Beans
-
Posts
735 -
Joined
-
Last visited
Content Type
Profiles
Forums
Events
Gallery
Everything posted by Beans
-

2023 Cannonball Run-What-You-Brung Build Thread
Beans replied to White Rabbit's topic in Community Builds
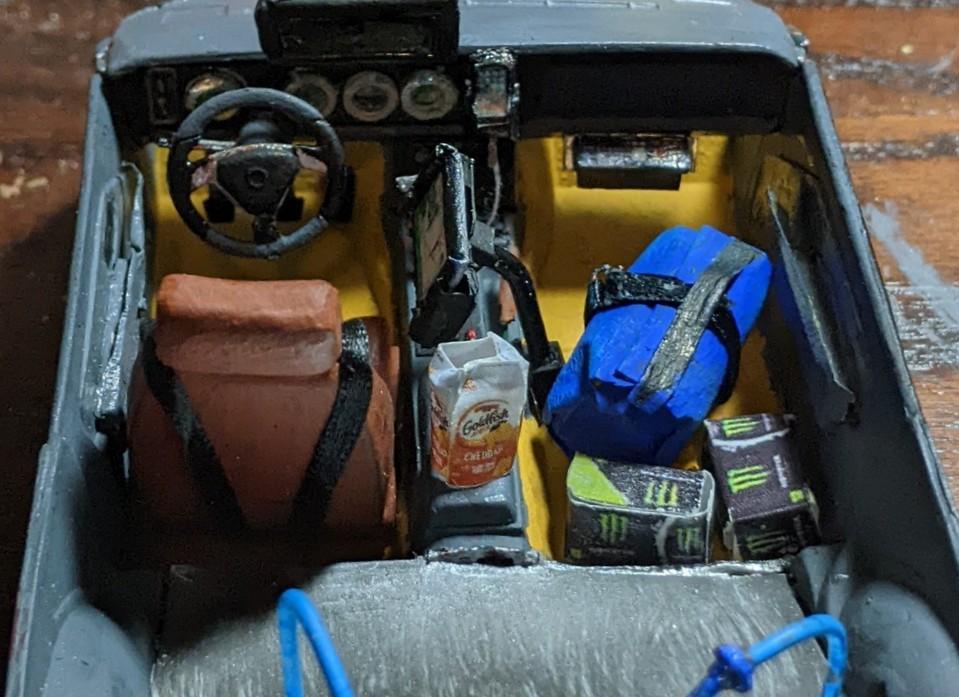
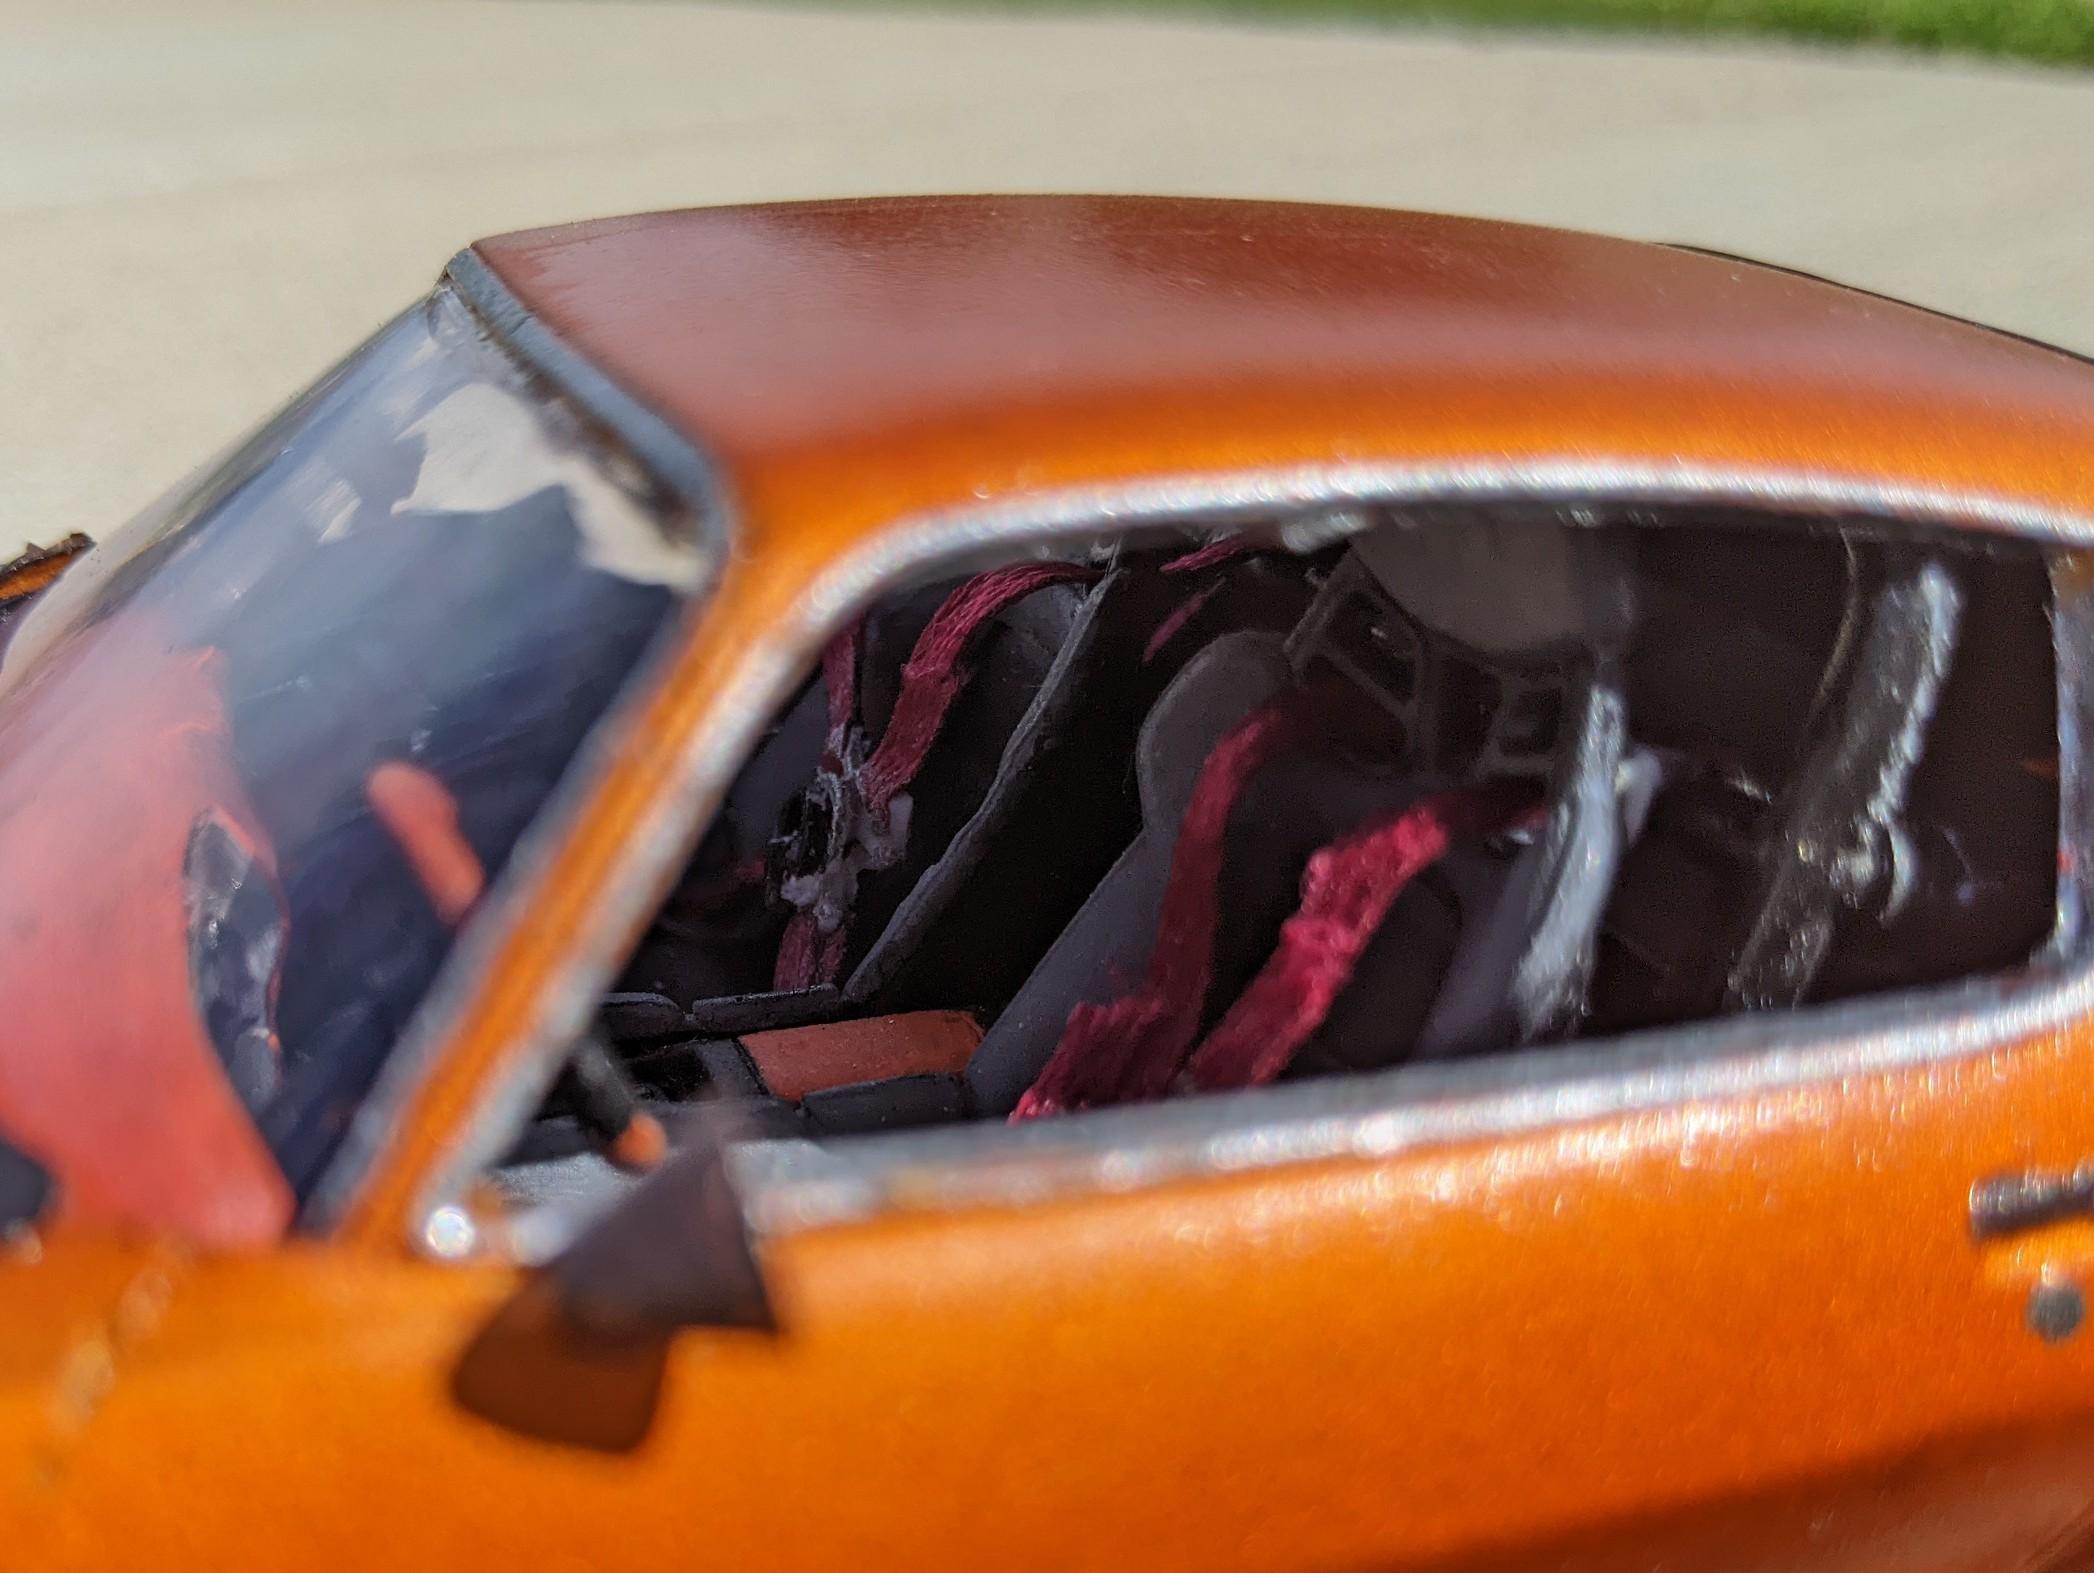
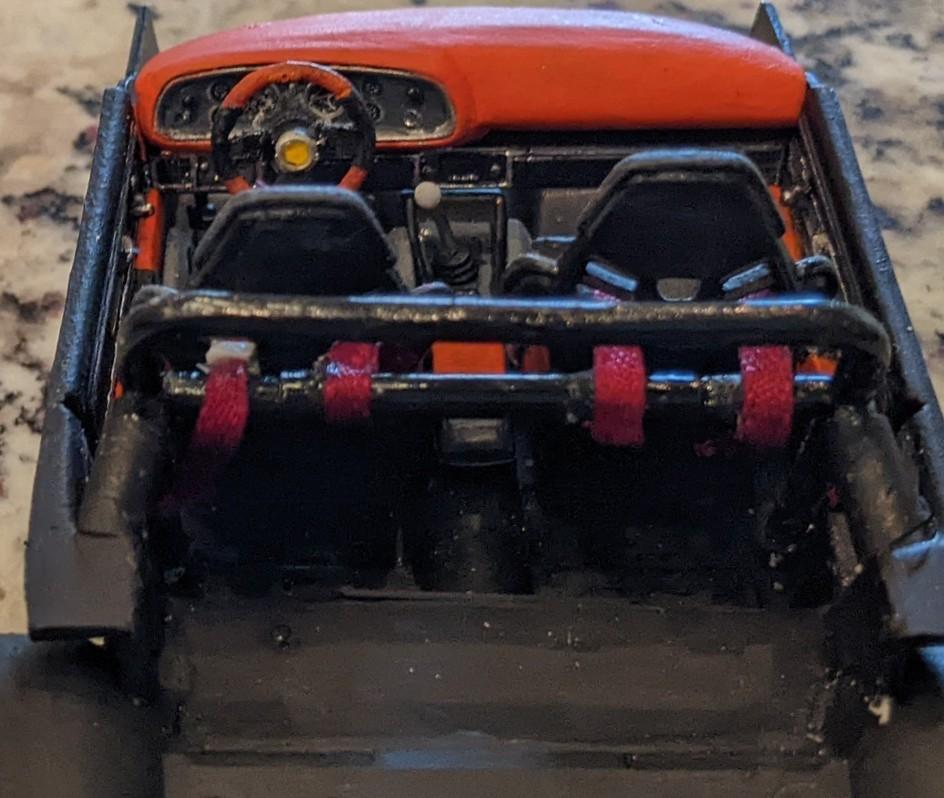
Going a little overboard on the interior this time around... Added: 4 point seatbelt, cell phone, tablet stand and tablet, police scanner, infrared camera display, drinks, snacks and duffle, and had to scratch up a new e-brake handle and shifter. Still finishing the deleted rear seat and auxillary fuel tank.
-
2023 Cannonball Run-What-You-Brung Build Thread
Beans replied to White Rabbit's topic in Community Builds
Can't wait to see this one all done up. I have yet to master 3d printing. -
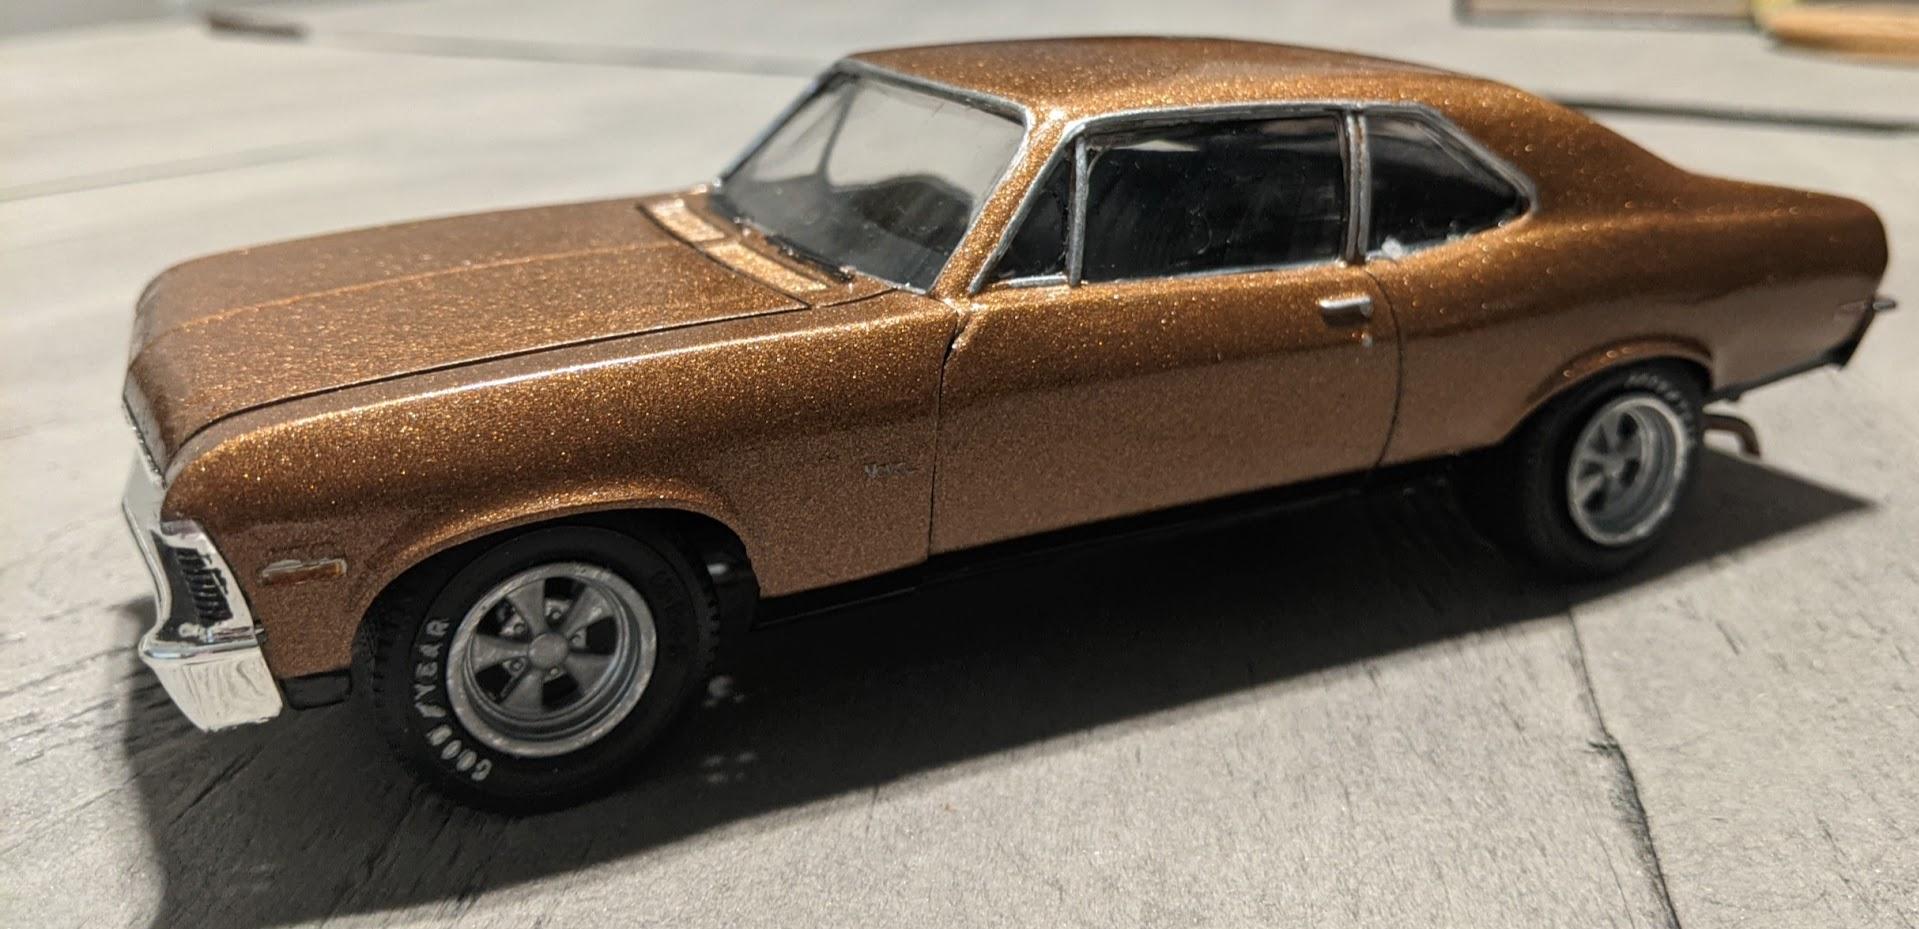
Awesome build!! So much attention to detail. Brings me back to highschool in the 80's and my 70 nova. License plate gas tank is my favorite.
-
2023 Cannonball Run-What-You-Brung Build Thread
Beans replied to White Rabbit's topic in Community Builds
Thank you. Being so stinking cold here I won't be able to paint for like another month or so. Gives me lots of time to keep messing with it, which is not always a good thing. -
2023 Cannonball Run-What-You-Brung Build Thread
Beans replied to White Rabbit's topic in Community Builds
Test fitting and sanding and modding and retest fitting...
-
2023 Cannonball Run-What-You-Brung Build Thread
Beans replied to White Rabbit's topic in Community Builds
Looks great!! I have never even attempted the 24 build. I always seem to get to a point where it is either put the model down for at least a day or throw it at the wall. Awesome job you did. -
2023 Cannonball Run-What-You-Brung Build Thread
Beans replied to White Rabbit's topic in Community Builds
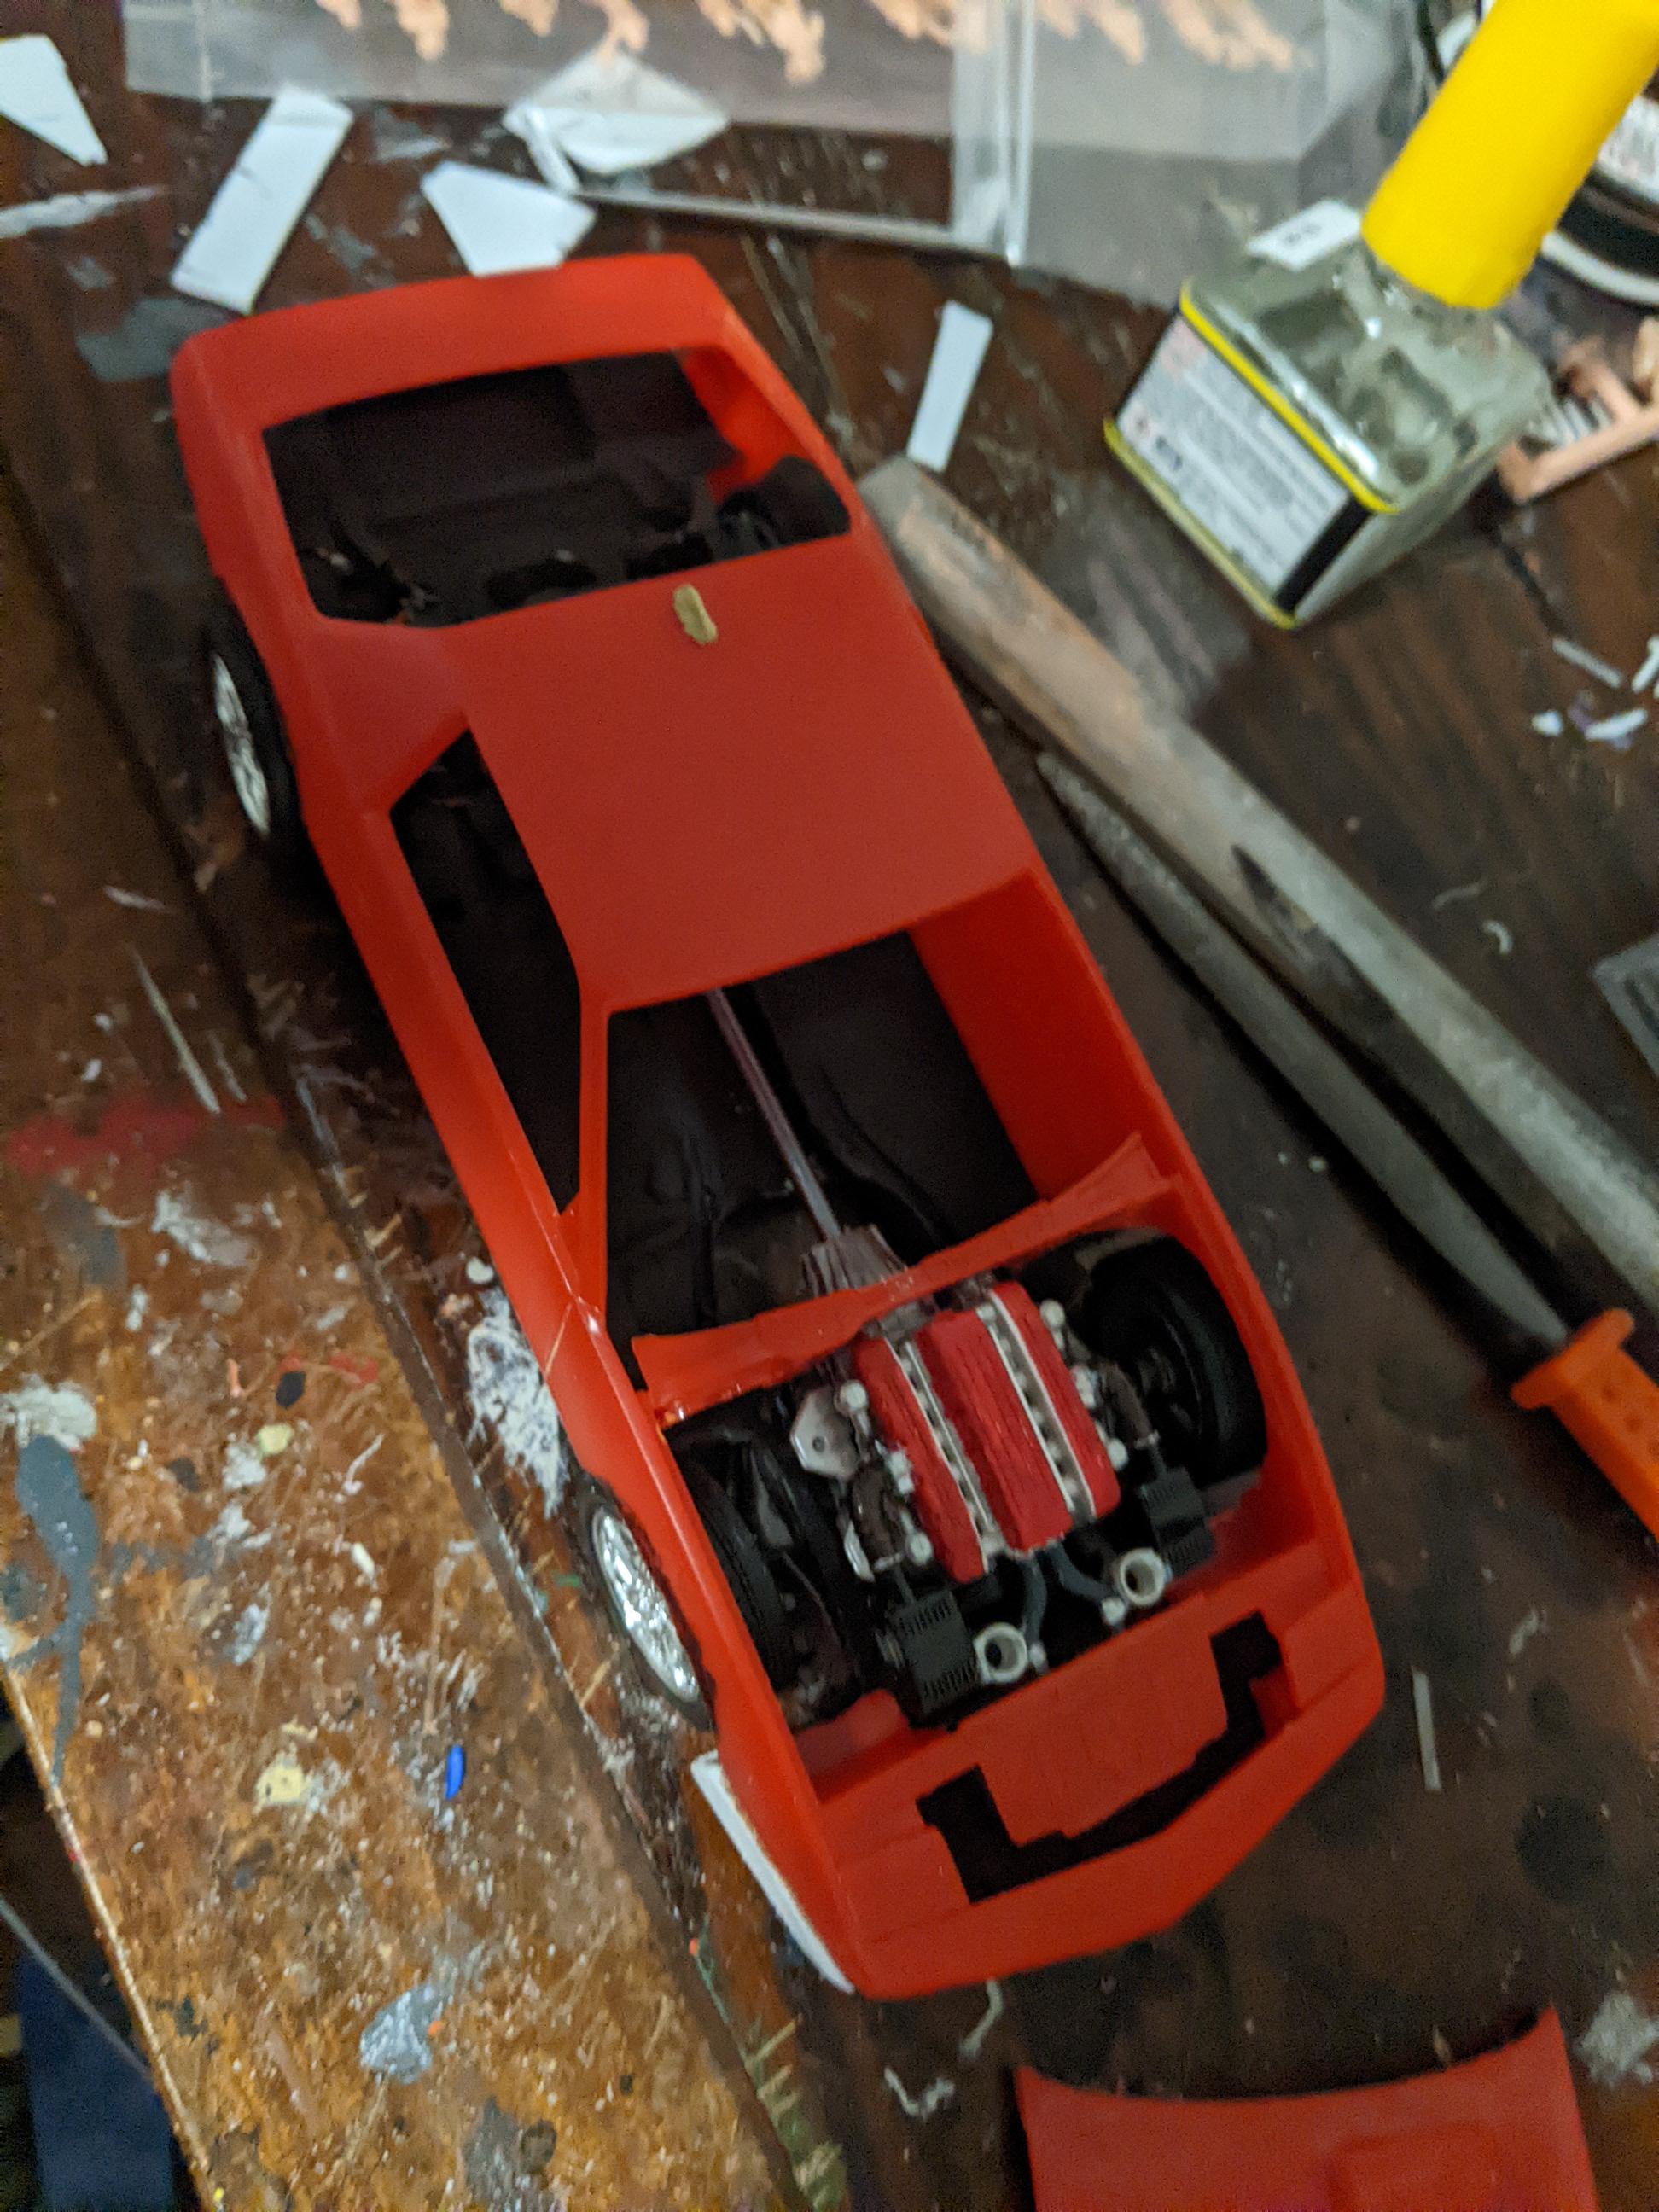
Did some pretty extensive frame modifications to get the Ferrari trans-axle and rear suspension under the firebird. Kept the Pontiac front suspension but lowered the front end and added the double fans.
-
The body on mine was warped like crazy.
-
2023 Cannonball Run-What-You-Brung Build Thread
Beans replied to White Rabbit's topic in Community Builds
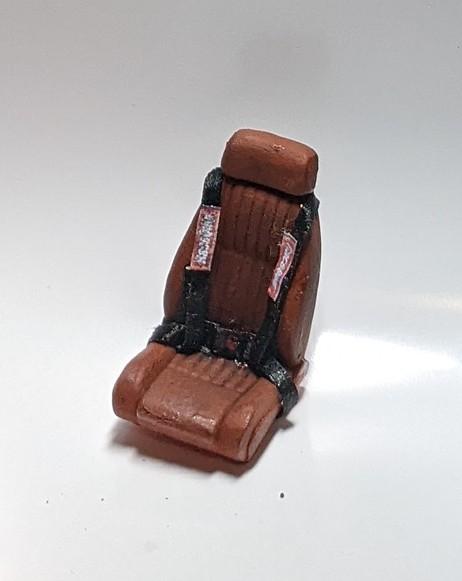
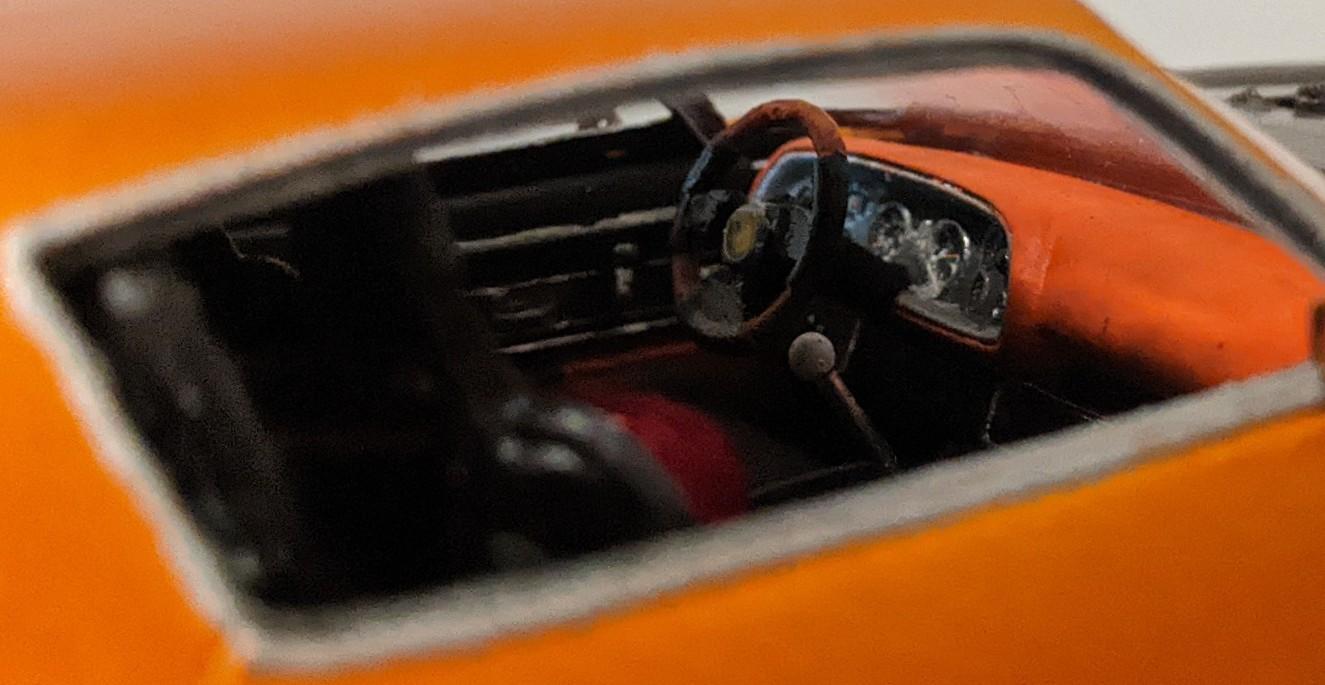
It fits!! (With some minor modifications) And driver's seat is pretty much done.
-
2023 Cannonball Run-What-You-Brung Build Thread
Beans replied to White Rabbit's topic in Community Builds
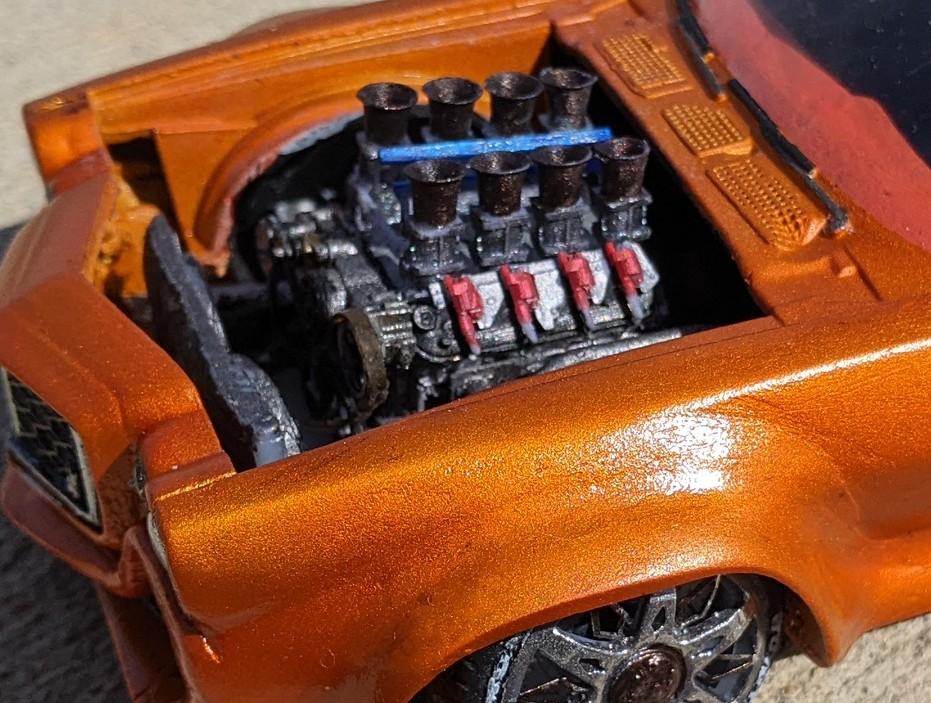
Ferrari 5.7L/533 hp/434 lb-ft DOHC 48-valve V-12. it's gonna require some reworking to fit the firebird. -
2023 Cannonball Run-What-You-Brung Build Thread
Beans replied to White Rabbit's topic in Community Builds
Ladies and gentlemen, we have an engine!! Now to make it fit.
-
2023 Cannonball Run-What-You-Brung Build Thread
Beans replied to White Rabbit's topic in Community Builds
And just like that... No more back seats. Figure I will just cover up the previous owners affection for glue.
-
2023 Cannonball Run-What-You-Brung Build Thread
Beans replied to White Rabbit's topic in Community Builds
Good find!! I never find dropped parts until I have already replaced them. -
2023 Cannonball Run-What-You-Brung Build Thread
Beans replied to White Rabbit's topic in Community Builds
Y'all are moving right along. Already in primer and all I have done is the side markers filled and trim and panel lines made smooth....no engine,. No glass,. 3/4 of an interior, no tires or wheels, and an unmodified chassis. So much to do!!
-
2023 Cannonball Run-What-You-Brung Build Thread
Beans replied to White Rabbit's topic in Community Builds
I remember reading about that. Looks good. That cooler in the background is pretty cool too. -
Here are the three I have done so far.
-
2023 Cannonball Run-What-You-Brung Build Thread
Beans replied to White Rabbit's topic in Community Builds
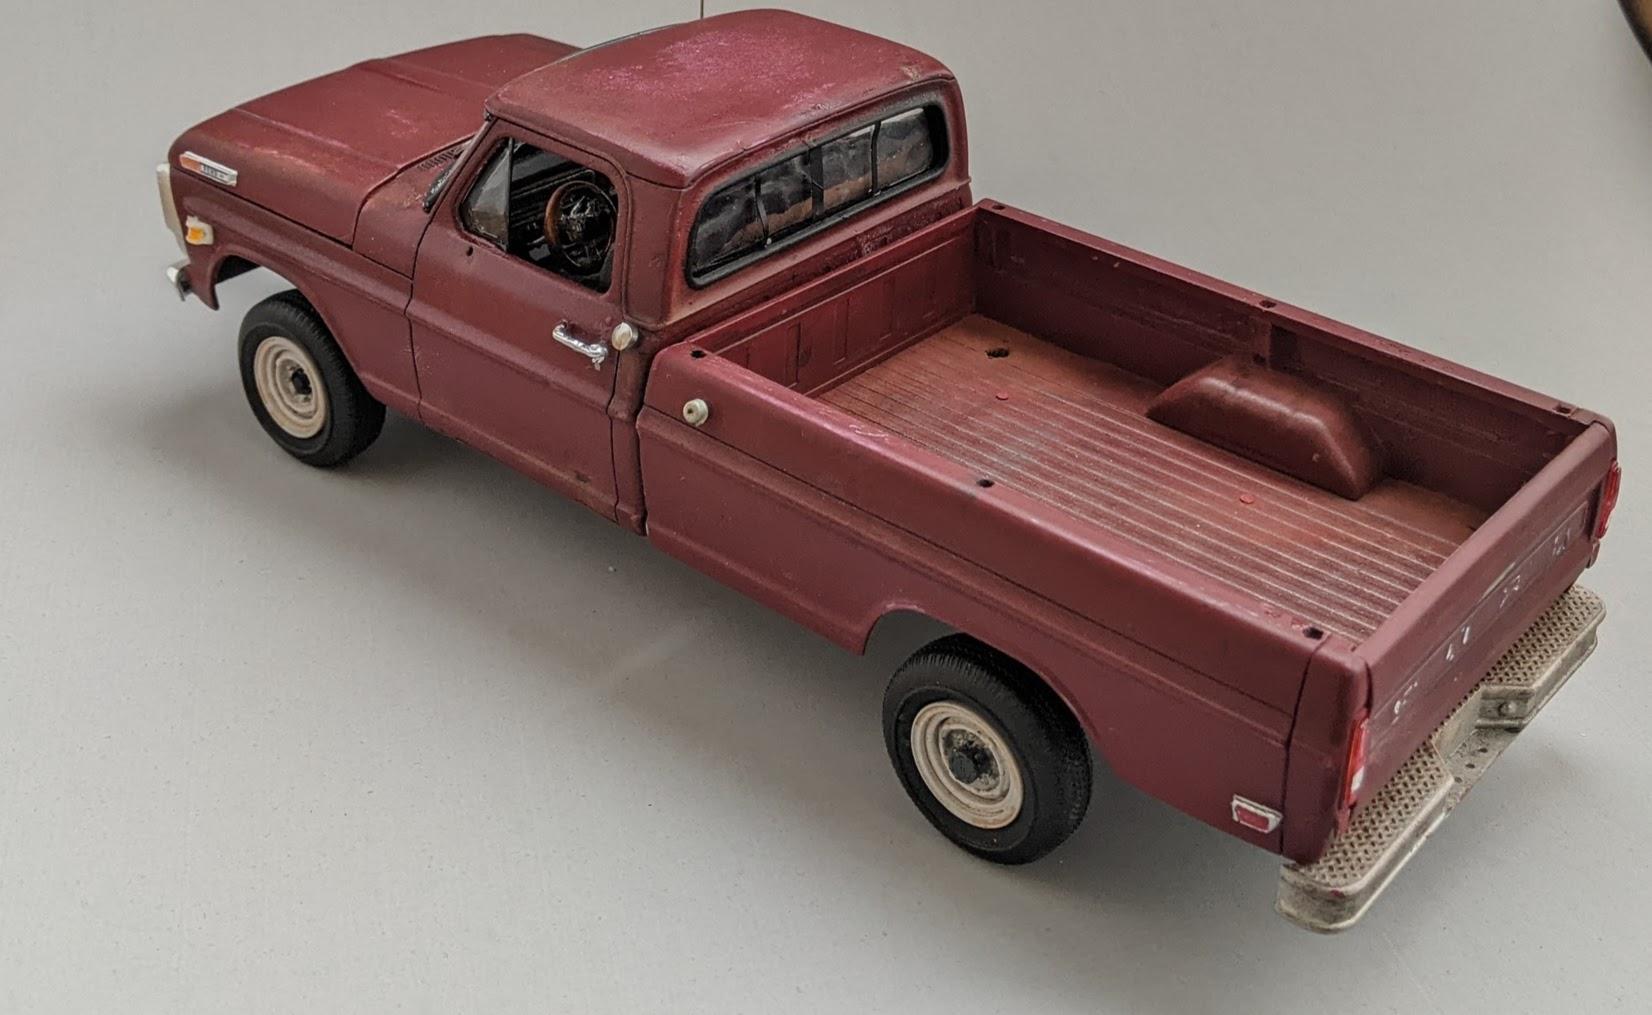
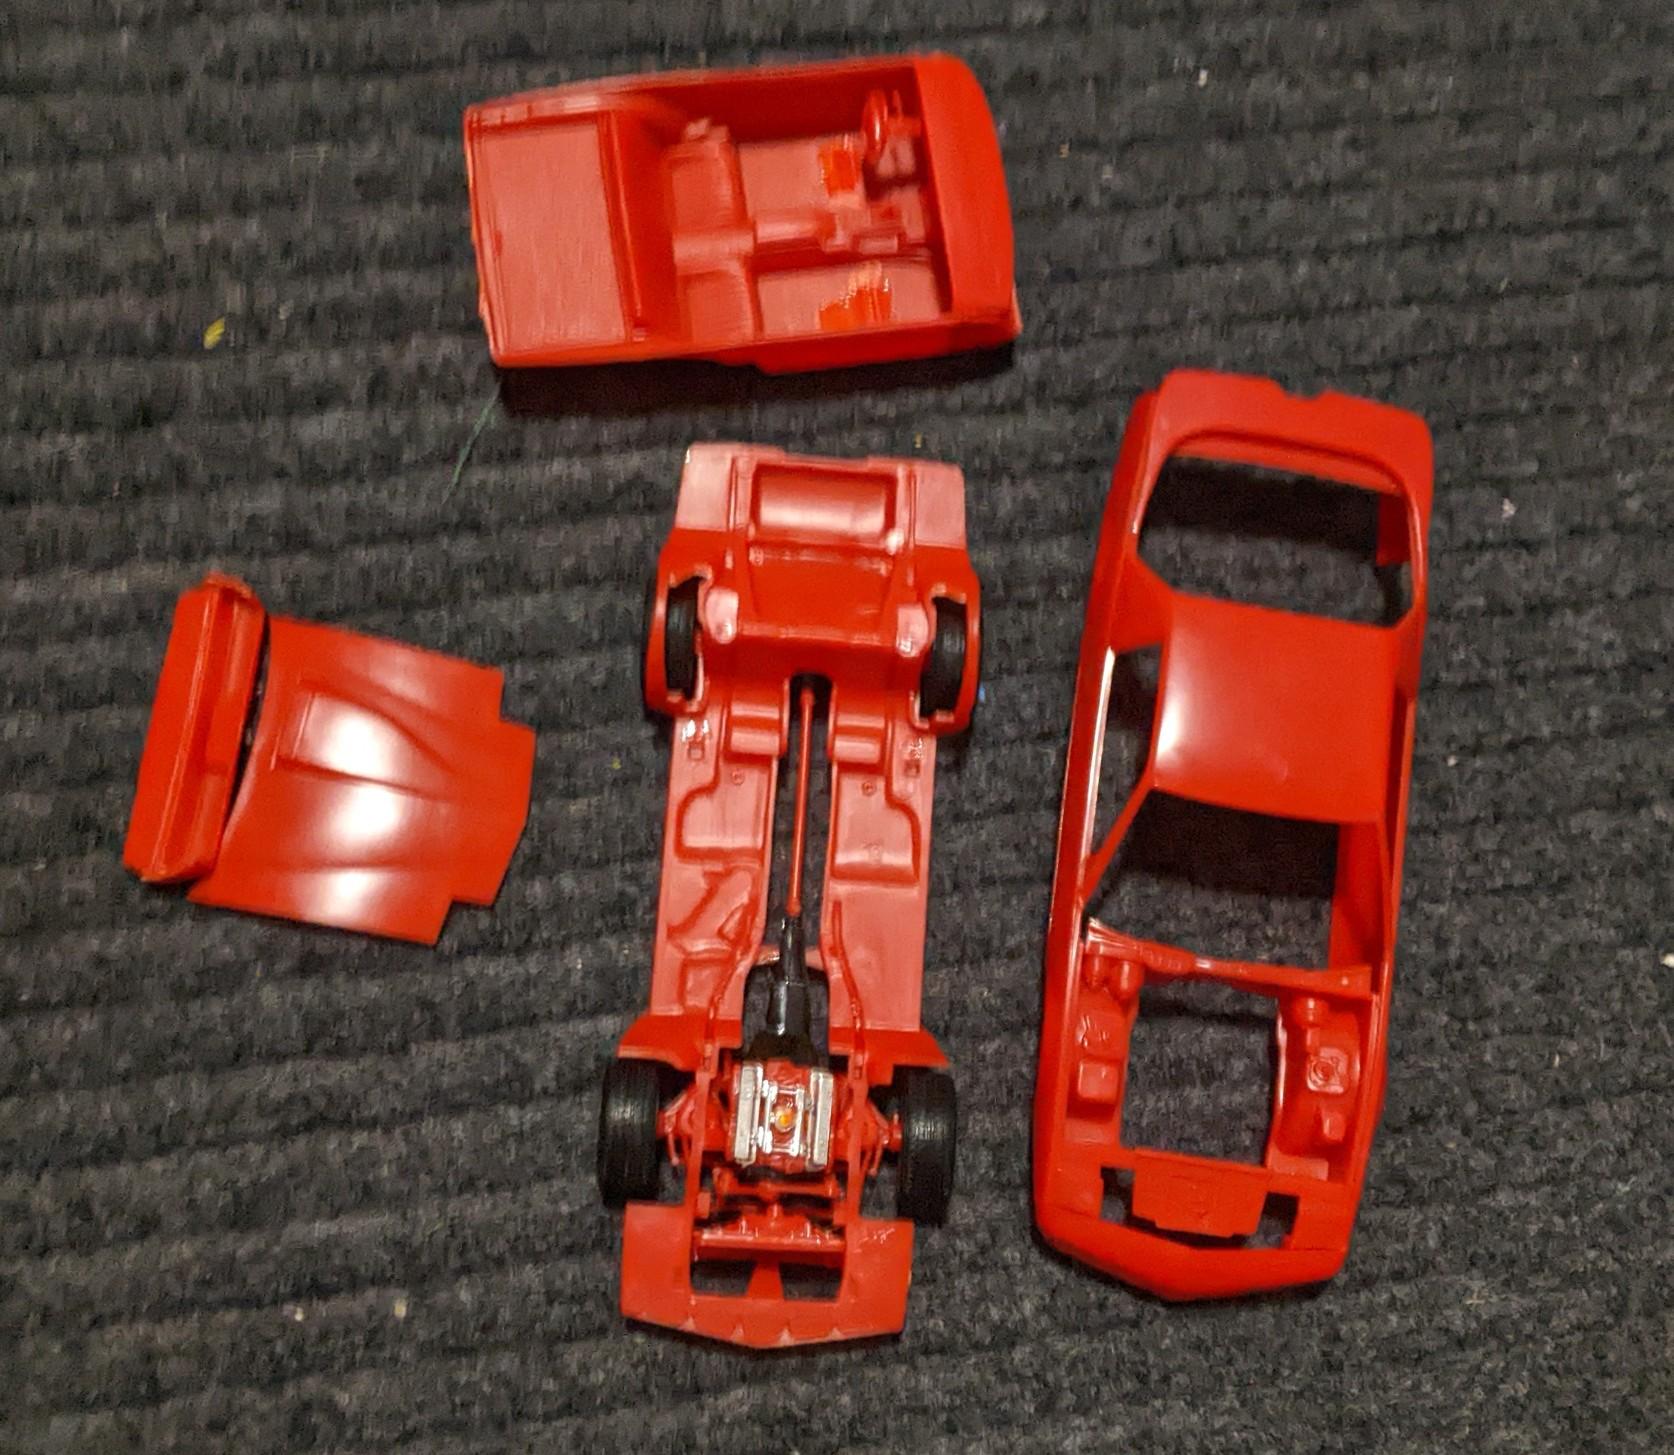
Figure I'll throw my hat back in this year. Only this time I'll remember to post in the completed thread.... I am planning on this for my humble submission. It is a mostly disassembled glue bomb. It is going to be modified quite a bit so even the "completed" parts will require quite a bit of work.
-
The 2022 Cannonball Run Year of Birth Build Thread
Beans replied to disconovaman's topic in Community Builds
Very nice work. I discovered that although the basics aren't that hard the application of getting the suspension on right and then not to break it 10 times during the rest of the assembly, is a challenge. Yours looks great!! -
The 2022 Cannonball Run Year of Birth Build Thread
Beans replied to disconovaman's topic in Community Builds
Thank you. It was kind of a Frankenstein deal that included some 3d printed parts, and some various kit parts and a belt from one of my daughter's rubber band hair ties. -
The 2022 Cannonball Run Year of Birth Build Thread
Beans replied to disconovaman's topic in Community Builds
Thank you. This was one where I started out super motivated but by the end was settling for good enough. Still happy with the way it came out though. -
The 2022 Cannonball Run Year of Birth Build Thread
Beans replied to disconovaman's topic in Community Builds
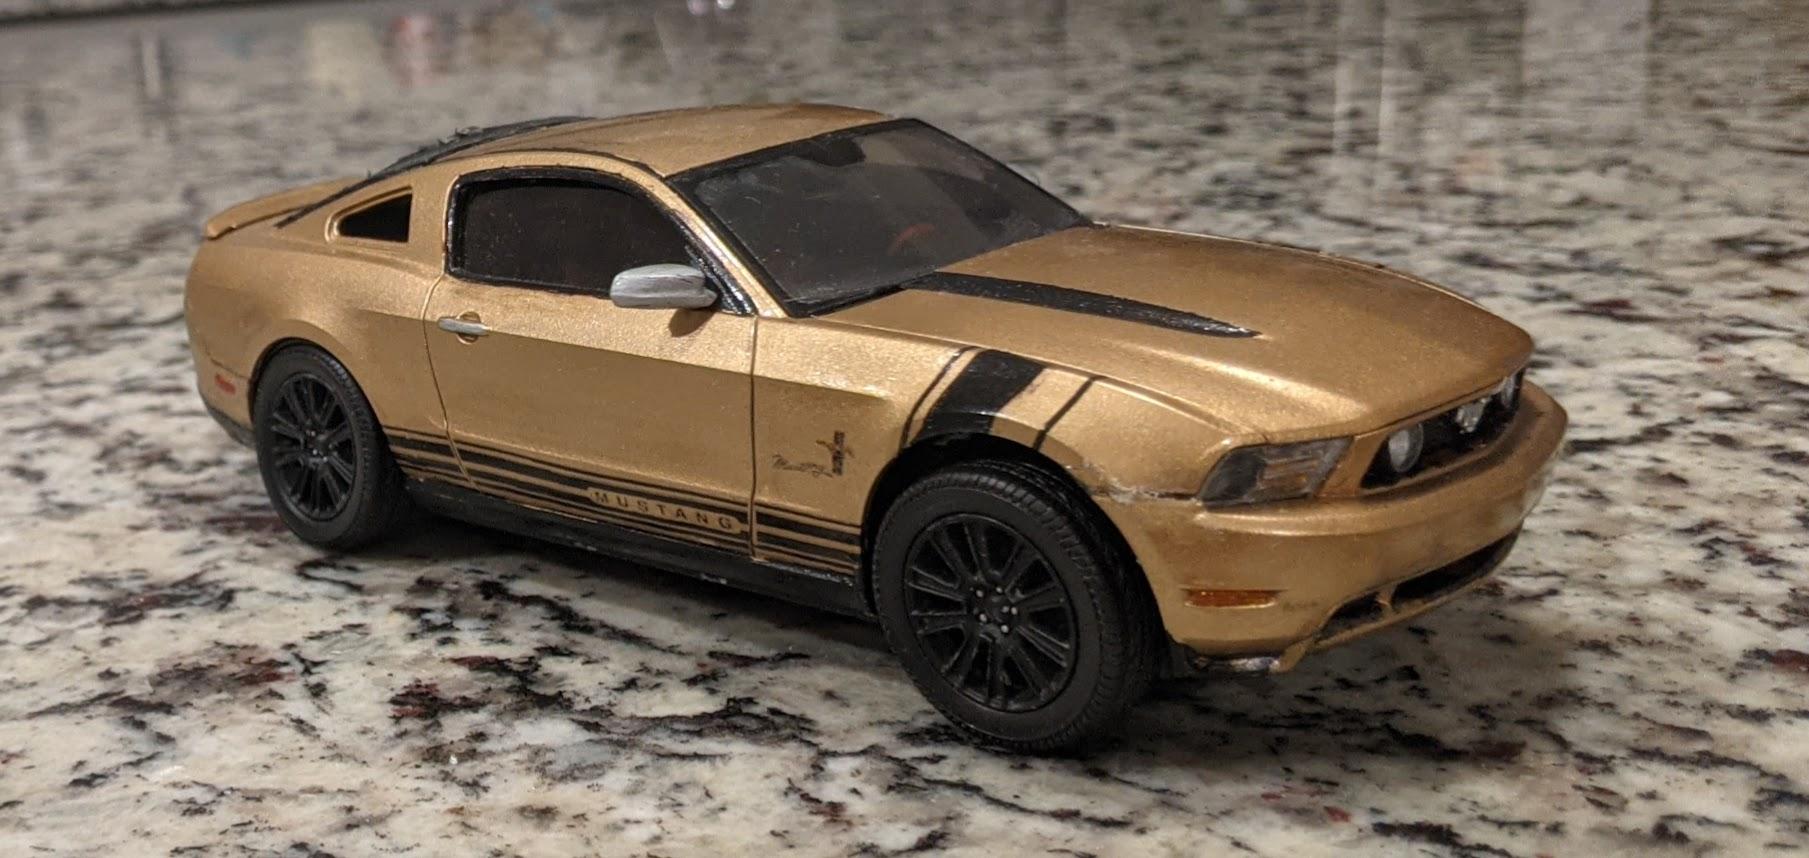
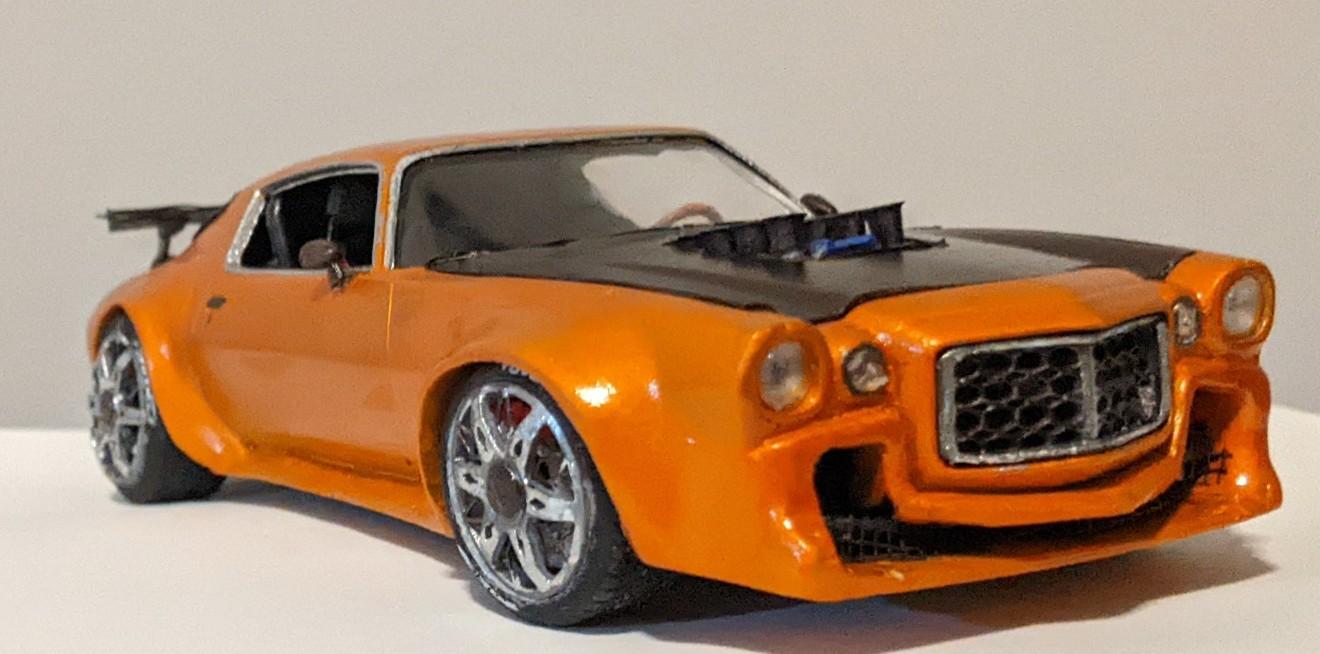
#11 - 1970 Camaro Z28 Calling this one done. Not my best but definitely the most I have customized any model. Here's a list of the mods: opened up the fender wells Created wide body and front and rear body modifications LSX engine Dual electric fans independent rear suspension Racing drive shaft Custom wheels and tires Disc brakes all around Exhaust re routed through the interior and out through the tail lights. Custom grill Custom rear spoiler and diffuser Carbon fiber hood and mirrors Rear window louvers Interior roll bar Racing seats with 5 point harness Custom steering wheel Extra long stick shift Rear seat removed and auxiliary fuel tank added Paint is candy orange over gold MS license plate Named it the F-Bomb because I dropped so many of them during the build.
-
The 2022 Cannonball Run Year of Birth Build Thread
Beans replied to disconovaman's topic in Community Builds
Looks good!! I like the wheels and the color scheme is great. Nice clean stripes. -
The 2022 Cannonball Run Year of Birth Build Thread
Beans replied to disconovaman's topic in Community Builds
Just shorten everything else.....? -
The 2022 Cannonball Run Year of Birth Build Thread
Beans replied to disconovaman's topic in Community Builds
The hood louvers look great!! I have the hardest time maintaining consistency with thing like that. Yours look awesome!! -
The 2022 Cannonball Run Year of Birth Build Thread
Beans replied to disconovaman's topic in Community Builds
That black is flawless!!! Looks awesome.