.jpeg.4c7adcf30d18ed99893024ed0cd4cd57.jpeg)
Quiet Eric
-
Posts
333 -
Joined
-
Last visited
Content Type
Profiles
Forums
Events
Gallery
Everything posted by Quiet Eric
-
.thumb.jpeg.8c79d9534dc815ba827147ab721a20d4.jpeg)
What did you see on the road today?
Quiet Eric replied to Harry P.'s topic in General Automotive Talk (Trucks and Cars)
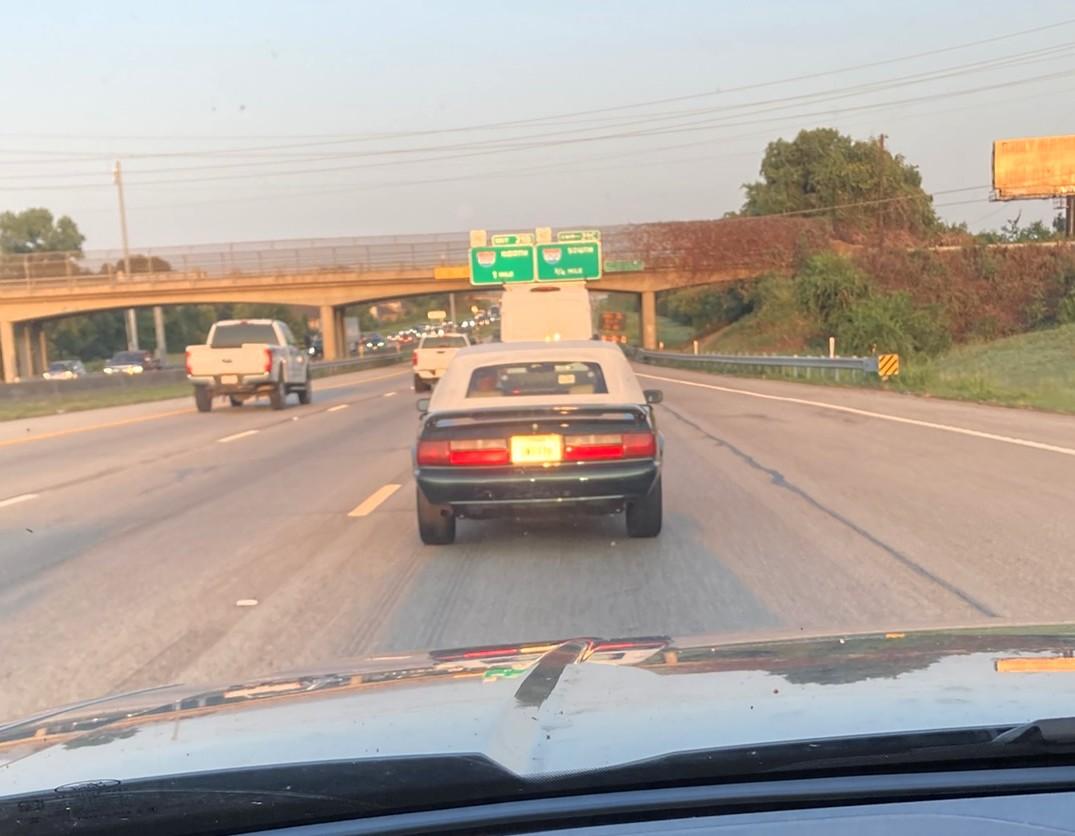
Are those drag radials??? -
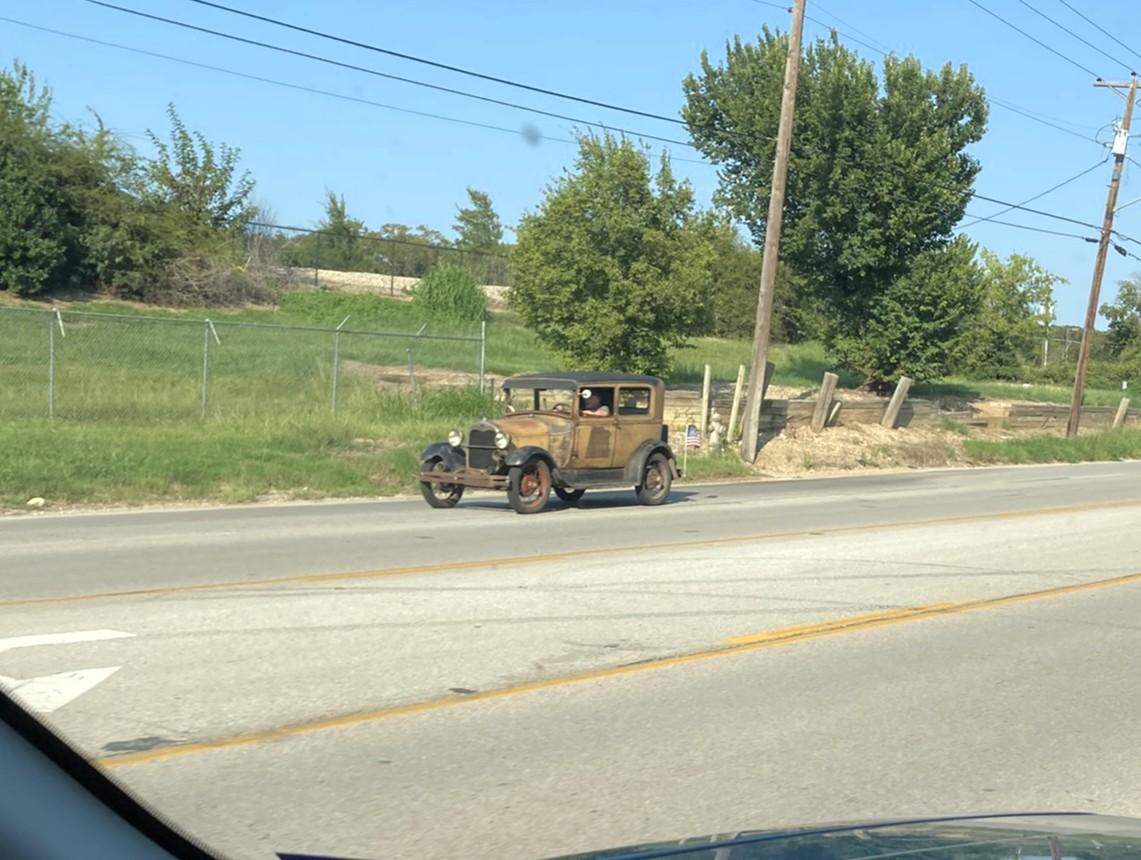
What did you see on the road today?
Quiet Eric replied to Harry P.'s topic in General Automotive Talk (Trucks and Cars)
A couple old Fords today... Really clean Fox body LX convertible in Emerald Green And a '28/'29 Tudor in well earned patina
-
I'm sure you've seen this one before, but in case you hadn't... Perhaps pancaking the hood would help give you some room to blend the new headlight surrounds in on the inside. But what you've got is looking good.
-
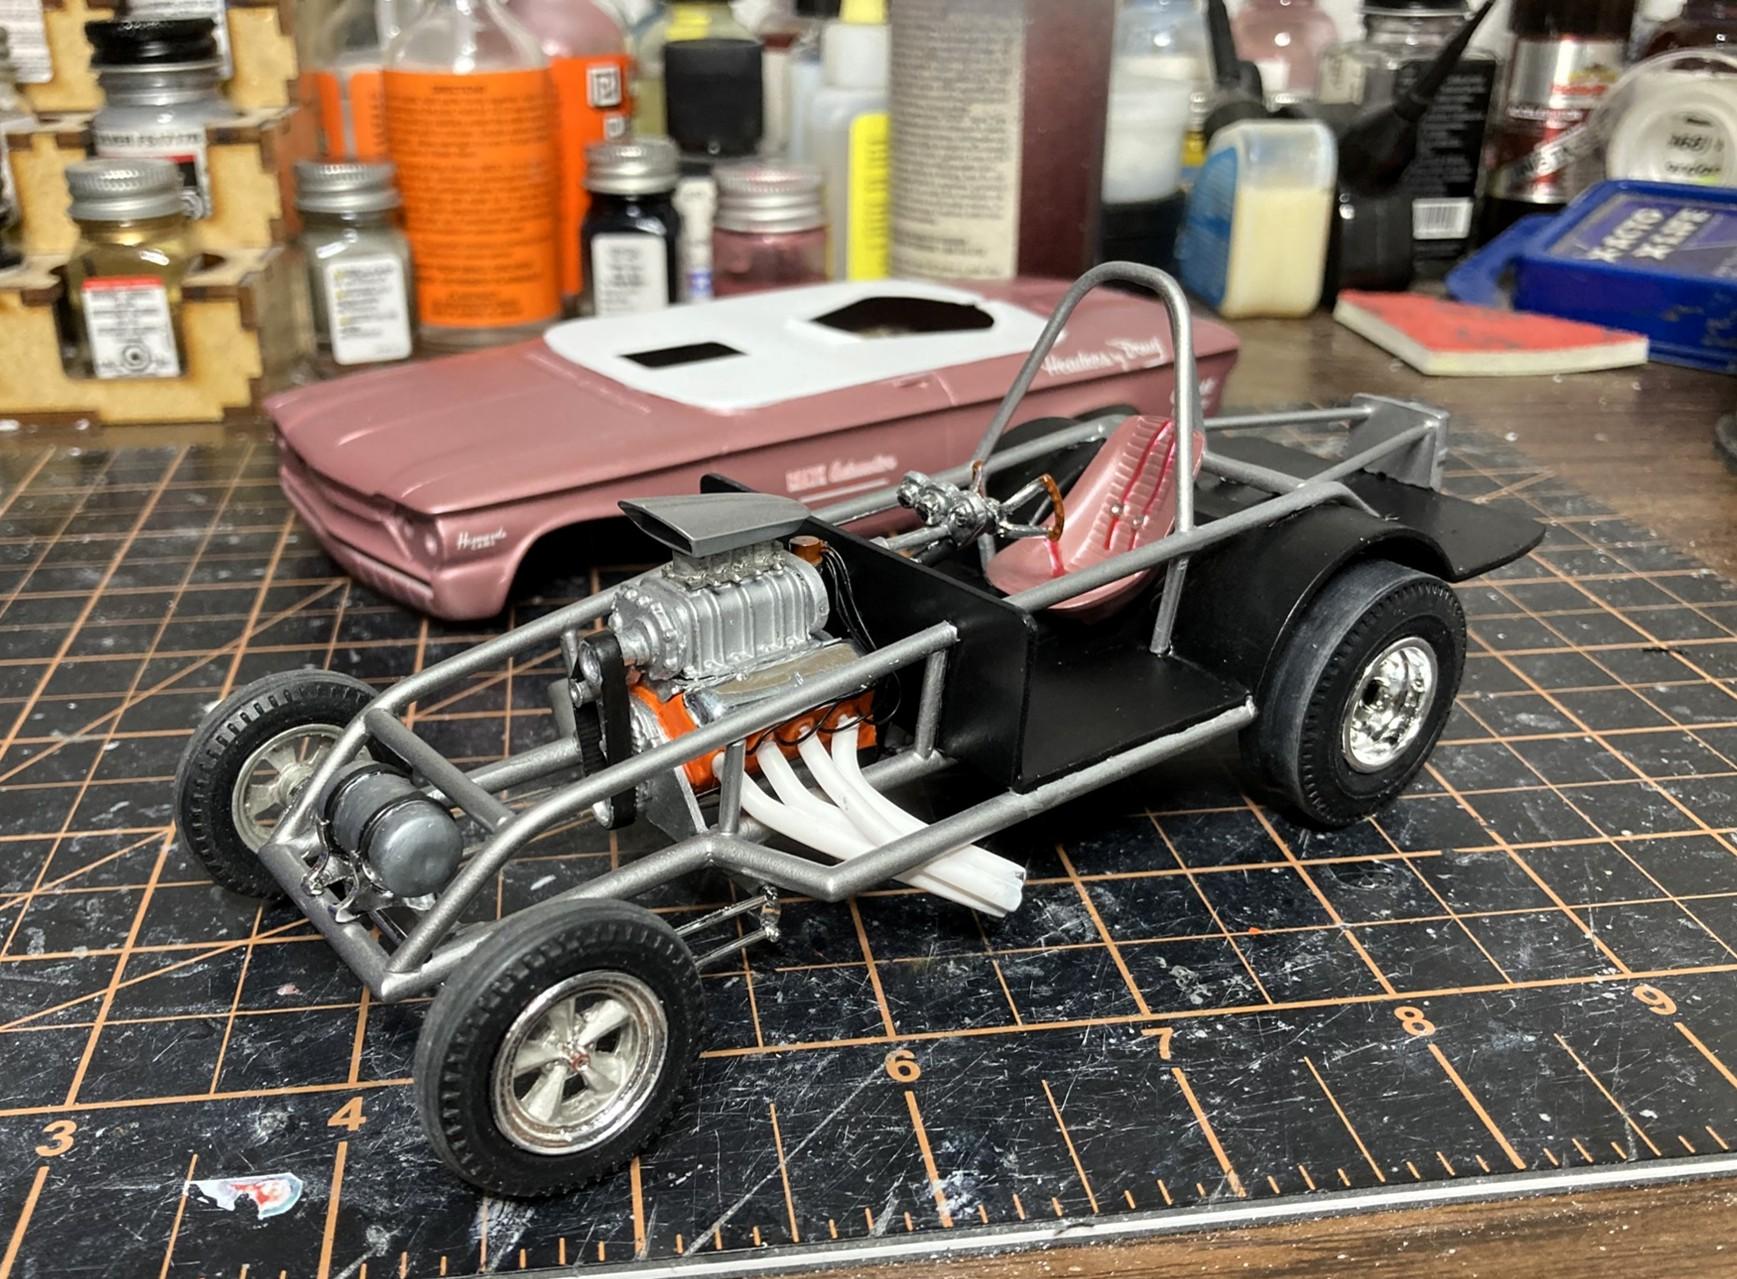
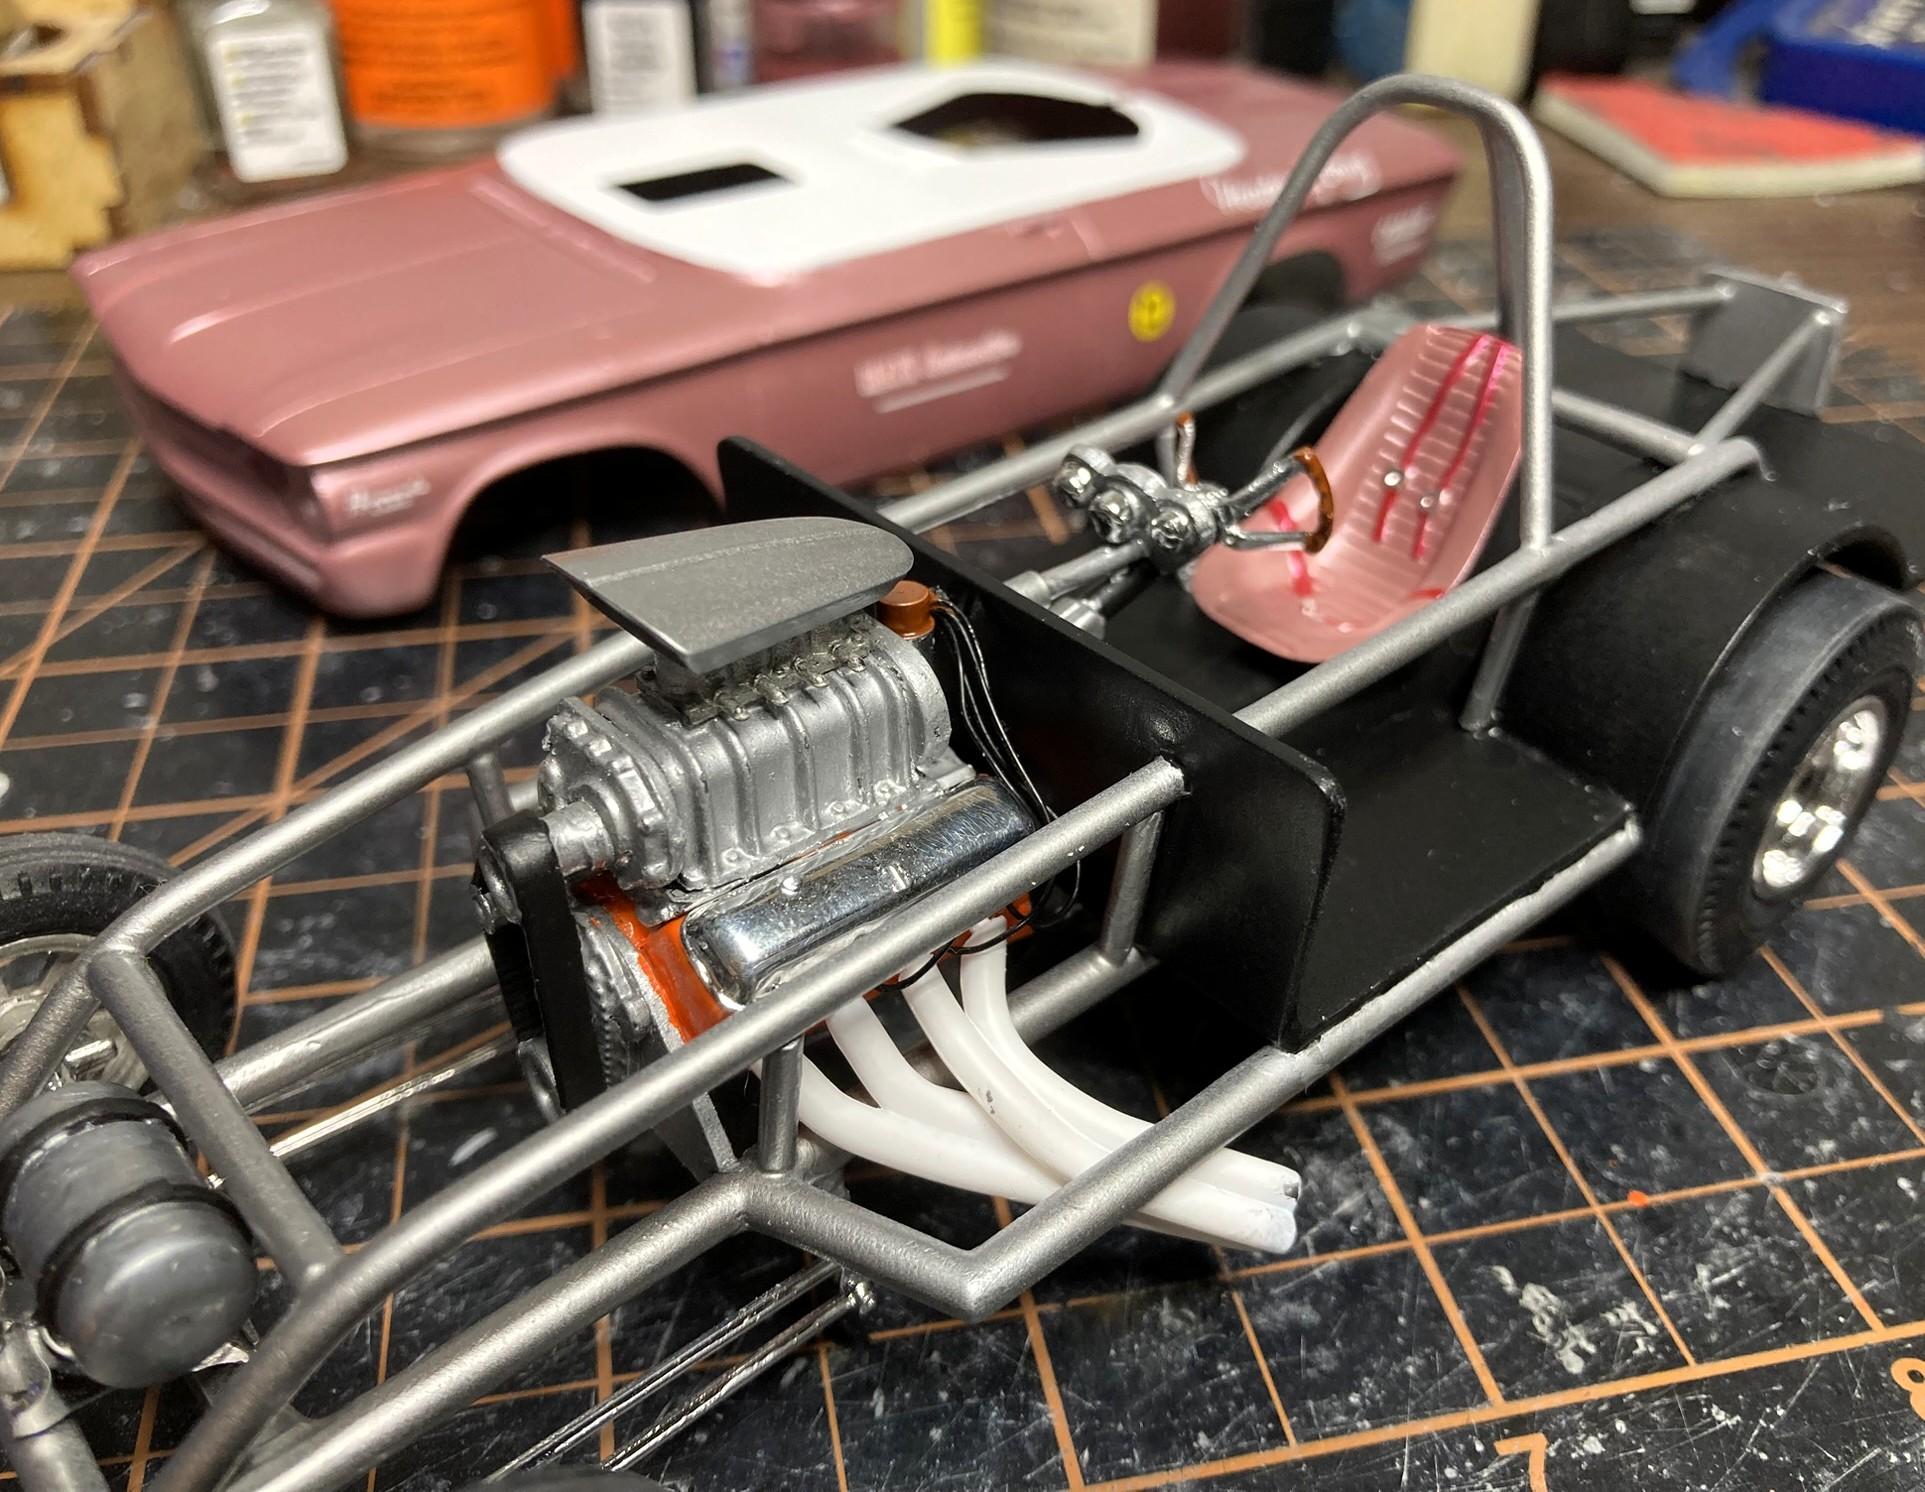
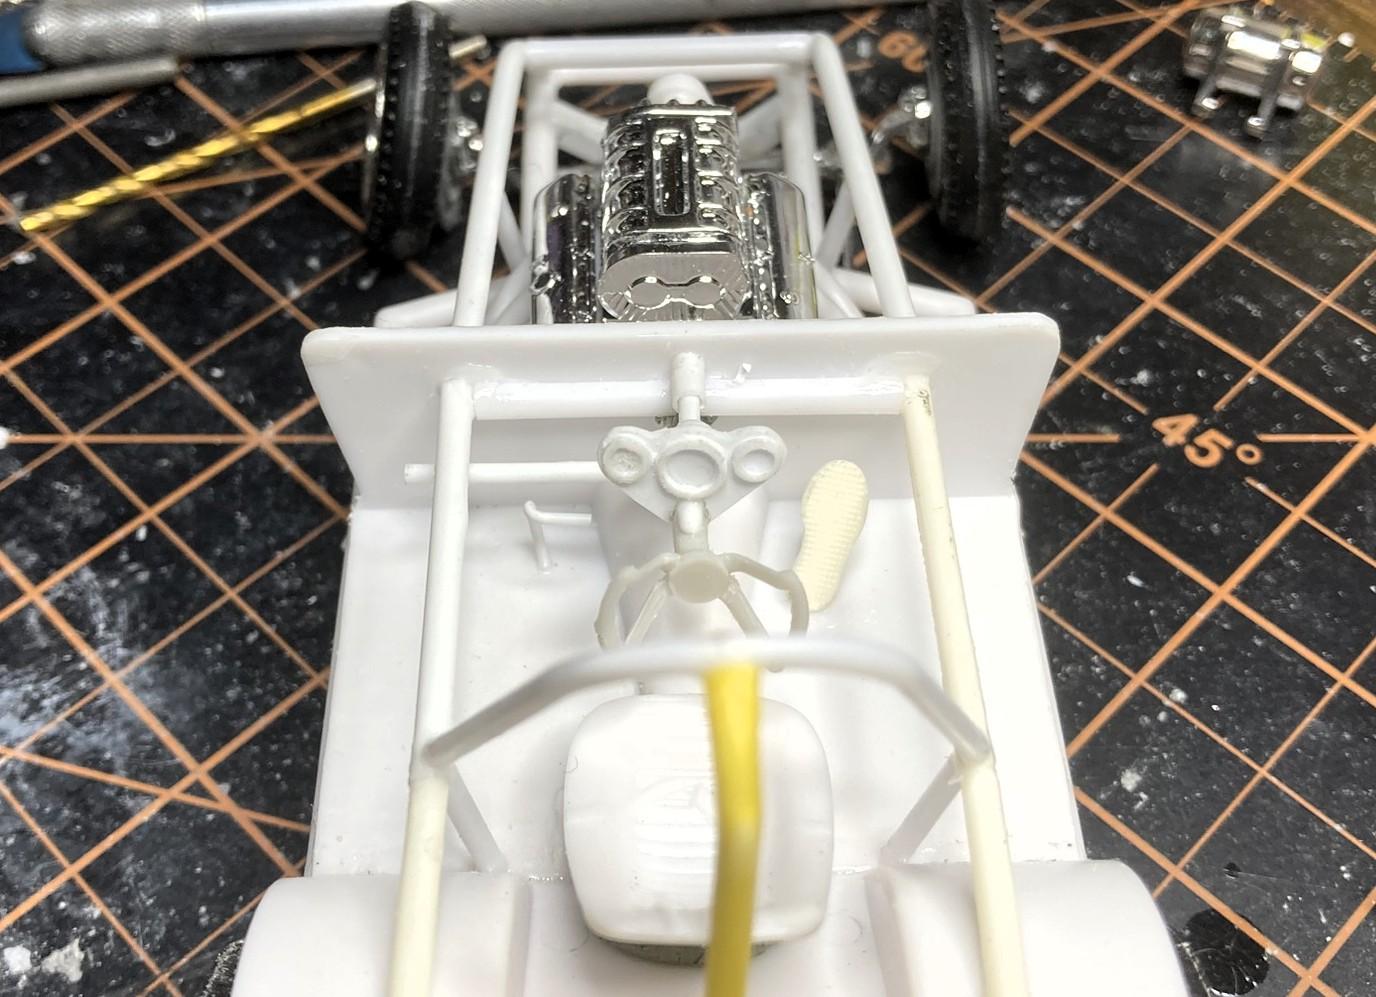
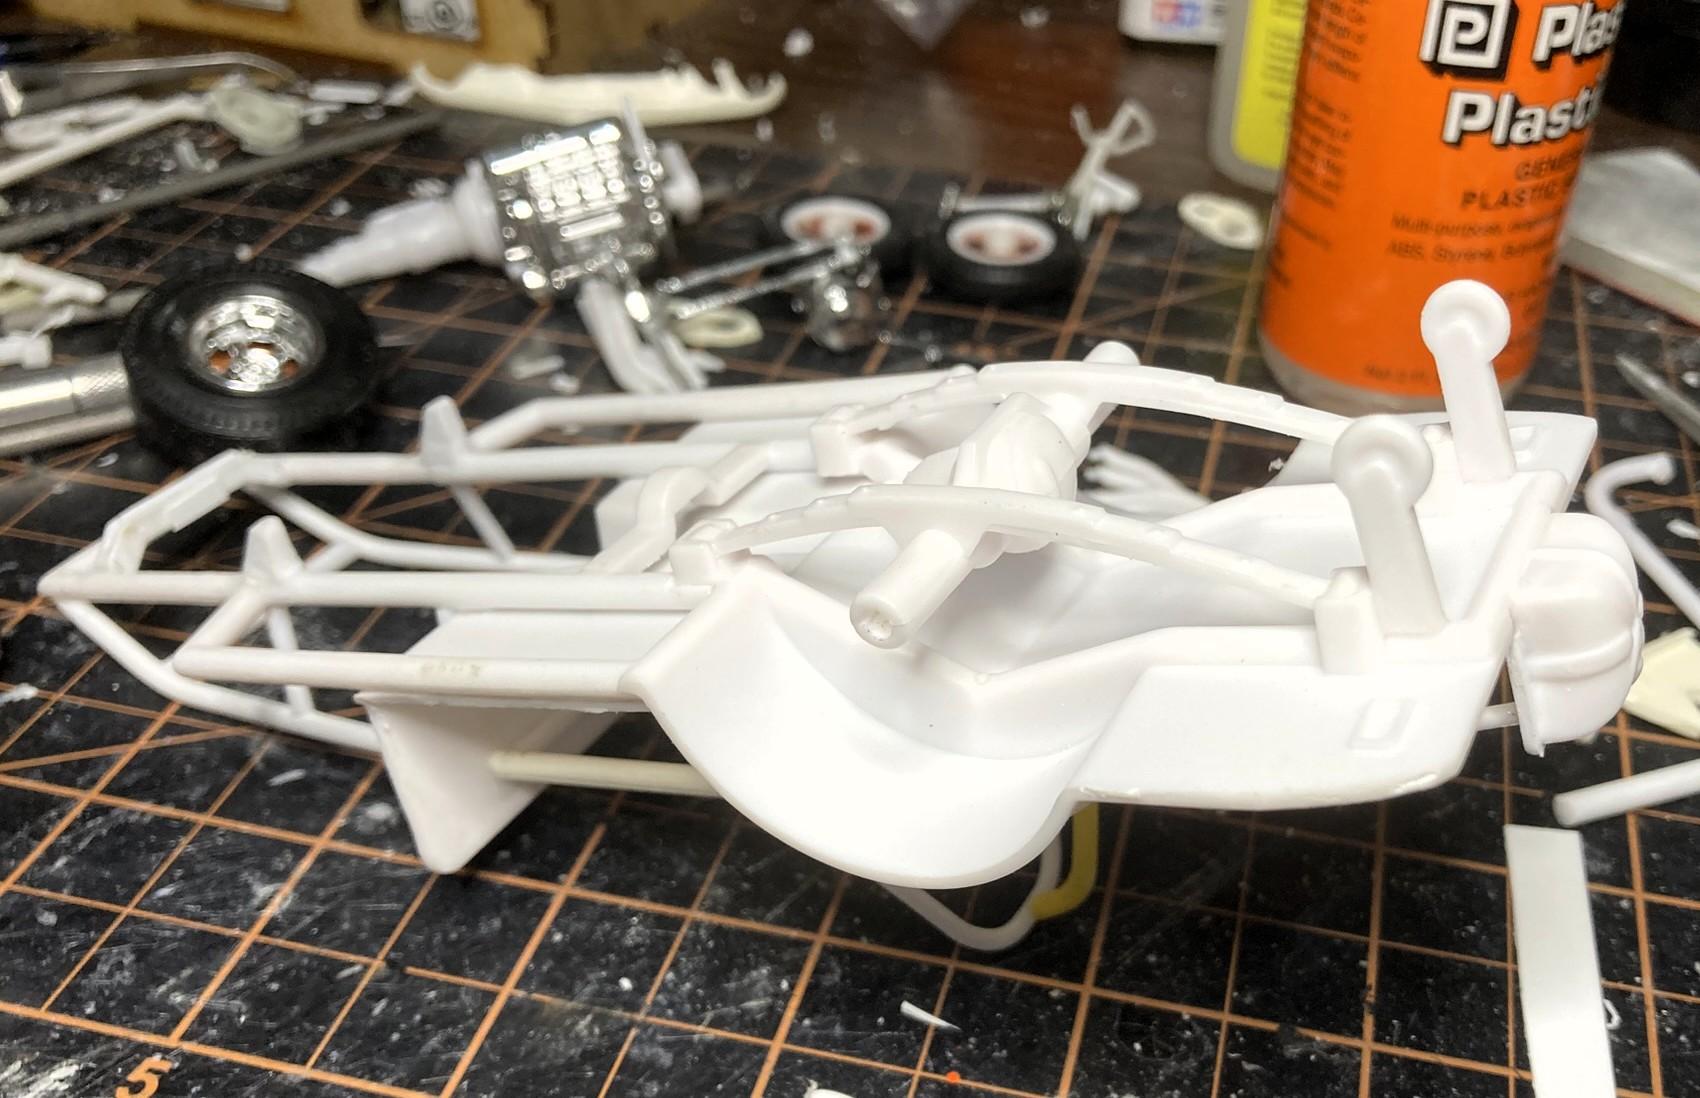
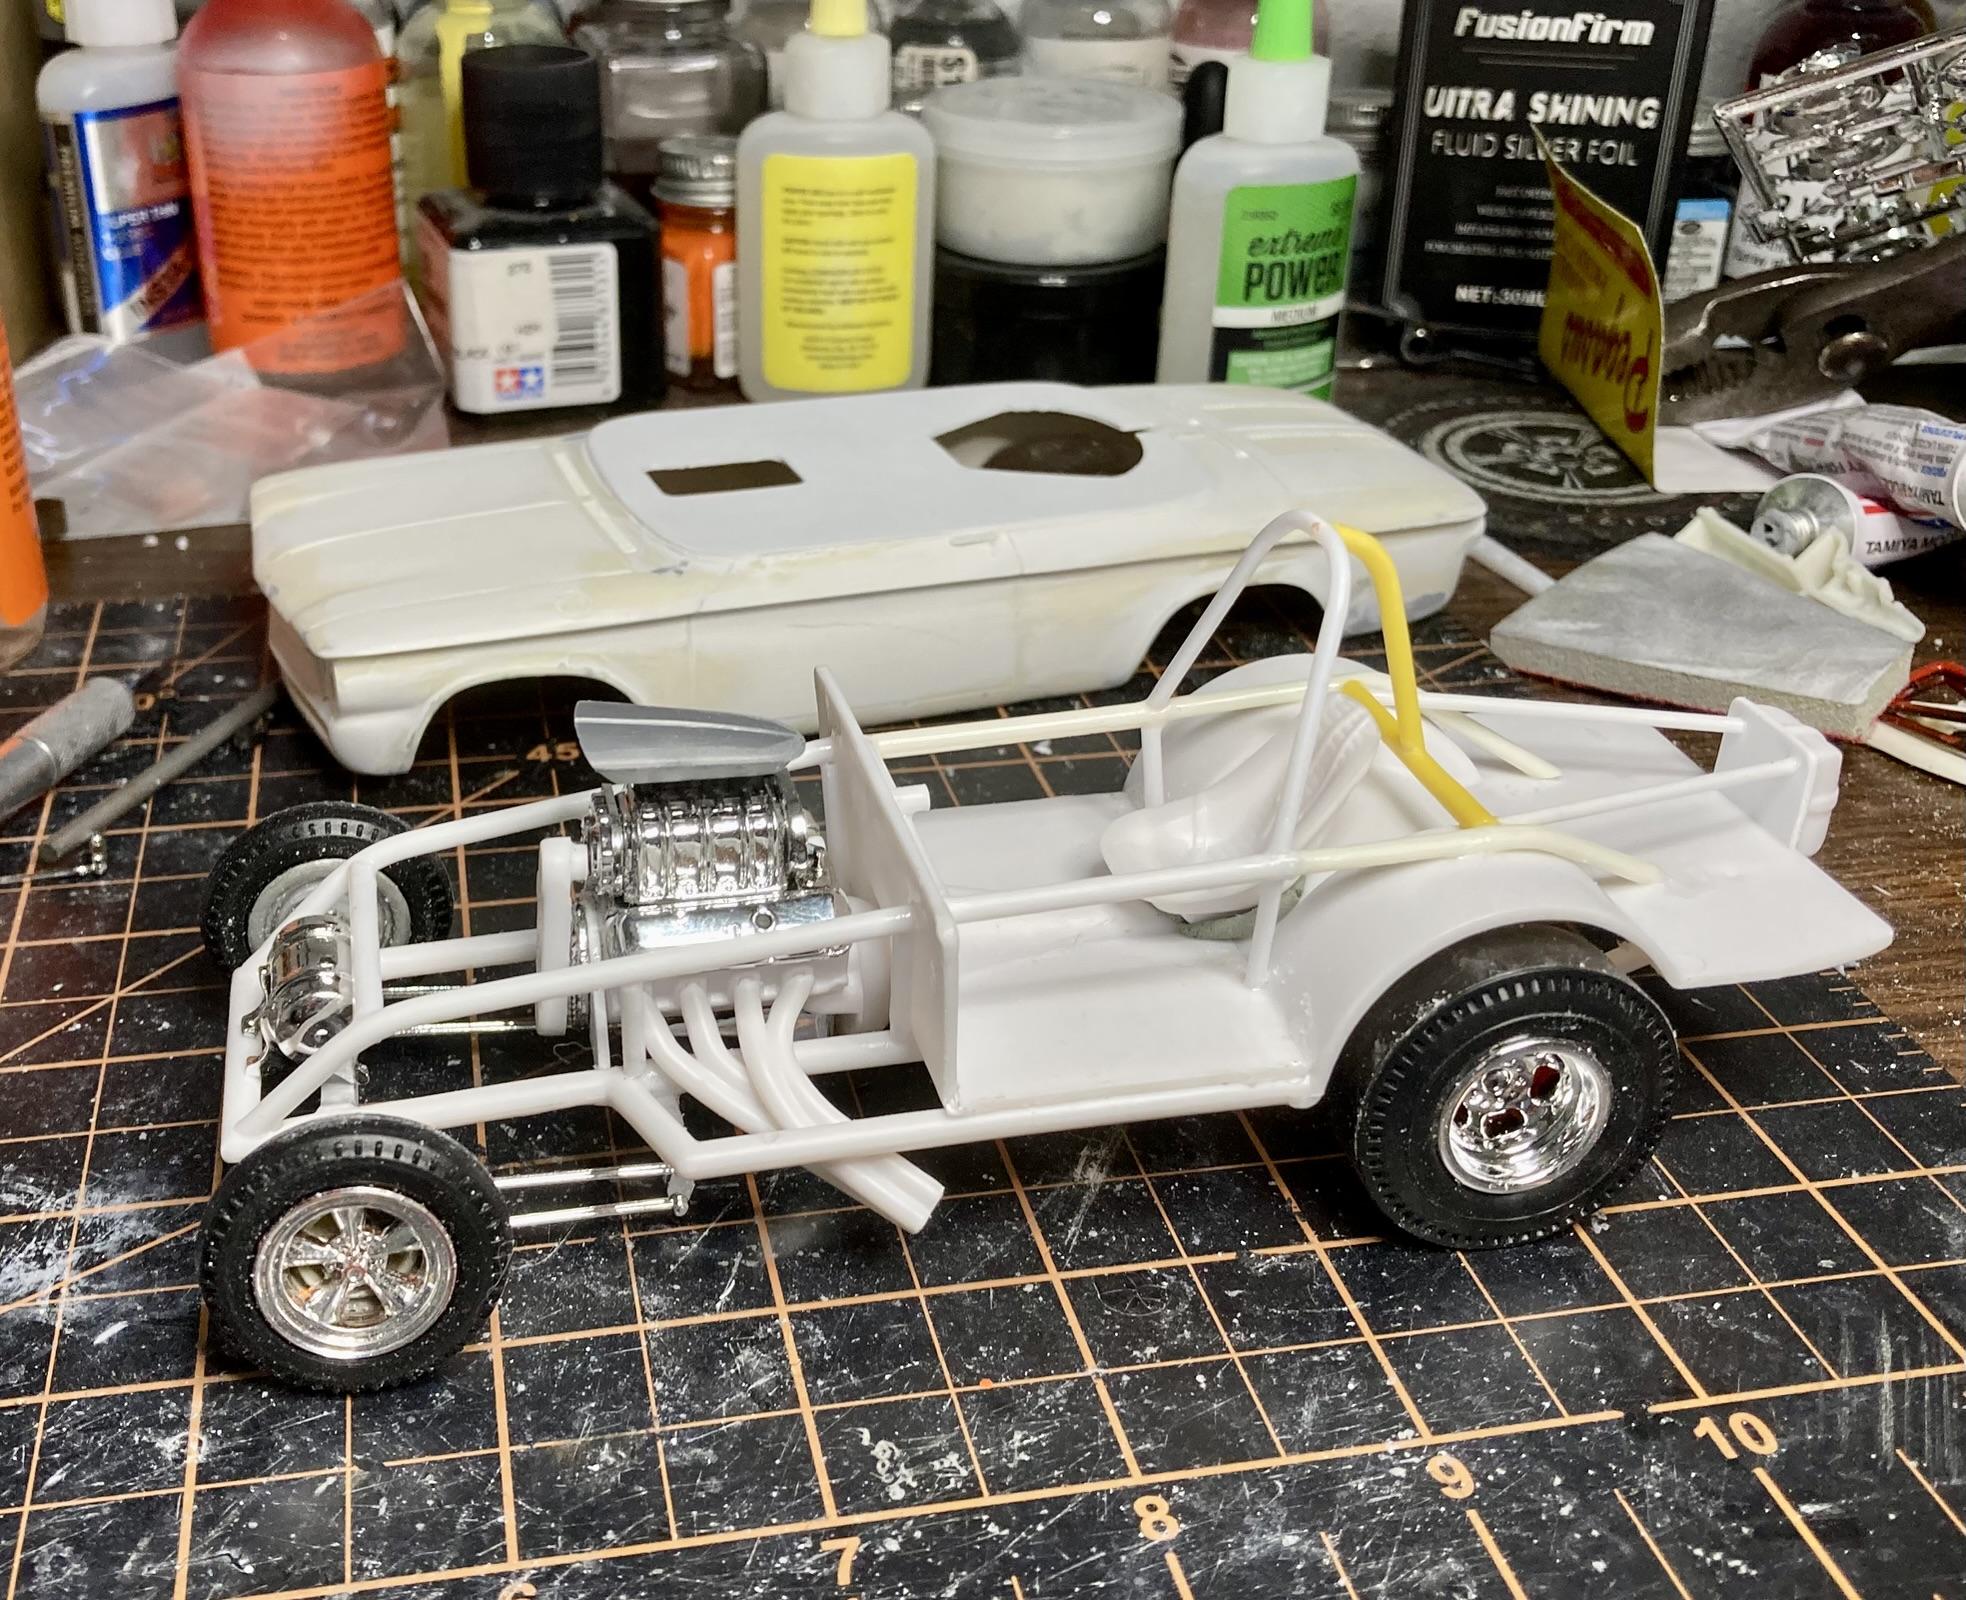
Thought I'd be taking a break on this one while I got another one in paint but changed my mind on the color for that one, so I've been knocking out the chassis. Made a lot of stupid mistakes that I had to sort out, the biggest problem being having the chassis, floor, and cage all glued together but wanting them different colors. Went with silver for the bars and black for the floors. Ended up spraying everything silver, then brush painting the black. It's not my finest work but it'll do. And of course there's stuff that fit fine in mock up but gave me trouble now like the drivers side header. The magneto is from Detail master. I plan on doing the barrel valve and fuel lines, and it still needs a few more parts installed along with some detail painting and touch ups, but I got to a good stopping point.
-
Who doesn't love a mock-up? Let's see yours!
Quiet Eric replied to Belairconvertable's topic in WIP: Model Cars
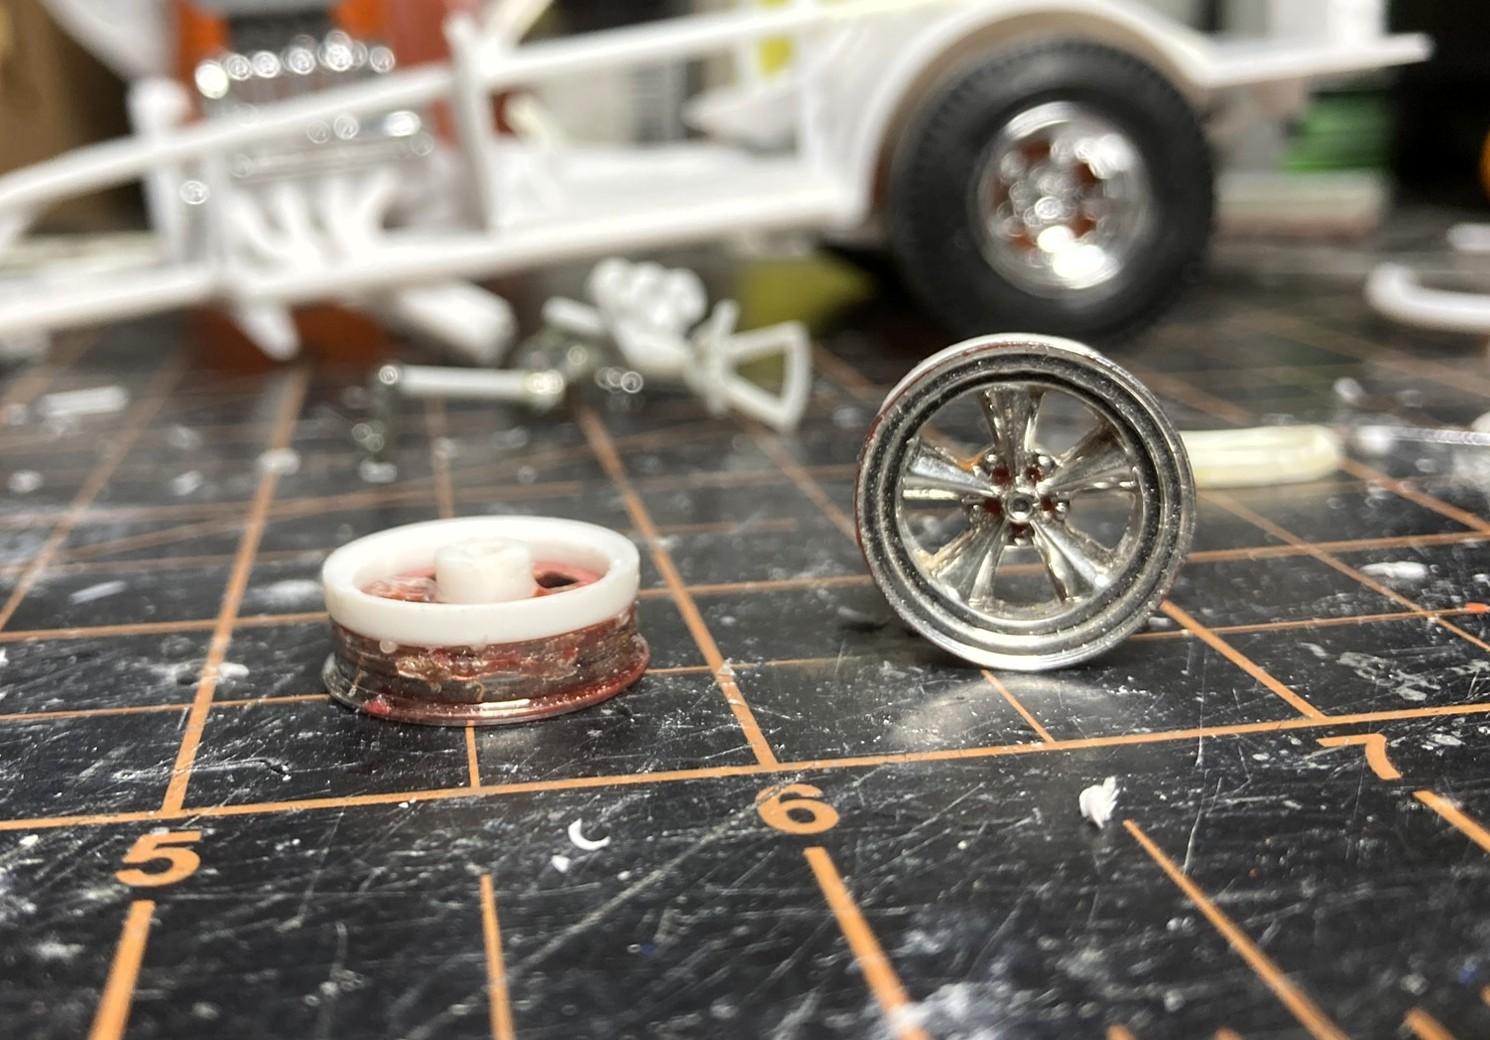
I have seen those before and almost ordered them because I really like their American SS wheels/tires, but never noticed the 4 lugs. Pretty cool! -
Who doesn't love a mock-up? Let's see yours!
Quiet Eric replied to Belairconvertable's topic in WIP: Model Cars
I just noticed those wheels are 4-lug...where did you find those?? -
Do you also have 1:1 project cars?
Quiet Eric replied to ctruss53's topic in General Automotive Talk (Trucks and Cars)
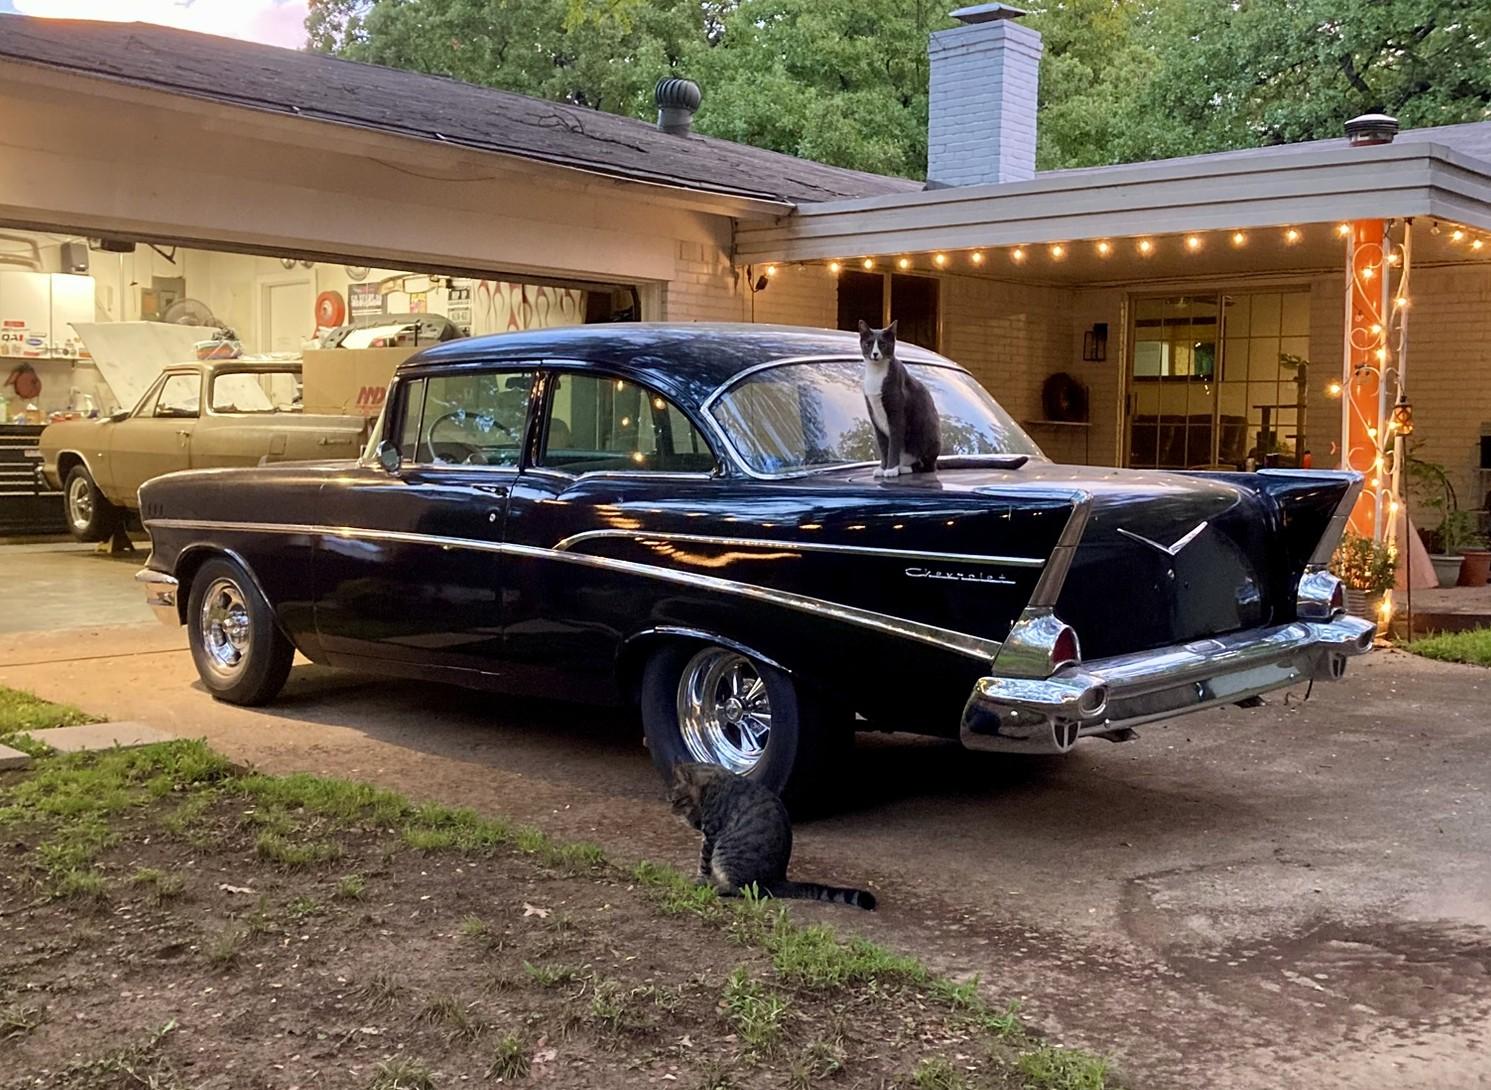
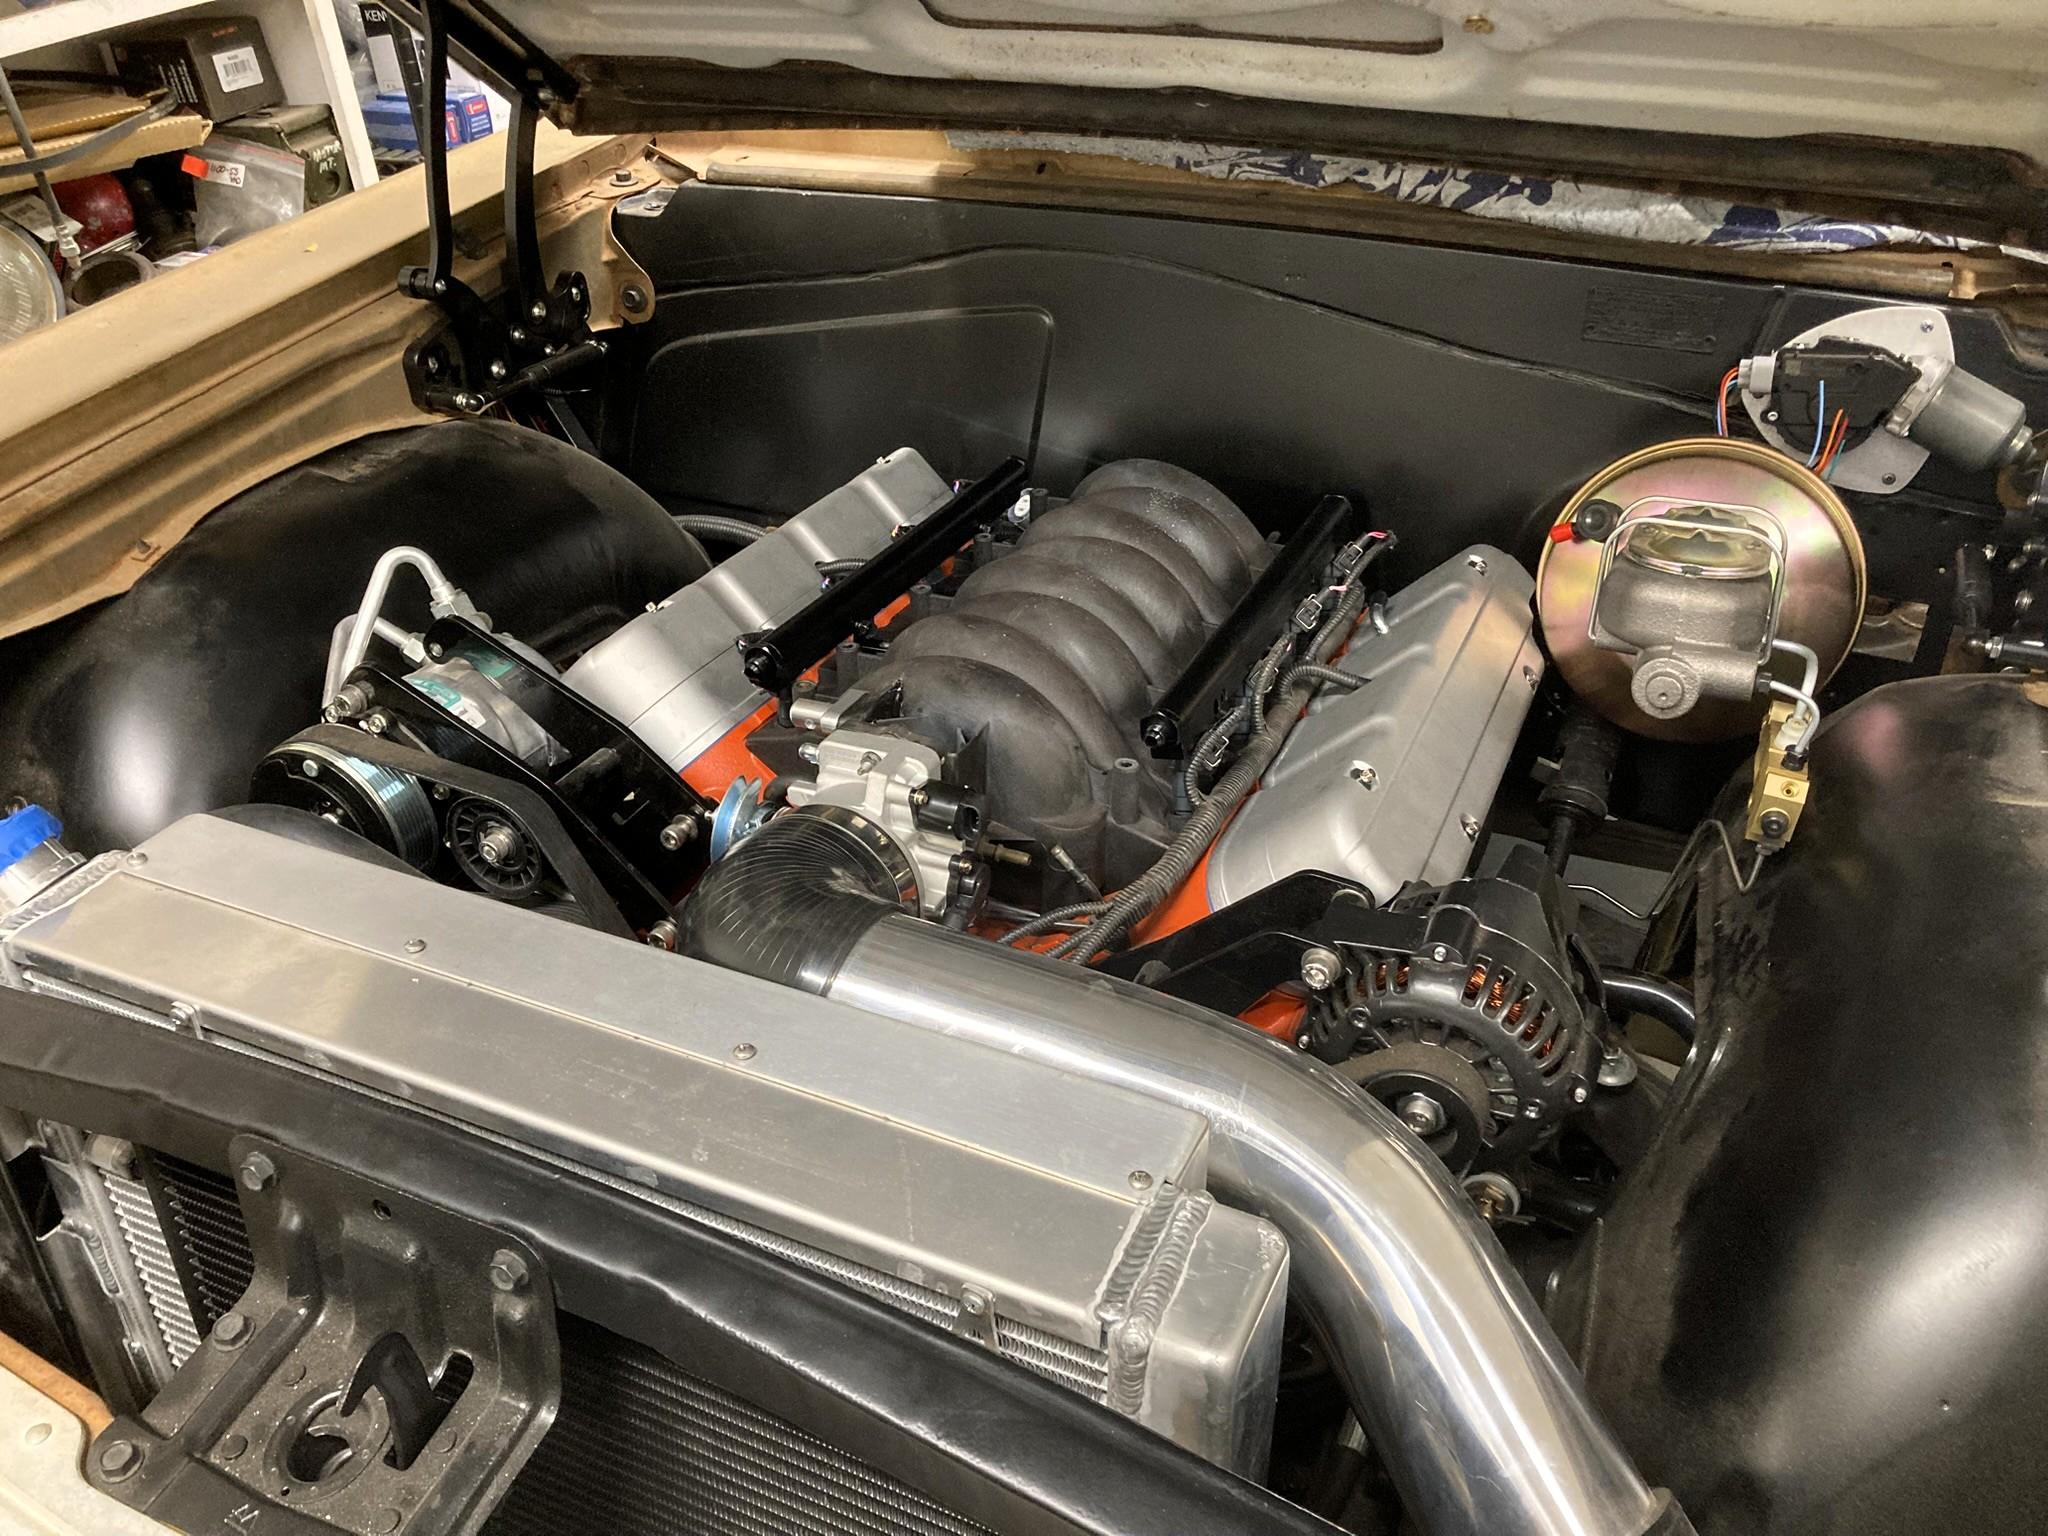
I've posted about the '57 before, but it has changed a lot since the last time it was on the road. Of course that was around 3 years ago. I've also been working on this '64 El Camino. It's a full frame off. Lots or rust repair, suspension work, 9" rear. 6.0LS. But it's been pretty hard for me to find the motivation to get out in the garage the last couple years. Much easier and quicker return on my effort building models!
-
Who doesn't love a mock-up? Let's see yours!
Quiet Eric replied to Belairconvertable's topic in WIP: Model Cars
Oooooooooh man. That is cool. -
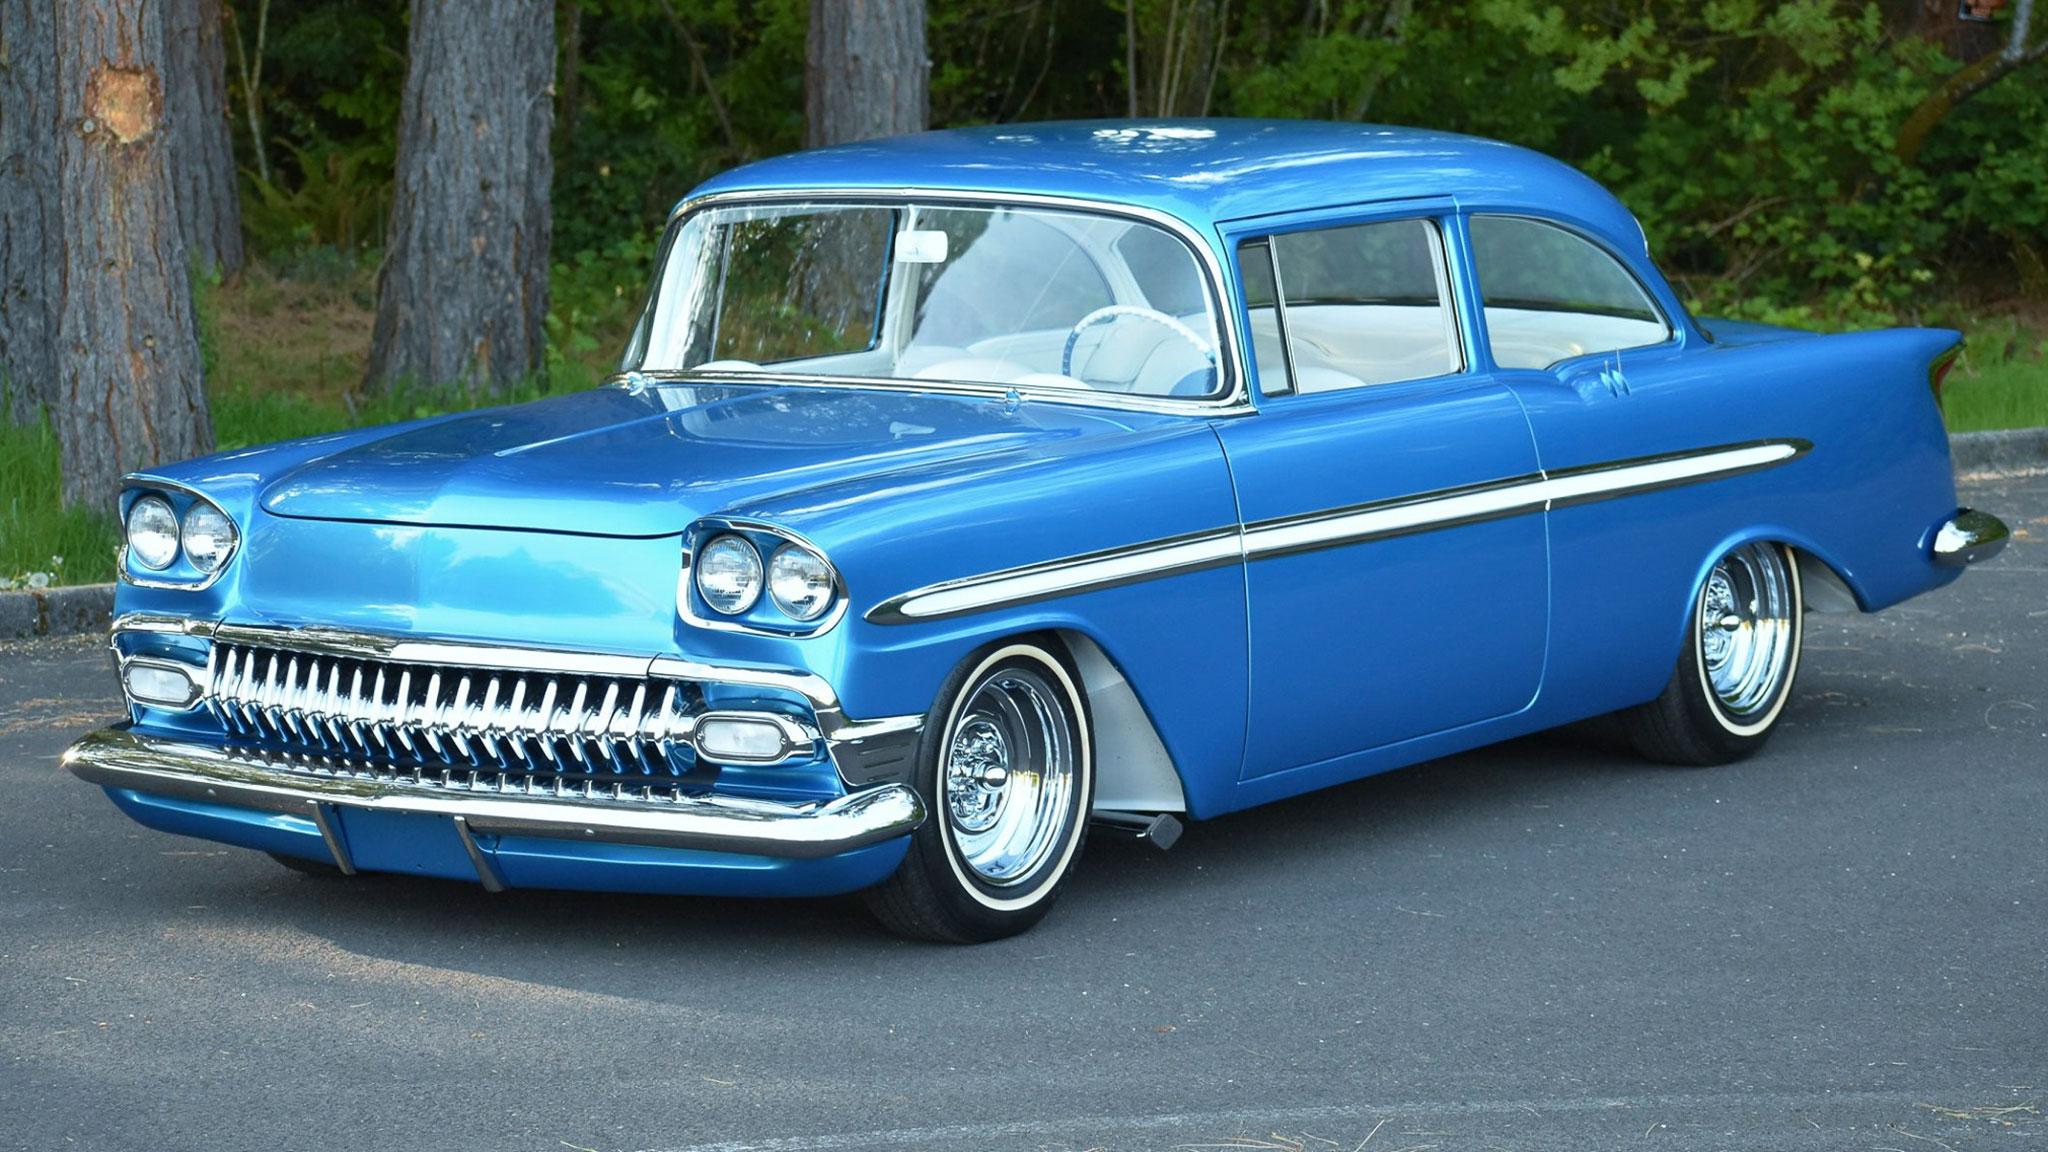
You're nailing it on this one. Always been one of my favorite customs.
-
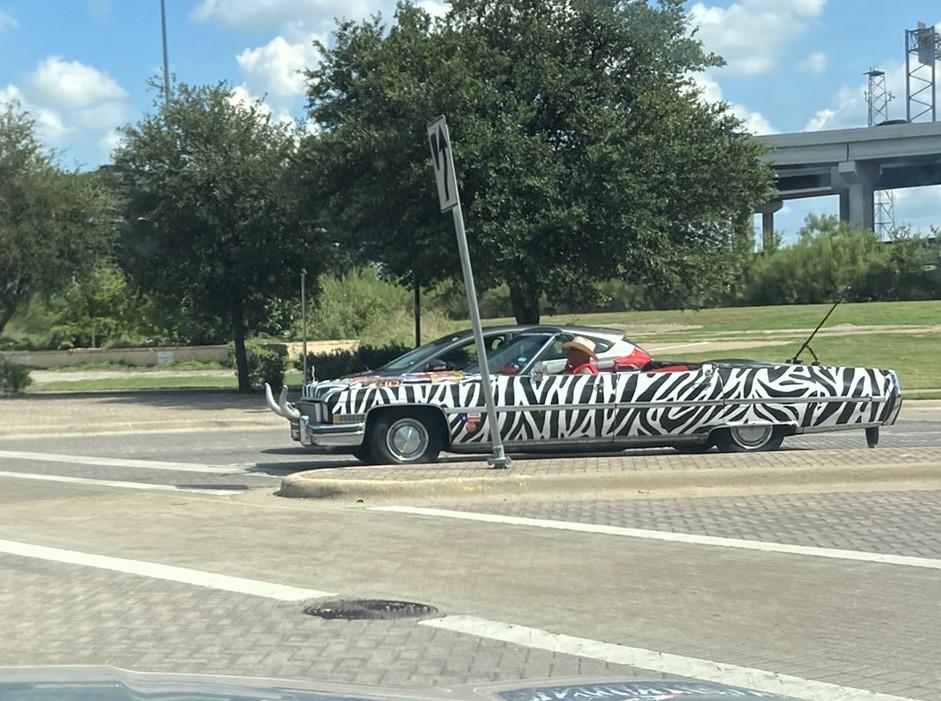
What did you see on the road today?
Quiet Eric replied to Harry P.'s topic in General Automotive Talk (Trucks and Cars)
Spotted in surprise surprise, Ft. Worth Tx yesterday afternoon.
-
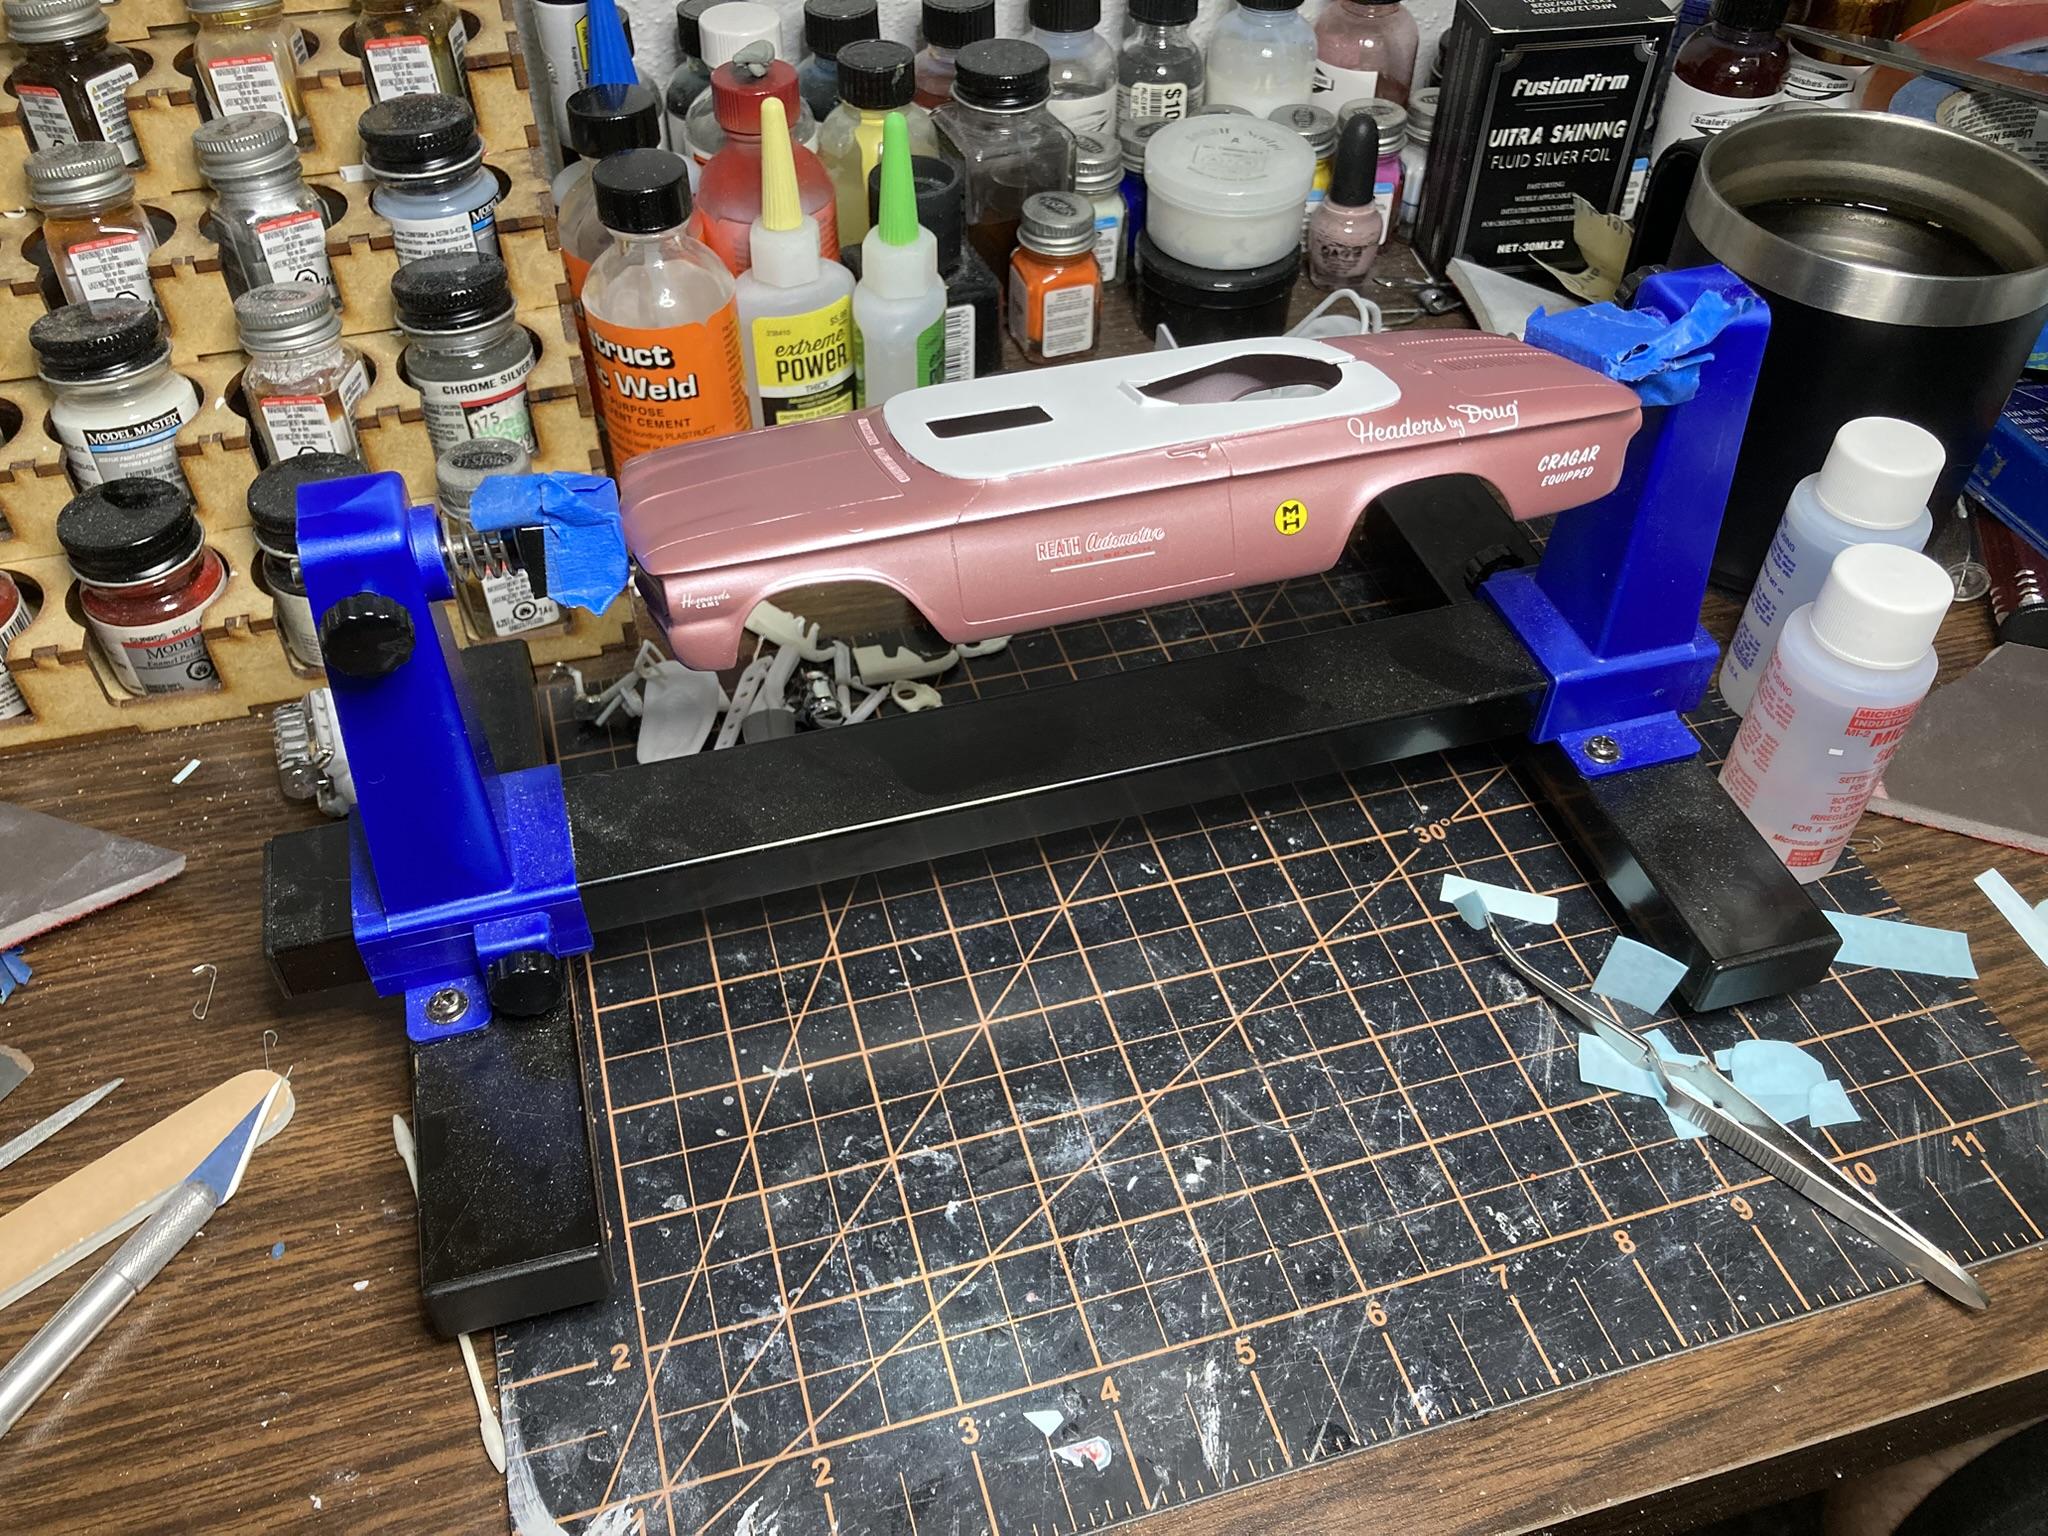
I don't remember where I saw this and it might have been here a long time ago, but thought I'd share anyway. This is a "Printed Circuit Board holder." It is excellent for holding a body to put decals on when when you really need an extra hand. Good for holding chassis too for assembly. Lots of adjustability and it rotates. They go for $10-$20 online.
-
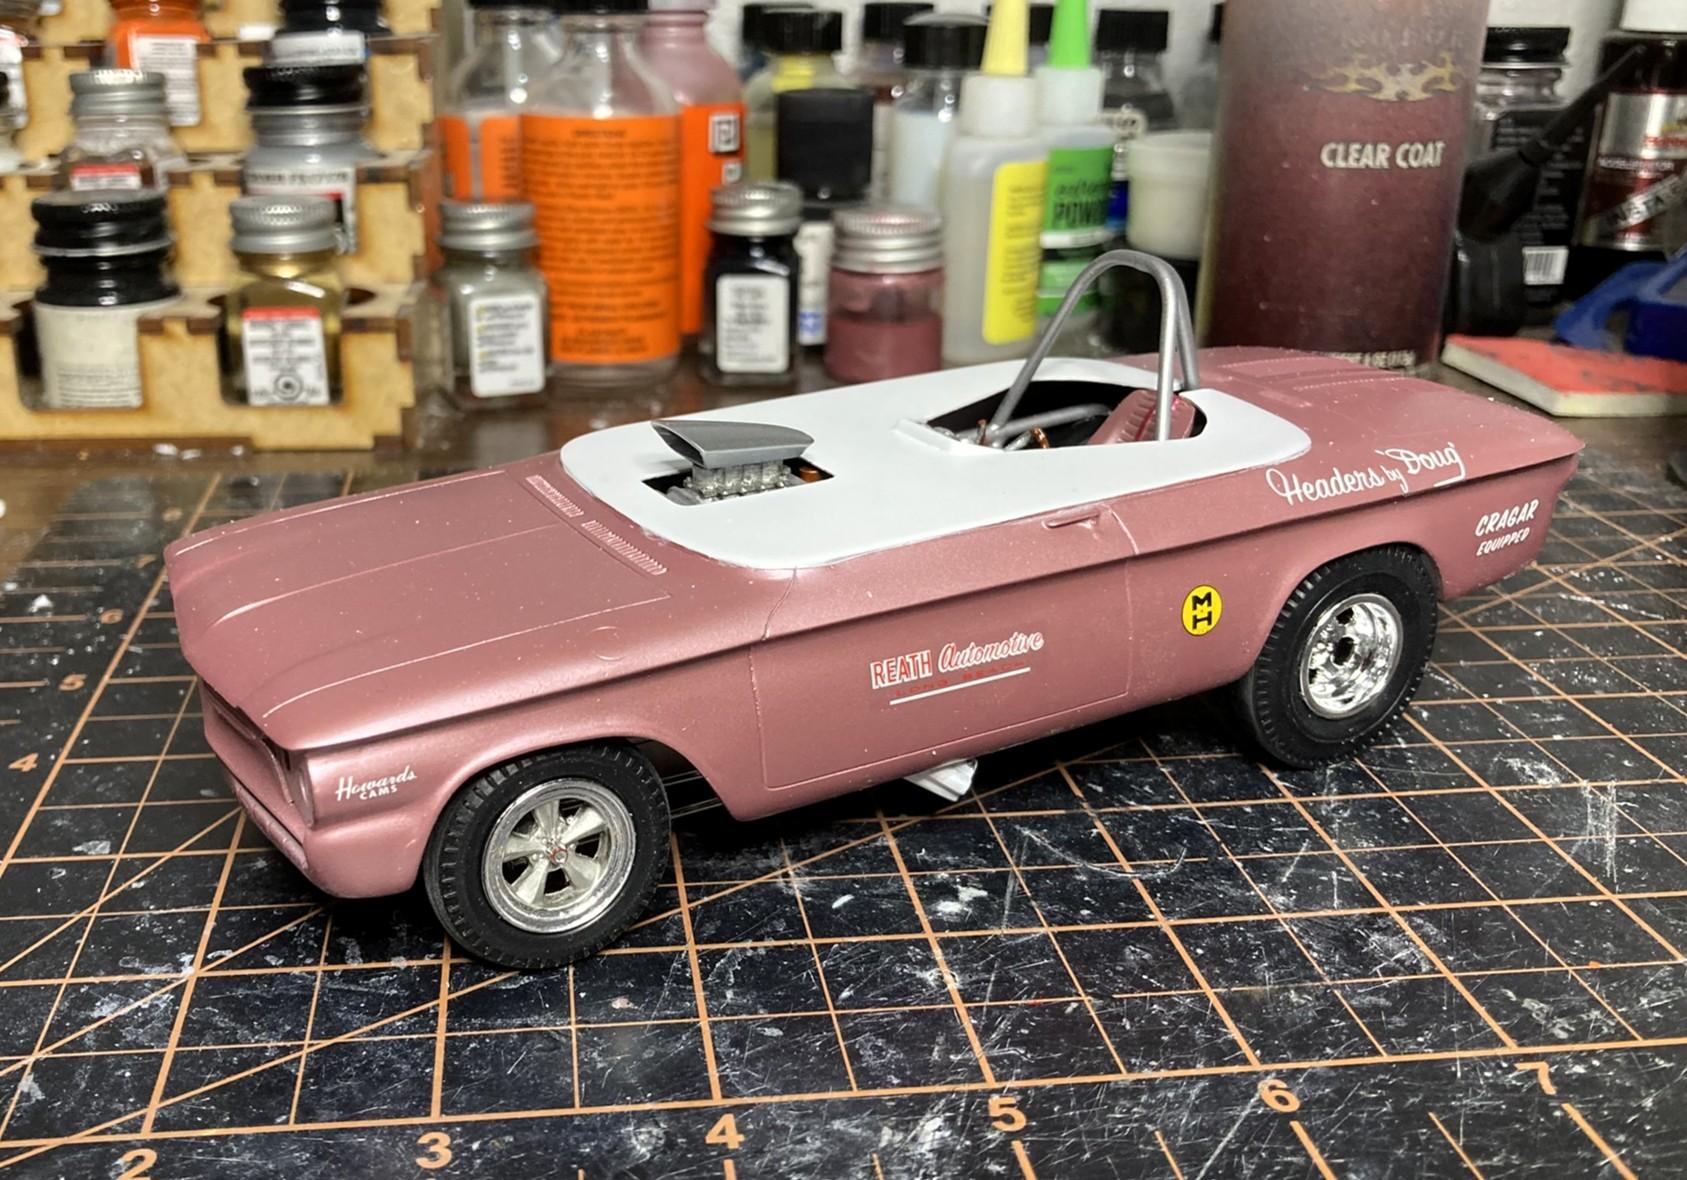
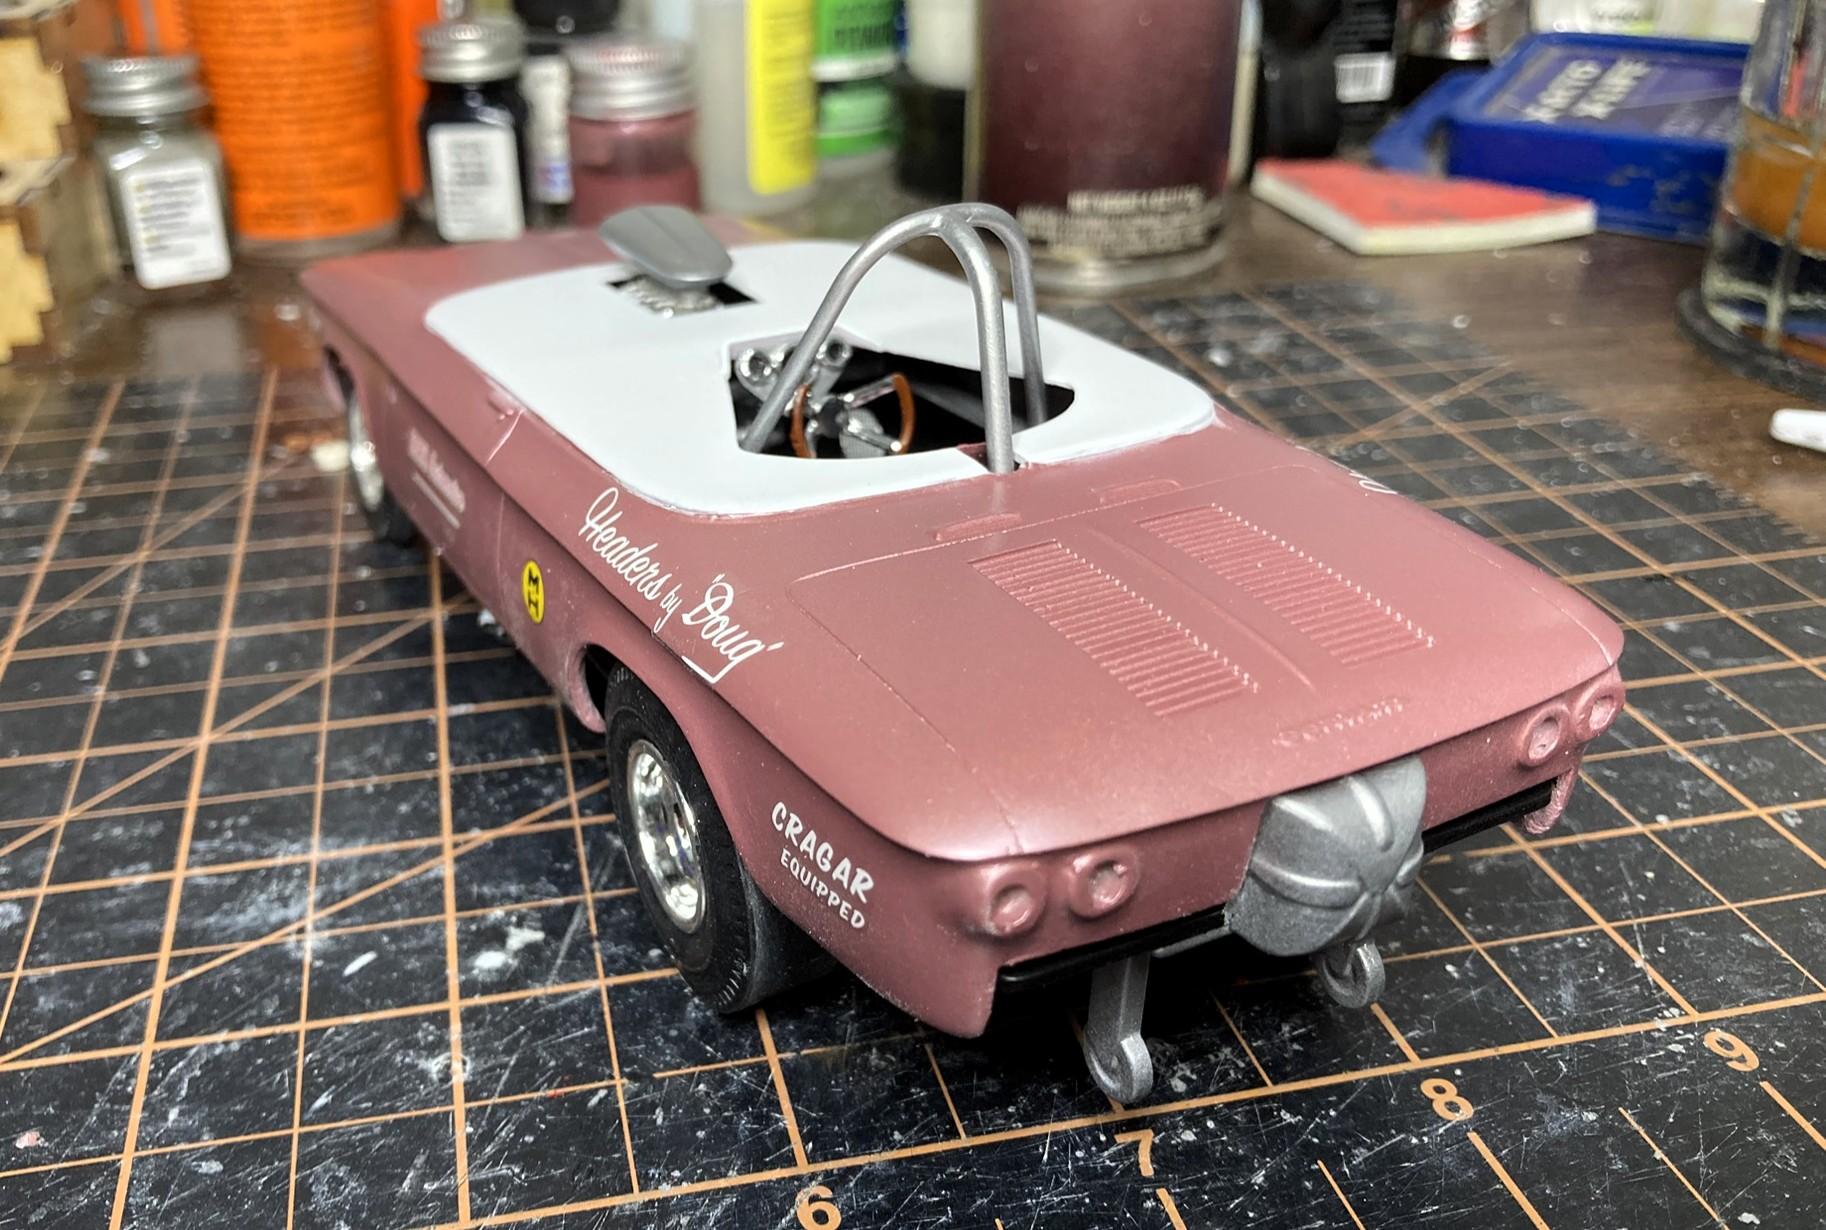
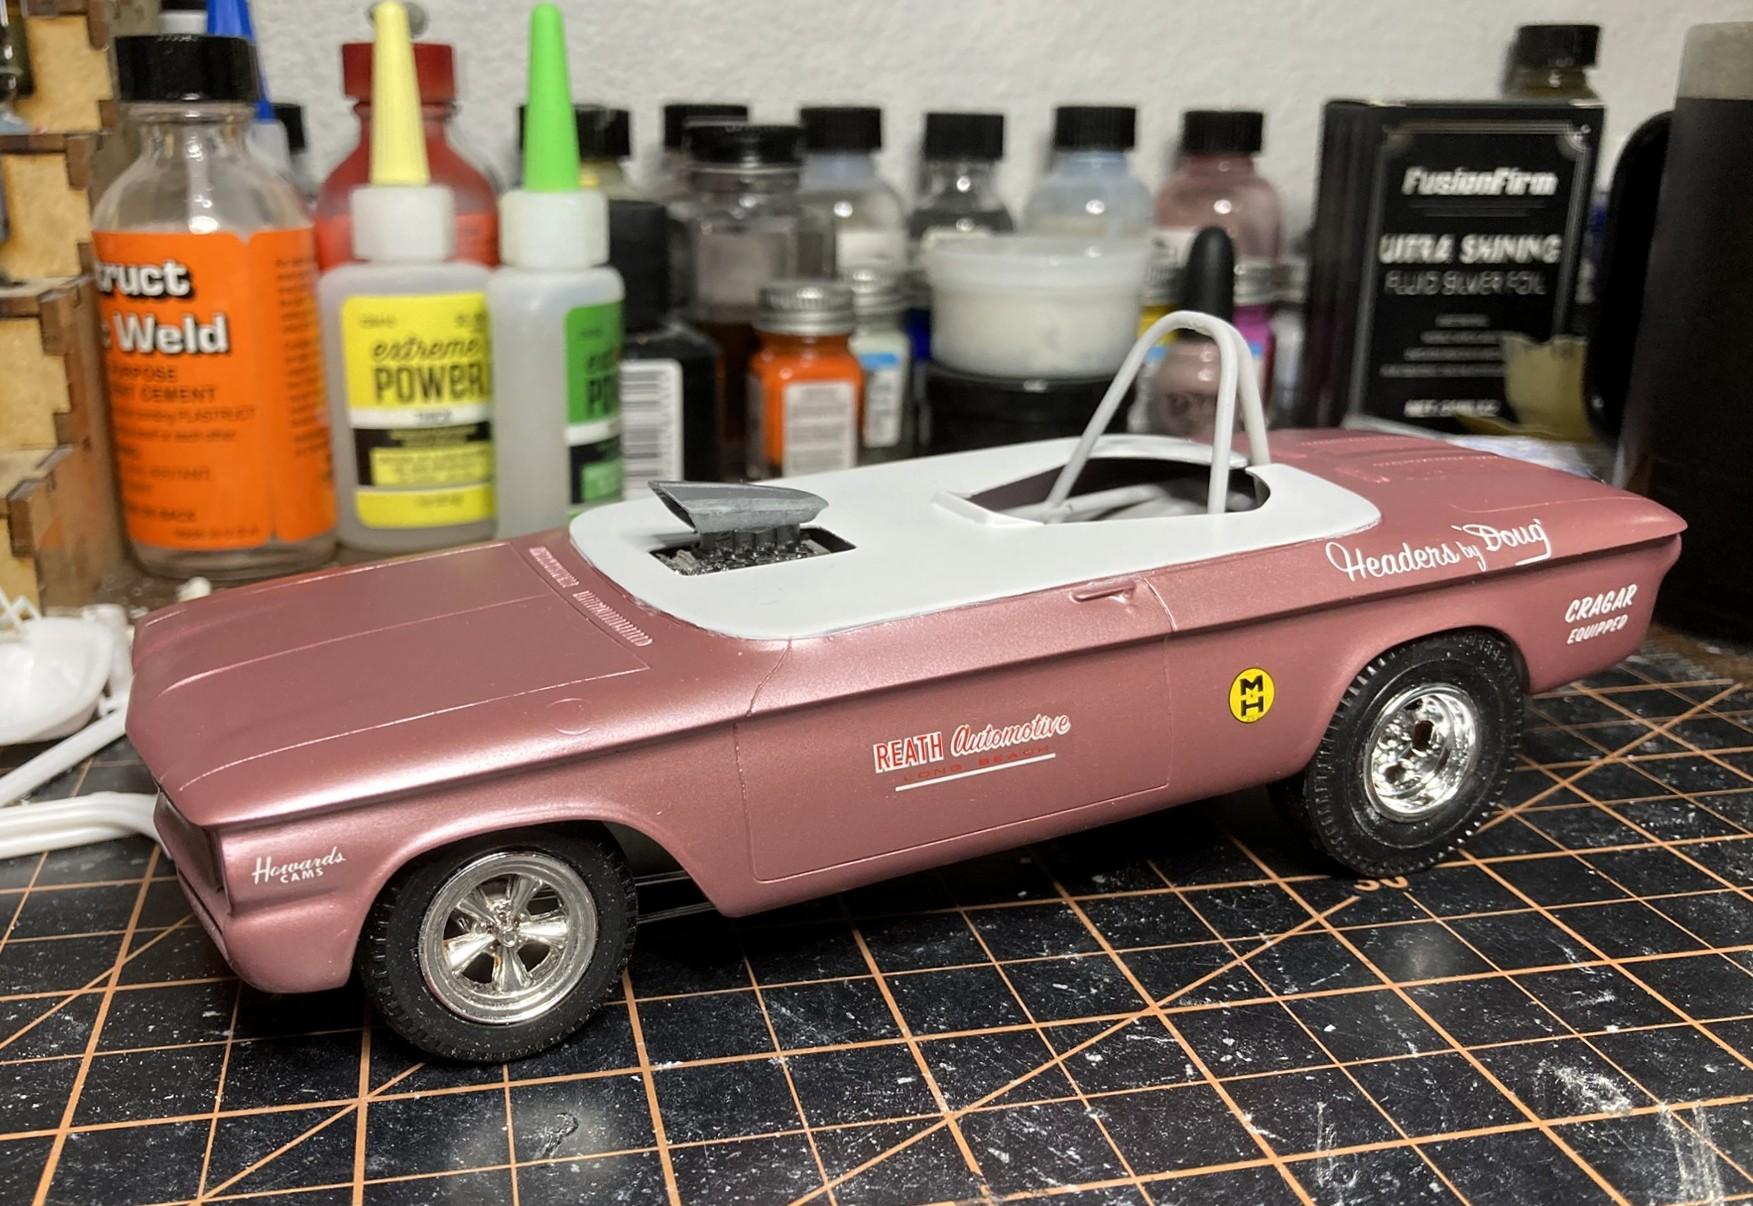
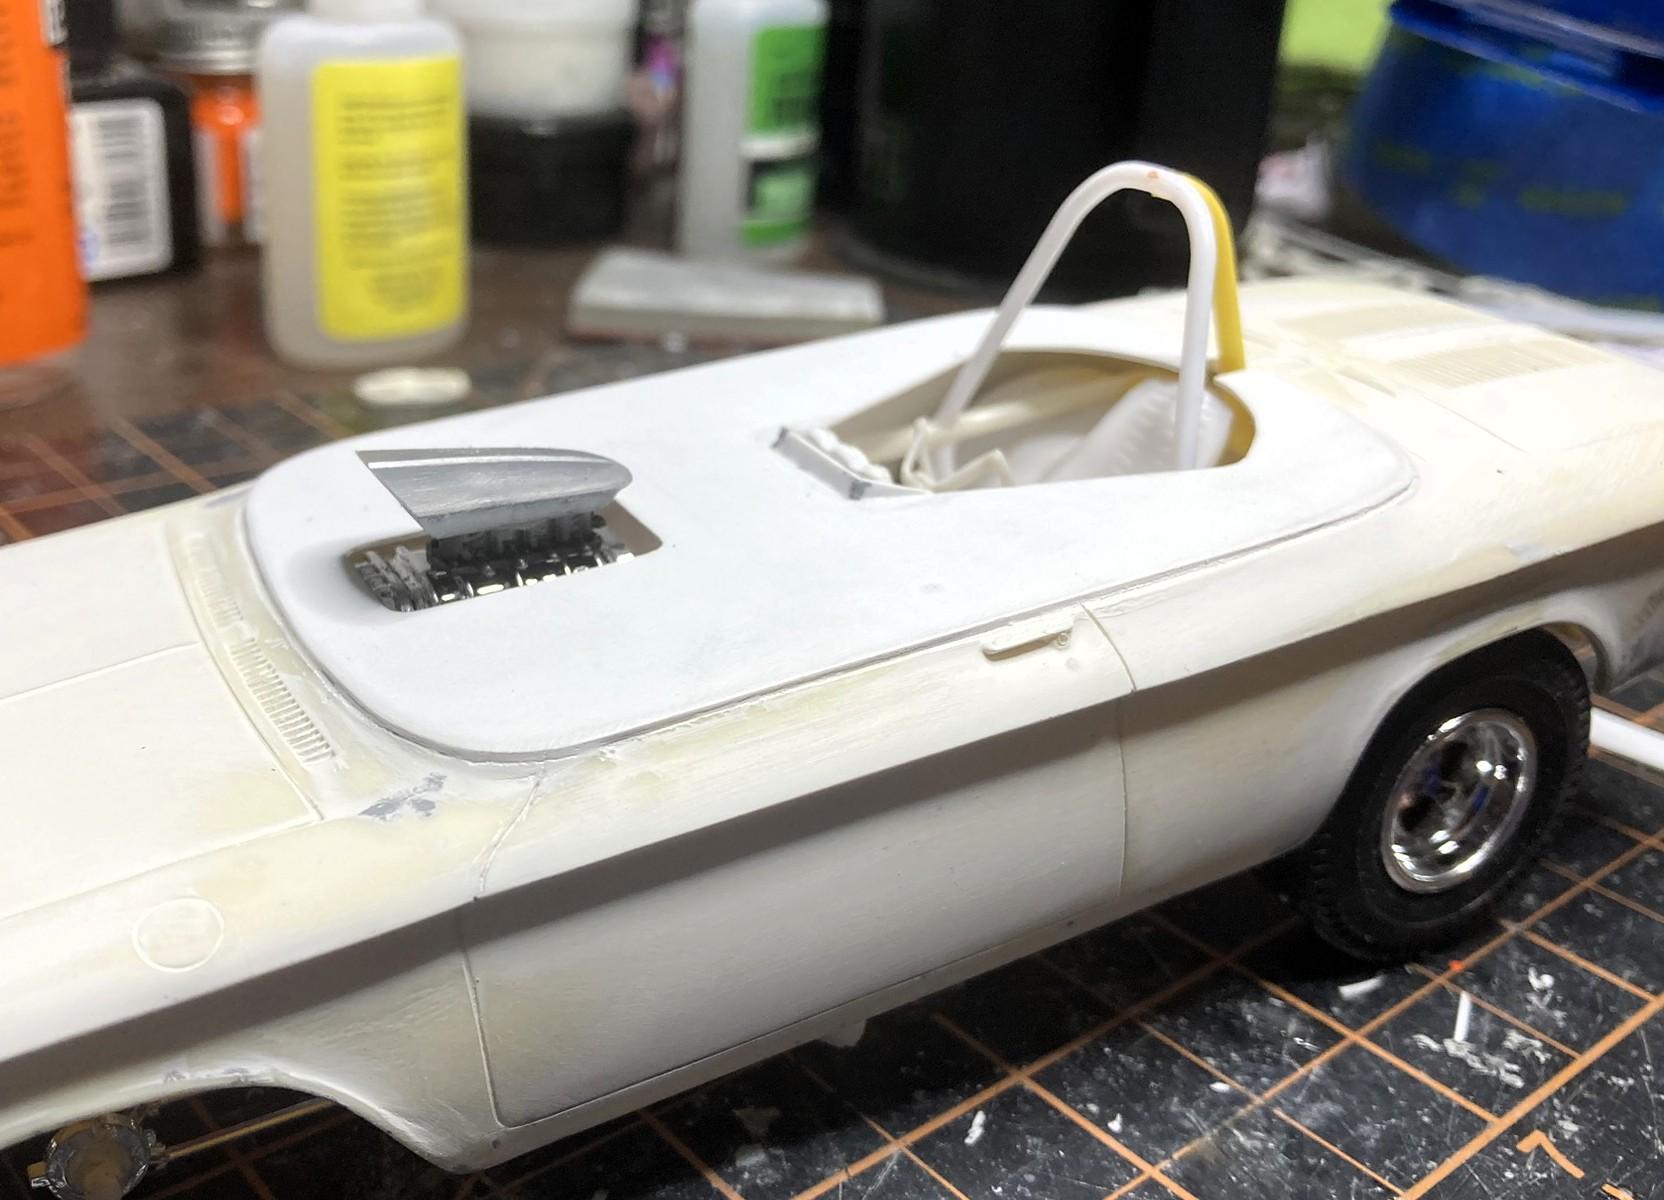
Couldn't resist adding some decals this morning.
-
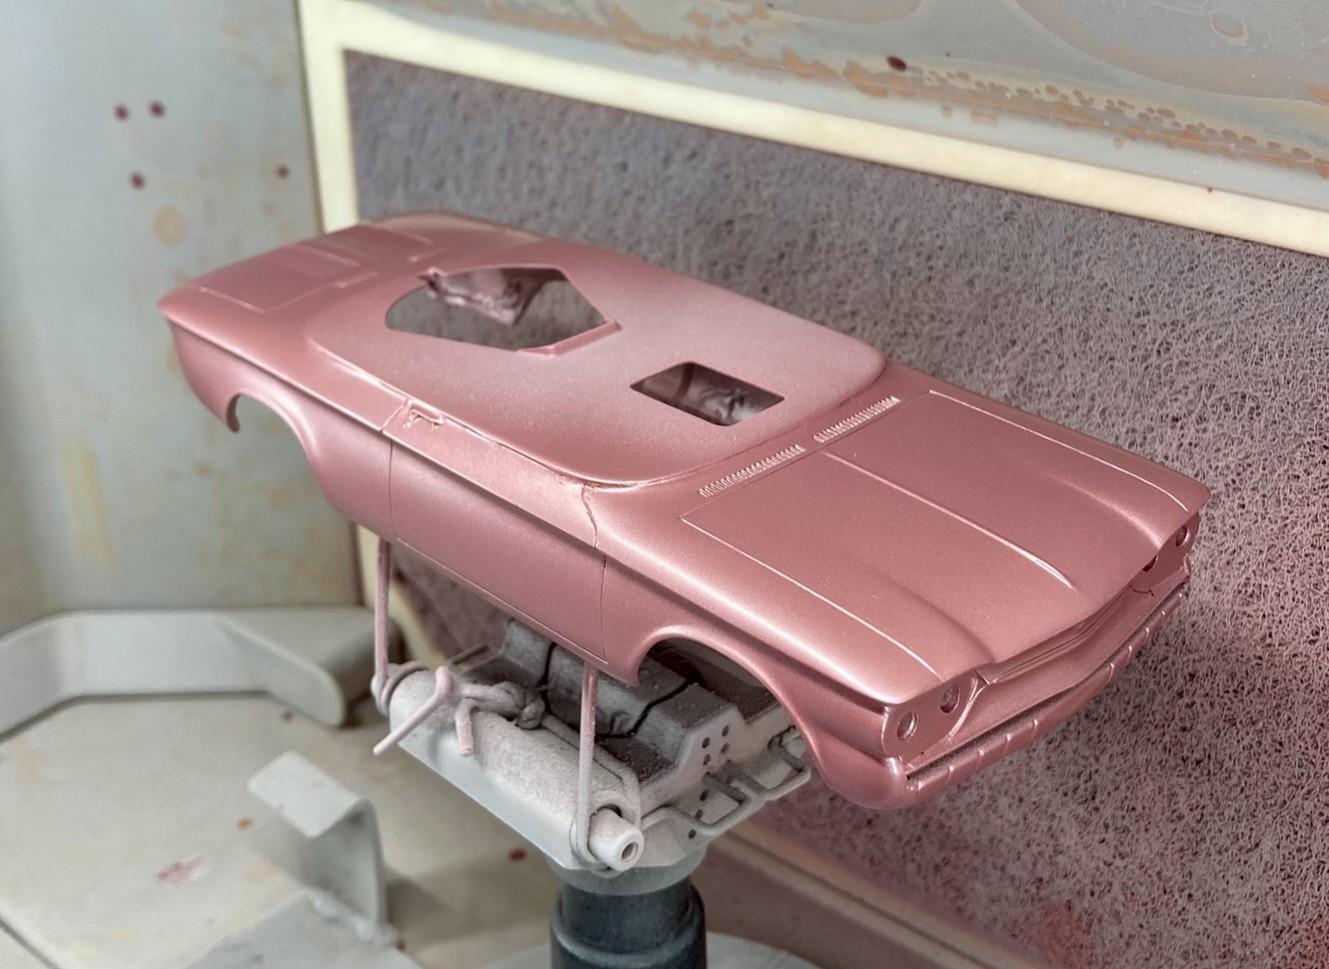
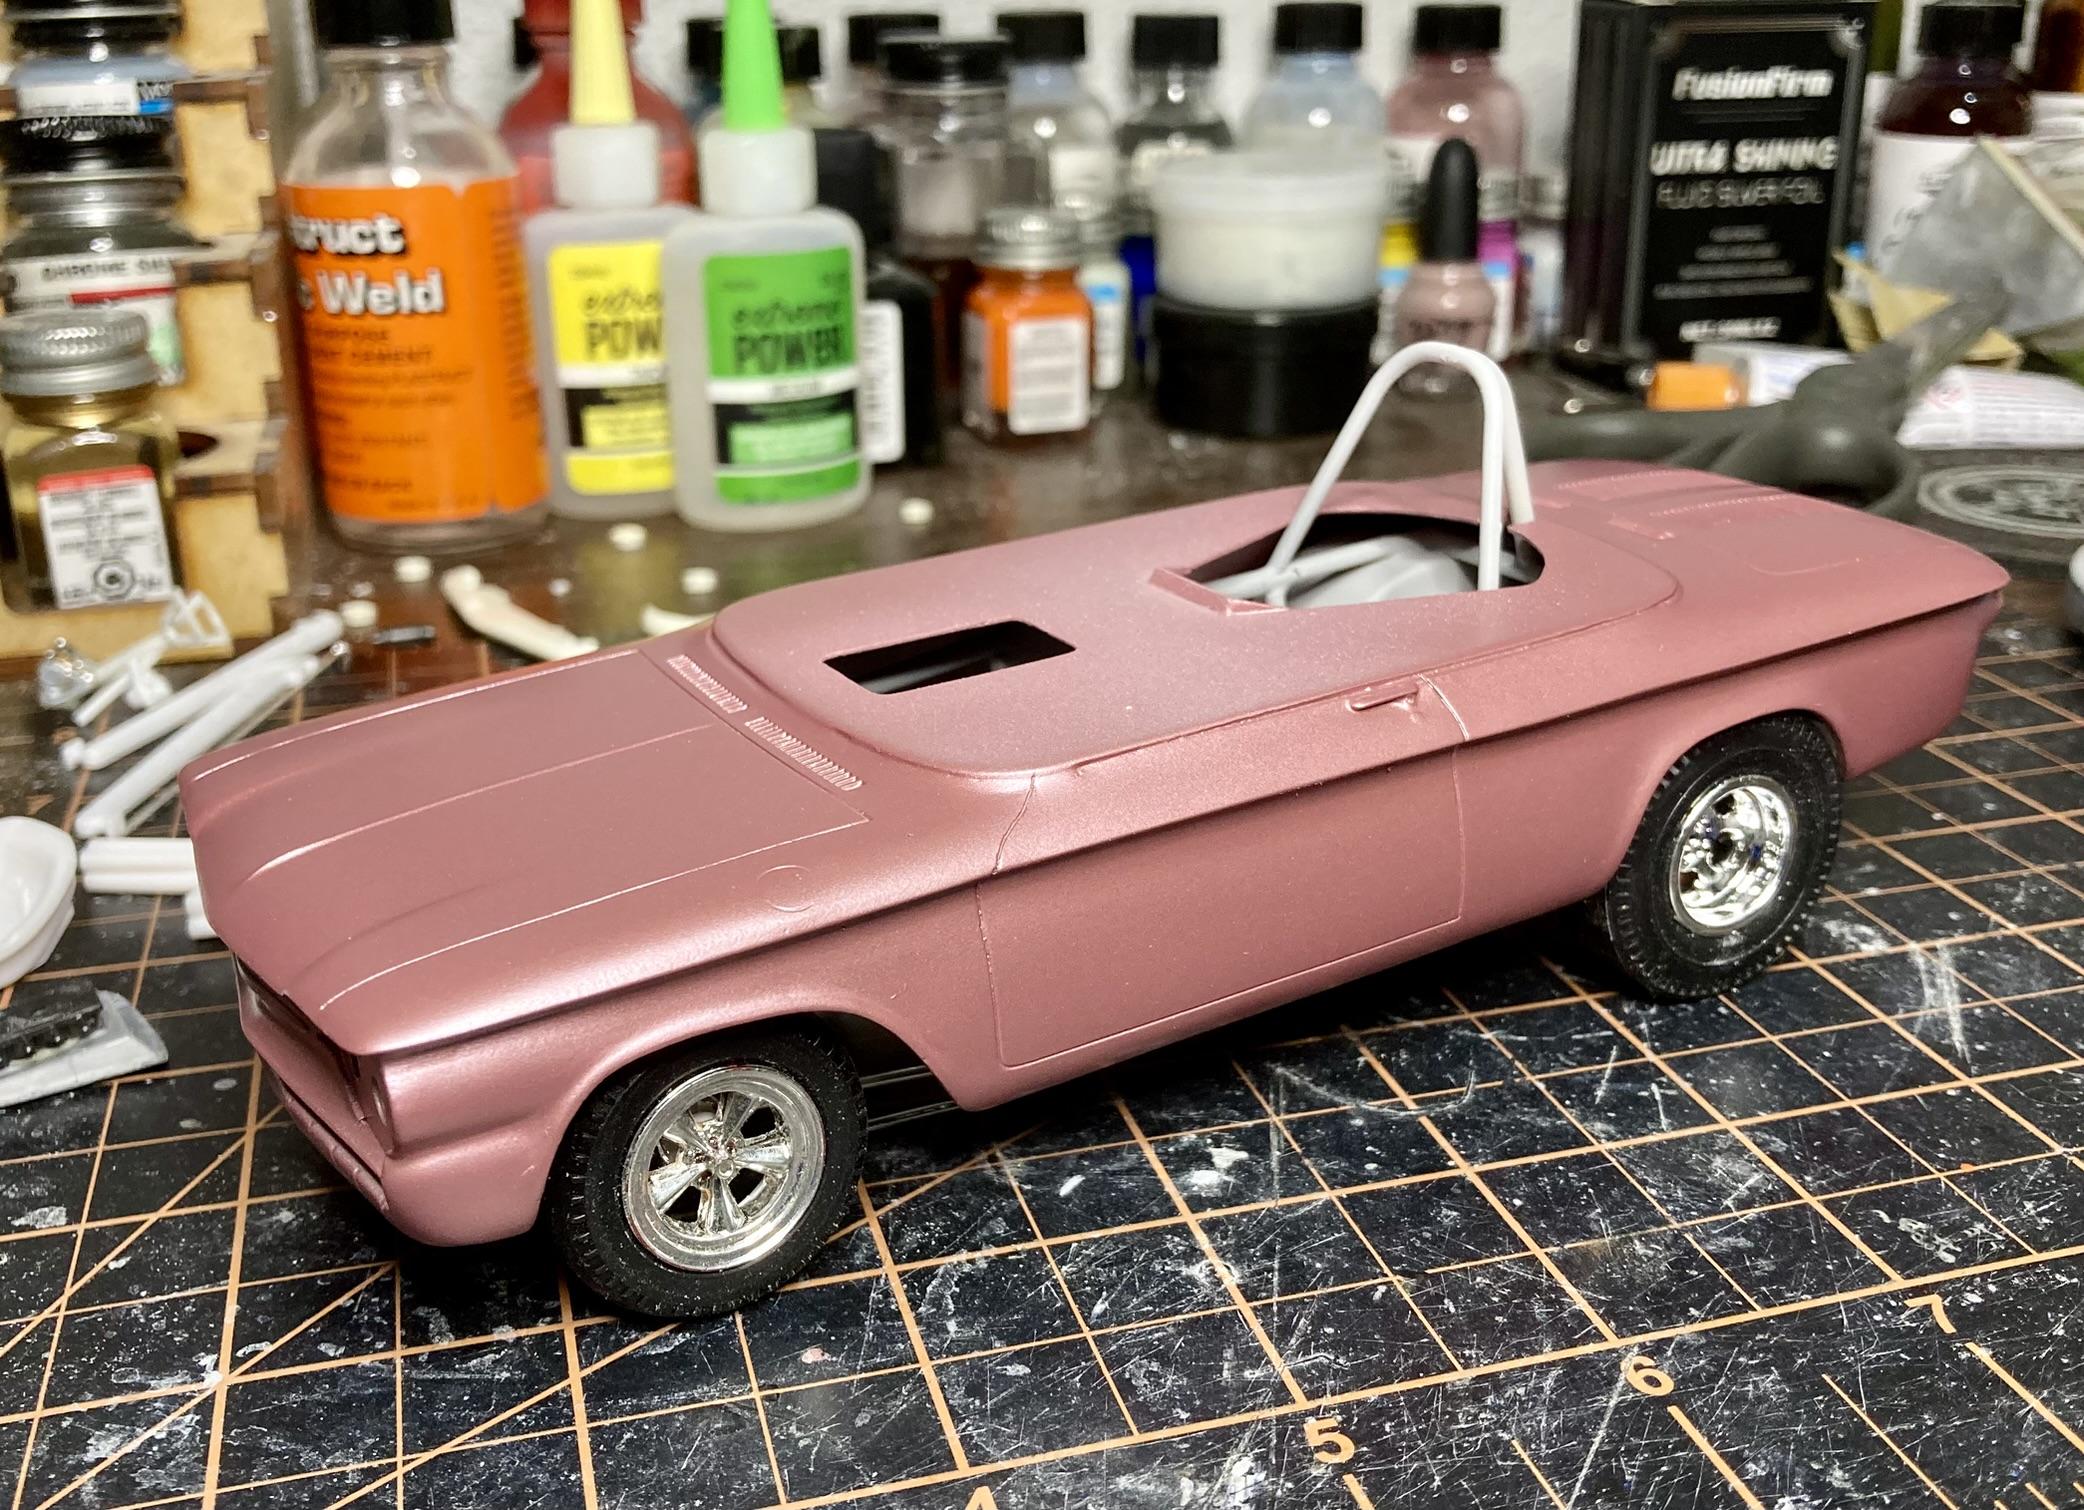
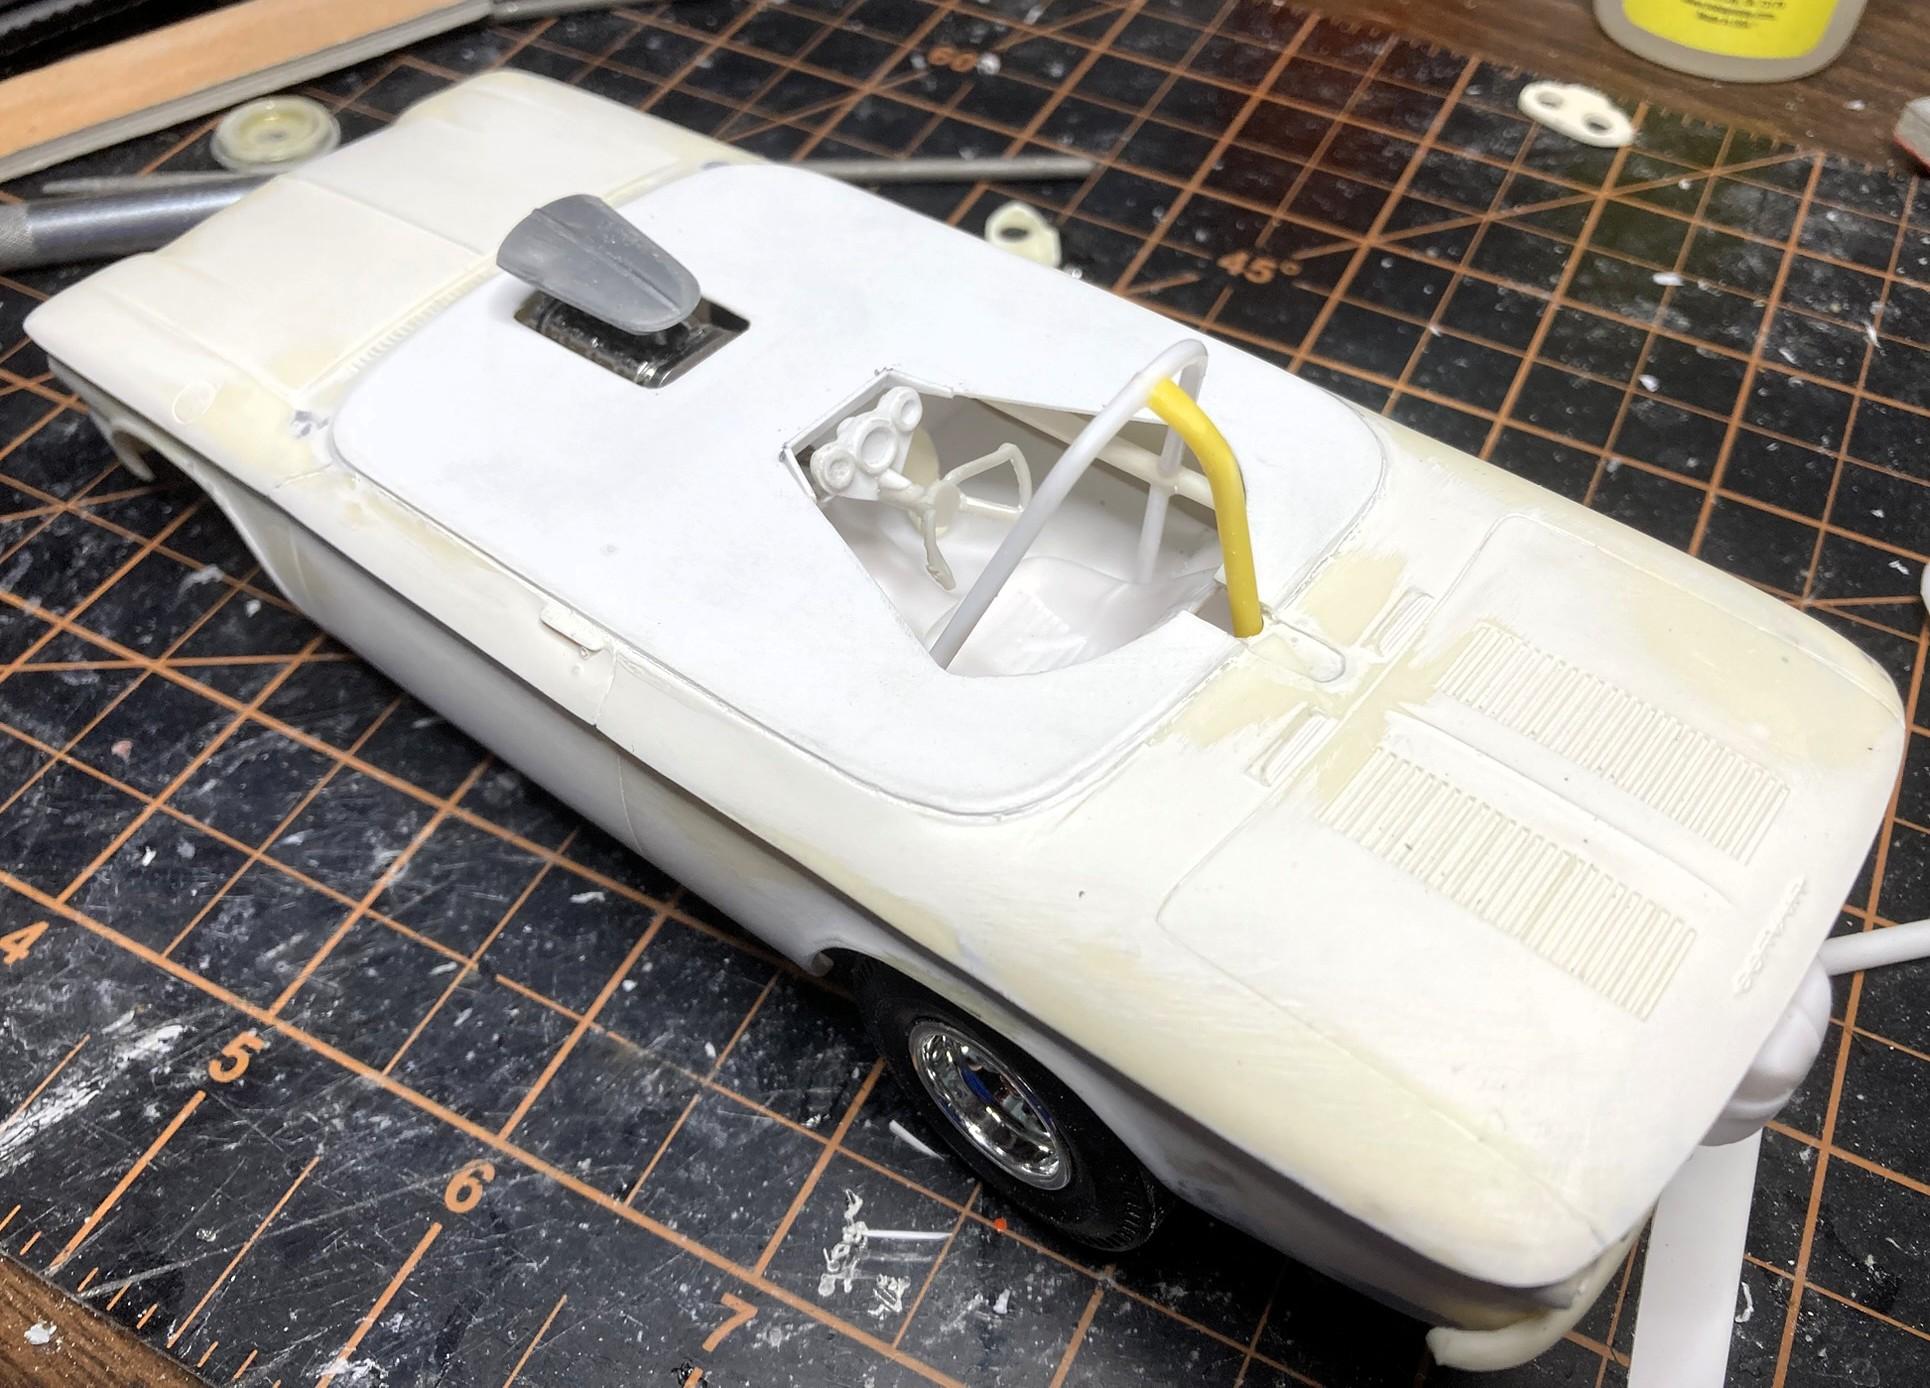
I decided this one should be something close to Evening Orchid/Iris Mist...well I didn't figure that out before my last Scale Finishes order, so this is my compromise. I decanted and mixed a couple Tamiya colors and came up with this. It's pretty close to what I had in mind and I'm excited to see it with some white detailing and decals.
-
A tale of 2 A990 Race hemi Plymouths
Quiet Eric replied to gtx6970's topic in WIP: Drag Racing Models
Really nice work on this pair Bill. -
Thanks! As far as I know, there's really not much difference from '65-'69 so I don't see why that wouldn't work, especially for racecar purposes. I call this one a '60 and I don't recall why I landed on that year, because the resin kit I bought was sold as a '63.
-
What did you see on the road today?
Quiet Eric replied to Harry P.'s topic in General Automotive Talk (Trucks and Cars)
I agree, don't know the story on that. But should be an easy fix. The seat back doesn't have that issue. -
Fantastic result!
-
The fan on the front of a Z28 was the same fan on any other V8 camaro. And the noise from an evenly space fan blade on the highway with an engine at 3500rpm...is very obnoxious. So finding a fix for that was pretty important to many drivers. They also did not remove any blades from the fan, they are just clocked a little differently and done so in a way that the fan is still balanced.
-
What did you see on the road today?
Quiet Eric replied to Harry P.'s topic in General Automotive Talk (Trucks and Cars)
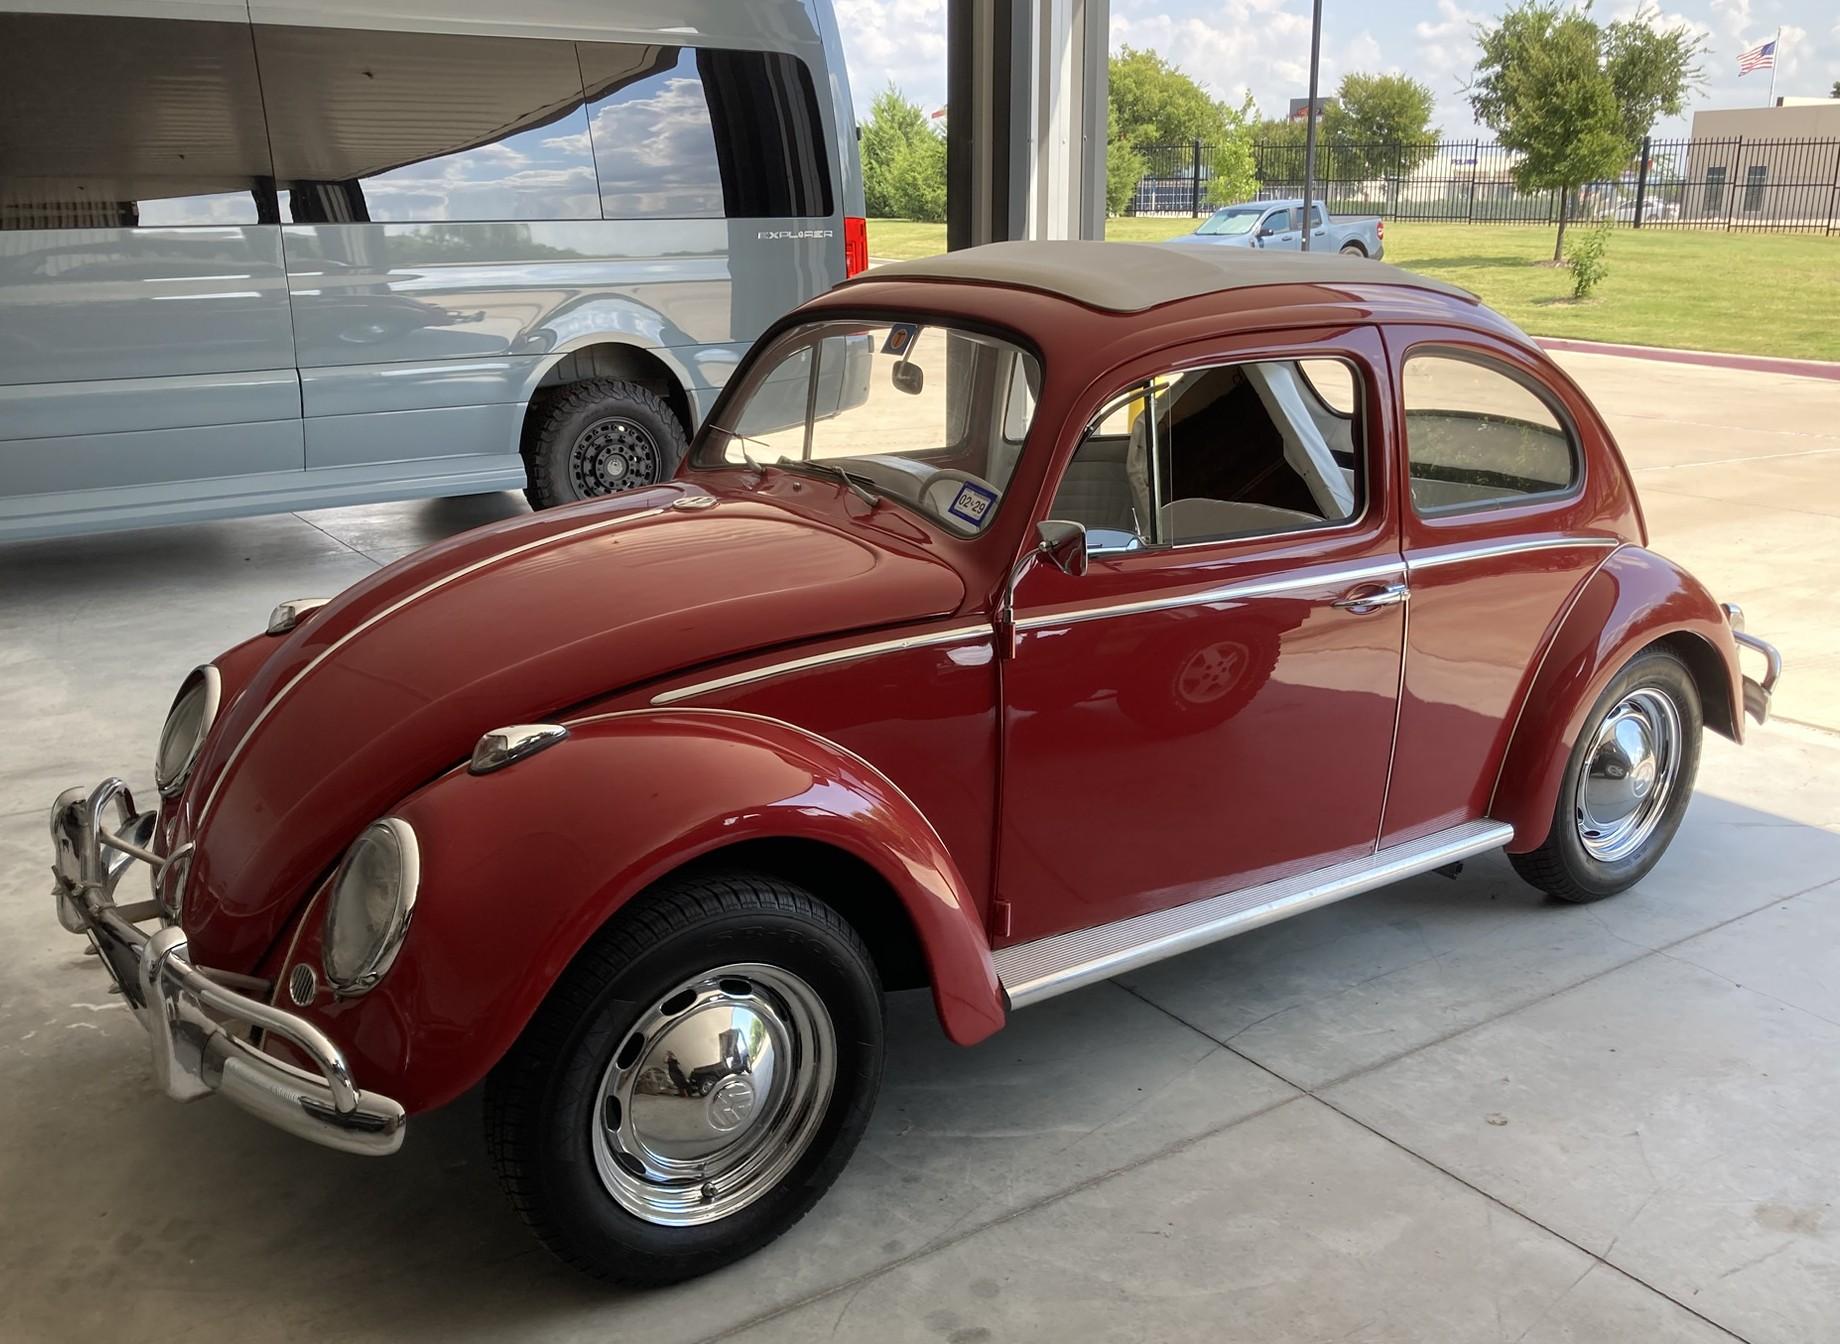
The camaro is pretty junky, nothing special. At least not yet. Yes on the go kart. And here's the '63 ragtop.
-
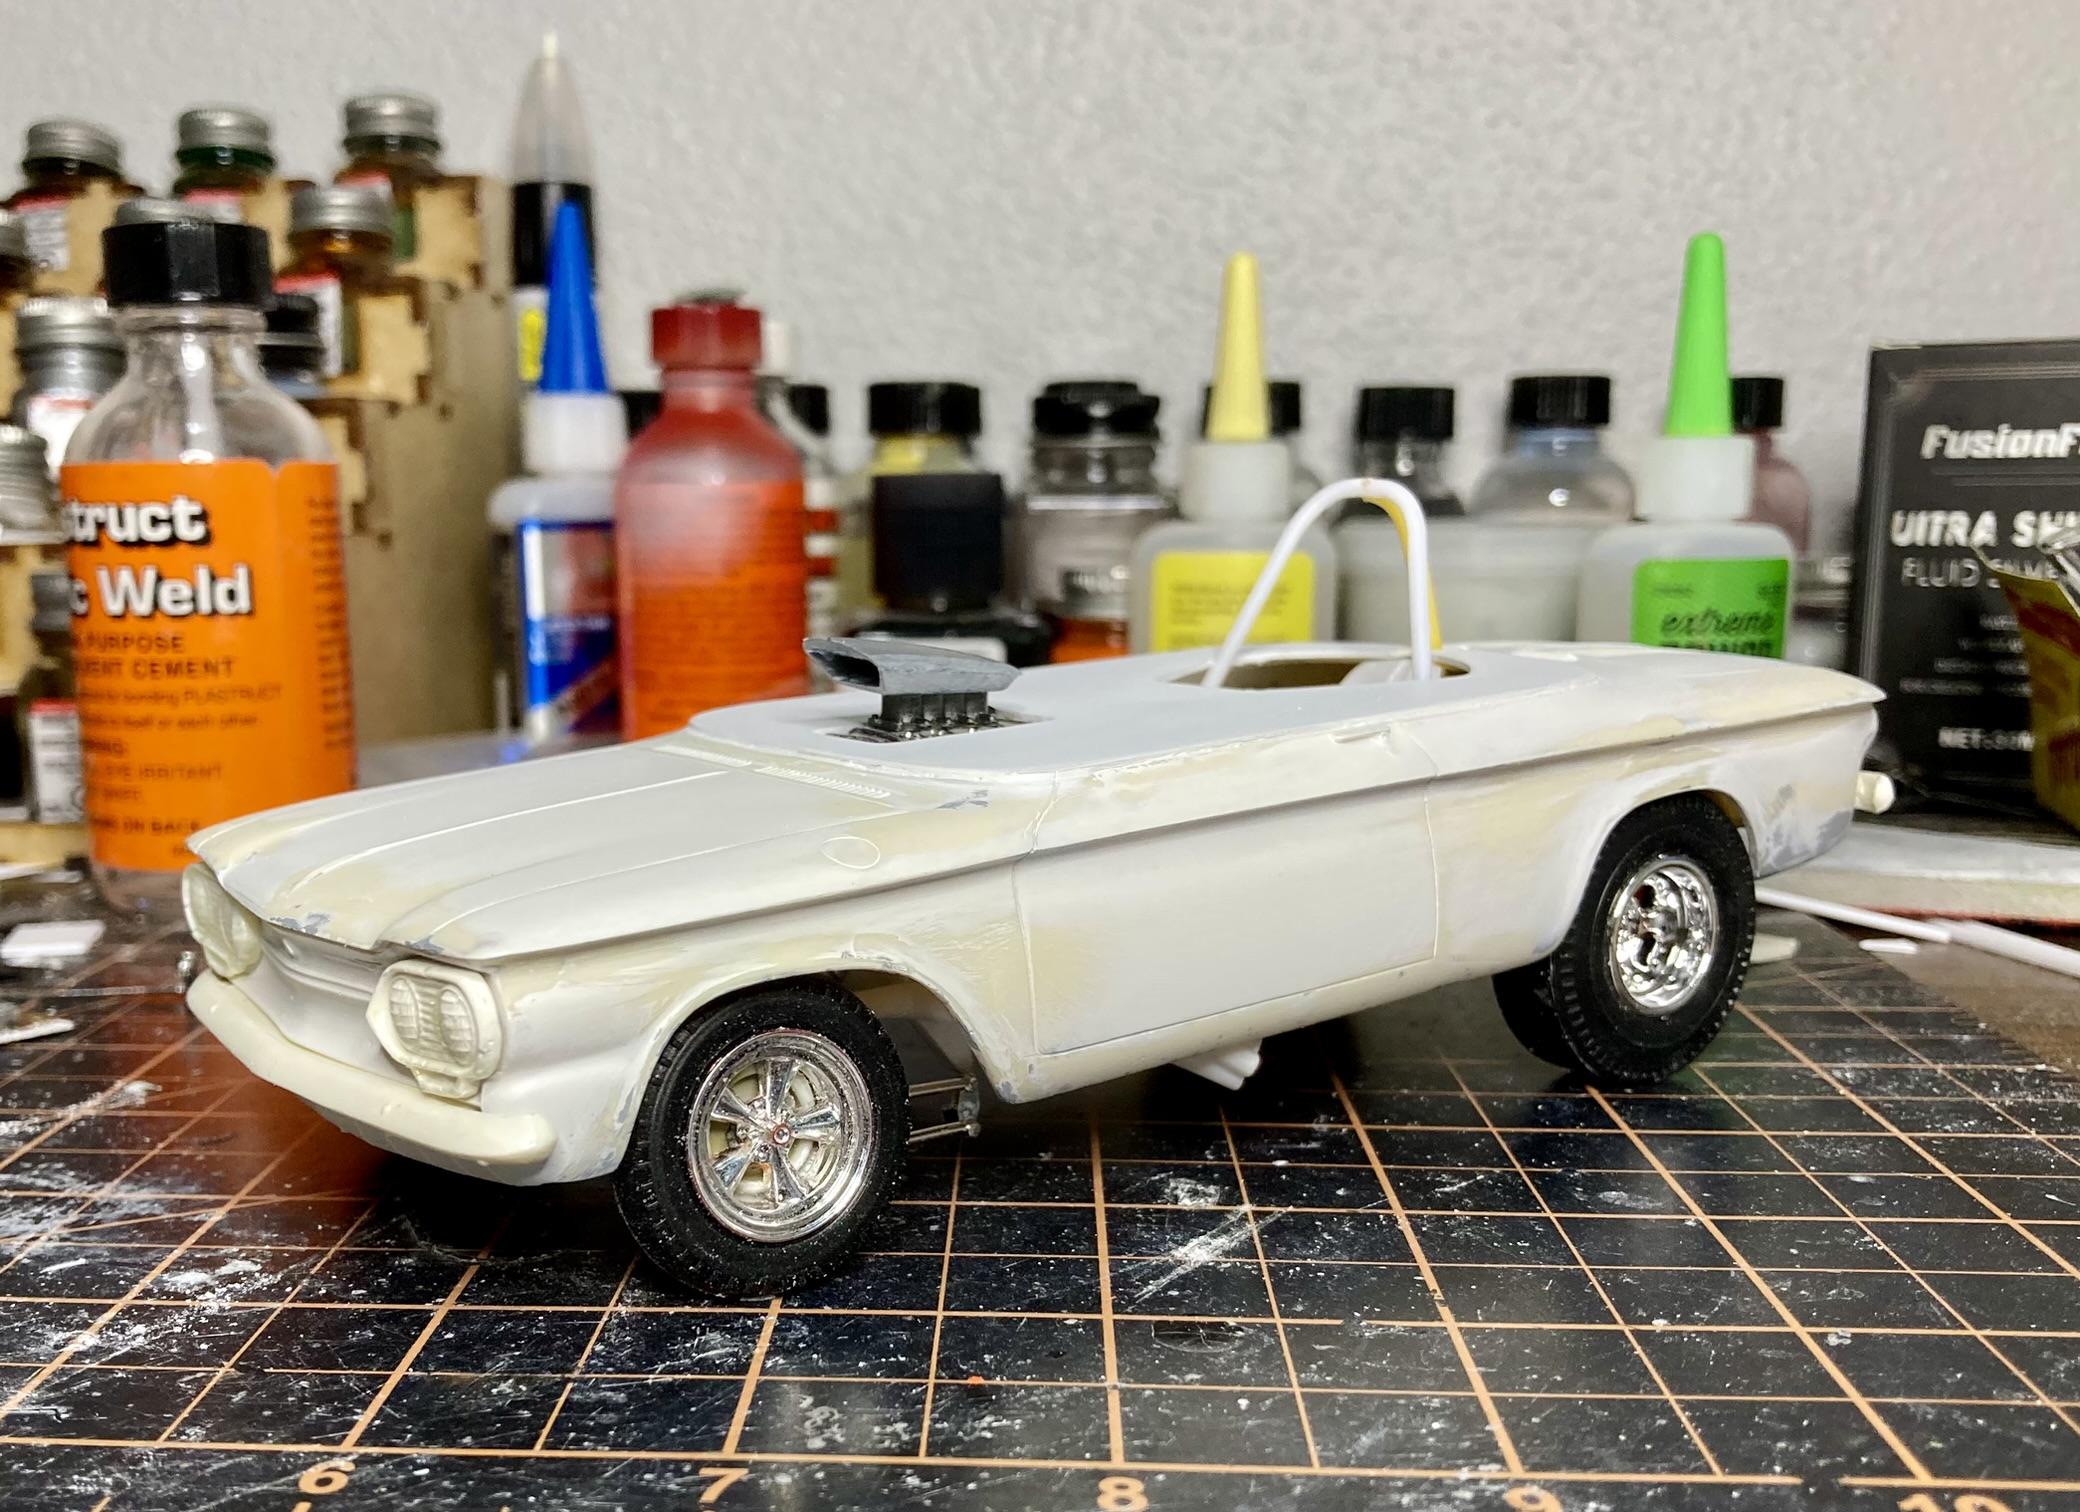
I'm calling it on the fabrication end. Time to wrap it up and start painting. Bent a piece of rod for the brake pedal and added the shoe print gas pedal. I couldn't find a gauge panel I liked so I made one by cutting thin slivers of some tubing and gluing it to some sheet, then trimmed it all down. The gauge backs are some shaped pieces of sprue. Added the pitman arm...should have added a support towards that end of the steering shaft but might wing that one later. Cut the tonneau cover to fit around that and added a small lip, to which I'll add a small piece of clear to act as a "windshield". I trimmed and added the kit wheelie bars to the chassis and will detail them with some photo etch bolt heads later. My one regret that I'm not going to do anything about is finding a better rear axle than the whatever-that-thing-is that comes in the kit. Not to mention the way is attaches to the springs, or the lack of shackles. But it'll have to do! I also found some correct big block valve covers, and swapped in an automatic transmission. Finally I cut the centers out of some AMT wheel backs and glued them to the front wheels, then added a piece of tubing to the center of the wheels to attach to the axle. Now the wheels are open all the way through, because there's no need for front brakes.
-
Looks like some nice conversion work so far.
-
What did you see on the road today?
Quiet Eric replied to Harry P.'s topic in General Automotive Talk (Trucks and Cars)
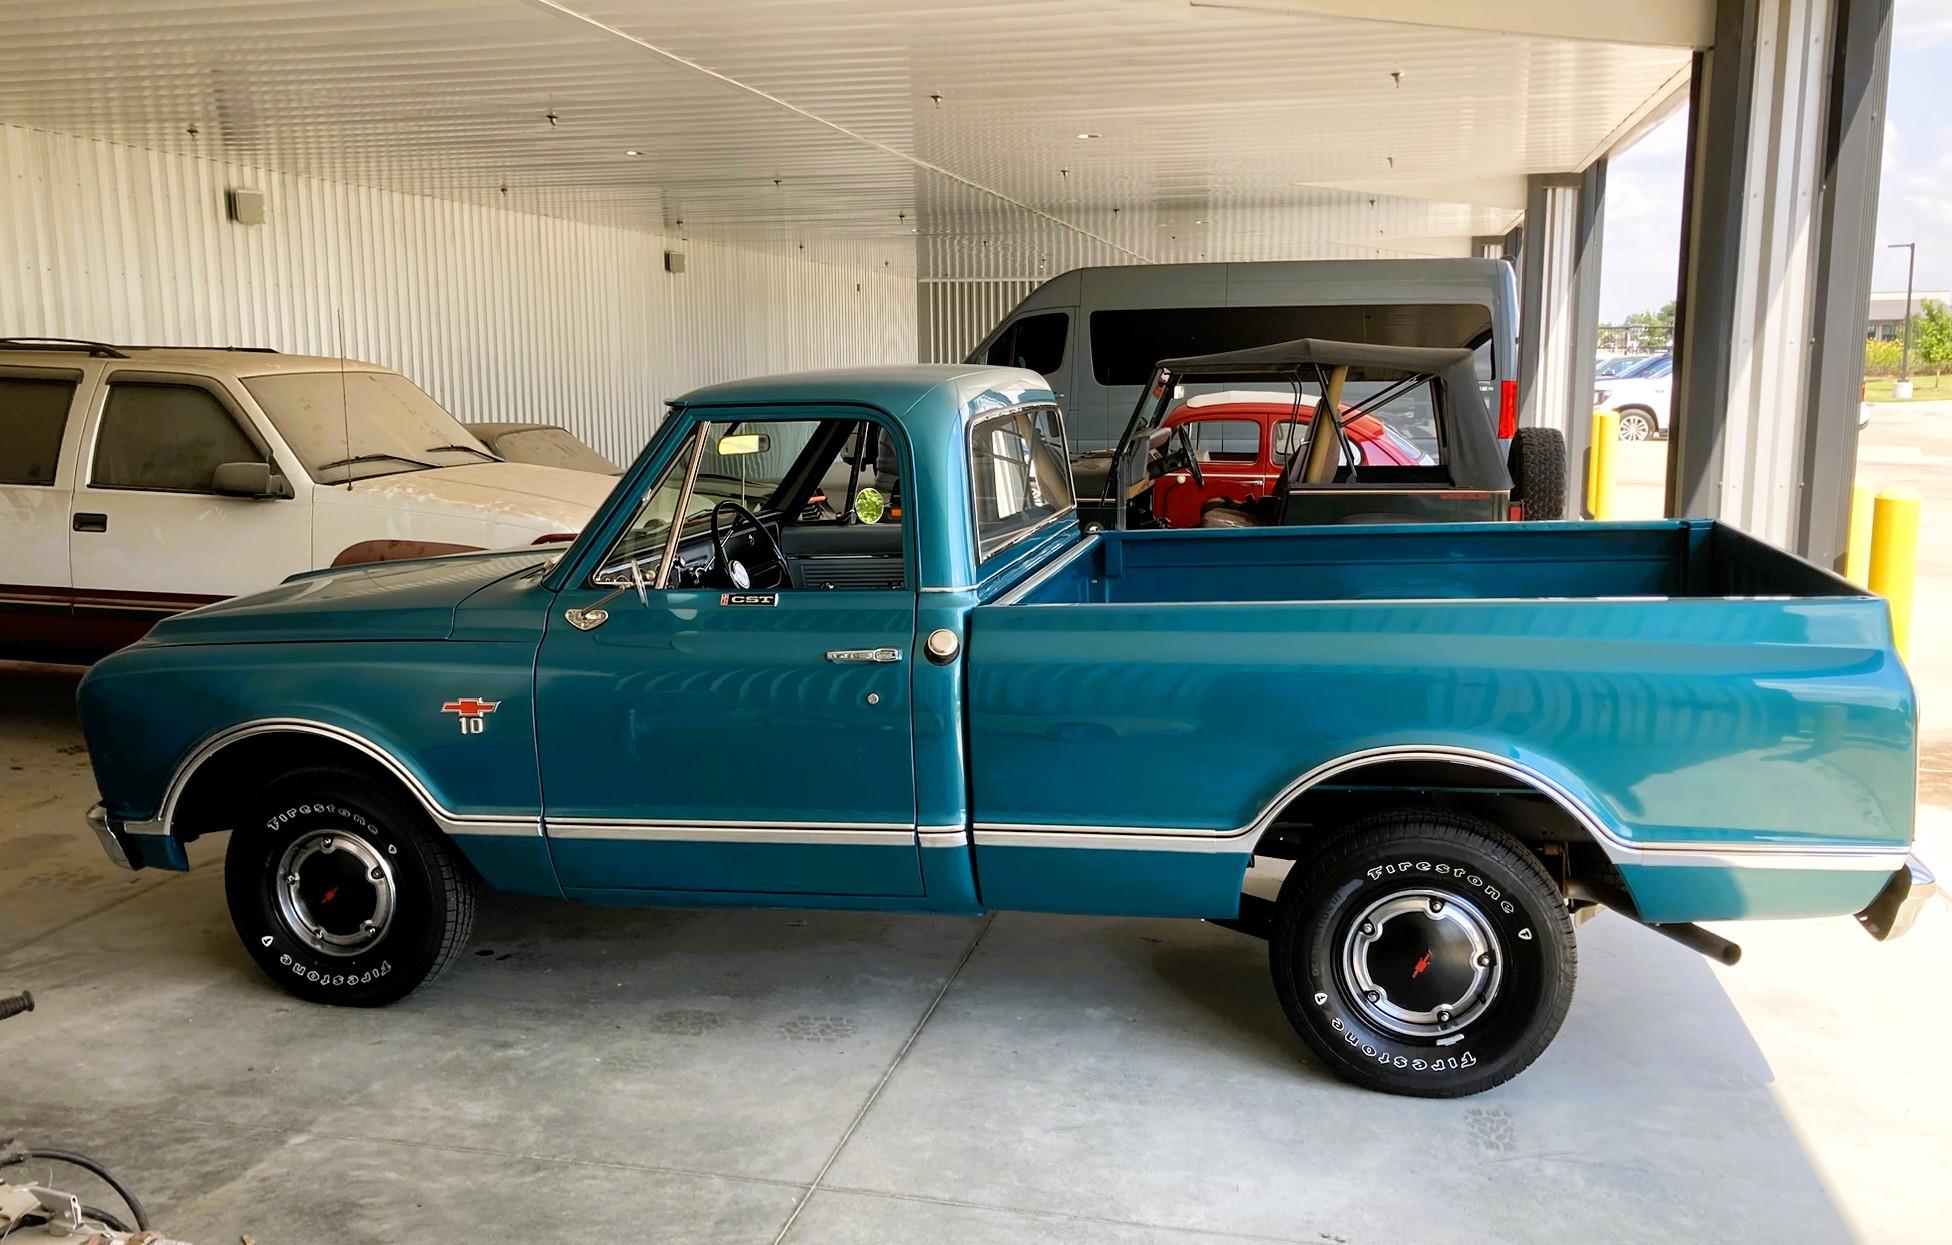
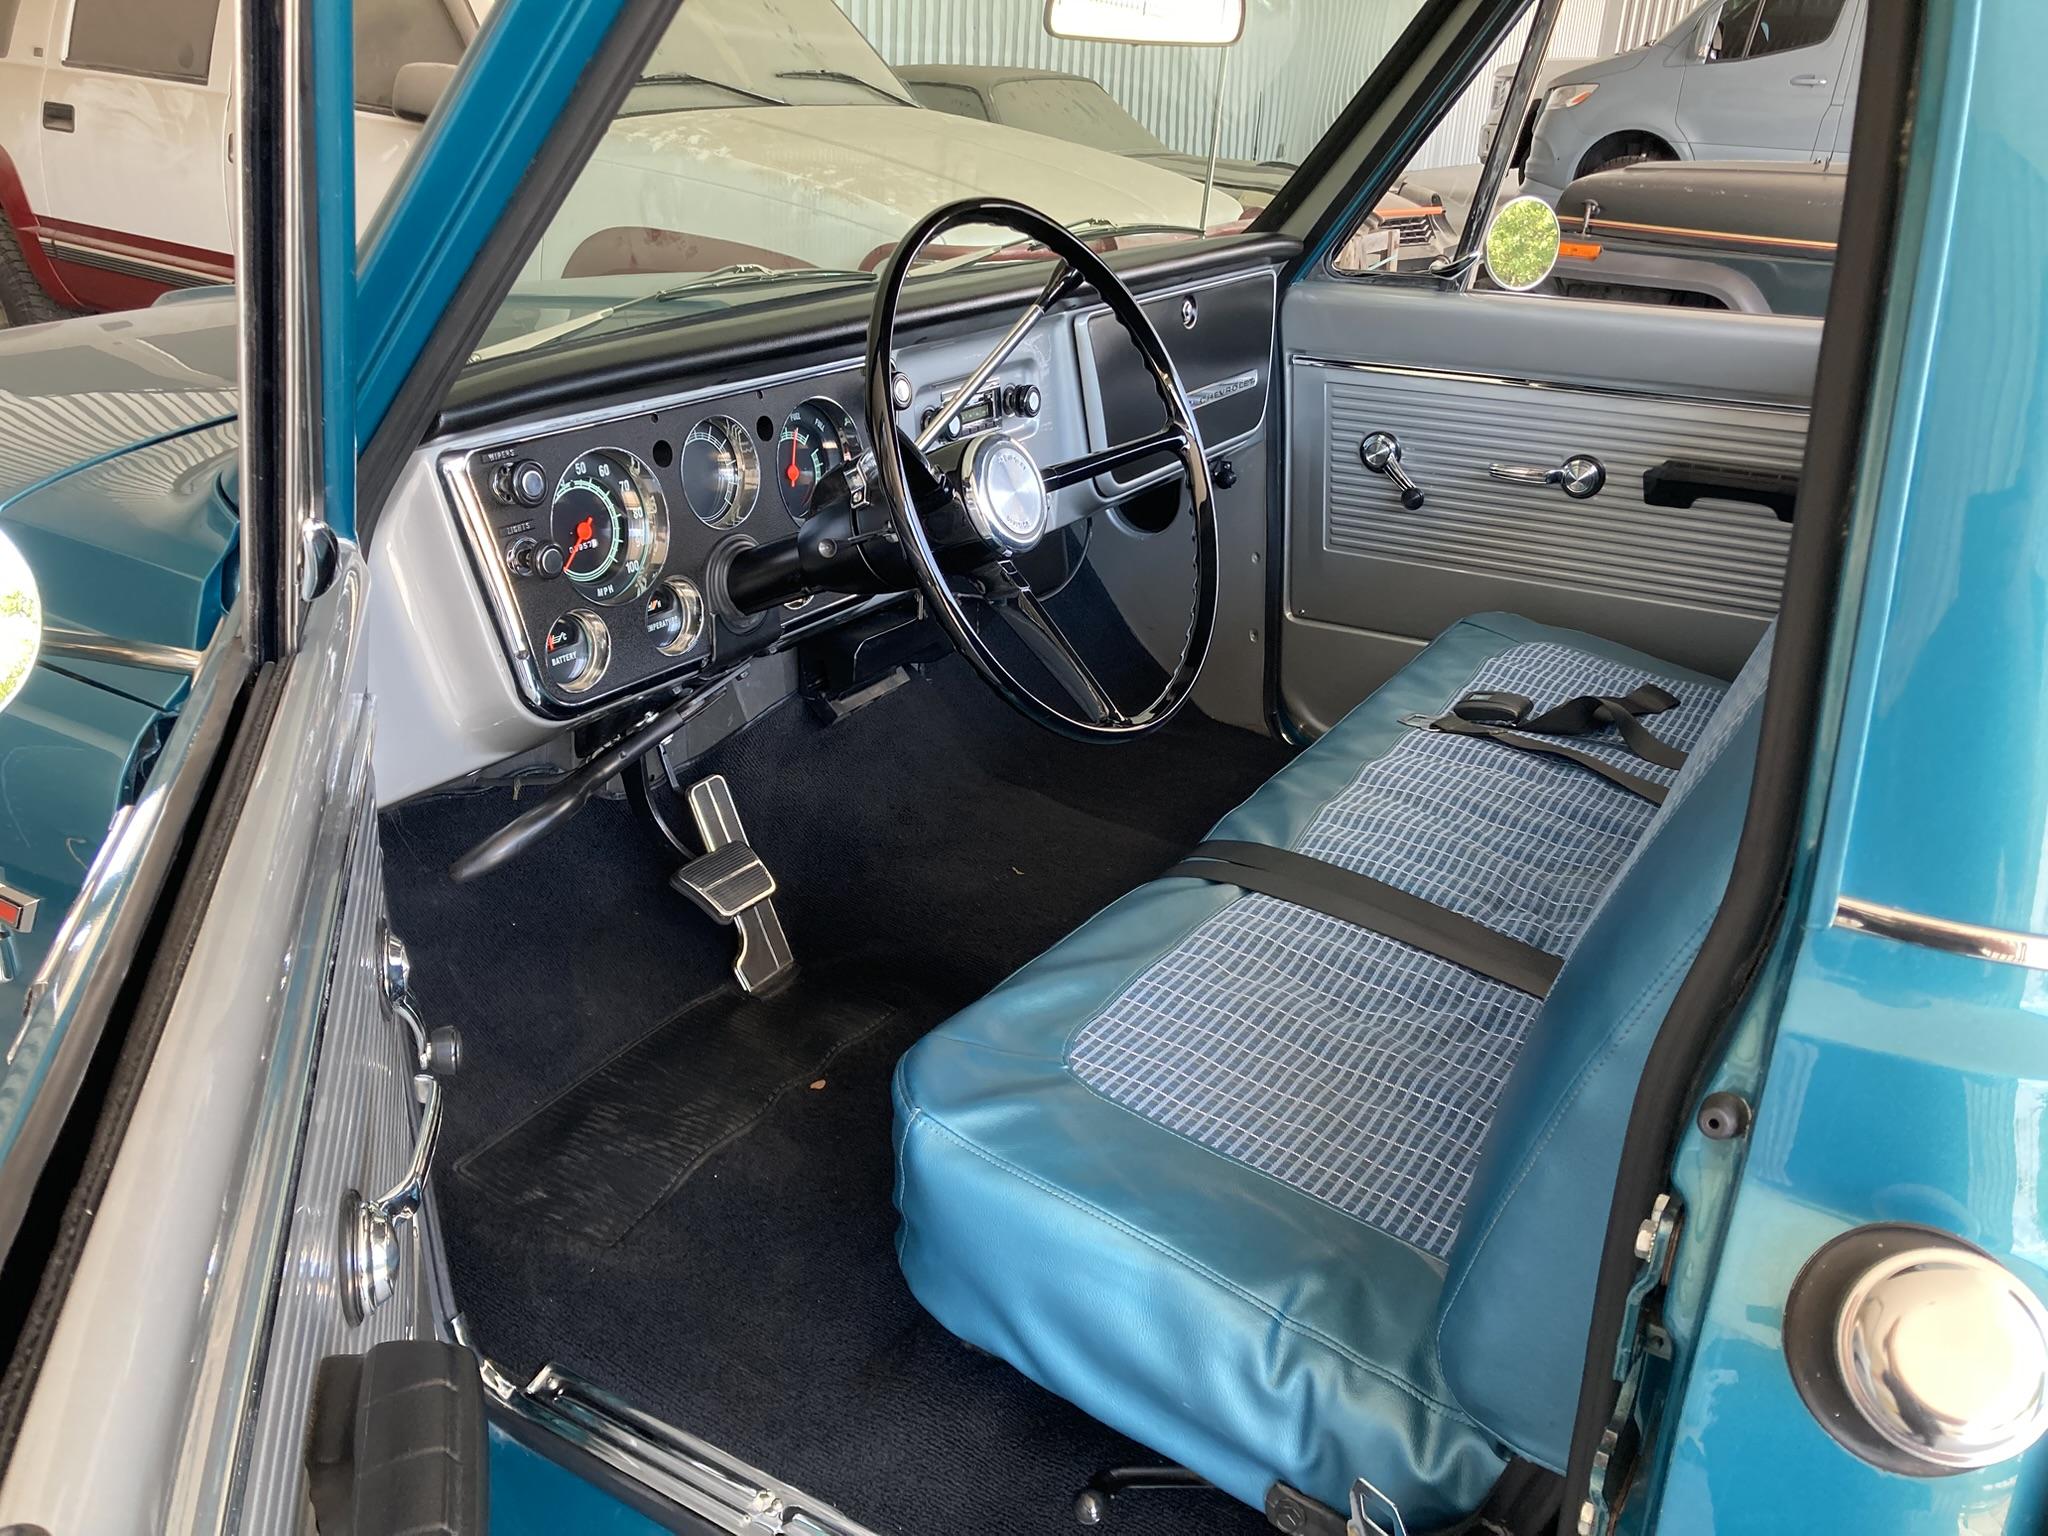
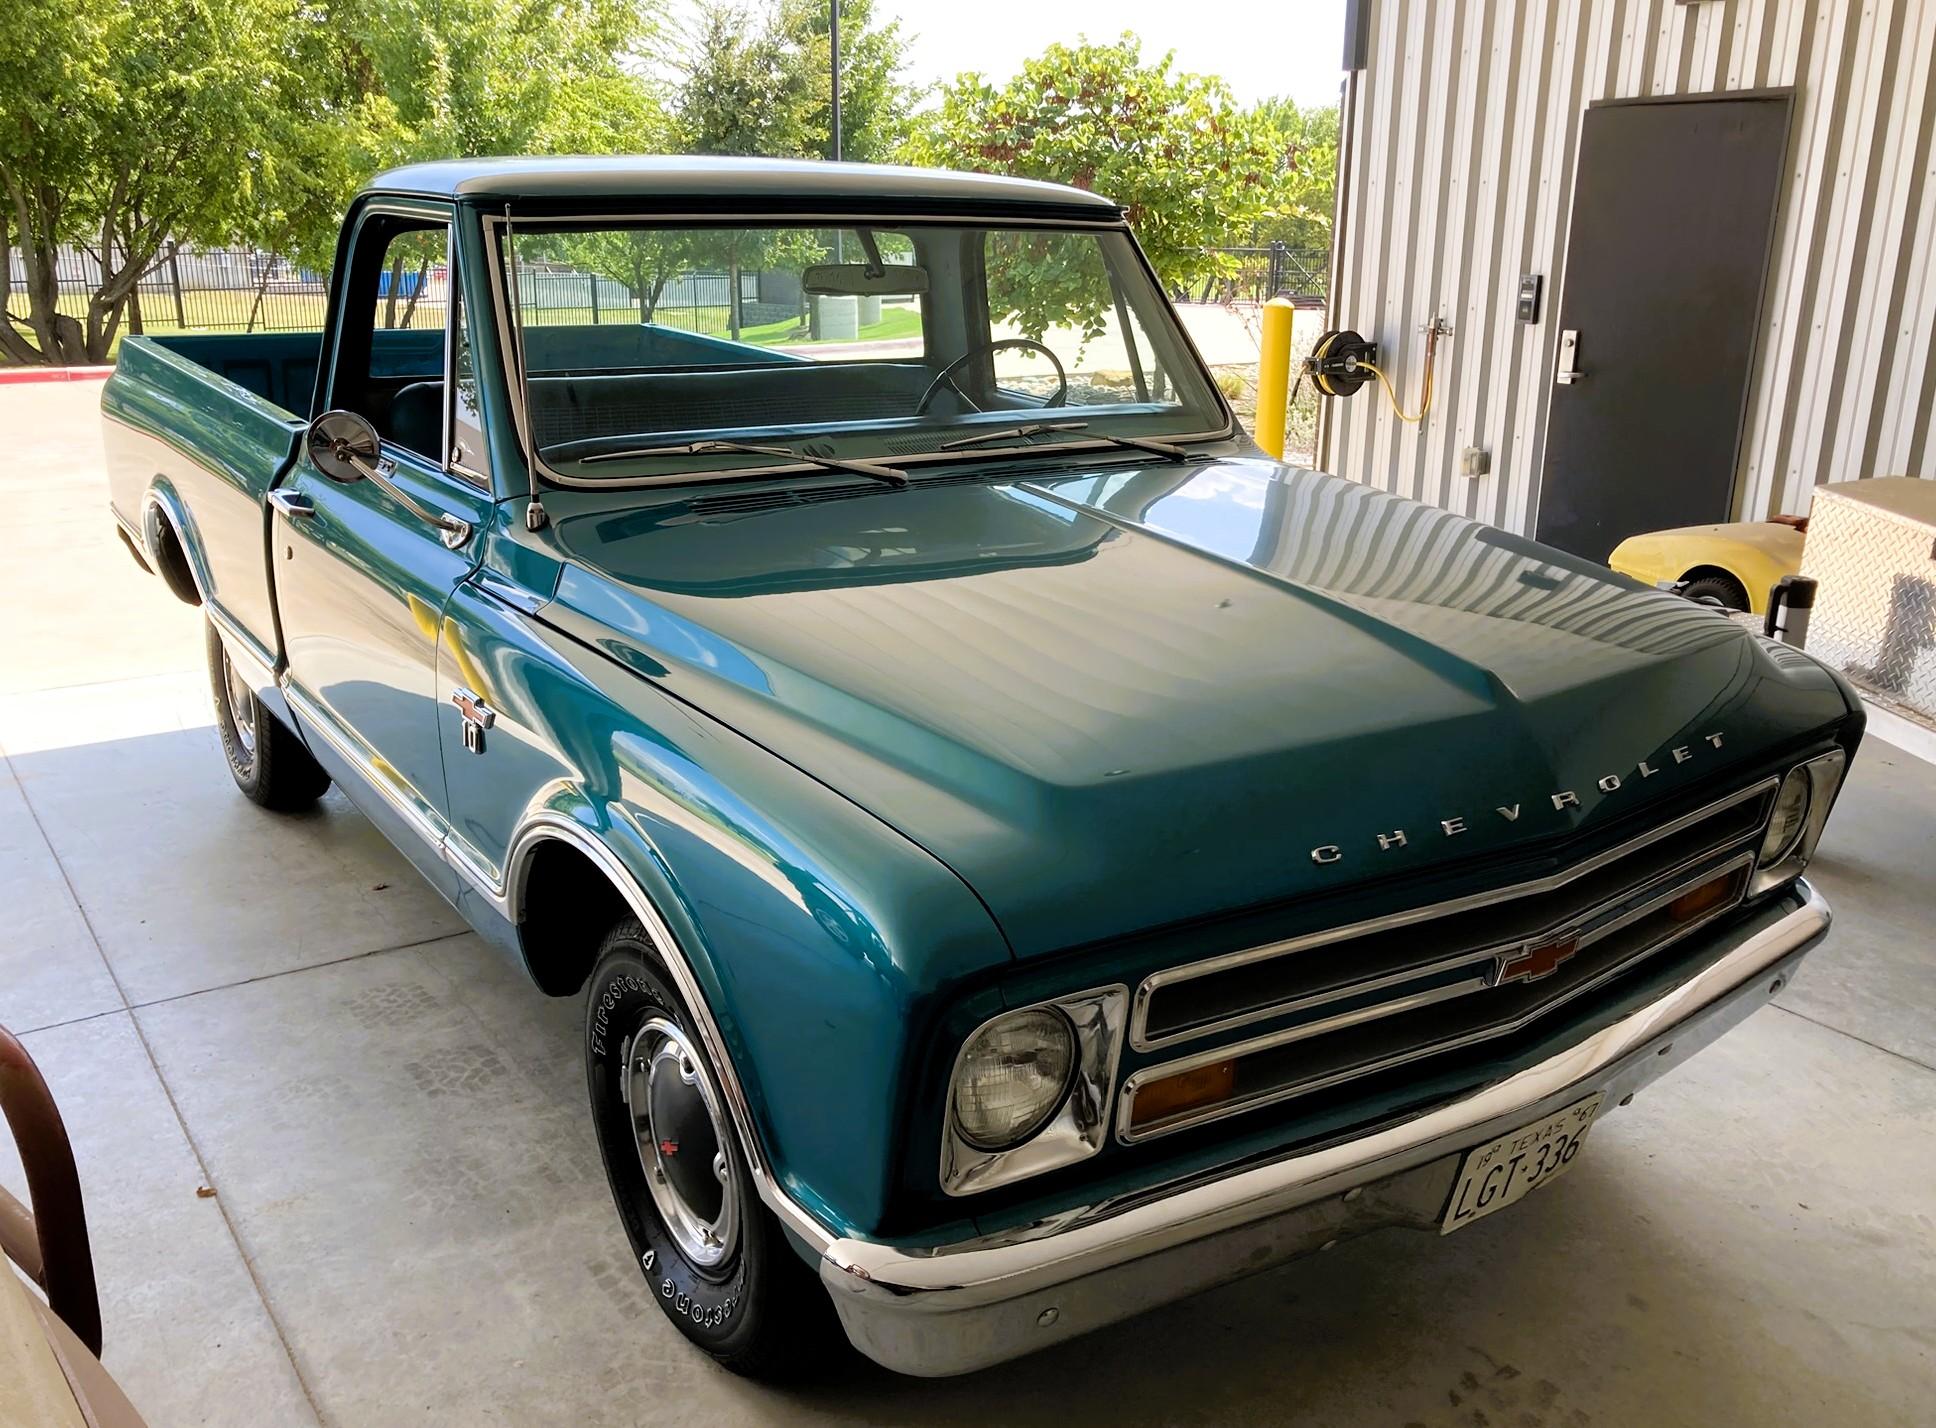
This showed up at my workplace. While it is obviously a very well restored '67 C10, it took me a while to realize the uniqueness of the CST "Custom Sport Truck" package. It's very refreshing to see such a nice example of a bone stock truck instead of another street rodded version or a patinamobile. Though I wouldn't hesitate to throw a set of aluminum slots or Cragars on it!
-
So seldom do I see those carb scoops done well and you nailed it. The whole project is just right!
-
Thank you! Still unsure on color but I do think white decals. I ordered up a bunch of Slixx decal sheets to make something that will work.
-
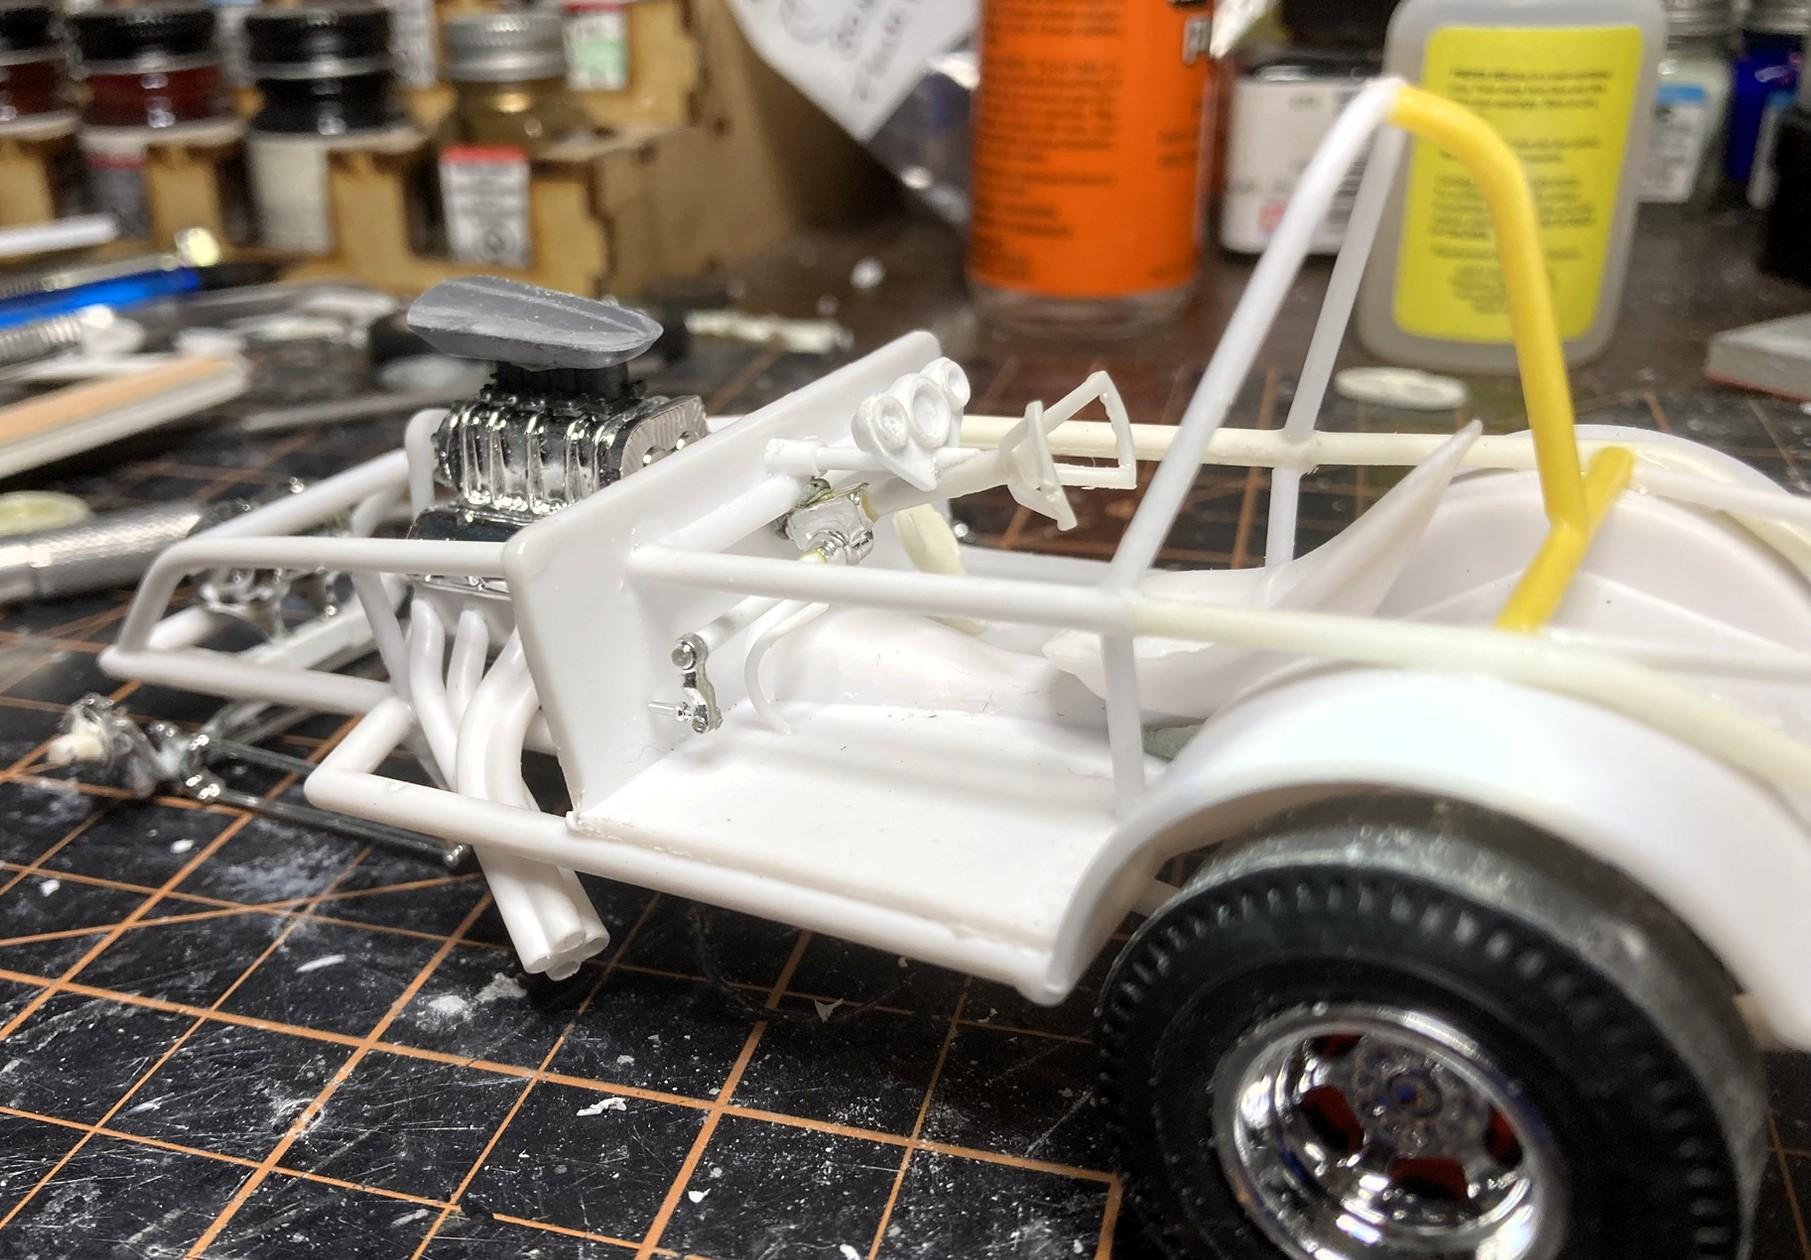
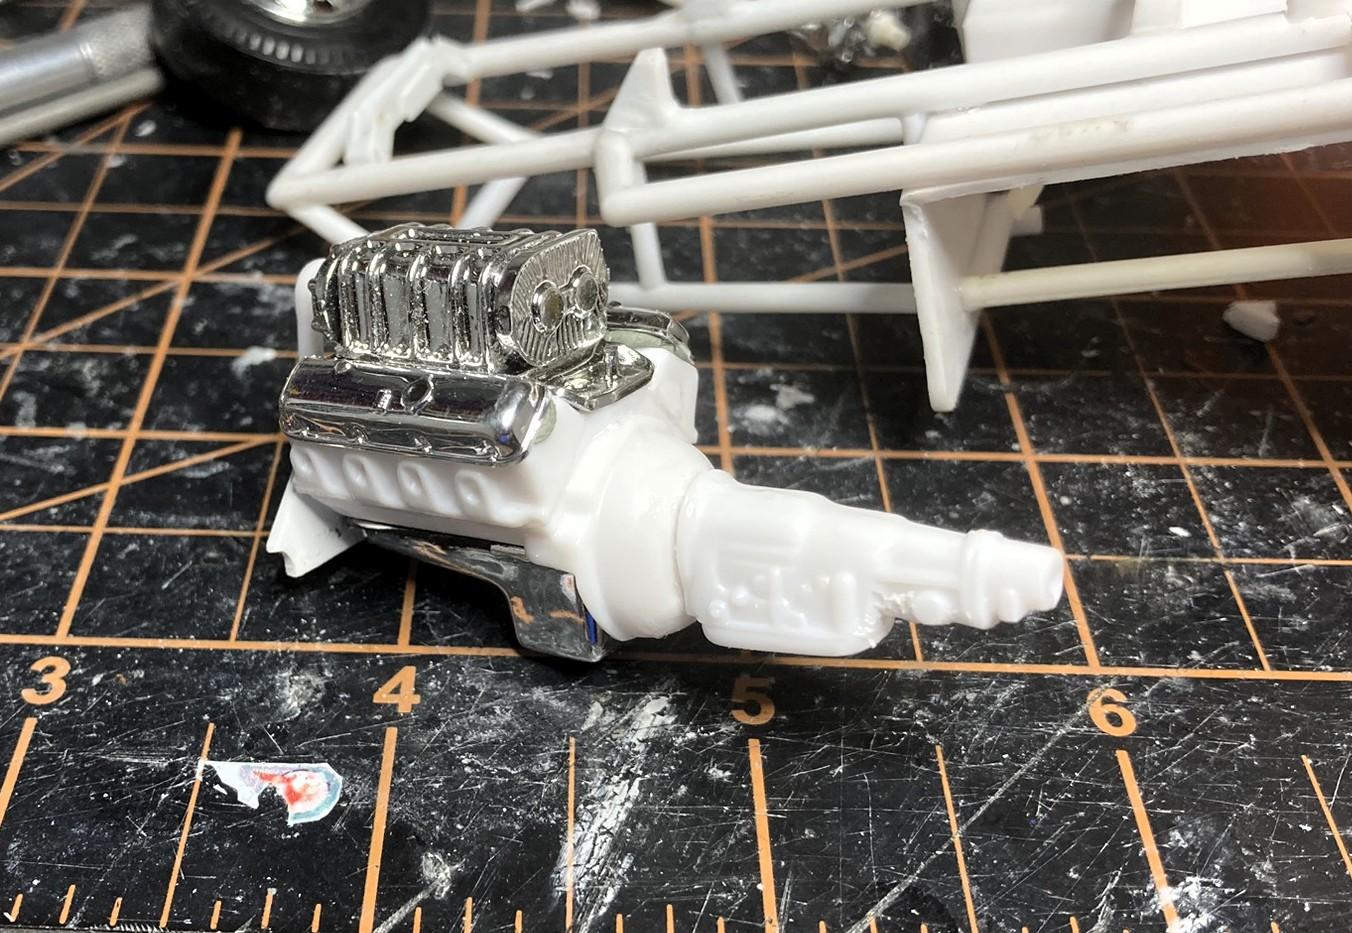
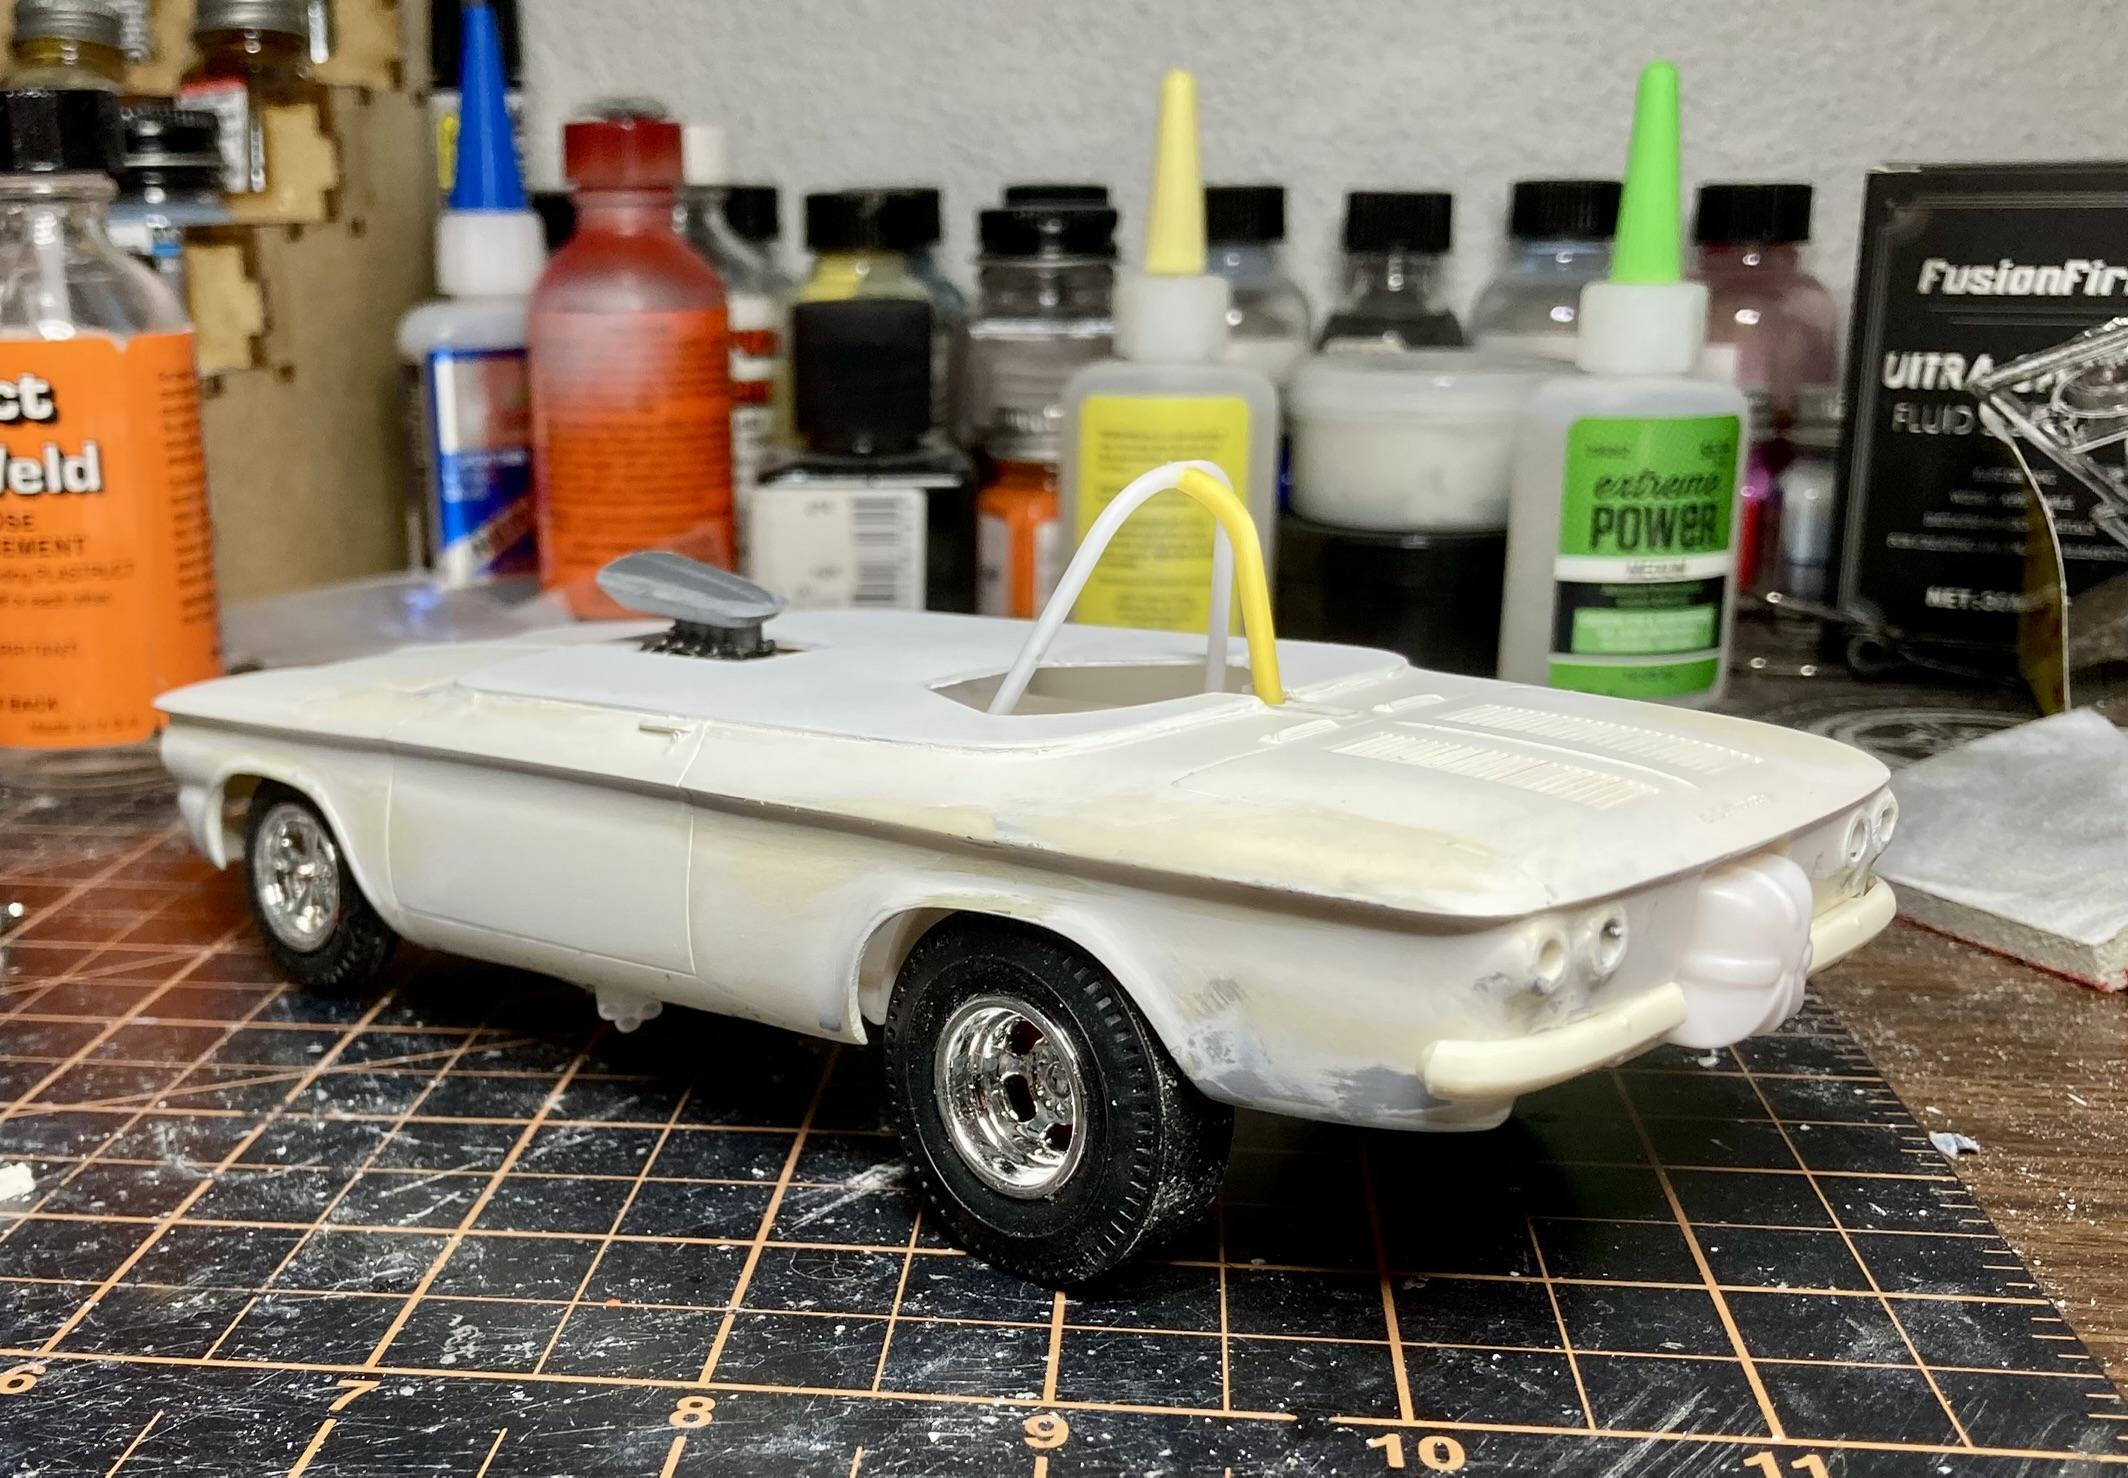
Ok, I think I'm finally happy with the chassis and fit of everything on this one. Reworked the roll hoop and added some bars out back. I couldn't make it to the LHS this weekend for the right diameter styrene rod so I used some good ol' fashioned parts box scrounging, hence the multi-colors. I shortened the injection unit and cut down a scoop from the Tony Nancy double dragster kit, but think it needs to be cut down just a little more to fit this right. Now I can do some cleanup and sanding on the chassis, and start getting everything in paint.