.jpeg.4c7adcf30d18ed99893024ed0cd4cd57.jpeg)
Quiet Eric
-
Posts
333 -
Joined
-
Last visited
Content Type
Profiles
Forums
Events
Gallery
Everything posted by Quiet Eric
-
That looks like a wiper motor to me
-
.thumb.jpeg.8c79d9534dc815ba827147ab721a20d4.jpeg) That is amazing. Cool trick!!!
That is amazing. Cool trick!!! -
It’s Boyd Month! Building the full-detail Coddington Alumacoupe
Quiet Eric replied to OldNYJim's topic in WIP: Model Cars
Its always a struggle to divvy up credit on these cars...Everyone always knows and hears Boyd's name attached to these cars, but the parts we know and love are the sheetmetal. Which in this case was designed by Larry Erickson, and Marcel Delay built from scratch. Boyd certainly had some skills, but maybe his most crucial skill was bringing together all of the right folks to birth cars like this into reality. -
Pretty amazing what a few modifications can do to significantly improve this one. Makes me want to build one for myself. Nice work! I agree with you on early Camaro's, '68 for me is the best year. One note on the rocker trim. It looks like you have scribed the fender separation line through it. That trim is one piece front to back, overlapping the rocker and fender.
-
A little progress, got the body stripped. It spent the better part of 3 days in a Simple Green bath. The bright green came off very quickly...but there was some avocado stuff underneath that was ON THERE! It probably would have come off easier with something stronger like brake fluid, but I already had the jug of simple green in the garage. Mostly it just softened the paint to the point where I could scrape it off. This will only get a minor cleanup, no modifications though I do have to finish the hood. I'm not sure what color it'll be.

-
Got a little primer on it yesterday so I can see where it needs some more work.
-
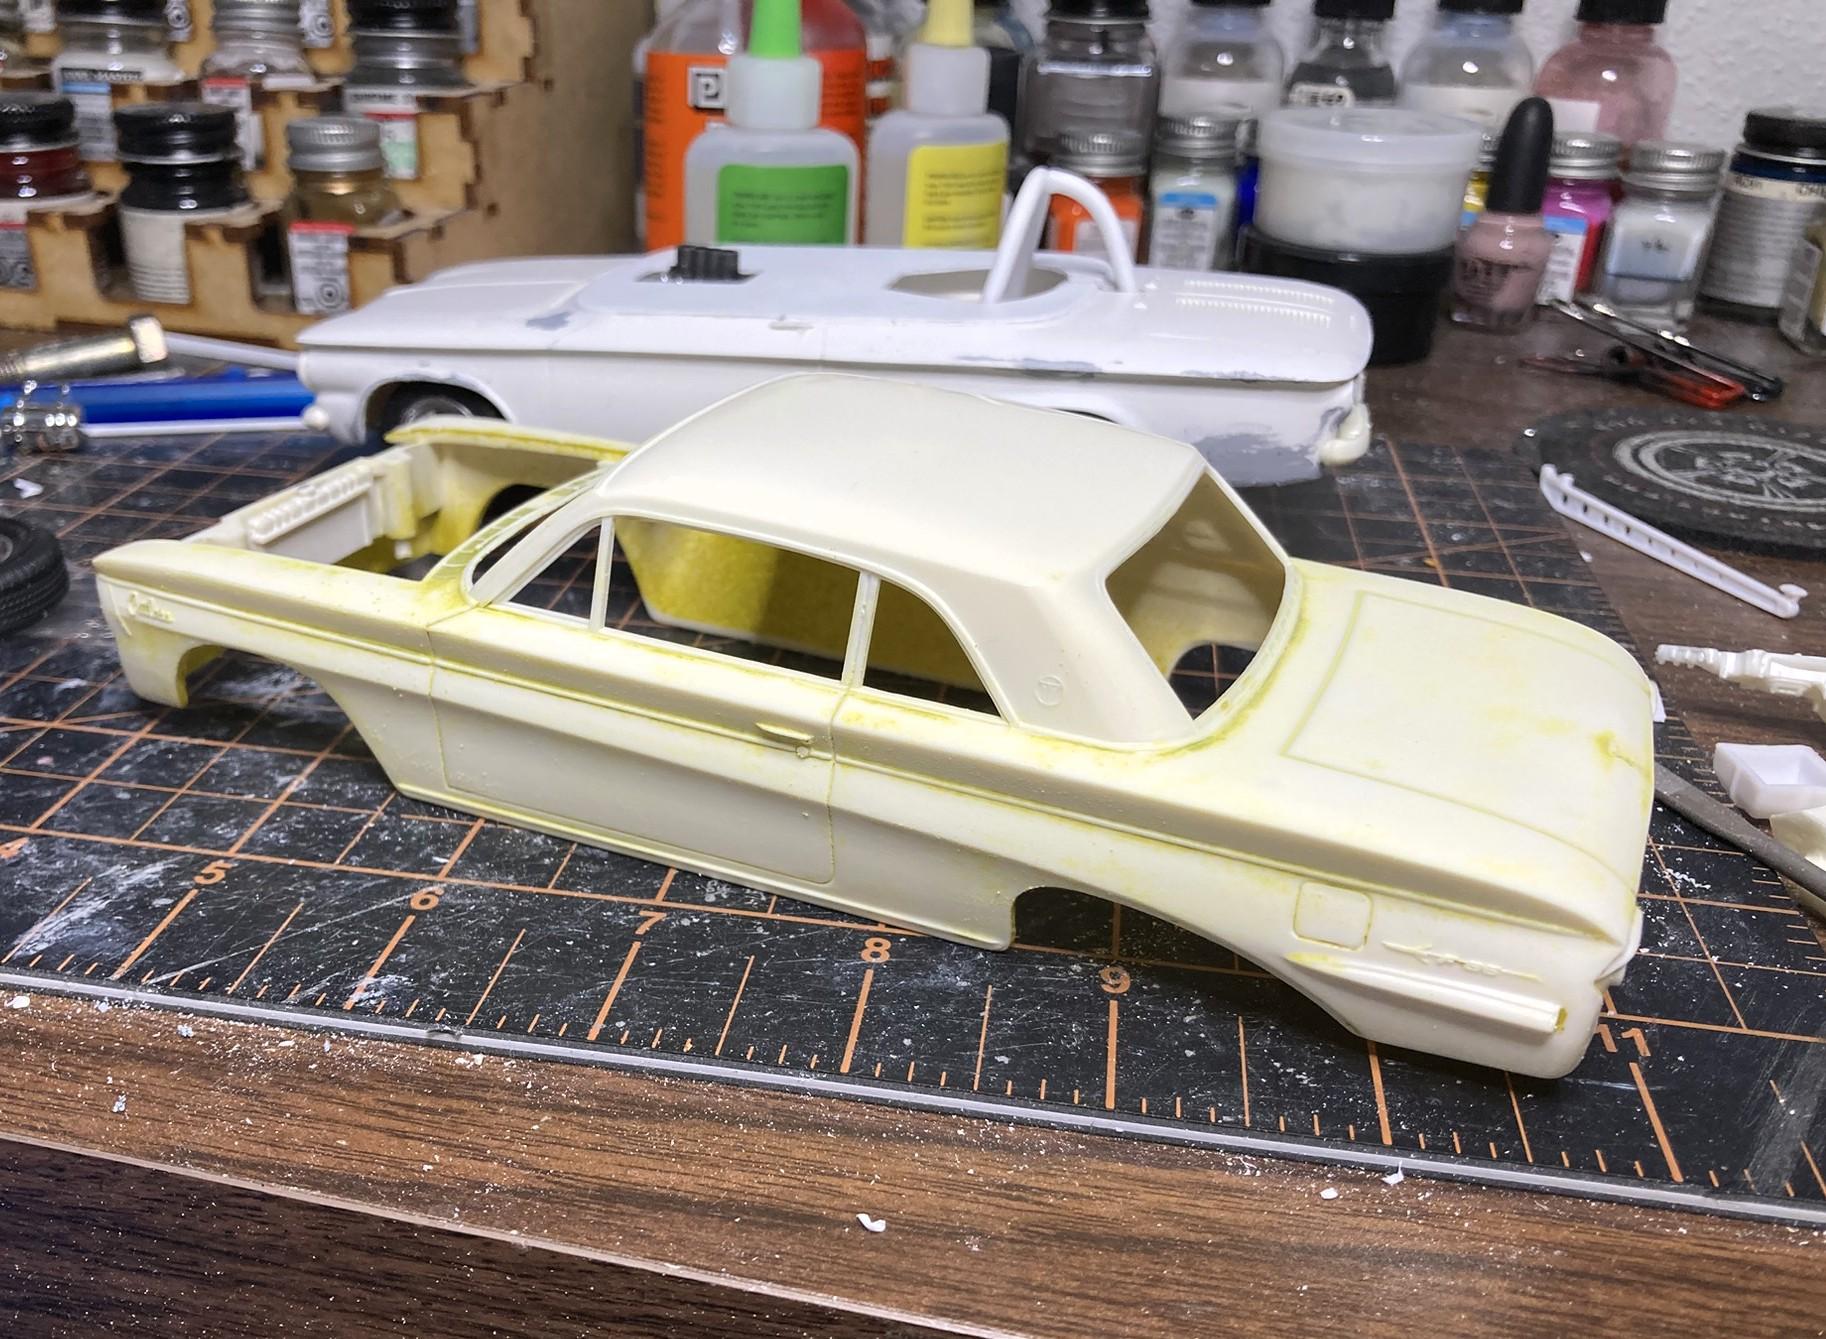
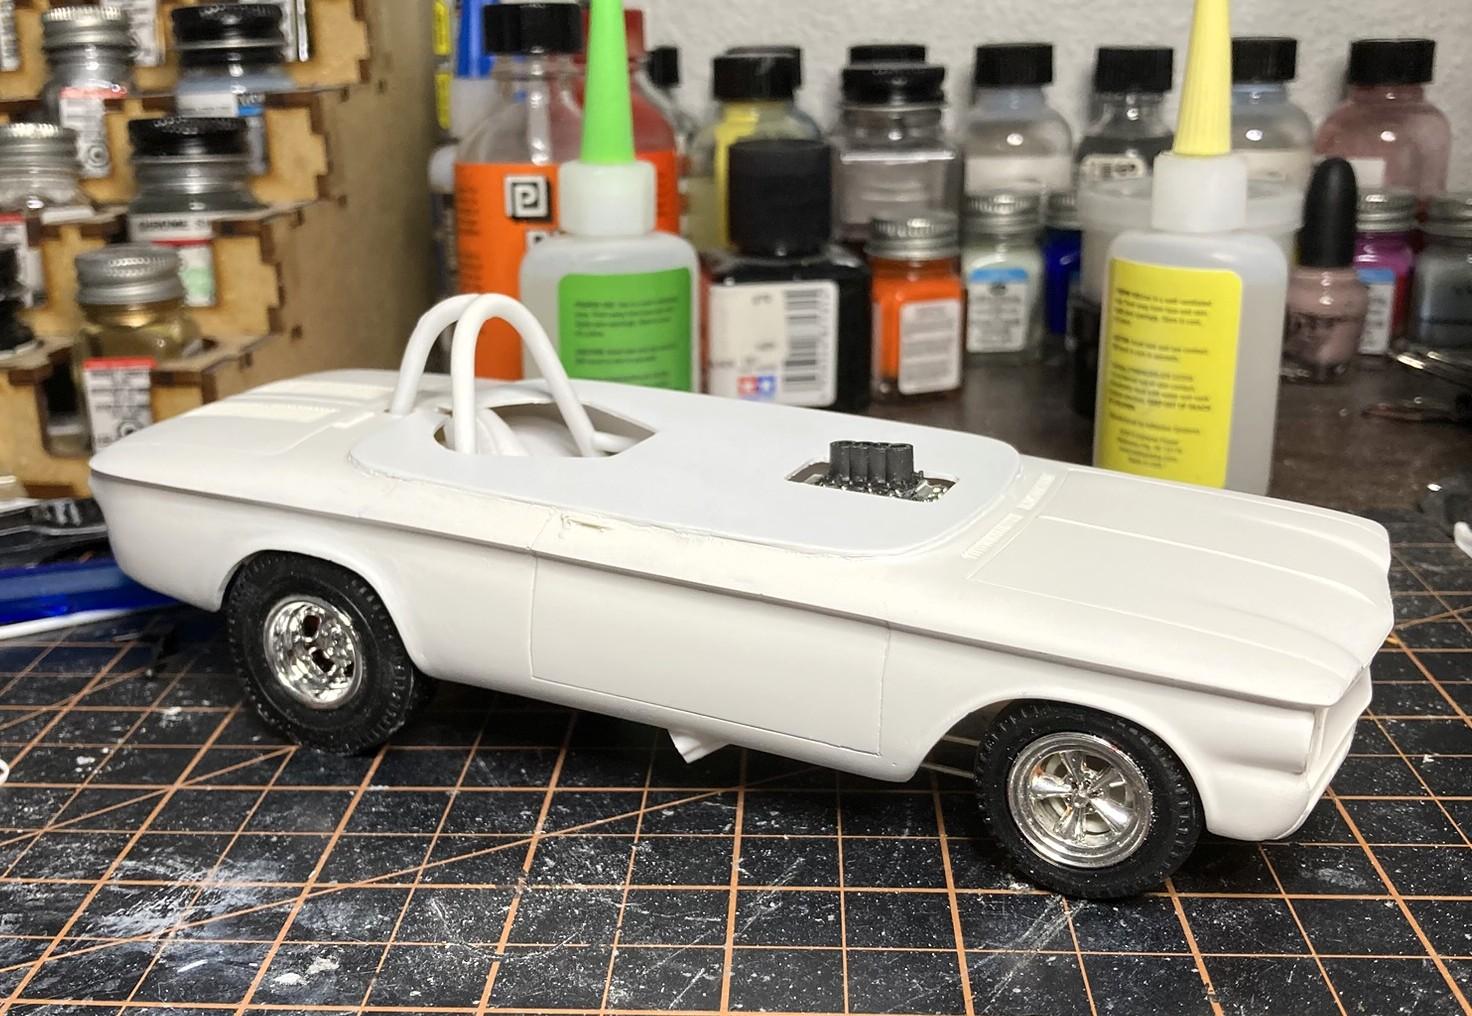
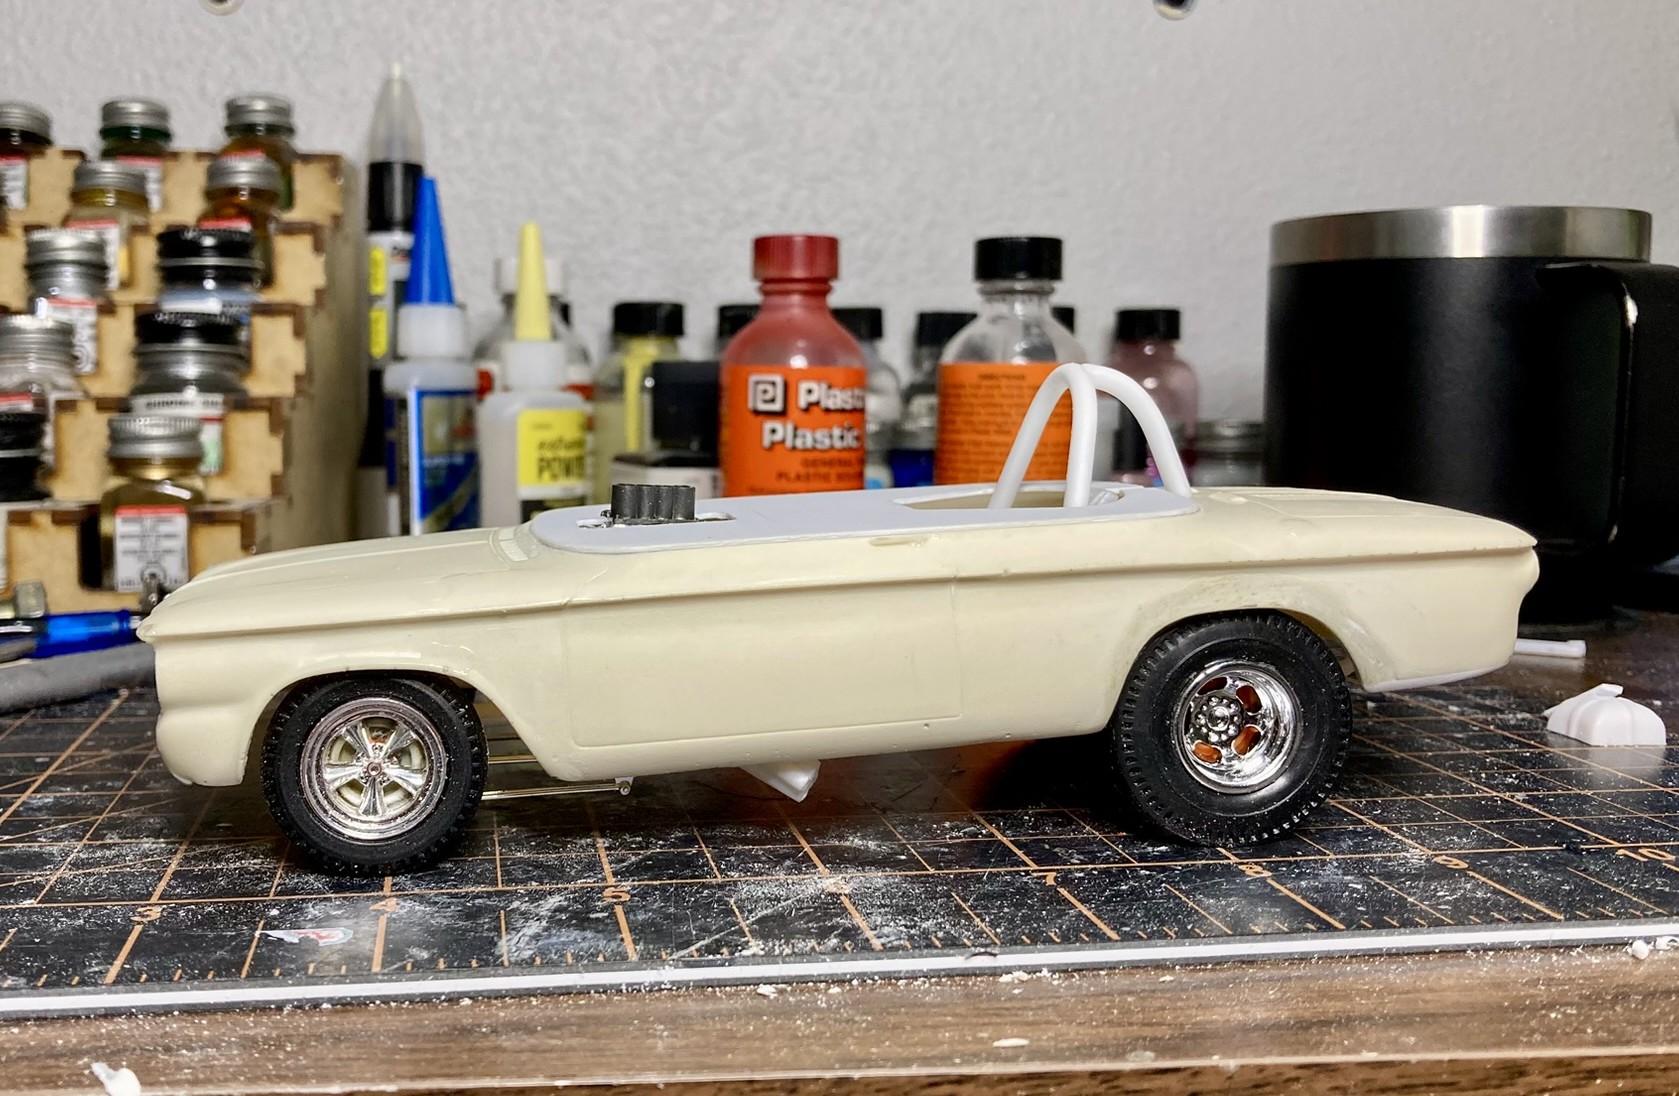
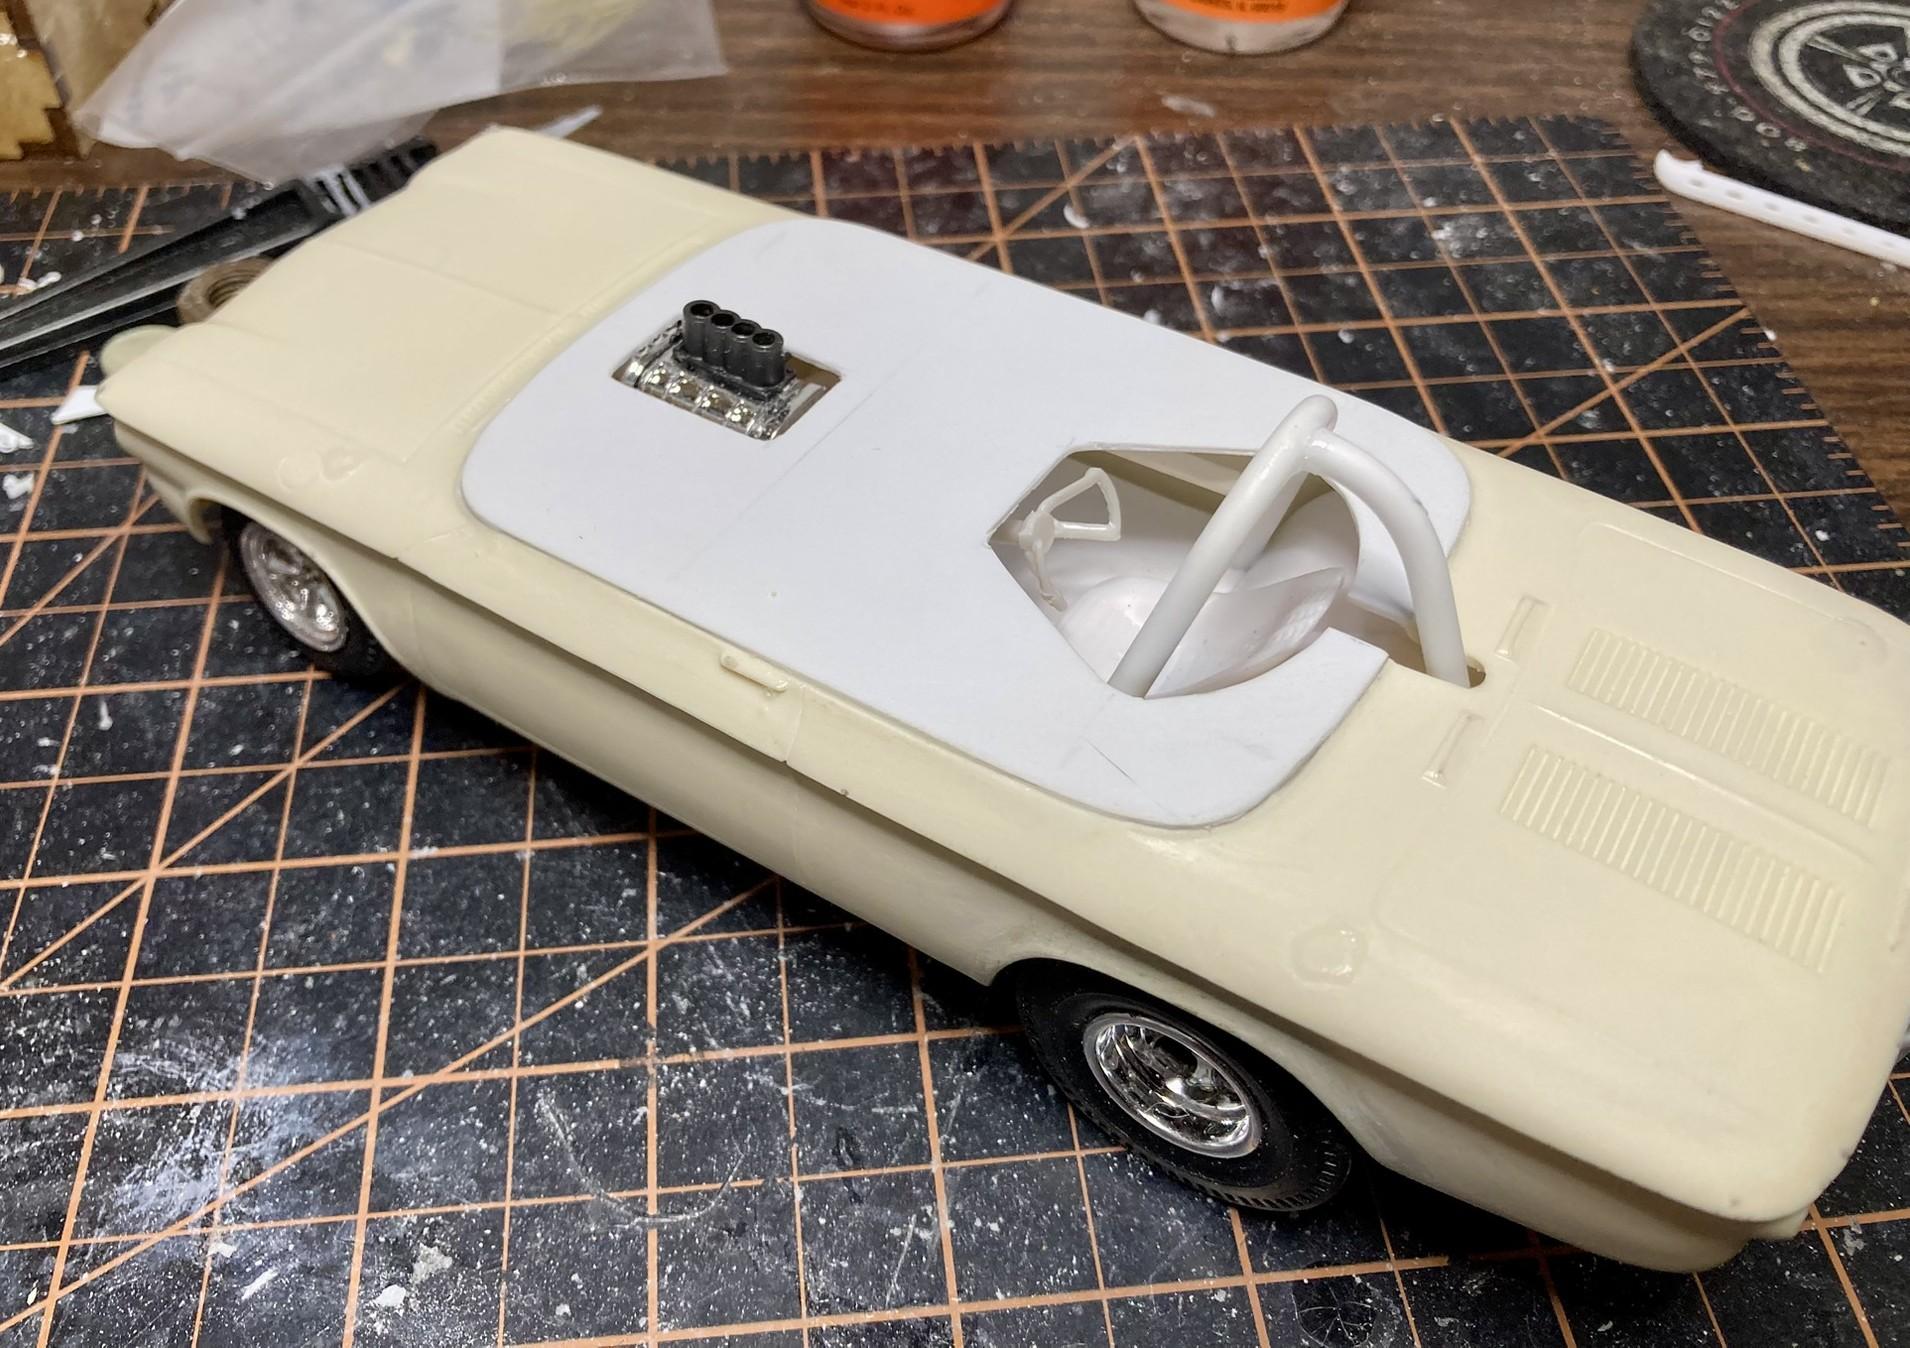
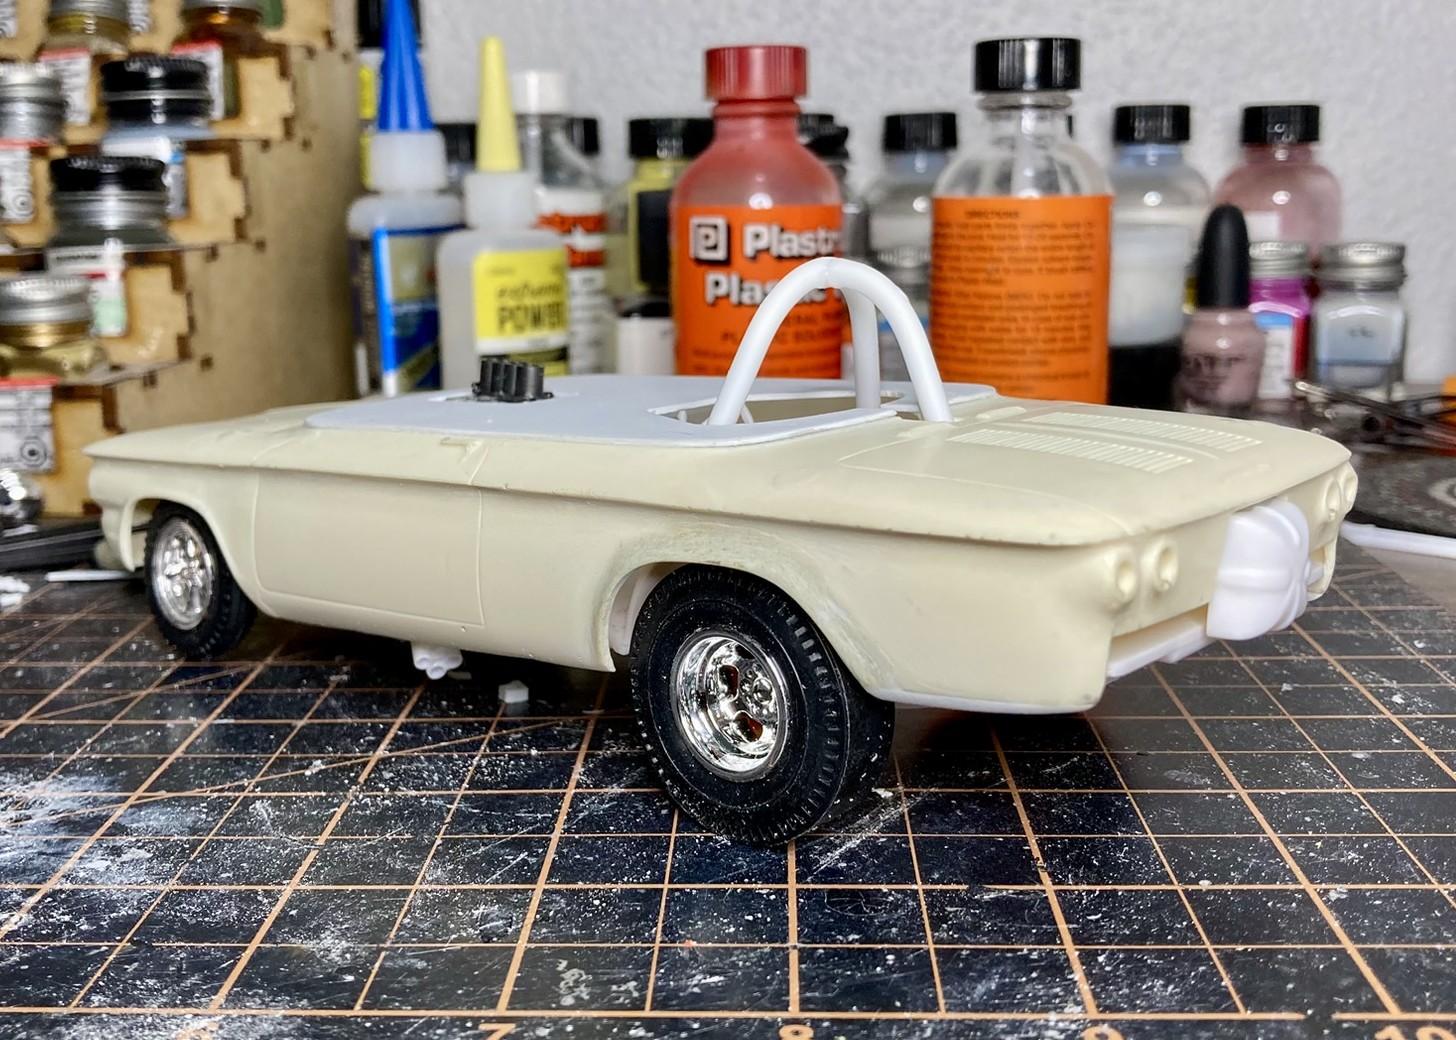
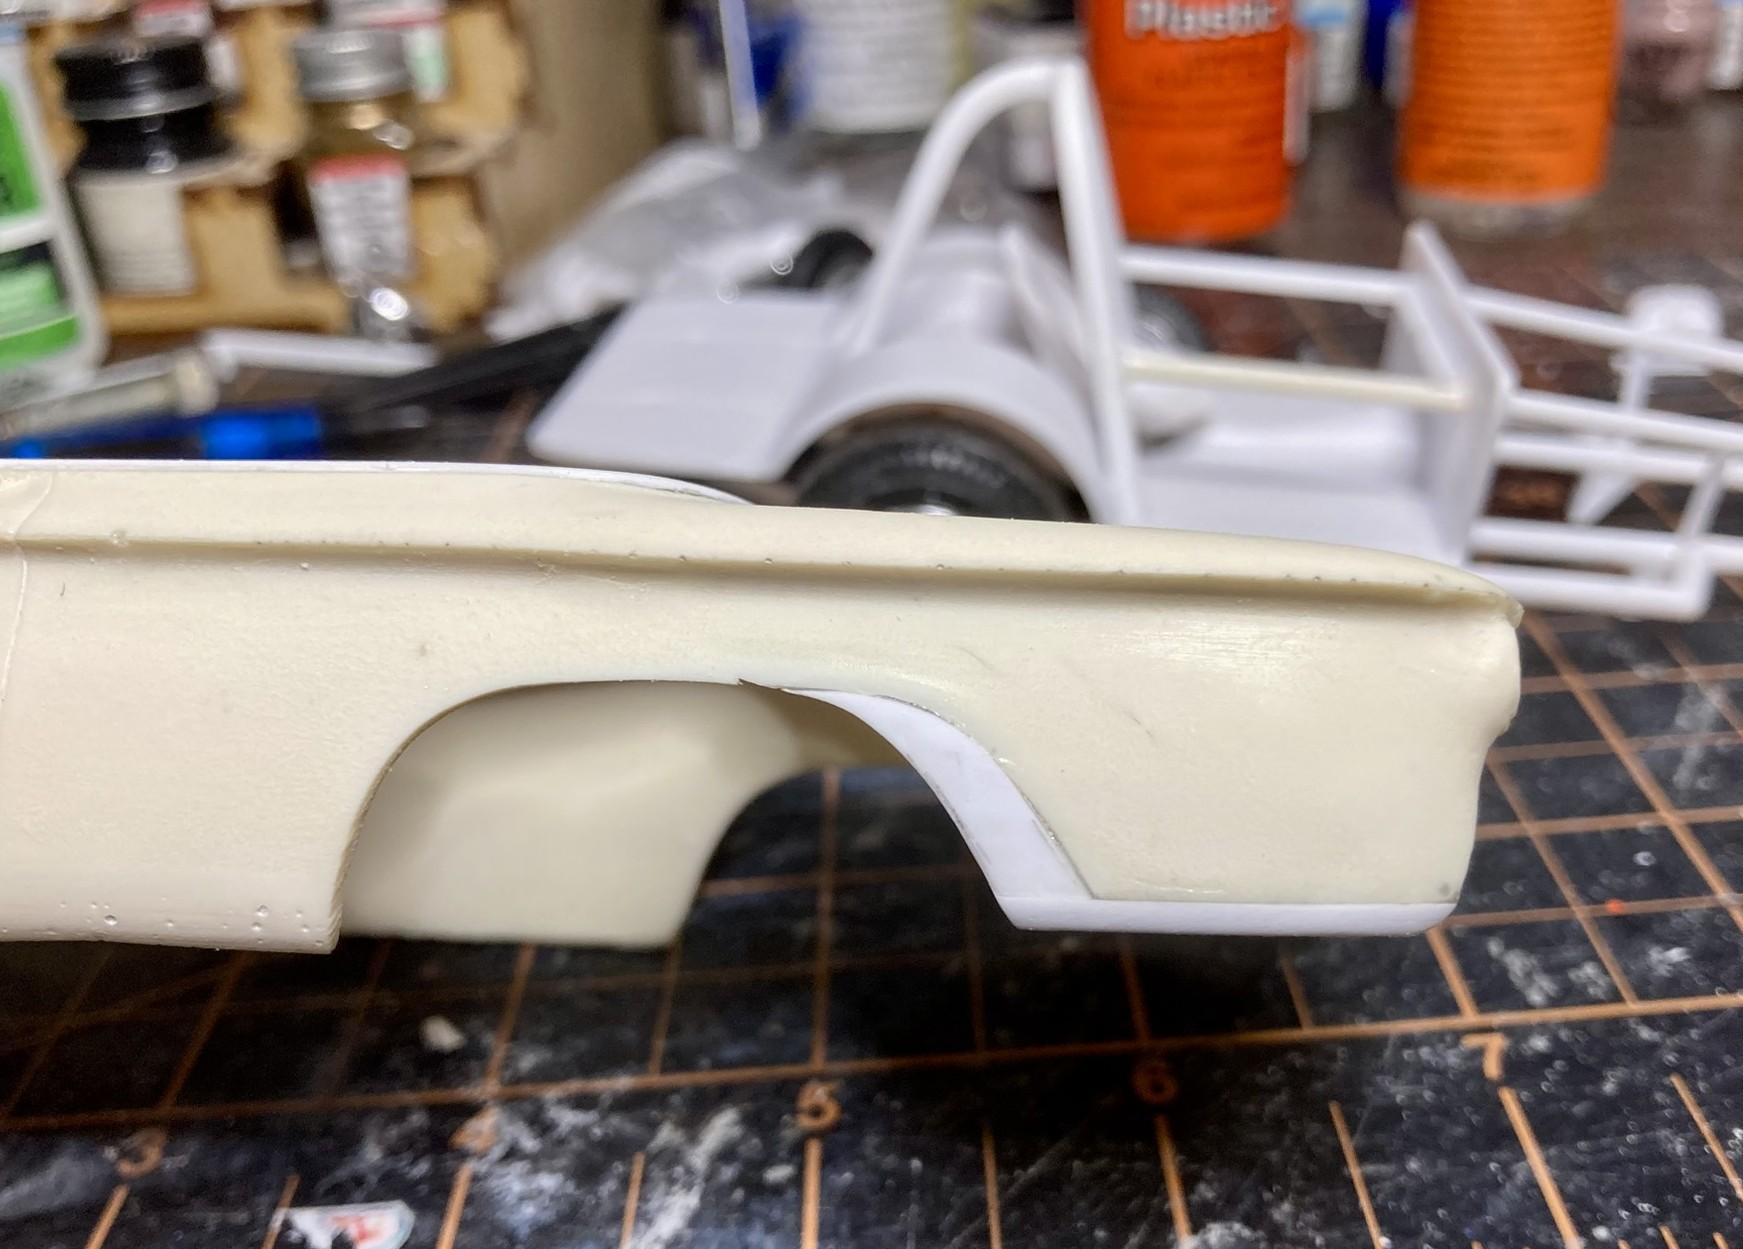
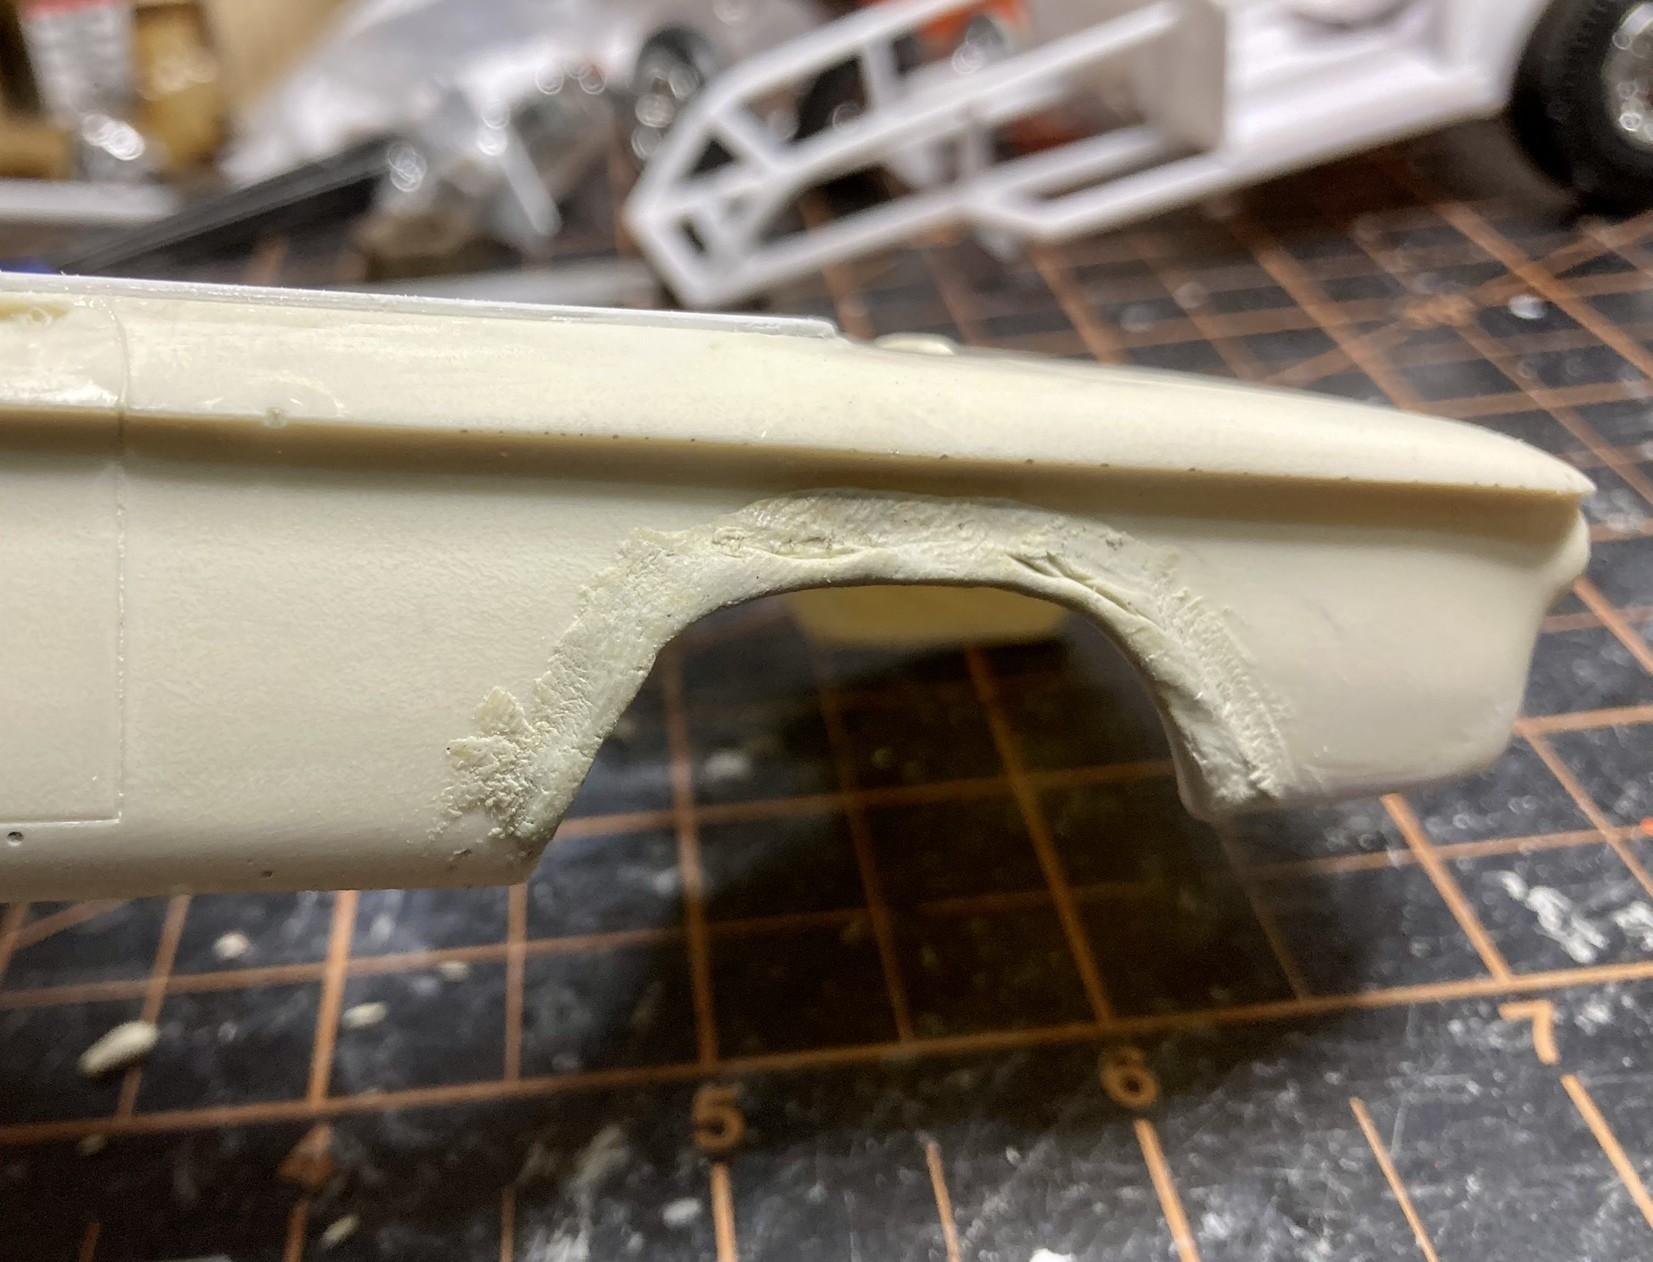
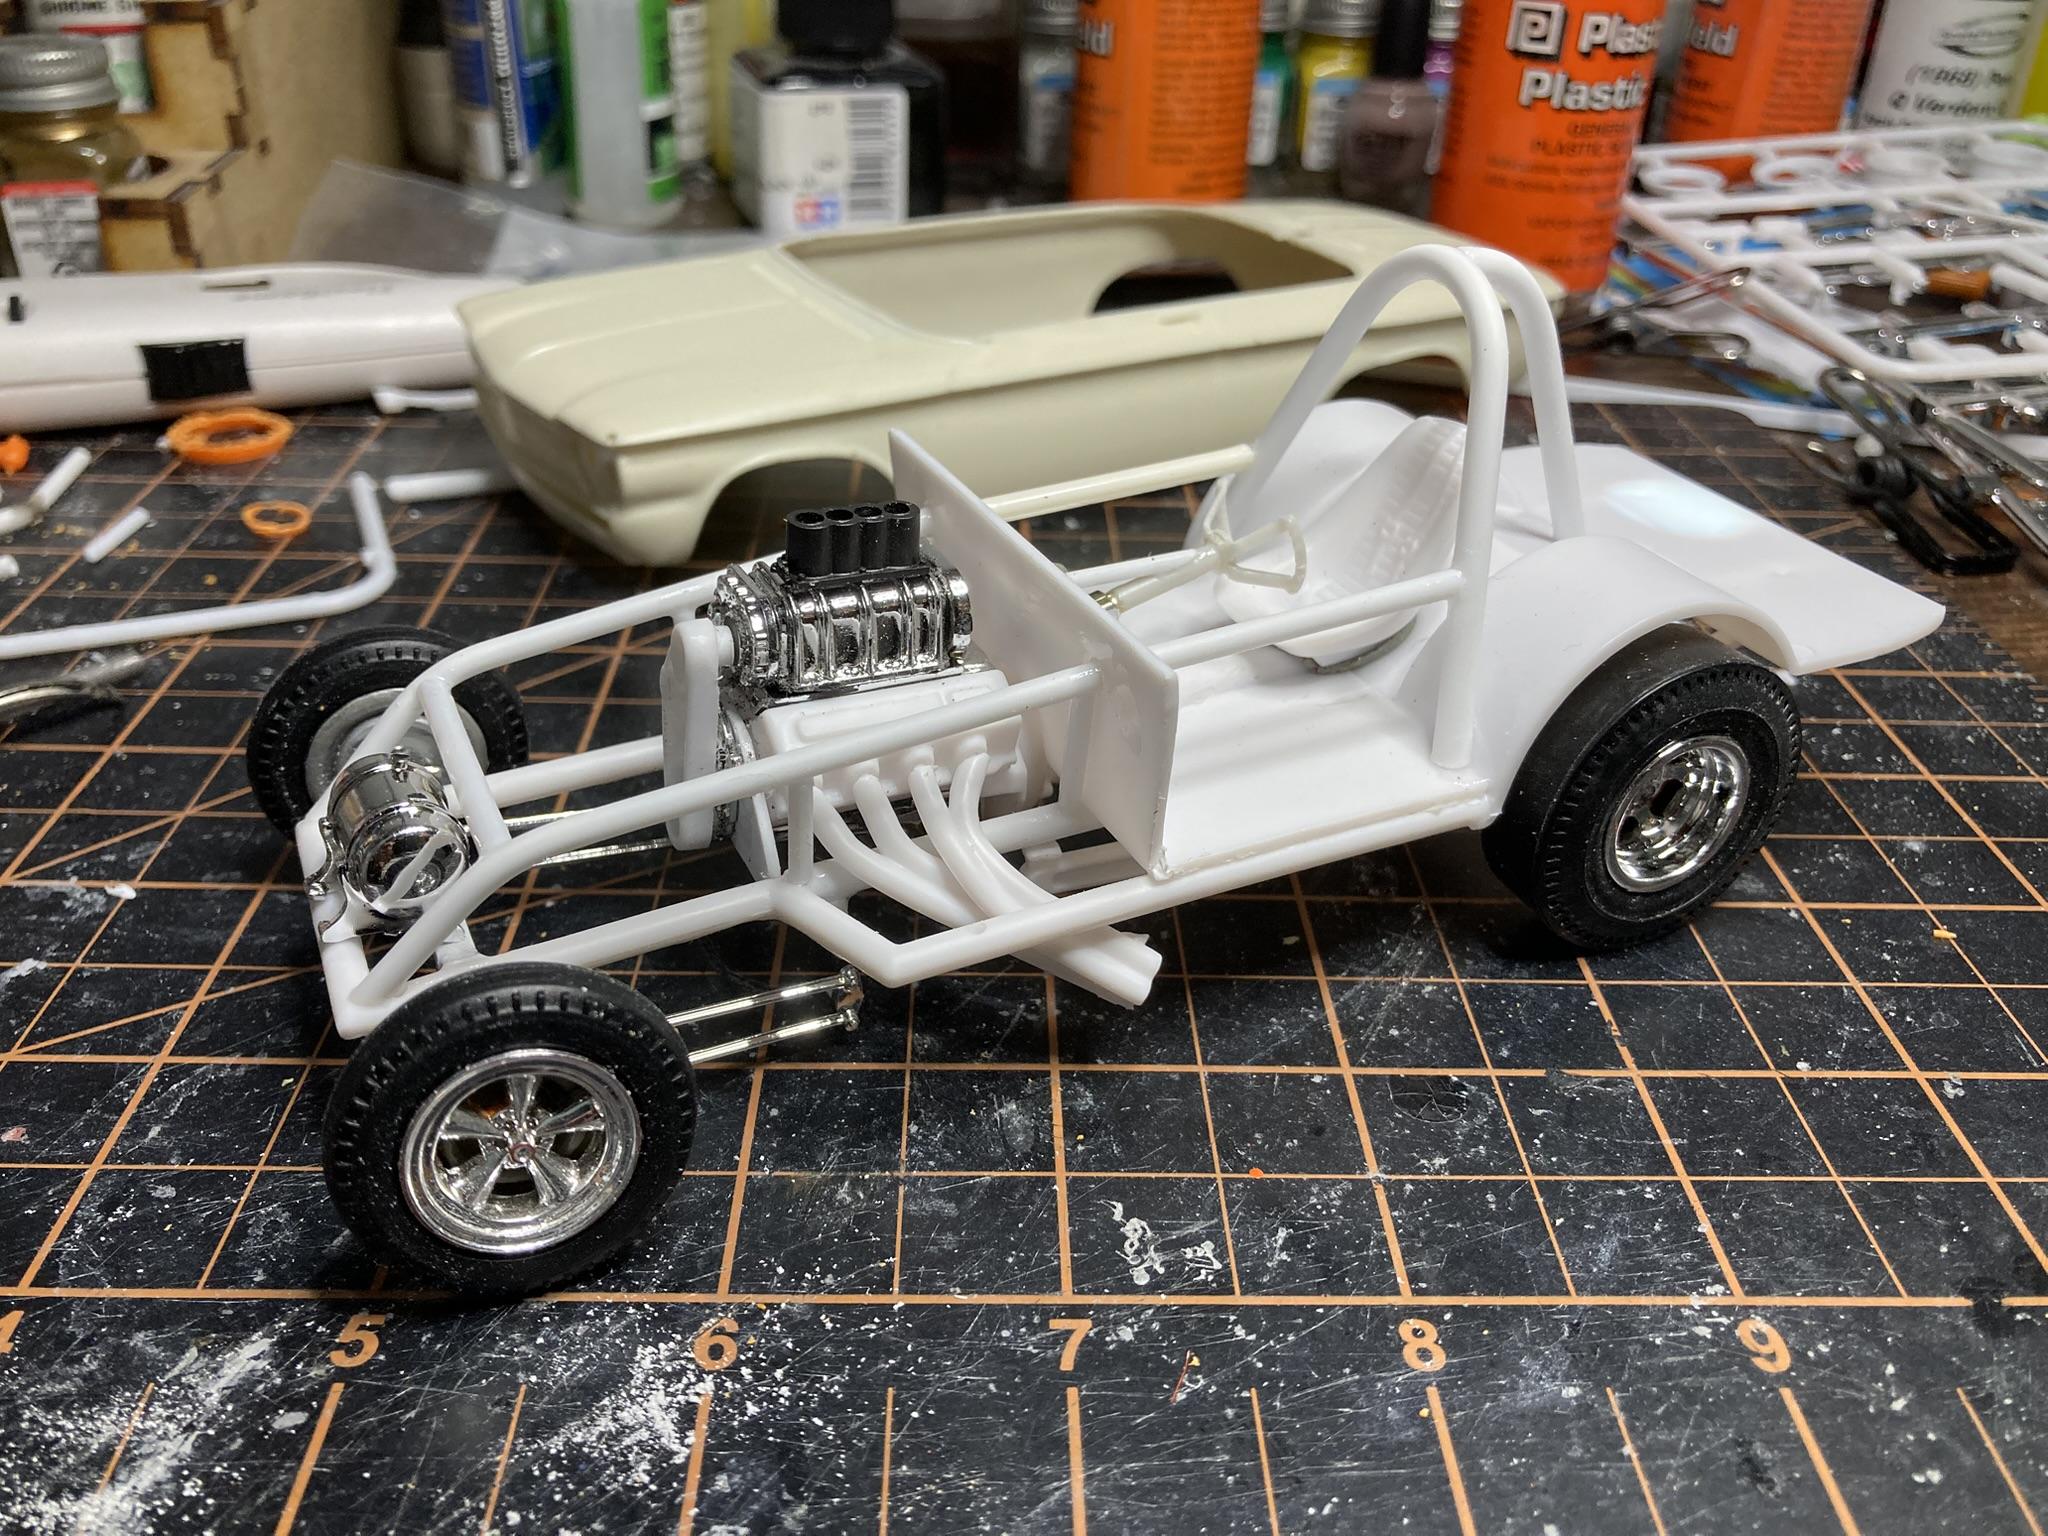
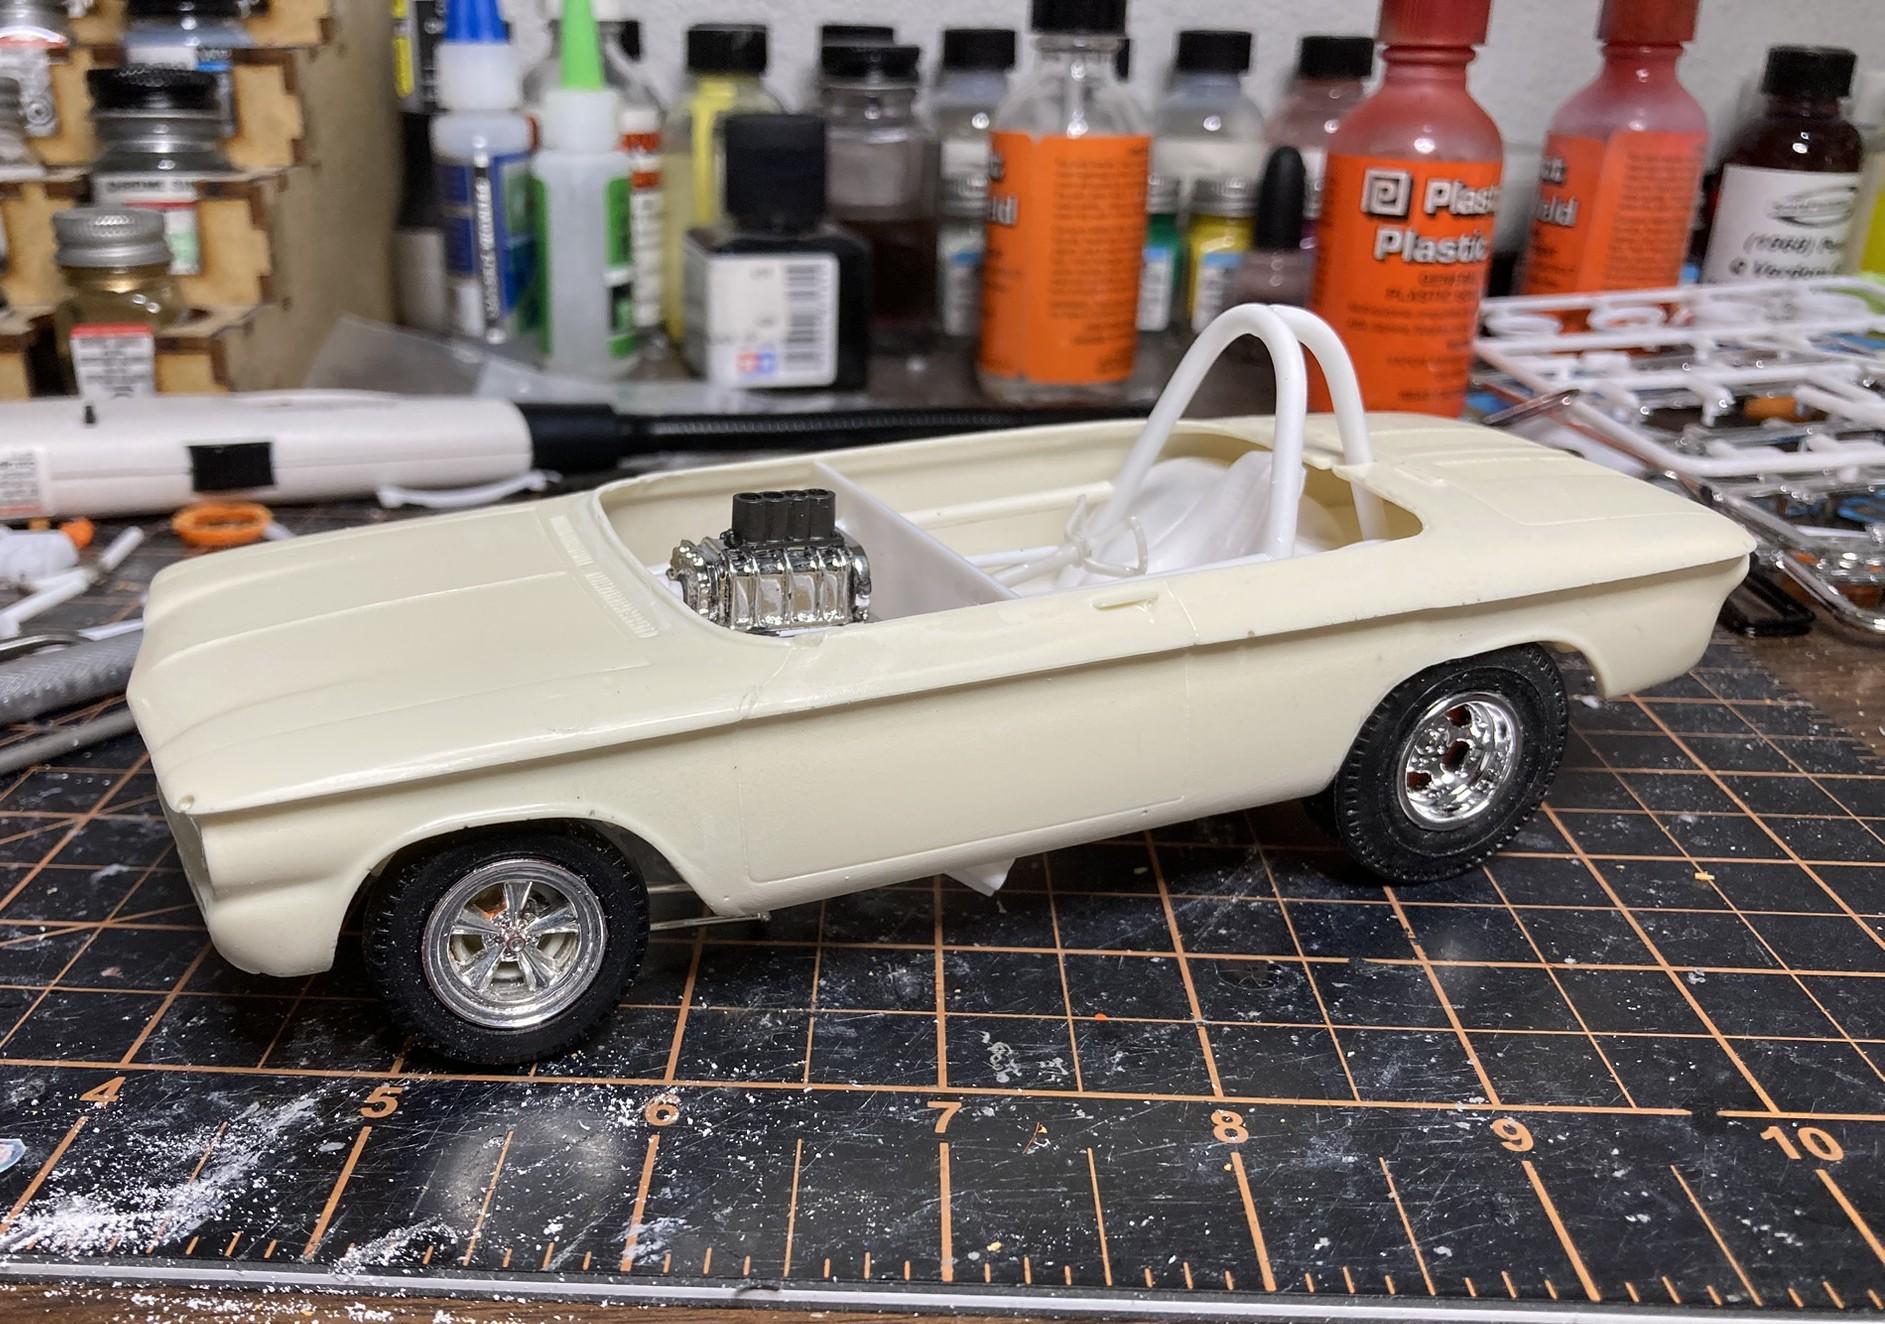
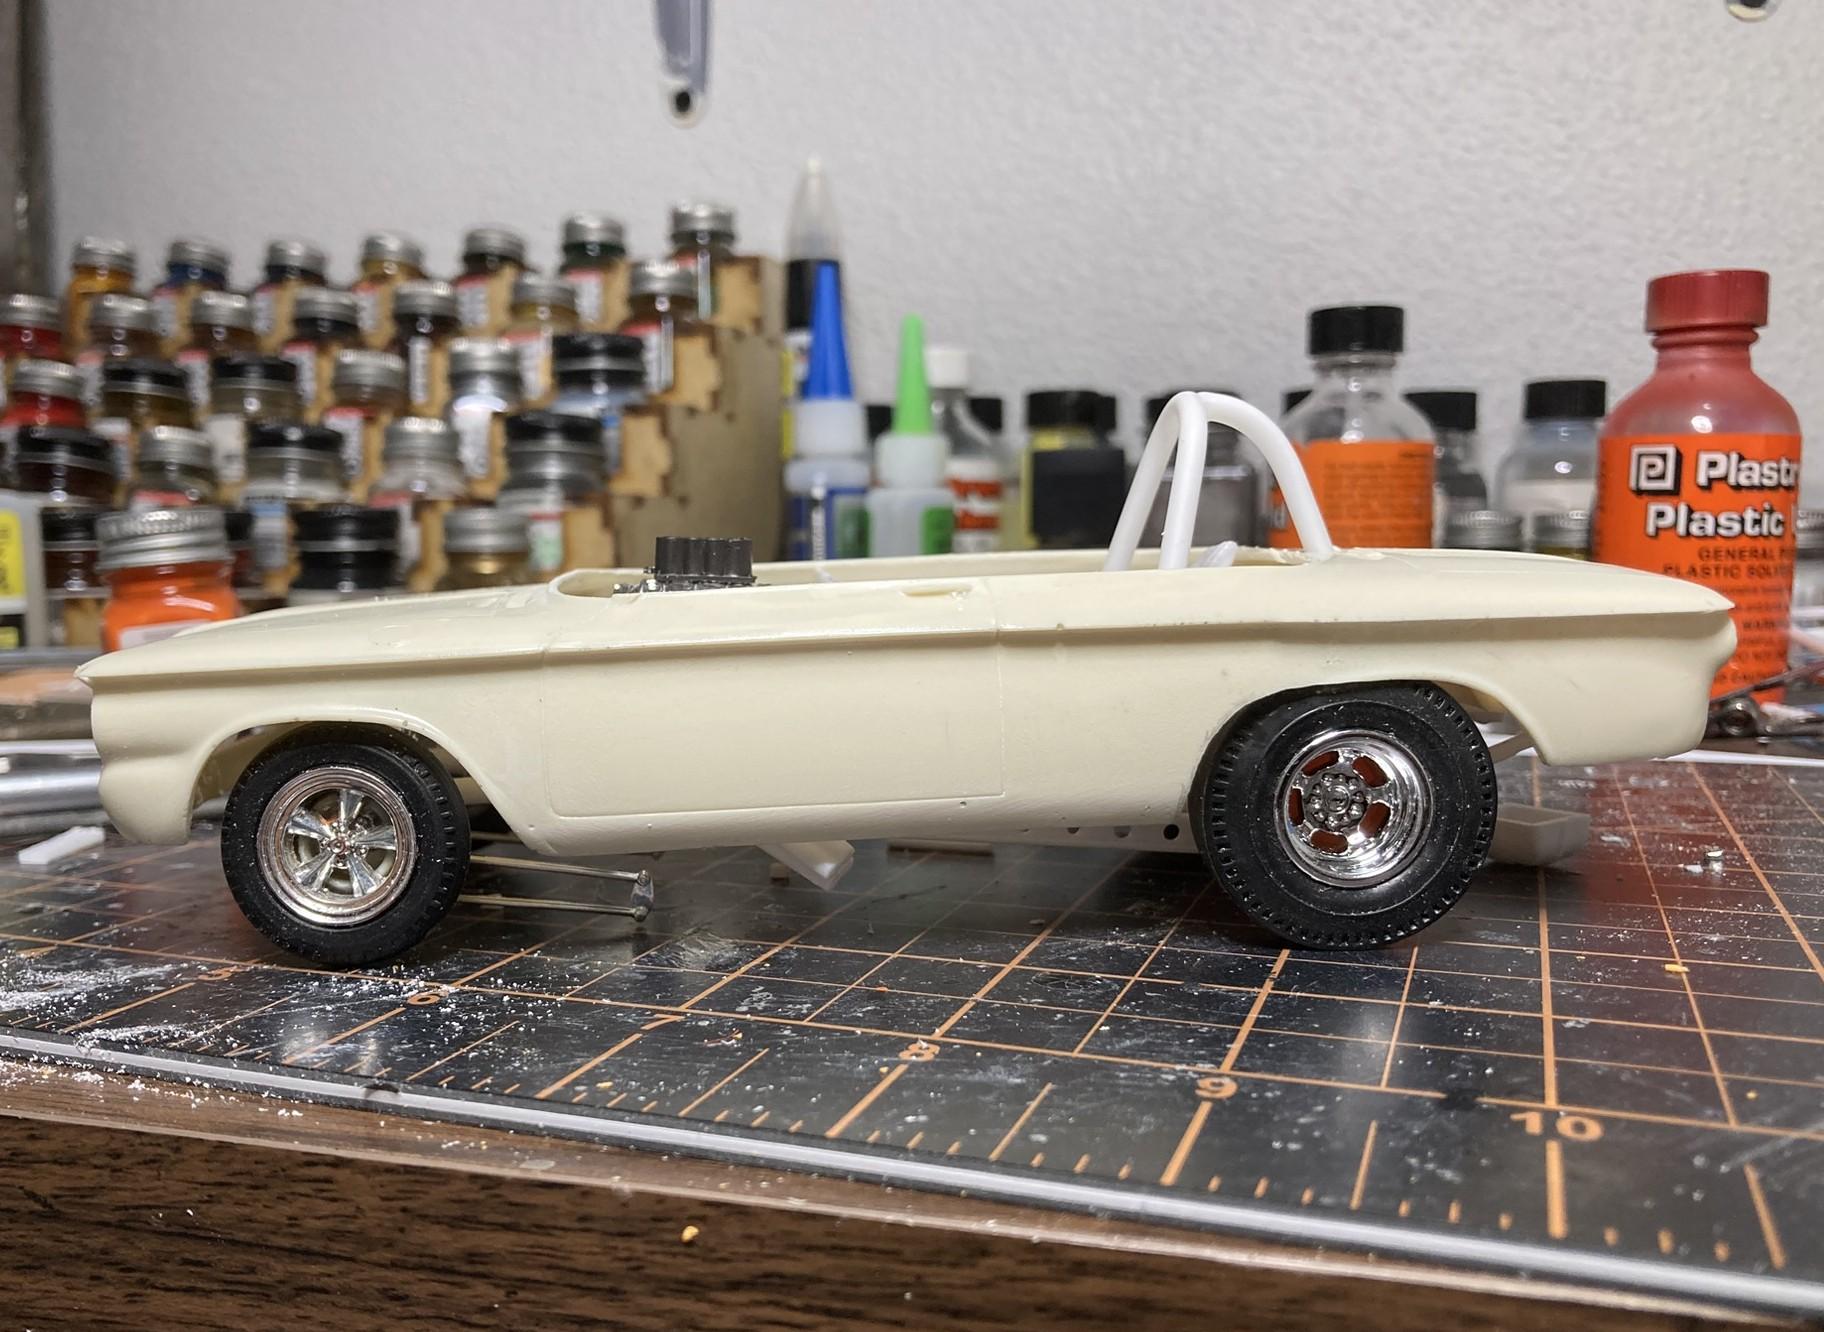
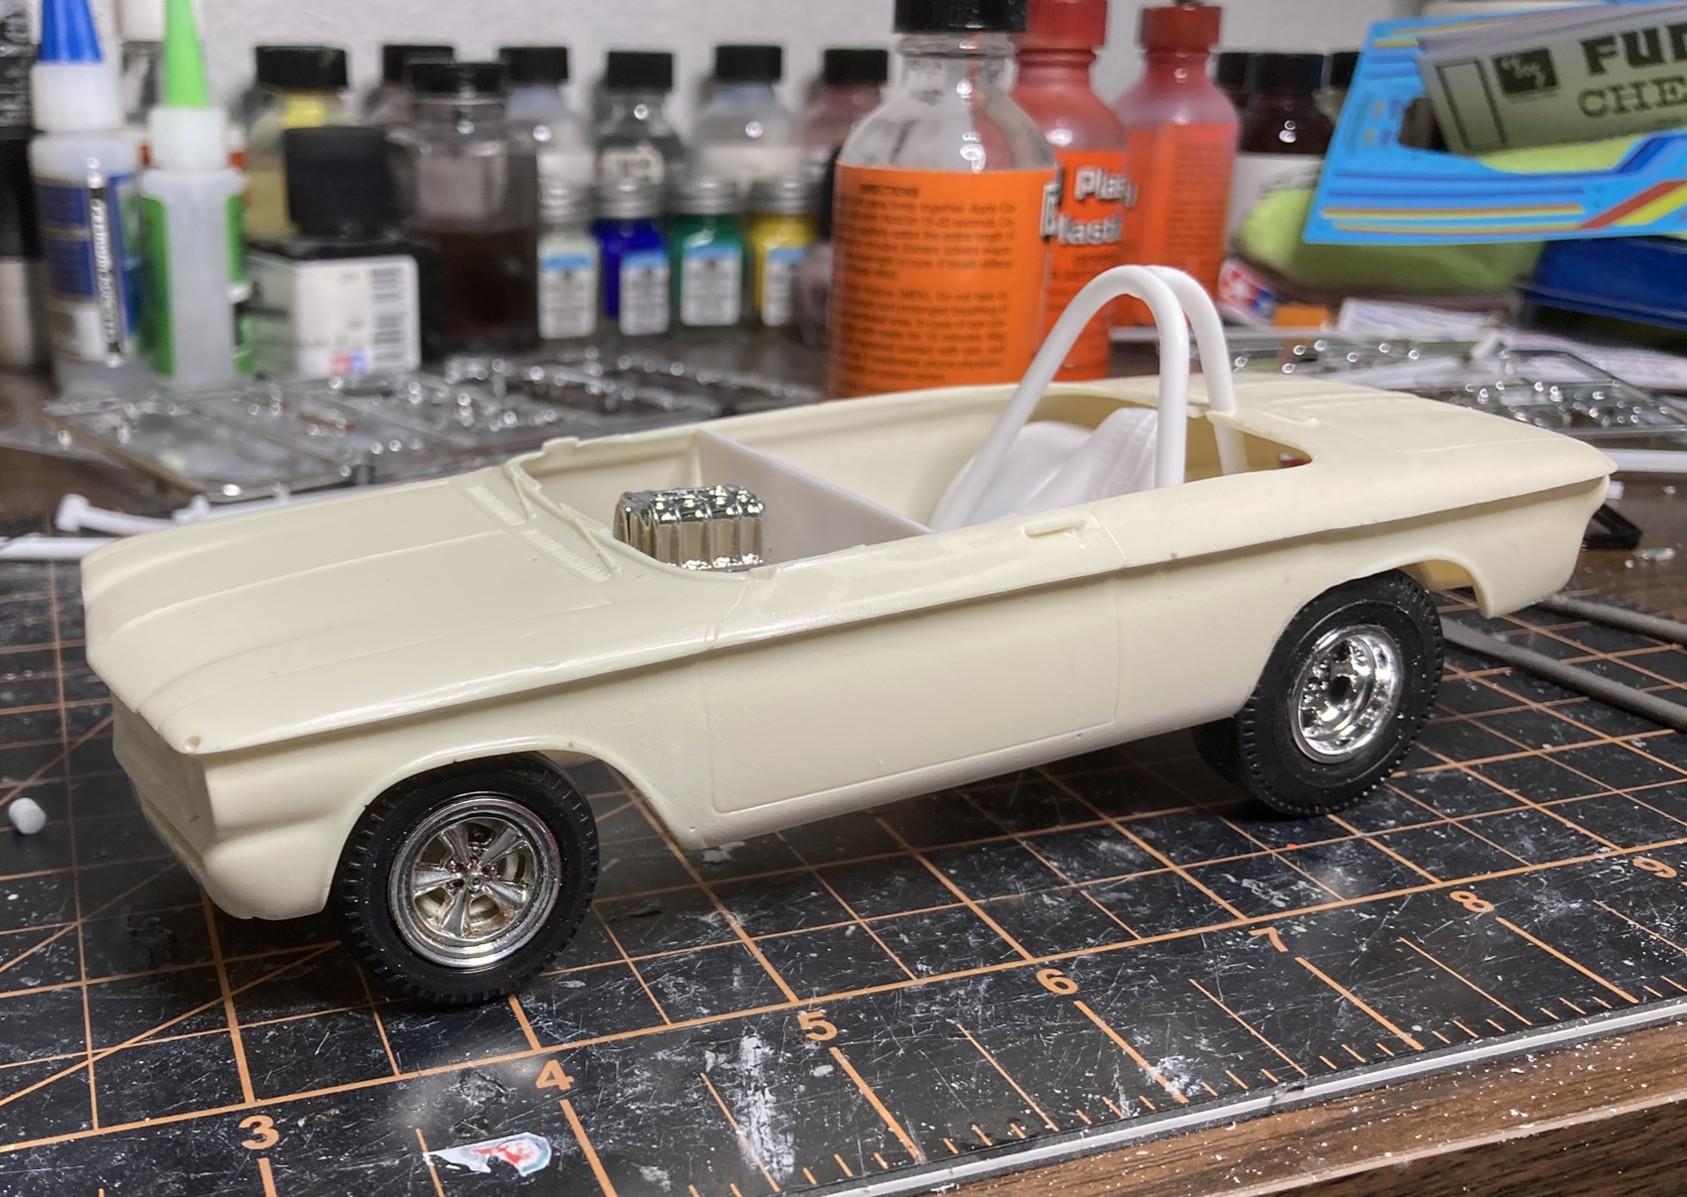
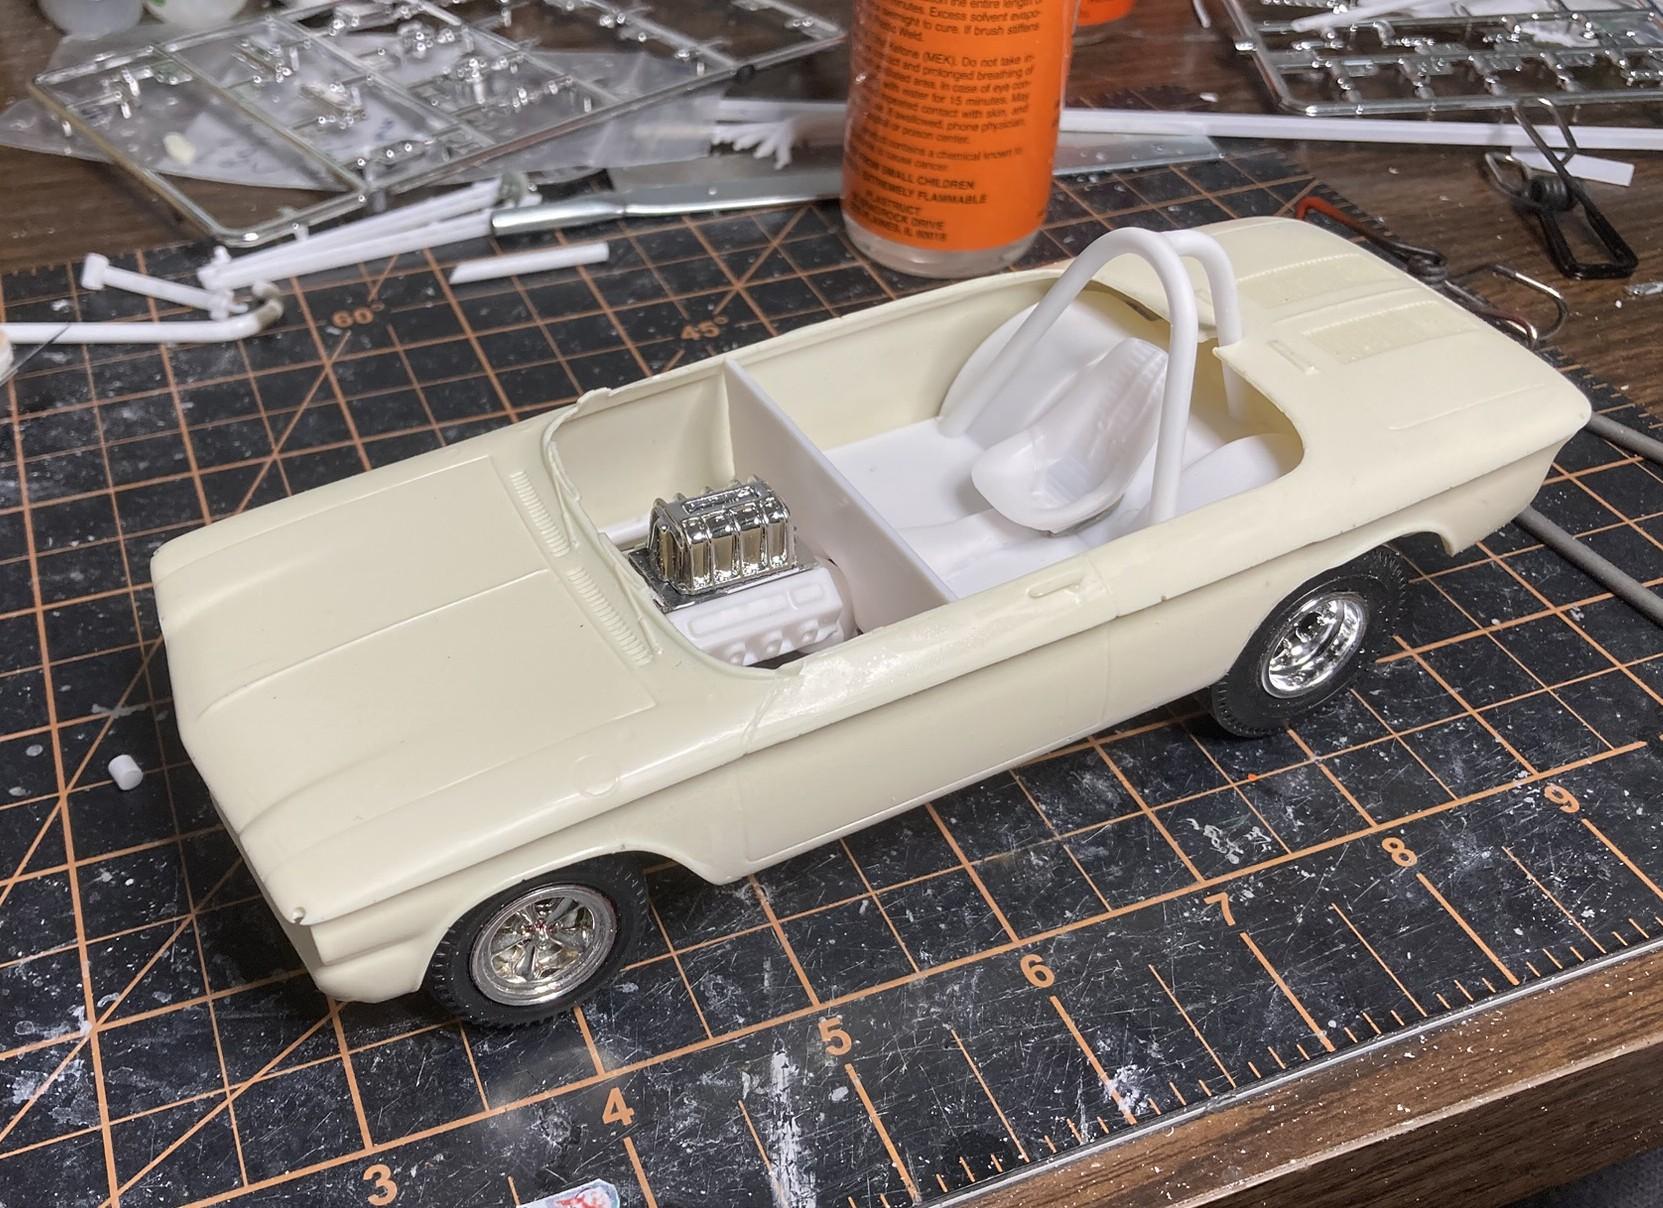
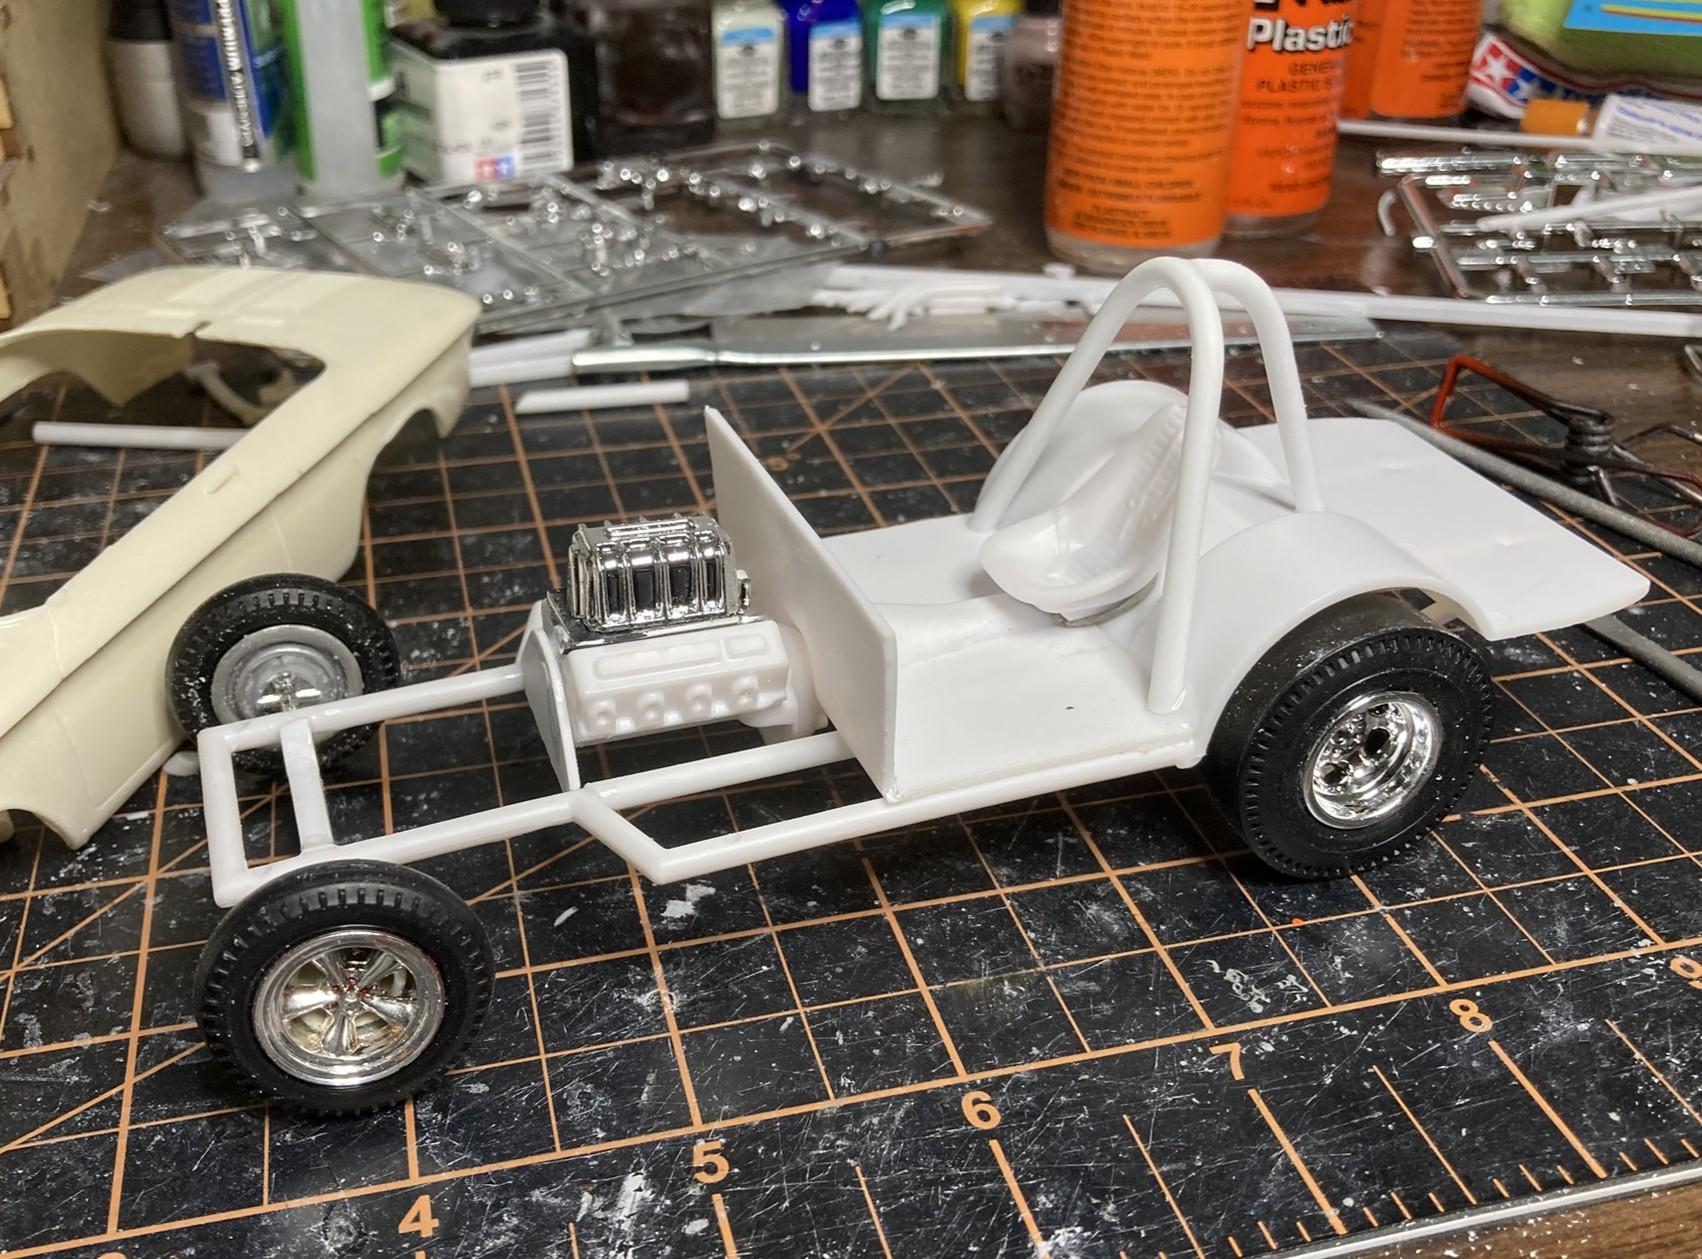
Worked on this one just a little every day this week. I decided to fill in the rear part of the the wheel opening in the quarters. I extended them forward to match the offset to the front, then added just a little to the bottom since they looked too short. Smoothed all of that out, then mixed up some 2-part putty to rebuild the wheel lips. Got those sanded down this morning. Its hard to see what they look like but once I get a coat of primer on this thing they'll show up. I also got the tonneau cover made and glued on. I might do a little more work on the openings later, the steering column still needs a gauge panel so will probably have to make room for that plus I'll add a small lip for a "Lexan" wind deflector in front of the cockpit. The injection unit is going to get a Surfer scoop. I'm also starting to think I will re-make the roll hoop and support. They are too big in diameter and I didn't mind that originally, but this project has started to take a little more serious turn and I think it deserves a little more realism.
-
It’s Boyd Month! Building the full-detail Coddington Alumacoupe
Quiet Eric replied to OldNYJim's topic in WIP: Model Cars
I loved this ere of hot rodding when I was a kid. I've got a "full detail" Aluma Coupe and CheZoom to build myself. -
Never seen that kit before, very cool!!
-
What did you see on the road today?
Quiet Eric replied to Harry P.'s topic in General Automotive Talk (Trucks and Cars)
It seems to have held up a little better than that Dodge! -
Lindberg's '53 Ford - following the instructions
Quiet Eric replied to customline's topic in WIP: Model Cars
Gorgeous! -
What did you see on the road today?
Quiet Eric replied to Harry P.'s topic in General Automotive Talk (Trucks and Cars)
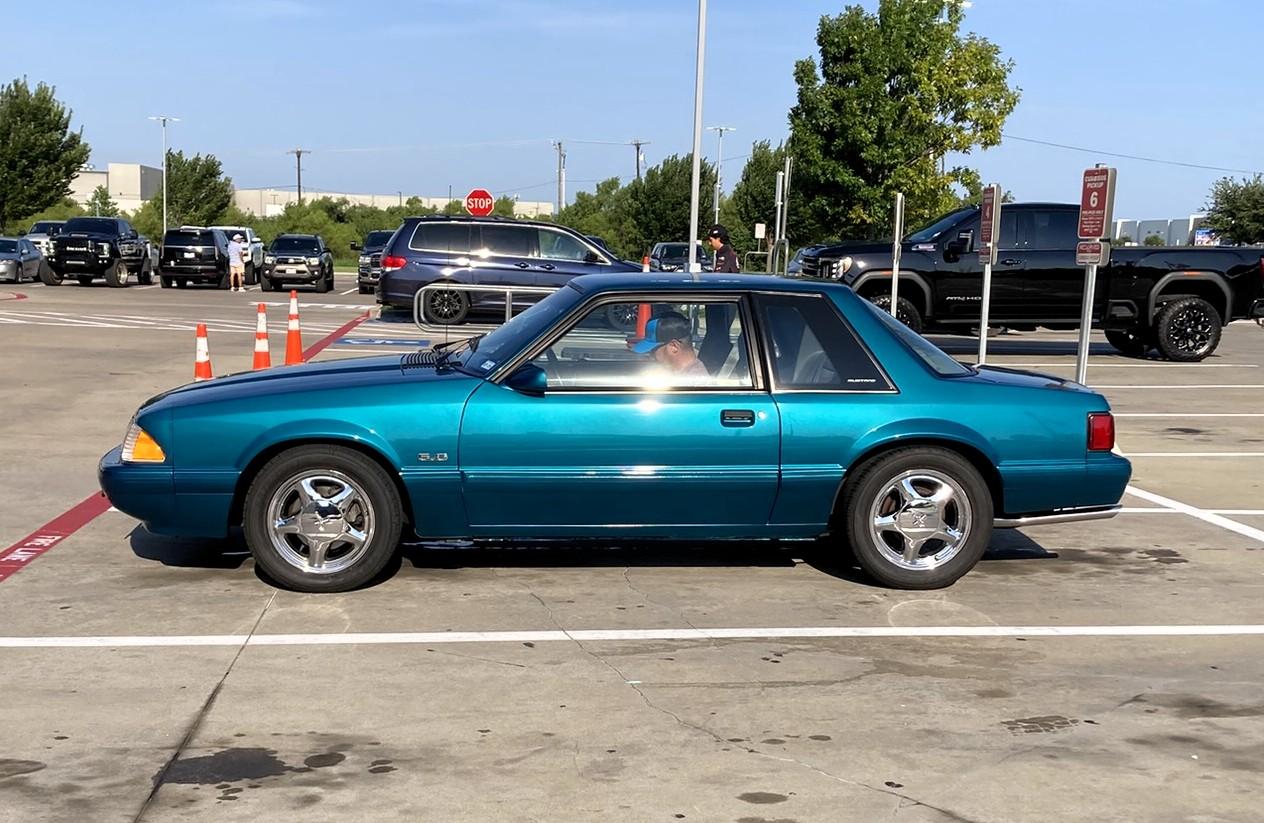
Made a stop at Summit Racing this morning an found this really clean Fox body in one of my favorite colors.
-
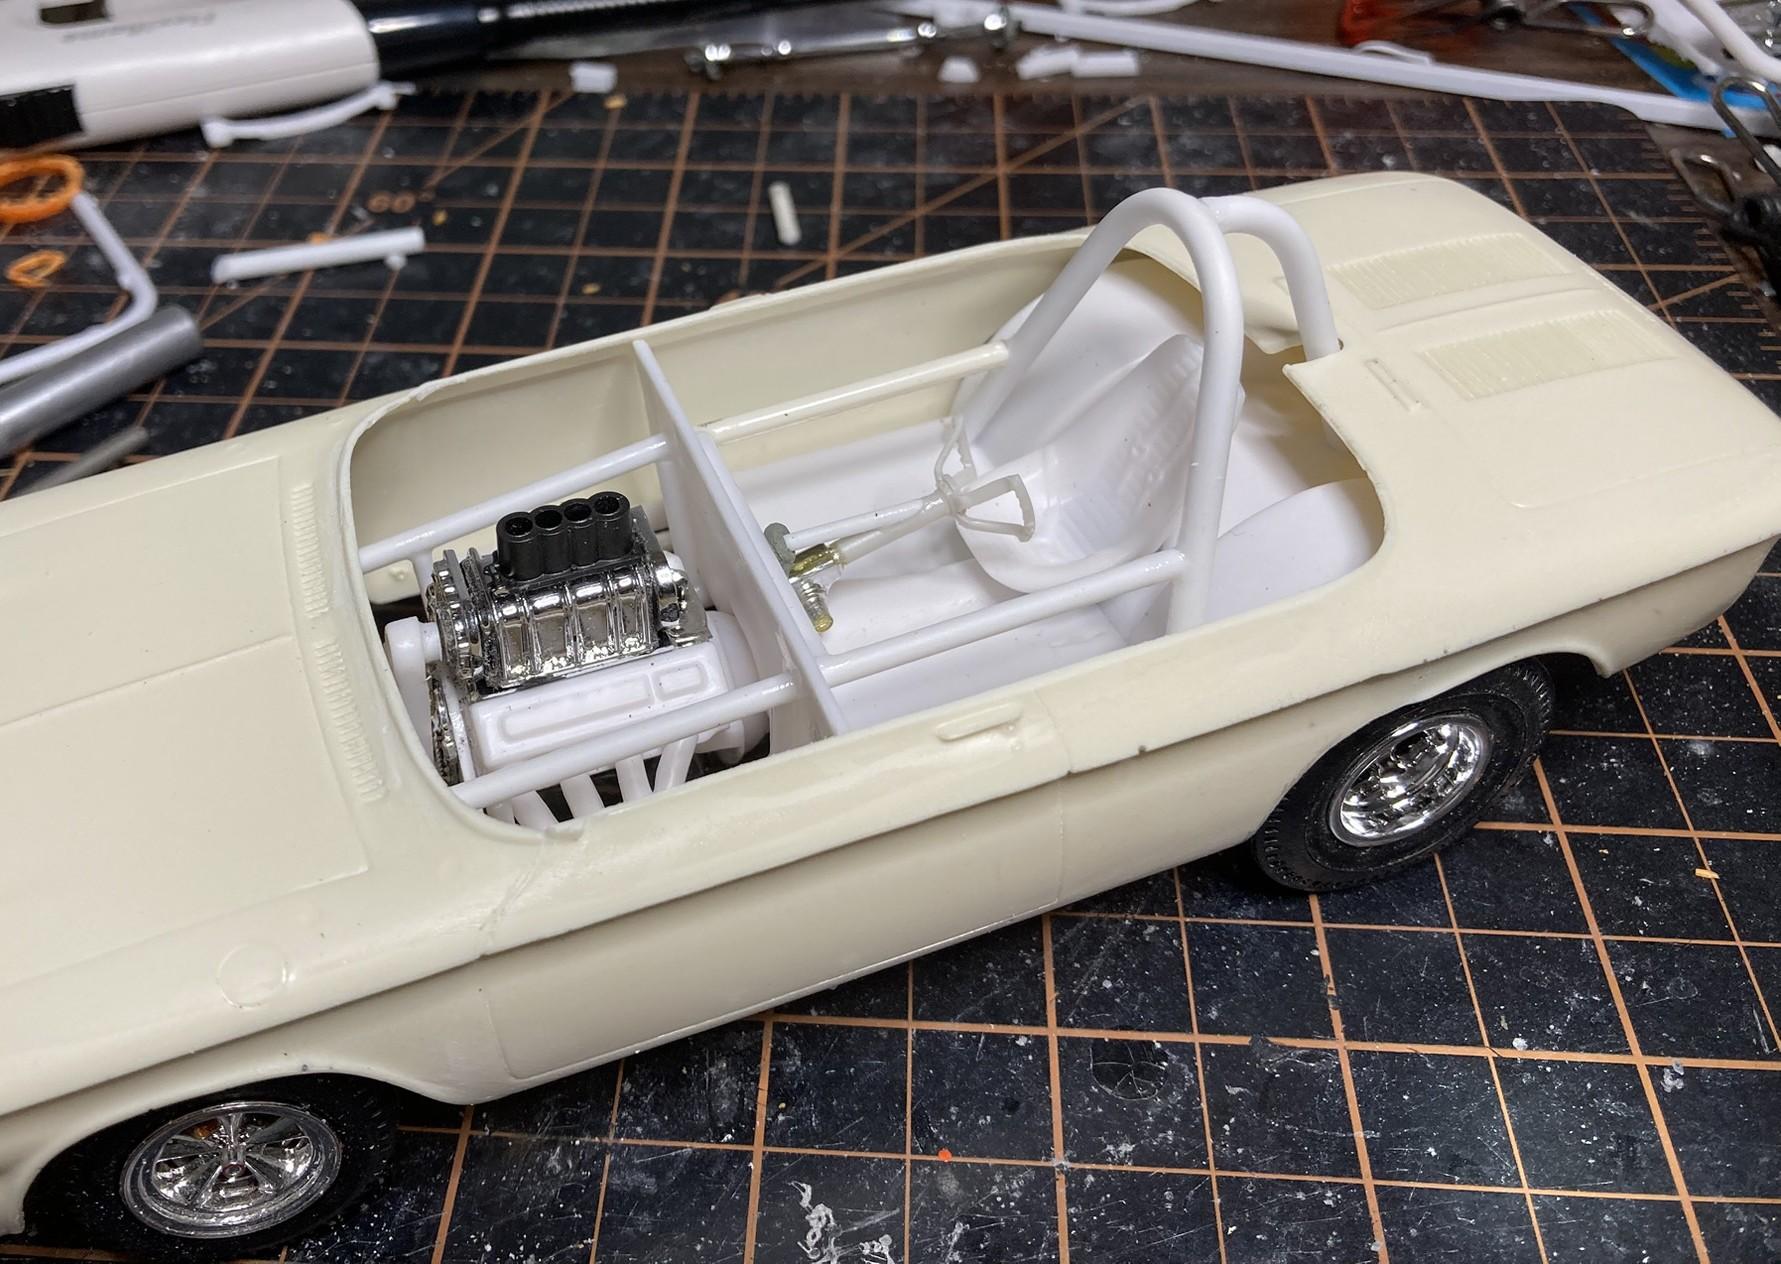
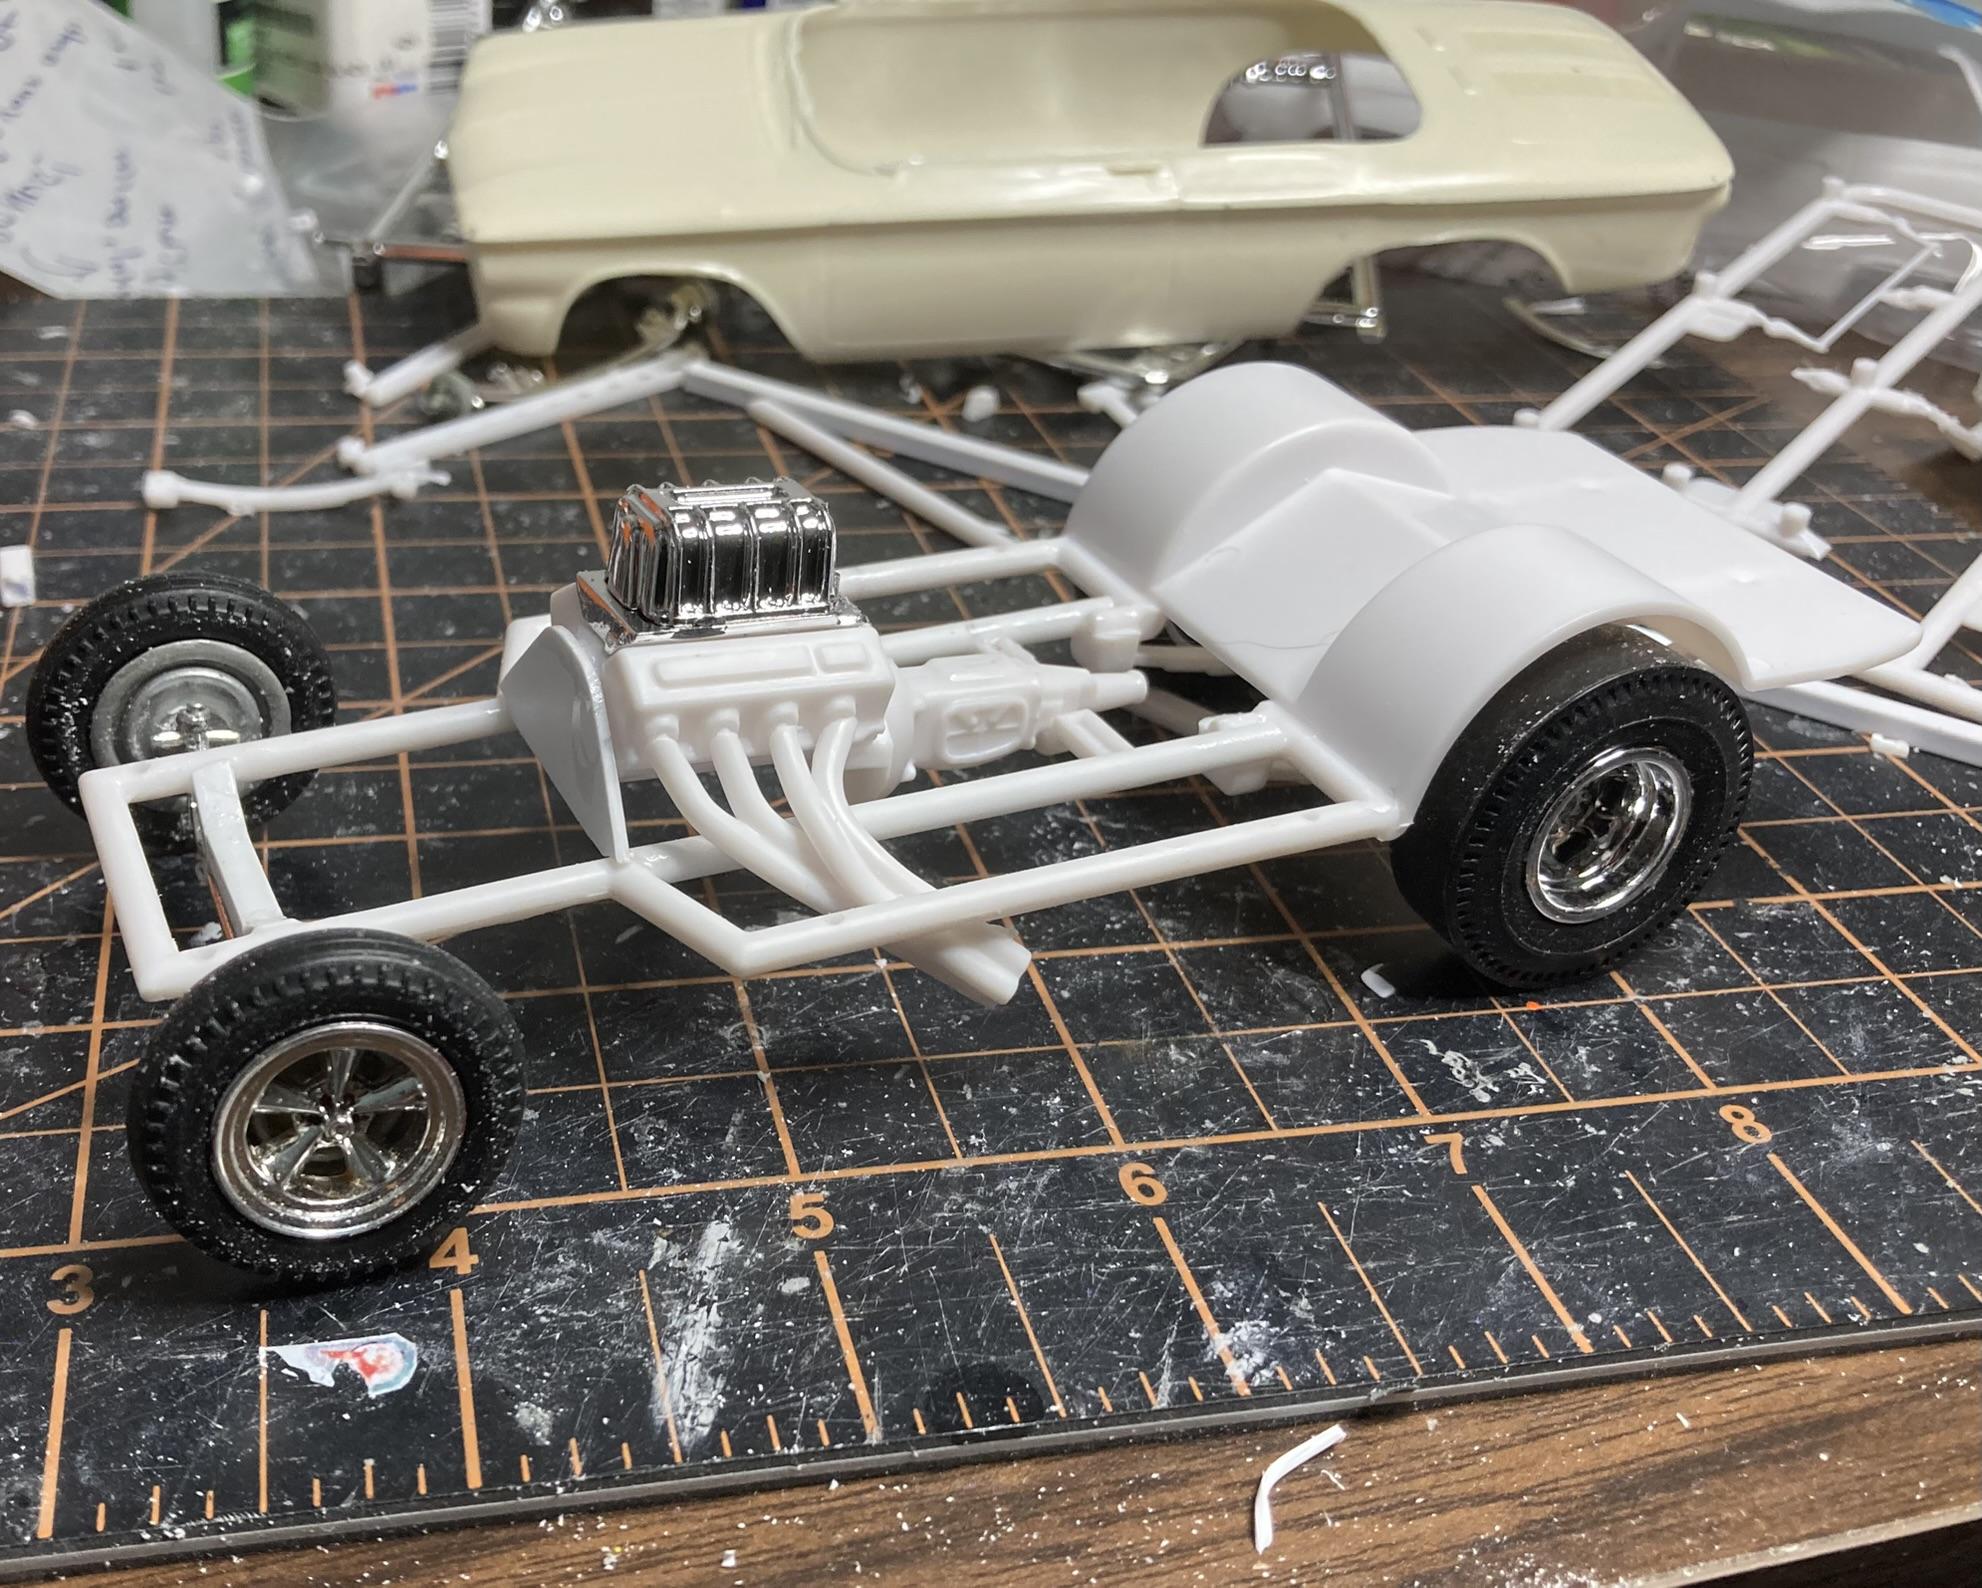
I originally thought this would be a pretty simple build. But I couldn't help but get a little more serious with the chassis. Theres a lot of superglue reinforcement on the joints that I'll shape and sand later. Needed a place to mount the steering box so I had to build the upper half of the framework. I think I'll remake the motor plate to mount to the frame upright bars in that area now. The steering wheel was a 4-spoke I think from a '65 GTO kit that I trimmed and bent. Started getting the body ready for the main cover panel, flattening the opening some and shaving the wipers.
-
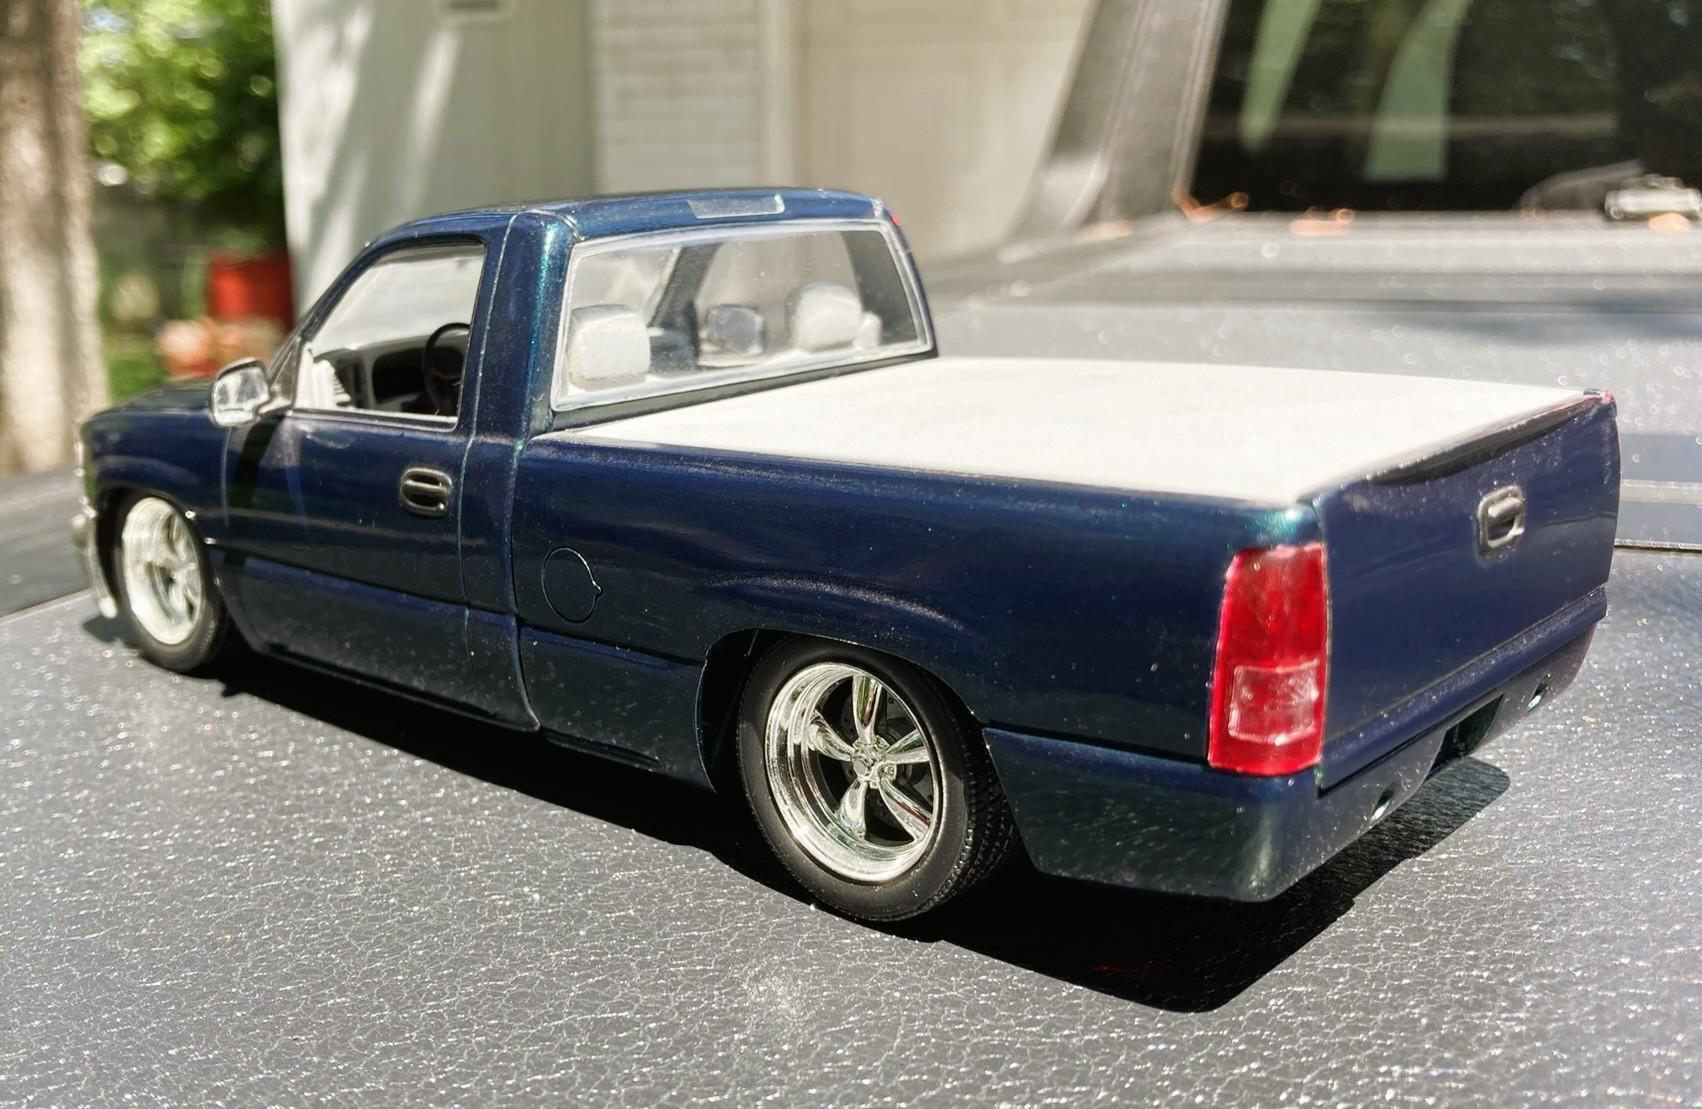
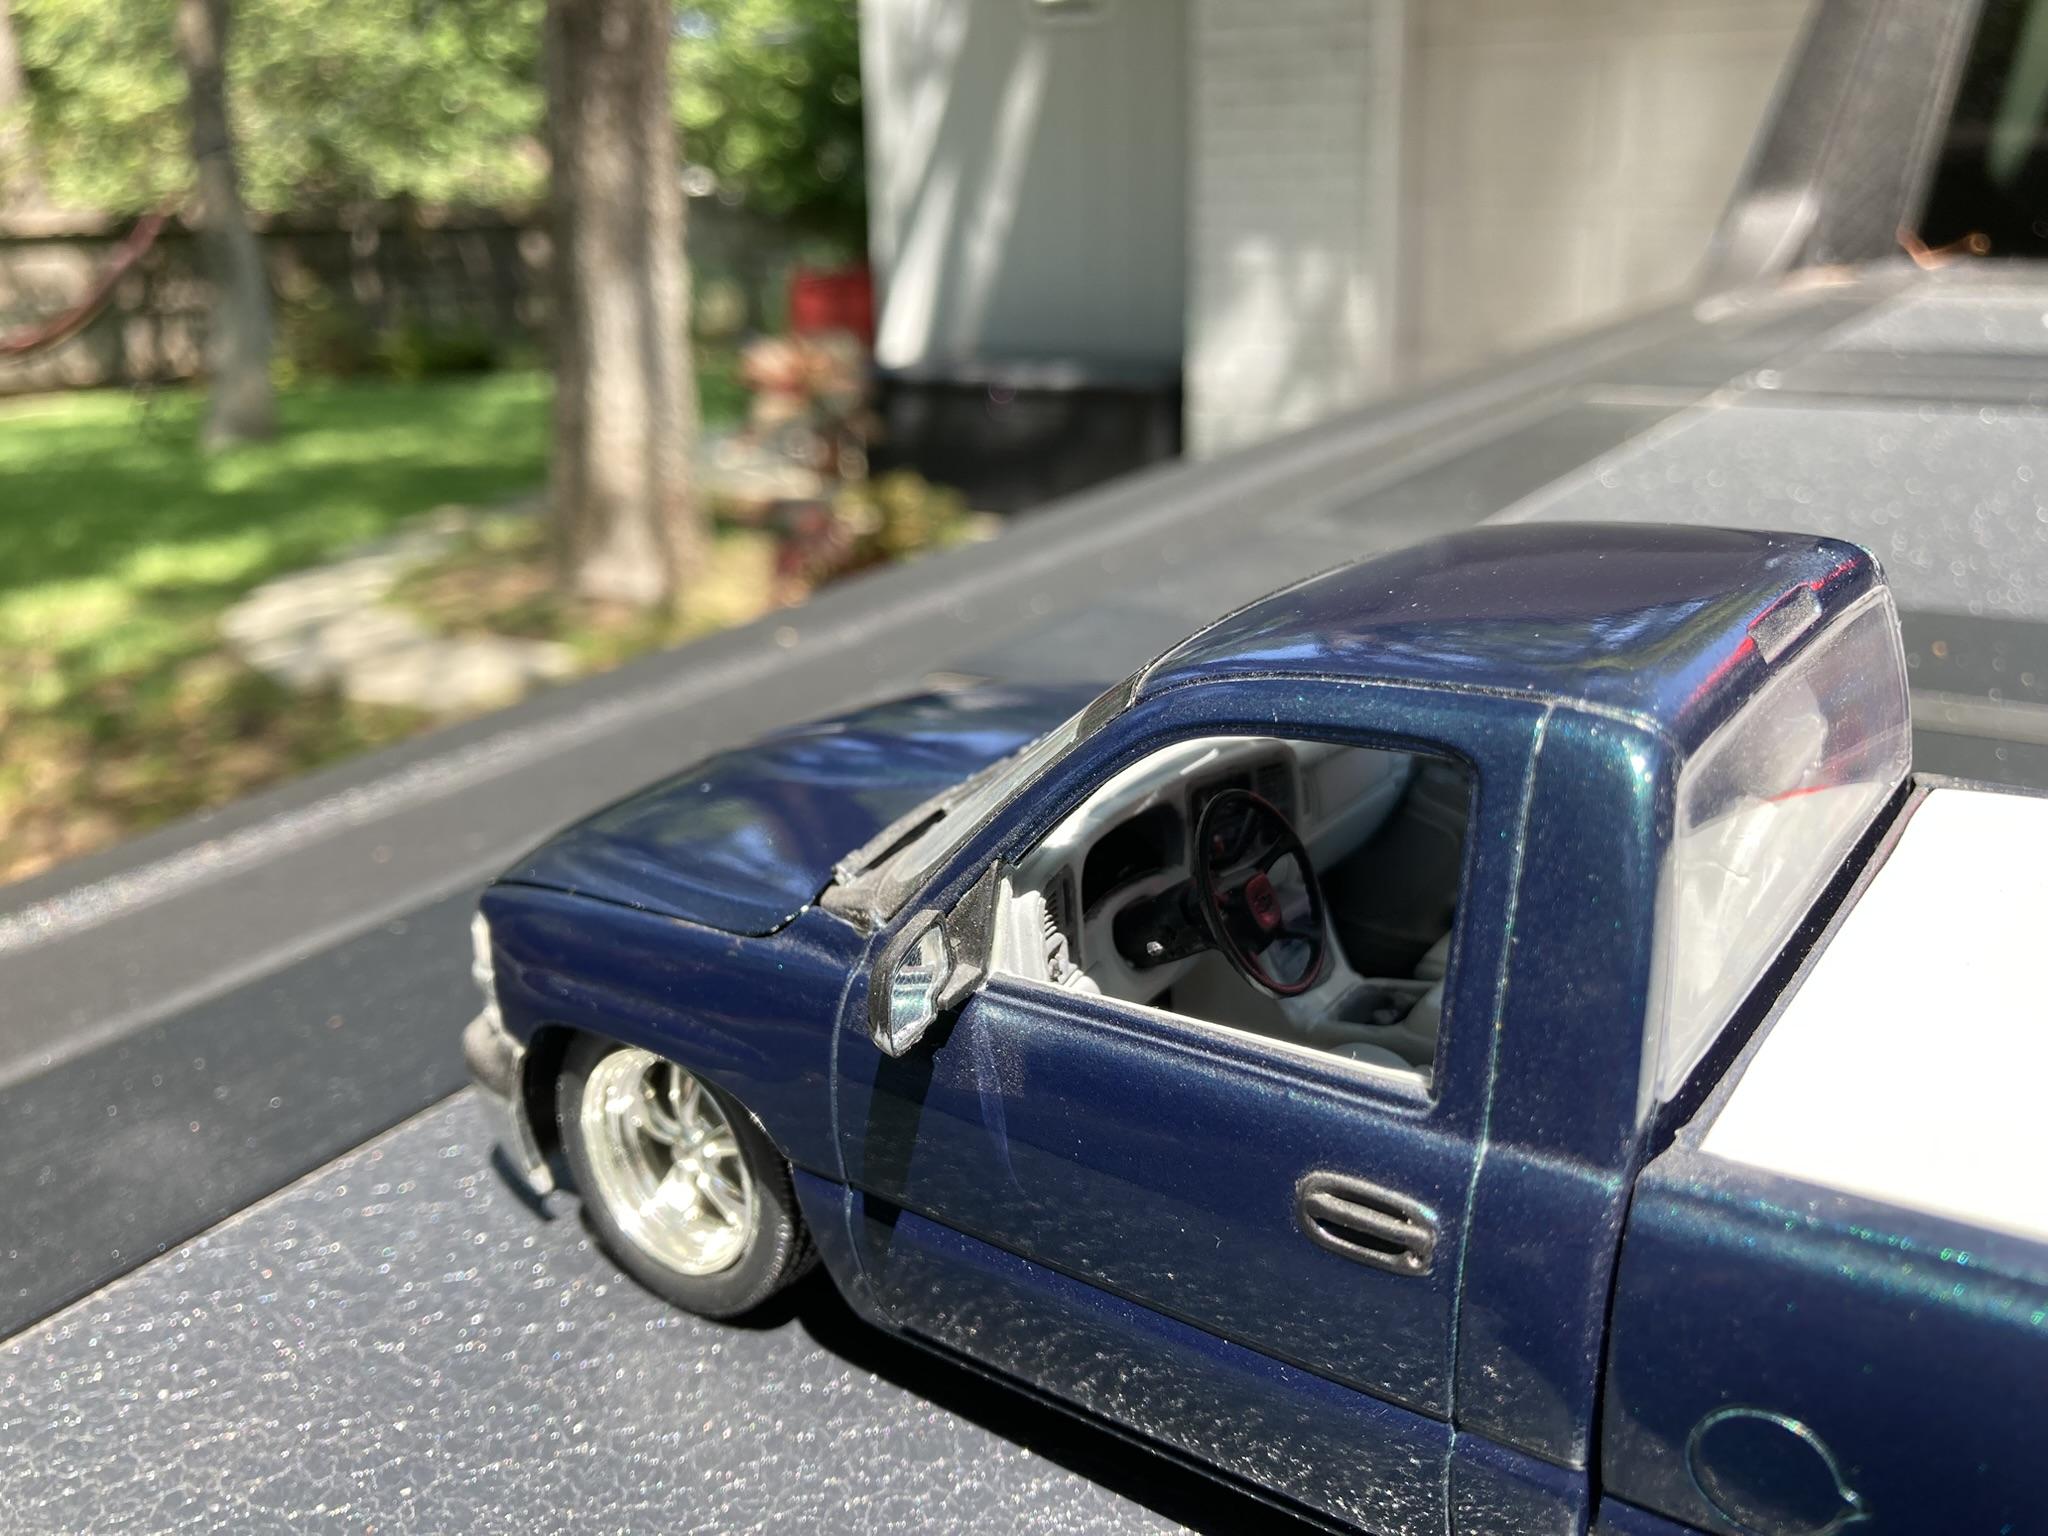
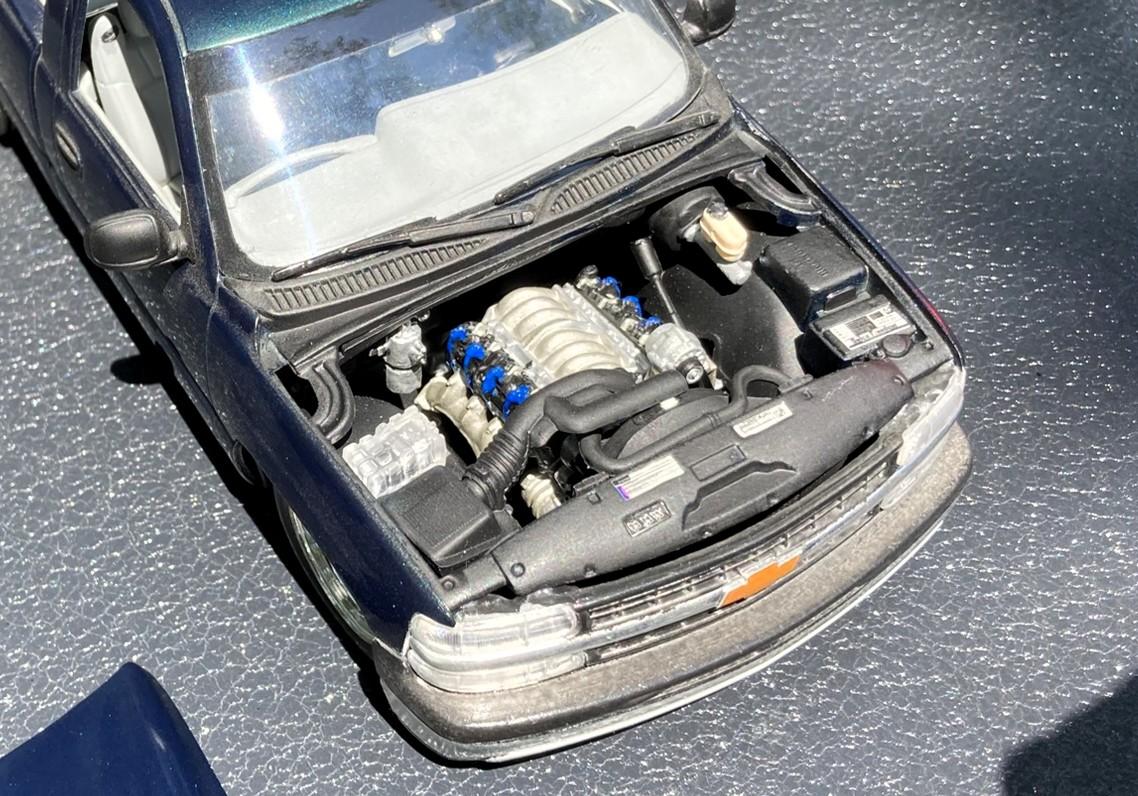
This is one of my older builds I think from '03, but one of my earliest that I started finishing out pretty well and still one of my favorites. Might be the first one I color sanded and polished. Obviously made it into a regular cab. Added a Camaro hood scoop, used the Camaro intake and other engine stuff too. Added a small spoiler to the top of the tailgate and made a bed cover. Did a rolled rear pan. I think the exhaust is solder. "Converted" it to 5-lug and lowered it, a lot. I would share how but I don't remember at all. Took some fresh pictures of it outside today though its still a little dusty.
-
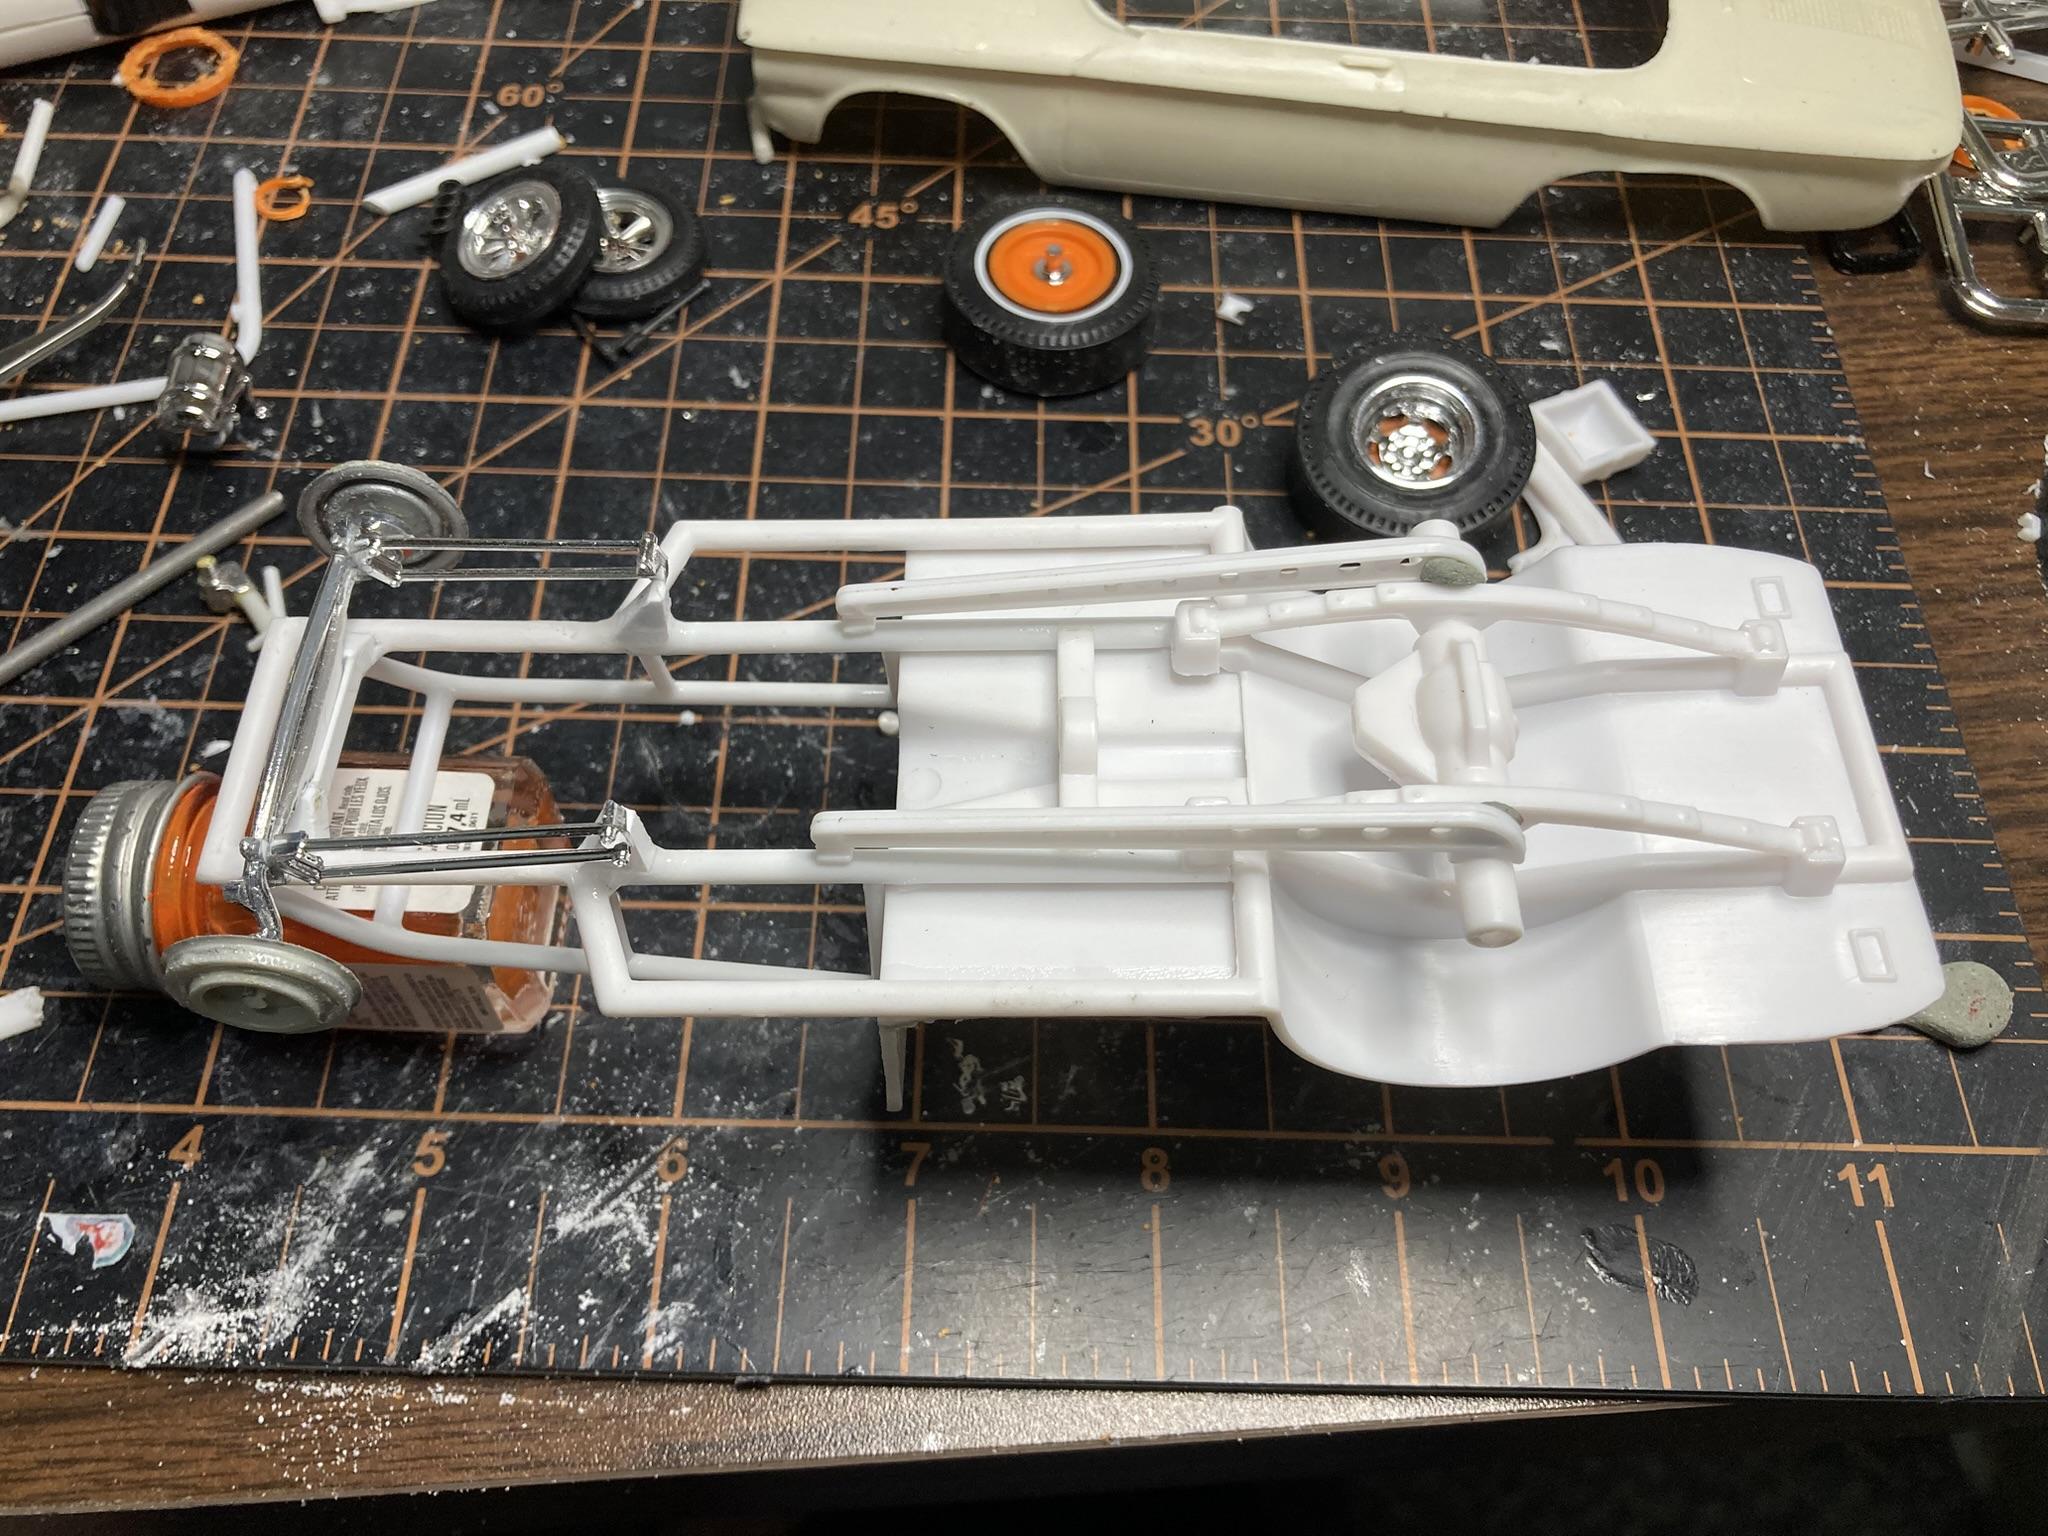
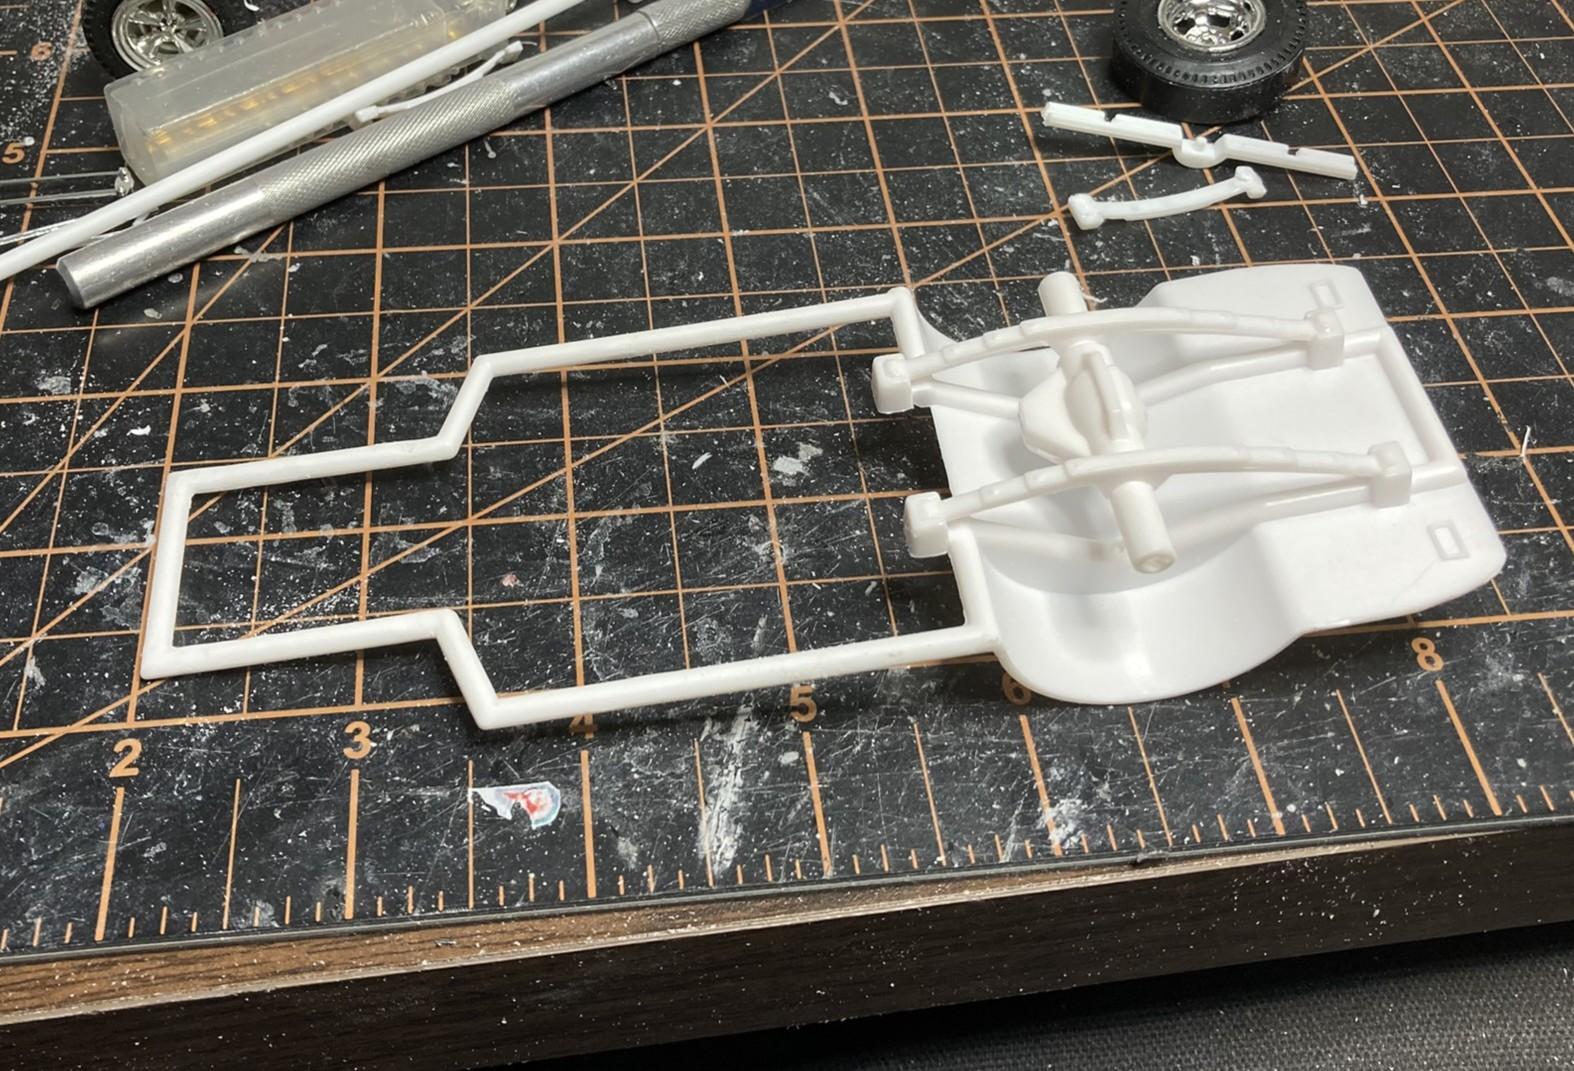
Progress. I decided to start over with a lot of stuff on the chassis. Grabbed a front axle setup from a Revell '32 Ford kit with a much narrower track and made a custom spring crossmember. I'll use the 4-link from that kit too. Cut out the transmission crossmember and added longitudinal bars to the frame. That gives me a place to mount the front of the rear ladder bars since the trans crossmember is gone. Did someone say engine setback? Because theres a lot of it now! Made a motor plate for the front of the engine and reused part of the original transmission crossmember. I cut the rear section of the interior tub away only using the floor and firewall, and shortened it a lot. Whipped up a roll hoop. I think it's pretty close to the original concept.
-
Everything looks great. Very nice foil work too.
-
Do you mean around the emblems and such? Admittedly there is a little more buildup around those than I'd like but everything is still plenty raised for foil and and a Molotow pen to bring to life.
-
Anybody ever build one of these
Quiet Eric replied to junkyardjeff's topic in General Automotive Talk (Trucks and Cars)
Well kinda...I don't think I had as much of the kit to start with as you do. This was a long time ago.
-
Great save on those fenders! You're really making me want to pick up this version of that kit.
-
Got it re shot this morning. Still a couple minor issues that I think will disappear with a clear coat. Had to mock it up! Time to wrap up the chassis and start on the interior.
-
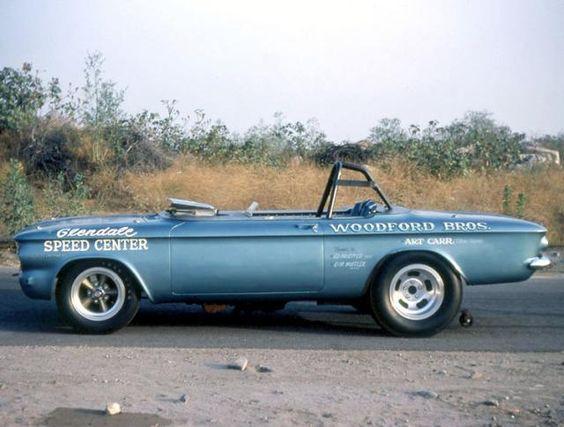
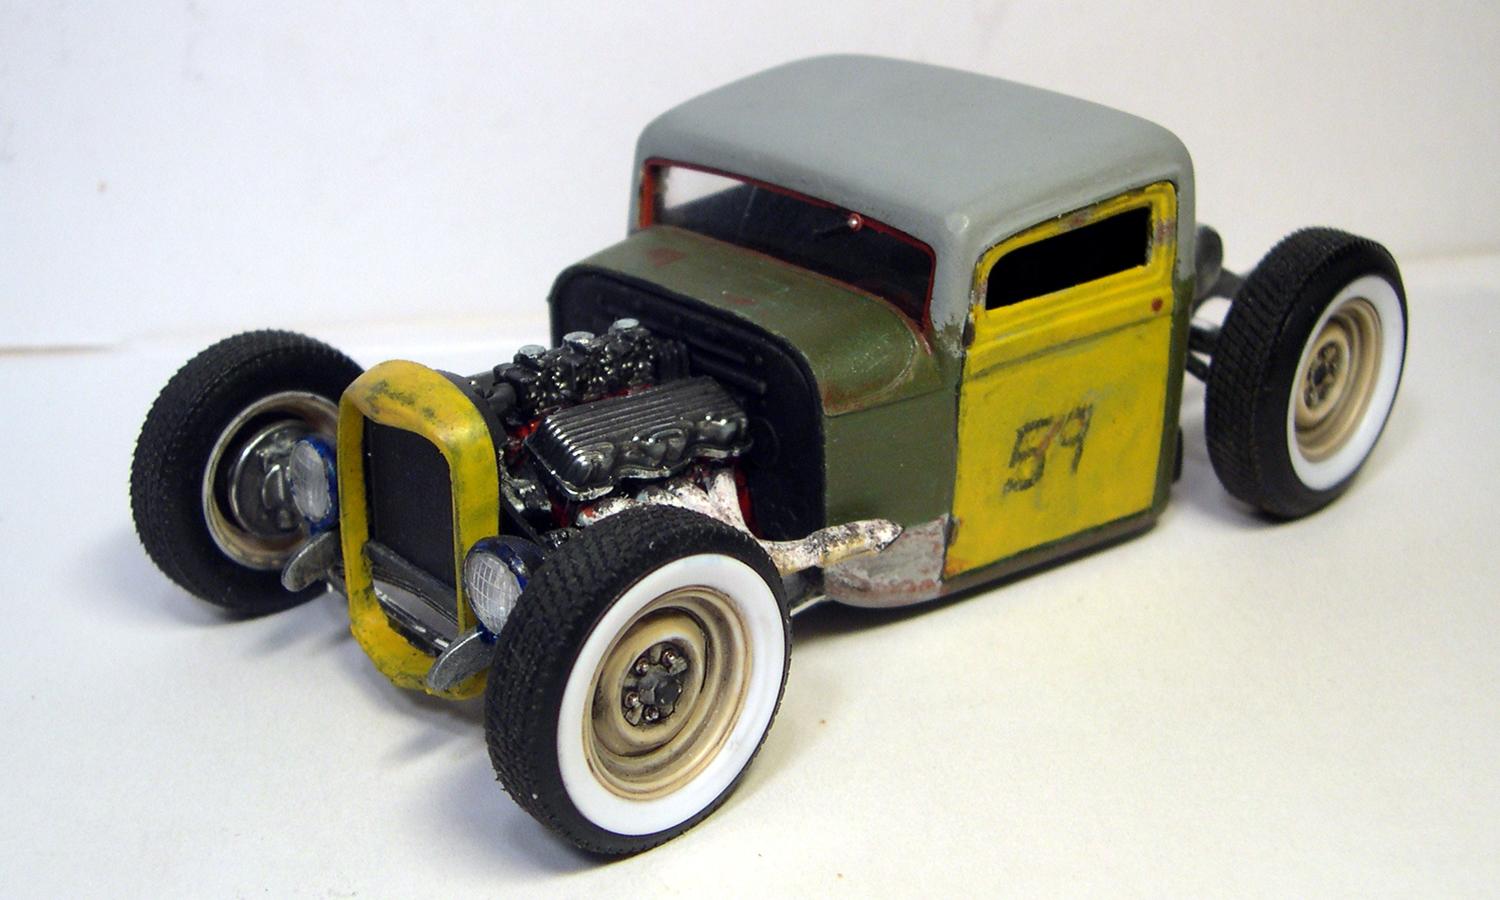
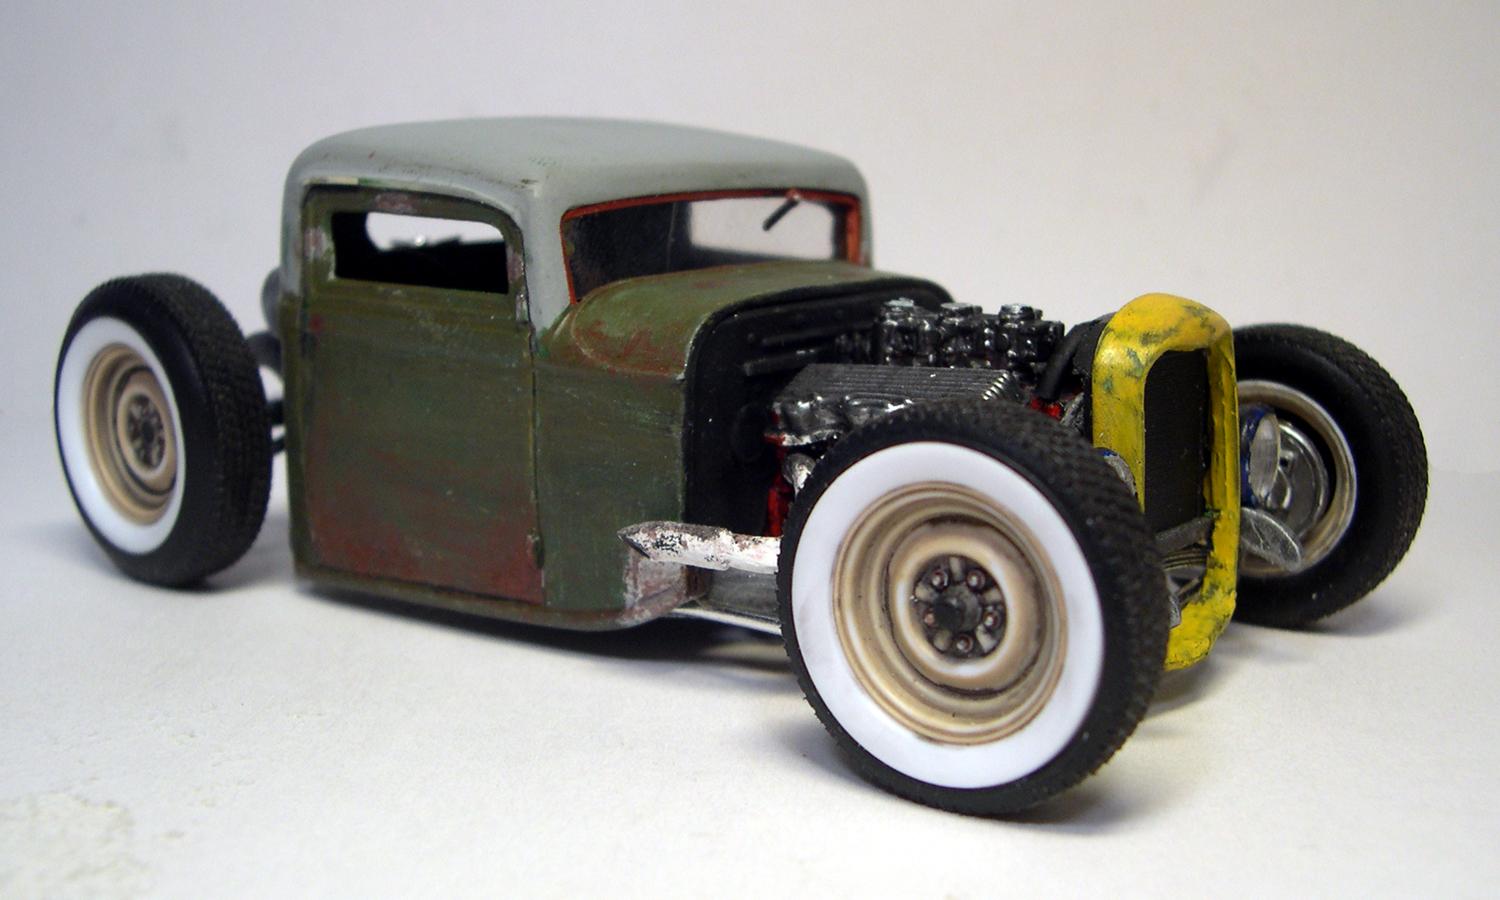
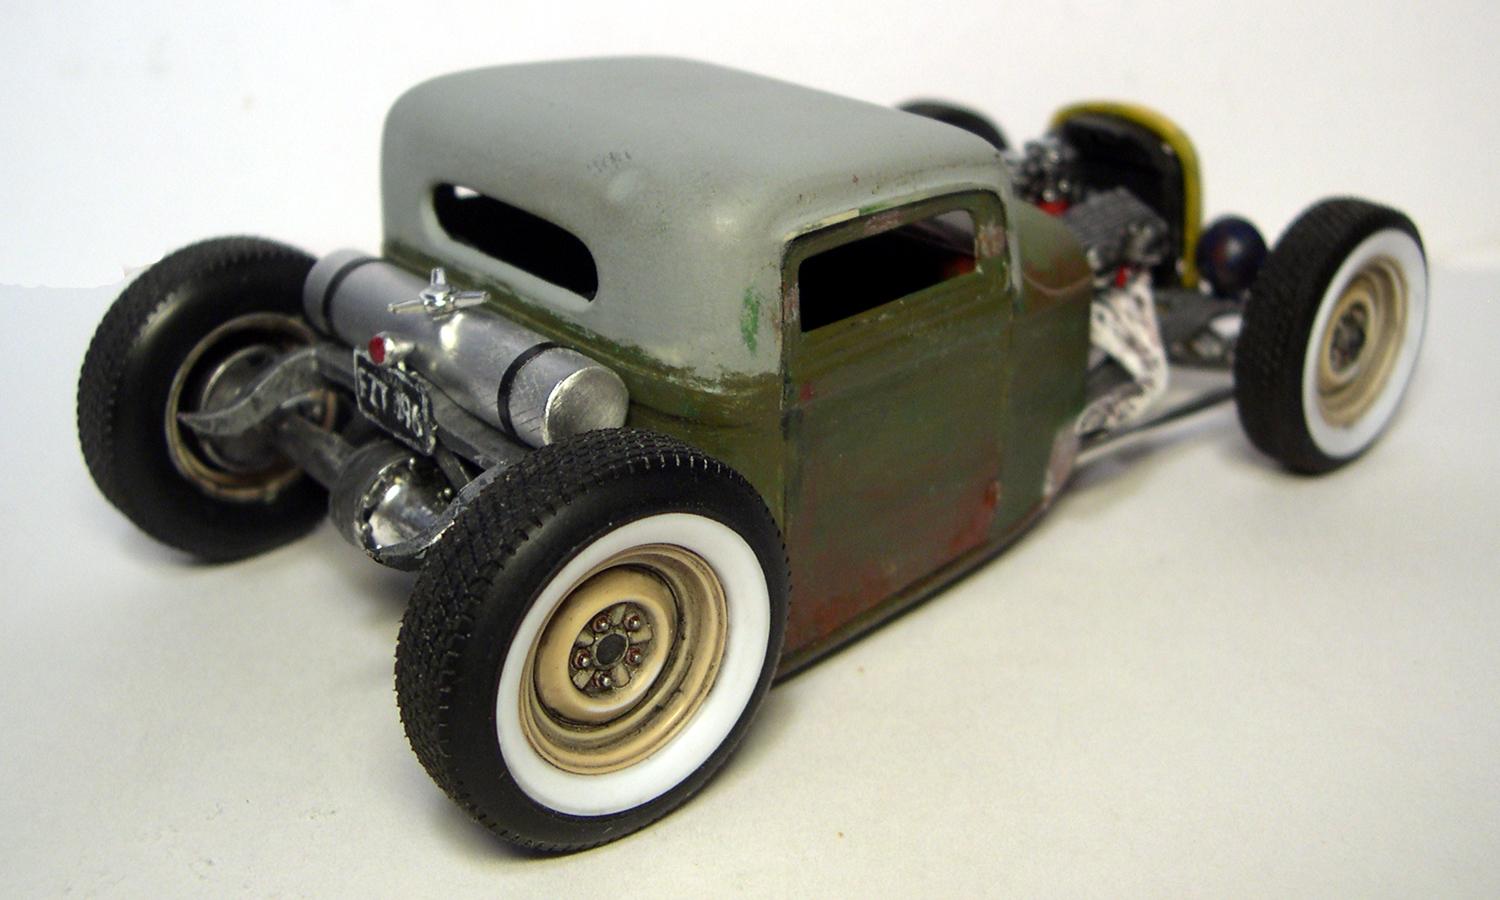
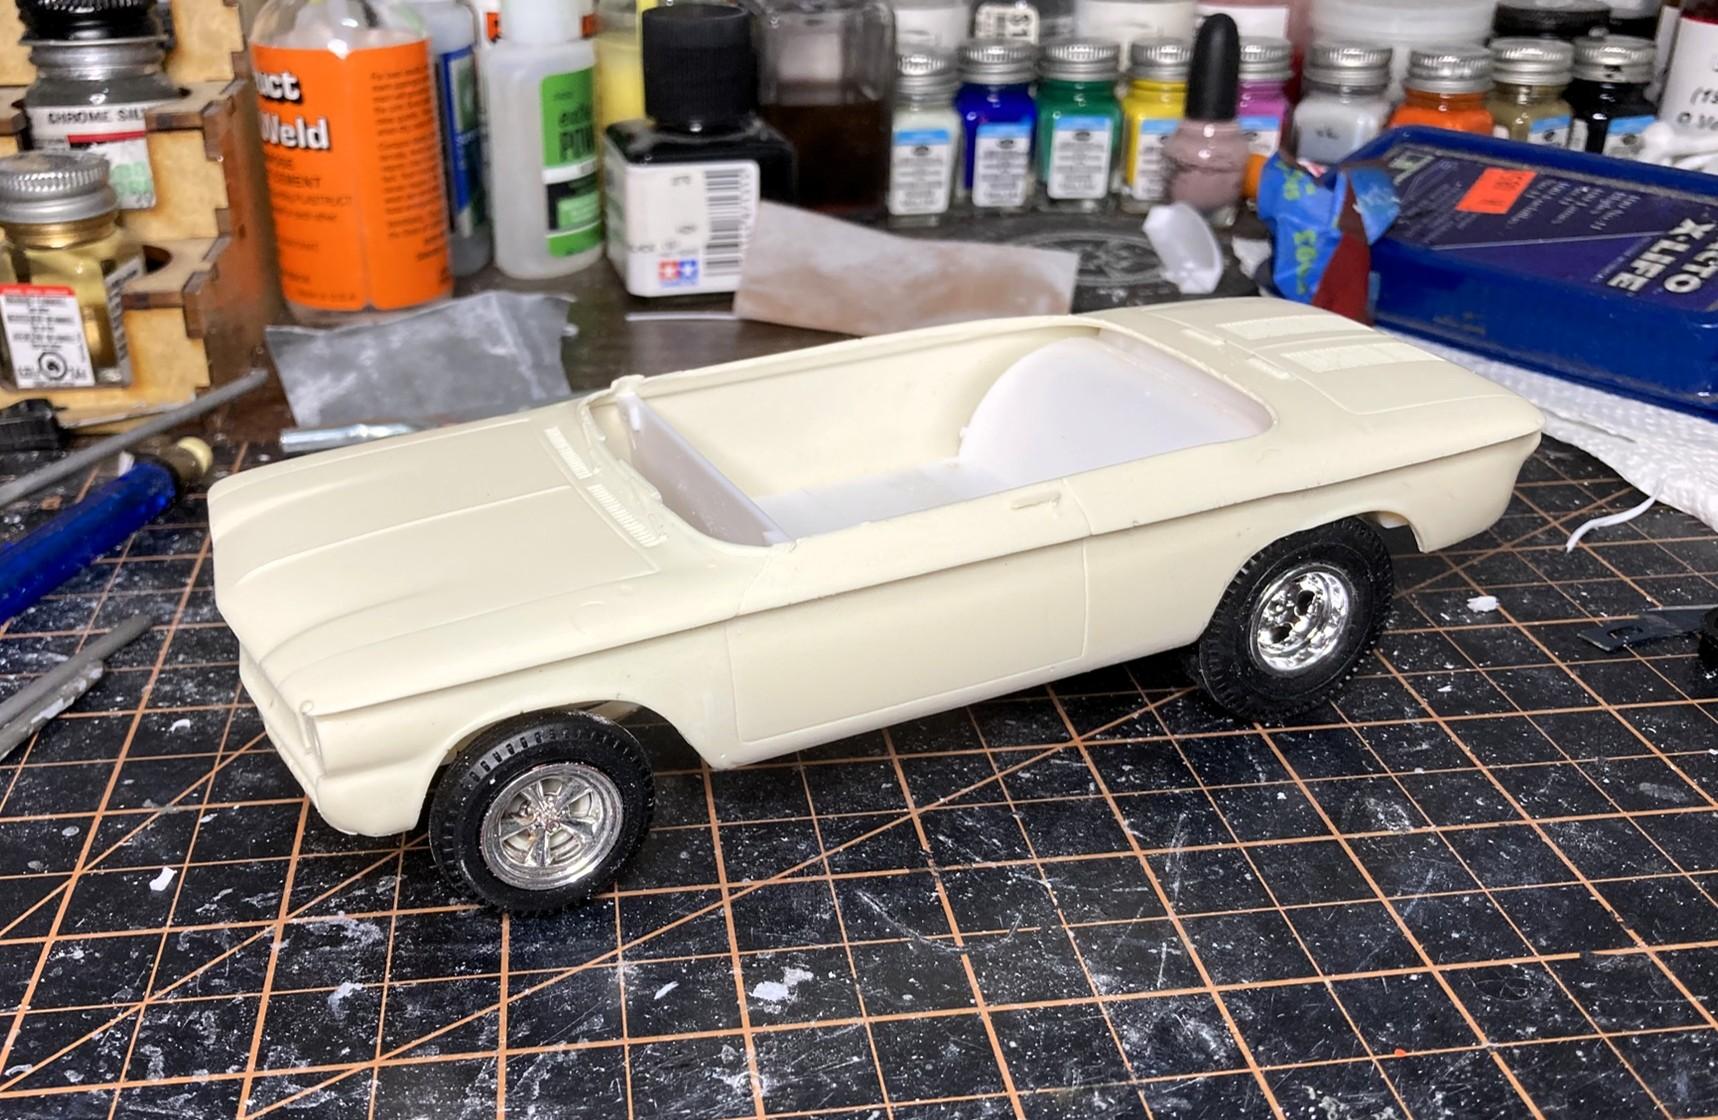
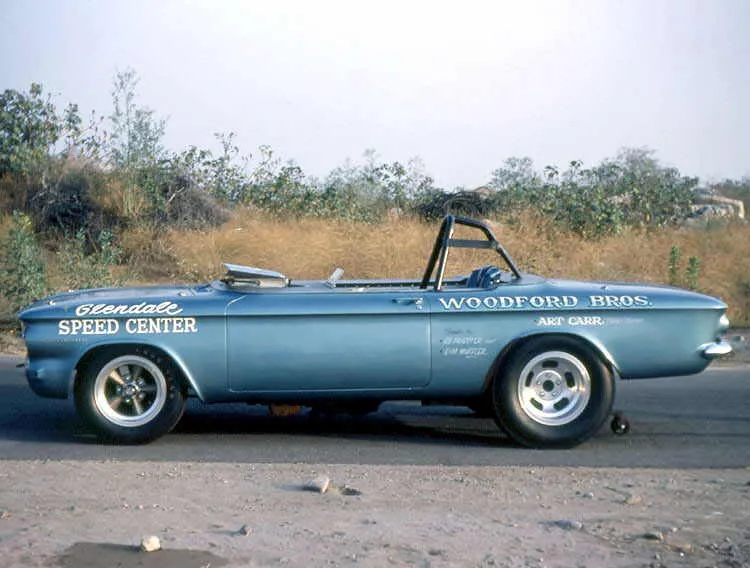
This probably doesn't fit into any actual class, it's more of a match racer. I was very inspired by a picture I saw of the Glendale Speed Center car. I tried a couple times to score an original but rough AMT convertible for this but failed. Next best thing was a reject/rough resin casting I found on ebay. Just what I needed. The chassis is from the current issue '65 Chevelle funny car. I have cut the interior tub up quite a bit to make it fit. I also cut off the front spring perches, moved them forward and shortened them as much as I could to get it lower. I also cheated some an drilled new locating holes in the springs to get the axle even more forward, but I'm not shooting for realism on this one anyway. I still needed to stretch the rear wheel openings to line up. Not sure if I'll keep them stretched or fill in the back area. Front tires are from the kit, wheels I believe are from a Little Red Wagon wheelstander with modified parts box wheel backs to really narrow the track width. Rear wheels are slightly modified from the kit, and the tires are from an AMT Model T kit.
- 39 replies
-
- 10
-

-
Thanks for all the comments everyone and for following along! Paint has had 24 hours to cure some it was time for a mock up. I'm pretty stoked with how it turned out. Now I have to wrap up all the chassis and engine stuff (mostly just paint details and a couple rear suspension items). Also need to work on the interior, it'll just be some passing form of grey tweed, not going crazy with any major modifications there. I'm going to try out some 2k clear for the first time so the body will be waiting around a while until I have enough cars to paint at once.
-
Here it is. They have less expensive smaller versions, but this is the one I could get by the weekend and I really wanted to get moving on this paint work. https://www.amazon.com/dp/B08CKSJNP3?ref=ppx_yo2ov_dt_b_fed_asin_title&th=1
-
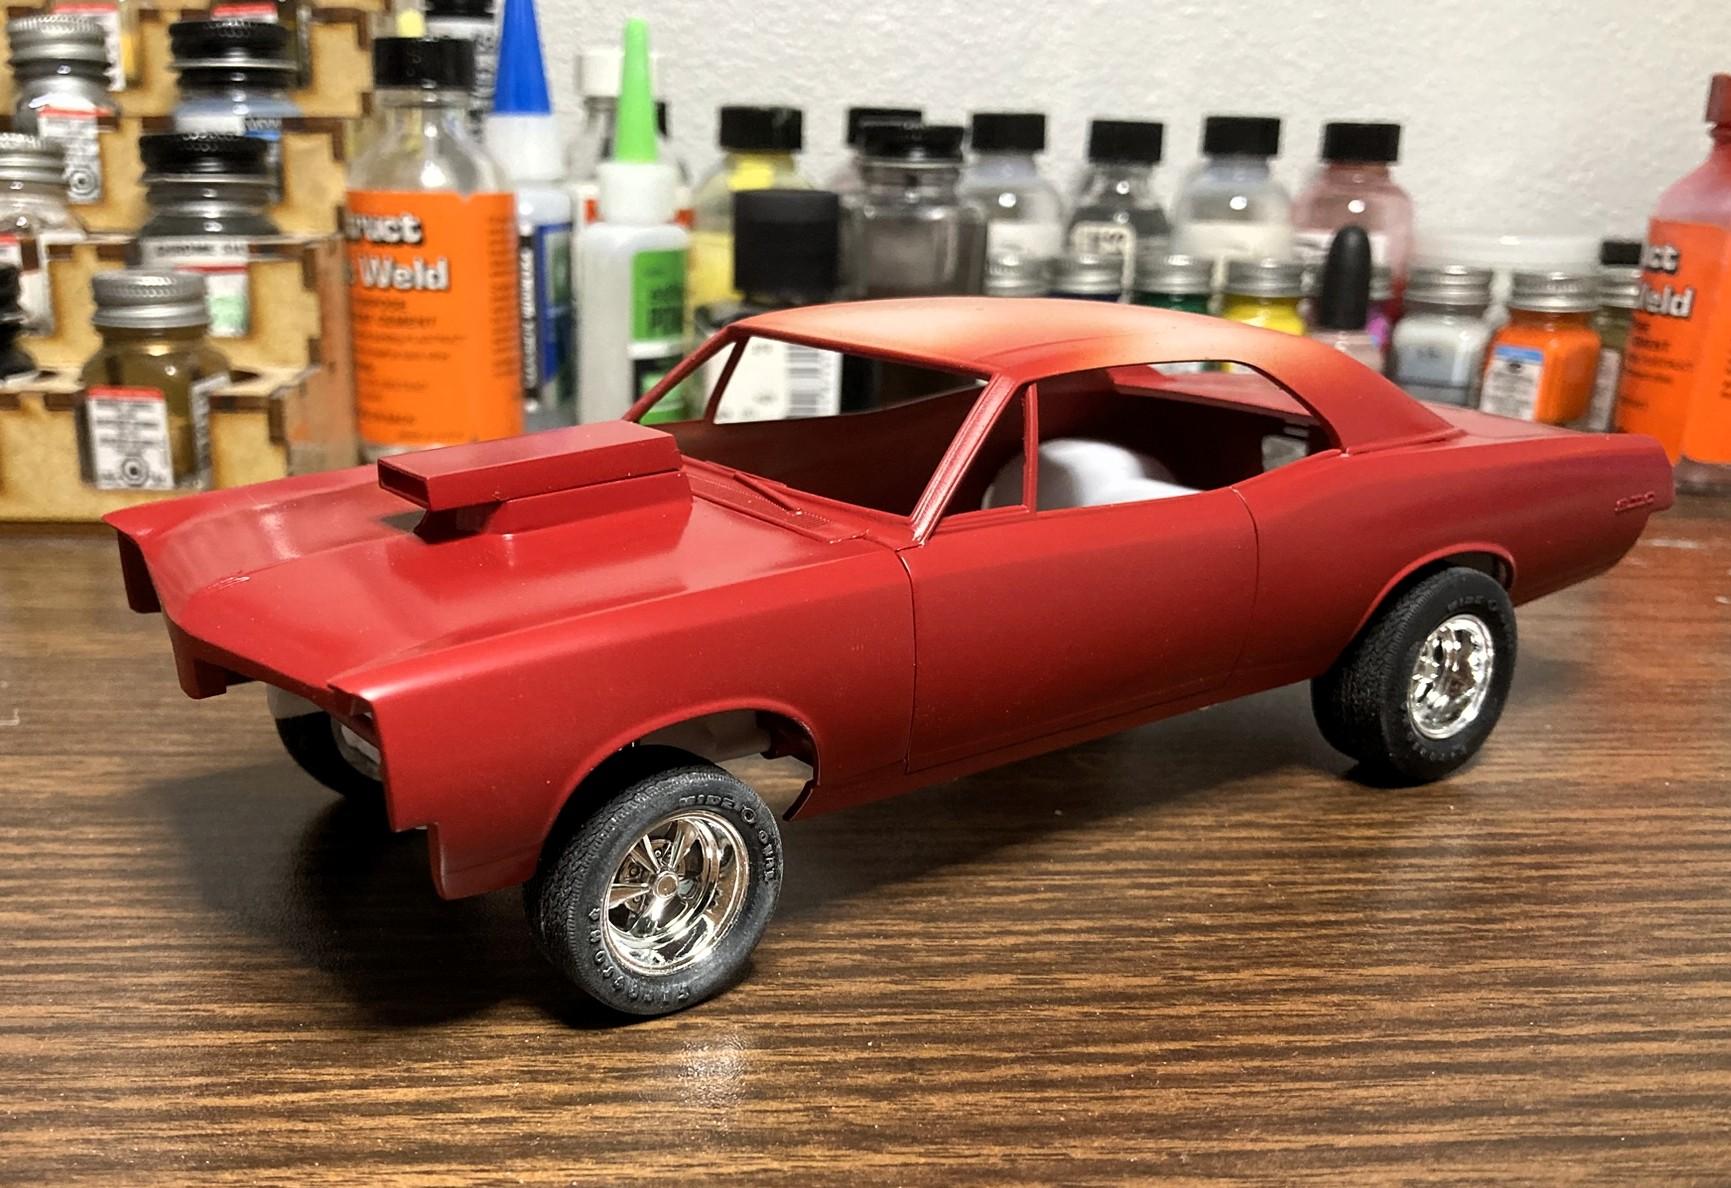
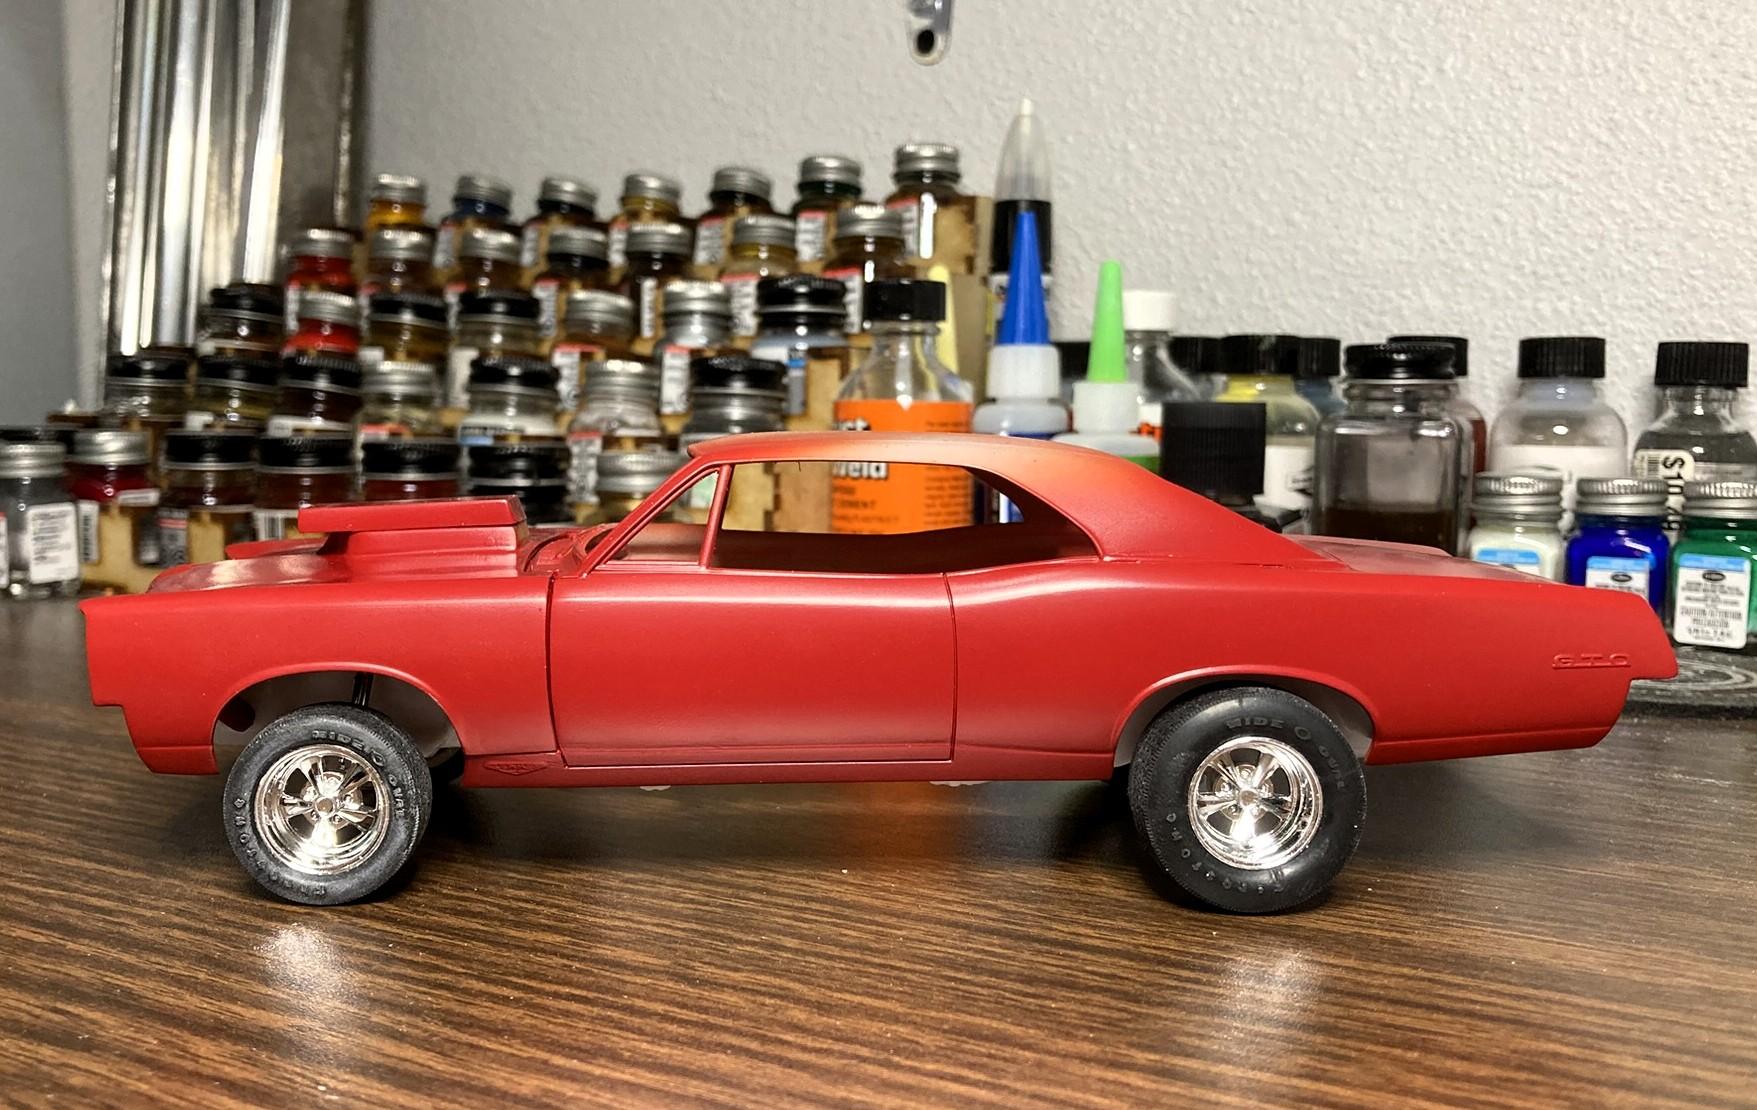
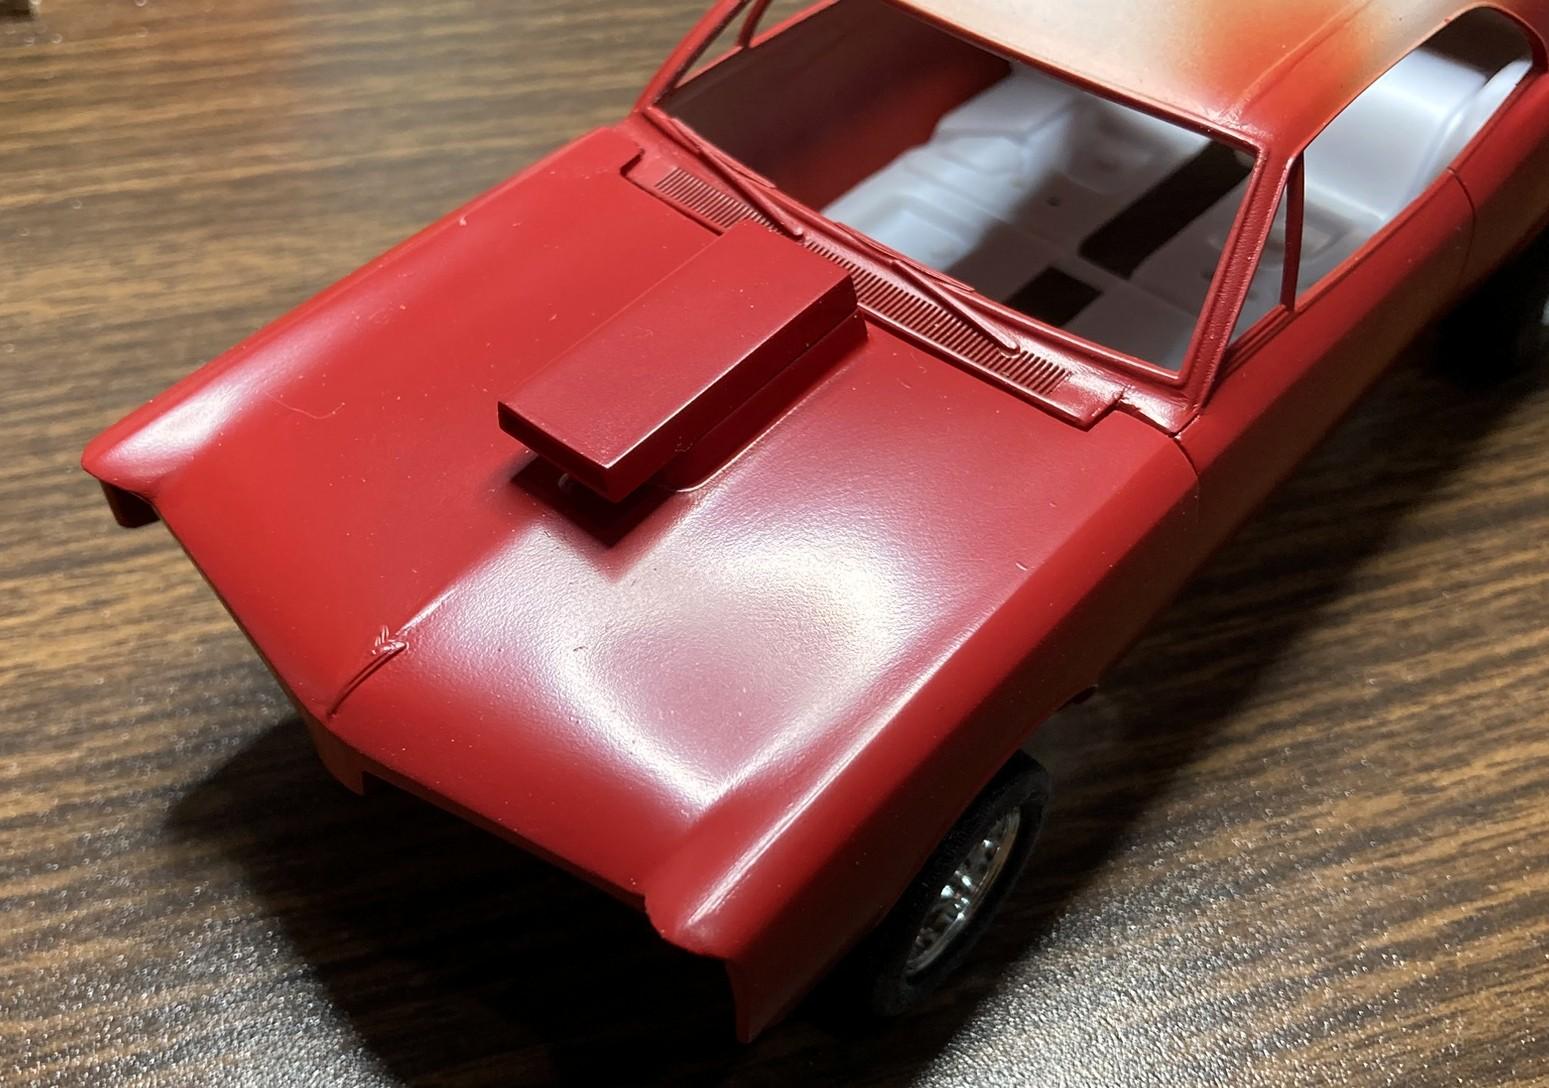
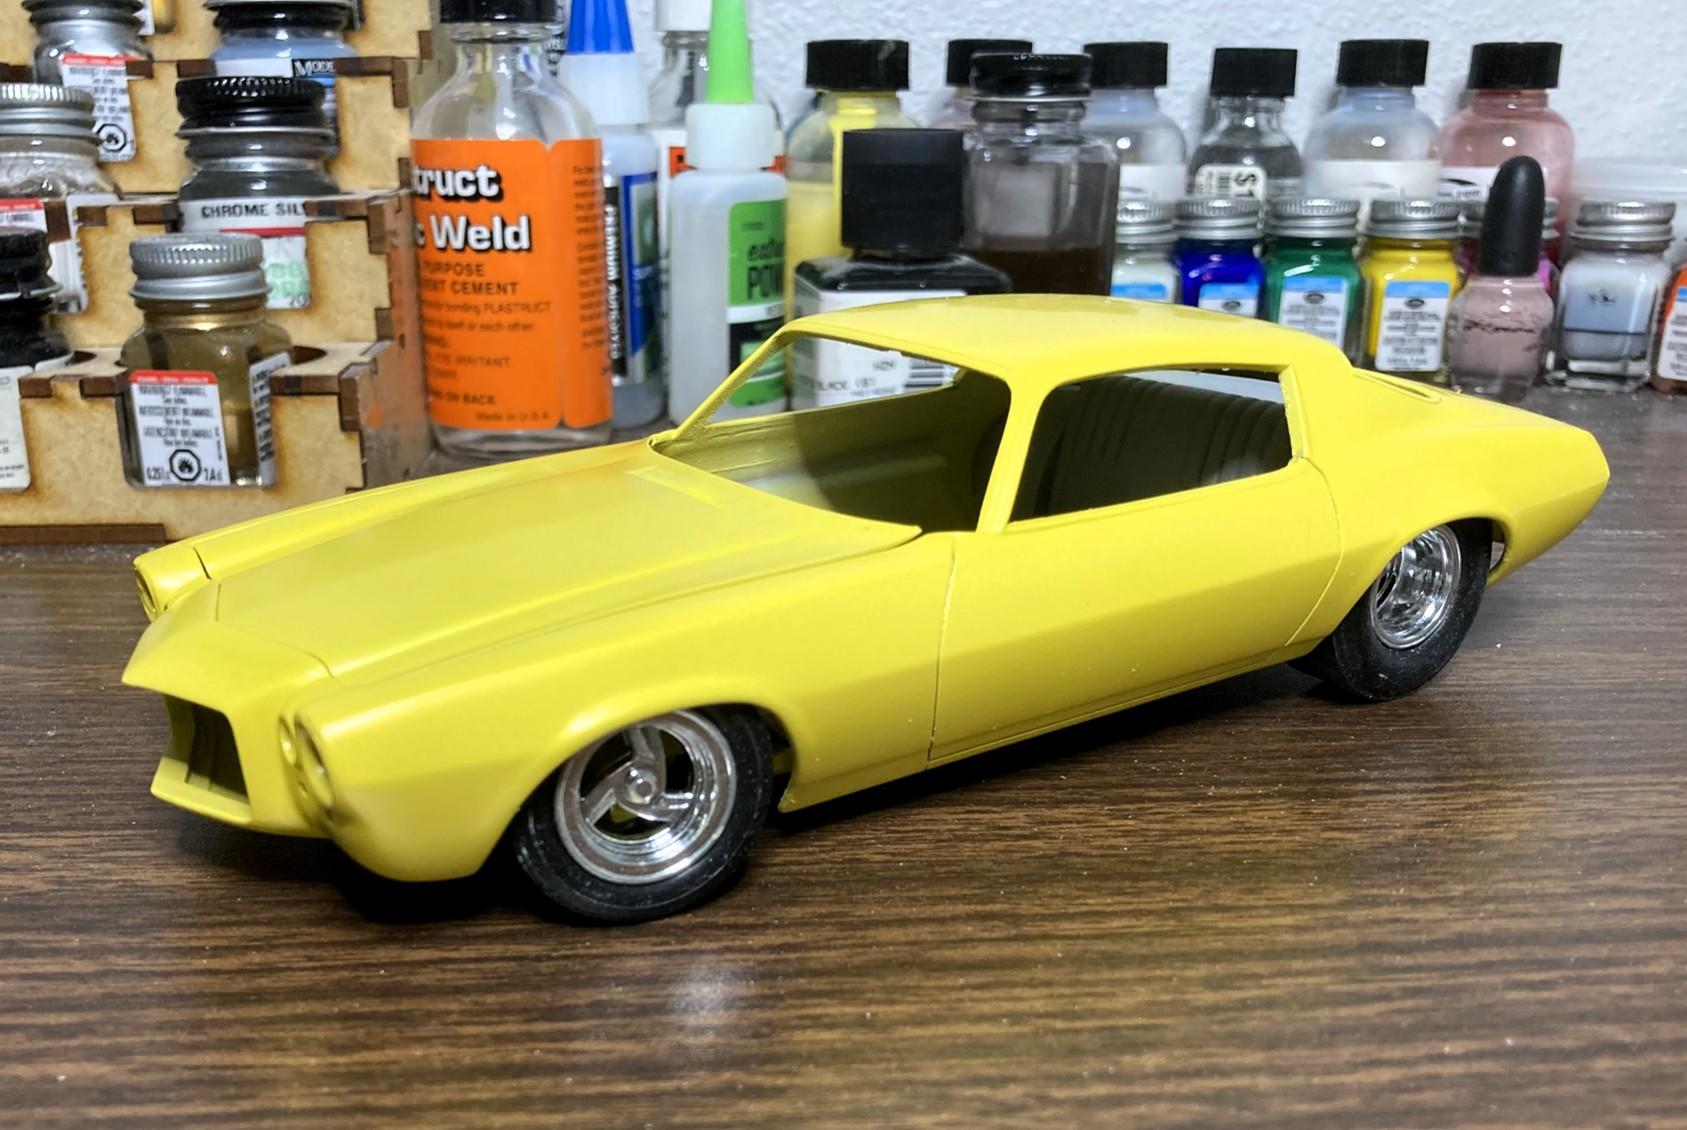
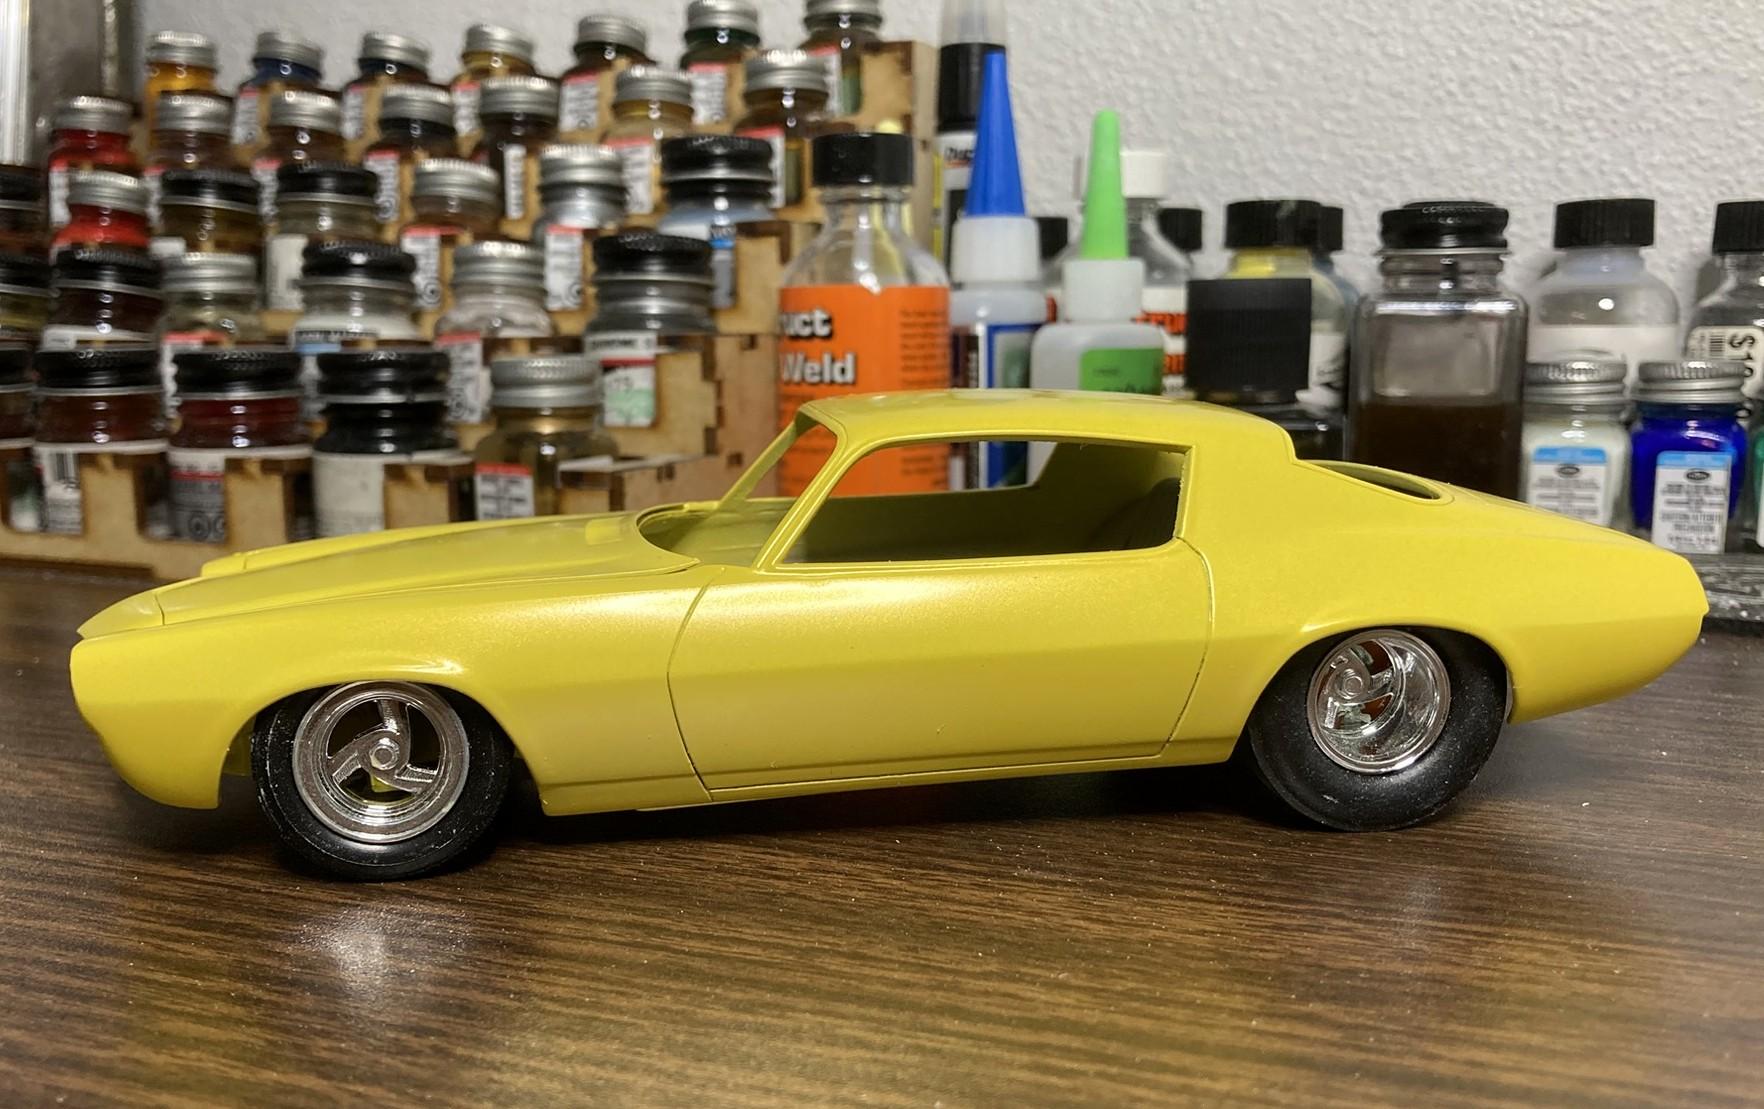
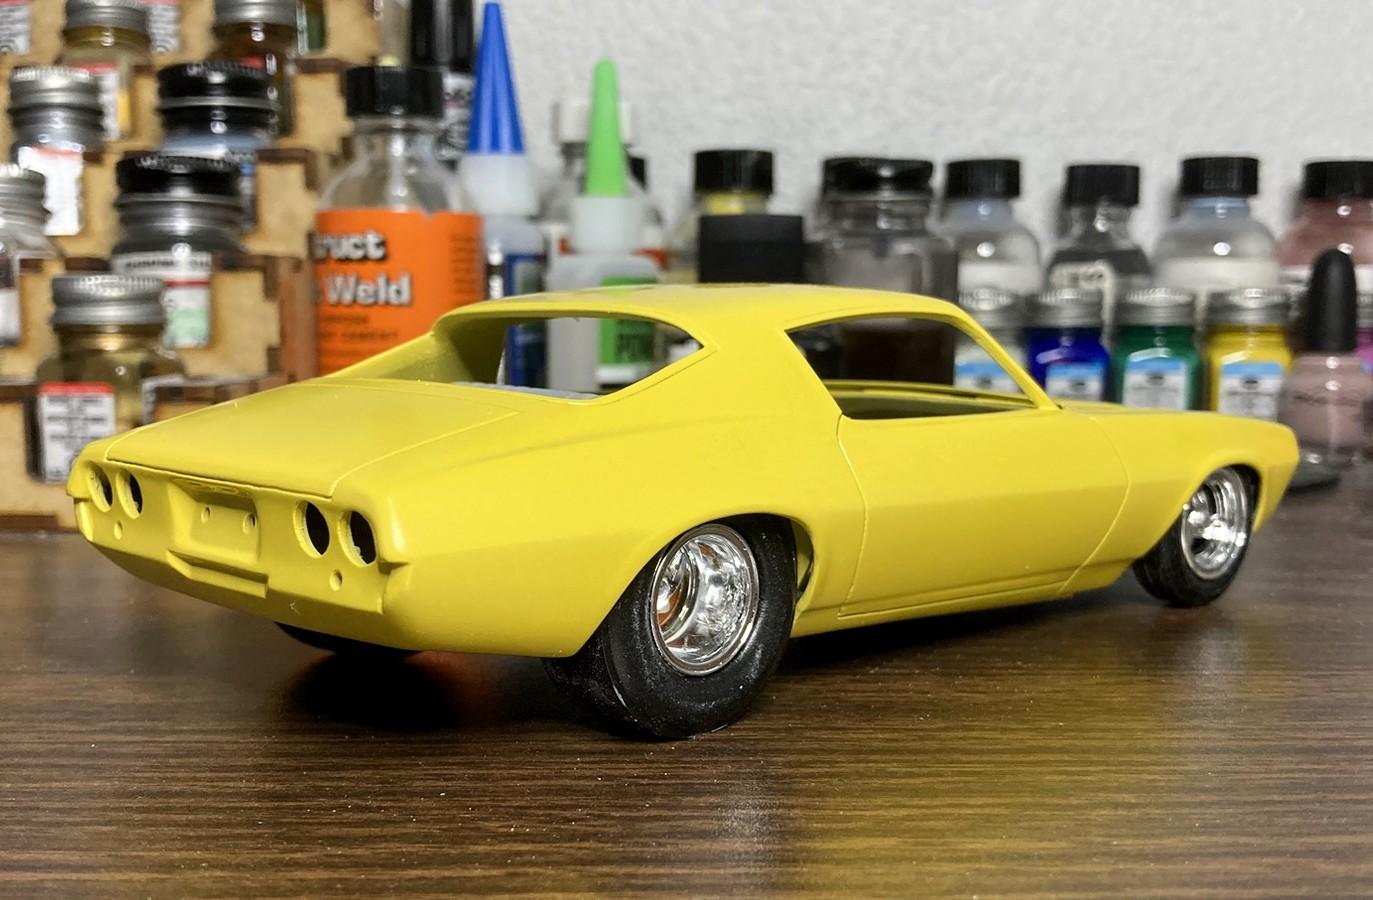
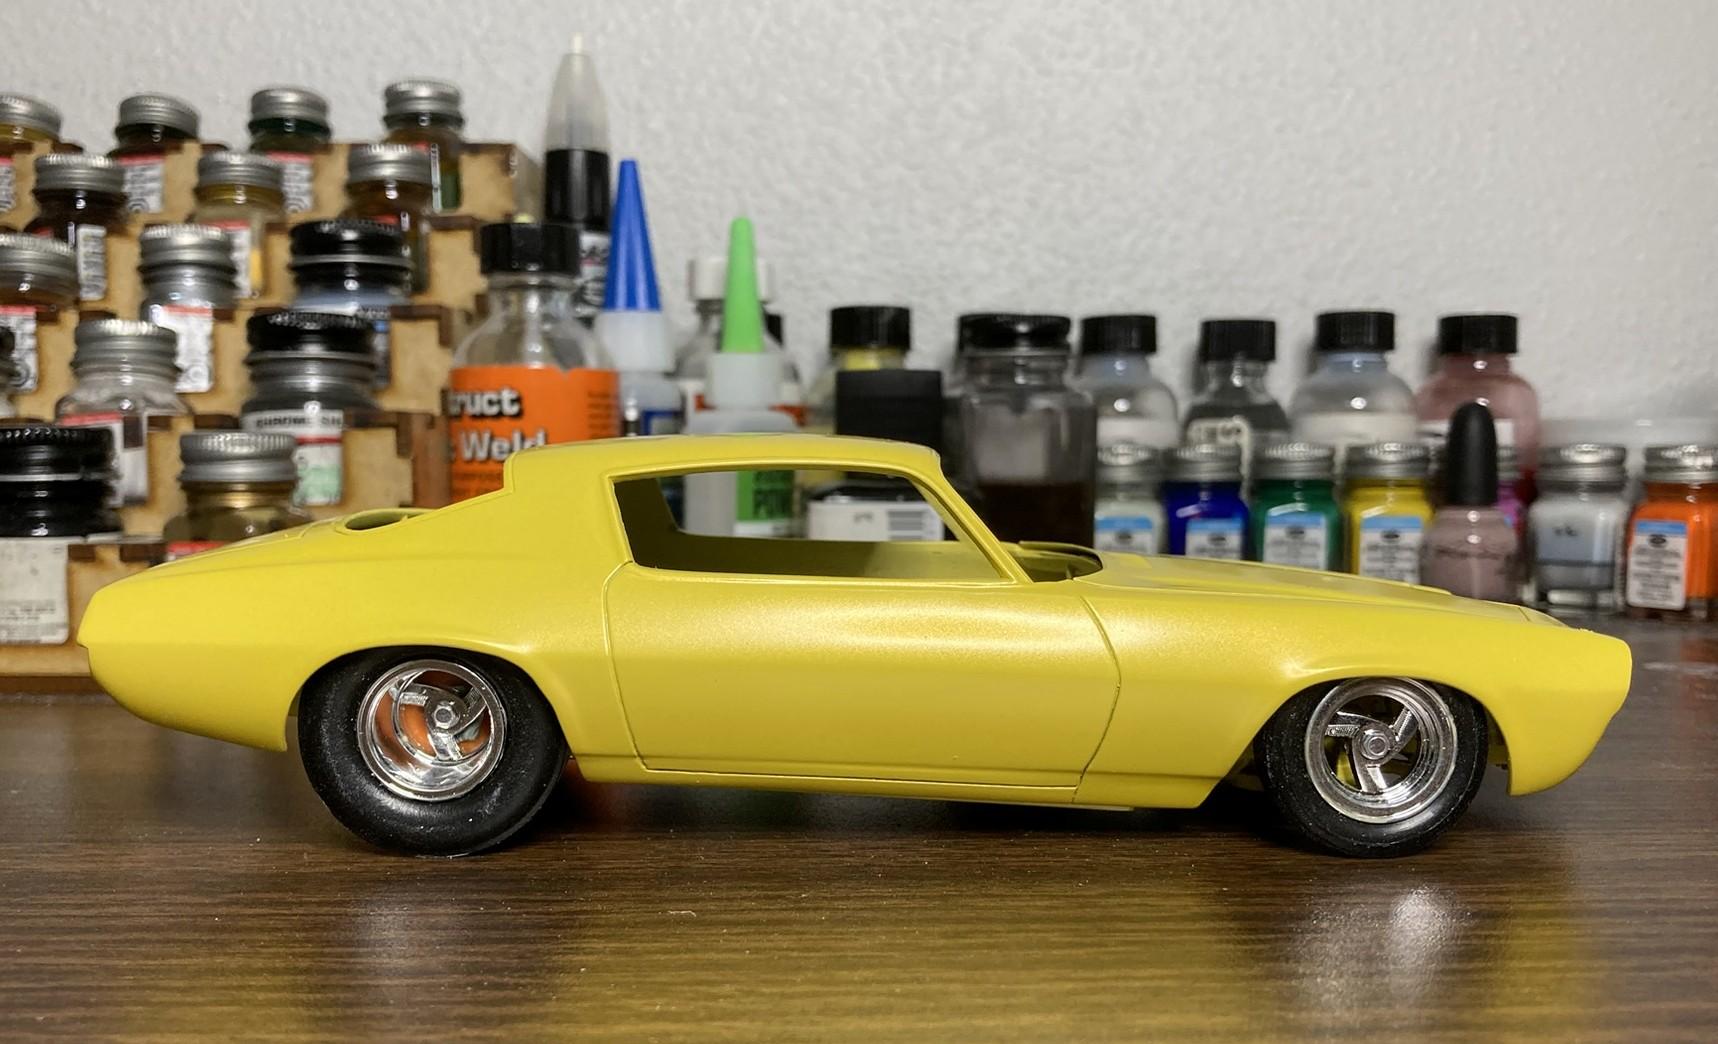
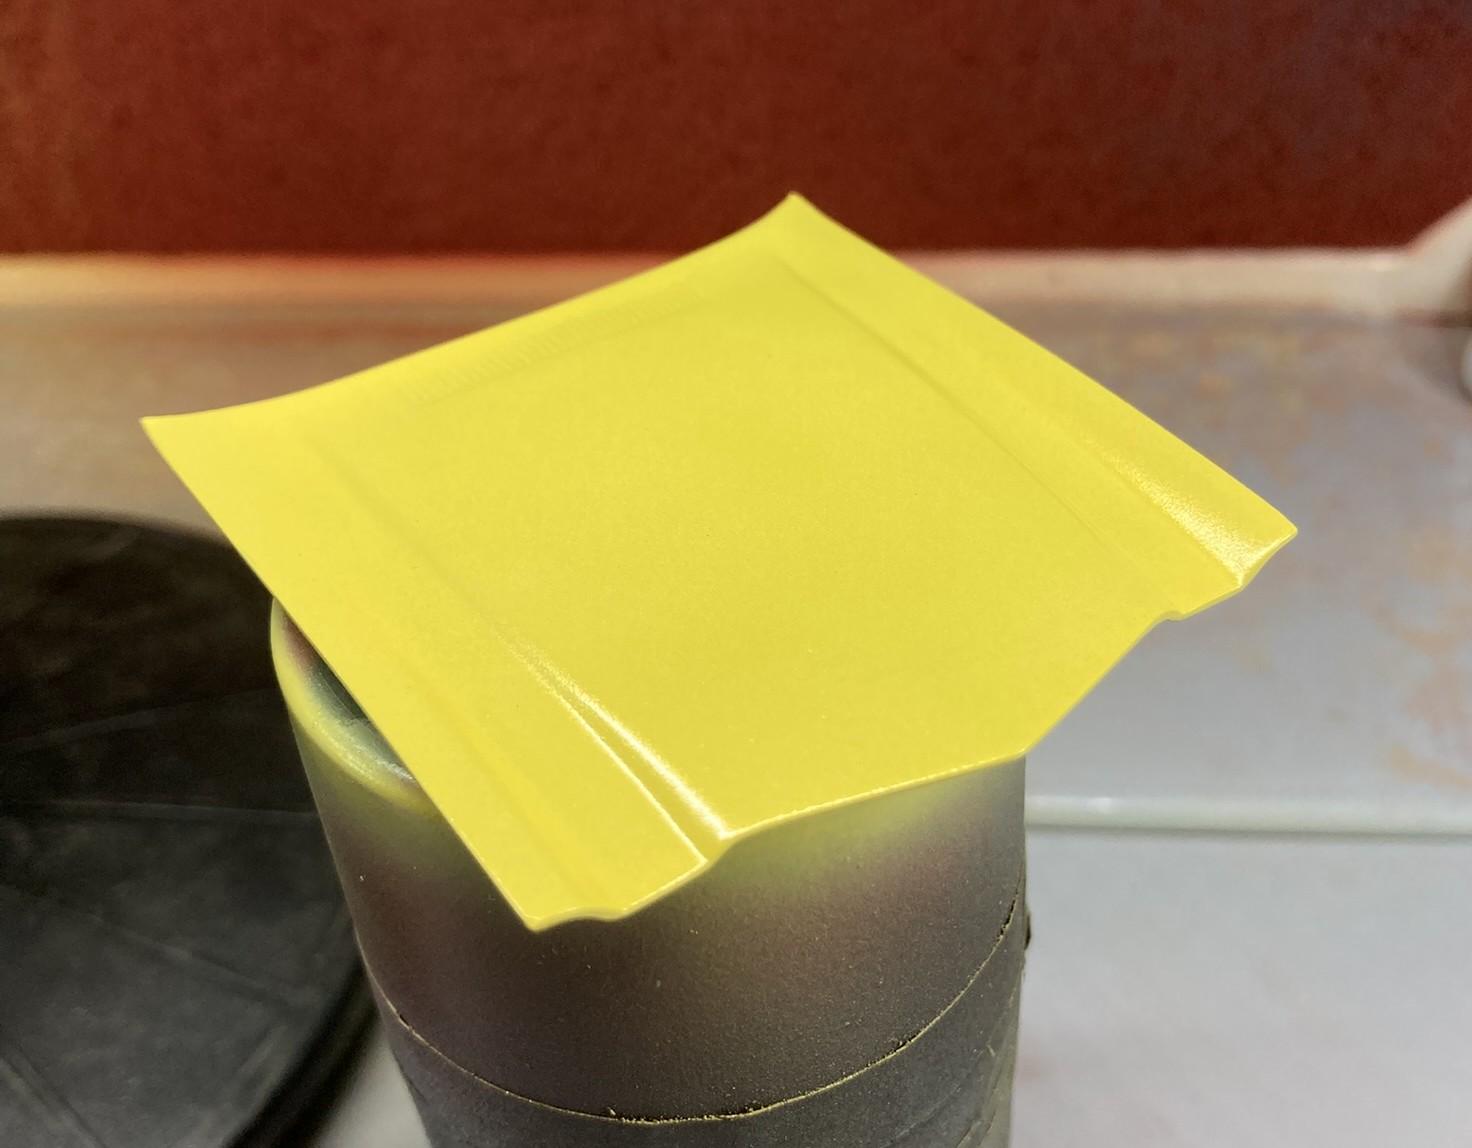
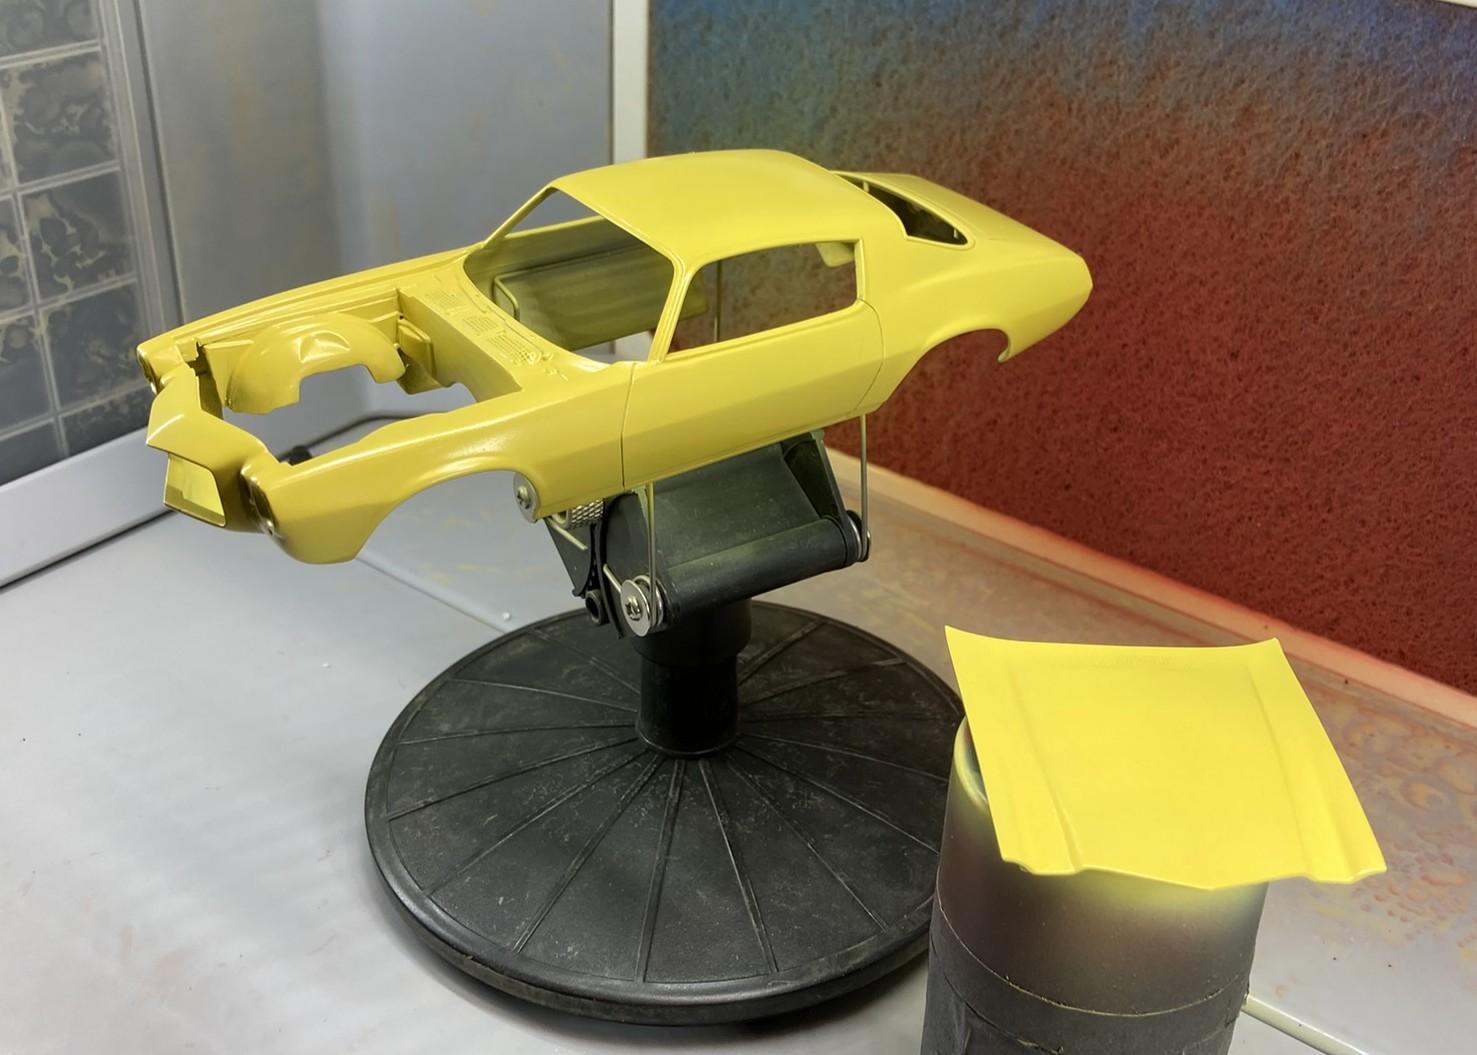
Got a pretty cool spray booth setup to help control fumes and overspray. I had much better luck painting the Camaro this morning than I did with my GTO project, but at least one of them turned out well. First I sprayed it Daytona Yellow, then yellow pearl over that though its hard to see in the pictures. Paint from Scale Finishes. It might get the lightest of color sanding to remove a small amount of trash before clear. I thought it was going to be too light of a shade, and it's still lighter than I was planning on but I do like it.
-
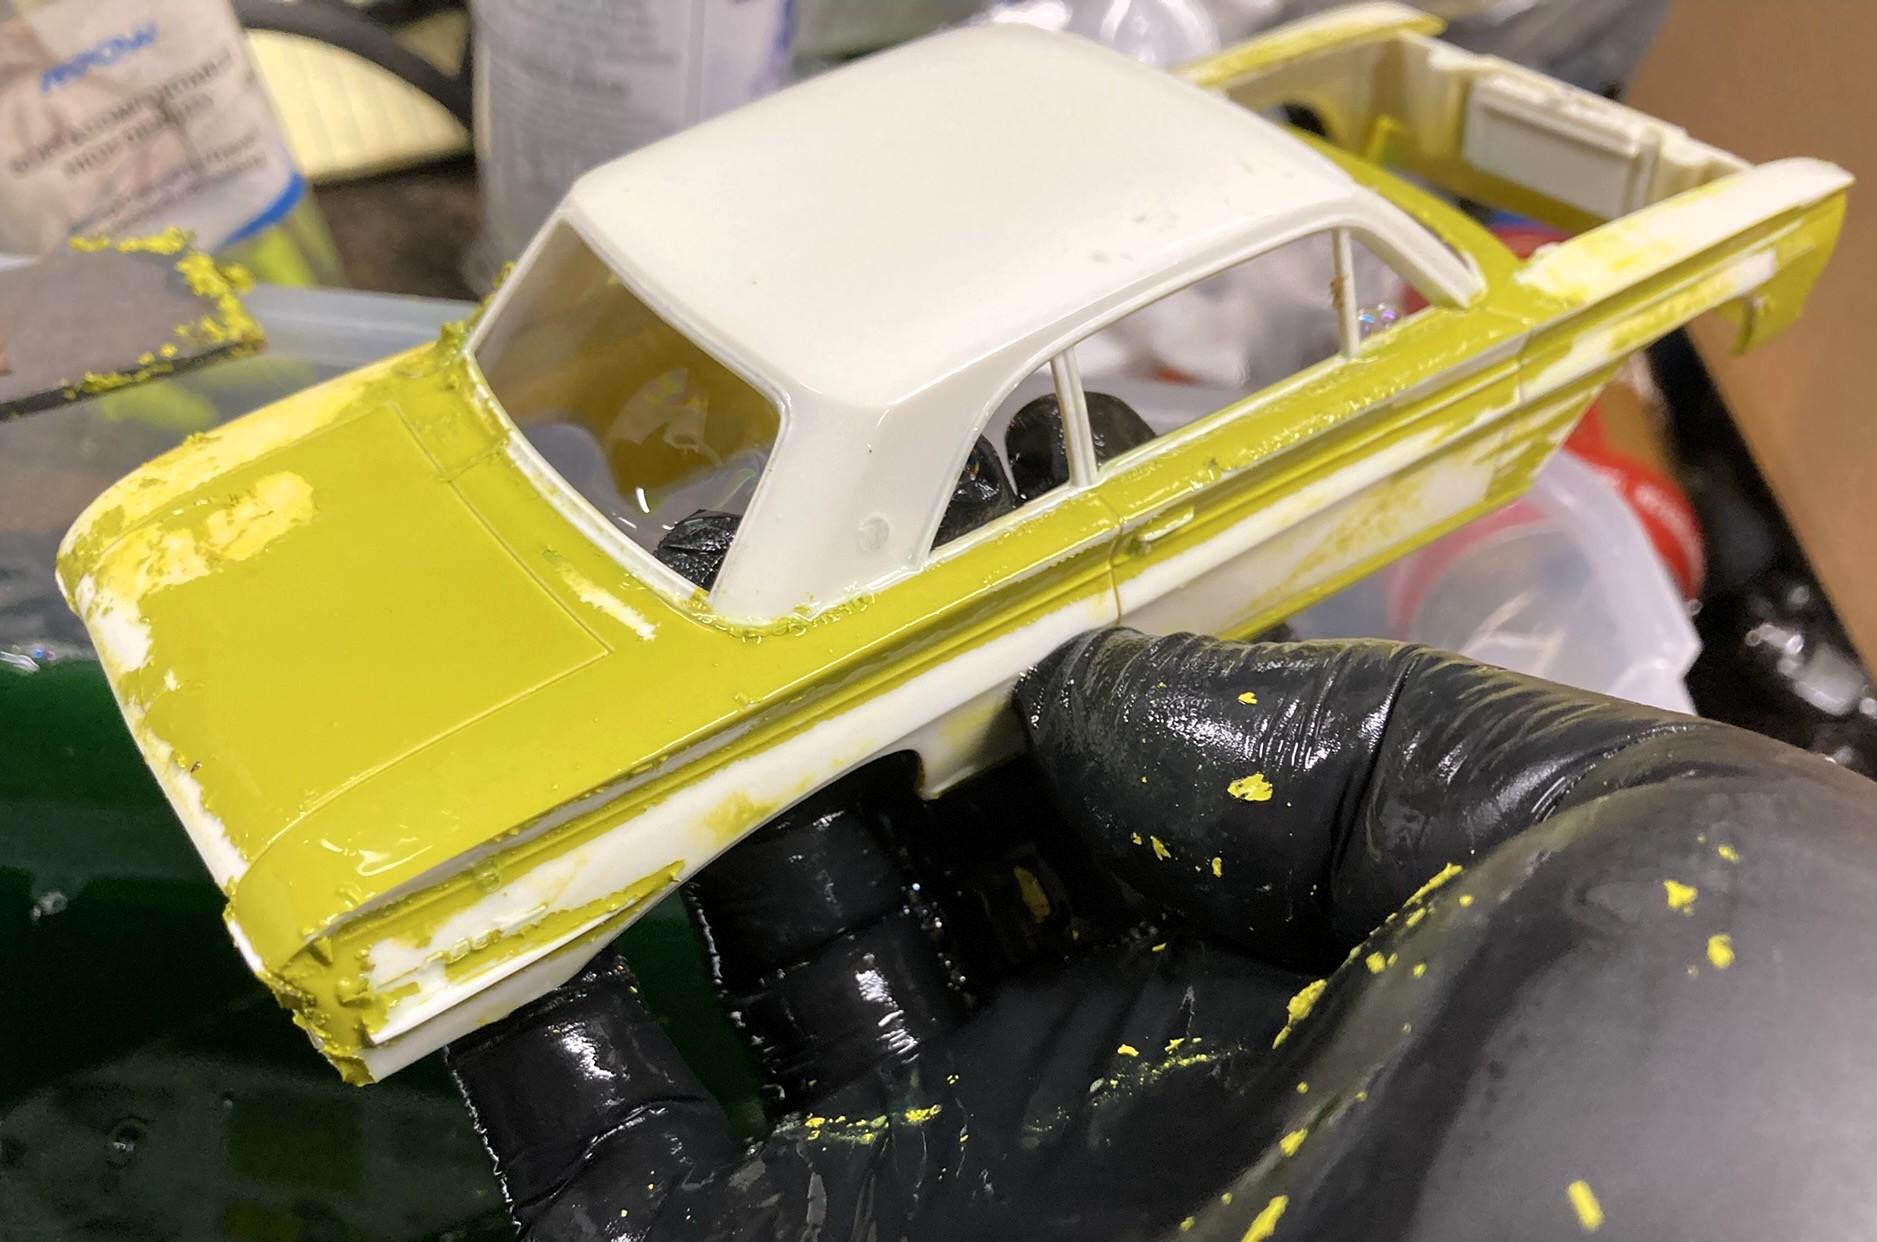
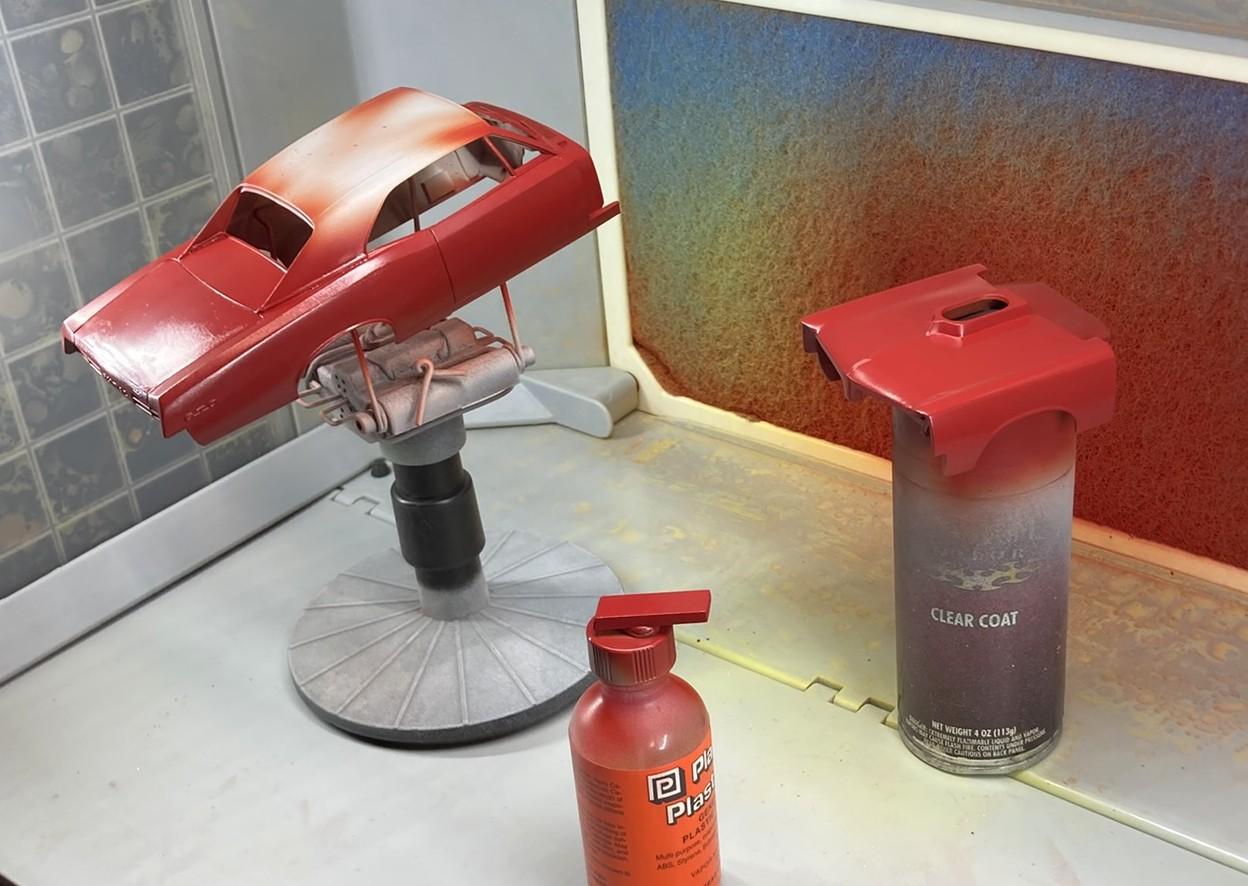
I kept doing a bunch of little nit-picky fixes on this one and was excited to get it into paint but obviously didn't spend enough time wetsanding, and then got a bunch of trash on the decklid when I painted it. I'm not operating in the cleanest environment by far, but I painted my Camaro project before this one, and laid down some pearl on it after and didn't get any of that kind of trash in it. I probably screwed up cleaning the paint jar with a paper towel and didn't get all of the lint out of it. So I'll let this cure for a while then wet sand and shoot it again. The front clip and scoop turned out decent but I'll probably reshoot them too. I got this new spray booth set up that does a great job controlling the fumes and overspray. Nice lighting too.