Zippi
-
Posts
10,696 -
Joined
-
Last visited
Content Type
Profiles
Forums
Events
Gallery
Everything posted by Zippi
-
Yup, I'm happy with it.
-
Thanks. Yup, got lucky on this one I guess.
-
Mystery solved on the gap between the dash and windshield opening. Don't know how I missed it but there was some excise material at the bottom of the windshield opening on the passengers side. Just a little sanding and it looks much better.

-
Great looking 60 Impala.
-
Well, I'm hoping for a good outcome on this one.
-
Thanks Buddy. Like my granddaddy use to say, hope for the best and expect the worst.
-
I did the best I can do with this old tooling. Yup, I'm liking the stance.
-
I'm thinking If I sand it down some and then when it's painted the dark Maroon color it won't be so noticeable.
-

1934 Ford Truck
Zippi replied to SmallRed63's topic in Model Trucks: Pickups, Vans, SUVs, Light Commercial
Super nice. I've built one and have another in my stash. -
Nice build. I like it.
-
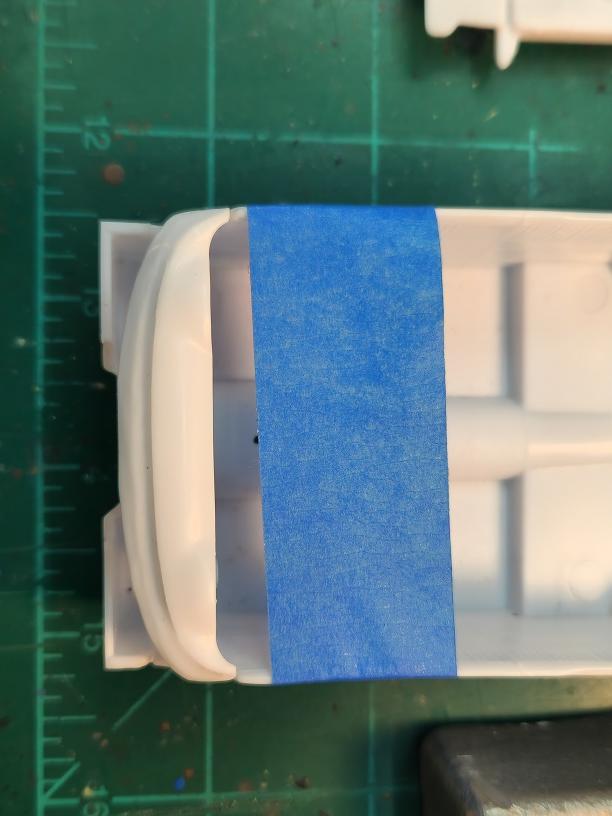
Ok fellows....I got out in the garage this morning with a game plan. I pinched the interior tub together, wrapped tape around it, and glued the dash on. I installed the glass and fit the body, chassis, and interior tub together. All three parts seem to merry together fairly good but looking through the windshield the dash is way out of location and setting at an angle. I'm going to let the glue set up on the dash and once I pull the tape off I'll trial fit it again. I then turned my attention to the tailgate. I think I have it operating pretty nice in the dry fit state. We all know that once we apply paint things change.
-
Thanks Carl. I think I need to stop buying these new releases of the old kits that are from the 60's. The tooling is totally shot. I guess I could use the chassis from the 67 Chevelle Pro Street and put some big ole meats on the back.
-
Thanks Roger. l would like to see another one just to see what is going on.
-
Thanks man.
-
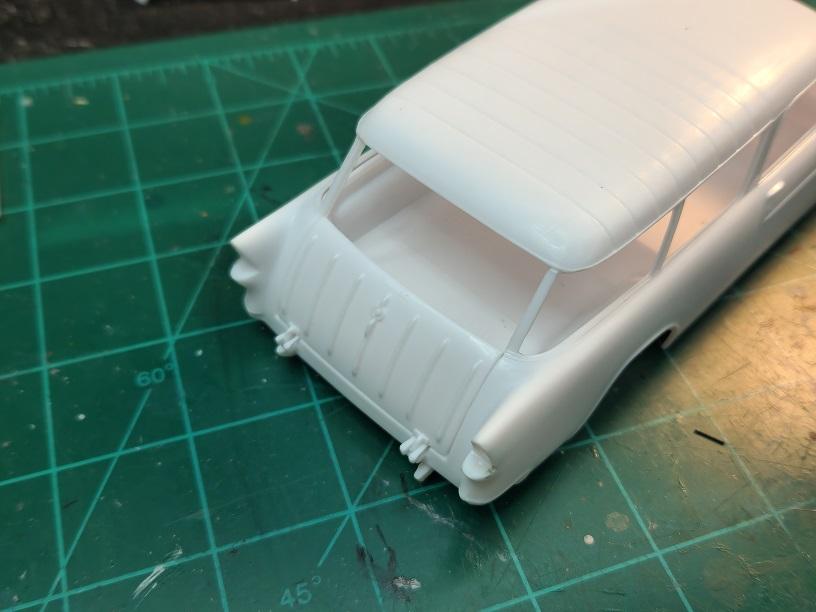
Well....this just turned into a big headache. Either the interior tube is way out of wack or the dash is wrong. If I pinch the interior tube together to get the dash to fit the door panels are WAY to far away from the body. At this point I'm at a stand still because I have nothing to work with.
-
Thanks Kyle.
-
In think I have the front end ride height set. I have the King pins set at the highest location that drops the front end to where I needed it. All I had to do is install some inserts in the wheels and I'm good to go. I'm not sure if I like the ride height or not.
-
👍
-
You know what, I think your right Roger.
-
Much appreciated Hector. The hood turned out to look pretty kewl on this build. That candy color paint was hard to get a uniform coverage. For me at least.
-
Nicely done man. I build a replica of my Buddy's 32 Ford Roadster and the look on his face when I gave it to him was priceless.
-
65 Chevy Shorty Sedan Delivery
Zippi replied to Rocking Rodney Rat's topic in WIP: Drag Racing Models
That is looking bad to the bone. That would be fun down the 1/4 mile. -
On yeah, I'm liking the stance on this one. Nicely done on the tach and taillights. I love the color of the carbs. What color and brand paint is that?
-
Yup, I thought this was going to just be a simple kit this time around but major mods needed.
-
Killer looking Coronet. The detailing looks nice and clean. Super looking Build.