Pierre Rivard
-
Posts
2,579 -
Joined
-
Last visited
Content Type
Profiles
Forums
Events
Gallery
Everything posted by Pierre Rivard
-
Bentley Blower4.5 liter Les Mans 1930.....Kit Airfix 1/12 scale
Pierre Rivard replied to louis Carabott's topic in Model Cars
Fabulous build Louis. Your detailing and finishes never cease to amaze me. Inspirational. -
Thank you Misha. The kit needed a lot of finessing and deciding to go to a matte finish + race weathering has given it a nice period feel. Definitely a technique I will want to try again.
-
The MGB looks fabulous Misha. The mix of colors and finishes applied to the interior makes it feel so real. For the stripe have you considered mixing some reds and doing a delicate touch up with a fine brush?
-
Thanks Ace, something else I missed. It explains why my window opening trim rests at an angle coming to the back end of the door. Fixing it would require to re-do the trim pieces. Not sure if I want to tackle this but I will try to smooth out the transition to make it less visible. Matt, thanks for pointing that out, I think I can reduce that effect although the amount of material left is rather thin.
-
Always so cool to see AND HEAR these 2 beauties driven the way they were designed to.
-
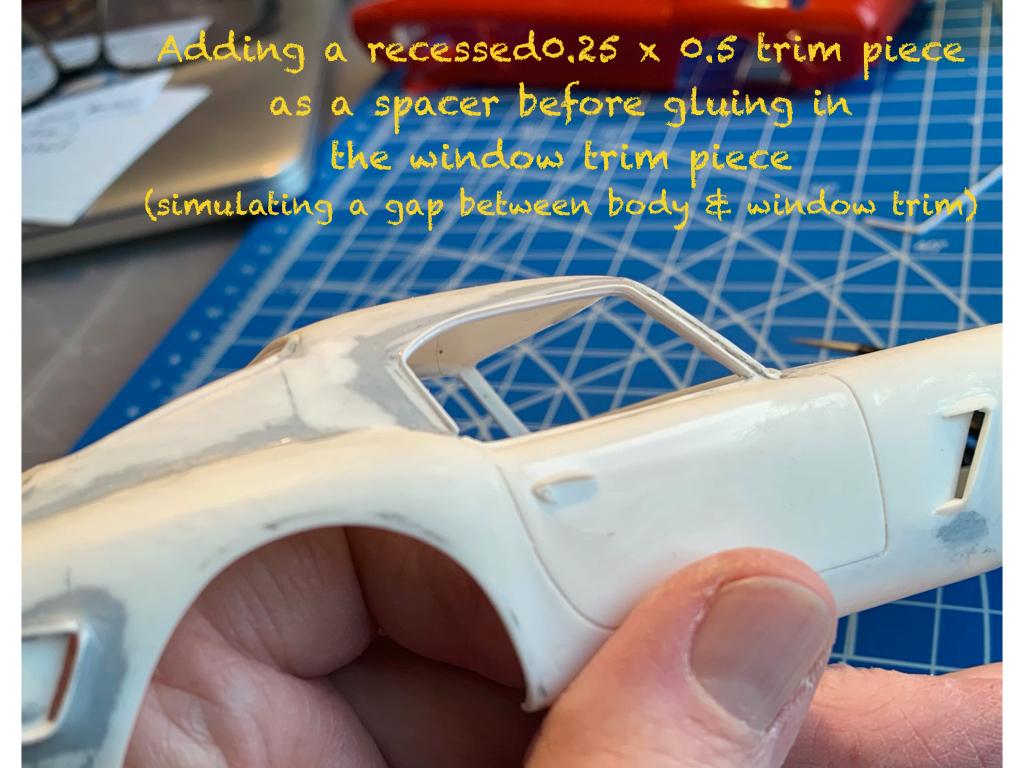
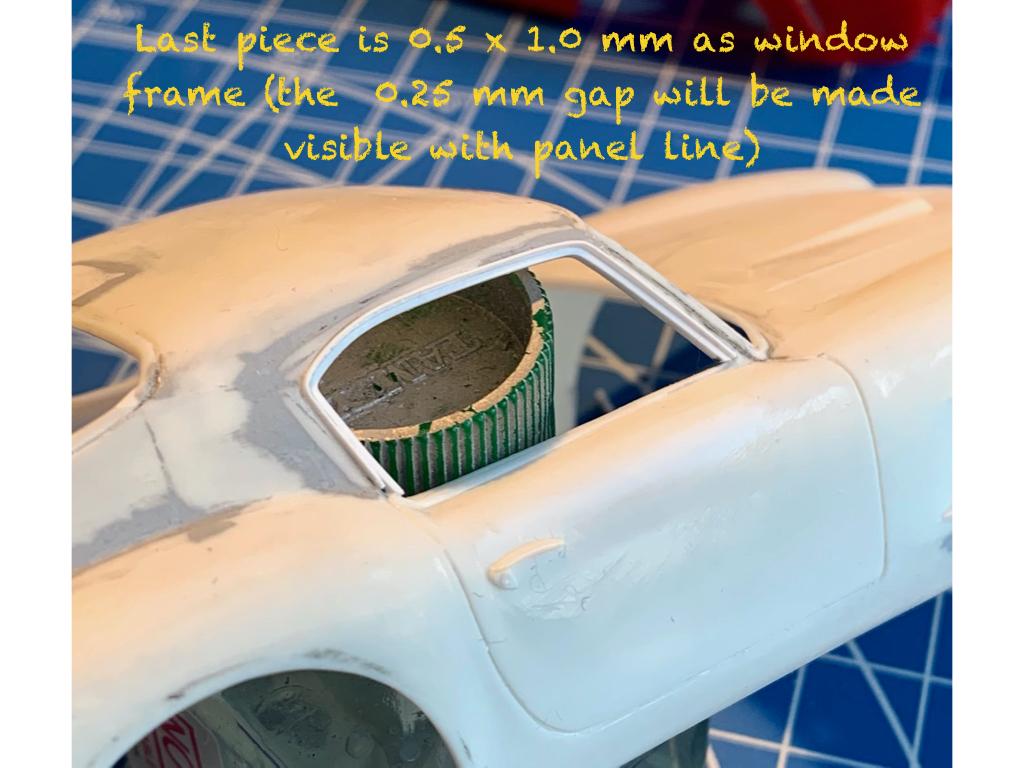
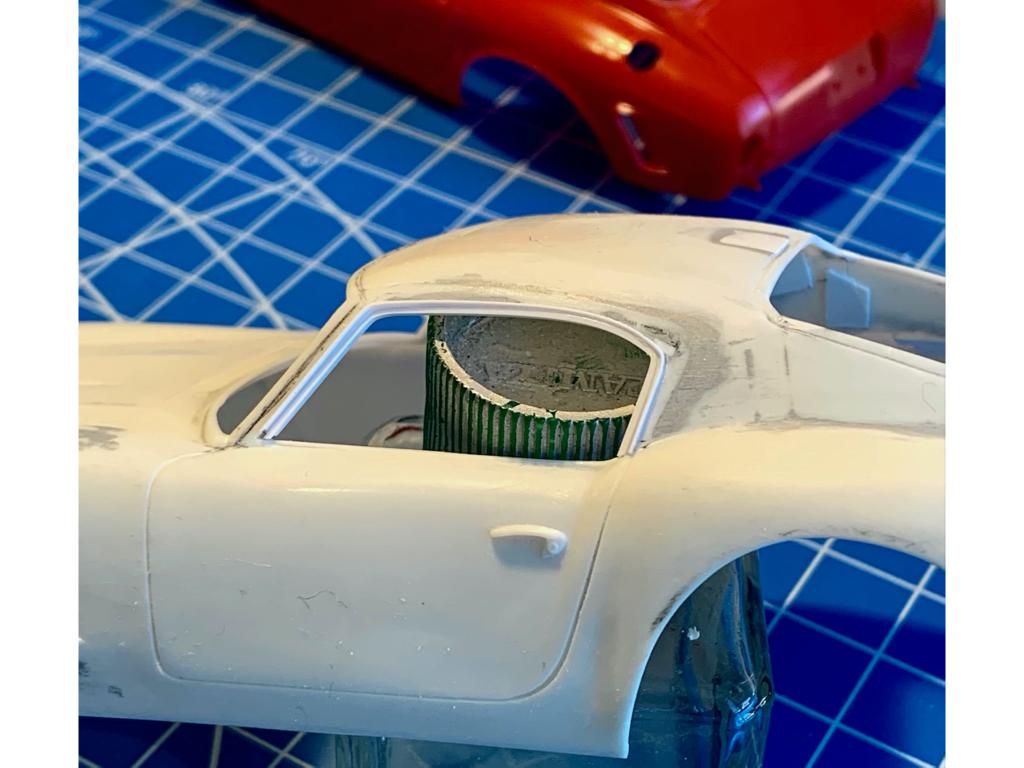
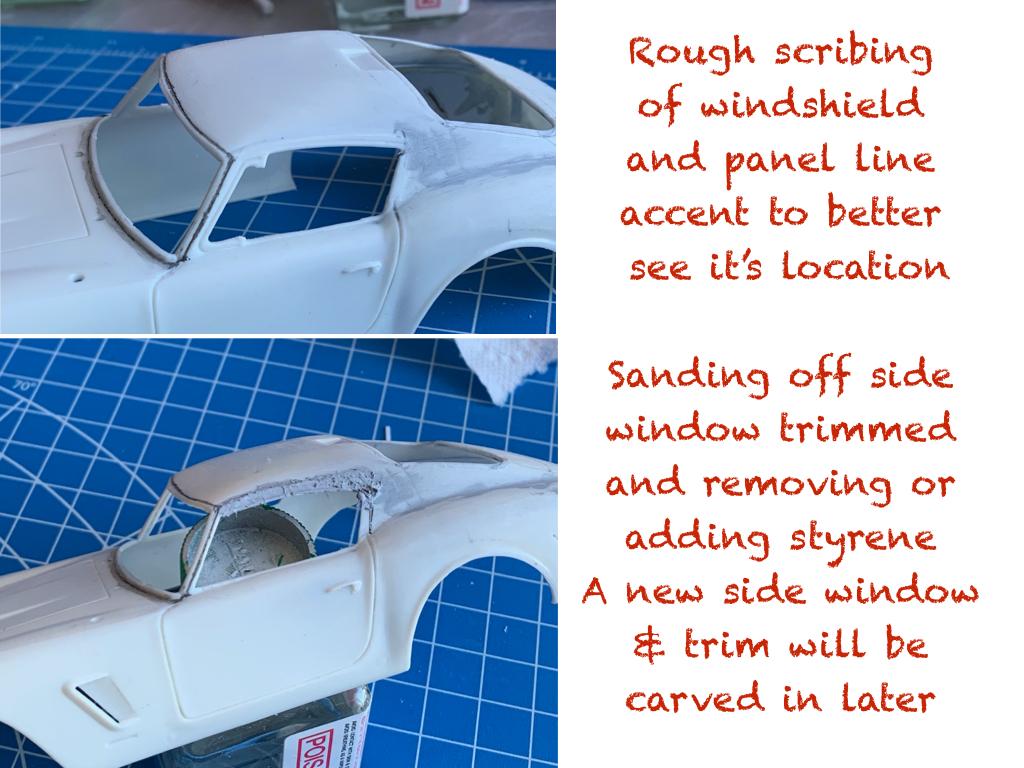
Side glass trim... while I am pondering on a front grille solution.

-
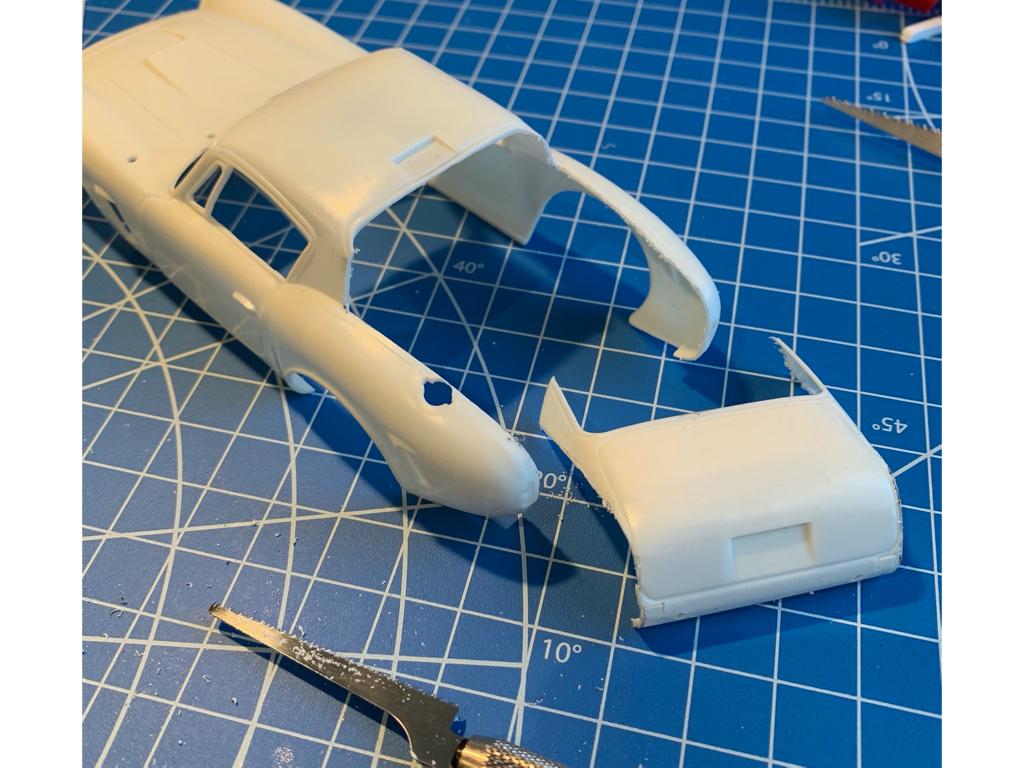
Definitely more than I expected, but getting closer. Looking forward to a first coat of primer which should help me better see if the transformation has been worth the effort.
-
Thanks Helmut. I agree, the ESCI/AMT grille should be a better starting point but will still need some work. Oh well, add that to the growing list...
-
Comstock Ford GT40 MKI
Pierre Rivard replied to Phildaupho's topic in WIP: Other Racing: Road Racing, Land Speed Racers
Project is looking really good. A great one to follow, thanks for sharing. -
I look forward to seeing this one come together. By looking at your comfy work station you should be able to put in long hours on this project.
-
2017 Ford GT GTE
Pierre Rivard replied to Chris Smith's topic in Other Racing: Road Racing, Salt Flat Racers
Just thinking how I would do such a paint job... where's my defibrilator? Another seriously gorgeous build from your very productive factory. -
Thanks fellows, plucking along...
-
I haven't touched the nose yet. As I kept chasing info on these I noticed the front openings were not identical on all of these. When I settle on the specific race car I want to replicate I will work the front end.
-
Yes I do. I got sucked into something more complicated than I thought it would be. At this stage pride has taken over sanity...?
-
3rd gen Camaro
Pierre Rivard replied to MarkJ's topic in WIP: Other Racing: Road Racing, Land Speed Racers
We all do it sometimes, going a bit too deep into making one part...but that seat will look very good. Definition of a pastime. ? -
1/8 scale 79 Ferrari T4
Pierre Rivard replied to Chris Smith's topic in Other Racing: Road Racing, Salt Flat Racers
Another incredible (and big!) build from your bench Chris. The T4 was a weirdly, beautiful, flat 12 ground effect (?) car and your build captures it's vive so beautifully. I was lucky to be on site in Canada when Gilles captured his maiden win and was looking forward to the 79 season. And what a season it was. Laffite (Ligier) winning the first 2, then Ferrari coming strong, then Jabouille's first win for a turbo (Renault) while Gilles and René took the show with their epic battle for third, and then the emergence of Williams and Jones taking 4 wins in the last 6 races. Thank you Chris for taking us down to memory lane with your wonderful build -
The chase continues. Now working on smaller stuff that takes... more time.
-
Hi Tom, please feel free to post pictures of it here. always good to have more visuals. I'm just having fun here with a basket case kit so precise measurements would be beyond what I can use. Assuming you are talking about the original chassis 2001 GT that raced as #16?
-
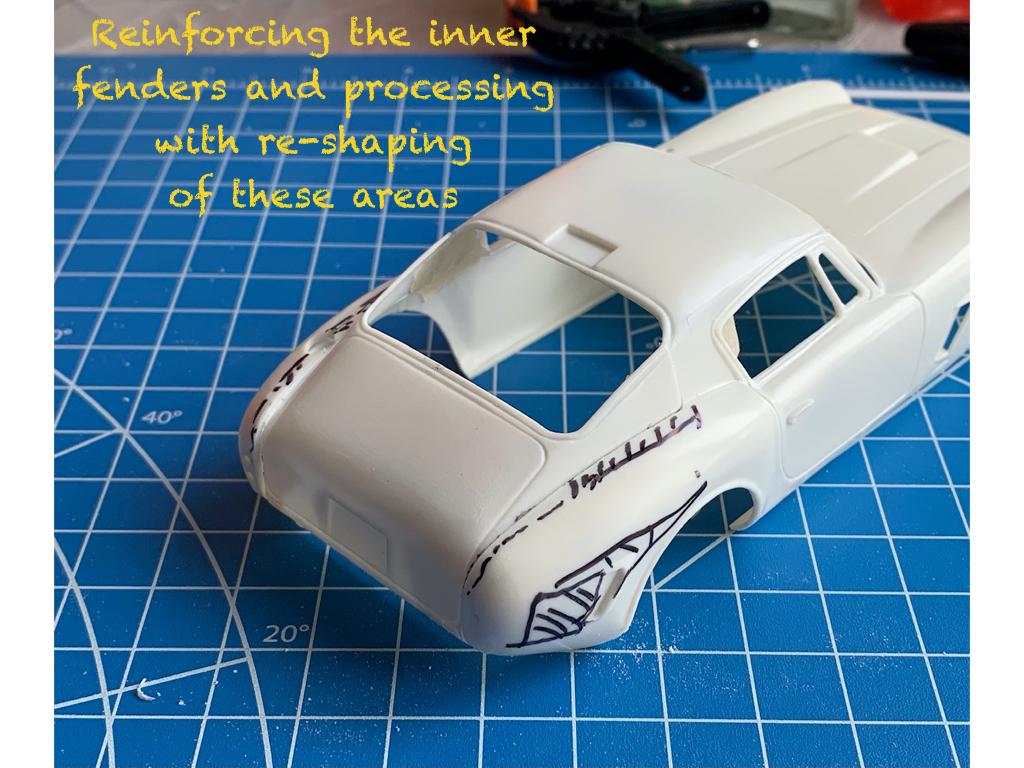
Un-detail a model? NO!
-
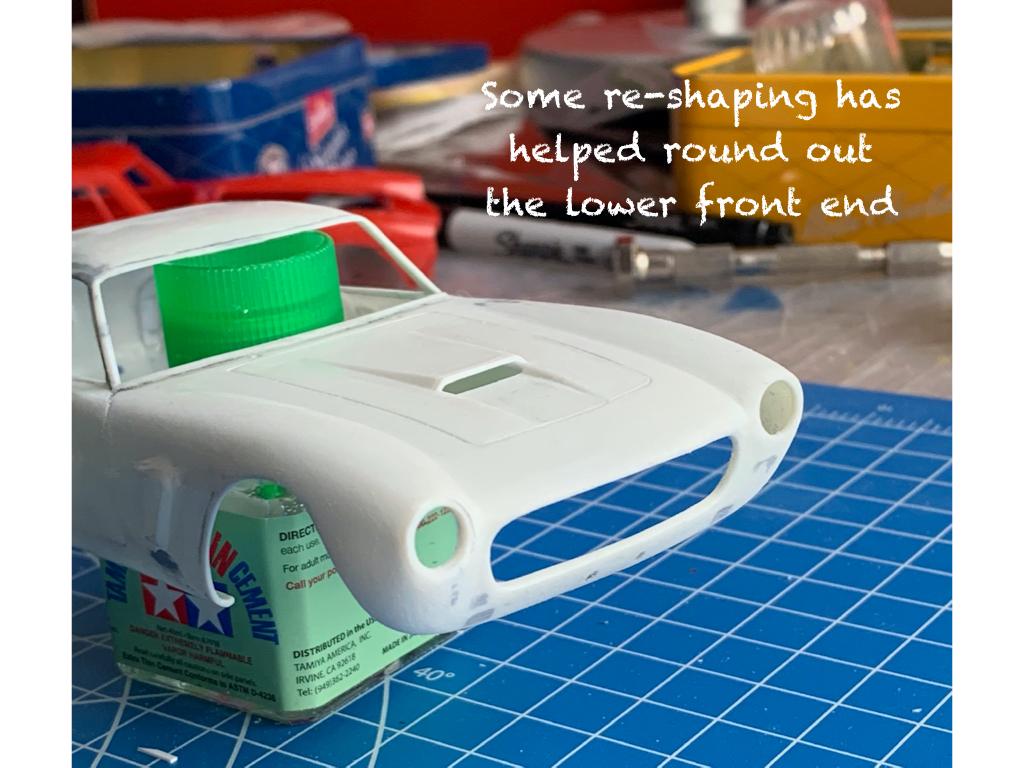
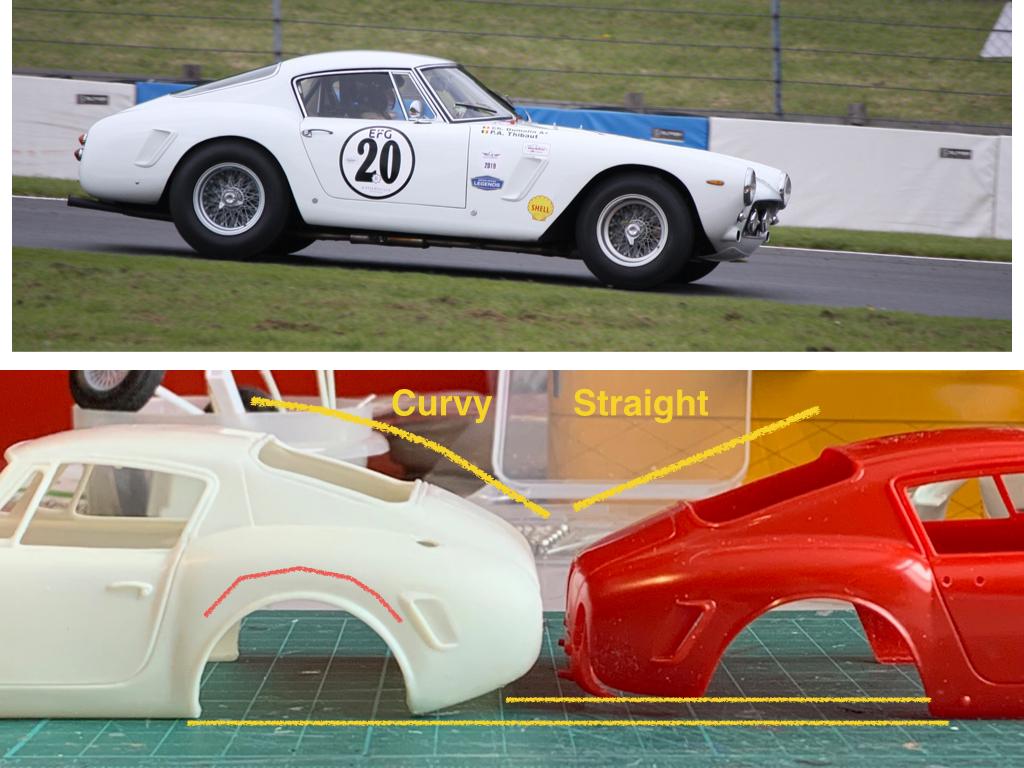
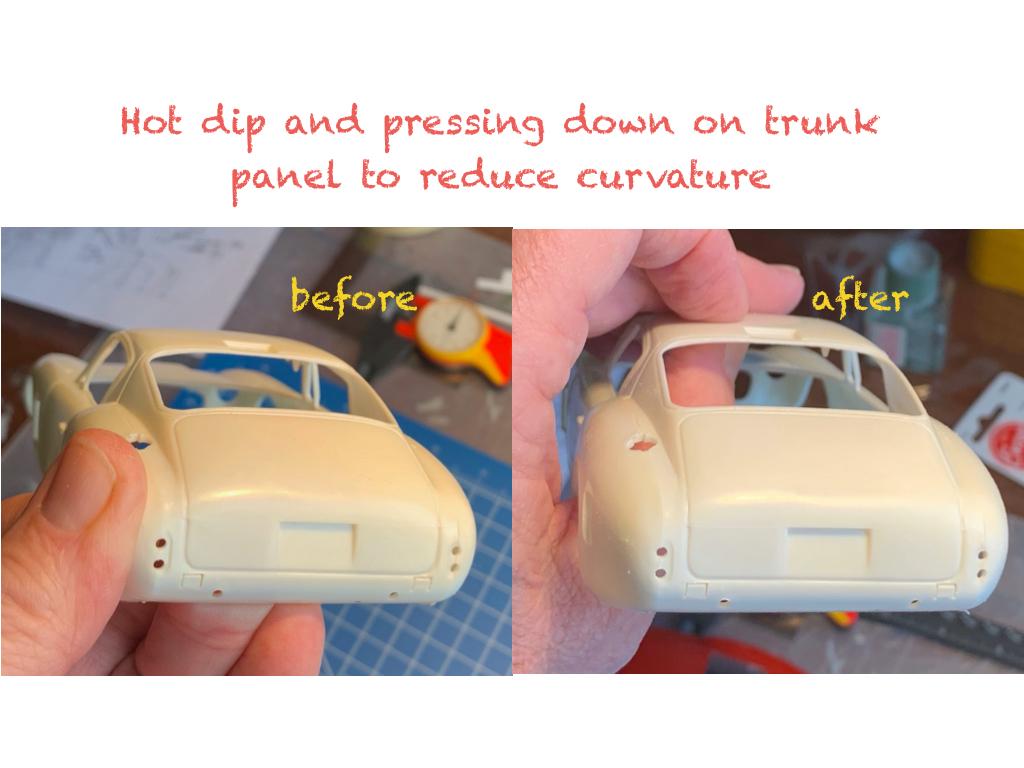
Well... the curve of the front fenders on the AMT kit is... shall we say a lesser problem than the curve of the rear fenders? The whole back end looks like a brazilian butt lift gone bad, very bad! Oh oh... I feel the censors coming in...
-
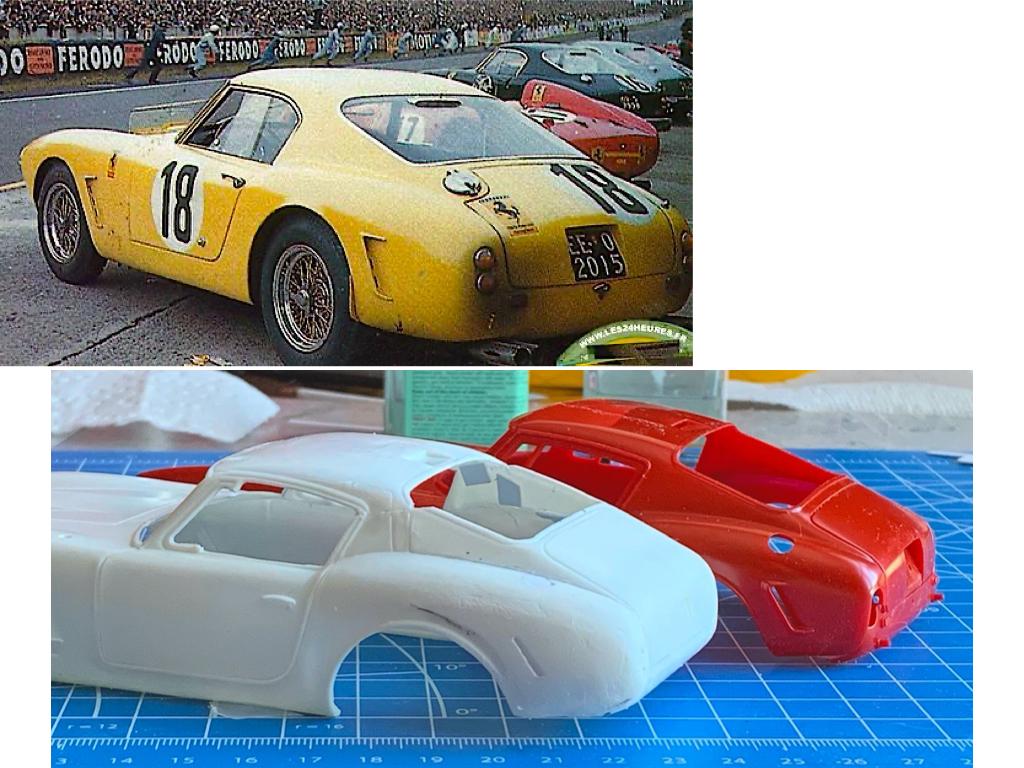
Thank you all for the interest in this project. Great pictures Andy, they help... and man what a beautiful car it is. Can body lines be more elegant than that? Mark, not taking a break from the 300 SLR... just a little diversion. Ace, thanks for the advice, trying to absorb and apply it as best I can. Phil, the under-pinnings on this kit are actually pretty good, but the body needs a lot of help. More so than I initially estimated.
-
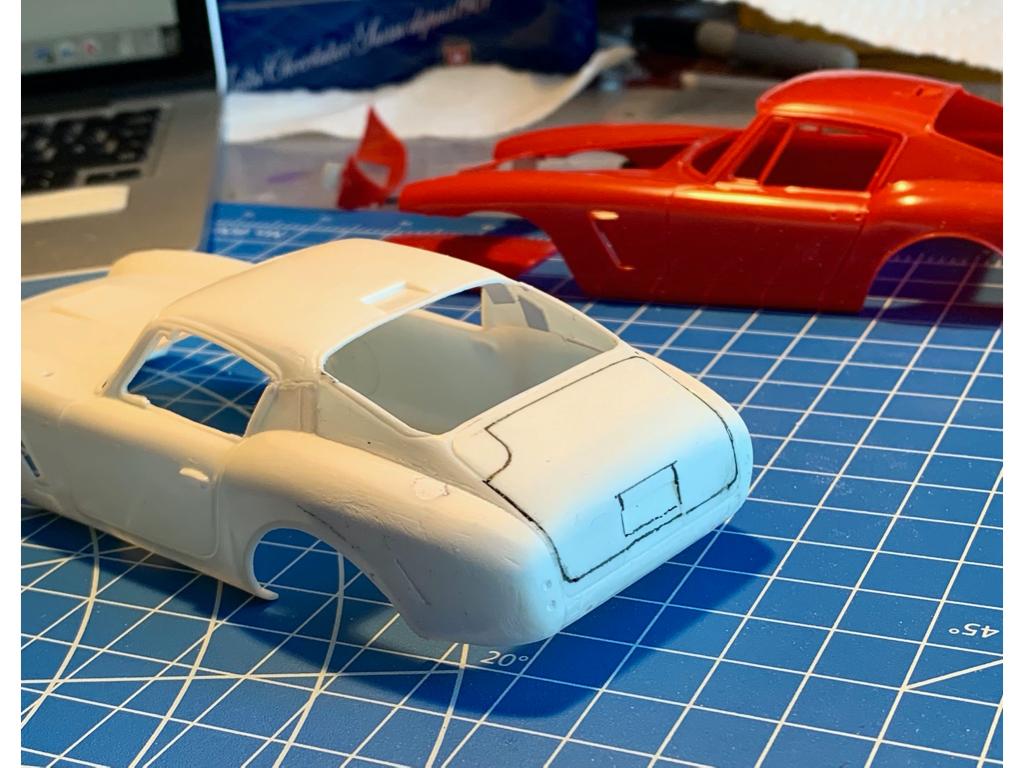
The idea here is with MFH kits being almost impossible to find (not to mention the second mortgage), Gunze and Italeri reaching unobtainium status and AMT/ESCI pretty easy to find, maybe something can be done with it? Thinking this would be relatively easy, provide the necessary boby massaging/modifications to make this kit respectable... well this feels more like going down the rabbit hole as I keep finding stuff that does not look right. Anyhow, here's the result of the last 3 days. Still lots to do. The red body is an Italeri used as the muse for this project
-
Thanks for the analysis Tim. I'm taking that in as I could not help myself and decided to give it a try. Perhaps I should post the work in the w.i.p other racing section to get input as I go along
-
Comstock Ford GT40 MKI
Pierre Rivard replied to Phildaupho's topic in WIP: Other Racing: Road Racing, Land Speed Racers
Definitely one to follow. So this is based on the Thunder Valley kit with some mods right? -
1:16 Gunze Sangyo 1937 Rolls-Royce Phantom III Sports Saloon
Pierre Rivard replied to Anglia105E's topic in WIP: Model Cars
For sure this will be a fabulous project David. Do you plan any upgrades / substitutions or is the kit good enough for OOB. I will follow with great interest and would love to build one of these classic RR if a good 1/24 kit was available.