Pierre Rivard
-
Posts
2,579 -
Joined
-
Last visited
Content Type
Profiles
Forums
Events
Gallery
Everything posted by Pierre Rivard
-
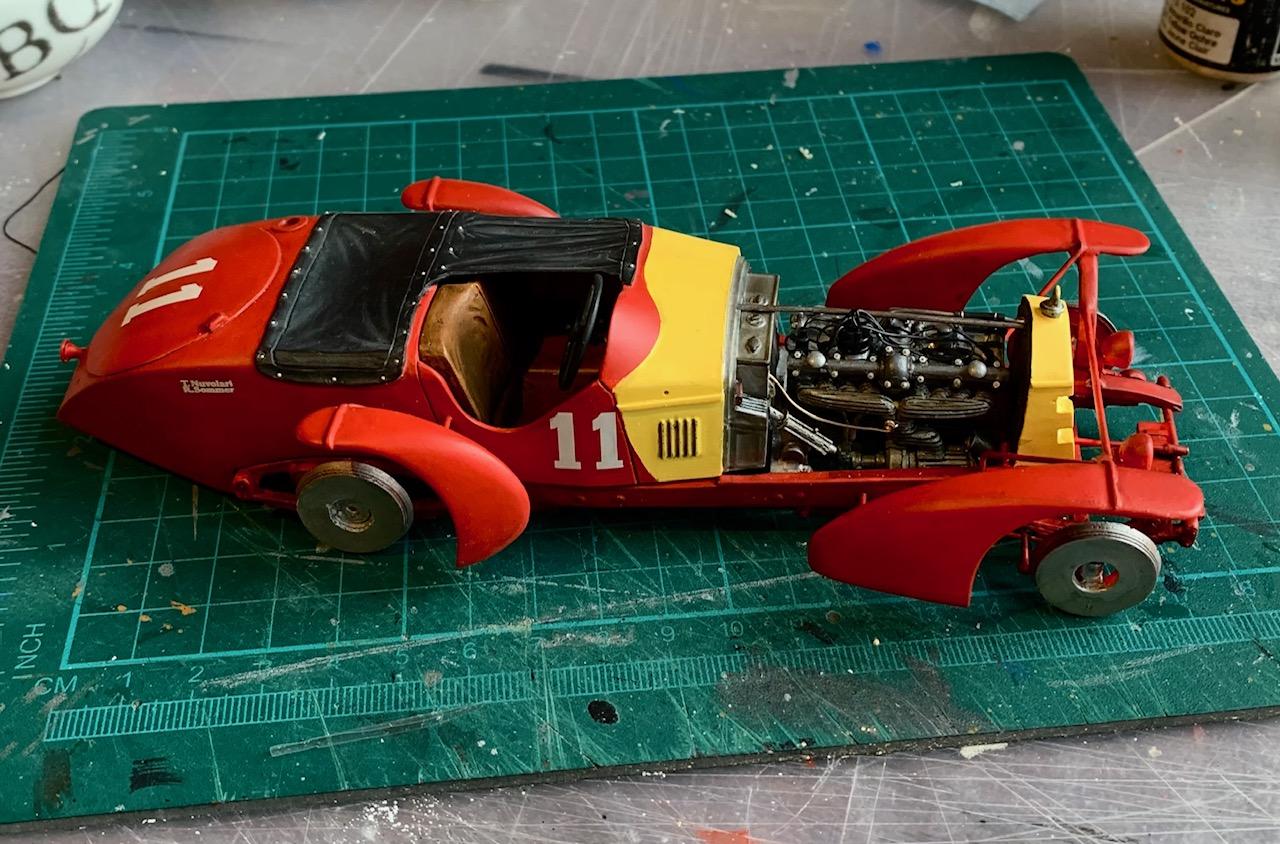
And the very very last part, rear lighting elements and fuel cap. While I was in the neighborhood I could not resist a bit more weathering of the exhaust outlet. Done! Beauty shots will be posted in showroom tomorrow.

-
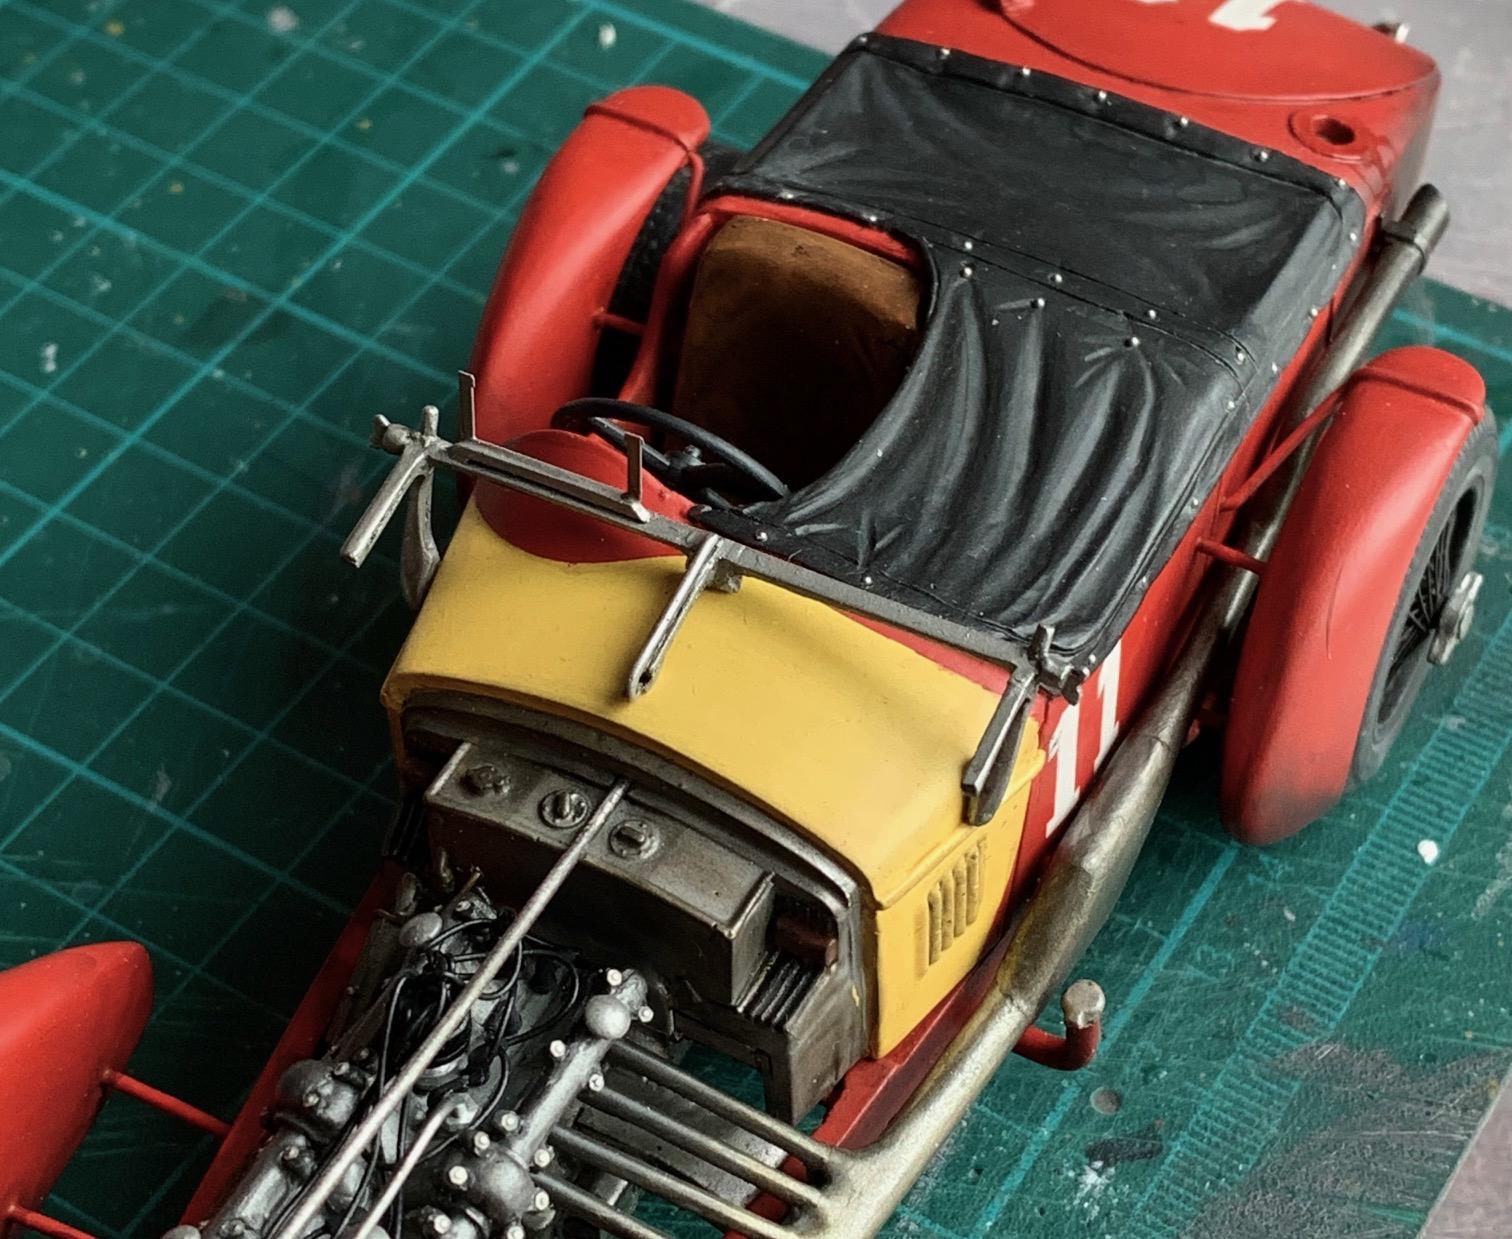
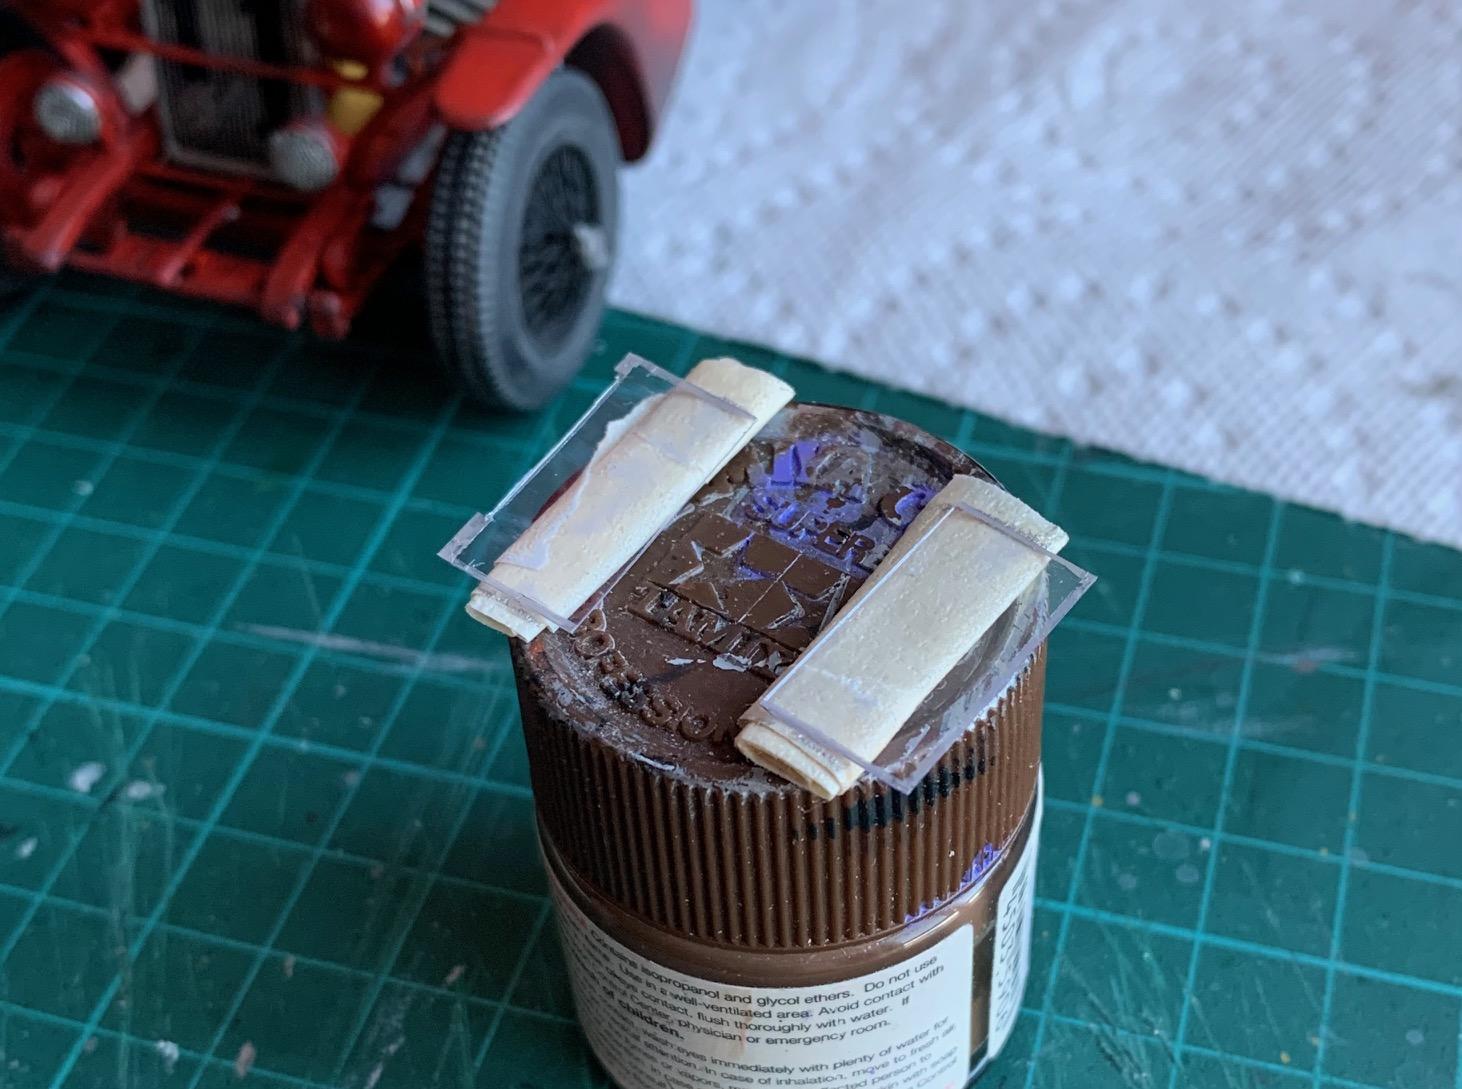
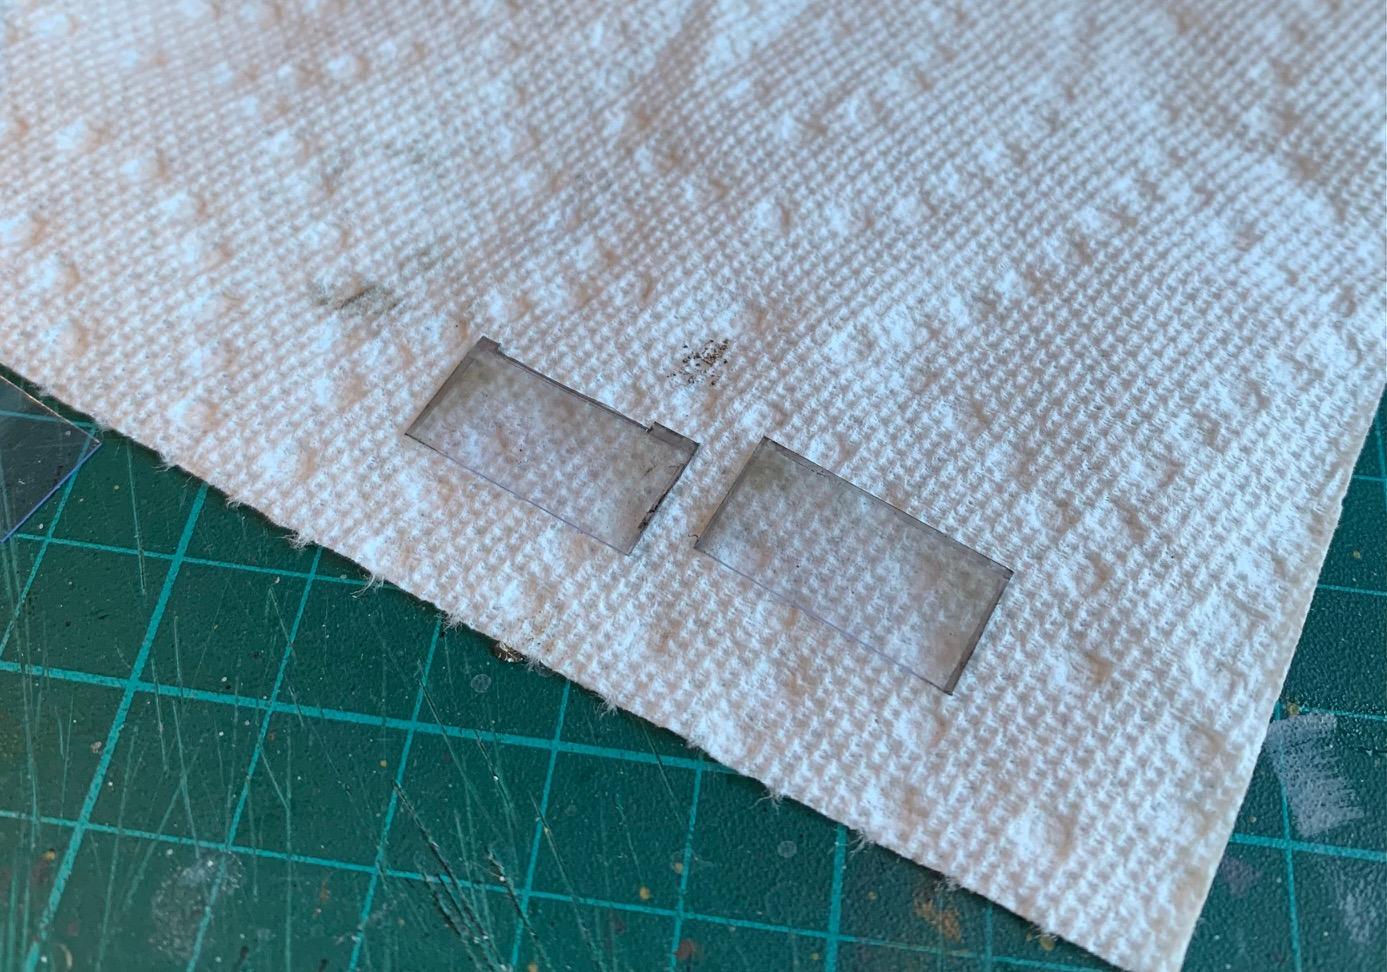
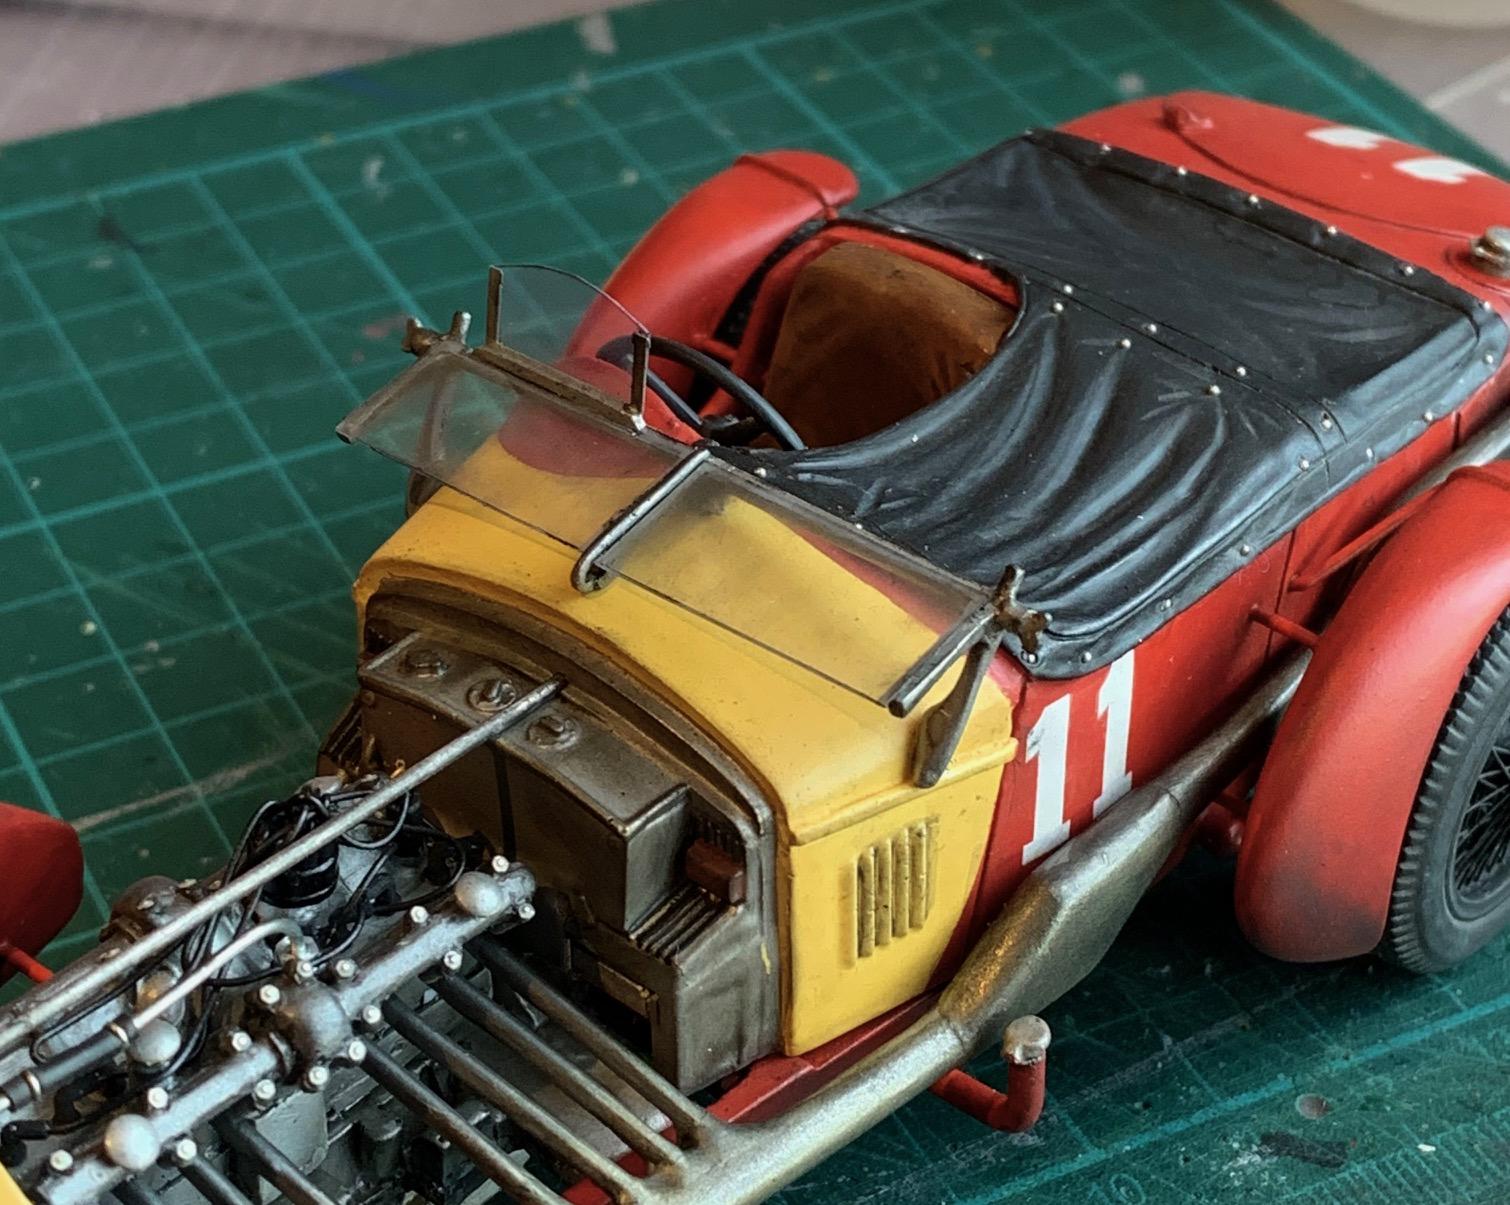
Finally getting to the last details on this build. Windshield. I used the kit frame and thinned it as much as possible. Flat aluminium paint and again weathering with dark oily wash helps making it look less bulky. For the glass I just cut to size the 3 pieces from cheap produce packaging (clear cover). I painted a small edge lines aluminium to hide where I will glue it to the frame. Also I weathered the glass with Tamiya weathering master to simulate road grime. There's this really talented (and sometimes funny) guy in Miami who would make this out of brass. I decided against it for fear of excessive royalties. ?
-
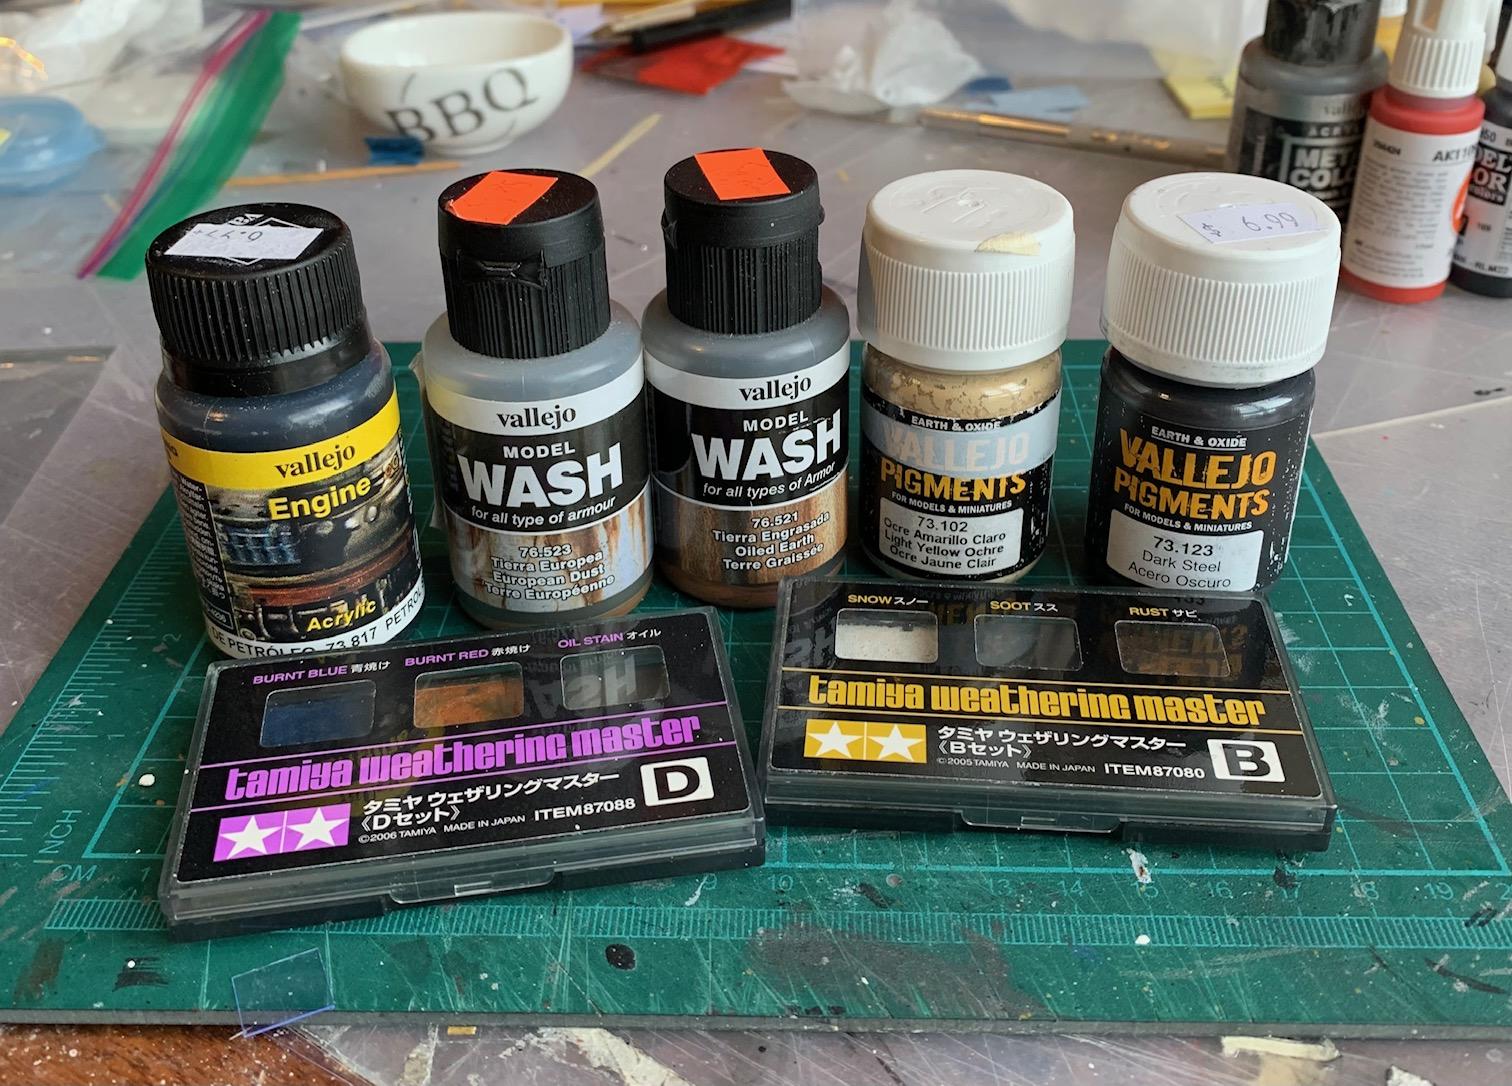
Thanks guys, in case anybody would like to try it here are the products I use for weathering. There's a lot of options out there but these always work for me. I've used these for engine and chassis stuff before but a first on the whole car body.
-
Engine looks much better. Should be amazing once finished with all the detailing.
-
Formidable research, design and fabrication work. Anything from the original kit still in this model? Seems like you are making everything new and significantly upgraded.
-
Thanks Hanjo. I've done a rusty car before but this is the first attempt doing race weathering. All with brushes. I'm pleasantly surprised.
-
He occasionally...did not...
-
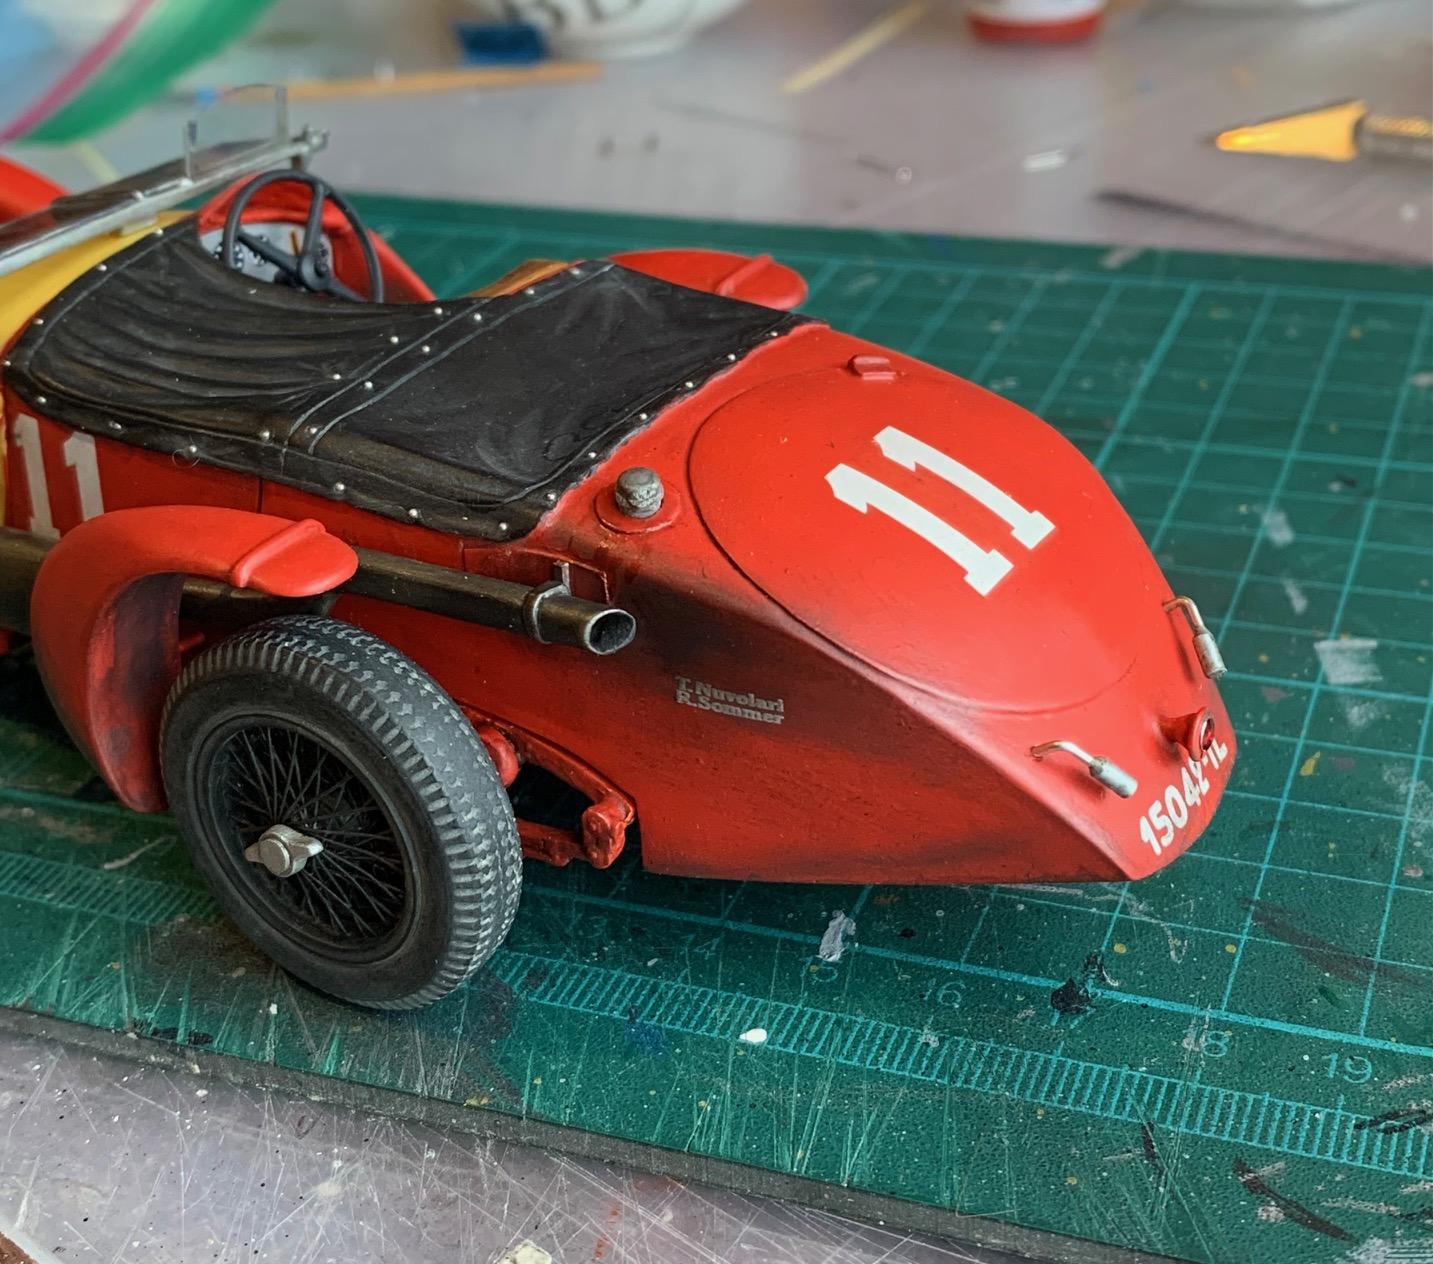
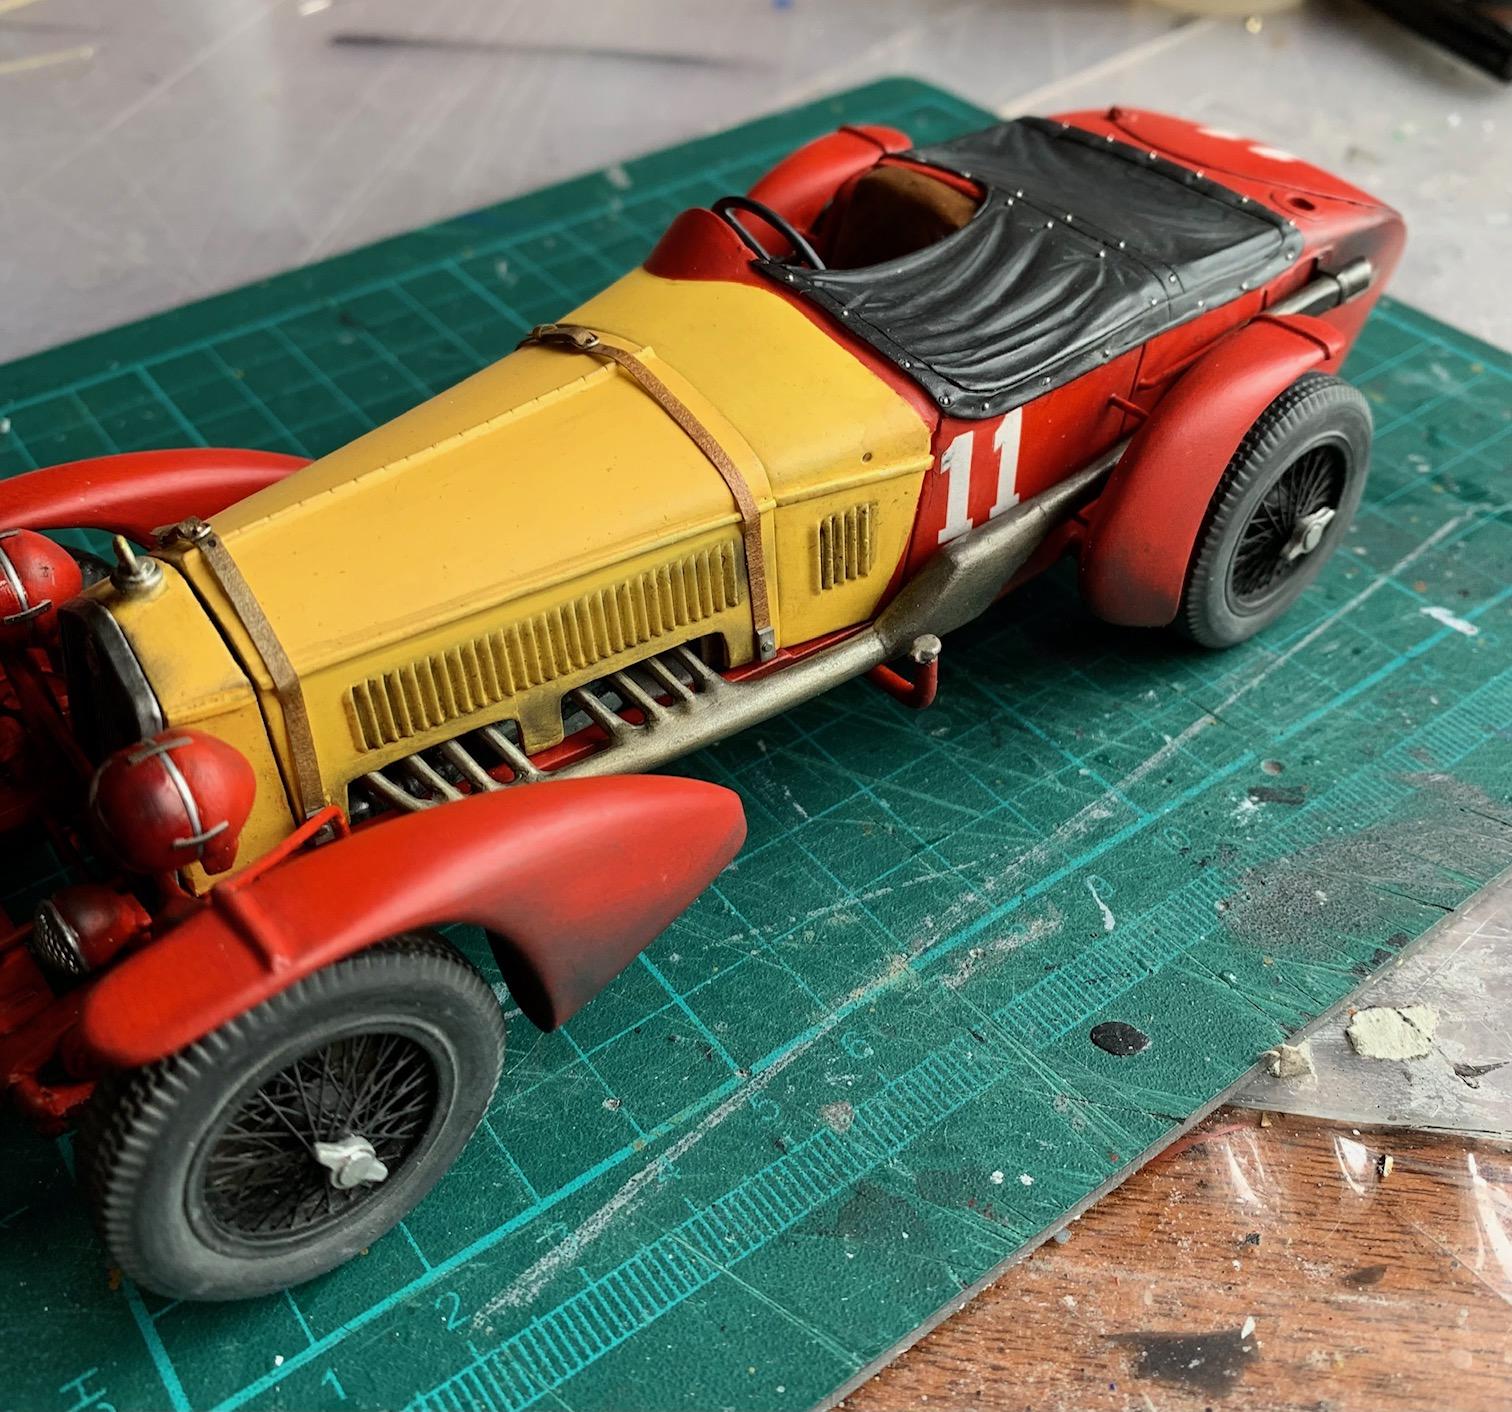
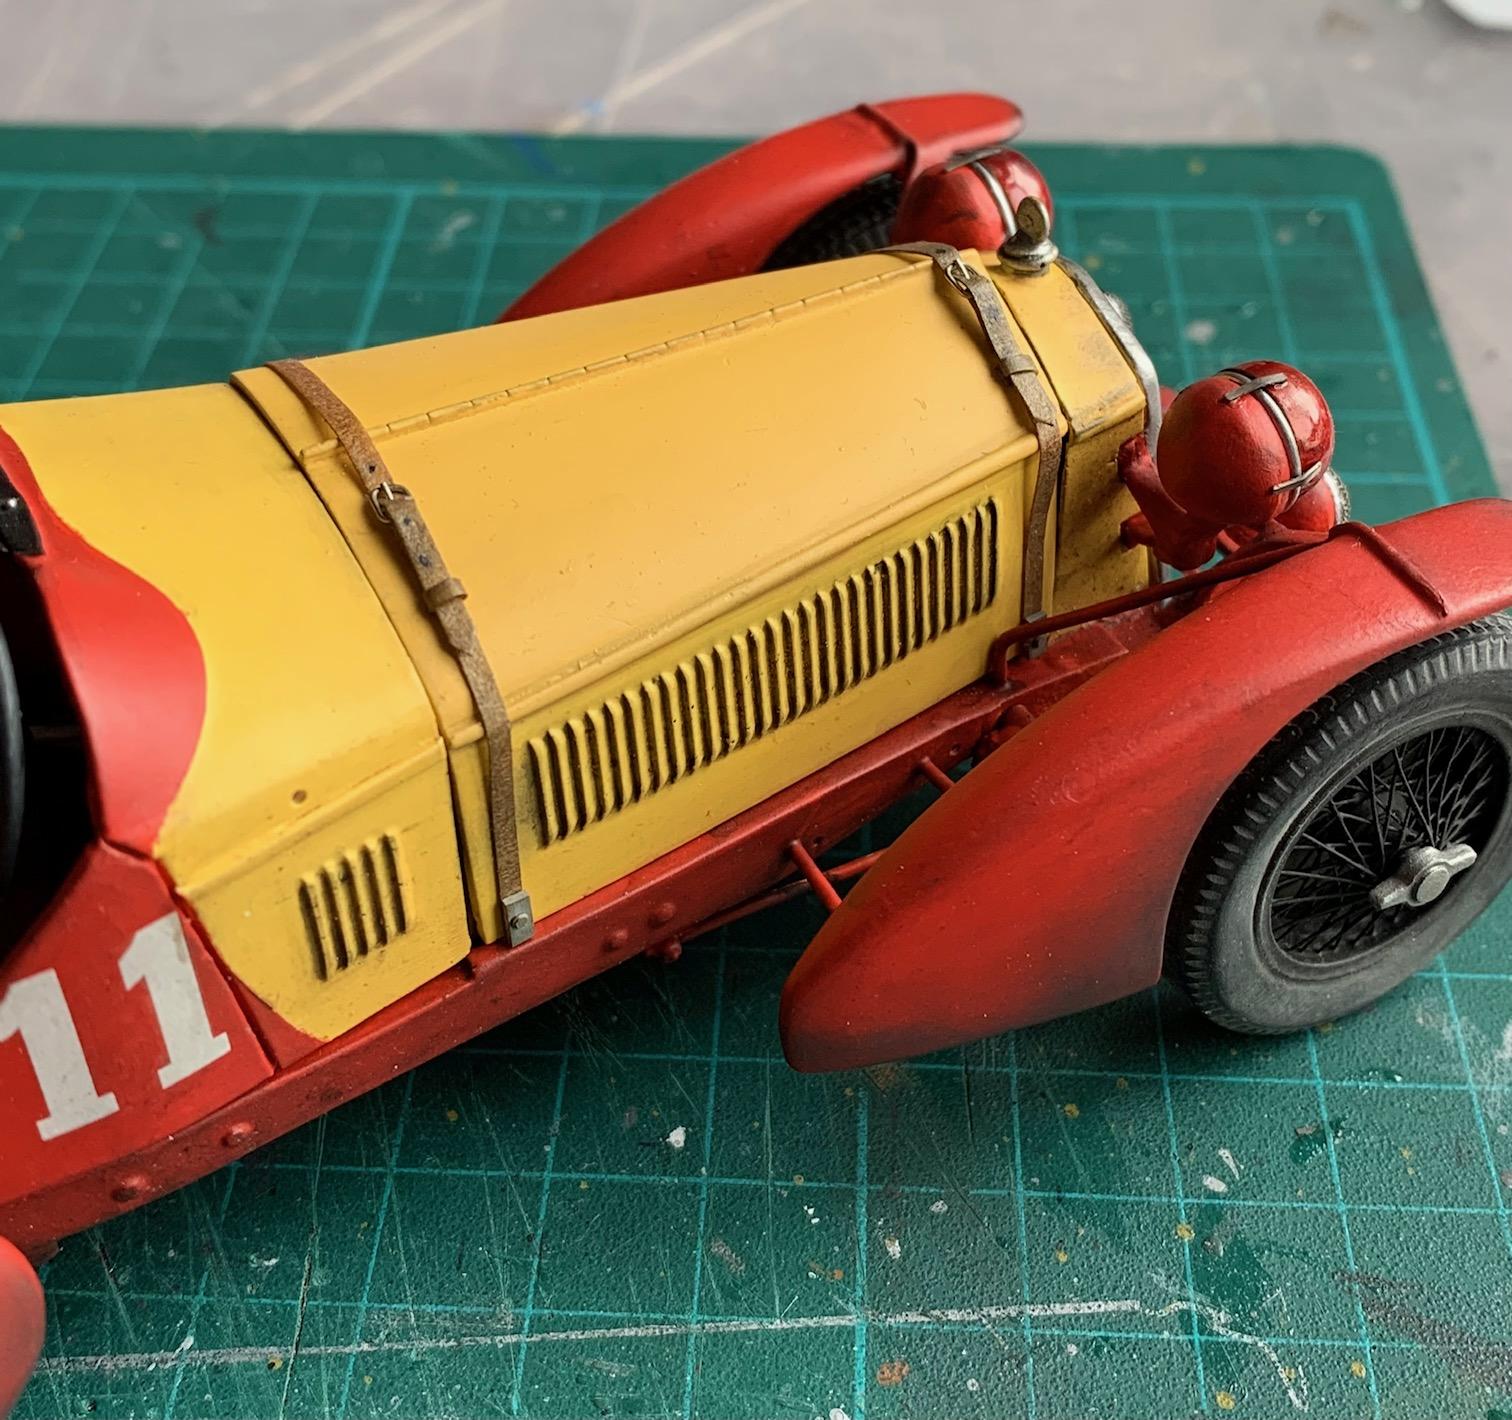
Weathering of the body is complete. Decided to stick to a dark weathering to simulate road grime and spitting oil from cars ahead. 1. after color coats I added a layer of matte clear 2. dark brown washes over the red and hood louvers, light brown over the rest of yellow surfaces. 3. Mix of Tamiya weathering master colors over most exposed areas 4. Dark brown / charcoal pigments brushed on on the splashed areas. 5. Light ochre pigments over tires
-
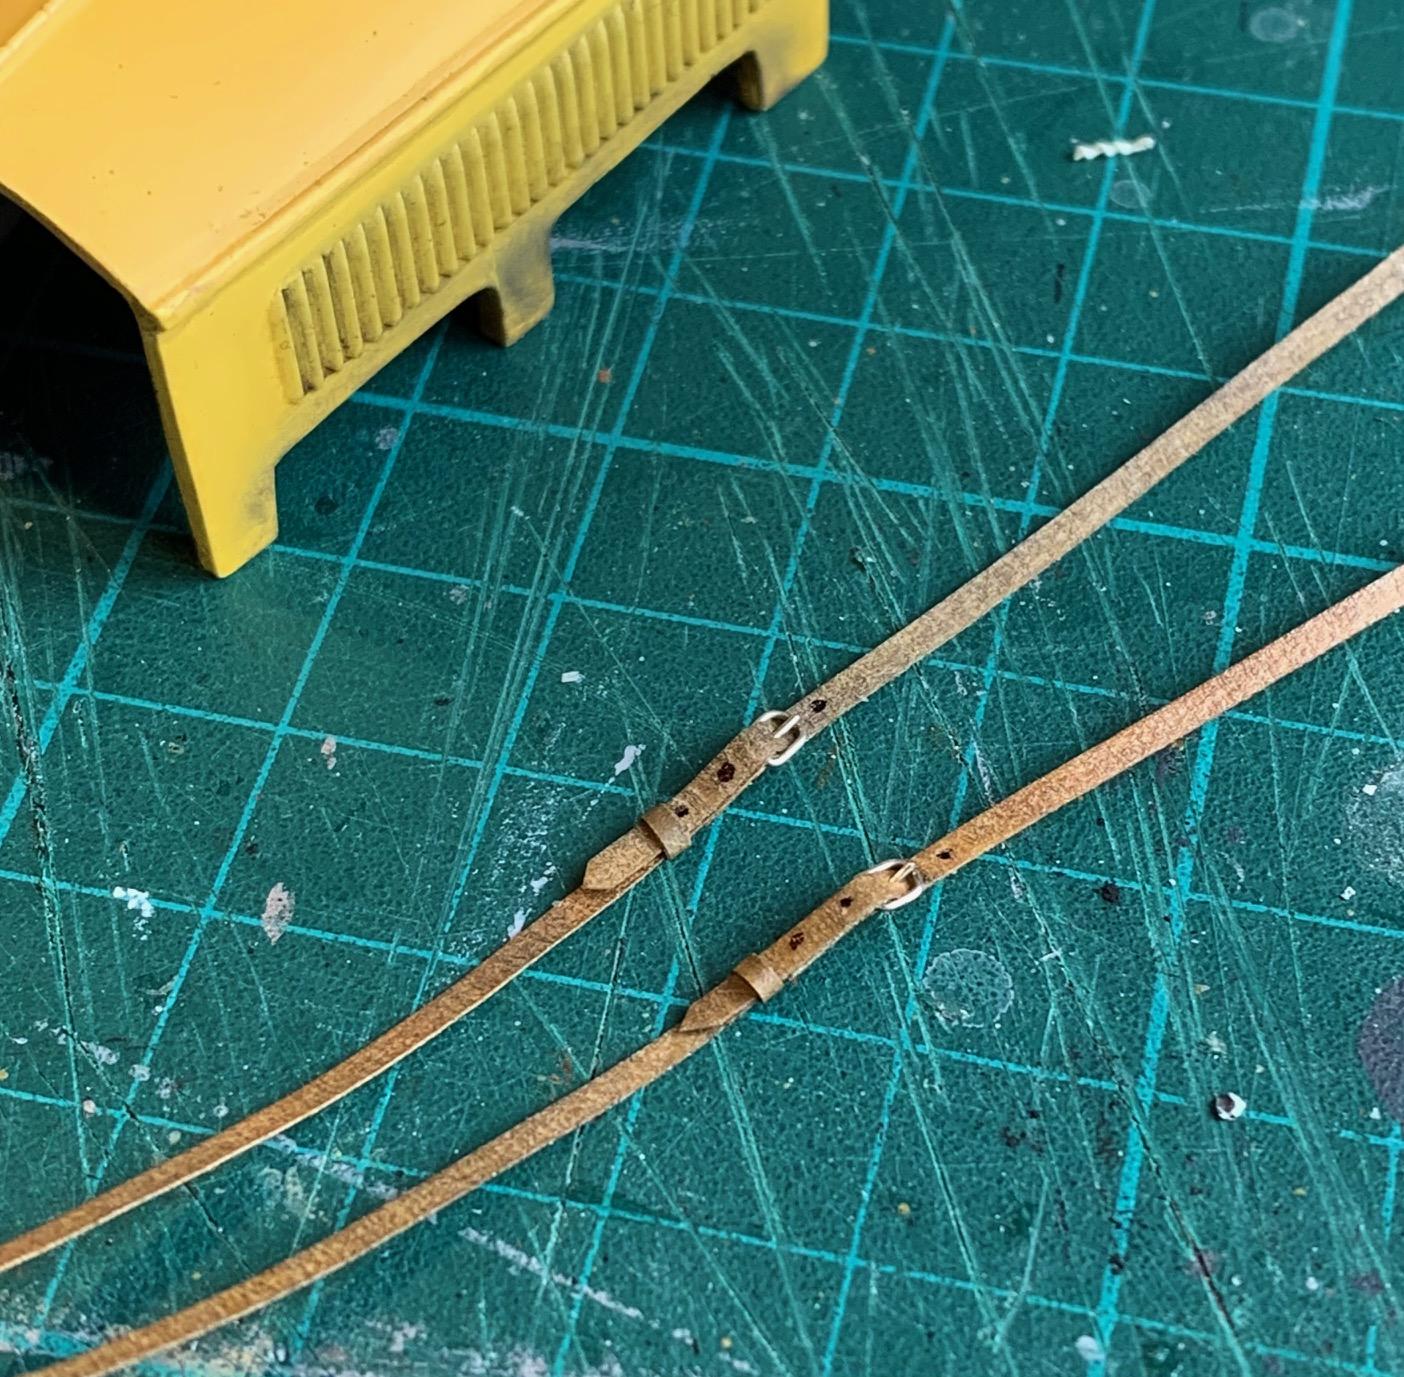
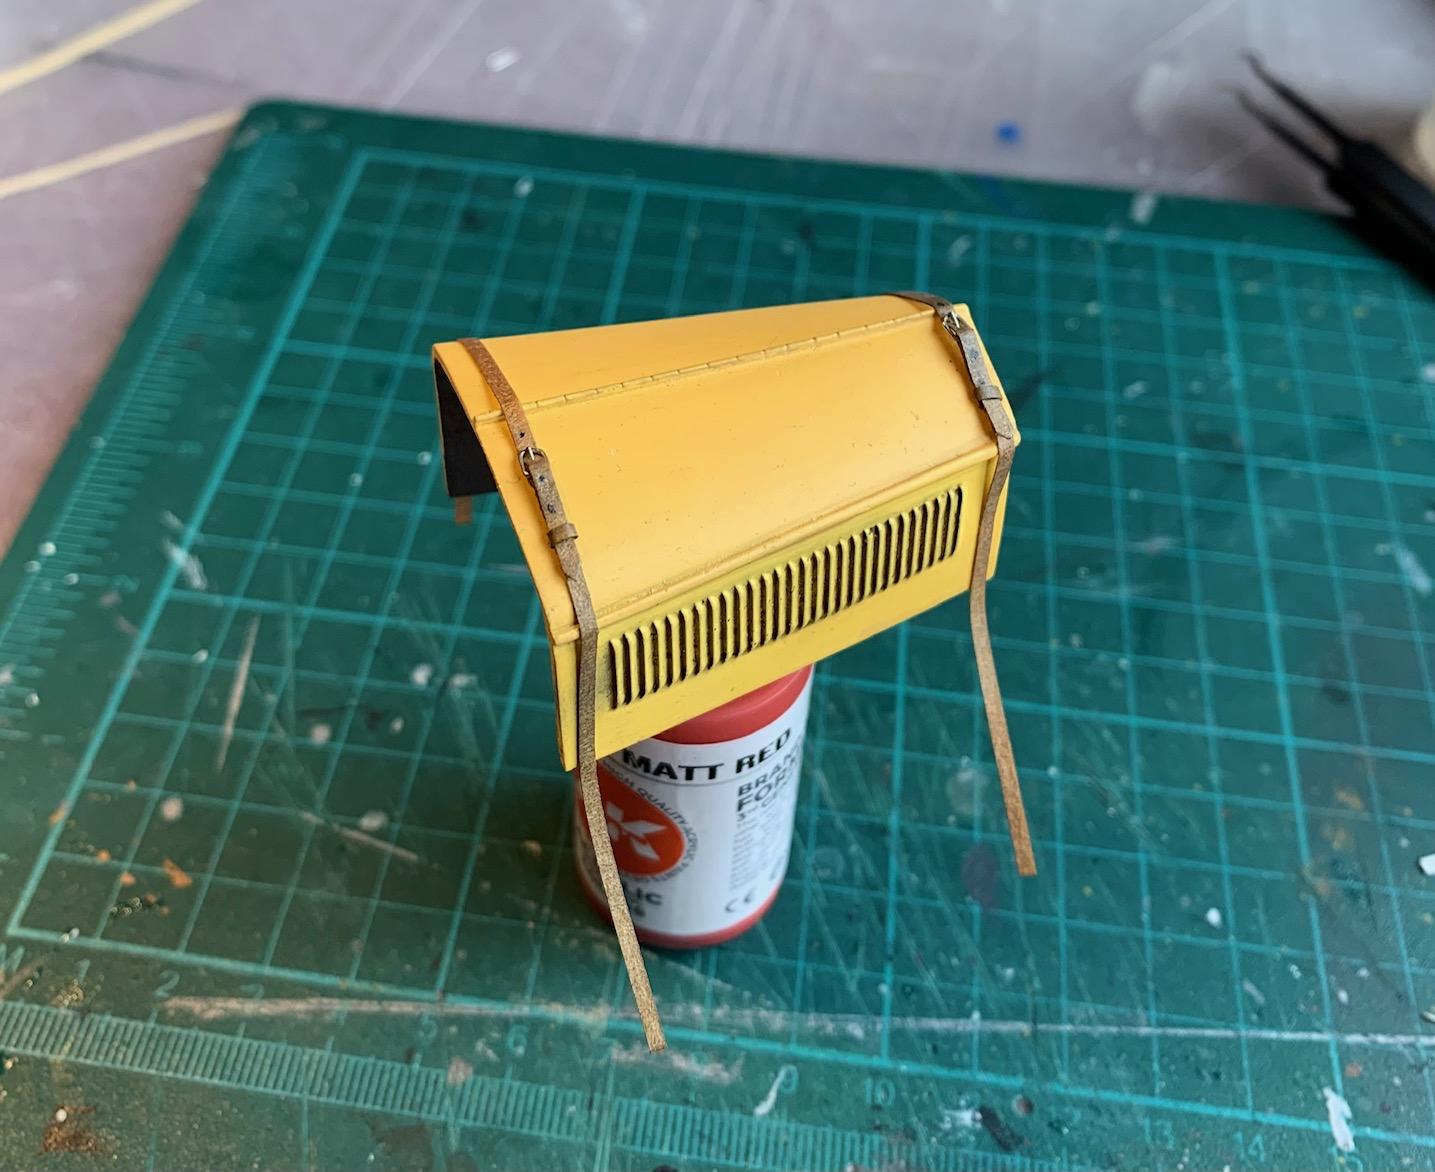
Almost there Tazio... Leather straps for the hood, made the same way as I did for the Ferrari 275P so not showing the steps. Basically twisting wire for the buckles and masking tape Tamiya weathering master for the straps.
-
Where is my car ?
-
Engine looks good Andy. Don"t know it it could help but I painted mine flat Aluminium with the covers a 2/1 mix of aluminium and black , then a flat clear, then Vallejo Oiled Earth wash which gave it depth and a bit of the grimy look I was looking for.
-
T41 Bugatti sport coupe
Pierre Rivard replied to charlie libby's topic in WIP: Other Racing: Road Racing, Land Speed Racers
Impressive! -
Thank you fellows. I plan to add a bit of weathering to the lighting elements to better harmonize them. The punch list is getting shorter... I can see the light.
-
Excellent sir! What tires are you using for this build. These do not appear to be the ones that came with the kit.
-
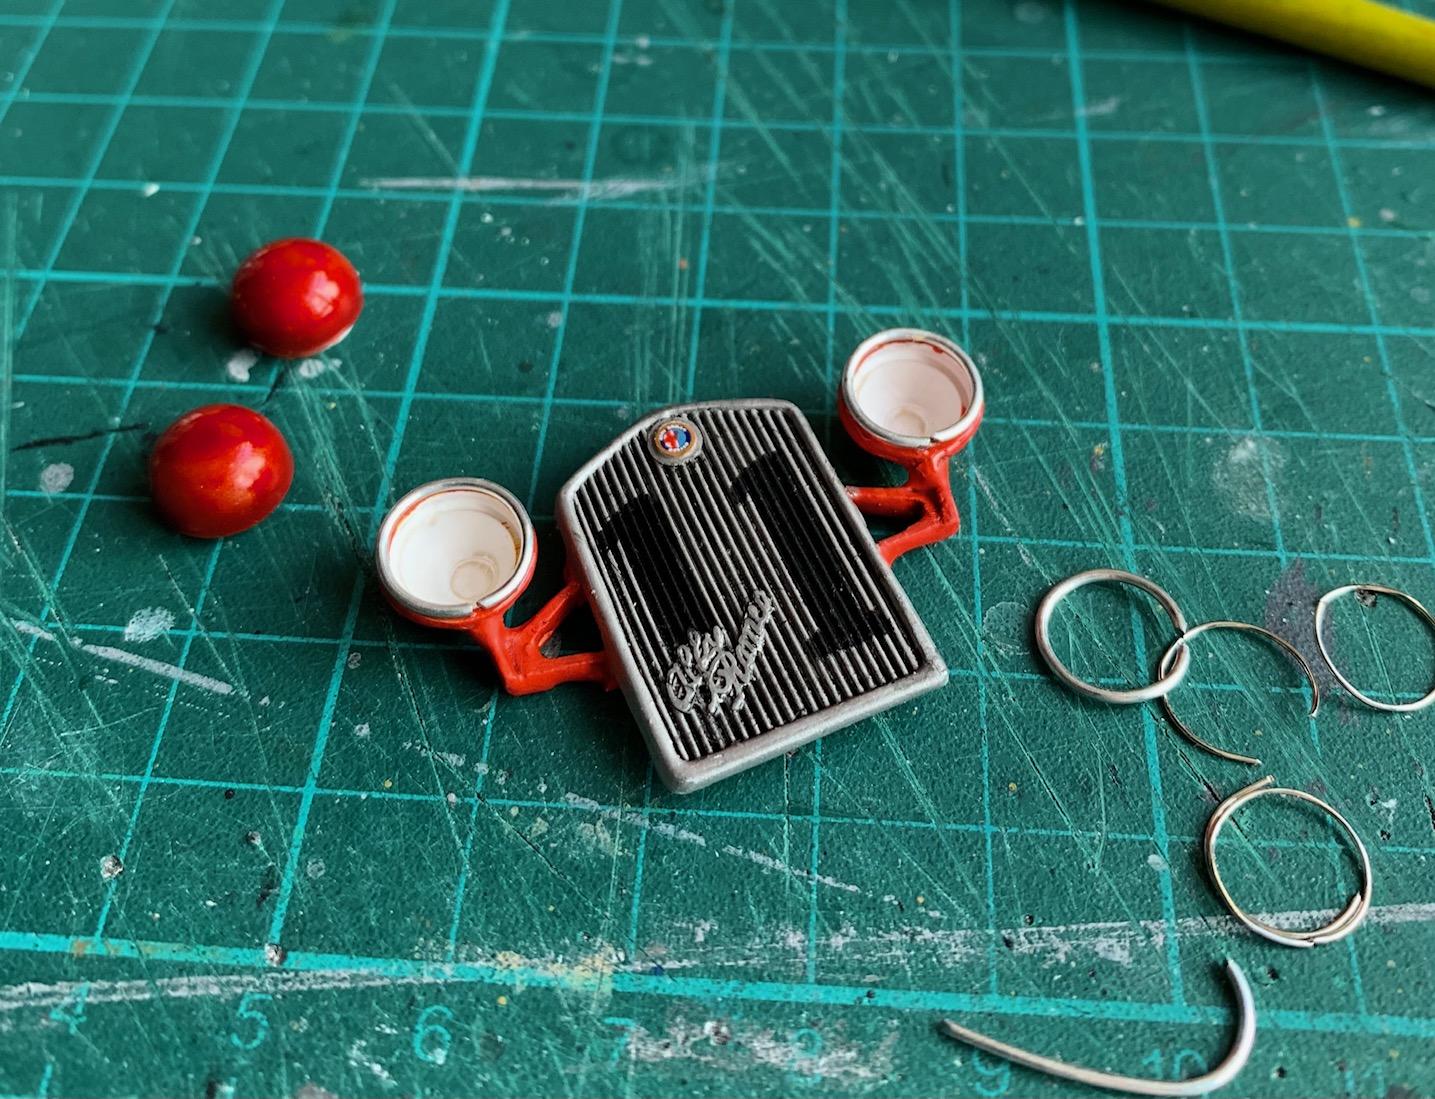
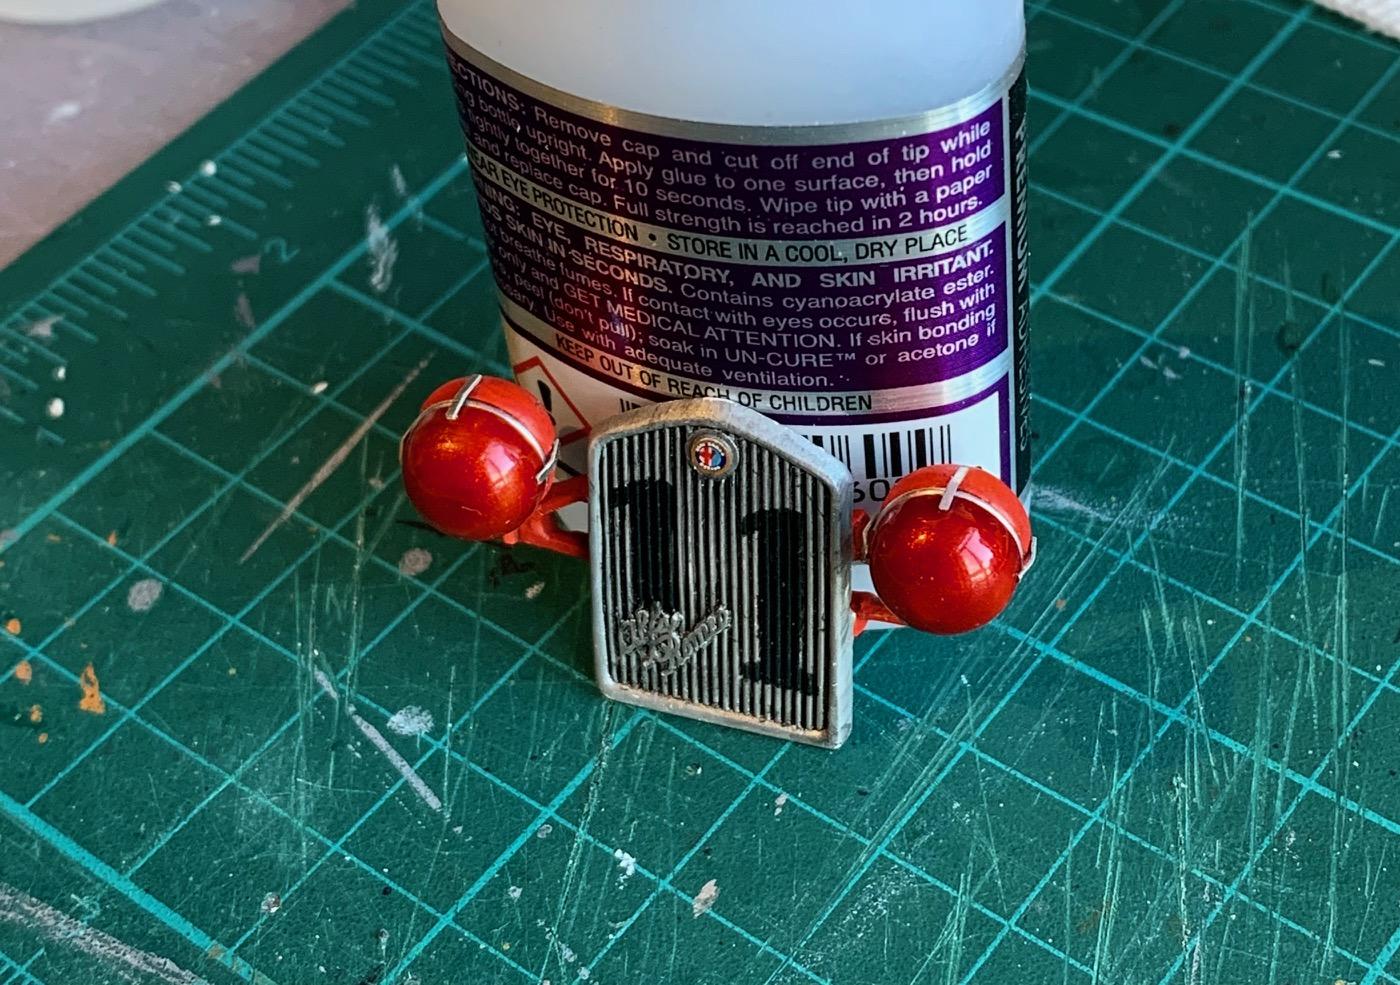
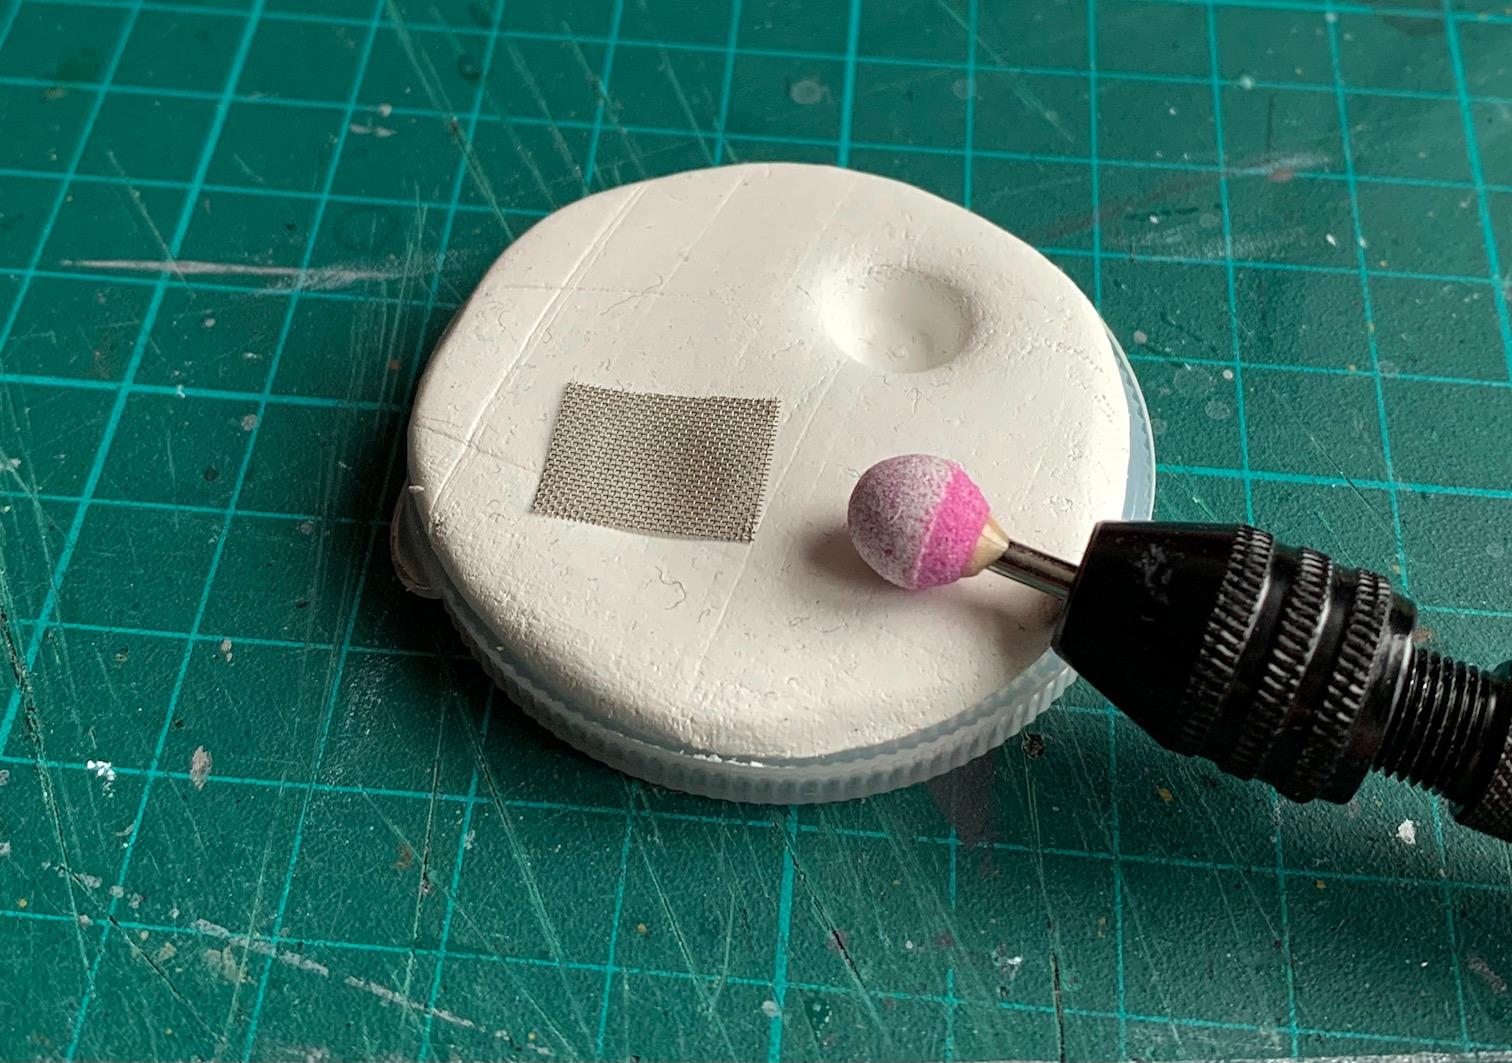
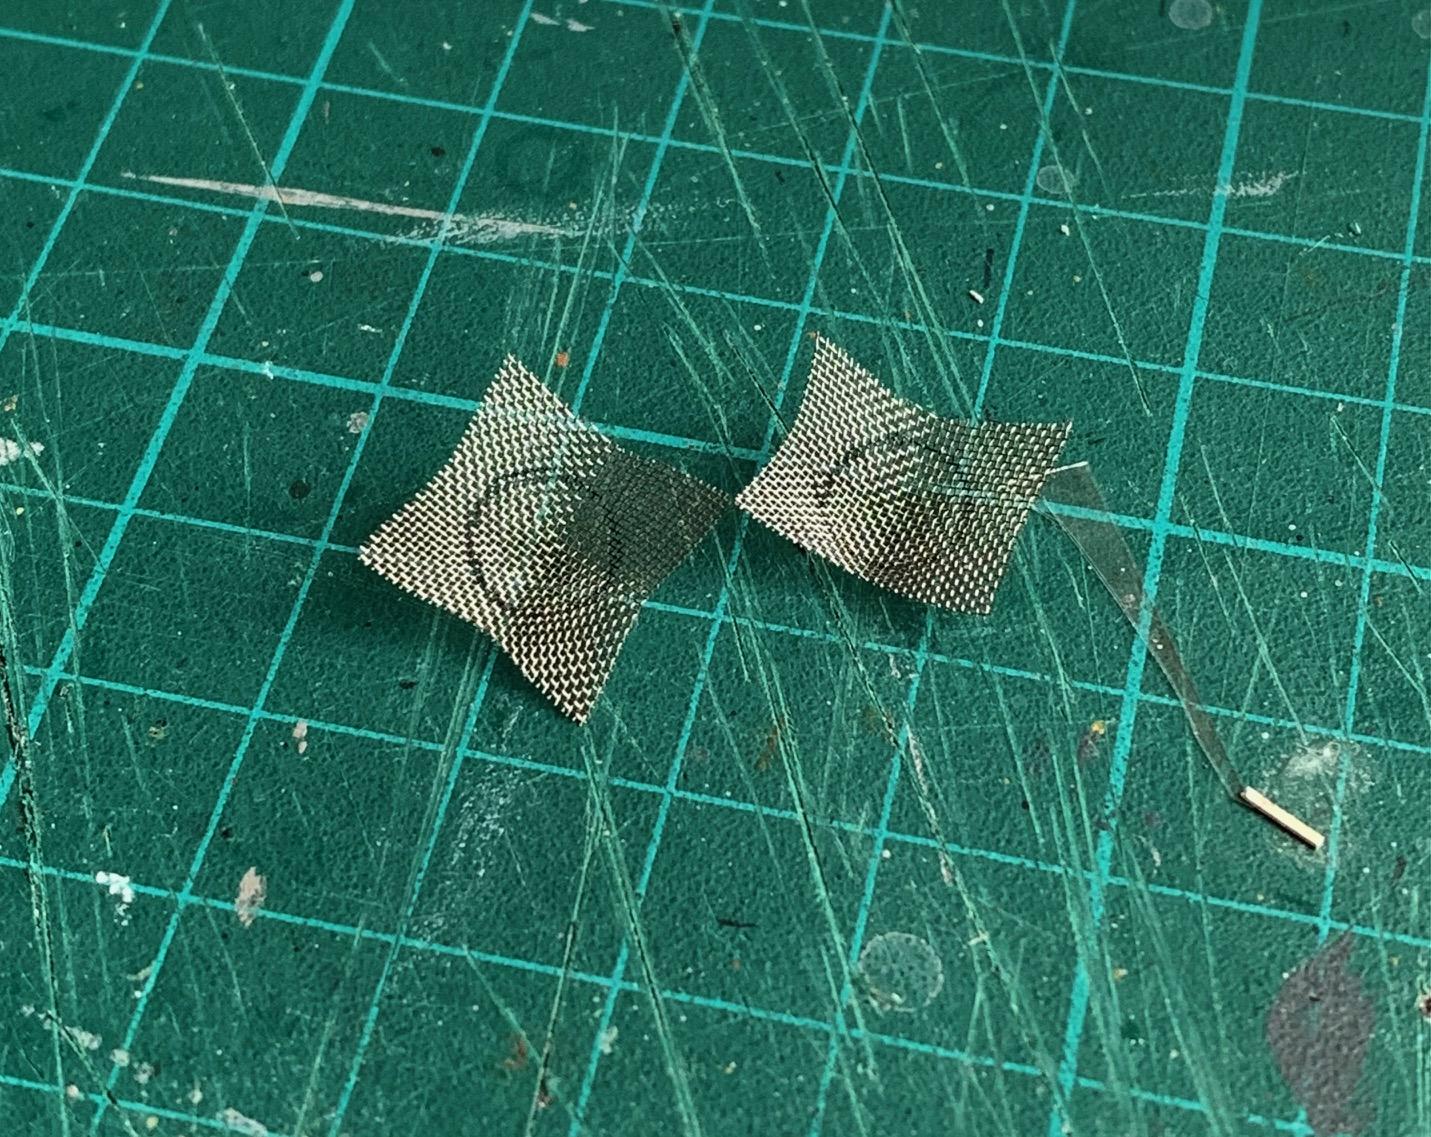
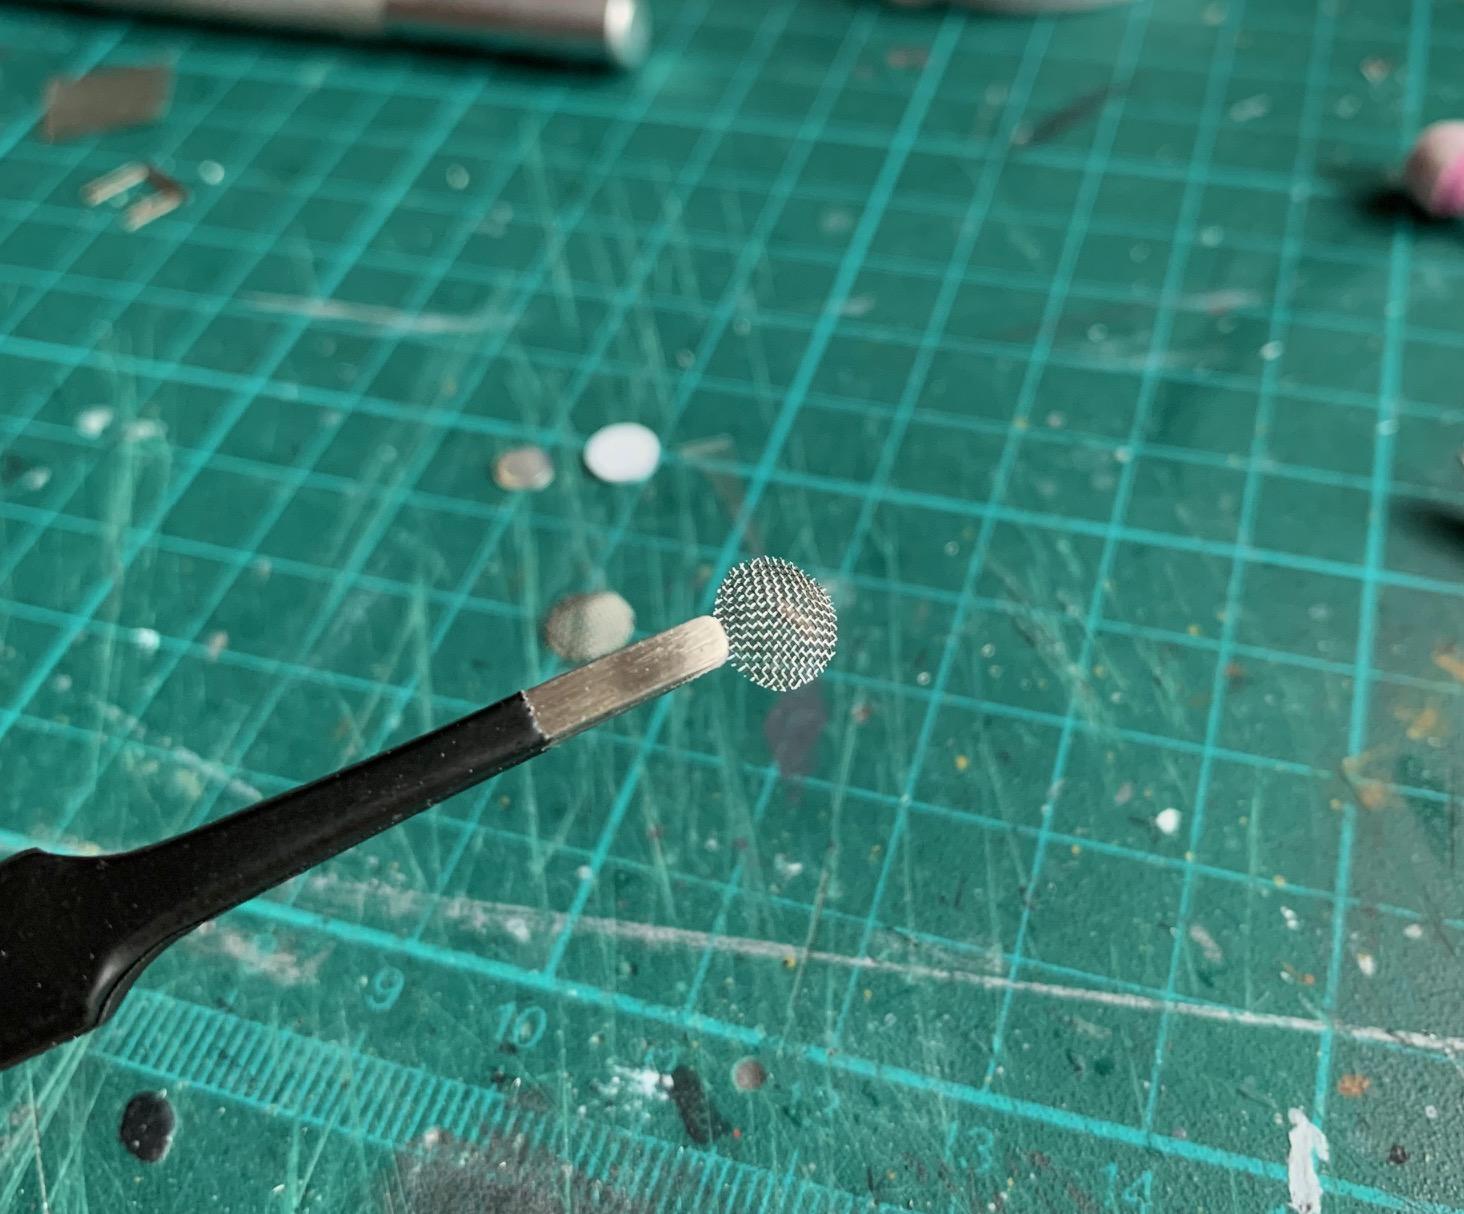
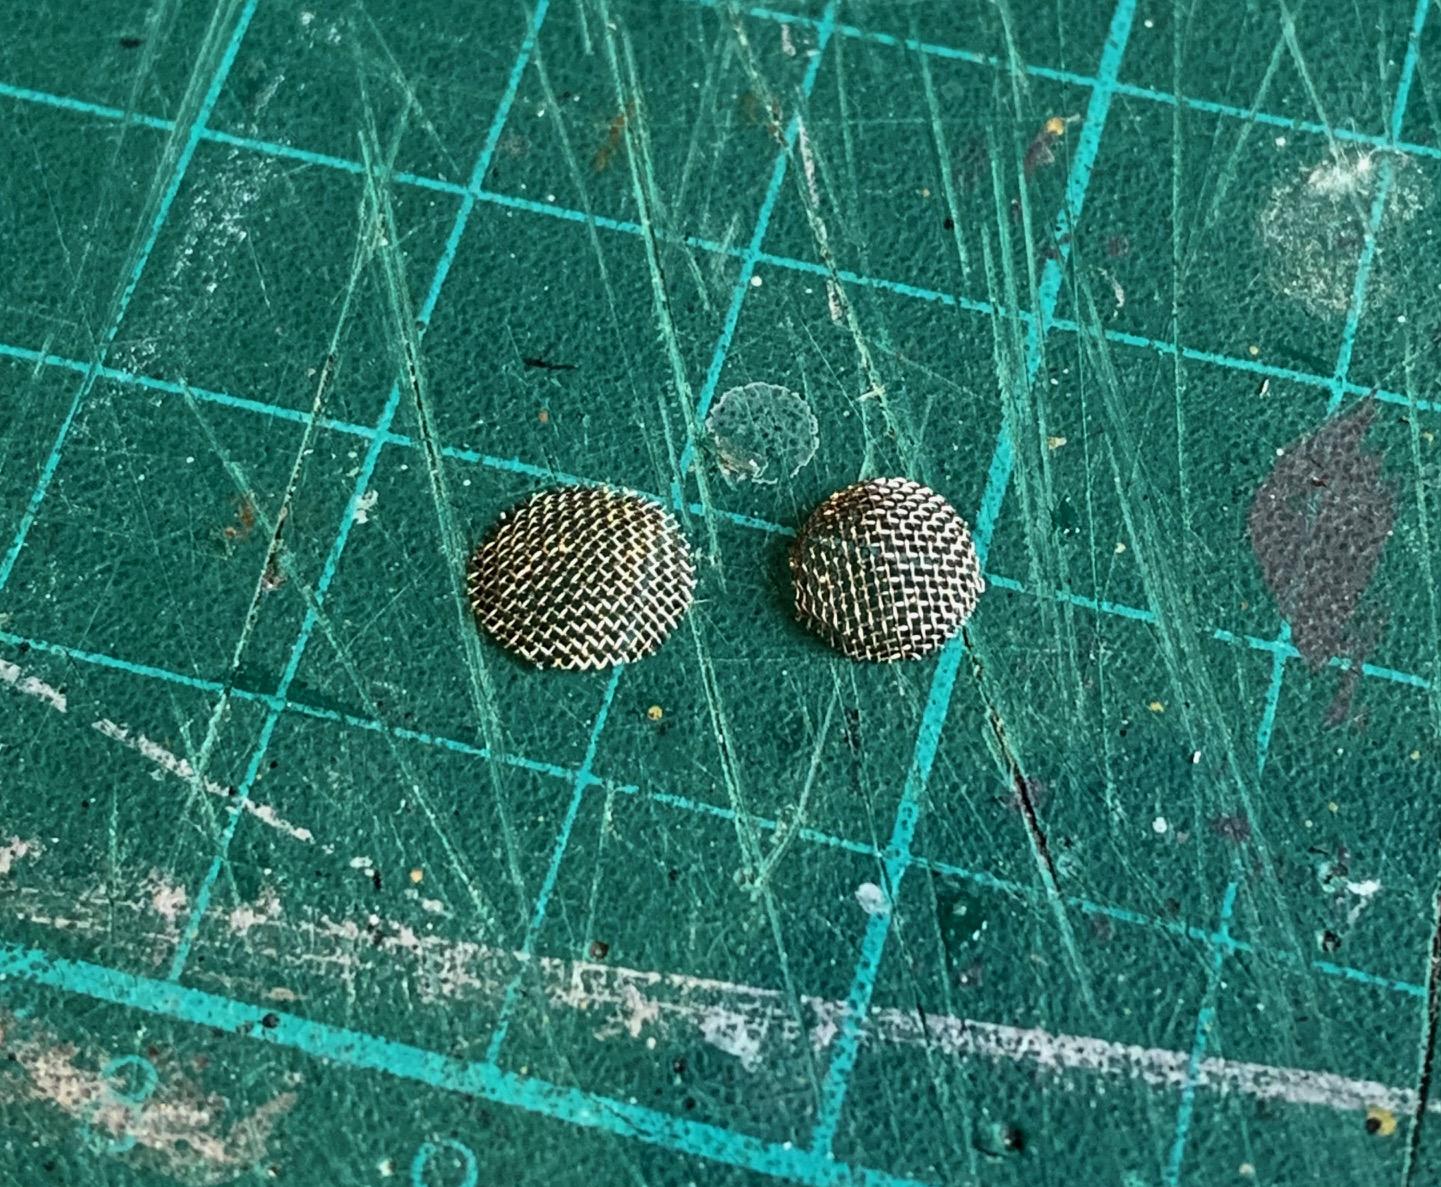
Kit has housing for these but no bezels and too small lenses. First time I try doing mesh covers, pretty happy with the result but next time I'll need to find a finer mesh screen to work with.
-
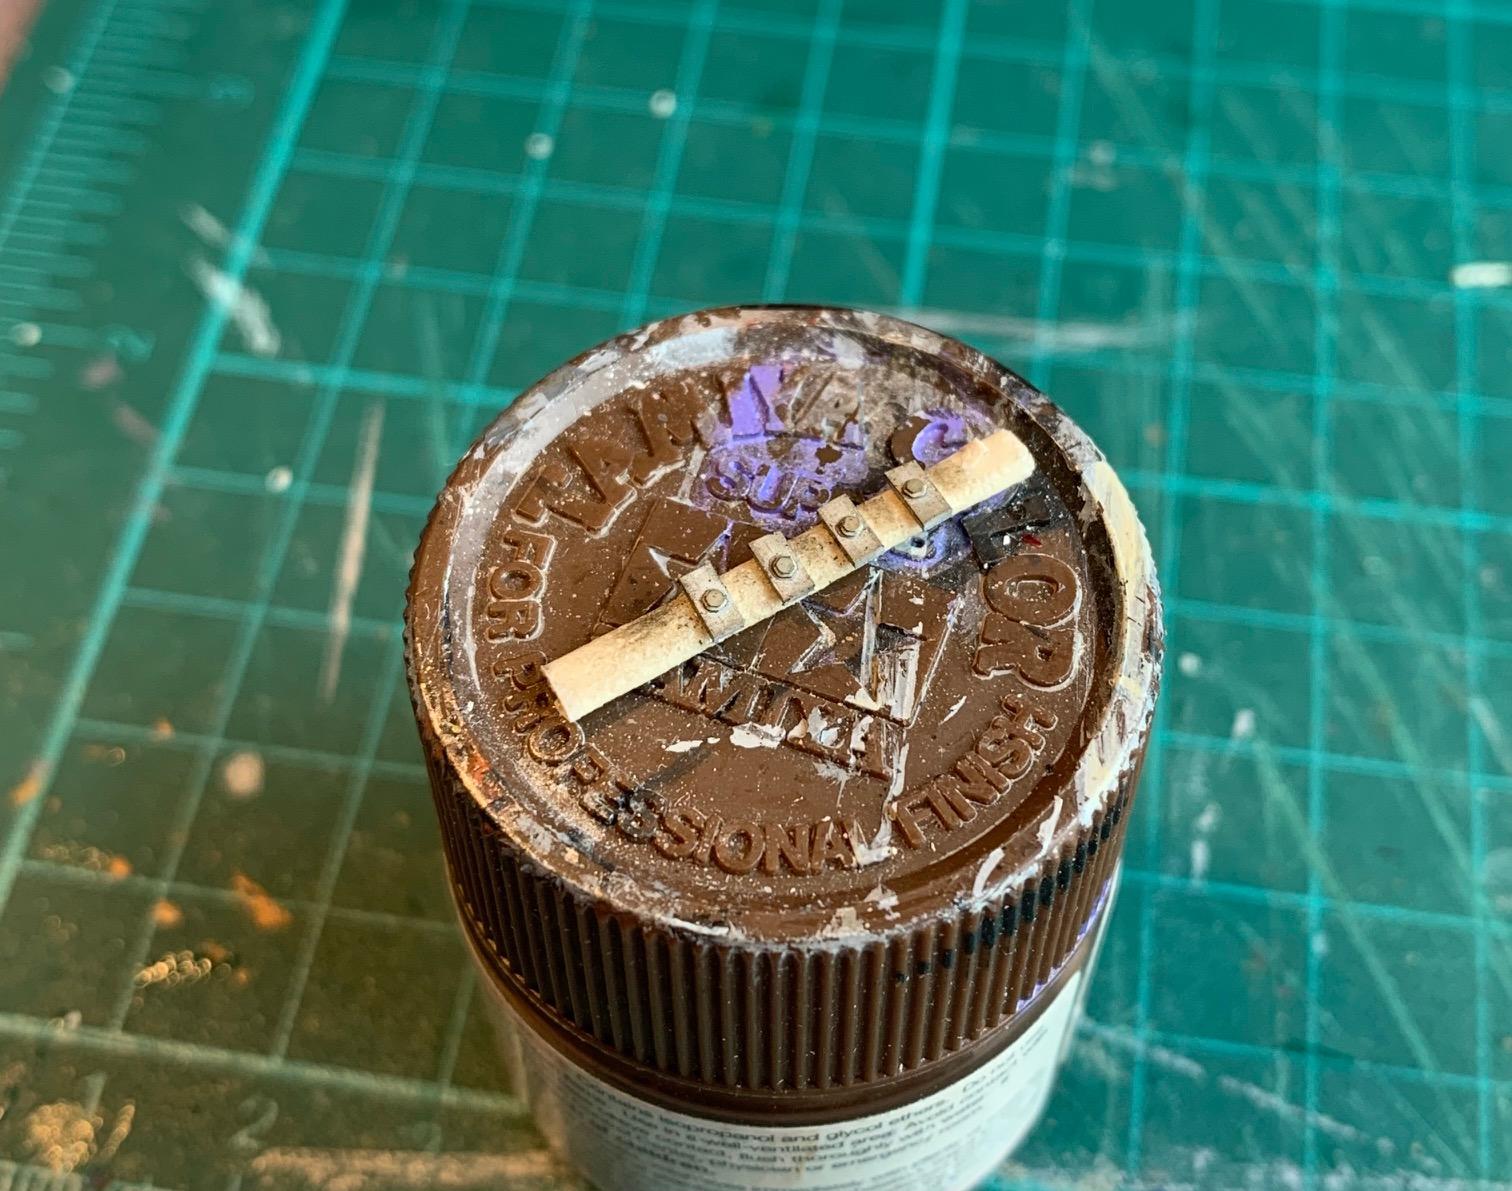
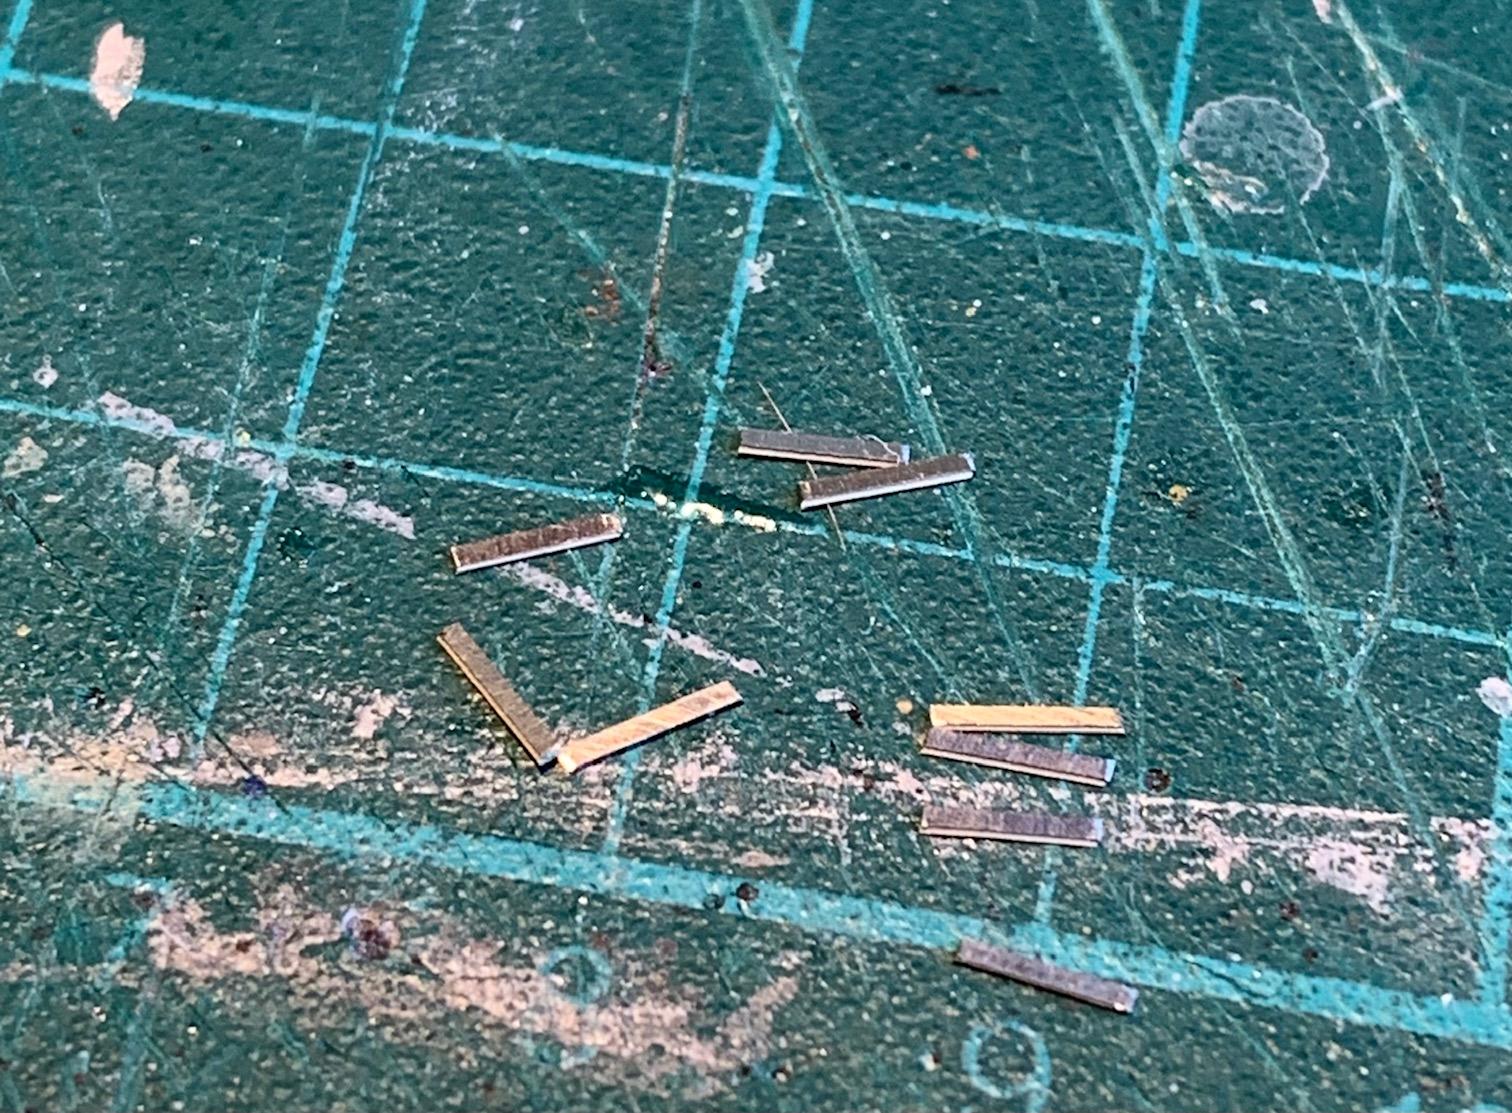
Finishing foward lamp assemblies. Main lamps have red covers. I added rings made from 0.8 mm soft metal wire and cover attachments with PE scraps. Secondary lamps have a mesh cover. I made a mild for shaping these from epoxy putty and further curled the edges to get the shape I was looking for.
-
To think it started out as a Corvette. Even now that I have seen it can be done I would not dare to try it. Bravo!
-
To think it started out as a Corvette. Even now that I have seen it can be done I would not dare to try it. Bravo!
-
Porsche RS60
Pierre Rivard replied to afx's topic in WIP: Other Racing: Road Racing, Land Speed Racers
Slot car origins are fast disappearing. Beautiful work go the cockpit structure and looking forward to see how you engineer the rear chassis/engine mounting structure. -
A little more weathering of the body done, I'm taking it slow to make sure I don't over do it. The exhaust collecter/outlet has been fitted (no easy task) and weathered.
-
Thanks guys, support much appreciated. I did say that the body only received a dark wash but more was done for the seats and cockpit tarp. Cockpit tarp received a flat clear to better receive weathering which was just light dirt colored pigments. The seats did get multiple washes and oriented to allow the wash to pool into recessed areas. I then added some dark rust Tamiya weathering master to the more worn out areas.
-
Don't be sad Andy. Pouln's work is a wonderful display of CAD design and 3D printing expertise. Very much an engineering approach to model building. I think it is extraordinary, if a bit clinical. The work you are doing at the comparably tiny 1/24 scale is a more artistic display of multi-material fabrication. In other words scratch building extraordinaire. Keep doing it your way so that us mere mortals can enjoy watching your creativity. This first consultation is free of charge. Dr Pierre
-
T41 Bugatti sport coupe
Pierre Rivard replied to charlie libby's topic in WIP: Other Racing: Road Racing, Land Speed Racers
Wow, this car looks fabulous. Did it actually exist or is it an unrealized concept? Either way this will be an amazing journey! -
With this level of exquisite fabrication and detailing there's always a few things to do. Knock down items from the punch list and a few more pop up. Hang in there Daniel, the finish line is now in sight. Hoping you will set up "showroom" pictures with good background and lighting. This marvel deserves a spectacular unveiling.
-
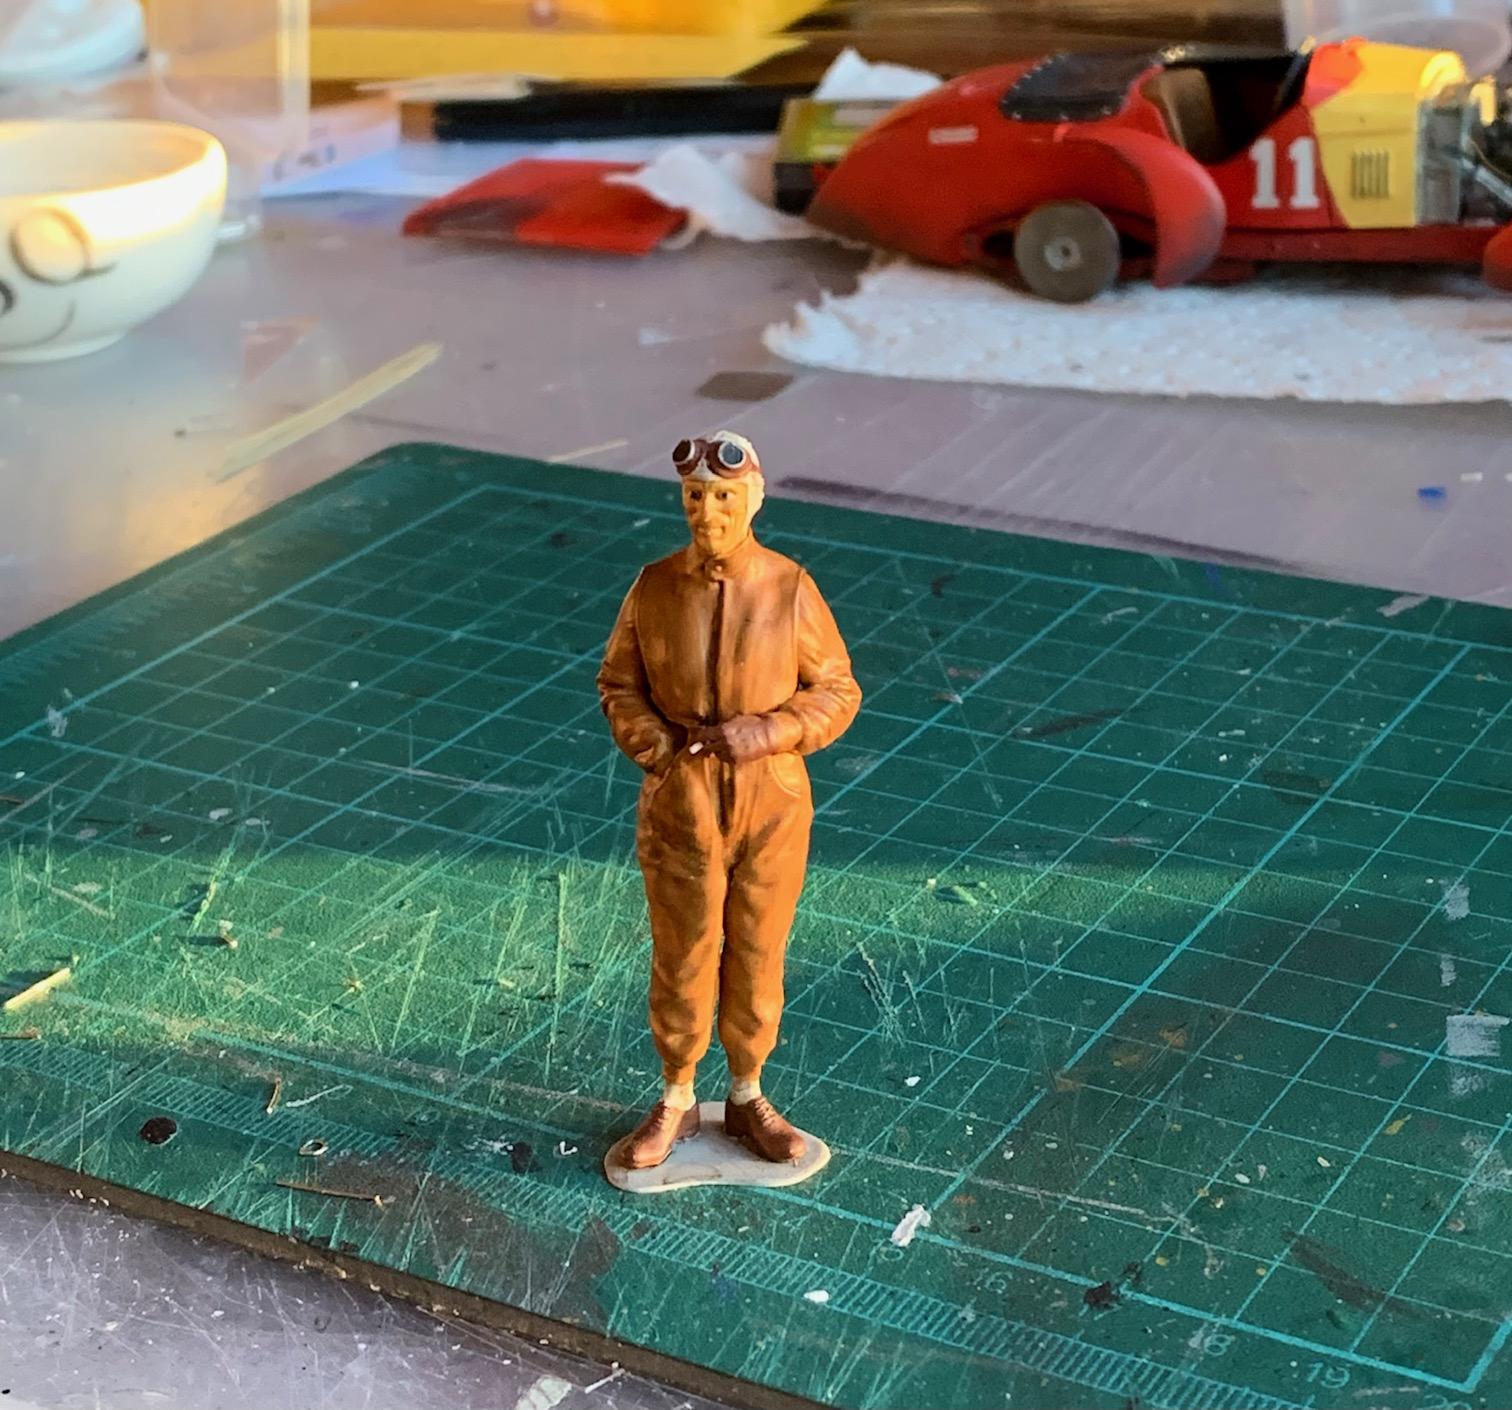
Got the interior finished and did some weathering to the seats. Engine has been weathered a bit and installed. Finally body has been bonded to the chassis. I have given the body a dark brown wash as a first weathering step, wondering how much more to do. I want some weathering to reflect race use without going too far.