Pierre Rivard
-
Posts
2,579 -
Joined
-
Last visited
Content Type
Profiles
Forums
Events
Gallery
Everything posted by Pierre Rivard
-
1971 Pearson GTO
Pierre Rivard replied to Pierre Rivard's topic in WIP: Stock Cars (NASCAR, Super Stock, Late Model, etc.)
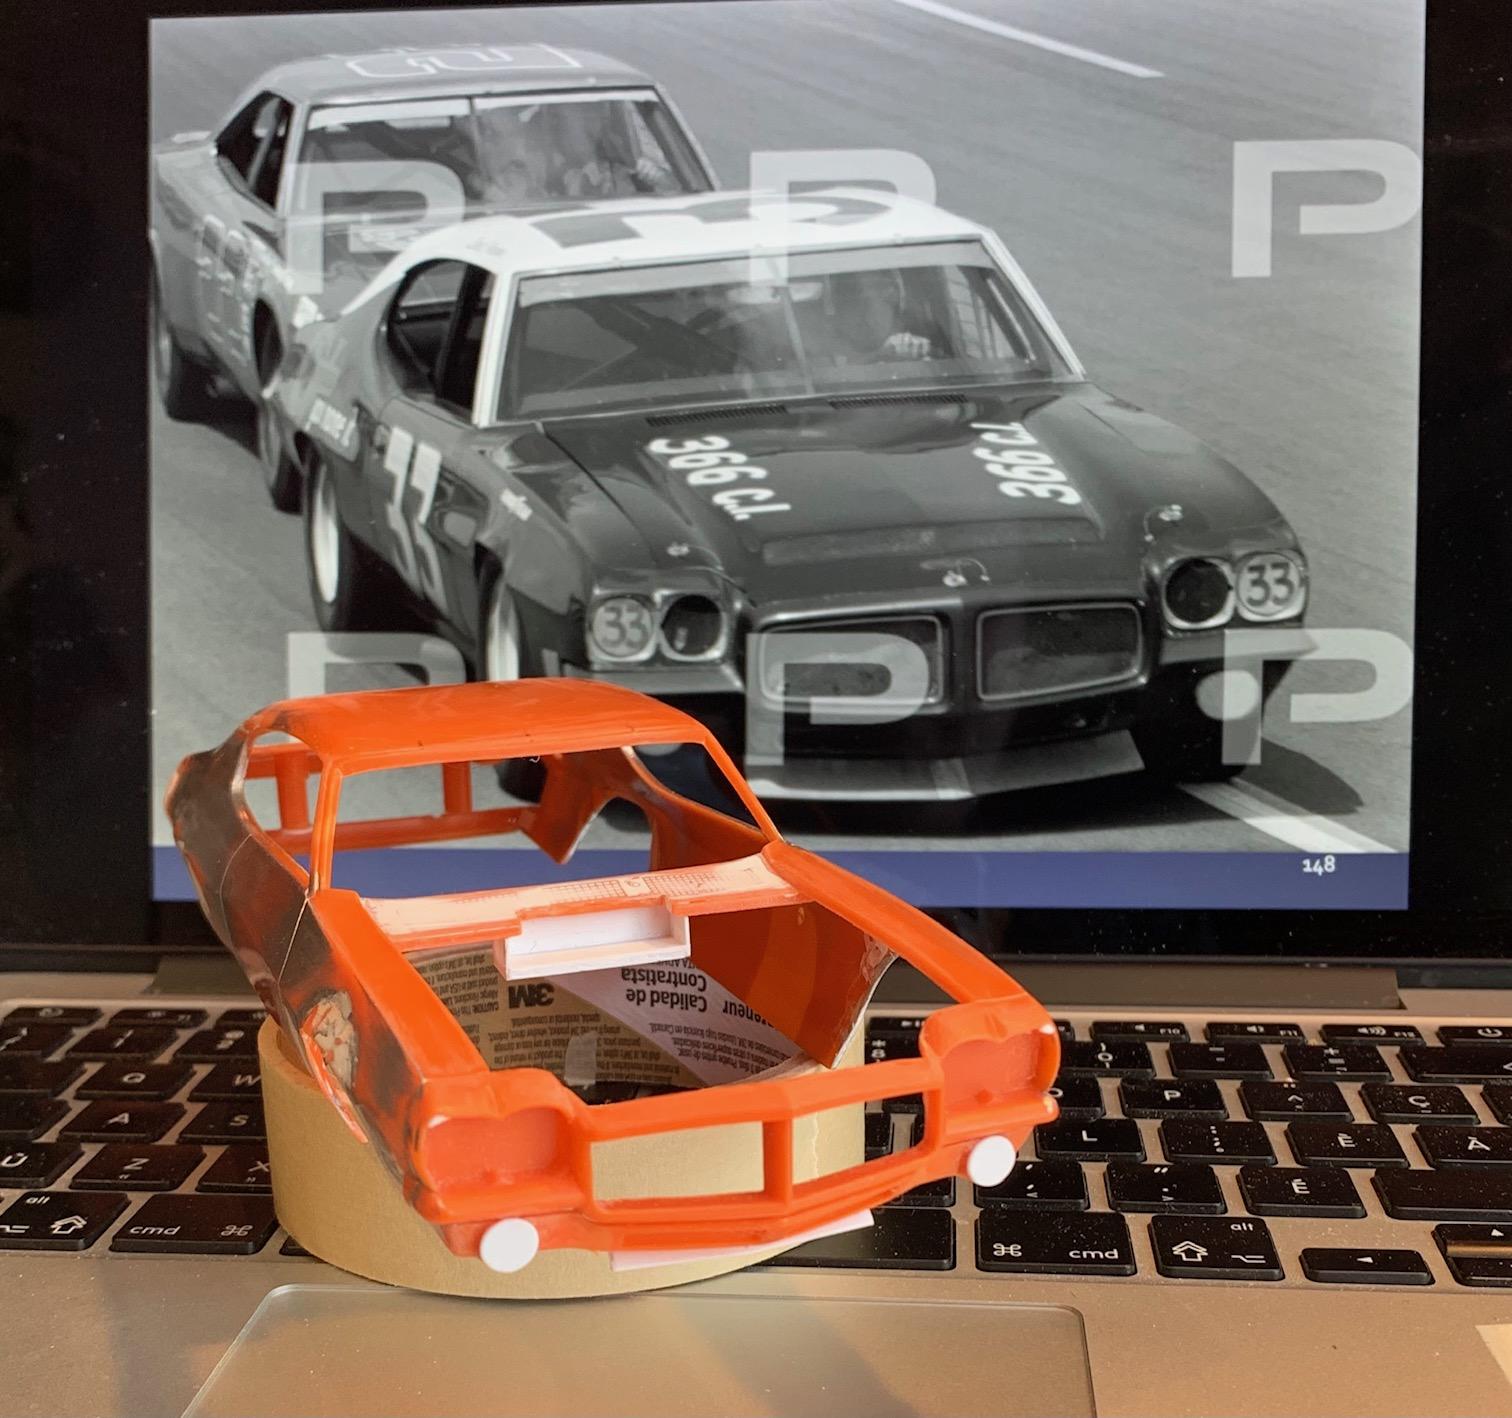
Update on the chassis work. Here are 2 reference pictures from the build stage in Nichels' shop. My take away is a H&M Galaxie style fabricated front end. Floorpan could be fabricated but I'll assume reinforced stock. No information on the rear suspension. I'll go with assumption of a modified short arm. Also taking note that the rear upper spring and shock mounts are not exposed but boxed in.
-
1971 Pearson GTO
Pierre Rivard replied to Pierre Rivard's topic in WIP: Stock Cars (NASCAR, Super Stock, Late Model, etc.)
Thanks Todd, I happen to have one of them in my spares and the fit is good. -
1966 Mercury Comet
Pierre Rivard replied to MarkJ's topic in WIP: Stock Cars (NASCAR, Super Stock, Late Model, etc.)
Looking good. I have worked with .020 rod lately and it is small and very difficult to manipulate. Good stuff! -
1971 Pearson GTO
Pierre Rivard replied to Pierre Rivard's topic in WIP: Stock Cars (NASCAR, Super Stock, Late Model, etc.)
James, thank you for the nice feedback. This is the first time I try to flare fenders and I just guessed my way into it and it worked our reasonably well. The front sheetmetal is definitely dropped relative to a stock body but I did not feel capable of doing it properly, so I will give the car some lean on the chassis side instead. I got this pic from a fellow builder on Randy' site and it shows it clearly.
-
1966 Mercury Comet
Pierre Rivard replied to MarkJ's topic in WIP: Stock Cars (NASCAR, Super Stock, Late Model, etc.)
I think you'll make it look great. An alternative would be a styrene insert with a grille texture decal. Slixx has many options available. I can post pic or send you a pm if you think it might work. -
1971 Pearson GTO
Pierre Rivard replied to Pierre Rivard's topic in WIP: Stock Cars (NASCAR, Super Stock, Late Model, etc.)
I think they drew in the 66 chassis in the 72 kit. Mismatch in wheelbase, multiple body attachment pegs, none of which match. I think I'll just fab something with an axle from the spares box. Thanks. -
1971 Pearson GTO
Pierre Rivard replied to Pierre Rivard's topic in WIP: Stock Cars (NASCAR, Super Stock, Late Model, etc.)
The winner is behind door #1 What's the deal with the 429 c.i on the hood of #3? Weird... -
1971 Pearson GTO
Pierre Rivard replied to Pierre Rivard's topic in WIP: Stock Cars (NASCAR, Super Stock, Late Model, etc.)
I'm doing the purple one as it raced at Michigan Raceway. For the chassis I am set on doing a Galaxie front clip but still not sure about the back end. 1971 was sort of a transition year before fabricated chassis with truck arms became the norm for the GM and Ford teams. Thinking I might do some sort of beefed up short arm setup. I don't have pics of the car's rear chassis so it's a bit of a guess. -
1971 Pearson GTO
Pierre Rivard replied to Pierre Rivard's topic in WIP: Stock Cars (NASCAR, Super Stock, Late Model, etc.)
Thanks Larry. I did consider it but chose to go the route of a hybrid chassis consisting of a beefed up road chassis with a Galaxie front clip. Now that I'm in the thick of it I'm not yet sure how this will pan out. Time will tell... -
1971 Pearson GTO
Pierre Rivard replied to Pierre Rivard's topic in WIP: Stock Cars (NASCAR, Super Stock, Late Model, etc.)
So do I but I'm a long way off from the painting steps. Firs I need to fab some sort of chassis and test fit it to the body. -
Awesome scratch-building I love the checker plate finish
-
1971 Pearson GTO
Pierre Rivard replied to Pierre Rivard's topic in WIP: Stock Cars (NASCAR, Super Stock, Late Model, etc.)
Next the various small parts. Blanks over turn signal, front air dam bracket to body (the dam will added after paint), I fabricated a rear spoiler, again with guides. Front grille recess has been reduced by grinding the back side of the trim piece. Headlamps: drilled out outer lamps and added blanks. Inner molded lamps will be painted to mimic a mesh inlet cover.
-
1971 Pearson GTO
Pierre Rivard replied to Pierre Rivard's topic in WIP: Stock Cars (NASCAR, Super Stock, Late Model, etc.)
Next I scratch built rear window straps. I hate trying to glue them on a painted body...shaky hand and all. I tape the strips in position and drill through strip and body, then insert a guiding rod. the rod is glued only to the strip for now. I then trim the top part of the rod. When all is painted I will insert to body and glue from underside and trim excess rod before glass install. I use Evergreen 0.02 x 0.06 (0,5 x 1.0 mm) strips and 0.02 (0.5 mm) rods Same idea for windshield clips
-
1971 Pearson GTO
Pierre Rivard replied to Pierre Rivard's topic in WIP: Stock Cars (NASCAR, Super Stock, Late Model, etc.)
Next step were mods to the engine air intake plenum. I added the plenum box at the cowl and blocked off the hood ram intake which was not in use for racing the GTO
-
1971 Pearson GTO
Pierre Rivard replied to Pierre Rivard's topic in WIP: Stock Cars (NASCAR, Super Stock, Late Model, etc.)
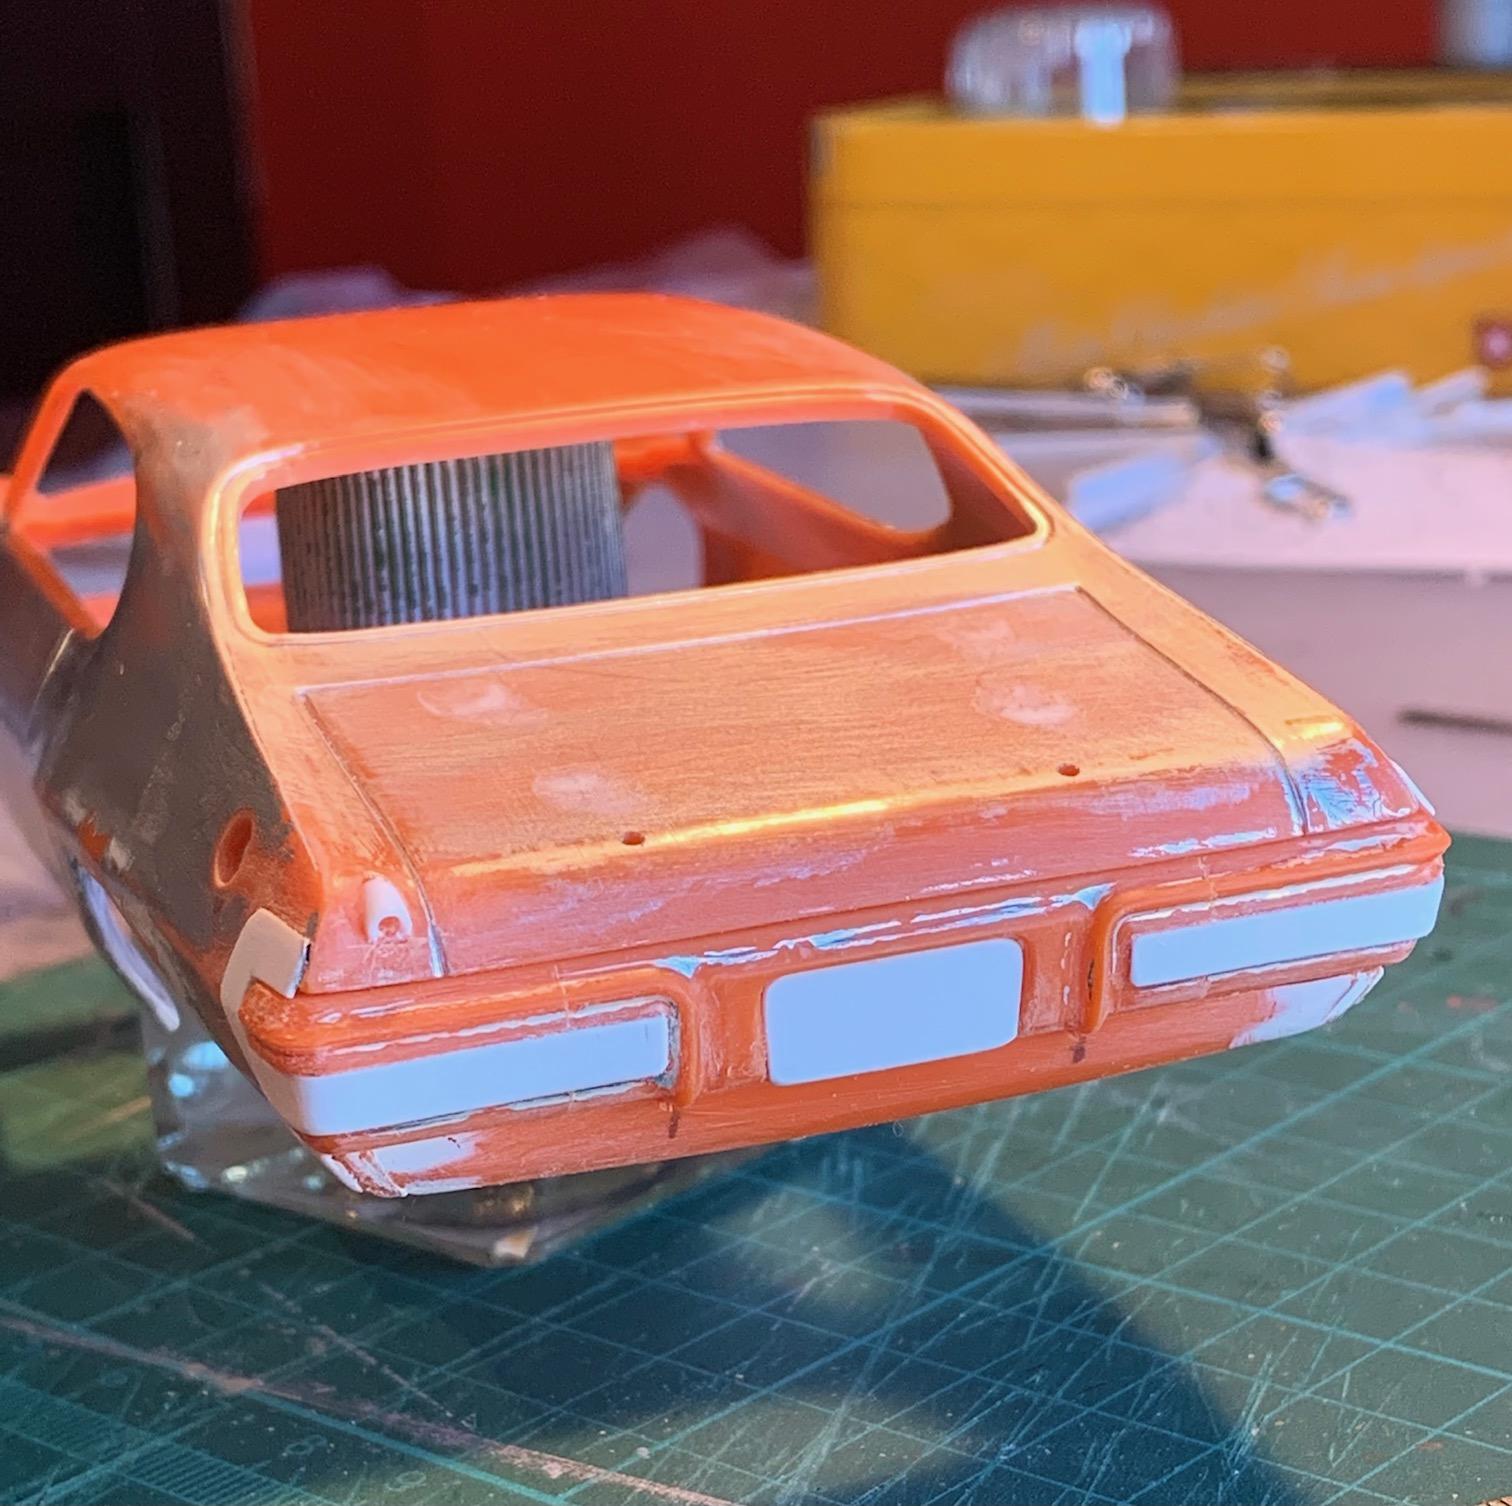
I then built up the back end components starting with the sheetmetal adds to smooth out airflow around the bumper sides. The bumper itself was very wide fo I removed about 3 mm (1/8") by making 2 cuts and removing material as required. Typical of what the teams did on the real cars,
-
1971 Pearson GTO
Pierre Rivard replied to Pierre Rivard's topic in WIP: Stock Cars (NASCAR, Super Stock, Late Model, etc.)
Here is the result for the front opening. Some touch up may be required after primer but I think I'm close The rear wheel openings were moved back 3 mm to replicate a scale 115 in wheelbase typical of era cup cars. The GM A-bodies were 112 in and all had to be stretched to comply. I then had to flare up the rear part of the openings to counteract the body tapering off going back.
-
I can't explain why but this may be my favorite NASCAR race car. I know it ran only a half dozen times and failed every time...but I love the way it looks. The basis for this build is the MPC road car kit. It's orange (we all love painting over colored bodies right?), the A posts are squished and the rest of the kit is a blob of unusable plastic. After my last project I wanted to do something easy but I can see this may require some work. I plan to release updates in batches: body, chassis, interior and final Body work for this project started with wheel opening flares. I made cuts, pulled the plastic strips outward with pliers, glued in wedges and then multiple steps of putty and sanding.
-
1966 Mercury Comet
Pierre Rivard replied to MarkJ's topic in WIP: Stock Cars (NASCAR, Super Stock, Late Model, etc.)
Brave man. I would have chickened out and done a 67. Is there as much change needed for the back end? -
This is a great build. These old Dodges looked very purposeful when transformed into race cars and you rendered it beautifully!
-
1966 Mercury Comet
Pierre Rivard replied to MarkJ's topic in WIP: Stock Cars (NASCAR, Super Stock, Late Model, etc.)
This is a great project and I very much look forward to seeing how you tackle it. Is this going to be a Bud Moore solution or a Holman Moody style half chassis? -
Wow Mario. Absolutely wonderful build. The car and diorama both look so lifelike. I wish I could do rust like that but that's beyond my capabilities. Epic effort!
-
Thank you all for the nice feedback!
-
But there is a good ending to the story. Ray Everham's Big Iron Garage has completely restored it back to the Marty Robbins Charger Daytona. It was presented in 2019 for the 50th anniversary of the Talladega speedway
-
Thank you guys. This was definitely the biggest project to date for me. Planning and research started 14 months ago, then lots of testing to develop a weathered appearance with only brushes. I did not count but I would guess the research + testing + car + diorama totaled between 300-400 hours. I need an easy topic for my next build...
-
Thank you all