Pierre Rivard
-
Posts
2,579 -
Joined
-
Last visited
Content Type
Profiles
Forums
Events
Gallery
Everything posted by Pierre Rivard
-
Eagle Gurmey Weslake 1/12 MFH
Pierre Rivard replied to primabaleron's topic in Other Racing: Road Racing, Salt Flat Racers
No doubt the best looking F1 from the era. Your mode of it is stunning! -
1971 Pearson GTO
Pierre Rivard replied to Pierre Rivard's topic in WIP: Stock Cars (NASCAR, Super Stock, Late Model, etc.)
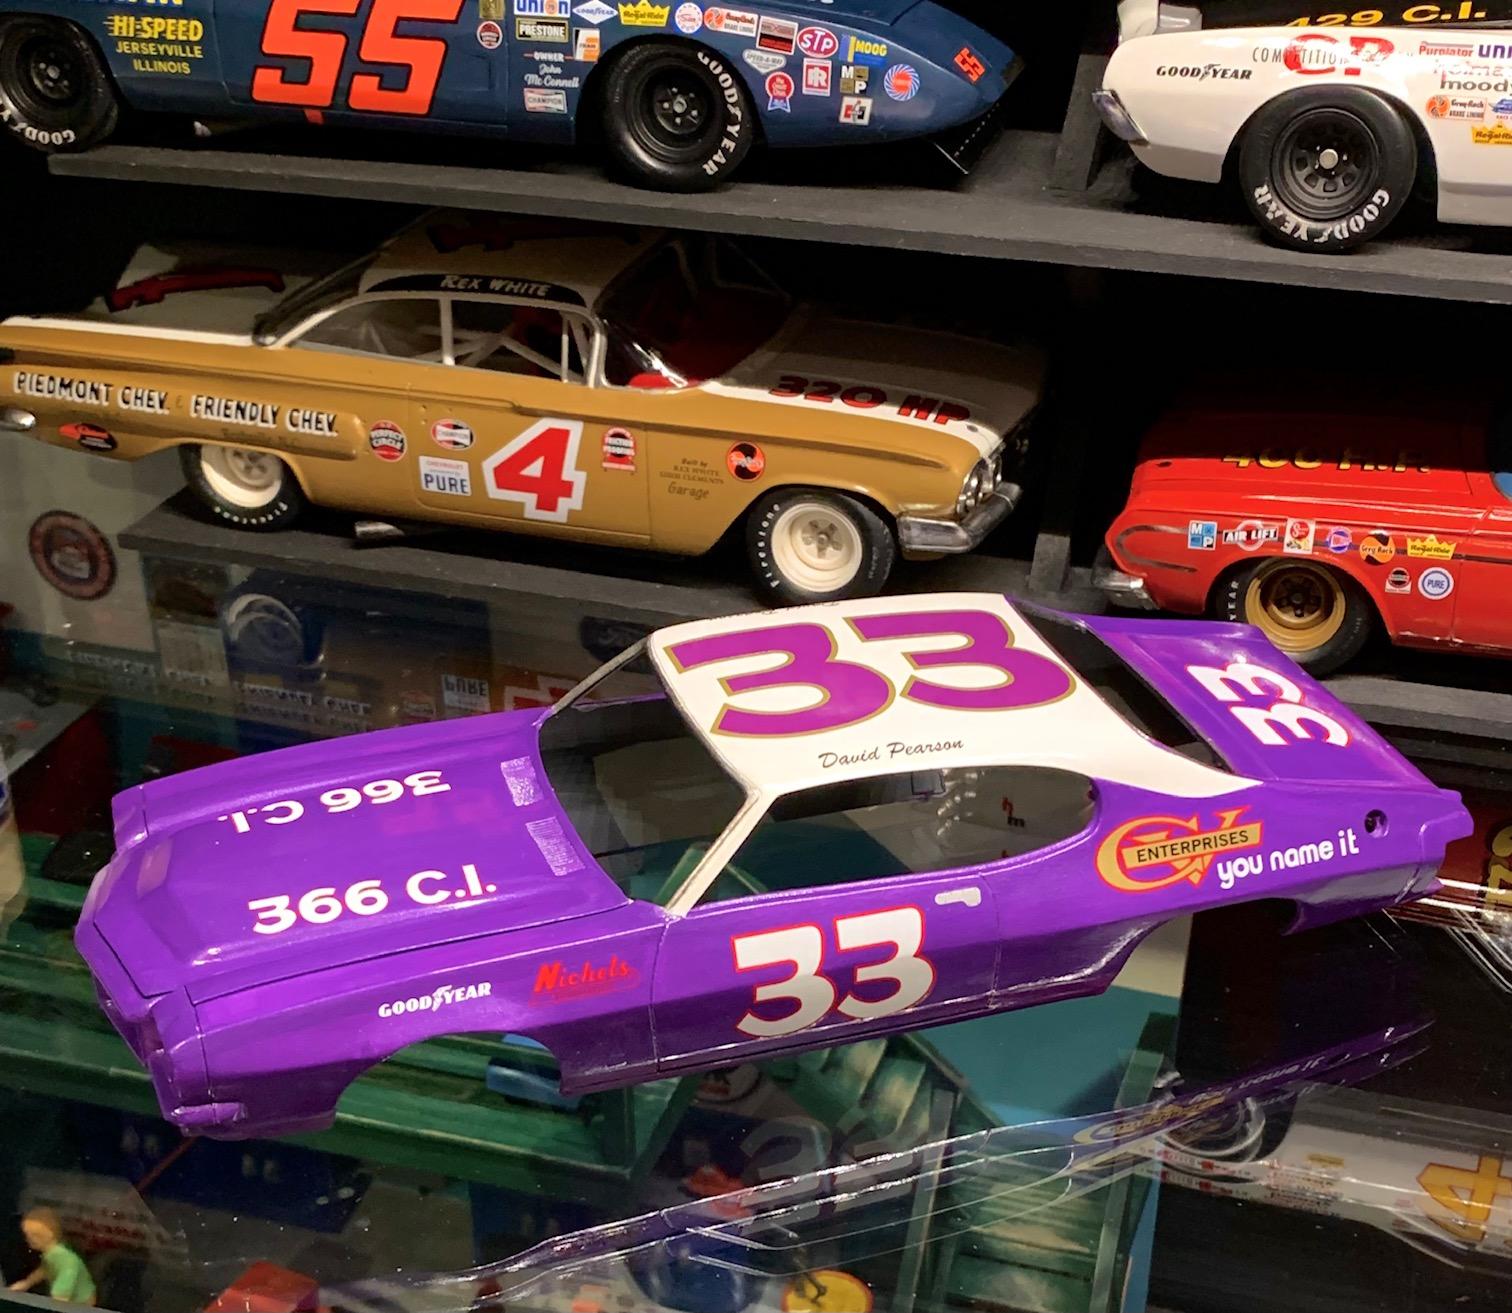
Powerslide decals.
-
1971 Pearson GTO
Pierre Rivard replied to Pierre Rivard's topic in WIP: Stock Cars (NASCAR, Super Stock, Late Model, etc.)
Thanks. Still some way to go but it is taking shape. -
1971 Pearson GTO
Pierre Rivard replied to Pierre Rivard's topic in WIP: Stock Cars (NASCAR, Super Stock, Late Model, etc.)
Thank you Gerald. Feedback much appreciated. -
1966 Mercury Comet
Pierre Rivard replied to MarkJ's topic in WIP: Stock Cars (NASCAR, Super Stock, Late Model, etc.)
I hope this will work out for you. I am puzzled why I am not suffering from the same masking issues knowing we use the same paint and technique. -
1971 Pearson GTO
Pierre Rivard replied to Pierre Rivard's topic in WIP: Stock Cars (NASCAR, Super Stock, Late Model, etc.)
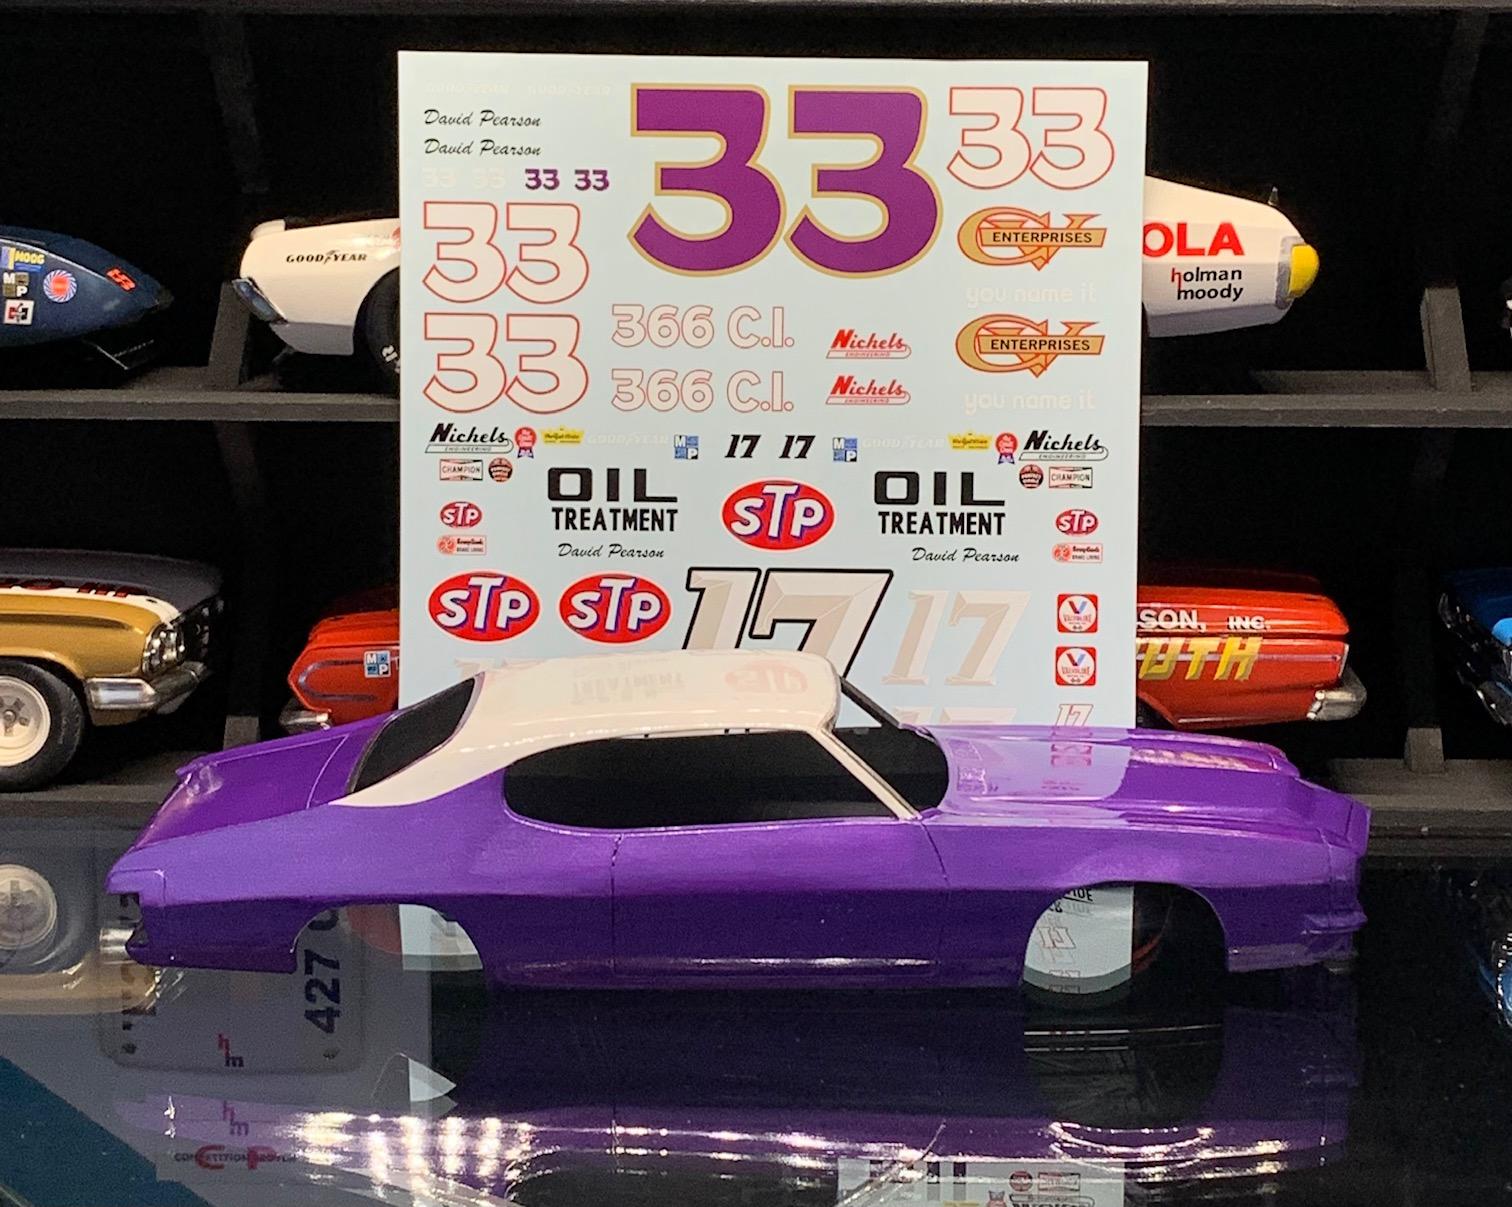
Two coats brush painted Tamiya acrylic clear (thinned and with retarder). After 24 hours, a modest polishing with 6-8-12k cloths to smooth out the finish and then 1 coat of Future. It's now ready for my favorite: DECAL DAY !
-
Fiat 131 Abarth
Pierre Rivard replied to afx's topic in WIP: Other Racing: Road Racing, Land Speed Racers
What happened to the engine you were scratch building? -
1971 Pearson GTO
Pierre Rivard replied to Pierre Rivard's topic in WIP: Stock Cars (NASCAR, Super Stock, Late Model, etc.)
Absolutely. I always spend a lot of time on the chassis to body interaction in the initial part of the build so that I don't have to deal with fit/stance issues in the latter stages. -
1971 Pearson GTO
Pierre Rivard replied to Pierre Rivard's topic in WIP: Stock Cars (NASCAR, Super Stock, Late Model, etc.)
Thank you JC. Taking inspiration from your beautiful work and trying to mimic some of the stuff you do. -
1971 Pearson GTO
Pierre Rivard replied to Pierre Rivard's topic in WIP: Stock Cars (NASCAR, Super Stock, Late Model, etc.)
The long road to making a chassis with very little from the kit and with a lot of scratch building and many some parts from the styrene scrap yard (spares) has come to a happy end. It was a lot more work than I anticipated but I'm pretty happy with the result.
-
1966 Mercury Comet
Pierre Rivard replied to MarkJ's topic in WIP: Stock Cars (NASCAR, Super Stock, Late Model, etc.)
I'm sorry to hear you have so many issues with this paint. I Hope you can find to repair the body. -
AJ Foyt '66 Ford Mustang T/A
Pierre Rivard replied to afx's topic in Other Racing: Road Racing, Salt Flat Racers
This is as good as it gets. Not surprising since it comes from your bench! Beautiful! -
Wow Rich, simply outstanding. Lots of beautiful detailing and impeccable finishing. Rosemeyer claimed that this car was very very fast but always "in motion" One little gust of wind was all it took to flip it over and kill him.
-
1971 Pearson GTO
Pierre Rivard replied to Pierre Rivard's topic in WIP: Stock Cars (NASCAR, Super Stock, Late Model, etc.)
Home made seat belts. This is the third time I do this and I simplified (i.e less detail) because they don't show that much in the end. They're a little rough but ok considering the time I put in. Belts made from a ribbon with a glue/water mix, then strips cut to desired width. Buckles made from Evergreen sheet and 0.5 mm rod as well as thin craft wire.
-
1966 Mercury Comet
Pierre Rivard replied to MarkJ's topic in WIP: Stock Cars (NASCAR, Super Stock, Late Model, etc.)
I use Tamiya products. The white one is 2mm plastic or vinyl and is great for curves because it stretches and bends well. The brown one is 6mm wide traditional type but thin (fine edge). I use the brown when the curve is too tight even for the white one. Best example is a tight window corner when I want to do the painted chrome. I apply the tape and cut along the edge of the trim and remove the unwanted piece. On a smooth surface I would precut the tape. Allow me to post pictures to help visualize. On the GTO I pre-cut the corner pieces, On the MC I simulated cutting on the body because it is right on the trim edge.
-
1966 Mercury Comet
Pierre Rivard replied to MarkJ's topic in WIP: Stock Cars (NASCAR, Super Stock, Late Model, etc.)
Sorry to hear that. Bleed through or problems with pulling off the mask? I hope it will not be too much work to fix this. This is such a great project. -
1971 Pearson GTO
Pierre Rivard replied to Pierre Rivard's topic in WIP: Stock Cars (NASCAR, Super Stock, Late Model, etc.)
It depends on the color. In this case I am using the metal medium as part of my mix and it has a heavy viscosity so I added more thinner. -
1971 Pearson GTO
Pierre Rivard replied to Pierre Rivard's topic in WIP: Stock Cars (NASCAR, Super Stock, Late Model, etc.)
Here's a picture in a light that better shows the color as I see it. Products I used are from Vallejo. This was an easy color to mix (for a change). 3 parts violet, 2 parts metal medium and 8-10 parts thinner. Multiple thin coats to avoid brush marks.
-
1971 Pearson GTO
Pierre Rivard replied to Pierre Rivard's topic in WIP: Stock Cars (NASCAR, Super Stock, Late Model, etc.)
Thank you sir. It will take a few days because I want to let that paint cure before I do the chrome trim and clear. Moving back to the chassis and interior stuff in the meanwhile. -
1971 Pearson GTO
Pierre Rivard replied to Pierre Rivard's topic in WIP: Stock Cars (NASCAR, Super Stock, Late Model, etc.)
Thanks JC. It took some experimenting to get there but I now have a formula that works for me. Successful brush painting requires thin laters with very thinned paint. This way brush marks disappear but some pigment laying at the surface affect the finish ( see hood in reflected light). The color coats I use don't take polishing well so instead I lay a Tamiya acrylic clear on it and polish that. Then Future, decals and Future. -
1971 Pearson GTO
Pierre Rivard replied to Pierre Rivard's topic in WIP: Stock Cars (NASCAR, Super Stock, Late Model, etc.)
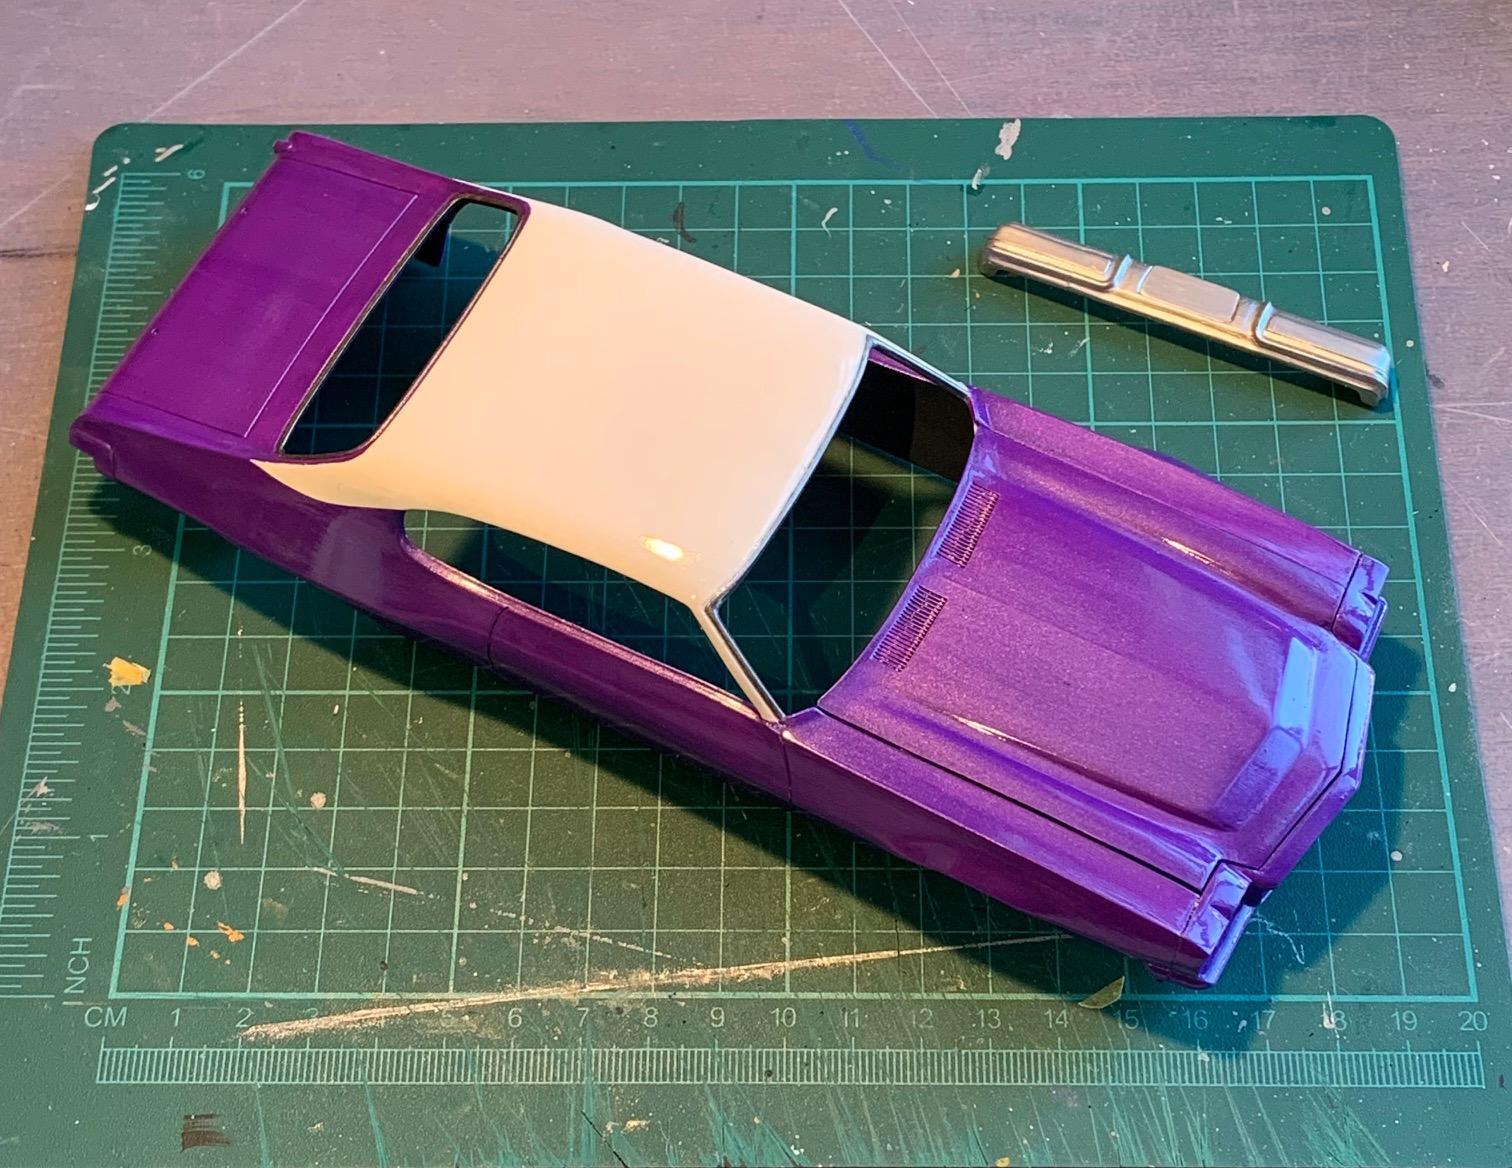
A part of the project I have been fearing. Finding a way to paint the two tone with the white to purple cutting across the top 1/4 sail to the 1/4 panel and then a sharp turn to circle the rear window. Painted the white roof and then after masking i did some white along the edge on the purple side. The thinking is that initial bleed through (if any) wouldd be white over white. After a quick dry I moved to the purple layers. Minimal purple bleed through. Should be easy to fix
-
1971 Pearson GTO
Pierre Rivard replied to Pierre Rivard's topic in WIP: Stock Cars (NASCAR, Super Stock, Late Model, etc.)
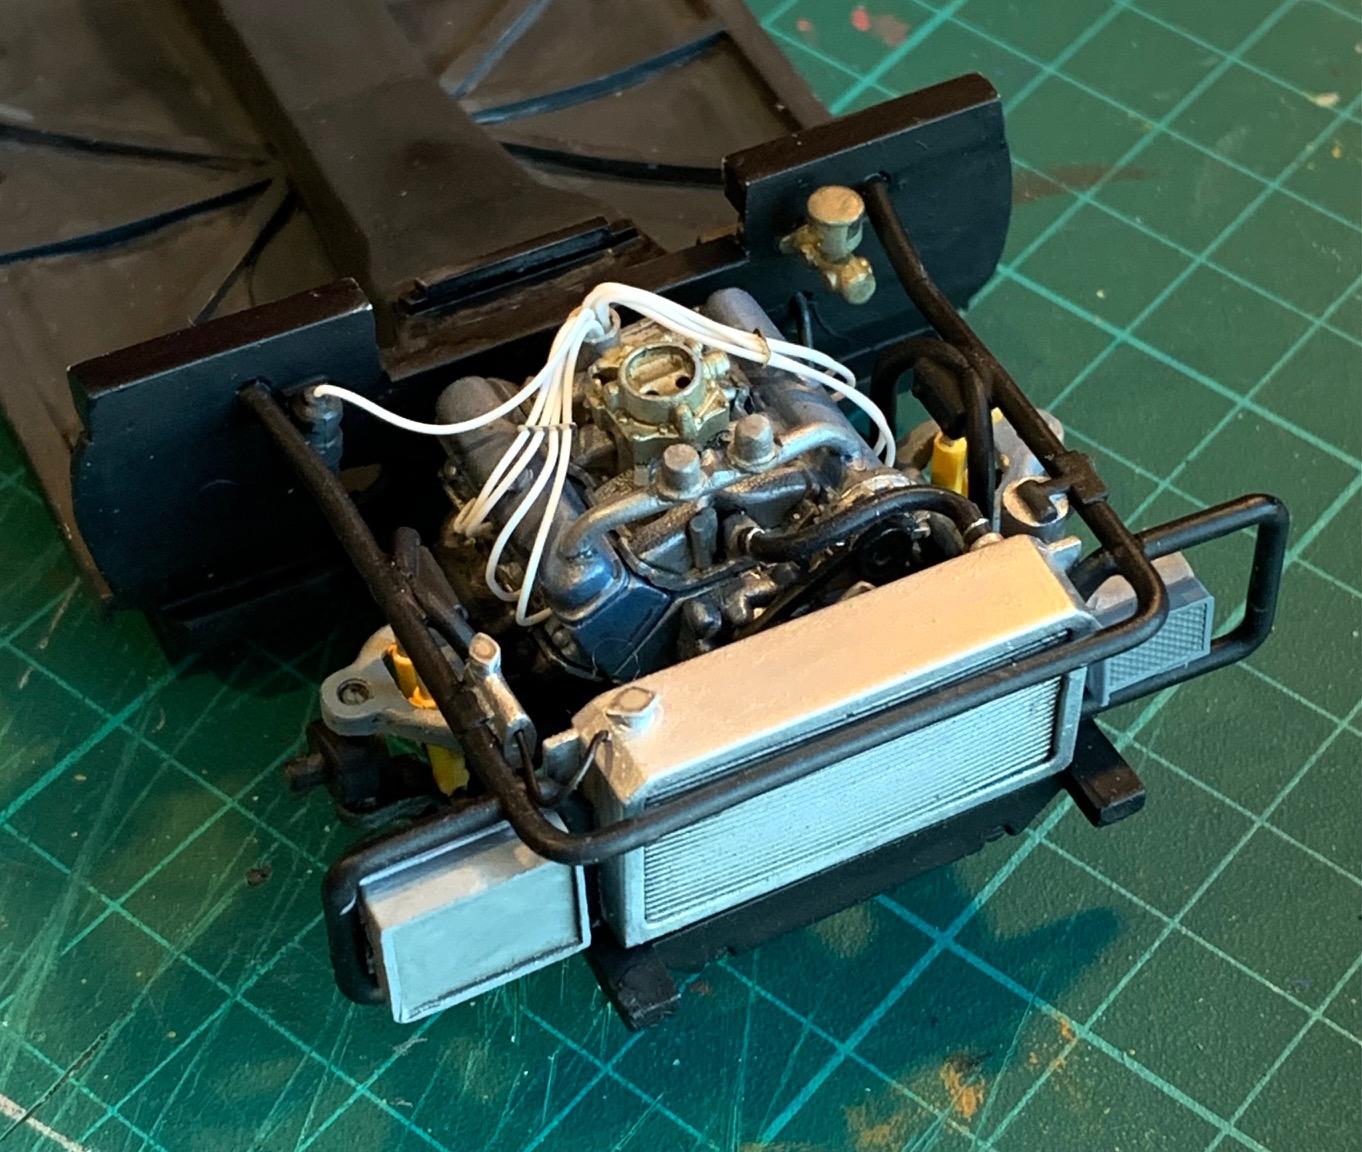
Engine has received washes to add depth, then added wiring and rad hoses. DONE!
-
1966 Mercury Comet
Pierre Rivard replied to MarkJ's topic in WIP: Stock Cars (NASCAR, Super Stock, Late Model, etc.)
Very interesting. What brand material are you using and what is the method for doing this? -
1971 Pearson GTO
Pierre Rivard replied to Pierre Rivard's topic in WIP: Stock Cars (NASCAR, Super Stock, Late Model, etc.)
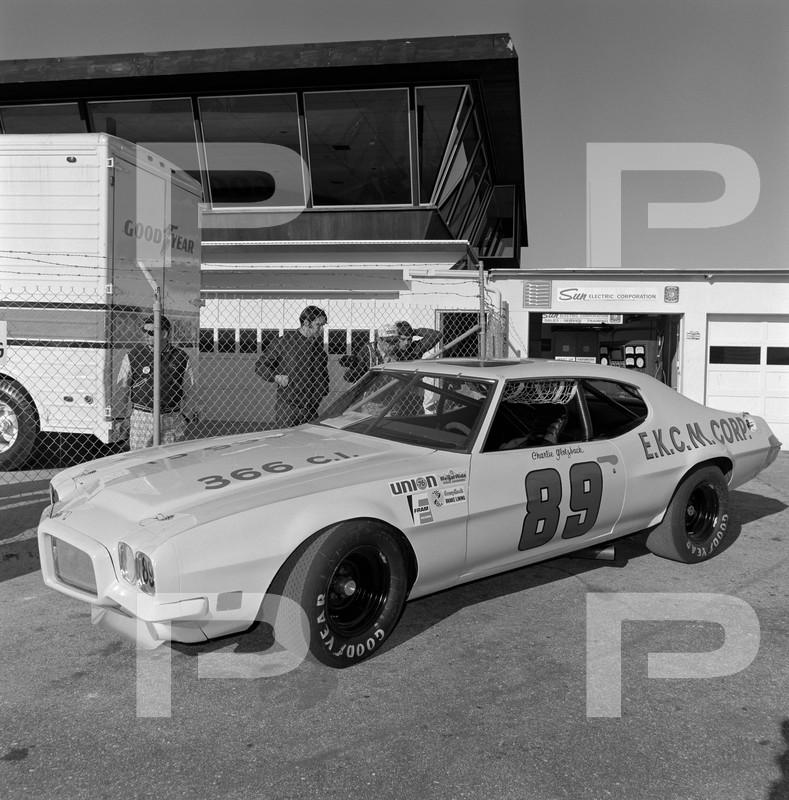
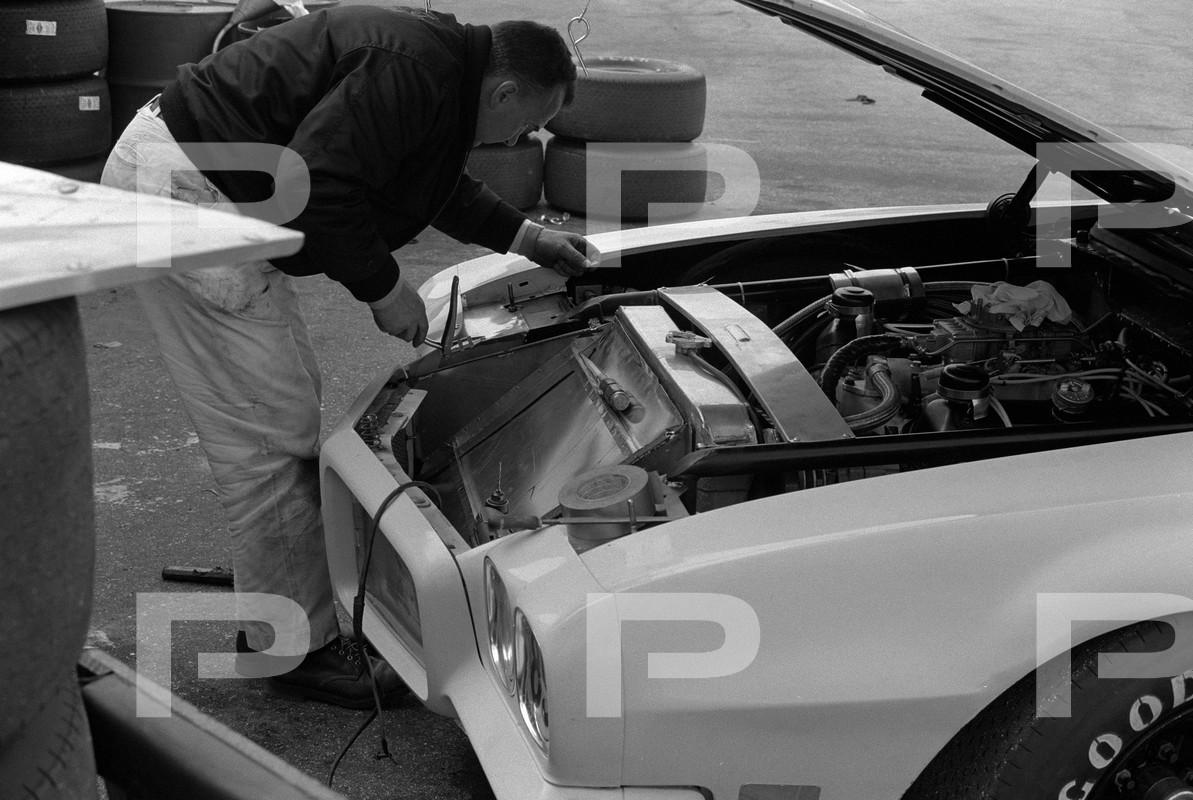
Like I said, engine is done! I did not have a picture of the Pearson car engine but for 1 the chassis ref pic shows air intake through base of windshield (conventional way) and I have ref pics showing the engine of another GTO from 1971 (Charlie Glotzbach?). I'd rather go by these assuming the setup would be the same for this new for 1971 Pontiac engine.
-
1971 Pearson GTO
Pierre Rivard replied to Pierre Rivard's topic in WIP: Stock Cars (NASCAR, Super Stock, Late Model, etc.)
No no no! Don't show me 366 engine pictures. Engine is done. Nope, not changing it! Kidding aside, thanks Larry for sharing these