Pierre Rivard
-
Posts
2,579 -
Joined
-
Last visited
Content Type
Profiles
Forums
Events
Gallery
Everything posted by Pierre Rivard
-
The mods make it work much better than the original. Beautiful!
-
Talk about making something great starting with a most basic kit. Exquisite work sir!
-
Giovanni, è bellissima, è assolutamente stupenda. I don't have these kinds of skills so when I see such a beautifully detailed and finished replica like your's I can only admire and maybe learn a little from you. Thank you for the detailed explanations. This is art at the highest level. Magnifique, félicitations!
-
Wow! Daniel, this is a most impressive build. The aluminums roof wing with all the rivets is formidable but most impressive is the engine detailing. Awesome in so many ways. Scratch building extraordinaire. Félicitations!
-
1966 Mercury Comet
Pierre Rivard replied to MarkJ's topic in WIP: Stock Cars (NASCAR, Super Stock, Late Model, etc.)
Nice to see an update on this great build. Beautiful job on the engine. -
1971 Pearson GTO
Pierre Rivard replied to Pierre Rivard's topic in WIP: Stock Cars (NASCAR, Super Stock, Late Model, etc.)
Thank you Gerald and Bob. I have posted pics of the finished model in the Underclass Nascar section. -
Jaguar XJR8-LM (Hasegawa)
Pierre Rivard replied to 1959scudetto's topic in Other Racing: Road Racing, Salt Flat Racers
Beautiful race car and your representation looks so lifelike. I never purchased a Hasegawa kit. How does it compare to Tamiya or Fujimi? -
1966 Mercury Comet
Pierre Rivard replied to MarkJ's topic in WIP: Stock Cars (NASCAR, Super Stock, Late Model, etc.)
Looks super nice and will be great with decals. Looking forward to the chassis work. Does the kit provide a nice starting point for the chassis? -
Thanks James. When I got in the hobby 5 years ago that car was at the top of my list and I am happy I finally got to do it. I hope we'll get to see your's soon. Sharing and learning from each other is always so helpful.
-
Beautiful work as always JC. I did not realize that in the MCM astrology calendar 2022 is the year of the Mustang. Keep'em coming. Love it!
-
Merci John. Can't blame the driver. Best all time driver in my book but it would be a close fight with Bobby A.
-
I like it too. I used a cheap cork tile from the dollar store and painted it flat black, then a few light dry brushed coats of various earth and gray tones.
-
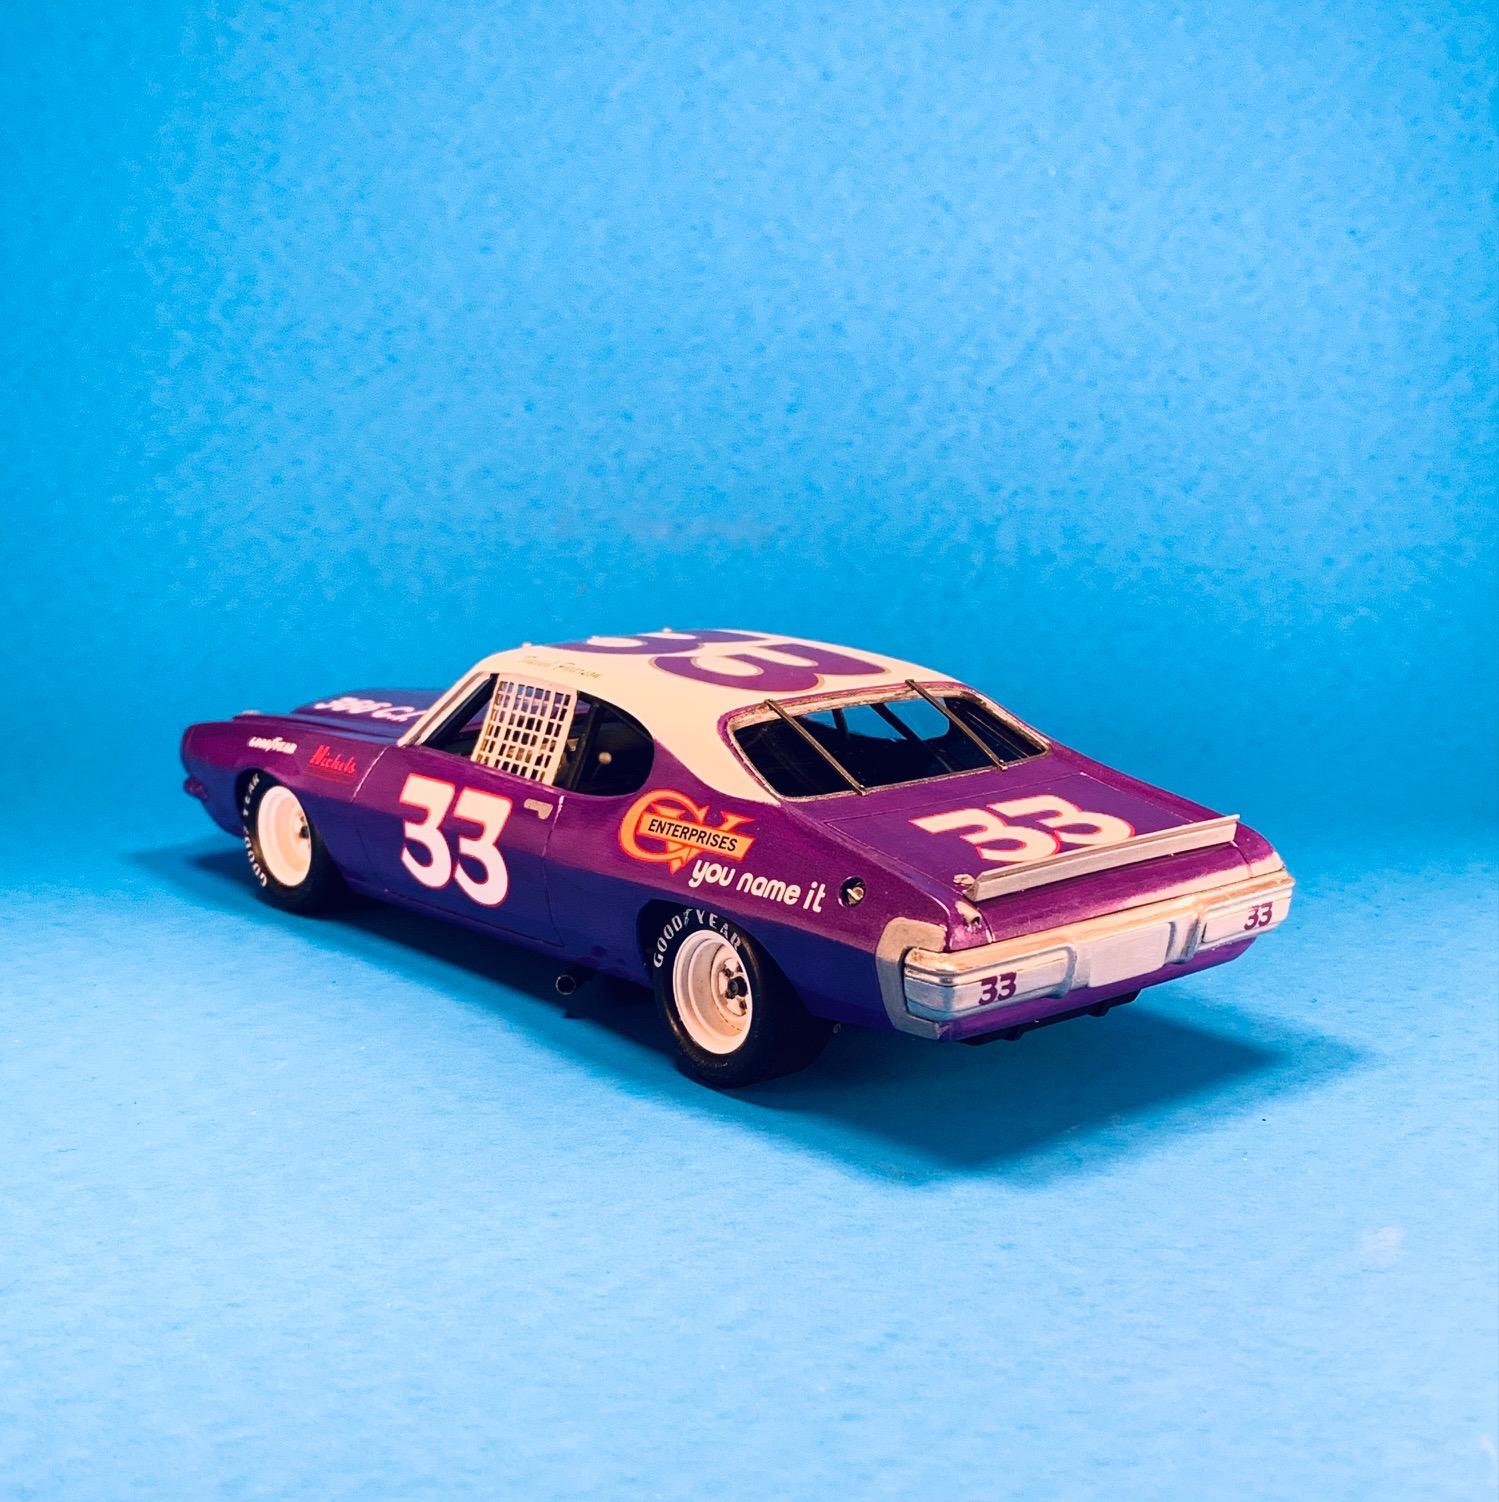
This is the photo setup concept, done quickly to see if I can get a better color representation. I would need a bigger road surface (only had a 12x12 cork tile available) and the full lighting setup but I like the way it is going.

-
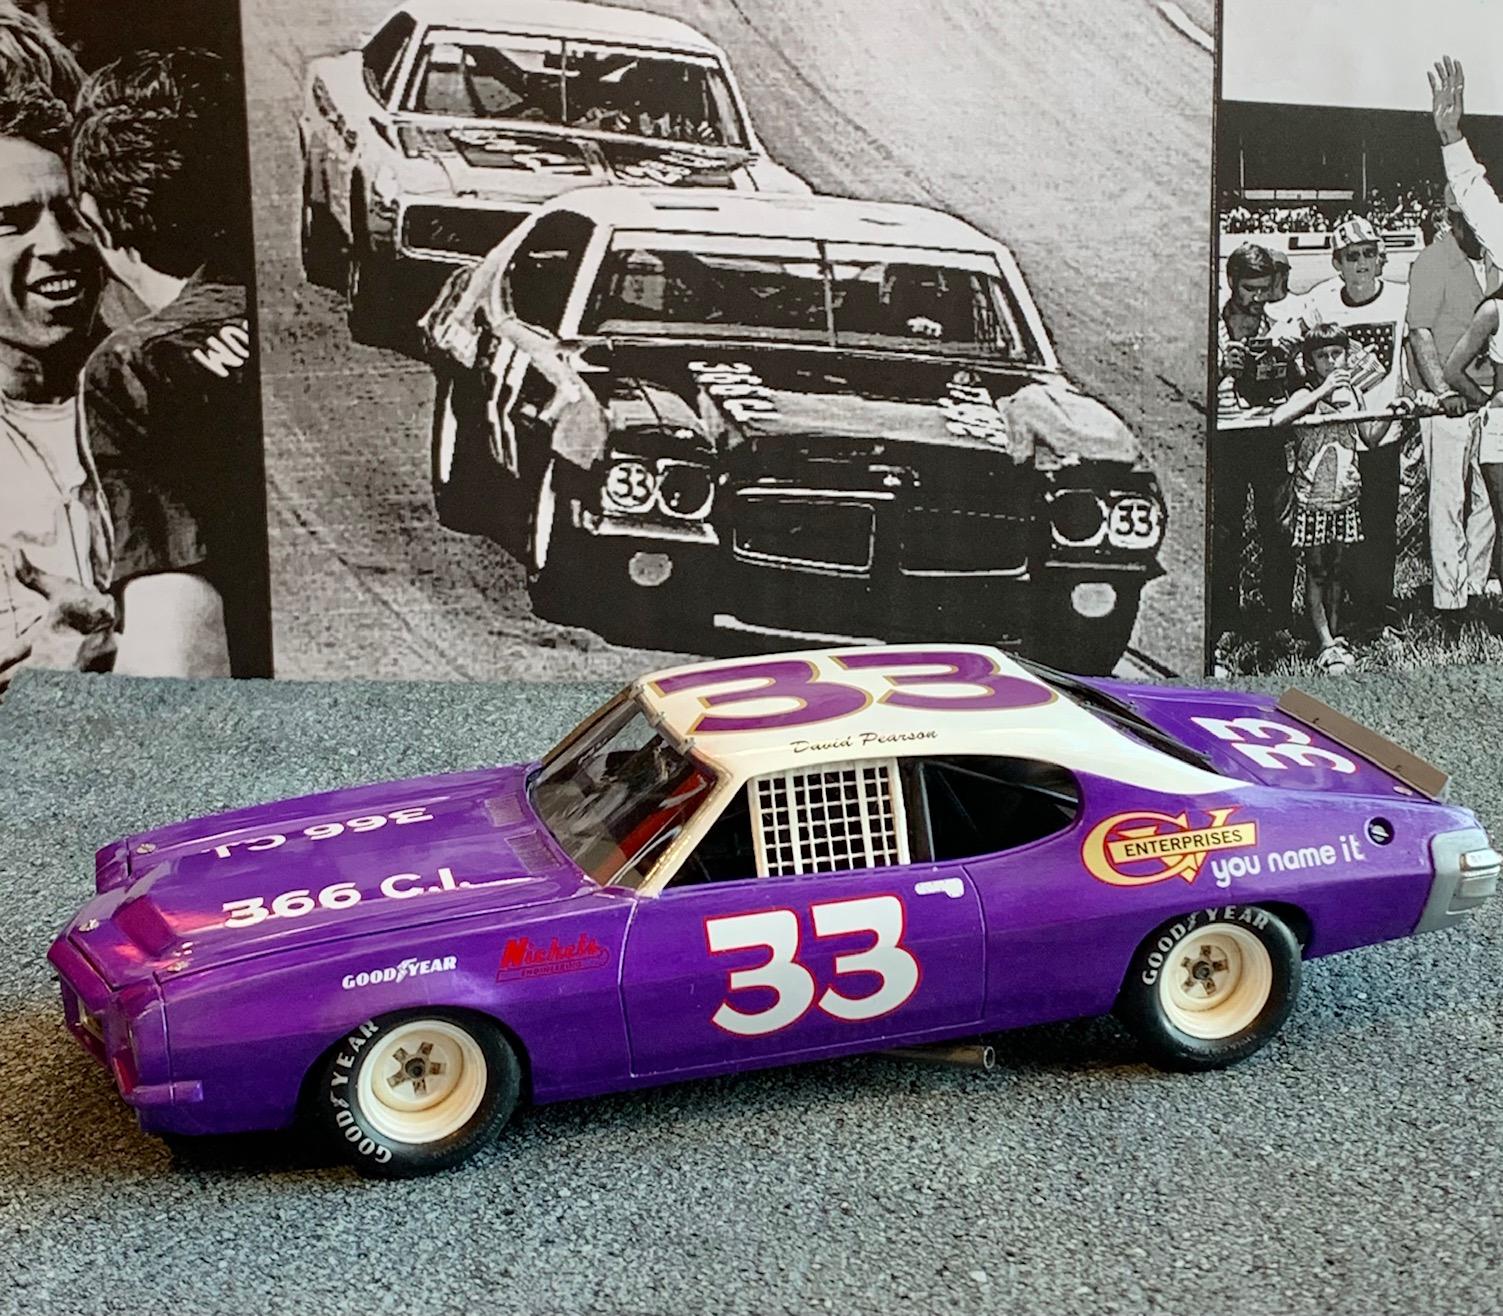
Thanks Mark, happy to get this one finished. I'm still struggling with the photos. The blue background needs to go. Working on a new setup.
-
Thank you all for the nice feedback. After all the mods on this one I'm ready for a nice OOB.
-
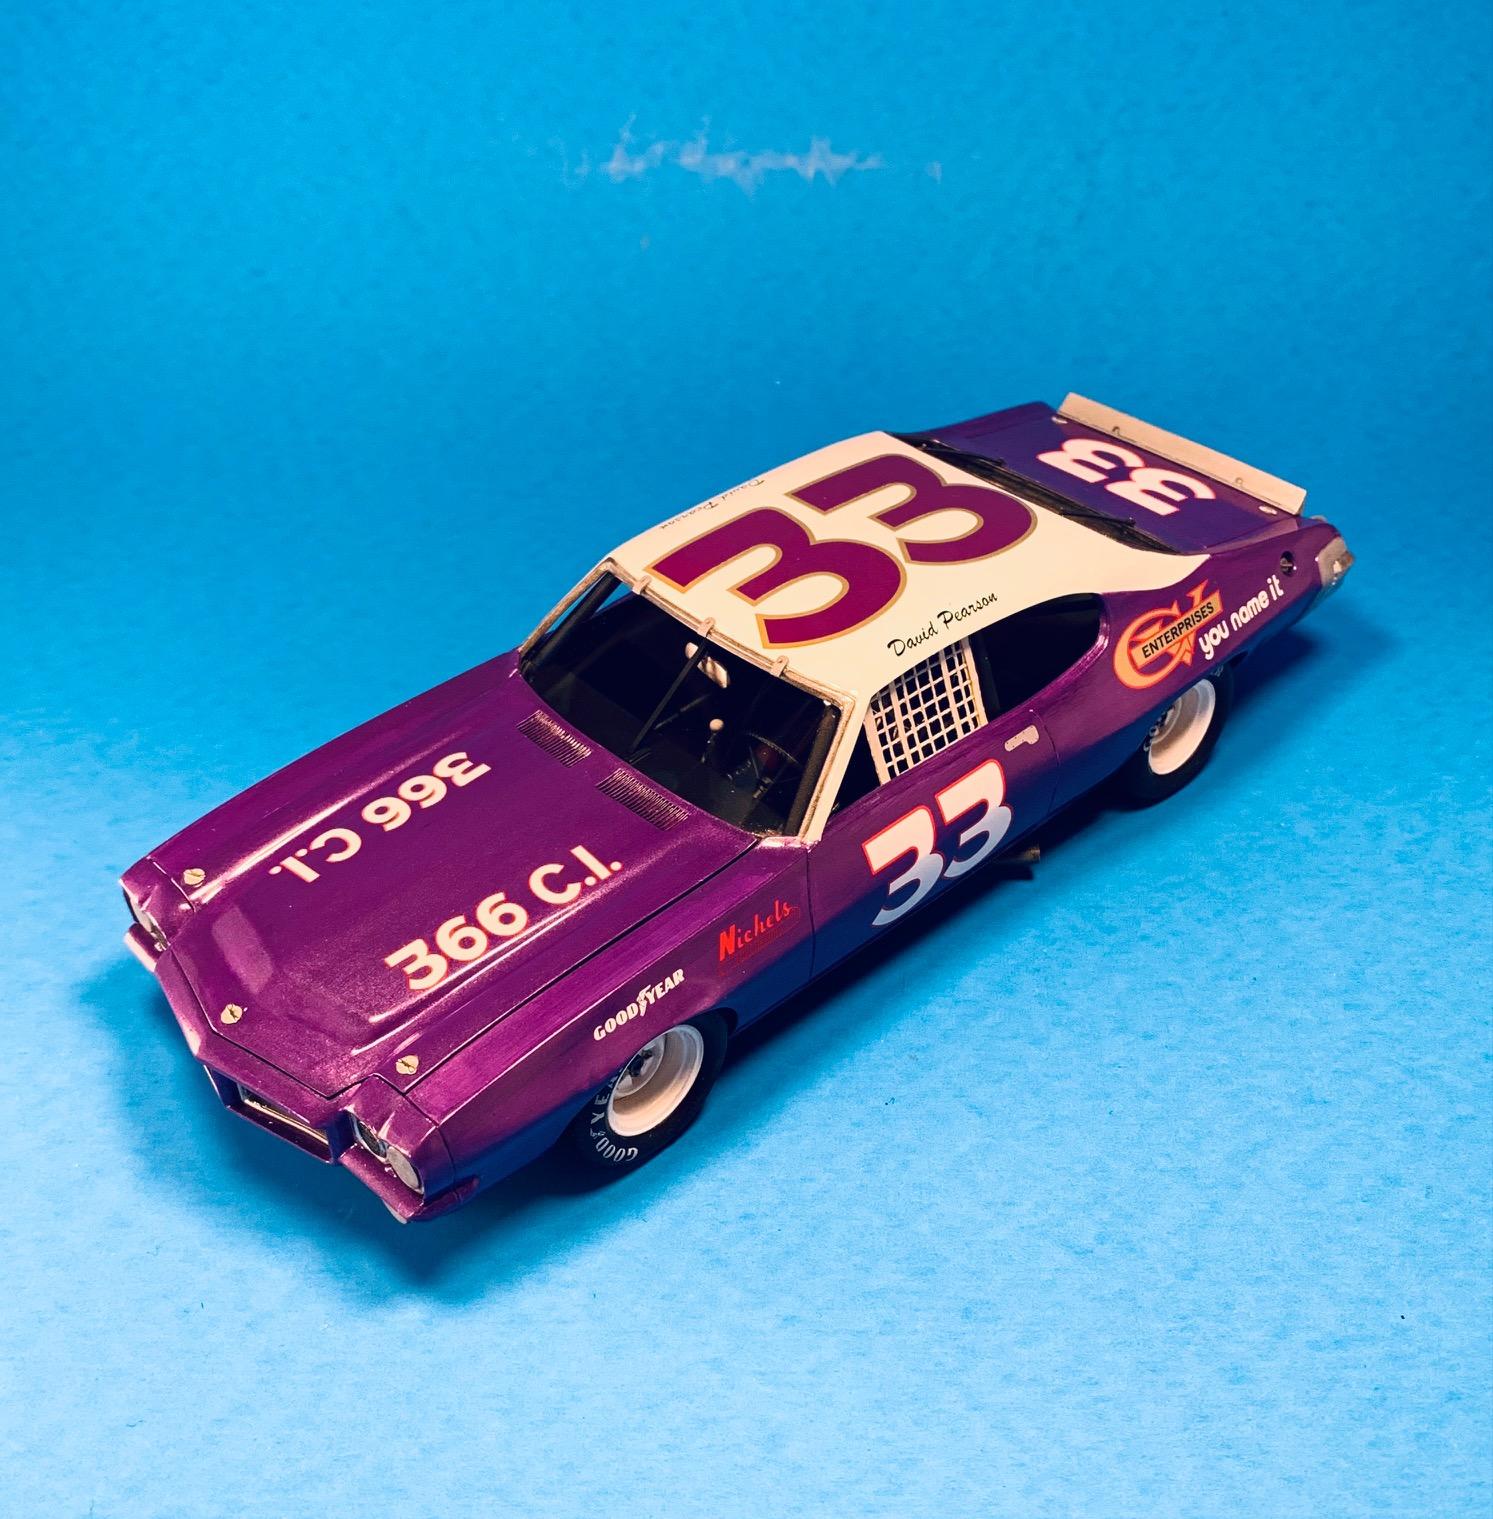
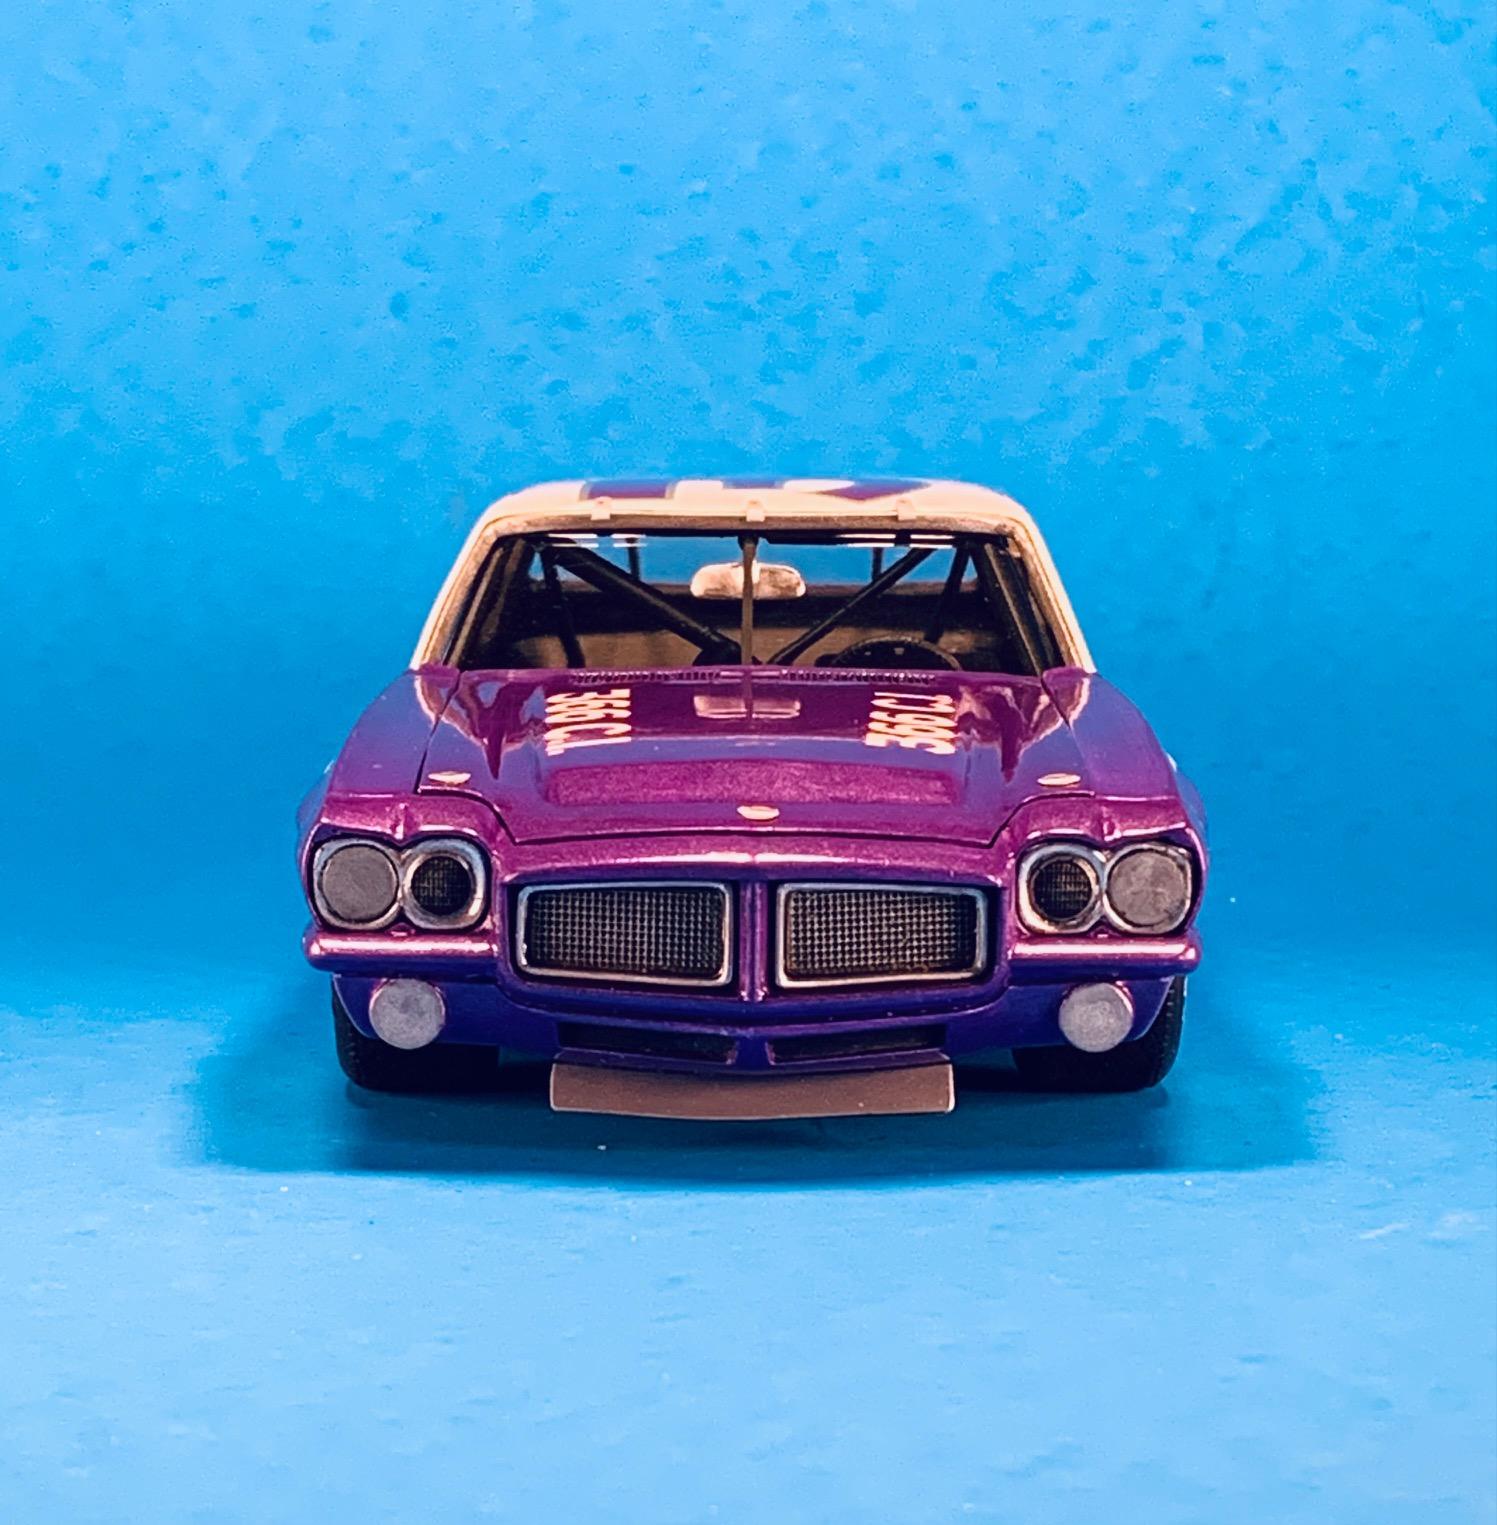
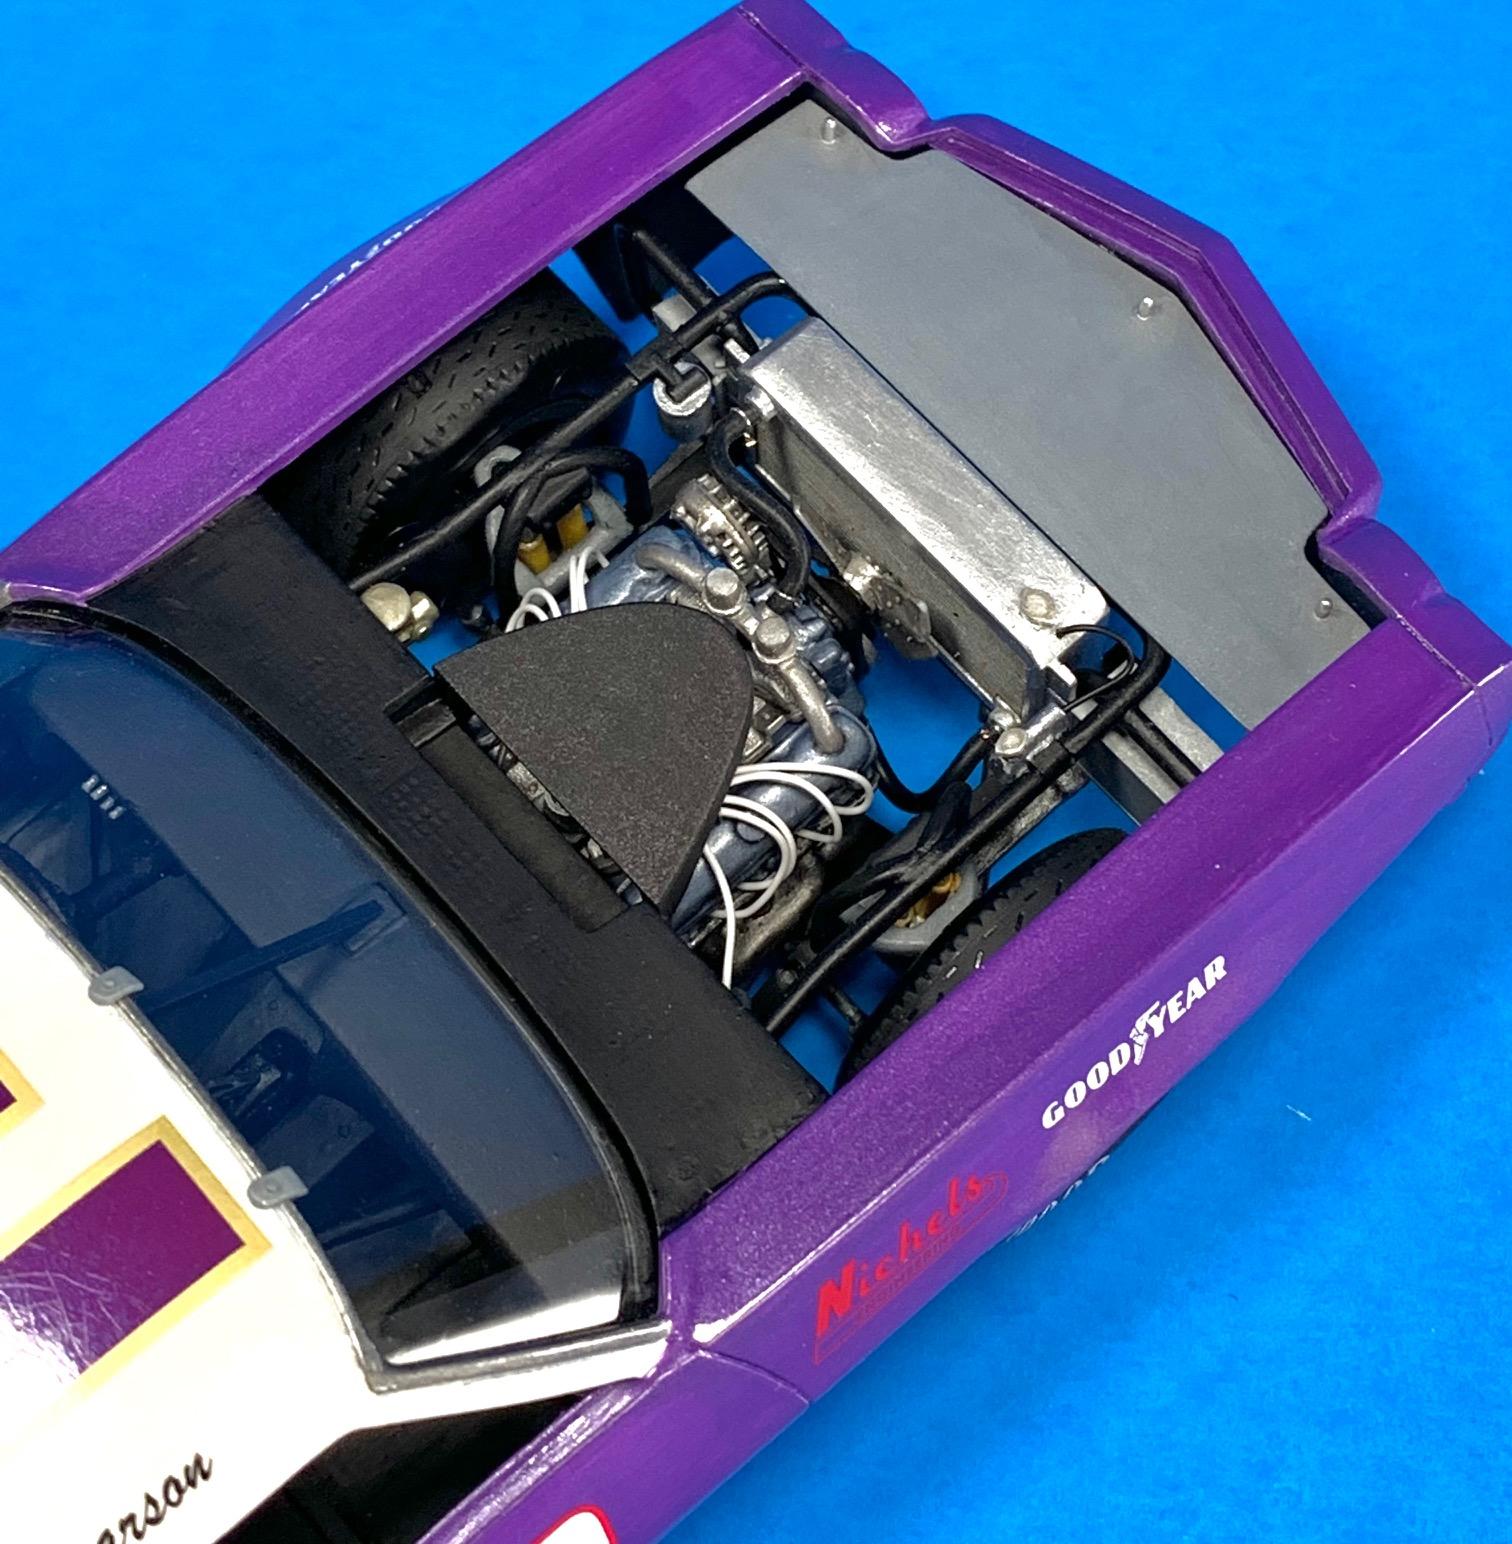
This is GTO Pearson drove for 6 races in 1971. Livery represents as raced at the Motor State 400 All details of the build in the w.i.p. section. Thank you for looking.
-
1966 Mercury Comet
Pierre Rivard replied to MarkJ's topic in WIP: Stock Cars (NASCAR, Super Stock, Late Model, etc.)
I would say about 50% clear, 30% thinner and 20% retarder. I put a bit more retarder on my GTO and it seems like it was a bit more fragile when polishing. Suggest you experiment on a scrap body first. You may want slightly different ratios. -
1971 Pearson GTO
Pierre Rivard replied to Pierre Rivard's topic in WIP: Stock Cars (NASCAR, Super Stock, Late Model, etc.)
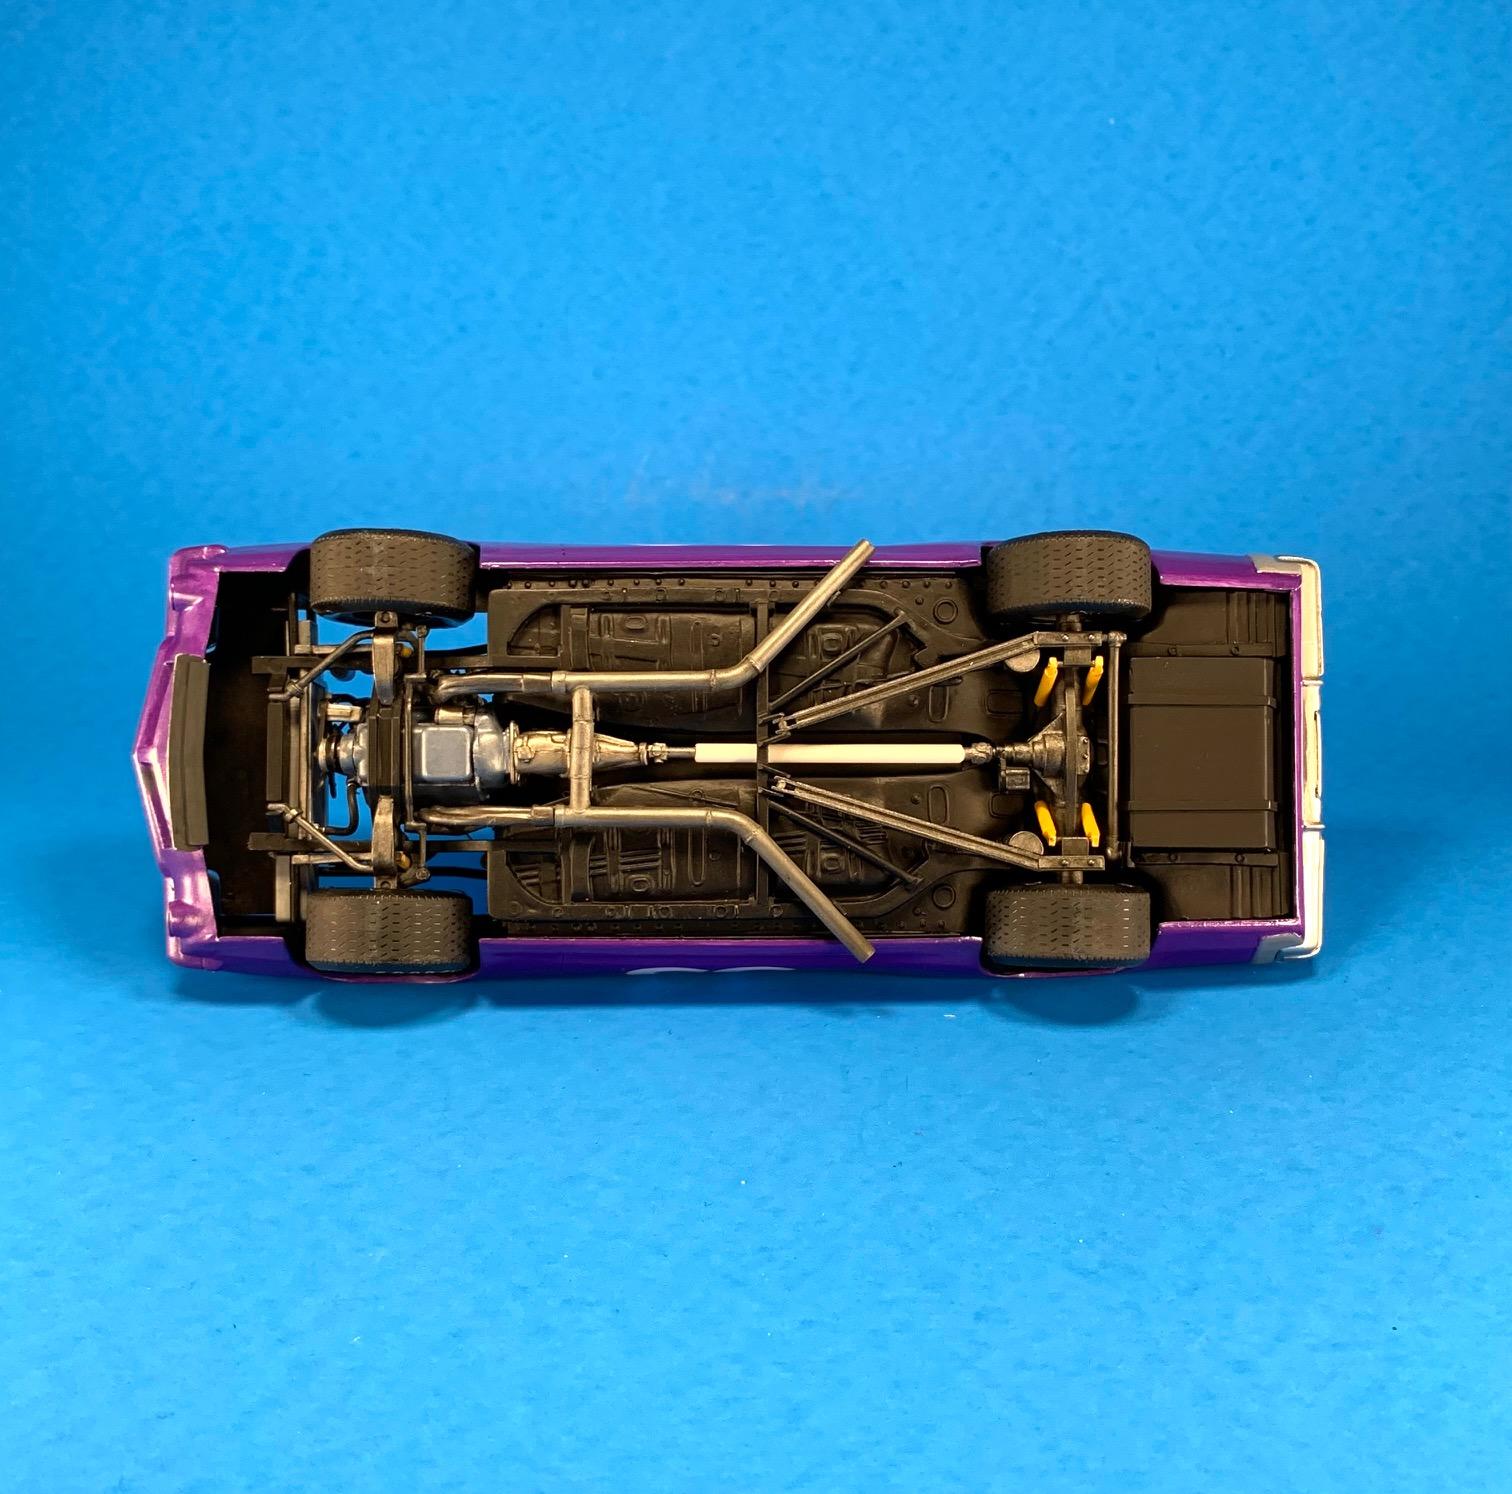
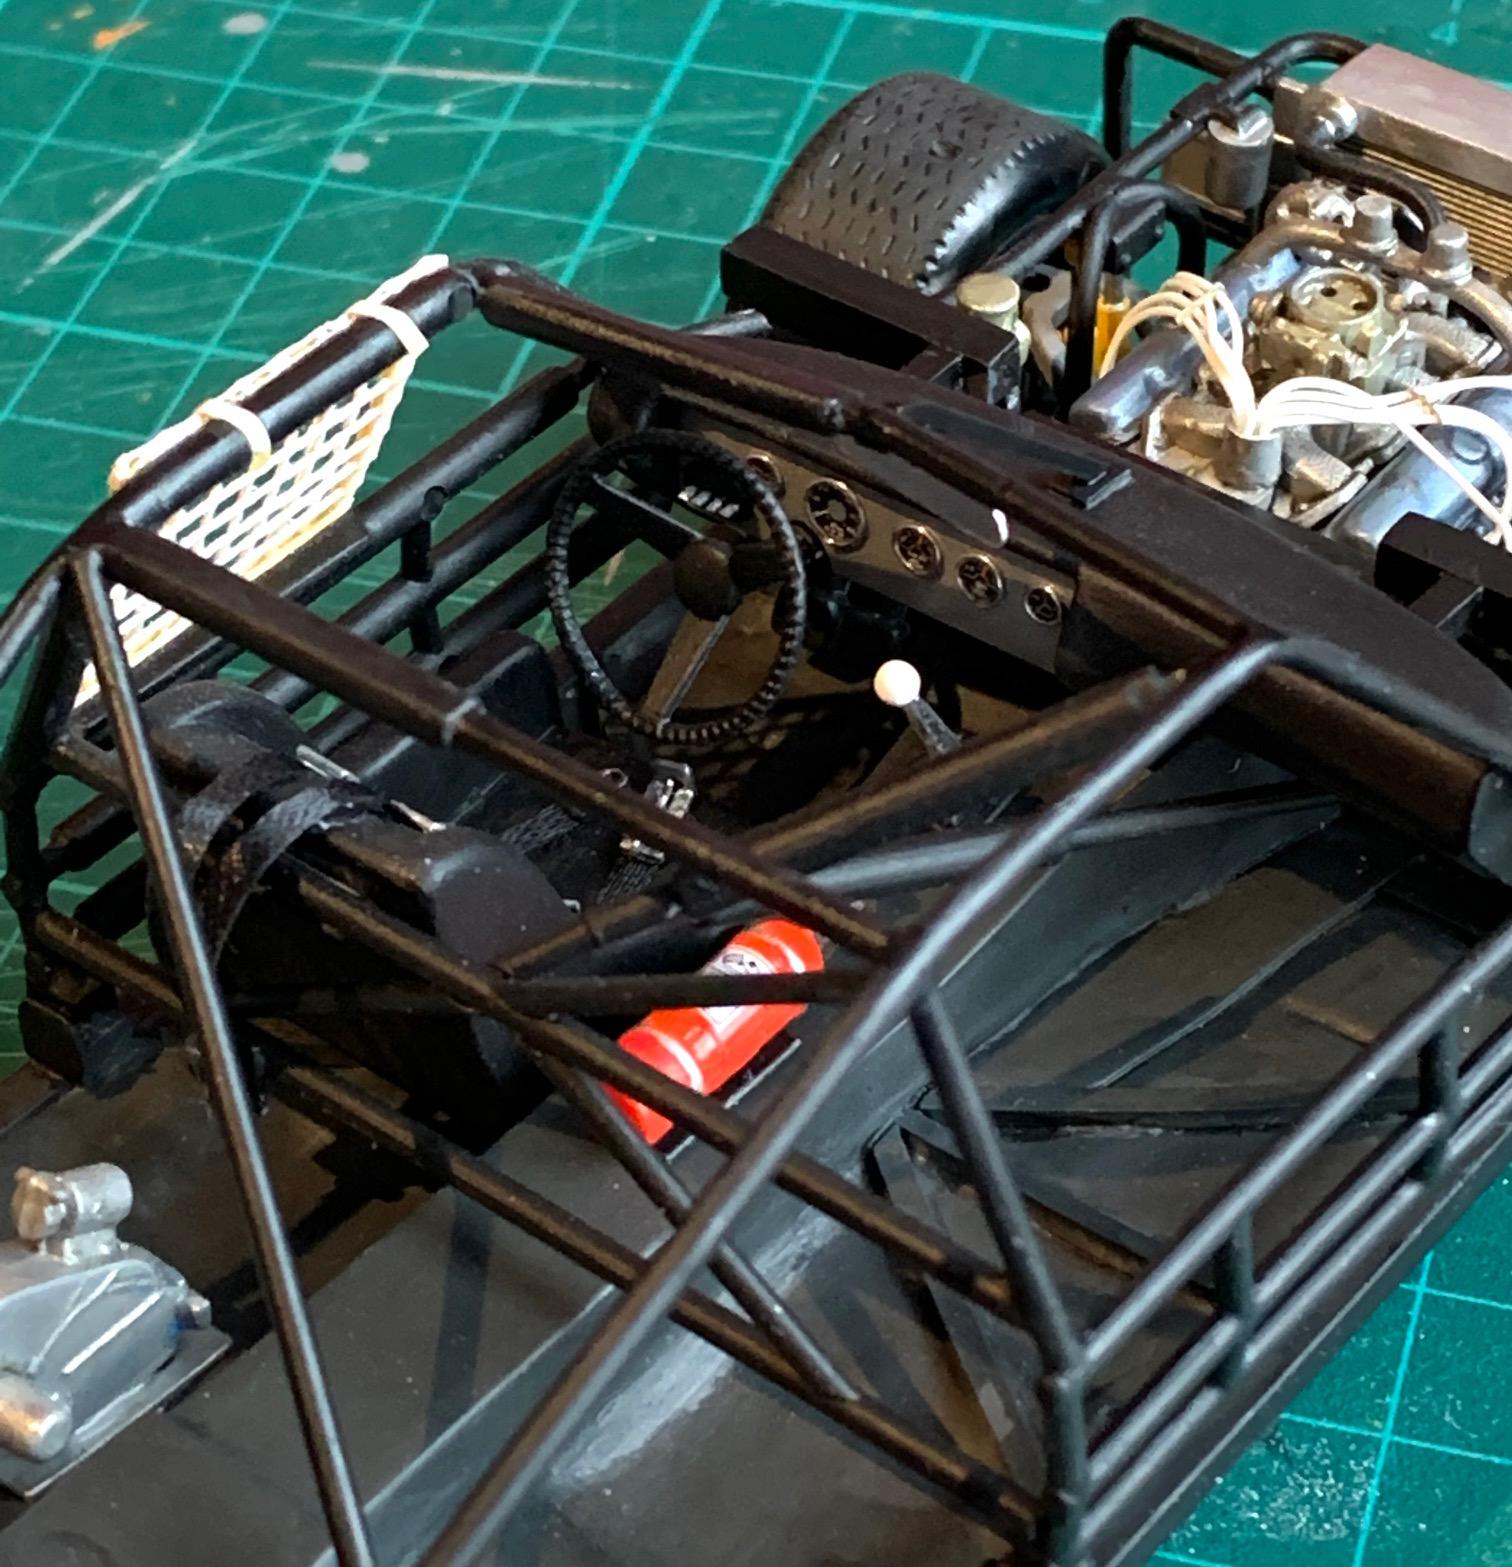
Miss Body please meet Mr Chassis. Last elements needed to complete this build will be fabrication of the rad shroud and carb inlet duct. I will get these done tomorrow and then post the finished project in the under glass section.
-
1971 Pearson GTO
Pierre Rivard replied to Pierre Rivard's topic in WIP: Stock Cars (NASCAR, Super Stock, Late Model, etc.)
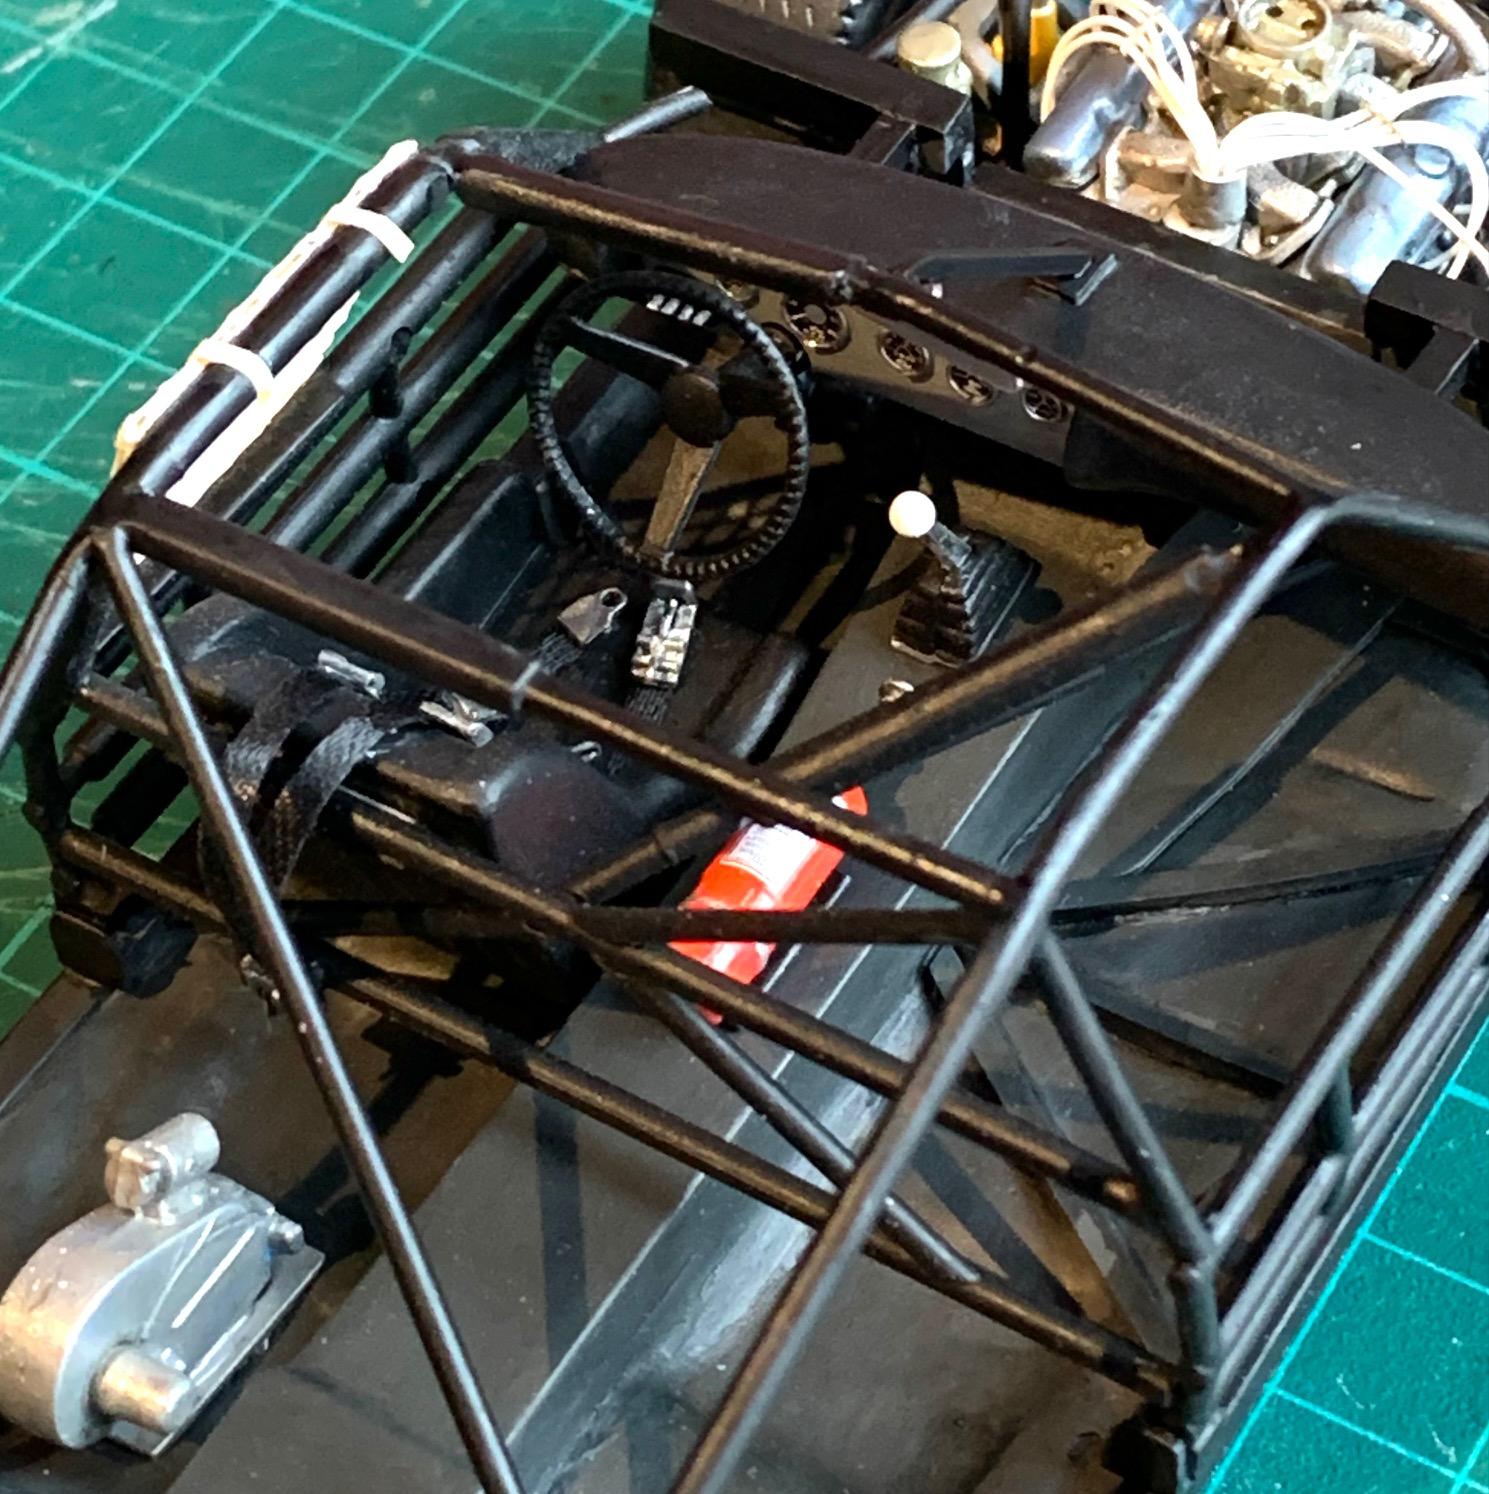
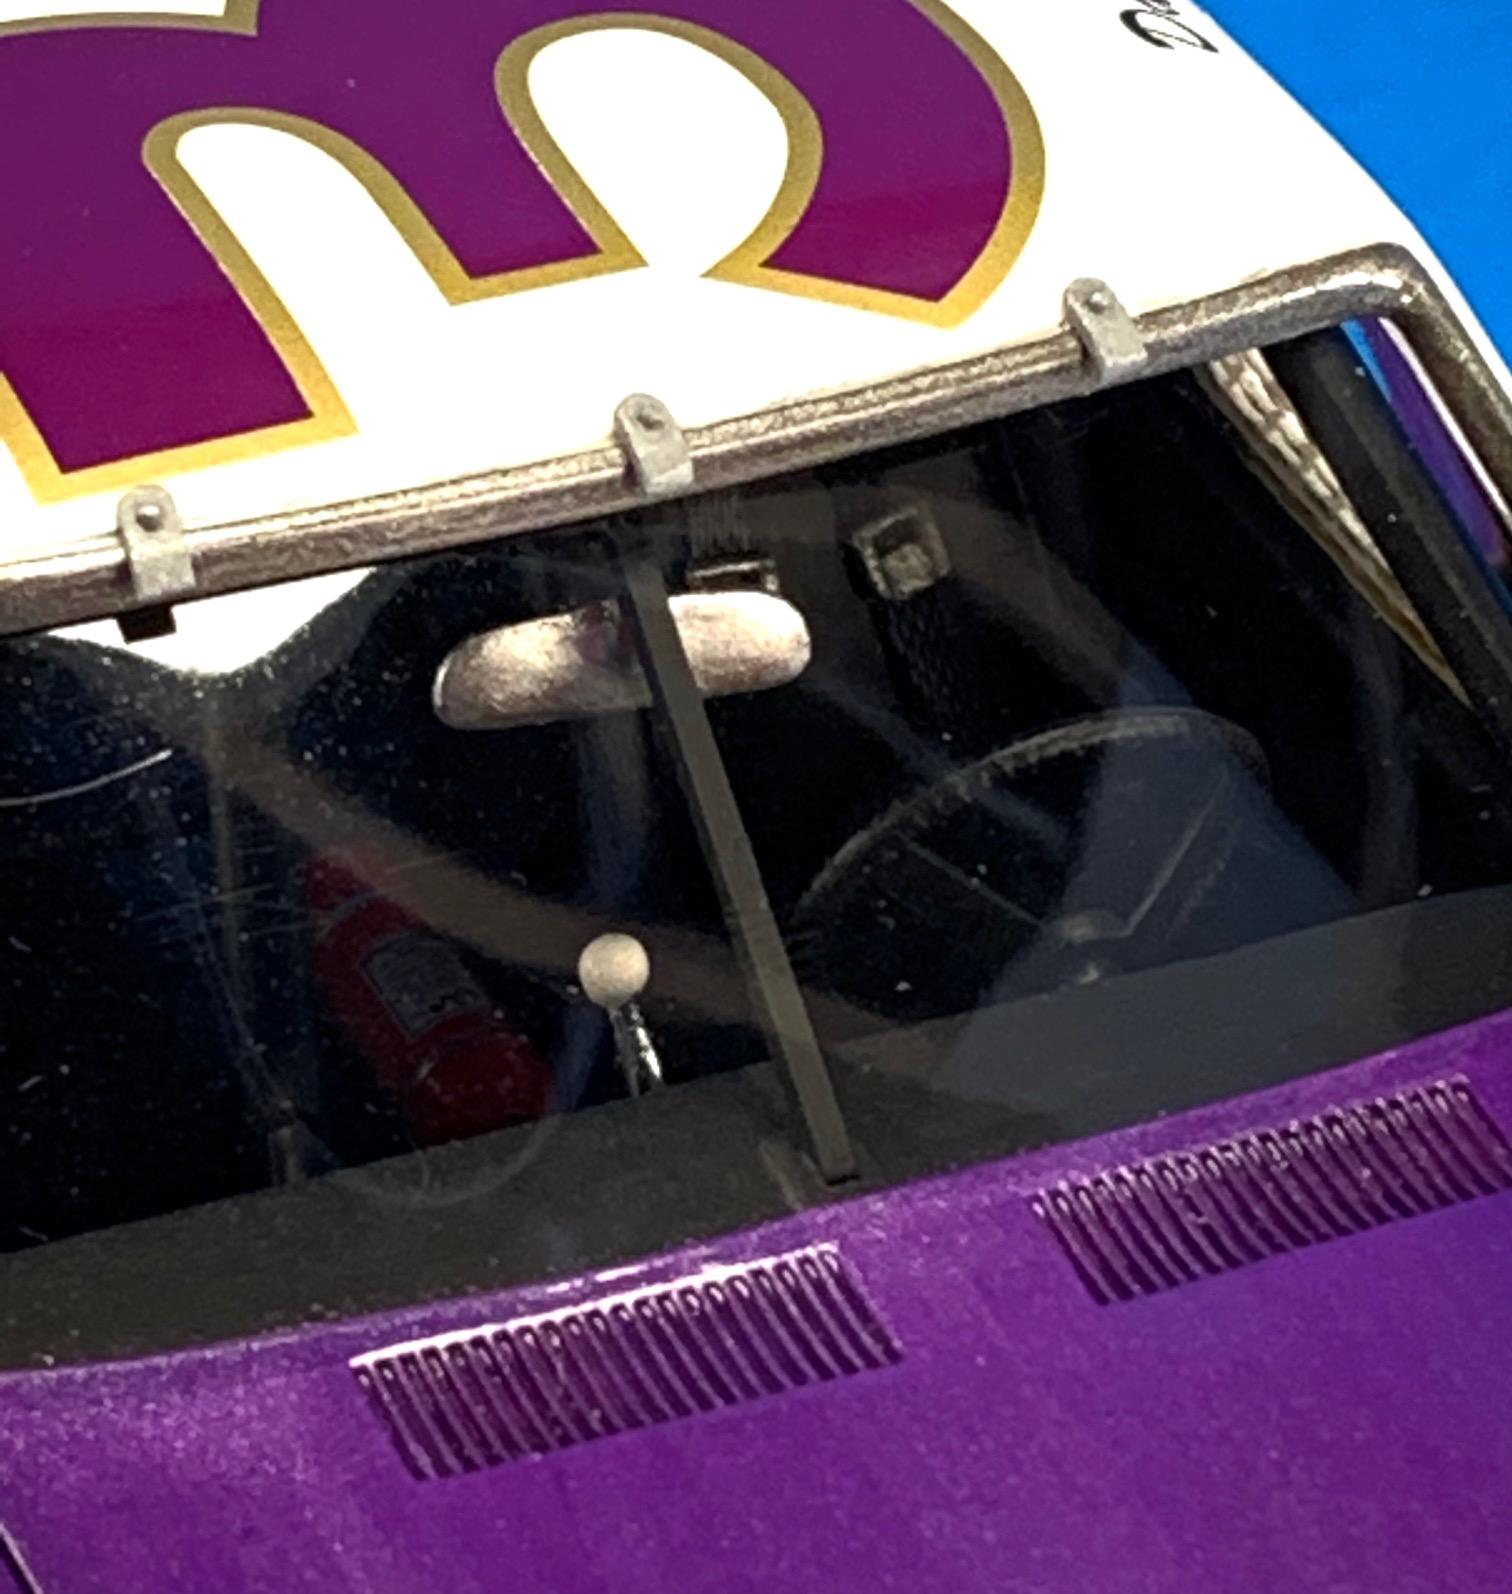
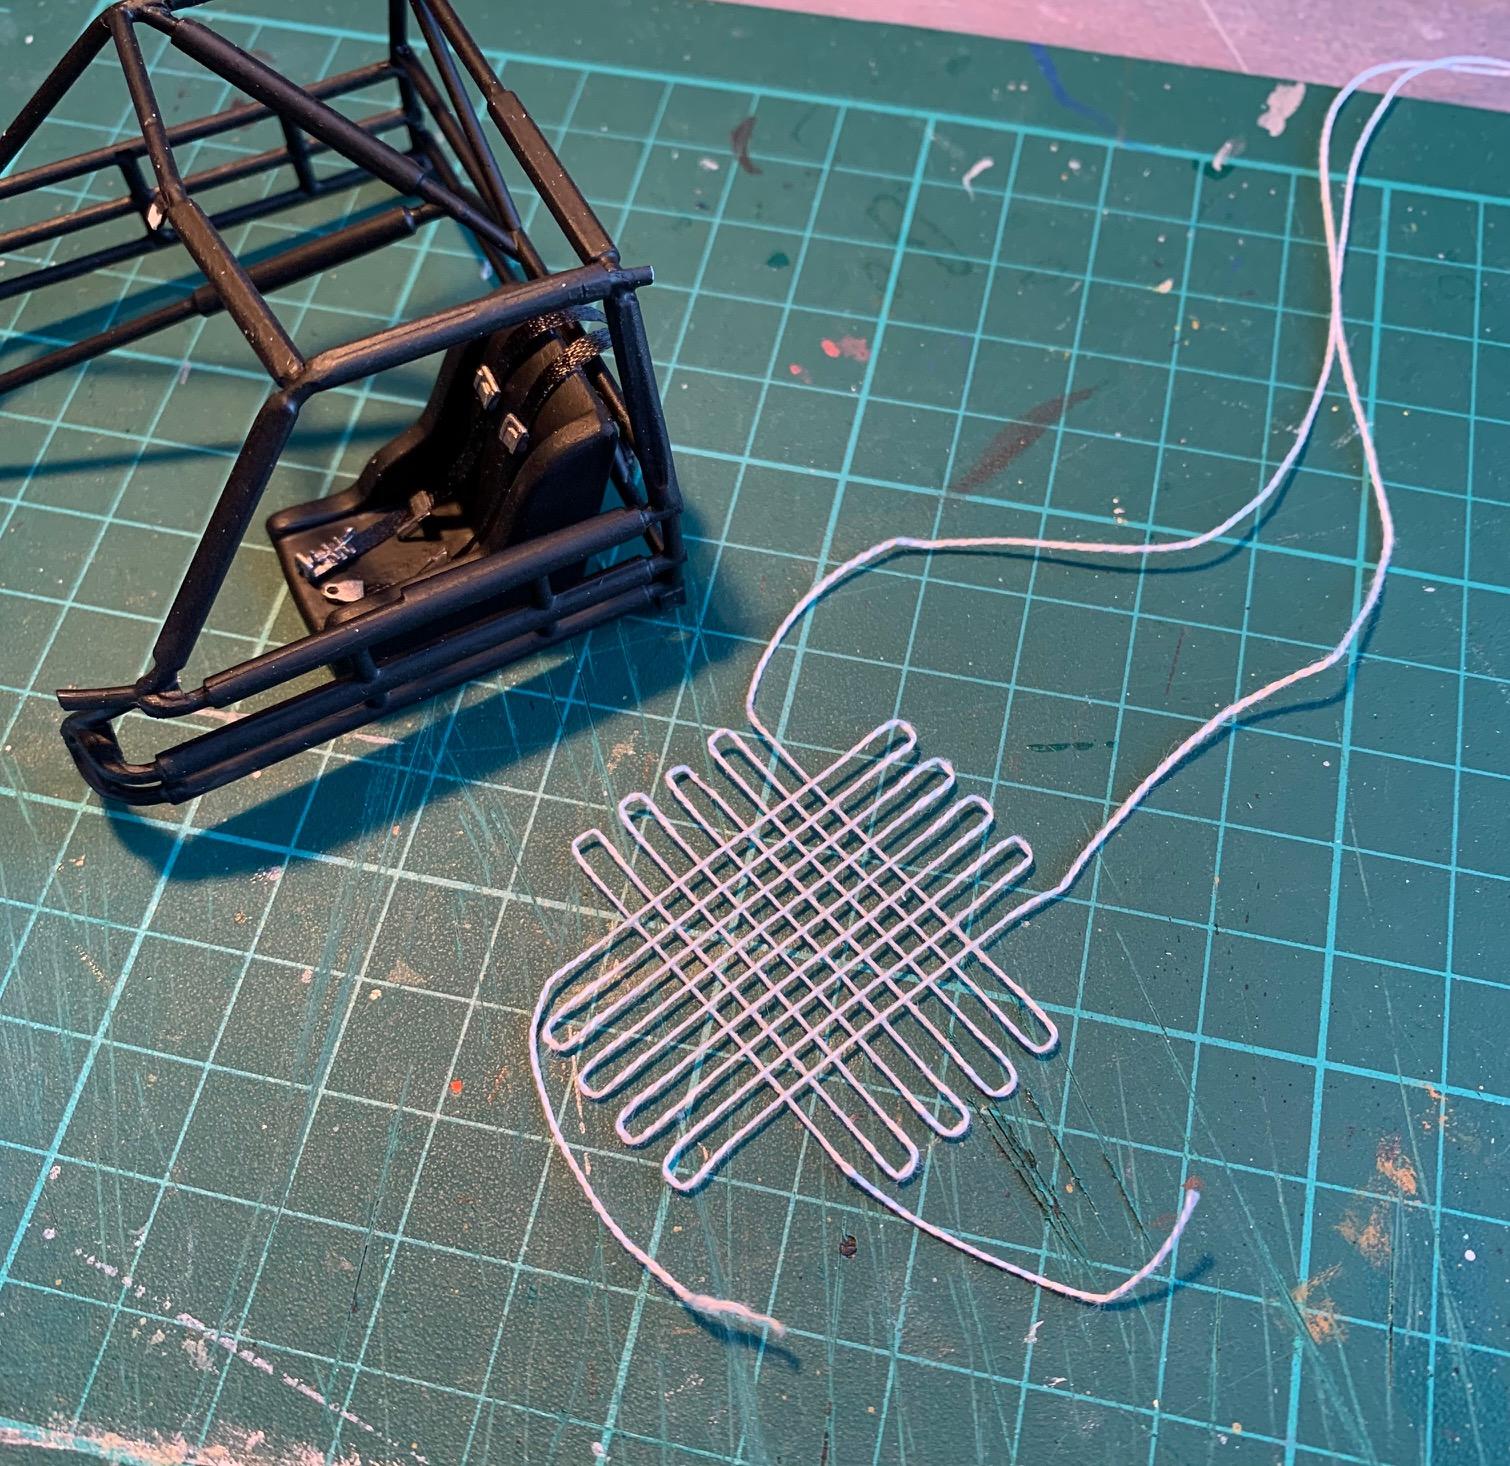
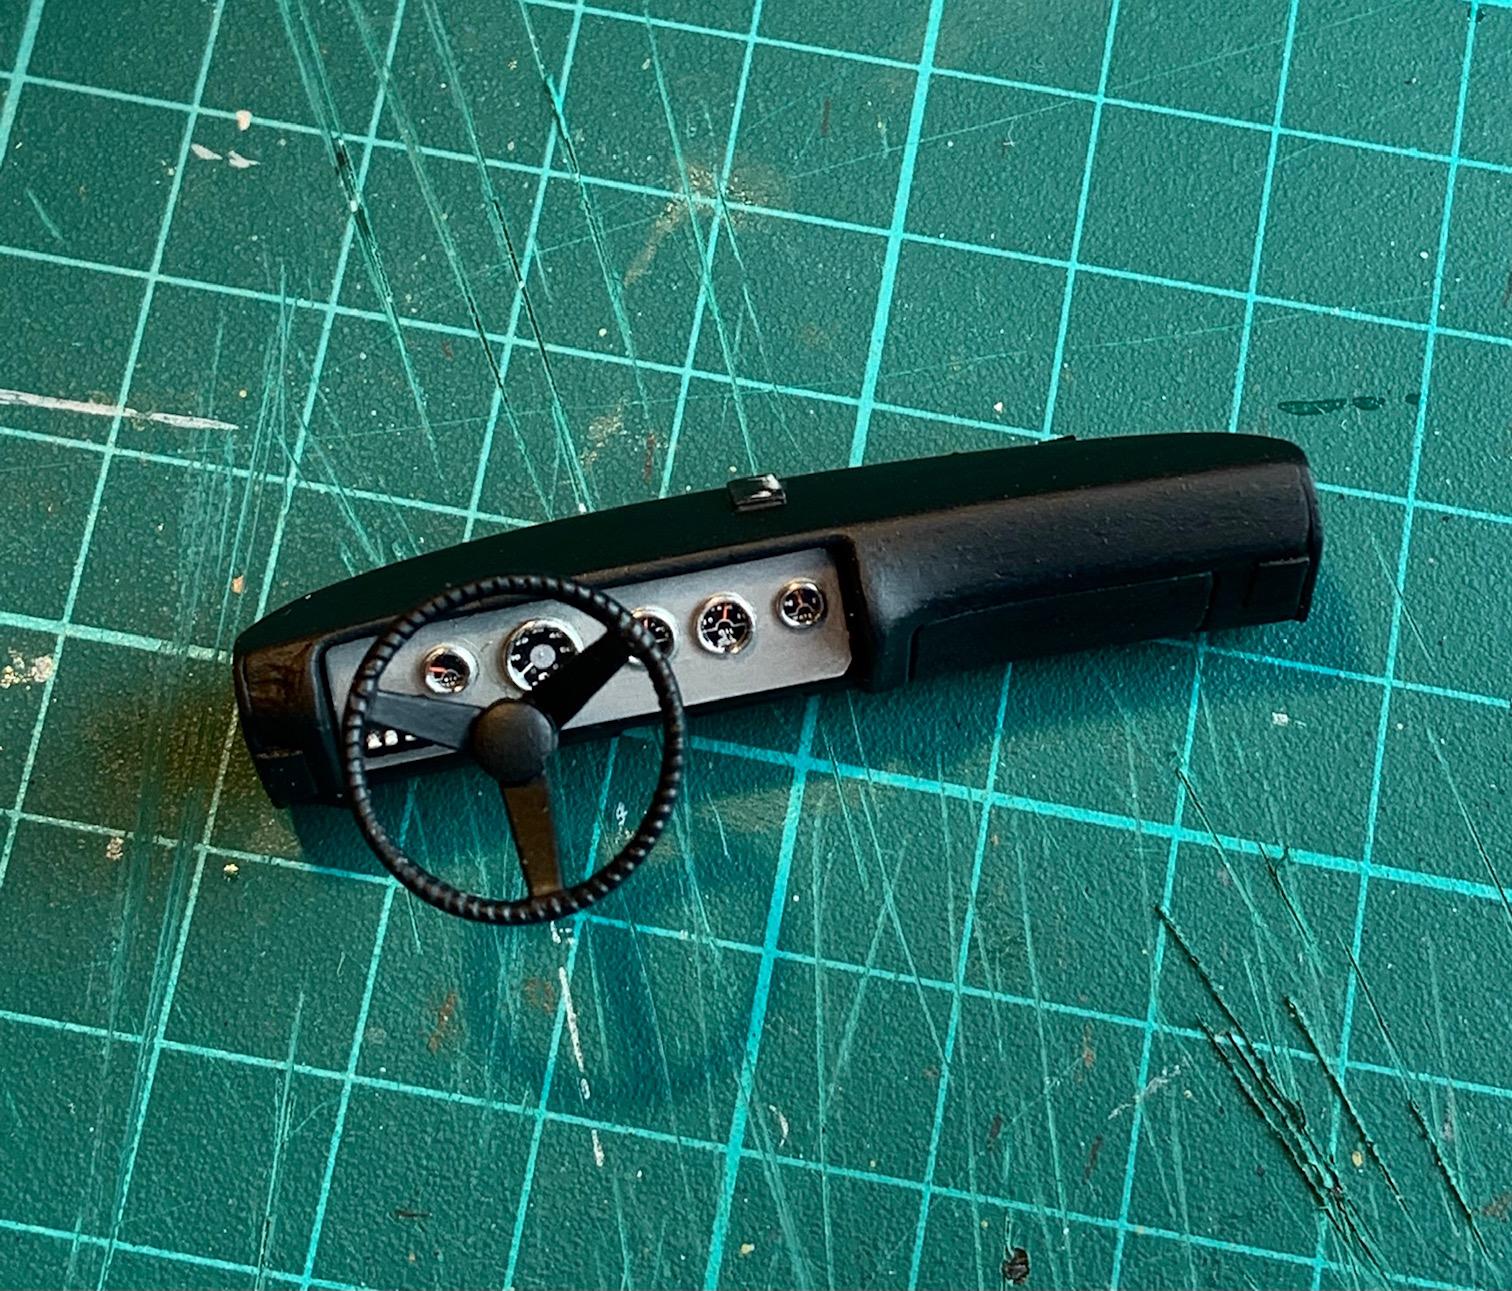
Moving on to finishing the interior. I made a jig to do a net using #12 sewing thread and tape. Thanks MarkJ for the tip on how to do this. Dash built with addition of scratch built gauges using metal wires for bezels and Krystal Klear for the glass Assembly of all parts completed
-
1971 Pearson GTO
Pierre Rivard replied to Pierre Rivard's topic in WIP: Stock Cars (NASCAR, Super Stock, Late Model, etc.)
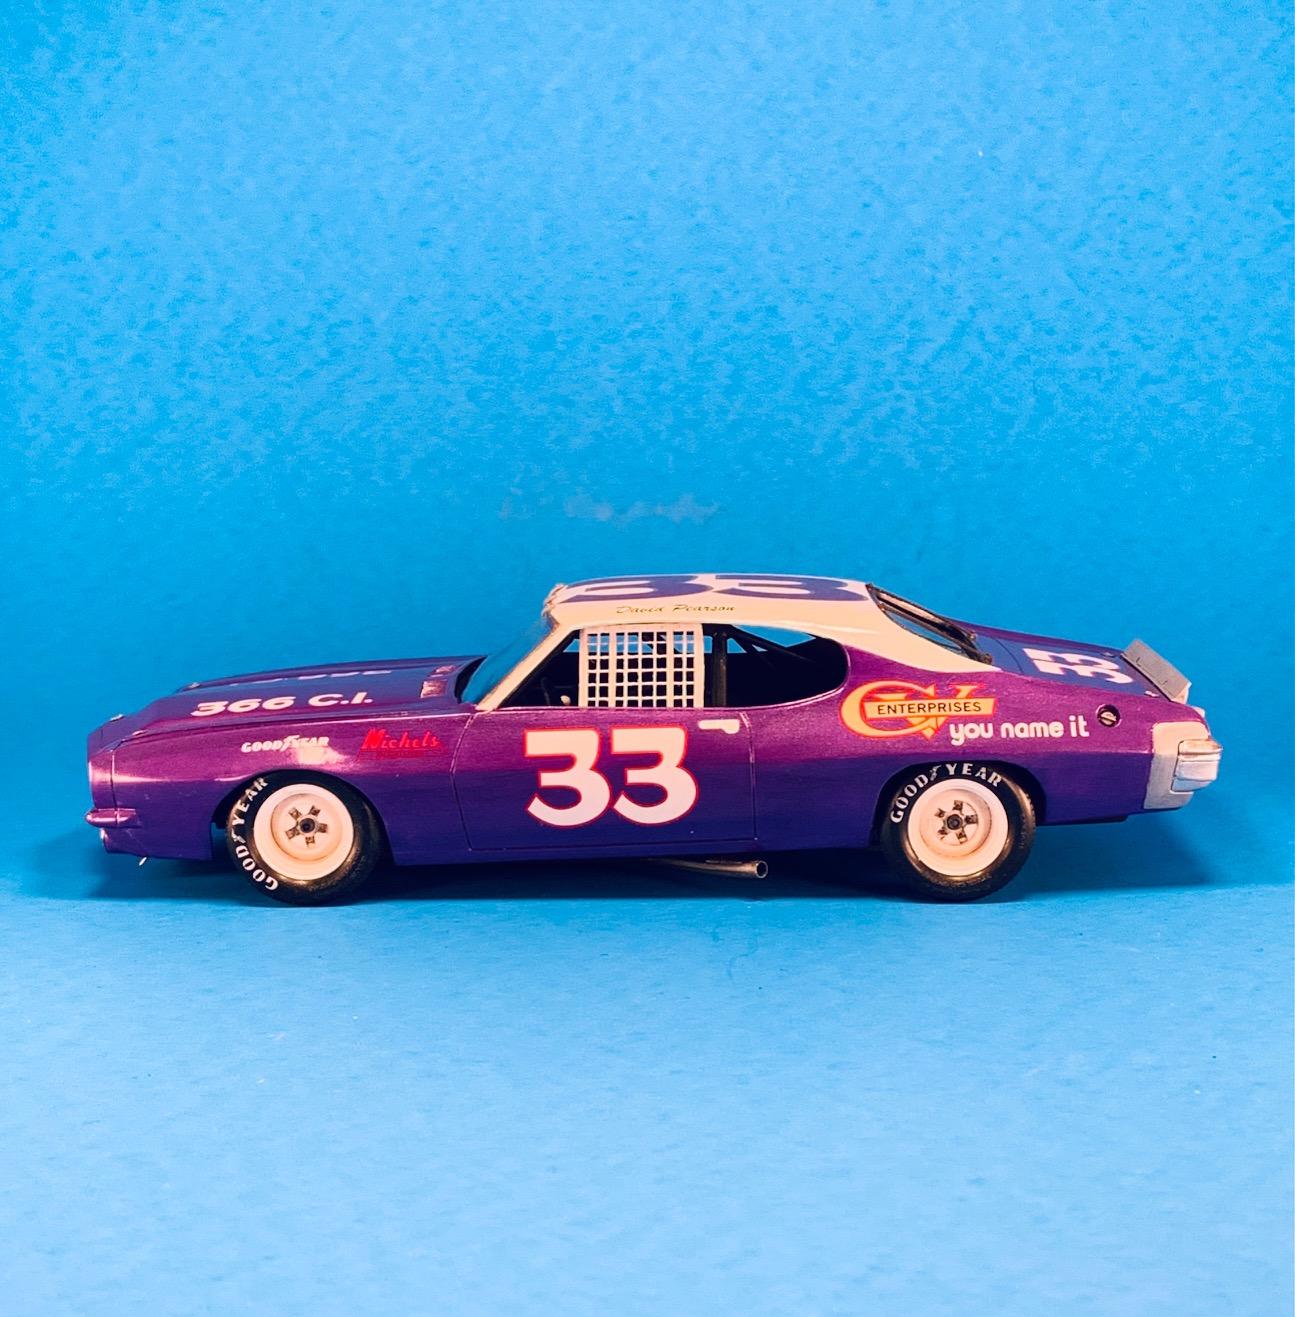
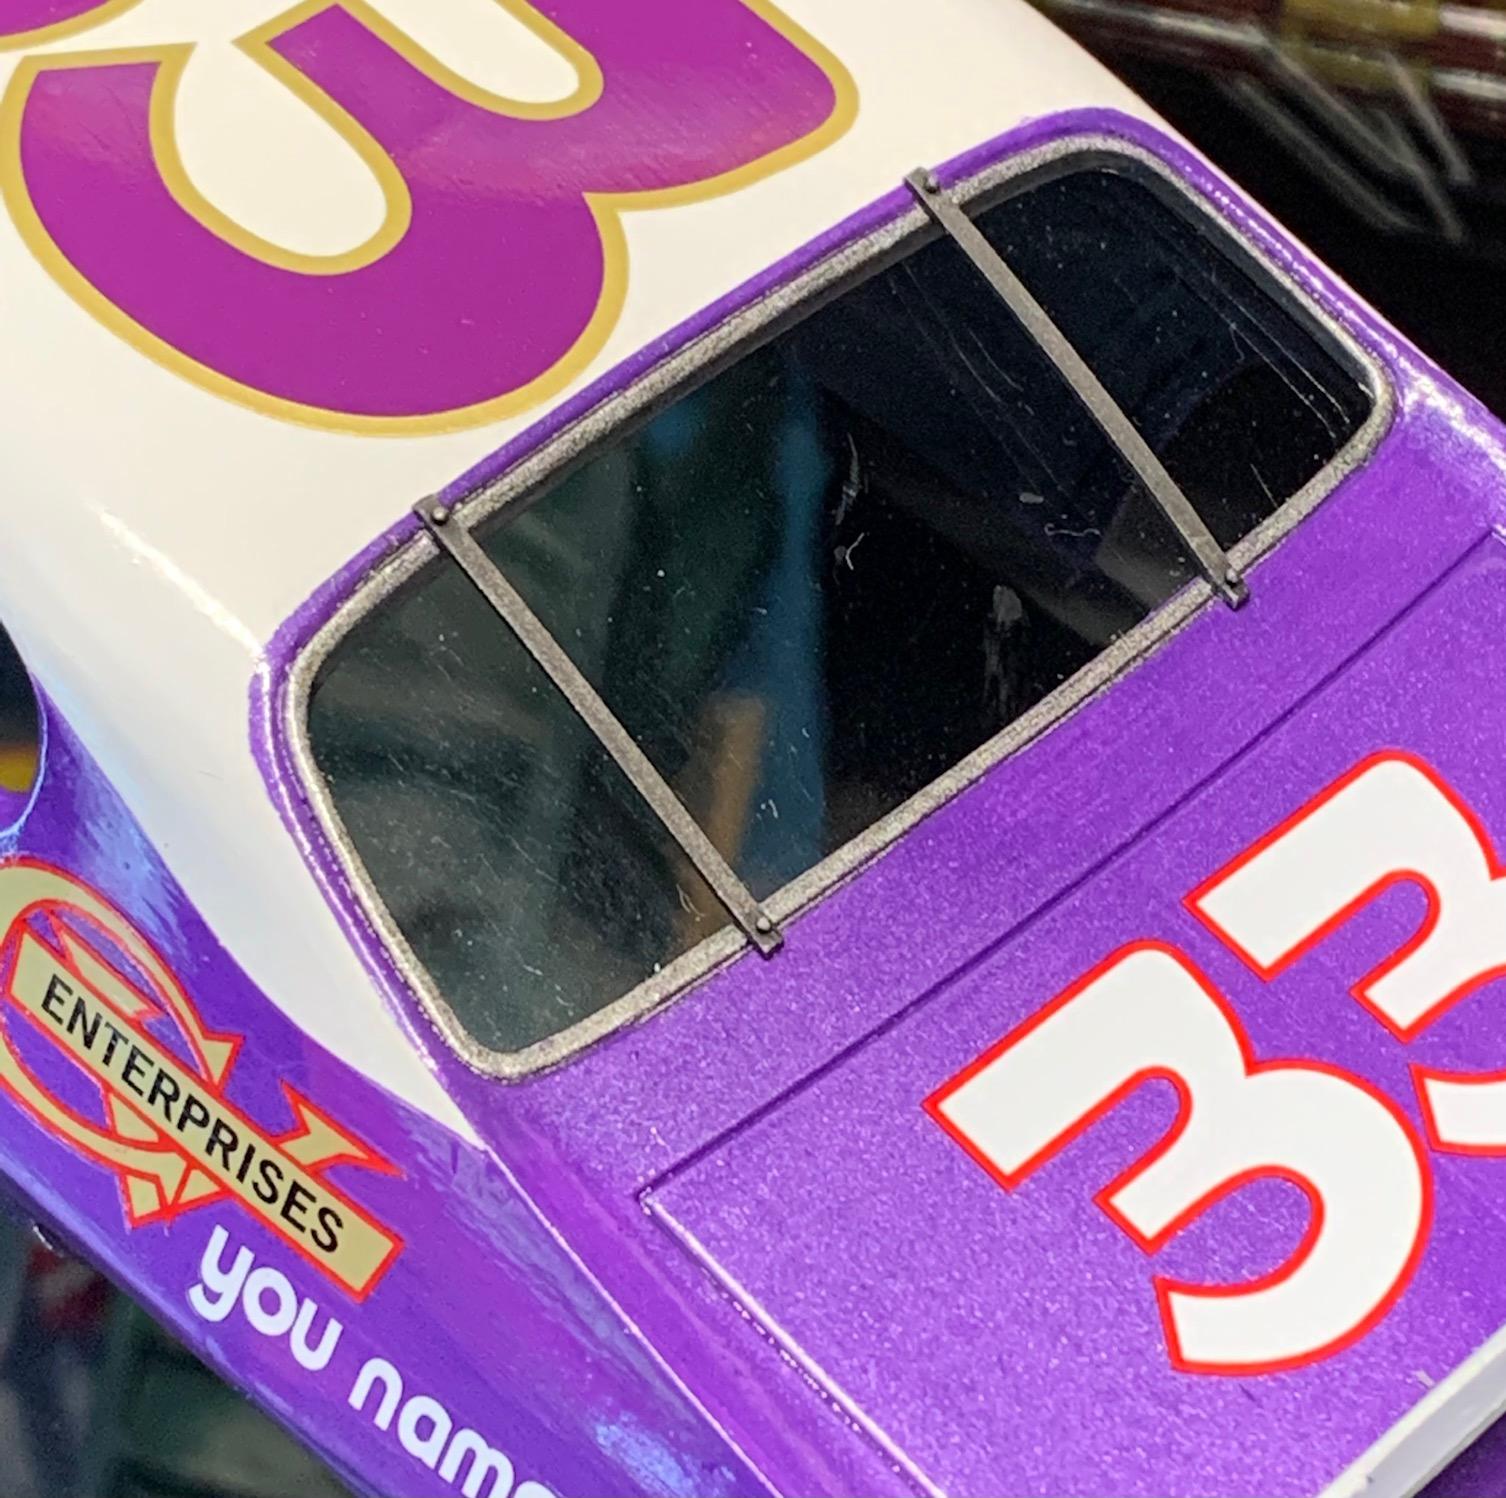
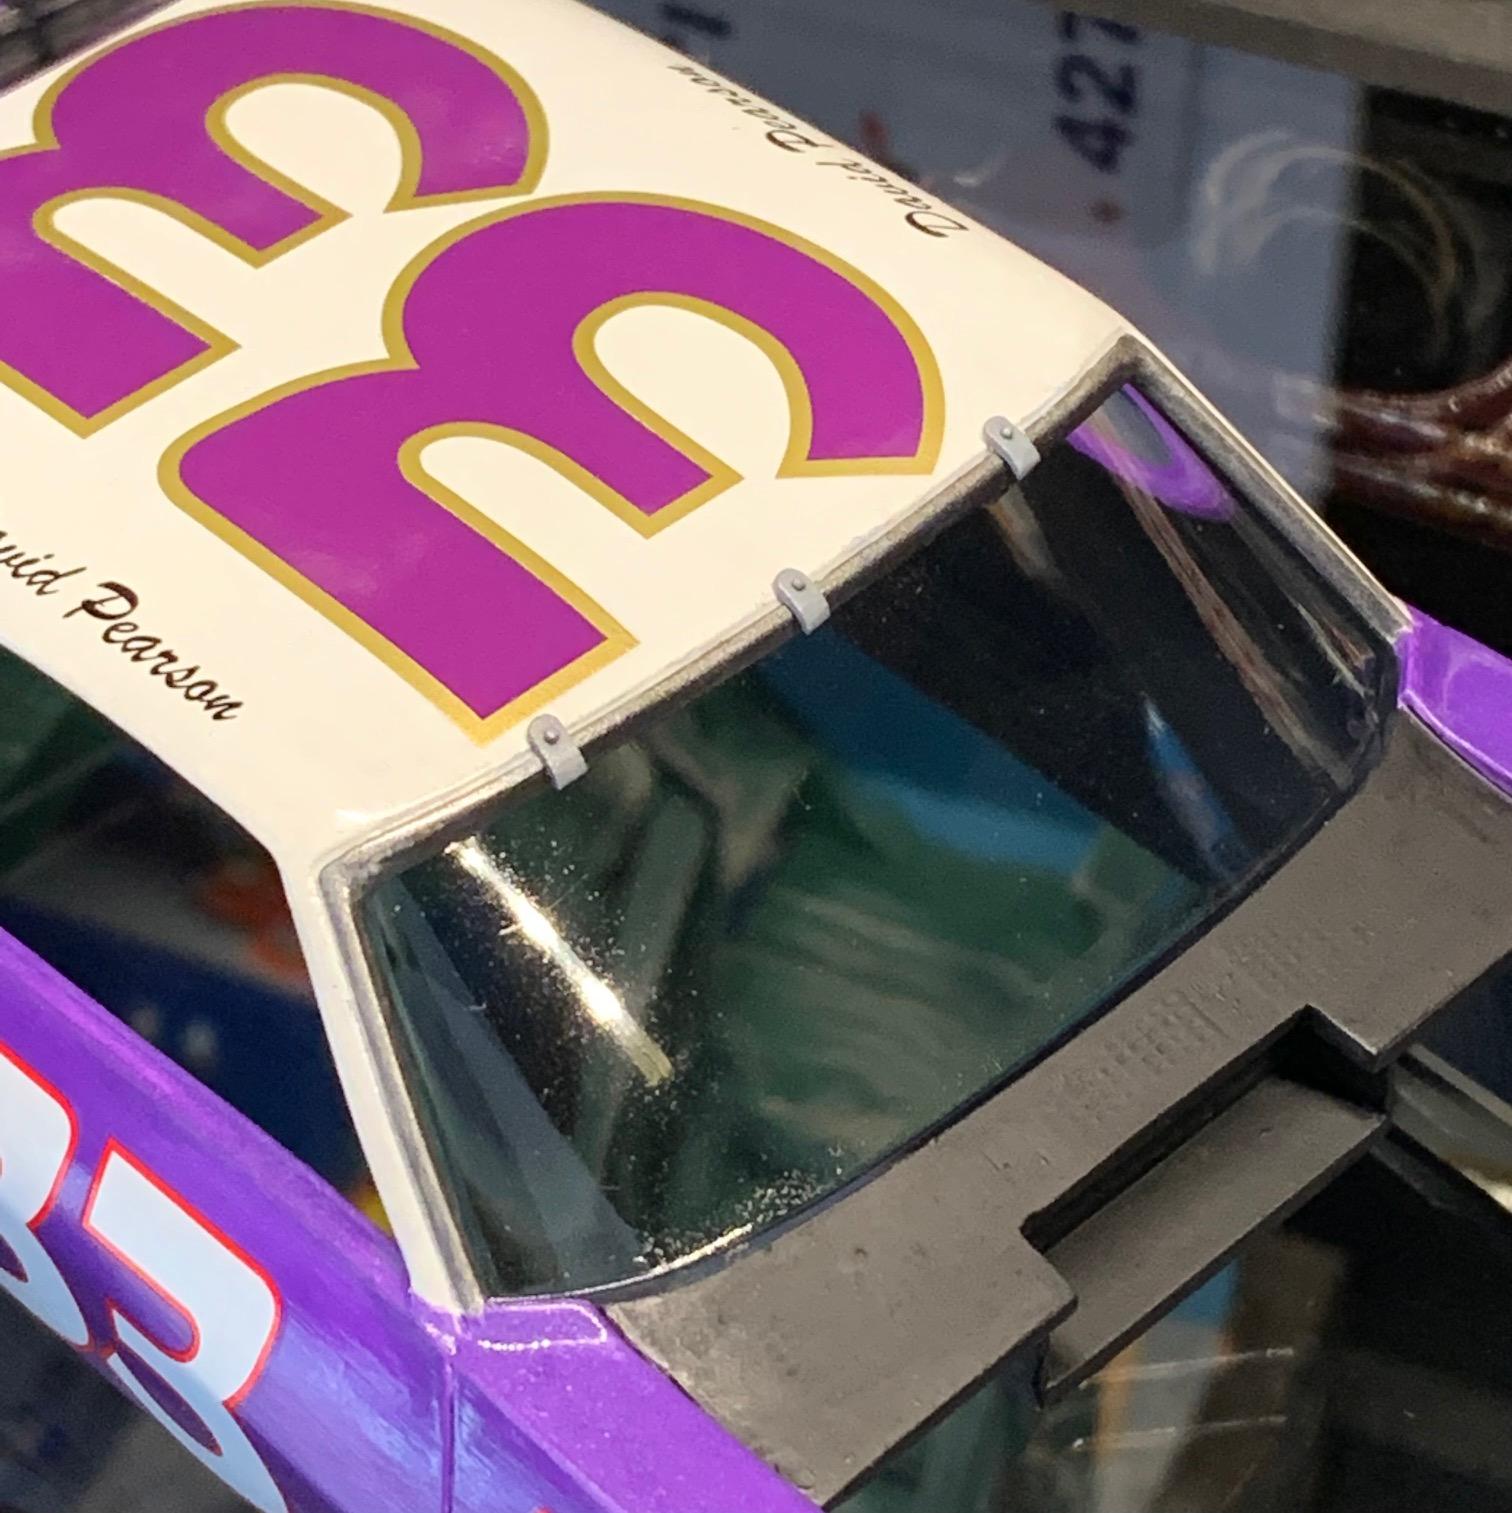
The body was finished with the installation of grilles, bumpers, glass etc. The fab of rear window straps and windshield clips with guide pins has worked well. No more dealing with shaky hands trying to glue these in the right spot.
-
1971 Pearson GTO
Pierre Rivard replied to Pierre Rivard's topic in WIP: Stock Cars (NASCAR, Super Stock, Late Model, etc.)
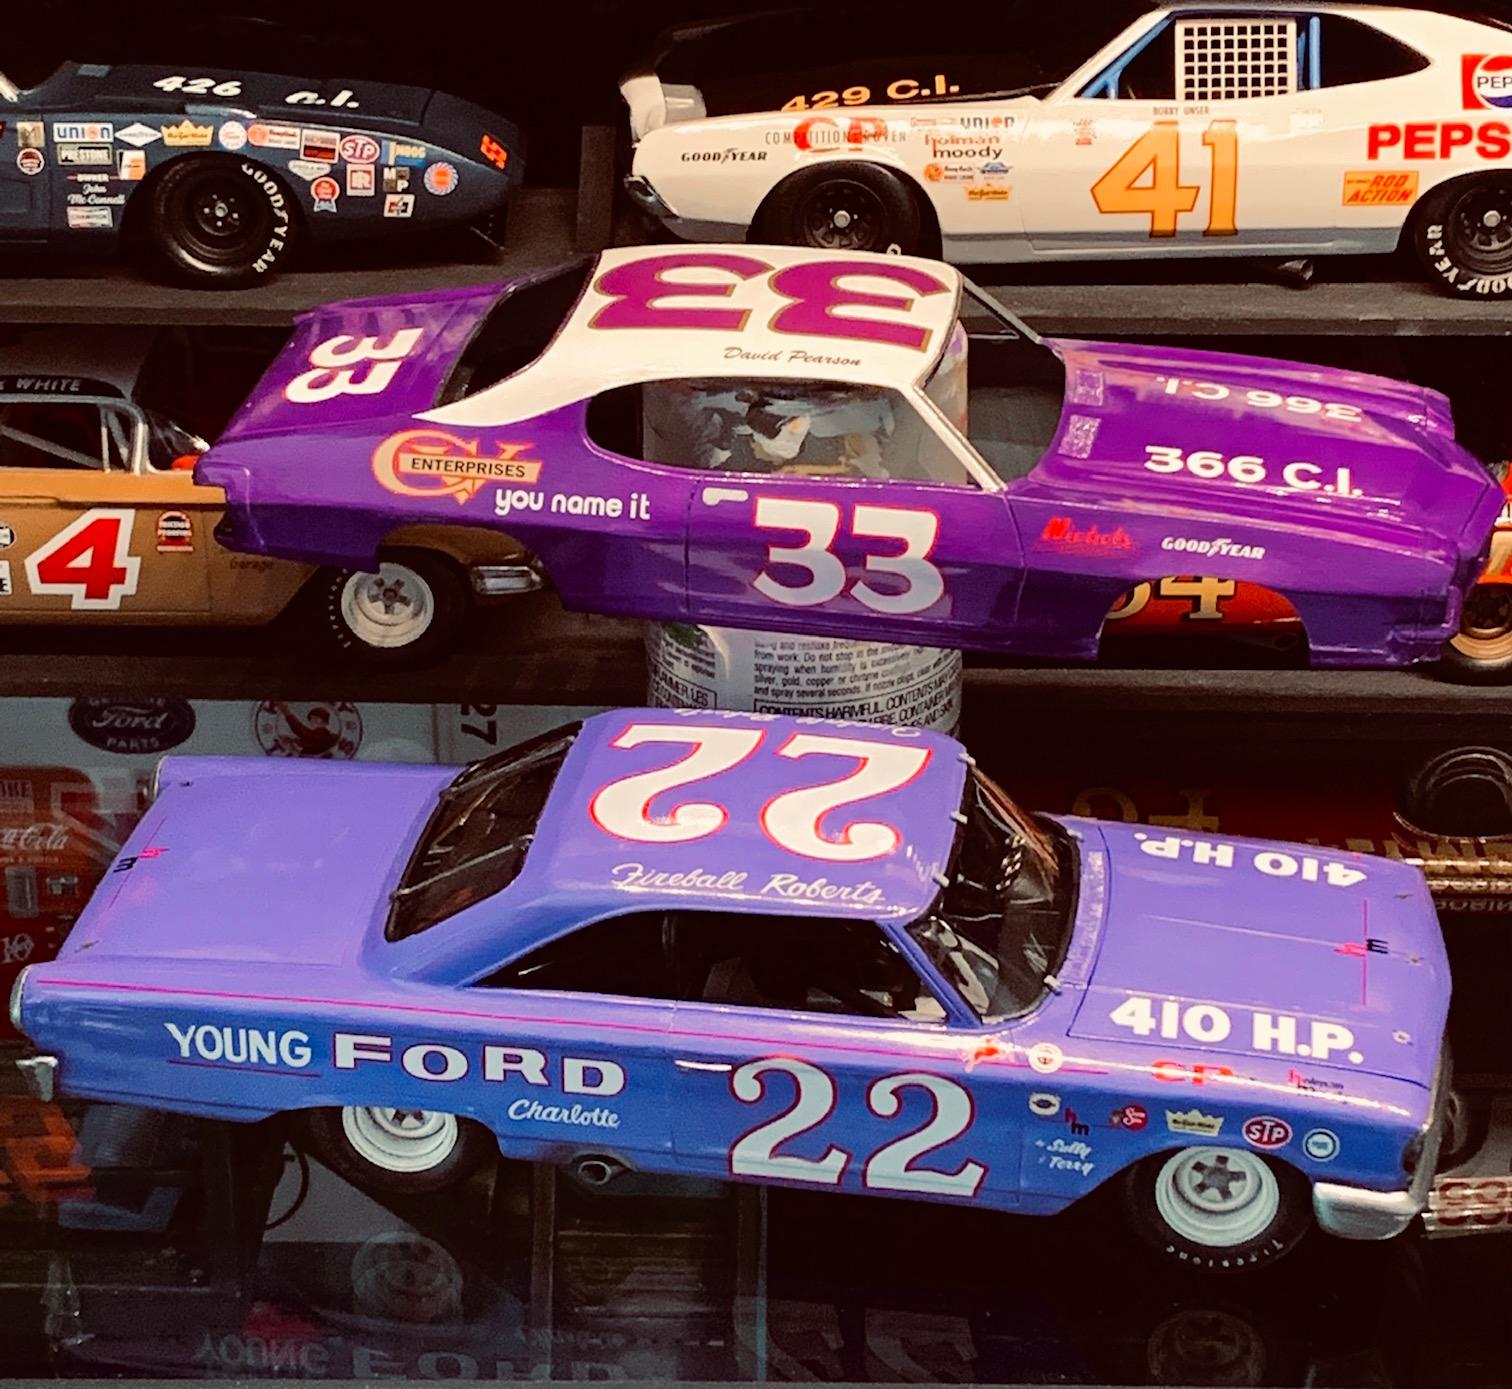
Going sidetrack a bit. I mix my colors using Vallejo acrylics. Purples are hard because on top of doing a metallic effect and balancing darkness there is also the delicate balancing of red vs. blue tones. Using the same base colors I developed two very different tones of purple as shown here.
-
1966 Mercury Comet
Pierre Rivard replied to MarkJ's topic in WIP: Stock Cars (NASCAR, Super Stock, Late Model, etc.)
Yes, Tamiya X22 acrylic clear with some X22A thinner and Retarder for acrylic. -
1966 Mercury Comet
Pierre Rivard replied to MarkJ's topic in WIP: Stock Cars (NASCAR, Super Stock, Late Model, etc.)
Wonderful! Happy to see your perseverance rewarded. -
1971 Pearson GTO
Pierre Rivard replied to Pierre Rivard's topic in WIP: Stock Cars (NASCAR, Super Stock, Late Model, etc.)
Thanks Mark. I'm pretty happy with the result. Two tone paint was a challenge but I survived it. Getting close to the finish line. Sent you PM about Rex. -
1971 Pearson GTO
Pierre Rivard replied to Pierre Rivard's topic in WIP: Stock Cars (NASCAR, Super Stock, Late Model, etc.)
You're absolutely right Noel. Plenty of road car kits out there that can be transformed into Nascar racers so the possibilities are endless.