Pierre Rivard
-
Posts
2,579 -
Joined
-
Last visited
Content Type
Profiles
Forums
Events
Gallery
Everything posted by Pierre Rivard
-
Yeah JC...we need our fix!
-
1966 Mercury Comet
Pierre Rivard replied to MarkJ's topic in WIP: Stock Cars (NASCAR, Super Stock, Late Model, etc.)
The interior looks super nice. What did you use for the cage padding? -
Awesome build. This is like attending advanced scale modeling school!
-
Thank you Rich. I have another GS kit in my stash and want to acquire a roadster resin transit for it so I'll definitely follow your lead on that one.
-
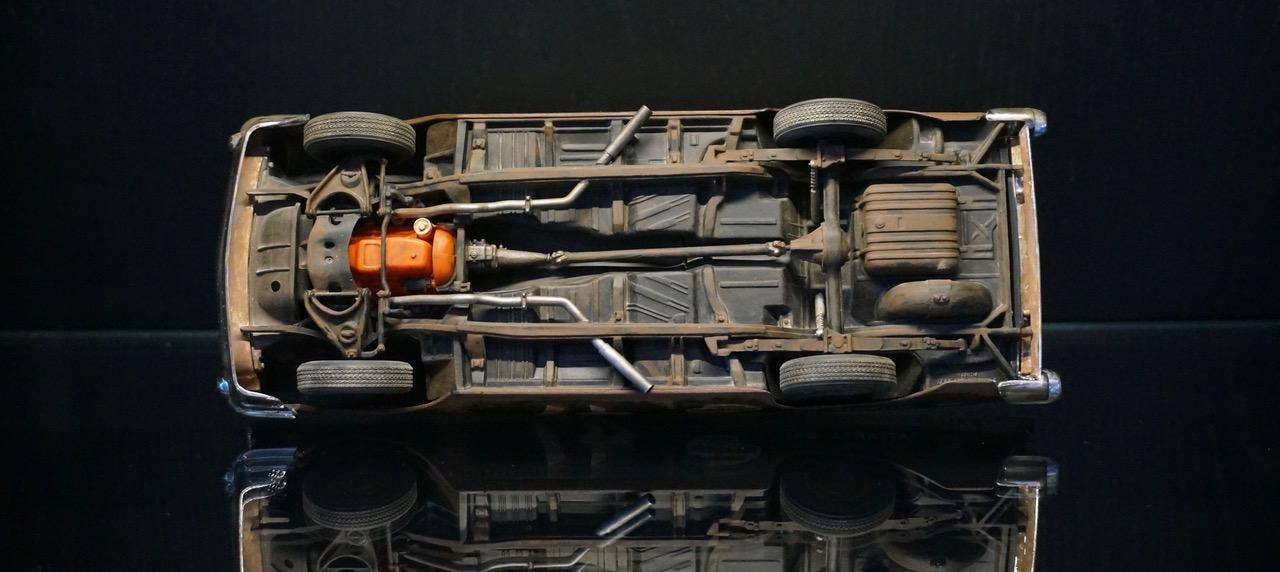
Chassis is done and painted. Only have to loop oil lines to filter and cooler after chassis & body marriage. Only recent mod was the side pipes to reflect the configuration of the specific car I am modeling and making the exhaust outlet look more "muscular" Final adjustments body to chassis with 0.5 mm shim at the front.

-
My Future 3D WIP's (LOTS of pics)
Pierre Rivard replied to MrObsessive's topic in Car Aftermarket / Resin / 3D Printed
Pretty amazing stuff Bill. Lots of work ahead but you'll create your own scale models. Super cool. Can a 3D printer handle a complete body or will you break it down to body panels? -
1/24 1963 Chevrolet Corvette Grand Sport Mecom Racing Team
Pierre Rivard replied to cjmin75's topic in Model Cars
Working on a similar one myself. Your's will be a tough act to follow. Congratulations Jung-min, this is a superb build! -
She's taking shape. Beautiful!
-
Making tires look aged.
Pierre Rivard replied to James Maynard's topic in Model Building Questions and Answers
I just did it with a dullcote followed with Tamiya weathering master rust color and finally a sand colored pigment to fill the threads. Done 3 years ago and still looks good.
-
Maserati 300S Chassis #3055
Pierre Rivard replied to Dave B's topic in Other Racing: Road Racing, Salt Flat Racers
Wow Dave, this is just wonderful. Us mere mortals will assemble existing kits and make some improvements along the way, but you sir are a true creator of scale models. -
P-51 Mustang GT-4
Pierre Rivard replied to Scale-Master's topic in WIP: Other Racing: Road Racing, Land Speed Racers
Now that's unique. Don't forget to add the propeller! -
Simply gorgeous detailing!
-
1/12th Porsche 934 Vaillant
Pierre Rivard replied to majel's topic in WIP: Other Racing: Road Racing, Land Speed Racers
Jim, your work on this kit is exquisite. True that the large scale allows for more detailing but I would rather say it demands it and you nailed it. Your weathering techniques add a lot of realism too. Bravo! -
I thought the first picture was a 1/1 reference! Through the roof authentic, all of it! Inspirational
-
Love the 60's Cadillacs. Your work on this oldie is mighty impressive. Thanks for sharing.
-
1968 Daytone 500 Winner
Pierre Rivard replied to Bill J's topic in Stock Cars (NASCAR, Super Stock, Late Model, etc.)
Looks like you are working through a lot of the Wood Brothers decal sheet! I like the W nose Cyclone the best and your interpretation of it is superb. -
That color is totally awesome. Great demonstration of creativity.
-
Congrats Dan. Very very nice!
-
I love the MCM forums. It is a place for scale modelers to support and help each other. The highly skilled builders show their work product and methods and always provide information and advice to their peers. The "less than expert" builders expose their work knowing they will be helped, not judged. This is the way it works out 99% of the time, but on occasion there is that MMQ waiting on the sideline for the right moment for a dressing down of a peer's efforts. This fellow will claim he's there to help but really only wants to tell he knows it all. The funny thing is that fellow never puts himself at risk by displaying his work product. Yes Joe Zrodlowski, I'm talking about you! I still plan to remain active on this forum because I love supporting the efforts of fellow modelers. I will complete building my GS and eventually display it but will pause on sharing updates of my build process. Perhaps Joe might want to take over this GS w.i.p. thread? Put yourself out there Joe, show your work product!
-
Thank you all. This was a very interesting project considering it started out with a very basic street car kit.
-
1966 Mercury Comet
Pierre Rivard replied to MarkJ's topic in WIP: Stock Cars (NASCAR, Super Stock, Late Model, etc.)
From here I can see the finish line. Almost there Mark. -
Randy, just saw this for the first time and went back through the whole 10 pages...covering 6 years worth of unbelievable artistry. I am floored by the skill, creativity and dedication. My little battles with styrene seem so silly now. I salute you!
-
Thank you Ray for sharing your work. I've never done a Cobra but it is on my wish list. That Revell kit looks really good.
-
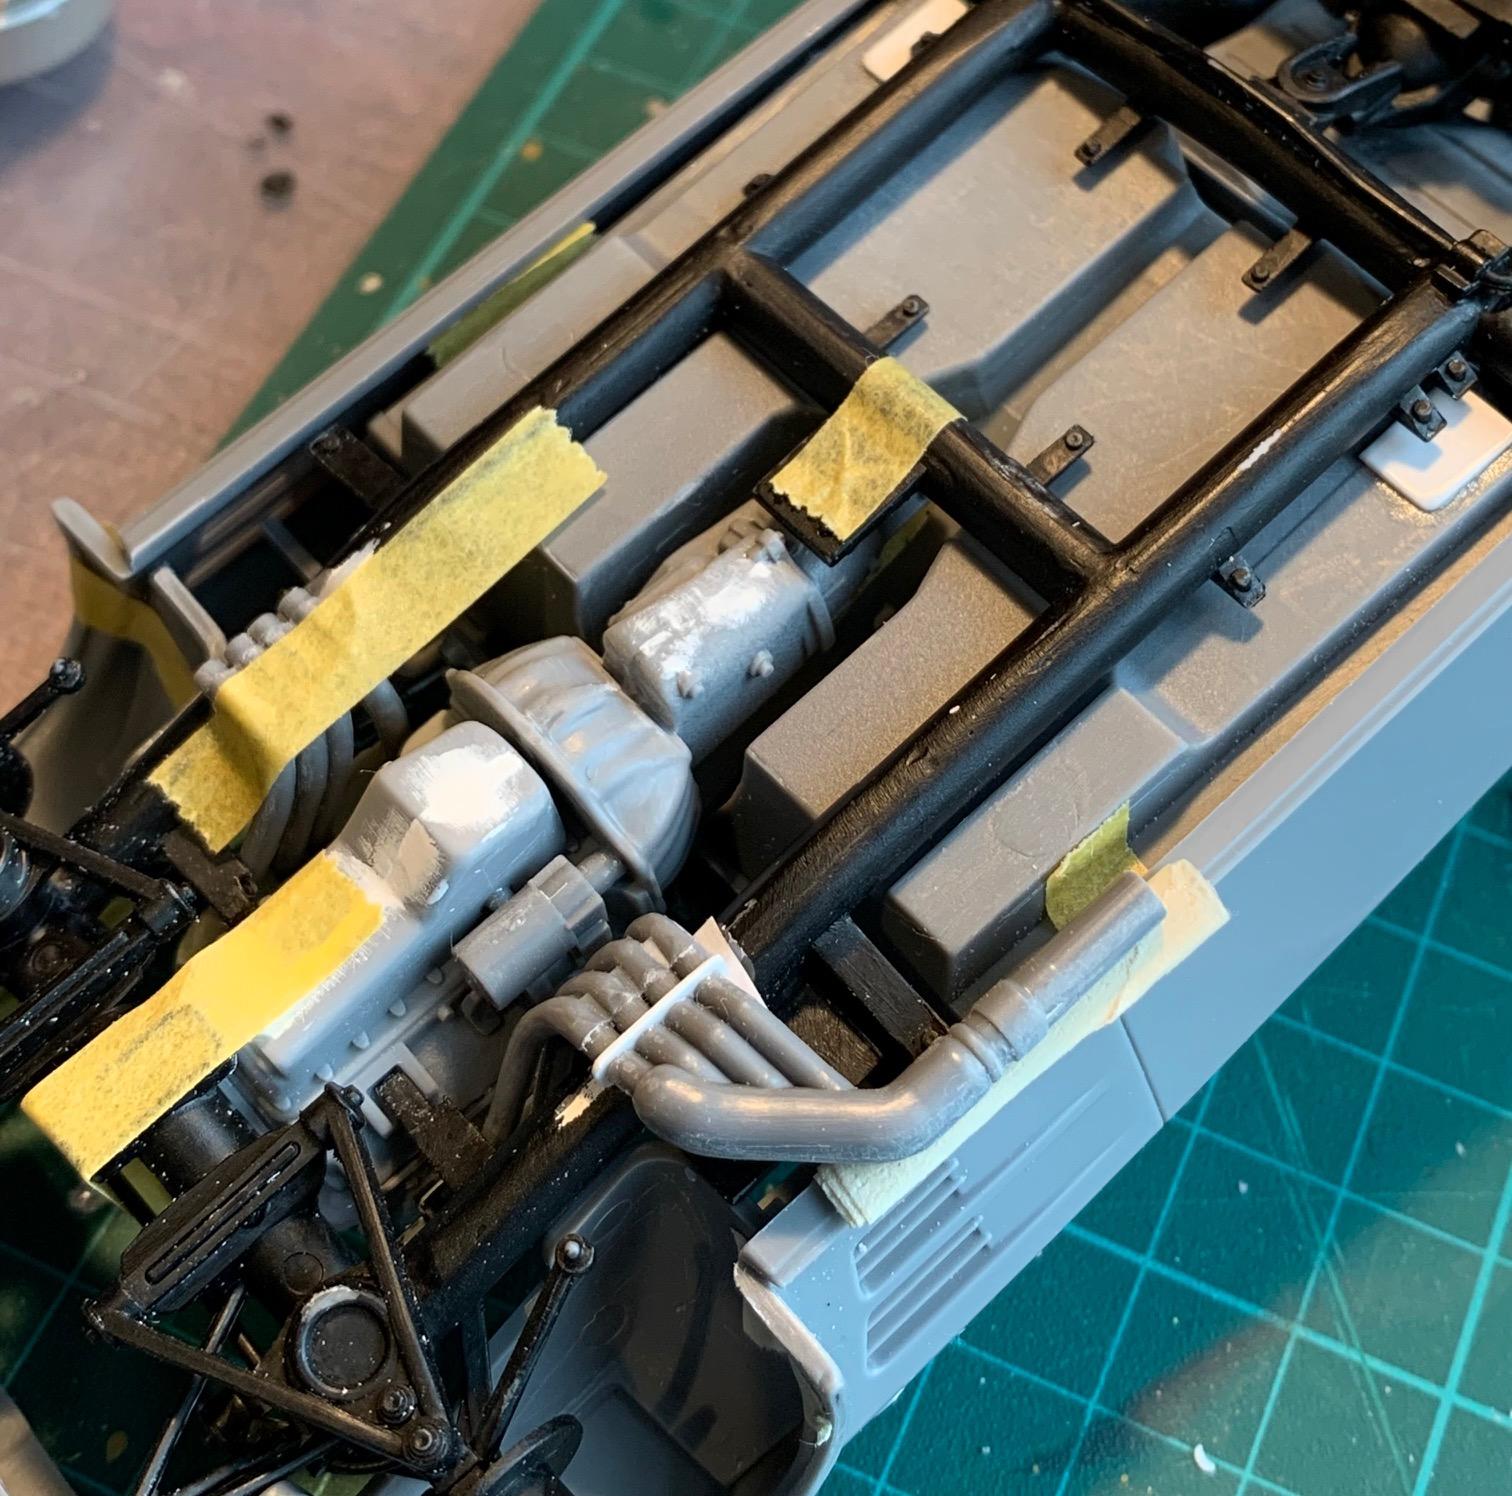
And the final parts as they will be integrated after engine is secured to the chassis.
-
At some point I will need to integrate a wider cross section to the exhaust dumps to replicate the unique setup of the car I am modeling. This is fine because I wanted to break up the side pipes. The front half of it will mate to the manifolds with a flanged joint. Not exactly accurate but it looks better than butt gluing tubes. The back half of the exhaust I will build and integrate after chassis is integrated to the body. Lots of fiddling but happy with the look...and it comes out straight!