Pierre Rivard
-
Posts
2,579 -
Joined
-
Last visited
Content Type
Profiles
Forums
Events
Gallery
Everything posted by Pierre Rivard
-
I agree. Now I need some tire replacement for this GT40 and wheels & tires for some Cobra projects. I sent an email to Randy at MBW to see if Mr Bradford still makes wheel/tire sets.
-
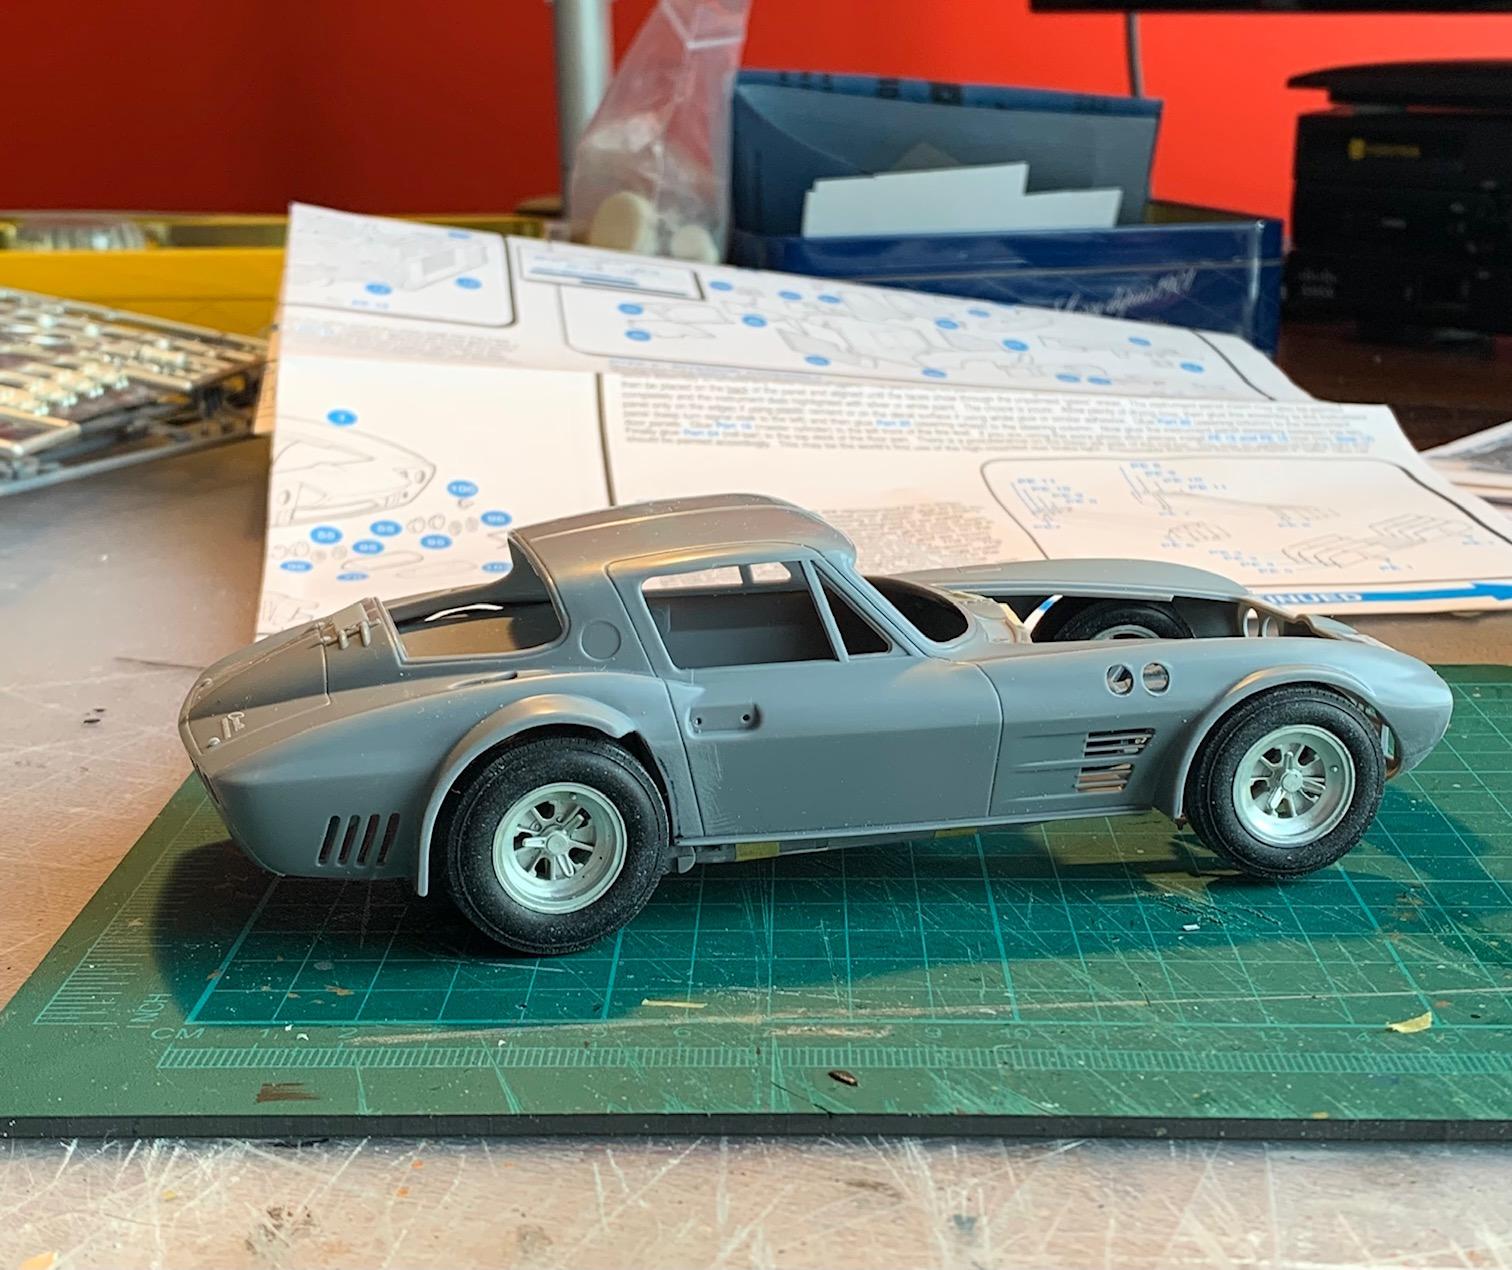
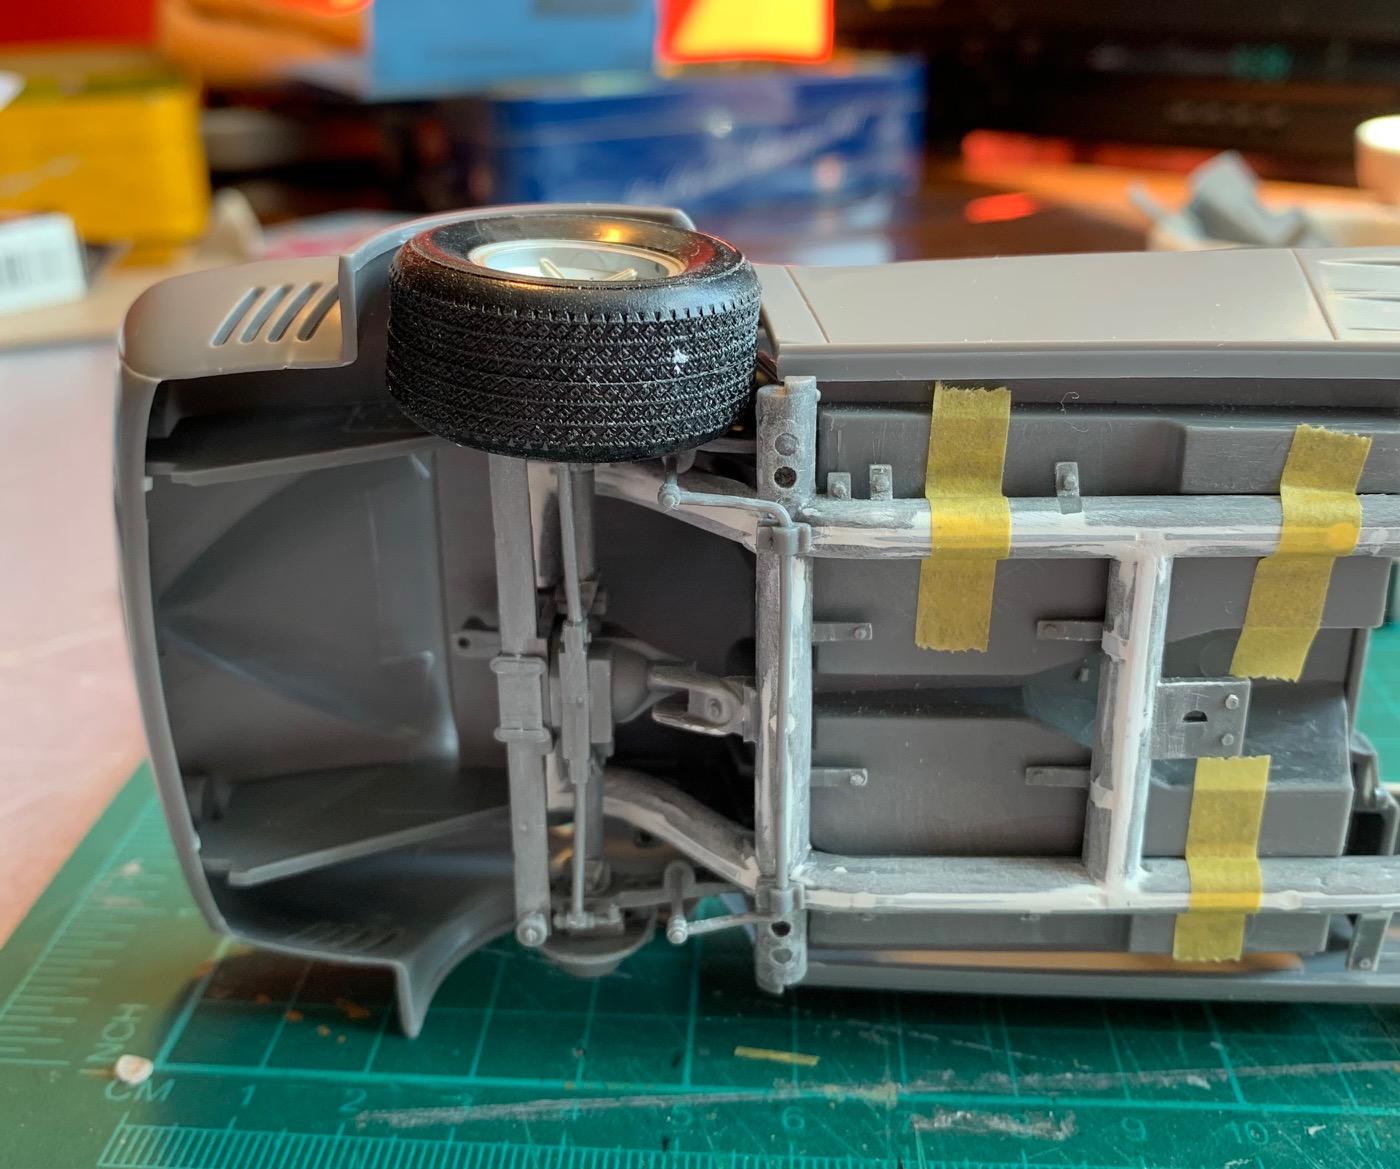
Now everything fits nicely. A quick mock up of the interior shows the IP pretty tight to the cowl possibly not leaving enough room for the glass. But that's for another day. I made the decision to dump the kit tires. They are too big, particularly the fronts. I like the wheels and they mate perfectly to the Fujimi GT40 tires. I will use those for this car and eventually find some replacements for the GT40 The picture below shows the new tires on the car.

-
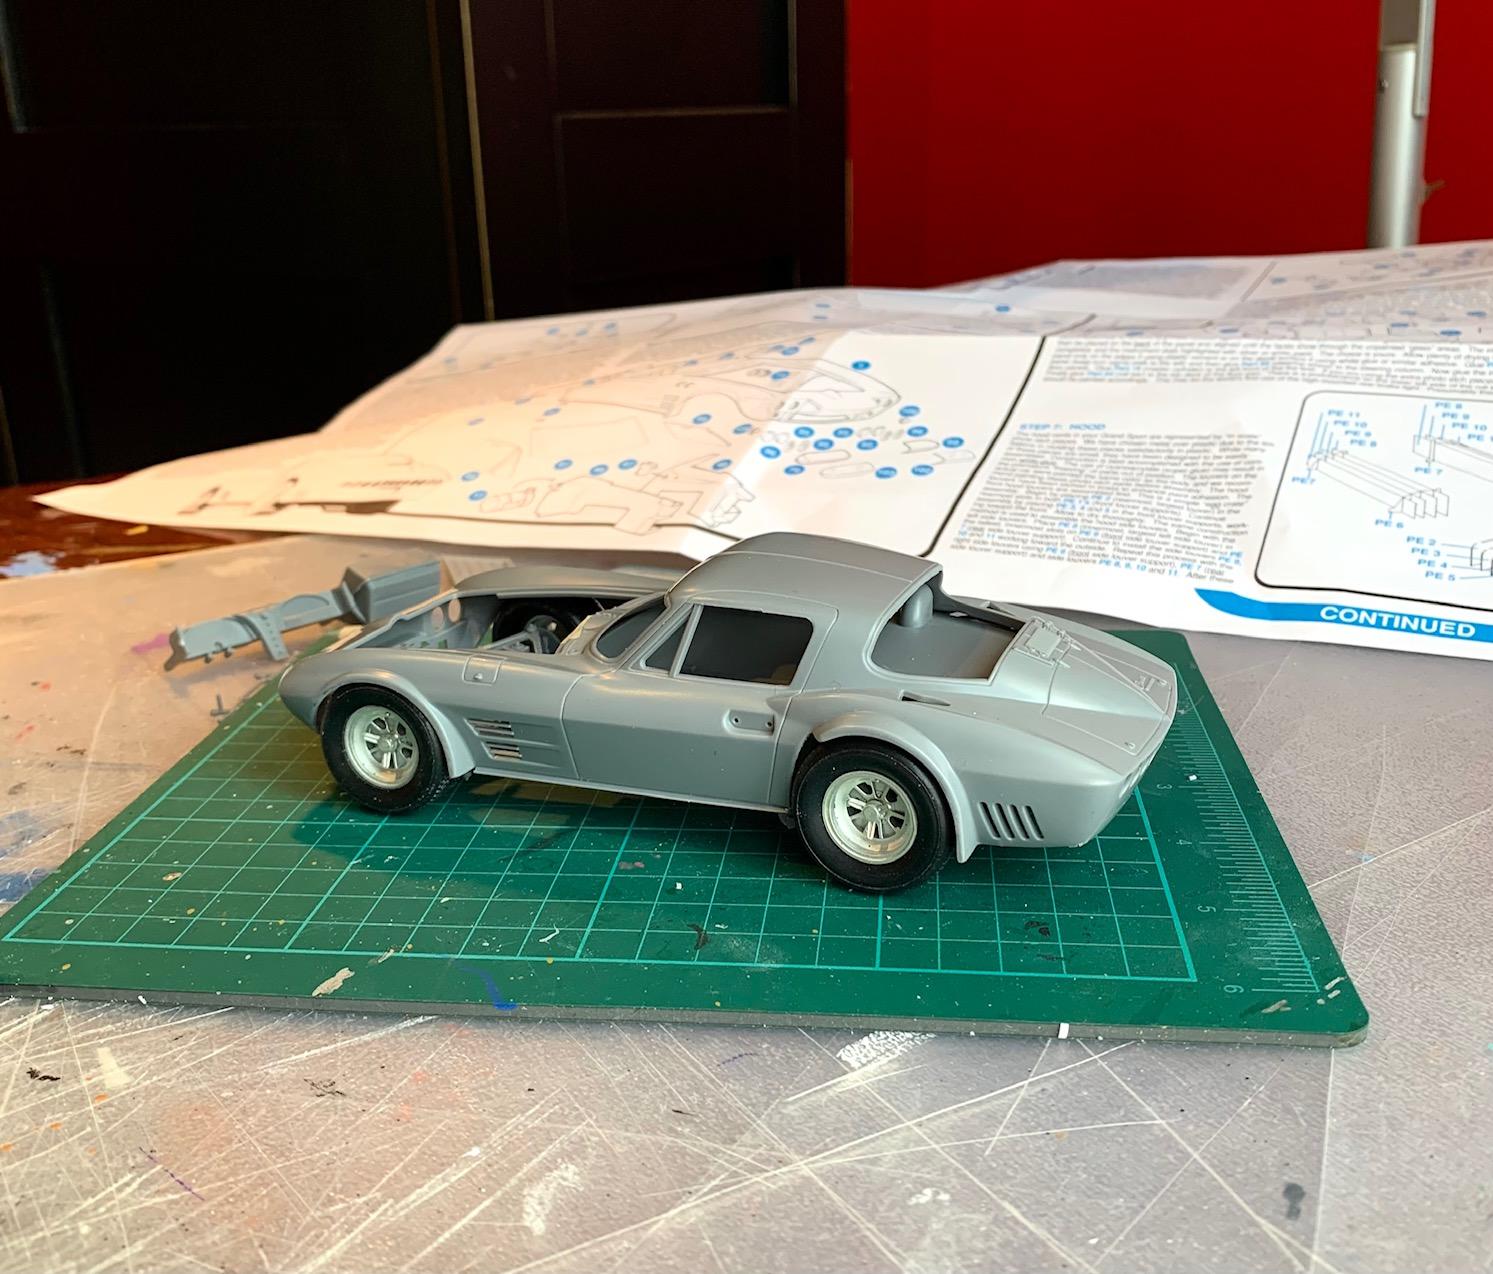
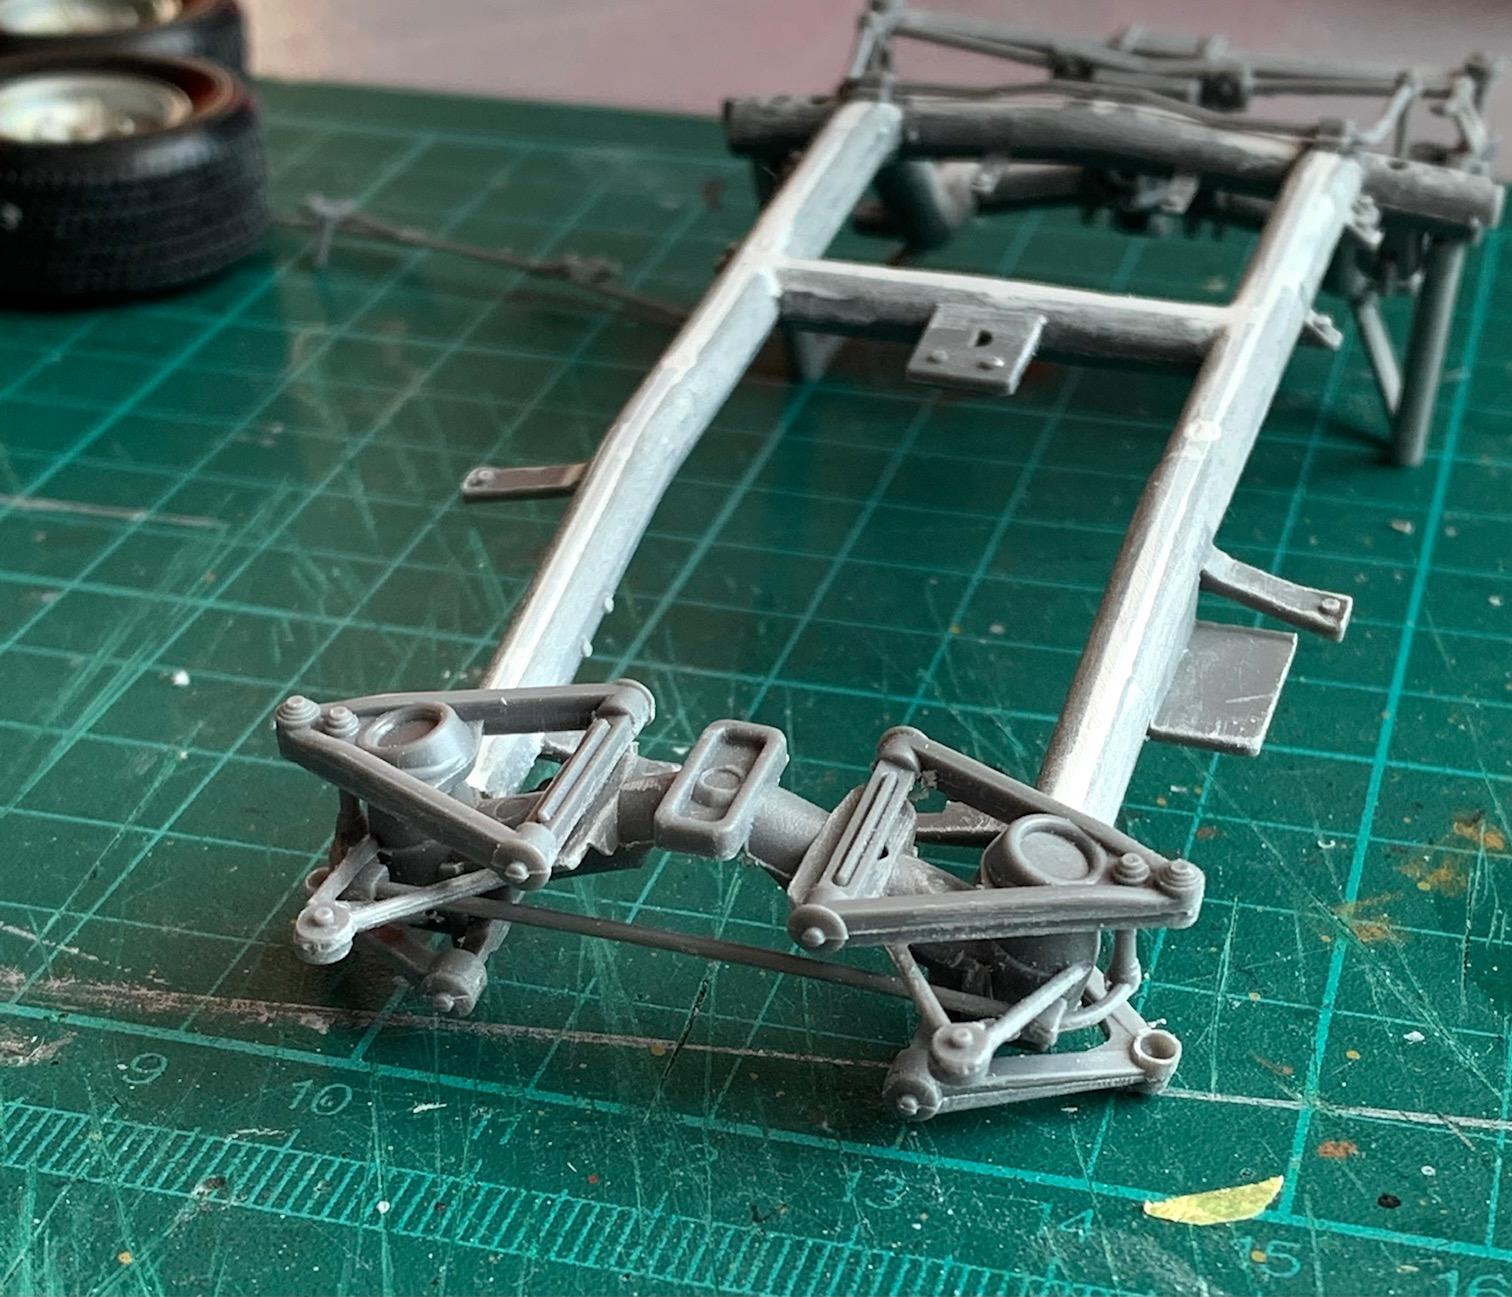
A bit of a setback as I added the fuel tank and spare tire. The tail of the car sits up like a dragster...again. The spare was easy. I added 0.5 mm spacers to the upper attachments, thus tilting the tire down by about 2 mm. The fuel tank was a harder task. First the visual instructions ask to mate the 2 halves opposite of the way the molded pegs guide the 2 parts together, so which is right. After ungluing and trying both ways... The way the 2 halves naturally mate is the right way but the diff still crashes to the underside of the tank. After efforts to grind some local relief I ended up removing 2mm from the top side of the tank.
-
1966 Mercury Comet
Pierre Rivard replied to MarkJ's topic in WIP: Stock Cars (NASCAR, Super Stock, Late Model, etc.)
White will turn red into pink. I'd try to add some yellow to the red. -
Very nice build, and it has survived the test of time. Impressive.
-
Leon CVSTOS AMG GT3
Pierre Rivard replied to harti20's topic in Other Racing: Road Racing, Salt Flat Racers
Congratulations Urs for such a beautiful build. I went back to your w.i.p. and find your work impressive to say the least. -
Thanks guys, I like the way she sits. She now looks more like a race car. Lots of work on making stuff fit and integrate but I got used to that building dark side Nascar racers out of street car kits. I look forward to the rest of this build.
-
1965 Ferrari 275 GTB
Pierre Rivard replied to Scale-Master's topic in Other Racing: Road Racing, Salt Flat Racers
Mastering the miniature world! -
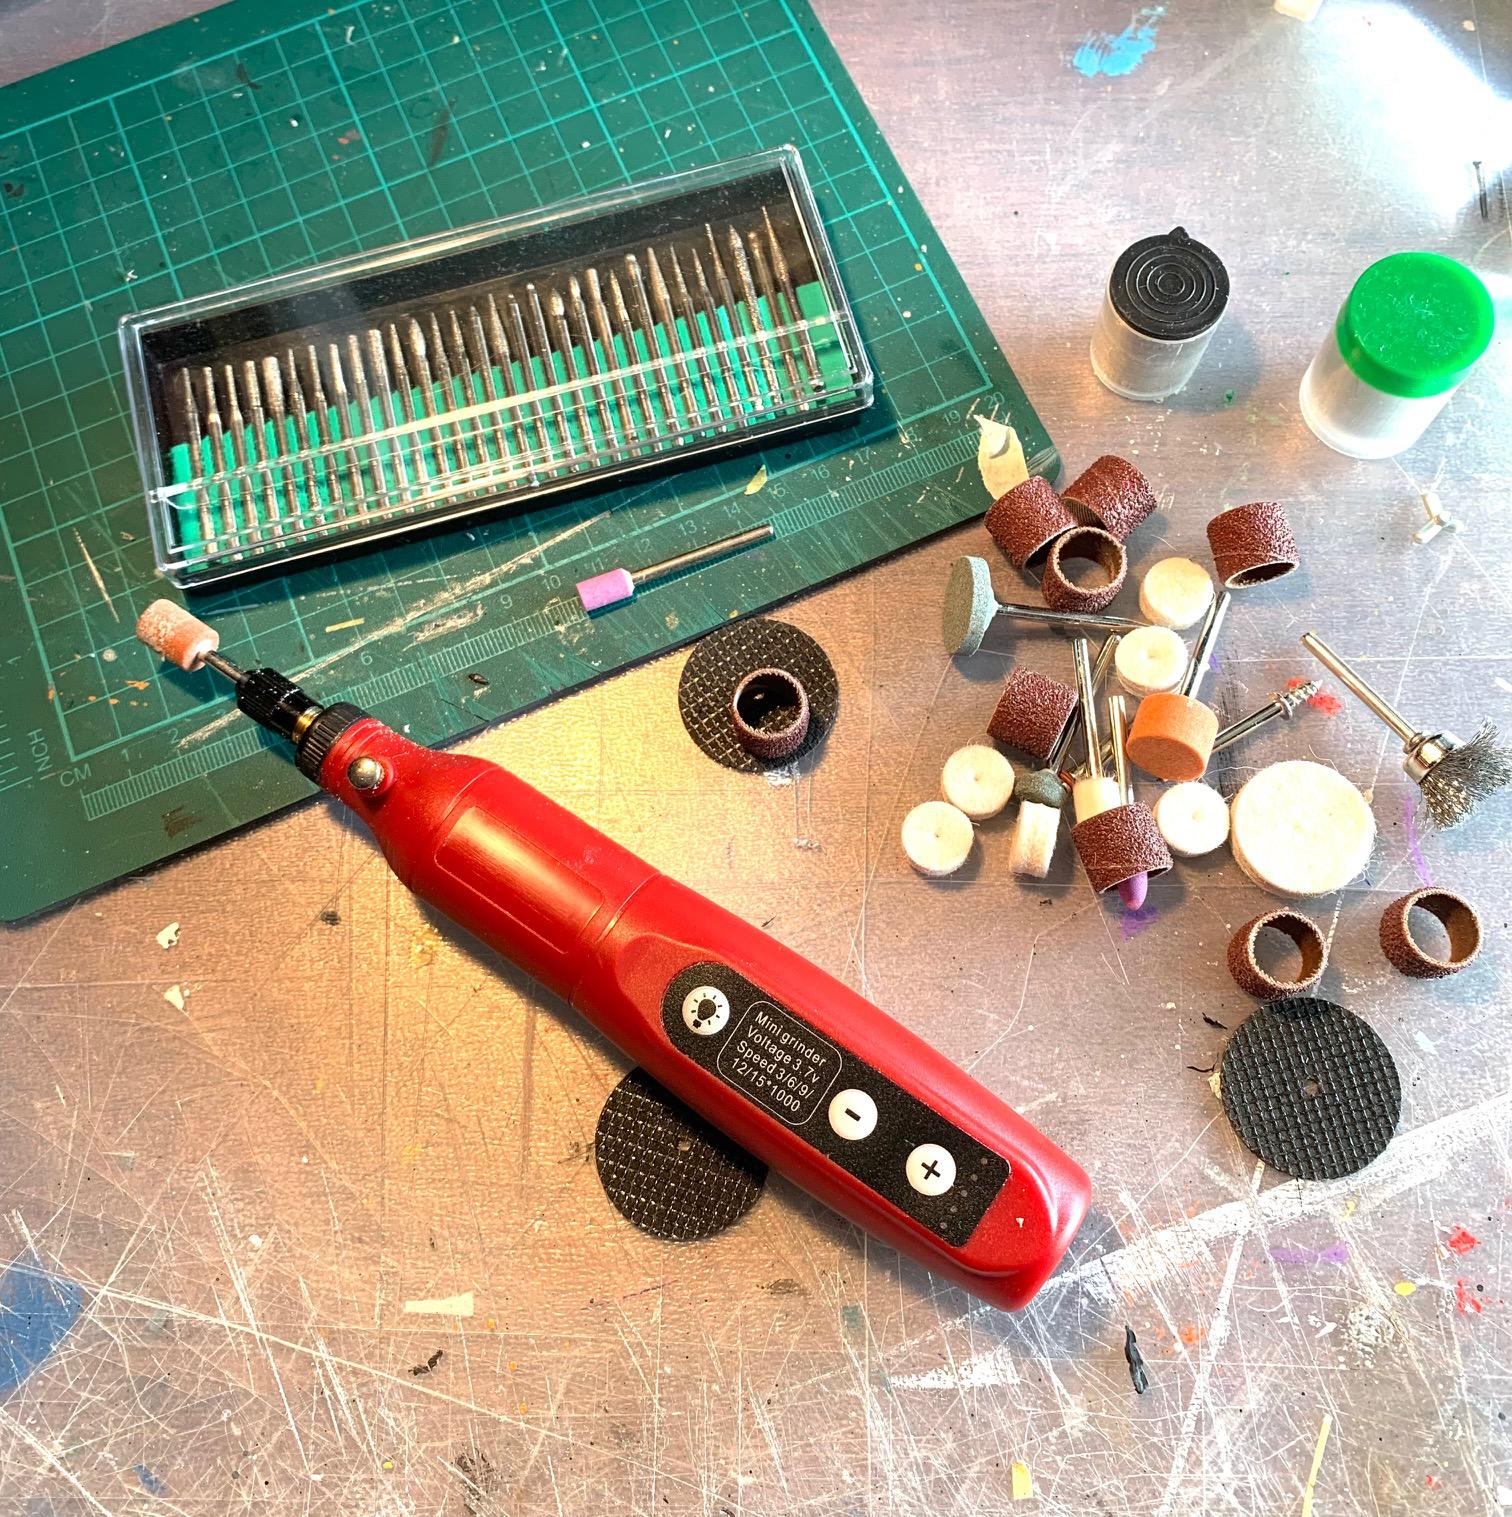
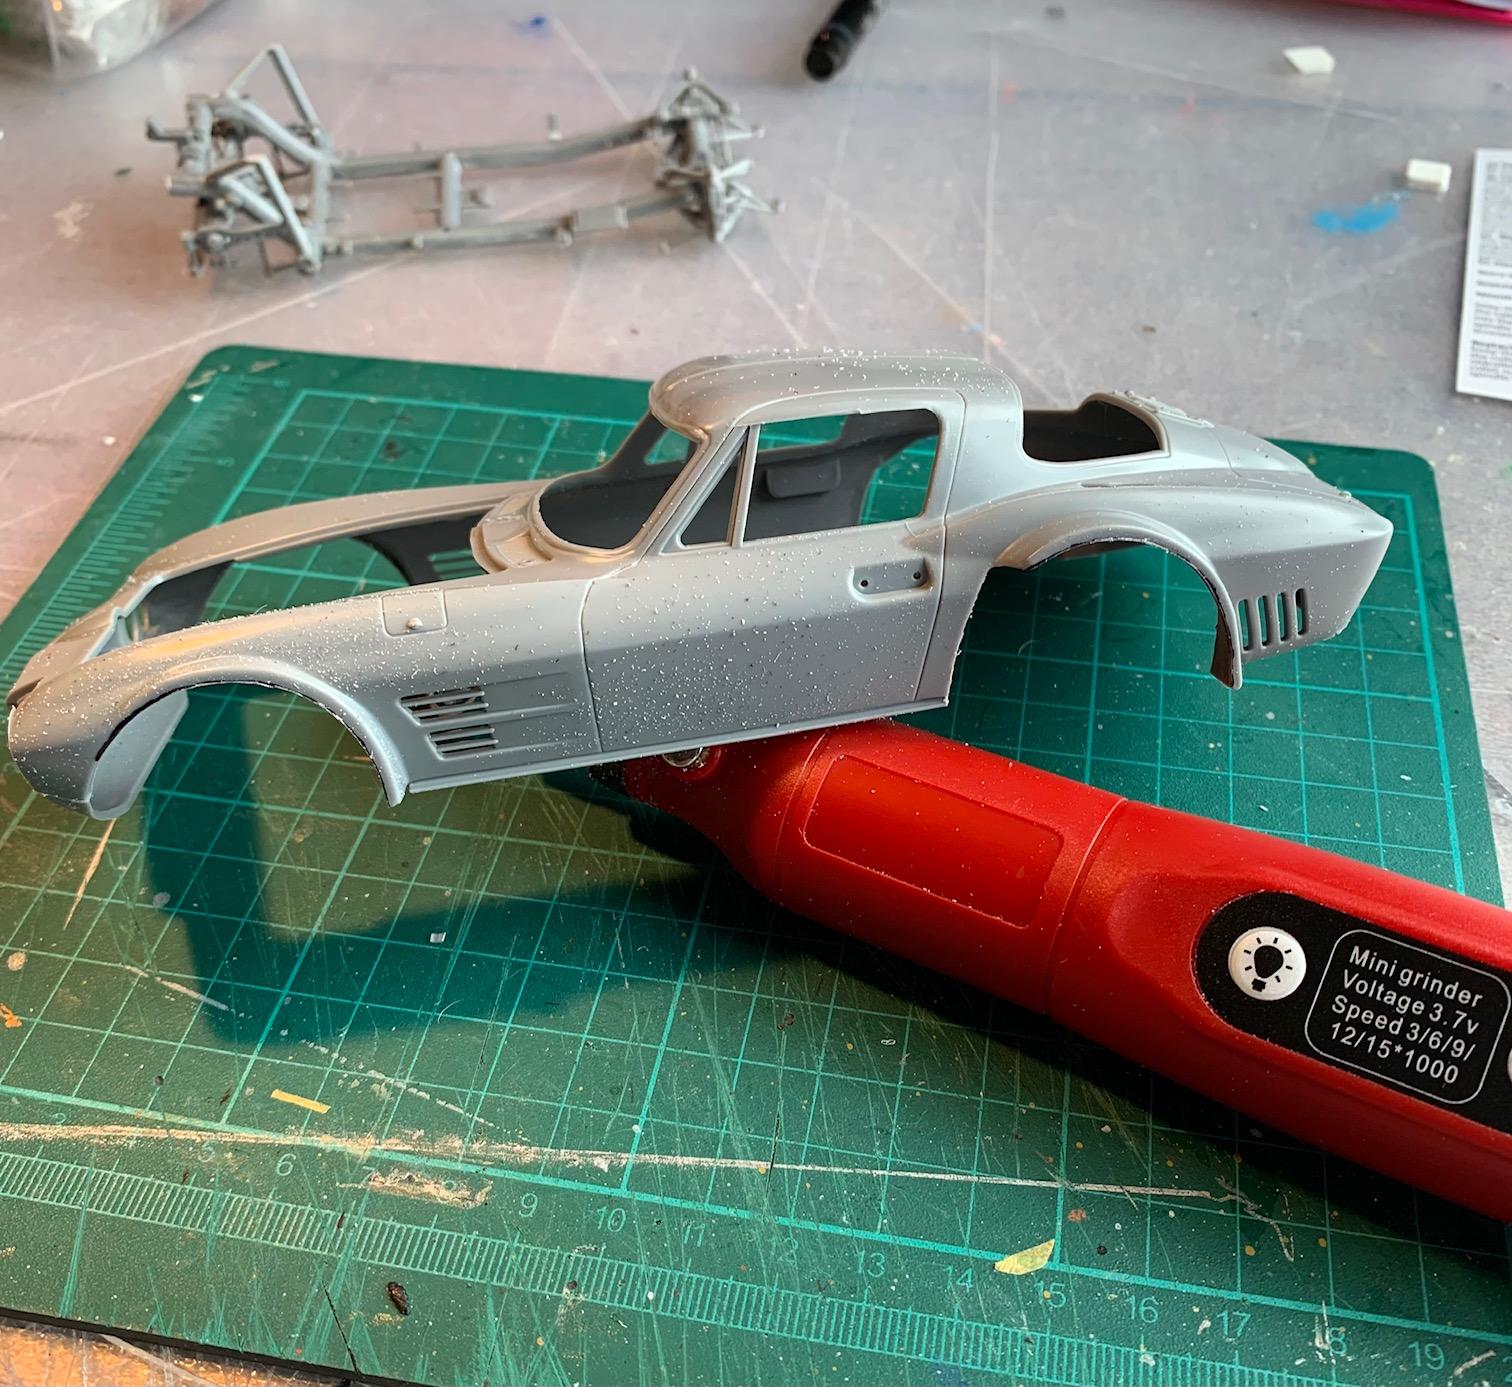
Dremel is the gold standard but the small one was not available here when I finally decided I should get one. I found this inexpensive alternative on Amazon for about $30. Justool Minigrinder. Light, cordless, 5 speed setting (3000 to 15000) and with a bag of accessories. Tried it for the first time yesterday and it i really like it.
-
And finally the result.
-
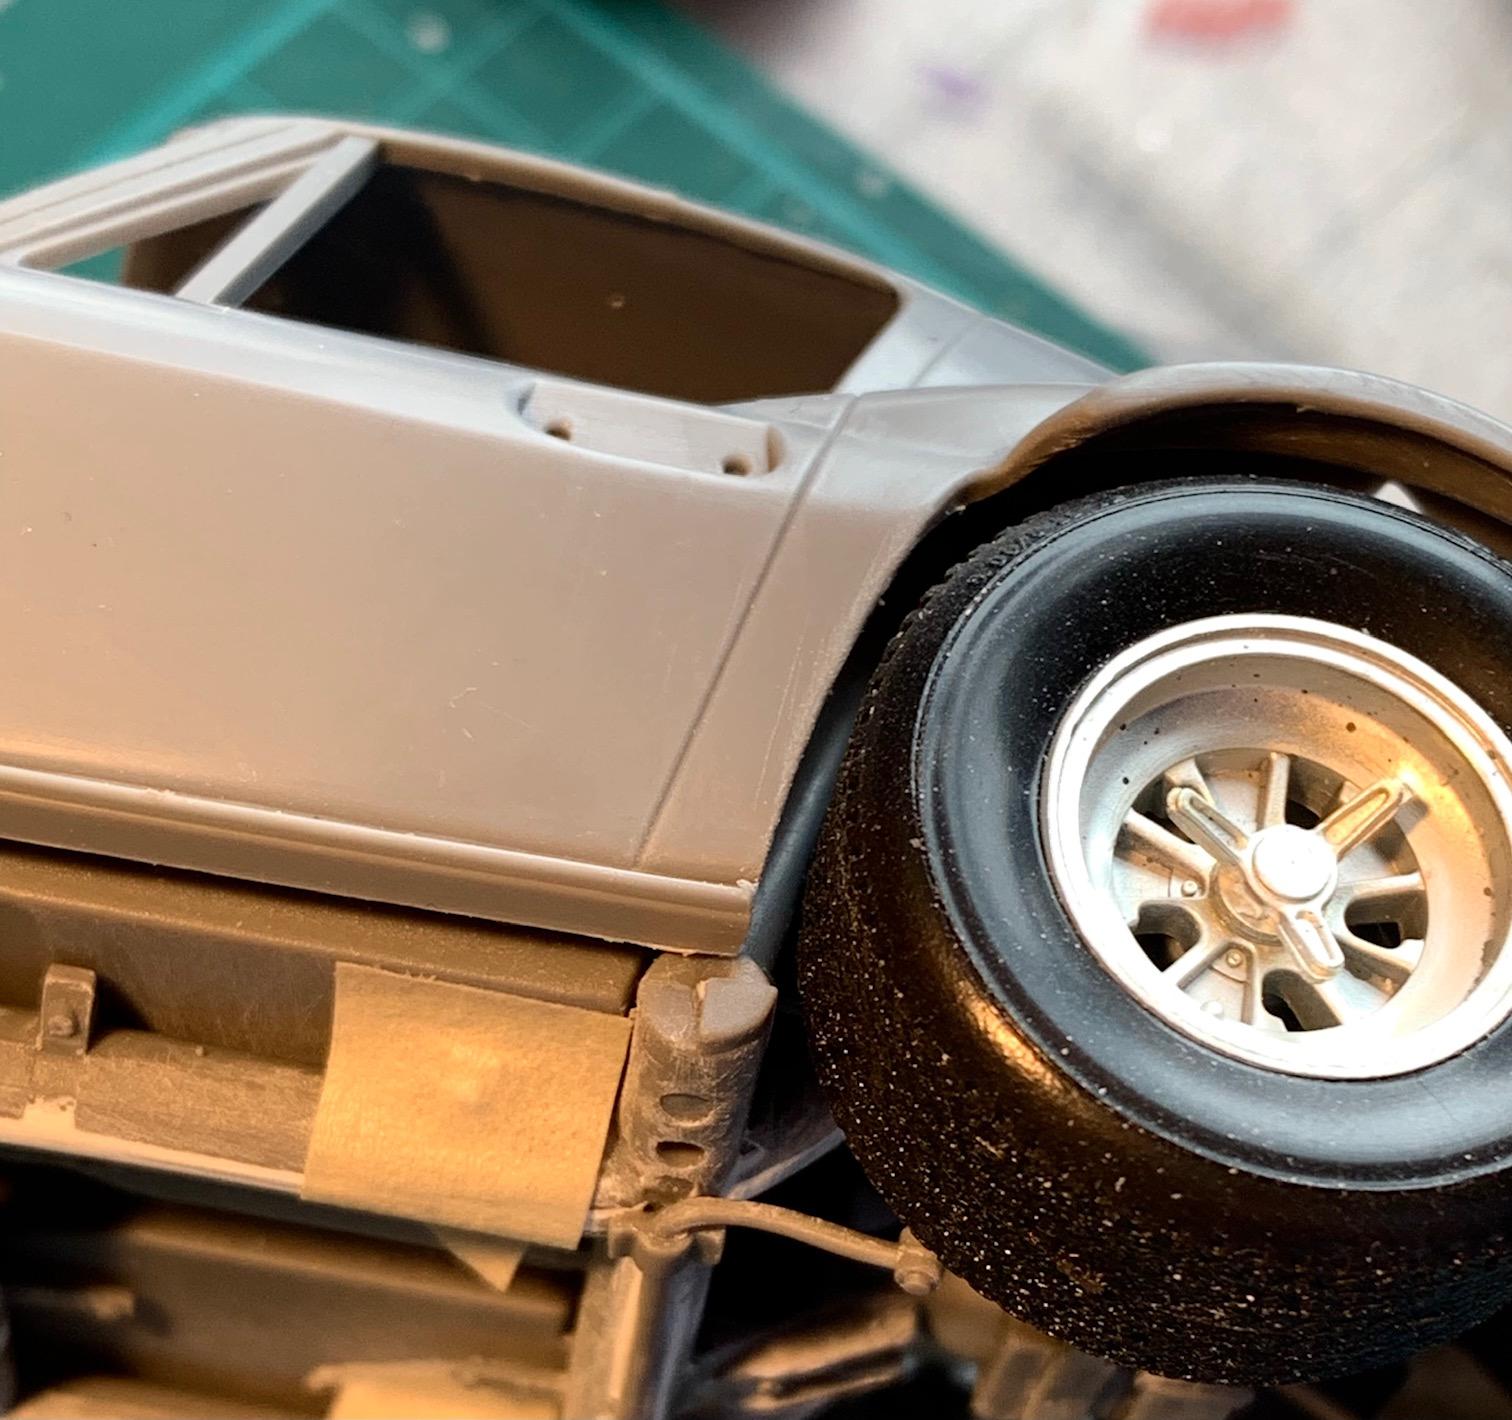
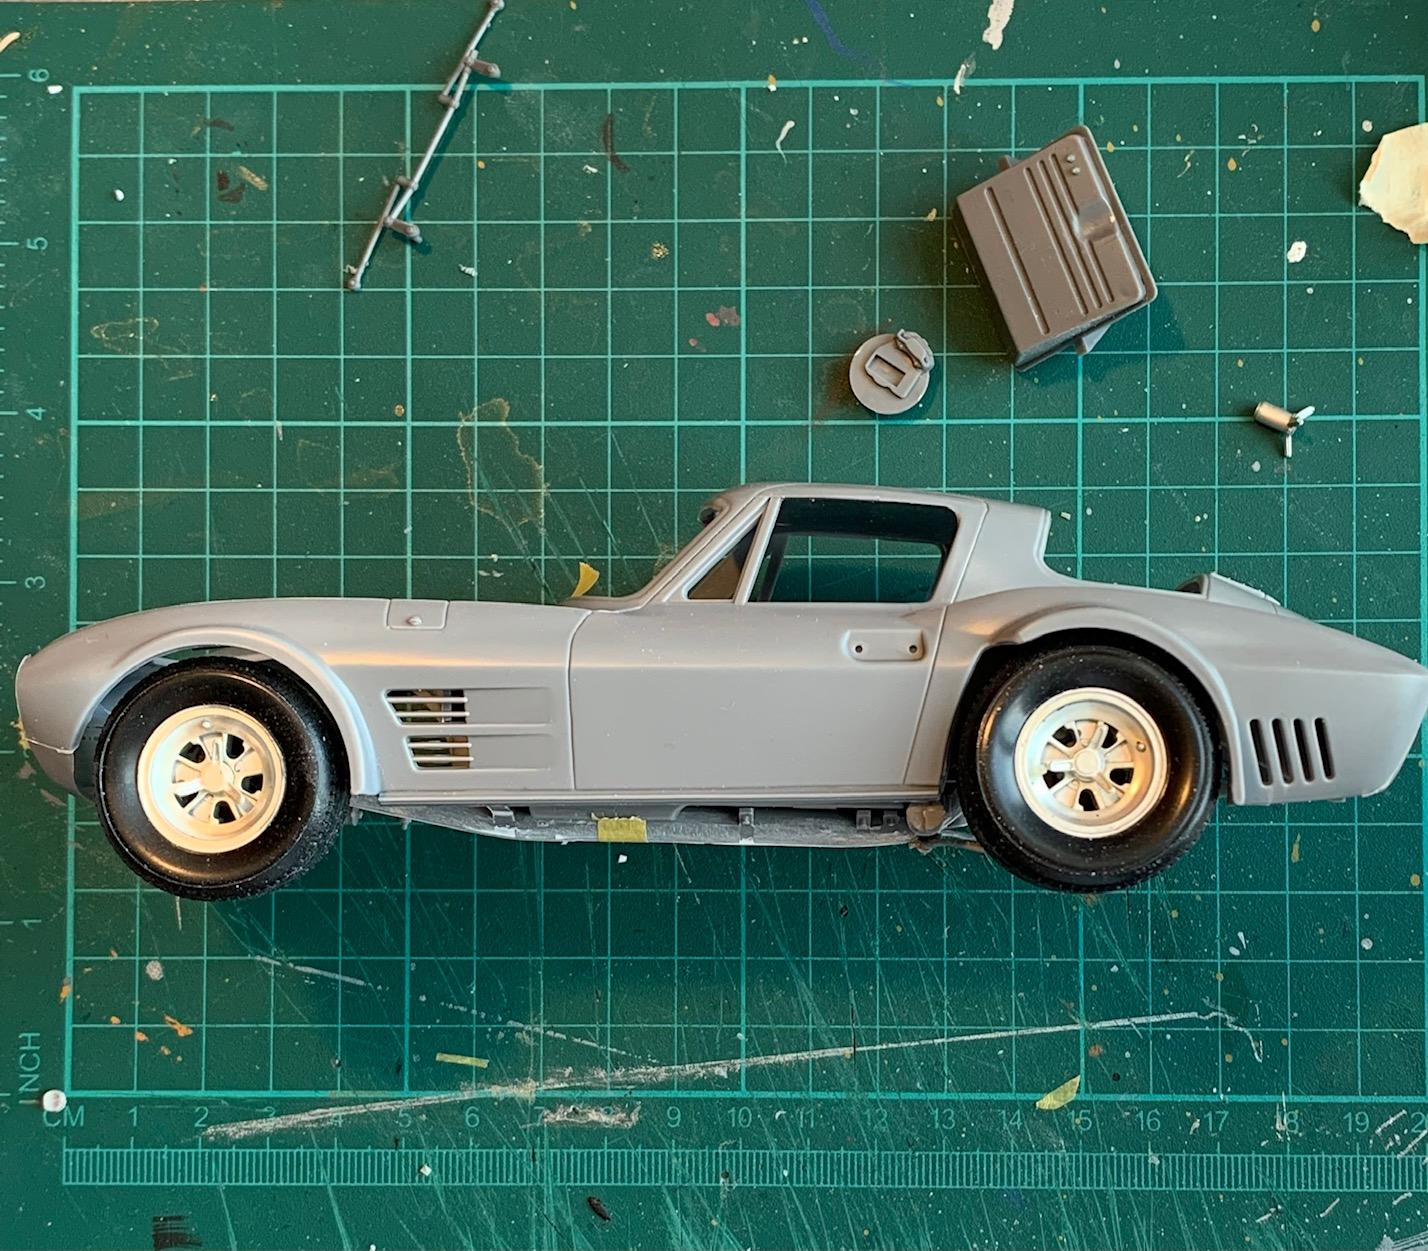
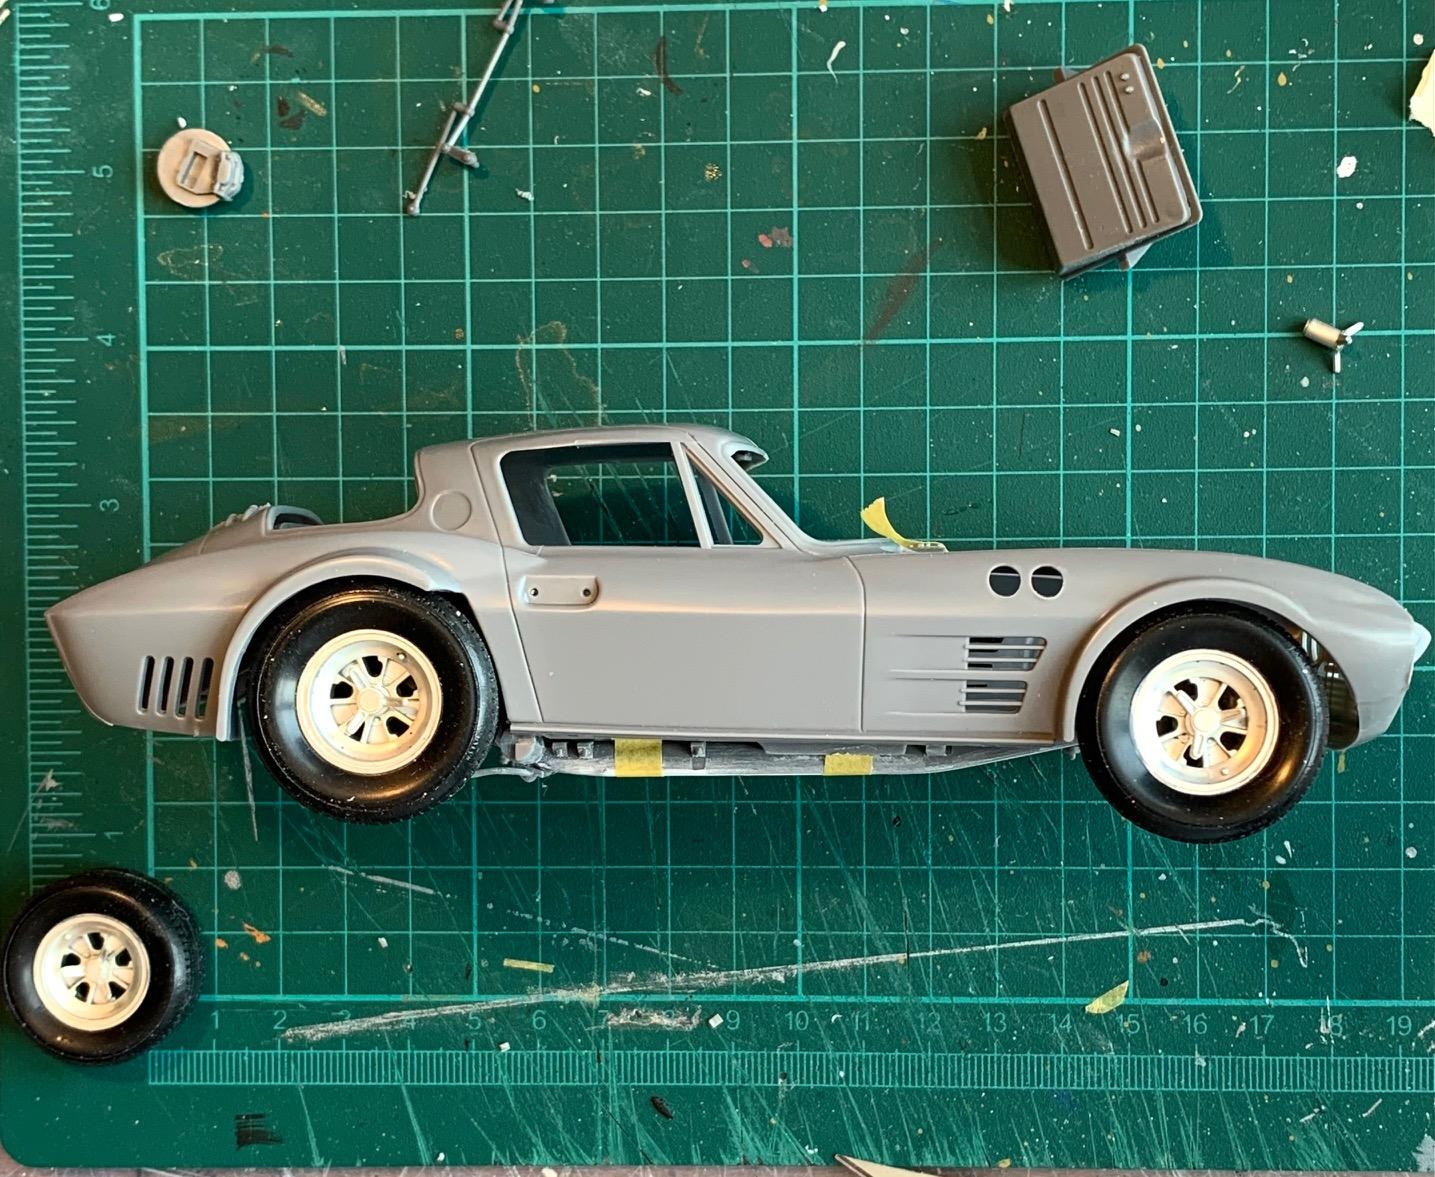
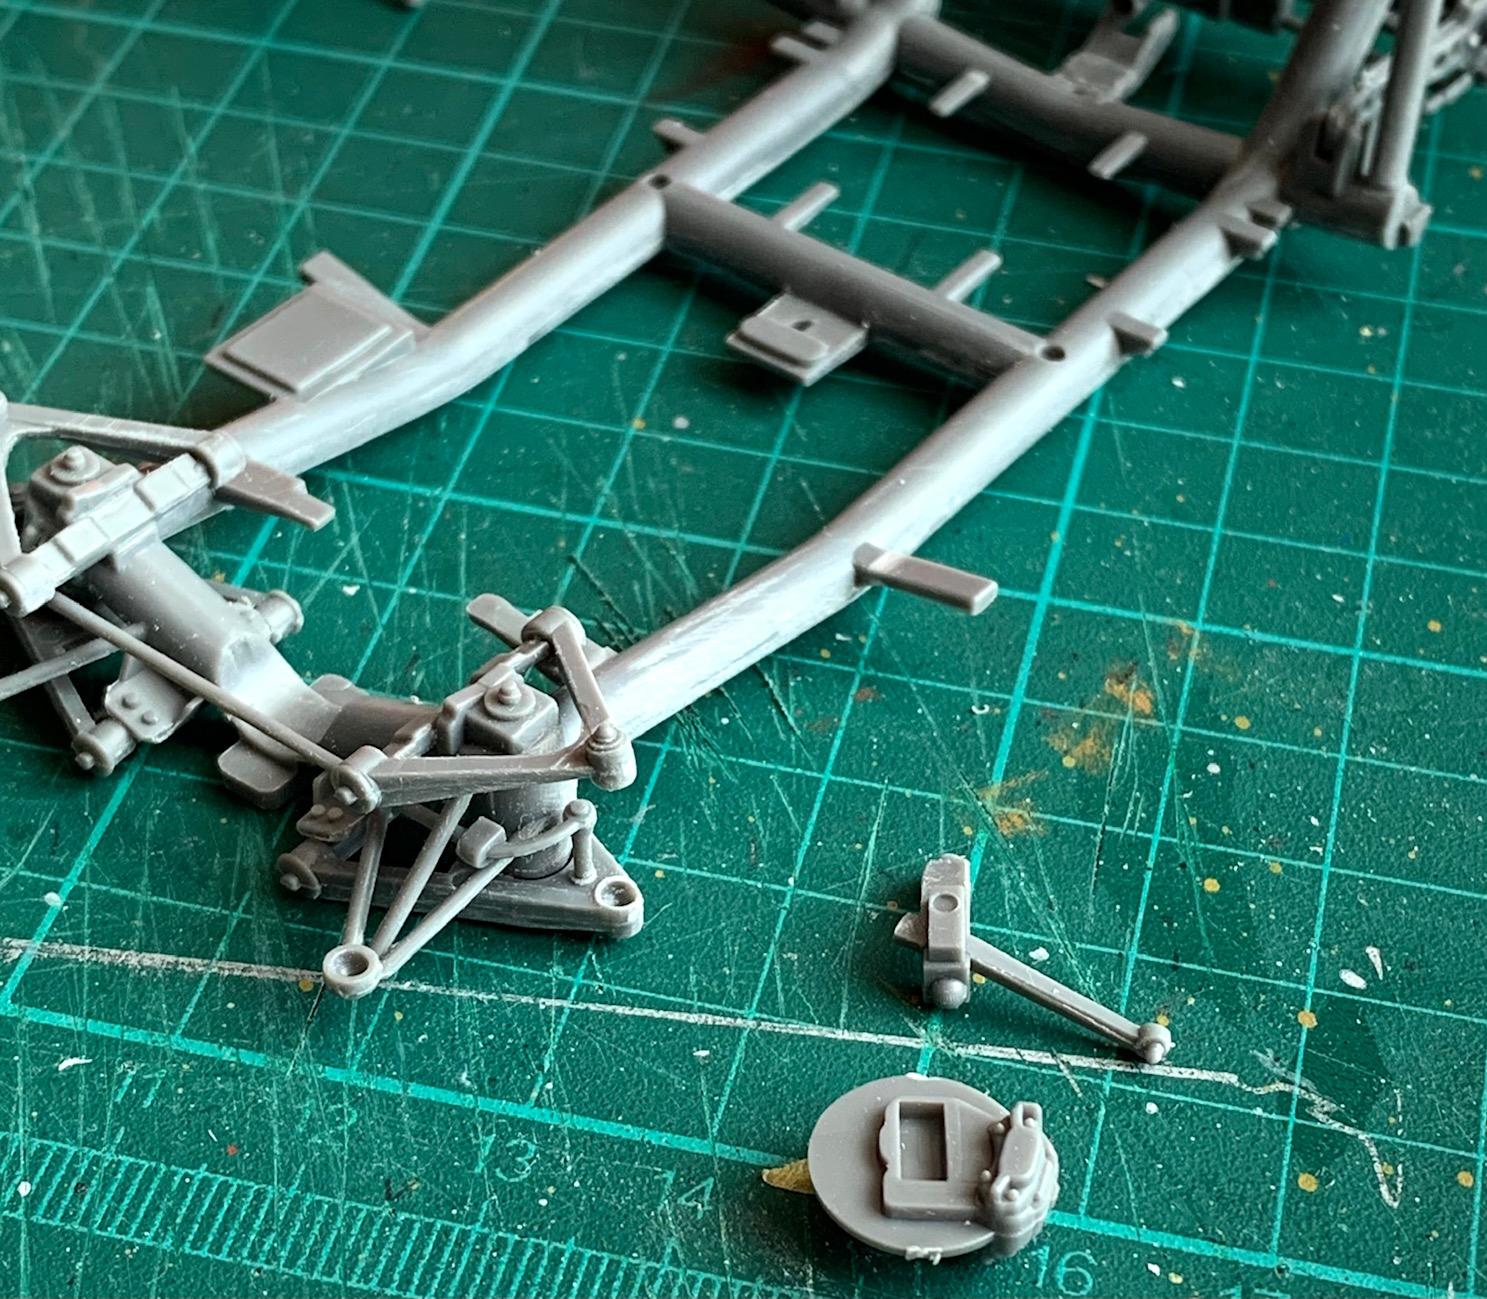
Discovered yet one more interference to fix. Tire contact to roll bar support. Fixed that and Thinned at an angle the back side of the rear disc/hub part to get rear wheels to align properly. For the front side I still need to go lower. The fit from hub/disk to upright is a square into square so I removed some material to allow to slide the interface up. Lots of finessing to get the 4 tires to sit square to the ground.
-
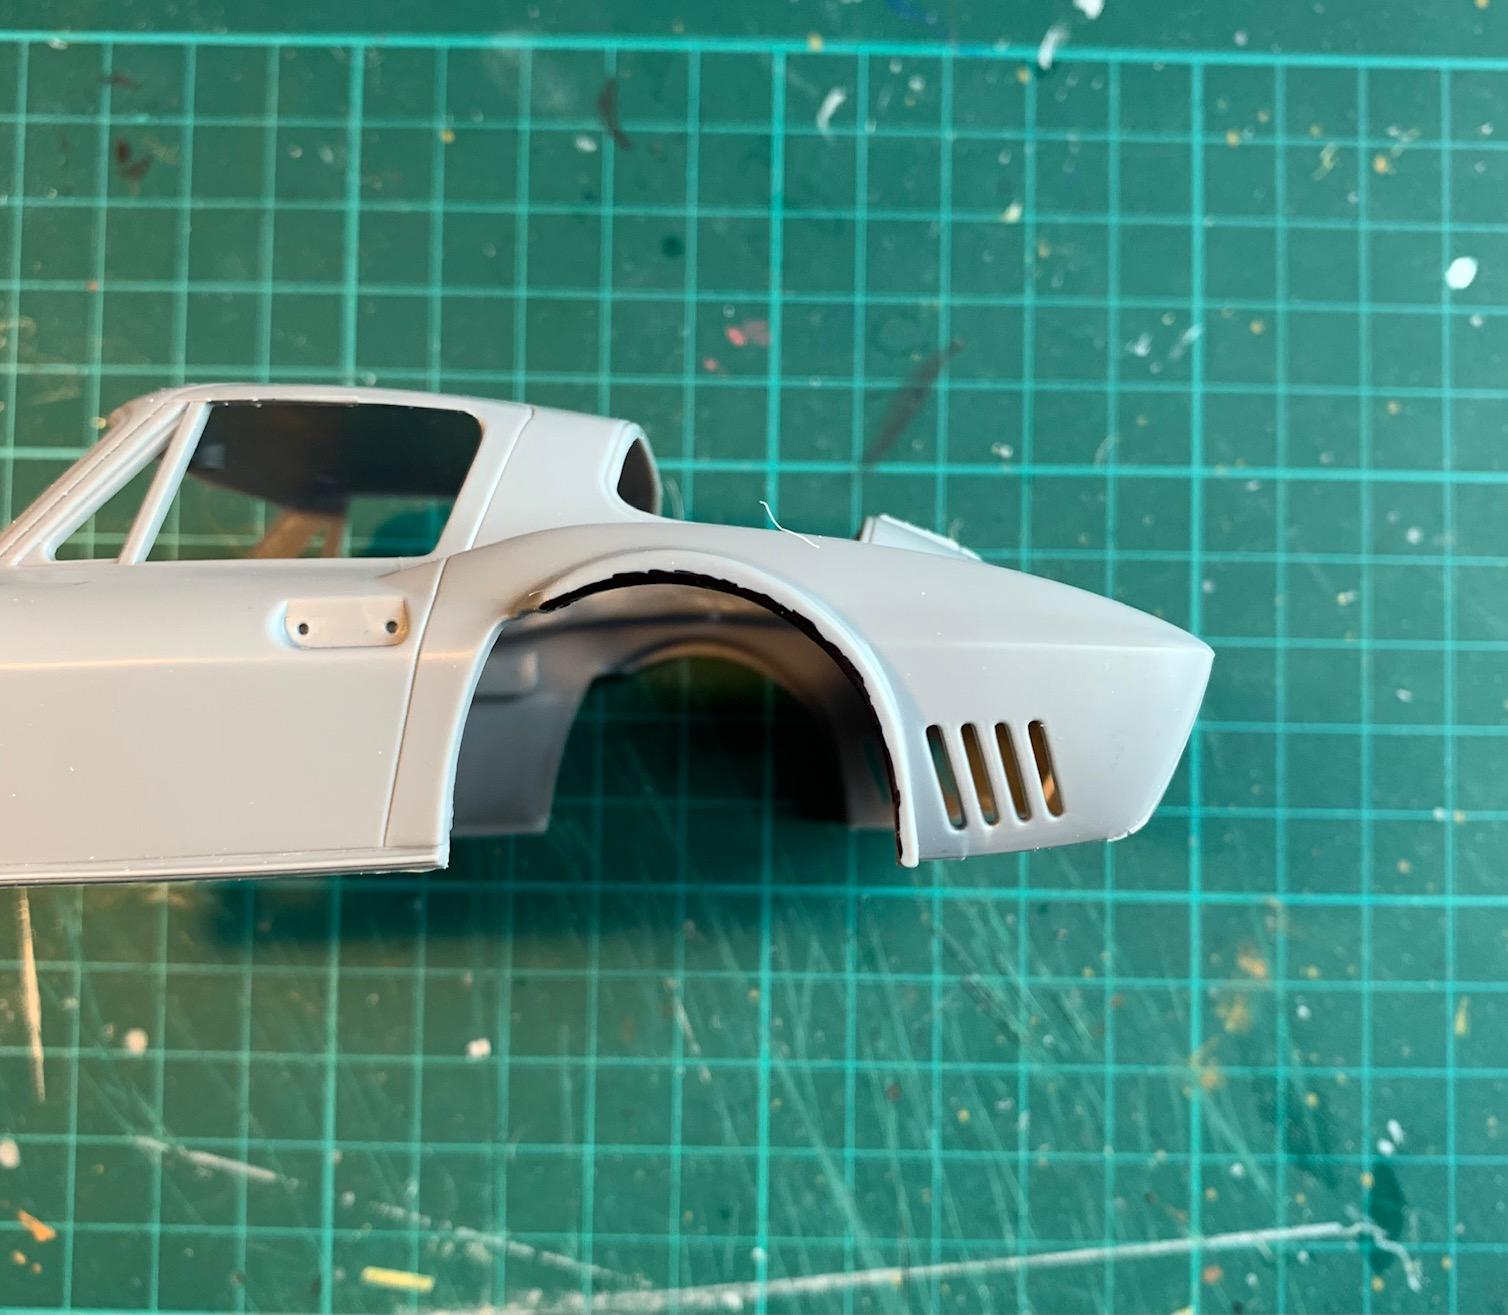
Today I tackled on finishing the chassis ride height. This is a major issue with this kit and a must fix for me to proceed with the rest of the build. I first took action on Bill's observation that the body's fender lips need thinning. I want to address this first before finessing the wheel positioning. My first time using a mini grinder...cools and a bit scary. Worked out ok, with some finesse sanding to follow. I might want to remove more material eventually, not sure.
-
Thank you all. Feedback much appreciated!
-
Definitely Vallejo. Brush painting Tamiya is mission impossible.
-
MPC Flip Nose '57 gasser converted to......well, a gasser.
Pierre Rivard replied to roadhawg's topic in Drag Racing
Don't know a thing about drag racing but this is an awesome looking build. Simply formidable! -
I'm always amazed to see such clean component fabrication. They always look like they were crispy molded that way. Thank you from sharing Professor Reckner!
-
1966 Mercury Comet
Pierre Rivard replied to MarkJ's topic in WIP: Stock Cars (NASCAR, Super Stock, Late Model, etc.)
I could not agree more. I take the body on and off so many times as I work ride heights, wheel openings and overall integration. Then I move on to paint and of course decal day is the best! Take your time and enjoy the ride on your build. There's no deadline. -
1966 Mercury Comet
Pierre Rivard replied to MarkJ's topic in WIP: Stock Cars (NASCAR, Super Stock, Late Model, etc.)
Beautiful fabrication as always. I'm sure it takes time and patience do scratch build all these components and you should be proud of the results. -
Beautiful GS Steve. What did you use for tires and tire decals?
-
I'll use Mecom blue and Cadillac Pelham blue as starting point and do mixing test cards. Right now I see it as a slightly grayish medium blue metallic.
-
JC, Bill, Andrew, thanks for the help. I like the stance on the last pic posted by JC. I was thinking of adding a bit of lean and this is a good guide. As for tire sizes it's always hard to figure out from era tire size specs because aspect ratio being 70% or 78% on road tires may not be the same for race tires. Measuring era pictures and scaling around the known 15" wheels my best guess was that the fronts were about 25-26 and the rears about 27 Kit tires equate to 27 front and 28 rears, a bit large as expected. Just for fun I dropped Fujimi GT40 tires on the GS rims to see the difference. The Fujimi tires measure to an equivalent 26 front and 28 rear. I would not want to sacrifice the Fujimi kit for tires but just see how it looks.
-
Welcome back friend! I am looking at ways to get the car to look more natural and I agree with you that some decal solution is needed to break the tall sidewall appearance. Despite the challenges I love this car so much that I have a second kit on order. First one will be chassis 004 Sebring 1964.
-
I measured the tires and the conversion to 1/1 would equate to 27.2" front and 28.3" rear. Anyone know what the real car tire size was? Is Harold Bradford the old gent who only accepts phone orders and checks?
-
Now I can mock up the ride height, one side at a time because the front wheel to brake to upright is just balanced in position. That's why I do this with the body sitting on it's side. See pics ob both sides. Looking positive but still some tweaking because the right side sits lower than the left. I also need to make adjustments to the rear wheels that are toed in. That's a story developing with this kit. The parts look good but nothing fits without many adjustments. If you want a nice relaxing OOB project this is not the one.
-
So today i tackled the front end. The way it assembles I can't mock it up without some gluing. Cross my fingers. I started by cementing the lower arms in a horizontal plane. Not quite right but I gotta do it. I then glued the upper A arms without the uprights in. The plan is to allow the uprights to snap in and out of position so that I can make adjustments to the upright to brake assembly as a way to finesse the wheel position. Eventually the uprights will be cemented to the A's.