Pierre Rivard
-
Posts
2,579 -
Joined
-
Last visited
Content Type
Profiles
Forums
Events
Gallery
Everything posted by Pierre Rivard
-
A quick mock up of parts to see what I need to do next

-
Now for the ugly part. I feel like a senile dentist... drilling through a freshly filled cavity. Later I will try to finesse this to look like a bend in the chassis rail
-
The last delicate part of chassis fabrication is the integration of the exhaust system I should have invested in HRM exhaust manifolds which must have been designed to clear the chassis tubes...but did not so I will have to manage with the kit parts. Instructions call for headers to be attached to the engine after the engine is installed to the chassis. Makes sense because of the width of the engine/header combo would not clear the rails. Plus it's very tight to the steering box and there is slight contact to upper A-arms and a significant interference to the chassis rails. First I removed the little pegs supposedly fitting into the heads and made flanges, choosing not to use the kit's PE flanges.
-
Mark, I like the new name haha! Parts are beautiful but integration is lacking hence all the reworks needed. This one is fighting me all the way but I'm not giving up. Not even close. Bill E, I could not agree more with your statement. I love this kit but it is a big test for my skill level. Bill G, thanks for the comments about the XK-SS. Looks like similar challenges. Started work on exhaust system. Oh la la!
-
David and Len, here's my take on the fitment issues. I don't see any mold degradation, the parts are crisp and straight. A homerun compared to old AMT/MPC kits for example. What I see is that AM tried to create very precise assemblies that cannot live with the realities of tolerance stack ups. As for lowering ride height causing the engine to crash into the hood all I can say is that I removed interferences until the chassis could mate to the underbody as it should (ie no gap to attachment points). I did allow some lowering of the front wheels to wheel hub interface but this should not have an impact. Perhaps I did cause some of this, not sure...
-
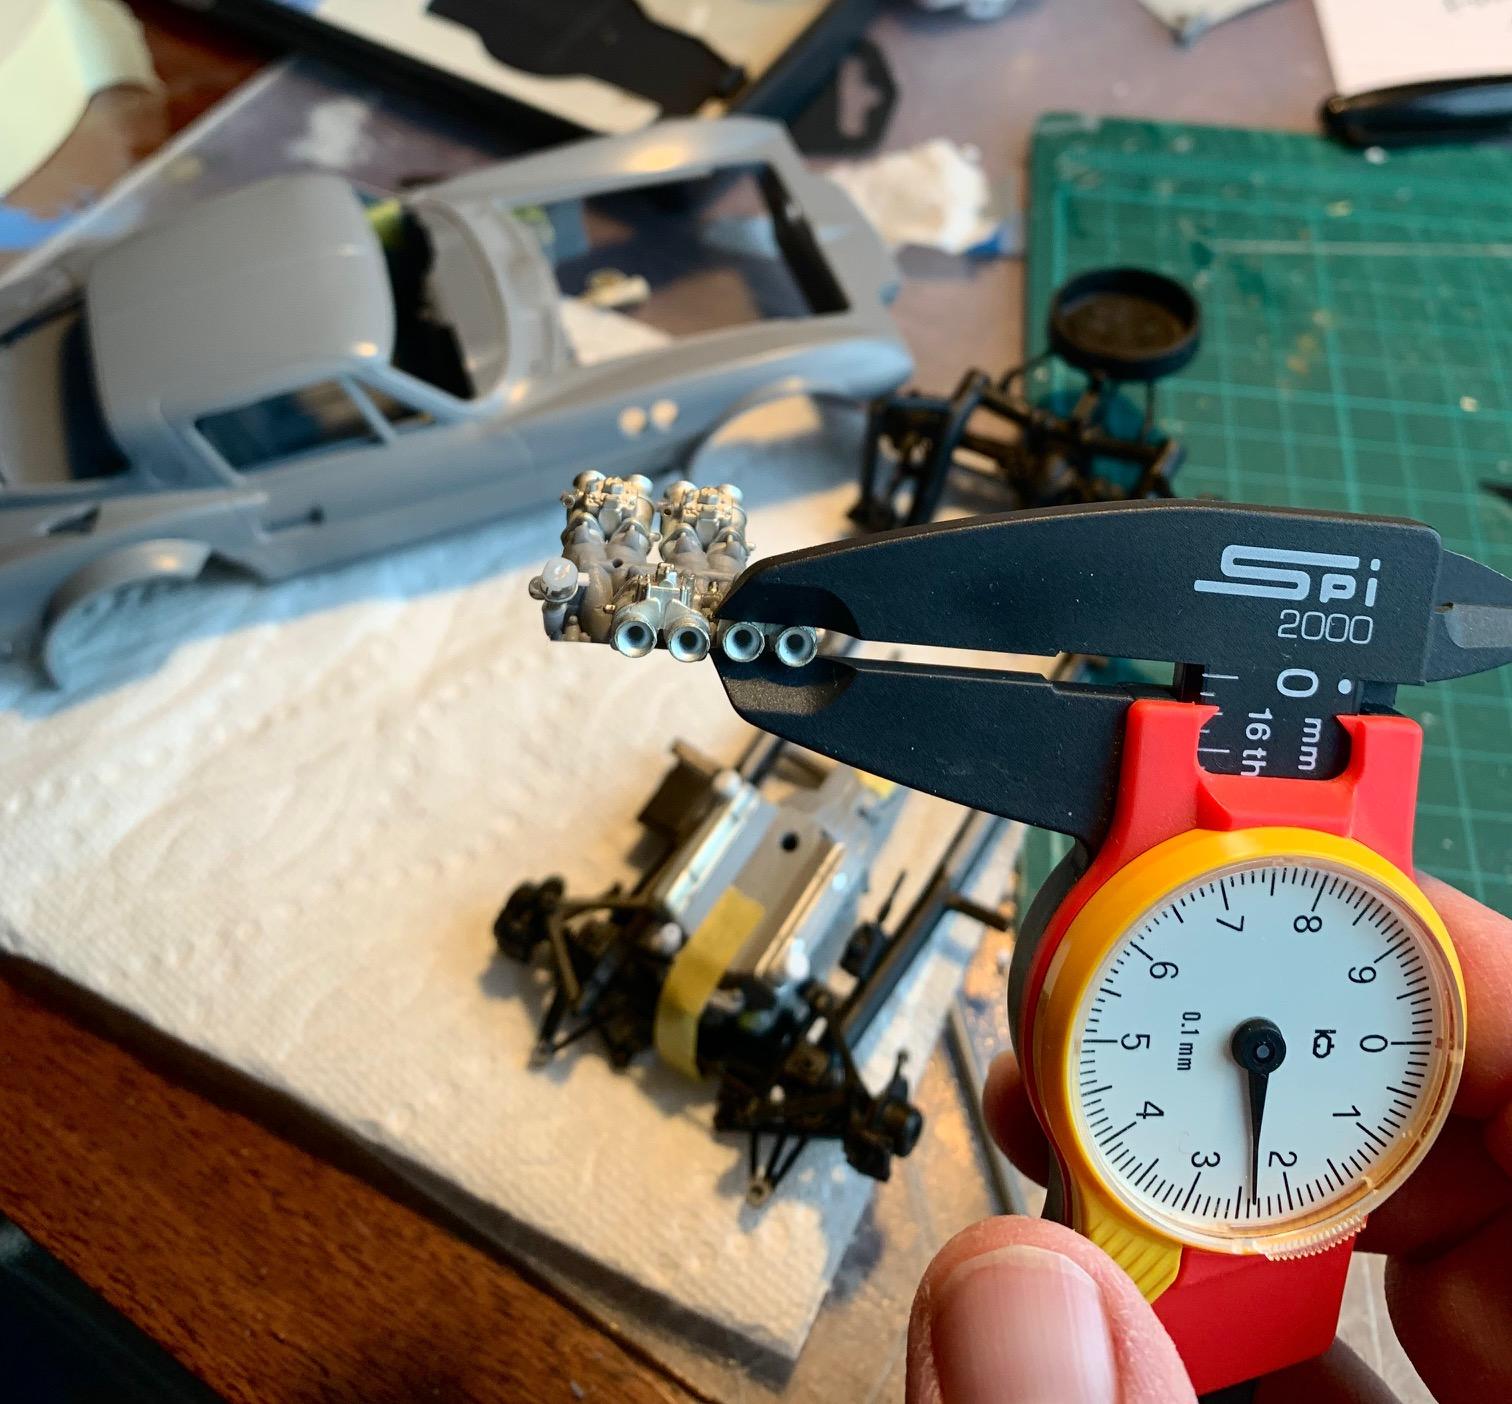
Yup, they look big because we are used to see the smaller ones but there are to scale for this application. No more complaining (from me) that everything is wrong with this kit (lol).
-
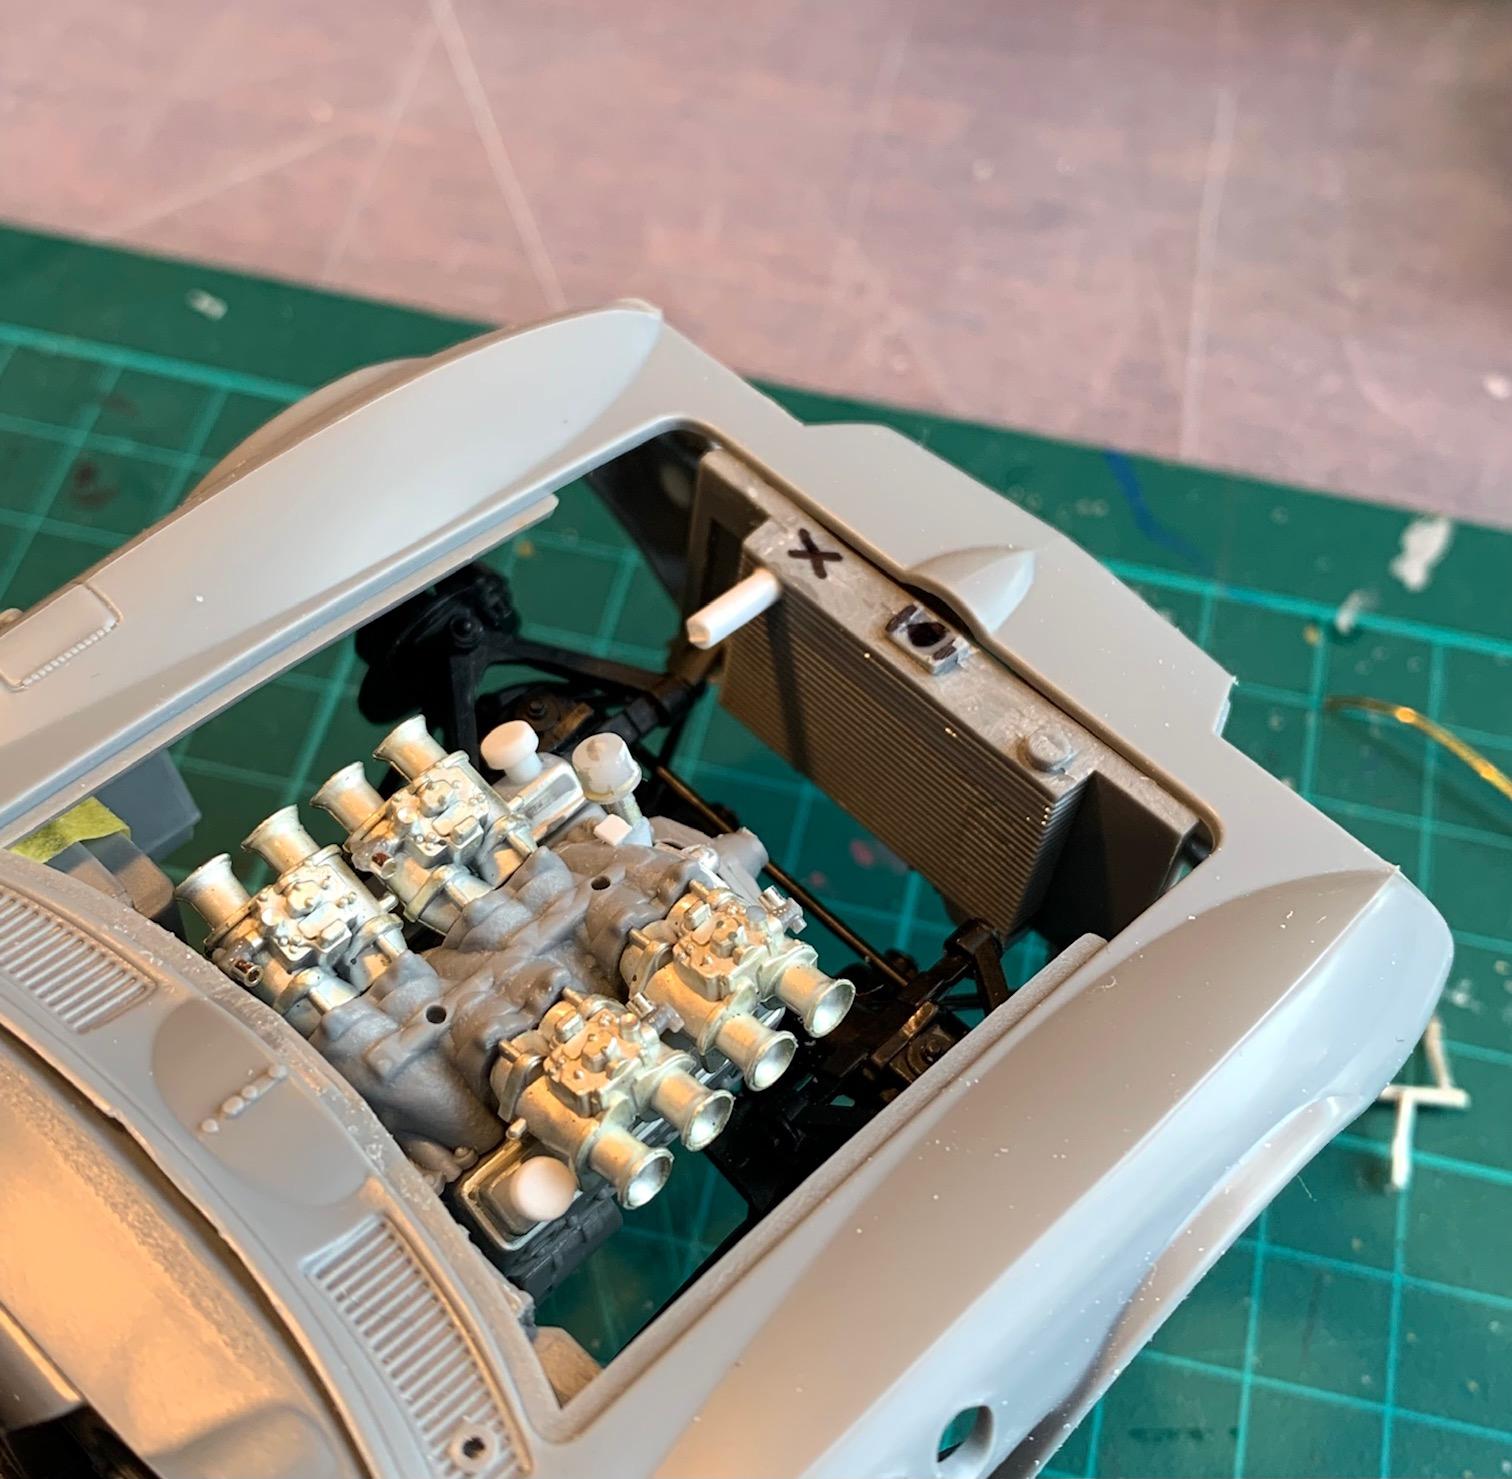
I figured I should check the rad clearance. Not even close. 1/8 inch interference. First picture has an X where the rad inlet was on top of the rad. Chopped that and making a new inlet lower. I also lowered the lower rad support. 2nd pic show the engine in it's new position. You can see I created some relief on the firewall wirer the distributor will be. I also added the engine coolant out where there was none in the kit design (?!). All these port location adjustment will require making my own coolant hoses. I would love to get to final chassis/engine painting and assembly but one more task awaits me. Exhaust system... My apologies if I am covering this with too many details but I plan to use this as a logbook to help me with my next GS build.
-
Then I had this silly idea to check engine integration to the chassis and body. I have to admit that at this point I got close to shelving this one. Got back to it after thinking it out. Main interference is right forward carb to hood as well as the newly added oil fill to hood. Engine was sitting high overall but more so on the right side. I slowly lowered rear mount by removing material on the tranny (not visible once built) and I bent and sanded the 2 engine mounts to lower the front. Some finessing of hood profile and thickness helped too.
-
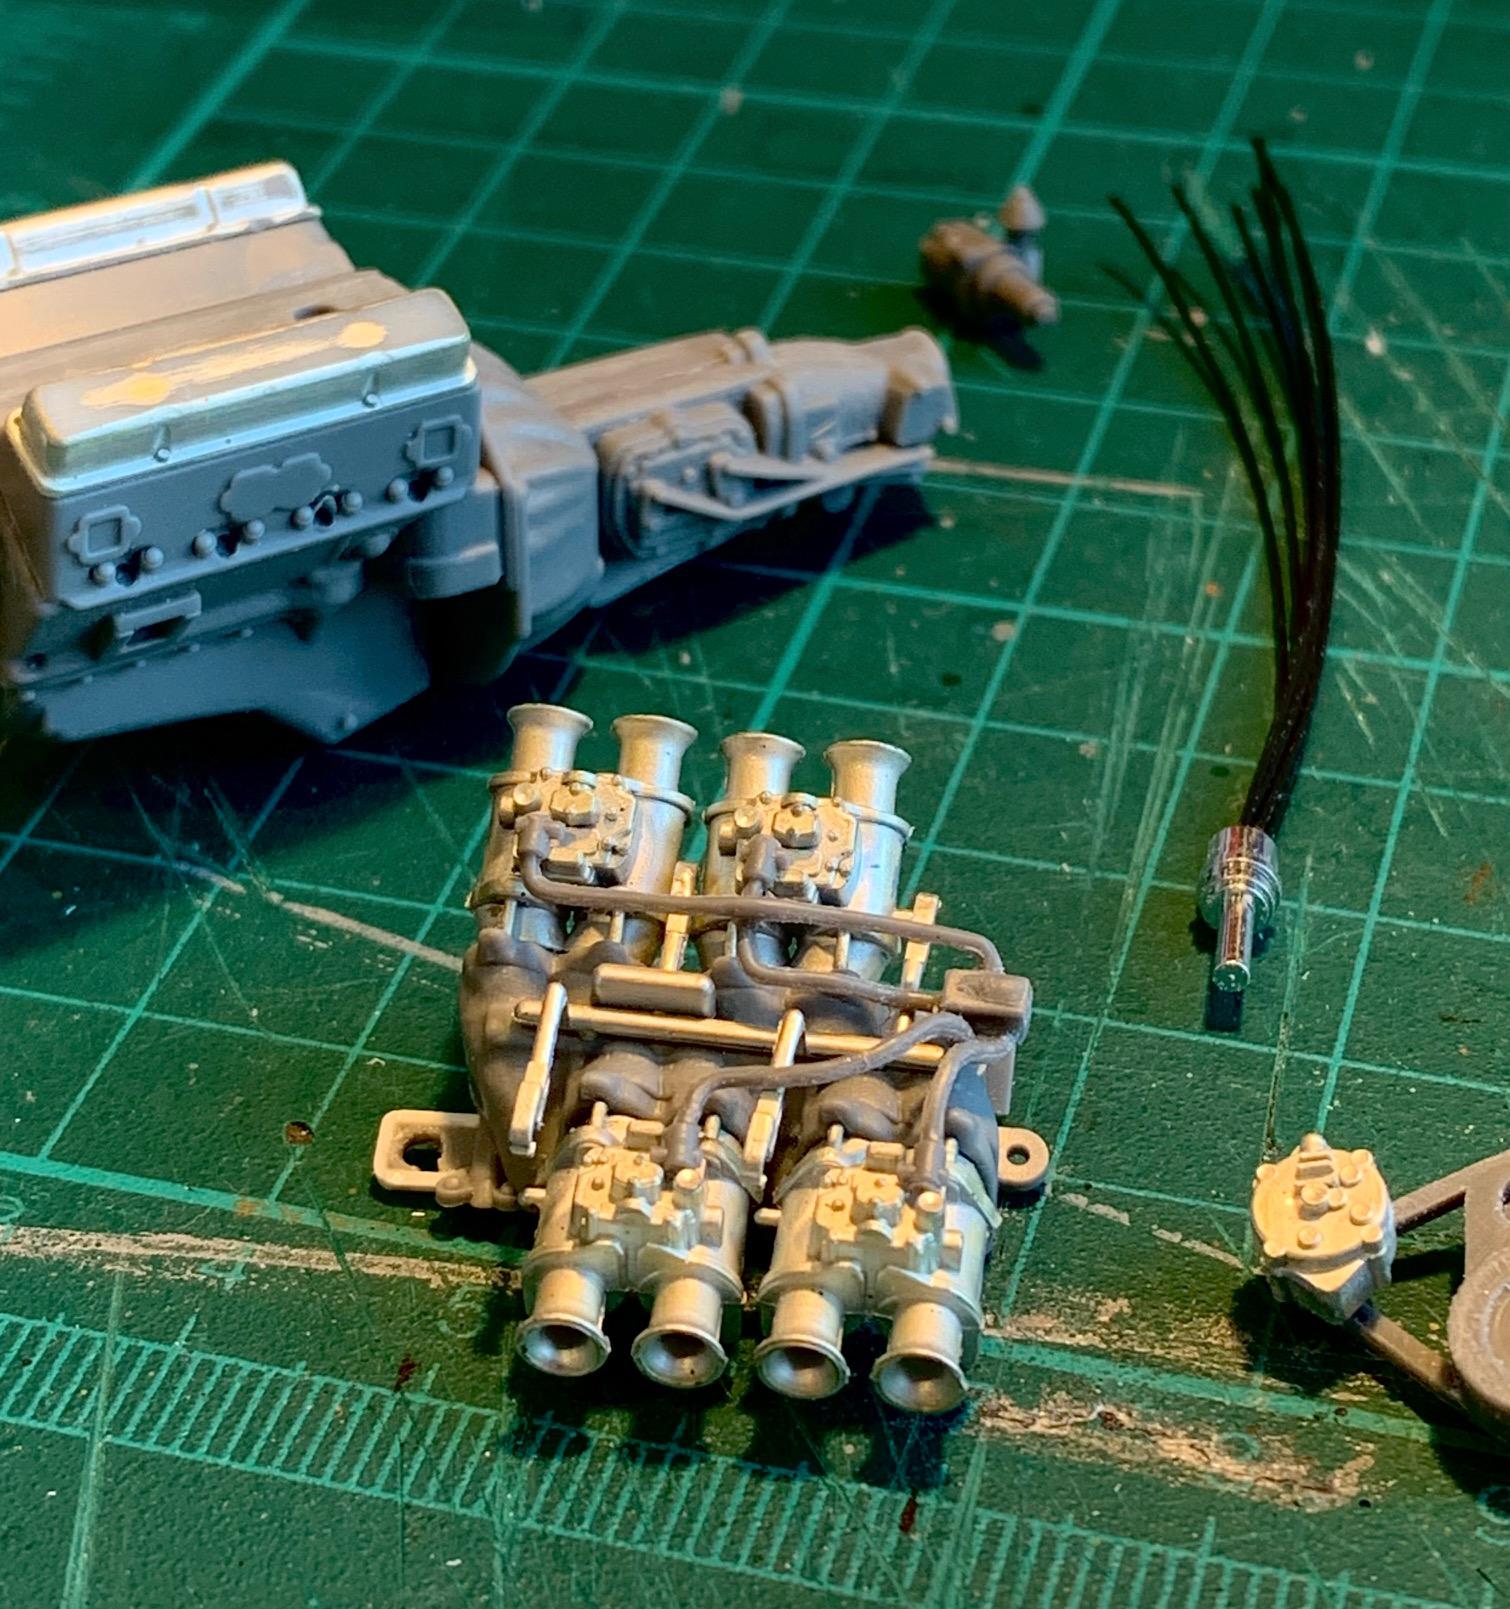
I decided that the molded fuel distribution is a no go. Gluing small ferrules on the fittings at the end of the molded hoses, chop them off and glue to the 4 carbs to create fuel inlet fittings to carbs. Fuel manifold scratch built with the fuel in line and the four out to carbs. Why yellow? Cuz I like yellow...
-
She's absolutely gorgeous Bill. Beautiful how you back dated it to a 68. Well done!
-
Peugeot 905 EV1
Pierre Rivard replied to Rich Chernosky's topic in Other Racing: Road Racing, Salt Flat Racers
Beautiful build Rich. This brings back memories. I saw the very first race of the 905 at the Gilles Villeneuve track in Sept 1990. Sauber was still dominant with it's big engine but the little Peugeot was the precursor to the winds of change. It wasn't the fastest yet but sure sounded fast with it's screaming V10 -
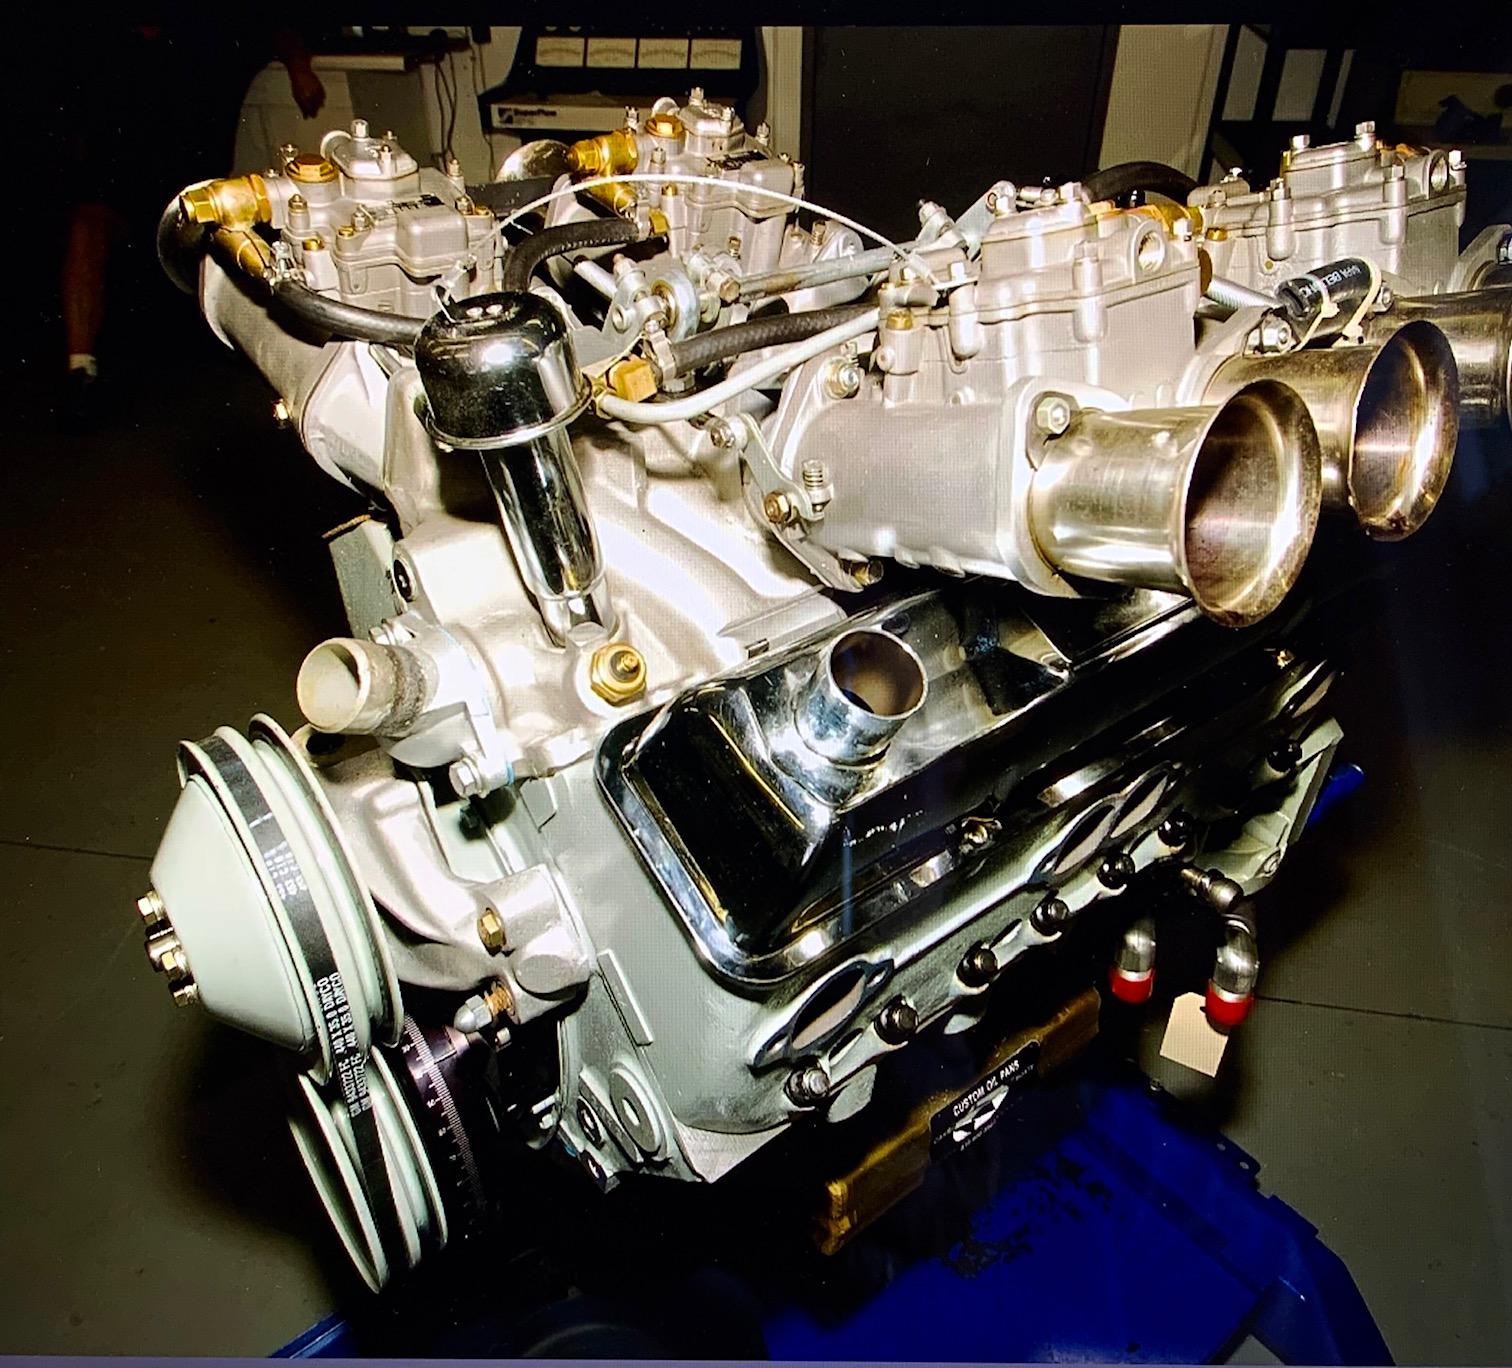
Discovering more stuff to fix. There is no location defined for the oil filler and the coolant outlet is missing. Instructions just say to glue the rad hose to engine block. Here's what the engine looks like, kit vs reference picture. I will scratch build the engine side components to match and soft hose to rad from there.
-
After fixing it as best as I can I realized that I could not add the cast piece for fuel lines unless I flipped around the throttle linkage relative to the instructions. As you can see I finally made it all fit after adding a bend to one of the fuel lines (meaning breaking it...) Putting this to a vote. Is this good enough or should a plumb soft fuel lines instead.
-
While the chassis has been sent to the paint shop (we run a big organization here...) I decided to start on the engine. Mostly OOB there but will add plug wires and oil lines to external filter and Hex. Lots of nice parts but they don't all agree with each other. For example instructions for the throttle linkage require to gently bend the links to carbs.... Translation: we cast it wrong, you make it right. And the result?
-
Thanks Rich, I really wanted to do this car as an hommage to Nascar's first superstar. The kit was very basic so tons of work was needed to convert it. Now if I can only find the courage to take on work on a 64 Galaxie (this kit is even more basic) in homage to another pioneer.
-
Best info I could get was that the color of Fireball's car was 1956 Ford Regency Purple and possibly with a pearl coat on top of it. It's a color that is very sensitive to different lighting conditions so it can look more red or more blue on various pictures. In the end I mixed my own color to match what looked right to my eye.
-
It was just me getting anxious. Decals came in today and the one sheet covers needs for 5 different cars. Fabulous!
-
Thanks Trevor. I went a different route and got a few resin sets from the great Mr Bradford through Randy Ditton at Model Builder's Warehouse. Randy has been fantastic in making it happen very fast.
-
Dan, that's what I call a fast build. I wanted to follow this one because this kit is on my potential list and then...you're almost done! Do you recommend this Revell kit?
-
Yup, gotta be brave to take on this paint job. Mission accomplished!
-
Thank you sir. Good to know...I just have to be patient (not easy for me)
-
1966 Mercury Comet
Pierre Rivard replied to MarkJ's topic in WIP: Stock Cars (NASCAR, Super Stock, Late Model, etc.)
Looking good. This red matches well the real car's interior. -
Wow William, both the Maserati and the Alfa are simply stunning builds. The Alpha looks like a beast of a car. Wonderful how cars all looked different from each other back then.
-
Thank you all for the input, JC, thanks for info about Mr Bradford. I got in touch with Randy. Great service, parts will be shipped today. Richard, good for you if you don't have to fill slots. Plenty of work elsewhere on this project. Mark, I confirm, the Revell kit is a repop of the AM kit. Anyone had issues with decals deliveries from V-R-M? Purchased 2 weeks ago, PayPal payment went through, no decals received and no answer to my inquiry...
-
I remember following your conversion of the AMT Vette. That was epic. I am attempting the shortcut route with the AM kit. It has it's own issues but it's manageable.