papajohn97
-
Posts
700 -
Joined
-
Last visited
Content Type
Profiles
Forums
Events
Gallery
Everything posted by papajohn97
-
I’ve been there more than once or twice, CA can be a real hand grenade when you accidentally get it on your fingers without being aware of it. Look’s like you’re recovering nicely. Really love the black over red color combo on your Impala and your interior came out so cool. These ‘59 -‘60 Monogram-Revell Impalas are among my favorite auto kits, they are such a great canvas for paint, detailing, foiling. The styling also still looks as futuristic as it did when I first saw these cars on the street as a kid. Great job John!
-
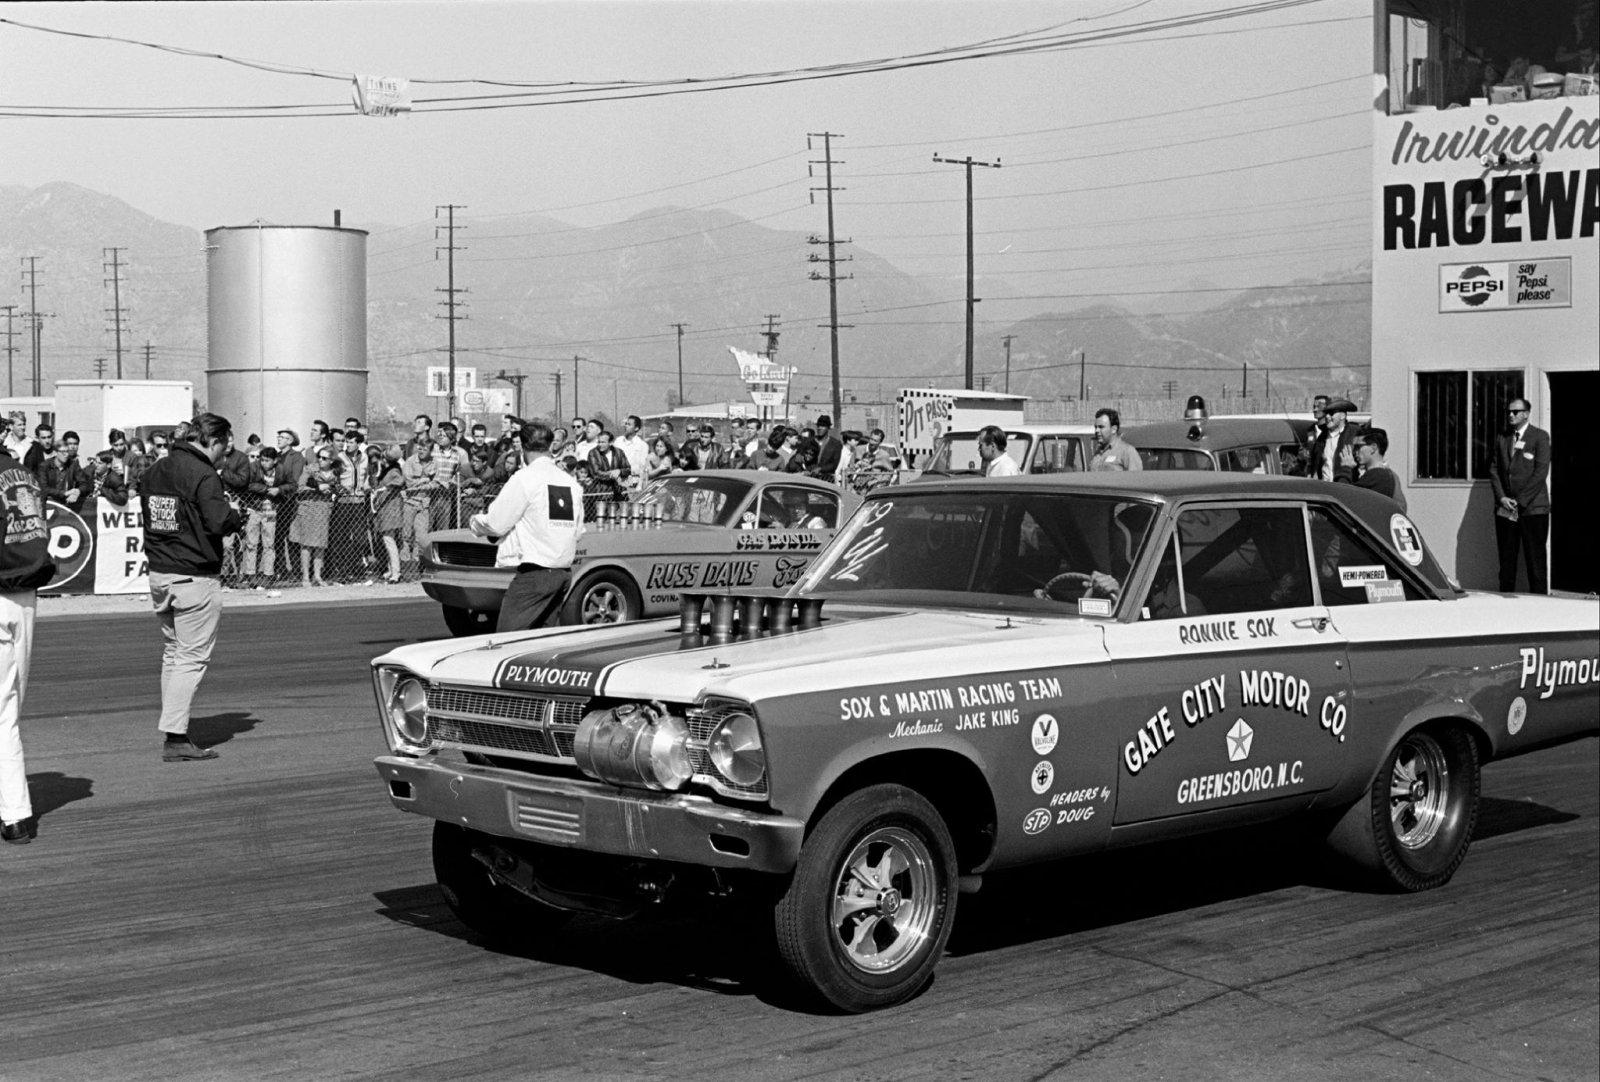
Thanks Wayne, I agree with you that S&M appeared to initially use the shorter Hilborn FI velocity stacks that were originally spec’d with the 4-speed and Hemi hood scoop on earlier appearances of this car but then I ran across this photo that is scoop-less and the stacks seem to be taller (at least they appear to be pretty close to my model!). My model omits the fuel tank mounted on the front grill, the Keystone mag wheels on the front, the metal headlight covers and the center racing stripe and smaller Plymouth name on the hood. The fact that these ‘65 - ‘66 A/FX - match race cars changed from week to week (and sometimes during a single weekend meet) makes them particularly interesting (and forgiving!) to model.

-
“ BUILDING THE COVERS “ Vol # 58 SOX & MARTIN 1966 BARRACUDA FUNNY CAR
papajohn97 replied to M W Elky's topic in Drag Racing
Oooh! Very nice job Mike on a challenging kit-bash project. Look’s like this Slixx decal set is no longer in production which is a reminder to the rest of us that when you see a set you like, grab it quick even if there’s no matching kit to go with it. That barracuda fish artwork is so cool. -
In a perfect world (where injection mold tooled kits weren’t so capital/ labor / time intensive), I can imagine Moebius extending their product line to include new kits of a Tucker, a Nash Metropolitan, ‘52 - ‘54 Kaiser sedans, a stock Henry-J/ Allstate and maybe even a Kaiser Darin sports car. Never in my wildest dreams did I ever think we would see high quality injection molded kits of ‘52 - ‘54 Hudson Hornets and first generation Chrysler 300’s (and those wonderful ‘65 Plymouths!)….thank you Moebius!!!!
-
Custom decal suppliers?
papajohn97 replied to Steve H's topic in Model Building Questions and Answers
Joe Curtis of Fremont Racing Specialties, a decal and resin body supplier who sells on eBay (paintinjoe) made custom decals for me for two 1/25 scale sixties A/FX Mustangs a few years ago that he was also able to sell to others on eBay. His quality is EXCELLENT and his prices are reasonable. I’m not sure if Joe is still taking on other custom jobs but you can inquire through his eBay store. John
-
Love ‘em all but particularly the Hudson & the Merc. Great idea to paint the big shiny parts (bodies) while the weather is still warm. Your WIP is inspiring me to start an assembly line for my winter auto builds….it was 84F here today!
-
Love the Monogram/ Revell ‘59/‘60 Impala kits/ car. The houndstooth decal seat inserts look fantastic with the red & white on your build. I’ve never had much success getting trunk lids to close flush/ straight (glued my ‘60 Impala trunk shut as well as AMT’s excellent old-tooled ‘49 Merc when I built it, no regrets!). Looking forward to seeing your black beauty come together! Enjoy the trip!
-
Beautiful job, especially like that interior. I’m surprised you encountered fit problems with a recent issue Revell kit, they are usually pretty good. Your build experience is a good reminder to me and others here to “test fit and debug before paint” wherever possible.
-
Amazing job so far Andy on super-detailing this ancient AMT kit. Question on your emblem comment: Did you print these downloaded emblem images onto decal paper or bond cut-out printed images from white photo paper print-outs? If they’re from photo paper, I’d love to learn more details about this technique. I’ve been able to get some Chevy emblem decals from Keith Marks in Canada but when I last checked, he doesn’t offer emblems for the ‘58 Impala.
-
Fabulous job on this El Camino, the two-tone paint, foil work, brightwork script, black wash on the wheel covers, everything about this build is just about perfect! Hard to believe you built this one from an old tooled (1964?) AMT kit, came out looking like a more modern Monogram/ Revell tooled kit. The Gothic Gold gold paint you used came out looking like a good match for “suntan copper metallic” - a ‘60 factory color which I think looks awesome on this car. I have this kit in my queue which I’m hoping to build into an early super stock drag car, your build inspires me to start it soon.
-
Very nice job Brian and a perfect color for that car (I remember lots of white Pontiacs back in my childhood). Despite your challenges, looks like you won the war with the ill-fitting windshield and grill (unusual for Moebius, their other kits are nearly perfect). I’ve built one each of the Ventura and Catalina kit and have a Ventura left in my stash with a set of Royal Oak S/S decals, your build is inspiring me!
-
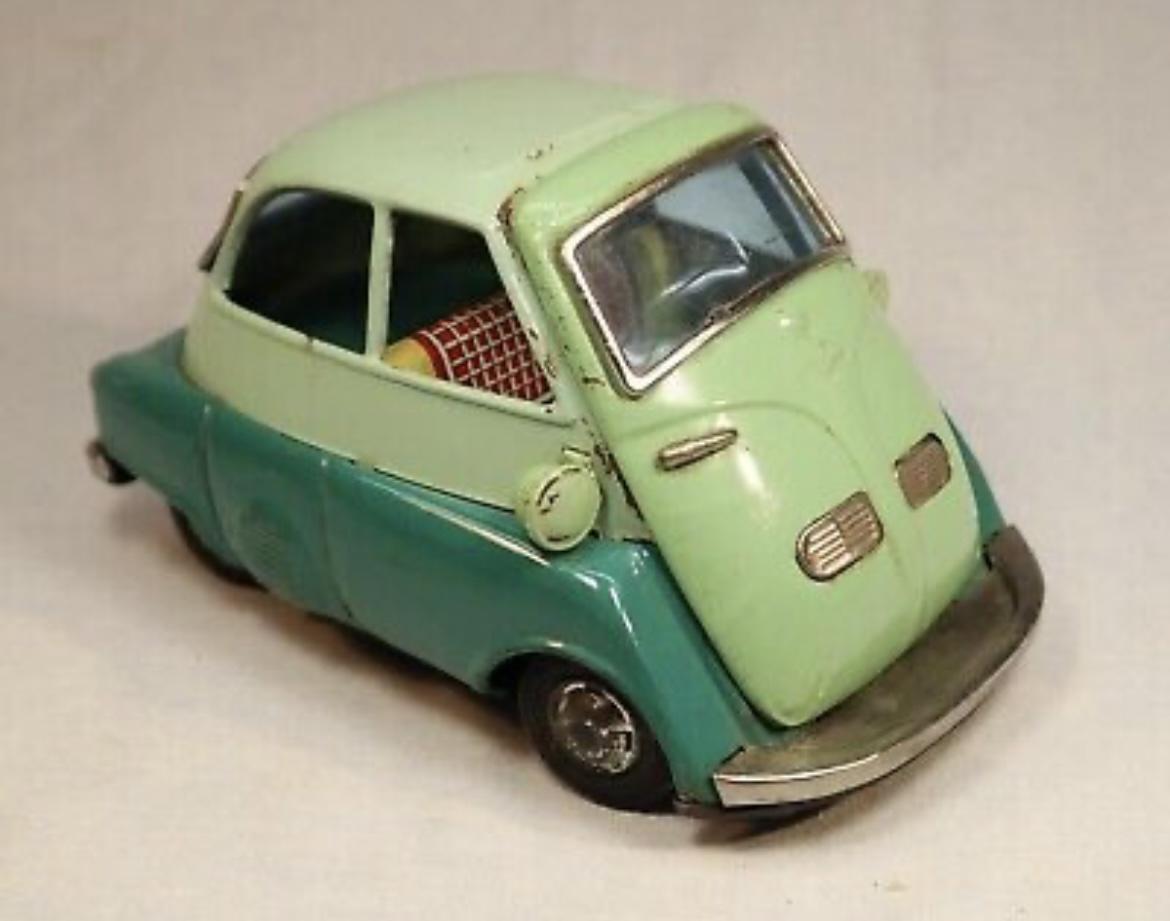
Great color scheme and beautiful clean build of this fun Revell kit. I built this kit when it was first issued in 2017 because it brought back childhood memories of a tin toy one my parents gave me in I think 1958 (yeh, I’m a geezer…) I painted mine dark Navy blue & white but I think this lighter blue you used looks better. Here’s a photo of the toy one I had as a kid which included an opening door like the Revell model. Thanks for posting!
-
Very cool subject and very well executed. I like that you kept all the selling feature embossed script on the underside of this promo chassis. I also love the black steelies and narrow WW slicks in the rear and white steelies with black walls in the front; whatever wheel/ tire combo they had that would give them the lowest ET that day, esthetics be damned! I wish there were new or better kits available for ‘61 - ‘64 Fords (other than the T-Bolt) and ANY re-issued or new kits for ‘60 -‘63 Mopars to allow building these early ‘60’s super stock drag cars.
-
AMT 1964 Pontiac Bonneville Convertible.
papajohn97 replied to StevenGuthmiller's topic in Model Cars
Really enjoyed following your excellent WIP on this build Steve, a real master-class in the fine scale model building. Thank you for all the efforts you put into and details you shared in your WIP postings. My favorite parts of this beautiful Pontiac are the incredibly realistic engine bay and the weathered undercarriage. I’d love to see what you could do building a weathered WWII warbird, AFV or ship model kit, I’m sure you’d win awards in whatever genres you were to build. Bravo! -
Really nice to see a ‘41 Willys gasser that isn’t the commonly modeled S-W-C, Big John or K.S. Pittman cars (love those too) and this one’s a real beauty! The muted gold paint looks “period perfect” and you did a great job filling in the front grill opening and removing and filling-in Revell’s funky slot & tab hood locks (why did they ever do that???). The engine details look interesting for which I’d love to see a few more pics of along with a pic of the chassis underside. Bravo!
-
Fabulous build of a really interesting subject. I’m particularly impressed with how you did the wood and metal components, so realistic looking. Is this build all “out of the box” or did you add/ replace components with a lot of scratch built?
-
1/12 DBR1 MFH
papajohn97 replied to primabaleron's topic in Other Racing: Road Racing, Salt Flat Racers
Nothing tops a well-built Model Factory Hiro kit and you really did this one justice. The weathering that you did on the seats and head rest is incredible, how’d do it? I read that the fellow that owned/ ran MFH recently passed away (sadly at a relatively young age), wonder if this company will continue their operation? PS - here’s a link that was posted on this forum -
Most accurate kit(s) ever (1/24-25)?
papajohn97 replied to Harry P.'s topic in General Automotive Talk (Trucks and Cars)
I agree, especially the 356 kits. Amazing 1/24 wheels and actual pistons, rods & a crank included! I would also include the Tamiya Mercedes 300SL Gullwing coupe on this list, a fabulous 1/24 kit of a fabulous car. -
I just started following this WIP and am really impressed with the methodical dry-fitting and adjustments that you are doing on these builds. I have built two of these excellent 356 kits and followed the instruction assembly/ bonding sequence to the letter on the first build (the B/C Coupe) which resulted in significant alignment/ fit issues at the engine-transmission - rear suspension - chassis assembly. On the second build (the B 1600S Roadster), I pre-bonded the engine and transmission before installing it into the chassis which made it much easier to assemble everything with a minimum of alignment issues. Hopefully you’ll avoid these headaches on your builds.
-
1962 B/FX CHEVY IMPALA OF DICK HARRELL & BILL ALLEN
papajohn97 replied to M W Elky's topic in Drag Racing
I’d say you’re doing a pretty amazing job these days Michael pumping out these beauties. These MCW decals look really nice/ crisp/ clean (vector graphics?), too bad their decal selection is so limited. They have a set available for Hayden Proffitt’s Cone Chevrolet ‘63 Impala Z-11 that I’m tempted to order but I hate to struggle again kit bashing chassis and engines with the ancient AMT kit. Your Revell ‘62 Impala postings are motivating me to pick up another one of these excellent kits (I need more kits like a hole-in-the-head ?). Any suggestions for other decal sets out there that might be applicable? Beautiful build! Keep ‘em coming please! -
Very neat clean tidy job on this ‘69 (‘65?) Falcon cammer doorslammer and the matching ramp truck is a wonderful way to display it. Love all these AWB pre-funny cars being posted lately.
-
Nice box art! I’m getting at least four of these when they are released to build the Strickler box art car and the other three to be used with my Landy, Dyer and Harrop decal sets. I could be wrong but these look like the same mags & tires that Moebius have been offering in their AWB Plymouth kits?
-
Beautiful bubble-top model! More pics please! This is an unusual two-tone paint scheme, was your 1:1 a re-paint? I think the ‘59 - ‘62 GM bubble-tops are among the most attractive designs ever to come out of Detroit and this Revell kit is one of the best. Great job!
-
Great job Mike on another classic door slammer. I was unfamiliar with this car but found two nice photos of it on the George Klass Website, your model looks very accurate relative to the photos there. It’s mind boggling how many SS drag cars were in competition in those early years when drag racing was a relatively affordable sport. Love black cars with red interiors. This Revell kit is so good, I’m tempted to do another SS’er if I can find a nice set of decals (these Zorro decals are no where to be found). I would love to build Dick Harrell’s black ‘62 Impala. Always enjoy your postings, keep ‘em coming!!!!
-
Beautiful clean well-executed build of one of my favorite Moebius kits and a fabulous jobs on those huge decals, easy to tear them when they’re that big.