papajohn97
-
Posts
700 -
Joined
-
Last visited
Content Type
Profiles
Forums
Events
Gallery
Everything posted by papajohn97
-
Also saw it yesterday, finally an historically accurate racing movie for grown-ups. Loved ever bit of it. Good script, casting, acting, art direction, non-CGI action scenes, incredible 12 cylinder Ferrari sounds, touching human story (my wife probably would have enjoyed it). Loved Adam Driver’s understated conflicted portrayal of Enzo and Penelope Cruz’s portrayal of Enzo’s wife Laura stole the show. Never been a Patrick Dempsey fan but his performance was fantastic as an aging Taruffi, also the dudes playing Peter Collins and de Portago were convincing. The tragic Mille Miglia crash scene was graphic and made it understandable why the Italian gov’t discontinued any future road racing on public roads. One of my favorite scenes was when Enzo discusses intake manifold design features with his young son while reviewing blueprints at the kitchen table as well as the touching final scene. Brock Yates, author of the book they based it on, would be pleased with the result. A “no Hollywood BS” racing movie, go see it!
-
Desire Wilson's WR4
papajohn97 replied to Belugawrx's topic in Other Racing: Road Racing, Salt Flat Racers
Cool collection of one of my all-time favorite F1 cars. Form following function and oh what a beautiful race car! Beautiful clean builds all 3! -
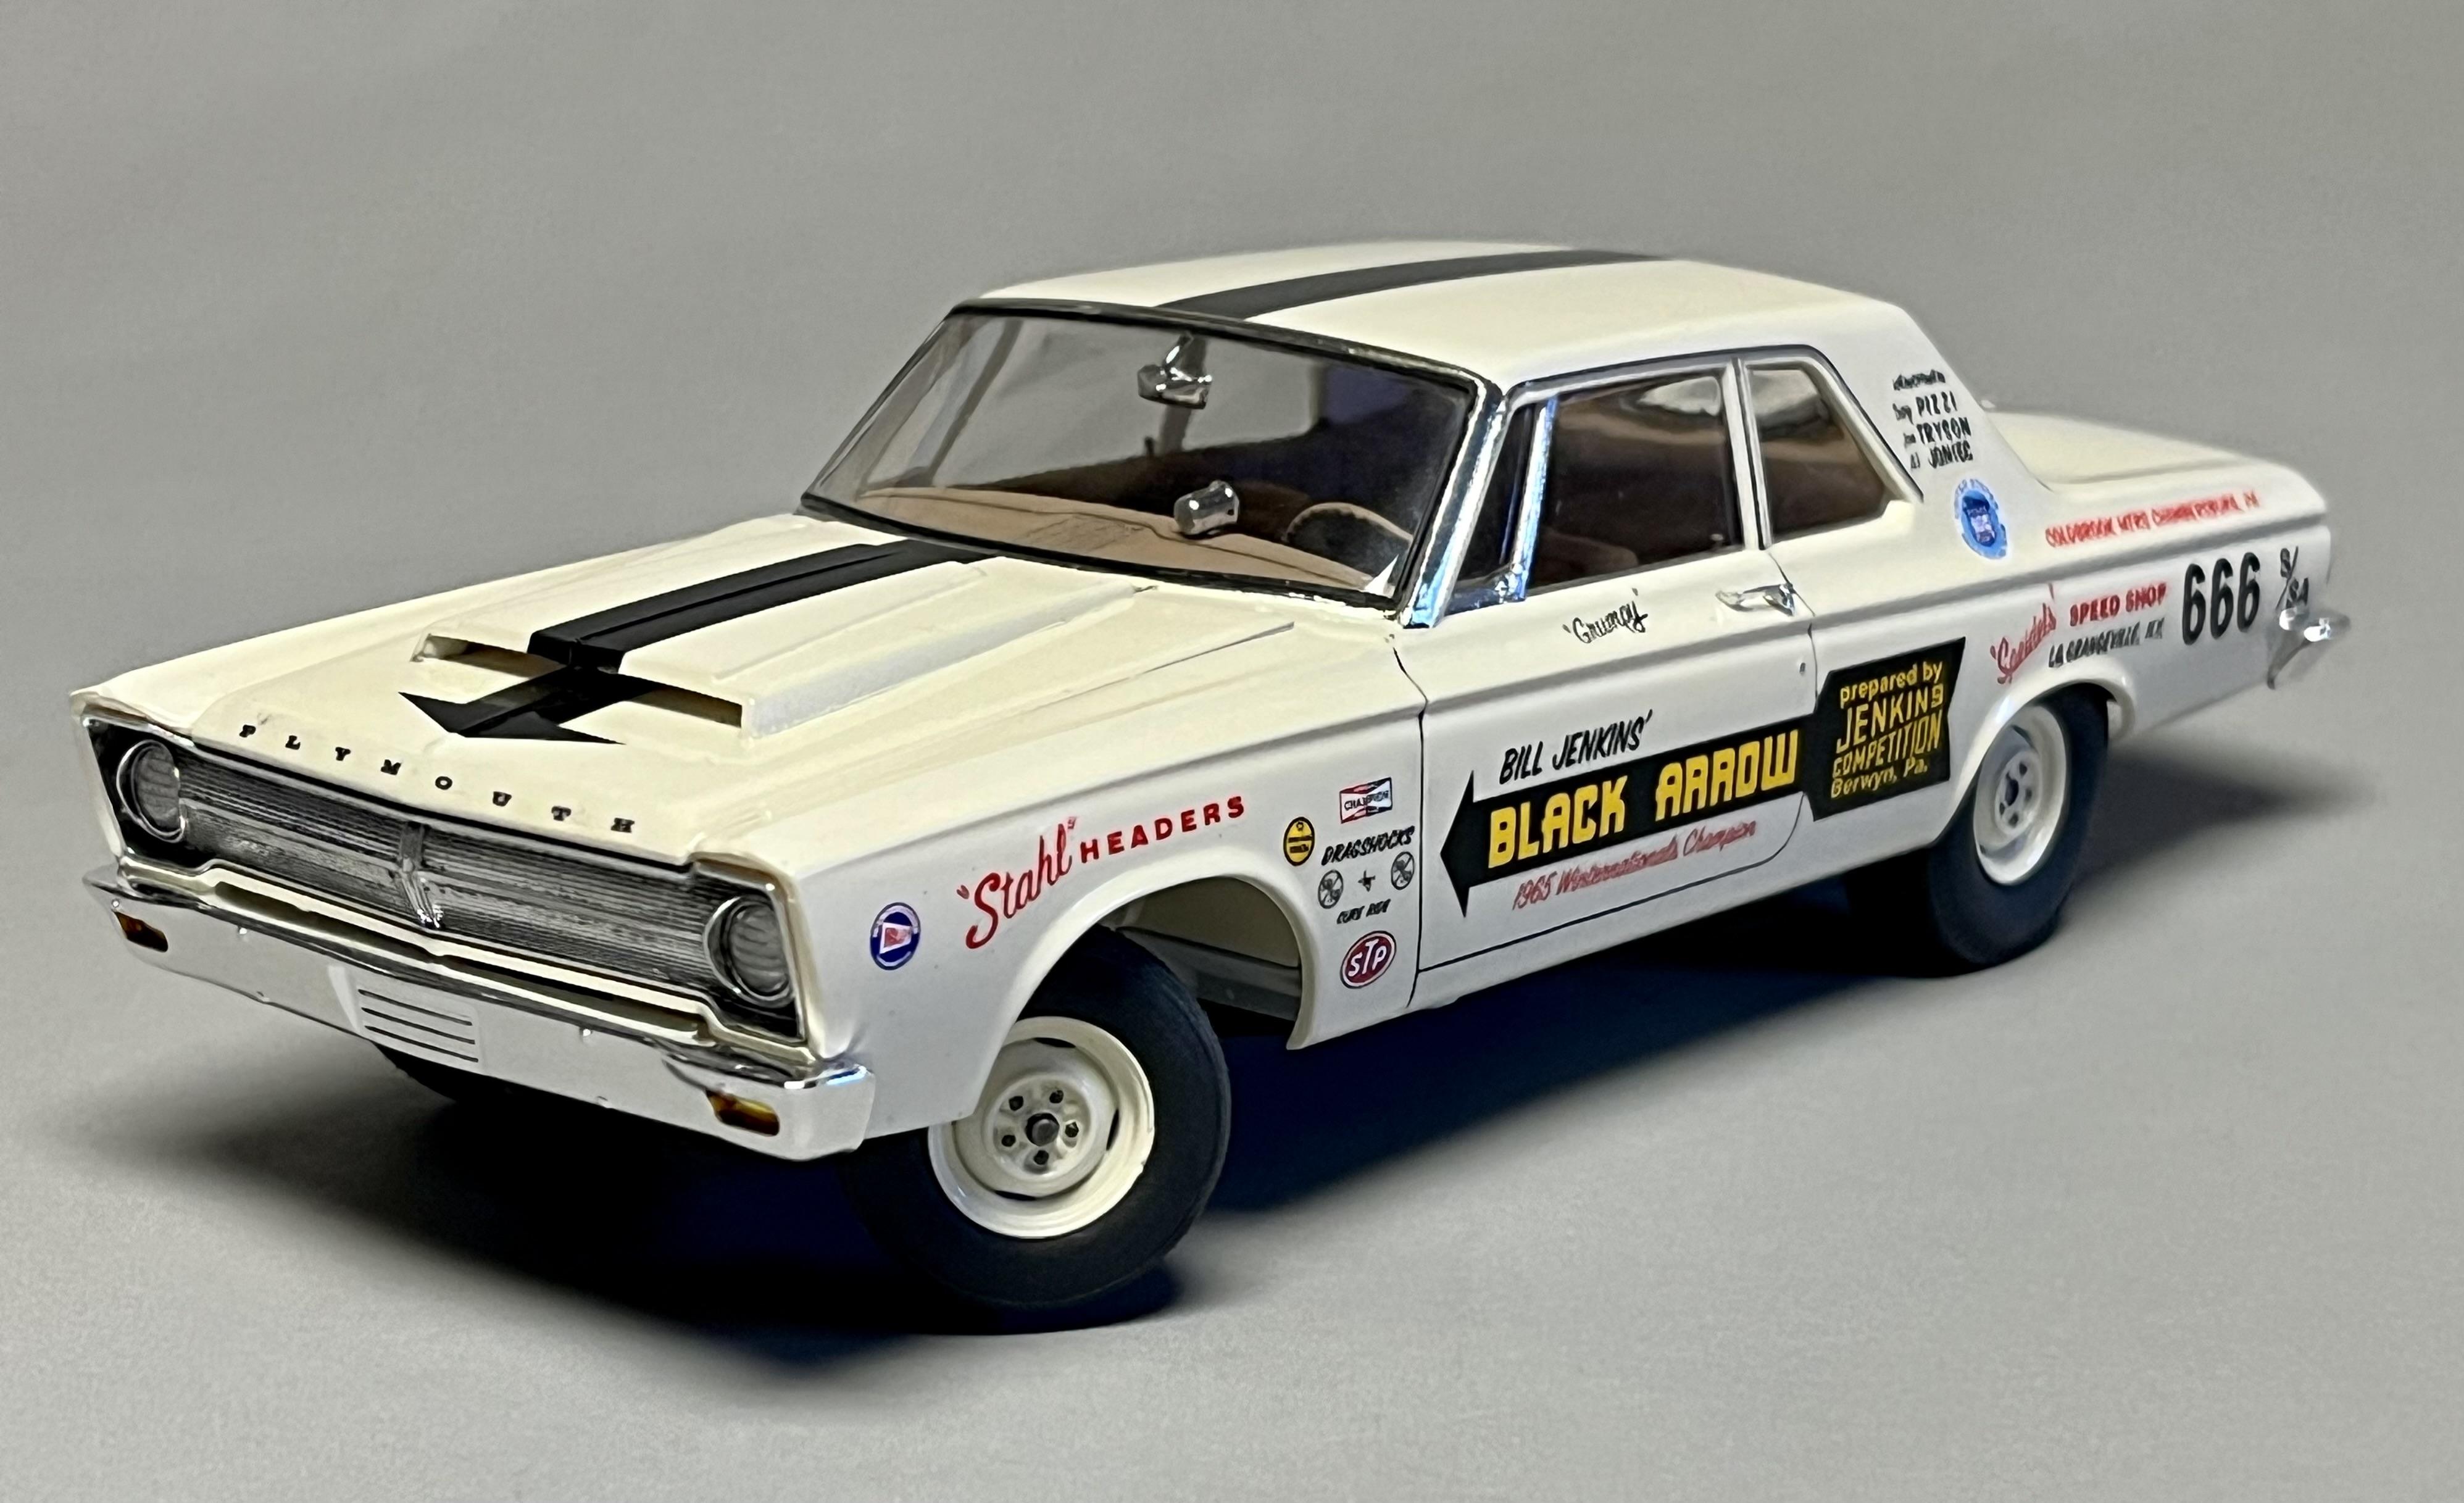
“ BUILDING THE COVERS “ Vol # 65 Phil Bonner’s 1964 A/FX FORD FALCON
papajohn97 replied to M W Elky's topic in Drag Racing
Nice job Mike on this BTC kit-bash. I’ve read that the Trumpeter car kits are pretty mediocre but the body on this ‘64 Falcon looks pretty accurate to me. Did you use the Thunderbolt chassis on this build or is this the Trumpeter chassis with Thunderbolt driveline and rear suspension parts? Congrat’s on that two-page write-up in this month’s Model Cars Mag. Love that Hemi-Under-Glass! -
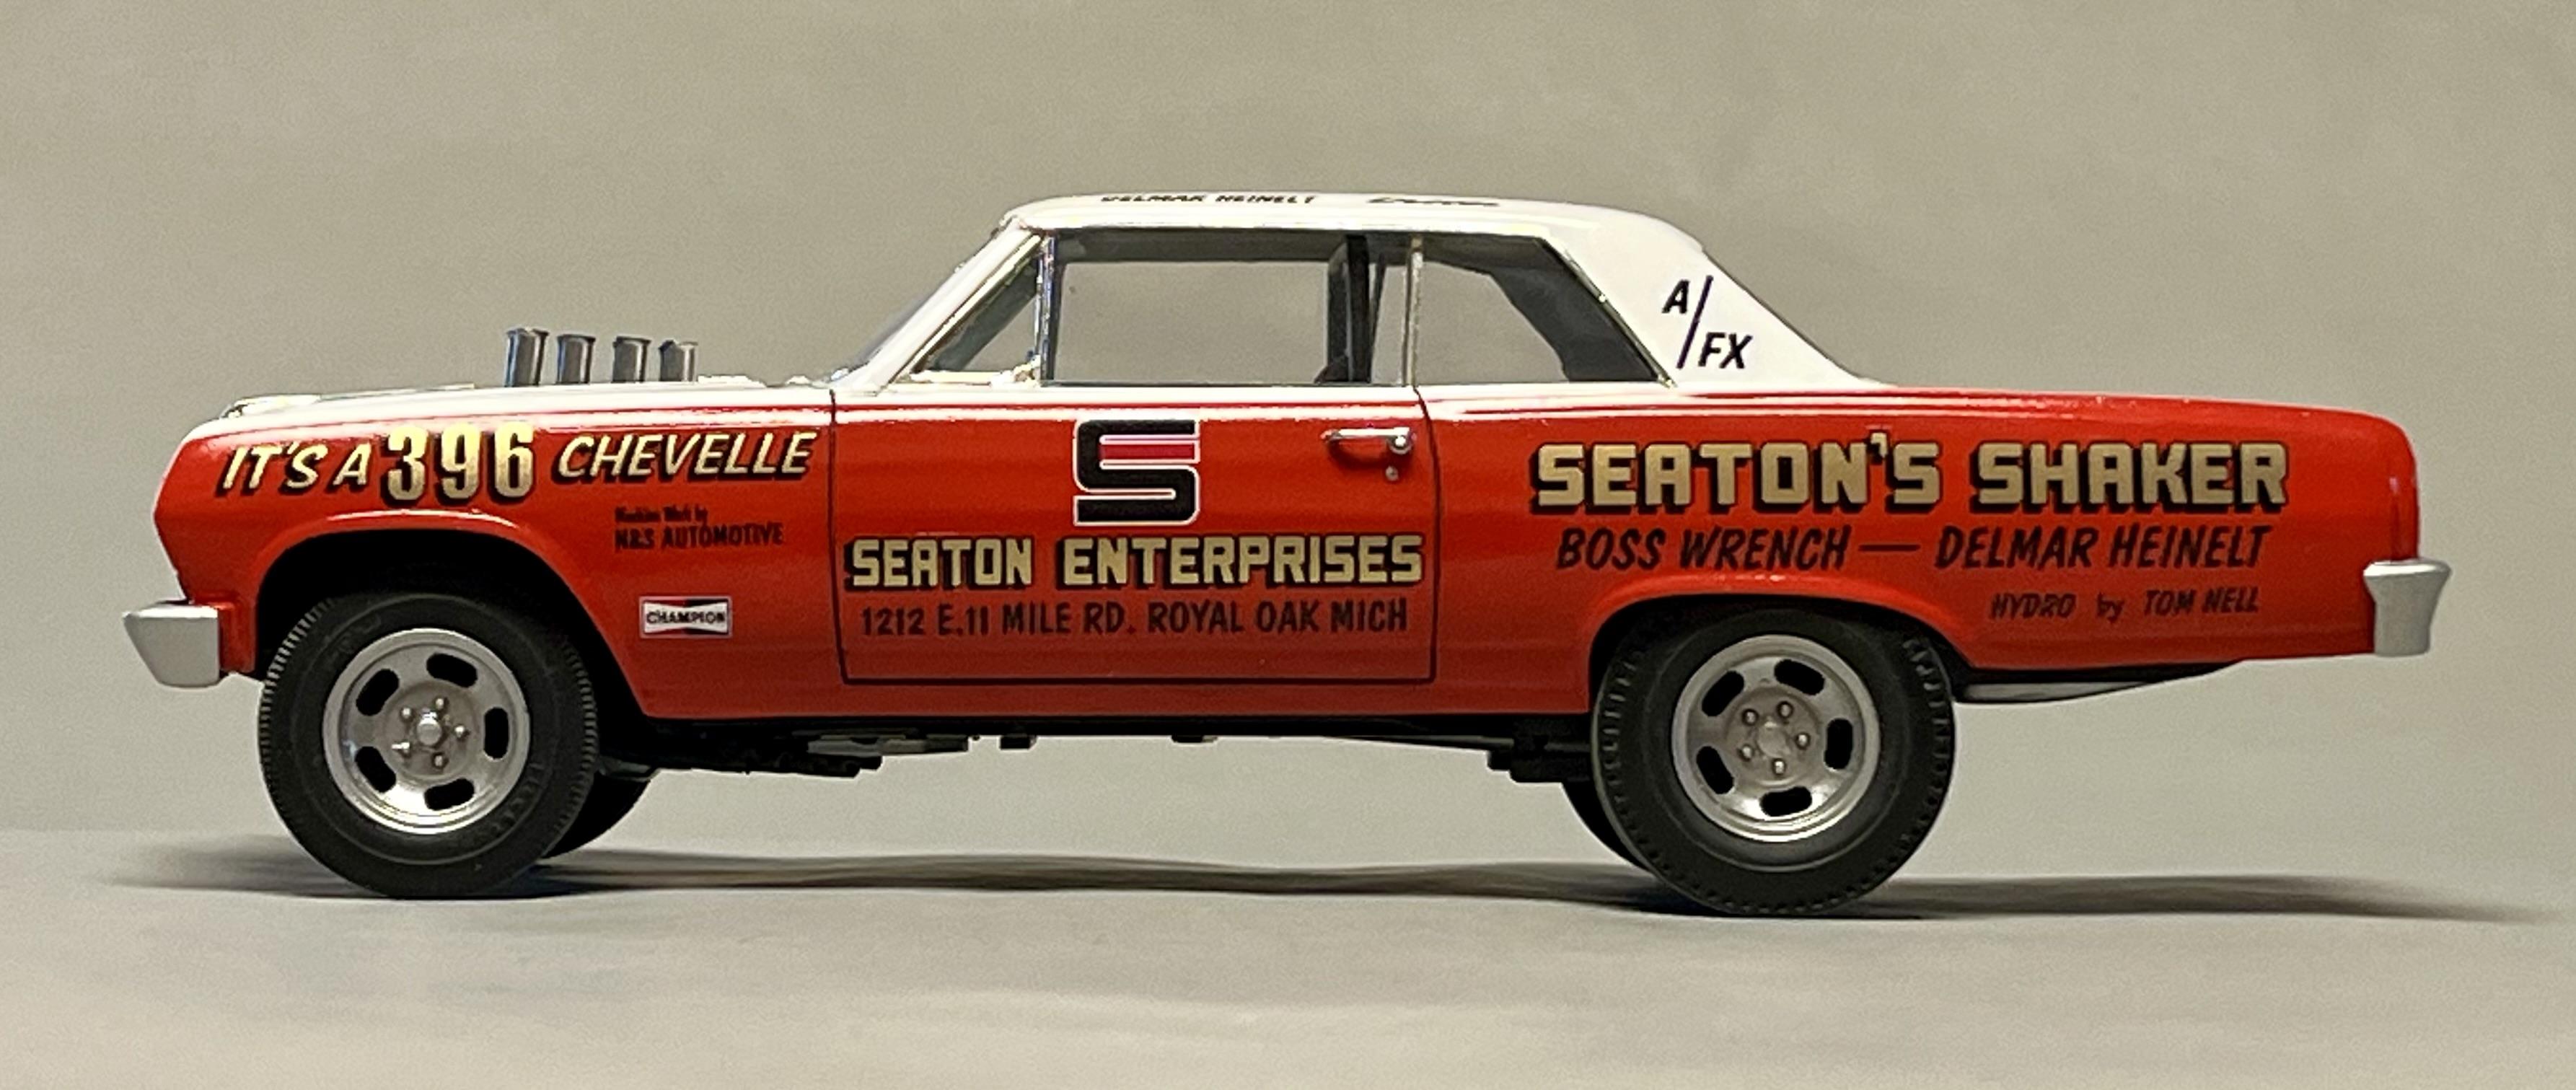
Fabulous recreation of Grump’s first Camaro. The detailing and realism of the engine bay is an A+. I have the Slixx decal set for this one and am hoping that Revell re-pops this kit before I get too old to build and paint model cars, the ones on eBay are crazy $$$ ($80 - $100 with tax & shipping).
-
Wow Zip! You completed a ton of kits this last year and all beautiful top grade builds! My favorites are the El Camino, the orange ‘37 gasser and that ‘50 Chevy truck with the swamp cooler. Can’t wait to see what you post next year!
-
Very nice builds! Particularly love the lowered bird & ‘stang!
-
Now that’s the car I want to borrow when I burn up all the firewood this winter and need to make a quick run out for more! Beautiful job Pat on this cool outlaw 356. These Fujimi kits are not easy ones to assemble and it looks like you got all four tires in contact with the road and the ride height adjusted just right. Bravo!
-
‘23 was a pretty fun year for me for building car models. Despite being away from the man cave for a few months due to travel and recovery from surgery, I managed to complete the eight kits below (along with two aircraft, one tank and one ship). The bad news: I probably added three times as many unbuilt kits to my stash! ?? Need to crank up the production numbers in ‘24! Much thanks to everyone for all the input and encouragement I’ve received on this forum. Happy holidays guys and keep the glue & paint flowing in ‘24! Cheers, John

- 25 replies
-
- 12
-

-

-
What a cool idea and clean well-executed result. That Moebius cammer is one of my favorite 1/25 engines, looks like it was meant to fit into that super large Starliner engine bay. Love it!
-
Hey Mike, fellow post-prostatectomy car model friend! I had my robotic surgery in April as well and also celebrated my 6 month “non-detectable PSA” blood test in Oct, what a relief! We are both lucky to be alive in these days of robotic-assisted laparoscopic nerve-sparing surgery! Congratulations to us both! Cheers, John
-
Wow! Fantastic job Thomas on this hammerhead Tyrrell. The additional fasteners, wiring, springs, switches that you added really brings this build up to an MFH kit level. What paint/ technique did you use on the Cosworth block to make it look so realistic as a casting?
-
Great job Mario on one of my most favorite cars. Your street diorama photography is amazing!
-
I really enjoyed and learned a lot from your recent Bonneville convertible WIP and am so happy to see you’re doing another one with this Lemans. It’s incredible to me to see the results you get from starting with such old basic kits, simply amazing skill and artistry! This comment made me laugh. When I go to show a family member or friend some old social or travel related photo taken on my phone, they laugh at all the scale model related pics I have. If it weren’t for my cell phone, I would totally loose track of what I built and when! I’ve also started putting reference photos of each project I do (or intend to do) into digital albums which helps me find pics quicker. Thank goodness I have a 2T cloud capacity!
-
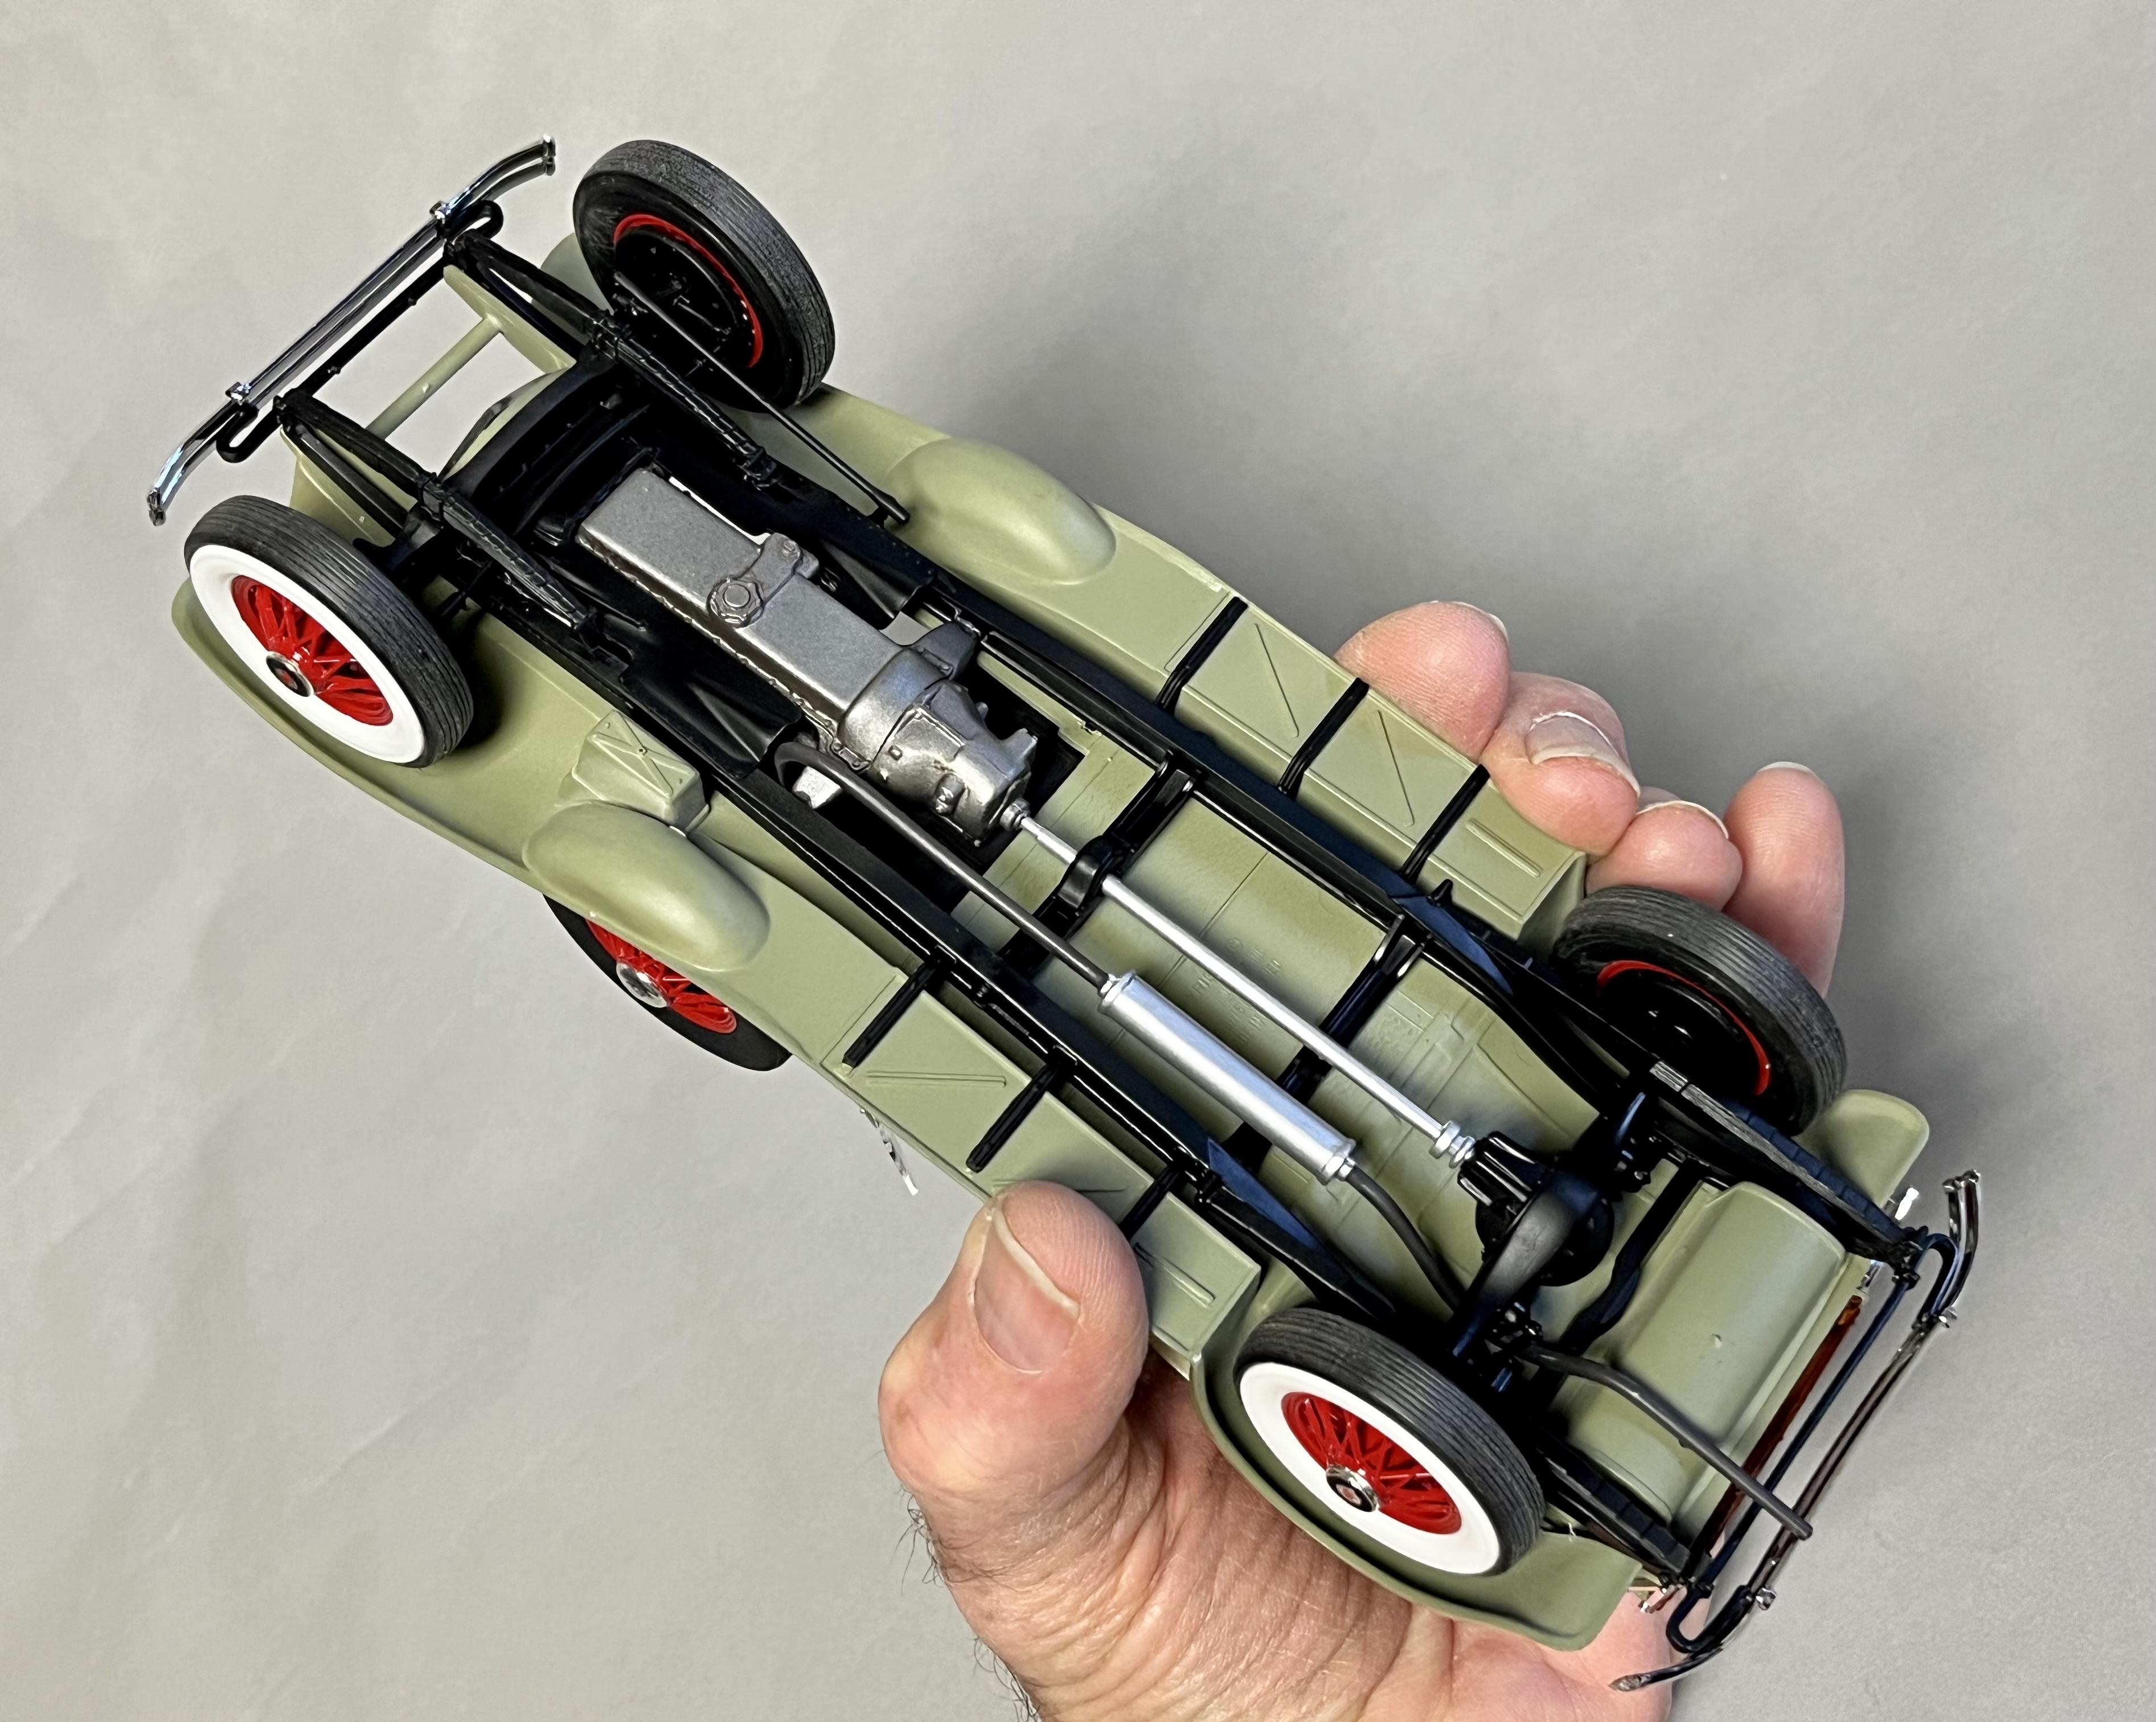
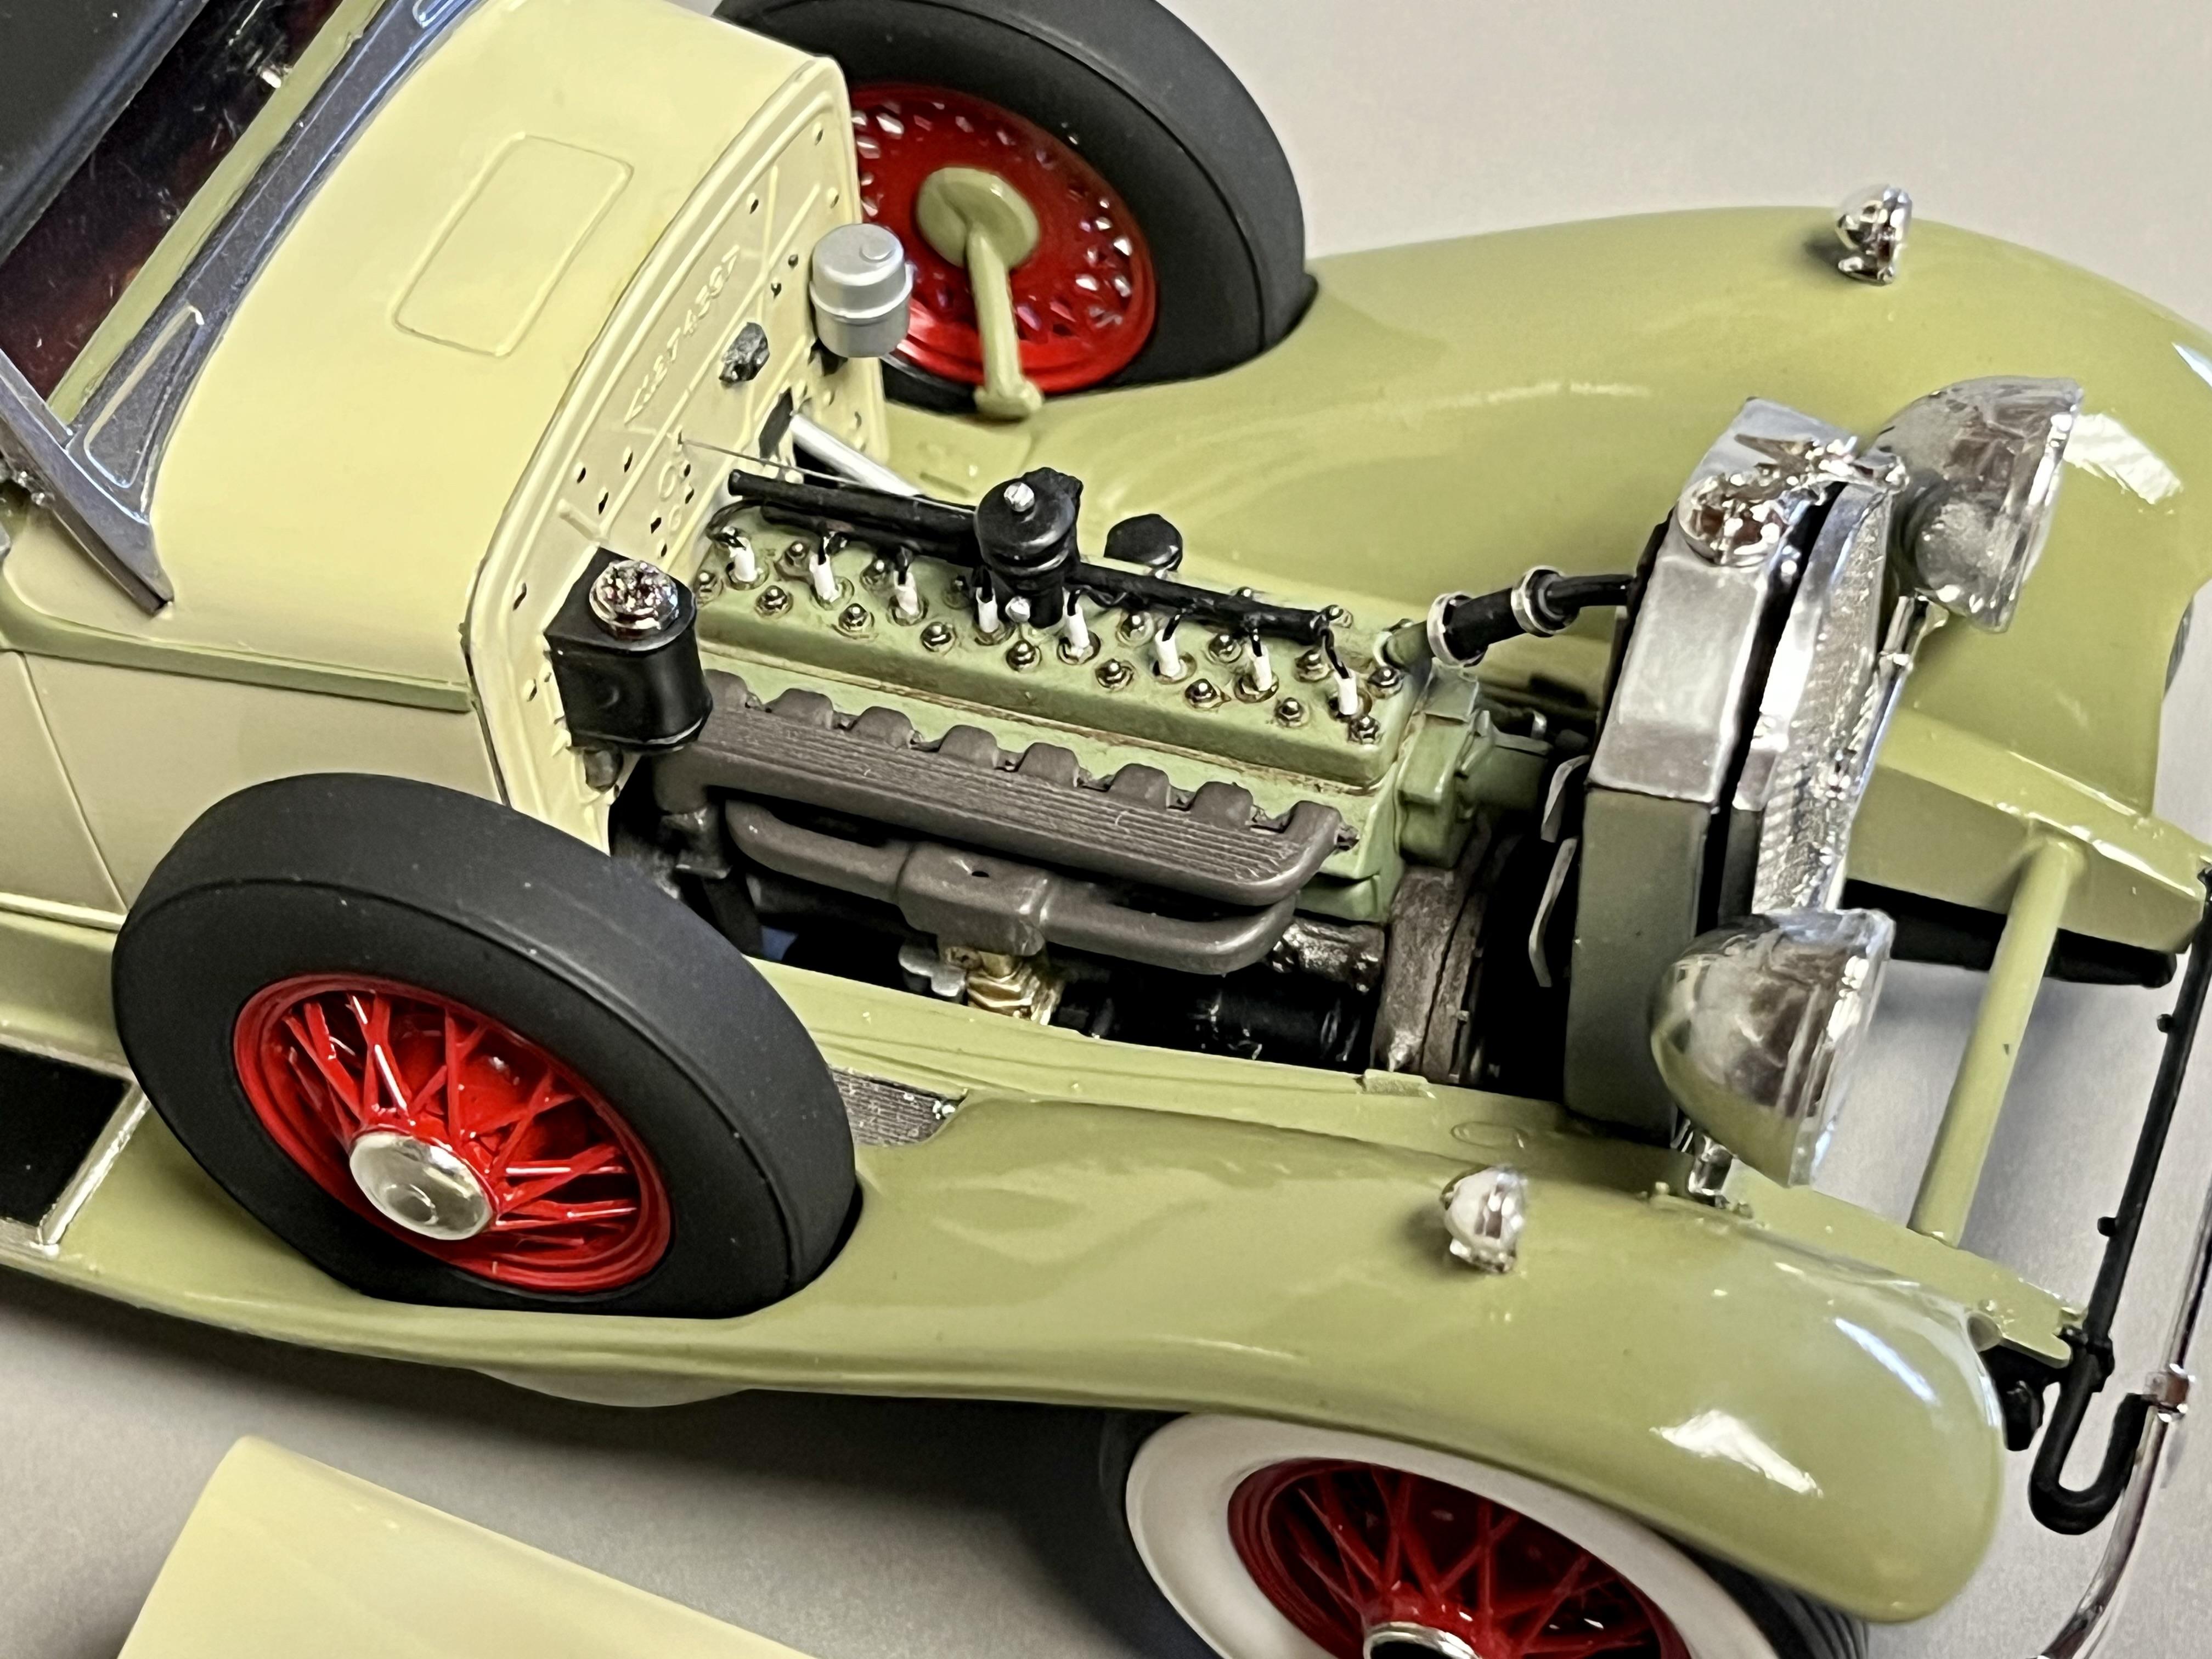
1933 Cadillac Fleetwood All Weather Phaeton
papajohn97 replied to ModelcarJR's topic in WIP: Model Cars
Enjoying your progress so far John on this classic. Very neat tidy paint & assembly results so far on the chassis. I built the Italeri Mercedes 540K a few years ago and remember the challenging of painting and assembling the body in pieces, hoping you’re able to bring it all together without damaging the red paint. Love these 1/24 Testors / Italeri/ Monogram classic kits, they are a nice change from the AMT/ Revell auto kits and are a good base to add extra detailing. -
Amazing job that you’re doing so far Andy on this “Rubic’s Cube” kit. I noticed there are very few builds posted of this kit and now I understand why! I don’t ever recall seeing what one of these EB’s looked like with both doors open. After consulting a listing for one that was auctioned on bringatrailer.com, I learned that they included a weird angled vertical strut extending off the chassis on either side of the front seat: It looks like both doors engaged/ locked against this side strut. I’m not suggesting that you need to incorporate these struts in your build (you have enough to do with all the other mods!) but I just thought it was interesting how the designers/ engineers handled suicide doors on a four-door hardtop. I look forward to seeing how you conquer this beast!
-
Bugatti Royale Victoria 1931...Linberg 1/24 scale
papajohn97 replied to louis Carabott's topic in Model Cars
Incredible result from this Lindberg kit, particularly the metalizing (Alclad?) paint work on the engine, front grill/ lights/ horn and wheels. I’ve recently gotten inspired to build the 1/24 classic auto kits and have been shopping for most of the old Monogram kits - I may have to add this Bugatti to my wish list. -
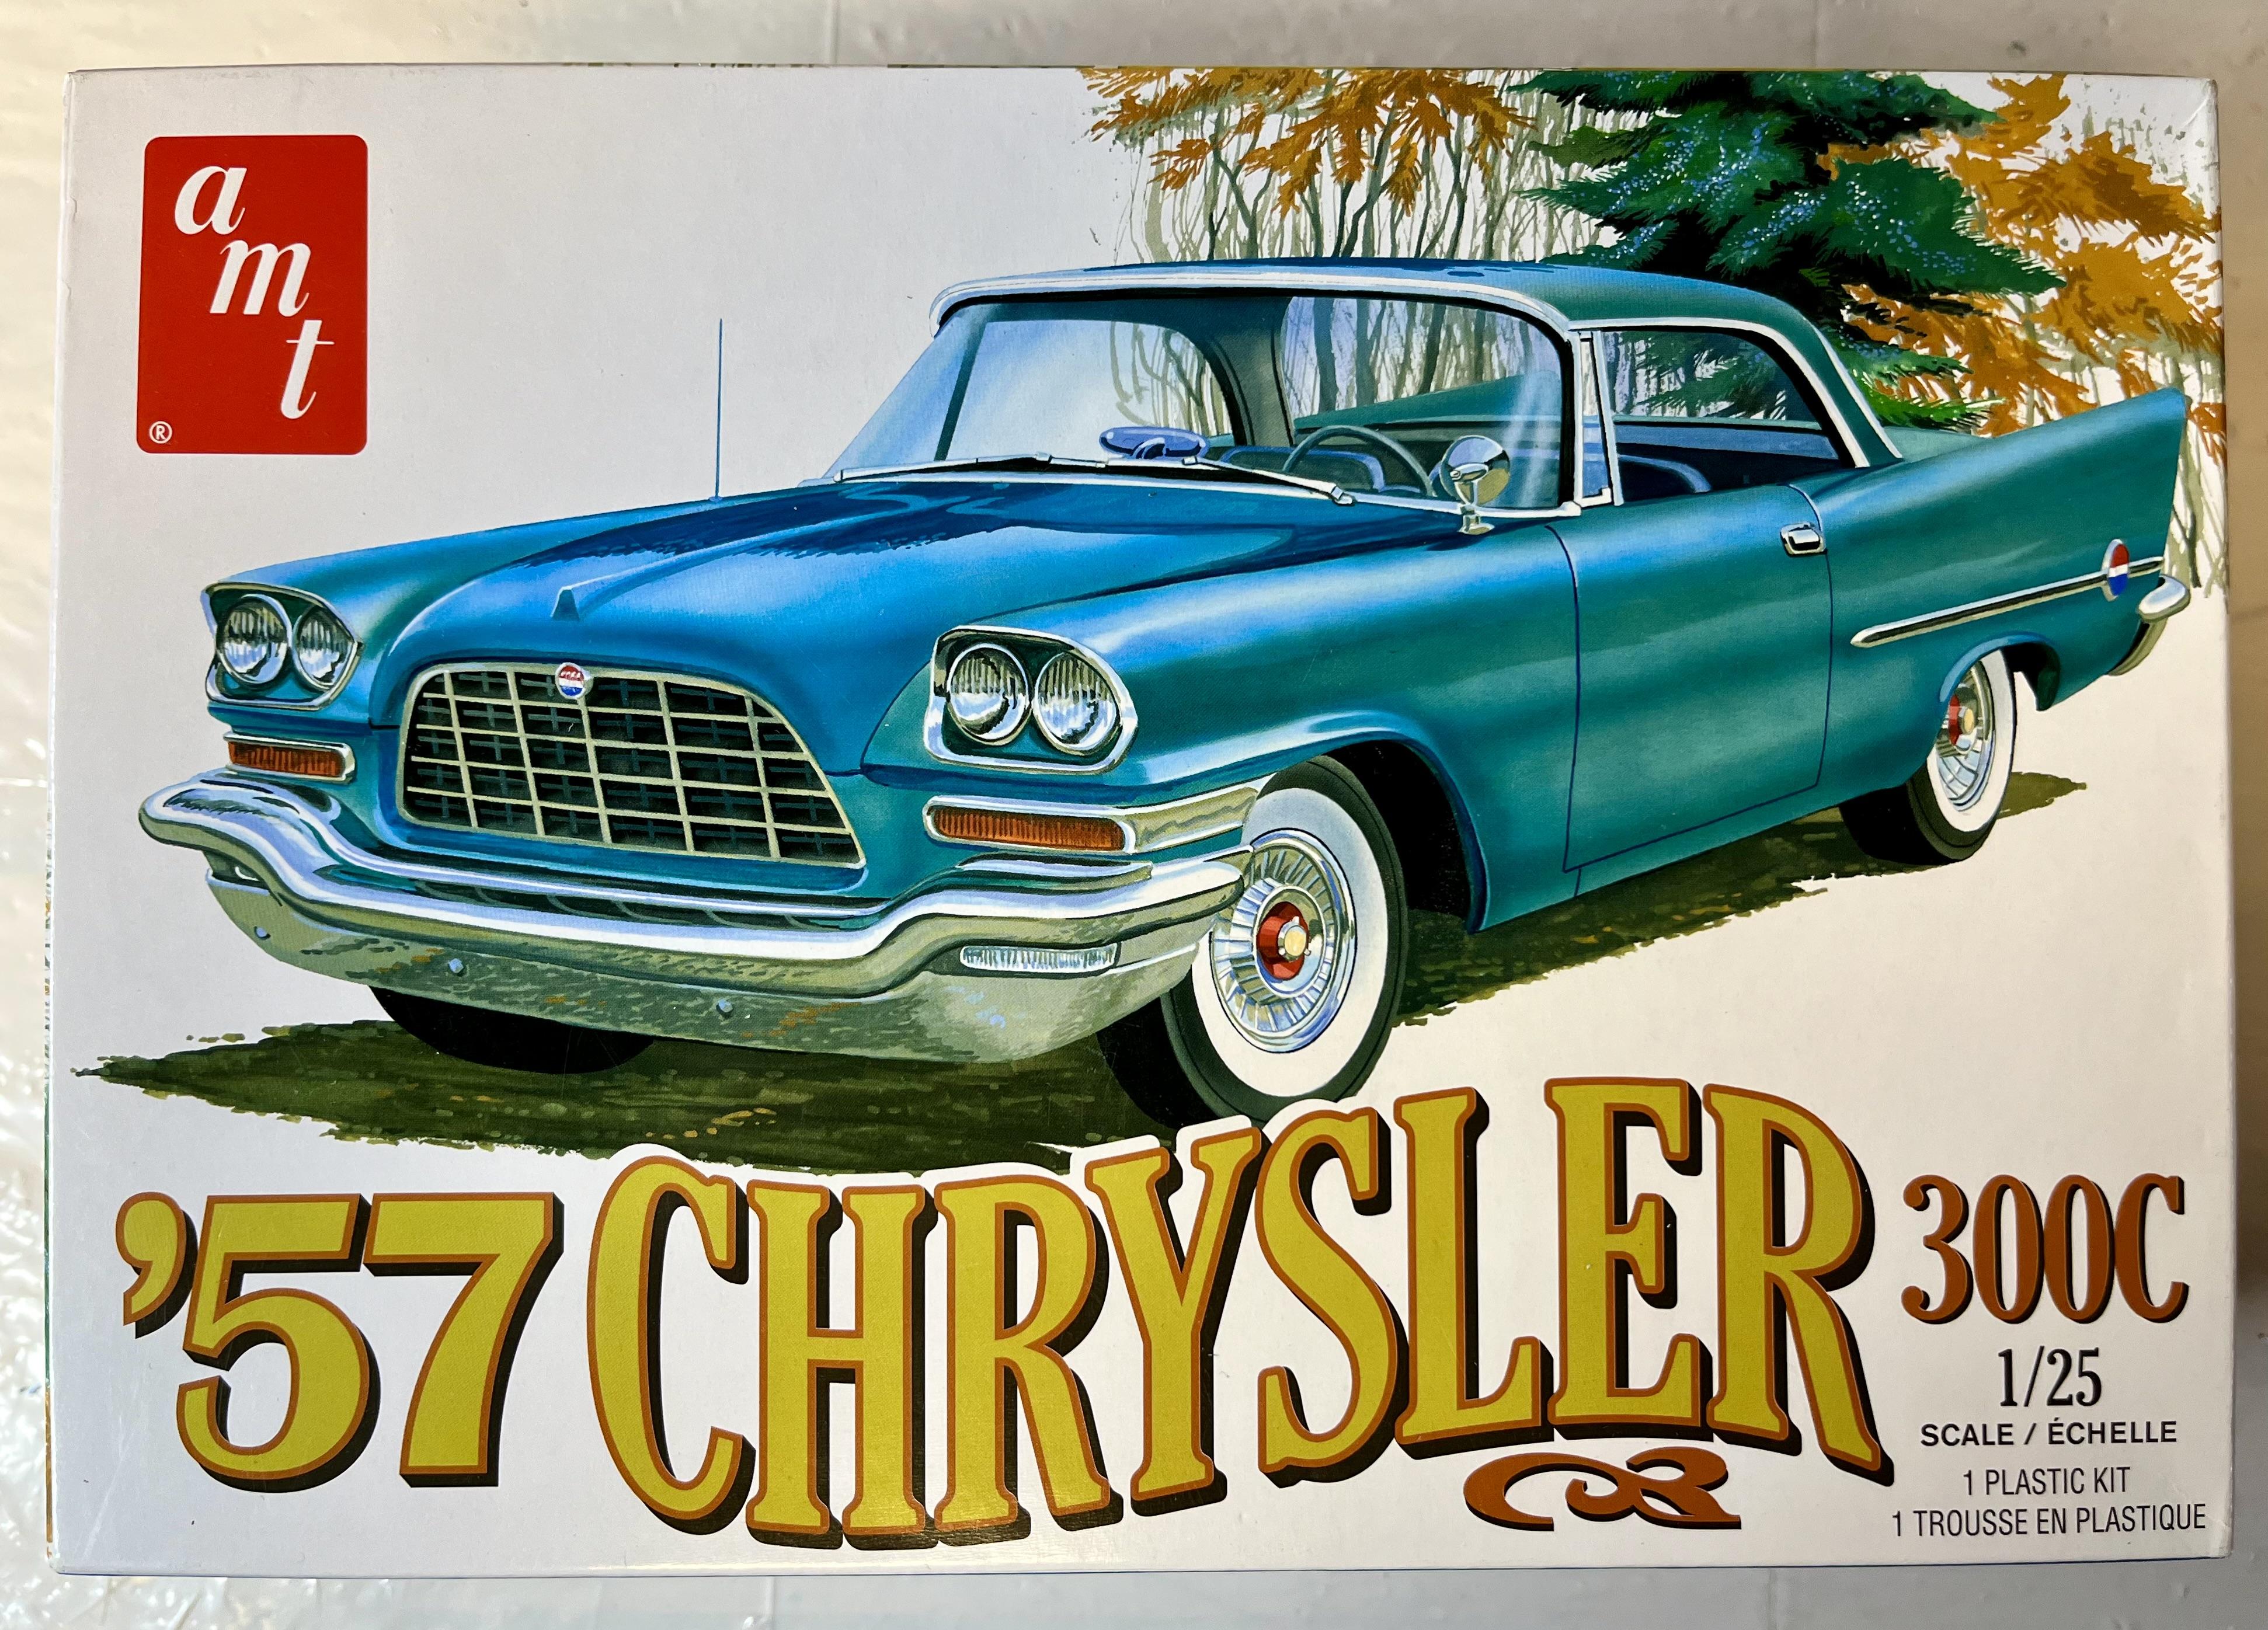
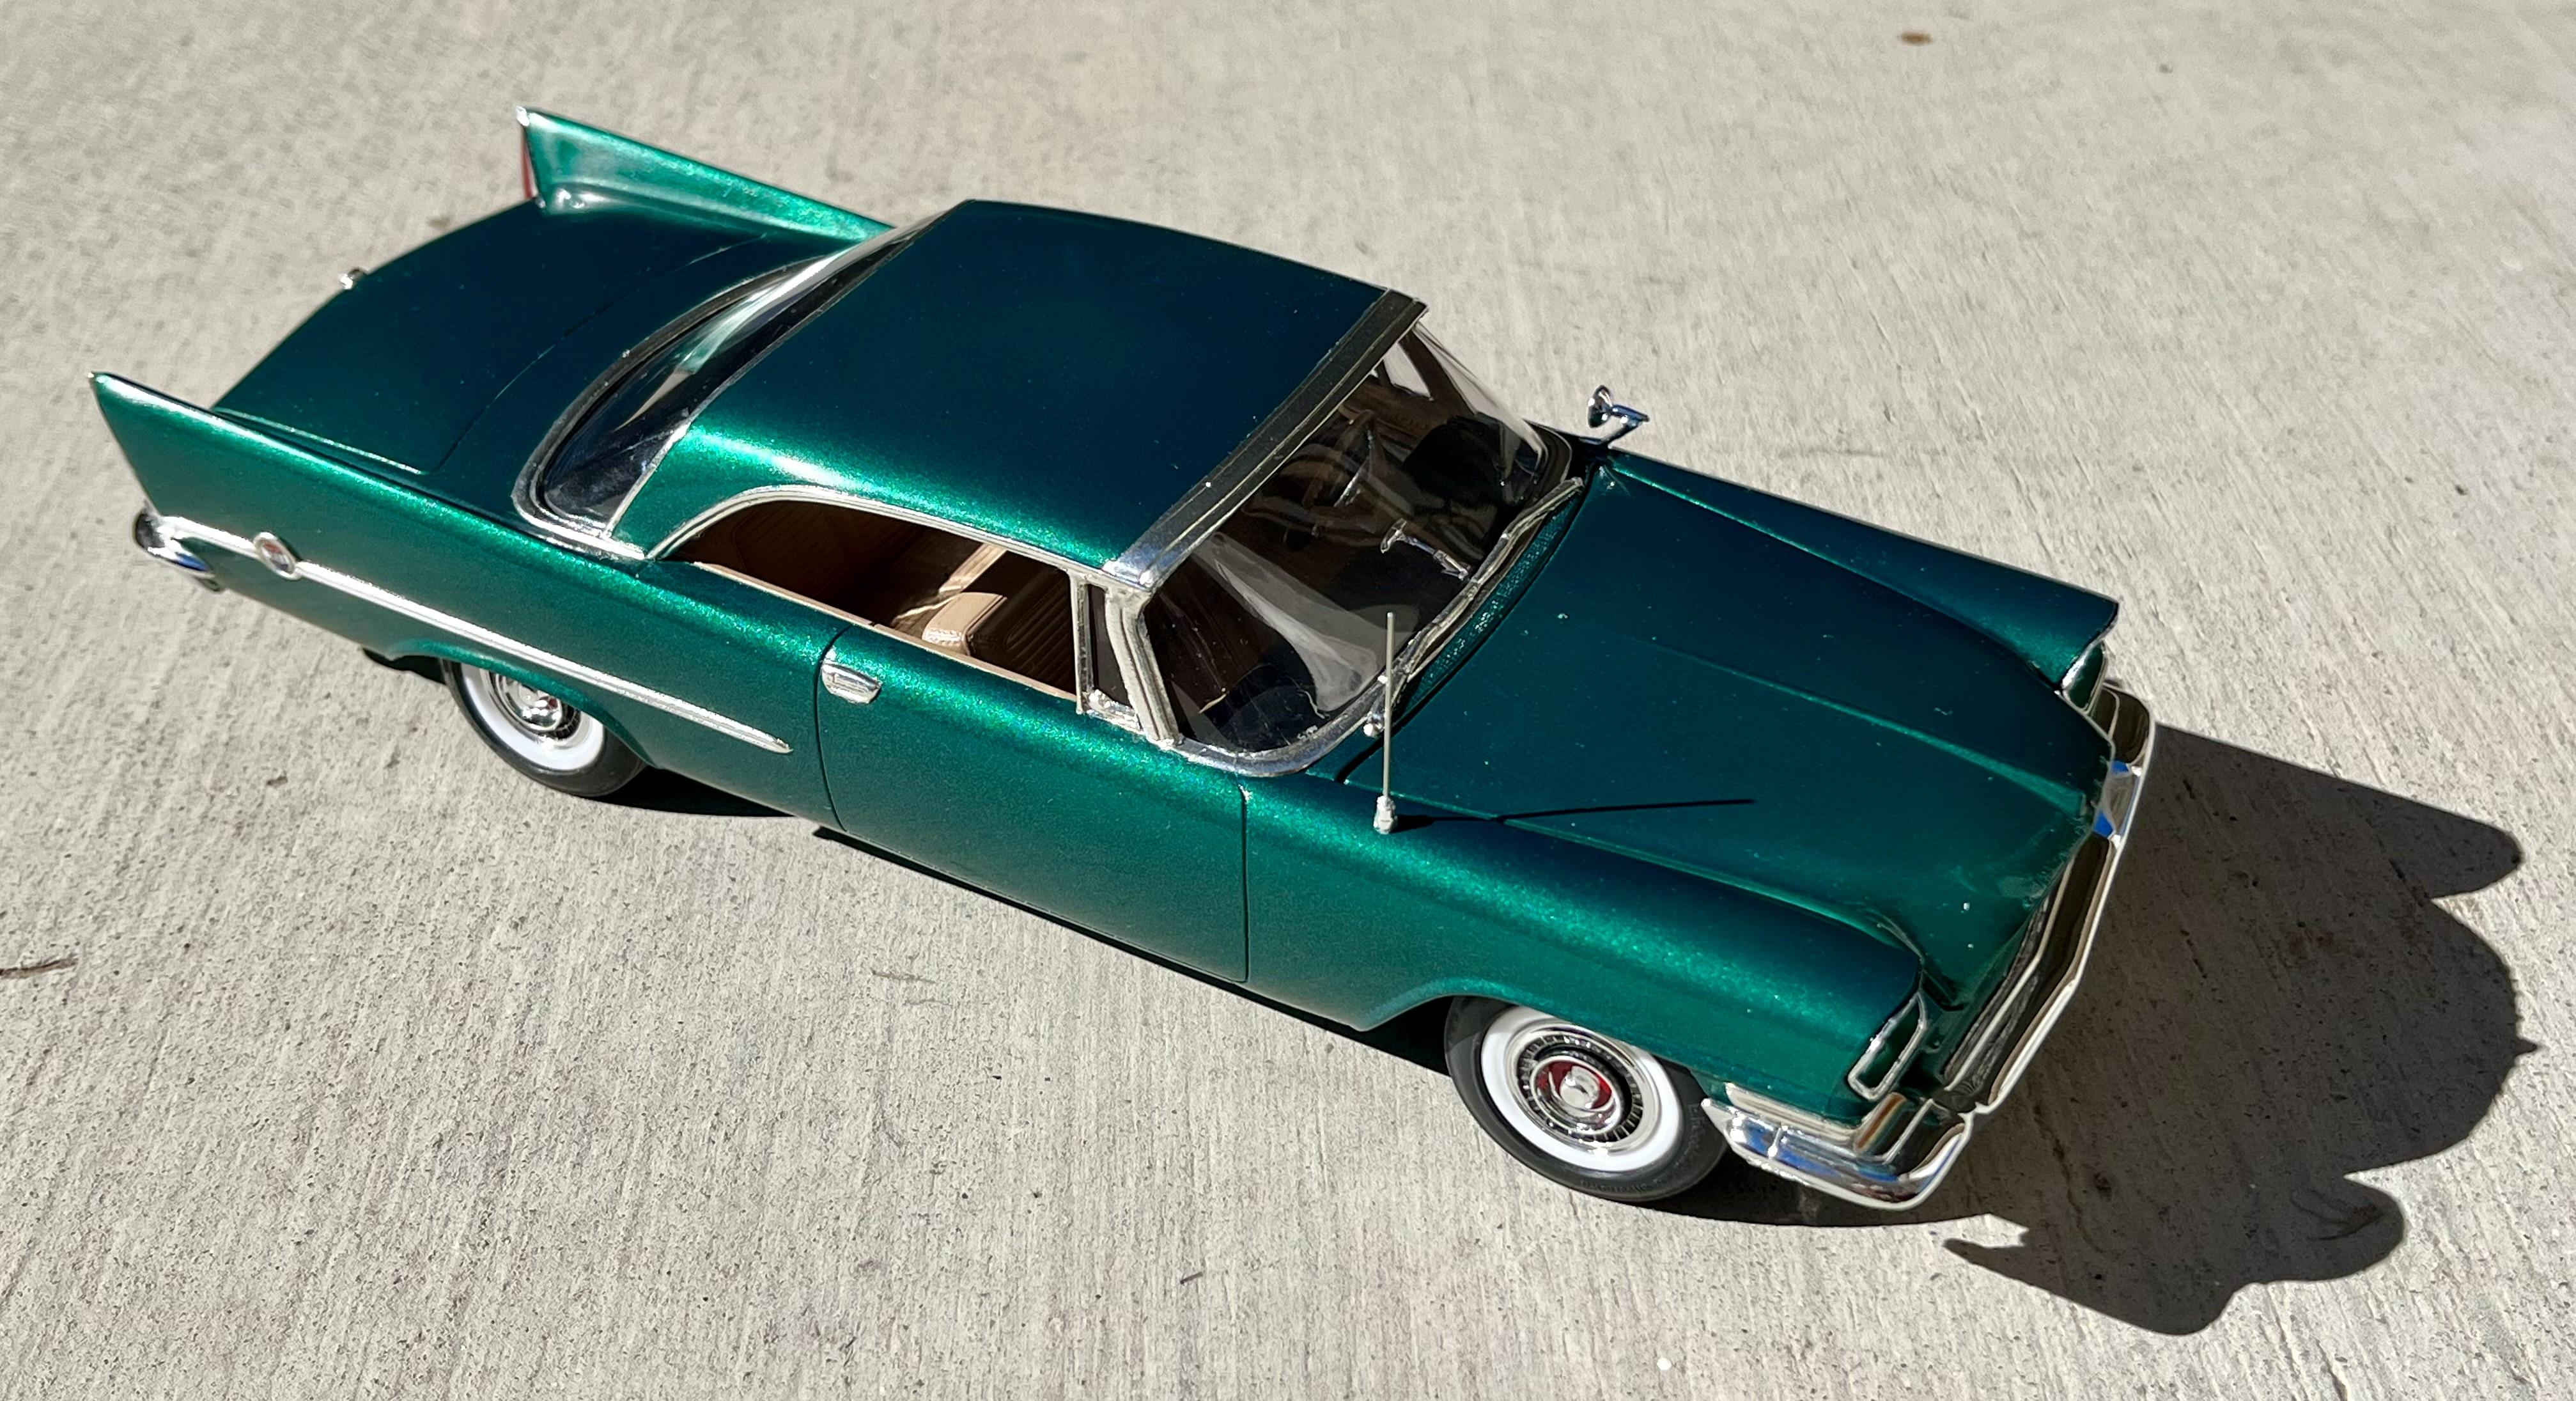
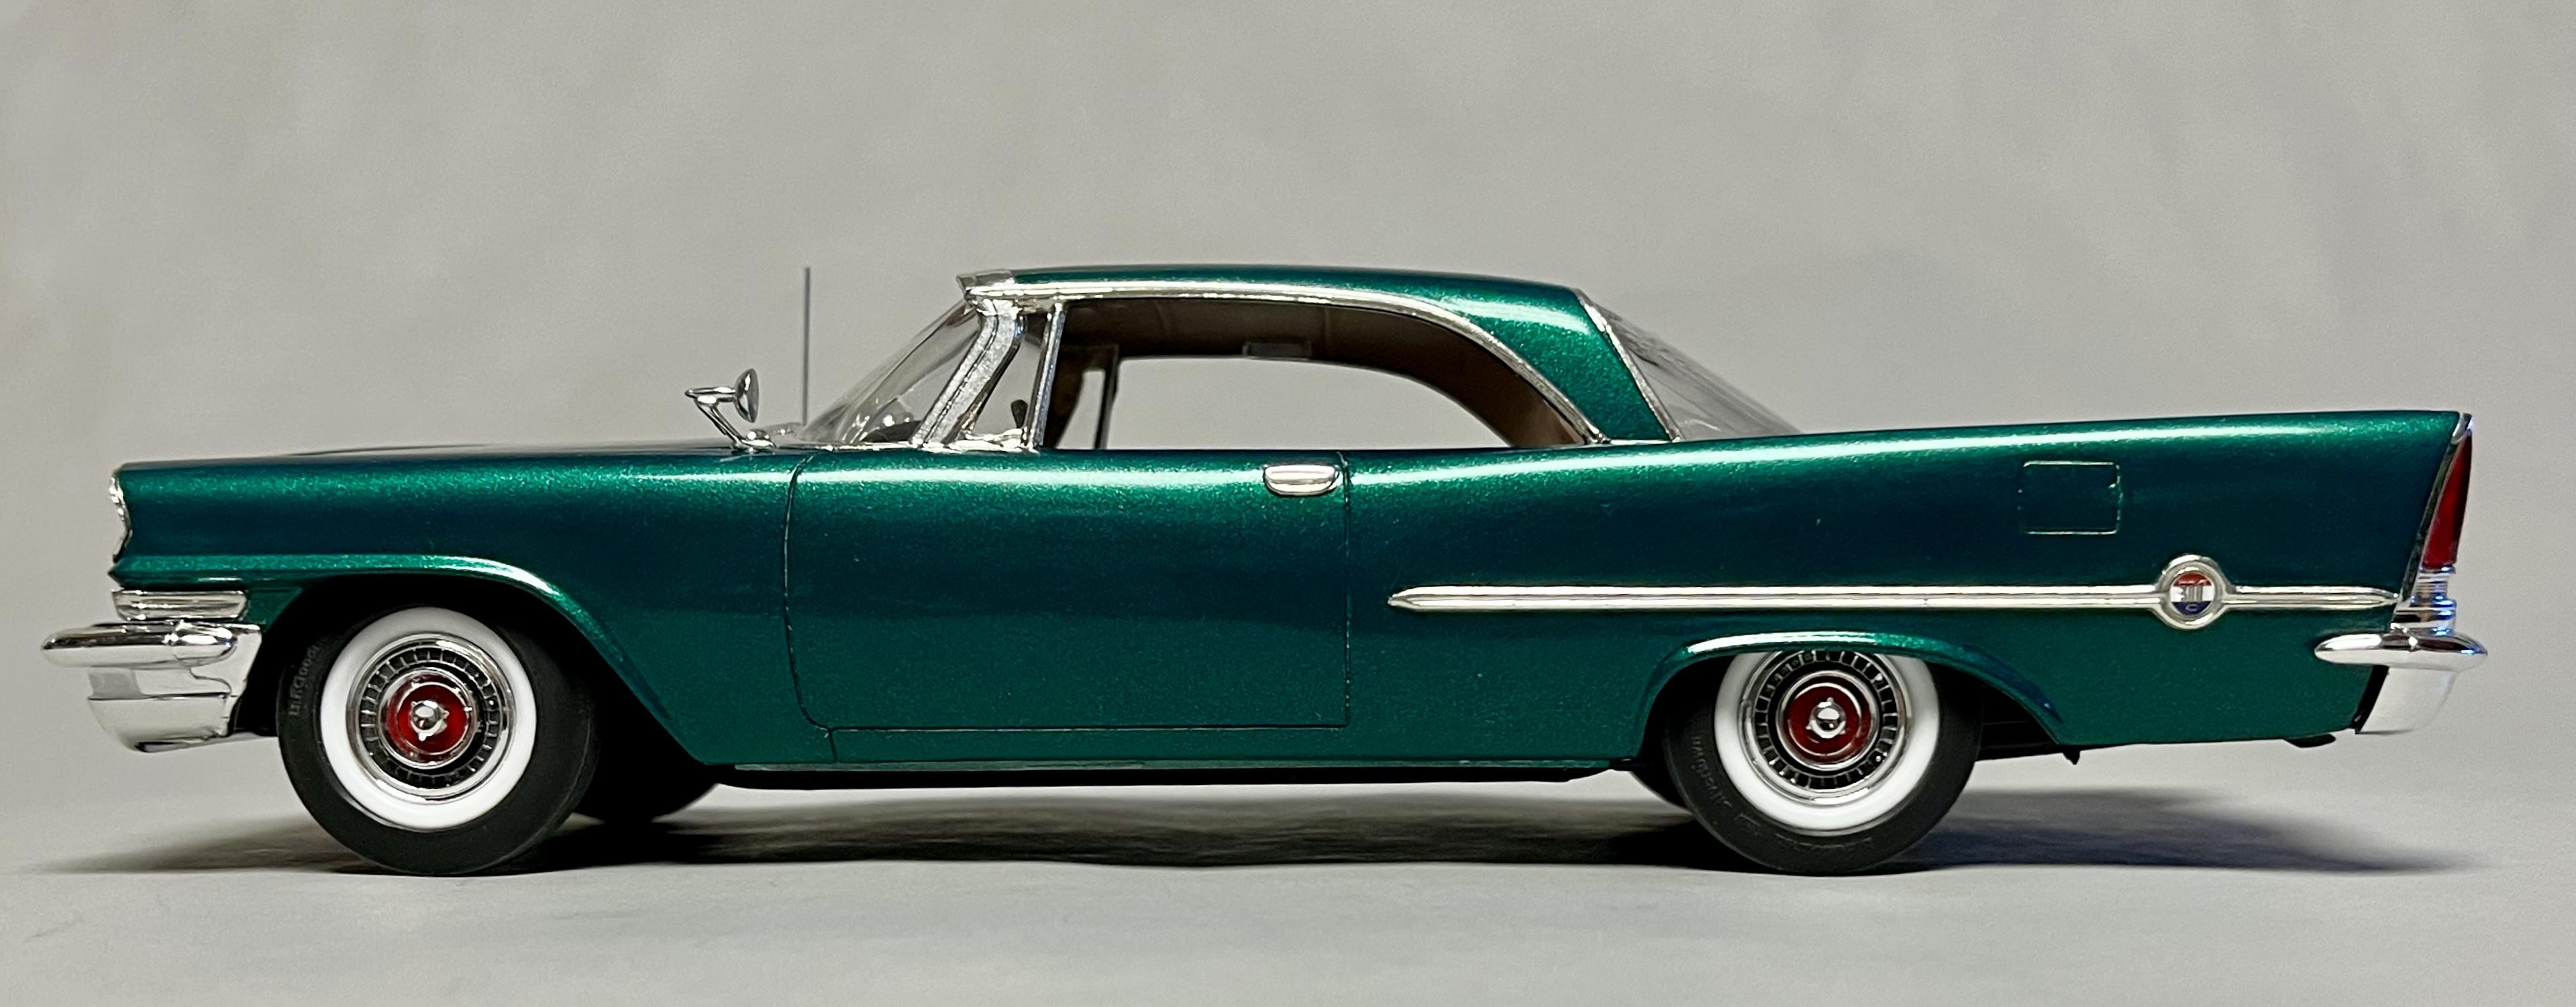
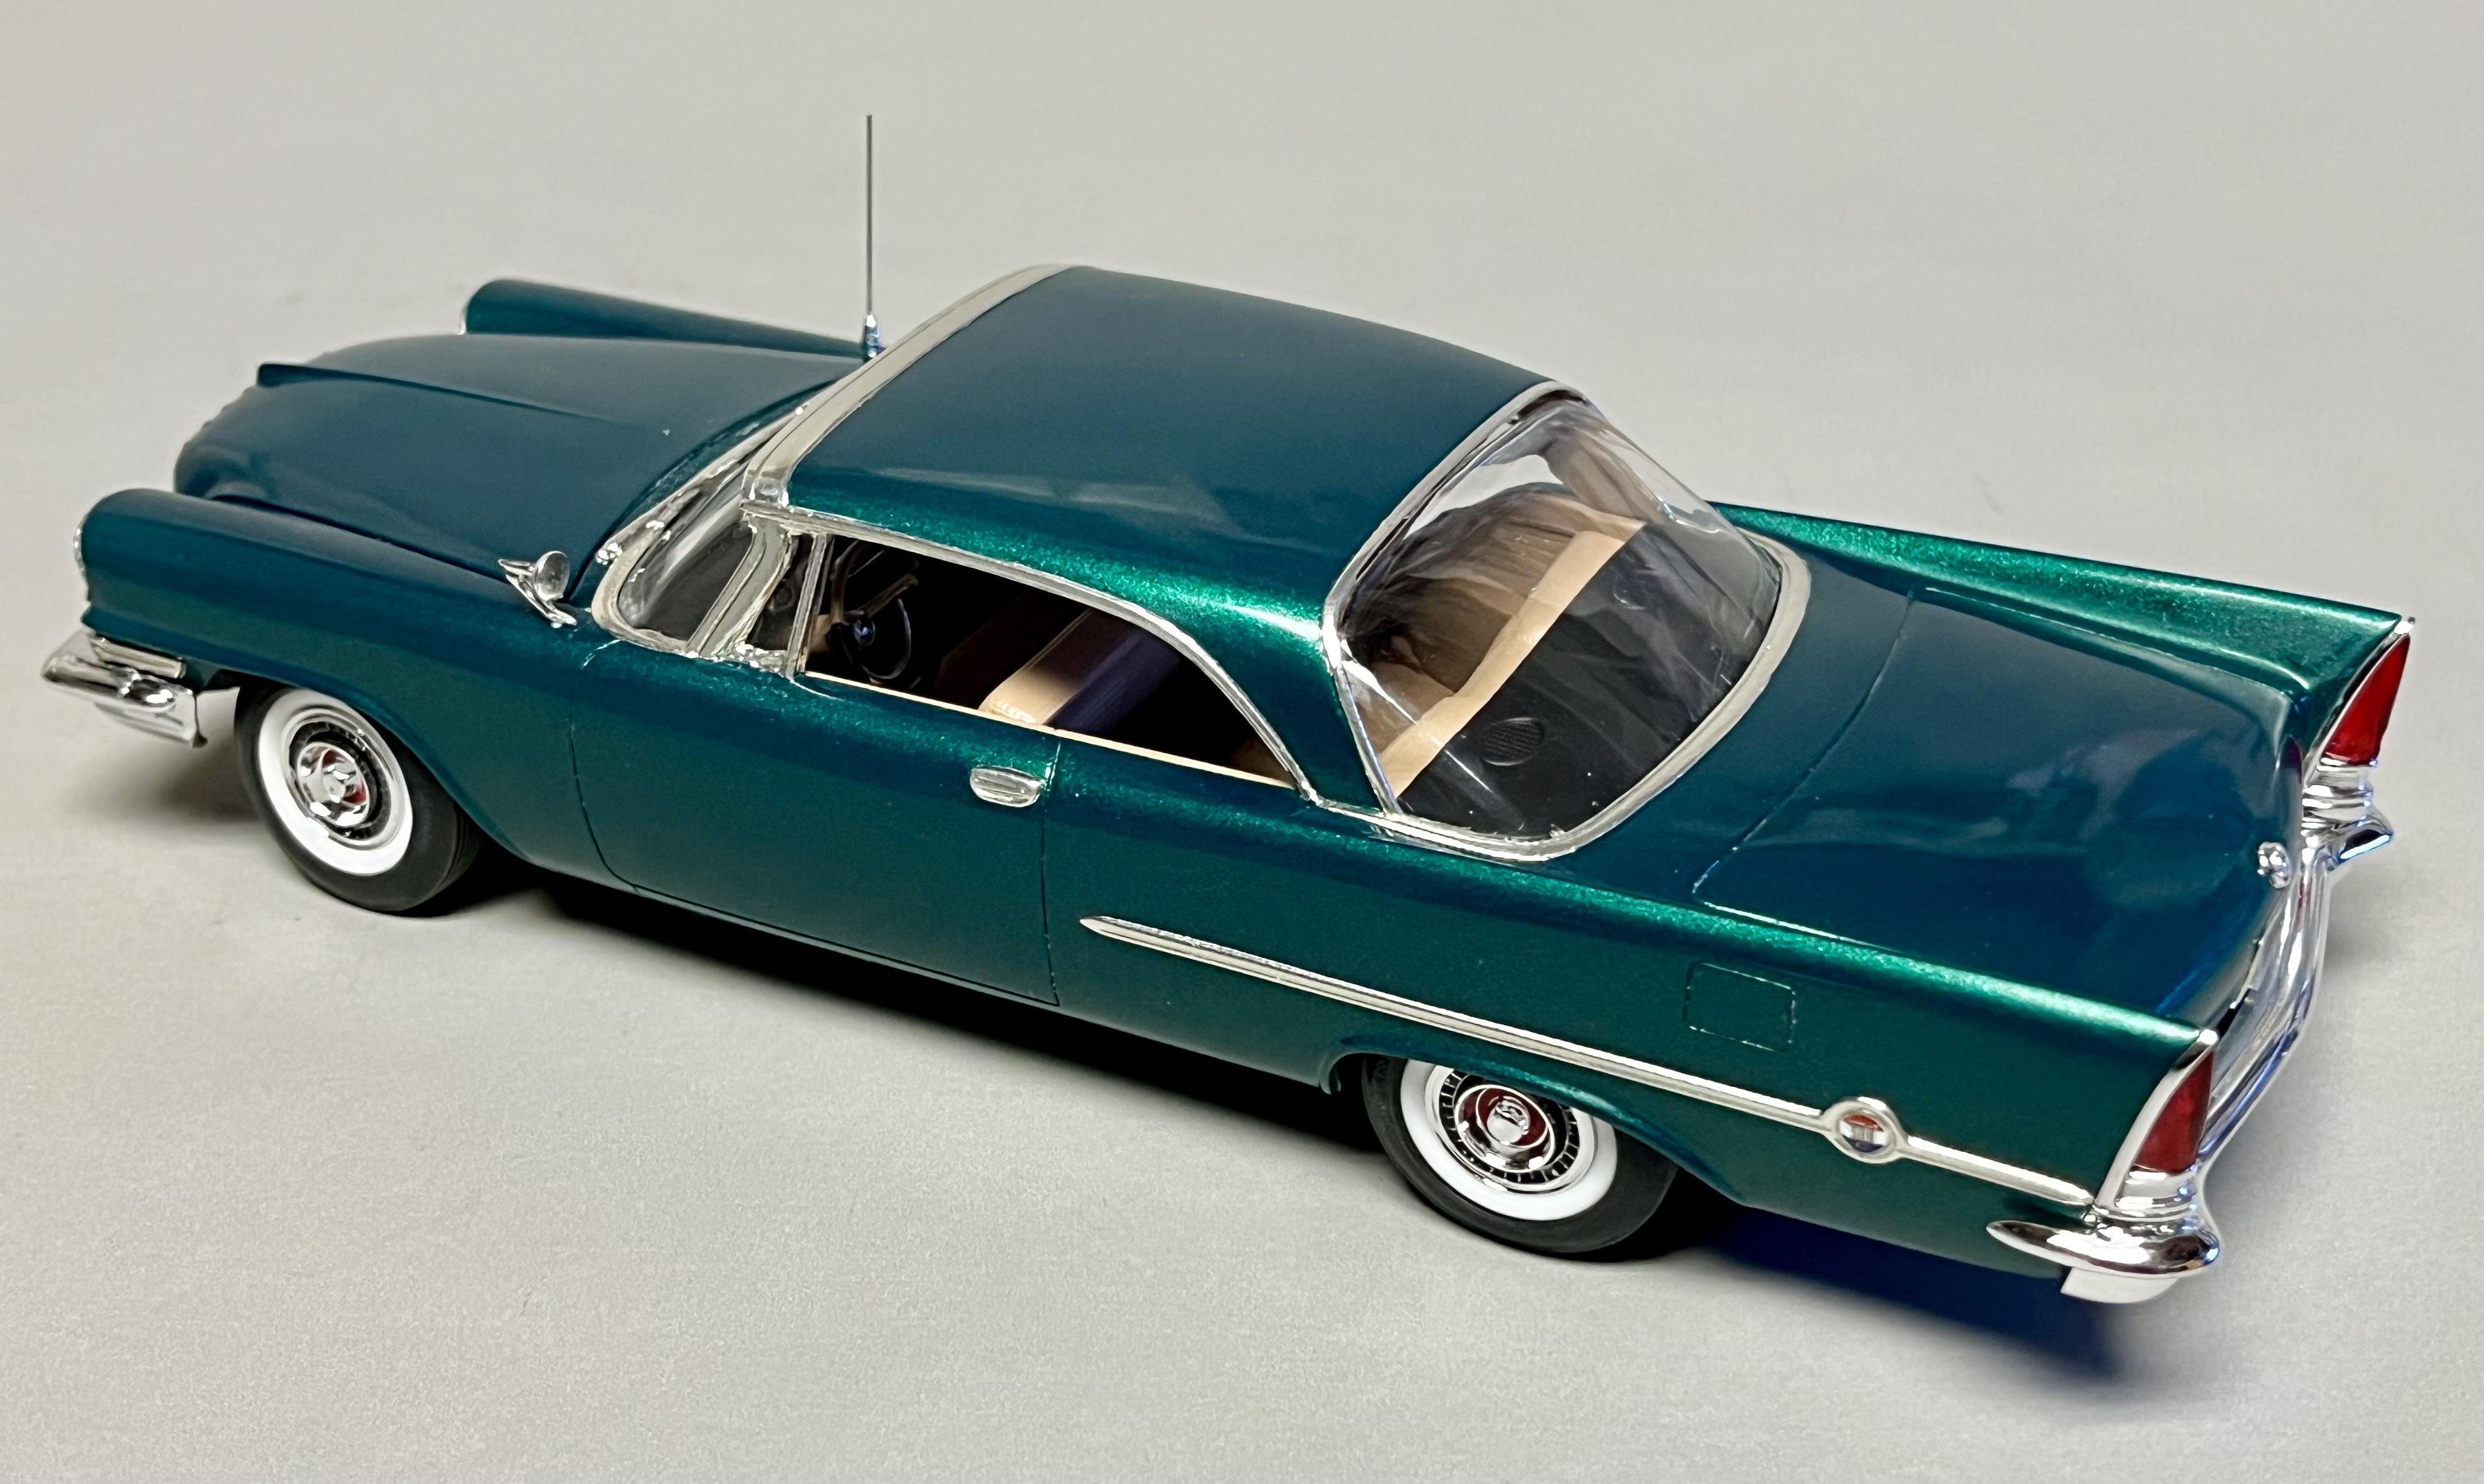
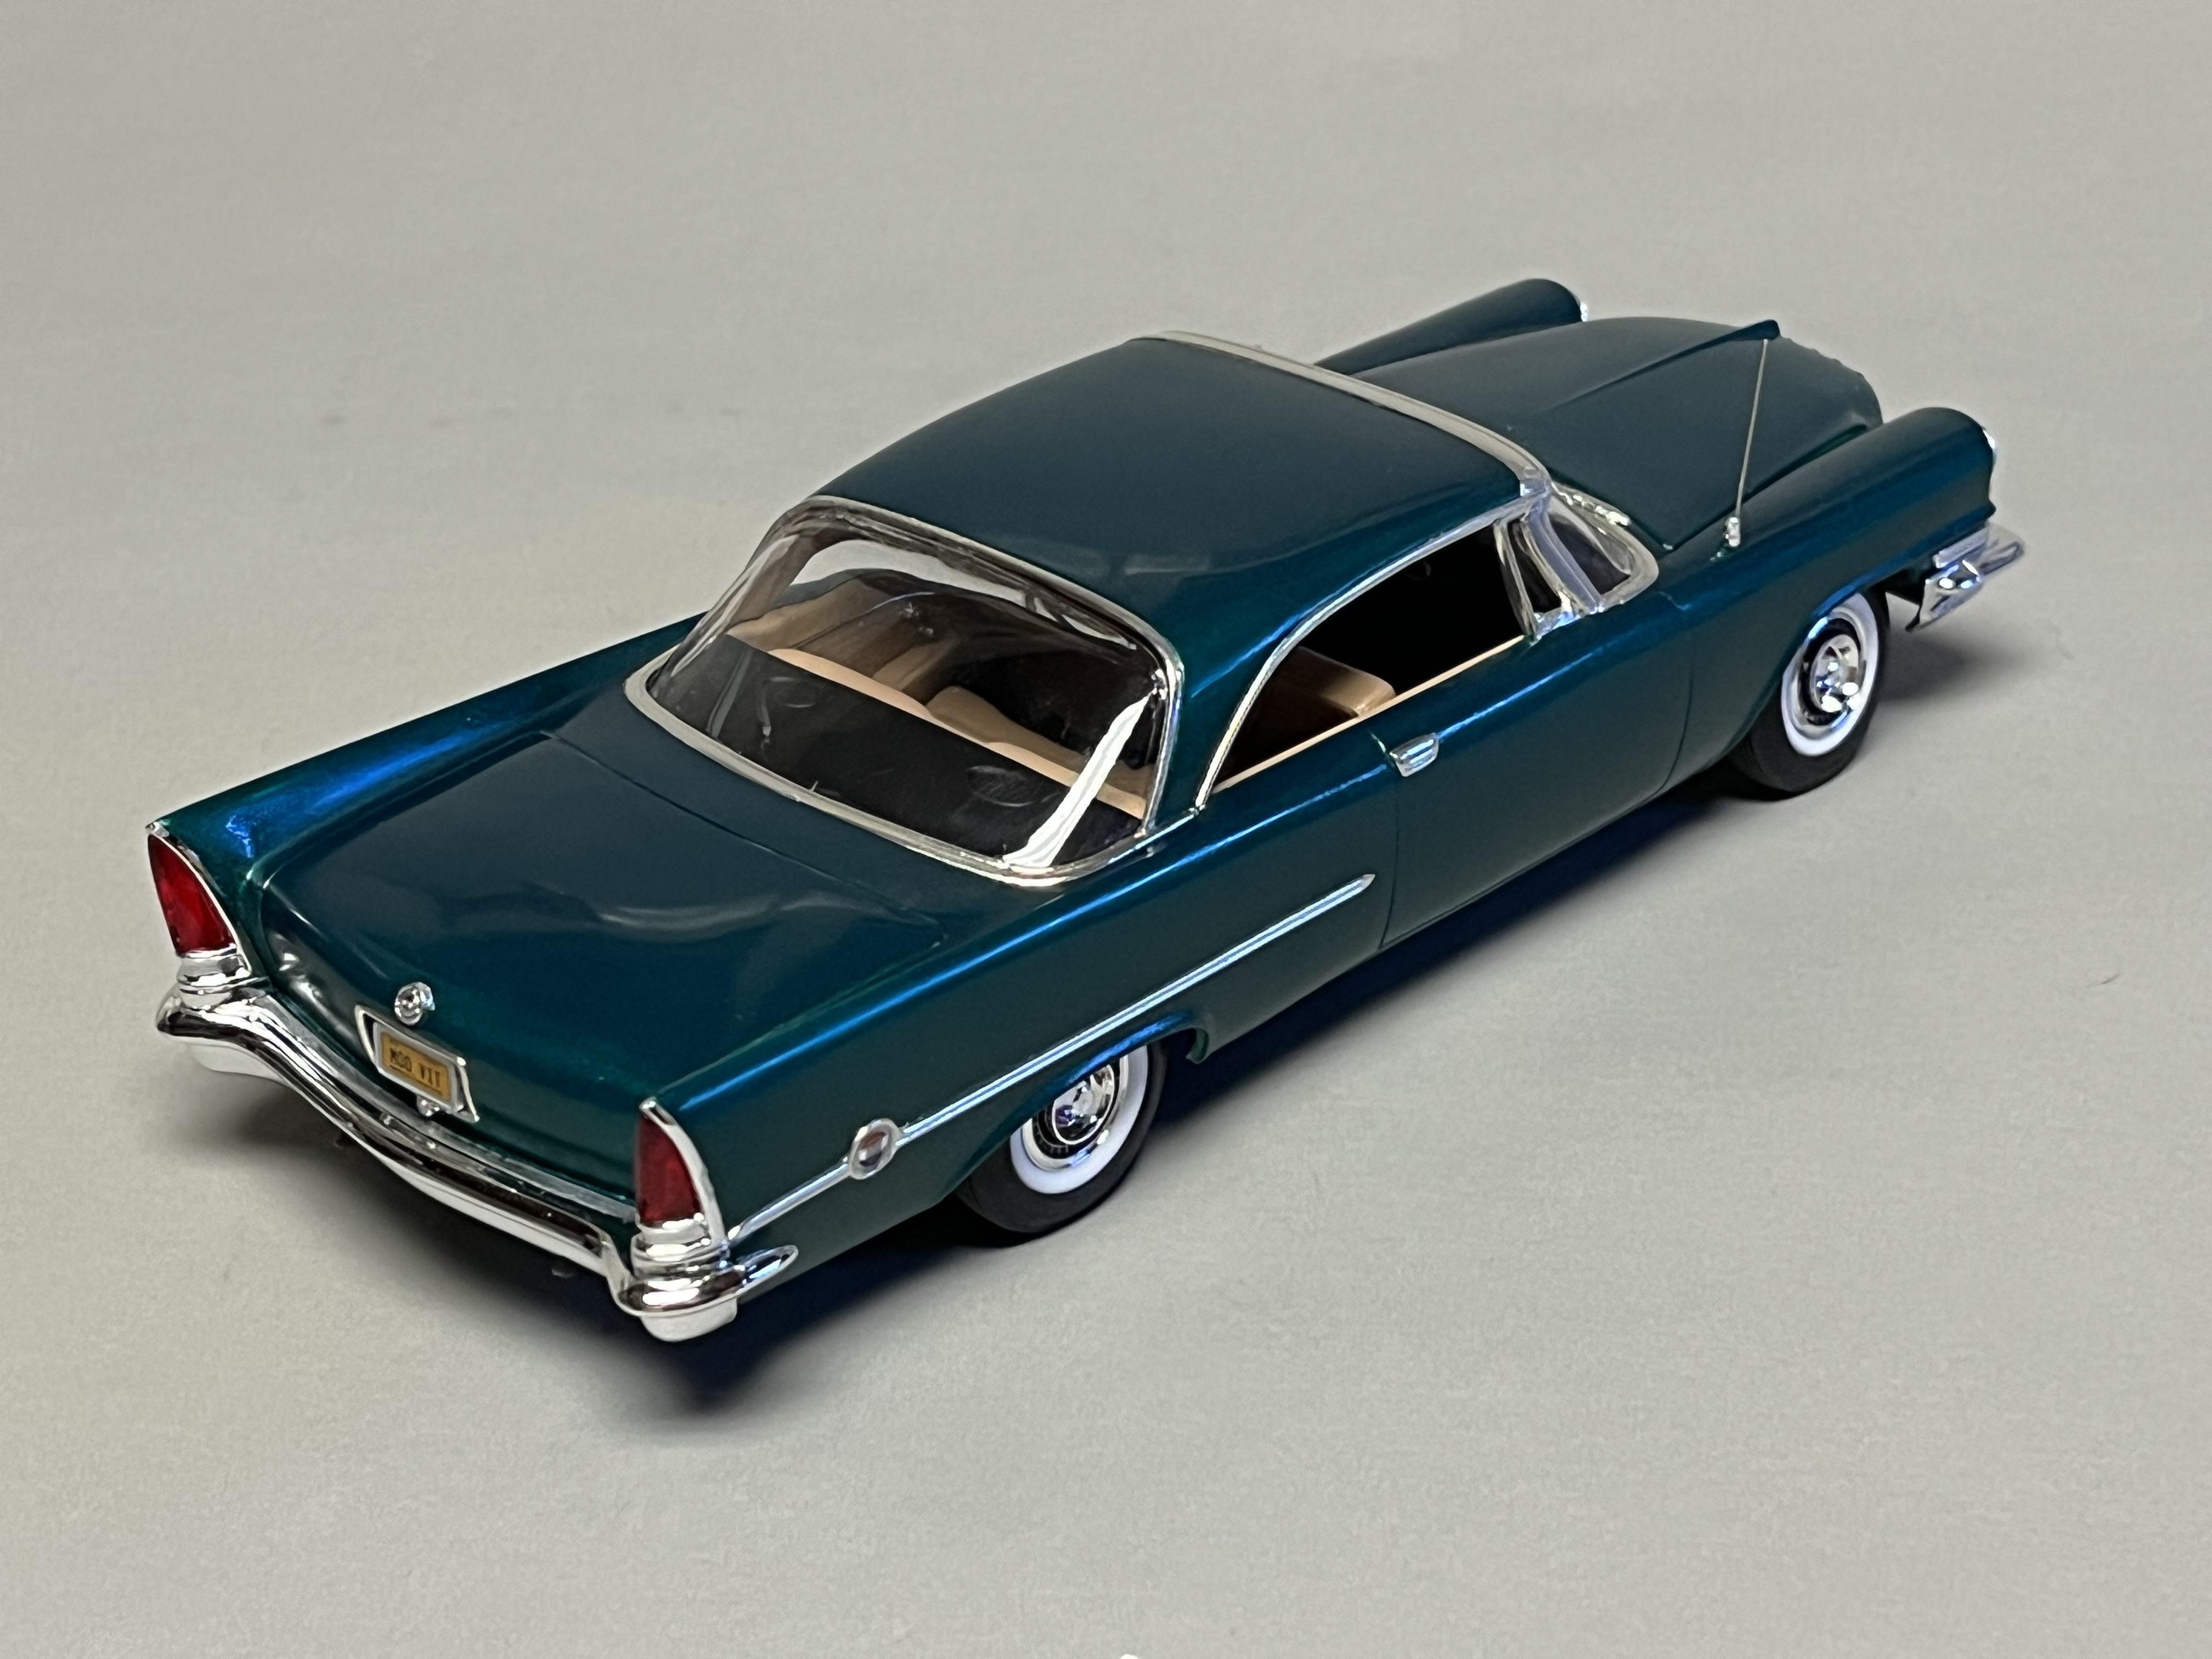
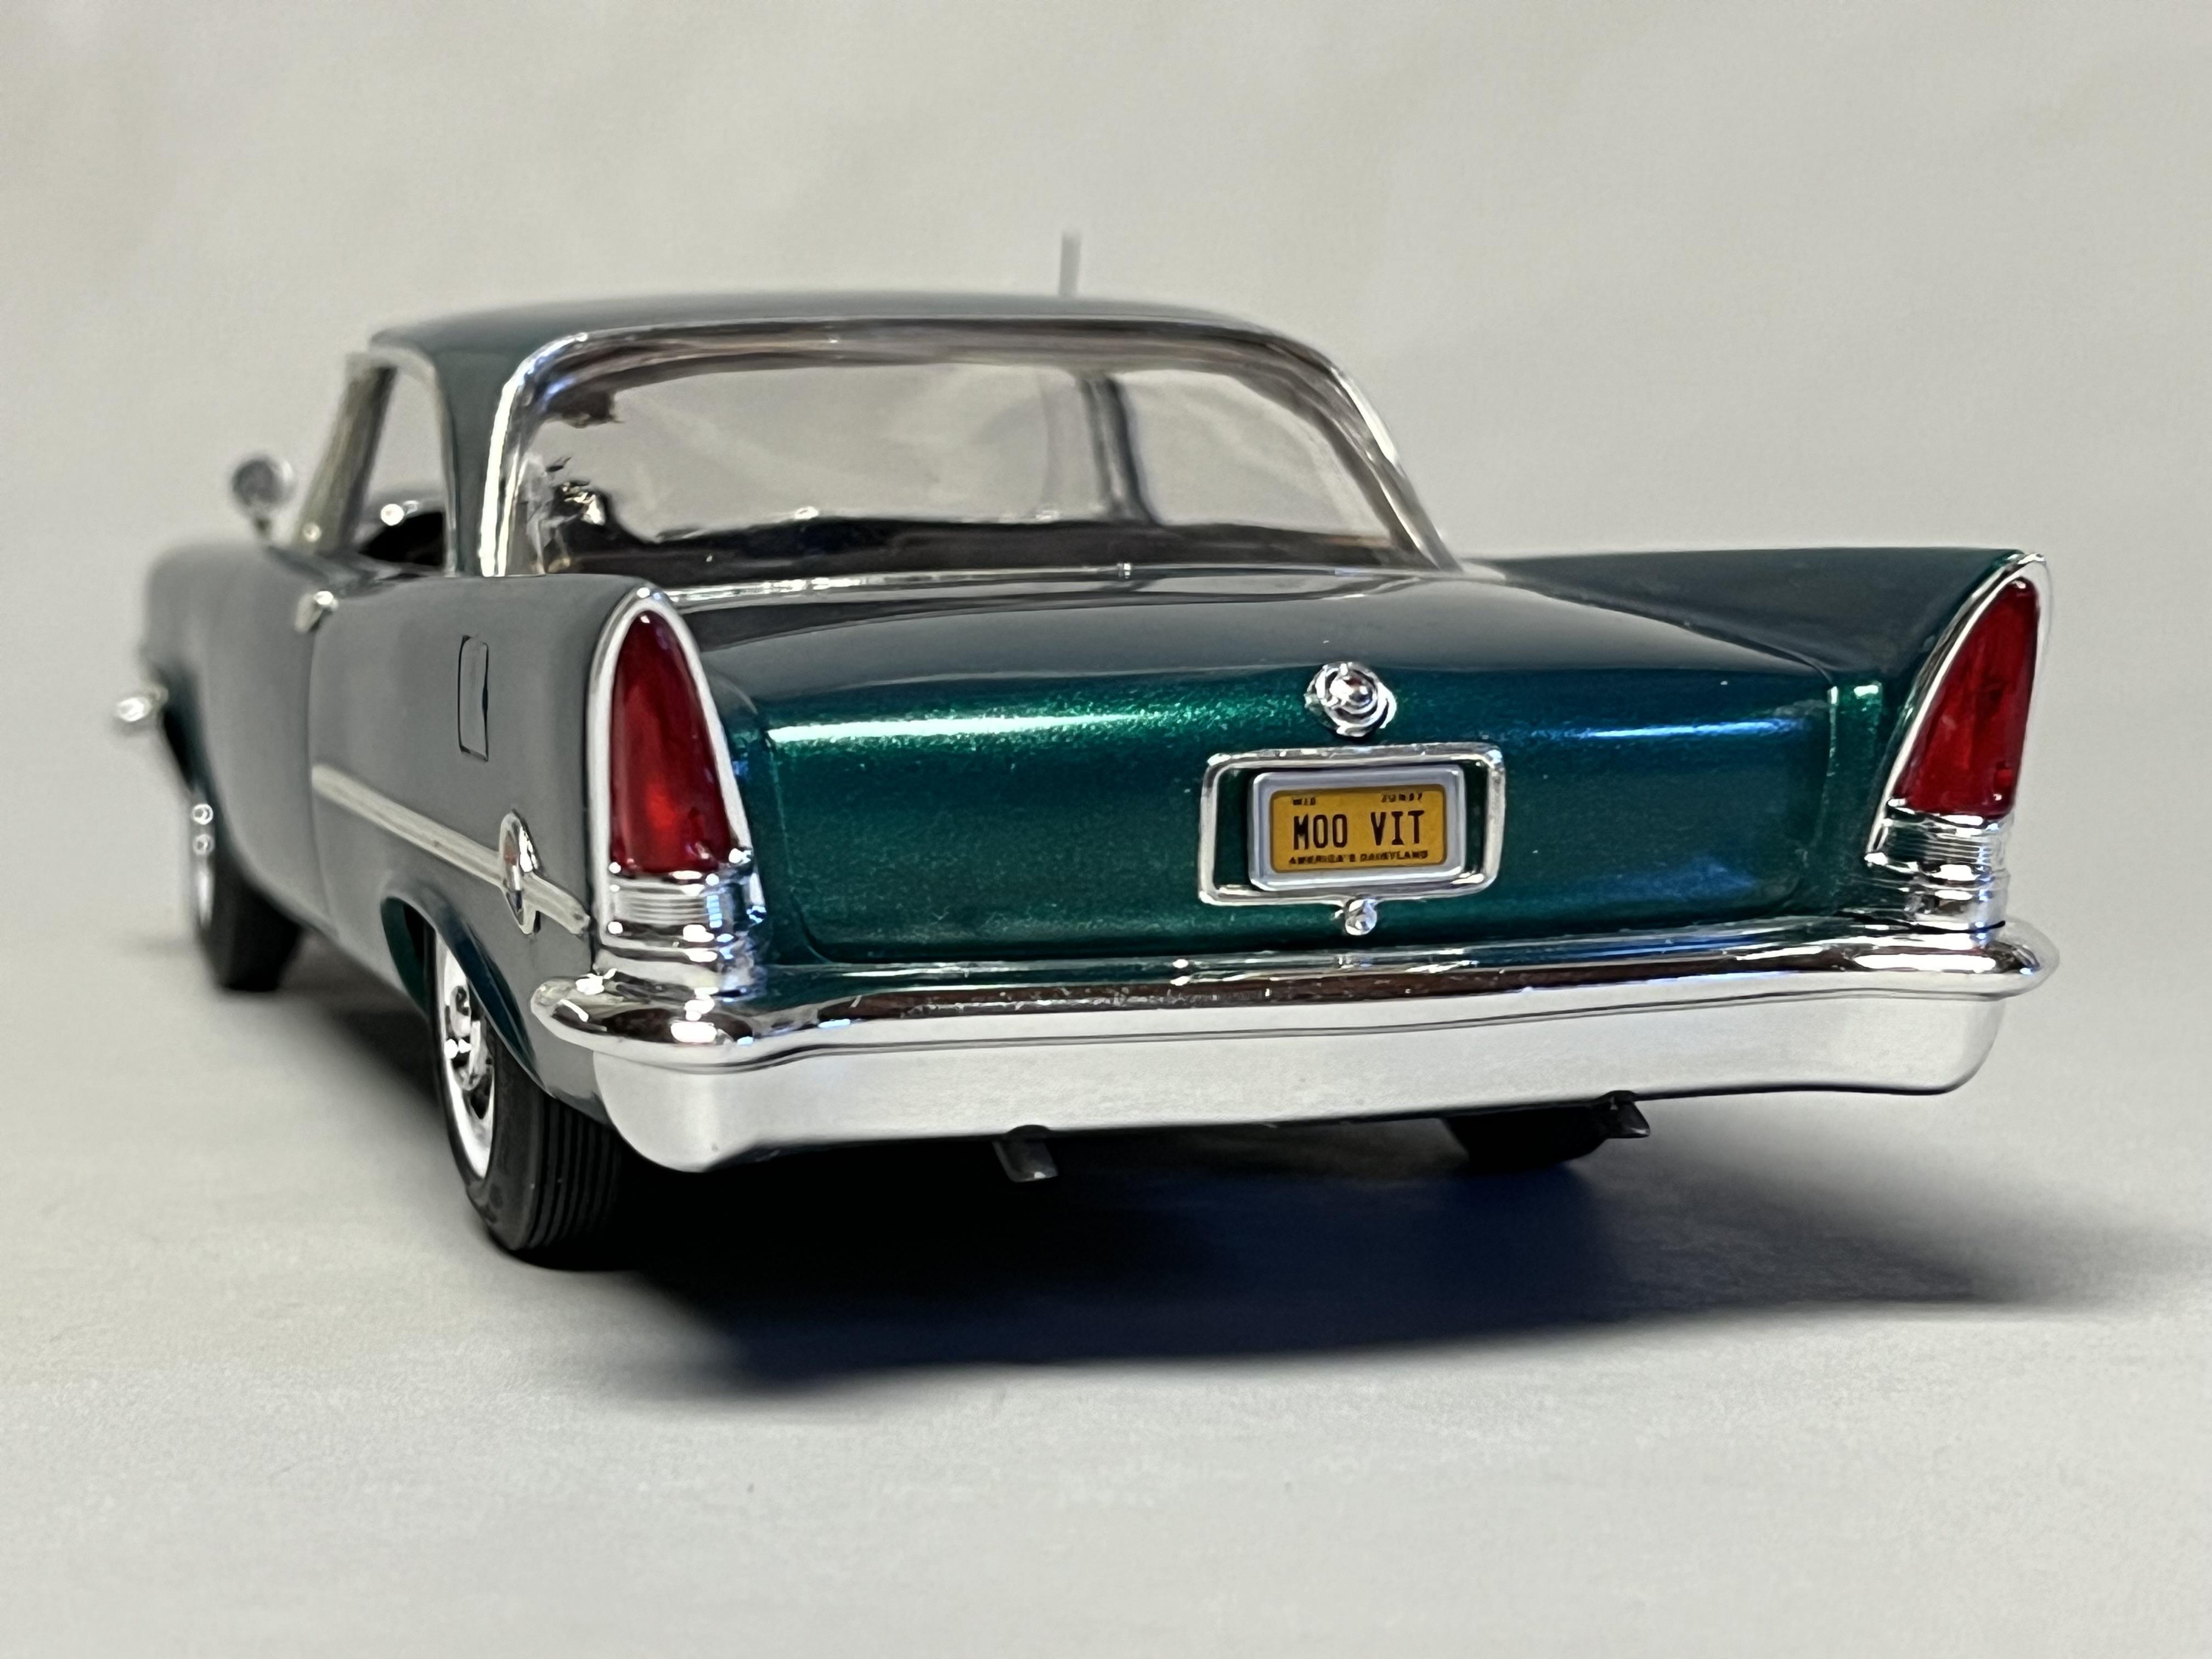
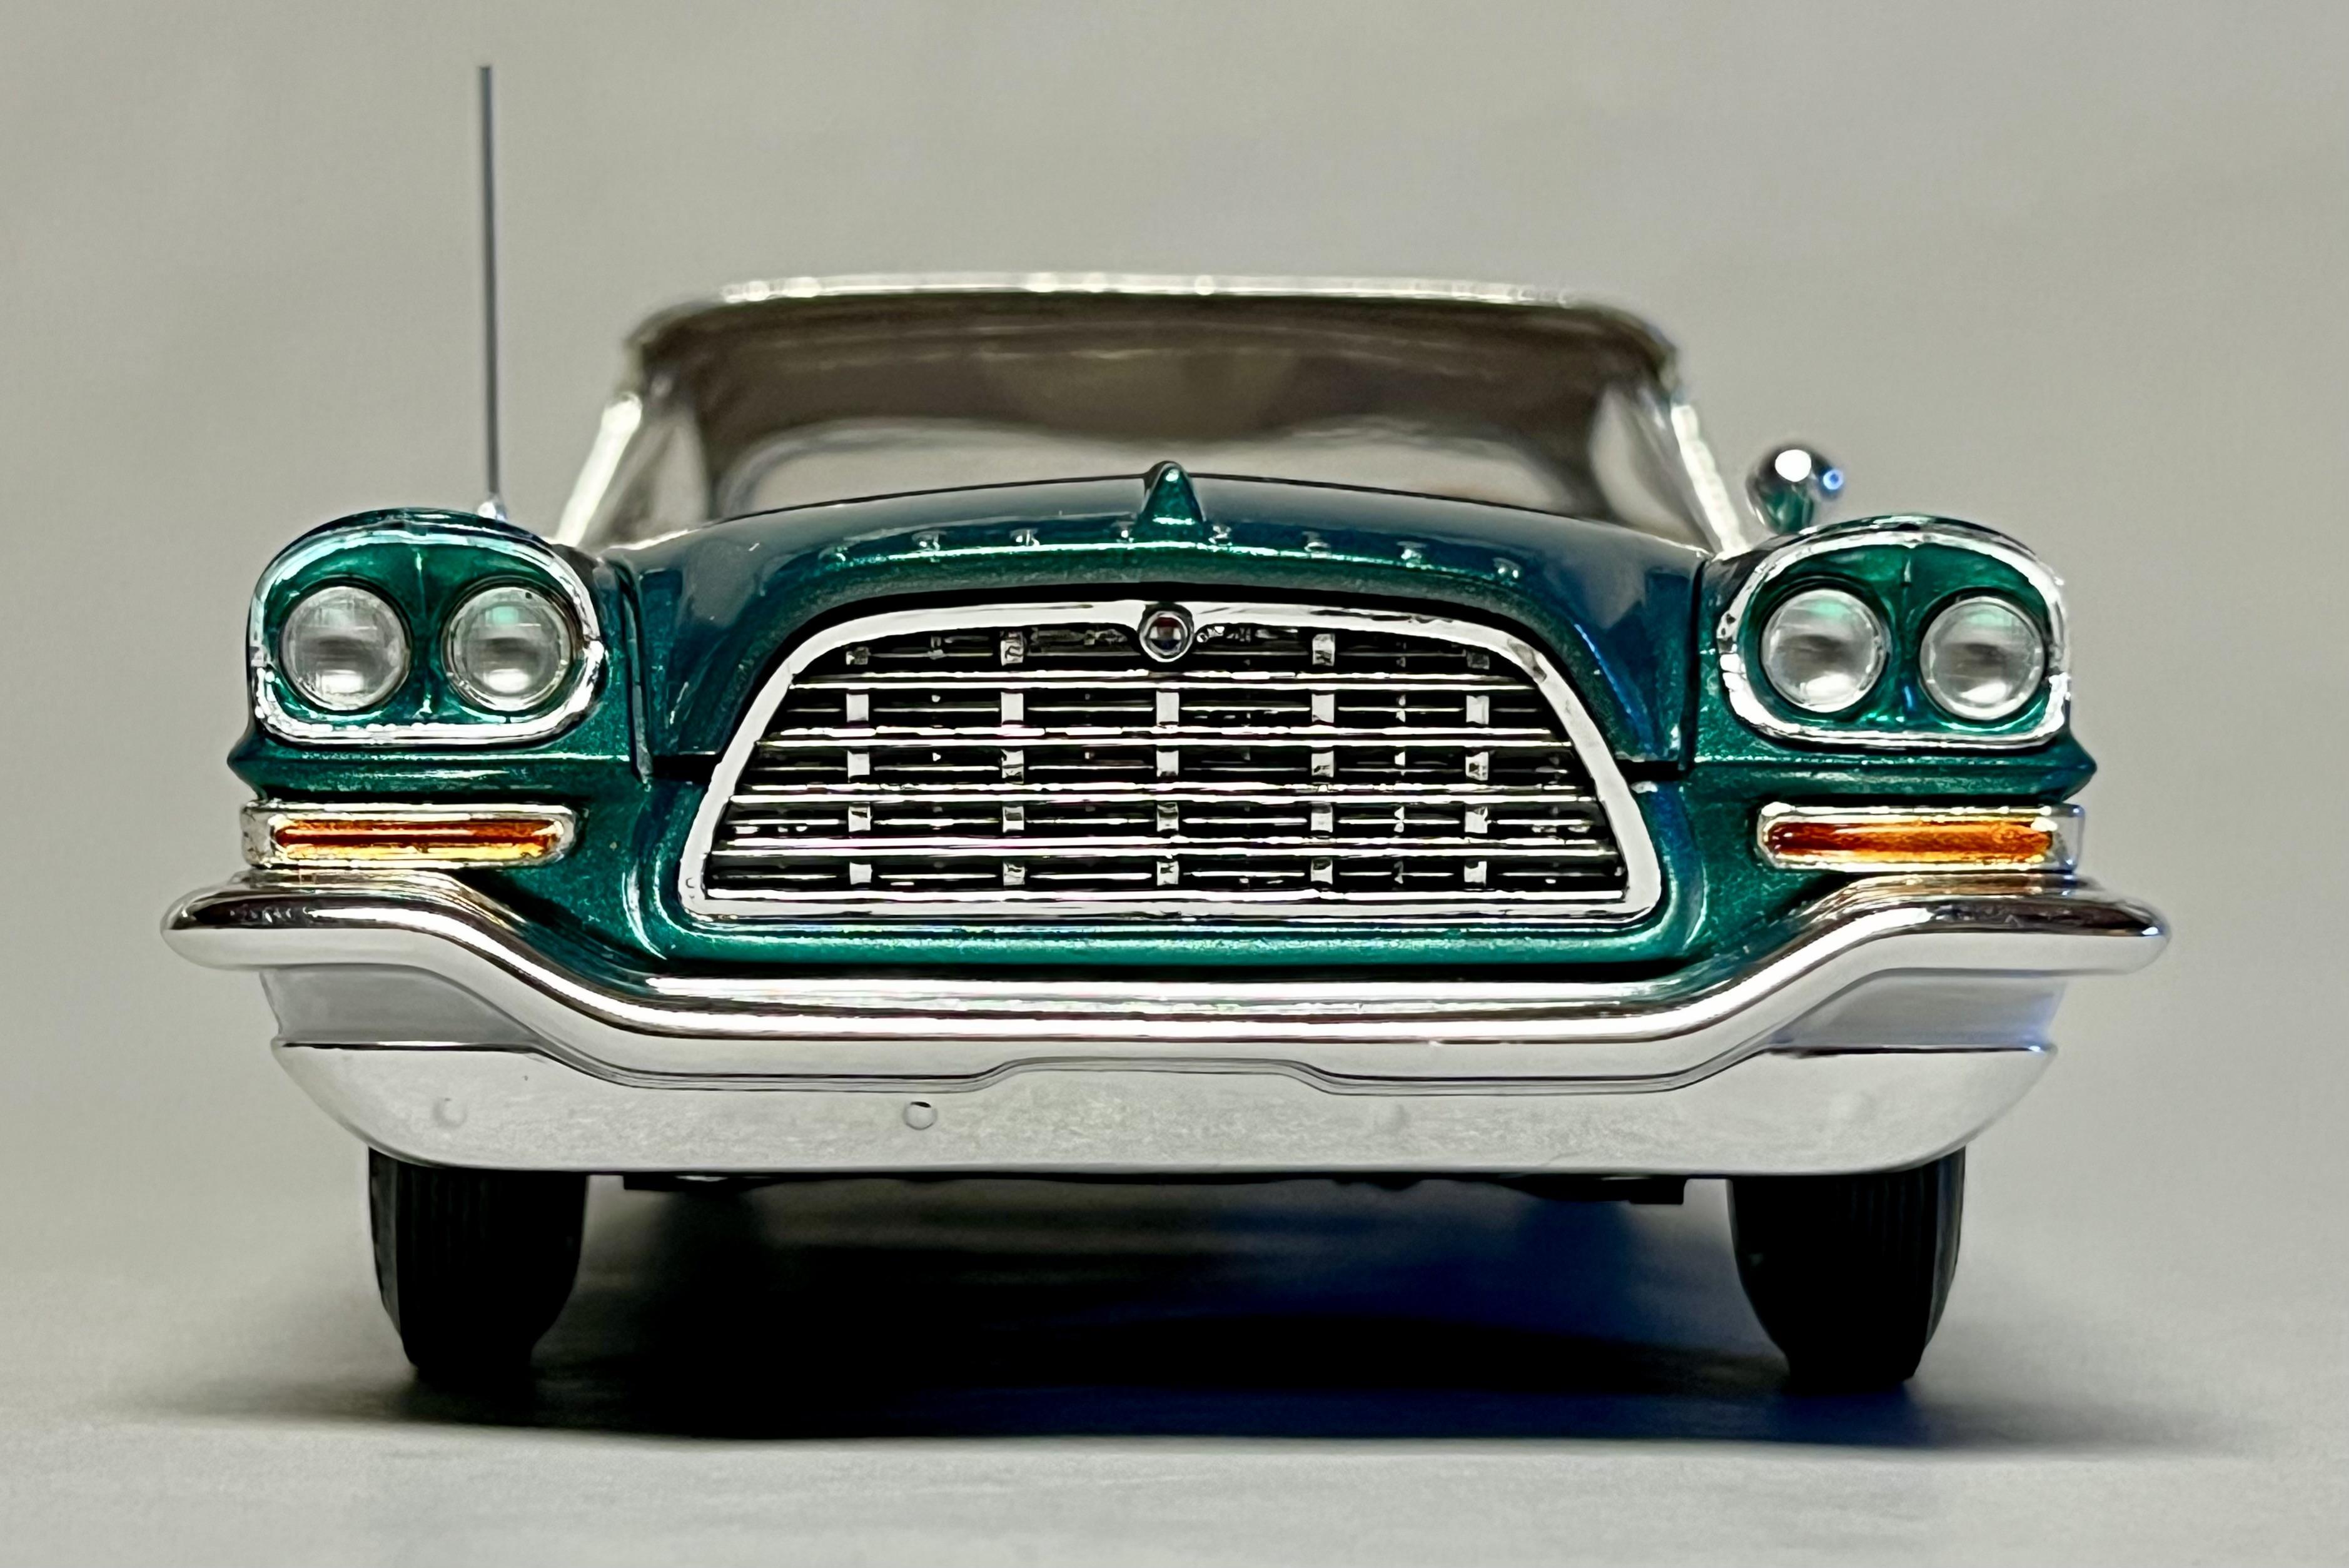
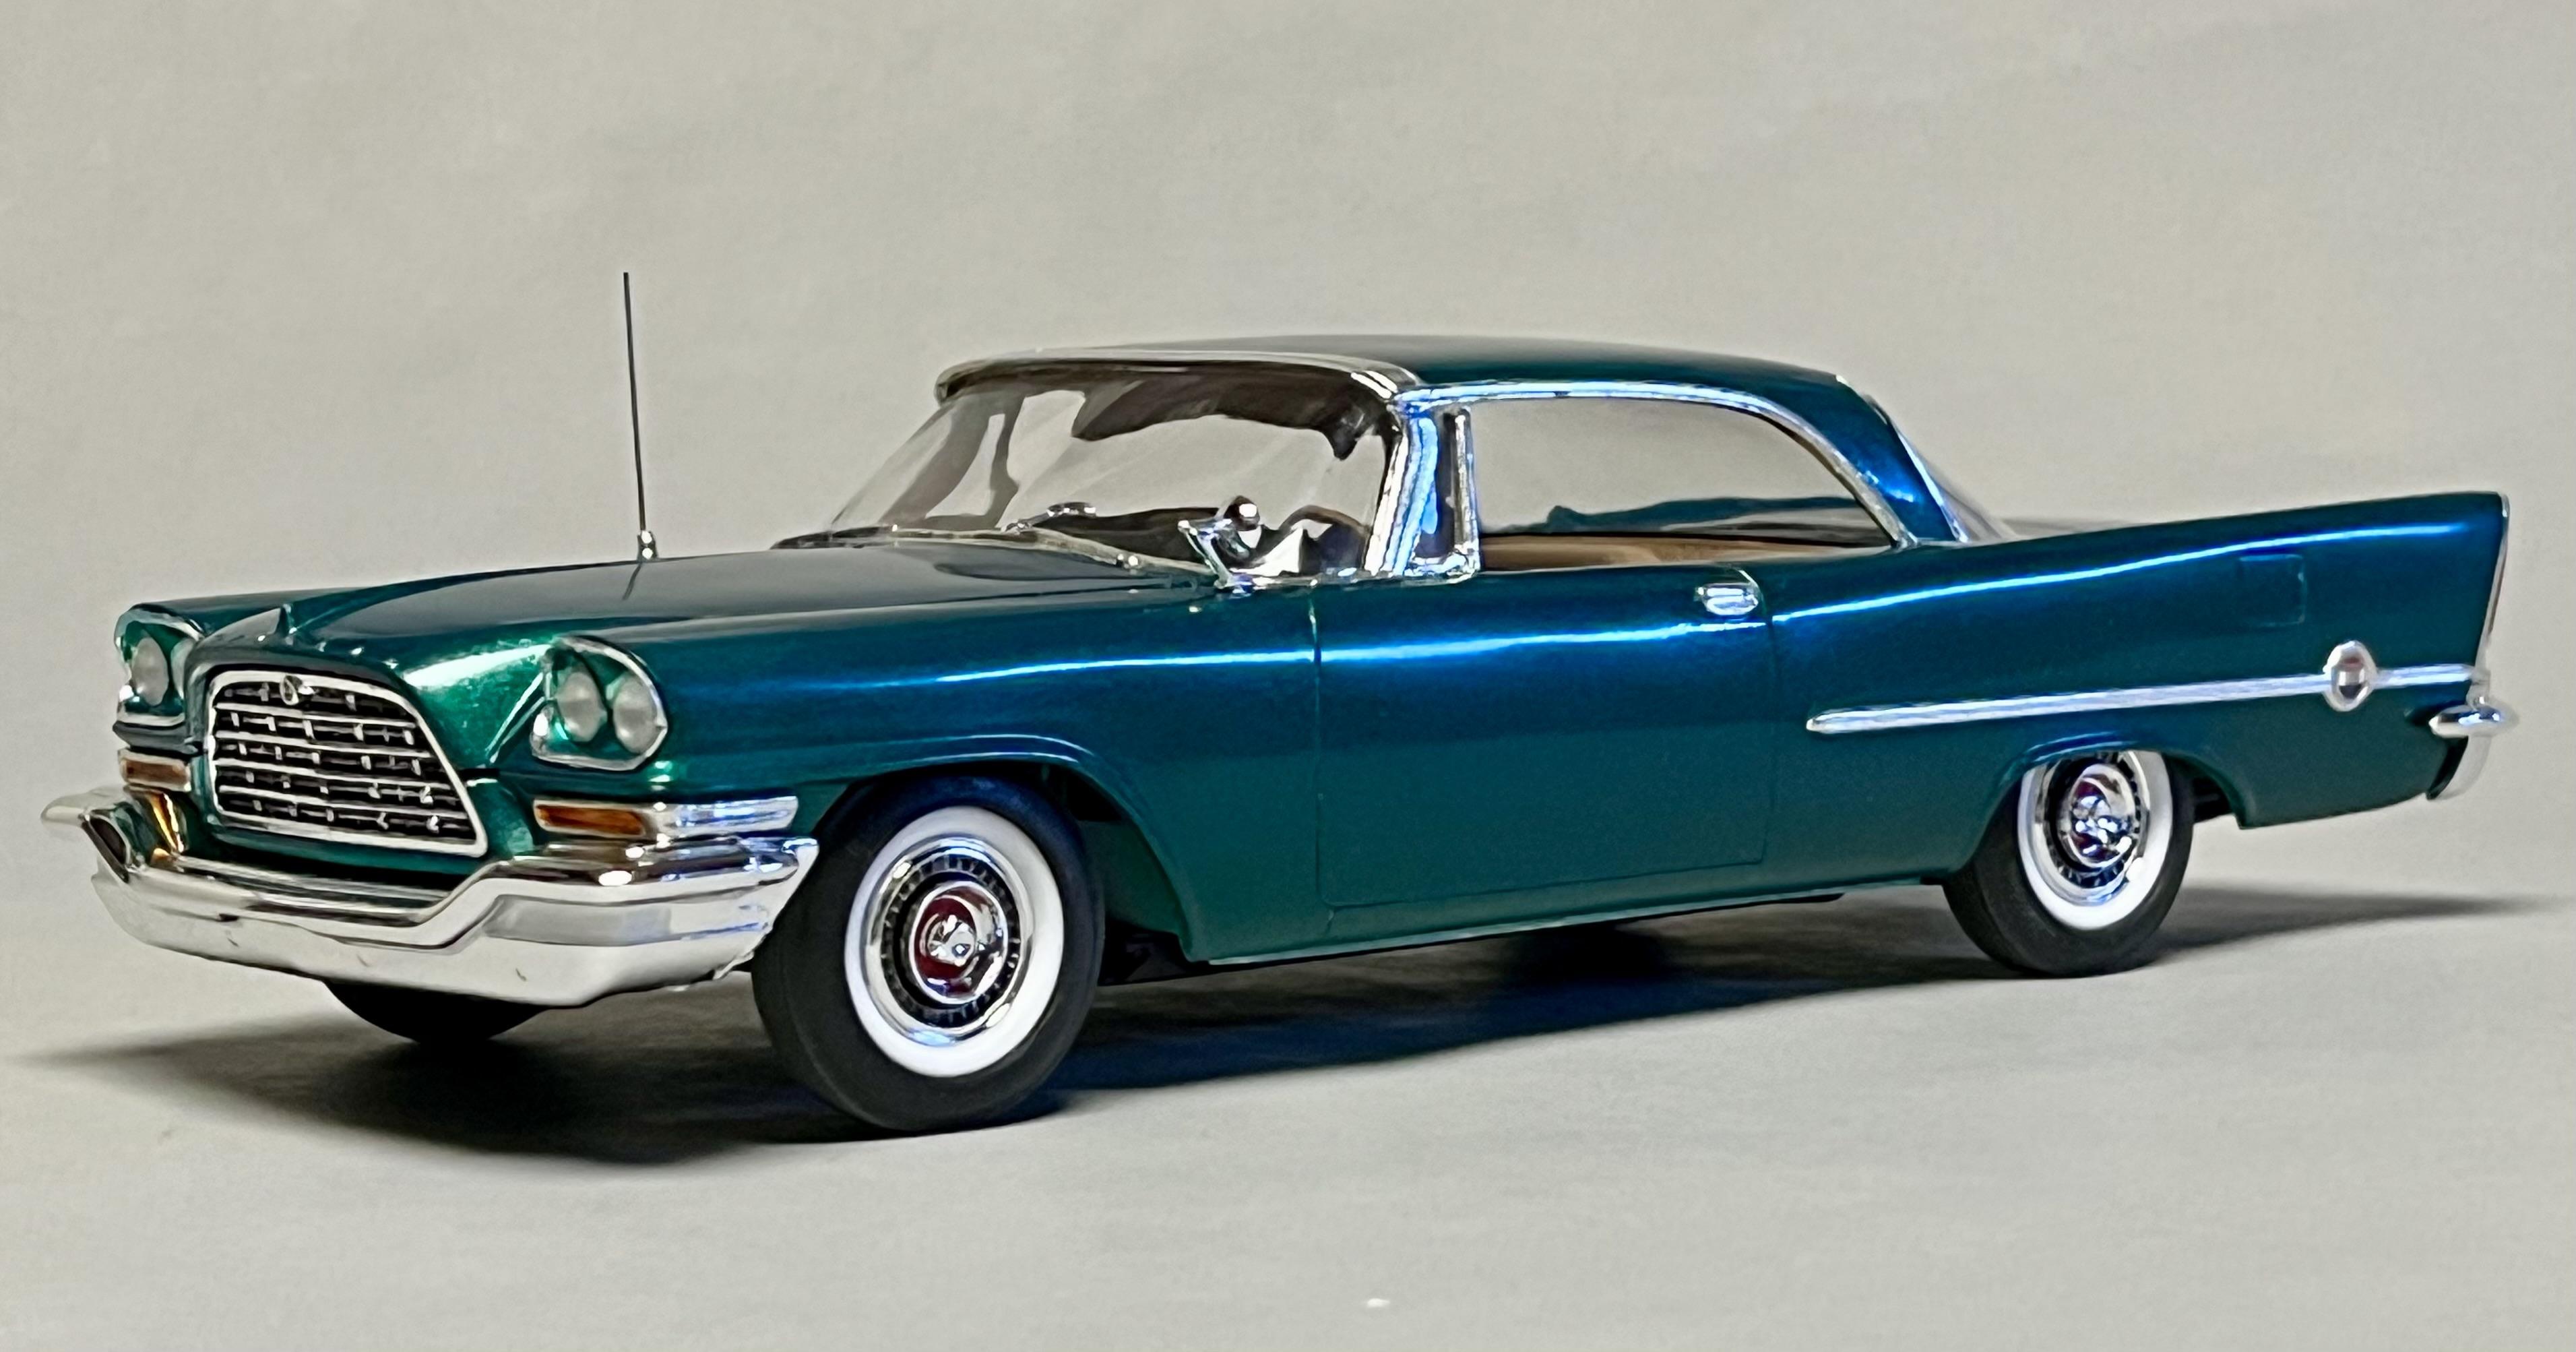
Nice job Phil, love a 300 in red (I posted the green one last week) and the detail painting in the engine bay is particularly nice. The silver (stainless steel) paint at the rear of the roof is reminiscent of Chrysler Imperials of the late 50’s. Love this AMT kit and yours makes me want to build another one in red.
-
Absolutely! I can see Don Draper (Mad Men) cruising through Manhattan in this beast (although I think he drove a blue Caddie coupe IIRC). Thanks Tim. Painting the inner areas of these chrome headlight inserts actually wasn’t that hard to do. I punch out round tape masks for each of the headlight bezels using hypo tube punches (made years ago, I use these a lot for rounds/ fillets in masking) and then just applied liquid masks around the parimeter of each insert. I then airbrushed the green base paint and then removed the masking and did a few Molotow touch-ups where the chrome plating was damaged. Thank you all for all the other observations and nice comments above, it’s always very helpful and encouraging for me to share builds on this forum! John
-
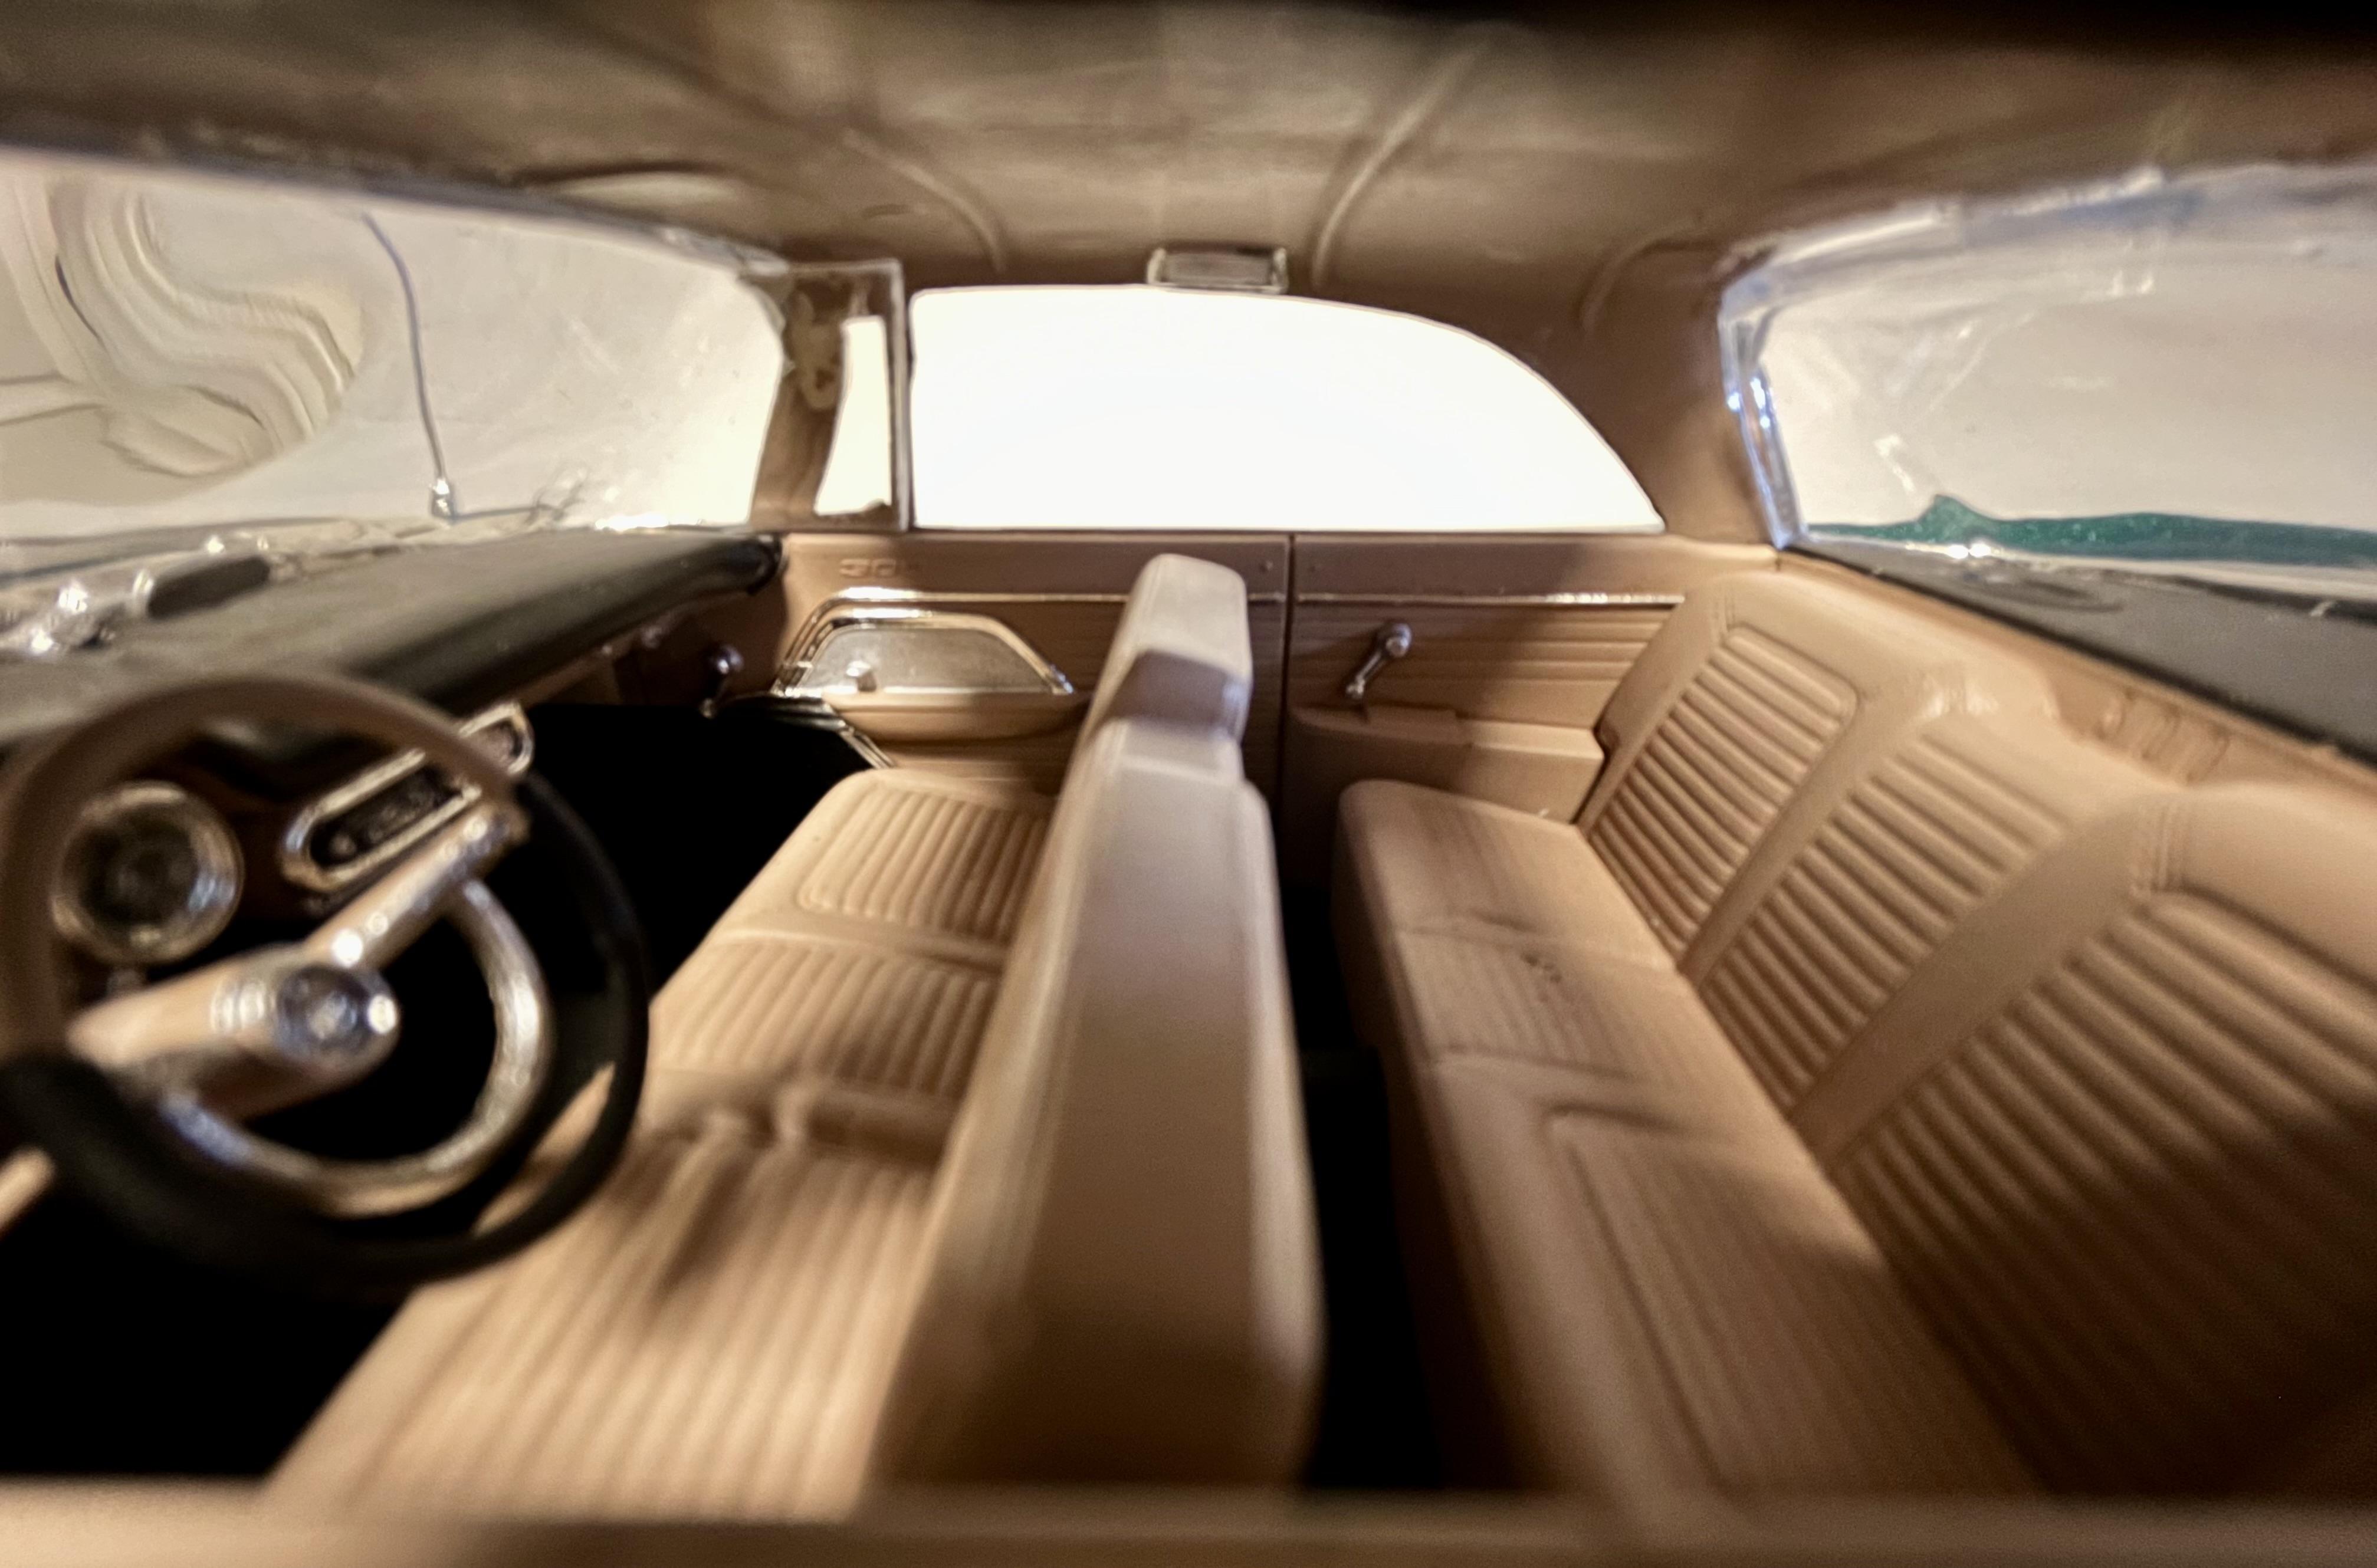
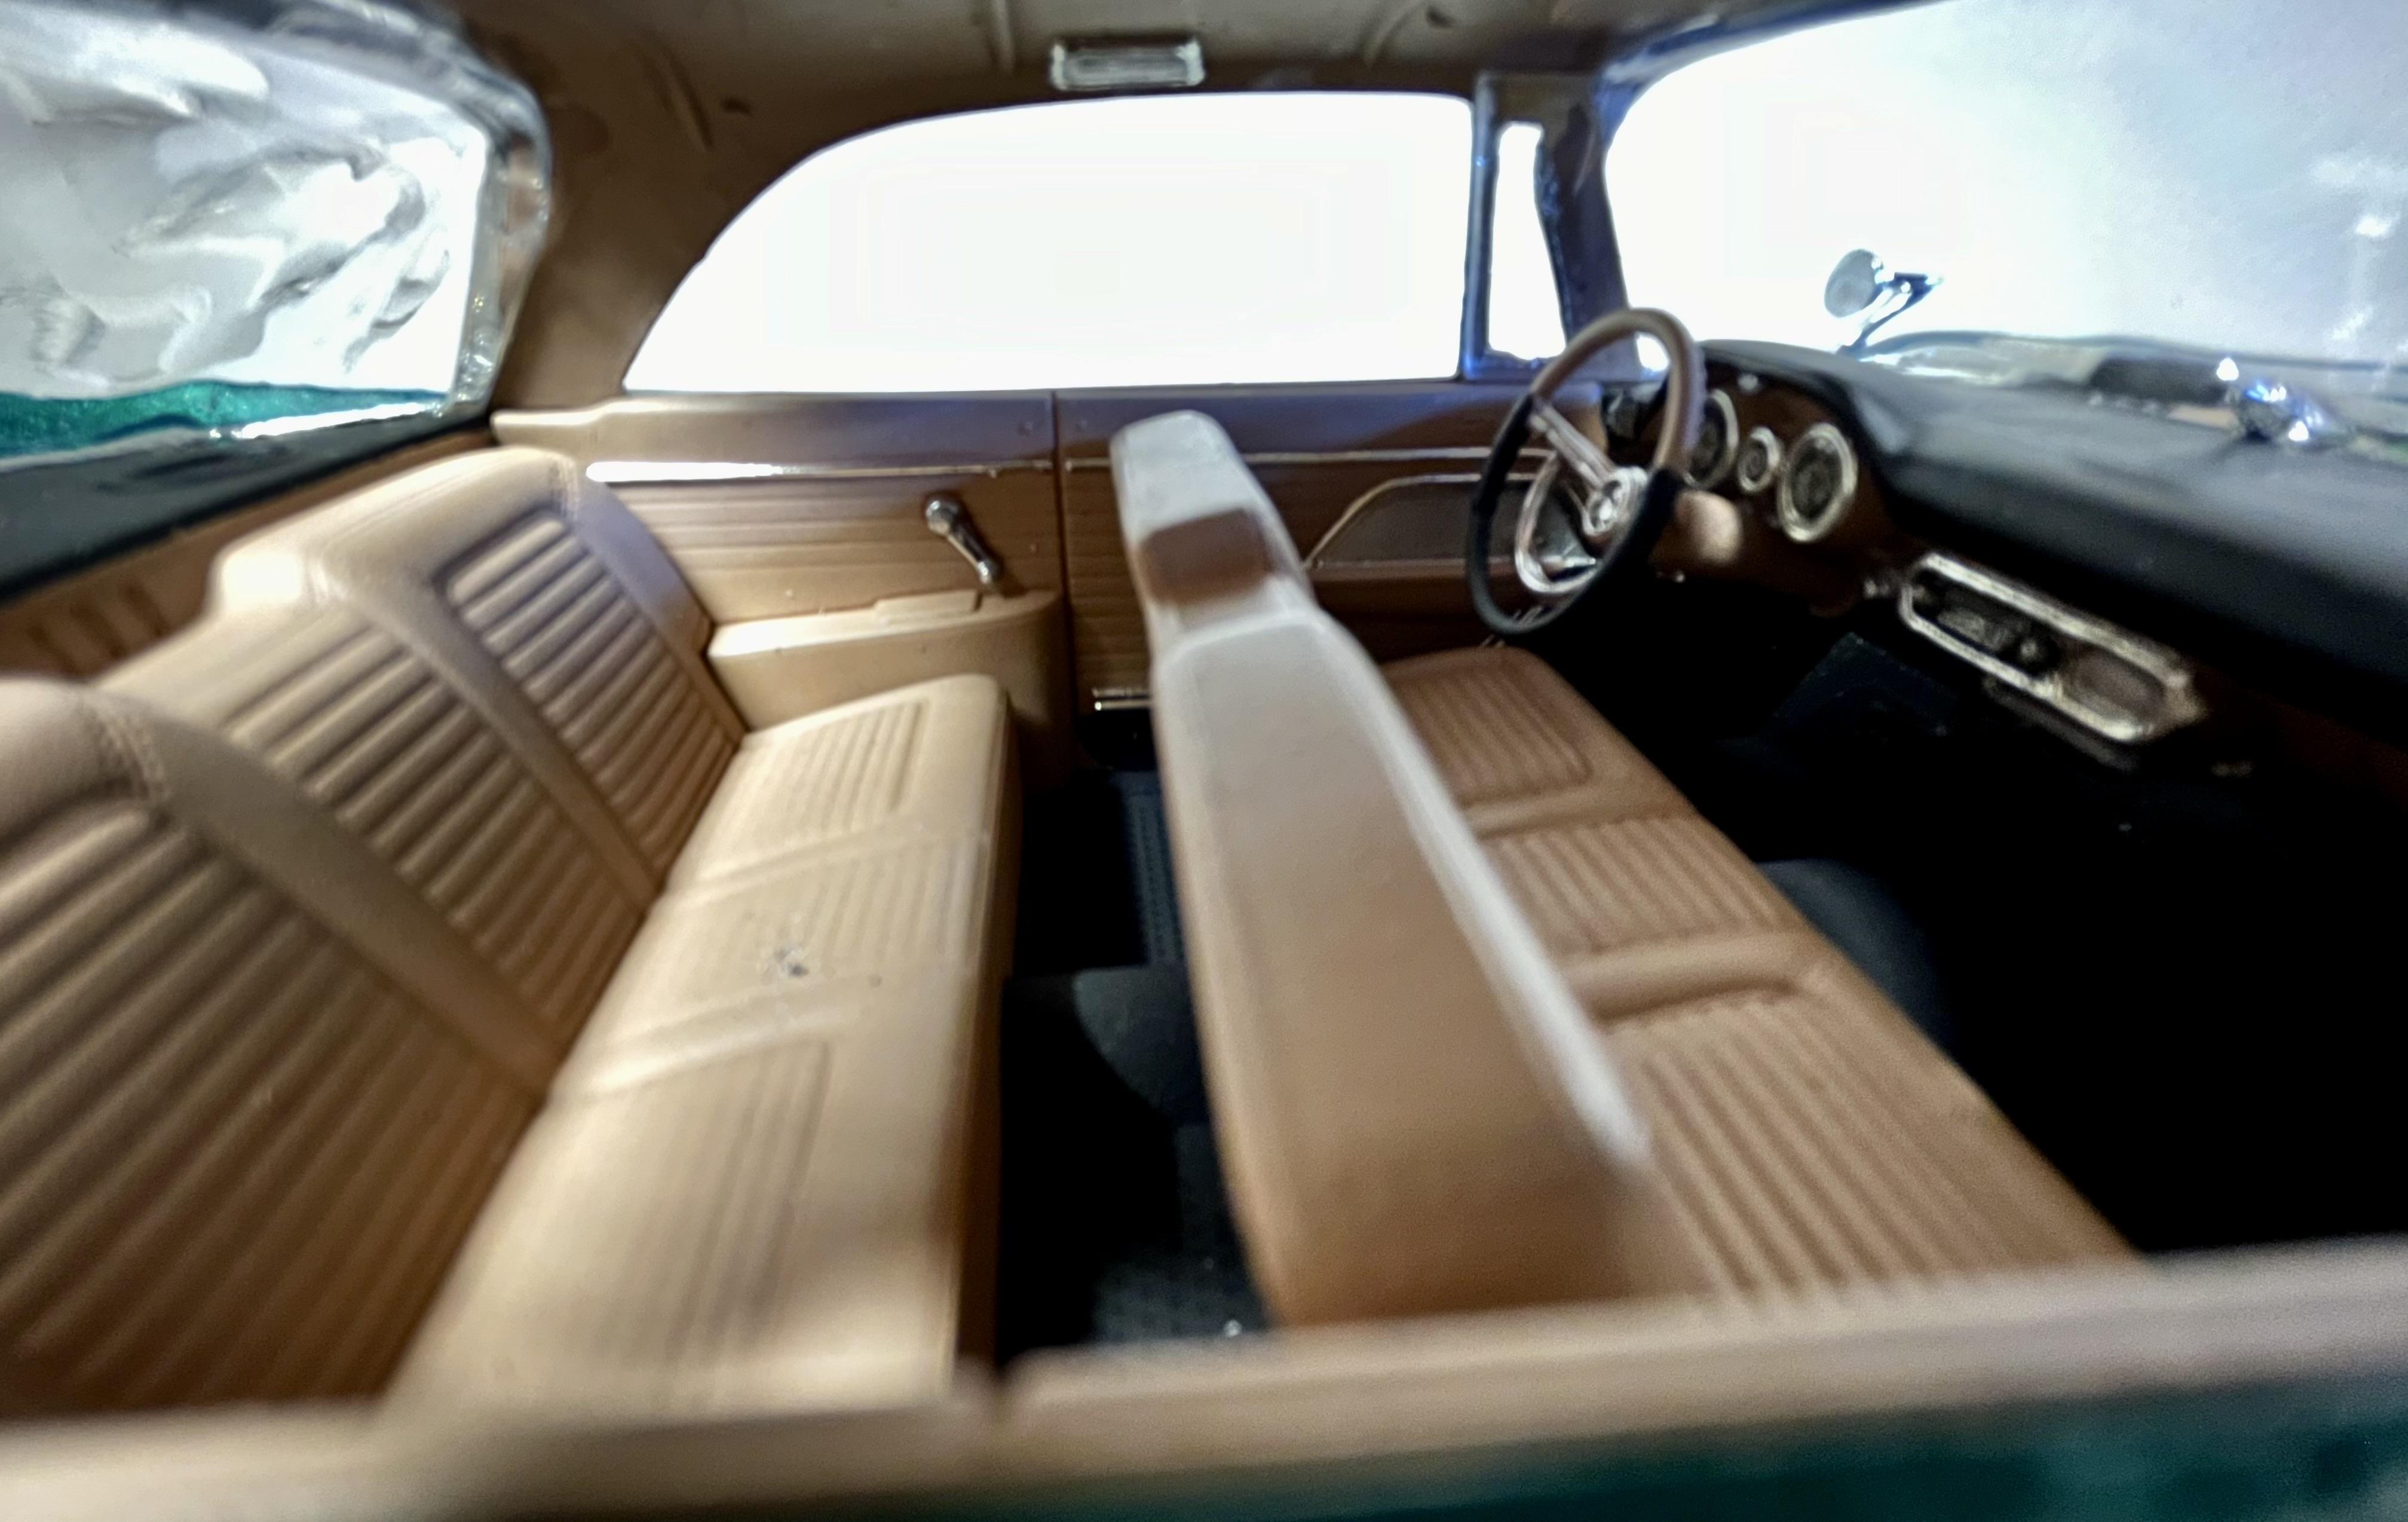
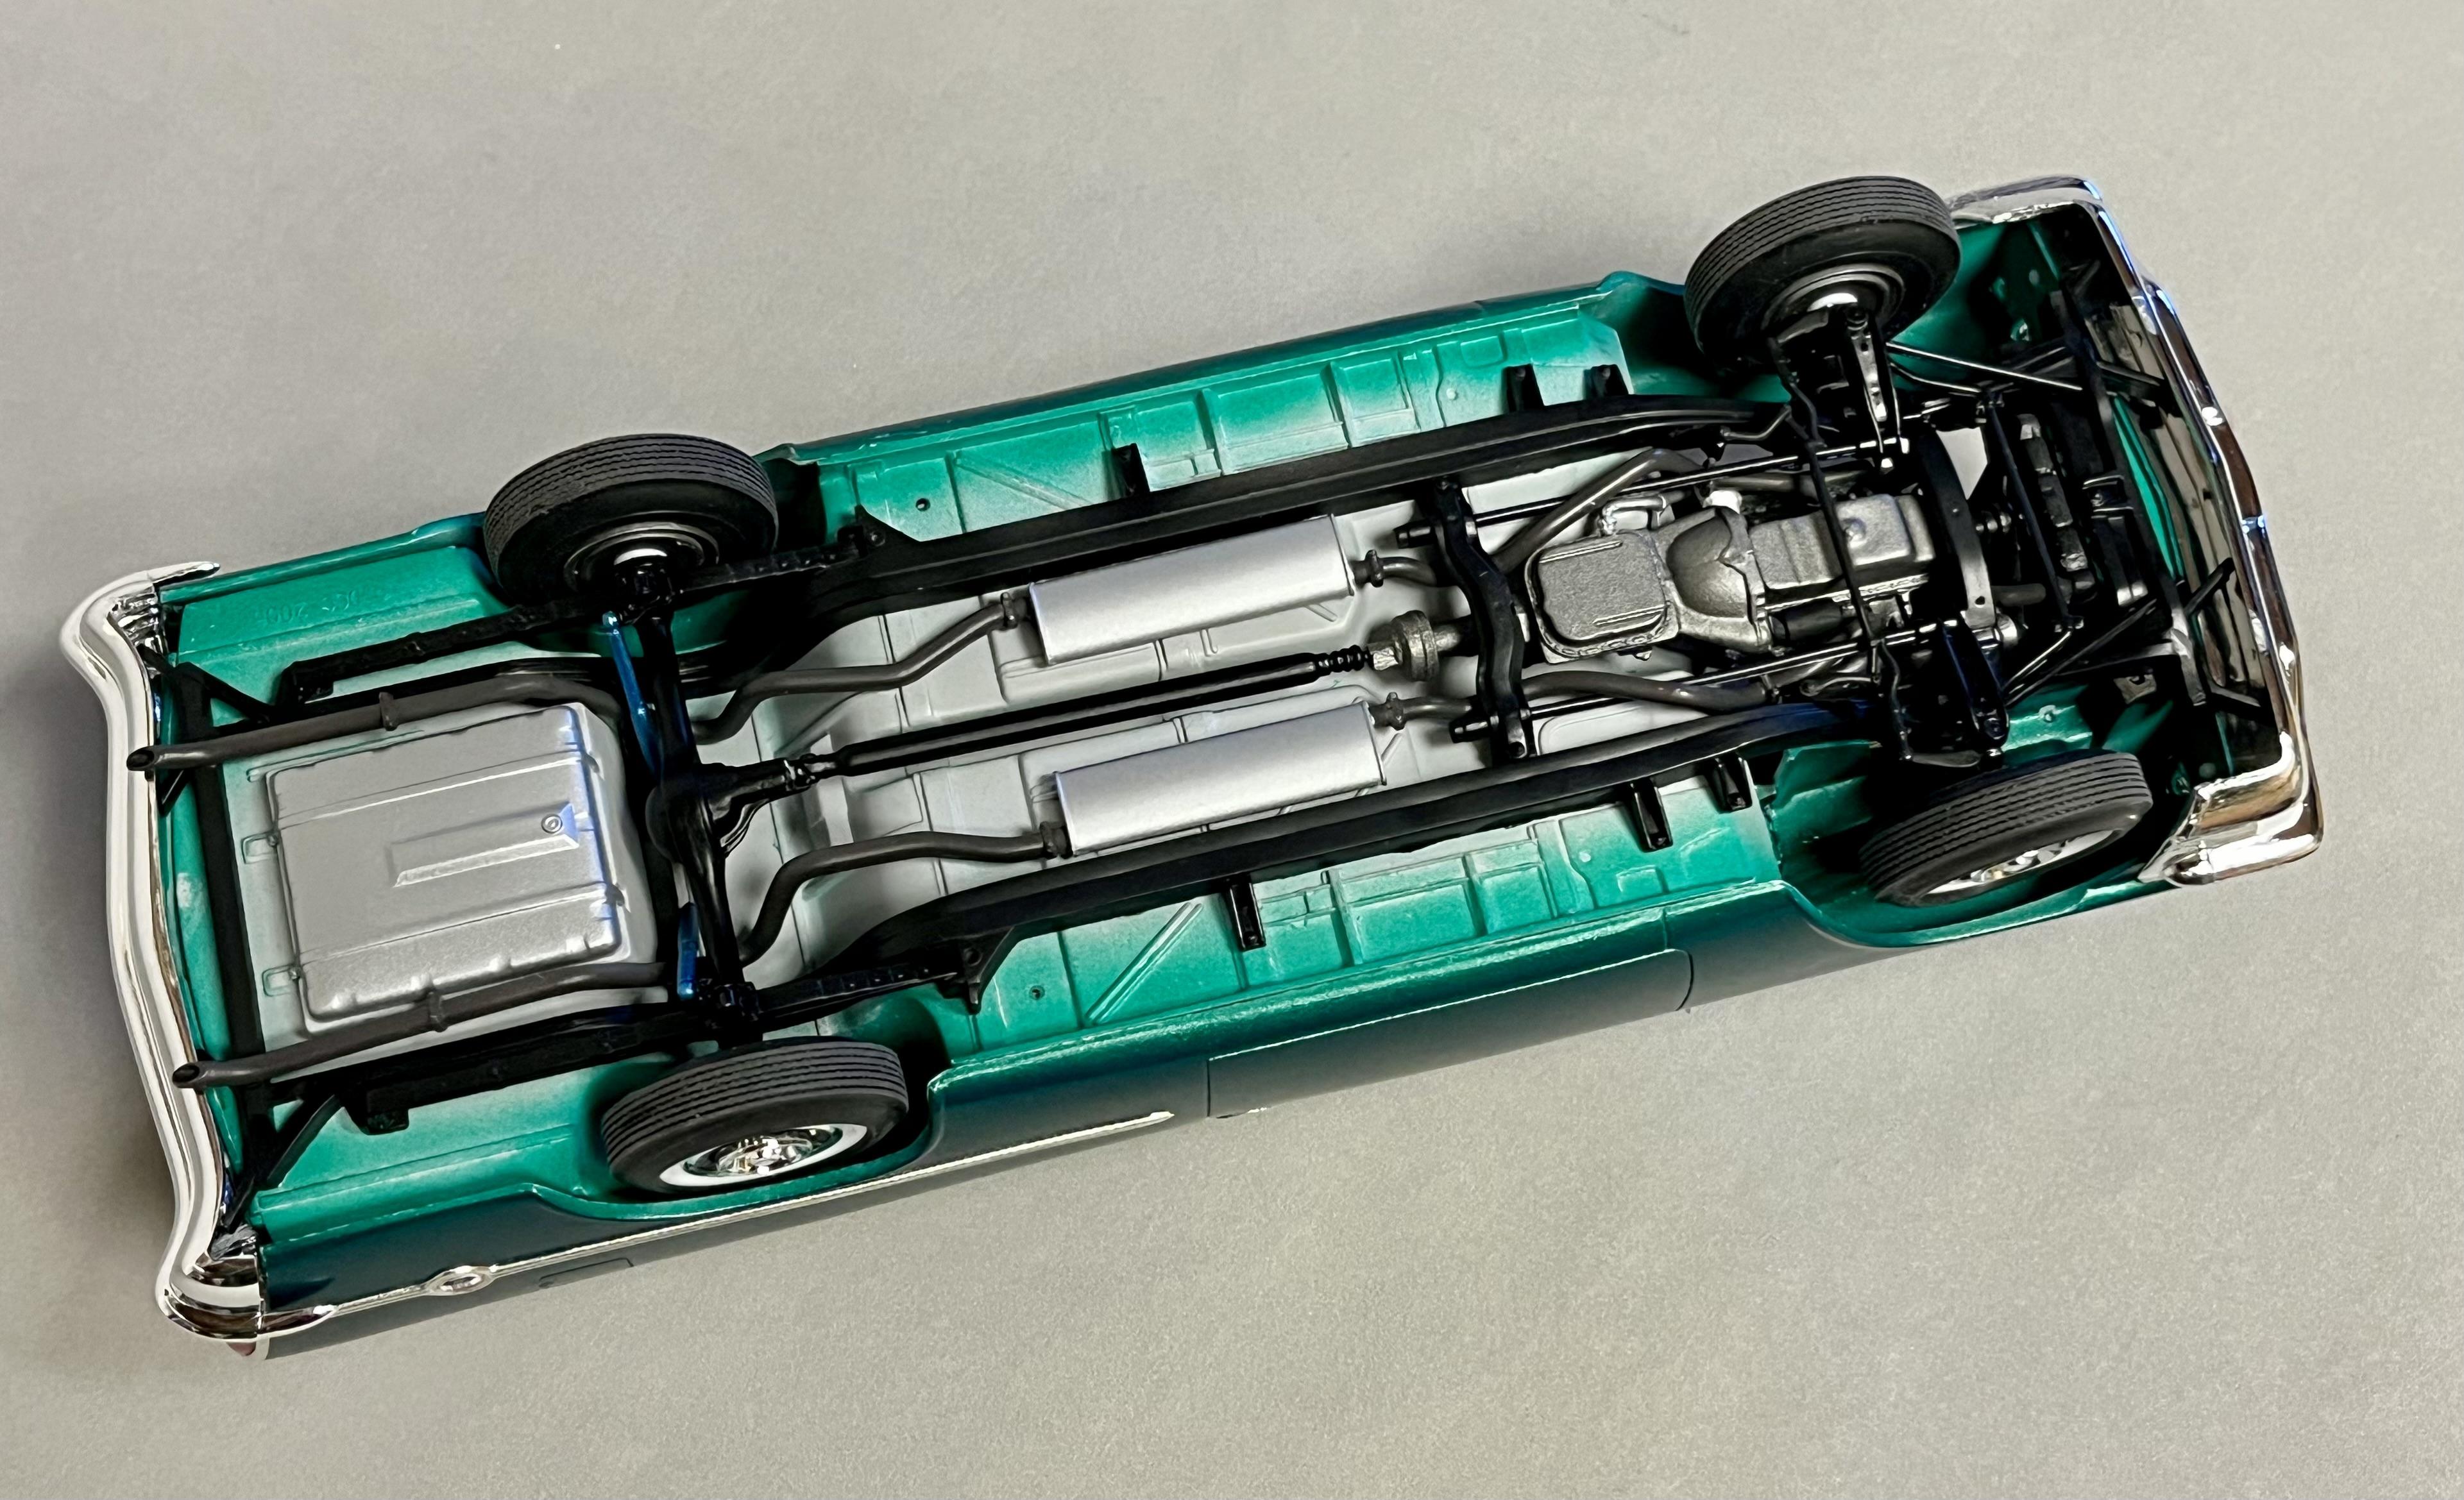
This was a fun quick effort mostly built OOB of a kit I read good things about. The green I used is called “Parade Green”, a Chrysler factory color in ‘57, for which I used MCW base lacquer with Gunze Mr. Color GX100 lacquer clear coat, all other colors done with Tamiya acrylics. I tried wicking red paint into the circular recess in the kit chrome wheels but it was impossible for me to achieve a clean concentric result so I punched some rings out of masking tape and airbrushed them with gloss red Tamiya acrylic and then just stuck them on like stickers, much better result! The one problem I had with this kit was getting the front chassis + interior to fully seat within the body. Most likely due to error(s) on my part. I ended up having to squeeze the front end assembly together (causing the chassis to bend upwards), bond it with liquid cement and CA and tape it tight overnight. Not the first AMT kit that I have had this issue with (looking at you ‘62 Bel Air!). Despite this issue, I’m happy with the finish and really like the look of this shade of green on this car. Cheers, John some outdoor shots:
-
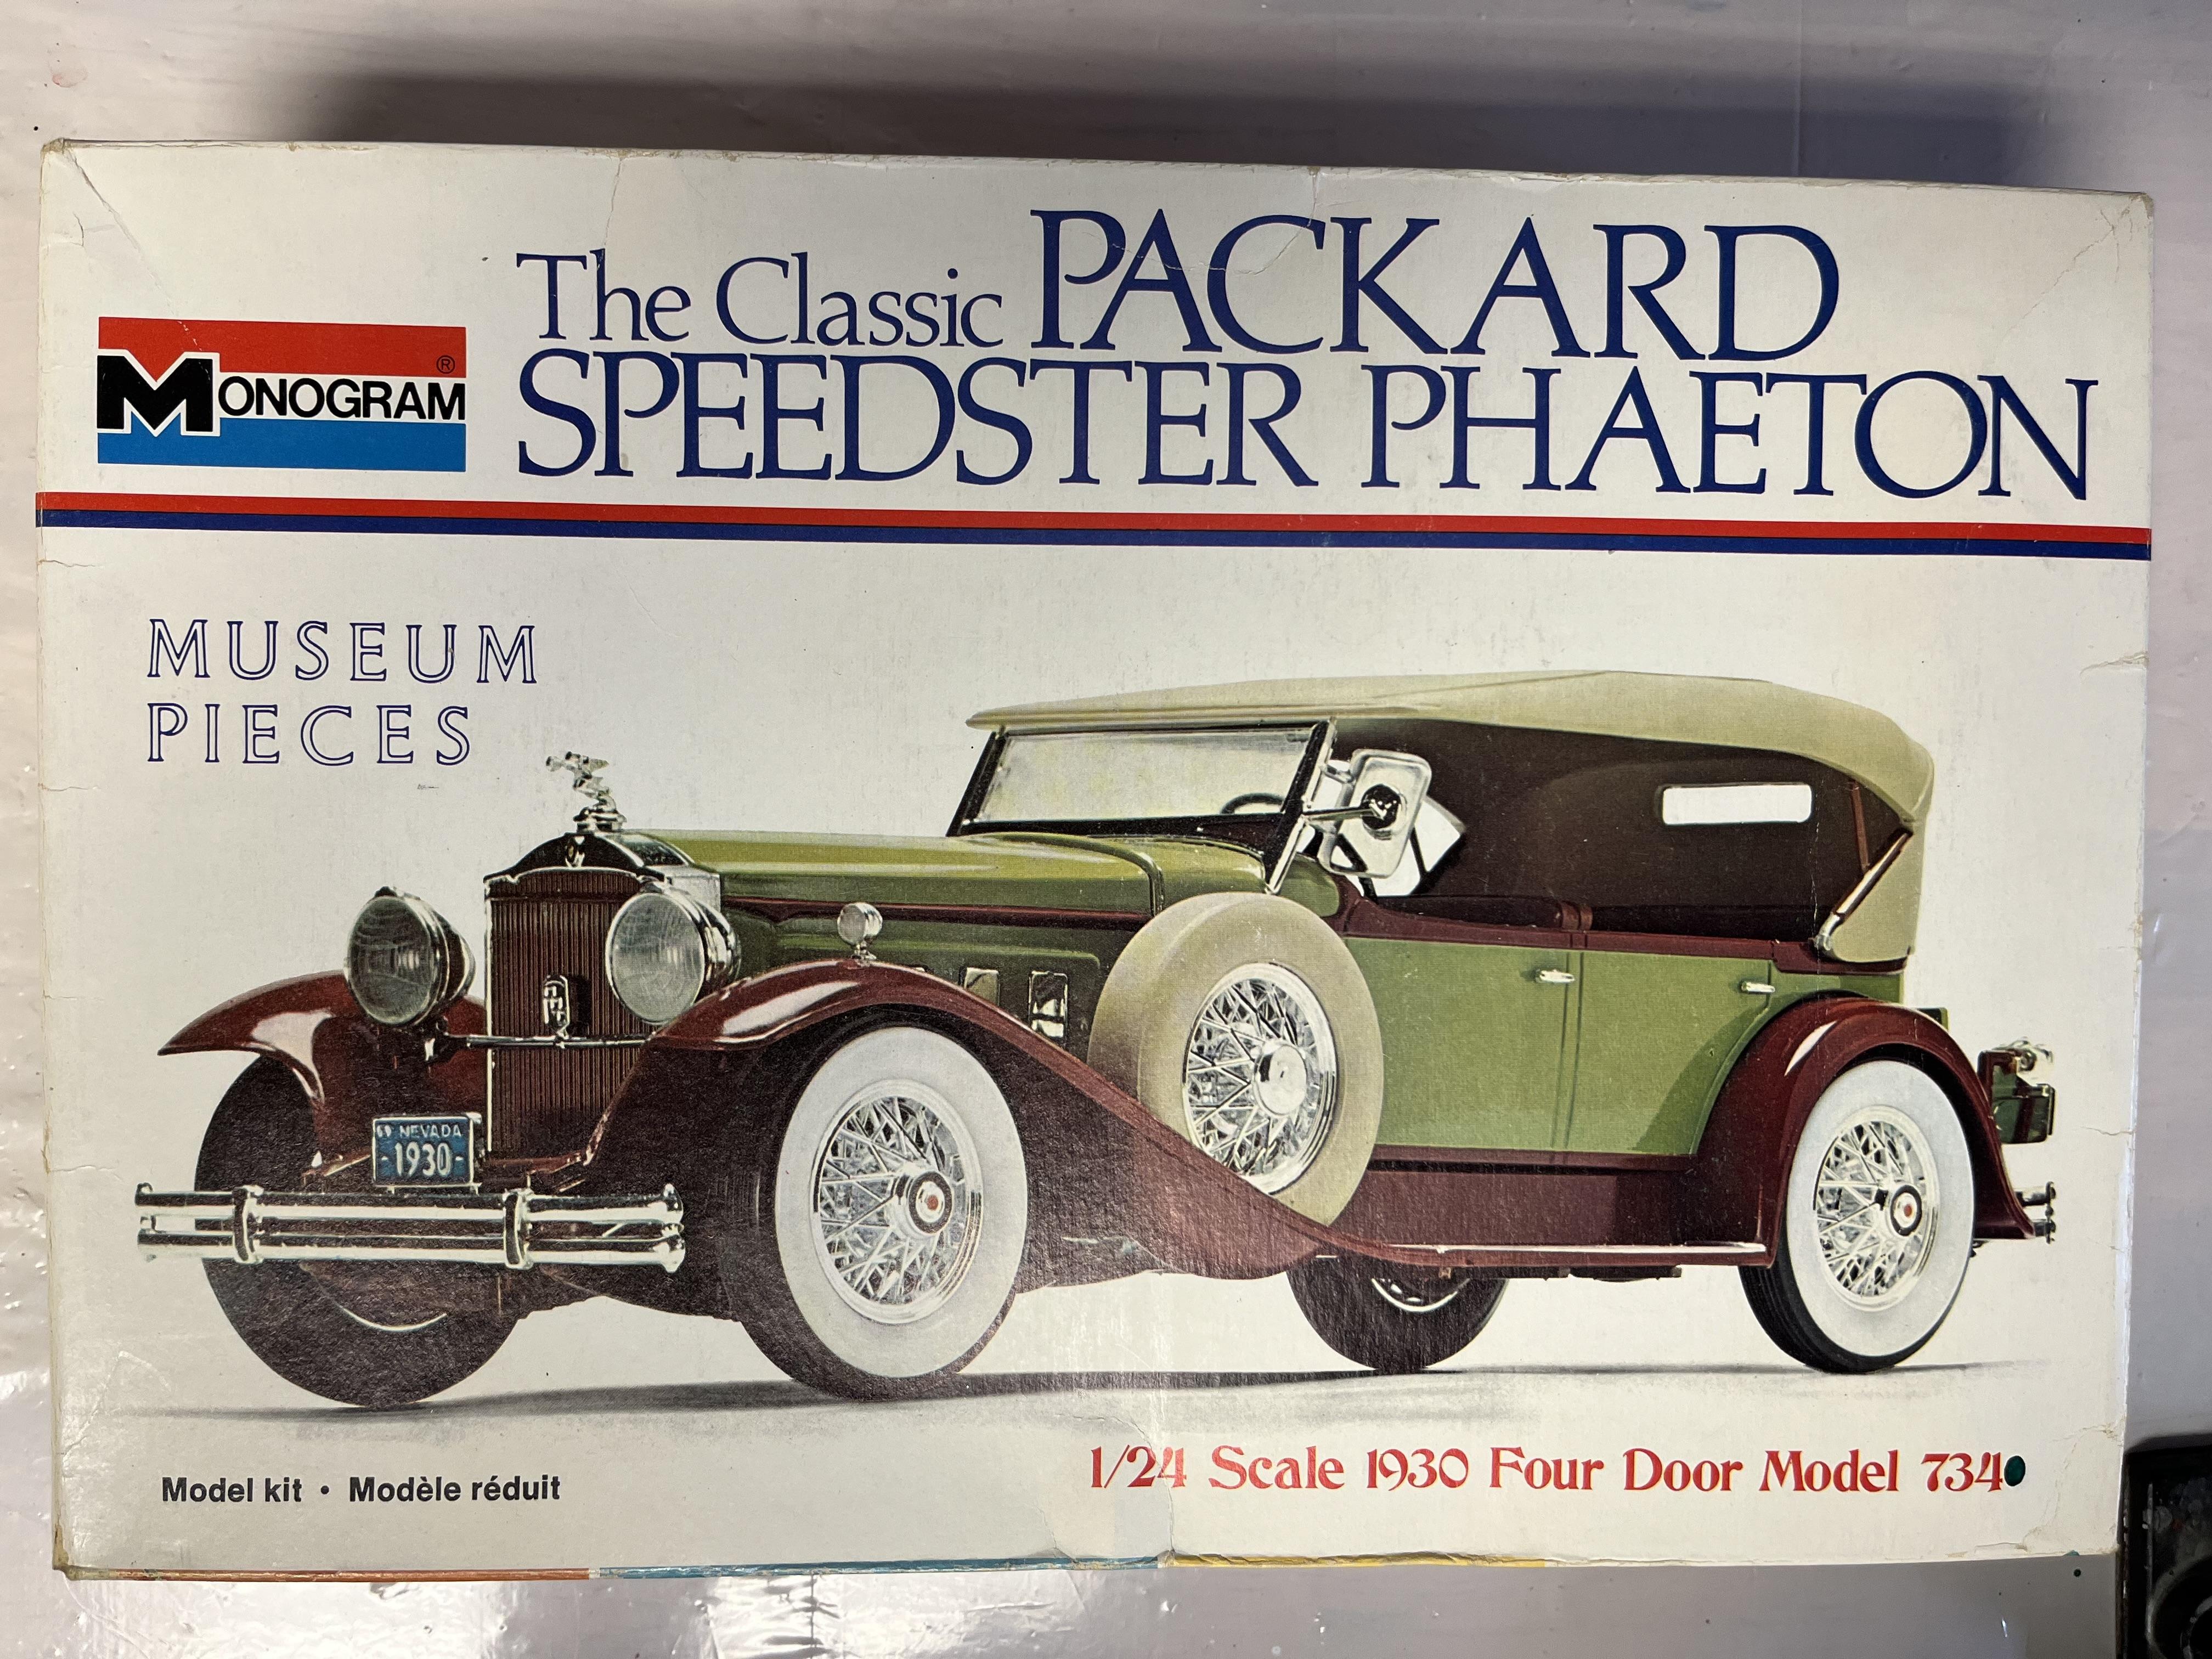
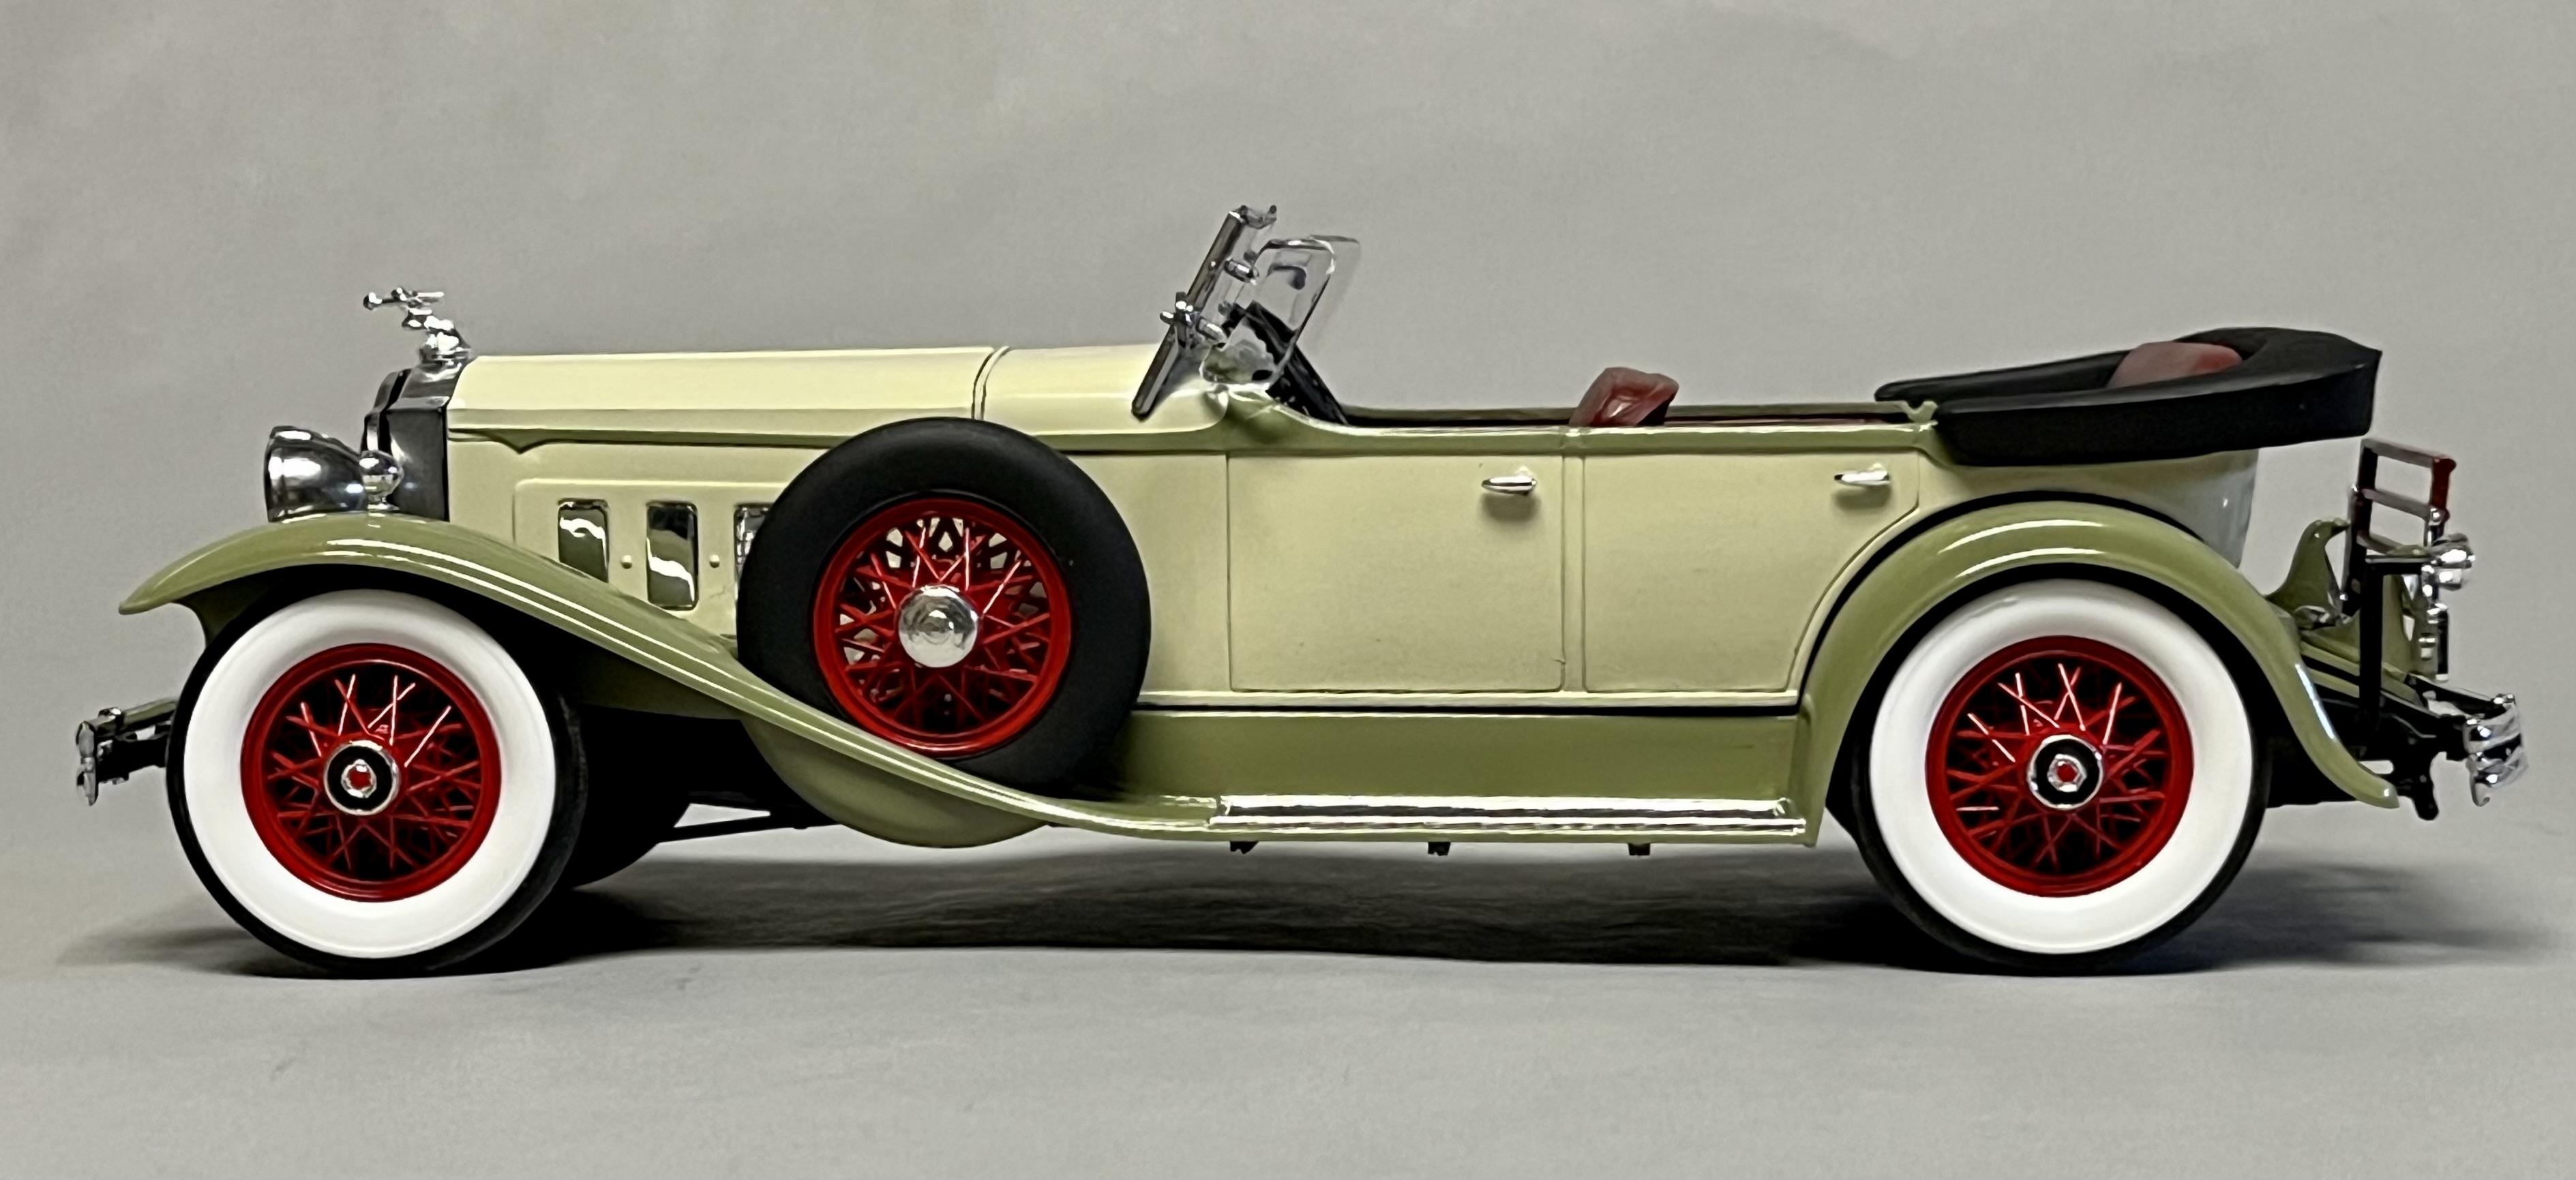
Thank you guys for all the nice comments! I’ve been shopping online for more of these Monogram classic kits and thinking about picking up the Jo-Han Caddies as well. I’ve read that these classic car kits never sold well compared to other car kits so I’m surprised that they are so plentifully after 50 -60 years and most are still available in the $25 - $40 range. Another reason to buy and build more of this genre!
-
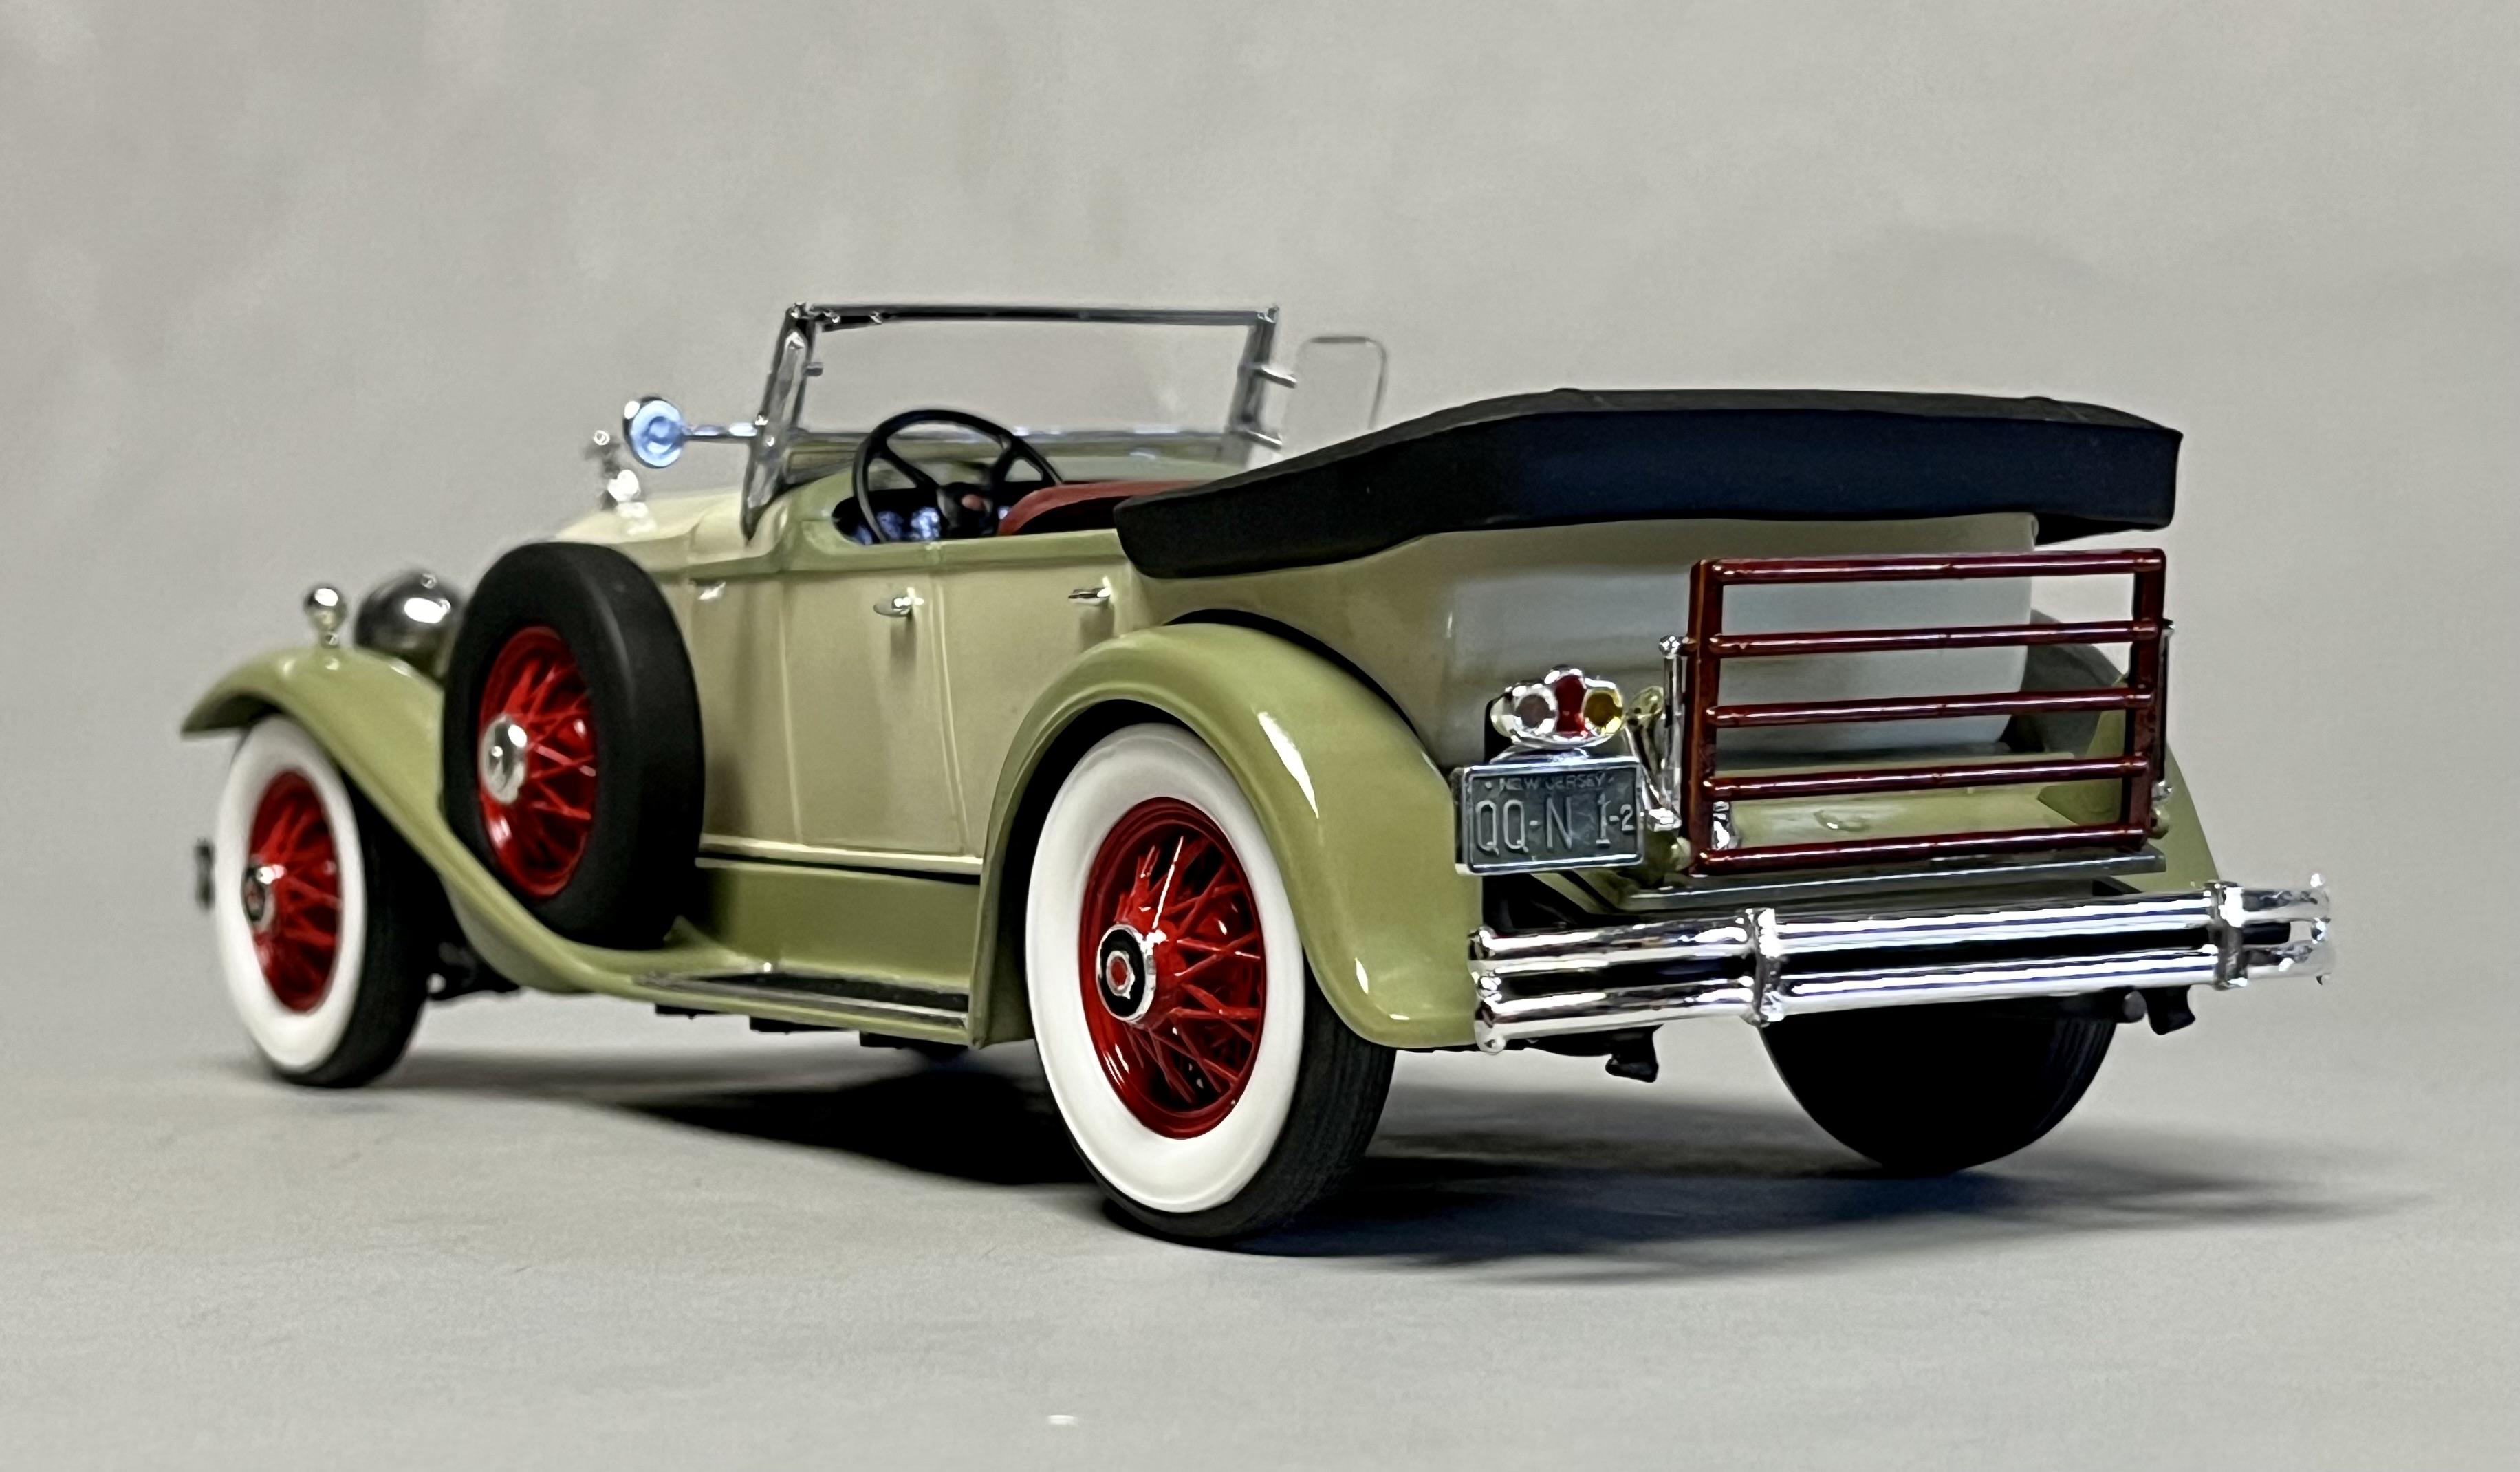
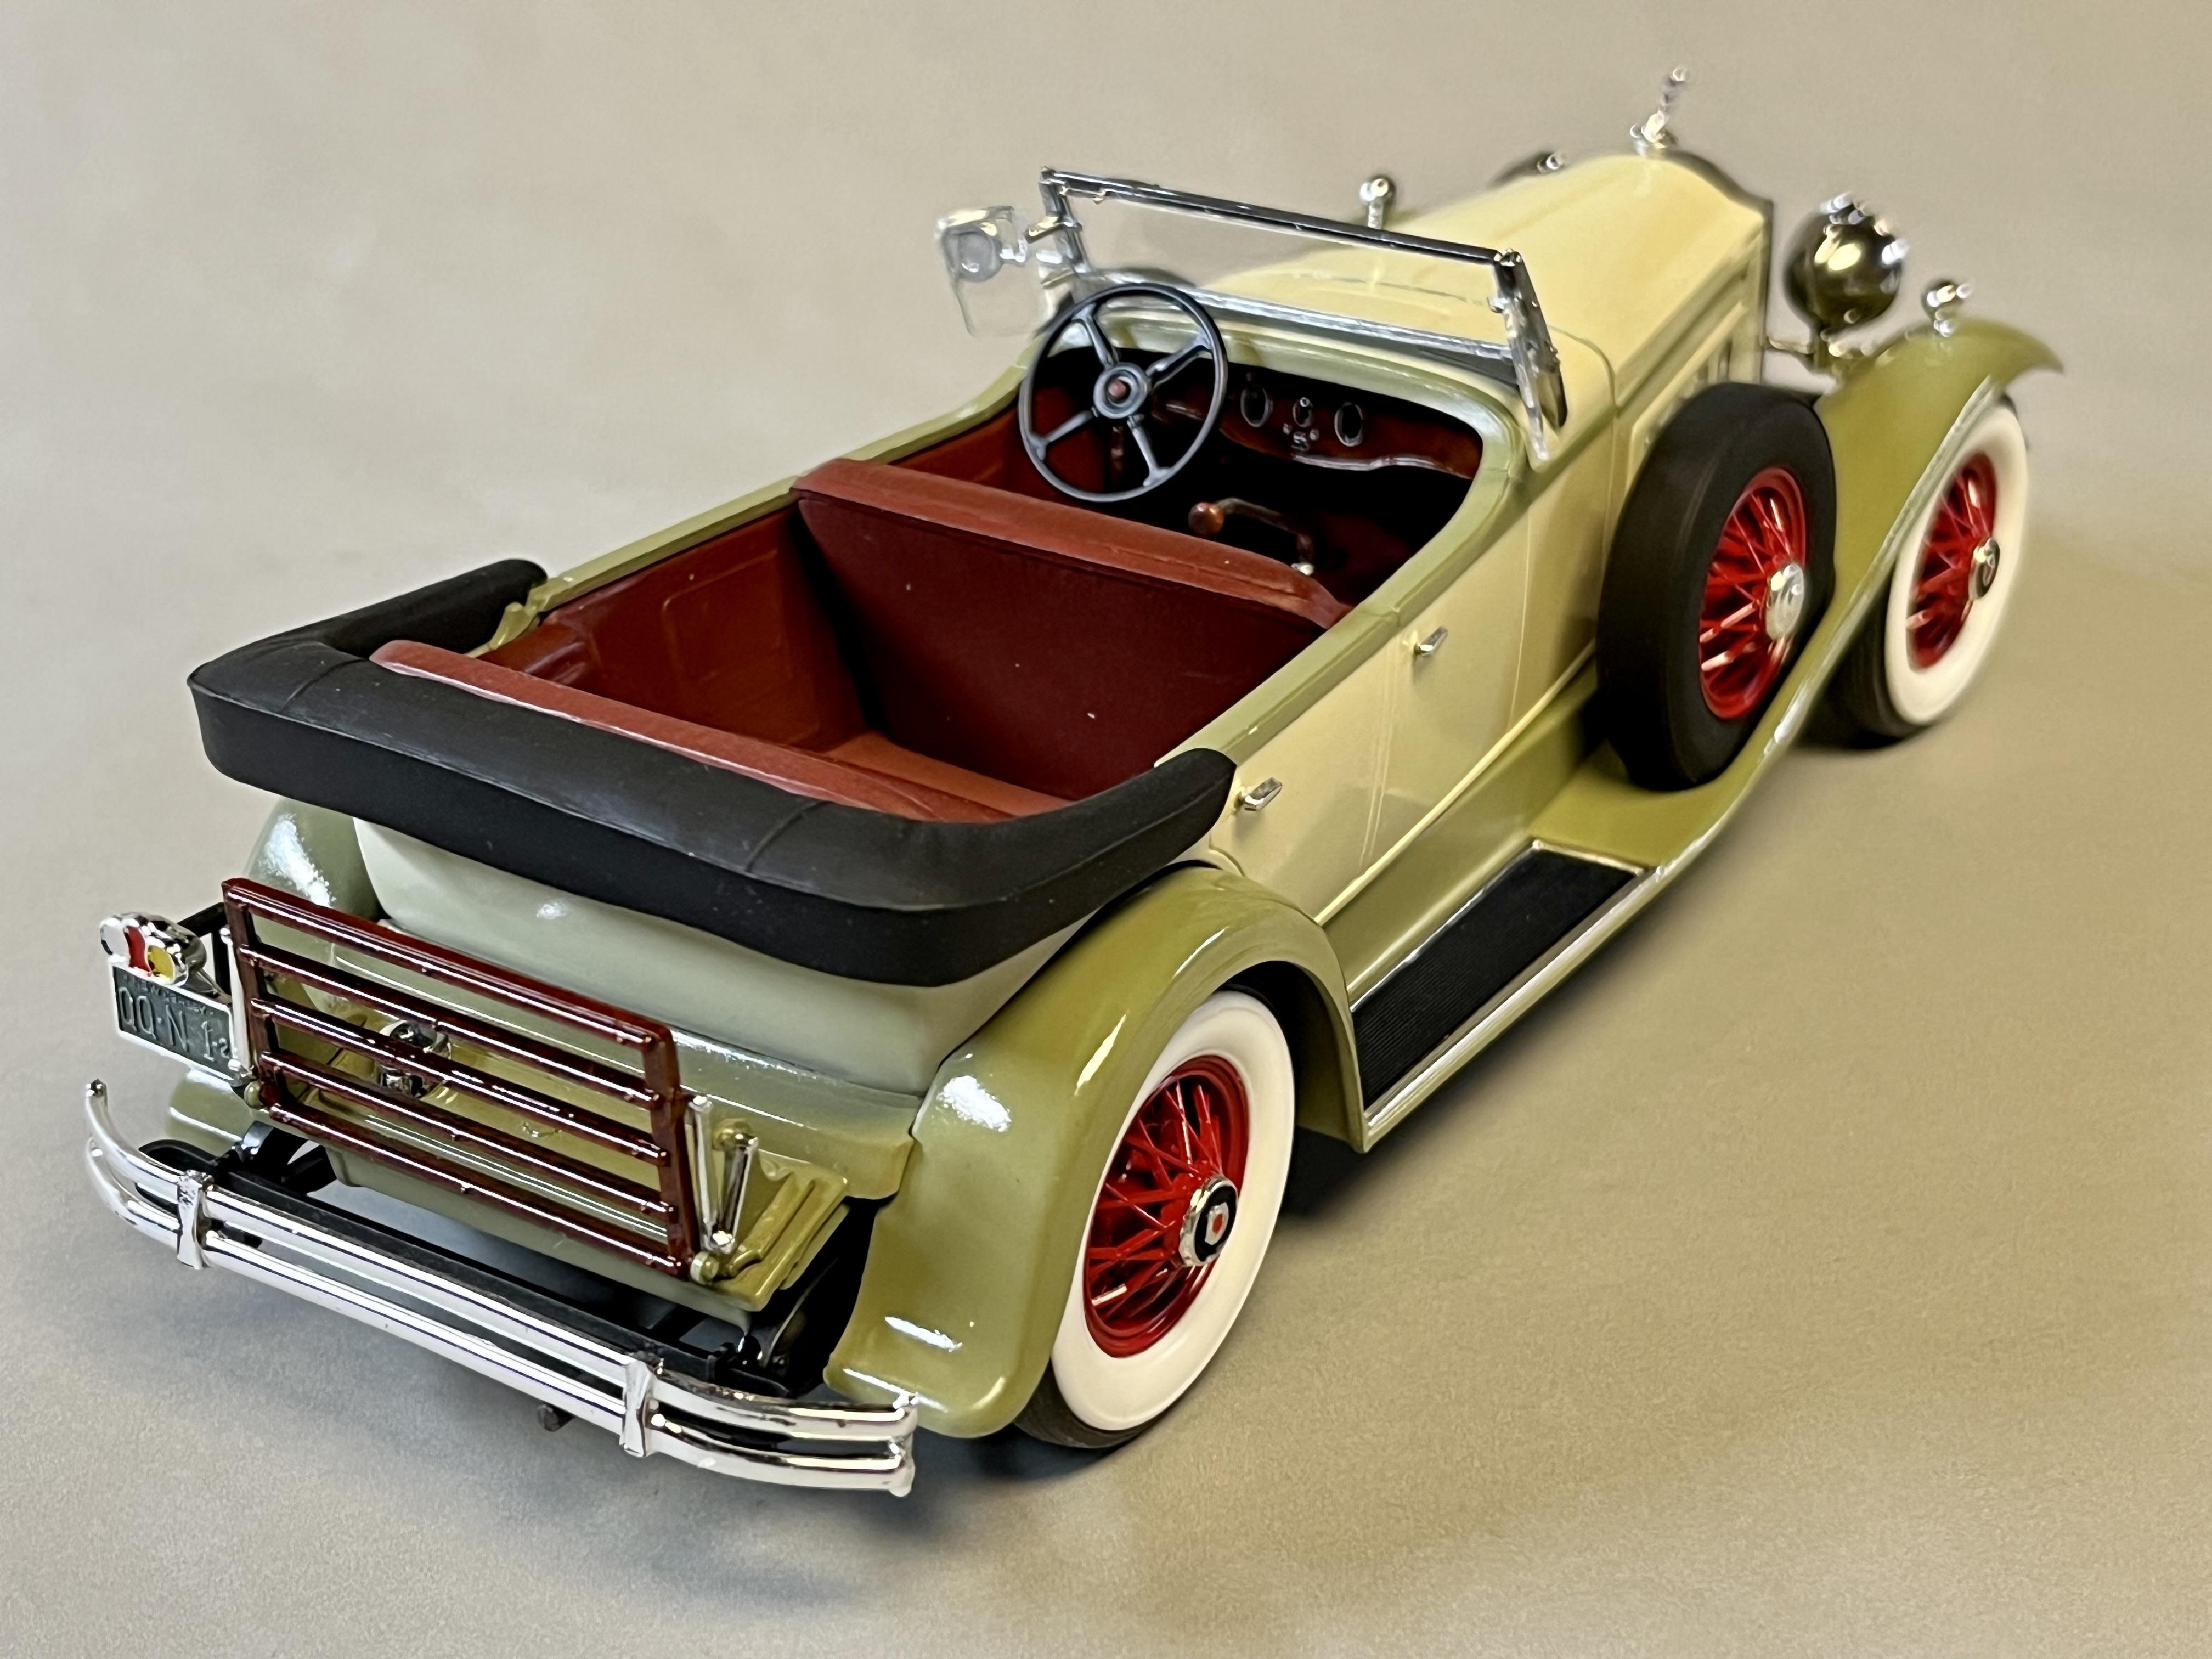
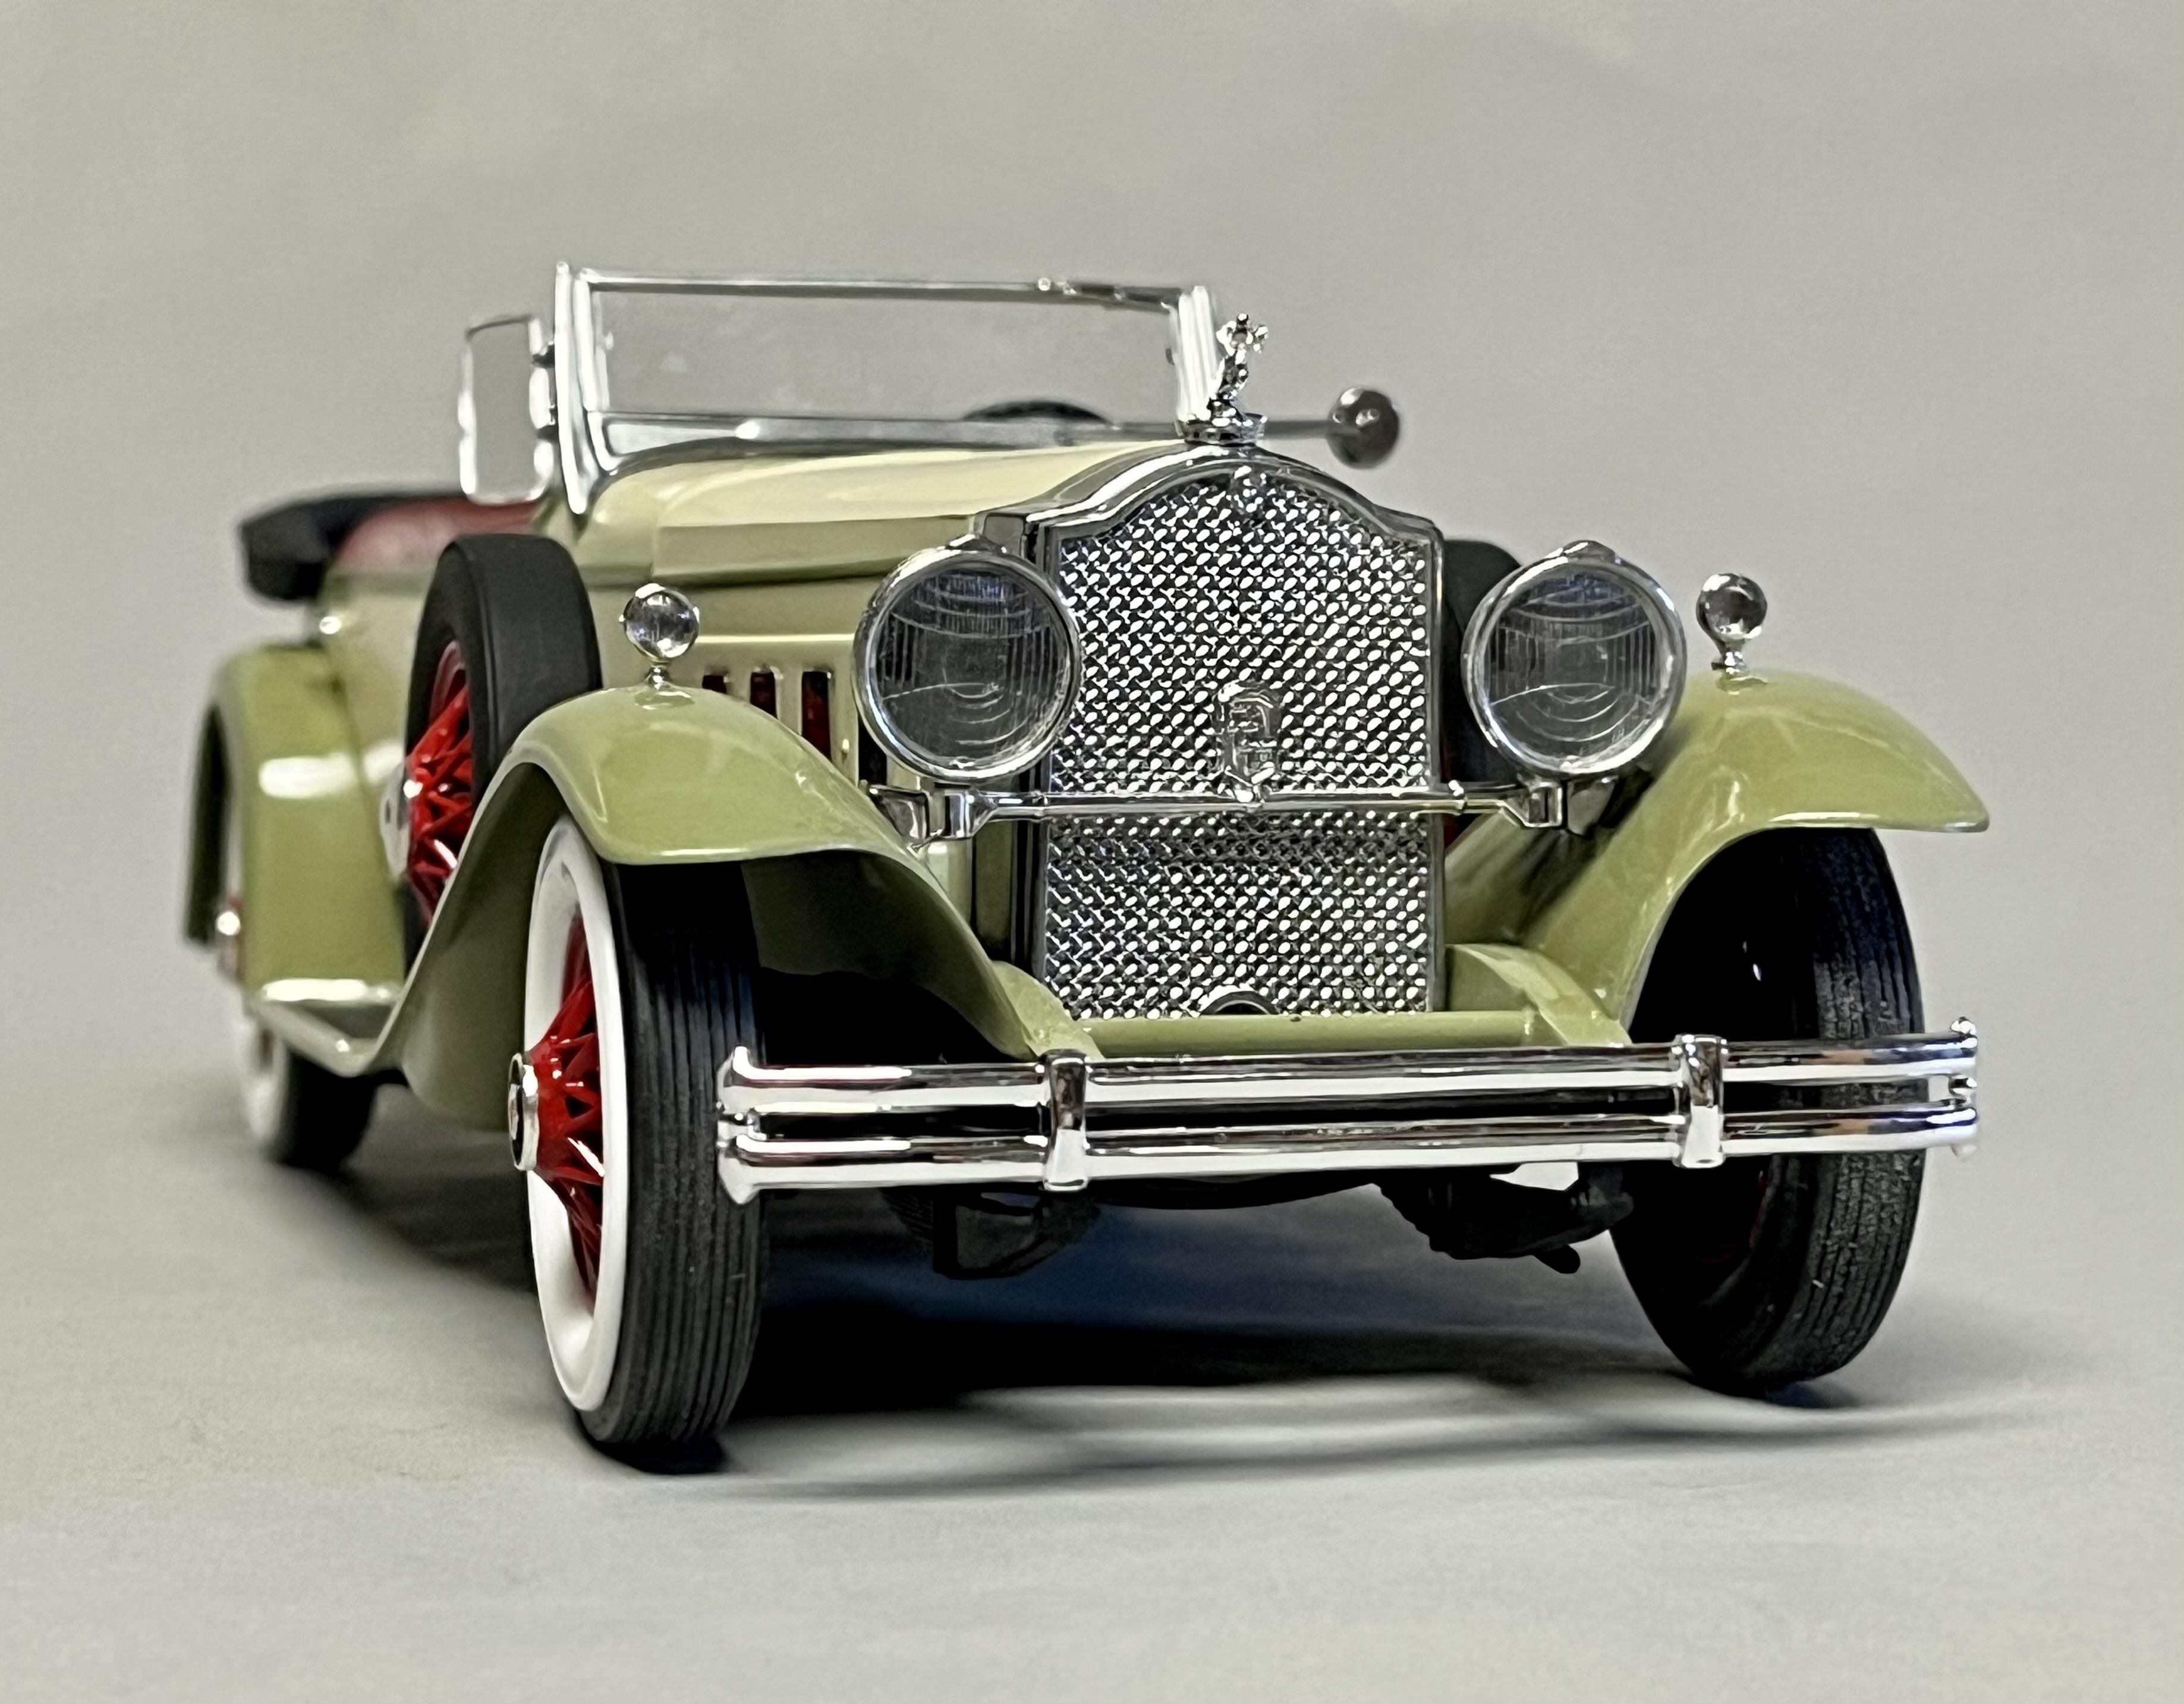
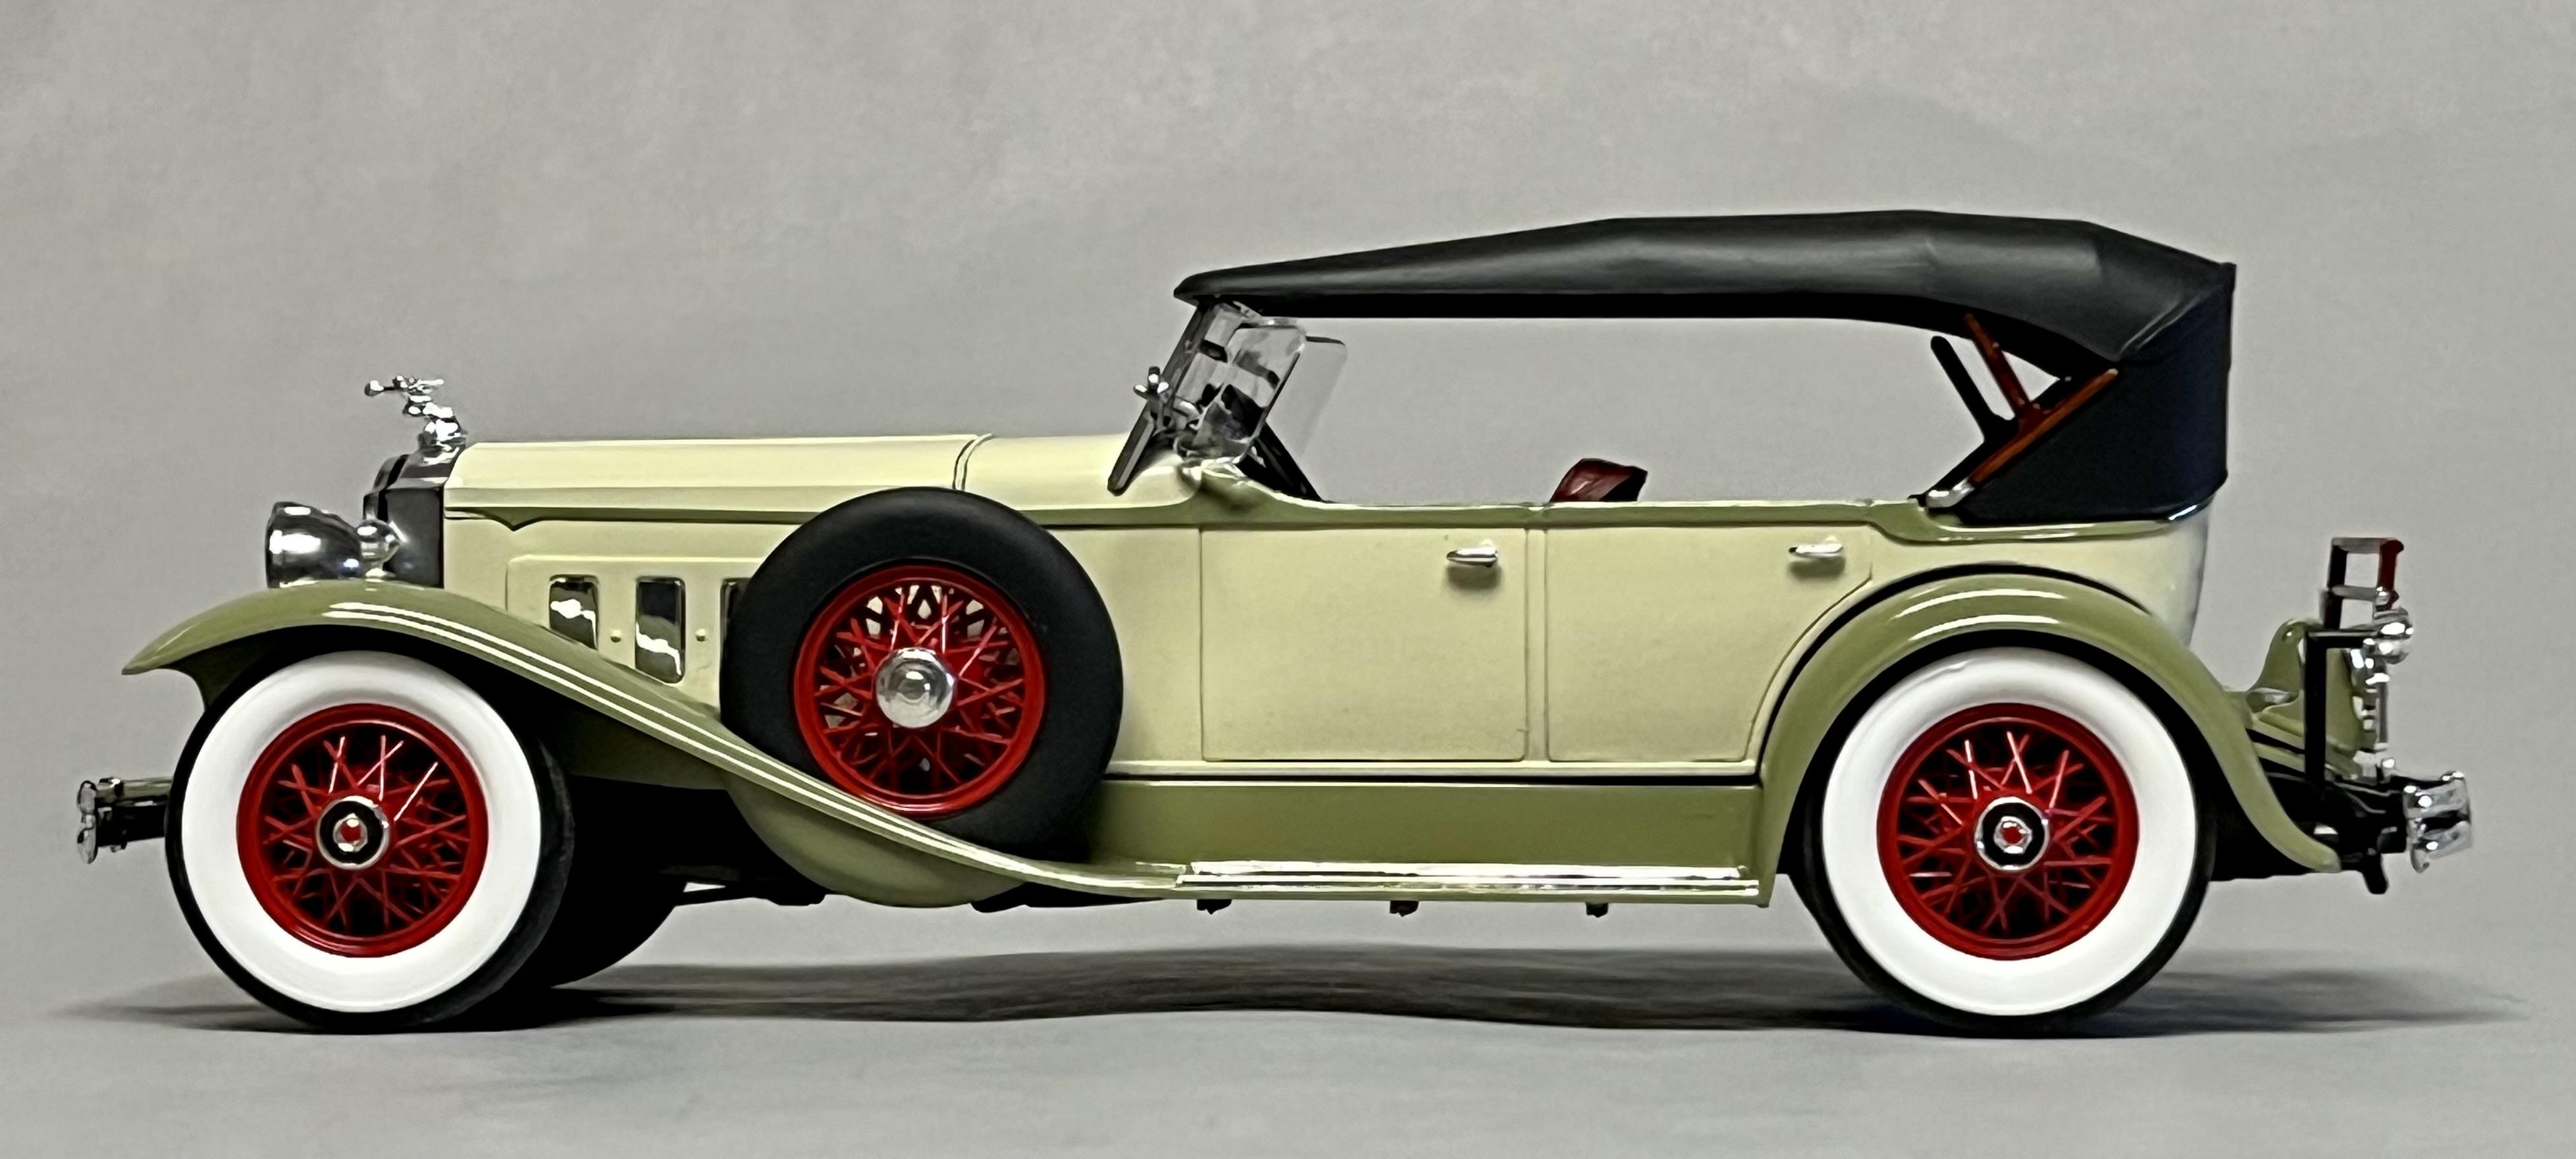
After visiting the Nethercutt Museum in Sylmar, CA a few weeks ago, I got inspired to build one of these old 1/24 Monogram classic car kits from the ‘70’s. Despite lacking the crisp detail of more recent kits, I must say this one went together really nicely, looks relatively realistic proportion-wise and was fun to add a few details to the engine. The chromed wire wheels that came with most of these kits scream “toy” to my eyes so I think painting them (to look like many of the actual 1:1 restored cars) really helps. Anyways, a nice break from building drag cars and so much fun to paint and assemble, I’ve picked up a few more from this series to do in the near future. Cheers, John
- 30 replies
-
- 13
-
-
Magnificent model Pierre! It’s like you took some of the best techniques used on weathered AFV scale models and applied them to a hard driven race car. Build and post more like this please!
-
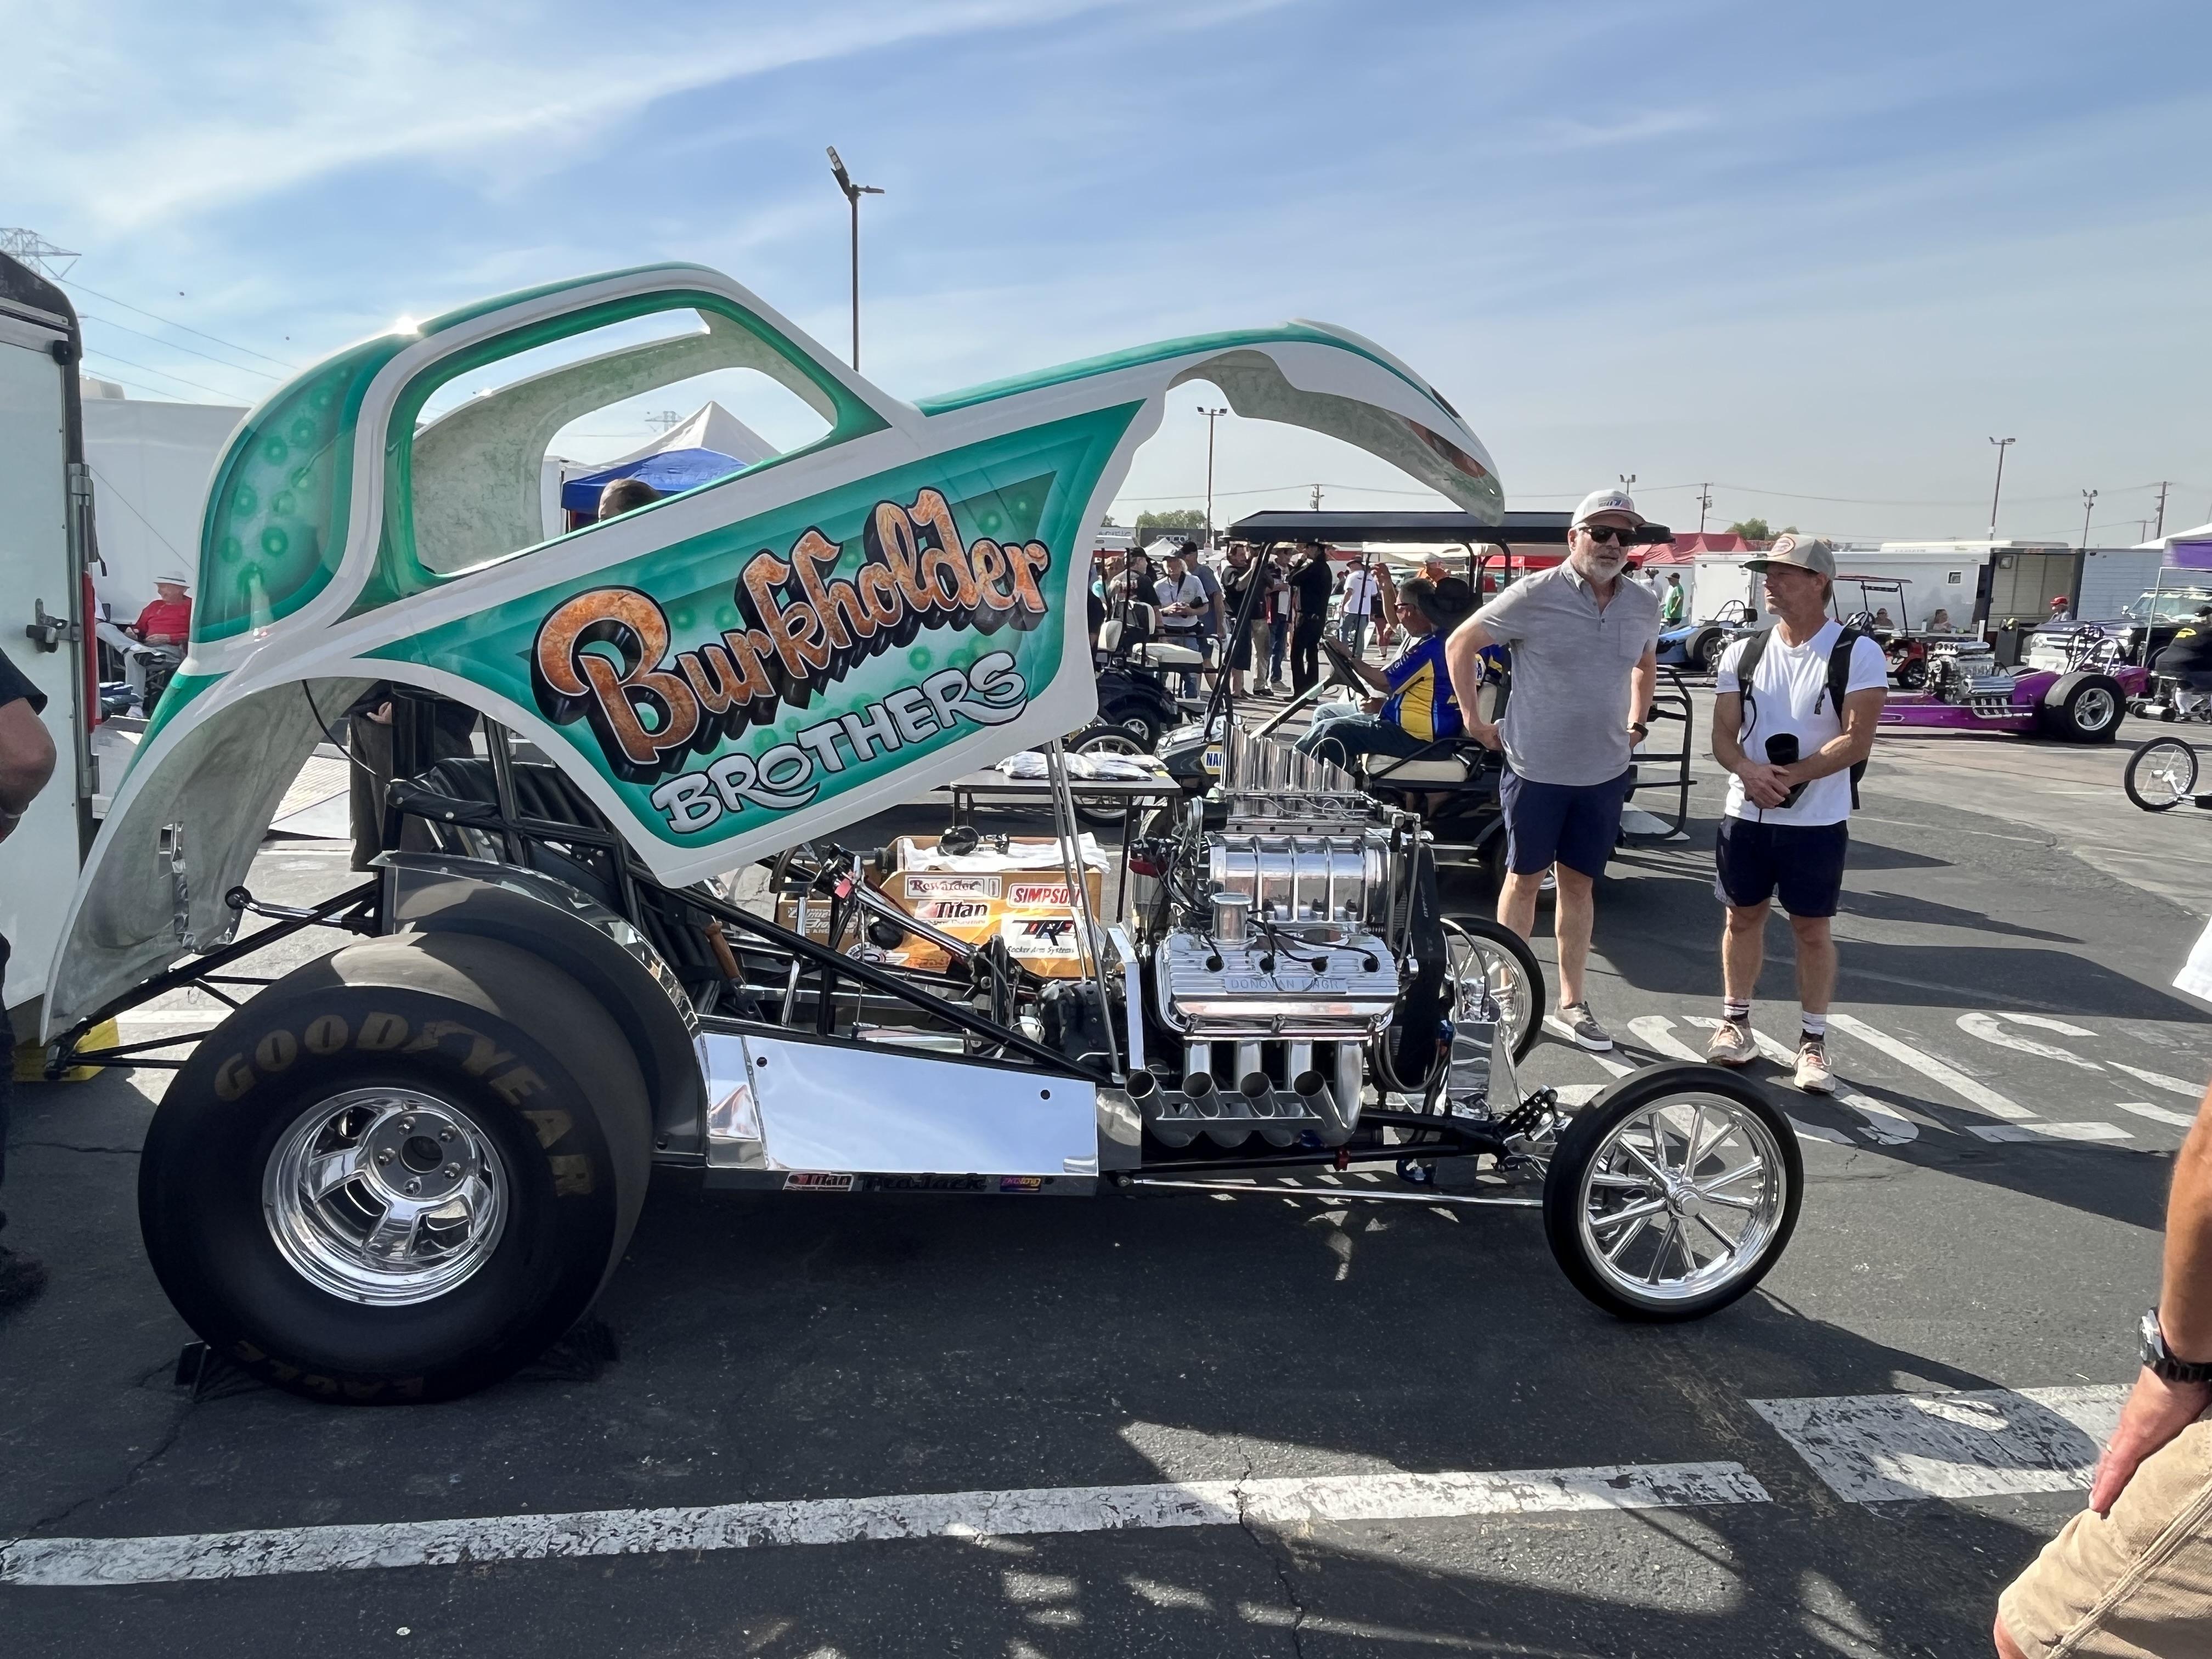
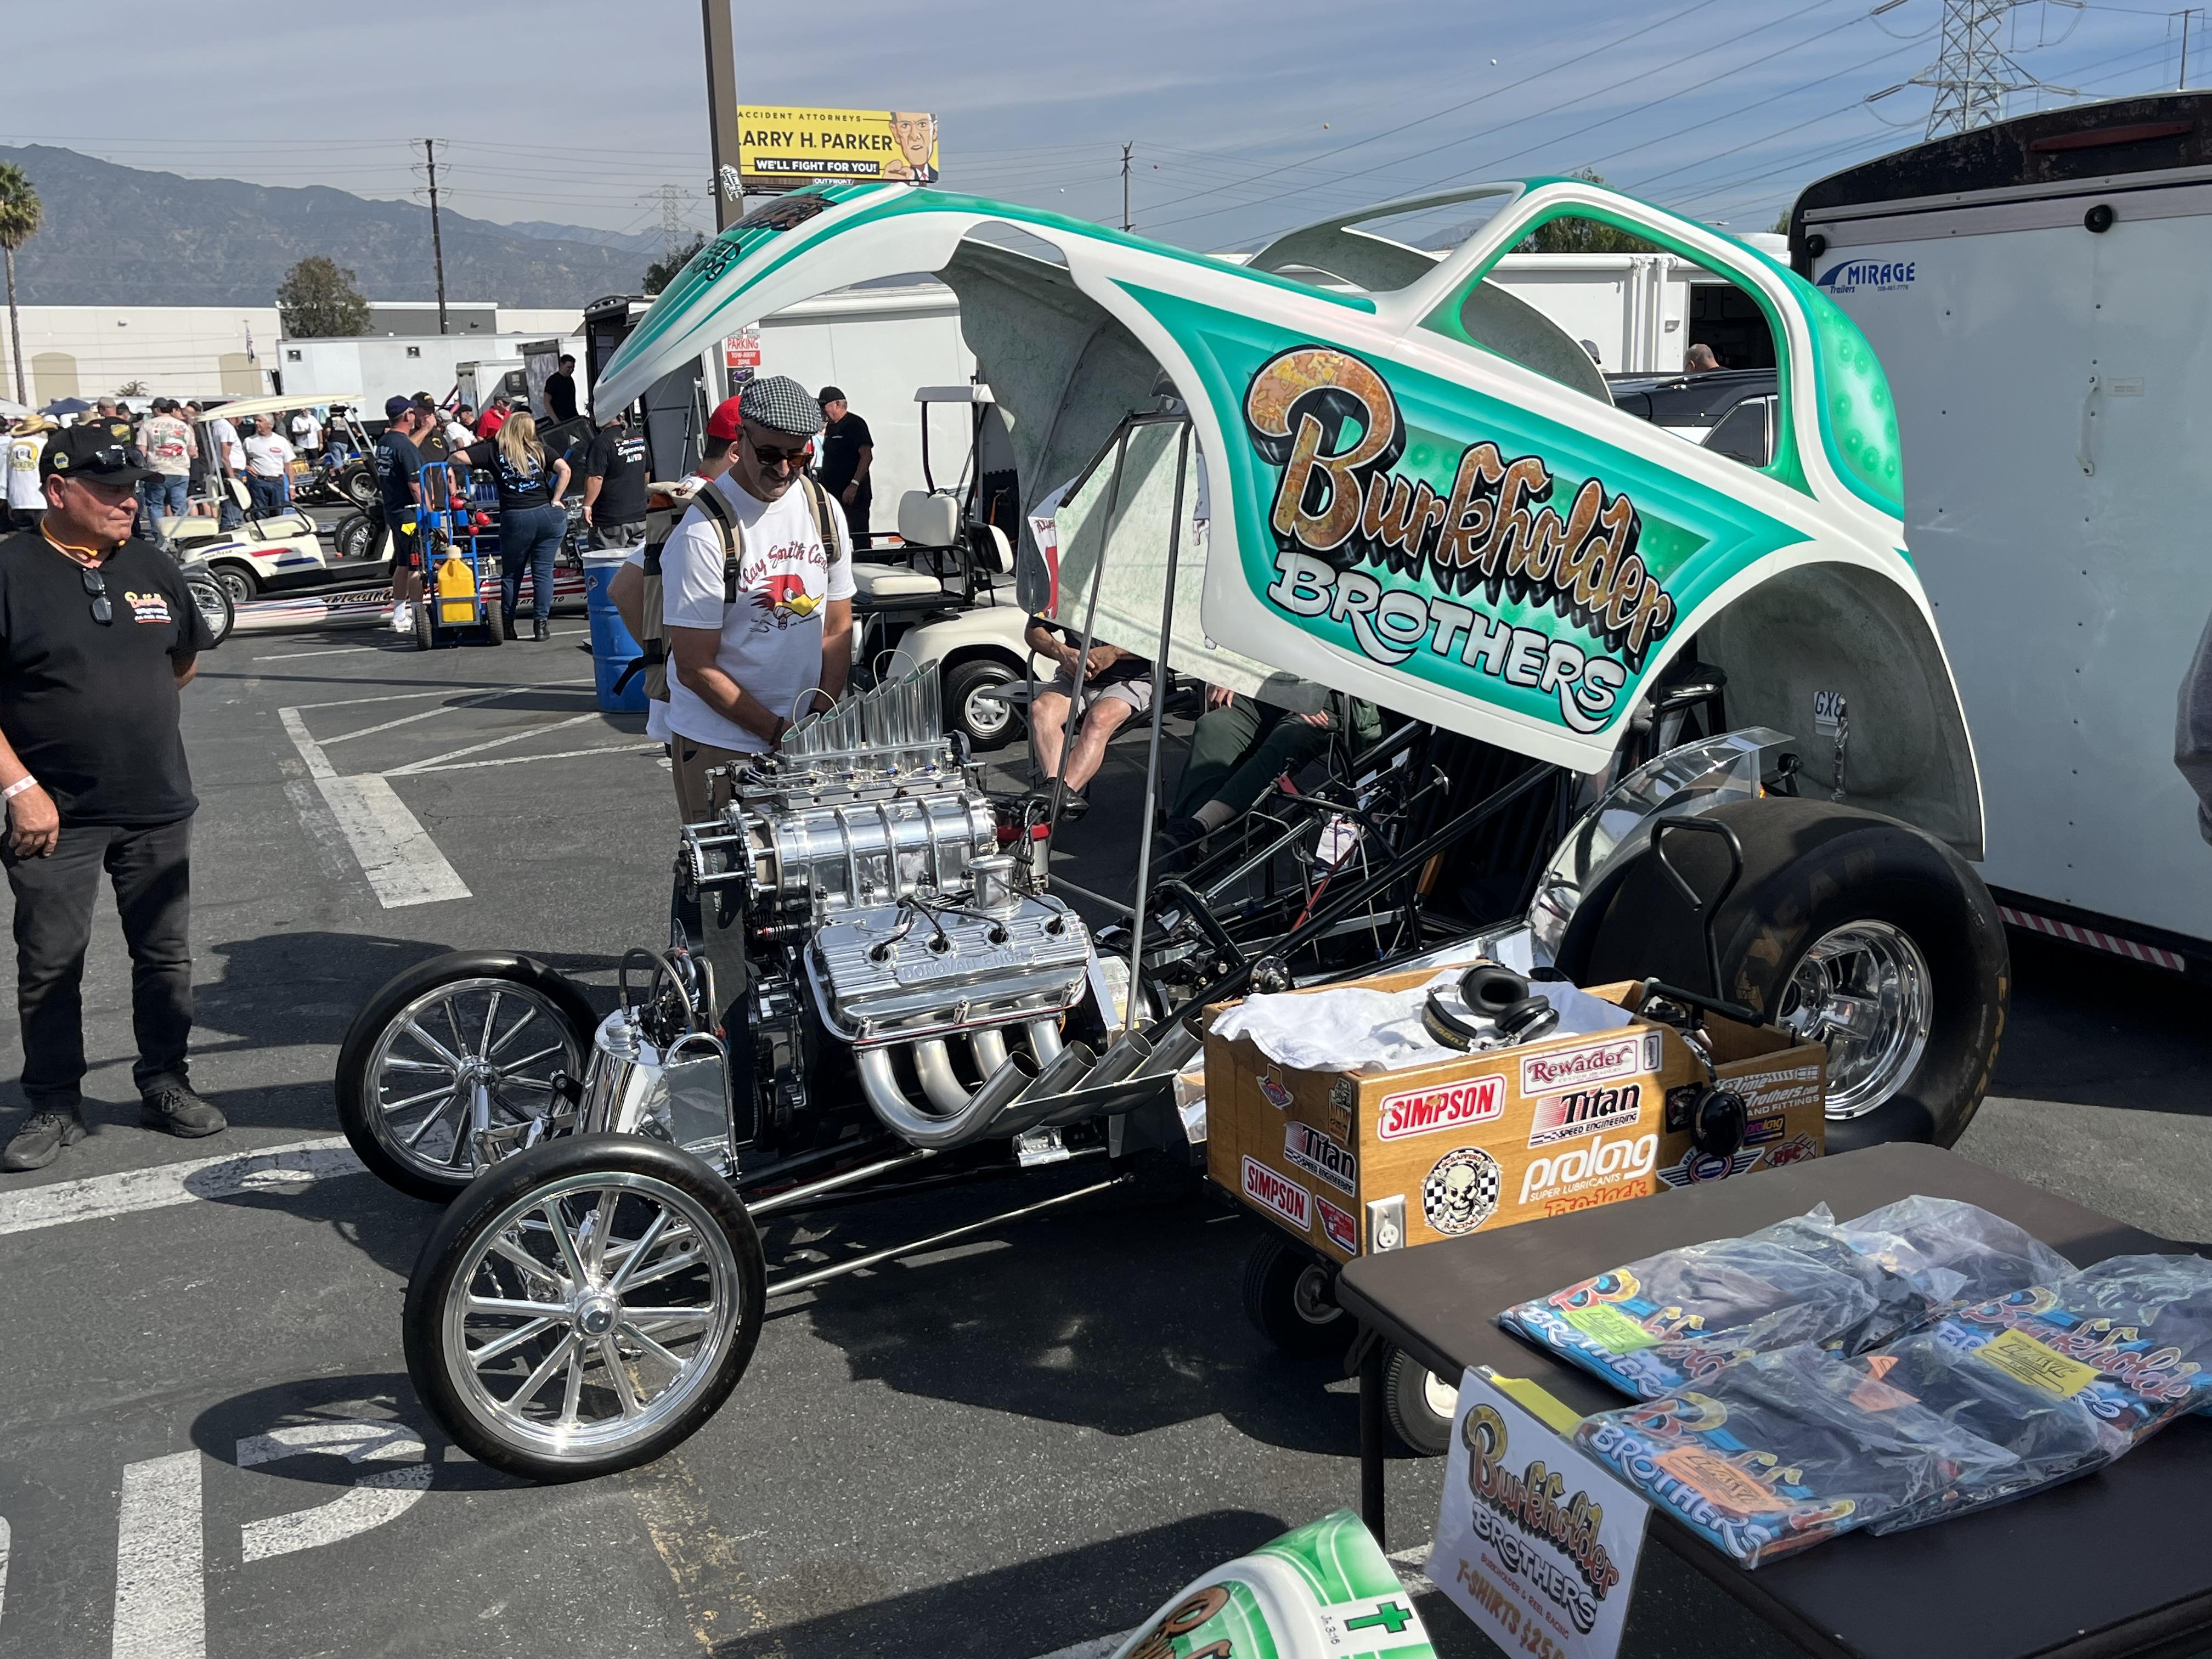
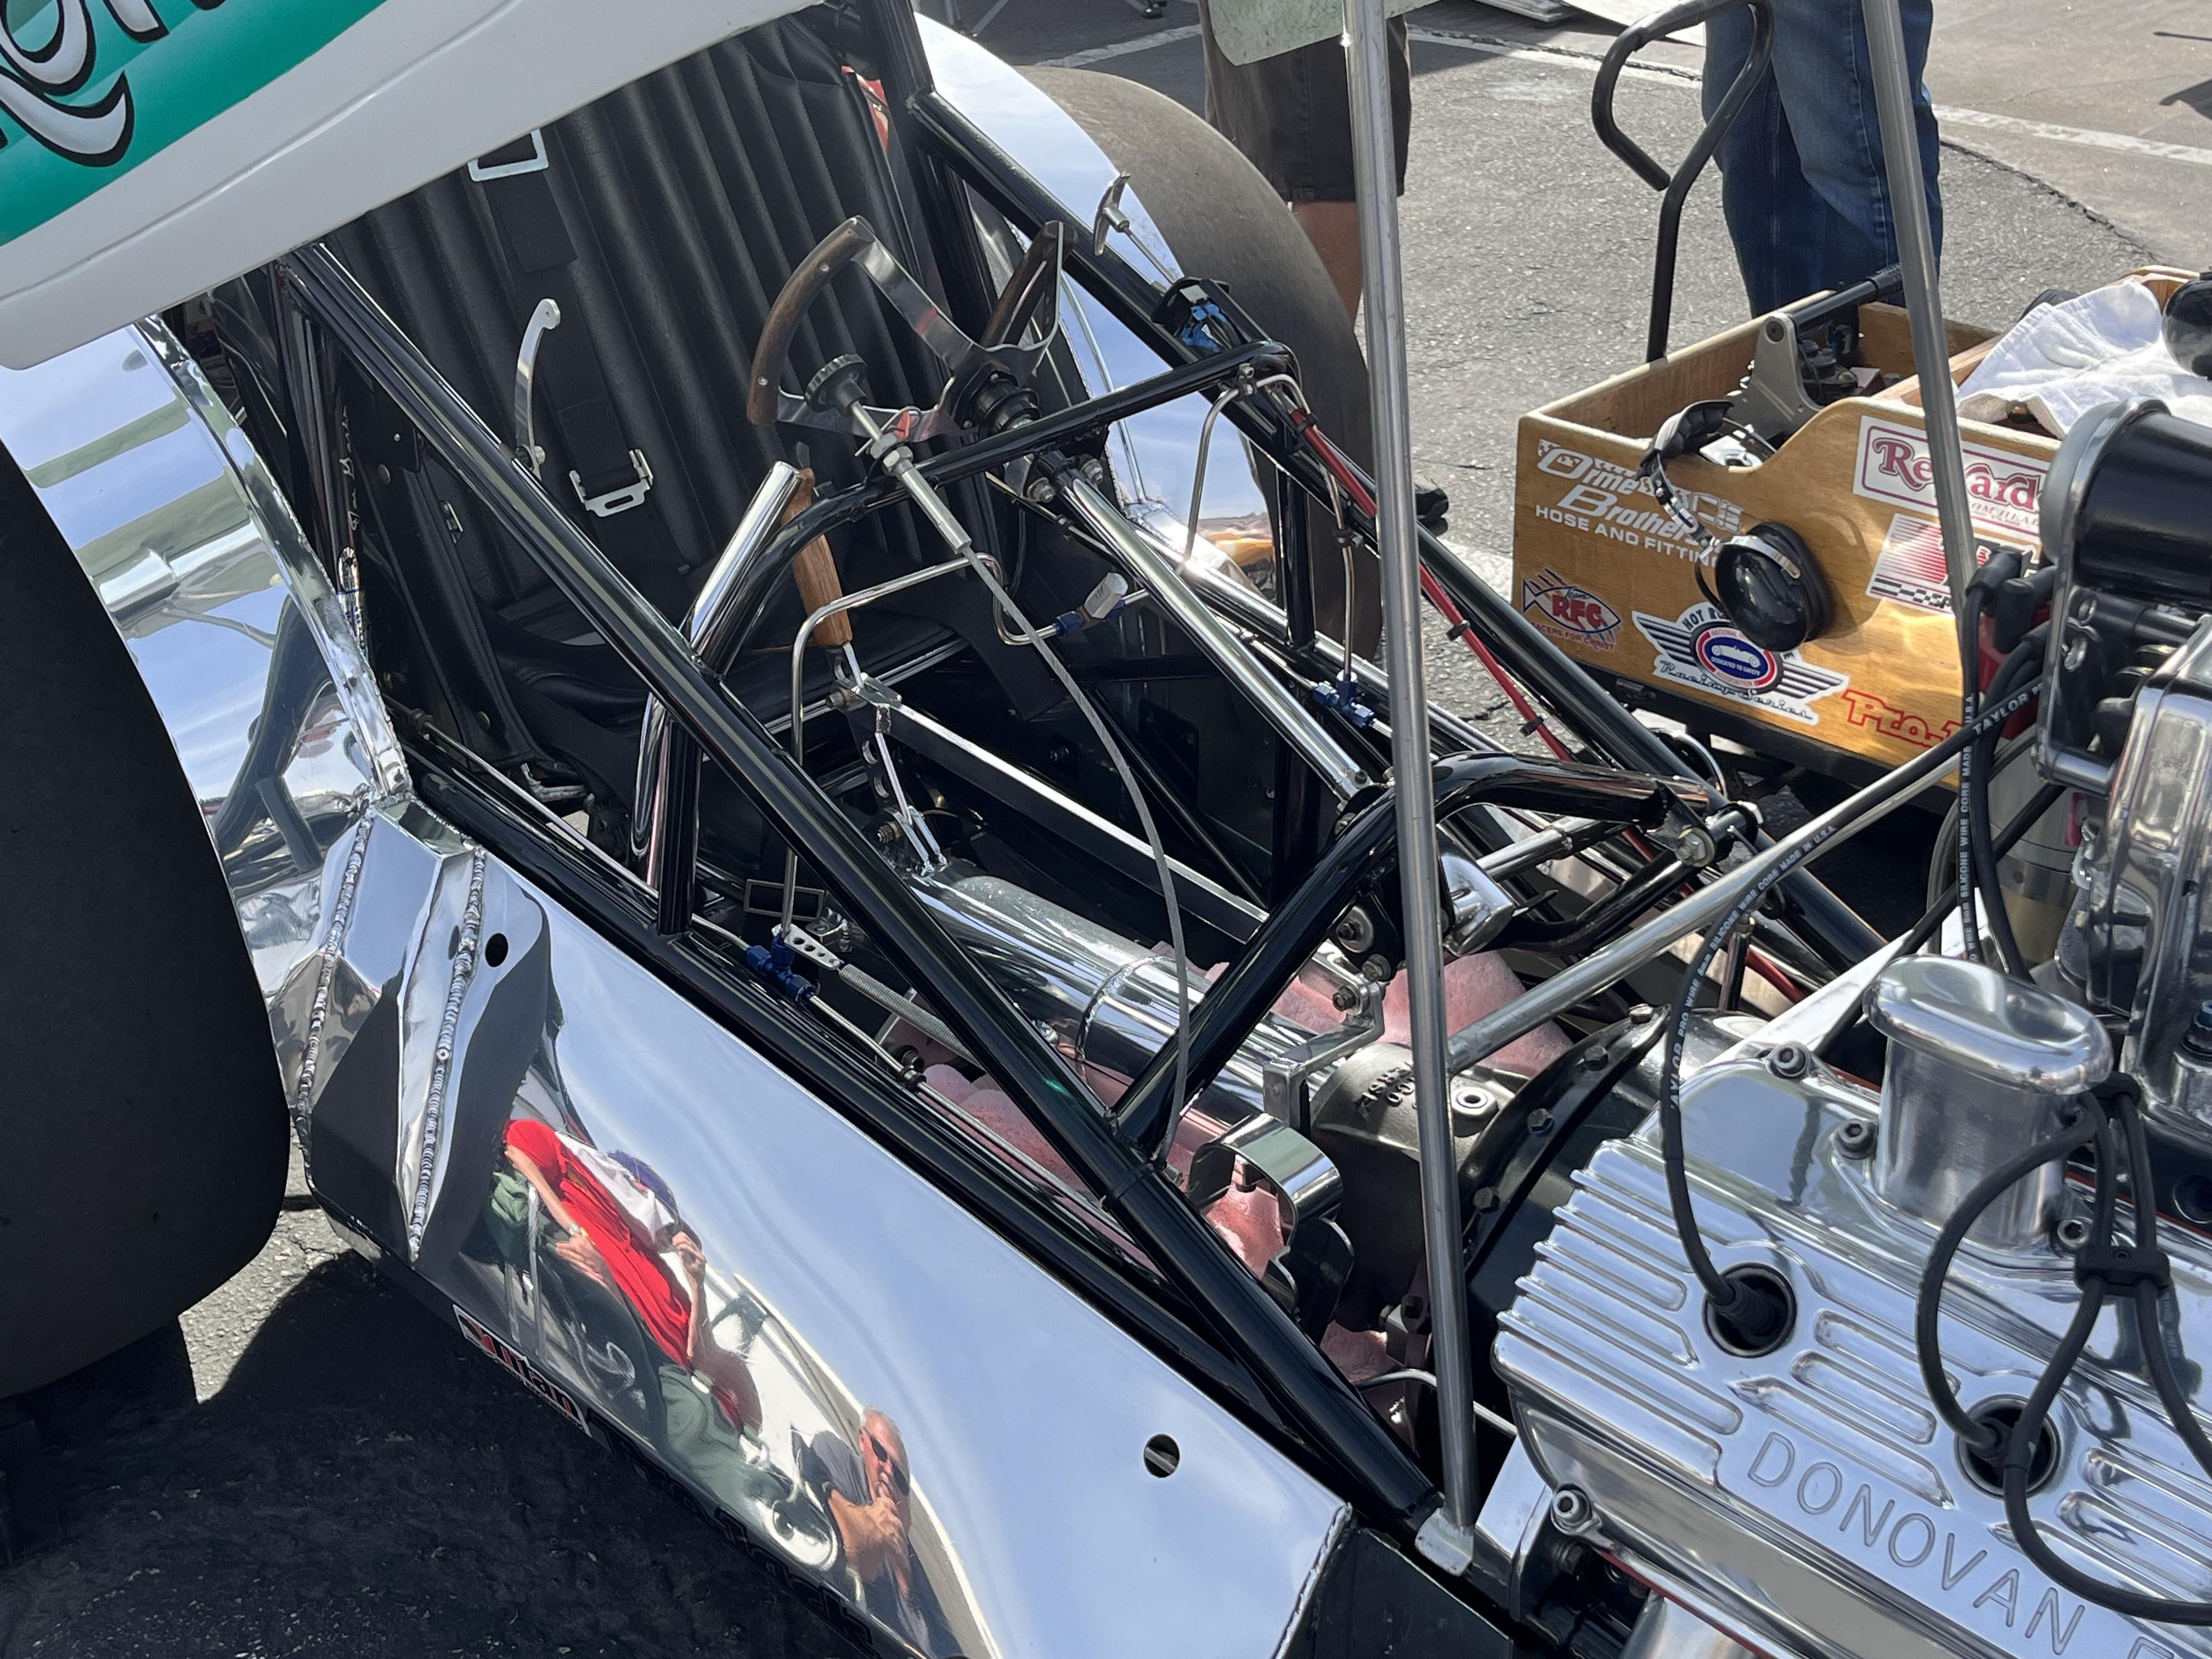
Here’s the 1:1 that was at the Nitro Revival meet at Irwindale today (along with hordes of other vintage fuel altereds, AA fuelers, gassers and lots of old fellow geezers). You did a good job on your model capturing the spirit of this crazy scary machine!
-
Revell’s 1962 impala super stock THE GOLDEN ROD
papajohn97 replied to M W Elky's topic in Drag Racing
What! No magazine cover????? Just kidding! Another gorgeous early sixties super stocker! Thank you Mike for cranking these builds out so quickly, applying rare decals to your builds and posting them so frequently. I love this Revell kit, need to keep an eye out for other decal possibilities so I can do another one. Bravo Mike! -
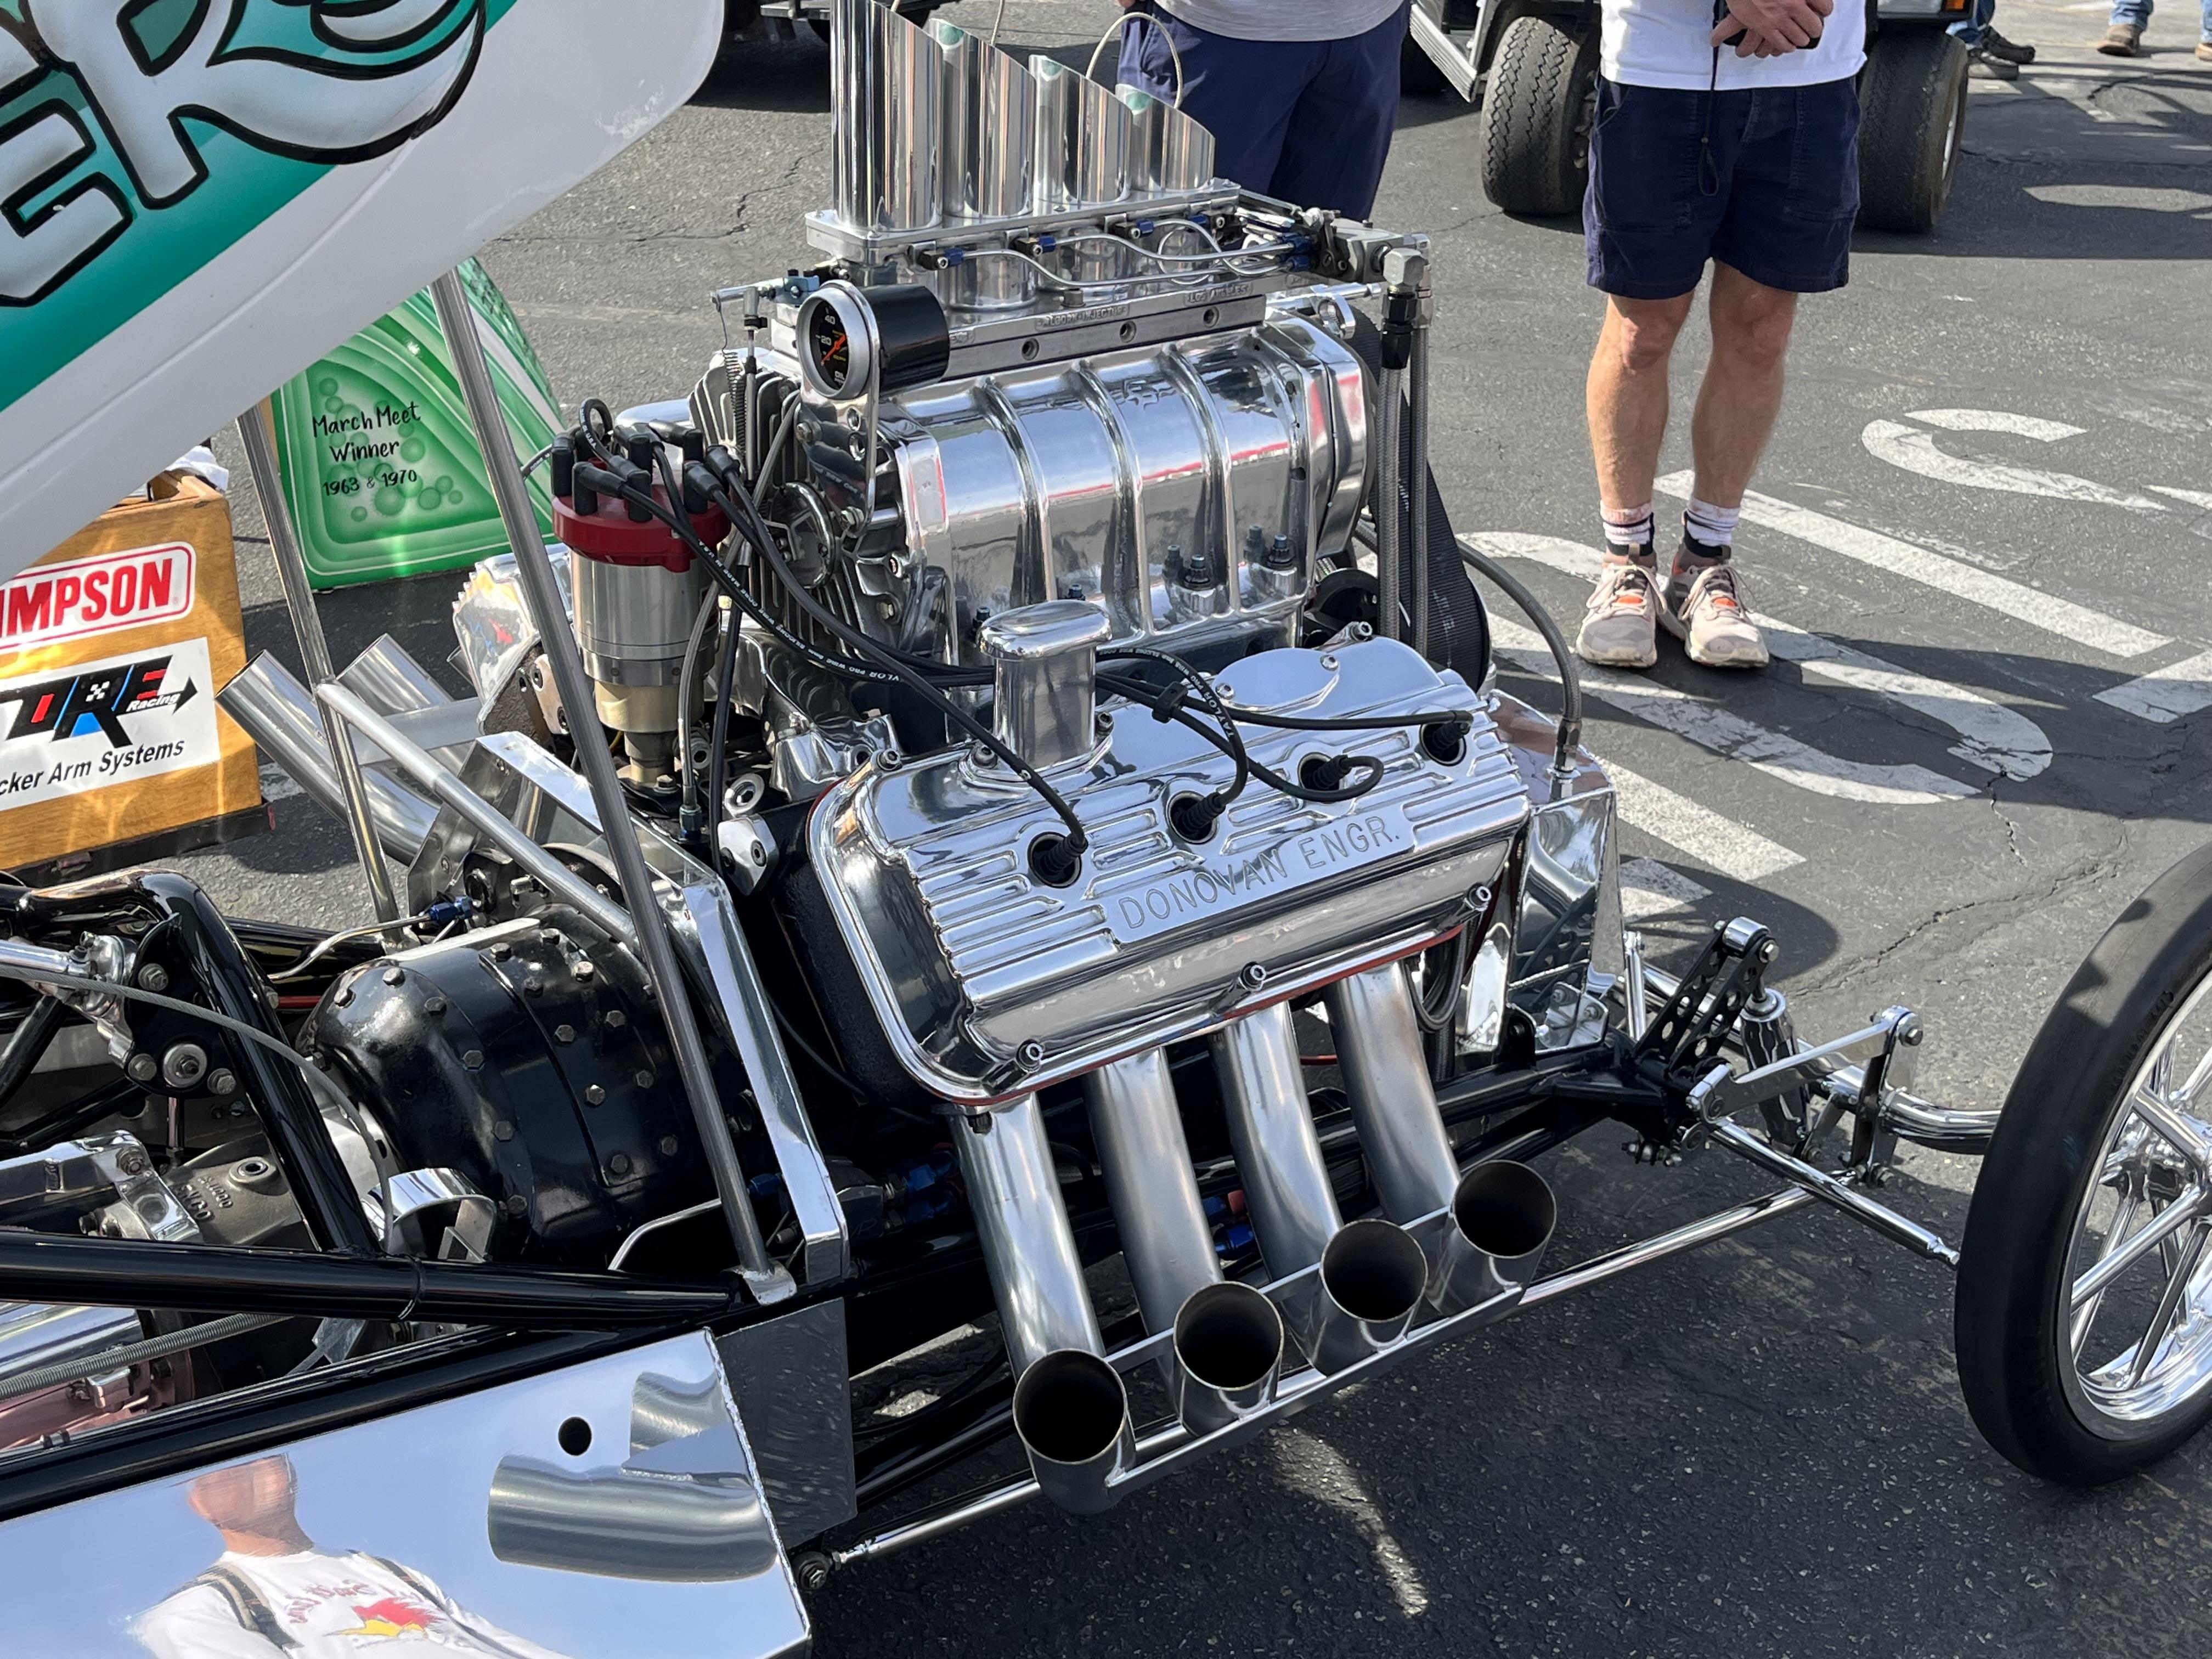
Very nice build and amazing job on the decals - came out looking like a Larry Watson masked panel paint job! I’m hoping to see the current 1:1 version of this car at the Nitro Revival at the Irwindale 1/8 mile strip this weekend. I’ll post a pic or two if I see it.