papajohn97
-
Posts
700 -
Joined
-
Last visited
Content Type
Profiles
Forums
Events
Gallery
Everything posted by papajohn97
-
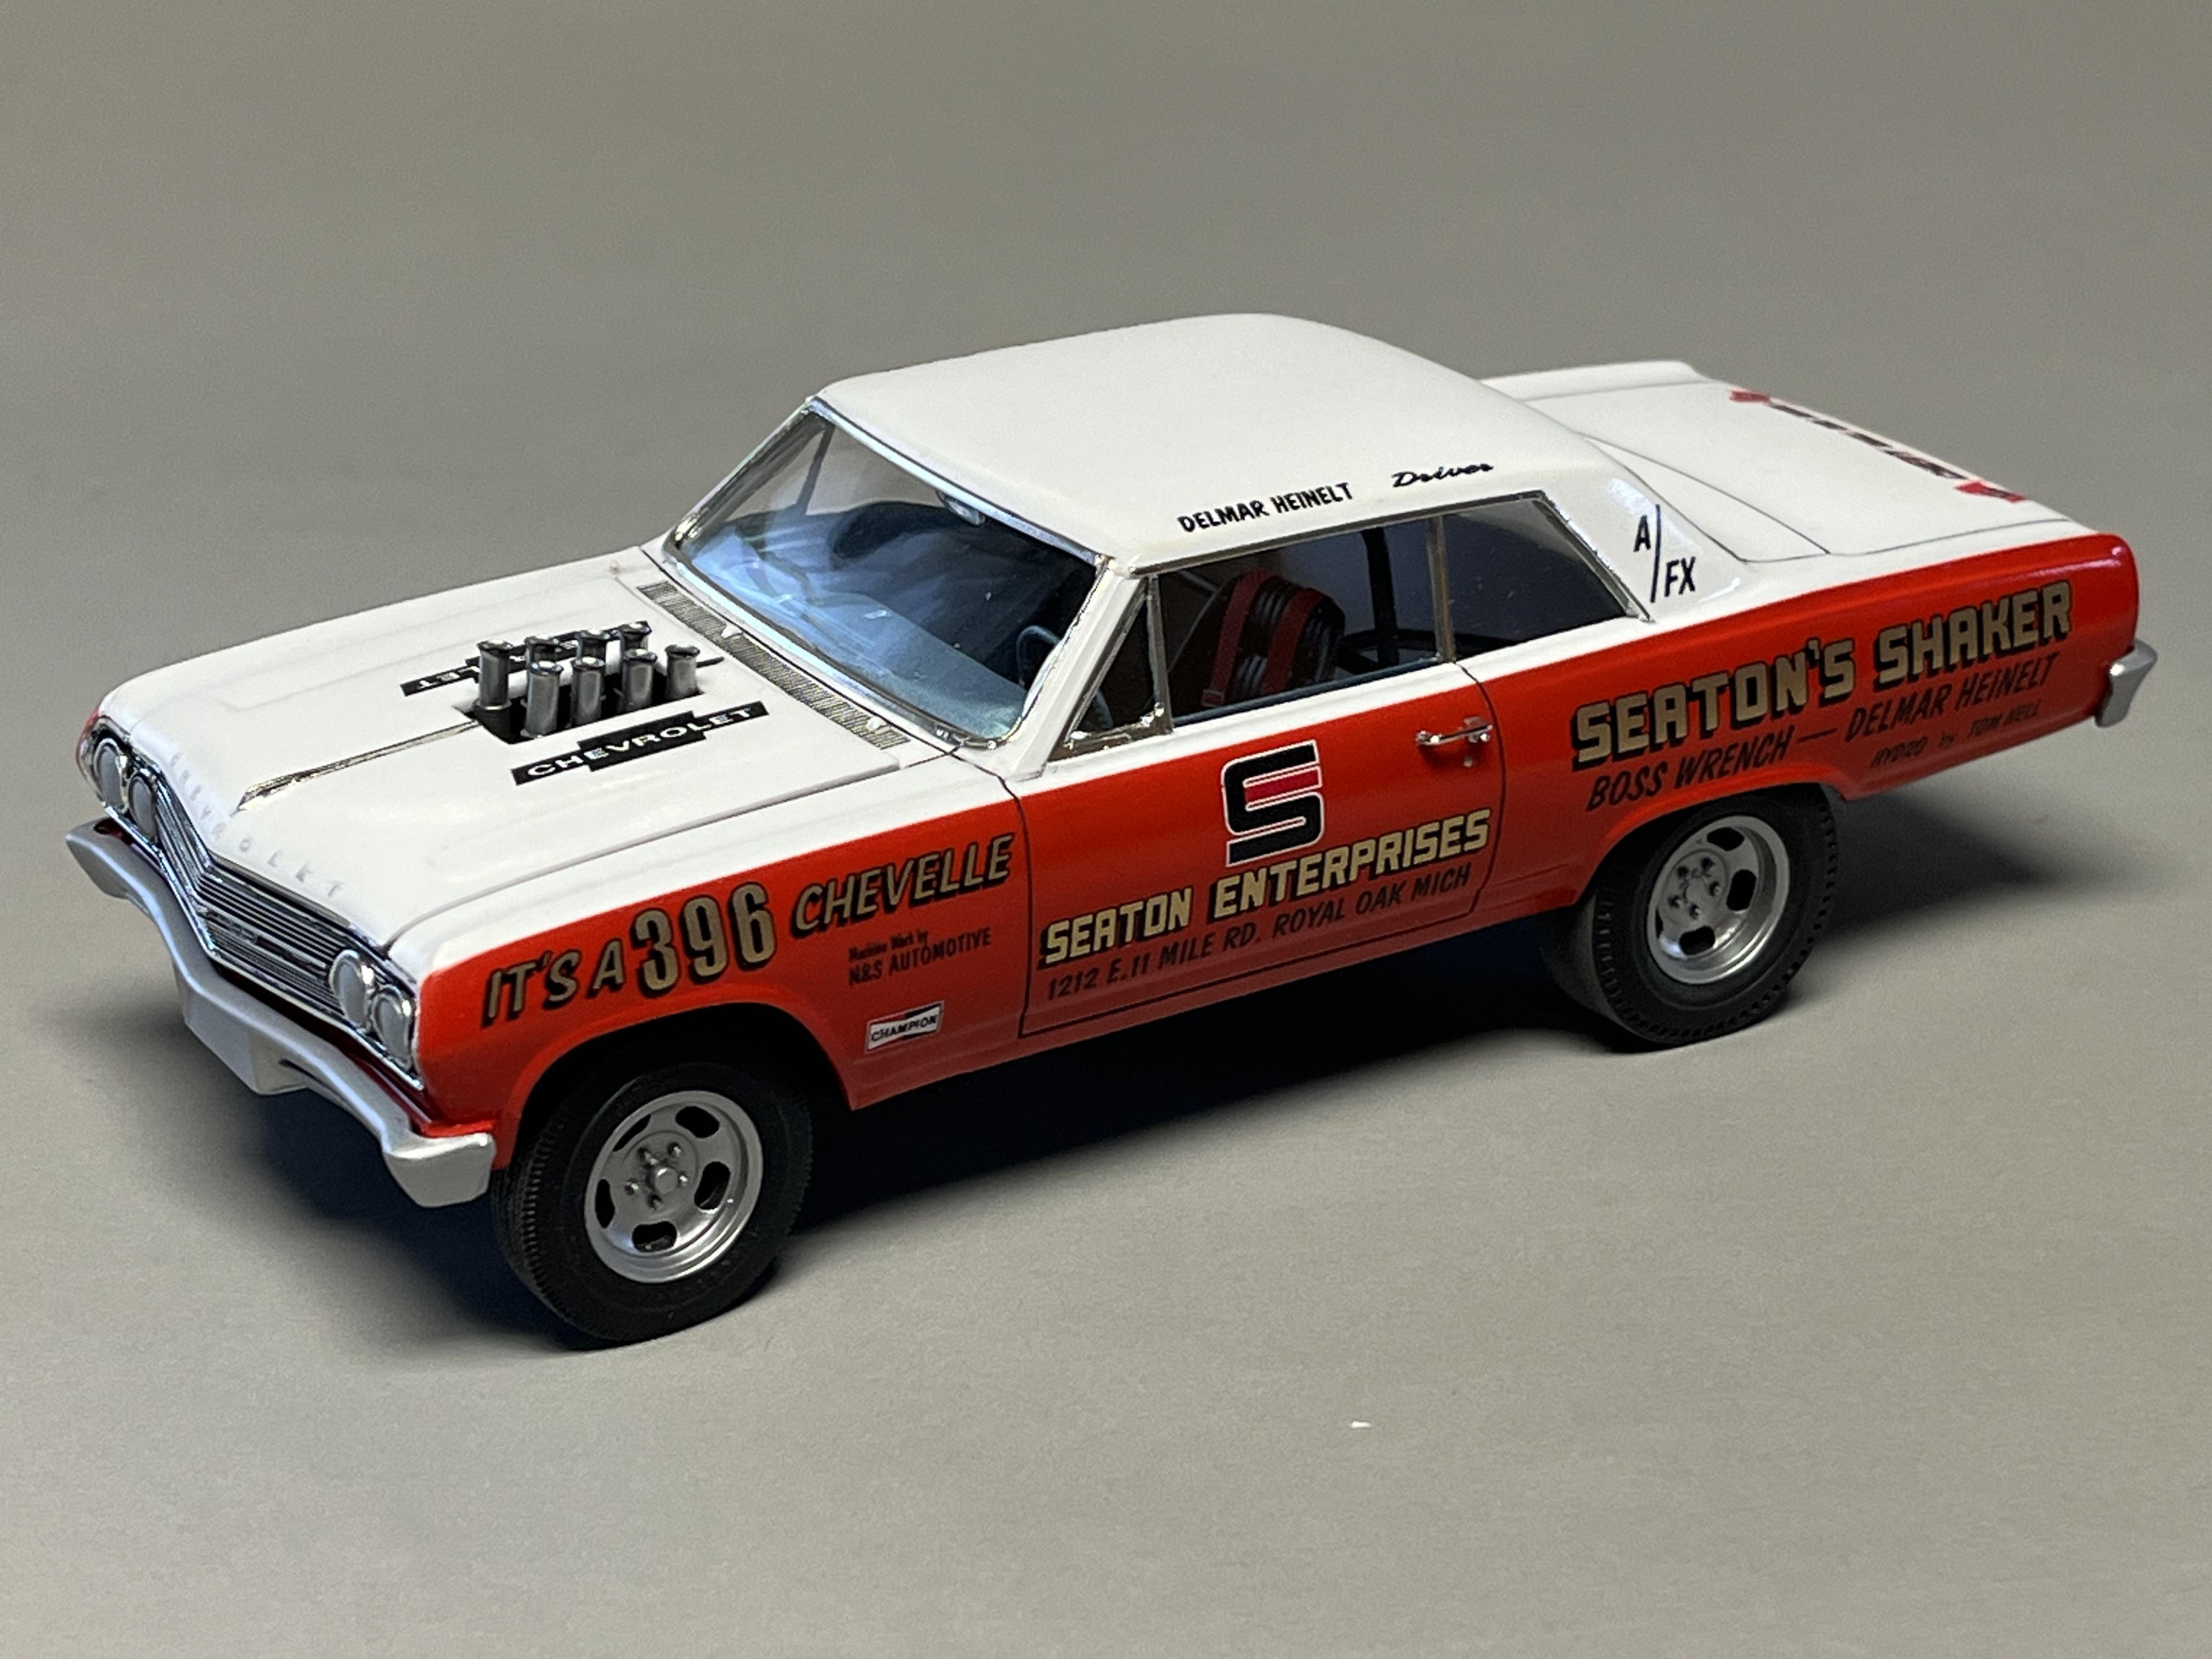
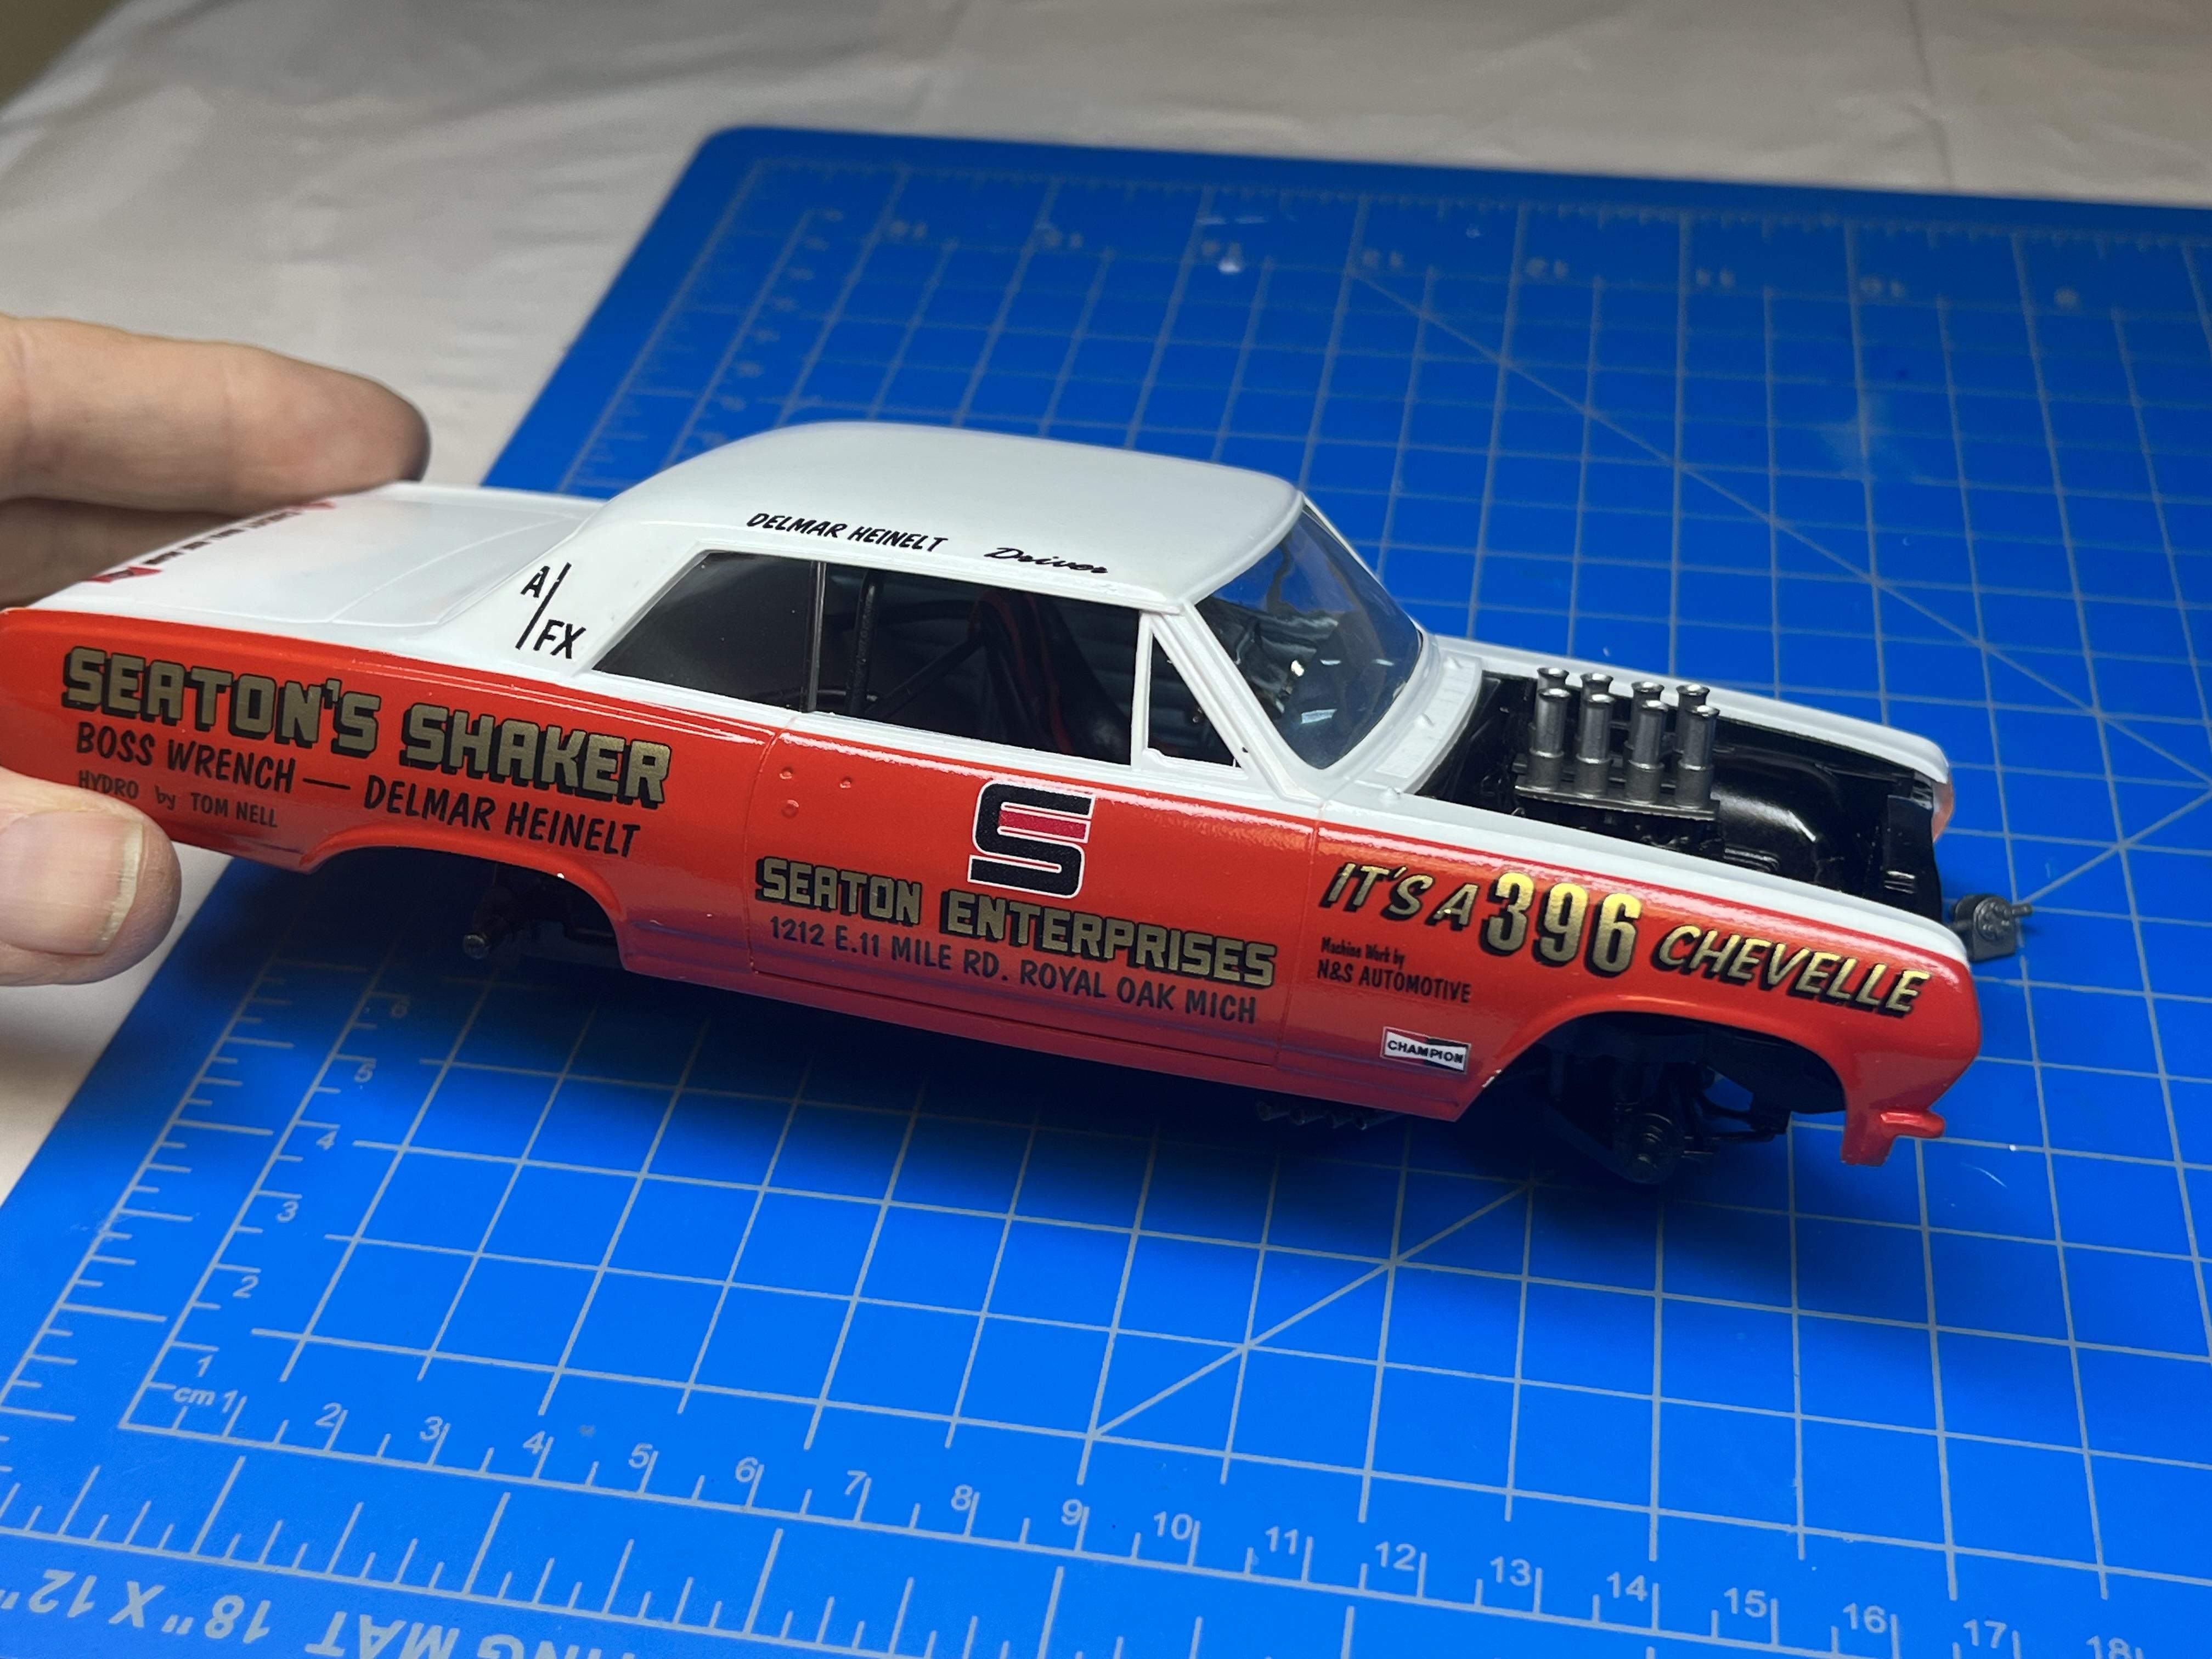
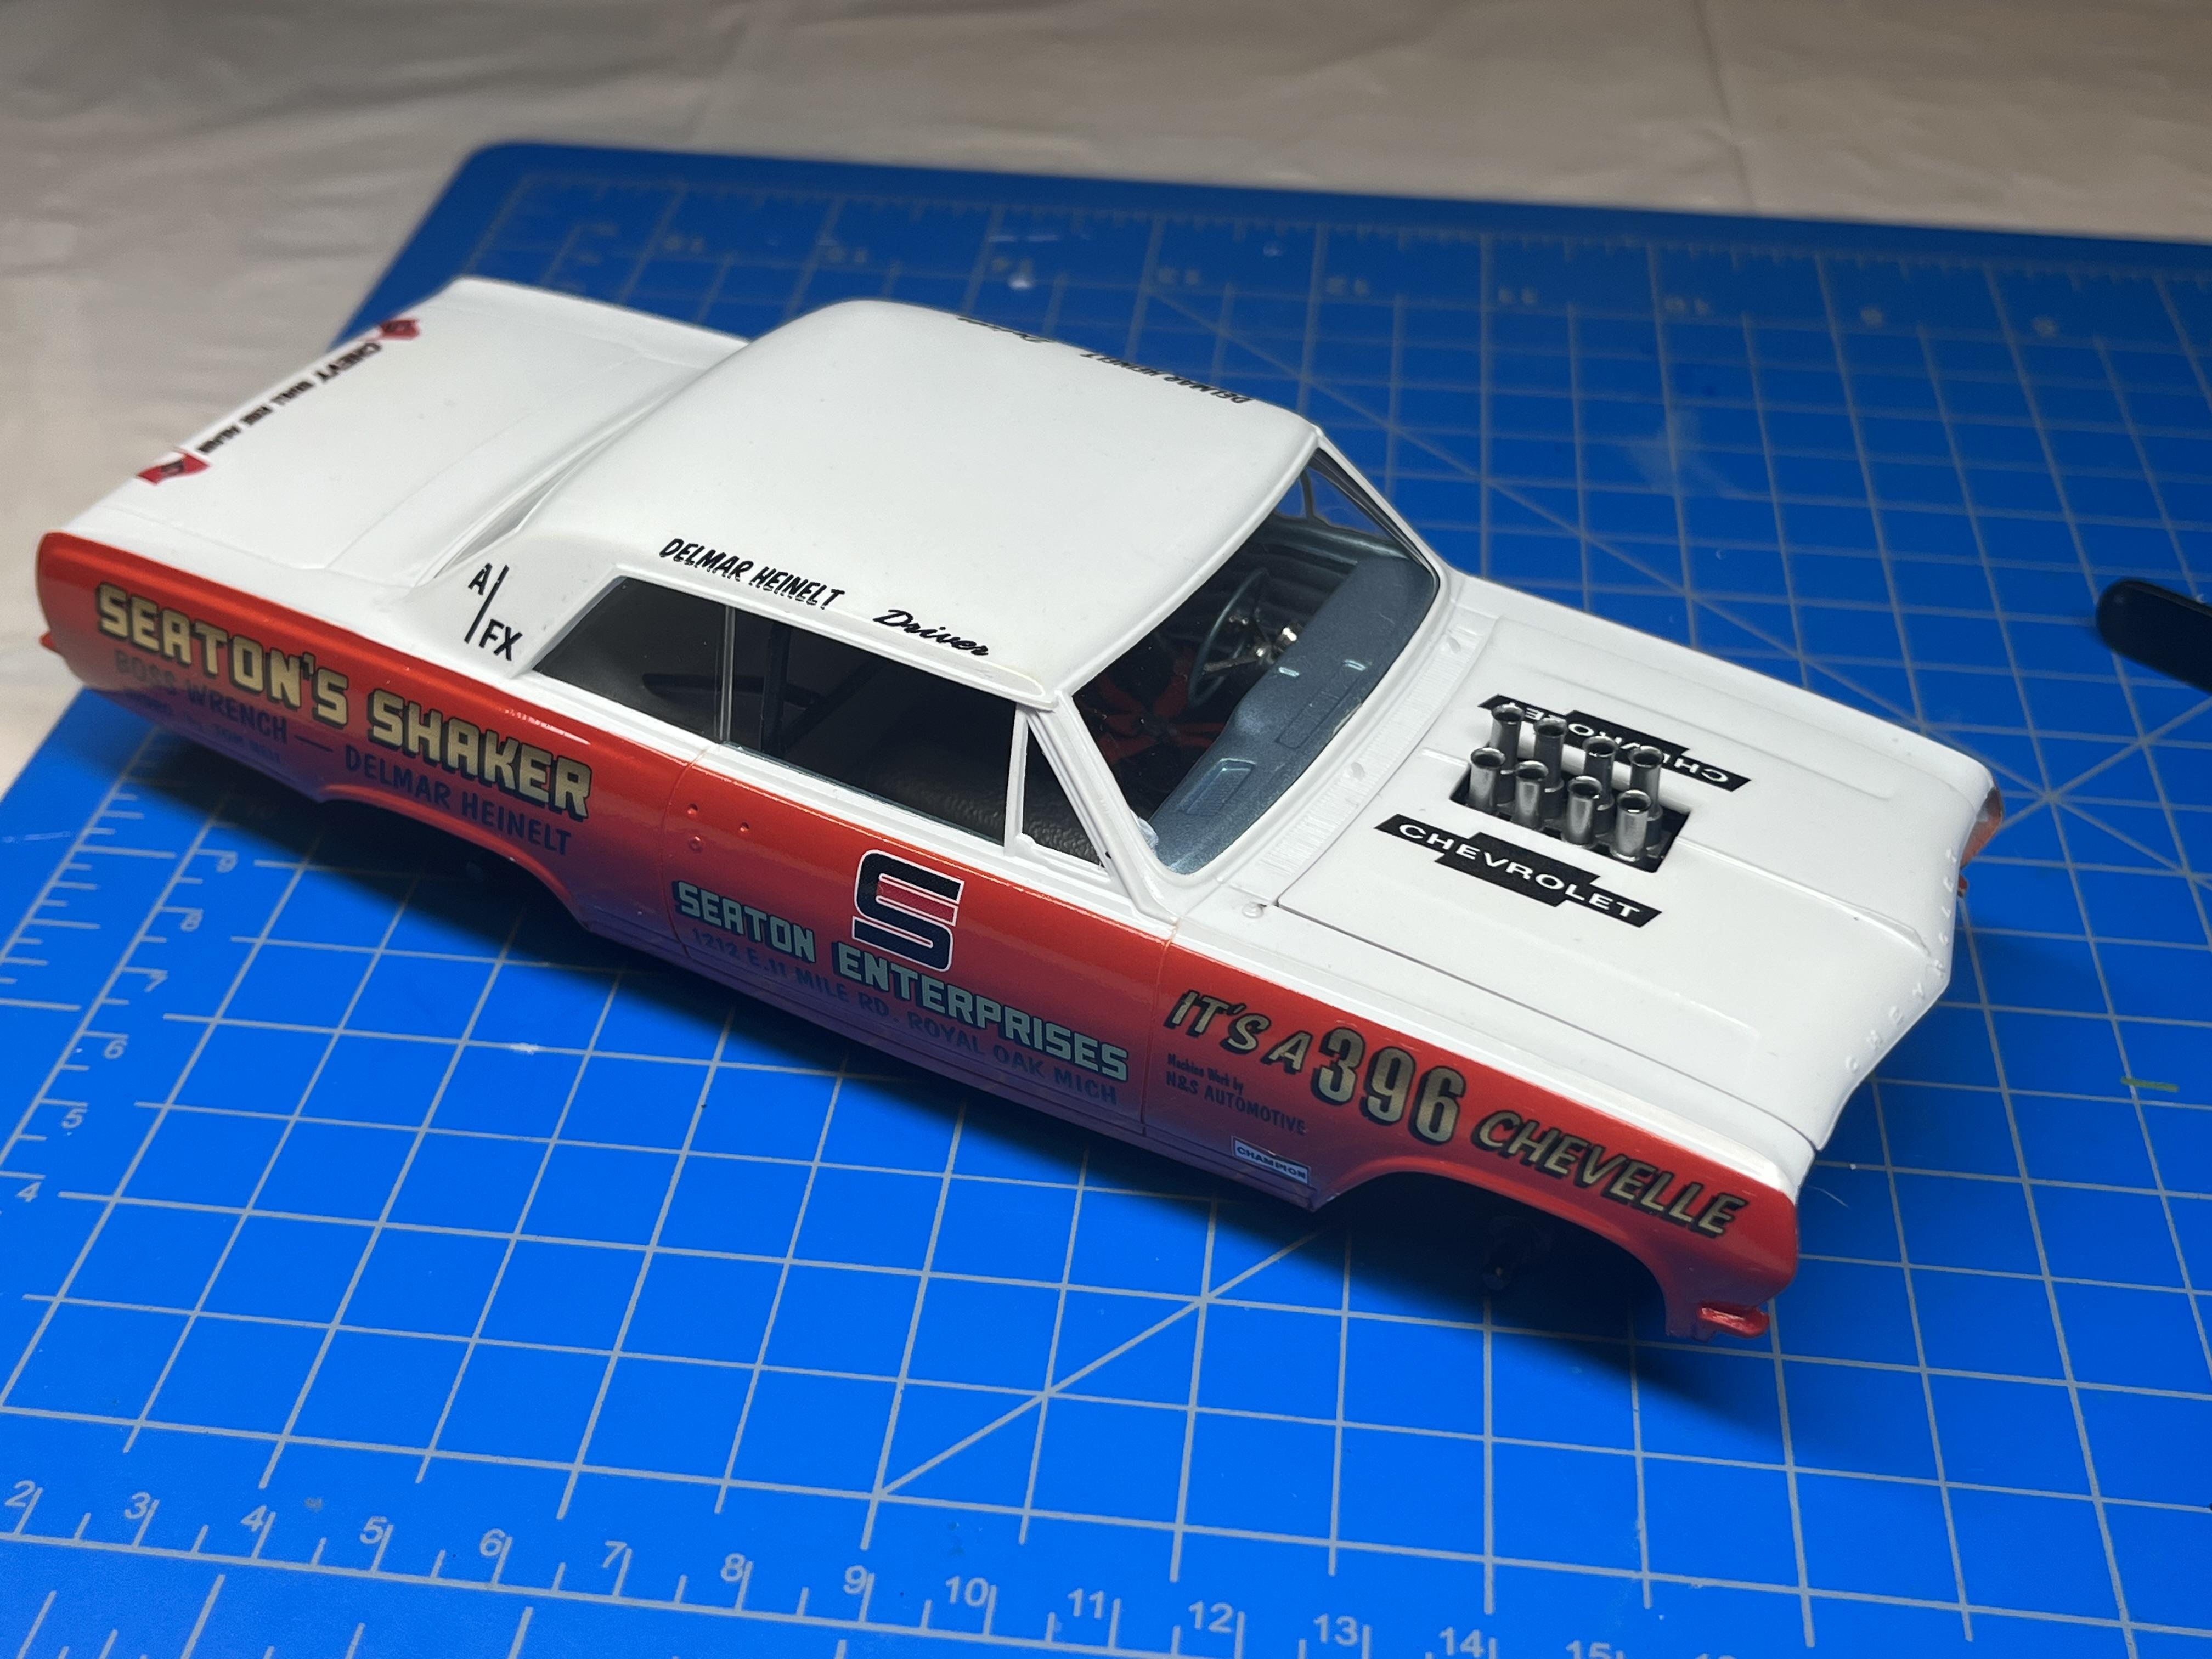
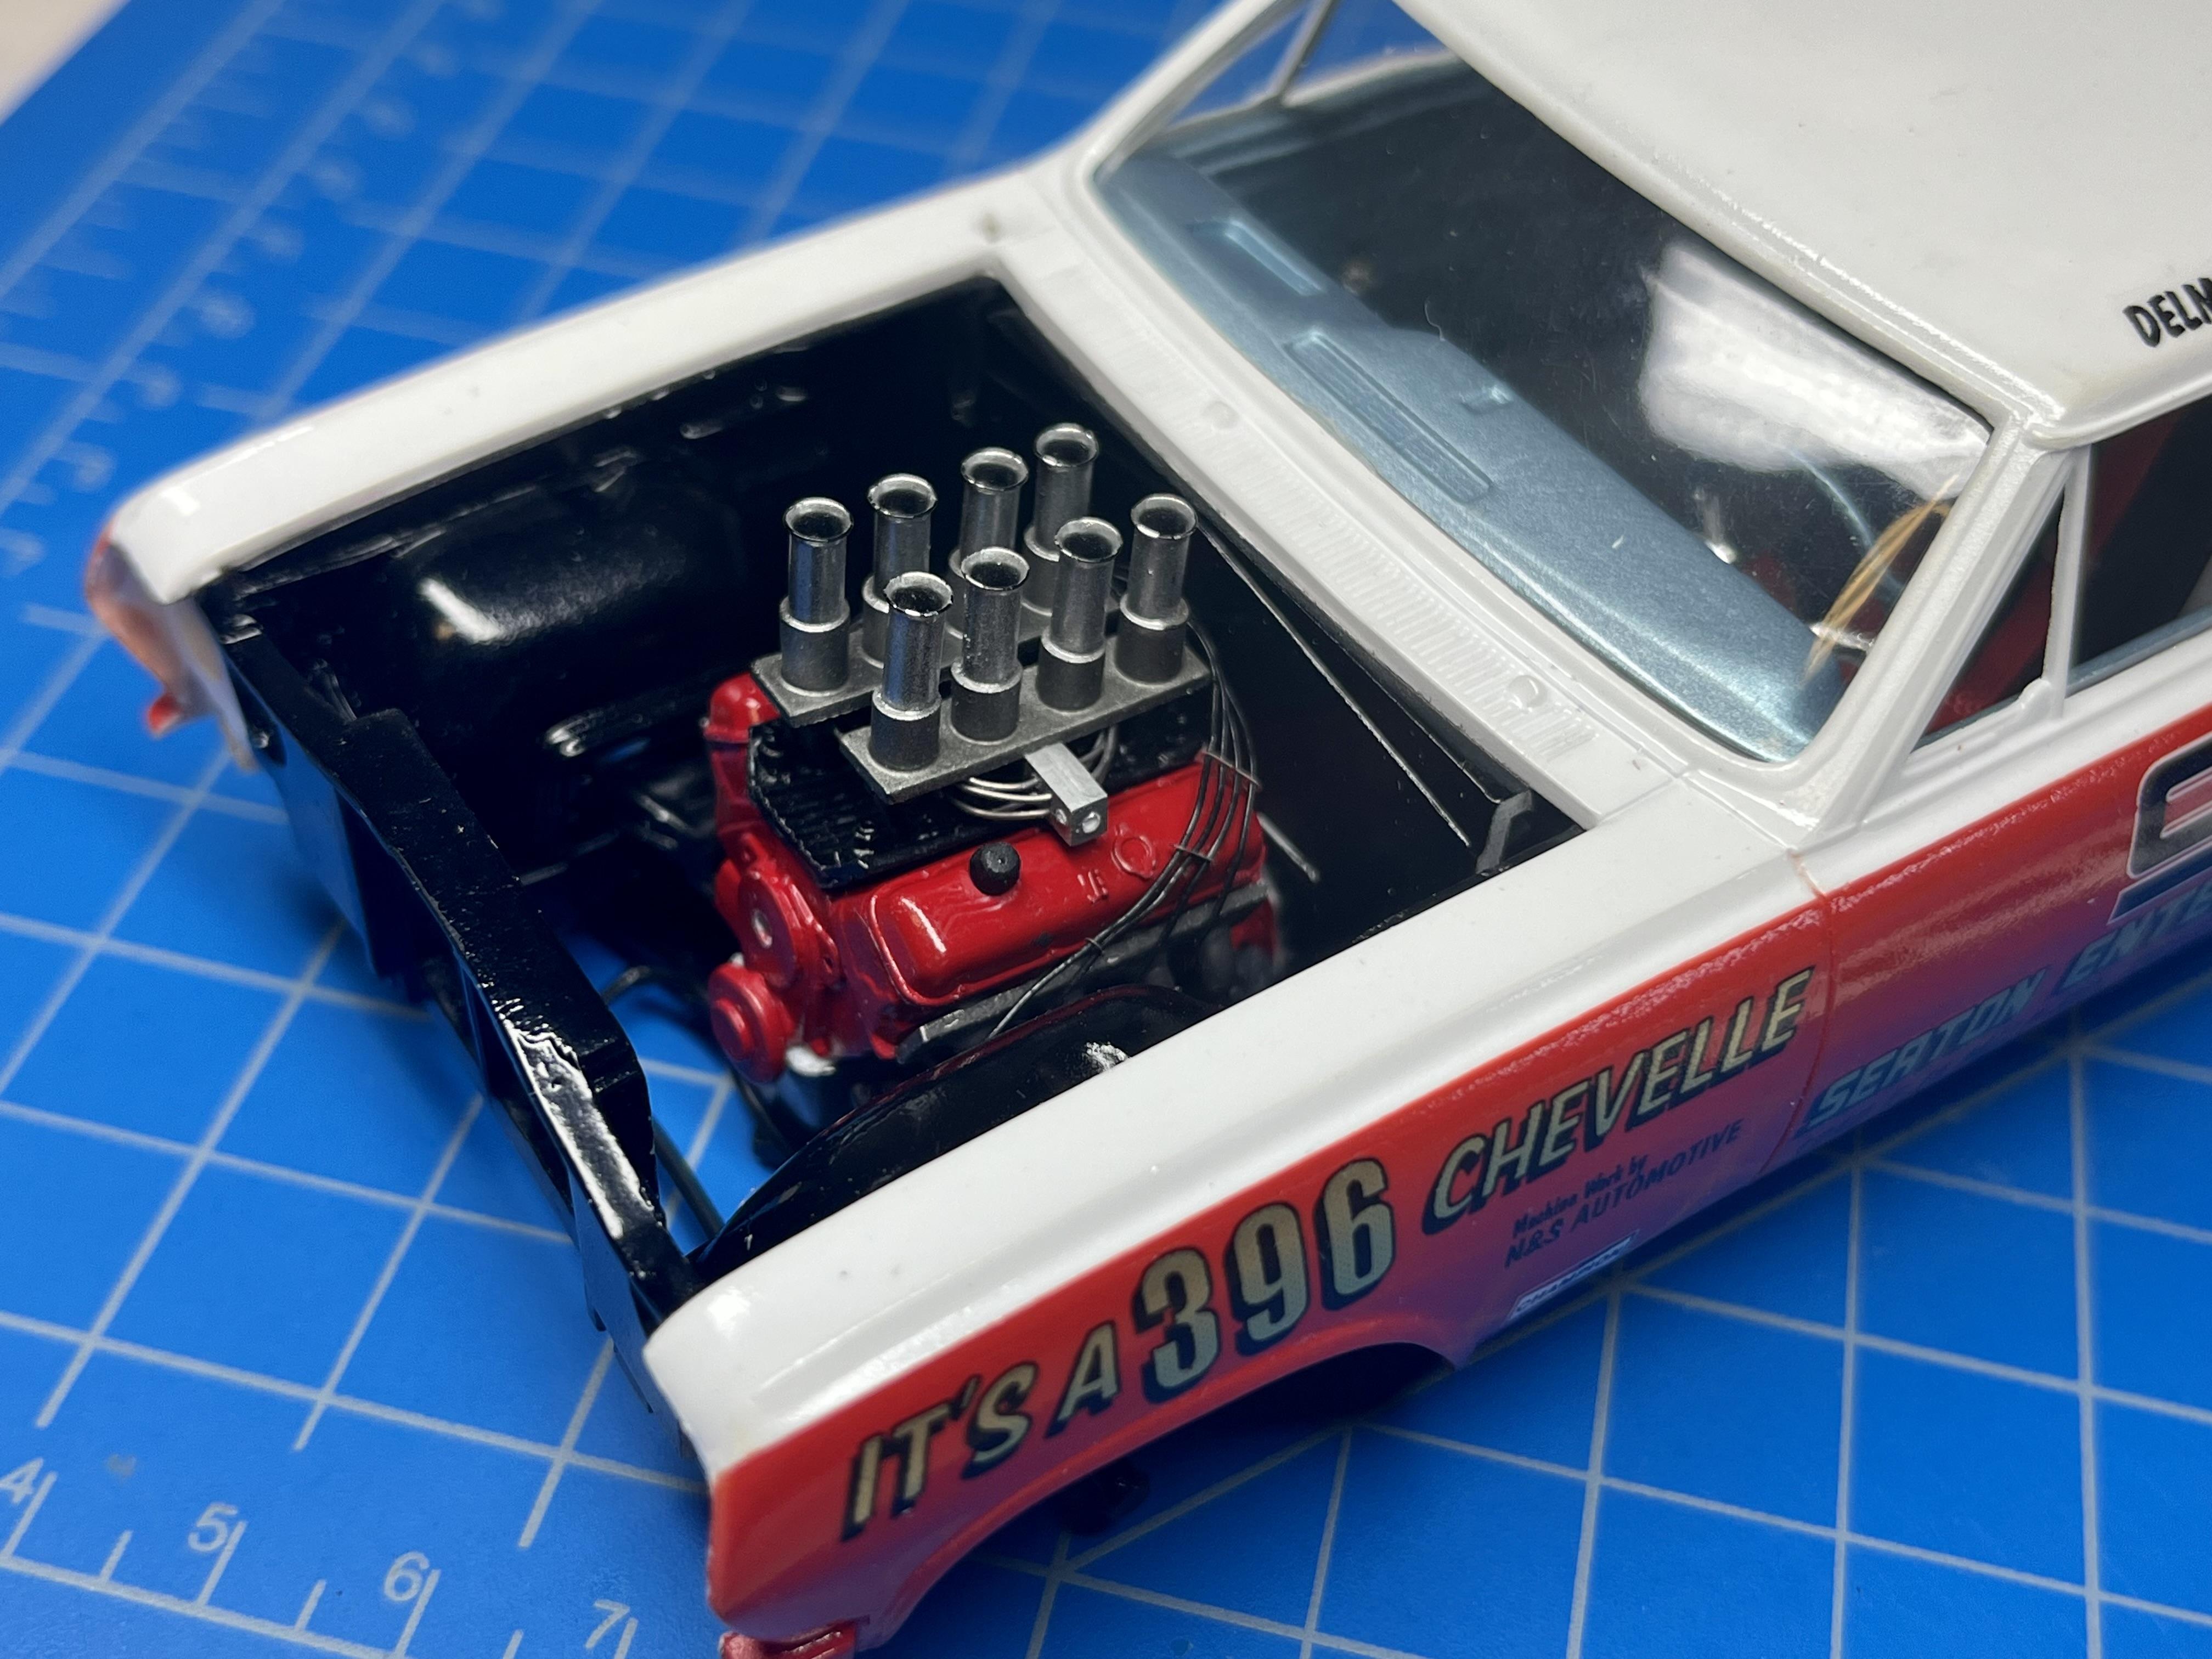
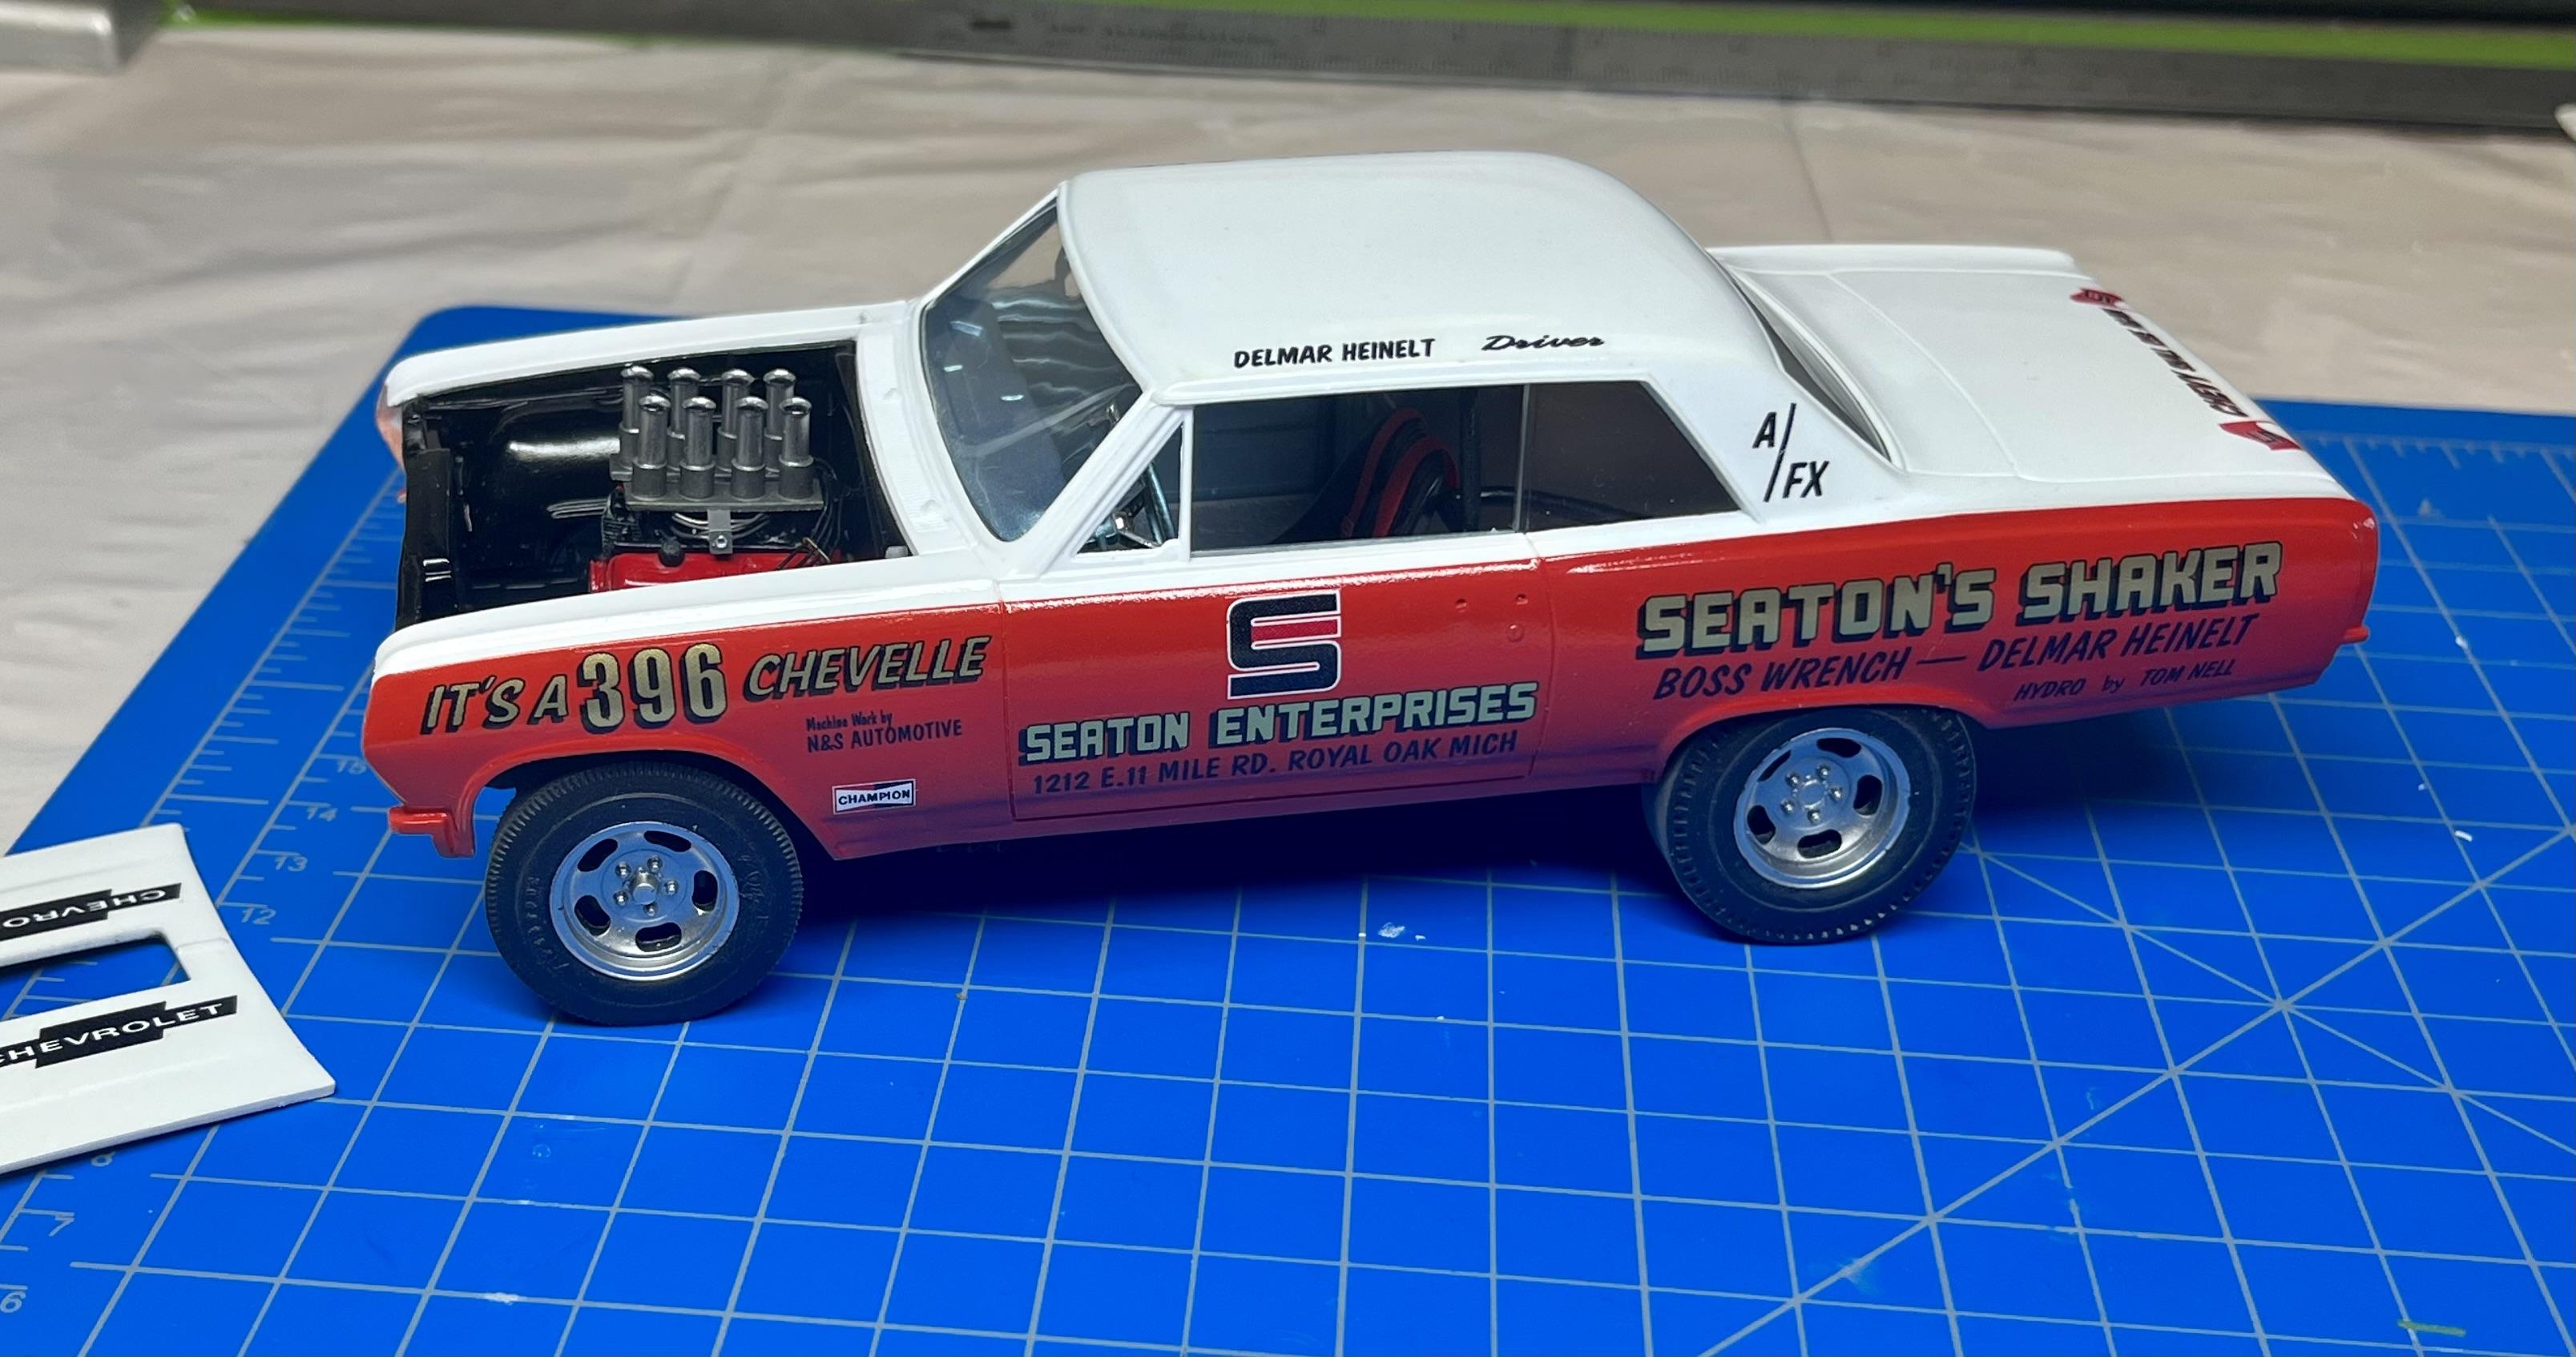
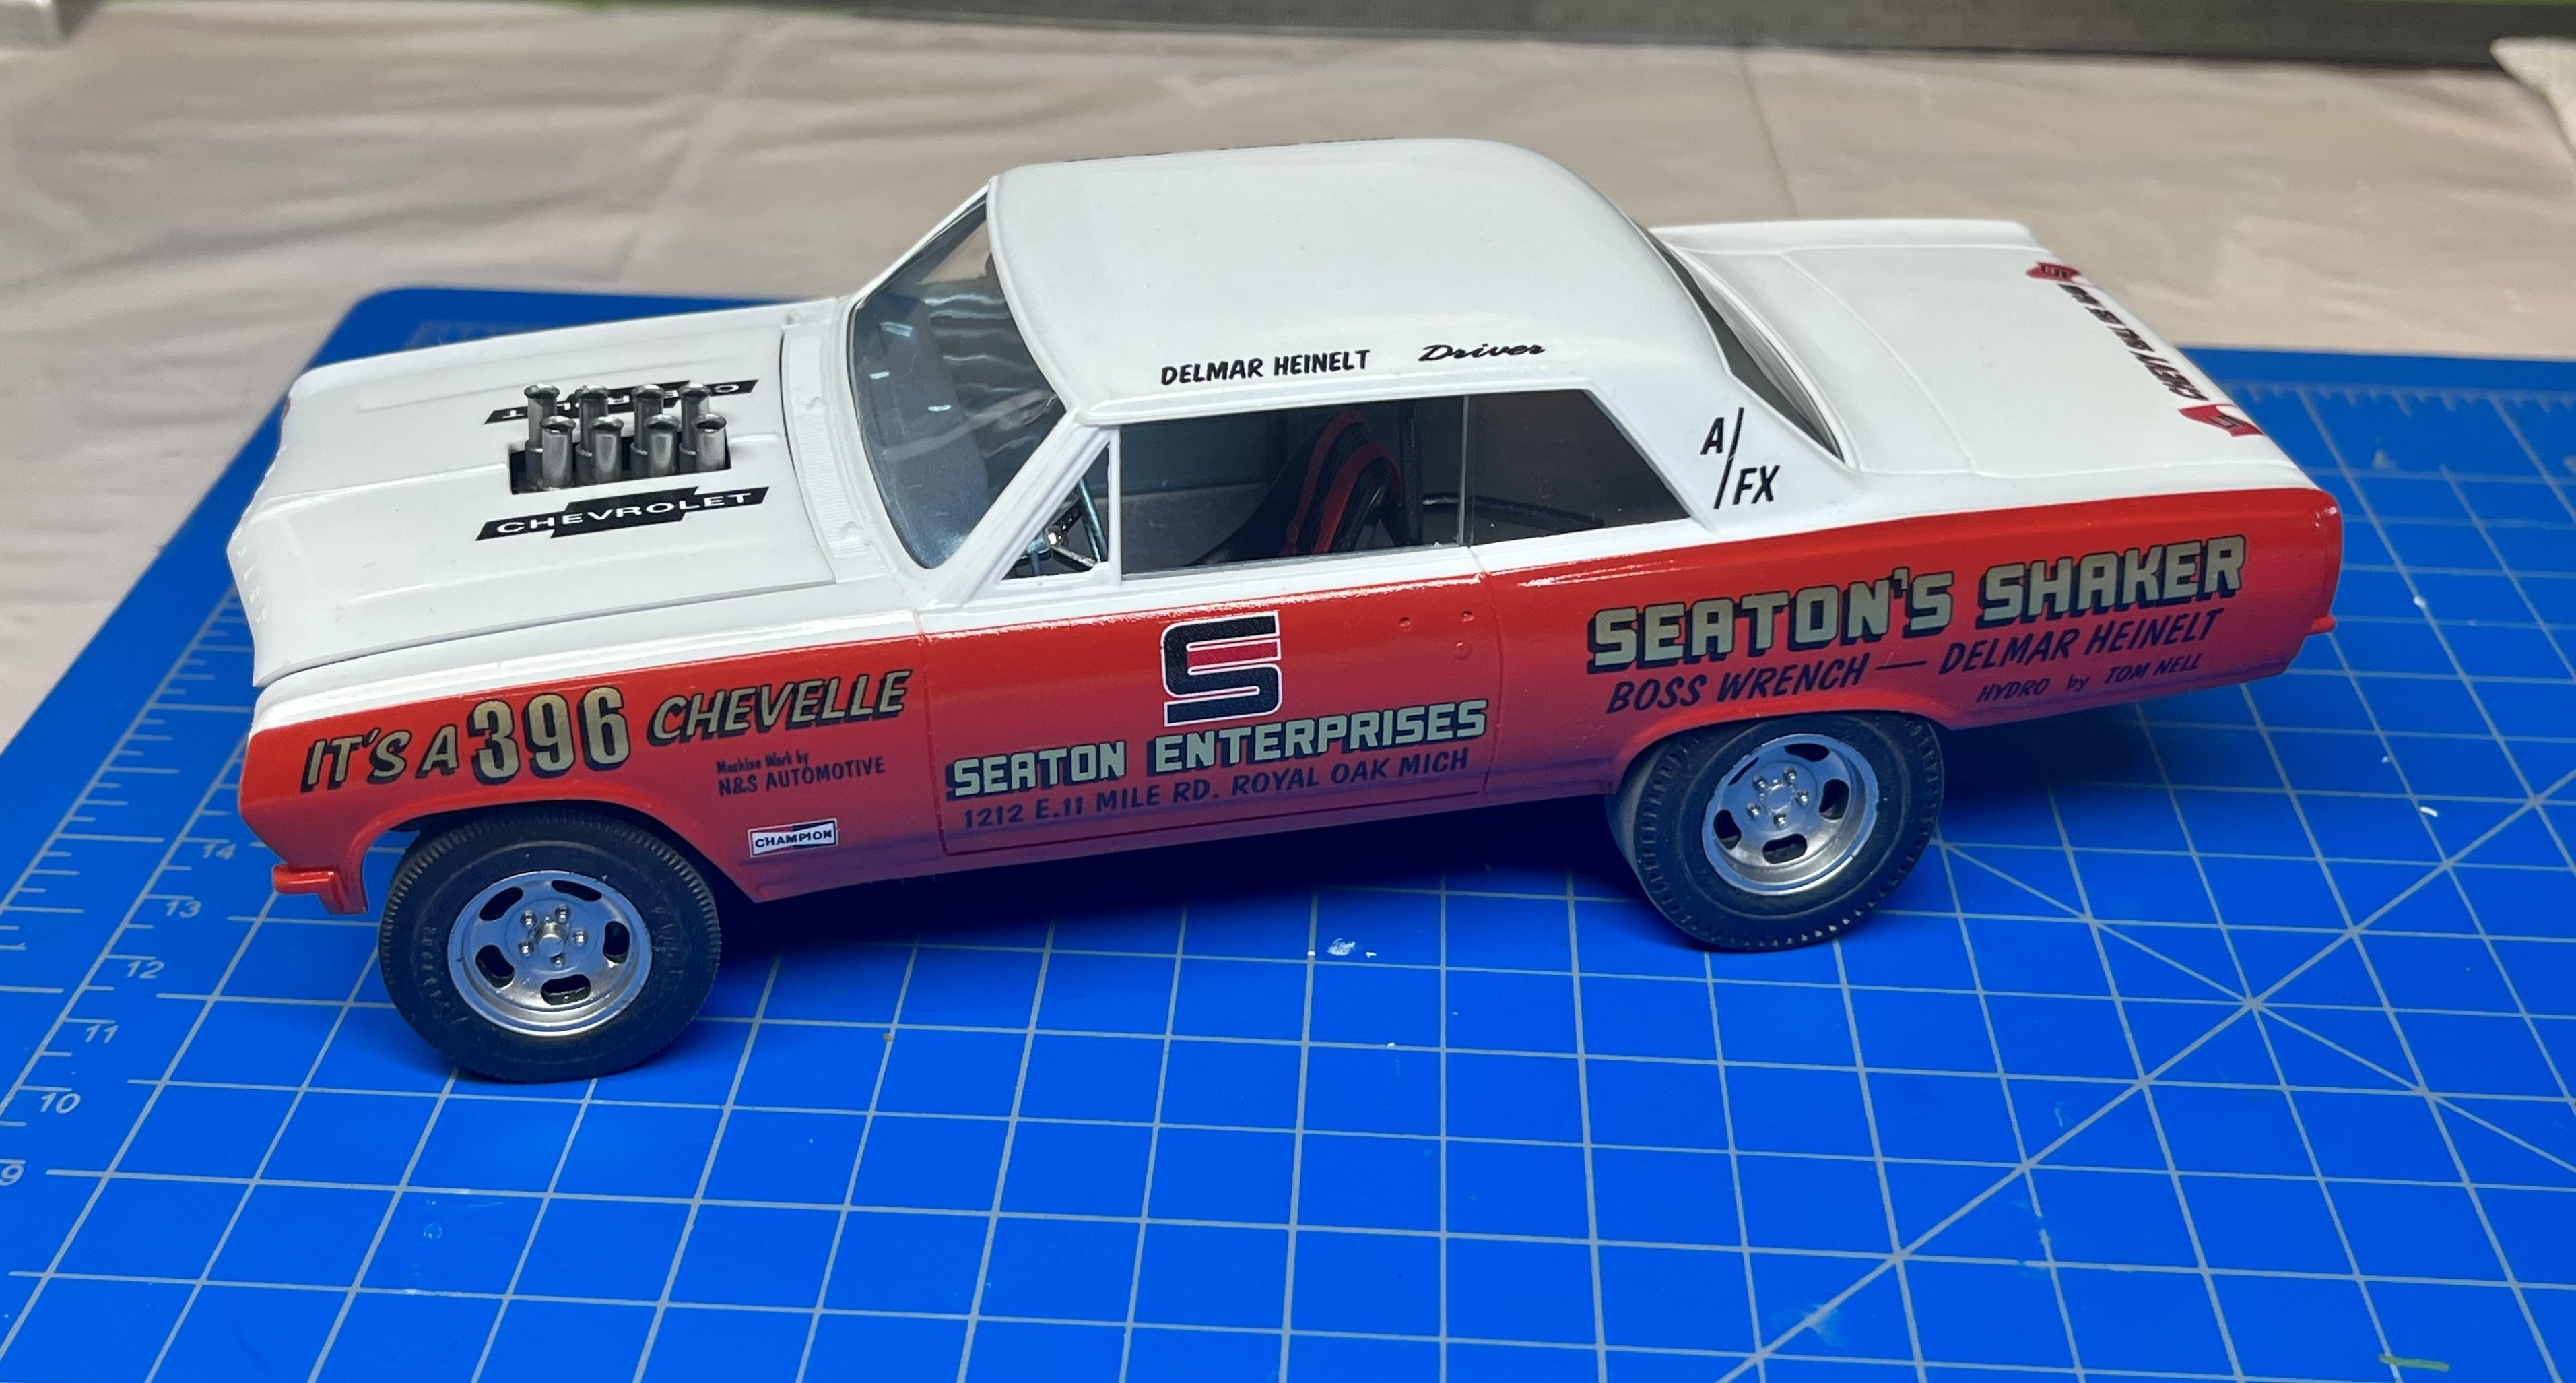
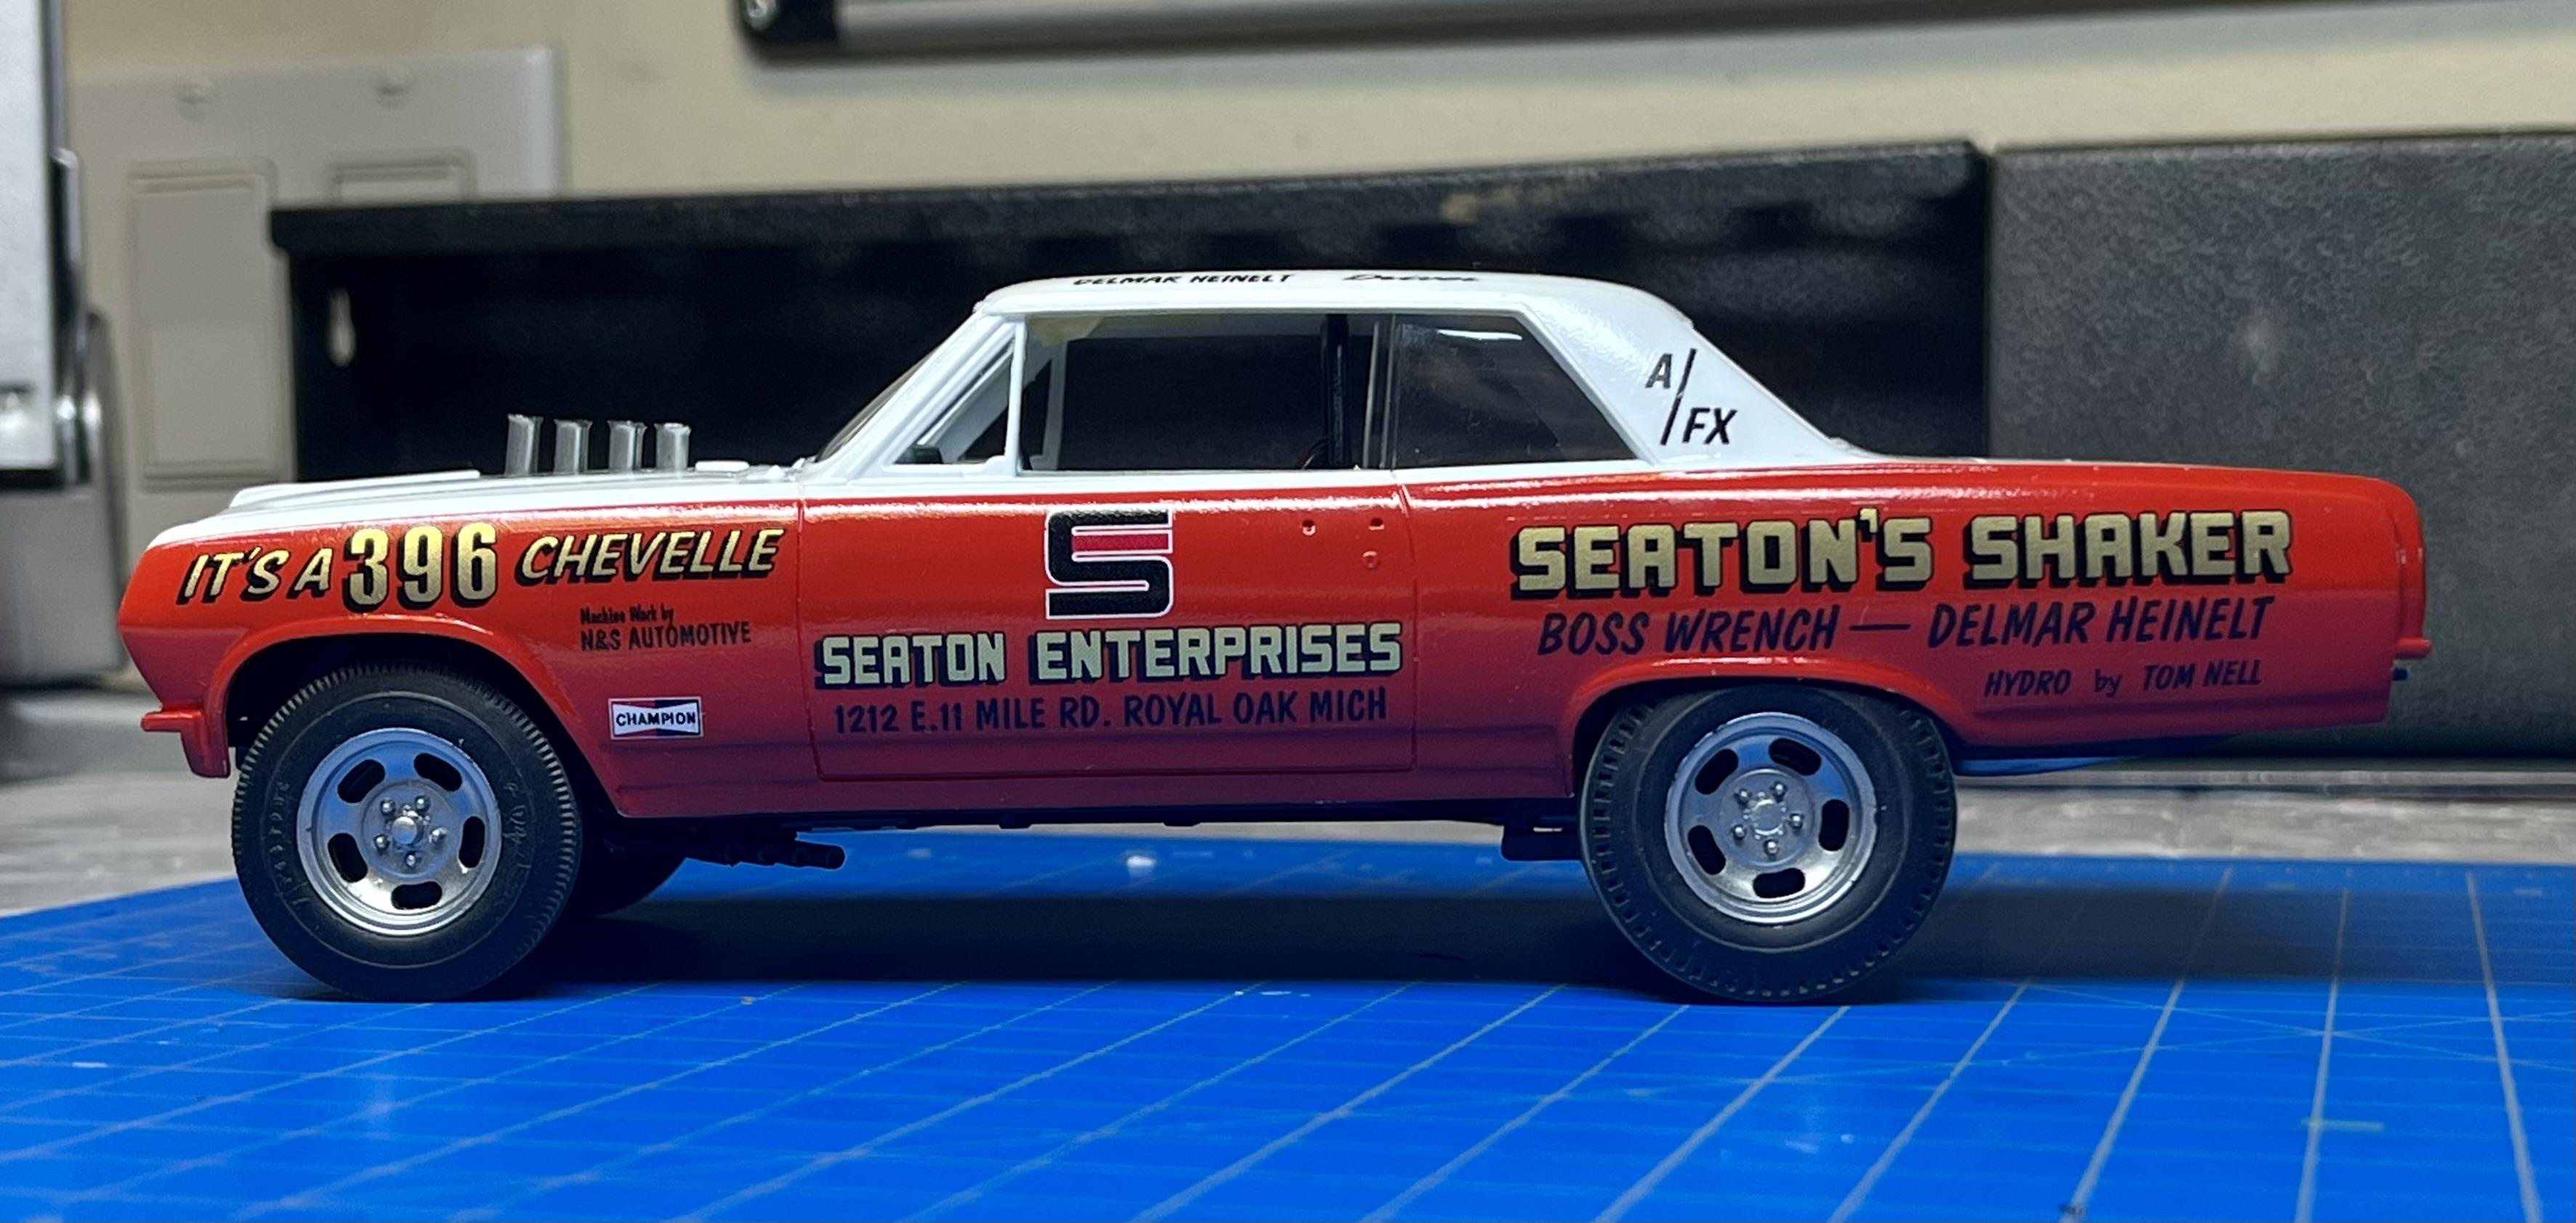
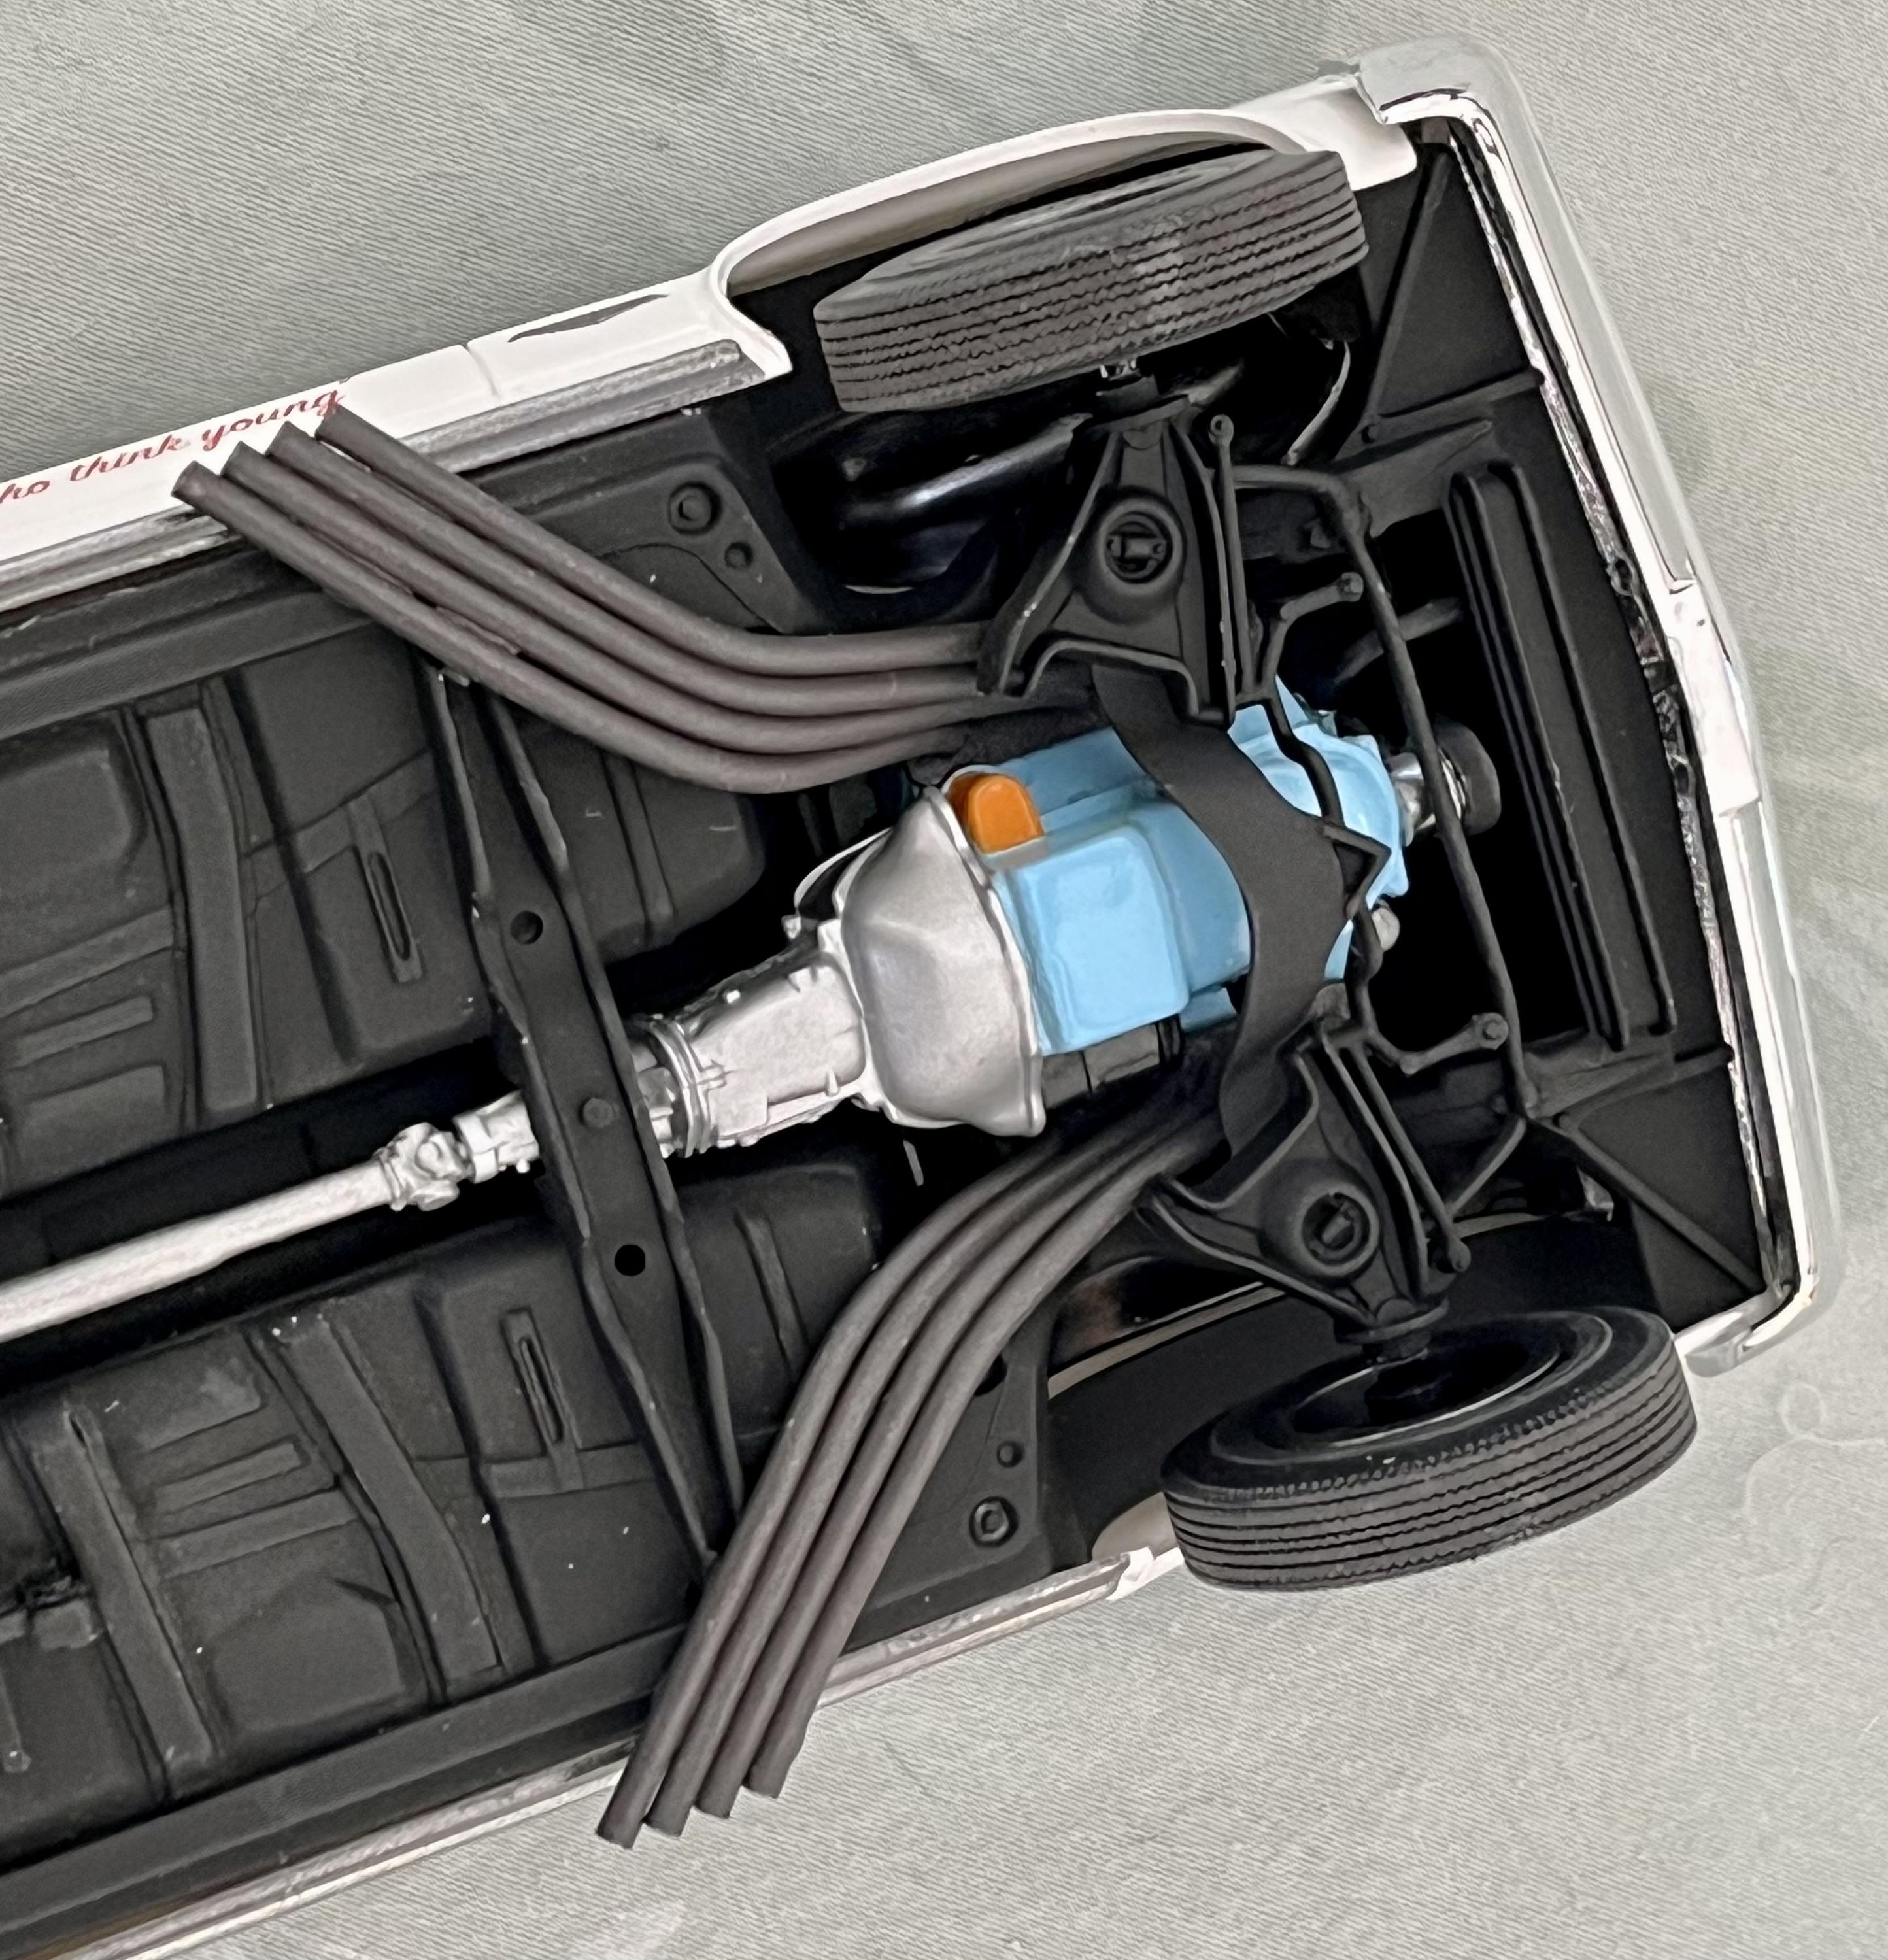
I wrapped this one up today and glad it’s over! My skills and patience tends to diminish as I get near the end of a challenging build and this one really kicked my &%#$ as I tried to get everything to fit, be aligned and generally behave…Seaton’s Shaker won the last few battles but I like to think I won the war! The biggest problems near the end were related to getting the interior tube/ chassis/ body to assemble properly, installing the front and rear grills/ fascia/ bumper to the body (not well engineered by Revell on this kit) and then installing the final detail bits in the engine bay (fuel lines, cooling lines, condenser, cooling hoses). Theres some residual misalignment here & there but it’s about as good as I can do on this one for now. I’ll post more pics in Under Glass - Drag. Thanks everyone for following along, providing good suggestions and questions and passing on words of encouragement. John

-
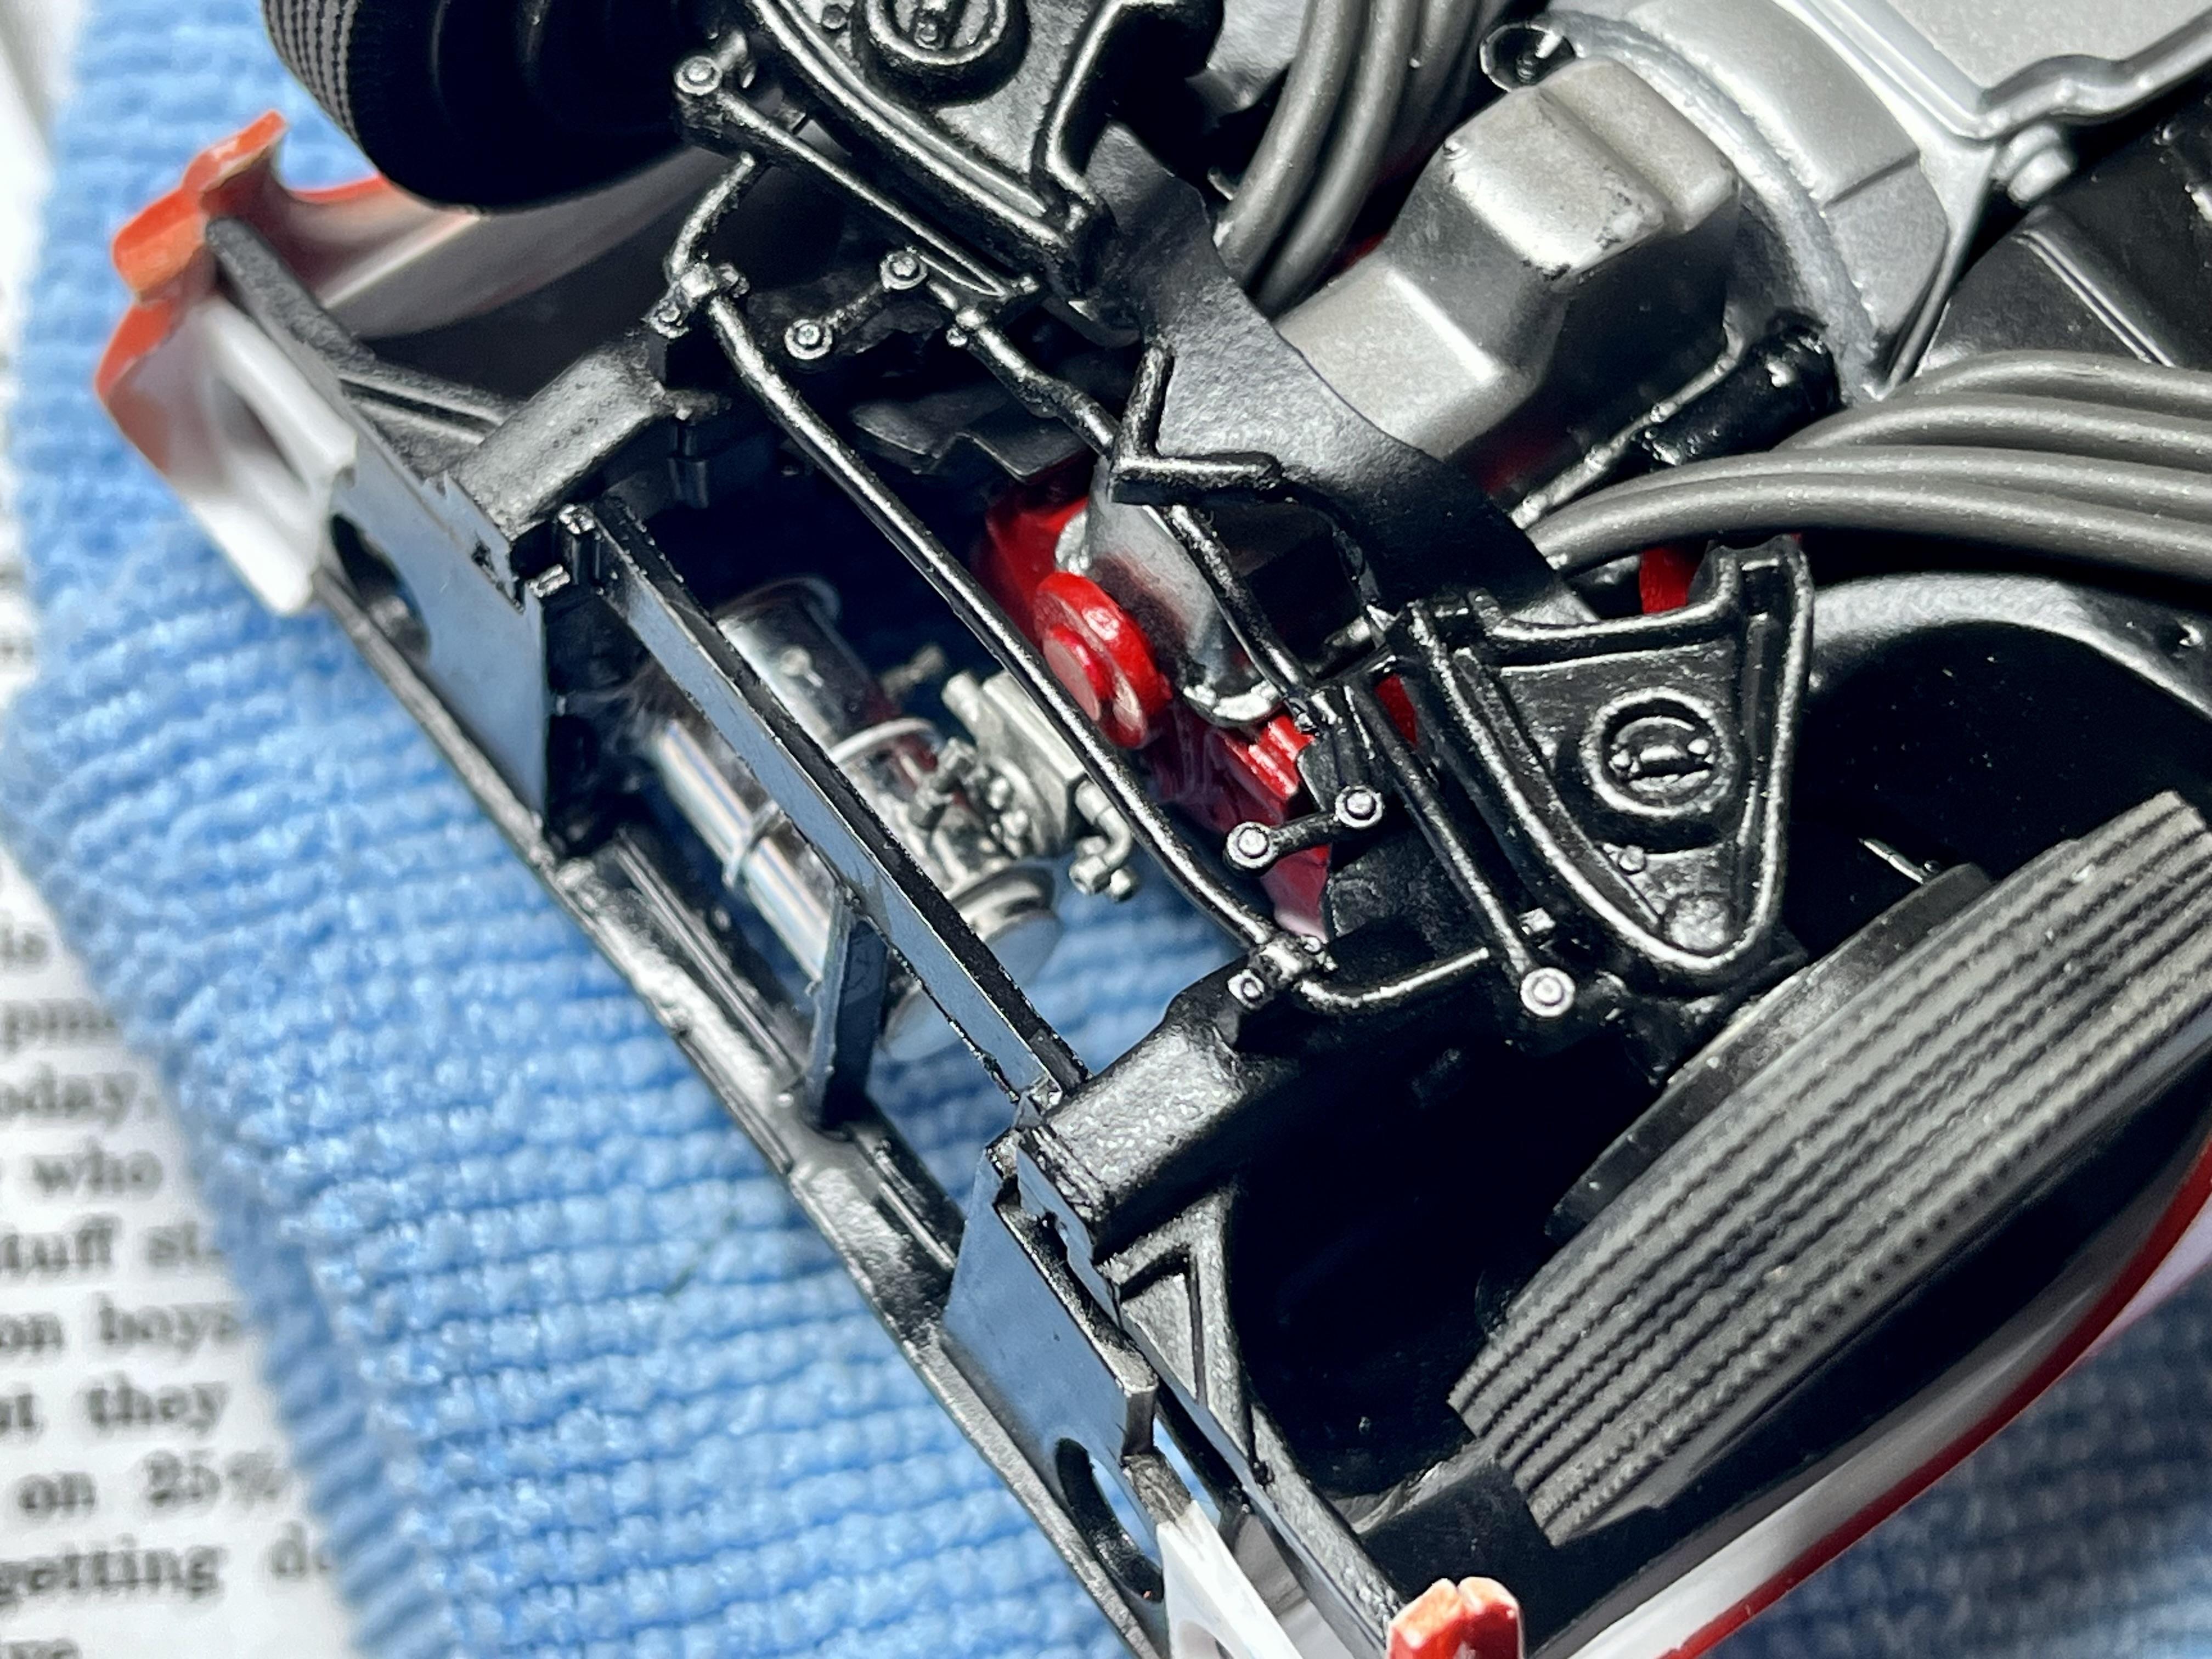
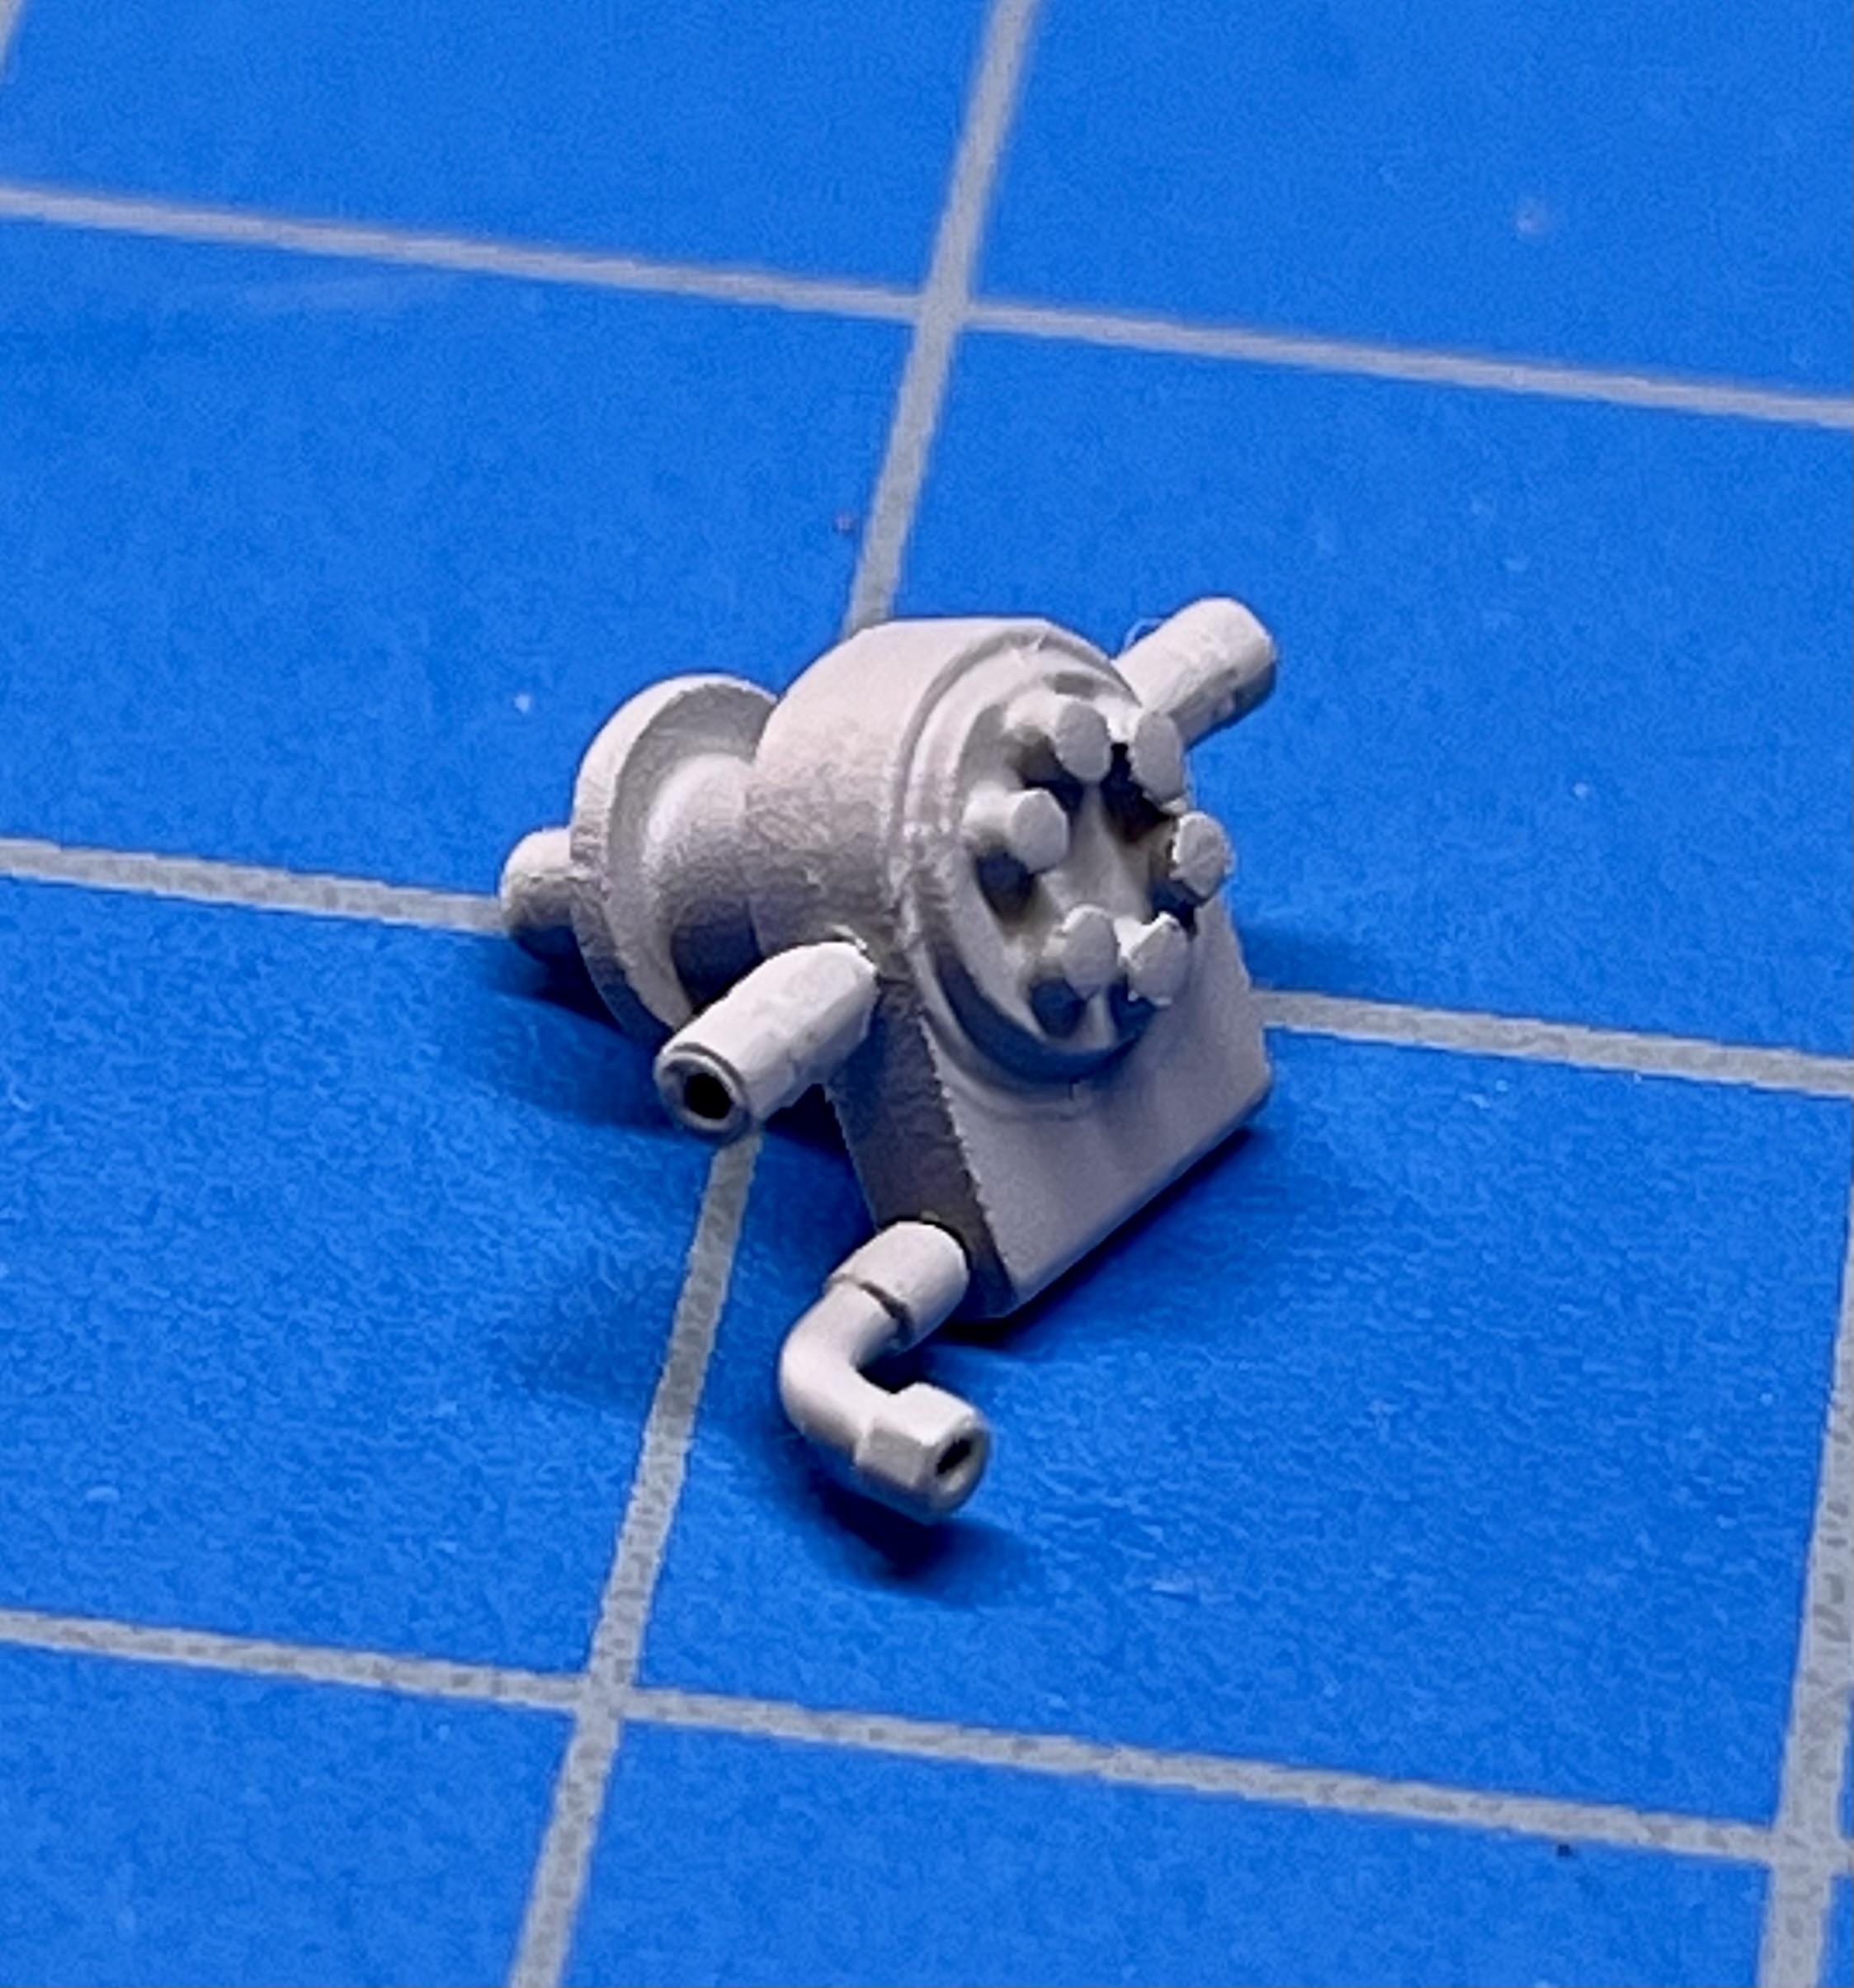
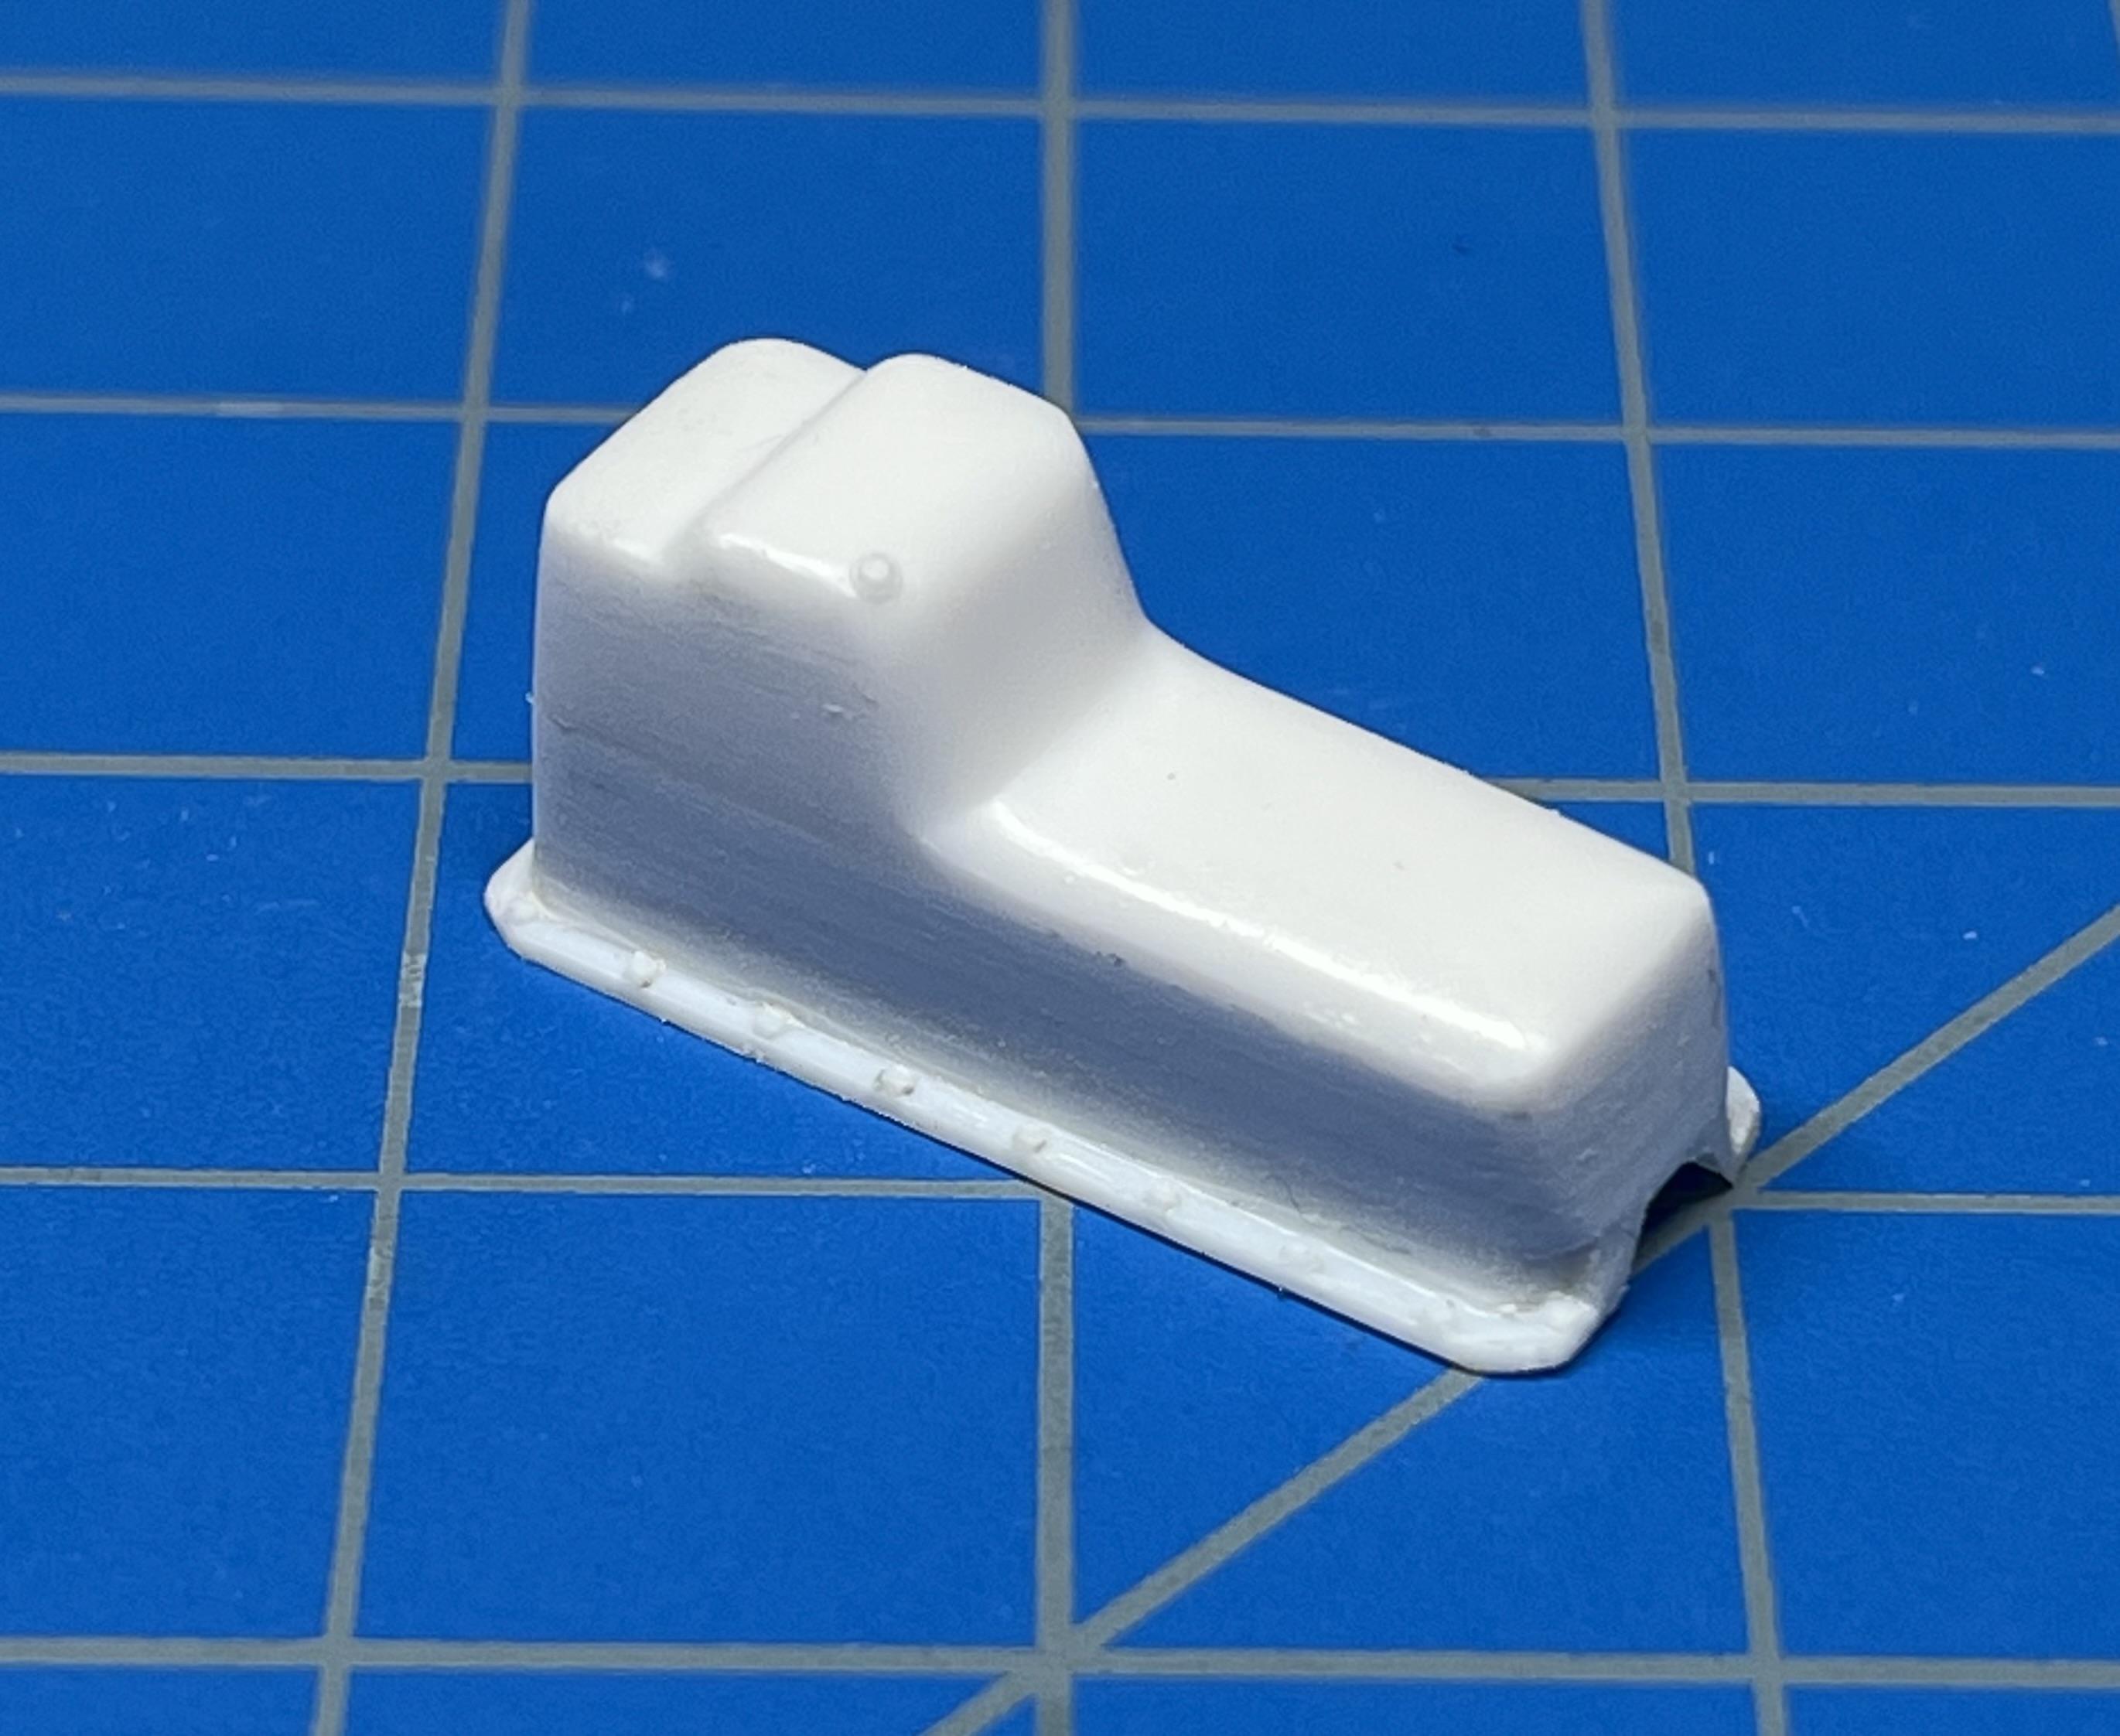
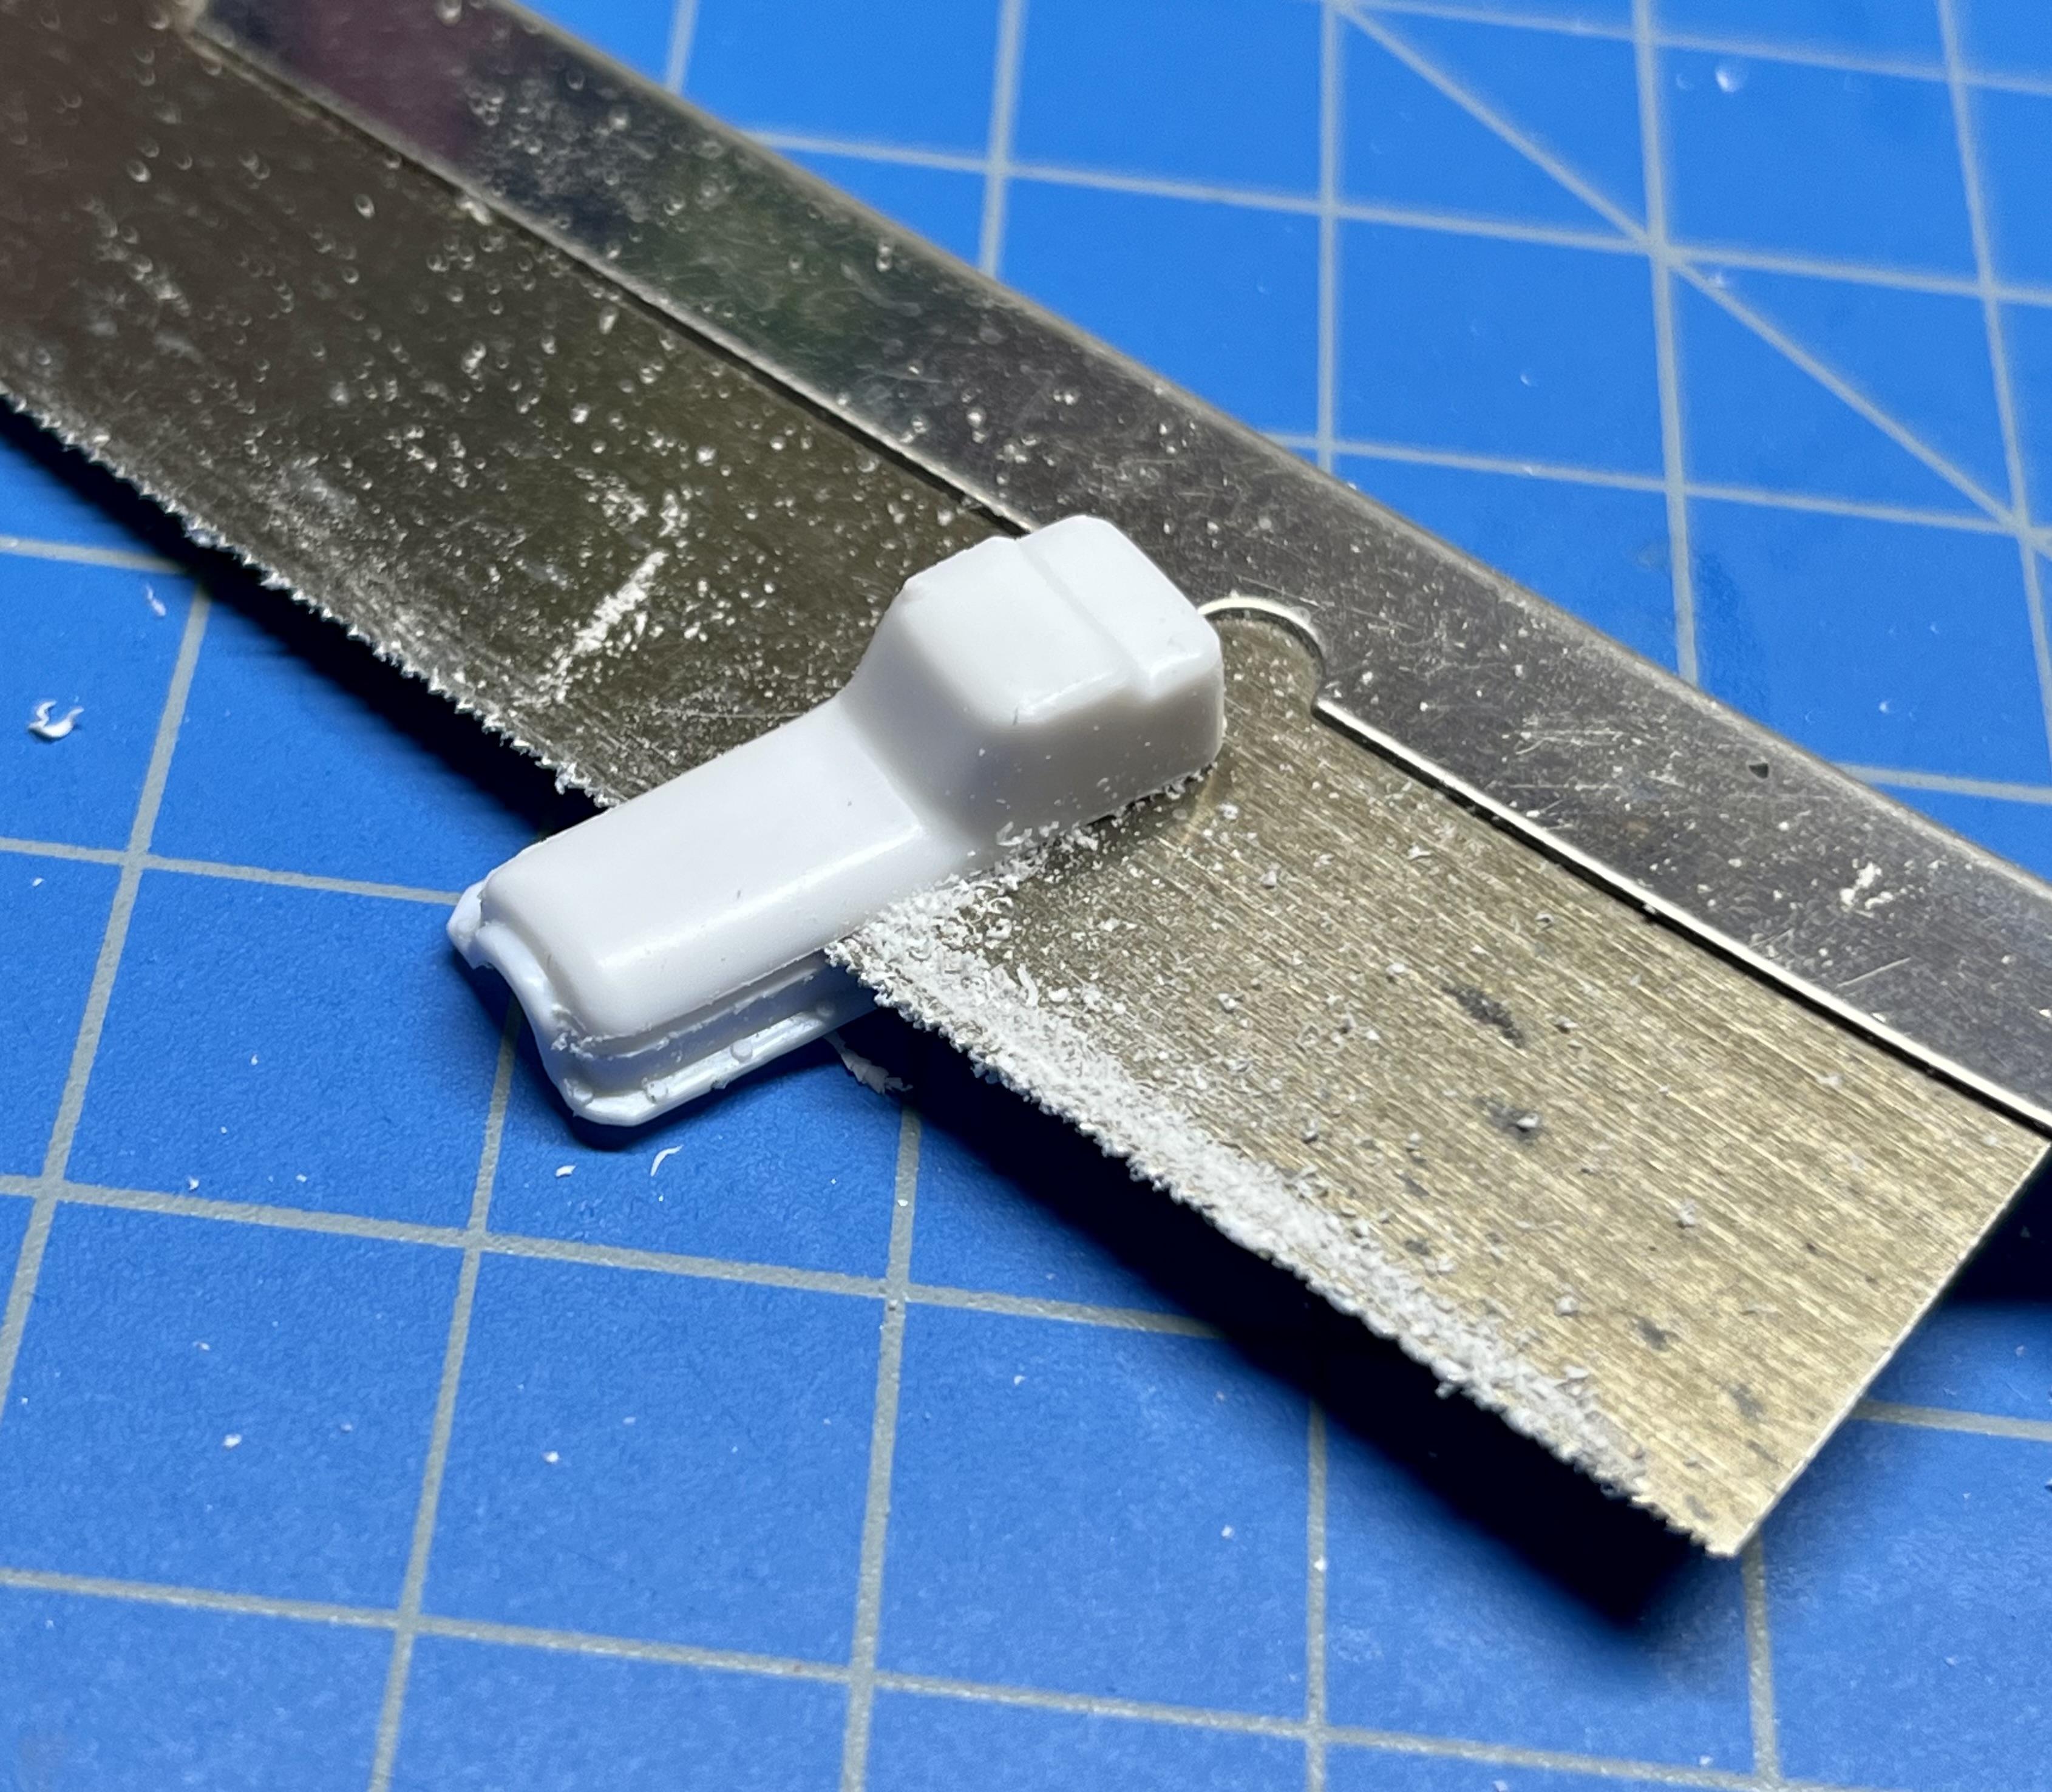
Mounting the Moon tank onto the front bulkhead of the body turned into a painful trial & error/ cut & fit exercise. I had to trim a little more off the front of the fuel pump to clear the tank: I finished applying and trimming the BMF around the window frames and side rain gutters and then installed the windows: I cut .005” clear styrene shapes for the right and left front side windows and wing windows and bonded them within the body to simulate the non-roll-down-able plexiglass. I still need to install the firewall detail/ brake cylinder, fine-tune and finalize the body-chassis assembly, add the front/ rear grills/ bumpers/ install cooling hoses and fuel lines, install door handles. I’m hoping to wrap this build up this week, it’s become a grind…. John
-
Beautiful clean build Sid. I love the two-tone color choice and clean paint execution as well as that gorgeous interior. I feel your pain on the challenges of joining chassis to body and getting everything to seat perfectly, seems like I have the same problem on about half of the 1/25 builds I do. I’m slowly learning the more dry-fitting before painting, the better! I would be proud to have your build in my display case “as is”. The one thing that sticks out to me with this Revell kit which surprises me (and is unrelated to your excellent build quality) is the unrealistic looking finished tires + wheels. The wheel rims appear to me to protrude way too far beyond the outside face of each tire and the tires also appear slightly undersized to my eyes. I built the Revell ‘57 “Black Widow” 150 coupe kit which was tooled a few years later than this ‘56 and the wheels and tires look so much more realistic to me. I have this ‘56 210 kit in my stash (it was my first 1:1 car) and I’m tempted to use the wheels and tires from the ‘57 kit when I get around to it.
-
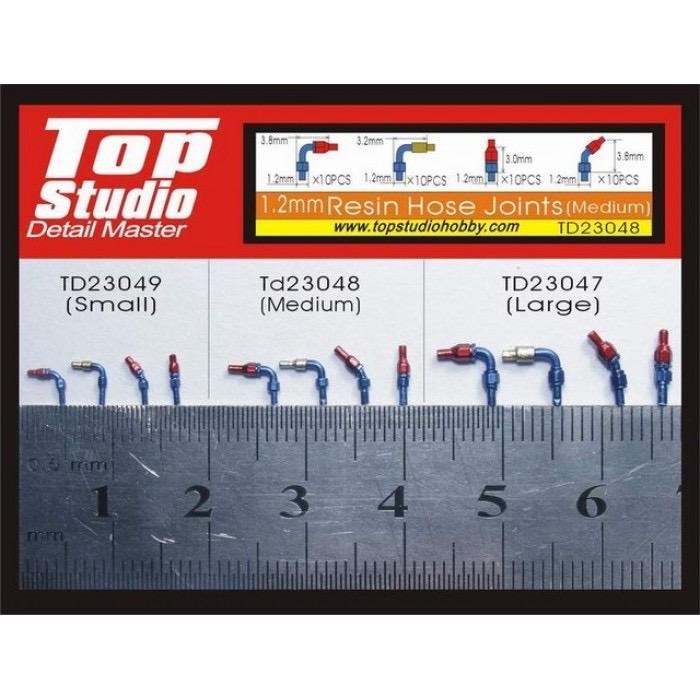
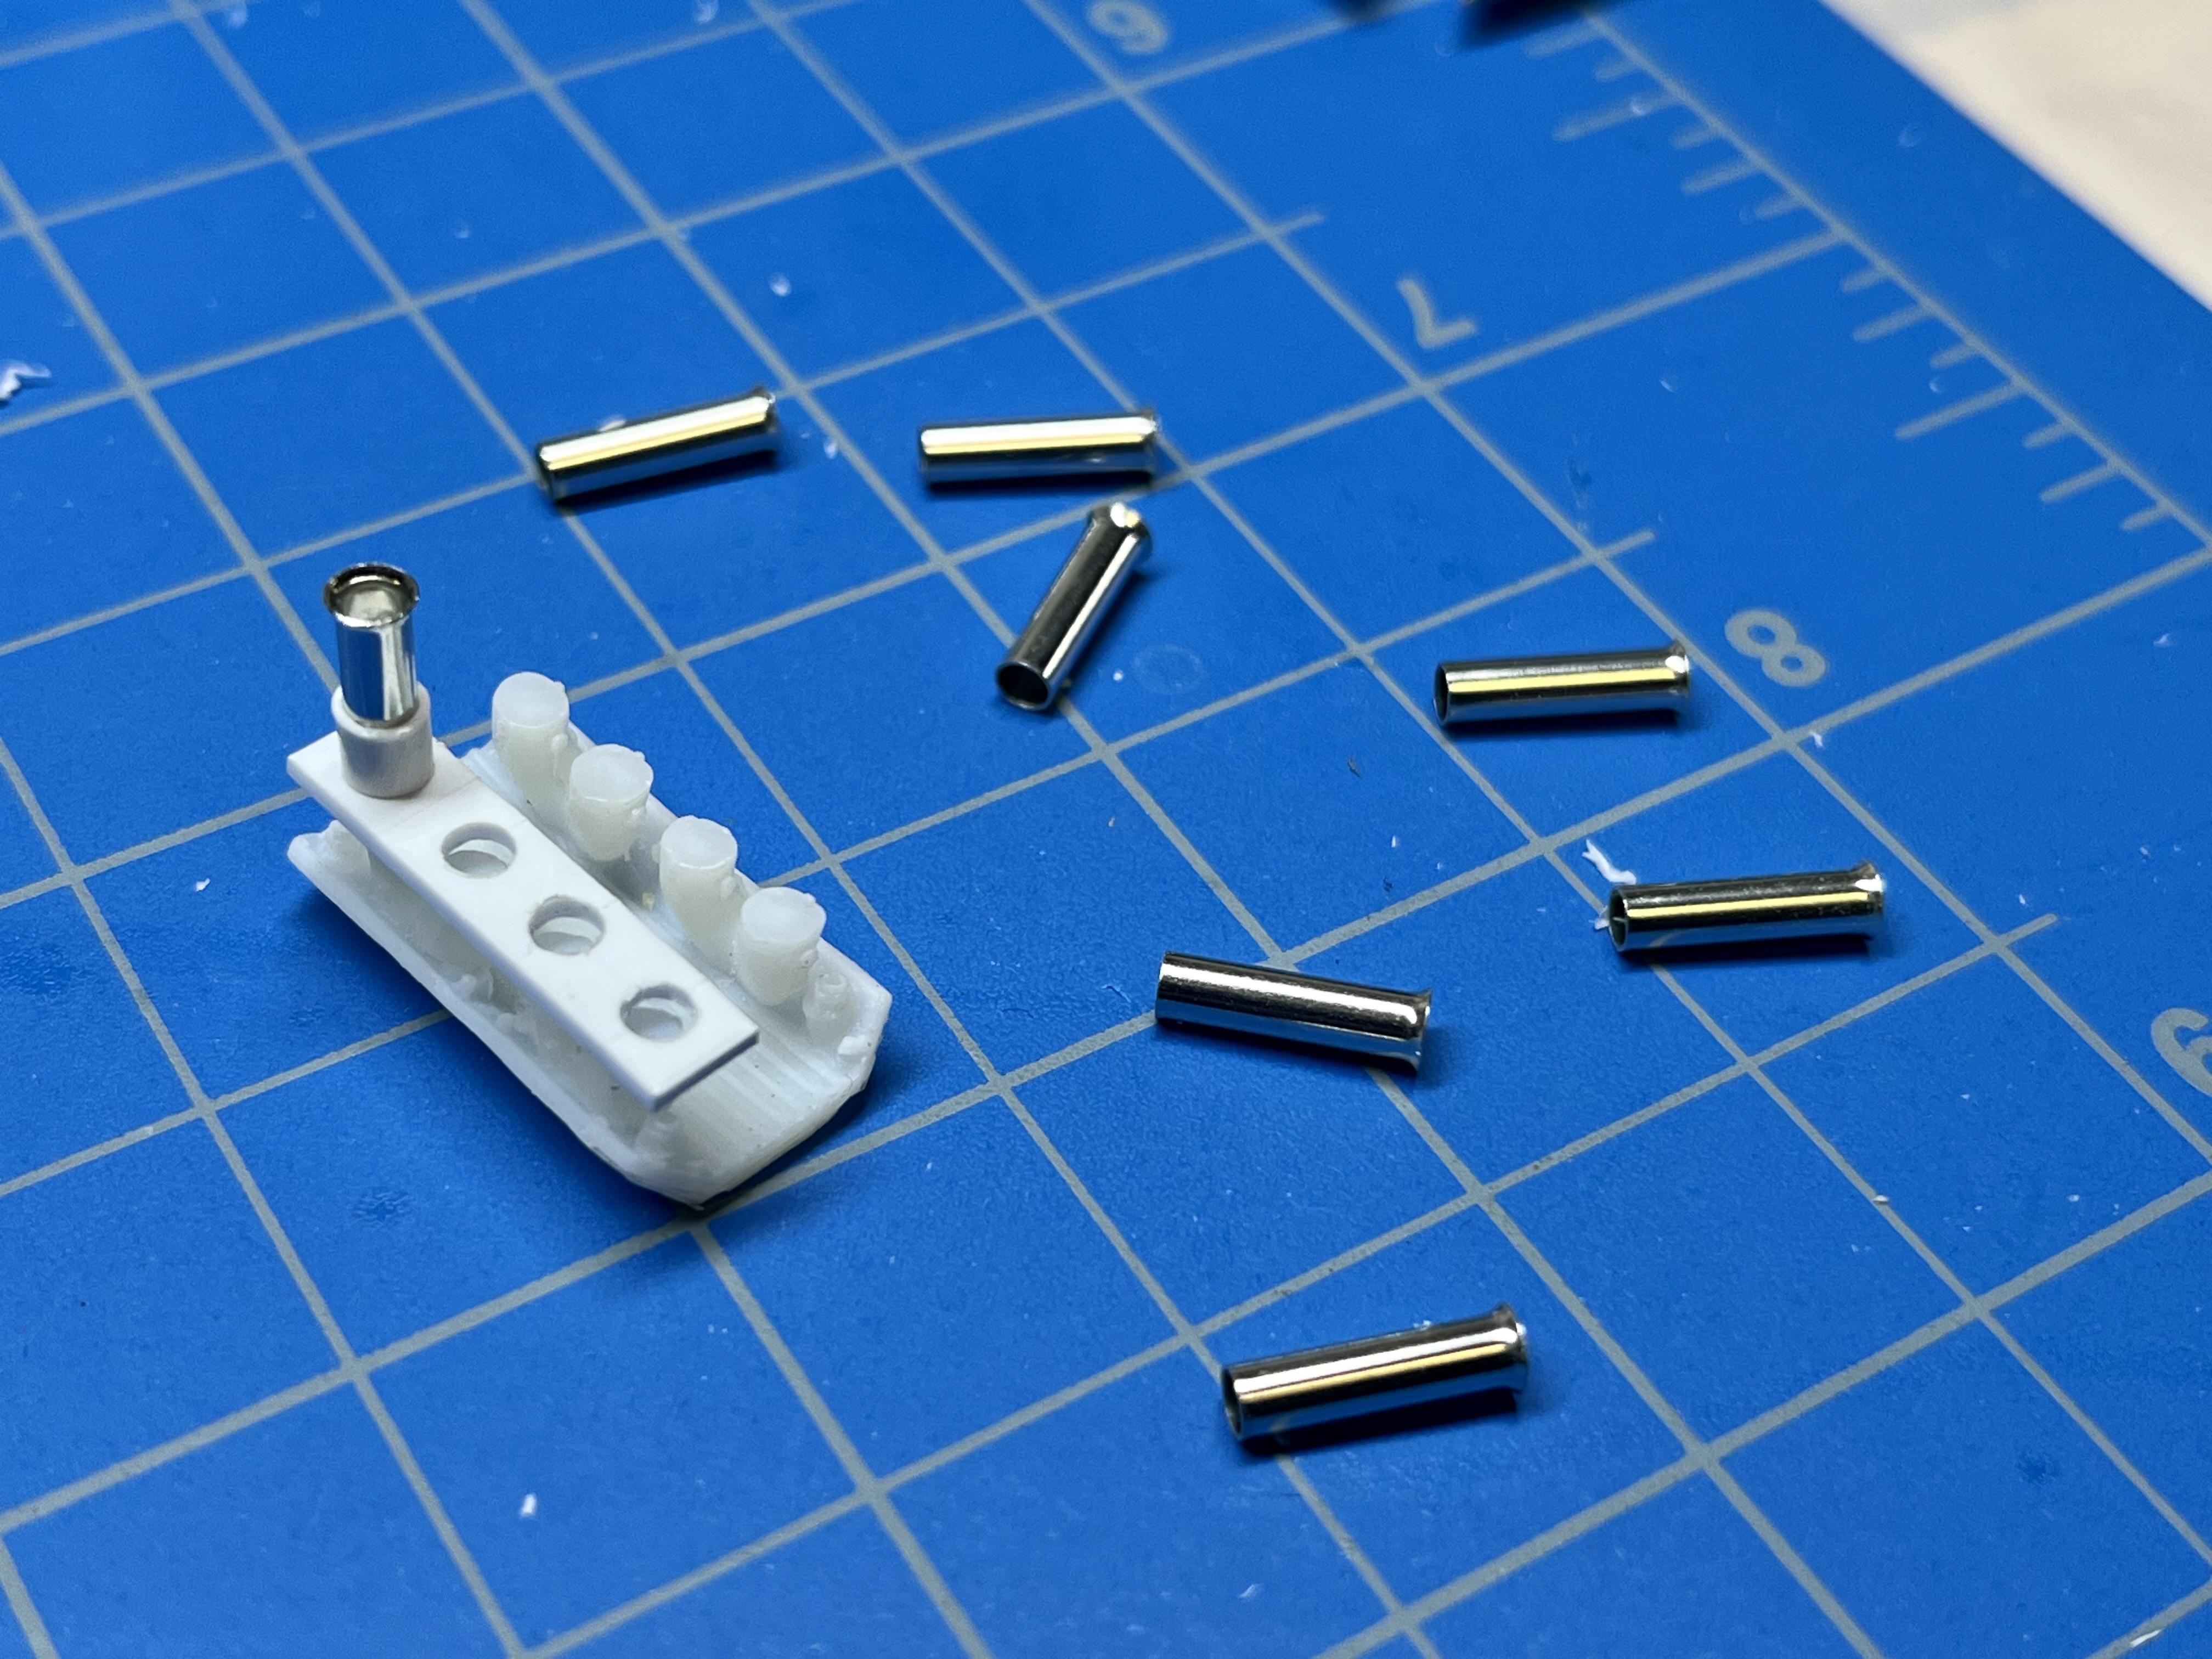
These are Top Studio Detail Master parts I ordered a few years ago from HLJ.com. Unfortunately they are getting harder to find these days, the 1.2 mm sets (the size I used here) are still availability from BNA (Australia) and a few Chinese sources, check eBay.
-
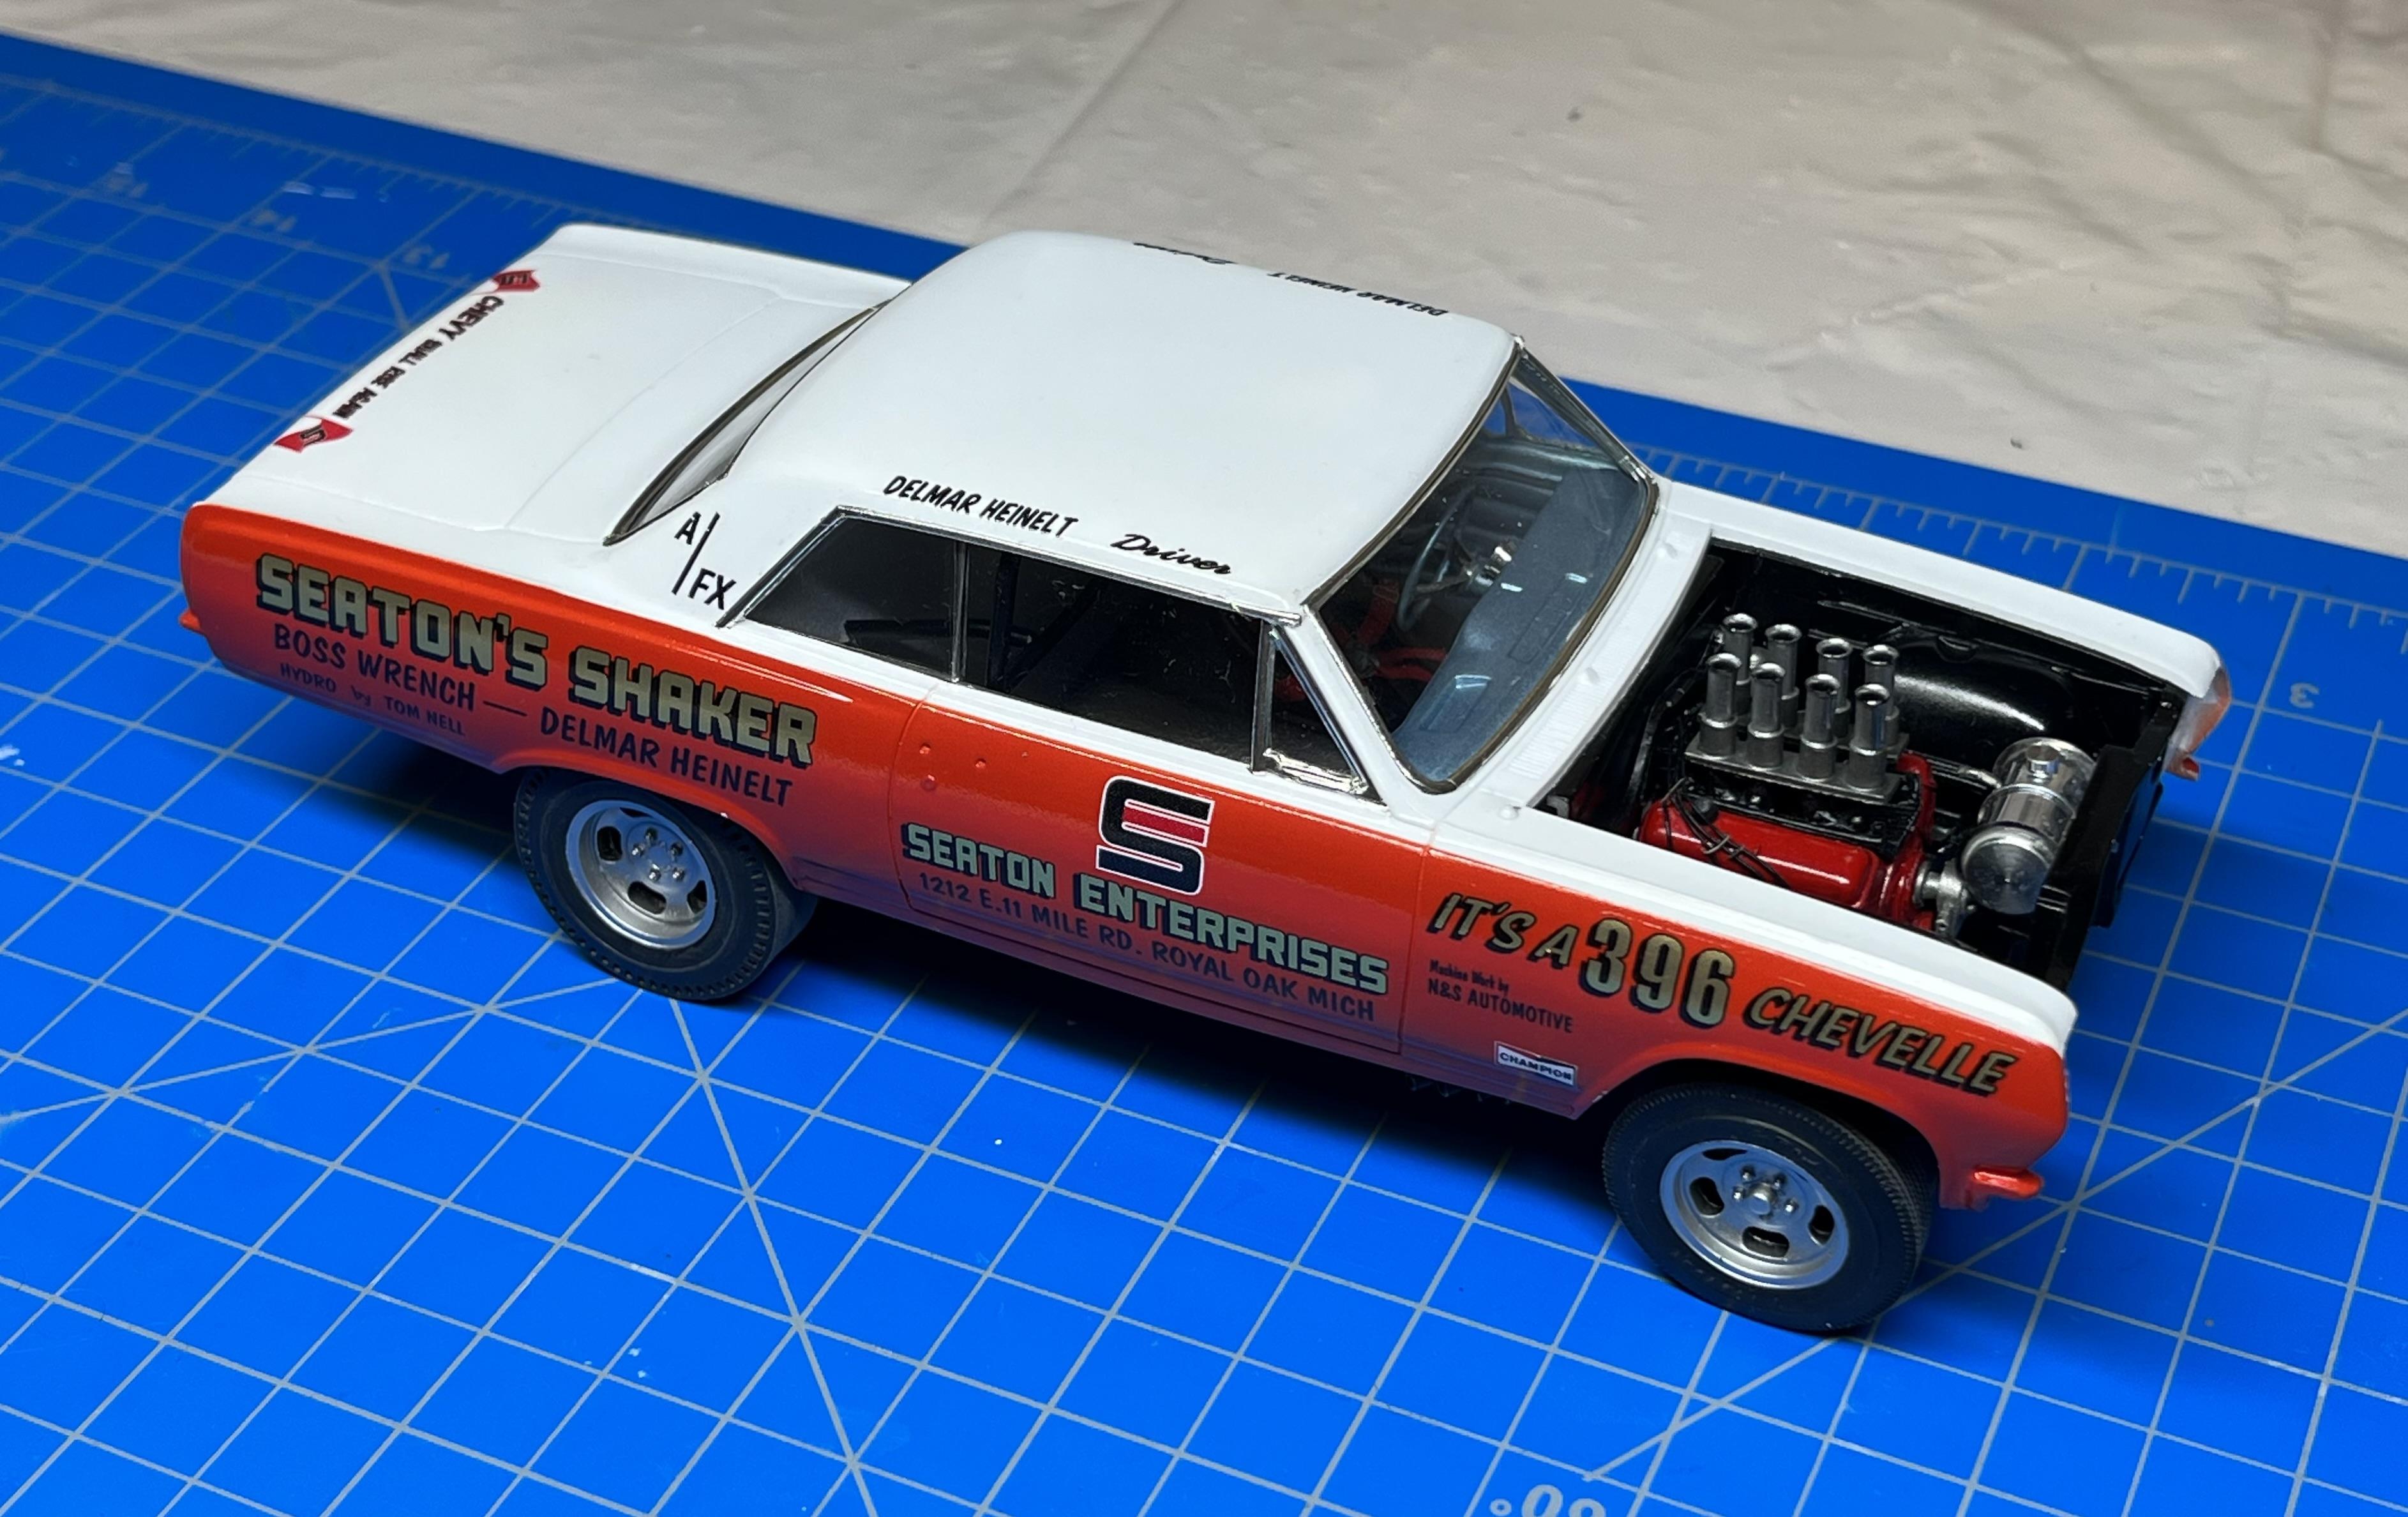
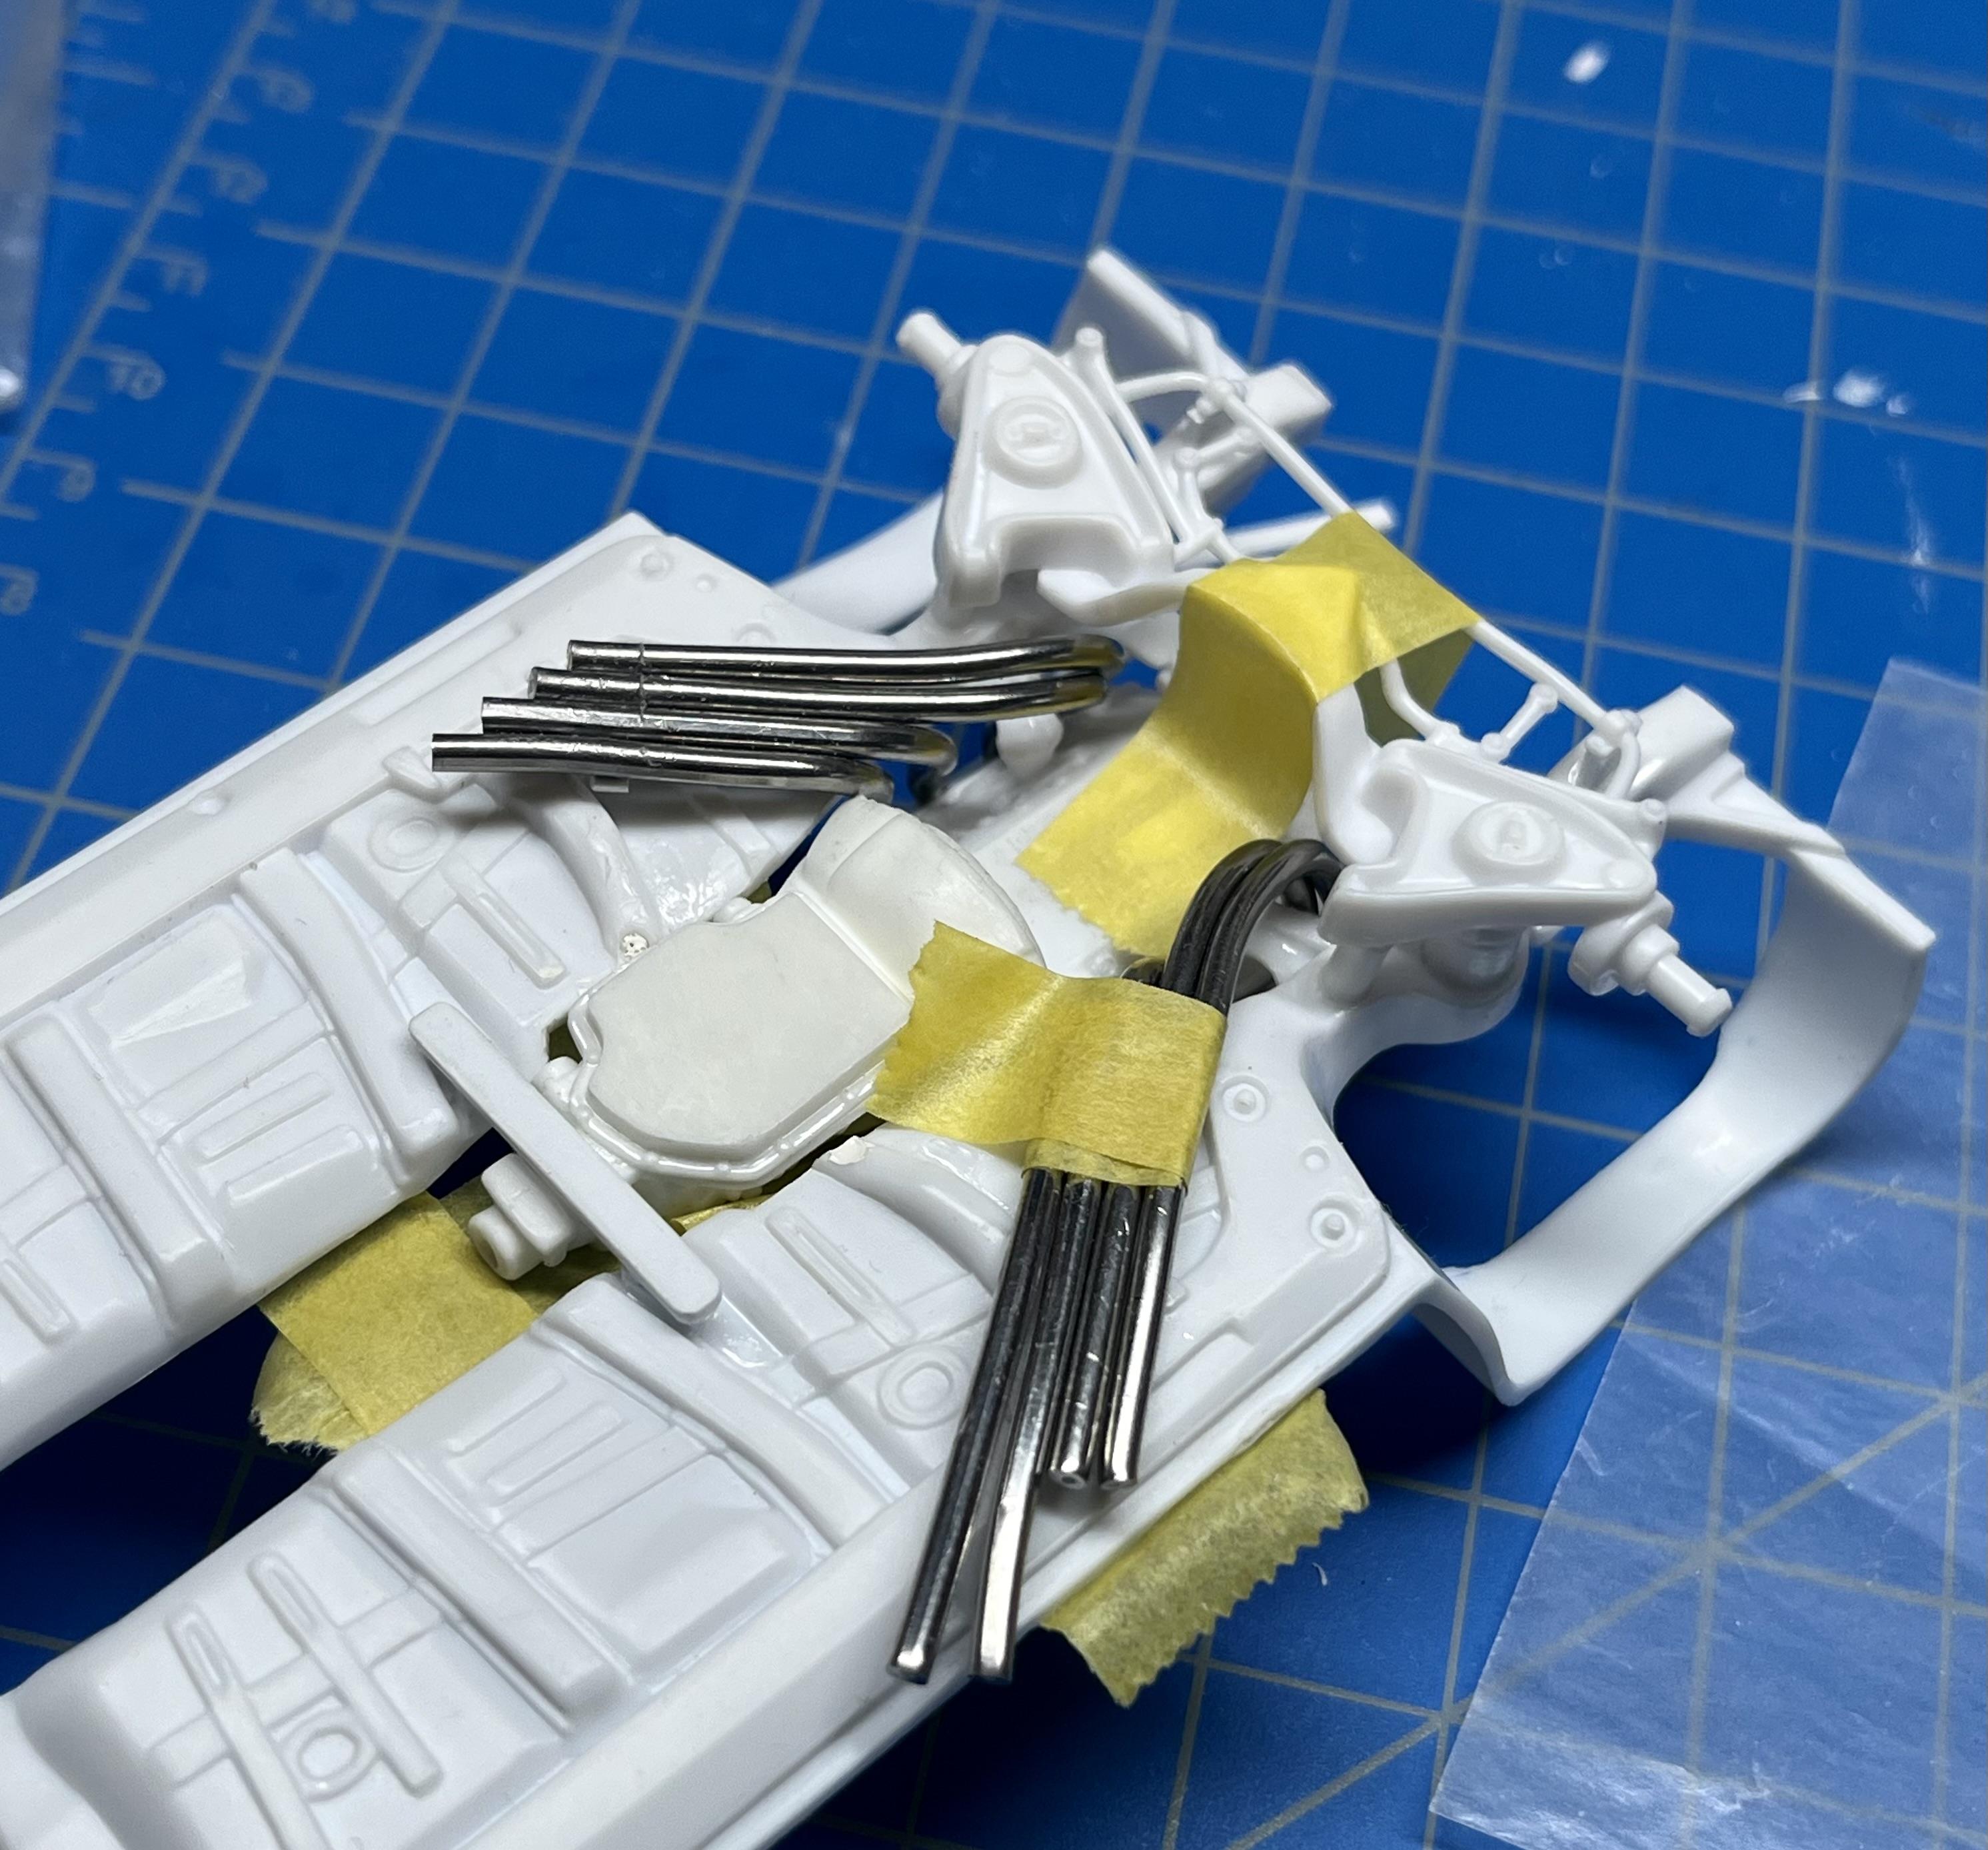
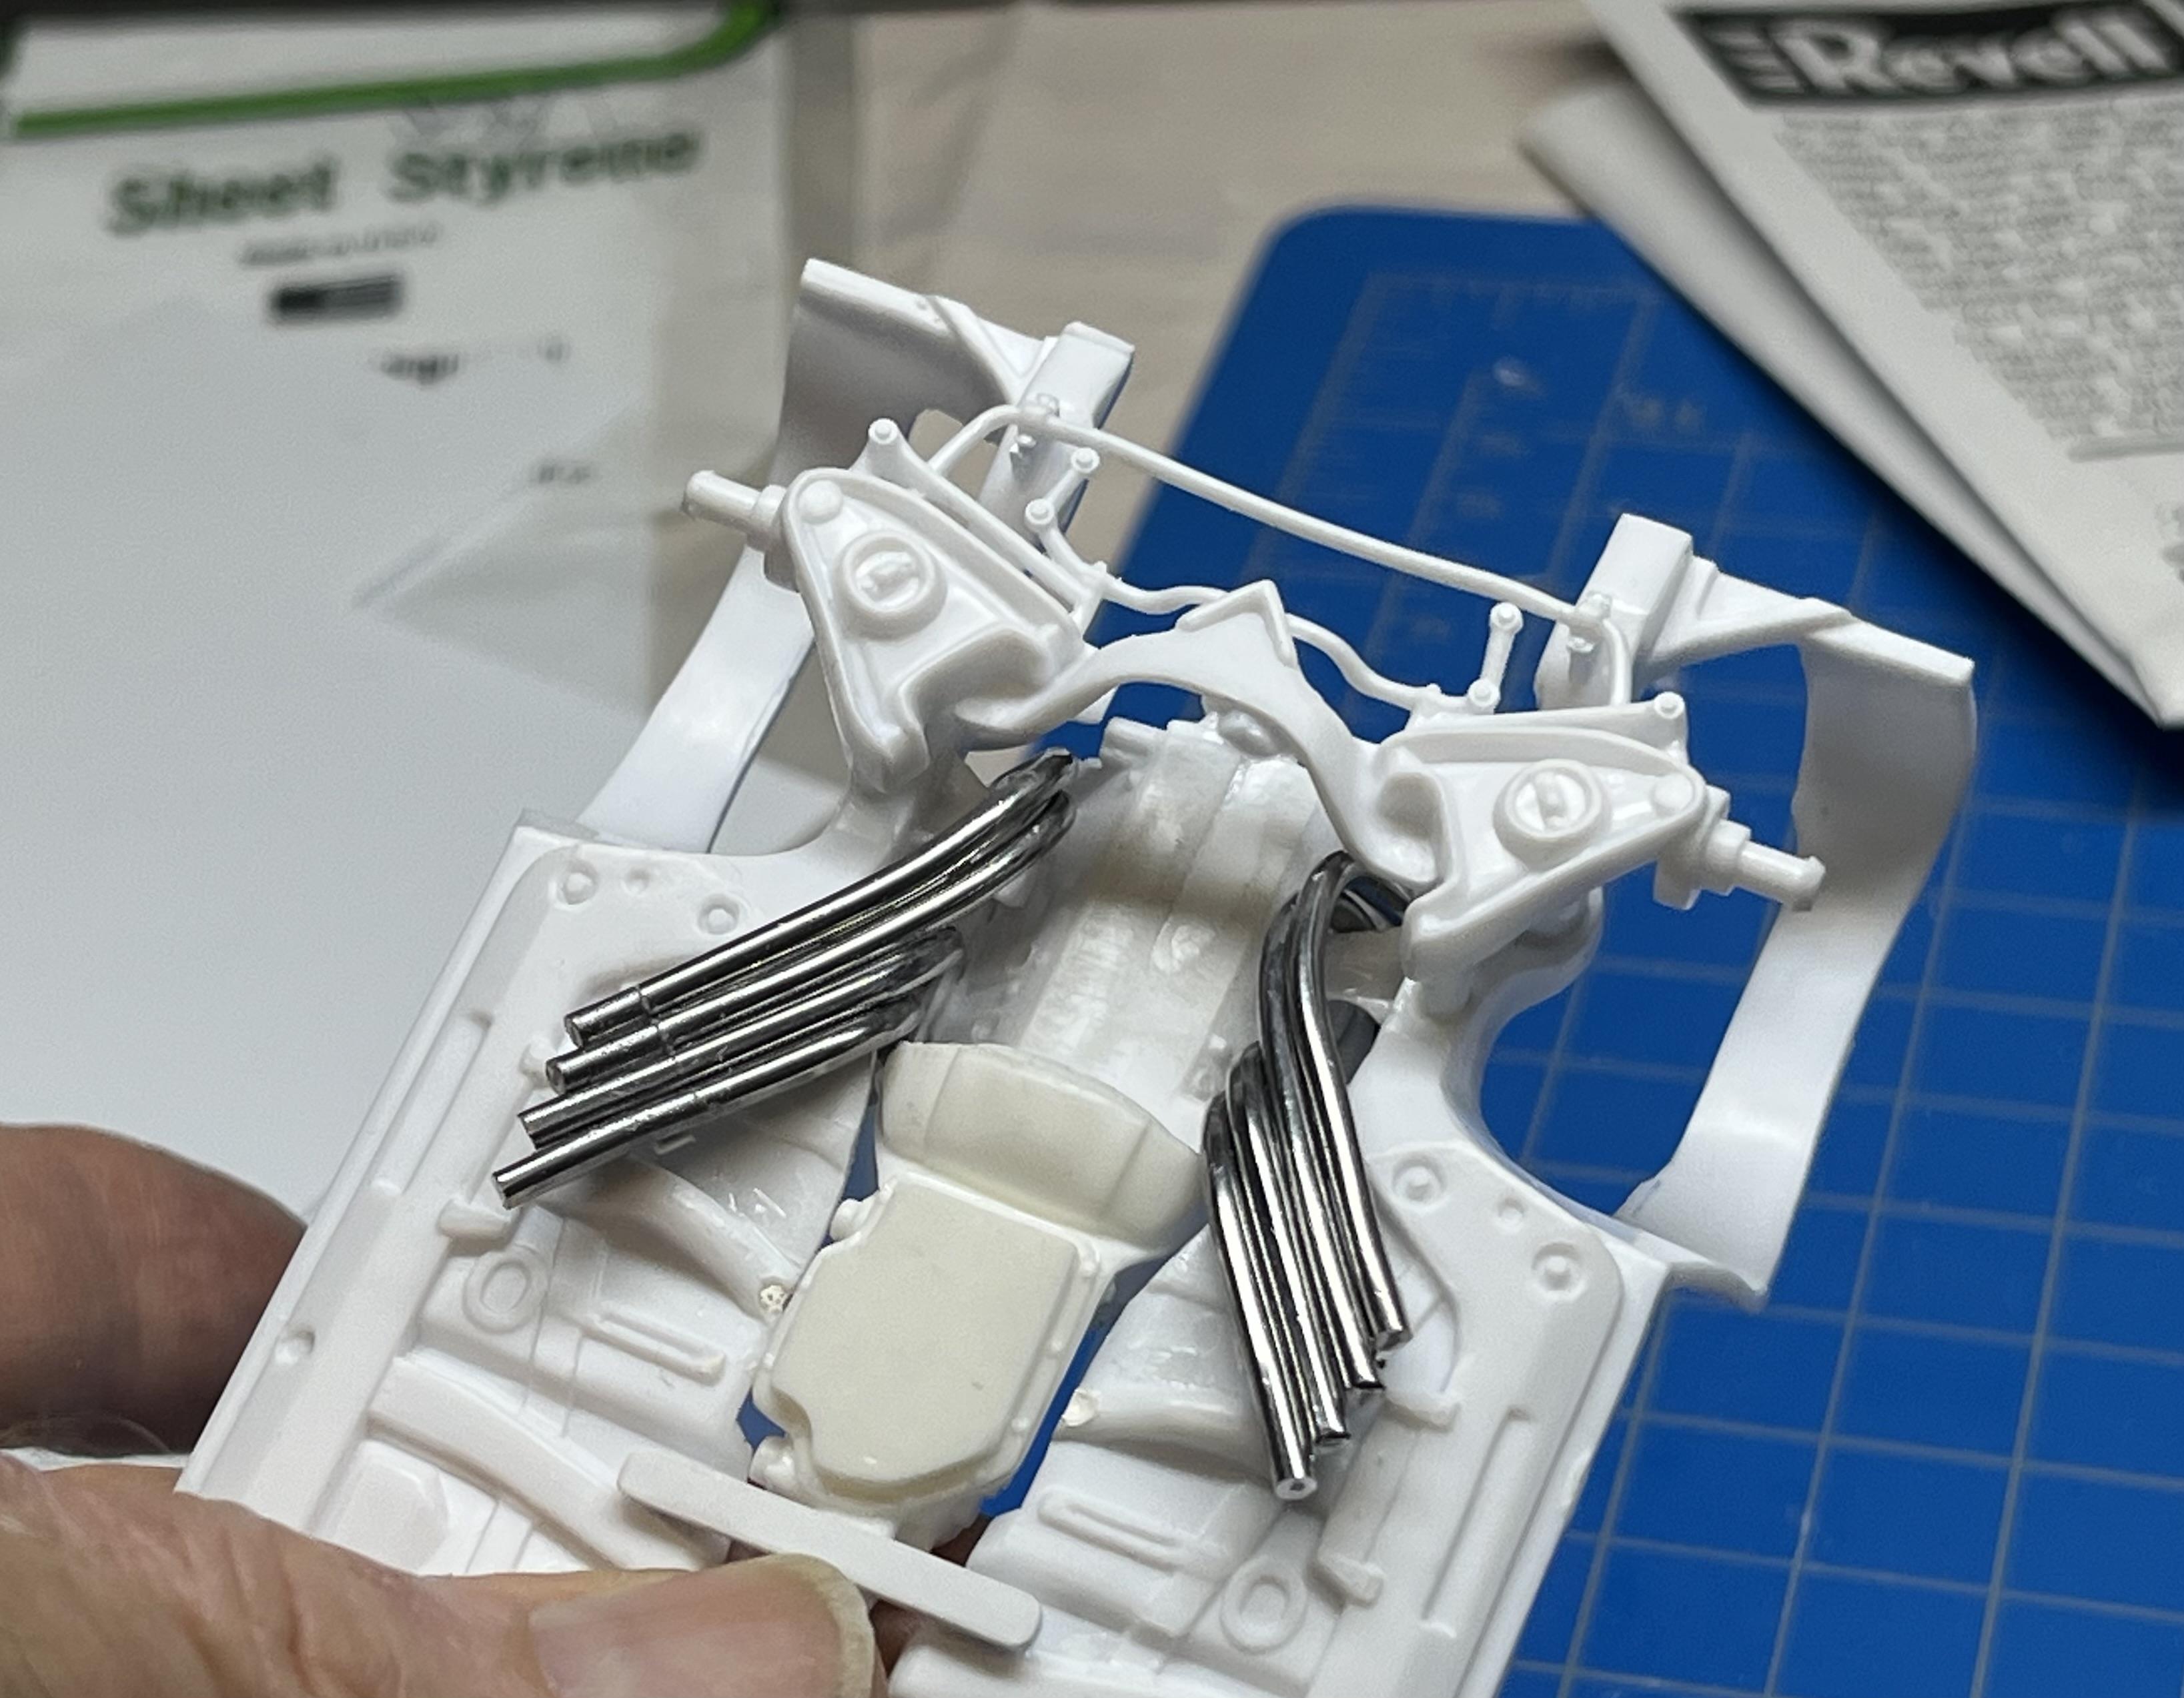
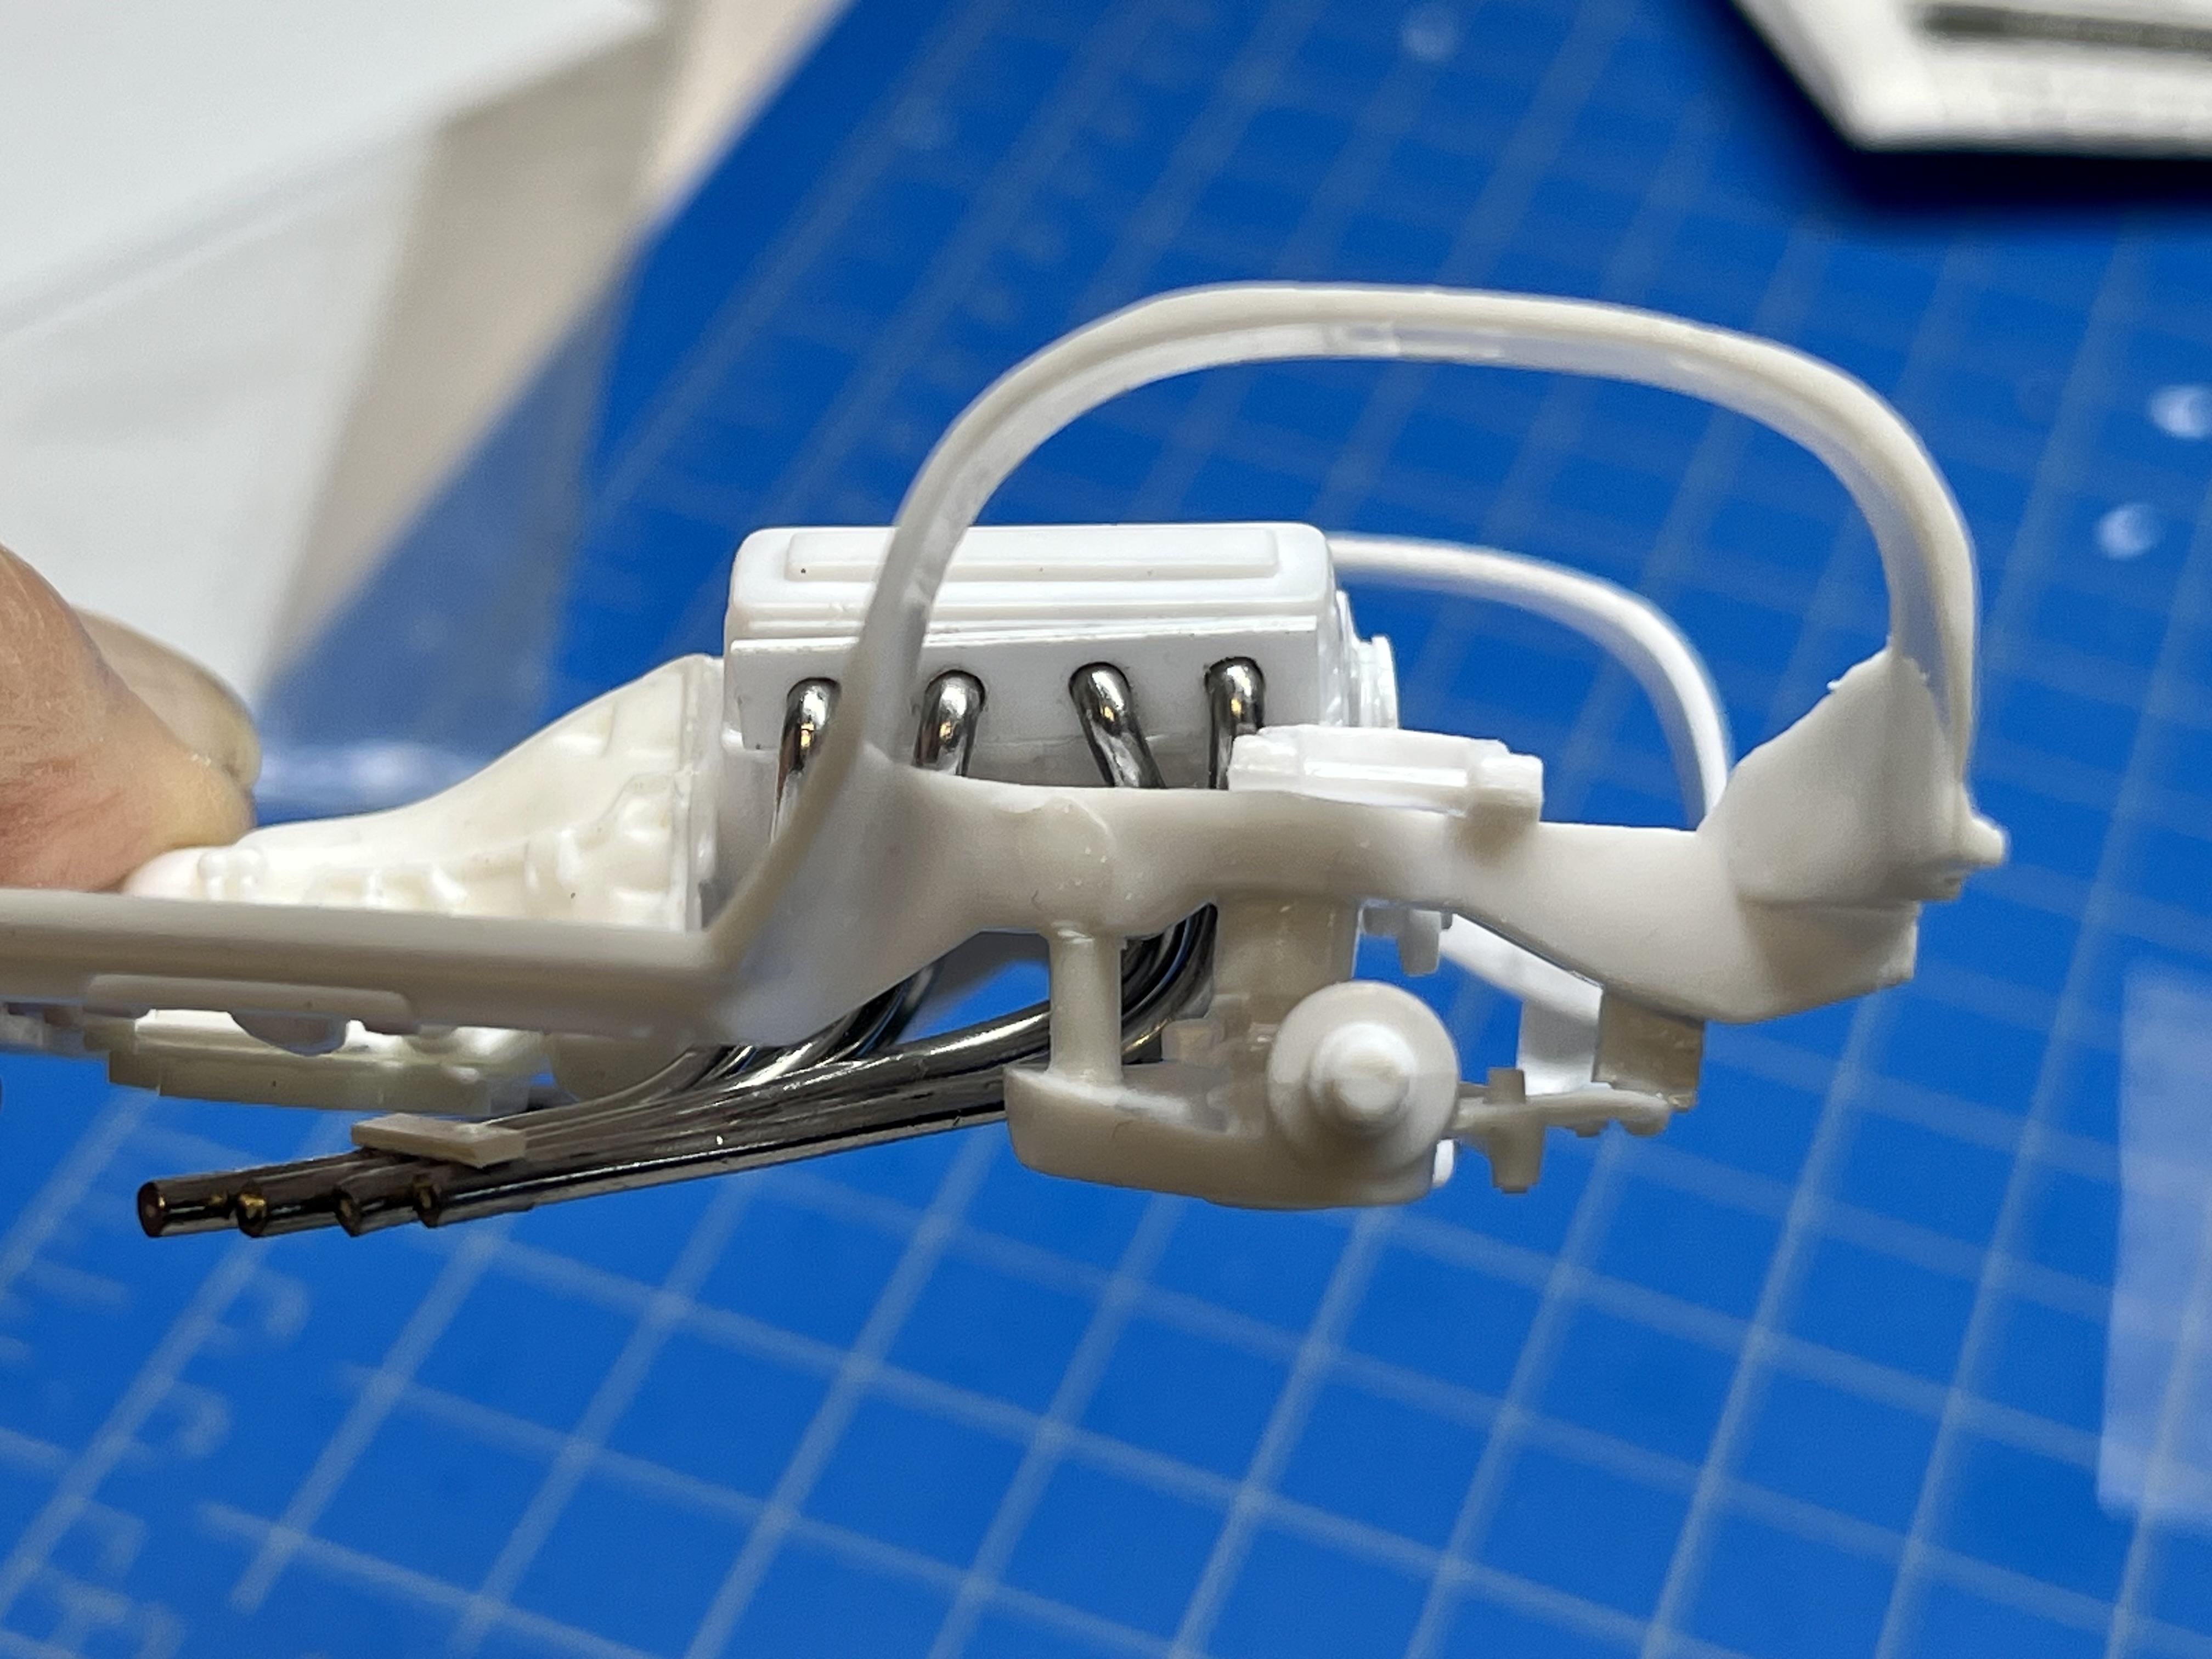
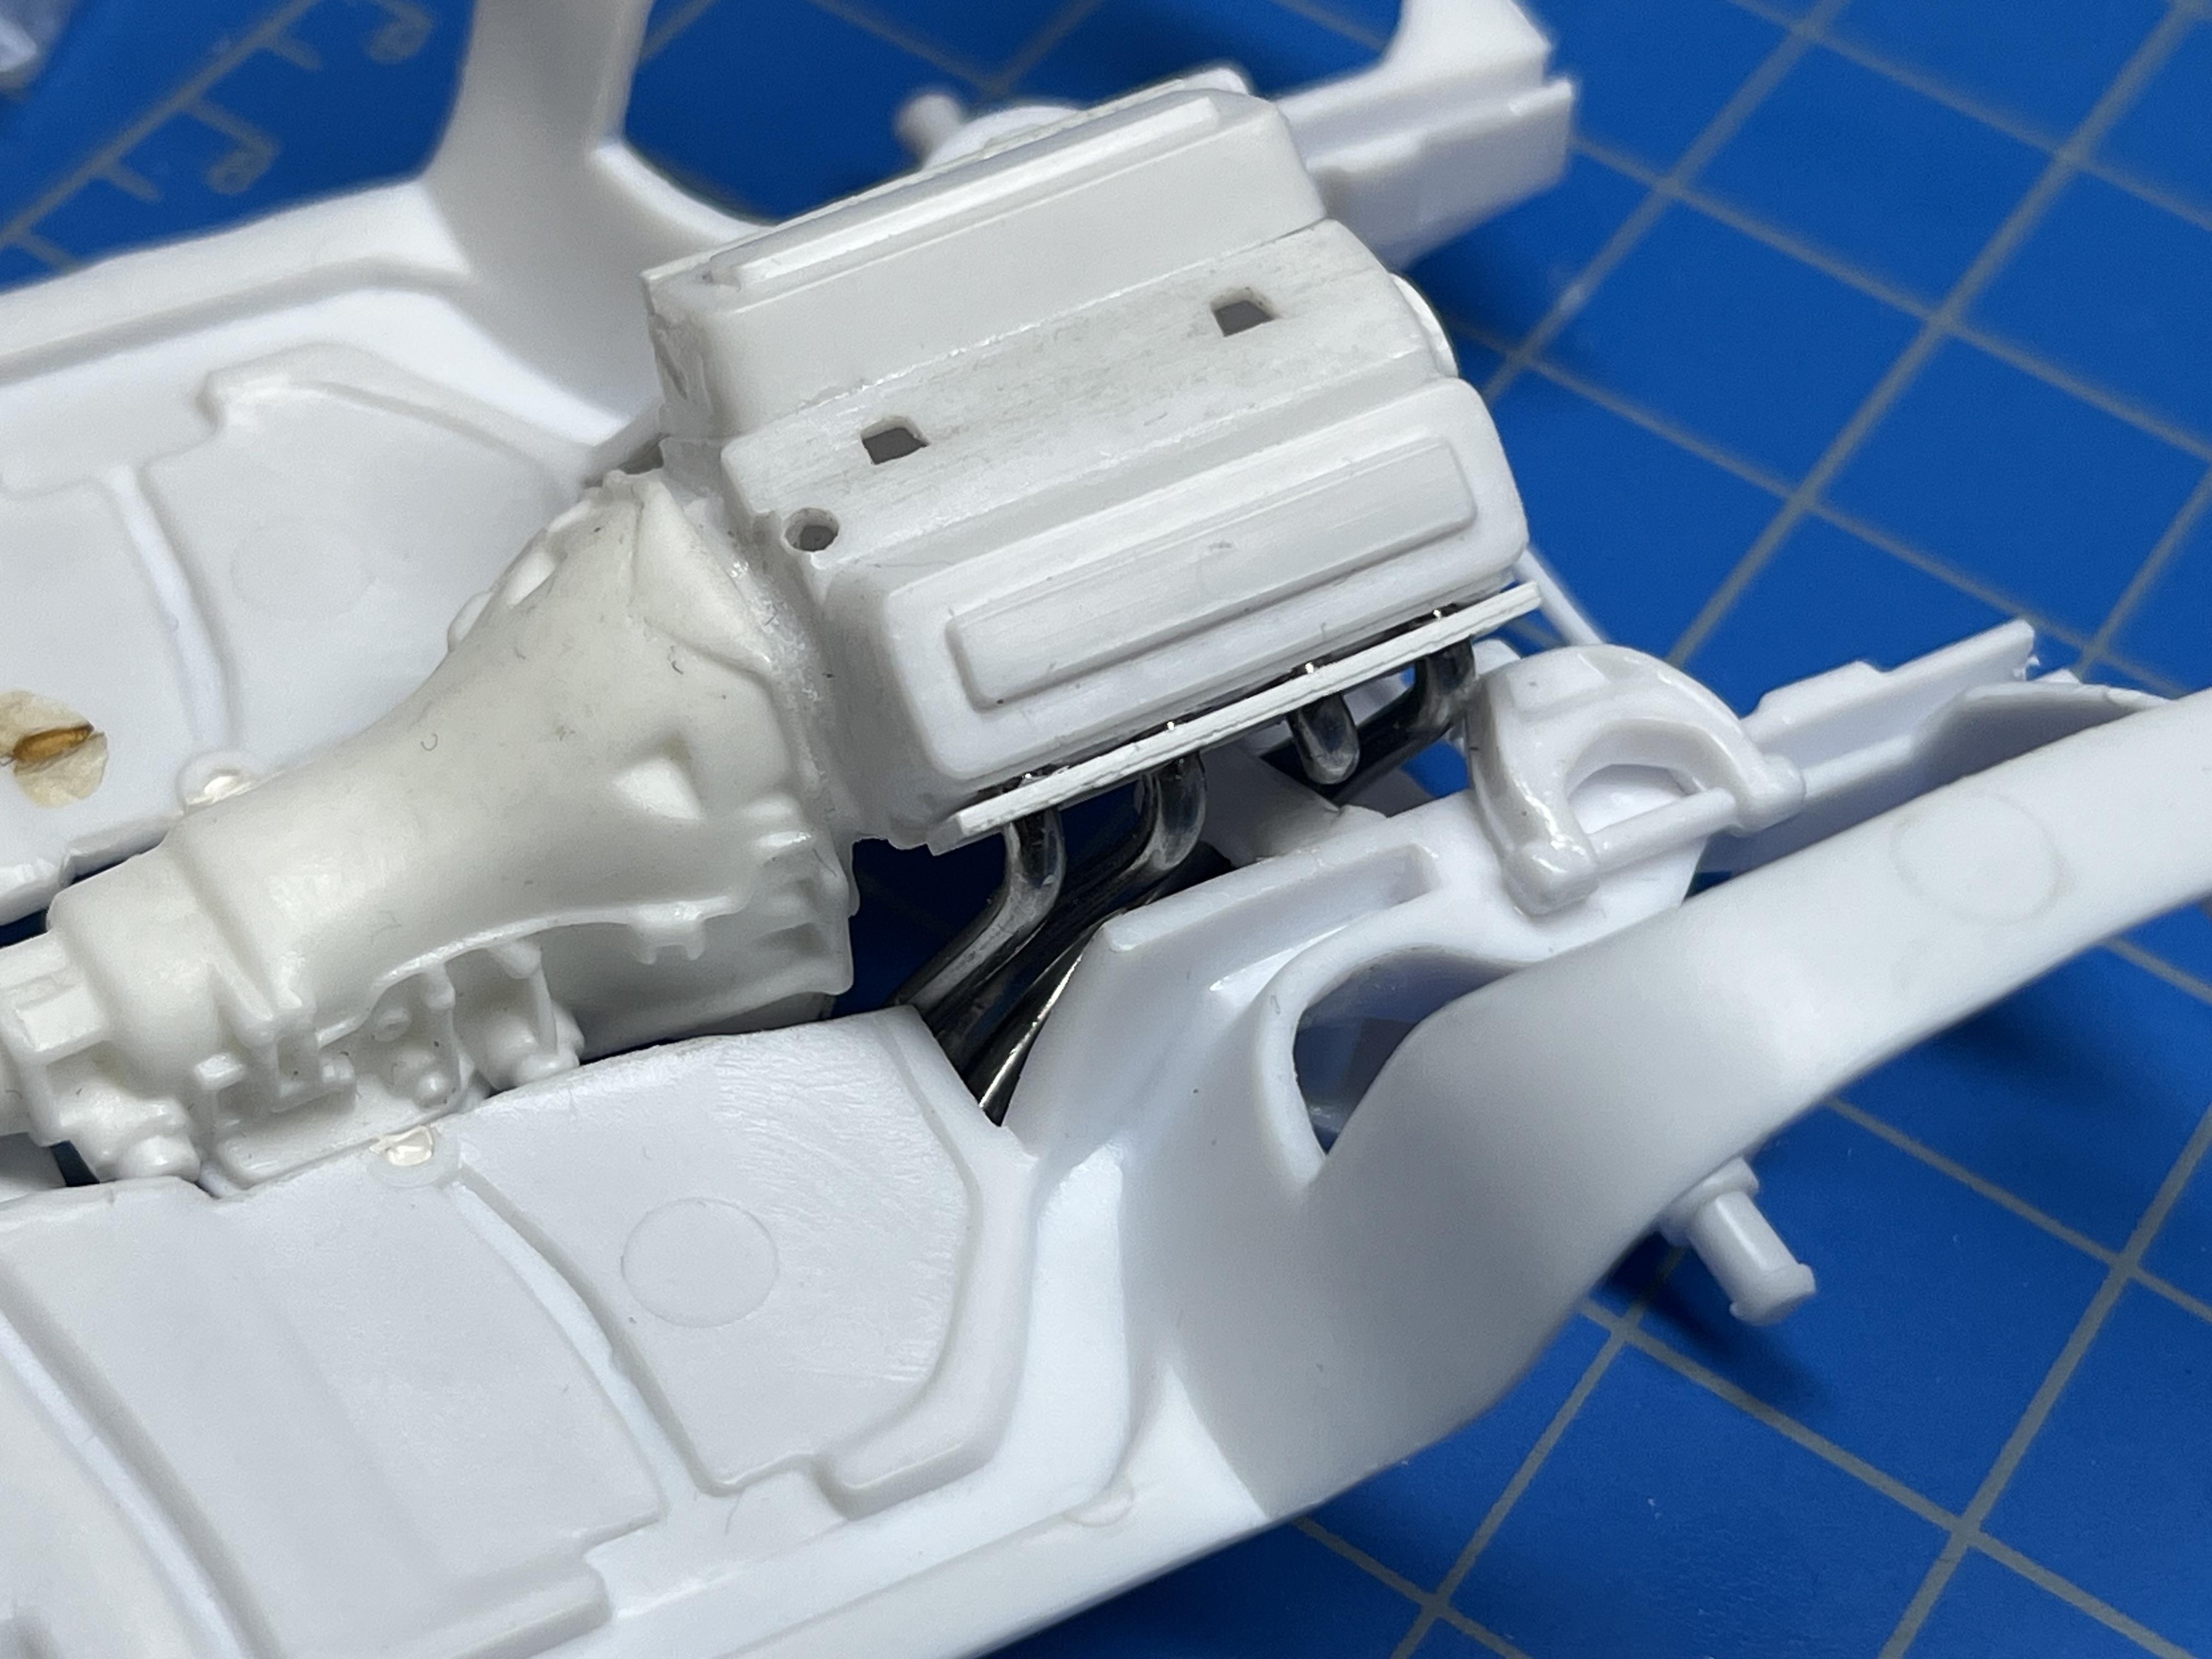
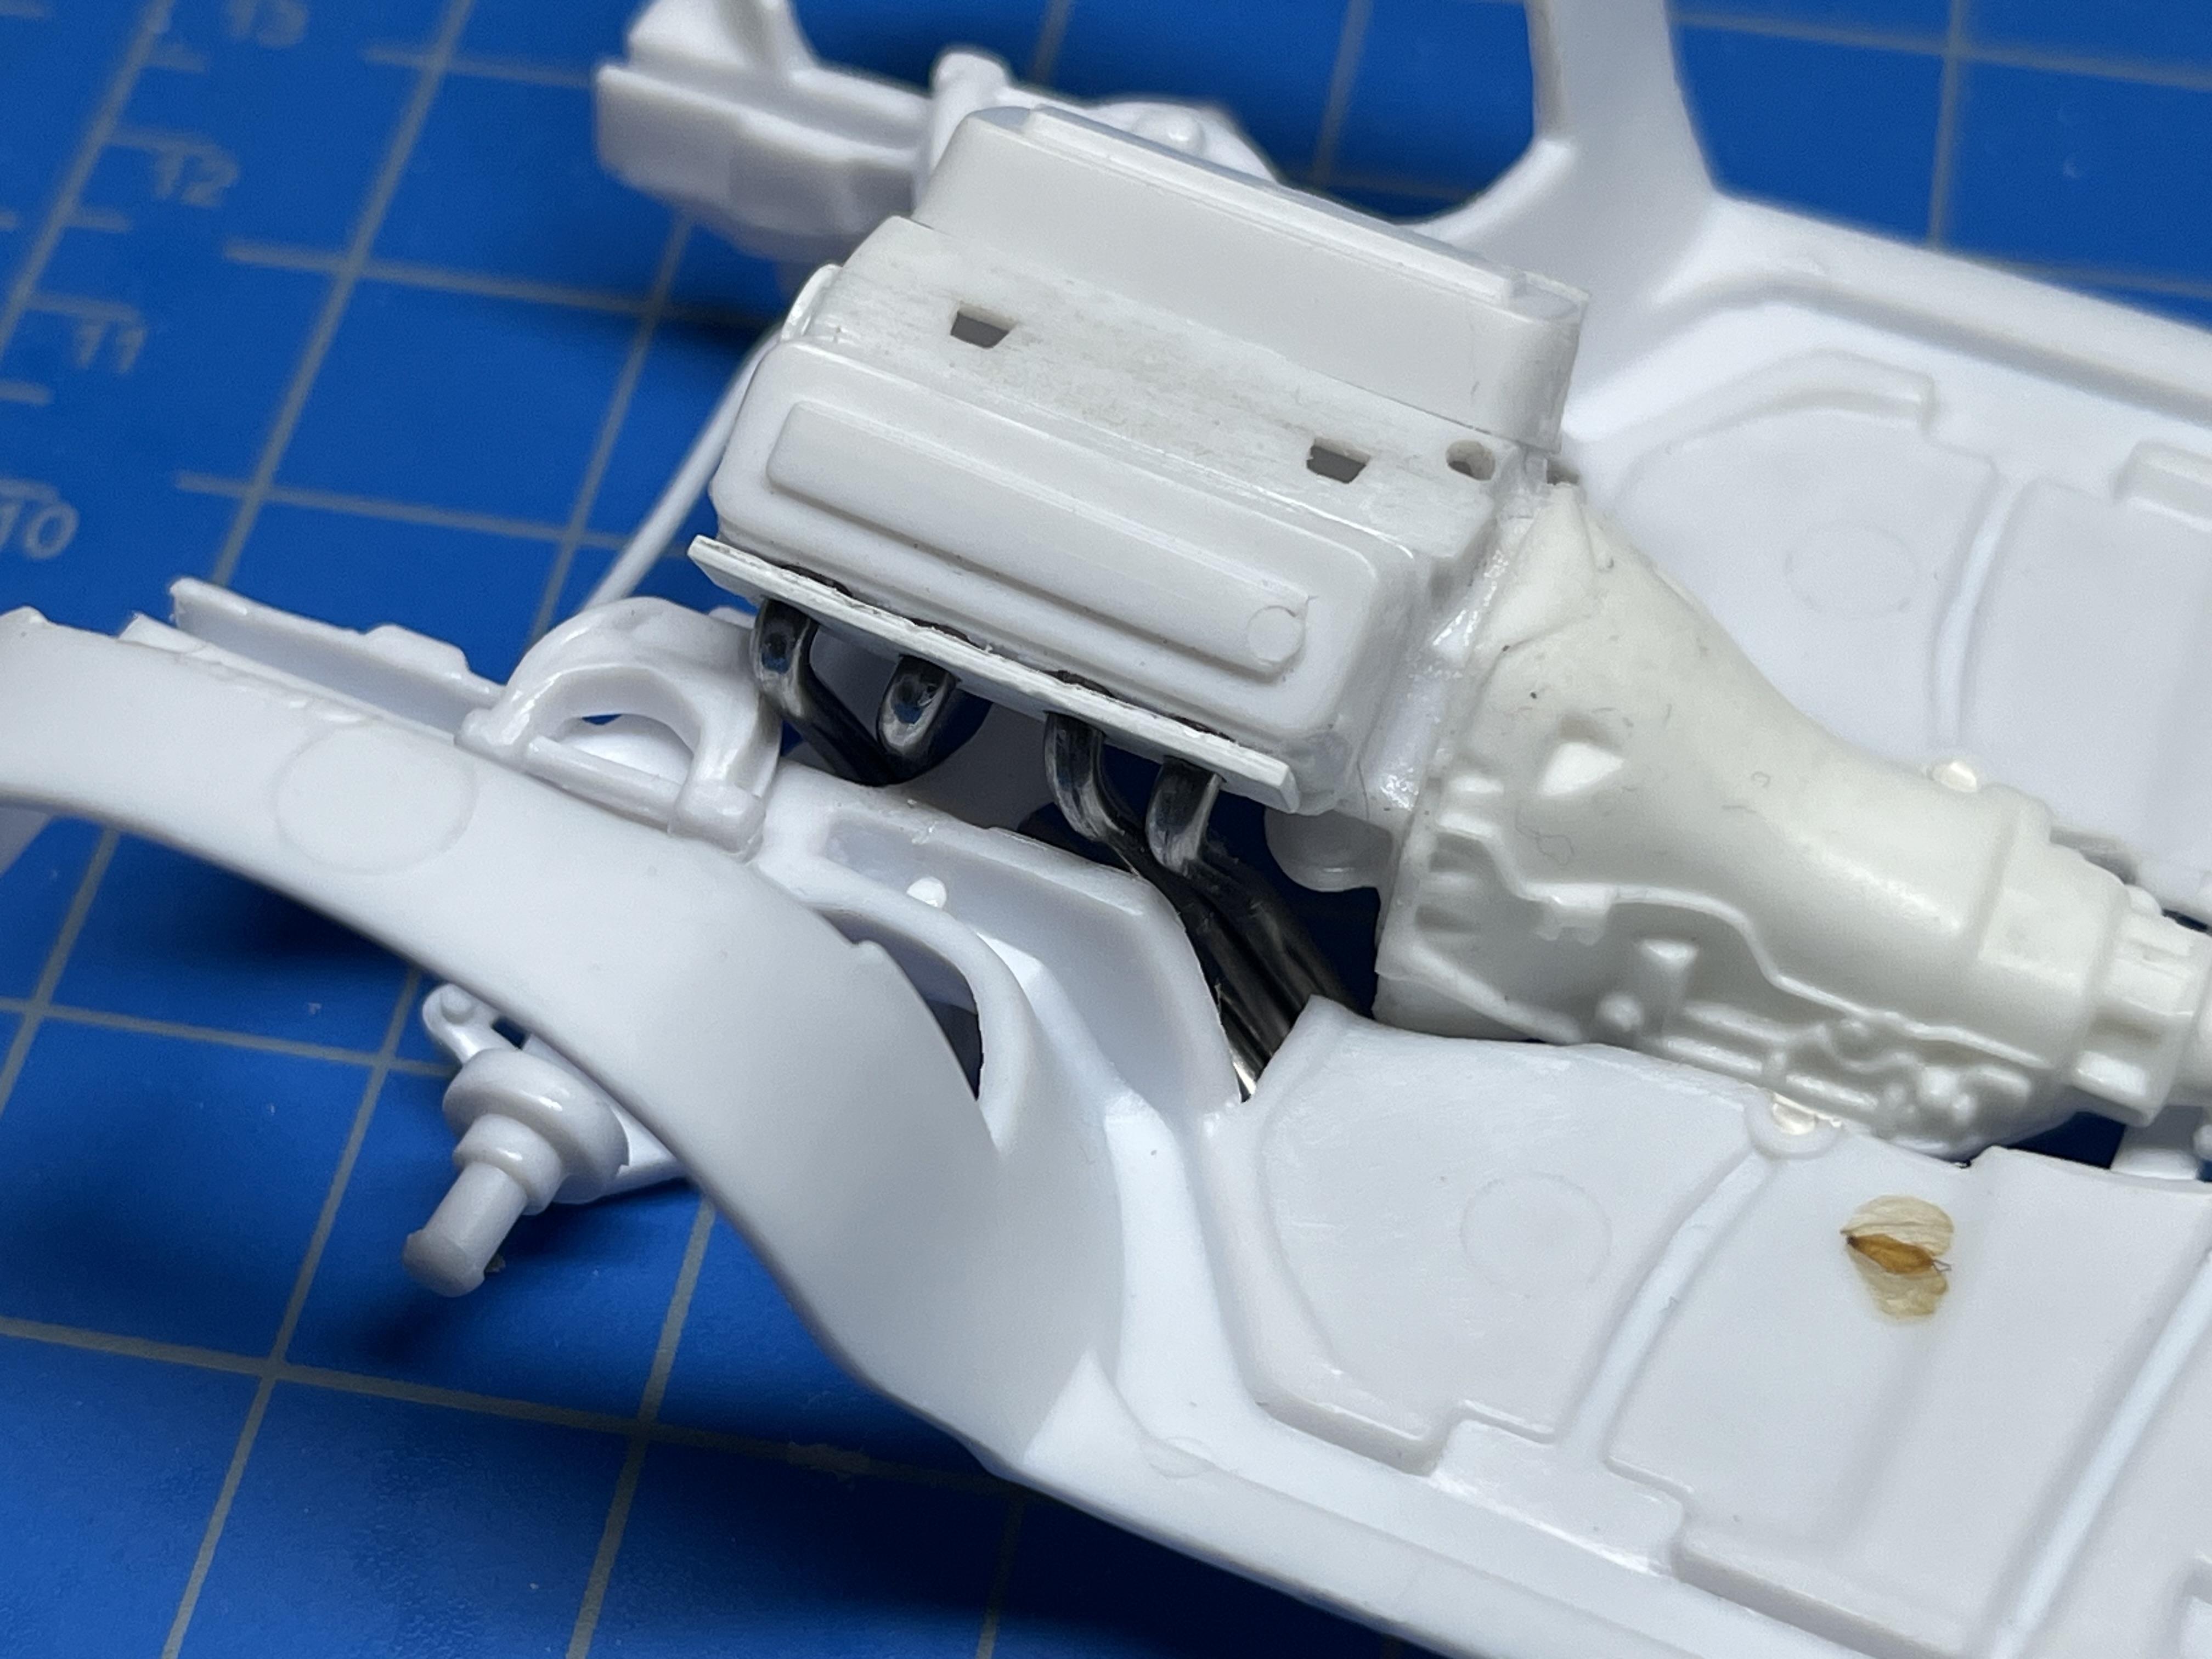
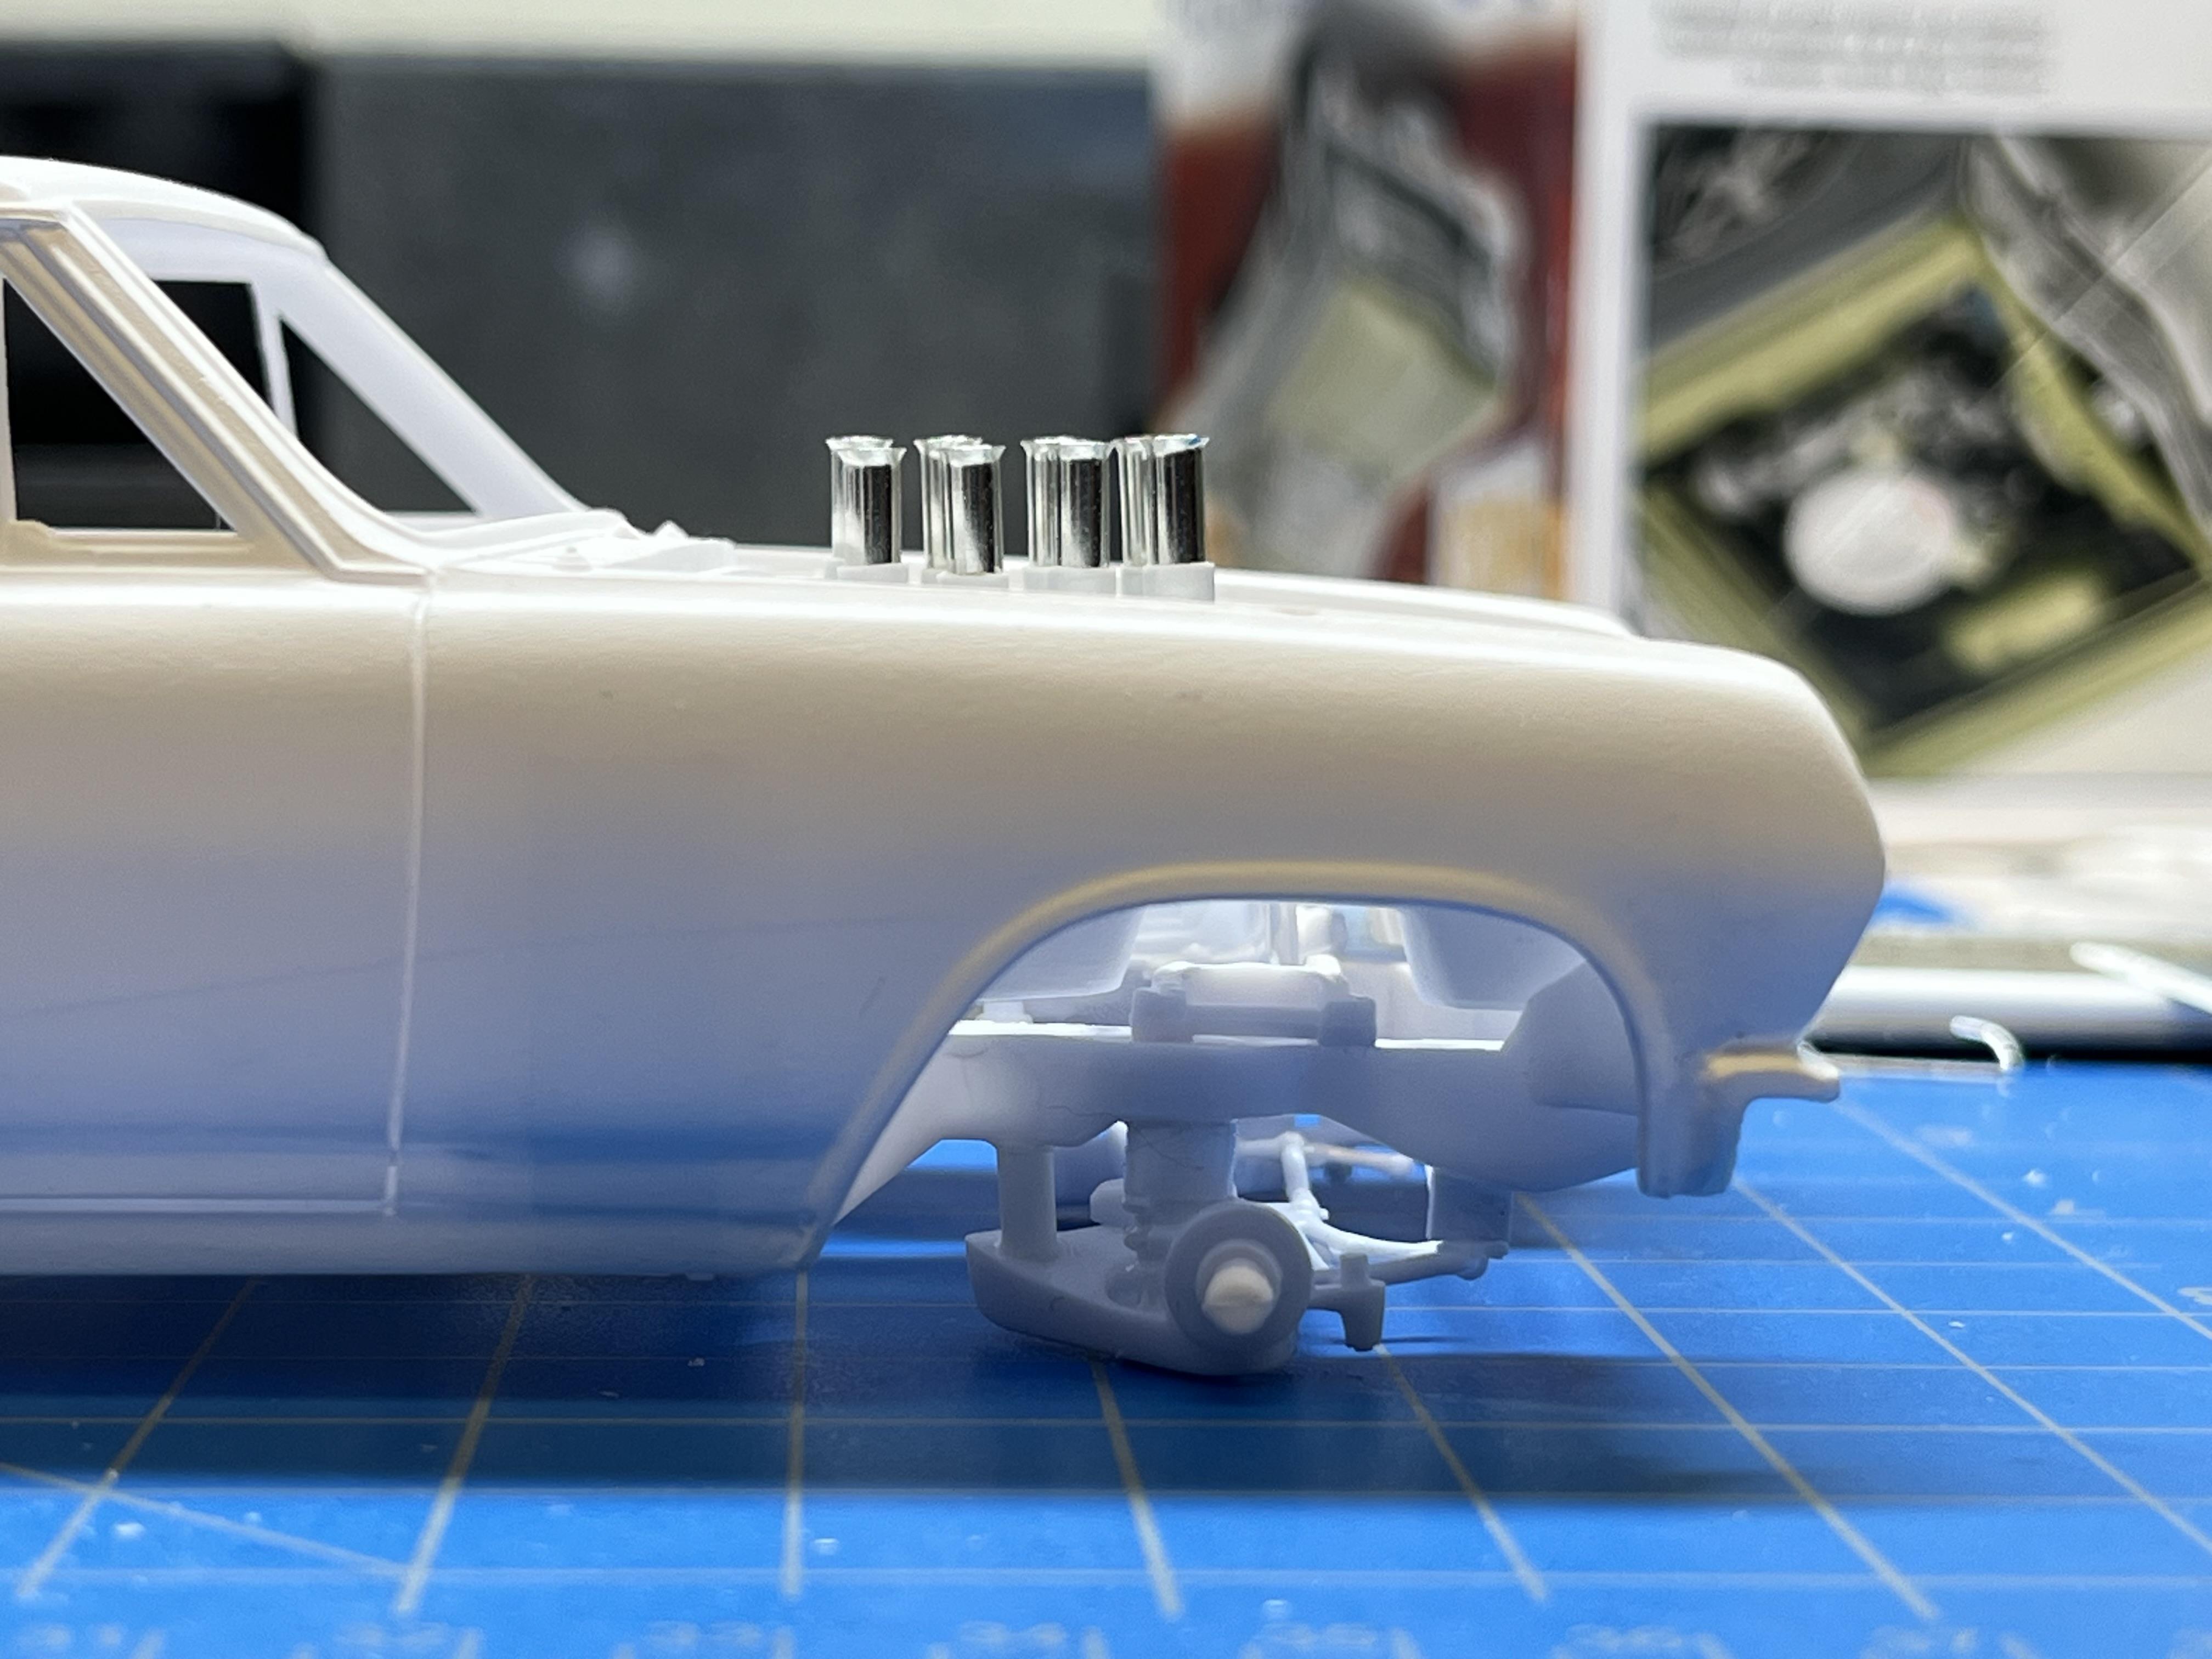
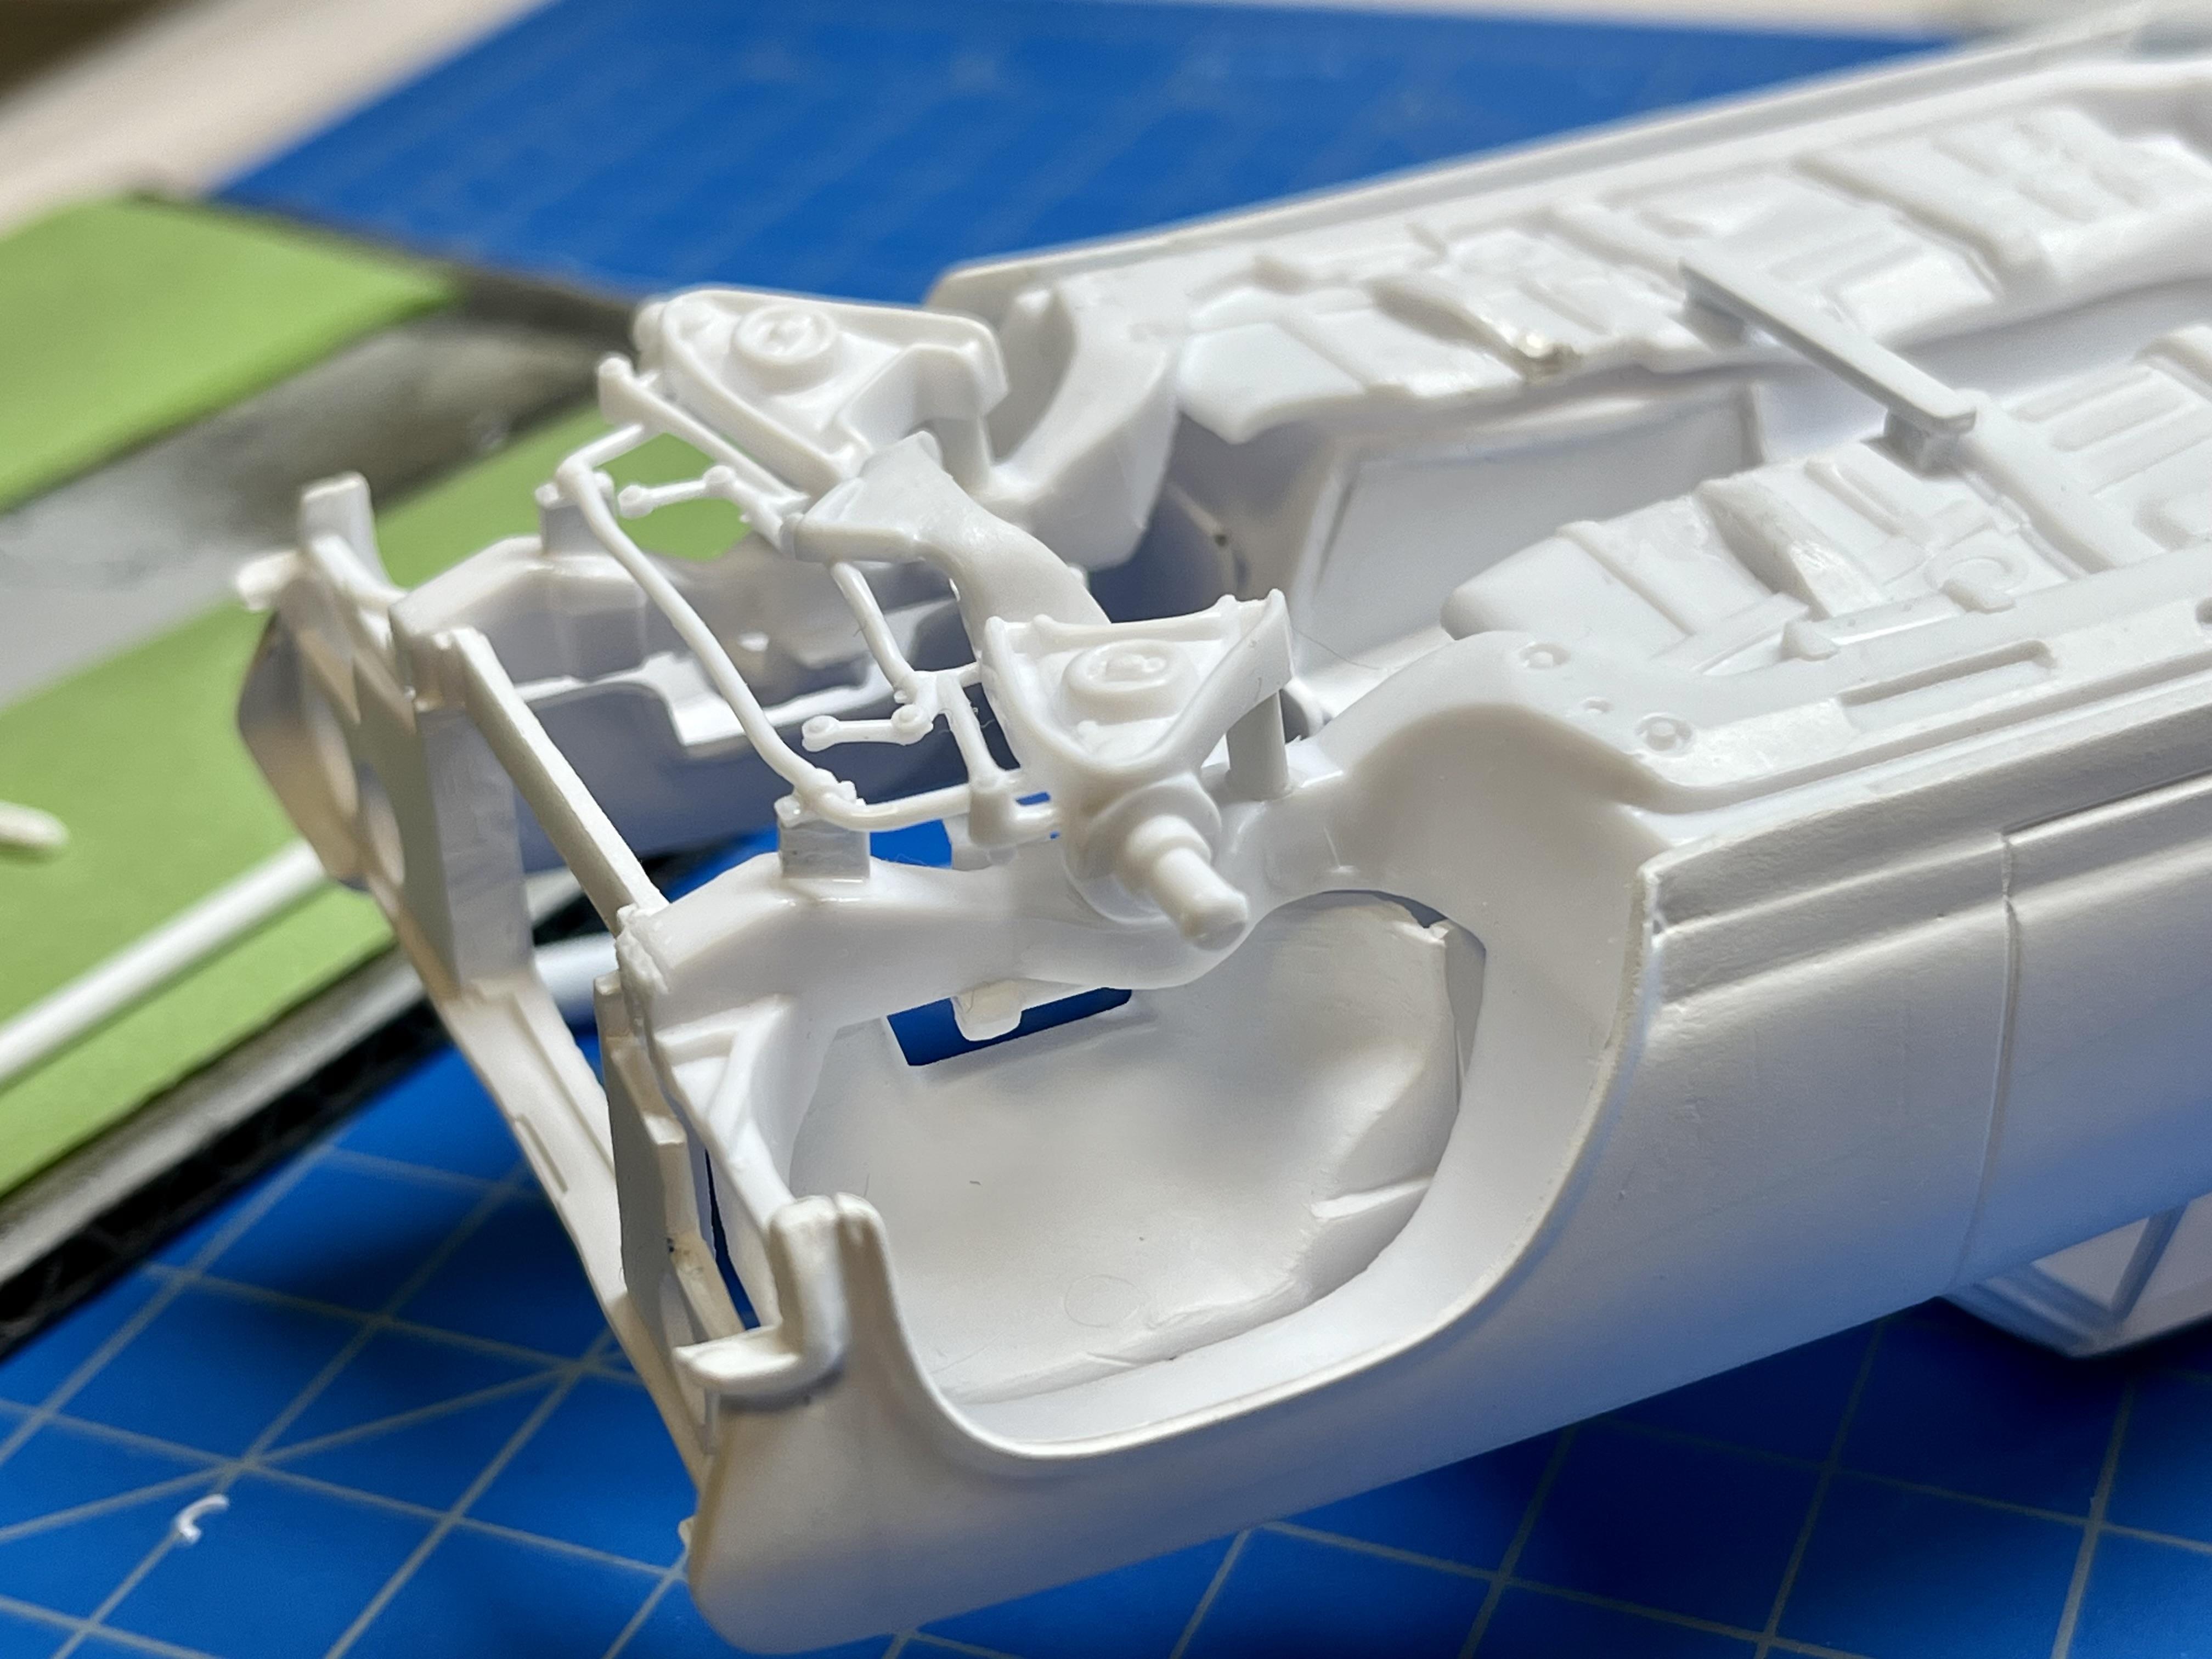
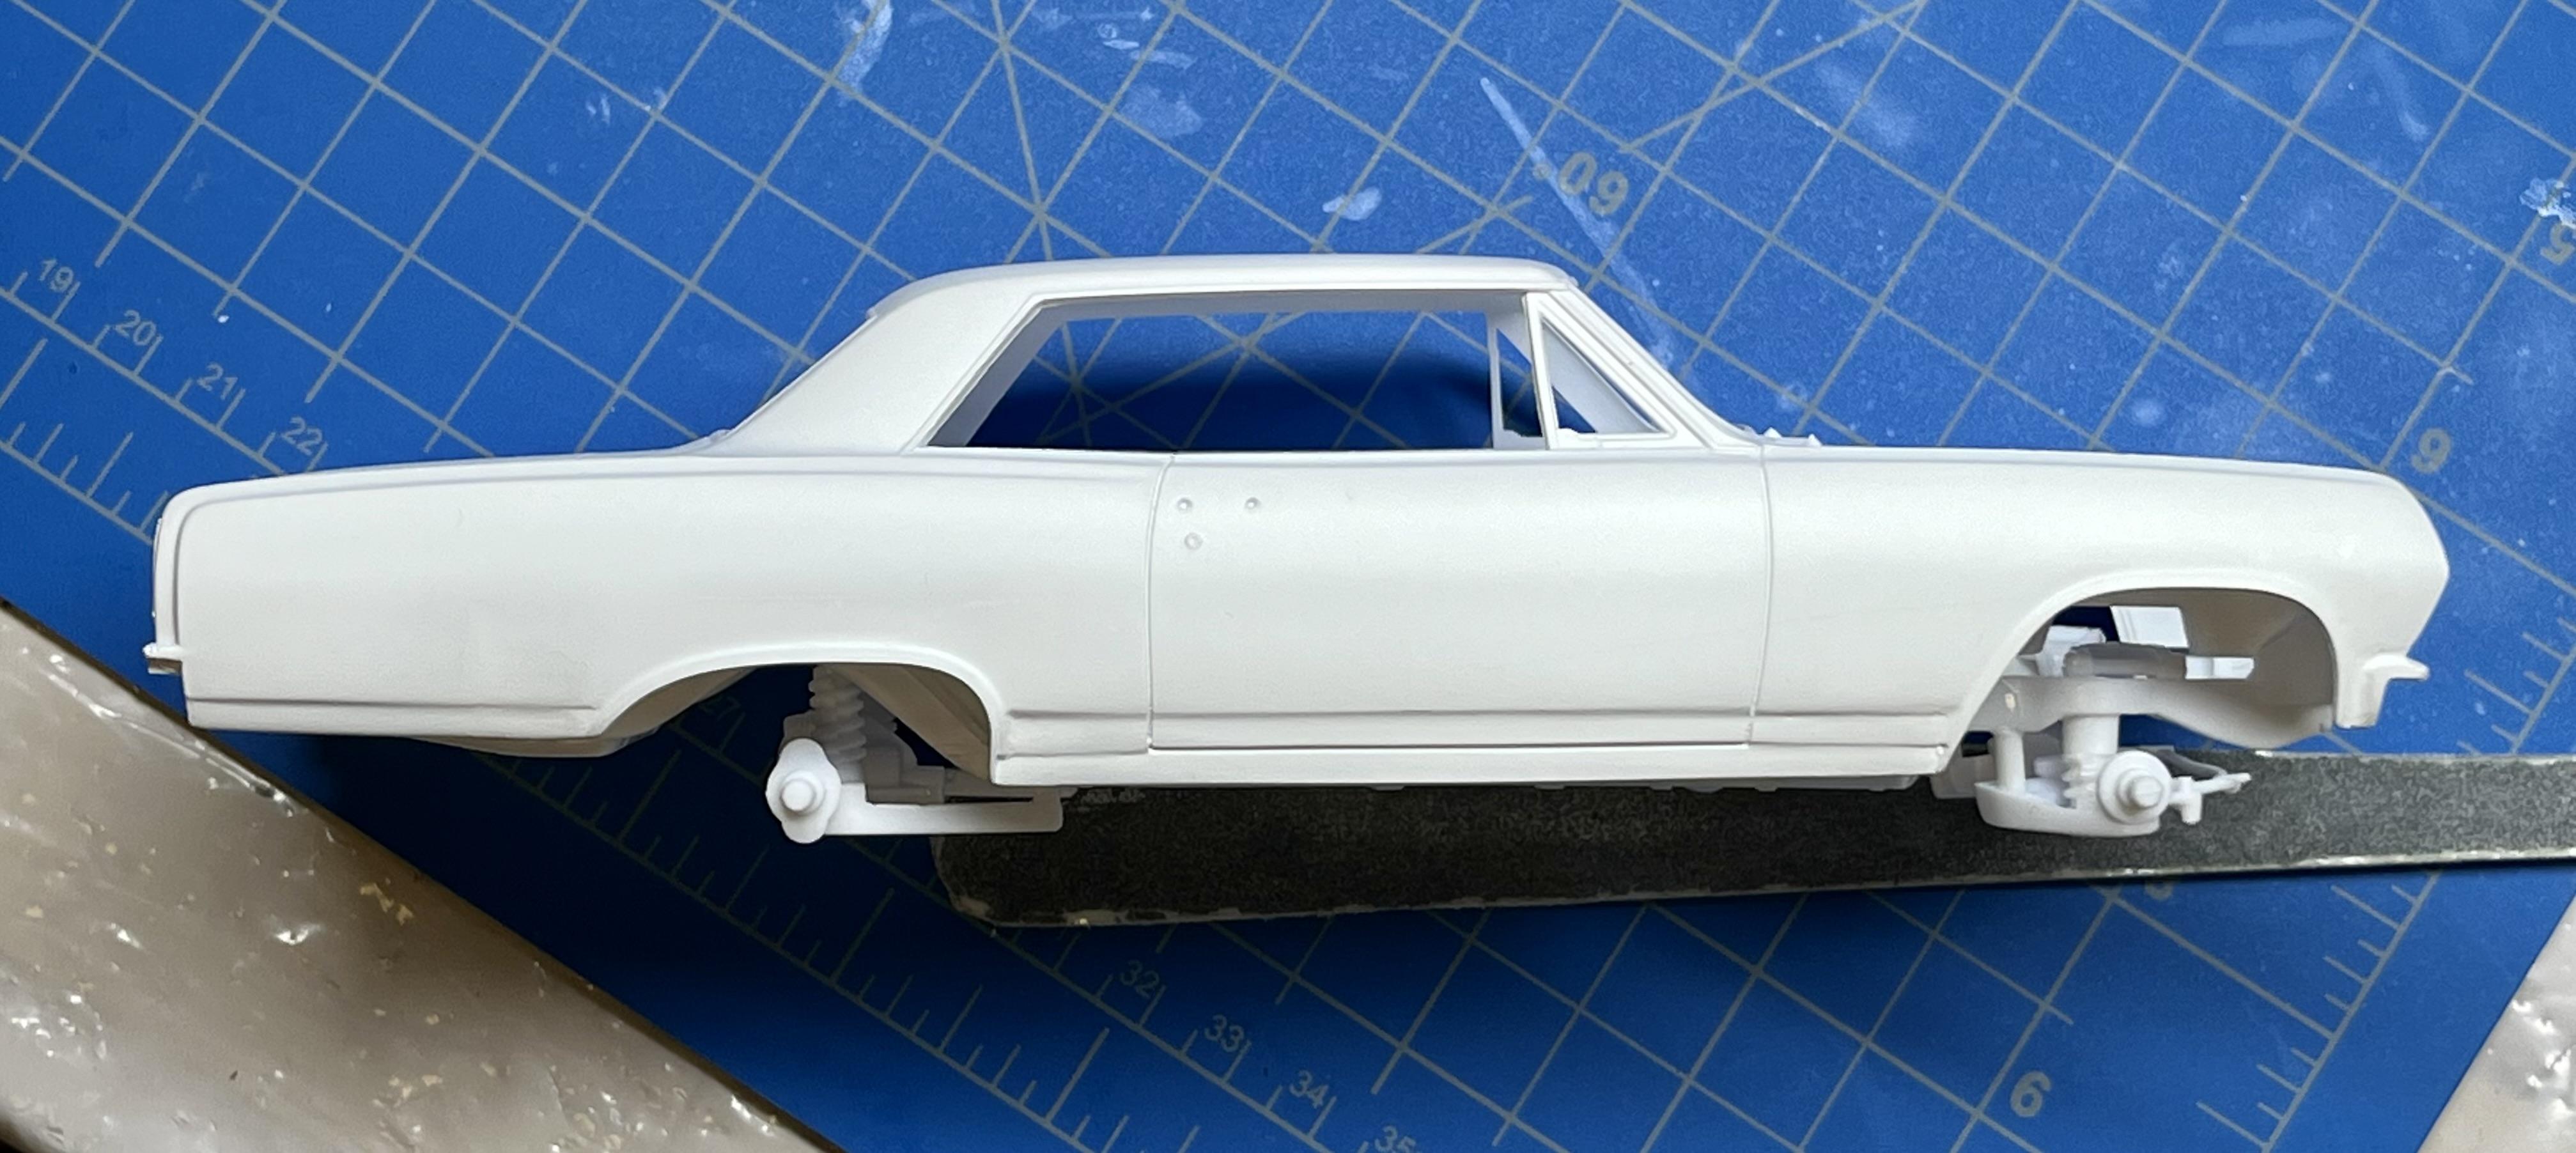
Lots of dry-fitting, bending, trimming, dry-fitting again in an effort to join the engine, the headers, plug wiring and chassis together with the goal of the velocity stacks to protrude out the cut-out in the hood in a somewhat centered fashion. Here’s photos of my last-dry fit with the headers bonded to the engine but the engine/ trans not yet glued to the chassis and drive shaft: I’m glad I didn’t yet bond the engine/ trans to the chassis as it’s unlikely that everything would have cleared and been fully asemble-able if I had. There is not much clearance between between parts and that was after a lot of trimming on the headers and chassis A arms. If I do bond the engine in, I think I’ll wait until EVERYTHING else is assembled onto/ into it first. Here’s a few pics of this dry-fit body + interior + chassis + engine/ trans balanced over all four wheels & tires (not snap-fit yet onto the axle posts on the chassis). I like it! Still lots to be done on this, I’ve had to shorten my scratch-built fuel pump to clear the Moon tank, also need to make some side windows (car had all Plexiglass with no roll-down cranks), paint or BMF the window frames, make and install the fuel tank lines and water lines (which will disappear past the firewall, they would go into a 5 gal water tank/ pump in the trunk), add the brake cylinder/ reservoir, grills/ light covers/ bumpers, etc…. Still enjoying this build but it’s been a lot more work than I anticipated. Looking forward to an easy O-O-the-B build on my next one! John
-
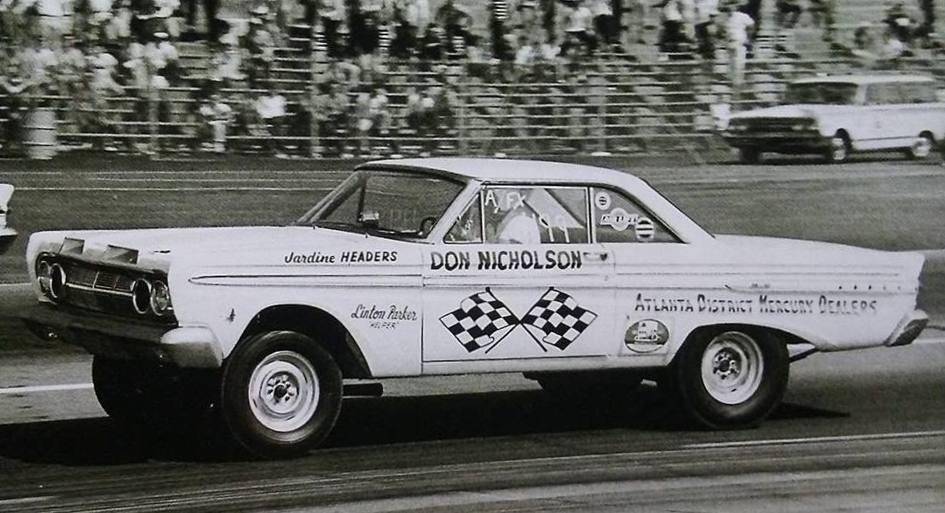
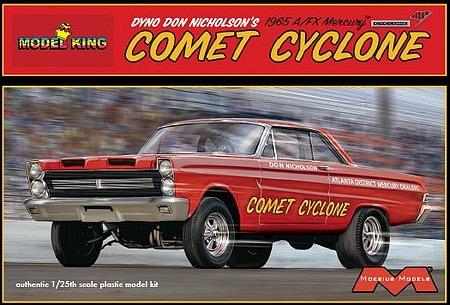
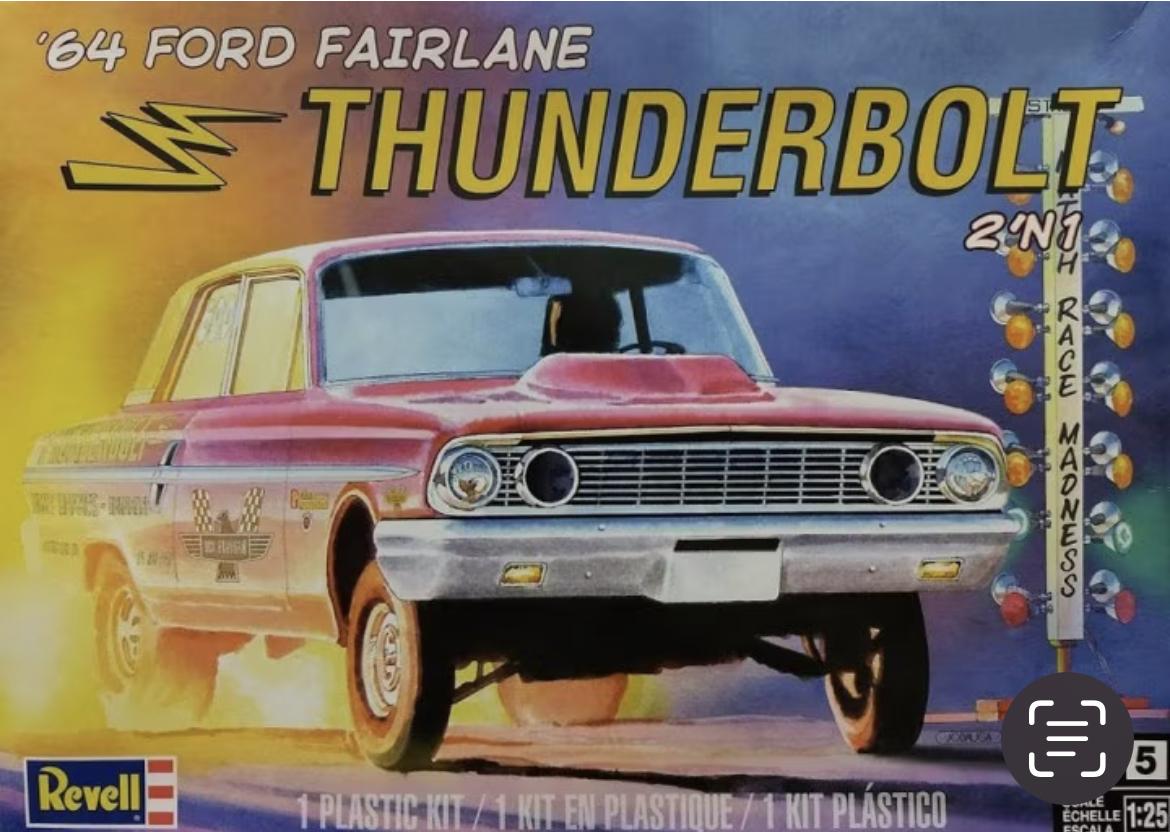
With AMT/ Round2’s re-release of this old annual ‘64 Comet Caliente kit with (I’m told) a fairly decently tooled body but no engine:, I’m thinking of using the body and interior from this kit and some Slixx decals to recreate this Dyno Don ‘64 A/FX car but with a detailed 427 engine and a moderately accurate chassis: My question is this: has anyone taken a crack at doing this car with engine via kit-bashing? The two possible kits I’m thinking of using for the chassis and engine are shown below: 1. This excellent Revell kit for both chassis and engine?… 2. Or this excellent Moebius kit below for the chassis and an FE block 427 out of the Revell Thunderbolt kit or other suitable source: I’ve read somewhere on this forum that the hood cut-out of the AMT Comet is shorter than the hood from the Moebius kit so that’s one issue I’m aware of. MCW offers resin replacement hoods for the ‘64 body with the double front scoops (or a teardrop) options so the hood issue may be easily solvable. I’m ok with making moderate mods to the chassis and other parts to make the body fit the chassis but, like most of us here on this board, I prefer to learn from other’s experiences when attempting a kit-bash project. I welcome everyone’s input/ opinions/ experiences! Cheers, John
-
I’ve been looking for additional sources for 1/25 sixties super stock drag car decals and am interested if anyone has recently ordered and applied decals from SlotCar-Fever.com (coco_mn (11880 star) on eBay, slotcarfevercheyna on Etsy)? I’m looking for sharply printed “vector graphics” decals (like most kit decals from AMT/ Revell/ Moebius/ Tamiya/ etc. as well as SLIXX, Yesteryear ) vs. the lower resolution “rastor graphics” type decals (SMP). Do Slot Car Fever decals have crisp sharp graphics? Are they thin but strong and easy to work with? I don’t mind having to cut each decal shape out individually and being inkjet printed, I’m ok if they are printed on clear or white based decal sheets. Let me know if you’ve used Slot Car Fever decals and if you’d recommend them. Much thanks! John
-
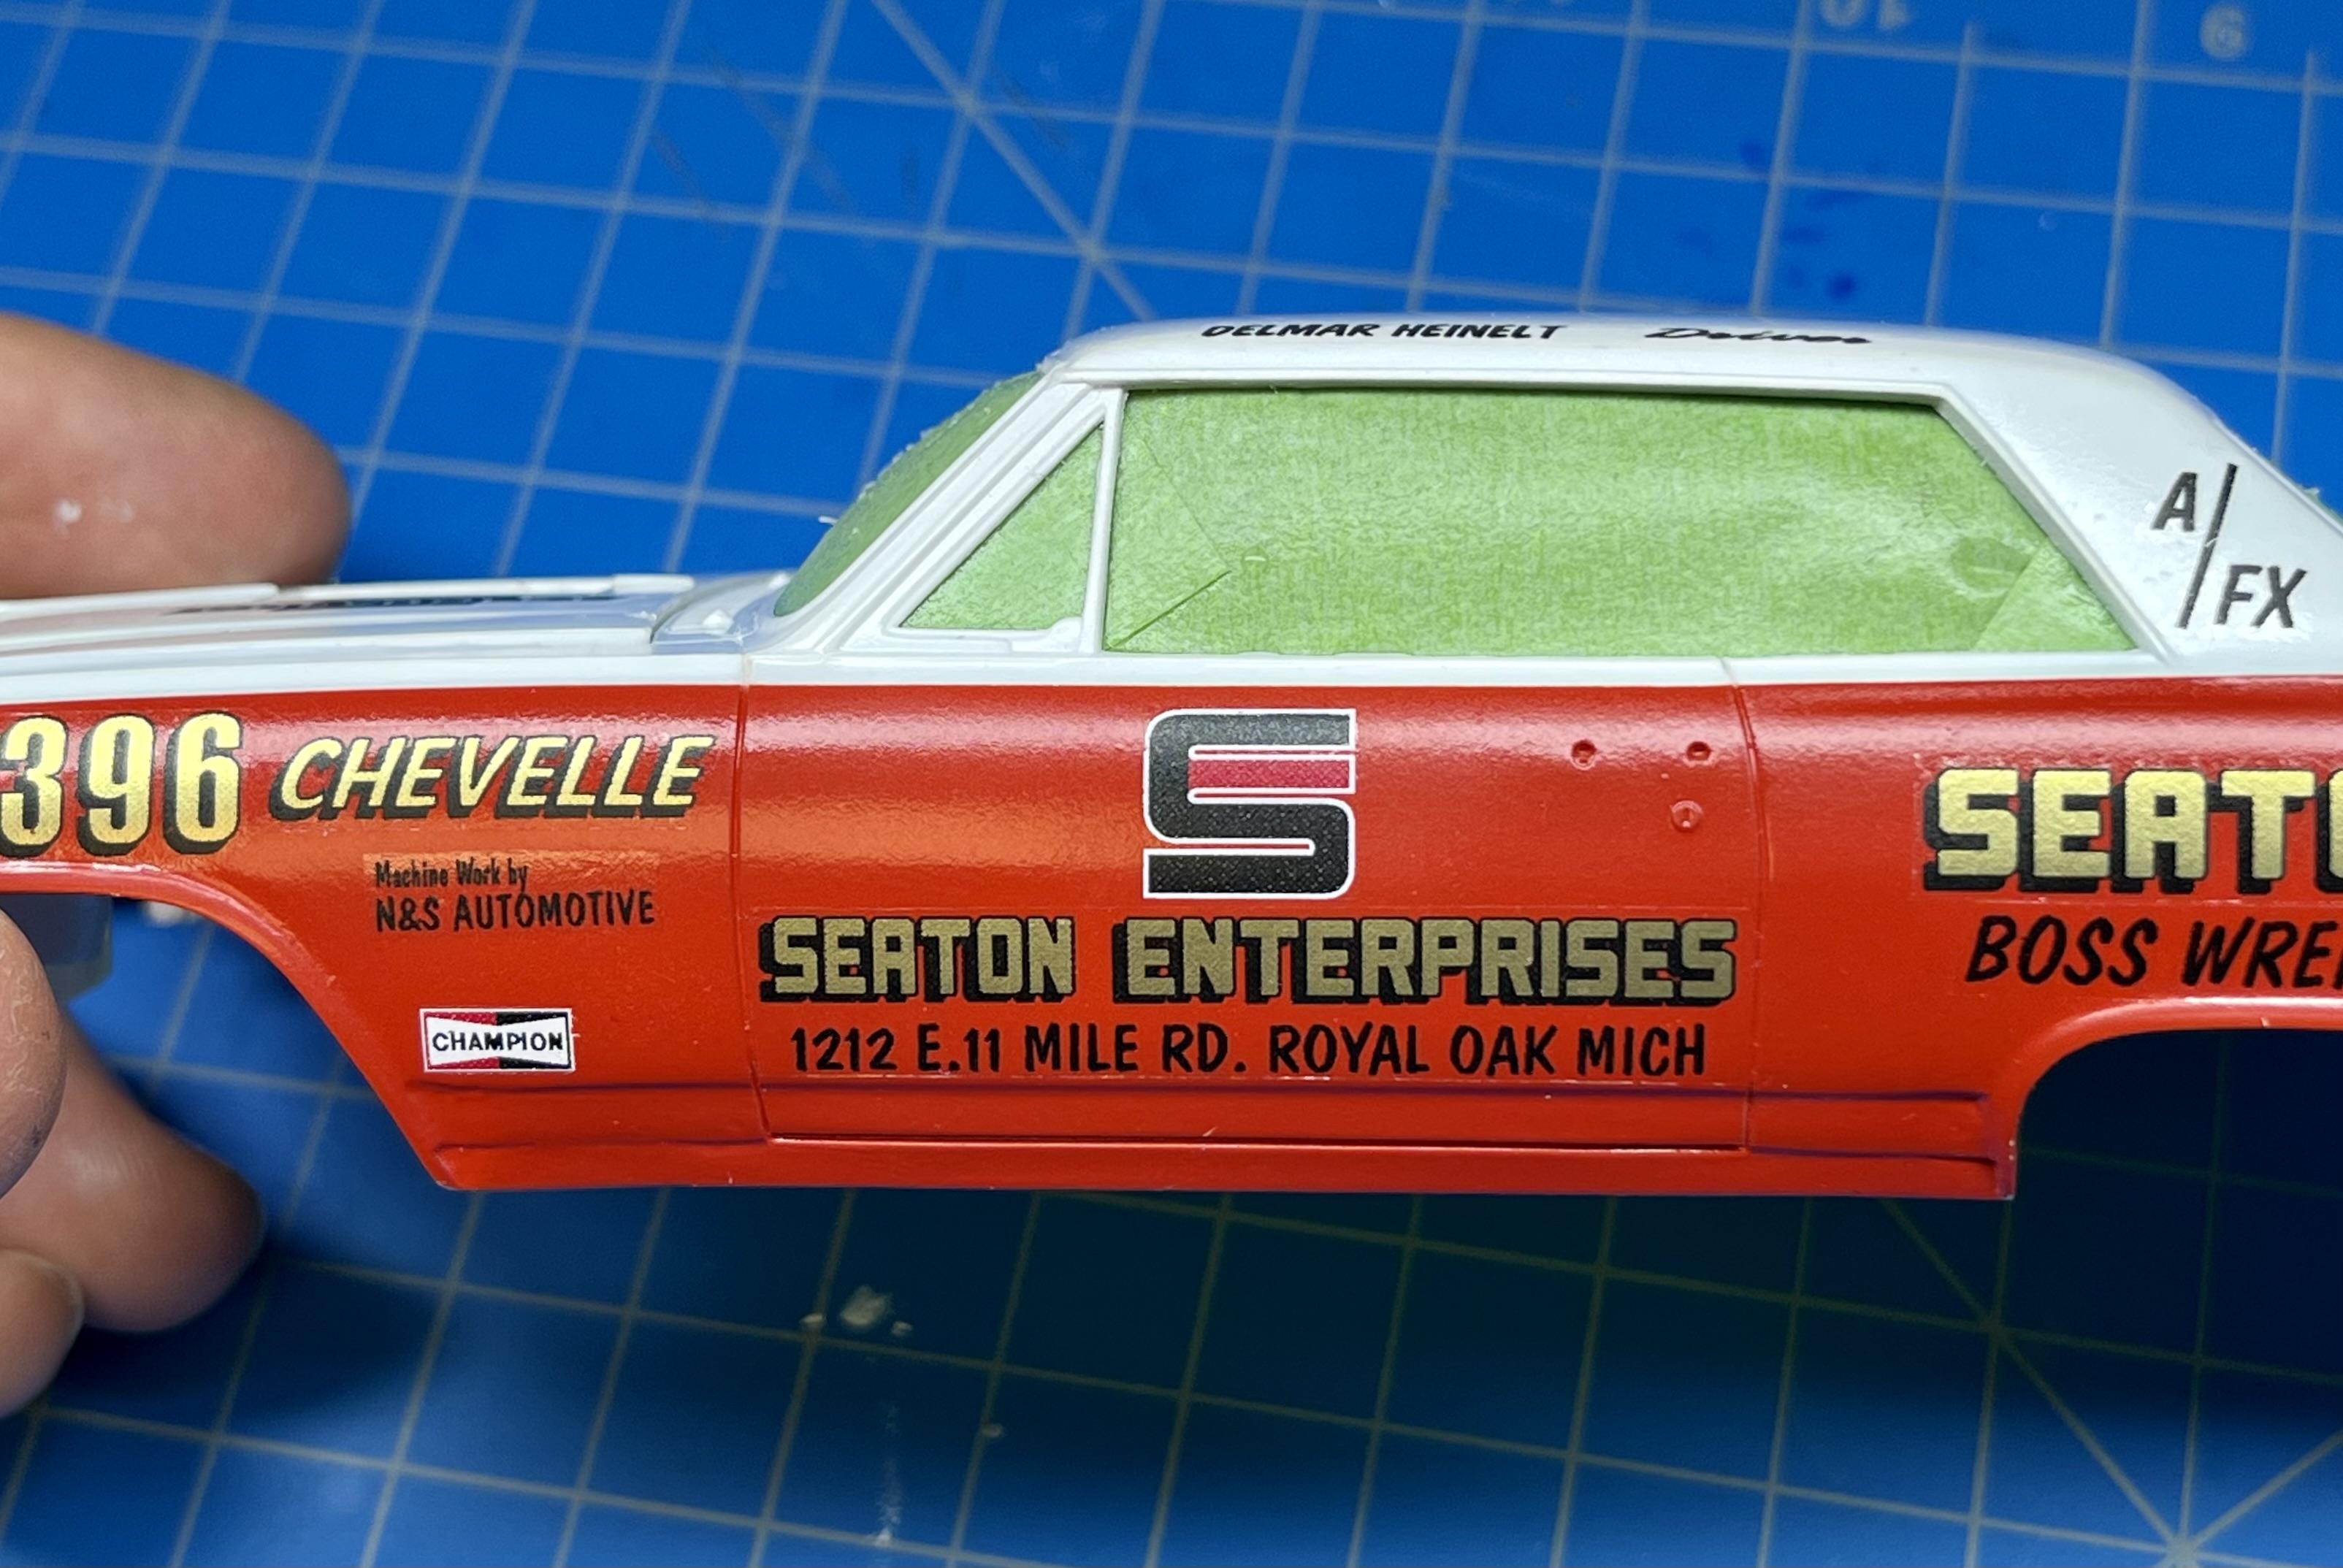
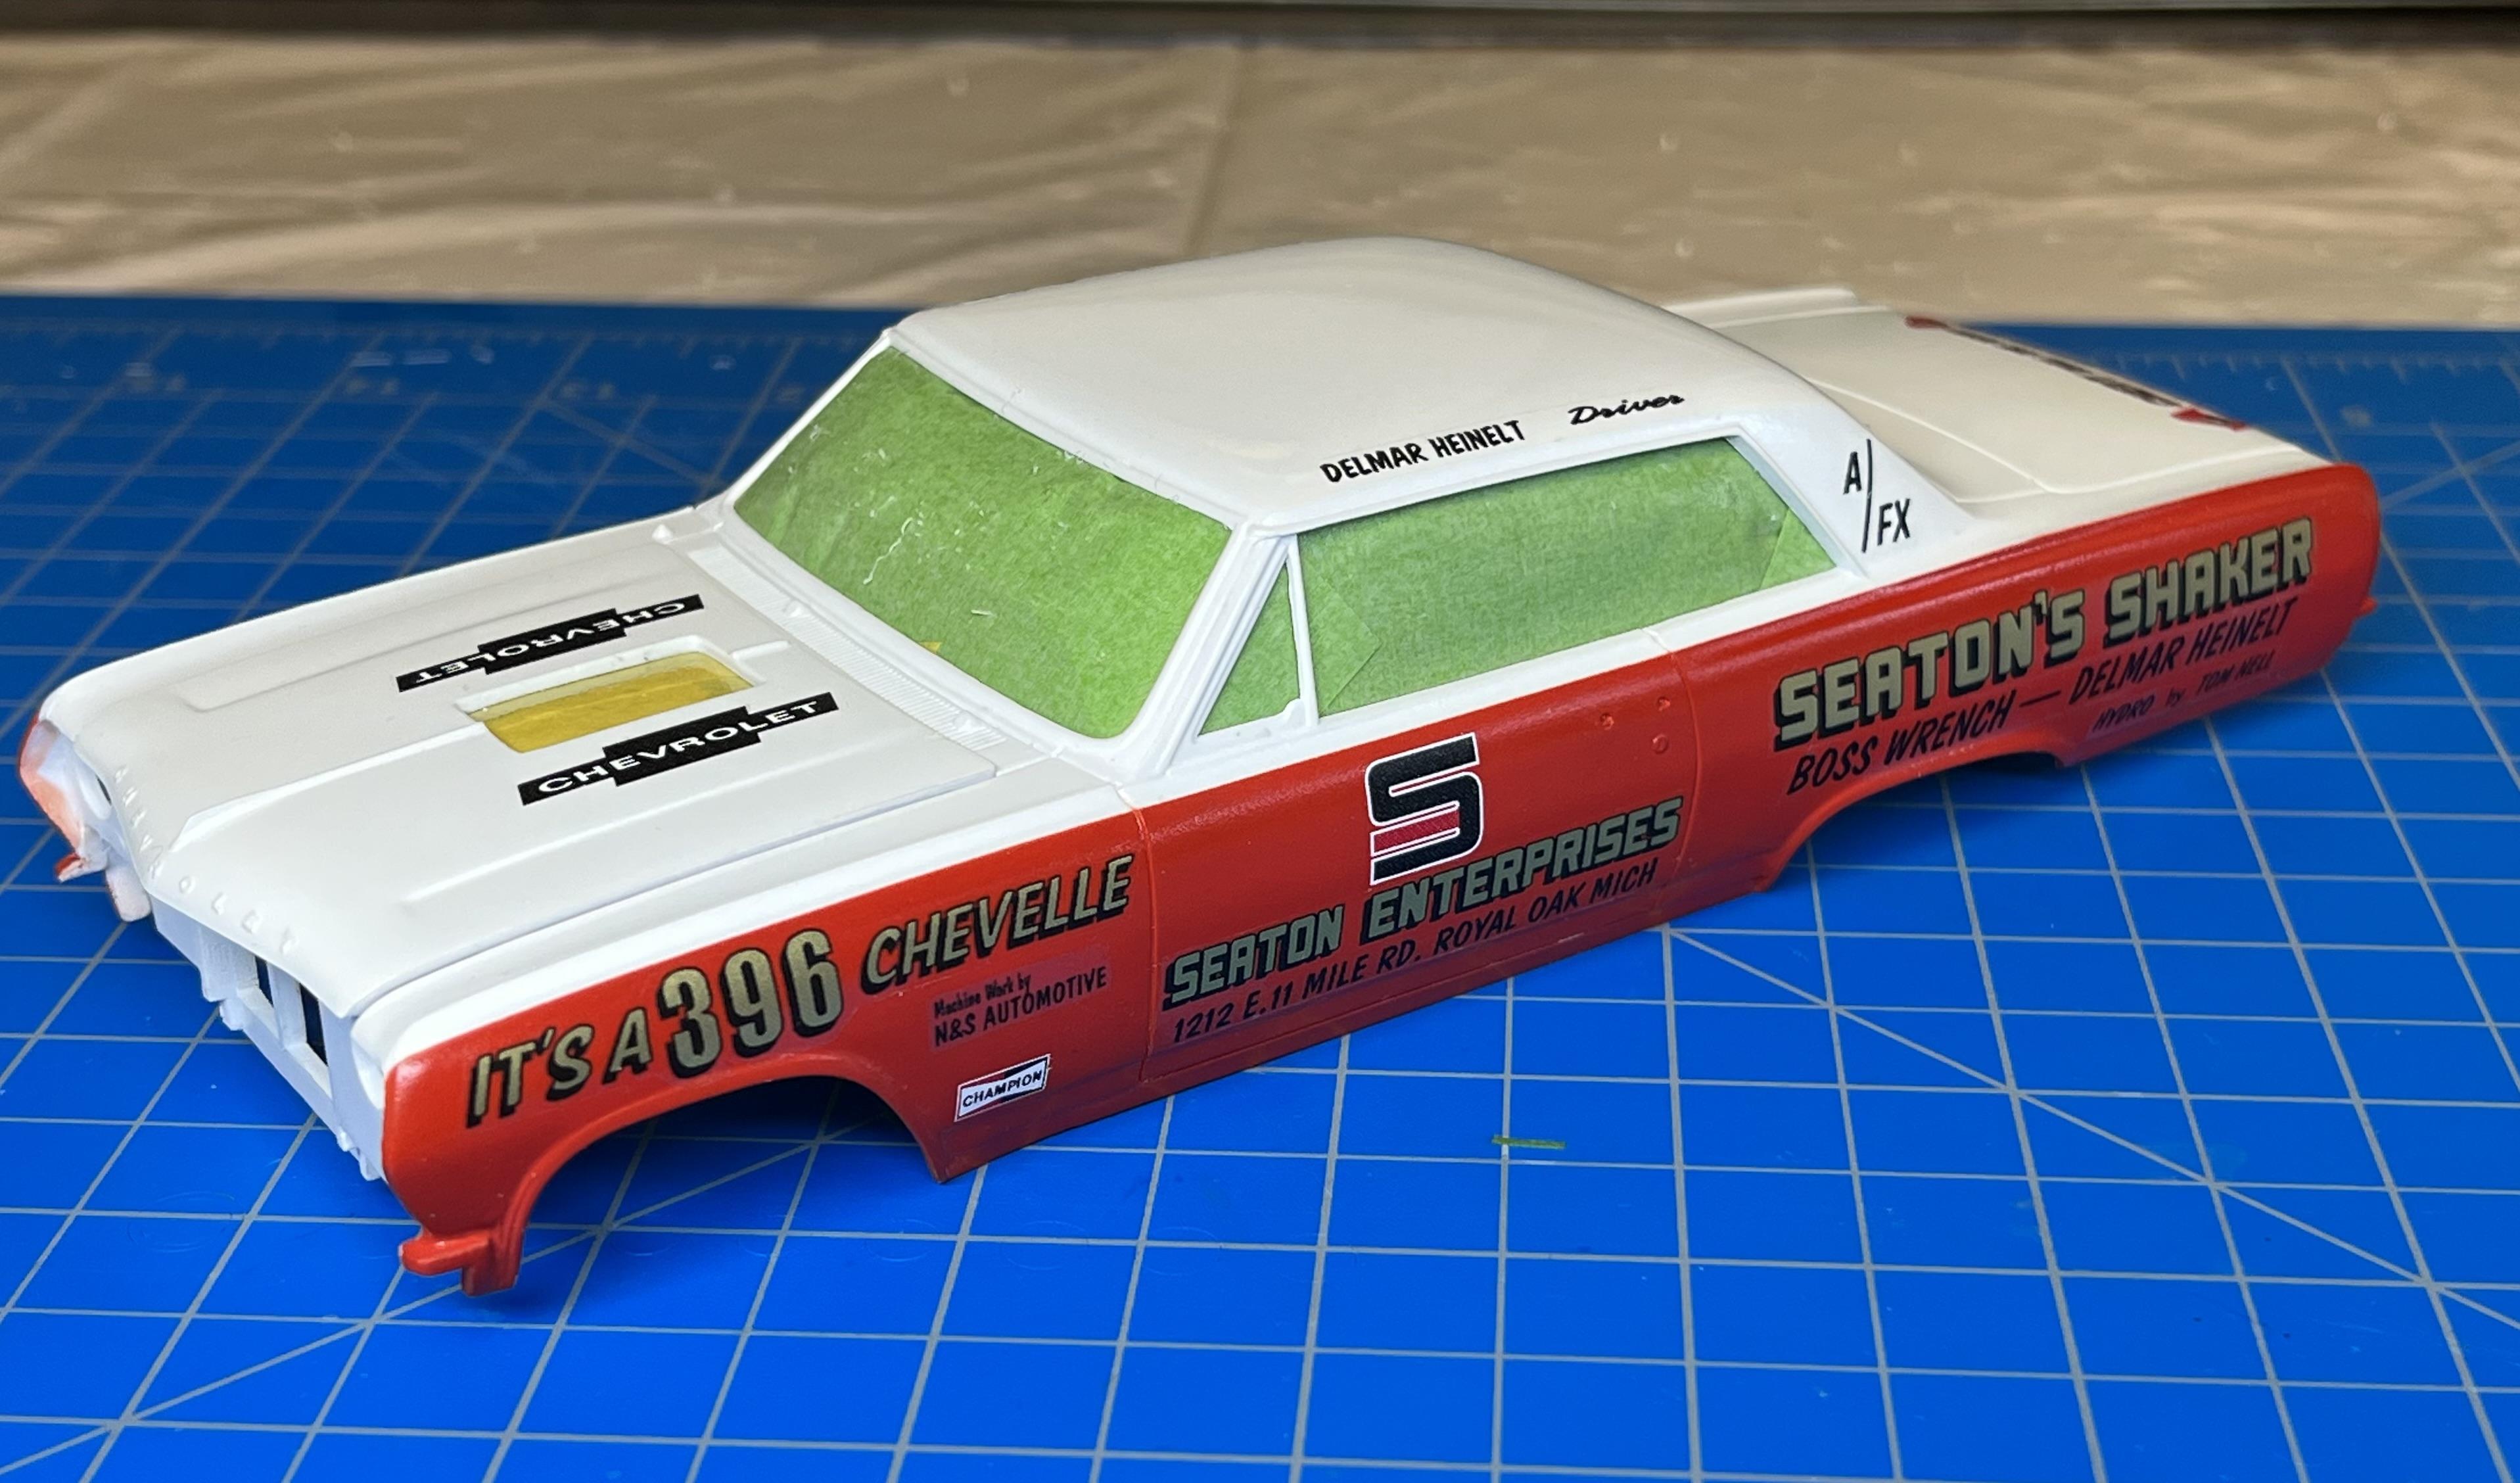
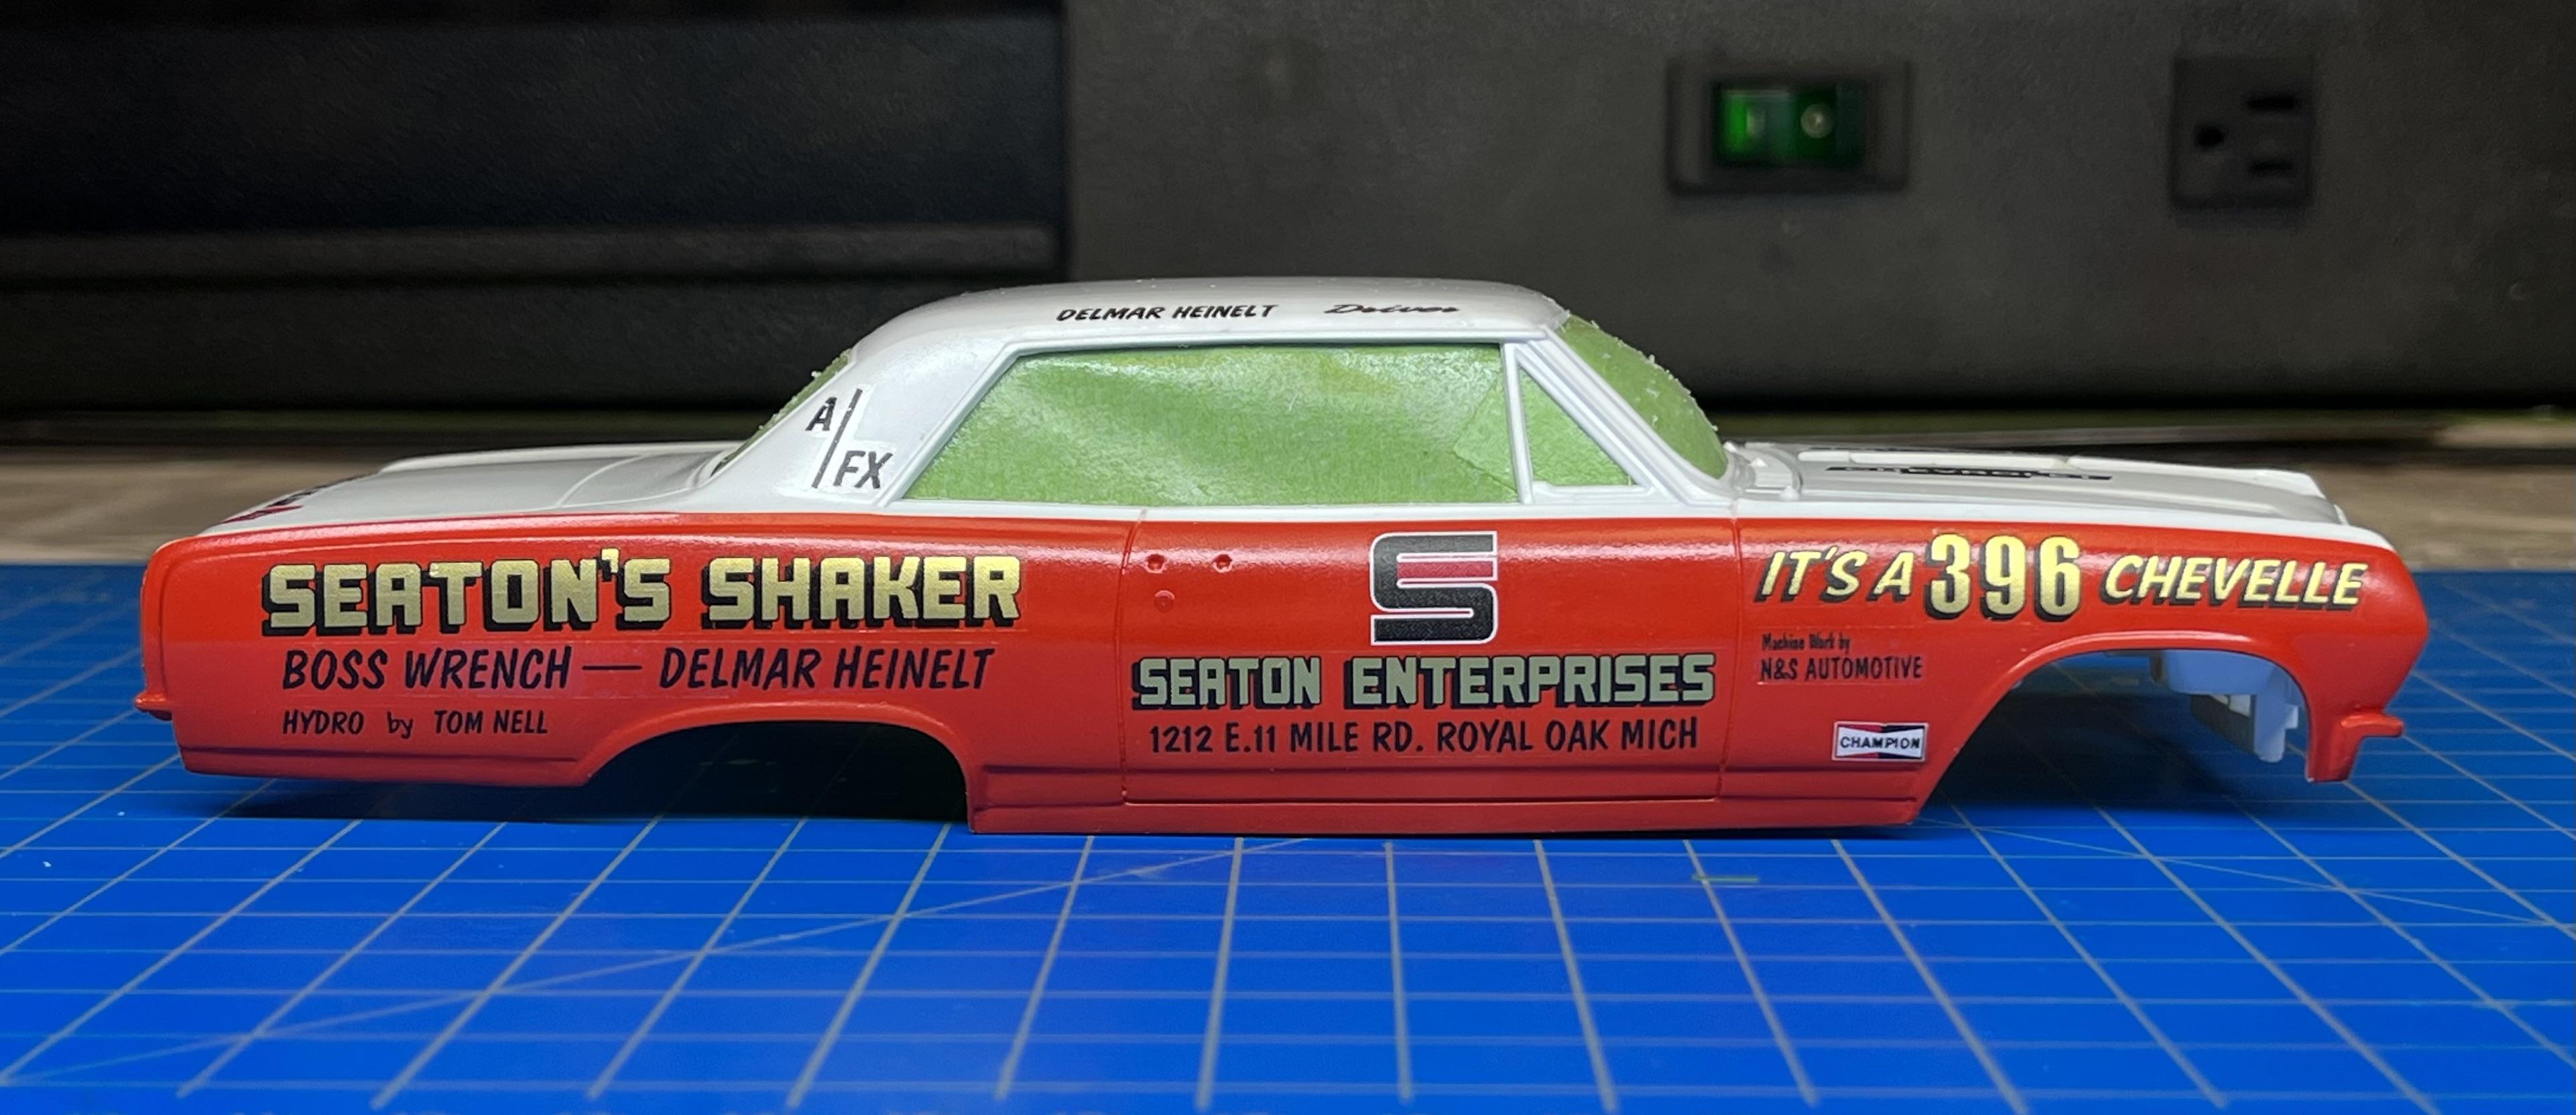
OMG! I put the “S-E” logo on upside down on the drivers door….senior moment? Luckily I was able to soak the decal to loosen it and then correct it. Posting WIP’s are a great way to perform public quality control inspections on a build….embarrassing but effective!
-
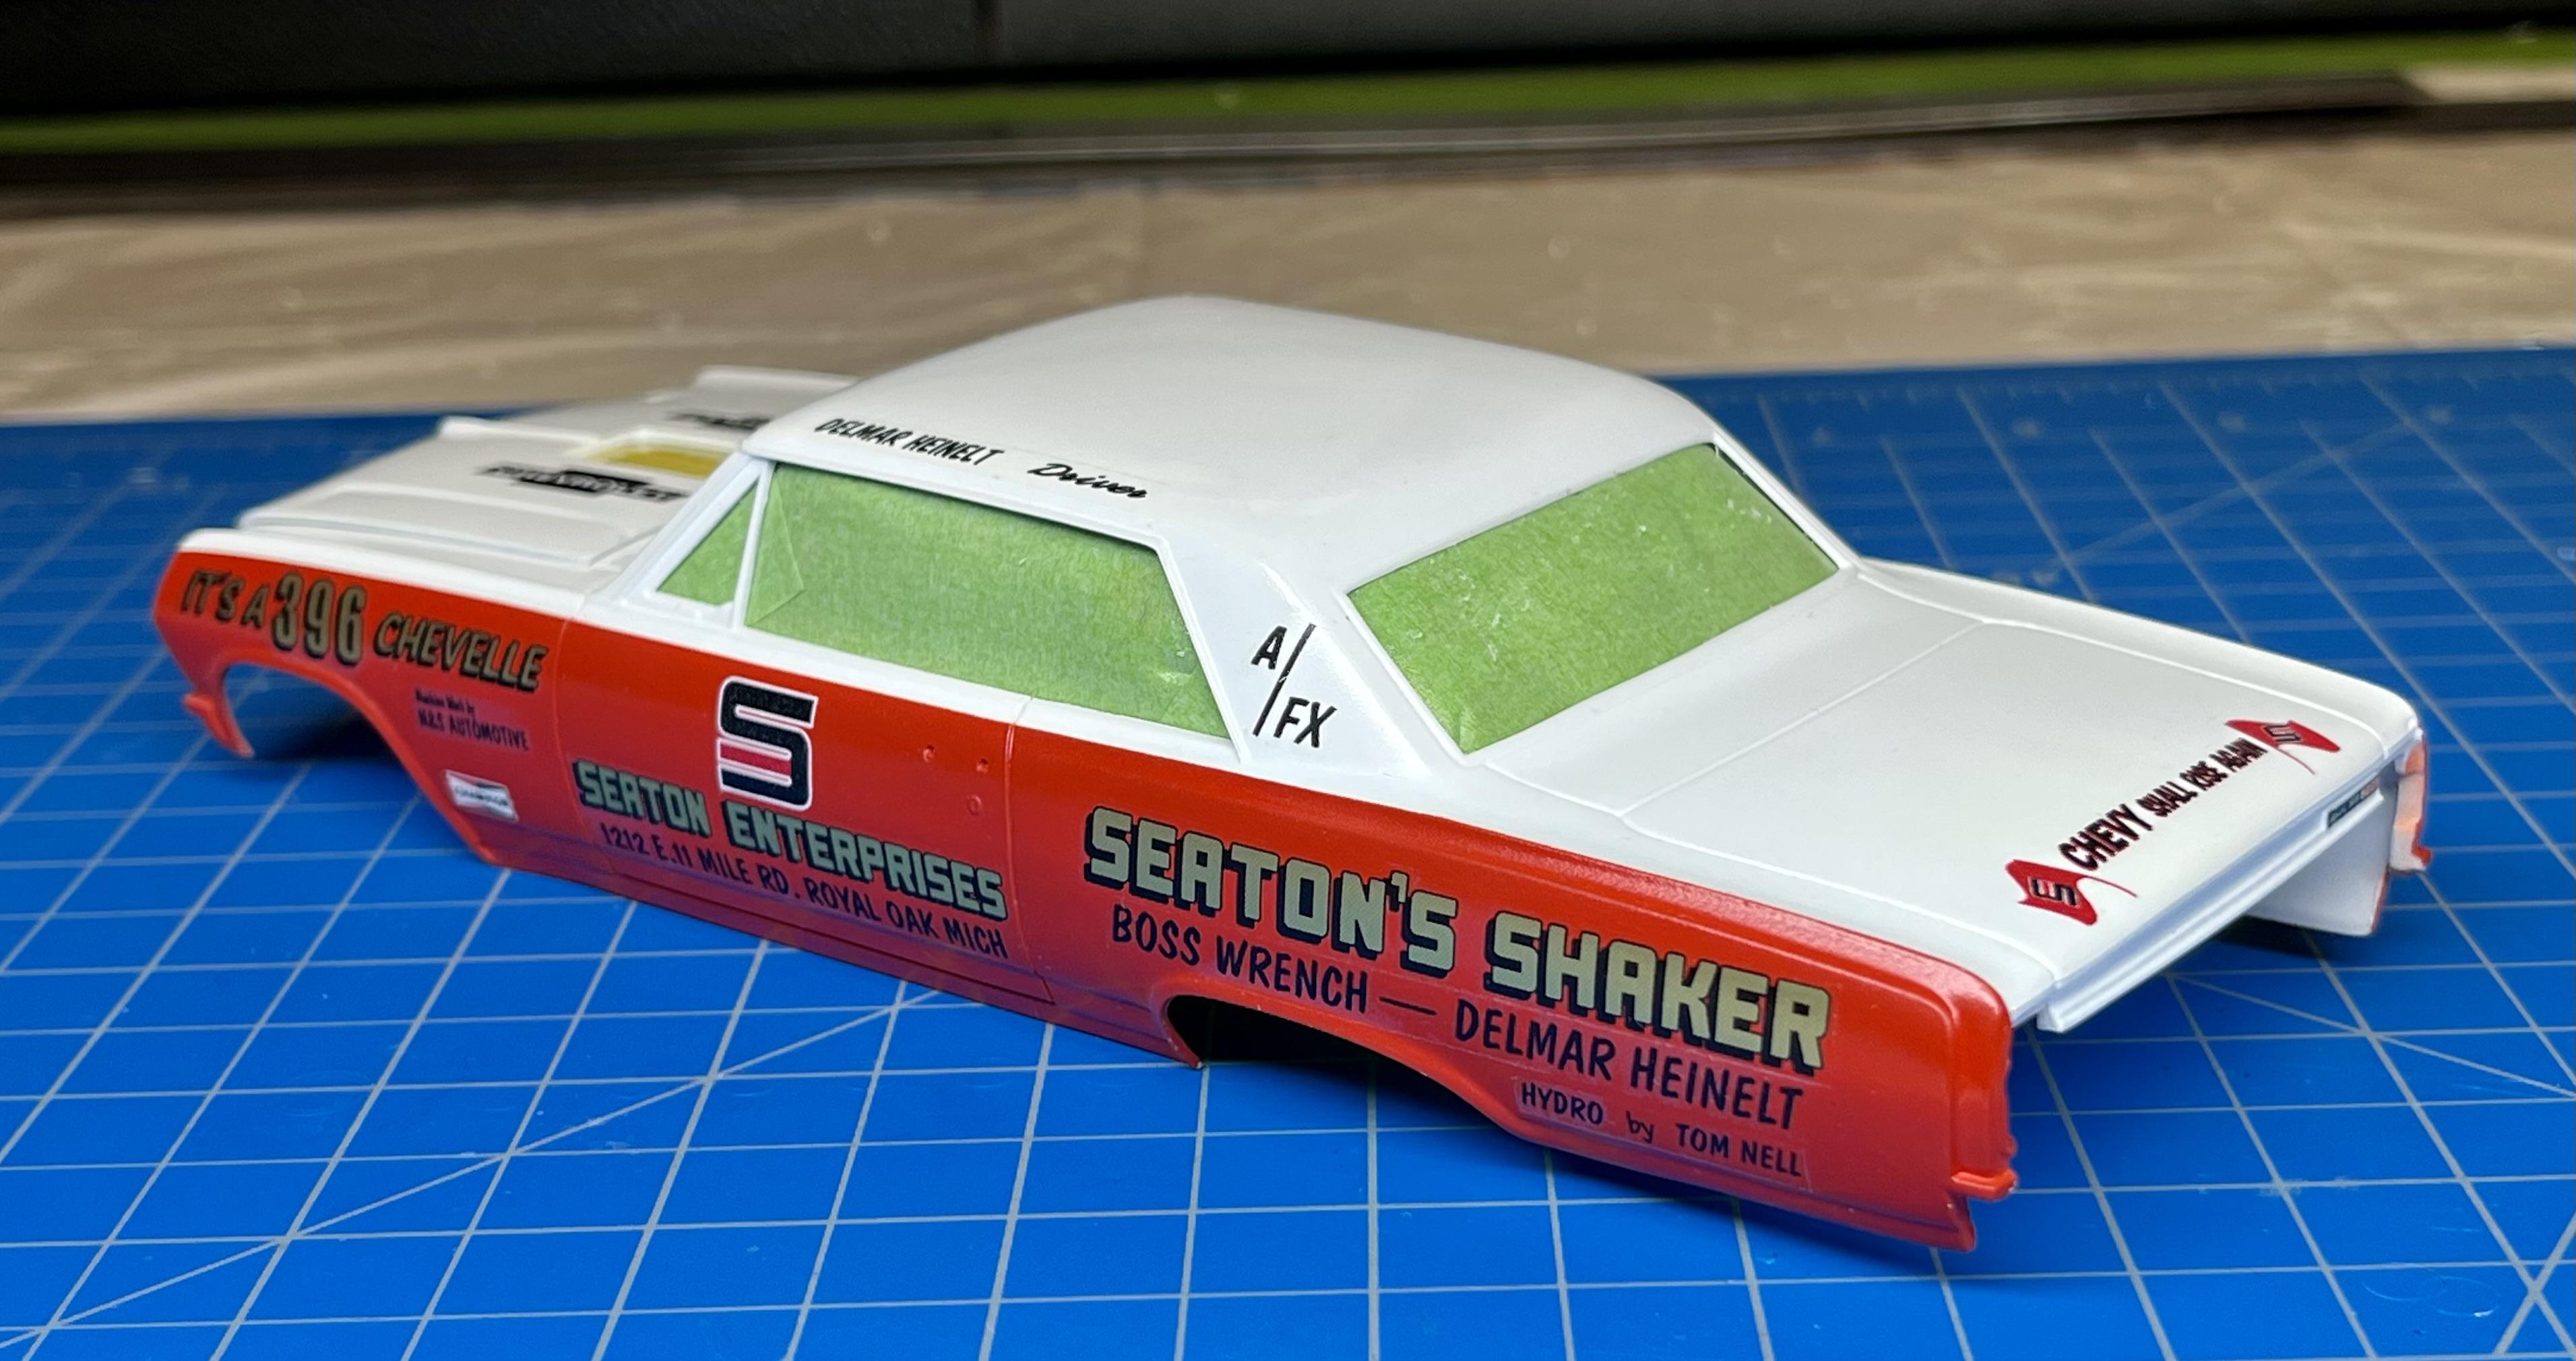
I finished airbrushing the Mr. Color clear coat (nice stuff) onto the body by thinning it 1:1 with Mr Color thinner then I let it cure for a couple days before applying the decals: These decals from Yesteryear are super nice and thin but oh-so delicate. I broke a few but was able to finesse them back together. I used a little white glue heavily diluted with MicroSet beneath each decal to try to reduce ghosting but I’ll not be surprised if a few don’t ghost a little after these dry. I love decaling these super stock builds, the decals really make the paint pop. I’ll clear coat over these once dry and then apply some BMF to the window frames. John
-
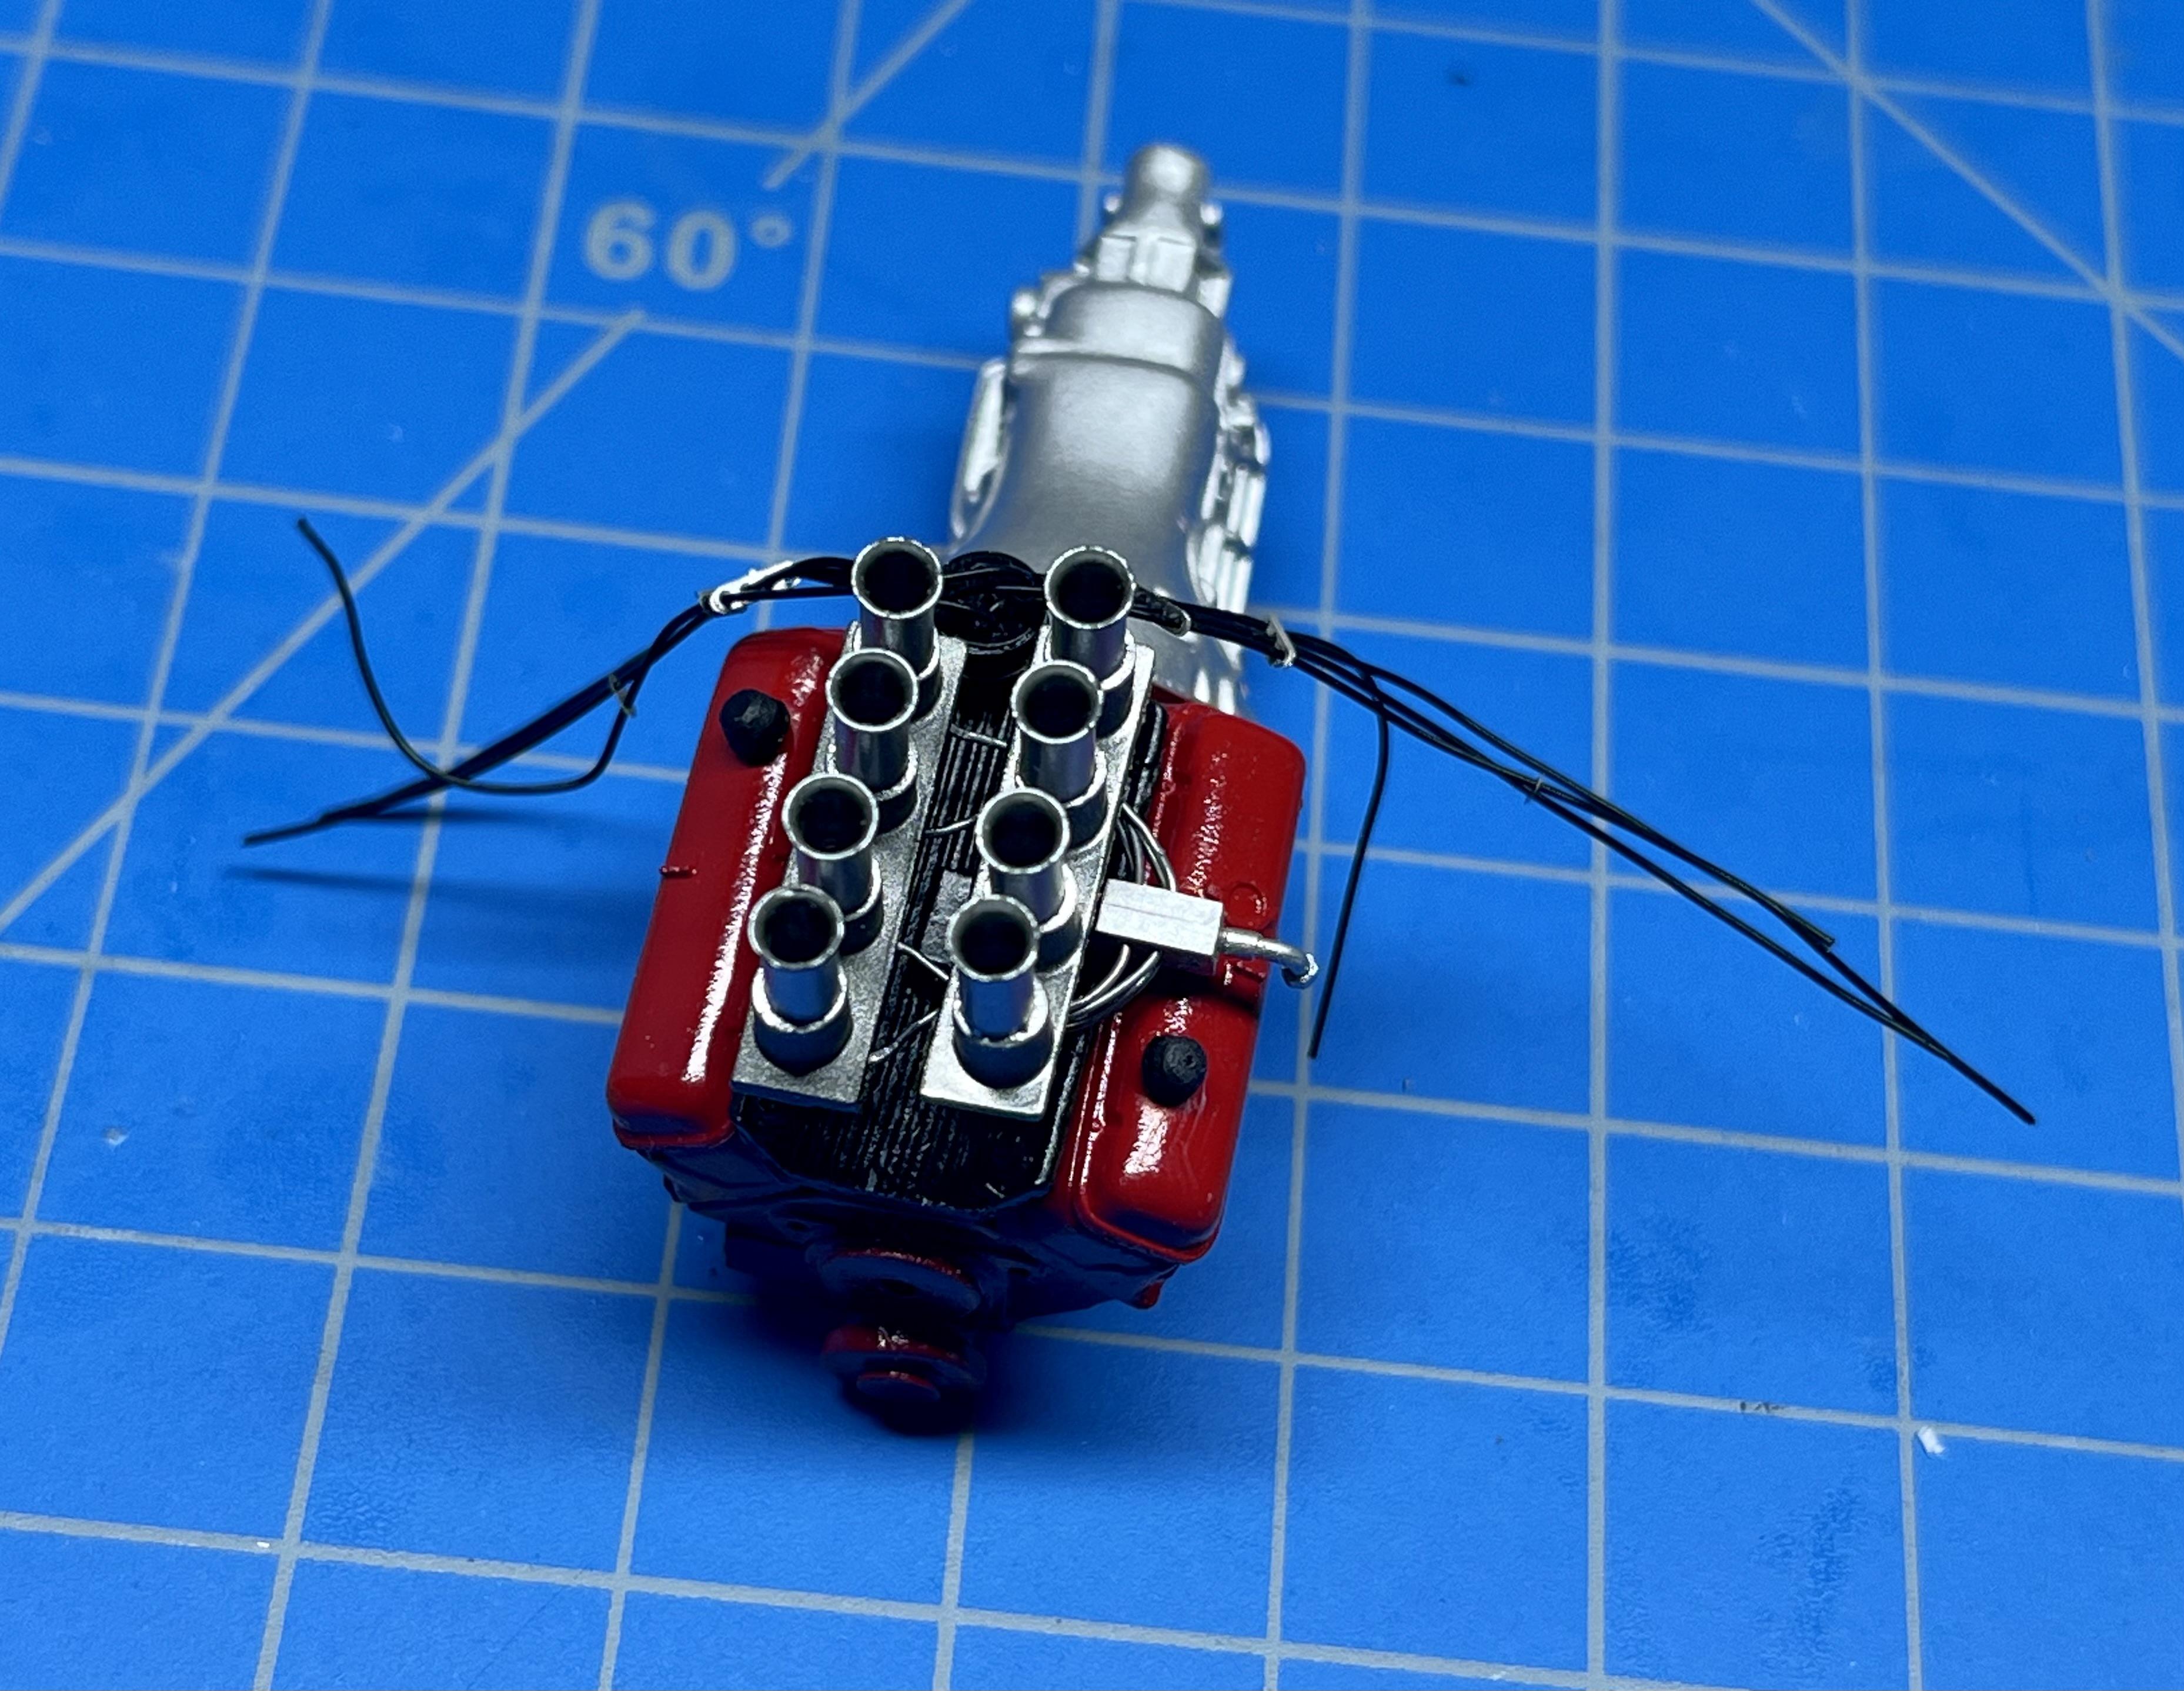
I airbrushed several plastic spoons & knives with the Scalefinishes base paint as well as some Alclad Chrome over black lacquer to test the Mr. Color clear coat, will give them an extra day to cure before I test the CC. I may apply a few scrap decals onto the spoons and knives to verify that the Mr. Color doesn’t react with them. While waiting for my spoons to dry/ cure, I did a little work on wiring the engine and finishing up the interior: I noticed in the reference magazine engine photos that, like most other BBC’s, the plug wires are routed over the valve covers and between the header tubes which I won’t be able to do until after I mount the headers to the engine (which I have to do while installing the engine into the chassis! Warning!: Finger and tweezer gymnastics job ahead!!!). Sounds like a good situation to dry-fit test first?
-
Nice job Walt! I particularly like the PE grill, valve stems on the rear wheels and the neat & tidy BMF work. So what’s with the rod passing through the oil pan? Did you make the front wheels steerable by adding pins to the front axle hubs and adding a tie rod?
-
Test shot of Moebiuse Altered wheel base '65 Dodge coronet
papajohn97 replied to Mr mopar's topic in Car Kit News & Reviews
I’m also looking forward to ordering a few of both the standard and AWB kits so I sure hope they are both still in the pipeline. I have decals for a Dick Landy “Landy’s Dodge”, a Gary Dyer “Mr. Norm Grand-Spaulding” (the blue one) and a Bob Harrop “Flying Carpet” all waiting for these kits. If I finish these three versions and still have the itch for the AWB one, there’s always the Ram Chargers car, Dave Strickler car and Bud Faubel’s “Hemi Honker” along with a bunch others I’m probably forgetting….so thankful to Moebius for doing these ‘65 Mopar kits!!!! -
Thanks Pierre, you’re a very talented builder so your compliments made my day! I bought these resin elbow fittings a few years back to use on some 1/20 F1 builds, I think I ordered them from Hobby Link Japan (HLJ.com) and they are manufactured by Top Studio: In checking both HLJ and one US dealer, Scale Pro Shop, it looks like they’re all out of stock. BNA in Australia has some and you can order them thru their eBay listings. BNA is an excellent shop, they don’t gouge and shipping is amazingly affordable and prompt.
-
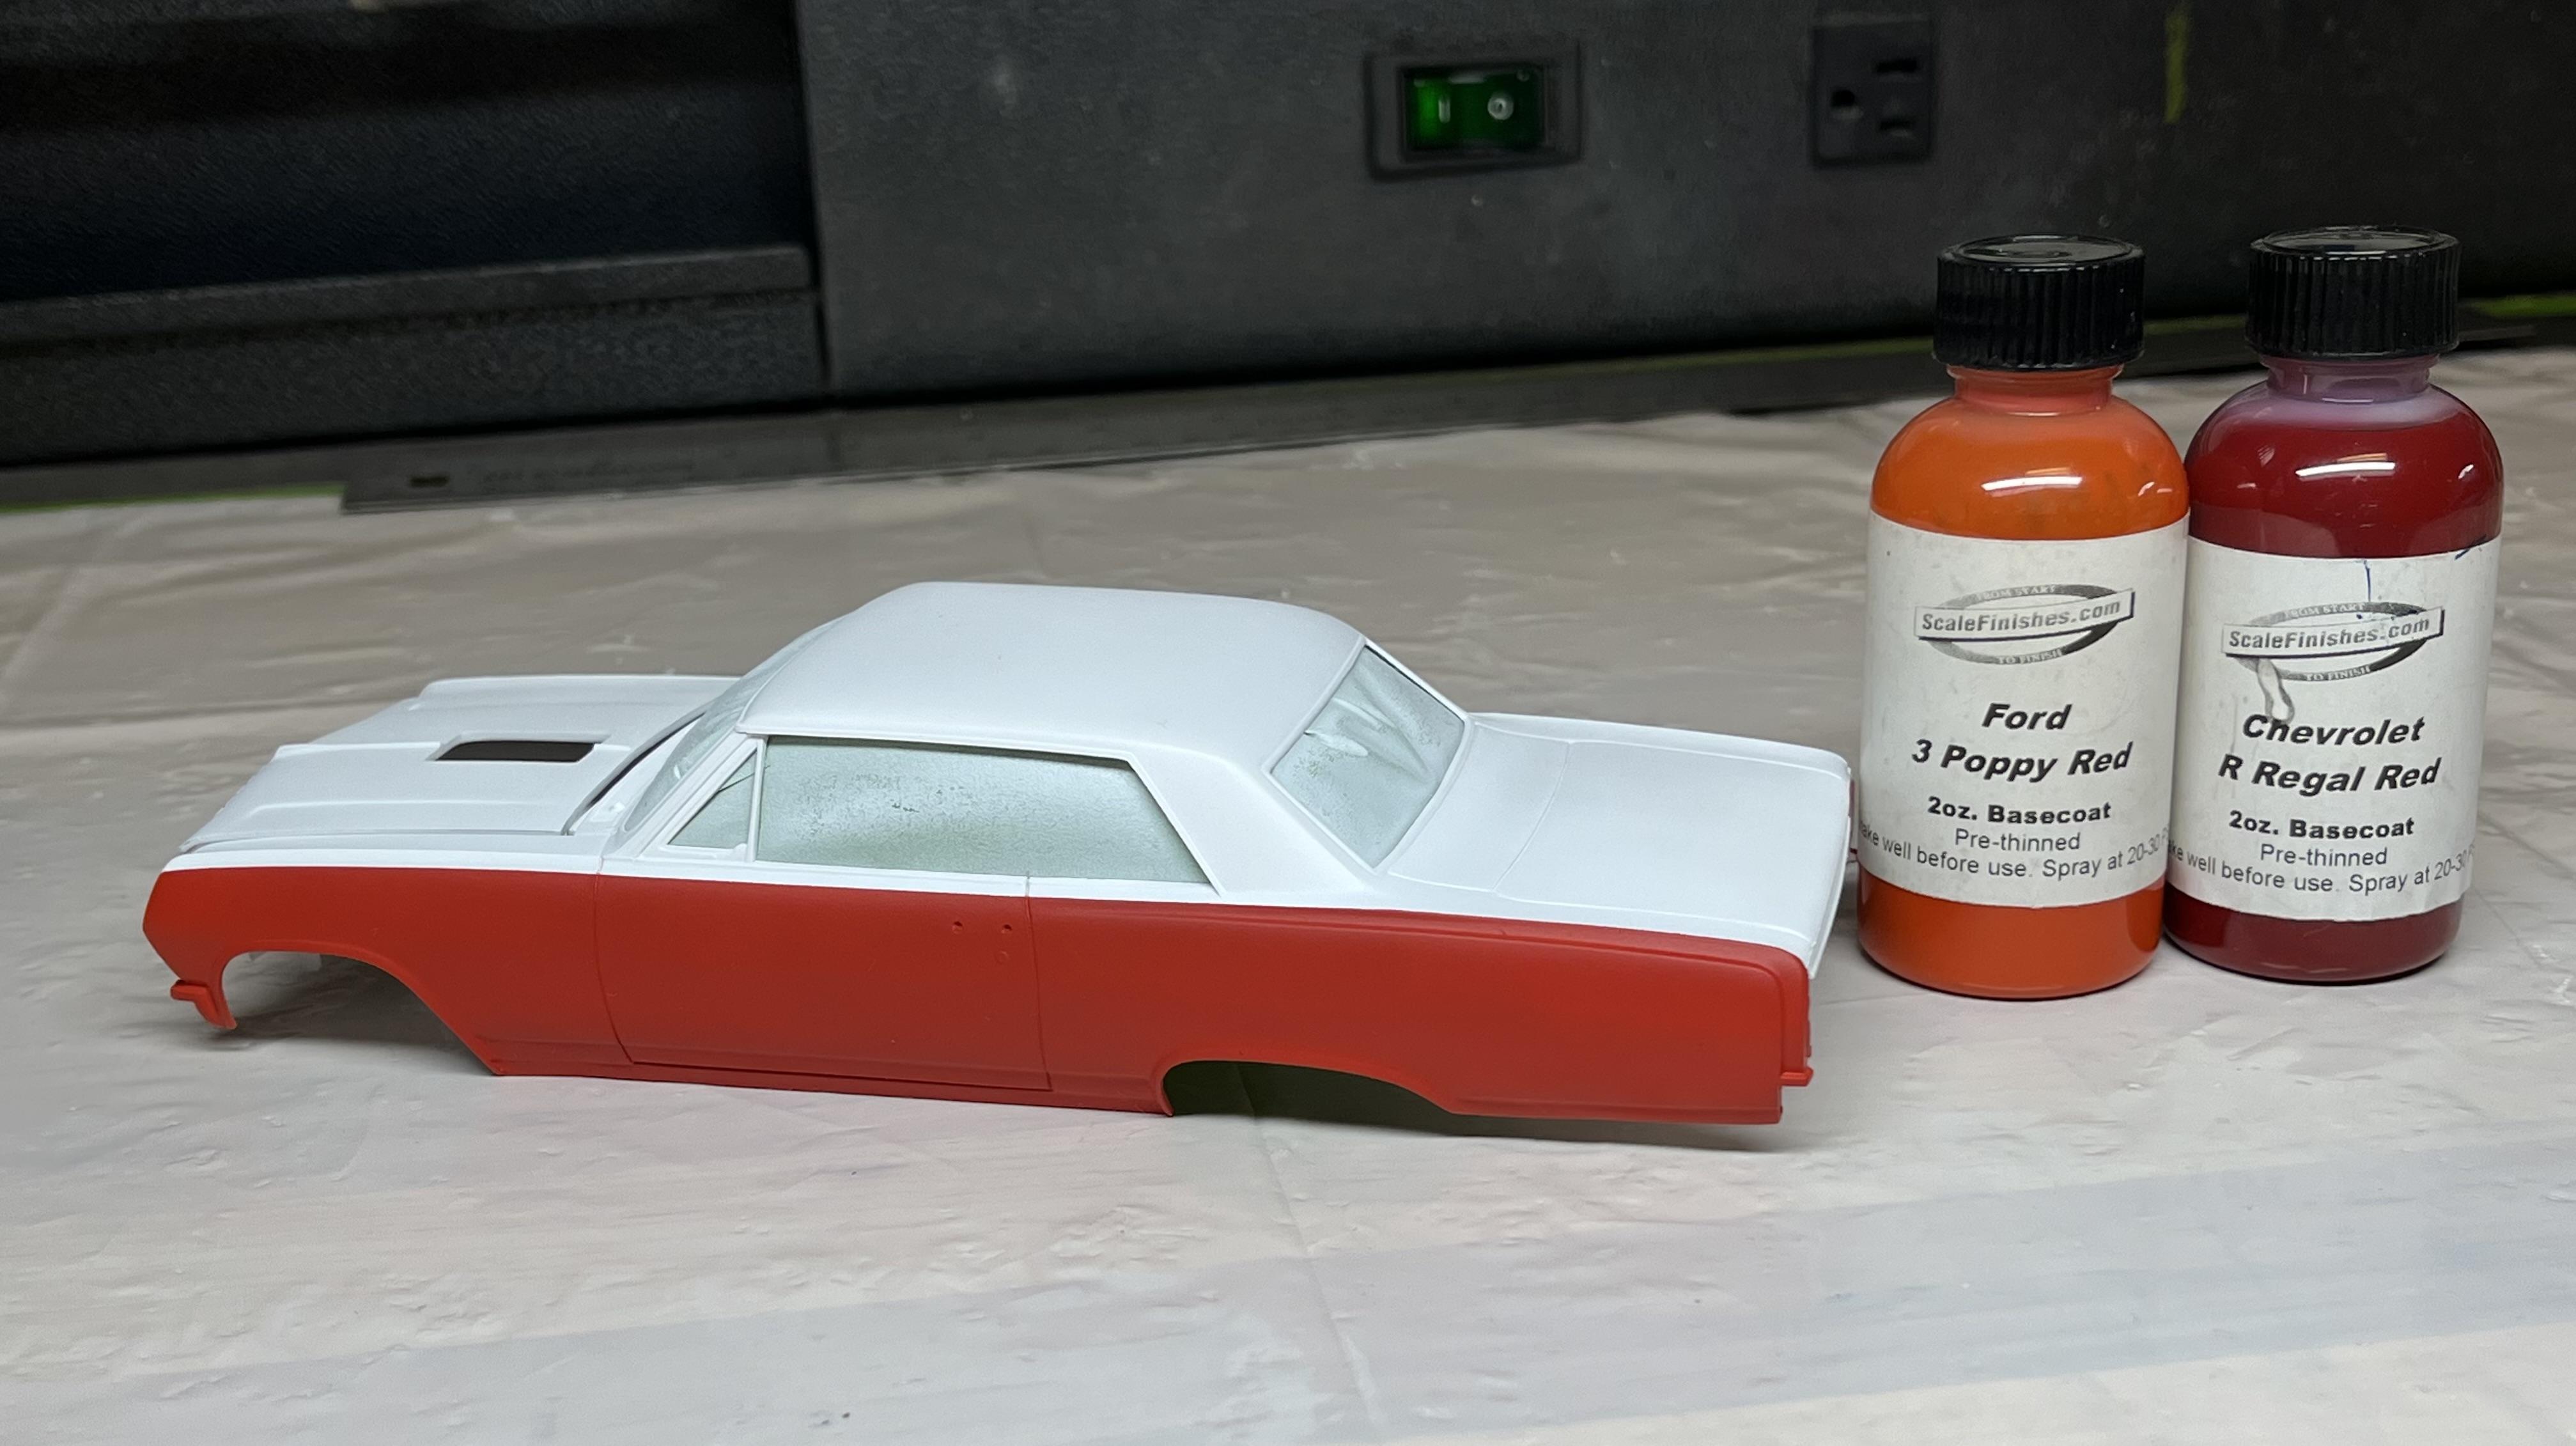
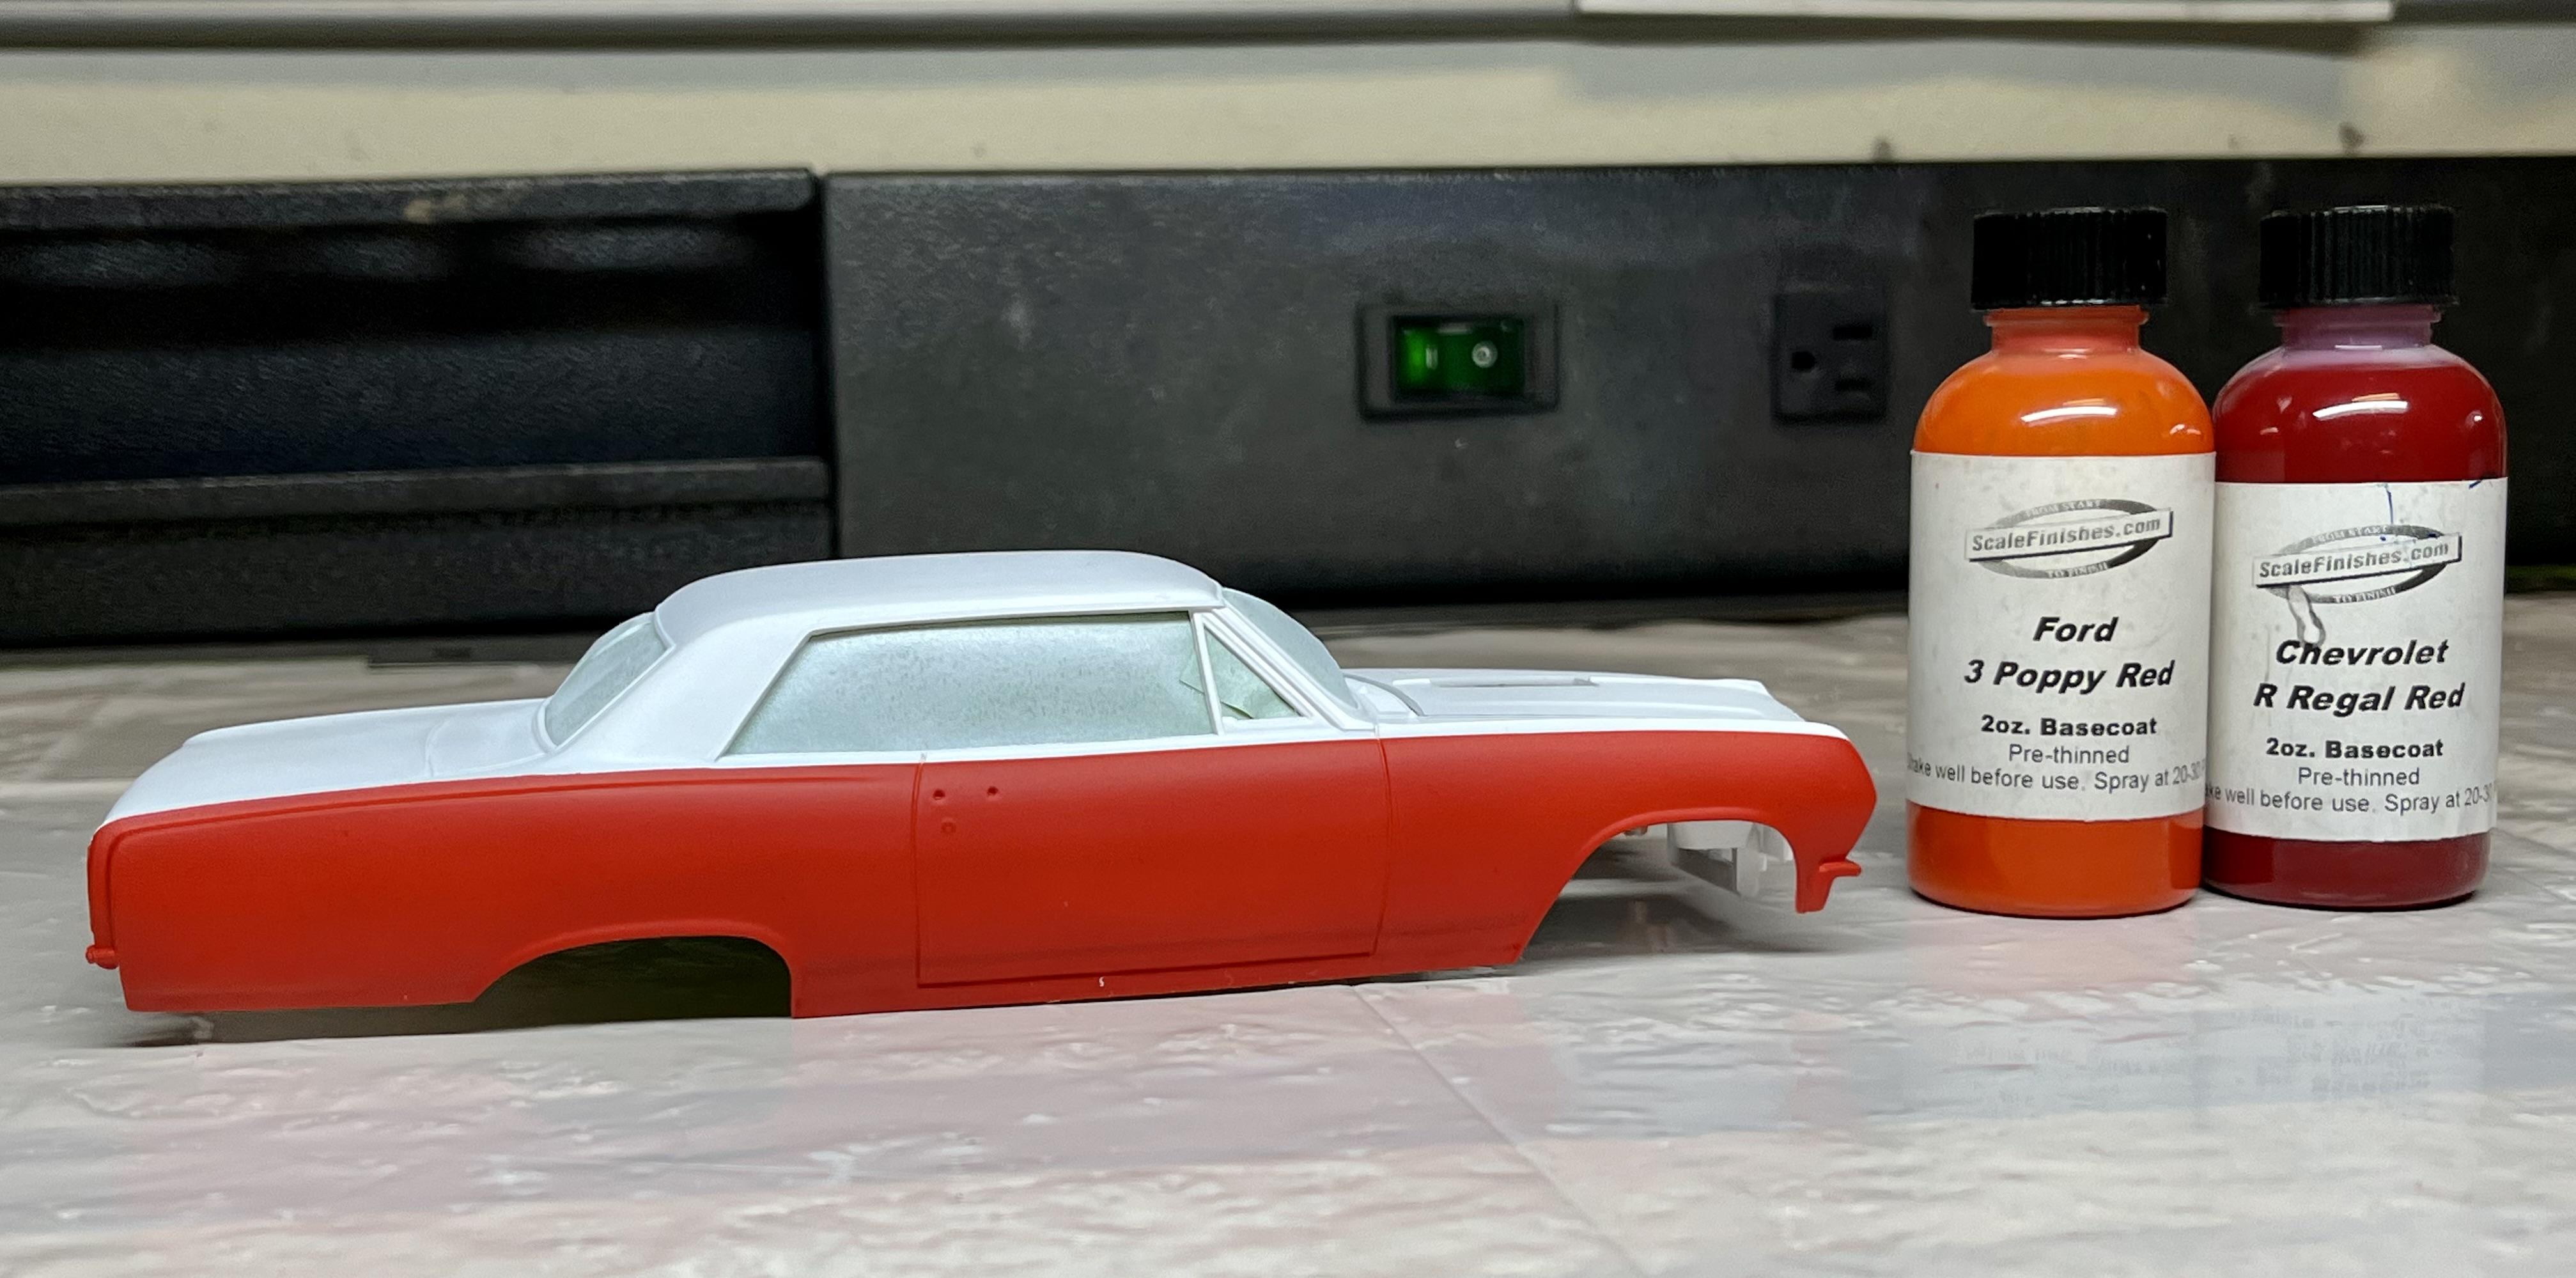
Today I masked and airbrushed the reddish-orange onto the lower sides of the body: I mixed three parts of the Poppy Red with one part of Regal Red - It look about right to me for what I was aiming for although who knows how it will look with clear coat applied? I failed to spray a few plastic spoons with the white and orange paint to allow testing with a new clear coat I’m thinking of using. I usually spray Tamiya TS-13 Lacquer over Scalefinishes base paints but I’m thinking of trying this Mr. Color UV Cut Super Clear which I’ve read is easier on decals: Scalefinishes website says their base coats are not compatible with Mr. Color Self-Leveling thinner but I was planning on using their standard thinner to thin this clearcoat. Let me know if anyone’s tried this stuff over Scalefinishes basecoat. John
-
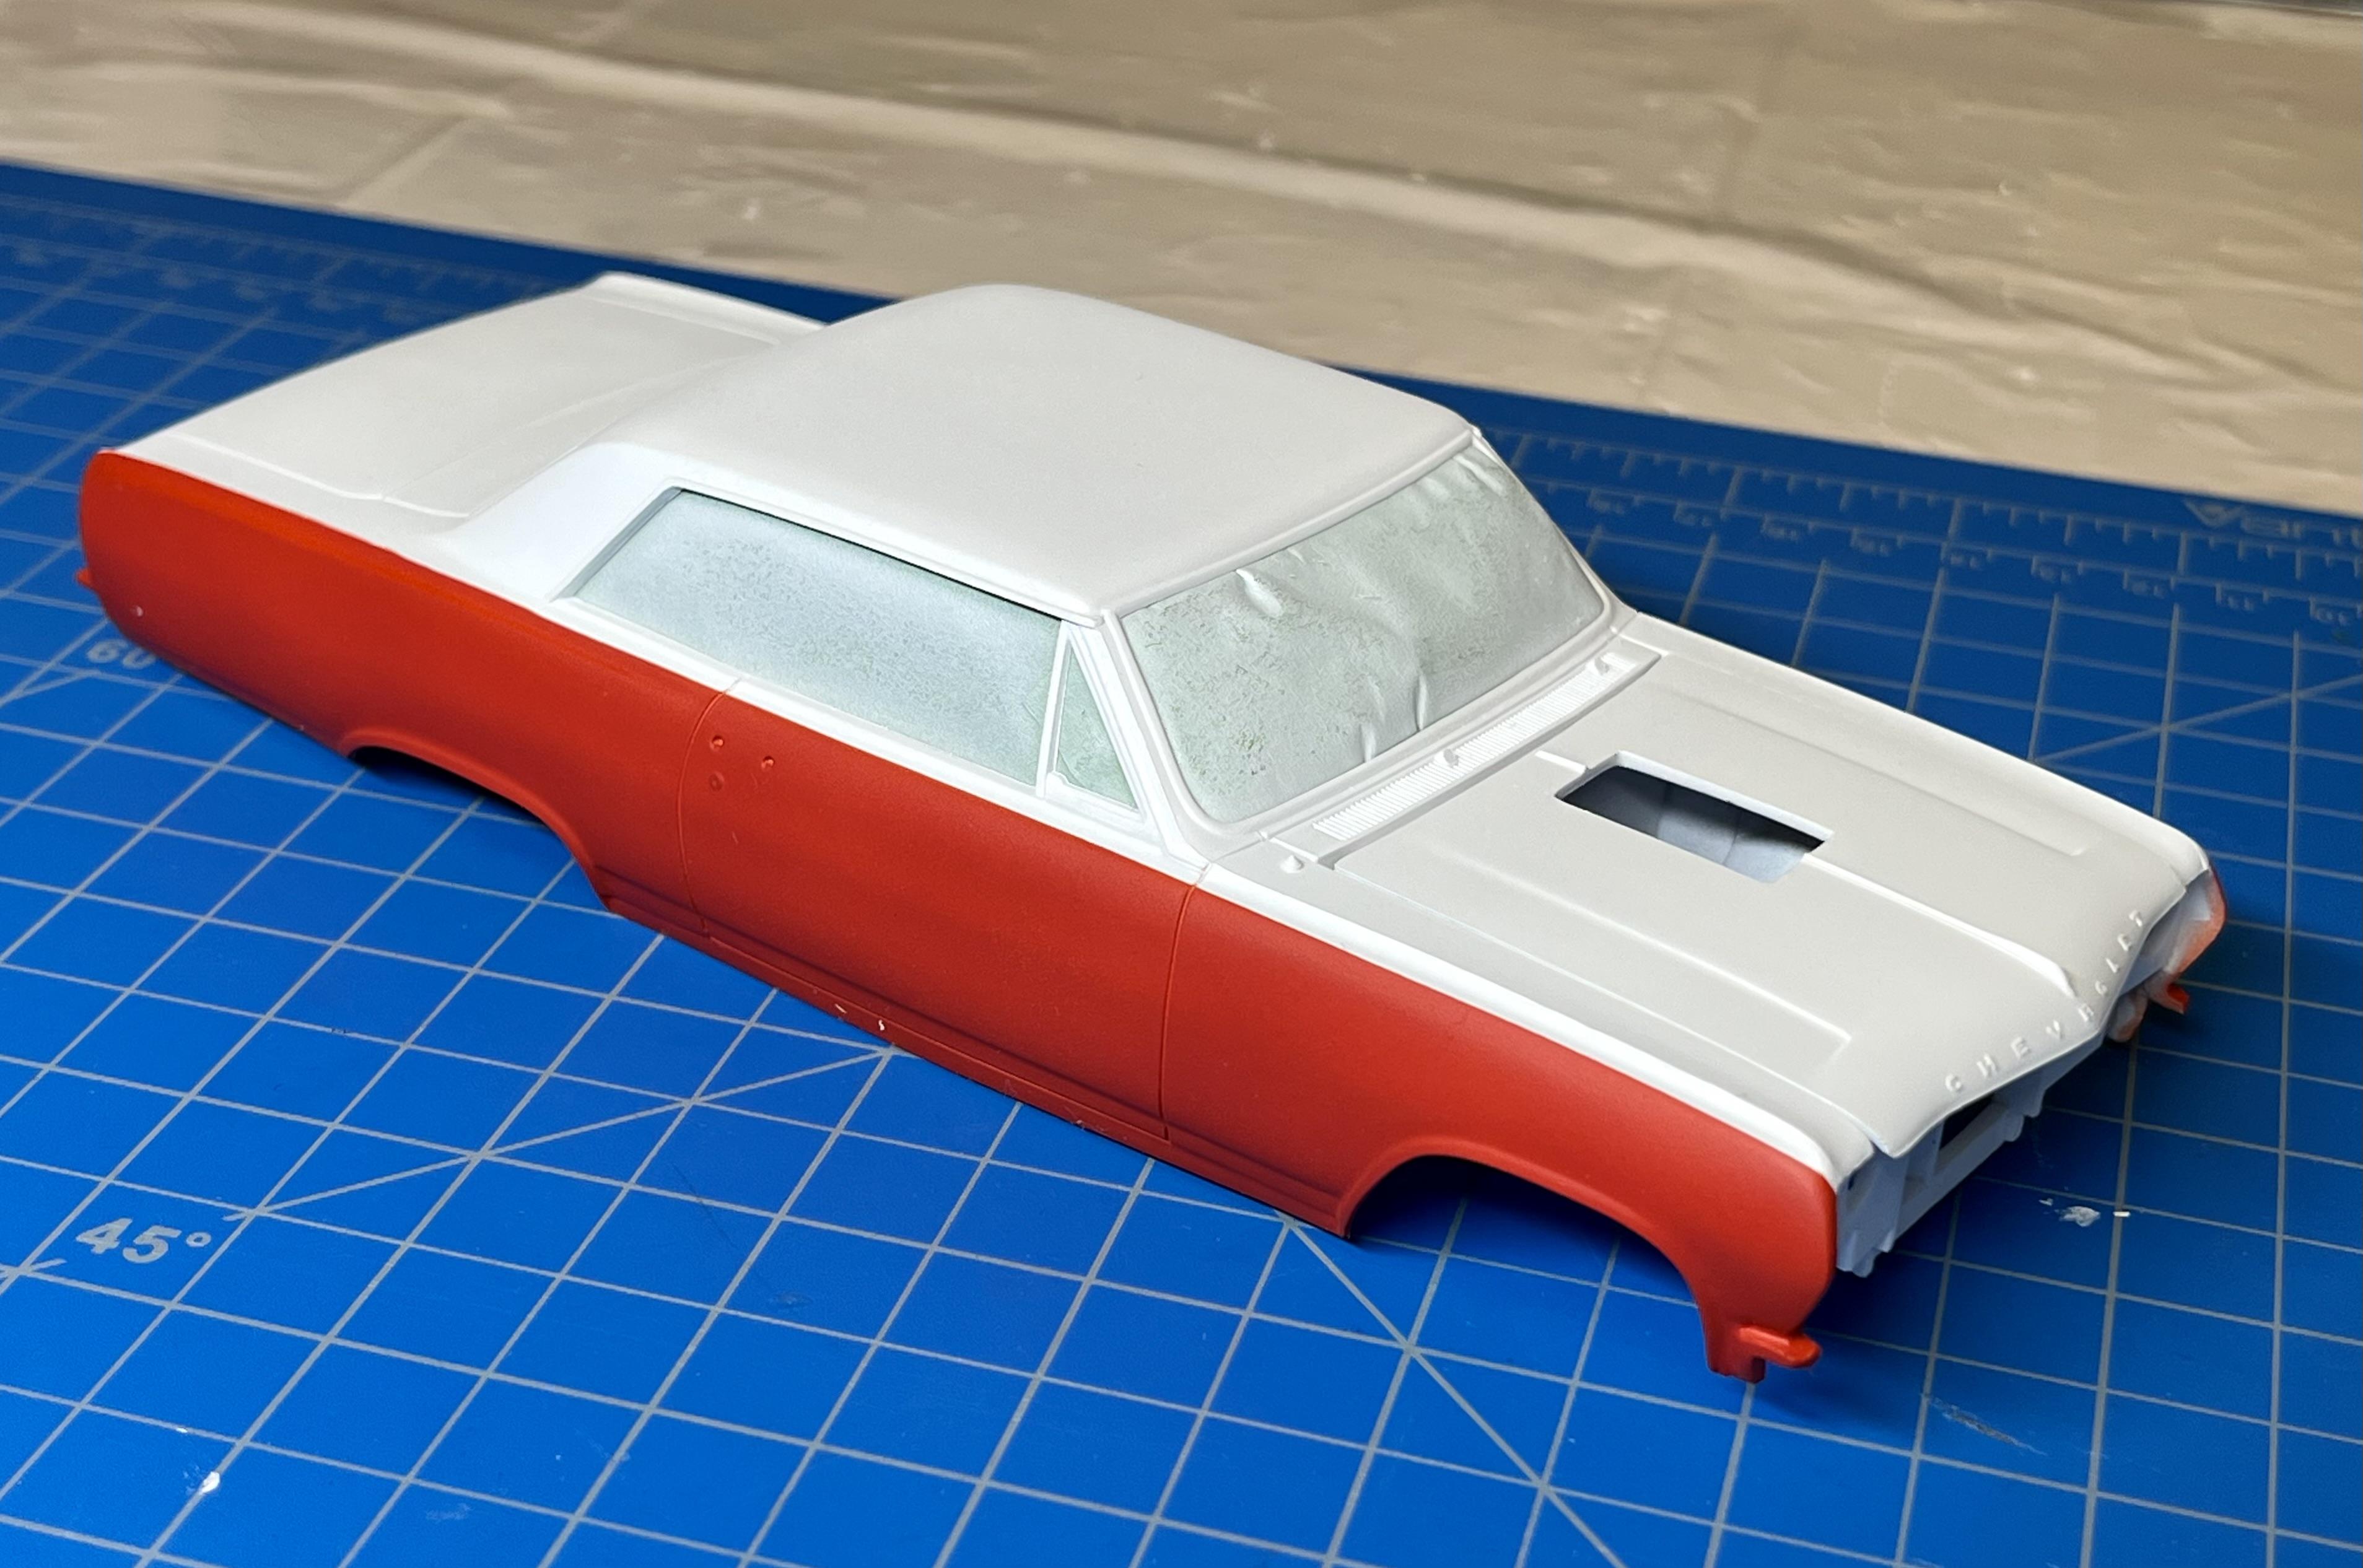
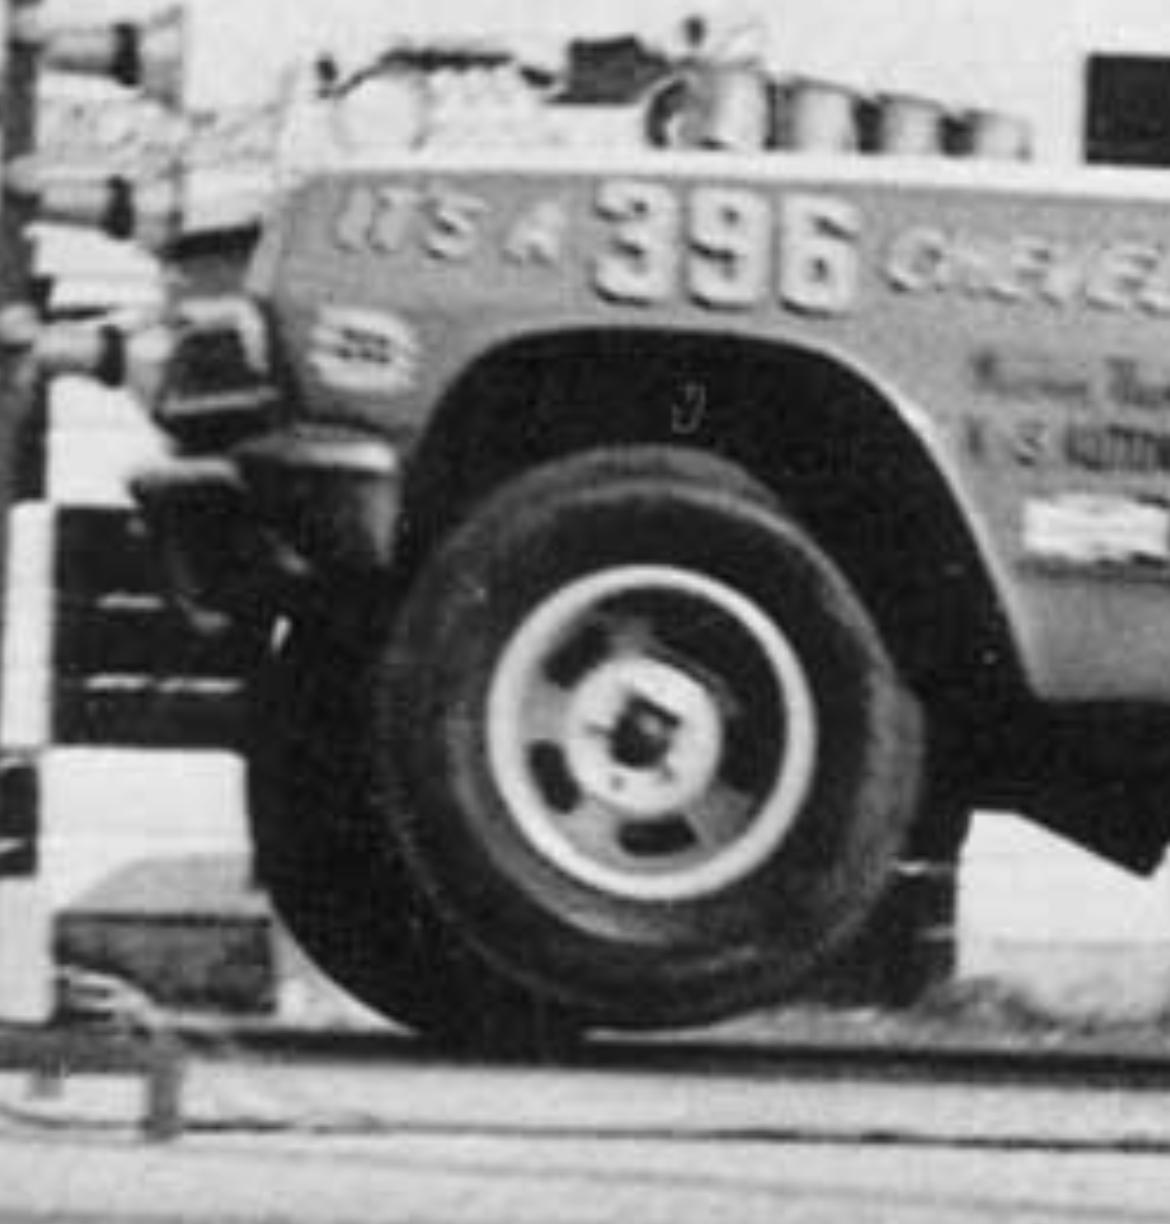
Lots of airbrushing today: I put a few coats of Scalefinishes Chevrolet Arctic White basecoat on the upper surfaces of the body. I need to knock-down the gloss of the Tamiya Semi-Gloss Black (X-18) on the chassis and driver’s seat, it’s amazing how much this paint can vary in sheen from bottle to bottle. I’ll use Dullcote or Vallejo Satin (my favorite lately). Tomorrow I hope to mask the upper white on the body and basecoat airbrush the red-orange. I’m thinking of mixing some combination of these two Scalefinishes basecoat paints I have in my paint collection: I would just use the Poppy Red but I have a Gas Ronda Thunderbolt already painted this color and I’d like this Seaton car to be a slightly different color (redder?). Color period photos of this car (actually two cars?) are all over the place in hue but most of them appear in the reddish orange range. I welcome any thoughts or if someone happens to know the actual color they used. John
-
Not my favorite drag car period either but you did great job on this one, particularly on the chassis mods. I believe Don dropped out of funny car racing in the late 60’s due to how crazy dangerous they became when supercharging was introduced, he was a devoted family man and had the good sense to know that the risks were just not worth it. I wish there were good kits available for Don’s “Eliminator I & II” Mercury funny cars (not that horrid AWB AMT kit!), that’s about the latest drag subjects I’d like to build.
-
Great job Michael on this ‘62, the kicked-up front end looks perfect. I was really impressed with the quality of this Revell kit and would like to build another one someday, maybe a Dave Strickler’s/ Bill Jenkins “Old Reliable”? Can never have too many ‘62 Chevys (Impalas or Bel Airs!).
-
What a fabulous collection and a fitting tribute to a legendary racer/ tuner who was also known as one of the nicest guys in the sport. Based on your past postings Michael, you must have a huge collection of classic super stock model builds. I would love to see a few pics of all of them laid out like a pit line-up to the staging lanes at a mid-sixties drag meet. Thanks for another cool posting!
-
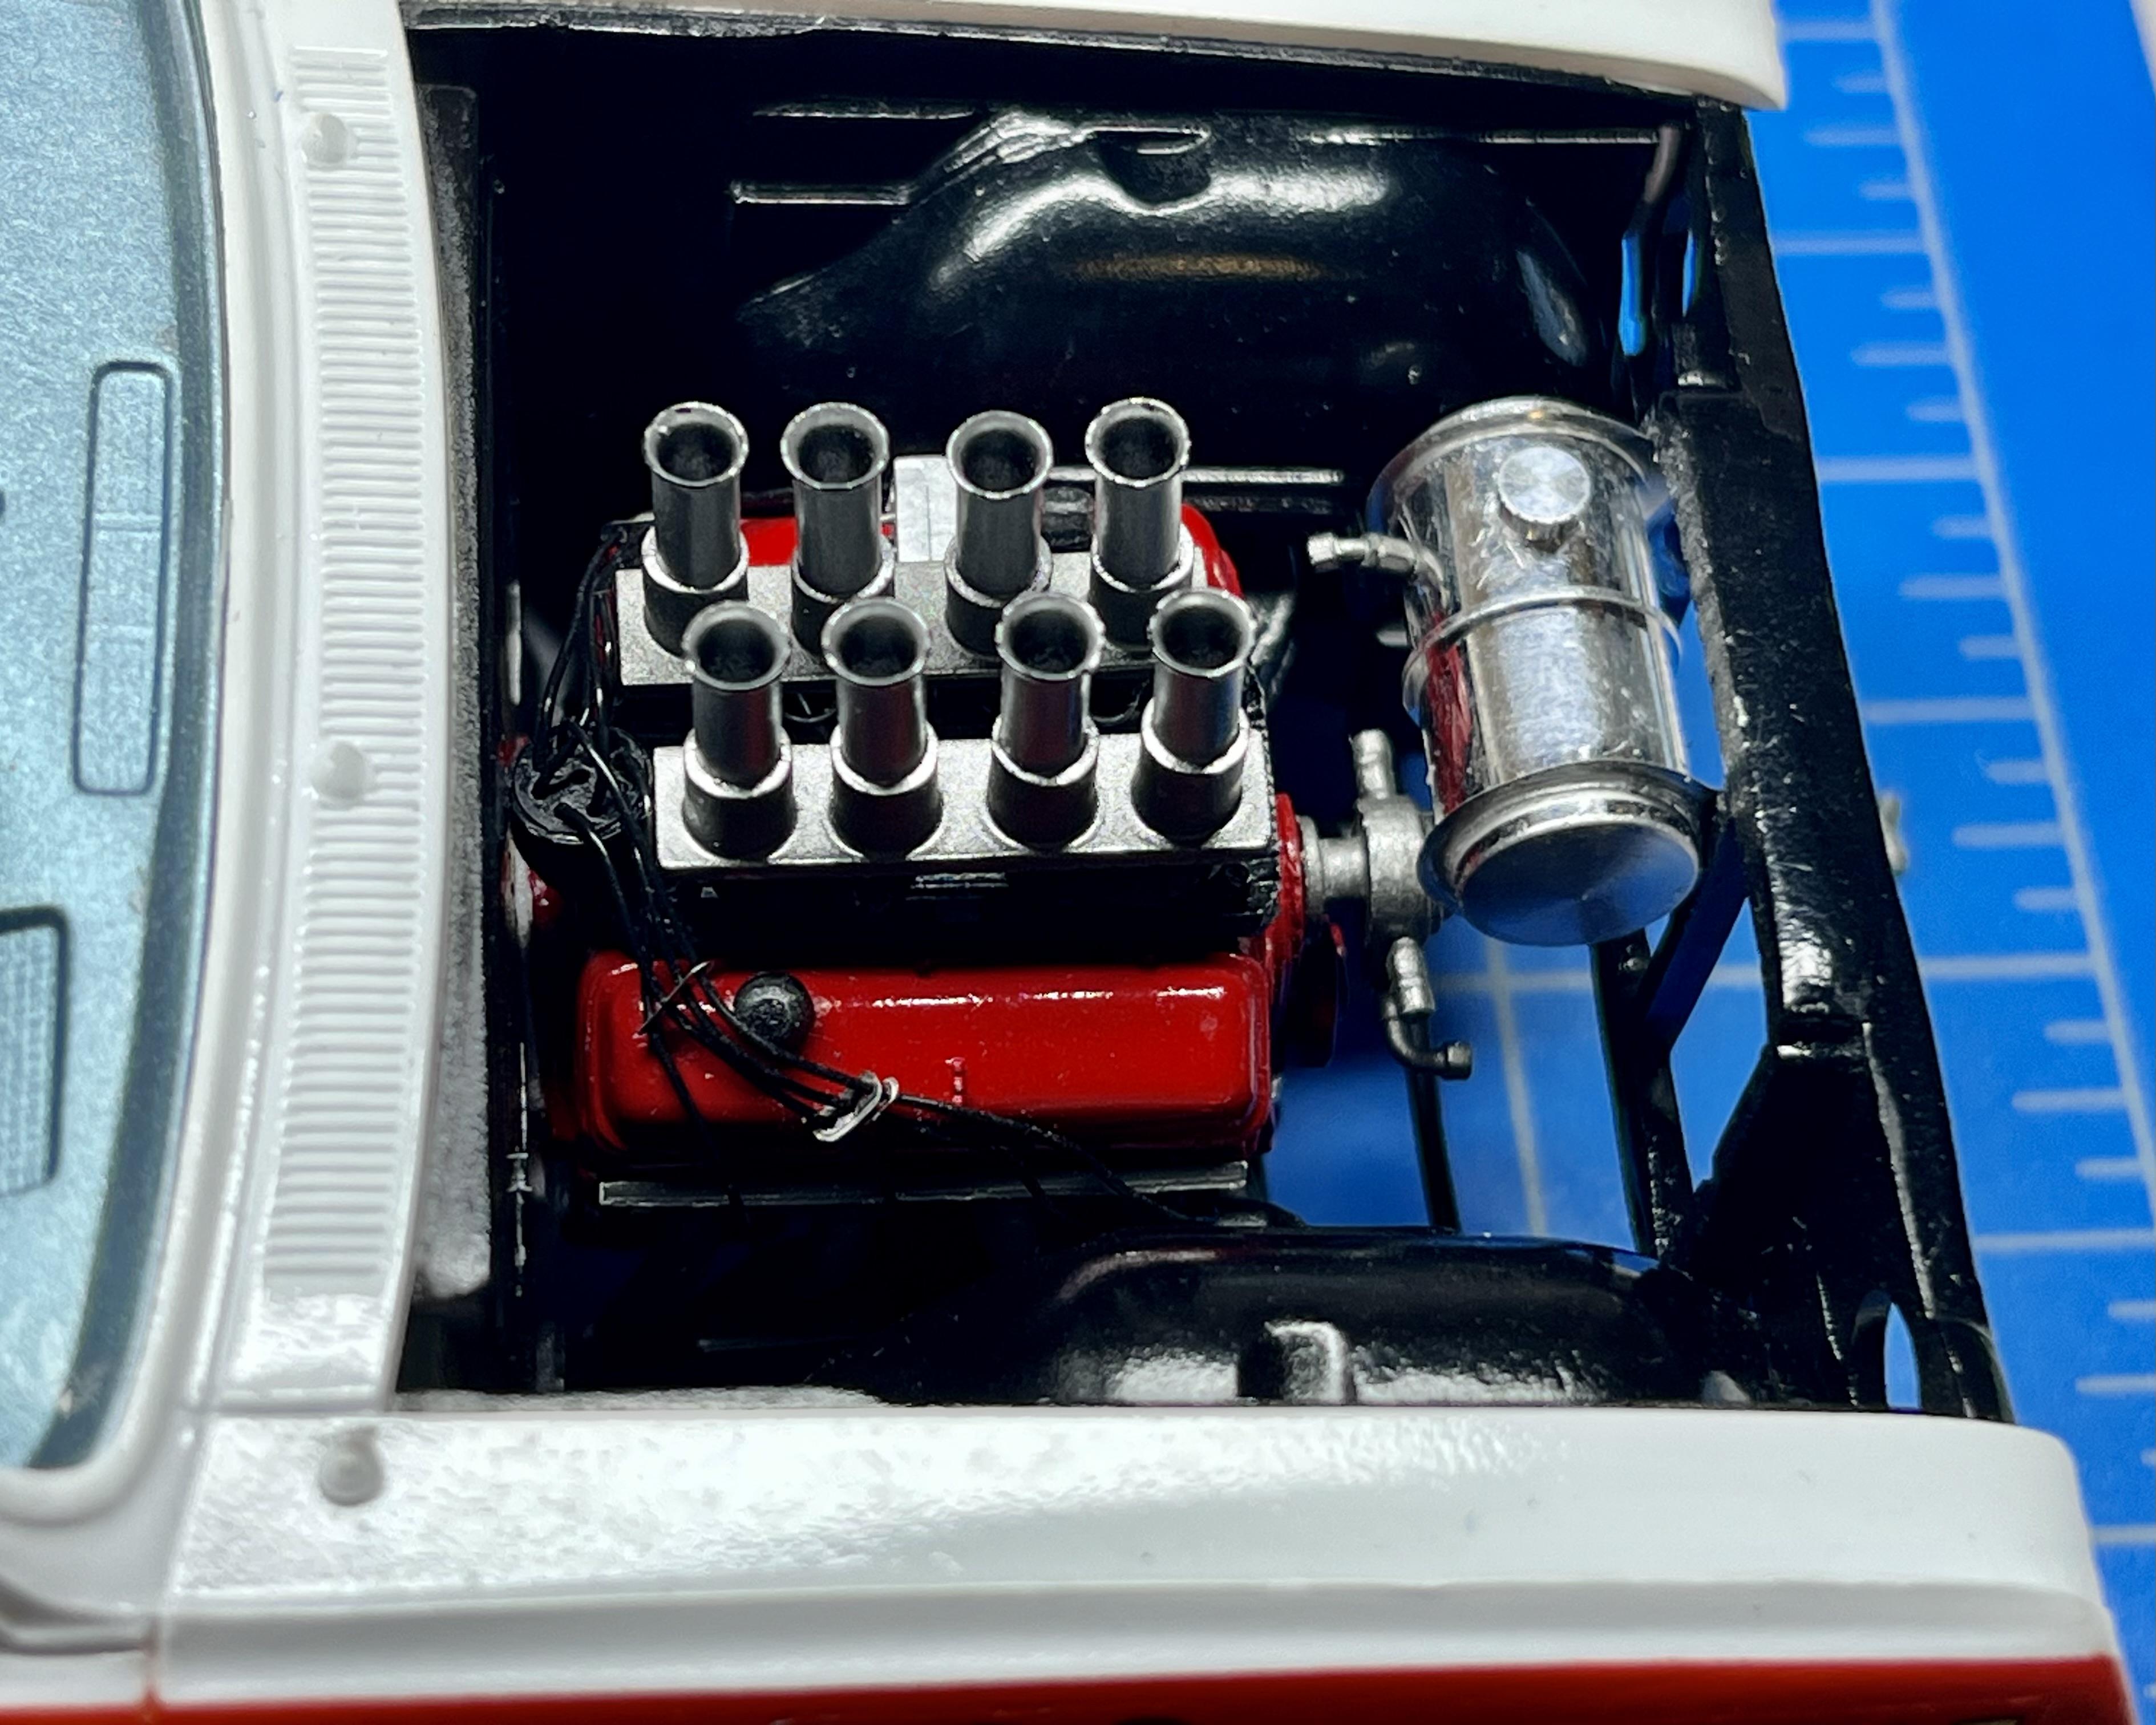
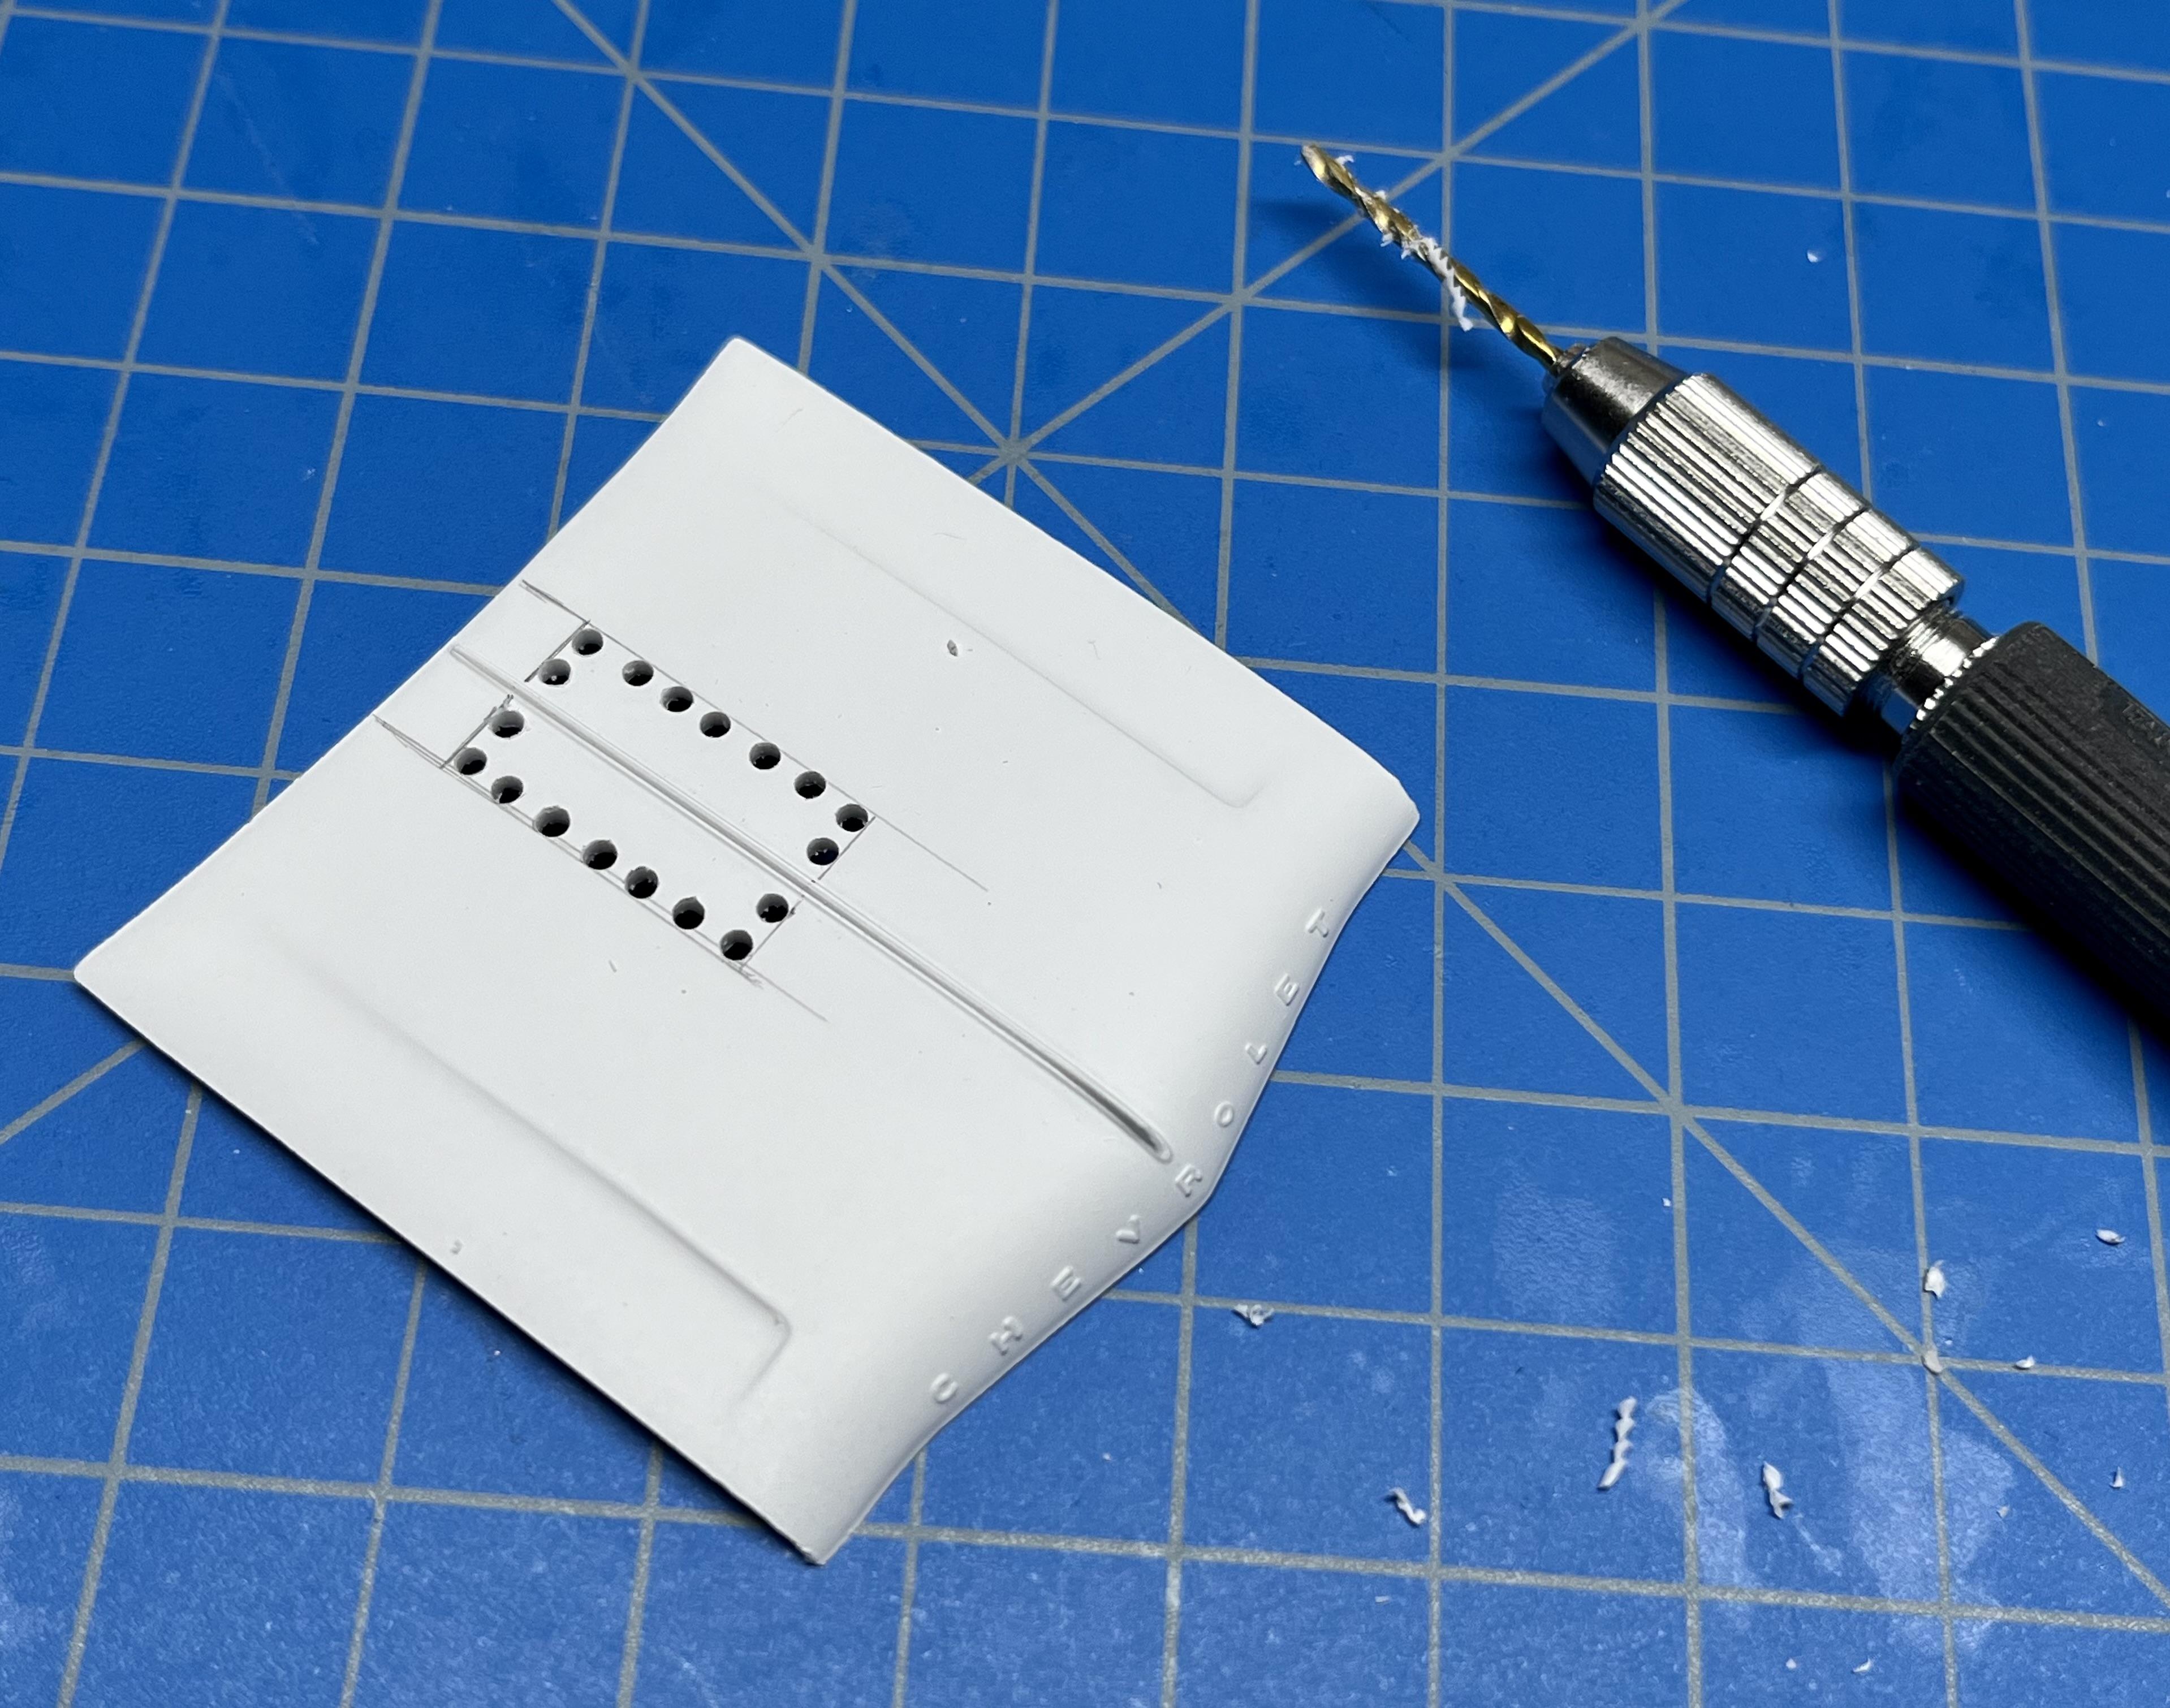
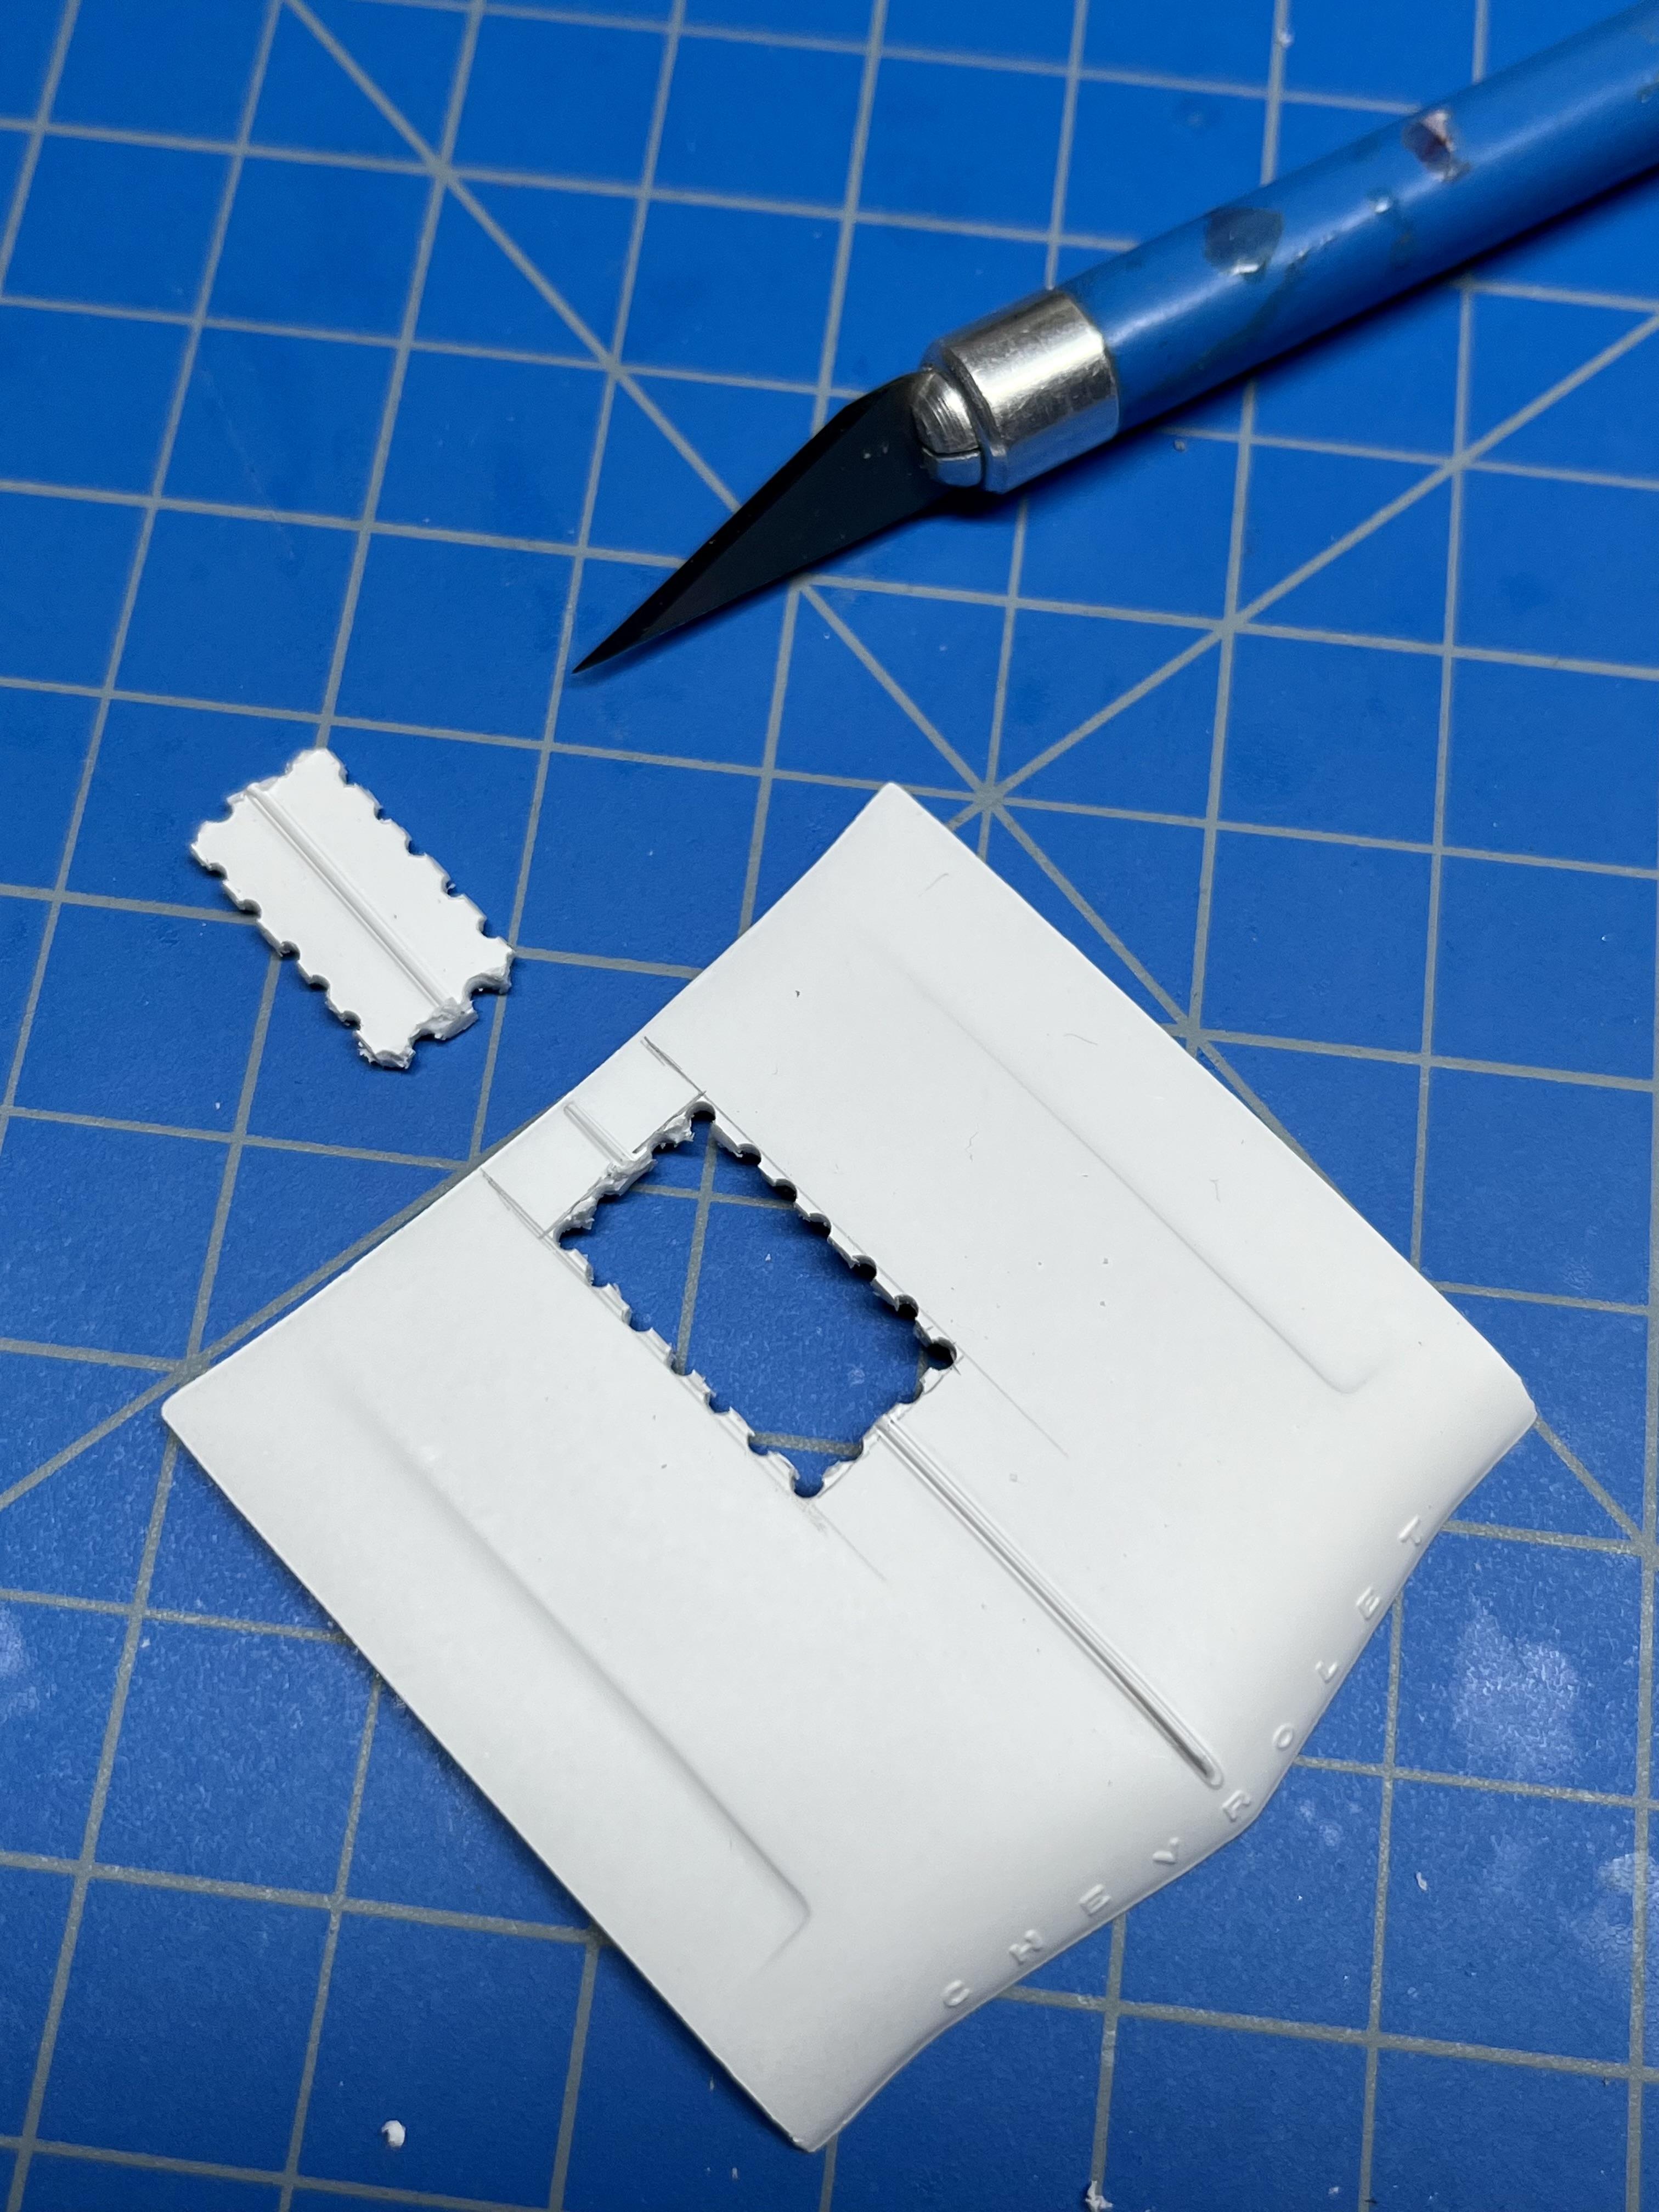
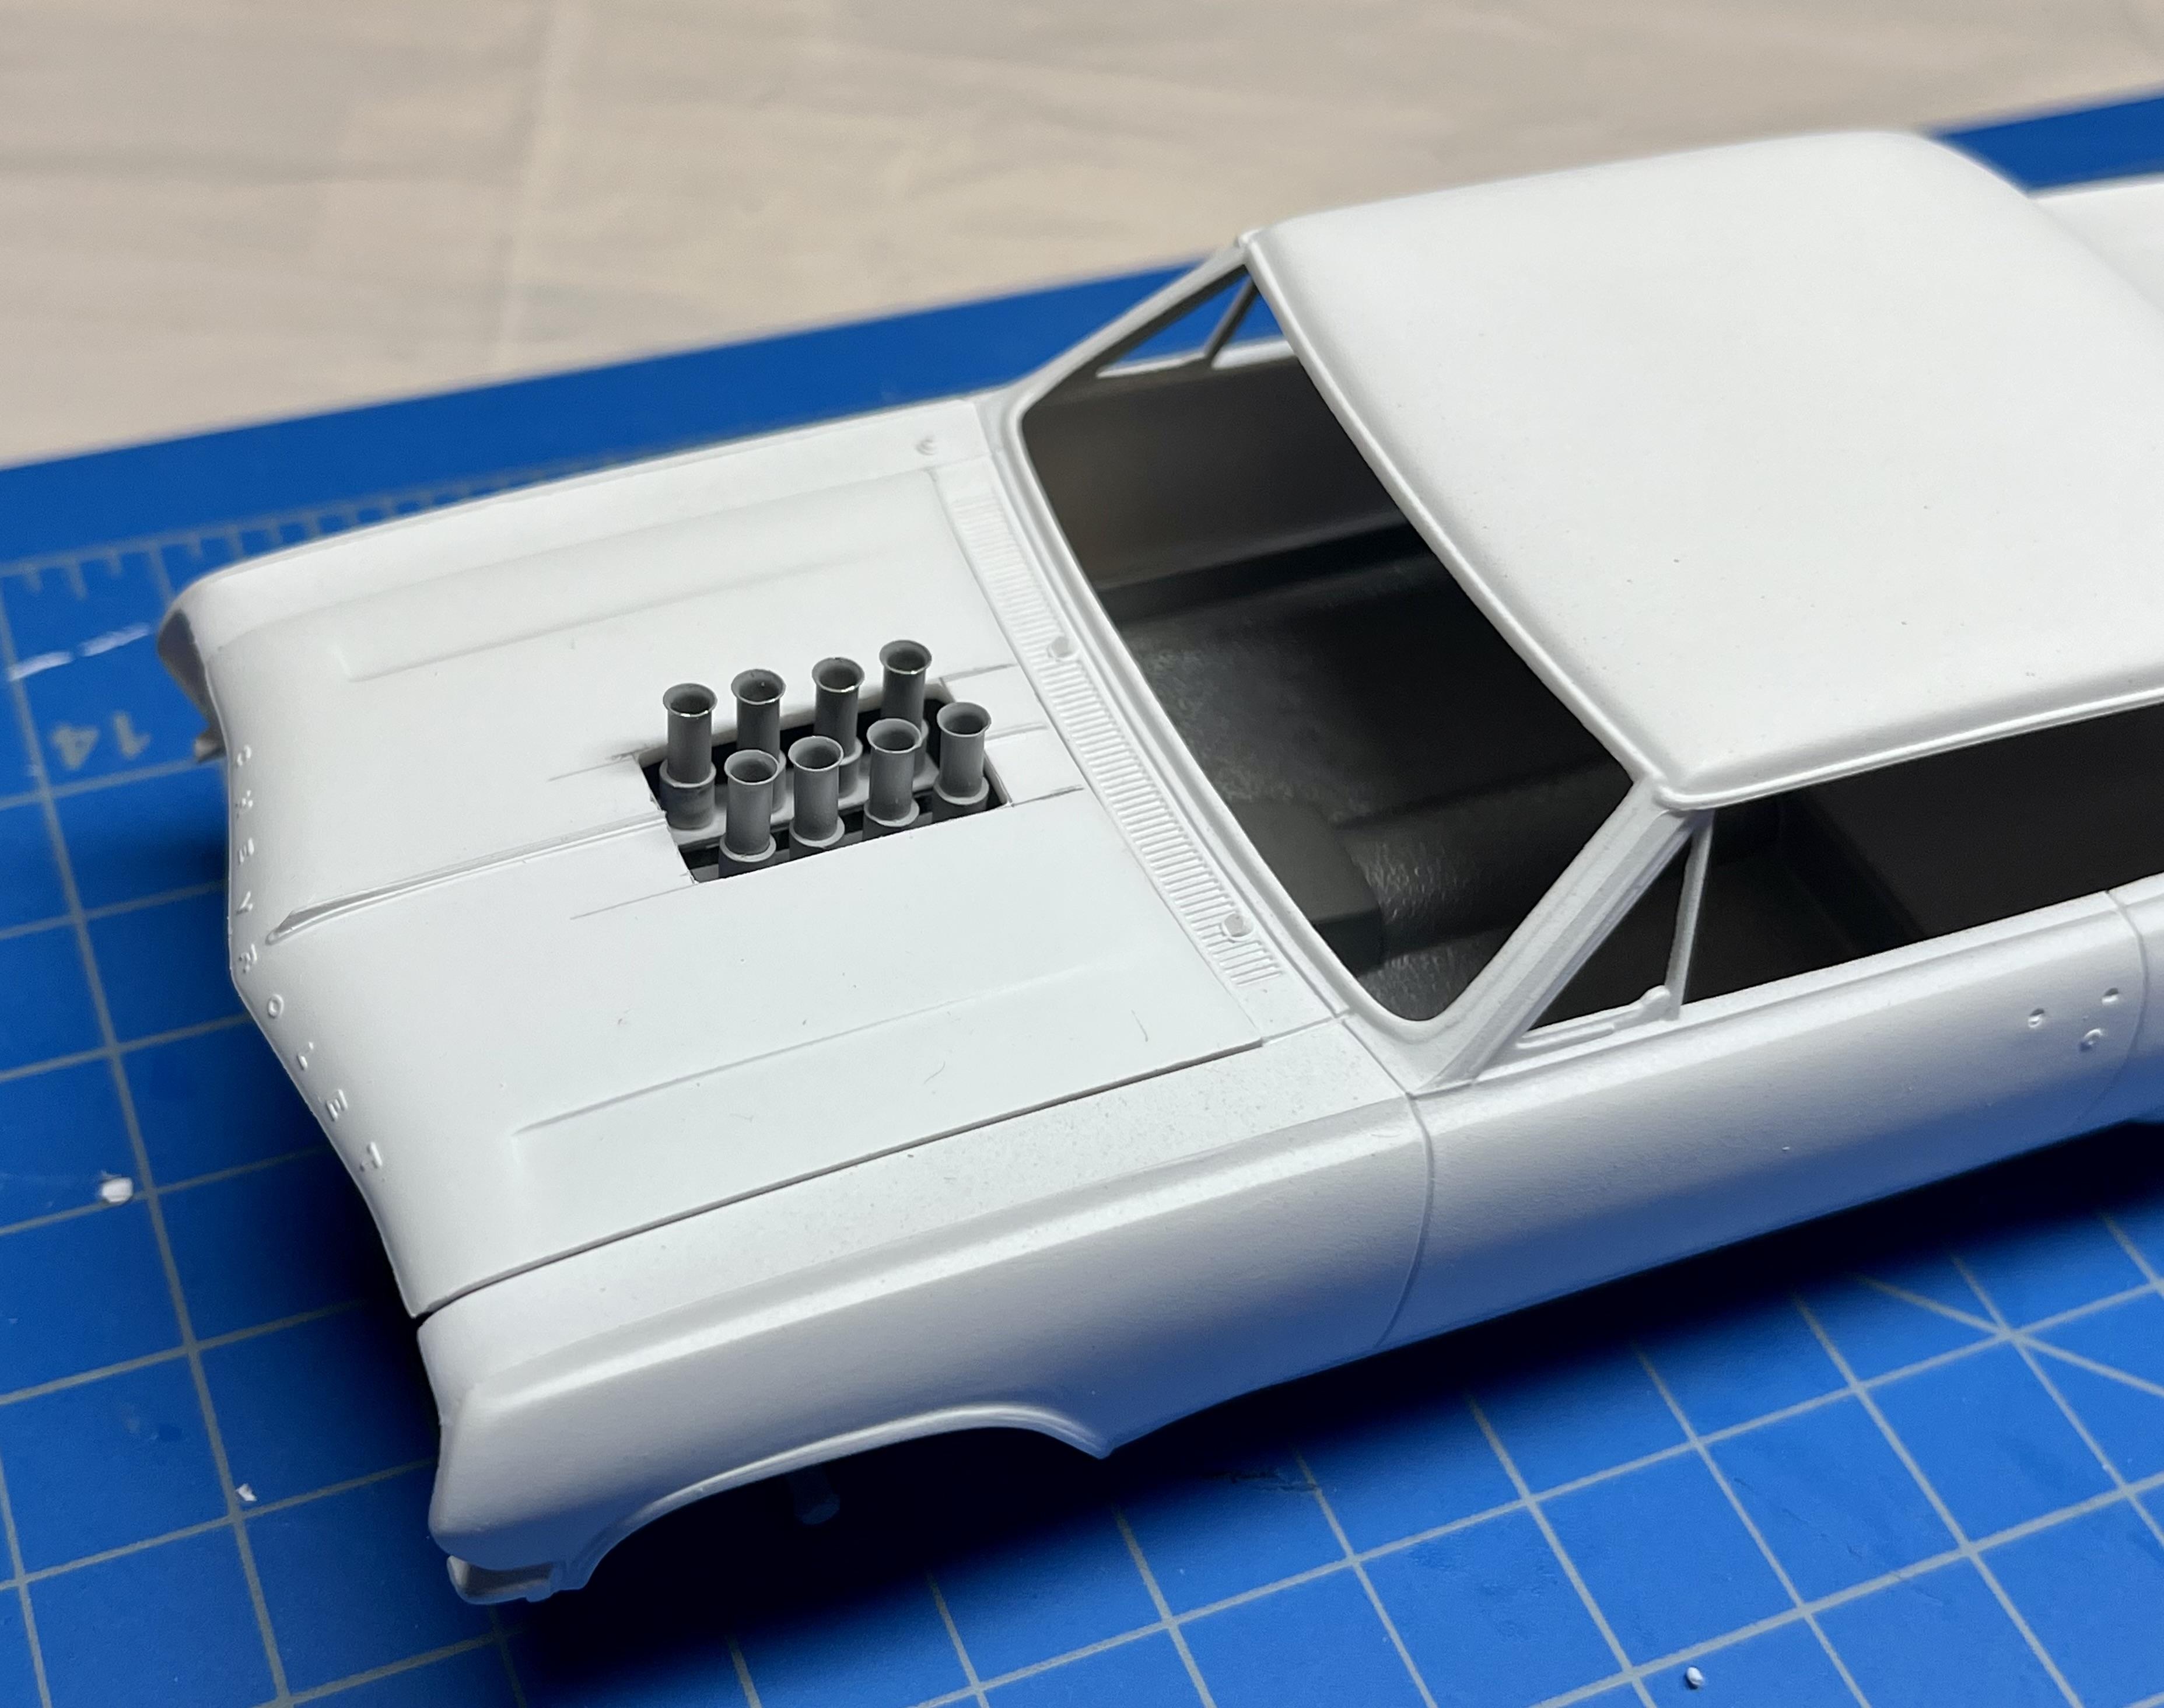
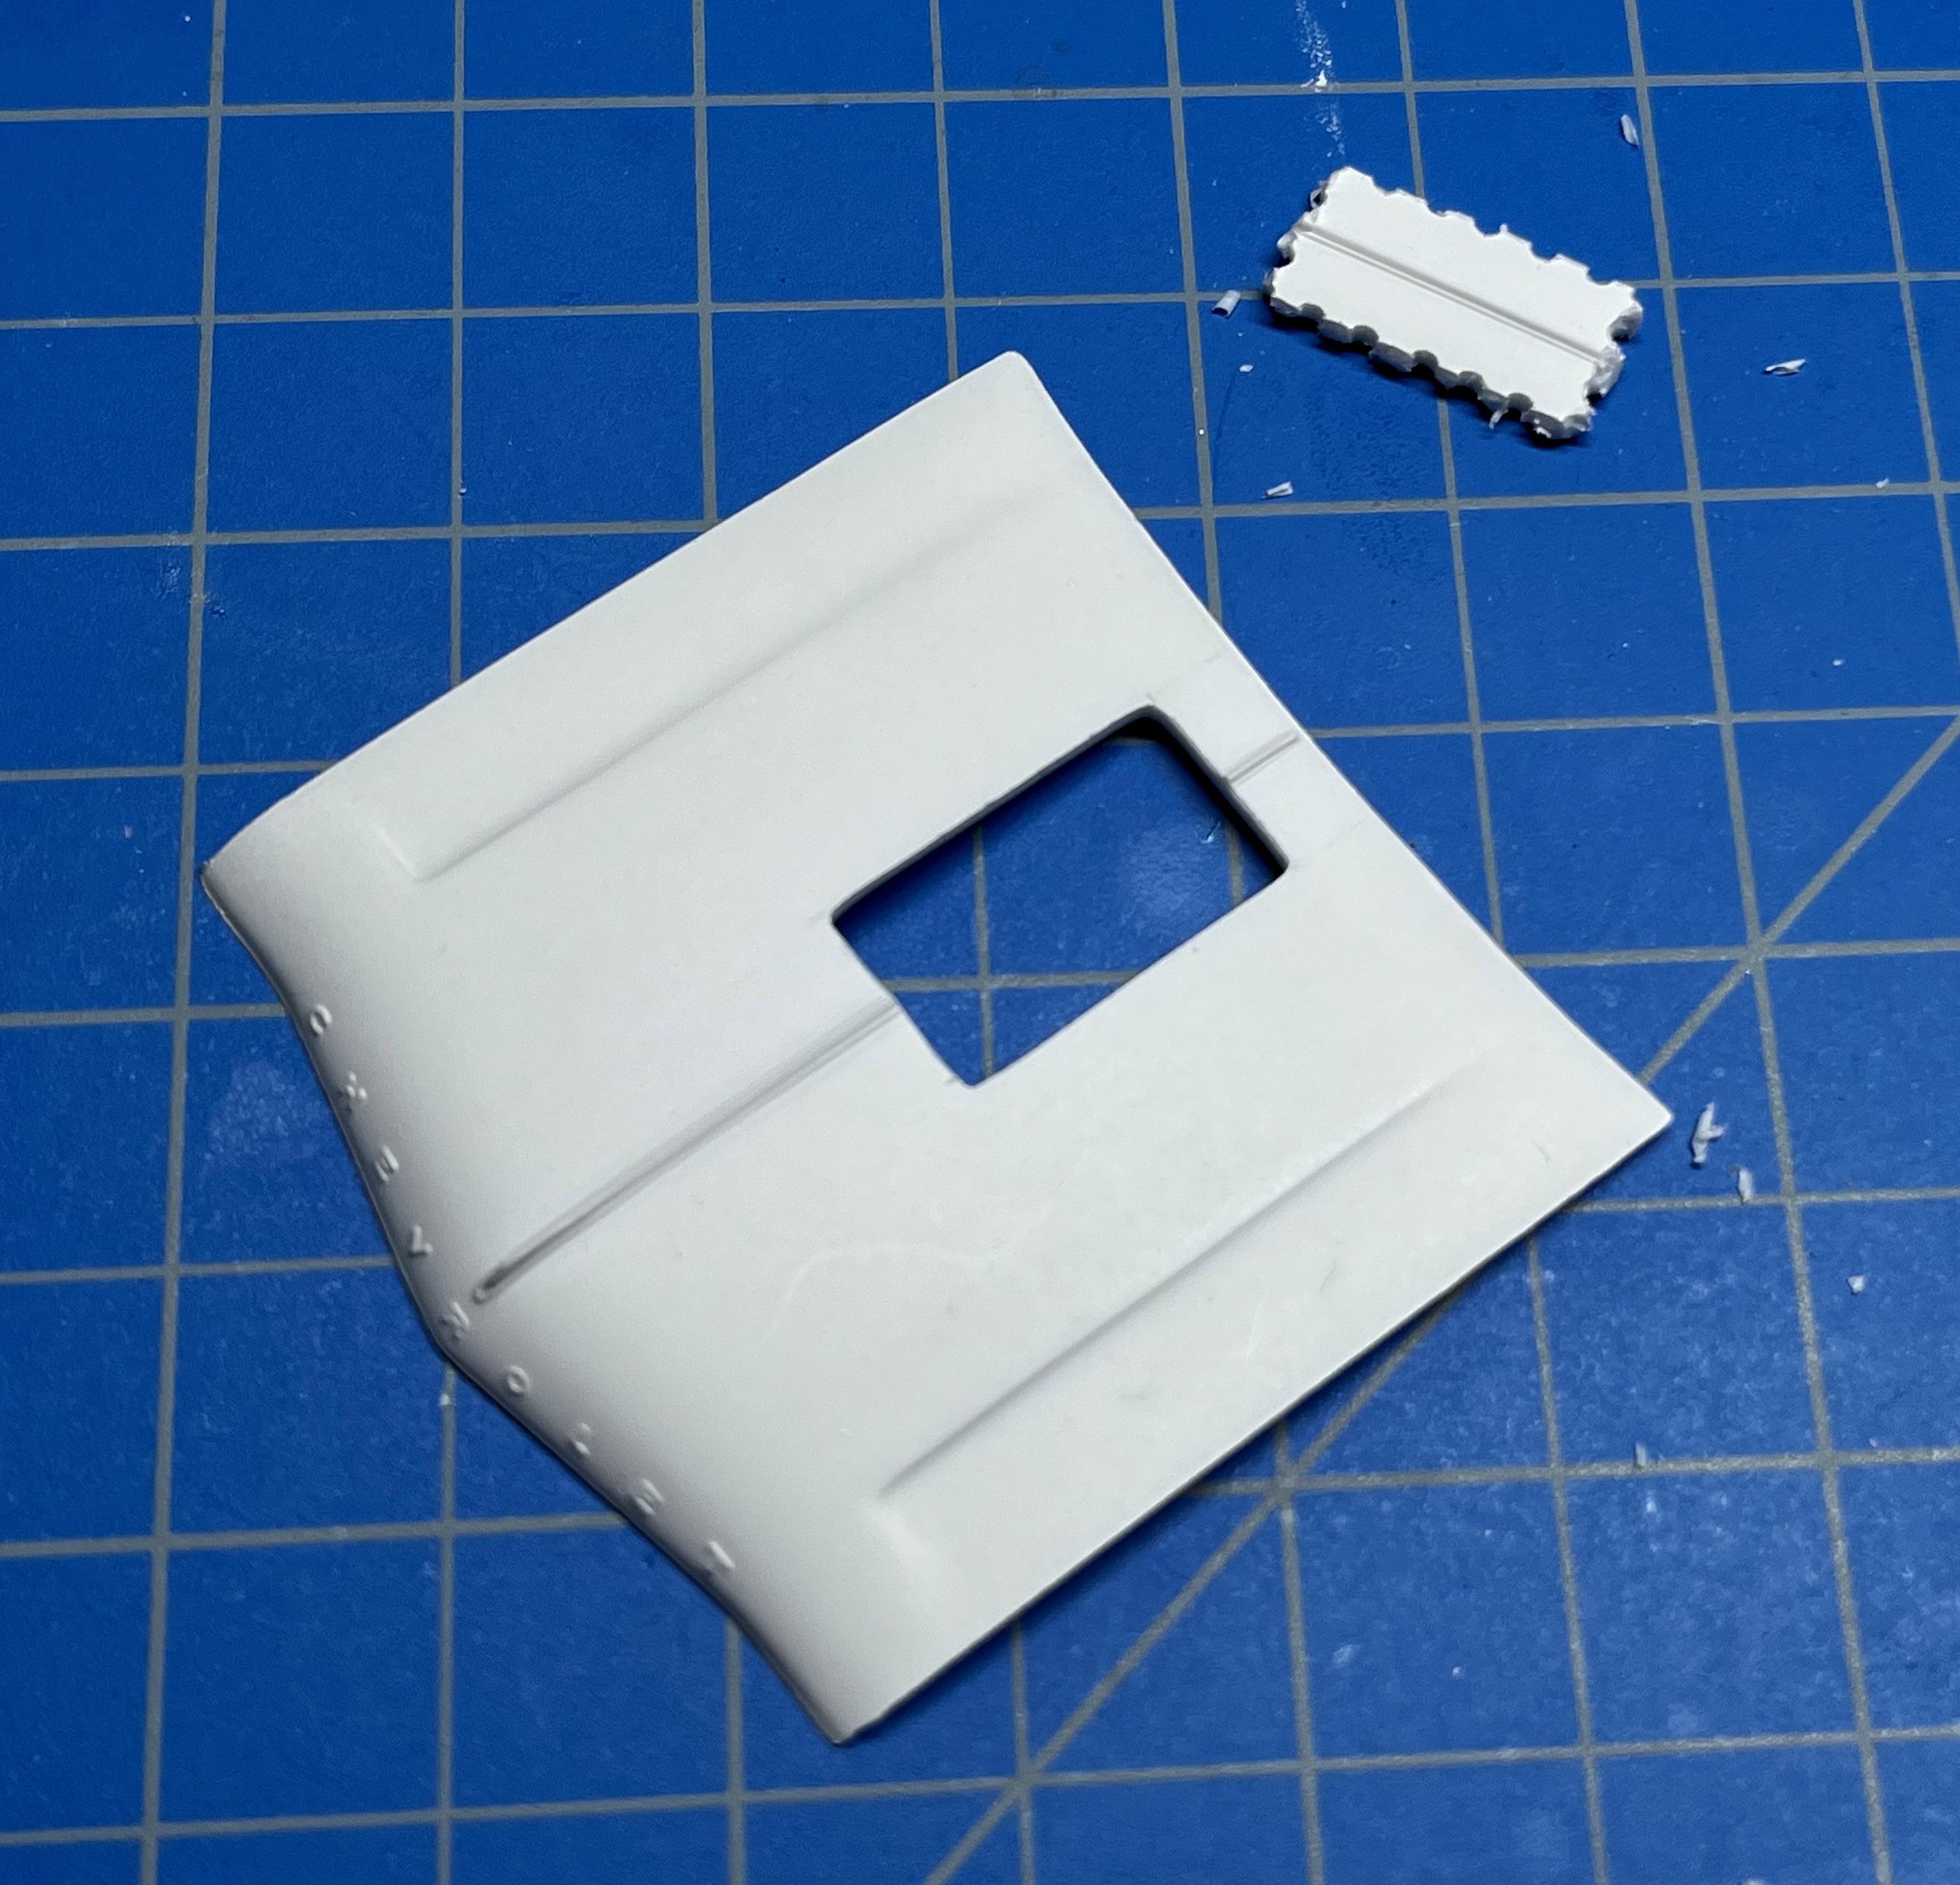
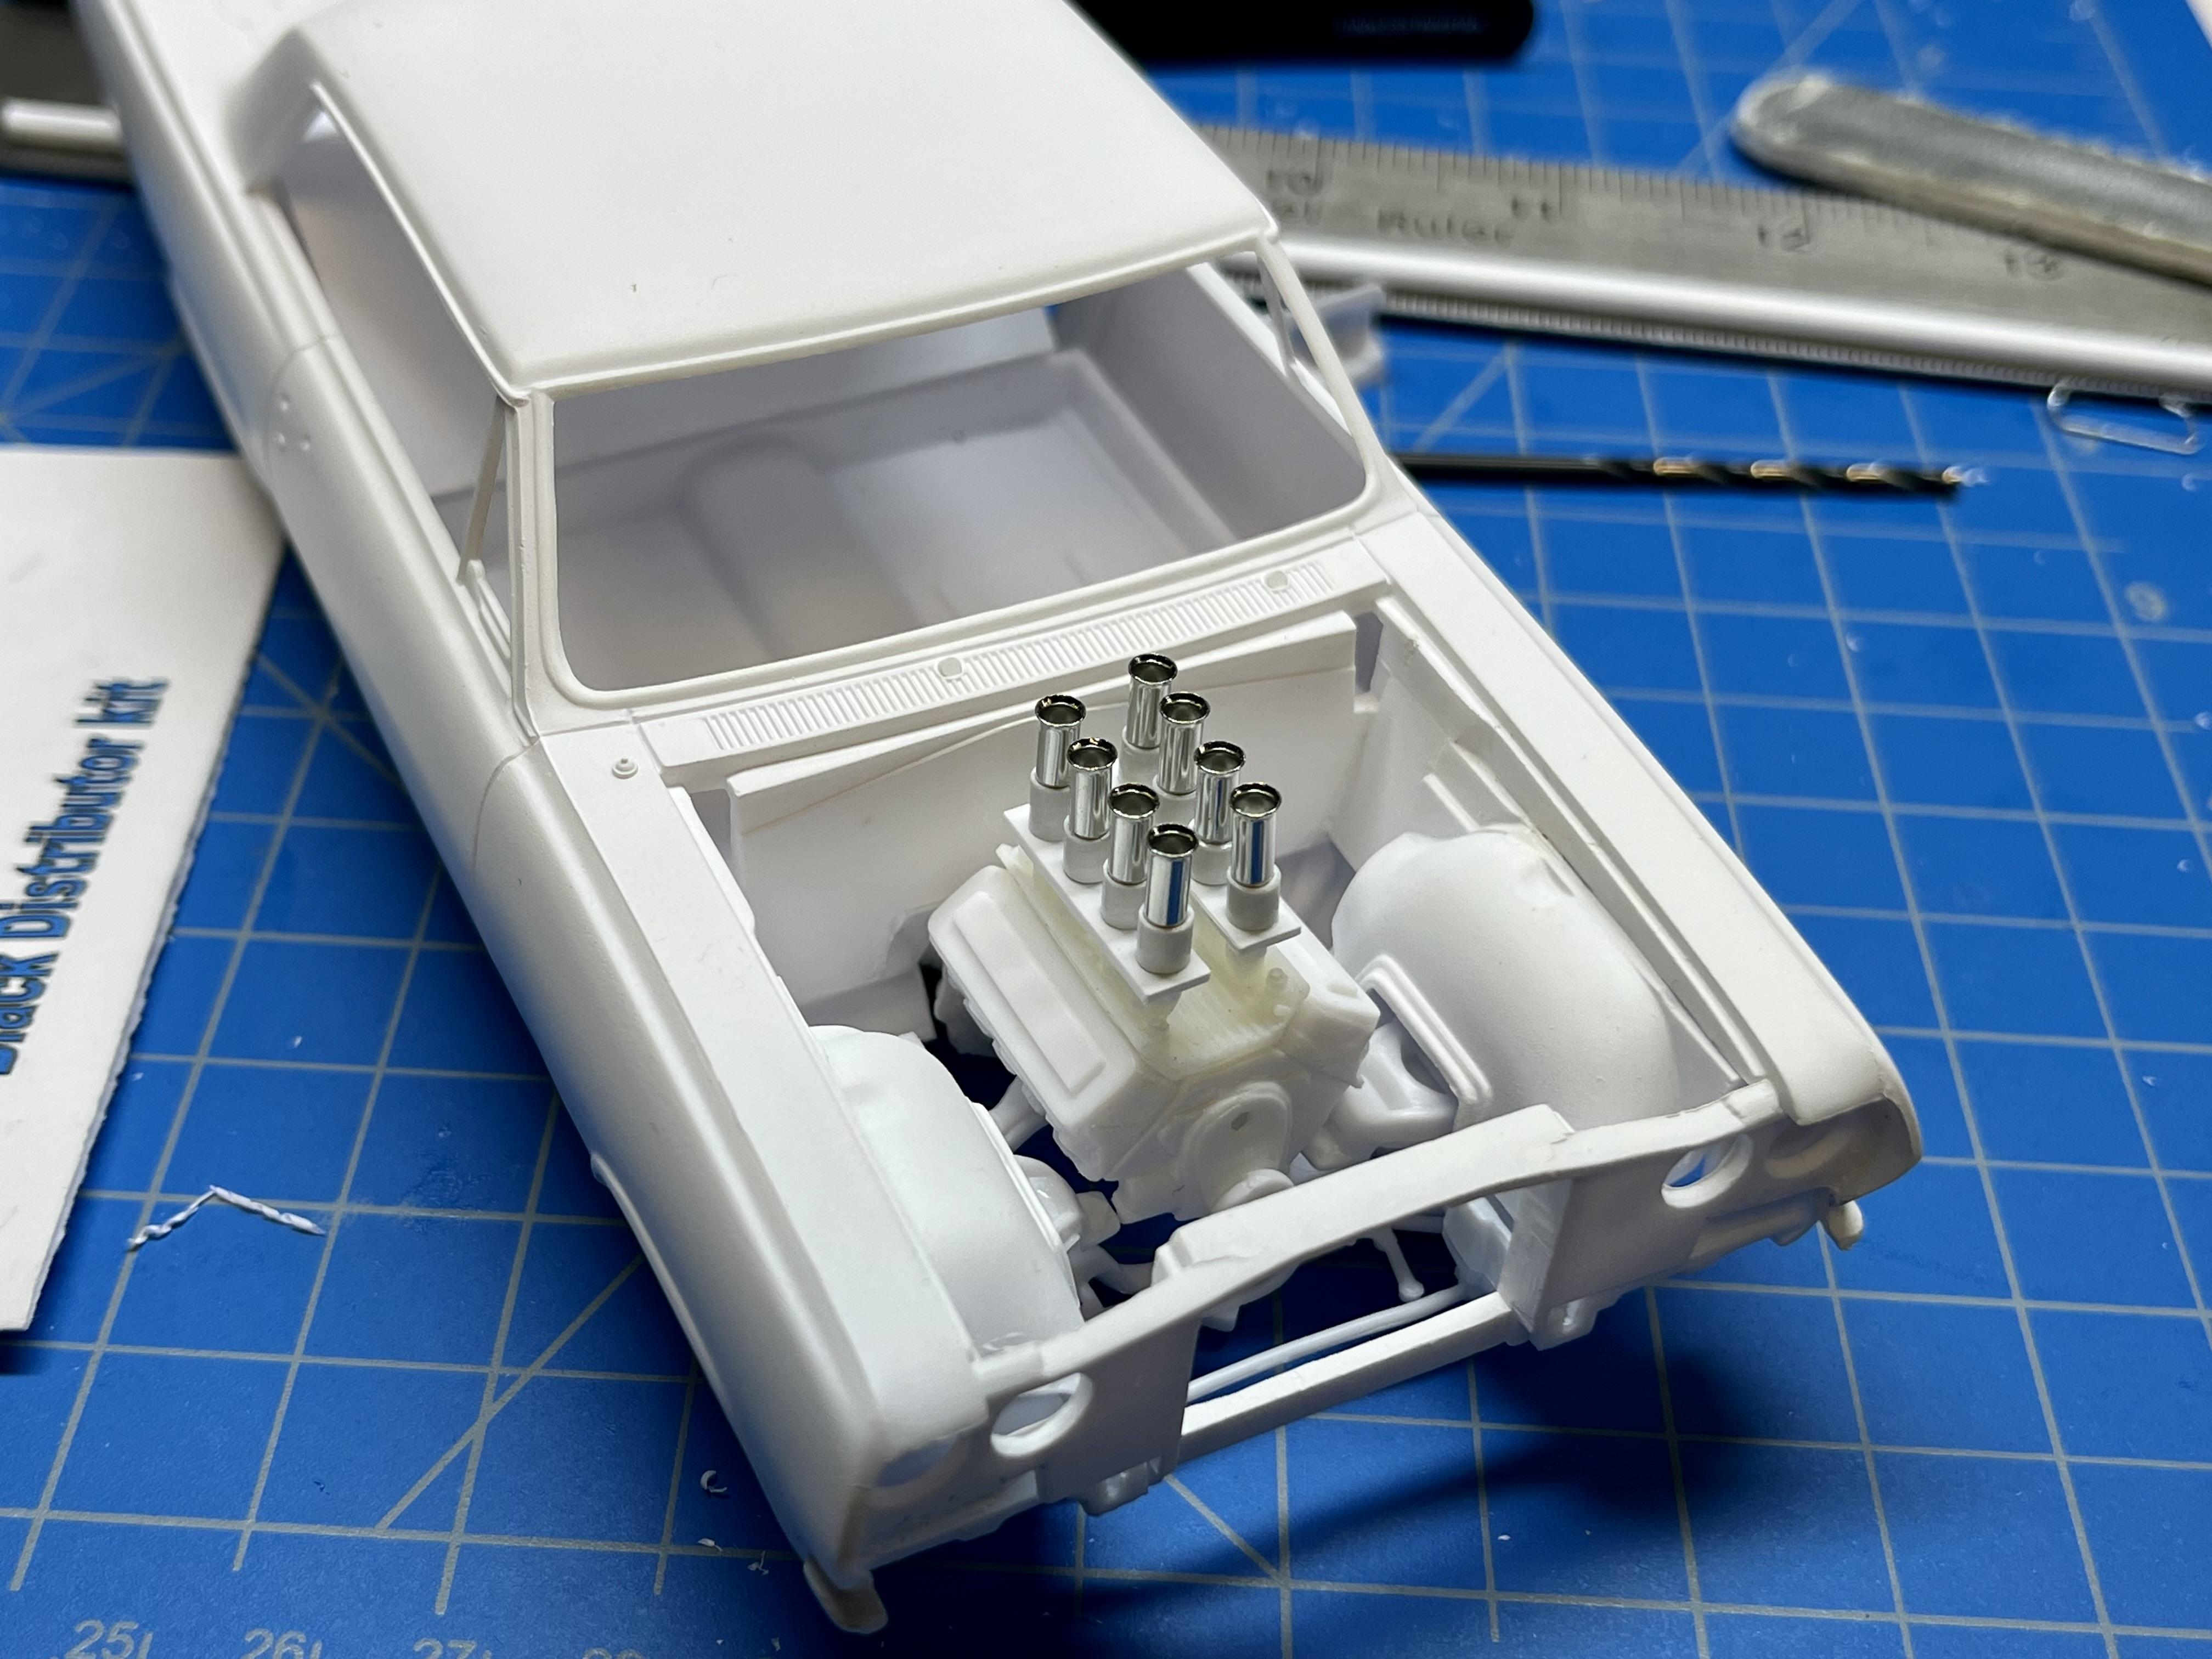
Punched out a hole in the hood for the FI velocity stacks to protrude:
-
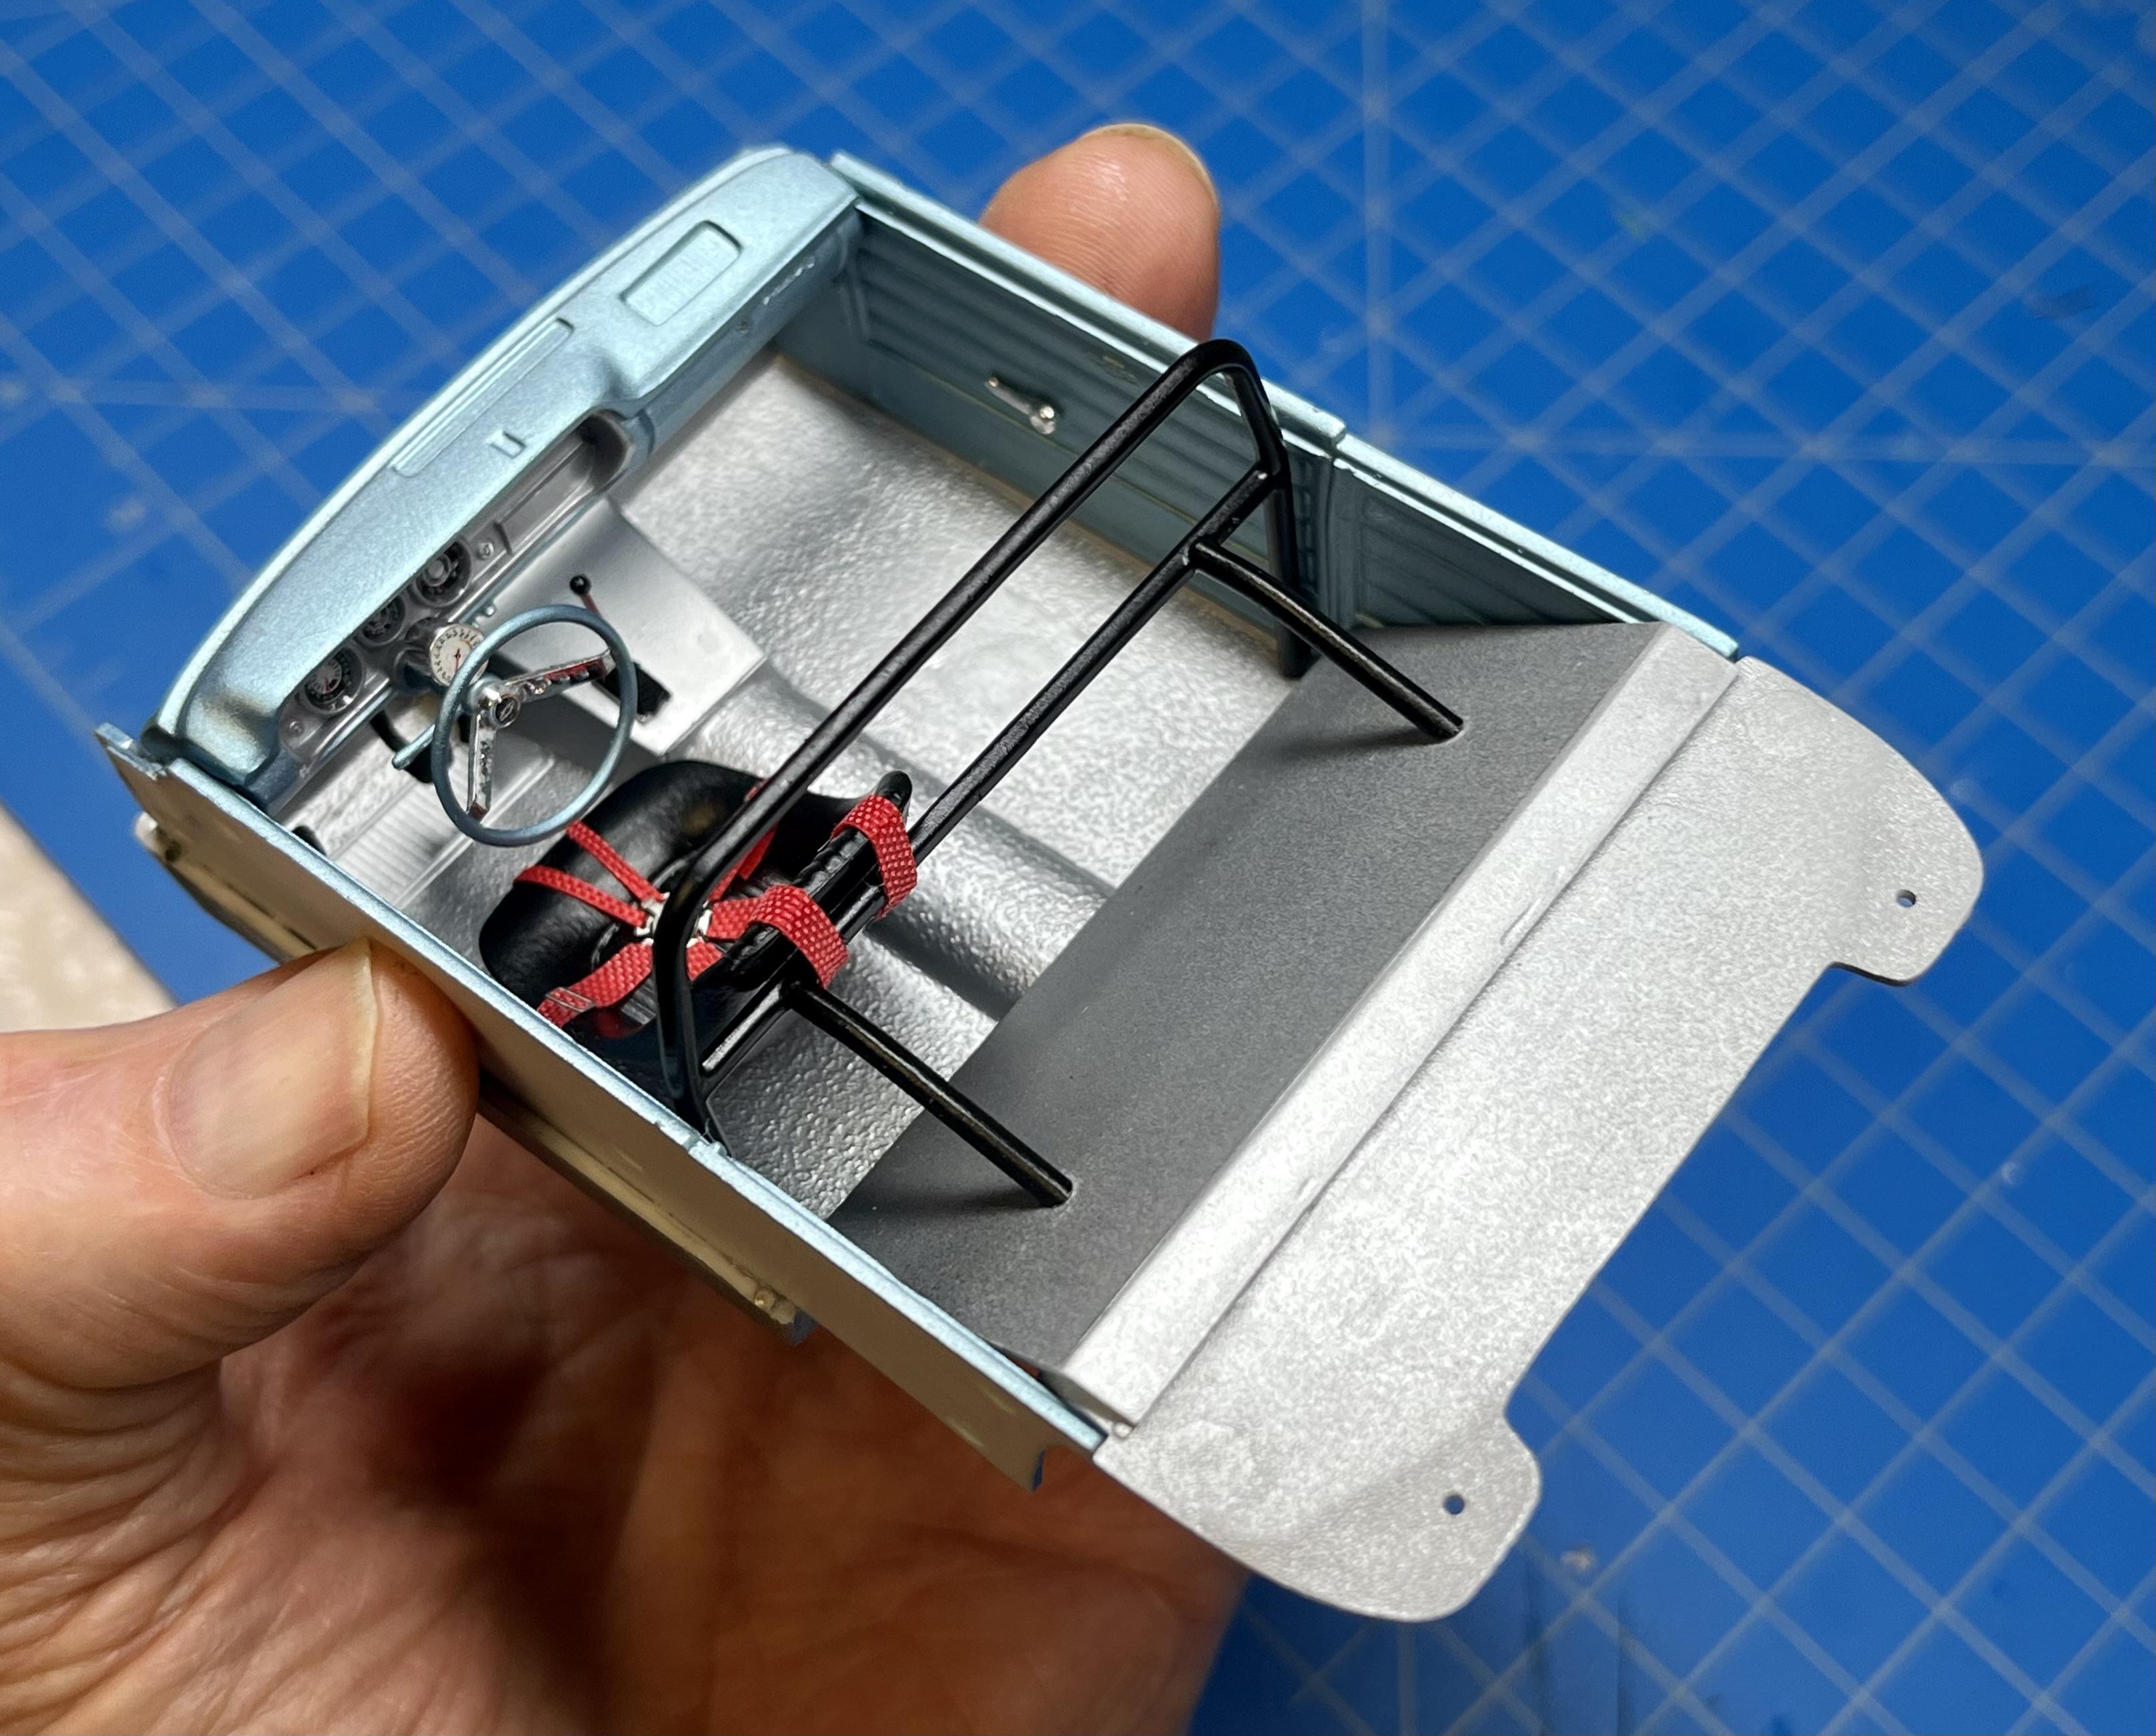
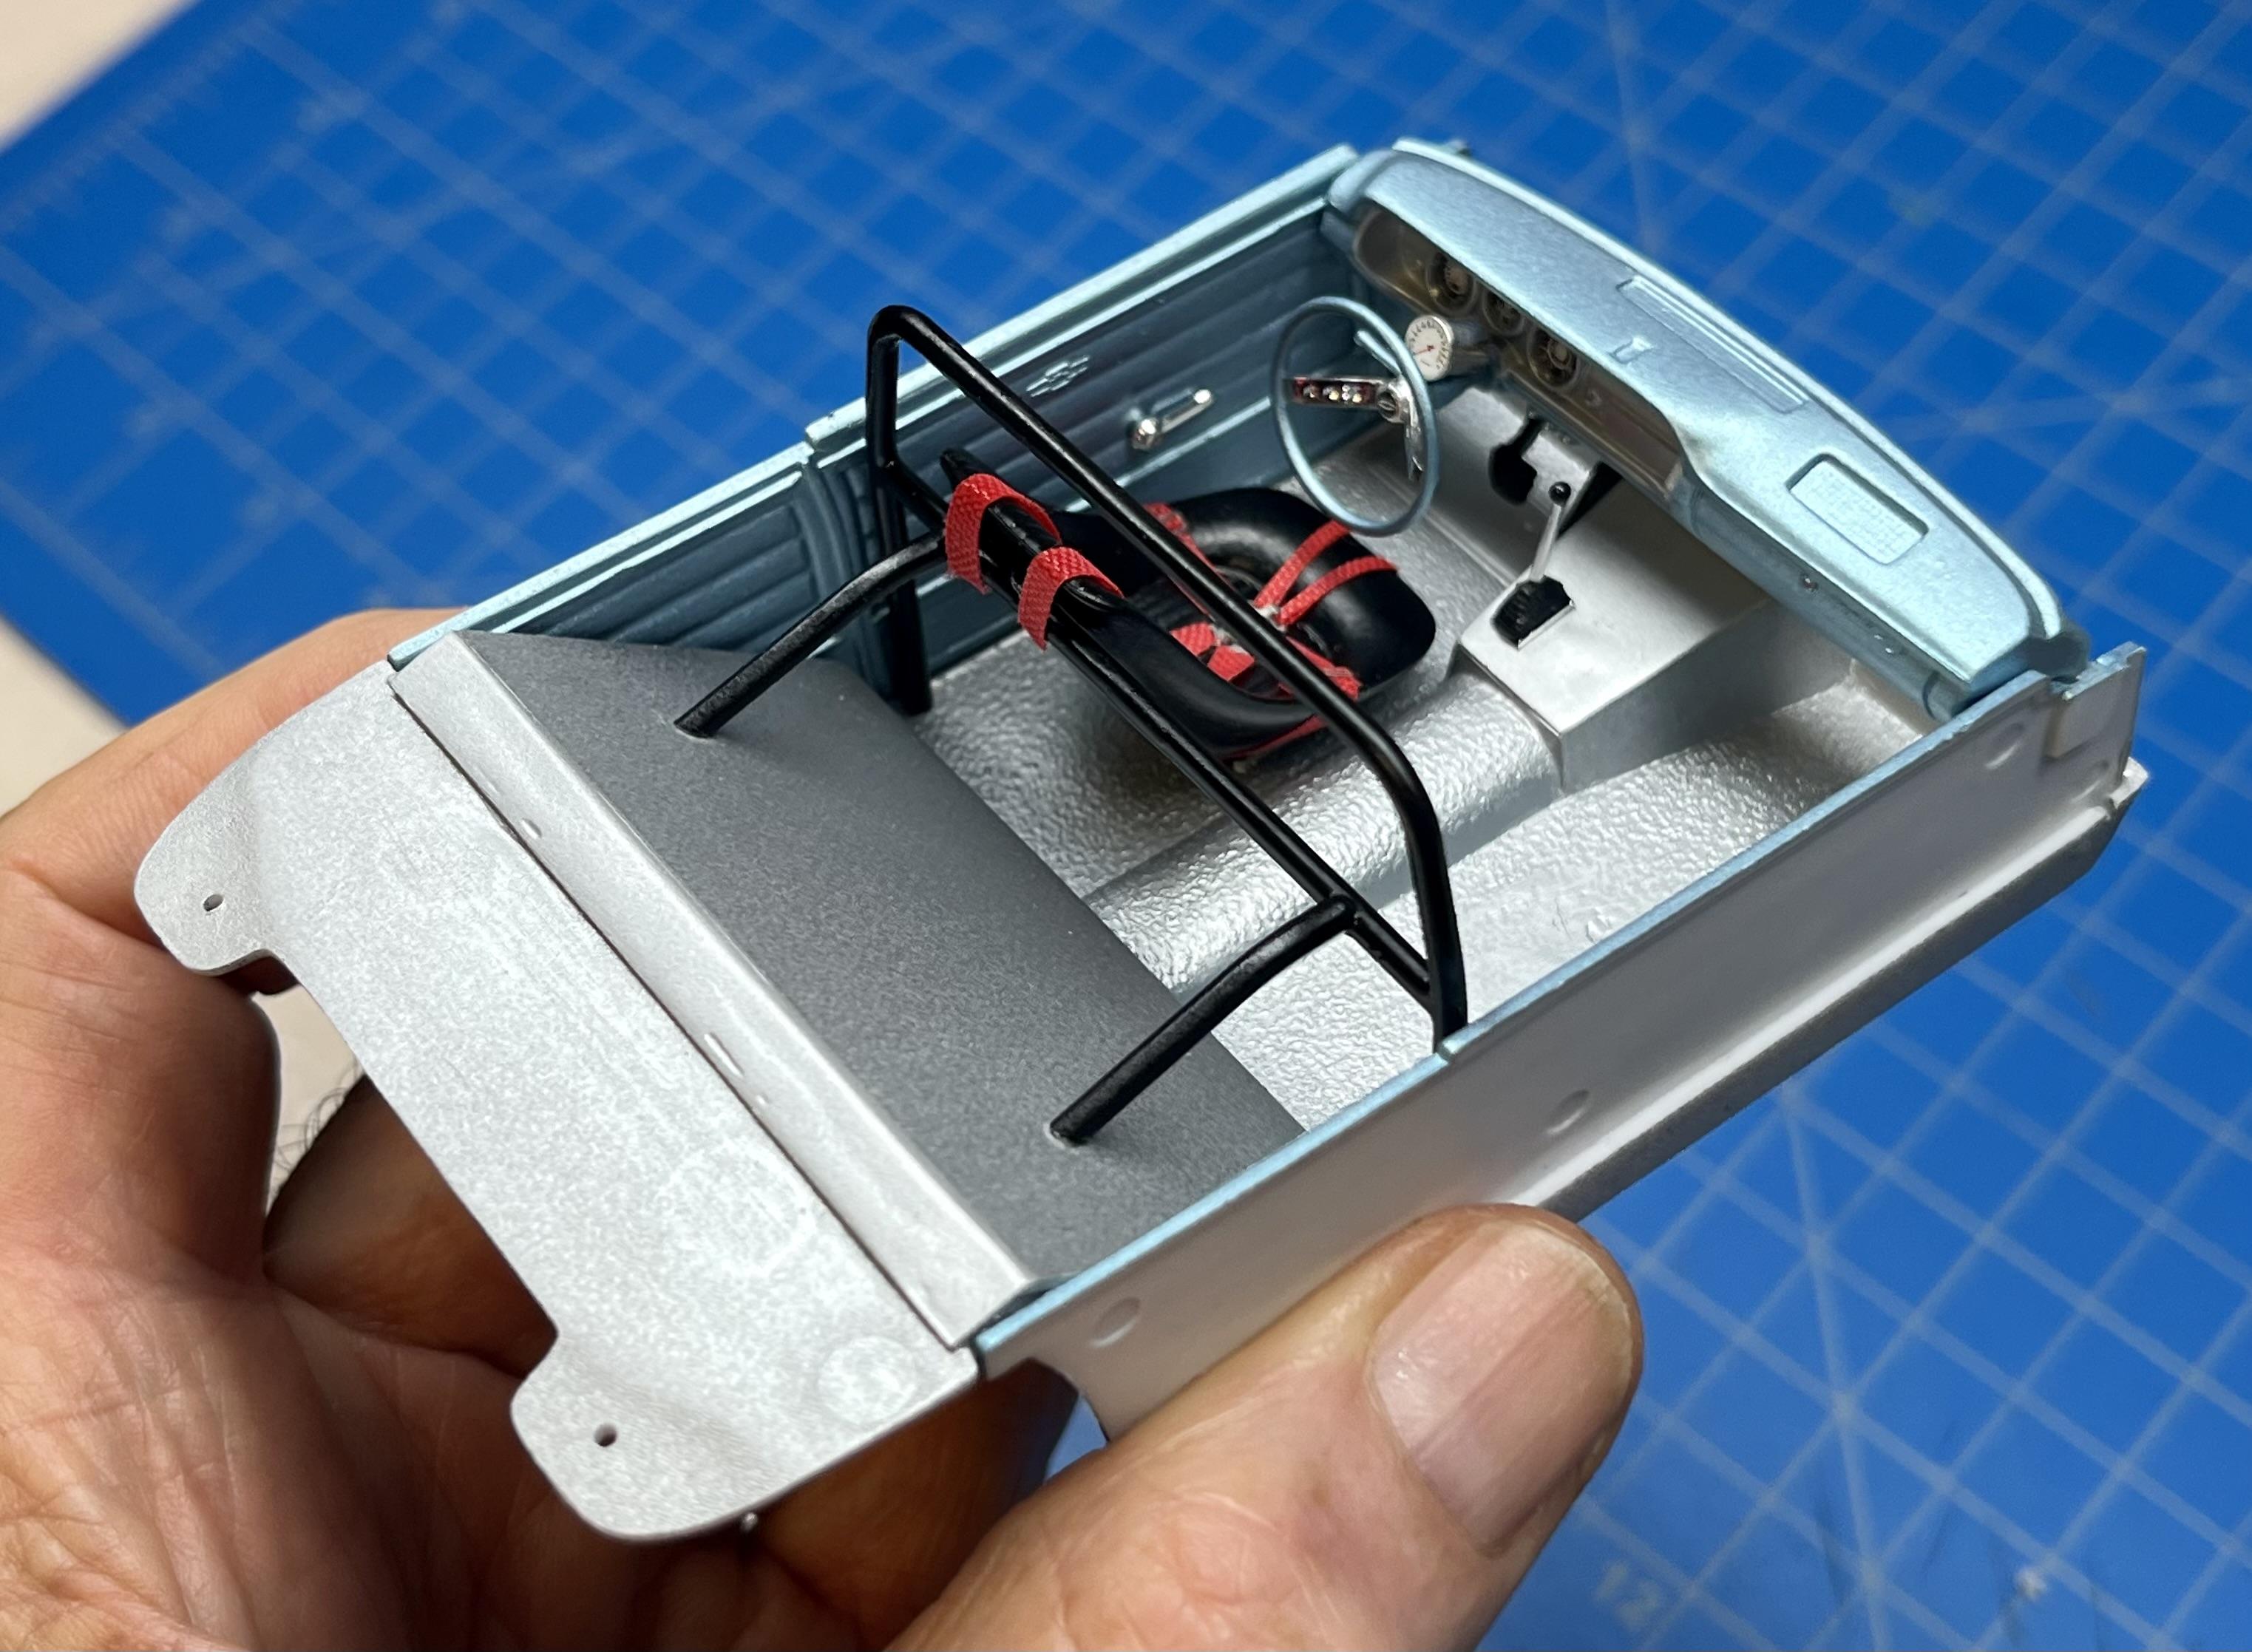
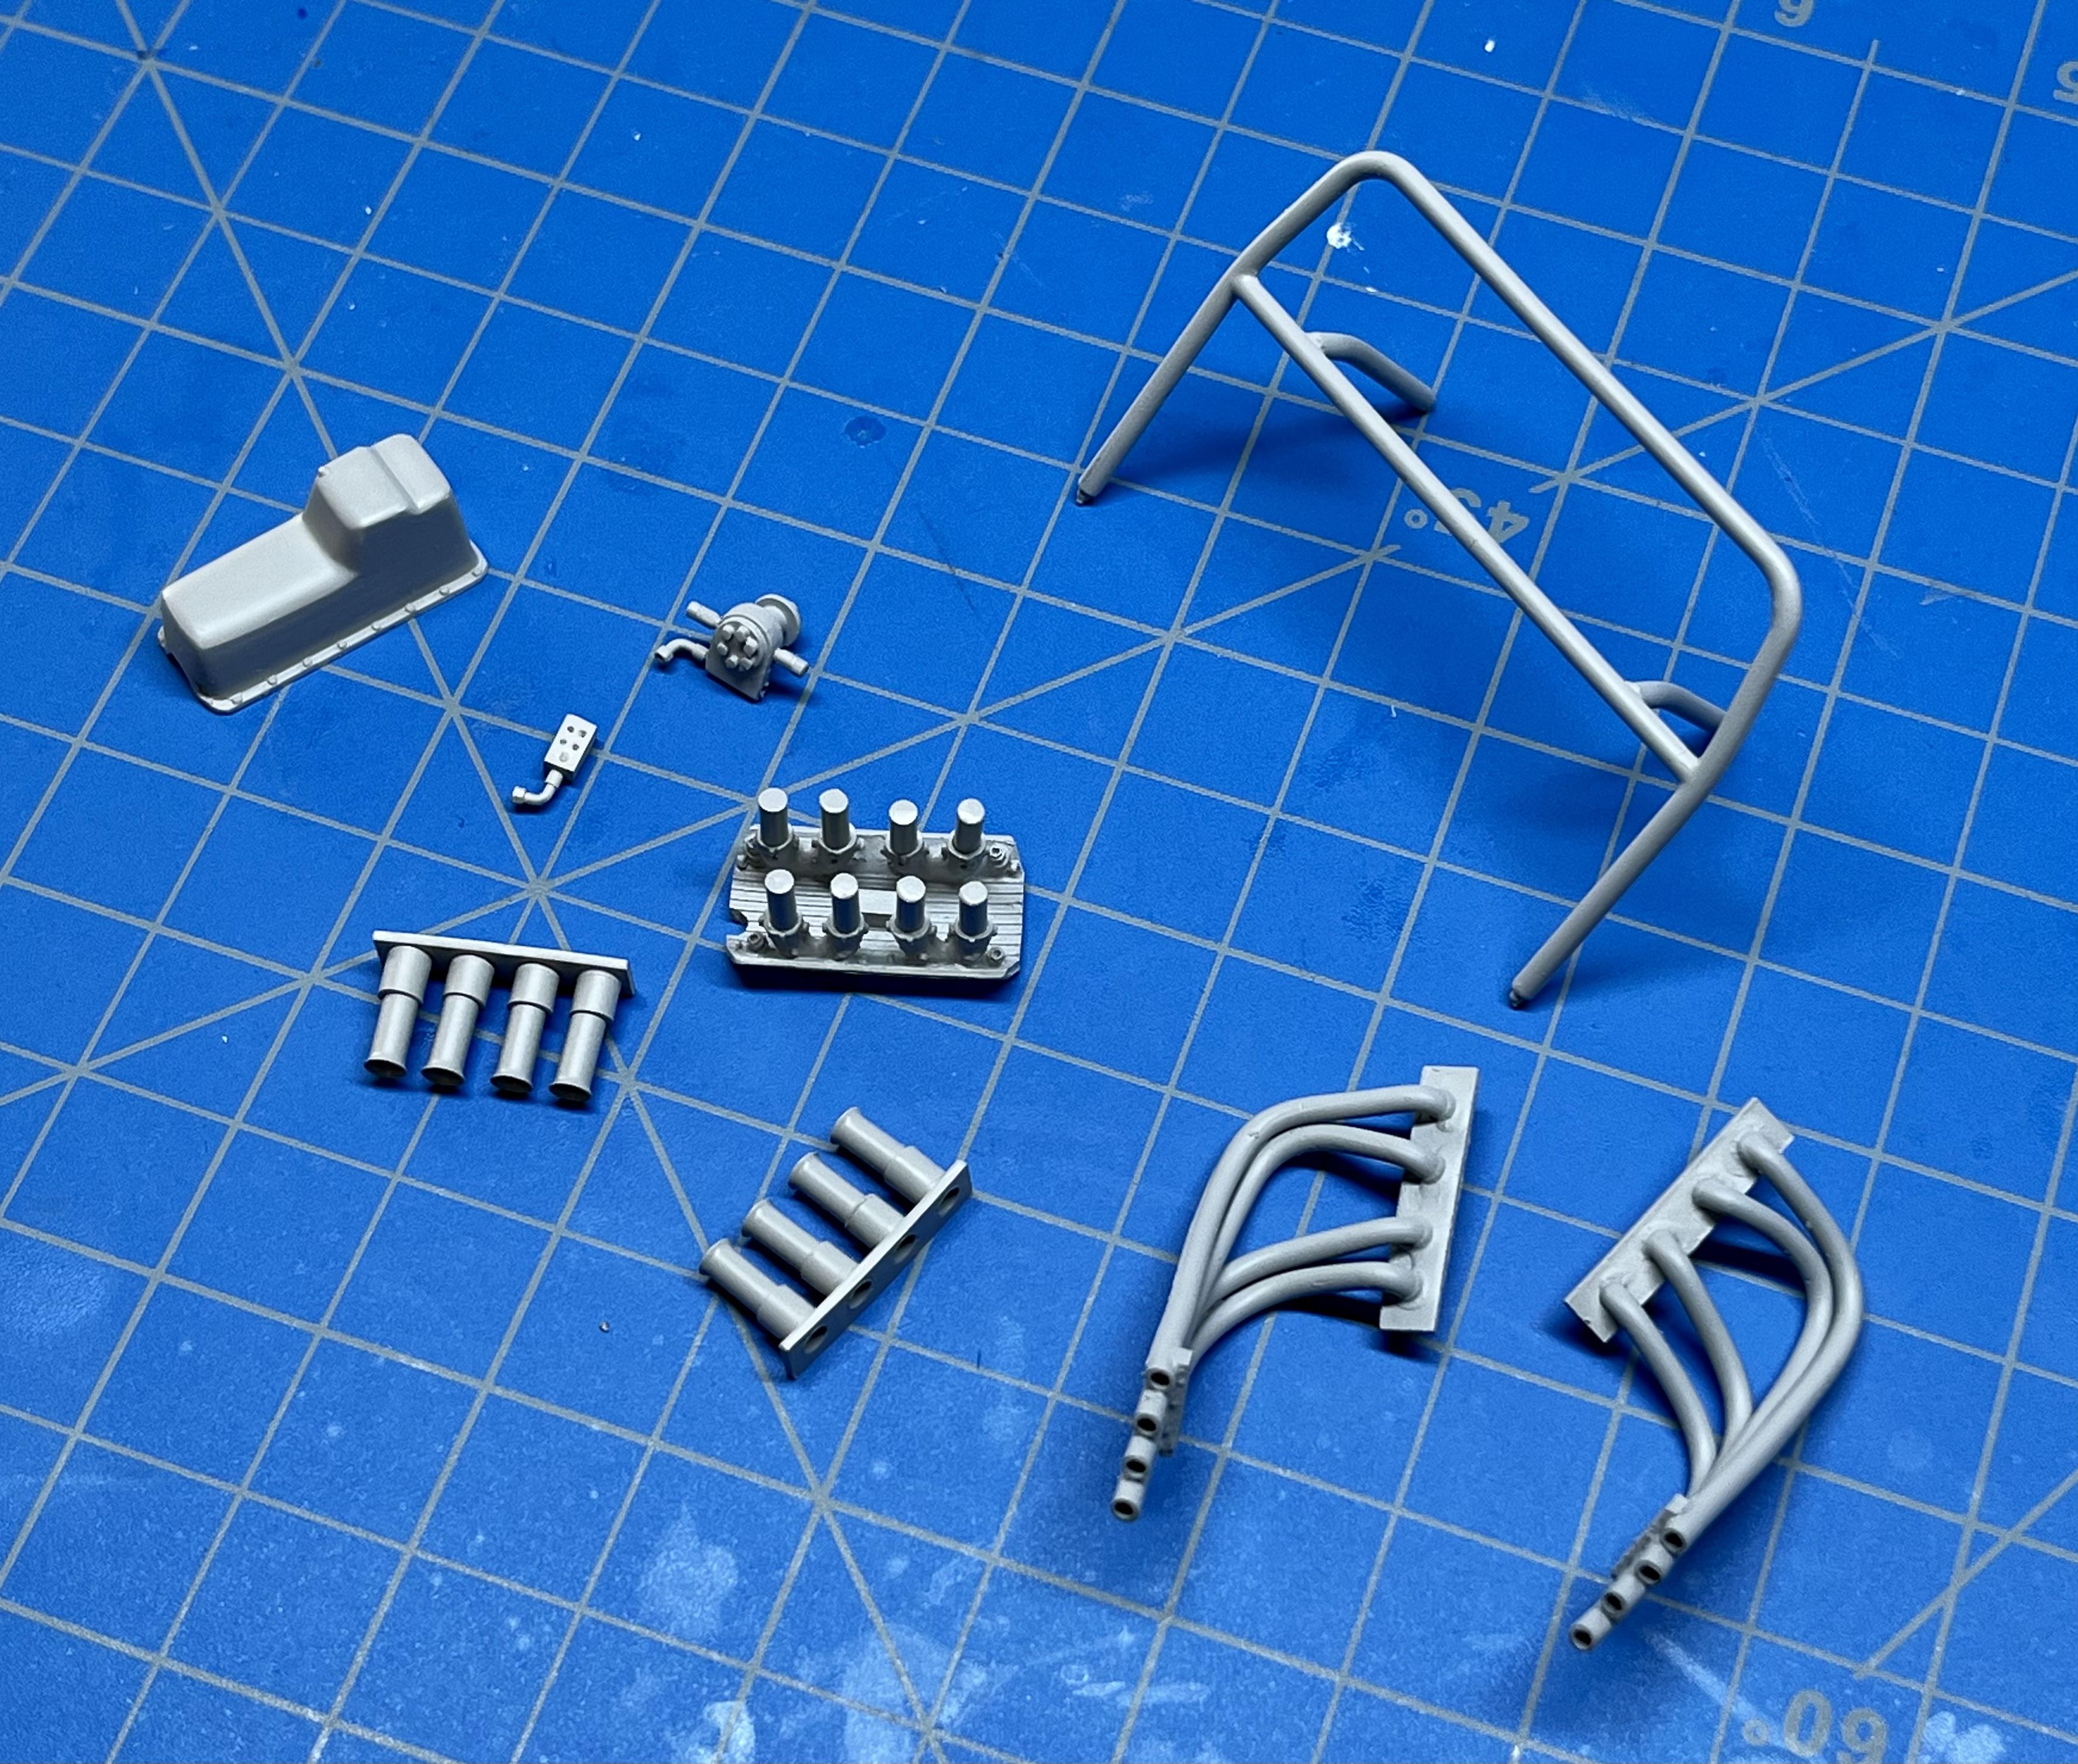
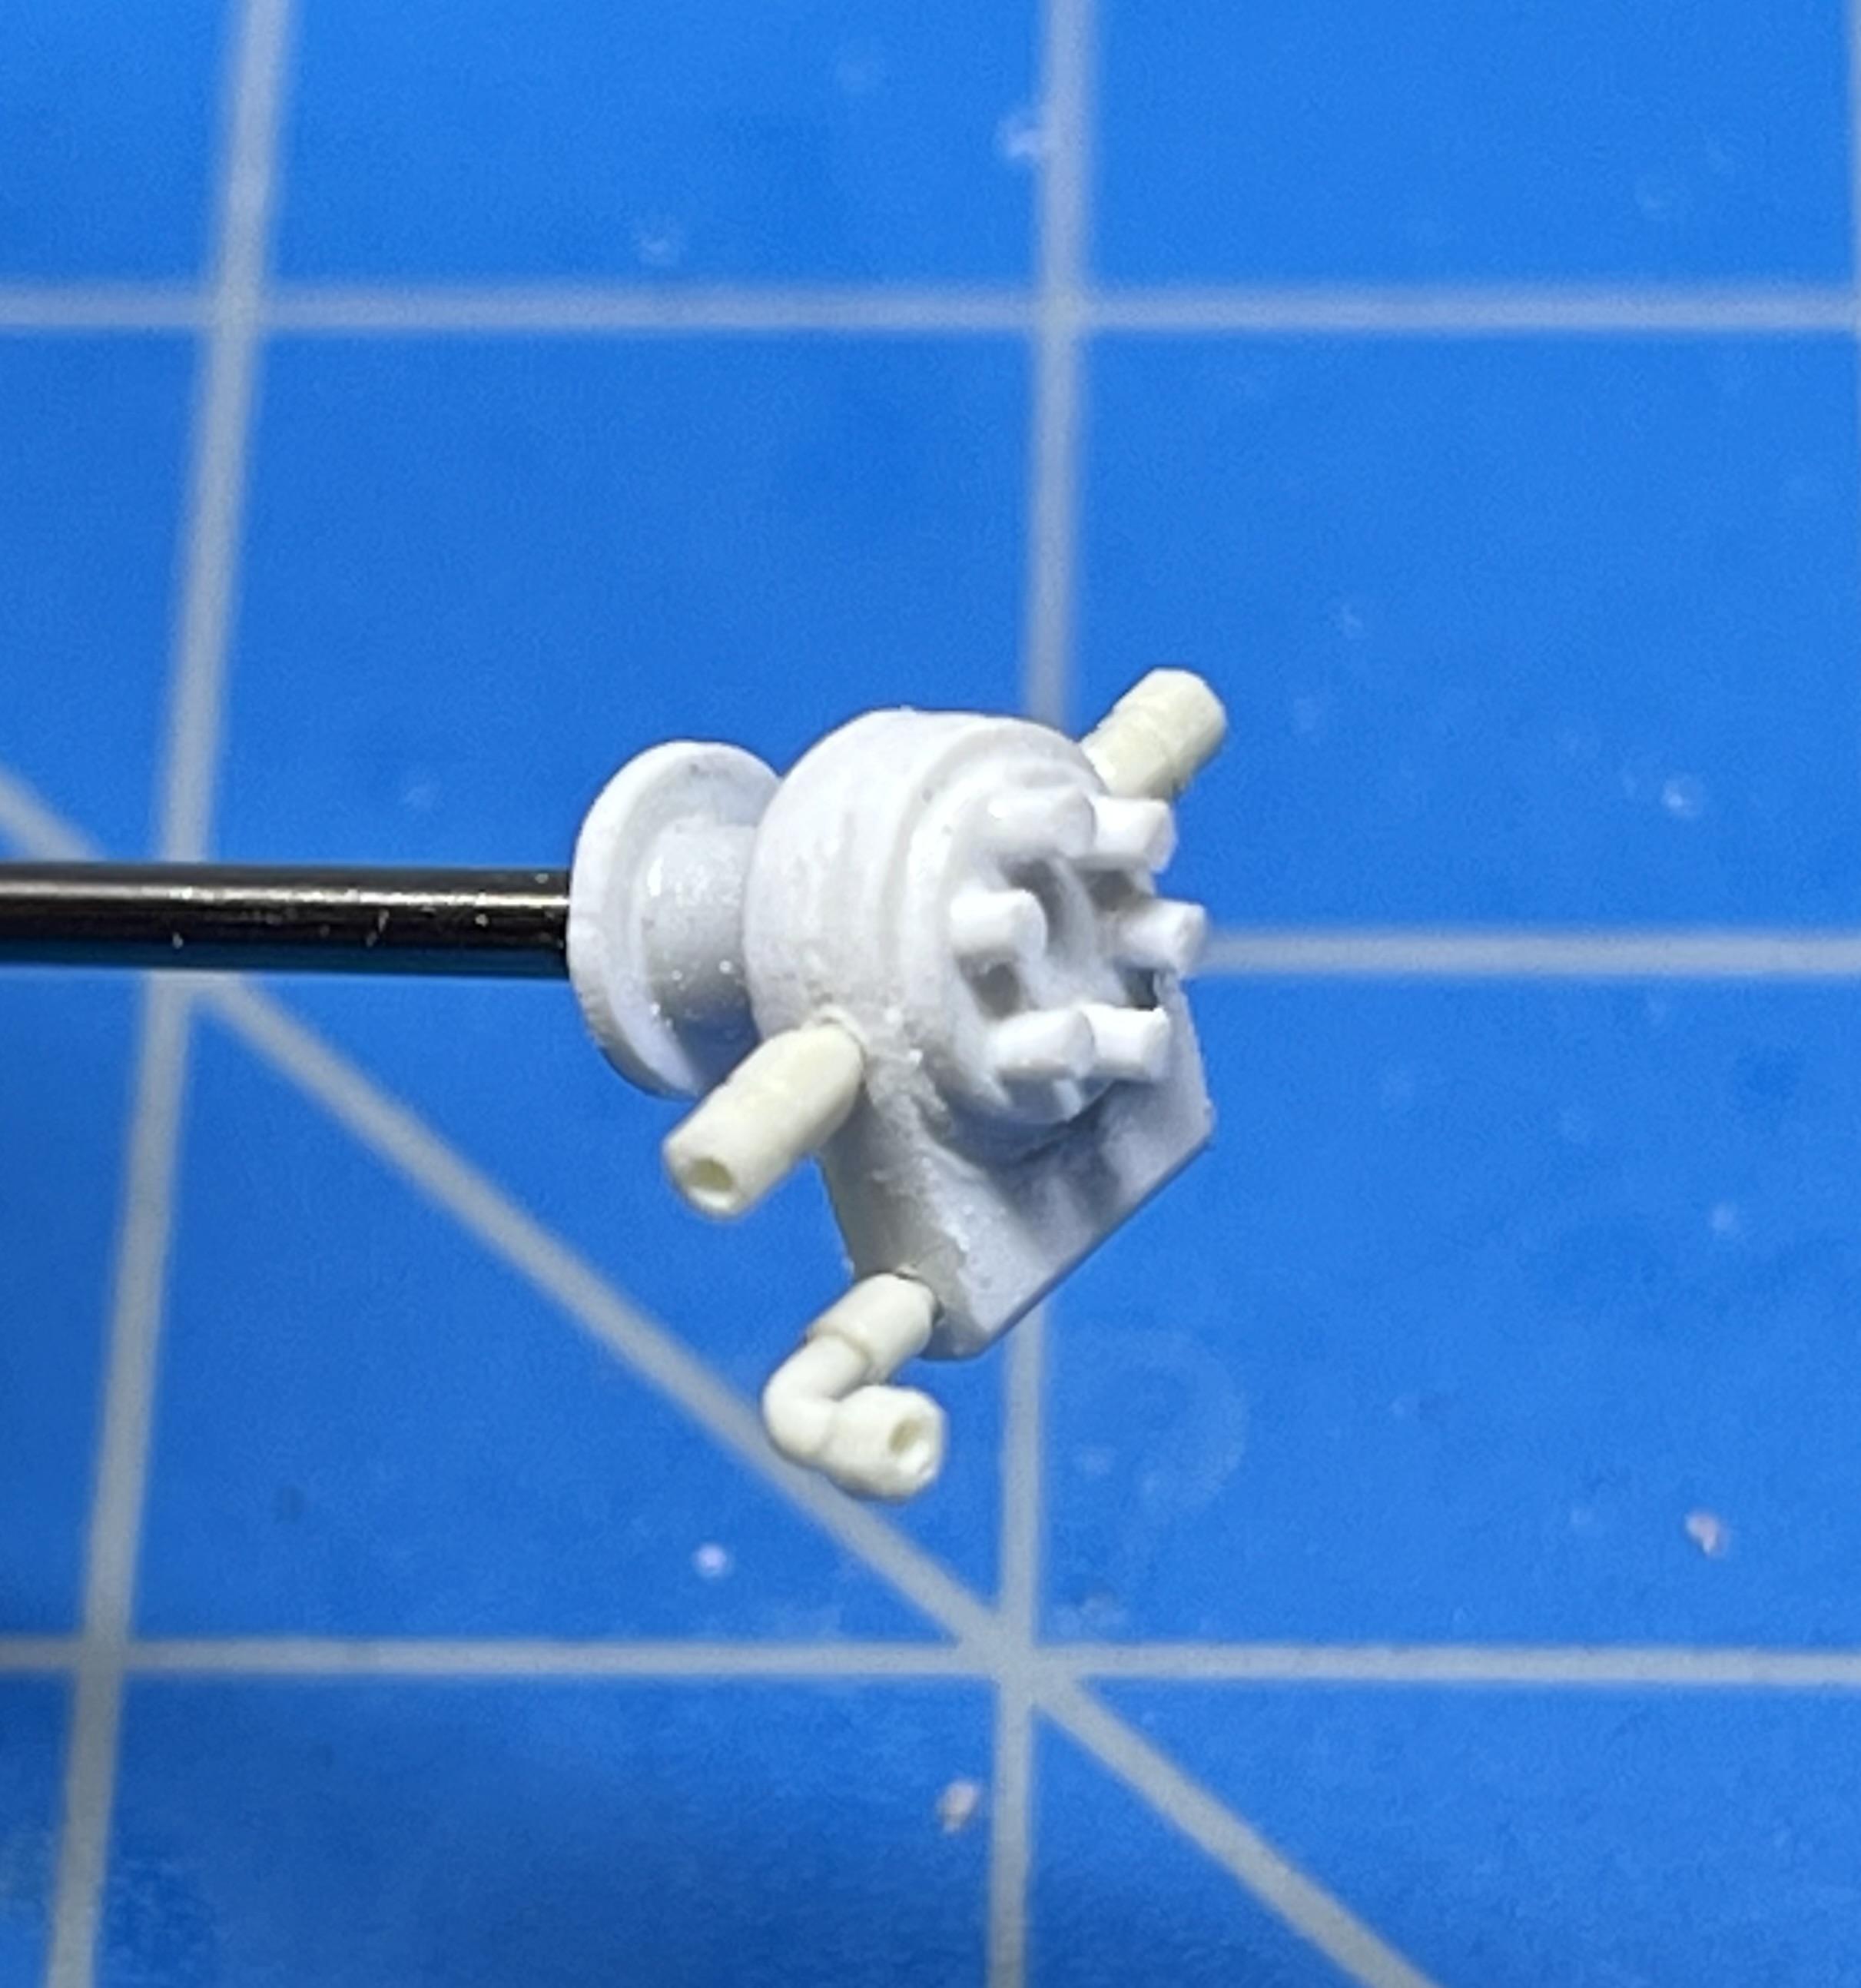
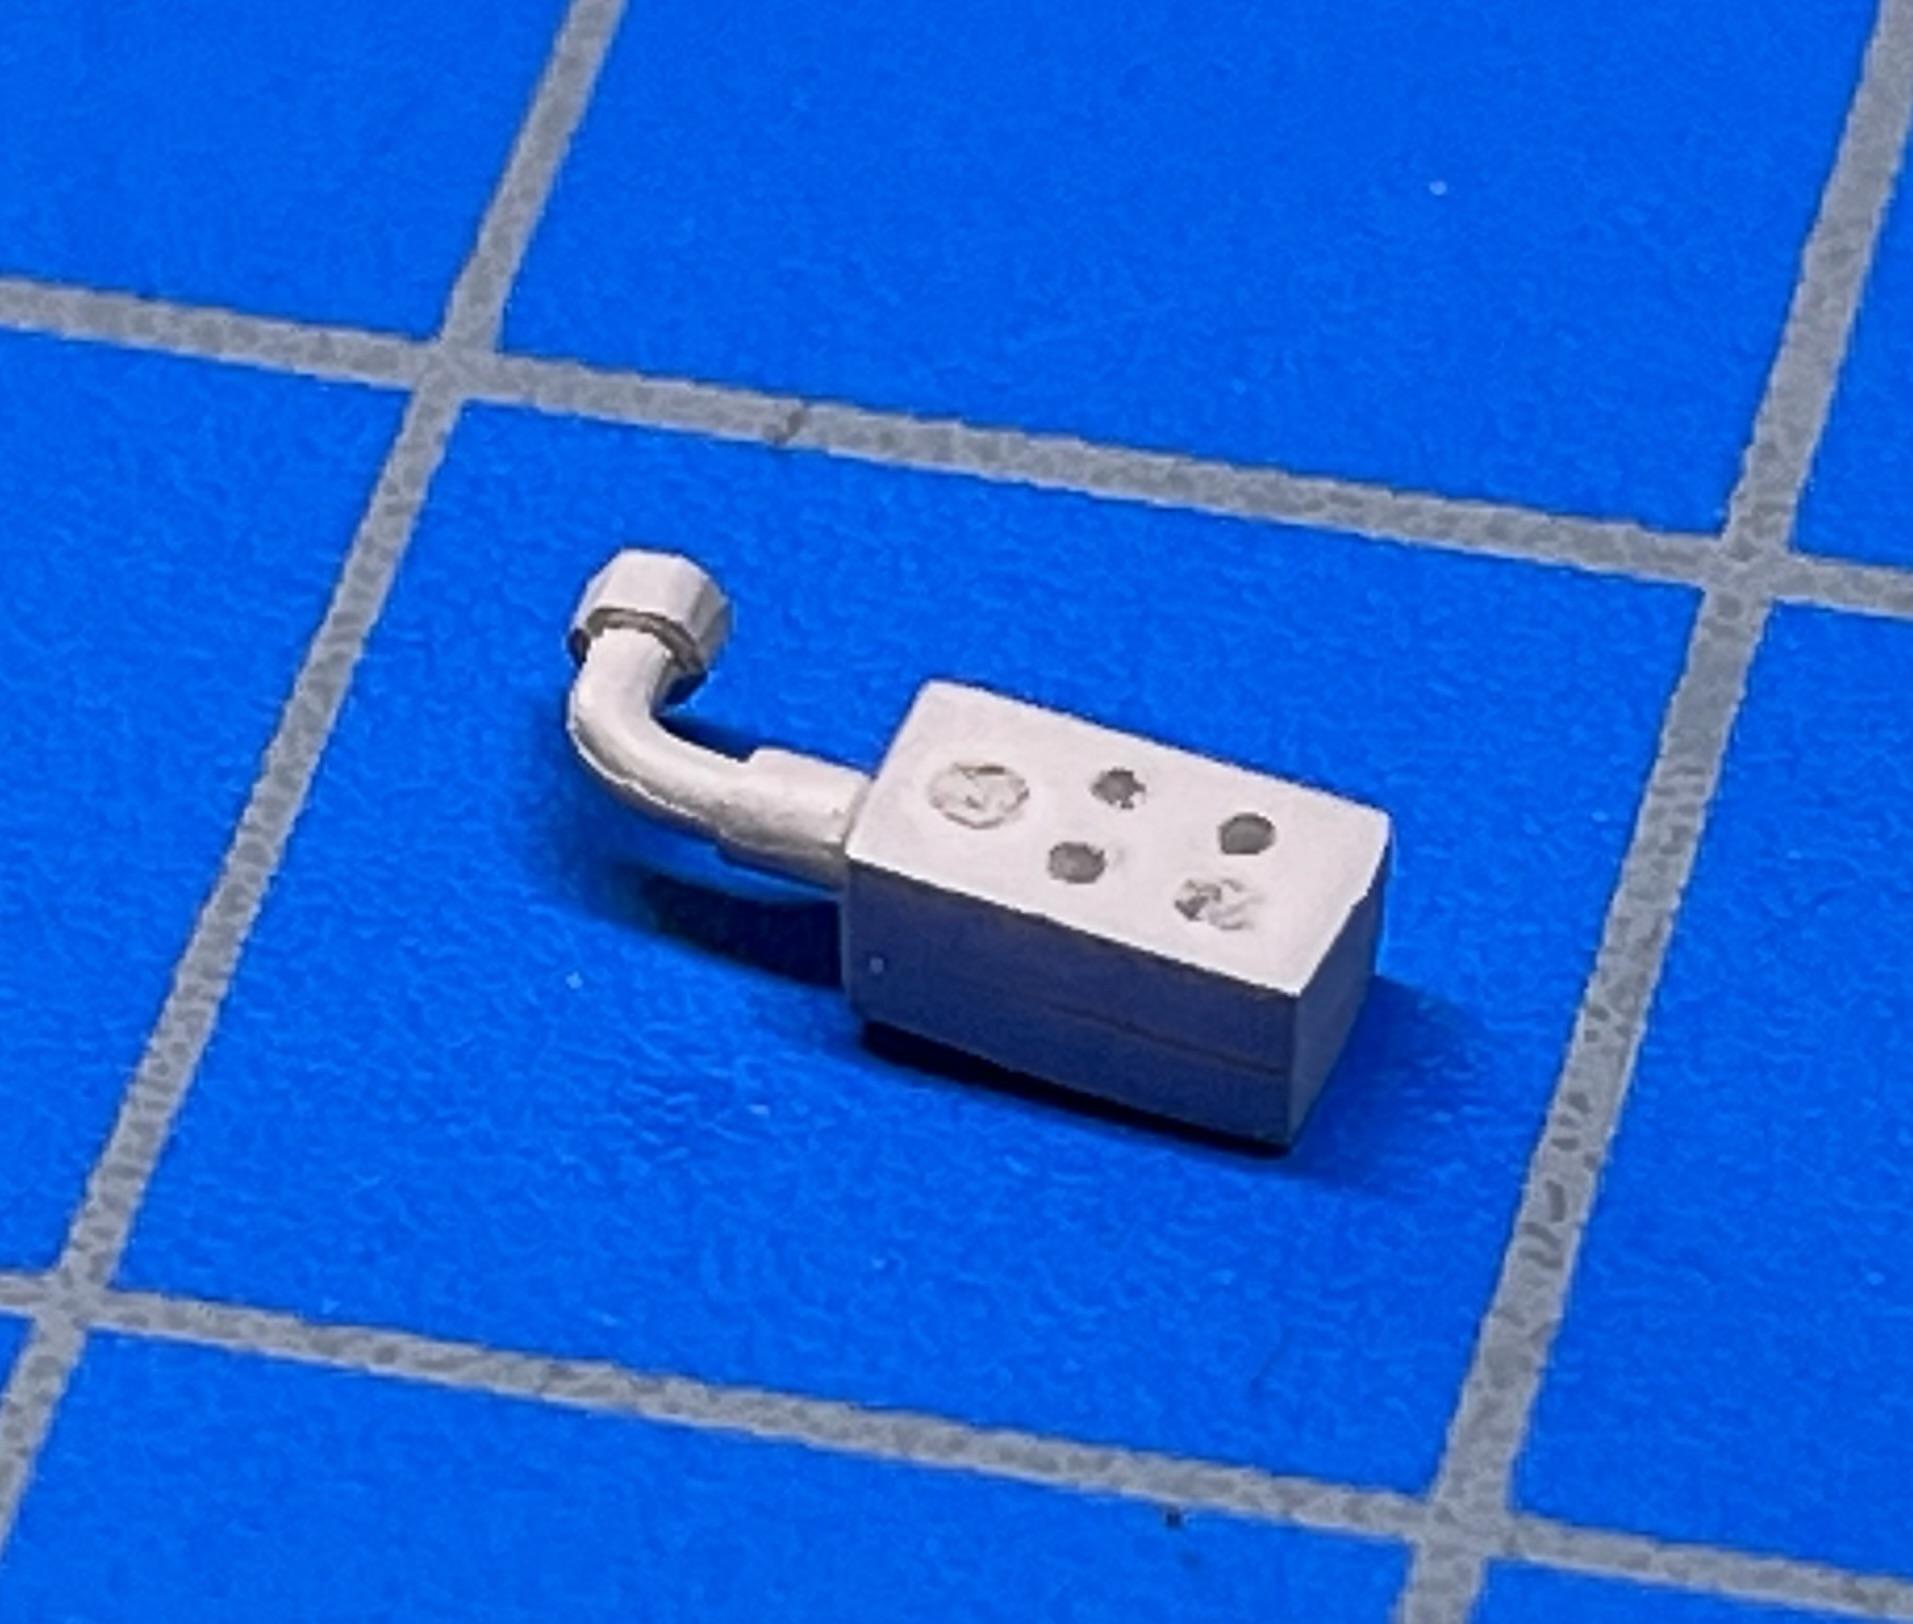
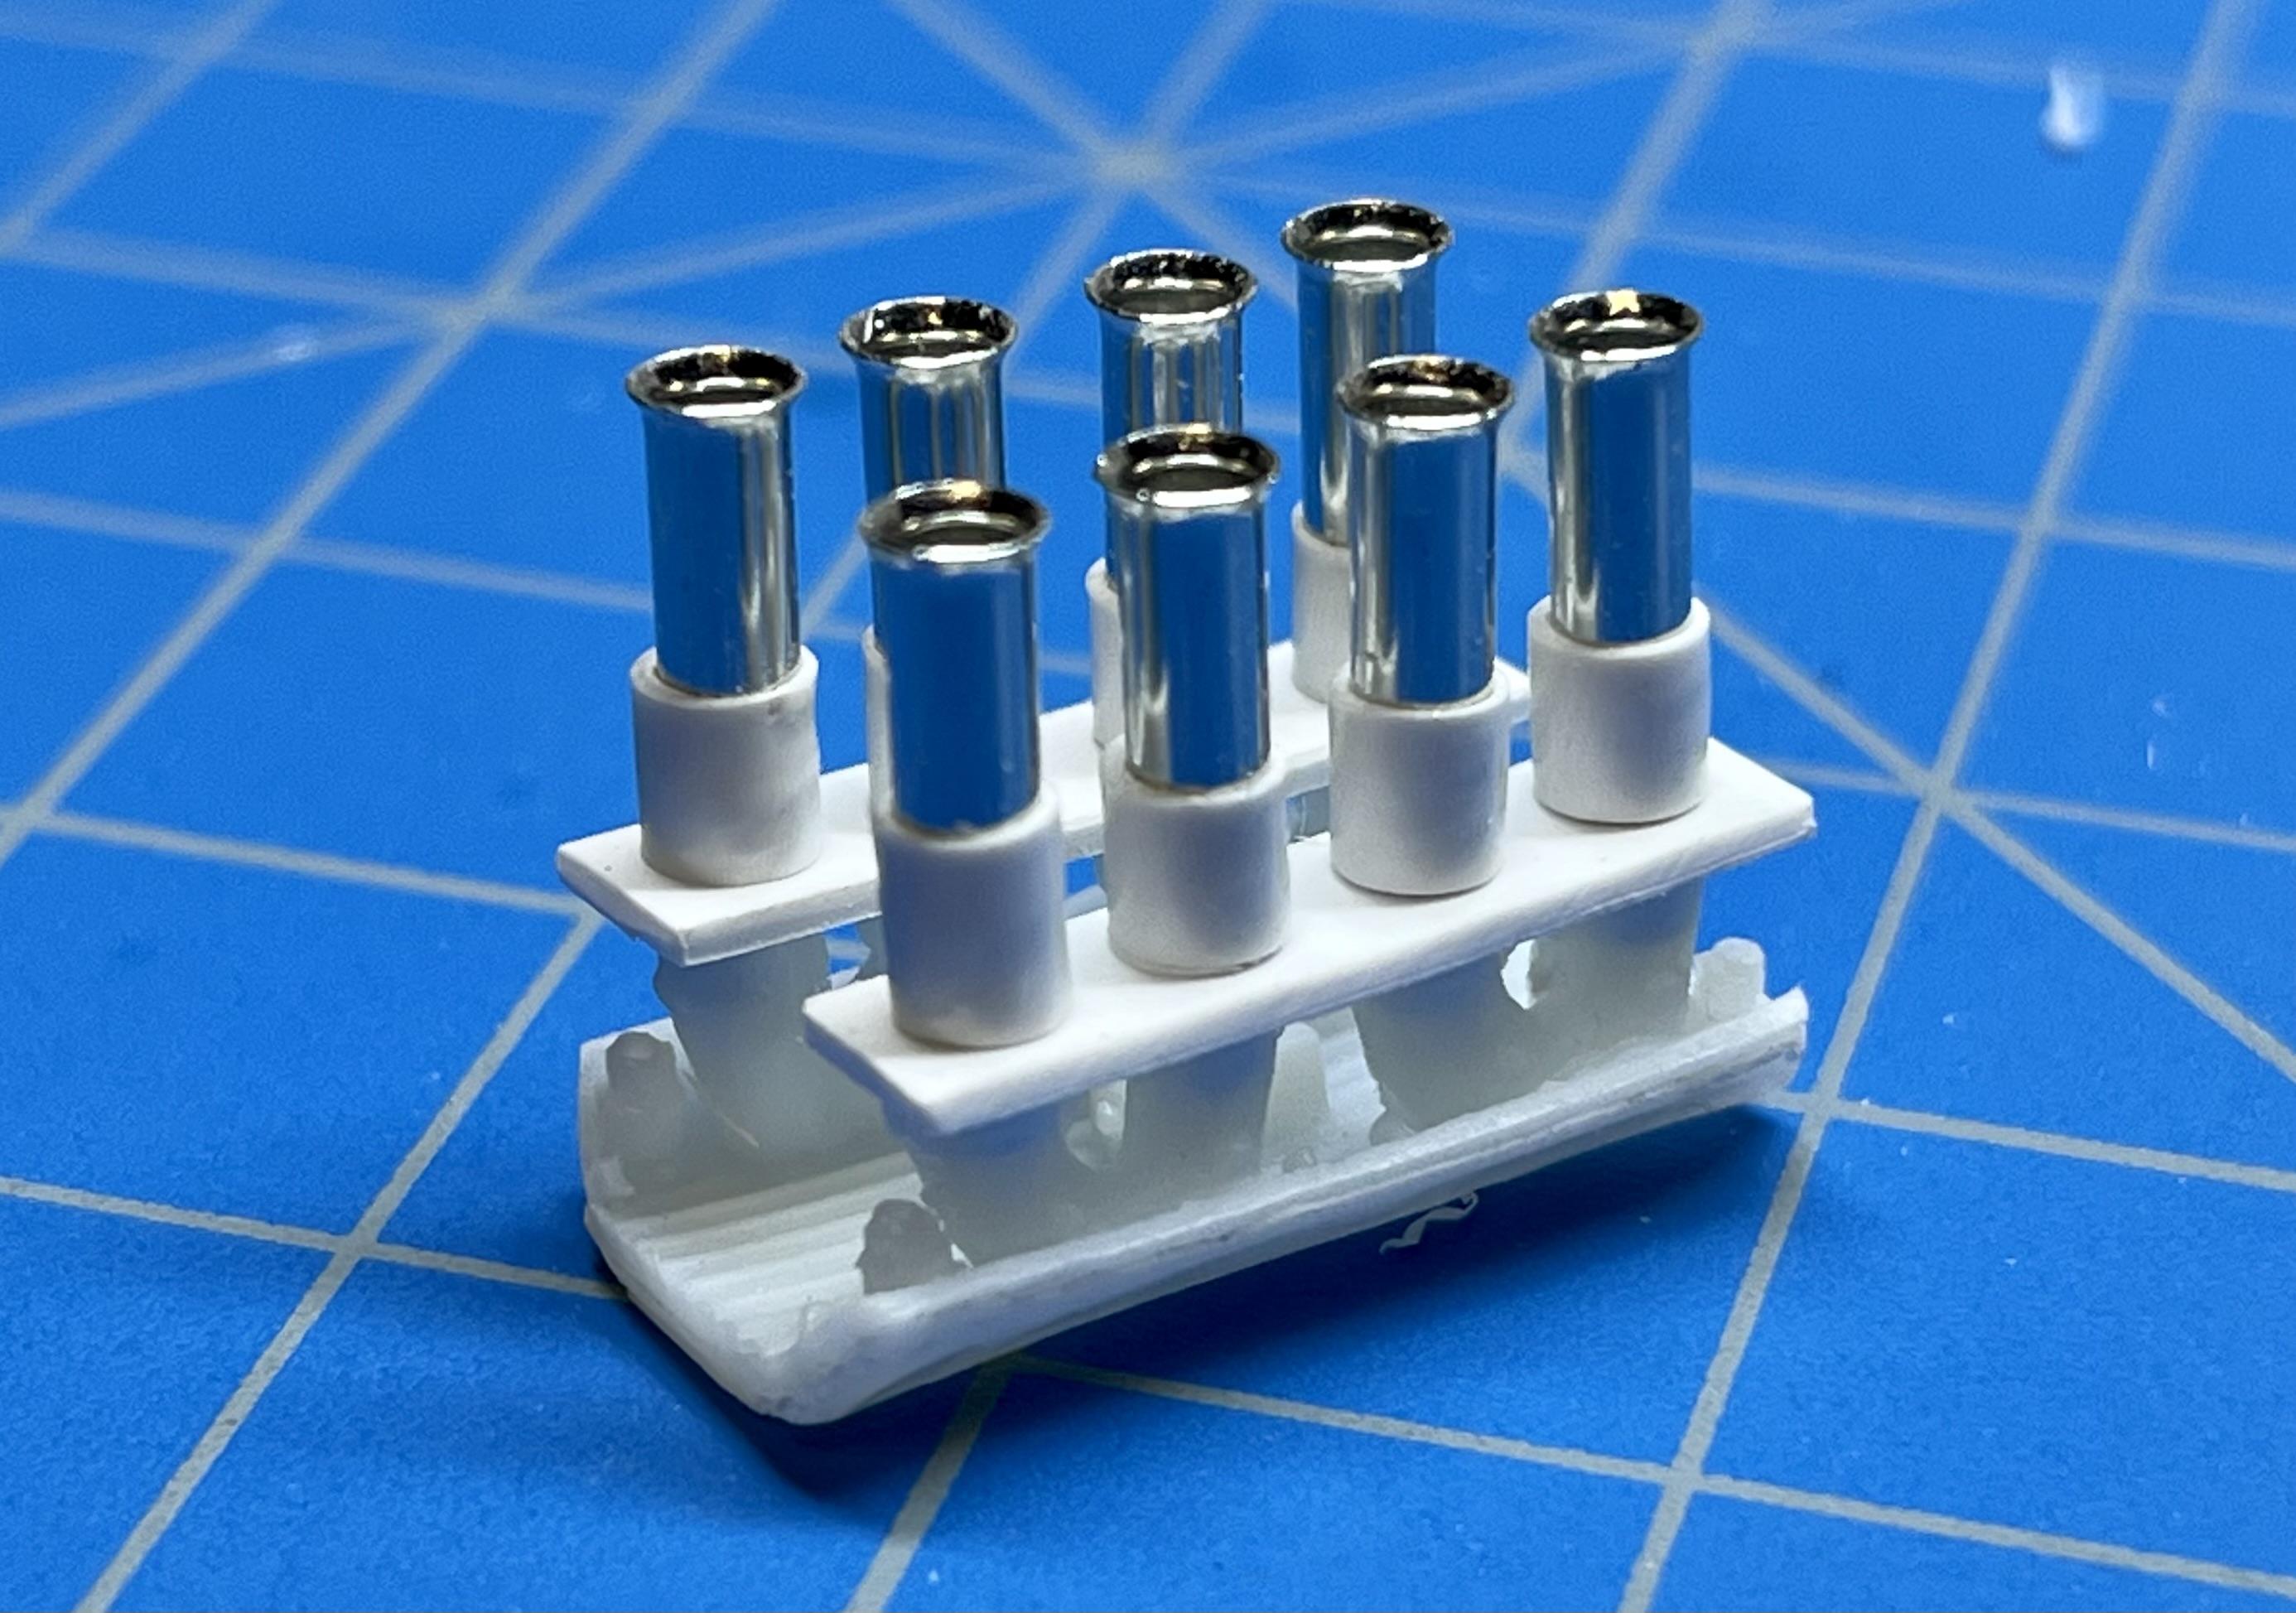
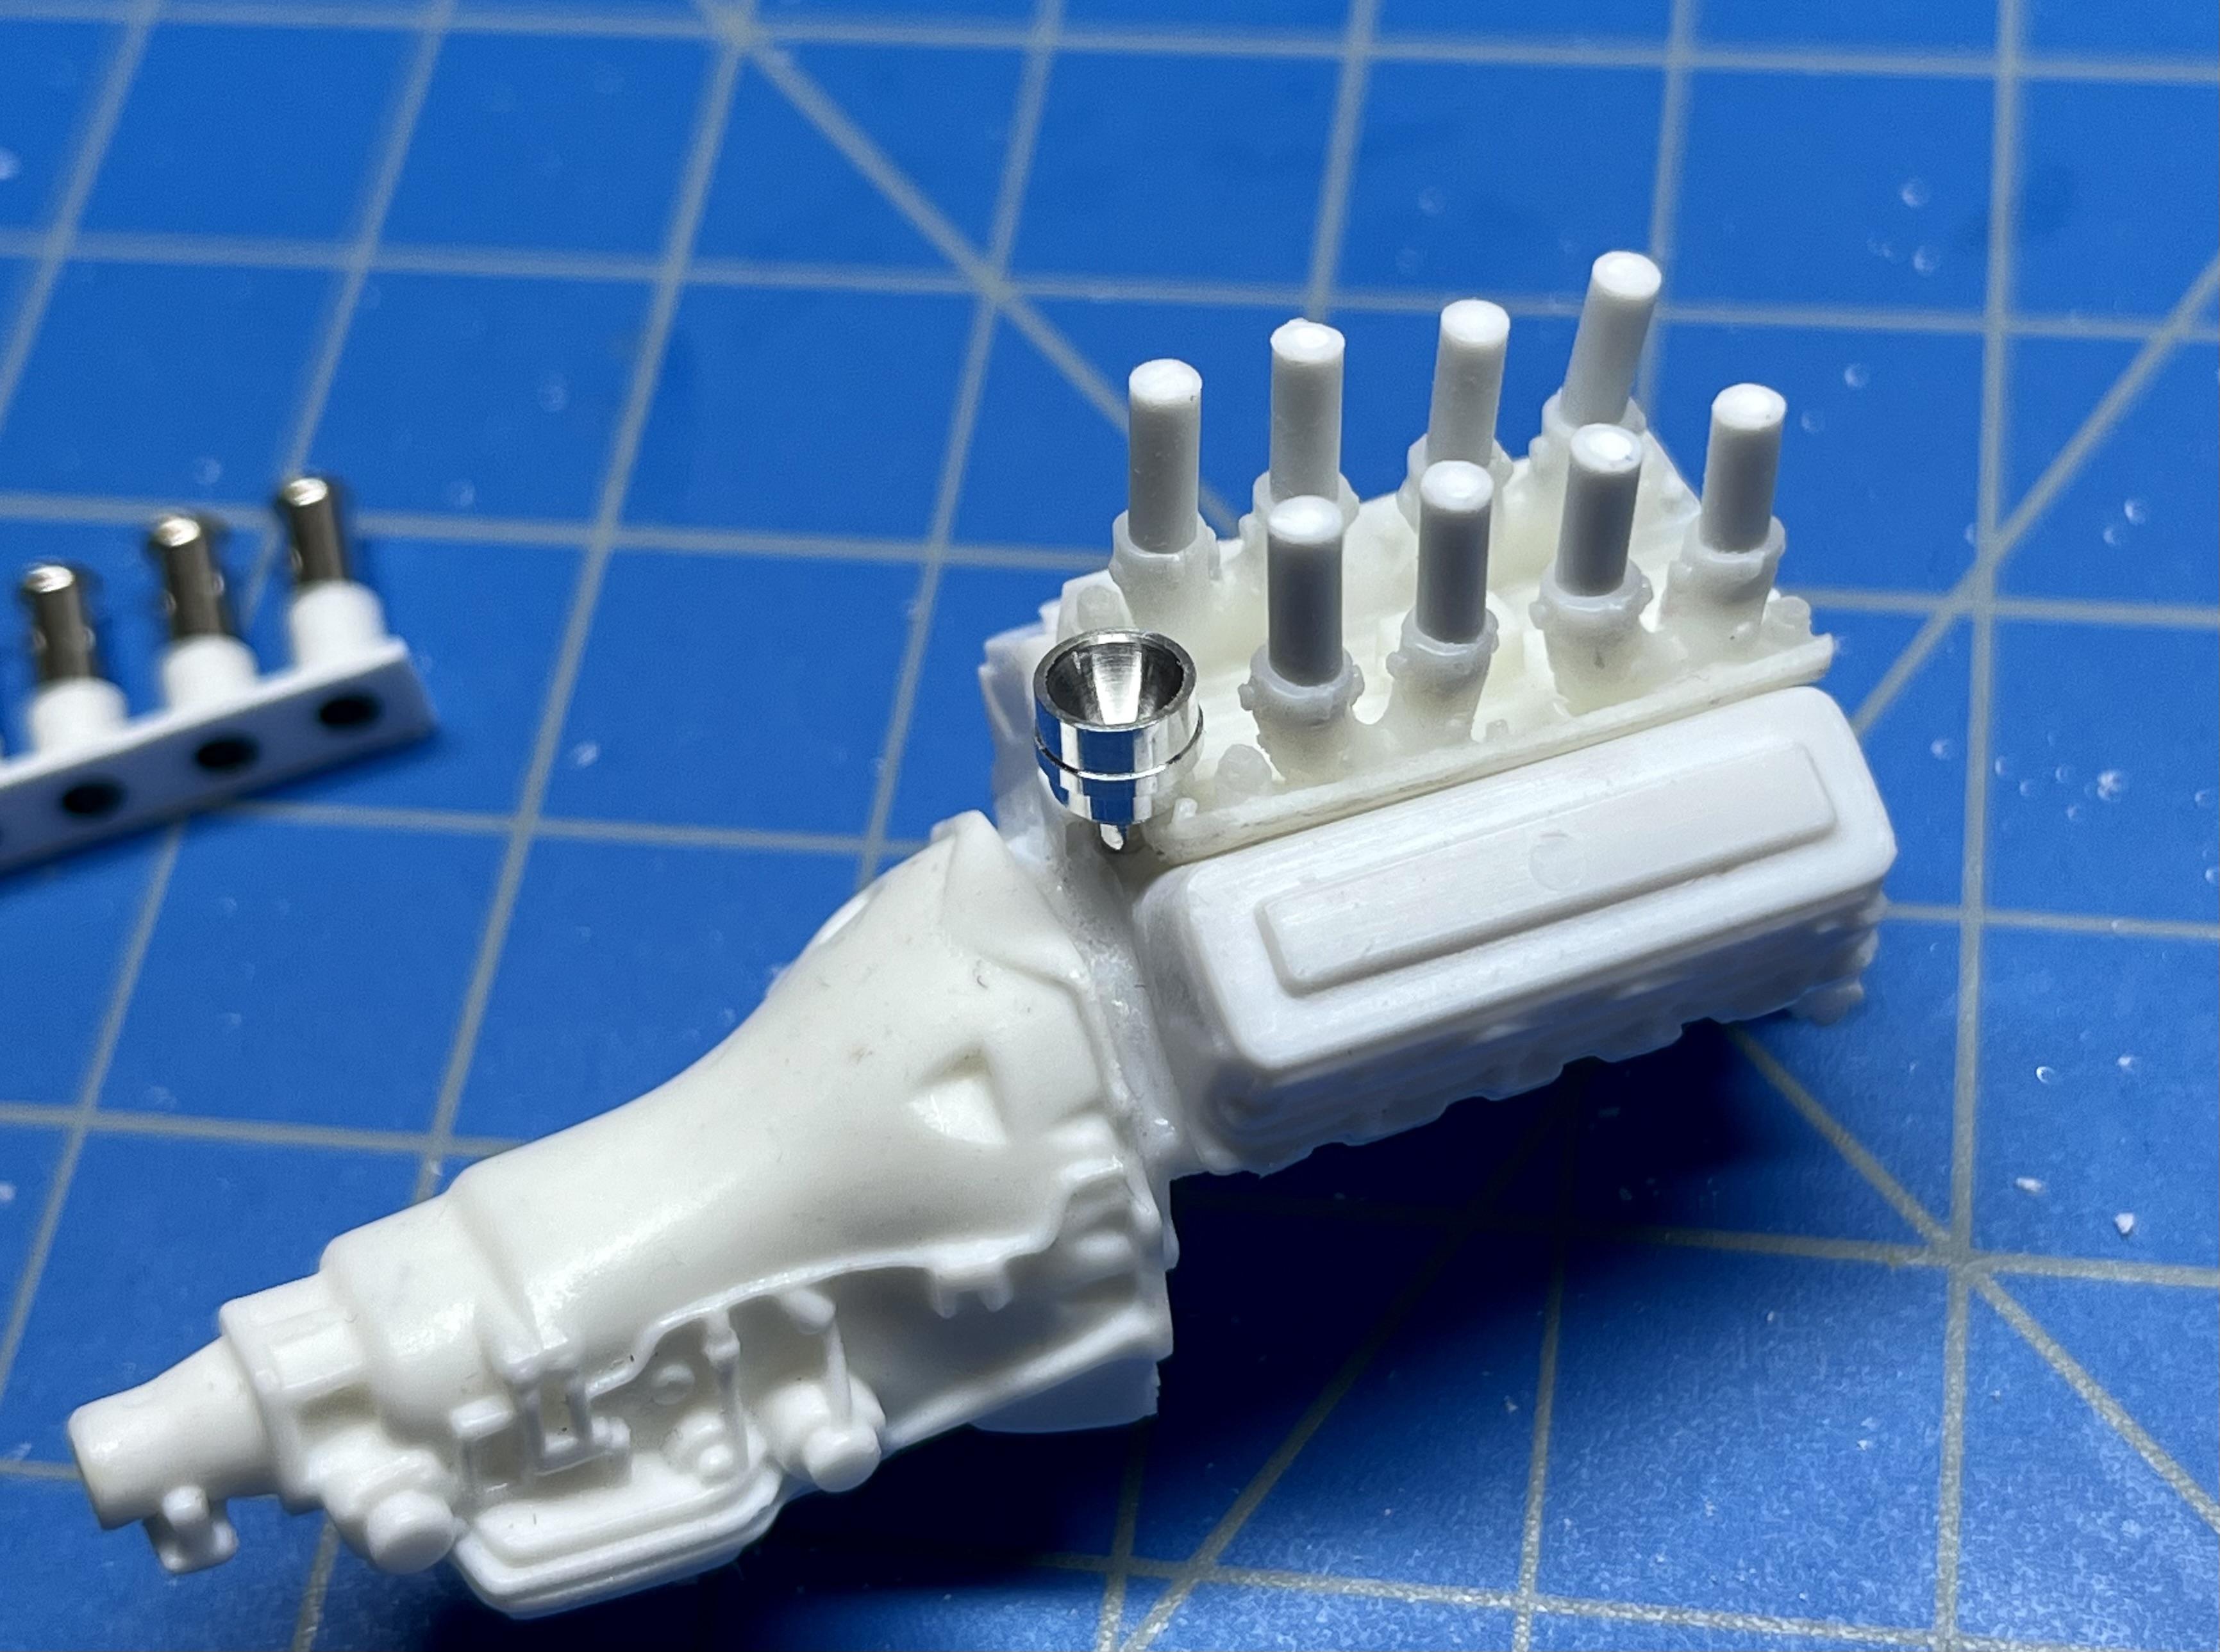
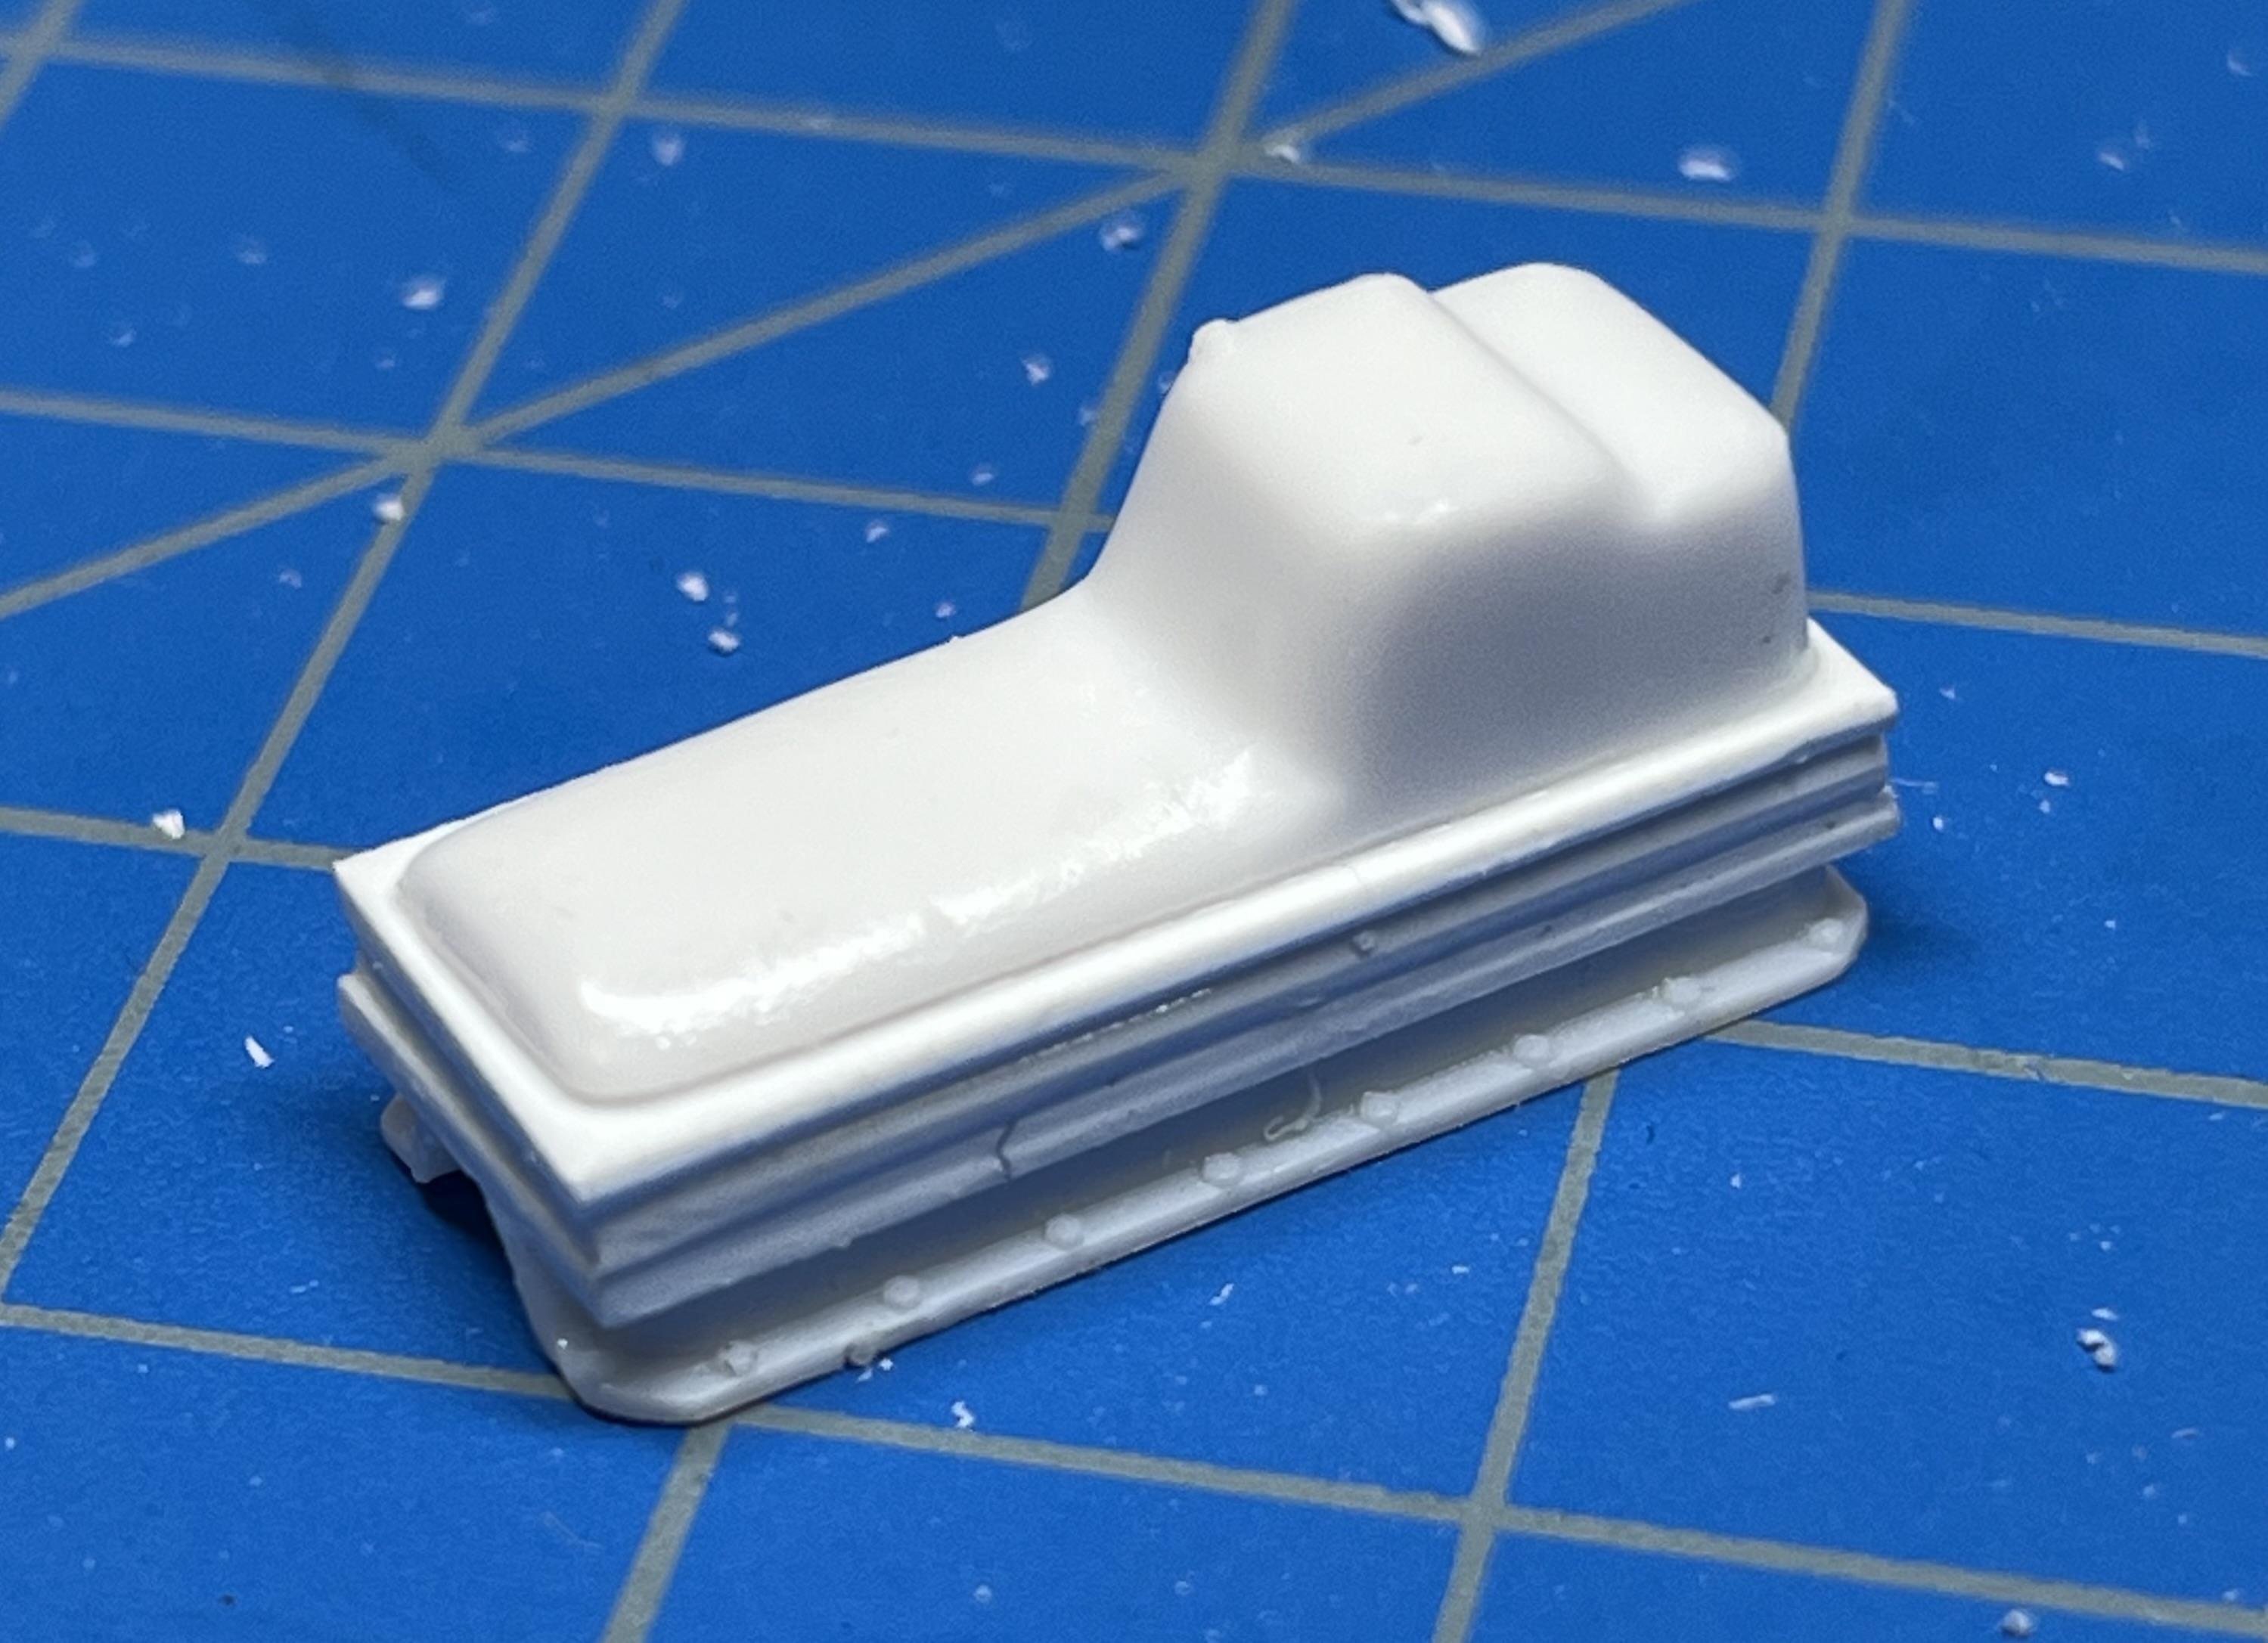
Made a few more little parts, scratch-built a Hilborn fuel pump (probably not to scale but roughed out totally by eye, intended for mounting in front of the block) using Evergreen styrene rod and sheet: Scratch-built a fuel line routing block using Evergreen sheet styrene and a resin fitting to hang off of the left side of the FI manifold: Drilled out right .016” holes on the inside of each intake tube on the manifold to install fuel lines later: I would have liked to drill out two axial holes running down the base of each of the two rows of four tower inlets on this resin manifold to allow running wire down each row for butterfly axles but I was afraid of turning this delicate resin part into Swiss cheese as well as well as the near impossibility of keeping the drill centered thru each tower. Maybe I can bond short pieces of wire between each tower later to simulate these butterfly control axles? I primed all the little parts as well as the chassis and interior tub: The roll bar shown above was out of my spares box but I had to widen it by .20” by splicing in some .08” Evergreen rod so that it would adequately span the interior tub. It’s supposed to finally warm up to the 70’s to low 80’s here on the So. Cal. coast over the next few days so I hope to finally be putting some colors on these parts. This is mostly a “done by eyeball” build but so far it’s still pretty simple and fun (compared to the crazy over-engineered tank model I’ll building in parallel). Thanks for viewing my slow progress! John
-
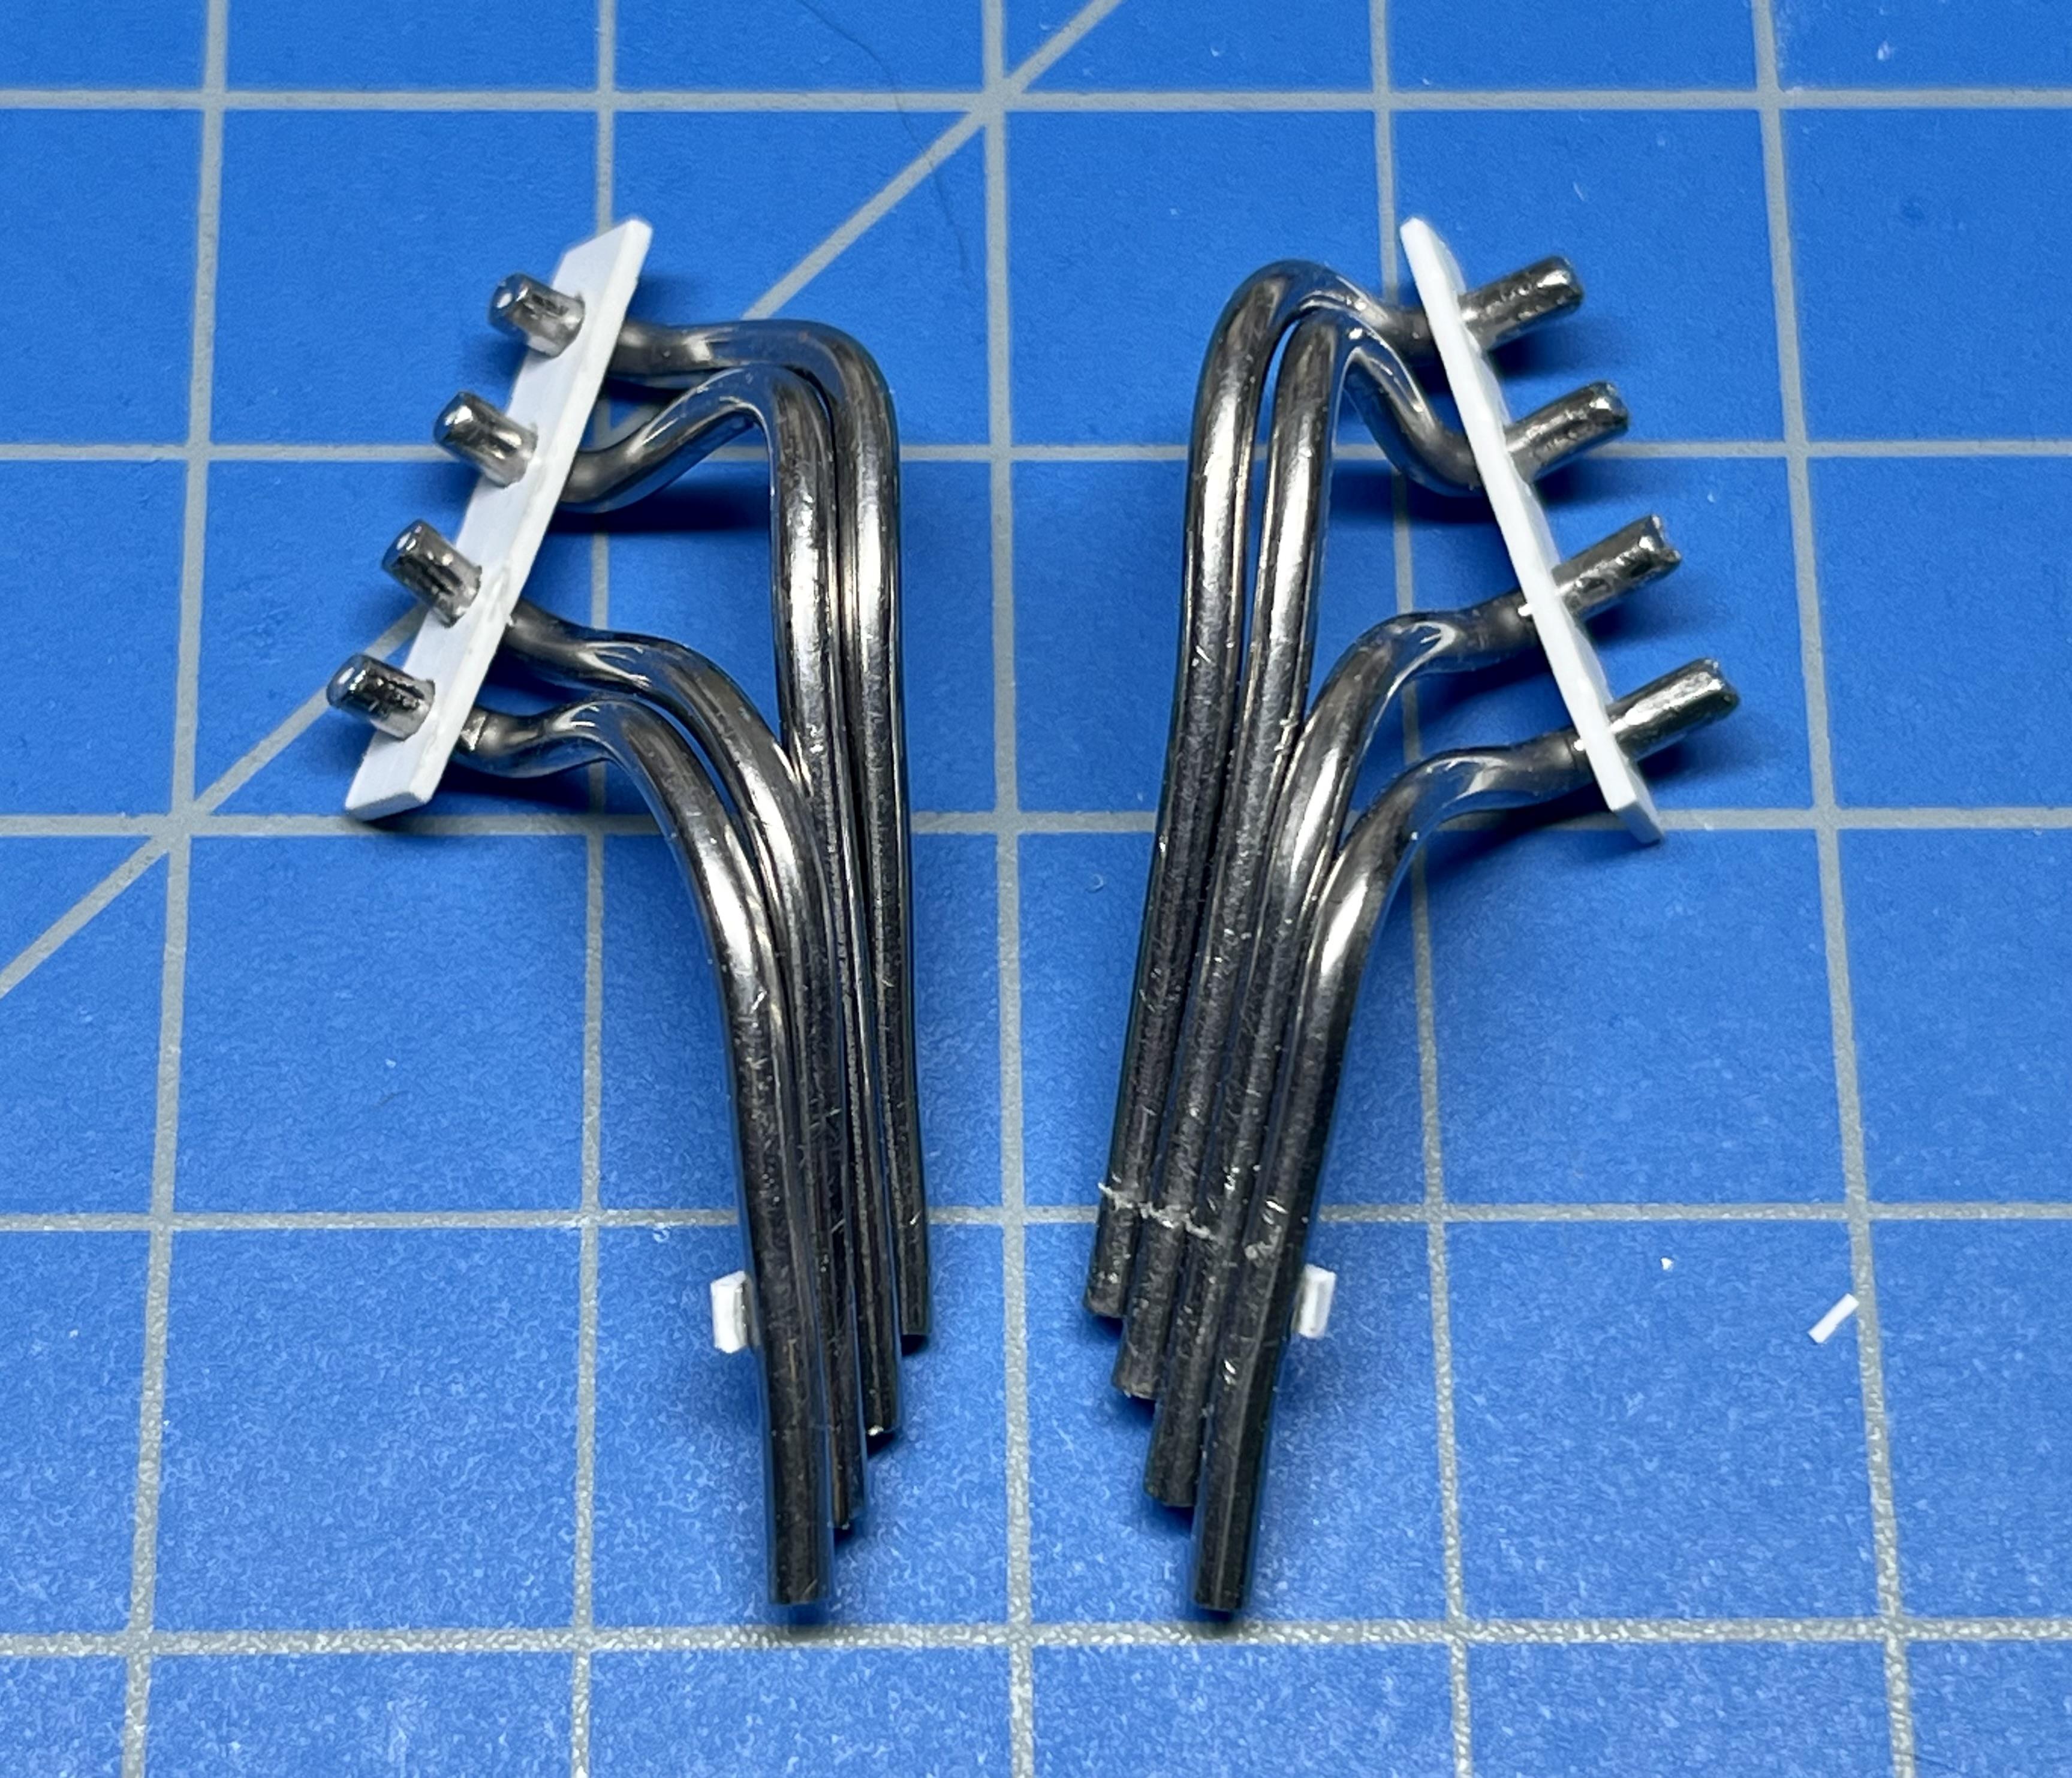
Trimmed and sanded the sides of the styrene sheets added to the deeper oil pan: Made some progress on roughing out the headers: I’ll drill out the ends before priming and painting these. I will have to place these over the upper A arms on the chassis before assembling them to the engine block. The plugs are below these headers so I’ll need to finesse some wiring holes at the bottom of the heads to block area, not totally accurate but you won’t be able to see the plug end once the engine + headers are assembled to the chassis. Making these headers took about 3-4 hours of trial and error scratch building. They’re not pretty but they’ll be good enough once I airbrush them with Tamiya XF-1 or XF-84 (my favorite these days for exhausts). John
-
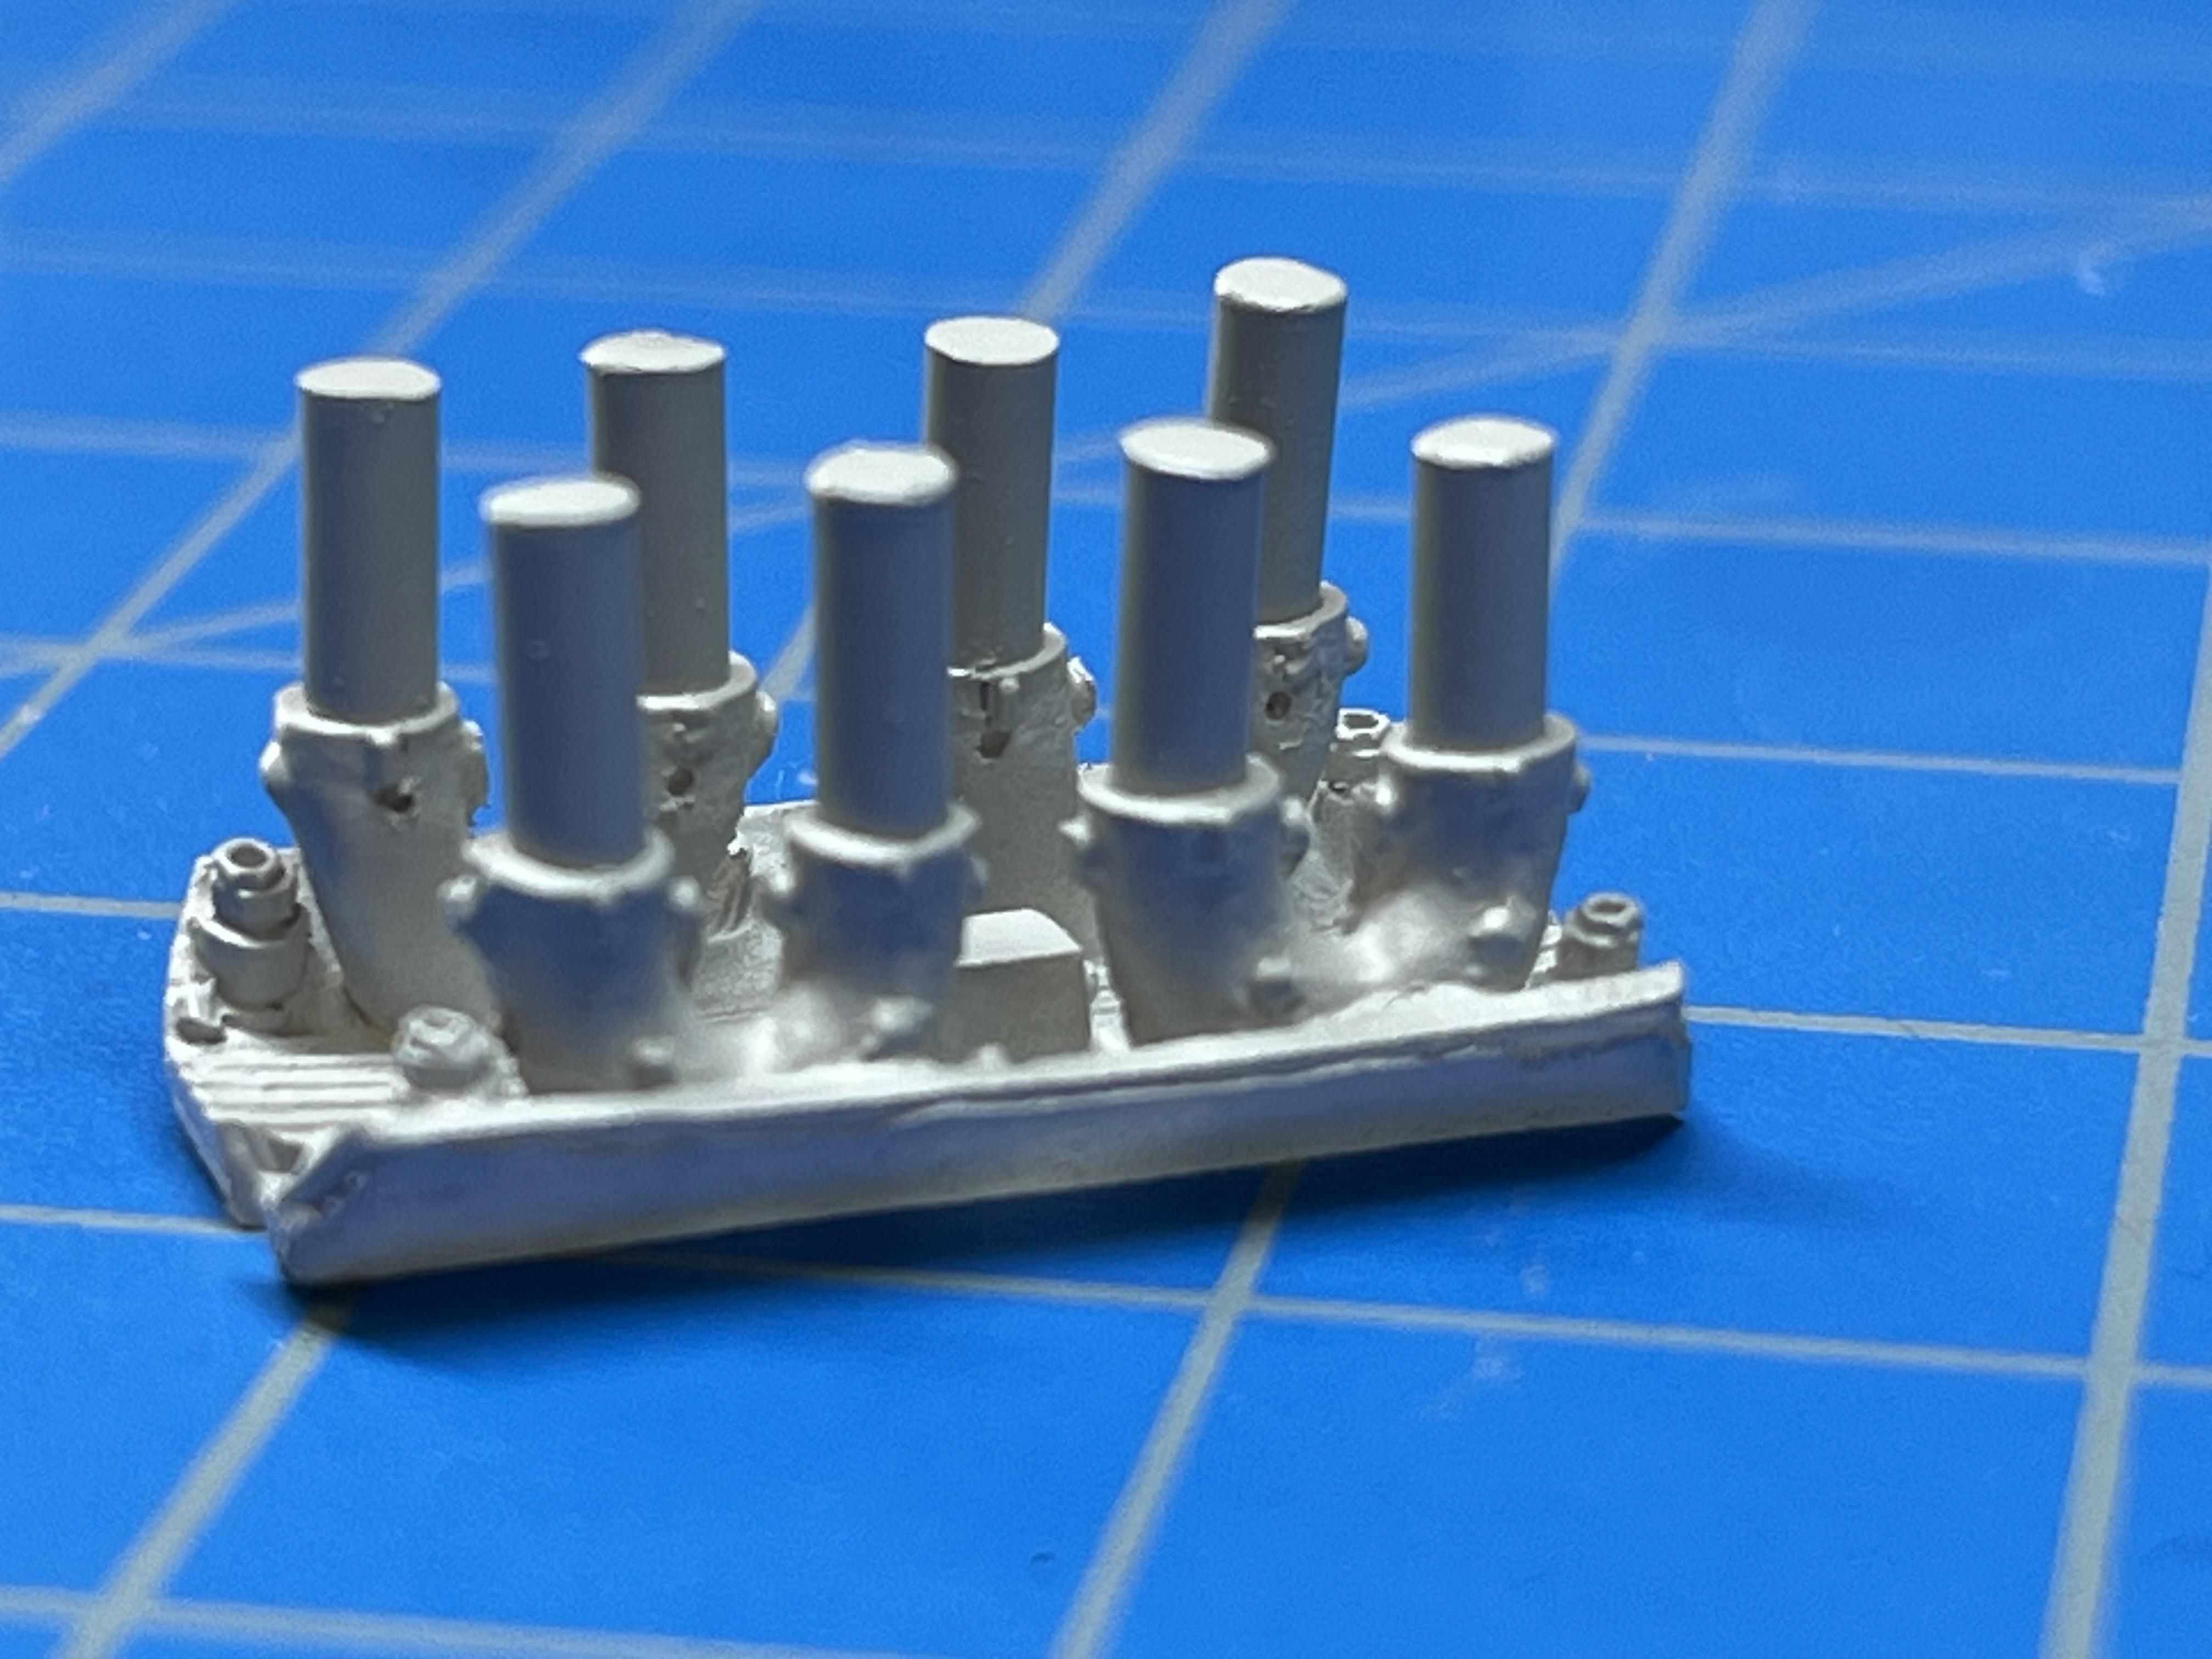
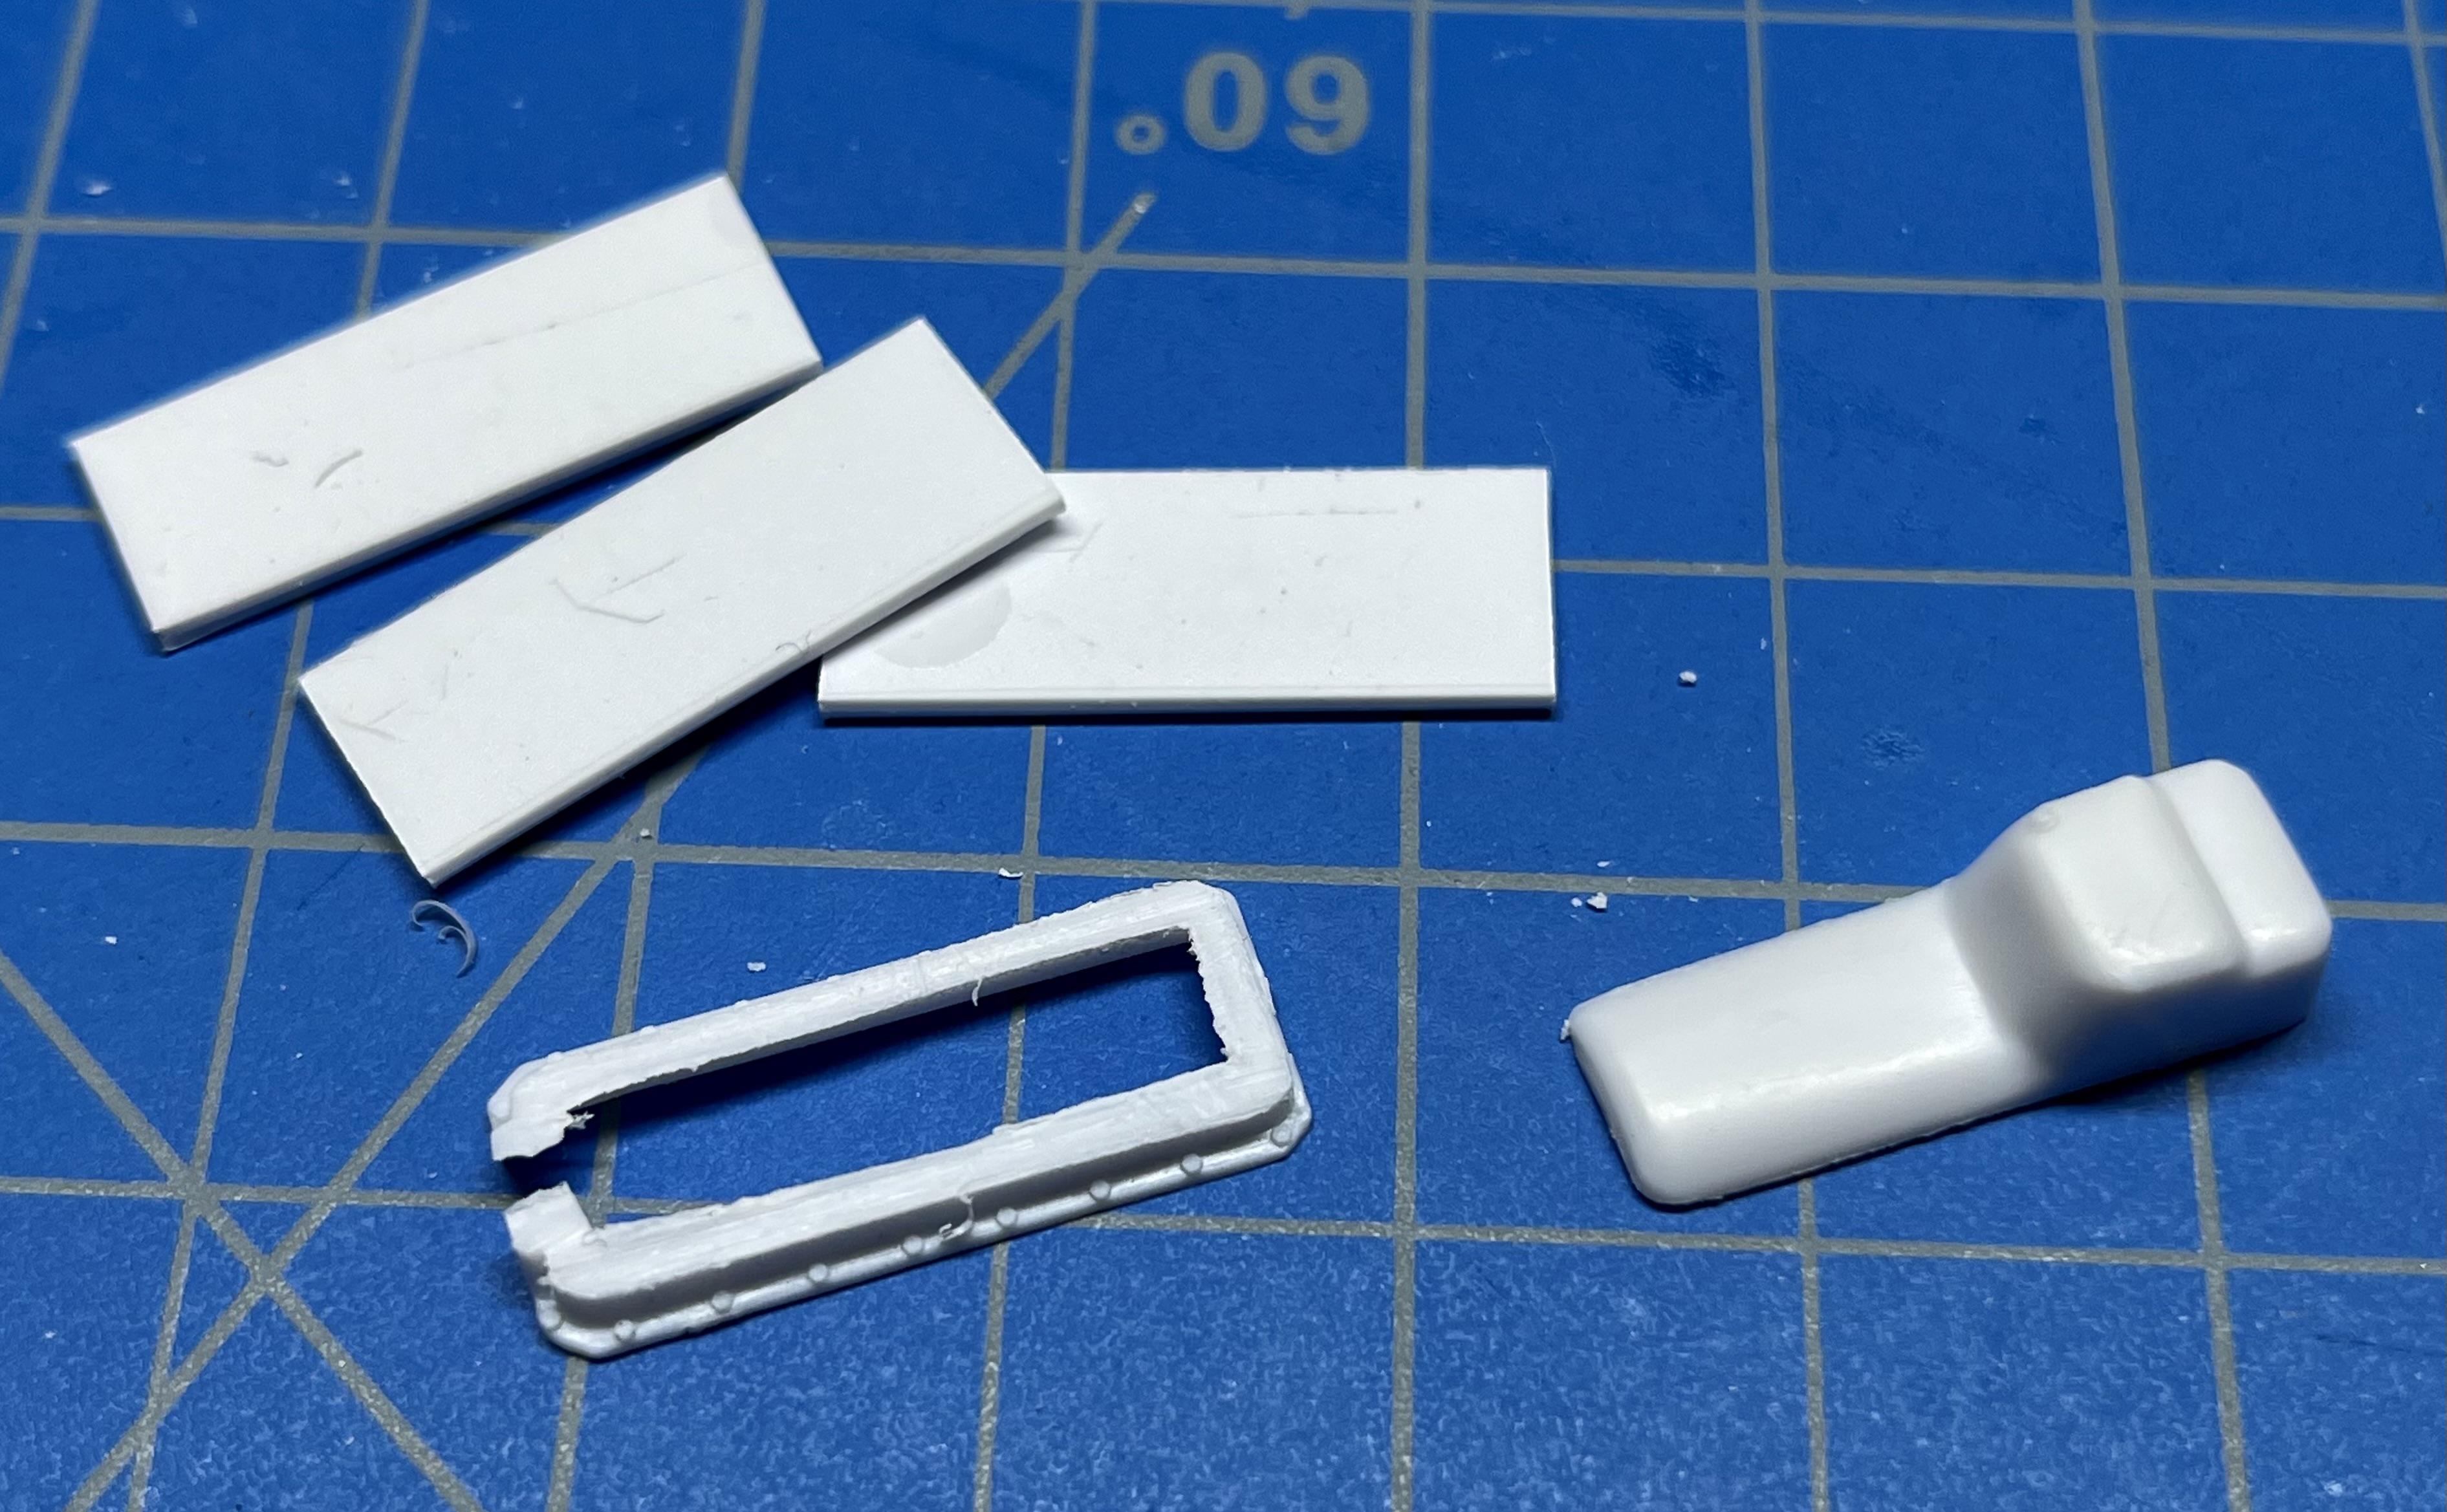
A little progress today…. I finished roughing out the weird Hilborn FI set-up and checked the rough appearance with the engine/ chassis/ body….looks about right? I then started the mods on the oil pan to deepen it by 3” (.12” scale) by sectioning it with a razor saw and then bonding three .04” thick Evergreen styrene sheets. I’ll flush out the sides of these bonded sheets after an overnight cure: I’m planning on using a Detail Master aluminum distributor on this engine and so I drilled out a .062” hole in at the rear of the FI manifold and block;: The next big mod is to scratch build the headers which my Car Craft magazine reference describes as 2” tubing, 40” long, individual tubes with no collector. I’m planning on using 2 mm diameter solder wire and will need to make a header plate out of styrene sheet with holes for the tubes spaced at the 4.84” (.194” scale) cylinder spacing. I made similar headers for an Arnie Beswick ‘64 GTO a few years back: It doesn’t appear from reference photos that these individual tube headers on Seaton’s car extended out to the outer edge of the body like on this GTO, I’m hoping I can approximate how long they were based on the 40” length (1.6” at scale), these GTO headers look closer to +2” long. I did similar scratch-built headers for a ‘65 Chevelle A/FX build but with collectors: Scratch-building headers can be a laborious time-consuming trial & error effort so bear with me if I disappear for a while. Making them symmetrical is the hardest part. Thanks for following along! John
-
Nice job on Landy’s “last stock wheelbase” drag car. I’m particularly impressed with the painting of the black raised wiring details within the engine bay, not an easy detail to paint.
-
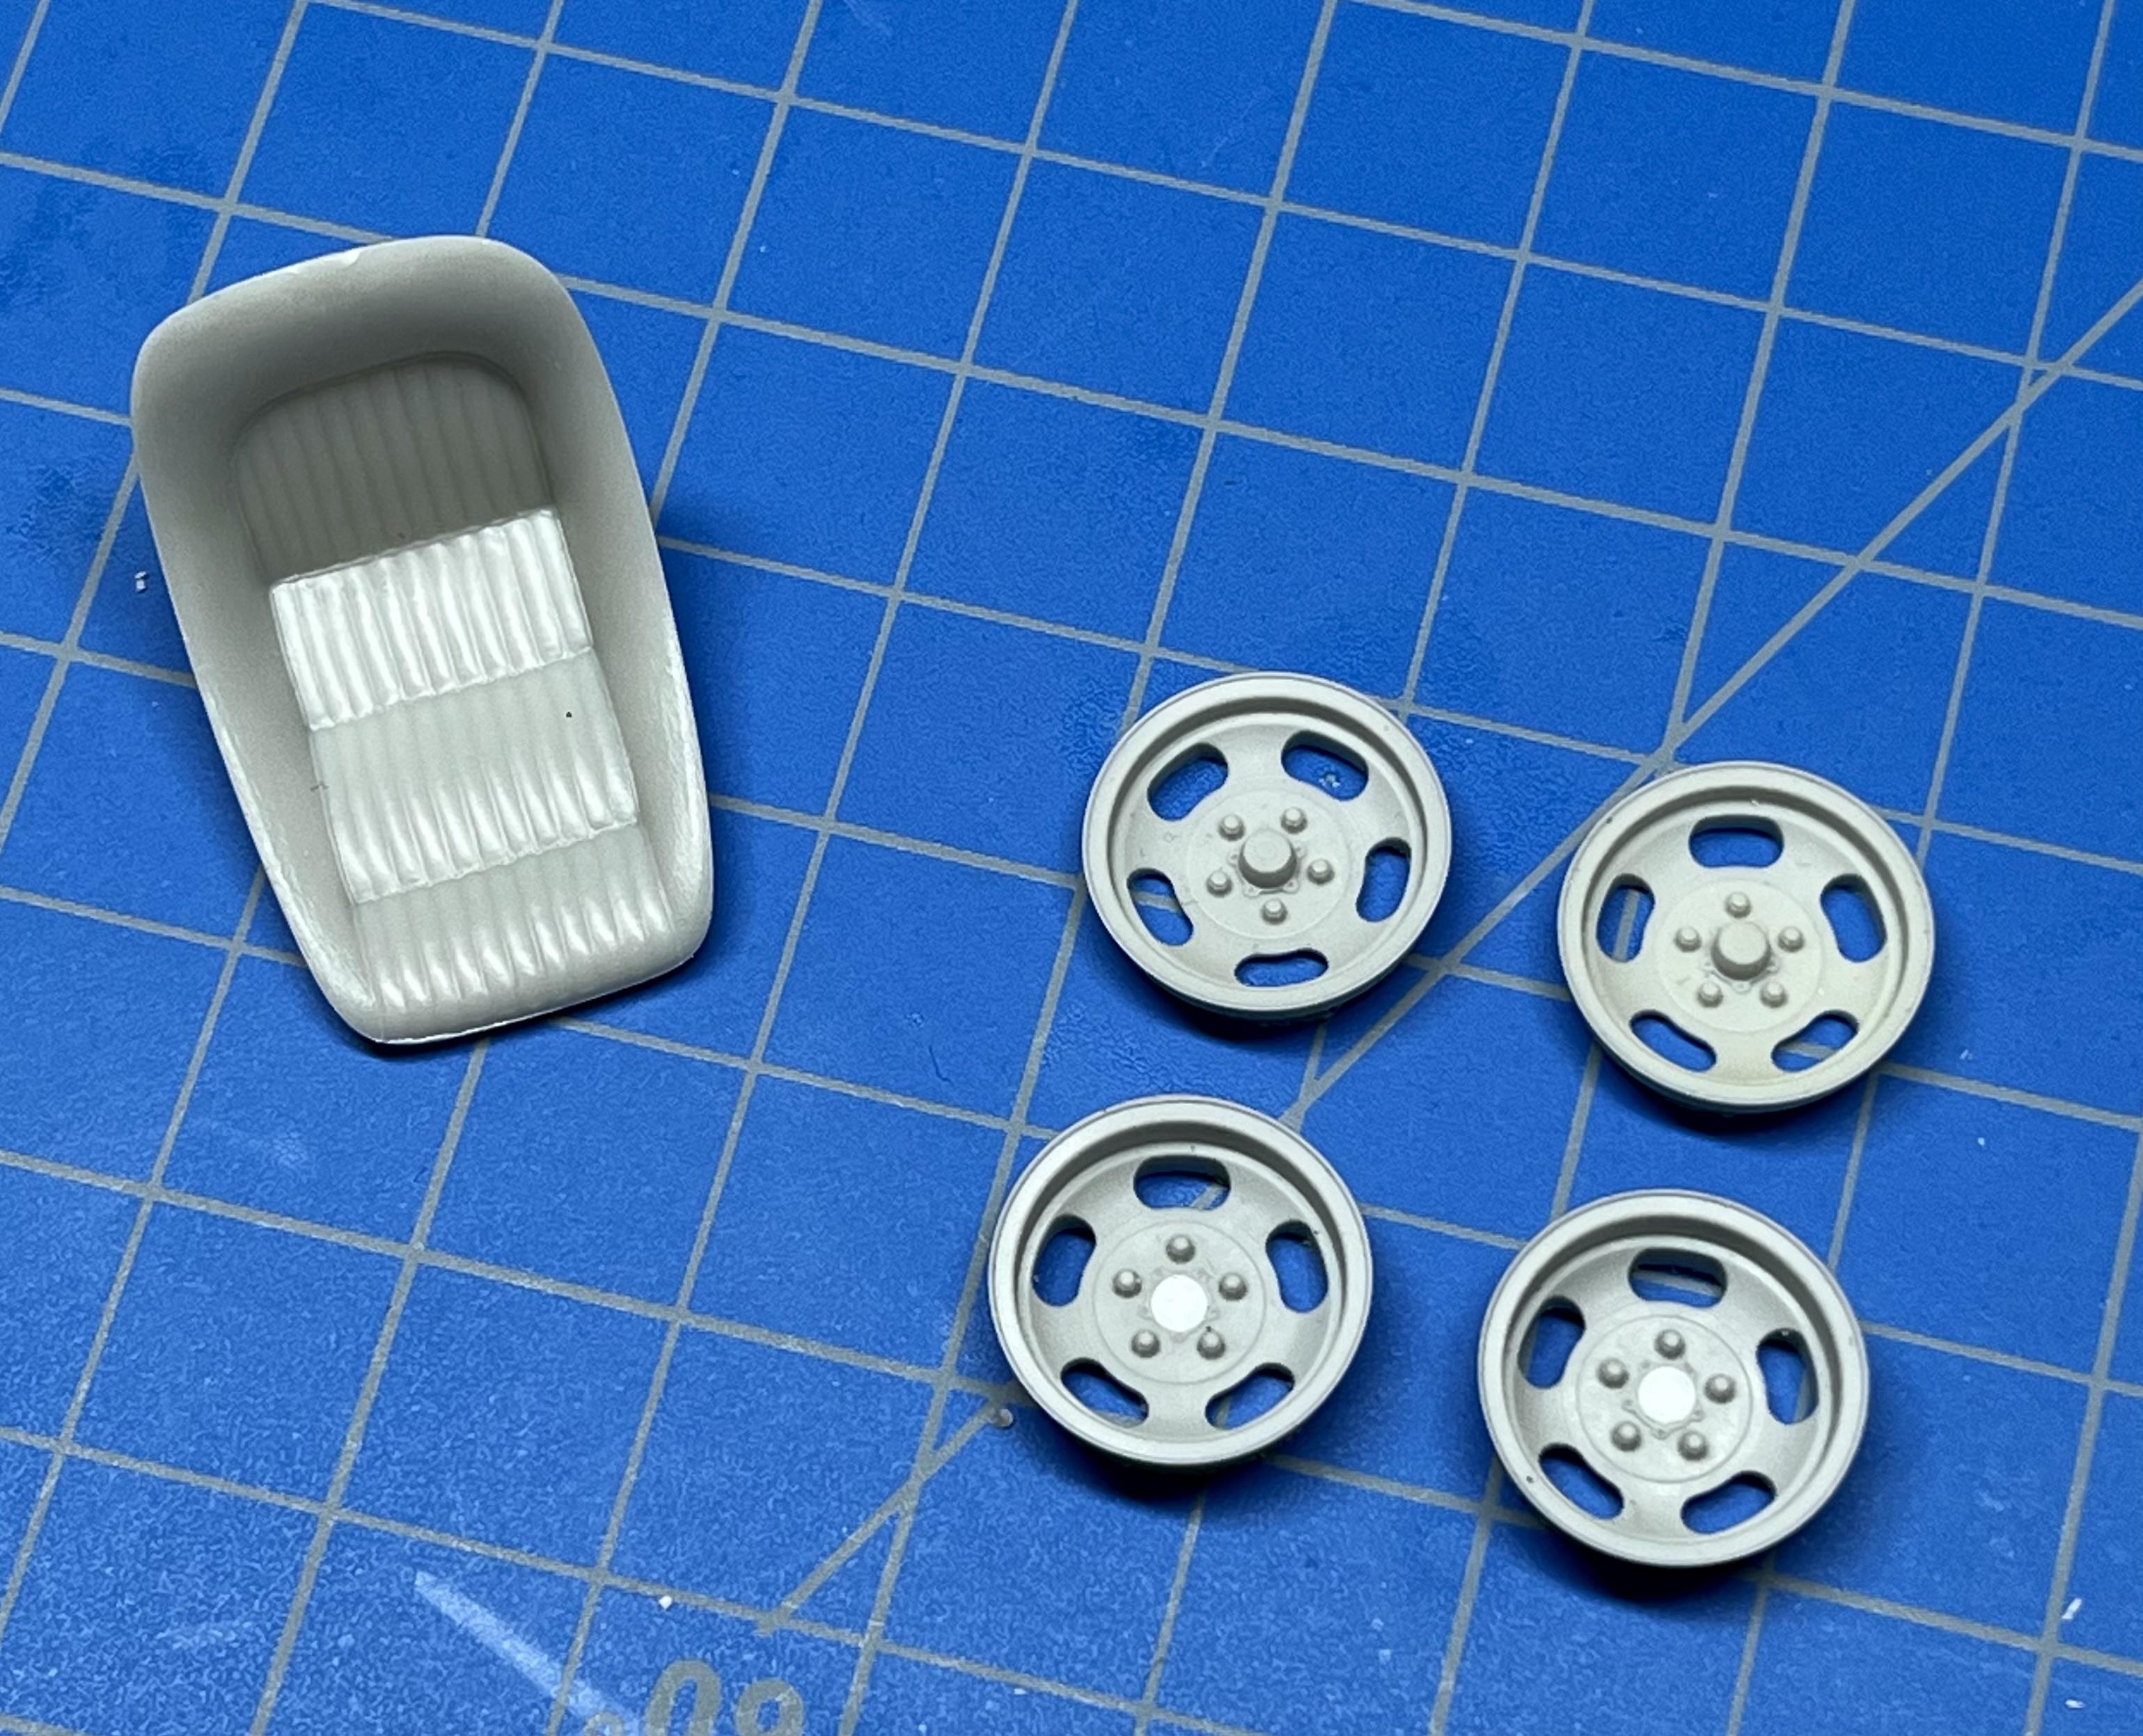
Thanks Mike. Like other drag cars at the time, they raced on a variety of wheels on this car. The triangular slotted Howard’s mags were on several of the pics I’ve seen and unfortunately with the closure of Modelhaus they are now likely unobtainium. I decided to use these Fireball oval slotted wheels because they are close to a few of the photos I have and I prefer the look over the triangular slots. I hope to apply a unpolished light magnesium/ dark worn aluminum Alclad which should contrast nicely with the white & orangery-red two-tone.
-
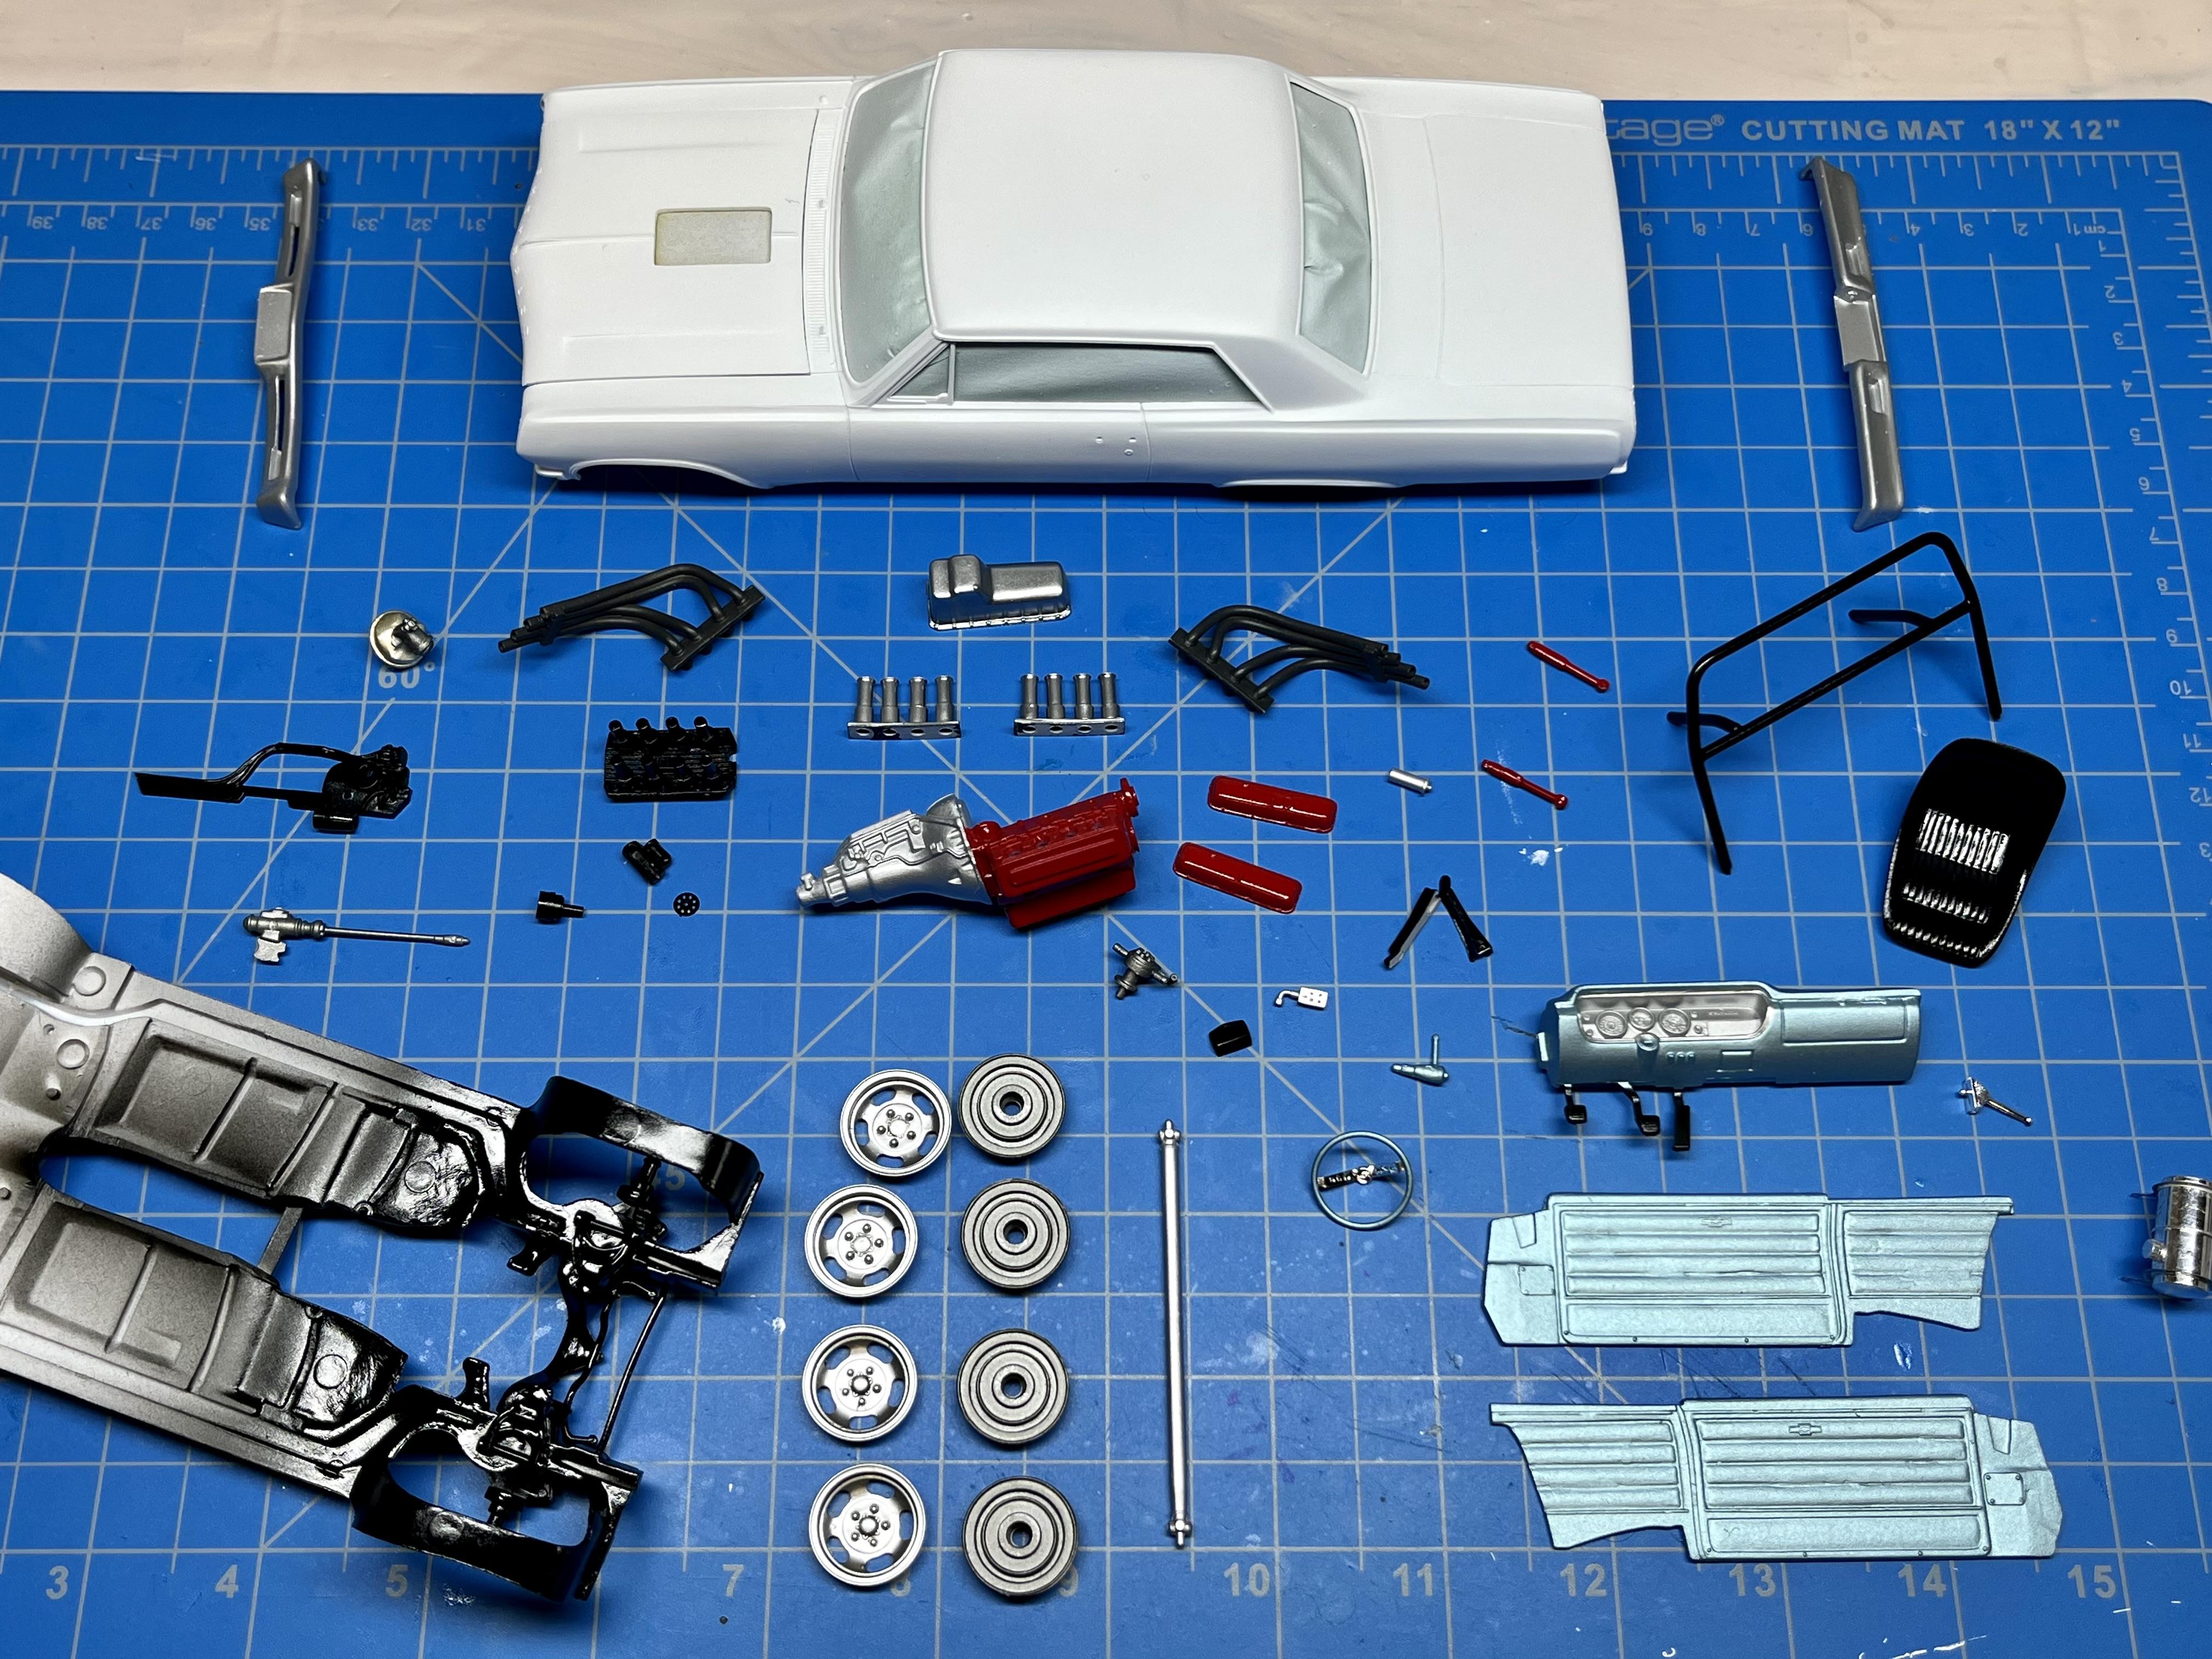
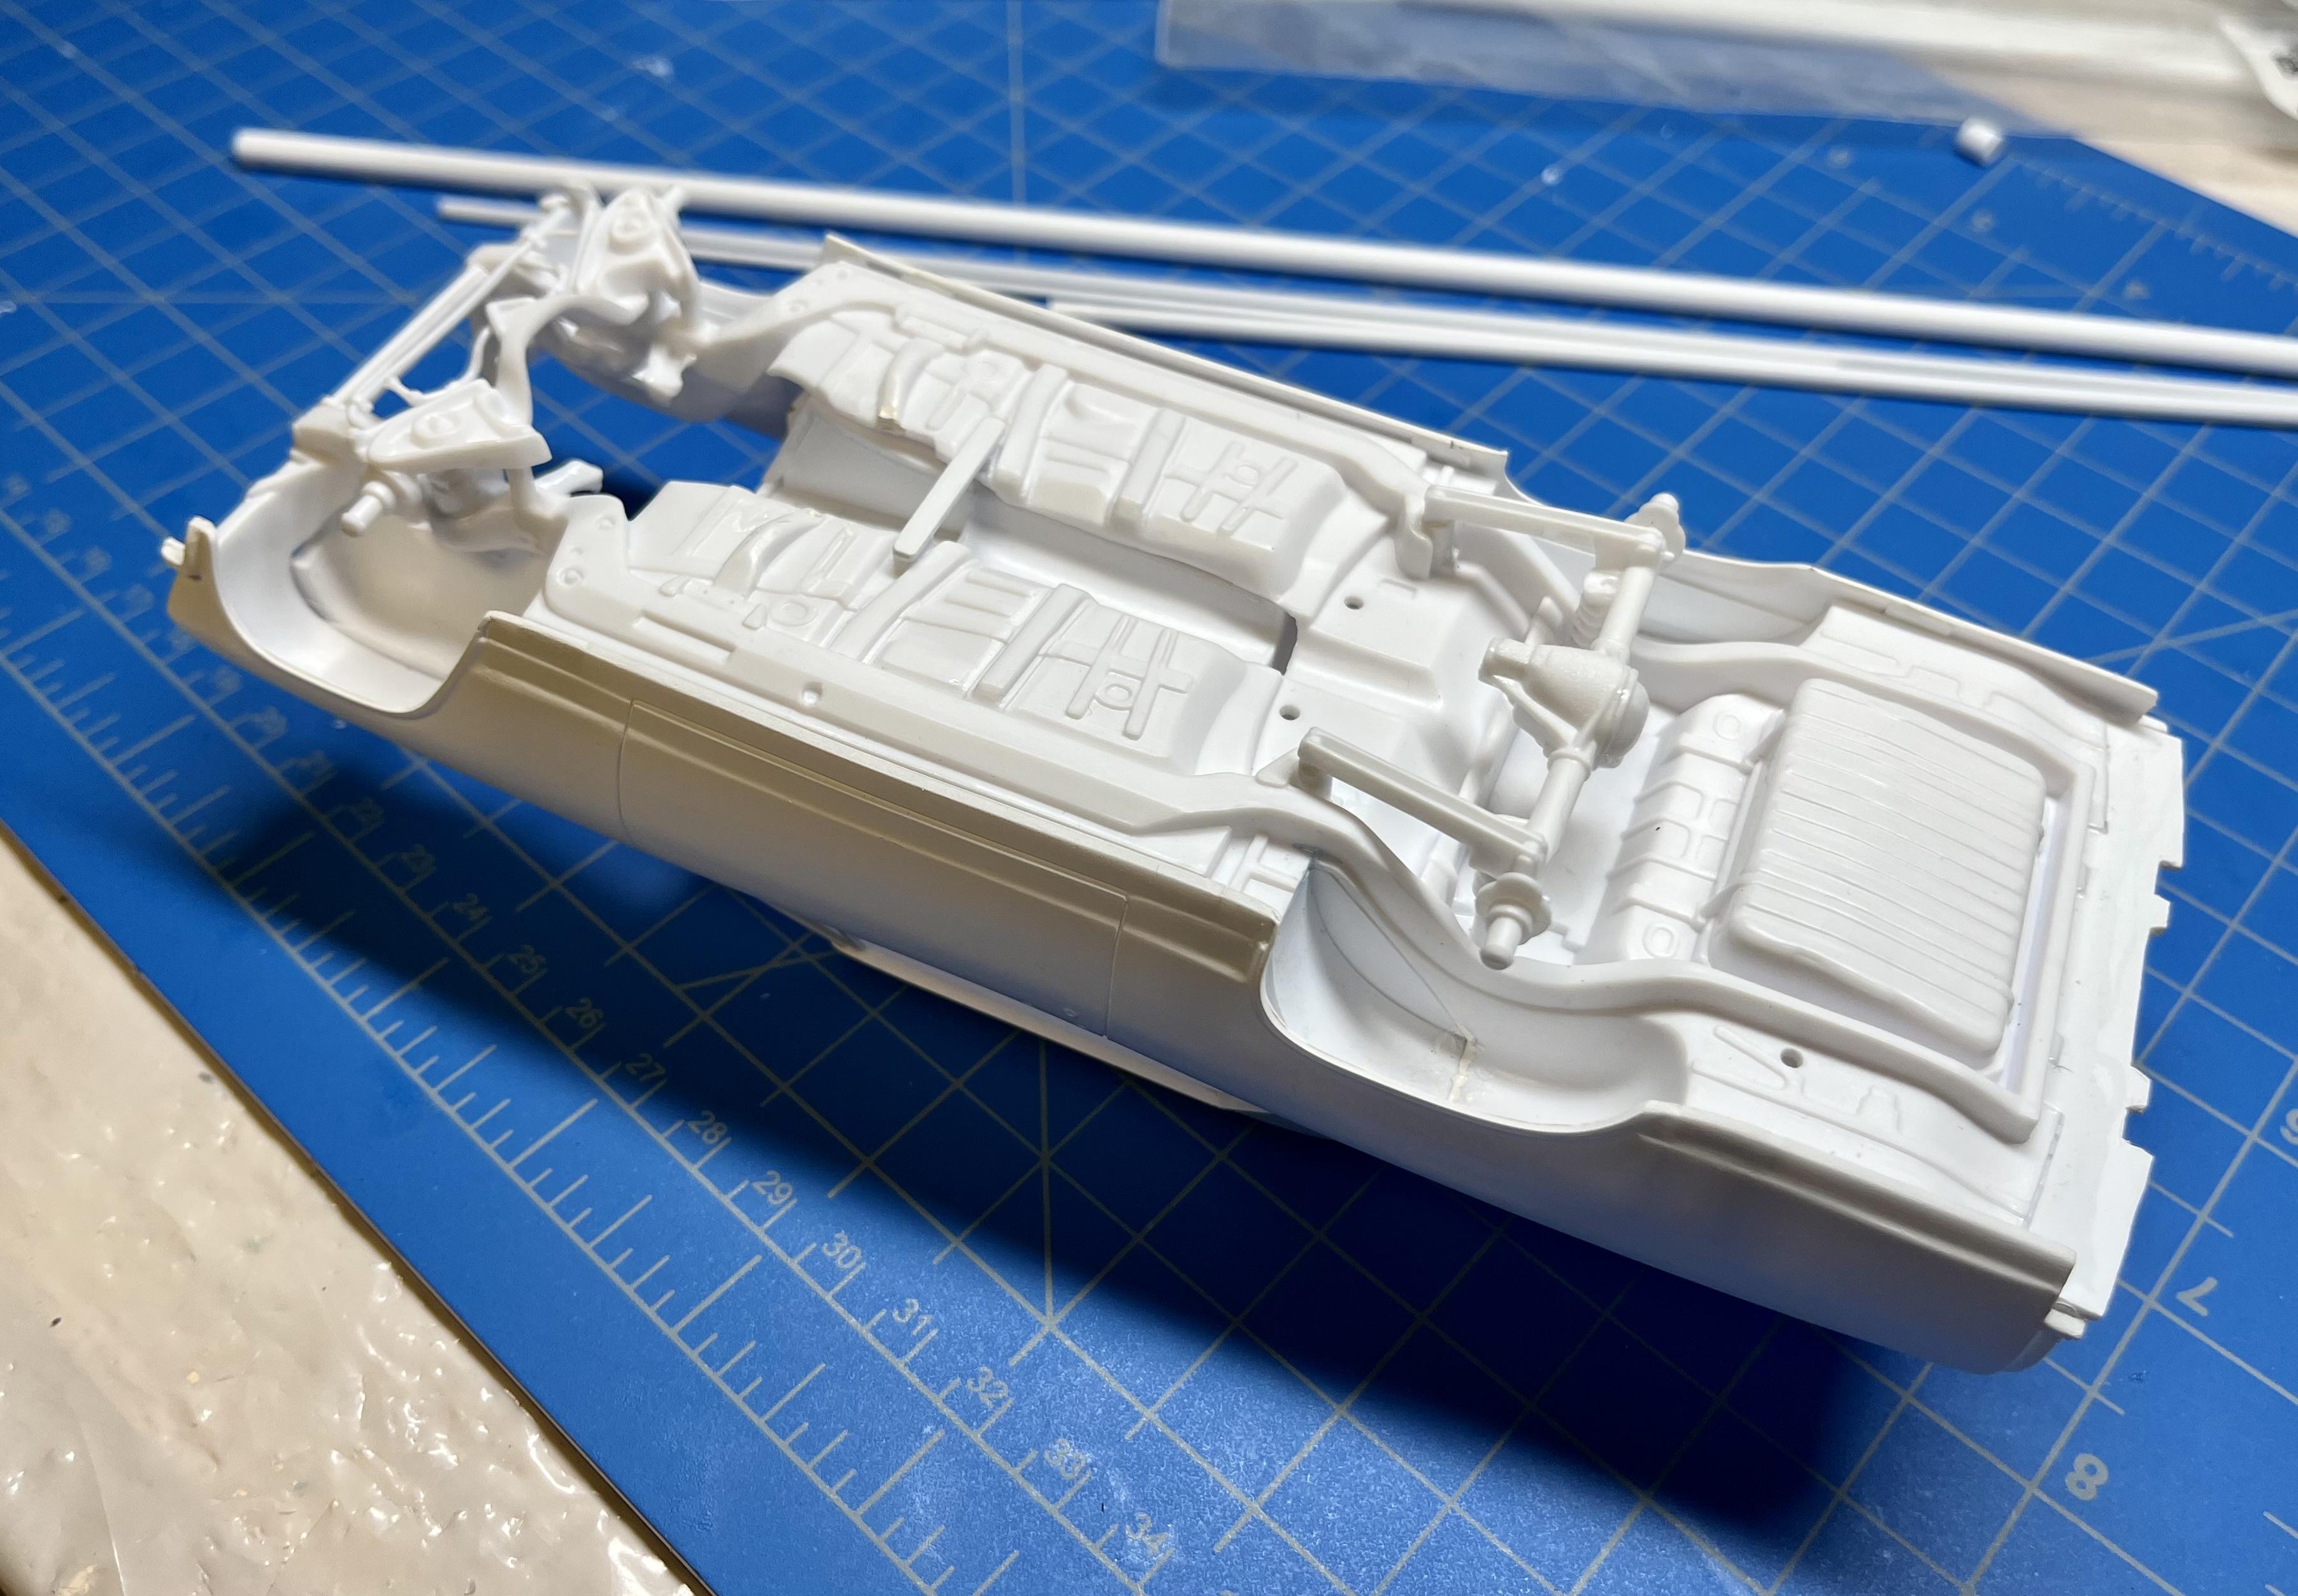
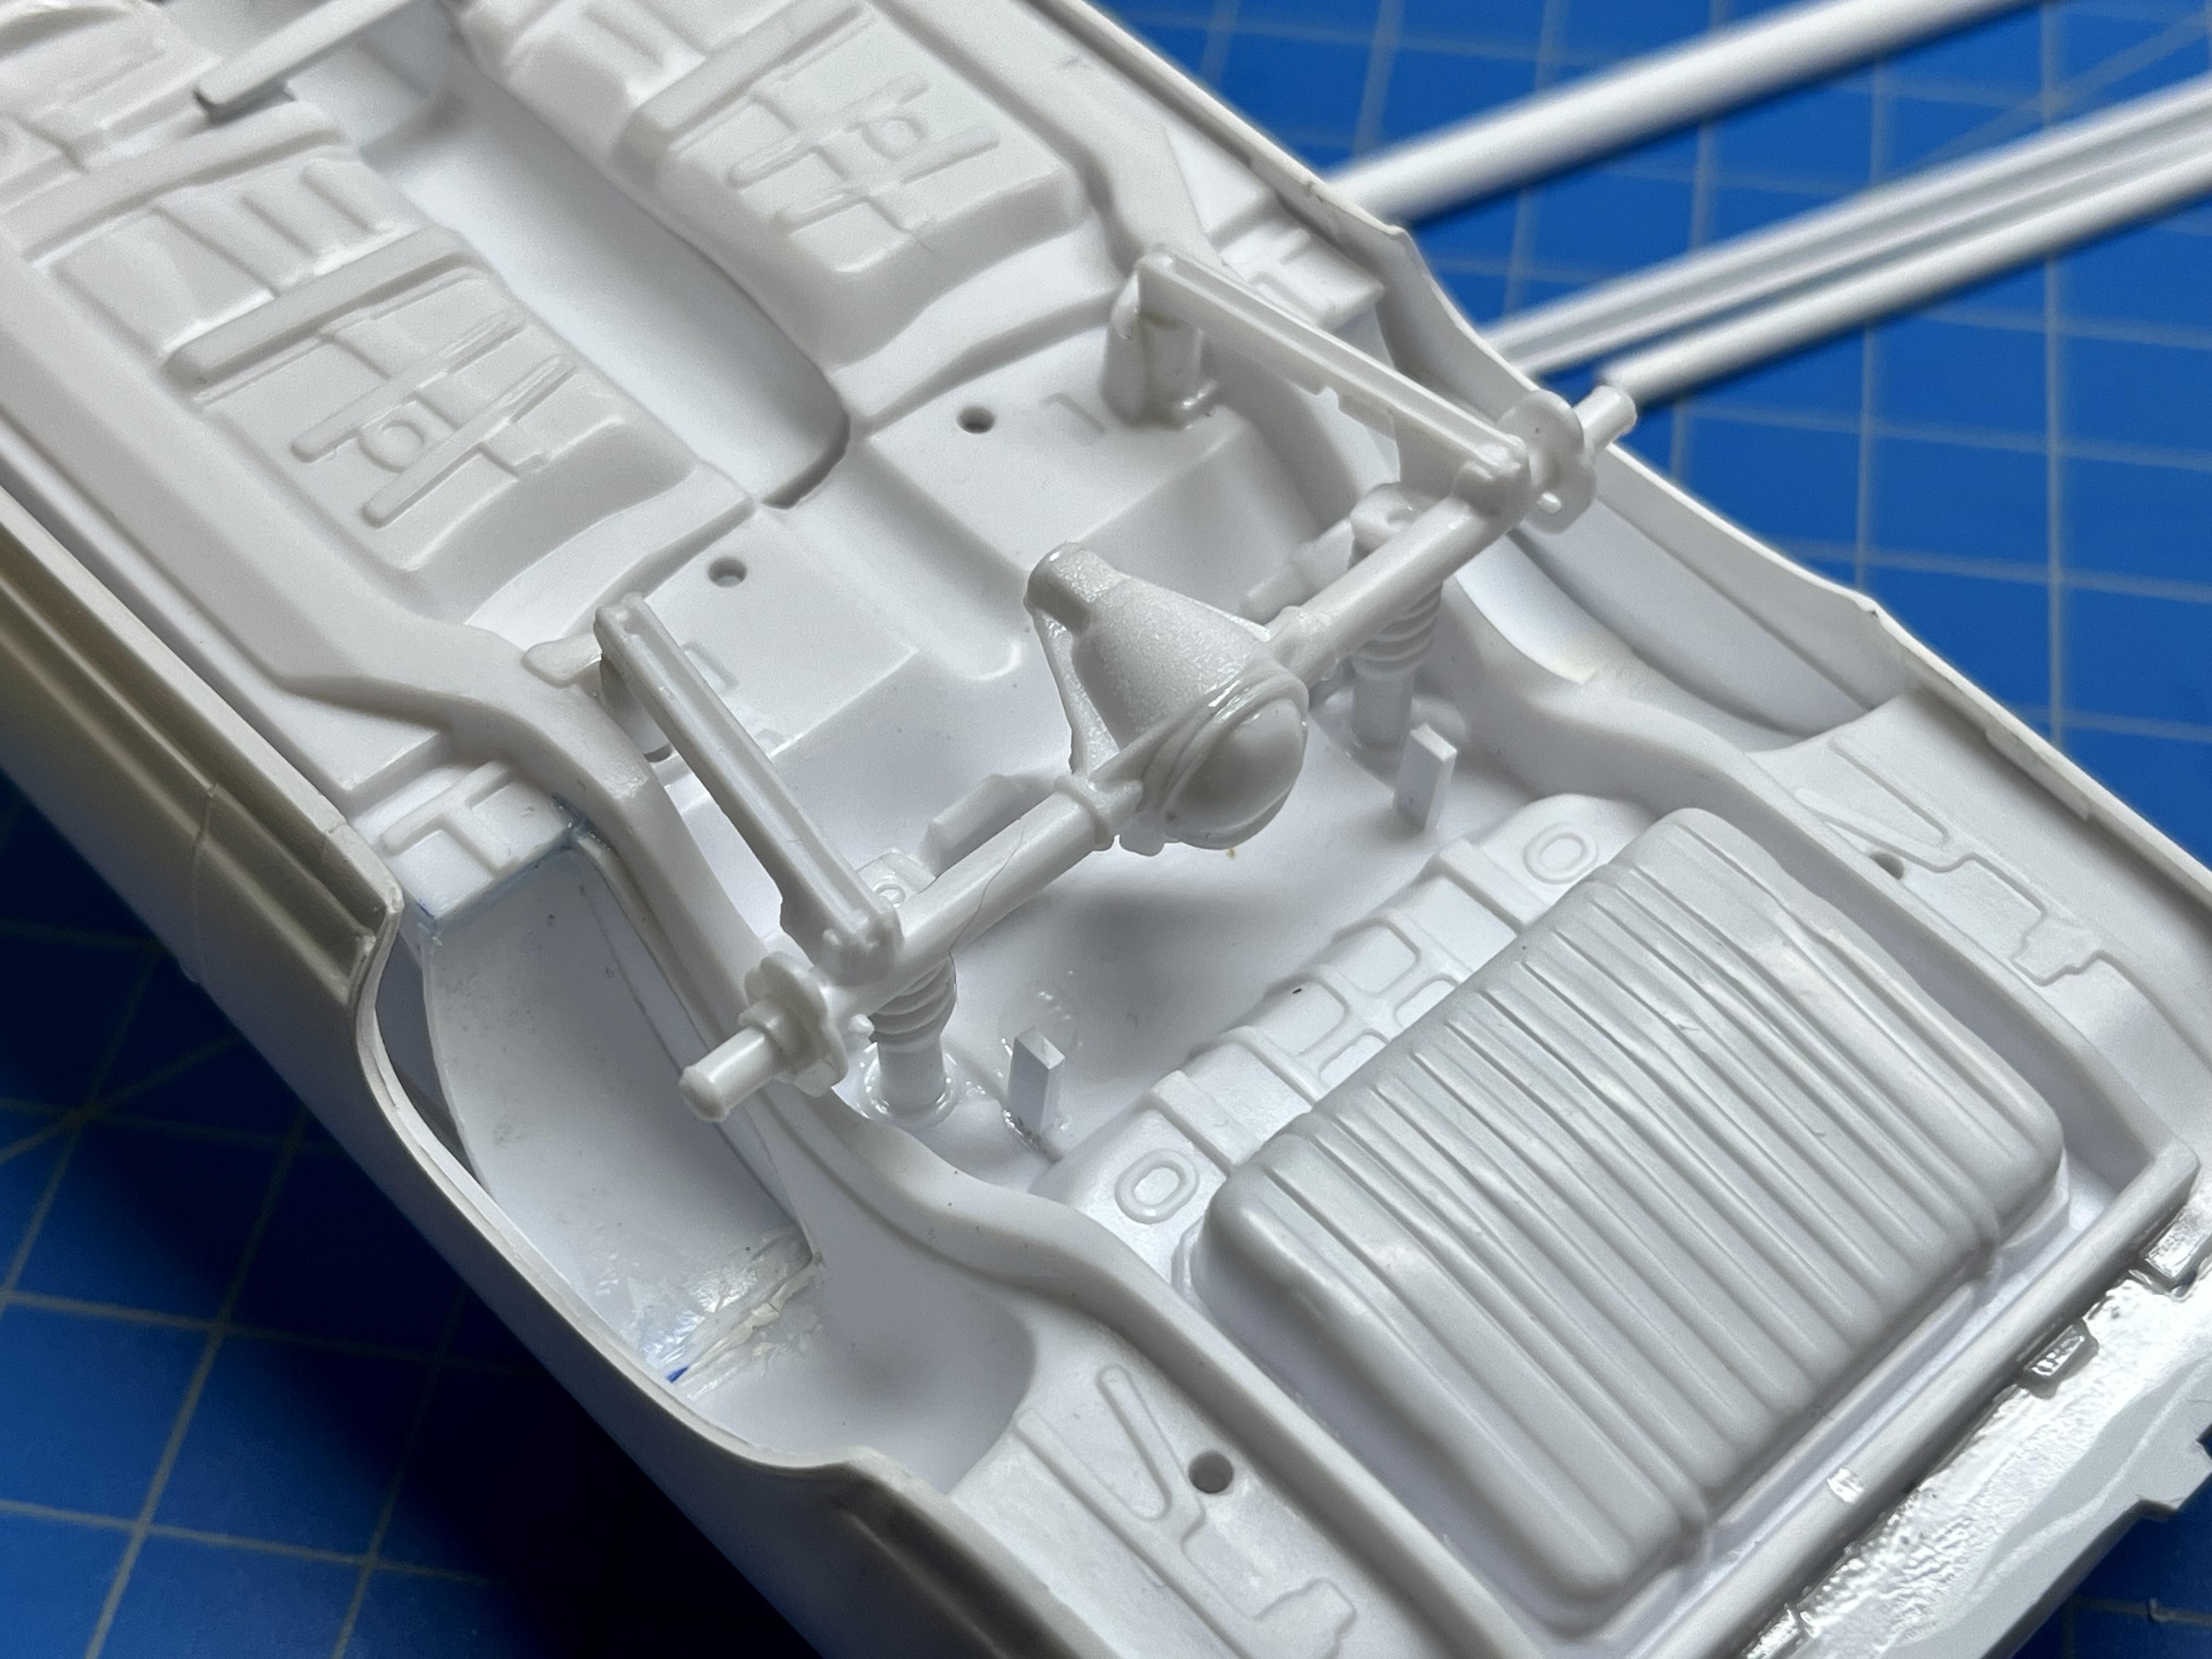
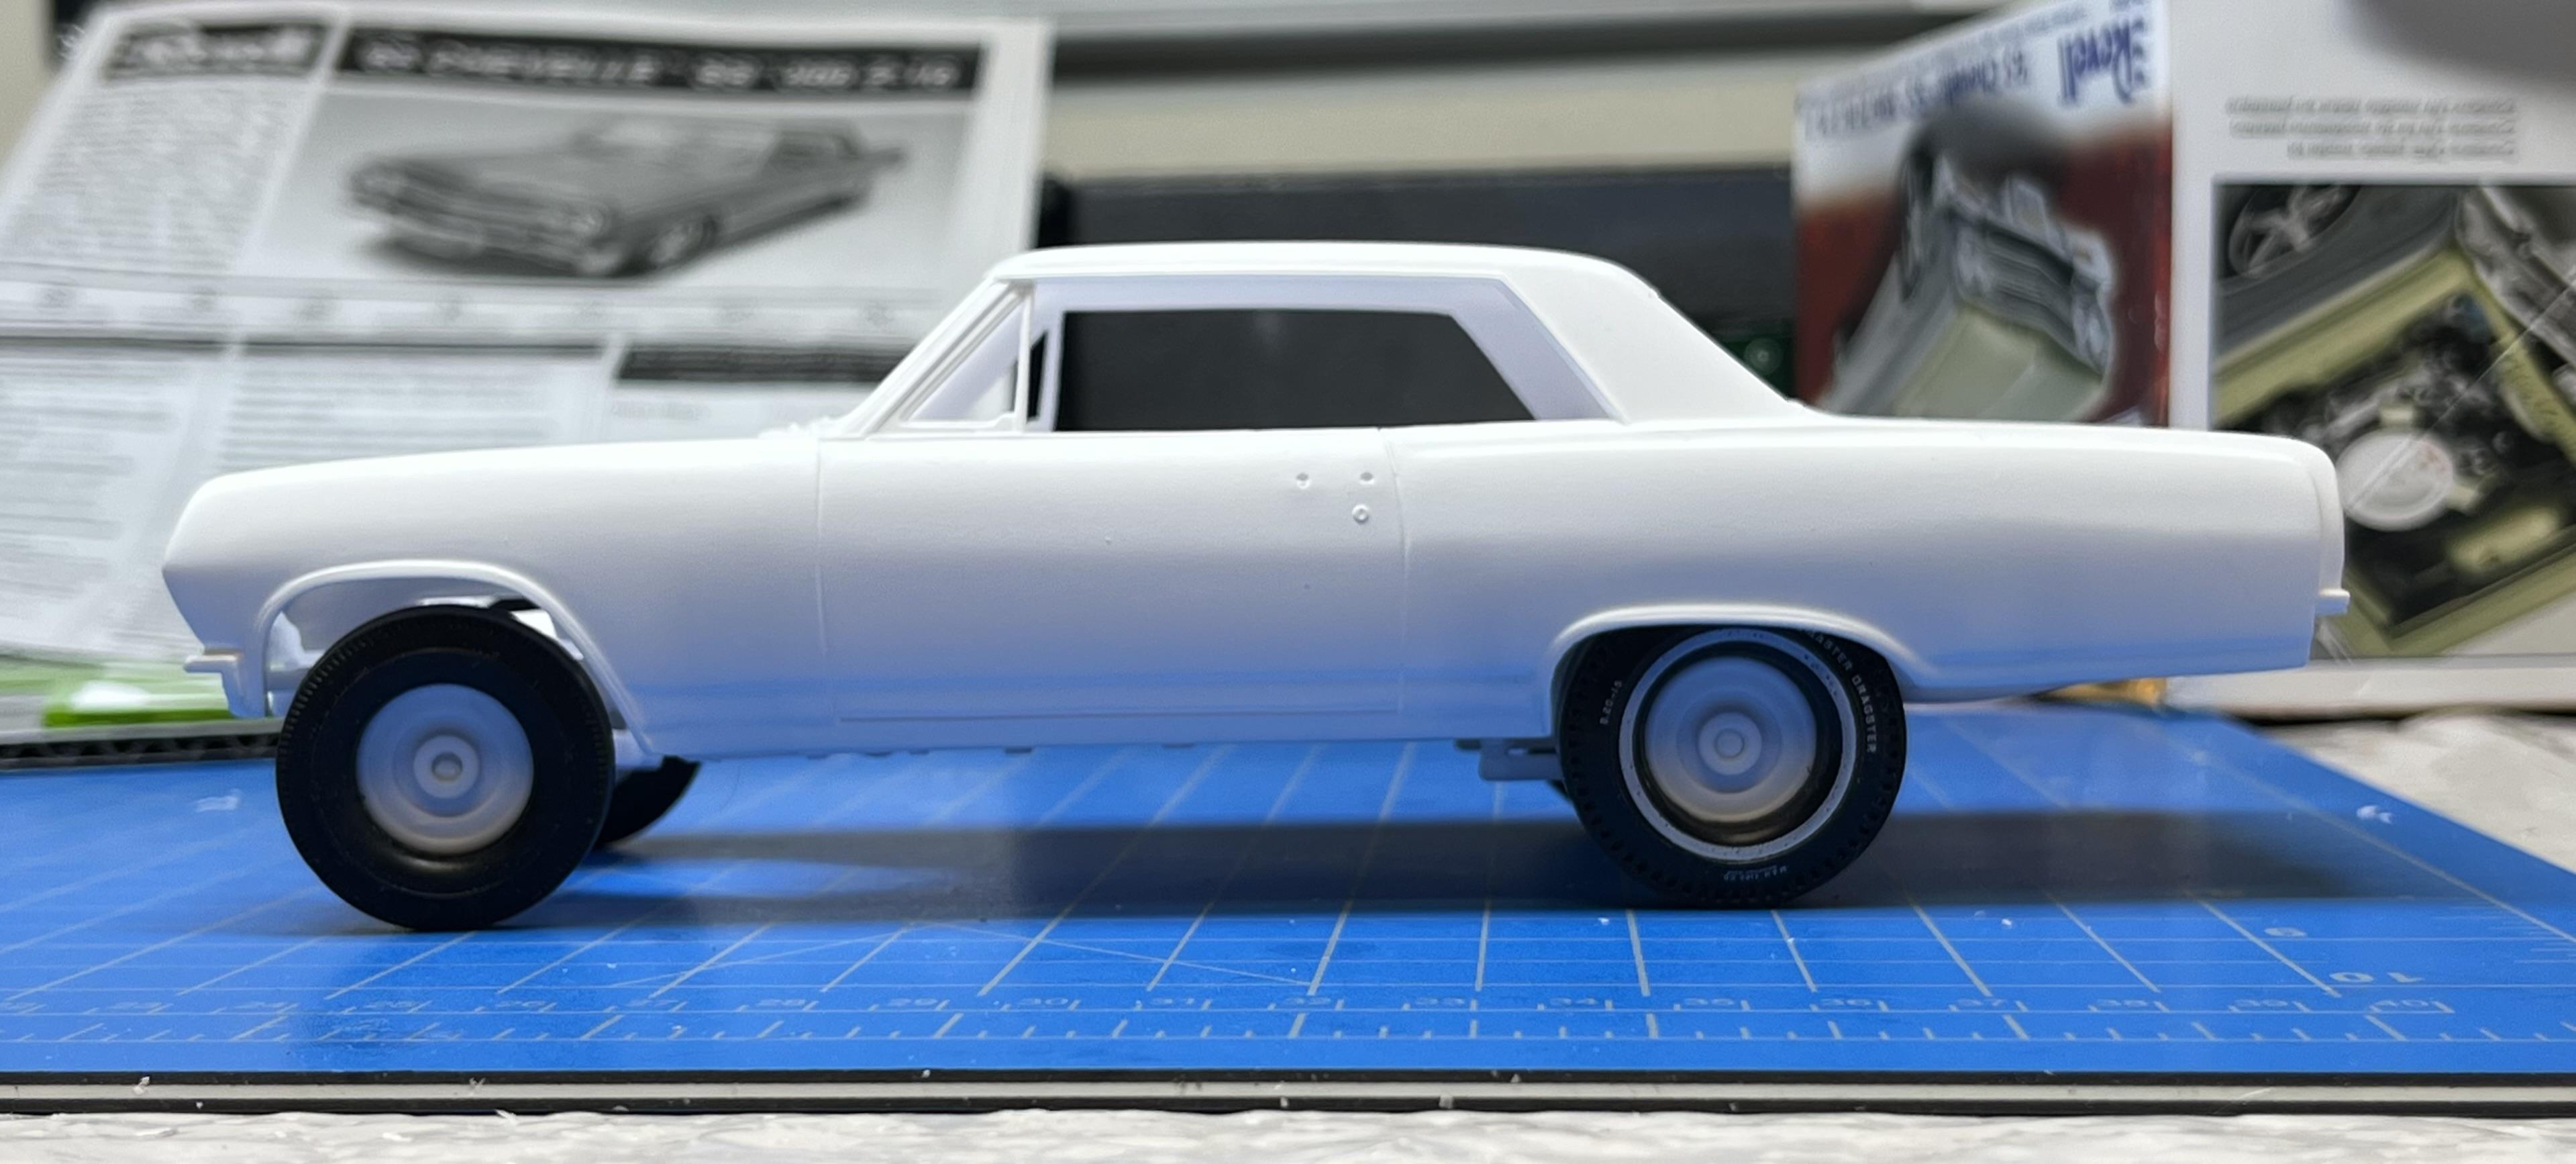
Finally got back on this one after being distracted by a 1/35 Miniart M3 Lee with full interior tank kit I’m doing simultaneously (little risk of parts mix-up!). I mounted front and rear axles/ suspensions with a .18” hike up in the rear and a .20” in the front, total eyeball estimate based on 1:1 photos. I used a lot of Evergreen rods and tubes to make these changes: Here’s a rough reality check with the body/chassis balanced on some wheel/ tires: I’m planning on using some slotted wheels from Fireball Resins I purchased a few years ago and will paint these with black base coat and Alclad aluminum. The rear wheels came with extended center hubs which I had to drill out and replace with styrene rod to simulate the flush axle ends. Here’s a shot of the wheels with driver’s fiberglass seat I’m planning to use: I’m starting to rough-out how I’m thinking of modeling the weird Hilborn FI set-up on this car. The Car Craft reference that I wrote about in a previous post stated that Seaton adapted a Hilborn FI manifold for a 427 Ford to the BBC but then another reference I just received, Super Stock & Drag Illustrated magazine (Oct ‘65), stated Seaton adapted two Hilborn FI’s intended for 4 cyl. Offenhauser Indy engines….maybe they tried both? I’m not going to sweat absolute accuracy and will just try to approximate the set-up shown in the photo in Scott8950’s post above by adding two four/hole manifold plates and short cylindrical extensions around the velocity stacks above the BBC Hilborn FI resin manifold that I have. Other than a little priming here and there, Im going to keep assembling unpainted parts/ subassemblies before doing any serious painting. Nothing worse than having to modify painted parts! John