Chris B
-
Posts
117 -
Joined
-
Last visited
Content Type
Profiles
Forums
Events
Gallery
Everything posted by Chris B
-
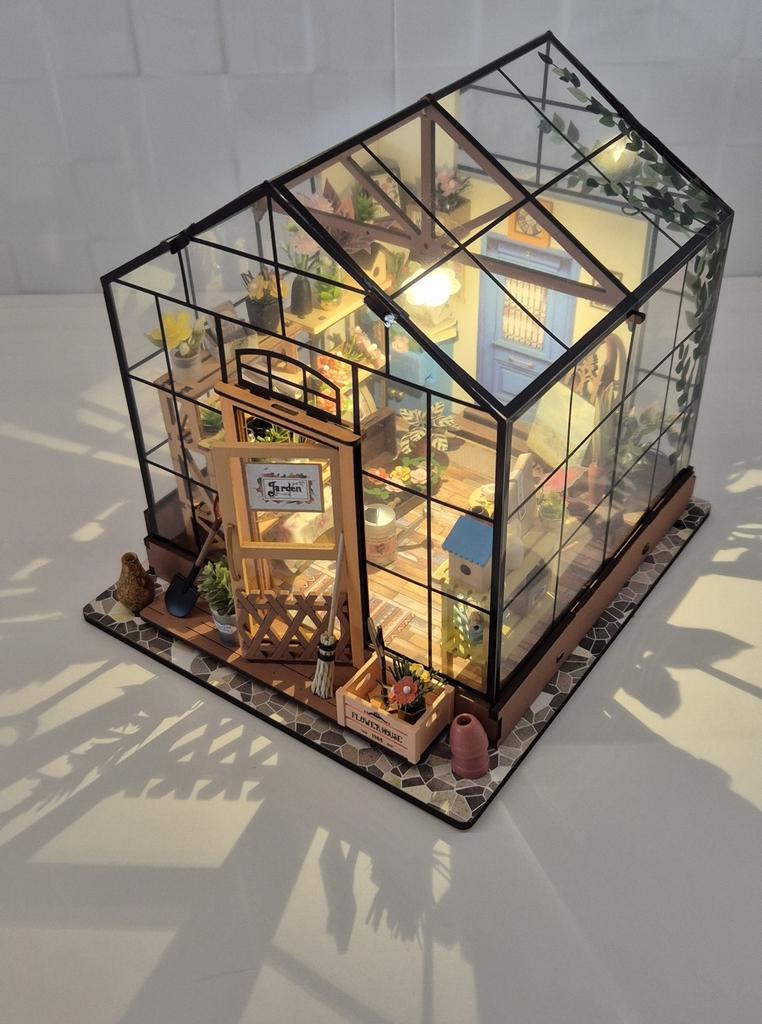
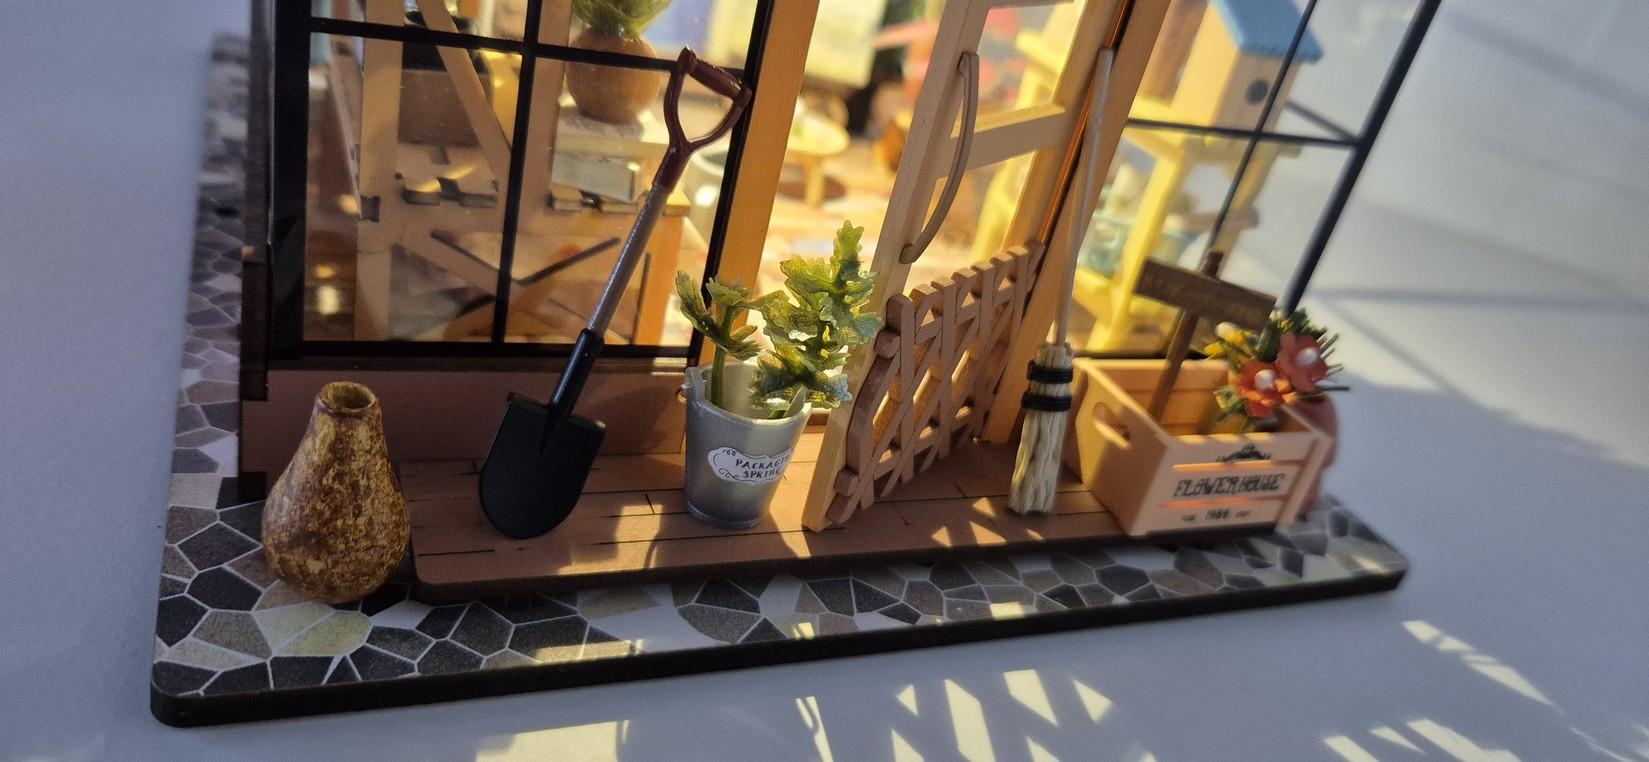
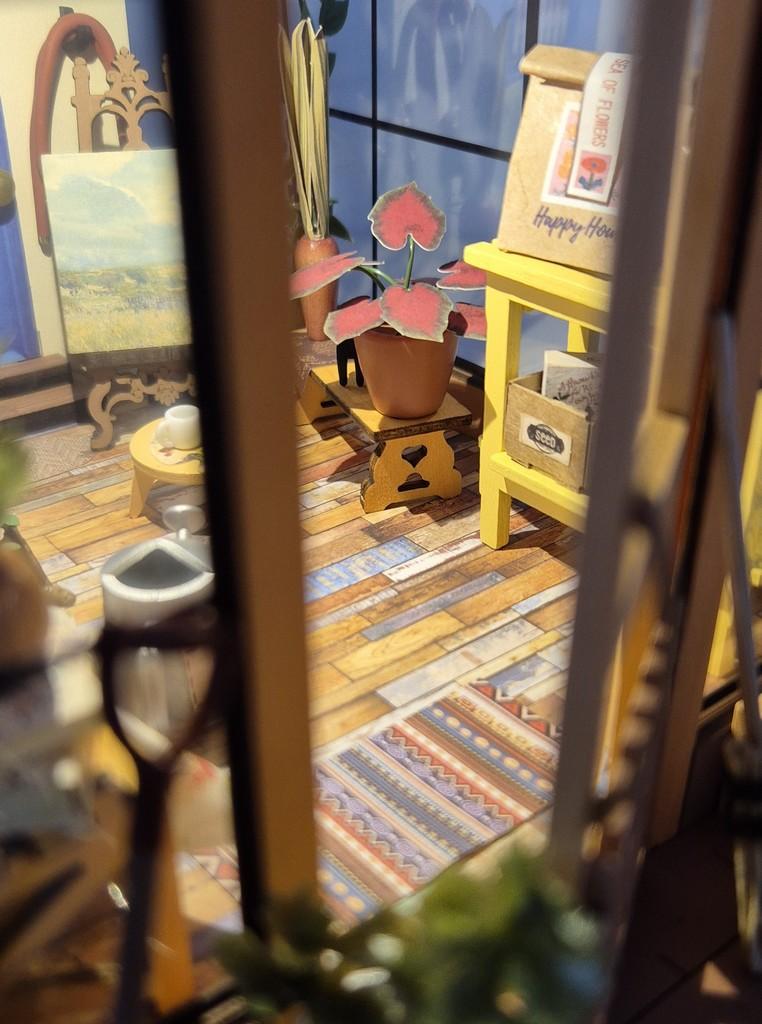
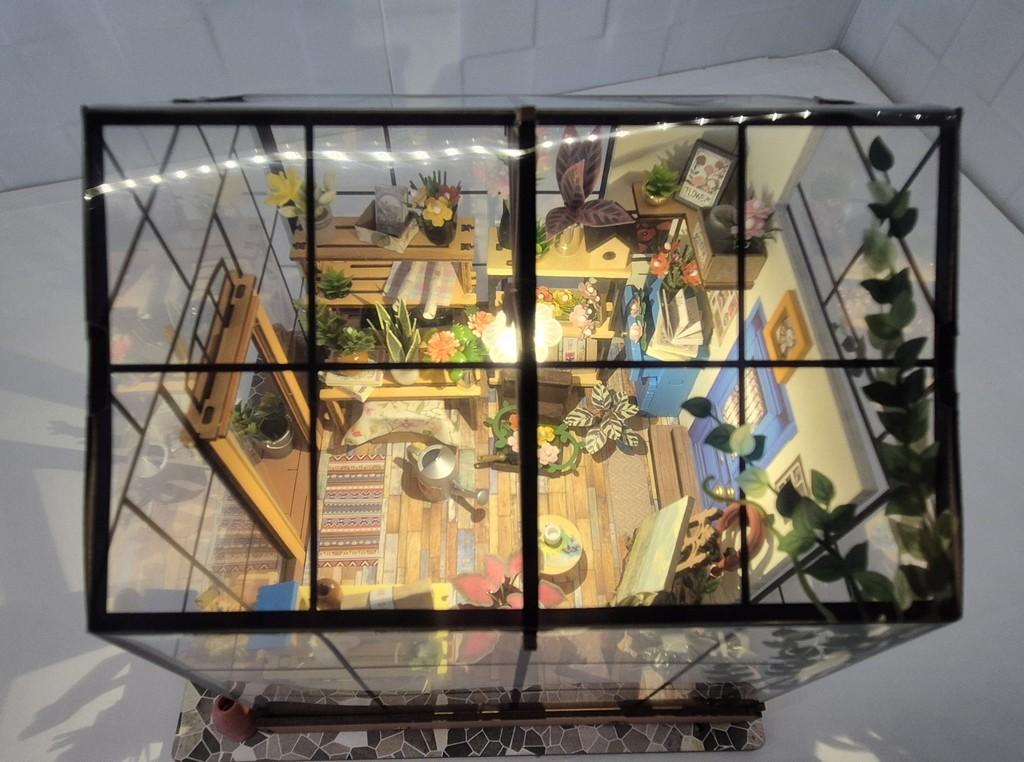
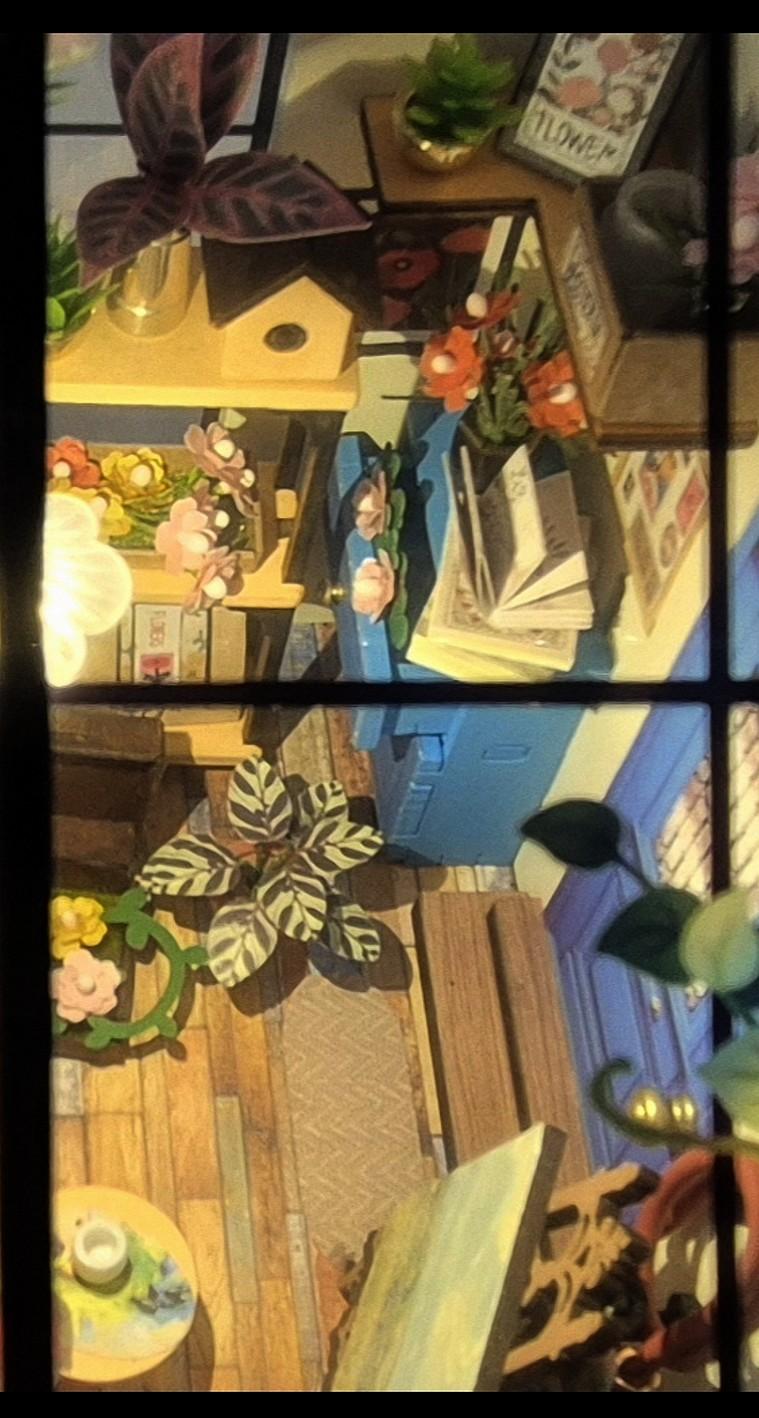
Gosh it's hard to believe it's been 6 months since I posted on here and a lot has happened in that time. The good news is that I have finished the model I started for my Wife of the glass house. It was only supposed to take me a couple of nights but it turned out to be quite an en-devour Needless to say the Wife is very happy with her glass house that she is proudly displaying. I have to say that i did enjoy the challenge that it was, every leaf, flower petal and page in a book had to be assembled and glued etc. Now that it is complete I have dusted of the bench and will be back into getting on with the Phaeton and some photos will be on here very soon. I have had quite a spend up since my last post I've purchased a spray booth and a dehydrator and countless other tools that will be put to good use. I have also come to the realization that a 1 to 1 boat project that i have been working on for some time now due to poor heath issues, Rheumatoid arthritis and a hip that has deteriorated to the point that it frequently dislocates itself when In sitting down will never be finished and I have removed it from the rotisserie that it was on in my garage and put it on the market. Because of this I now have space to build a purpose built model building area with a new bench set up complete with a Hobby zone Modular Workshop System and new shelving for the paint booth and dehydrator etc Thanks for the patience guys. I'll be back real soon with some updates on the Phaeton.

-
Looking forward to see how this one turns out
-

Monogram ‘32 Ford Roadster - The Rebuild
Chris B replied to atomicholiday's topic in WIP: Model Cars
I too will be watching this one I have this kit and have collected the drag city chopped top and Texas 3d blown Ardun and some early Monogram early iron wires for mine -
Monogram ‘32 Ford Roadster - The Rebuild
Chris B replied to atomicholiday's topic in WIP: Model Cars
I Like these wheels in thr right application I think they would have to be shiny polished alloy to match with the color scheme you have gone with -
Thanks Craig I will be back once I have caught up on life
-
The drag link would then be on the wrong side them. I have almost completed new knuckles. Just lacking time due to other commitments at the moment but will be back into it soon
-
I stumbled upon the A4 Garage channel on YouTube a few weeks ago and have literally been watching all of the videos in my spare time. Must say I have picked up many tips from his builds and have investigated the availability of some of the supplies he uses as well as tools. I was pleased to see in one of his builds the lap belts he uses as I had been waiting for the only lap belt that I knew of to come into stock in my usual model store and I was presently surprised to see that they have the ones he uses in stock. I plan on using them in this build. I am currently working on a model of a different sort for my wife at the moment and its turned out to be a bigger mission that I expected
-
Thanks
-
1937 Ford Pickup
Chris B replied to ModelcarJR's topic in WIP: Model Trucks: Pickups, Vans, SUVs, Light Commercial
Looks very nice. Love the color combo -
Gosh this all looks very familiar. Very similar to what I am doing on my 32 Phaeton
-
I have to say that I am really enjoying the challenge Dennis. Time has not been on my side lately but I can say that I have started to re-model the steering knuckle and have also put some thought into creating the tie rod and drag link from the speedway style steering box. I intend to solder some brass tube to make these and have collected up the appropriate size tubes and have also made a start on making some rear telescopic shock absorbers. I have had family here over the Christmas period and am joining more family for New Years and then hopefully will be back into the build. A late Merry Christmas and I hope you all have a fantastic New Year
-
I have to say that i am loving the look of this one. Keep up the great work
-
I'm watching with intent. Looks good so far
-
Almost finished with my chopped Revell '32
Chris B replied to the60falcon's topic in WIP: Model Cars
That is very nice -
Well after a bit of hunting around looking for the missing steering knuckles that go with this front axle and finally finding them it was obvious that they were not going to work meaning I had to either find something else or attempt to make something. I looked in my parts stash but couldn't find anything suitable so here is my attempt at making something I bent some wire to the correct shape and glued styrene to the wire to resemble the tie rod bosses and mount to the stub axle initially I thought it looked a little out of scale but when comparing them to the original kit parts it looked close. I did however discover a problem, when I sat the engine in the chassis the blower pulley is in the way of the tie rod that runs from one side to the other. Back to the drawing board. There is no way that I can make the tie rod work behind the front axle so I'm going to have to re-make the steering knuckle in reverse with the attachment for the tie rod going forward and the tie rod will have to be in front of the axle. I have also found some better wire that is thinner and more pliable so I can scale down the size of the knuckle a little.
-
I must say that i have really enjoyed following along with everyone's progress and i hope that some time I can join in in a future build off
-
Agreed, hopefully life is a bit more on track now and I can spend some more time on this build. unfortunately I have discovered that I have misplaced some vital parts from the front suspension, I have reached out to the local modelling community in the hope that someone may have them in their parts stash otherwise I will have to attempt to scratch build the missing parts
-
Thanks Andy. It took me a while to figure out what to do with this kit but I'm pretty happy with the way its turning out
-
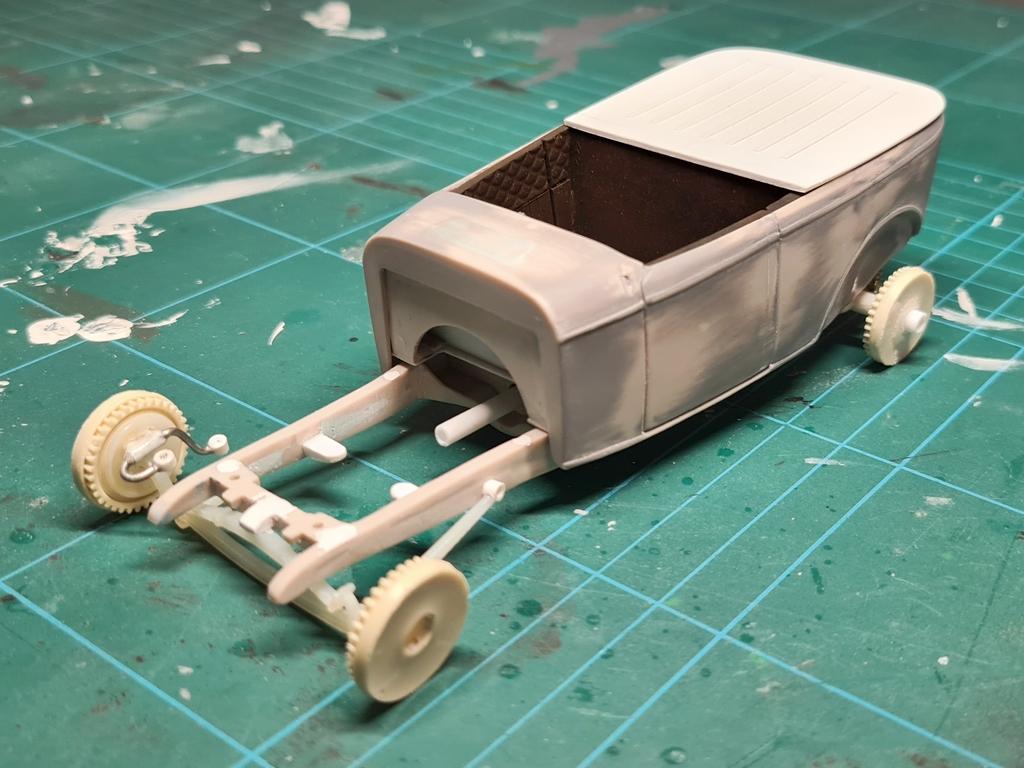
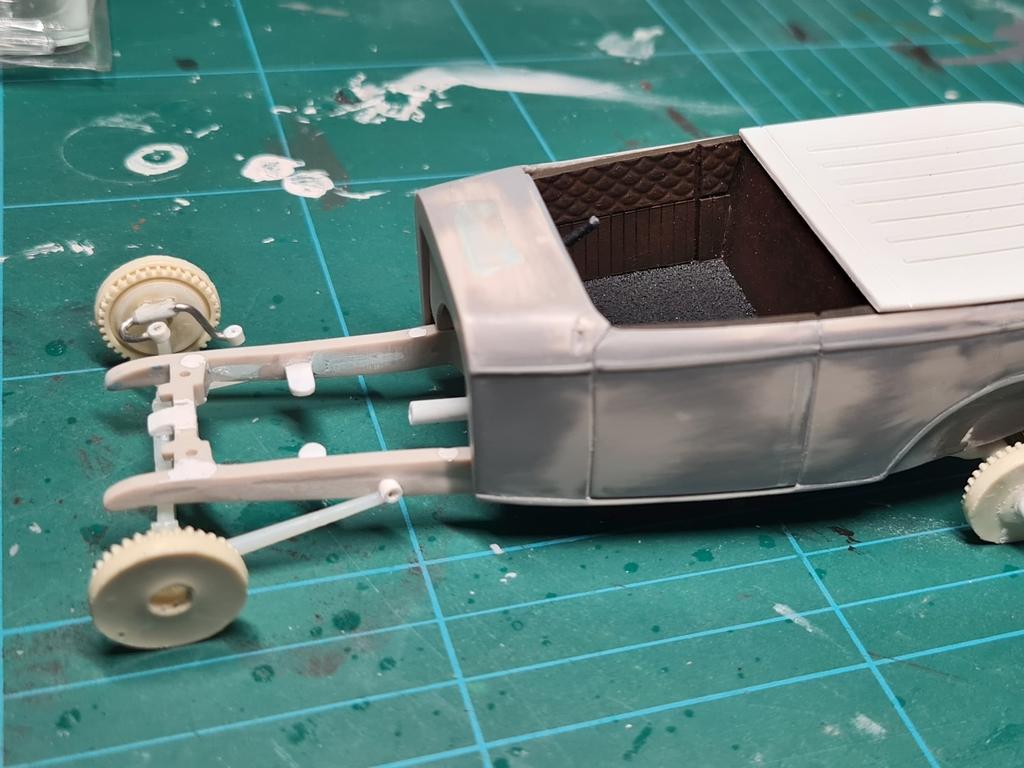
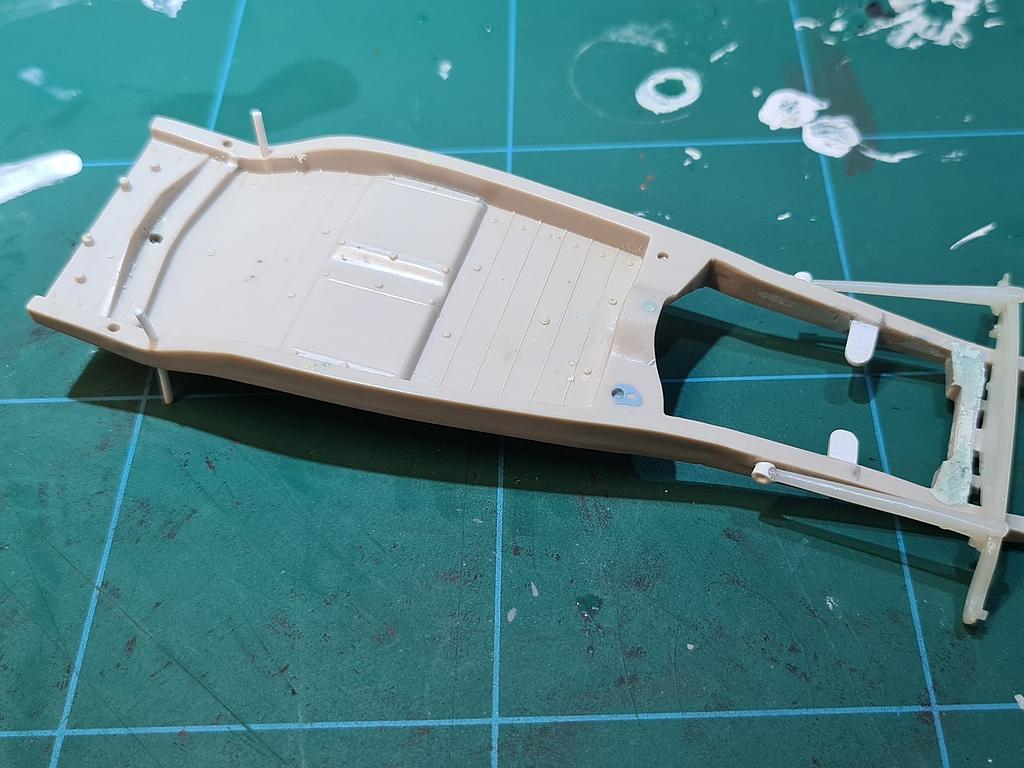
Well it's been a while since I made a post on here and a lot of things have happened since. I've struggled a bit to get the motivation to get back into the swing of things. Since my last post my foot has healed as well as it can and I am awaiting the next step of the surgery. This has been postponed a year as since the surgery and me going back to work there was a large restructure and myself and several other staff were asked to take voluntary redundancy or apply for different positions within the company. I lost my job of 8 1/2 years and was moved to another role within our company network but at a different site. Right at the time that this happened my Wife had a cancer scare. The specialists believed that she had melanoma in her big toe nail and she had surgery to remove it. Much to the surprise of everyone specialists included it came back clear and now she is waiting for that to heal and to top things off she started a new job on the day before she had the surgery so it's been fun and games. Anyway on to the build. I have struggled a little on how to assemble the components of the rear end in a sturdy enough way that it would support the finished model. First of I drilled some holes in the rear chassis rails and inserted styrene rods to support the axle while assembling the rest of the axle/spring etc. these pins will be chopped back and filled once the assembly is complete and sturdy. I also shaved back the front of the rear cross member to allow for clearance and drilled a hole in the center of the cross member to take a locating pin that i glued to the spring Sorry for the blurry photo something is up with the camera on my phone that I have used to take the photos. Next up I had to lengthen the drive shaft and as the original axle would have had a sliding ball arrangement that attached to the back of the gearbox I cut a piece of styrene tube that slides over the drive shaft tube and cast a small ball by pressing a ball bearing into modeling clay and poring some resin into it then drilling a hole in the center once cured. I drilled a hole in the chassis at the rear of the gearbox mount cross member for this to pass through again to offer more support and once everything fits nicely I can cut that back to length. I still have a bit of fettling to do and a couple of small detail items to get the desired affect with this slip joint setup. I also drilled out some styrene tube and added to the ends of the axles to support the wheel backing plates/drums etc I drilled some holes through the spring and into the rear of the axle to take some metal pins to help hold the spring to the axle solidly and next I will replicate the shackle mounts on the diff. When finished I hope the pins will not be visible. The backing plates had a hole with a flat on one side. I removed the flat and glued a piece of styrene tube inside the hole and then drilled the styrene larger to take the tube that slips over the end of the axles to make the wheel fitment snug. As far as the rear end goes now all I need to do is make the mounts for the spring shackles and some mounts for shocks but I am going to leave the rear as it is for now and start mounting the front wheels as i think I may need to sink the rear spring further into the chross member to get the stance right. Unfortunately I have misplaced the parts that mount the spindles to the front axle. Hopefully I can find them somewhere.
-
Wow this is really starting to come together here Great job
-
Loving this look Bil I can't wait to see how this one turns out
-
That's some really nice work with those hood sides Paul You are doing a great job
-
Yes I have very good circulation They checked it on Thursday
-
I feel your pain with the numb toes, Over the last year or 2 I have slowly been loosing the feeling in the toes on this foot also and since the surgery it is worse. It drives me made, I'm always taking my sock of trying to untangle my toes fro my sock but it's not tangled. I find it very frustrating. I also have pain in my lower back I have early onset of Osteoarthritis in my right hip and this foot issue is aggravating the hell out of that. It's a bugger getting old. I have worked all my life as an automotive tech which is pretty hard on the body and now at 60 I'm starting to pay for it.
-
hey Zippy I have only just realized that I have been subscribed to and following you on your YouTube channel for several years I didn't realize that you were posting your builds here on this site. I have now started to follow and look back over your builds here also You do good work