Jürgen M.
-
Posts
1,678 -
Joined
-
Last visited
Content Type
Profiles
Forums
Events
Gallery
Everything posted by Jürgen M.
-

Pete 352 day cab
Jürgen M. replied to Jürgen M.'s topic in WIP: Model Trucks: Big Rigs and Heavy Equipment
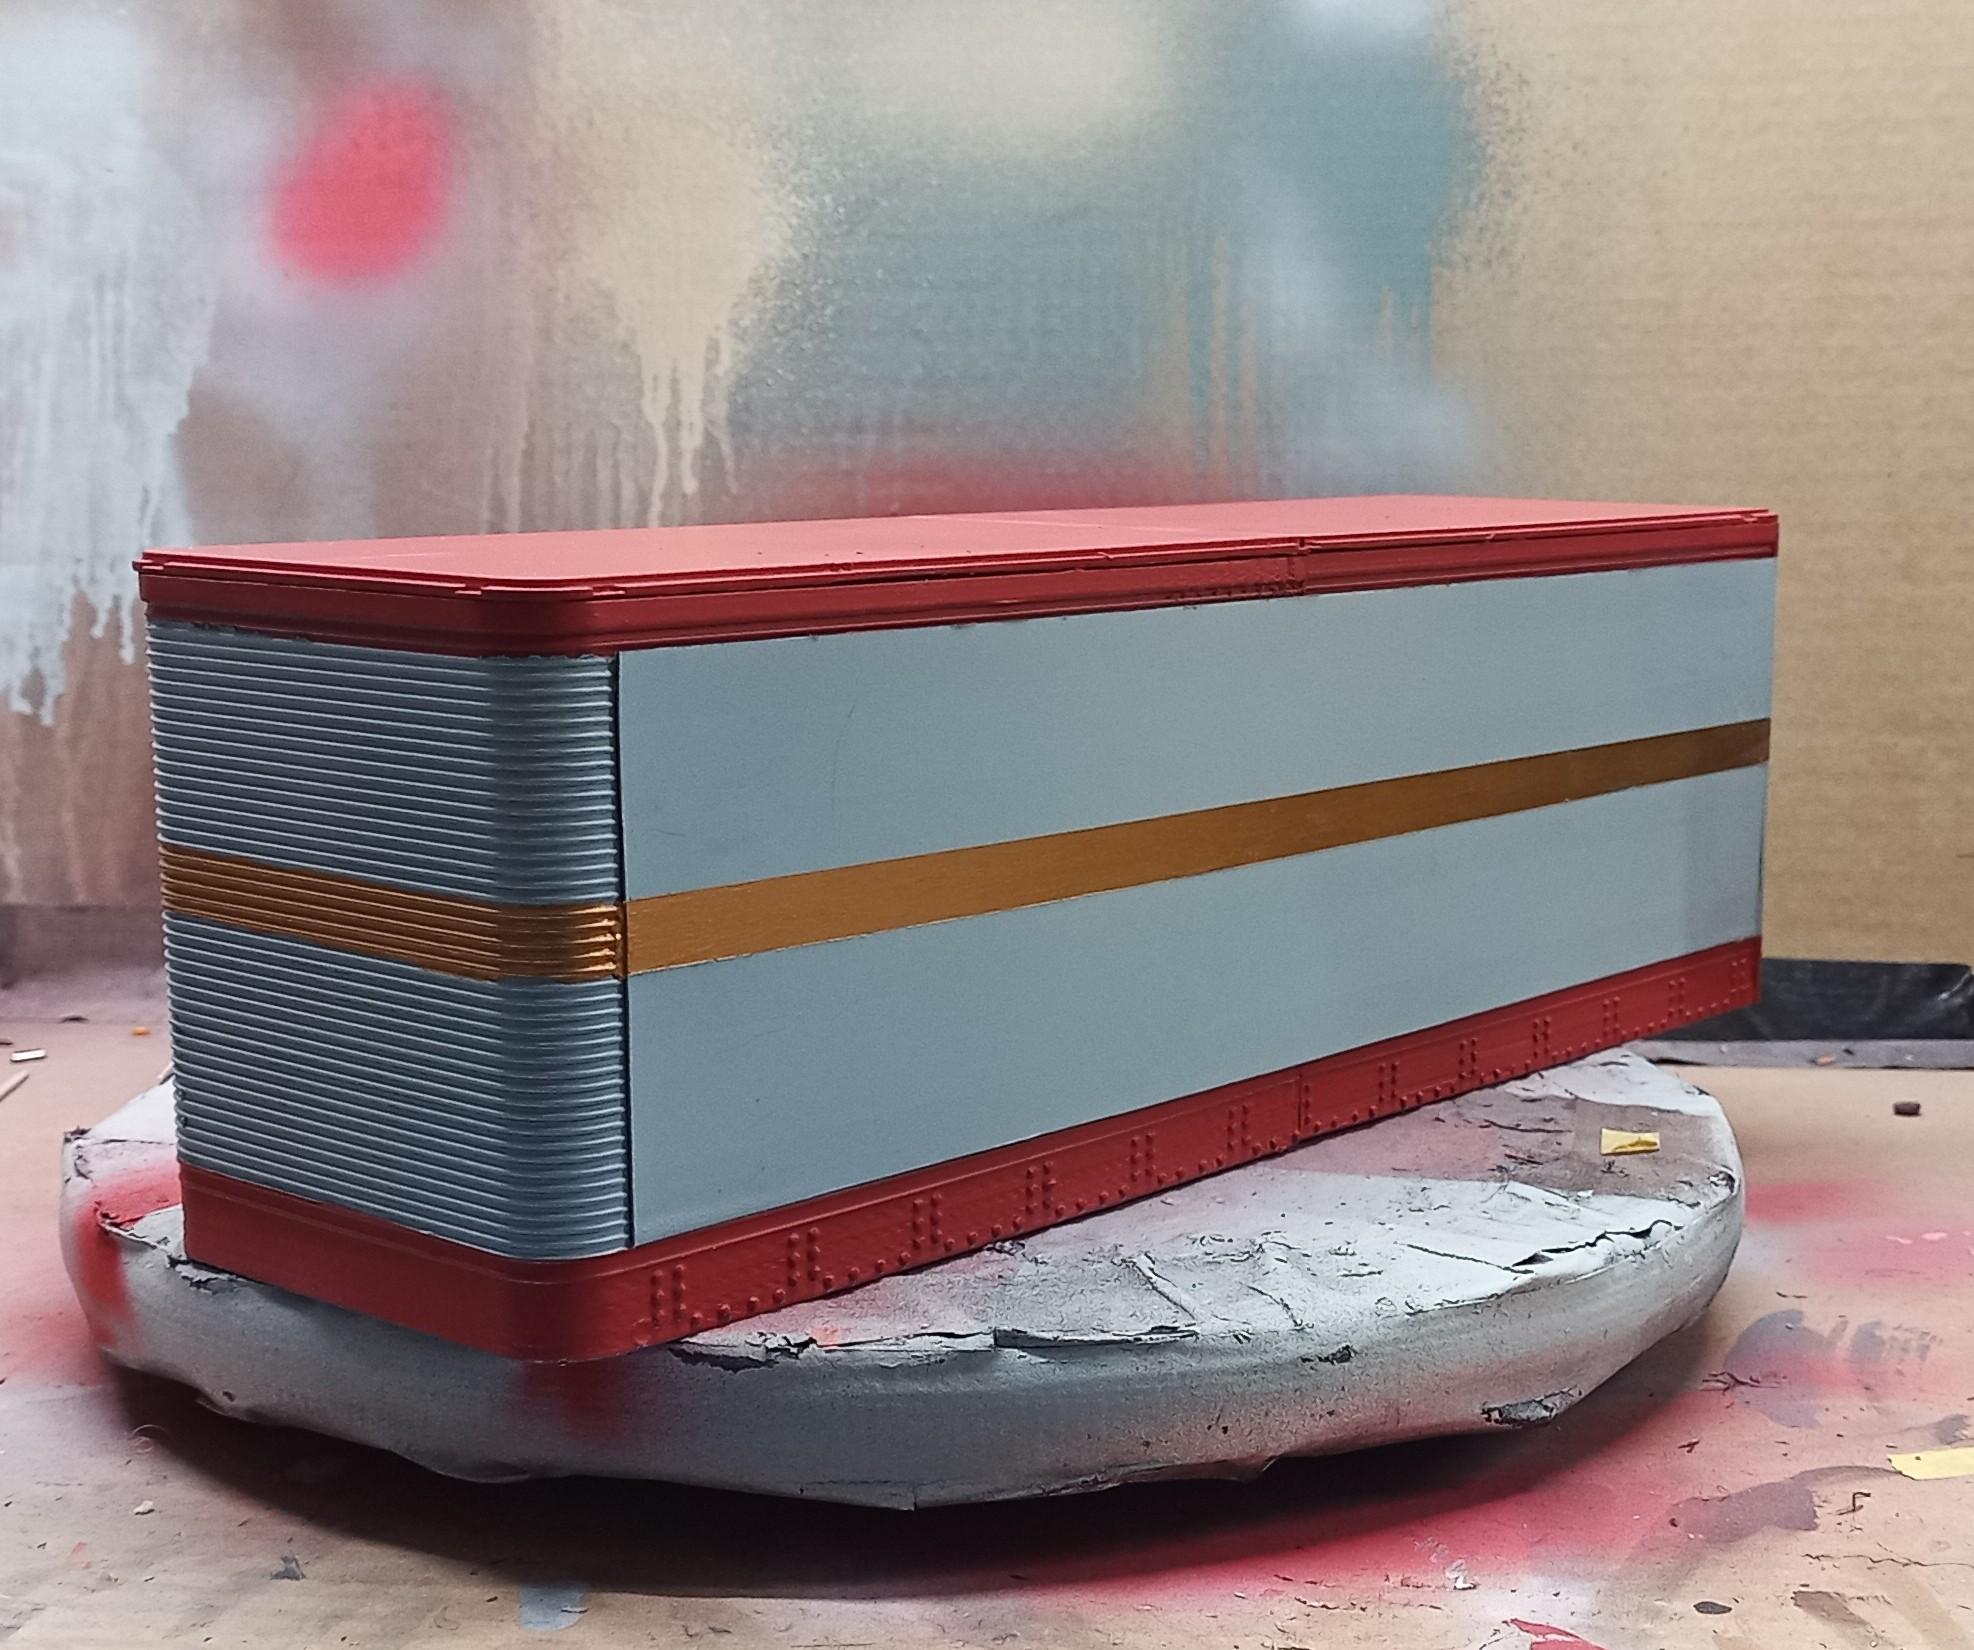
Got the brass colored stripe on! As soon as it's dry I'll apply the decals!
-
The Same but “ a little “ Different
Jürgen M. replied to Biggu's topic in WIP: Model Trucks: Big Rigs and Heavy Equipment
Exactly! Real men don't need instructions, they give them! ? -
Pete 352 day cab
Jürgen M. replied to Jürgen M.'s topic in WIP: Model Trucks: Big Rigs and Heavy Equipment
That is correct! I can only agree! We did the same thing! And I did the same with the masking tape on the trailer! Then a layer of the color below to seal the gaps and then the new color! -
Pete 352 day cab
Jürgen M. replied to Jürgen M.'s topic in WIP: Model Trucks: Big Rigs and Heavy Equipment
It worked! ? Seems there was a leak at the back door! Doesn't matter though. It'll be covered by a decal and I can touch that up with a brush first. Now the brass colored stripe in the middle hast to be masked and painted. Then decals, then clear coat, then final assembly!
-
Service Truck Kitbash
Jürgen M. replied to PHPaul's topic in WIP: Model Trucks: Big Rigs and Heavy Equipment
OK, that's a difficult arrangement. Sorry, I must have misunderstood that. For PLA I use a super glue but I can't recall having glued PLA and styrene before. -
The Same but “ a little “ Different
Jürgen M. replied to Biggu's topic in WIP: Model Trucks: Big Rigs and Heavy Equipment
The instructions often don't Show what's really relevant for building the kit correctly. Especially amt instructions seem to be famous for that! I had a closer look at the instructions you posted and I'm quite sure the arrow goes below! I actually never paid attention to that. Physics would say above because it would fall down otherwise but who says those instructions we're supposed to be logical? -
Service Truck Kitbash
Jürgen M. replied to PHPaul's topic in WIP: Model Trucks: Big Rigs and Heavy Equipment
I've made good experiences in using regular Revell modeling glue with styrene! Have you tried that? It takes a little bit longer to bond than glueing plastic parts of a kit but it does work. Maybe it helps! -
Pete 352 day cab
Jürgen M. replied to Jürgen M.'s topic in WIP: Model Trucks: Big Rigs and Heavy Equipment
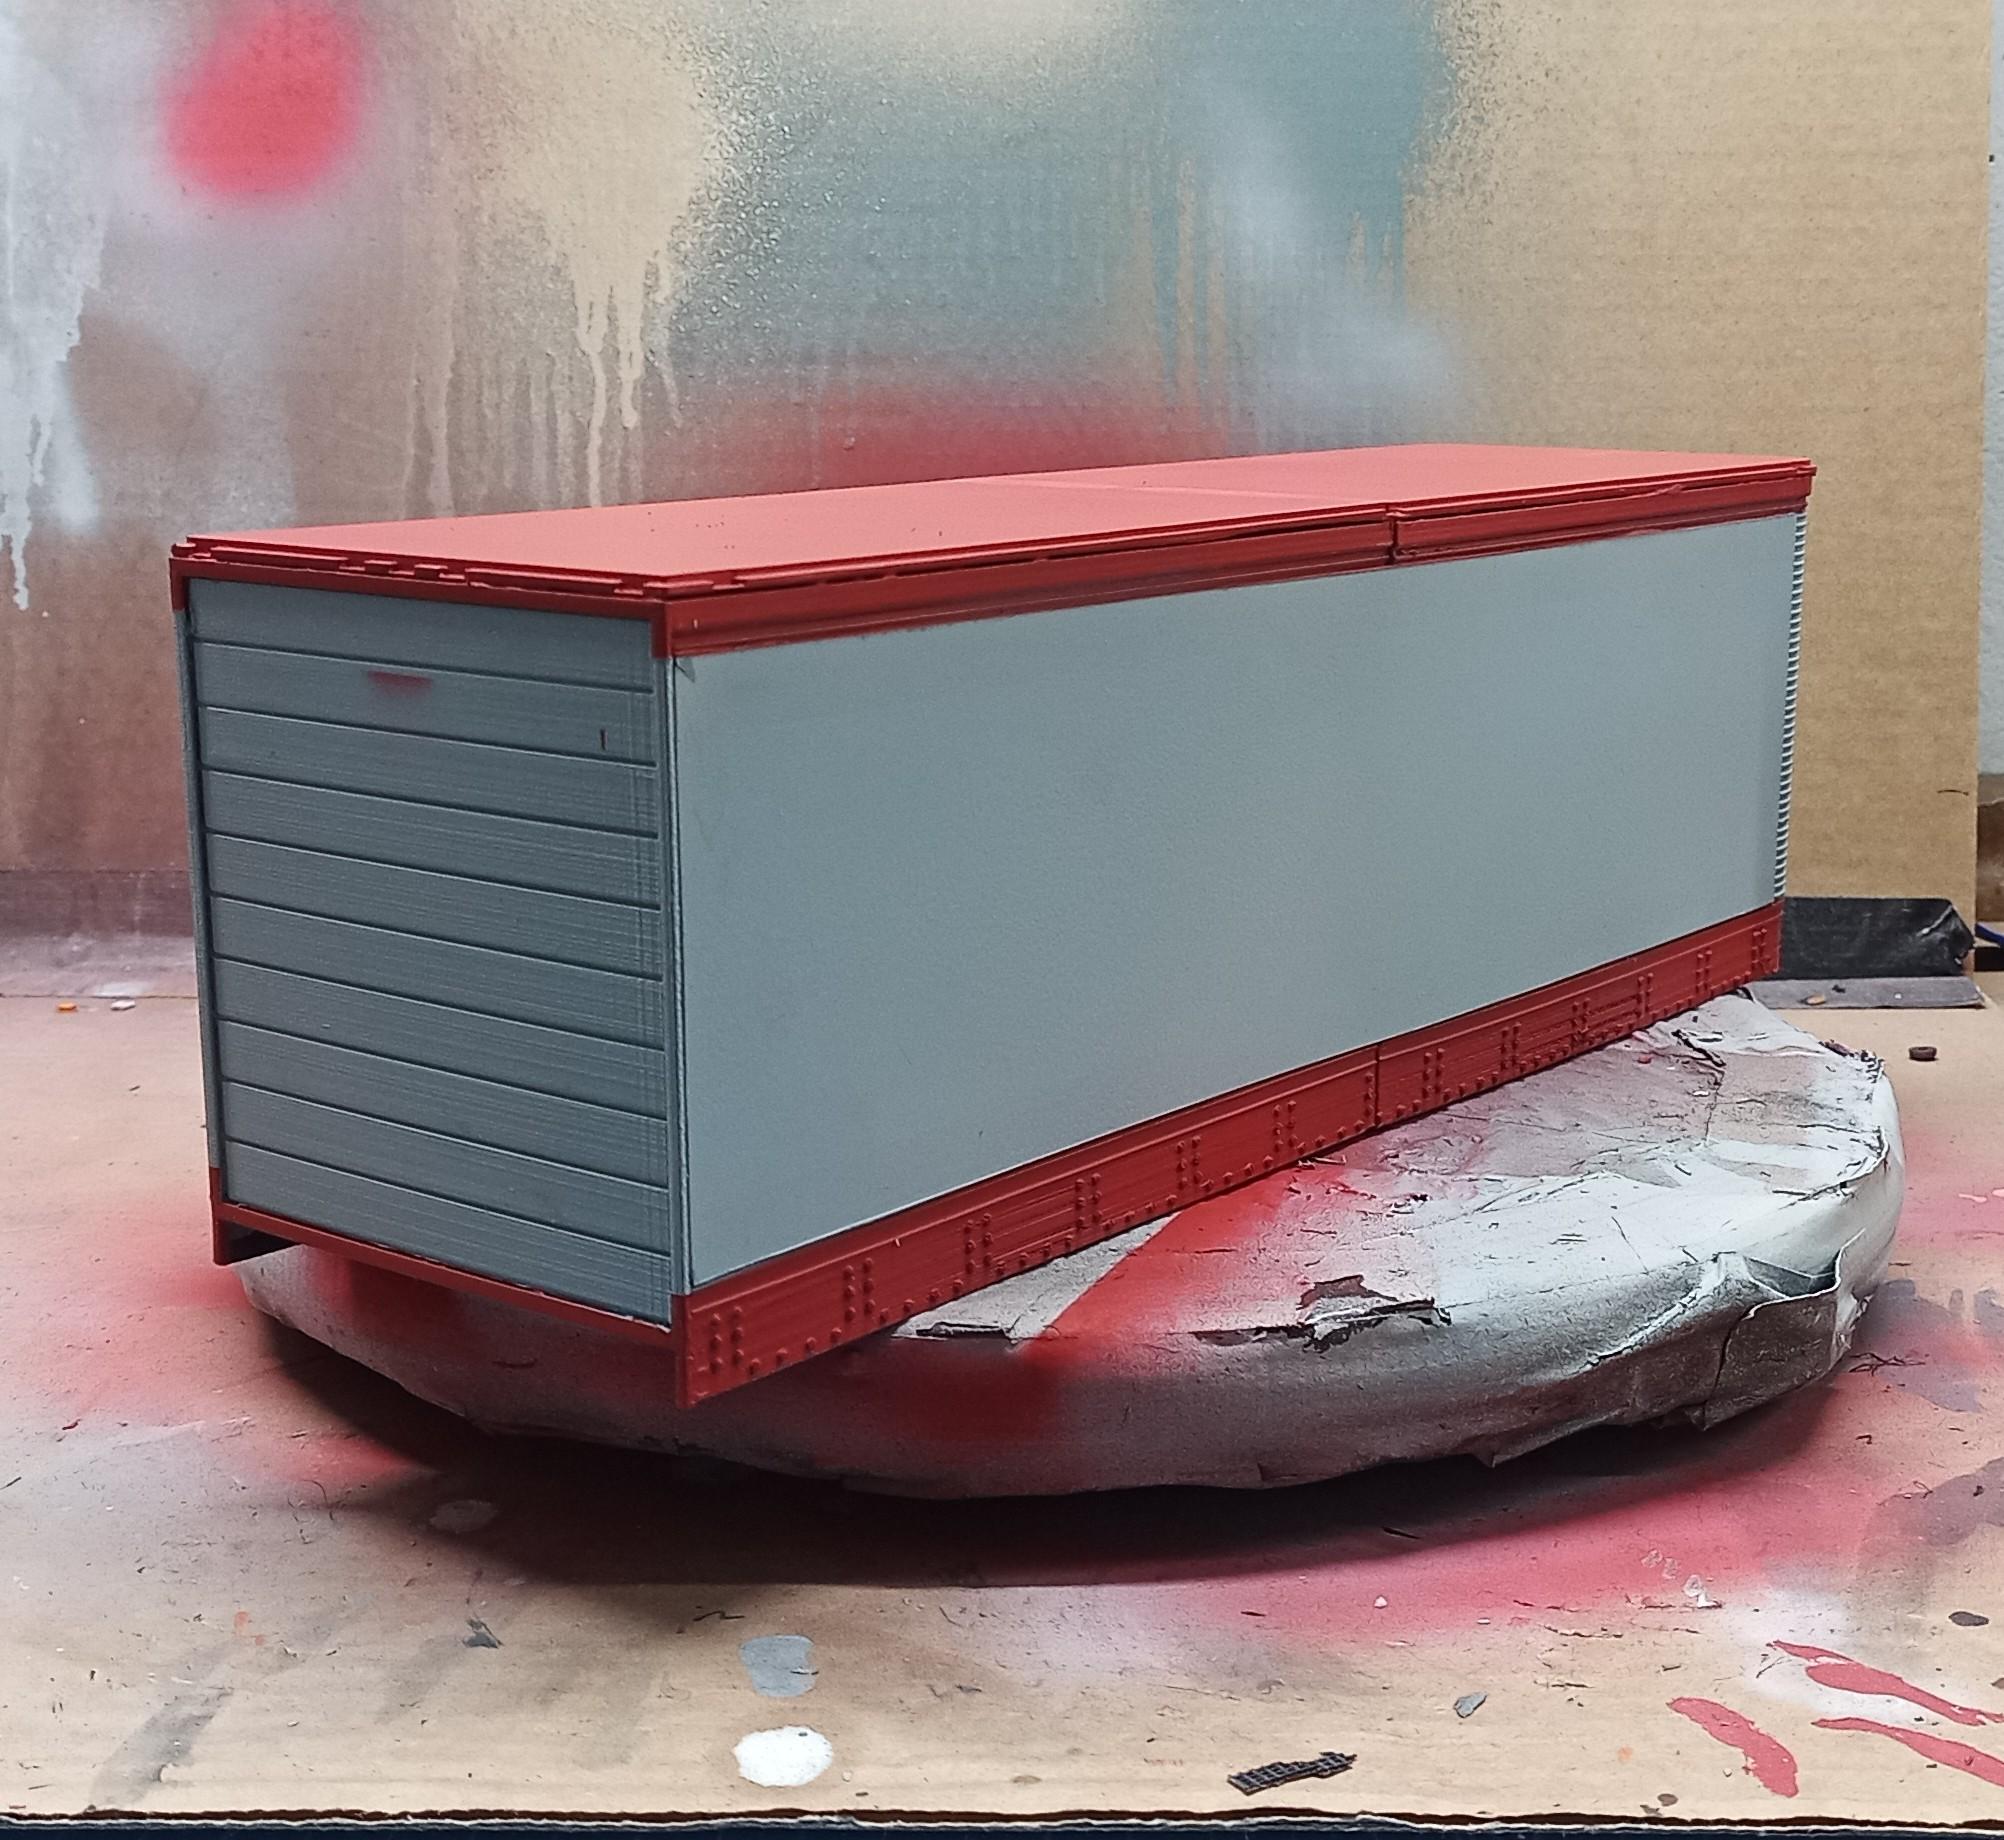
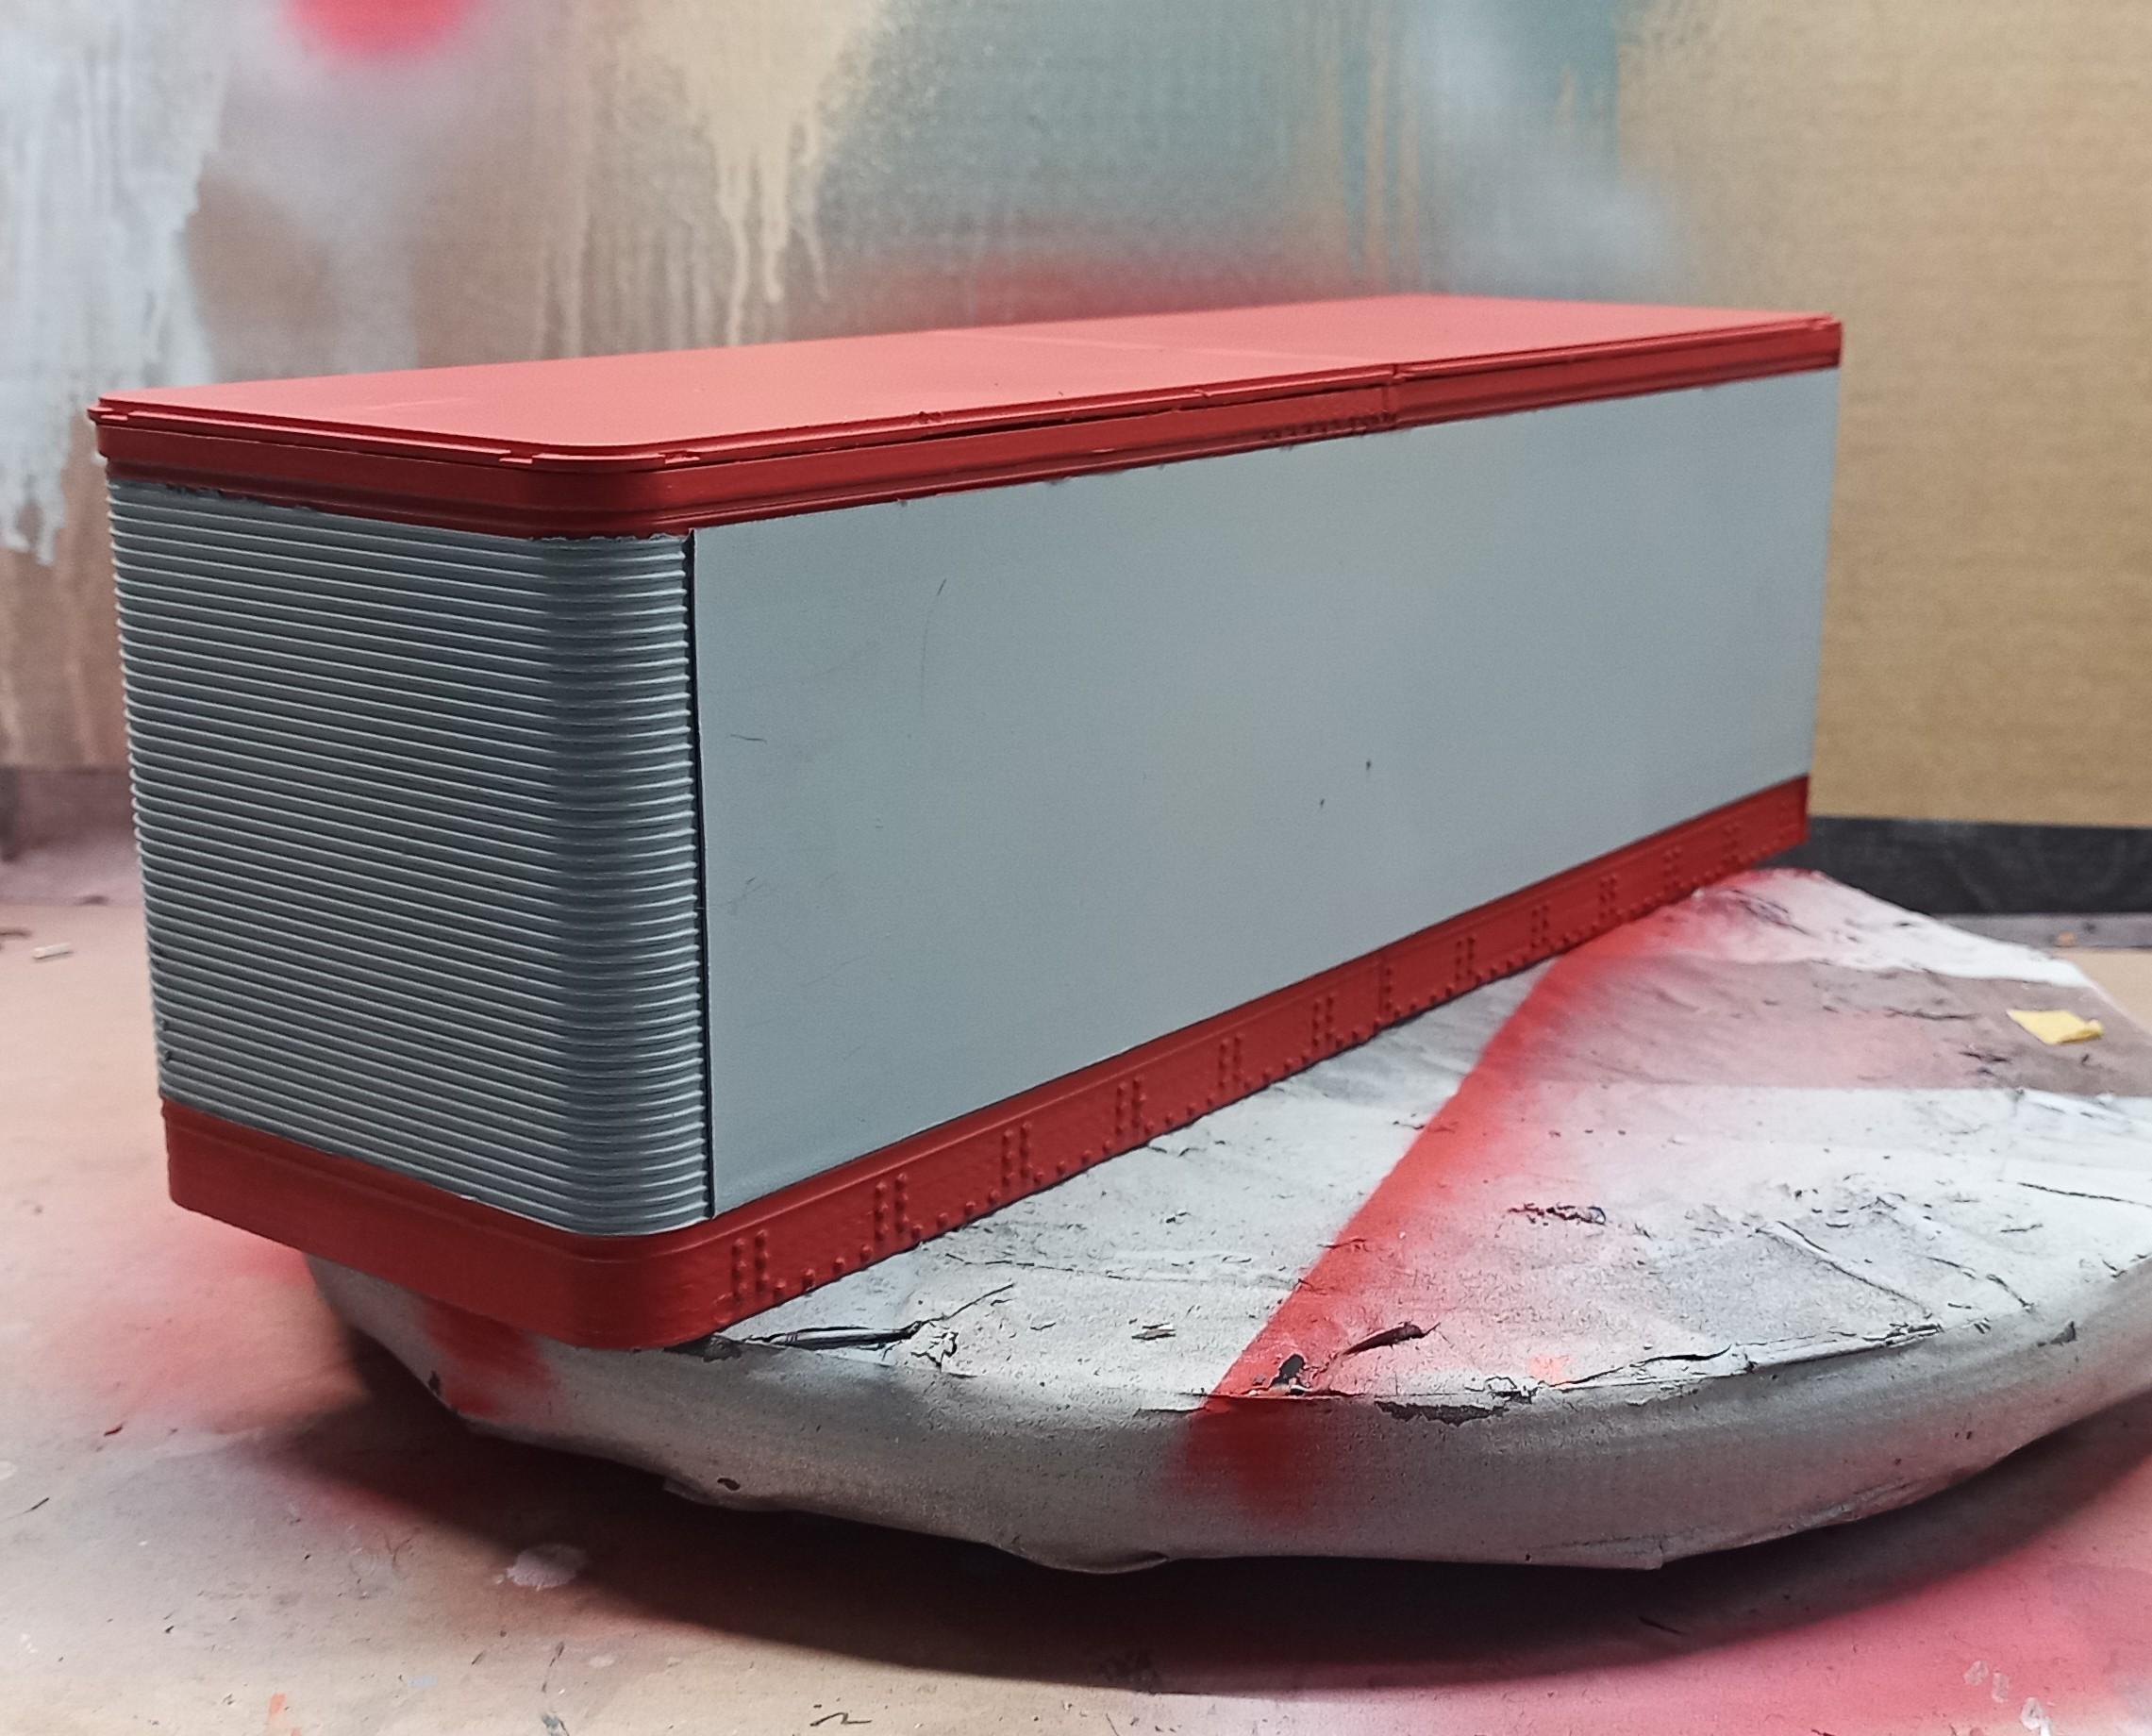
It's grey! The paint isn't quite dry yet on these pics. That's why it looks so glossy! Now the masking part begins! ? I'm a bit nervous cause the tape may pull off the paint from the smooth surface of the side walls! I have quite a lot of experience with masking and painting on real cars so I know how to do it but the past had shown that experience can be a bitch. (Is it allowed to use that word here?)
-
I doubt that! Your skills are fascinating and the scratch build of the box is just awesome! Keep going! I don't believe that your multiple skills include messing up!
-
The Same but “ a little “ Different
Jürgen M. replied to Biggu's topic in WIP: Model Trucks: Big Rigs and Heavy Equipment
Thanks guys. Very interesting! Concerning the engine fit, you might just be right putting it under. I remember building my Pacemaker. I put it above and the shaft almost touched the chassis! Didn't get the idea of putting it under! Good job Jeff! -
Mid 60s Peterbilt Unilite COE
Jürgen M. replied to RoninUtah's topic in WIP: Model Trucks: Big Rigs and Heavy Equipment
Looks pretty good Ron! I used to work a lot with styrene sheets. It's great for these things! Keep going! -
The Same but “ a little “ Different
Jürgen M. replied to Biggu's topic in WIP: Model Trucks: Big Rigs and Heavy Equipment
Thanks for the info! Maybe I'll have a look at those! Do they have rivets too? -
Pete 352 day cab
Jürgen M. replied to Jürgen M.'s topic in WIP: Model Trucks: Big Rigs and Heavy Equipment
Thanks Steve! Hope I find enough information and especially pics from all sides so I can design it! The Pete hast to be finished first though! ? -
Pete 352 day cab
Jürgen M. replied to Jürgen M.'s topic in WIP: Model Trucks: Big Rigs and Heavy Equipment
Thanks very much! Hope I have some time the next days to finally sand it and put in the second layer of primer! -
The Same but “ a little “ Different
Jürgen M. replied to Biggu's topic in WIP: Model Trucks: Big Rigs and Heavy Equipment
Looks great! How do you make the bolts? ? -
The Same but “ a little “ Different
Jürgen M. replied to Biggu's topic in WIP: Model Trucks: Big Rigs and Heavy Equipment
Lookin good Jeff! Keep going! Love the details! -
Pete 352 day cab
Jürgen M. replied to Jürgen M.'s topic in WIP: Model Trucks: Big Rigs and Heavy Equipment
Thanks guys! Still have to do some sanding, then a second layer of primer before I put the base coat on. It´ll hopefully turn out OK. I´m always a bit afraid that the paint comes off with the masking tape when I put on the second or third color. Yes, in some cases I have designed and printed my own decals. I bought water slide paper in white and transparent and print them on my laser printer. Mostly I print them on paper first to see if the size fits. Sometimes they come out smaller than I designed them. The main reason is that I´m running out of decals from the kits I´ve built and mostly they don´t fit the truck I´m building in size or color. -
1/32 Freightliner cabover
Jürgen M. replied to Rockford's topic in WIP: Model Trucks: Big Rigs and Heavy Equipment
Looks really good! I'm gonna keep that up too. Great idea! The colors look very nice! Just put the same decals on them and your fleet begins to grow! You can make up your own name! Except for the Pete I'm working on, all my corporate decals are fiction. How about Rockford Trucking corp? -
Pete 352 day cab
Jürgen M. replied to Jürgen M.'s topic in WIP: Model Trucks: Big Rigs and Heavy Equipment
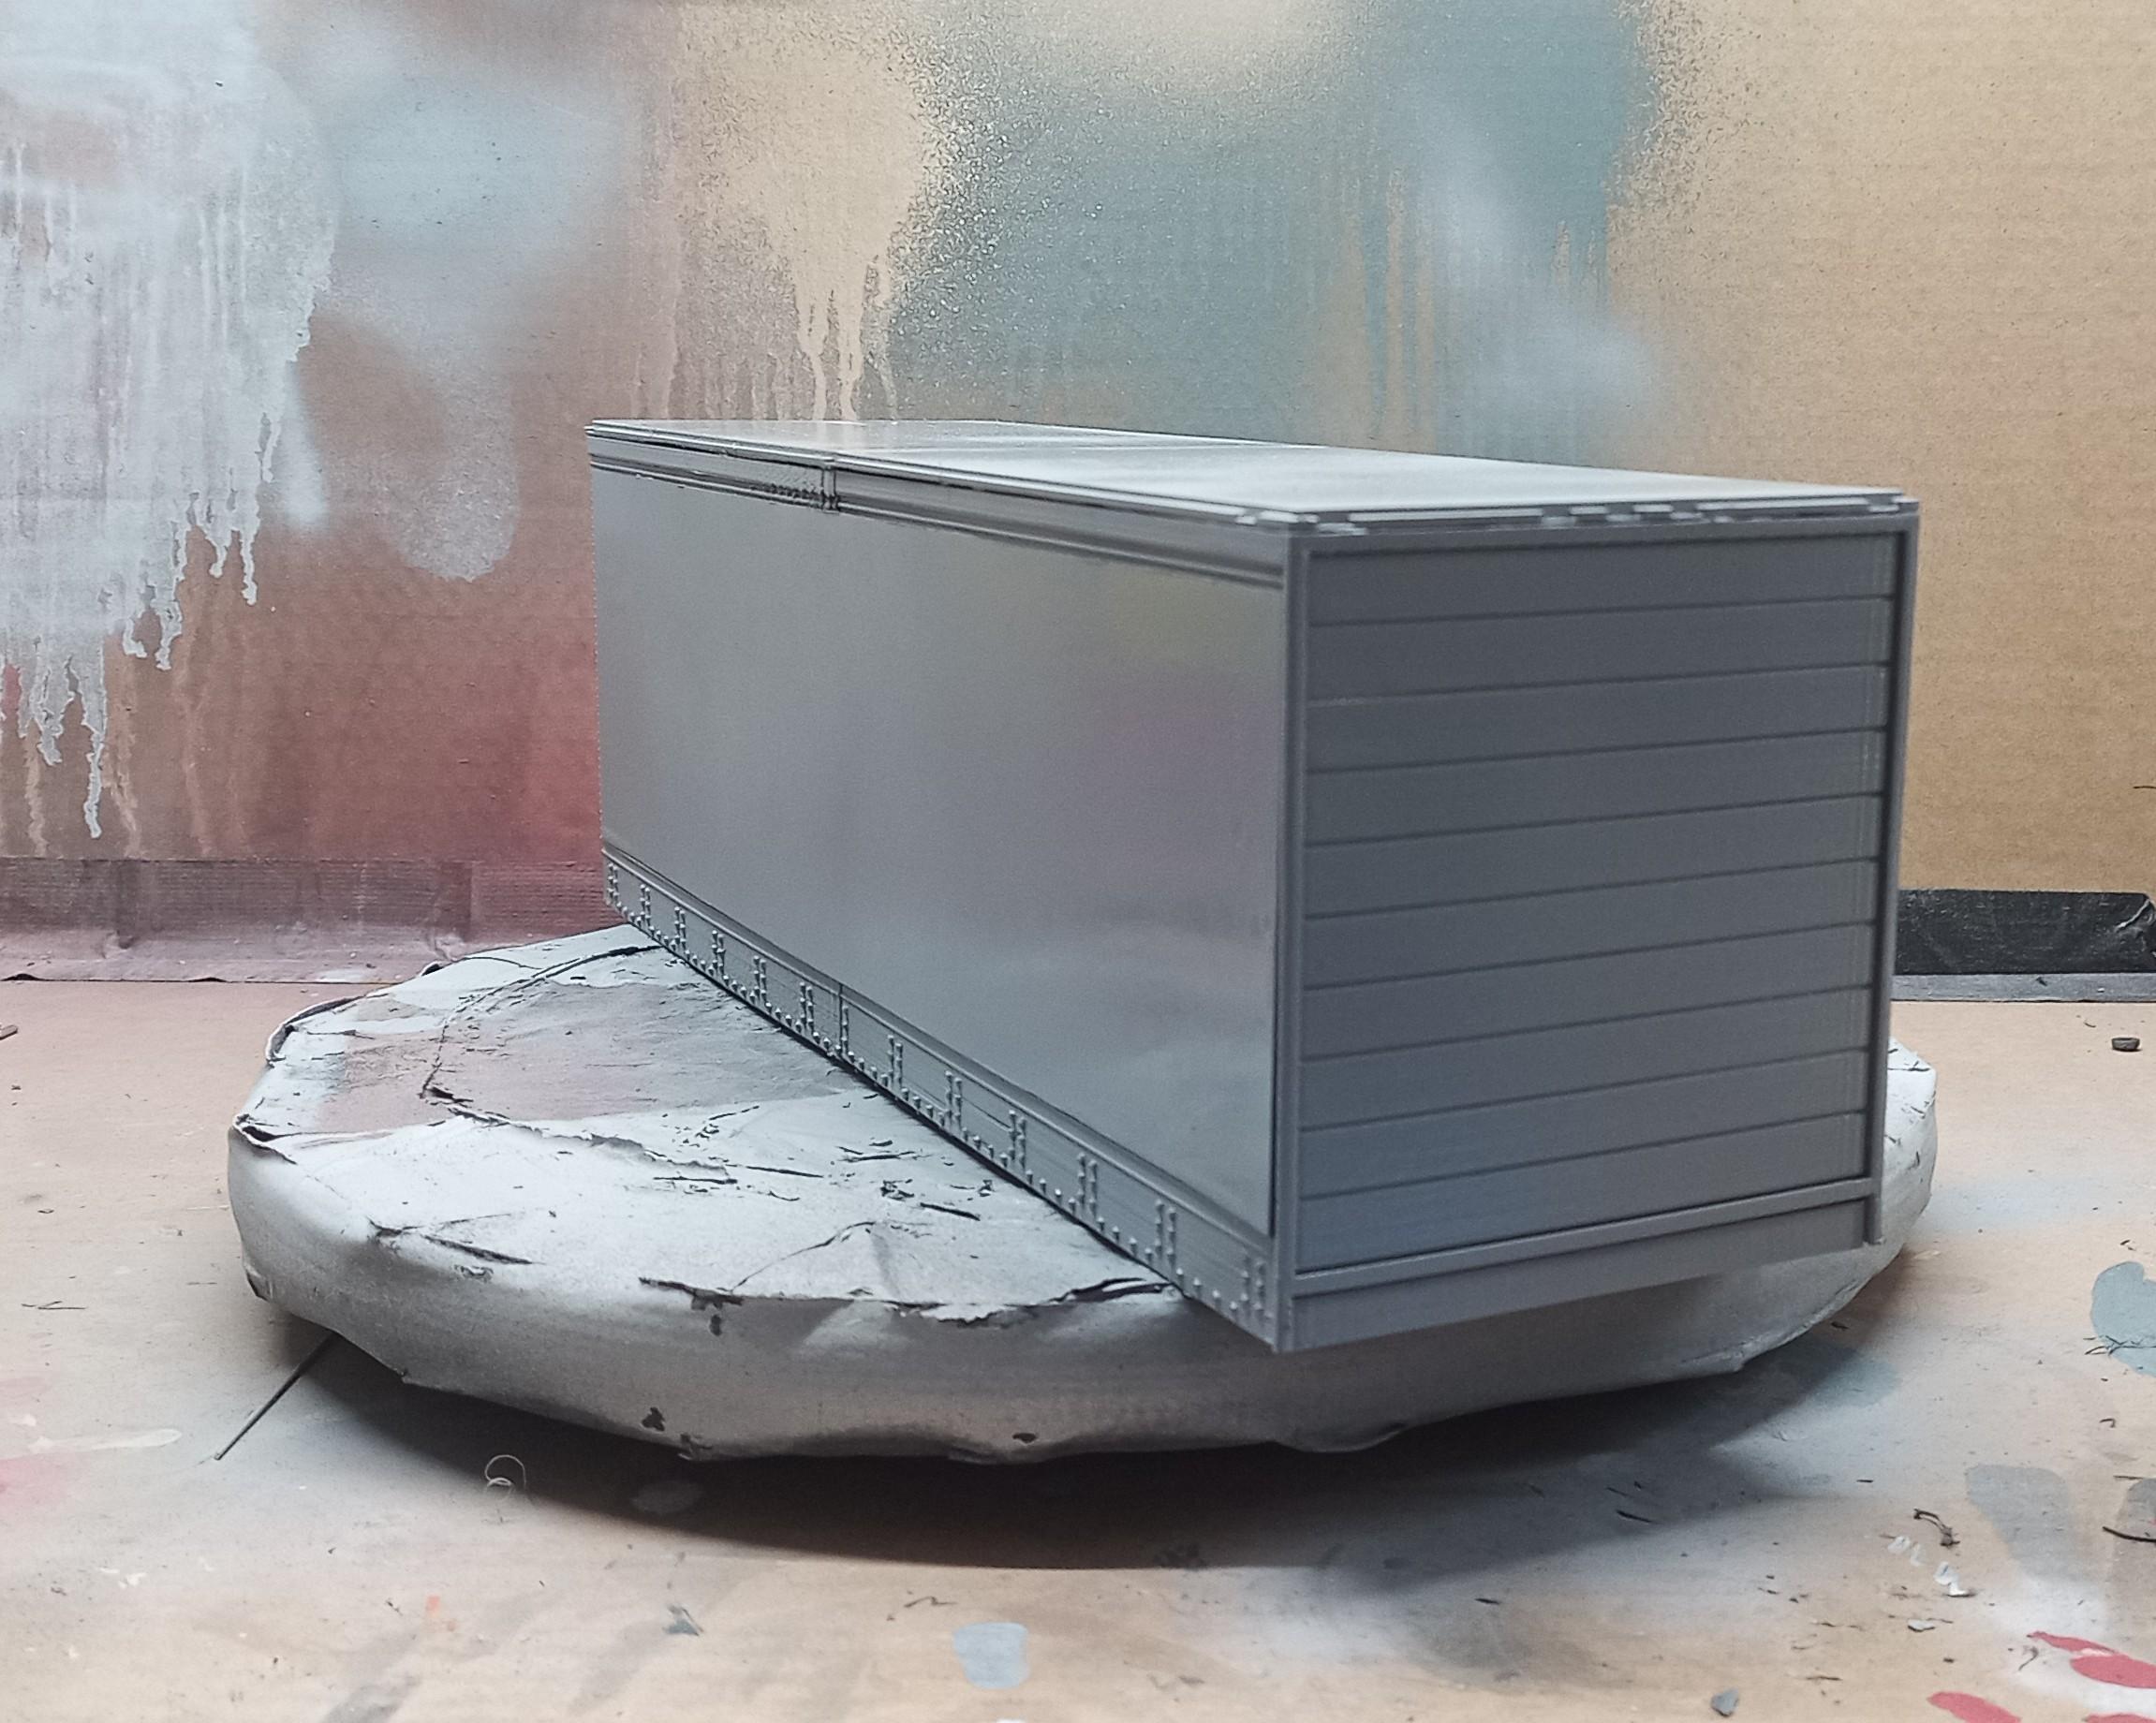
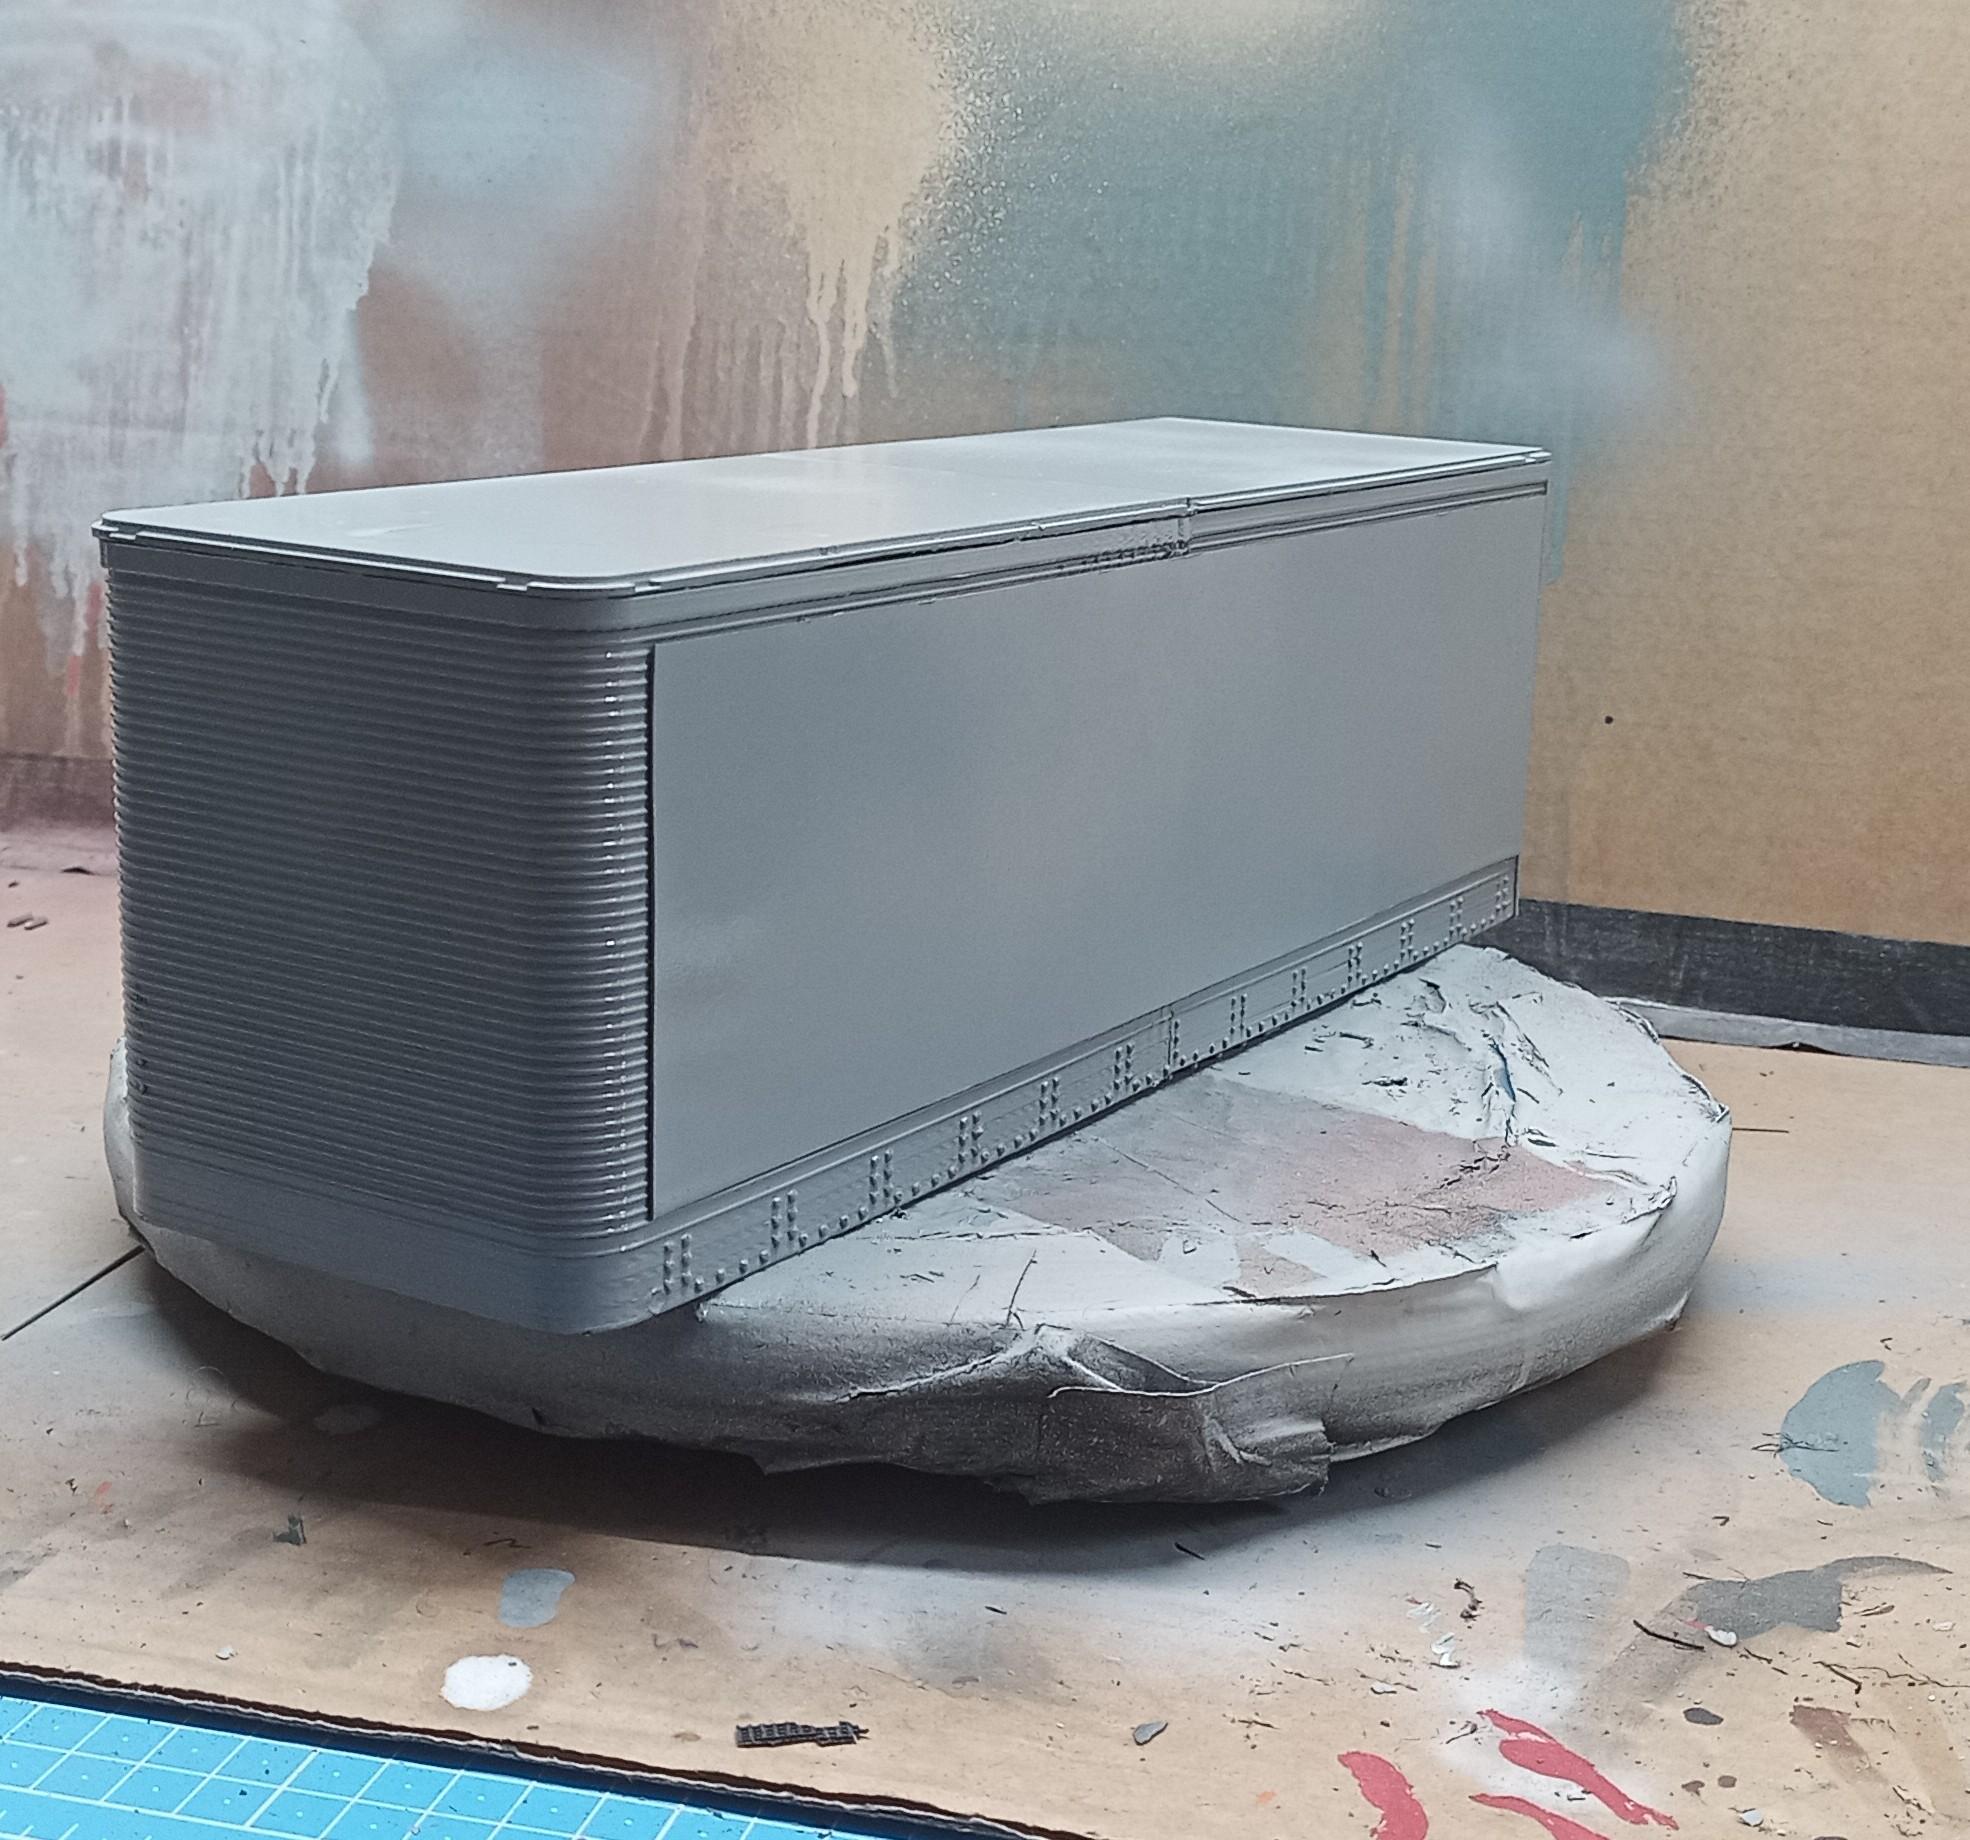
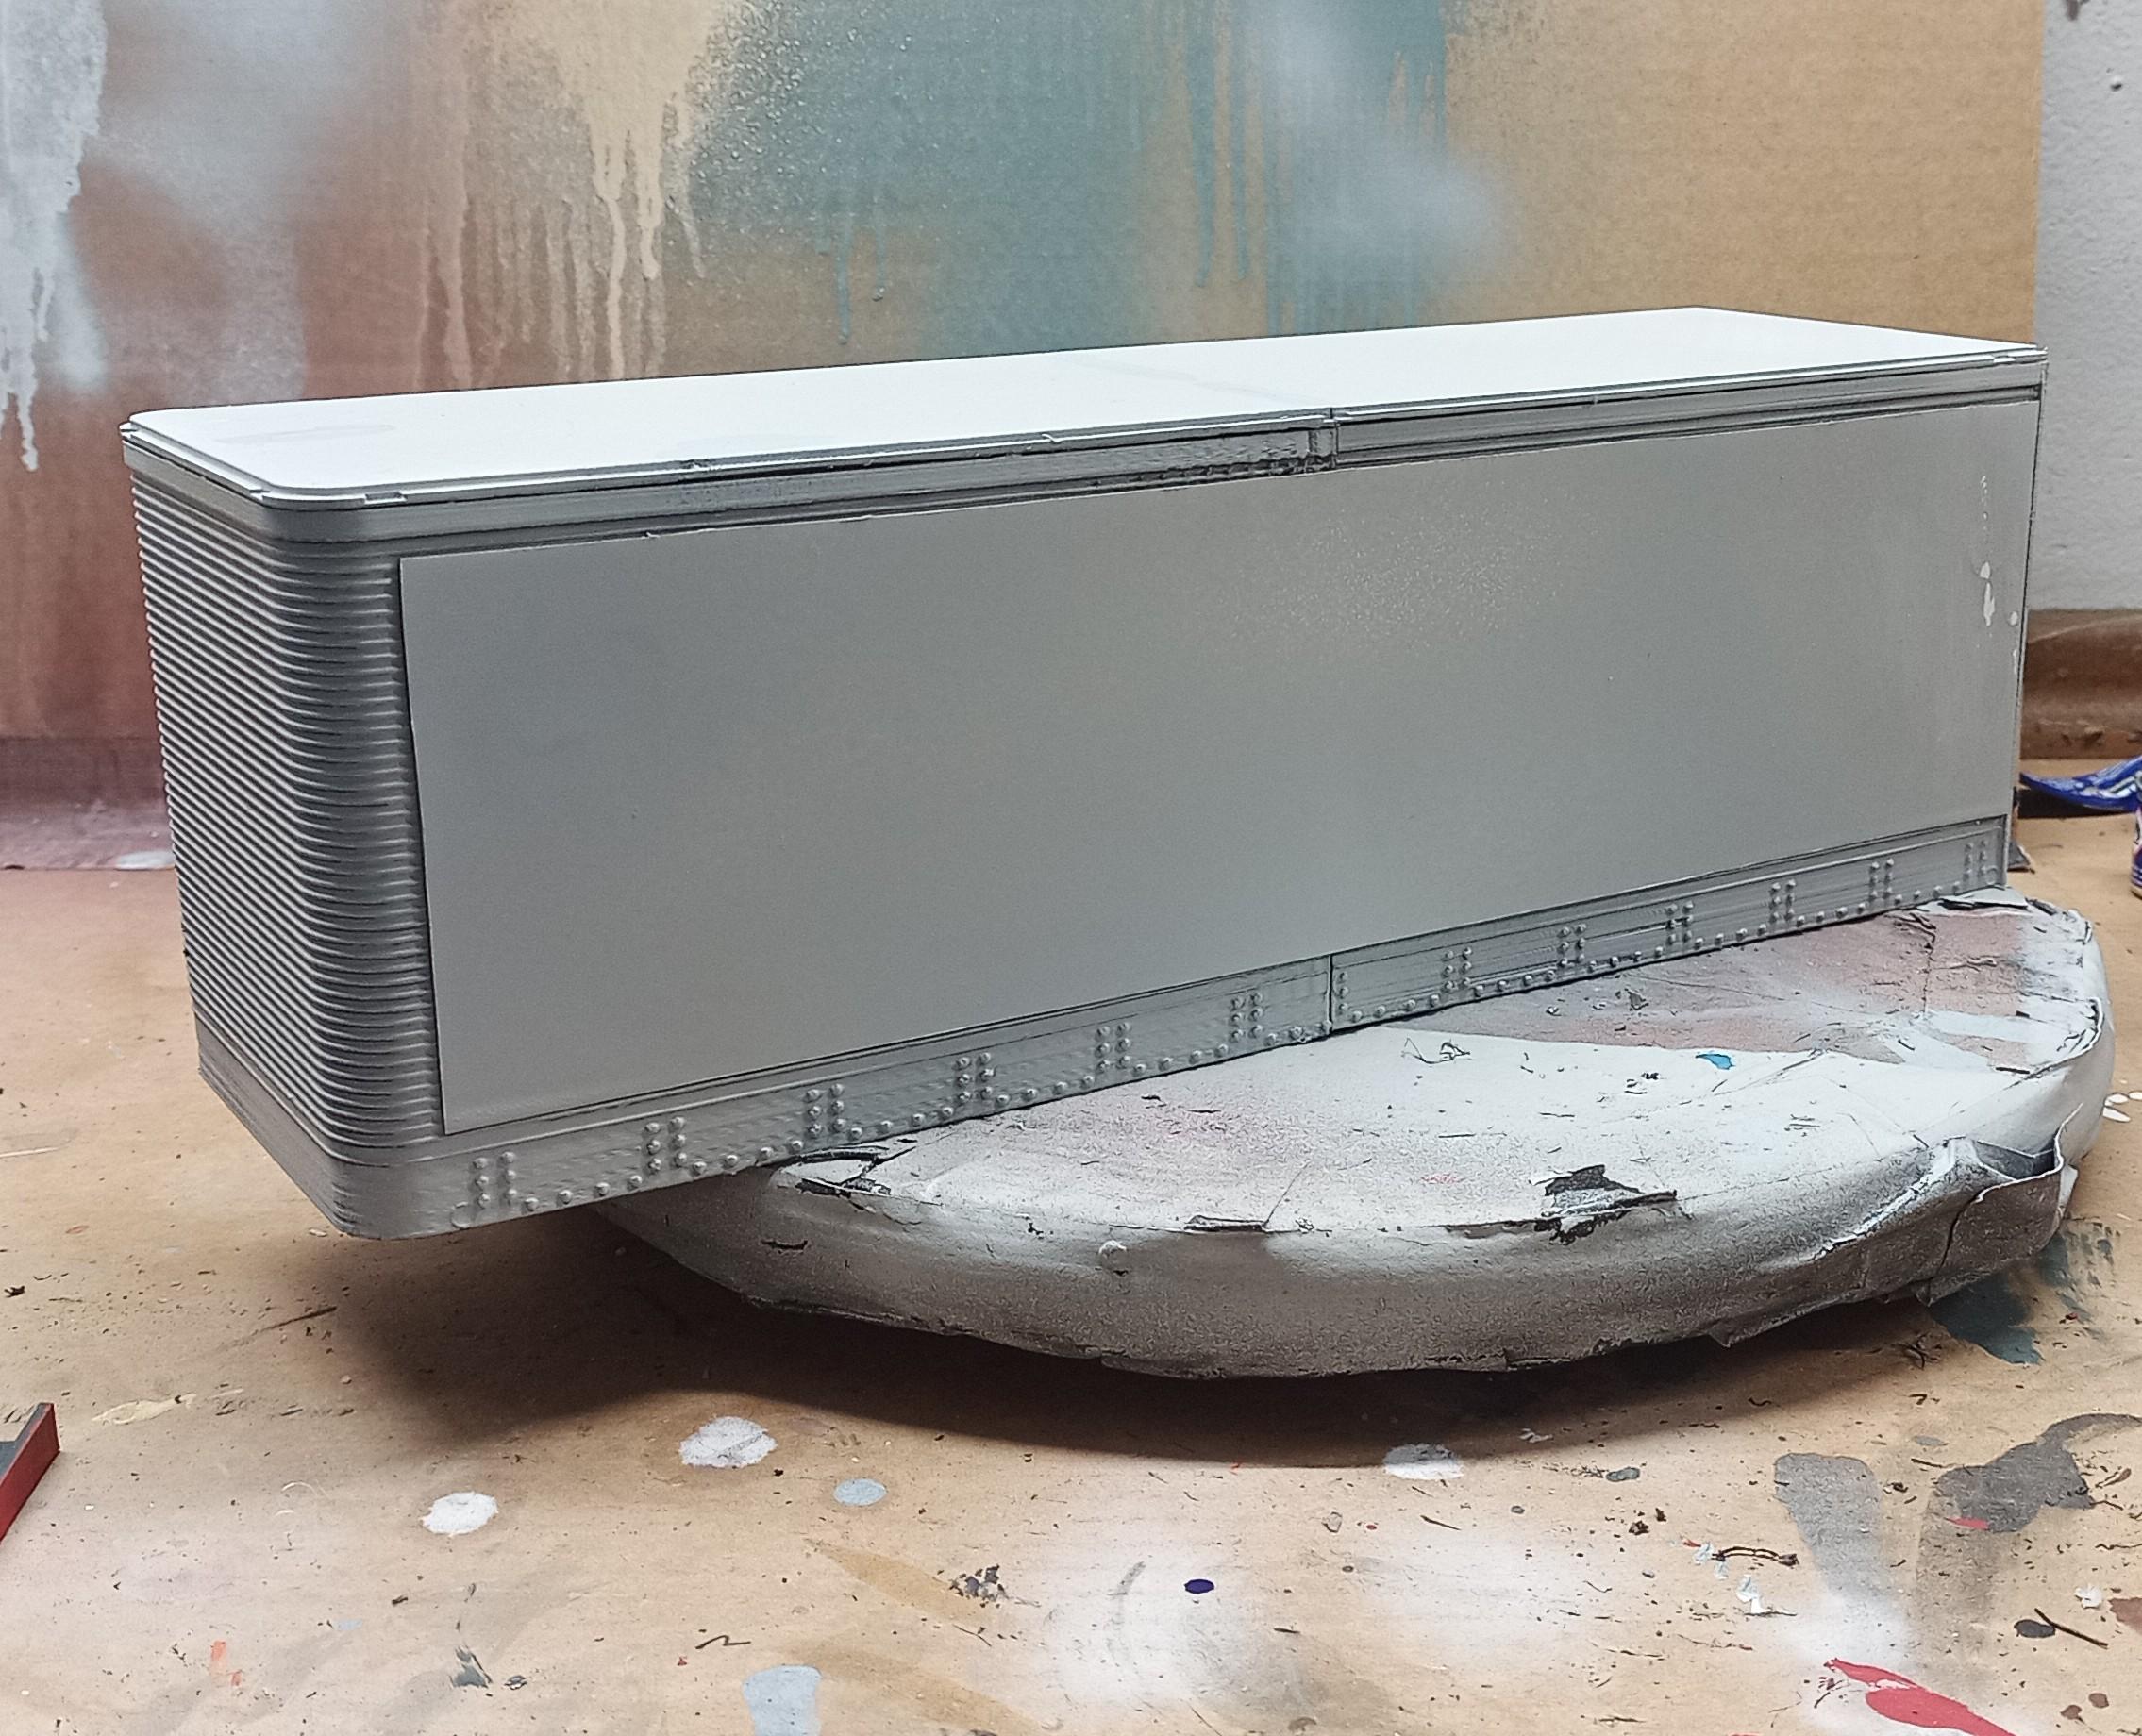
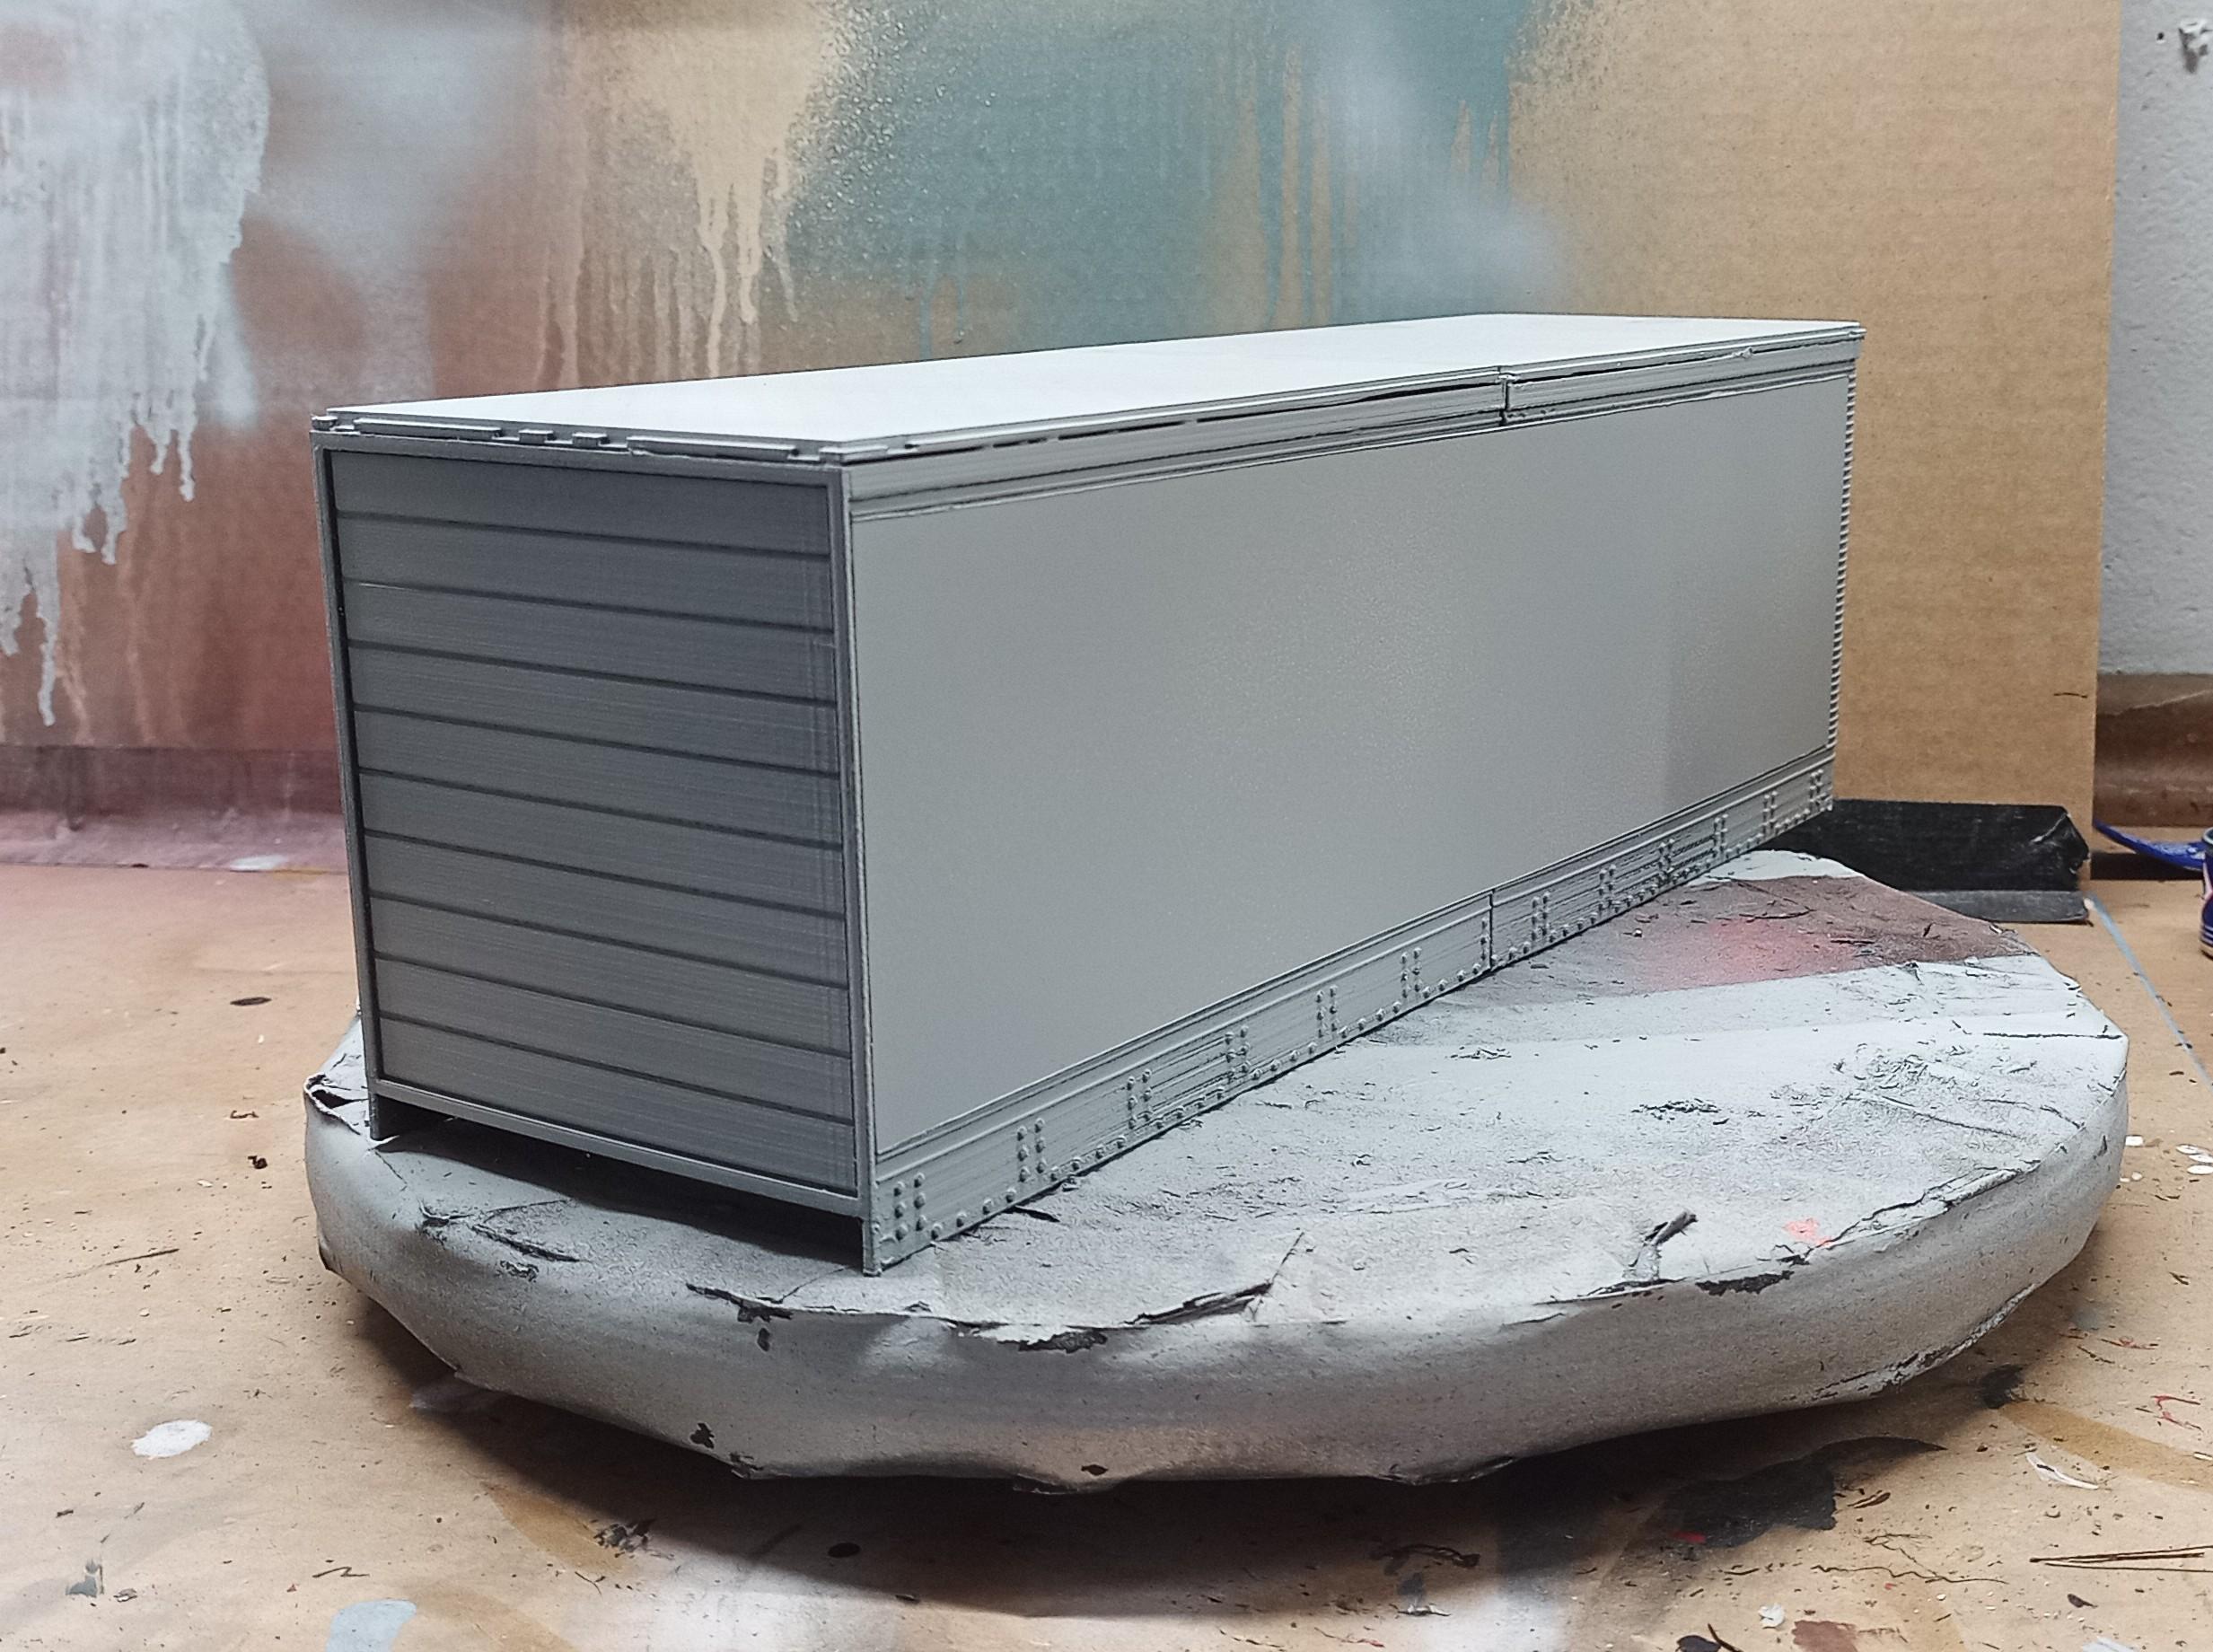
Good morning everyone! I have only a little progress to show. I have so much other stuff to do, I hardly get to the bench at the time! Anyway, I was able to assemble the trailer box and primer it so I can see where to rework before painting. The black material doesn't show much. After rework I'll put another layer of primer on it, then the first base coat! I want to use the same color scheme as on the tractor. I also made some decals which I still have to print though!
-
The Same but “ a little “ Different
Jürgen M. replied to Biggu's topic in WIP: Model Trucks: Big Rigs and Heavy Equipment
I wouldn't even know which lines are neccessary and where to put them! ? Great detail already. Can't wait to see more! -
The Same but “ a little “ Different
Jürgen M. replied to Biggu's topic in WIP: Model Trucks: Big Rigs and Heavy Equipment
I think it looks good! I think you can live with it! ? Will you put in steering? -
The Same but “ a little “ Different
Jürgen M. replied to Biggu's topic in WIP: Model Trucks: Big Rigs and Heavy Equipment
Love that precision! Chassis looks nice and straight! My Pacemaker is bent to the left a bit. You hardly notice it but it's there! -
Western Star 4900 FA plow truck
Jürgen M. replied to BK9300's topic in WIP: Model Trucks: Big Rigs and Heavy Equipment
It's just unbelievable what you're doing! If real car and truck makers today would do their work with your precision and enthusiasm we would have much better and longer lasting vehicles on the road! -
Pete 352 day cab
Jürgen M. replied to Jürgen M.'s topic in WIP: Model Trucks: Big Rigs and Heavy Equipment
Thank you! Very nice of you to say that! I always enjoy watching your builds too. I can learn a lot! -
Mid 60s Peterbilt Unilite COE
Jürgen M. replied to RoninUtah's topic in WIP: Model Trucks: Big Rigs and Heavy Equipment
Wow! That's gonna be interesting to watch! Can't wait to see more!