Jürgen M.
-
Posts
1,677 -
Joined
-
Last visited
Content Type
Profiles
Forums
Events
Gallery
Everything posted by Jürgen M.
-

International V190 Quarry Dump
Jürgen M. replied to Warren D's topic in WIP: Model Trucks: Big Rigs and Heavy Equipment
Looks like an interesting build! A functional tailgate would surely be cool but you could just hinge it up at the top corners They way it is on the Autocar would be quite adventurous but a challenge! Can't wait to see more! 👍 -
1984 GMC General “Autumn Almond”
Jürgen M. replied to Pete68's topic in WIP: Model Trucks: Big Rigs and Heavy Equipment
The General is really a truck for multiple purposes! You can make anything out of it from a two axle day cab tractor to beer truck (?) or anything in between! It always looks cool. Keep going! Love to watch this! -
1984 GMC General “Autumn Almond”
Jürgen M. replied to Pete68's topic in WIP: Model Trucks: Big Rigs and Heavy Equipment
That looks cool! Nice Idea for a build! ? -
Pete 359 tanker with trailer
Jürgen M. replied to Jürgen M.'s topic in WIP: Model Trucks: Big Rigs and Heavy Equipment
Tell my boss! He wouldn't be amused if I stayed home to build models instead of doing my job! ? -
1984 GMC General “Autumn Almond”
Jürgen M. replied to Pete68's topic in WIP: Model Trucks: Big Rigs and Heavy Equipment
6x6 is a cool thing for trucks. Reminds me of my 6x6 Oilfield General! Fun to build! Hope to see something similar Here someday! -
Pete 359 tanker with trailer
Jürgen M. replied to Jürgen M.'s topic in WIP: Model Trucks: Big Rigs and Heavy Equipment
Don't know when I'll have time for primer and painting the small stuff! Truck chassis has to be partially repainted, at least the frame on top including the rear bumper bar and the hitch. Got lots of work to do and hardly any bench time this week! -
GMC Astro double bunk
Jürgen M. replied to The Brush's topic in Model Trucks: Big Rigs and Heavy Equipment
Just wow! May I ask how you masked the stripes? I'd love to widen my horizon on that. Looks just perfect! Would have guessed they're decals! Perfect job! -
1966 Peterbilt Unilite 352 COE
Jürgen M. replied to RoninUtah's topic in Model Trucks: Big Rigs and Heavy Equipment
Go on Ron! Next build! We're all anxious to see what's next! -
Pete 359 tanker with trailer
Jürgen M. replied to Jürgen M.'s topic in WIP: Model Trucks: Big Rigs and Heavy Equipment
Thanks Jeff! Hope it turns out the way I expect! -
Pete 359 tanker with trailer
Jürgen M. replied to Jürgen M.'s topic in WIP: Model Trucks: Big Rigs and Heavy Equipment
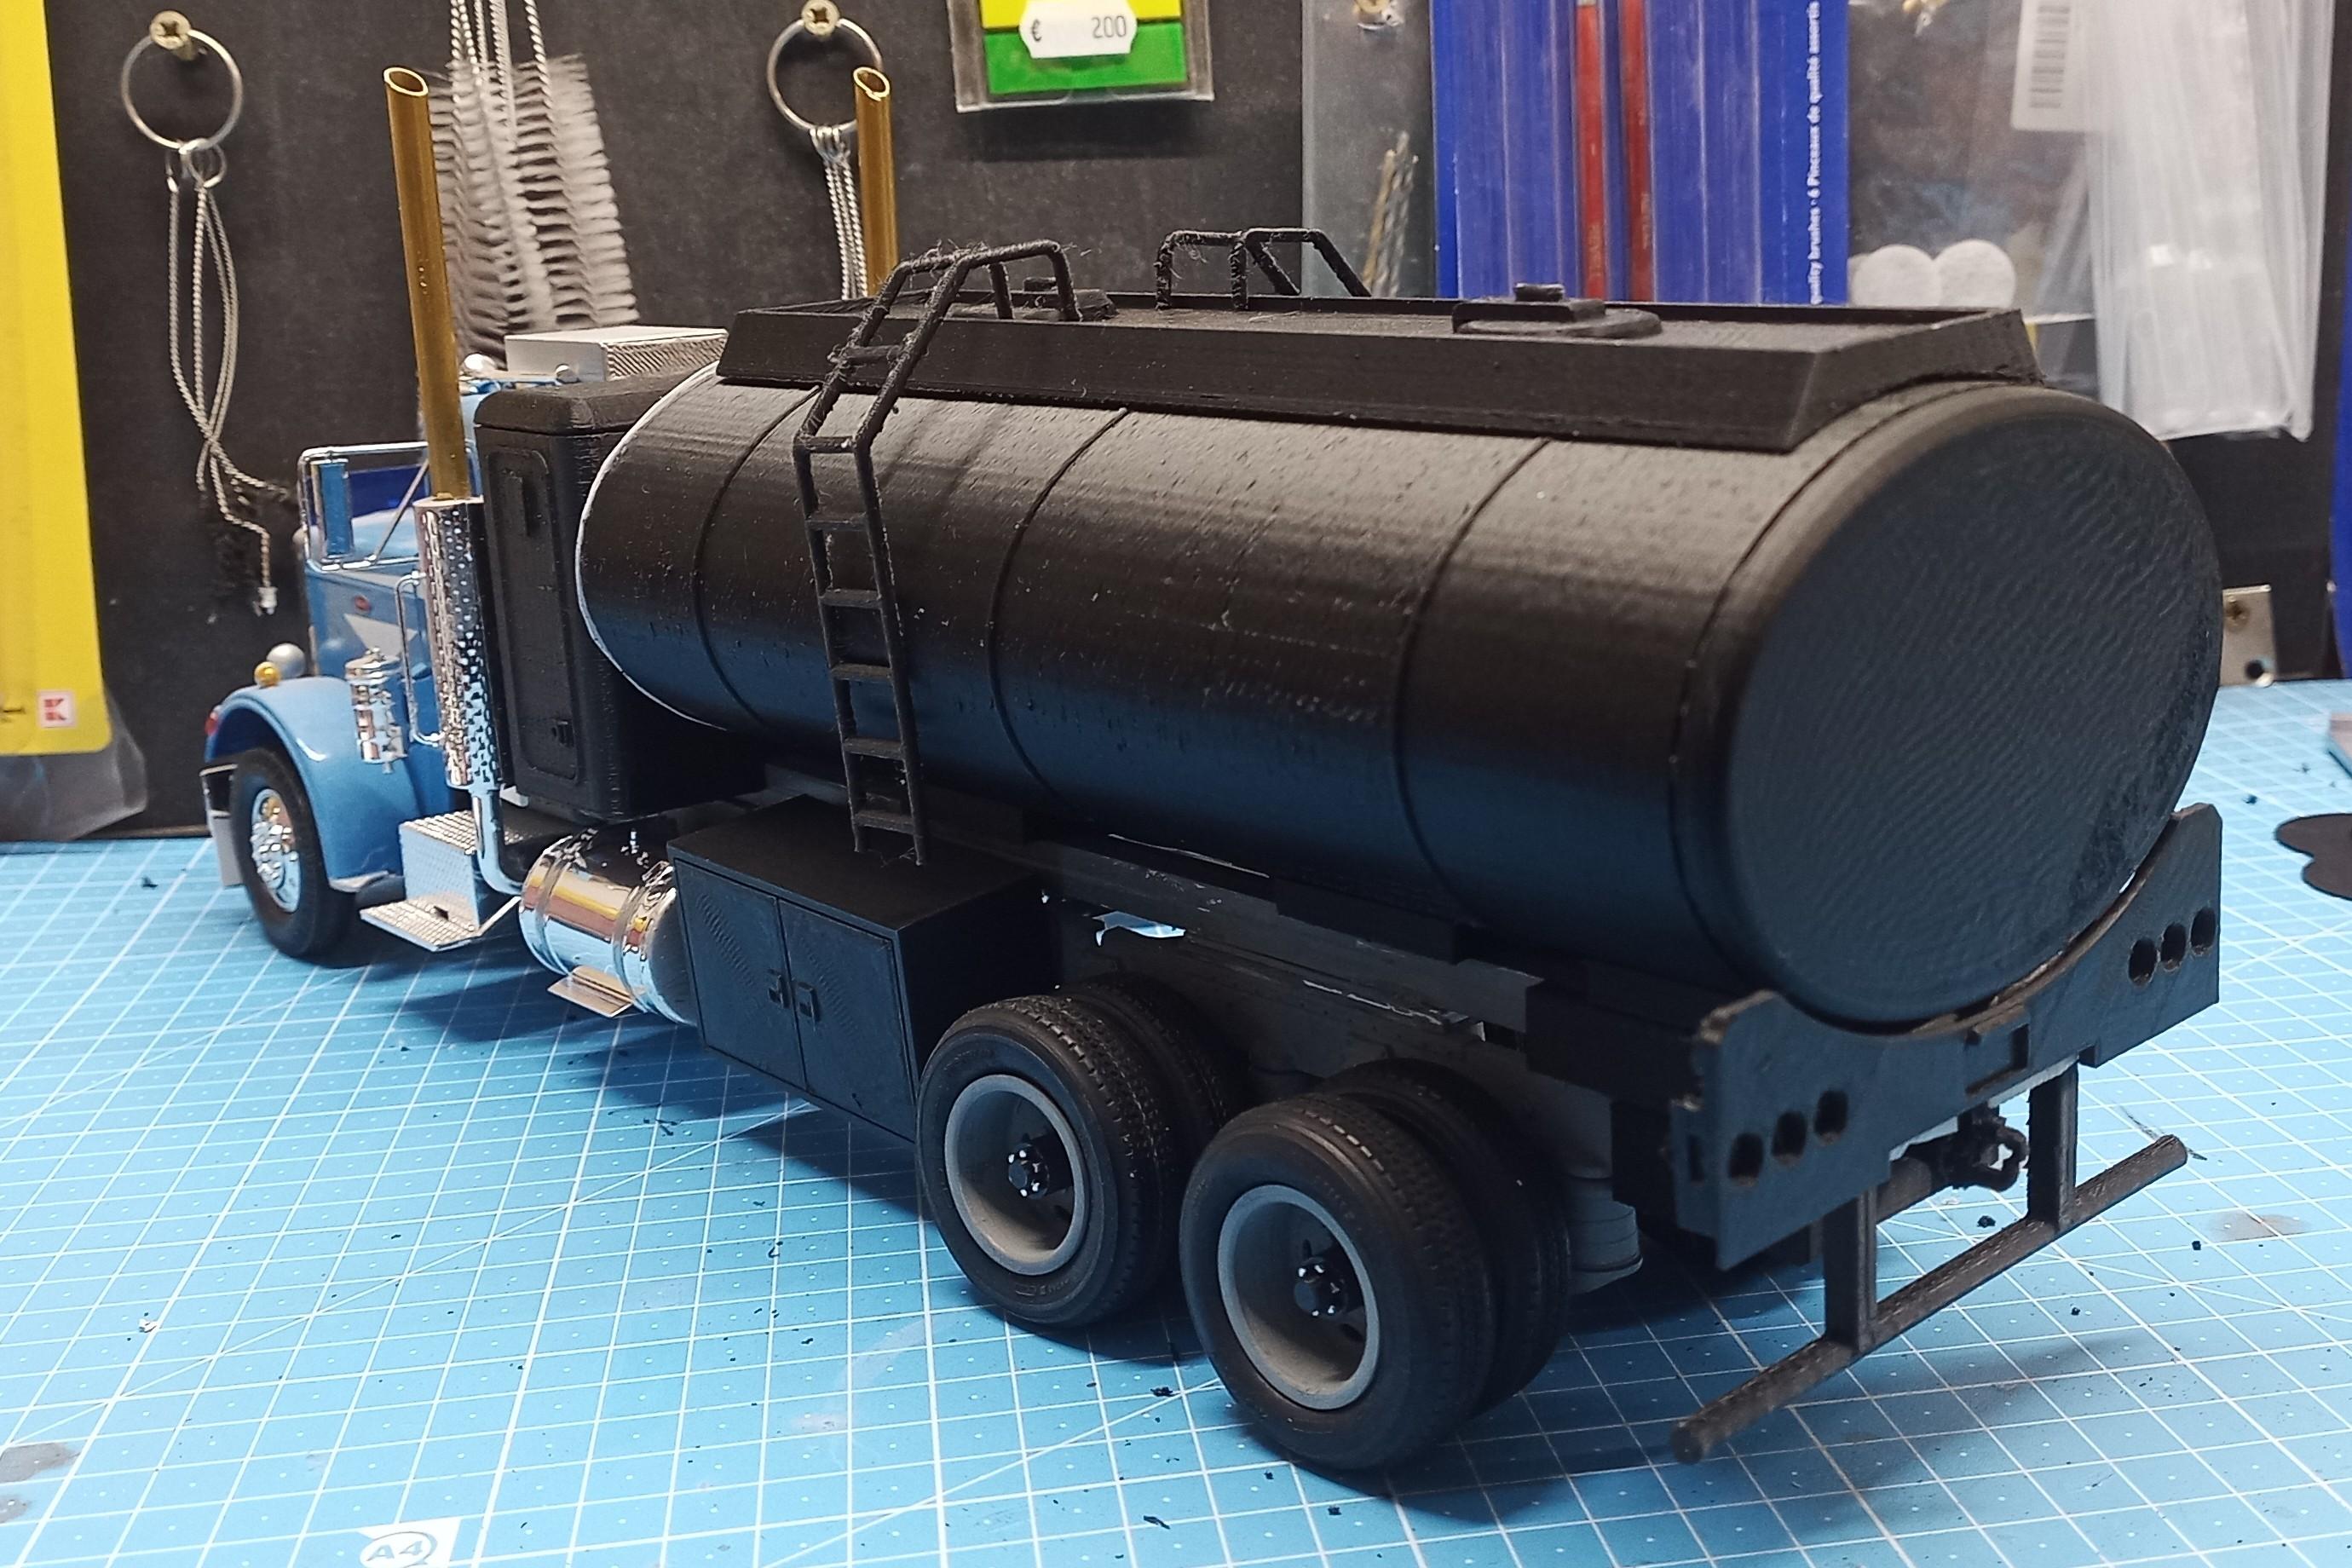
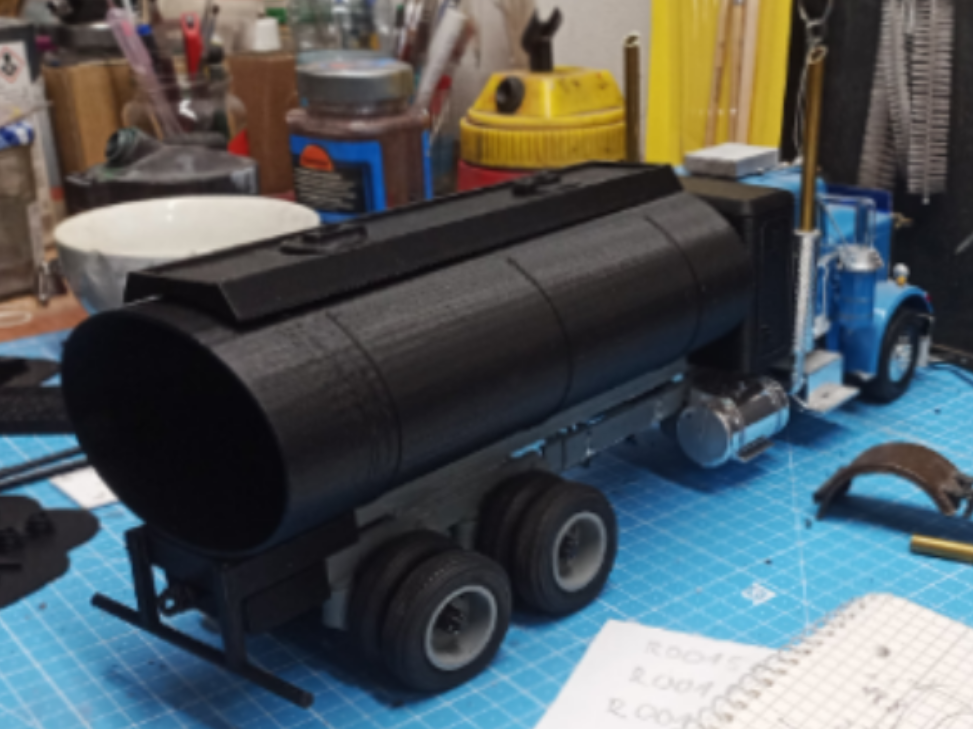
A little mock-up to see how it's gonna look. Don't know If I'll use both ladders. I think one's enough. Need one for the trailer too and if one more breaks I'll have a spare!
-
Pete 359 tanker with trailer
Jürgen M. replied to Jürgen M.'s topic in WIP: Model Trucks: Big Rigs and Heavy Equipment
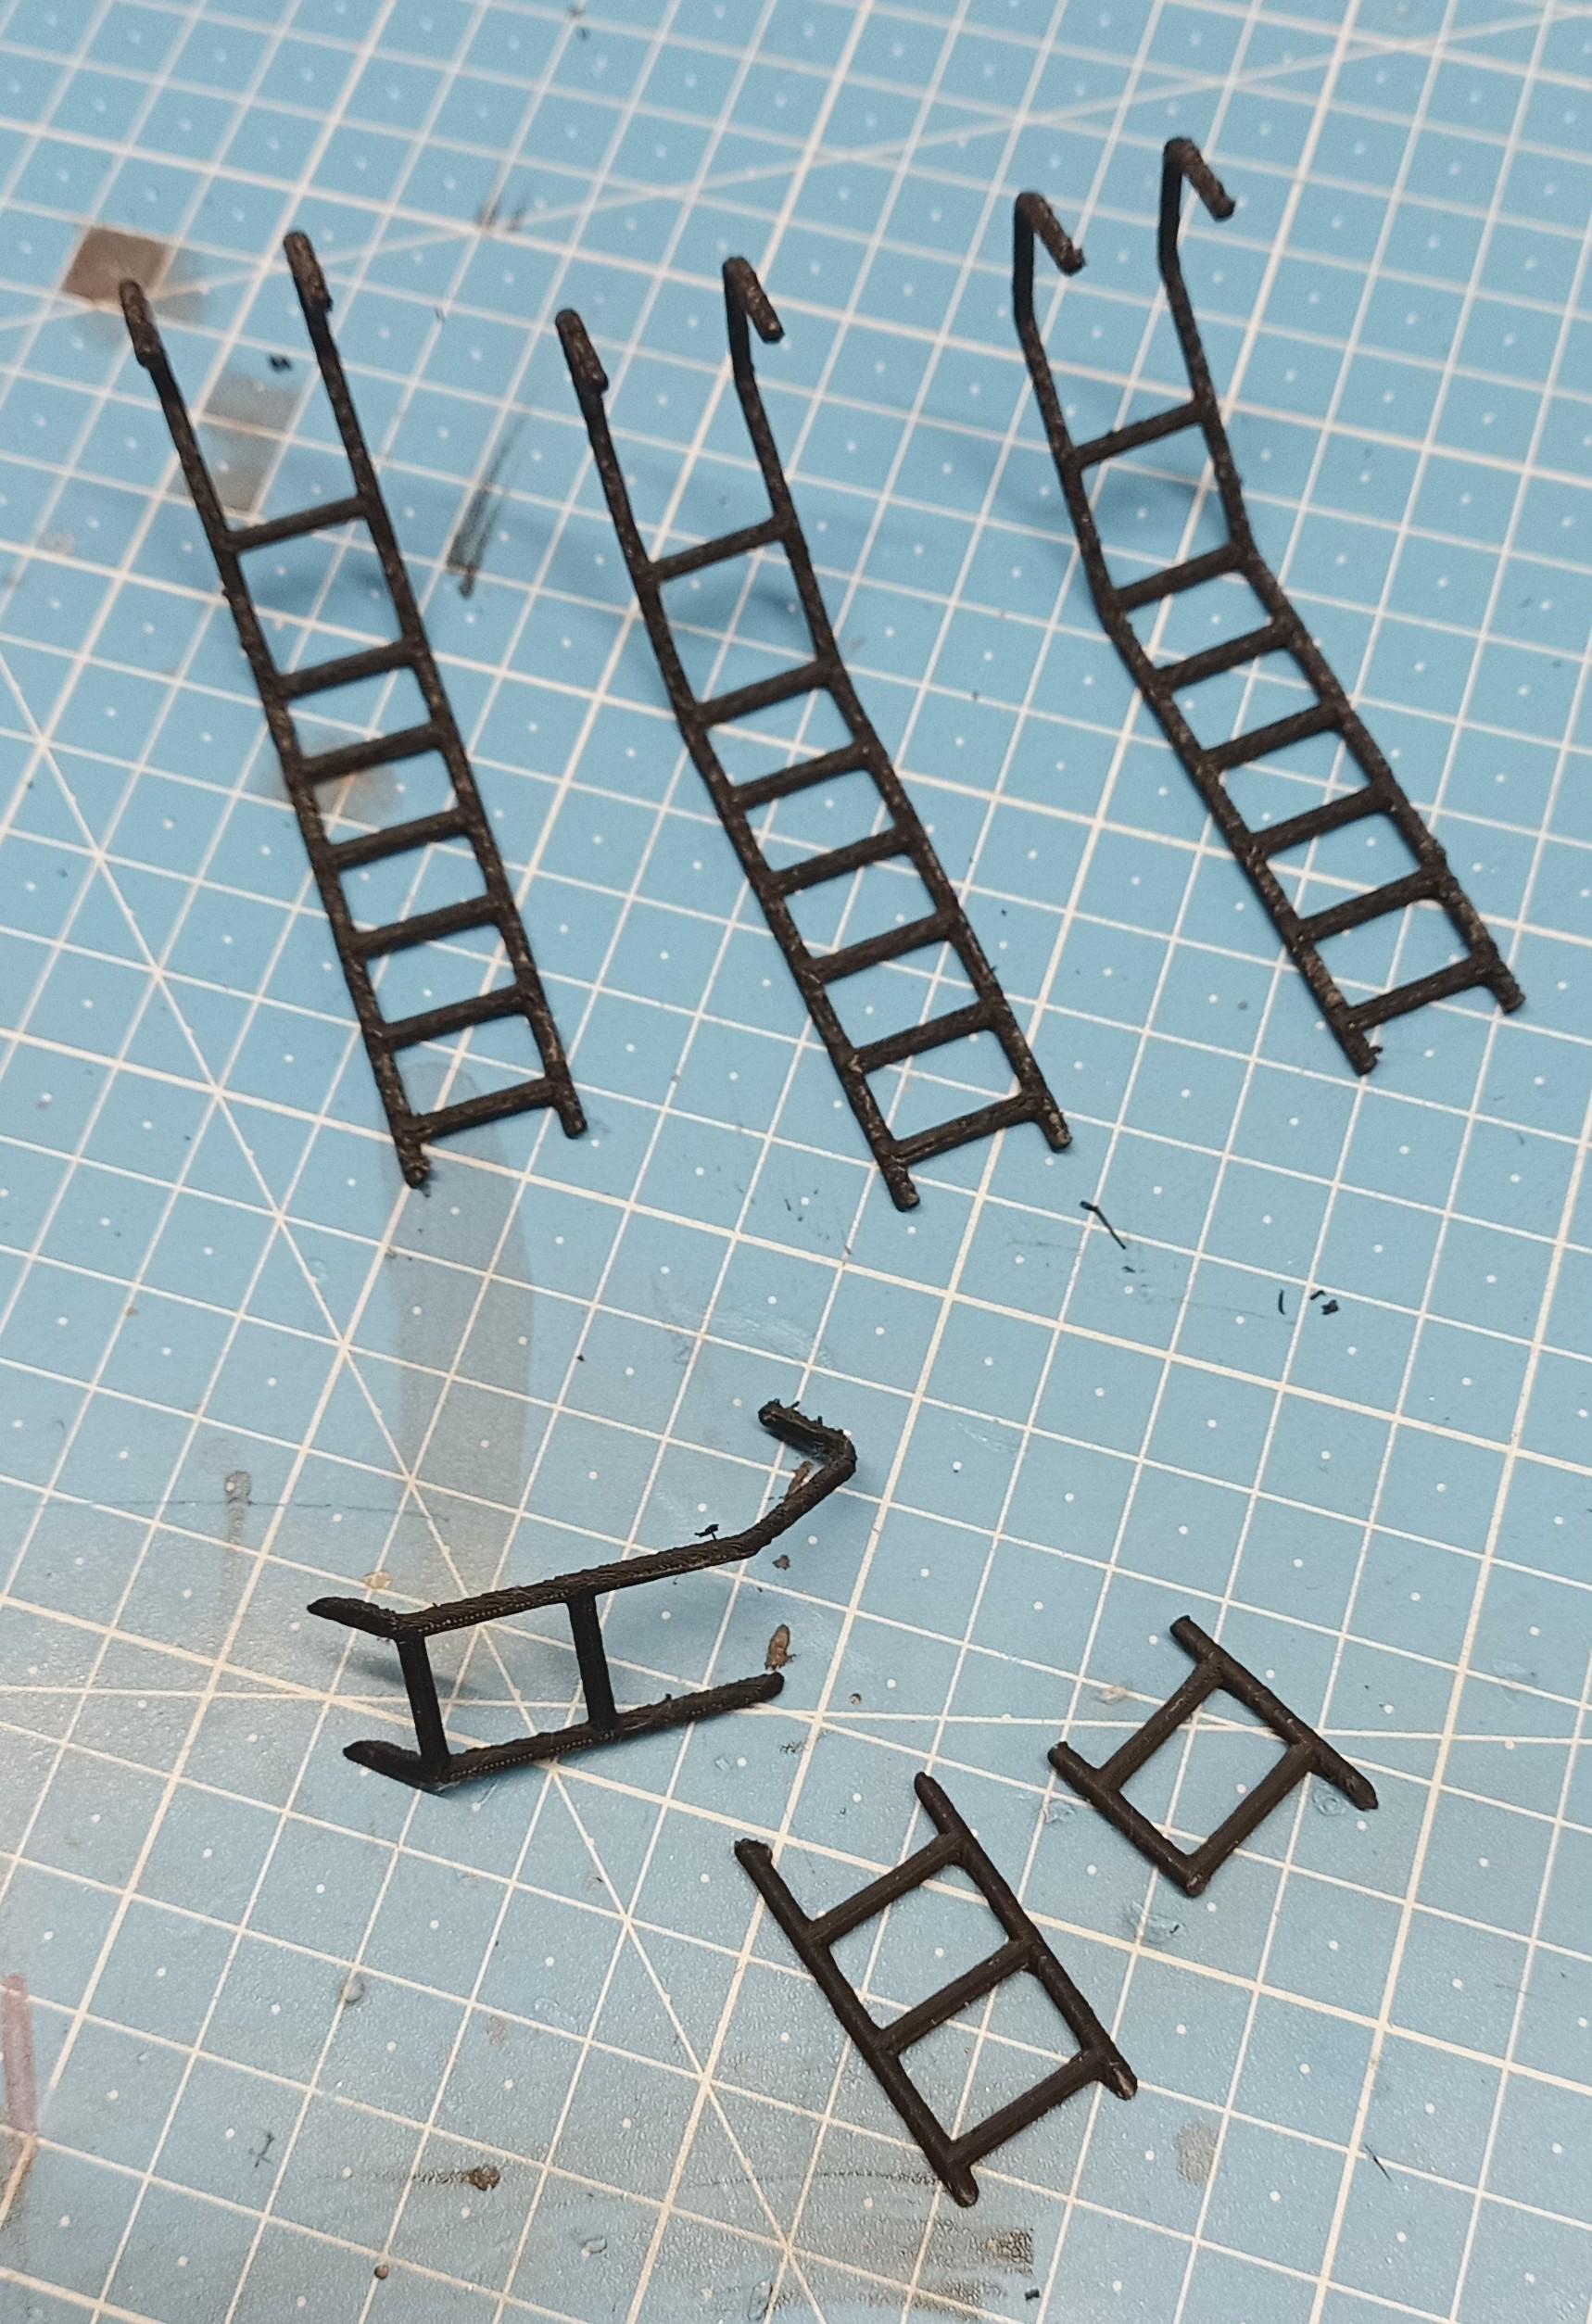
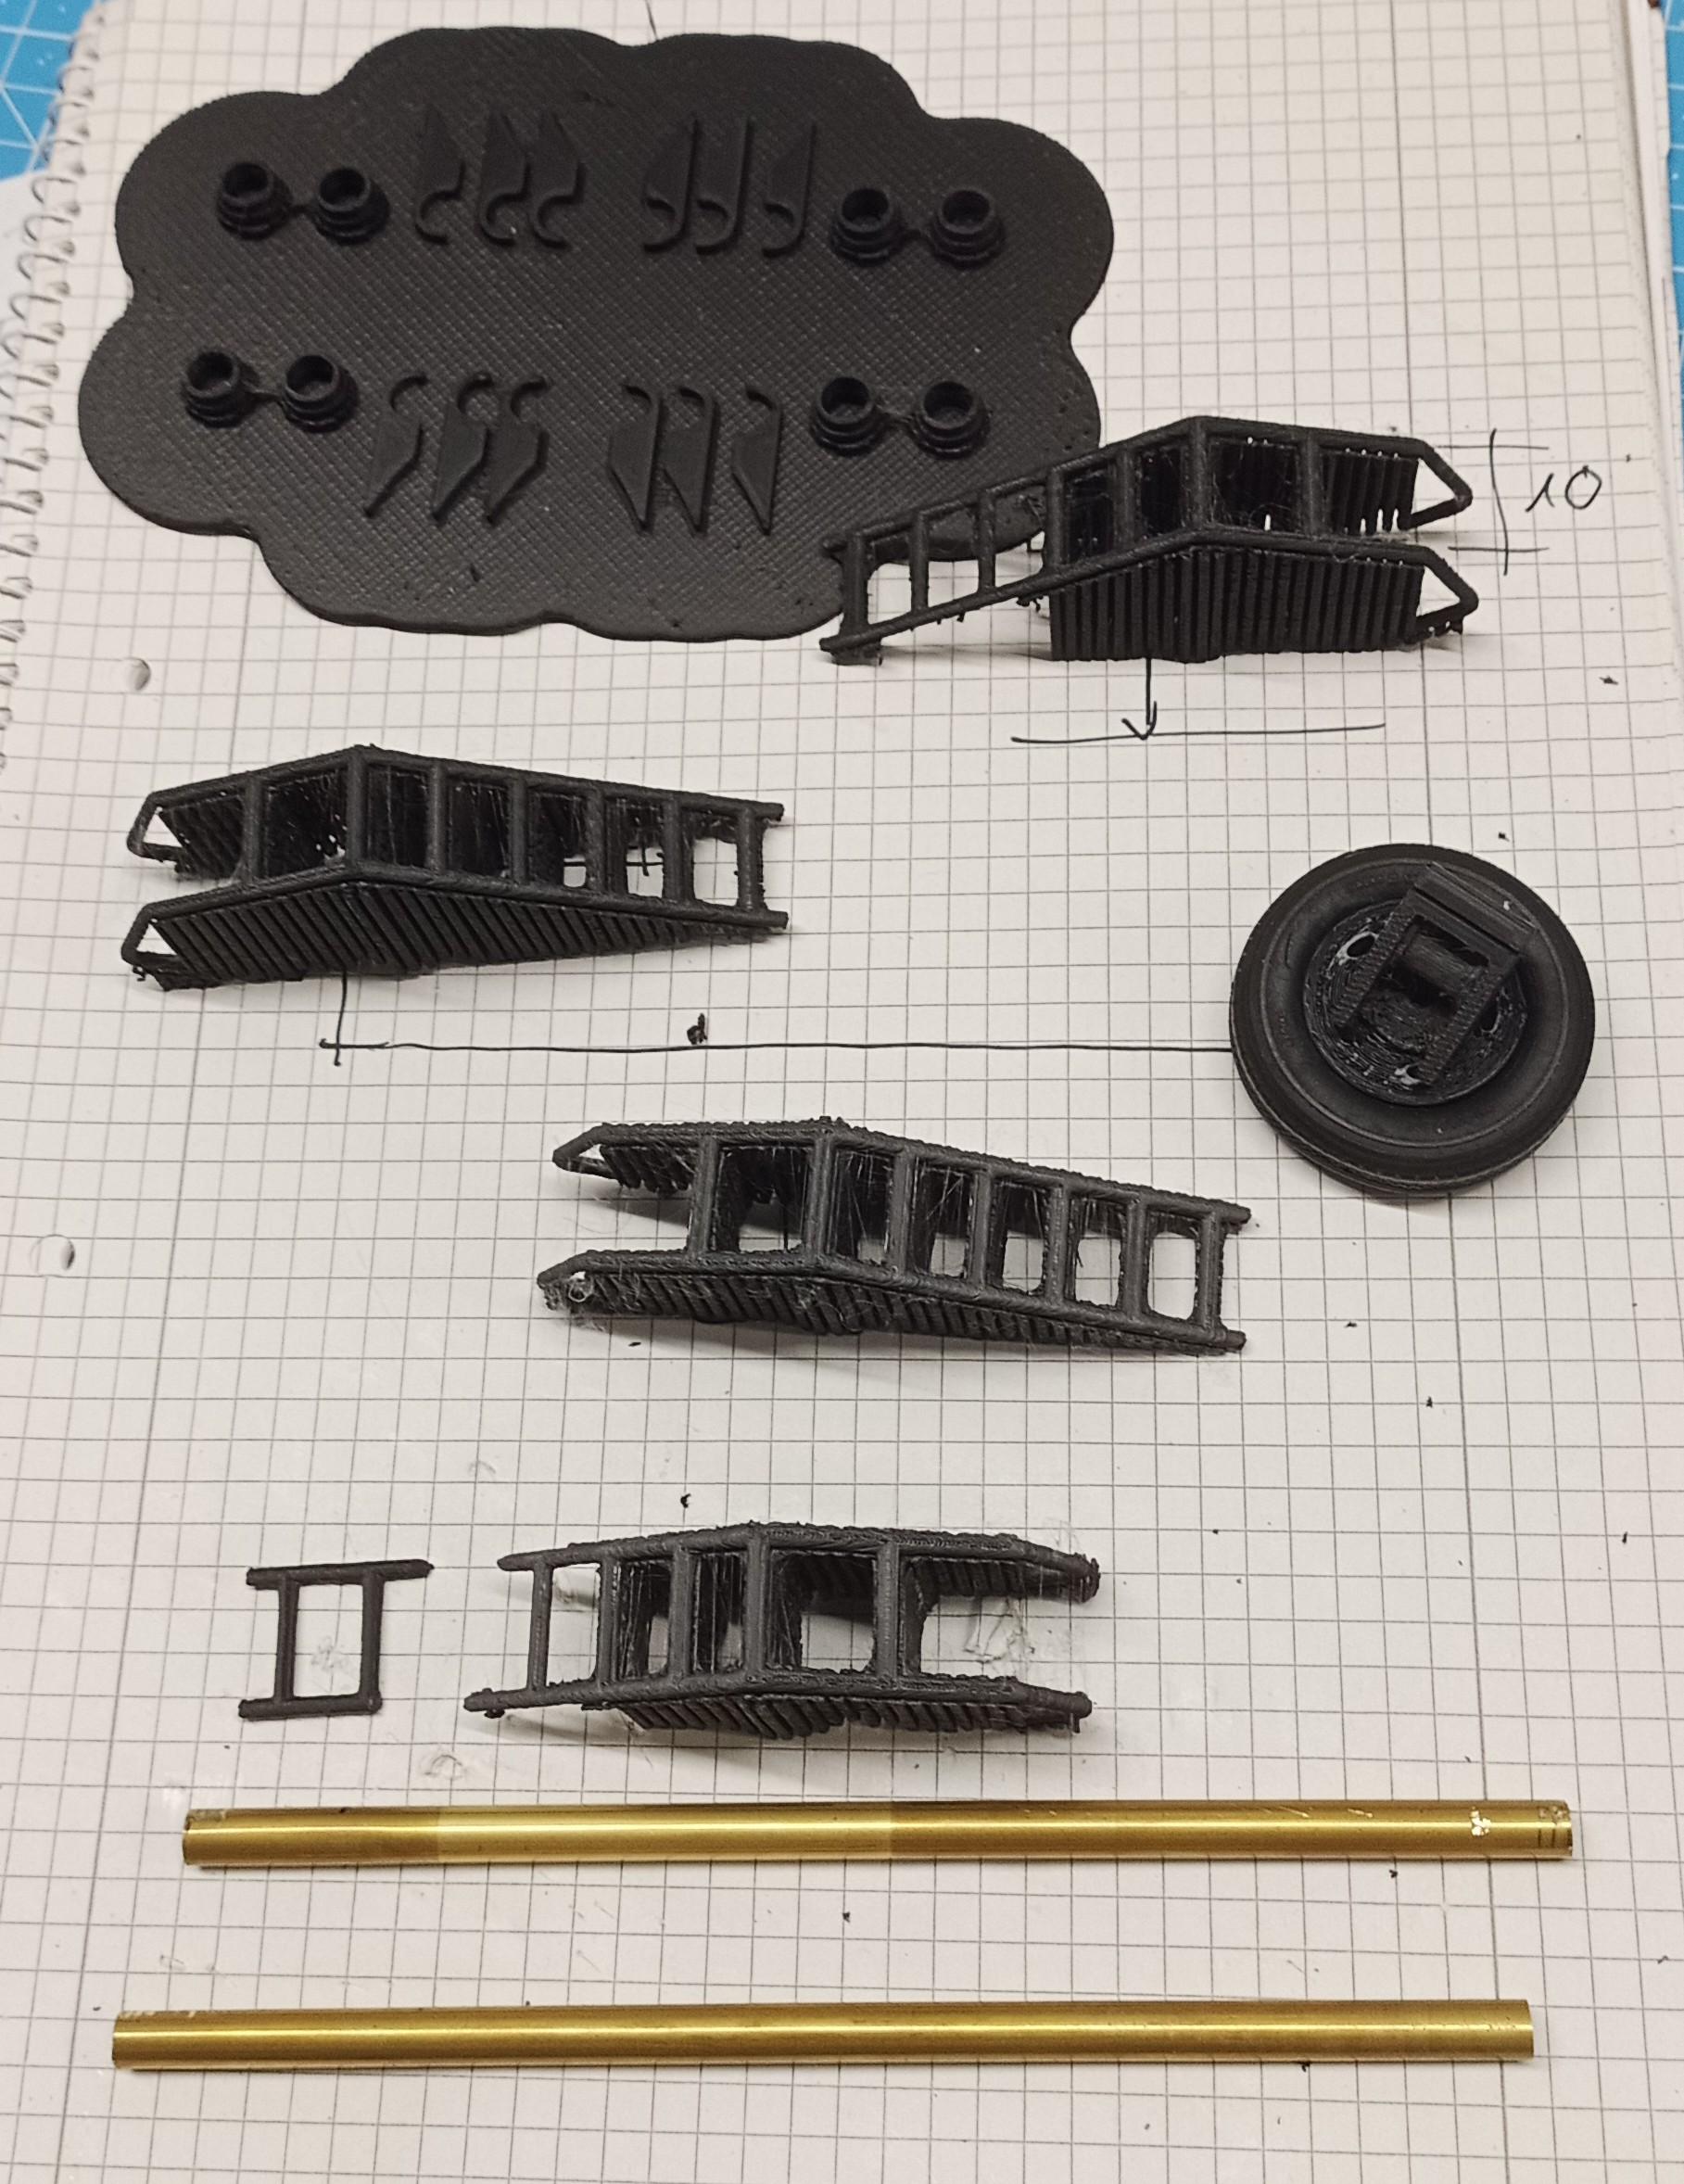
Three of four ladders survived the removal of the support structures!
-
Pete 359 tanker with trailer
Jürgen M. replied to Jürgen M.'s topic in WIP: Model Trucks: Big Rigs and Heavy Equipment
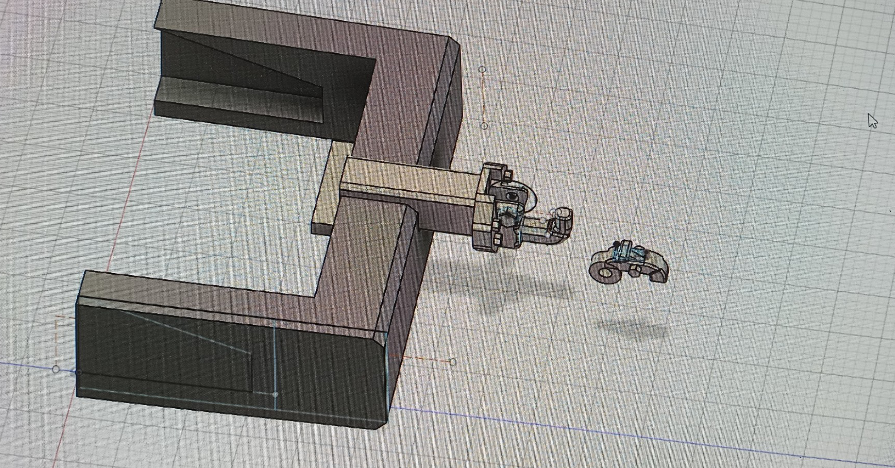
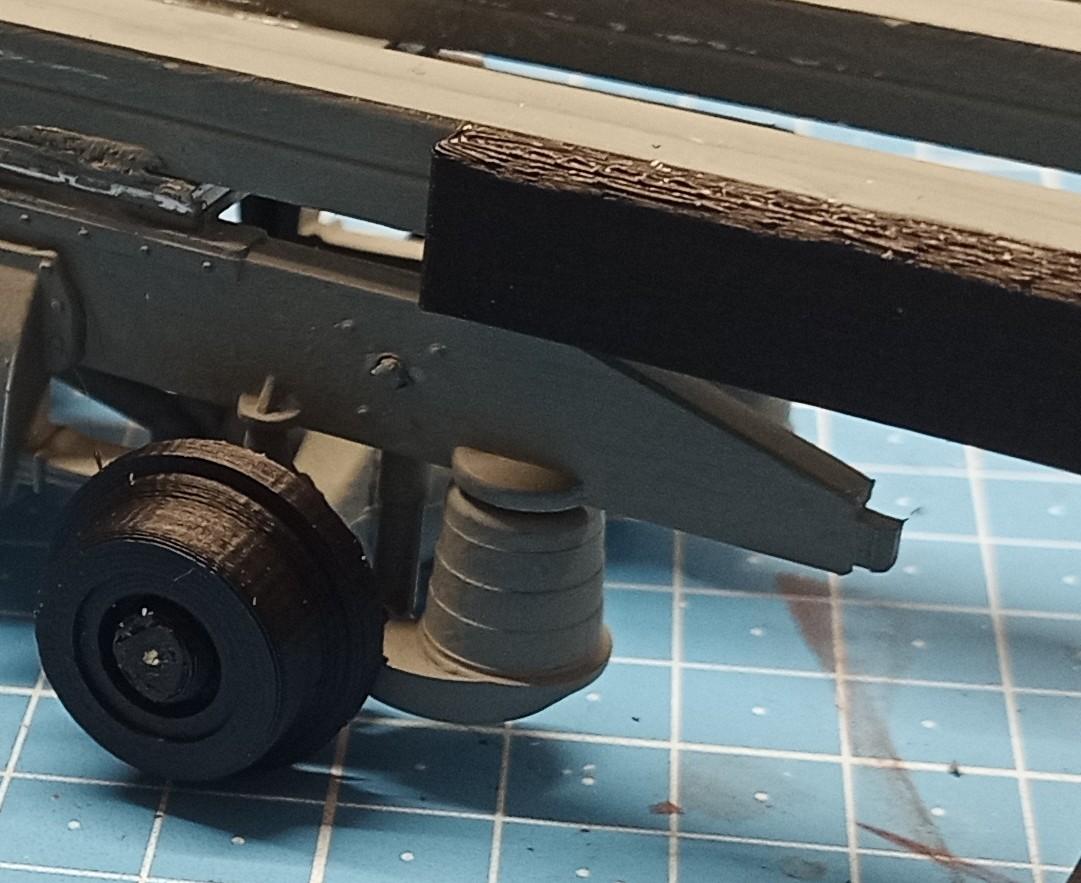
Thought I'd post some virtual parts cause they show the detail better. This is the bracket I made for the hitch: I made it fit to the end of the truck chassis! It fit perfectly, so did the hitch but I was so anxious to get the hitch on that I didn't notice it was a bit too short. Oops! I'll have to try and remove it or cut it off and lengthen it.
-
Mid 60s Peterbilt Unilite COE
Jürgen M. replied to RoninUtah's topic in WIP: Model Trucks: Big Rigs and Heavy Equipment
Anytime Ron. Glad to have helped! (I only recognized them after my third view in the model!) ? Did a great job on this Pete! A real eye catcher! -
The Same but “ a little “ Different
Jürgen M. replied to Biggu's topic in WIP: Model Trucks: Big Rigs and Heavy Equipment
Jeff, that is one detailled chassis there. Just by looking at it I can learn lots! I might Just "borrow" some of your knowledge for my next build! ?. Those decals look like painted! Wonderful job on those! -
Ford LN 8000 abd Tank Trailer
Jürgen M. replied to OldTrucker's topic in Model Trucks: Big Rigs and Heavy Equipment
Nice rig! I took like the Louisville! Never drove one though. I do have one in my virtual design drawer but I'm not satisfied enough yet to begin printing! I'm sure it'll find it's way into an own thread sometime next year. You did a a great job on this! Hope to see more of your abilities soon! -
1966 Peterbilt Unilite 352 COE
Jürgen M. replied to RoninUtah's topic in Model Trucks: Big Rigs and Heavy Equipment
Wow, Ron, it looks great! Finished so quickly you managed to give us a feeling of early to mid sixties West Coast trucking! The grille looks so authentic and I like the wheels! All in all you built a beautiful piece of American trucking history! Thanks for sharing! -
Pete 359 tanker with trailer
Jürgen M. replied to Jürgen M.'s topic in WIP: Model Trucks: Big Rigs and Heavy Equipment
Thanks very much guys! I can say the same about you! ? -
Pete 359 tanker with trailer
Jürgen M. replied to Jürgen M.'s topic in WIP: Model Trucks: Big Rigs and Heavy Equipment
The "Sky Walk" is finished! Side ladders are also printed but I have to be careful removing the Support structure! One ladder broke already but I can fix it. Also the support brackets for the pumping hoses are finished as well as the spare wheel holder. I also designed and printed a bracket for the chassis end to mount the hitch. Just started the print of the tank end covers. Will take till tomorrow! Hope I can do some primering by tuesday or wednesday! It all still needs work before final assembly!
-
1984 GMC General “Autumn Almond”
Jürgen M. replied to Pete68's topic in WIP: Model Trucks: Big Rigs and Heavy Equipment
It was worth the effort! Looks great! -
Not Another Freightliner
Jürgen M. replied to Rockford's topic in Model Trucks: Big Rigs and Heavy Equipment
What a fine build, Steve! Maybe you should show off your trucks all over your house. That would show the passion you have and convince a potential buyer that you desperately need more space! ? Hope you're Back at the bench soon! ? -
1/32 Freightliner cabover
Jürgen M. replied to Rockford's topic in WIP: Model Trucks: Big Rigs and Heavy Equipment
What an awesome looking truck Steve! Your builds are the Crown Jewels in truck shape! Now you just need a tower to exhibit them! ? -
Pete 359 tanker with trailer
Jürgen M. replied to Jürgen M.'s topic in WIP: Model Trucks: Big Rigs and Heavy Equipment
Oh, I know the feeling! I had ordered the heating element and the extruder at the manufacturer and waited weeks till I finally got the message that both are not deliverable at the time! ? Then I ordered at Amazon and got it after two days. The filament I ordered there wasn't very good though even though it was the original product. The foil it was shrunk in was torn and so the filament had drawn humidity. I had to put it into the filament dryer for two days till it was processable! -
1984 GMC General “Autumn Almond”
Jürgen M. replied to Pete68's topic in WIP: Model Trucks: Big Rigs and Heavy Equipment
Looks great! Very neat work. The hood seems to fit perfectly! Congrats! Great job! -
Pete 359 tanker with trailer
Jürgen M. replied to Jürgen M.'s topic in WIP: Model Trucks: Big Rigs and Heavy Equipment
OK, OK, I get it! ? Printing isn't exactly free either. The filament costs, so do the spare parts for the printer. But as I understand it, we all have our costs, we all wait during the process but at the end we all get what we want. The most important thing is, we build! ? -
1984 GMC General “Autumn Almond”
Jürgen M. replied to Pete68's topic in WIP: Model Trucks: Big Rigs and Heavy Equipment
Precise work on that cockpit! Nice colors! Perfect match to the exterior color scheme!