Jürgen M.
-
Posts
1,677 -
Joined
-
Last visited
Content Type
Profiles
Forums
Events
Gallery
Everything posted by Jürgen M.
-

Mack DM800 refurnish
Jürgen M. replied to Jürgen M.'s topic in WIP: Model Trucks: Big Rigs and Heavy Equipment
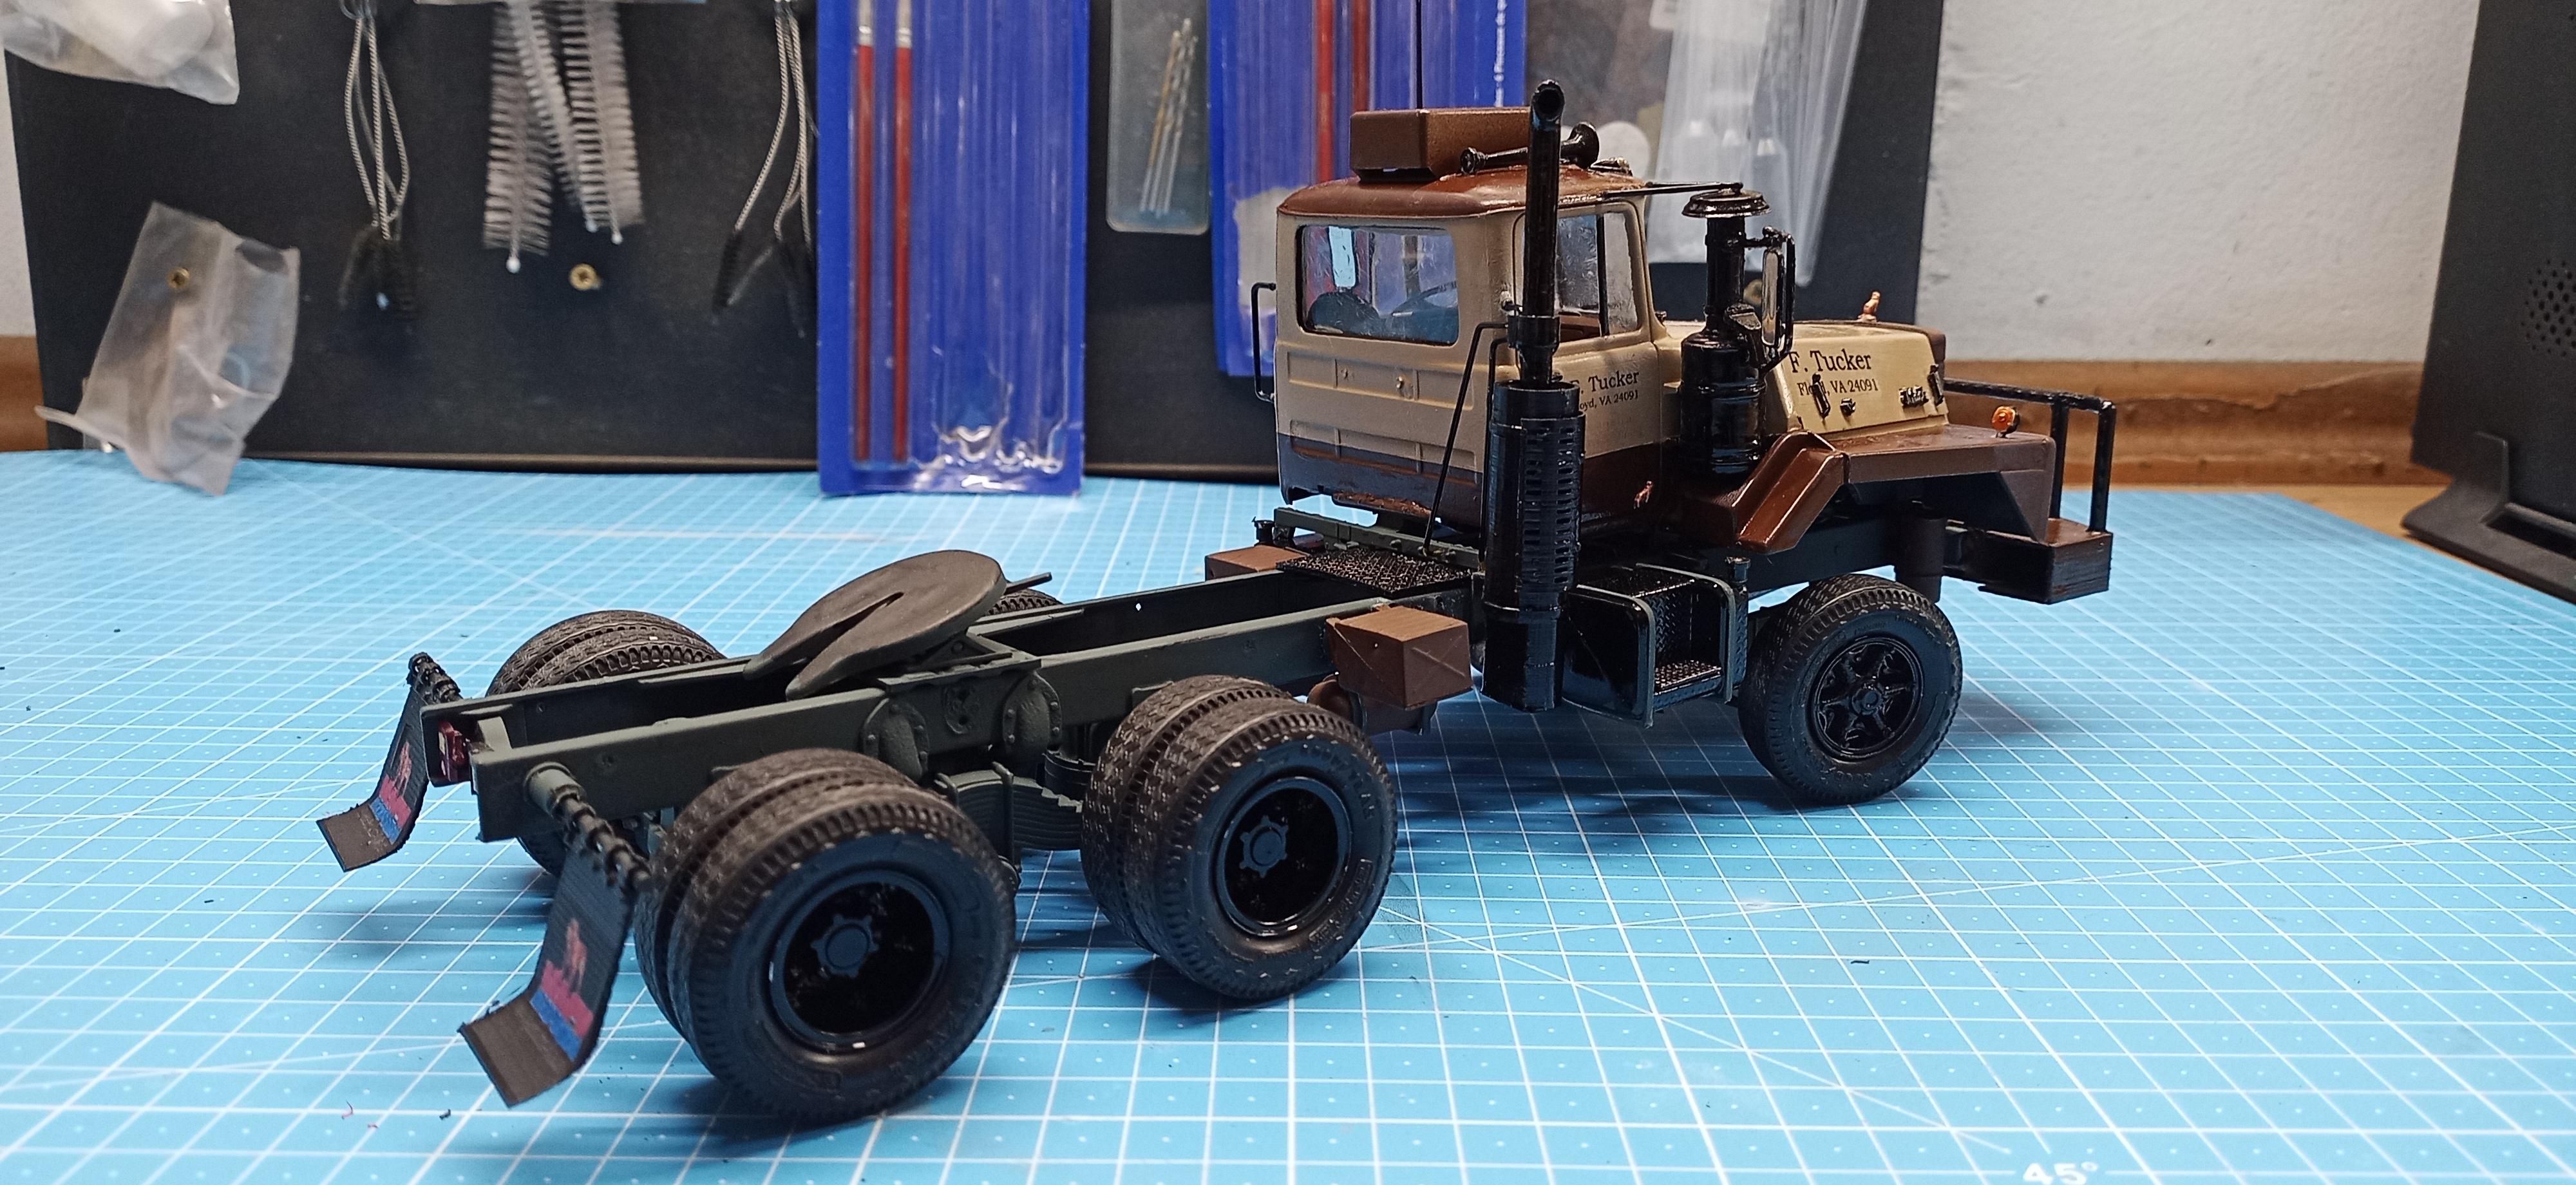
I guess that's about it! Still have a winch in print but I'm still not sure wether to use it on this one or keep it for some other project! The exhaust support was easy to build and looks pretty good I think. Of course the quality of this work over could have been better, I know that. But I thought it's an old truck so it should look used! Thanks for checking in and watching! If I do decide to use the winch I'll post new pics!
-
Mack DM800 refurnish
Jürgen M. replied to Jürgen M.'s topic in WIP: Model Trucks: Big Rigs and Heavy Equipment
Thanks!!!! I'll have to design a support for the exhaust system! First I wanted some sort of fixation like on top of the air cleaner but then I decided to fix it to the chassis. It'll probably turn out to be just a ring around the endpipe and some 1mm brass rod connecting it to the rail on the chassis behind the cab!
-
International 4300 tractor
Jürgen M. replied to Gary Chastain's topic in WIP: Model Trucks: Big Rigs and Heavy Equipment
Outstanding build Gary! Can't wait to see the tractor finished! -
IH Transtar 4300 converted to a 4200
Jürgen M. replied to k100's topic in WIP: Model Trucks: Big Rigs and Heavy Equipment
That's strange! Can't figure what happened there! I can't tell in your picture! Did you use a primer? If yes, did you sand it before applying top coat? Just trying to find out what happened! I'll keep thinking! But the main problem now is fixing the area. Best might be to carefully sand the edges of the peeled off area with a 1000 or higher sanding paper. Maybe the purple bath ist the smarter solution! ? -
Mack DM800 refurnish
Jürgen M. replied to Jürgen M.'s topic in WIP: Model Trucks: Big Rigs and Heavy Equipment
Thank you guys! Exhaust print worked out quite well! Needs to be painted! I also designed a winch. I'll have to decide If I'm actually going to use it! Pictures will follow shortly! -
Mack DM800 refurnish
Jürgen M. replied to Jürgen M.'s topic in WIP: Model Trucks: Big Rigs and Heavy Equipment
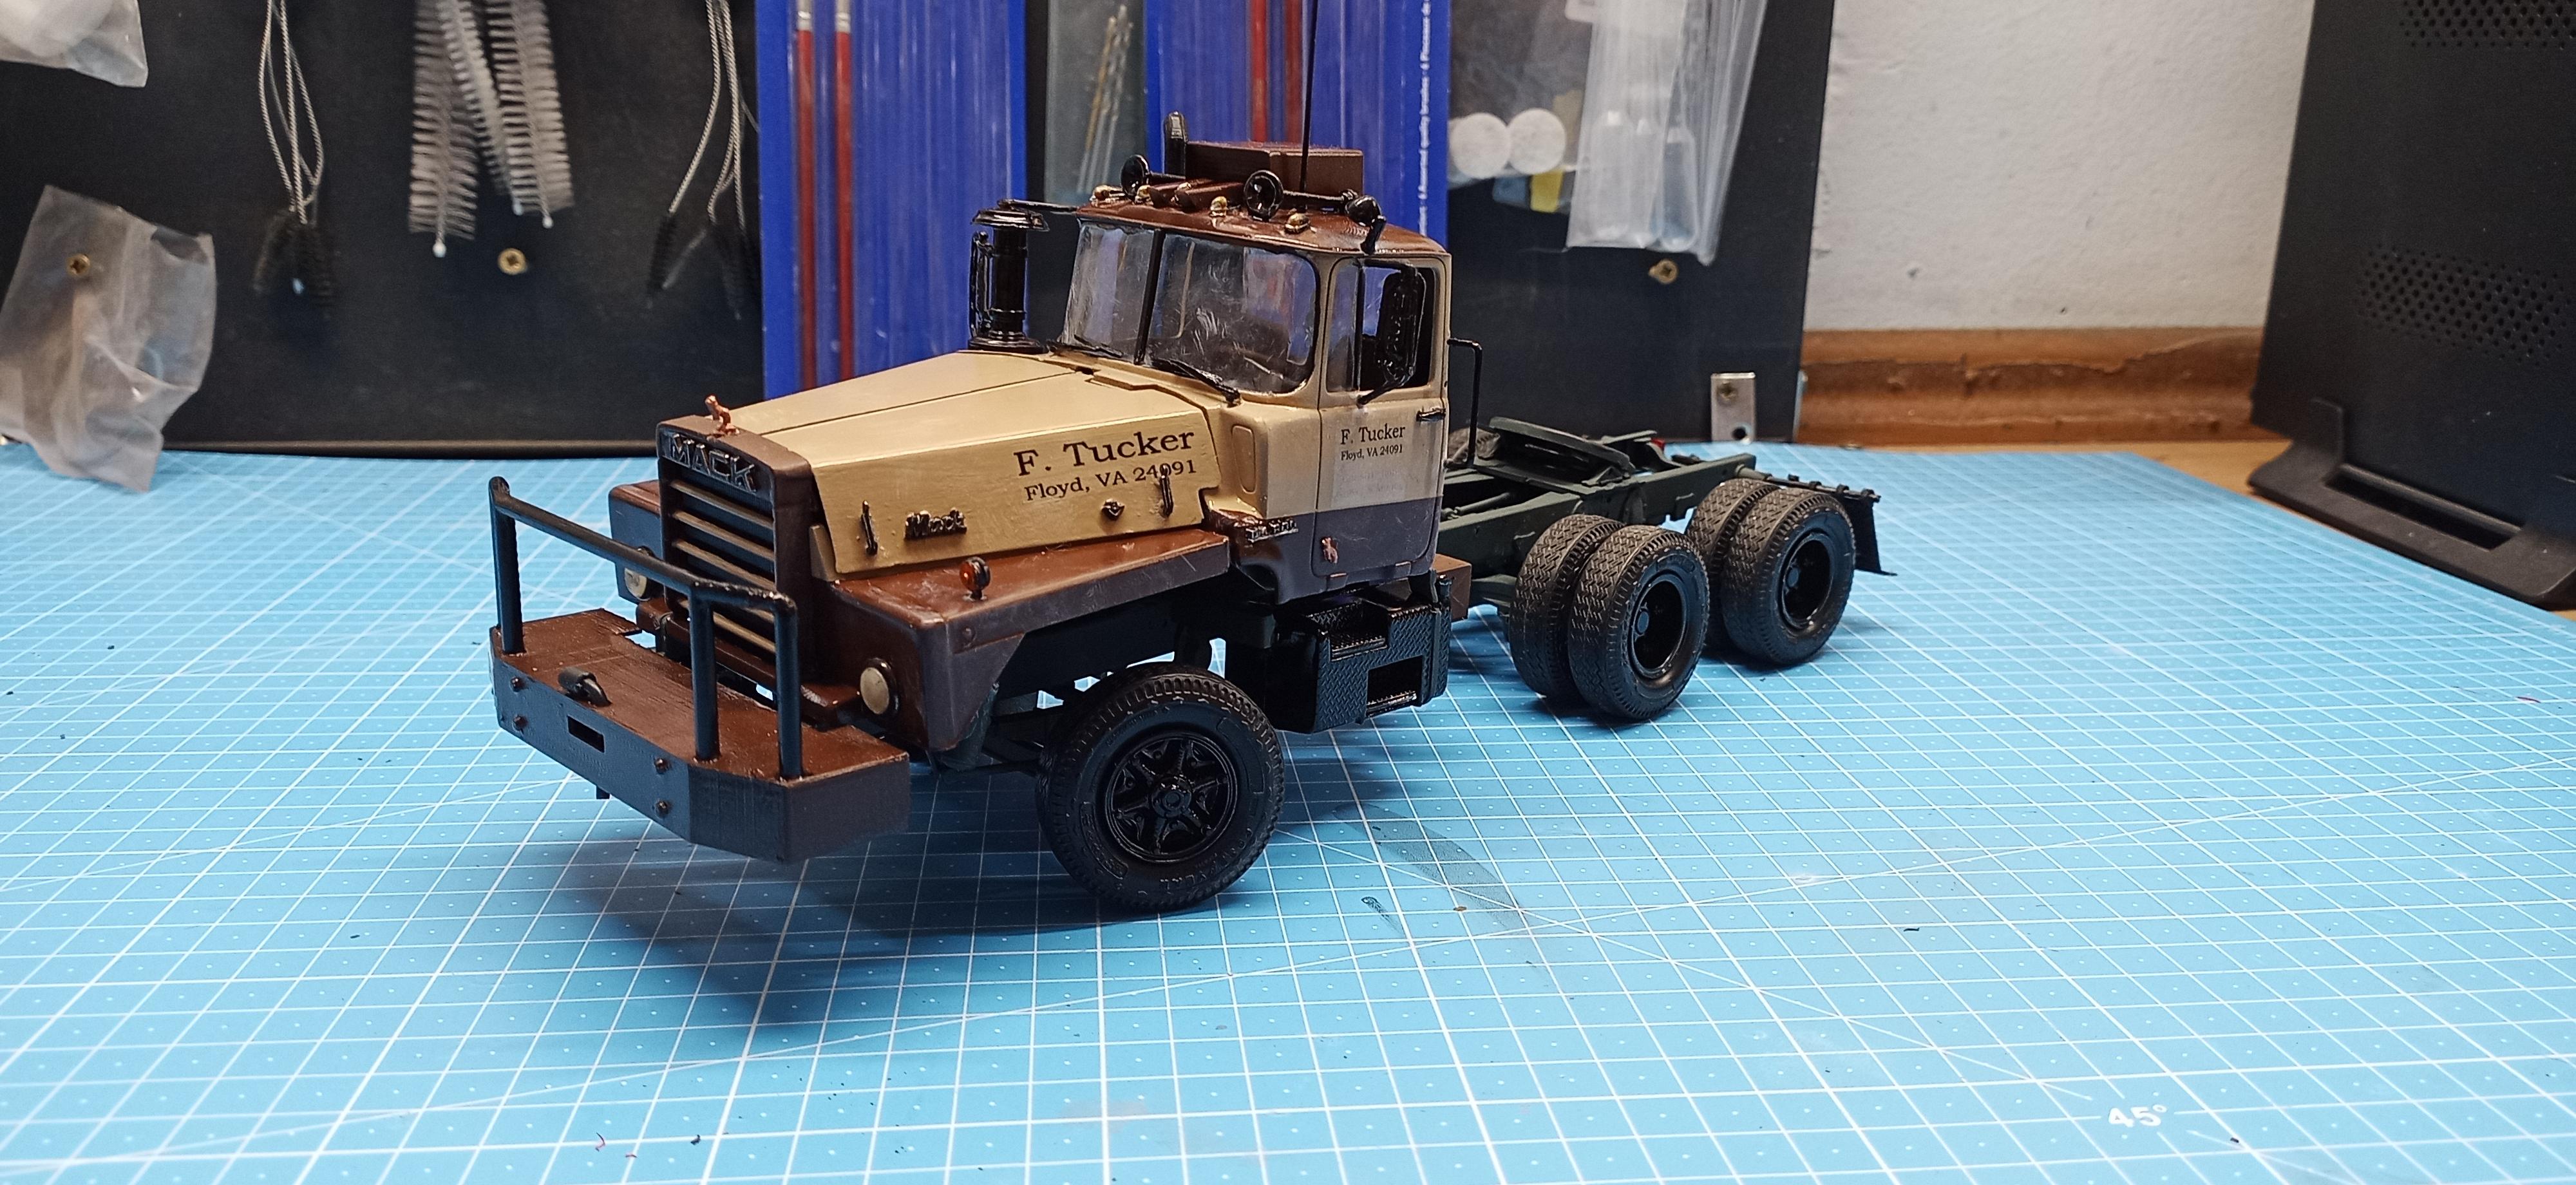
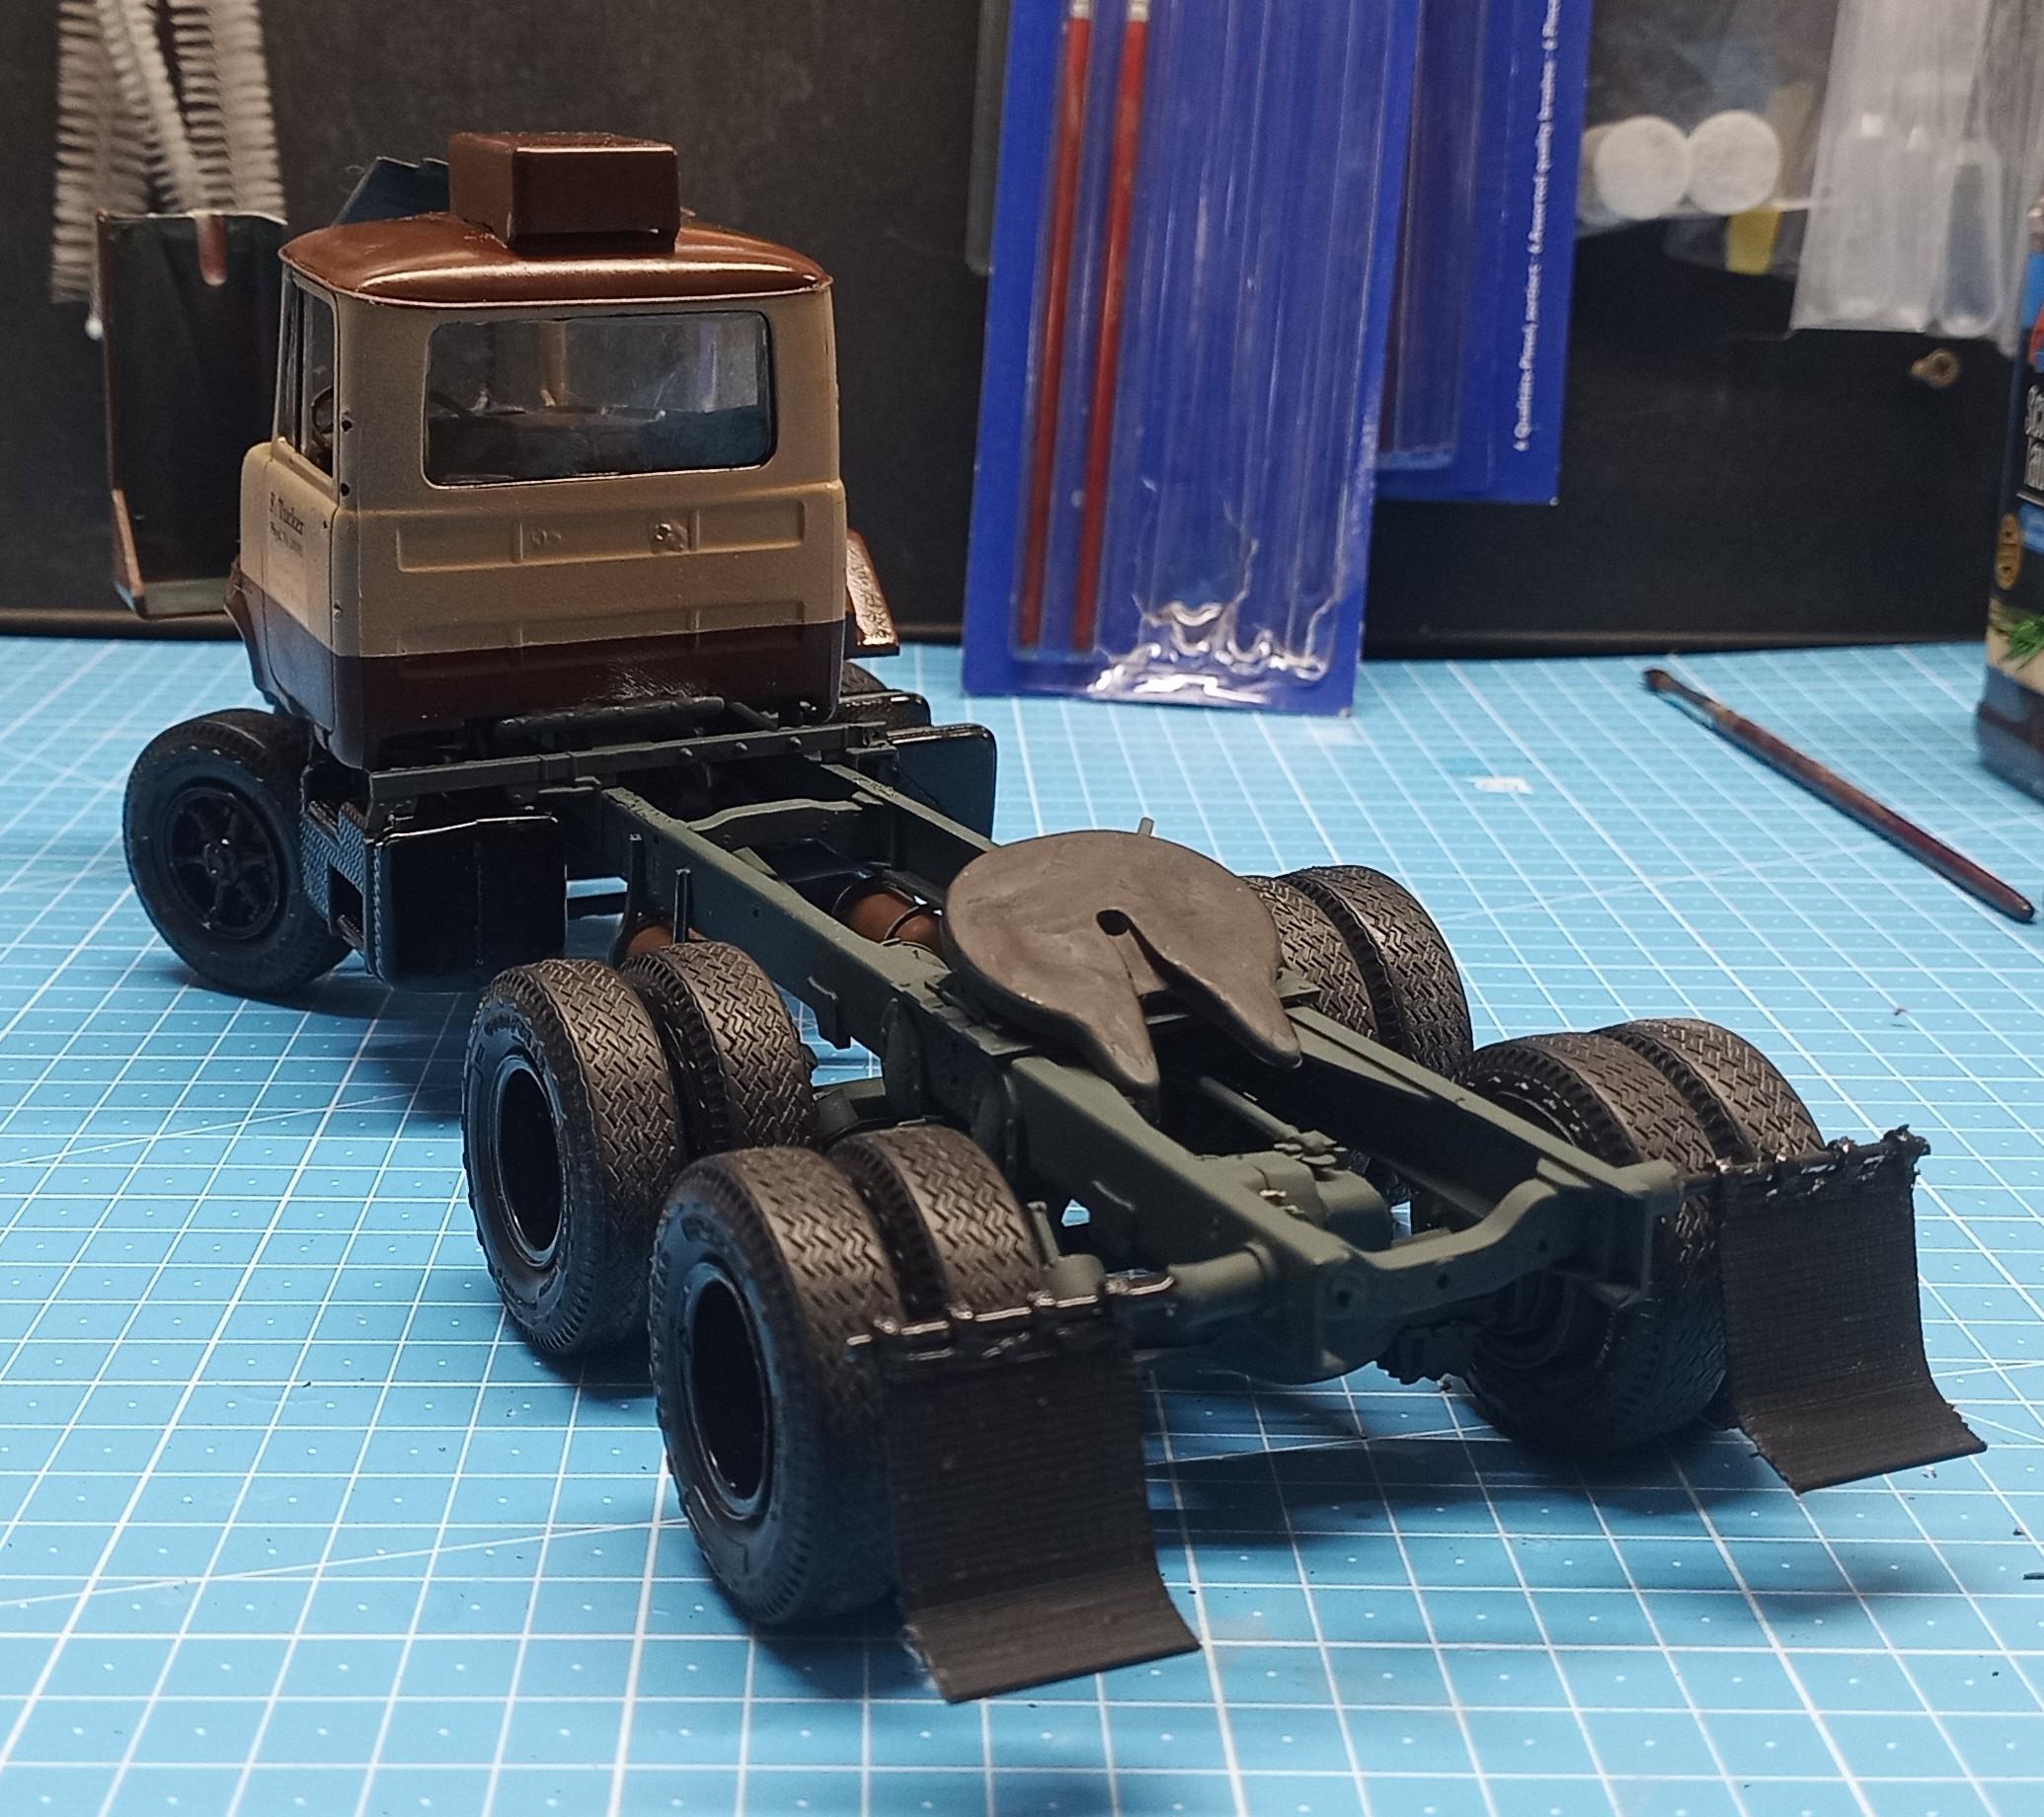
Some more progress: Small parts like mirrors, hand rails, ... attached! Bumper also attached. Looks pretty good I'd say. There's even enough space for a winch or something! Exhaust is in print. Got the thing working without the spare parts! They'll arrive tomorrow!
-
IH Transtar 4300 converted to a 4200
Jürgen M. replied to k100's topic in WIP: Model Trucks: Big Rigs and Heavy Equipment
I know the problem with the paint coming off! Which tape do you use? I had good experience with the yellow Revell tape. To avoid the paint coming off be sure to peel off the tape very flat and close to the surface! Practically horizontally and very slowly! And the paint the tape is draped on should be dry for at least 24hrs before applying the tape. It worked in my DM800!
-
Mack DM800 refurnish
Jürgen M. replied to Jürgen M.'s topic in WIP: Model Trucks: Big Rigs and Heavy Equipment
? You might be right there! -
1/32 Freightliner cabover
Jürgen M. replied to Rockford's topic in WIP: Model Trucks: Big Rigs and Heavy Equipment
Awesome! ? -
Mack DM800 refurnish
Jürgen M. replied to Jürgen M.'s topic in WIP: Model Trucks: Big Rigs and Heavy Equipment
Thanks! Hope you'll like the end result too. As soon as I get my printer going I'll print the exhaust system! Hope it fits well! -
Western Star 4900 FA plow truck
Jürgen M. replied to BK9300's topic in WIP: Model Trucks: Big Rigs and Heavy Equipment
Thanks! Nice of you to say that! I'm really amazed by the precision of your work! Fantastic! ? -
Western Star 4900 FA plow truck
Jürgen M. replied to BK9300's topic in WIP: Model Trucks: Big Rigs and Heavy Equipment
I have nothing to add! ? -
Mack DM800 refurnish
Jürgen M. replied to Jürgen M.'s topic in WIP: Model Trucks: Big Rigs and Heavy Equipment
By the way, the windshield strut broke while taking the kit apart. I printed a new one. Fits pretty good! -
Mack DM800 refurnish
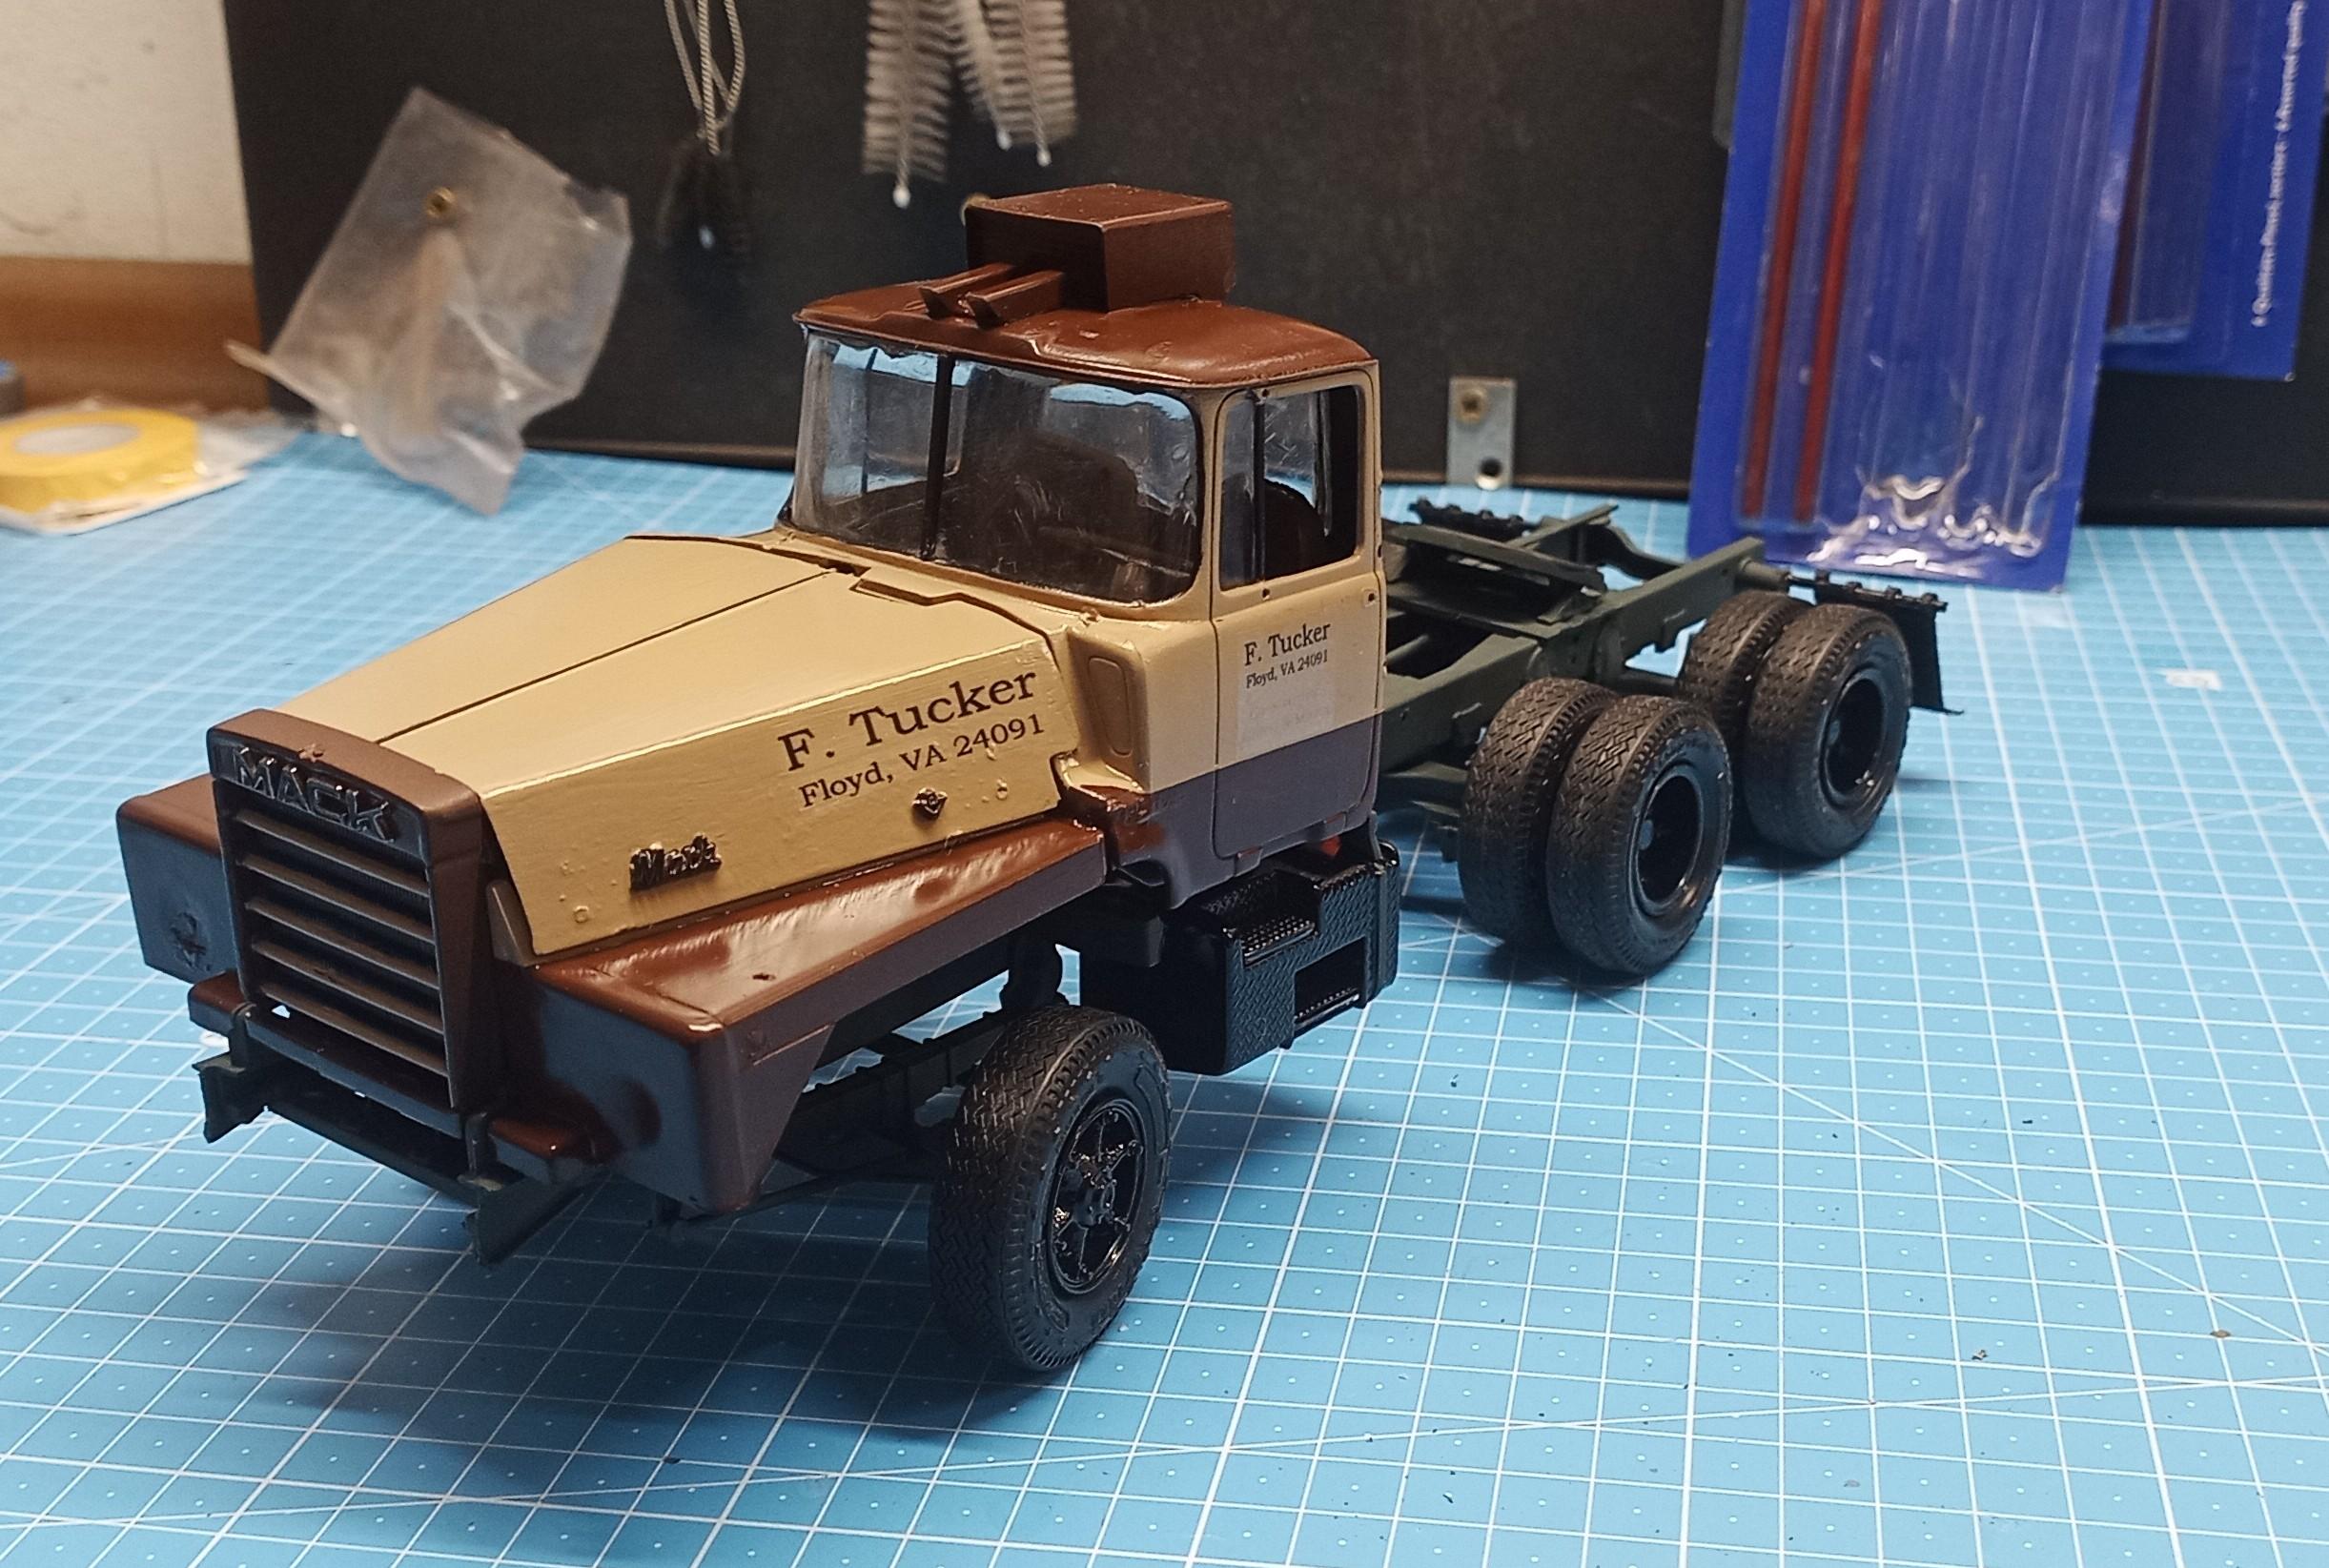
Jürgen M. replied to Jürgen M.'s topic in WIP: Model Trucks: Big Rigs and Heavy Equipment
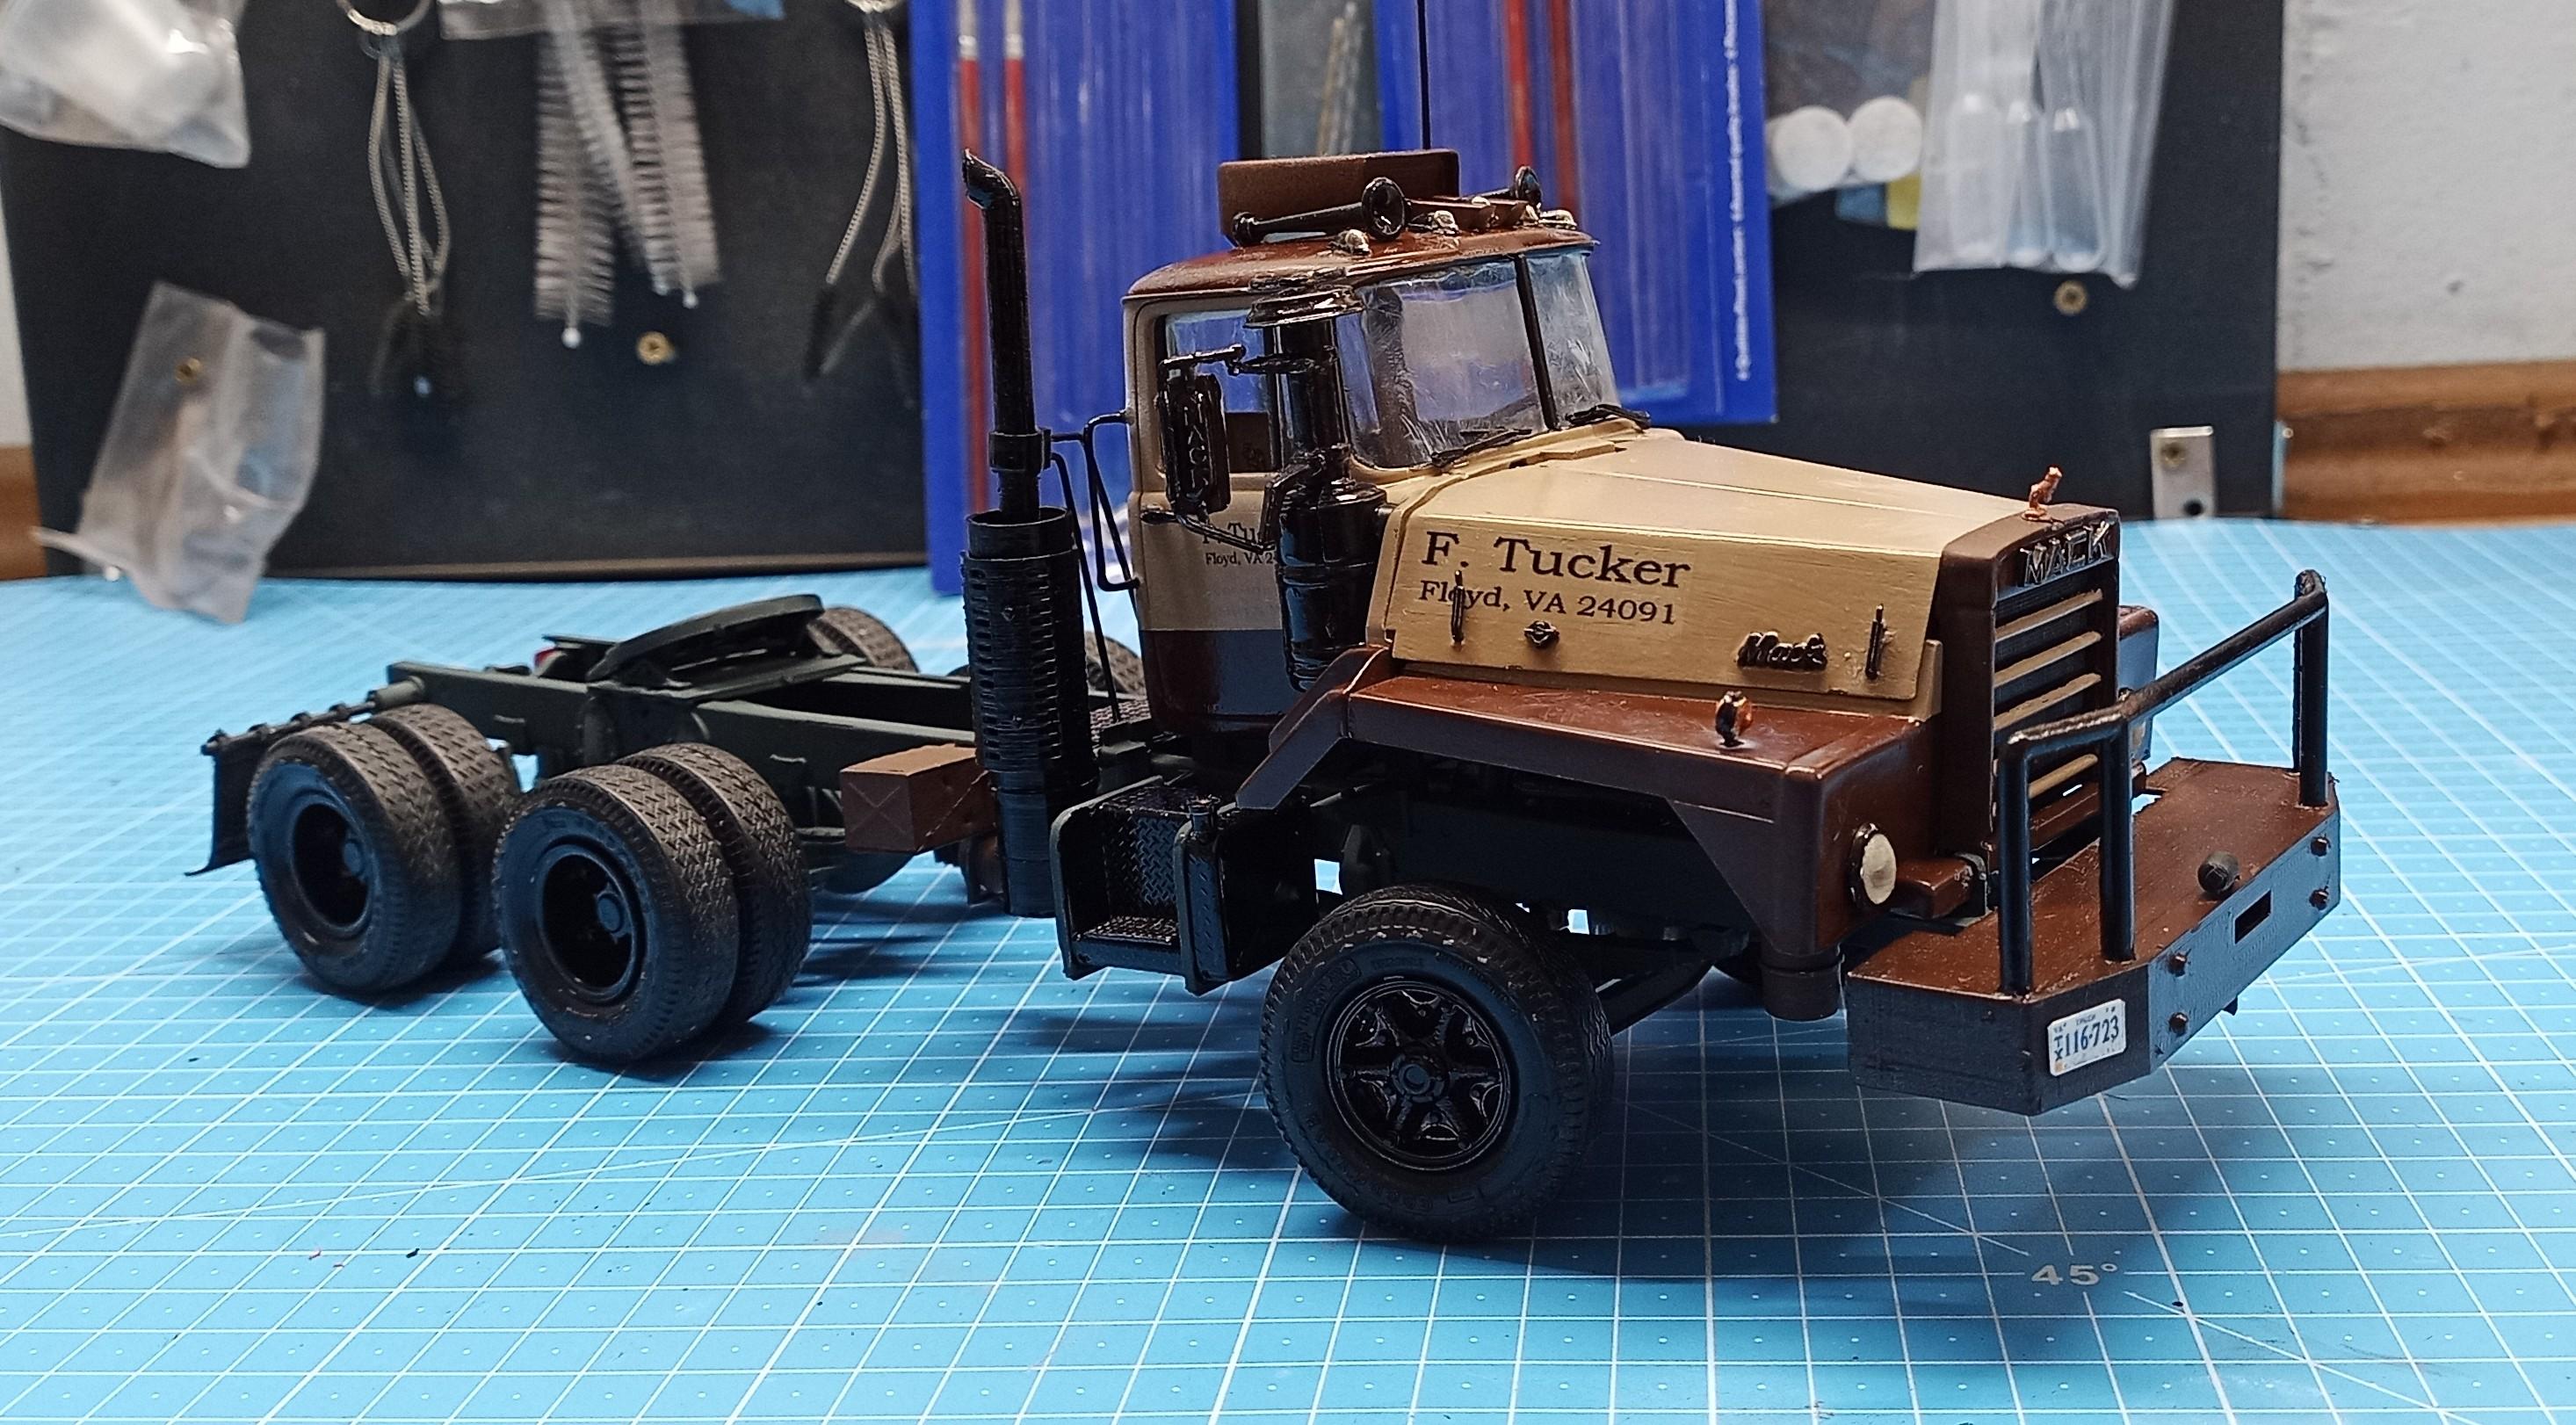
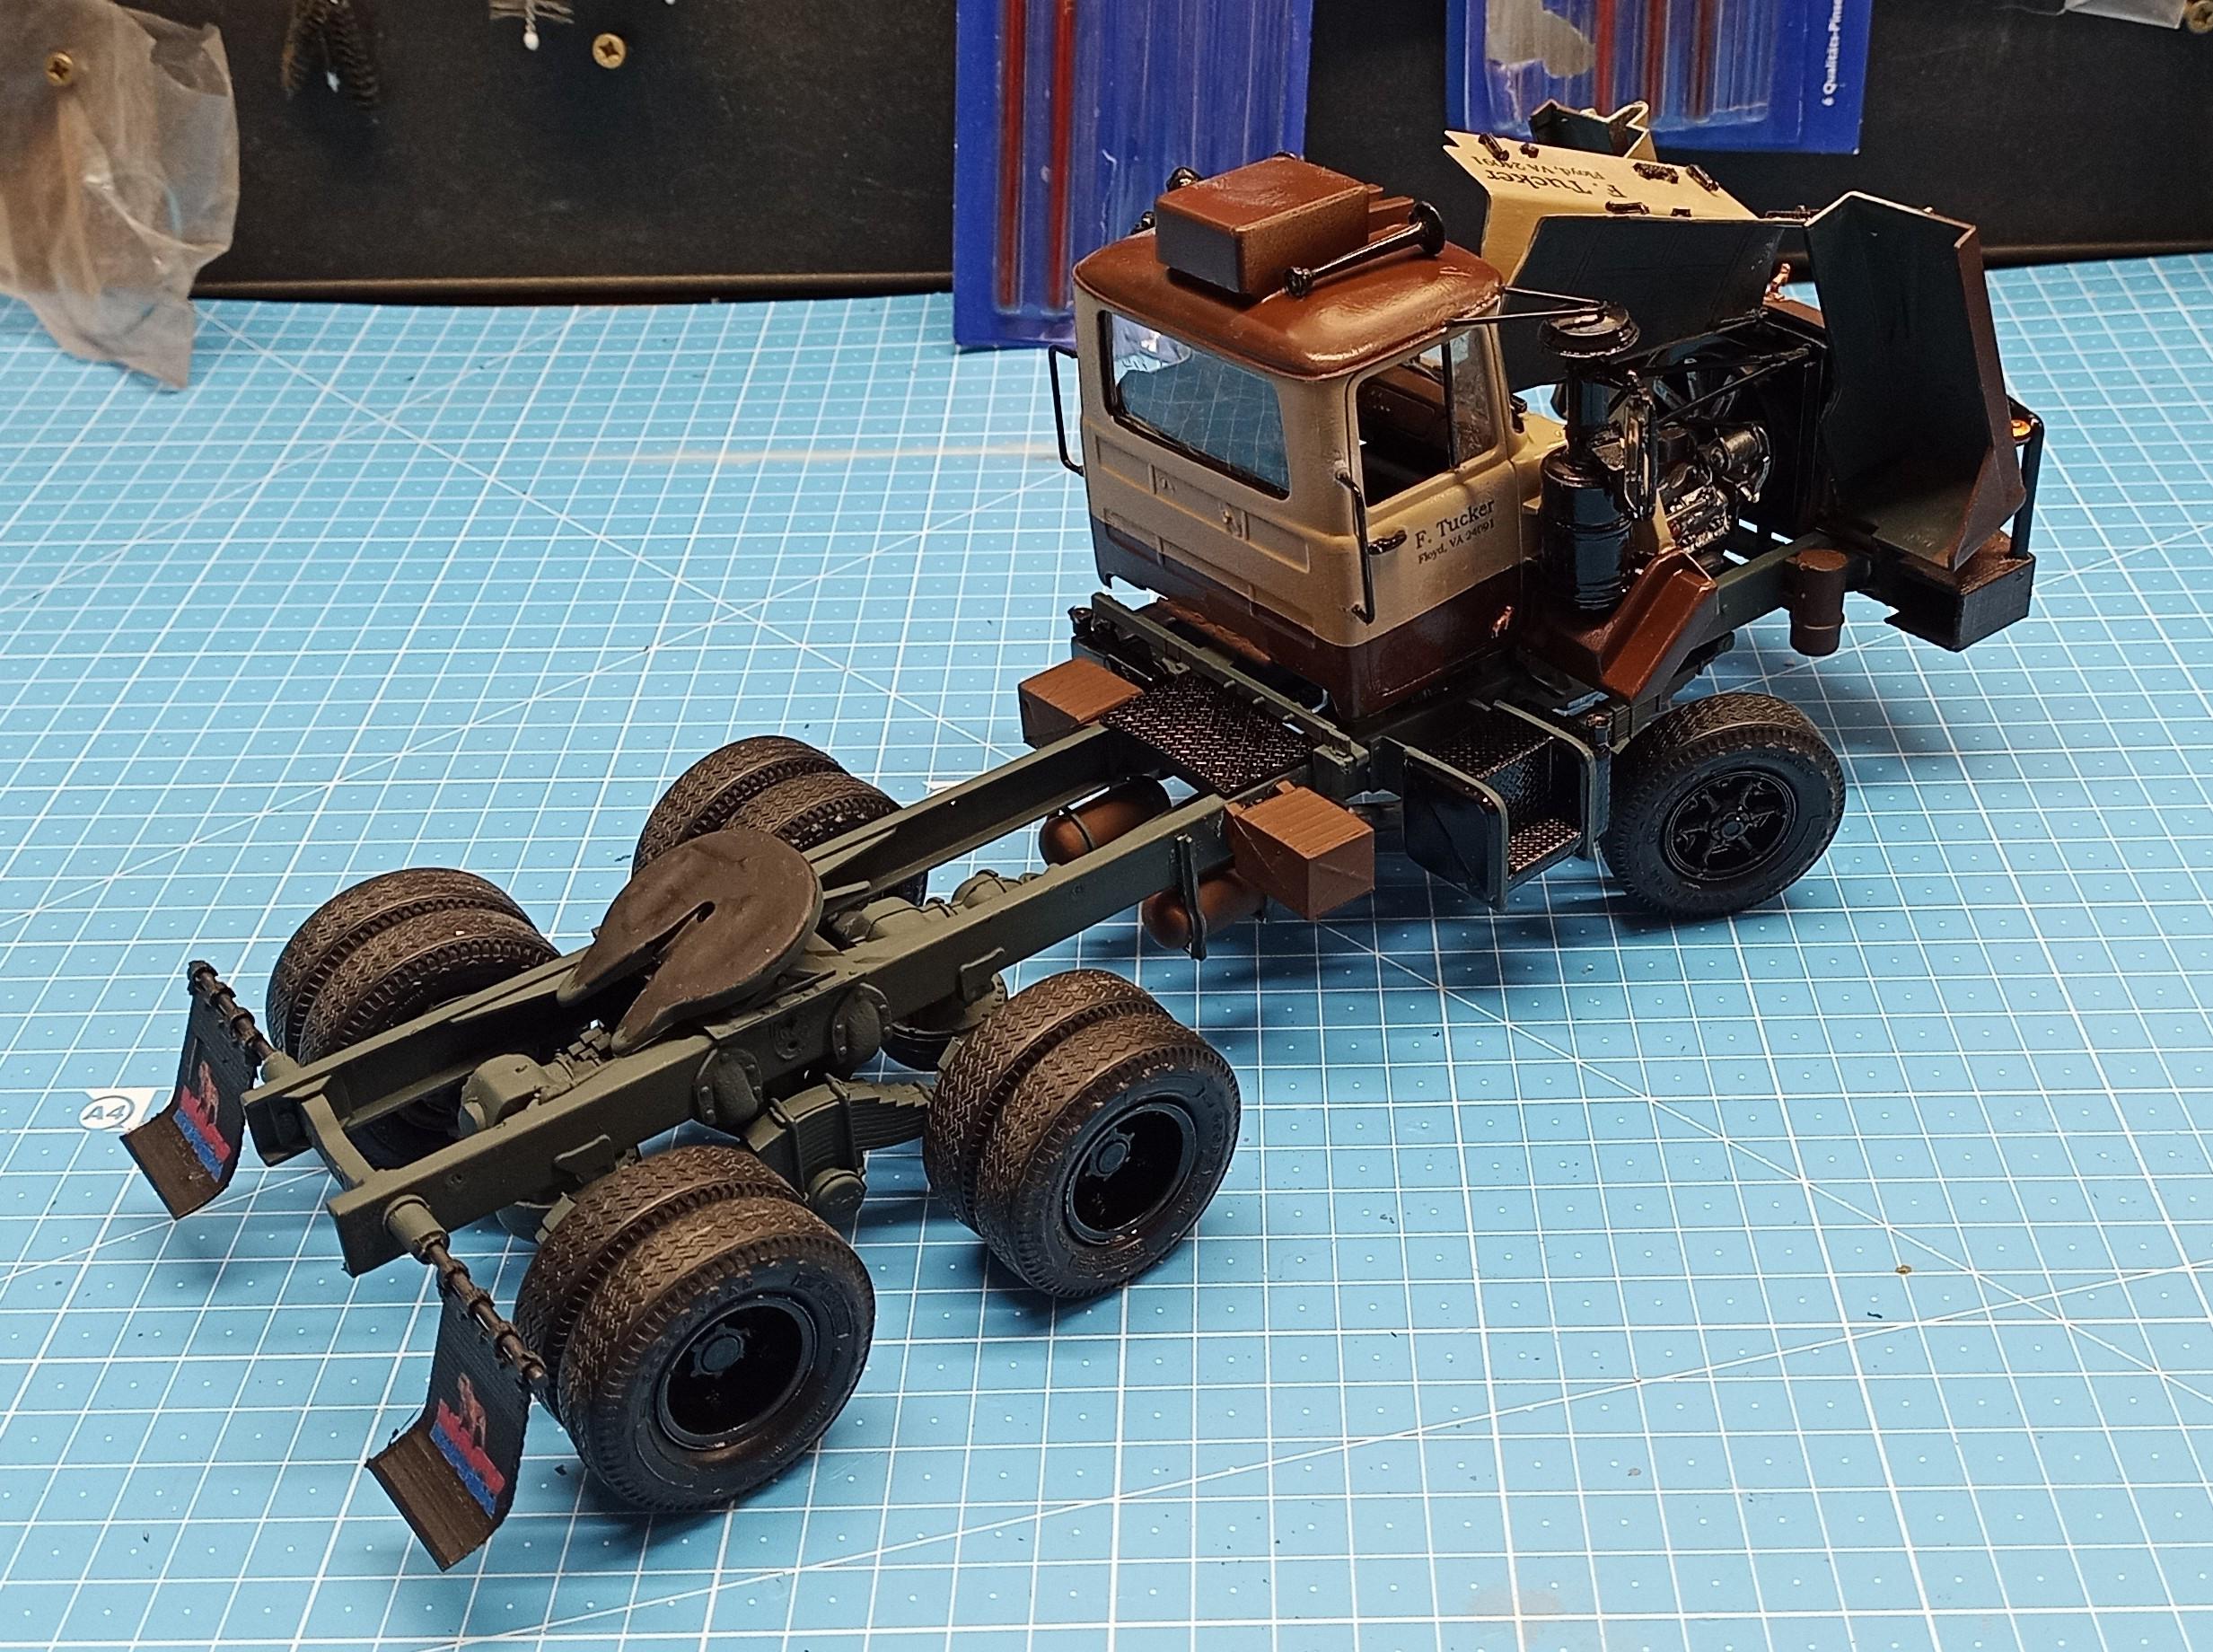
Here's some more: Still a lot to do! The mud flaps are taken from the "Big Nasty" Mack, just had to print them once more! The exhaust system will be taken from the ACX Autocar. Just reduced the size in the 3D drawings to about 80% and then lengthened the muffler! Didn't like the original one. Looked too skinny. Unfortunately my printer is now out of order. Had to order spare parts. Hope they arrive soon. Till then I'll finish up the rest! Marker lights, horns, headlights, mirrors, ...!
-
Mack DM800 refurnish
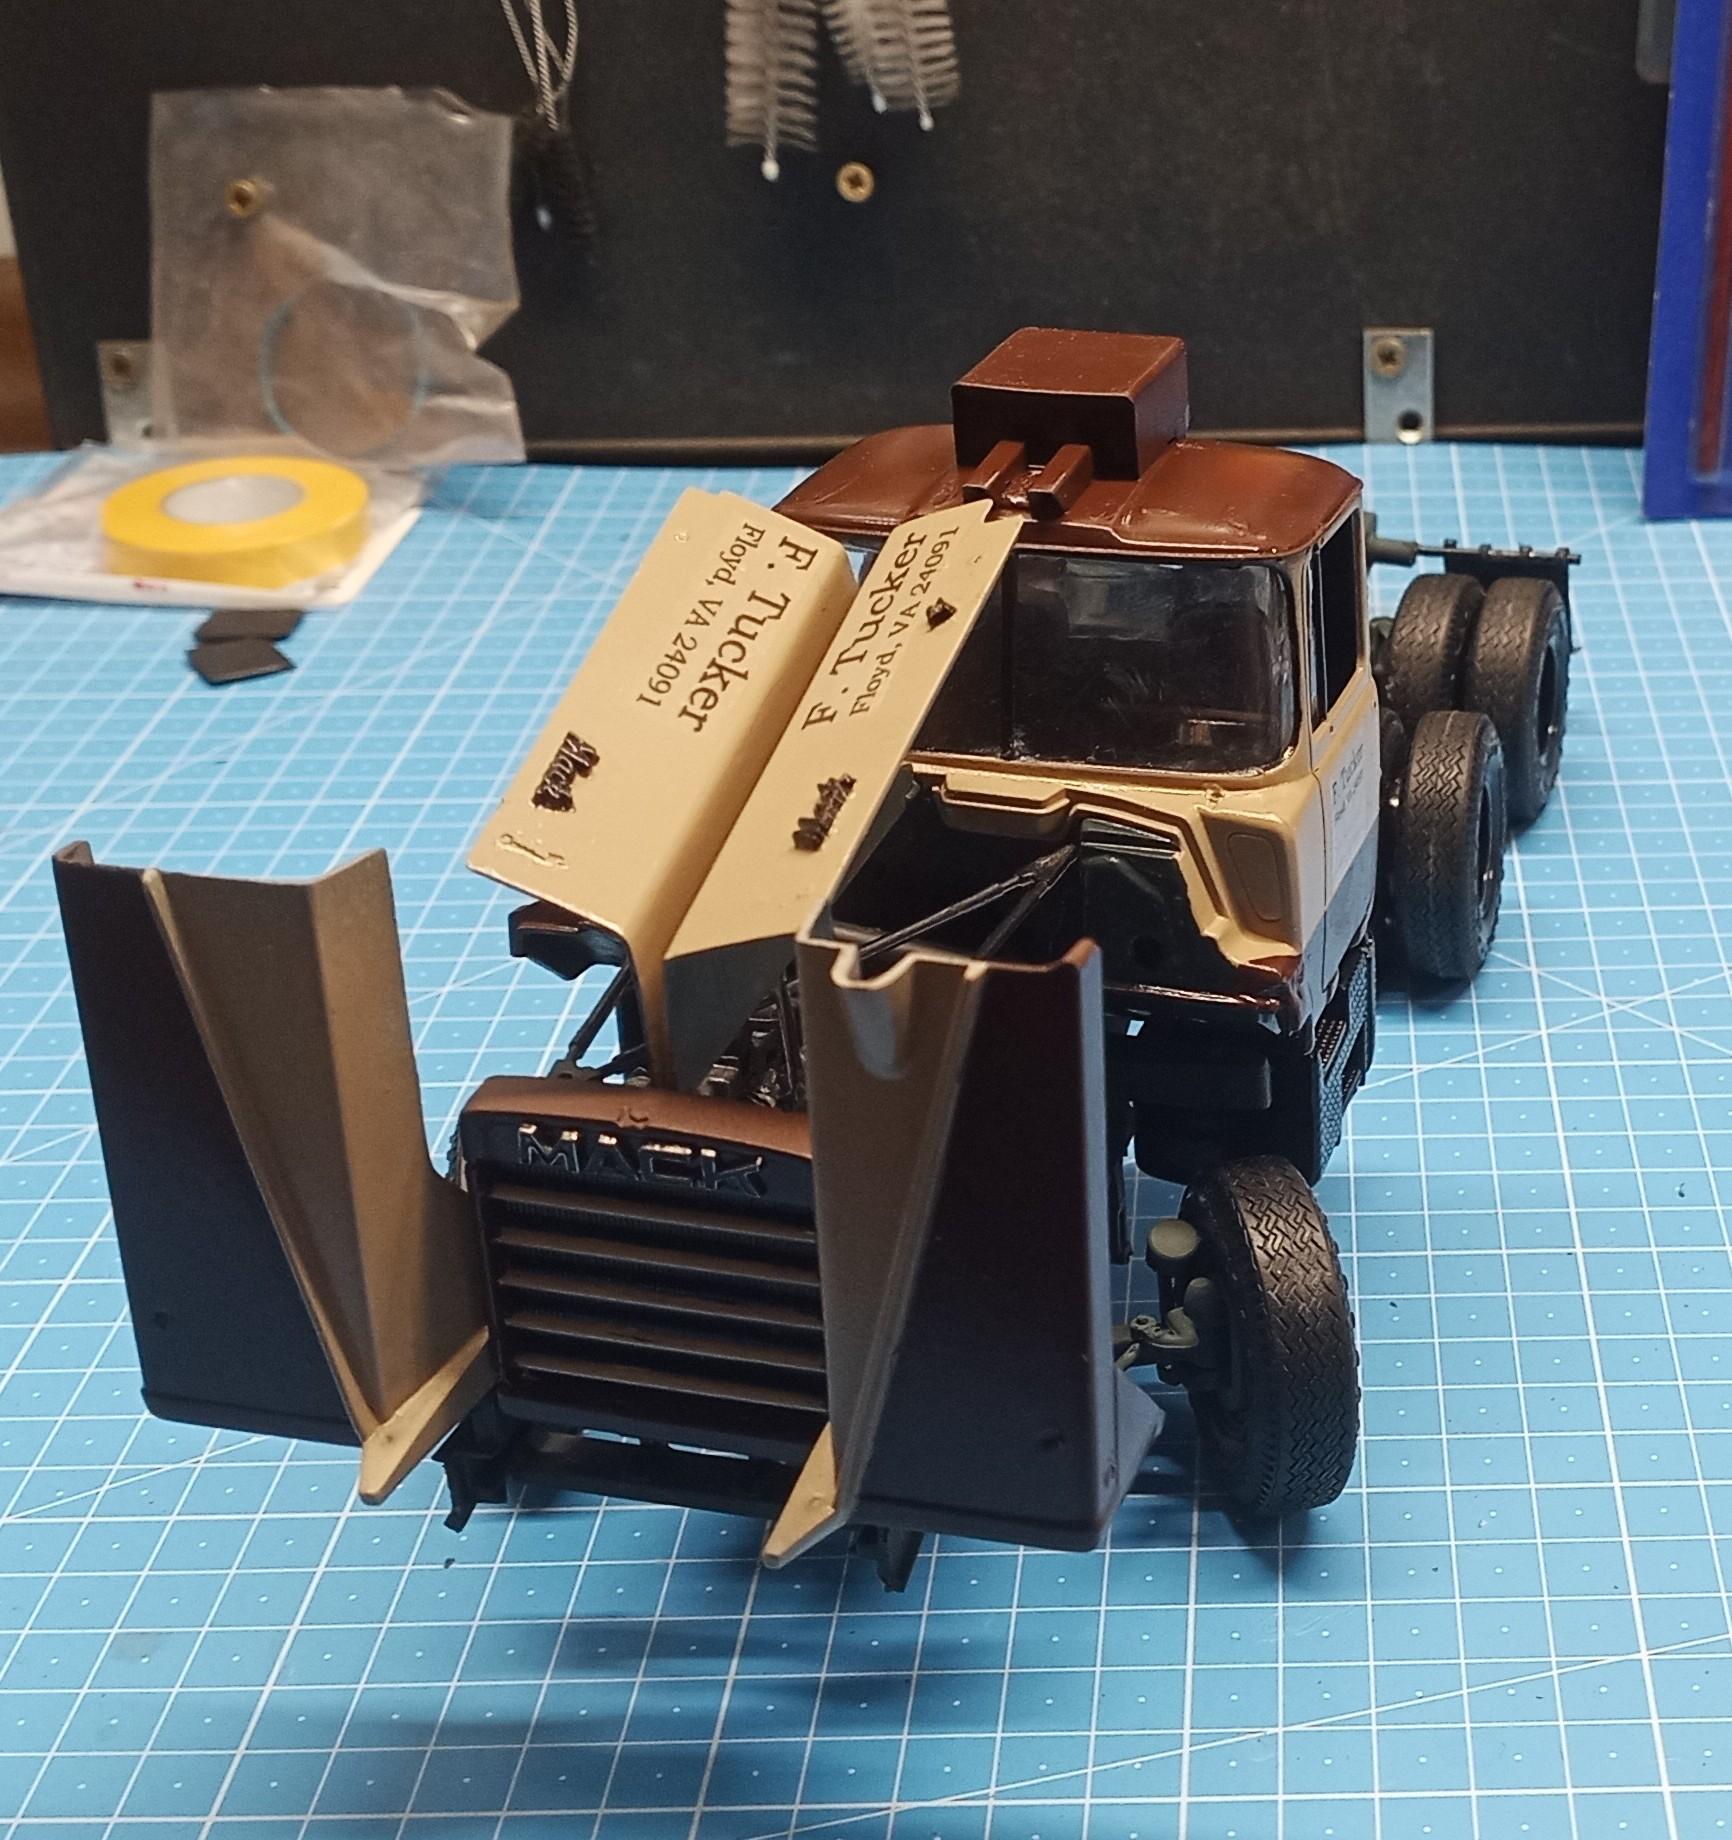
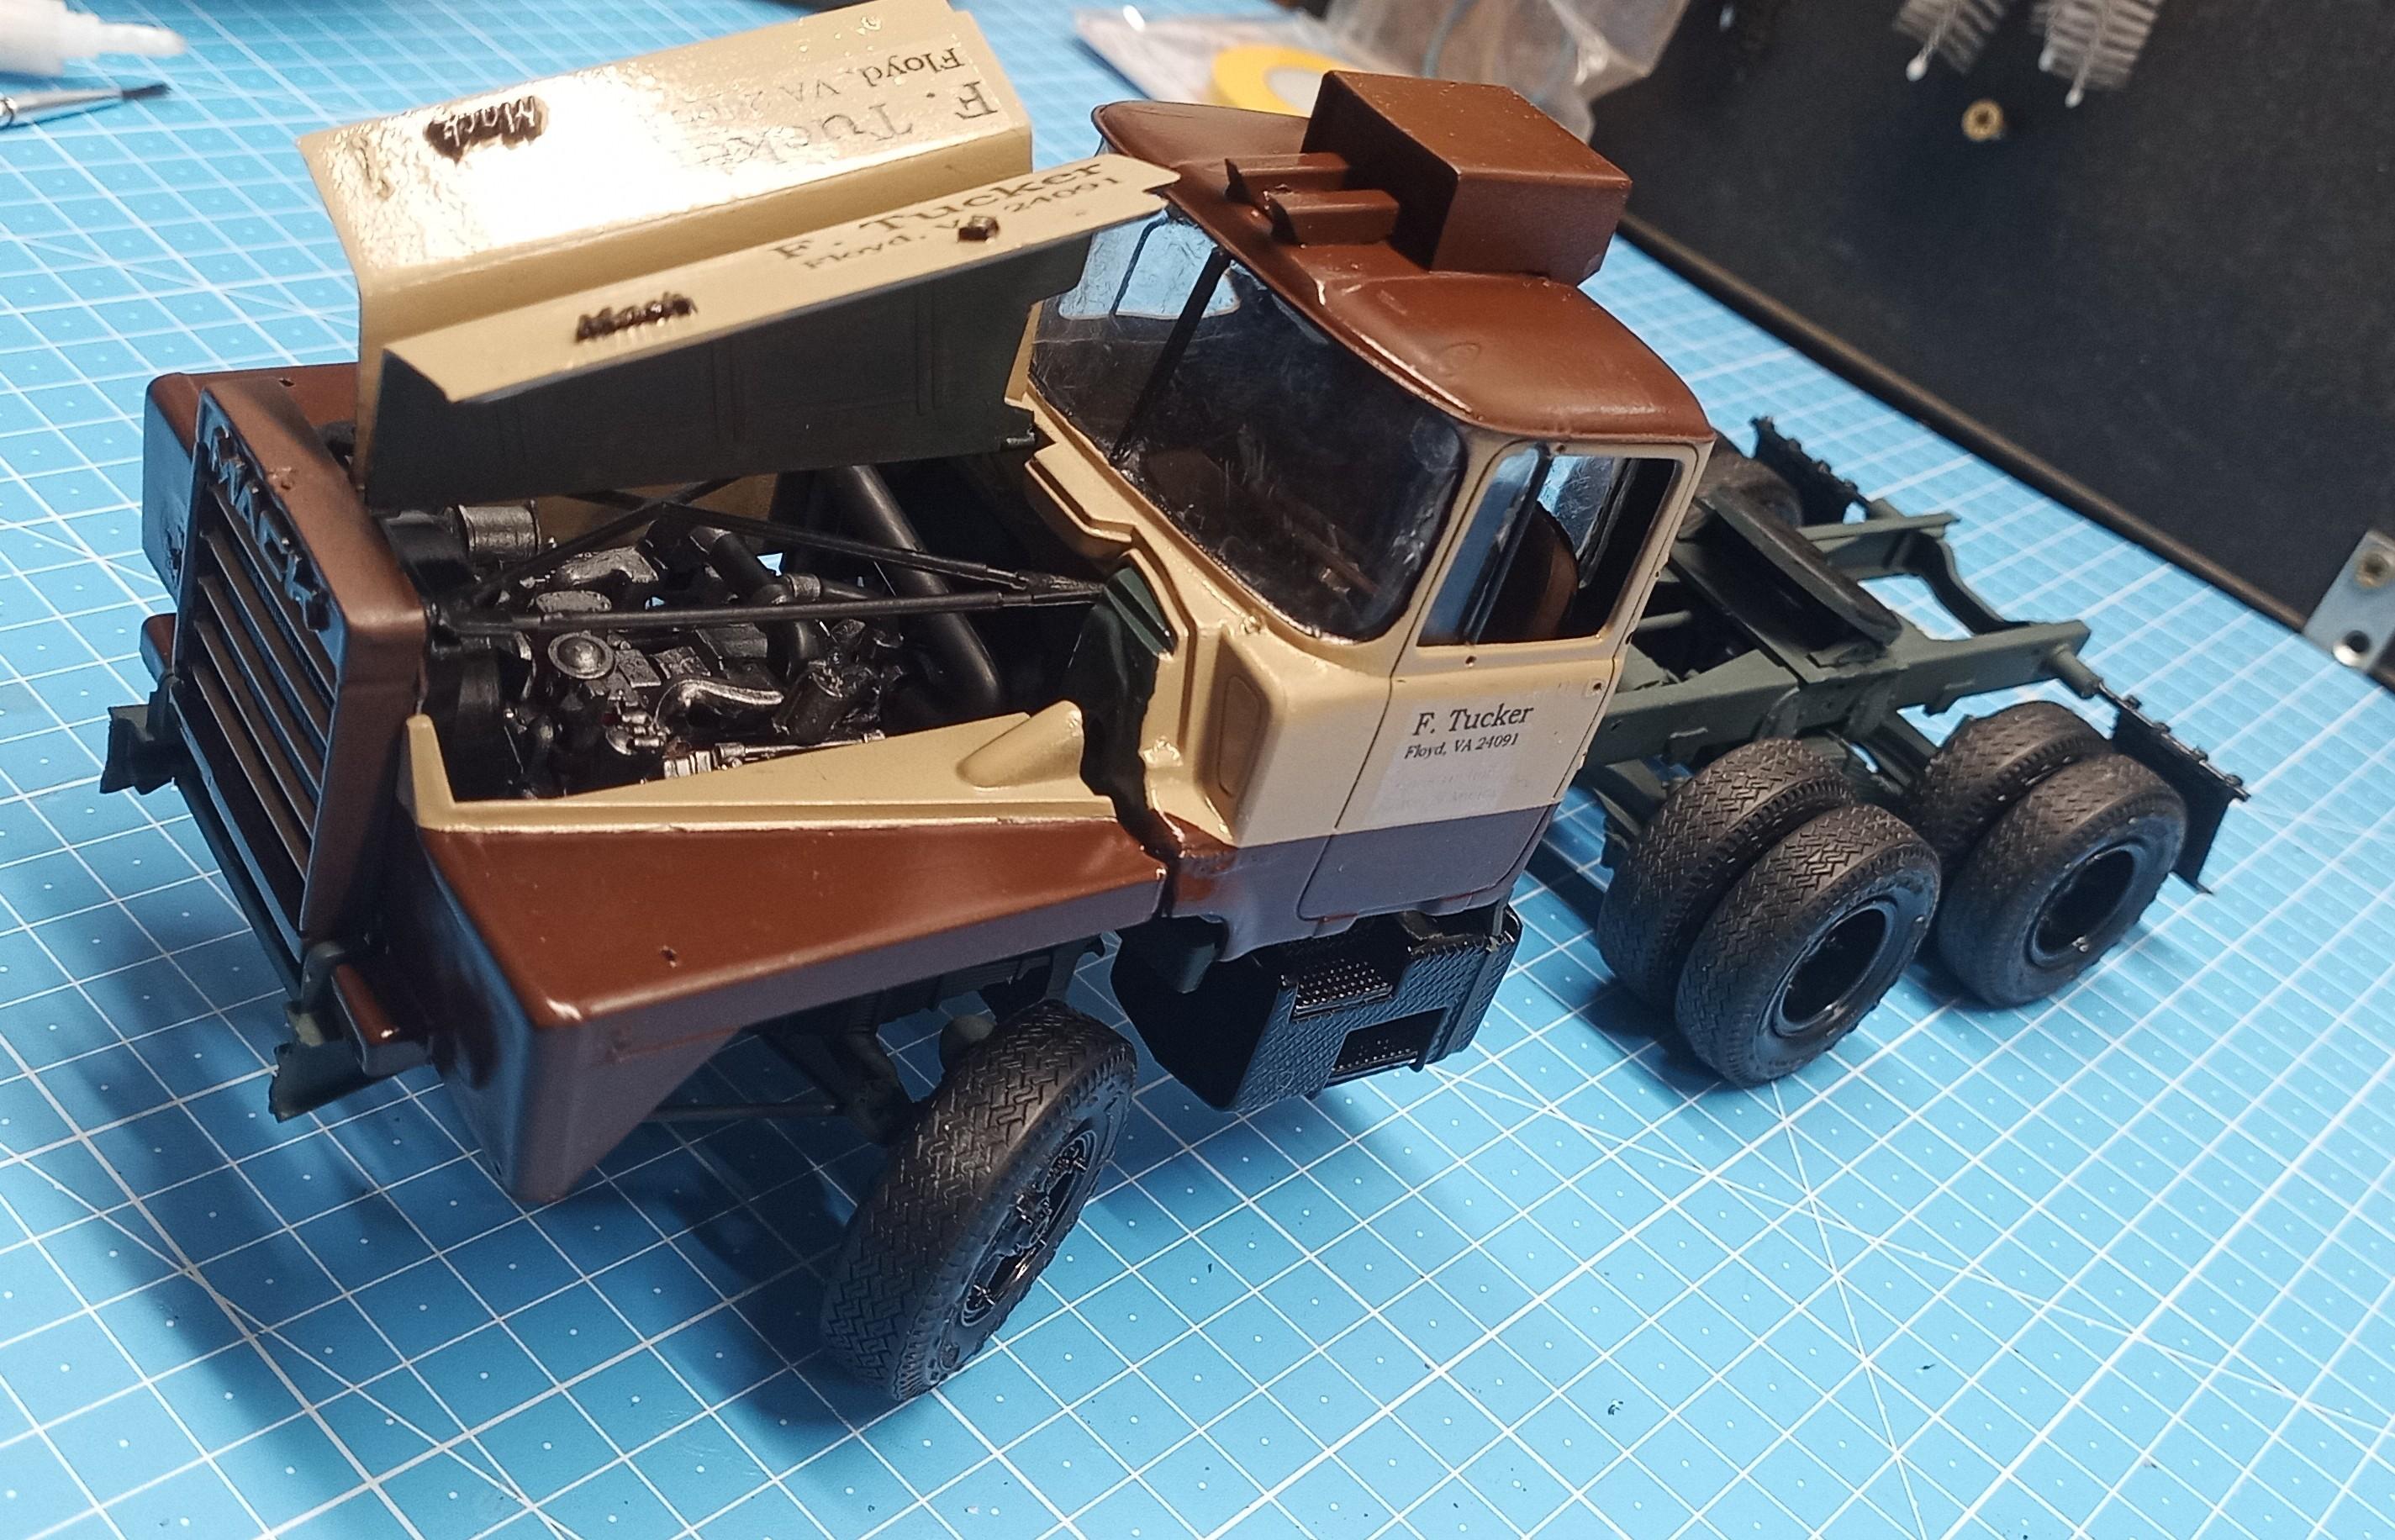
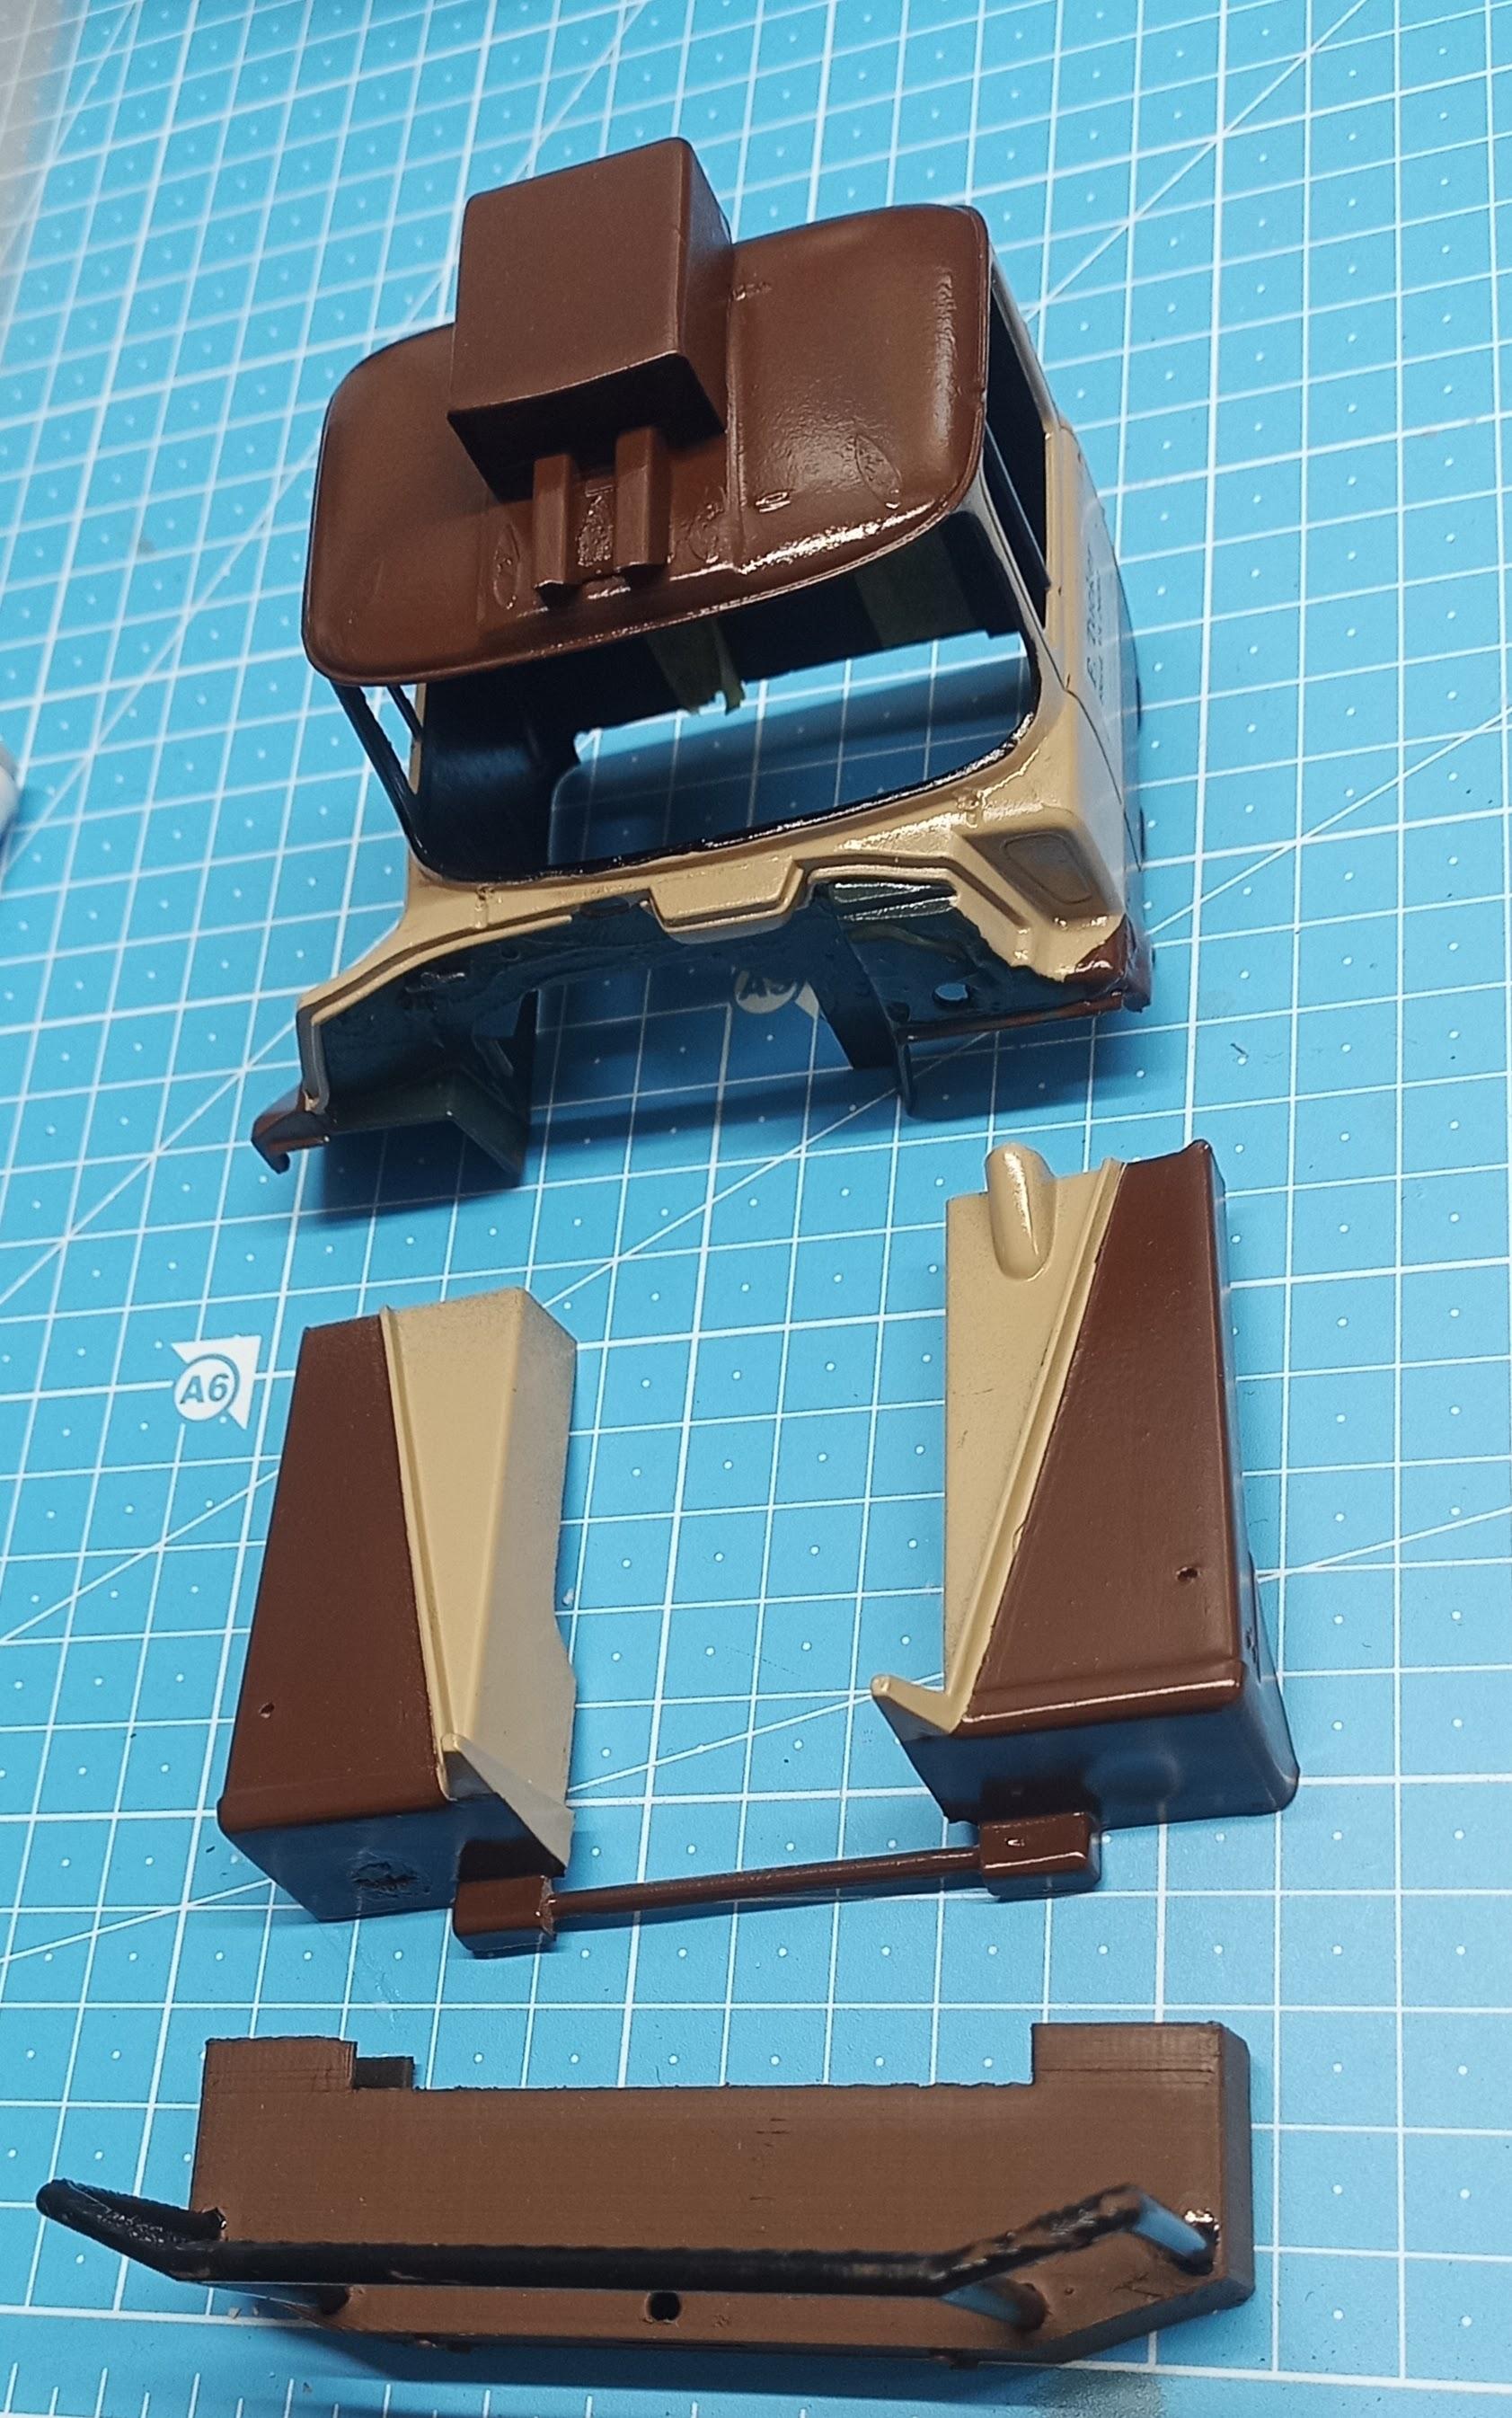
Jürgen M. replied to Jürgen M.'s topic in WIP: Model Trucks: Big Rigs and Heavy Equipment
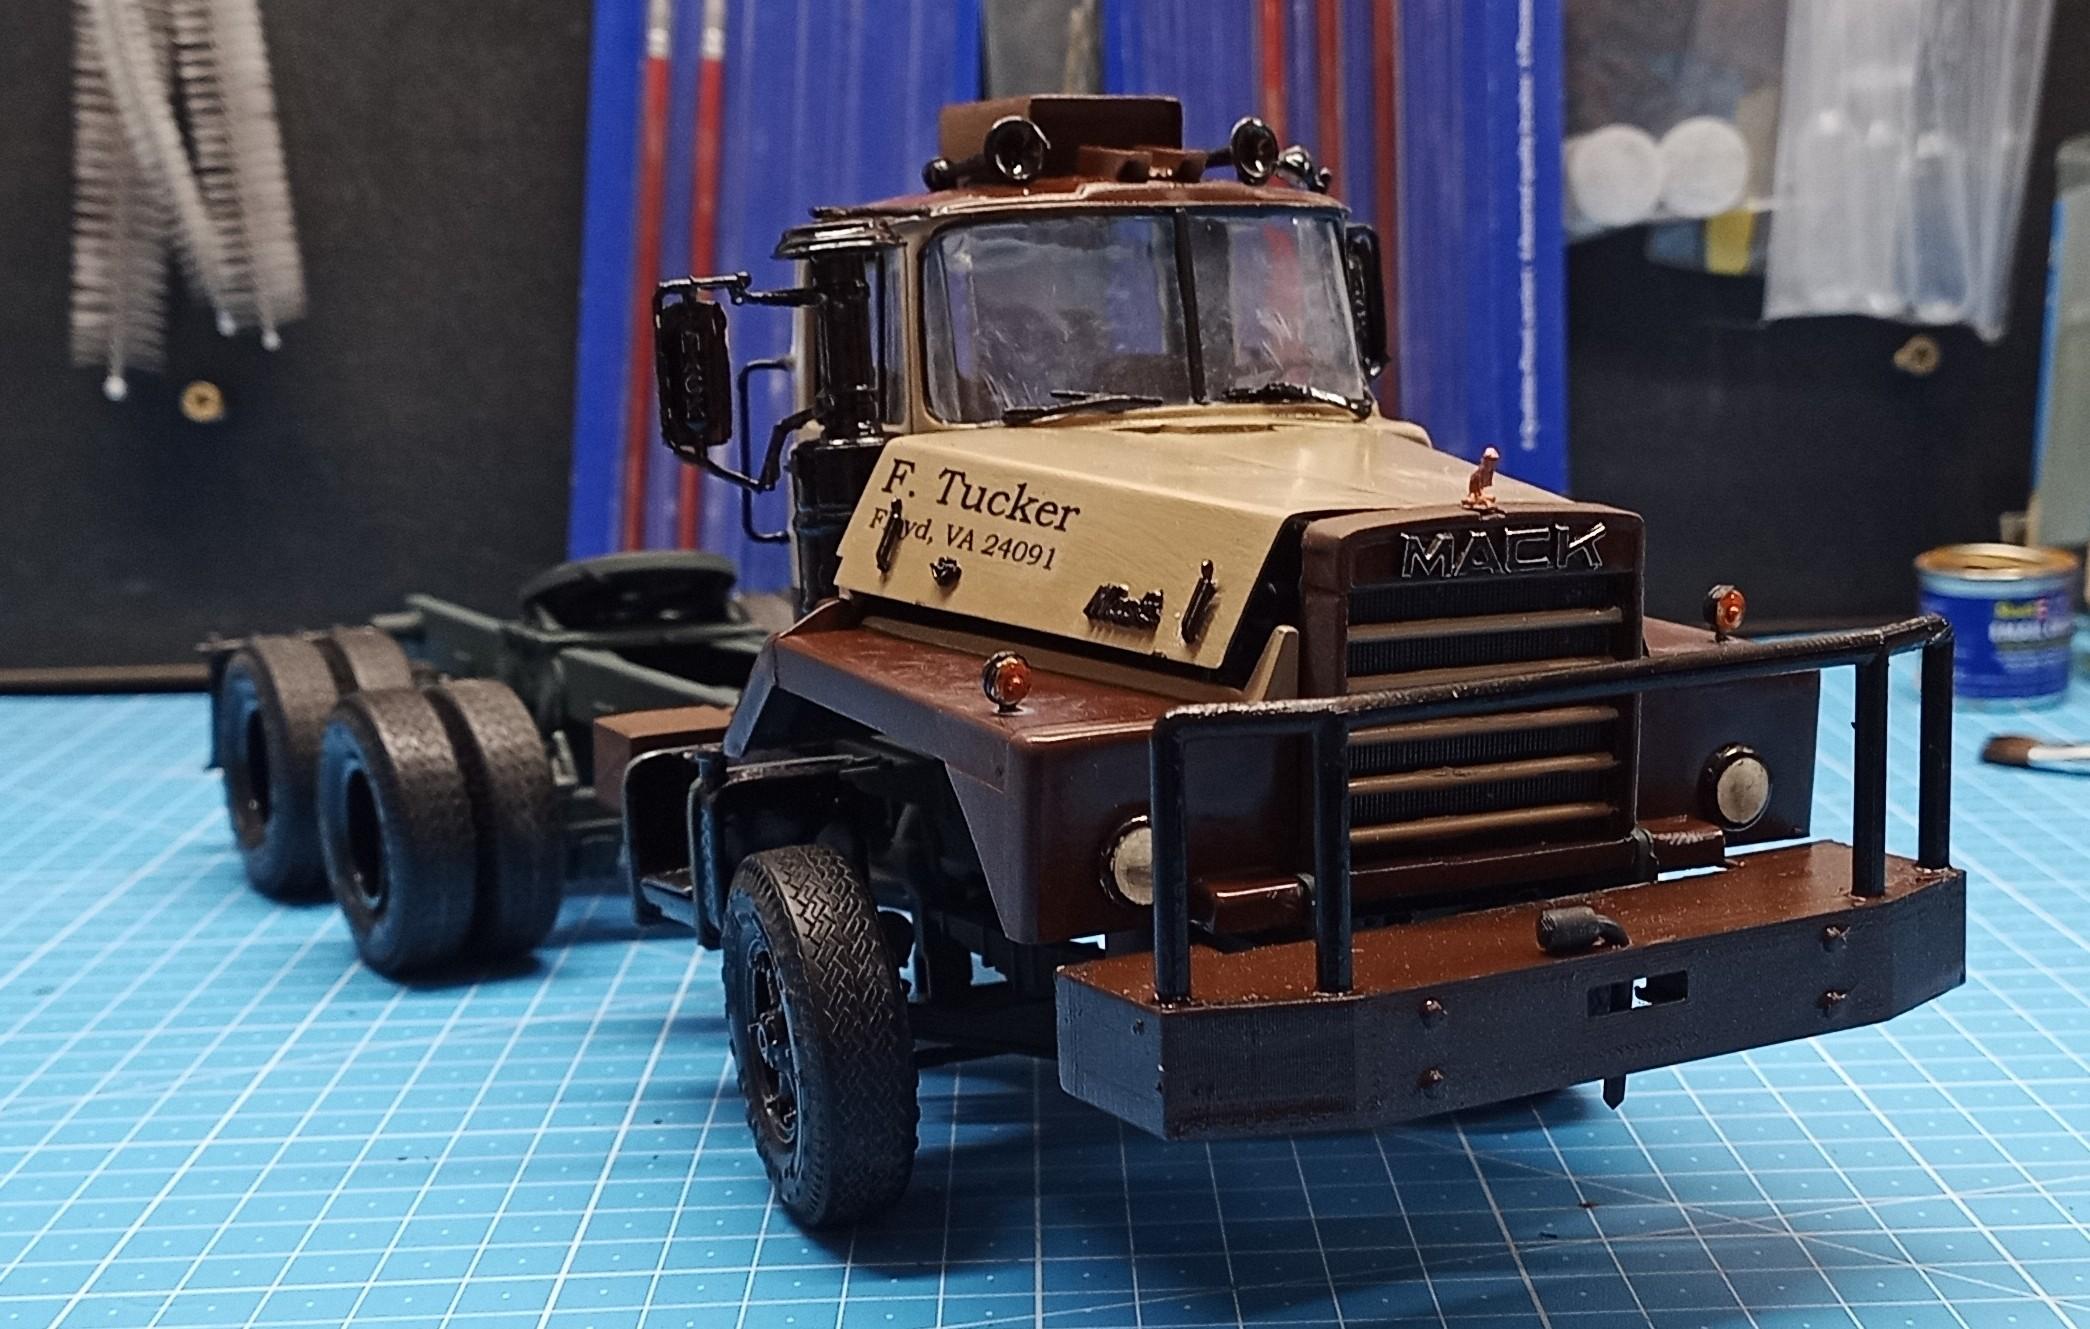
A sneak preview of the cab and fenders!
-
Mack DM800 refurnish
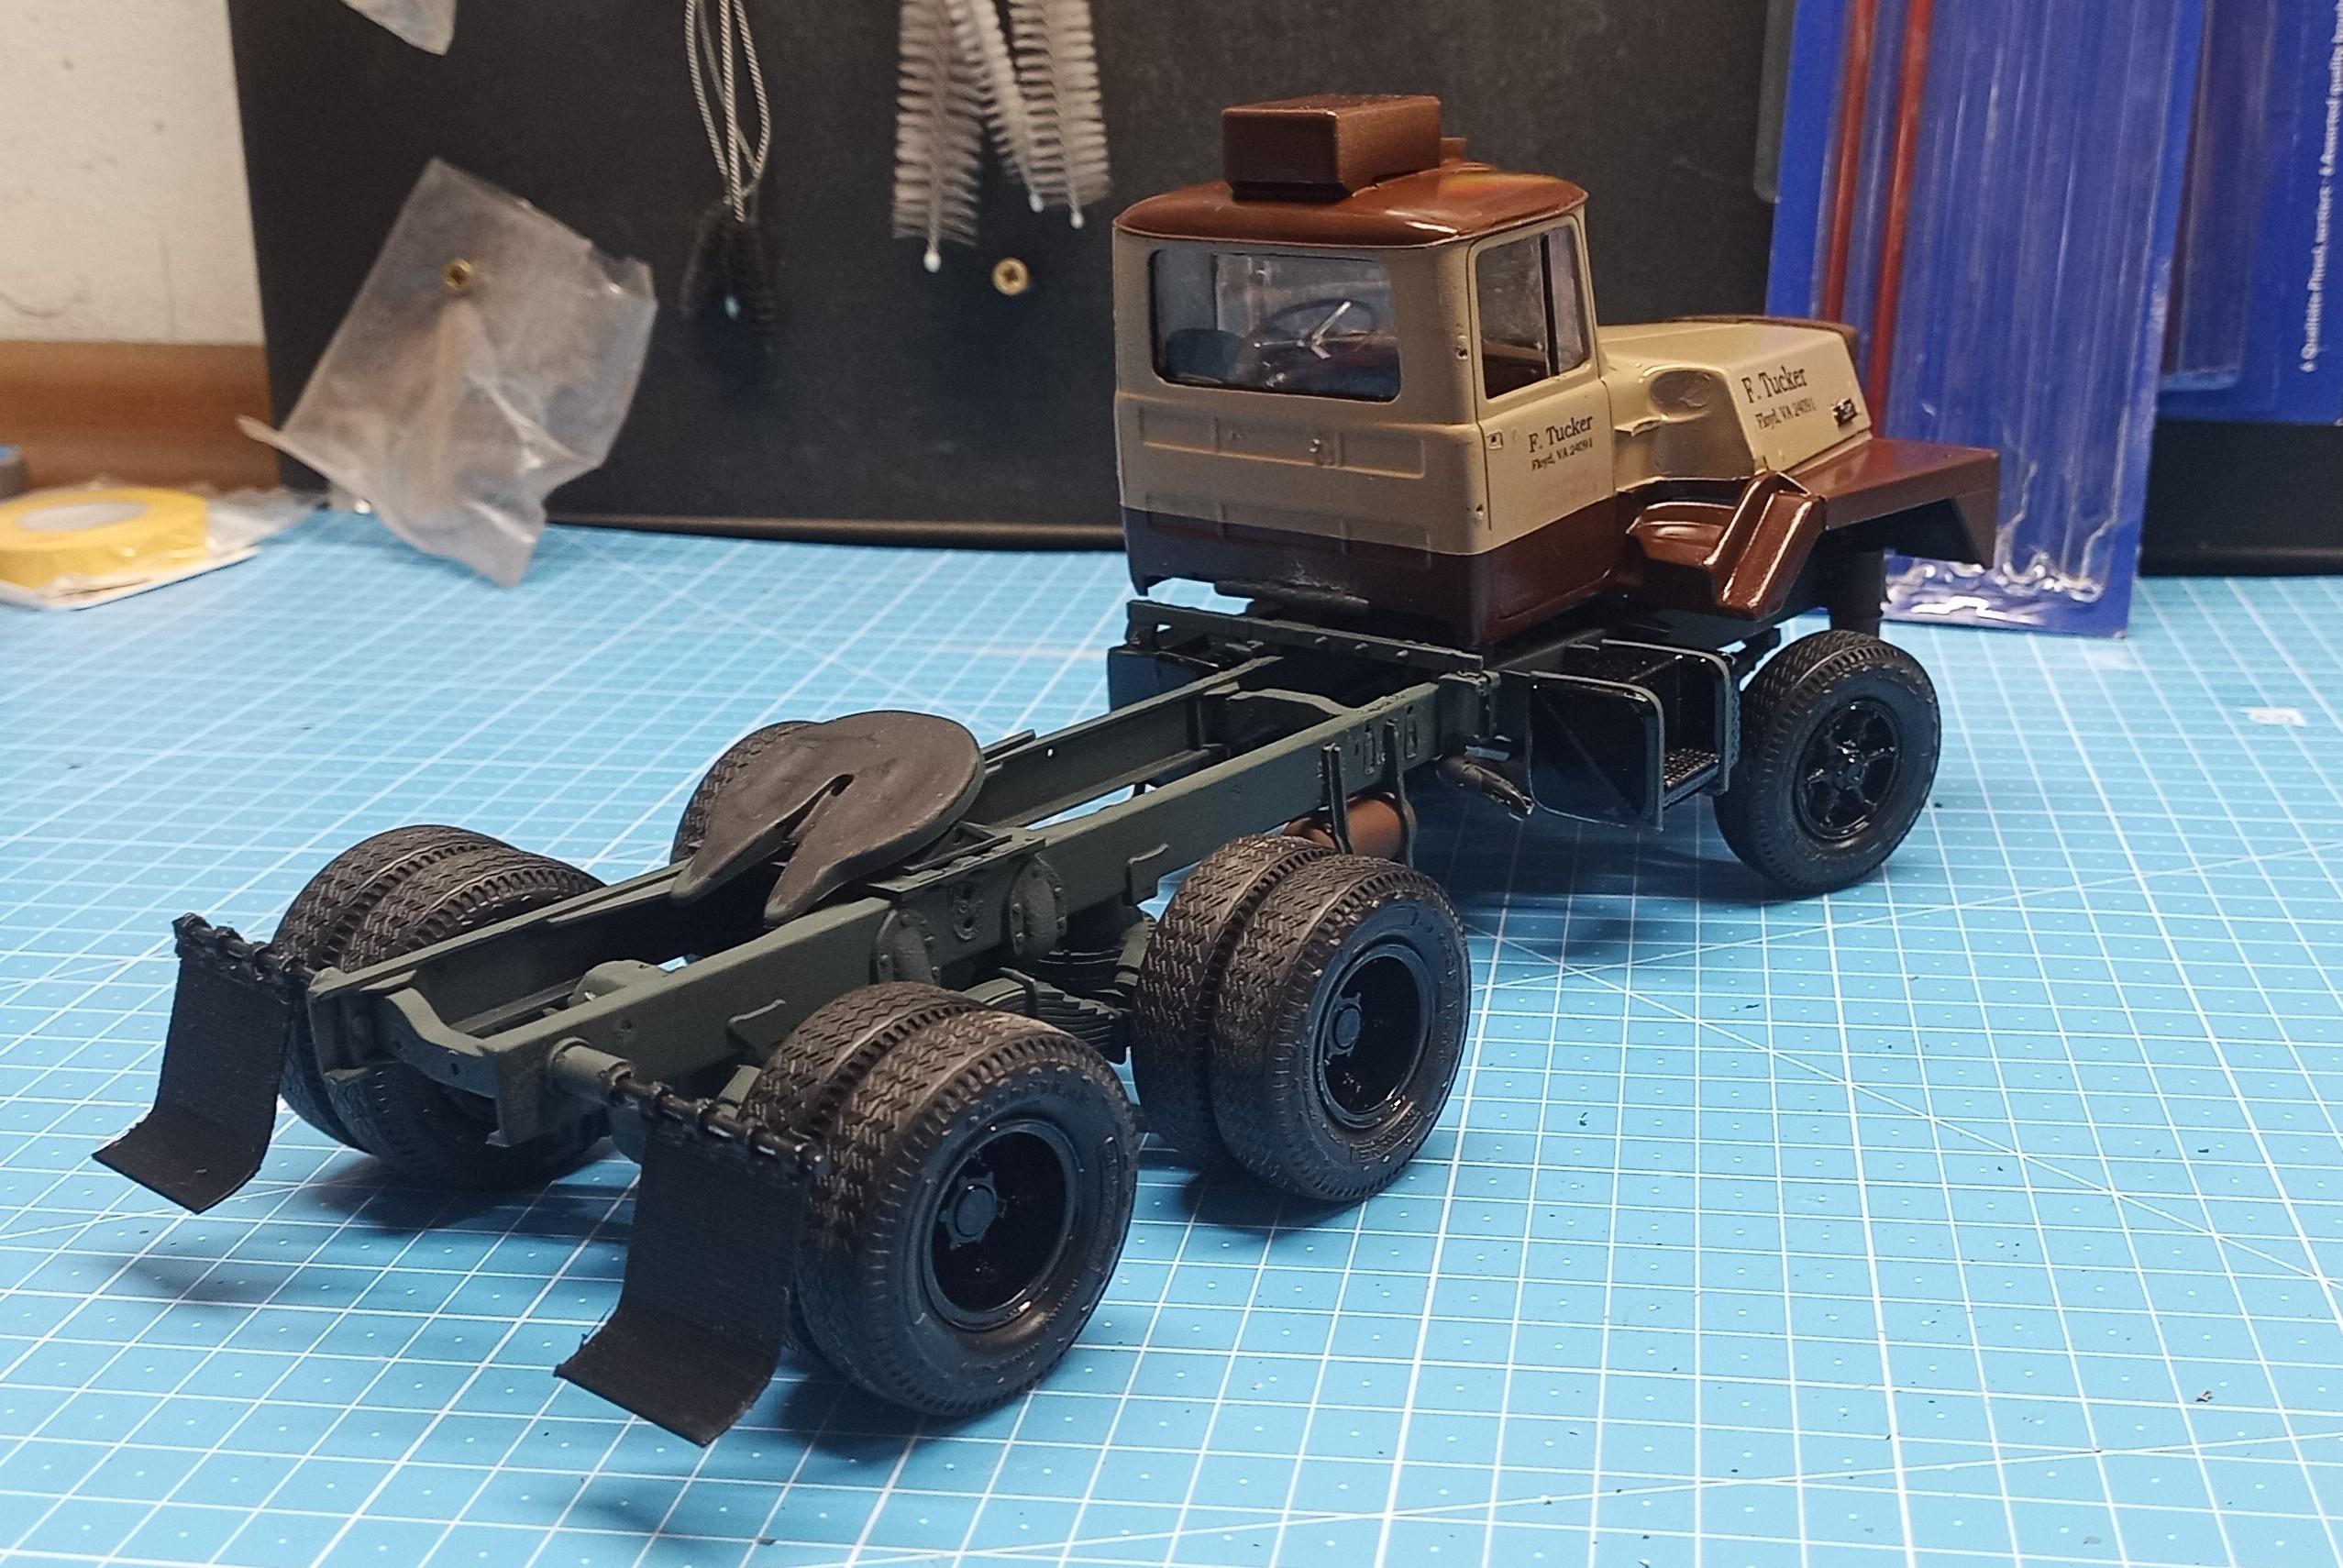
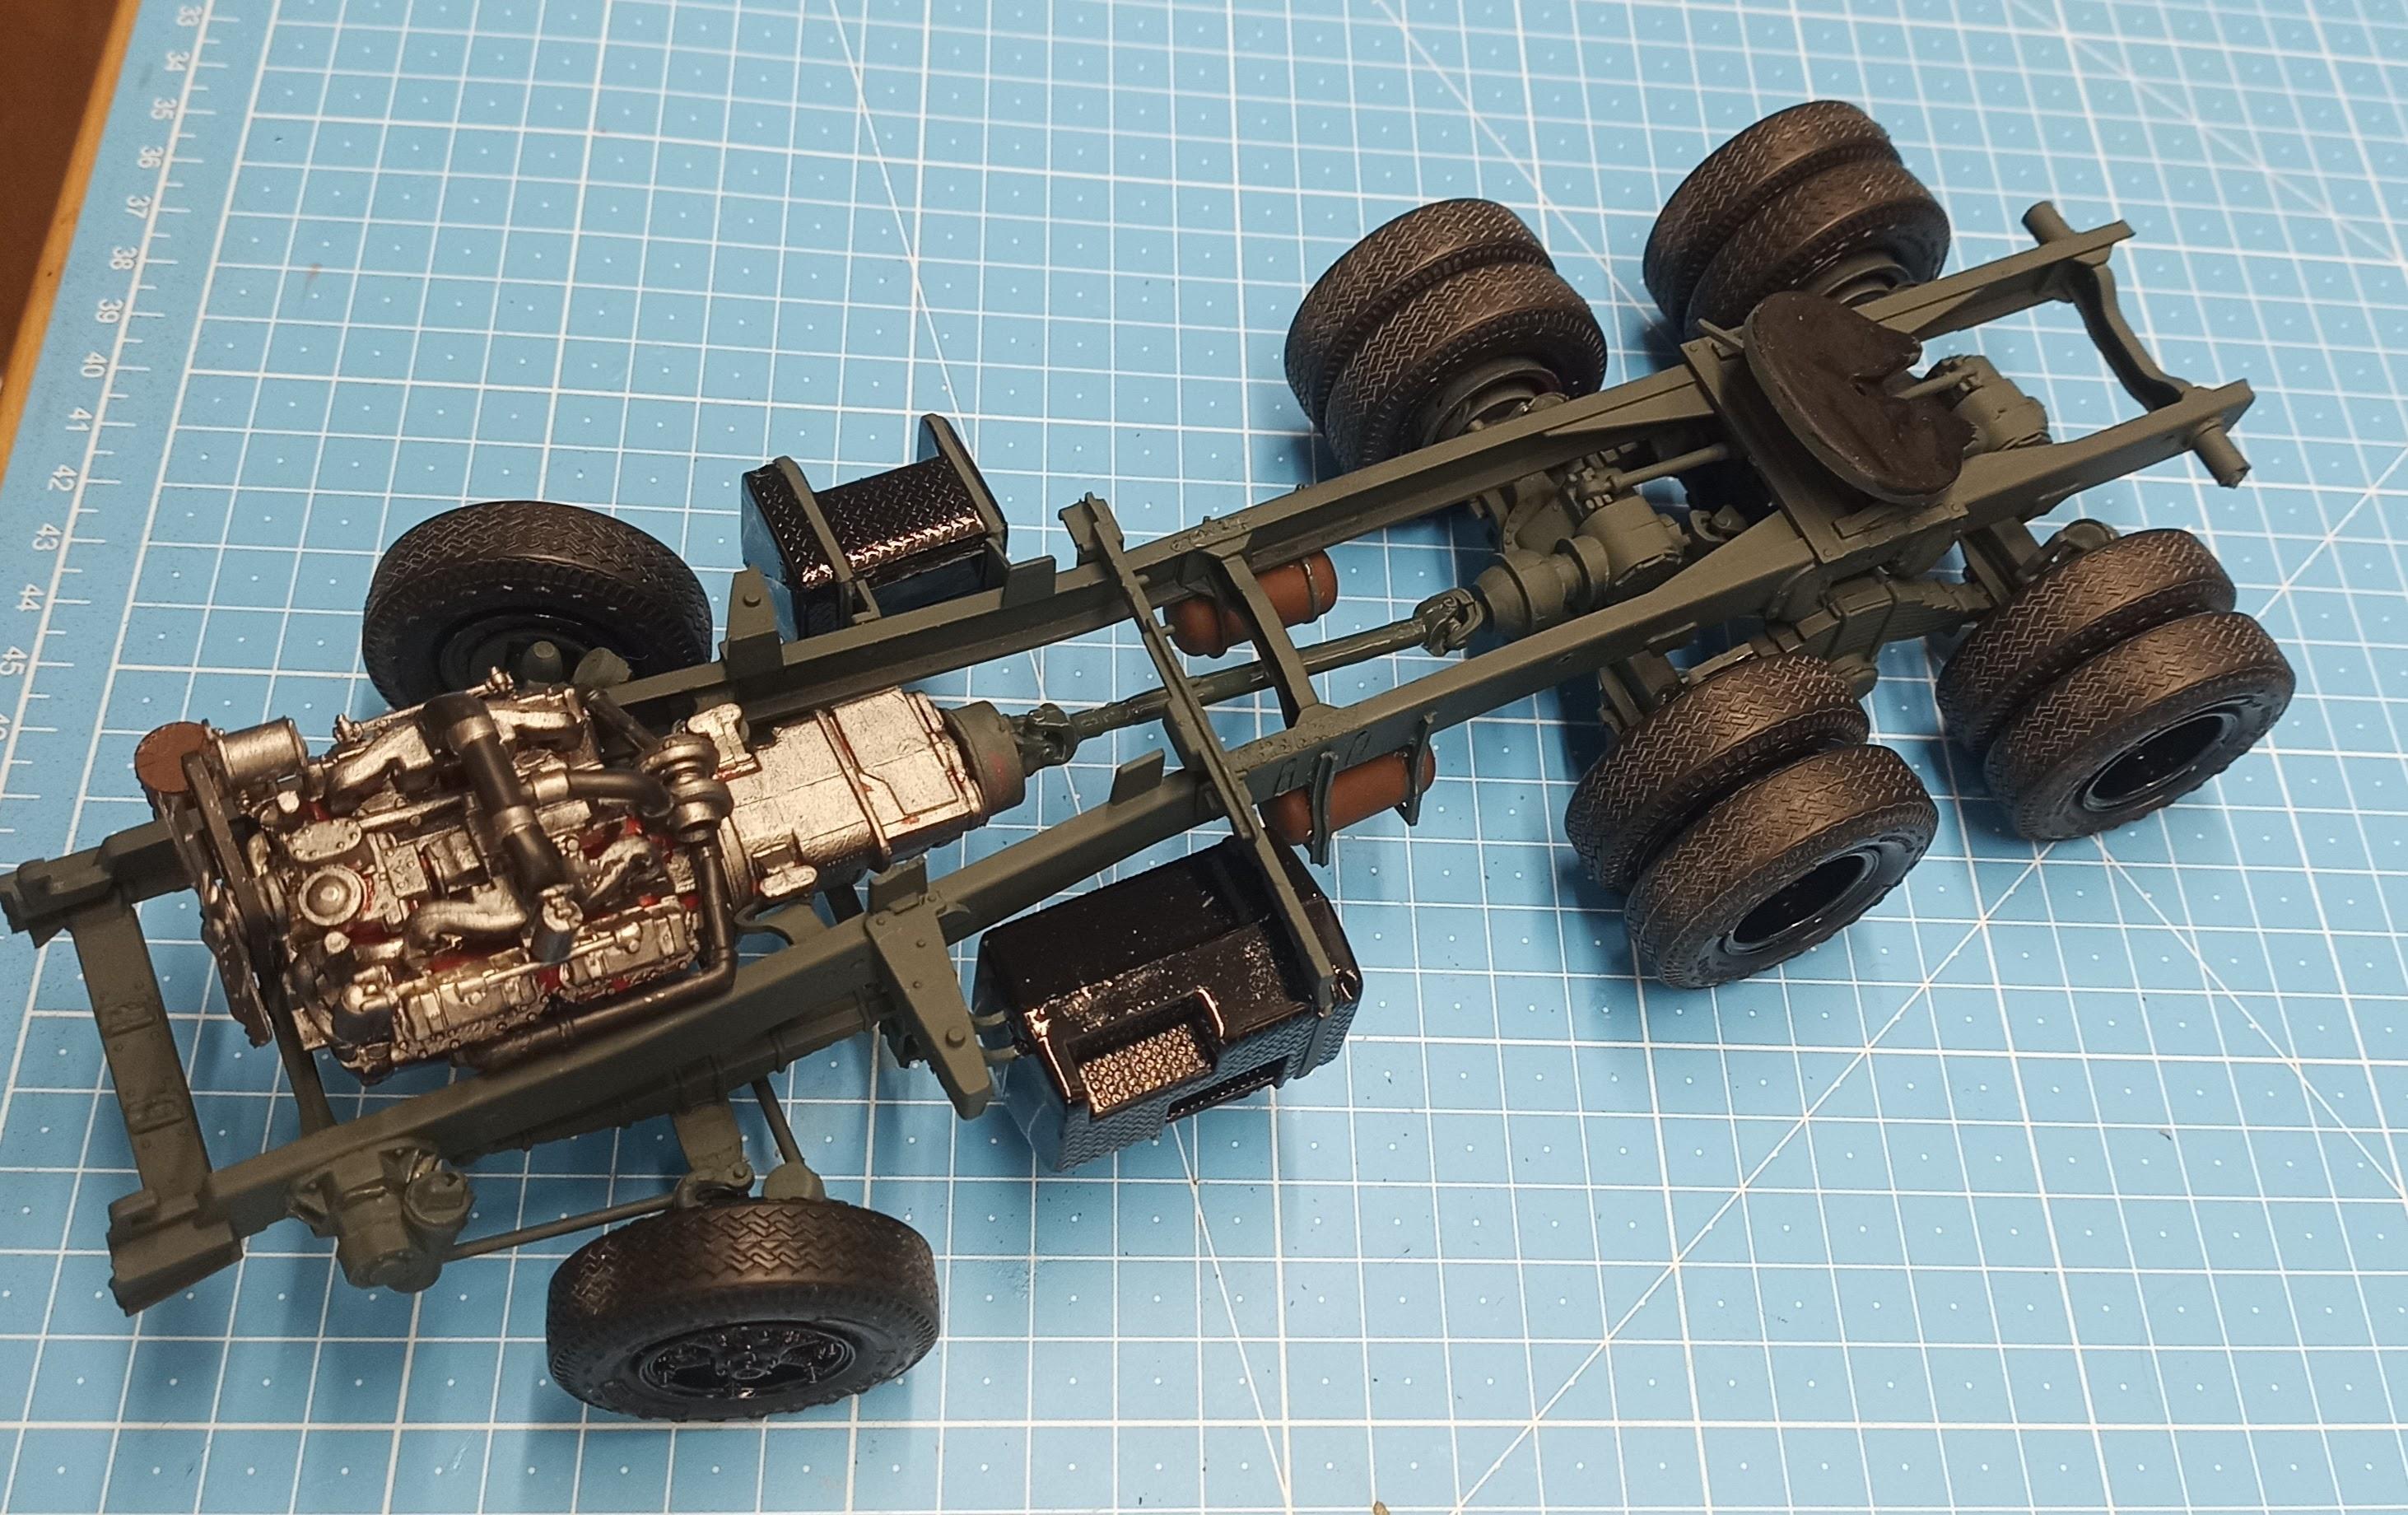
Jürgen M. replied to Jürgen M.'s topic in WIP: Model Trucks: Big Rigs and Heavy Equipment
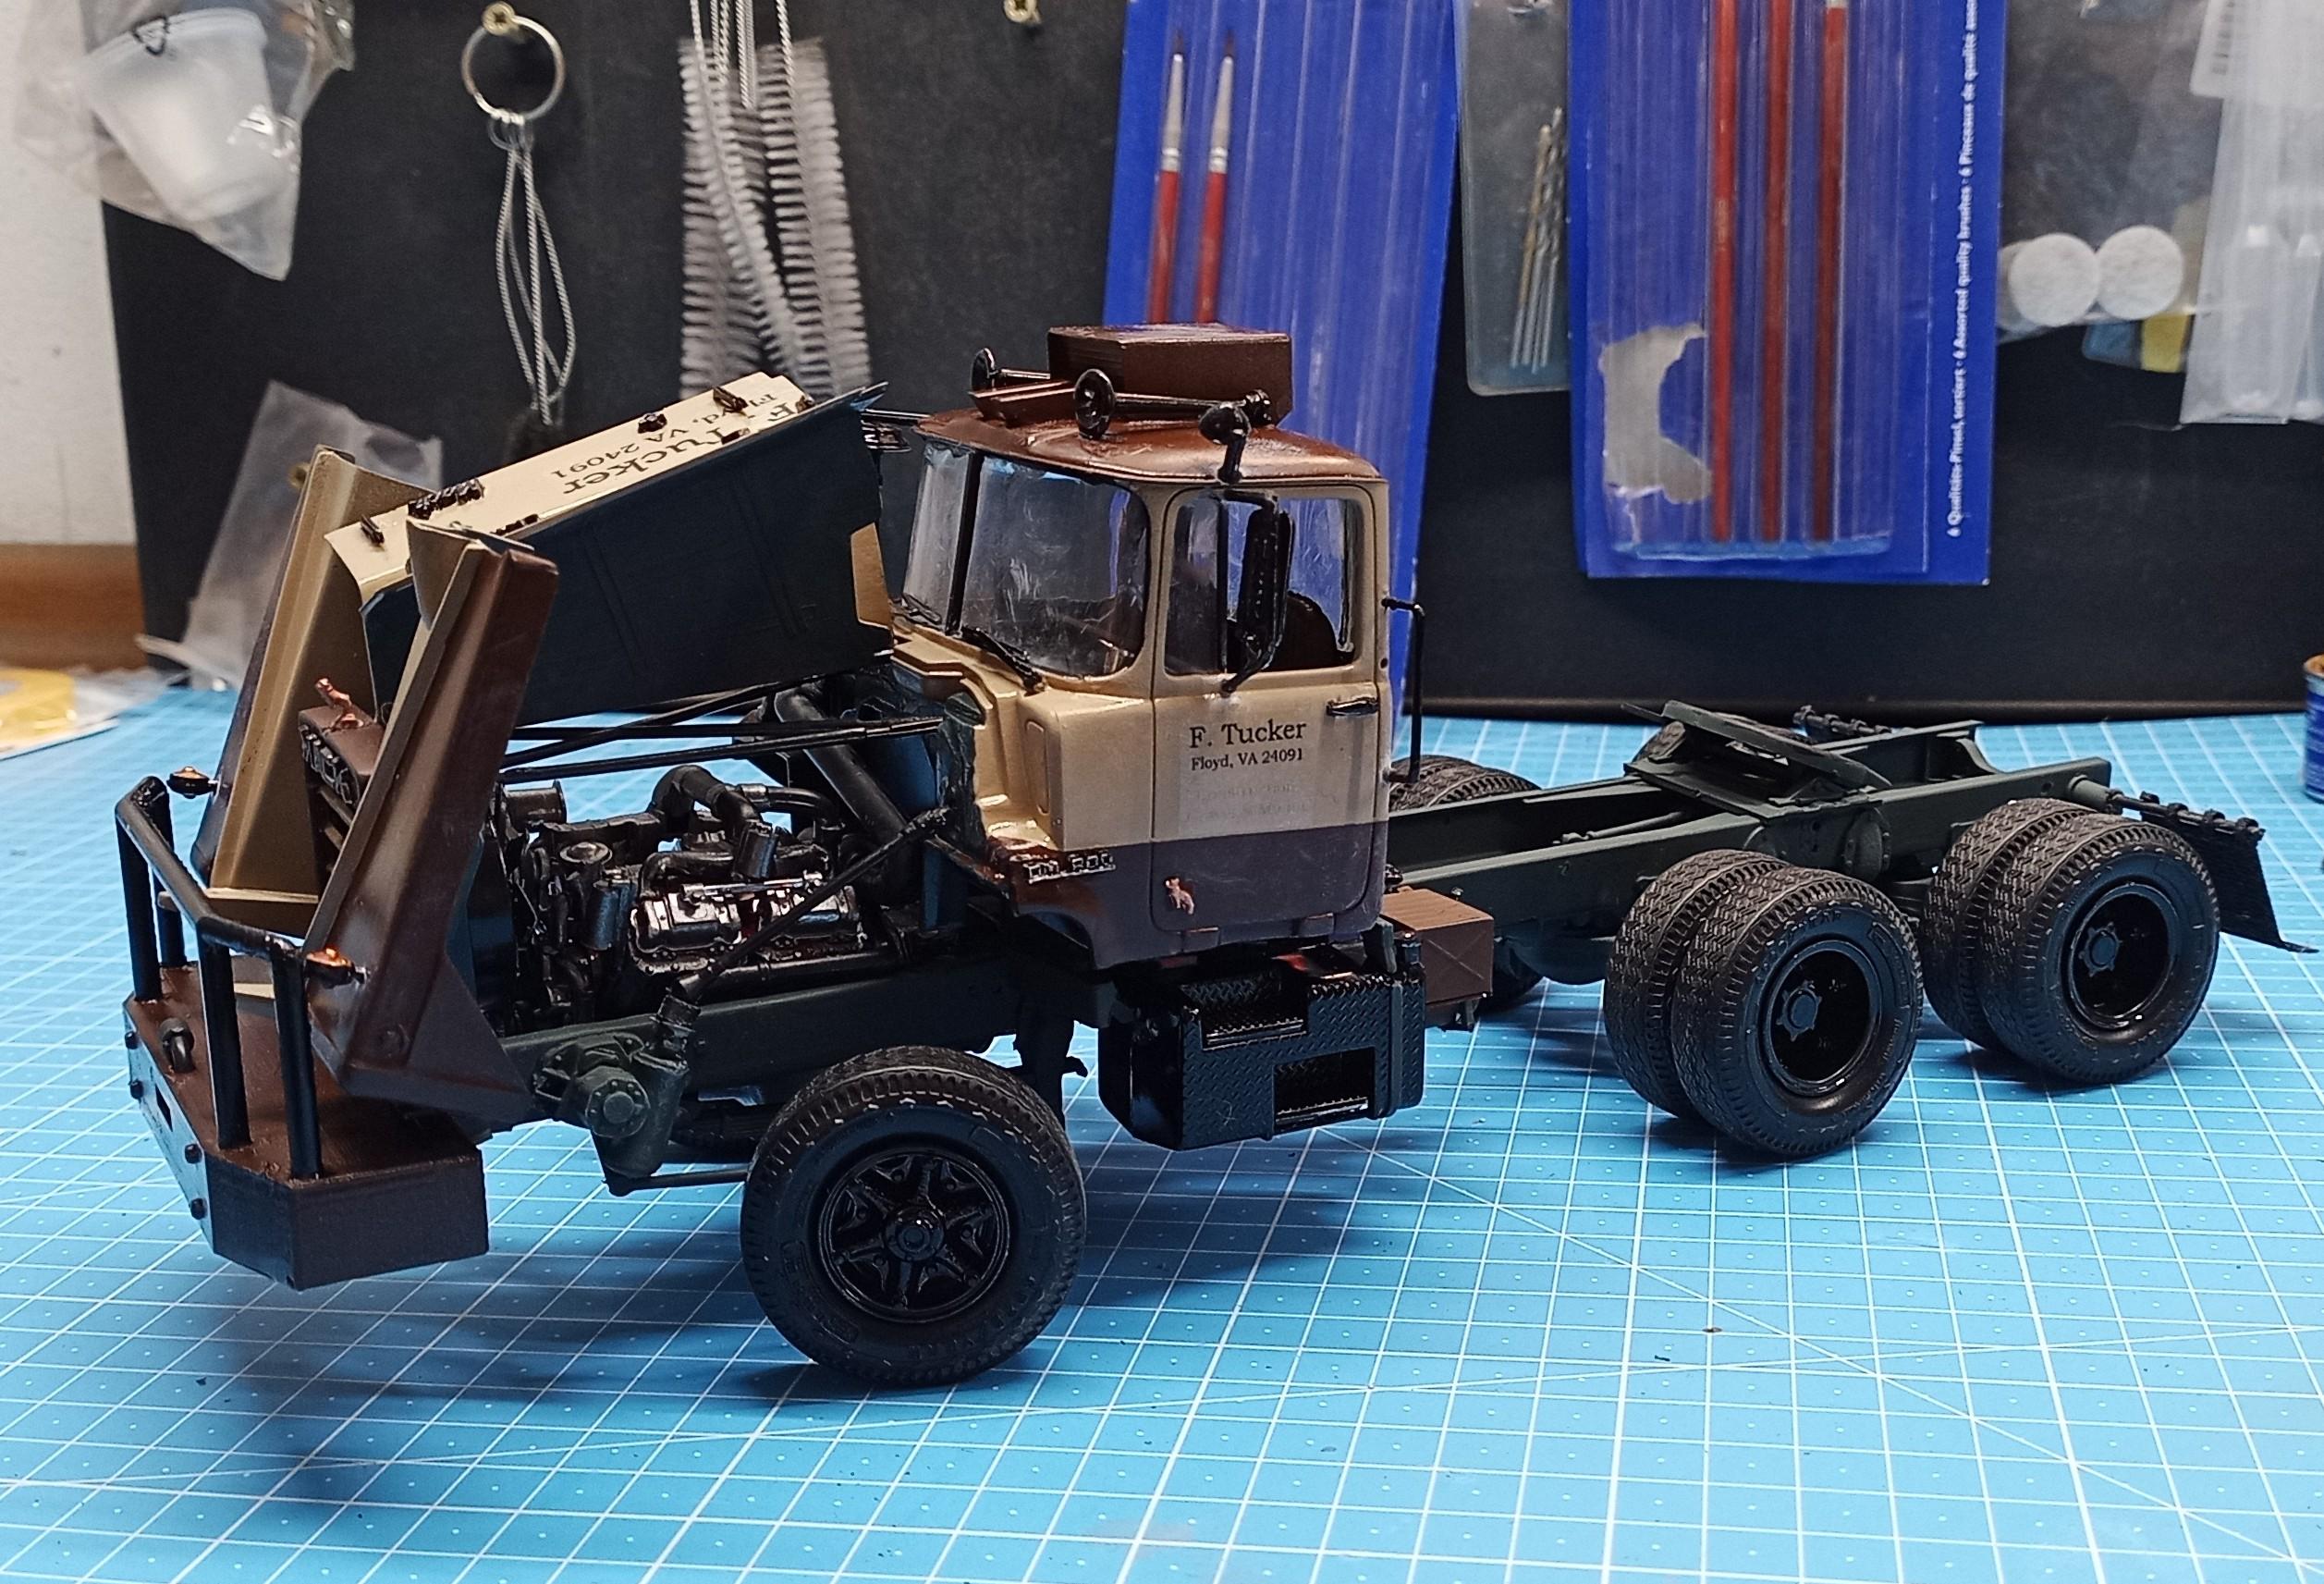
Here´s the chassis. Looks a bit more like a working horse now! The engine looks a bit golden colored on the picture but its iron grey.
-
Mack DM800 refurnish
Jürgen M. replied to Jürgen M.'s topic in WIP: Model Trucks: Big Rigs and Heavy Equipment
☺️ Yes, you´re right. I liked it back then in the 80s but over the years when you get a more realistic view of those trucks it doesn´t make that much sense anymore especially looking at the engine. It wasn´t really meant to be a show truck for exhibitions I guess. Anyway, I´m glad my inspiration finds your appreciation! I wanted to do this for years. It was really about time! You´ll be glad to see, that there will be not a single spot of chrome left on this one! -
Mack DM800 refurnish
Jürgen M. replied to Jürgen M.'s topic in WIP: Model Trucks: Big Rigs and Heavy Equipment
Wow, thanks for that info! I probably would have chosen green or orange or something! I think I'll follow your info and paint it grey! ? -
Mack DM800 refurnish
Jürgen M. replied to Jürgen M.'s topic in WIP: Model Trucks: Big Rigs and Heavy Equipment
I'm still undecided which color the engine will be! It seems to be a V8. Anyone know If these engines had a specific color or if they came how ever the customer wanted it? I once read that Peterbilt generally ordered the engines in white because they wanted them to look very clean in a new truck. Thought that Mack may have had some sort of policy of that kind too. -
Mack DM800 refurnish
Jürgen M. replied to Jürgen M.'s topic in WIP: Model Trucks: Big Rigs and Heavy Equipment
Hi Brian, thanks, I just thought the original bumper looked a bit boring! Actually there´s a bit of sanding to do but not much! It does depend on how you place the part in the slicer. The regions you don´t see to well when it´s in place should be the down side in printing. Then the sanding is not much of a job. It makes a difference though what kind of part you print. Printing a truck cab for example means much more after work than a bumper or a chassis part. The printing lines on a cab are not really sandable since the material gets so hard that you would need a diamond sanding paper. That would let you grind all details away though so it´s better to use a filler primer. That gave me pretty good results on my last project, the IH Conco. Of course it also depends on what printer you use. If you don´t want to spend a few thousand on a high end printer (or can´t) then you use a good everyday printer for a few hundred but have to get used to the printing lines. I´m quite satisfied with my Creality printer. Does the job! -
Looking really good! Nice Idea for a build!
-
1/32 Freightliner cabover
Jürgen M. replied to Rockford's topic in WIP: Model Trucks: Big Rigs and Heavy Equipment
You're doing it again: making a "grown up" truck out of a 1/32 minor detailed kit! Amazing! Can't wait to see this done! -
I needed another project....T800
Jürgen M. replied to gotnitro?'s topic in WIP: Model Trucks: Big Rigs and Heavy Equipment
Nice work! That rack looks great! Keep going! -
Mack DM800 refurnish
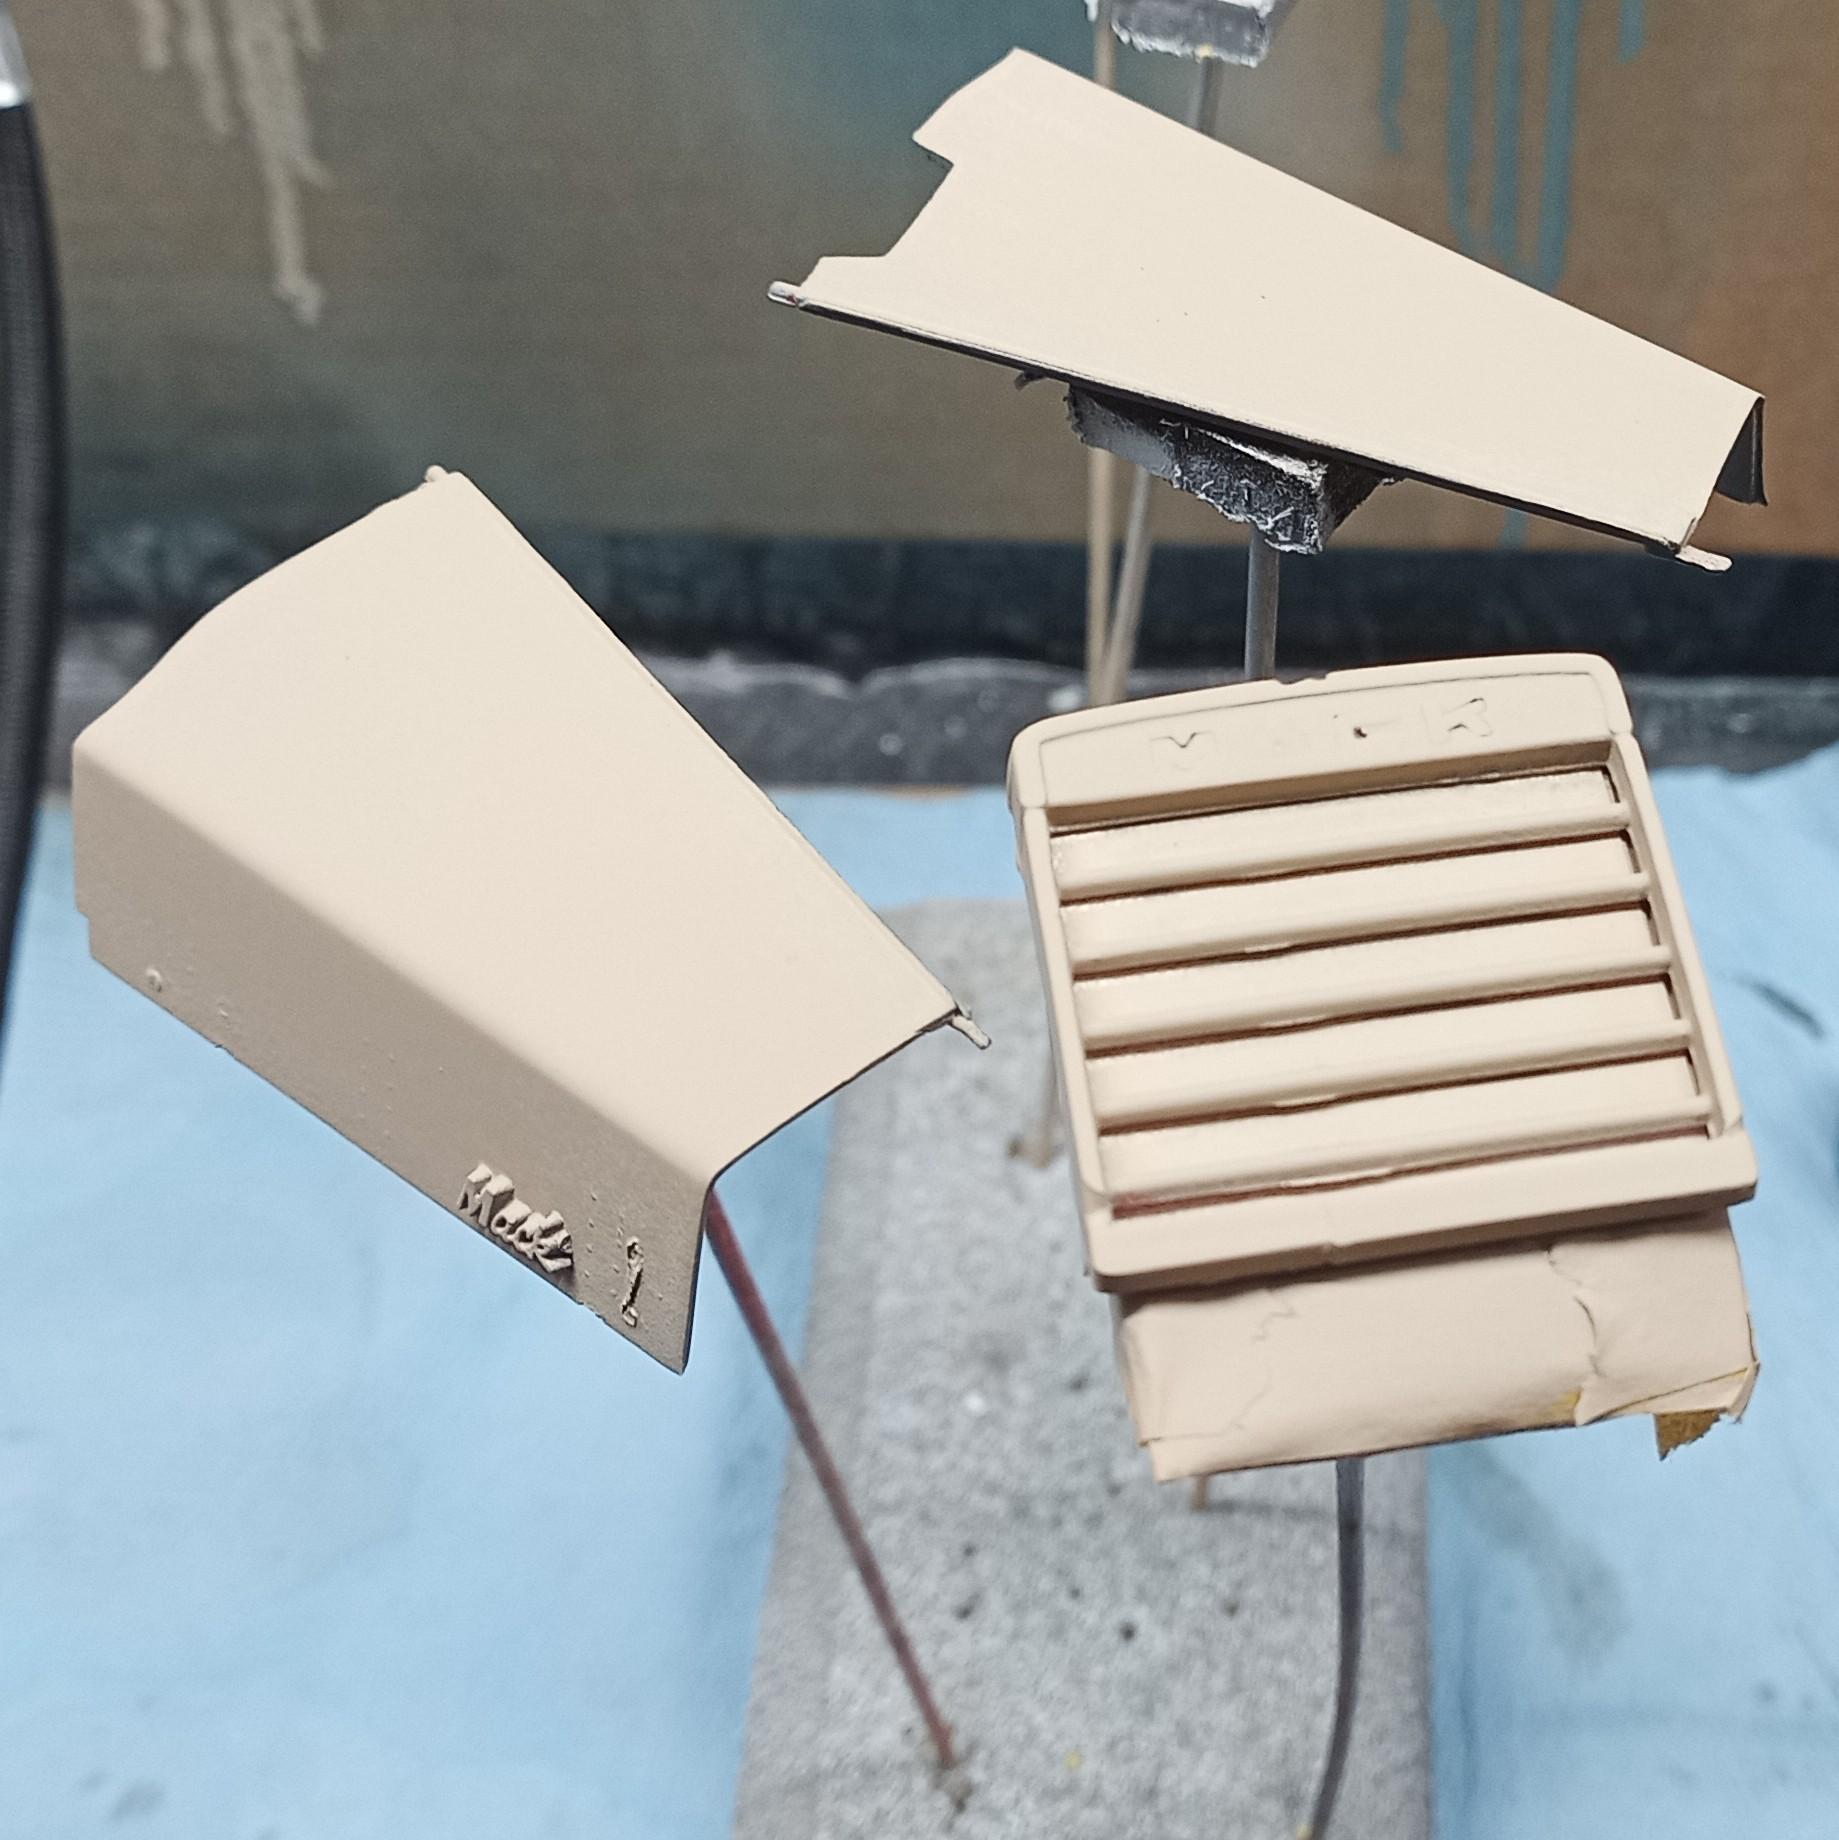
Jürgen M. replied to Jürgen M.'s topic in WIP: Model Trucks: Big Rigs and Heavy Equipment
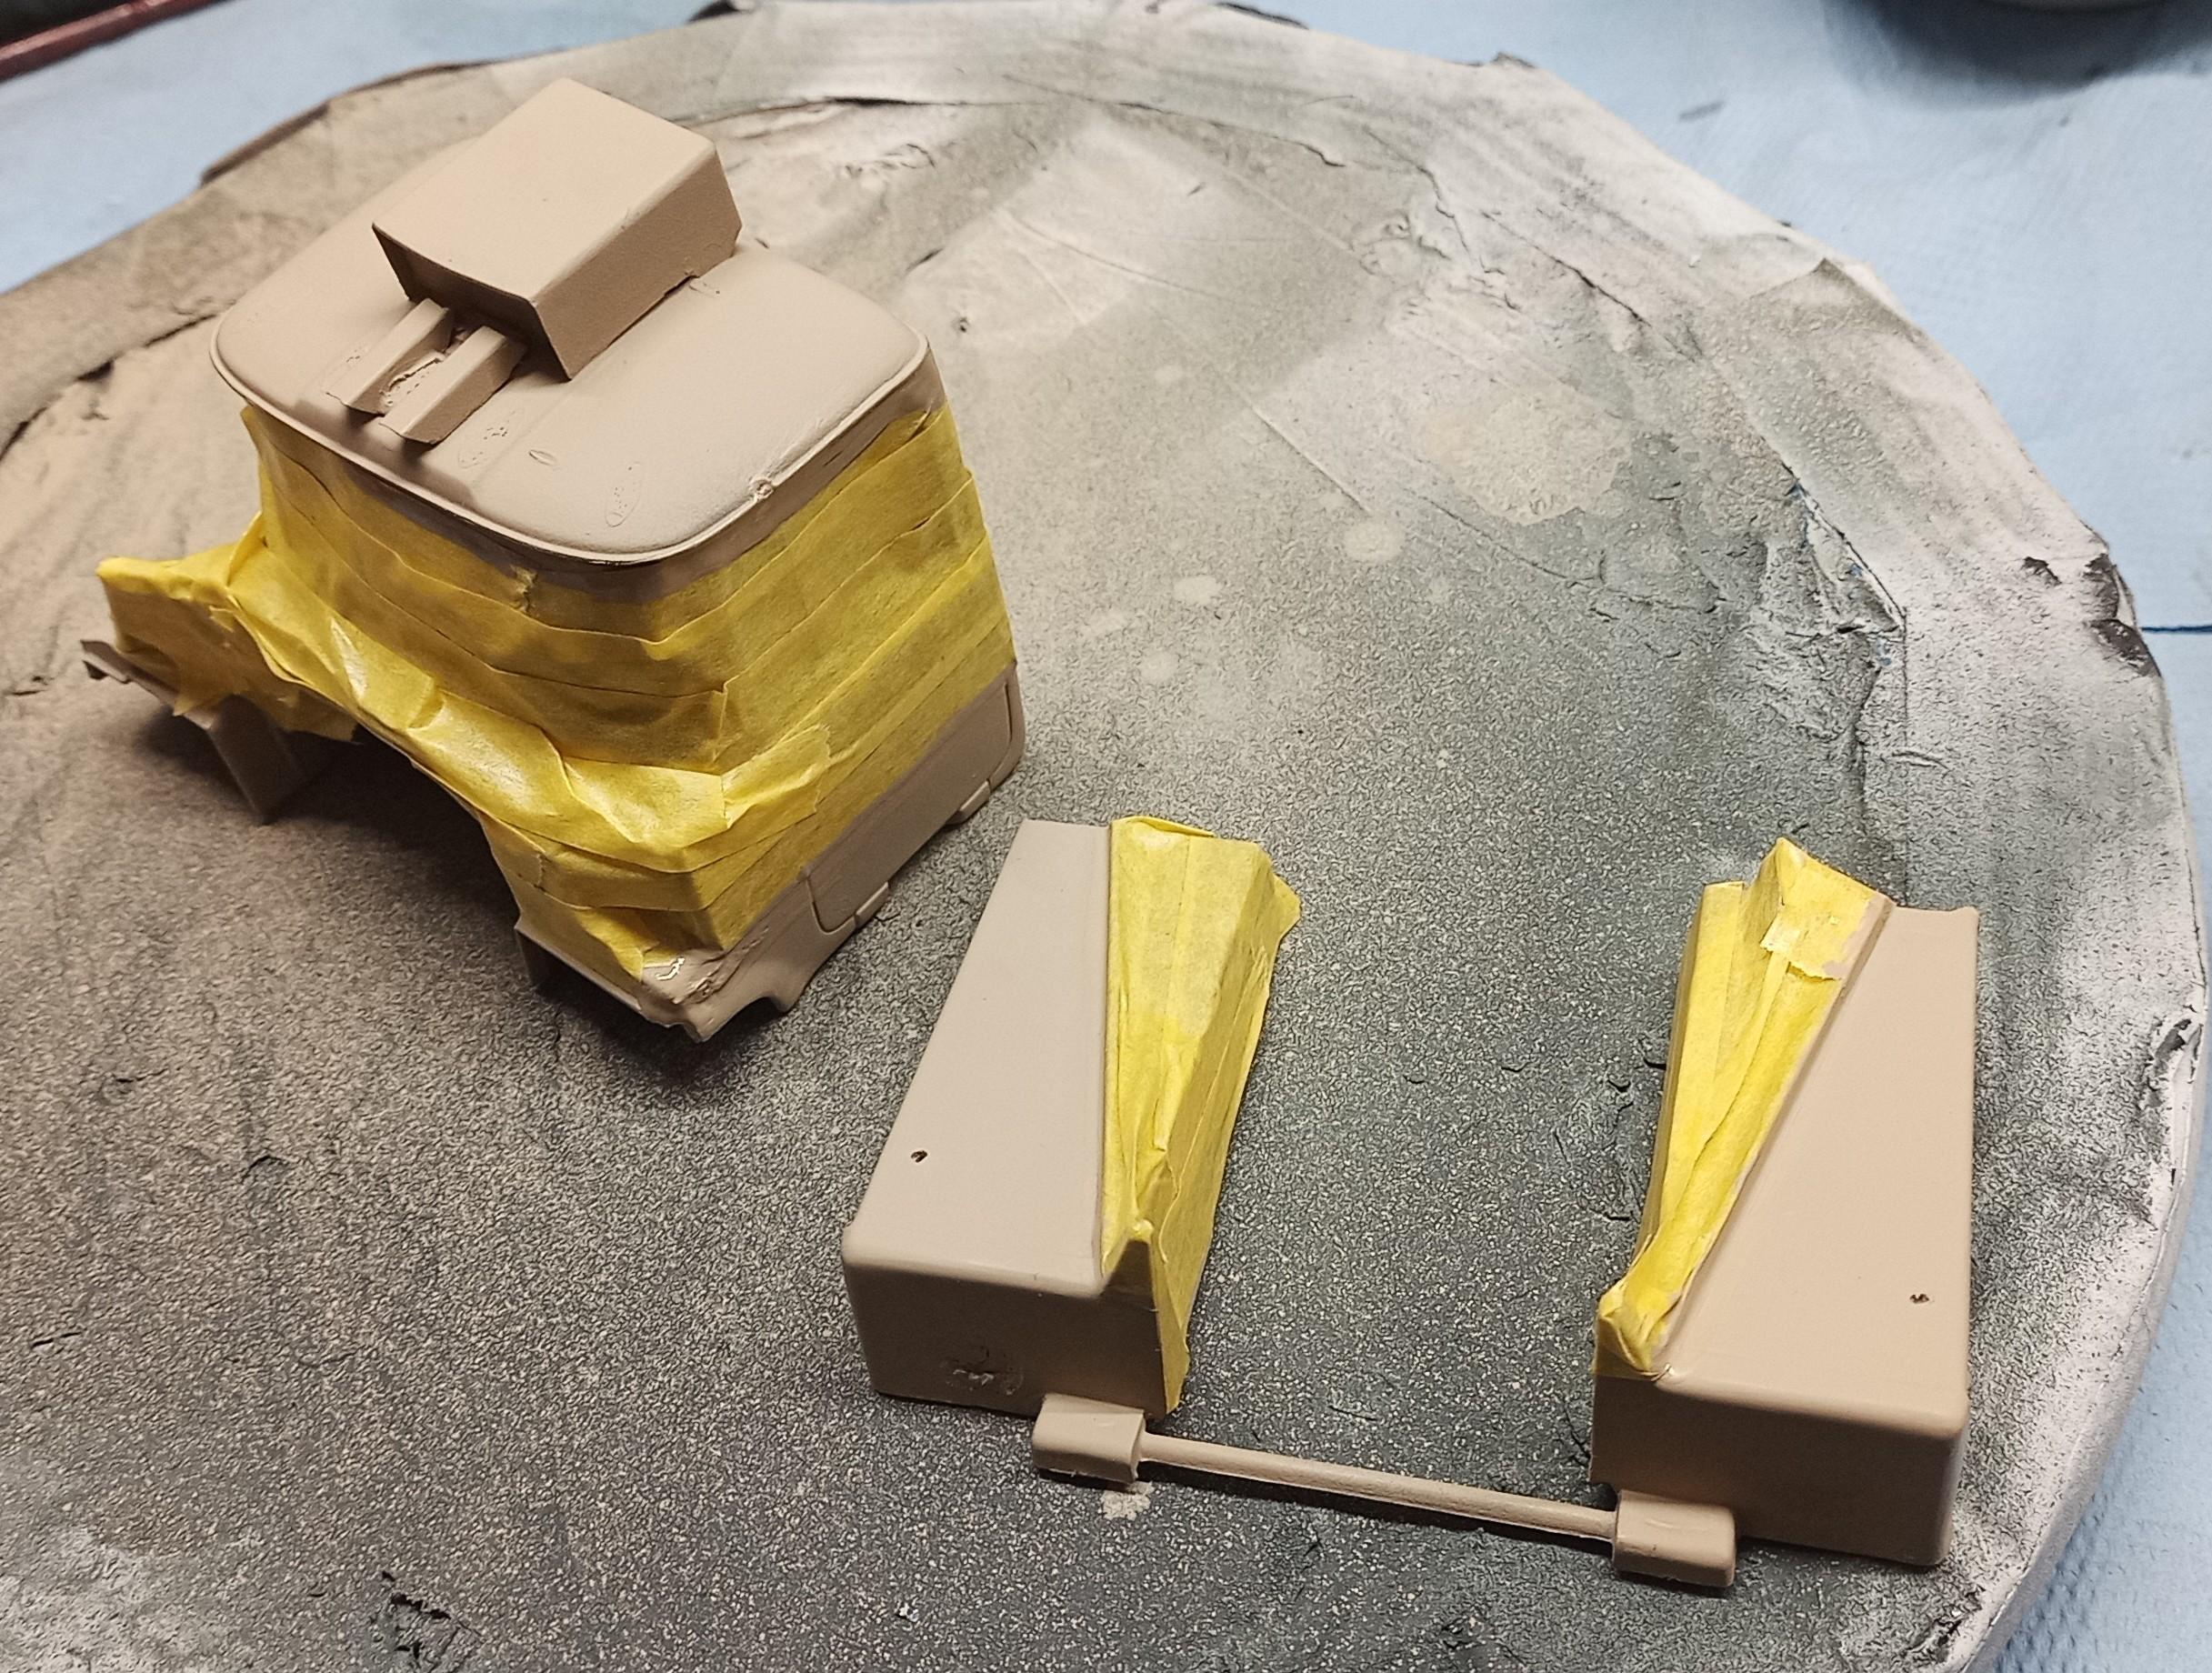
Primered and painted the body parts. There will be a second color as you can see. The masking is done! As soon as I've got time, I'll apply the next color! Then decals and clear coat! Even designed and printed a new bumper!
-
Rubber Duck Tank Trailer
Jürgen M. replied to Warren D's topic in WIP: Model Trucks: Big Rigs and Heavy Equipment
I´m not picky at all. My trailer and the truck are far from being identical to the movie vehicles. To me the main impression counts when its finished and on the shelf. You would find lots of mistakes on mine. I´m sure the trailer will be very nice when finished. I´m watching with pleasure! ?