Jürgen M.
-
Posts
1,677 -
Joined
-
Last visited
Content Type
Profiles
Forums
Events
Gallery
Everything posted by Jürgen M.
-

International S-Series F2674
Jürgen M. replied to Jürgen M.'s topic in Model Trucks: Big Rigs and Heavy Equipment
Thank you! ? Glad you like it! -
Another "Convoy" Truck!
Jürgen M. replied to Jürgen M.'s topic in WIP: Model Trucks: Big Rigs and Heavy Equipment
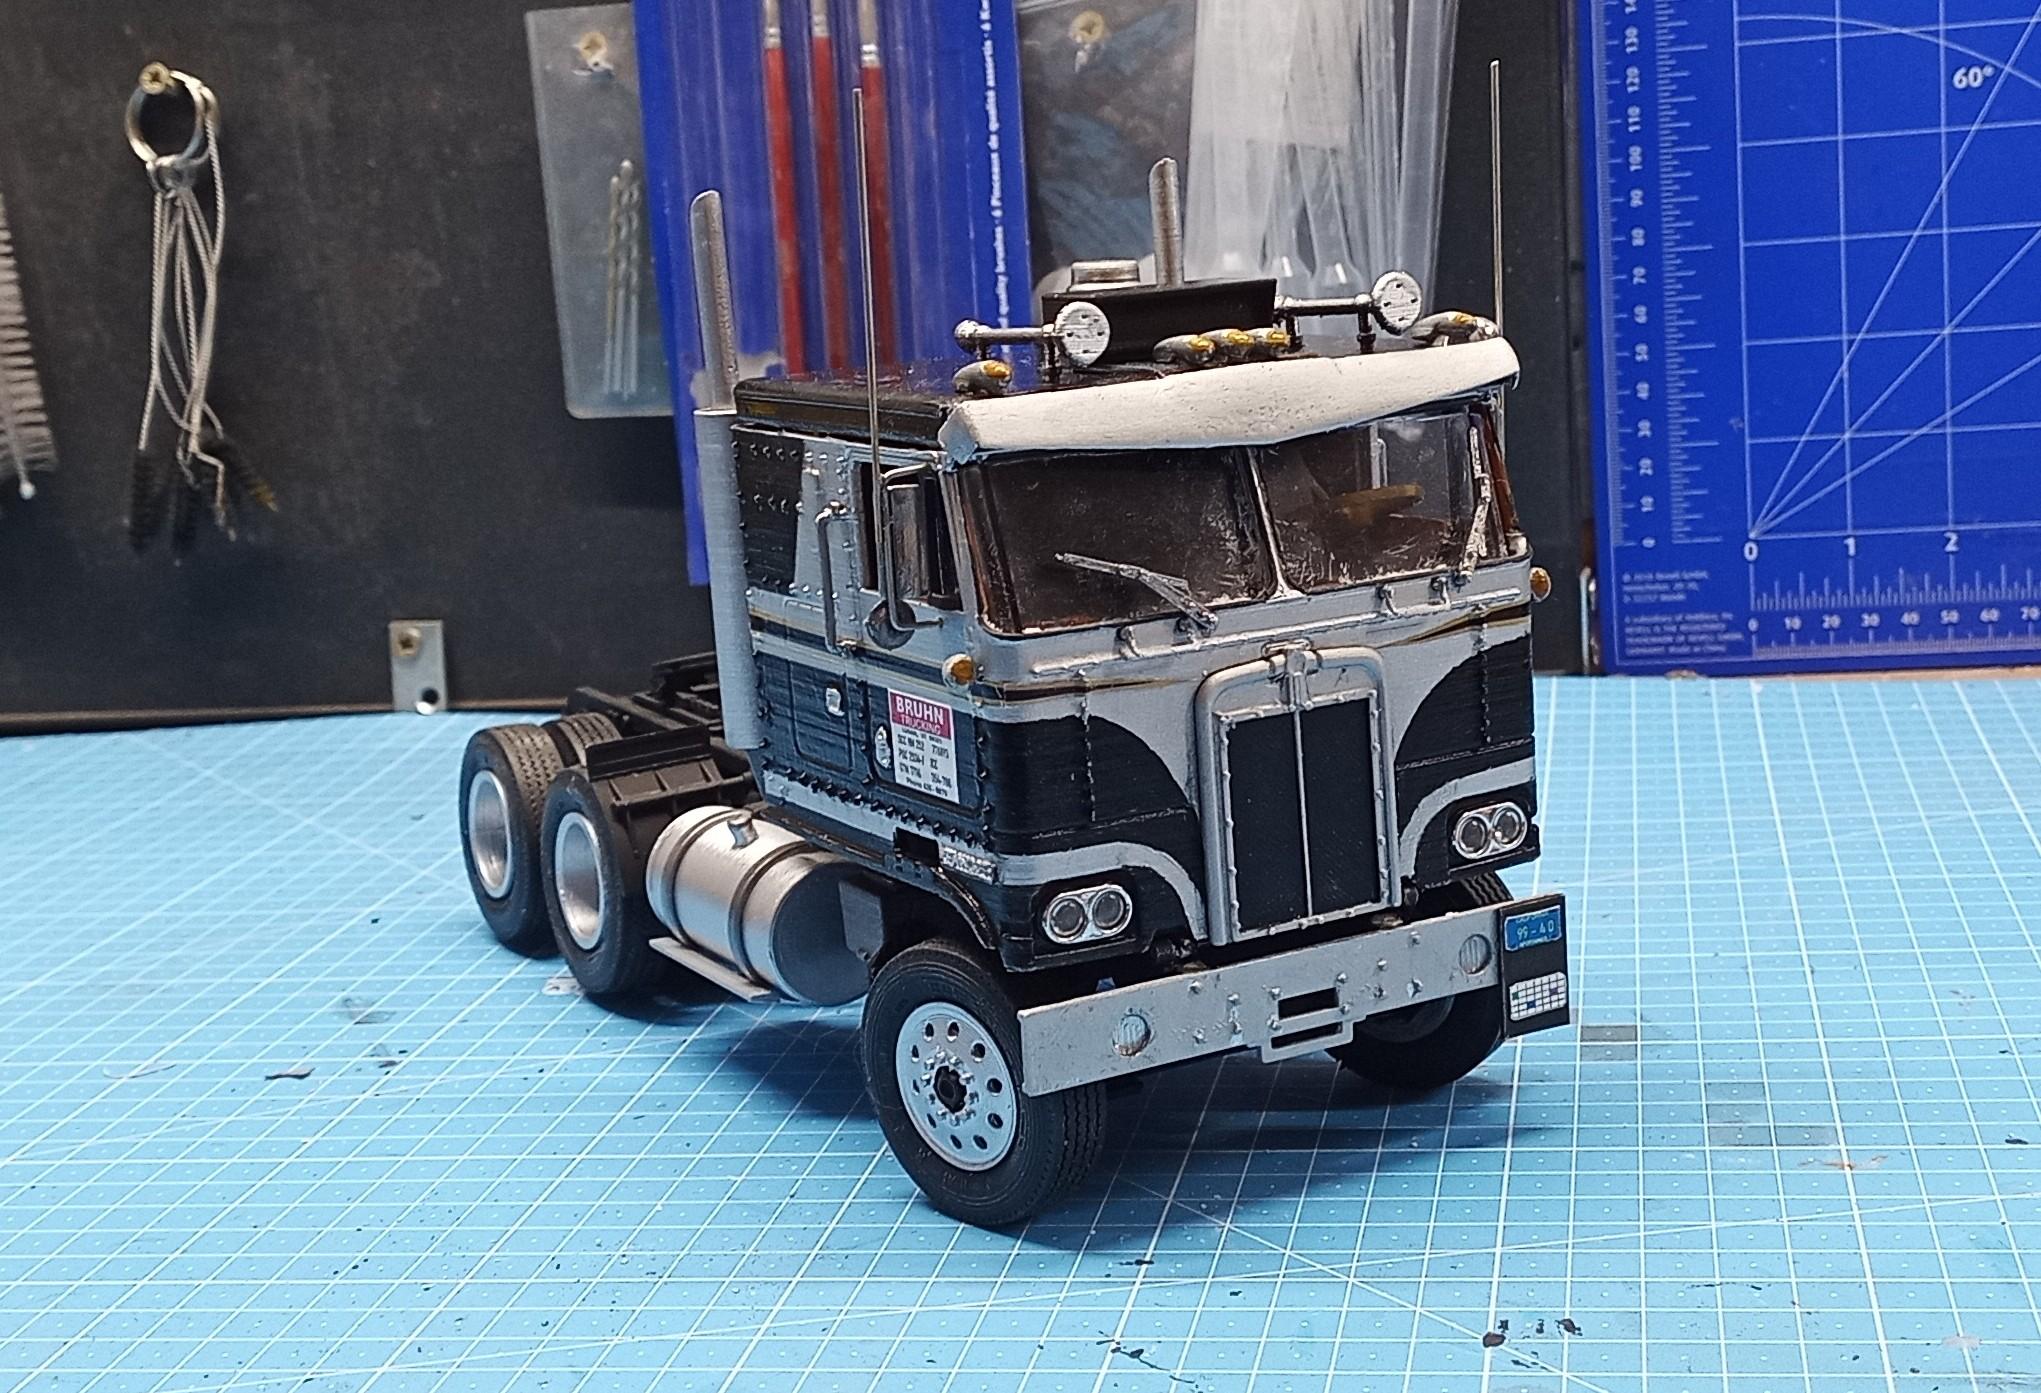
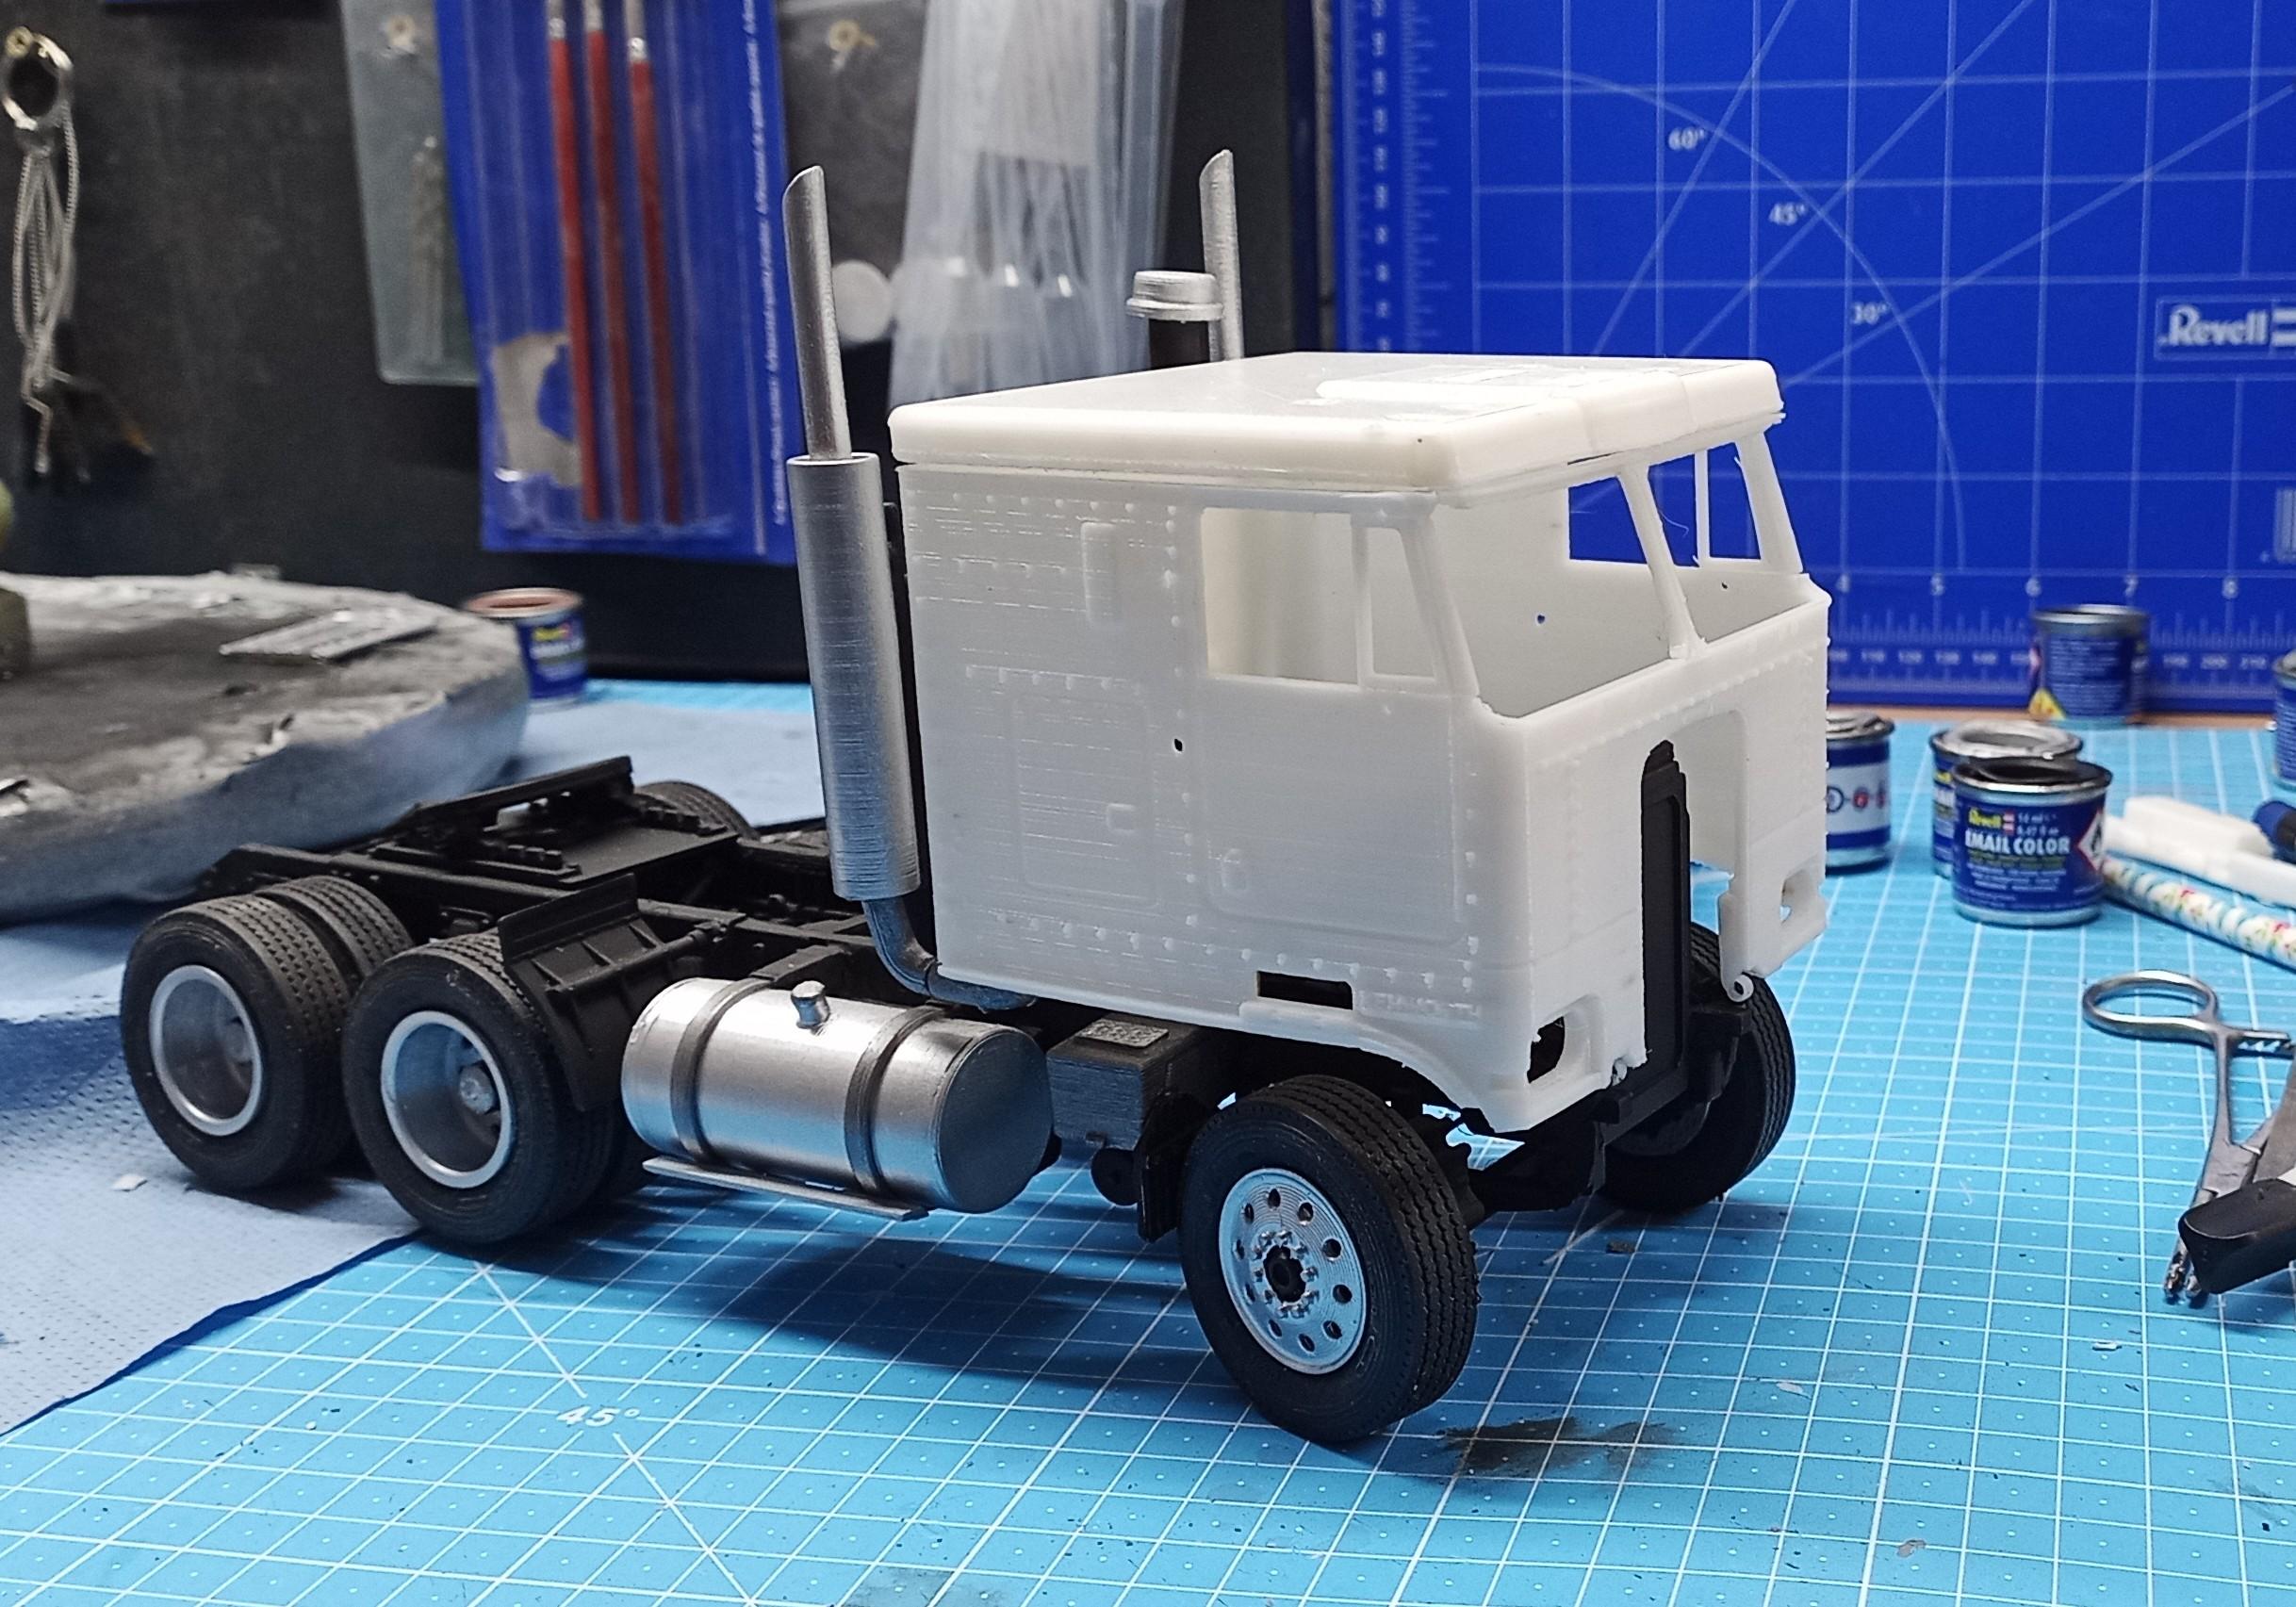
? I finished the tractor last night. Just couldn't wait! I know it's far from original kit quality but on the shelf it looks pretty good! Now comes the trailer!
-
Another "Convoy" Truck!
Jürgen M. replied to Jürgen M.'s topic in WIP: Model Trucks: Big Rigs and Heavy Equipment
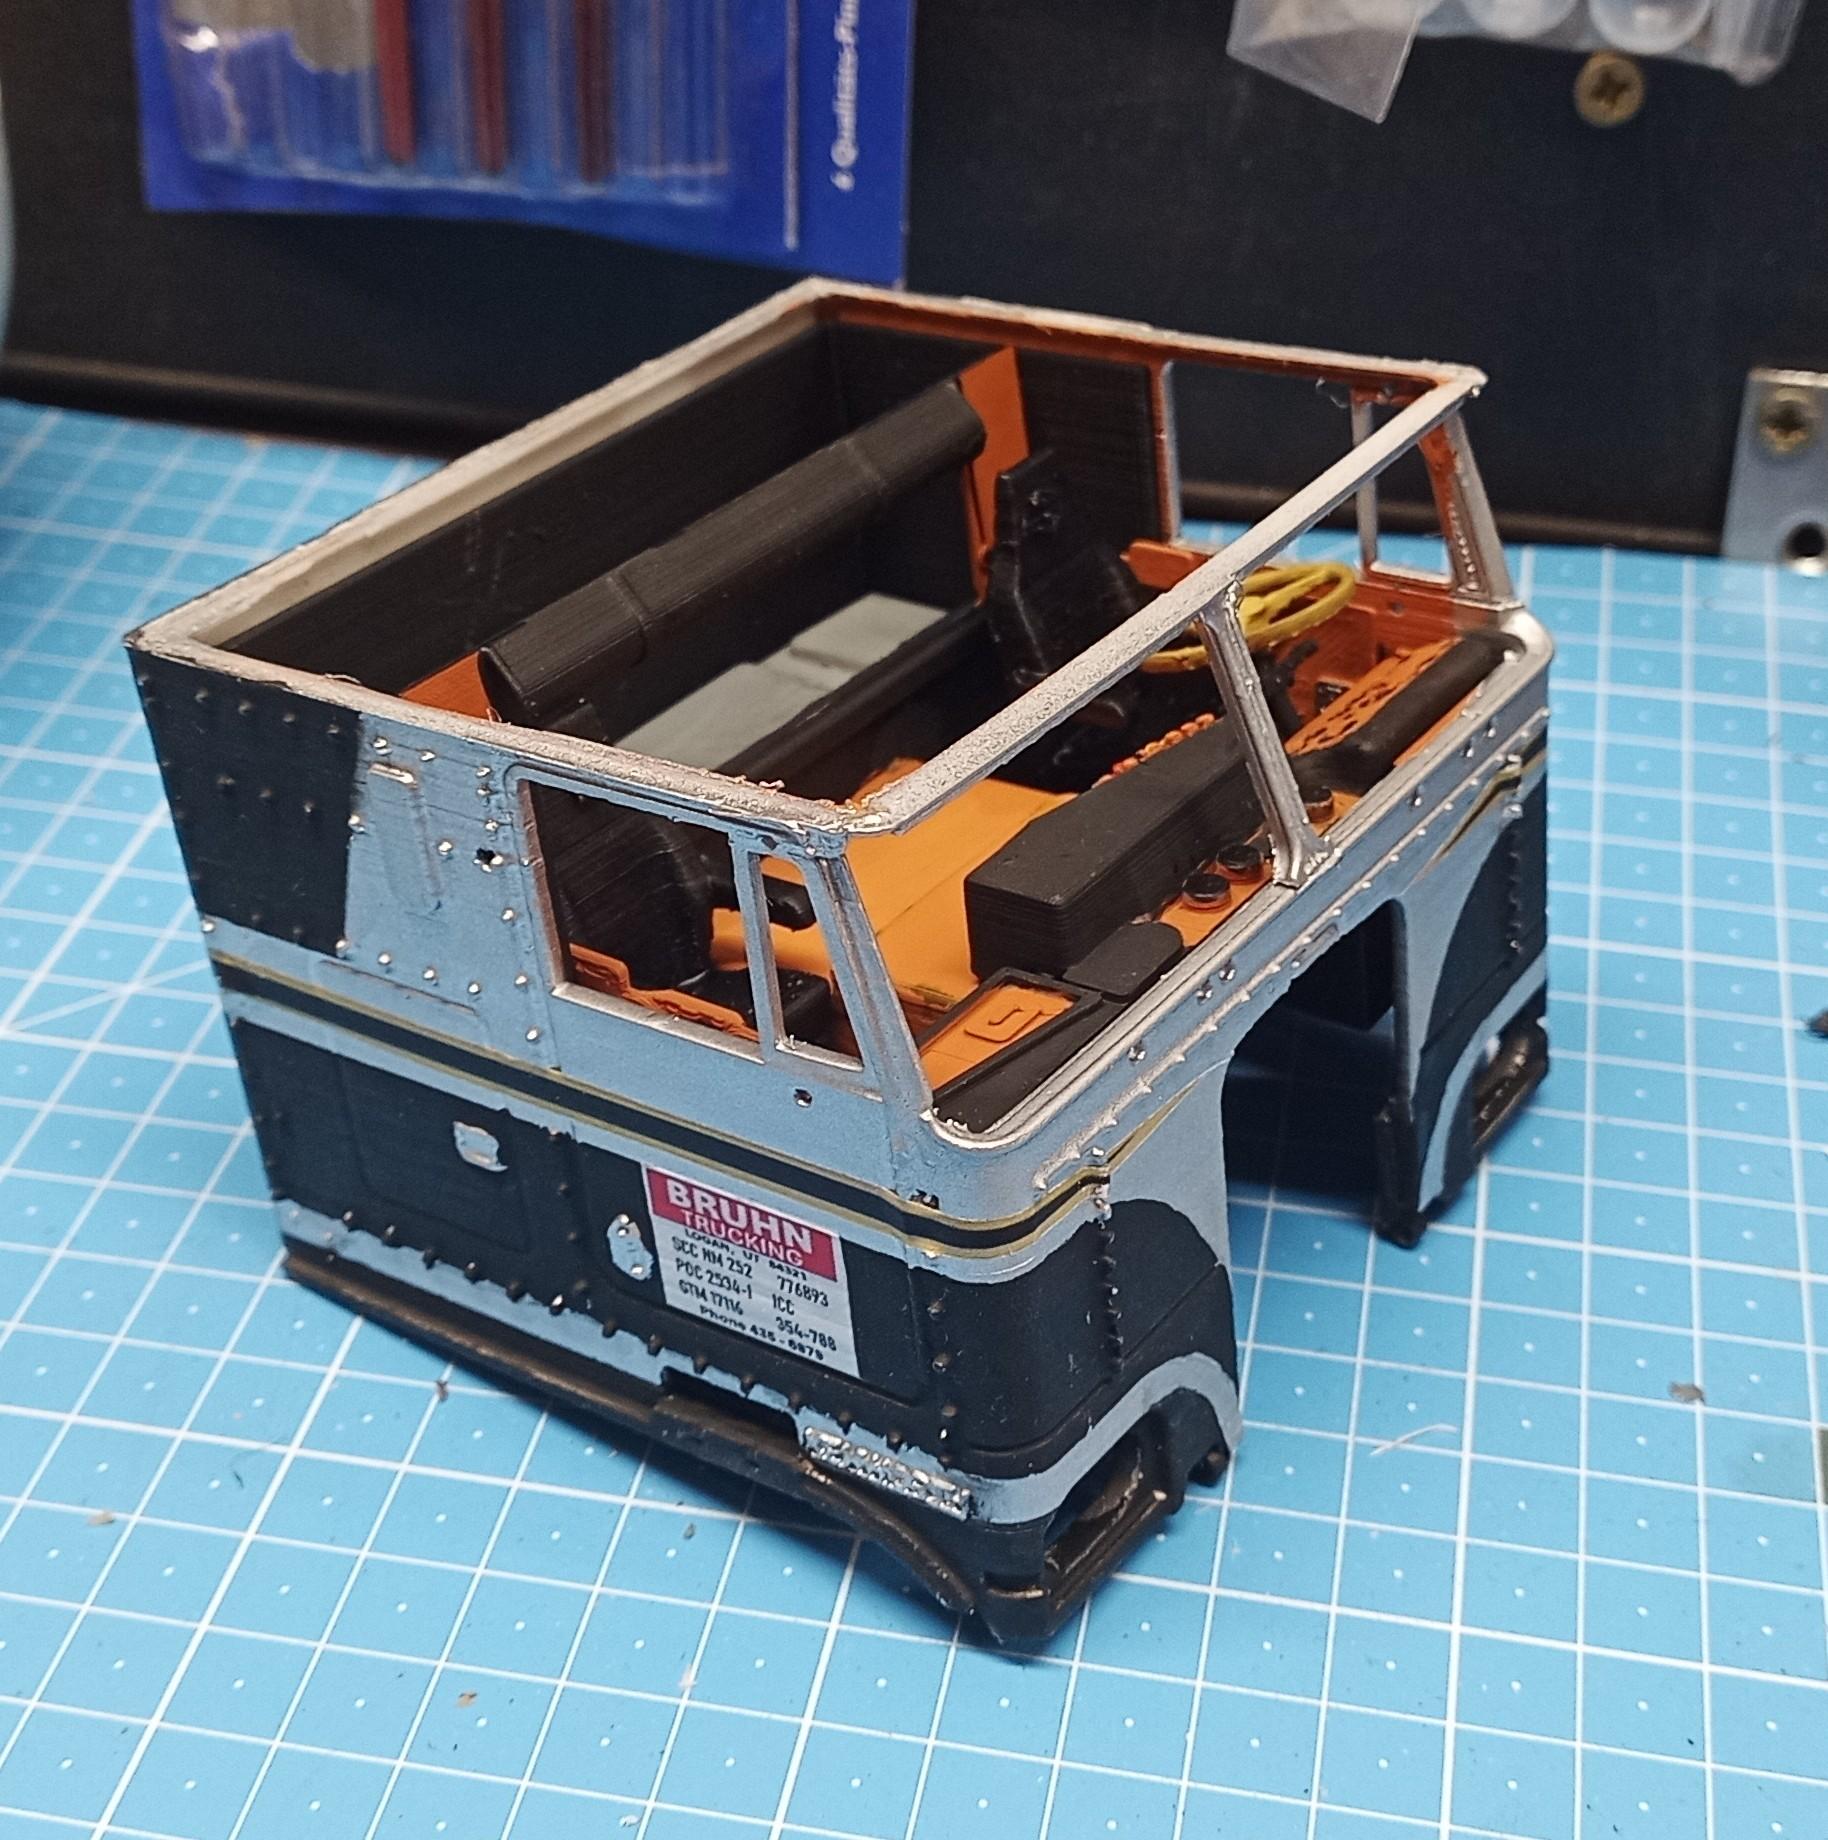
Got the windows installed and the roof on. Not a very good fit due to warping during printing. That happens for example when you have a part with different strong walls or components. In this case the cab walls are thick and the bridges above the windshields are comparably thin. These fell in a bit and therefore caused a gap to the roof. What did I learn? No more separation of cab and roof in design. It takes more filament because of the support structures but there's no warping. Had to redo the bumper and the grille because of an unwanted interaction between chrome spray and clear coat! I went over to plan B! Aluminium silver (Revell no.99) with a bit of beige mixed in to create the common yellowish shade in the aluminium parts. Didn't want the grille to be the same silver color as the cab! Hope it turns out well. I'll show you when it's dry!
-
My own Sundance
Jürgen M. replied to Rockford's topic in WIP: Model Trucks: Big Rigs and Heavy Equipment
?? Good Idea! Really looking great! Can't wait to see further progress! -
Another "Convoy" Truck!
Jürgen M. replied to Jürgen M.'s topic in WIP: Model Trucks: Big Rigs and Heavy Equipment
I understand why! It's always a risk. I've had fully dried paint dissolve beneath clearcoat, mostly metallics. Sometimes decals begin to wrinkle or come off. I don't know why that happens. Mostly it works out great. I actually use clearcoat just to fix the decals on the surface. I've had them come off sometimes after years. Maybe the decal sheets I bought are of a different quality. Haven't actually tried to find out If they're clearcoat compatible! -
Another "Convoy" Truck!
Jürgen M. replied to Jürgen M.'s topic in WIP: Model Trucks: Big Rigs and Heavy Equipment
I applied the clear coat after the paint and the decals were perfectly dry, still one of the stripes came partially off and had folded itself. I had to cut off the first 20mms and put a new tip on. I actually glued it on with a glue stick. It worked! - I saw that some of you guys work with decal sheets to make your own decals. Do you also have that problem when you apply clear coat? - Now the windows have to be made and fit in, horns, marker lights, mirrors, .... Still lots of work.
-
International CO-4000, Navajo Trucking.
Jürgen M. replied to Repstock's topic in Model Trucks: Big Rigs and Heavy Equipment
I believe everything has been said! I can only agree to all the others and say a job well done! ? -
Another "Convoy" Truck!
Jürgen M. replied to Jürgen M.'s topic in WIP: Model Trucks: Big Rigs and Heavy Equipment
Thanks Rockford! Your words in God's ear! ? -
Another "Convoy" Truck!
Jürgen M. replied to Jürgen M.'s topic in WIP: Model Trucks: Big Rigs and Heavy Equipment
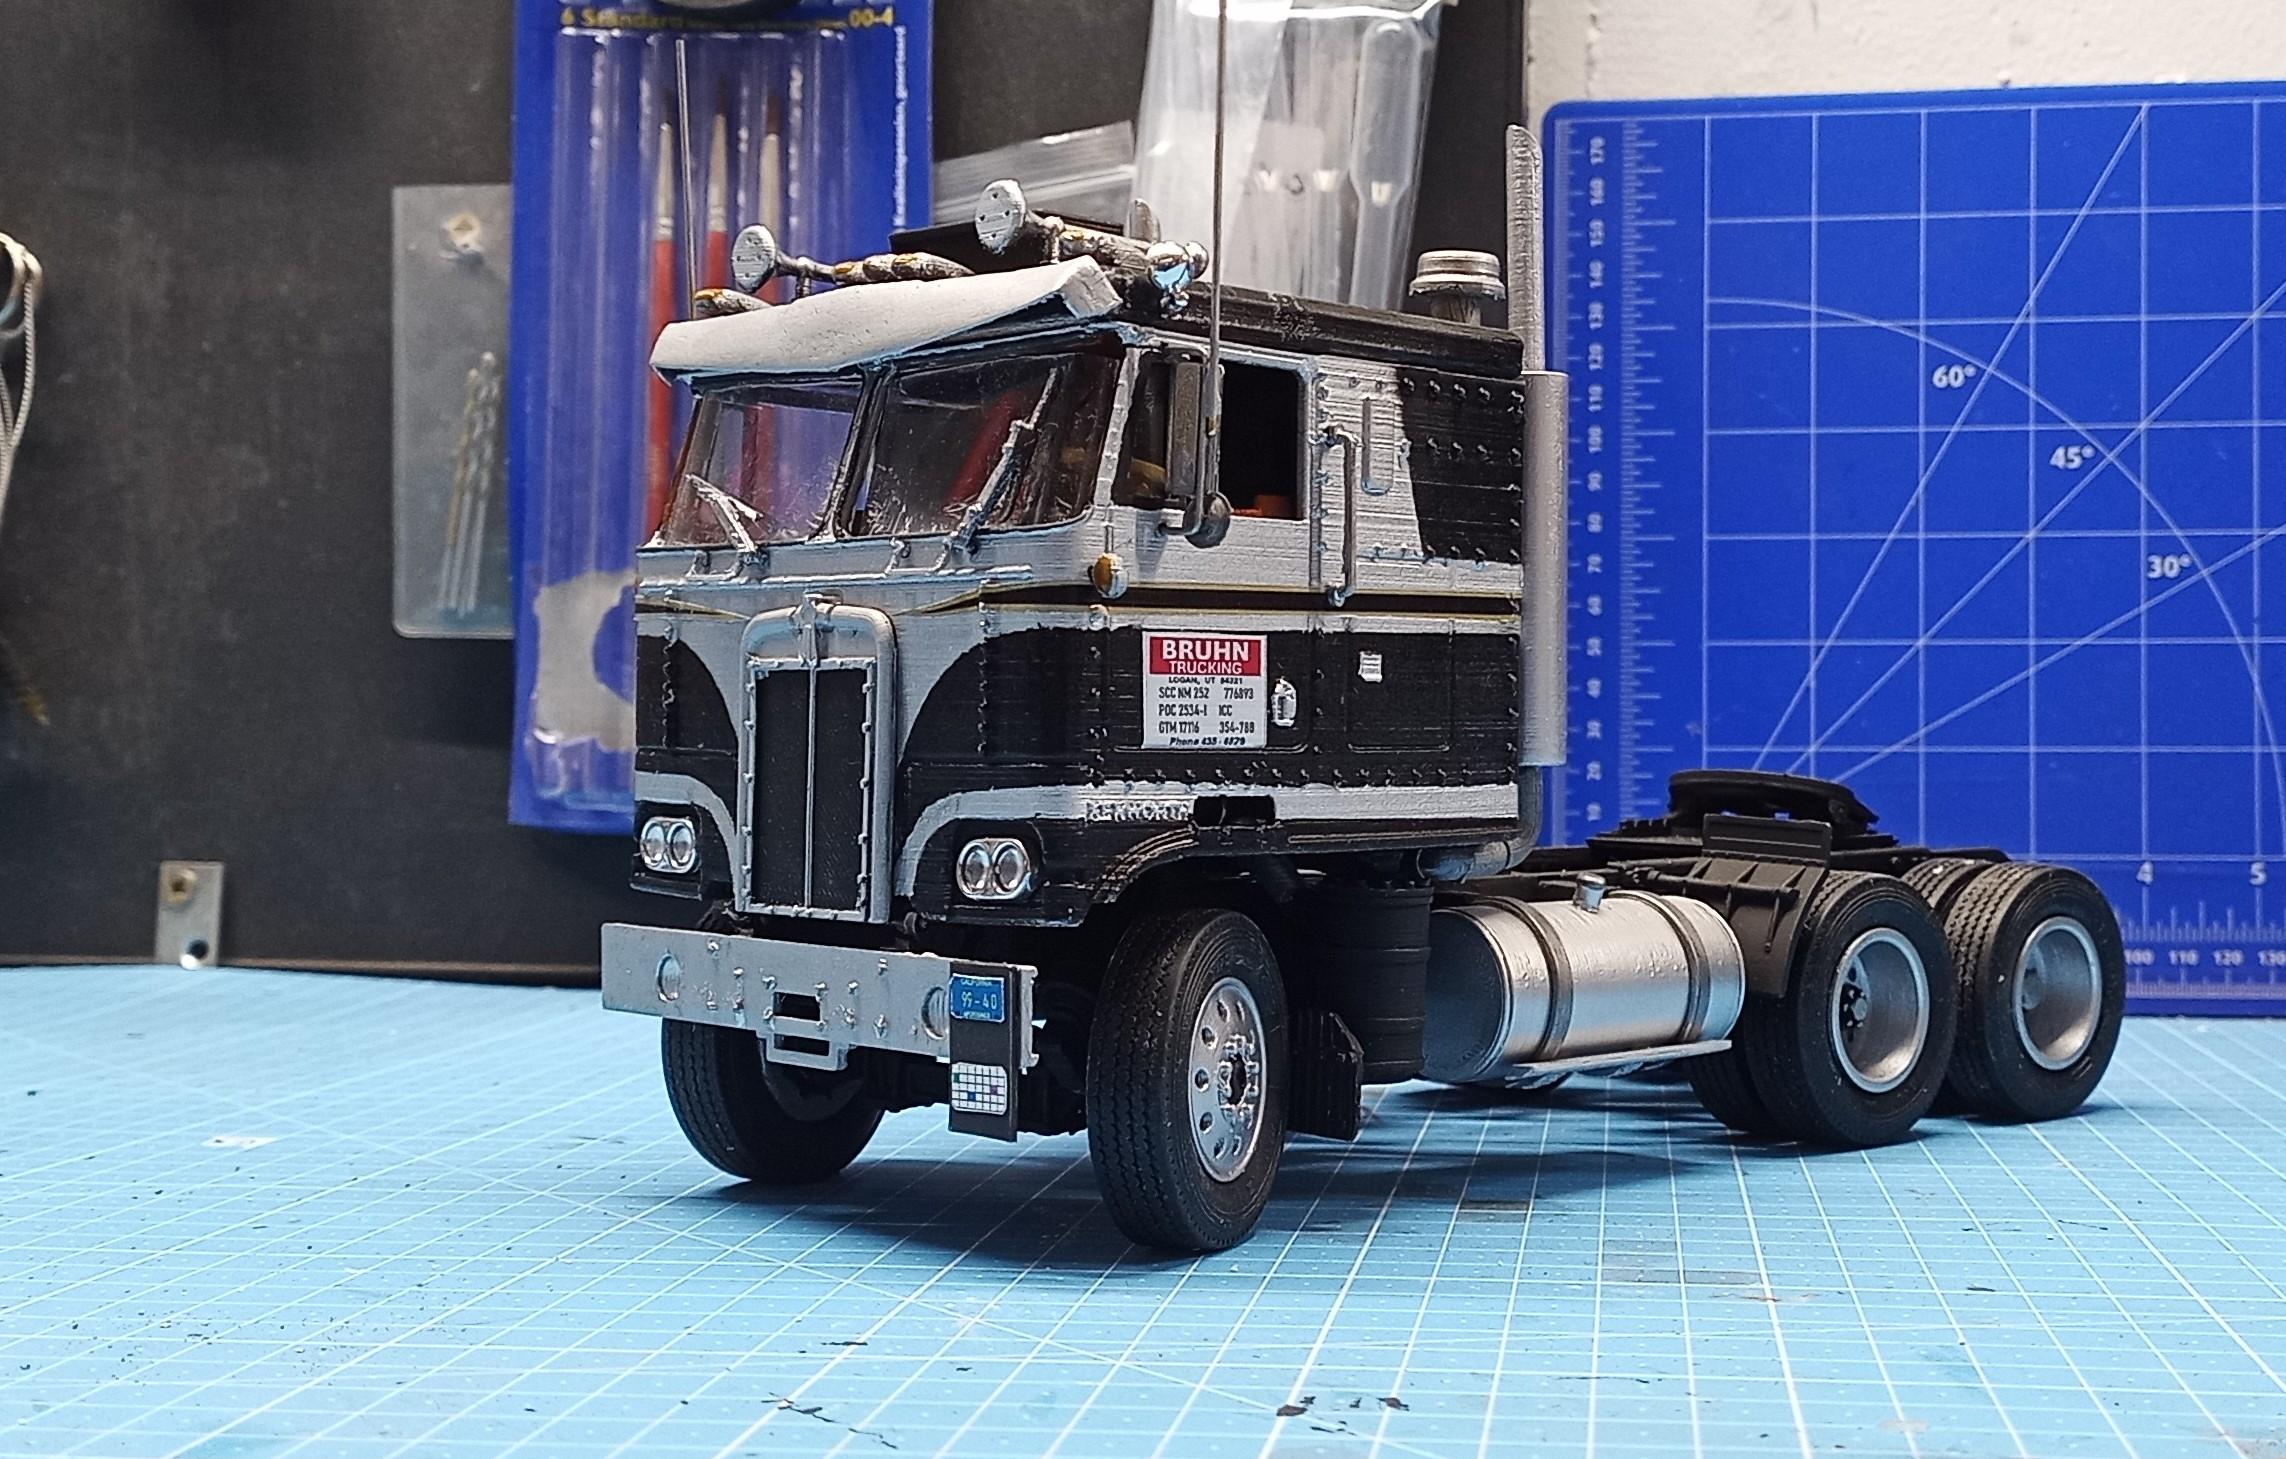
I painted the cab. Still need to do some fine tuning. The masking was a bit tricky due to the rivets. Should have made them a bit smaller! They break off quite easily too. The narrow stripe in the middle is a self made decal. The inside walls are only painted as far as visible! Looks a bit wild without the interior!
-
Black Box Twin V8 Truck
Jürgen M. replied to Dutzie's topic in WIP: Model Trucks: Big Rigs and Heavy Equipment
Looks really nice! Did you use a clear coat on the chrome? I had fingerprints all over even after two weeks of resting and drying in a warm and dry room. -
Peterbilt cabover
Jürgen M. replied to Bronzekeg's topic in Model Trucks: Big Rigs and Heavy Equipment
Now that is one nice truck you created! Congrats and thanks for sharing! -
Another "Convoy" Truck!
Jürgen M. replied to Jürgen M.'s topic in WIP: Model Trucks: Big Rigs and Heavy Equipment
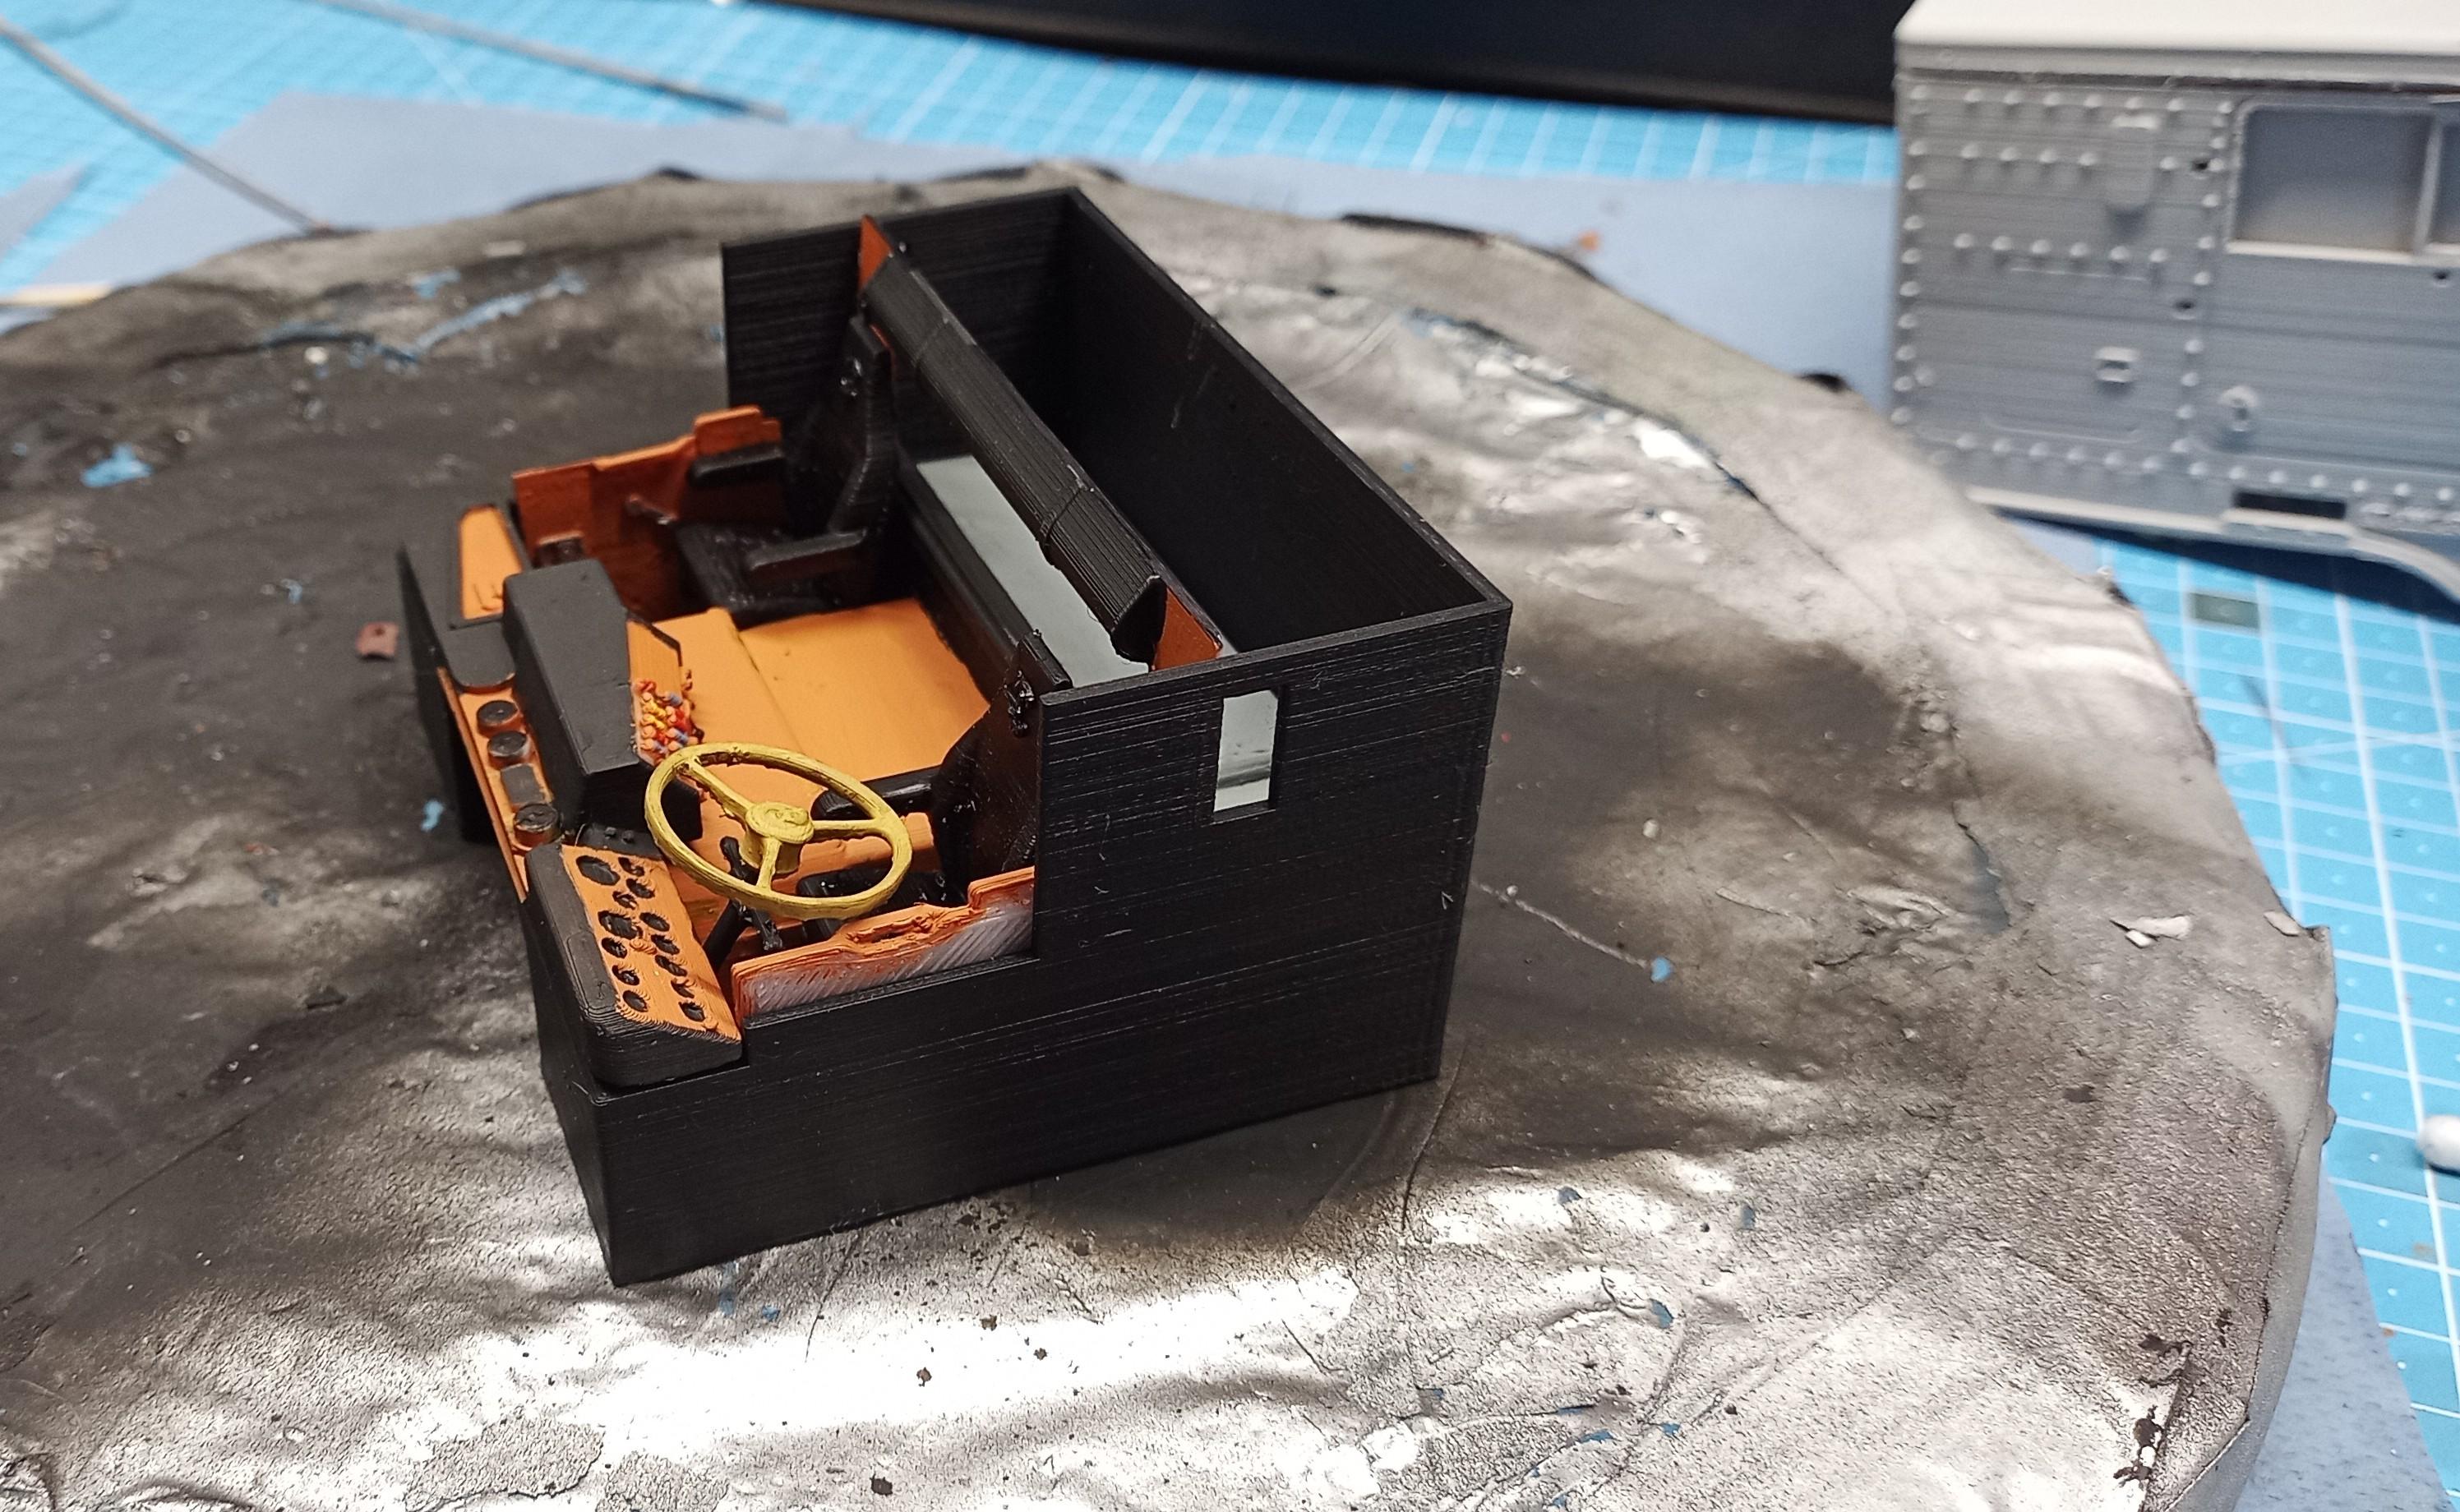
I finished the interior. Not very neat I admit but sanding these parts is practicaly Impossible considering that the filament is very hard and the parts would break easily due to their size. But since this truck will be on a high shelf between the other Convoy trucks the inside will not be relevant to the optics of the model! I will try to find a way to smoothen the surface of smaller parts though thinking about models still to come!
-
International S-Series F2674
Jürgen M. replied to Jürgen M.'s topic in Model Trucks: Big Rigs and Heavy Equipment
Thank you for your nice feedback! It's one of the few trucks that survived over the years. I'm happy it did. -
Smokey and The Bandit, my way!
Jürgen M. replied to TruckerAL's topic in Model Trucks: Big Rigs and Heavy Equipment
Beautiful! ? -
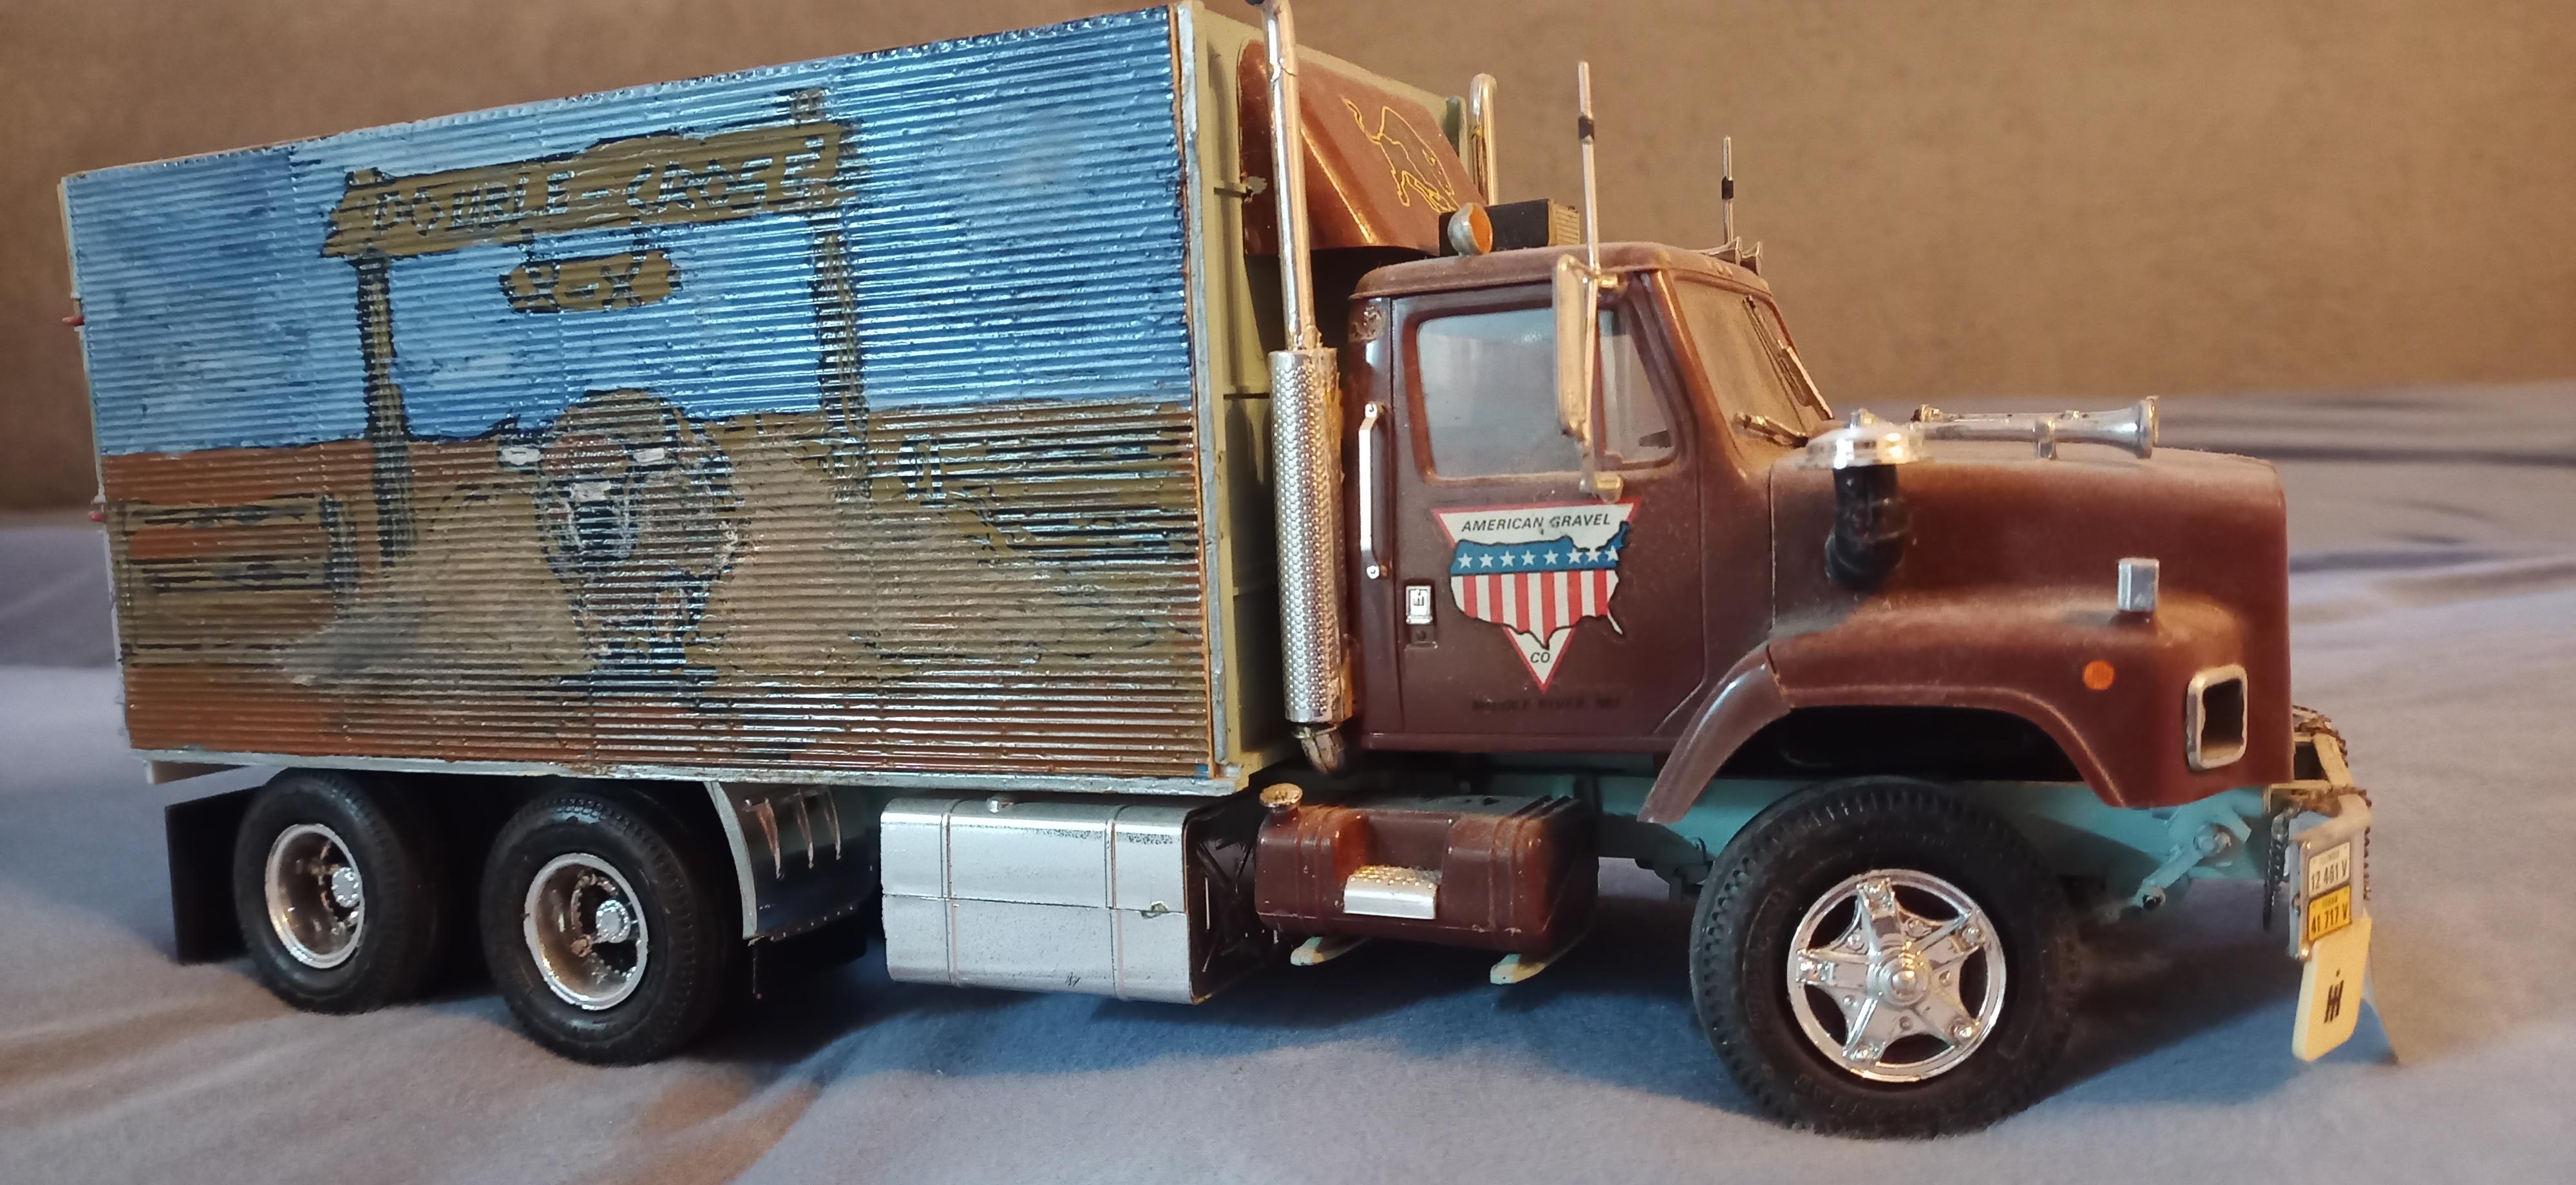
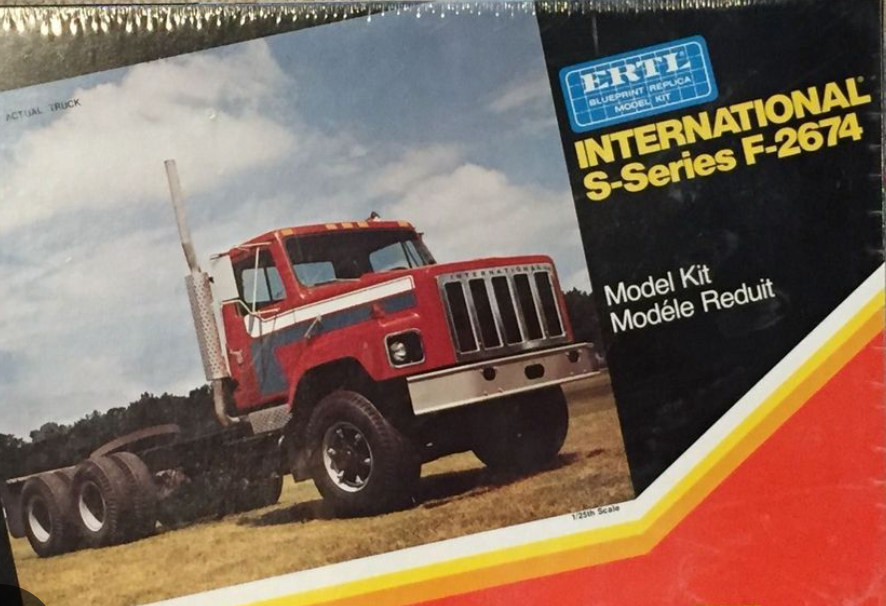
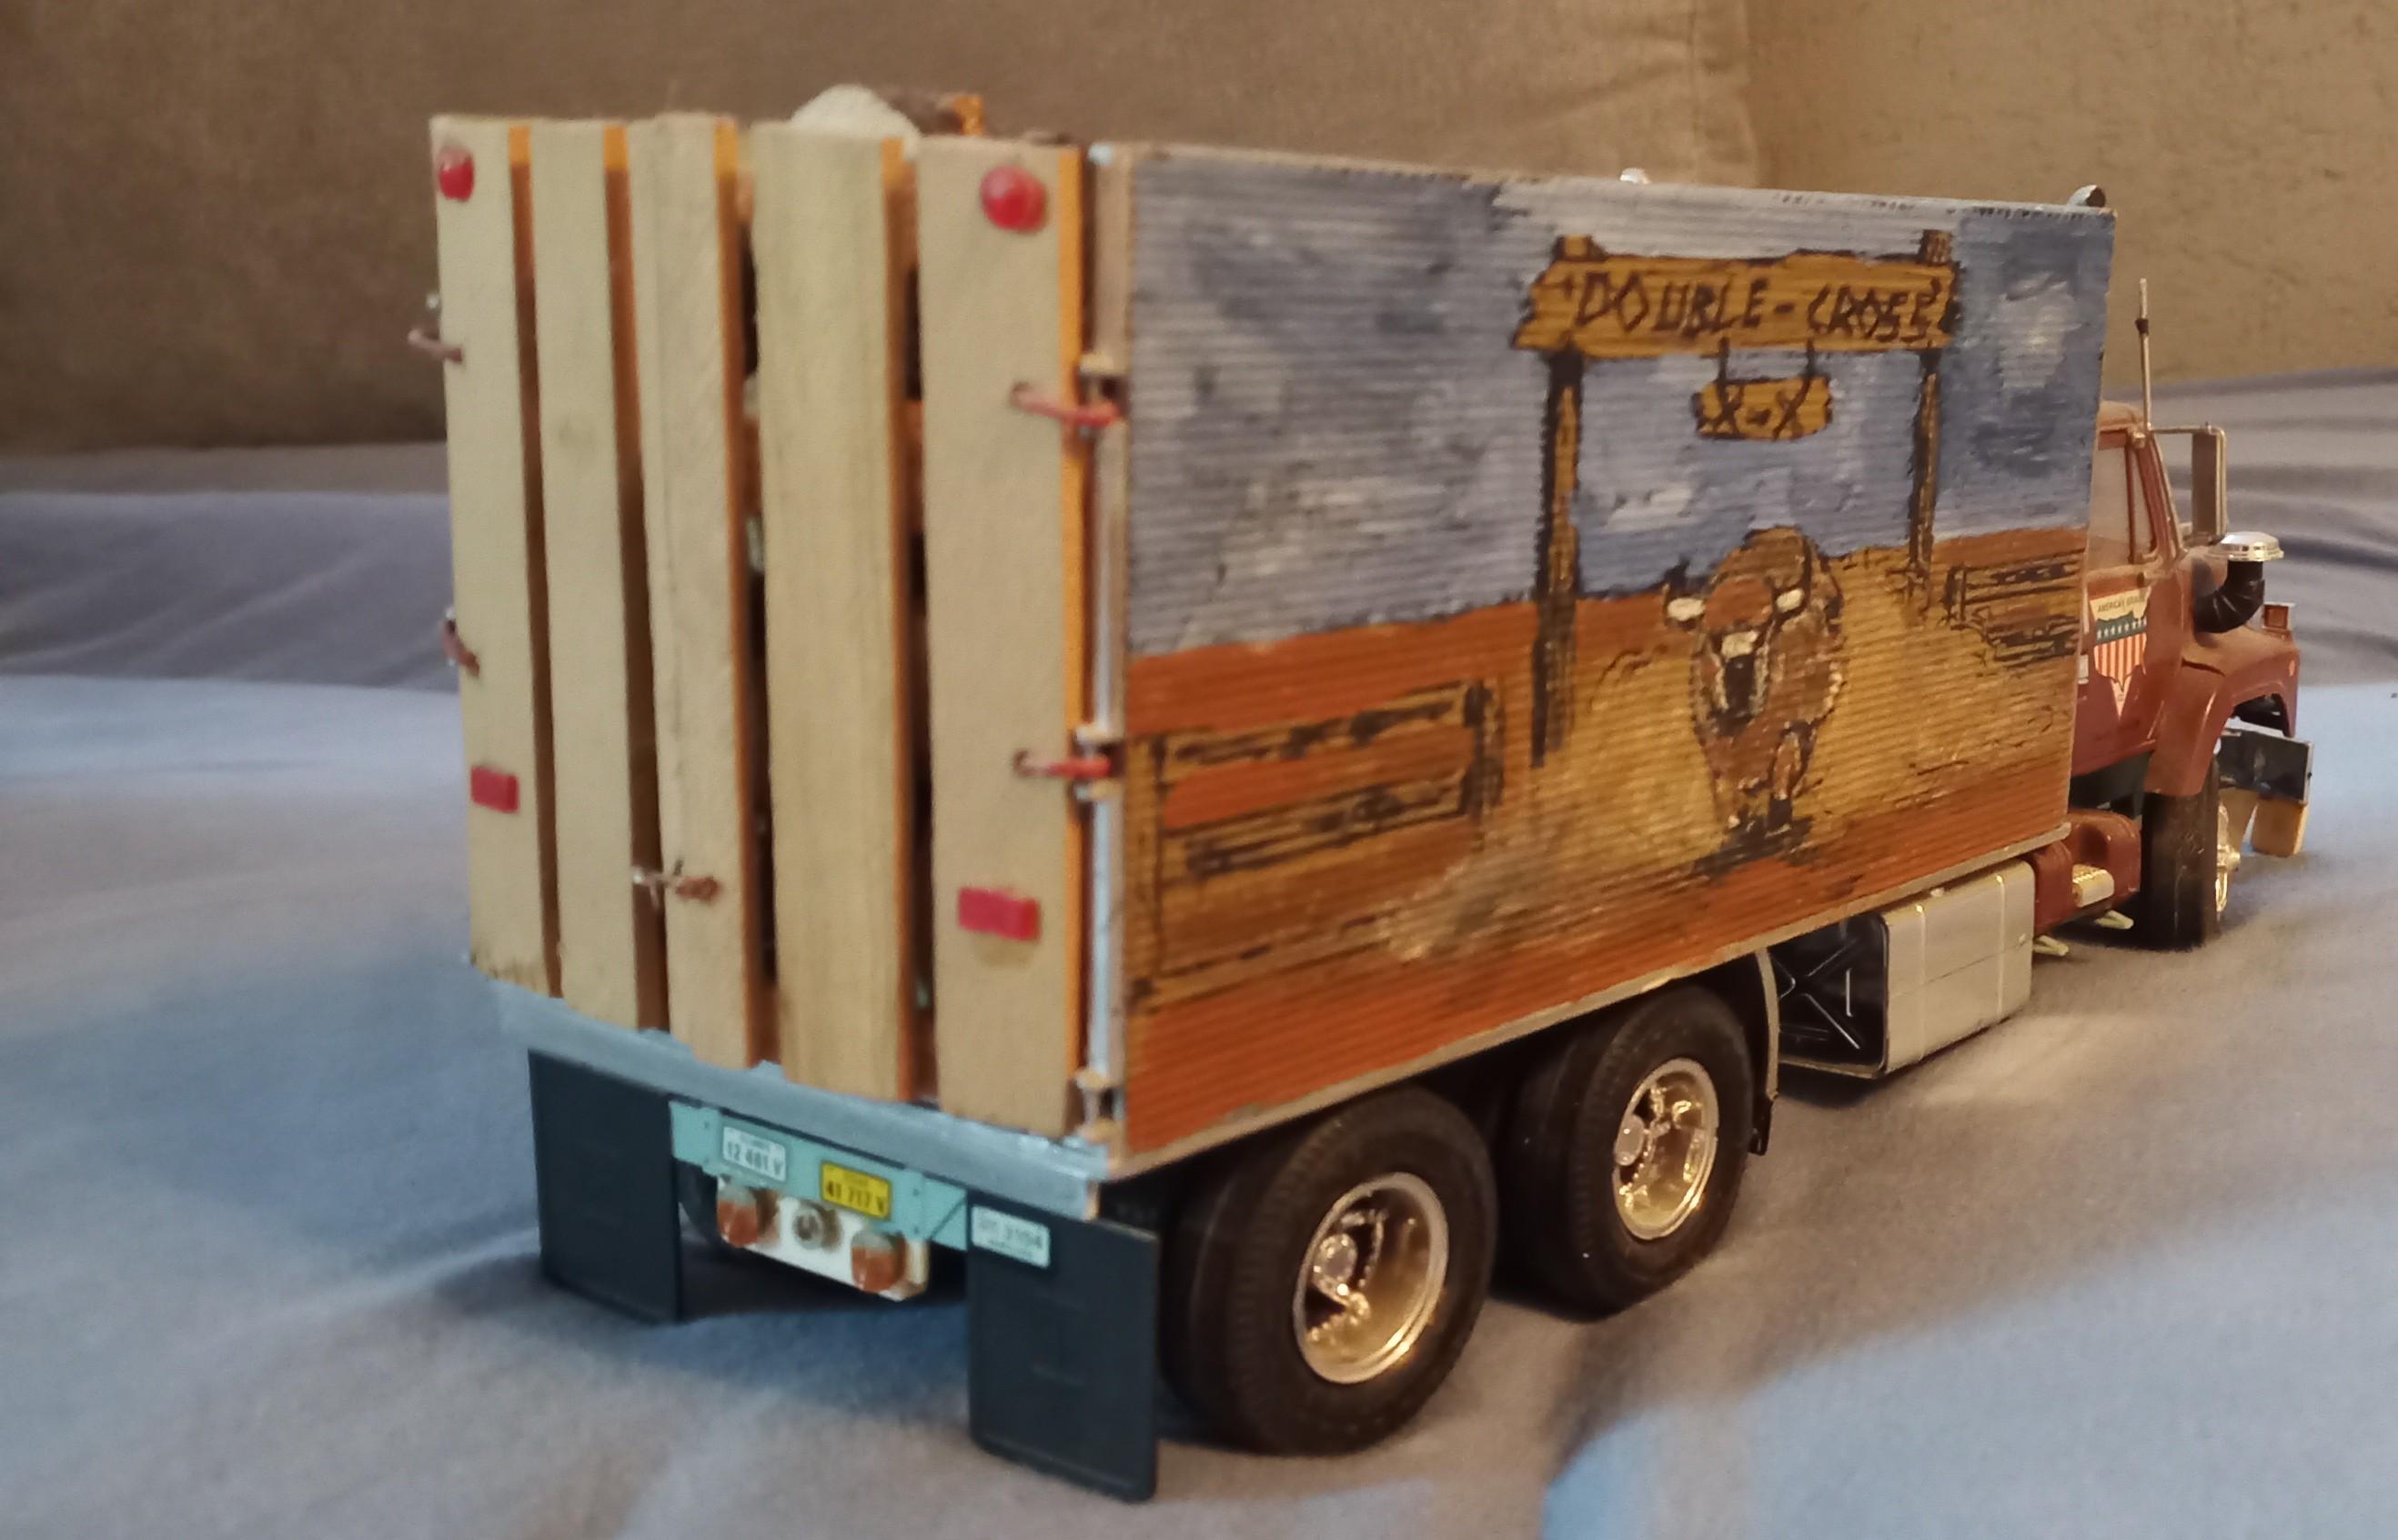
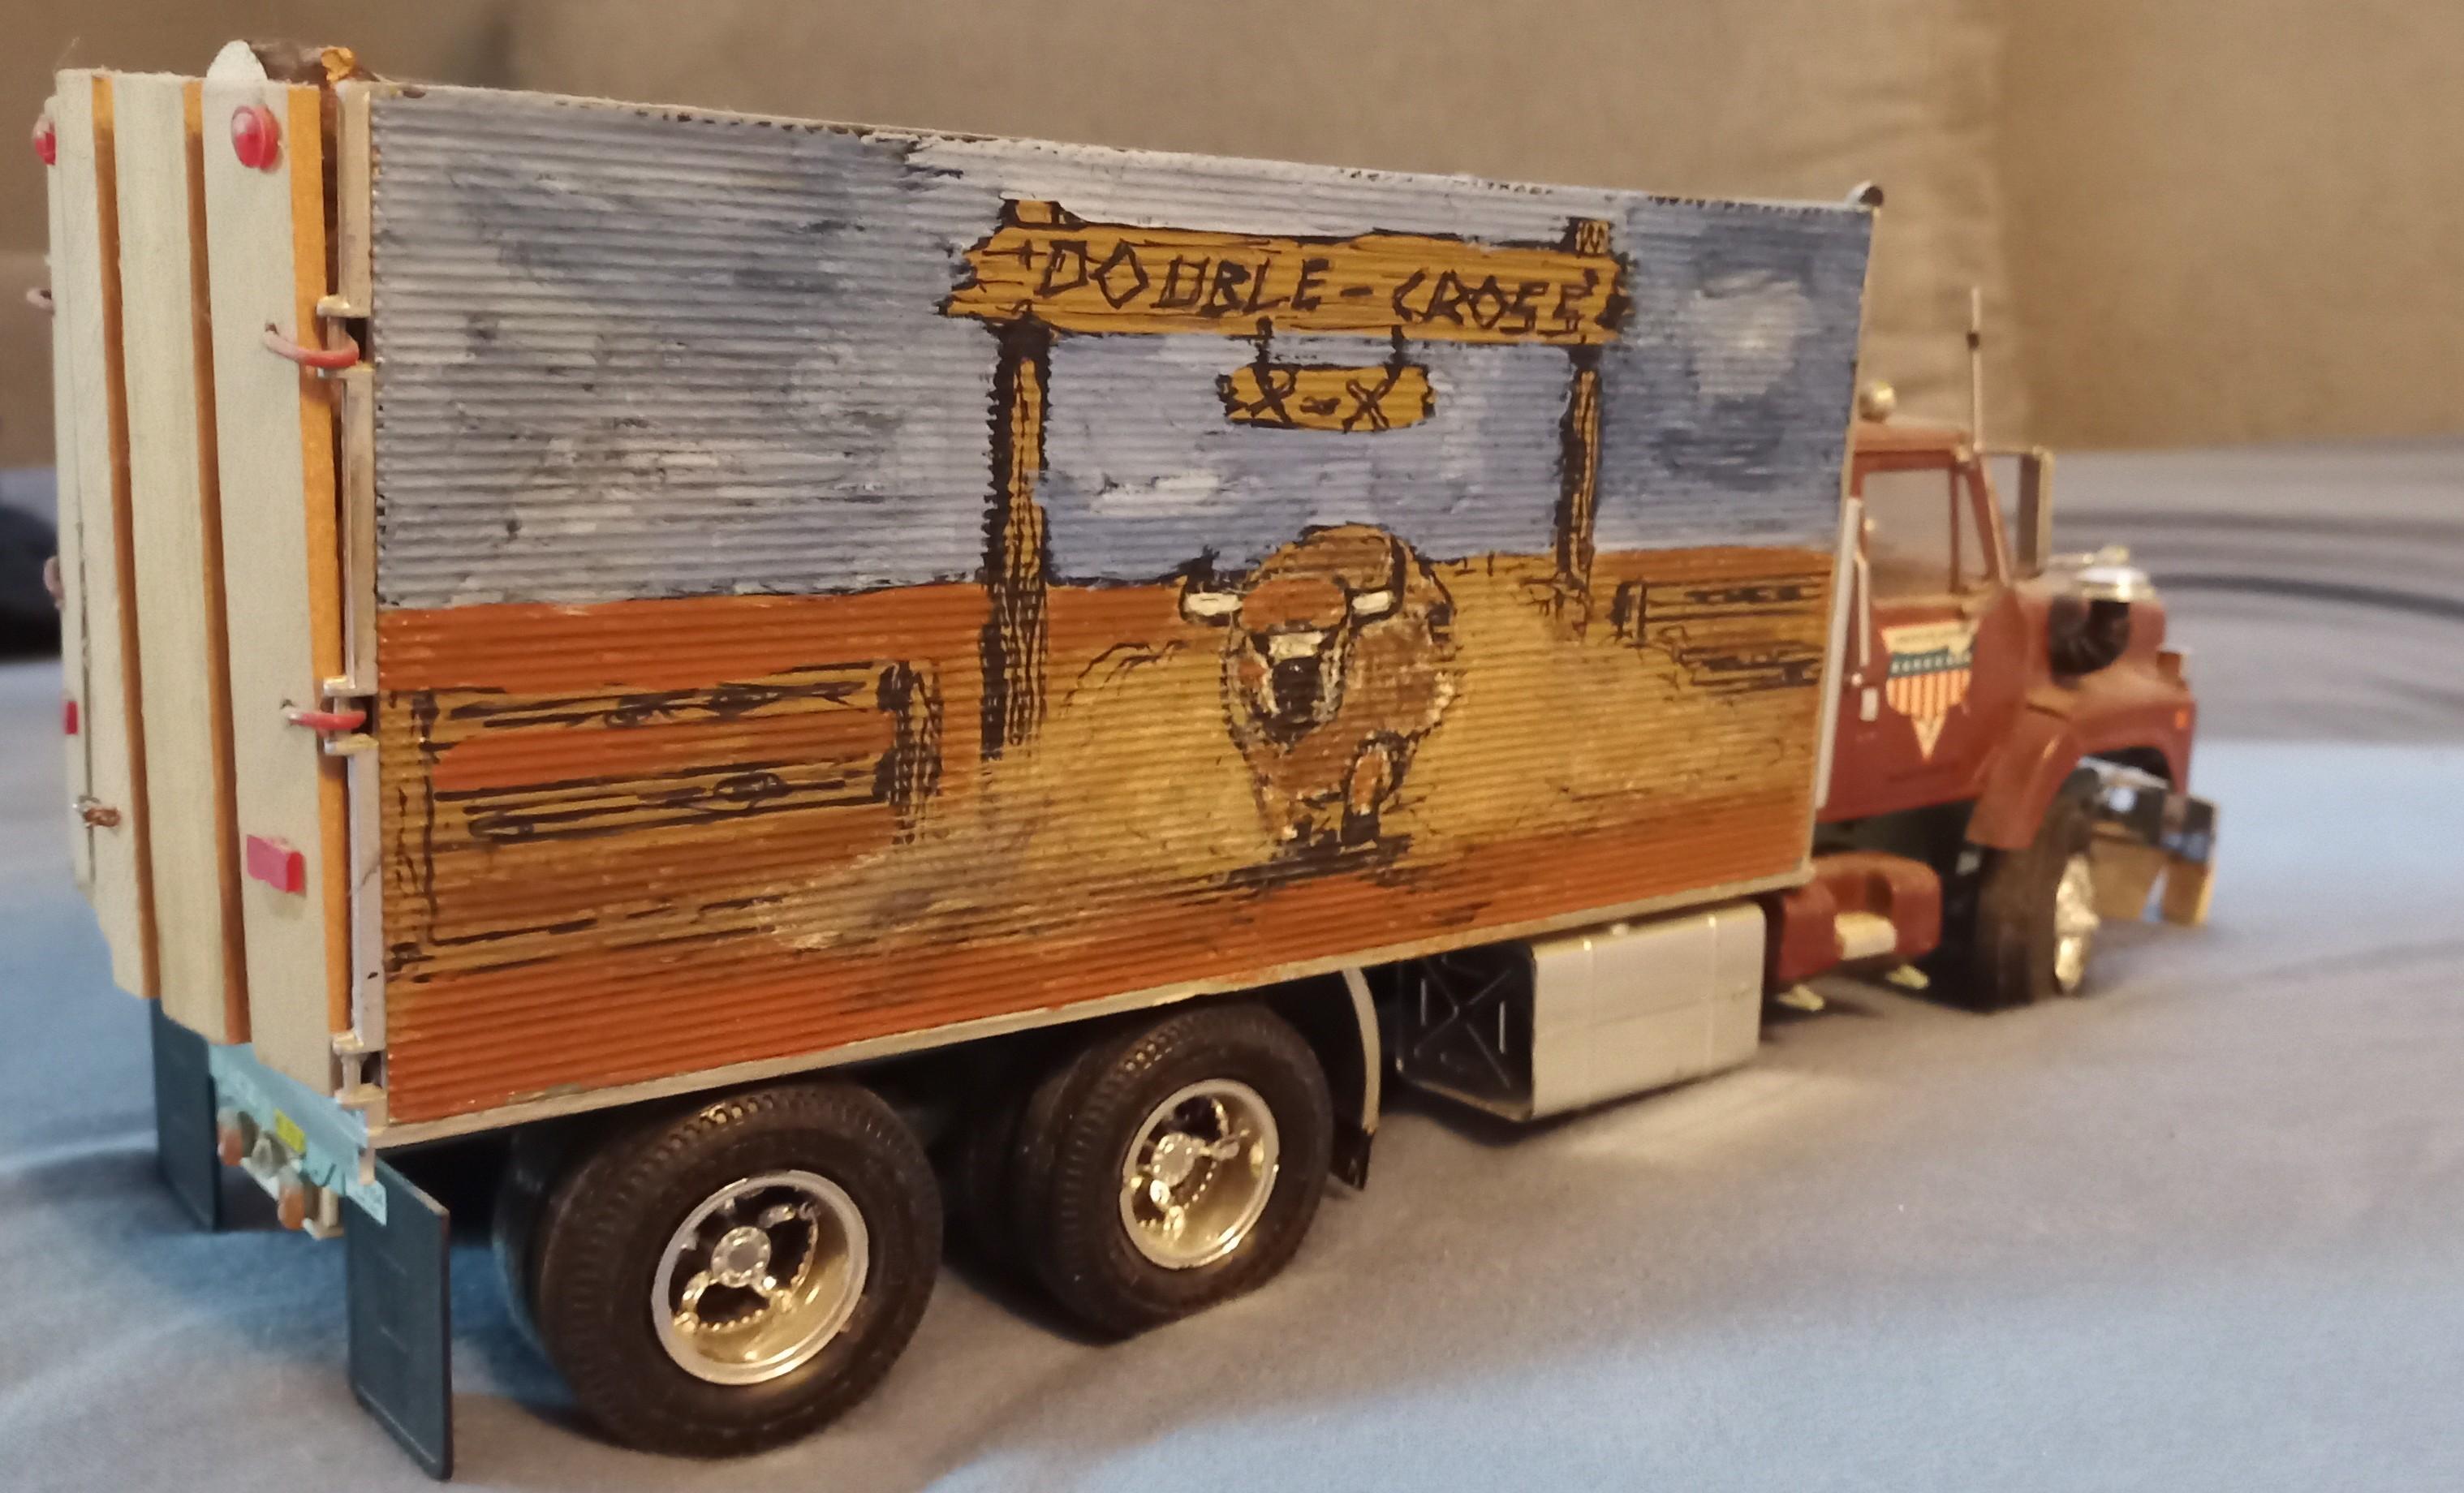
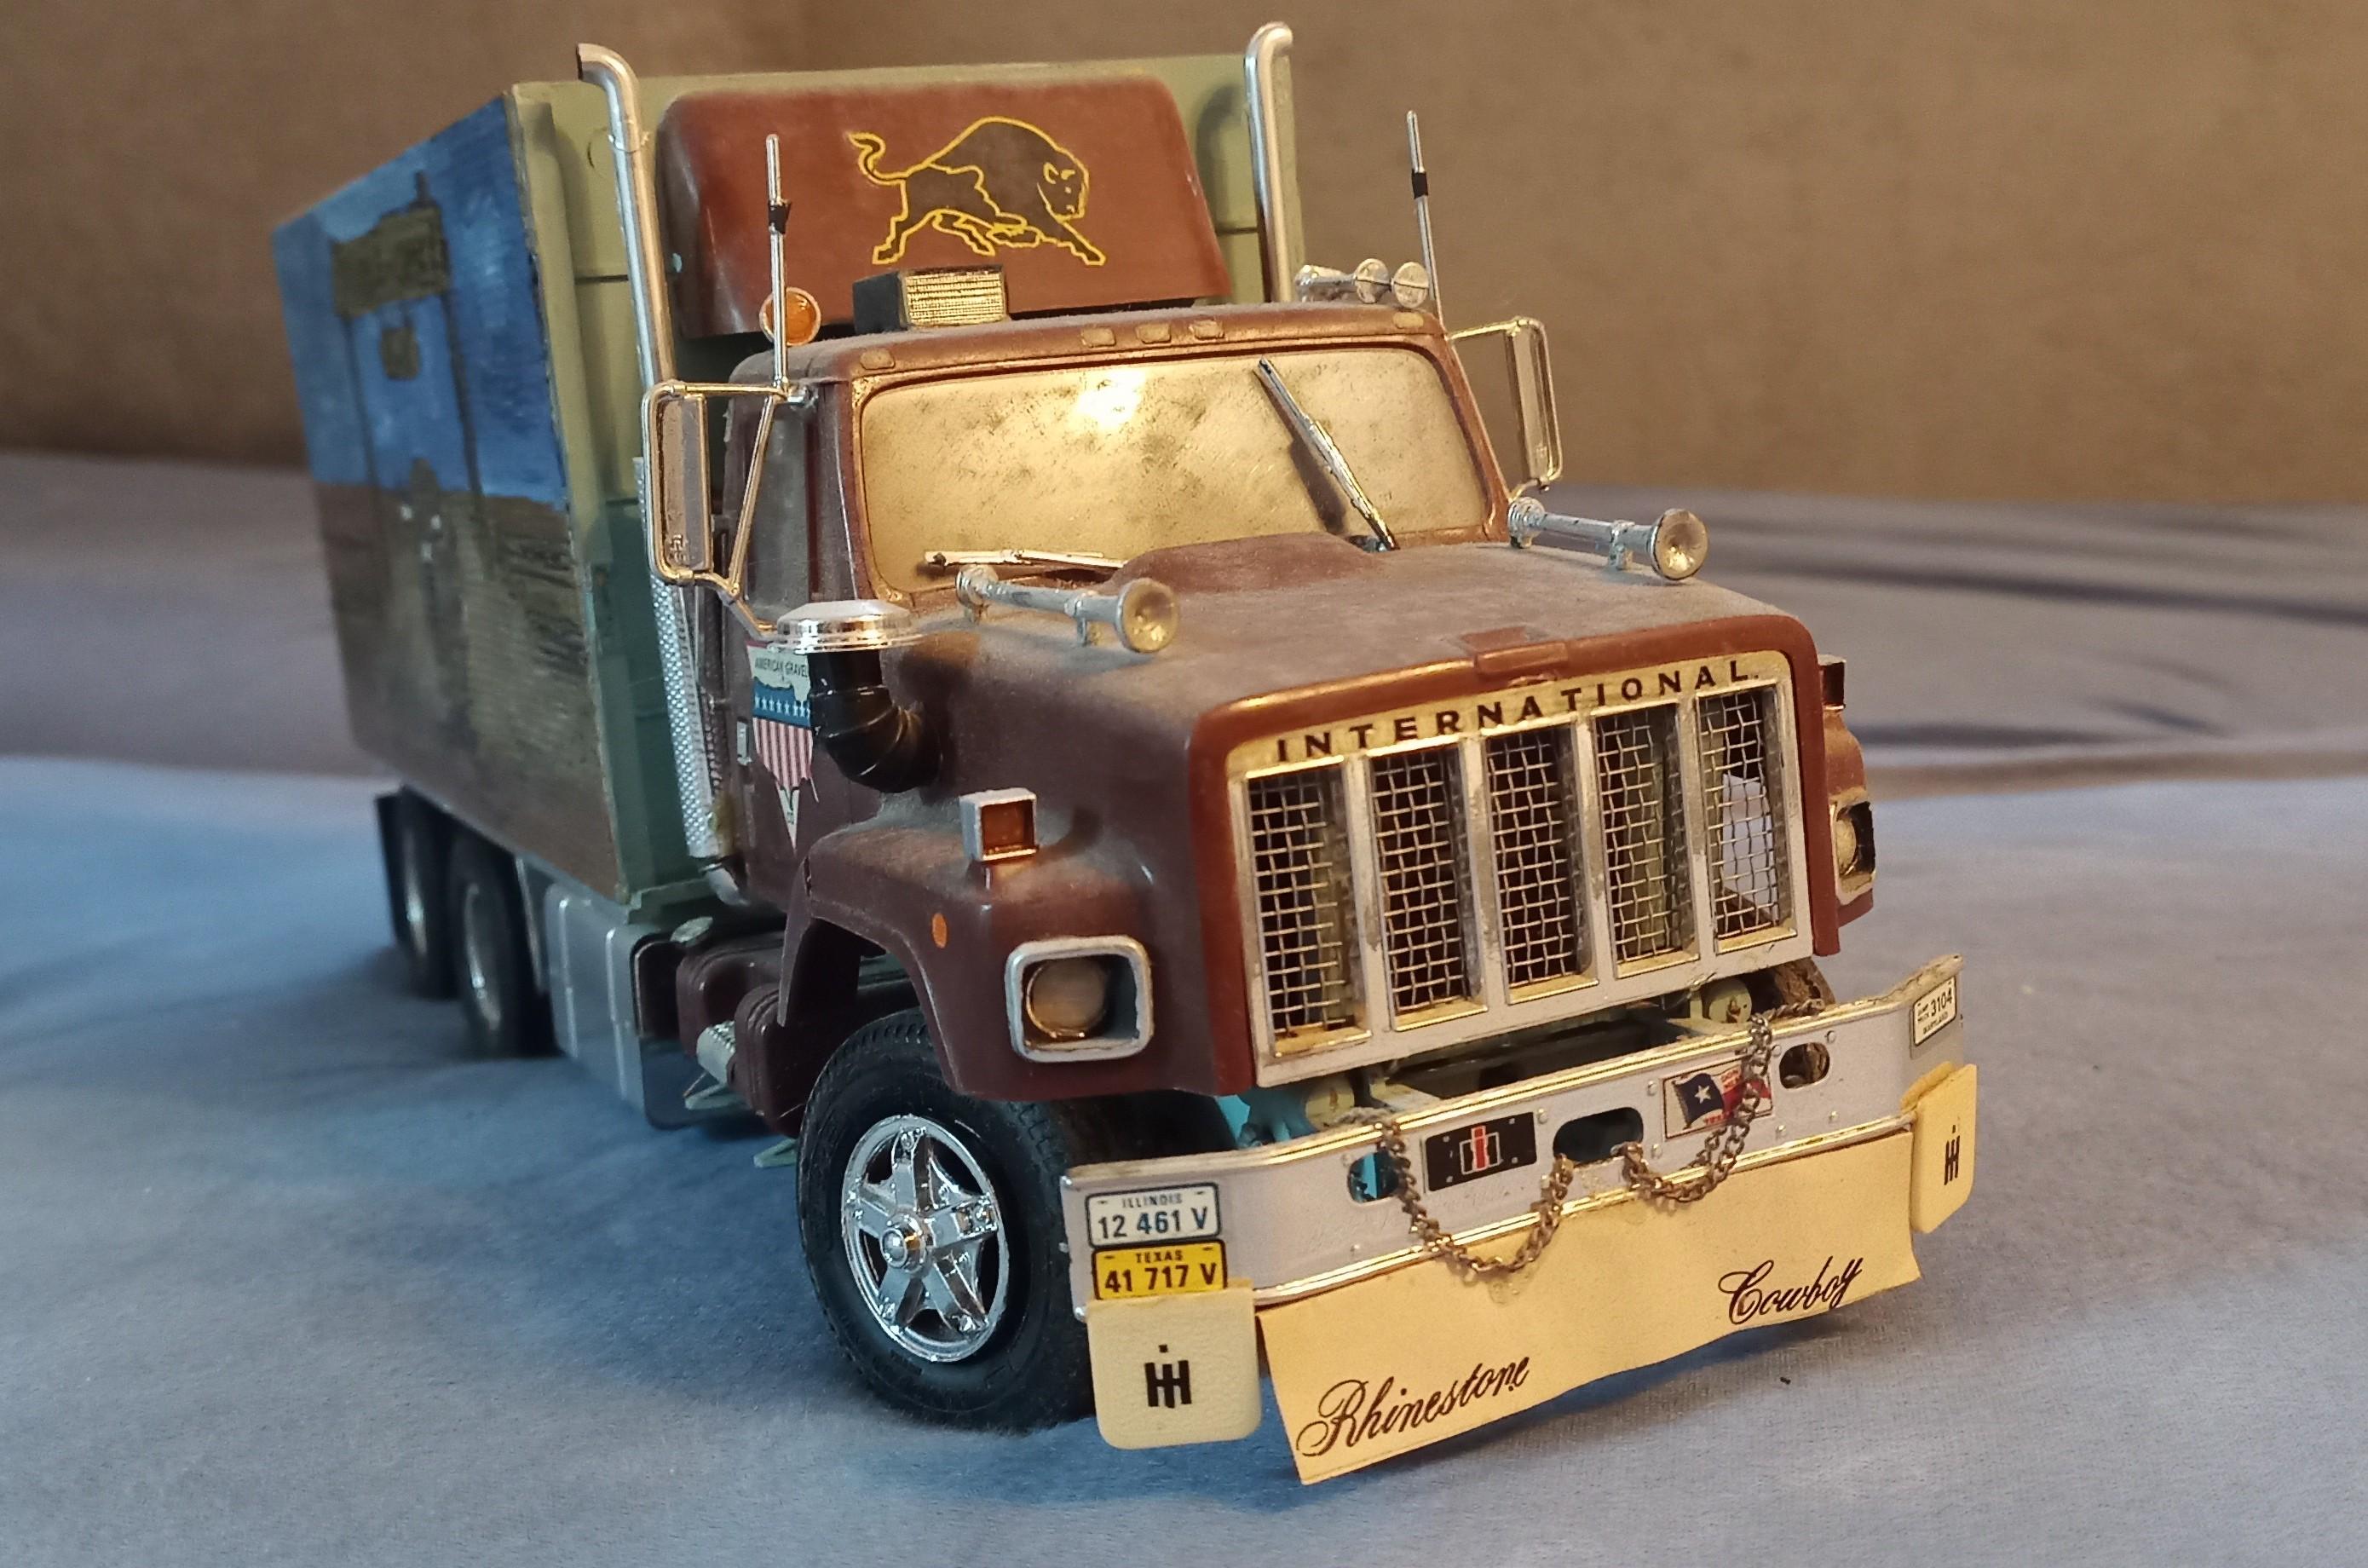
Hi, I think this is one of the kits I haven't shared yet! It's the Ertl F2674 kit. I built it around 1987 or so. Don't remember exactly! What I do remember though is that they were already quite expensive at that time, at least compared to amt and Revell! I didn't bother to do much painting. Just the engine and chassis. I did build up a box though Made of a reefer trailer that a friend had given me. It was very much broken down already so I couldn't use it as a 40" er! Here's how it turned out! It's very dusty but still Looks quite OK!
-
Another "Convoy" Truck!
Jürgen M. replied to Jürgen M.'s topic in WIP: Model Trucks: Big Rigs and Heavy Equipment
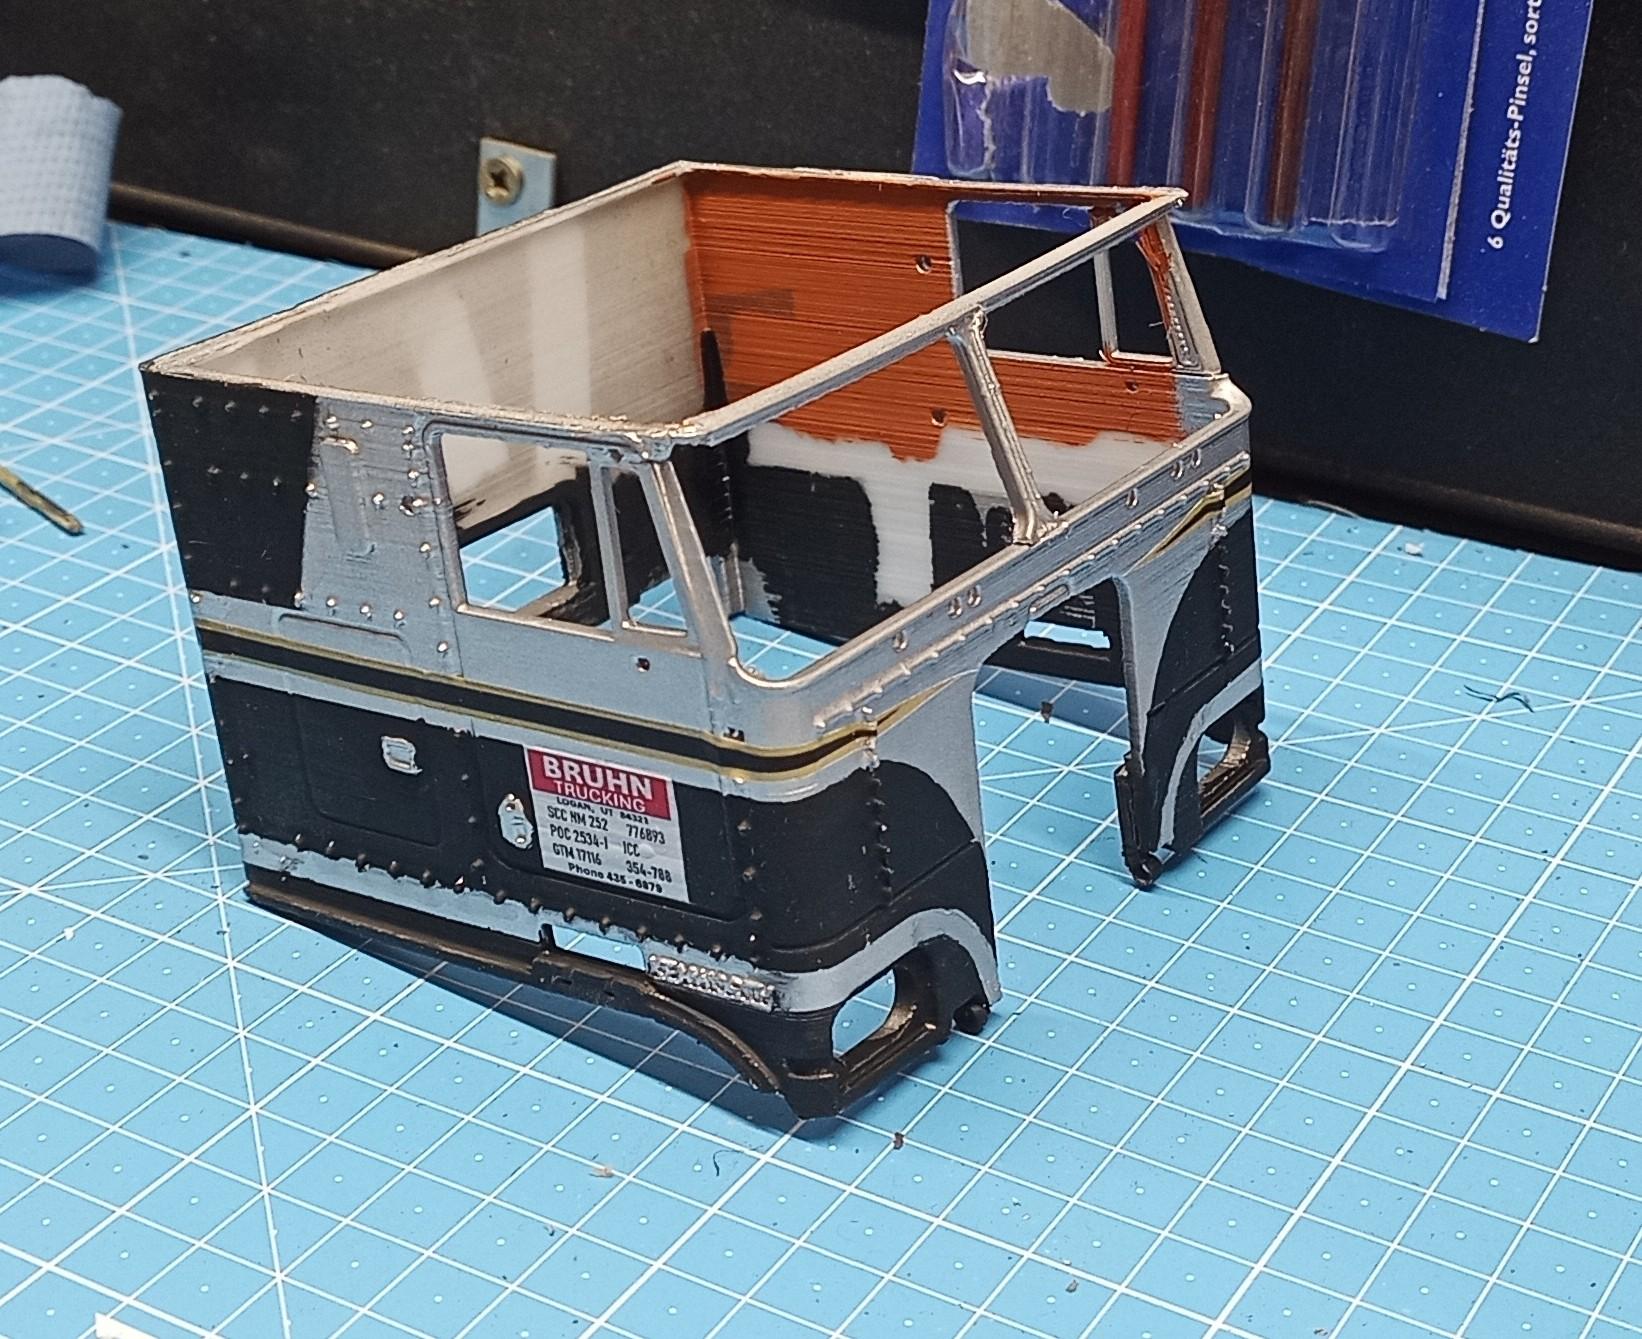
Thank you Gary! I'm quite happy with it eventhough I didn't hide the printing lines everywhere! ? I put the cab in position to get an idea how it will look. The roof is also just laid on top!
-
Another "Convoy" Truck!
Jürgen M. replied to Jürgen M.'s topic in WIP: Model Trucks: Big Rigs and Heavy Equipment
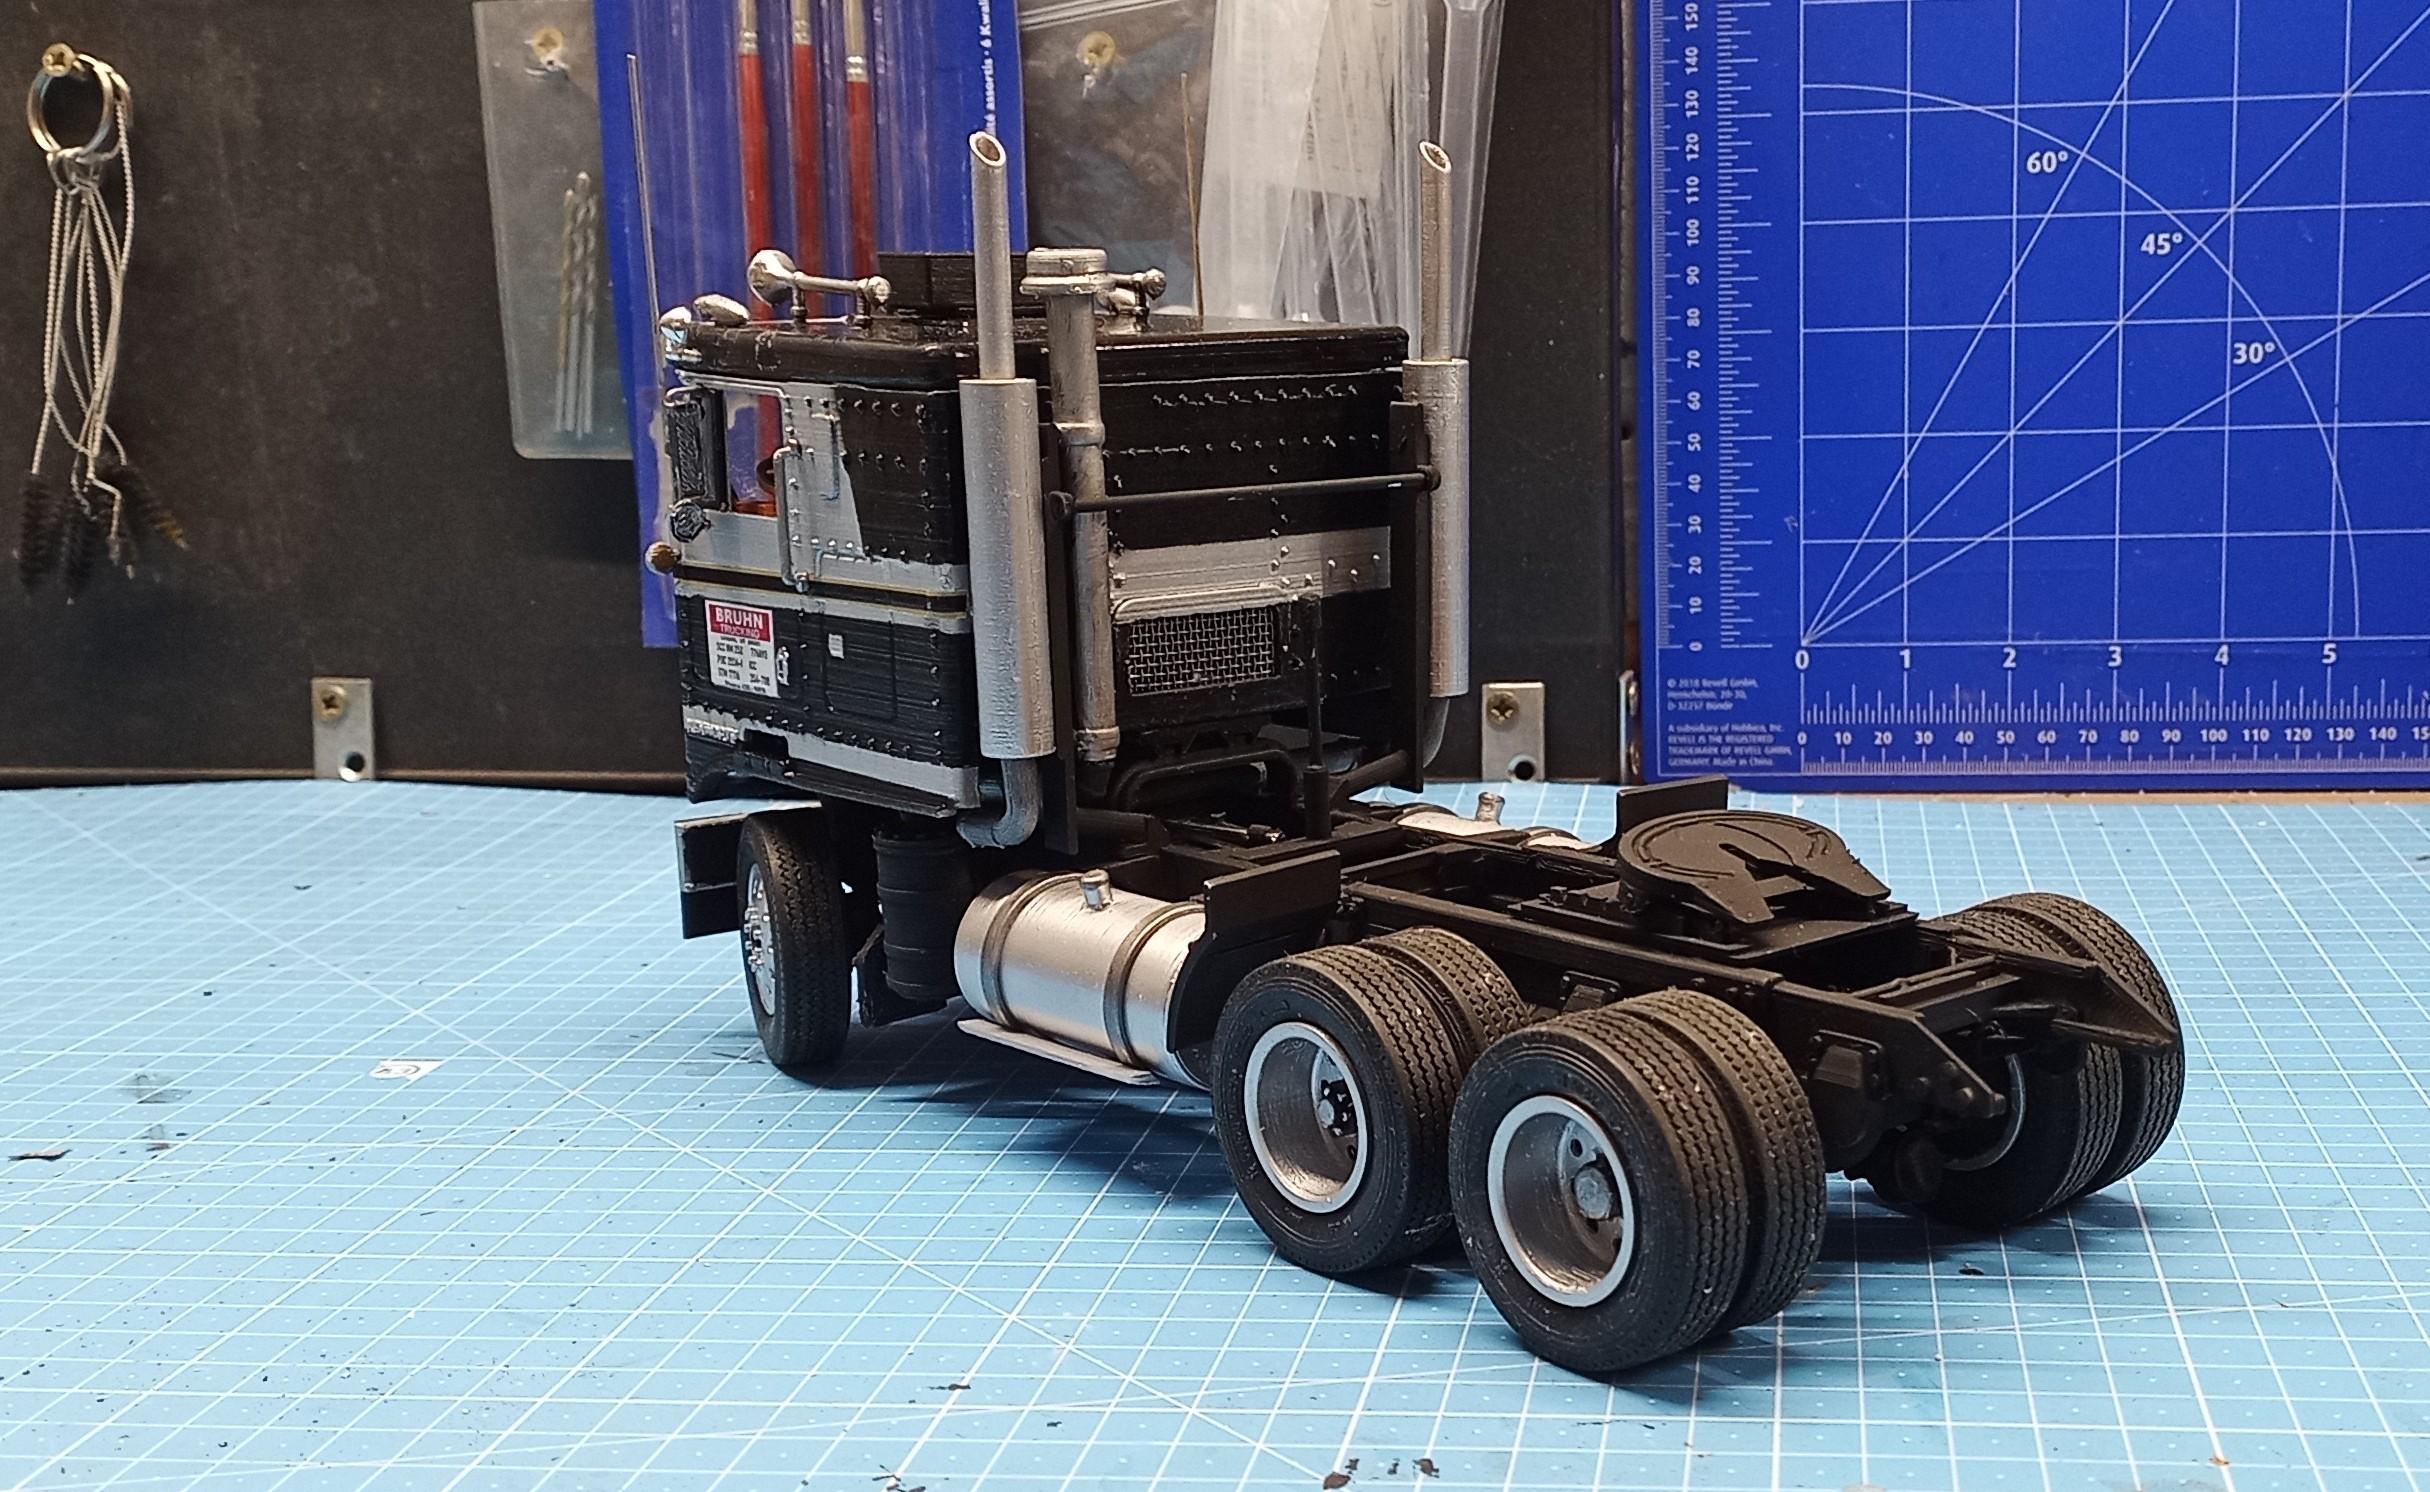
I guess now the chassis and powertrain are completed. What you see here consists of 172 parts of which 137 are designed and printed. Not printed parts are tires, u-bolts, tank straps, ... I know, the engine is not completely piped up but I'm gonna leave it that way. The shift stick will be designed as soon as the interior is printed. I want to make sure that it really fits into the opening in the cab floor.
-
My own Sundance
Jürgen M. replied to Rockford's topic in WIP: Model Trucks: Big Rigs and Heavy Equipment
Nice paint job! Very smooth! ? -
Another "Convoy" Truck!
Jürgen M. replied to Jürgen M.'s topic in WIP: Model Trucks: Big Rigs and Heavy Equipment
Nice to learn from experts! I do know a little about long distance trucking and how a transport and logistics company works, I drove a 7.5 ton truck with a tandem trailer for a while but never the big rigs. The driving was always the fun part to me. Today it's different. More traffic, less time. -
Another "Convoy" Truck!
Jürgen M. replied to Jürgen M.'s topic in WIP: Model Trucks: Big Rigs and Heavy Equipment
Interesting information. Thanks! So the trailer is supported by some sort of external device in order to break from the tractor. Otherwise they're always joined as a permanent rig? Never thought about that. I was always used to the fact that trailers were delivered and a new one hooked up! -
Another "Convoy" Truck!
Jürgen M. replied to Jürgen M.'s topic in WIP: Model Trucks: Big Rigs and Heavy Equipment
Hi Rockford, thanks for your words. You're quite right. I'll keep that in mind! I'll try to consider that while I go on. It is almost a pitty using a truck Like that as a working horse with a big risk of damage to it. What I discovered, the trailer doesn't seem to have a landing gear. Is that hidden somewhere or don't these trailers have one? -
1957 Ford F 900 Big Job
Jürgen M. replied to leafsprings's topic in WIP: Model Trucks: Big Rigs and Heavy Equipment
Indeed. An exotic one too. No everyday truck! Very nice! -
Another "Convoy" Truck!
Jürgen M. replied to Jürgen M.'s topic in WIP: Model Trucks: Big Rigs and Heavy Equipment
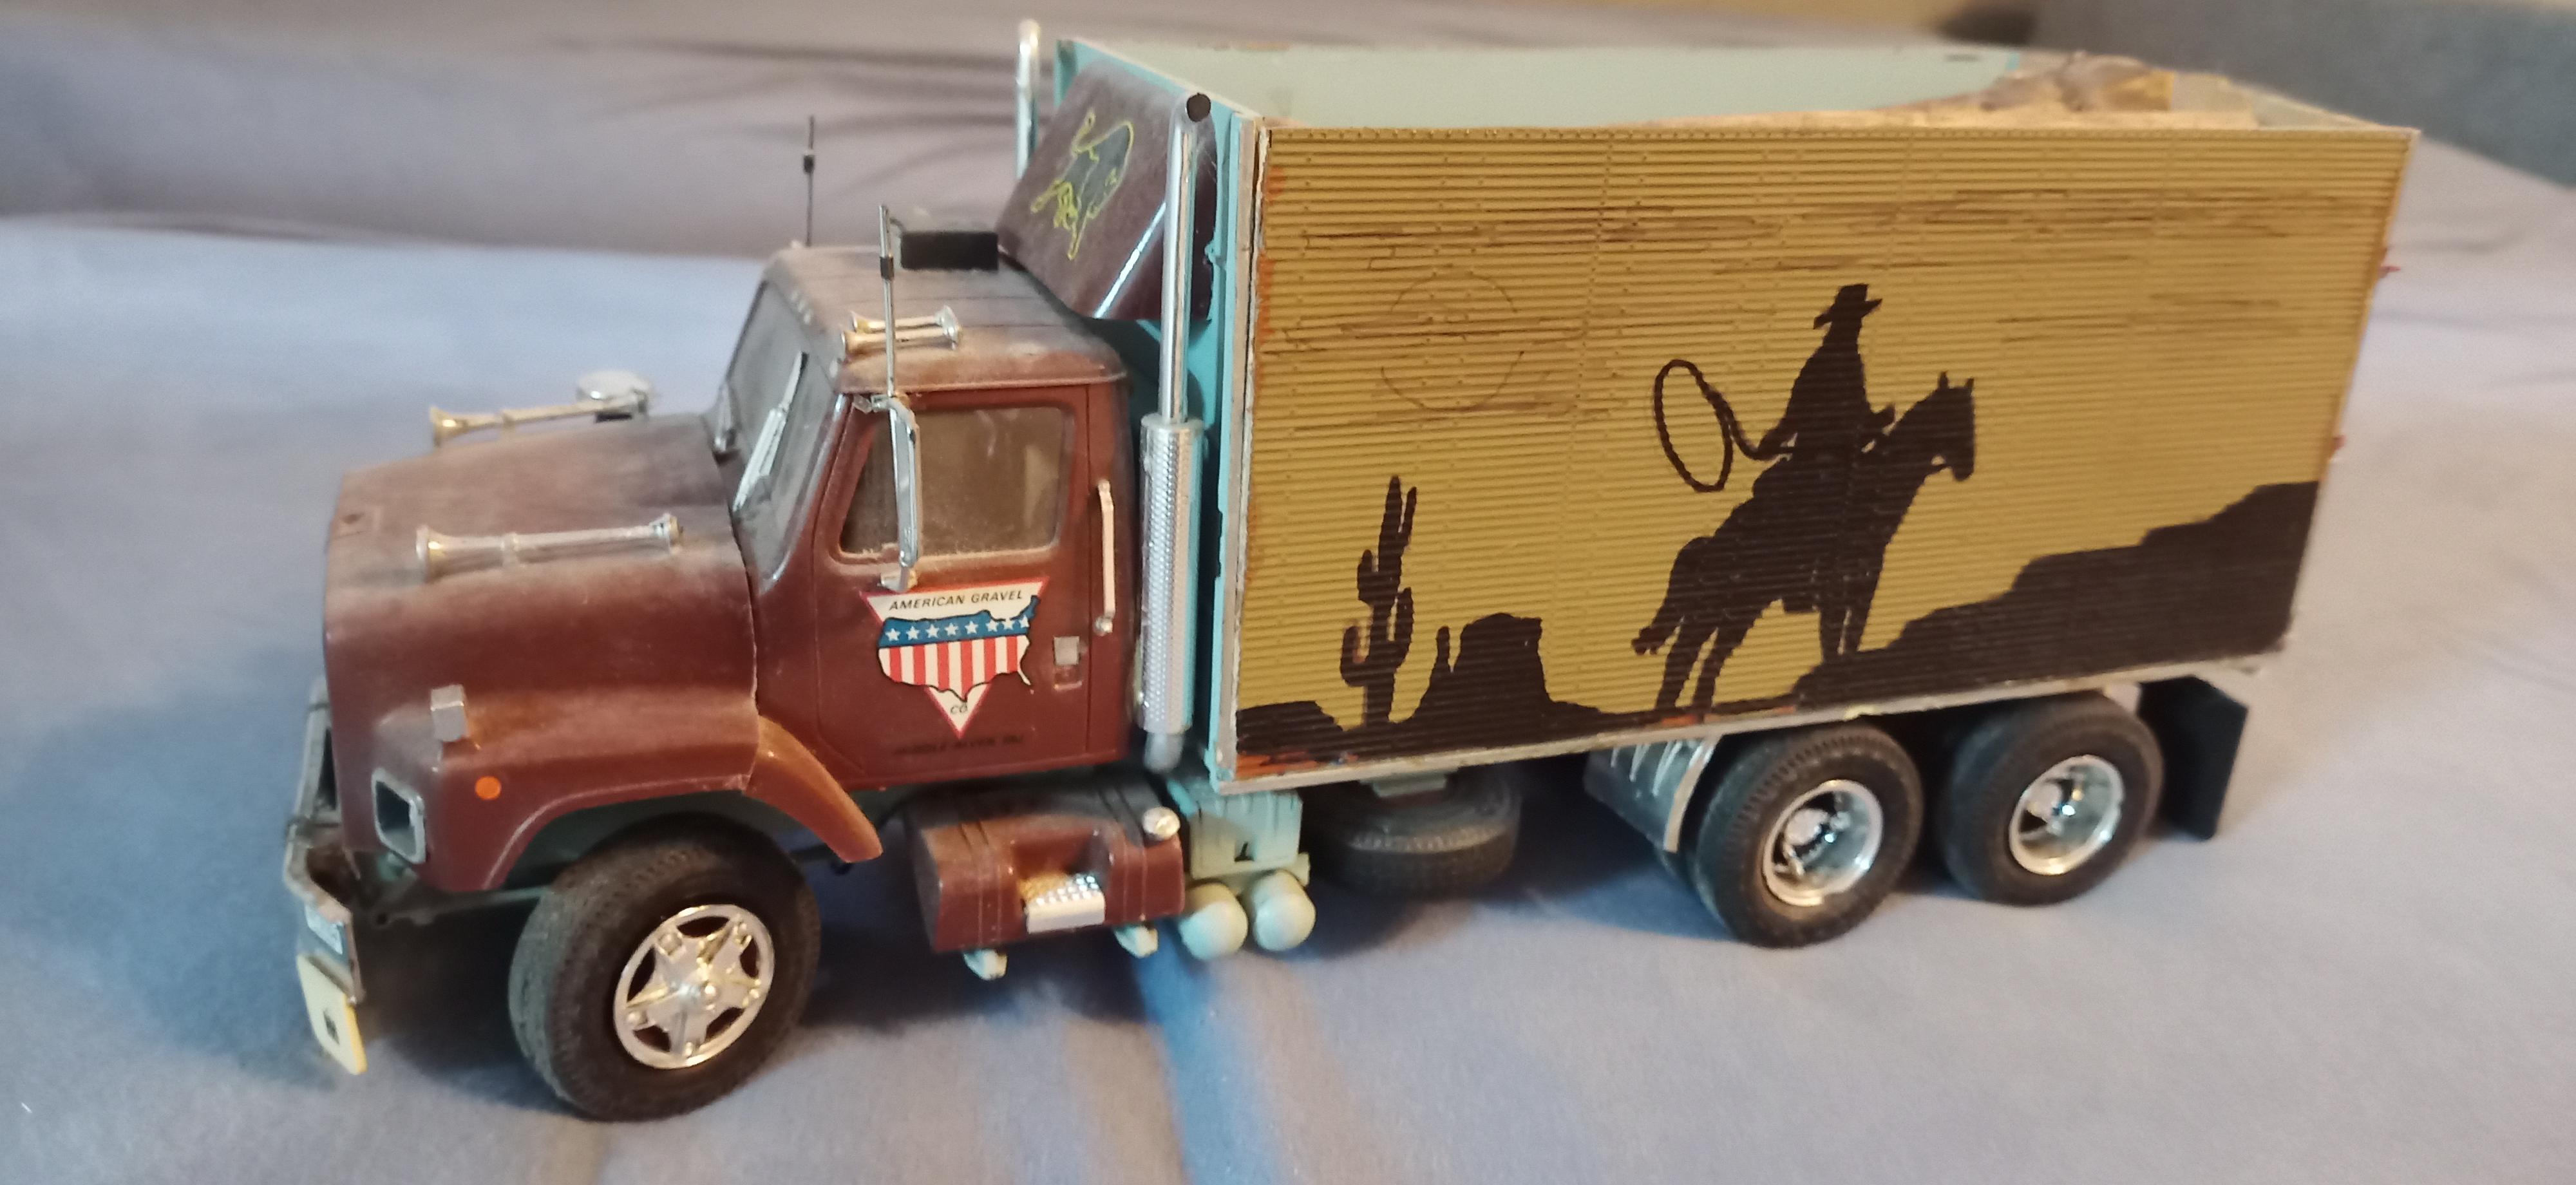
Mufflers and slash cuts! Have to be sanded and primered. I'll be using a chrome spray with a flat effect. When you look at the picture at the beginning of this thread it doesn't look like the classic chromed parts on this truck are polished and brightened up. Just the marker lights, horns and grab handles look like they're polished chrome. Even the grille looks more like a dirty silver than polished chrome!
-
My own Sundance
Jürgen M. replied to Rockford's topic in WIP: Model Trucks: Big Rigs and Heavy Equipment
Looking great, Rockford! I'm sure it'll turn out perfectly since your dedication to this rig is so huge! I can understand that too. It's always been one of my favorite TV series. Can't wait to see it finished! -
Another "Convoy" Truck!
Jürgen M. replied to Jürgen M.'s topic in WIP: Model Trucks: Big Rigs and Heavy Equipment
Thanks Rockford! The "meaty" probably comes from the fat Italeri tires. But I'm happy with it. I'll be finishing the engine and exhaust system, then I'll begin the interior and cab. Stay tuned! ?