Jürgen M.
-
Posts
1,675 -
Joined
-
Last visited
Content Type
Profiles
Forums
Events
Gallery
Everything posted by Jürgen M.
-

Another "Convoy" Truck!
Jürgen M. replied to Jürgen M.'s topic in WIP: Model Trucks: Big Rigs and Heavy Equipment
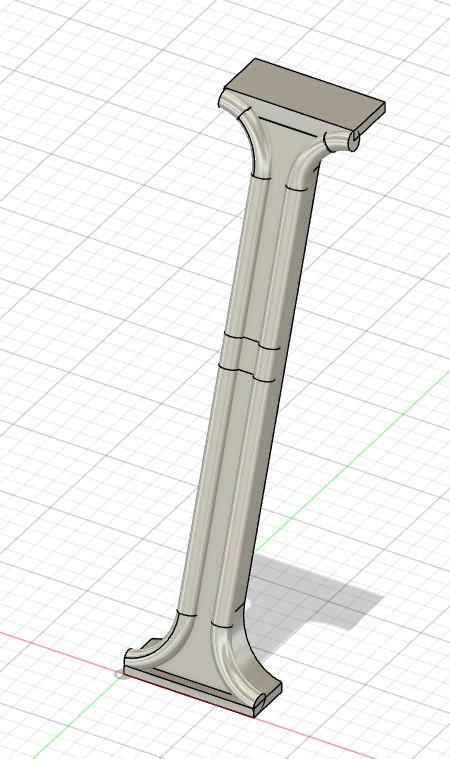
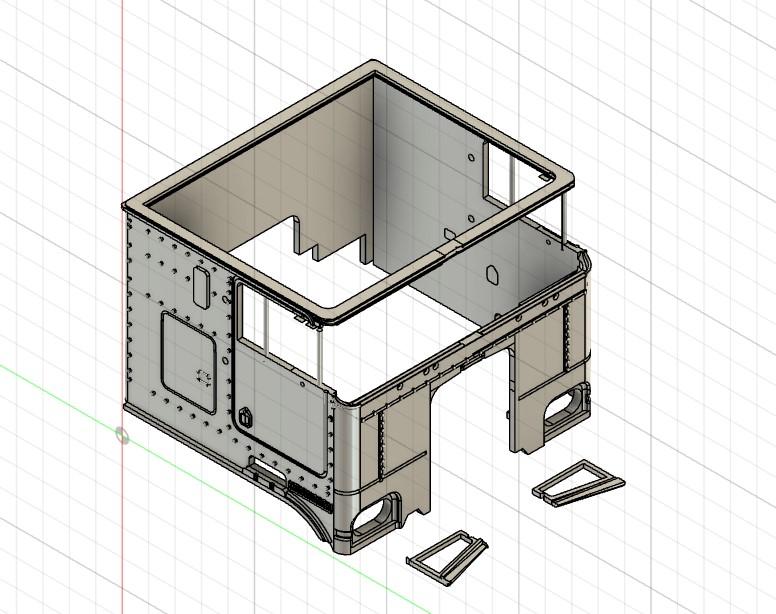
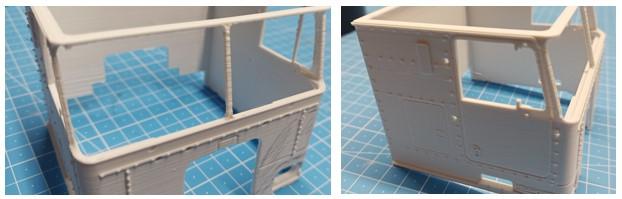
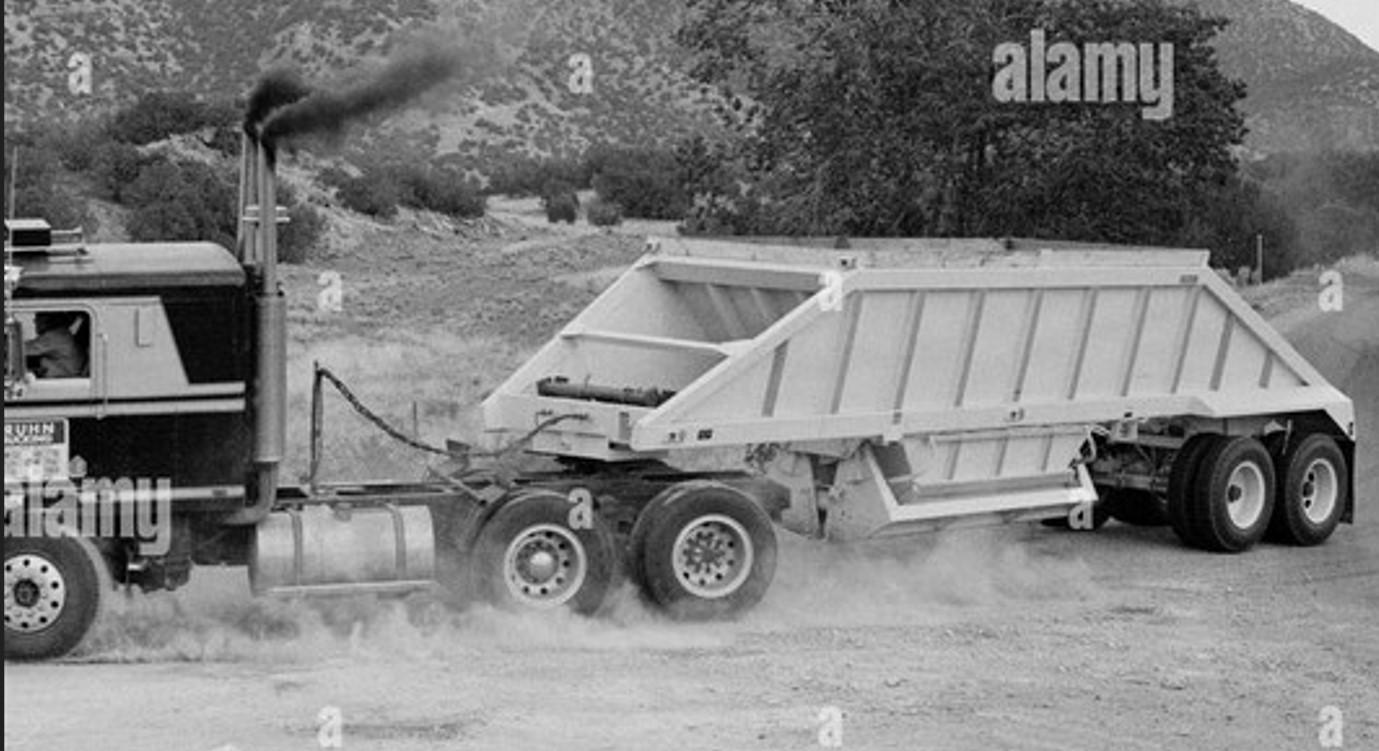
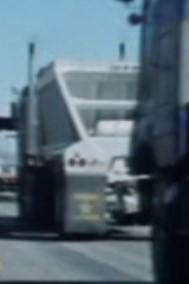
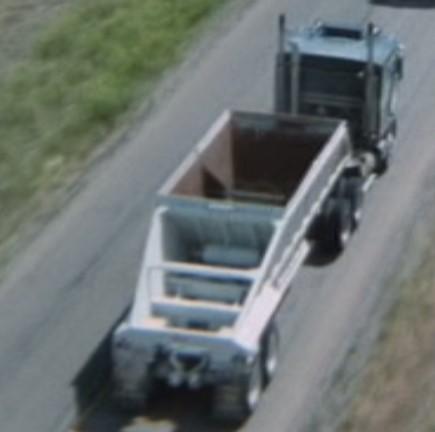
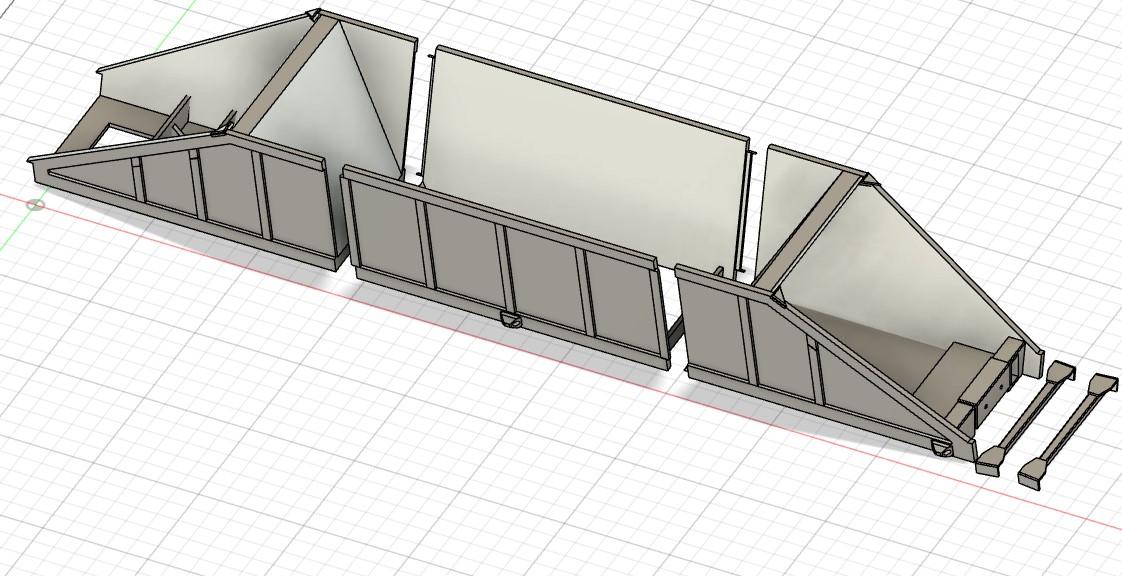
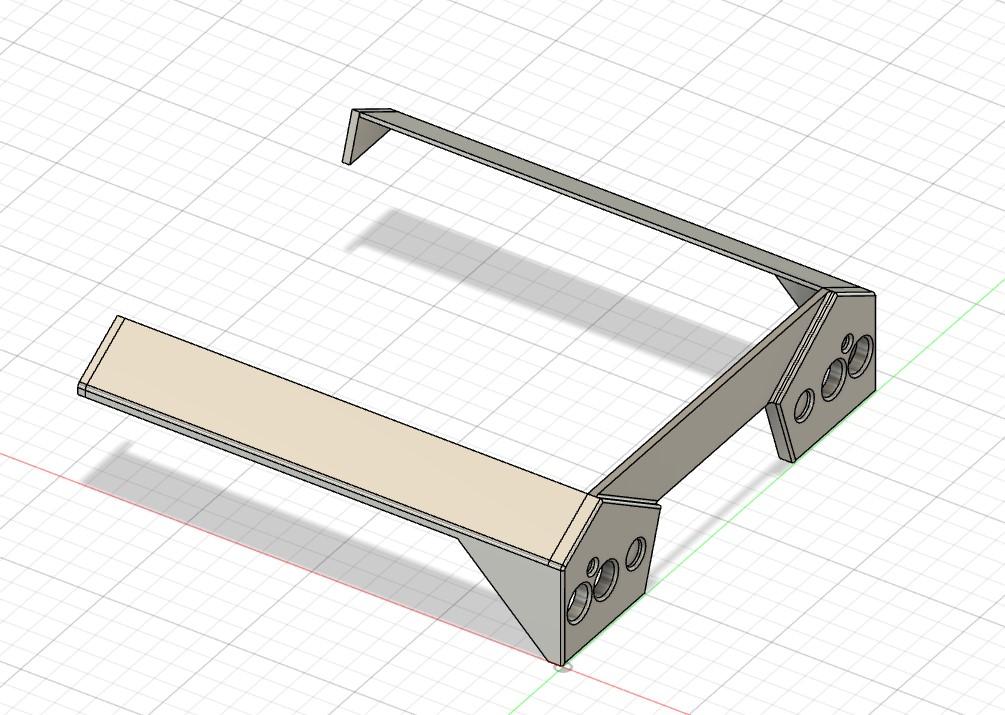
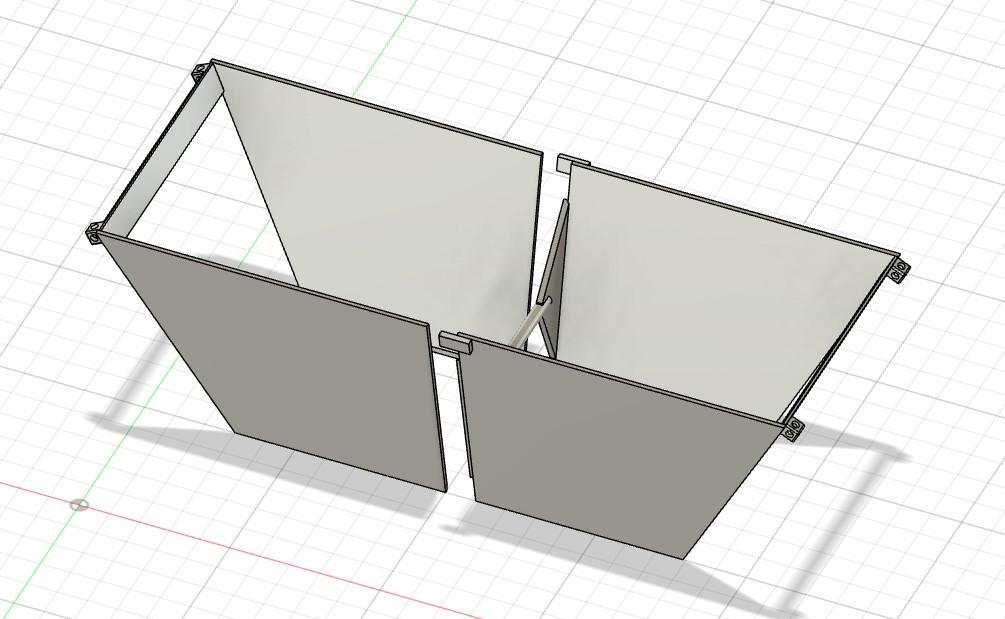
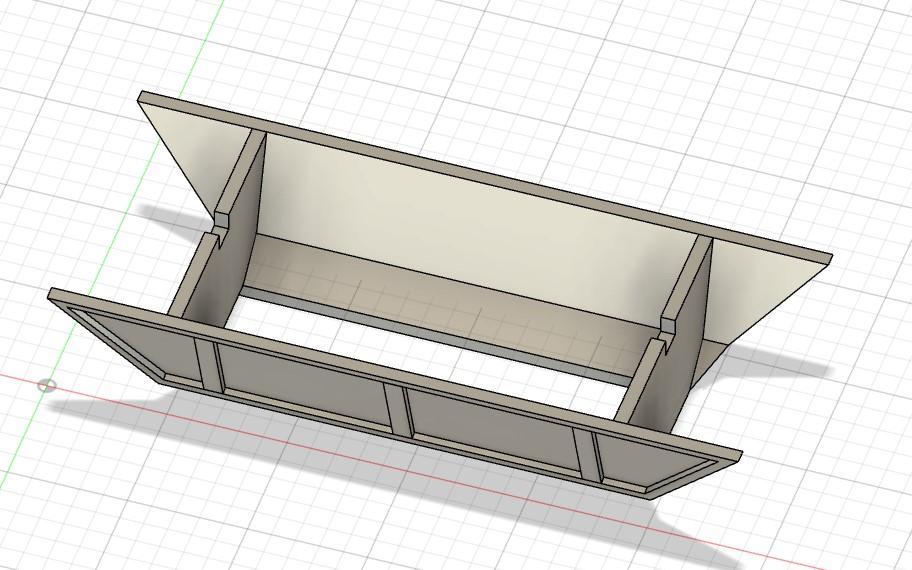
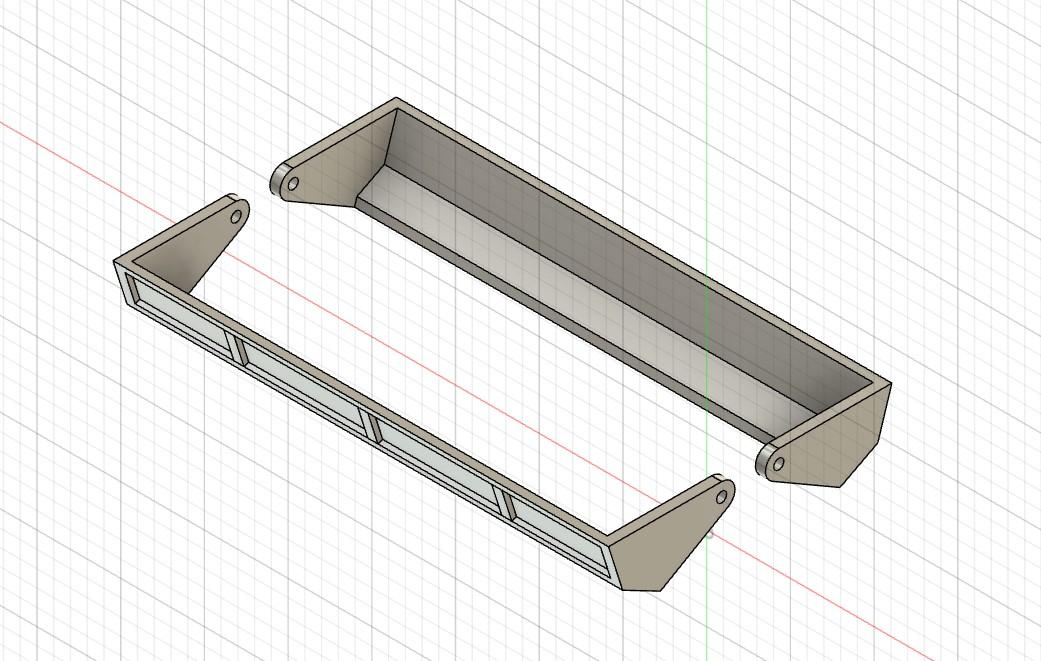
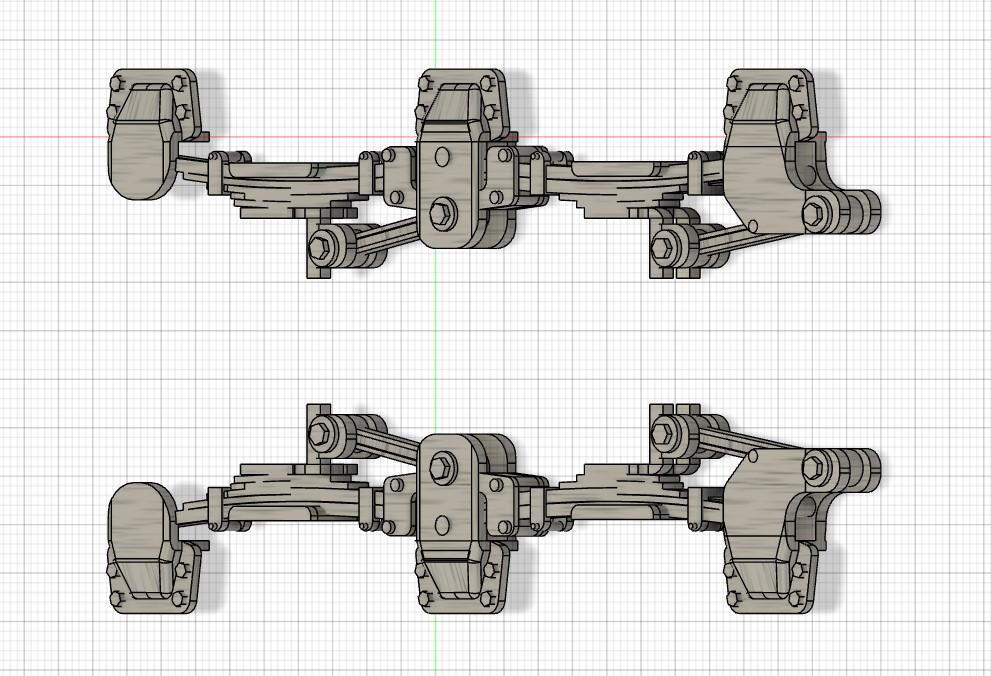
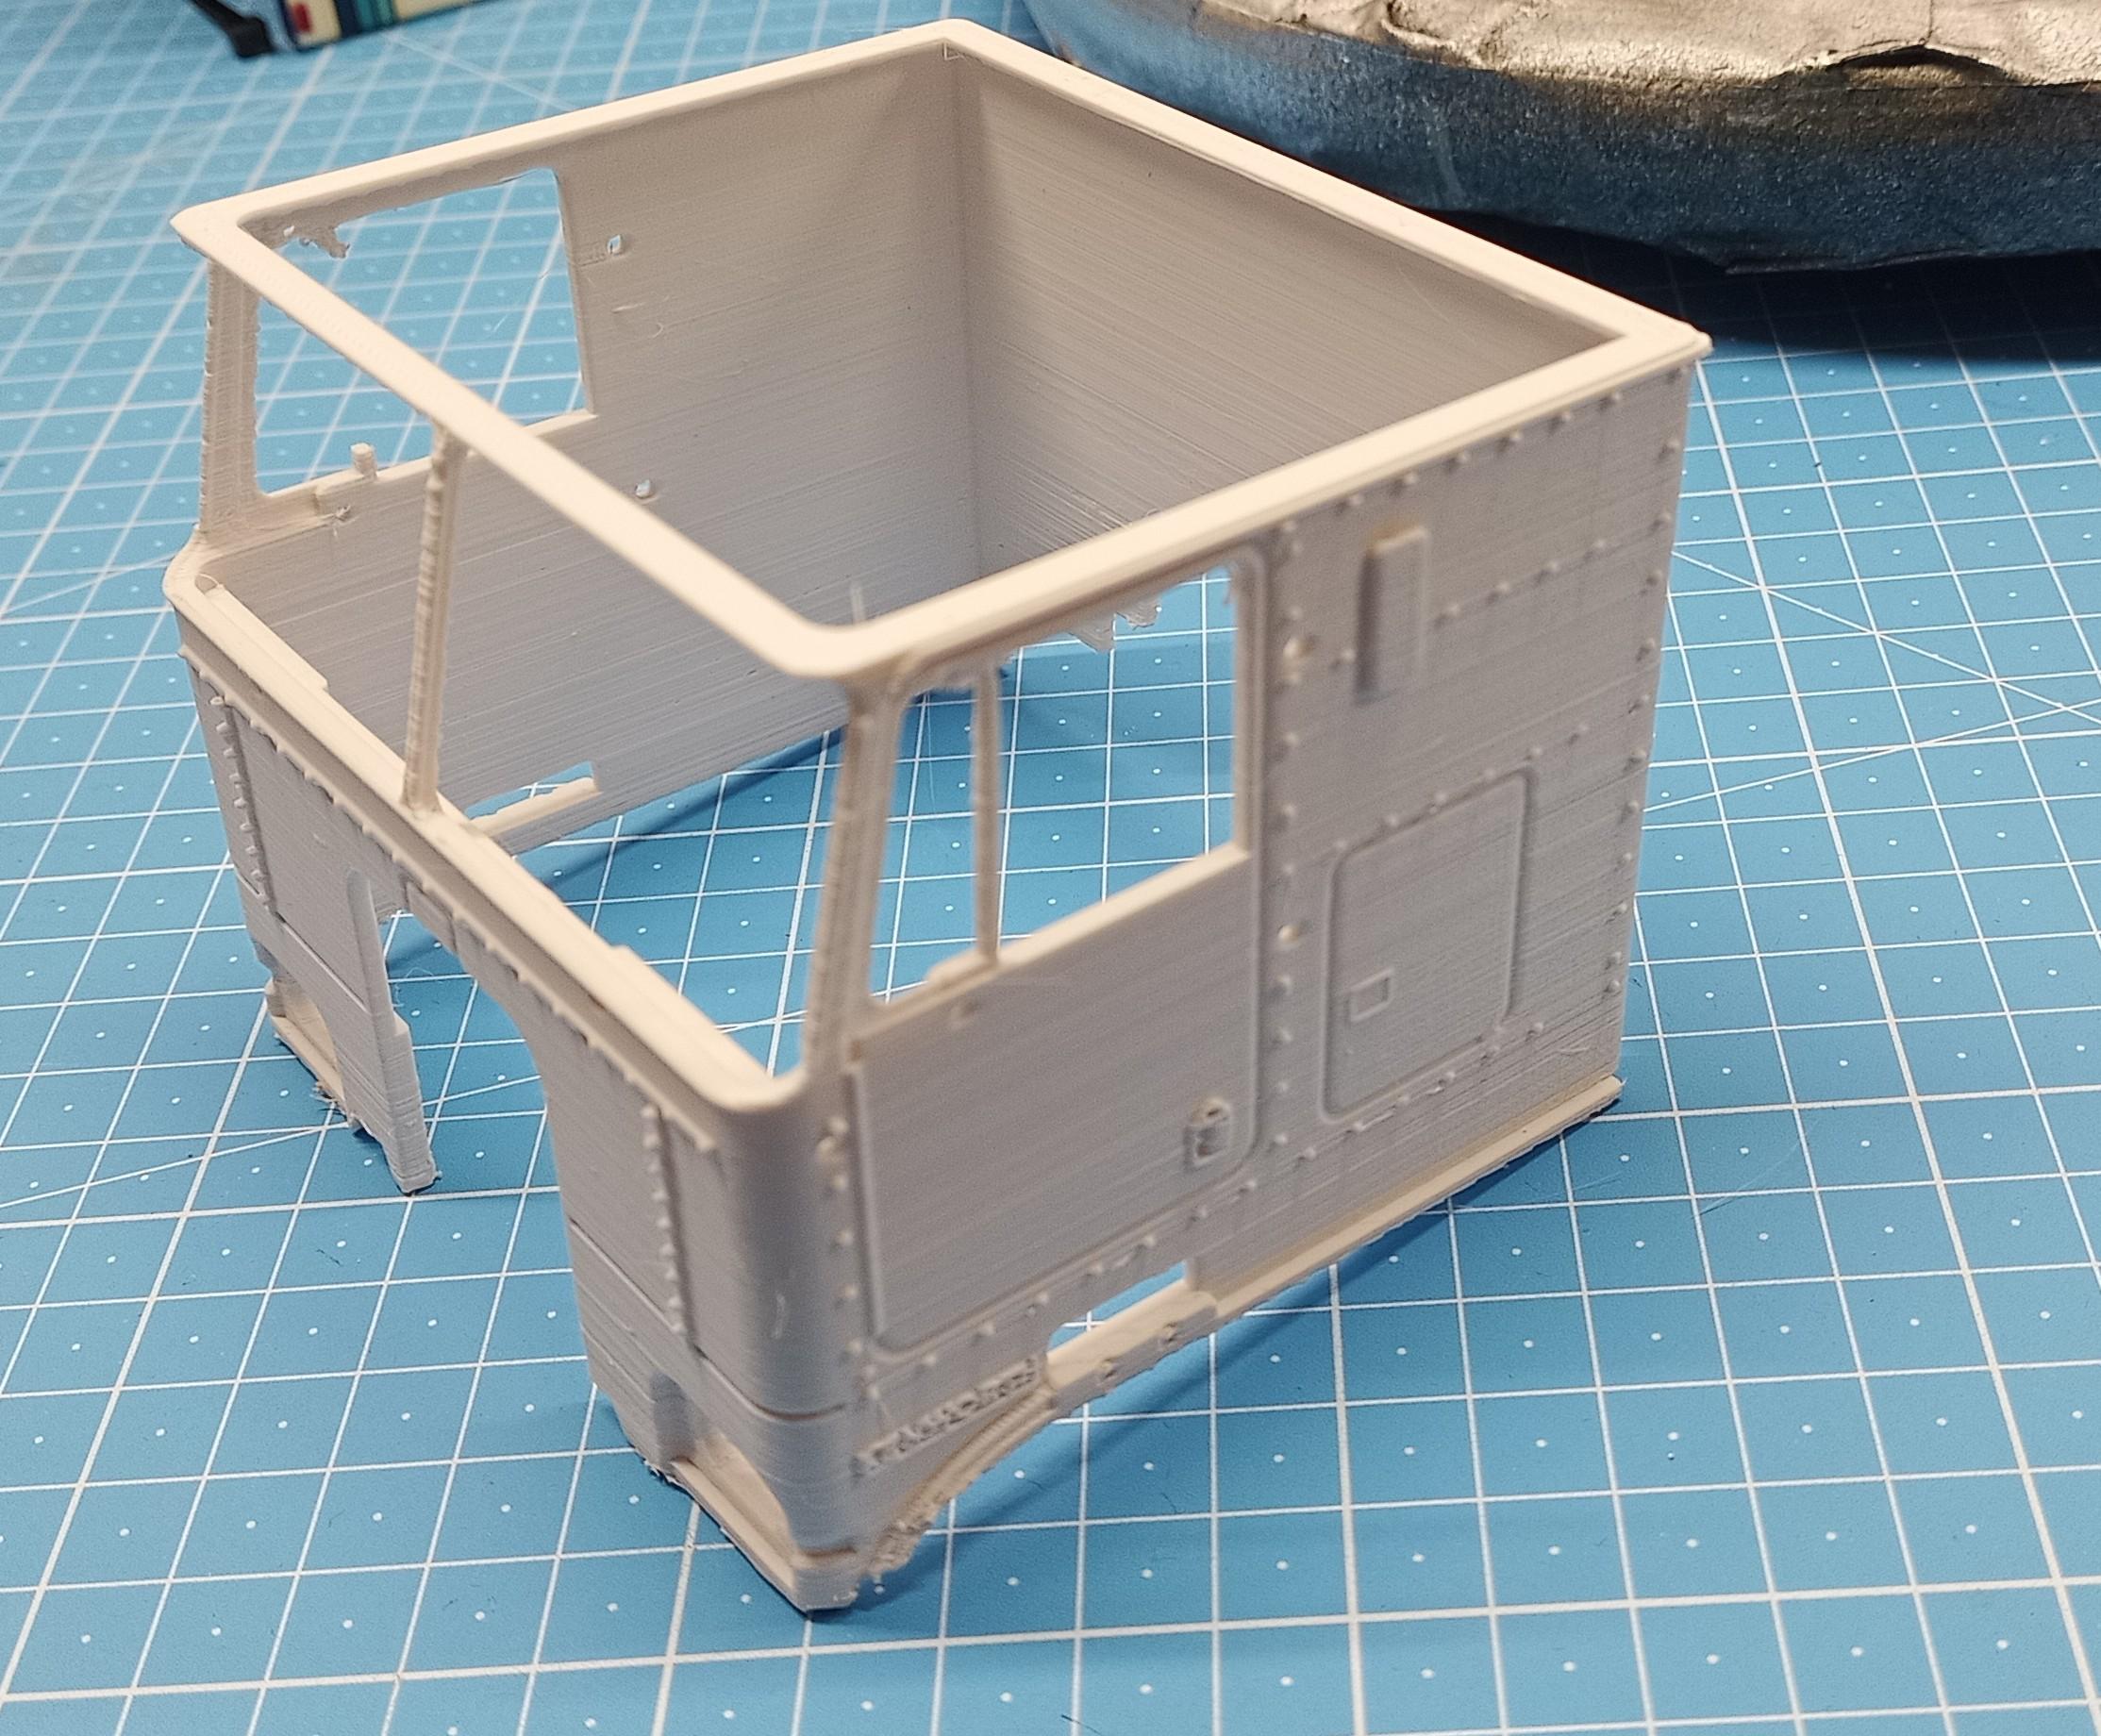
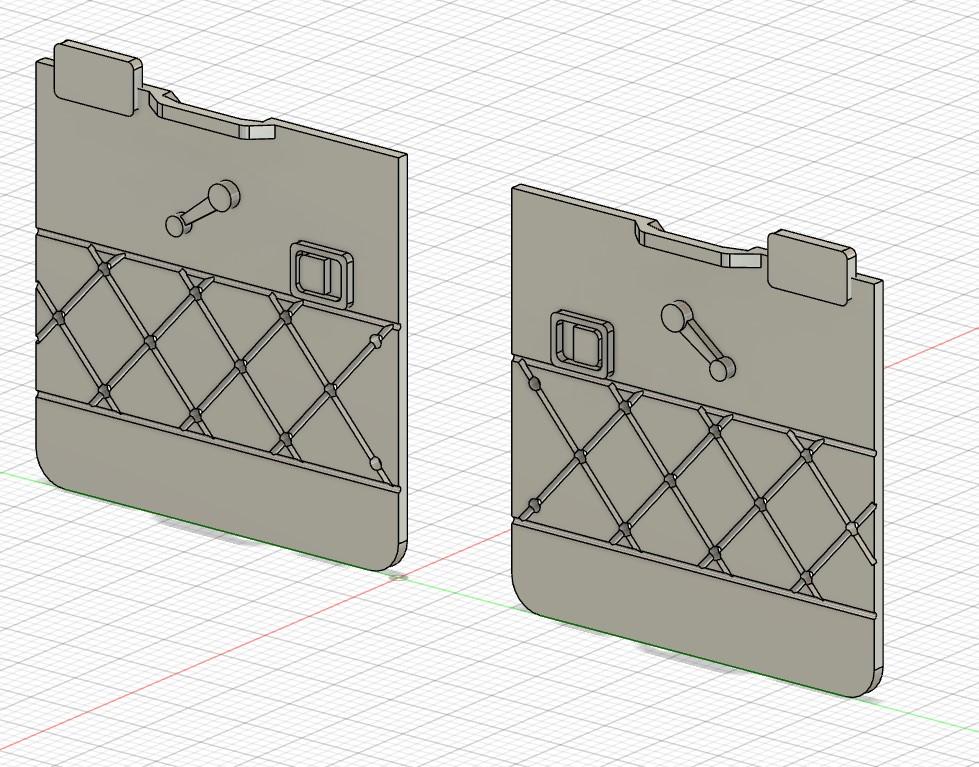
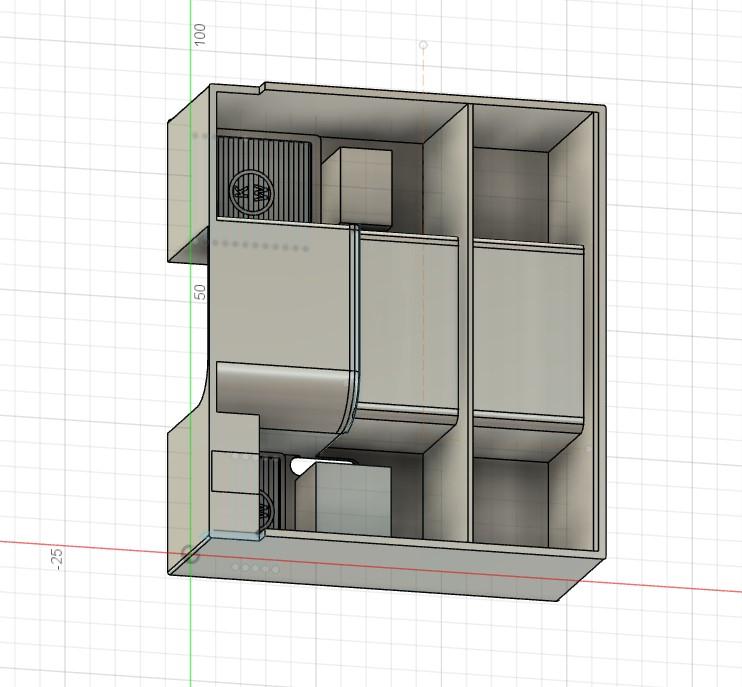
Thank you guys! These are the corrections I made to the cab: As you can see, the slim struts and the side windows don´t come out really well and They´re absolutely impossible to sand or rework in any other way so I extracted them out of the cabin in order to be printed in a different position. That way they should come out nicer! I put in some support struts in order to keep the roof from falling during printing. The front part will be held up by a software generated support structure. I also began designing the trailer which turned out to be quite tricky. Here´s the original first: Sorry, these are screenshots from the movie. They´re a bit blurry but I think you can see the important things. Now the designed parts of which I had to split some up due to the size of the parts. The printer only goes up to 220 x 220 mm. I also designed the cross bars in mounting position and then extracted them to get a better printing result. The back end: The container inside: Underbody and doors: and the suspension which I took over from the tractor and changed them to a trailer suspension with the u-bolts being mounted upside down like I learned from Force! Thanks again for your valuable input! That´s all for the time but there´ll be more!
-
De-Aerodyned K100
Jürgen M. replied to Rockford's topic in WIP: Model Trucks: Big Rigs and Heavy Equipment
Fantastic! Making a 1/32 Kit Look like a "big one"! Great job! ? -
Another "Convoy" Truck!
Jürgen M. replied to Jürgen M.'s topic in WIP: Model Trucks: Big Rigs and Heavy Equipment
Wow, thanks very much! The printing lines will hopefully be covered by a fill primer I purchased. Haven't tried it out yet though. Sanding is a bit complicated with all those bolts rivets and other 3D details. I read on this board and in personal notes that some guys had good experiences with it. -
Diamond Reo/Montone dump body
Jürgen M. replied to Scott Eriksen's topic in WIP: Model Trucks: Big Rigs and Heavy Equipment
Fantastic! It looks absolutely perfect! -
De-Aerodyned K100
Jürgen M. replied to Rockford's topic in WIP: Model Trucks: Big Rigs and Heavy Equipment
Beautiful! Amazing how realistic you made it look! -
Another "Convoy" Truck!
Jürgen M. replied to Jürgen M.'s topic in WIP: Model Trucks: Big Rigs and Heavy Equipment
Yes, that's true Rockford! Glad you like it! I could even turn it into an aerodyne. Still I've got some Others waiting in line to be designed and printed. Since there are already 4 Kenworth trucks on the shelf I thought it would be more interesting to do some more exotic types after this one. But that will stay confidential Till the KW is finished! ? I had even thought about shortening the cab of the K100 VIT which I had posted a while ago but I just couldn't! Too many good memories! -
Another "Convoy" Truck!
Jürgen M. replied to Jürgen M.'s topic in WIP: Model Trucks: Big Rigs and Heavy Equipment
Took a shot at the cab! Looks pretty good. Still it won't be the one I'll use! I've already made some changes and corrections in the drawing so I'll print it again!
-
Another "Convoy" Truck!
Jürgen M. replied to Jürgen M.'s topic in WIP: Model Trucks: Big Rigs and Heavy Equipment
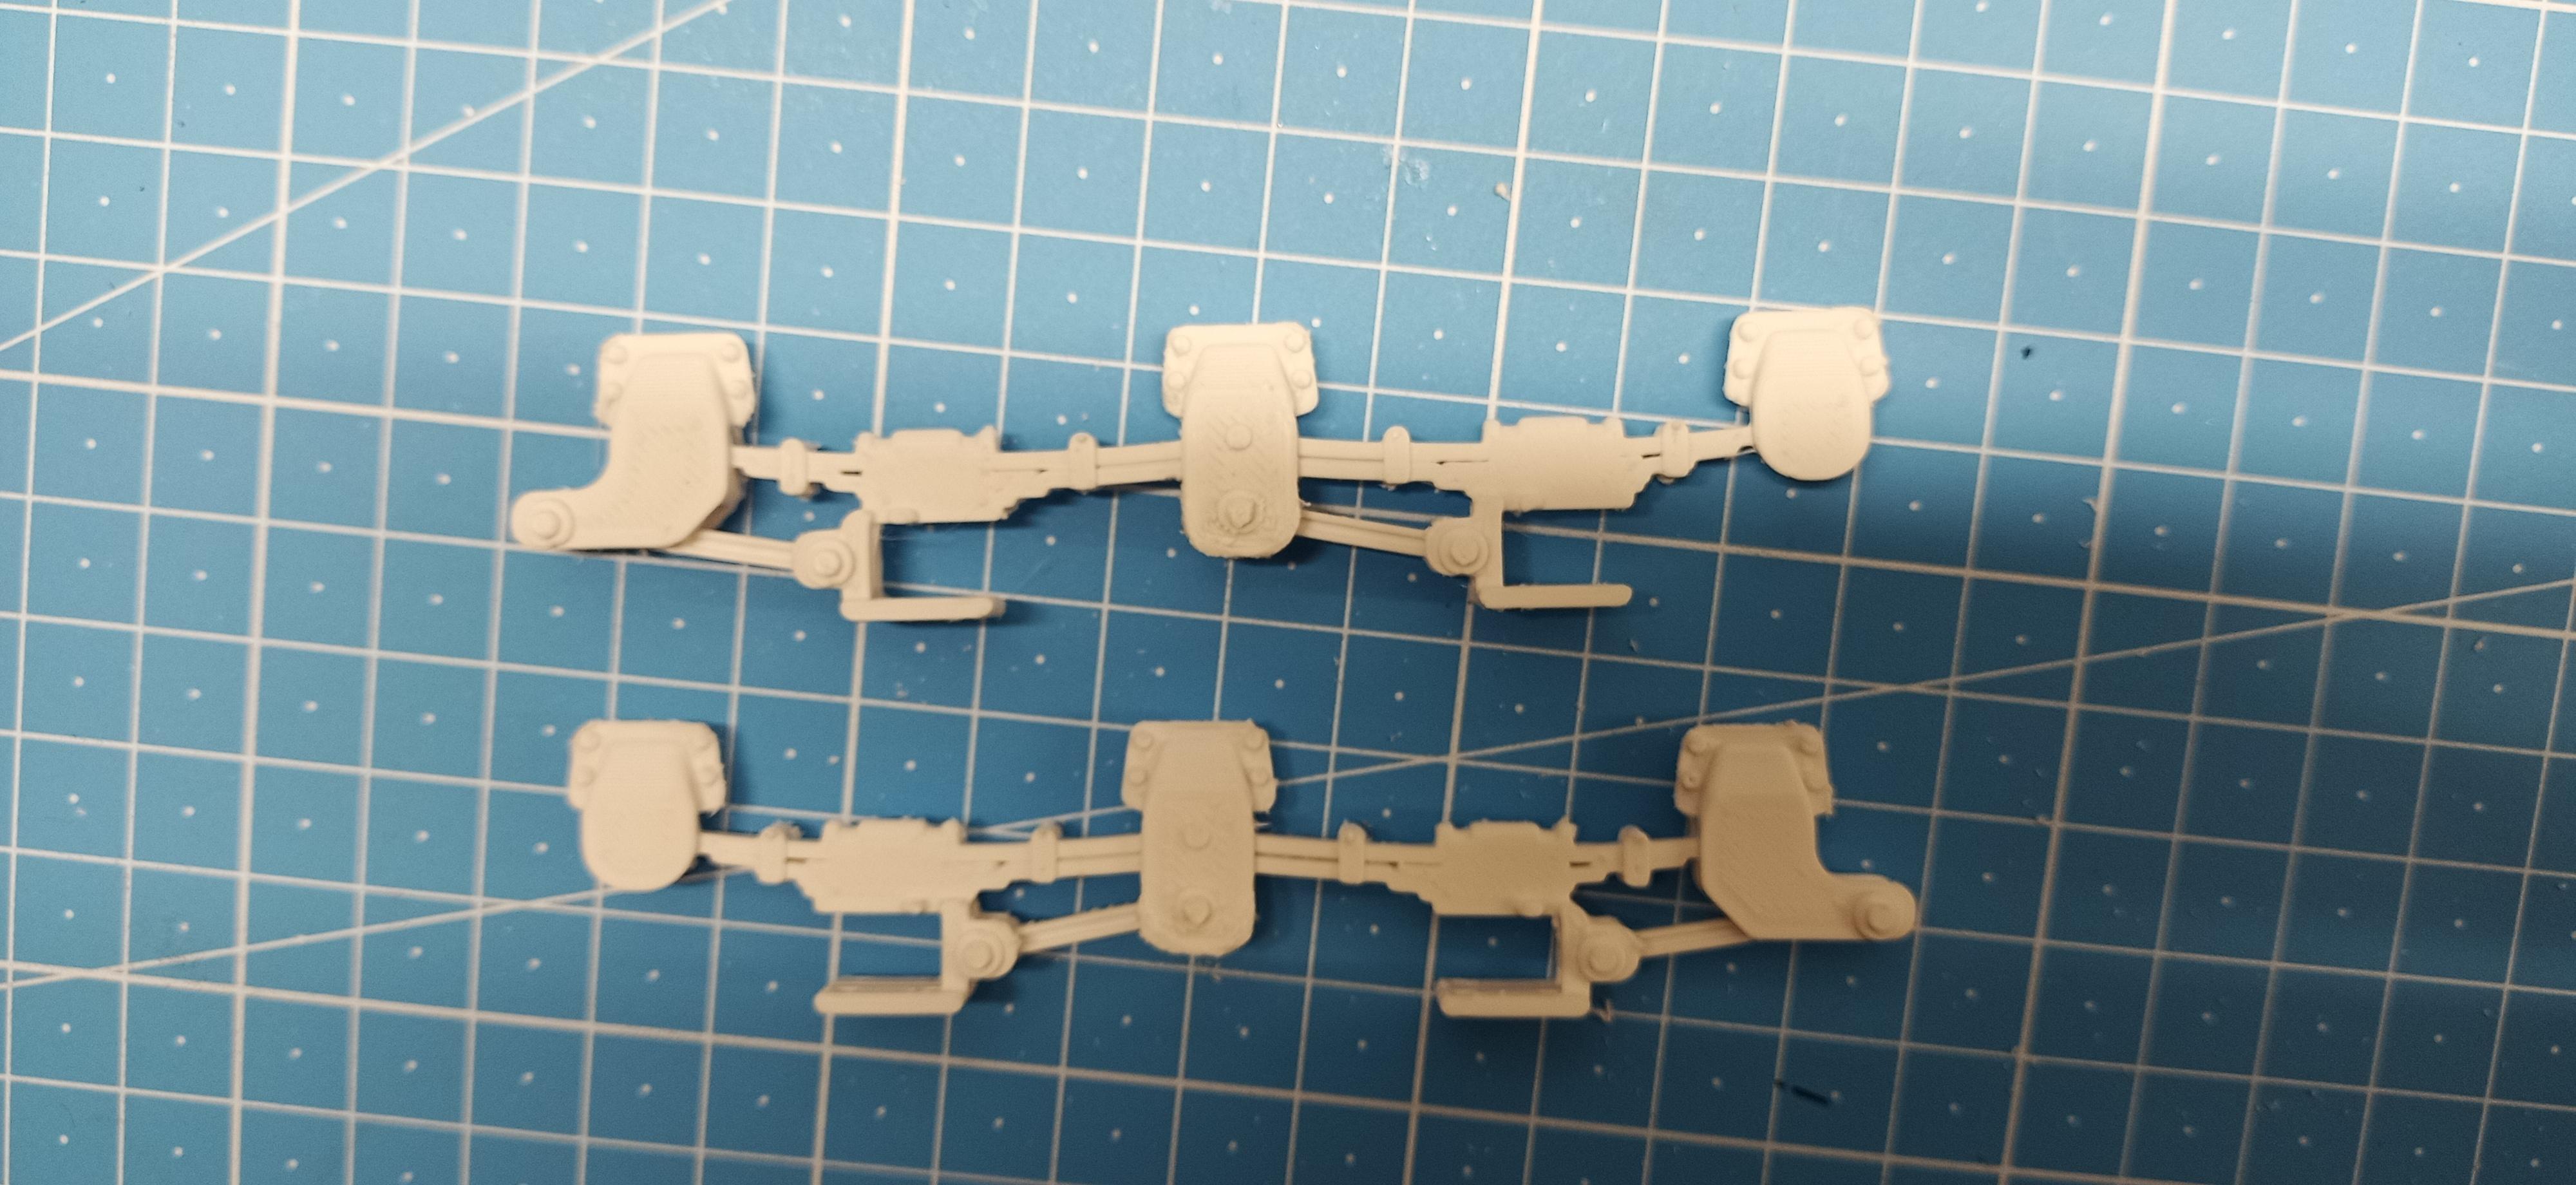
I already printed the suspension. Just couldn't wait to see how it comes out. I chose a different filament this time. One that's printed at a higher temperature but slower. It says it promises better results in surface quality. Looks pretty good to me! Still has to be sanded in a couple of places though.
-
Diamond Reo/Montone dump body
Jürgen M. replied to Scott Eriksen's topic in WIP: Model Trucks: Big Rigs and Heavy Equipment
Wow, great job! They look absolutely real. Thanks for the info! -
Thanks for the link! You can sign up for an e-mail that tells you when it's in stock again. But you're right, I noticed too the other day that they don't have much in stock at the time! It's been like that before. That's temporary!
-
Diamond Reo/Montone dump body
Jürgen M. replied to Scott Eriksen's topic in WIP: Model Trucks: Big Rigs and Heavy Equipment
May I ask where you got the exhausts or did you make them yourself? They look so perfect!! -
Diamond Reo/Montone dump body
Jürgen M. replied to Scott Eriksen's topic in WIP: Model Trucks: Big Rigs and Heavy Equipment
Love that paint job and the decals! Beautiful! ? -
Another "Convoy" Truck!
Jürgen M. replied to Jürgen M.'s topic in WIP: Model Trucks: Big Rigs and Heavy Equipment
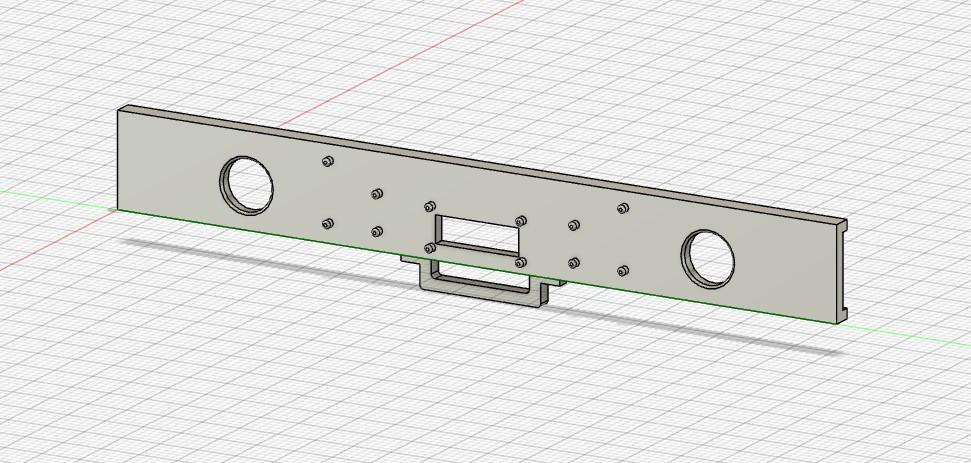
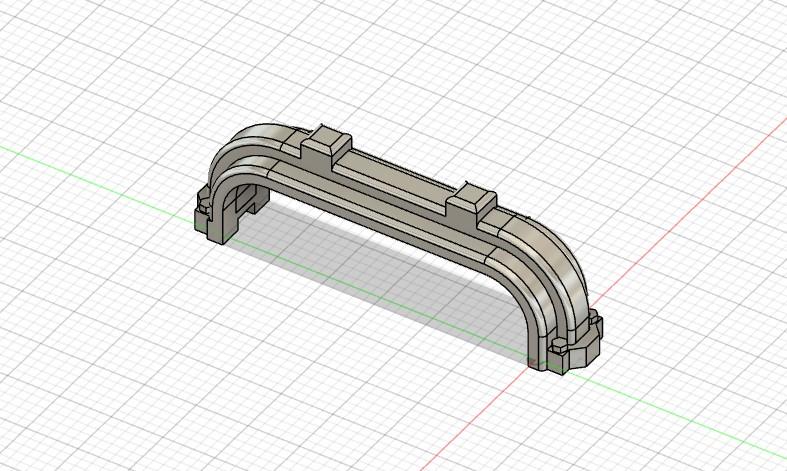
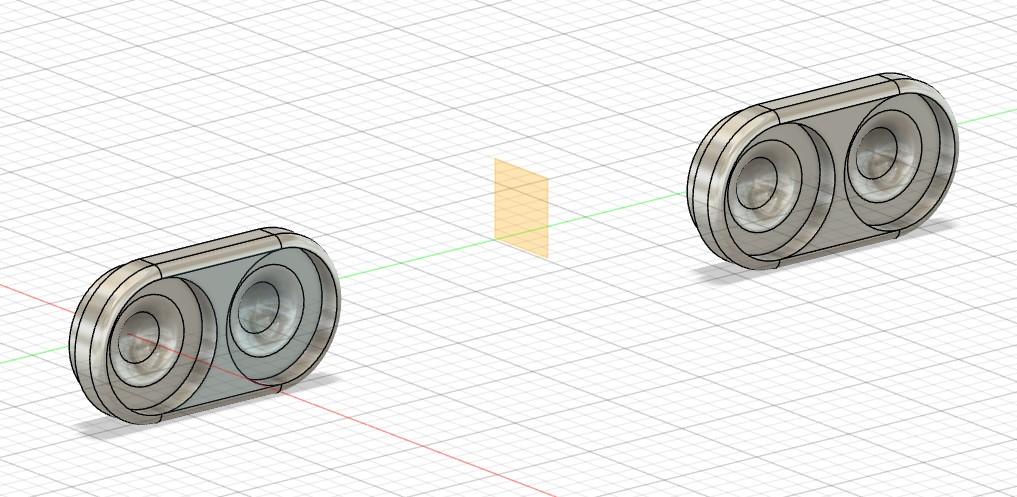
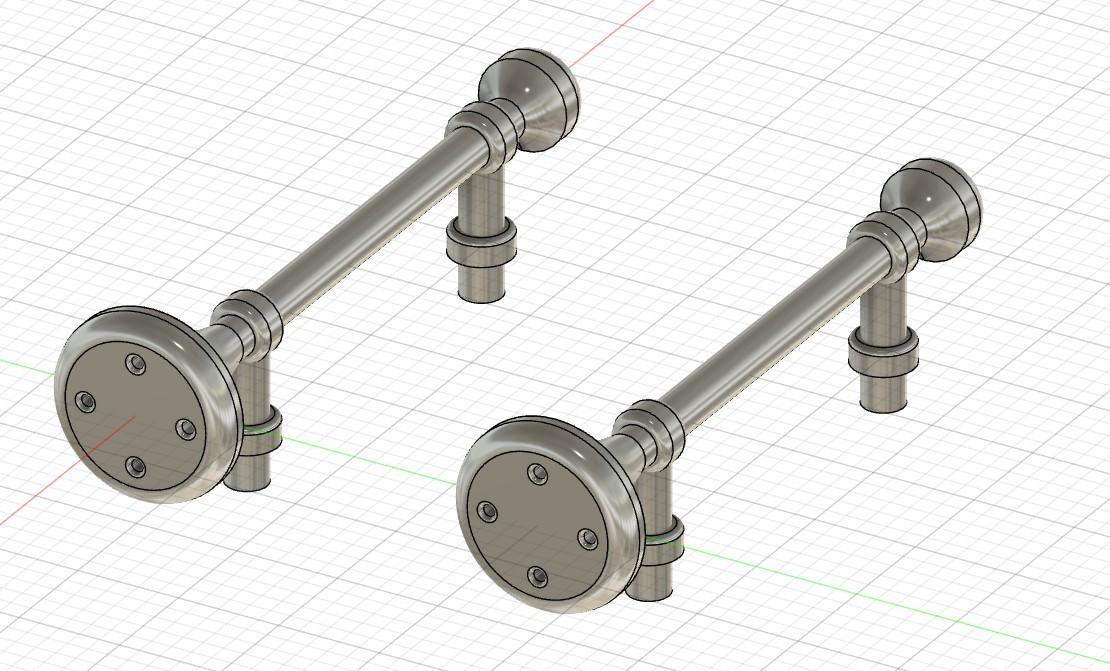
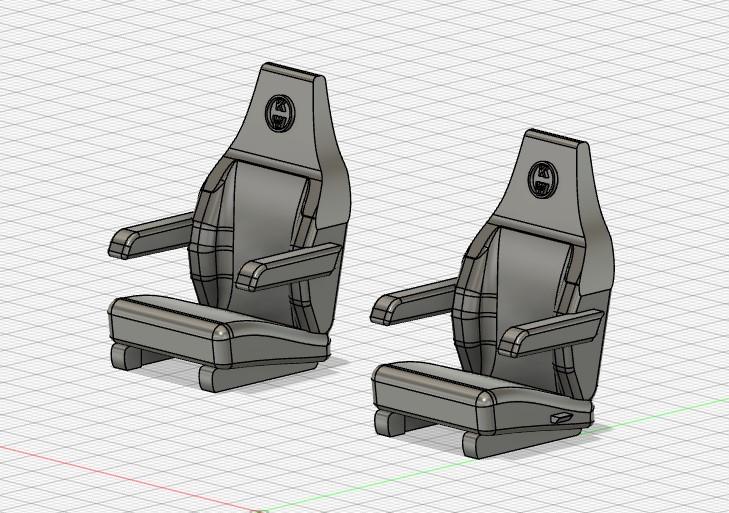
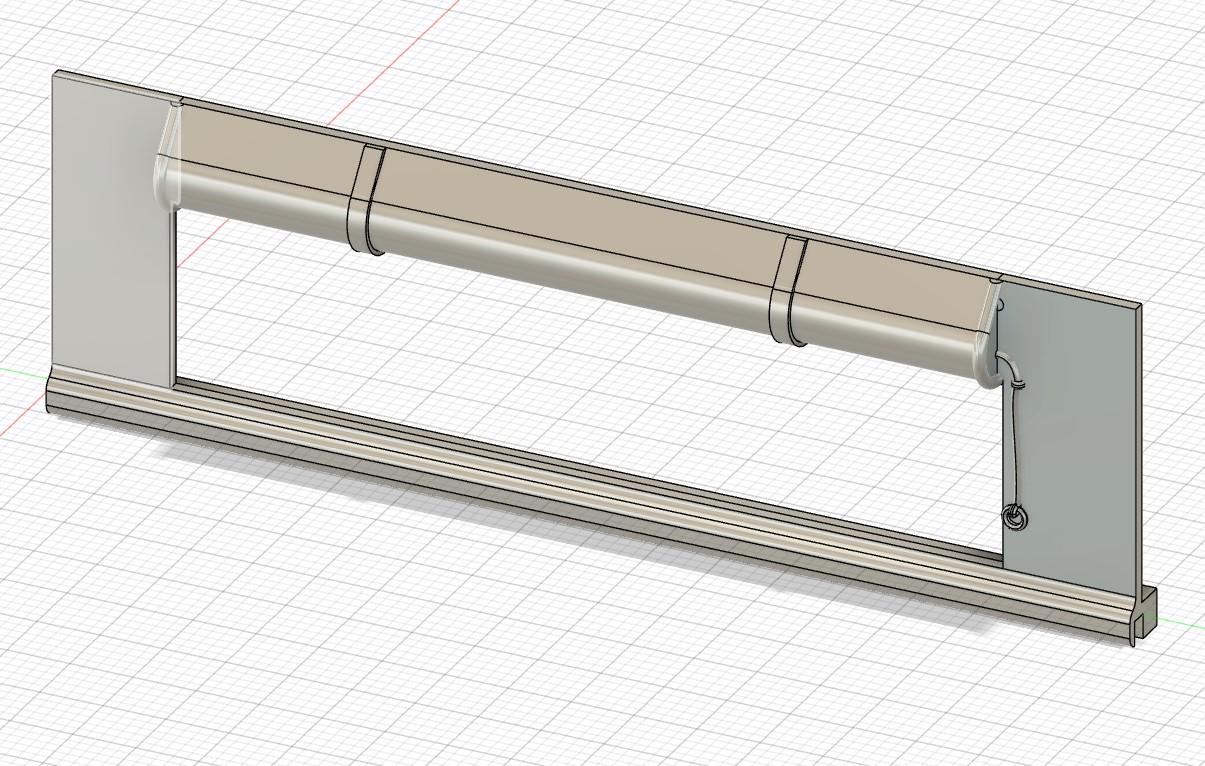
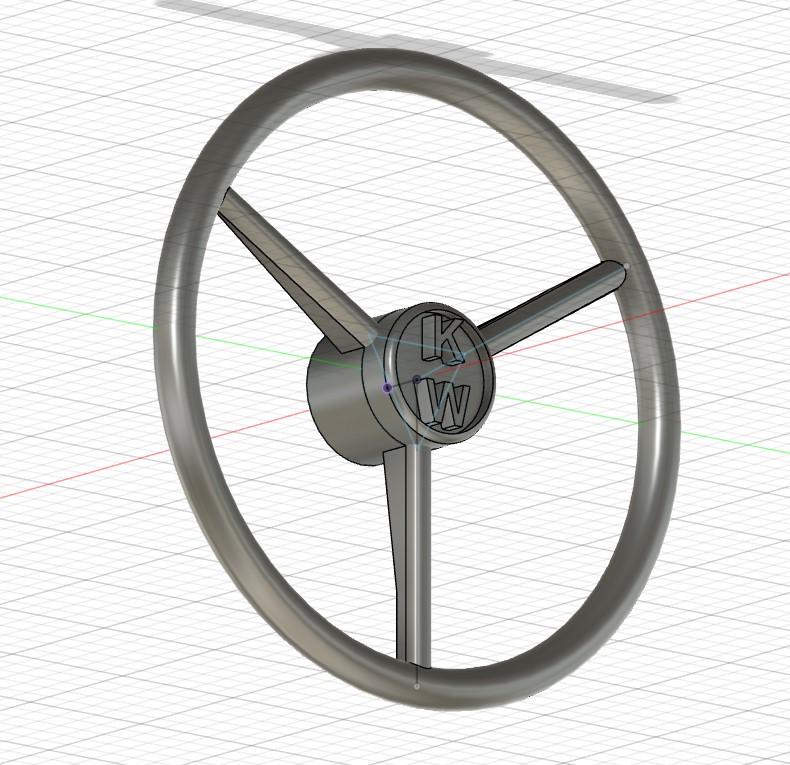
Here are a few more designed parts: Bumper: Cab rest: Headlight bezzles and horns: Inside door panels and interior: Seats and sleeper curtain: Steering wheel: There are of course lots of other parts which I have already designed but I won´t fill this thread with them. Some parts I´ll actually take over from previous models such as engine parts for example. Only the exhaust and air pipes will be custom made for this specific truck.
-
Another "Convoy" Truck!
Jürgen M. replied to Jürgen M.'s topic in WIP: Model Trucks: Big Rigs and Heavy Equipment
Of course! I use Autodesk Fusion 360! And UltiMaker Cura 5.5.0 for slicing! -
Diamond Reo/Montone dump body
Jürgen M. replied to Scott Eriksen's topic in WIP: Model Trucks: Big Rigs and Heavy Equipment
Exactly! Brockway belonged to Mack till they put it to sleep in 74 or so. Had same cabs, same fuel tanks, ...! -
Diamond Reo/Montone dump body
Jürgen M. replied to Scott Eriksen's topic in WIP: Model Trucks: Big Rigs and Heavy Equipment
Great effects in the tanks! Looks so real! -
Diamond Reo/Montone dump body
Jürgen M. replied to Scott Eriksen's topic in WIP: Model Trucks: Big Rigs and Heavy Equipment
Could be! I thought amt wanted to keep variations at a minimum. Hey Gary, sorry for the excursion but I was just surprised to see the same cab again. ? -
Another "Convoy" Truck!
Jürgen M. replied to Jürgen M.'s topic in WIP: Model Trucks: Big Rigs and Heavy Equipment
Wow! Great to learn from the best! Never thought I'd still learn so much about trucks at this age being a Fan for about 45 years or so. Thanks again to everyone for sharing your knowledge ! ? -
Peterbilt 359 "Black Magic"
Jürgen M. replied to Jürgen M.'s topic in Model Trucks: Big Rigs and Heavy Equipment
Thanks! ? -
Hello everyone, I hope I´m putting this in the right category. I´ve got a web address of an online model shop selling not just models but also spare parts such as tires, headlight lenses, interior accessories, ...! Of course they don´t just sell truck models but since I´m a truck model fan it´s the first thing I think of when it comes to modelling! Anyway, it´s an Austrian online shop. Maybe one or another of you knows it already. It´s called modelmakershop. The web address is www.modelmakershop.com (I don´t know how to place a link here so I just listed the name) You can of course choose English as main language if your German has become a bit rusty! ? Hope it helps on or the other. I´ve found some nice things there! Jürgen
-
Another "Convoy" Truck!
Jürgen M. replied to Jürgen M.'s topic in WIP: Model Trucks: Big Rigs and Heavy Equipment
I have the largest respect for that. It's worth while. I can see that when I follow your builds! Really amazing! ? -
It's in the post!
Jürgen M. replied to Rockford's topic in WIP: Model Trucks: Big Rigs and Heavy Equipment
Your precision is immaculate! Very nice build Rockford! -
Very nice! A rare truck well built! ?
-
My own Sundance
Jürgen M. replied to Rockford's topic in WIP: Model Trucks: Big Rigs and Heavy Equipment
Wow! How did you manage to make such an exact sun visor? -
My own Sundance
Jürgen M. replied to Rockford's topic in WIP: Model Trucks: Big Rigs and Heavy Equipment
Wow! Rockford, that's a beautiful build! Can't wait to see it finished! I used to build the 1/32 snap kits too but not one of them survived! I had a Freightliner COE with a reefer and a conventional with a tanker trailer. As they were gone I had comitted myself to 1/25 kits. No space for more! ? Keep going. I always loved "Movin' on"! Maybe I'll take a chance on that one in 1/25 some day!