Jürgen M.
-
Posts
1,675 -
Joined
-
Last visited
Content Type
Profiles
Forums
Events
Gallery
Everything posted by Jürgen M.
-

Another "Convoy" Truck!
Jürgen M. replied to Jürgen M.'s topic in WIP: Model Trucks: Big Rigs and Heavy Equipment
Hi Steve, thanks very much! You´re absolutely right there. I find it a very effective way to join frame parts and be sure they come out straight! I designed it so it just fits tightly without spreading the frame or having to much space. I´m glad it also worked out that way since the filament also has a bit of a shrinkage which may cause a too tight fit. I try to make it fit tight enough to stay in place before gluing. Sort of like a snap tite kit. Doesn´t work with all parts though. -
Another "Convoy" Truck!
Jürgen M. replied to Jürgen M.'s topic in WIP: Model Trucks: Big Rigs and Heavy Equipment
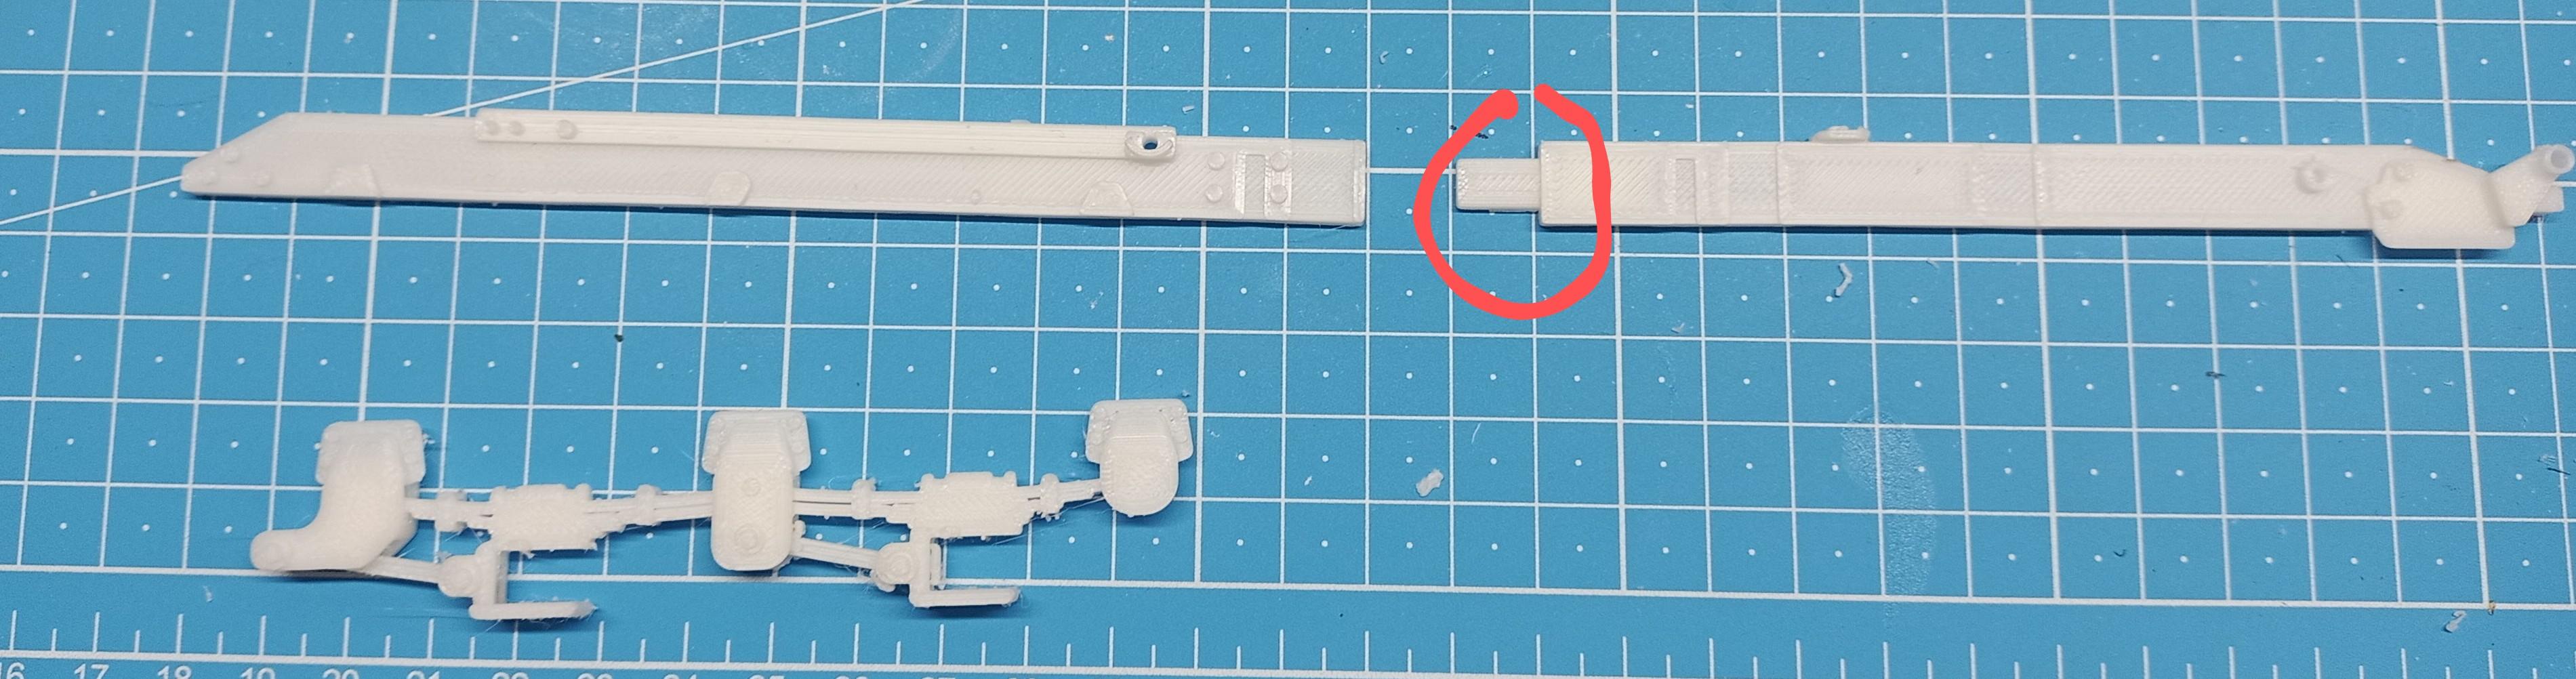
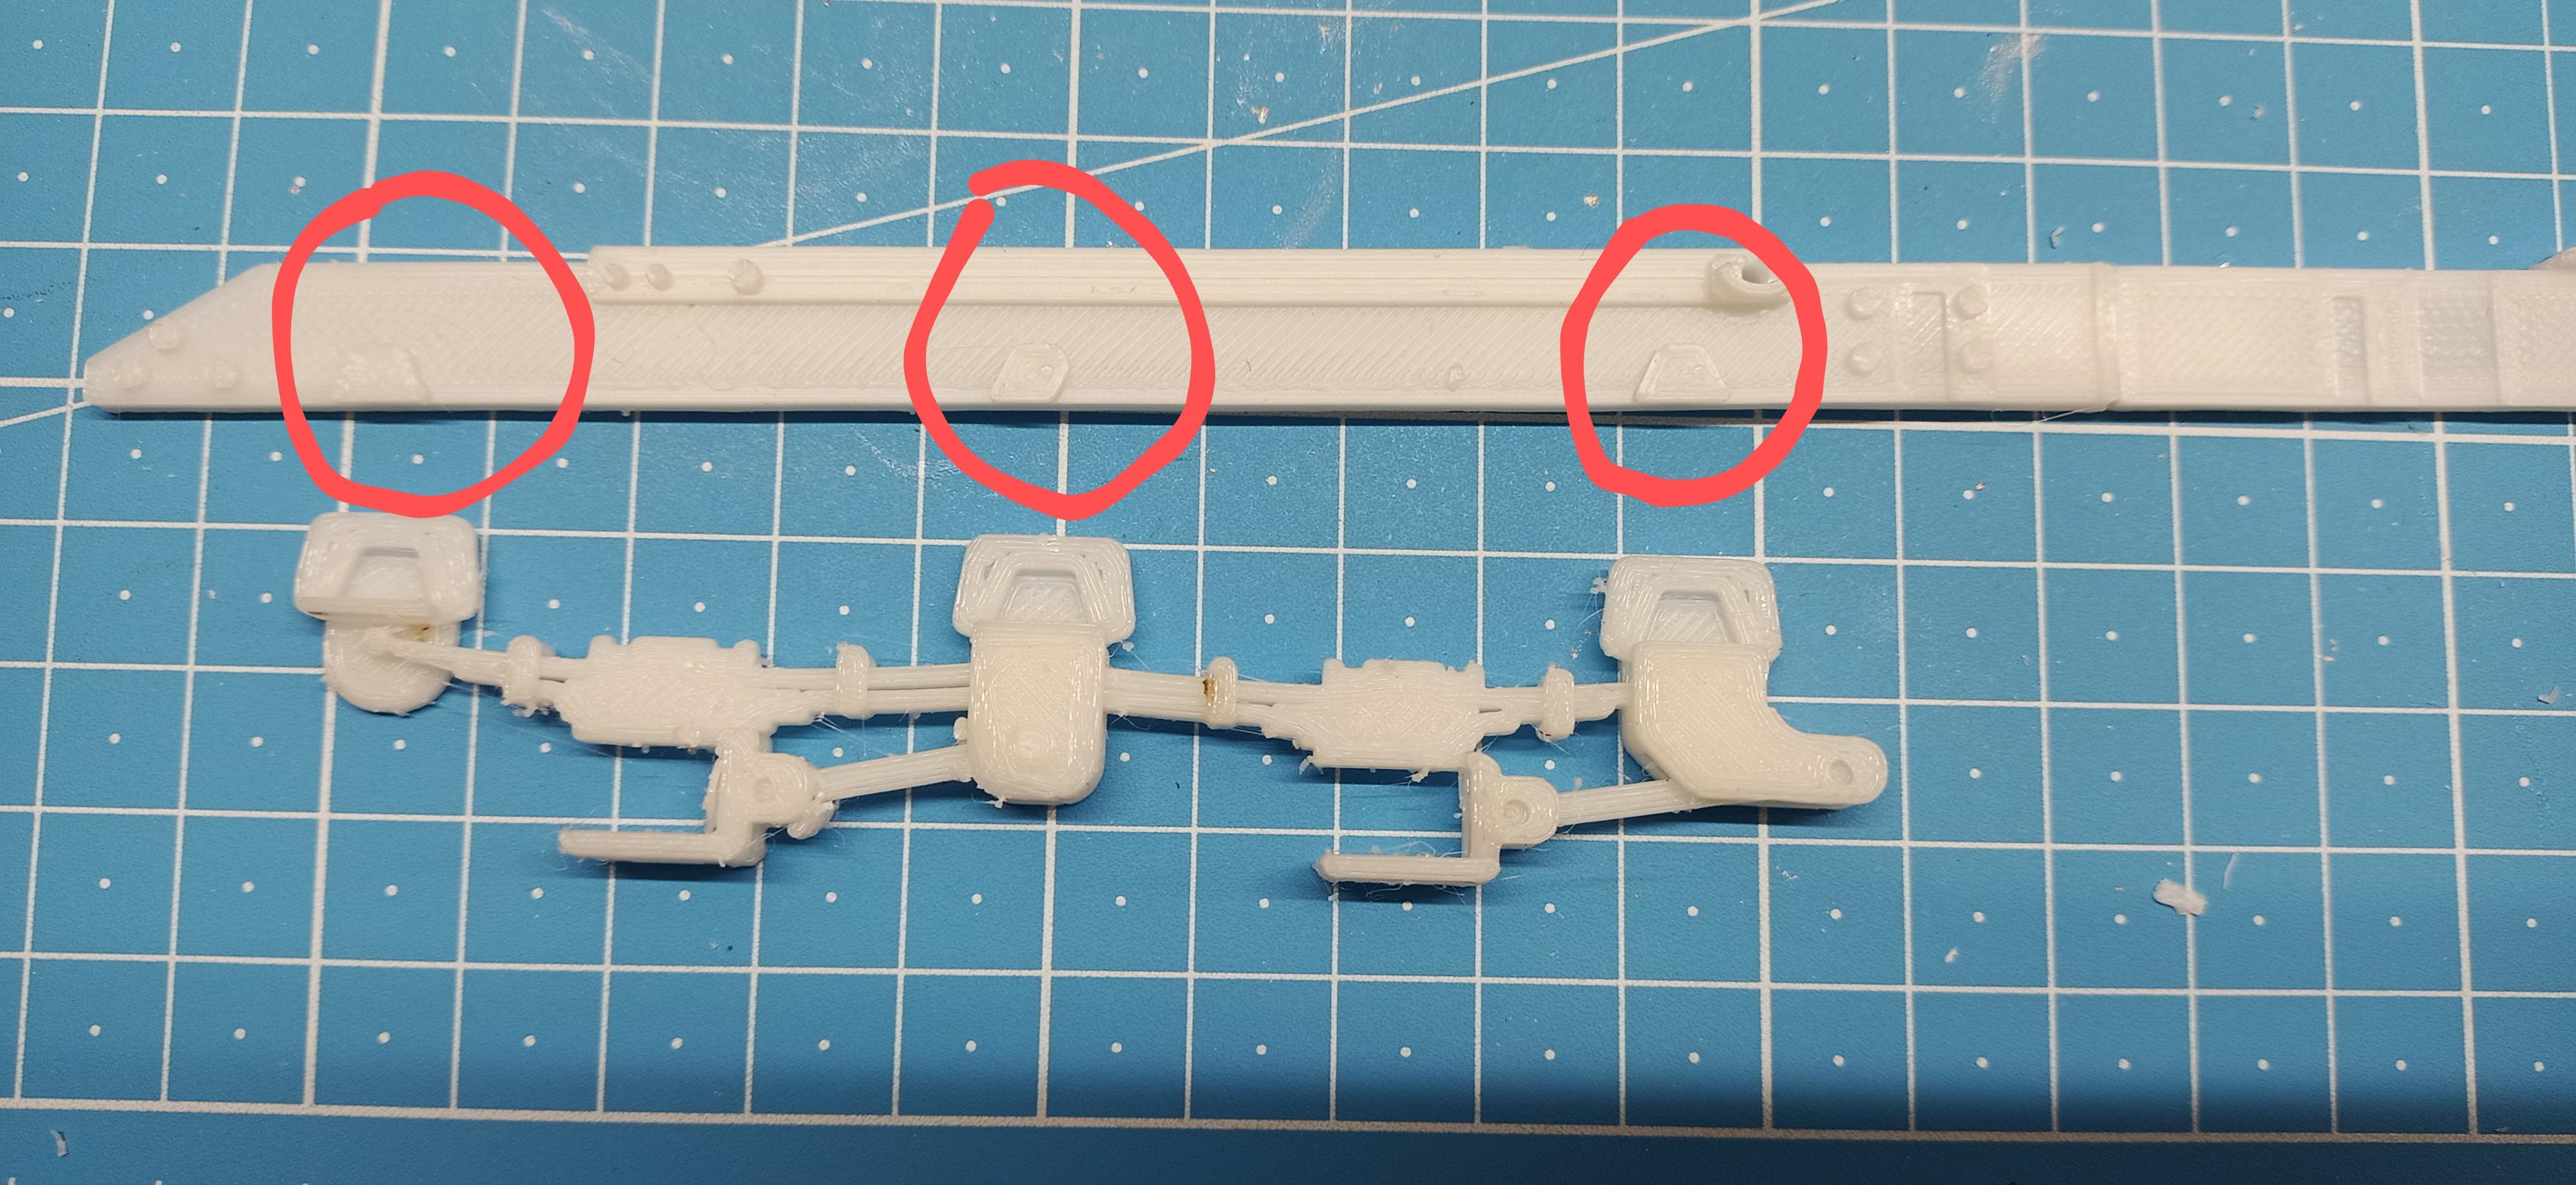
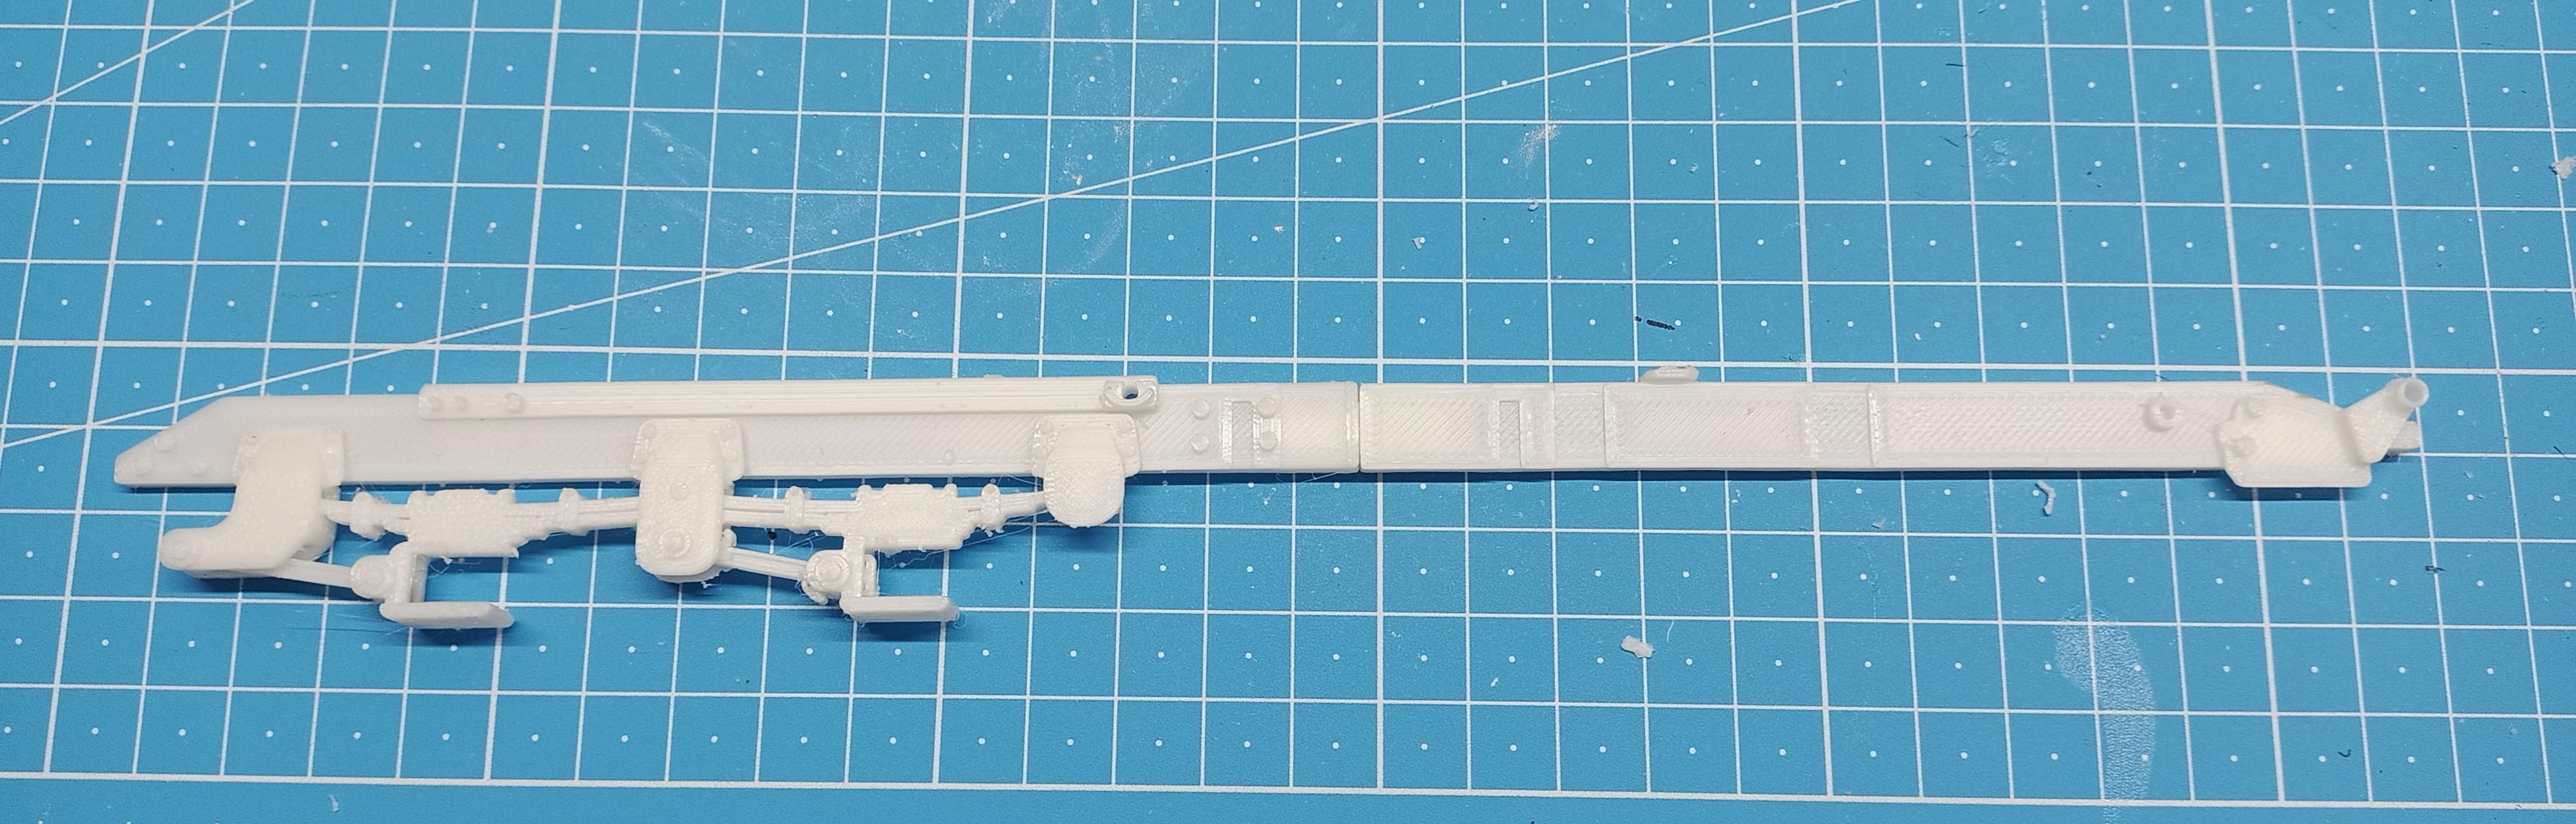
Some chassis parts are printed. The rails fit into eachother using the latches I designed at the ends! The suspension fits perfectly onto the shapes on the chassis rails. The suspension is the right way around, isn't it? ? If not, it's not glued yet and they fit in both sides, the fitting shapes being symmetrical.
-
Another "Convoy" Truck!
Jürgen M. replied to Jürgen M.'s topic in WIP: Model Trucks: Big Rigs and Heavy Equipment
Thanks Gary! Hope the rest turns out as well too! ? -
Another "Convoy" Truck!
Jürgen M. replied to Jürgen M.'s topic in WIP: Model Trucks: Big Rigs and Heavy Equipment
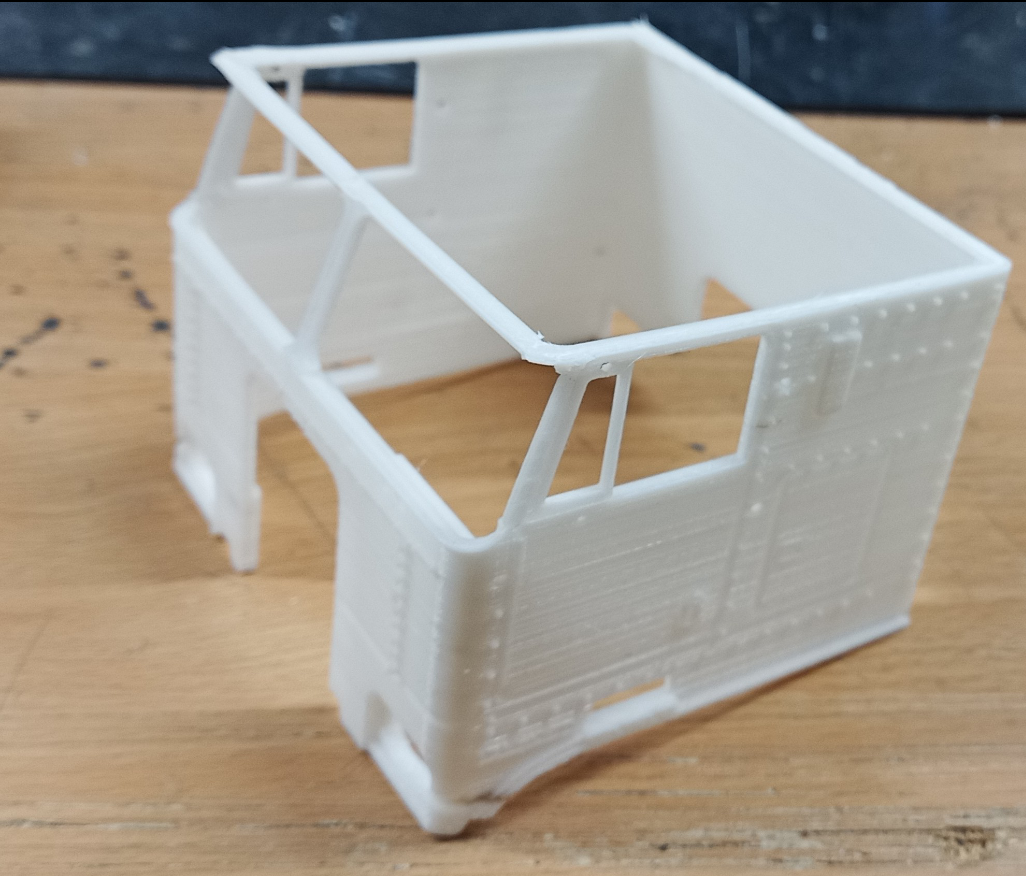
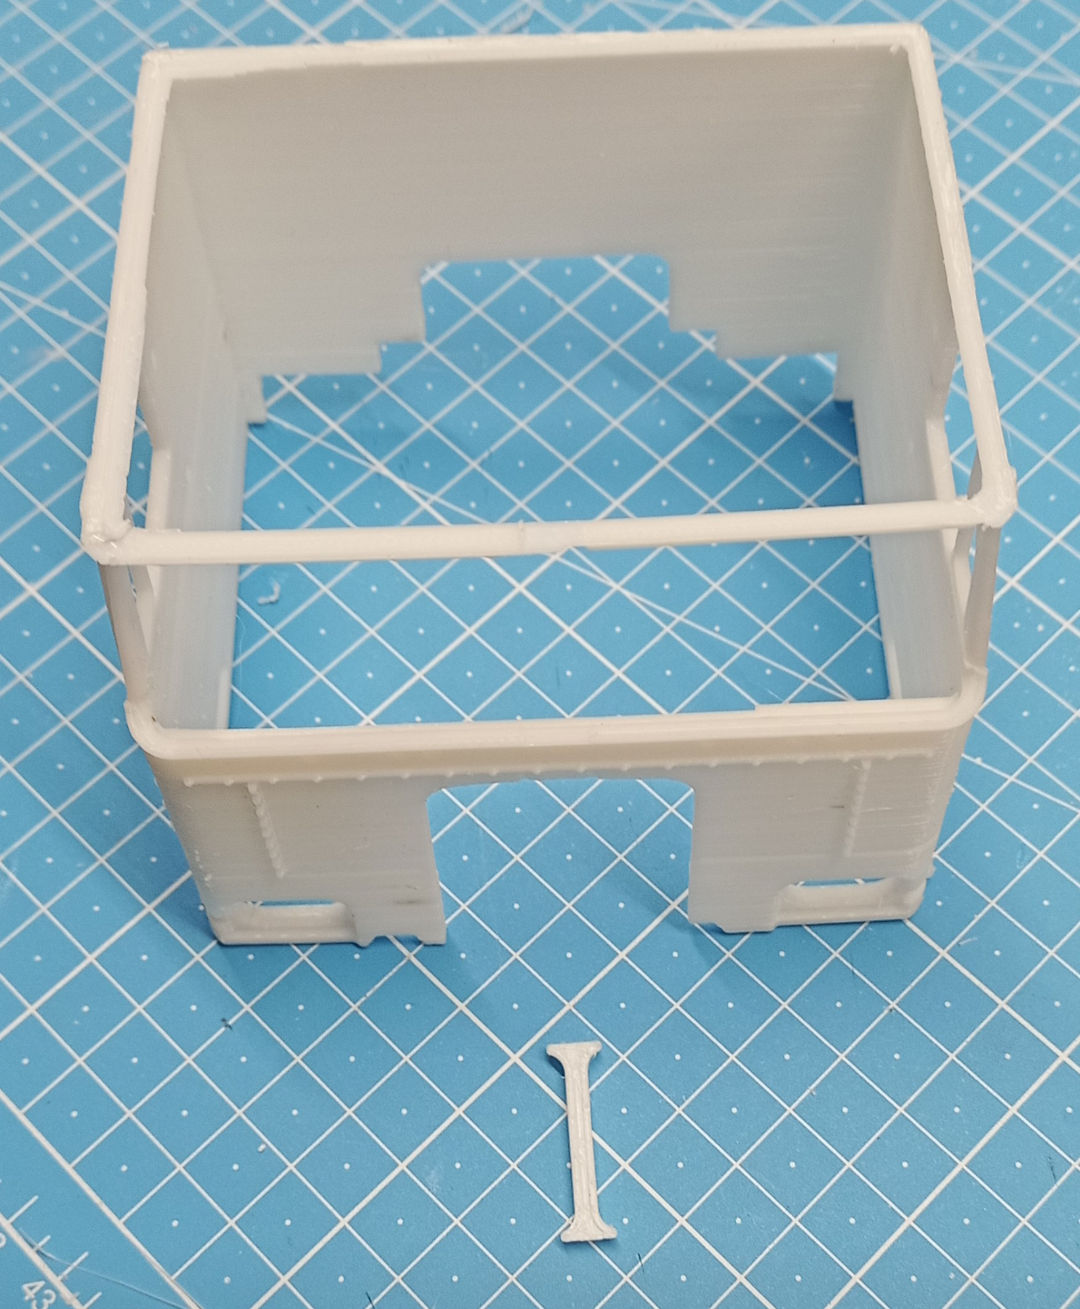
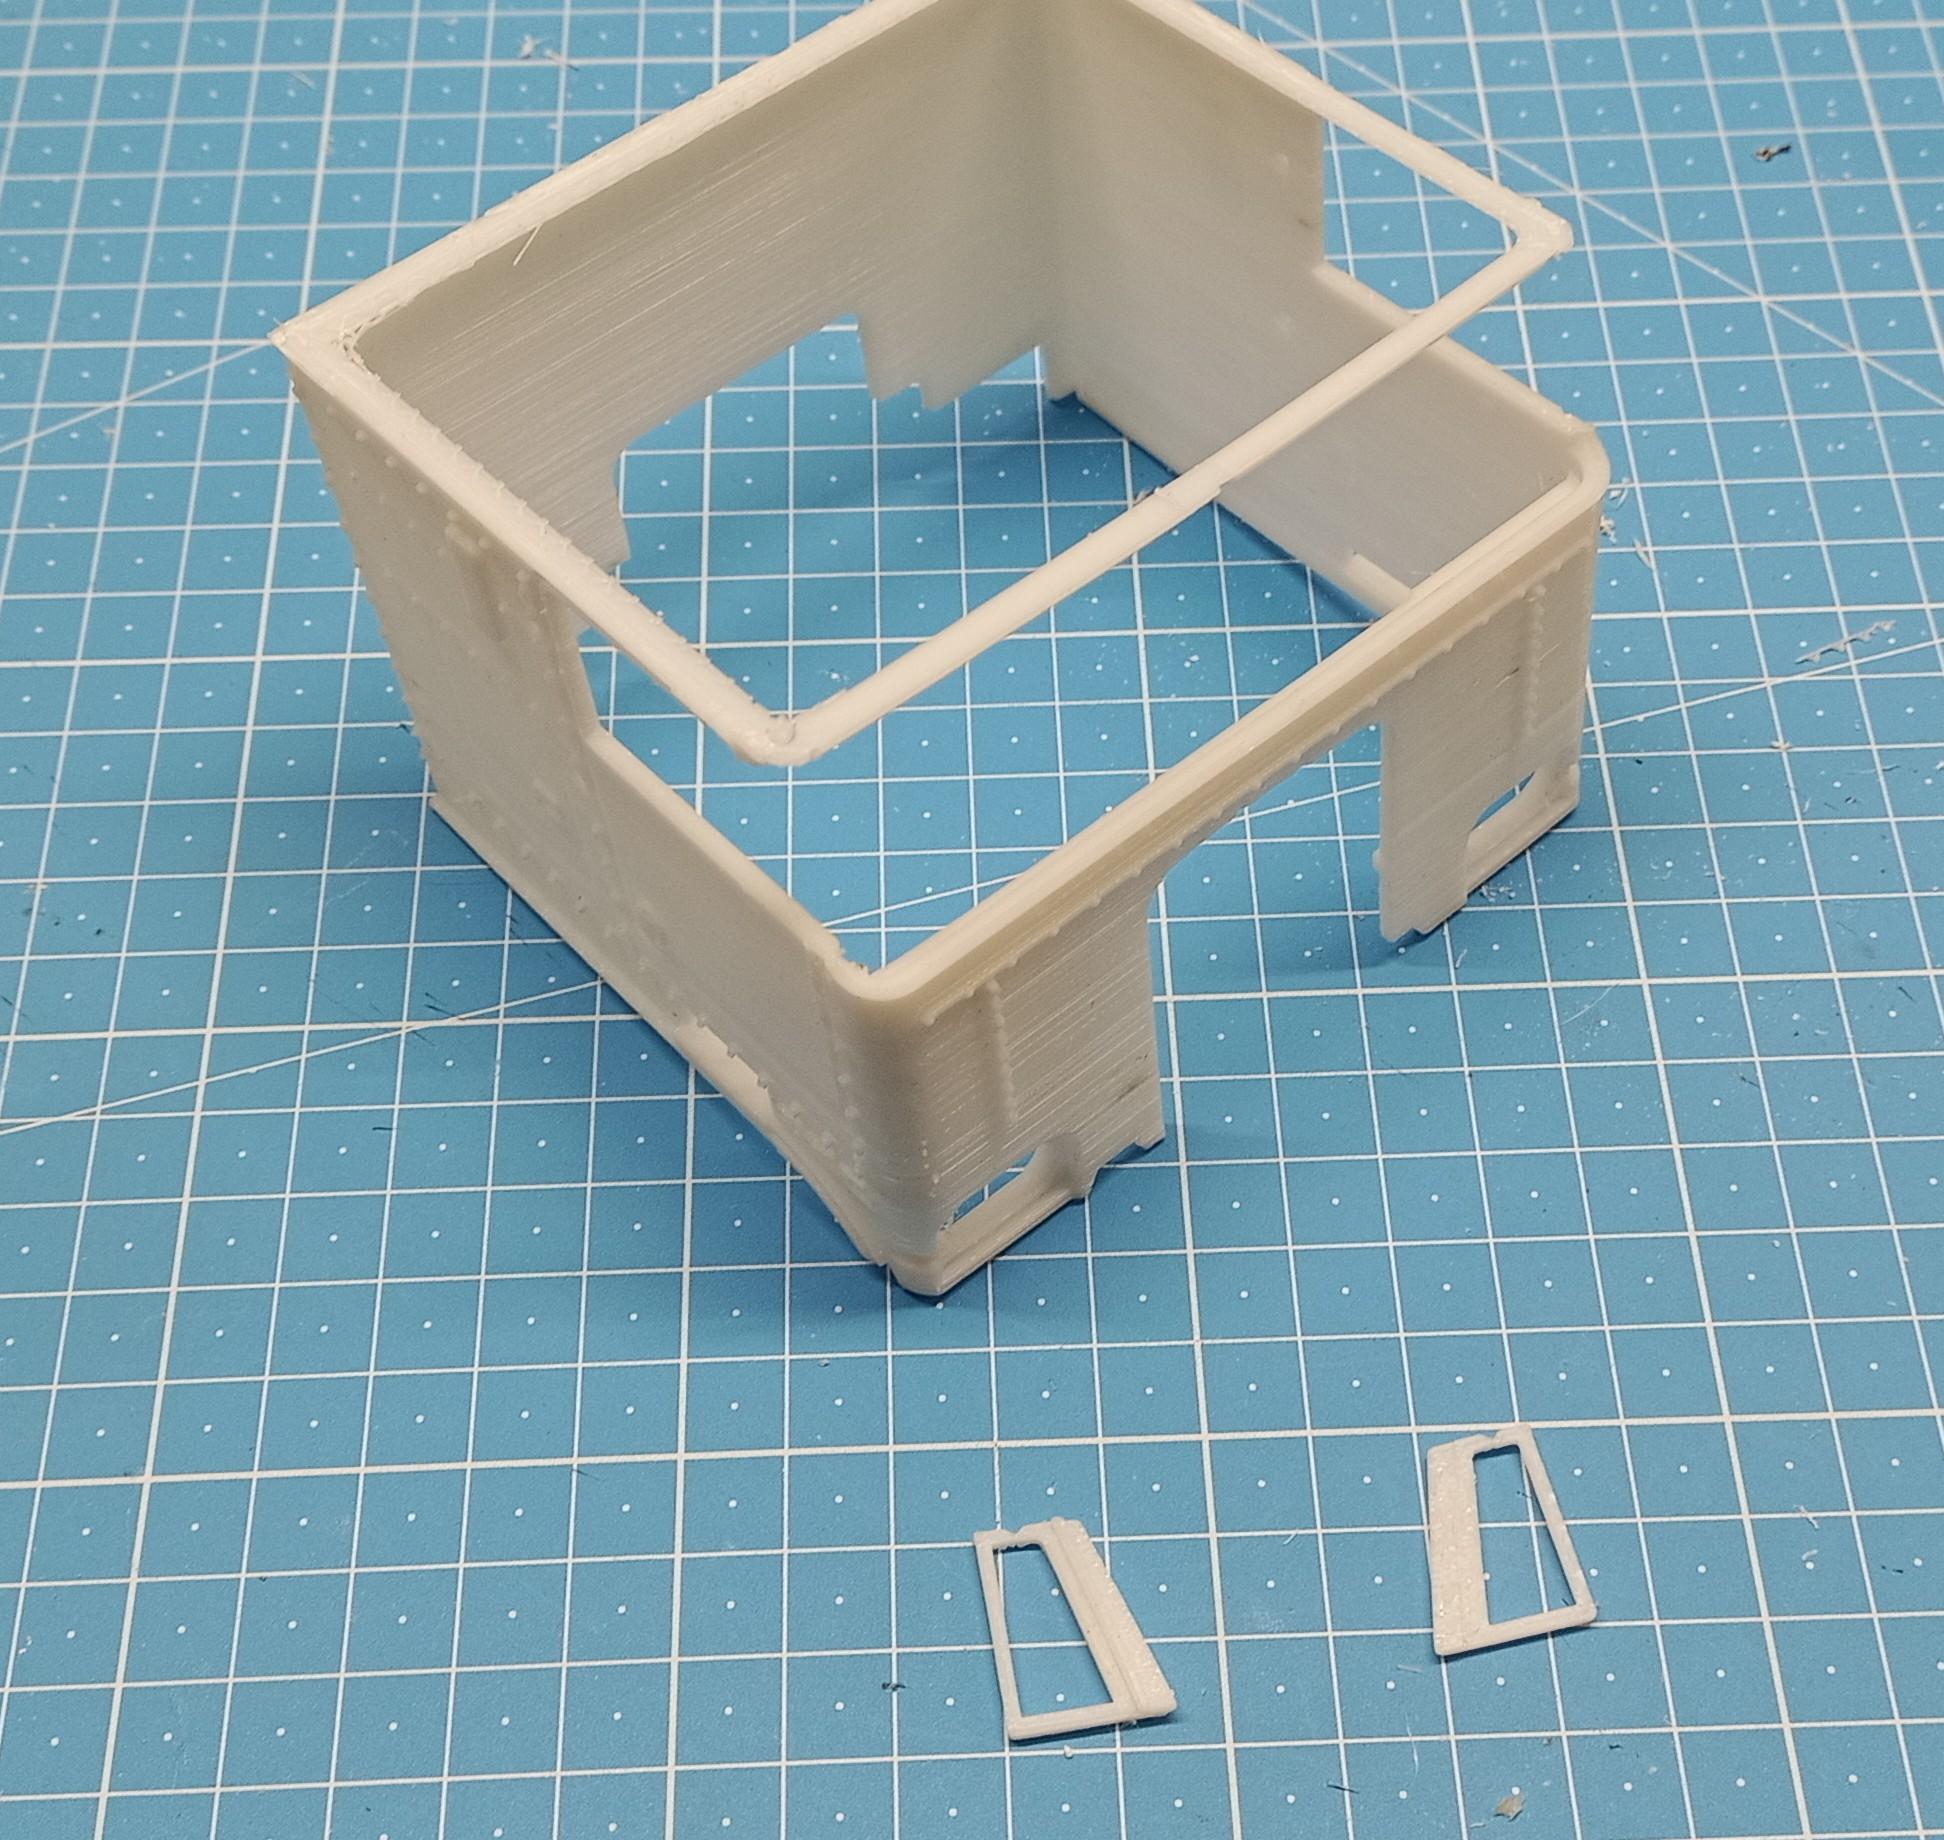
The cab is printed and the side windows and windshield strut assembled.
-
Another "Convoy" Truck!
Jürgen M. replied to Jürgen M.'s topic in WIP: Model Trucks: Big Rigs and Heavy Equipment
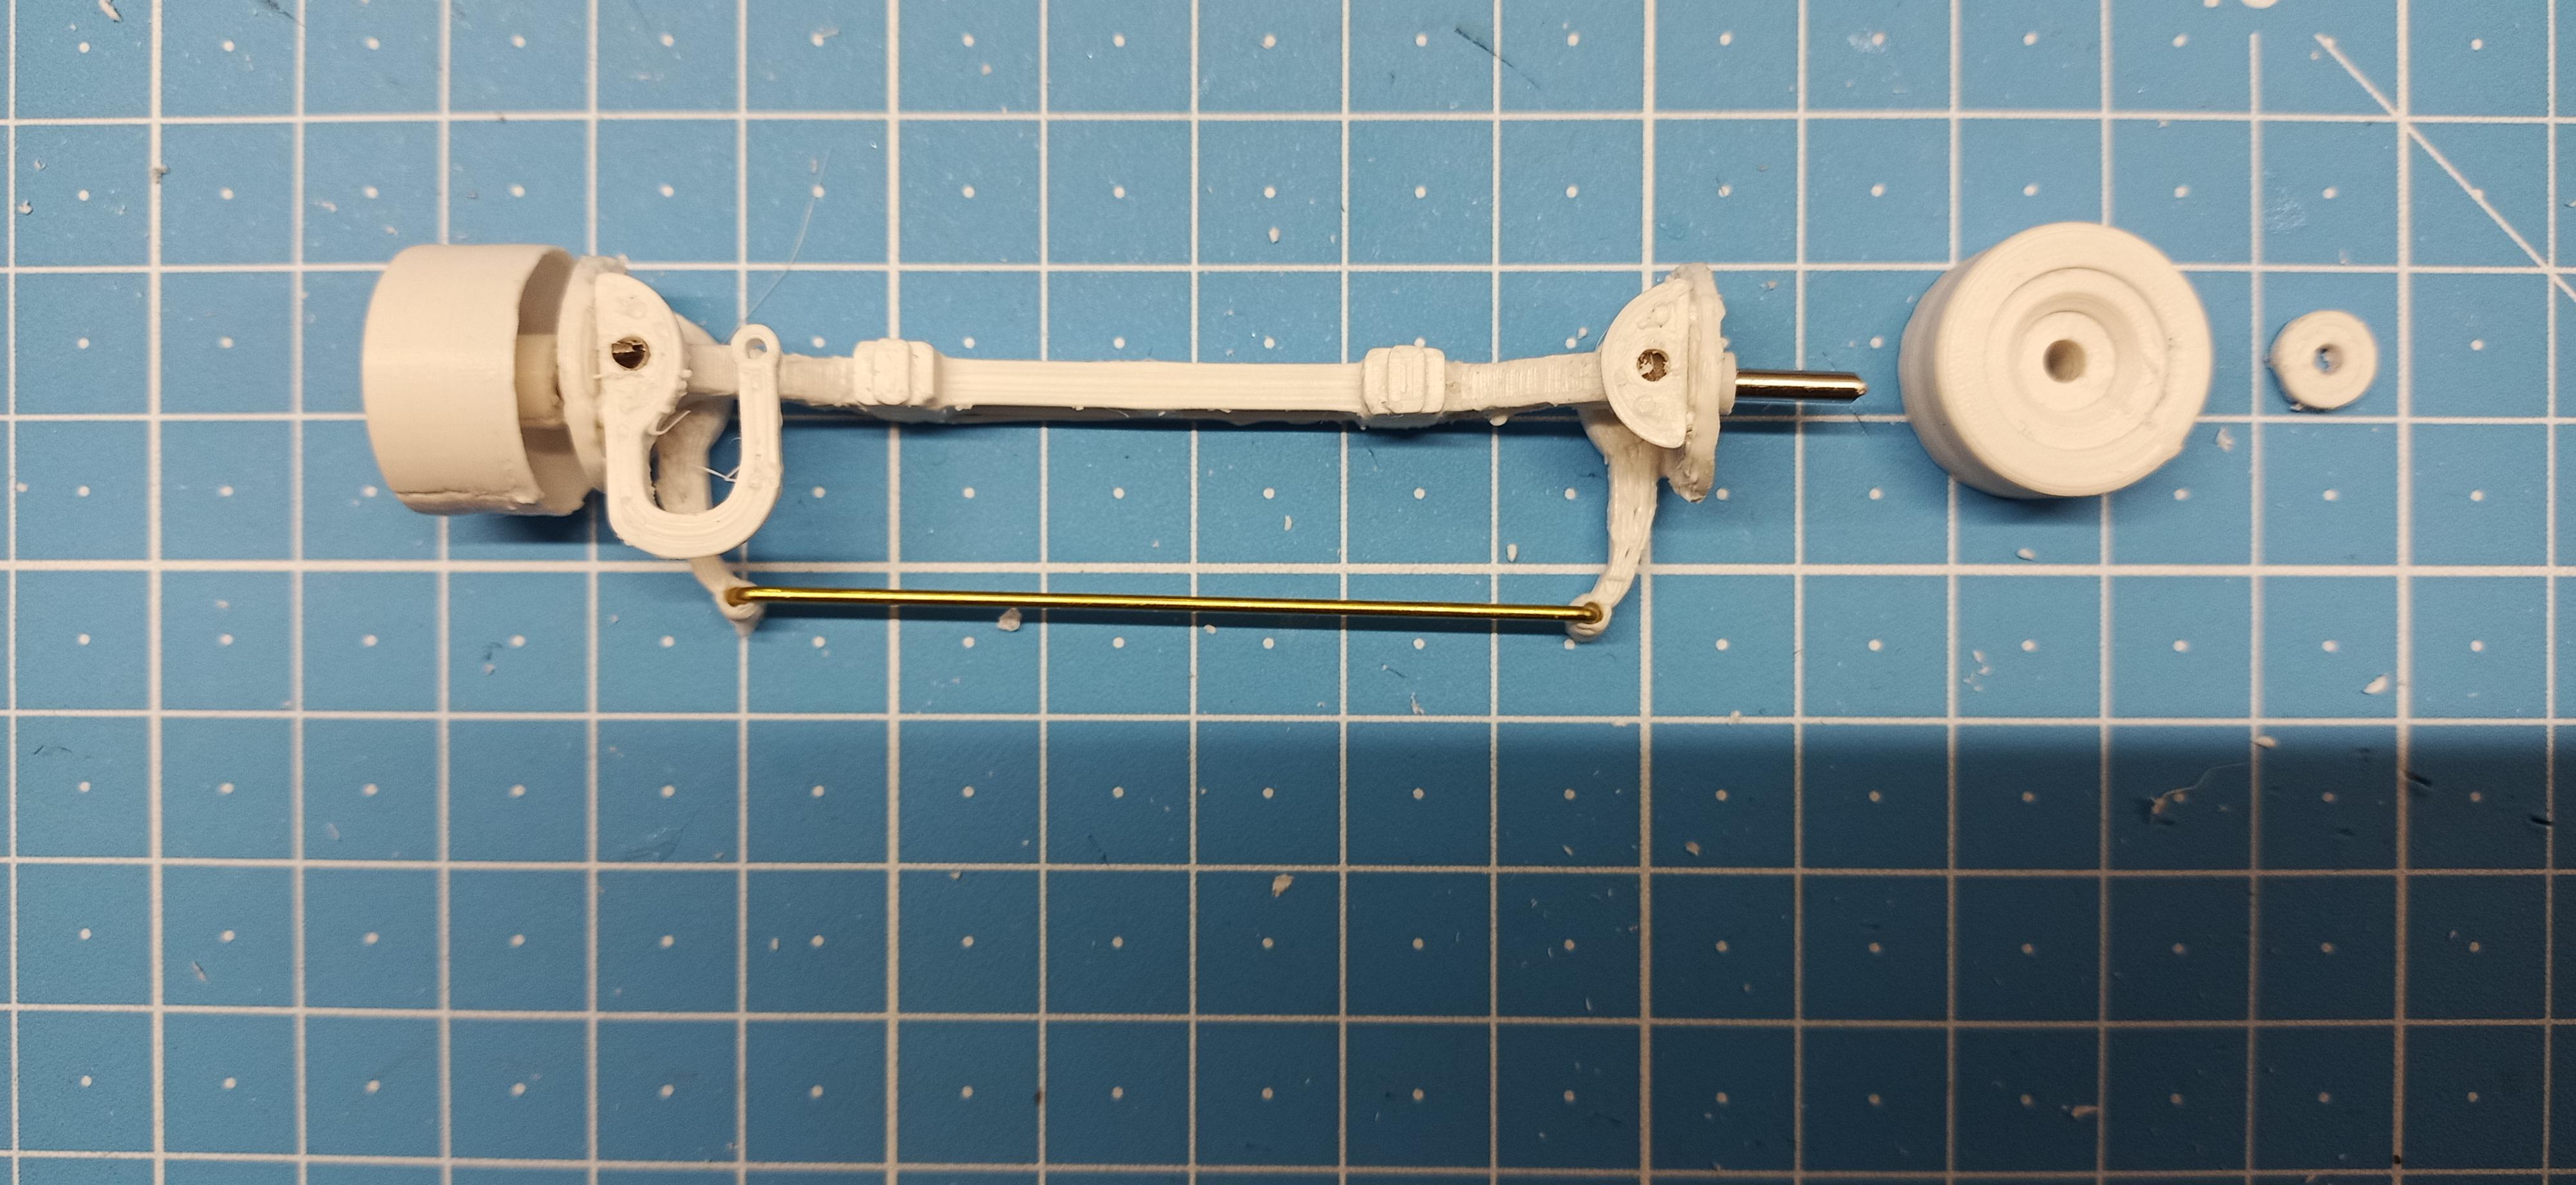
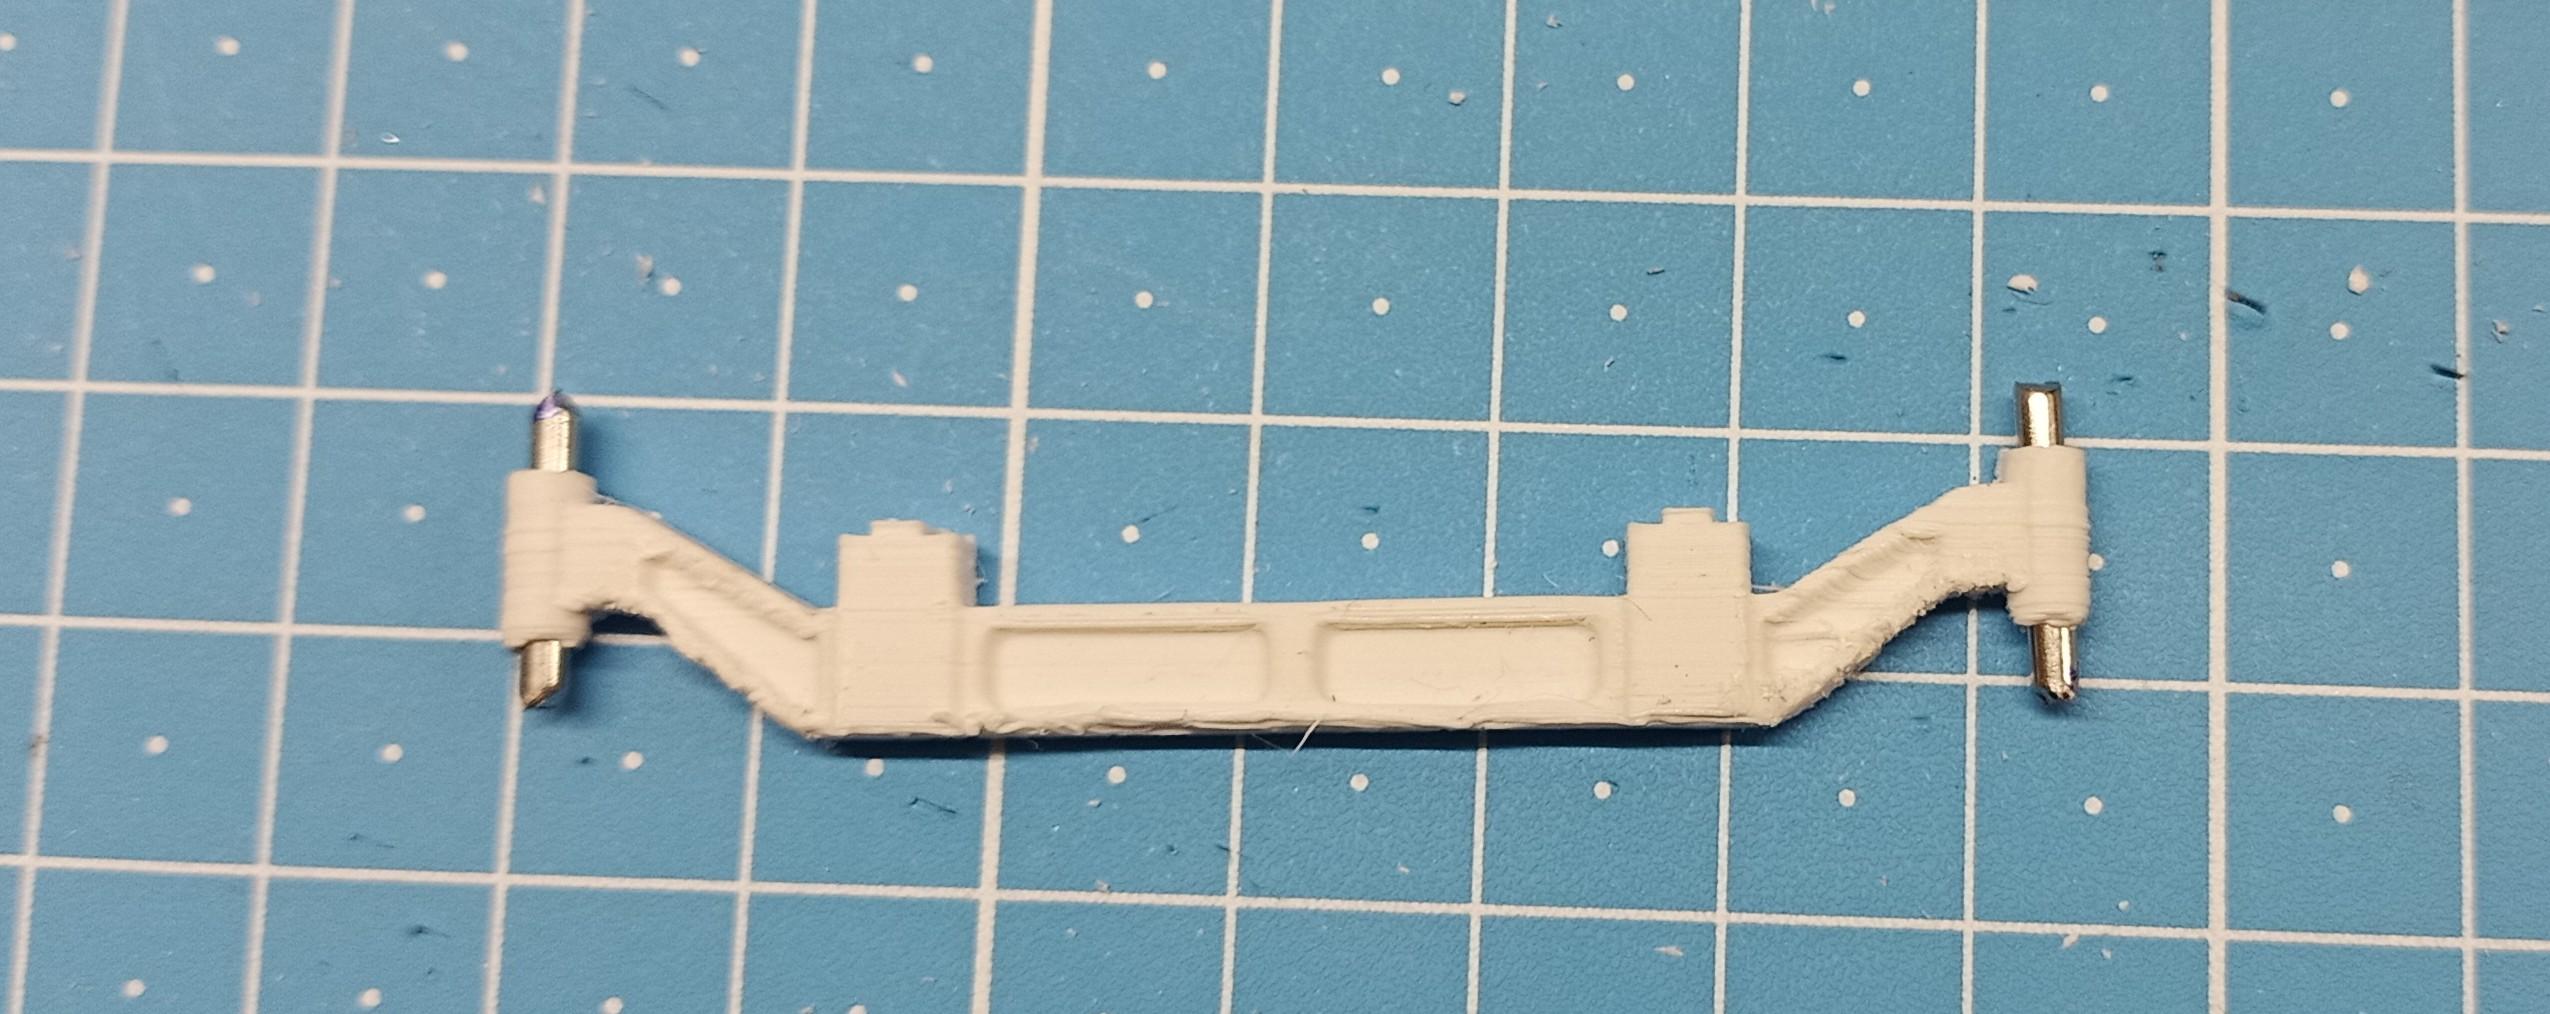
Here's the front axle. Wheels and tie rod are not glued yet. Just wanted to see If everything fits!
-
For fire truck fans
Jürgen M. replied to Jürgen M.'s topic in General Automotive Talk (Trucks and Cars)
Sure, anytime! I saw that there are quite a lot of modellers who enjoy building fire trucks so I thought one or the other might be happy about new ideas or would just enjoy the pics! -
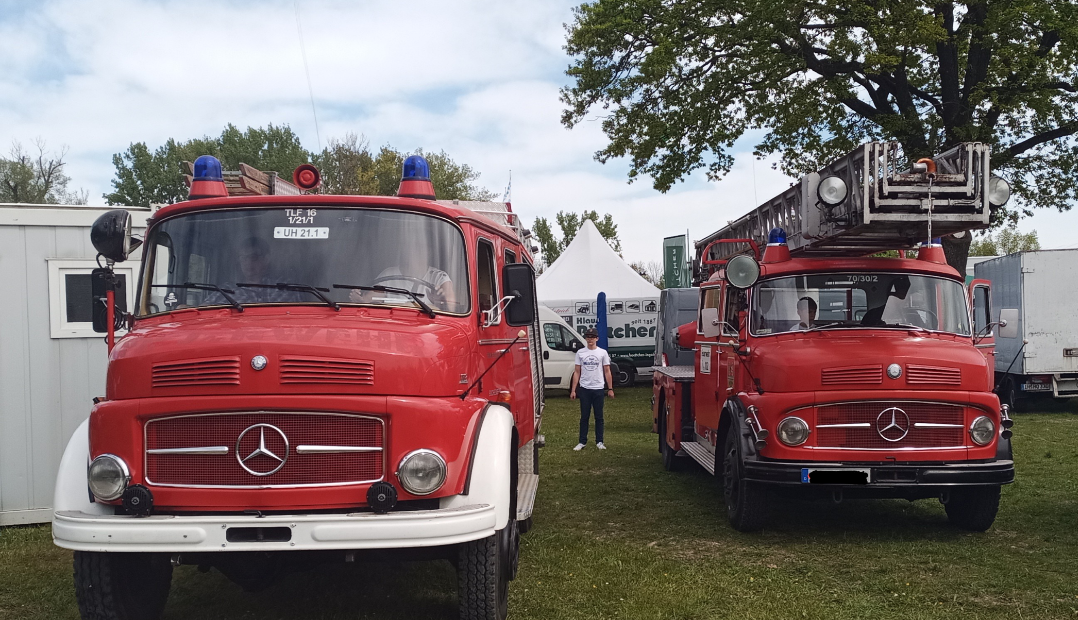
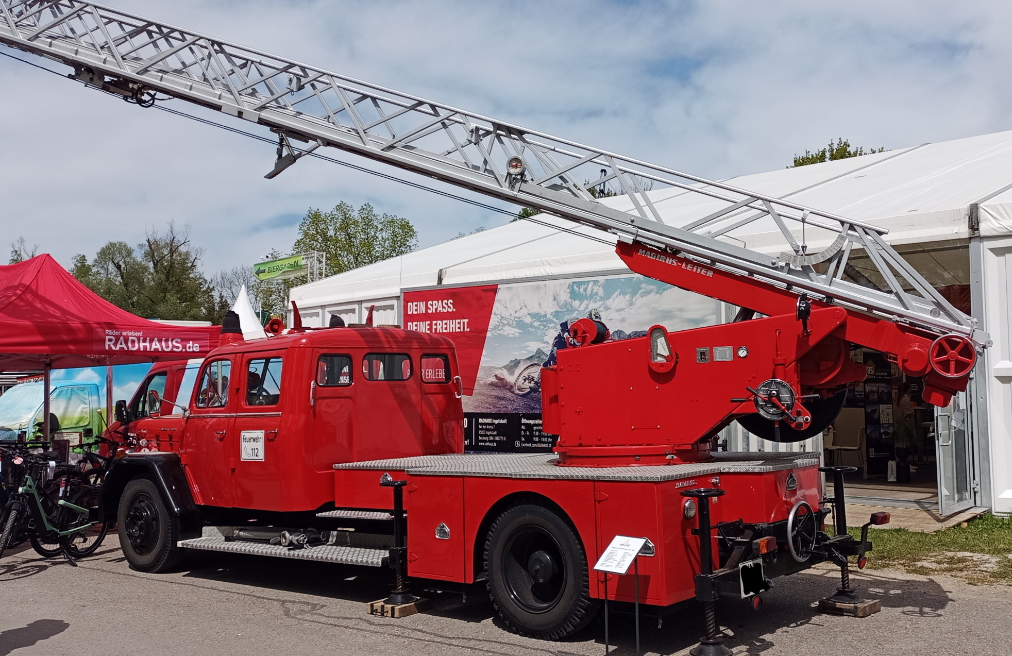
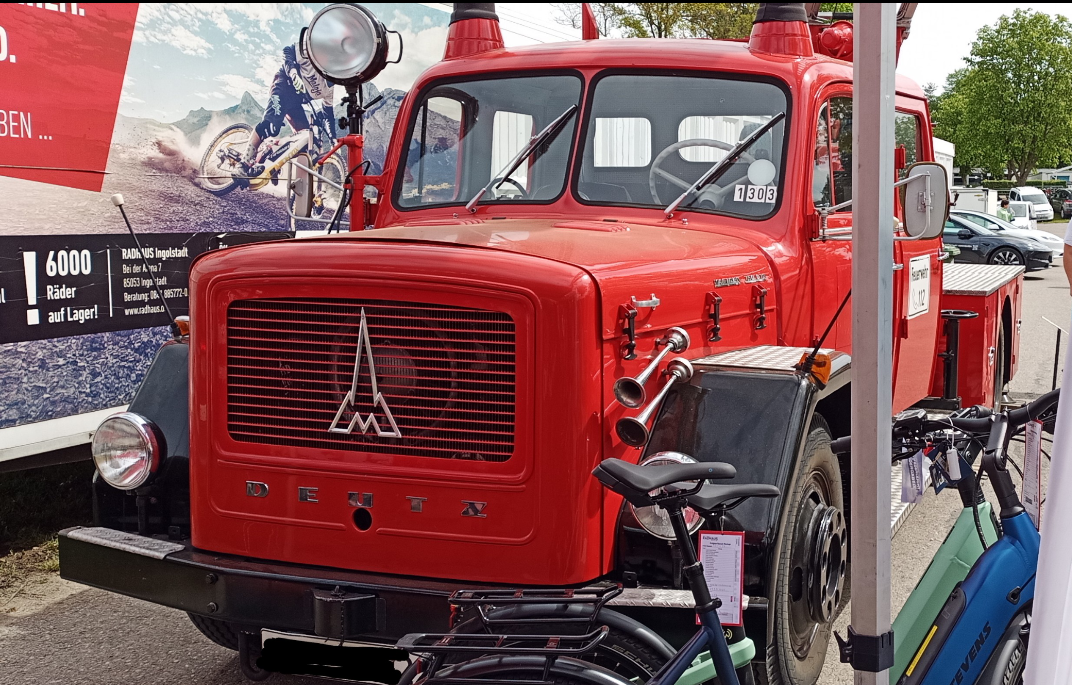
Hi everyone, I didn't know where to put this so I chose this board. Hope it's OK here! I was at an oldtimer show and saw these nice fire trucks. I'm not a specific fan of fire trucks but I like seeing oldtimers in good shape. Hope this is something nice for some of you so I wanted to share them: This is a 1966 Mercedes 1113 (right) It was in service until 2015. The left one is a 1962 Mercedes L322 which was in service until 2014. And this one is a 1959 Magirus Deutz Mercur, still in service!
-
Another "Convoy" Truck!
Jürgen M. replied to Jürgen M.'s topic in WIP: Model Trucks: Big Rigs and Heavy Equipment
Thanks! ? We'll see how they come out when they're painted. ? -
Another "Convoy" Truck!
Jürgen M. replied to Jürgen M.'s topic in WIP: Model Trucks: Big Rigs and Heavy Equipment
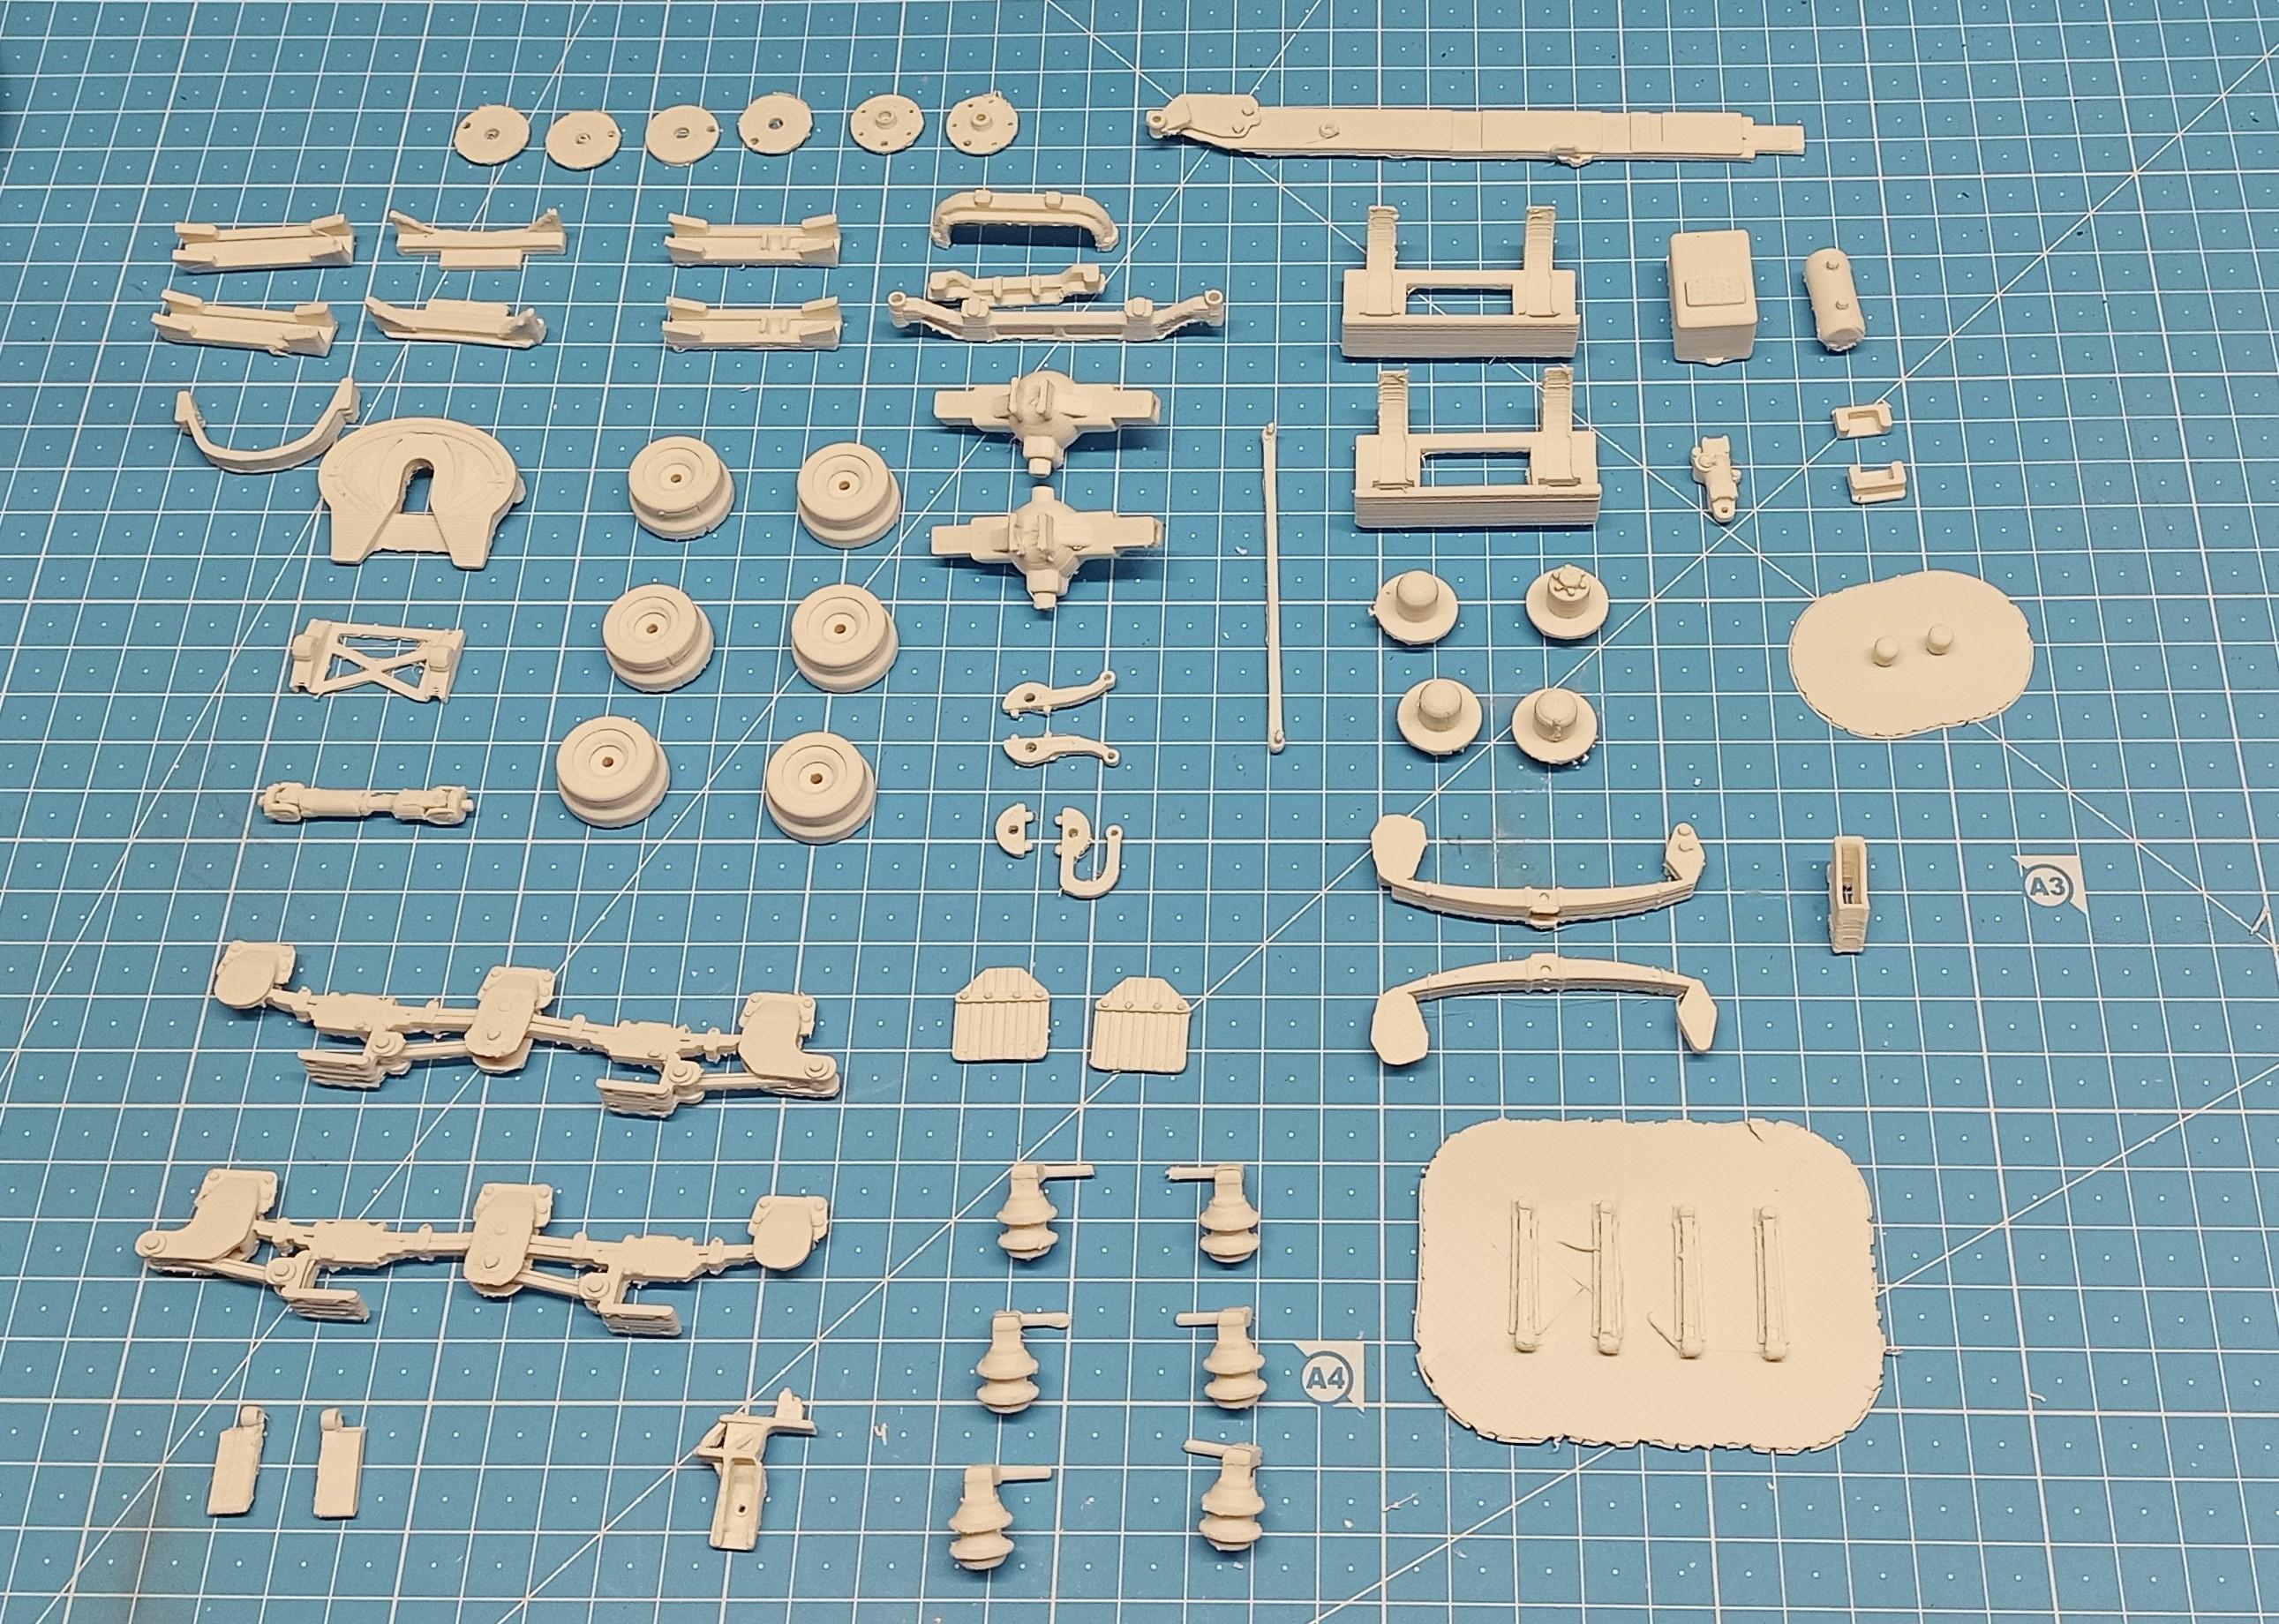
These are the first printed parts. They're unprocessed though, meaning they have to be deburred, grinded and filament threads have to be cut off. Some prints didn't work out OK, some just don't look good so I'll have to redo them.
-
The Titan kit shouldn't be any different from the Astro Kit and that I found wasn't too tricky! Maybe the typical amt bugs like bent chassis rails or so but yours Looks pretty strait. Have fun! ?
-
The aged and dirtied engine looks cool. Can't wait to see how the rest develops! ?
-
1/32 Ford LTL9000
Jürgen M. replied to Rockford's topic in WIP: Model Trucks: Big Rigs and Heavy Equipment
Wow, you're not wasting any time, are you! ? Just finished that great looking KW and already beginning the next project! Looks promising! Can't wait to see the progress! -
My newest project
Jürgen M. replied to JerseeJerry55's topic in WIP: Model Trucks: Big Rigs and Heavy Equipment
Take your time! ? -
My newest project
Jürgen M. replied to JerseeJerry55's topic in WIP: Model Trucks: Big Rigs and Heavy Equipment
I can't answer that but my opinion is, you've been doing such a great job on this truck, why worry about it? In customizing the sky's the limit! Do what ever you like! ? -
My newest project
Jürgen M. replied to JerseeJerry55's topic in WIP: Model Trucks: Big Rigs and Heavy Equipment
Looks really noble! Good Idea! Since Revell and others don't seem to make anymore colored metallics like red or green I tried to mix a metallic green using a uni bright green and aluminium metallic. Didn't work out like I had expected. Looks like I'll have to enter new grounds and try out something new! Thanks for the info and the idea. Keep going, it's a really nice build! -
Smokey and The Bandit, my way!
Jürgen M. replied to TruckerAL's topic in Model Trucks: Big Rigs and Heavy Equipment
Awesome! You should send the Pictures to Hollywood, maybe they'll use it to furnish a new Truck for a sequal! ? -
De-Aerodyned K100
Jürgen M. replied to Rockford's topic in WIP: Model Trucks: Big Rigs and Heavy Equipment
OK, thanks! Just have to get used to all the Insider abbreviations! I can Imagine it being a pain sometimes! That stuff is not easy to handle! But you're right, when it works it looks great! ? -
My newest project
Jürgen M. replied to JerseeJerry55's topic in WIP: Model Trucks: Big Rigs and Heavy Equipment
Nice color! What Kind of paint did you use? Looks like a metallic. -
De-Aerodyned K100
Jürgen M. replied to Rockford's topic in WIP: Model Trucks: Big Rigs and Heavy Equipment
Looking great! ? Just one (maybe stupid) question: What's a BMF? ? -
Thanks! If I had the space I'd do a lot more movie trucks.
-
Another "Convoy" Truck!
Jürgen M. replied to Jürgen M.'s topic in WIP: Model Trucks: Big Rigs and Heavy Equipment
Yes, and I hope it comes out like I expect it to. I'll be starting the print of all parts shortly so I can do the painting during summer. It'll take quite a while till everything is printed. The cab I showed you took 37hours. -
Another "Convoy" Truck!
Jürgen M. replied to Jürgen M.'s topic in WIP: Model Trucks: Big Rigs and Heavy Equipment
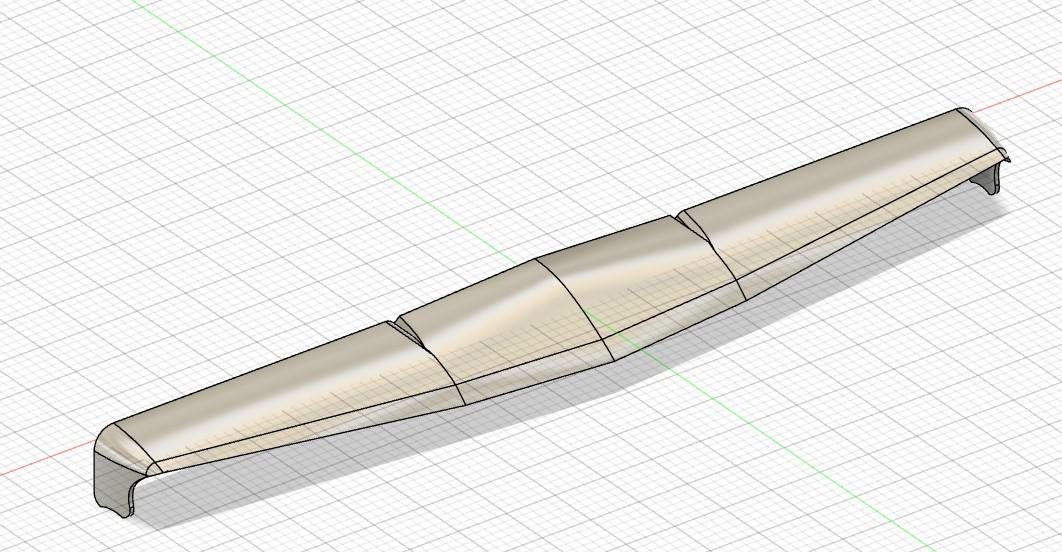
Thanks Rockford! What I forgot to say, I also lowered the cab a bit because compared to the K100 VIT kit the windshield and the side windows were way too high. So I took out a few millimeters and adjusted the bolts and everything else. It would have looked strange having two KW K100s with different windshield hights. Except for the engine tubing and a few smaller parts the designing of truck and trailer are almost finished. Didn´t think I´d get through that fast. Maybe it´s because I learned a lot in designing the last couple of weeks. I´ve been watching tutorials on different skills like freestyle shaping parts and using "short cuts" for things I had done much too complicated before. I also learned how to easily design gears and so I´ll be synchronizing the doors underneath the trailer when they open. Hope that works out. Here´s the first shot at the sun visor!
-
Another "Convoy" Truck!
Jürgen M. replied to Jürgen M.'s topic in WIP: Model Trucks: Big Rigs and Heavy Equipment
Thanks Rockford! What I forgot to say, I also lowered the cab a bit because compared to the K100 VIT kit the windshield and the side windows were way too high. So I took out a few millimeters and adjusted the bolts and everything else. It would have looked strange having two KW K100s with different windshield hights. Except for the engine tubing and a few smaller parts the designing of truck and trailer are almost finished. Didn´t think I´d get through that fast. Maybe it´s because I learned a lot in designing the last couple of weeks. I´ve been watching tutorials on different skills like freestyle shaping parts and using "short cuts" for things I had done much too complicated before. I also learned how to easily design gears and so I´ll be synchronizing the doors underneath the trailer when they open. Hope that works out. -
Peterbilt 379 RV
Jürgen M. replied to vincen47's topic in WIP: Model Trucks: Big Rigs and Heavy Equipment
Absolutely amazing! The details are stunning and so realistic! ?