Jürgen M.
-
Posts
1,675 -
Joined
-
Last visited
Content Type
Profiles
Forums
Events
Gallery
Everything posted by Jürgen M.
-

Kenworth K100 VIT Australia
Jürgen M. replied to Jürgen M.'s topic in Model Trucks: Big Rigs and Heavy Equipment
I'm glad you like the truck eventhough it's not that perfect but I think it's OK for a 15 year old! Yes, it is a bit disapointing when you buy a kit saying Australia and then you discover that it's just a left hand drive with a bull bar and a windshield guard. The only kit I know that's really a road train is the White Western Star from Italeri! A nice kit and pretty huge since it's 1:24. I'll share it too if you like! The whole rig is 1.73m long! -
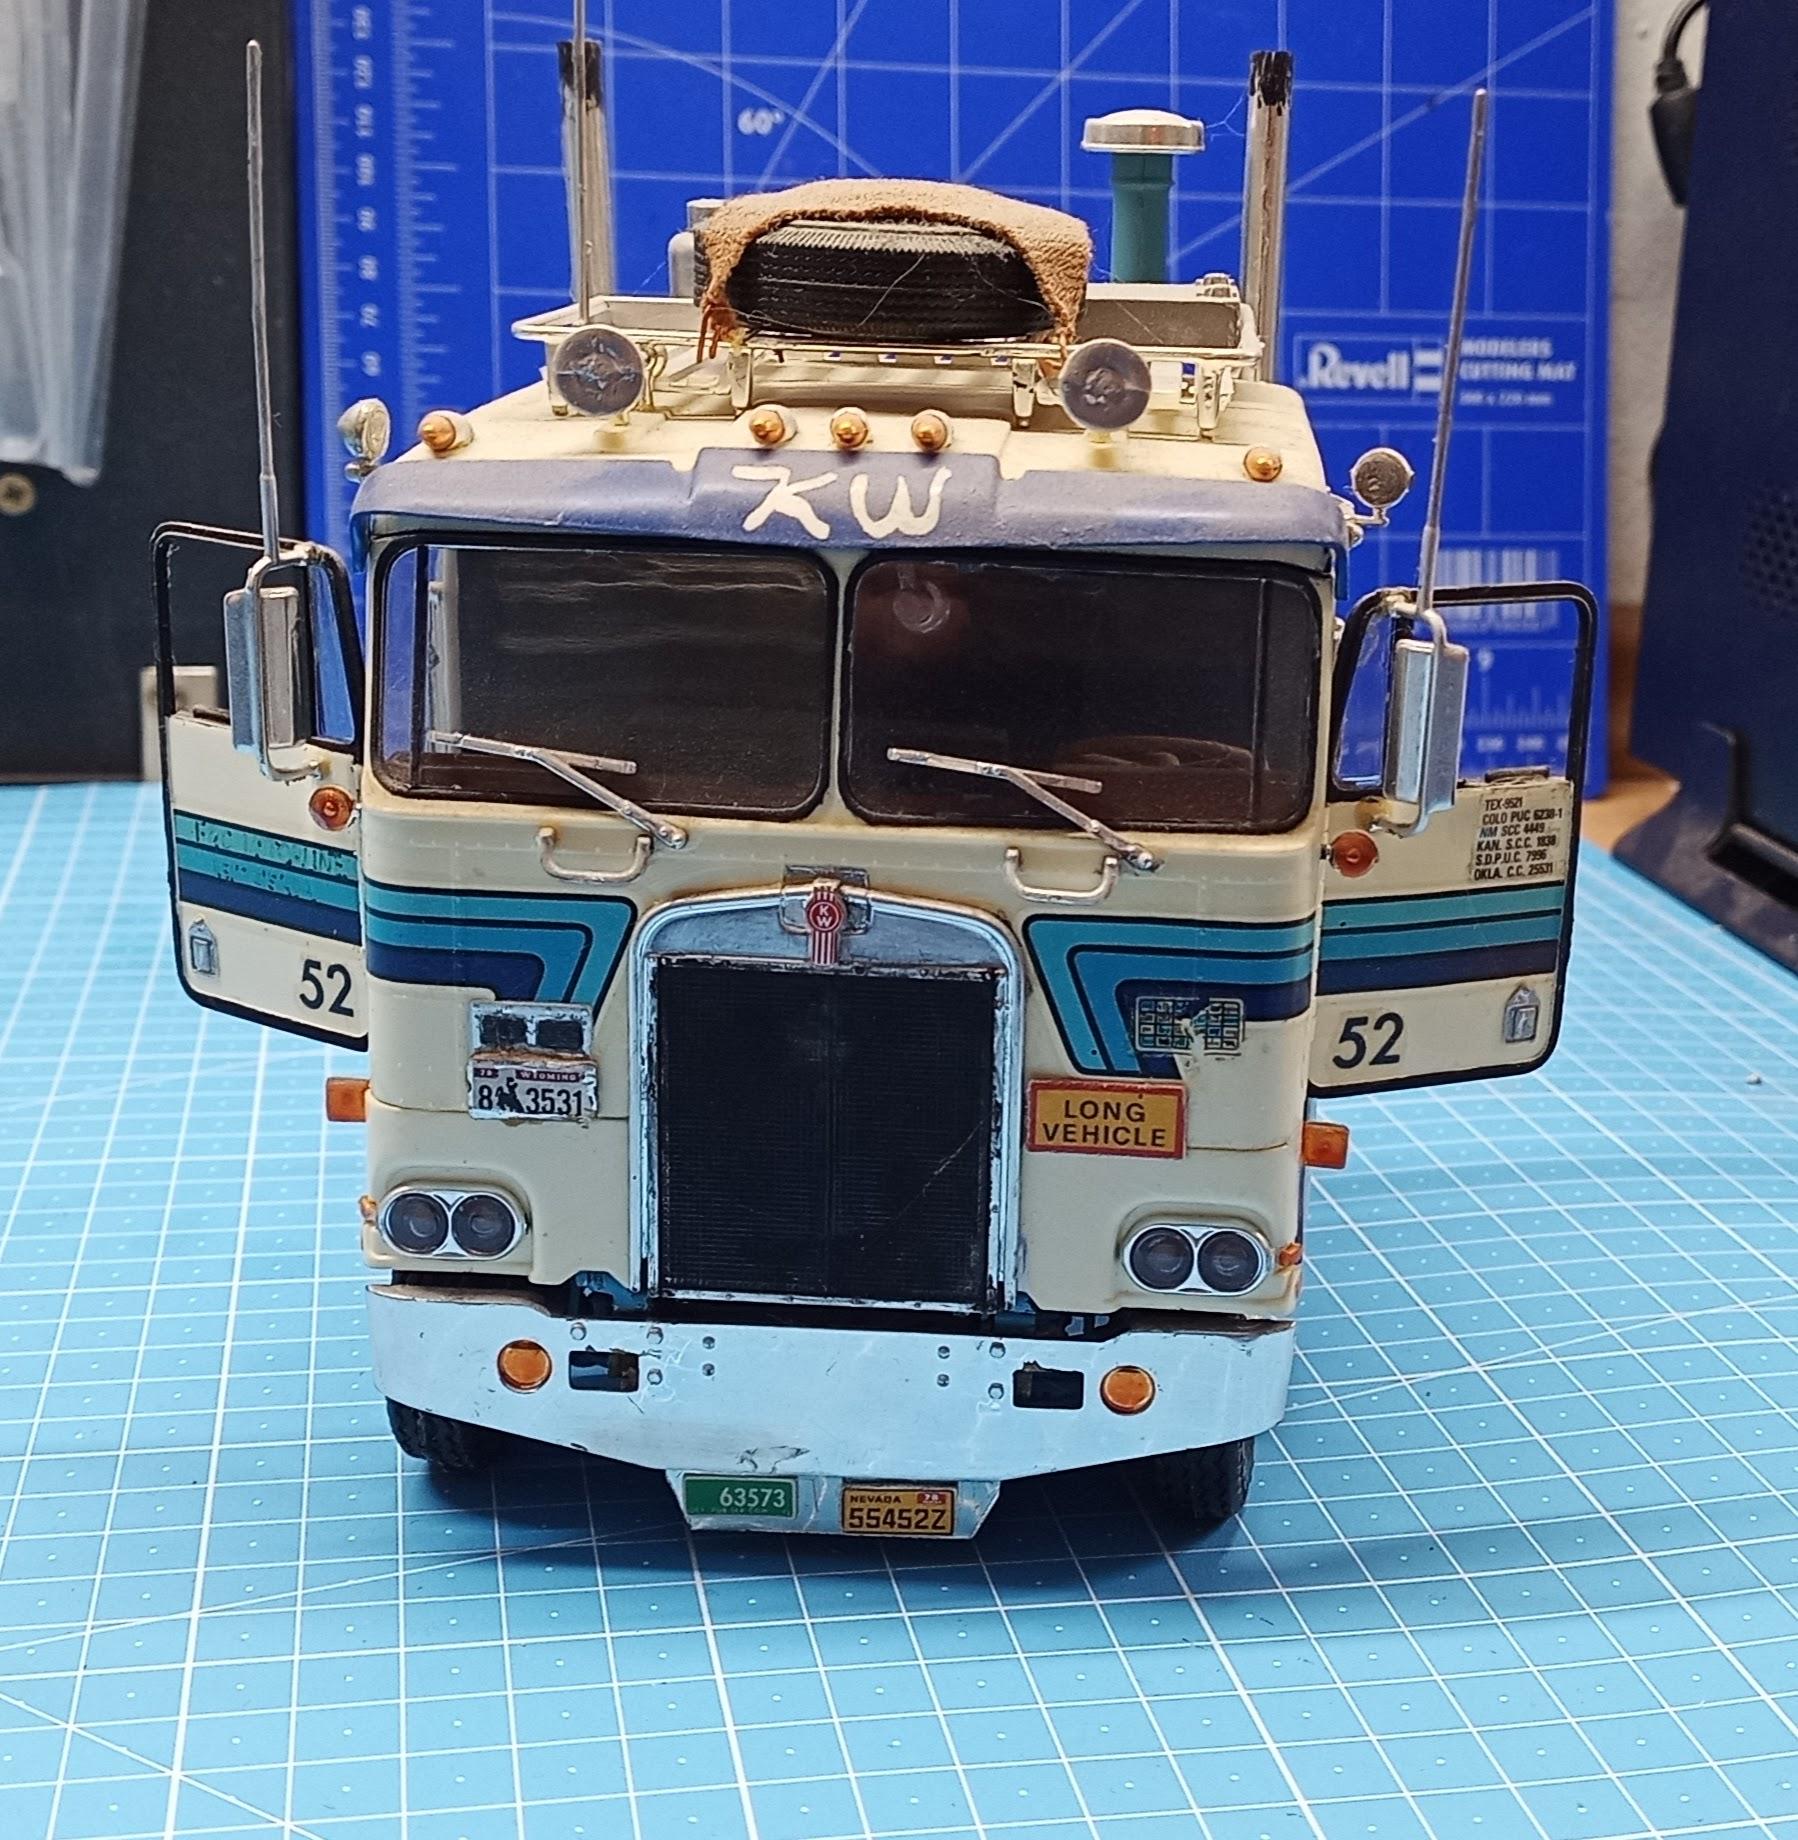
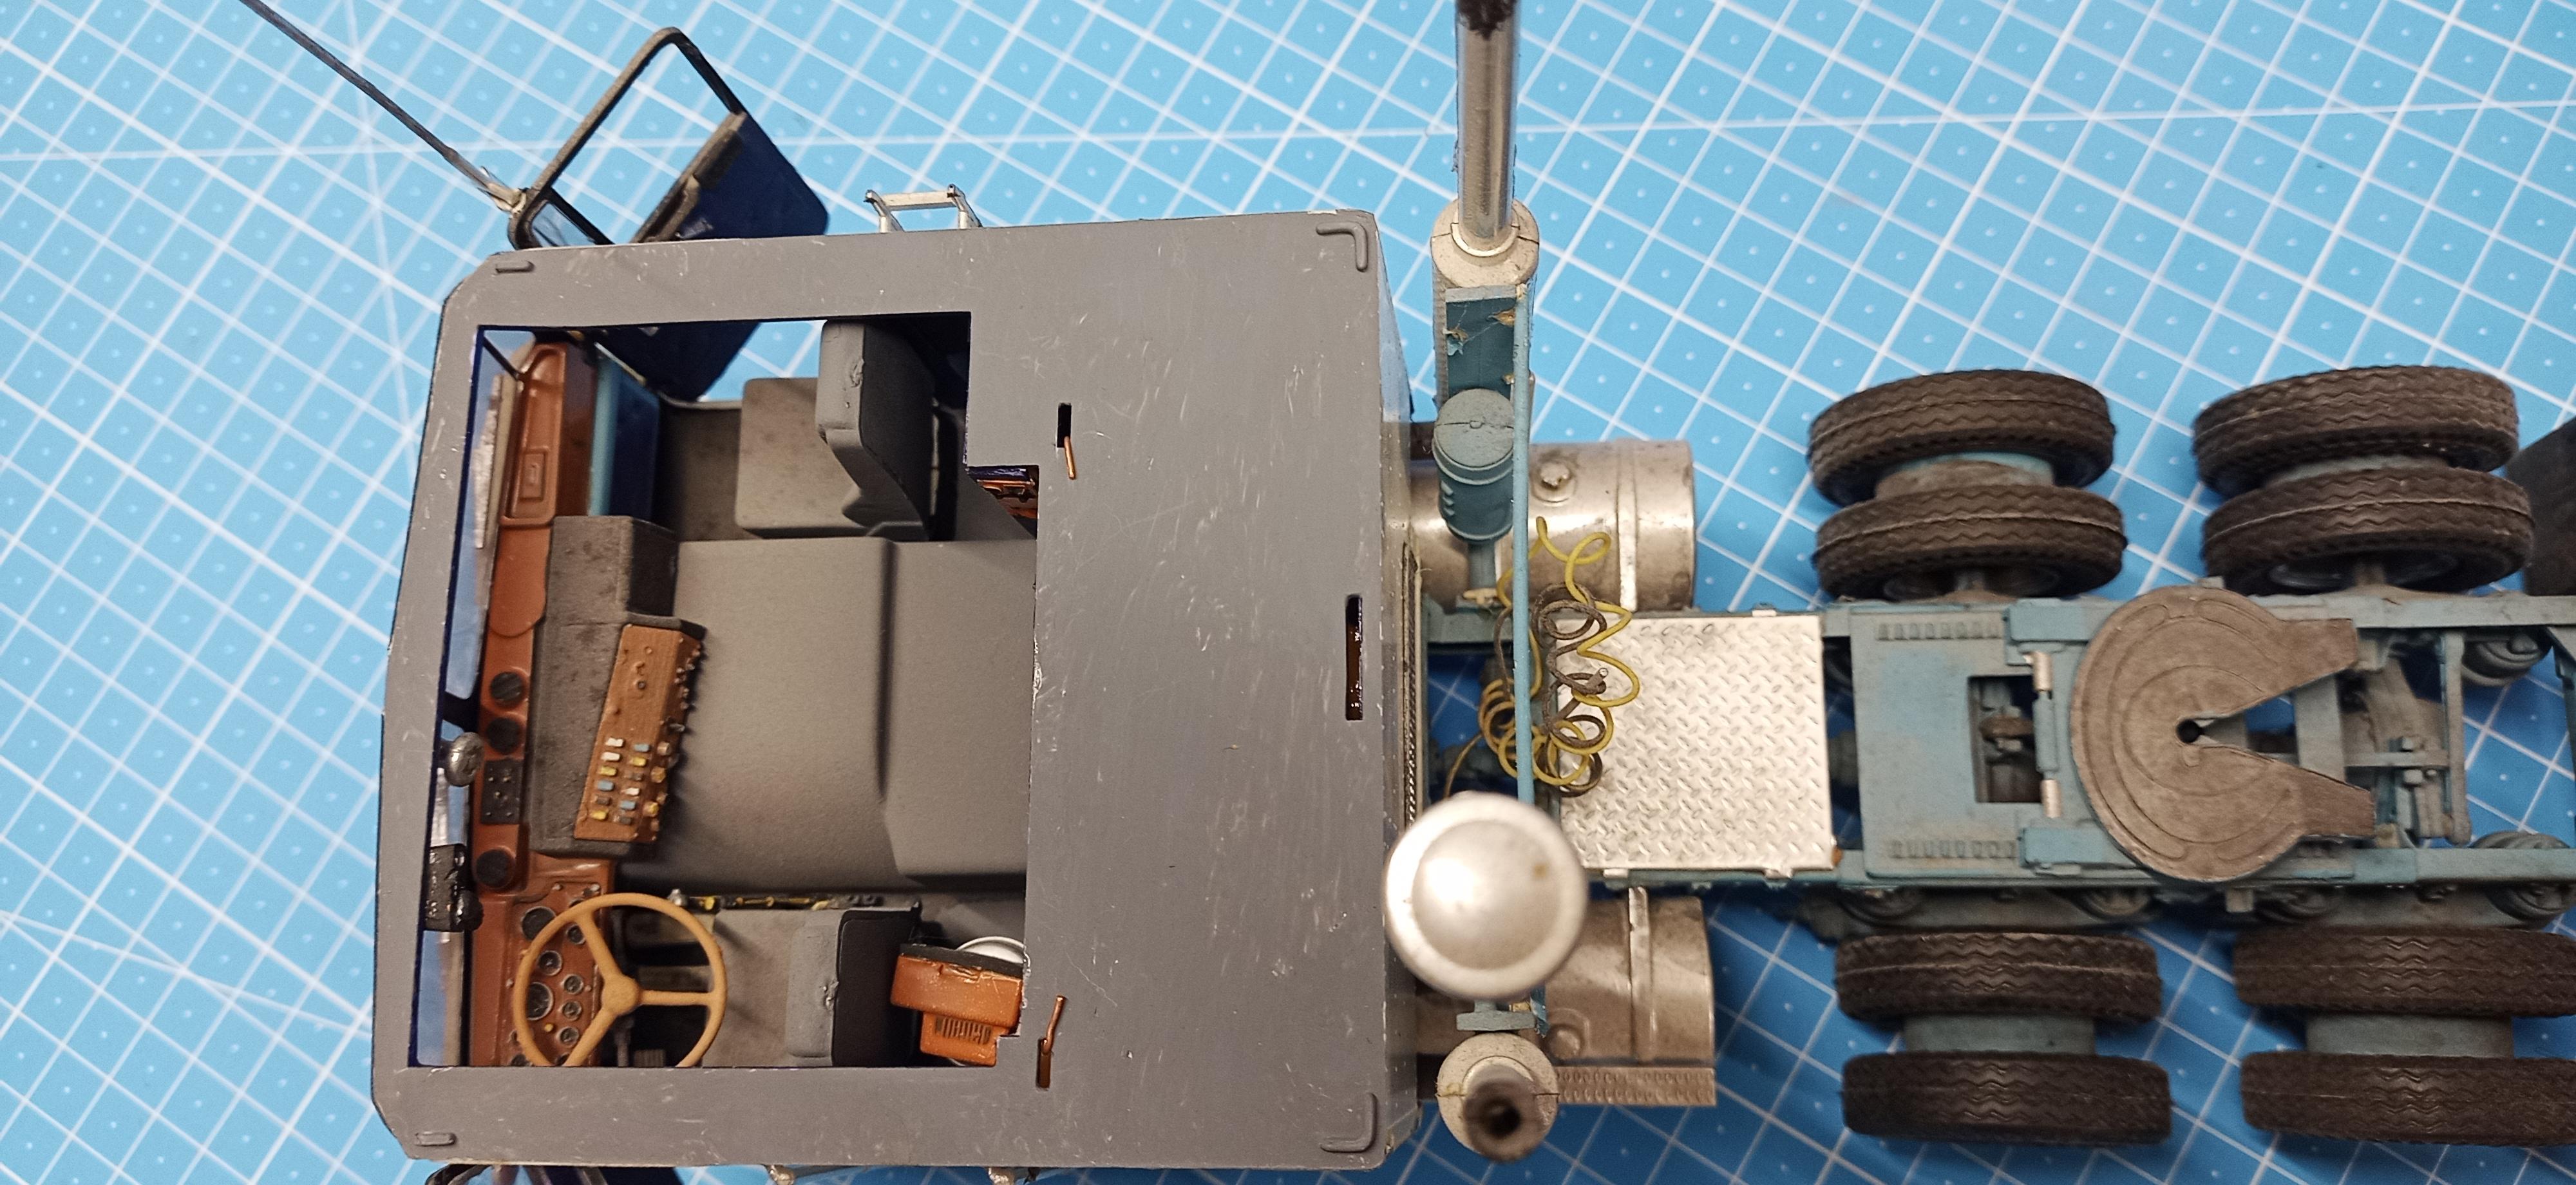
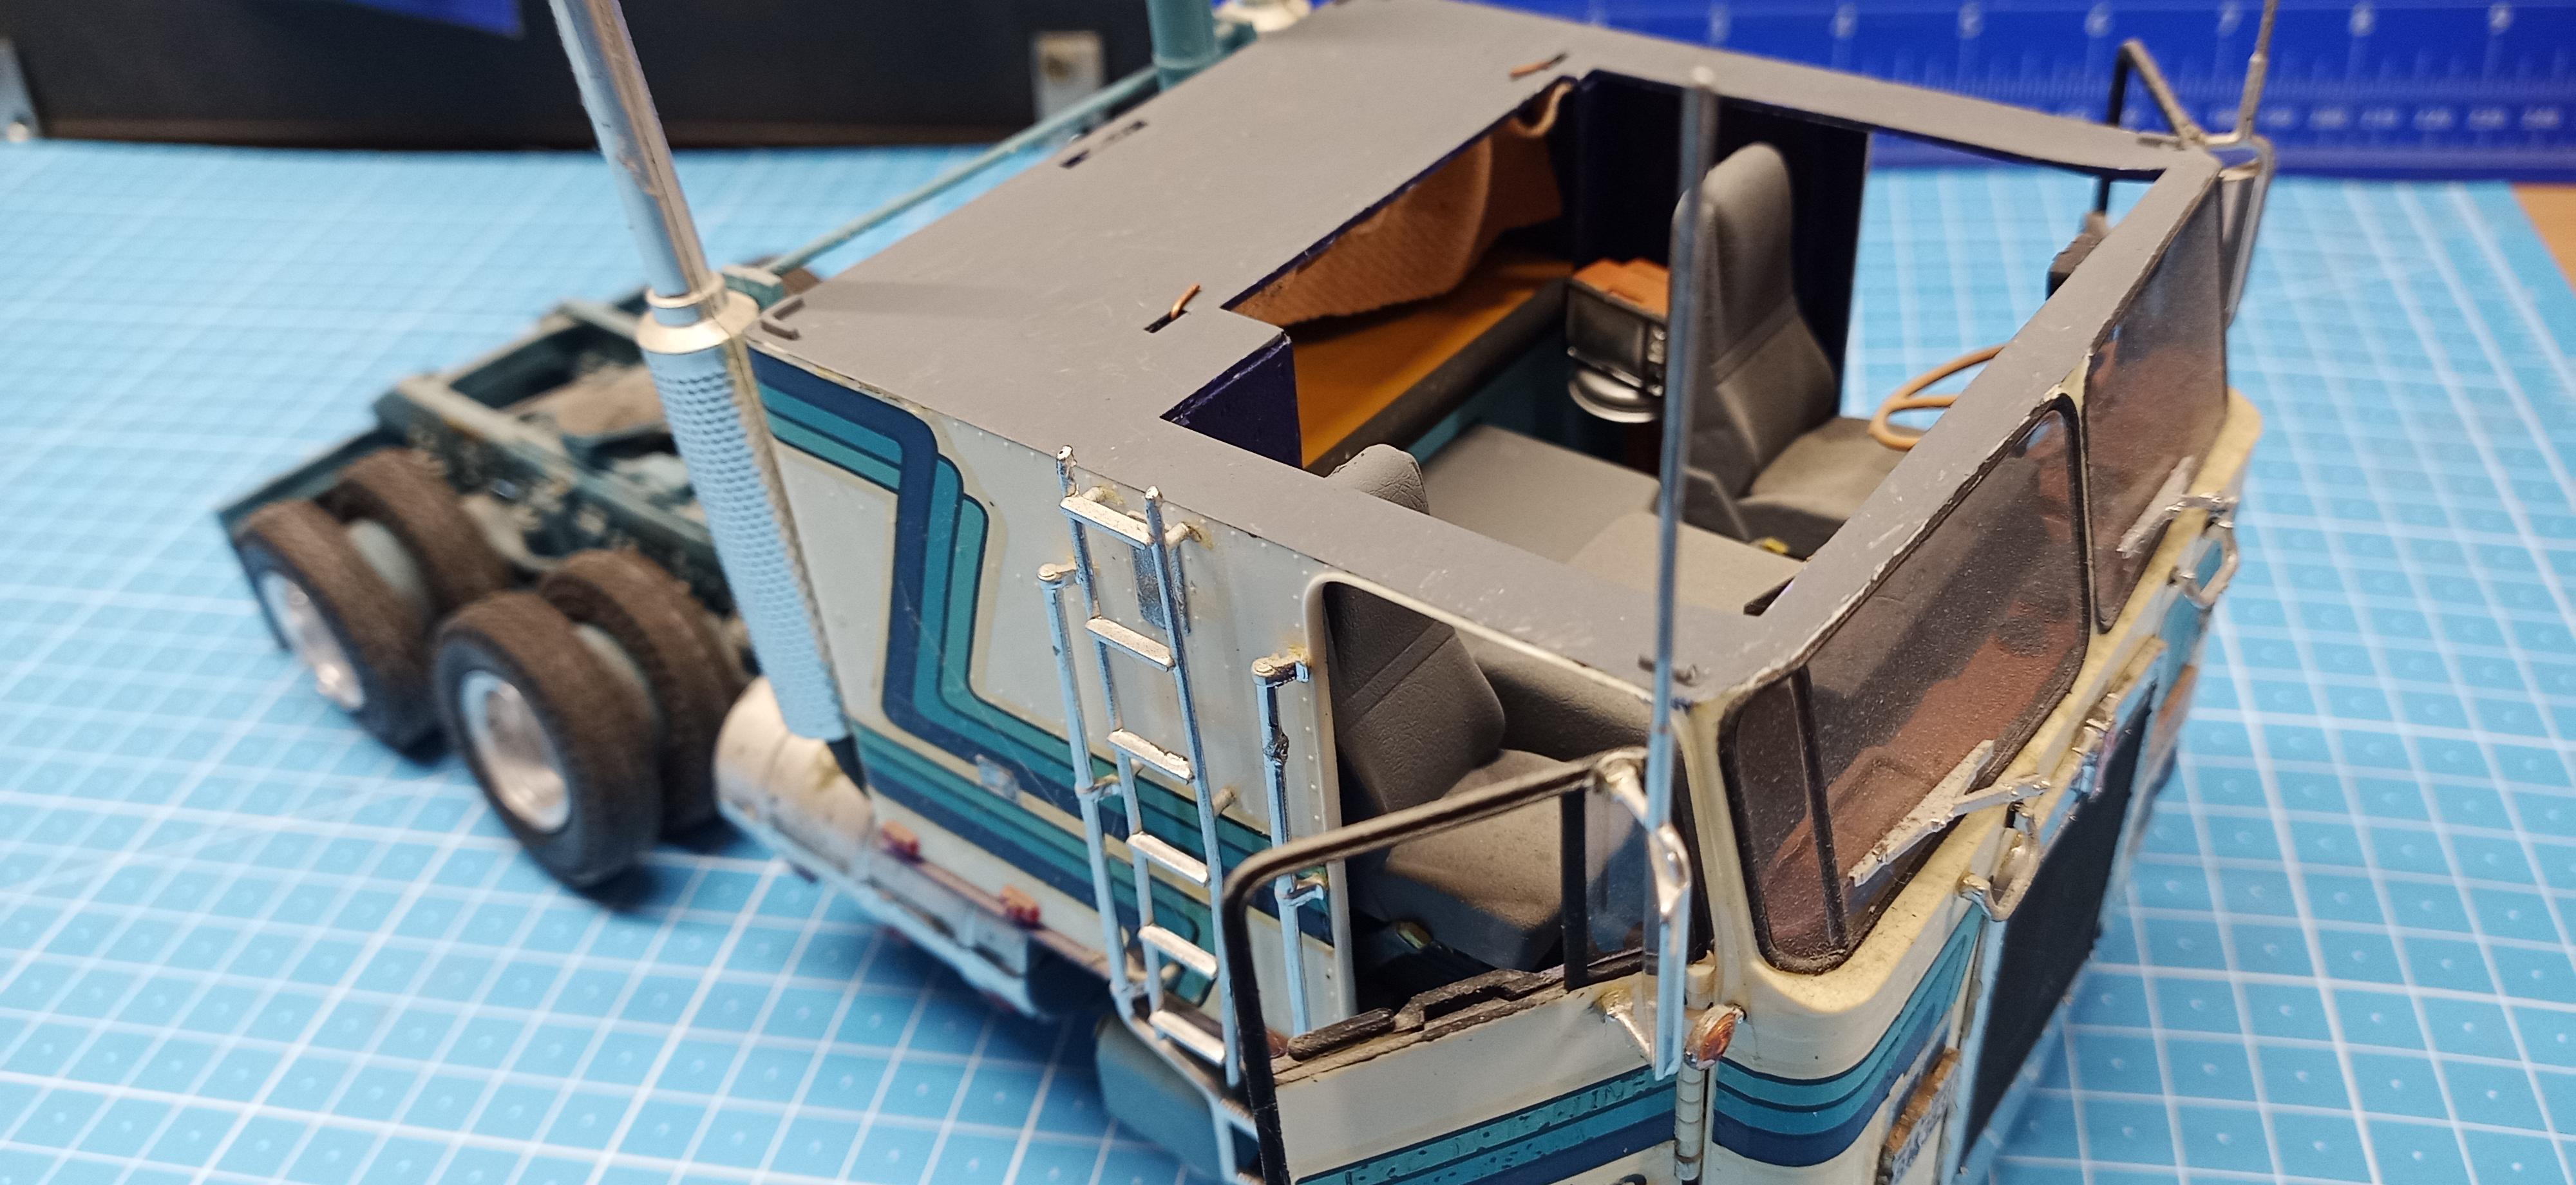
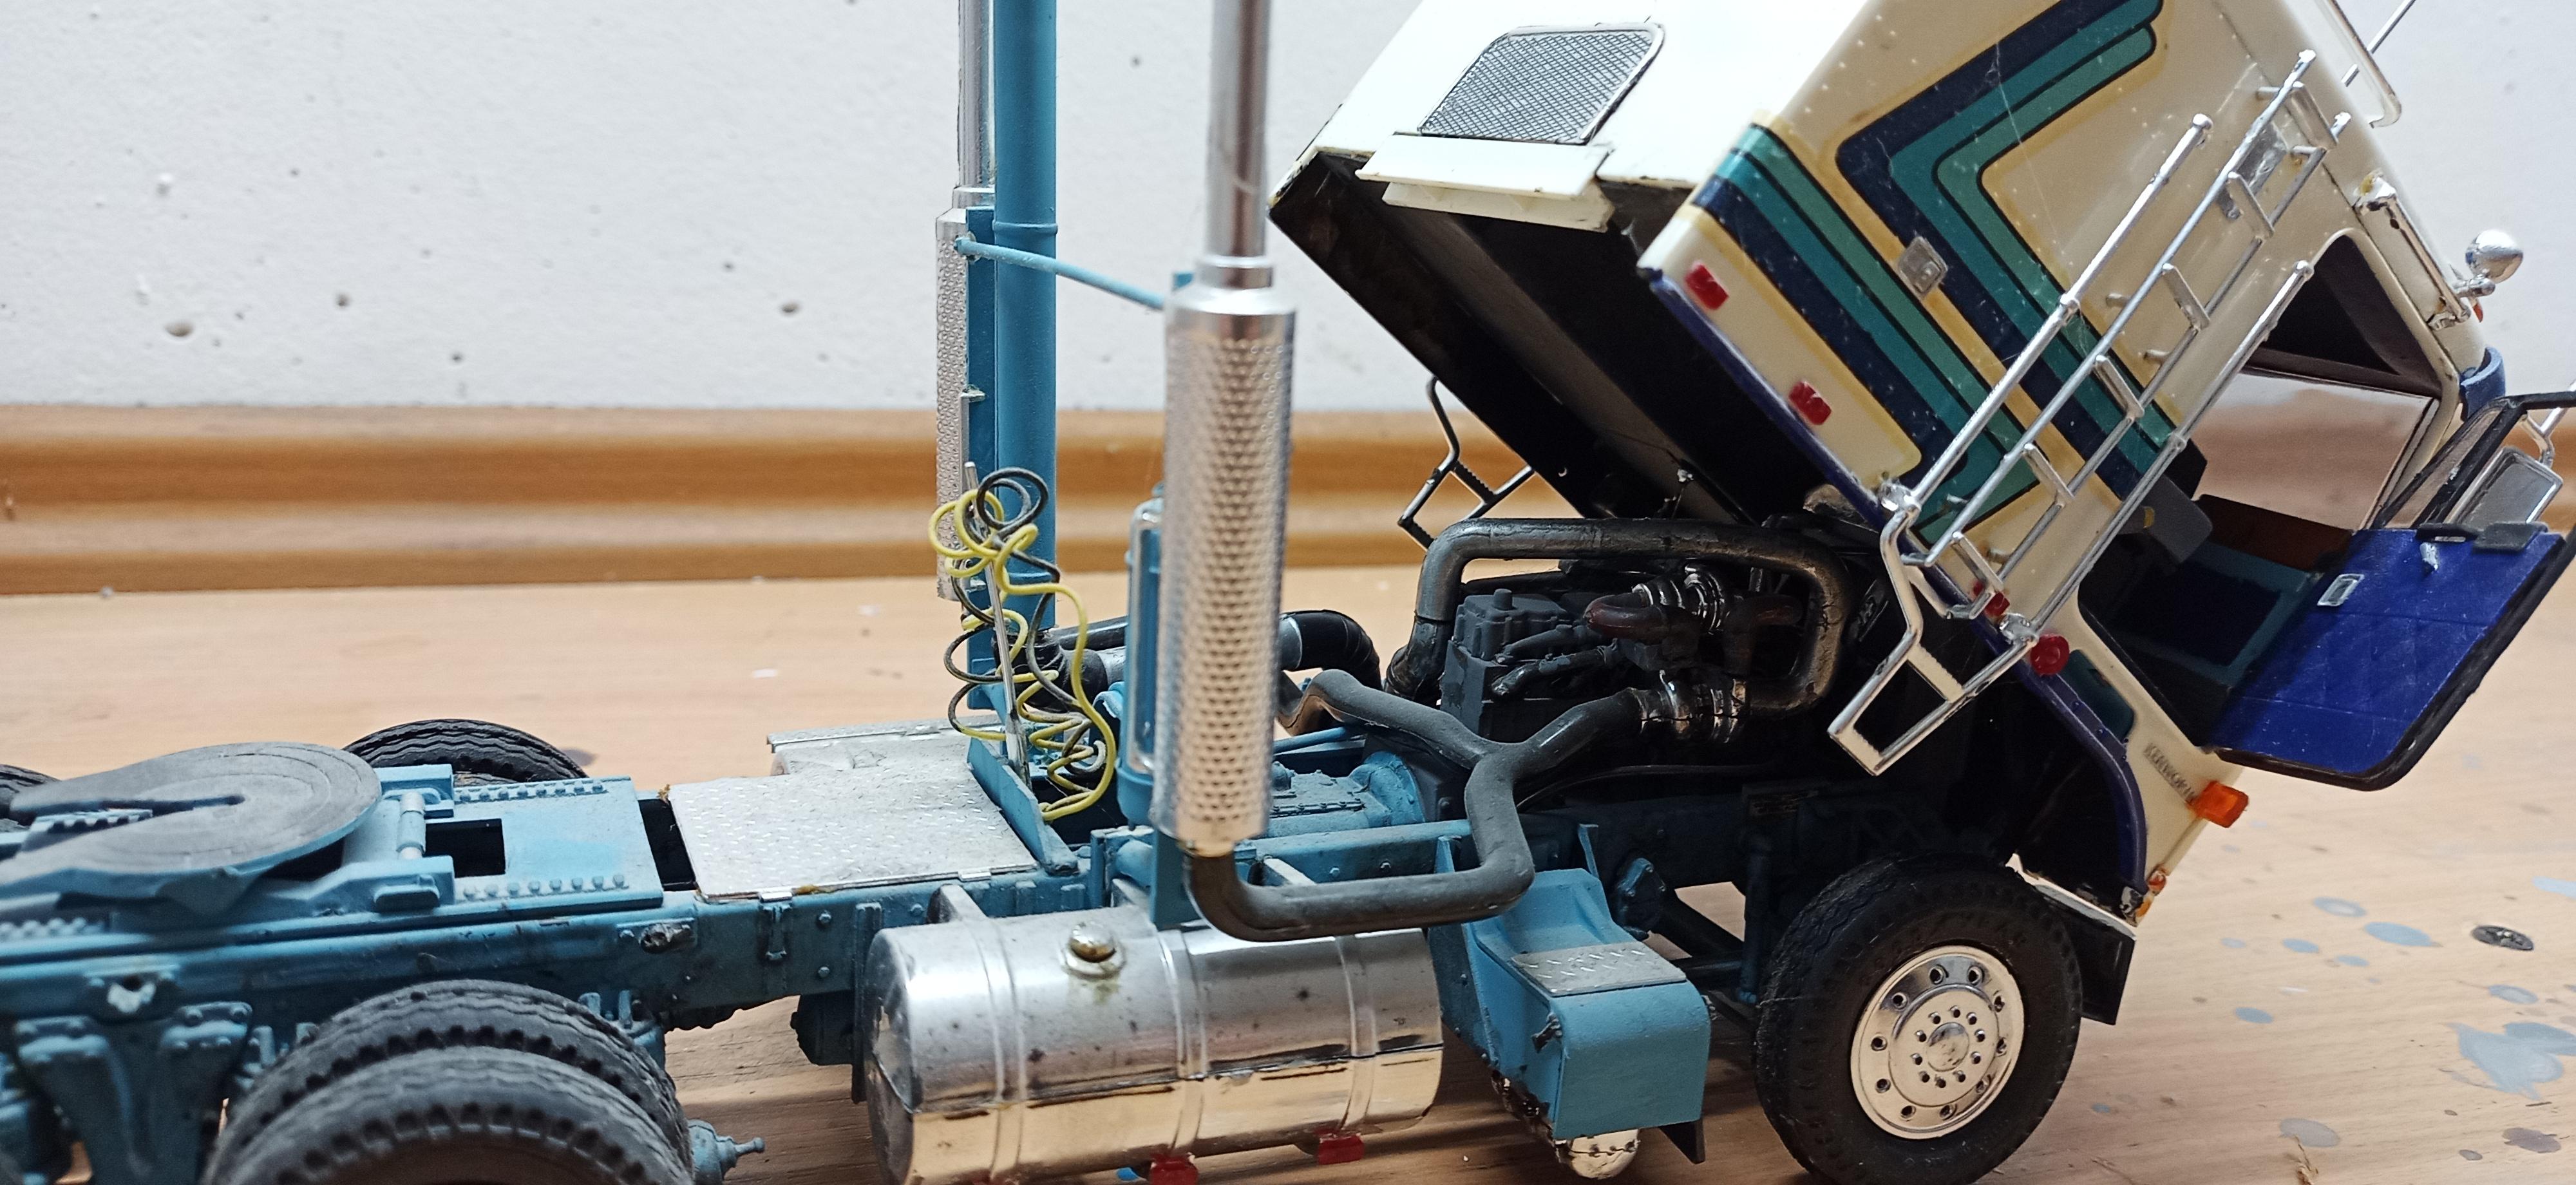
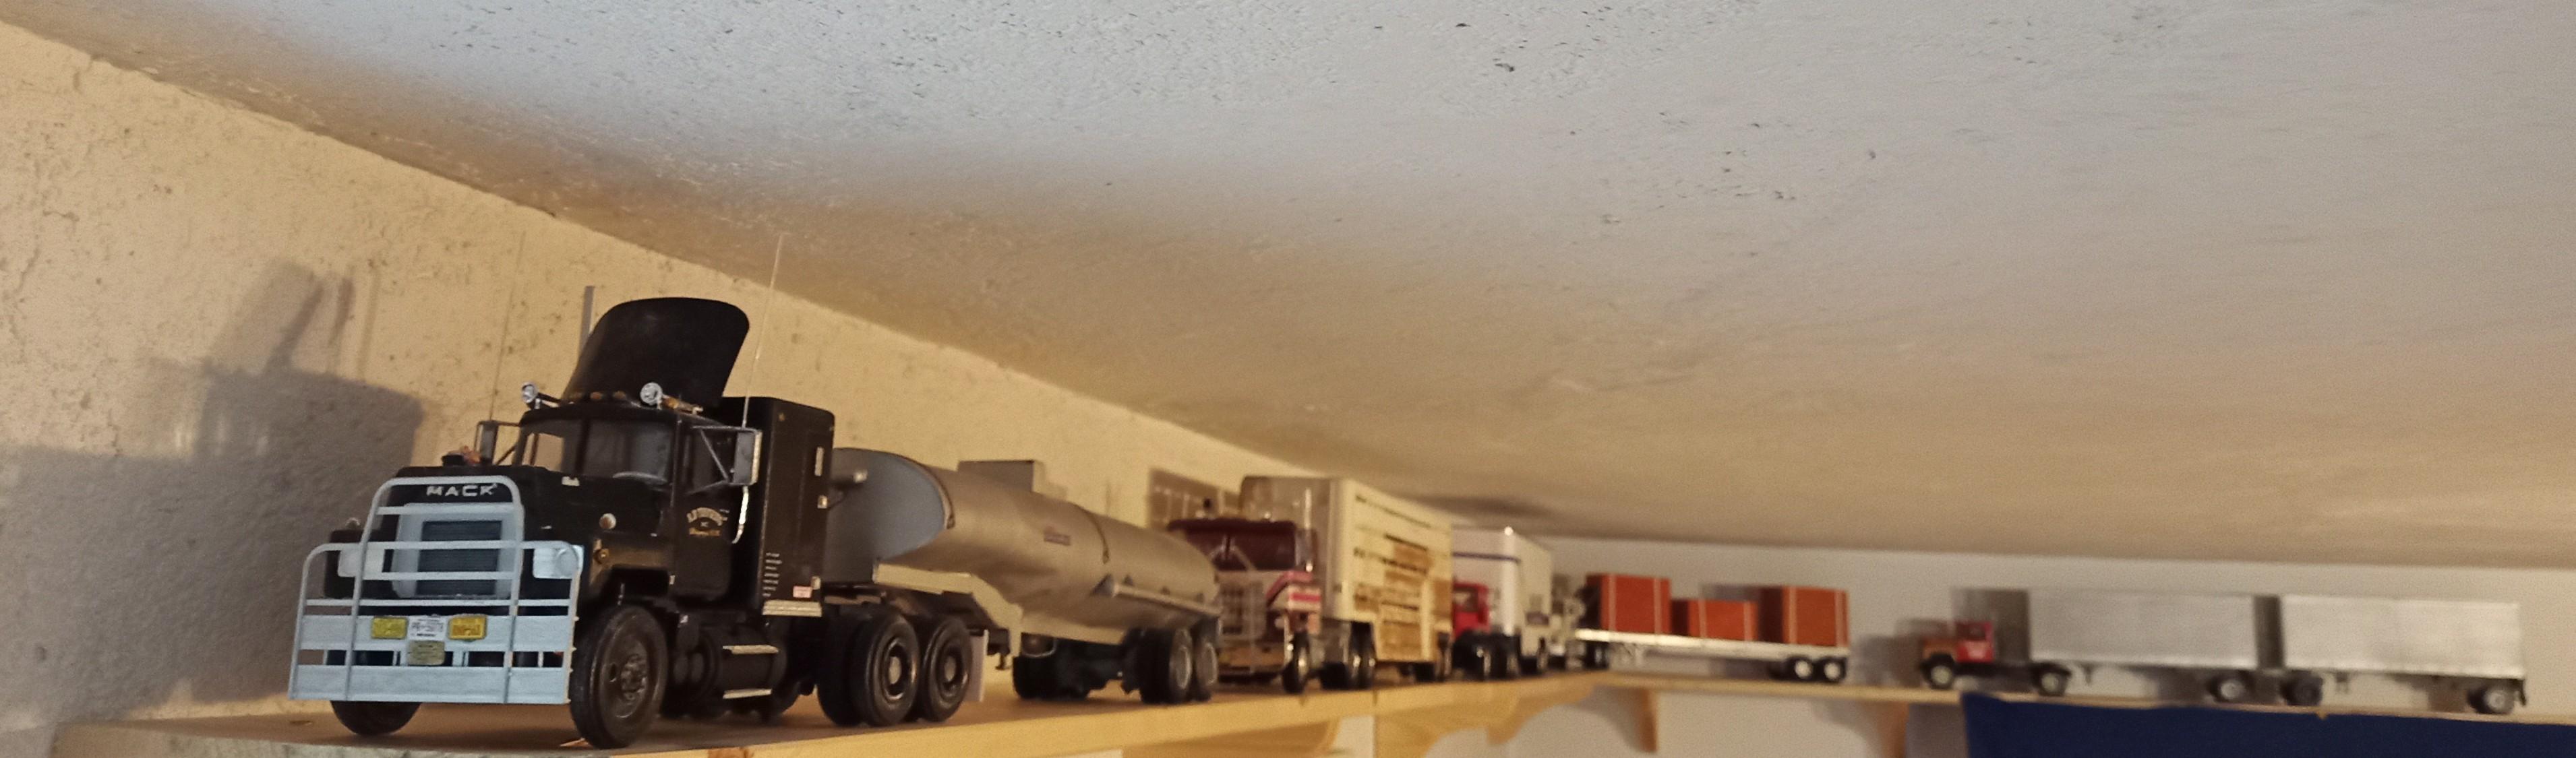
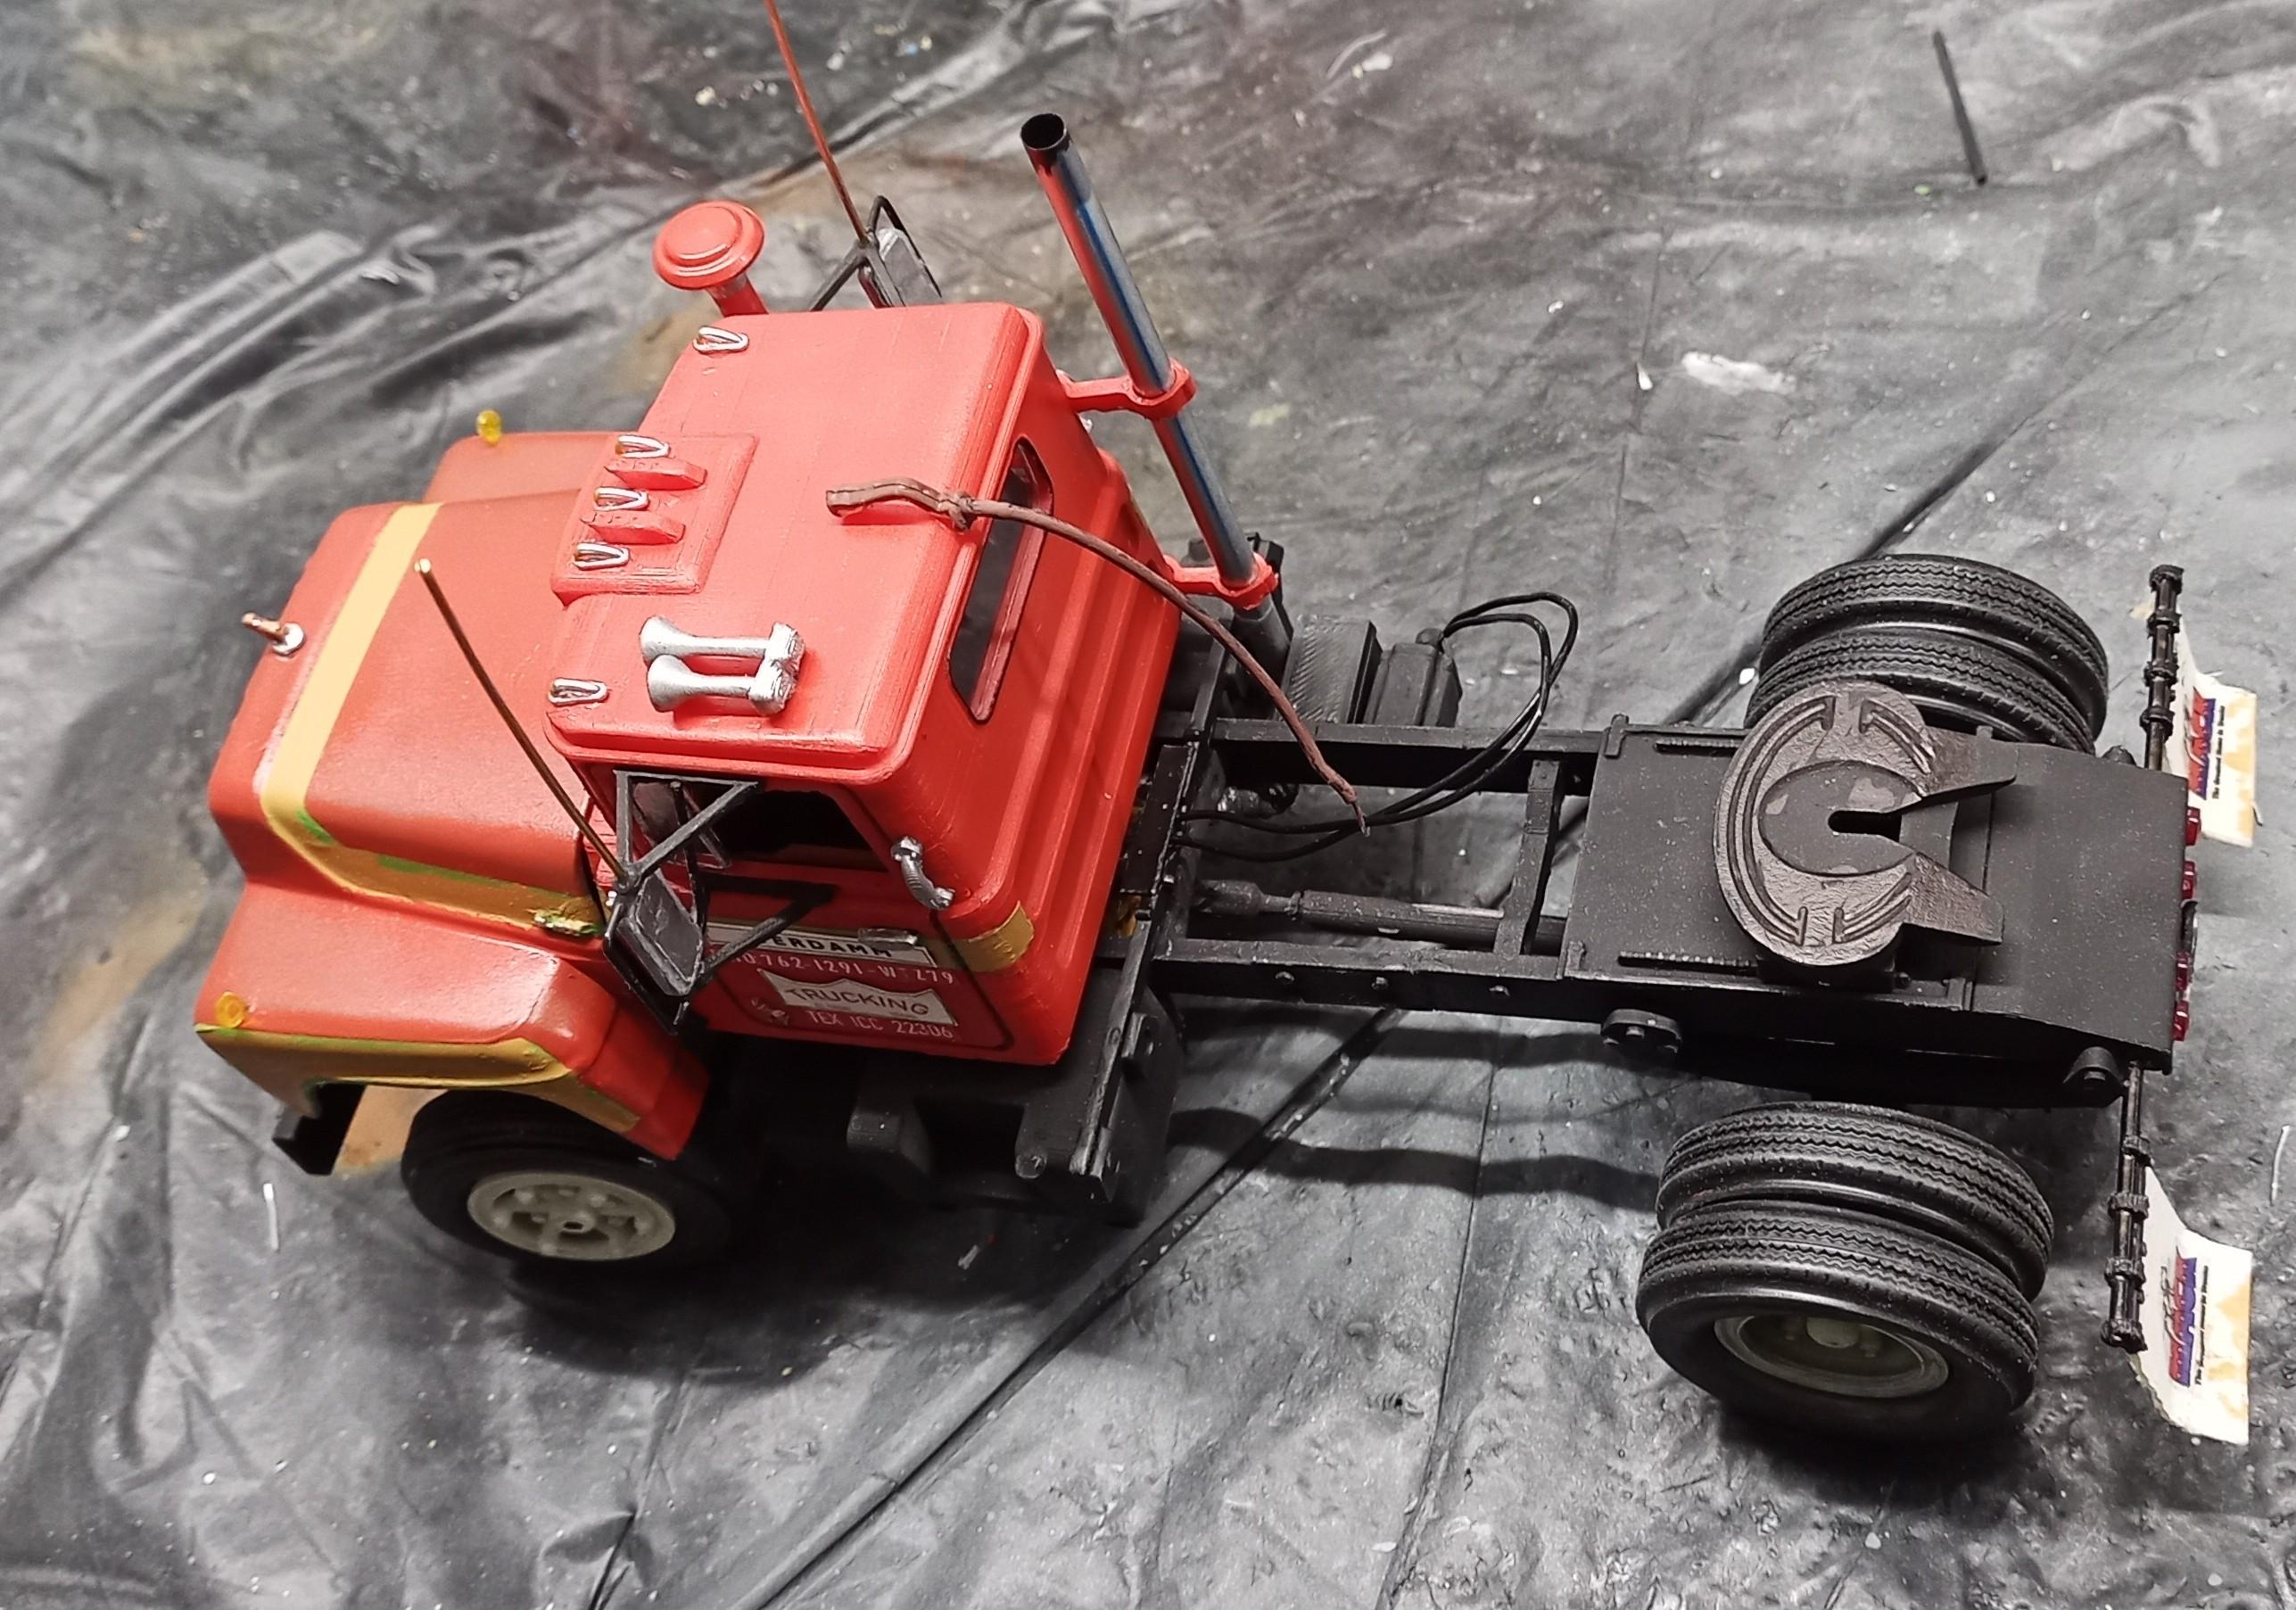
Hi everyone, since I´m taking a break in building new trucks I´d like to share some old ones. This one was one of my first truck models. Built it when I was 15. Even got second place in a model builders contest of southern Germany in 1985. You all probably know the kit. I´m glad I did it back then because today they´re offered on eBay for 250 - 400€. Back then I payed 35DM for it! Since it didn´t have right hand drive like an Australian Road Train should and I didn´t yet have the experience of building a new cockpit and what else belongs to it, I made a "regular" US truck out of it. The tires weren´t the today known soft rubber ones, the kit actually included the typical amt low profile tires even though the others are shown on the box. I remember being quite disapointed at that time but building it was fun! The rack on the roof was from the Italeri accessory kit for European trucks. The cover of the spare was just a piece of cloth which I painted. Made it stay in form too. I made it look very used too. At least I tried to and the jury in the contest seemed to like it! The tanks look rusty and the chassis and engine look quite dirty and oily. The interior also looks a bit filthy. The age of this truck of course increased that look! ? Hope you enjoy this "oldtimer"!

-
The convoy is growing! I'll have to think about which one's next for quite a while! But I'll be back with more. The build progress will be shown as soon as I've decided!
-
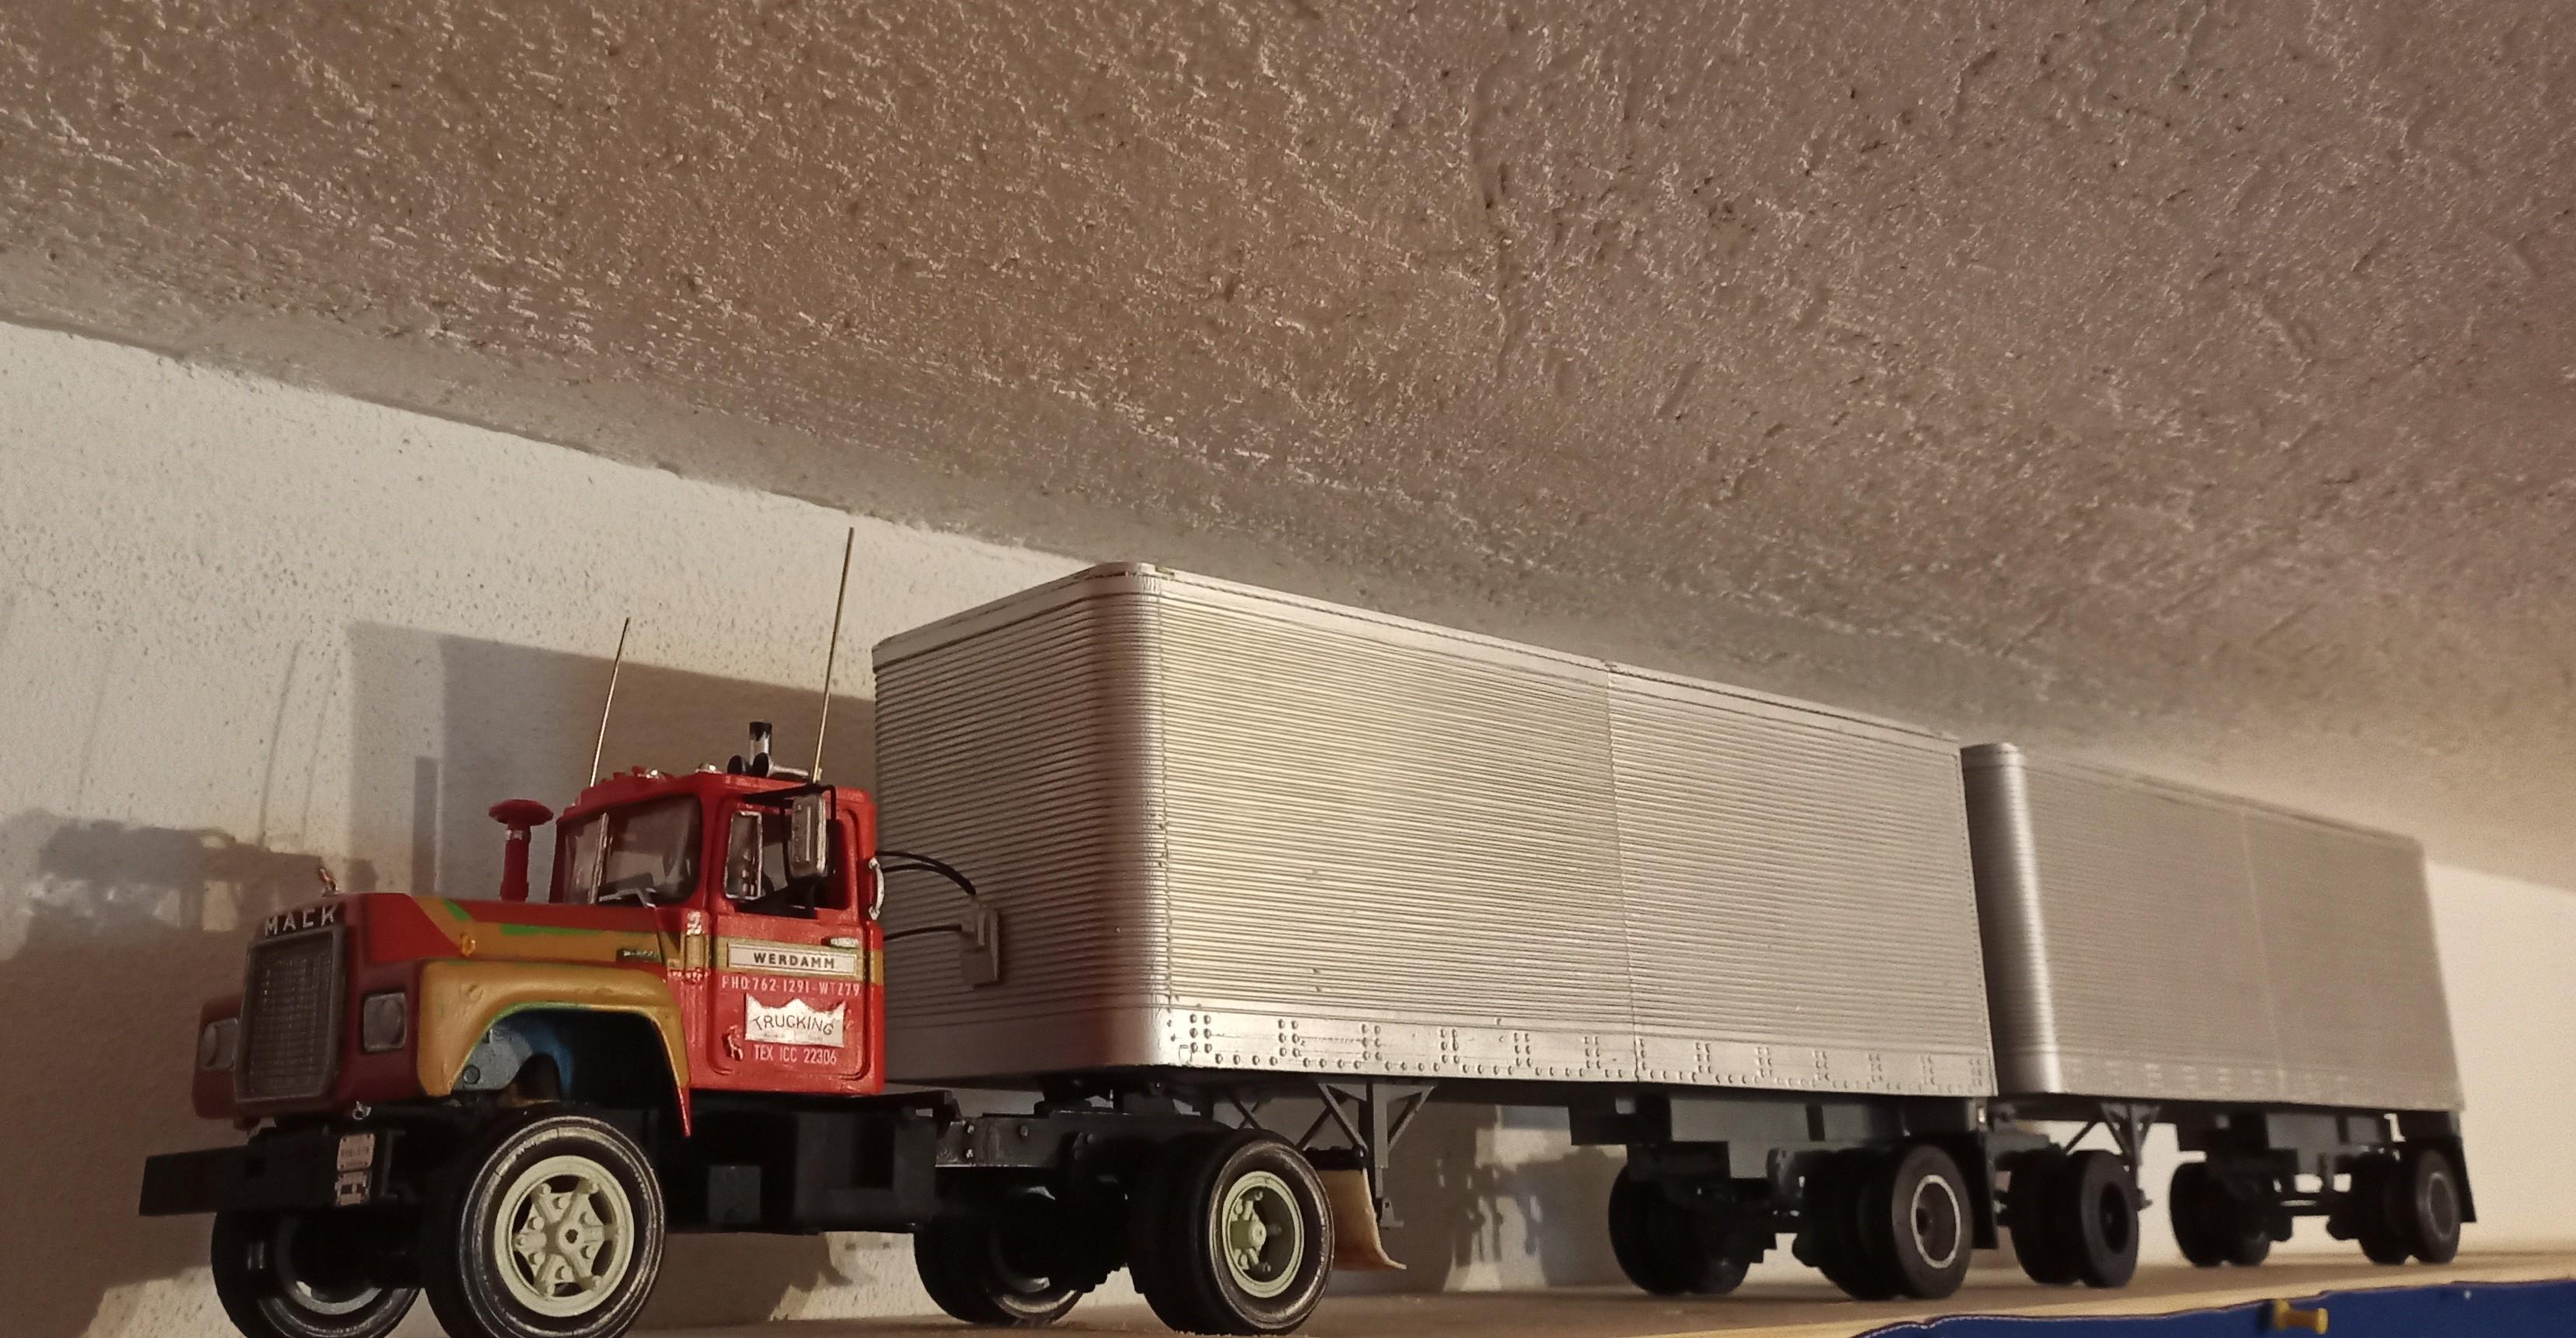
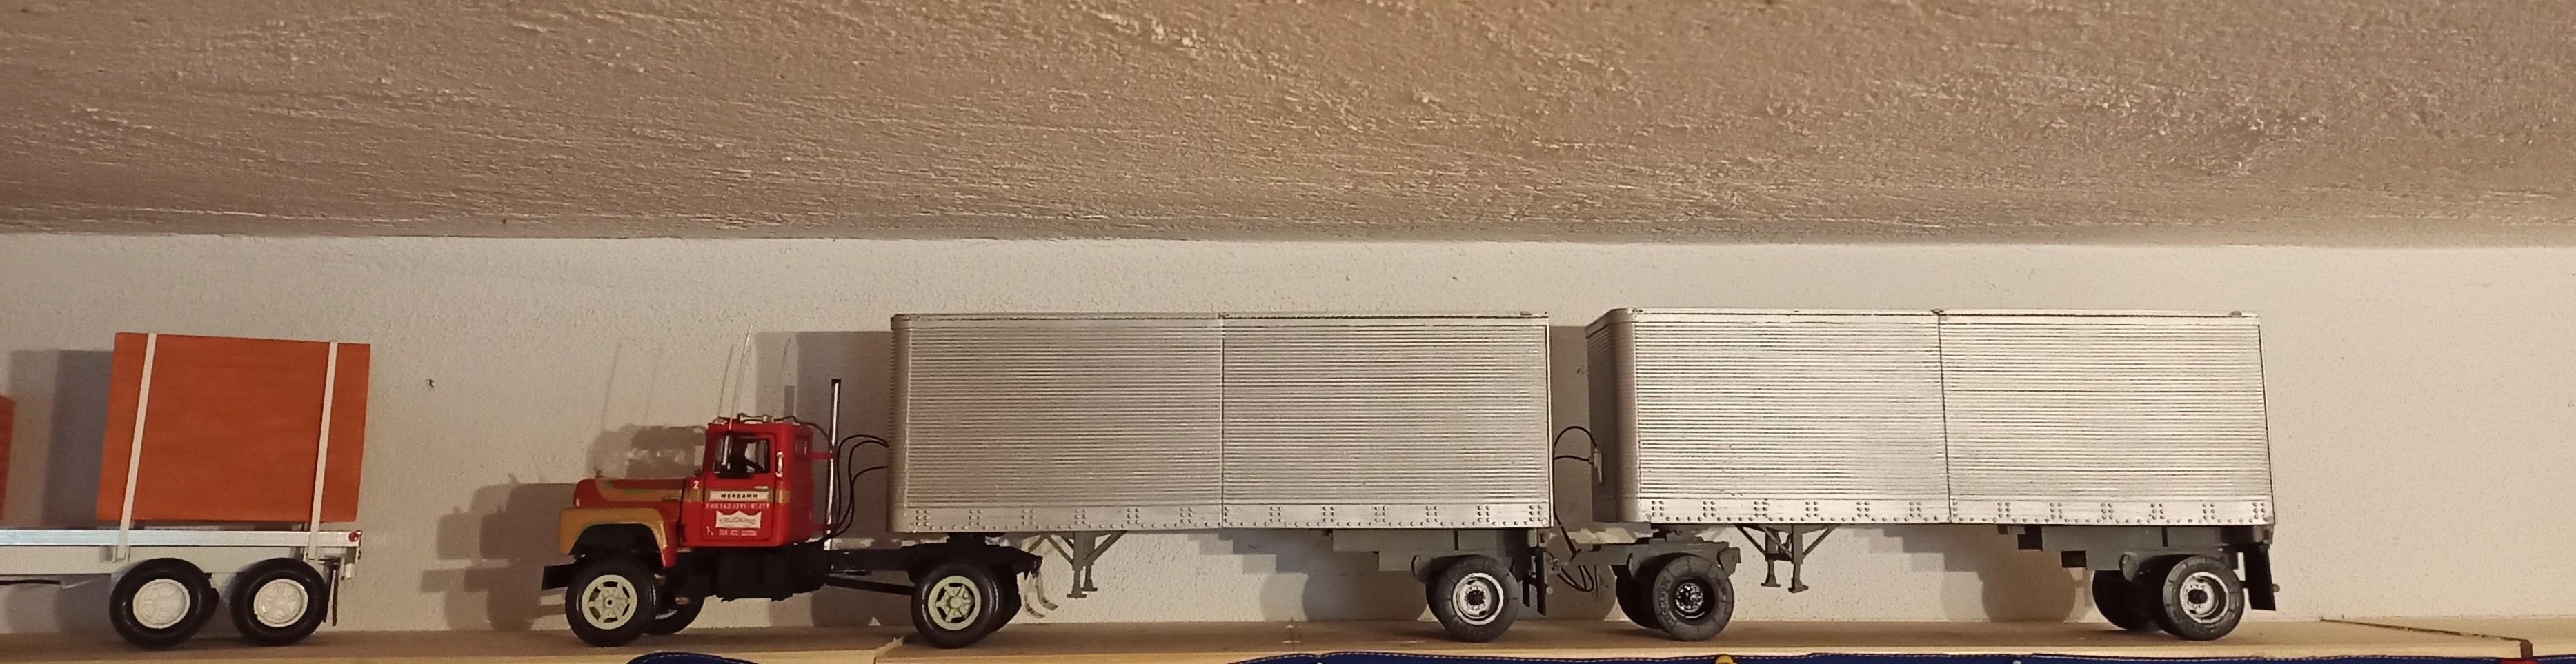
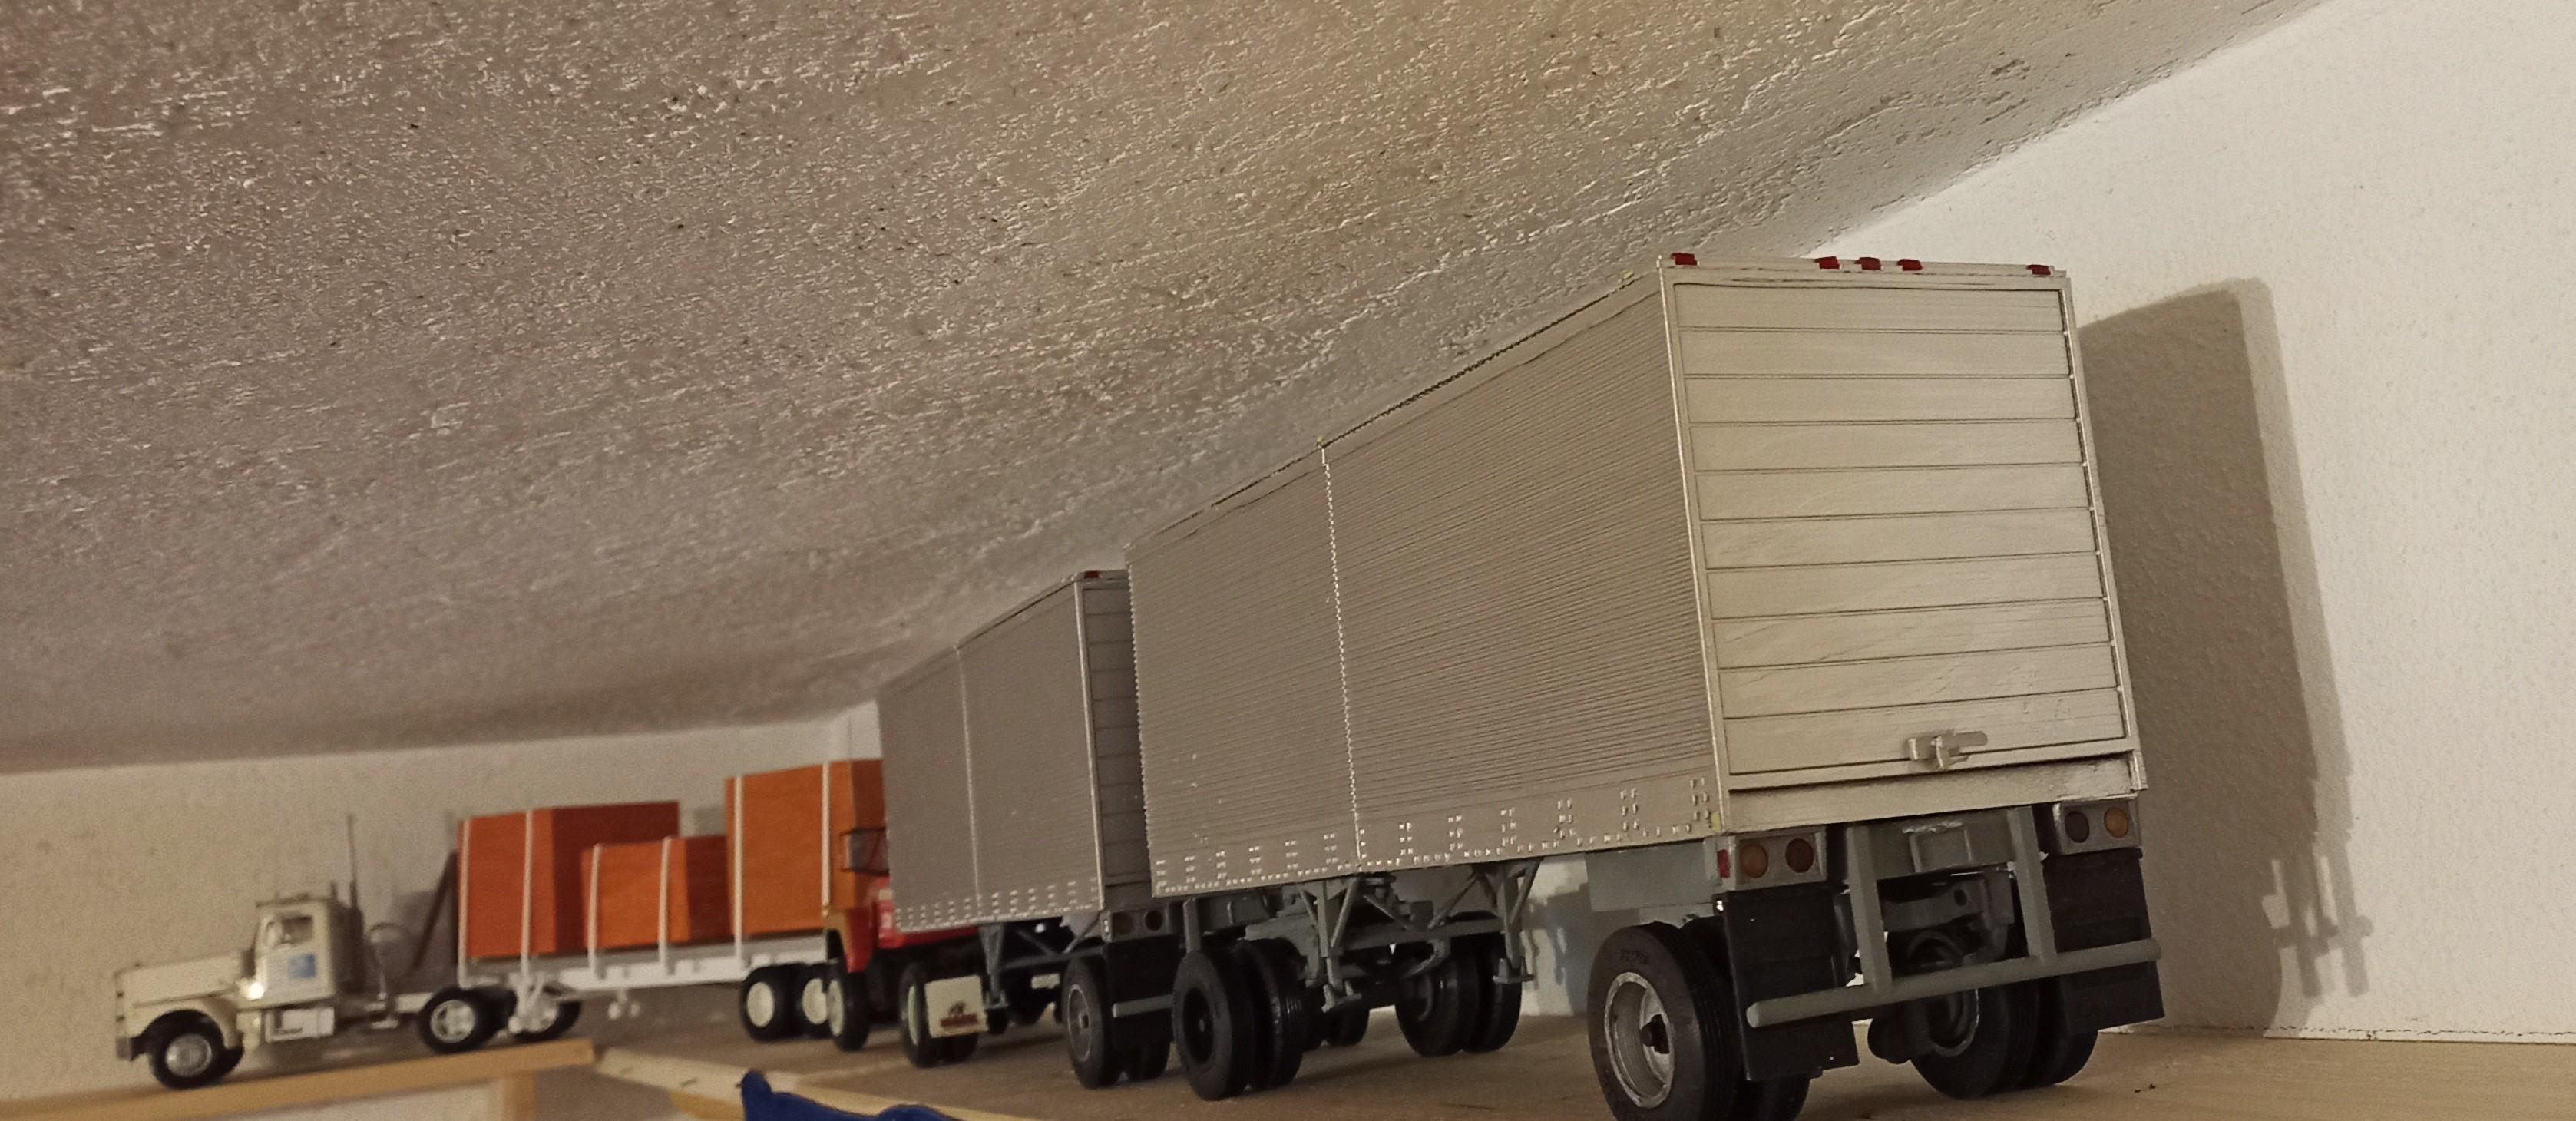
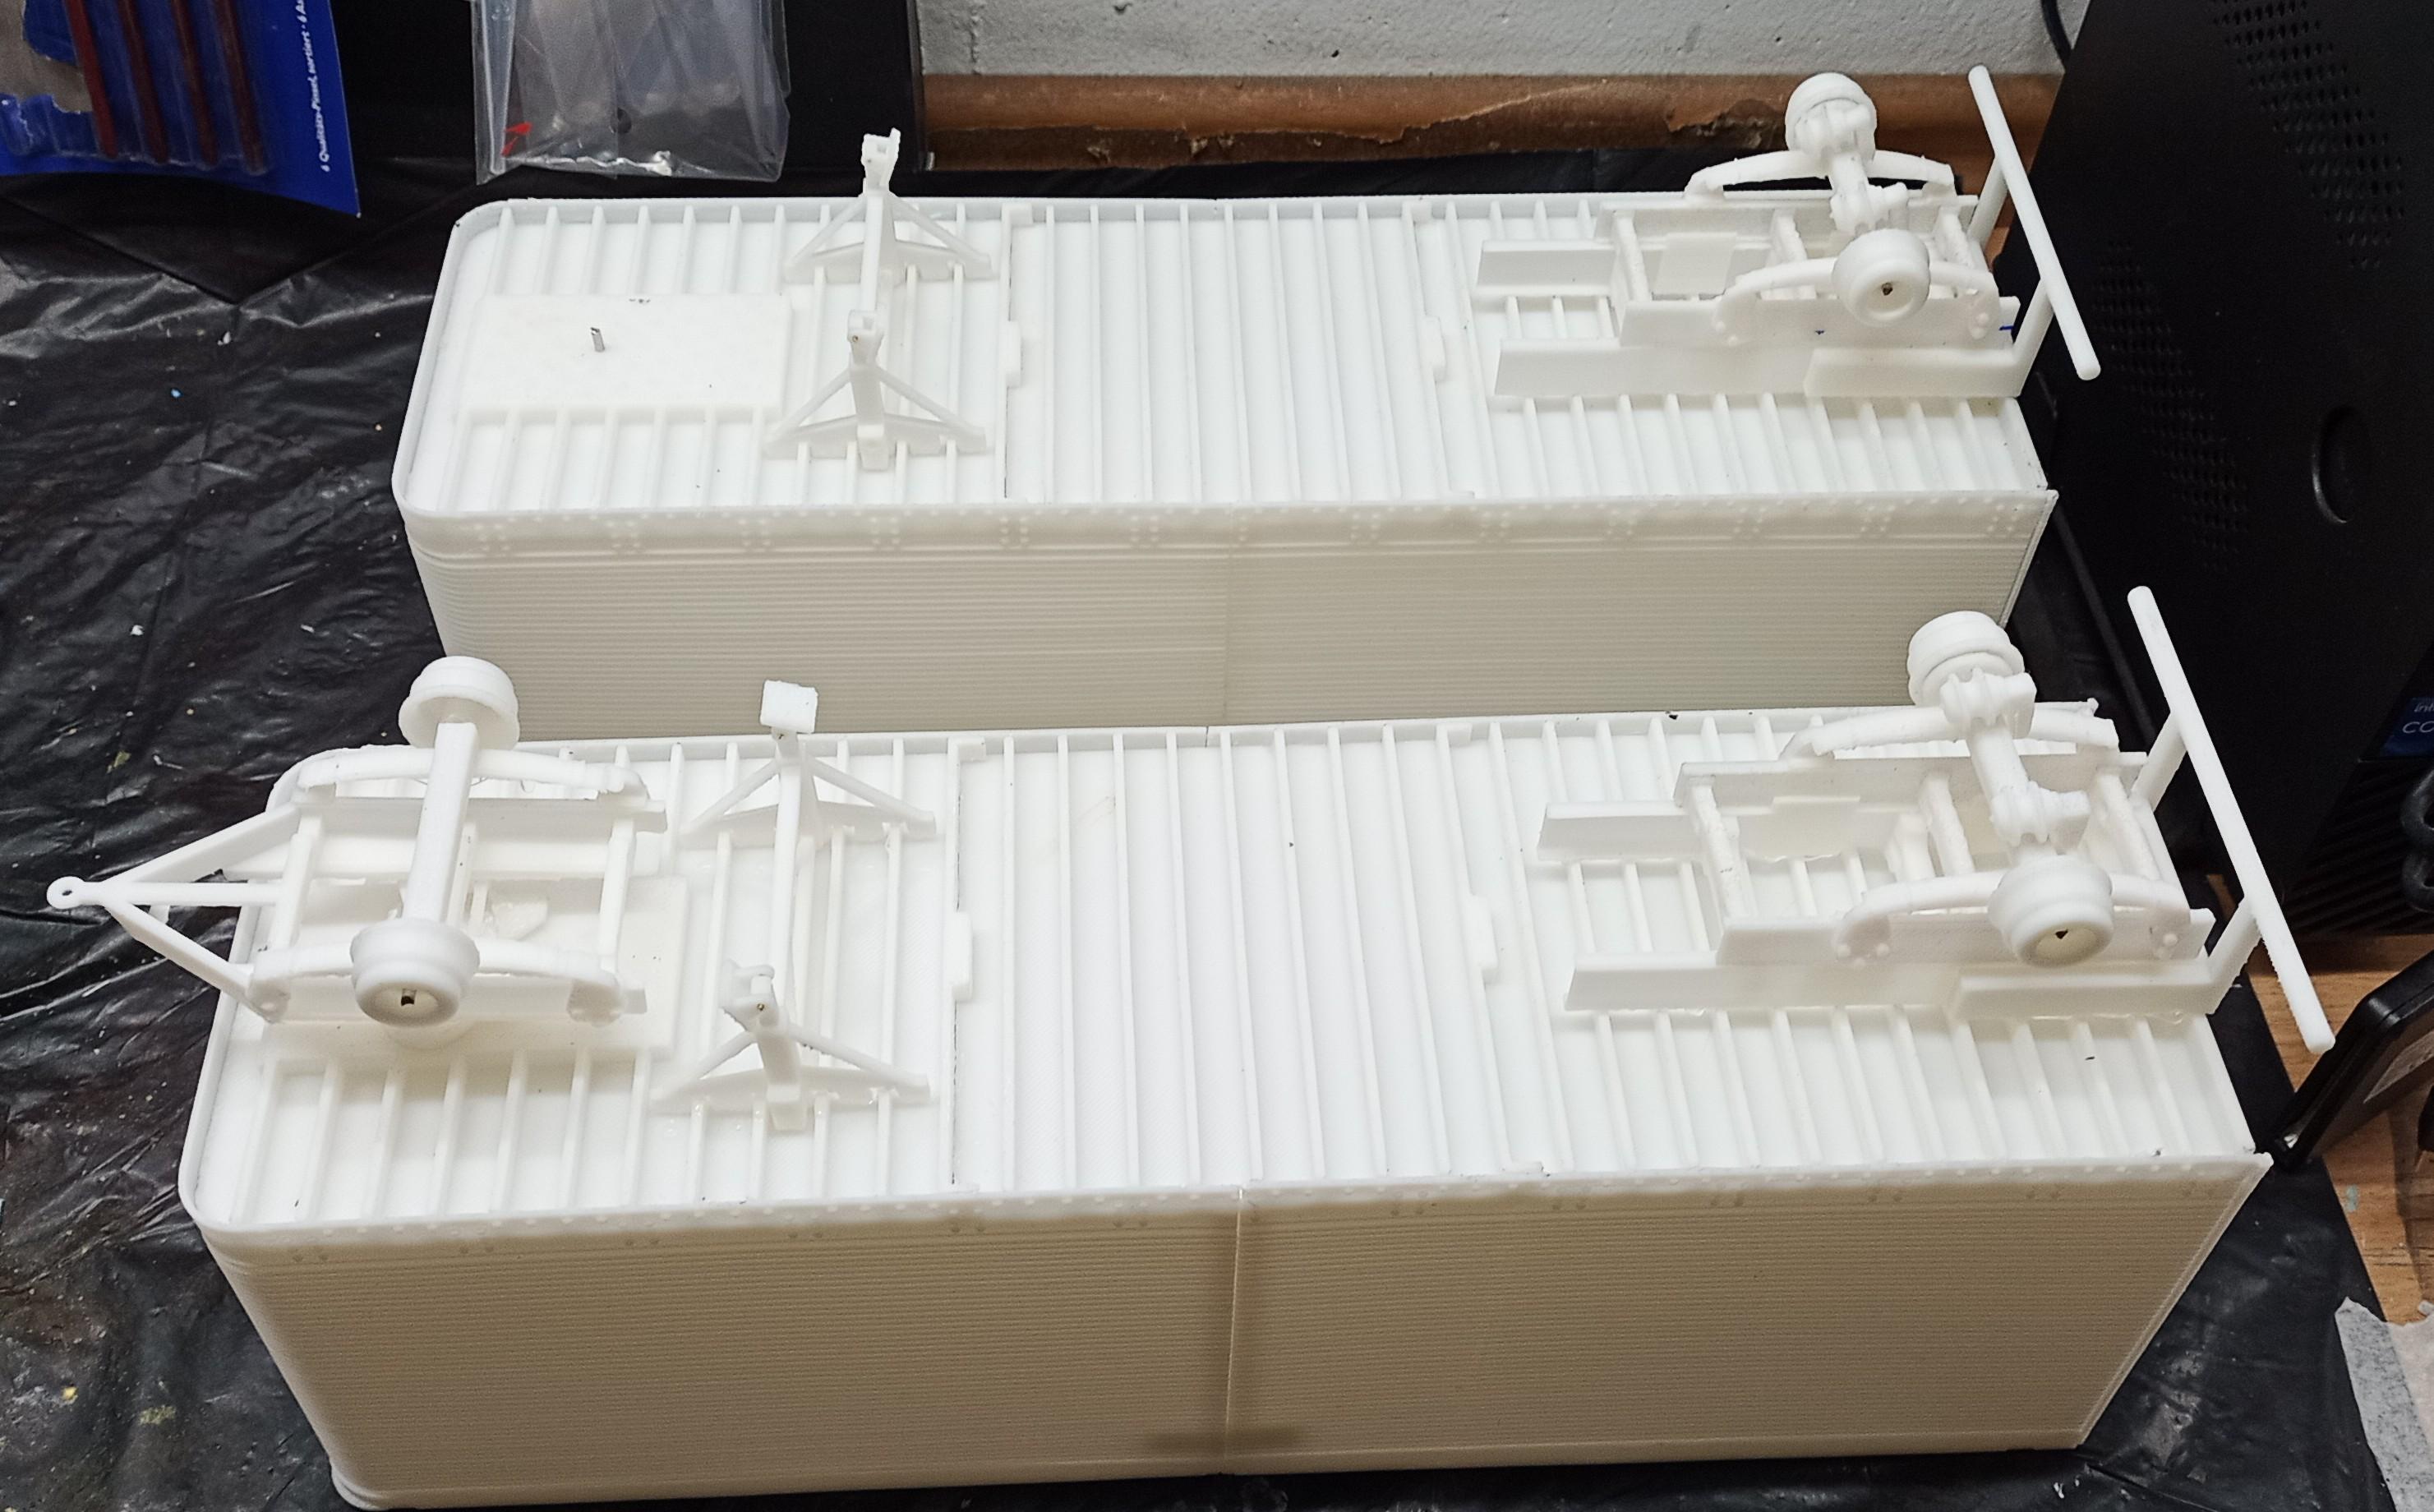
Looks like "Big Nasty" is ready to join the convoy! Air lines are installed! Ready to slip into the back door! Only the "Fruehauf" emblems on the trailers are missing but they'll be finished and applied shortly! Concerning the vertical lines on the trailer sides caused by printing in two halves (printer size doesn't allow larger parts), I tried to close the gaps but it didn't really help. A little maybe! Still looks pretty good to me. Hope you enjoyed the build and thanks for following and your good advice! ?
-
I also put clear coat on top. Keeps em from wrinkling and peeling off. That's really excellent work on that trailer. Very neat job! If you want to avoid bleed through then first apply one layer of the color underneath the masking. That will fill the gaps unseen and allow almost perfect lines especially If you have an uneven surface like like nuts or structured reefer walls. Not that yours aren't already close to perfect! ?
-
Jeep TJ
Jürgen M. replied to Jürgen M.'s topic in Model Trucks: Pickups, Vans, SUVs, Light Commercial
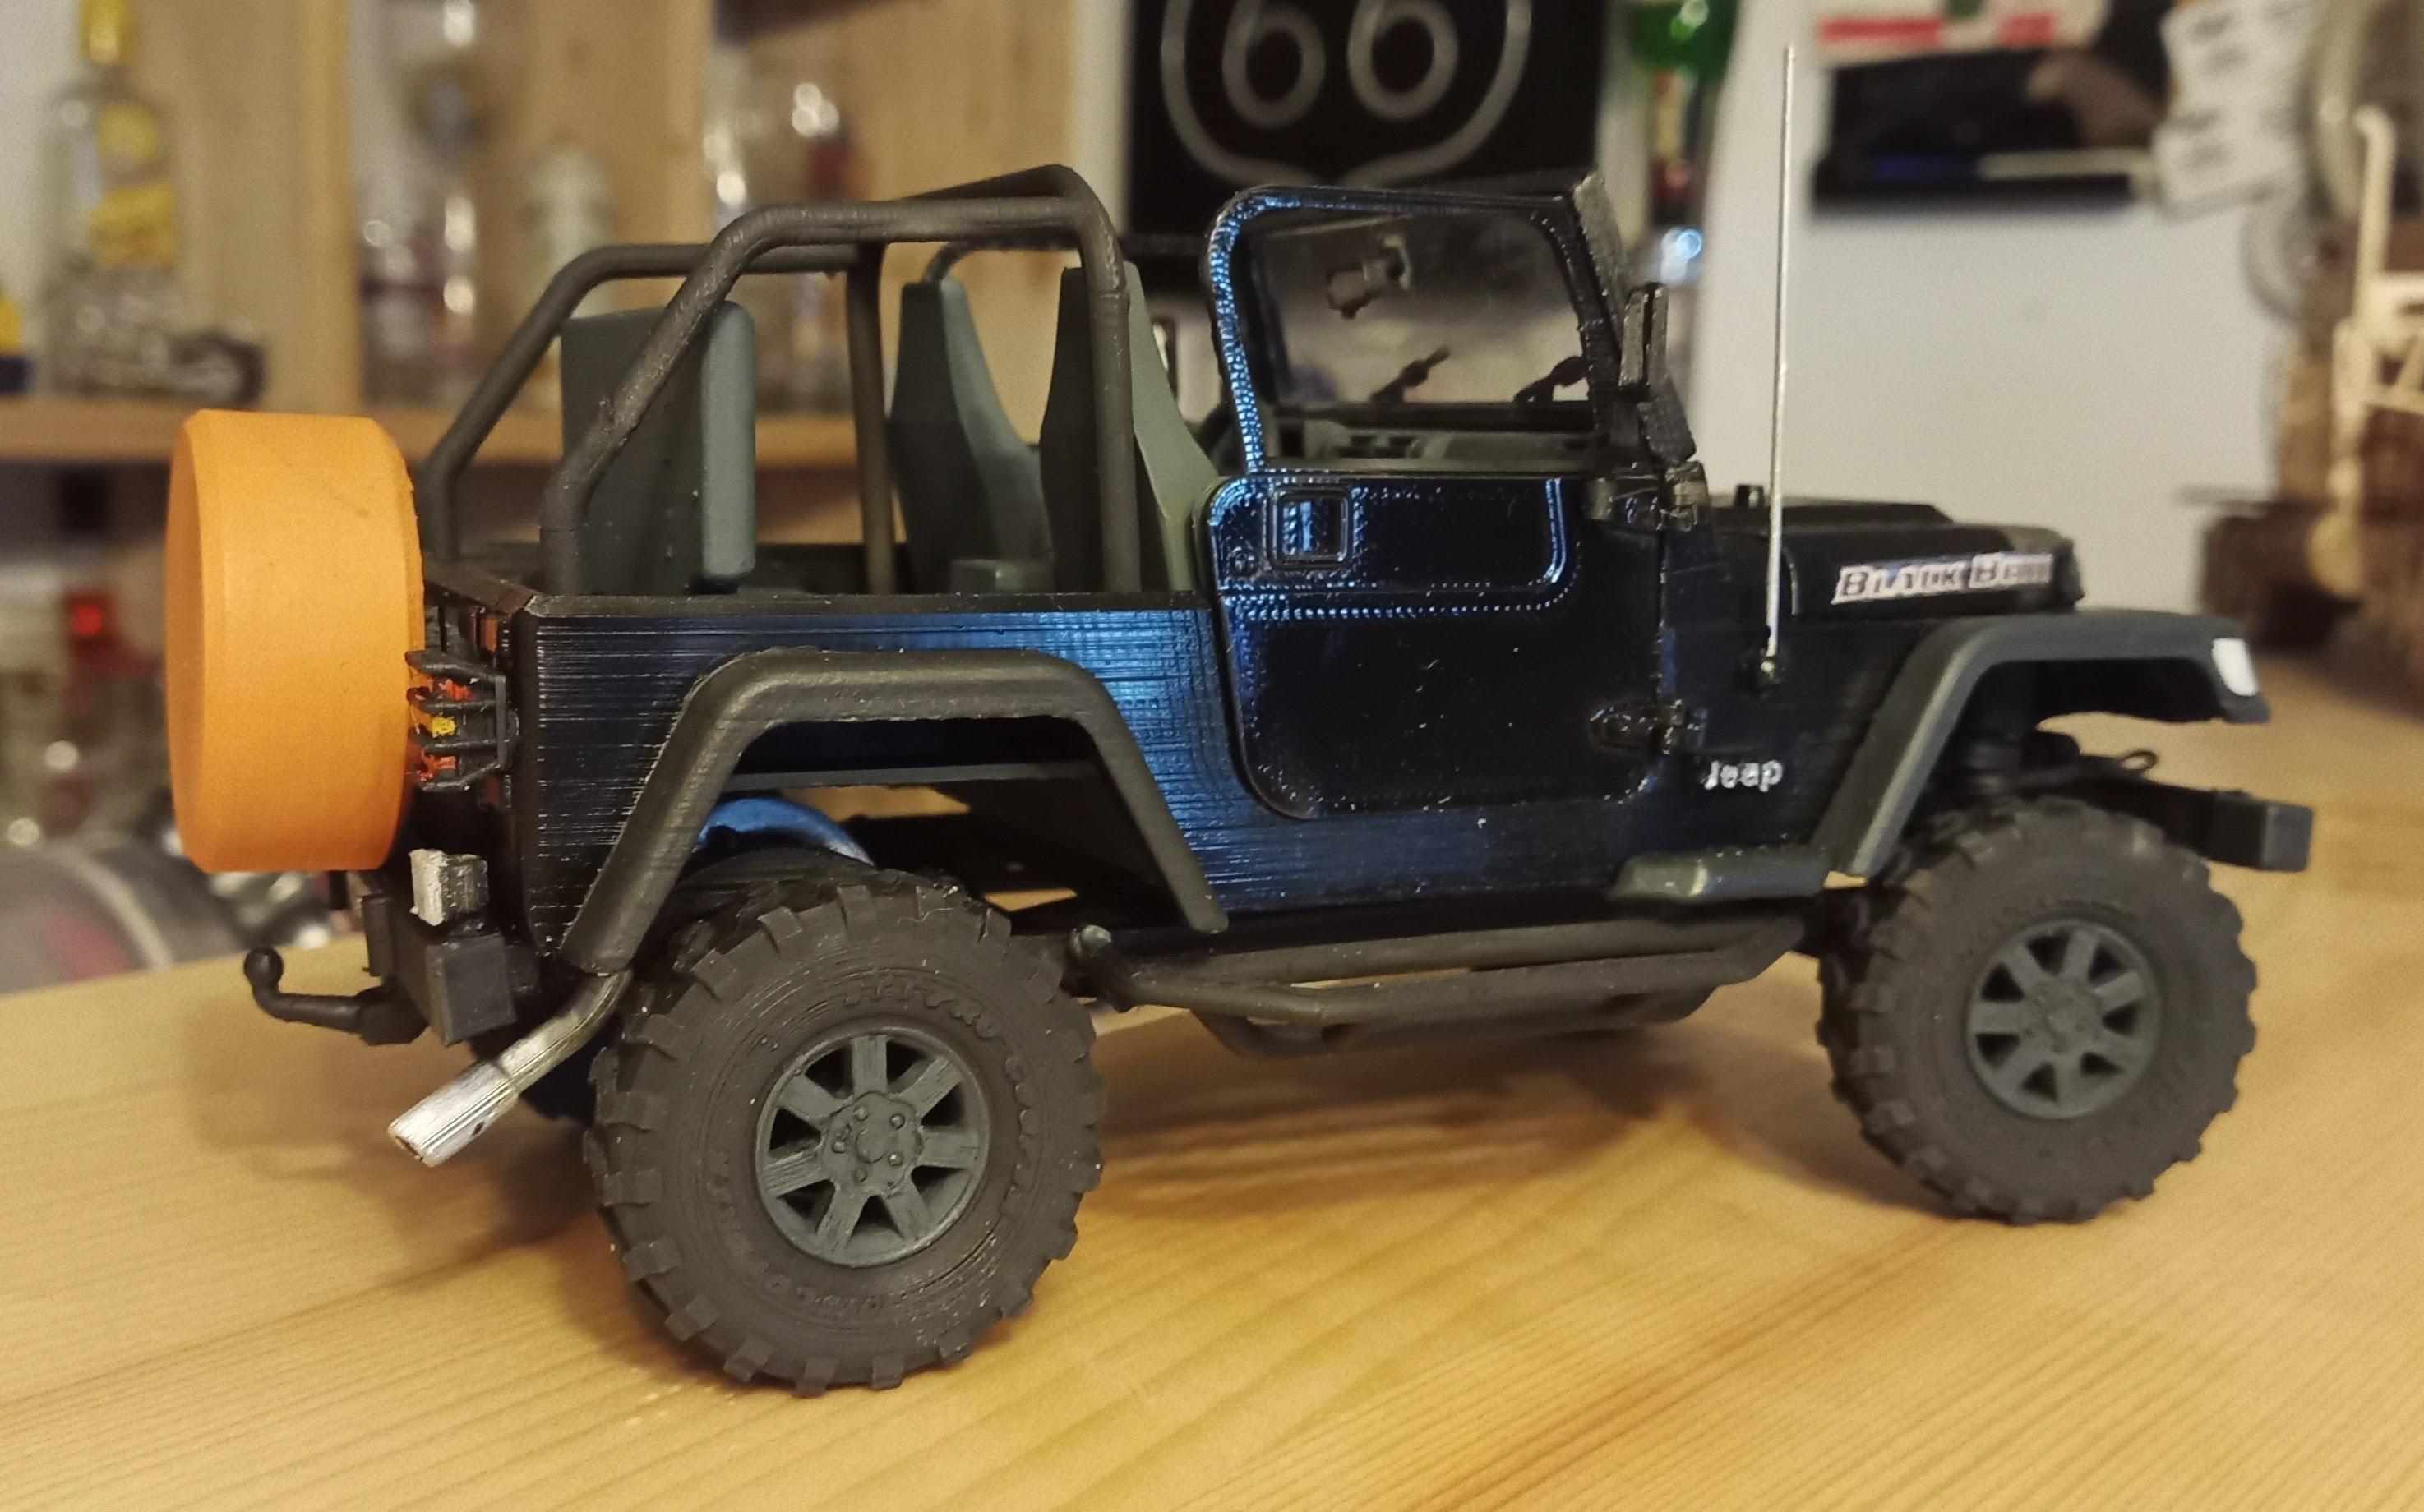
Thanks everyone! I'm glad you like it eventhough some details aren't correct. Like I said, I had to design from the few pics I had of the original. The rest I call freedom of art! ? -
Guess there'll be more to come! ?
-
OK. Thanks! I got the transparent sheets for laser jets. Works fine but for white backgrounds I'll have to get white decal paper! ?
-
Beautiful trailer, nice decals! Did you use white decal paper? I made the experience that you can't make white backgrounds on transparent decal paper. Or is there a trick?
-
The tail lights:
-
Jeep TJ
Jürgen M. replied to Jürgen M.'s topic in Model Trucks: Pickups, Vans, SUVs, Light Commercial
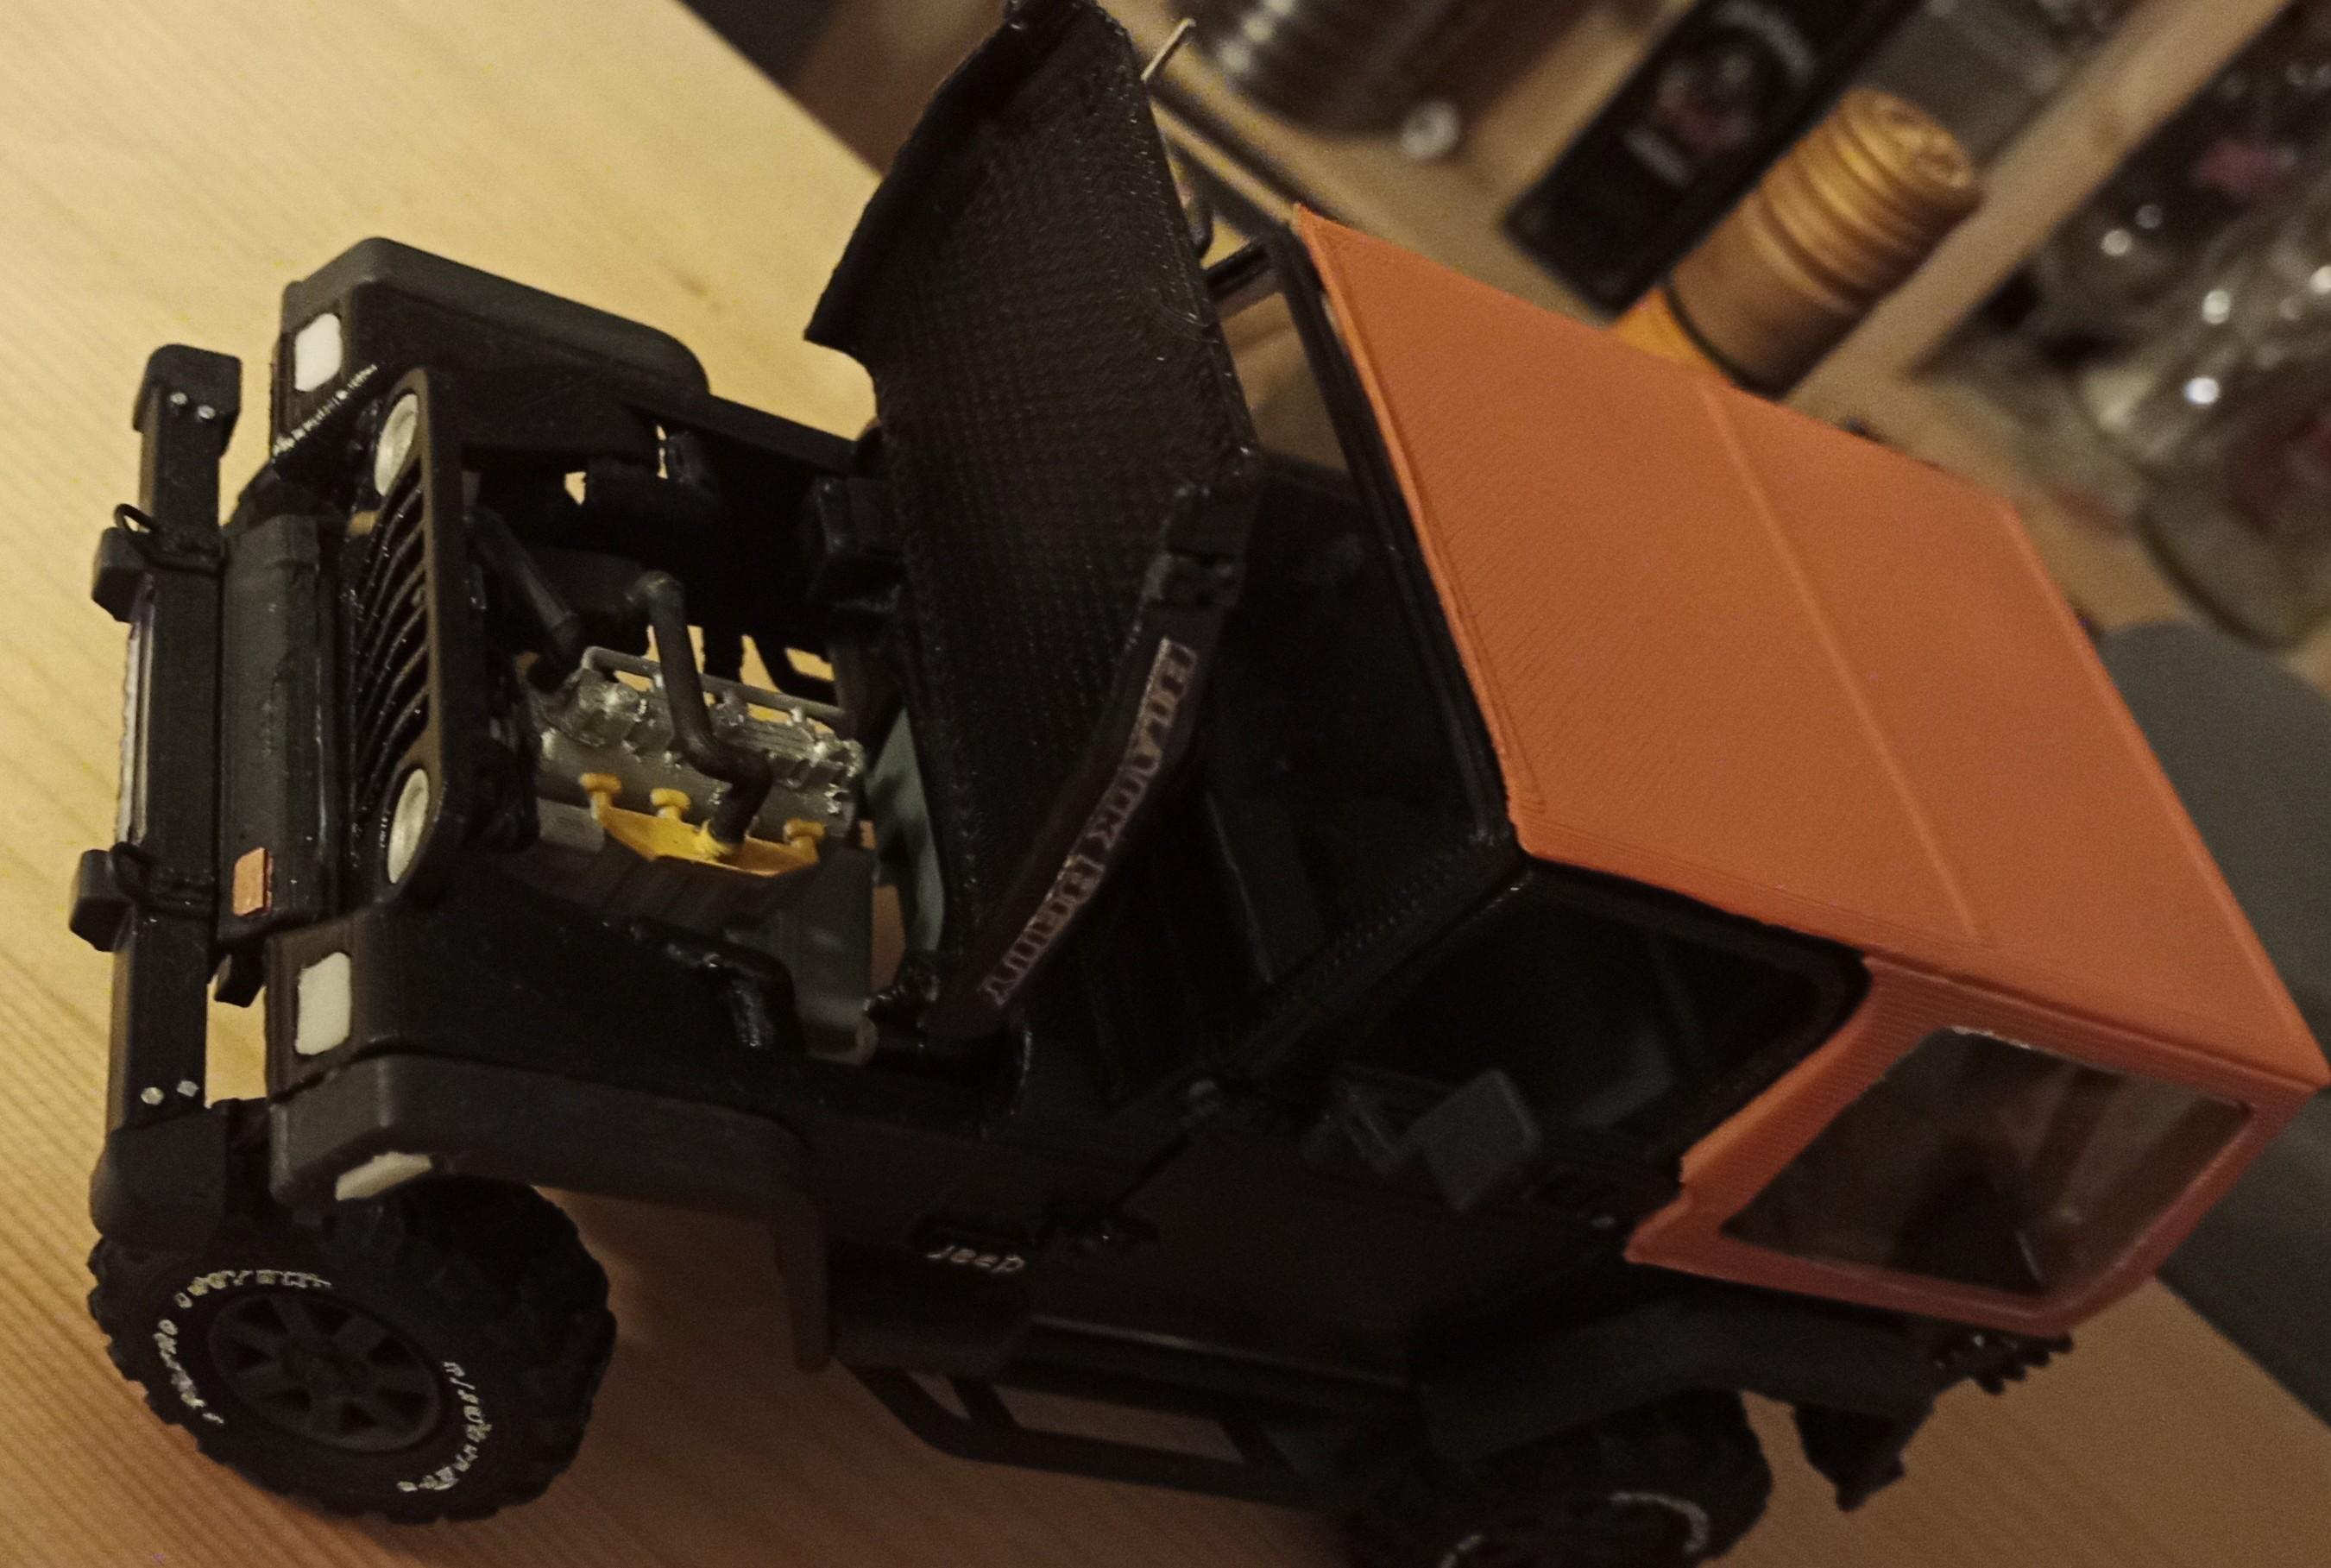
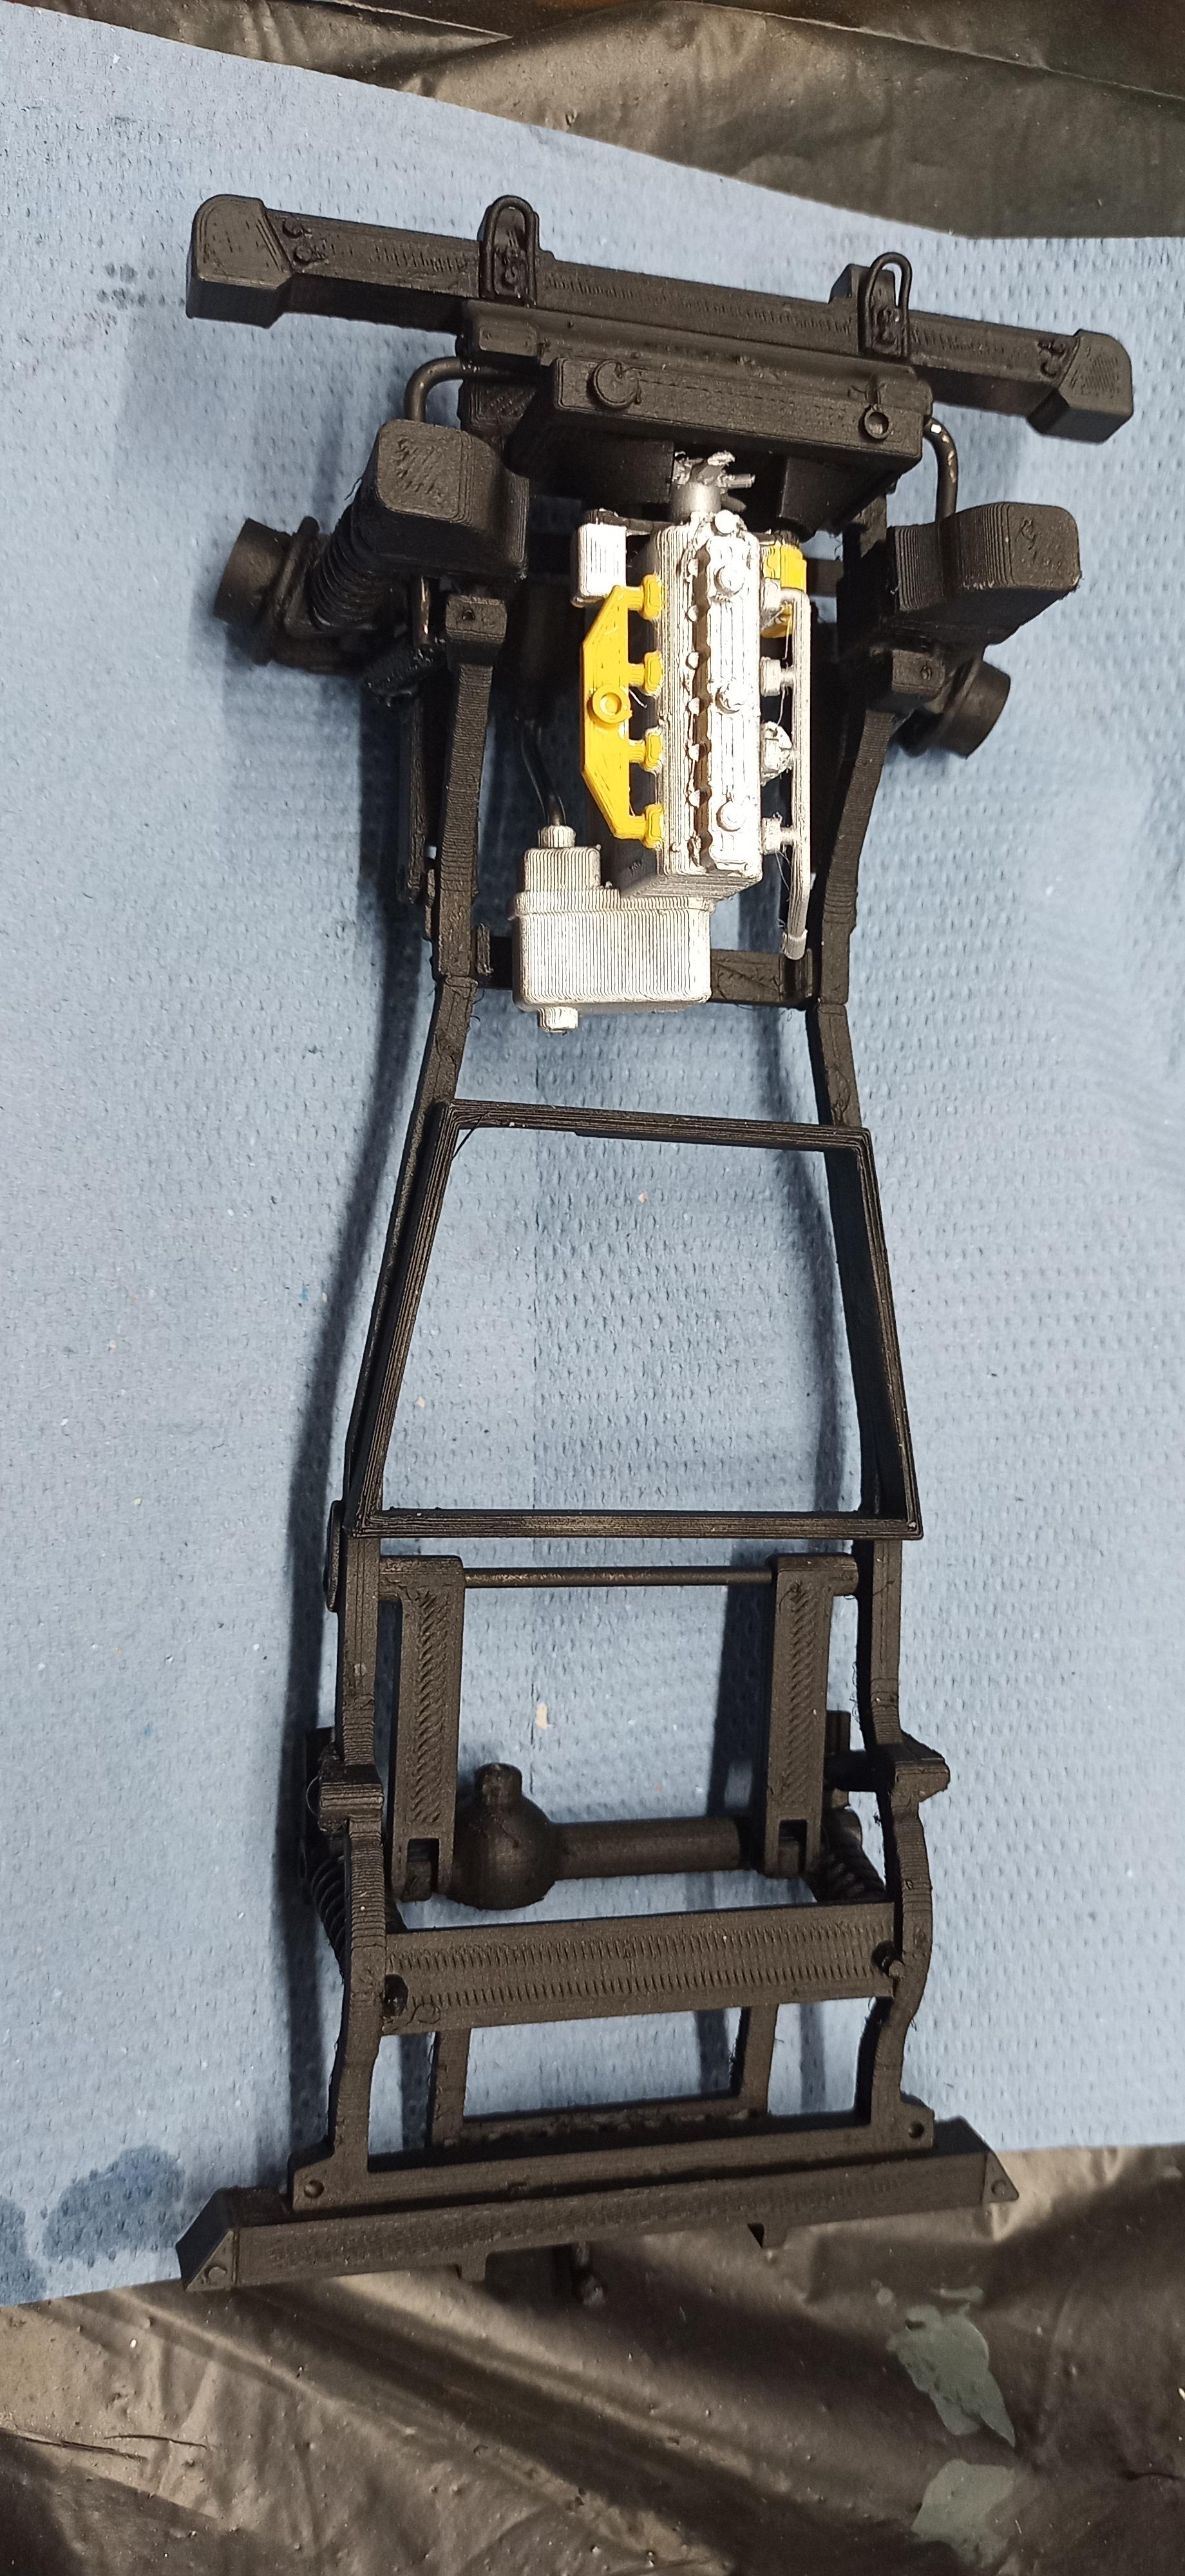
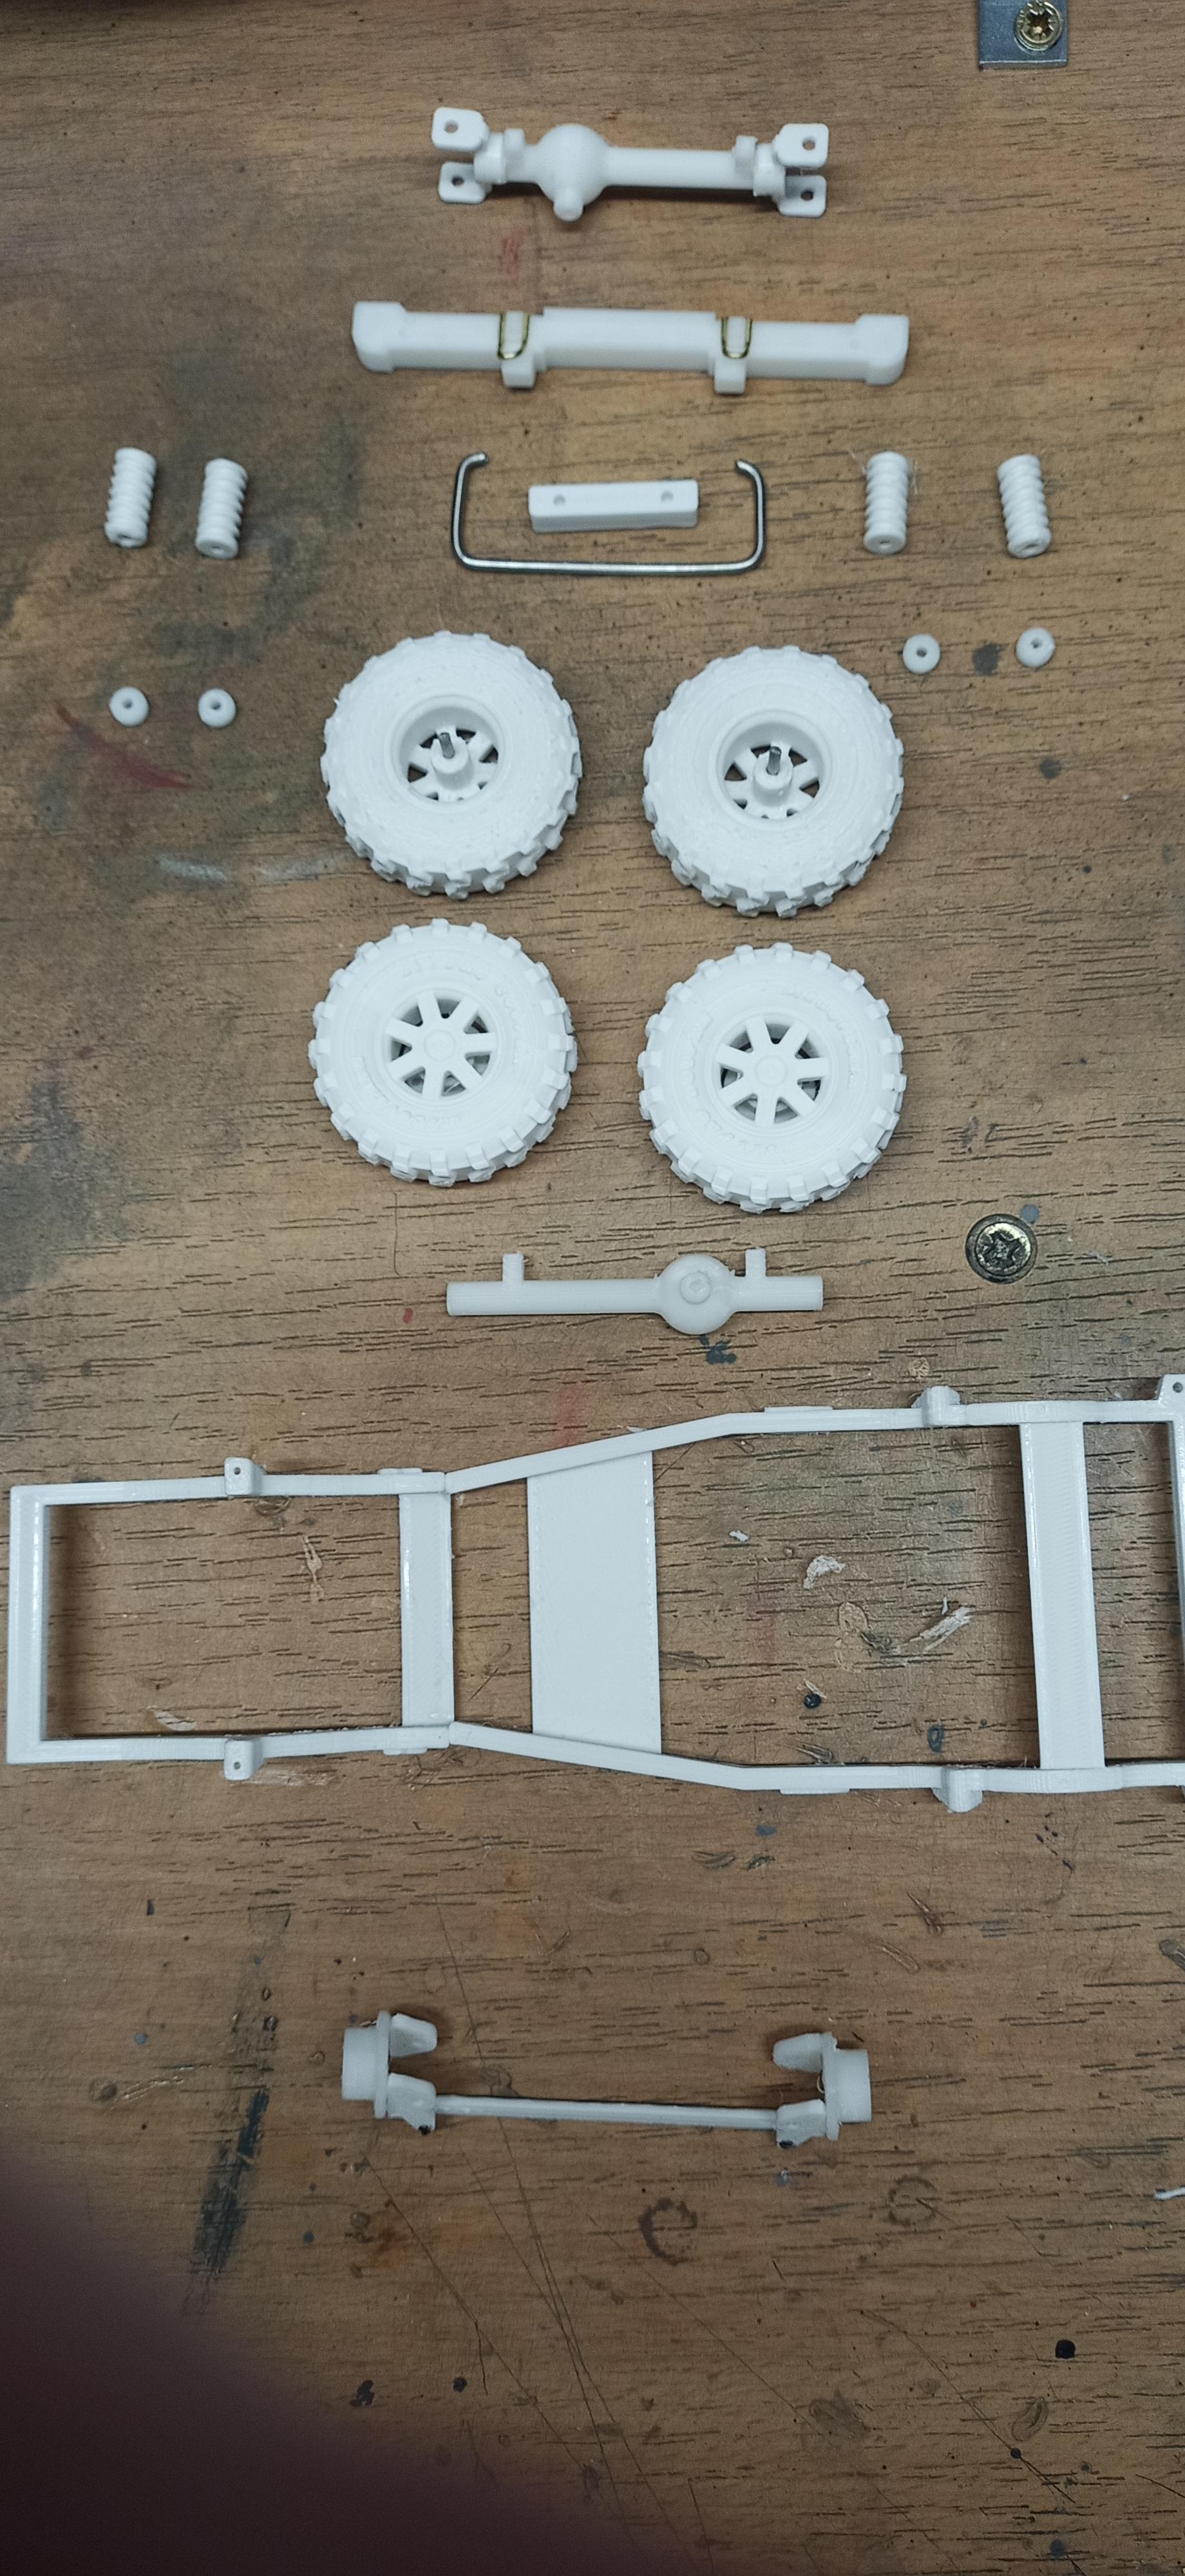
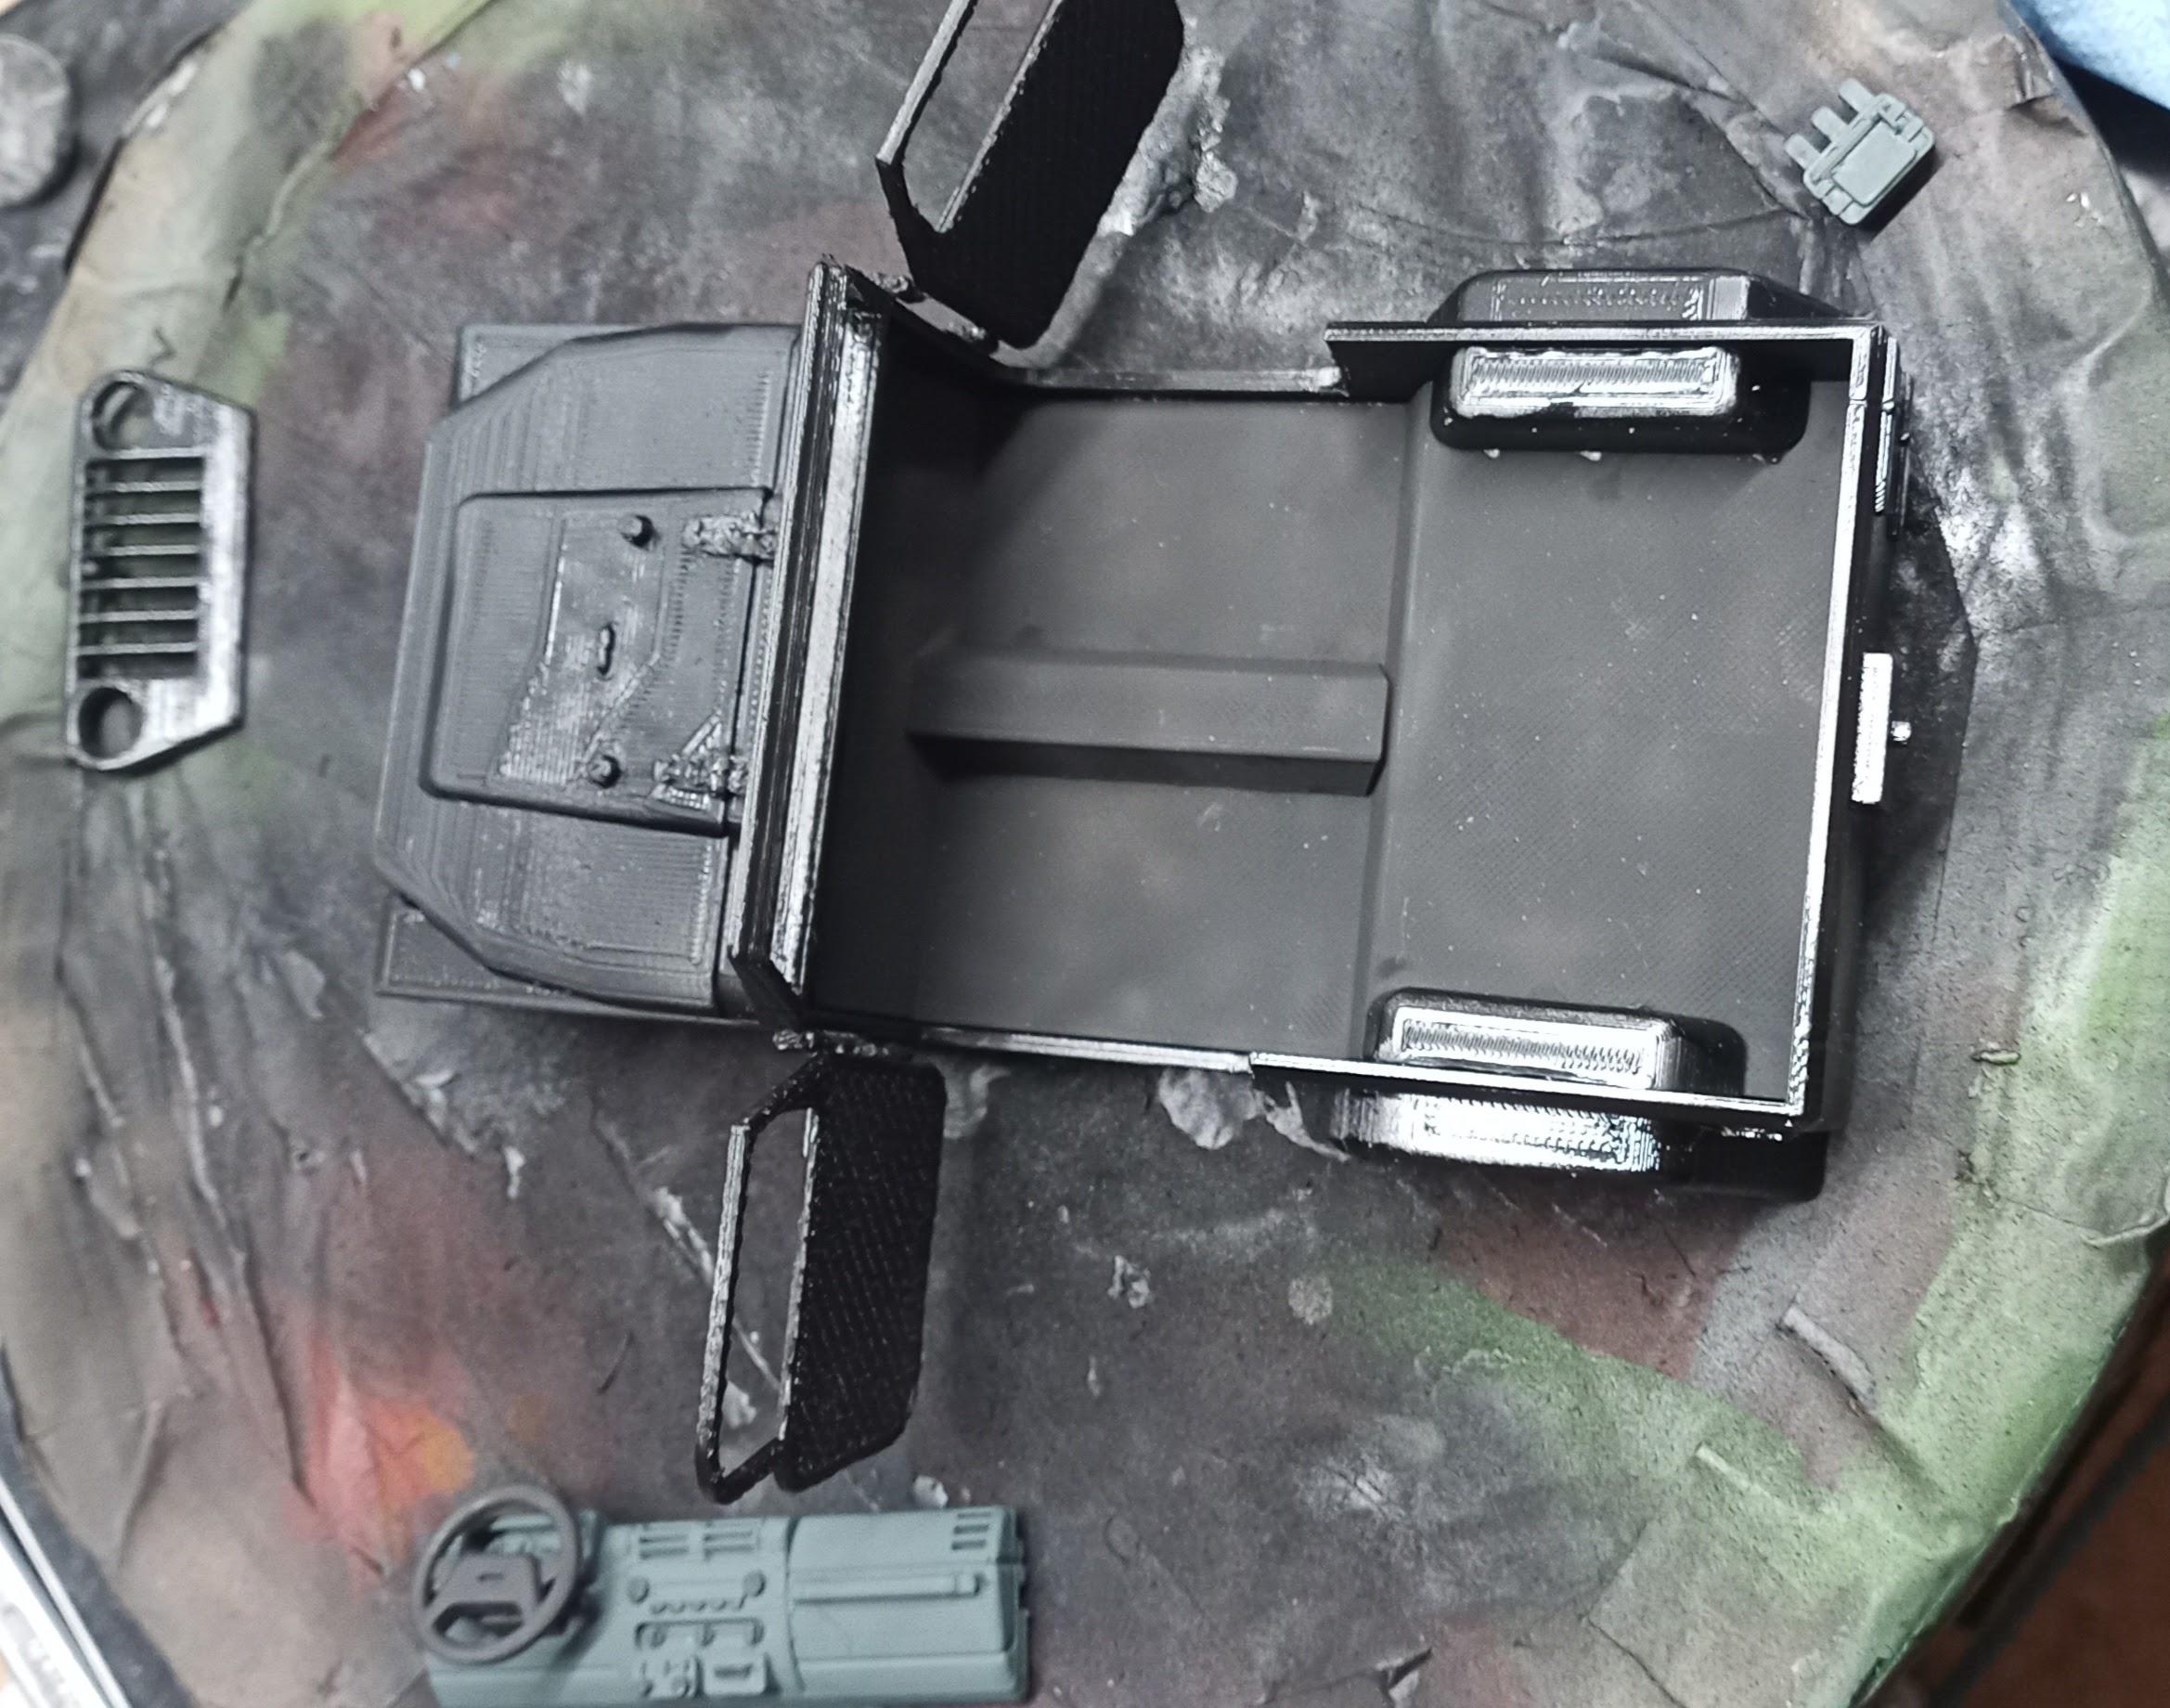
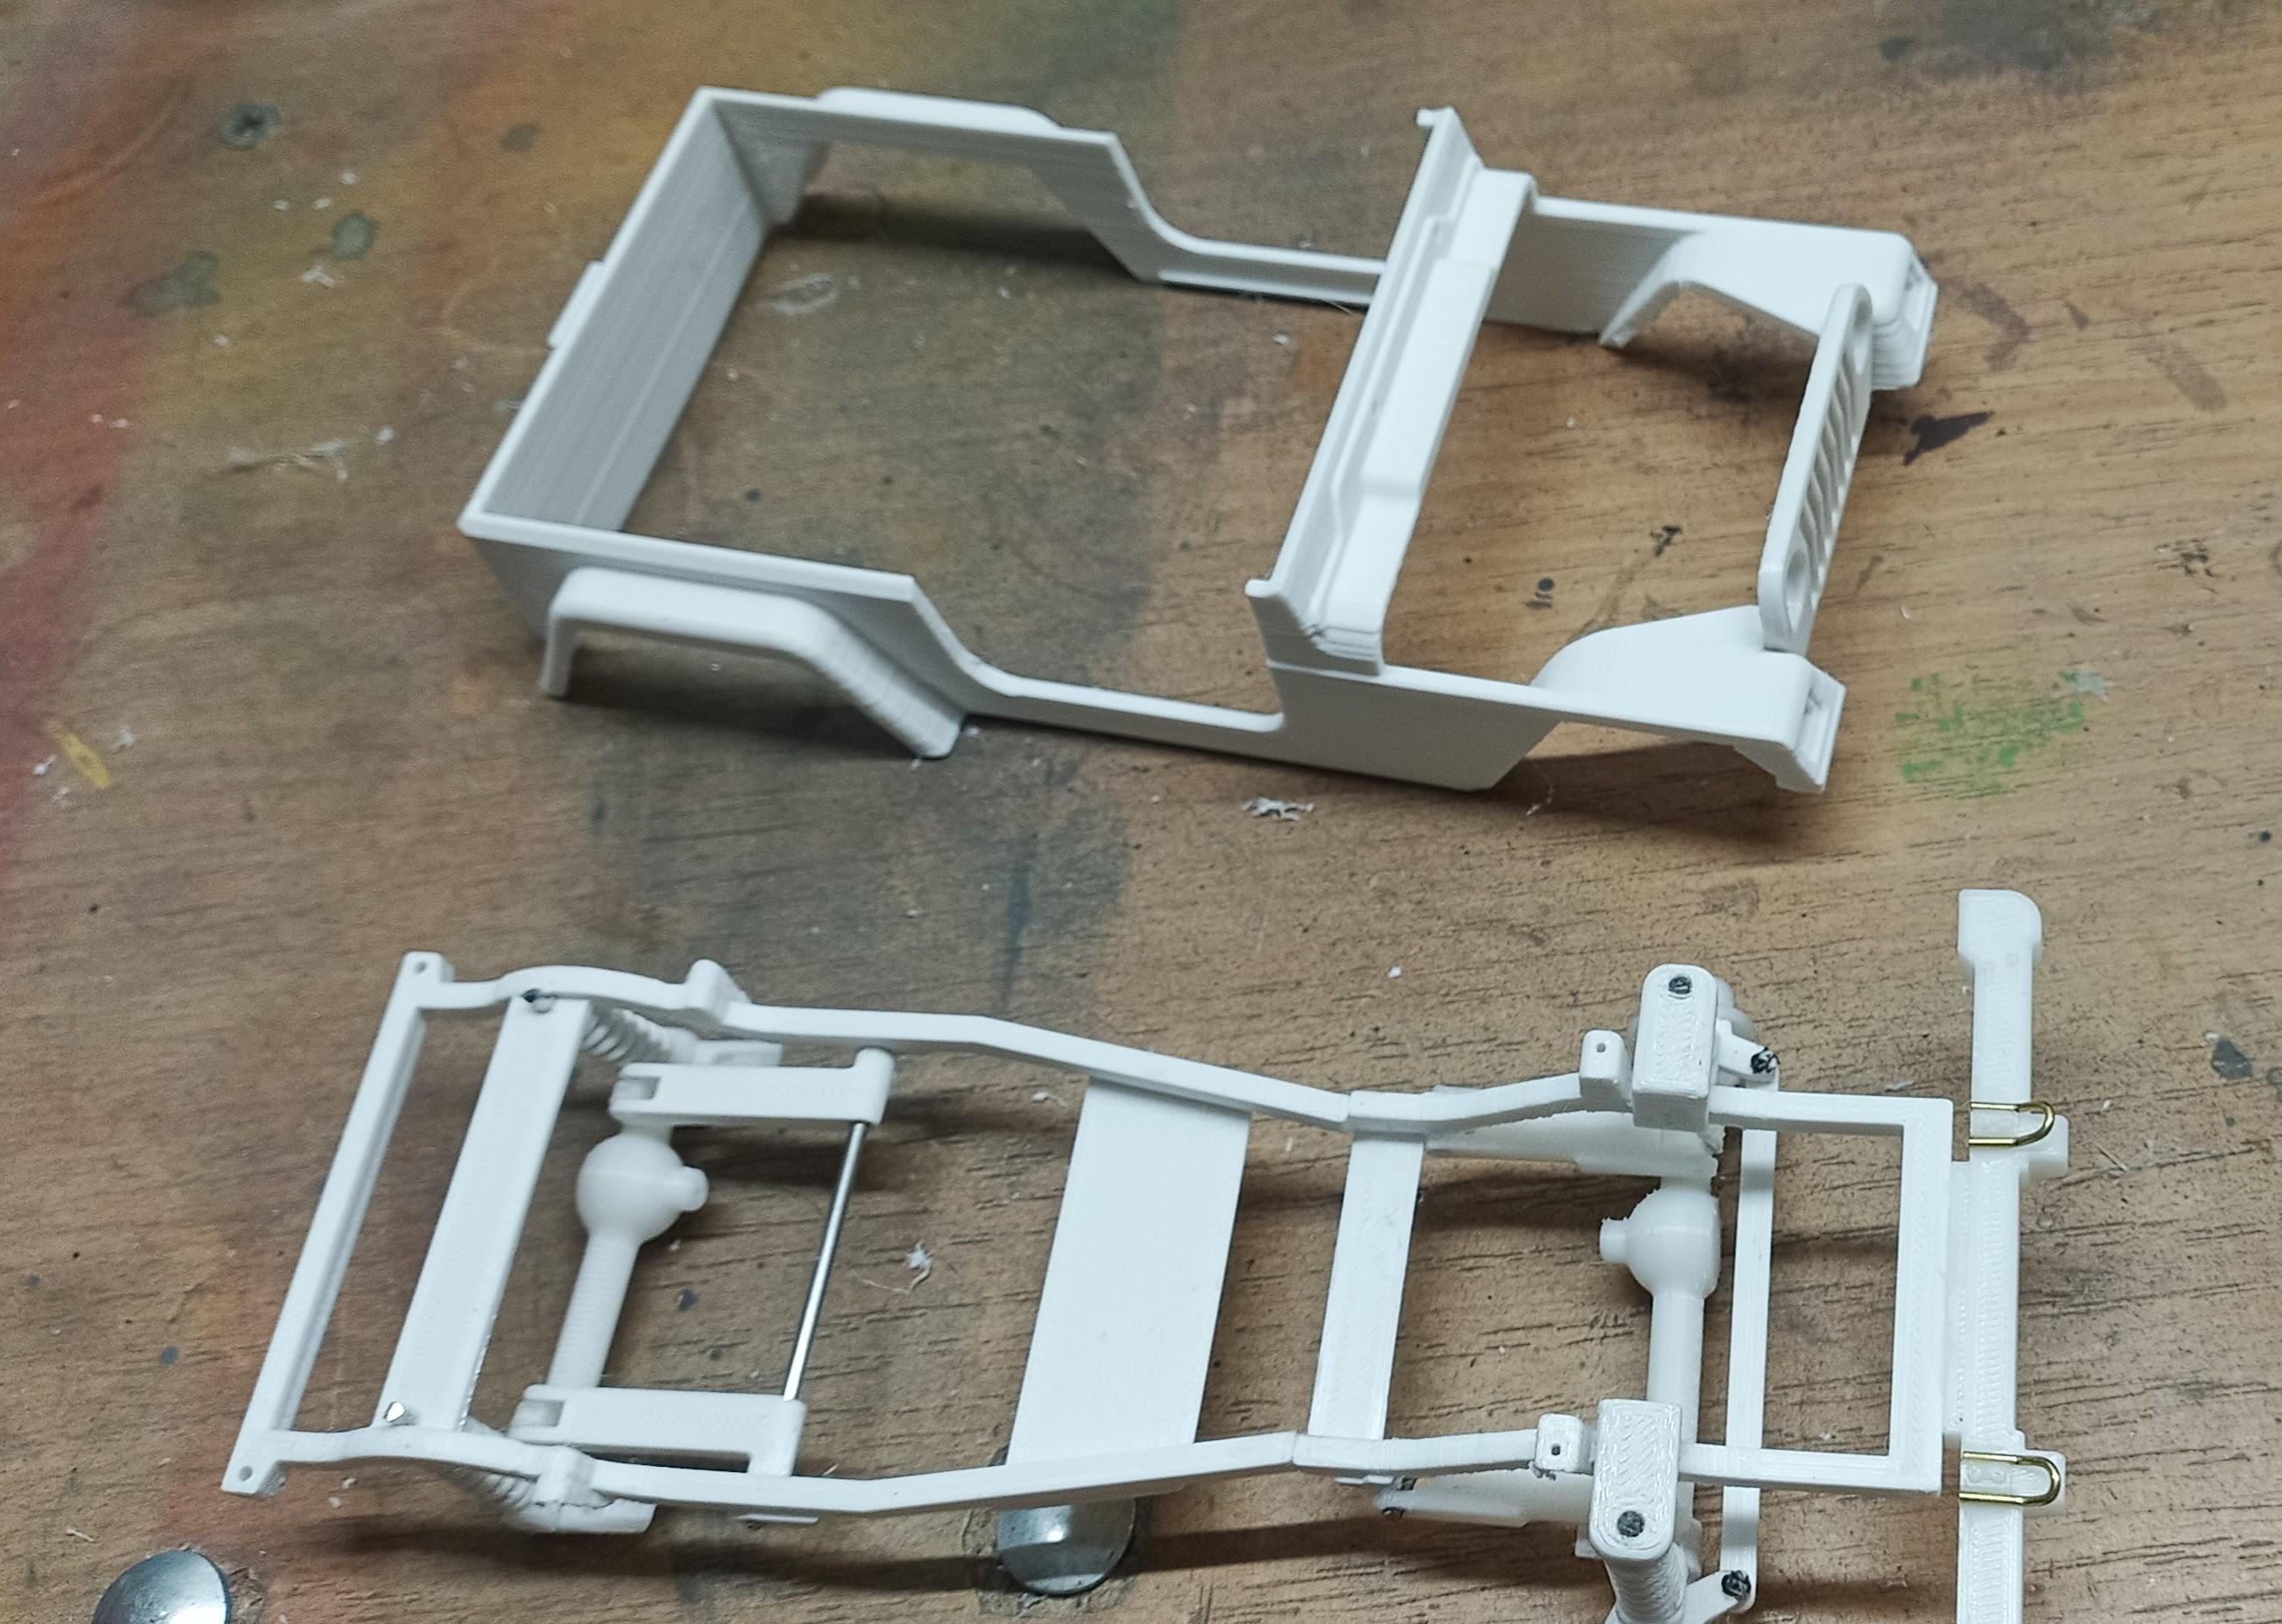
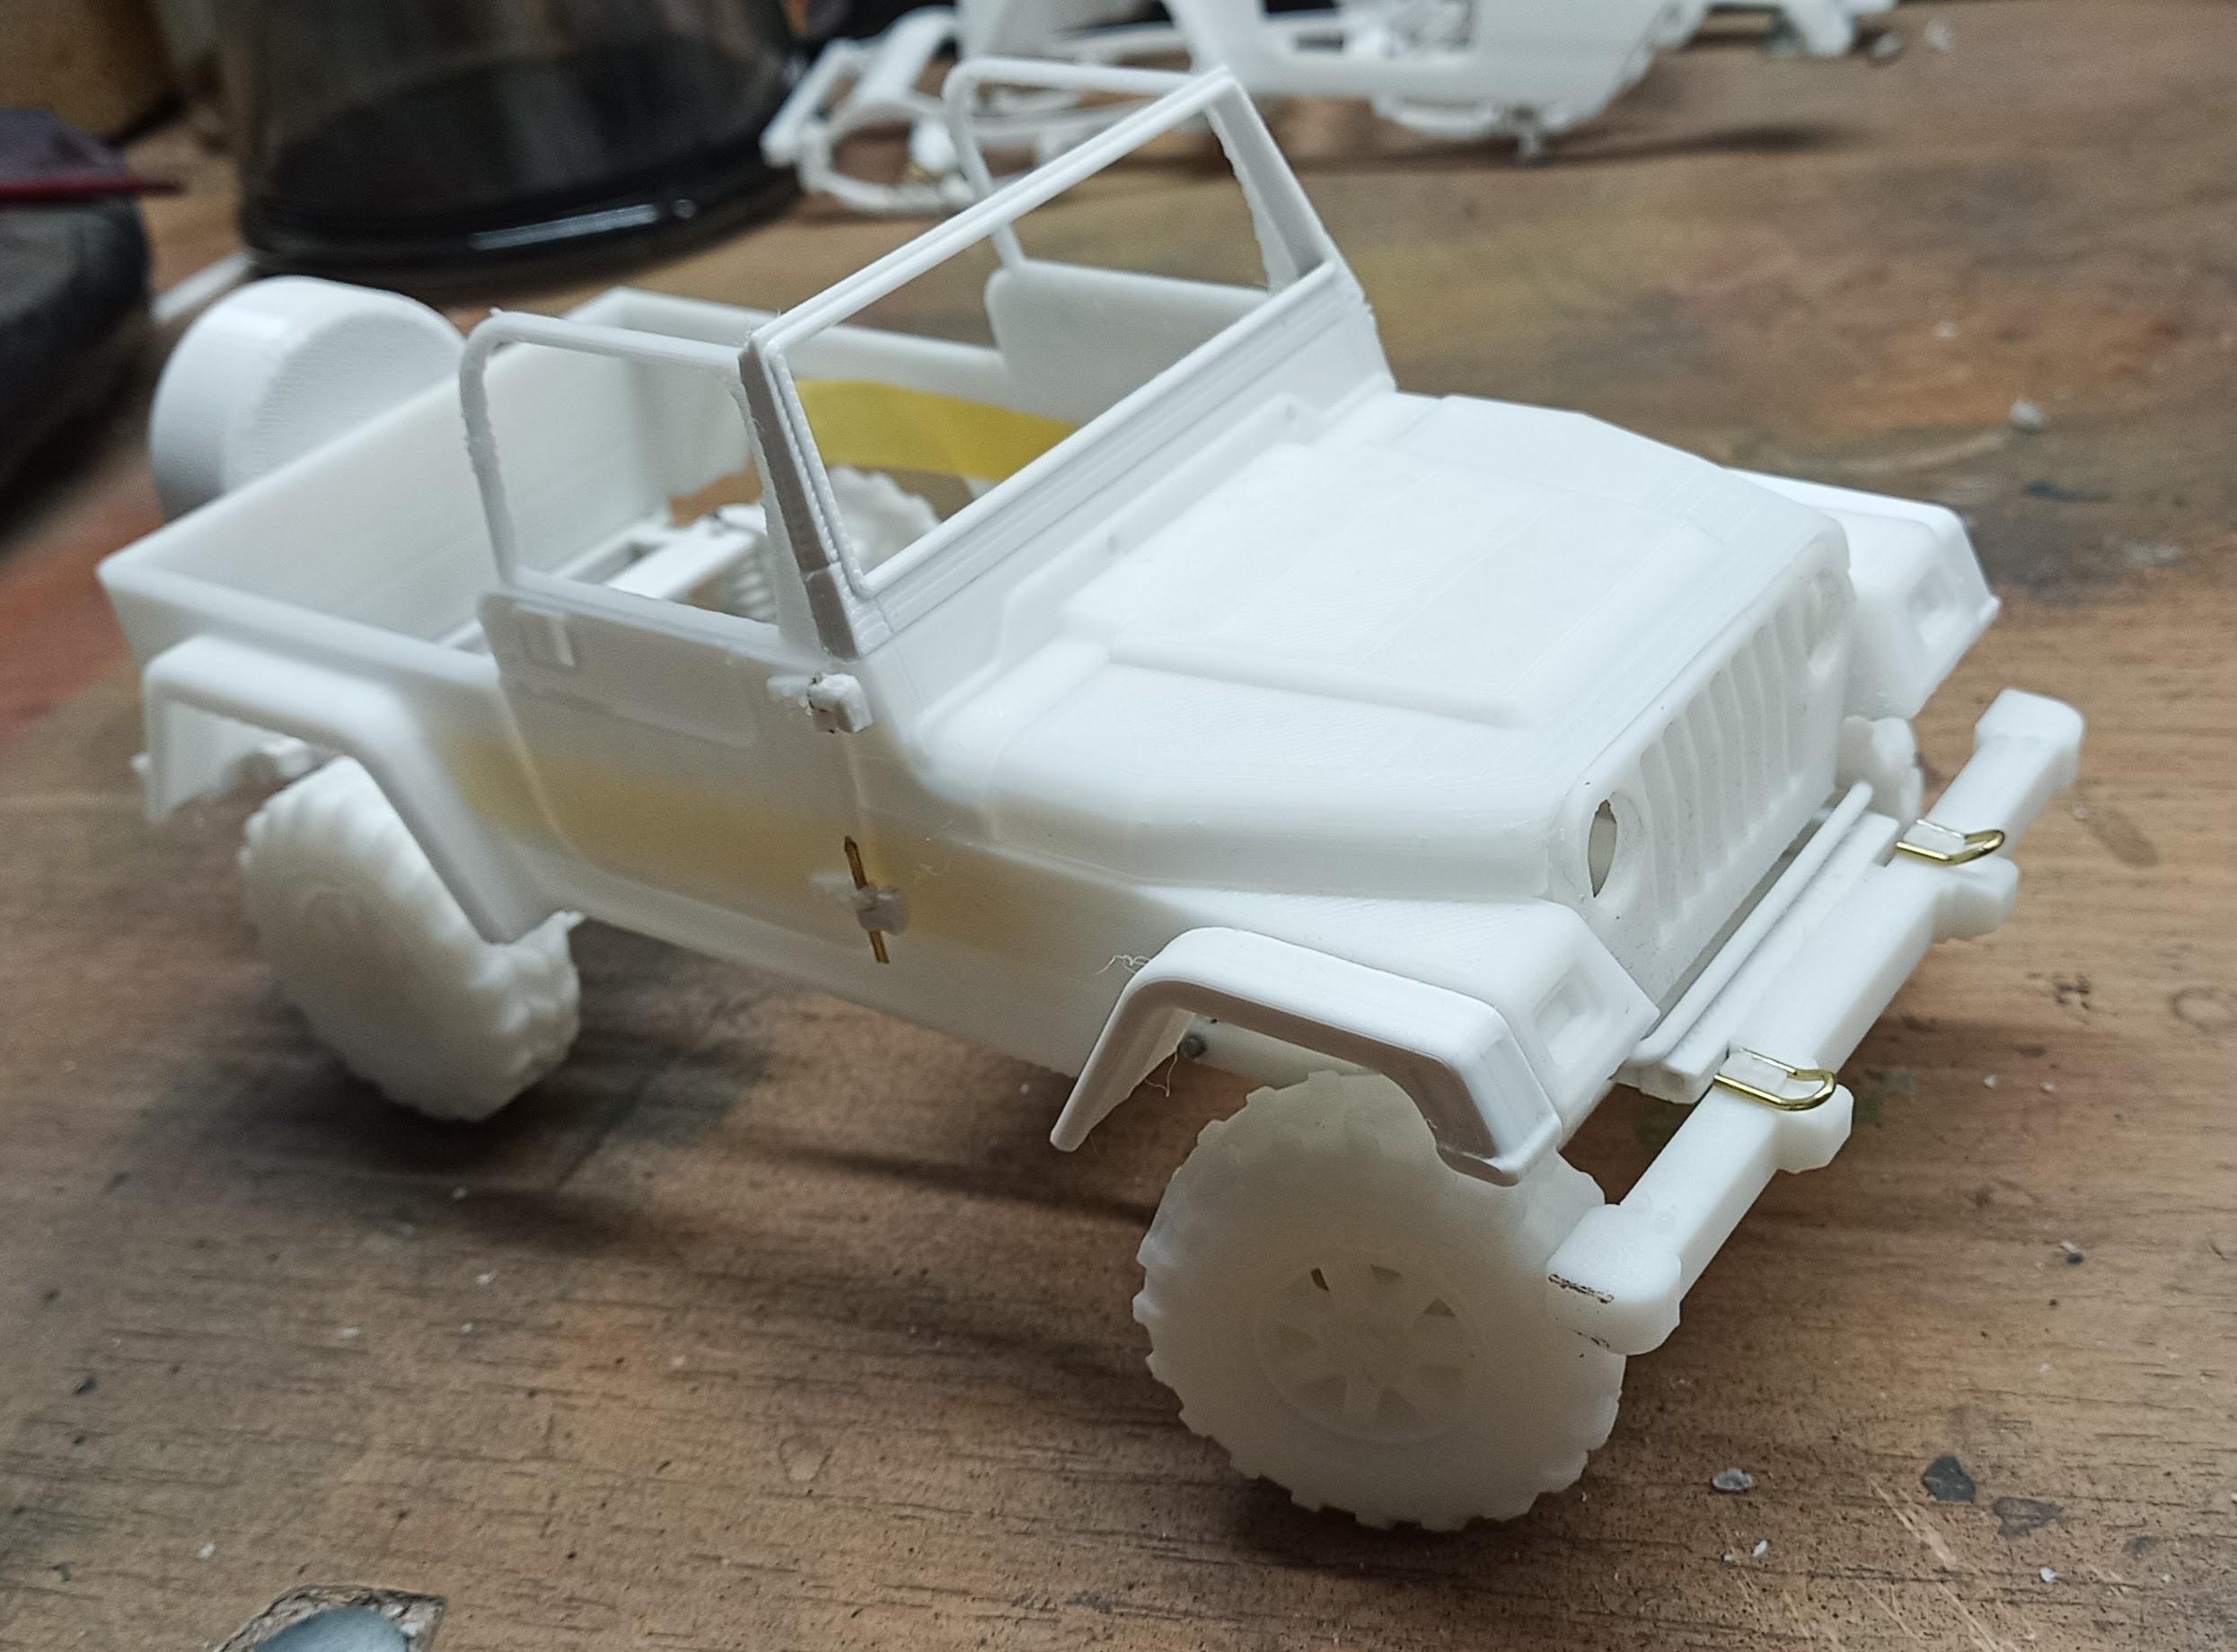
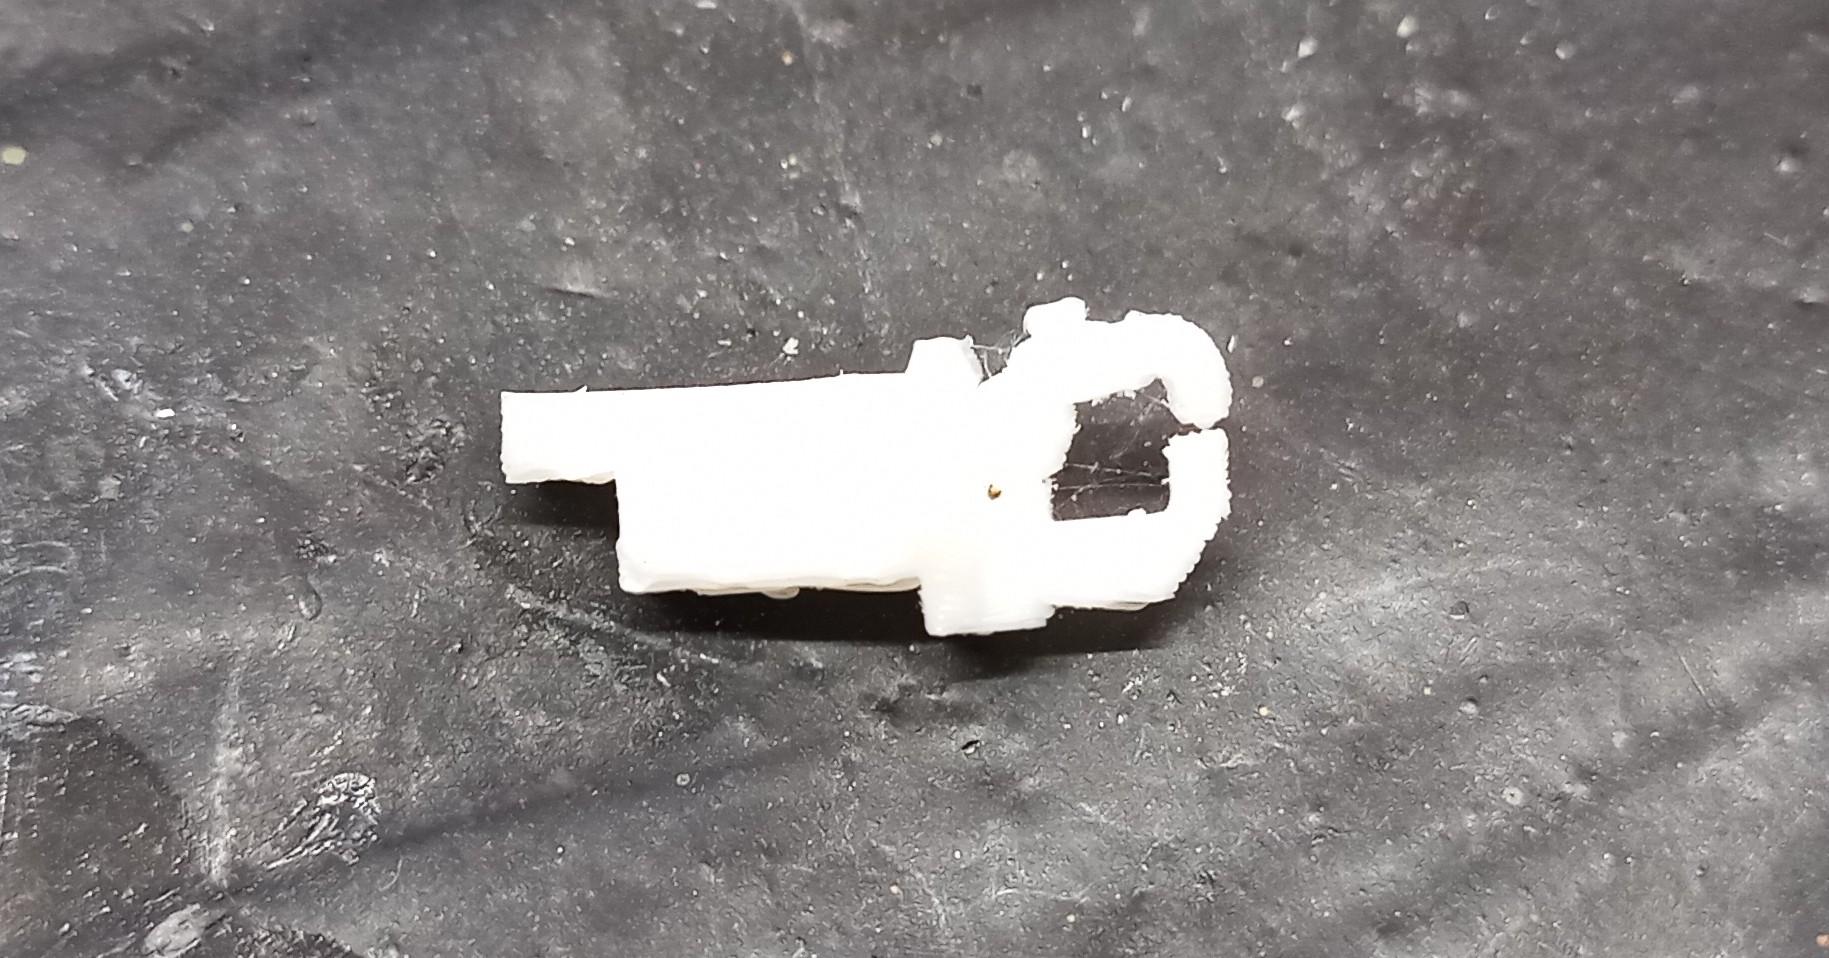
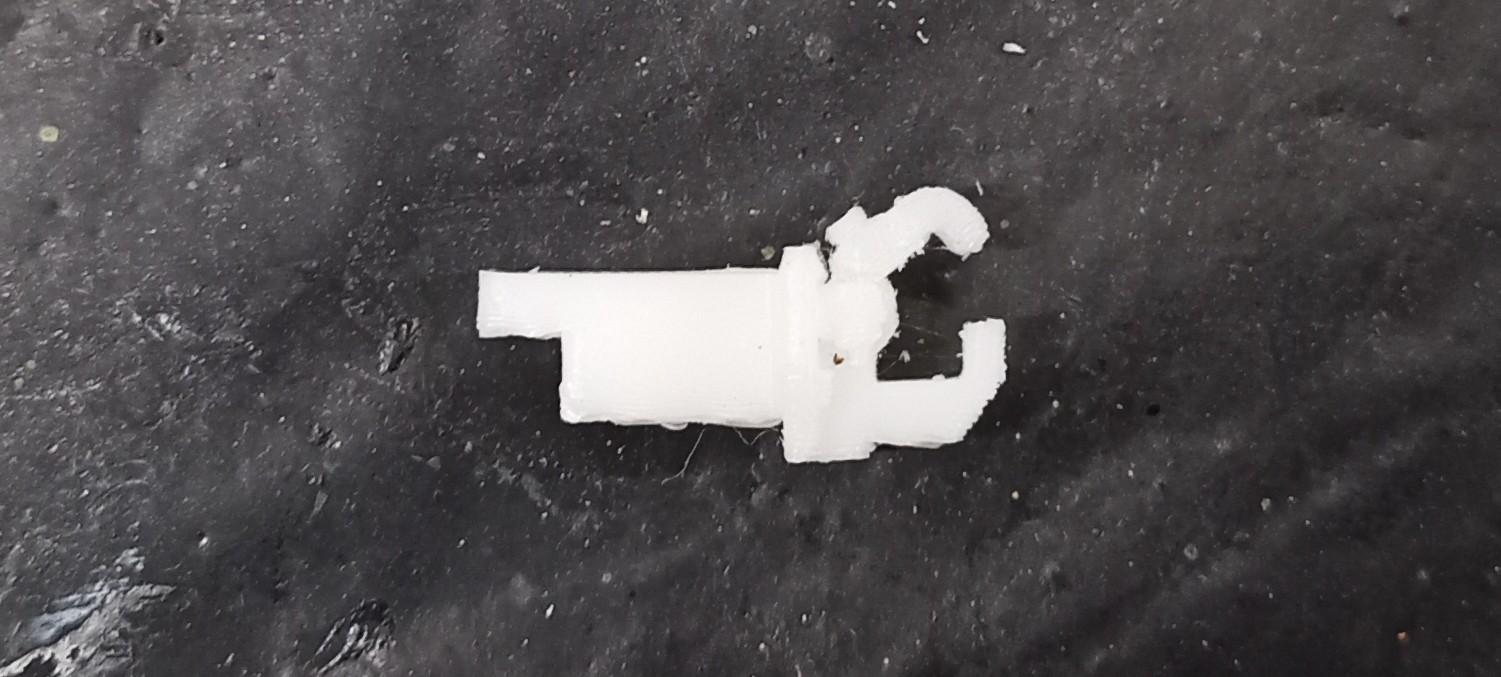
Forgot to show that the Hood opens too! ? The door and hood hinges were really tricky. Had to print the door hinges five times because they broke! They're only 1mm inside diameter and 0.7mm thick.
-
Jeep TJ
Jürgen M. replied to Jürgen M.'s topic in Model Trucks: Pickups, Vans, SUVs, Light Commercial
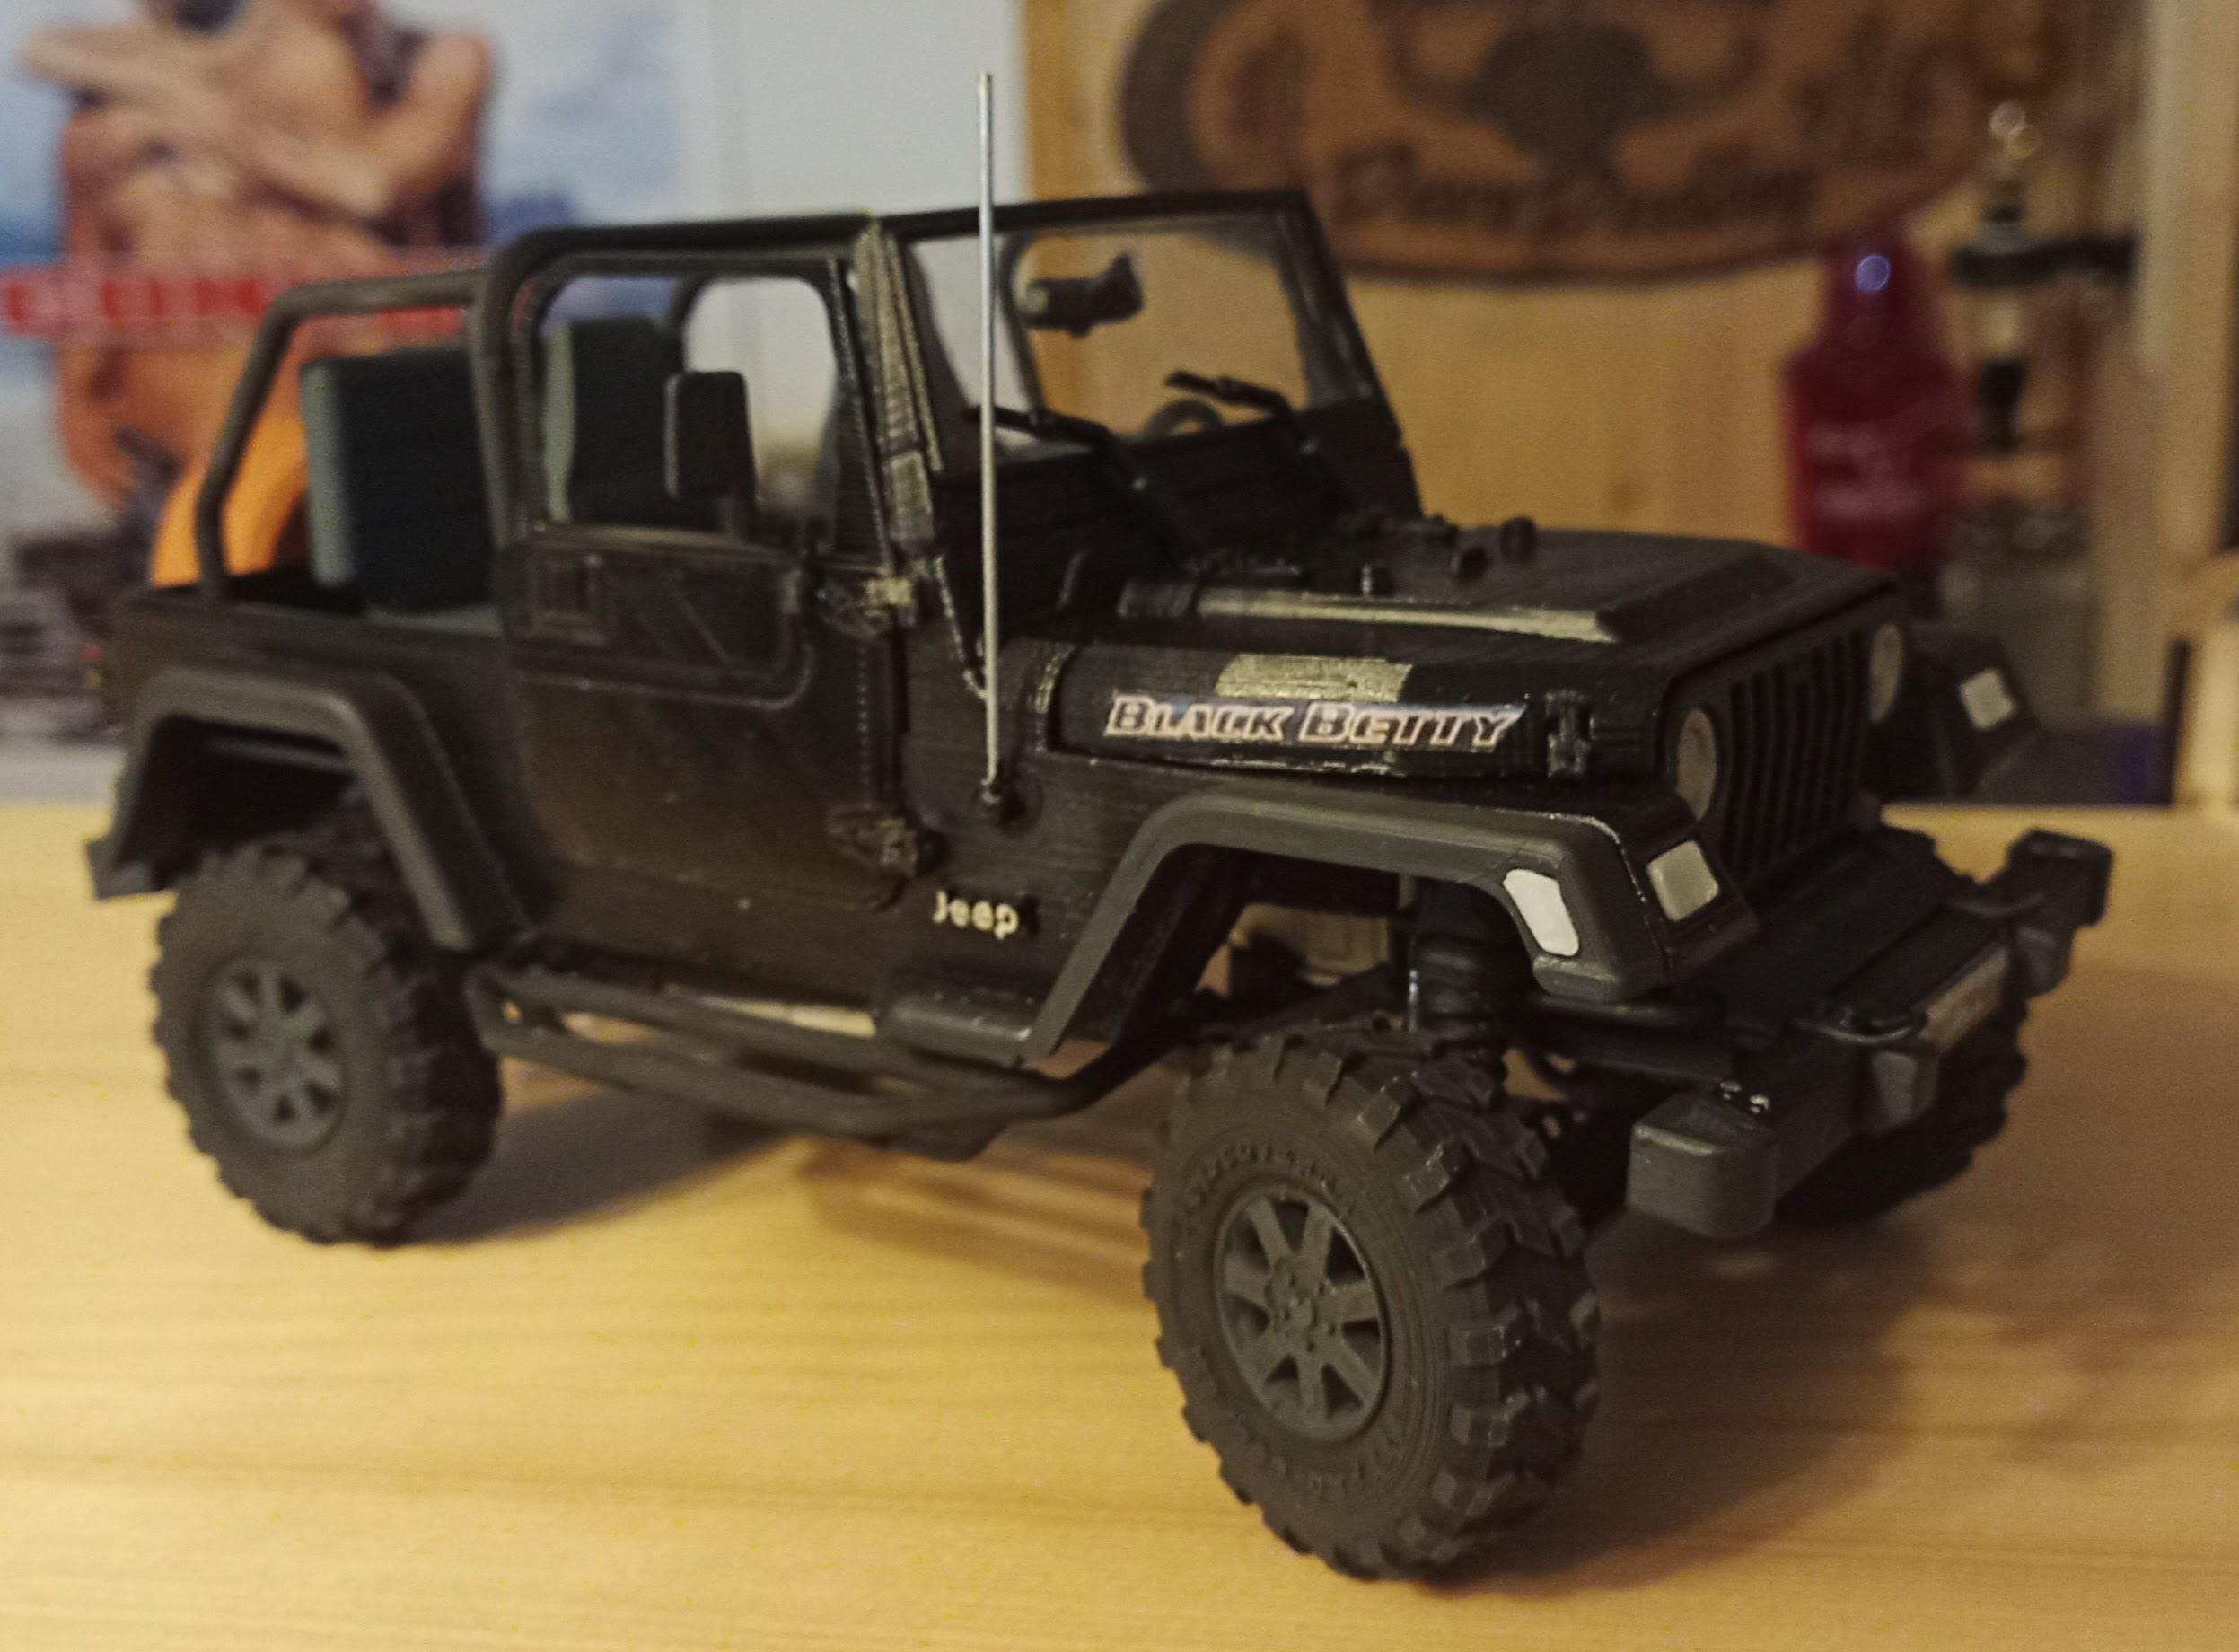
Thanks guys! I myself drive a Wrangler JKU V6. Nice ride too! ? -
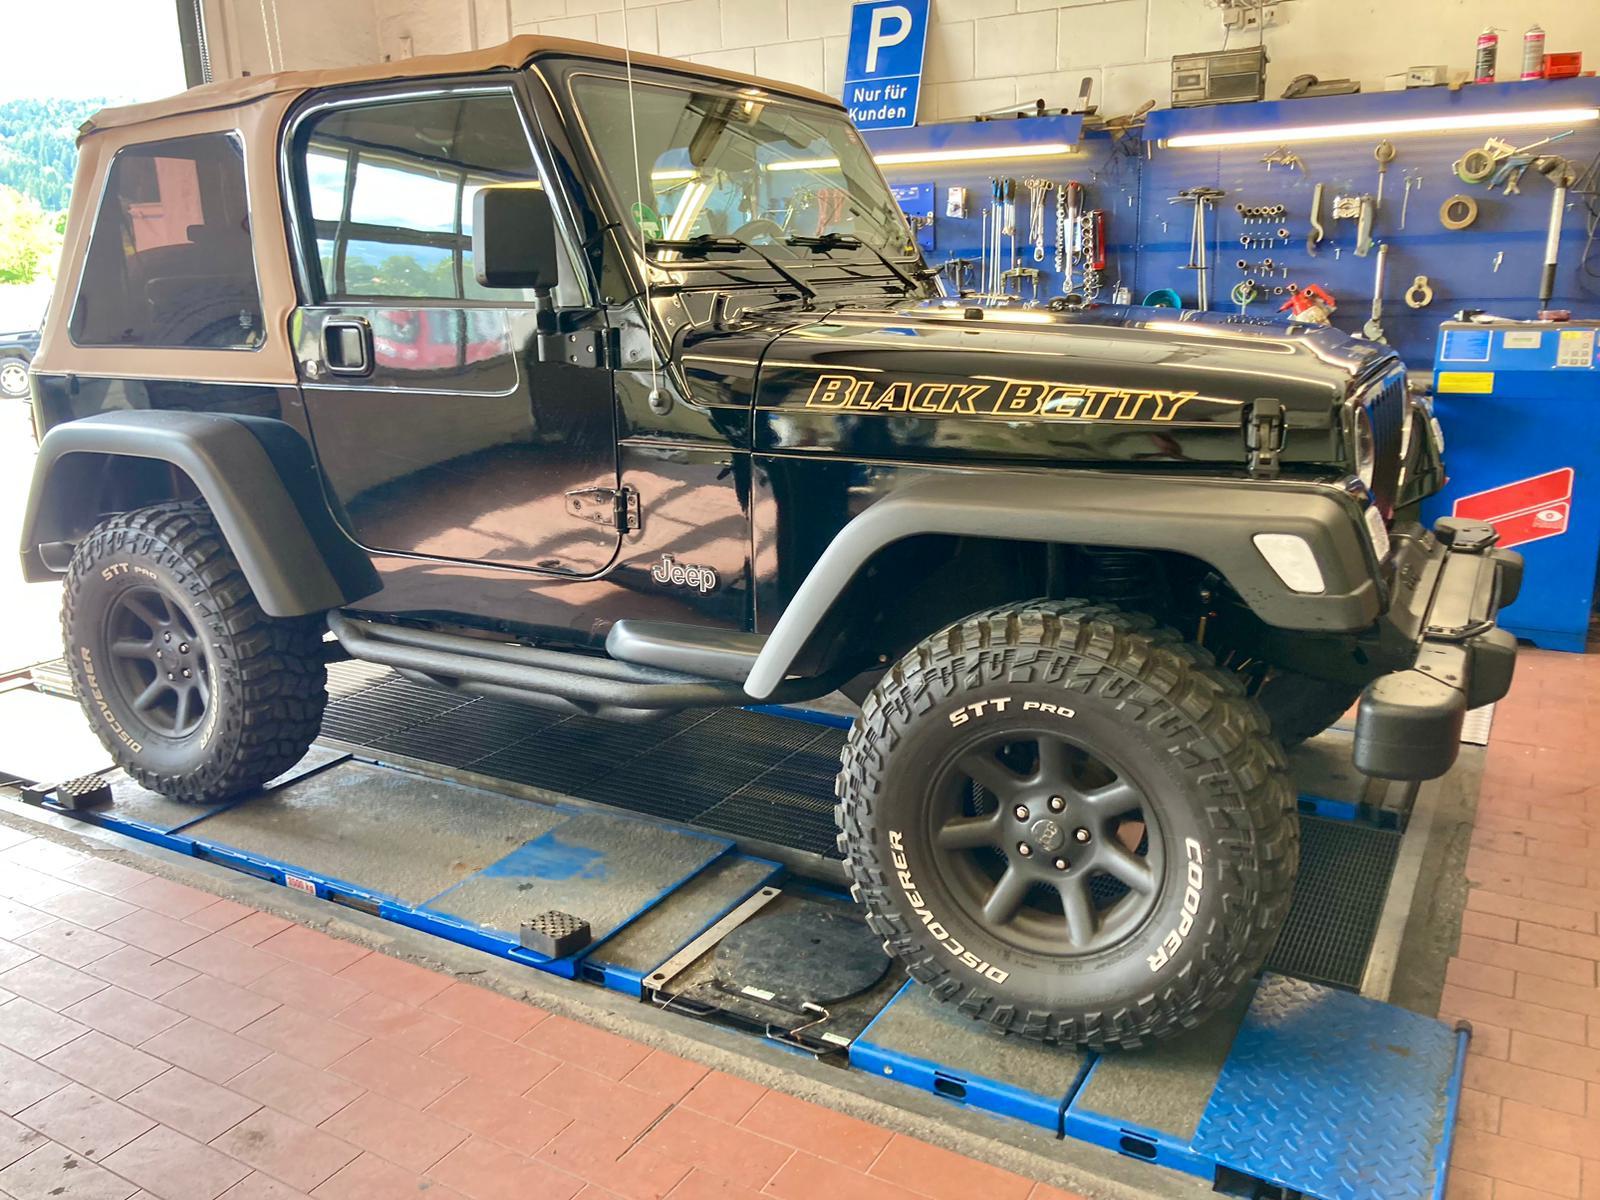
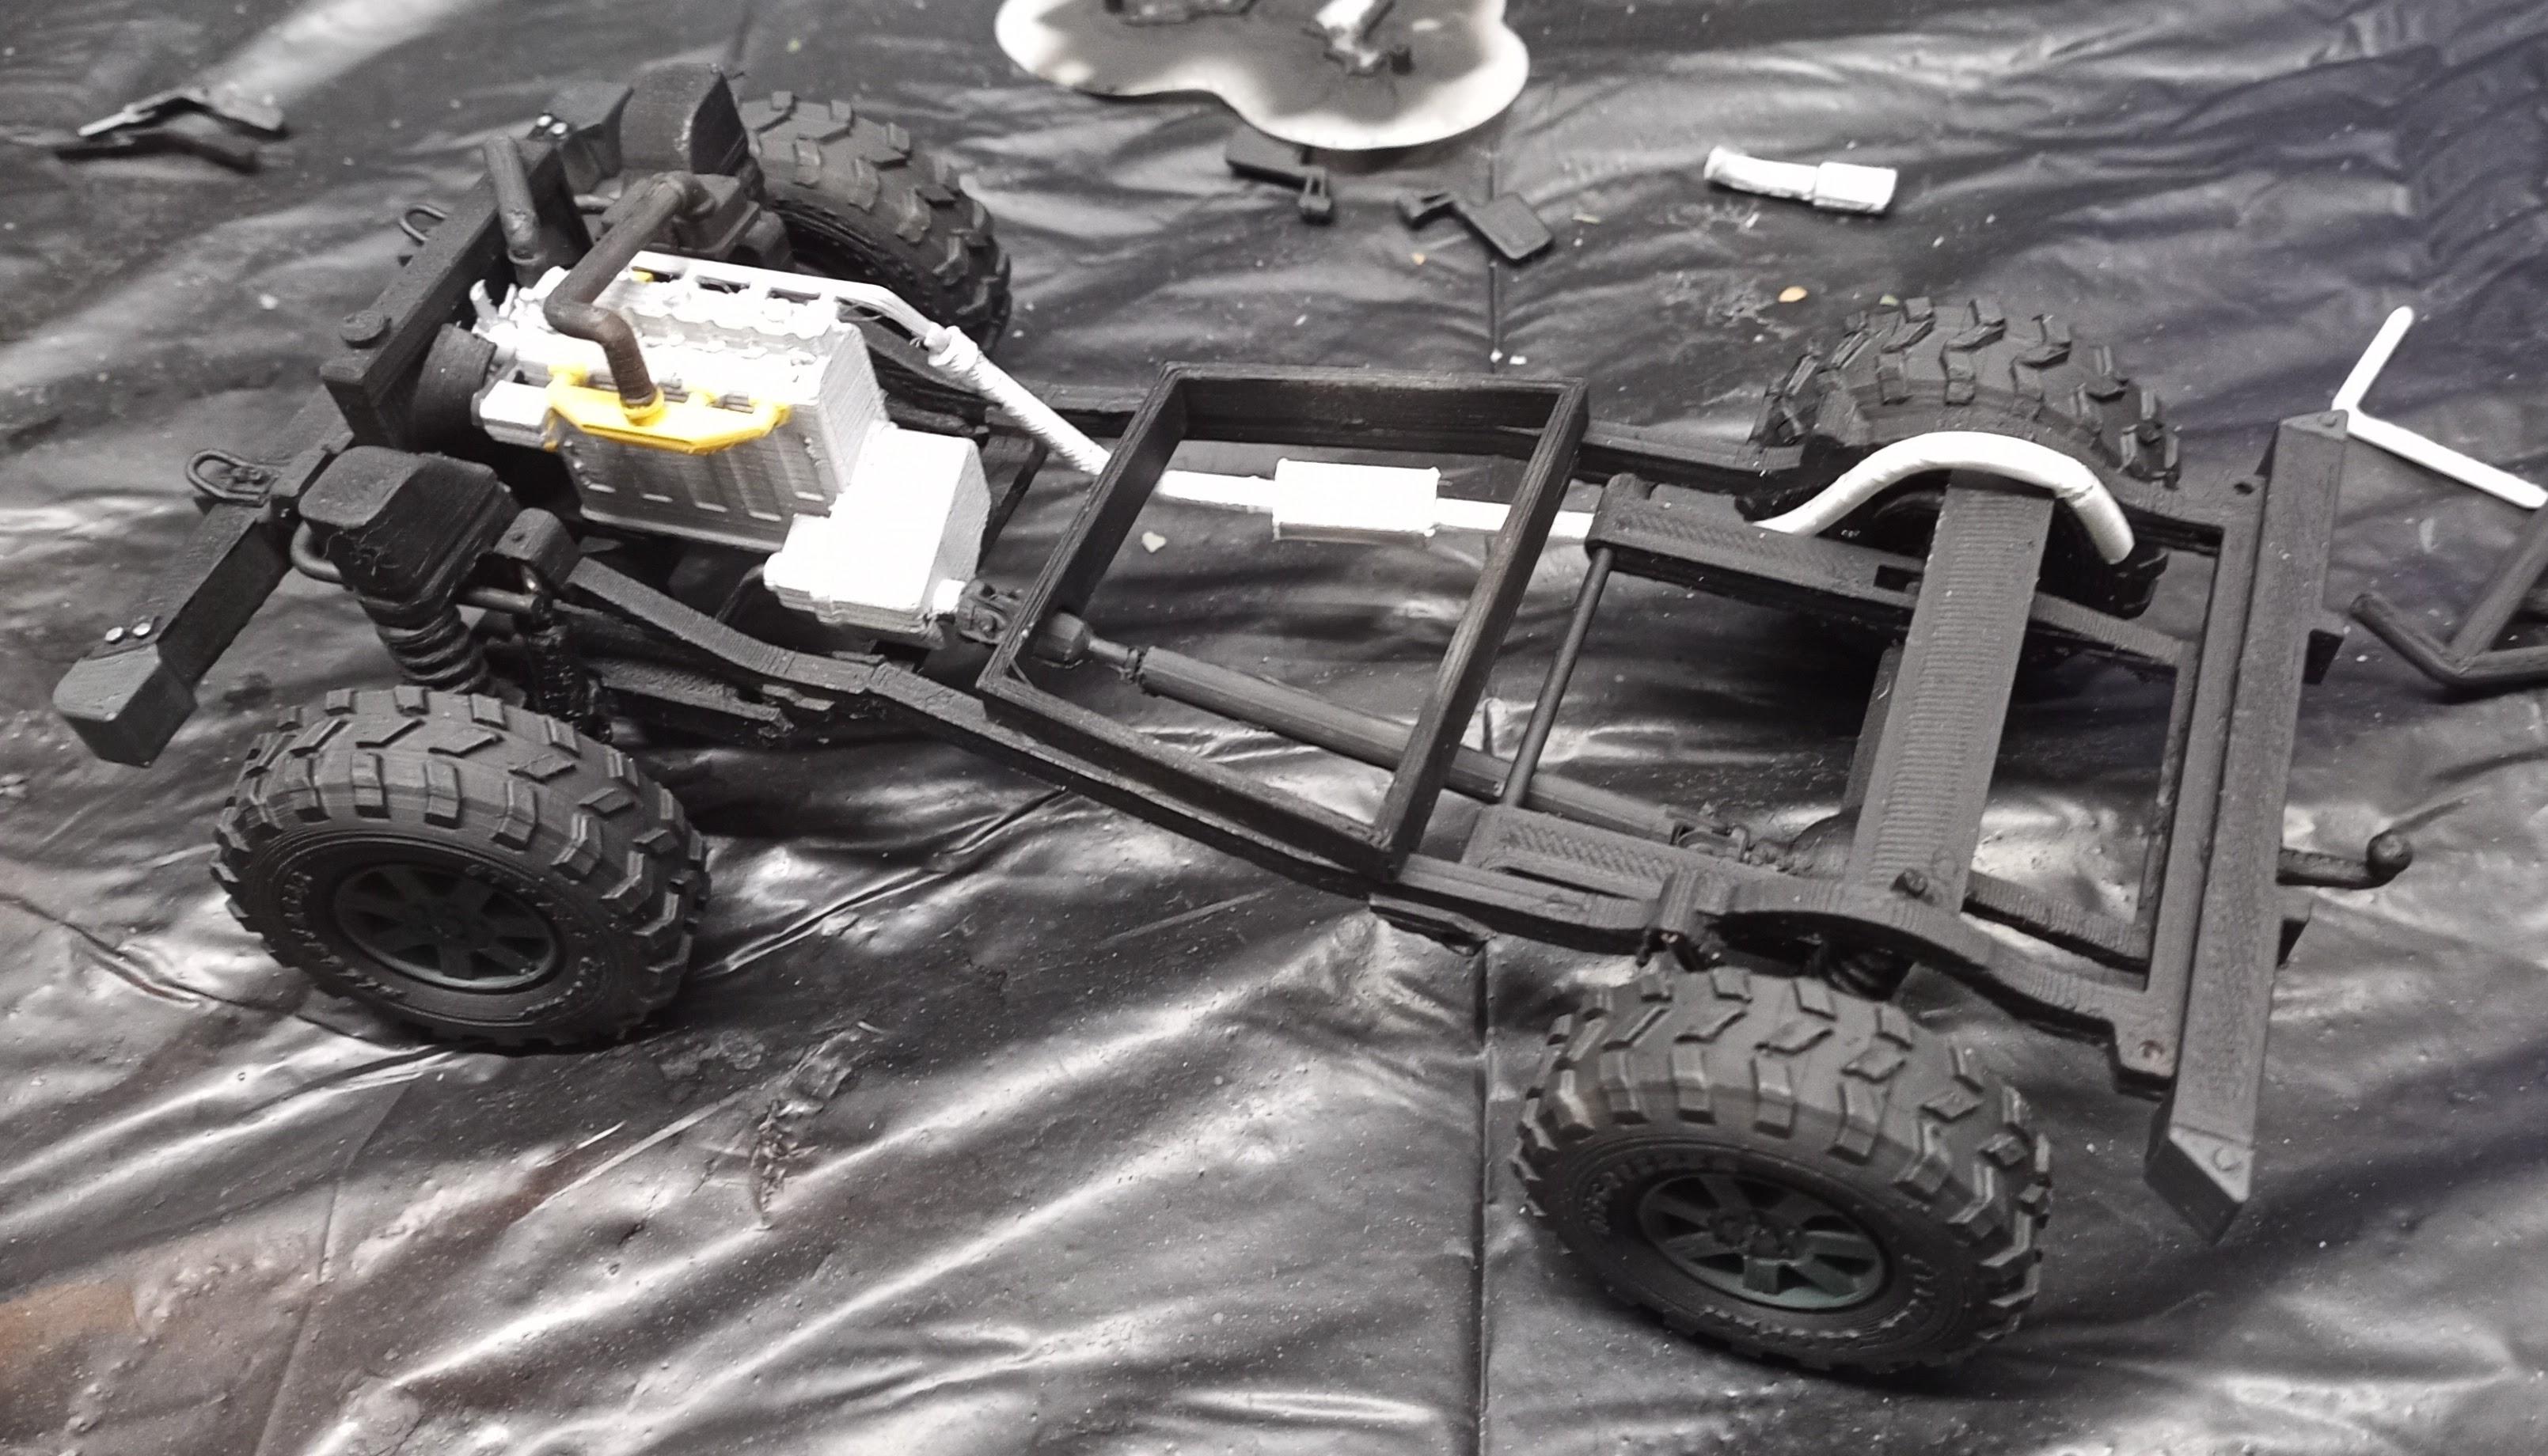
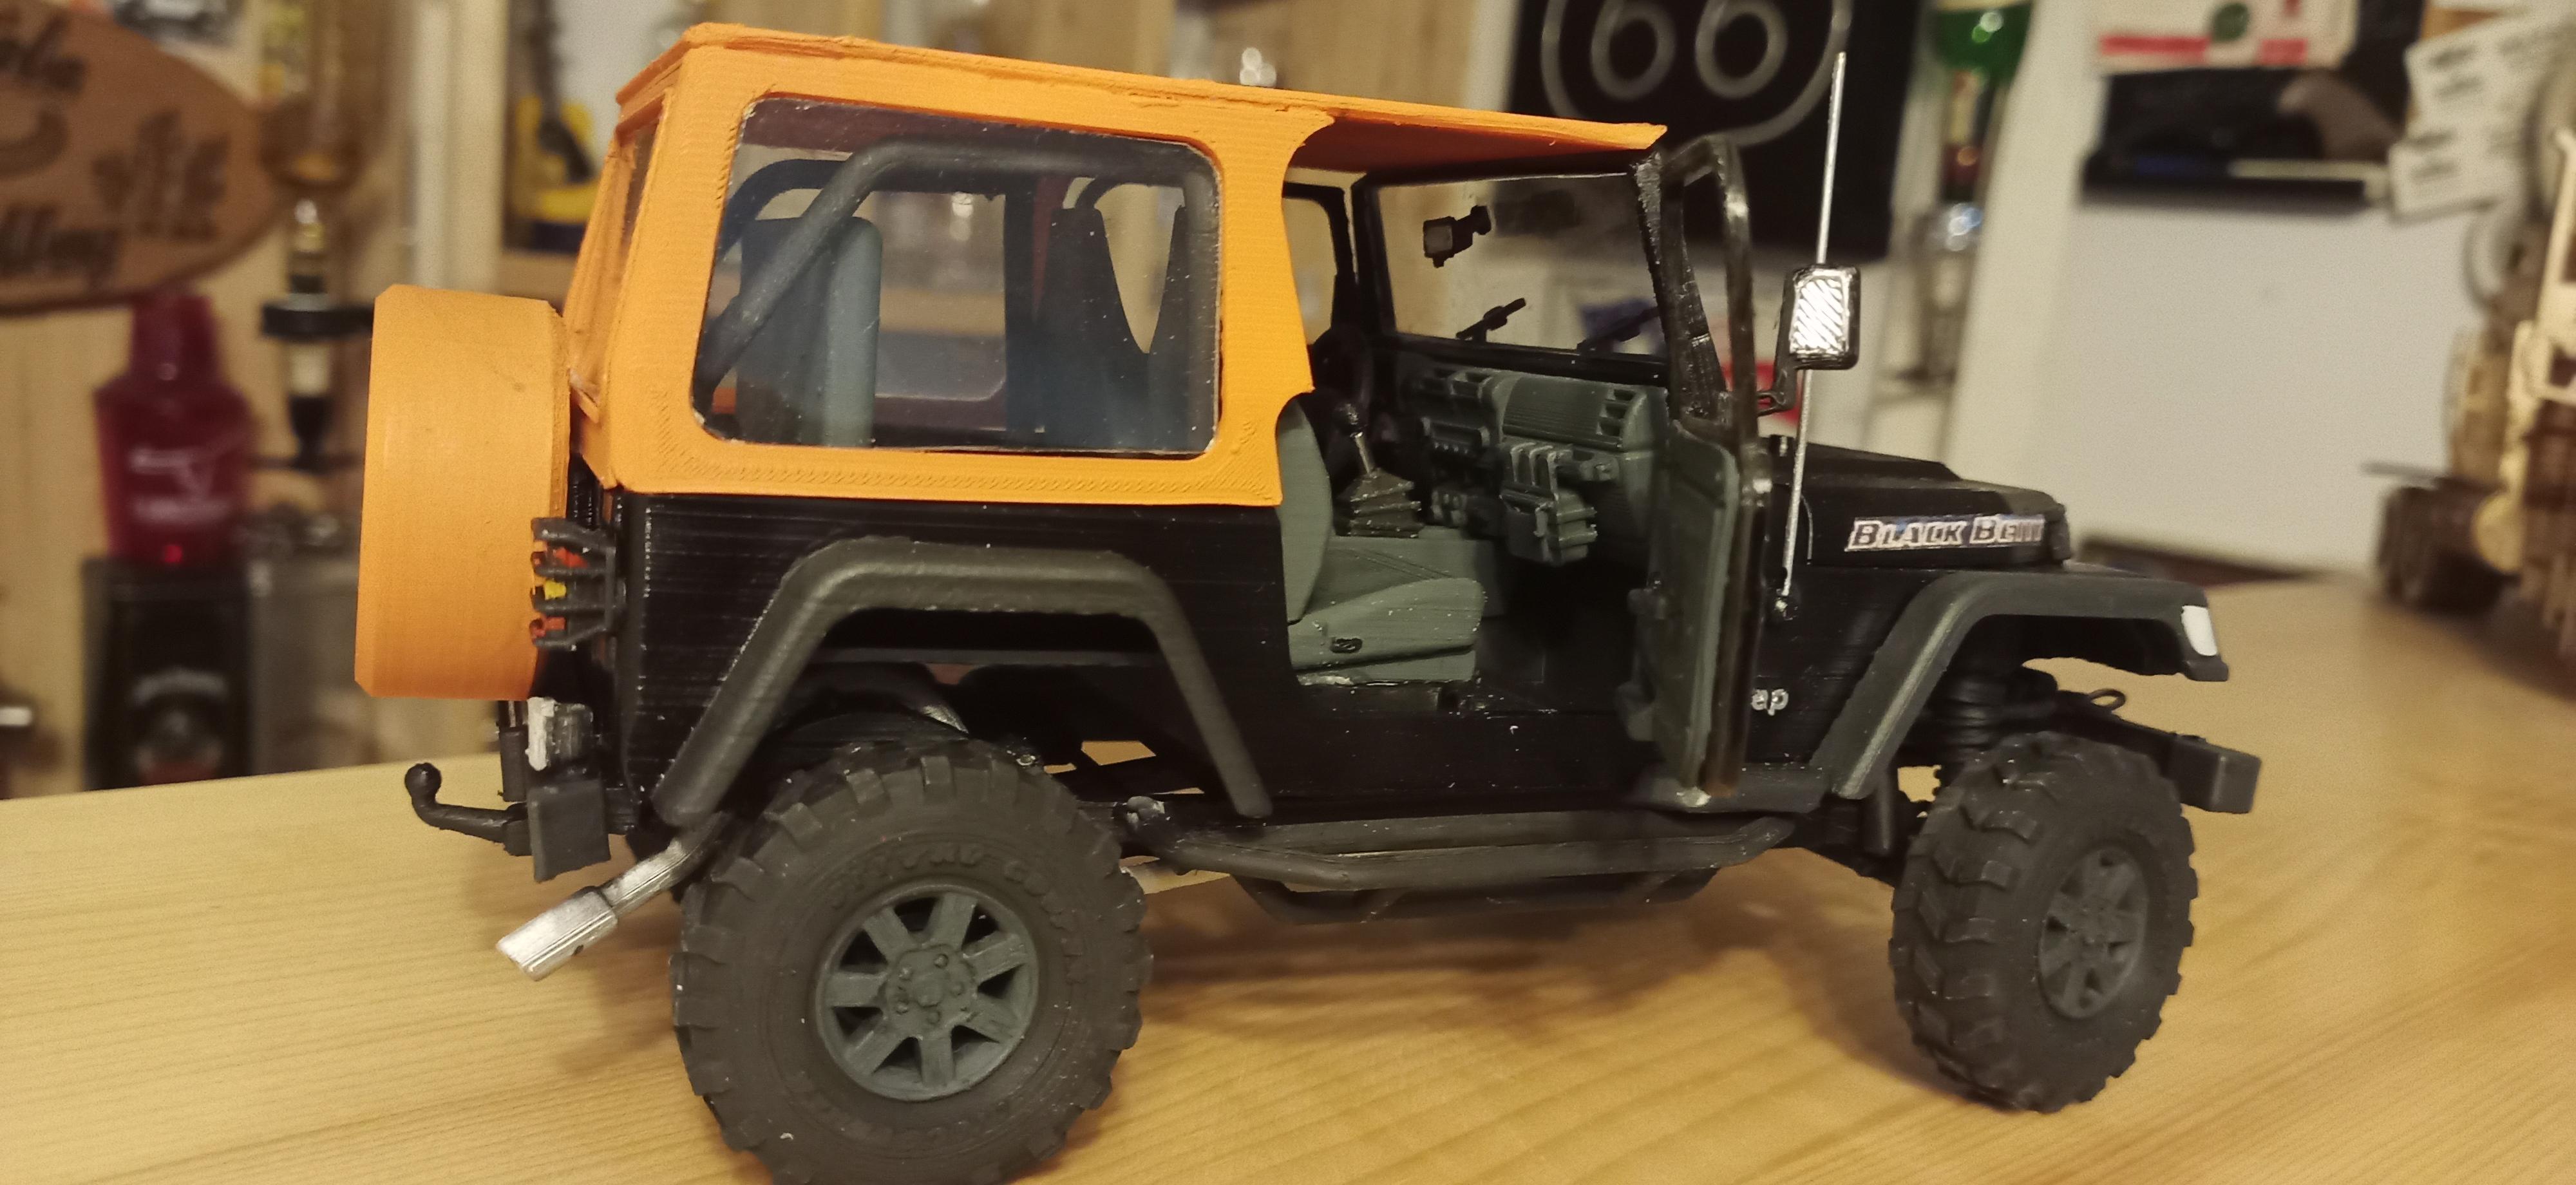
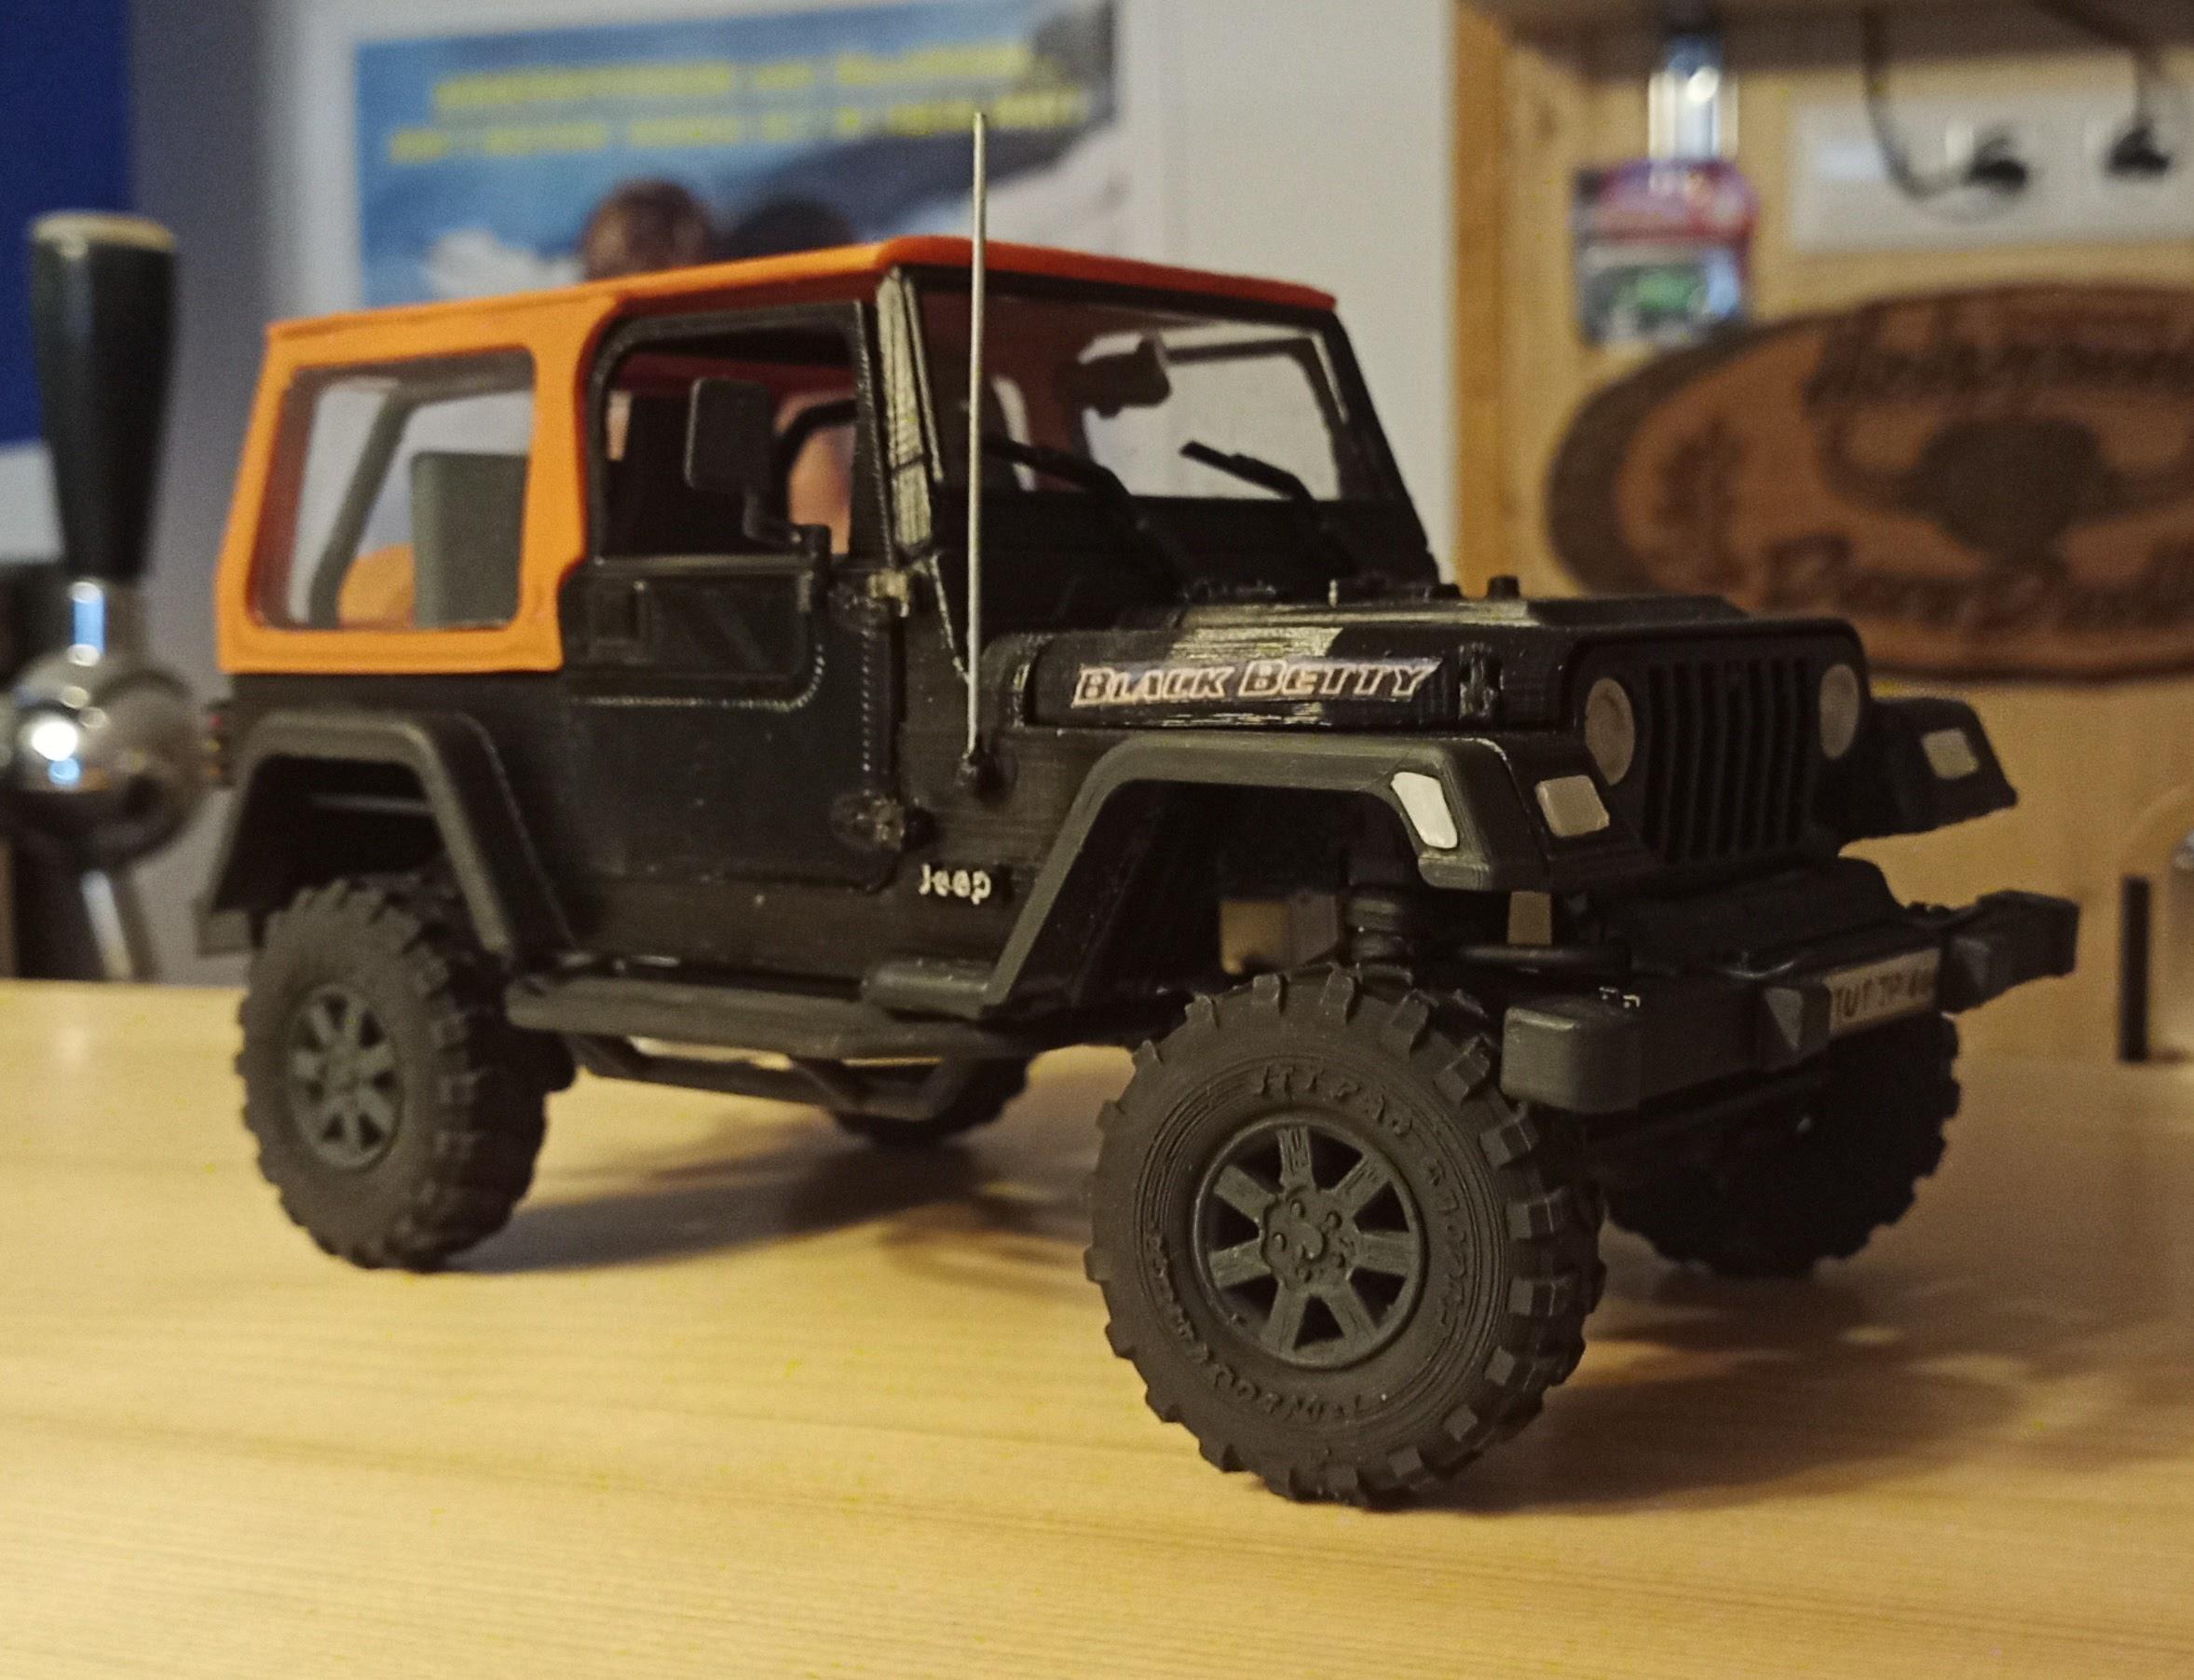
Hi everyone, normally I'm more into big rigs but now I'd like to share this special car. It's a 1996 Jeep TJ. I built it for my best friend who bought it a couple of years ago and has been working on it since then. Since the TJ is his dream car and he's been my best friend for almost 45 years I thought I'd surprise him with this selfmade model. It's about 97% self designed and printed. Hope you like it! For those of you who might ne experts on the TJ, I know it's not quite authentic concerning the chassis and the engine but I didn't have any pics to see the details so don't be too hard on me! ?
-
Painting has begun! Not quite dry everywhere yet but looks good!
-
This is the hitch. I tried to design it according to the pics you posted! Thanks again! That was very helpful! It opens just enough to hitch up the drawbar! Of course they still have to be smoothend. Too much material still in the hook. That comes from the small size. The printer hast problems with such tiny pieces. On larger parts you don't see it as much. The trailers are ready for painting now! Almost like twins! The drawbar is only positioned because I have to know how far it's going to have to stick out in order to make the trailers turn without touching.
-
Thanks Guys, glad you like em! Big Nasty will probably be ready to join them by tomorrow evening!
-
Yes, I agree. For car or truck body parts such a printer would be perfect. The sanding is not always fun and neither is the work with putty. Still I'm quite satisfied with the results. Since I only do this for my own pleasure and don't want to (or have to) make a living out of it, it's fine for me. The cabs I've printed up to now have become better in surface I would say. The ACX was already pretty good compared to the Marmon Cabover eventhough the horizontal printlines are still visible but the've become finer. The sanding is tough because the pla filament I'm using gets very hard. You risk destroying details in the surface like bolts or hinges when you apply too much pressure. Maybe I should try a softer filament.
-
Now they're assembled!
-
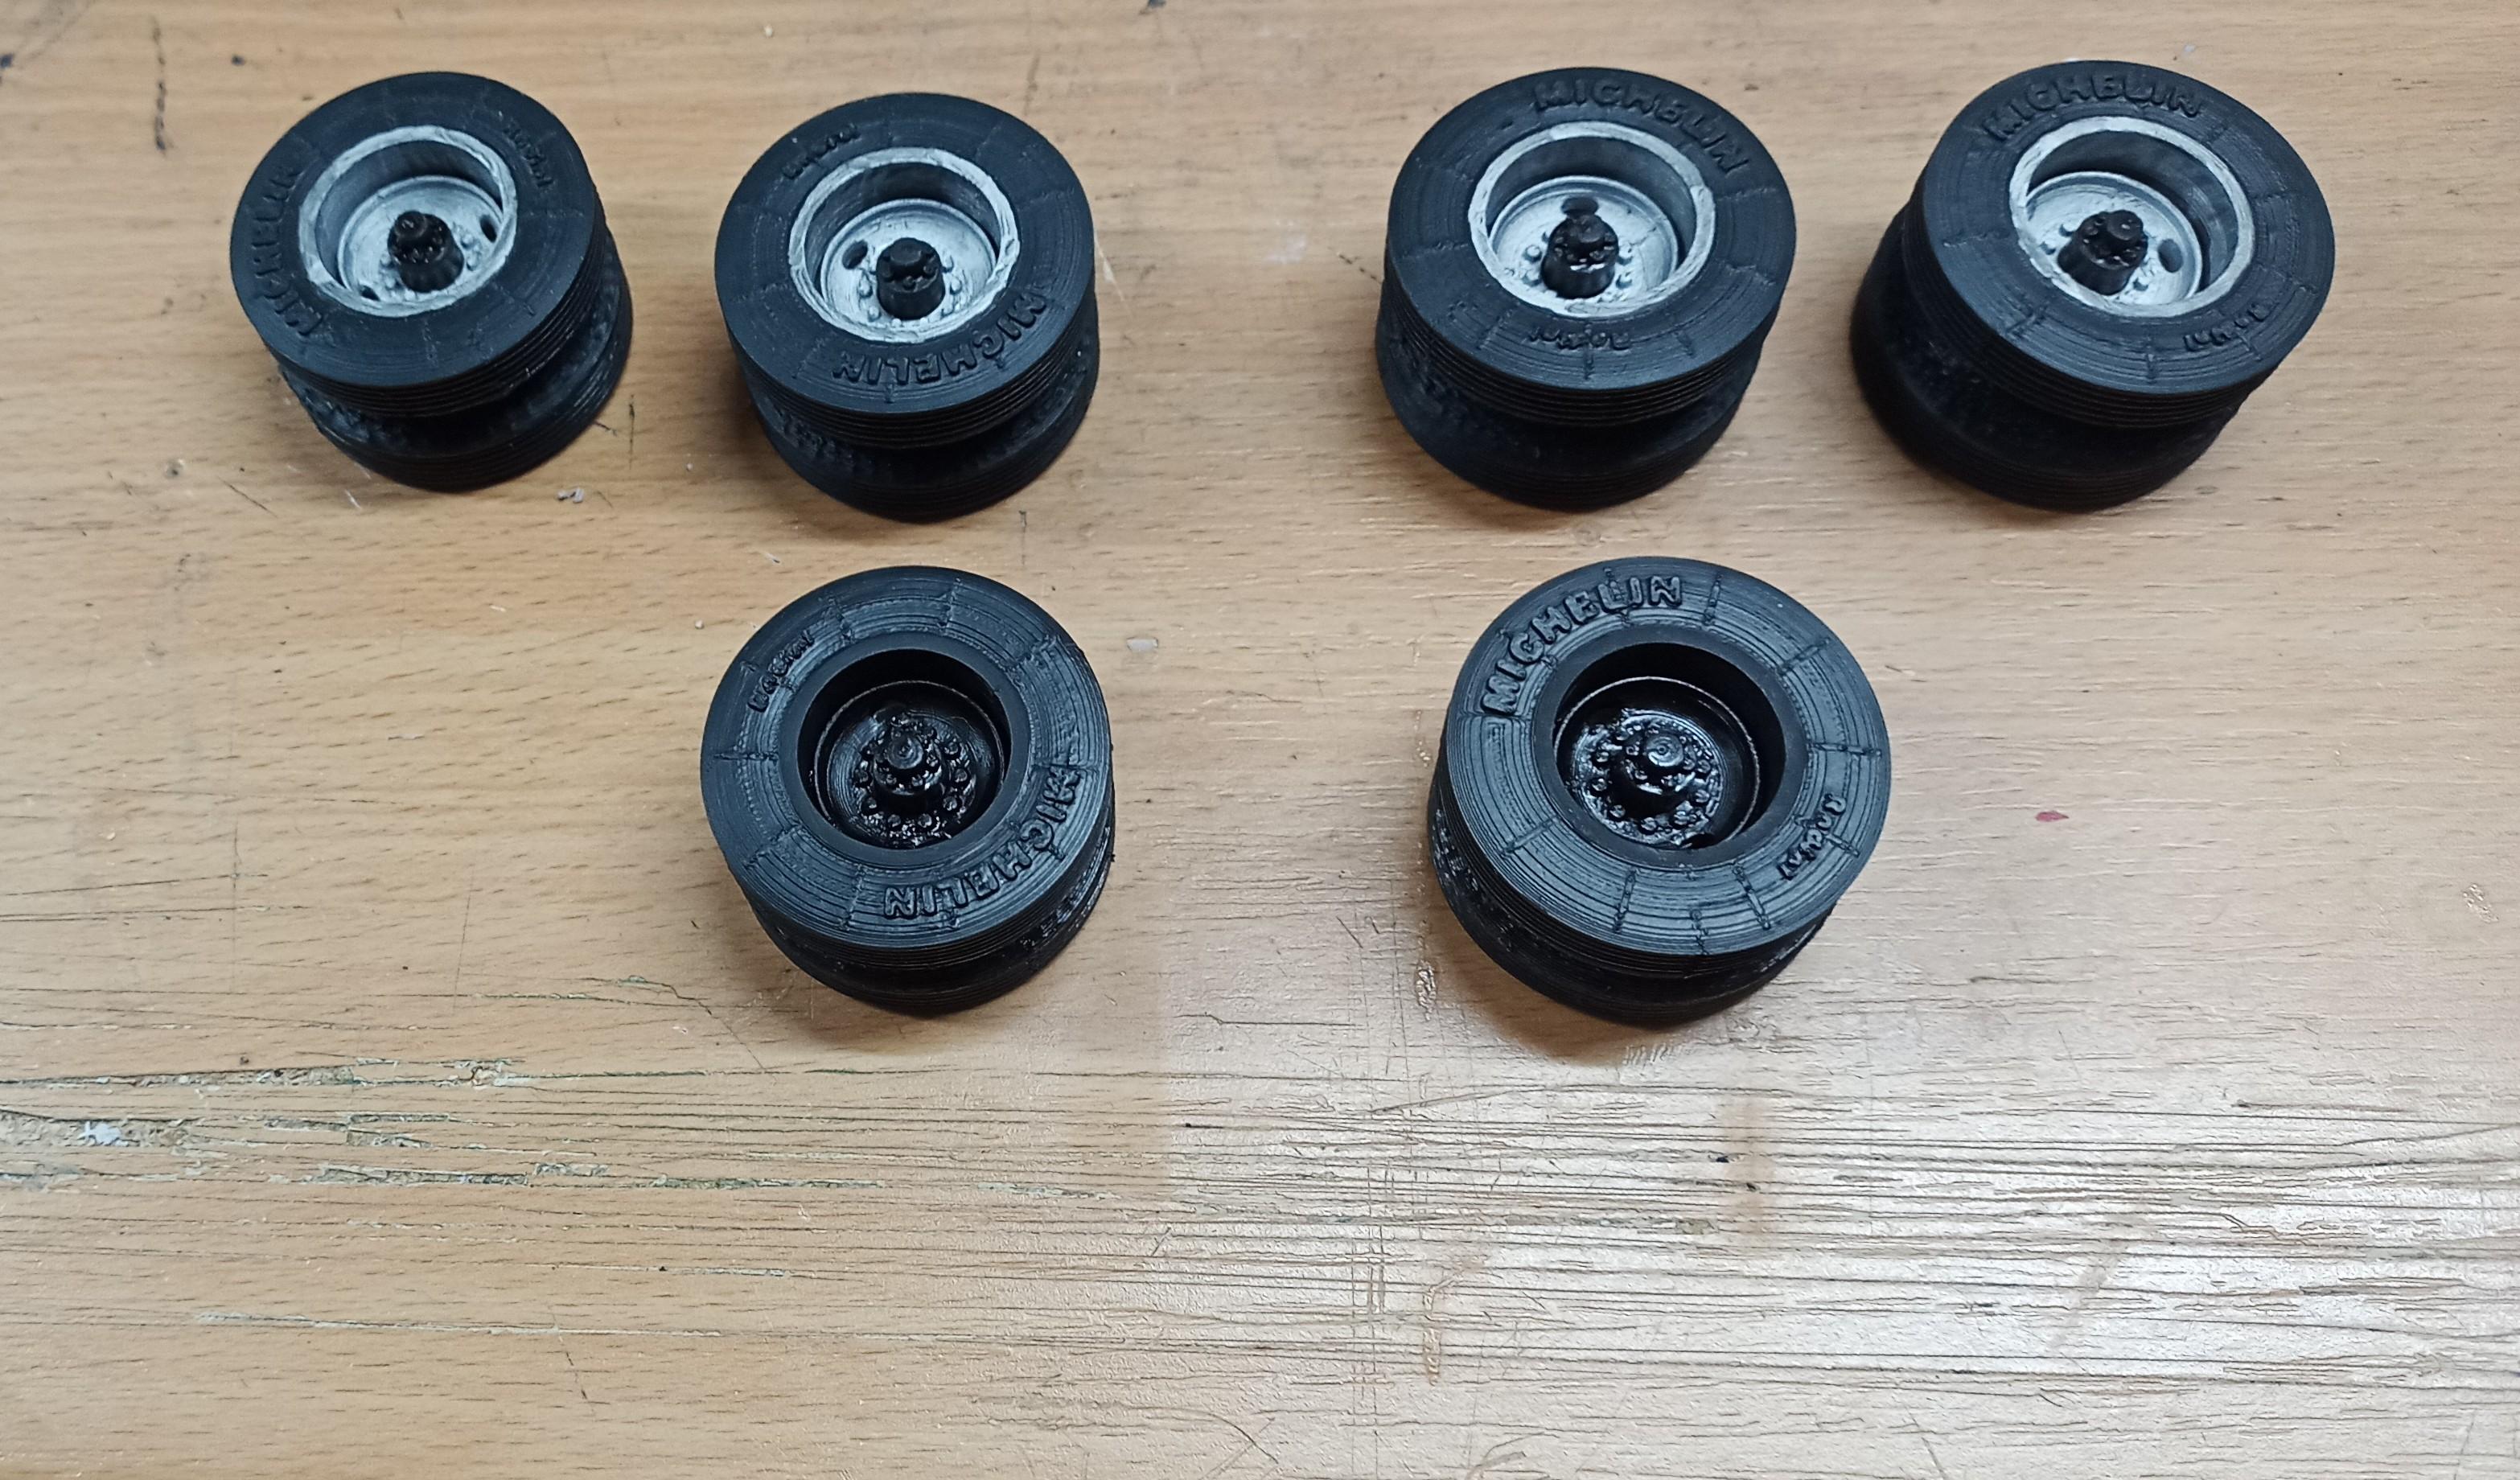
The wheels are painted! The rims are done with a small flat brush which I borrowed from my daughter's nail styling set. Very useful! ? If you look close enough you can see they're printed but that doesn't matter to me! It's the over all impression that counts to me! When the whole rig is on the shelf, joining the convoy, no one cares about such details.
-
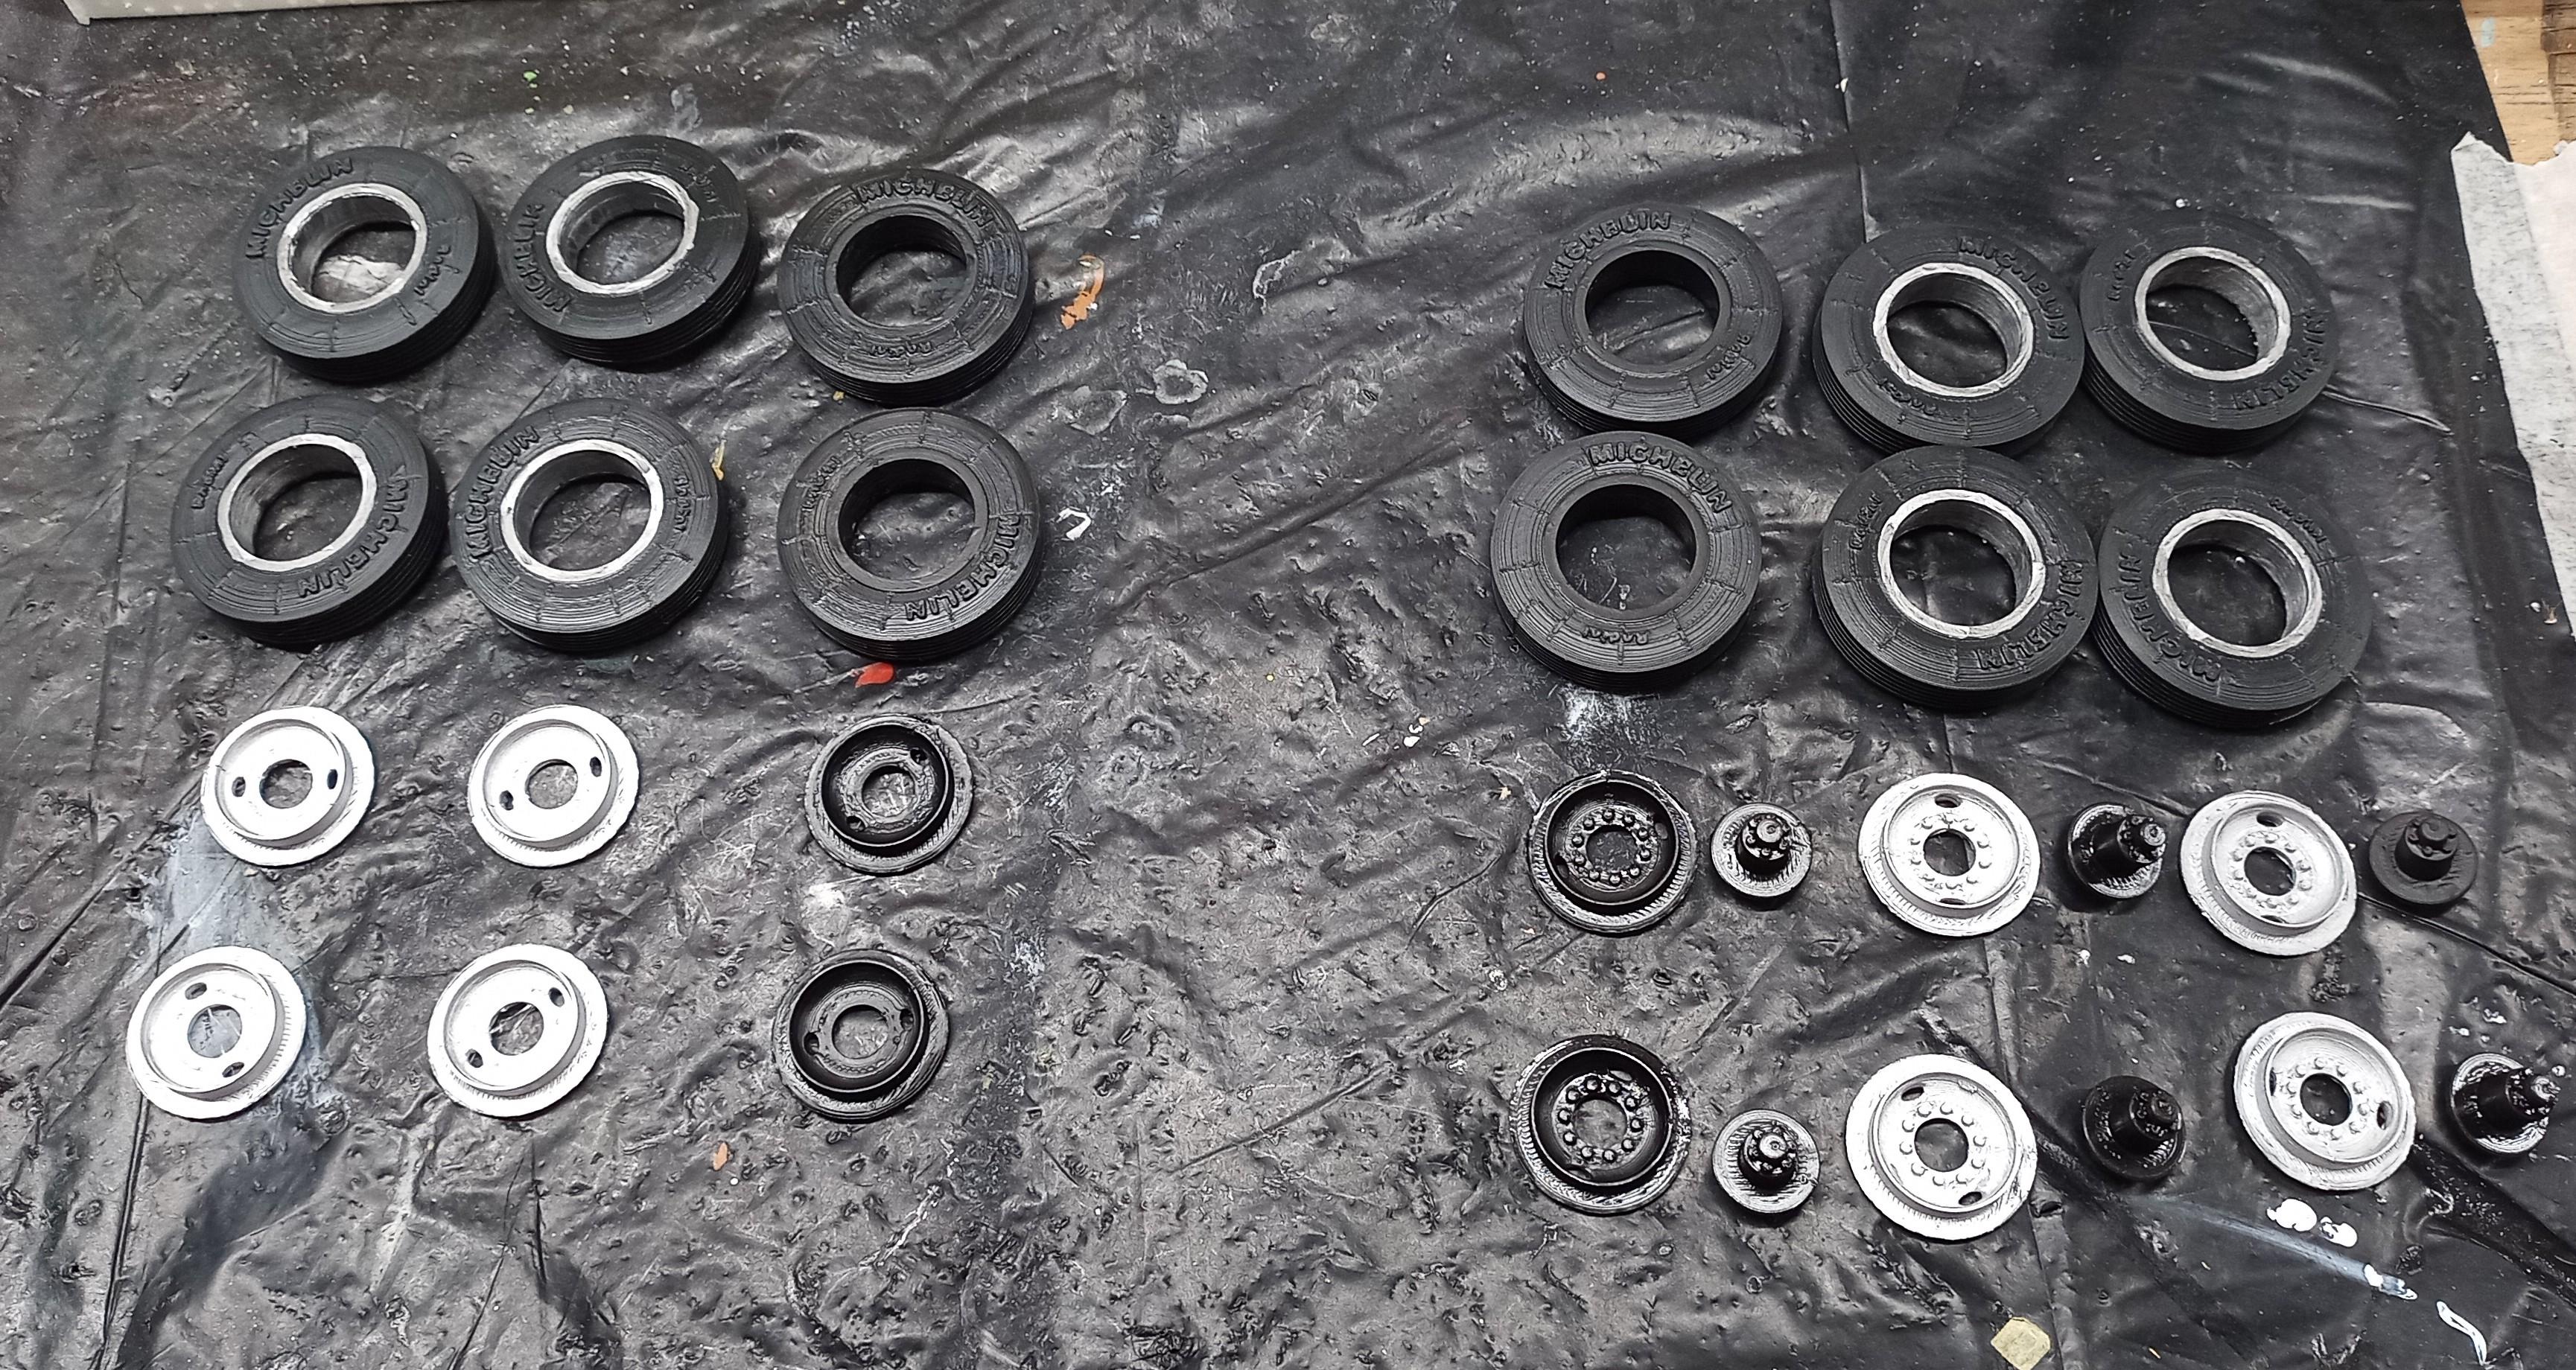
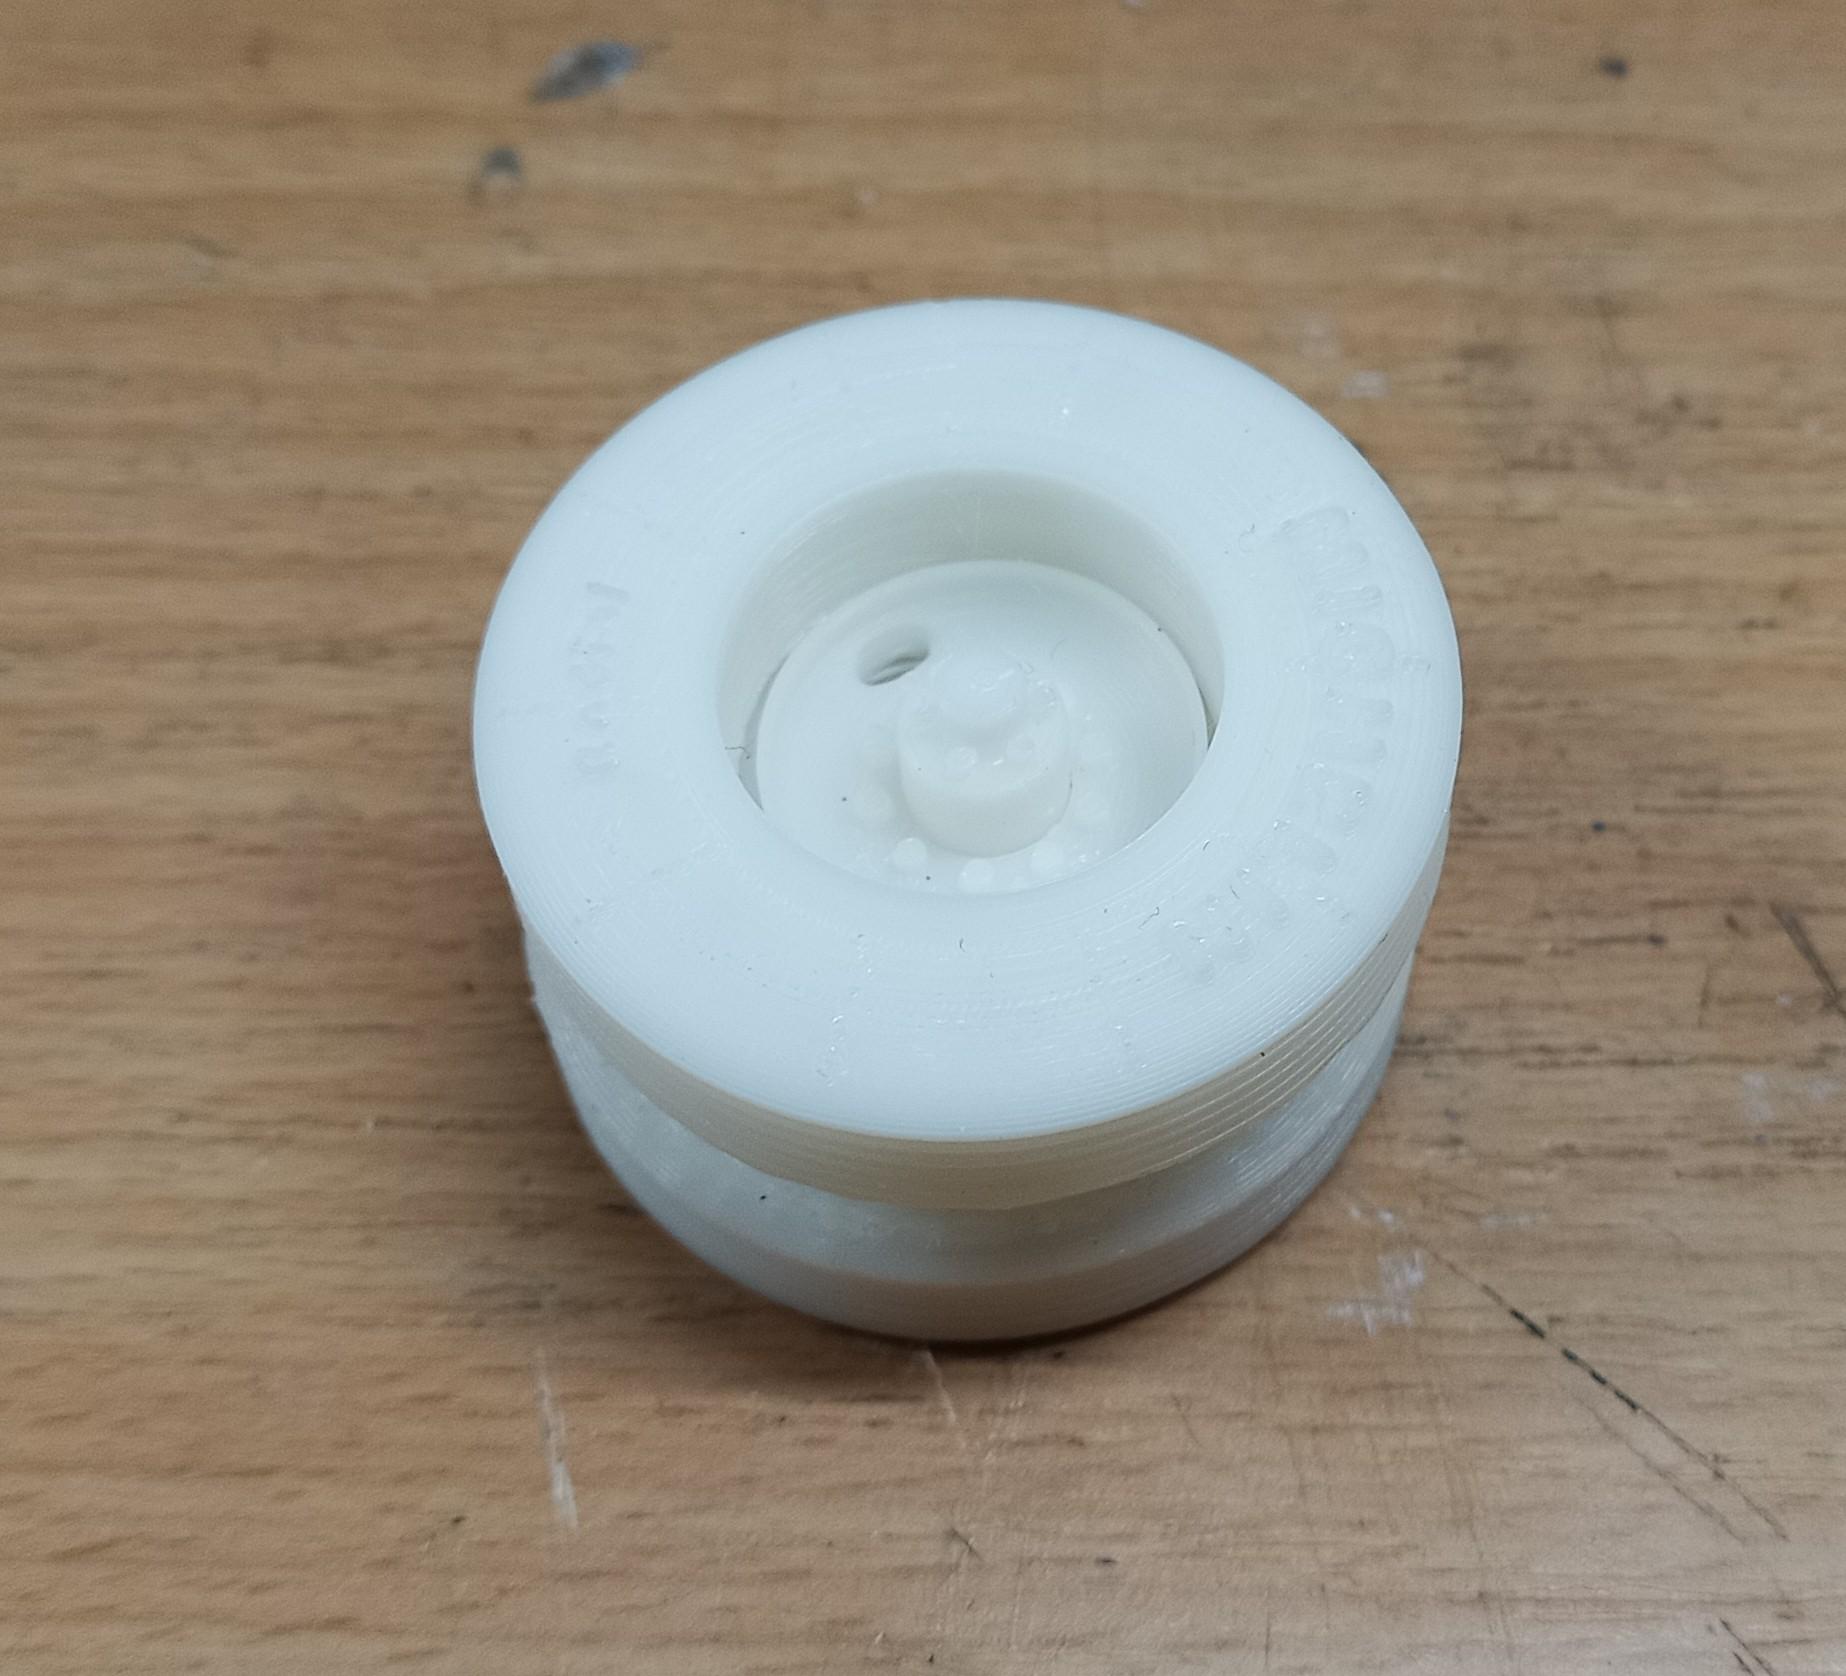
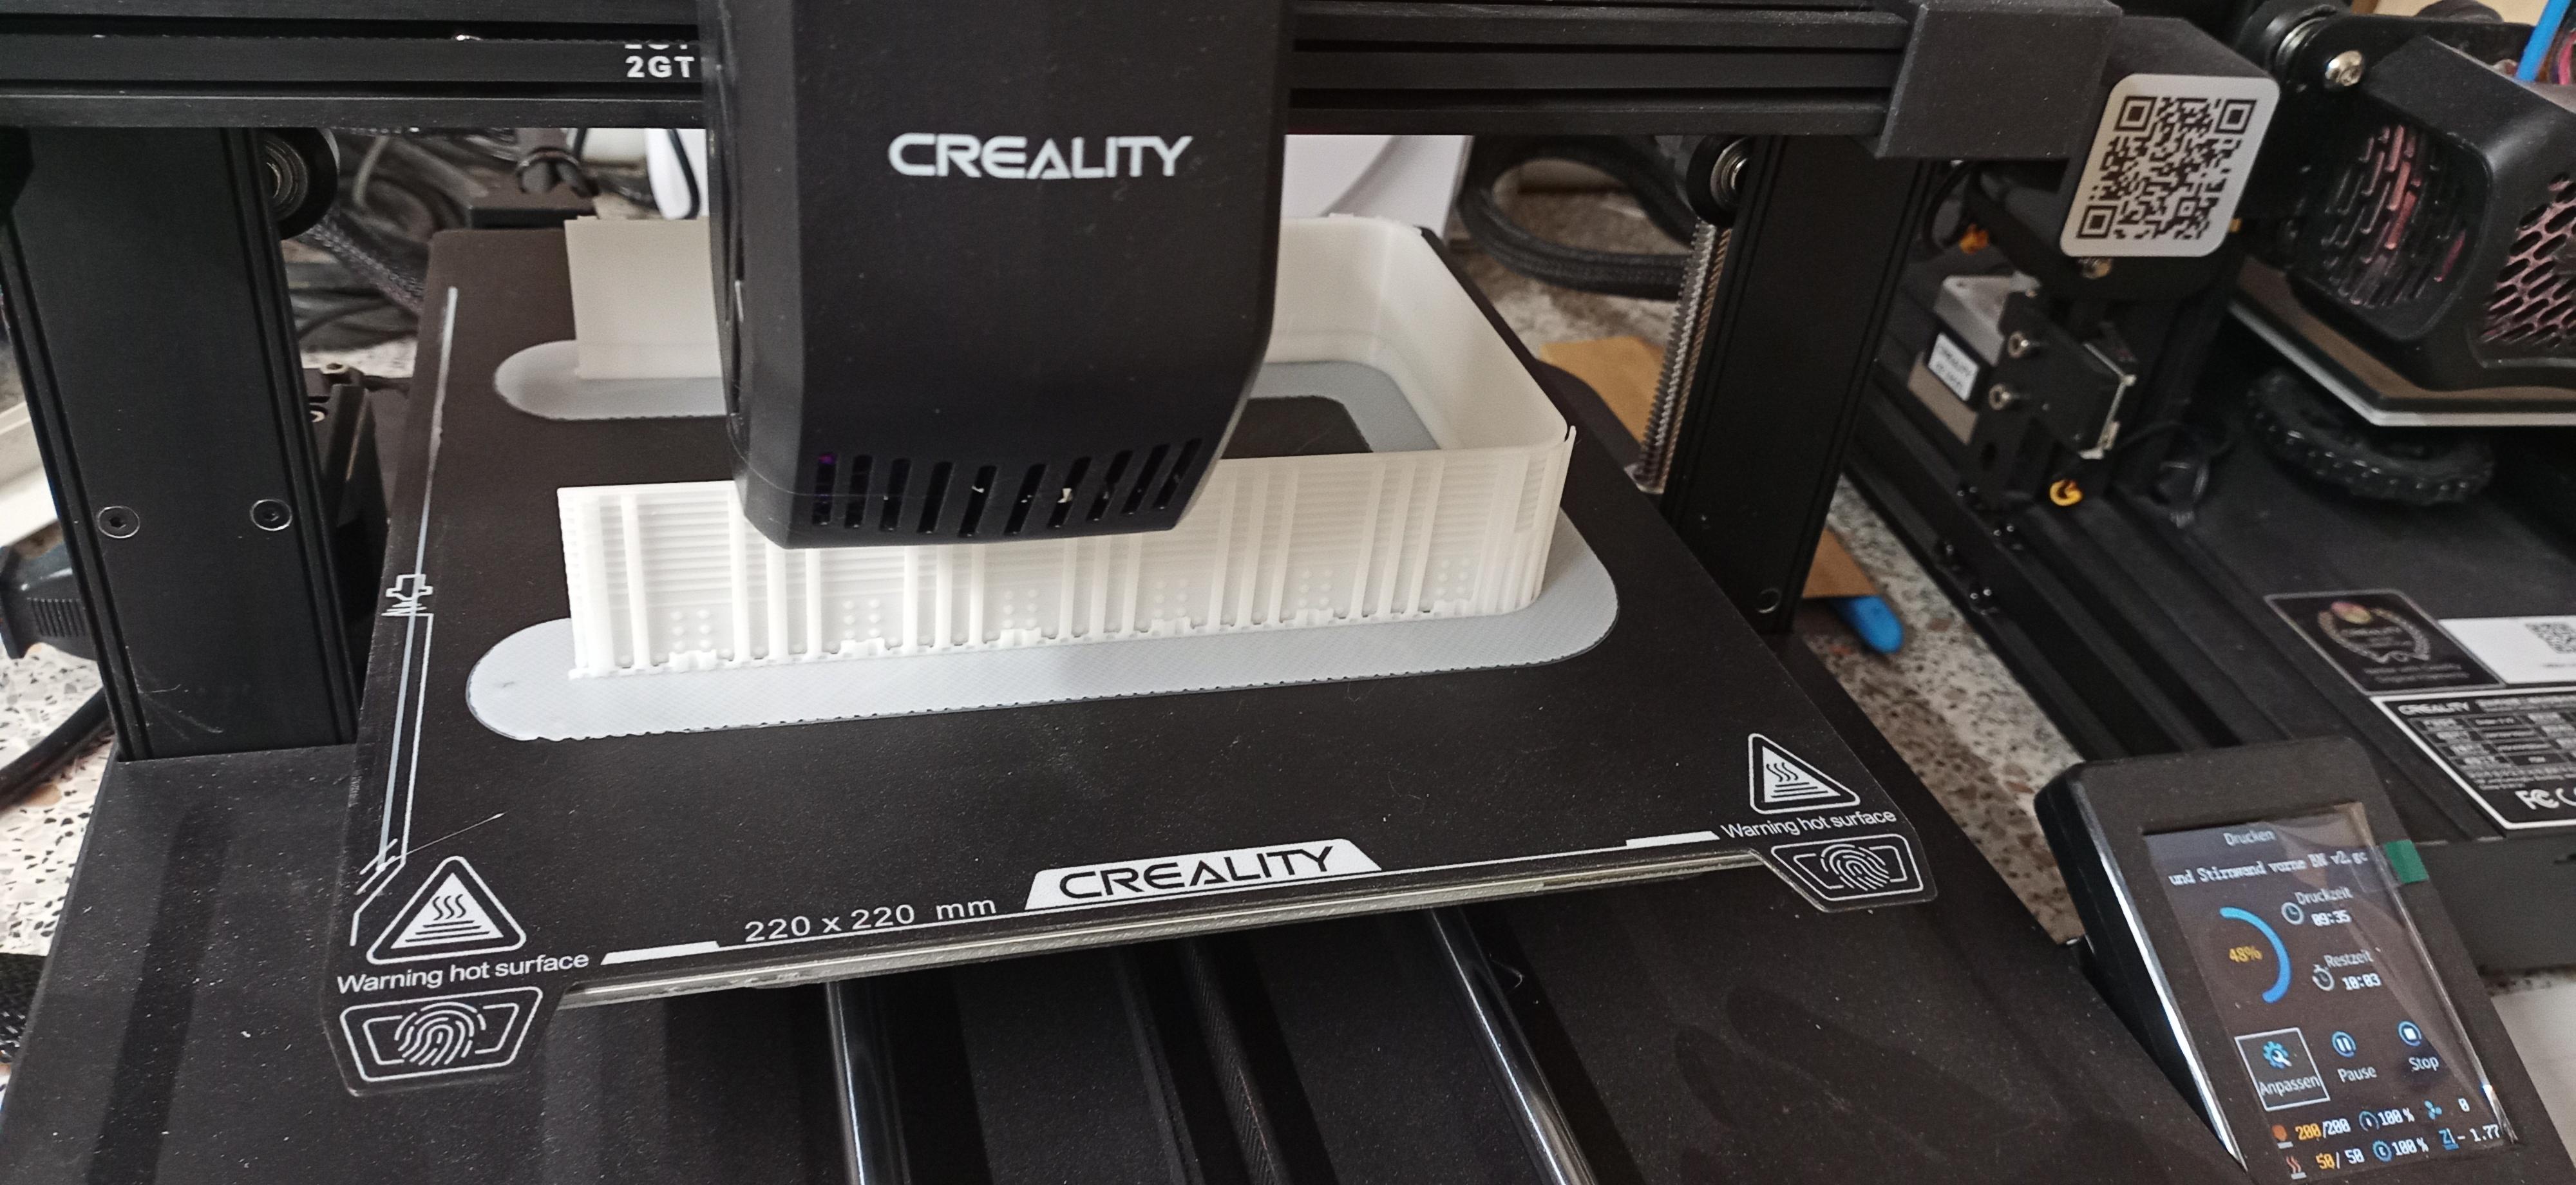
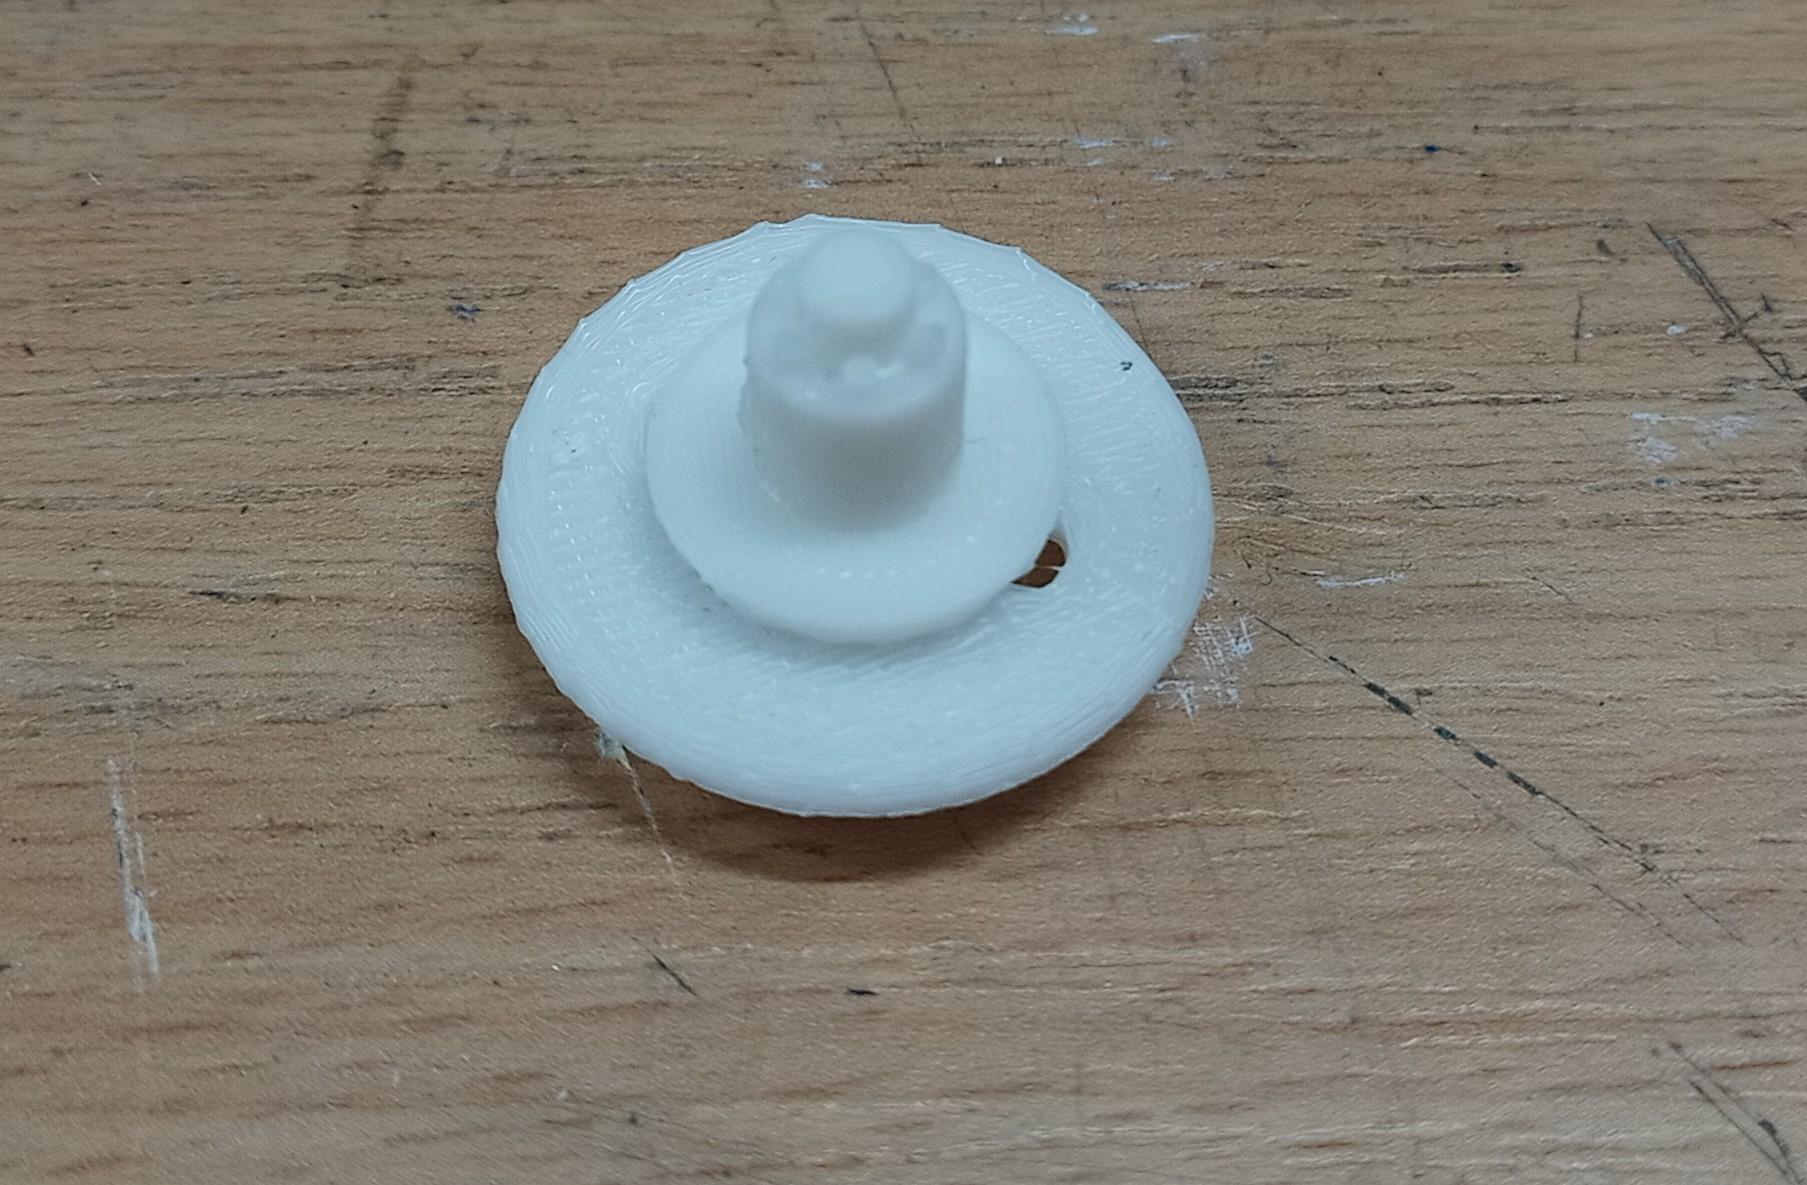
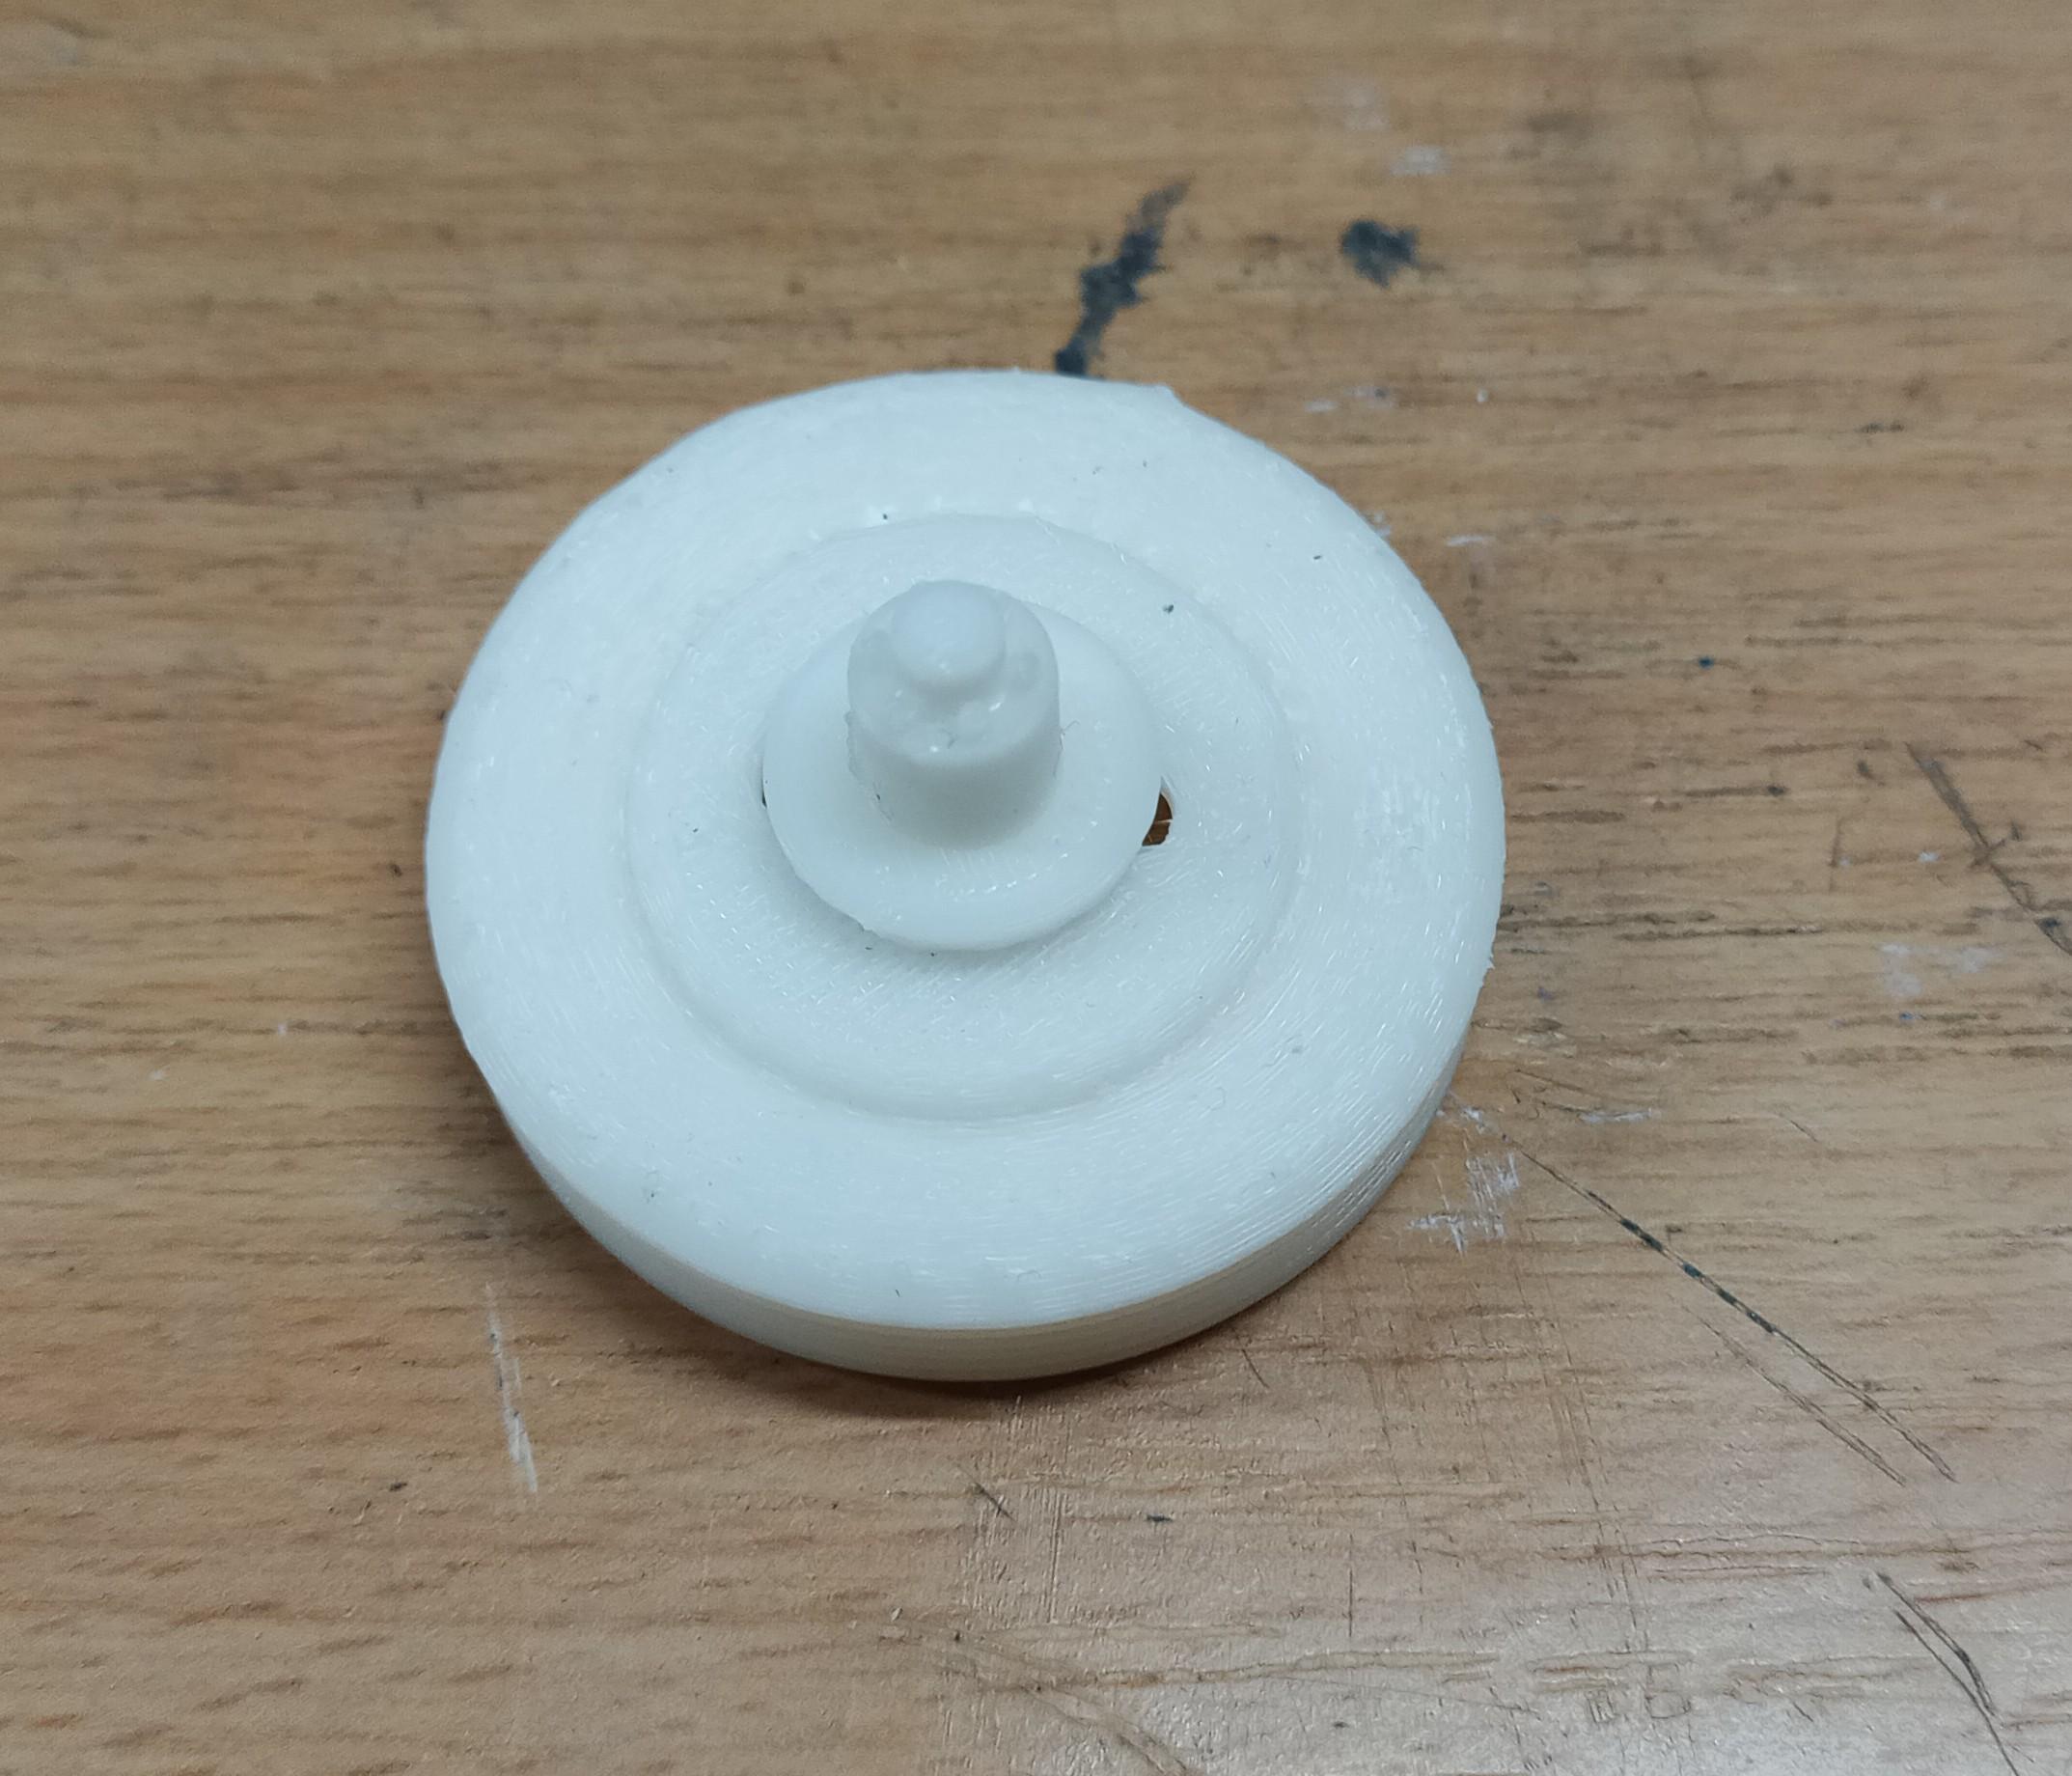
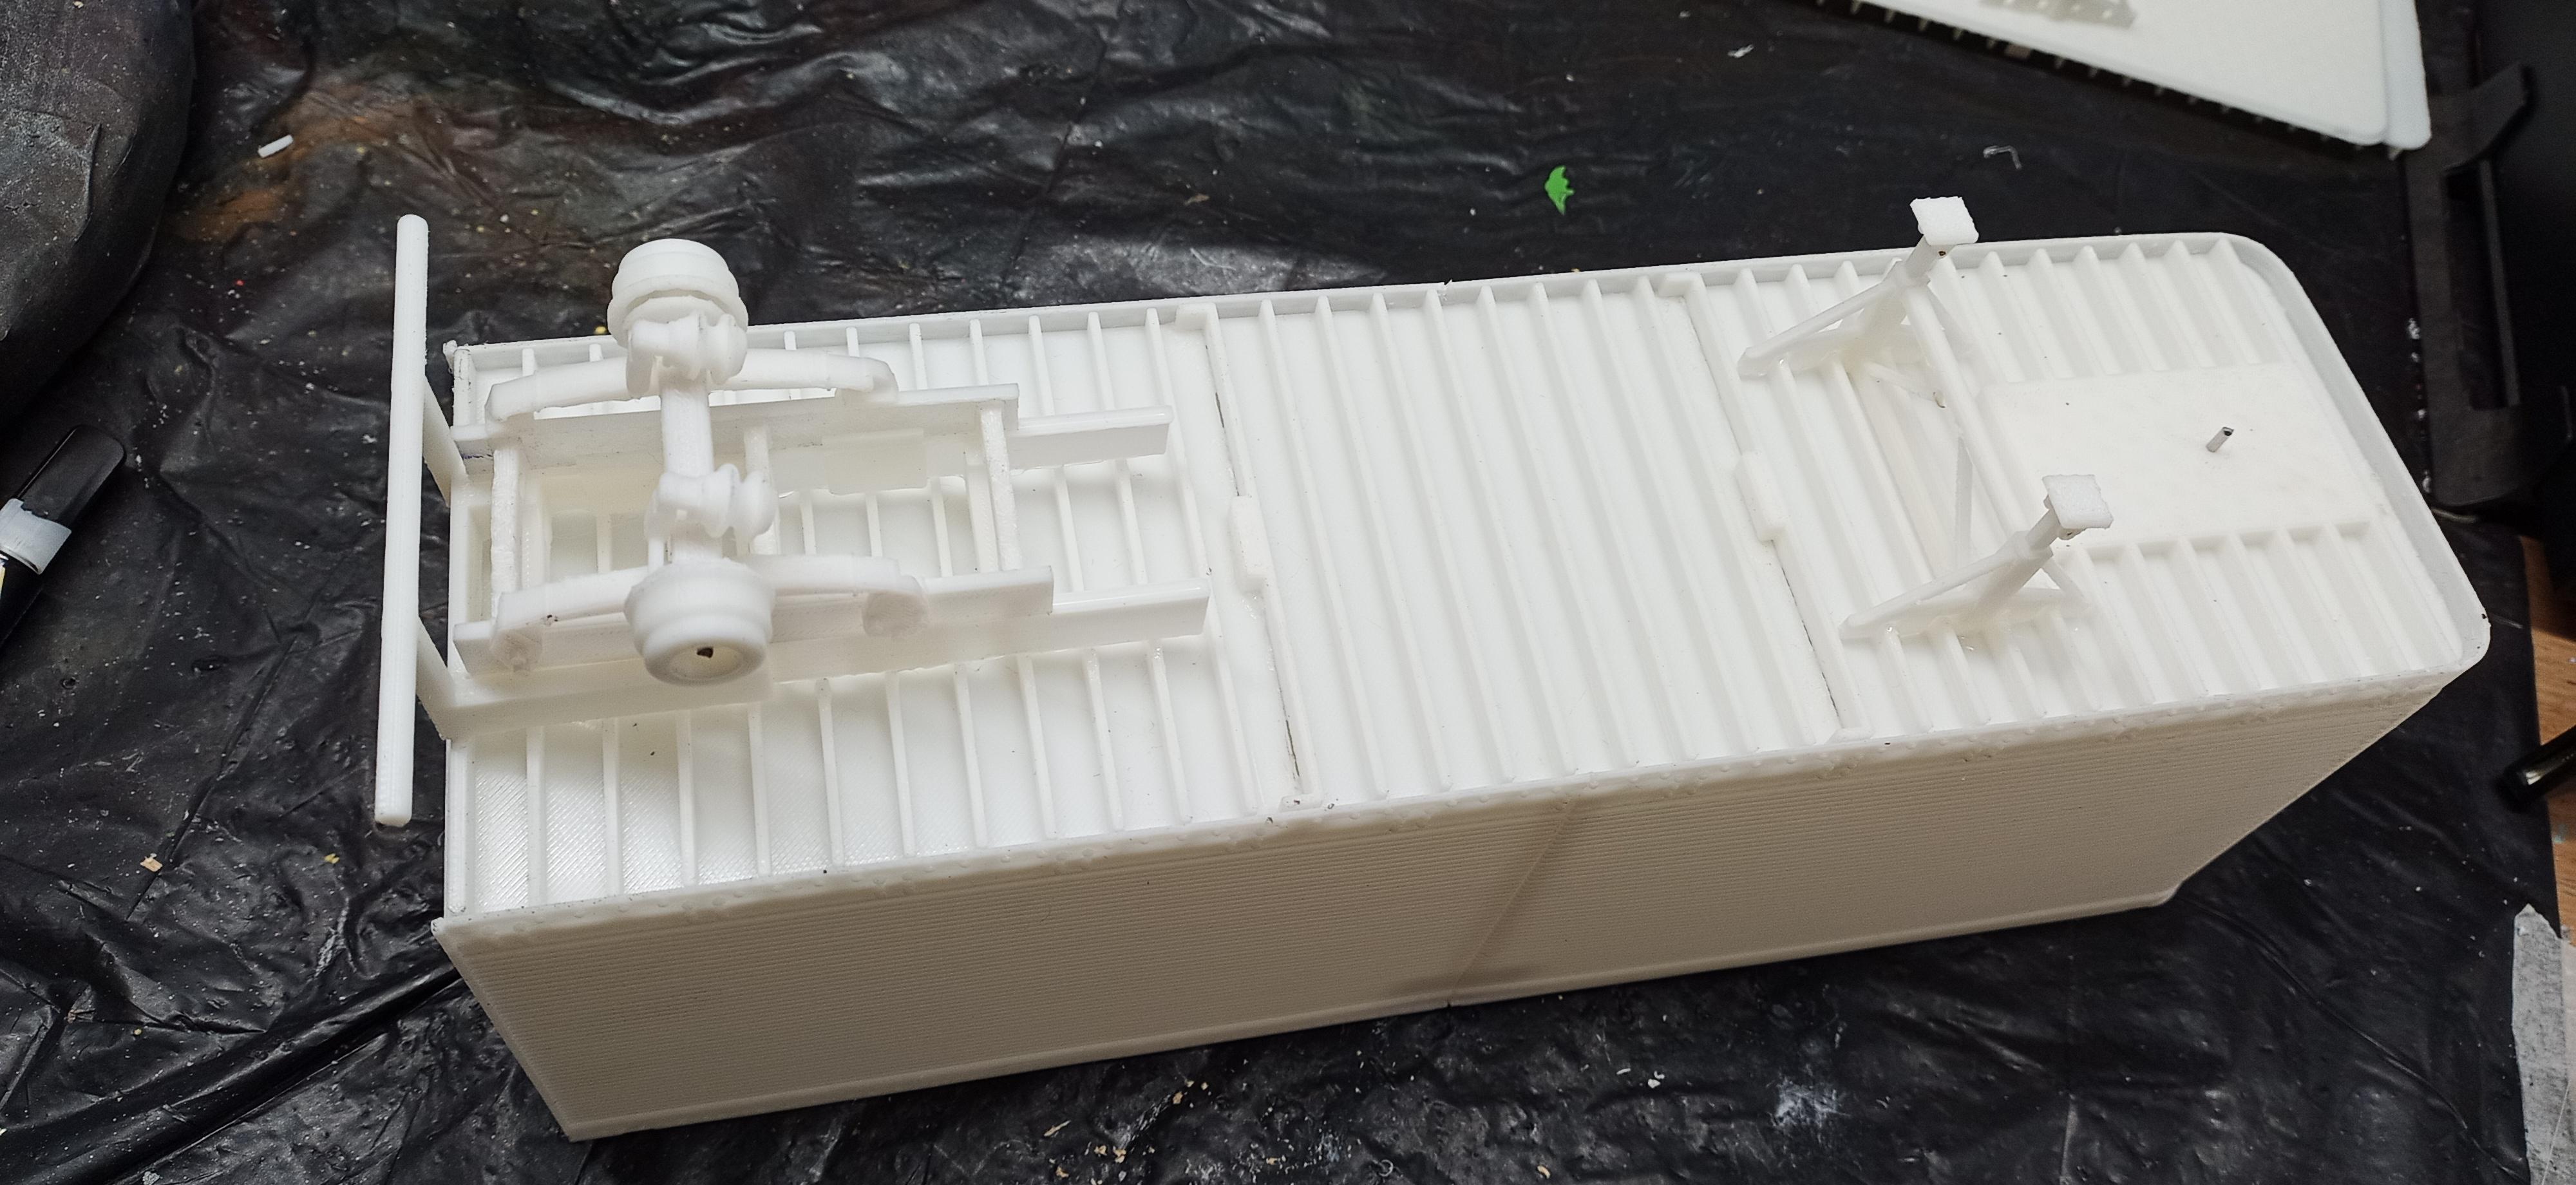
The wheels are completely printed now. This is how the parts fit together. (I know, it's hard to recognize details on white parts but I think the principle of the whole thing gets clear!) The hub is put into the inside wheel which hast to be turned around first... then they're fit into the inside tire. Then the outside wheel is put on top. Finally the outside tire is put in place. The rims are printed in one piece with the tires. It'll be visible when everything is painted. You might See it in the picture of the 3D drawing I posted. Anyway, this is one version of how I build truck and trailer wheels. In my next project you'll see the other version. This is the very last part of the second trailer to print. The vertical grid is just the support structure. If you can read the display there's another 18hrs to go on that. Takes about 24hrs in total on one of those! In the mean time I'll begin prep work for painting.
-
Thanks! ? Glad you like it! There'll be more to see!
-
IH Transtar II Eagle
Jürgen M. replied to Scott Eriksen's topic in WIP: Model Trucks: Big Rigs and Heavy Equipment
Nice work! I Love that kit. It's just pure fun to build! What you're doing is unbelievable! The details are awesome and the paintjob perfect. I'm thrilled by the precision and quality of your build! I'll be watching what's next! ? -
Hi everyone, I'm sure that at least those of you who have followed my posts so far know that I'm a great fan of Peckinpah's "Convoy"! I wanted to share my own convoy as far as it's grown up to now! My "Big Nasty" is still in the "in Progress" pages and will soon join the convoy as a complete rig. The Brockway got a steerable front axle today to make it look more realistic driving around the corner! The "Big Nasty" tractor is already there without trailers to keep it away from my workbench. Don't want any paint or anything to get on it. You can follow the progress of the trailers on the "in progress" pages if you like. At the beginning of the post of Big Nasty I said it would be my last Convoy truck. I'm not sure if I can keep that promise since now there's room for one more rig on the shelf. Dont know which one it'll be though. Maybe "Bald Eagle", the "Magnavox" Transtar Eagle for those of you who are familiar with the movie! I'll keep the tension up for a while till I've decided which rig to build. But before that I'll build two others that I've already started to design. But before that, the motorcycle season will keep me busy! Stay tuned! ?
-
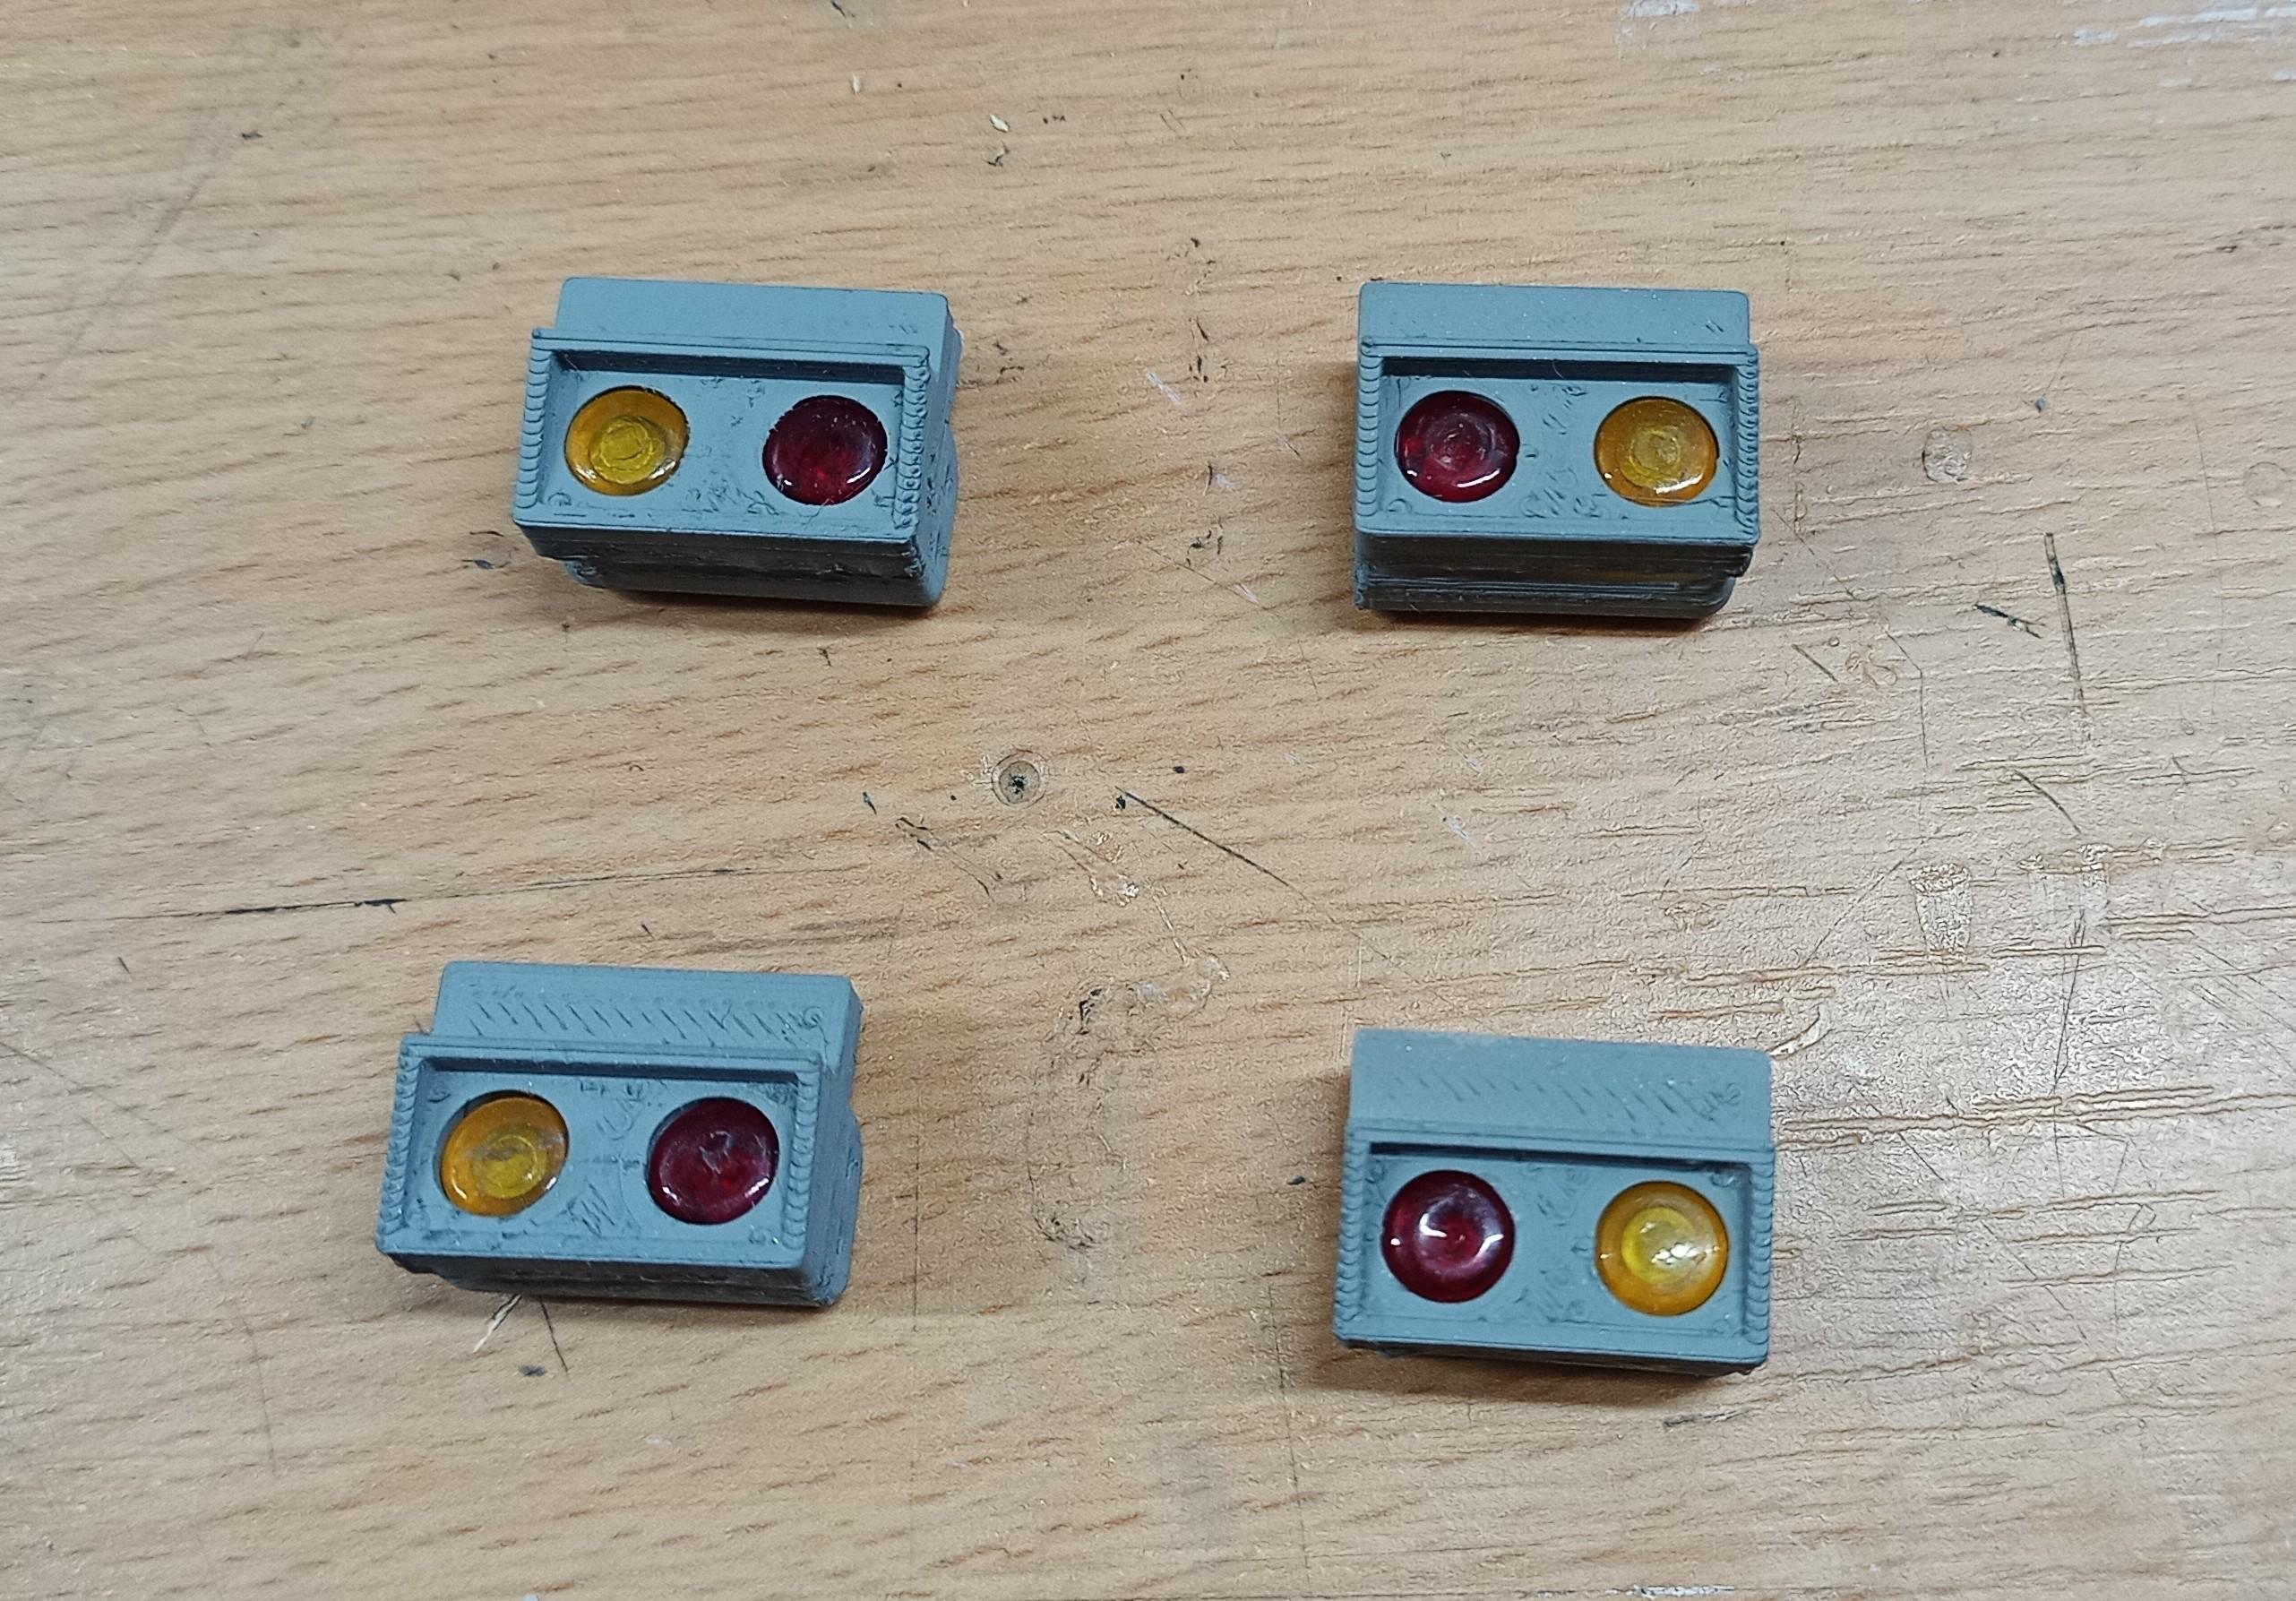
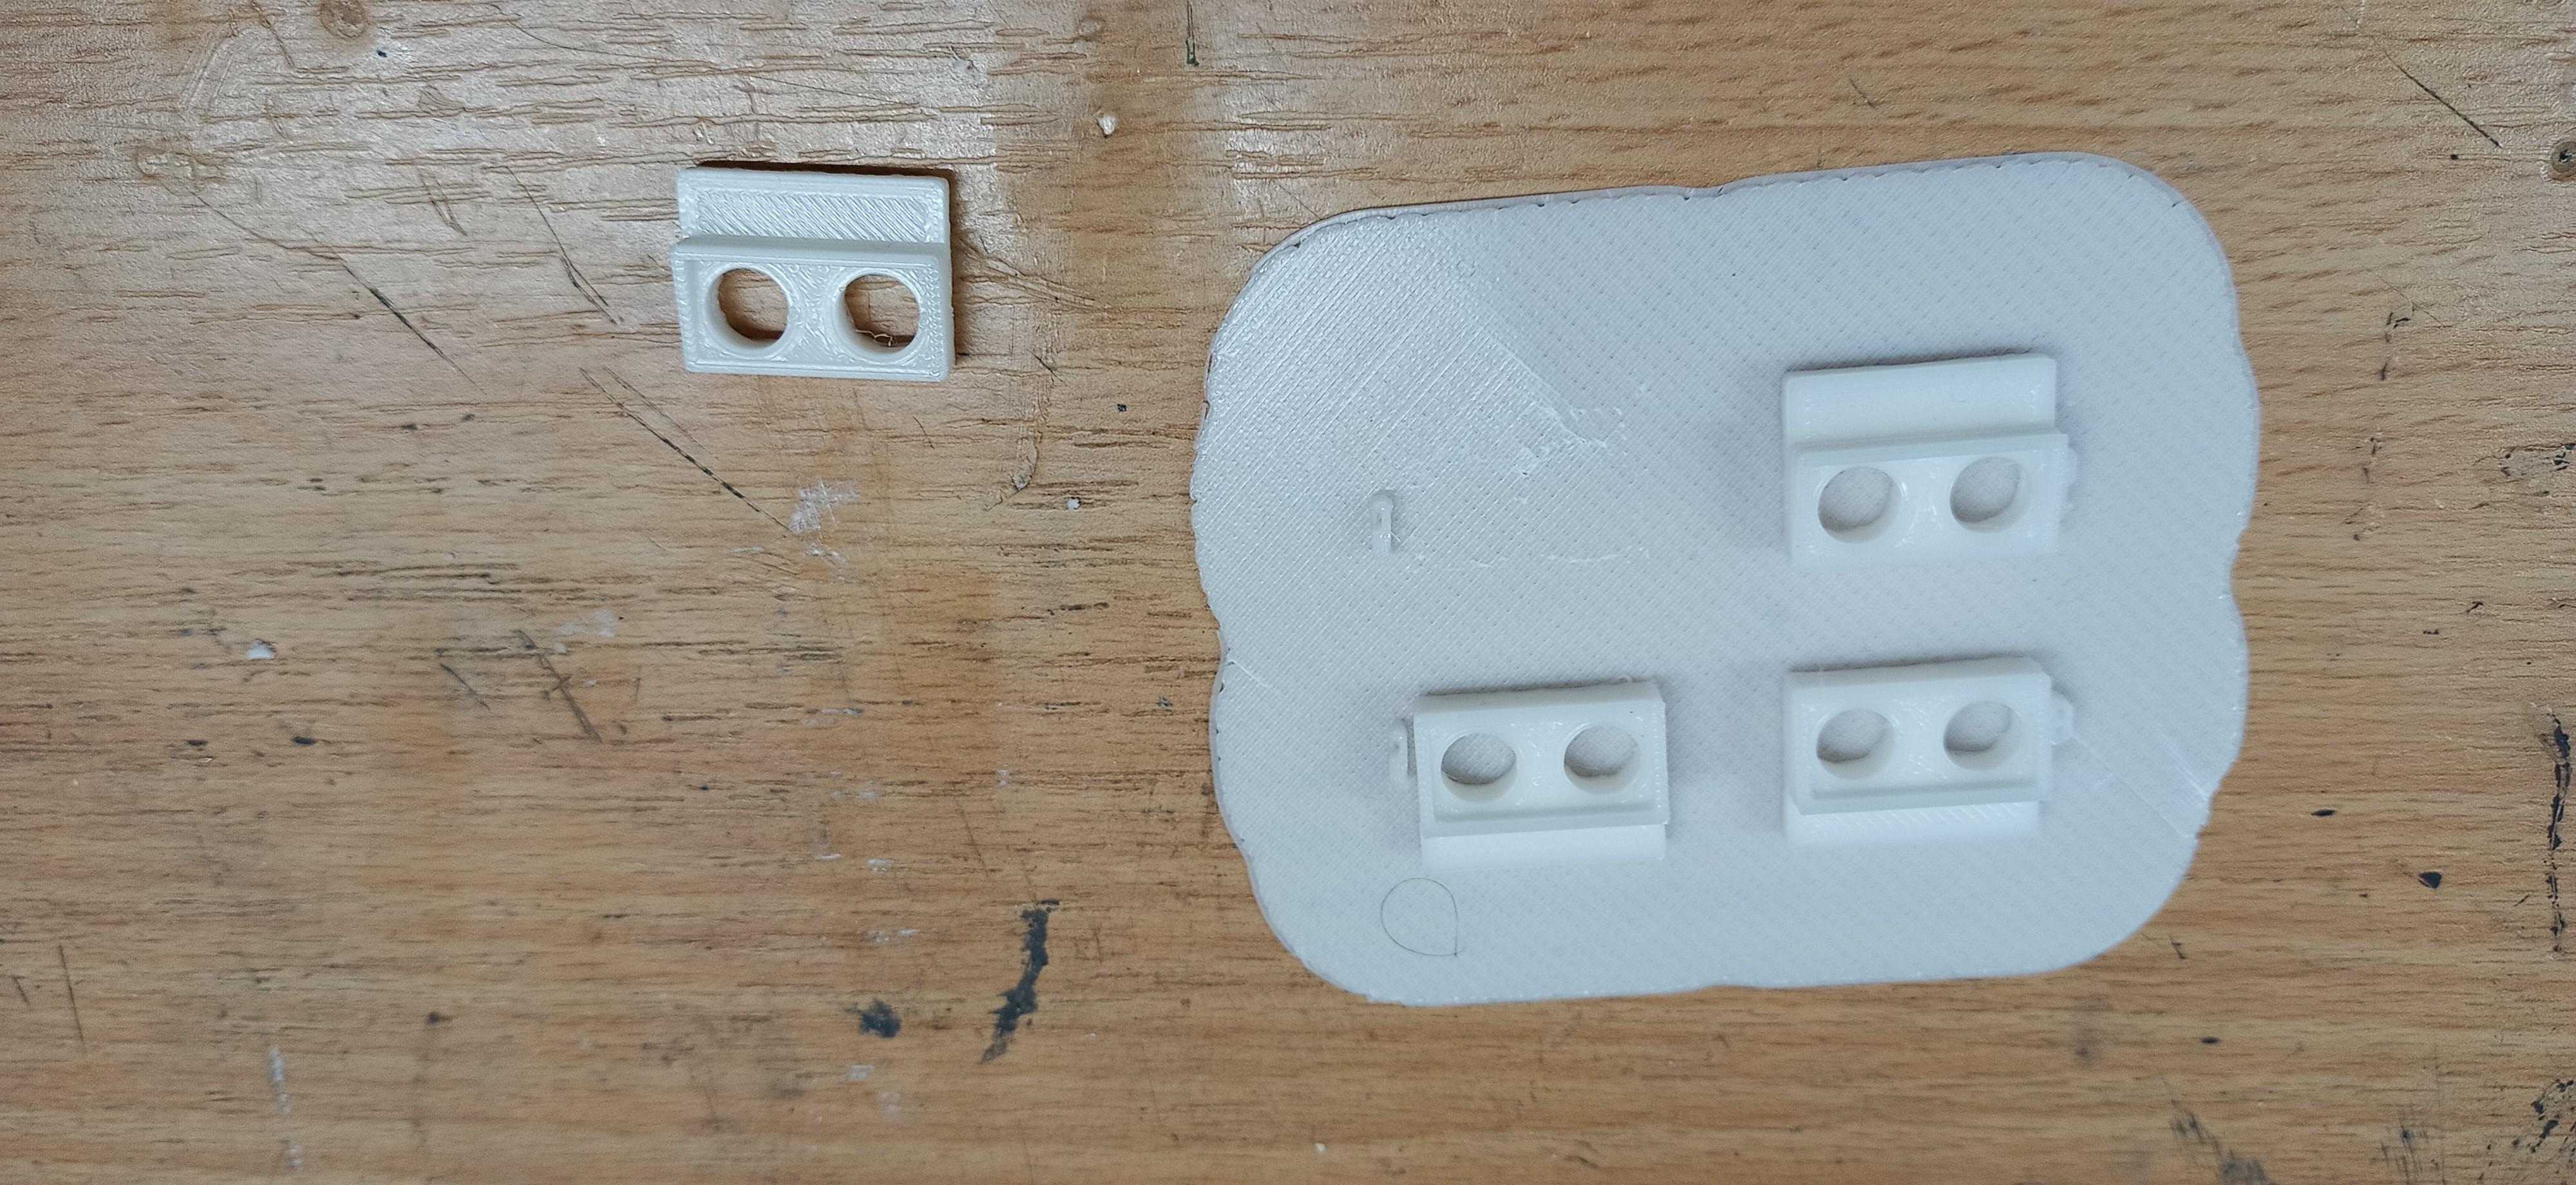
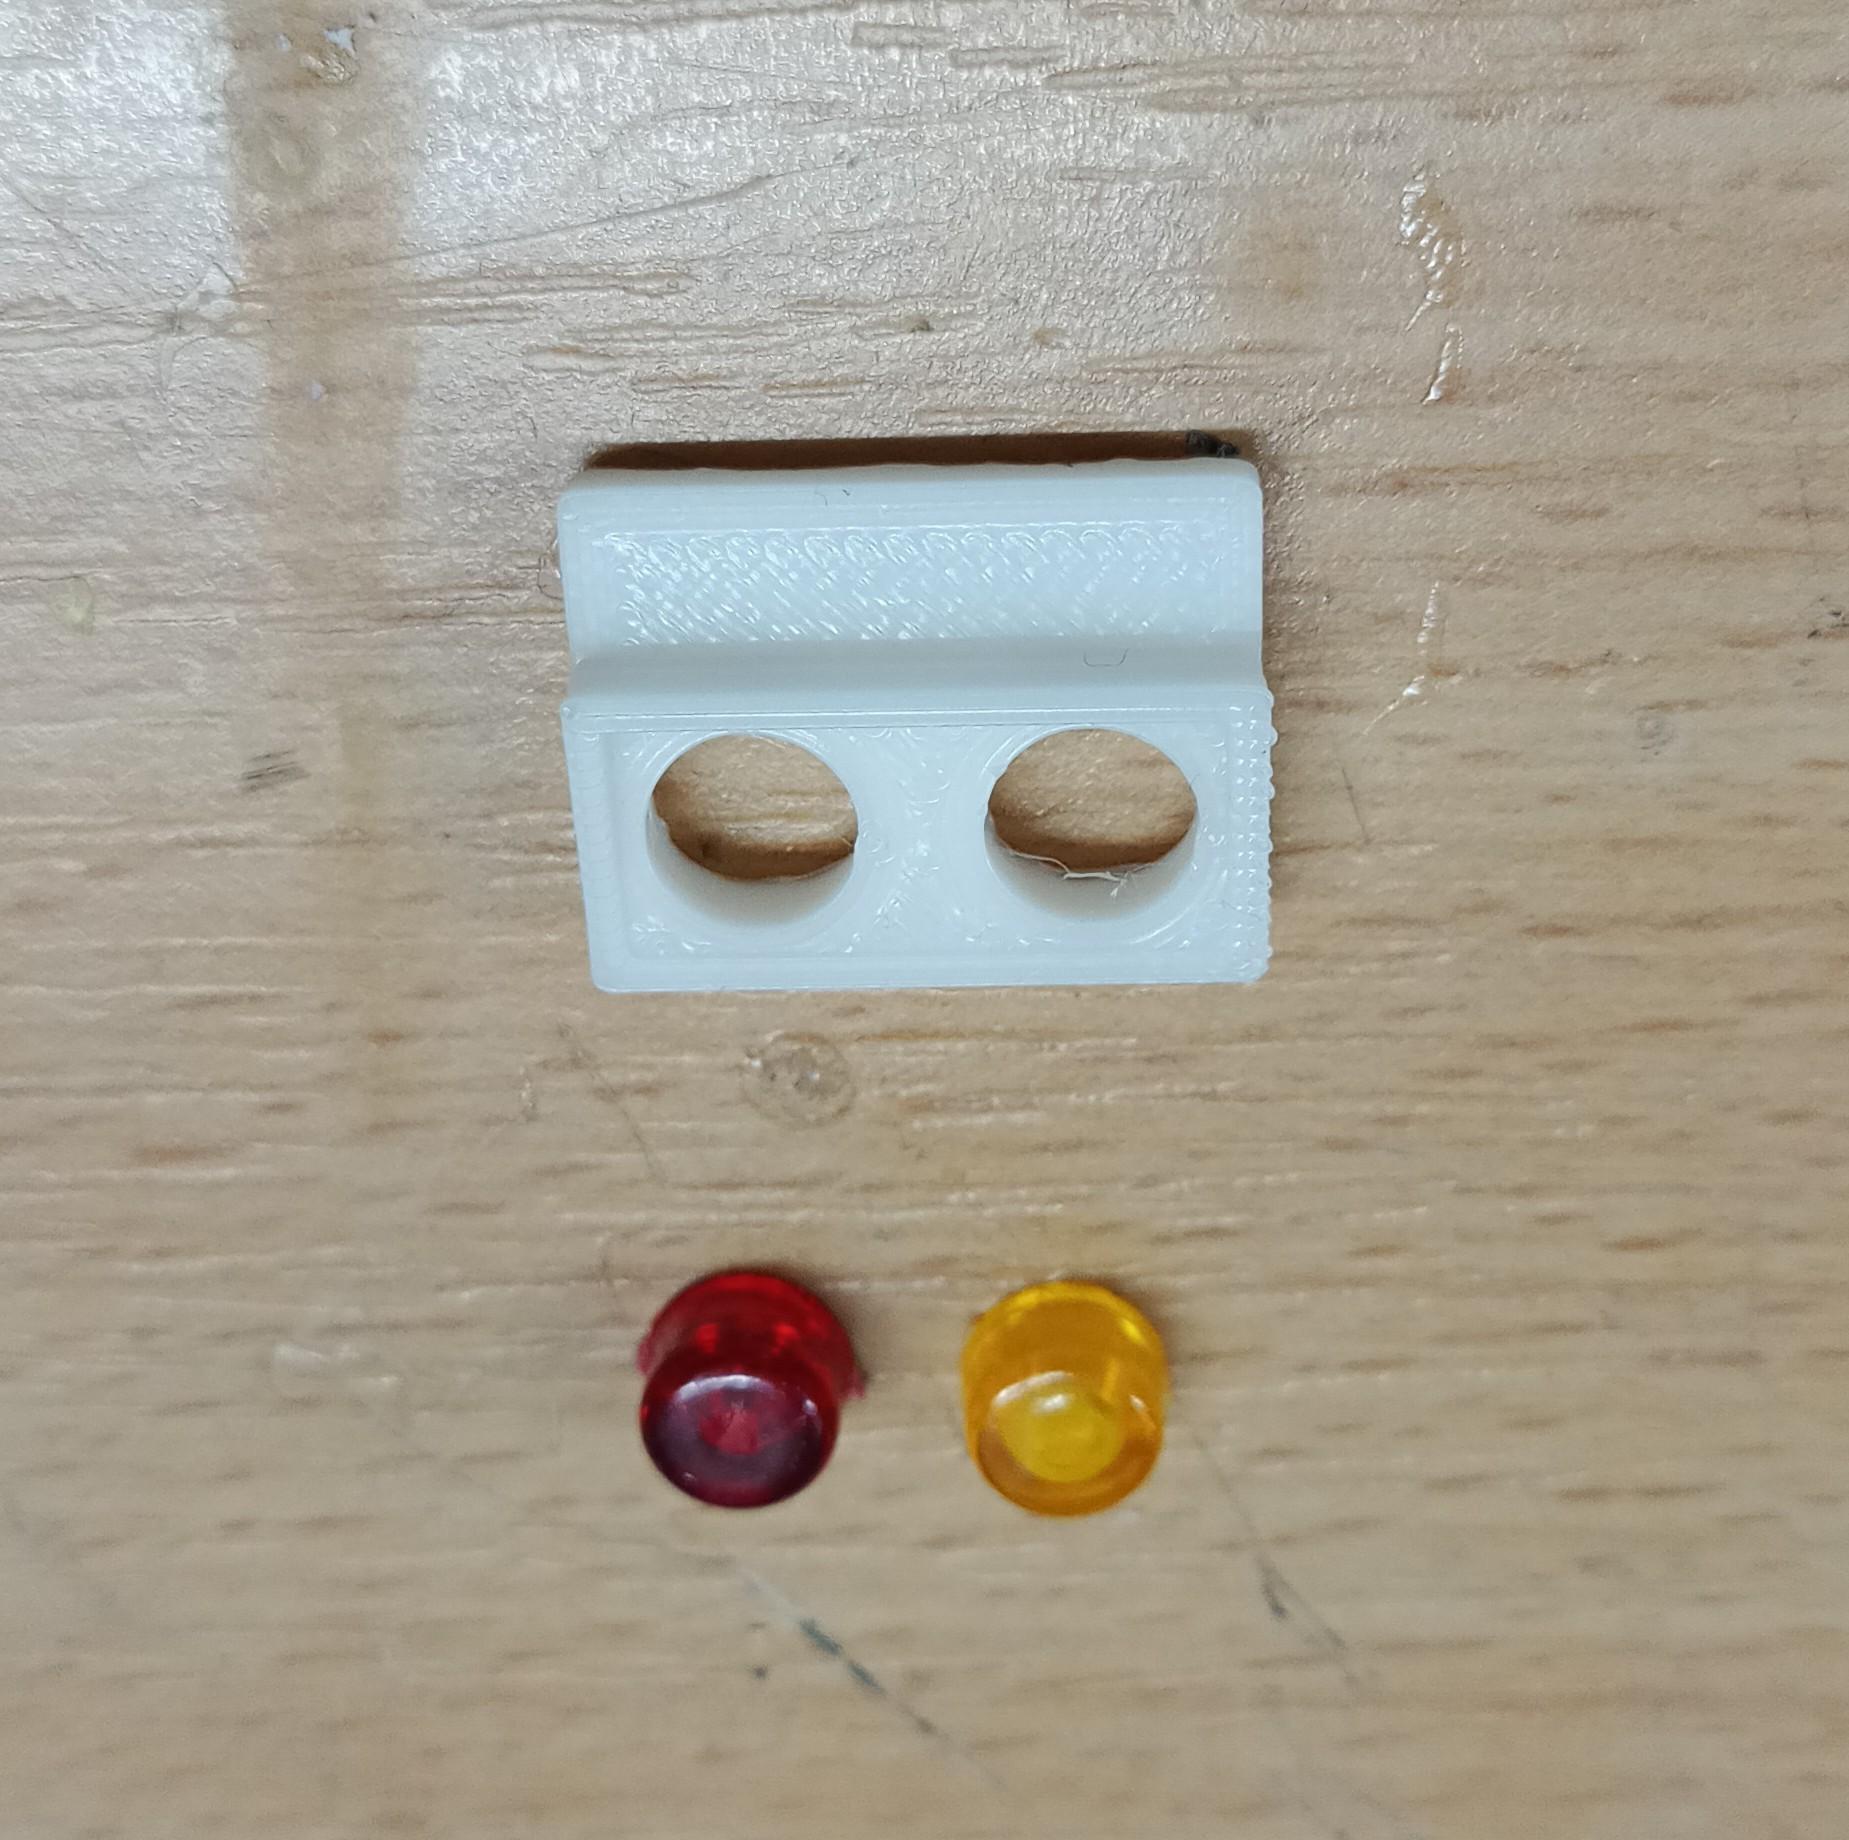
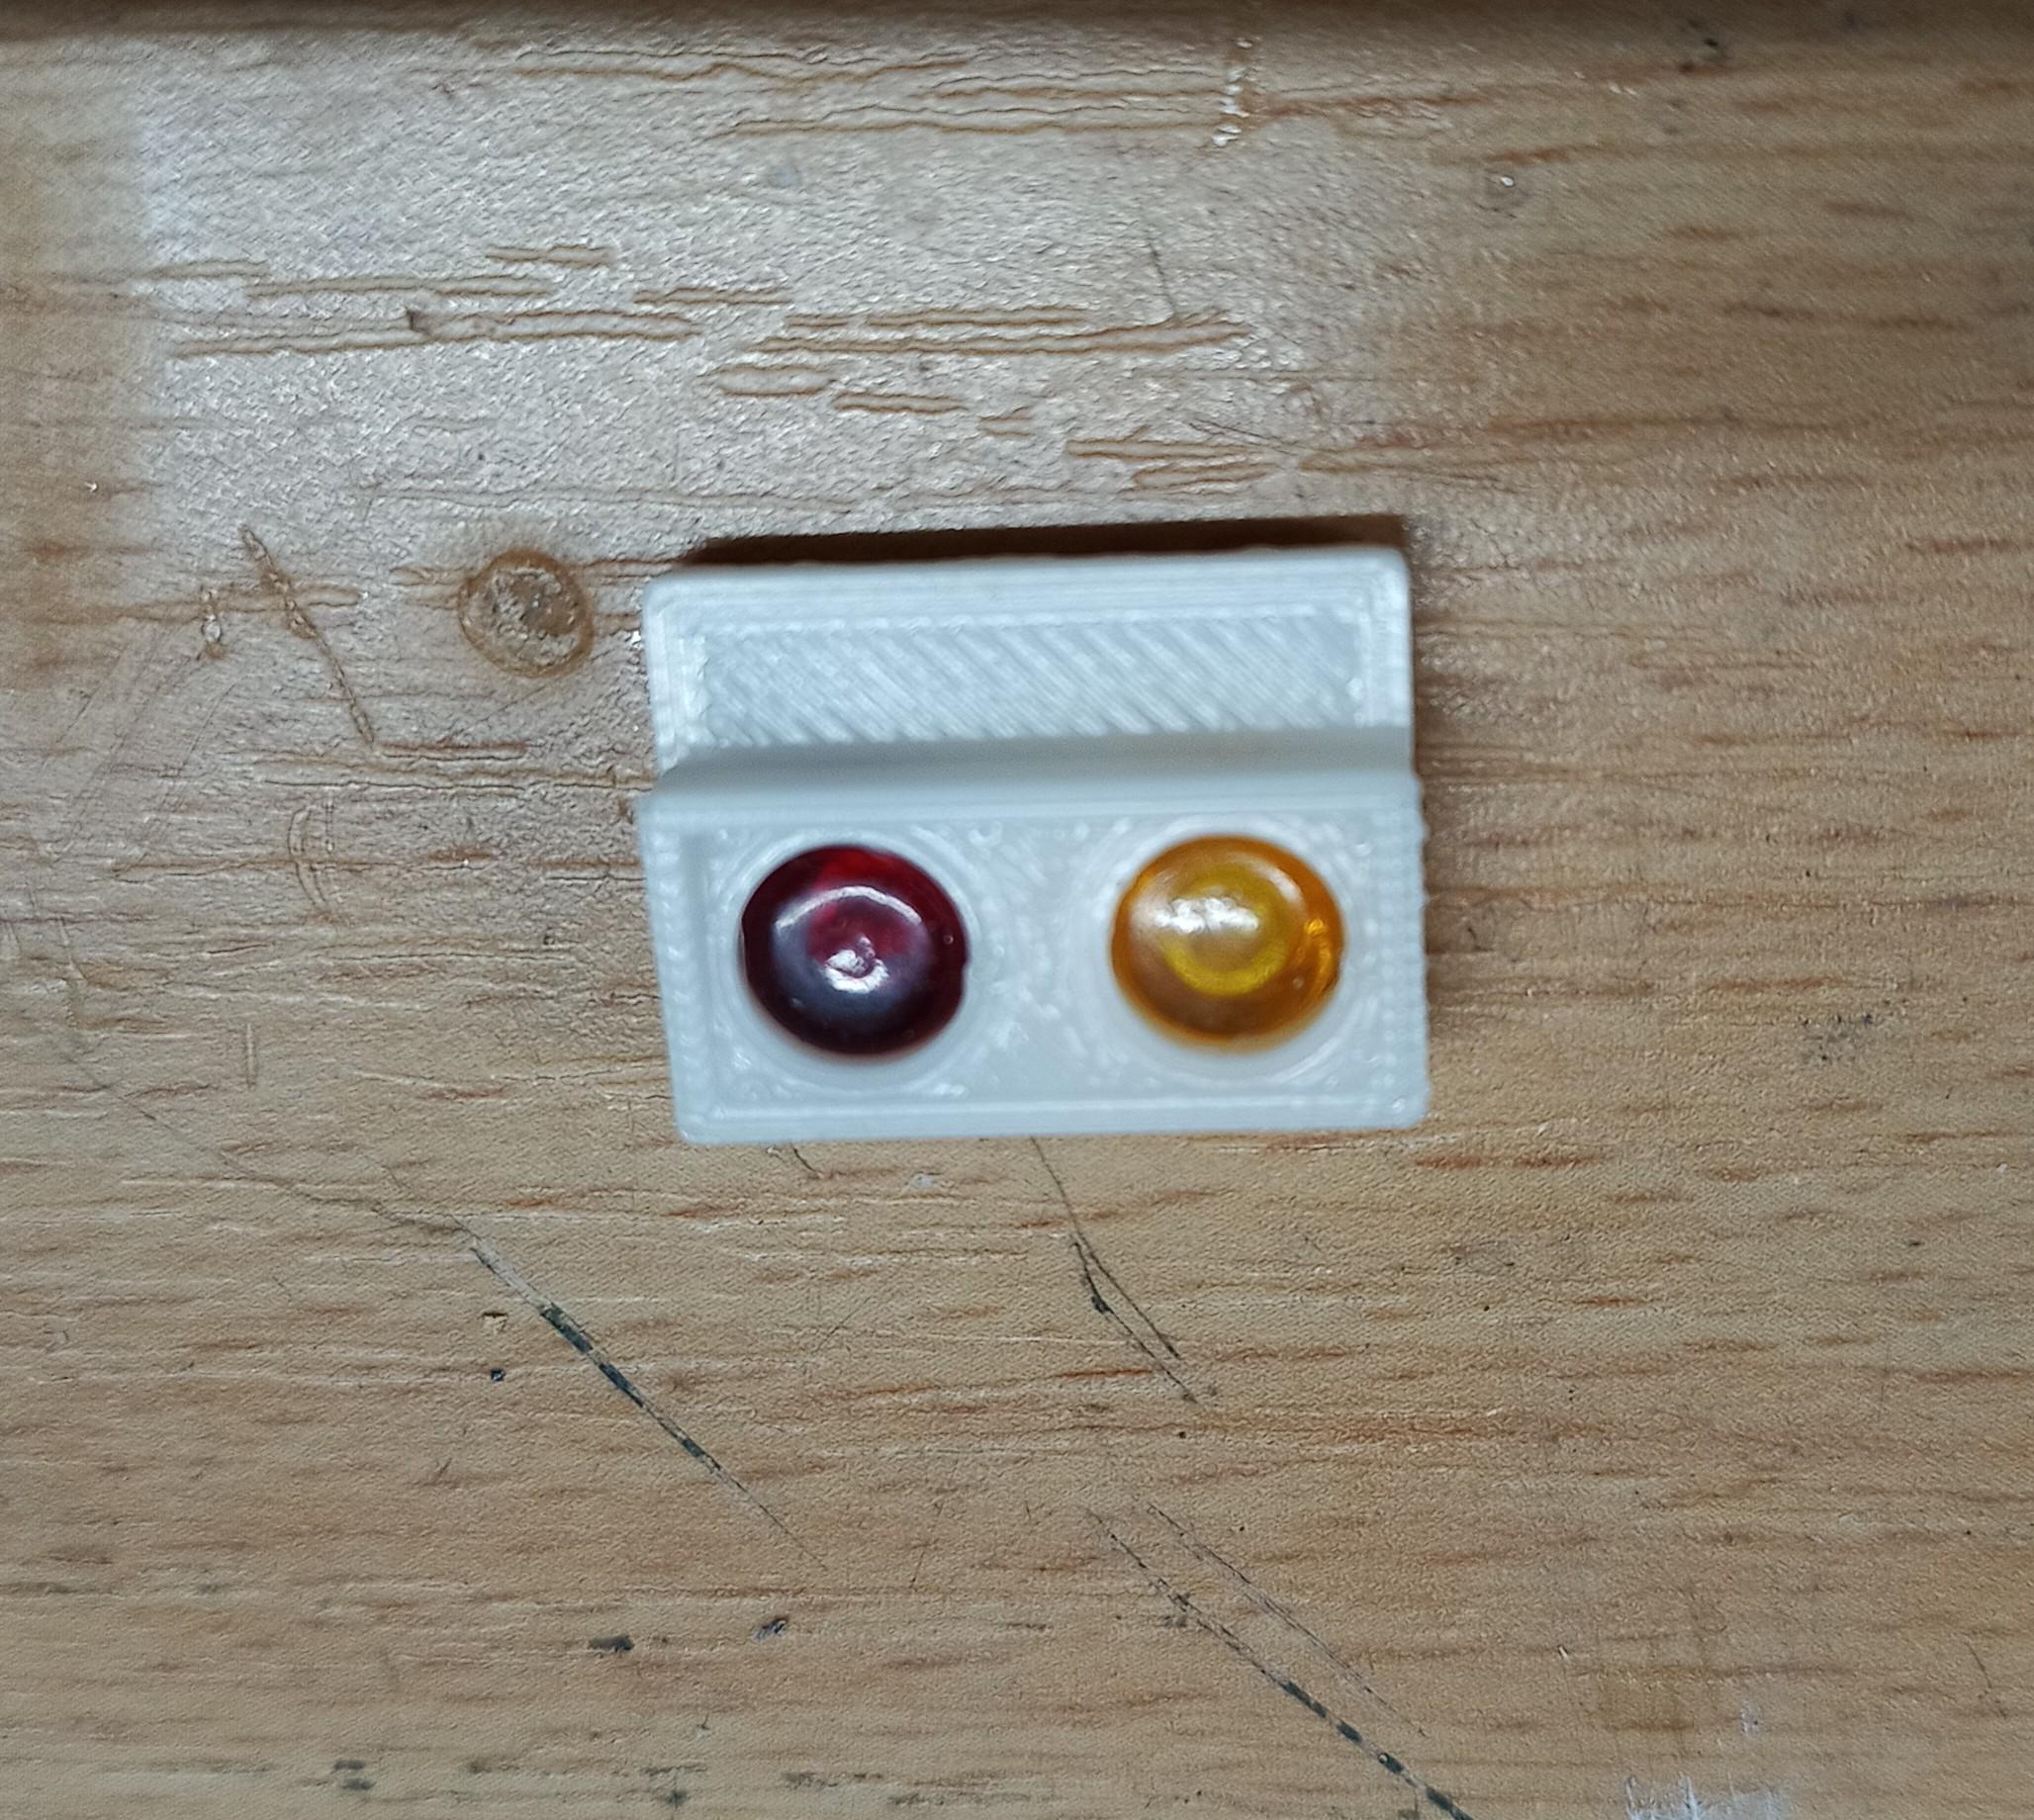
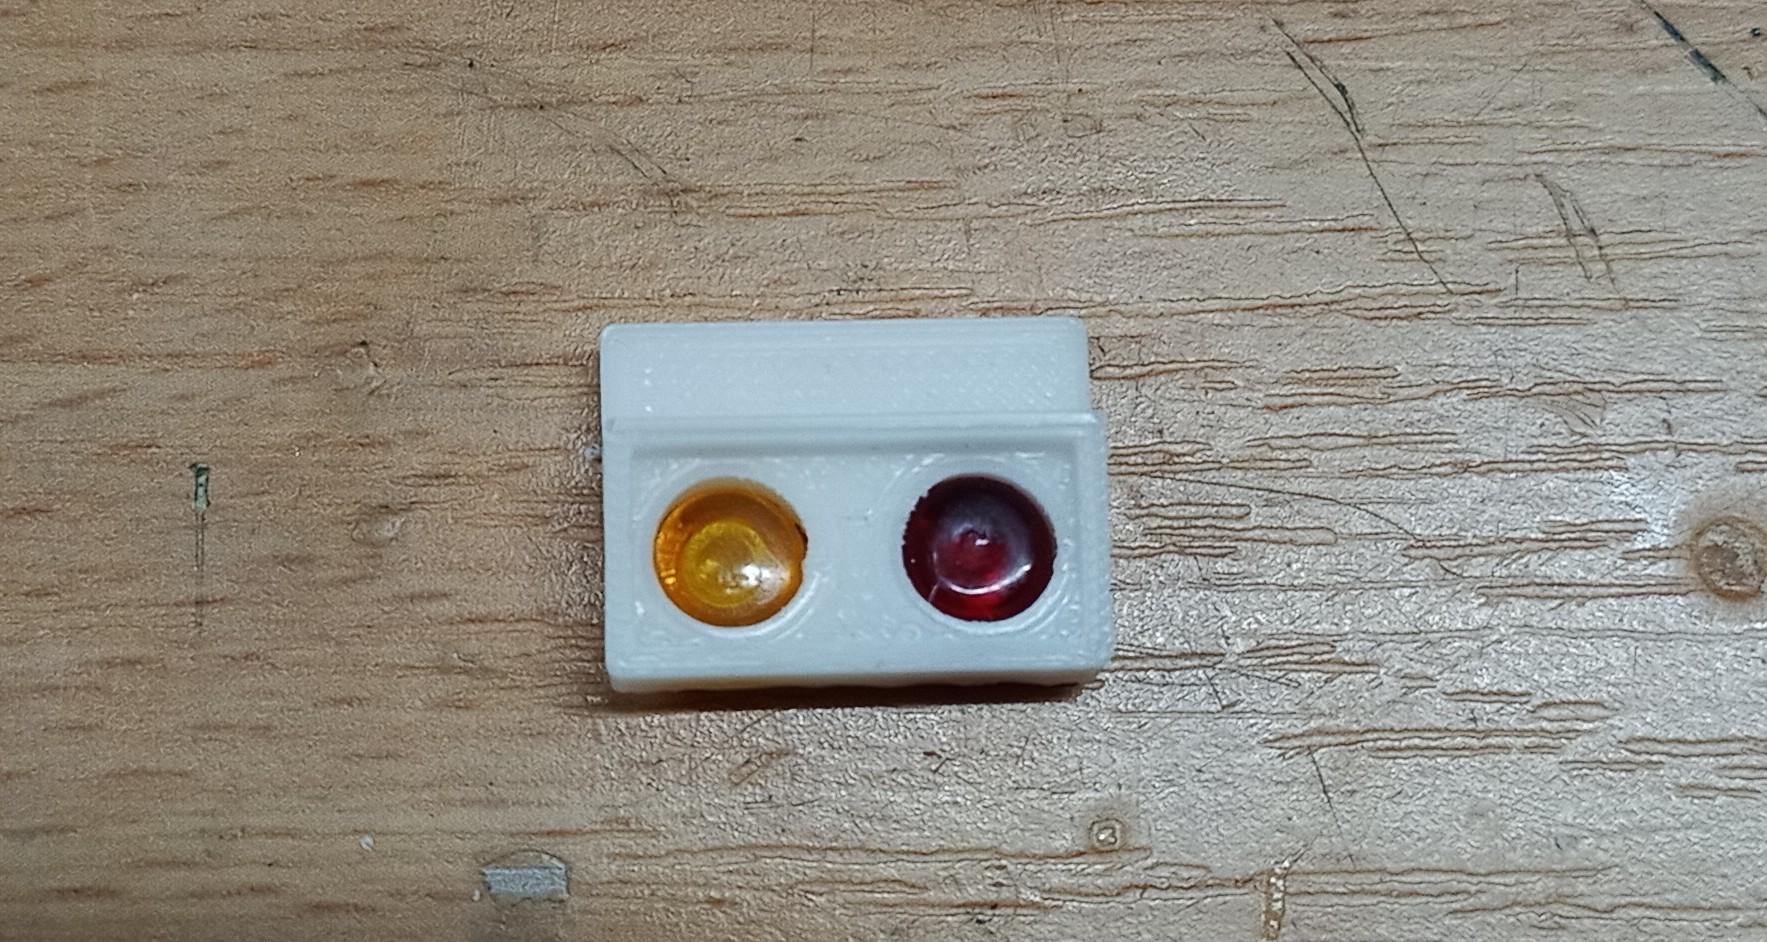
These are the rear lights of the trailers like they come out of the printer! I made them fit the red and orange lights you find in every Amt truck model kit. Guess everyone knows them! They'll be covered on the back side so you don't see the red and orange through.
-
Thanks! I was thinking about the vertical line too. I'll have to put some putty in and then clean the horizontal lines. Hope that works out the way I want it to! I think I'll put on the first layer of primer and then see how much the vertical line shows through. It just looks so dominant because the light ist shining through, showing the connecting areas. We'll see! Anyway, the wheels print is almost finished. VID_20240314_135339.mp4 Then one more part of the second trailer to print and I can begin prep work for the painting. This is how the first trailer looks up to now: The king pin is a little metal rod. So is the axle.