Jürgen M.
-
Posts
1,676 -
Joined
-
Last visited
Content Type
Profiles
Forums
Events
Gallery
Everything posted by Jürgen M.
-

Another "Convoy" Truck!
Jürgen M. replied to Jürgen M.'s topic in WIP: Model Trucks: Big Rigs and Heavy Equipment
I've got a KW W925 Amt kit with a suspension like the heavy duty Hendrickson you posted above. Would that be the right one for this project? I believe this truck might be round about the same model year as the K100 in the movie! Built this one when I was about 14. I'll post it too some time!
-
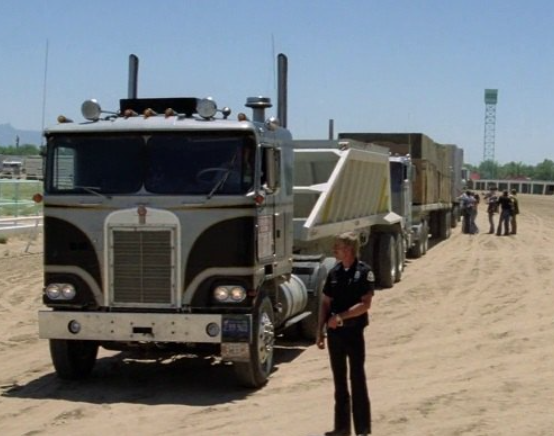
Another "Convoy" Truck!
Jürgen M. replied to Jürgen M.'s topic in WIP: Model Trucks: Big Rigs and Heavy Equipment
I was able to take this screenshot showing the truck from the side. For me it´s hard to tell which kind of suspension this truck has. Could be the 4 spring suspension, not sure though. .
-
Try using medical gloves. I always have used them for painting and discovered that they were especially useful when handling higloss parts. No fingerprints at all. But be sure to use a tight fitting size!
-
Another "Convoy" Truck!
Jürgen M. replied to Jürgen M.'s topic in WIP: Model Trucks: Big Rigs and Heavy Equipment
Wow!! Thanks for this information! I'm stunned by your knowledge about the different technologies and where they were applied! Which one do you think would be the right one or at least authentic for the mid 70s KW? I can design and print any one of them. Just want it to be correct concerning the technology of the time. I'm really thankful for all this. I don't have that much knowledge about the trucks of that time but maybe I can help out sometime in another way. I hope so! ? -
Another "Convoy" Truck!
Jürgen M. replied to Jürgen M.'s topic in WIP: Model Trucks: Big Rigs and Heavy Equipment
Wow! Amazing how much you know about trucks and such details! Thanks for sharing that. I never gave it any thought. I took another look at some movie scenes and I believe I saw leaf springs. You think those were in combination with a 4-bag suspension? That wouldn't be hard to change in my drawings especially since I have only drawn the frame. I think the Peterbilt 359 "Black Magic" hast got that kind of suspension and PB and KW being combined in the Paccar Corporation they might have used the same parts. I guess most of you know that better than I. -
Another "Convoy" Truck!
Jürgen M. replied to Jürgen M.'s topic in WIP: Model Trucks: Big Rigs and Heavy Equipment
You're probably right there! I'll have to look for some more scenes and make screenshots on that. Thanks for the tip. Guess I was too concentrated on making the KW look real that I forgot I was going for an older model. Guess it'll be a leaf suspension. I can change the drawings any time but I'll keep these for another time! ? -
European Trucks by Italeri
Jürgen M. replied to Jürgen M.'s topic in Model Trucks: Big Rigs and Heavy Equipment
Thanks! Actually I didn't build them with my usual passion. I was always more of an American truck fan. But your idea sounds interesting! Hope you find one! ? -
International 4300 tractor
Jürgen M. replied to Gary Chastain's topic in WIP: Model Trucks: Big Rigs and Heavy Equipment
OK, I see, you don't really need ideas! That's a beautiful solution! ? -
International 4300 tractor
Jürgen M. replied to Gary Chastain's topic in WIP: Model Trucks: Big Rigs and Heavy Equipment
nice job on a great kit! Concerning the fuel tanks: I always use cable ties as straps for round tanks. Works pretty well! There are so many sizes to choose from so you're bound to find the right ones! I always use the 3.6mm width. Maybe it helps! -
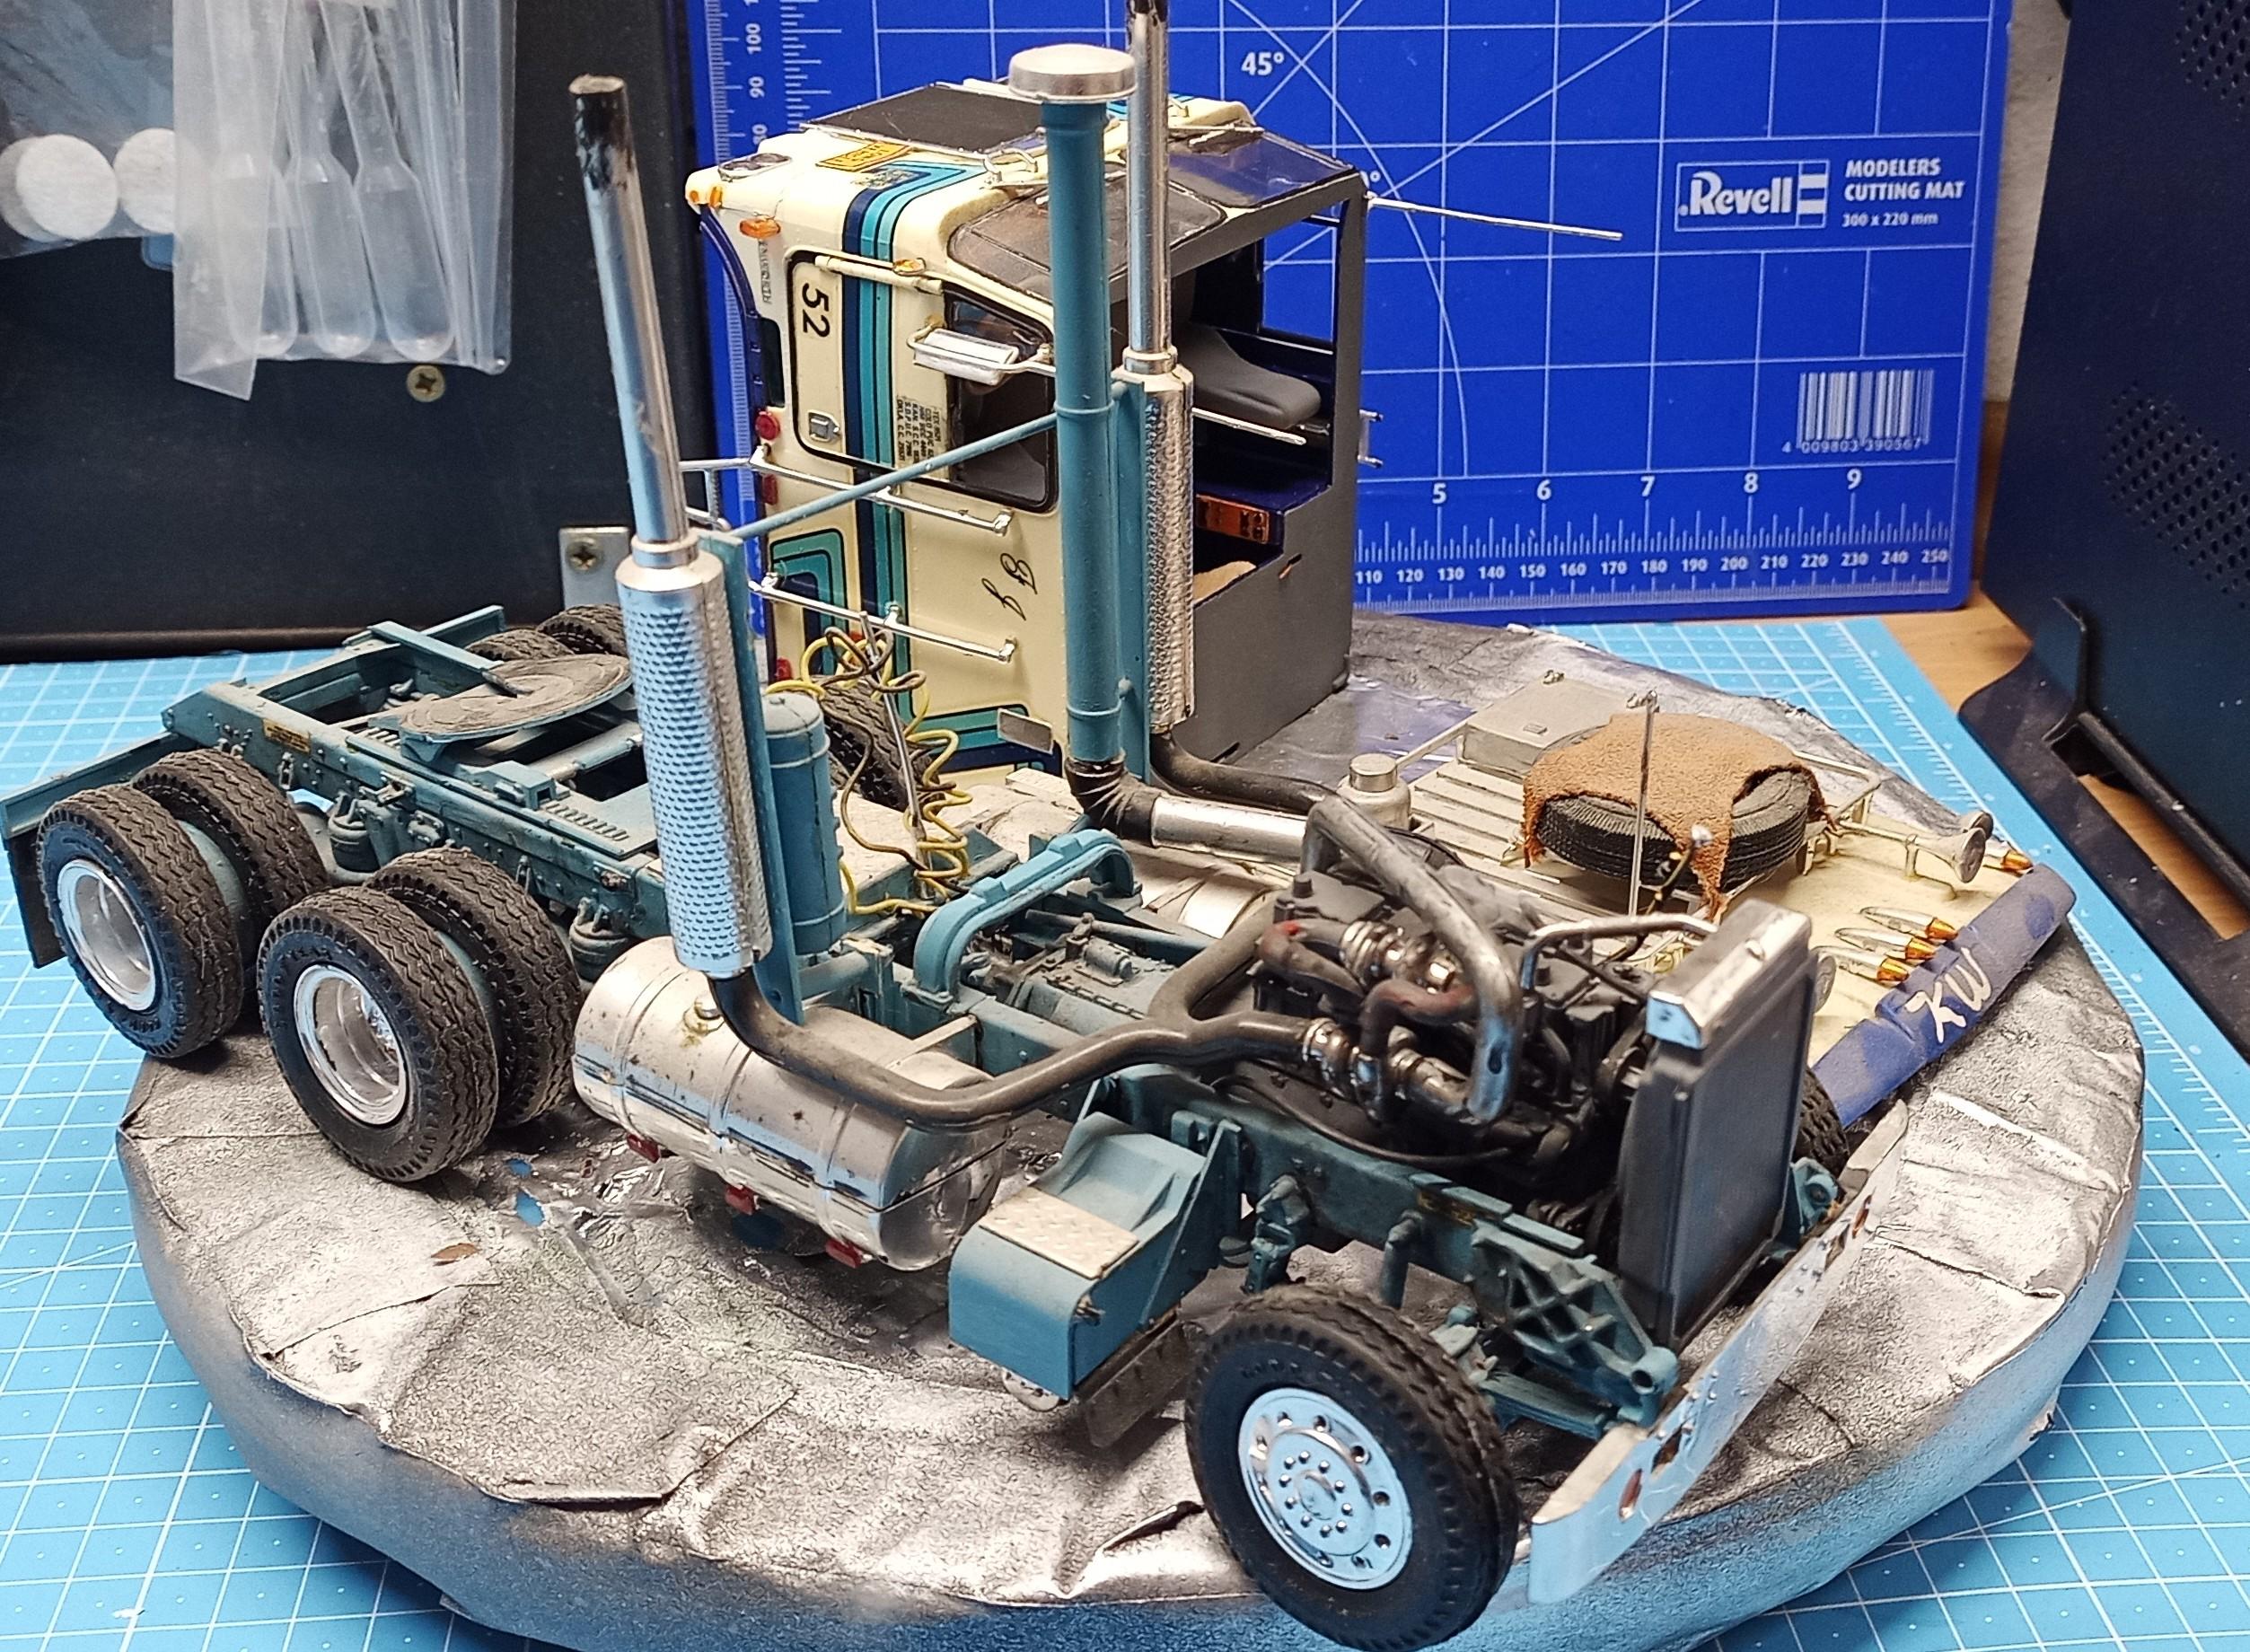
Thanks very much Steve! I appreciate that! Actually it consists of about 160 parts, there of about 140 designed and printed. I actually am kind of proud of it. It did turn out better than I had expected. Especially the designing of the cab was a real challenge.
-
Another "Convoy" Truck!
Jürgen M. replied to Jürgen M.'s topic in WIP: Model Trucks: Big Rigs and Heavy Equipment
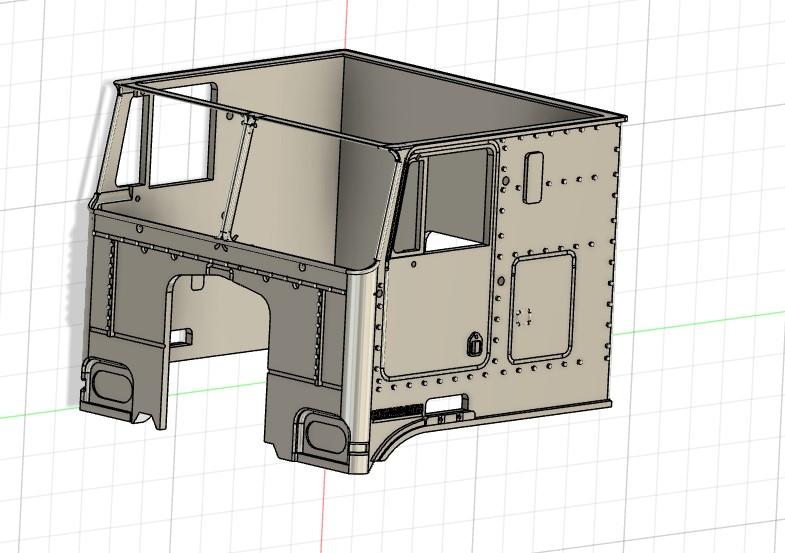
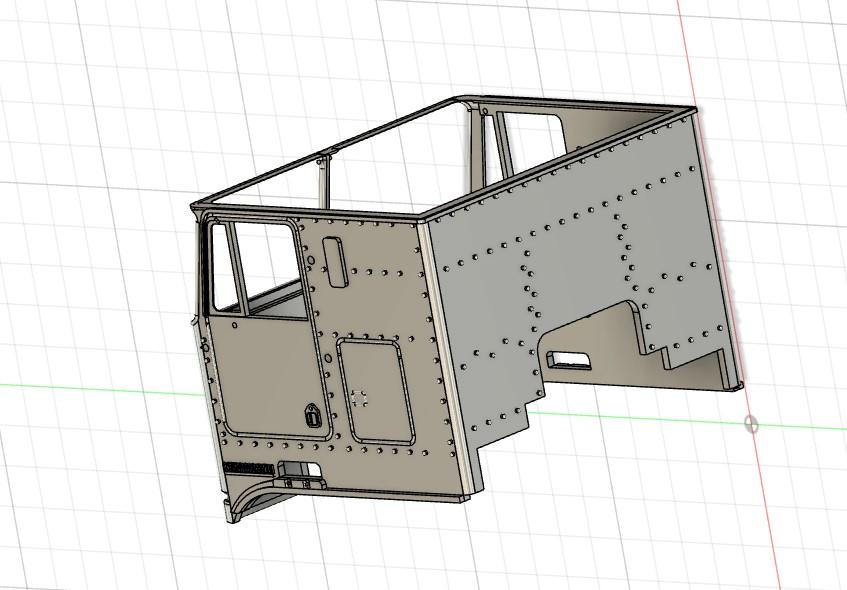
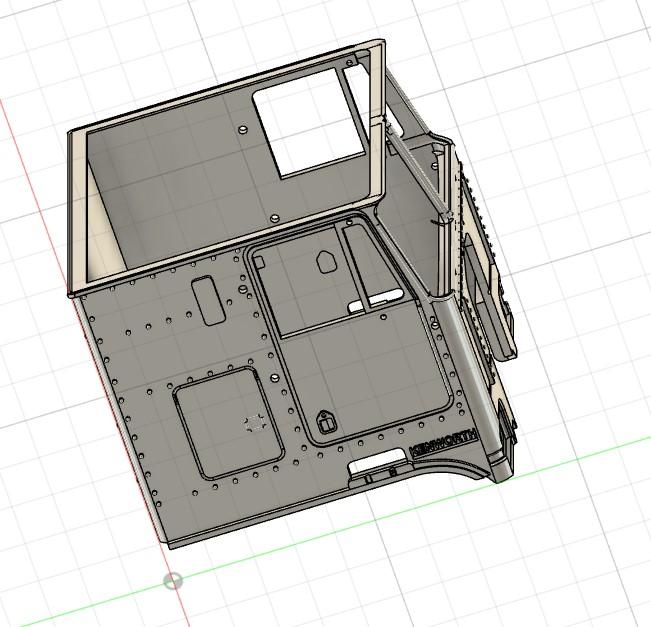
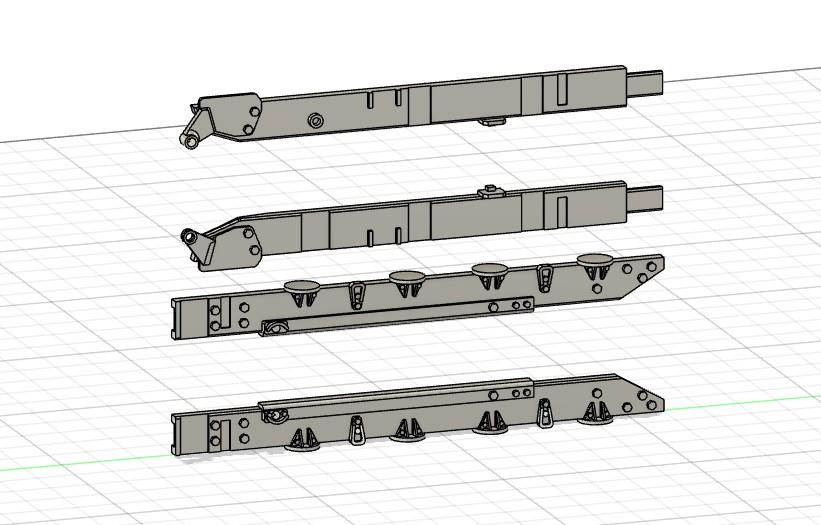
Here are some screenshots of the first self designed parts: The cab: and some chassis parts: The frame had to be cut in half because it would have been too long for the printing bed so I deigned the front rails with extra centering pieces and a larger glue area. Considering that the "Big Nasty" Mack already consists of 160 parts of which about 140 are printed and it´s only a two axle tractor there´s still gonna be a lot to do on this K-Whopper!! I could of course use already designed chassis and engine parts but I want to make it as authentic as possible. Means I will try to design as many parts as possible especially for this truck to make it look like a Kenworth from top to bottom and from front to rear. Since I´m not planning on building before September or October I´ve got enough time to get all the parts designed. A few I might actually take over from other printed trucks as long as they´re in a place where it doesn´t really matter. So I´ll have to ask for patience. There won´t be hardware to see in quite a while! ?
-
Kenworth K100 VIT Australia
Jürgen M. replied to Jürgen M.'s topic in Model Trucks: Big Rigs and Heavy Equipment
At the moment the K100 is a construction area. Pieces are falling/breaking off. There's a lot to do because for every part I glue back on, two fall off!
-
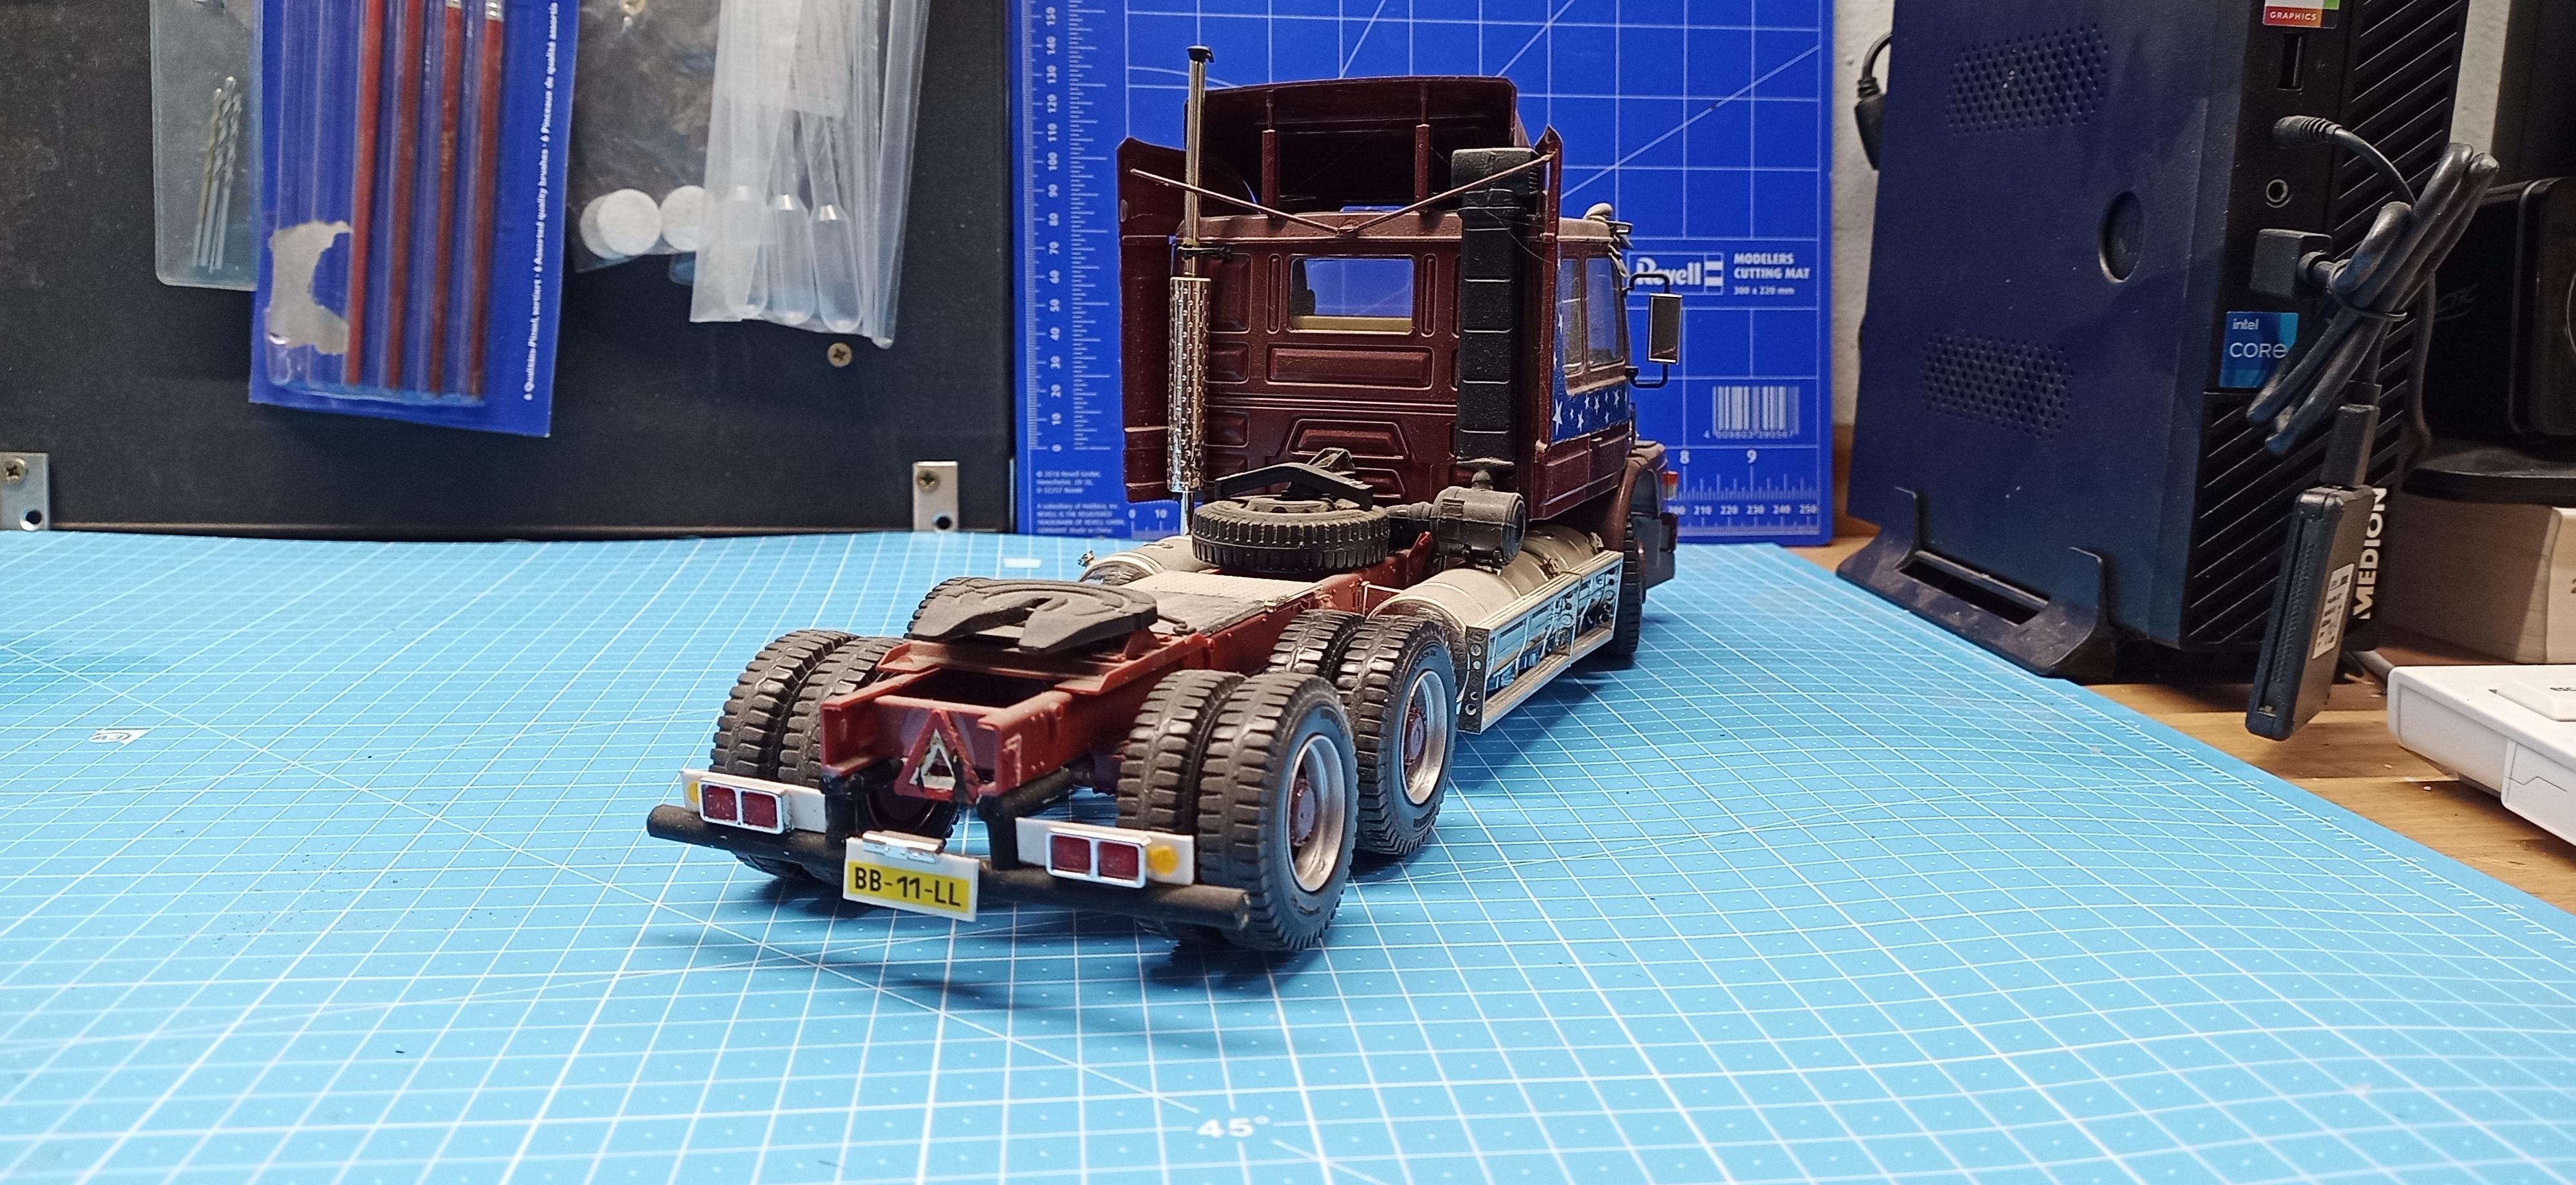
Hello, I'm back and I've made a decision about which (maybe finally Last) Convoy truck I'll be building! I chose the KW cabover "Bruhn Trucking"! I haven't yet started building but I have begun to design parts. I'll post some screenshots of the 3D drawings soon. Details like chassis and cab interior I'll be taking from my K100 VIT Australia kit and exterior from movie screenshots!
-
Looks perfect to me! Thanks for sharing!
-
Pretty In Pink, Mack Superliner
Jürgen M. replied to TruckerAL's topic in Model Trucks: Big Rigs and Heavy Equipment
Really nice build!! I´ve thought about a pink truck too but I couldn´t make up my mind if I really wanted it or not. I think you´ve helped me! I´ll give it a try! Looks pretty good to me! -
Kenworth K100 VIT Australia
Jürgen M. replied to Jürgen M.'s topic in Model Trucks: Big Rigs and Heavy Equipment
I'm running out of space too. Got 25 US trucks, some with trailer and 4 European ones! More is to come though! ? -
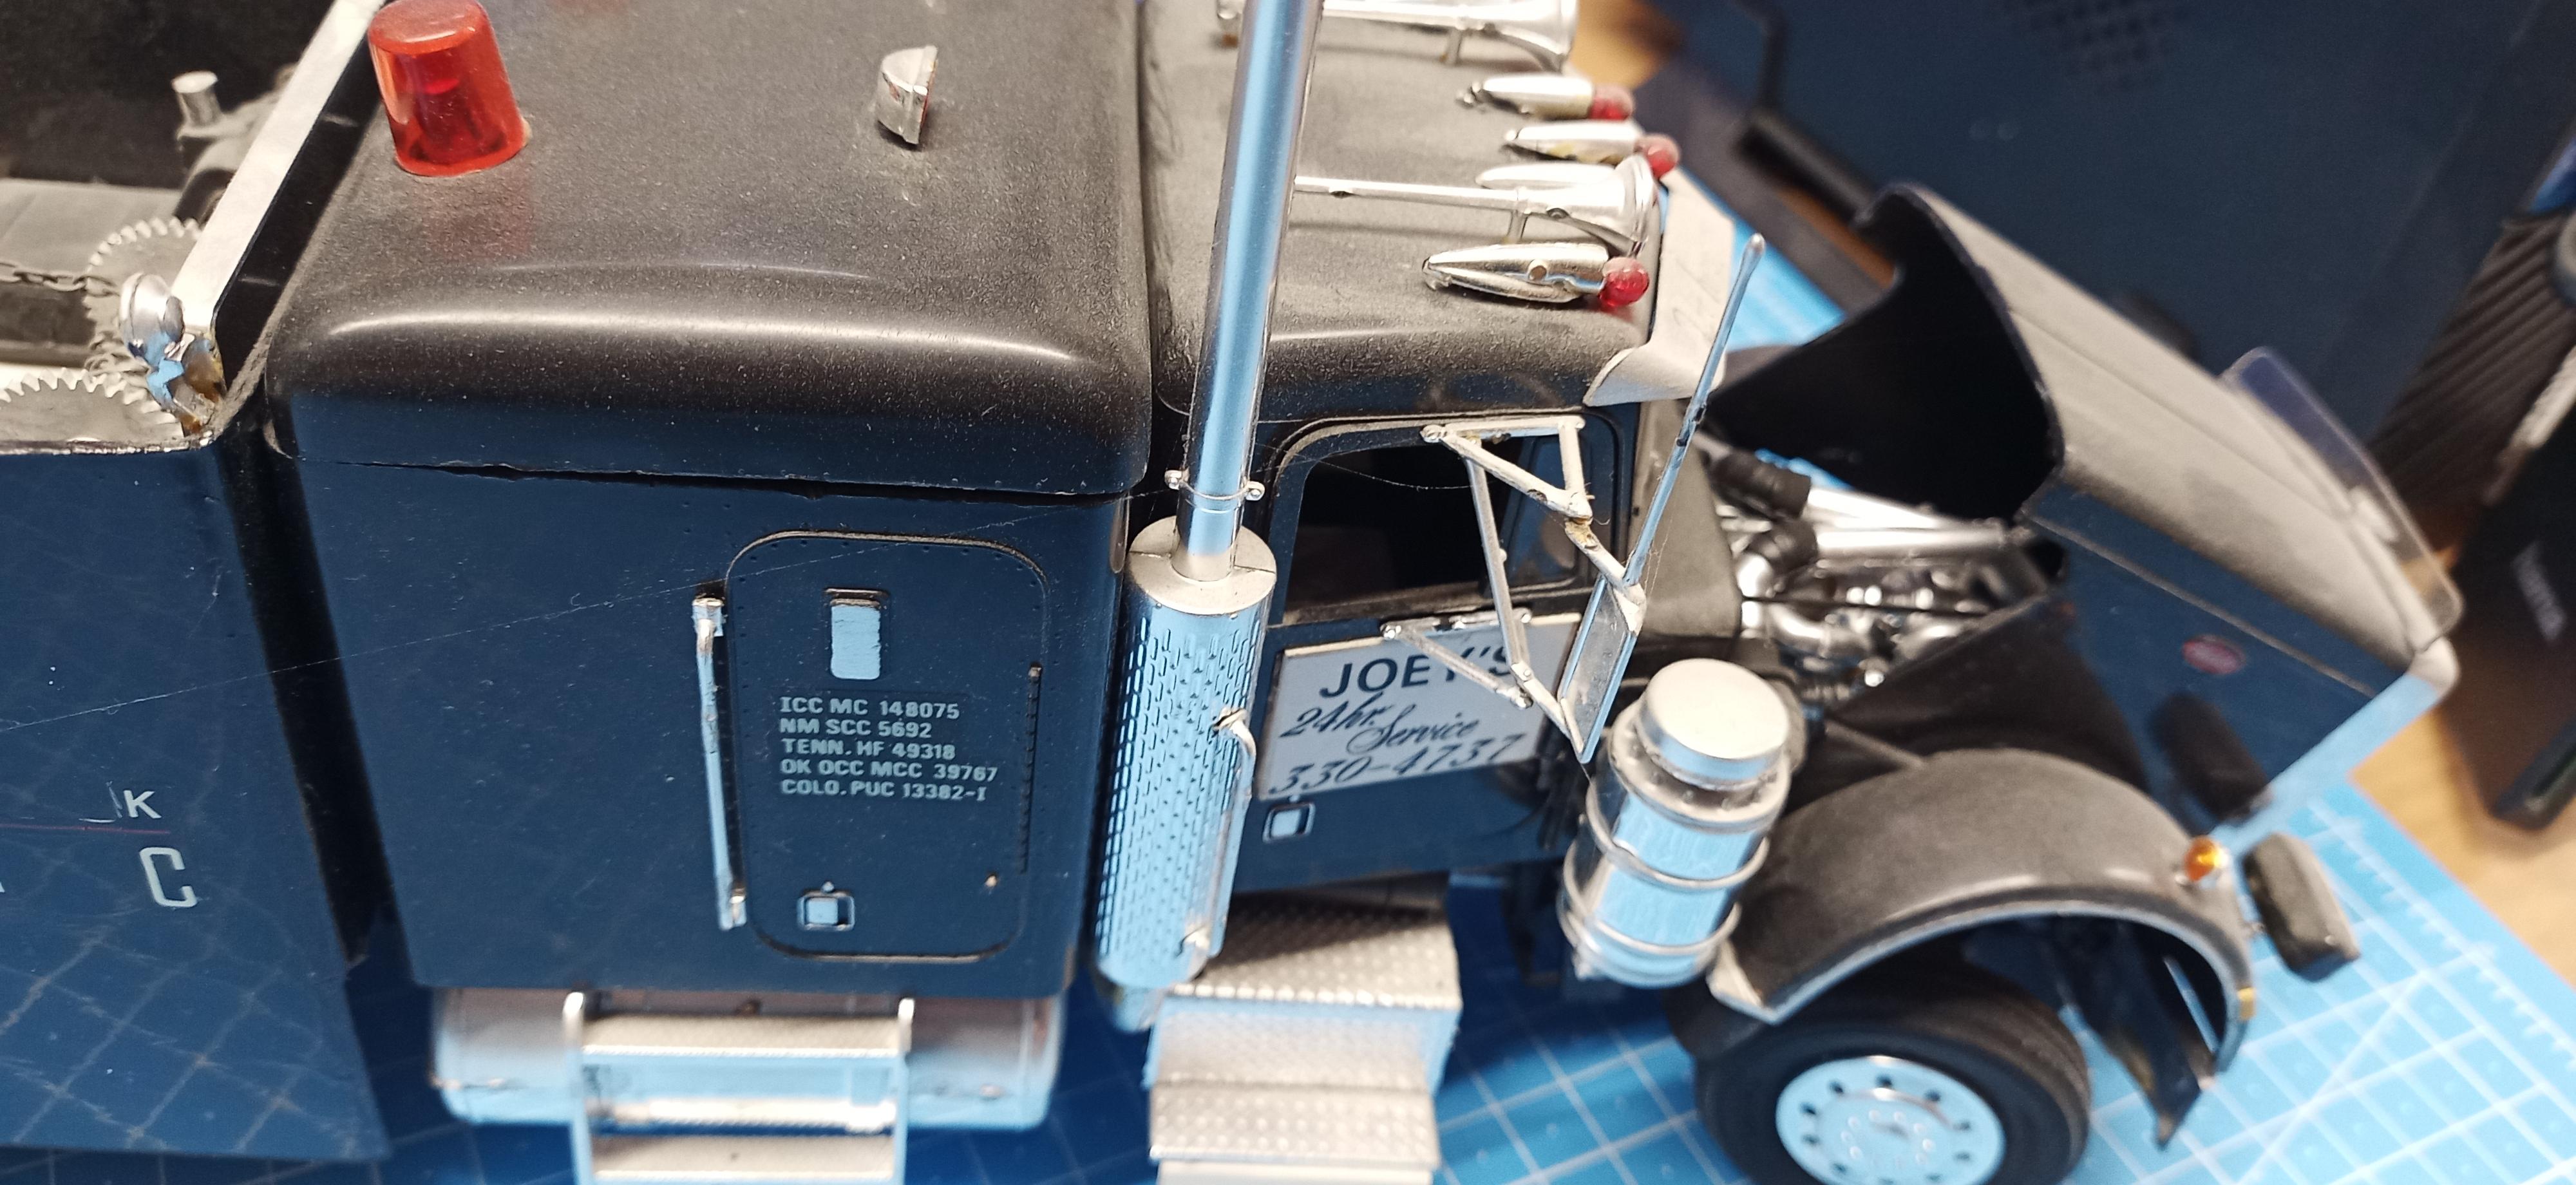
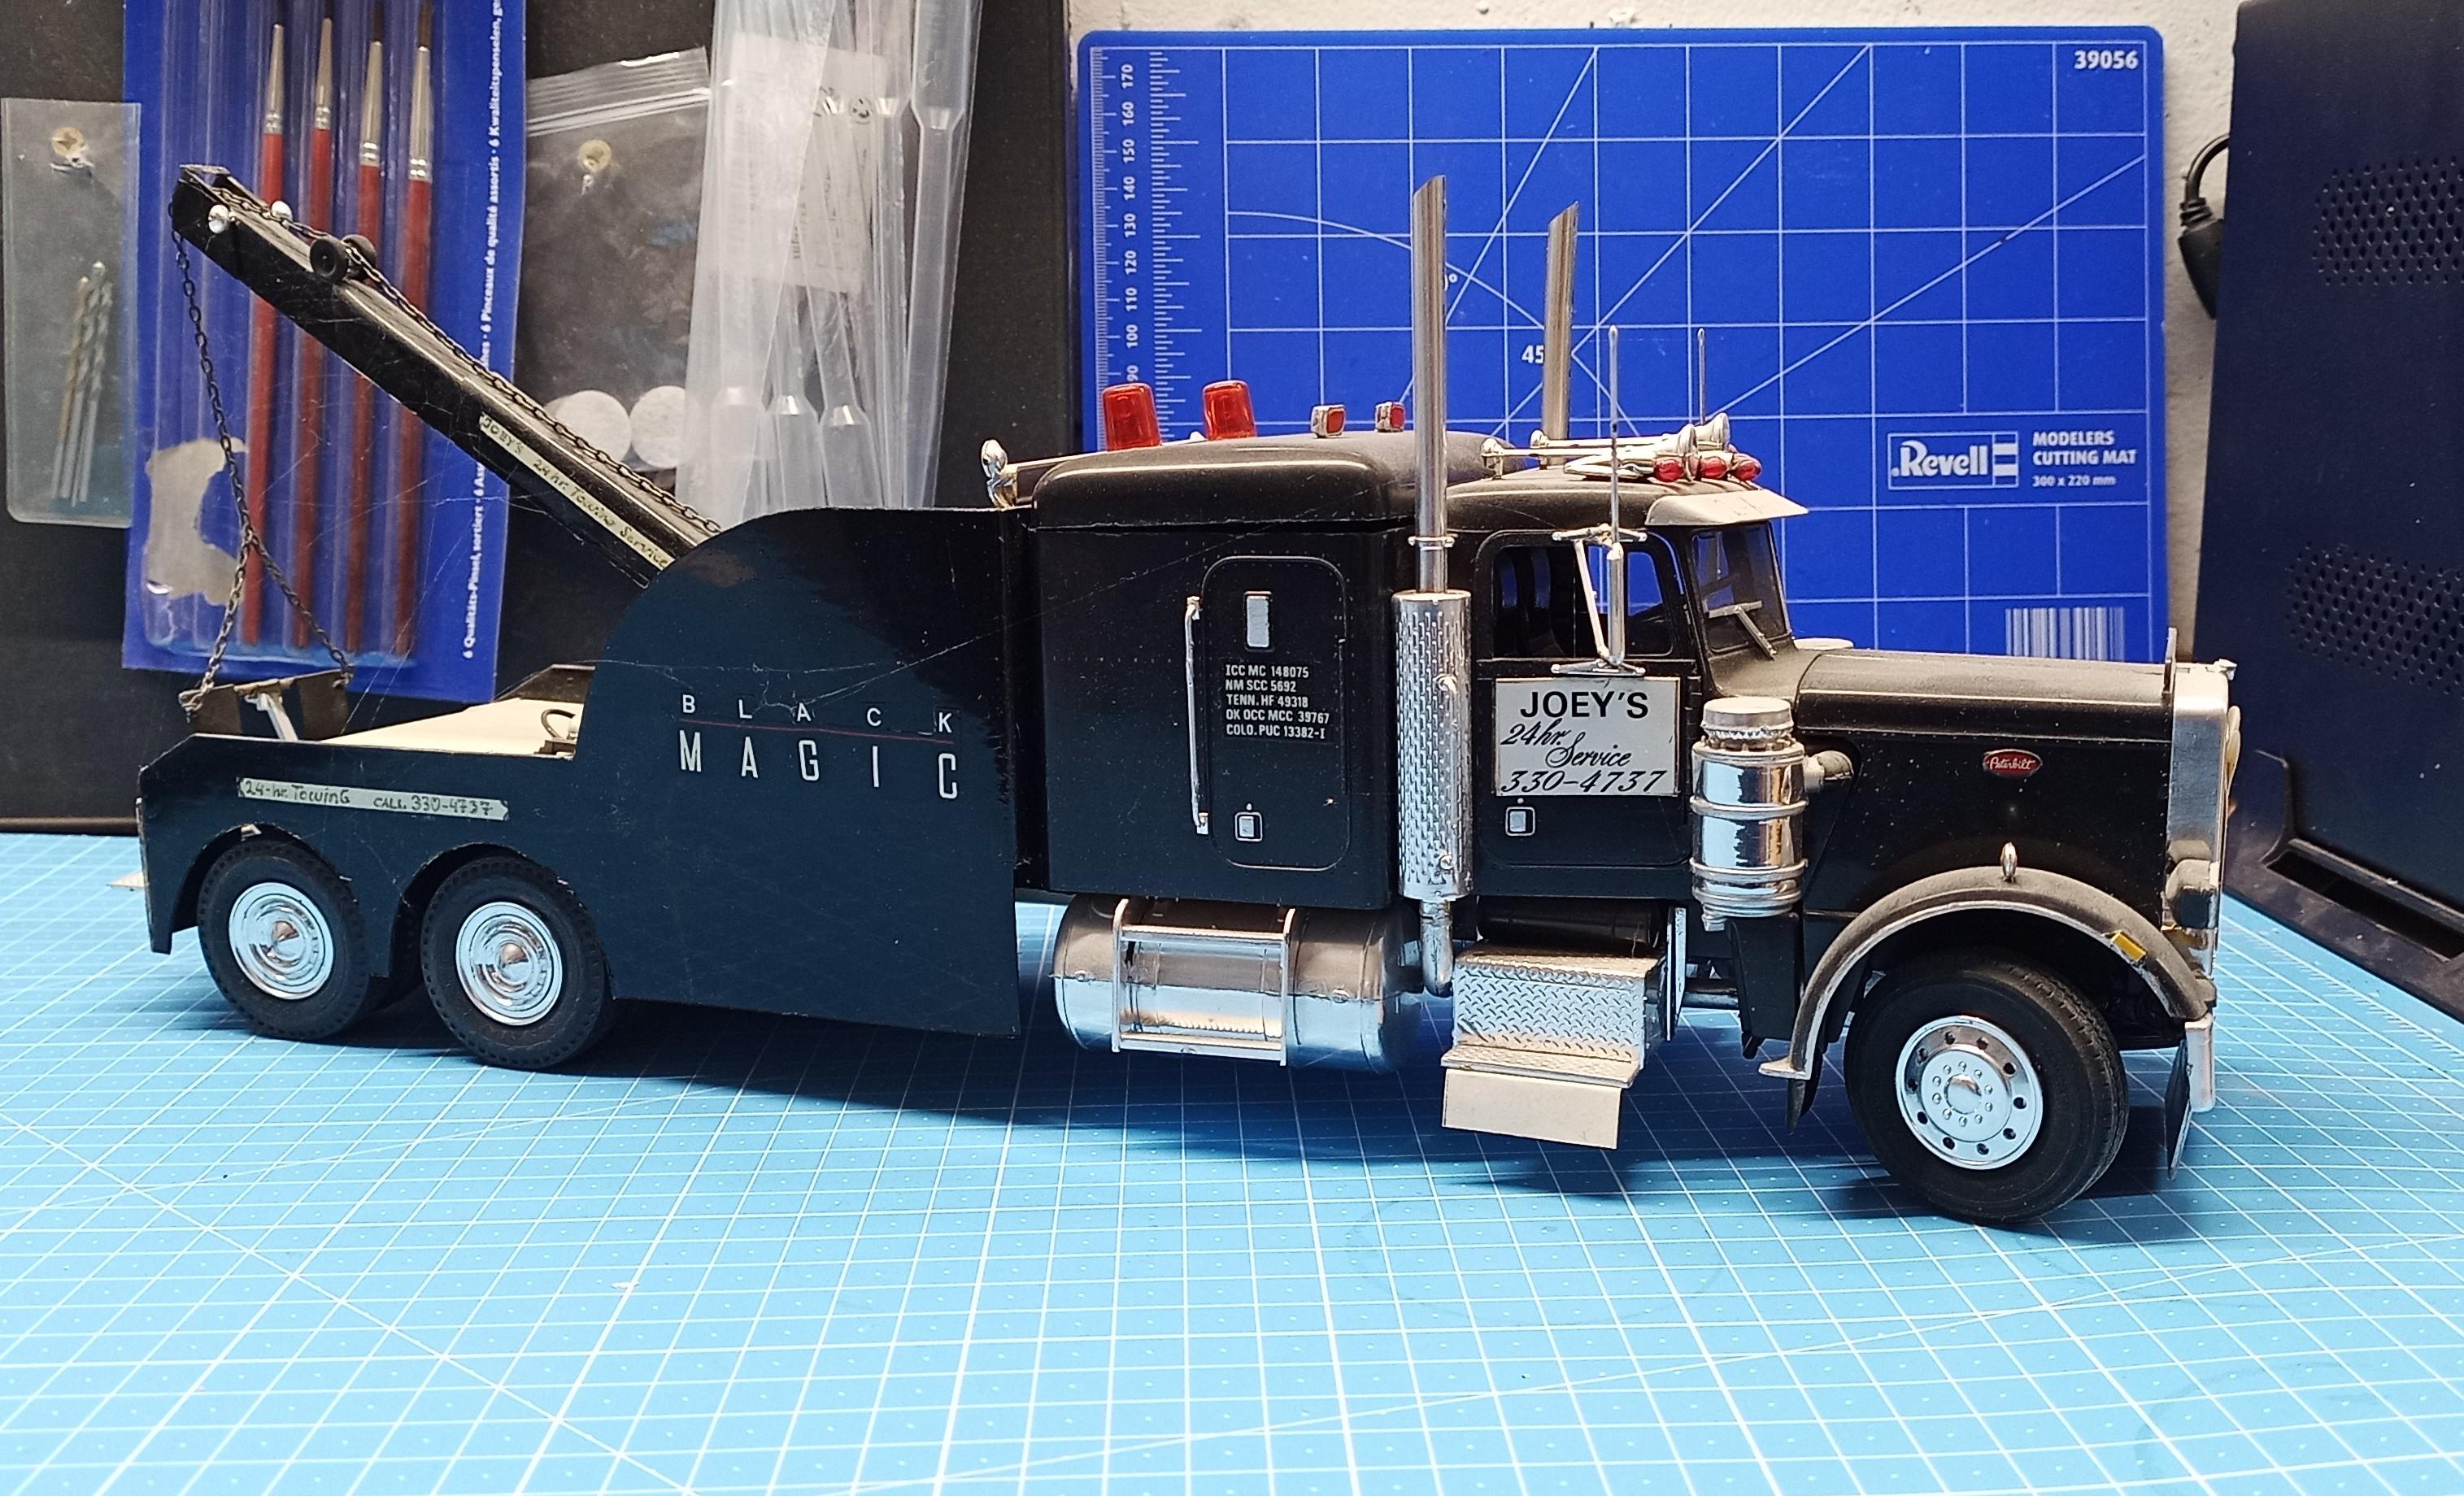
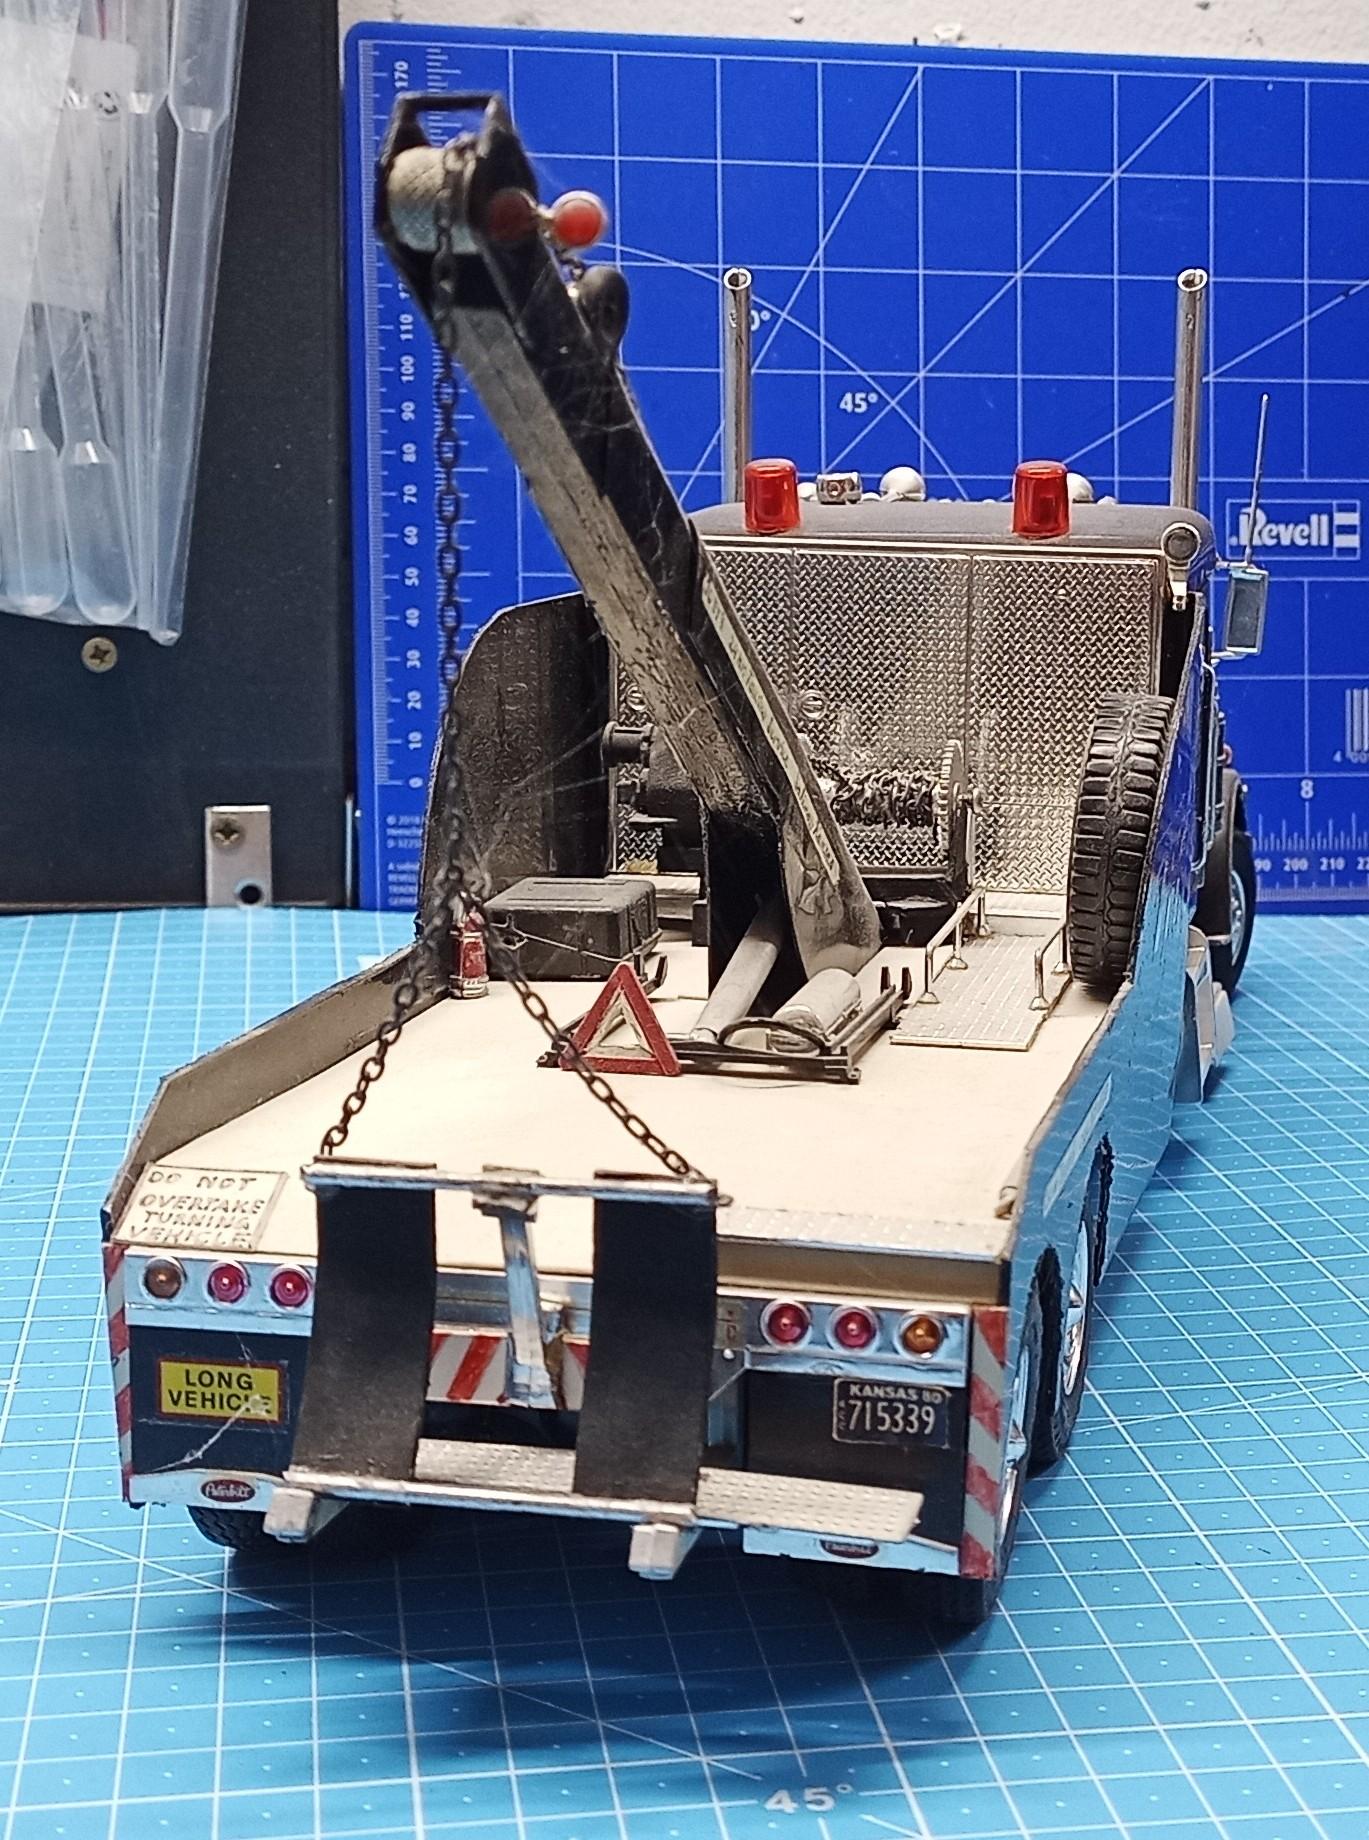
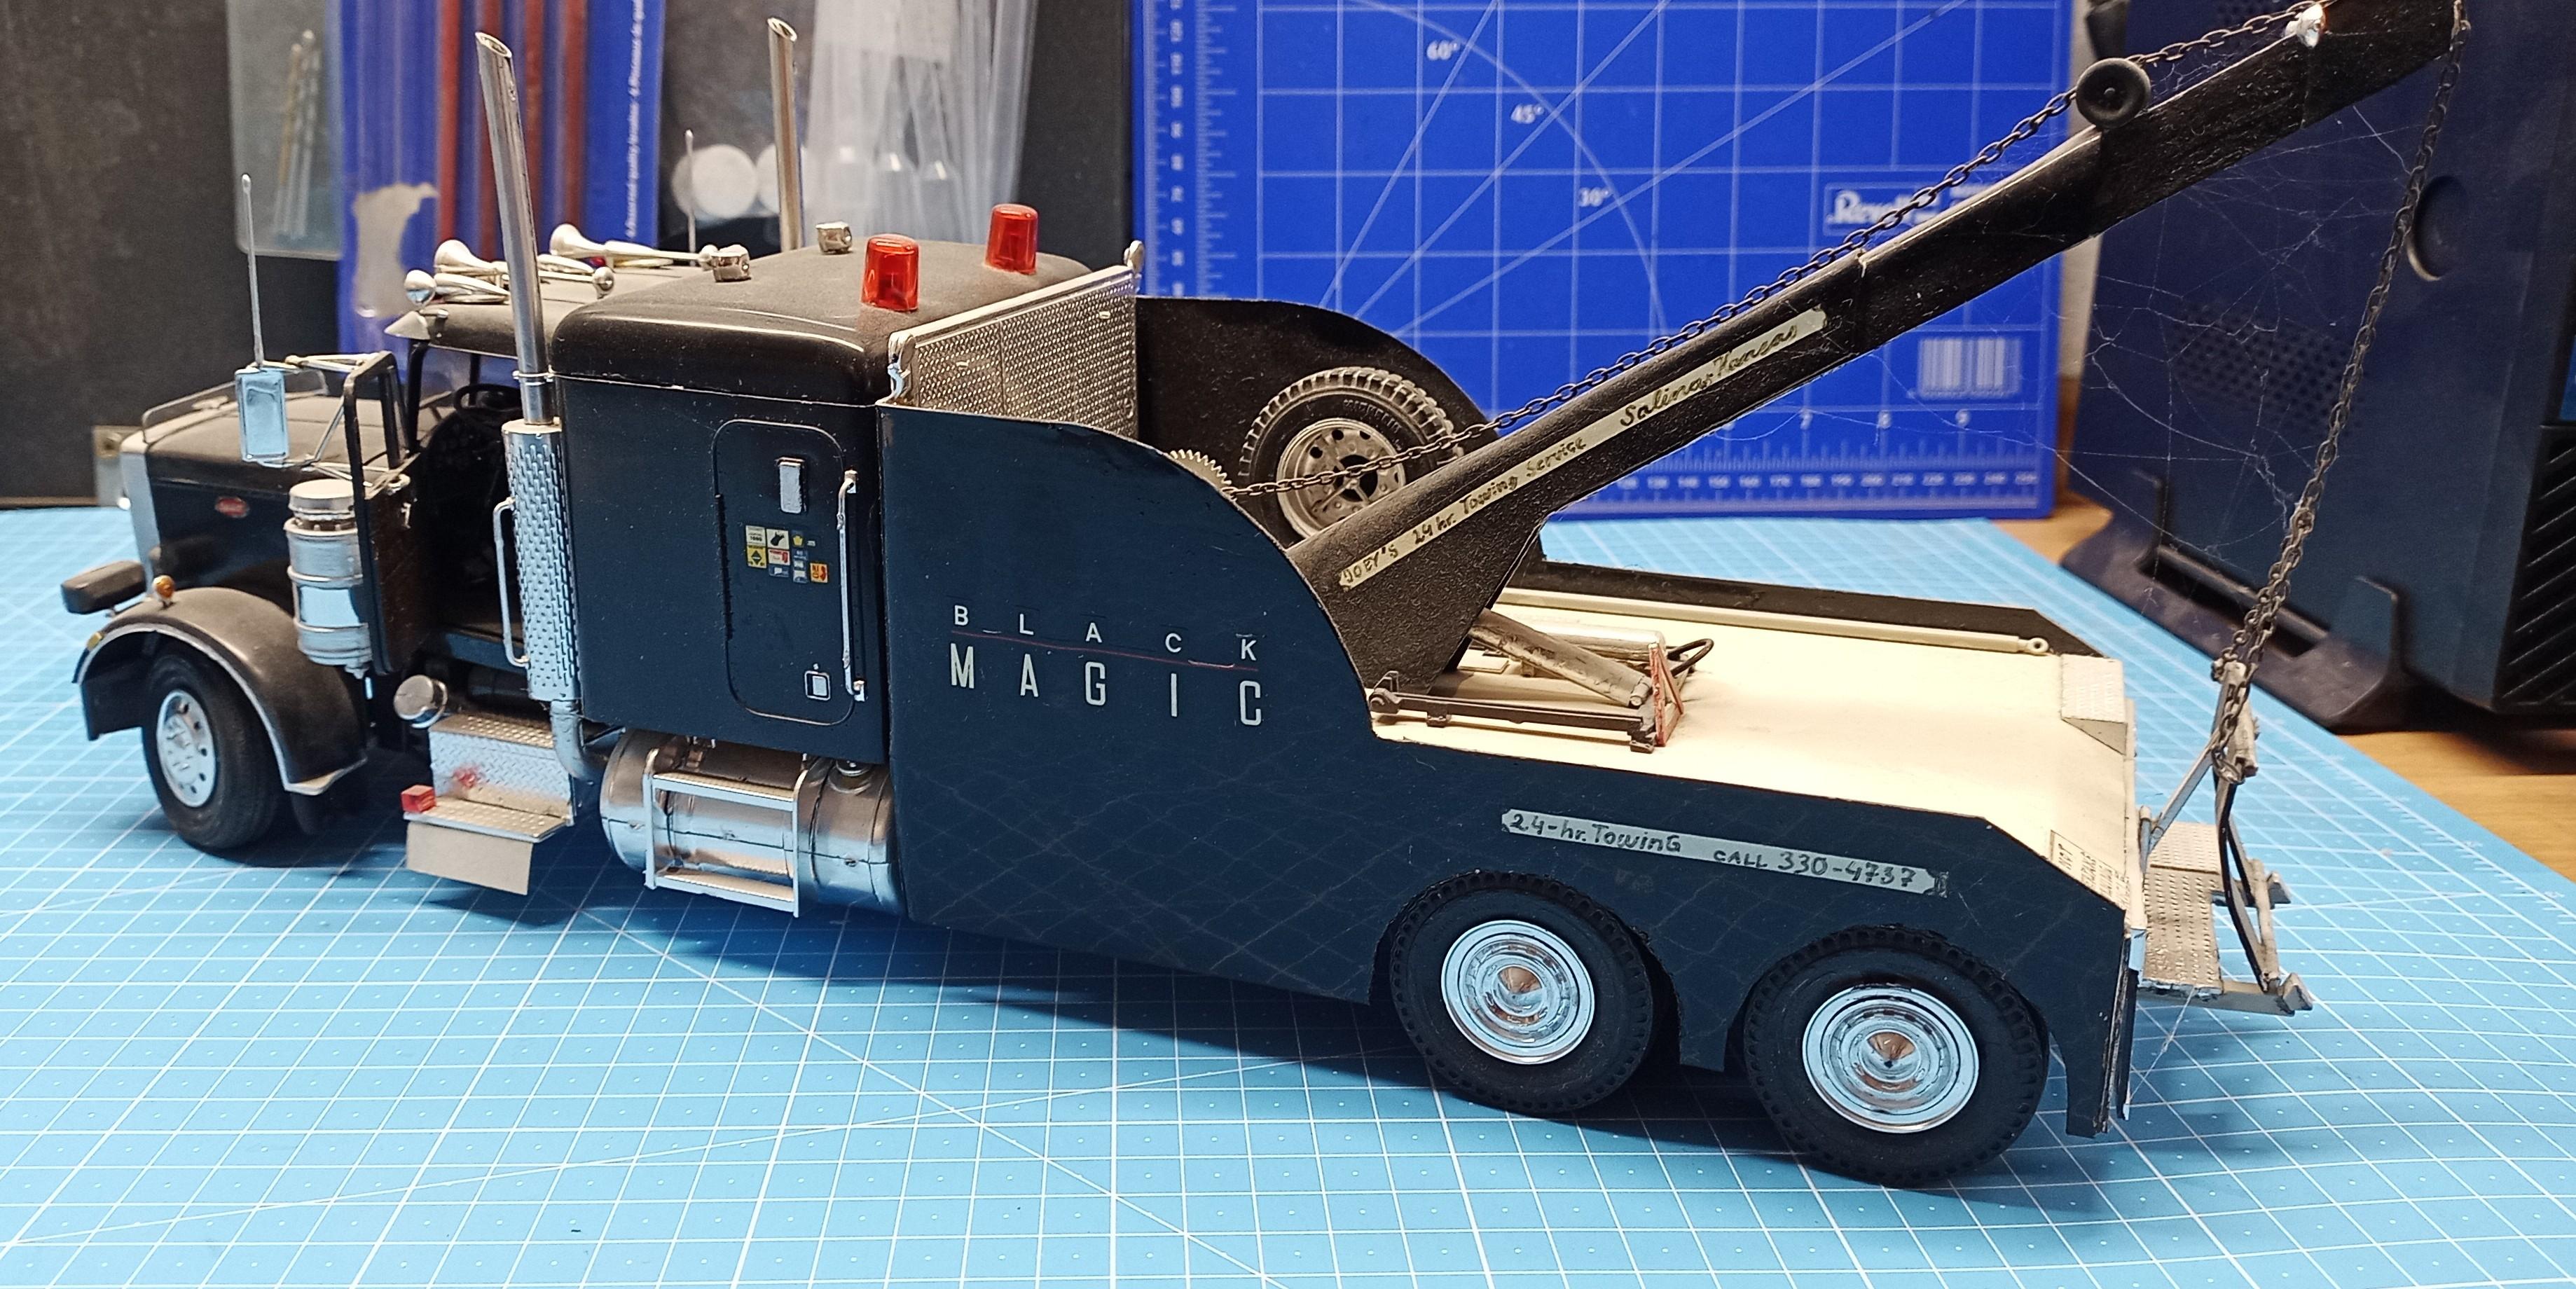
Hi Folks, I promised to post my Revell Peterbilt "Black Magic" truck: I had turned it into a wrecker! My modelling skills as a 16 year old had improved so I stretched the chassis and built a scratch wrecker on top! The crane is made of wood, covered with polystyrol sheet. The generator for the winch is a transmission of an amt PB 359 which I had ruined two years before. (I had tested my skills on that and had failed!) Hope you enjoy it: See the red lights on top of the sleeper? VID_20240321_060914.mp4 I did a lot of electronics stuff back then and thought I'd put a bit of it in this truck. By the way, the hub covers on the rear wheels came from an amt Chevy Nomad 1/16 I think it was. They fit perfectly!
-
Kenworth K100 VIT Australia
Jürgen M. replied to Jürgen M.'s topic in Model Trucks: Big Rigs and Heavy Equipment
I did notice that some tires were a bit sticky after all those years which is normal for that material after so many years but it was never as intense as that what you told. That's probably why Italeri had plastic tires at that time. But they too became crumbly. The tires of my Iveco had begun to fall apart after twenty years or so. They actually had big gaps on the side from the tread to the rim. The smaller amt tires, which were included in this Revell K100 kit (which I thought was strange!) seem to last the longest. -
European Trucks by Italeri
Jürgen M. replied to Jürgen M.'s topic in Model Trucks: Big Rigs and Heavy Equipment
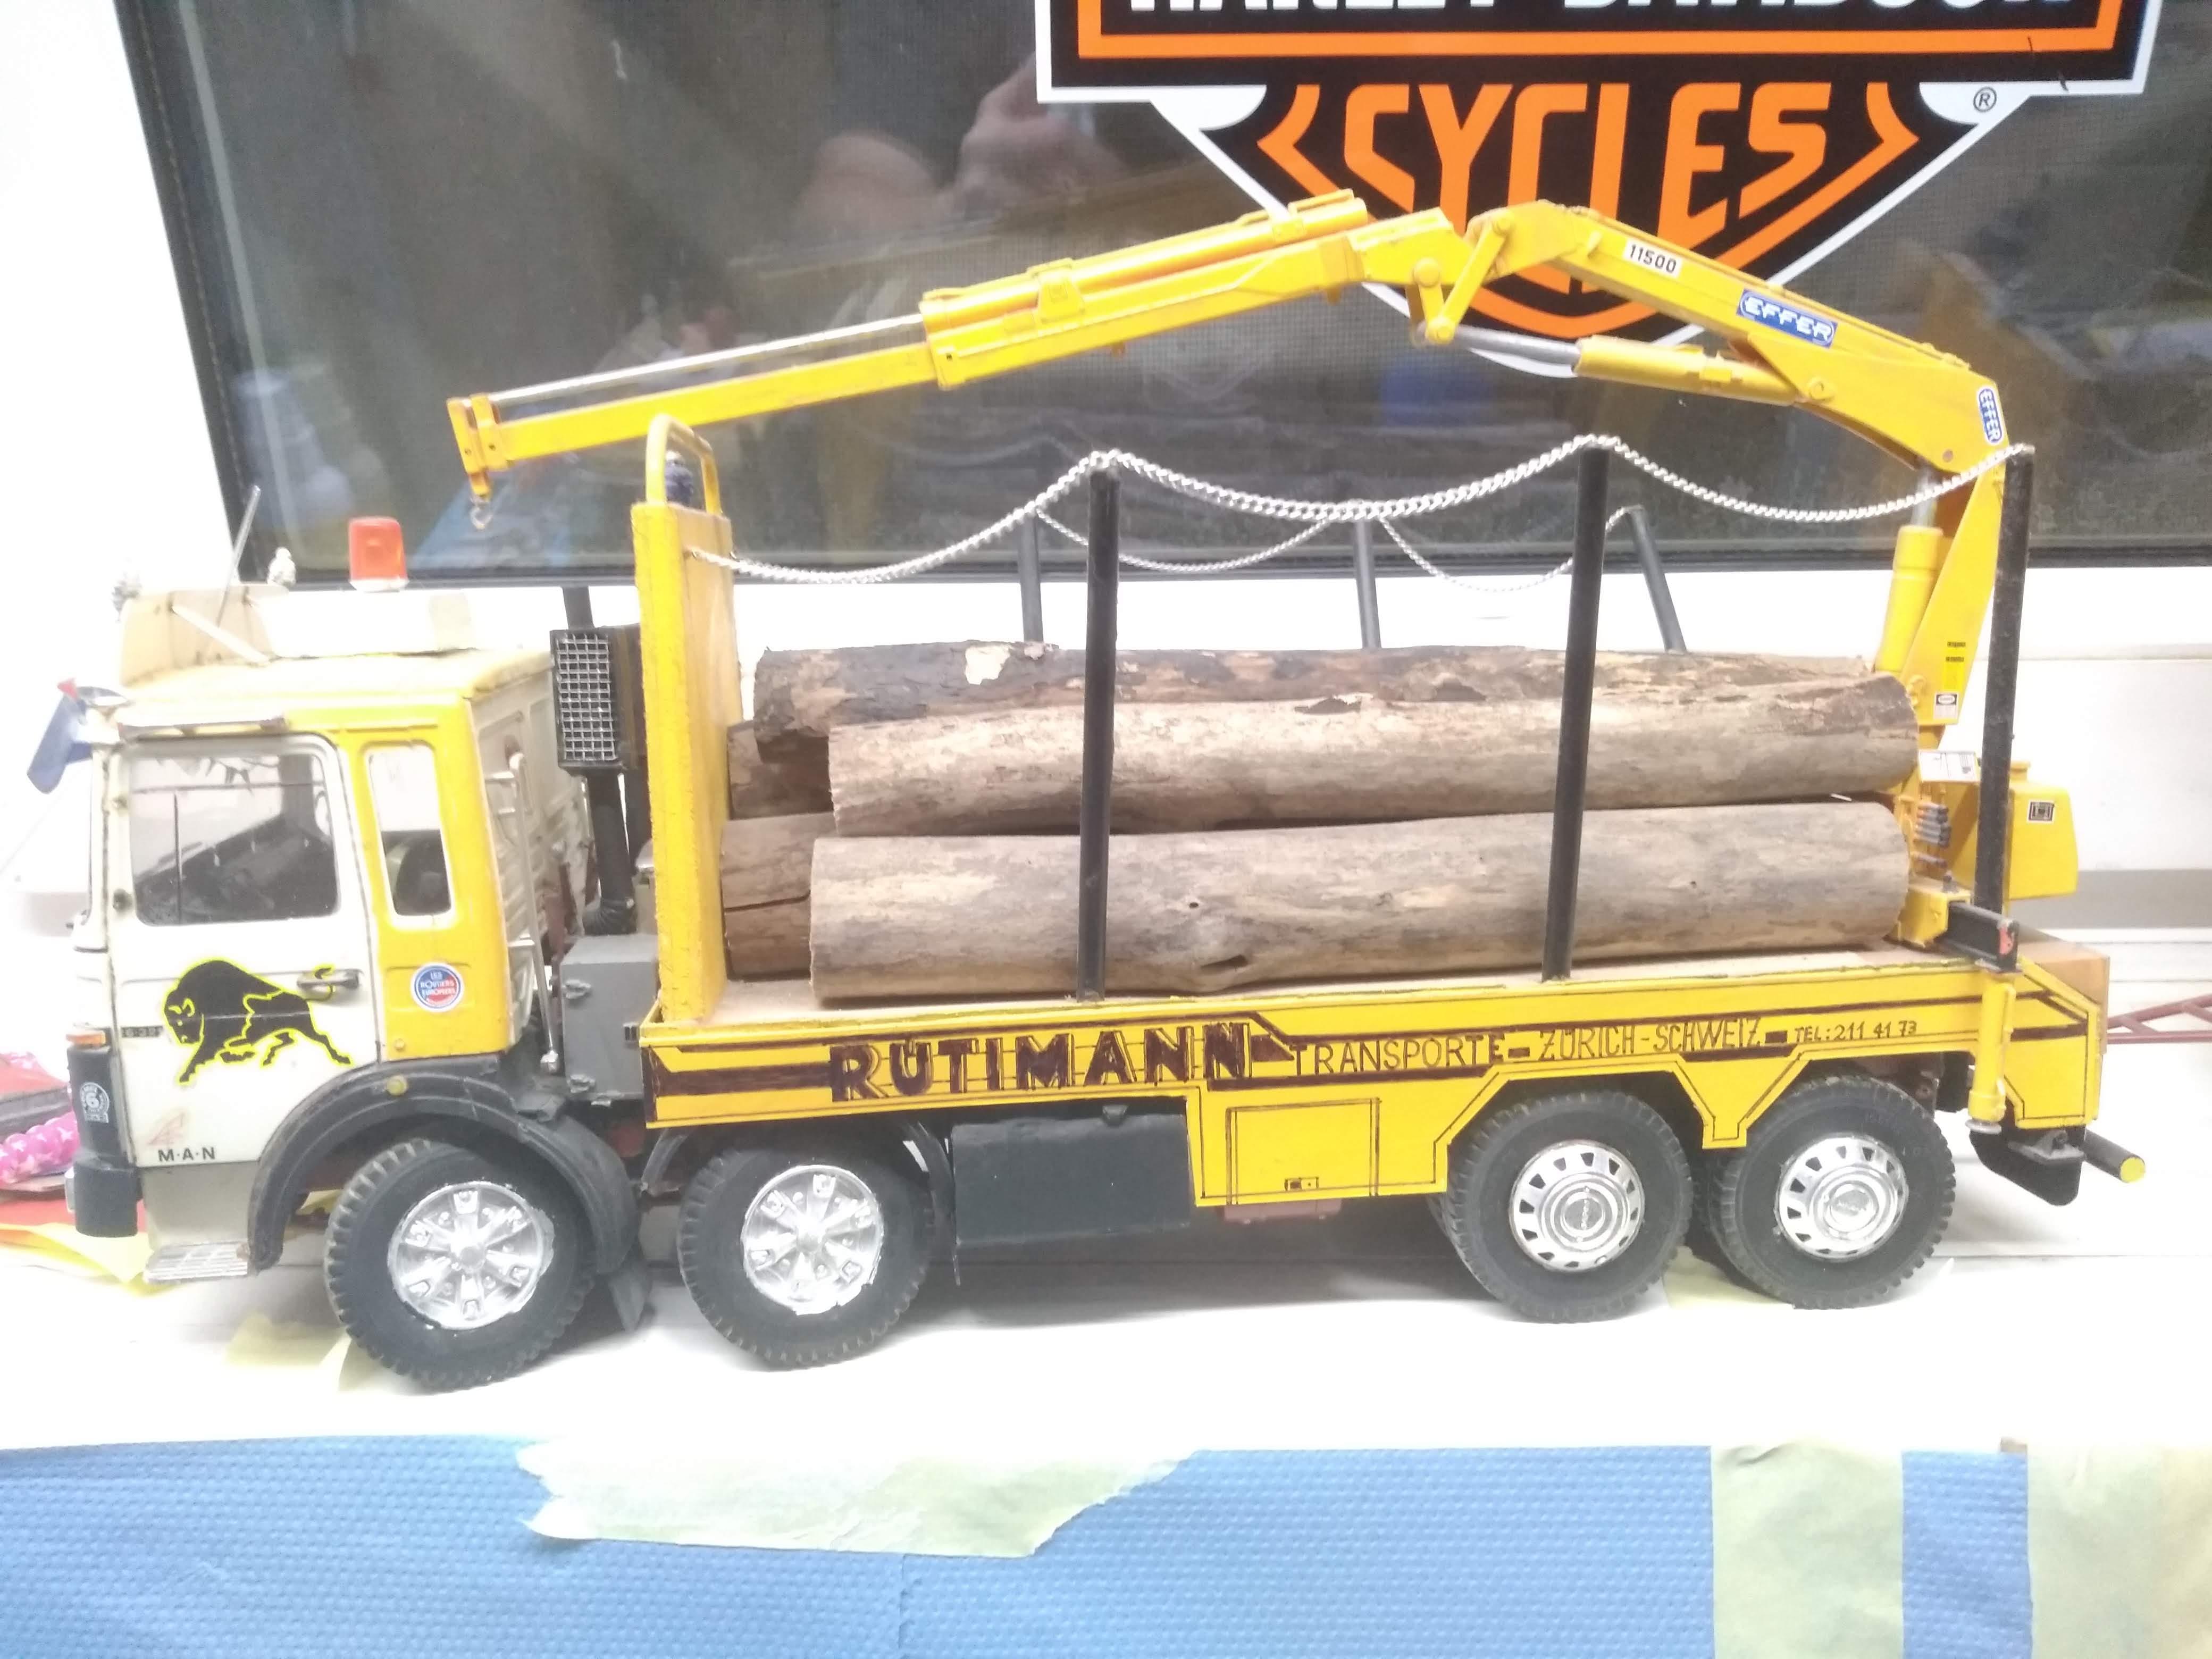
I promised to share if I found some pics of the MAN. I had transformed it into a 4-axle timber-truck with trailer. I shortened the cab to a day cab and built the timber platform from scratch. The second front axle is from the Iveco Cowboy ?(Italeri) that had unfortunately fallen from the shelf by accident and fell into more pieces than the kit had originally contained! ? I was able to save the axles and some chassis parts which I have already used for several trailers! The crane and the decals are from an Italeri accessories kit. The pics aren´t very good but I think you can see enough!
-
Kenworth K100 VIT Australia
Jürgen M. replied to Jürgen M.'s topic in Model Trucks: Big Rigs and Heavy Equipment
Thanks for your feedback! Actually I built the "Black Magic" PB right after this one! I made a wrecker out of it. Will be posted soon! ? Concerning the tire problem, I haven't had that yet! The K100 though is in restauration because actually parts are falling off due to old glue! Had to put a couple of parts back on like the cab rest and one of the cab hinges! -
European Trucks by Italeri
Jürgen M. replied to Jürgen M.'s topic in Model Trucks: Big Rigs and Heavy Equipment
That's correct! This one is 1:25 from Revell! Comparing the size with the Italeri trucks you can hardly tell the difference! Still a European truck! But one of the nicer ones in my opinion! -
Kenworth K100 VIT Australia
Jürgen M. replied to Jürgen M.'s topic in Model Trucks: Big Rigs and Heavy Equipment
Thanks for your feedback! Actually I built the "Black Magic" PB right after this one! I made a wrecker out of it. Will be posted soon! ? -
European Trucks by Italeri
Jürgen M. replied to Jürgen M.'s topic in Model Trucks: Big Rigs and Heavy Equipment
Thanks you, very nice feedback! I actually do prefer American trucks. Why? Don't really know. Maybe it's because I Love "Convoy"! Maybe because I spent a lot of time in the US! Maybe I just like the looks of them better? What ever! I know there are some really nice European trucks. I just think that they all somehow look alike just like the cars nowadays! Anyway, I'm happy that you like them. ?? -
European Trucks by Italeri
Jürgen M. replied to Jürgen M.'s topic in Model Trucks: Big Rigs and Heavy Equipment
Thanks Jim, I did all those in my teen years, not having much patience at that time. ? -
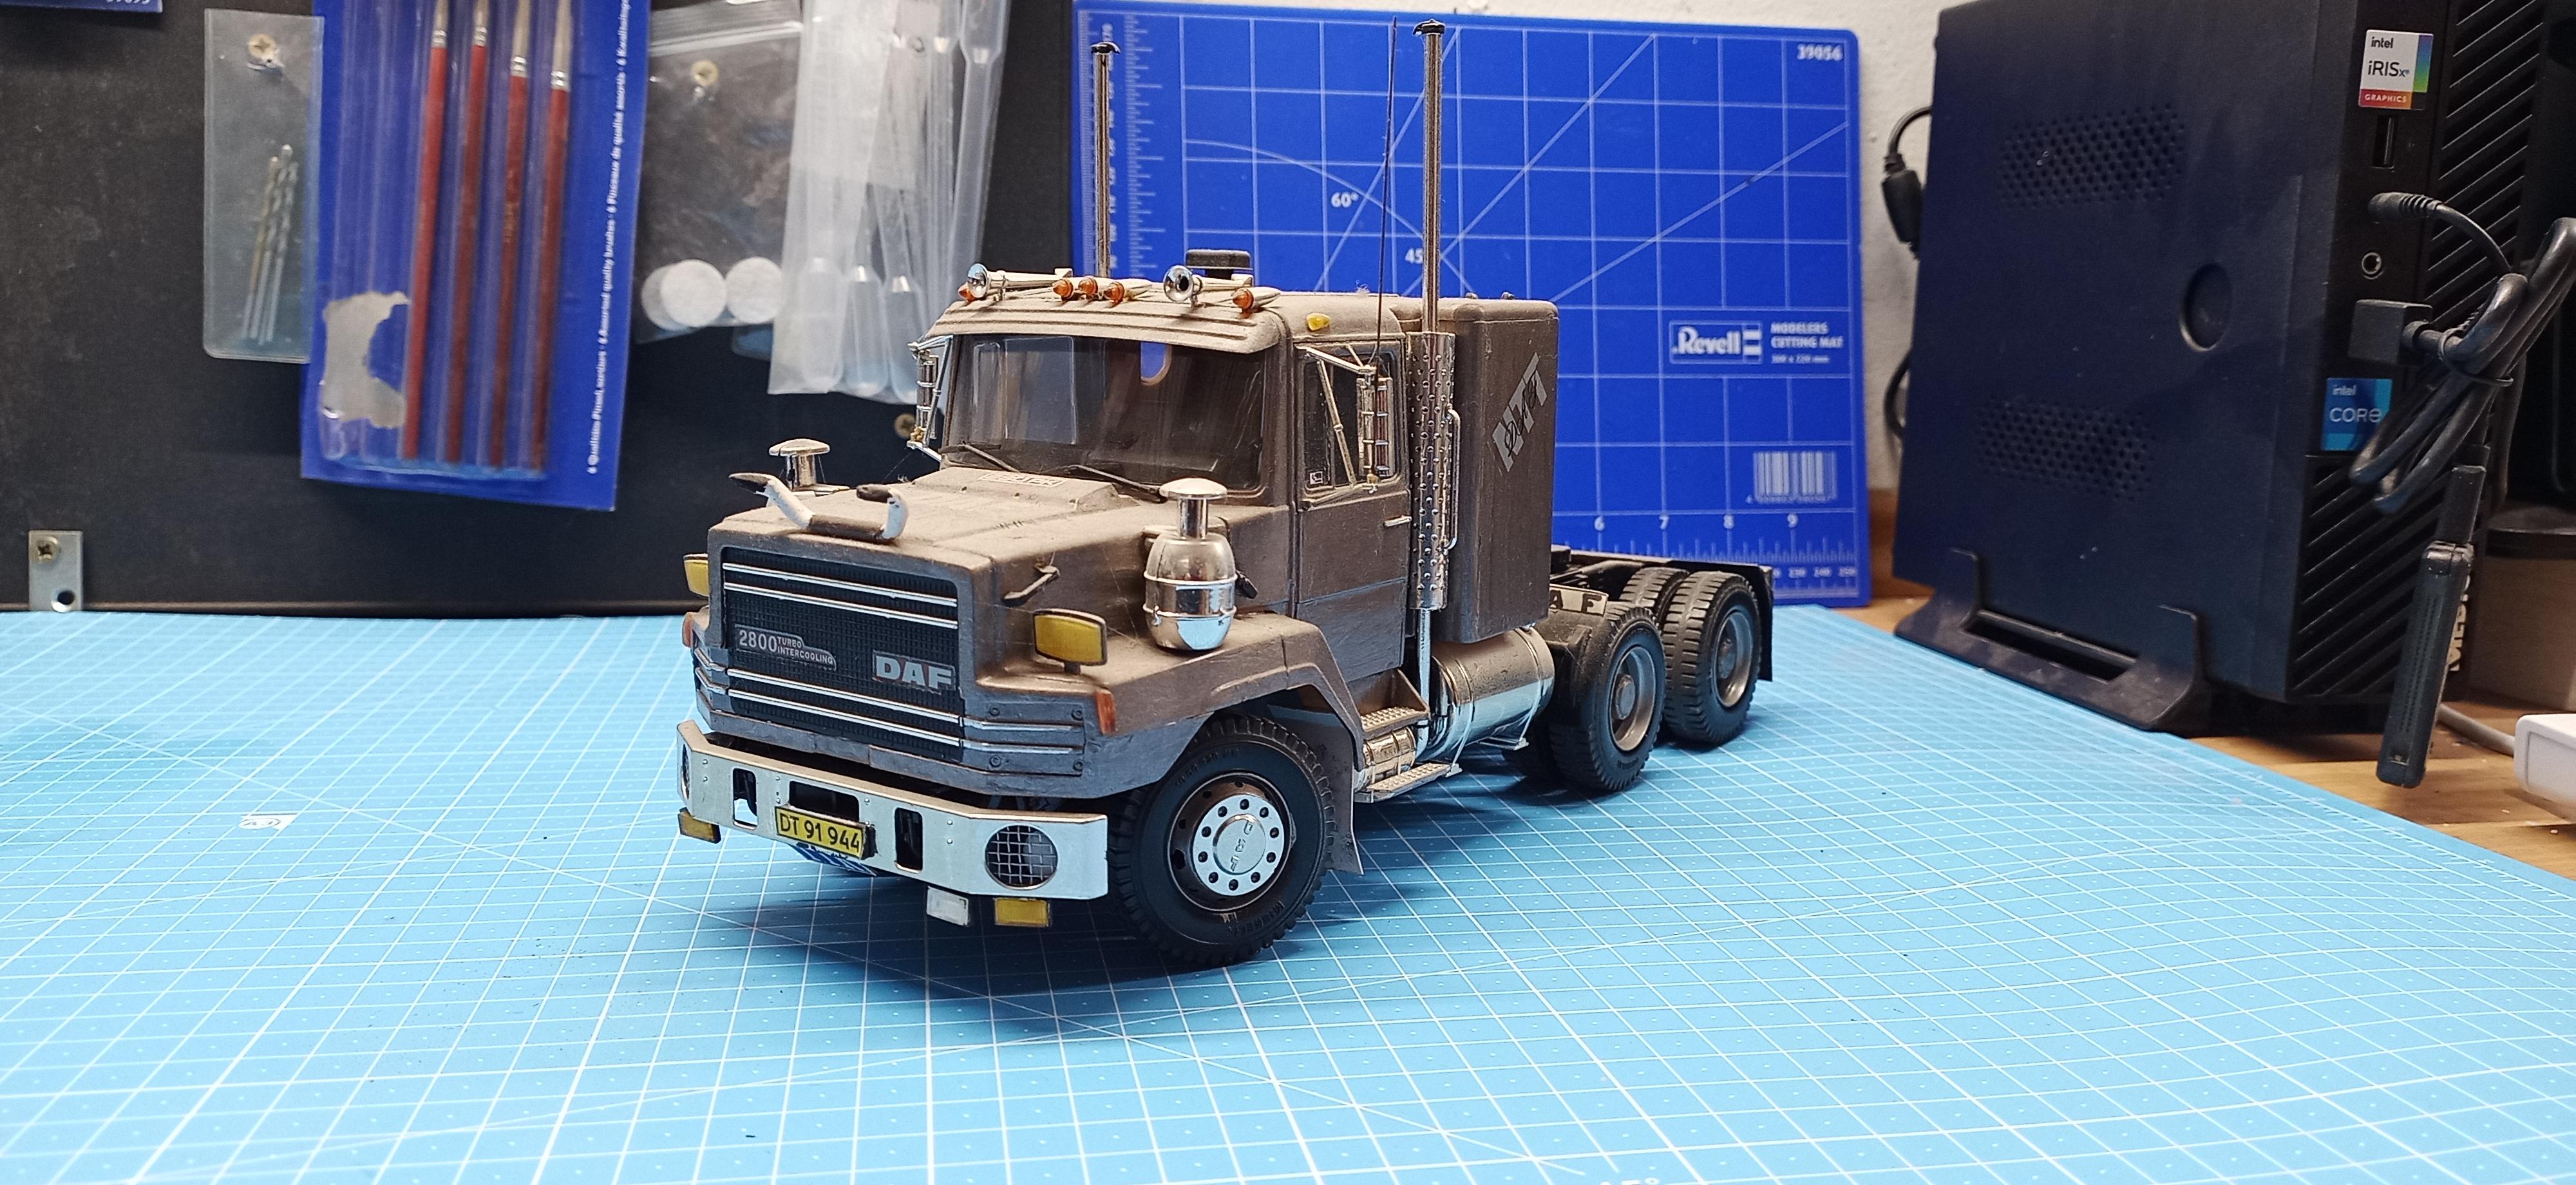
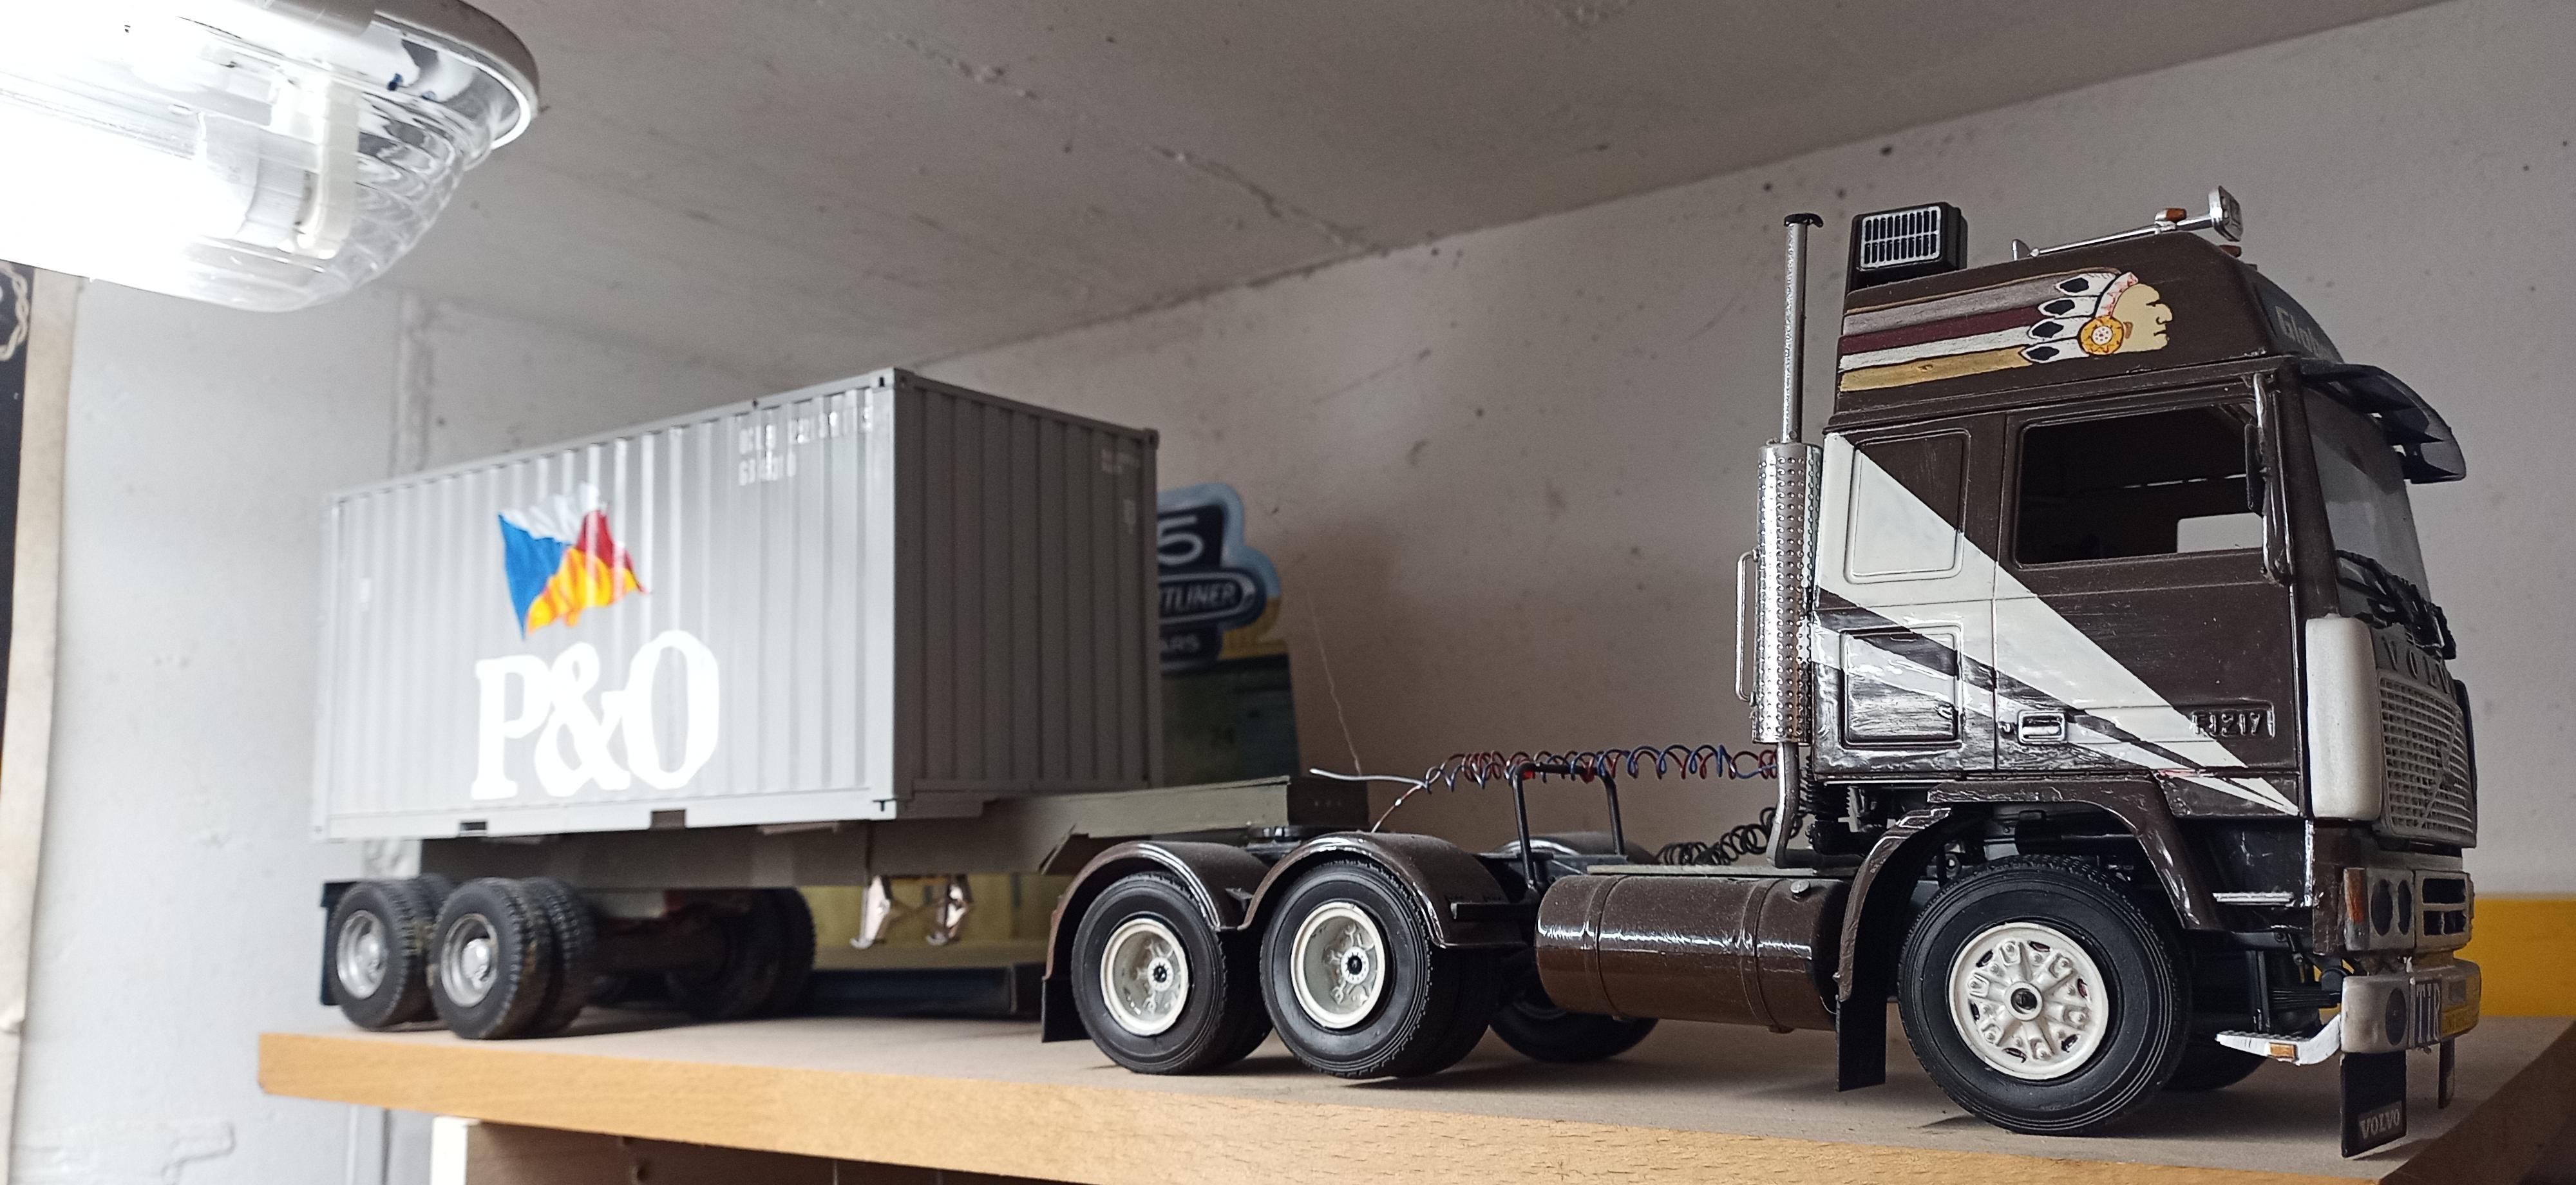
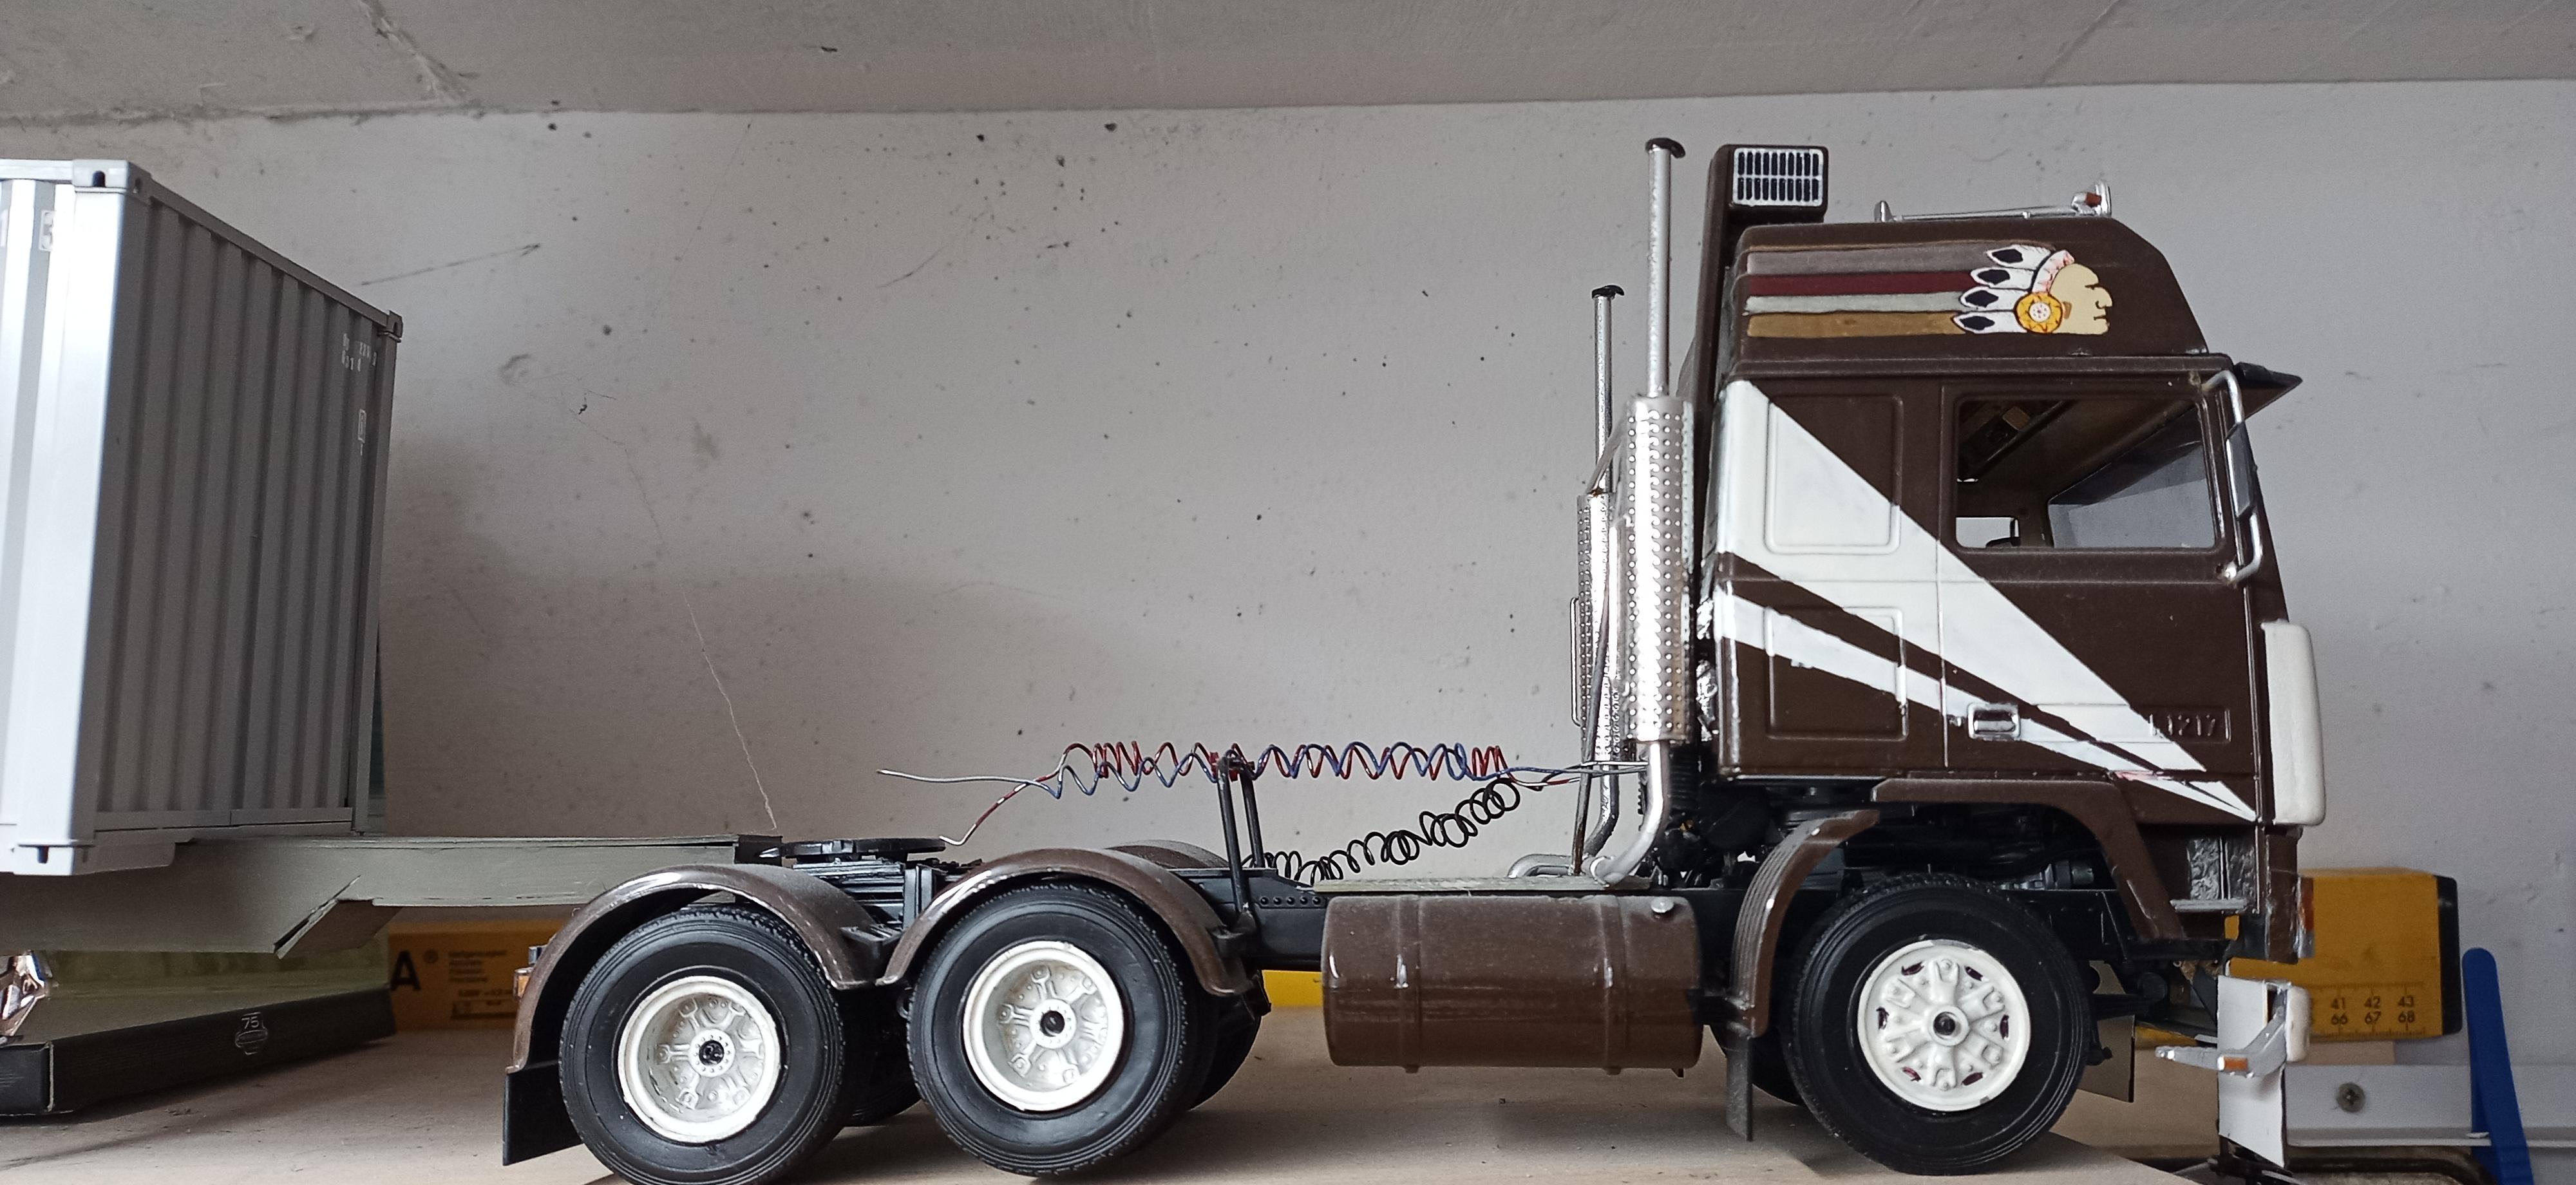
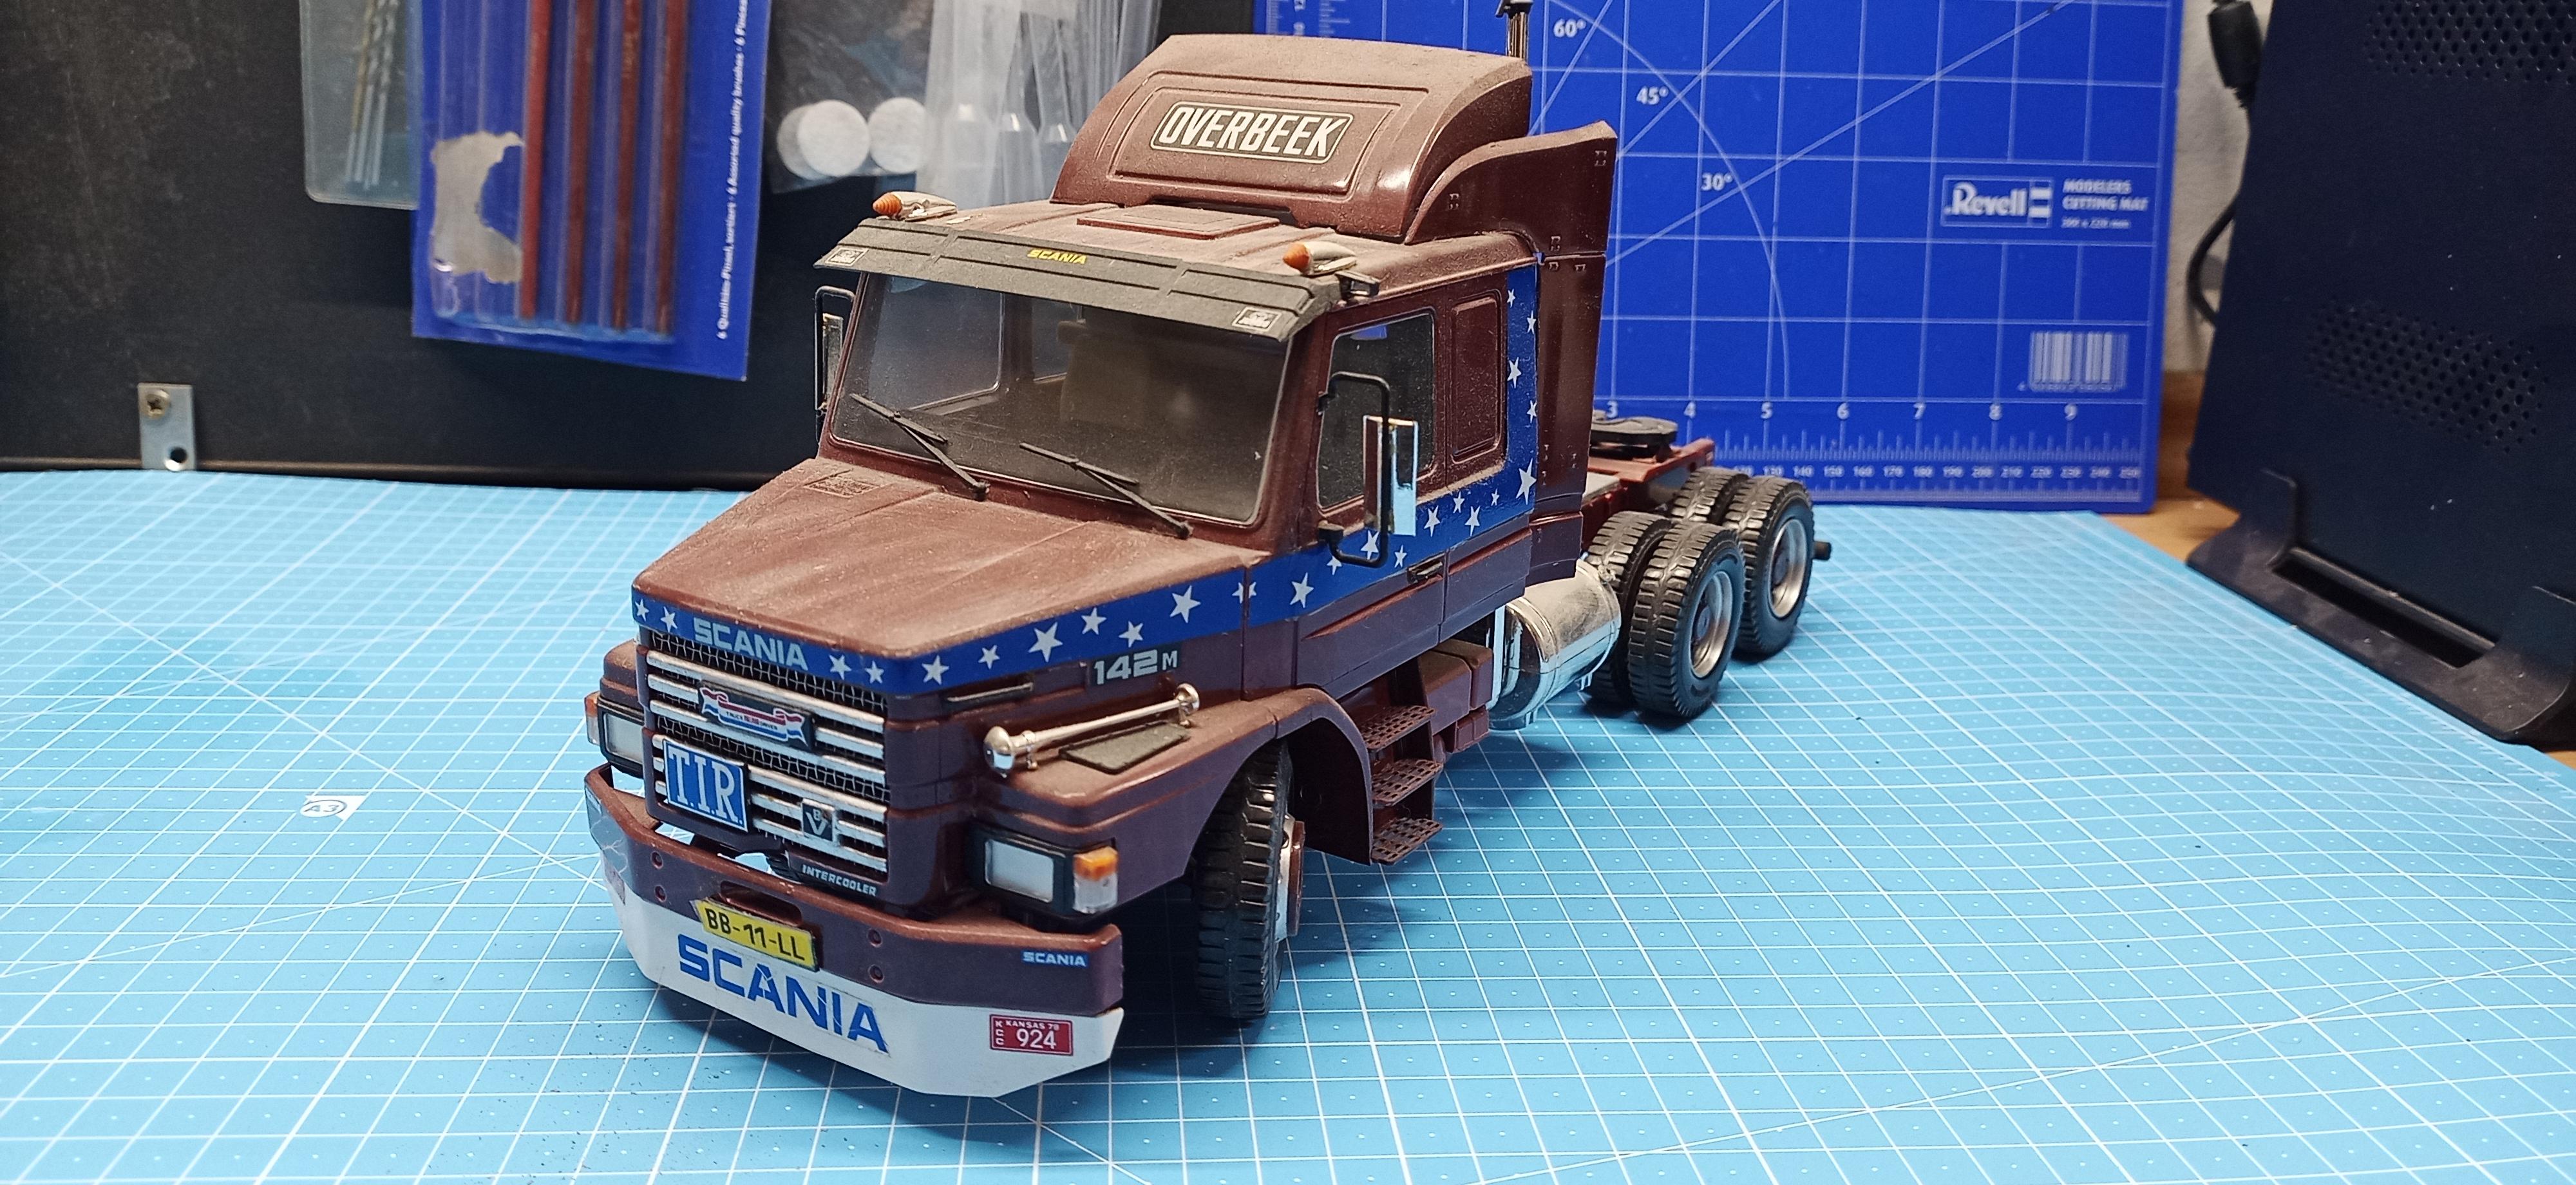
Good morning. After having seen that really nice Mercedes Truck I decided to share my European truck models too even if they´re not my favorites. I´m more into US trucks of the 70s and 80s. Anyway, I had built seven in total of which three, an Iveco "Cowboy", an MAN 26.321 and a Scania 142H didn´t survive. The one´s I´d like to share are: DAF 2800: Not much to say about this one. actually a quite boring looking attempt of a conventional truck. DAF 3300: (I think I´ve already shared that one during restauration) The decals are from the Revell KW W900 easy to build kit. Volvo F12 Globetrotter: Scania 142M: This one has lost a few parts. Haven´t had the time or the passion to fix it! That´s about it. I´ll have to search for pics of the lost ones. If I find them, I´ll post them! ?