TheBEAUMONTGURU
-
Posts
277 -
Joined
-
Last visited
Content Type
Profiles
Forums
Events
Gallery
Everything posted by TheBEAUMONTGURU
-
1967 BEAUMONT Station Wagon Conversion
TheBEAUMONTGURU replied to TheBEAUMONTGURU's topic in WIP: Model Cars
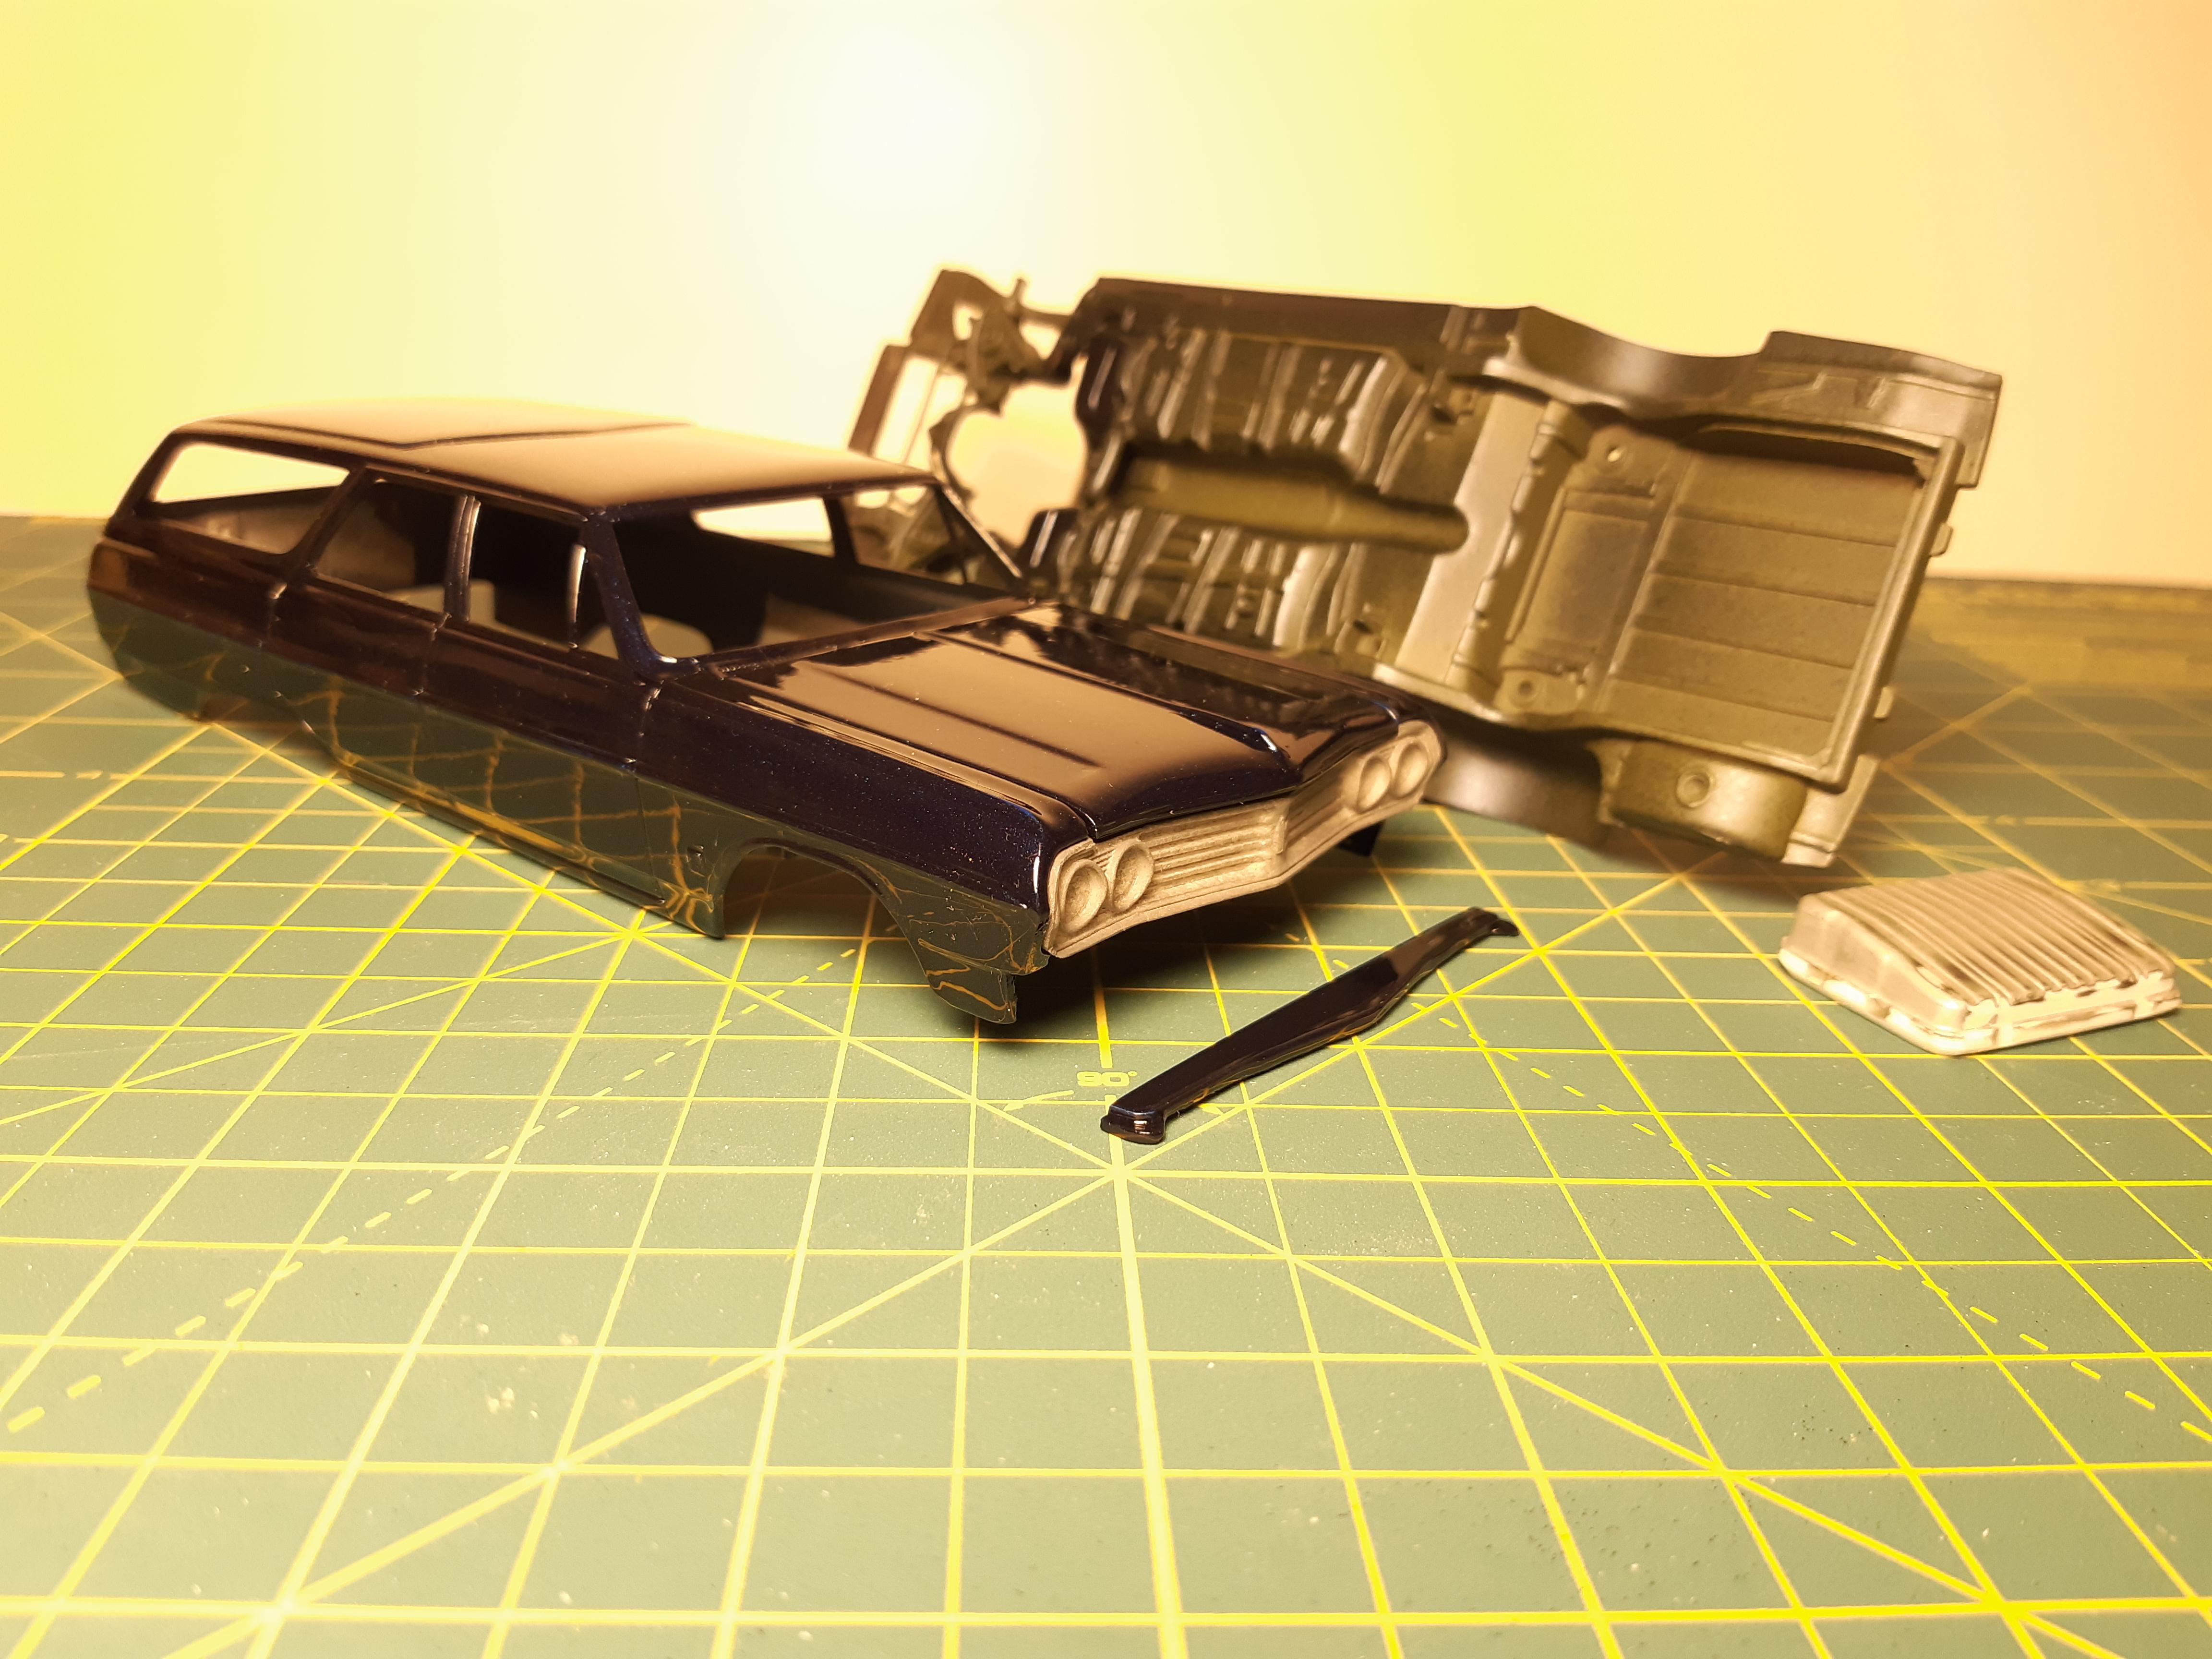
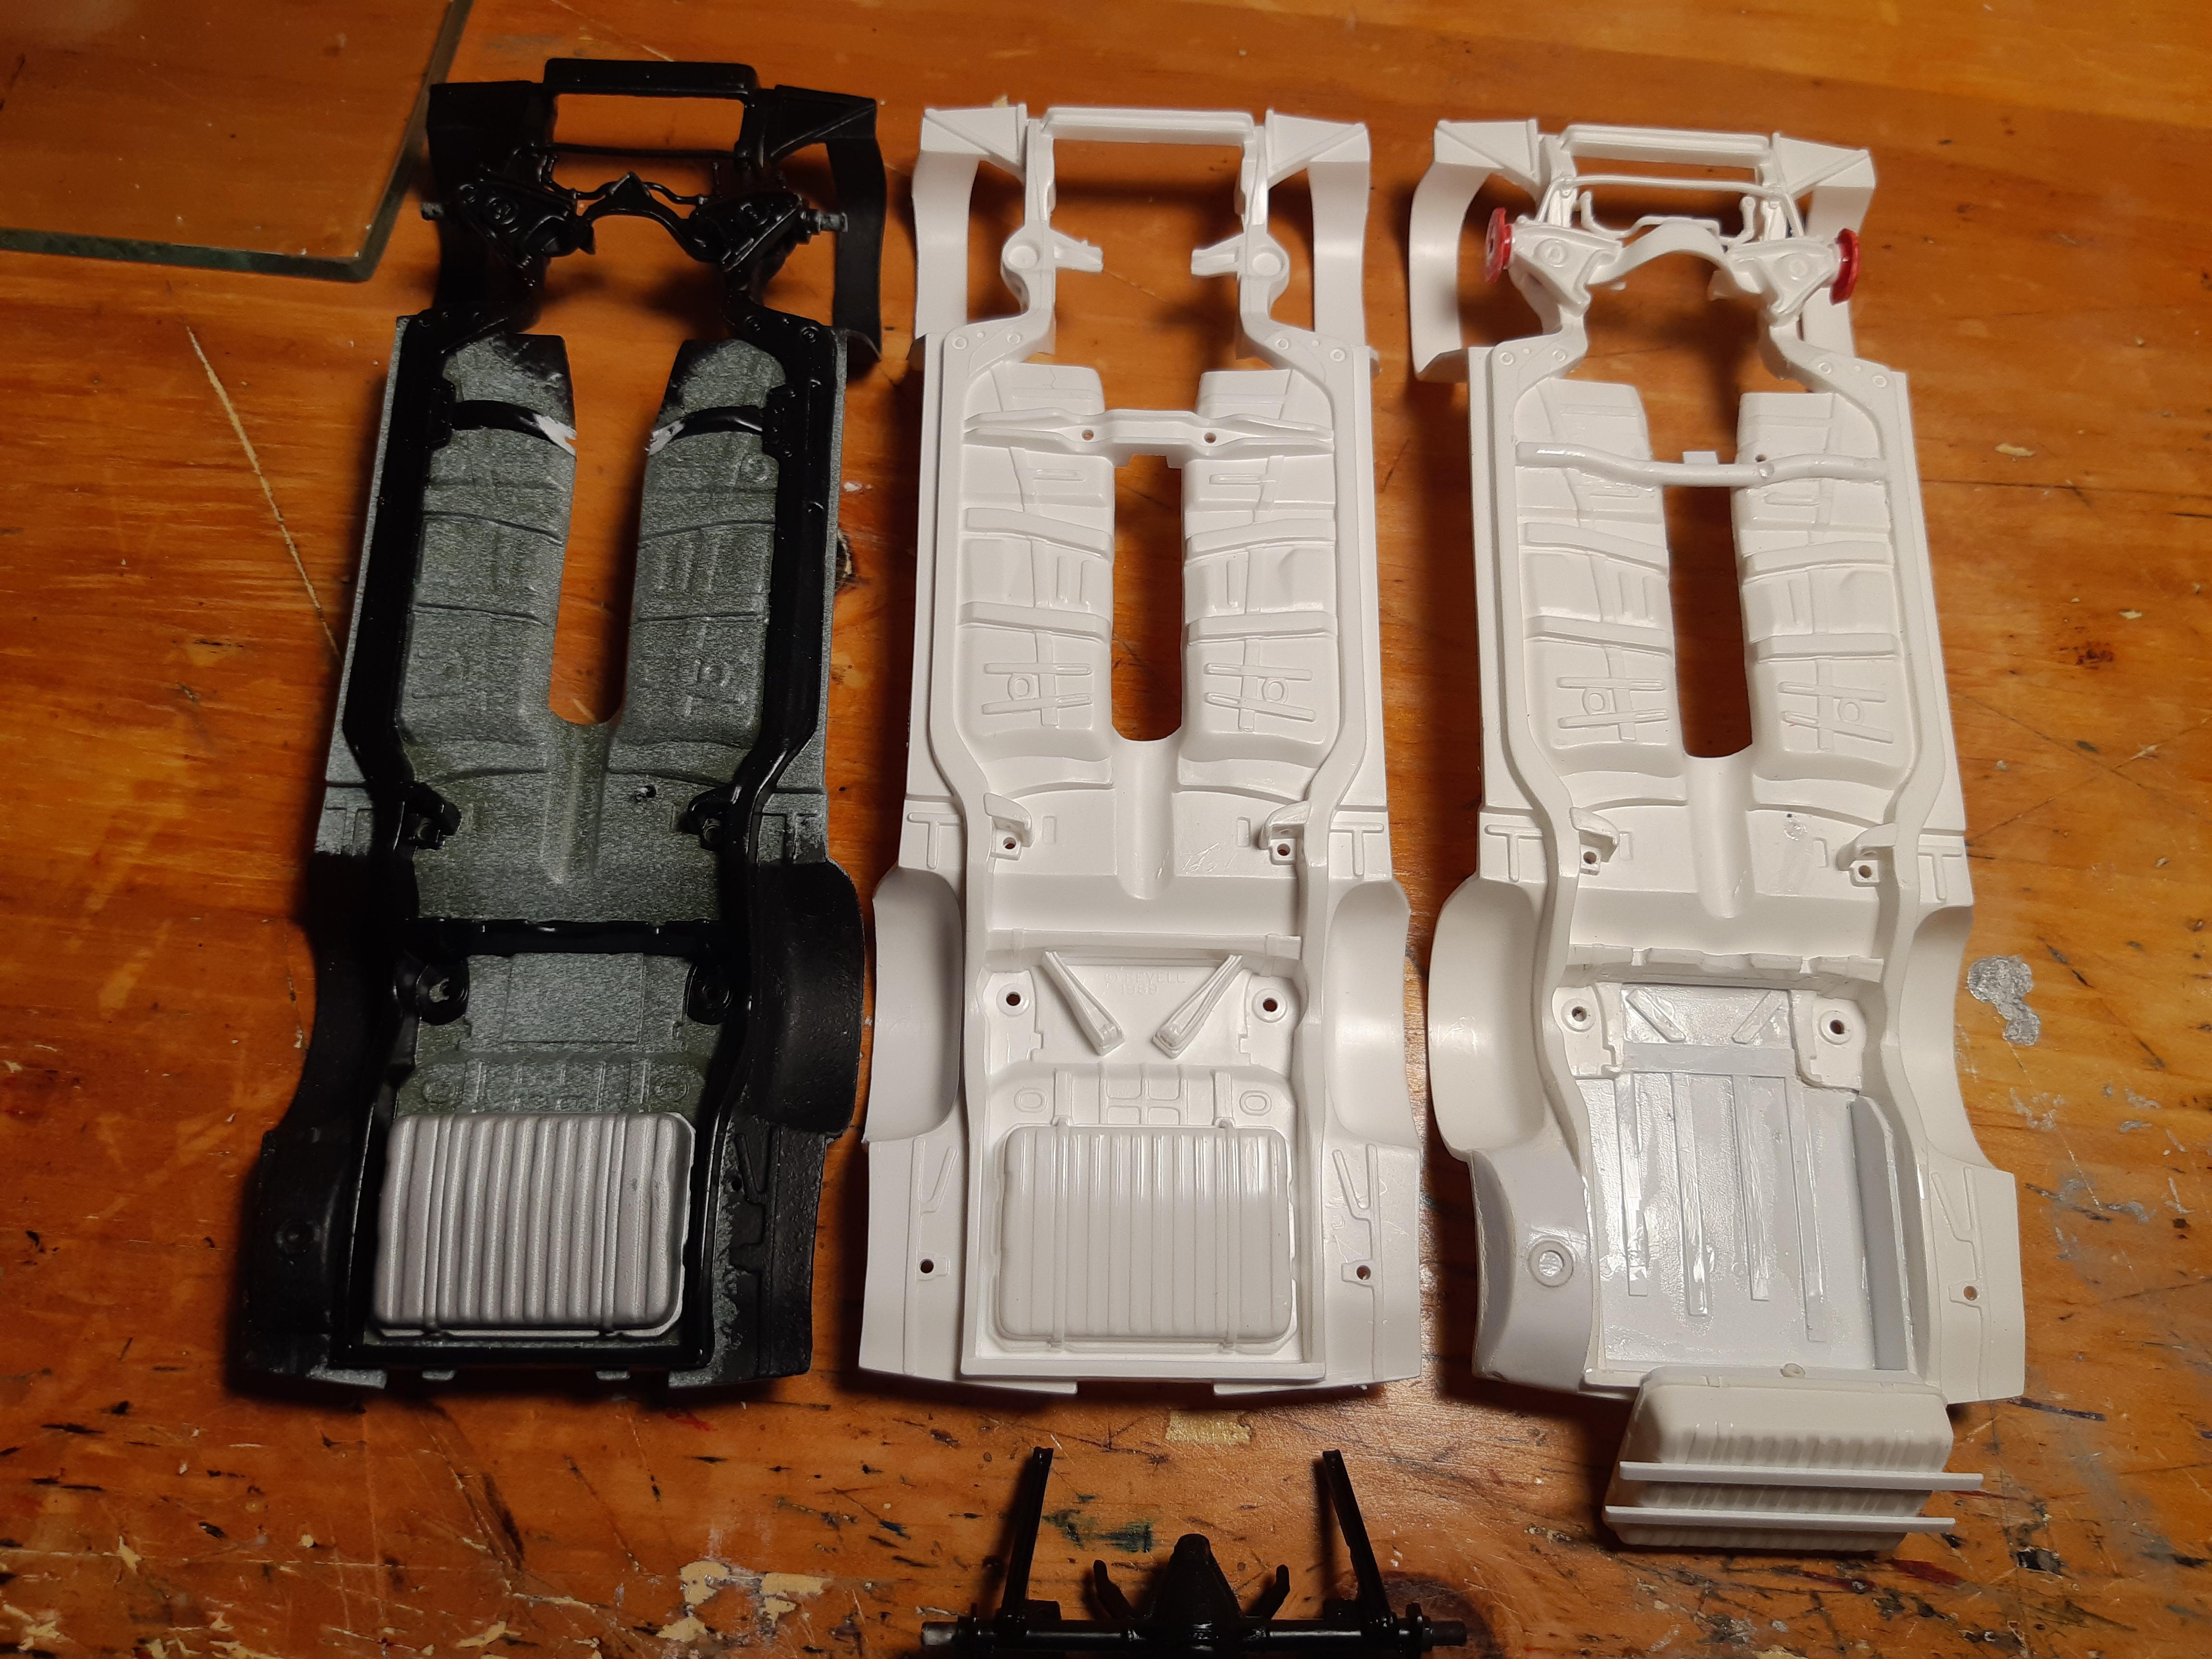
I did this same chassis pan modification on my 65 wagon project. i used the 67 chevelle pan because its the only one with a correct frame(the Z-16 kit uses a convertible frame). i modified the back end to depict the wagon floor and gas tank Left is the convertible/Z-16 frame, middle is stock 67 chevelle, right is modded 67 chevelle into wagon form.
-
1967 BEAUMONT Station Wagon Conversion
TheBEAUMONTGURU replied to TheBEAUMONTGURU's topic in WIP: Model Cars
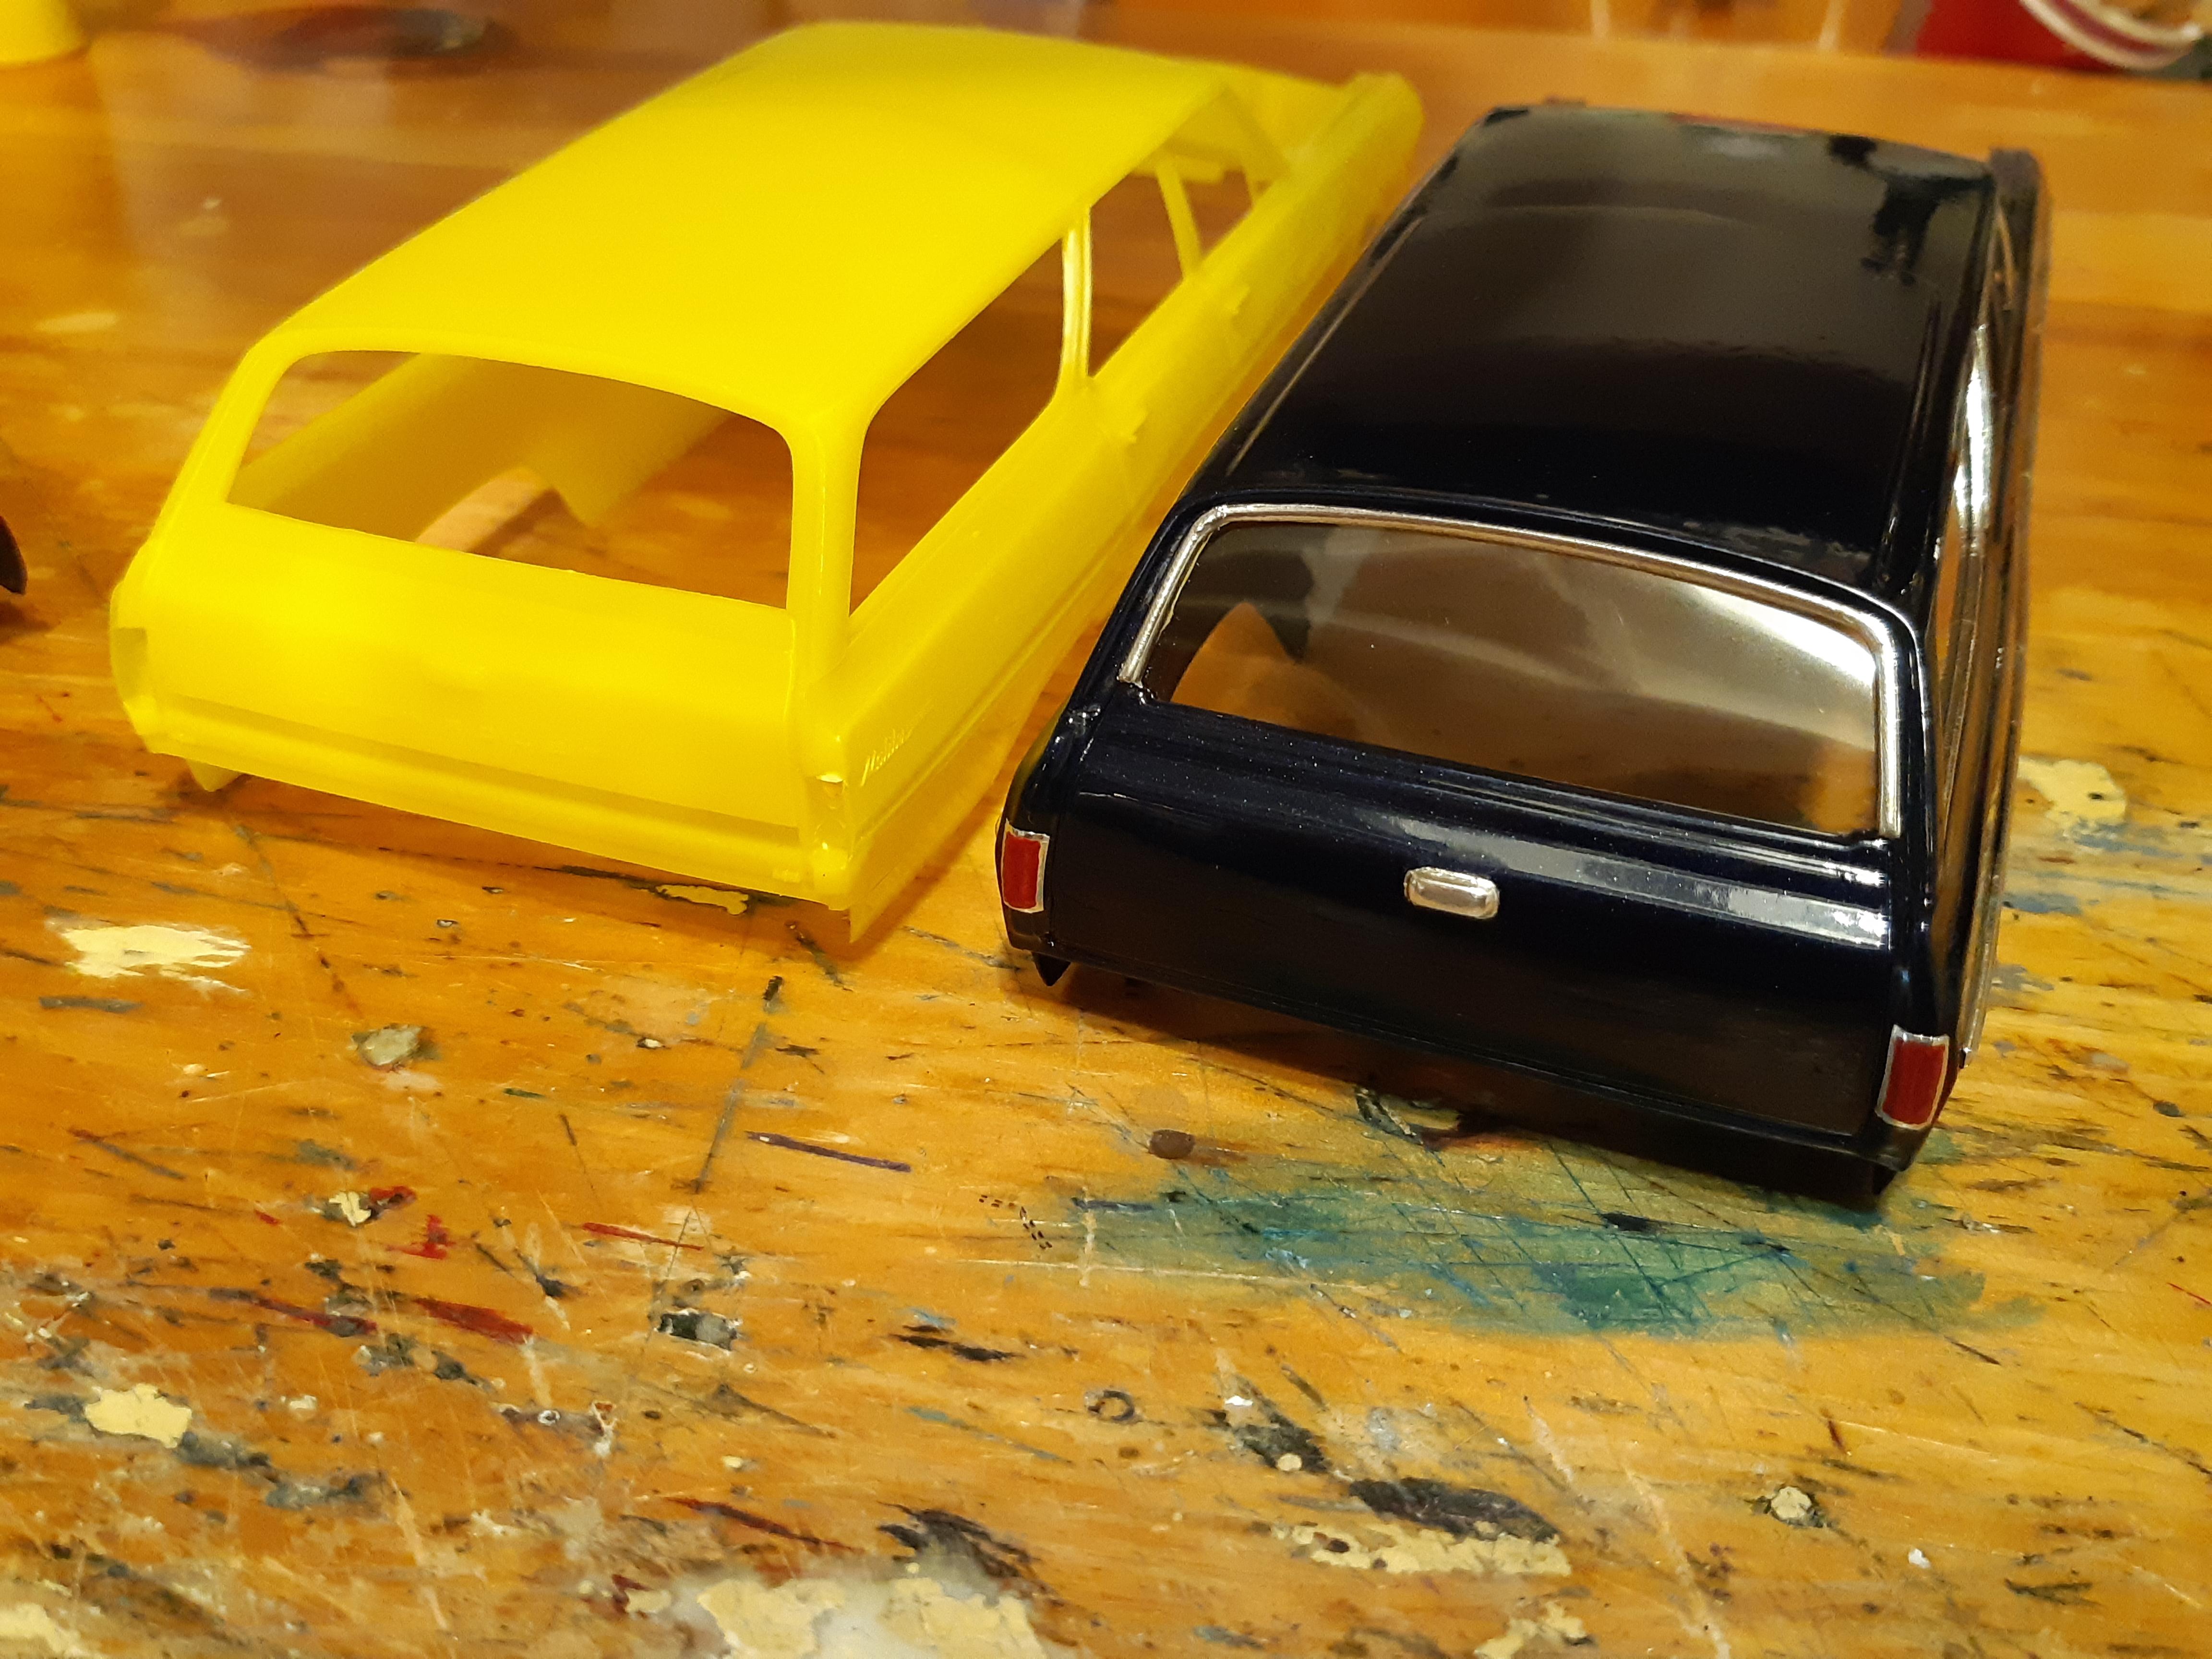
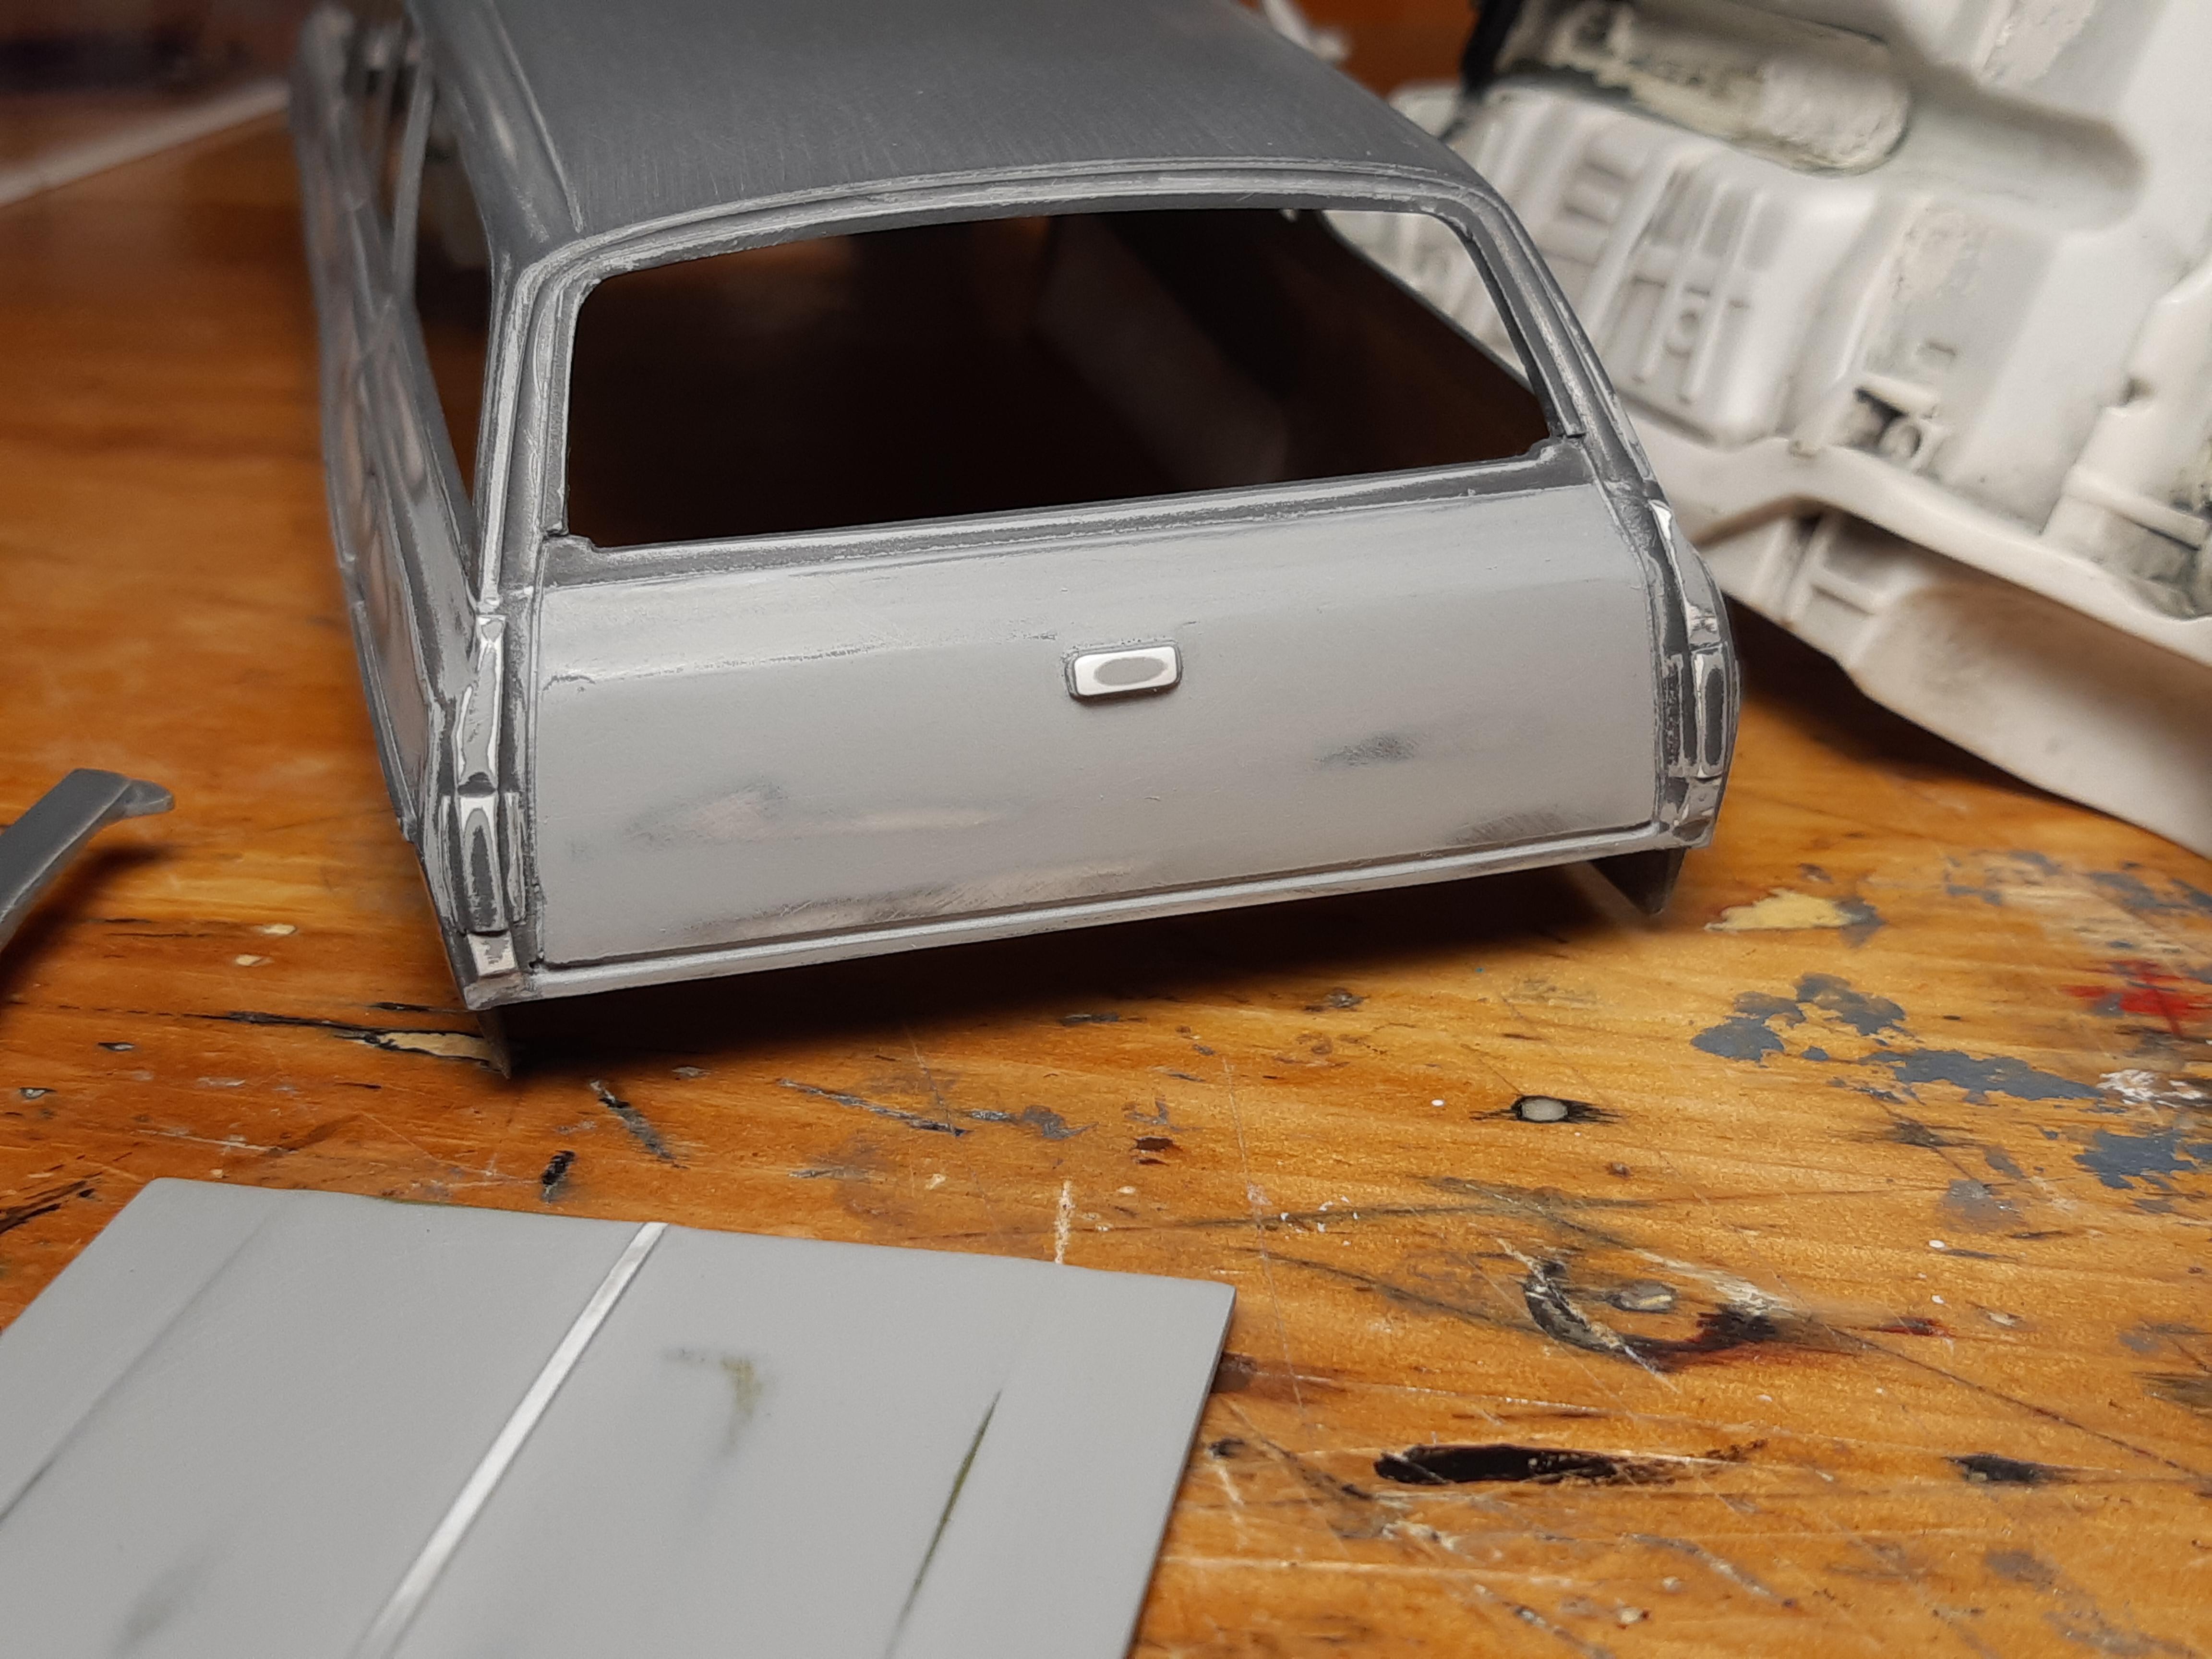
here i am making the unique taillights for beaumonts. although the station wagon does not use them, i made a set anyway just to have. i moulded them out of clay just like in a gm design studio in the 1960's, then resin cast them. Here is also some of the work cutting the bodies apart and grafting the 67 front end onto the wagon body. the other body is my test of the taillights for a future 2dr HT project
-
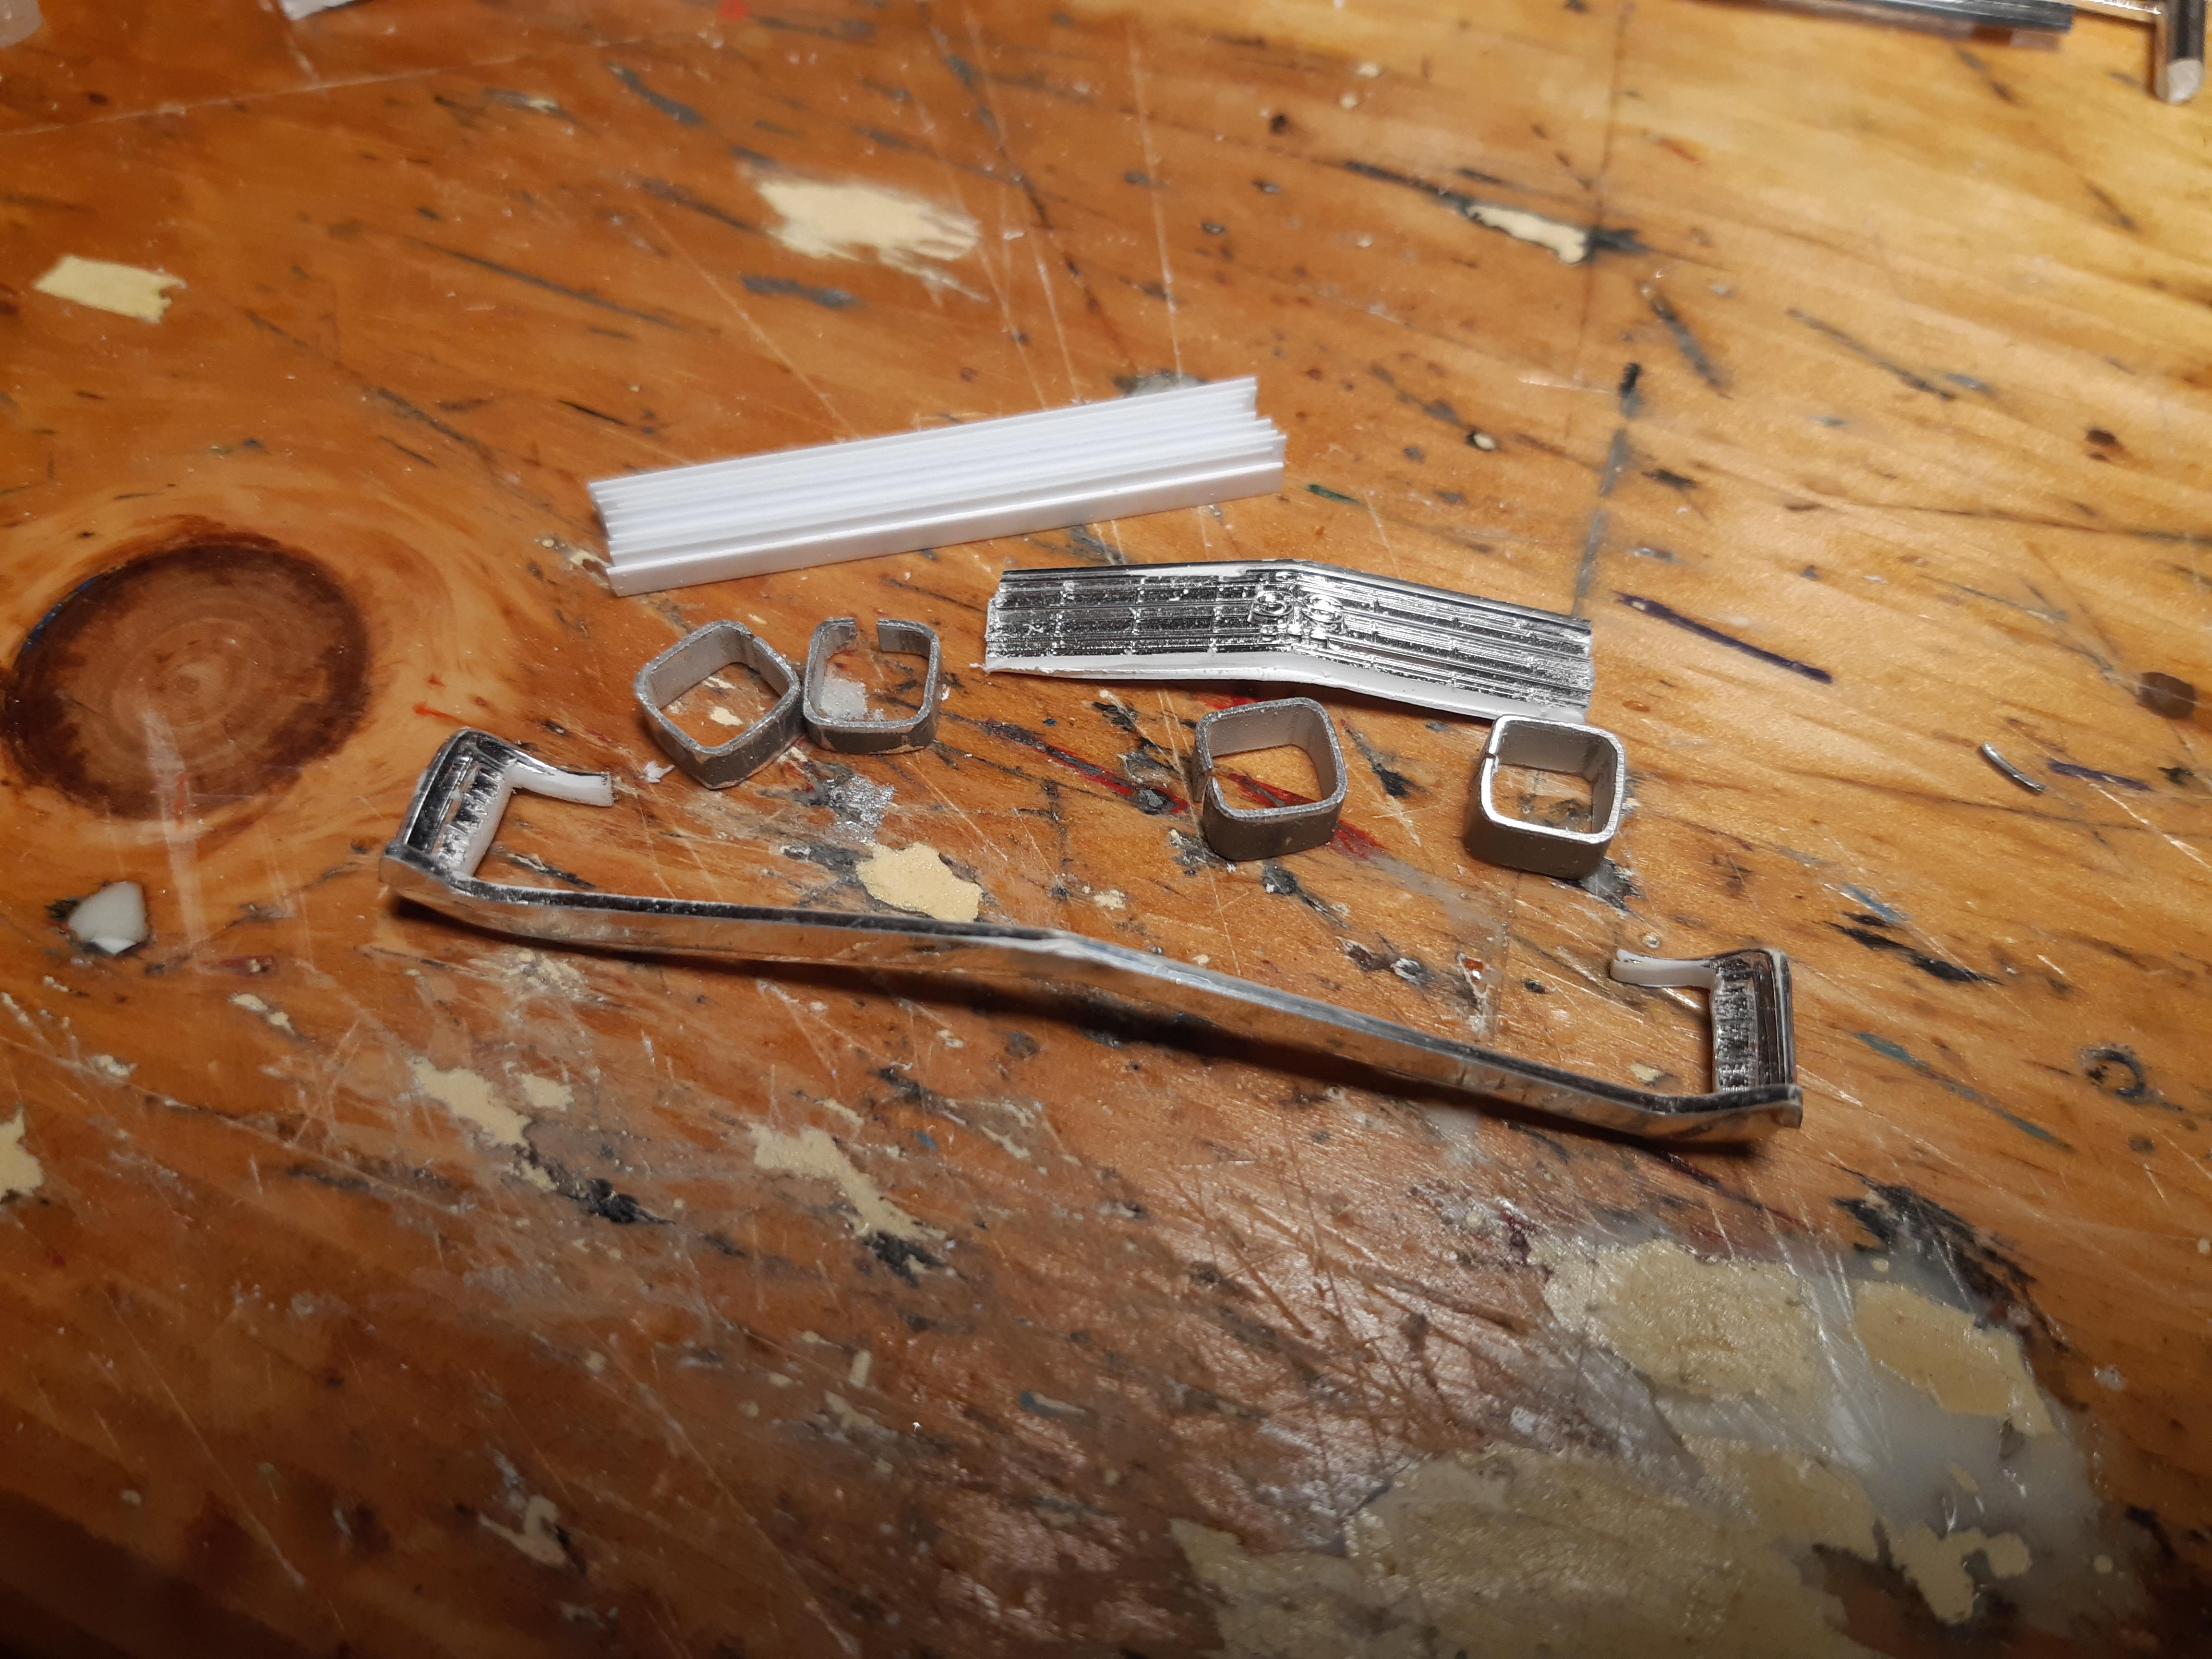
I already built a replica of my 1965 beaumont station wagon in another thread. Now this time im going to use some of my scratch-build and resin cast 1967 parts to build a one-off 1967 Beaumont Custom station wagon. I have a clear vision of how i want it to be equiped so there is going to be a ton of scratch building and kit bashing from various kits. Im using the revell 1966 chevelle wagon as a basis. as well as the front end off the 1967 chevelle SS hardtop kit. a parts bin Small block 283 is going in place of the Biglblocks. Here is how i made the grills for both the 65 and 67 beaumonts, first building and modifiying the 1967 chevelle grill using evergreen strips, then resin casting the final product.
-
Nice progress, i really like the mesh grill. Stay on it, only 3 more weeks til the next meeting/contest!
-
BOB GLIDDEN T-BIRD SCOOP AND GLASS WANTED
TheBEAUMONTGURU replied to TheBEAUMONTGURU's topic in Wanted!
Thanks Zen, if you find the taillights, would you be willing to ship everything to Minnesota address or my Canadian Address? -
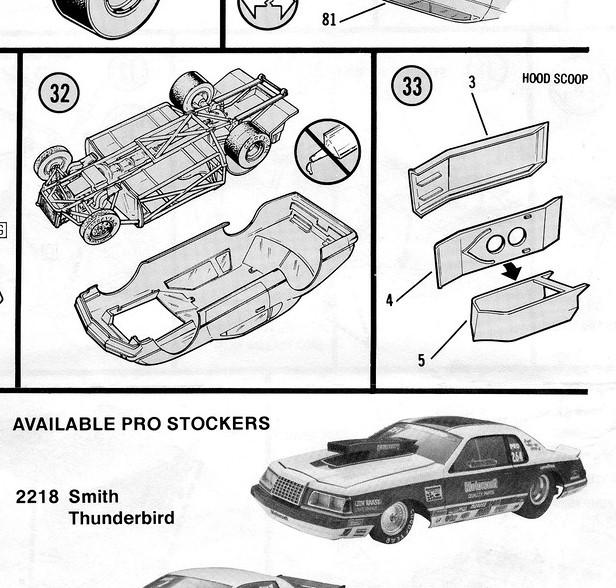
Looking for the window glass and the unique hood scoop from the CHEIF autoparts glidden car, i also believe the rickie smith version has the scoop too the scoop is made of 3 parts as shown in my picture. so i need the 3 peices. I also need the window glass, (clear), i think i also need the taillight lenses as well. Im in canada but i can have stuff shipped to either Minnesota, USA or Manitoba, canada Thanks Dave Anderson (thebeaumontguru)
-
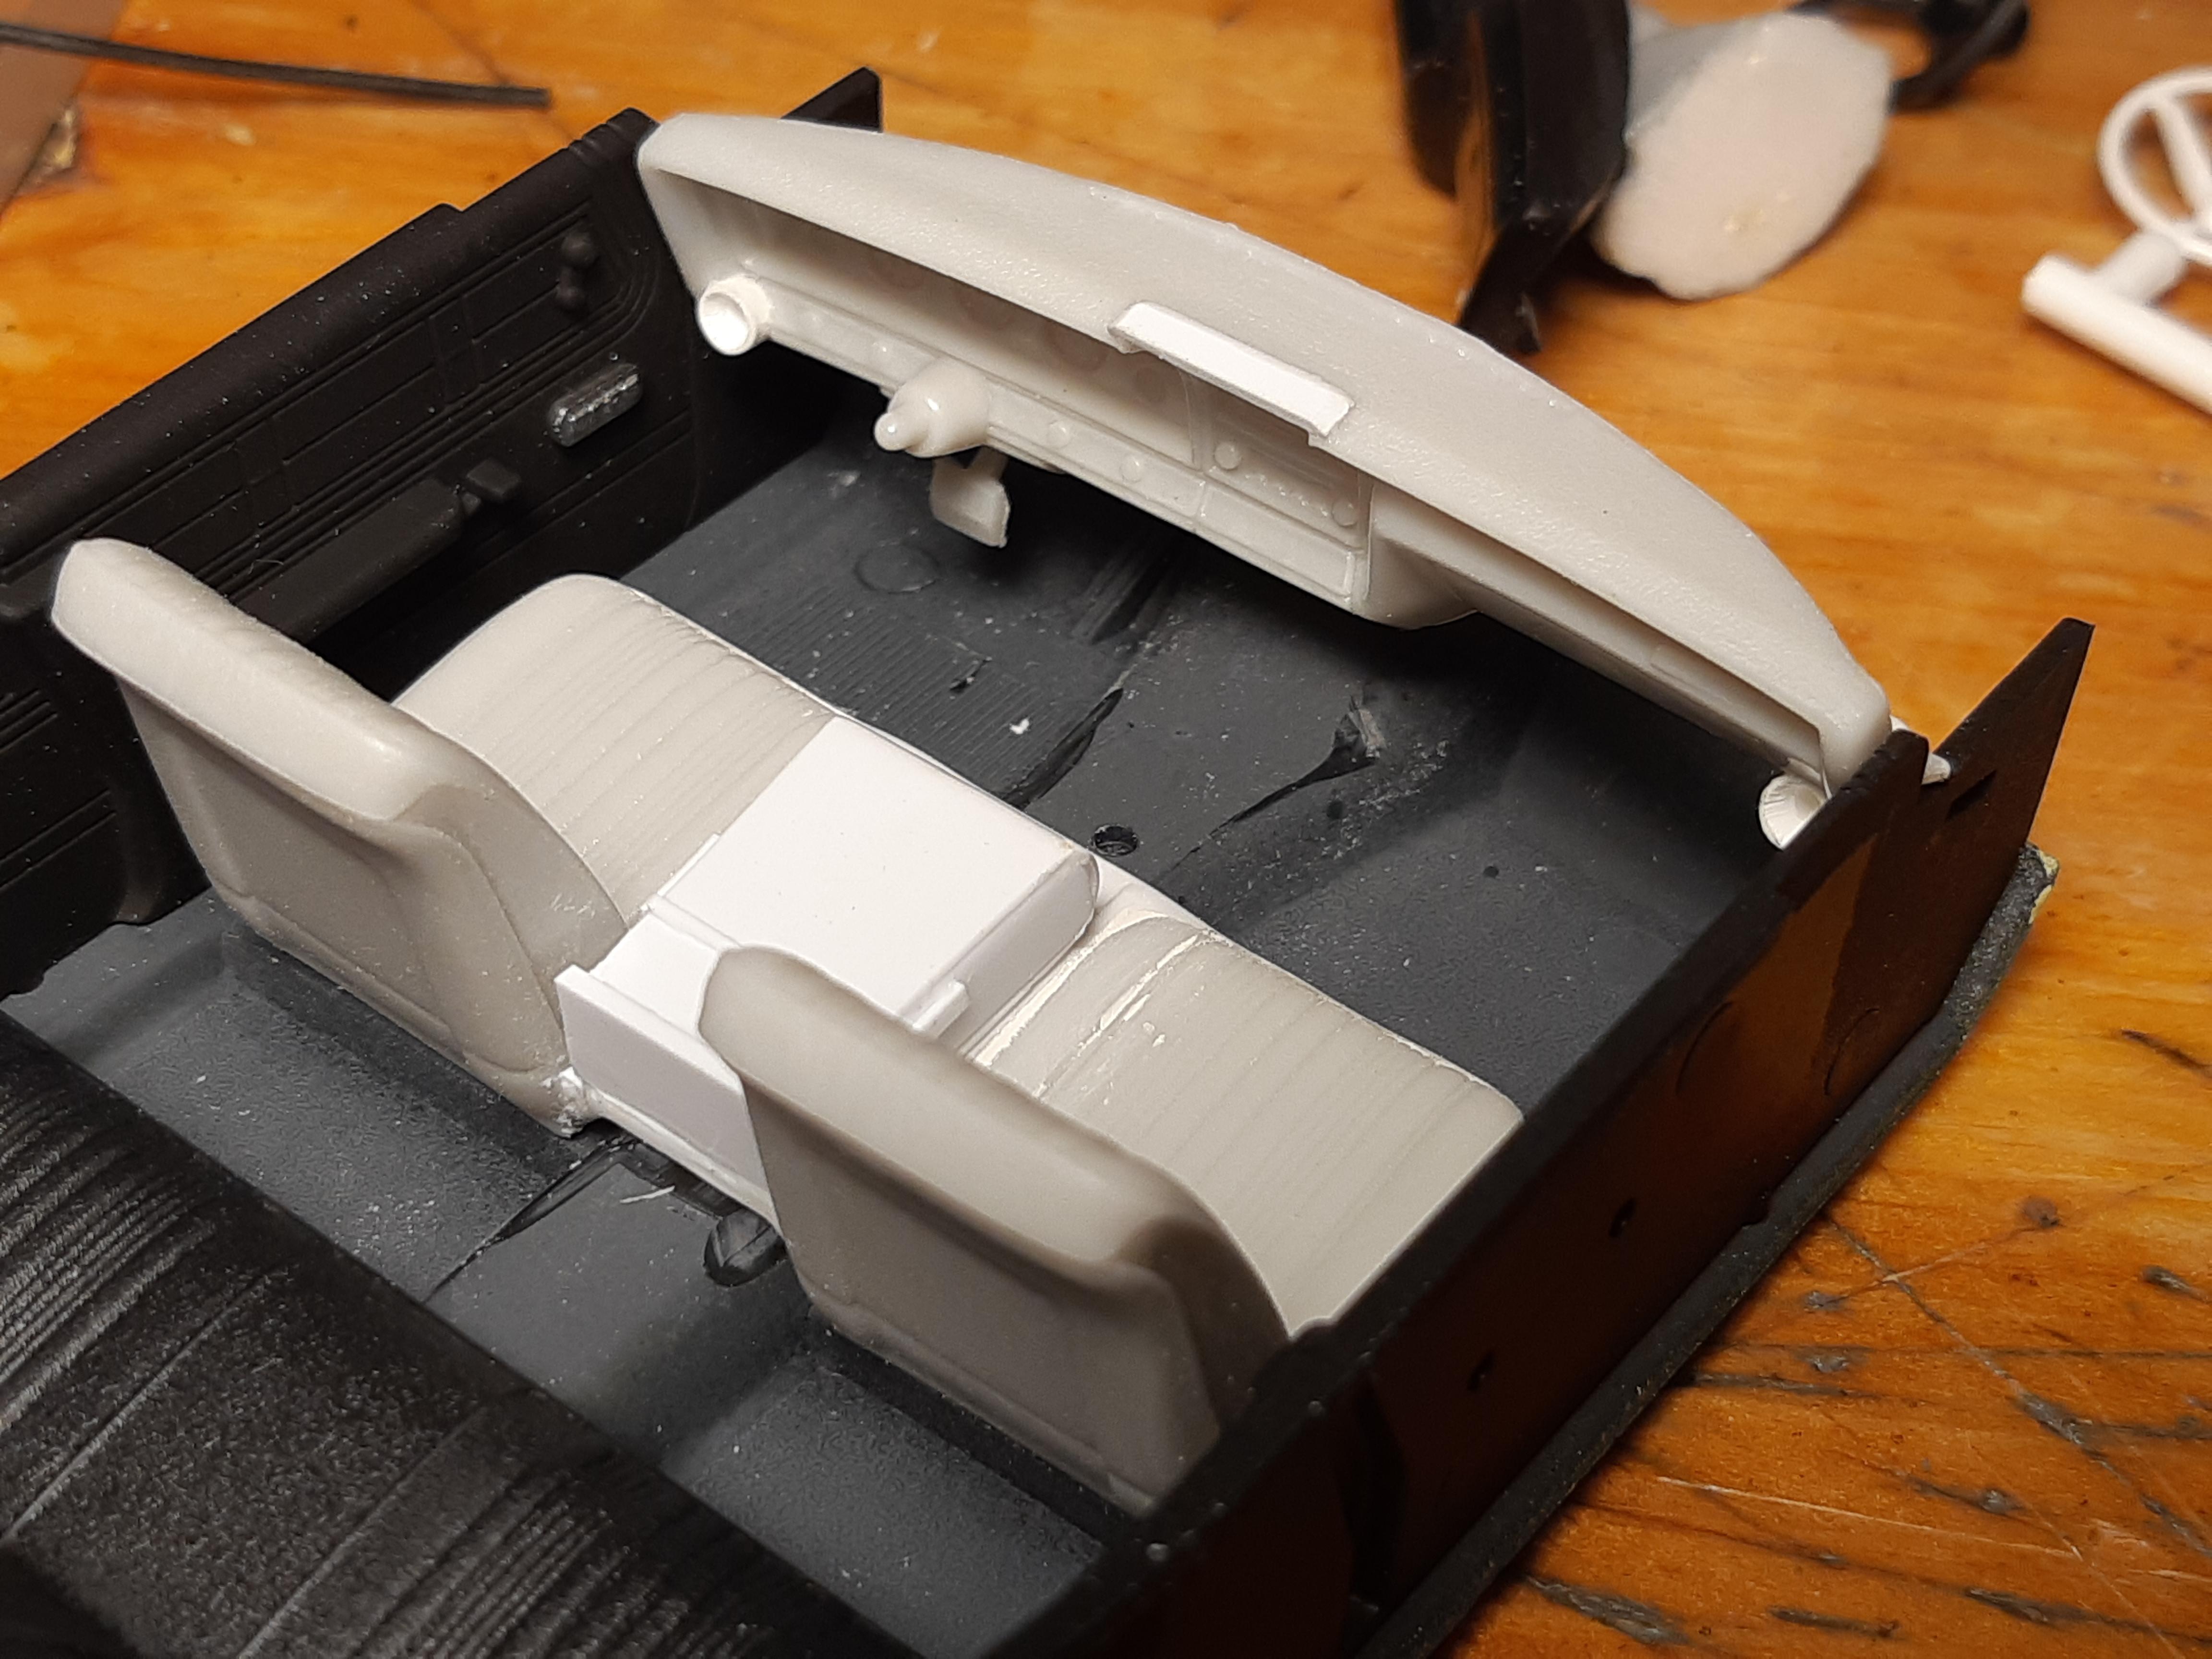
The 1966 Buick Riviera Kit has a really nice "stratobench". techincally to be correct only the 1967 Caprice had the stratobench as an option( but only the 67 chevy gurus will know that piece of trivia). It works very nicely in an impala too. I ended up just building my own stratobench from the 2 bucket seats in the SS kit(see picture), but then i found out the riviera has one already!
-
1965 Beaumont Wagon conversion
TheBEAUMONTGURU replied to TheBEAUMONTGURU's topic in WIP: Model Cars
Thank you everyone! i really enjoyed this project. stay tuned for more Beaumont conversions in the future! -
1965 Beaumont Wagon conversion
TheBEAUMONTGURU replied to TheBEAUMONTGURU's topic in WIP: Model Cars
Finished!
-
1965 Beaumont Wagon conversion
TheBEAUMONTGURU replied to TheBEAUMONTGURU's topic in WIP: Model Cars
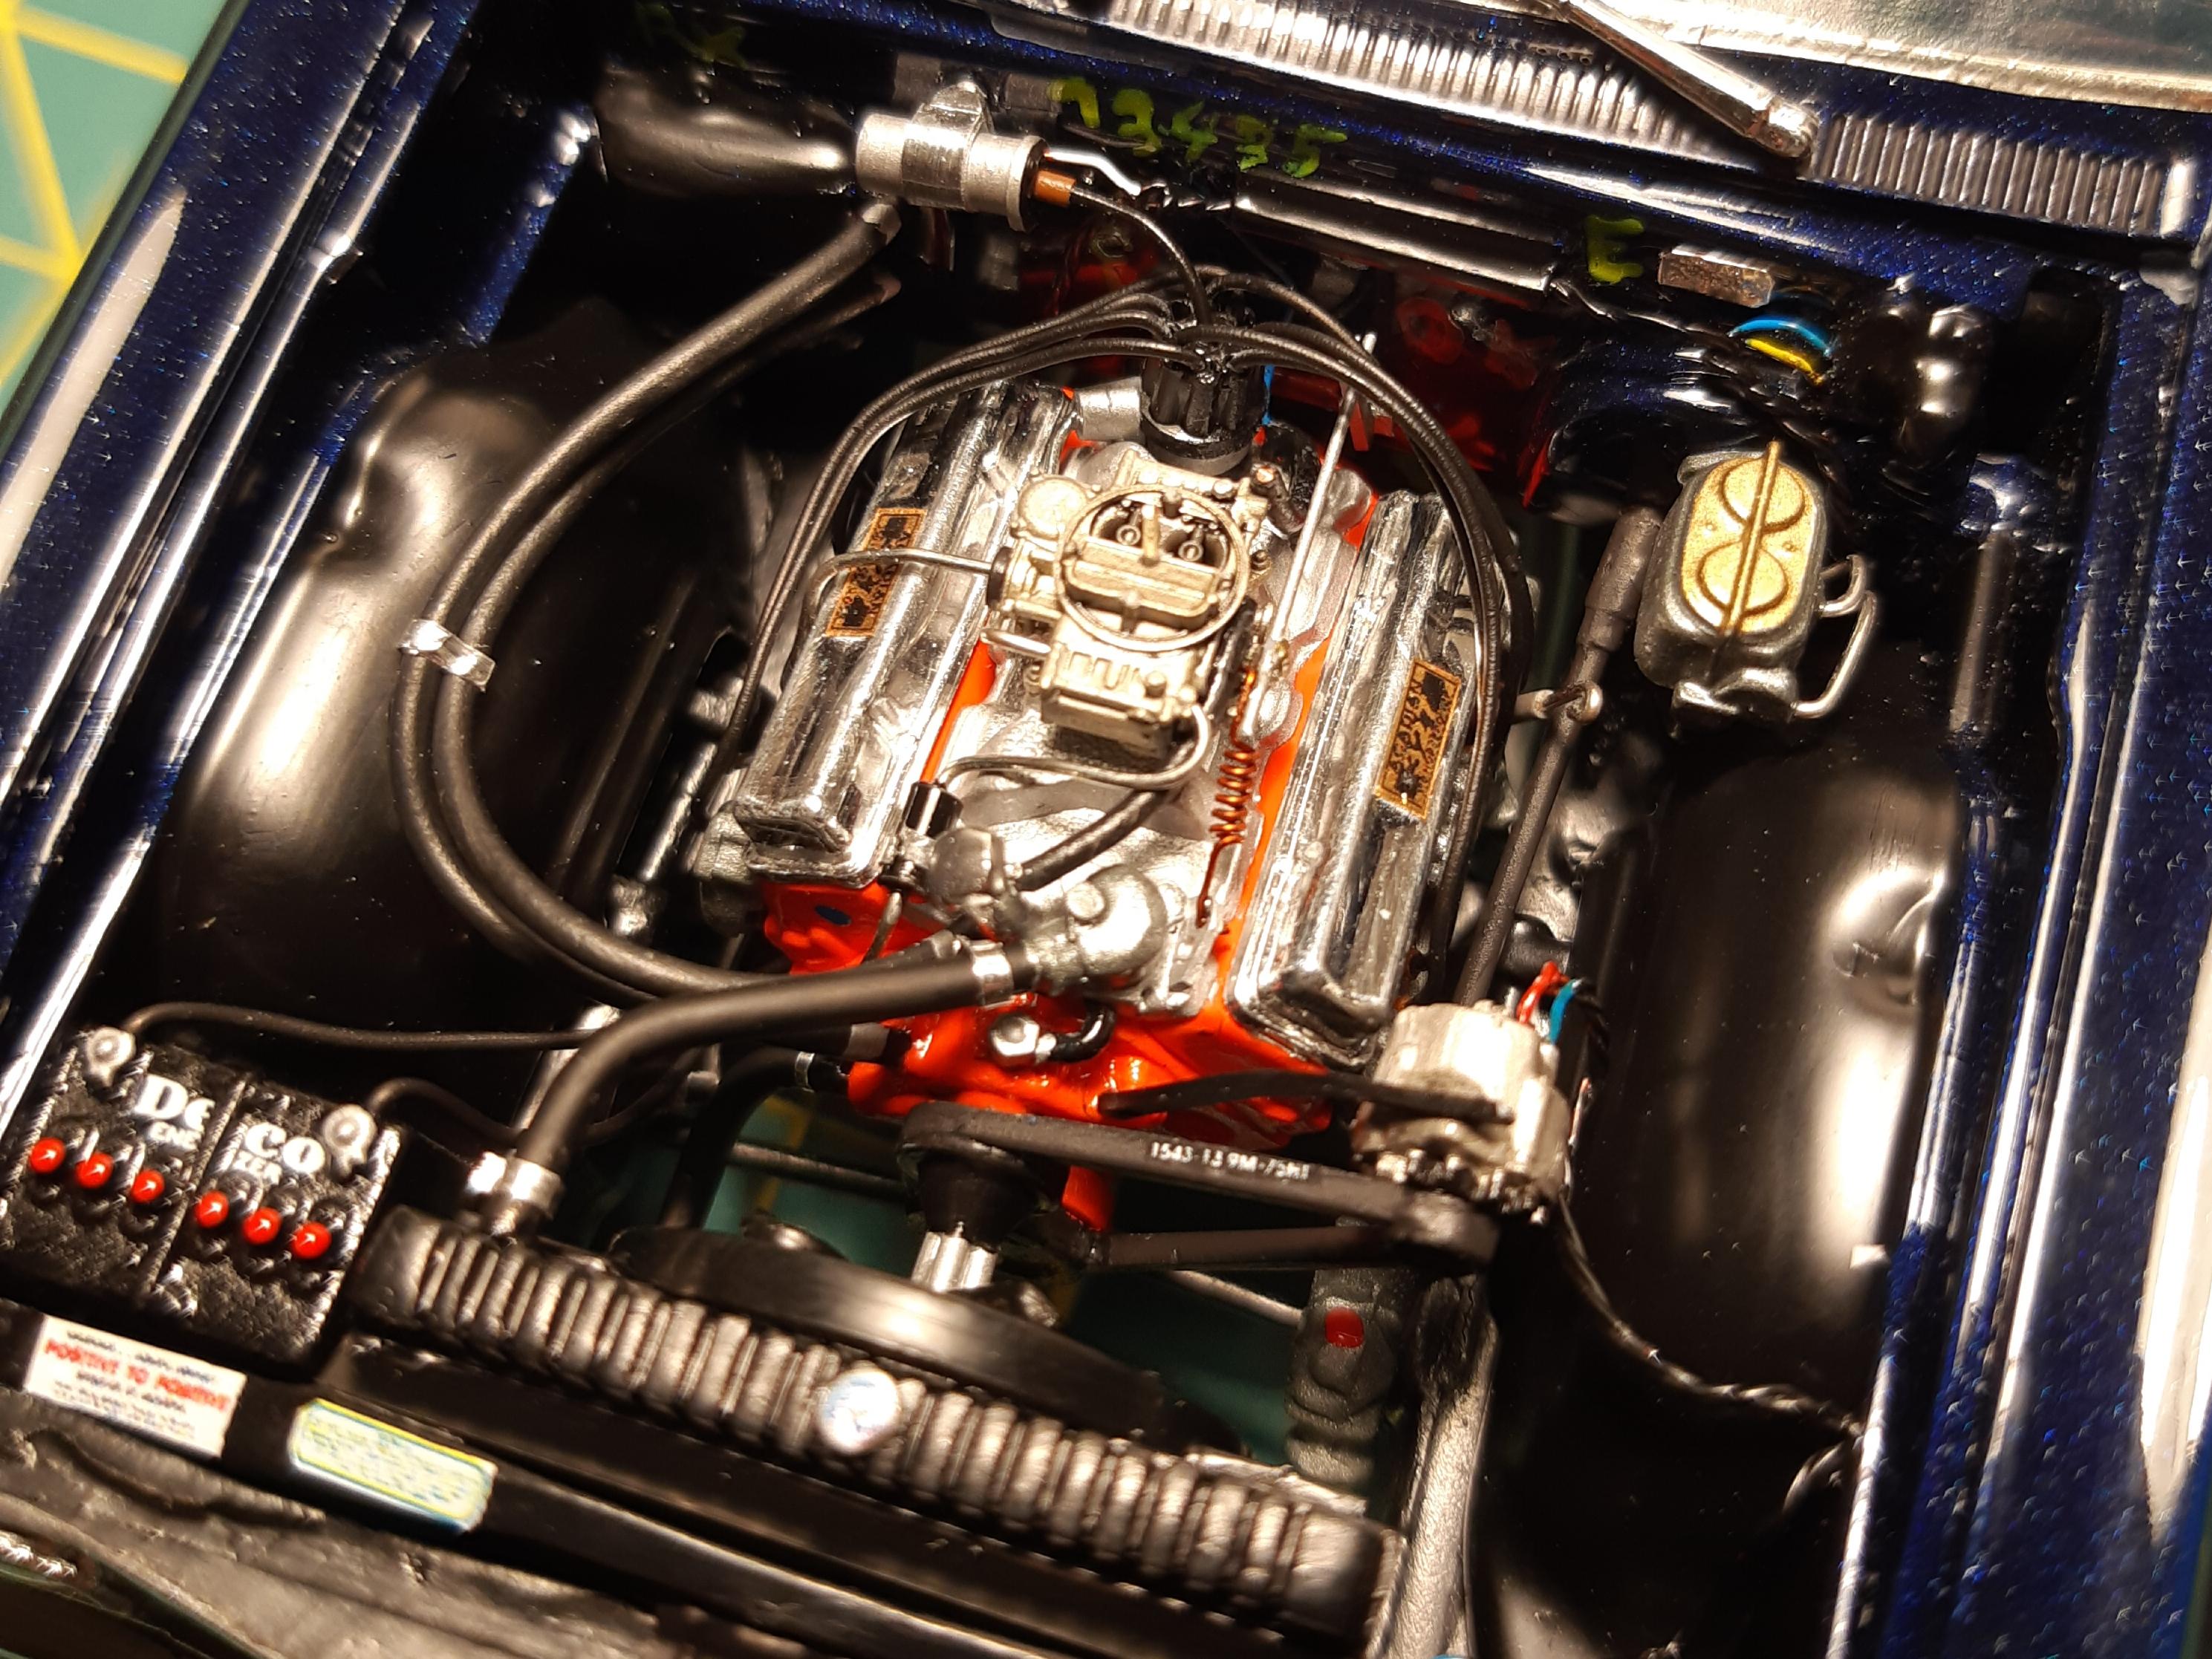
here is the L-79 327 installed. still lots of details left, but is getting there. I used the 66 nova engine and transmission, a parts box intake that i modded lots and lots! built the thermostat housing, fireball carb, made all my own fan spacers, alt brackets, hoses, throttle linkage and brackets, built my own coil and bracket. modded the rad spacer and craddle to accept my new grill, etc, etc. The 65 Z-16 engine compartment fit in really well to the AMT crappy wagon body. i even made a pretty convincing cowl tag from a piece of foil. i used the dual master cyl from a 67 chevelle kit, as my real car has the dual cyl upgrade.
-
1965 Beaumont Wagon conversion
TheBEAUMONTGURU replied to TheBEAUMONTGURU's topic in WIP: Model Cars
getting back on this project. Its almost finished. here i am mocking up the stance. wheels are fireball 15x7 and 15x6 just like the real car. fabricated the proper looking tailpipes and added a sway bar and raised the rear end a bit, built my own shocks from scratch.
-
1965 Beaumont Wagon conversion
TheBEAUMONTGURU replied to TheBEAUMONTGURU's topic in WIP: Model Cars
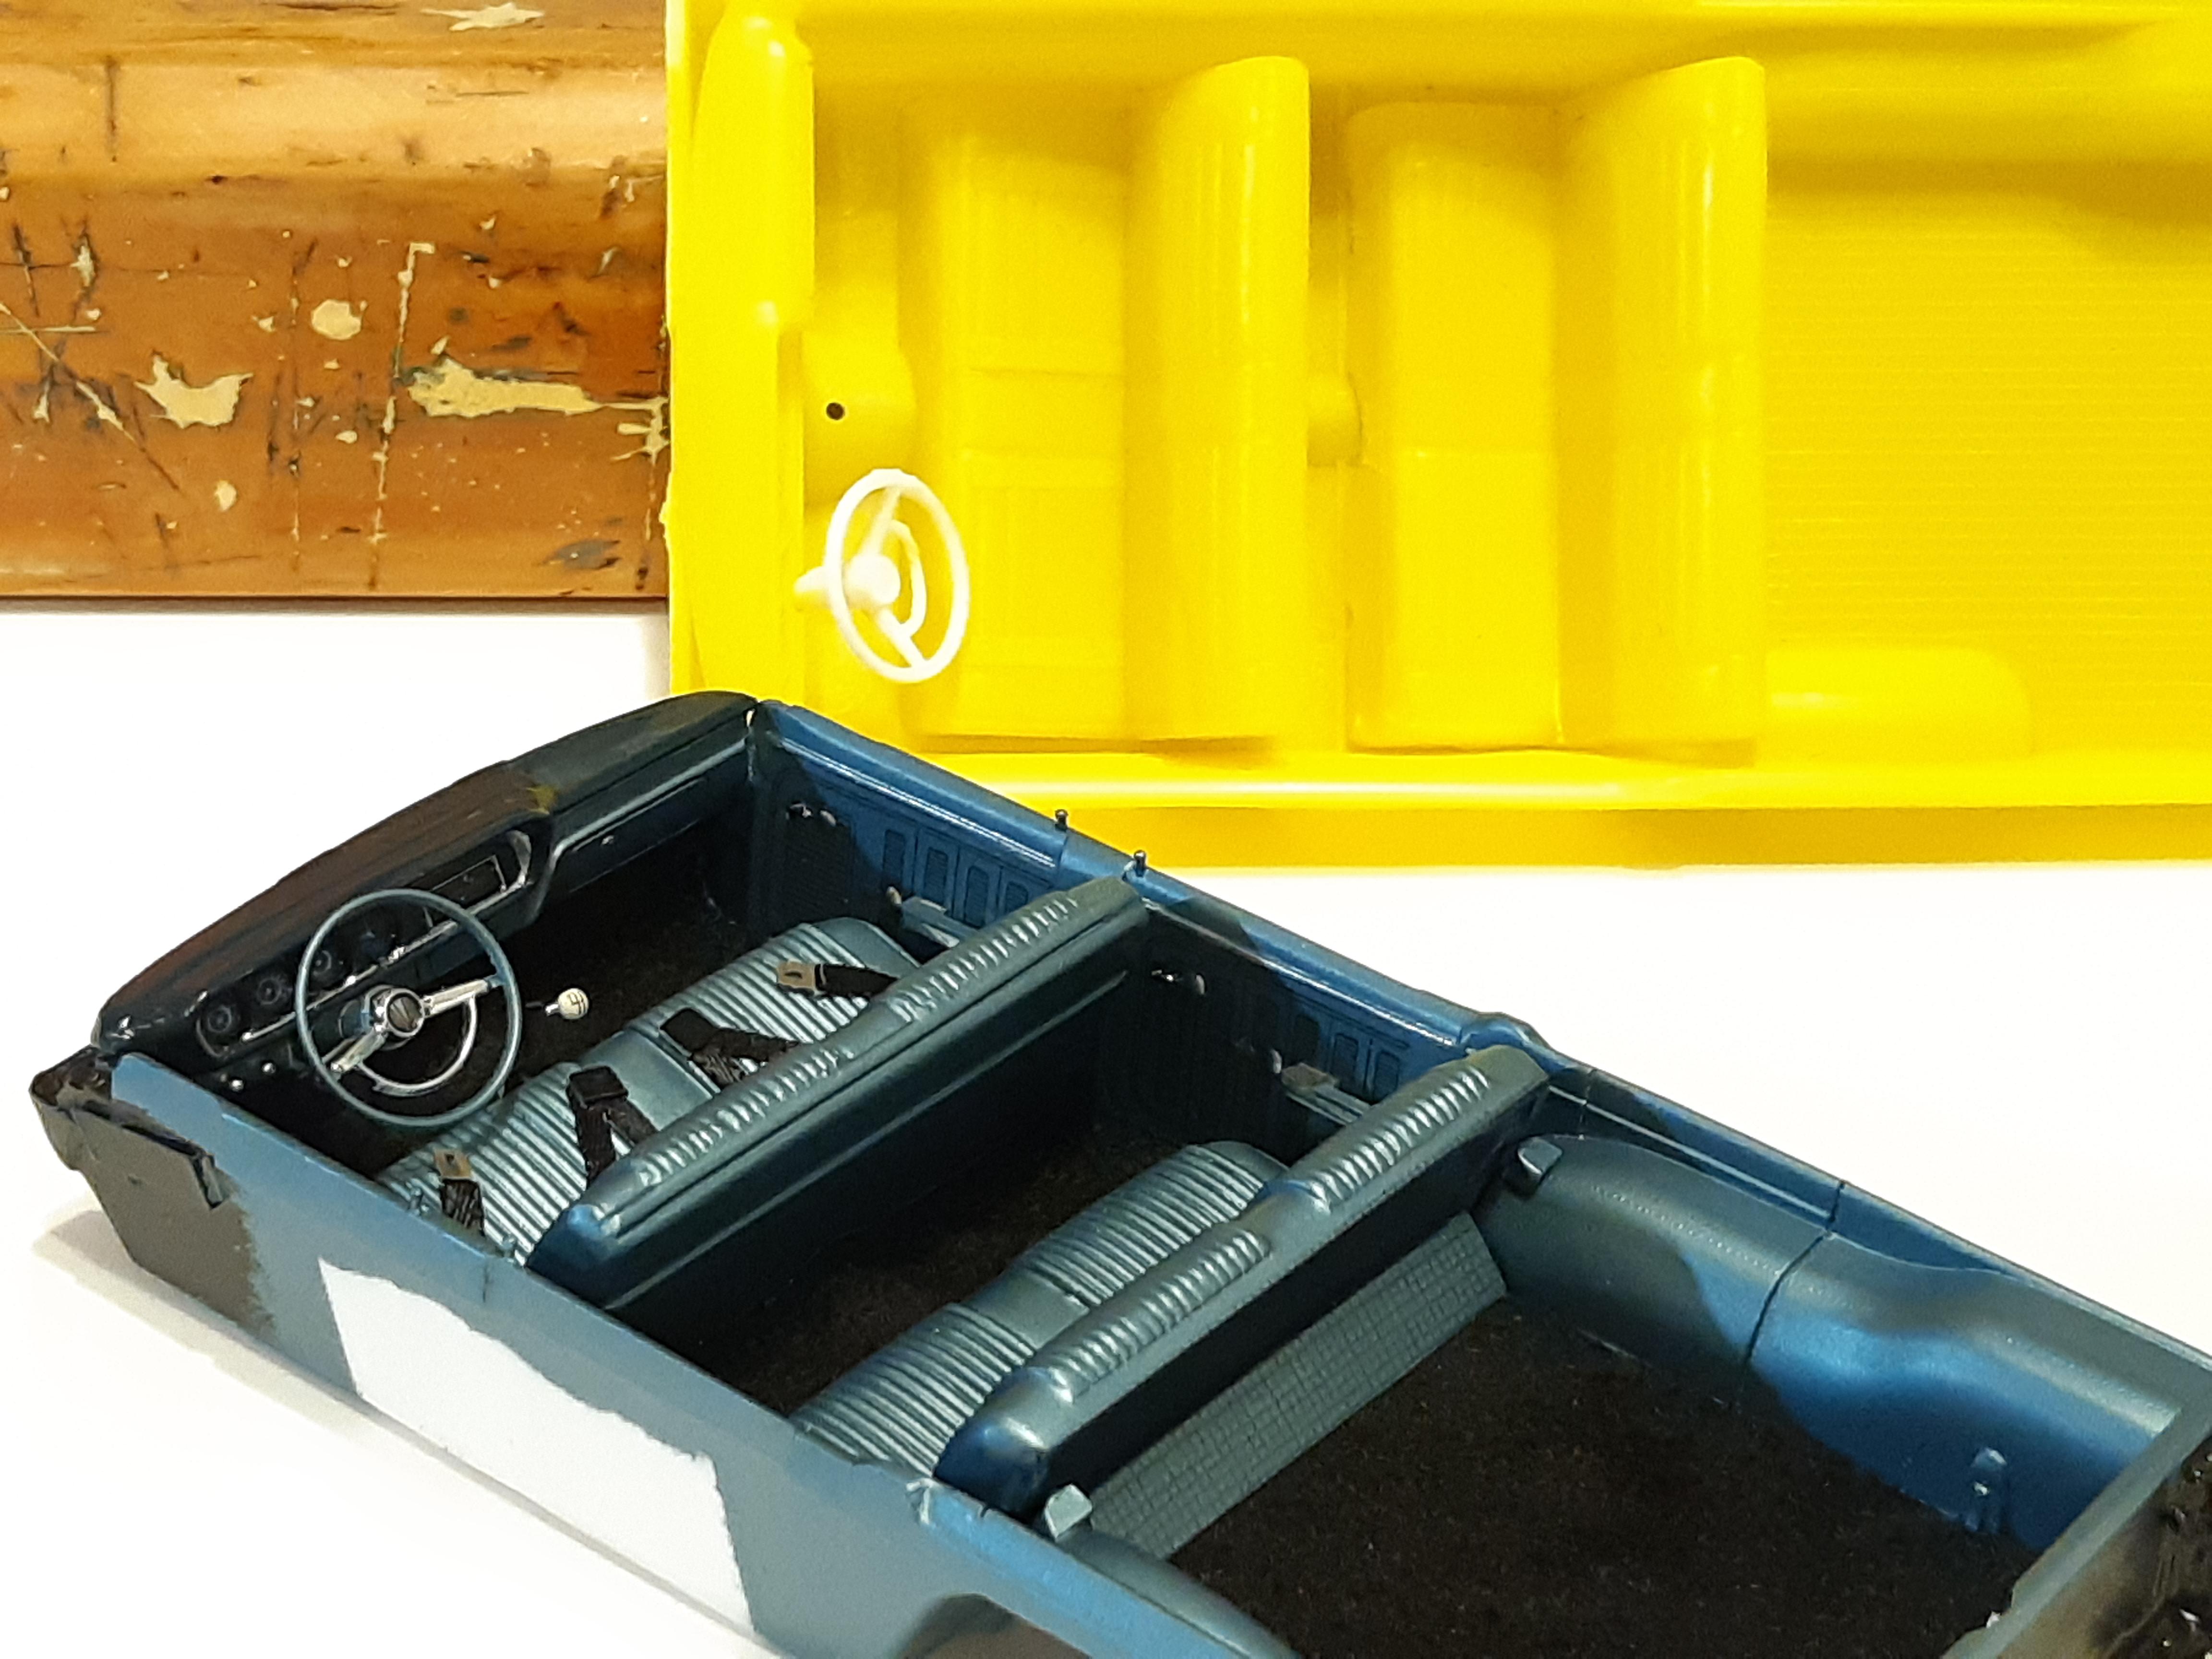
Got the interior finished. Lots of added details, photoshop decals for the gauges, and a 4 speed shift pattern. Bumpstops for the back seat, seatbelts, door lock knobs. Some scratch built armrests, radio delete plate, 4 speed steering column and some added pedals from the parts bins. I got all the foil work done on the body, and detailed out my scratch built tail lights TECH TIP: the front windshield from the revell 65 Z16 chevelle works way better and is way thinner. it fits like a glove with NO trimming needed and has molded in sunvisors that work perfect. I used clear Acetate sheet for the rest of the glass. the kit stuff is WAY too thick and looks terrible.
-
wow! im very impressed with the realistic weathering. very nice. Im a huge fan of these era trucks, and you nailed it. very accurate representation of a real world truck. But if its this rough and rusty, it should be missing all its wheel trim rings by now! ha ha!
-
71 Olds 442 W30 (replica of my brother in law’s car)
TheBEAUMONTGURU replied to Steve H's topic in WIP: Model Cars
very cool project. i always find it fun to replicate a real car, then you can add all the exacting details of that specific car. Always makes for a more realistic model in the end. Keep it up! -
1965 Beaumont Wagon conversion
TheBEAUMONTGURU replied to TheBEAUMONTGURU's topic in WIP: Model Cars
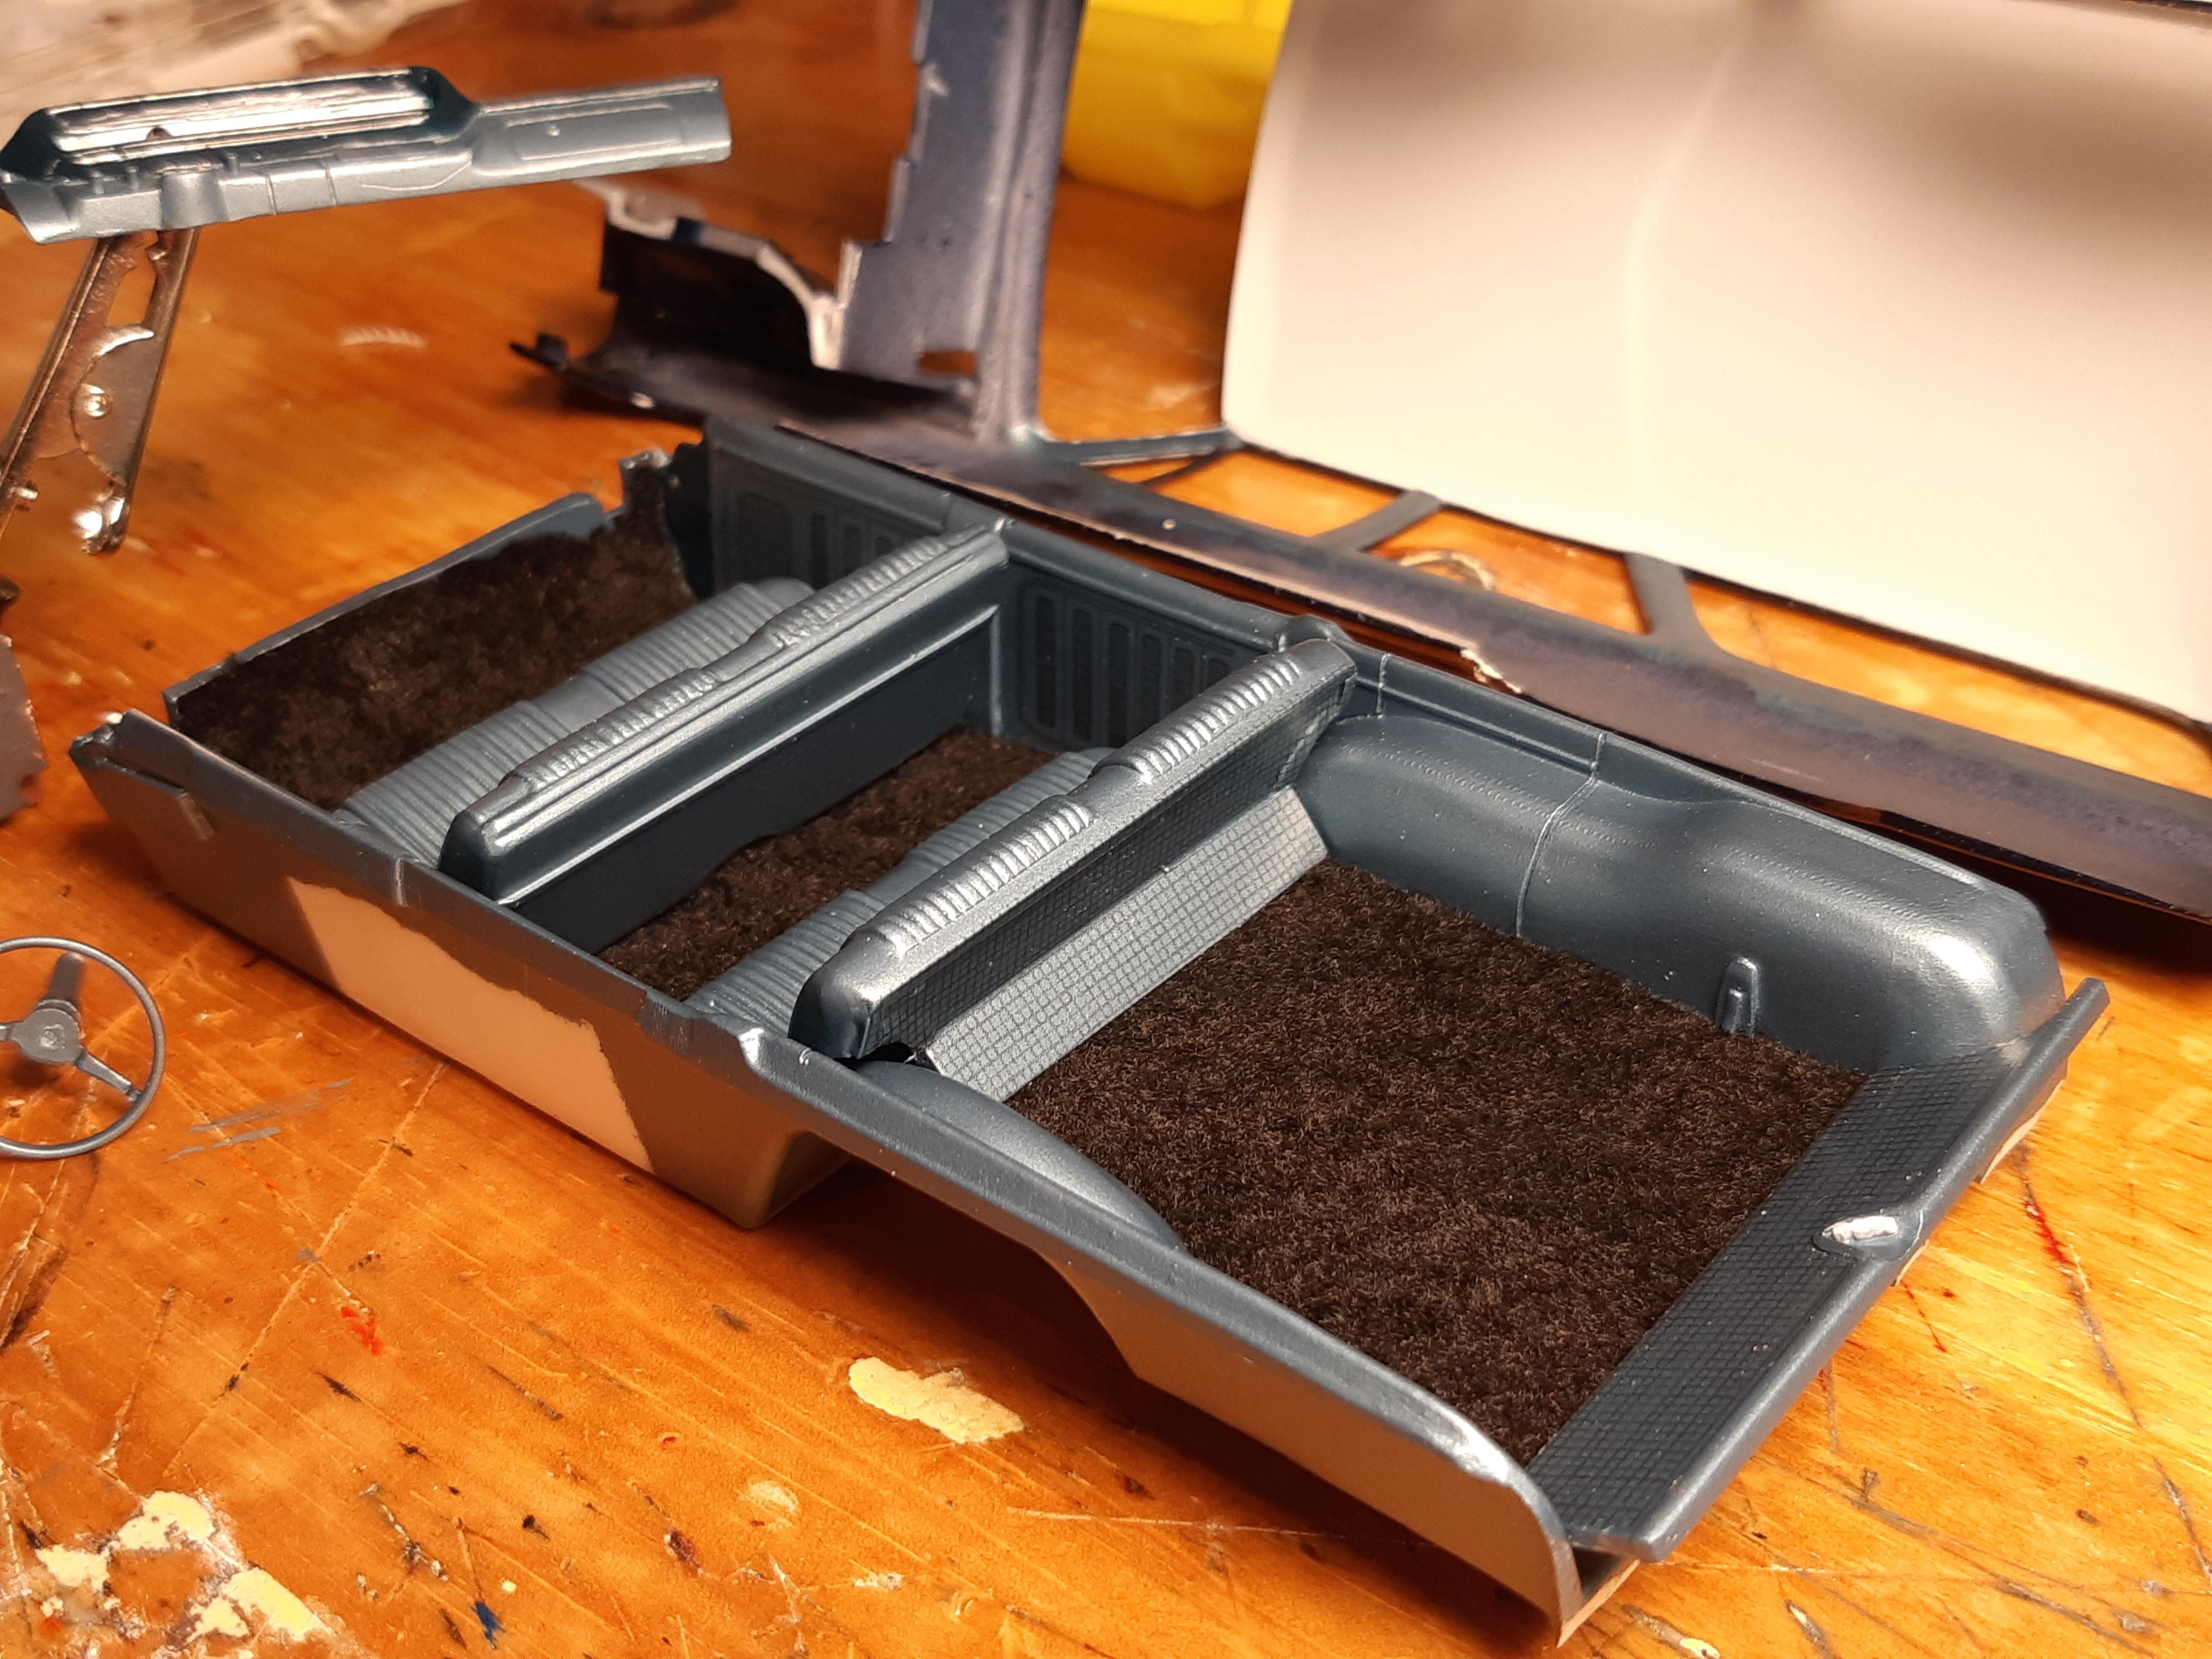
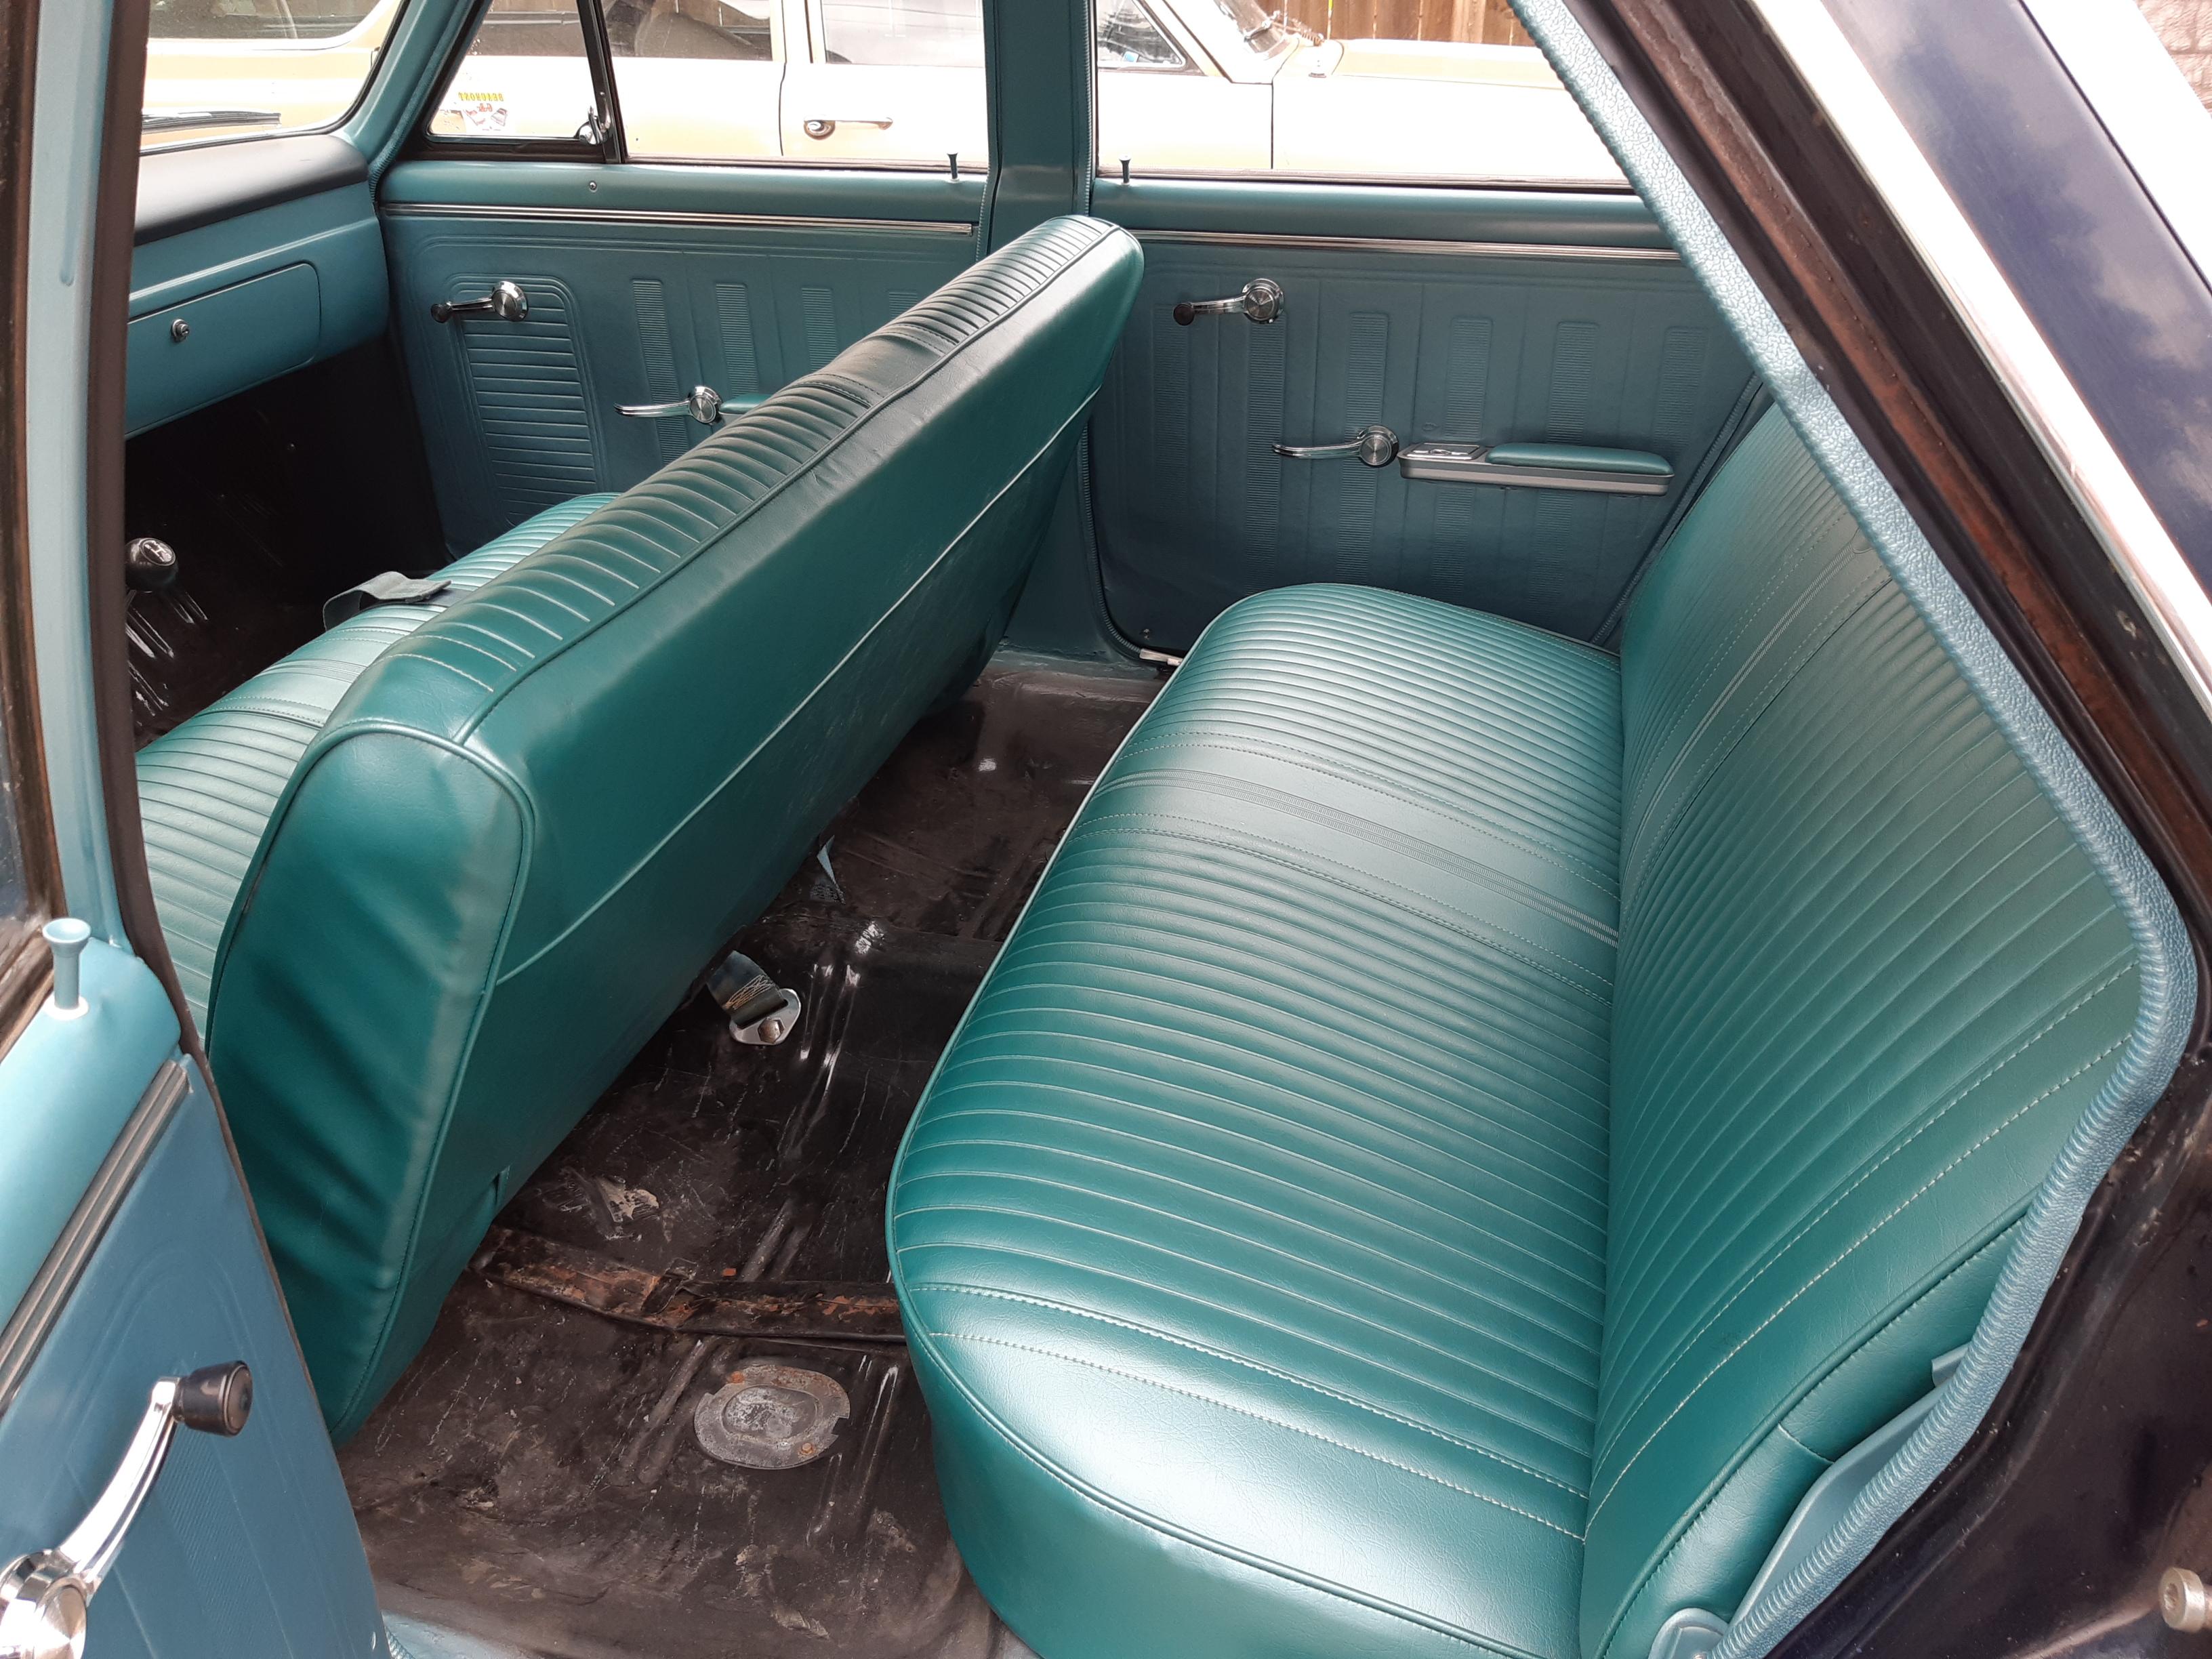
A little more progress. lots of upgrades to the original, made some door panel lines, decals for the embossing pattern. a GTO grill from another kit. had to fabricate the latch for the spare tire as well as the rear gate handle. scribed all the panel lines better, and made some trim strips for the tops of the doors, still need to chrome them tho. also made some decals for the waffle patterned metal panels on the rear seat and tailgate, the effect worked well. still lots to do, handles, armrests, belts, etc. the paint is the SEM vinyl dye from my real car. My car also has a black carpet front and rear, not correct for the purists, but its how my real car looks.
-
1965 Beaumont Wagon conversion
TheBEAUMONTGURU replied to TheBEAUMONTGURU's topic in WIP: Model Cars
Jerry, thanks. i just used various strips and thicknesses of evergreen strip to build up the grill bars. usually .010- .030 thicknesses -
1965 Beaumont Wagon conversion
TheBEAUMONTGURU replied to TheBEAUMONTGURU's topic in WIP: Model Cars
Starting in the interior, cut out the seat and sanded all the patterns off the seats and doors, making all my own patterns. Used 2 packages of .040 1/2 round to make all the pleats. Also scribed the rear cargo panels more correctly, added the spare tire cover latch. also complete redo of AMT's epic failure of the tailgate inside panel. Not even one thing correct about the model part! And of course the Dashboard swap to the Beaumont "Lemans/gto" one. Photoshopped up a set of door panel decals that will replicate the embossed pattern unique to a "beaumont custom"
-
1964 Impala(NOT A SUPER SPORT)
TheBEAUMONTGURU replied to TheBEAUMONTGURU's topic in WIP: Model Cars
Thanks Everyone! T.Rogers, thats a great looking original impala, glad to see it retains the 6 cyl! -
Very nice! i love these builds that are based on a real car. Its a great way to get all the details correct when you own the real thing!
-
Super cool! im following!
-
Some more of the kitbashing components involved. A parts bin 327 SBC with a resin cast Powerglide. I scratch built all the A/C compressor and brackets and front drive pulleys and belts along with a PS pump and belts. Qjet for the 327. You will also see a tilt steering column with woodgrain wheel option. and a scratch built AC condencer and a parts bin AC style fan shroud and heater box
-
I built a factory correct front seat called a "Strato-bench" available on sport sedans and caprice models. i used 2 bucket seats from the SS427 HT kit and built a center section and a folding armrest. I own a real seat like this so i got the details as close as possible. Im also wanting to build a complete factory AirConditioning system. I had to scratchbuild the 3 vents in the dash with evergreen
-
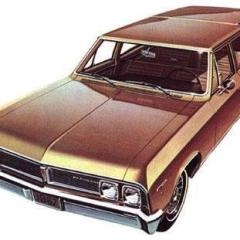
I started this project awhile back from the Supernatural kit. I was so delighted to see a model kit of a FOUR door Hard top. Such a rarity amongst a sea of convertibles and Hardtop kits. I have a clear vision of what i want to do. Butternut yellow, fairly loaded with options. SBC to replace the kits BBC. a powerglide automatic. Power window, Air conditioning, P/S, PB, tilt steering column, wood grain wheel. Mag Style wheel covers with white stripe tires. Going to have to do something about that front seat problem!!!! this is where i left off about a year ago, body has been sitting drying. PPG OMNI single stage GM paint code "Y" butternut yellow.
-
1965 Beaumont Wagon conversion
TheBEAUMONTGURU replied to TheBEAUMONTGURU's topic in WIP: Model Cars
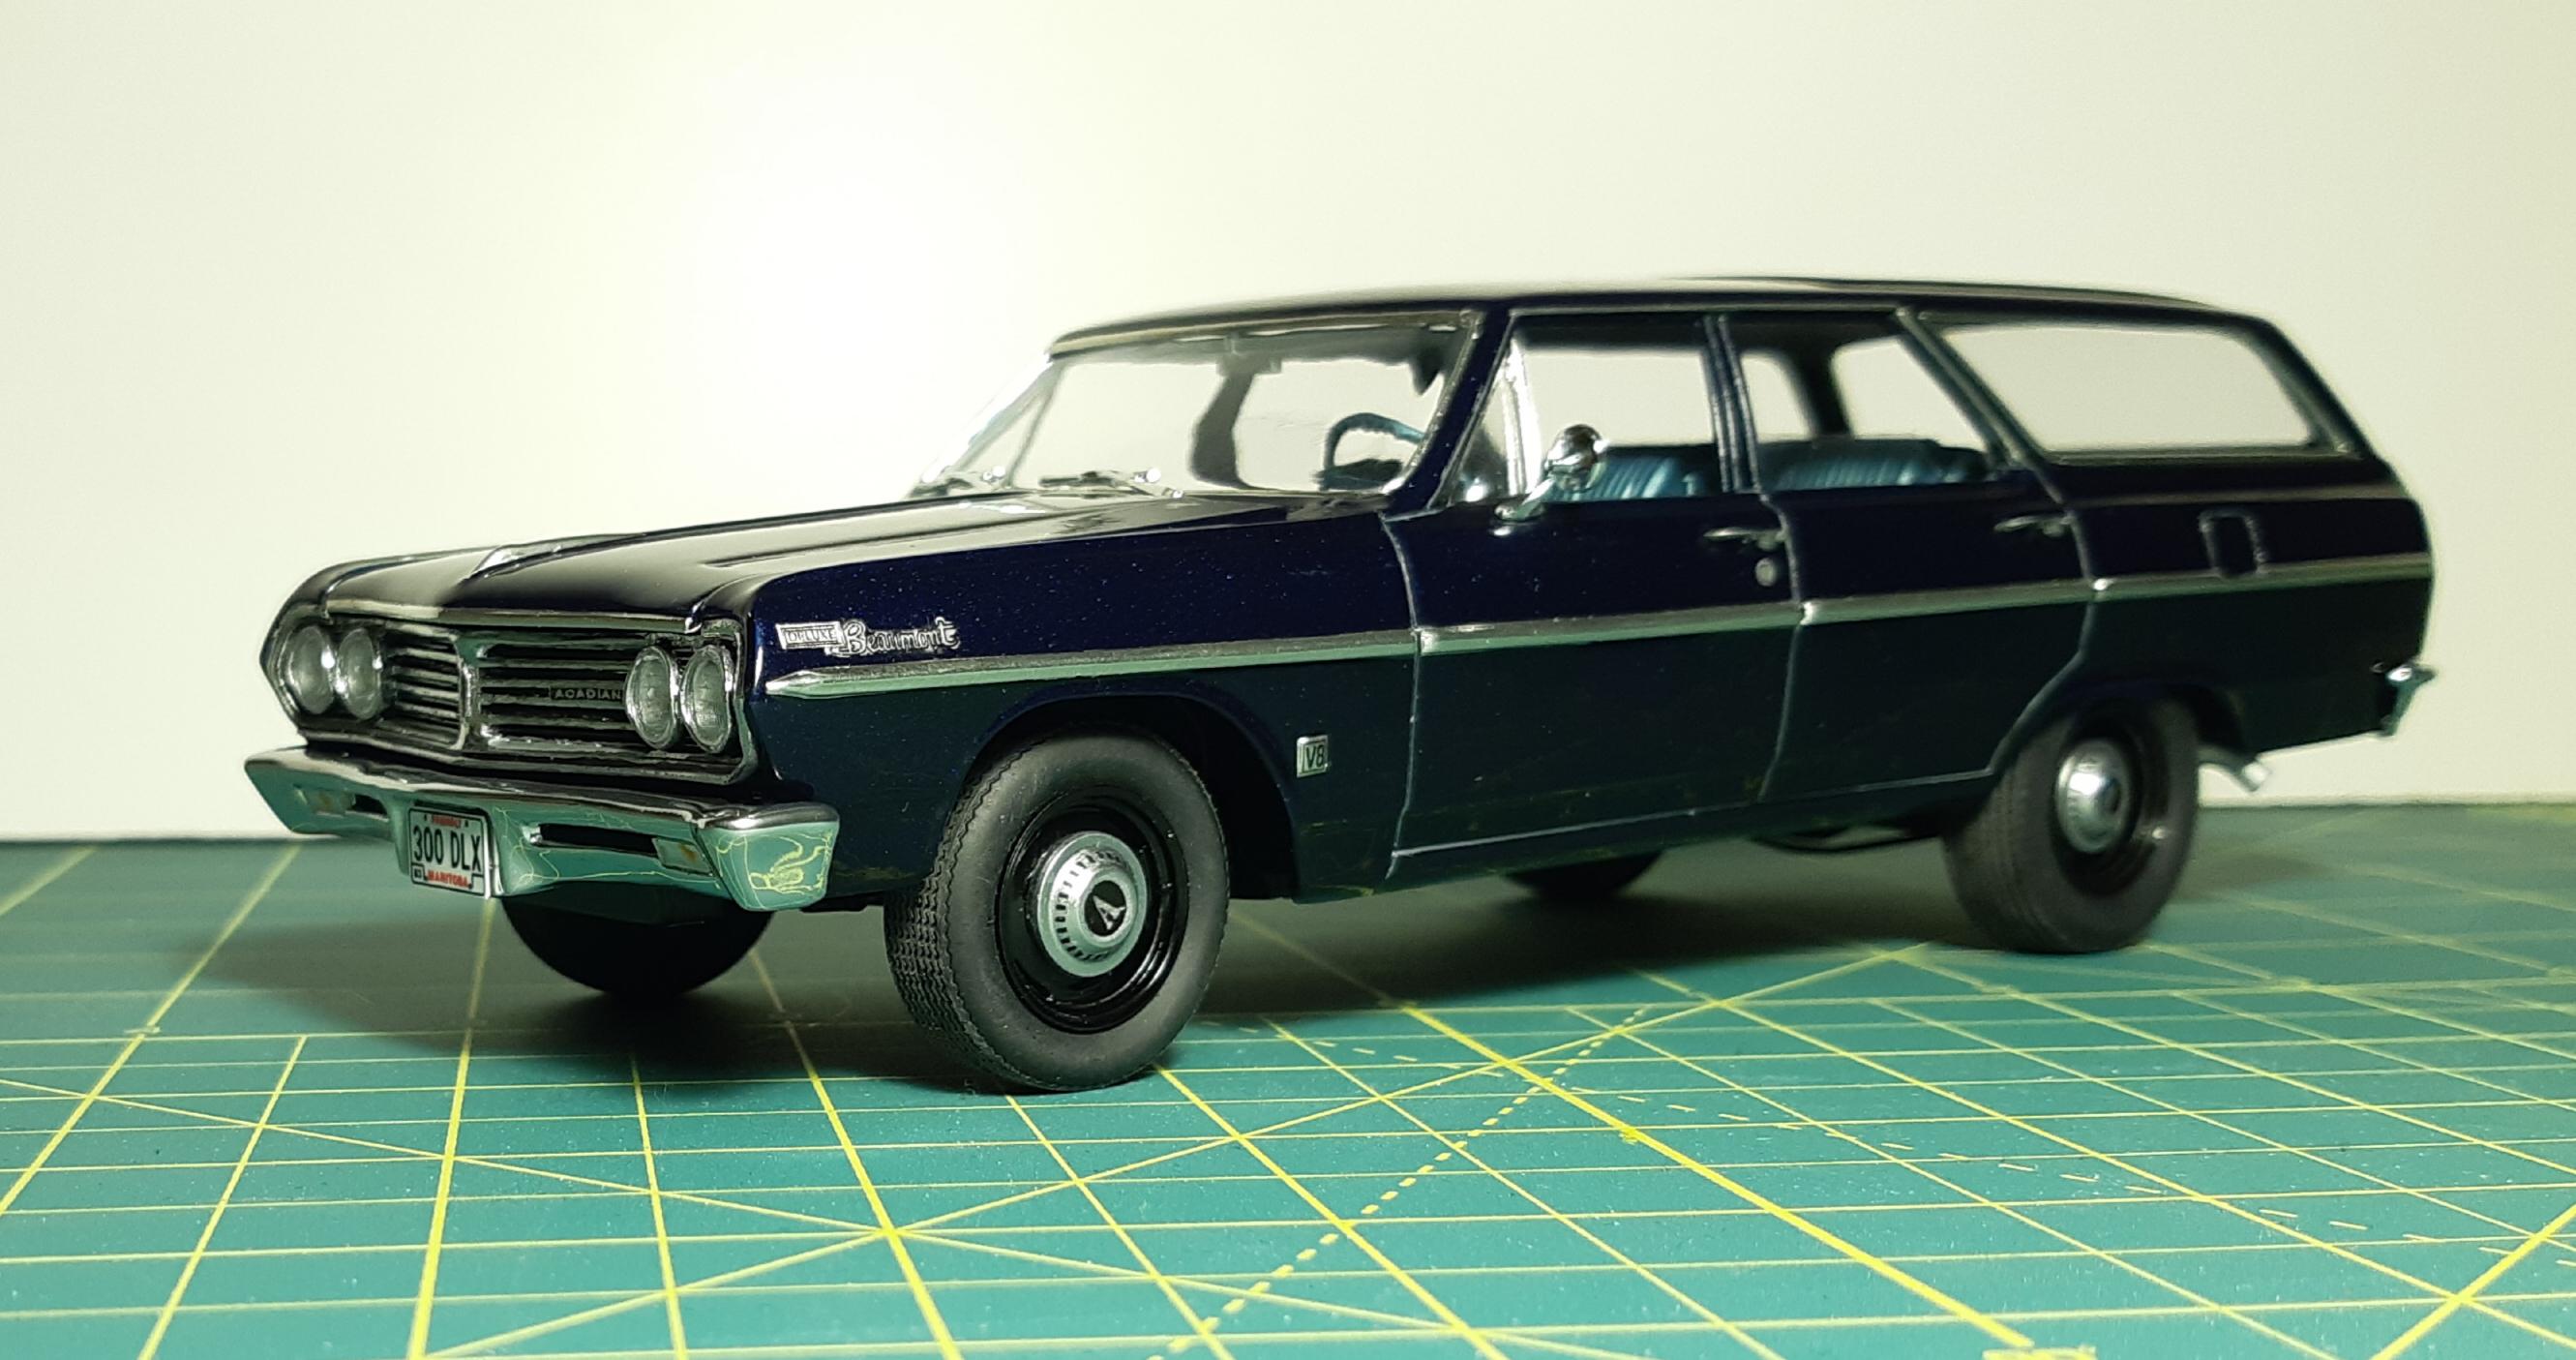
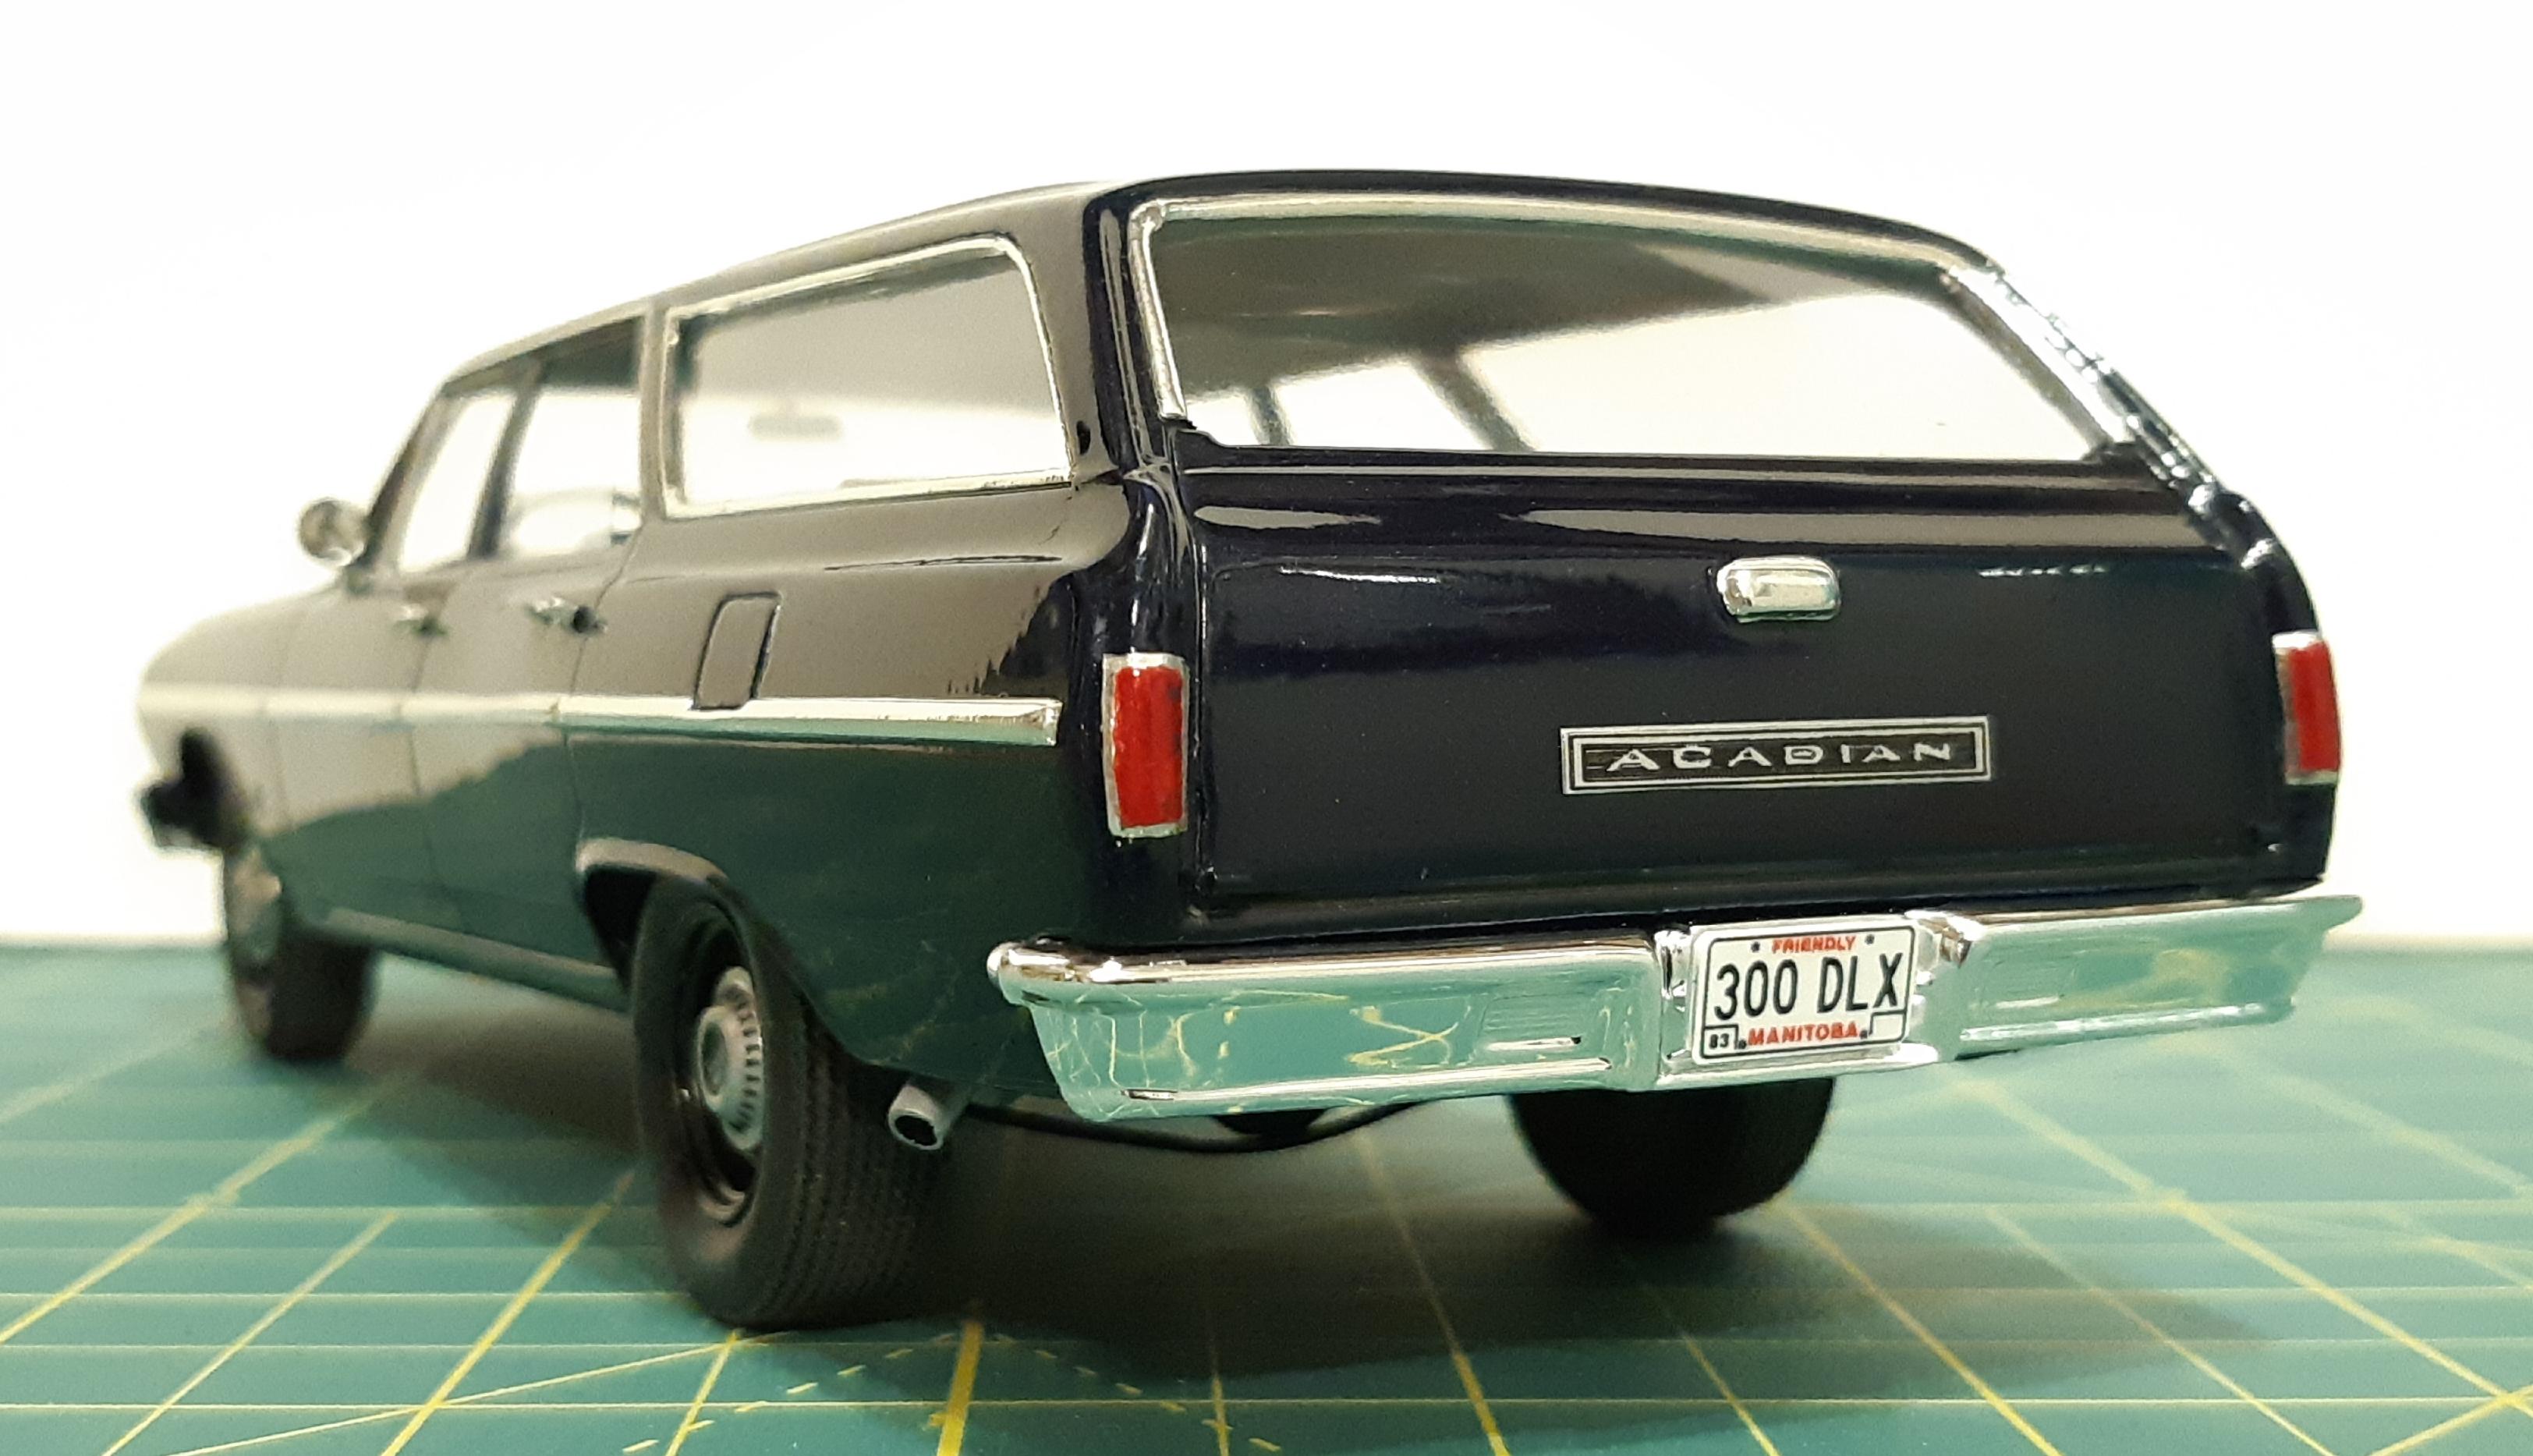
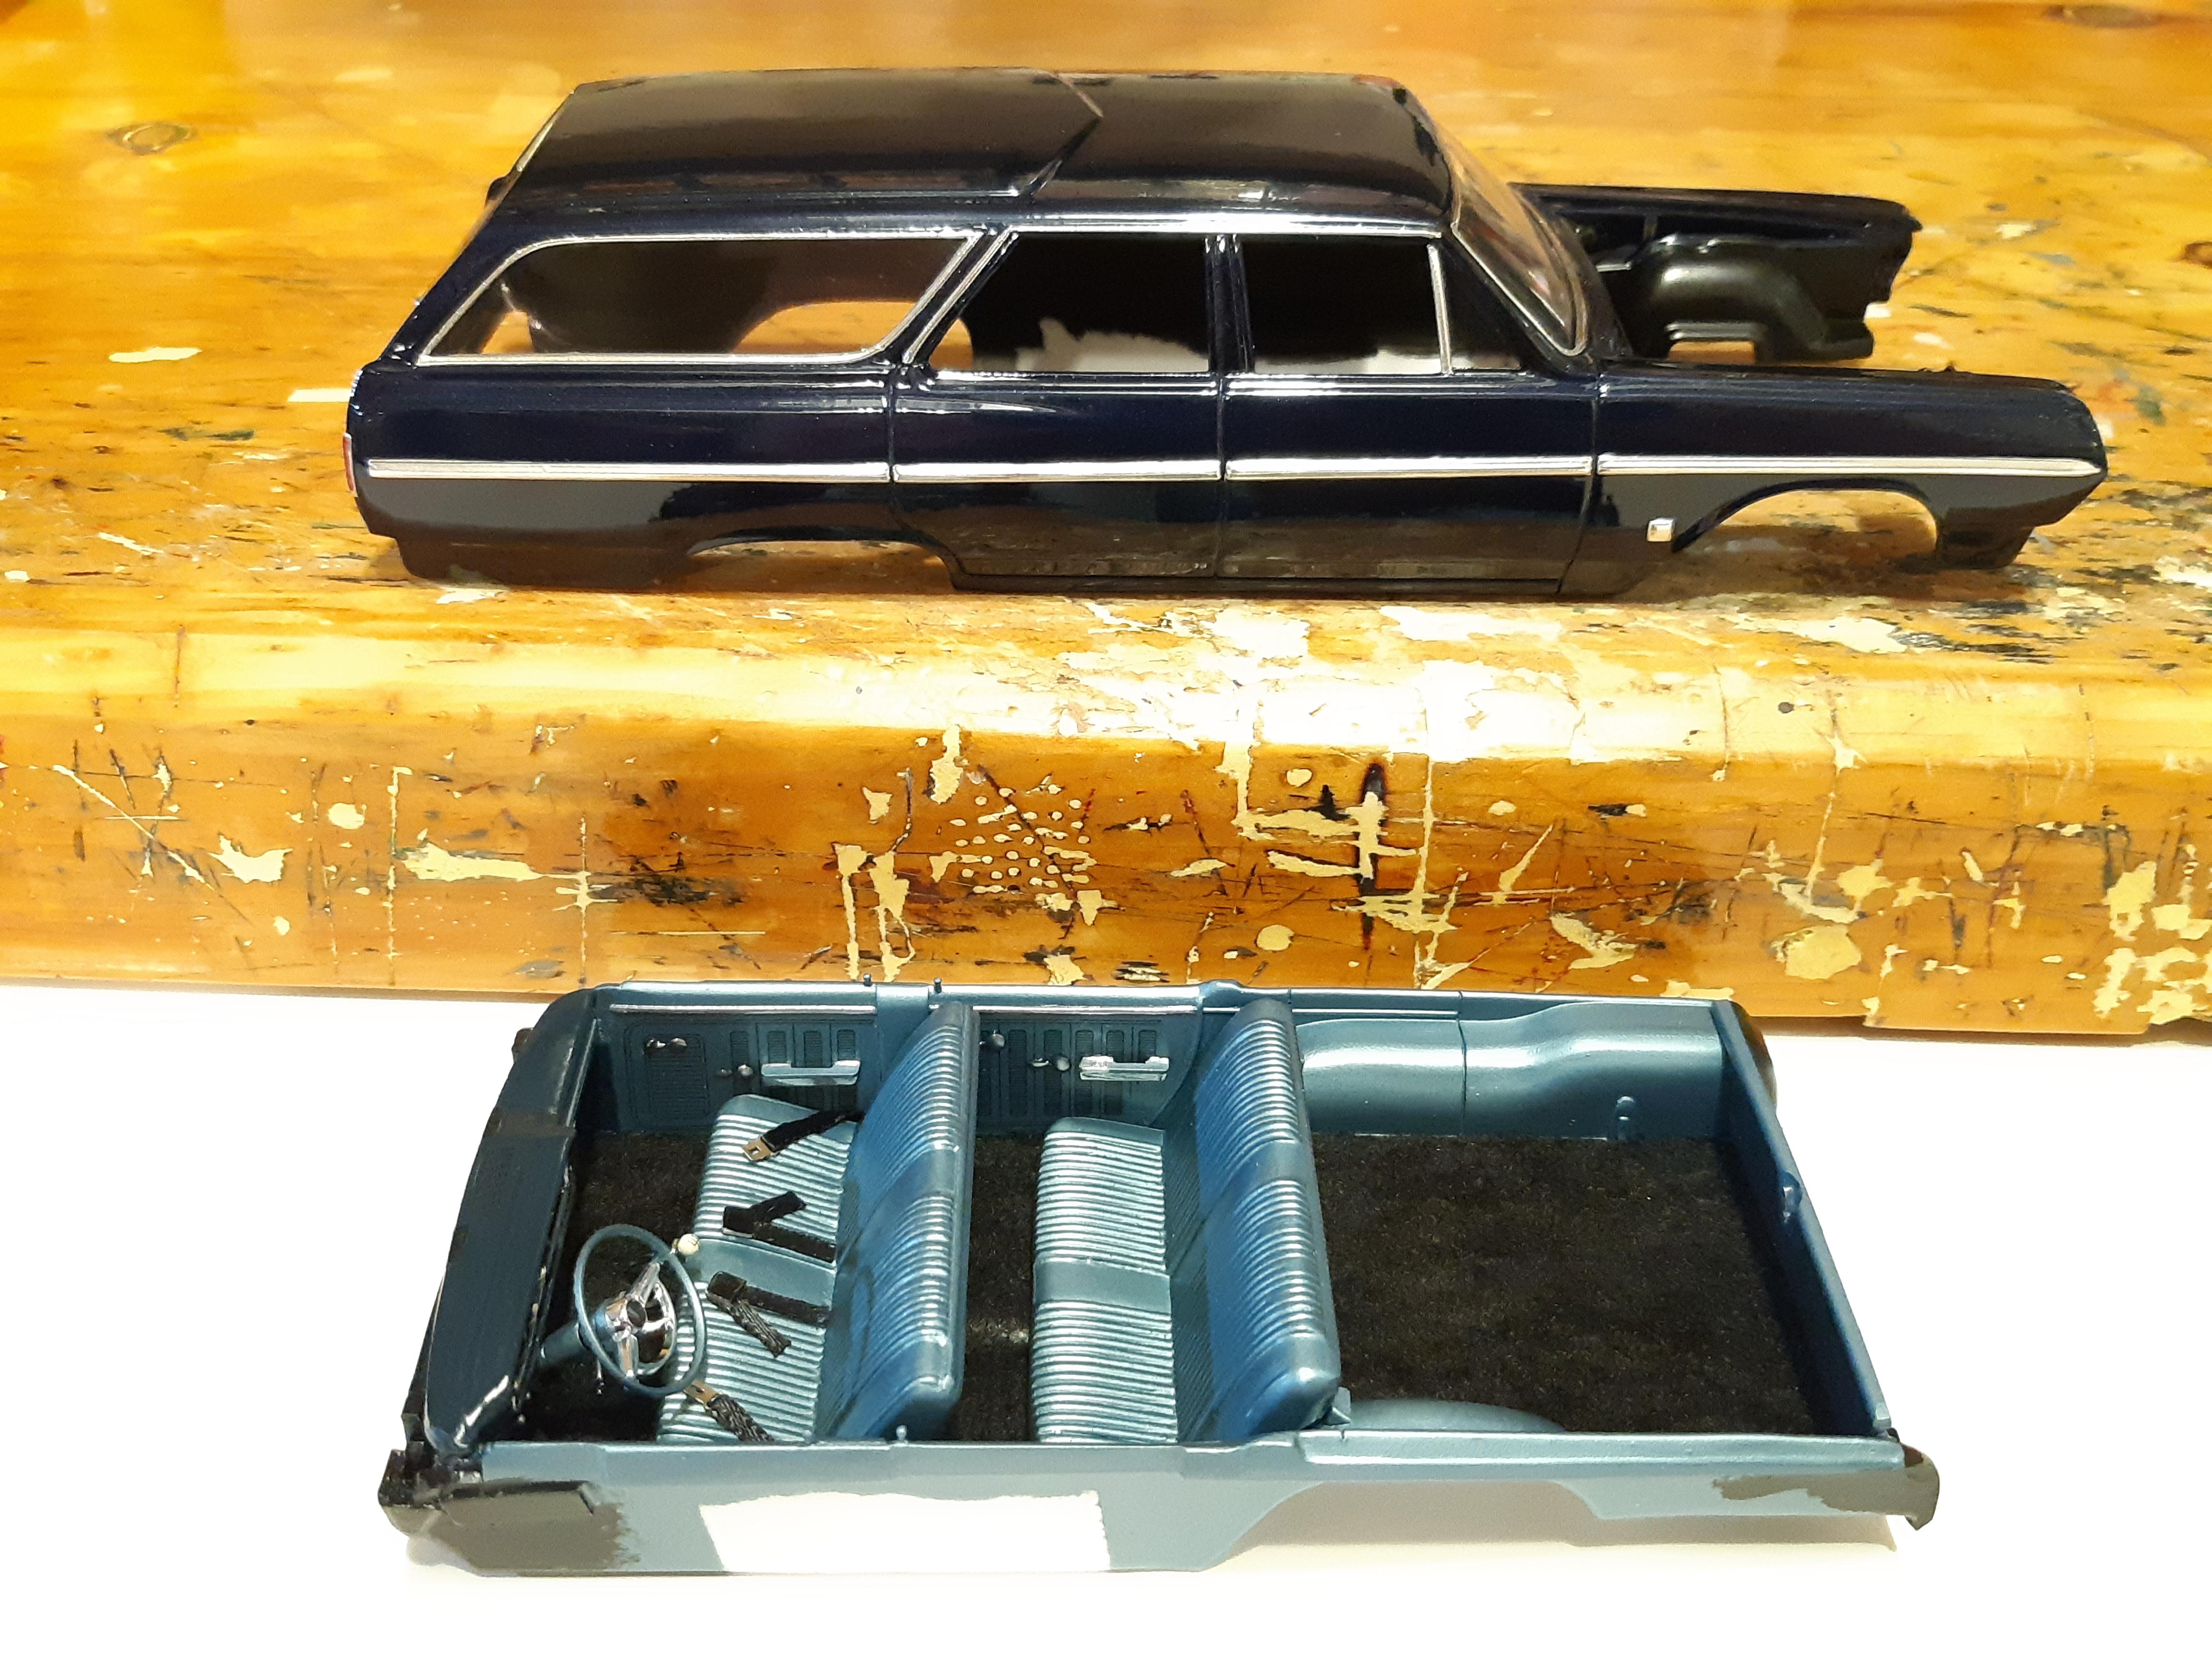
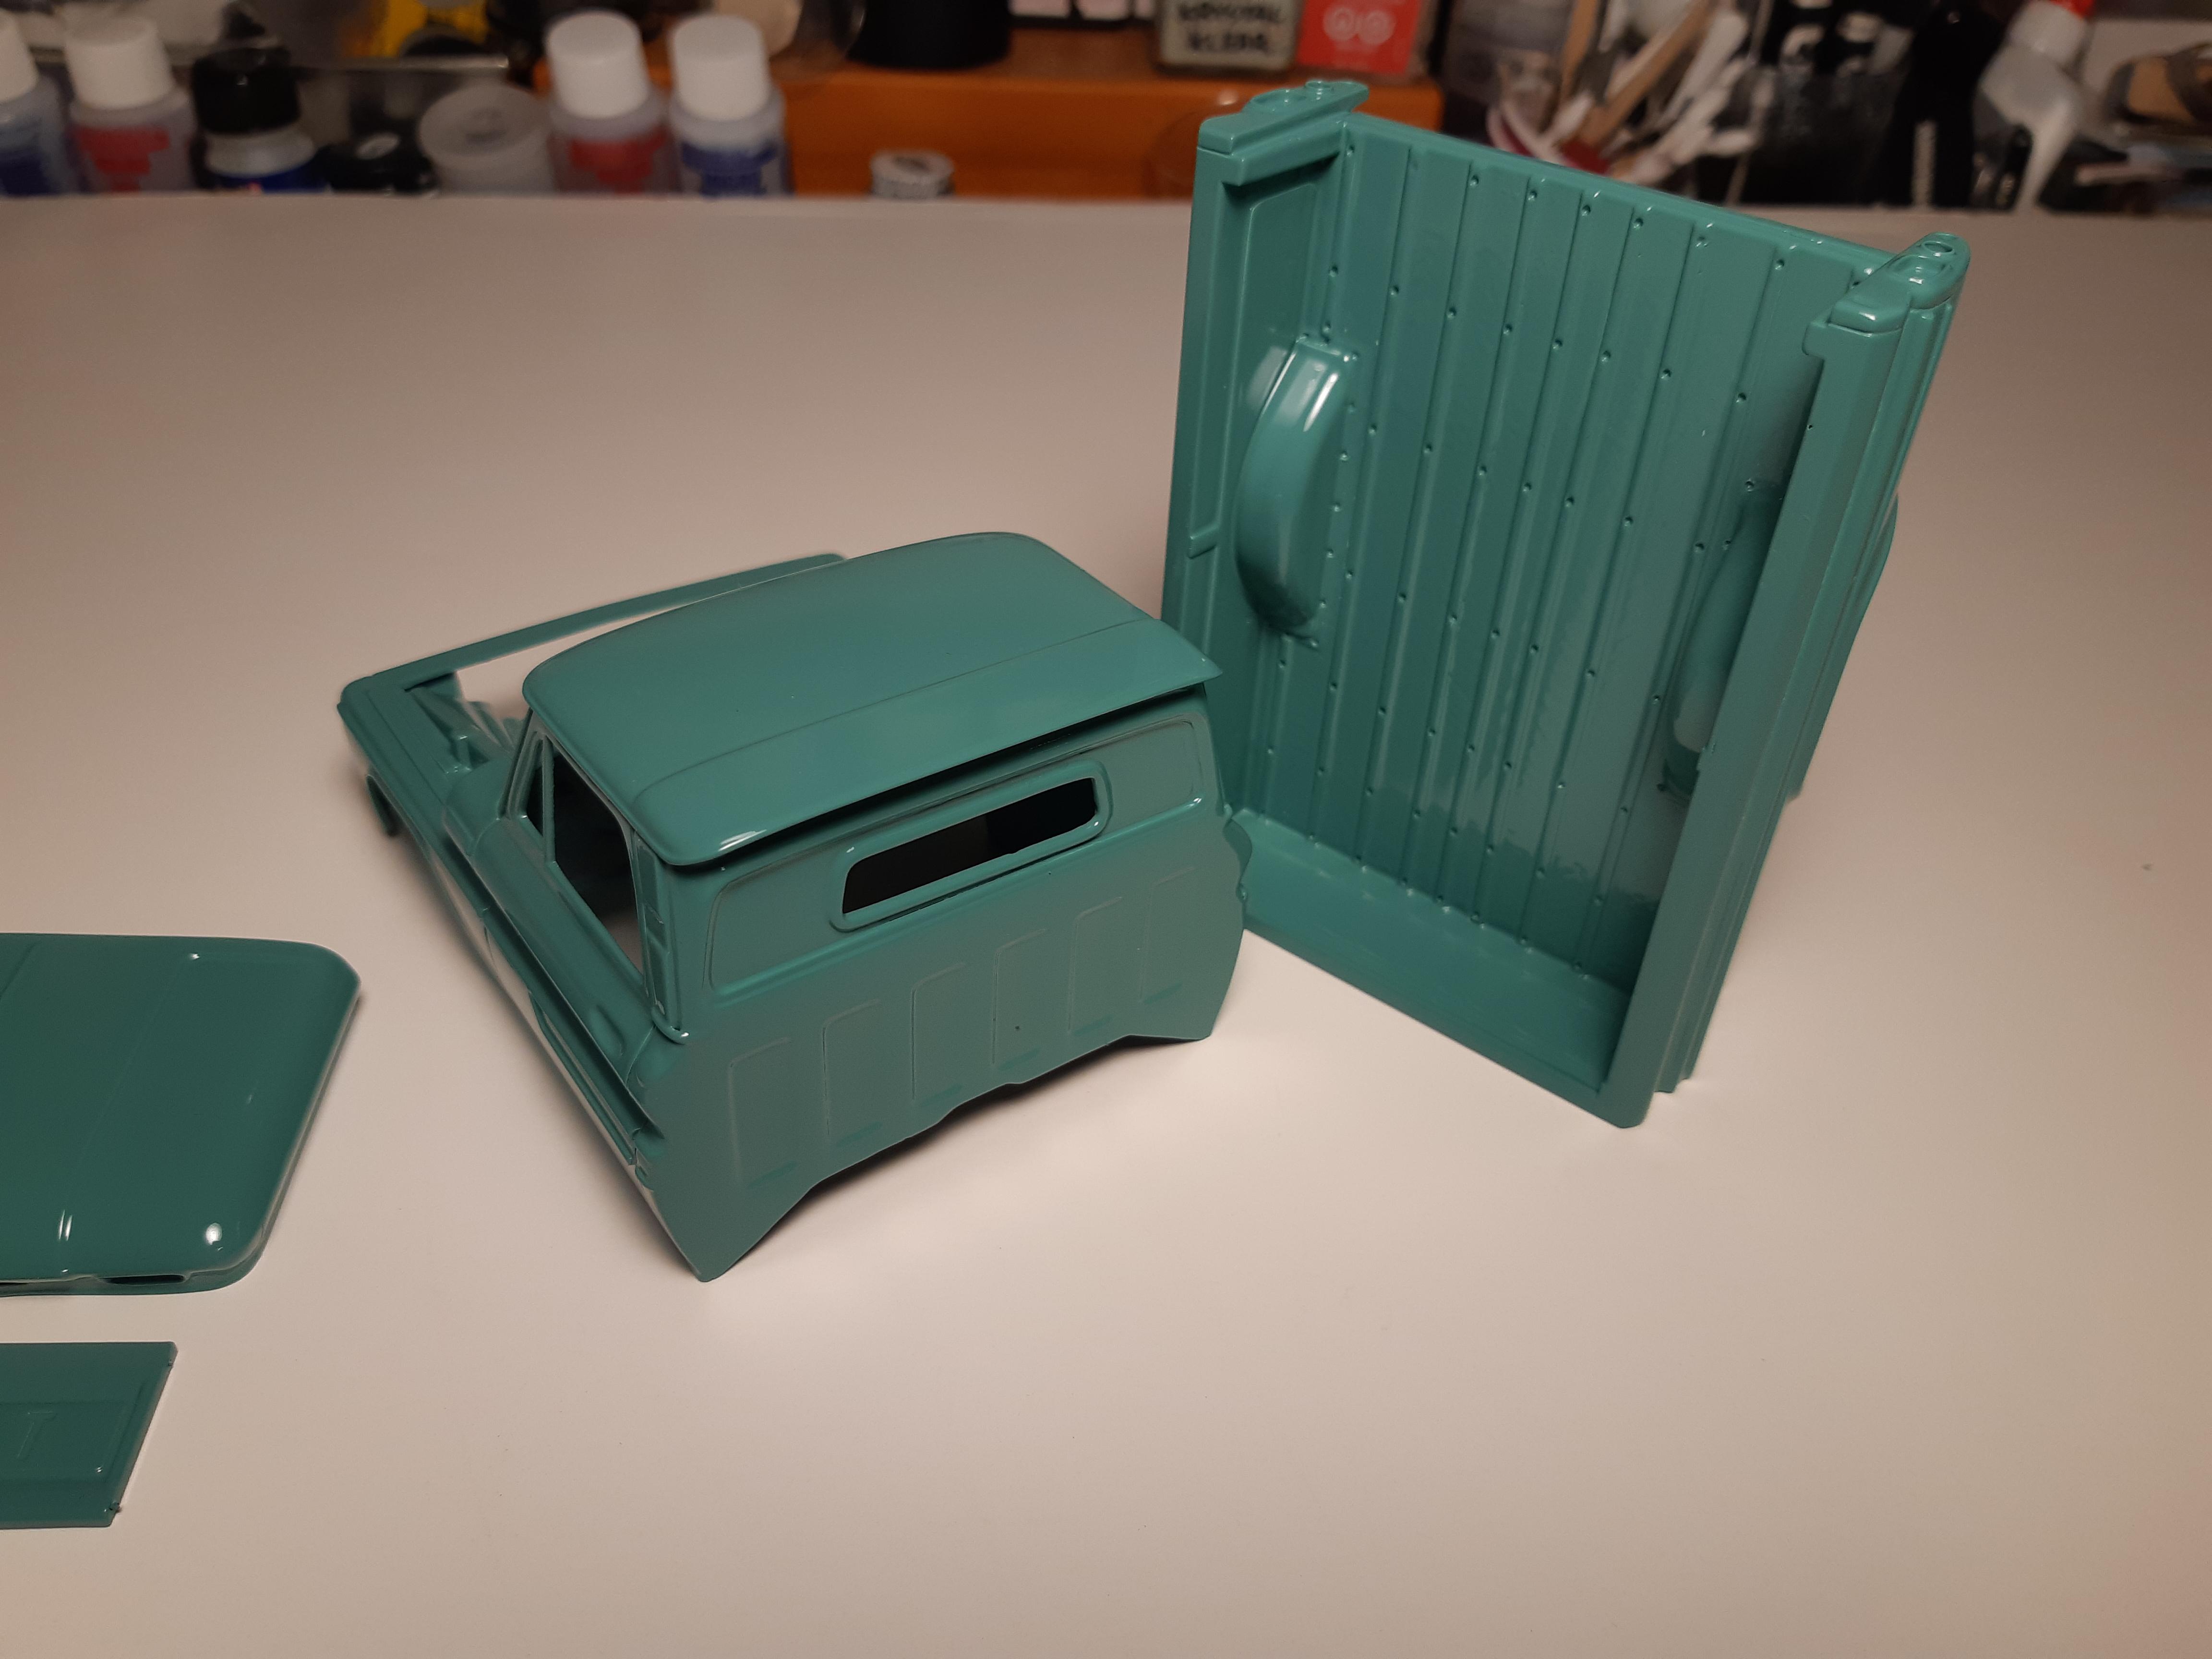
got some primer on it and painted finally. I used the real paint from the real car. PPG Omni GM 1965 Danube Blue. It got a bit orange peely. will block out some, but overall its good enough. the modified floor pan worked out good, just have to paint the frame now.
-
Shot some paint on it yesterday. I used 20 year old Dupont Centari from my real truck. GM paint code 503 Light Green. I really like spraying centari. its not available anymore, but i shot lots of real cars with it and got very good results. Im very happy with how it went on the model. Im going to maybe cut down a few dust spots, but otherwise its super flat. Ive never used an airbrush. this is a cheap automotive touch up gun with a 0.8mm tip. its all i've ever used.


.jpg.d08f3f5143600e81926be090f5dfb936.jpg)