Chinacar
-
Posts
368 -
Joined
-
Last visited
Content Type
Profiles
Forums
Events
Gallery
Everything posted by Chinacar
-

1/12 GT40 Sebring - Miles / Ruby
Chinacar replied to Chinacar's topic in Other Racing: Road Racing, Salt Flat Racers
You're right, my mistake. Thanks for that. -
Smart guy ? Yes I design cars for a living. Currently I work for SHELBY in China.
-
Really a very clean crisp build. Exciting to see cars that were in the magazines of my youth...great job.
-
1/12 GT40 Sebring - Miles / Ruby
Chinacar replied to Chinacar's topic in Other Racing: Road Racing, Salt Flat Racers
Thank you gentlemen -
I'm originally from Windsor (barely Canadian), but now living in Shanghai China working for Shelby American!
-
Thanks Ken!
-
I'm inpatient when I paint, so I usually have two going at the same time. I work on one while the other is drying...?
-
AMT Ford 1928 delivery.
Chinacar replied to happy grumpy's topic in Model Trucks: Pickups, Vans, SUVs, Light Commercial
Very nice clean build. -
Since the movie, I've been intrigued by the Preston Tucker story. He was a lot like Elon Musk in the day. Right idea wrong time.

- 19 replies
-
- 12
-

-

-
80's IMSA Mustang
Chinacar replied to Chinacar's topic in Other Racing: Road Racing, Salt Flat Racers
Thanks gents! -
This was a great concept I remember it well. Nice job on this one, I've got the 1:18 die cast version.
-
What did you see on the road today?
Chinacar replied to Harry P.'s topic in General Automotive Talk (Trucks and Cars)
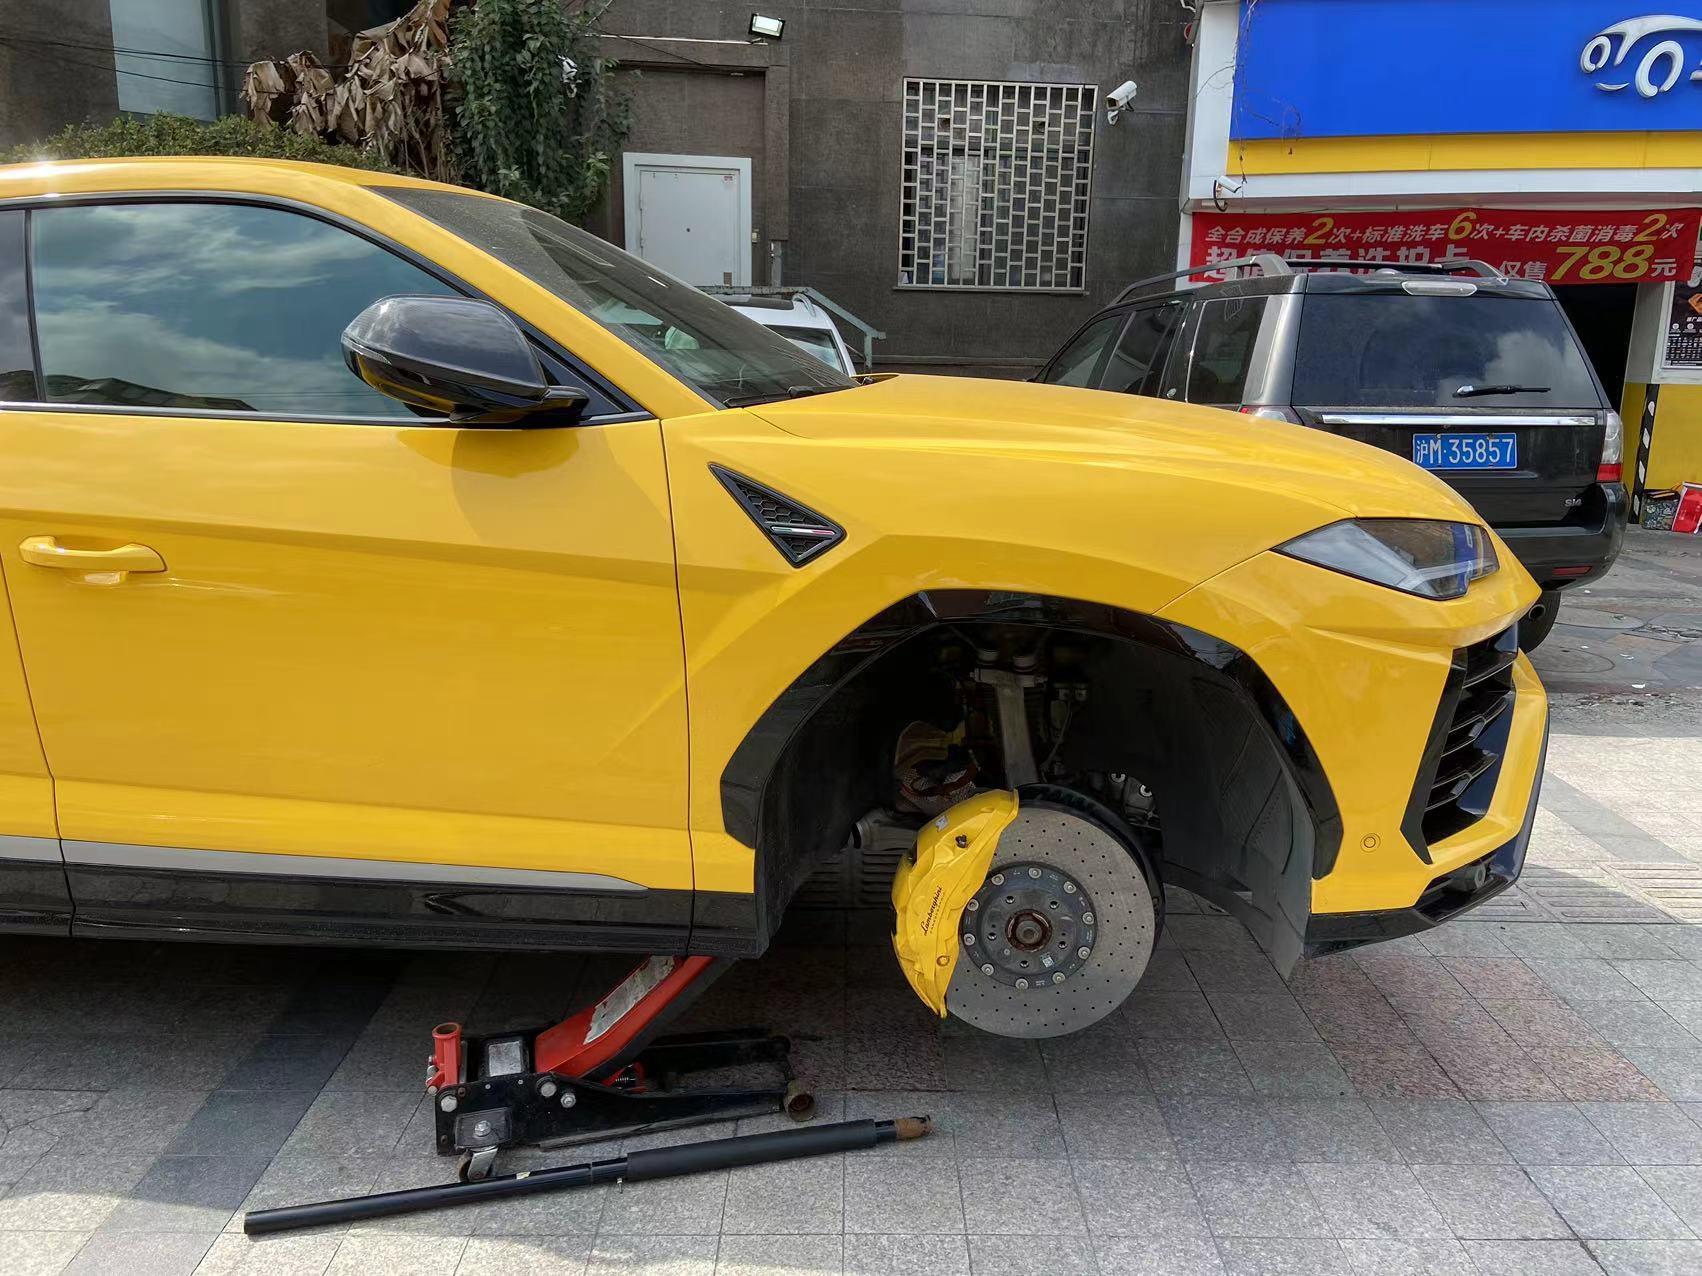
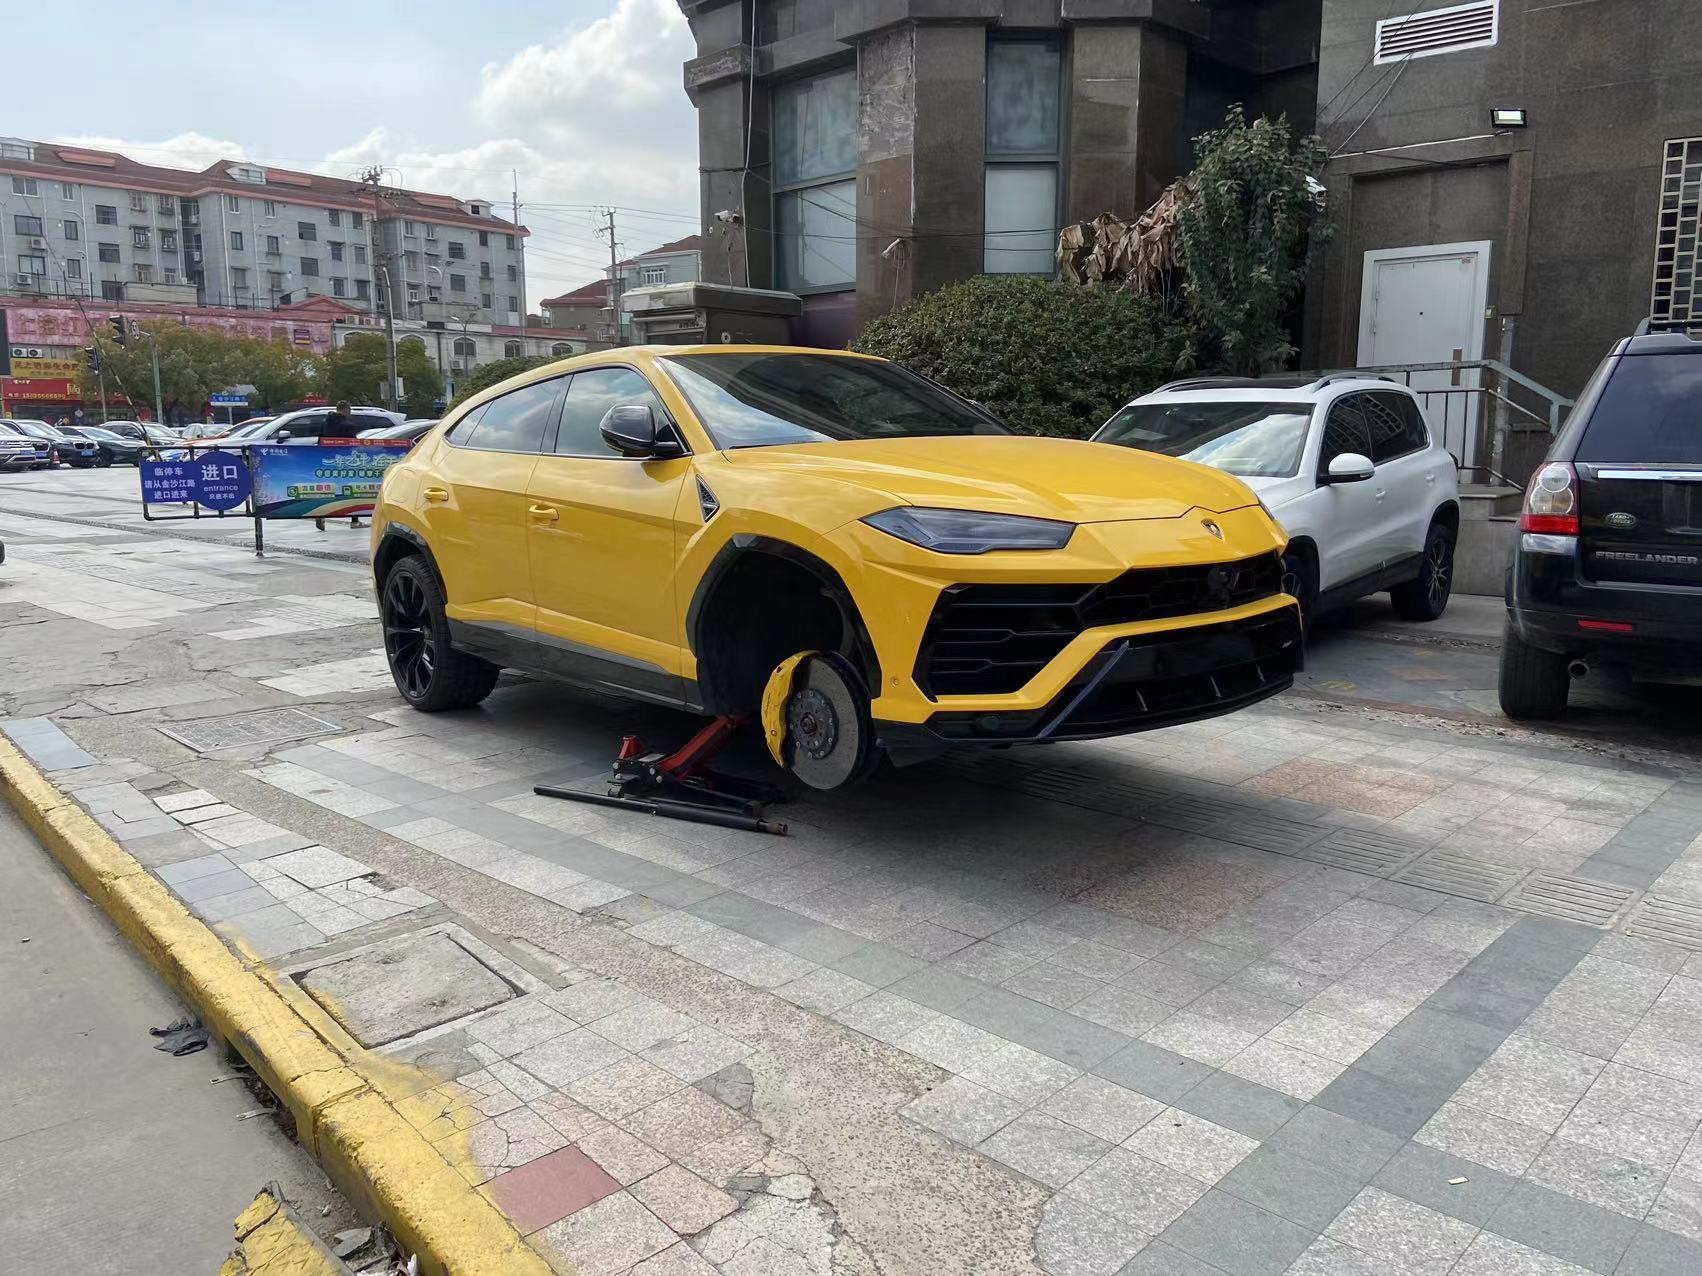
Lambo getting a tire fixed...look at the size of those brakes!
-
Looks great! Beautiful black paint. Everything about it looks like it just rolled out of the showroom in 1981.
-
80's IMSA Mustang
Chinacar replied to Chinacar's topic in Other Racing: Road Racing, Salt Flat Racers
Please share. Currently all I do is spray on a coat of Mr Hobby high gloss clear over the decal sheet. Then I carefully close cut all of the decals up. Some of the larger decals I cut up into smaller pieces especially around door cuts and hood/trunk splits. I align them when I put them on the car. I use Mr Hobby Mr Mark Softener during application. After the decals have dried for a day or two I apply a tack coat of Mr Hobby high gloss clear, followed by a couple of heavier coats. During the first coat if the decal lifts I carefully apply PVA (white glue) with a toothpick after the clear has dried and settle it back down. I don't use Tamiya clear anymore although I feel it's a higher gloss than Mr Hobby, because I've had decal slivering issues under the Tamiya. -
Thank you all...
-
Welcome Tony!
-
80's IMSA Mustang
Chinacar replied to Chinacar's topic in Other Racing: Road Racing, Salt Flat Racers
I saw a post in another forum that there are aftermarket decals available for these kits. This is great because you won't have to deal with 40 year old decals! -
Thank you gentlemen!
-
2024 Detroit Autorama Ridler winner
Chinacar replied to bobthehobbyguy's topic in General Automotive Talk (Trucks and Cars)
I guess looking at the 8 finalists it was probably the one that should have one. The other Vette had a better stance but there was something goofy with the side scallop that I didn't quite understand. It was a different toned red or maybe a weird surface change. And overall not seeing the other interiors Kingdik did a decent job on the inside, except for the square steering wheel in front of a round instrument cluster...;-)
-
Hi everyone, I've been on the board for about two months and I'd like to take the opportunity to introduce myself. I'm originally a Canadian who lived mostly in the US though now I've been stuck in Shanghai for the past 10 years working for Shelby American. Previously I'd been with Ford in Detroit and also spent time with a Chinese car manufacturer. I've been involved with cars for most of my life by designing real ones. I've worked to some degree on about 7 real life concept cars and many production cars. I'm glad to join this forum an connect with like minded people who are passionate about cars!
-
Nicely done. I want to start building commercial aircraft models. This seems like a good one.
-
80's IMSA Mustang
Chinacar replied to Chinacar's topic in Other Racing: Road Racing, Salt Flat Racers
Thanks Jim! -
80's IMSA Mustang
Chinacar replied to Chinacar's topic in Other Racing: Road Racing, Salt Flat Racers
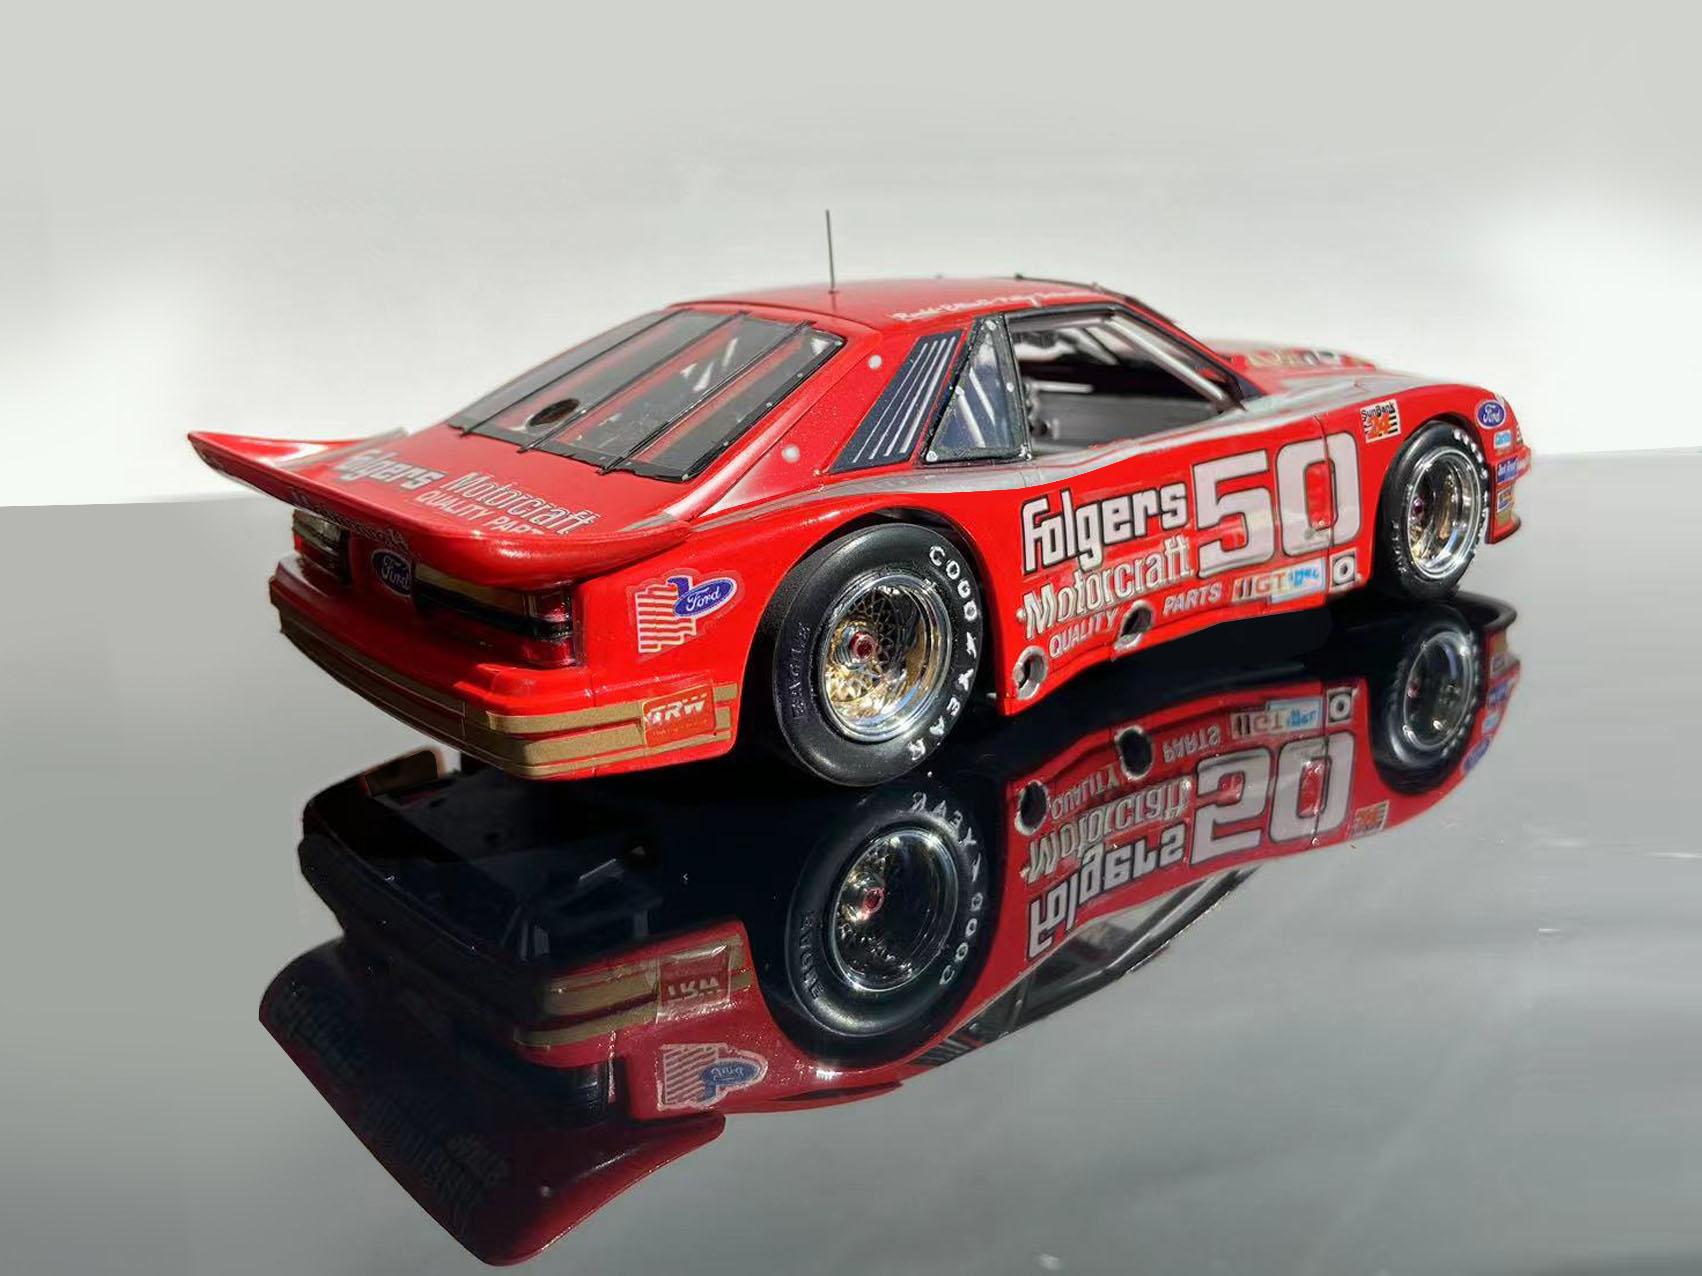
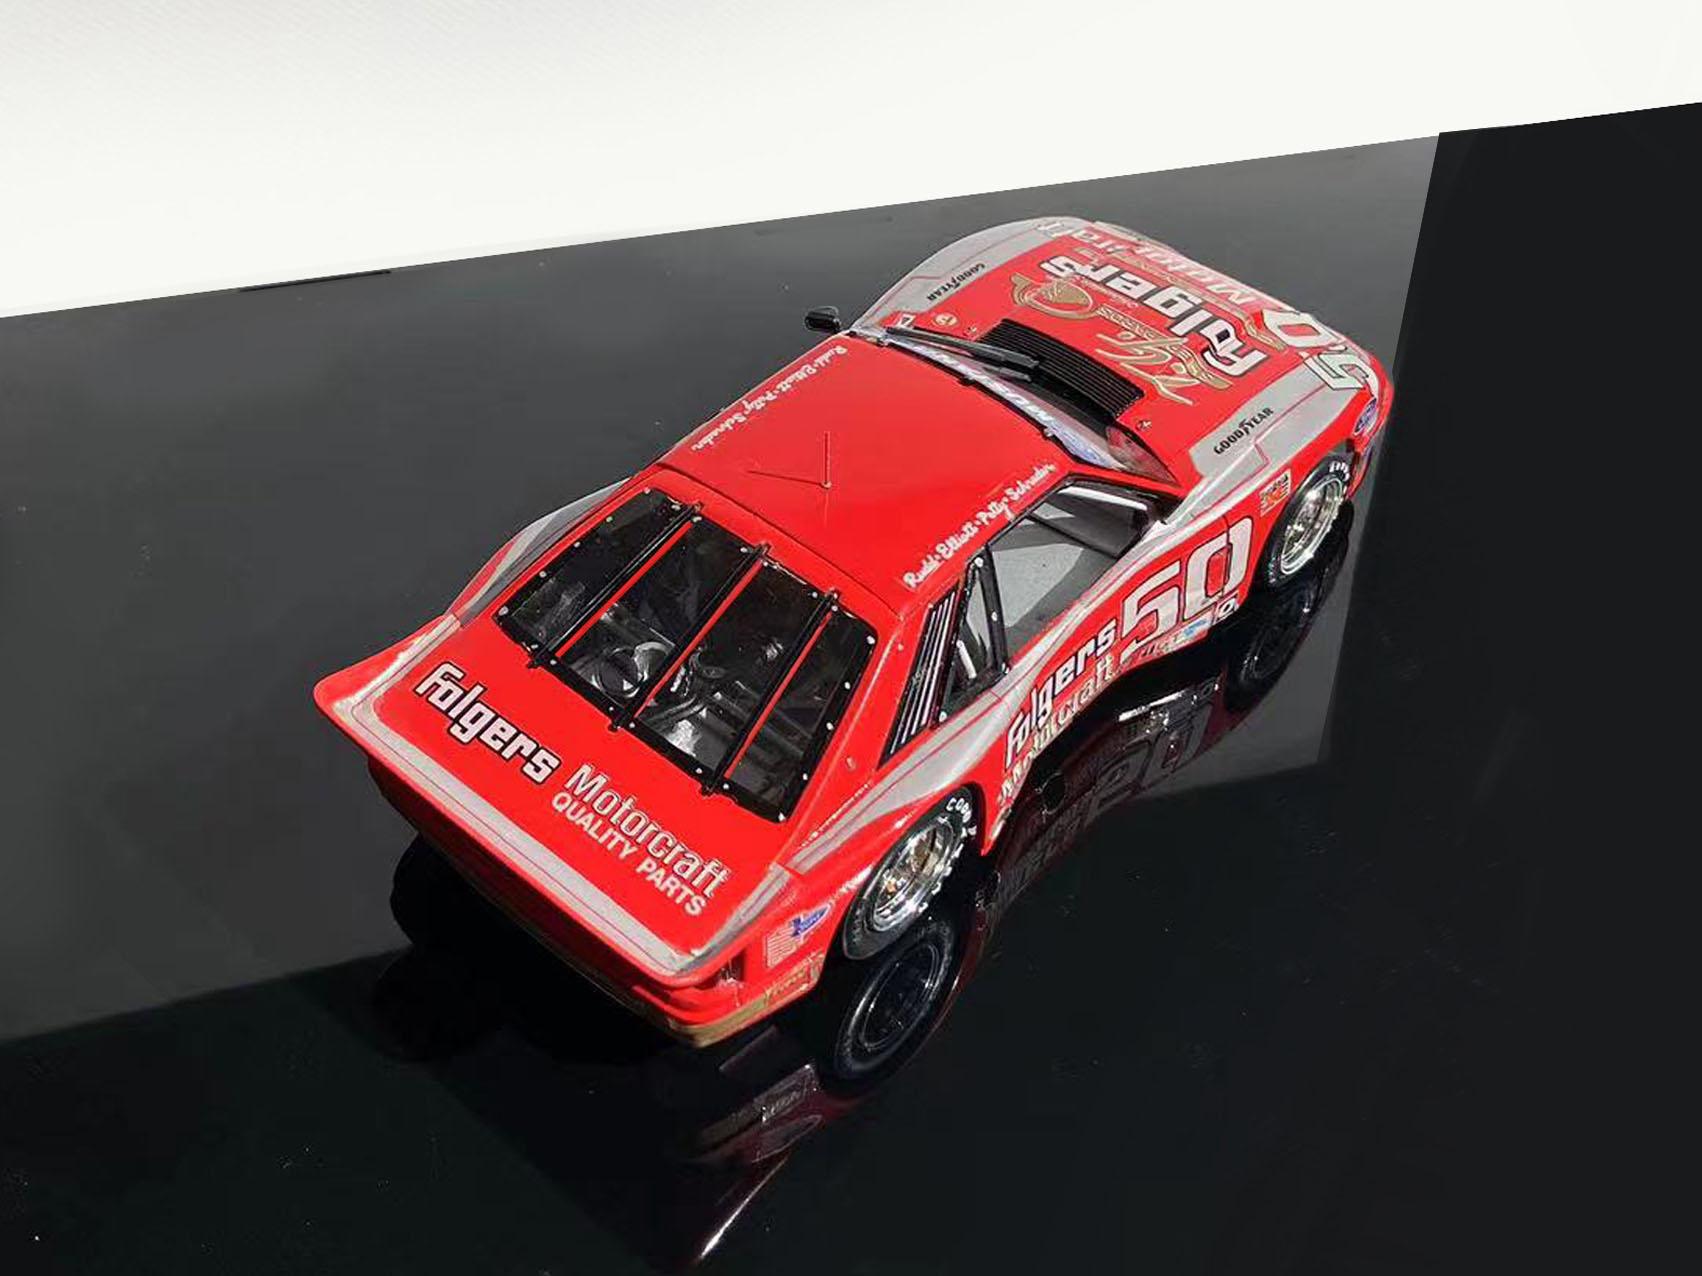
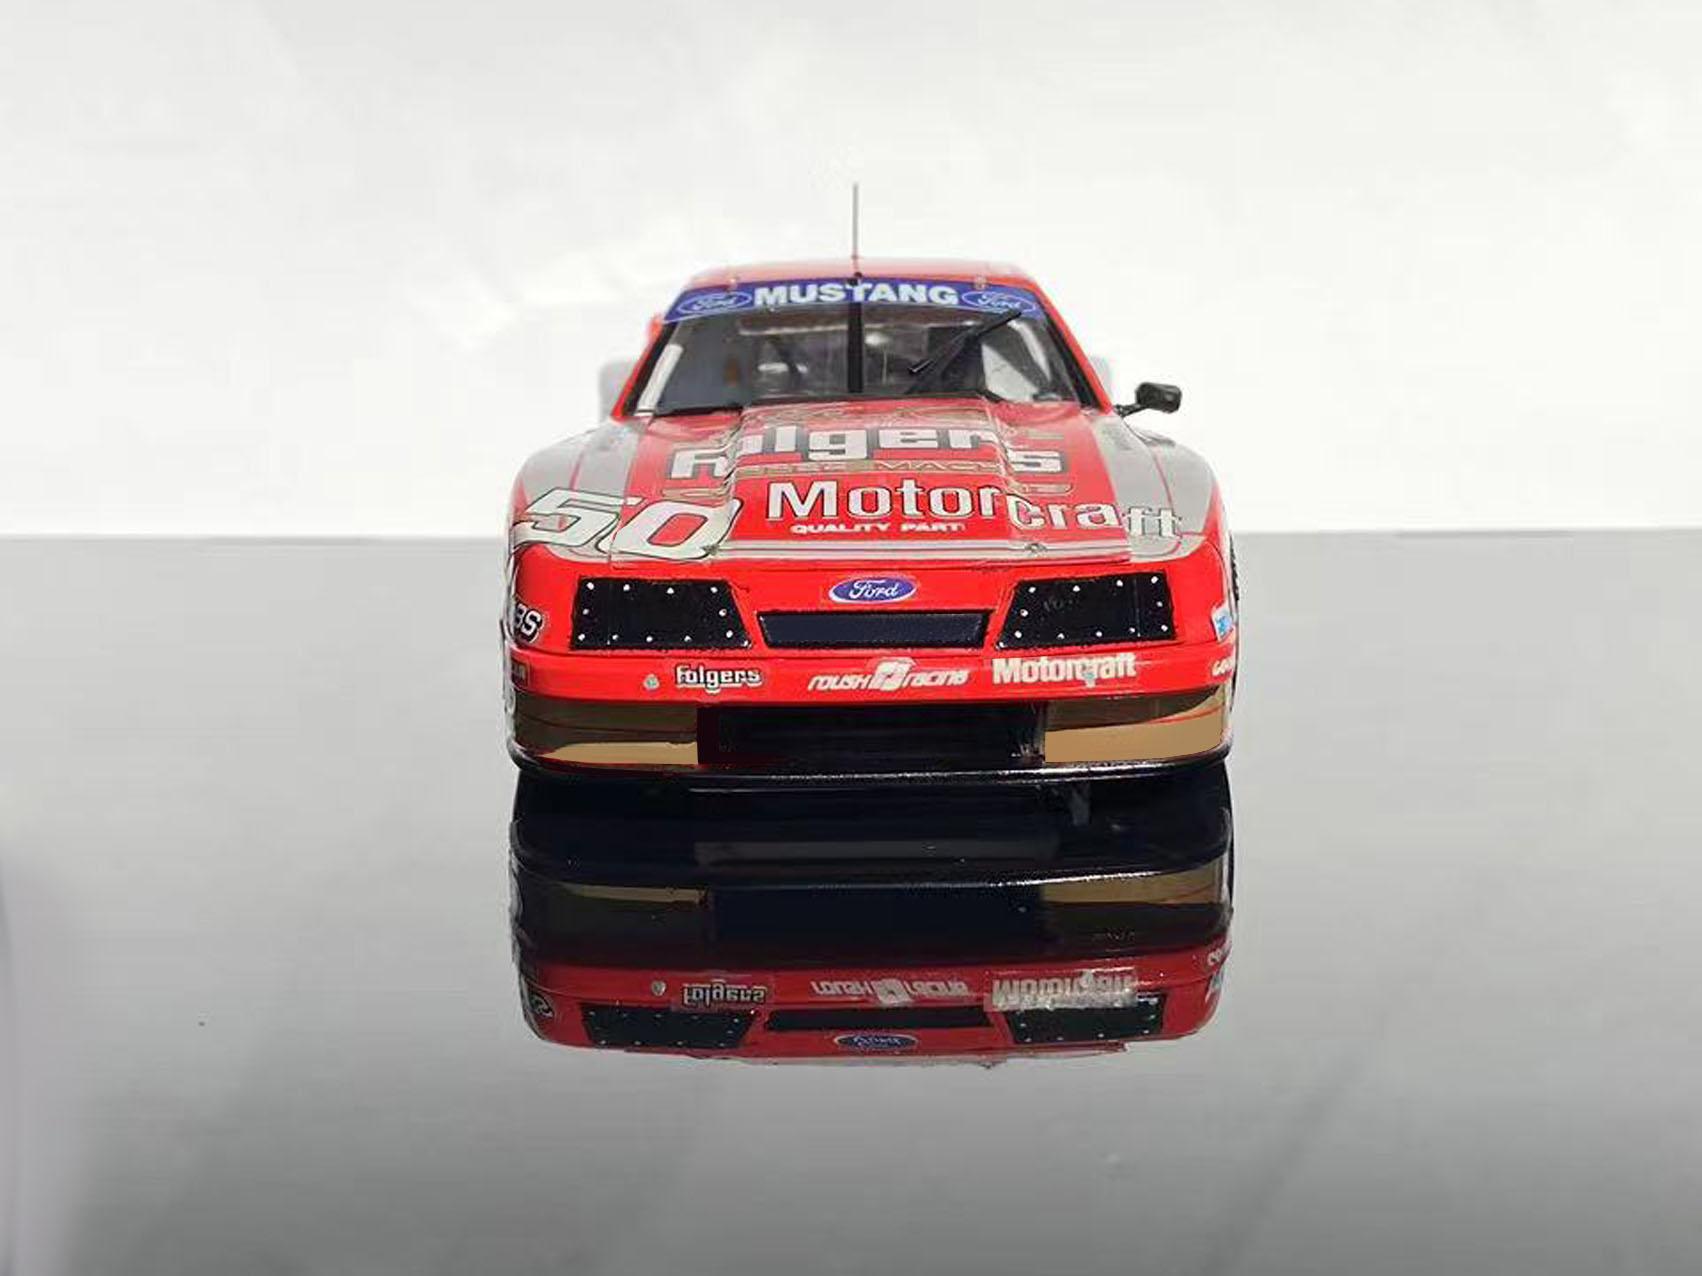
Clean up the flash around the clear parts. Do a test fit of all the windows before gluing them in. Also the fuel filler that goes through the rear window hatch hangs in space, so test fit the glass and body first before gluing the filler and hose to the fuel tank. The front part of the rollbar was warped, so it was easier to cut and reglue to reposition it rather than try to bend it back and completely screw it up. The rollbar pieces in general are fragile so you may find some are warped, so I would do a bit of test fitting. The body sits high over the wheels, especially in the rear. So making sure everything in the rollbar department is sitting down snug against the chassis is important. The engine assembly pushed the hood up, so with this too I would make sure that the parts stack is tight with no paint, glue or chrome making clearance worse. This is the second one of these kits that I've built with the JPS black one being the first about 20 years ago. They really build into a nice kit, though the chrome is a bit too heavy and bright. You can always hit it with Mr Hobby Clear Matt or strip and repaint it. Good luck! -
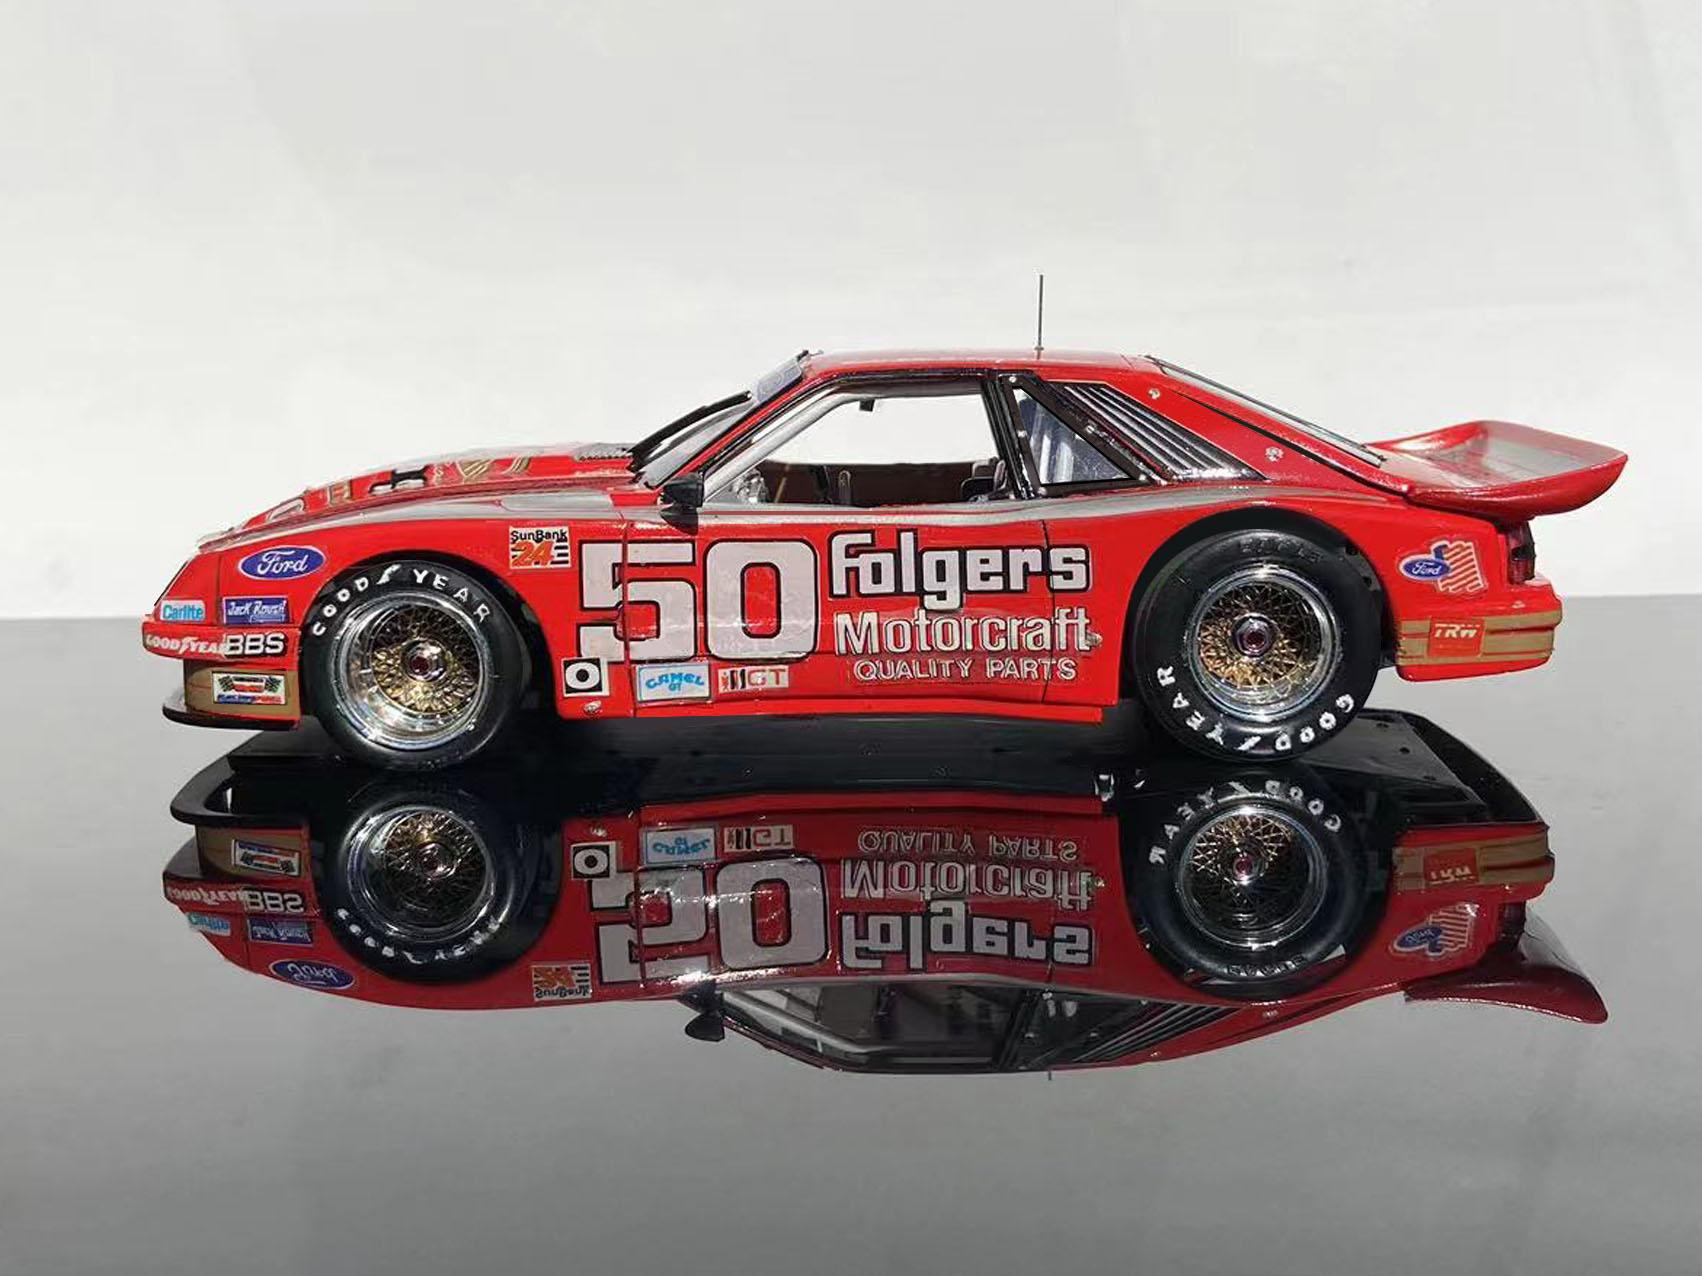
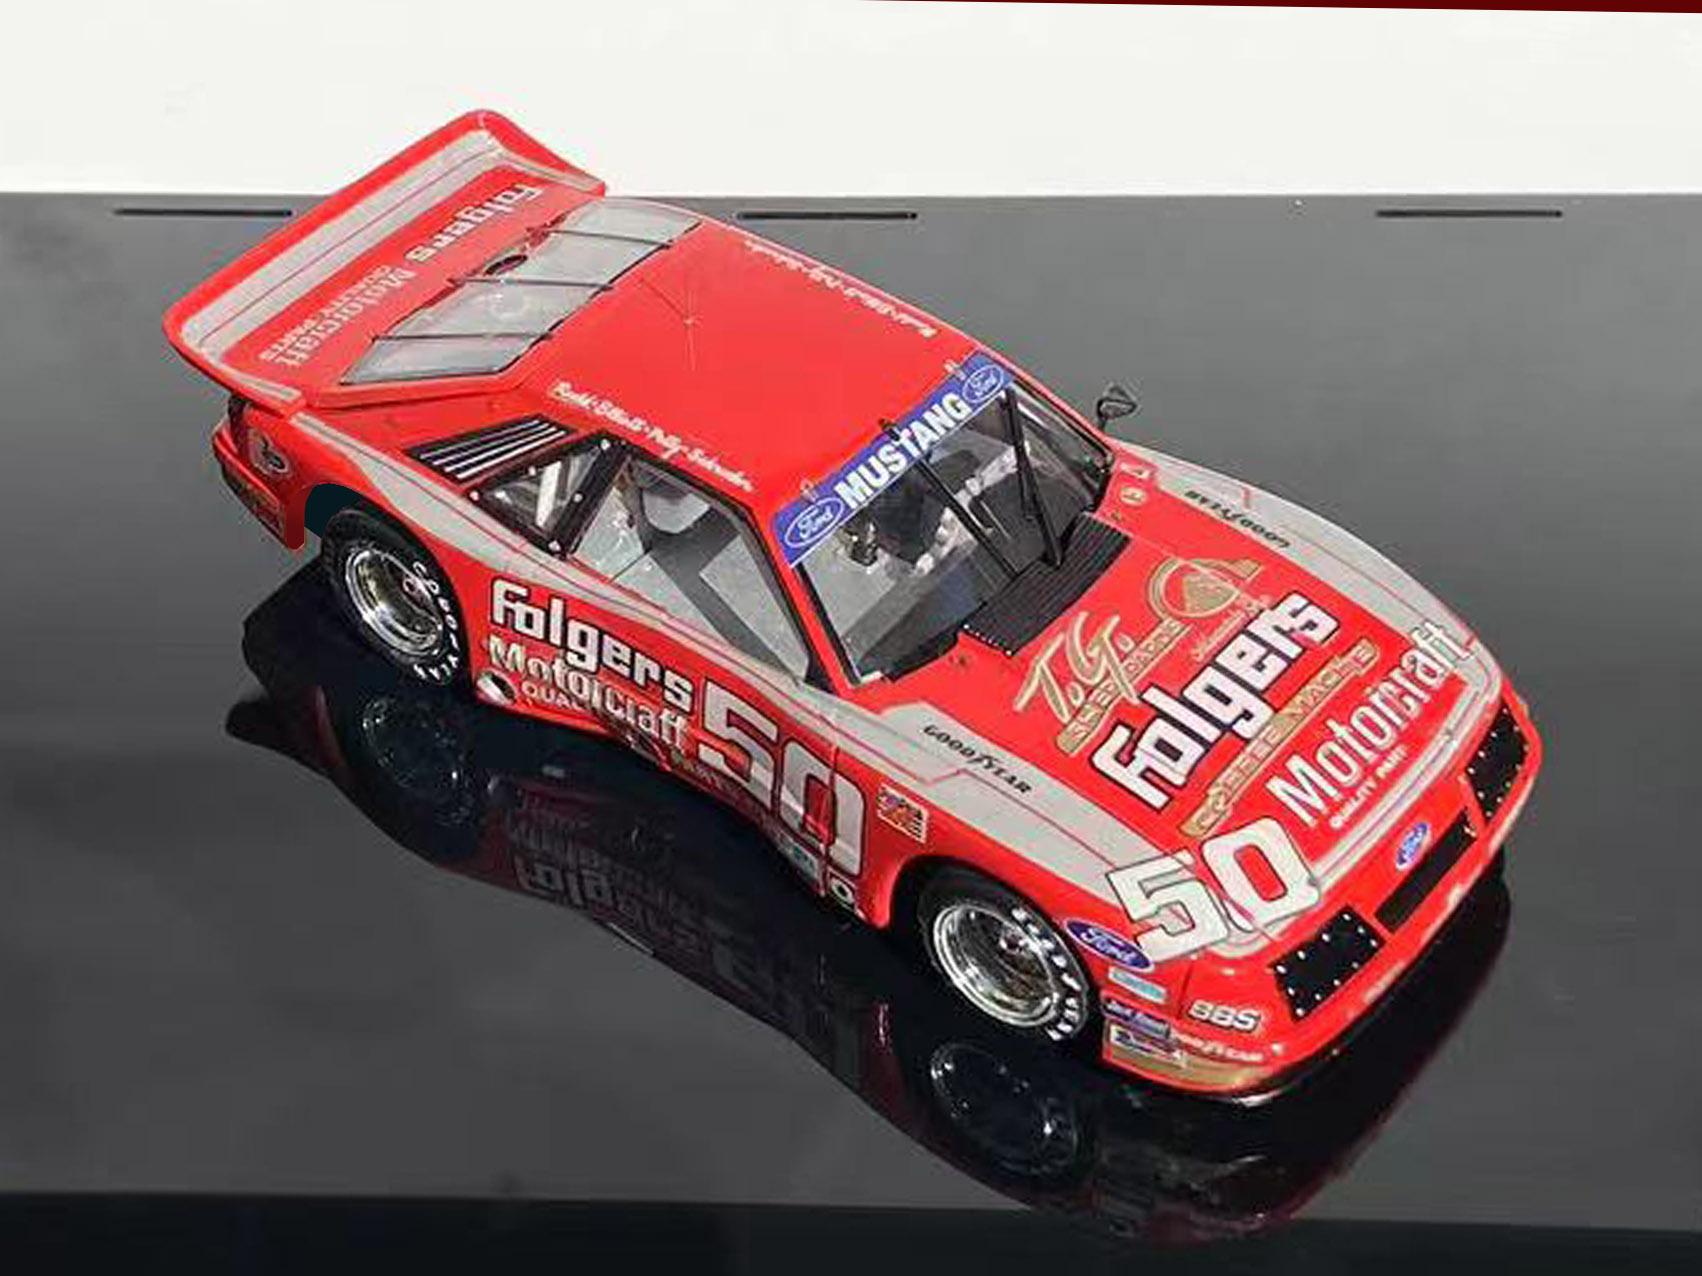
My first completed build of 2024 is Revell's 1985 IMSA Mustang ...Built from the box applying the original, nearly 40 year old decals! Expecting the worst, I was fortunate that Tamiya Decal Set and a lot of lip biting had worked. I used Tamiya and Mr Hobby paints and primers throughout the build. Two coats of Mr Hobby Super Clear applied from a rattle can finished off the body. I also added a thin gauge wire to represent a roof antenna. After the build I came across some reference photos and noticed that the real car had a NASCAR style window net. I think I'll apply one in the future. Enjoy the photos.
- 30 replies
-
- 21
-
.jpg.843c9ab2a3a5c4f1d6628bb5ee082f25.jpg)