OldNYJim
-
Posts
249 -
Joined
-
Last visited
Content Type
Profiles
Forums
Events
Gallery
Everything posted by OldNYJim
-
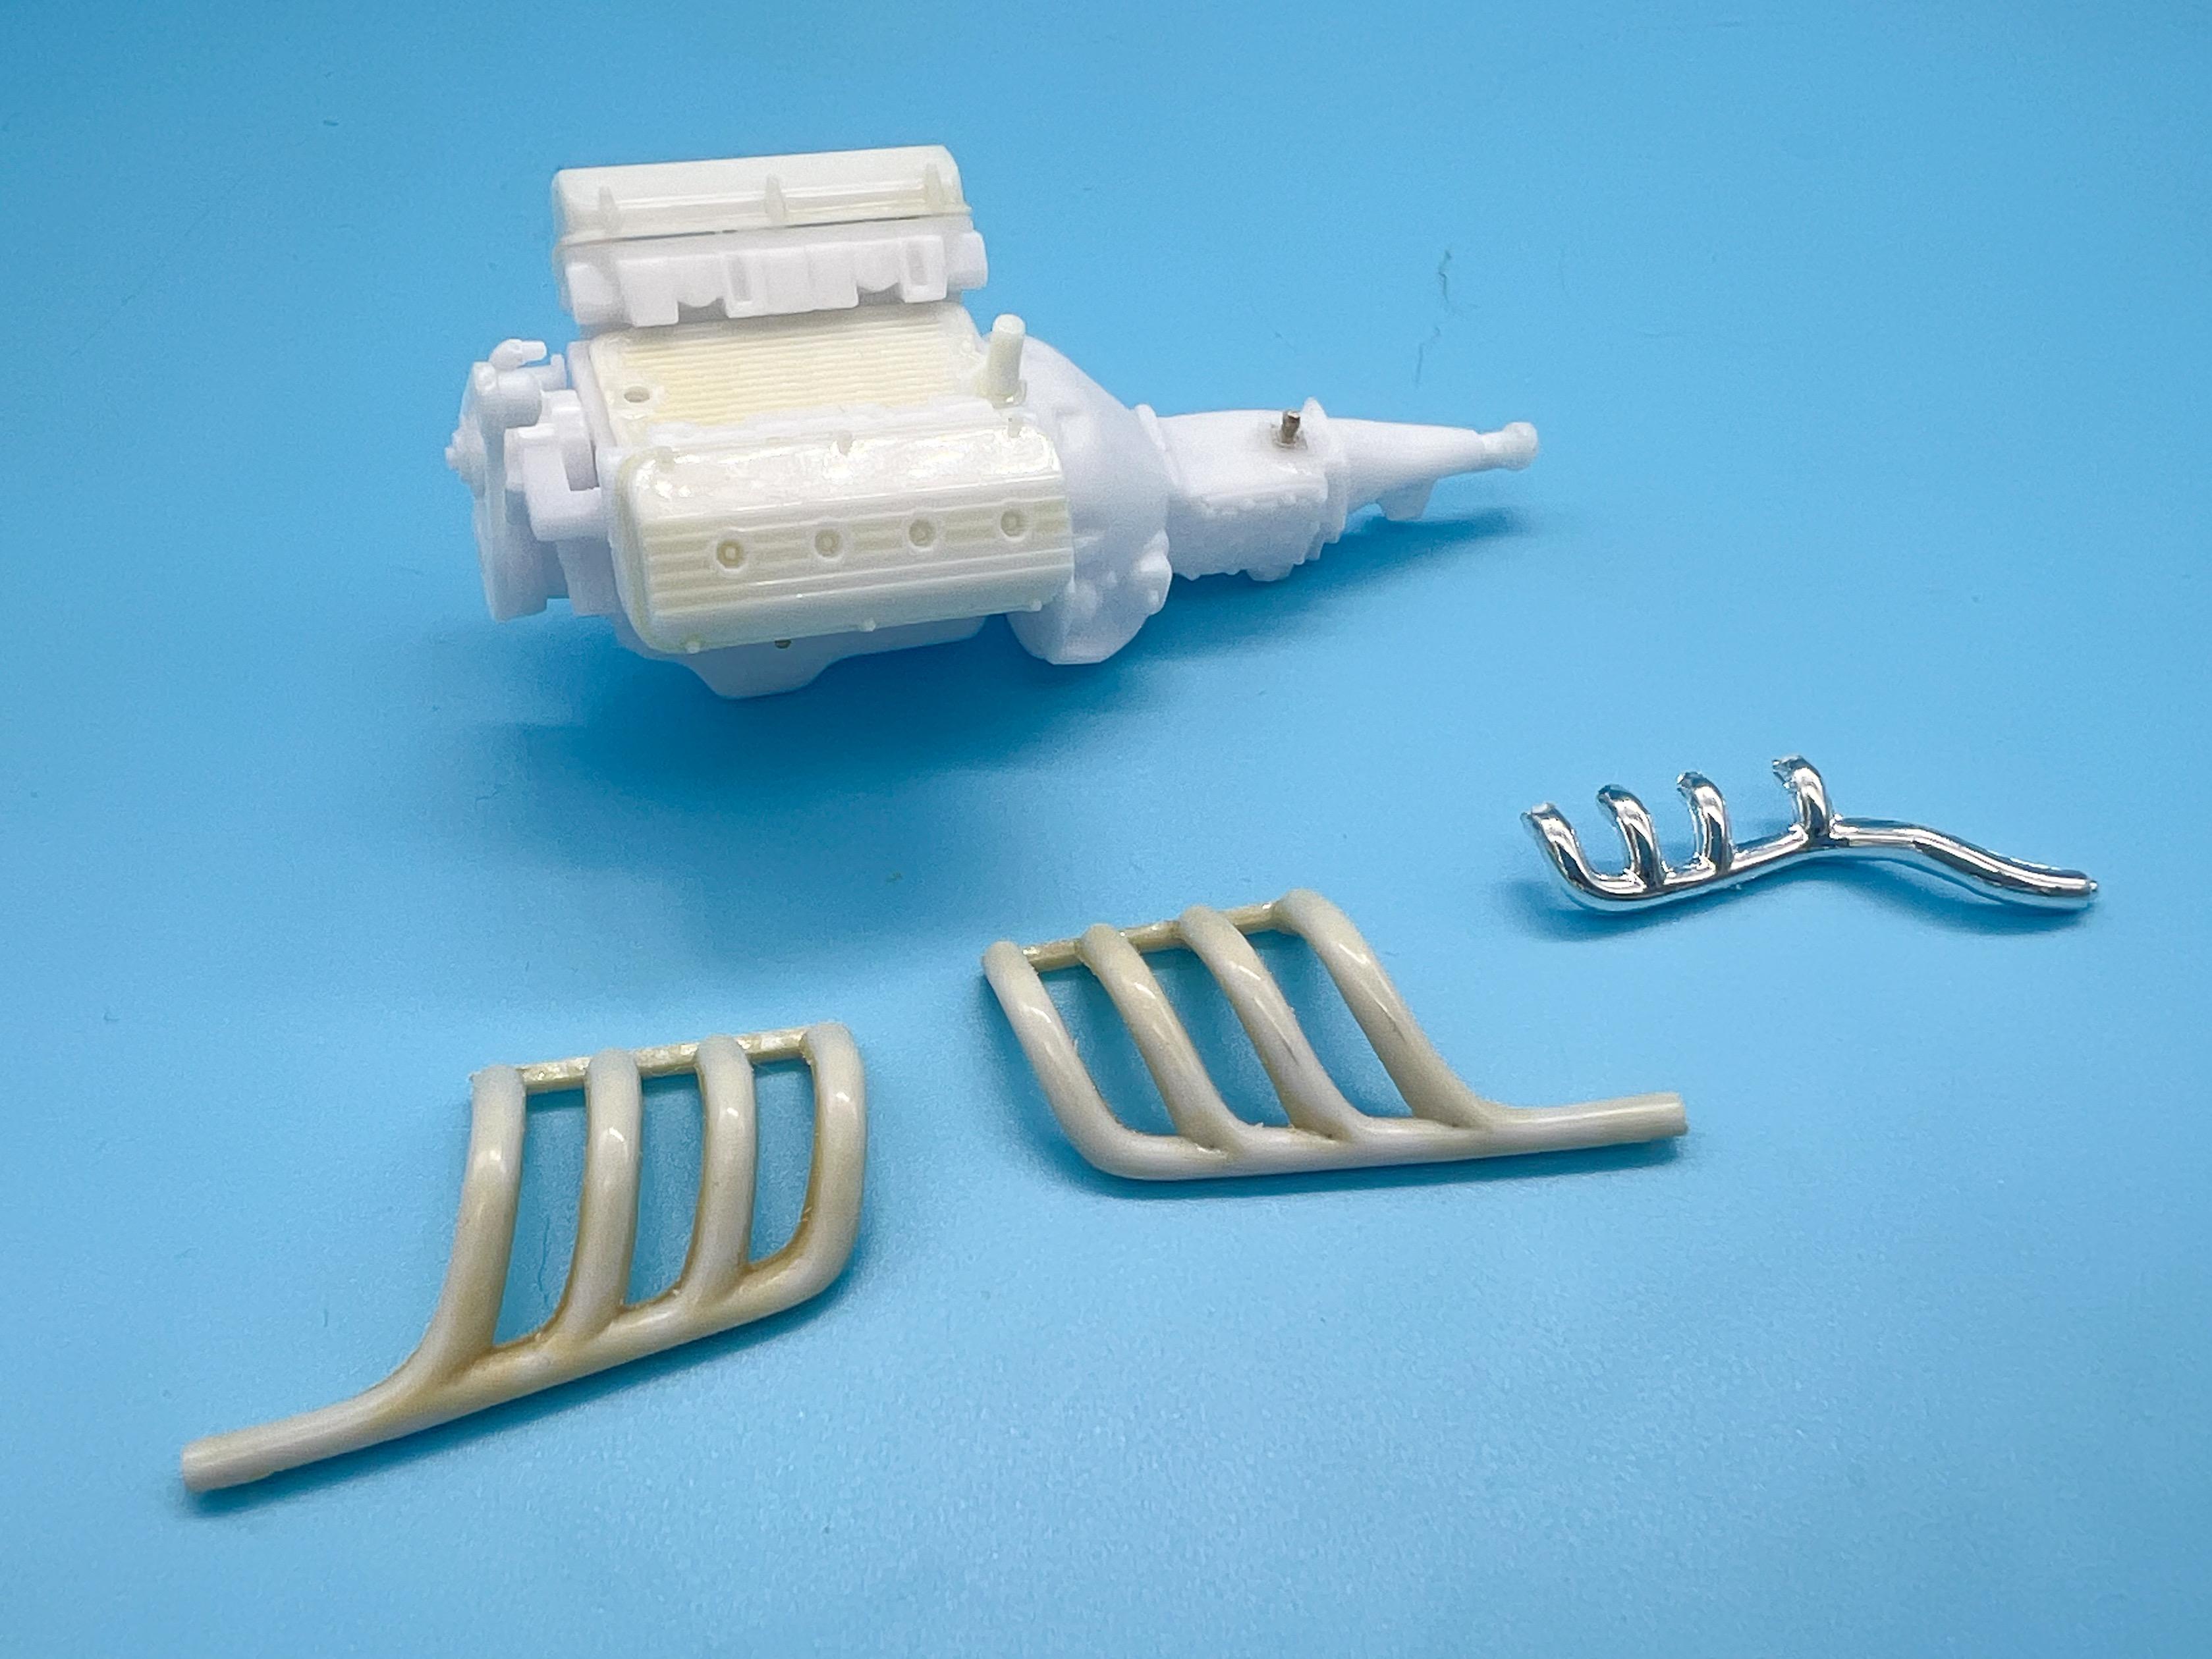
Thanks Bil! I tweaked it a little this evening - not quite done with that particular project yet… Absolutely! And it’s fun because we get to mess with a perfectly good part that would’ve been fine just as it is ? I think that 3 window version may even be a THIRD variation ?. Exactly what I found too - a lot can happen to a car in 90 years…tough to guarantee accuracy…luckily I have some wiggle room - thanks for the feedback Graham! A little more work tonight - I’m in that annoying prime/paint/clear cycle that means you’re doing a lot, but nothing finished…started laying some clear on the frame though… A frame is about a minus ten out of ten on my scale of fun things to polish, but I want a shiny frame so I’m giving it some careful attention… Next major component that needs paint is the engine, so prepped all of those bits this evening and got them in primer ready for inspection and tweaks tomorrow: Havent totally decided on engine color…I need to research what colors these early Hemis came in to see if anything jumps out at me, or if not it’ll be black or bare metal…probably black or the two… I’d like to run a magneto on this, just for some vintage cool - printed a too-modern MSD magneto this evening: Which I’m going to tweak to be one of these, I think: And…that’s another evening at the bench! Thanks for the nice feedback so far, everyone - appreciate you taking a look! More soon…

-

C2 custom Corvette Showrod project from 1/43 junkers
OldNYJim replied to ismaelg's topic in WIP: Model Cars
This would be clean impressive work at 1:24th scale…let alone half that! Nice job - keep going!! -
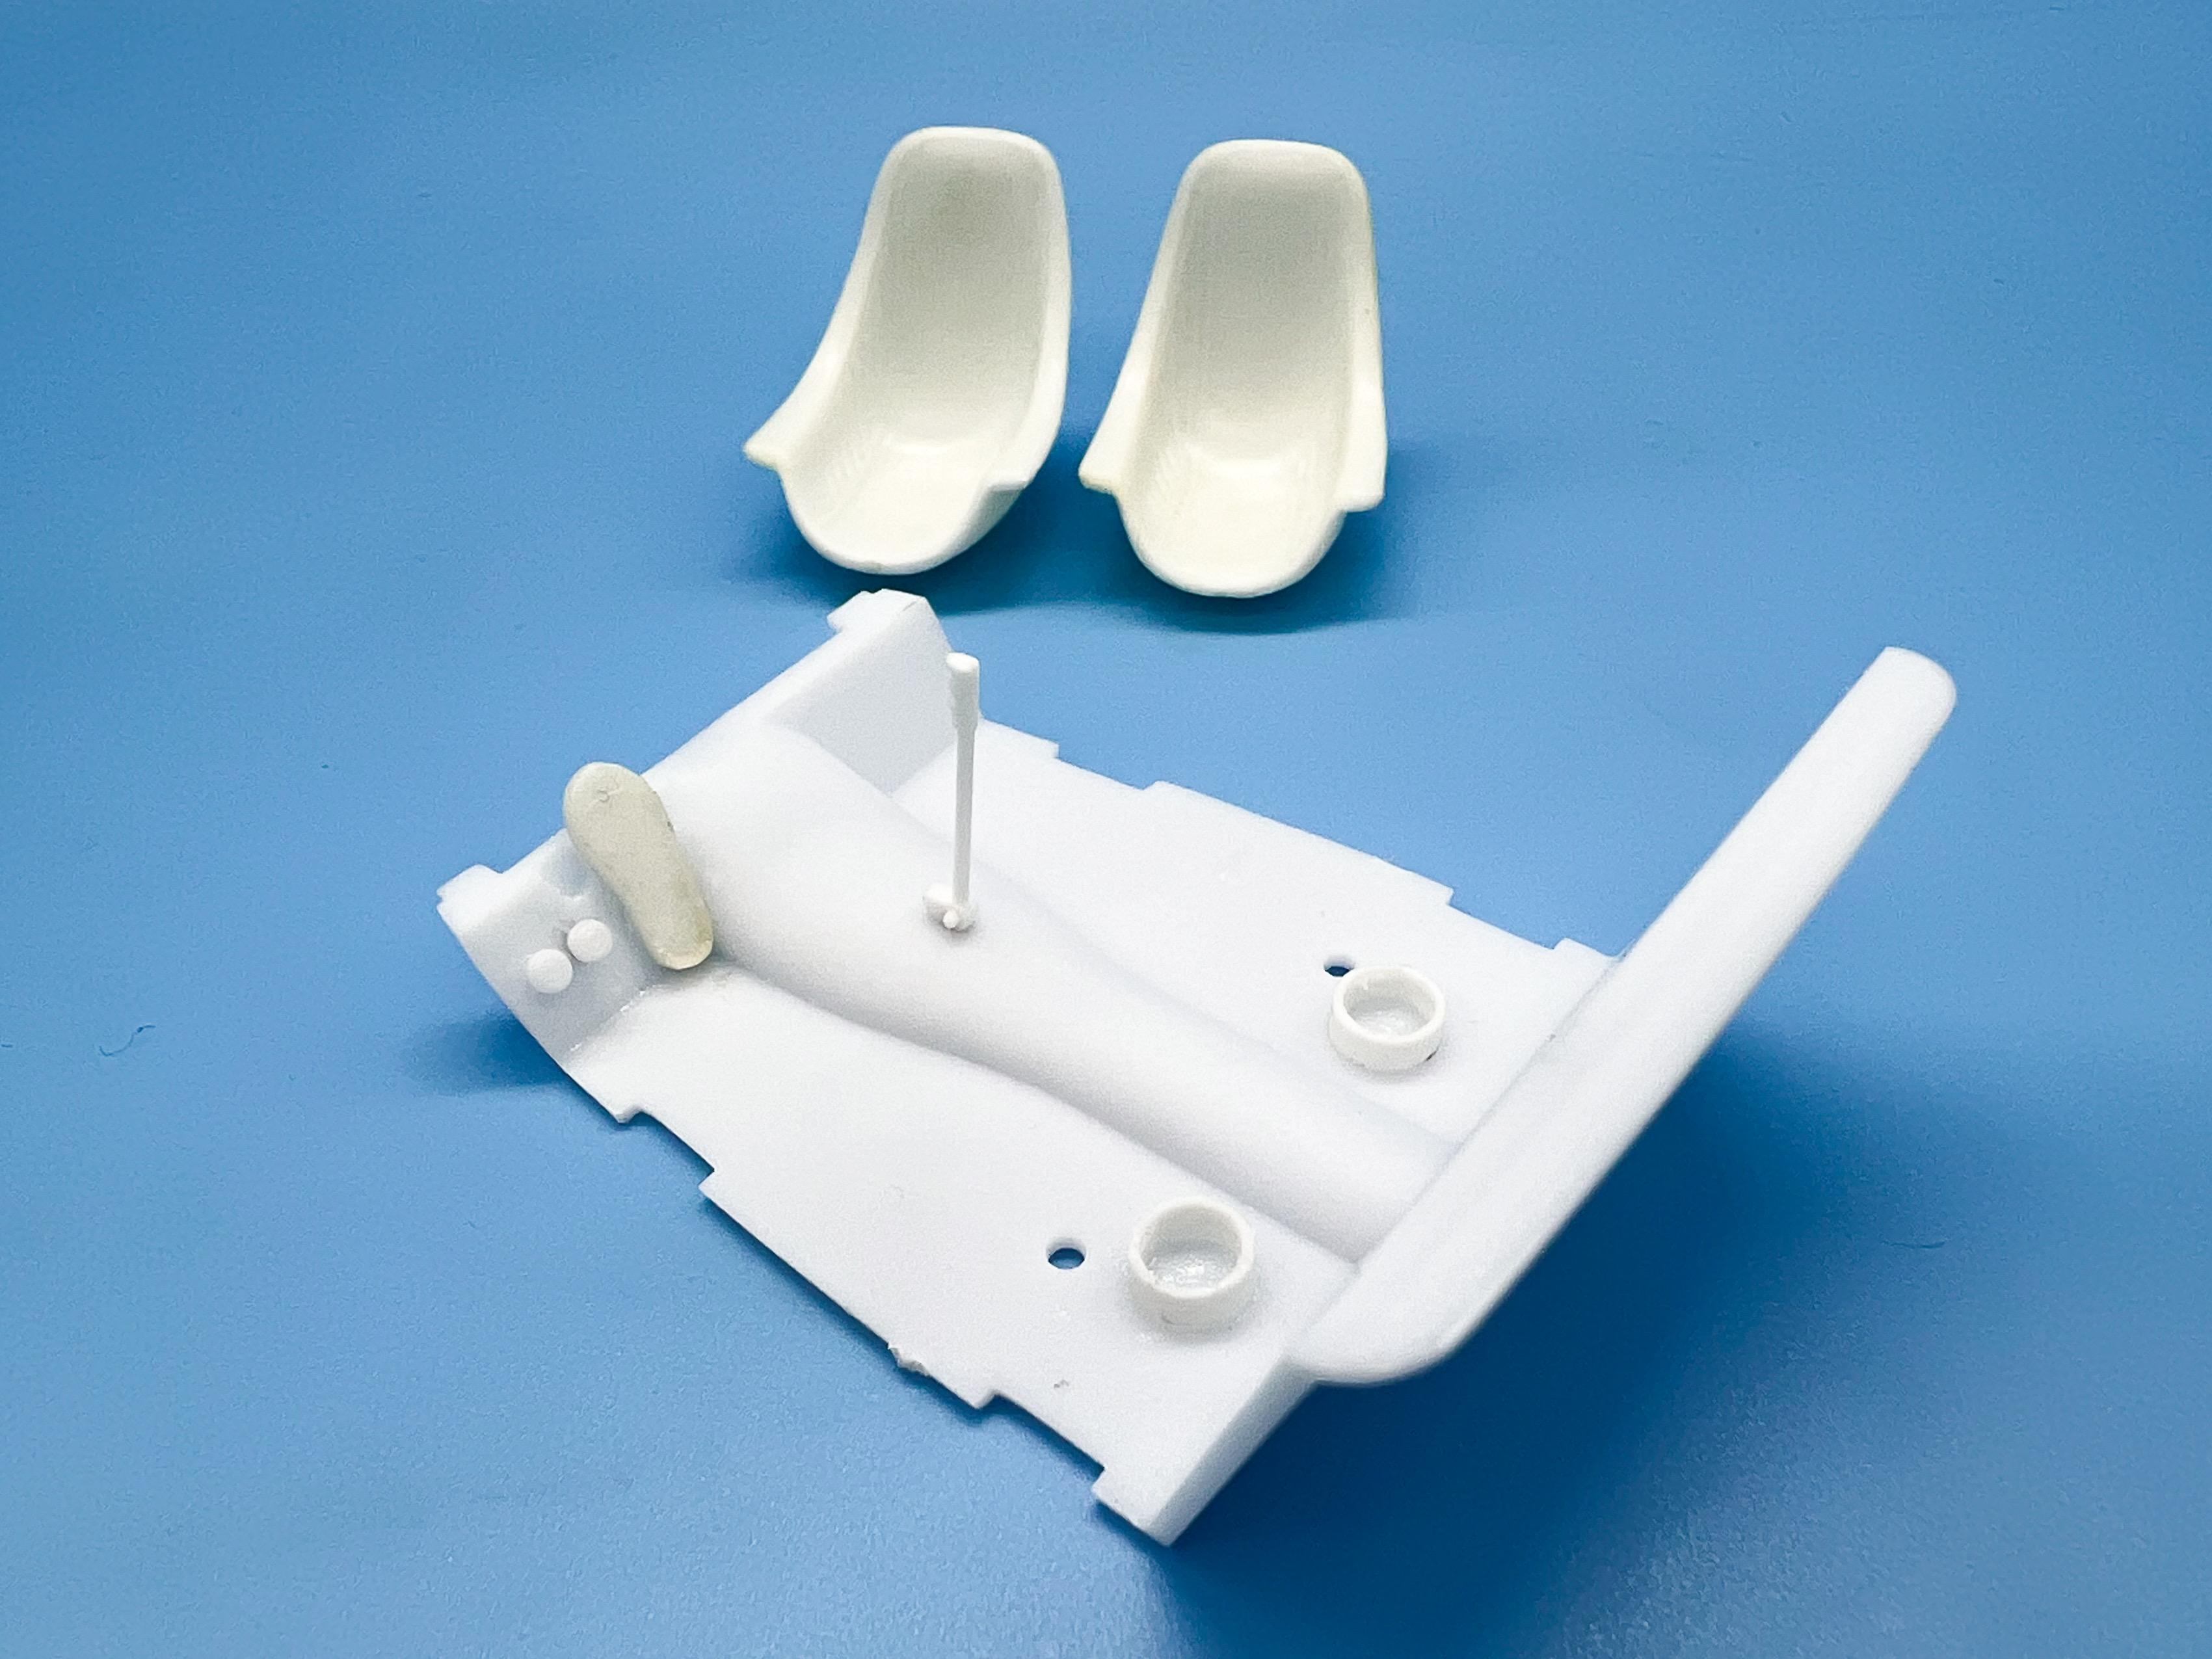
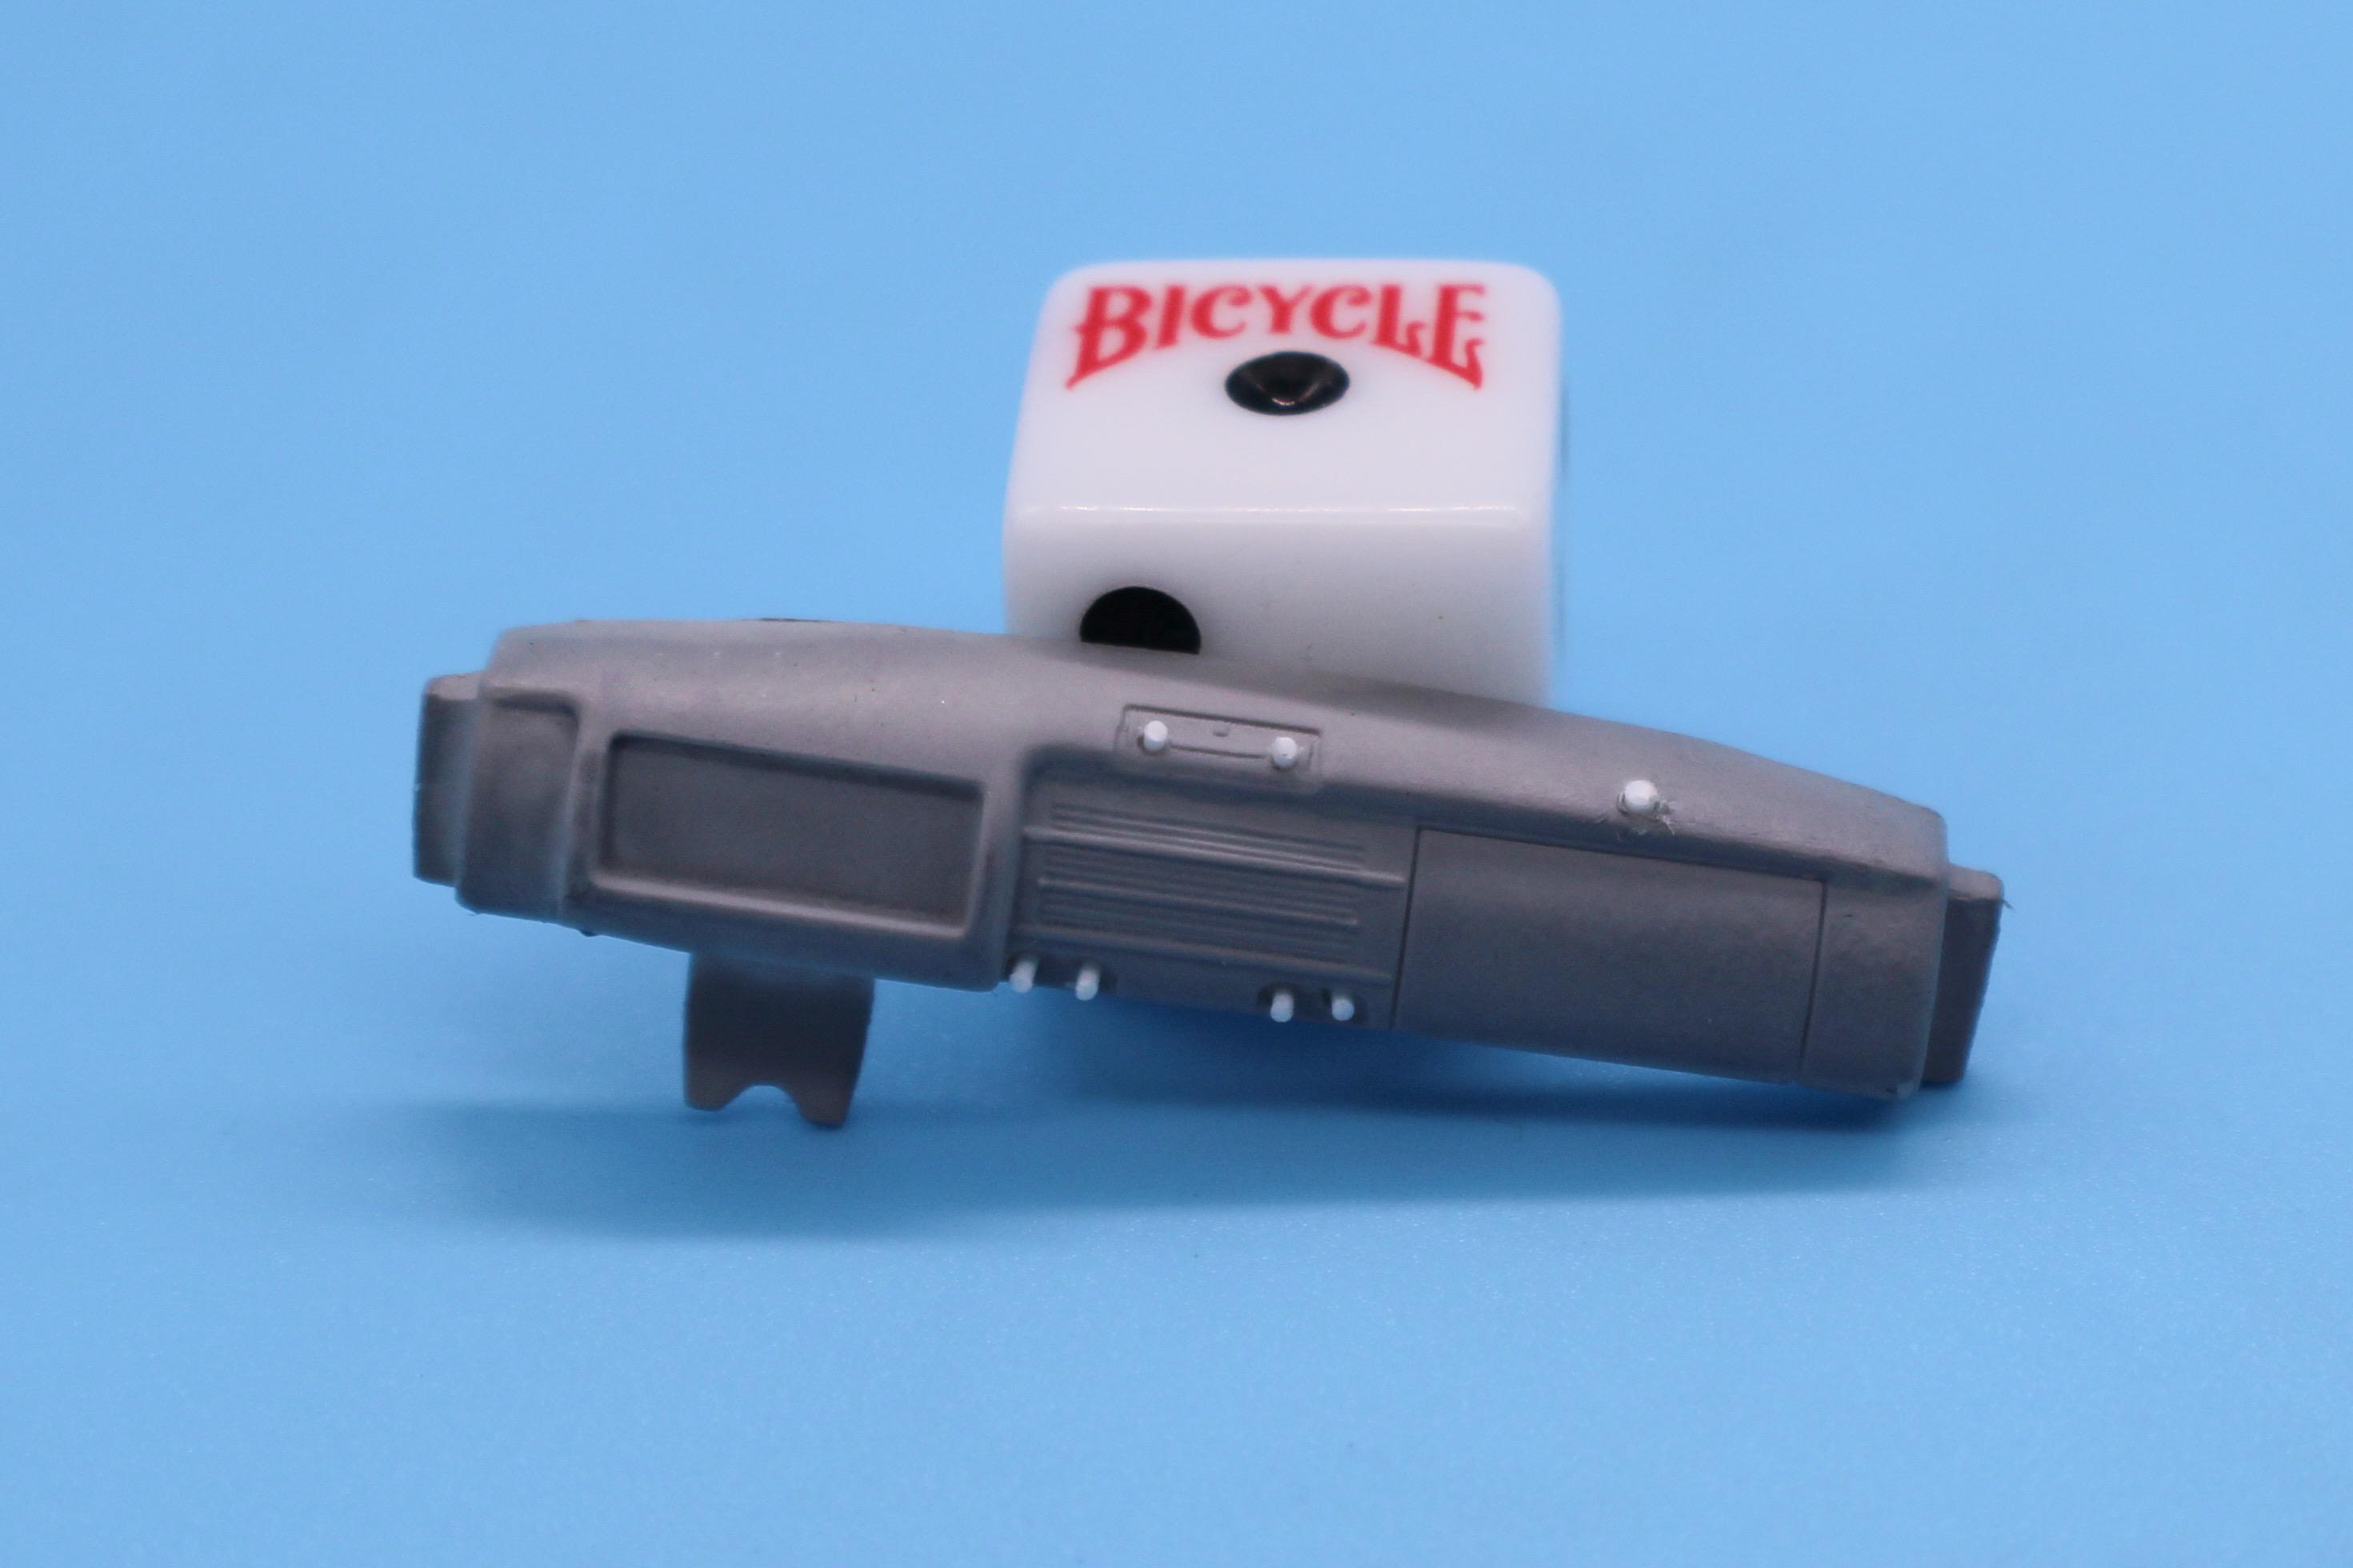
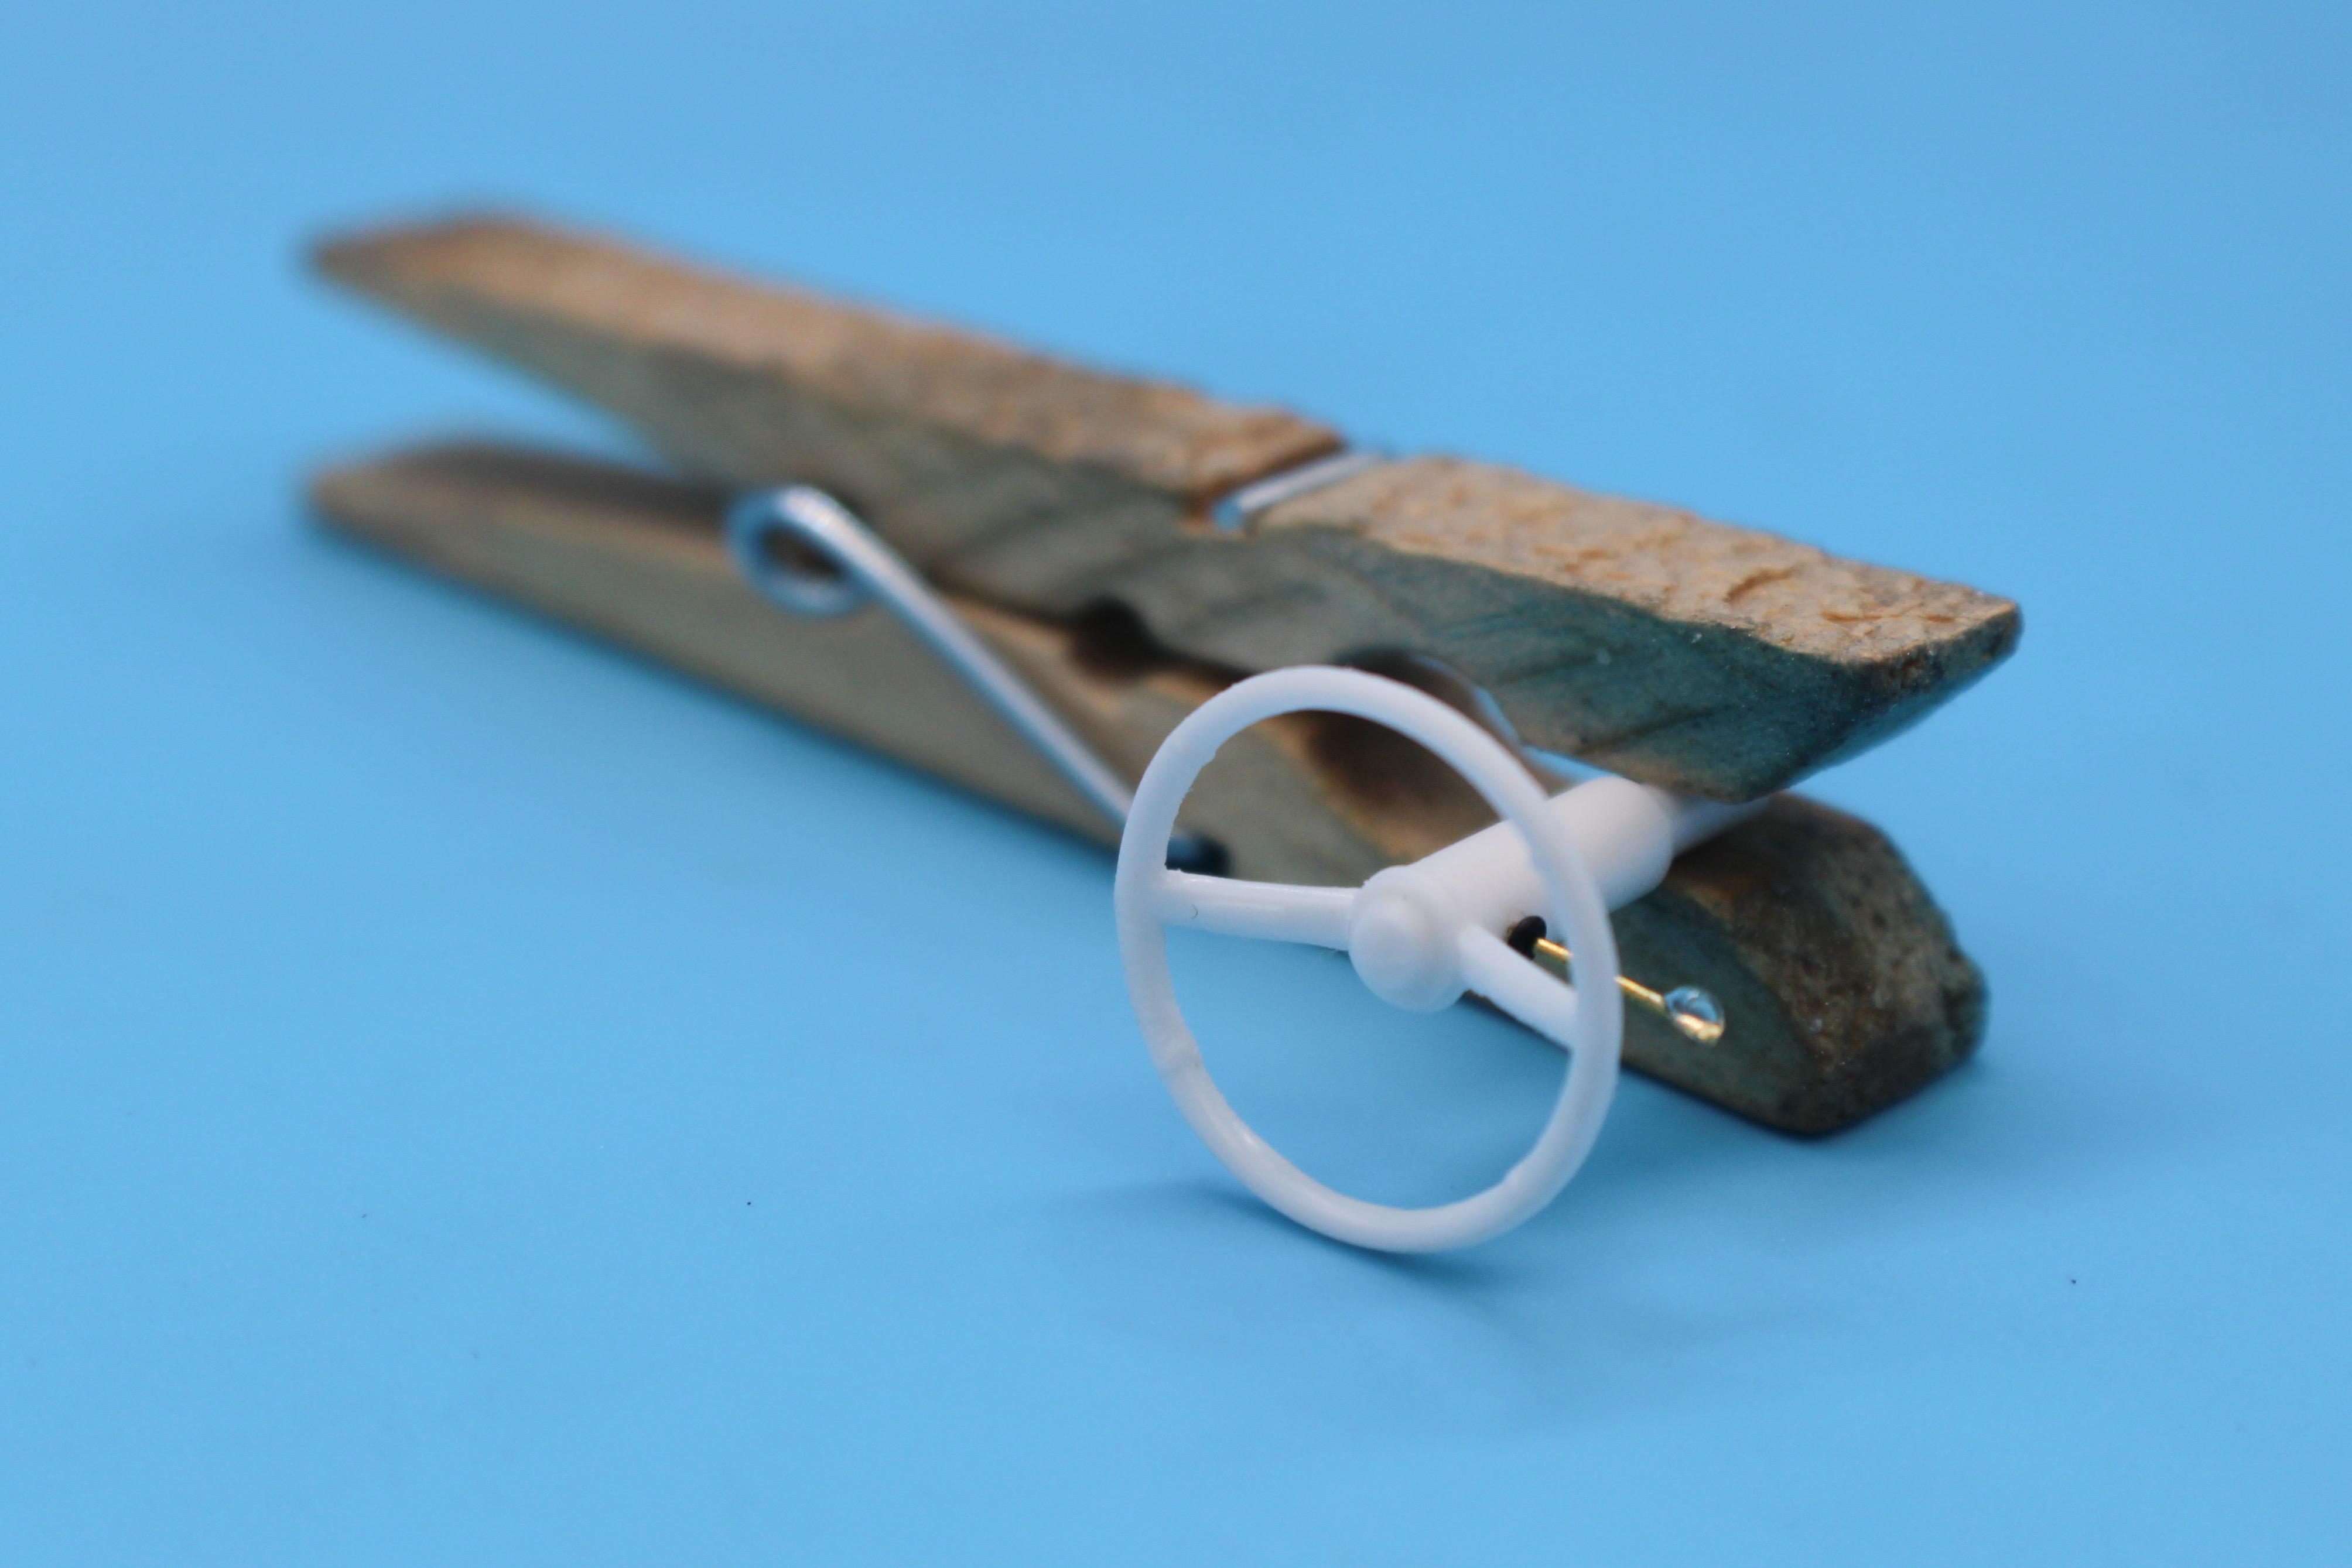
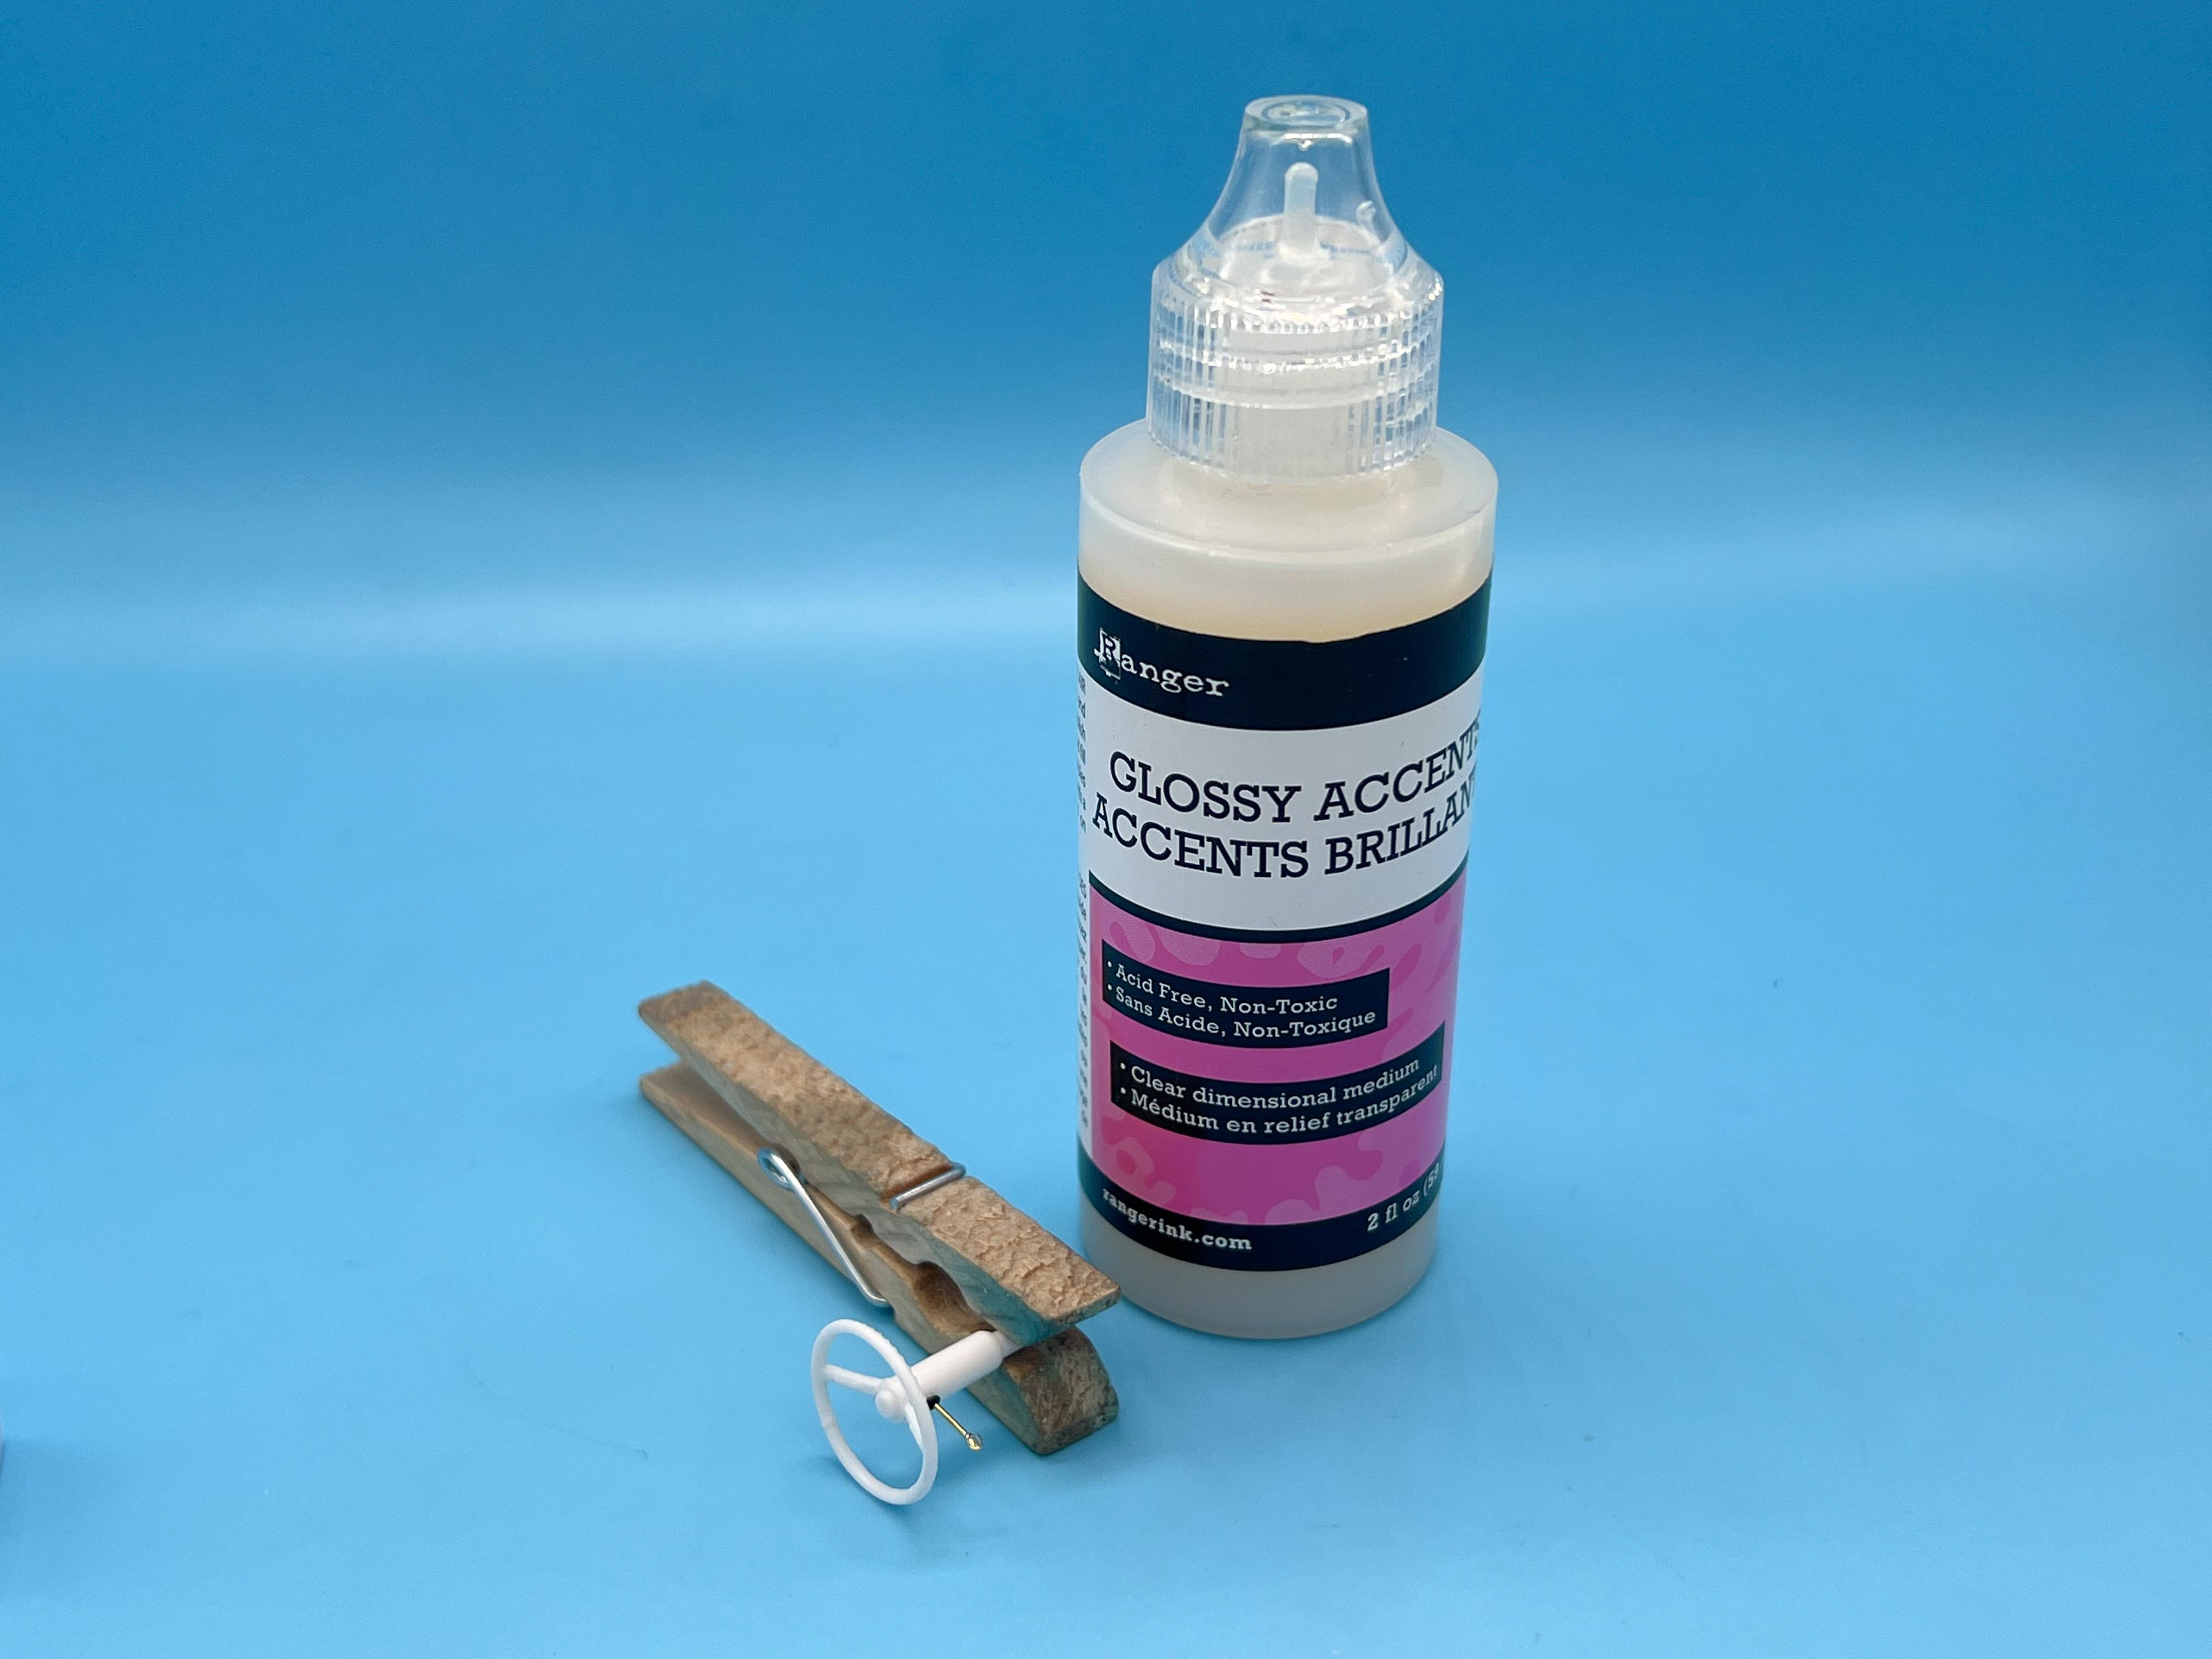
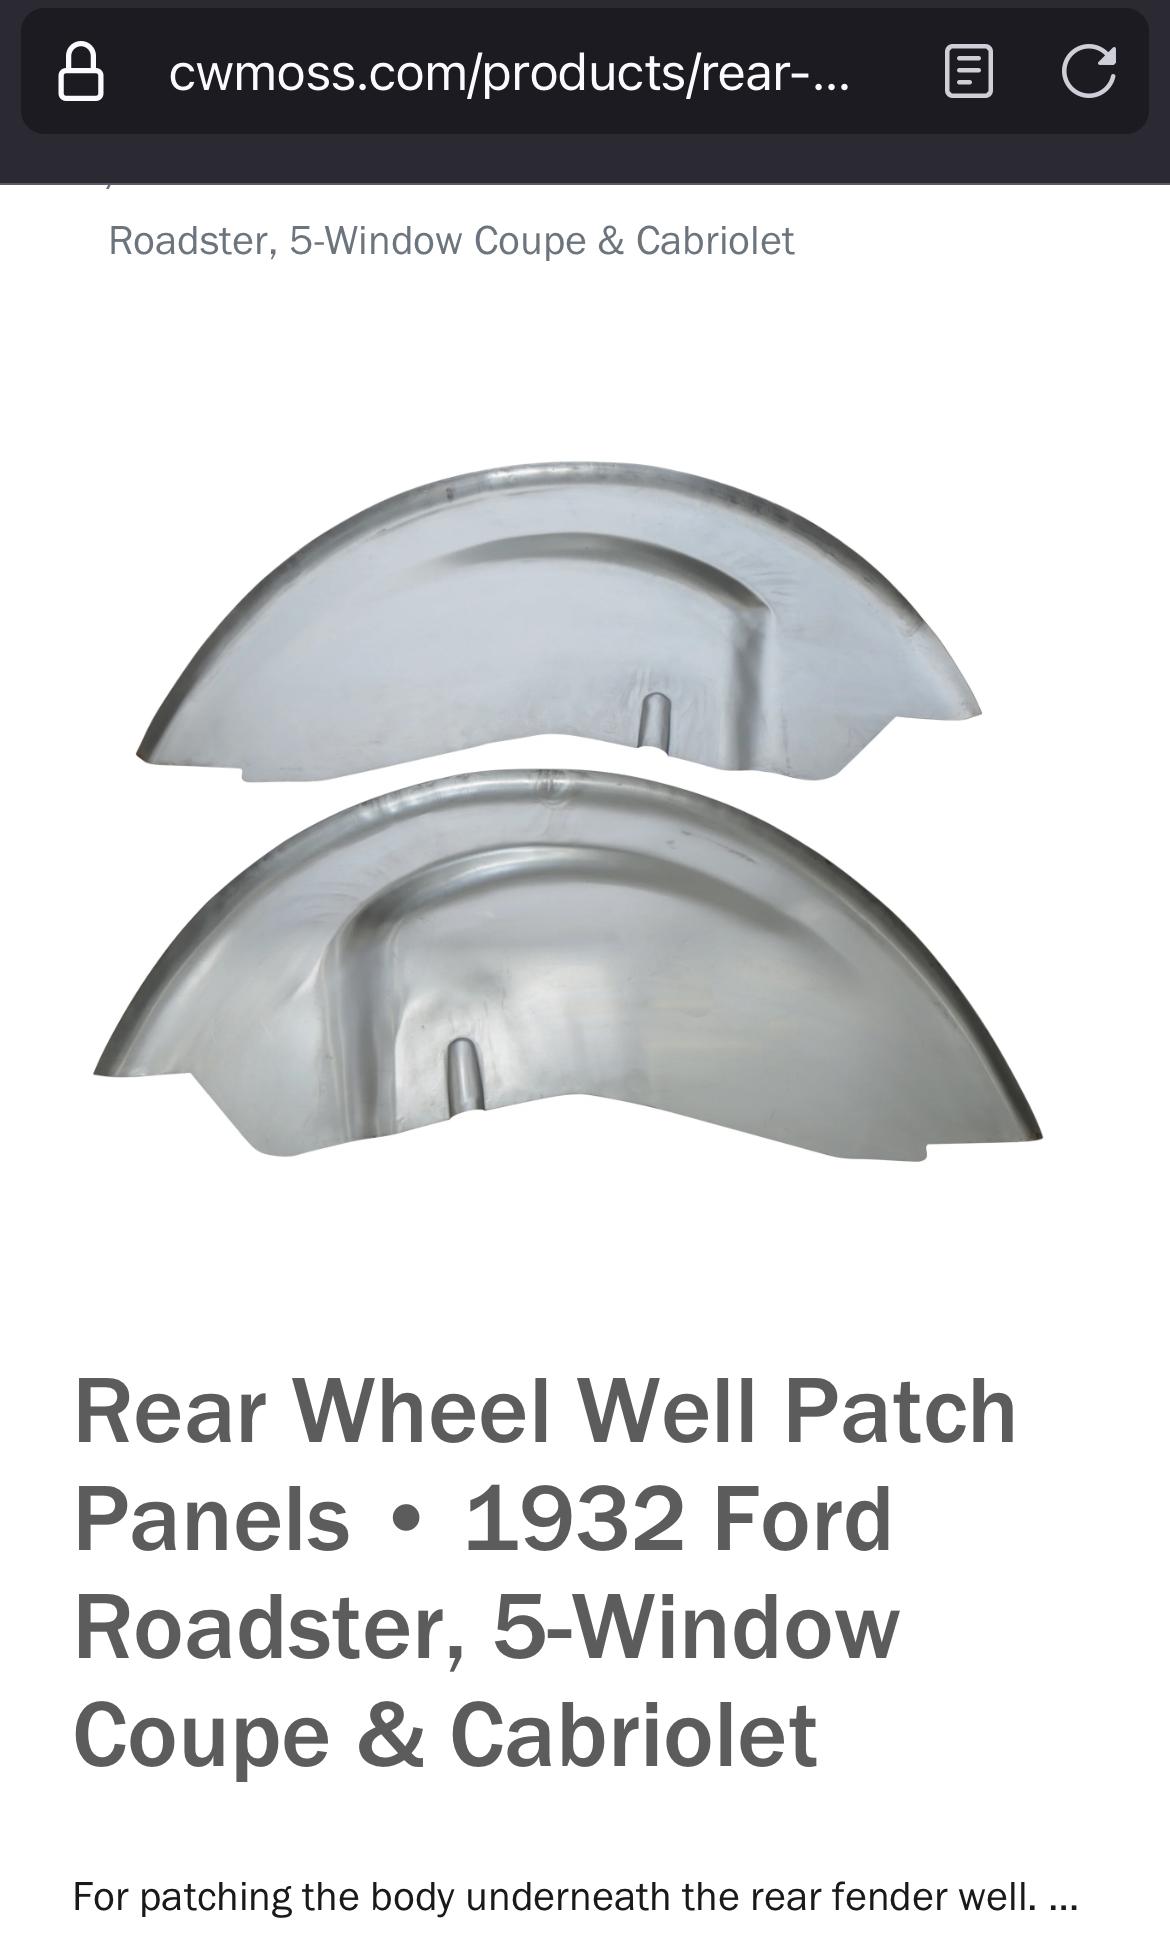
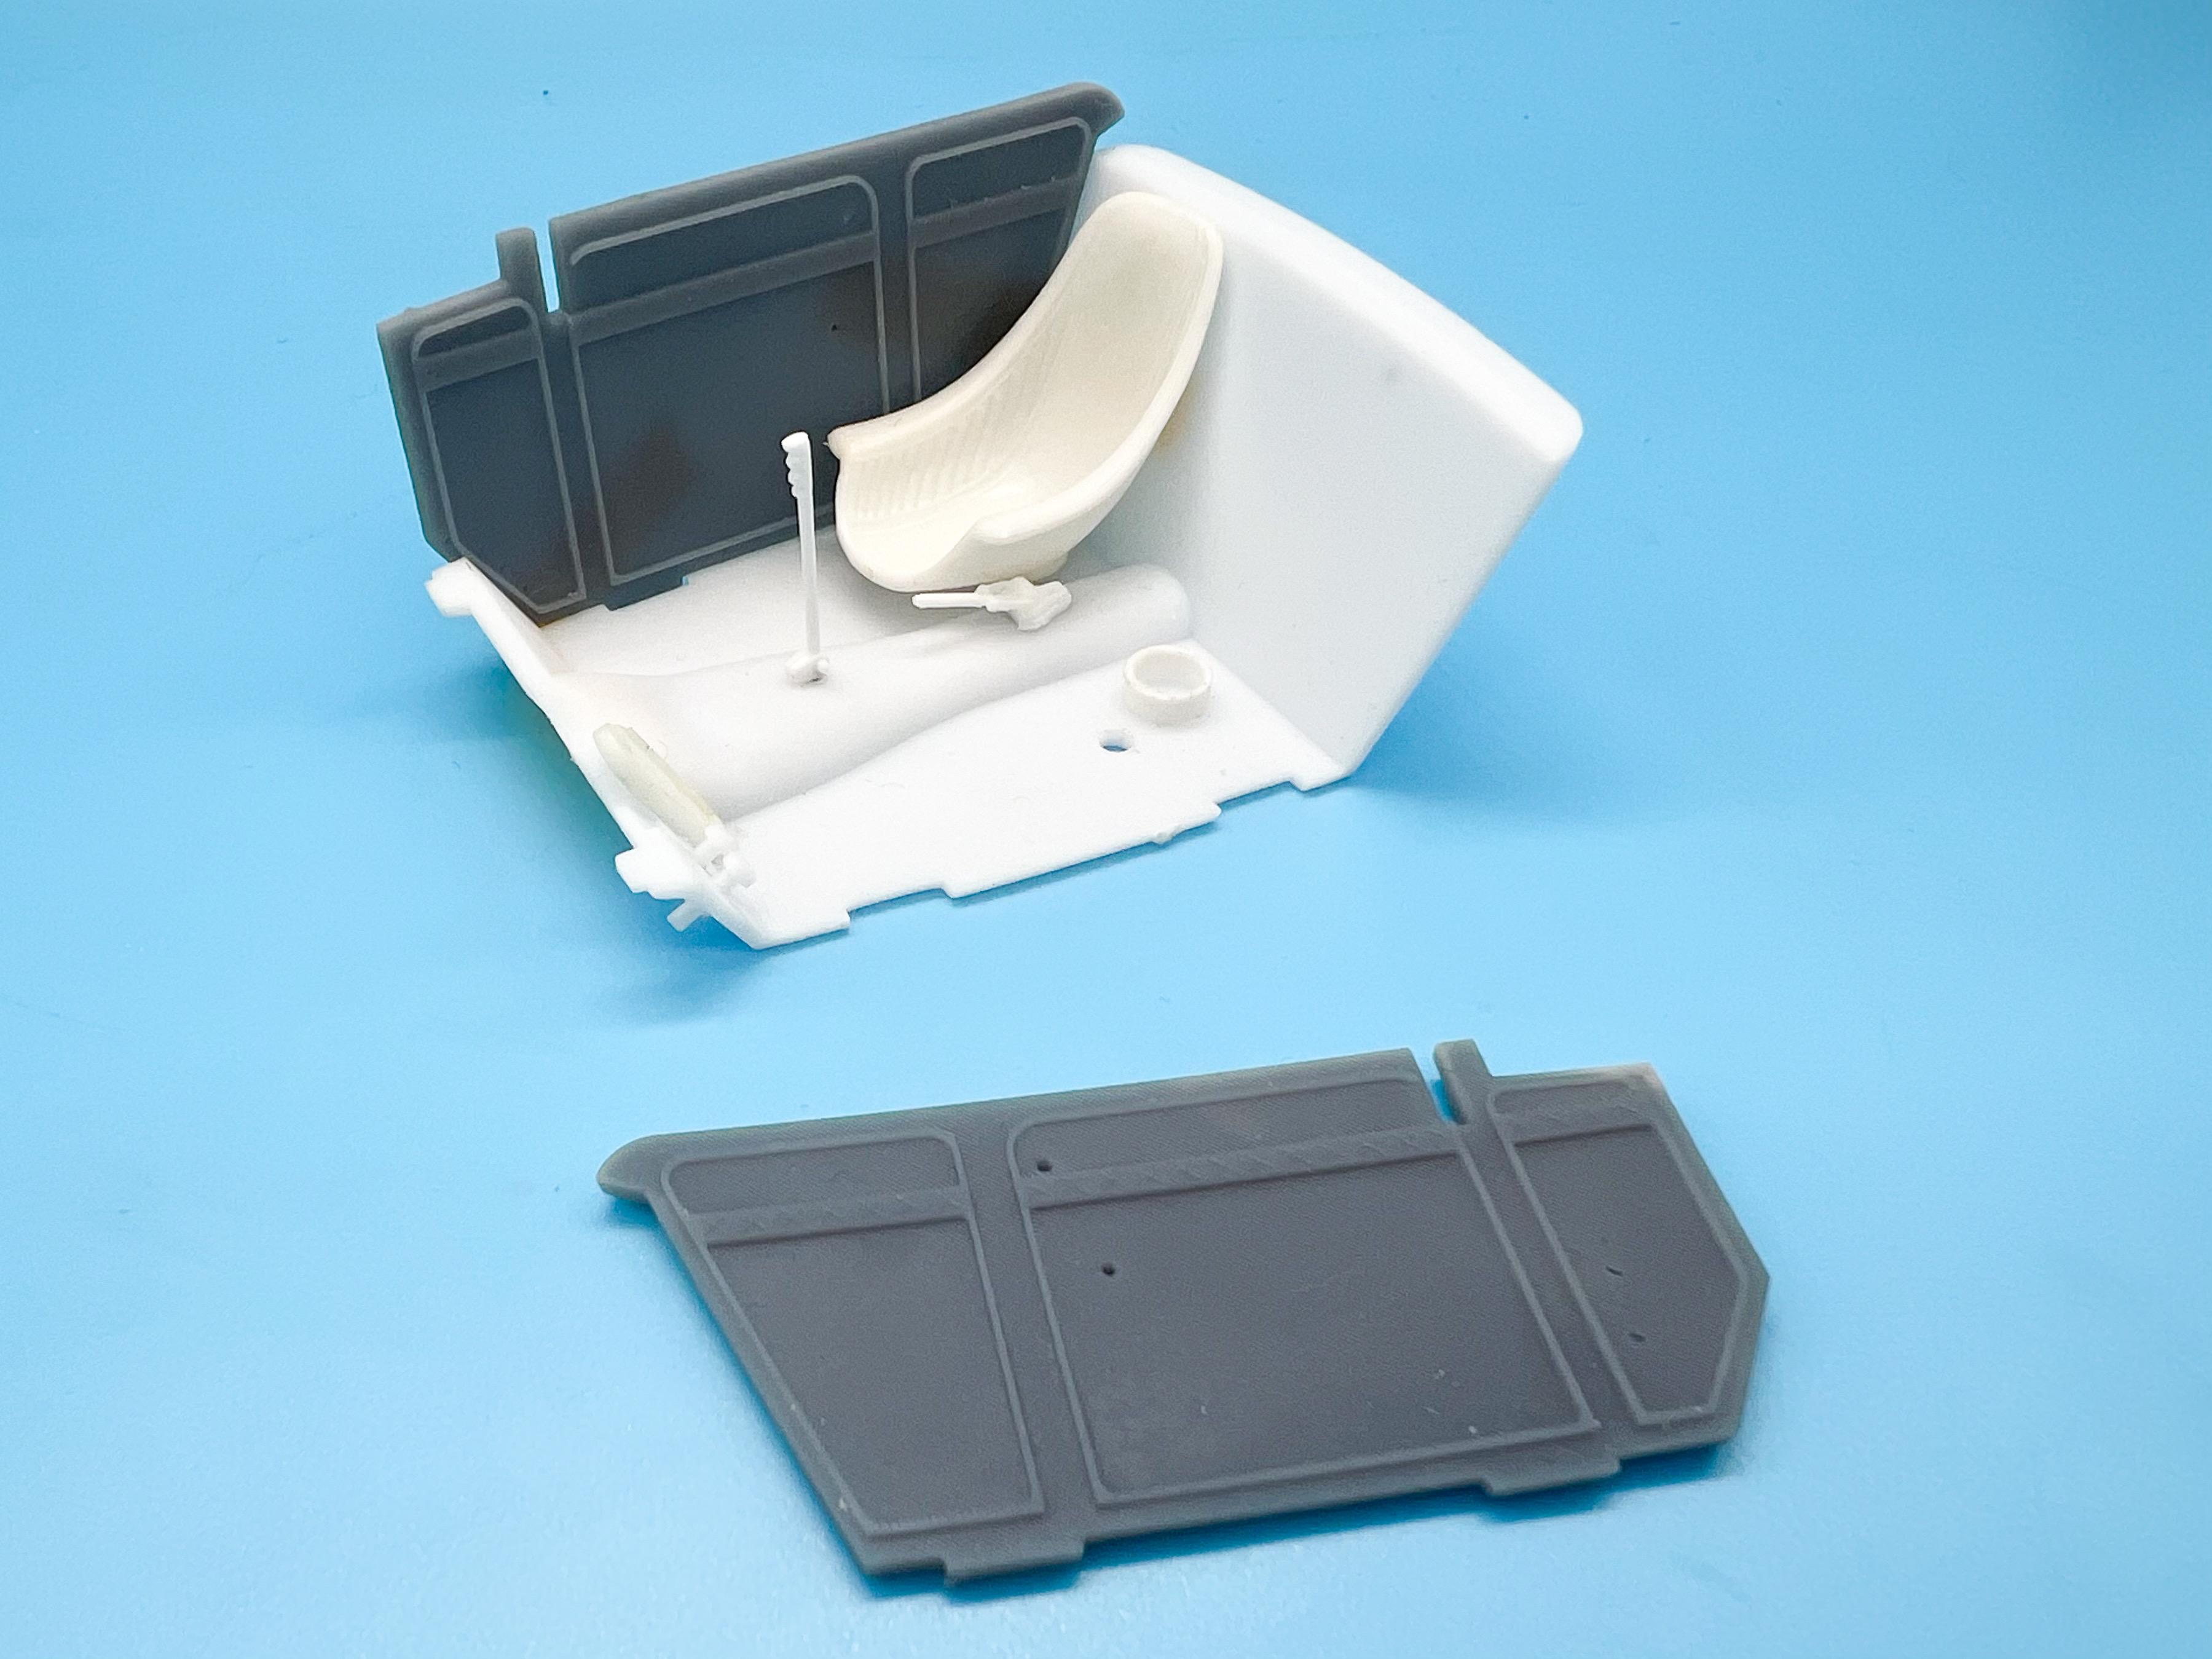
Thank you sir! And thank you too! And thank YOU! Interesting point on the rear wheel wells…I suspect you might be right…but in my research I also found this photo, apparently of the wheel well of a 3-window car: So…now I don't know what to think ?. Luckily, that Hemi out front isn’t factory-correct either, so I have a LITTLE leeway, but the fact my ‘improvements’ might be making it LESS accurate are going to bug me…more research required tomorrow - thanks for the heads up on that!! Tonight I did some research to try and figure out if those parts-box seats were based on something real… I didn’t come up with much useful info, or find much that looked like them…but also it’s hard to tell Google to search model car parts from just a picture…I’m really trying to figure out what they SHOULD look like so I can paint and detail them somewhat accurately - I’m leaning towards them being a representation of some kind of fibreglass racecar seat, but more research required there too… A little progress I DID make tonight…shot a quick spritz of primer on the dash, having drilled out the various switches and knobs so I can replace them with separate parts. The molded-in details were actually crisp and nice, but I prefer being able to paint parts separately and not have to try detail painting little stuff like that: Found a parts-box steering wheel that seems like it might be pretending to be a 40 Ford wheel, which matches the dash nicely, so started cleaning that up and added a turn signal stalk roughly where the column shift would’ve been on an ACTUAL 40: A product I like for making little clear parts as seen at the end of that turn signal lever is this product from Michael’s - it dries crystal clear and is also great for gauge faces, small lenses for lights, and probably a hundred other things too: Just a small update tonight because it’s cold here and my brain works slow when I’m cold - more soon, thanks for looking!
-
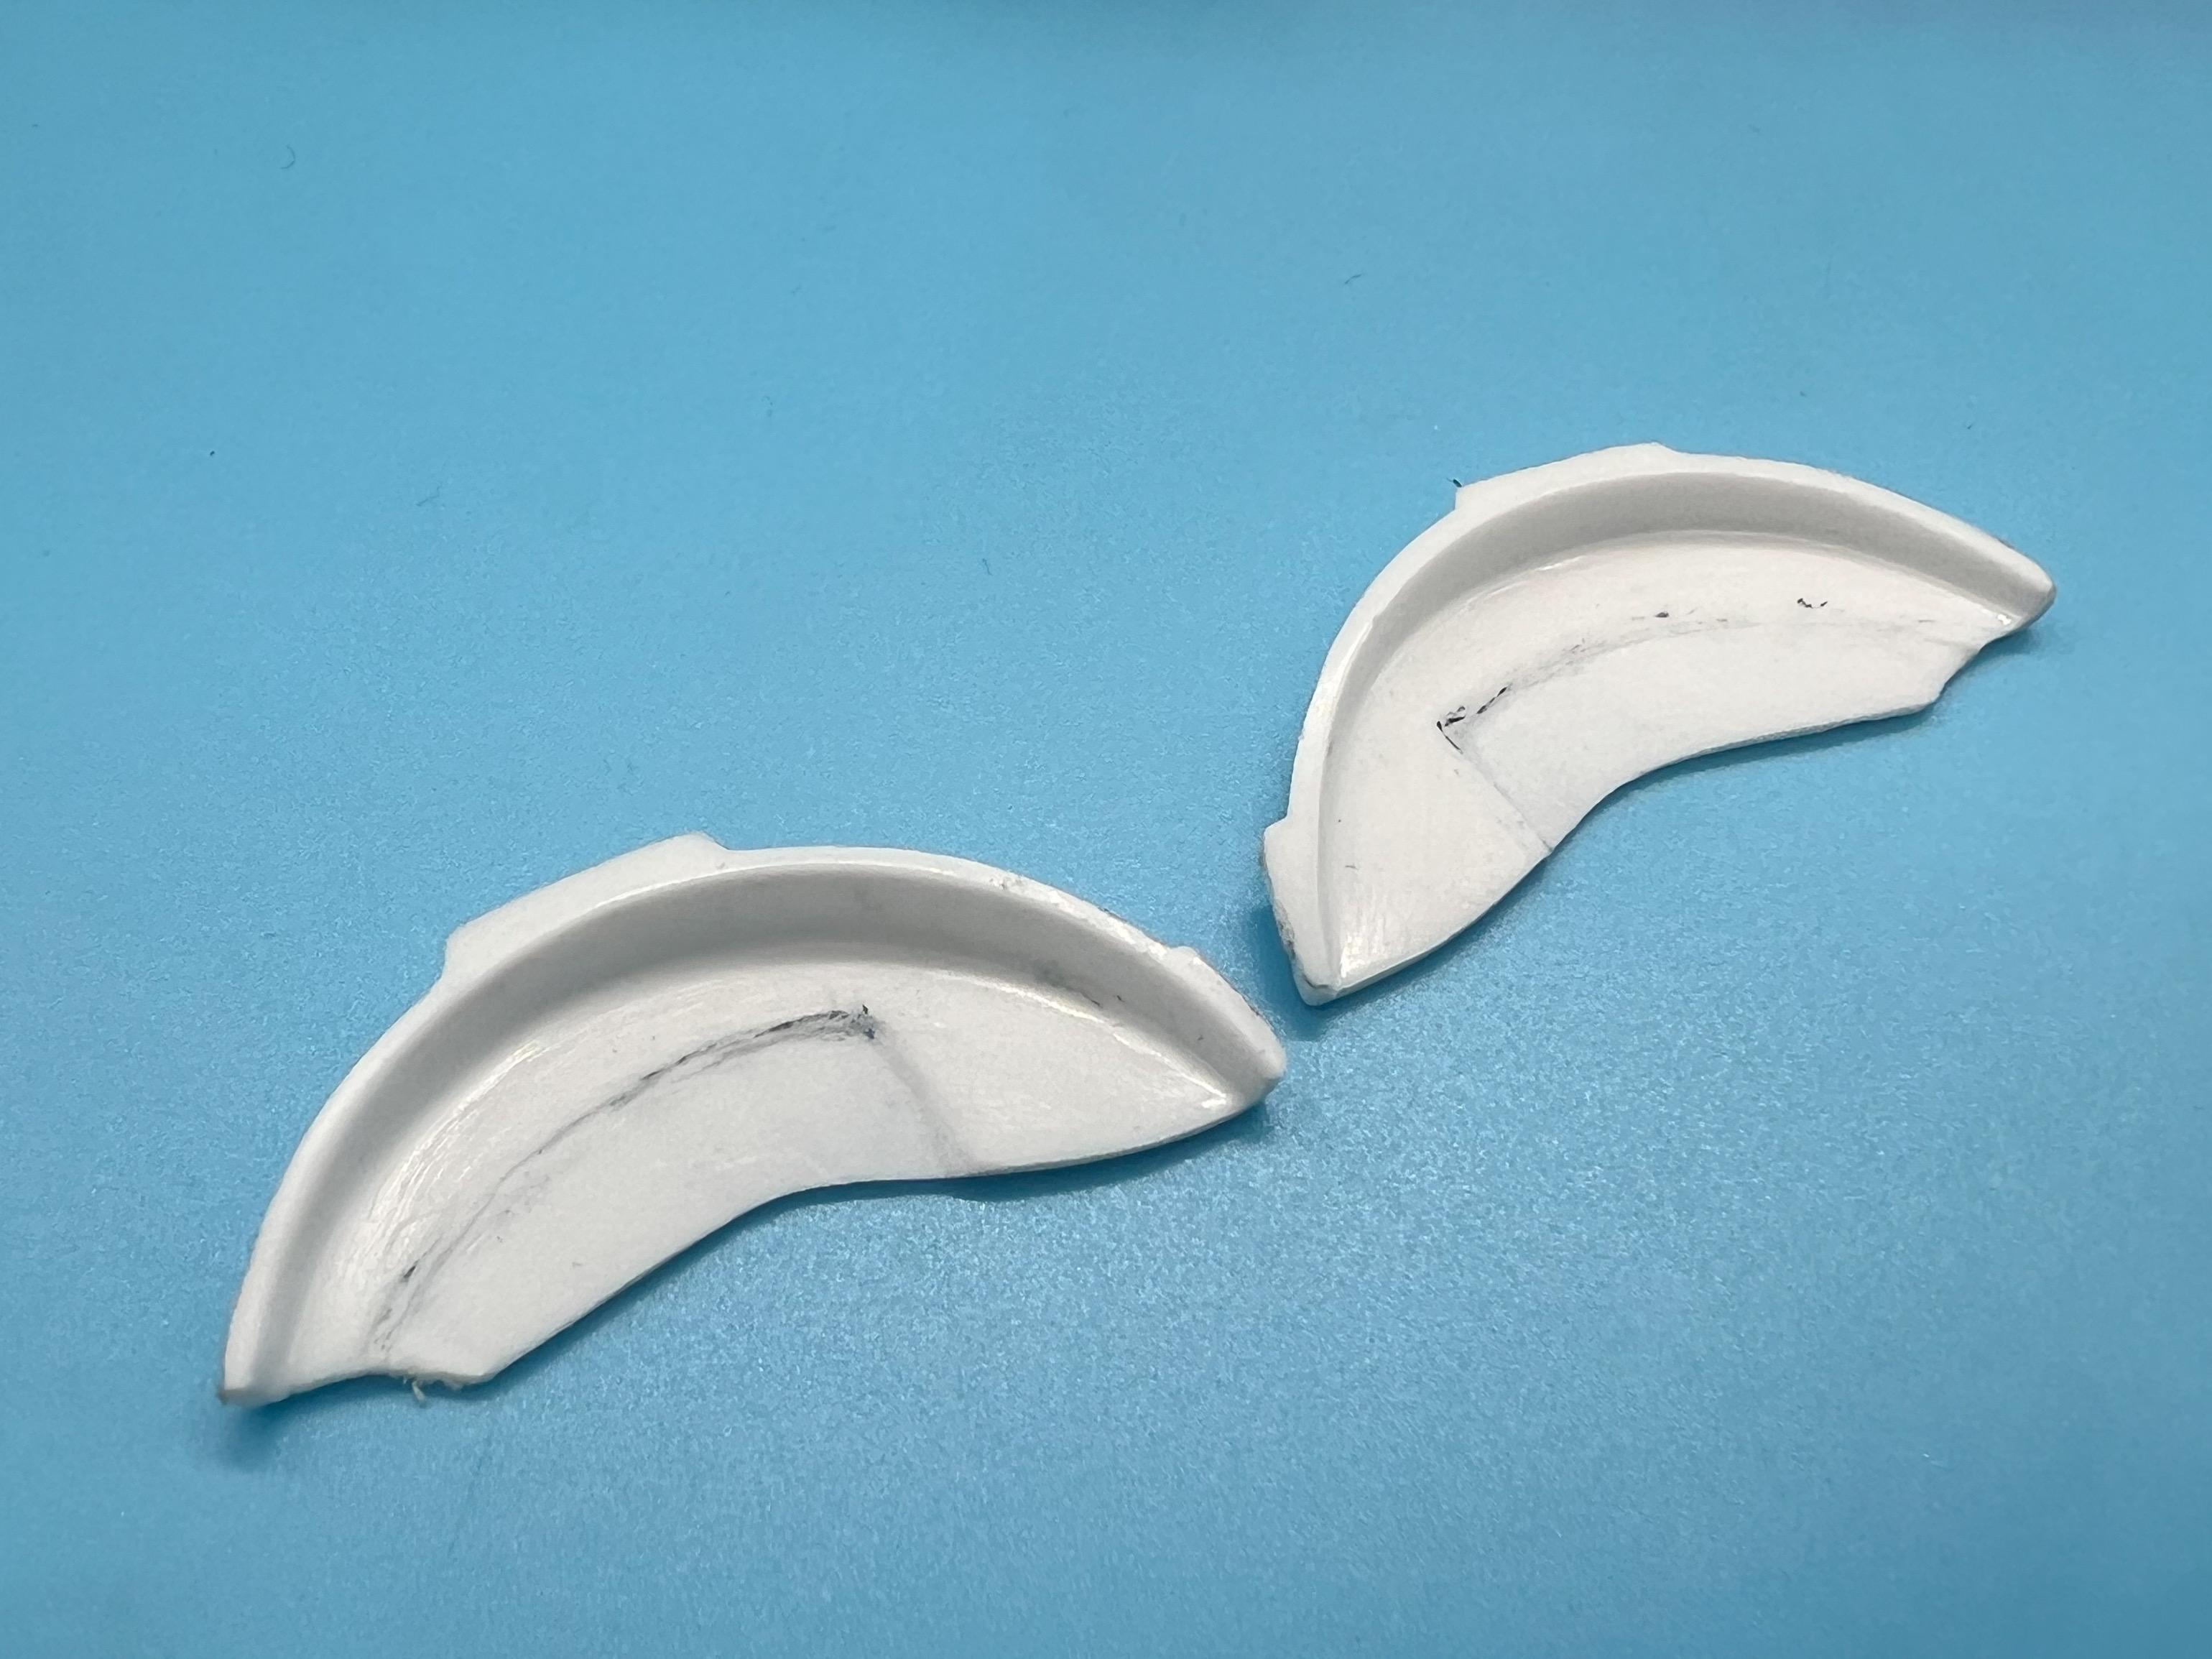
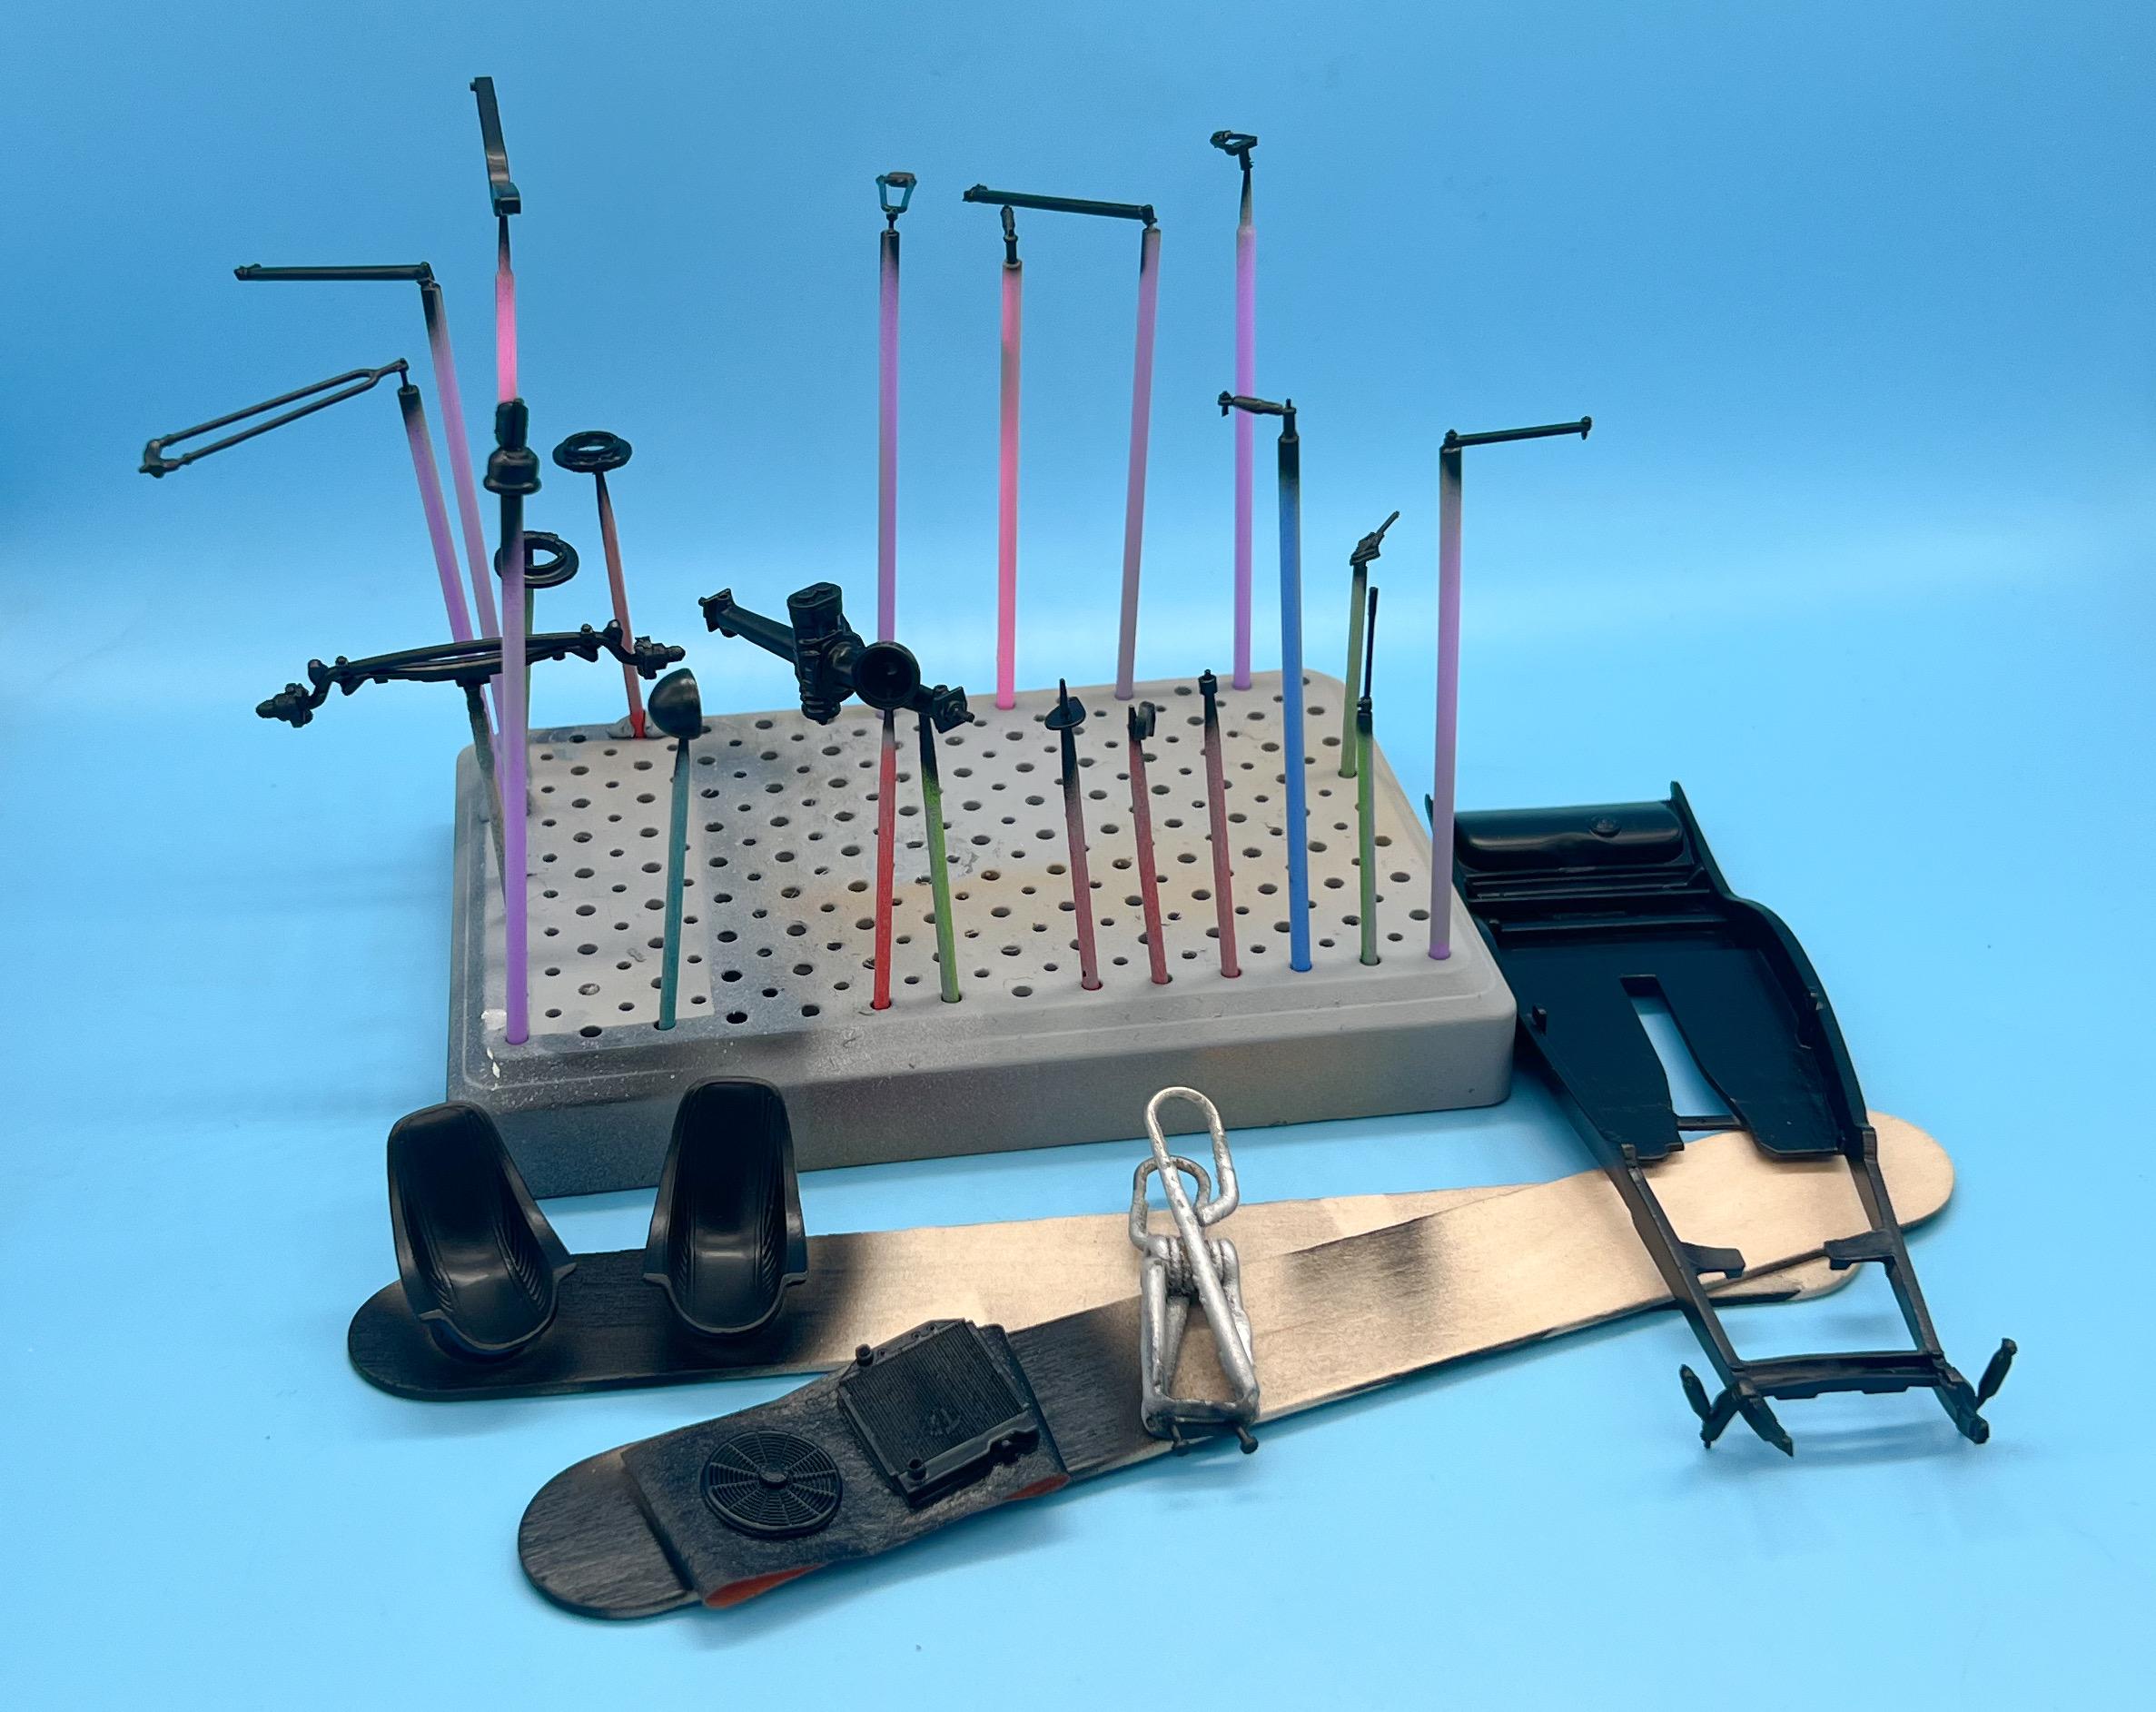
Happy Monday y’all! Super cold here, which made for a long tiring day (sub zero temperatures most of this week, on top of a bunch of snow we got over the weekend…) but got a little done at the bench tonight… First up, started working thru painting some metal parts. As I sorted through the parts I realized I wanted more of them to be chrome than I’d originally realized…gotta lay some clear on a load of little bits and get them smooth for some nice shine… Rear axle is aluminum tho, and will be masked and painted with some different shades this week to add to the realism, the old T leaf spring will be steel, as will the rear brake drums, another aluminum shade for the Moon gas pedal and some other colors for a couple of other pieces…it’s fun mixing and matching different metalizer products for different looks: Something I heard from an artist whose work I follow recently was “you’re probably not using reference material as much as you should be”. He was speaking to ‘regular’ artists, people who draw and paint, but I’ve been thinking on that a lot recently and making sure to collect a lot of reference pics even when I think I know how a part should look…here’s some I gathered as reference for future detailing on that quick change, for example: https://public.fotki.com/NewYorkSpeedShop/11-cars/reference-material/quick-change-axles/ Next up, I had in my head that those headlamps would have pinstriping and be painted, even if nothing much else above the frame is, so I went through my stash of decals just for a change of pace this evening. I was trying to find a couple of small decals with an arc to them to somewhat mirror the curve of those headers I was messing with yesterday, for some visual symmetry when the car’s viewed from above. Went through a bunch before finding a couple on the Revell kit decal sheet that did exactly that - doh! Should’ve started there ? Theyre still wet and snuggling down with the decal solution right now, but they laid down ok… And finally, I made a start on the inner rear fenders tonight. I’m sure you all know what the flat Revell kit pieces look like, but I wanted to add some detail to make them look more like a real set: Nothing for it but to get the files out and start carving away material… Excuse the roughness, they’re not finished yet, but I didn’t achieve much this evening and they were an extra thing to show for my time at the bench ? Thanks for looking, more soon, soon as I’ve done more!
-
One of my ‘grails’ - I always wanted one of those! I’ve been planning a King T replica build using more easily available stuff for a while tho - I saw a video recently of a Hot Wheels collector who owns the 1:1
-
Really impressive (and clean) work Bob! I’m enjoying watching this one come together
-
I remember that race being a kind of a dog, with the rain (flood) delays, multiple stoppages and people getting wedged under the barriers…EXCEPT for SVG’s performance. I was on the edge of my seat at the final restart, and that’s rarely the case. Great start so far - I’ll be following!
-
Transmission question.
OldNYJim replied to Classicgas's topic in Model Building Questions and Answers
That graphic is really useful - thank you for posting! -
That’s a perfect little roadster - love it! Nice work!
-
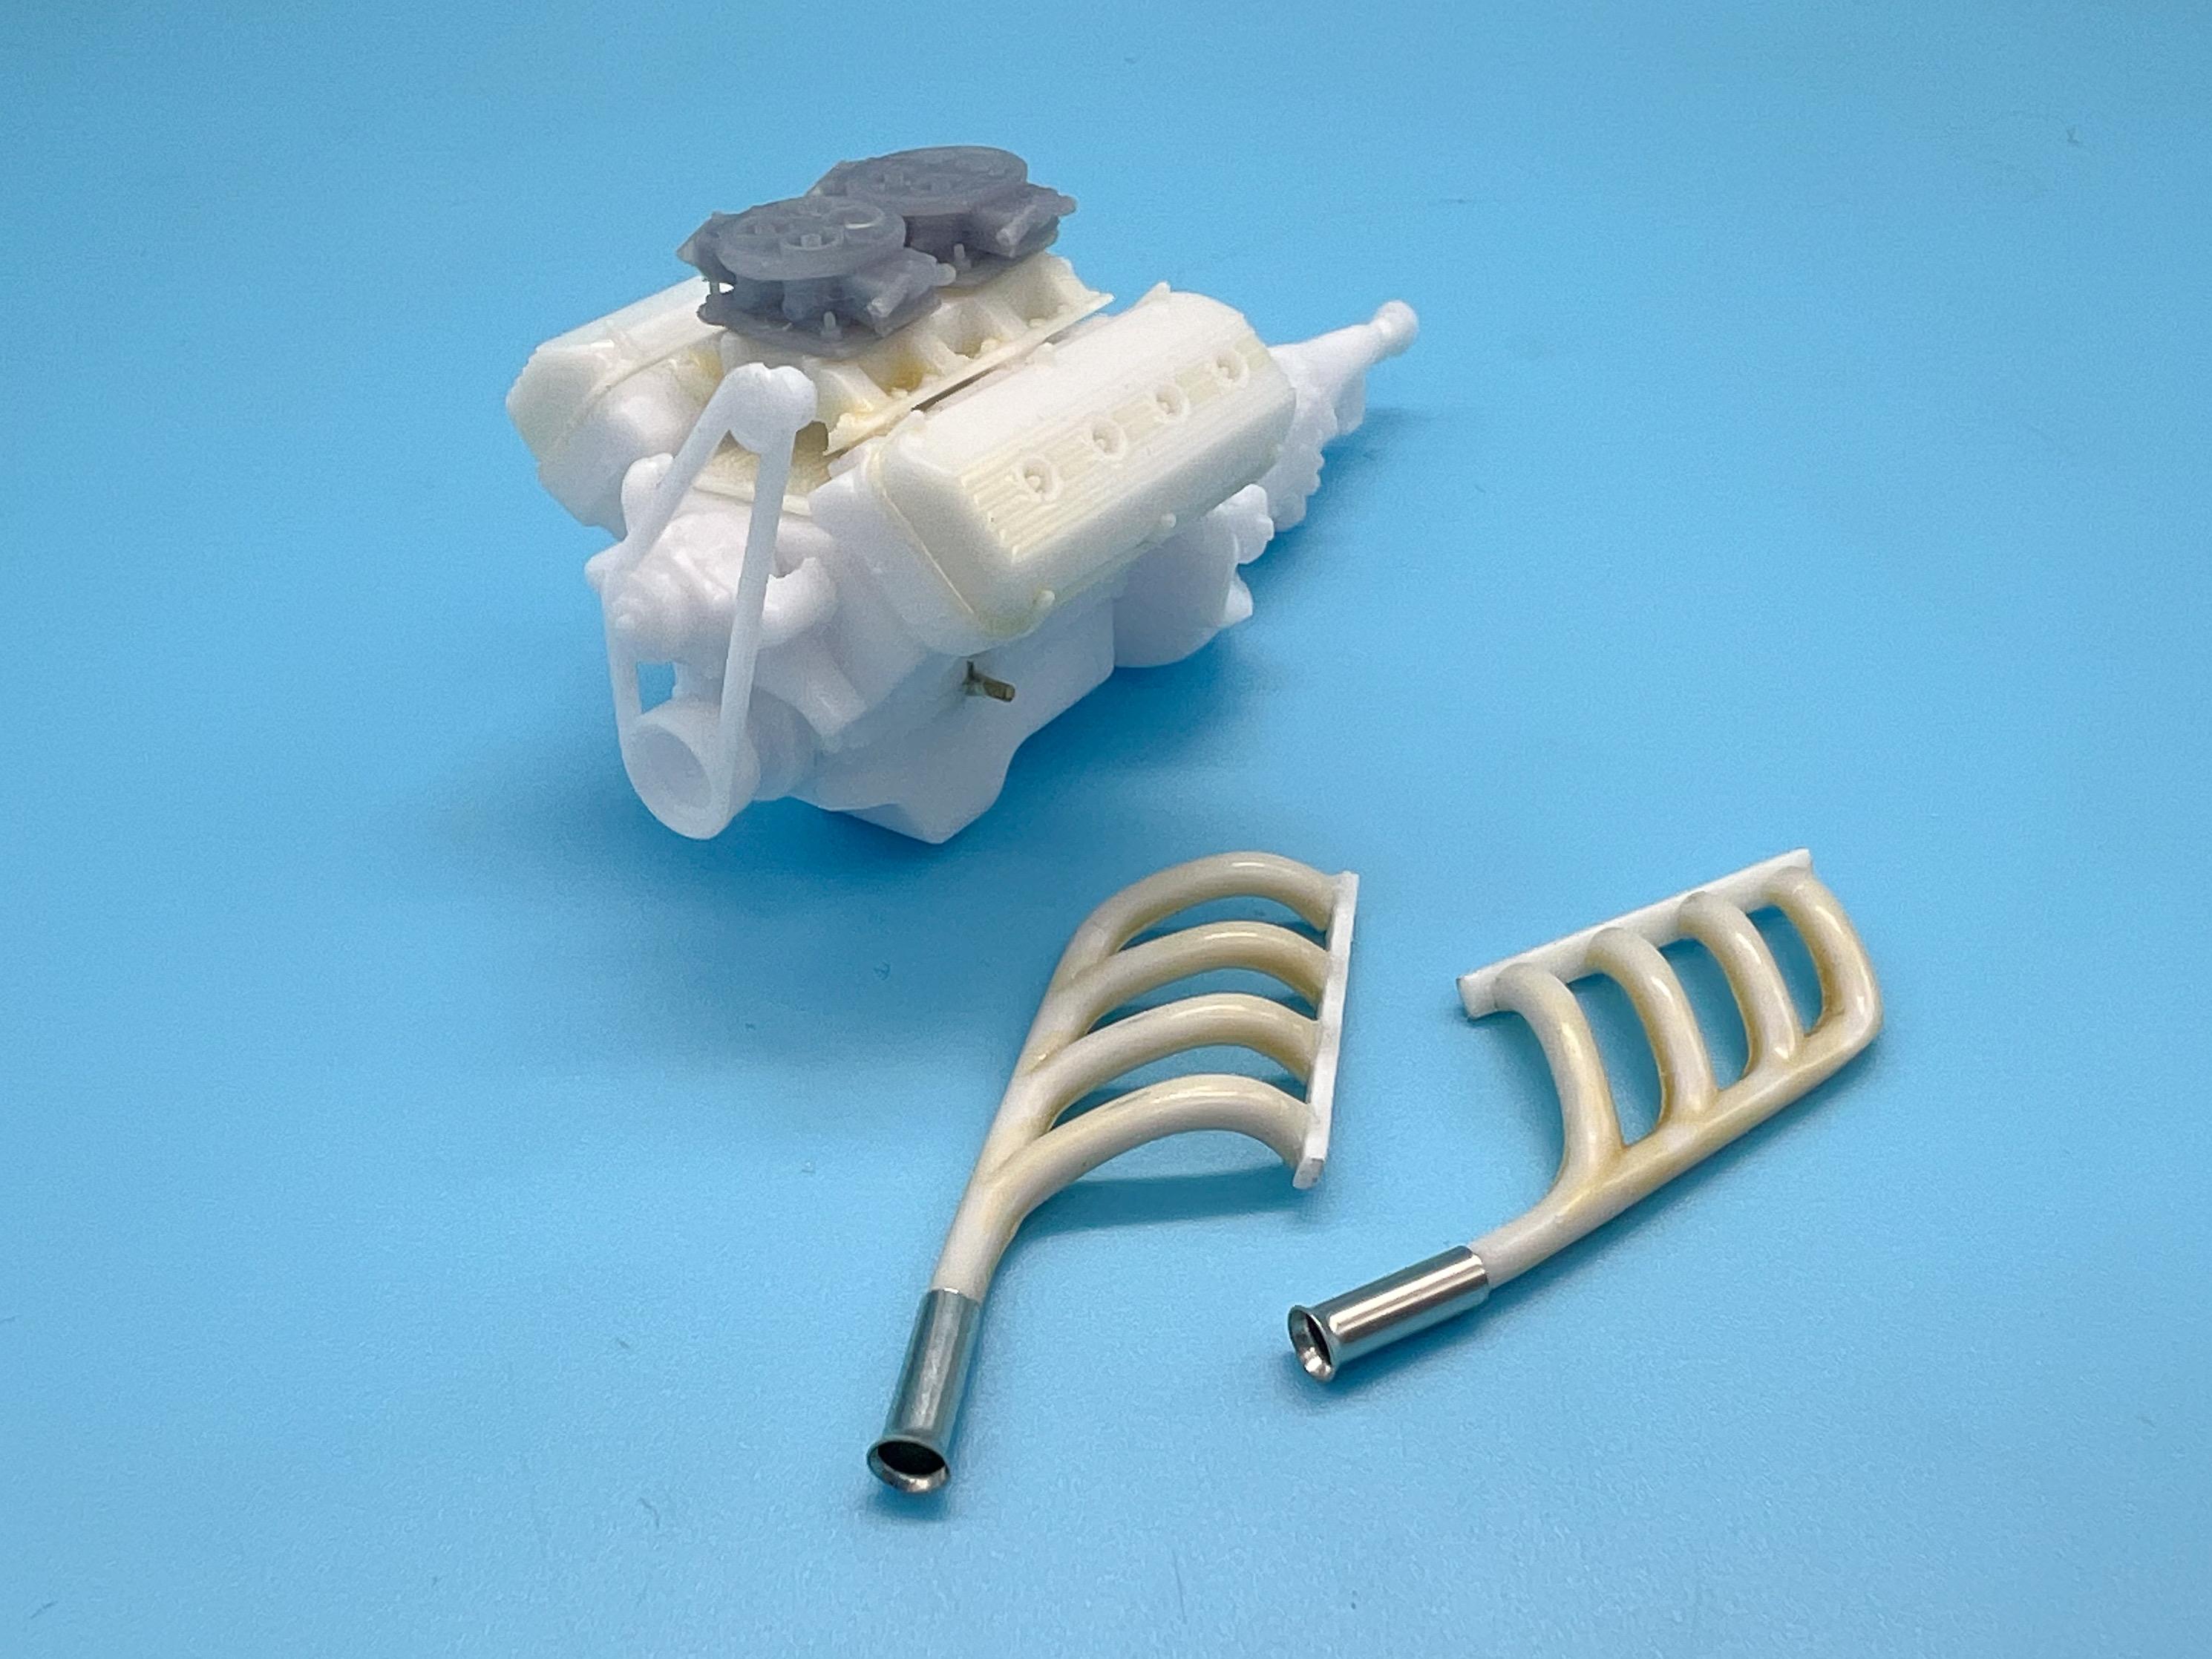
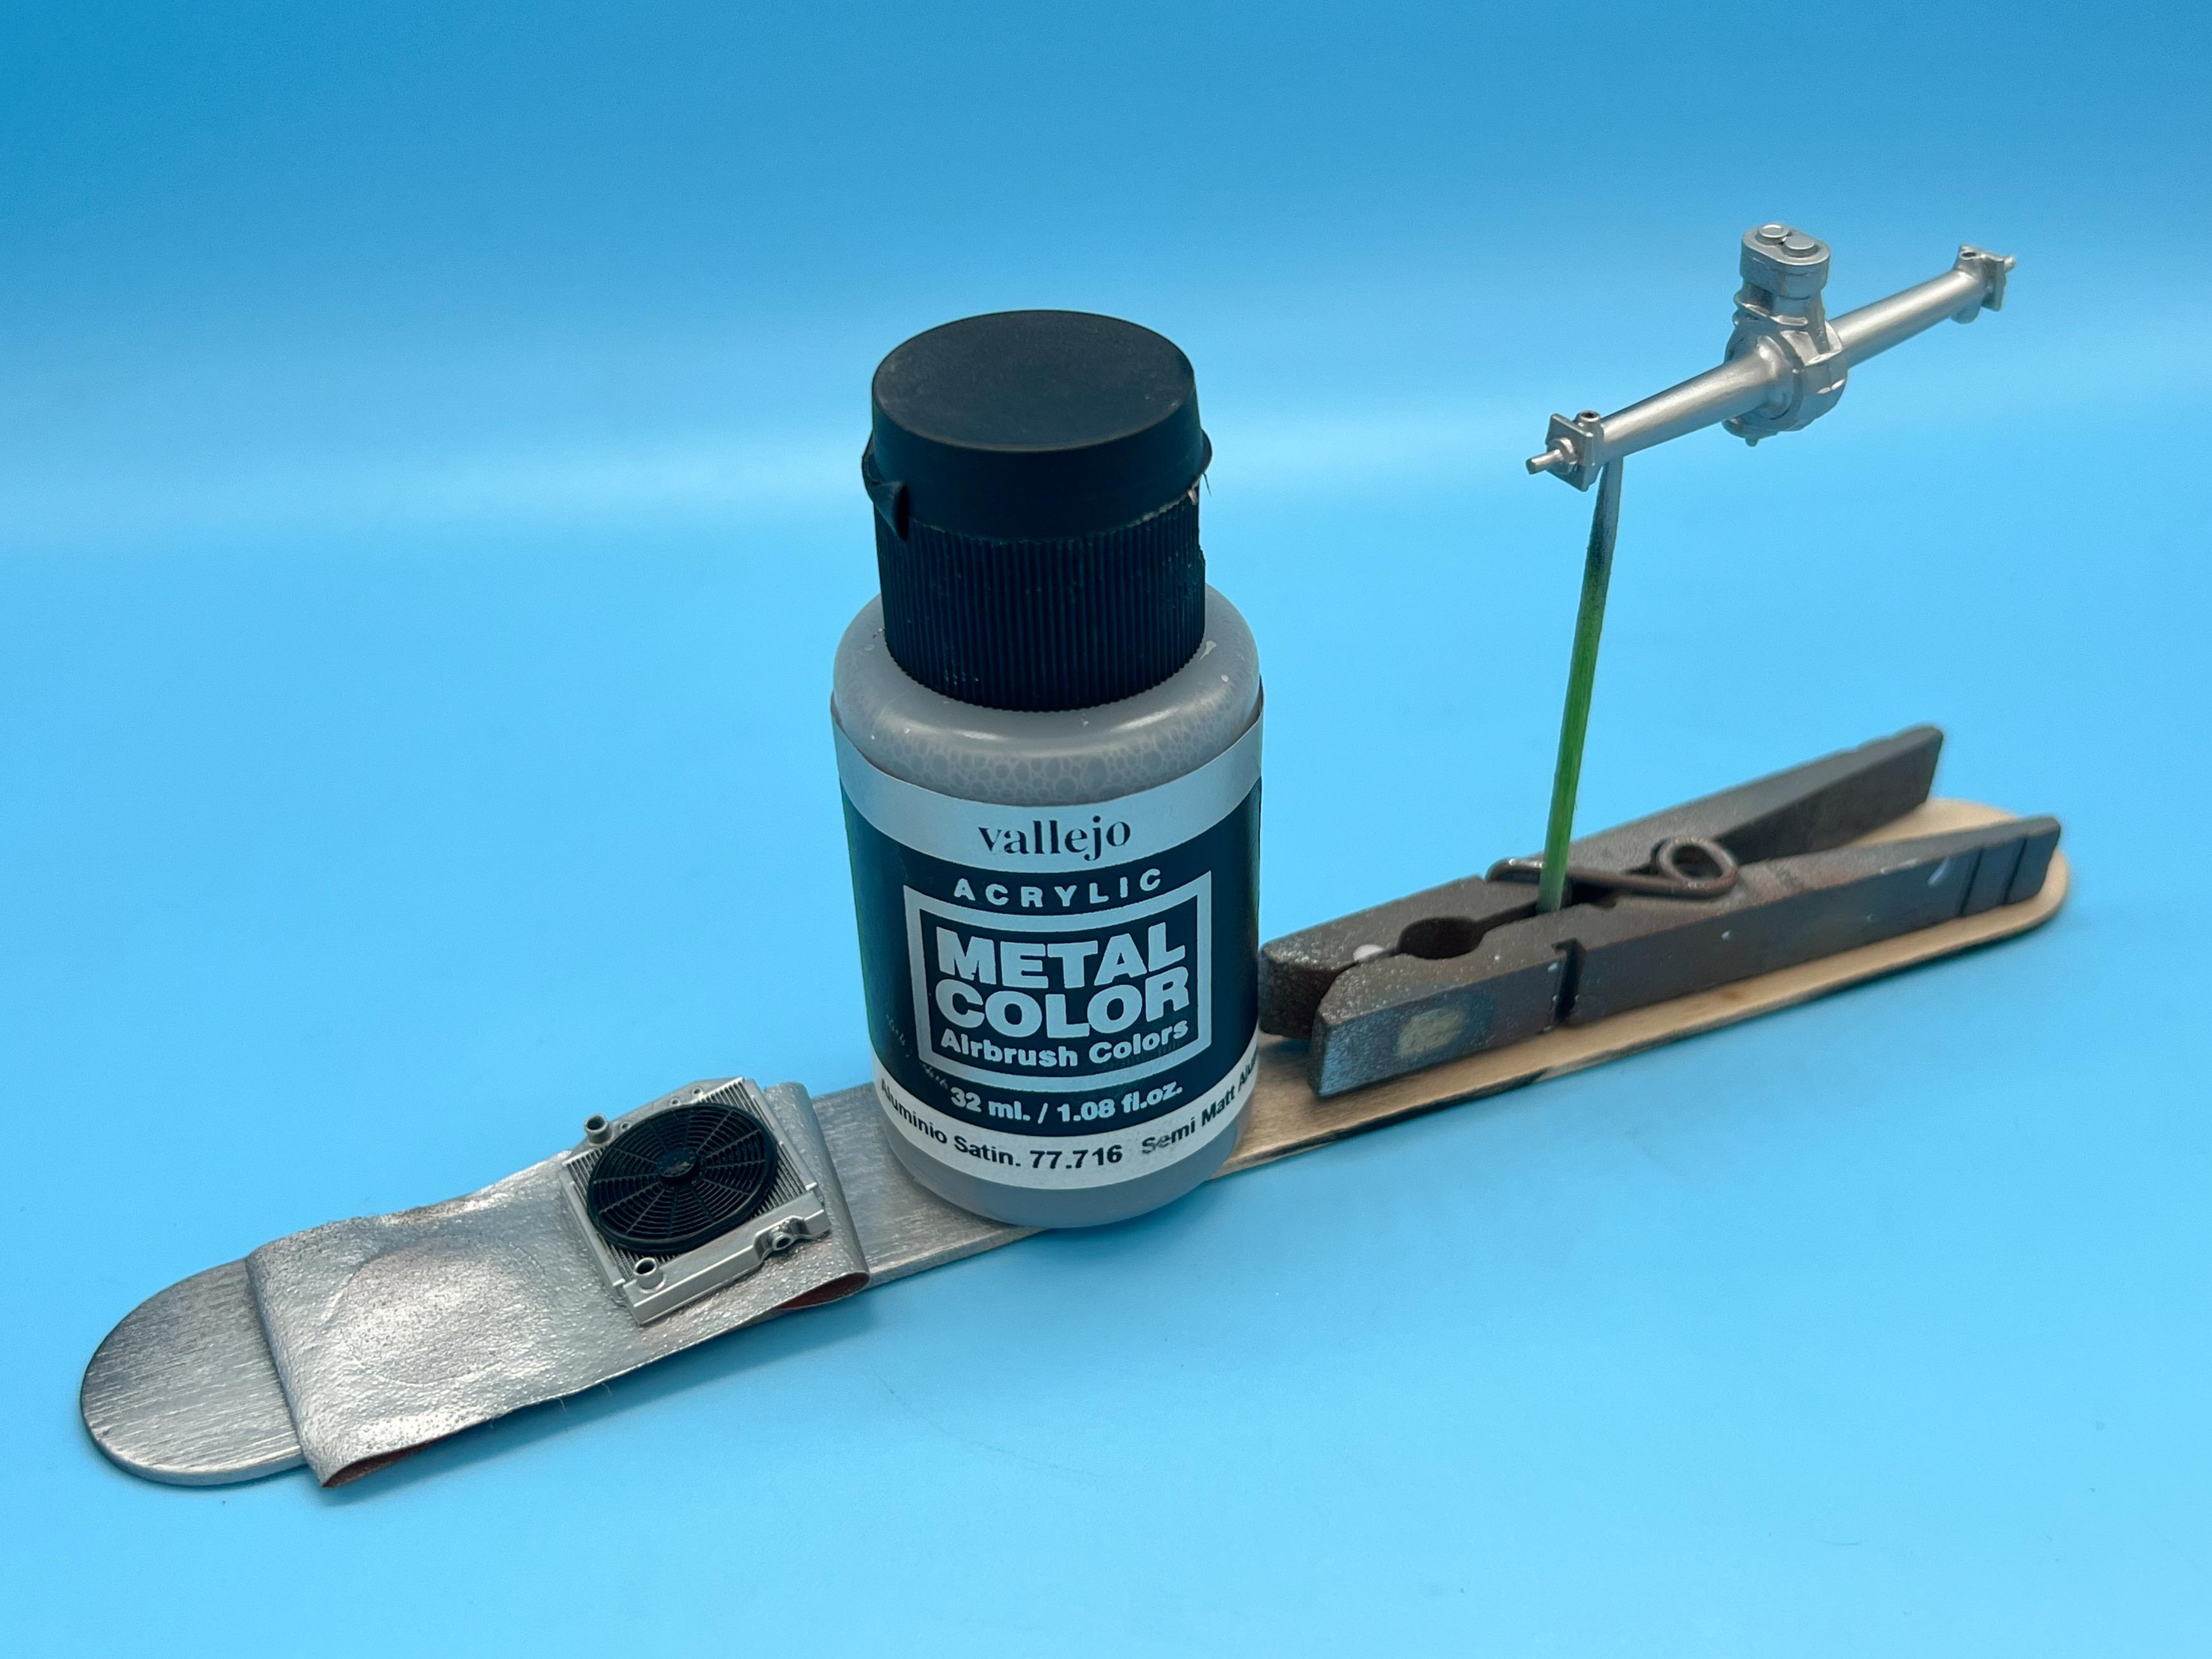
Thanks Greg! A little more progress today…I spent a couple of hours scratchbuilding some headers, and then didn’t like them as much as the parts-box (AMT?) ones I found originally. I liked the sweeping arc on these, although they sat a little too low so I sliced them up and removed a few scale inches to get the look I wanted: Next thing that I wasn’t super looking forward to was chopping the windshield frame - I should’ve done it before I painted the body, but I really wanted to get the body painted ?. Got it snuggled in there nice, just a little loose with no paint so it should snap right in after some primer and color: Just need to clean up the edges once the glue has set overnight and I can paint and chrome it. Reshaped the kit glass to fit, so that’s a chore I wasn’t looking forward to handled… Also shot a BUNCH of parts today - basically everything but the interior tub and the engine. The frame will be black and everything attaching to it will be either black or some kind of metal tone - the Createx black base is a really good undercoat for Vallejo metal colors in particular so it made sense to just shoot everything with that now. Here’s a couple of pieces shot with Vallejo aluminum - the black undercoat gives a nice reflectivity: And that’s about it for this weekend - ran out of time, but I’m really excited to shoot a bunch of metal-looking stuff this coming week and then start figuring out the engine. Thanks for looking, more soon, soon as I’ve done more!
-
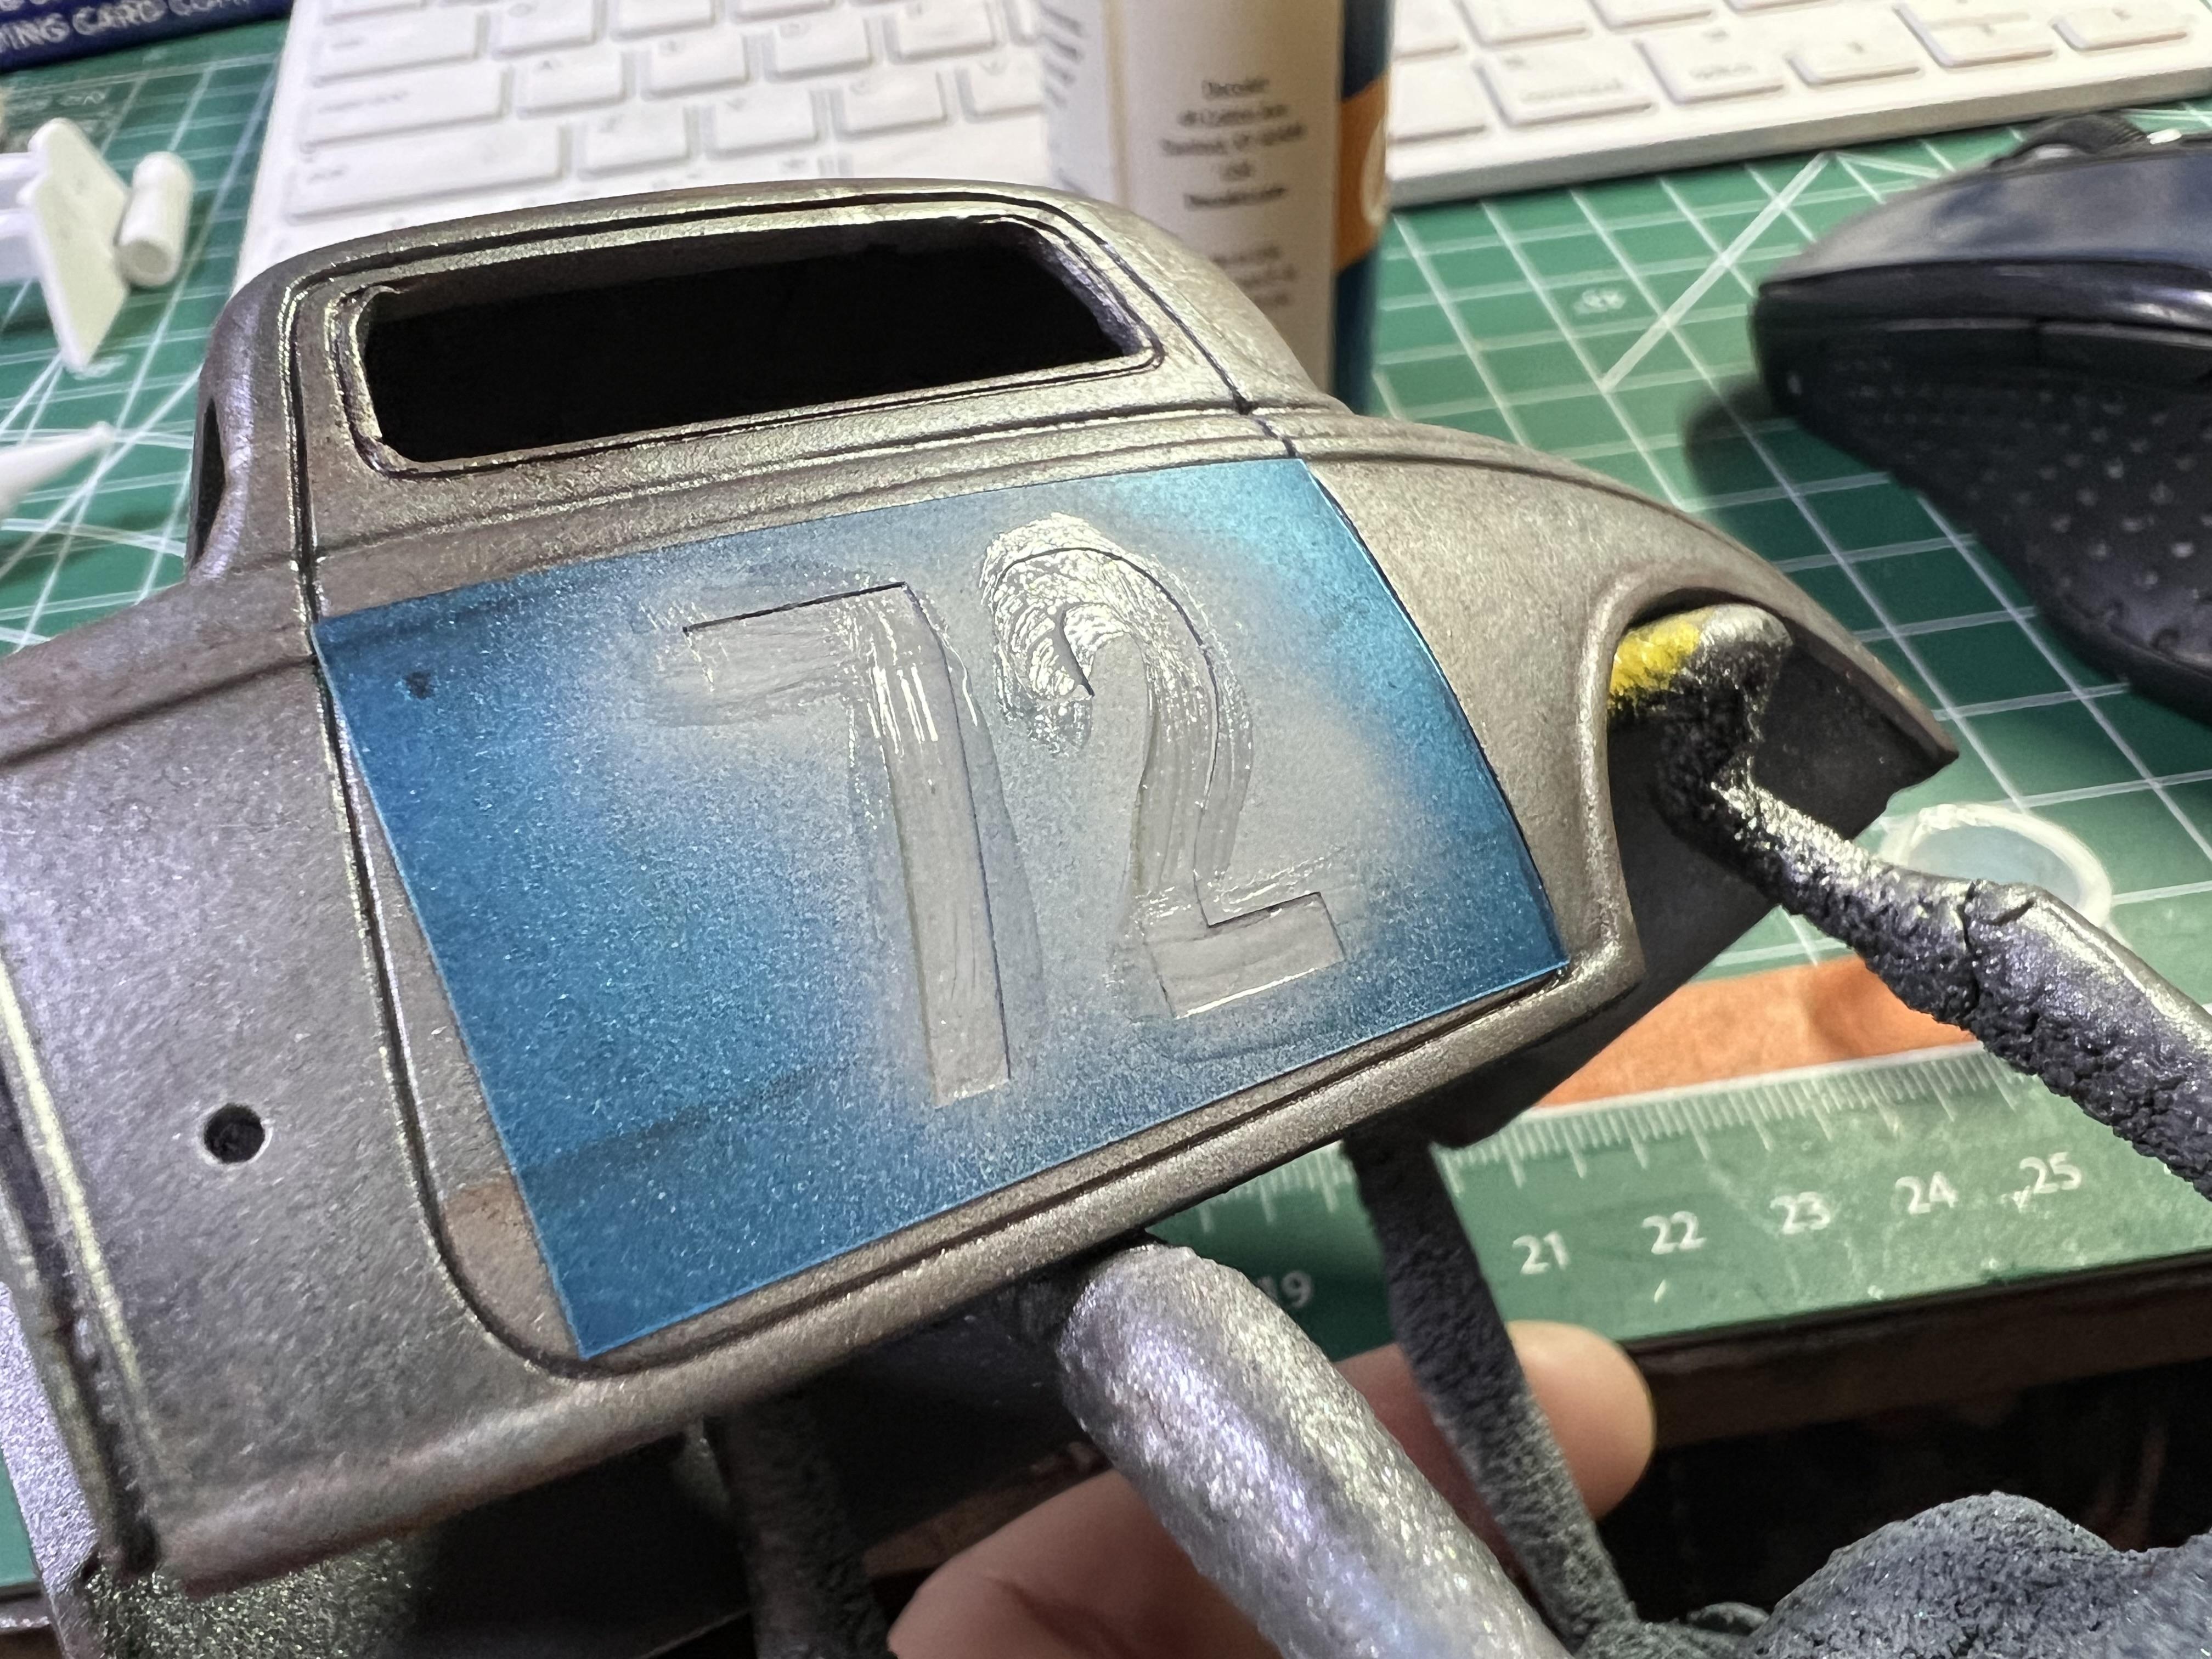
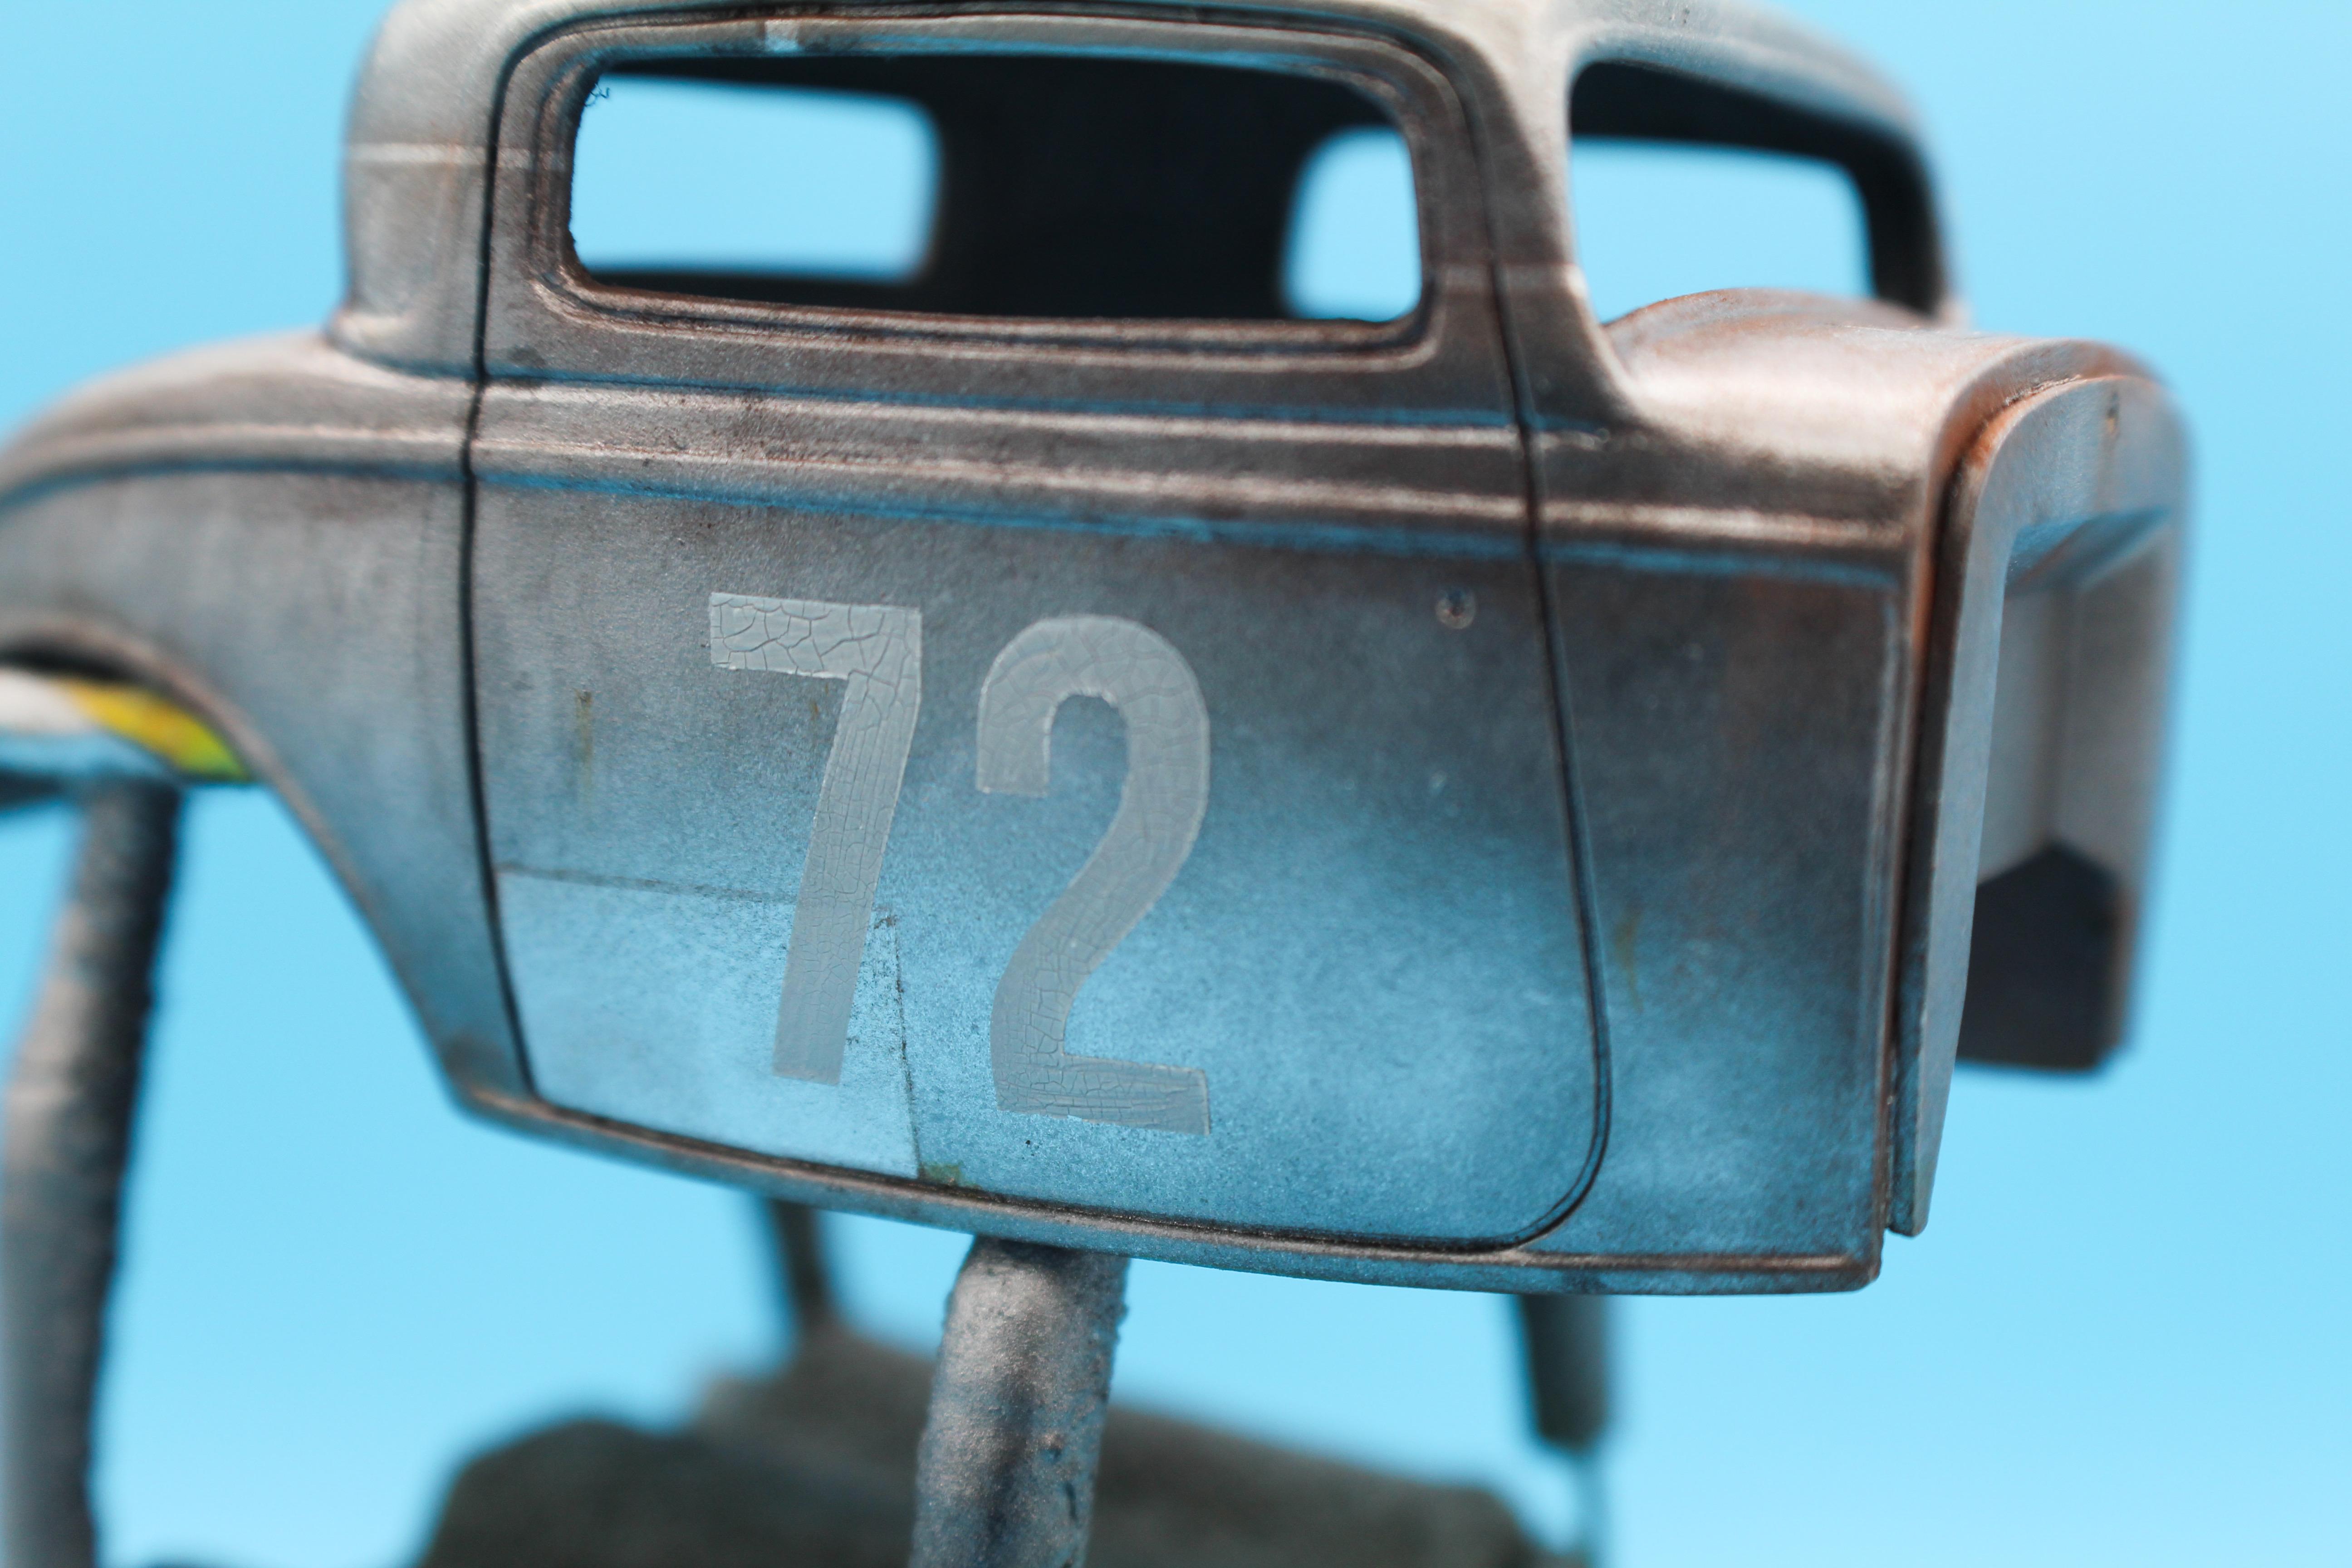
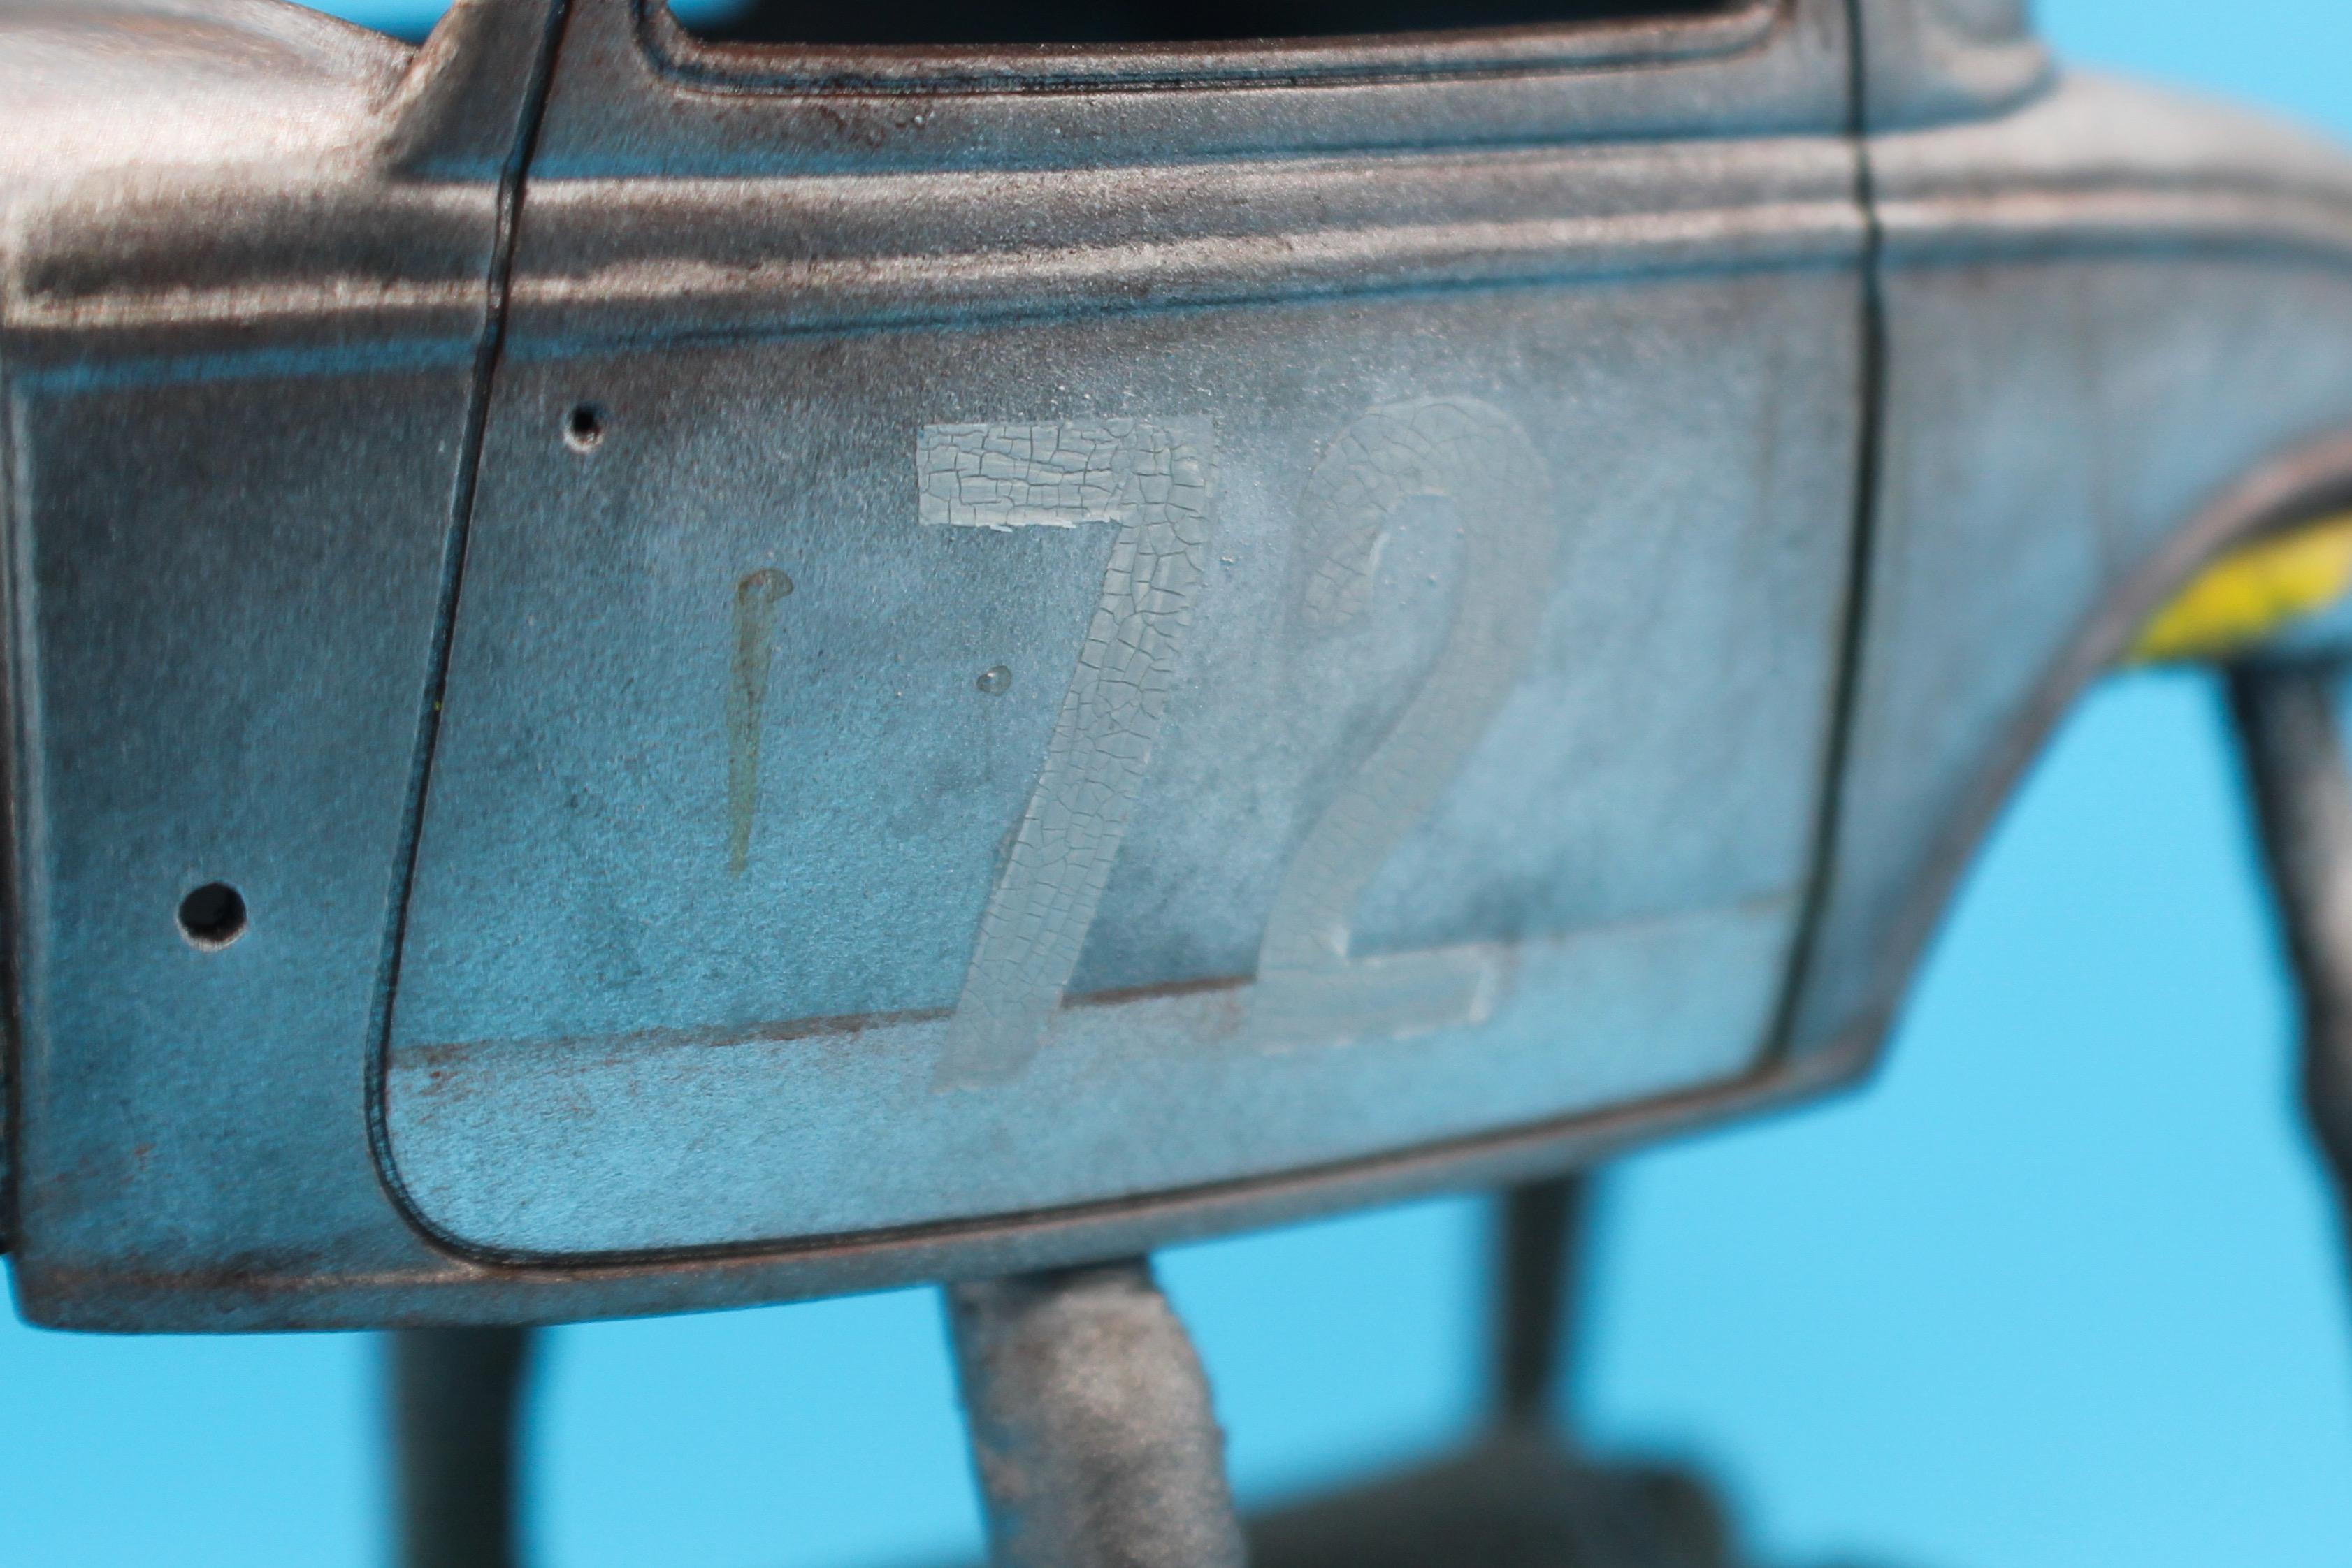
Thank you! Hmm, good question…guess I SHOULD…I’ll have to think on that. You’re right, that should be visible too…good point! Just a little progress today…some old-school-looking hand-painted door numbers! Spent some time looking at fonts until I found what I had in my head, then cut some masks: I went with Vallejo Ivory for the color…I figured they might have been white One Shot at some point, and like all enamels they’ve faded and yellowed somewhat: I wanted some visible brush-marks and then some cracking and aging so I brushed a little Decoart Crackle medium over top…this stuff is a thick gloopy clear that splits apart as it dries to create faux-aging to whatever you apply it to. The thicker you apply it, the bigger the cracks, so I had to make sure it wasn’t too thick to get the effect I wanted: Then, all you do is wait! It dries over 24 hours, but within 30 minutes you can see it start to break apart and ruin itself - it’s a cool effect, especially when done sparingly: Just a small update - everything else I achieved today was prepping a whole yard-sale of parts for paint, and no one cares to see me sanding and priming I’m sure…more soon tho, soon as I’ve done more!
- 103 replies
-
- 10
-

-
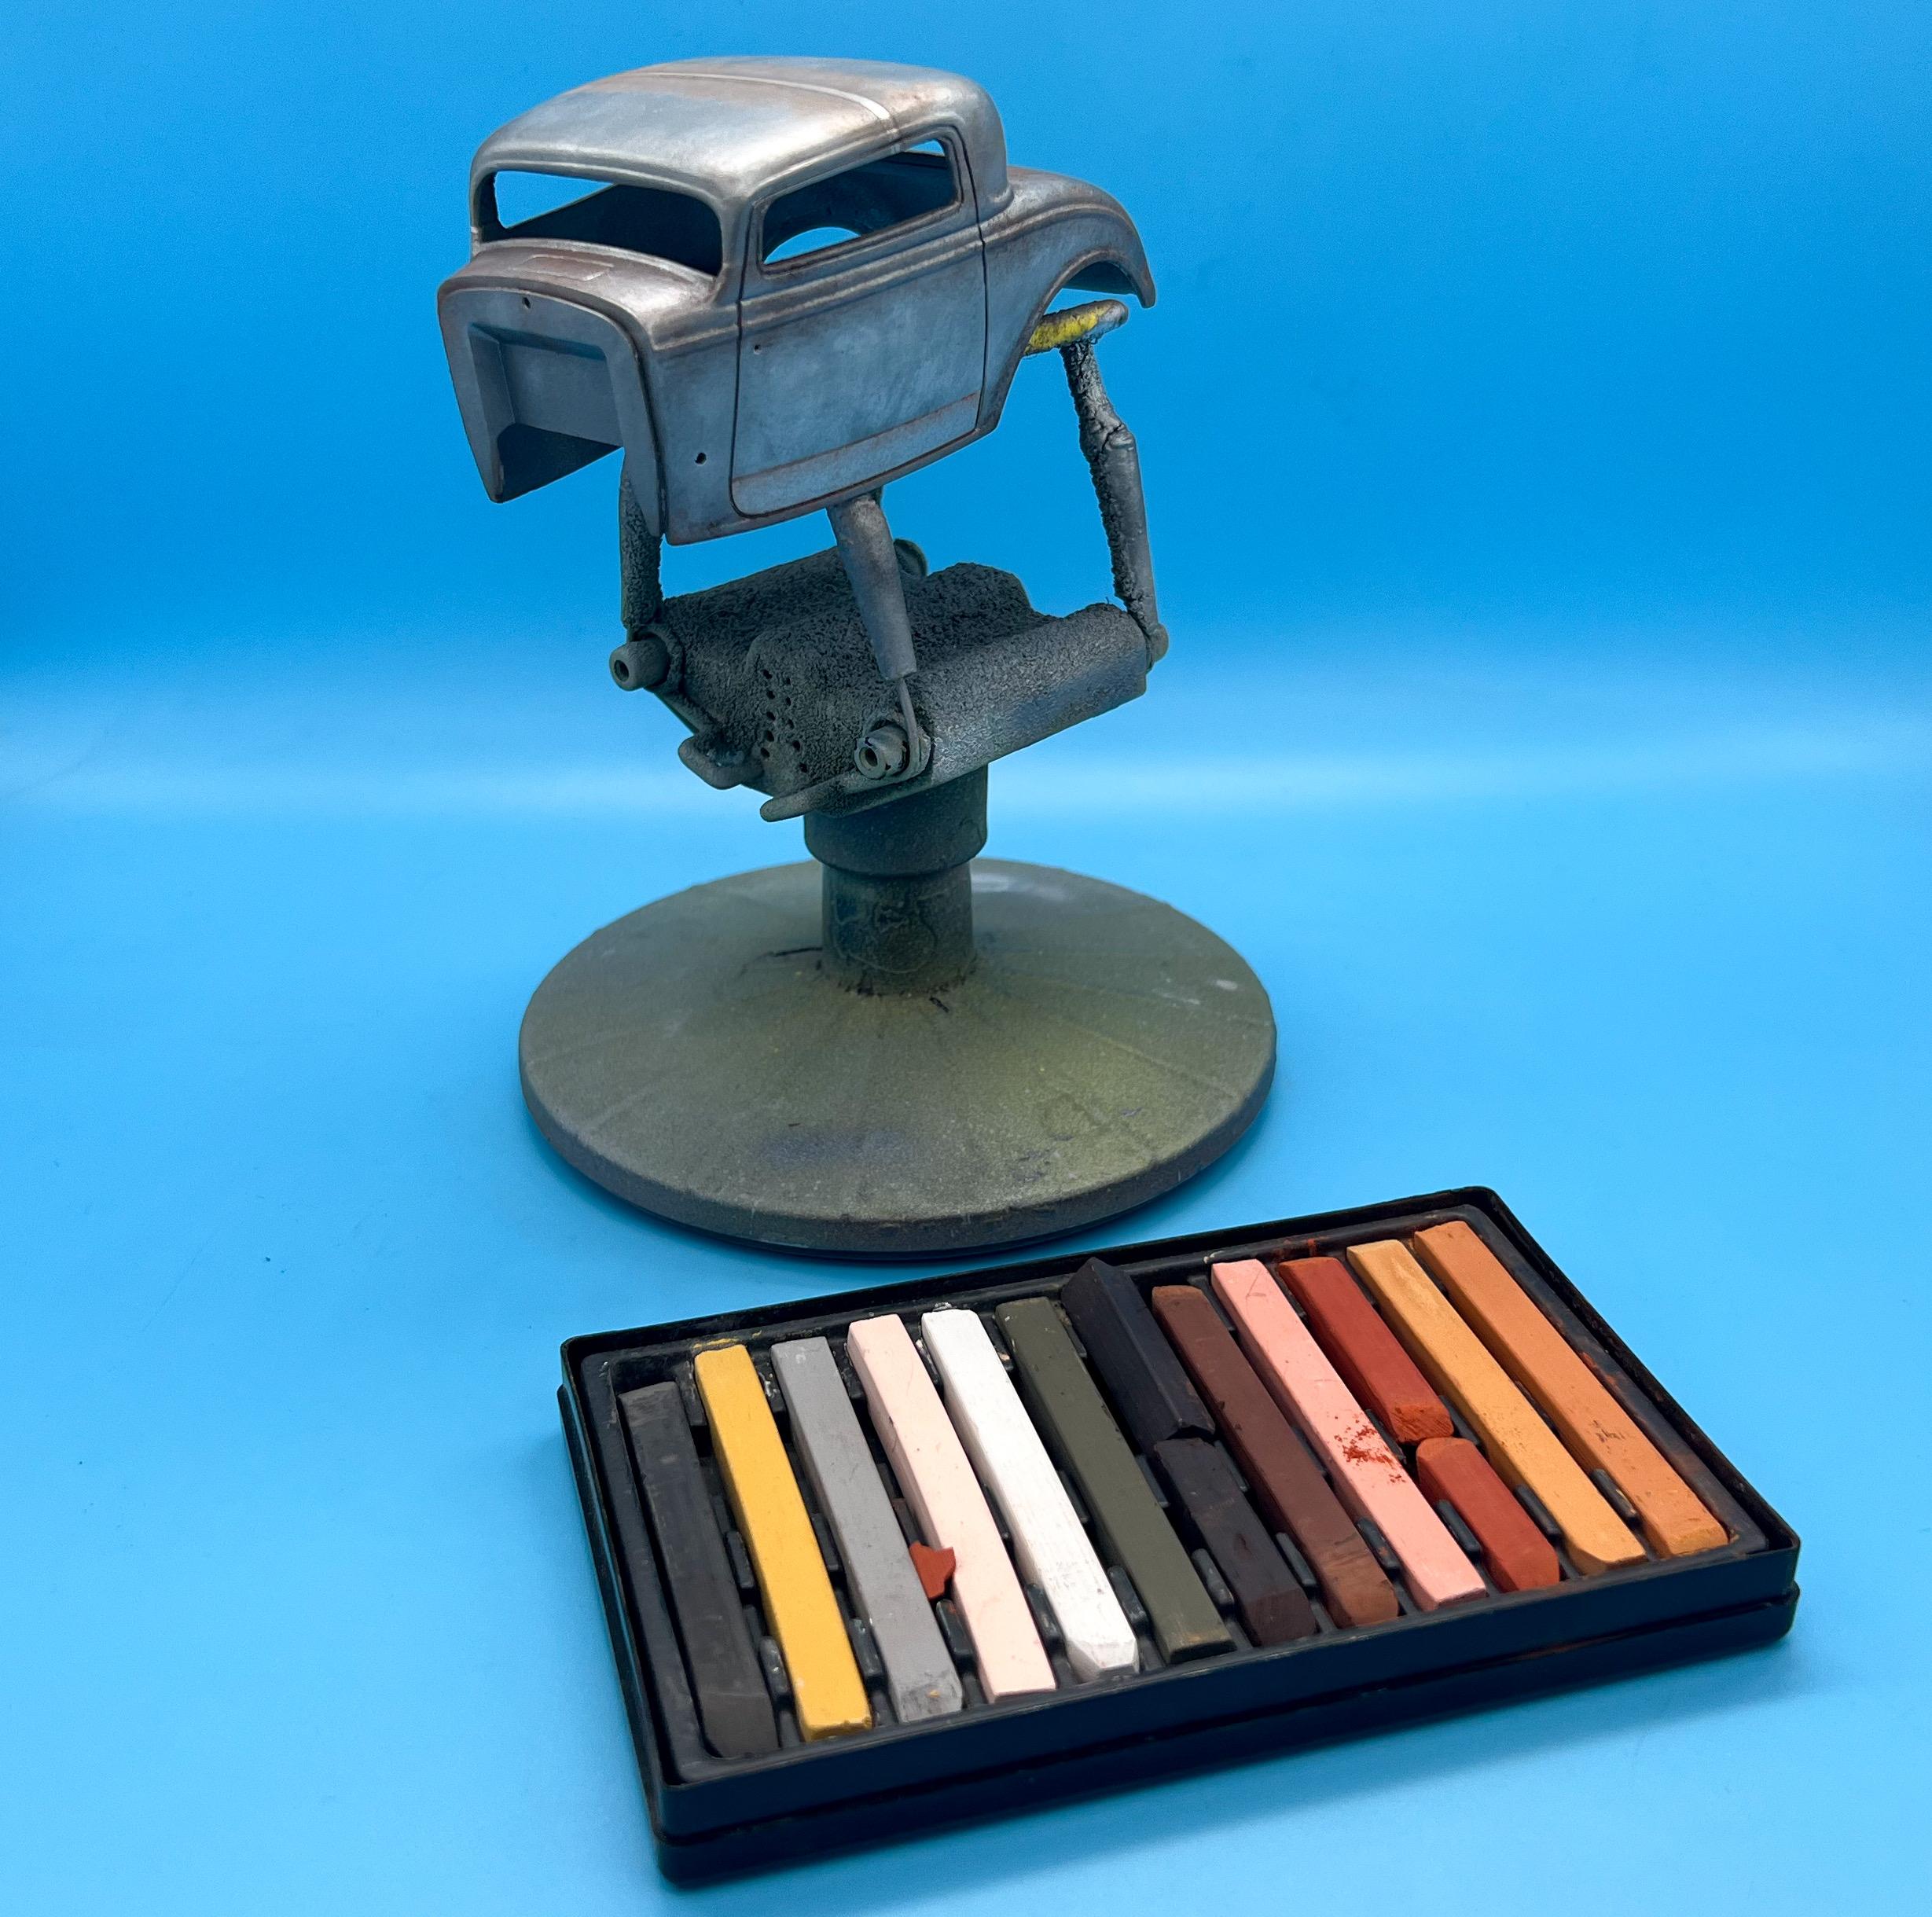
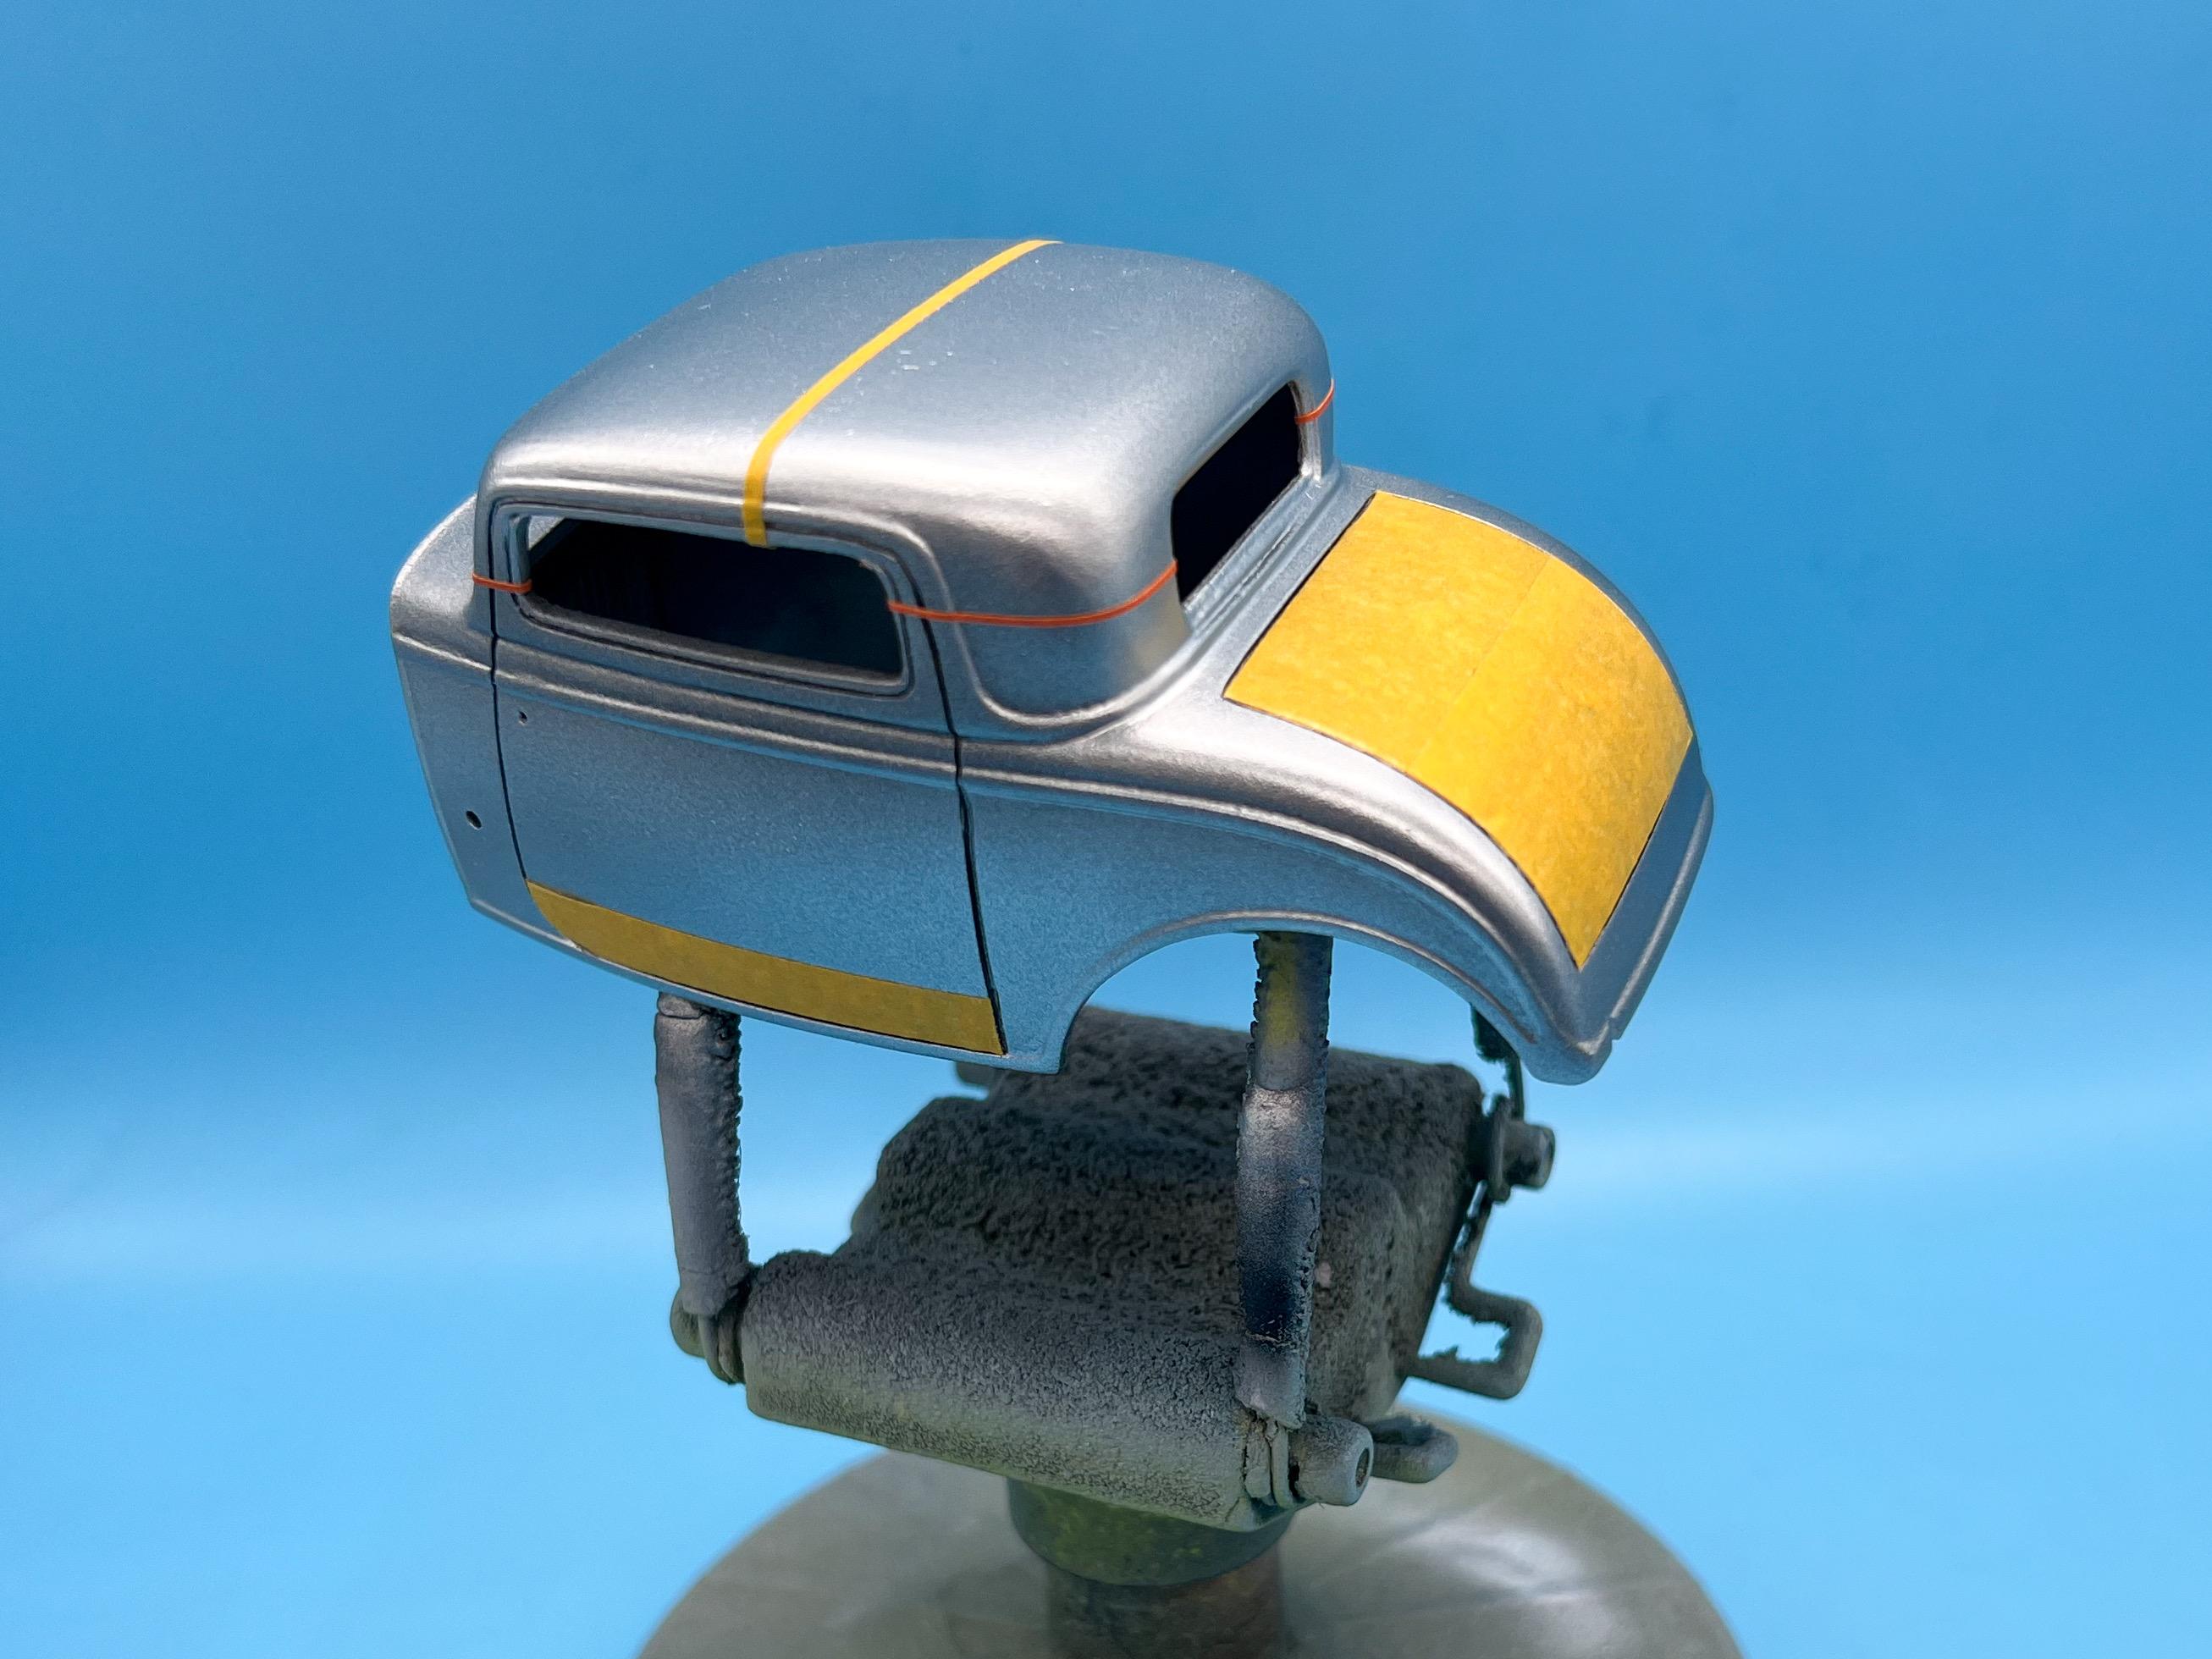
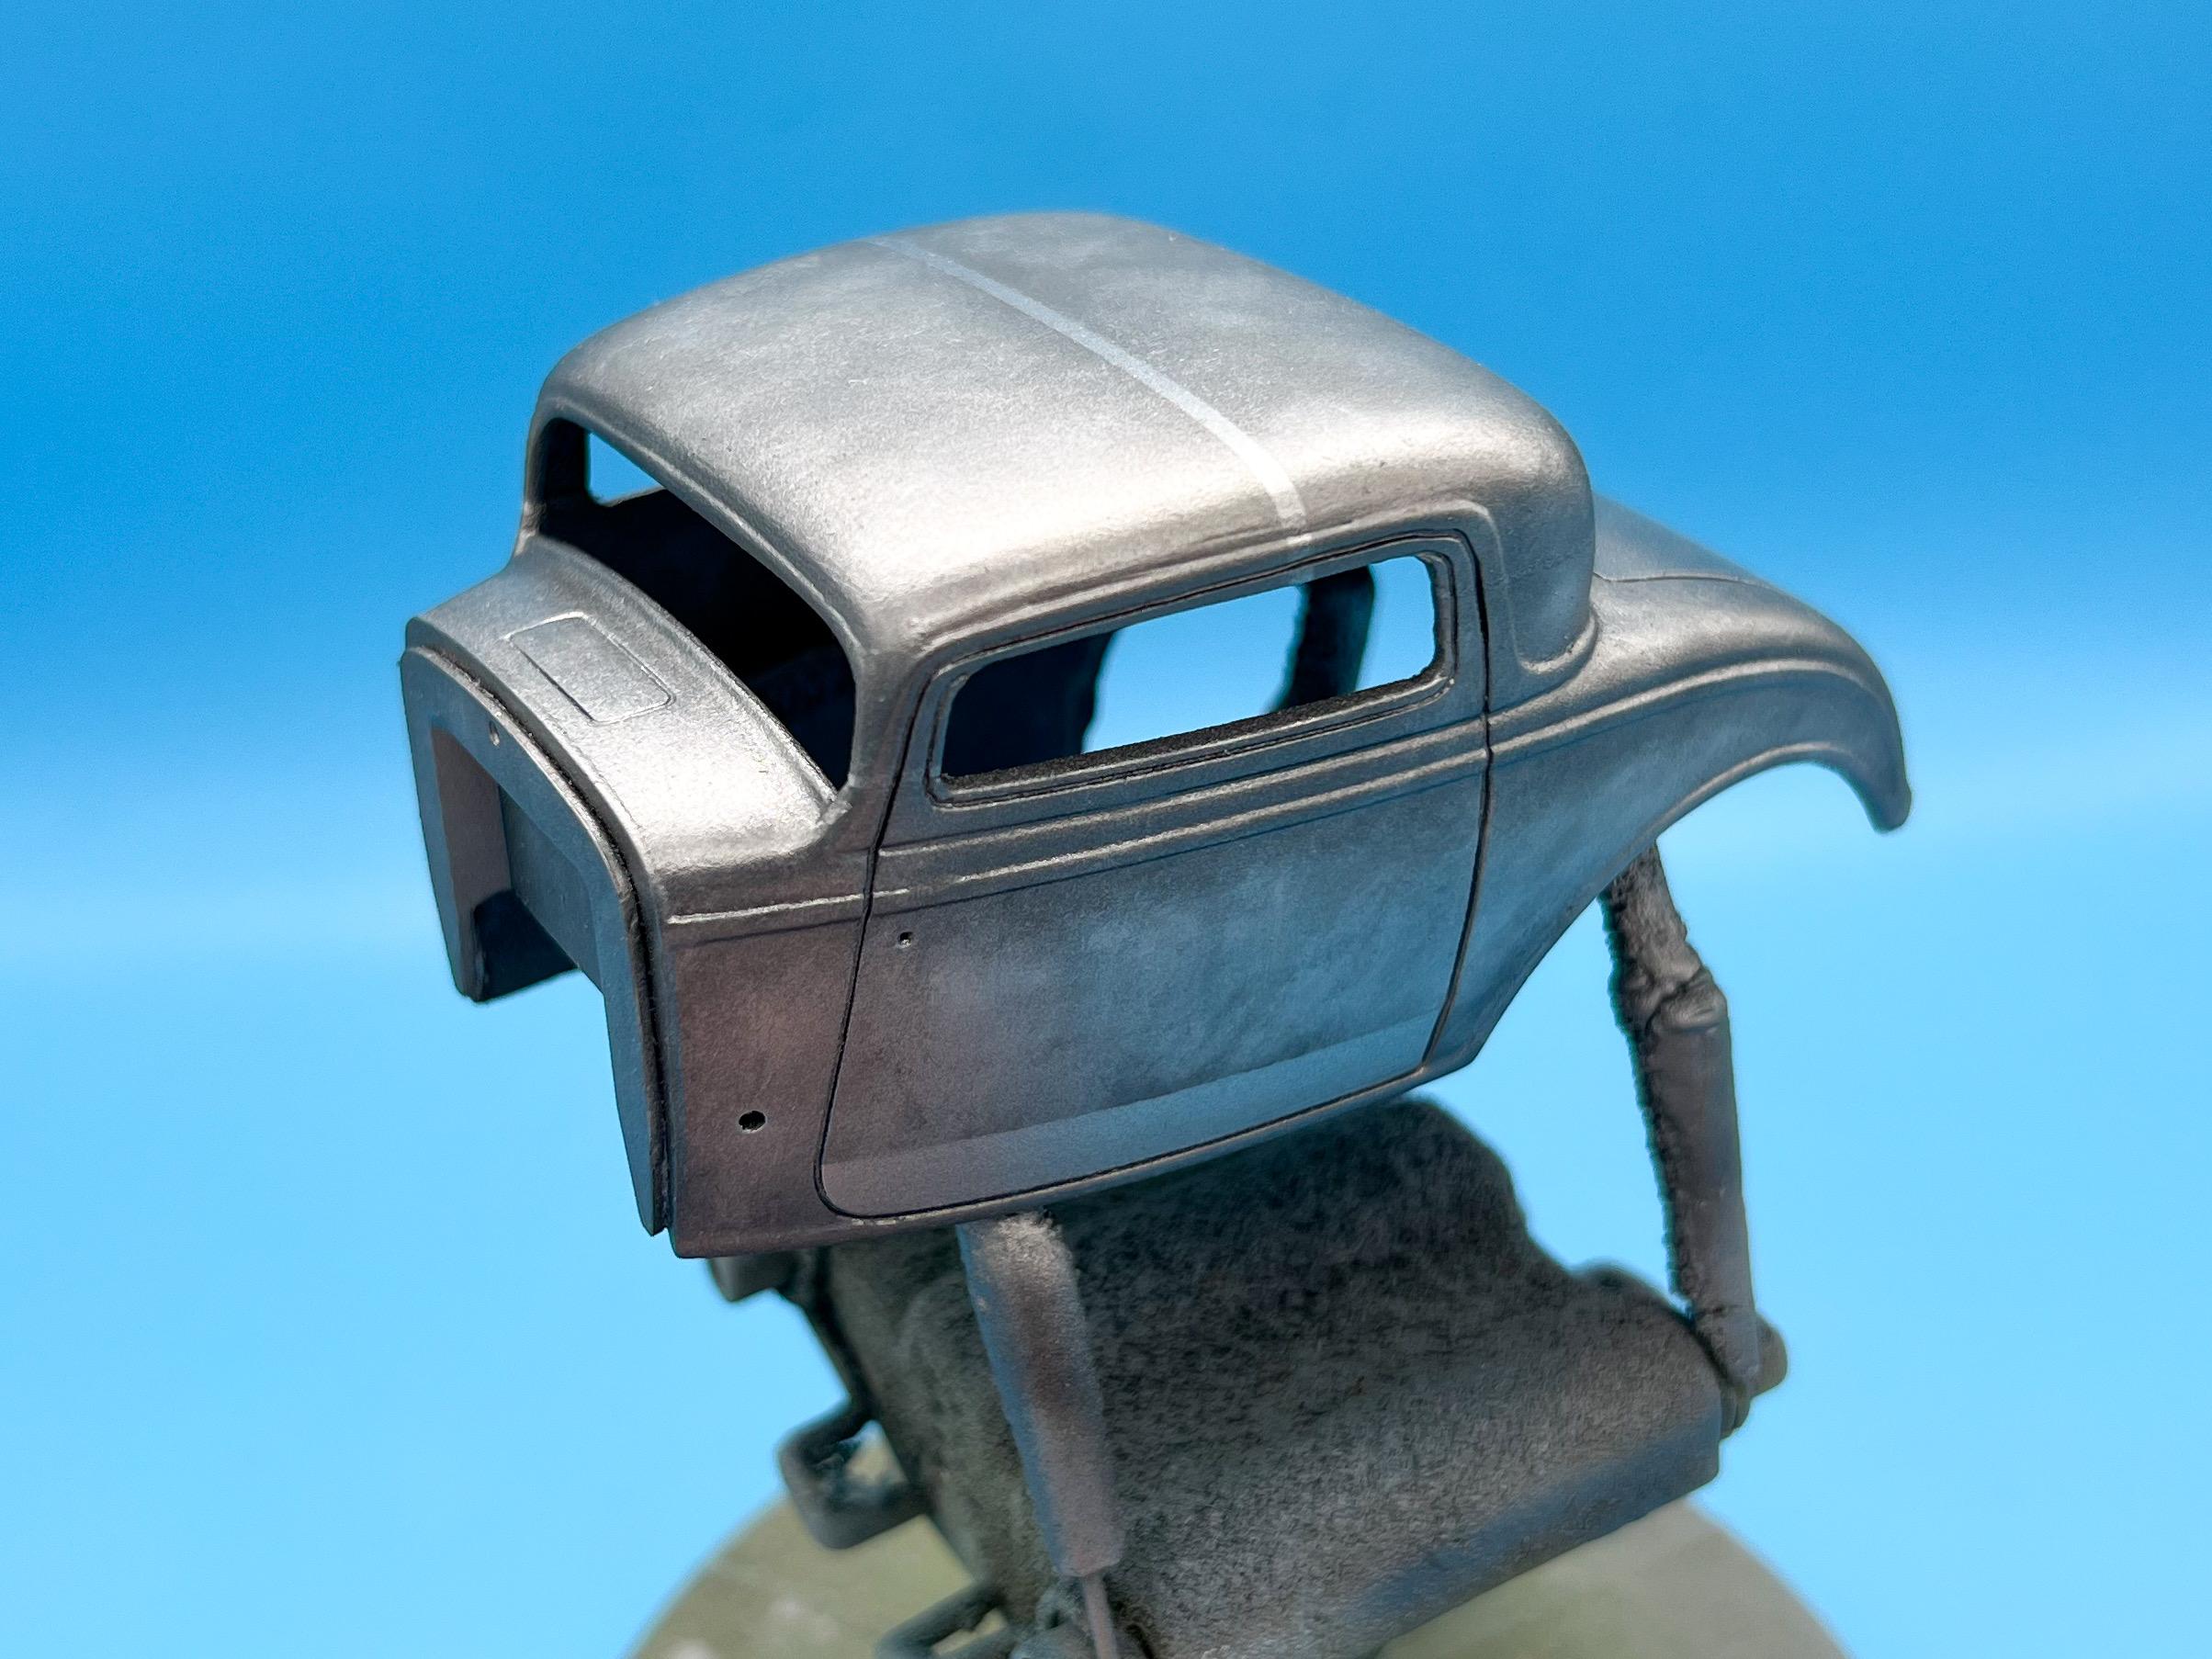
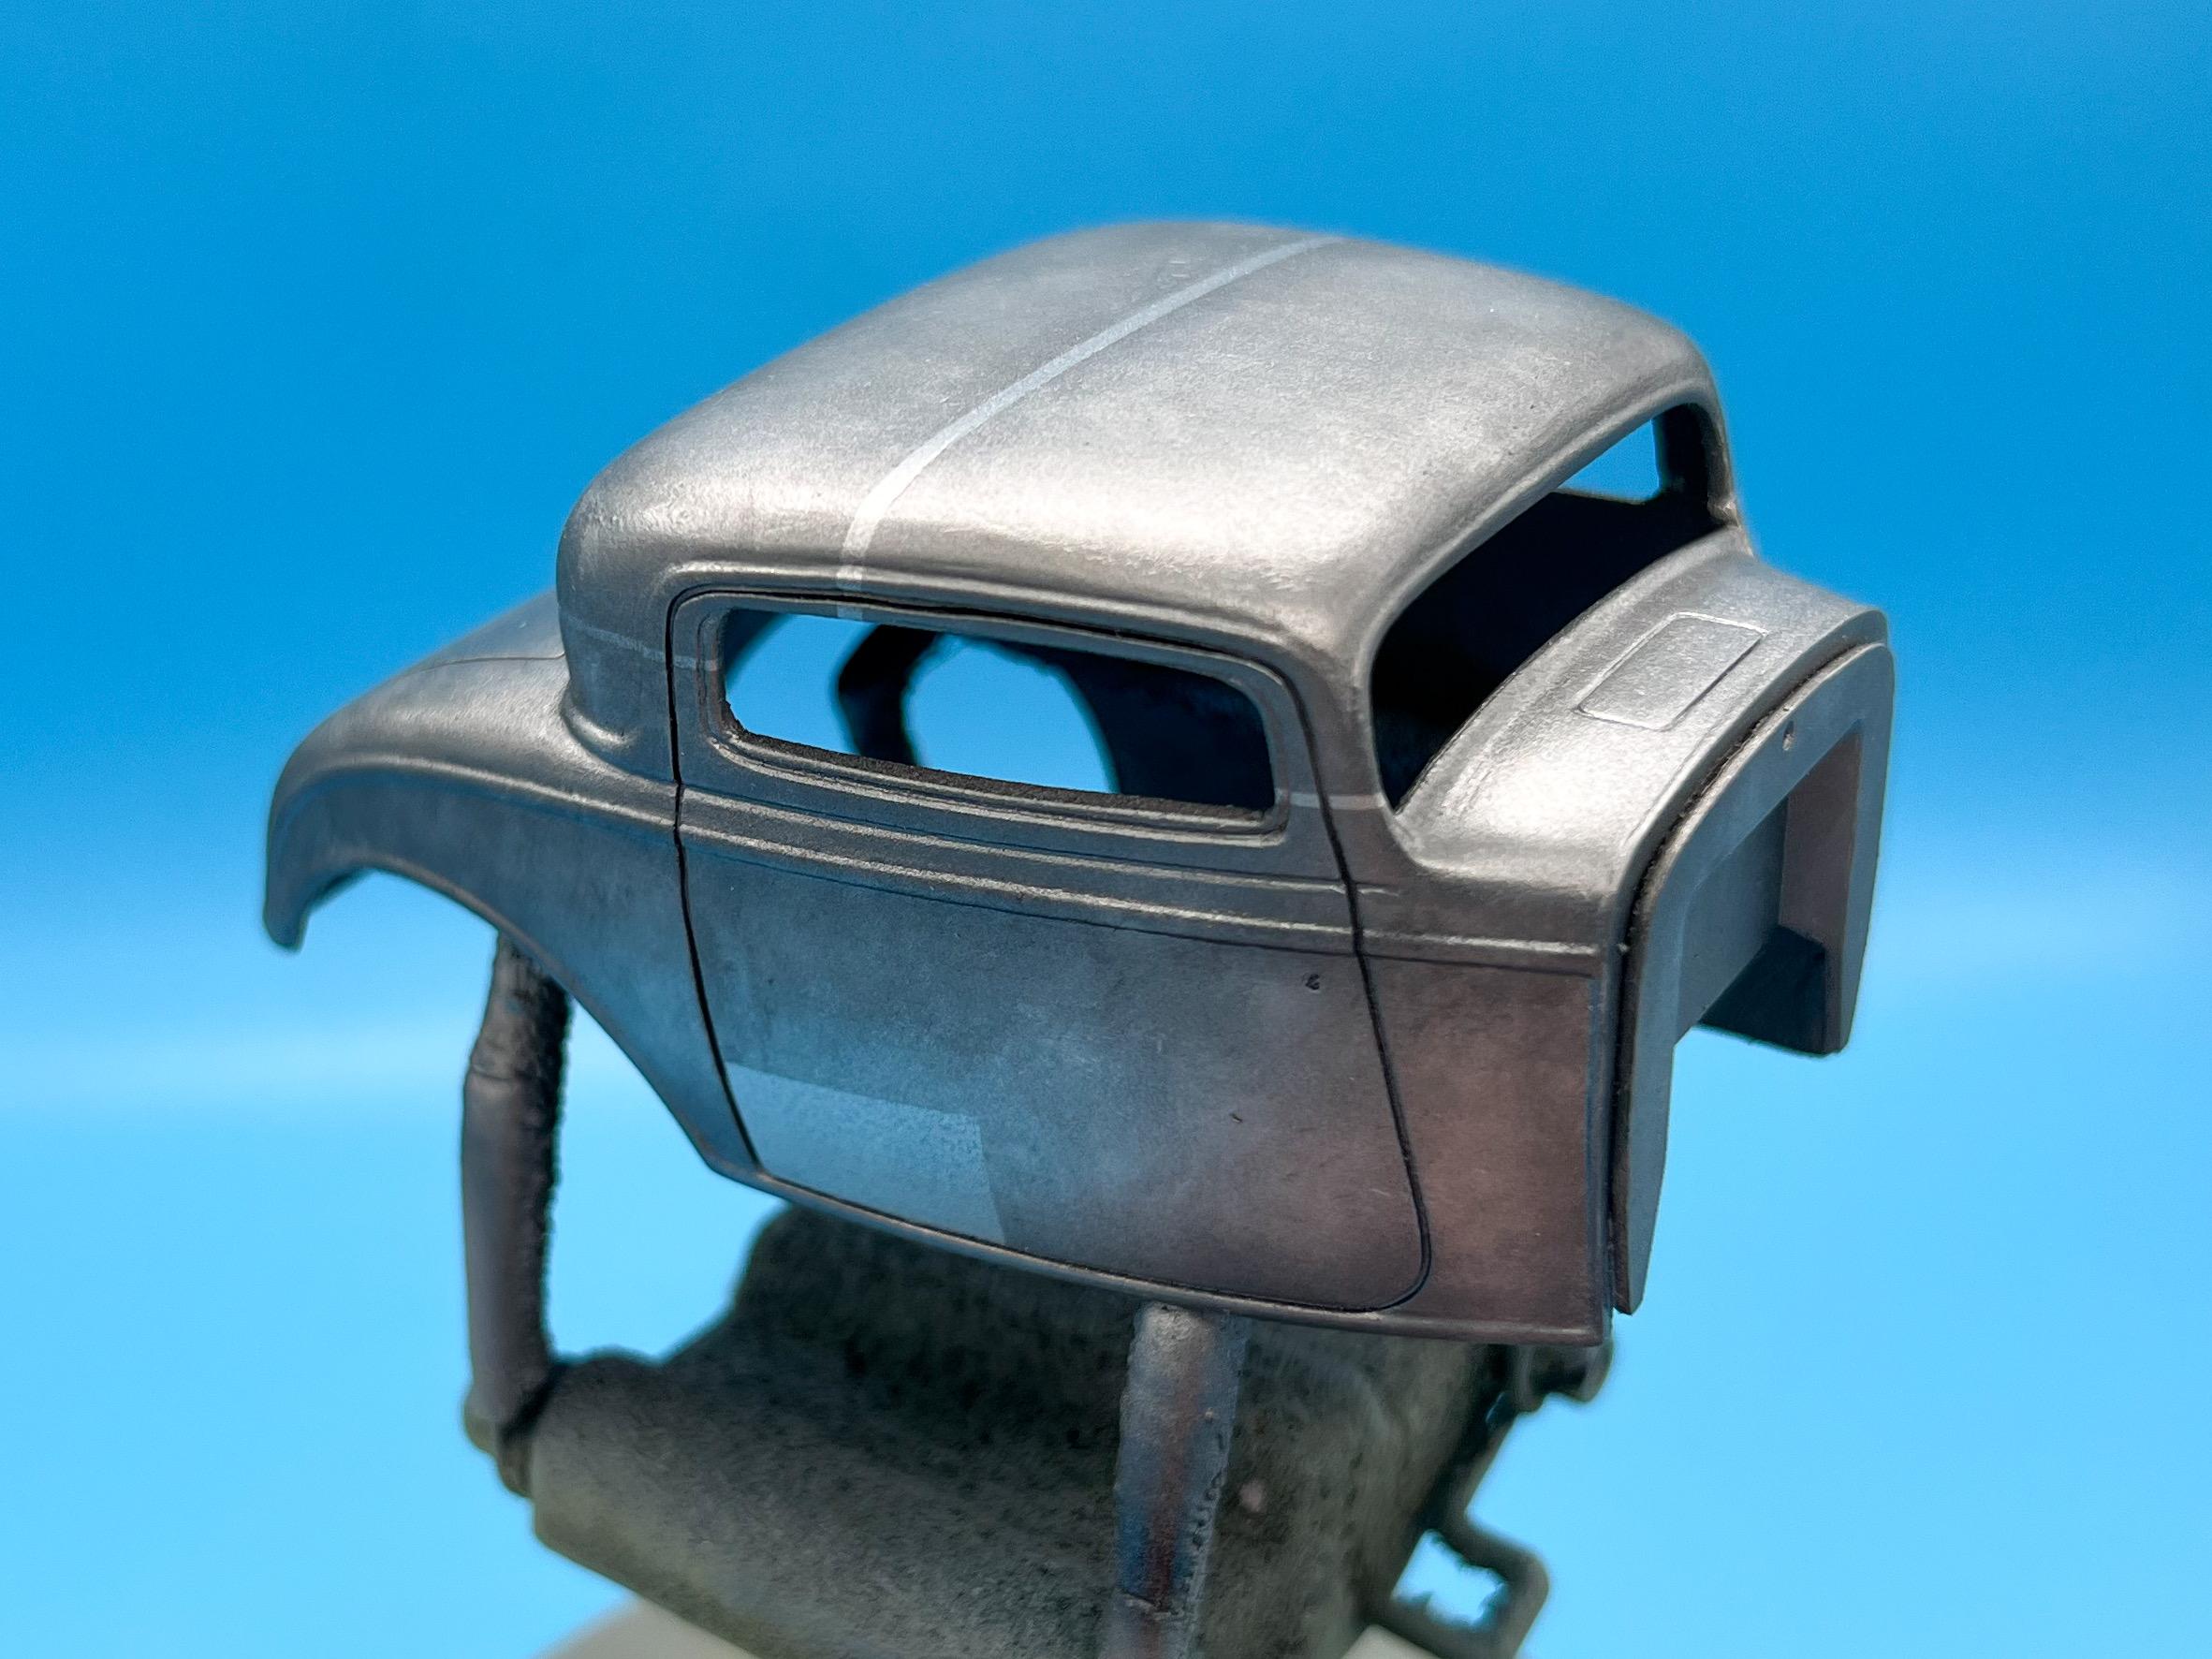
That’s a great looking build! Thank you for sharing!! I did a quick search this evening to find more pics of that dozer but came up short…I’ll do some more digging. Beautiful work on display there! It’s not super expensive either - I use it a lot for last-minute fixes on primer coats, and you can do some fun stuff with it like creating weld beads and so on too. Definitely useful! Funny you should mention that Paul…as you posted about pastels I was at the bench using some ? Next step tonight was adding some light aging to those ‘clean’ panels and patches. I figure the old original ‘Henry’ steel would have a lot of depth to it, subtle spots of dark and light and a lot of character, but the newer pieces would likely have some light superficial brown tones, like surface rust where they had lightly flashed from some humidity and exposure to the elements. First up, masked a couple of super-thin ‘weld’ lines where some new steel would’ve needed to be added to the roof during the process of chopping it: Nothing too fancy there, just wanted to demonstrate that the steel had been through a heat cycle and darkened up. Then, tape removed, I did some very light airbrushing of a tan and then dark gray color to further simulate discolored metal, and blended some similar color pastels lightly over top to make it look less ‘airbrushed’: I’m not going for heavy weathering or big obvious rat-rod looking lumpy welds - just something nicely done and smoothed down, but not quite ready for paint yet - if it ever were to GET paint. I used the same trick, but different colors on the new panels - much lighter brighter browns but subtly applied to give them a little character too…I’m pretty pleased with how it’s coming together… Nice thing is with pastels - if there’s too much rust (like where the firewall meets the body on that last pic above) you can just buff it out, like REAL rust. Downside too is that you can remove it really easily, so I’m sure I’ll be doing some touch-ups further down the line. Just a little progress to report, because this stuff seems to take me hours, but it’s rewarding! Still more to come on the body, but I really need to start working on painting some of the other bits this weekend too. Thanks for looking - more soon, soon as I’ve done more!
-
That 55 is cool! Love the tires! Plug wires are easy - most common mistakes people make are using super thick wire that looks like garden hose (or pool noodles), and not having them ‘droop’ like real ones do. Are you using an aftermarket pre-wired distributor or converting the kit piece yourself?
-
You worked a miracle on those rough resin parts - nice work!
-
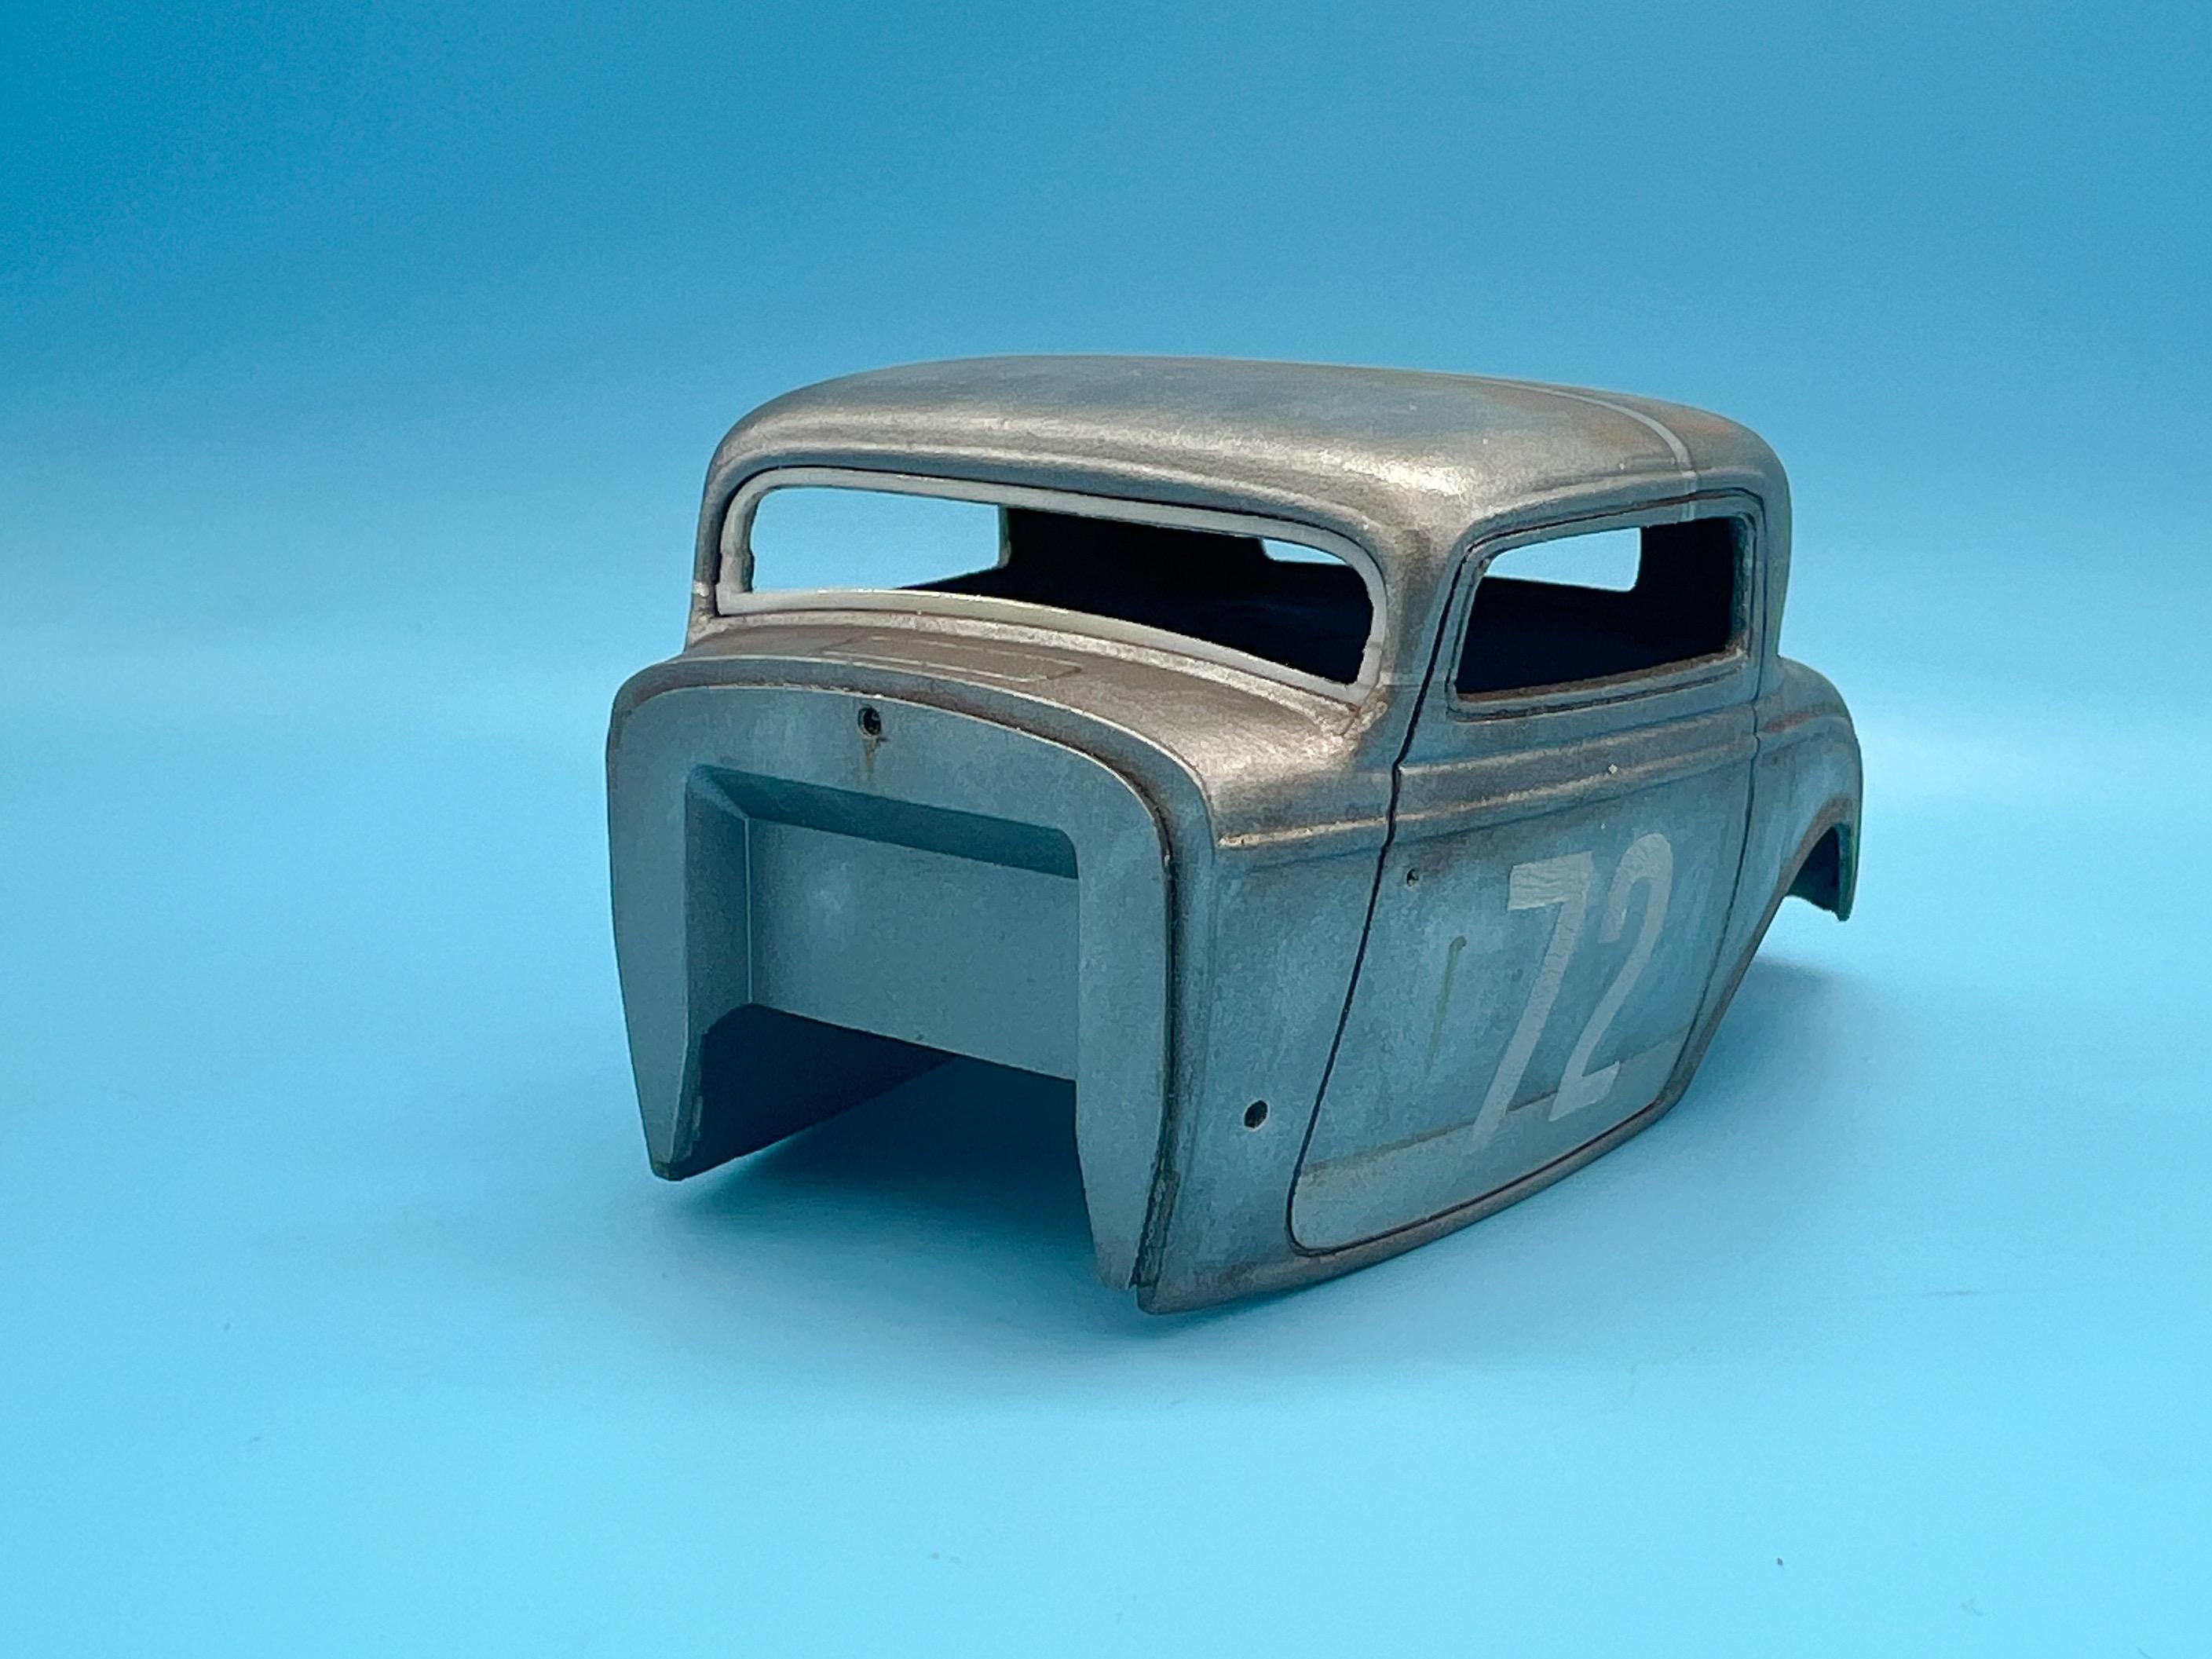
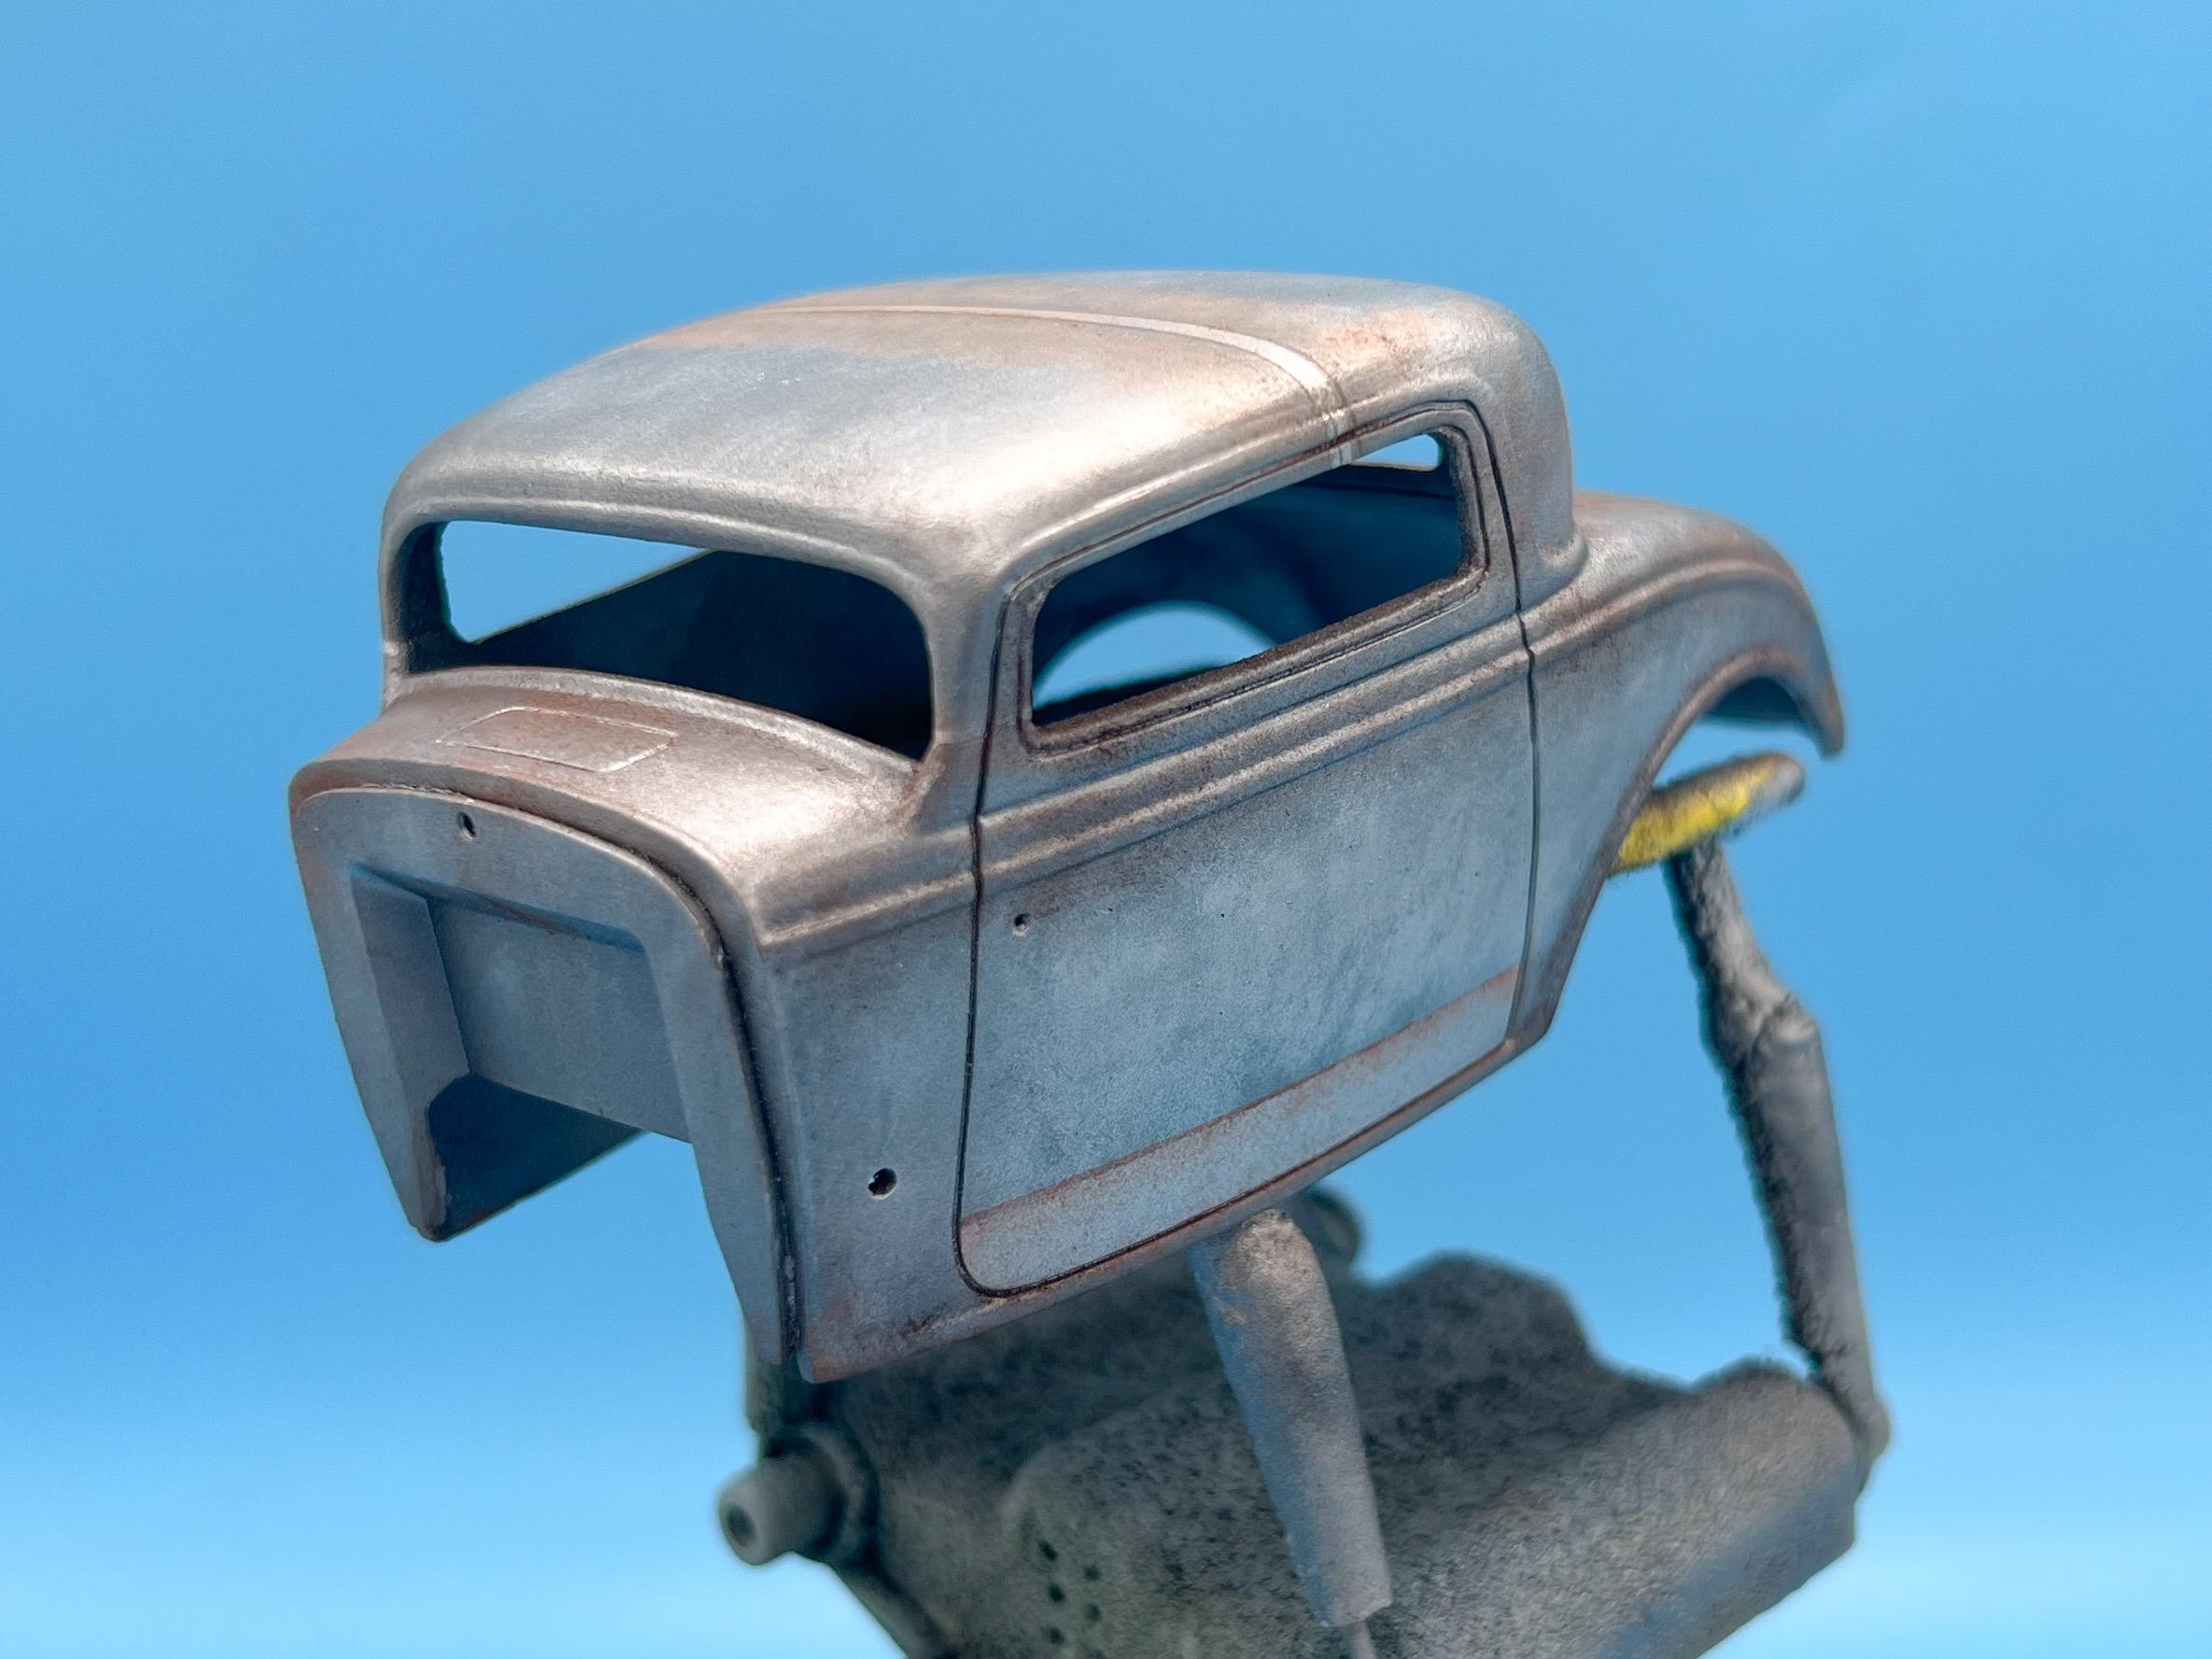
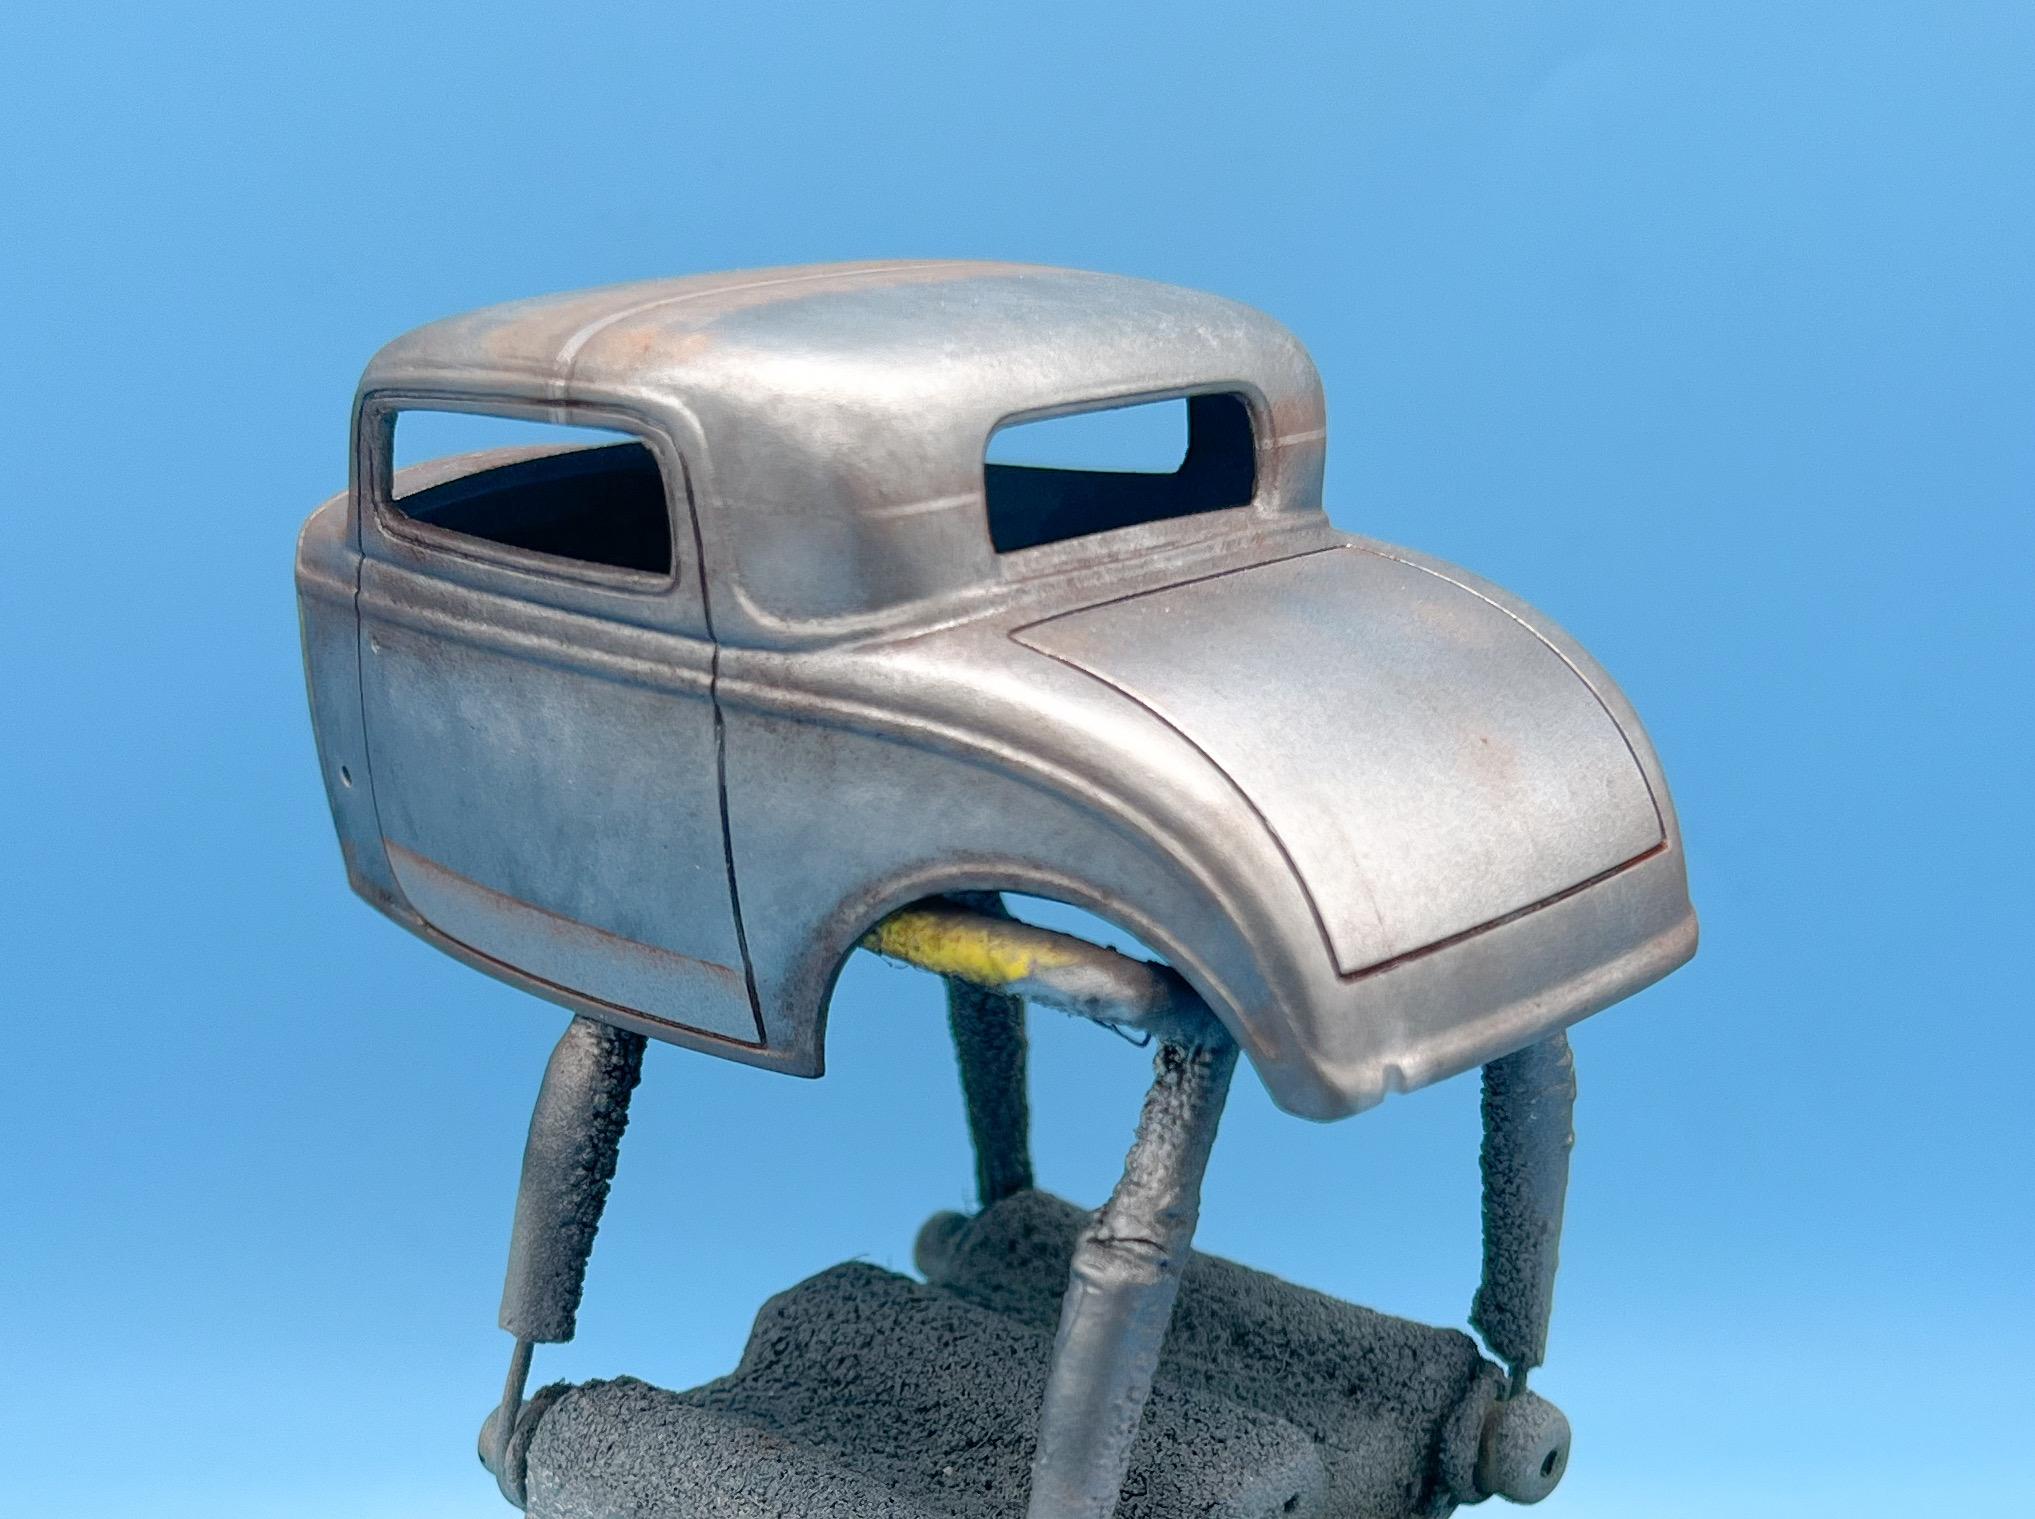
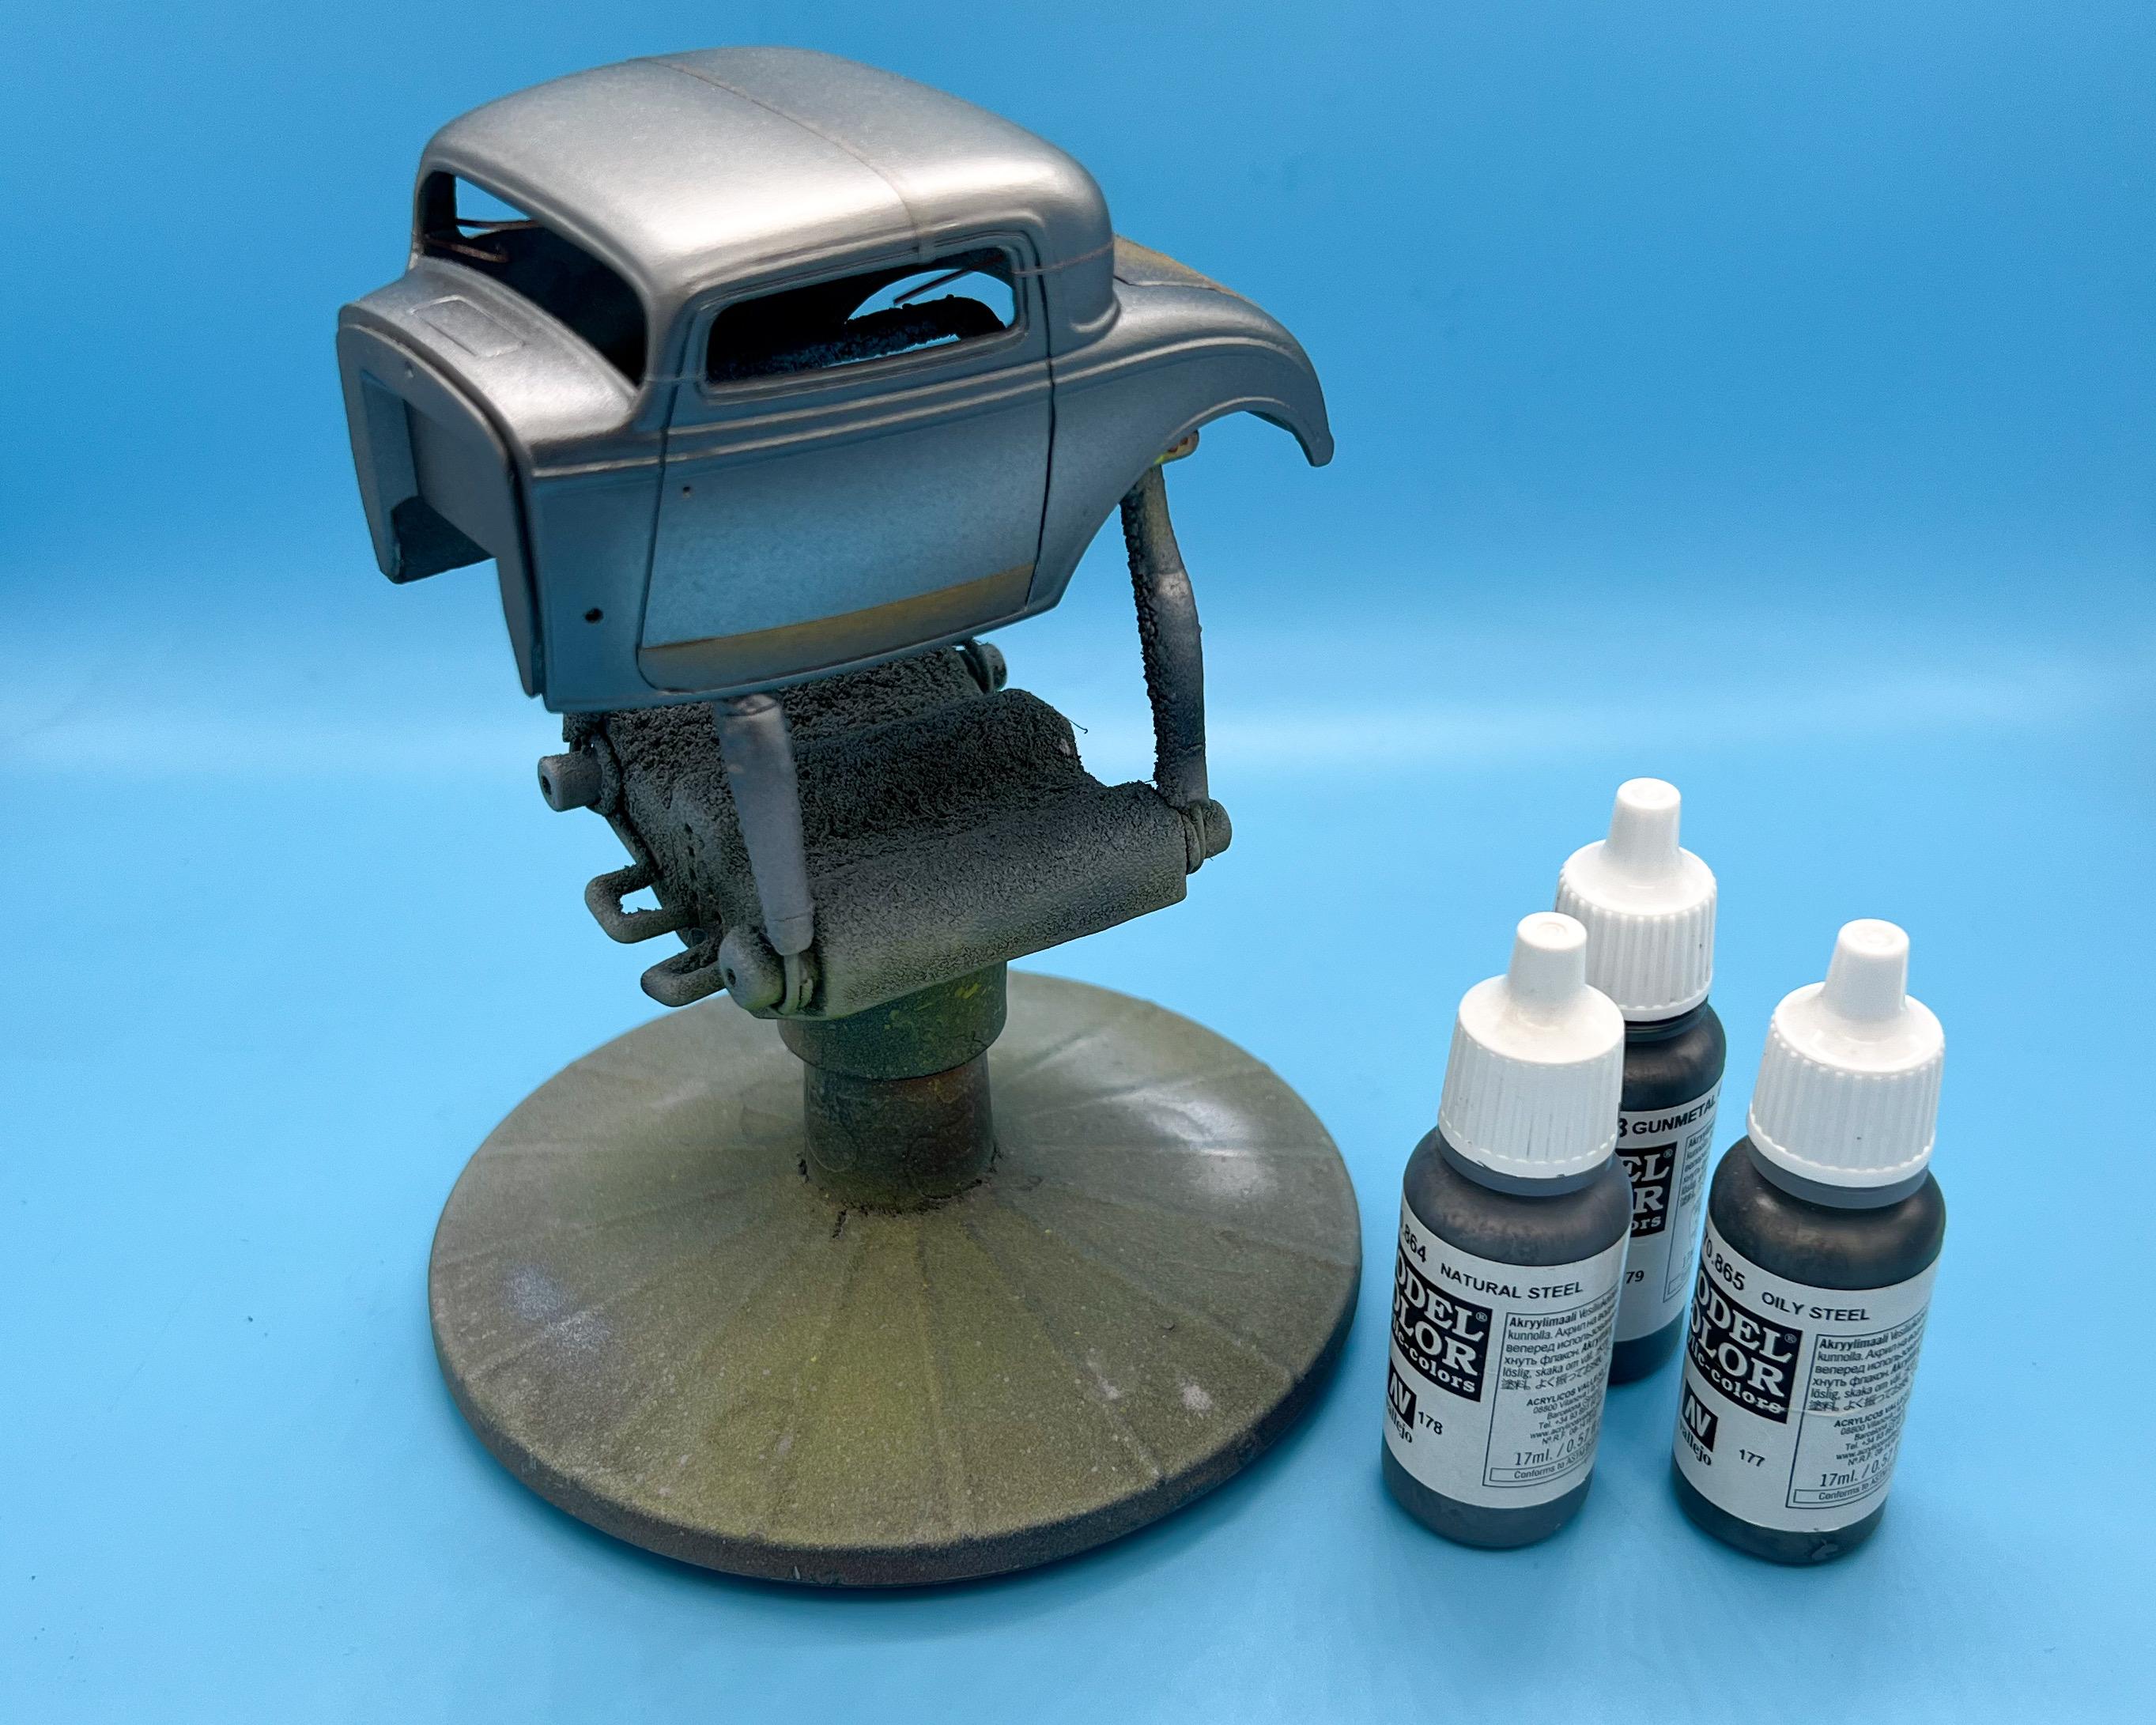
Thanks for the kind words fellas! Ohh, that’s an interesting idea, yeah!! Will experiment with that at the weekend…thank you!! Good thinking! Today’s project, making a start on the baremetal effects on the body. It’s going to take a few sessions to get this where I want it, and like most of these weathering-type activities it’ll take a bunch of lightly-applied layers to get an effect that doesn’t look heavy handed and unrealistic. I already shot the body in Vallejo ‘chrome’, which I really am using as a base more than anything - it’s too light for a steel color but it has good reflectivity and it’ll hopefully keep a degree of that as I build layers on top of it to get the effect I’m looking for. Tonight’s project will be getting an old, but clean(ish) steel look, but I also imagined that this body would have had patch panels added at some point - maybe a fix on one of the doors, a whole new lower edge on another, maybe a repro trunklid or one from another car - and I’d like to make the welds from the chopped top visible, a little too. So, laid down a little low tack tape so I can mess with a few little sections of the body some more later and not have any of the ‘aging’ process applied to them yet: And then I did a little light layering in the corners of the body and the recesses with some Vallejo steel colors: I’m just applying really light passes with each of these, just in a few spots to add some natural looking gradients and changes in color. Next up, I used some Alclad and Mr Color steel colors, and airbrushed a few more spots, again for some more color variation, and then used a technique I learned on here by Chris Drysdale of kinda ‘smooshing’ some dried lacquer into the surface with a worn out old brush to create some more variation: I’ve still got plenty more to do on these layers, so if this kind of process is boring to you might be time to change channel - but this stuff is really fun to do! It’s so easy to go too far, a light tough is required almost every step of the way, and knowing when to stop before you go too far…going to pace myself… Quick shot with the masking removed - tomorrow’s project will be figuring out how to paint some realistic ‘welds’ and then weather those ‘newer’ metal pieces Thanks for looking - more soon, soon as I’ve done more!
-
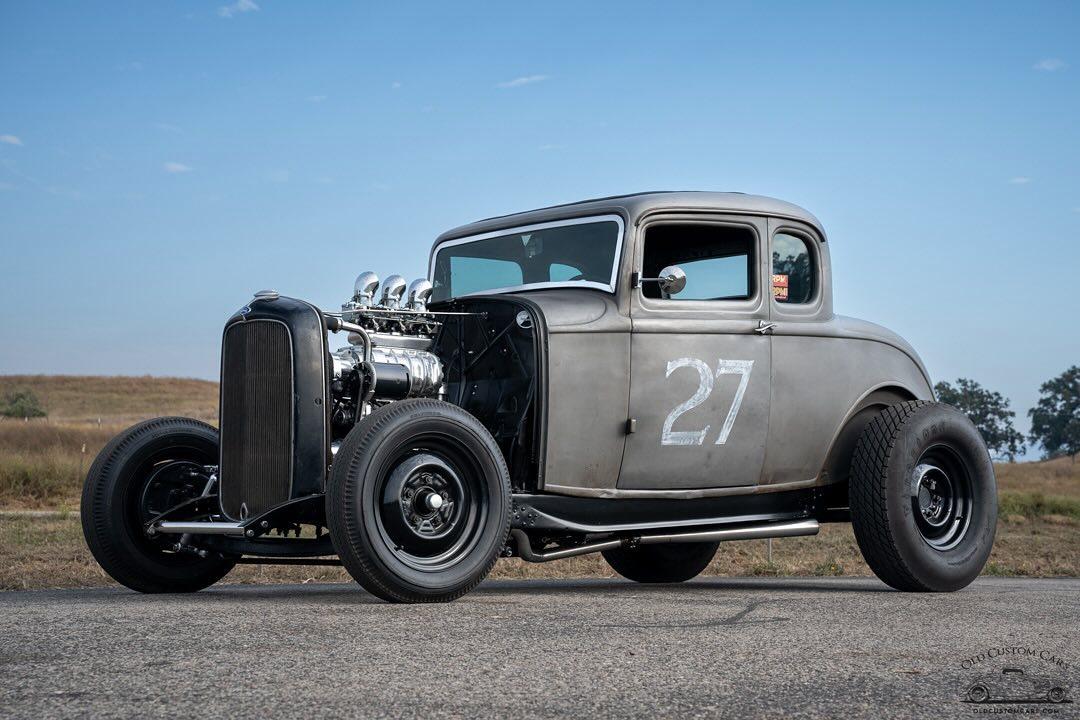
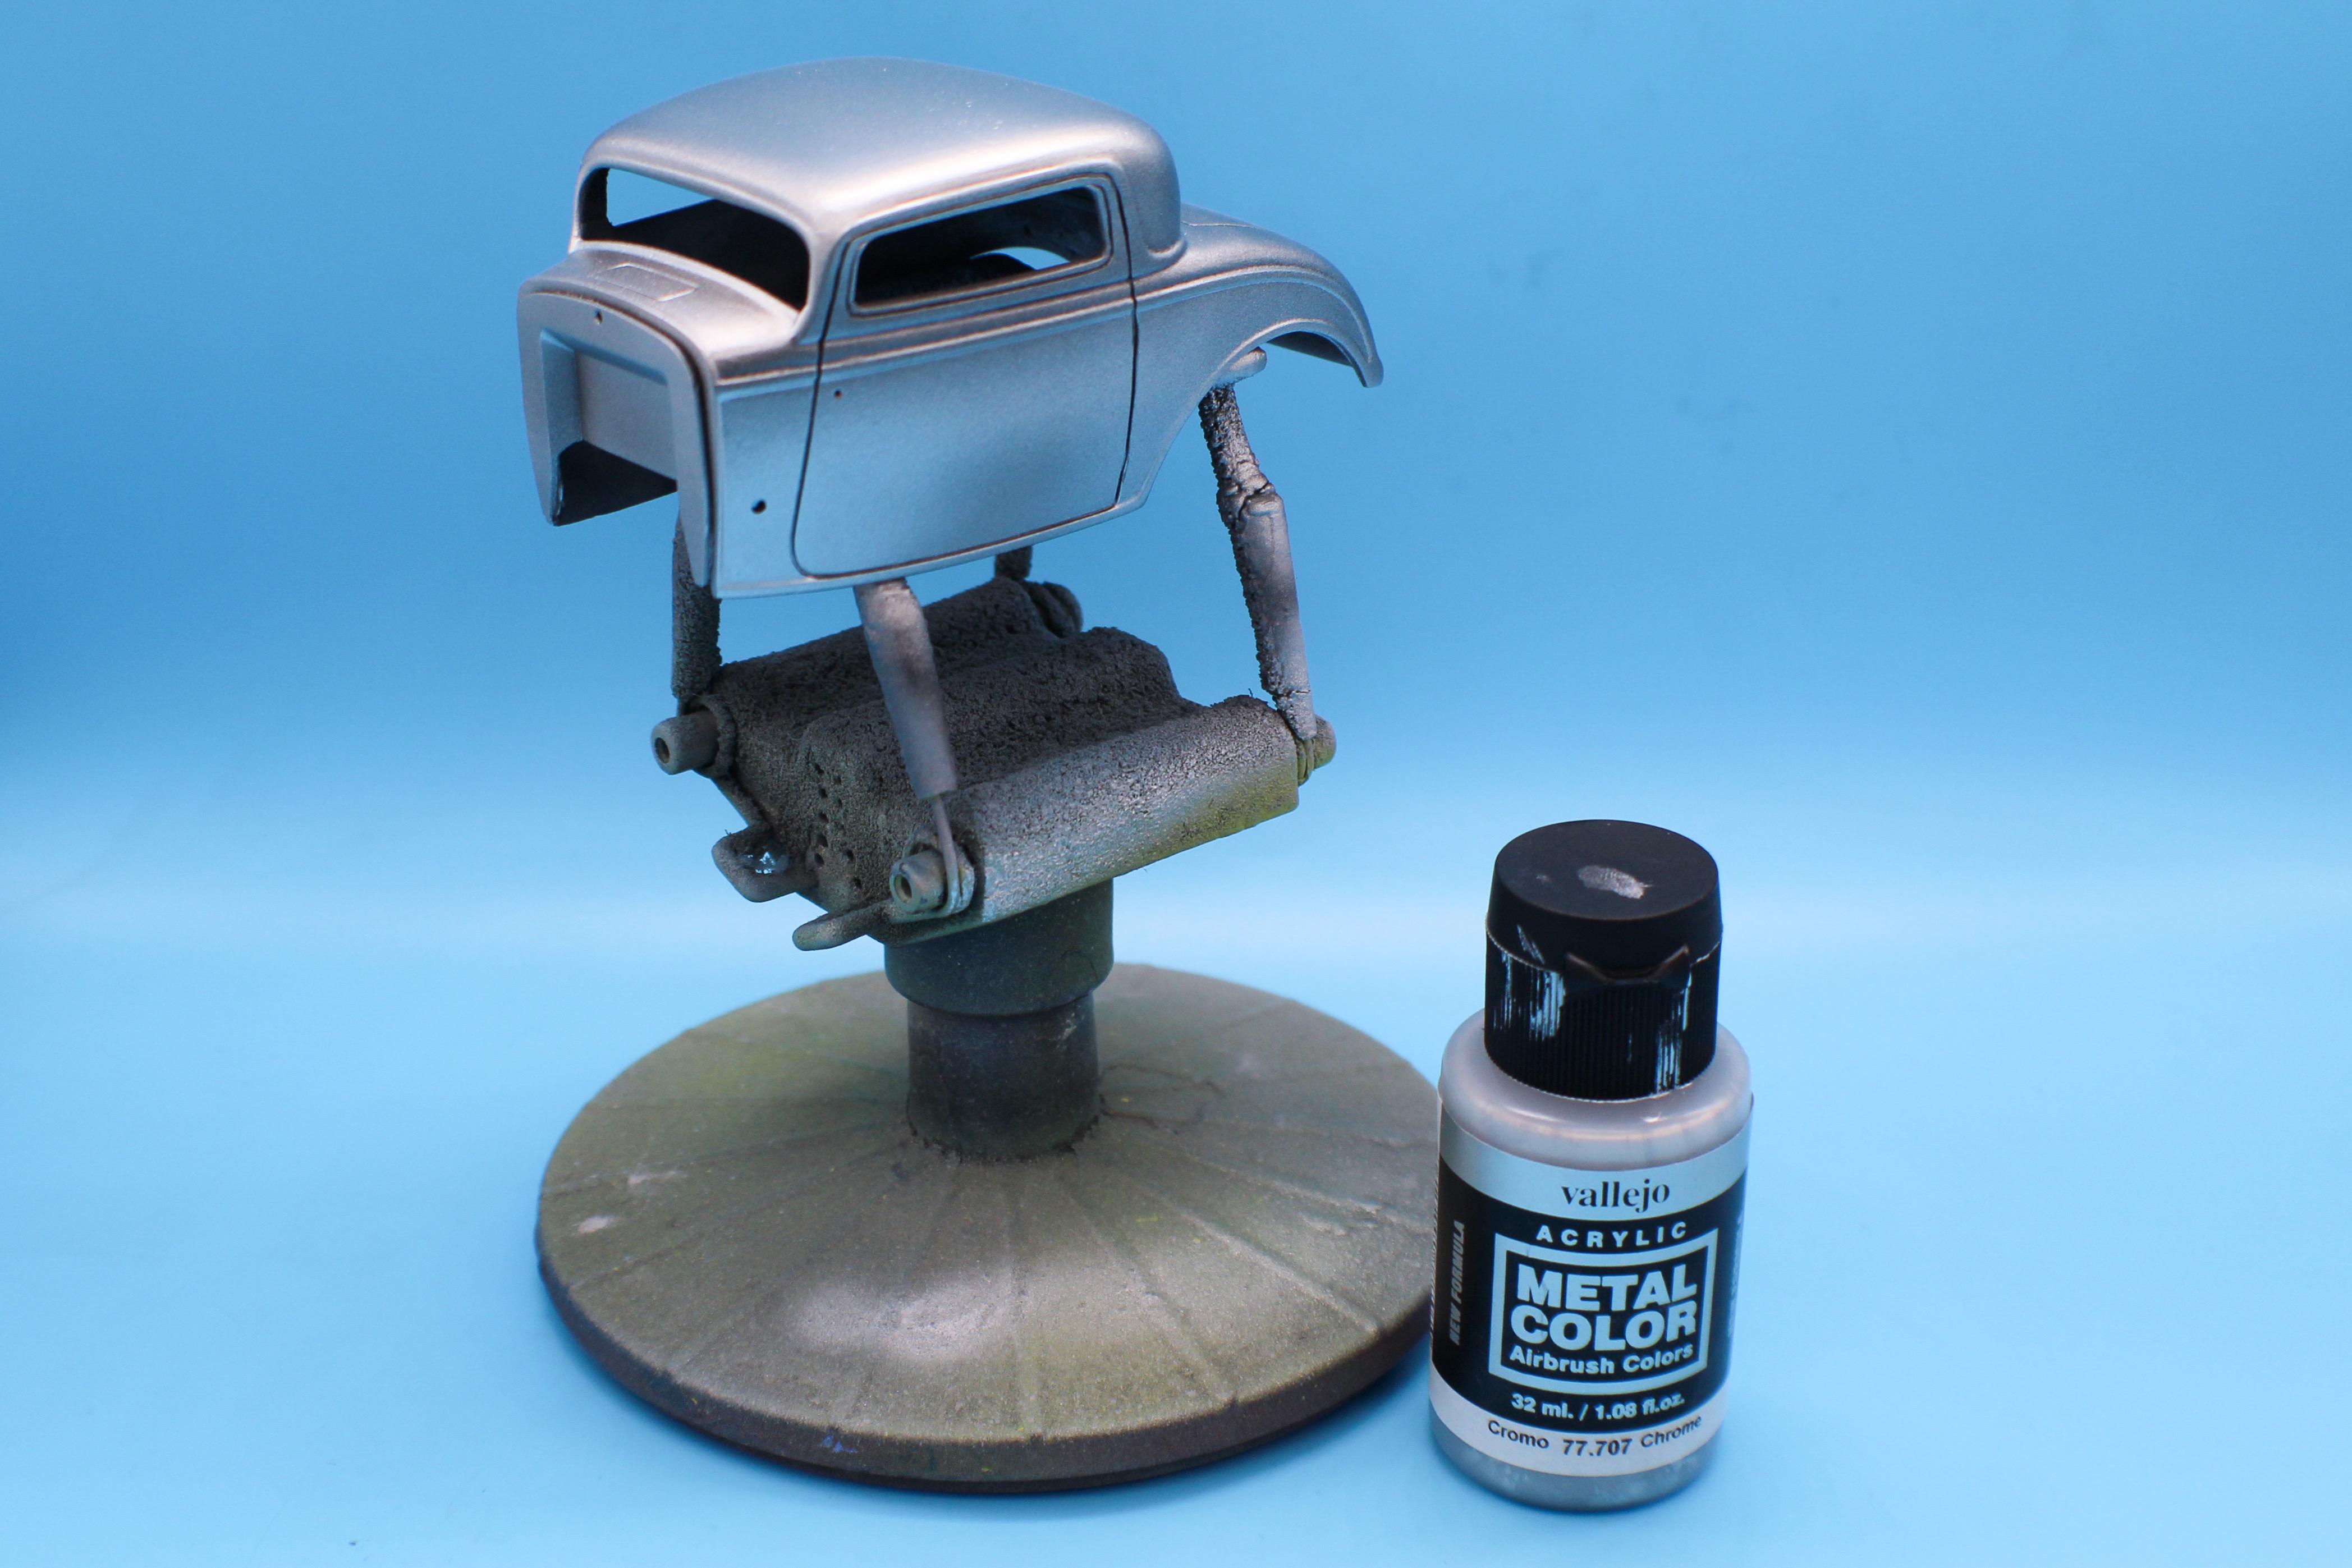
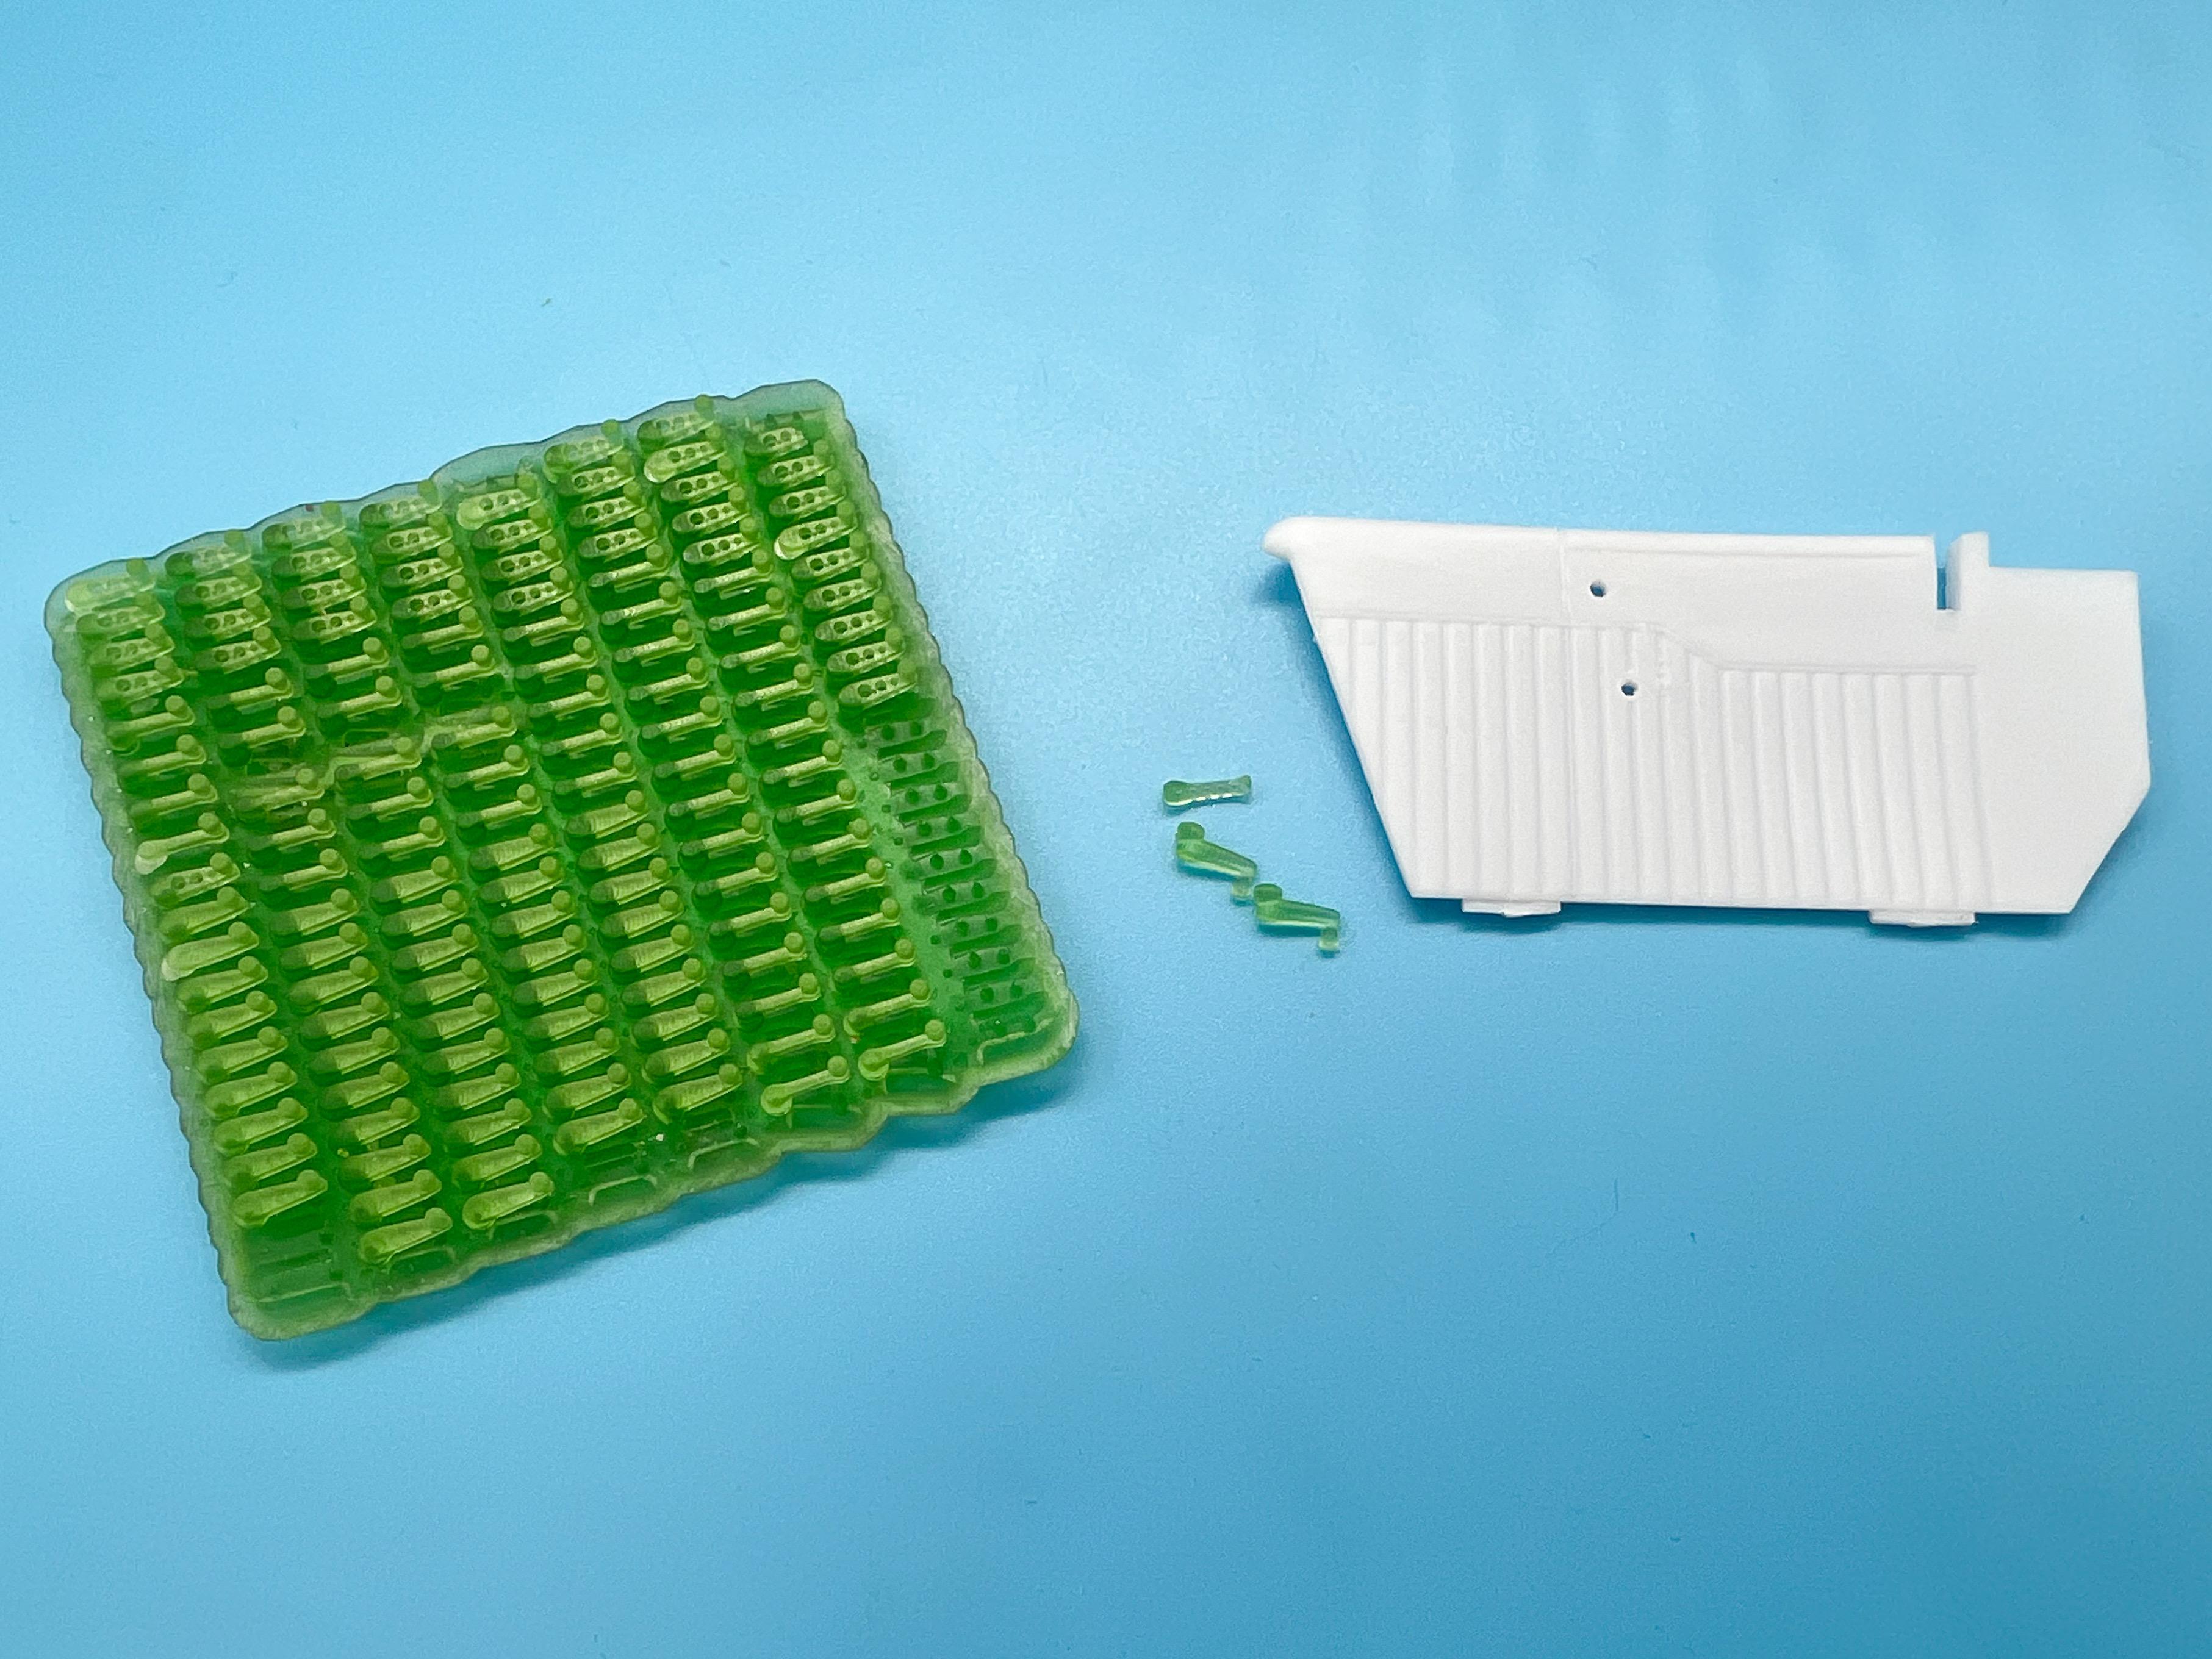
Thanks fellas! I had to work late tonight, so didn’t get as much done as I wanted this evening, but got a little done anyway… Following on from my door card experiment that I mentioned yesterday, I wanted to try the embossing aluminum over top the pieces I made to see how it would look: Meh, kinda ok - but I like the crispness of the printed parts, so I’ll prep those for paint and get an aluminum look that way. BMF would probably work ok too, although I haven’t figured out a good way to get around the roughness that the glue imparts when you use it on a large flat area. I’m sure there IS a solution, but paint will work for what I’m trying to achieve here I think… Speaking of paint, so here’s what I’ve been looking forward to…I’m going for a bare metal look on this one - the frame and the running gear and so on will appear ‘finished’ but I’m going for a bare metal body and grill shell to give me a chance to work on my realistic metal painting skills. Totally finished looking car, but no paint. Coincidentally, I was collecting a bunch of bare-metal reference material this last couple of weeks and then today stumbled upon almost exactly what I had in my head, in 1:1: Complete coincidence, and I don’t think I had ever seen this car before but it’s pretty close to the look I’m gonna for…might incorporate a couple of elements from it into my build now that I’ve seen it and got some other ideas. If you ever go to an IPMS show, especially one with a lot of aircraft models, you’ll see some masterful use of all kinds of paints to achieve a whole array of impressive metal finishes, and I’m going to be trying some of those techniques on this build. This car will represent a steel body, probably original ‘Henry’ material but maybe with some subtle repairs and some evidence of the roof chop having been done. Some of the metal will be lighter and newer looking than other parts, so I’m starting off with a light base. But first, a dark base: My favorite Createx black sealer - lays down super thin, super opaque and ready for the next color in 10 minutes or so. I need the dark base in this case for my ‘real’ base color - I went with Vallejo chrome, which is bad as a chrome, but is a really light tone, has no visible flake to it (to the naked eye anyway) and will hopefully be a good starting point for what I’ll be doing the rest of the week: And…that’s all I achieved today ??. I’m SUPER excited to get some more done on what the aircraft guys call a ‘natural metal finish’, so more soon! Thanks for looking
-
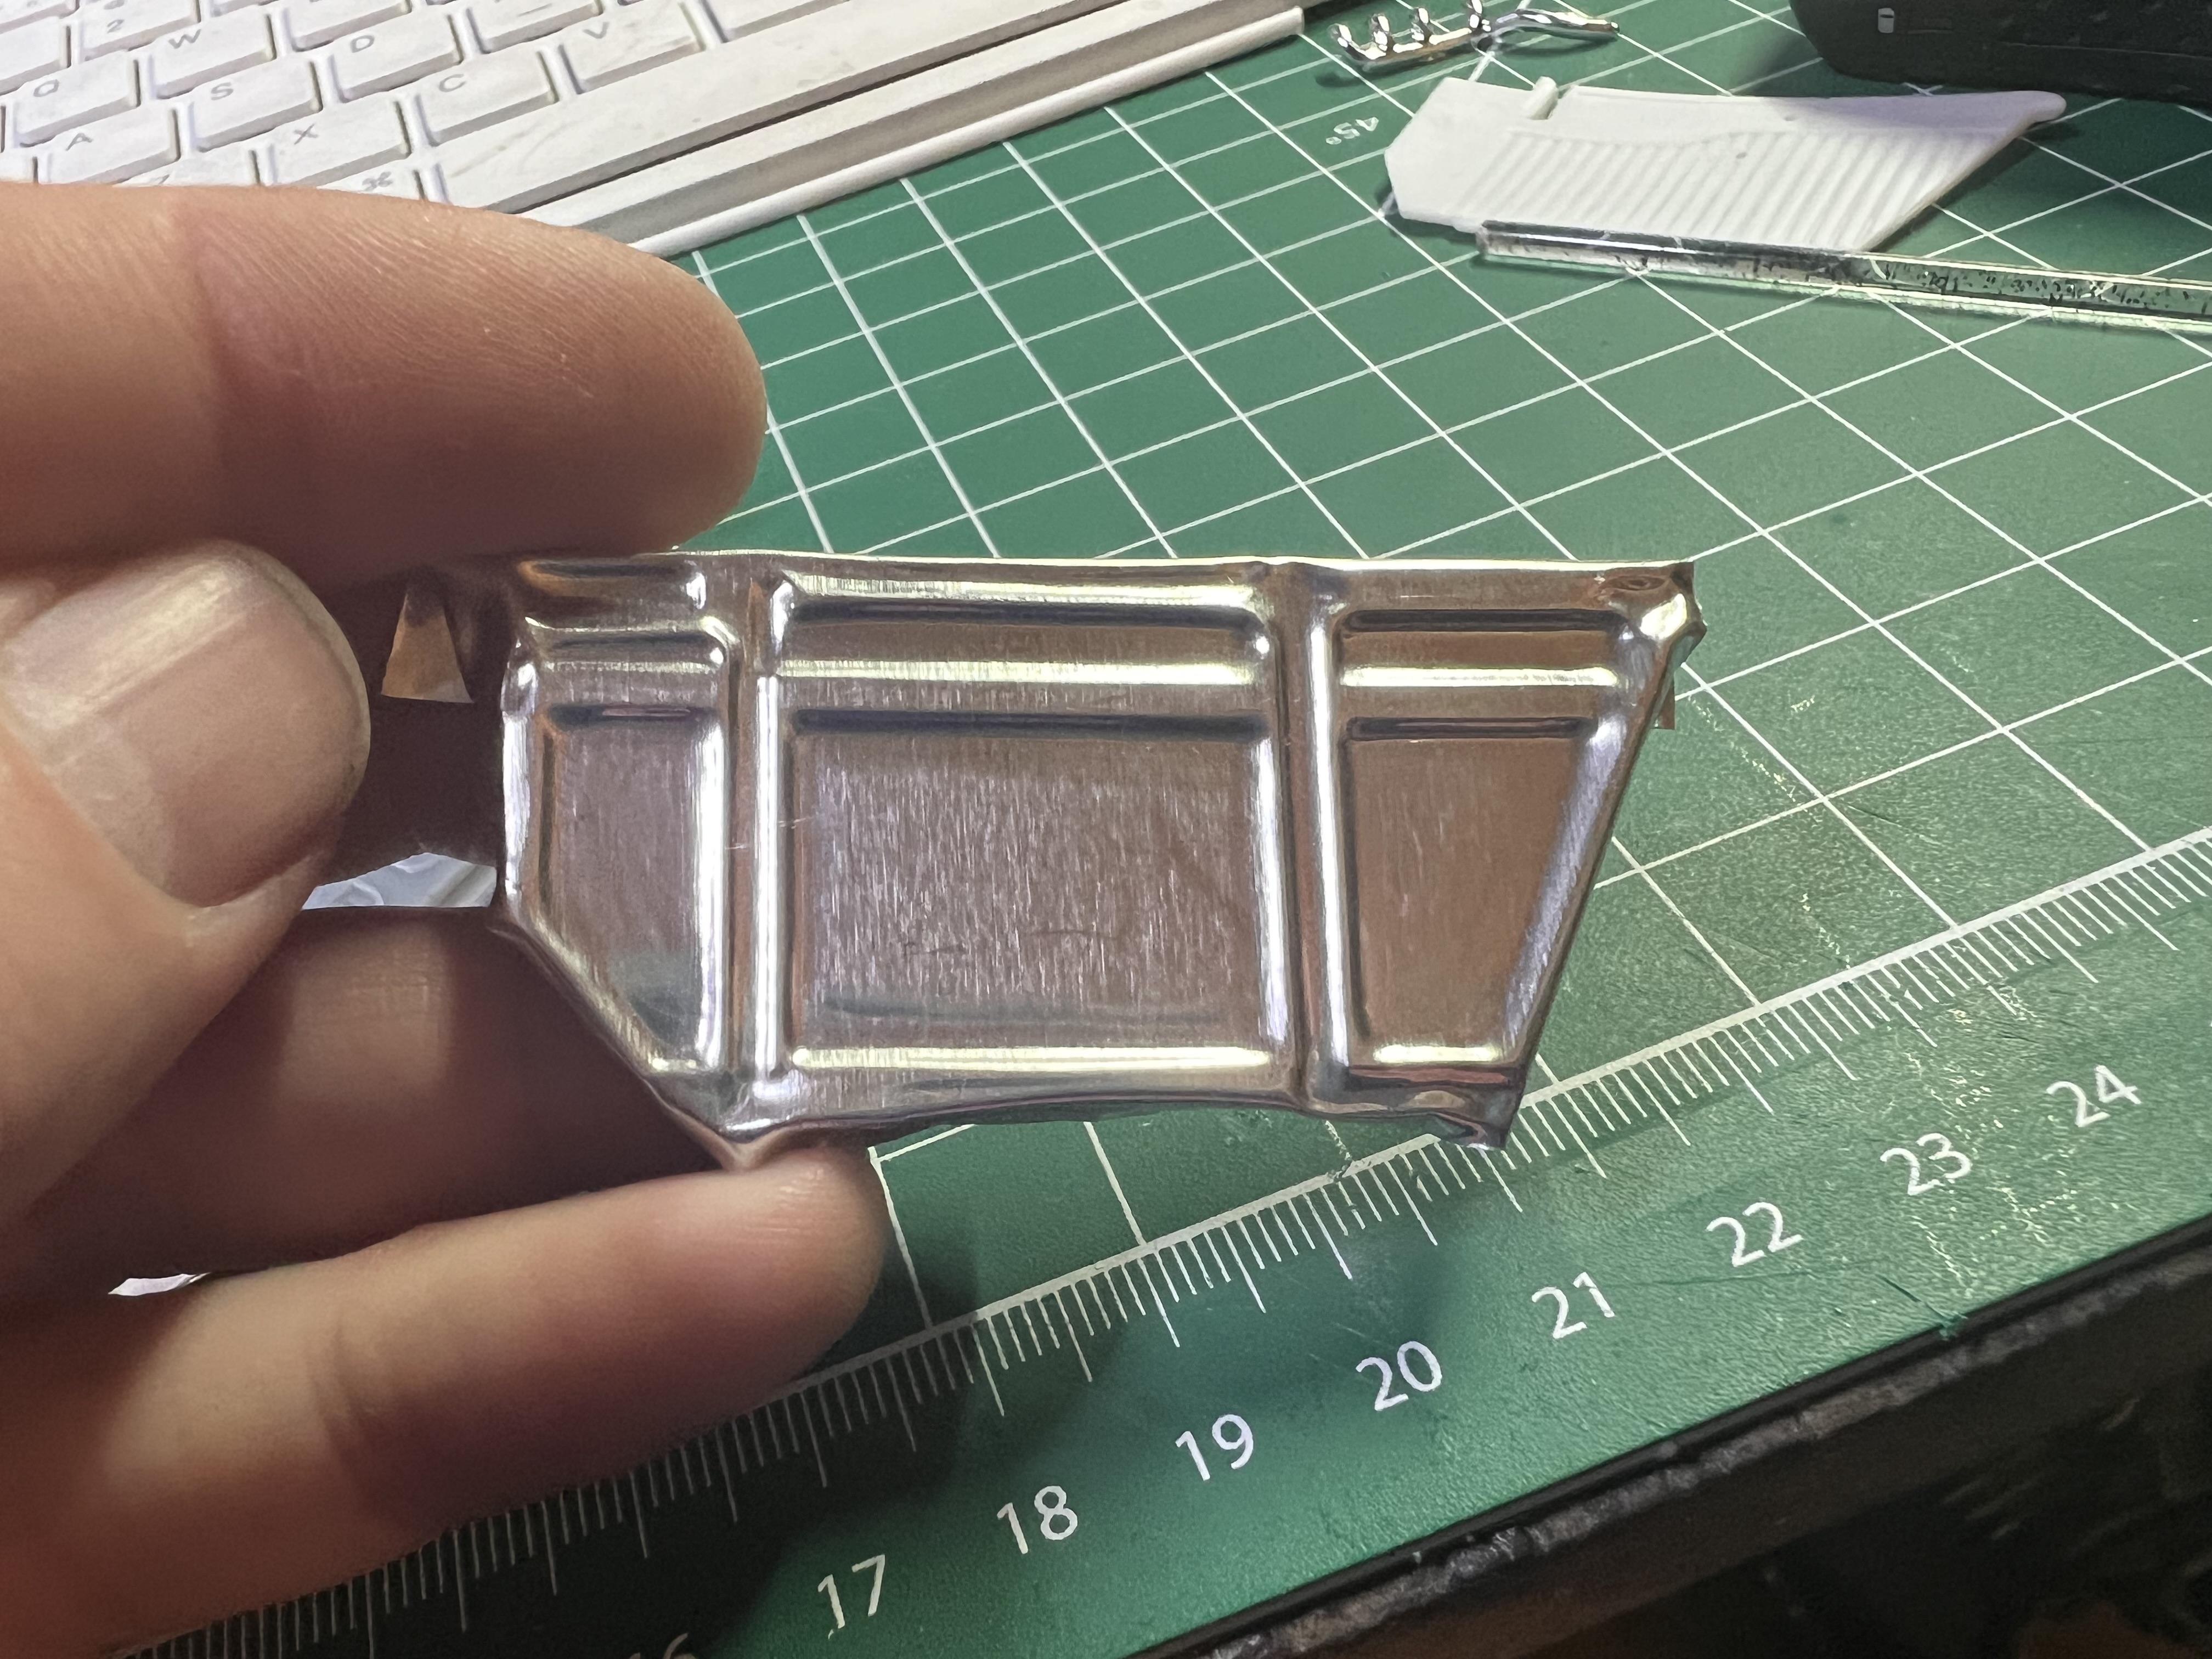
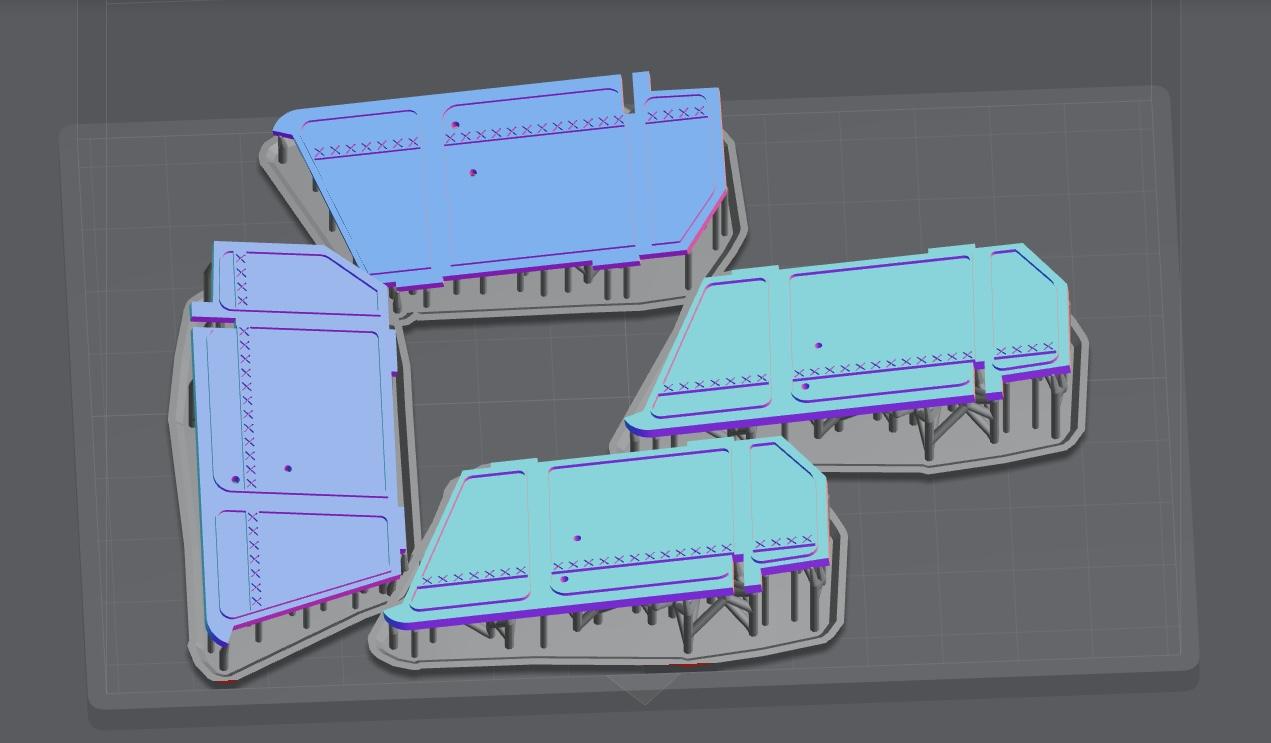
Thanks fellas! Appreciate the tricks! I always enjoy your build threads, and appreciate the pointers! Always something to learn! I moved the engine back a scale inch or so on this one which looked more ‘right’ to me, but then I needed the clearance for the firewall and my flat one didn’t work…but I like how you handled that problem on the gold car there…storing that away for the next one! I did have to notch the gas tank a touch for the Quickchange, but mine didn’t need too much, luckily… Meanwhile, back in snowy Indiana…still priming and prepping a bunch of stuff for paint, but primer’s boring so I spent some time designing some new door cards that look more like what I imagined: I’m going for a bare-aluminum racecar-y look, but I added a little detail with some bead rolled edges to the panels and a recurring cross pattern that mirrors the stamping on the underside of the frame. Sent parts to the printer, and 90 minutes later… Printed two sets, because there’s a lot less pressure working with a part when you have an identical extra one just in case… All cleaned up and test fitted: Needs a tiny tweak to fit perfect but I’m pretty pleased. My intention is to try embossing aluminum over top, but I ran out of time tonight…that’ll be an experiment for tomorrow…if that doesn’t work I’ll try BMFing them, or painting them… In other news, Revell goofed on the spacing on the kit headers, but I didn’t want to use them anyway…found these in the parts box that have the right spacing (I think?) and look a little more like what I had in mind…AMT parts maybe? More on those soon as I figure out what I want the exhaust to look like, also considering just scratchbuilding something… Thats all for tonight, folks, more tomorrow assuming I don’t get stuck in a pile of snow…thanks for looking!
-
What non-auto model did you get today?
OldNYJim replied to chunkypeanutbutter's topic in The Off-Topic Lounge
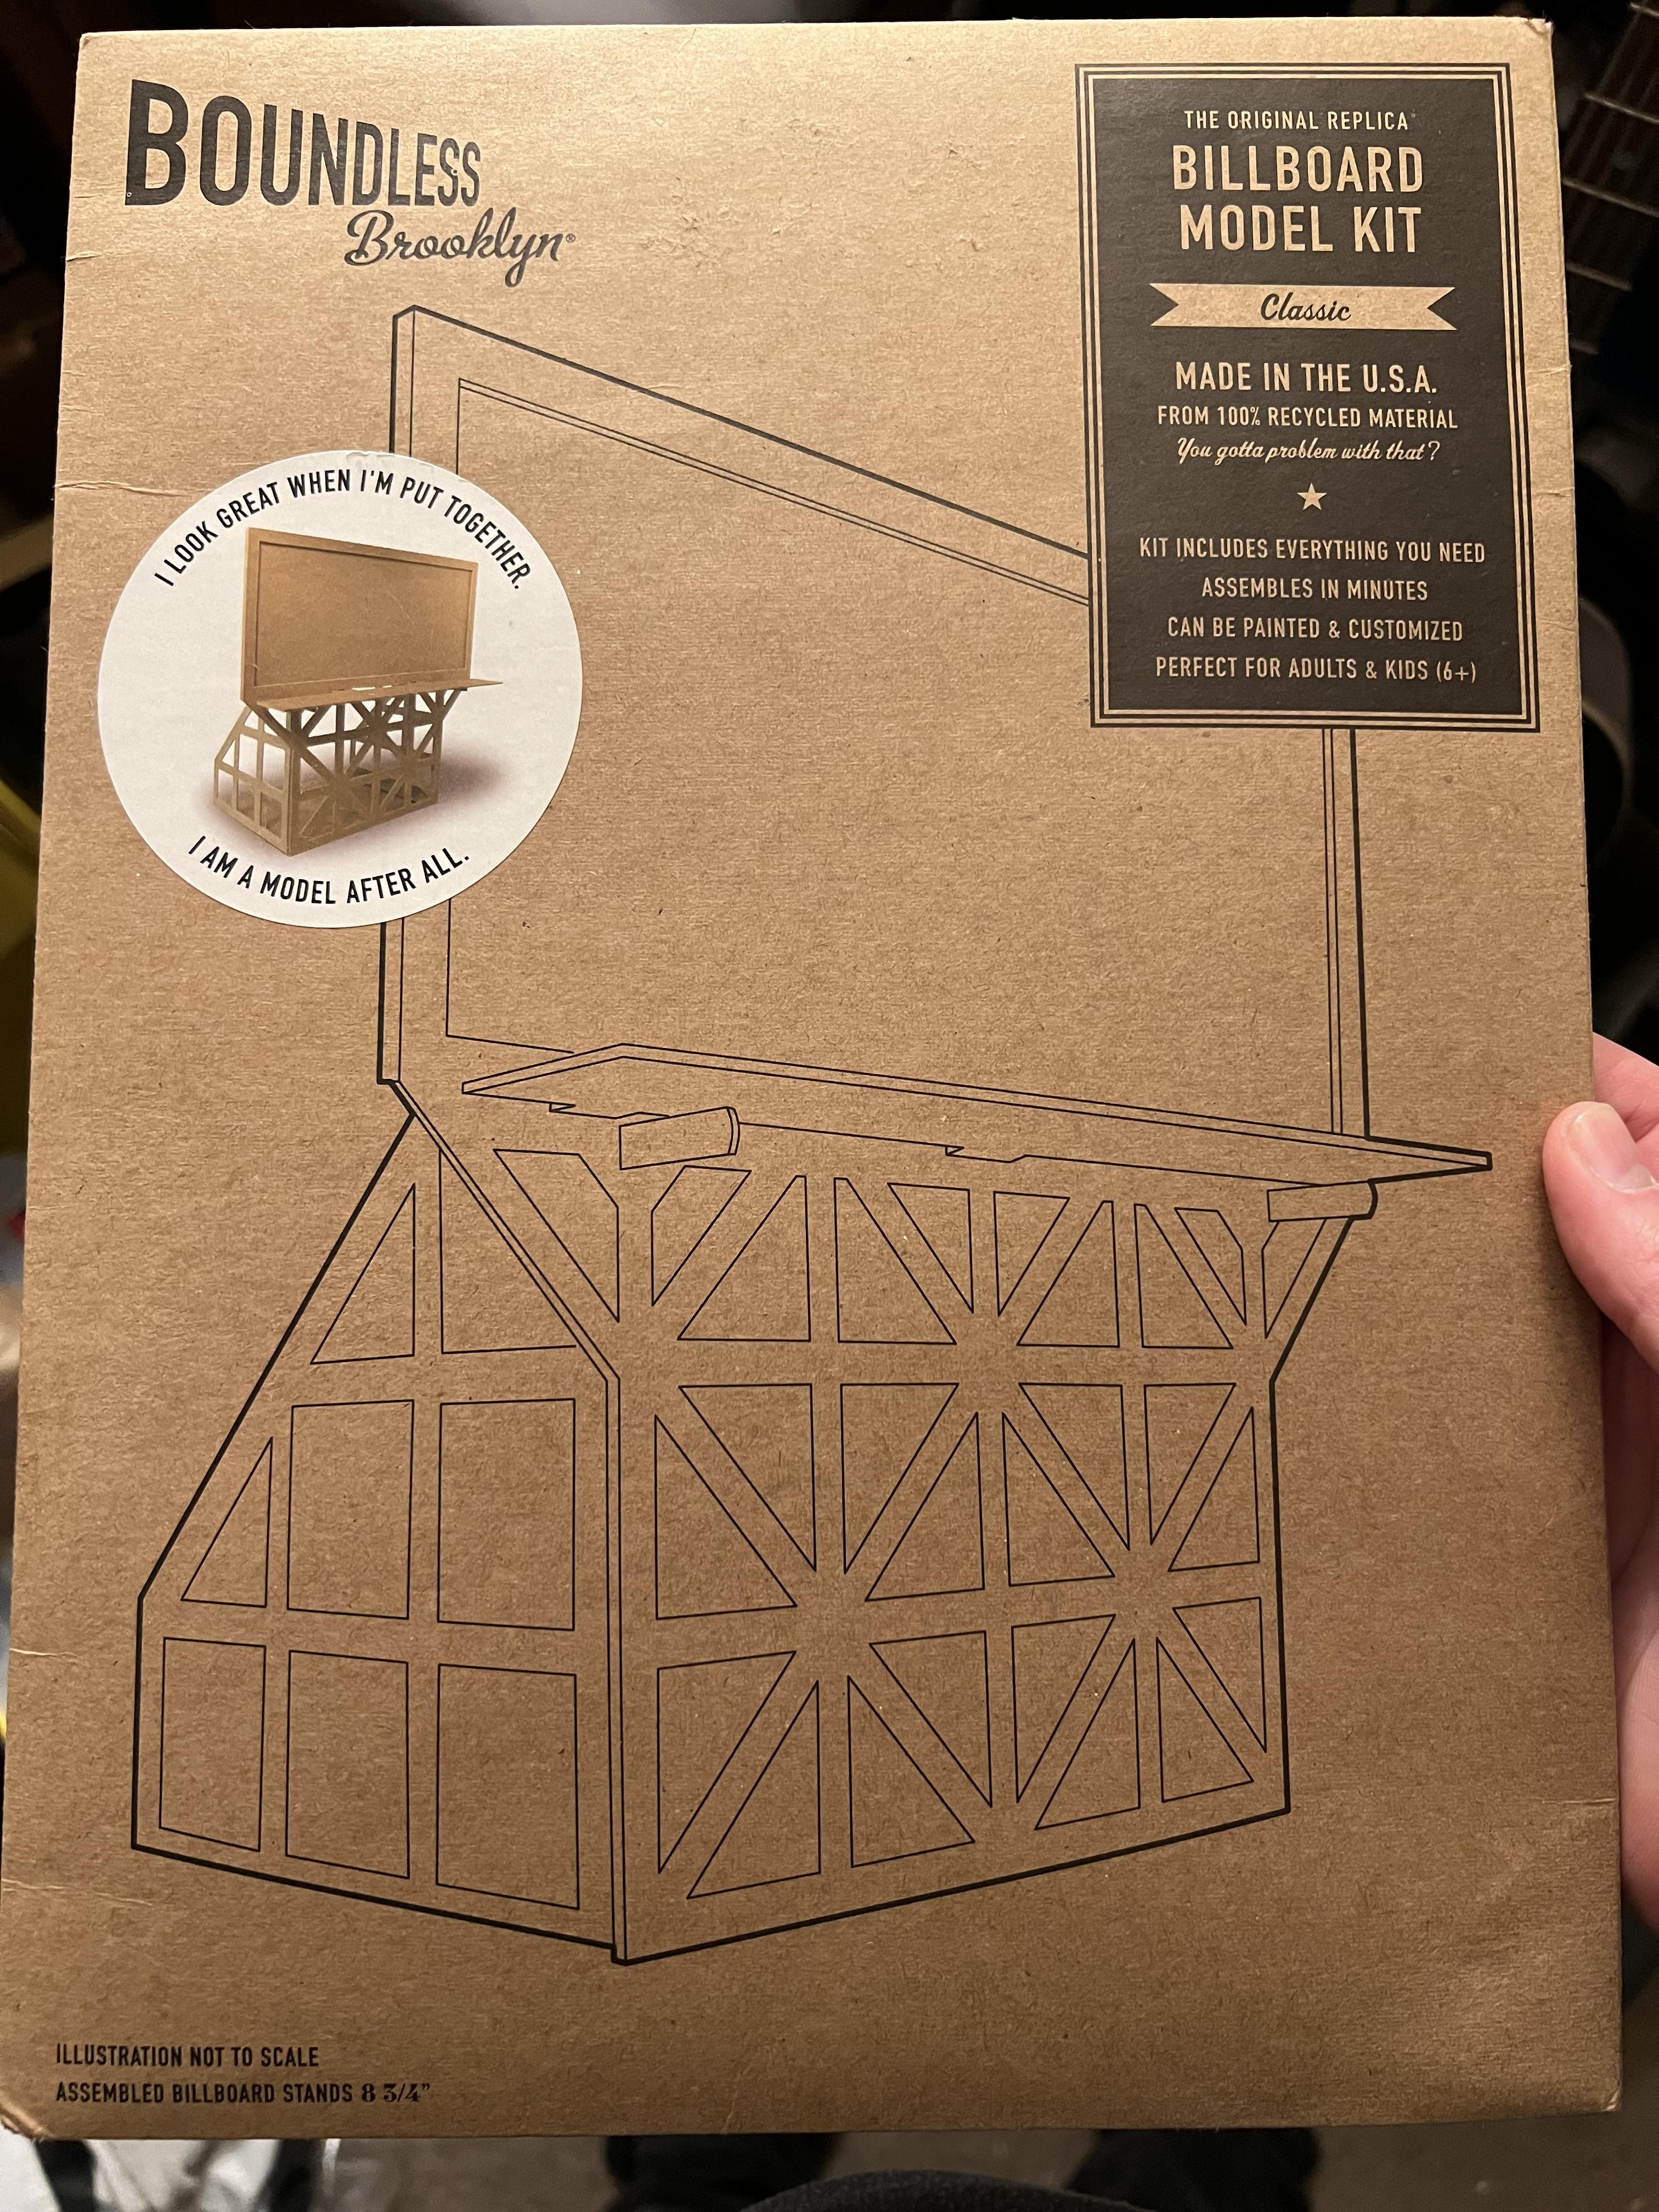
Model kit of a billboard…not a very complicated or detailed one, but not I have almost the complete set of this company’s products to build…
-
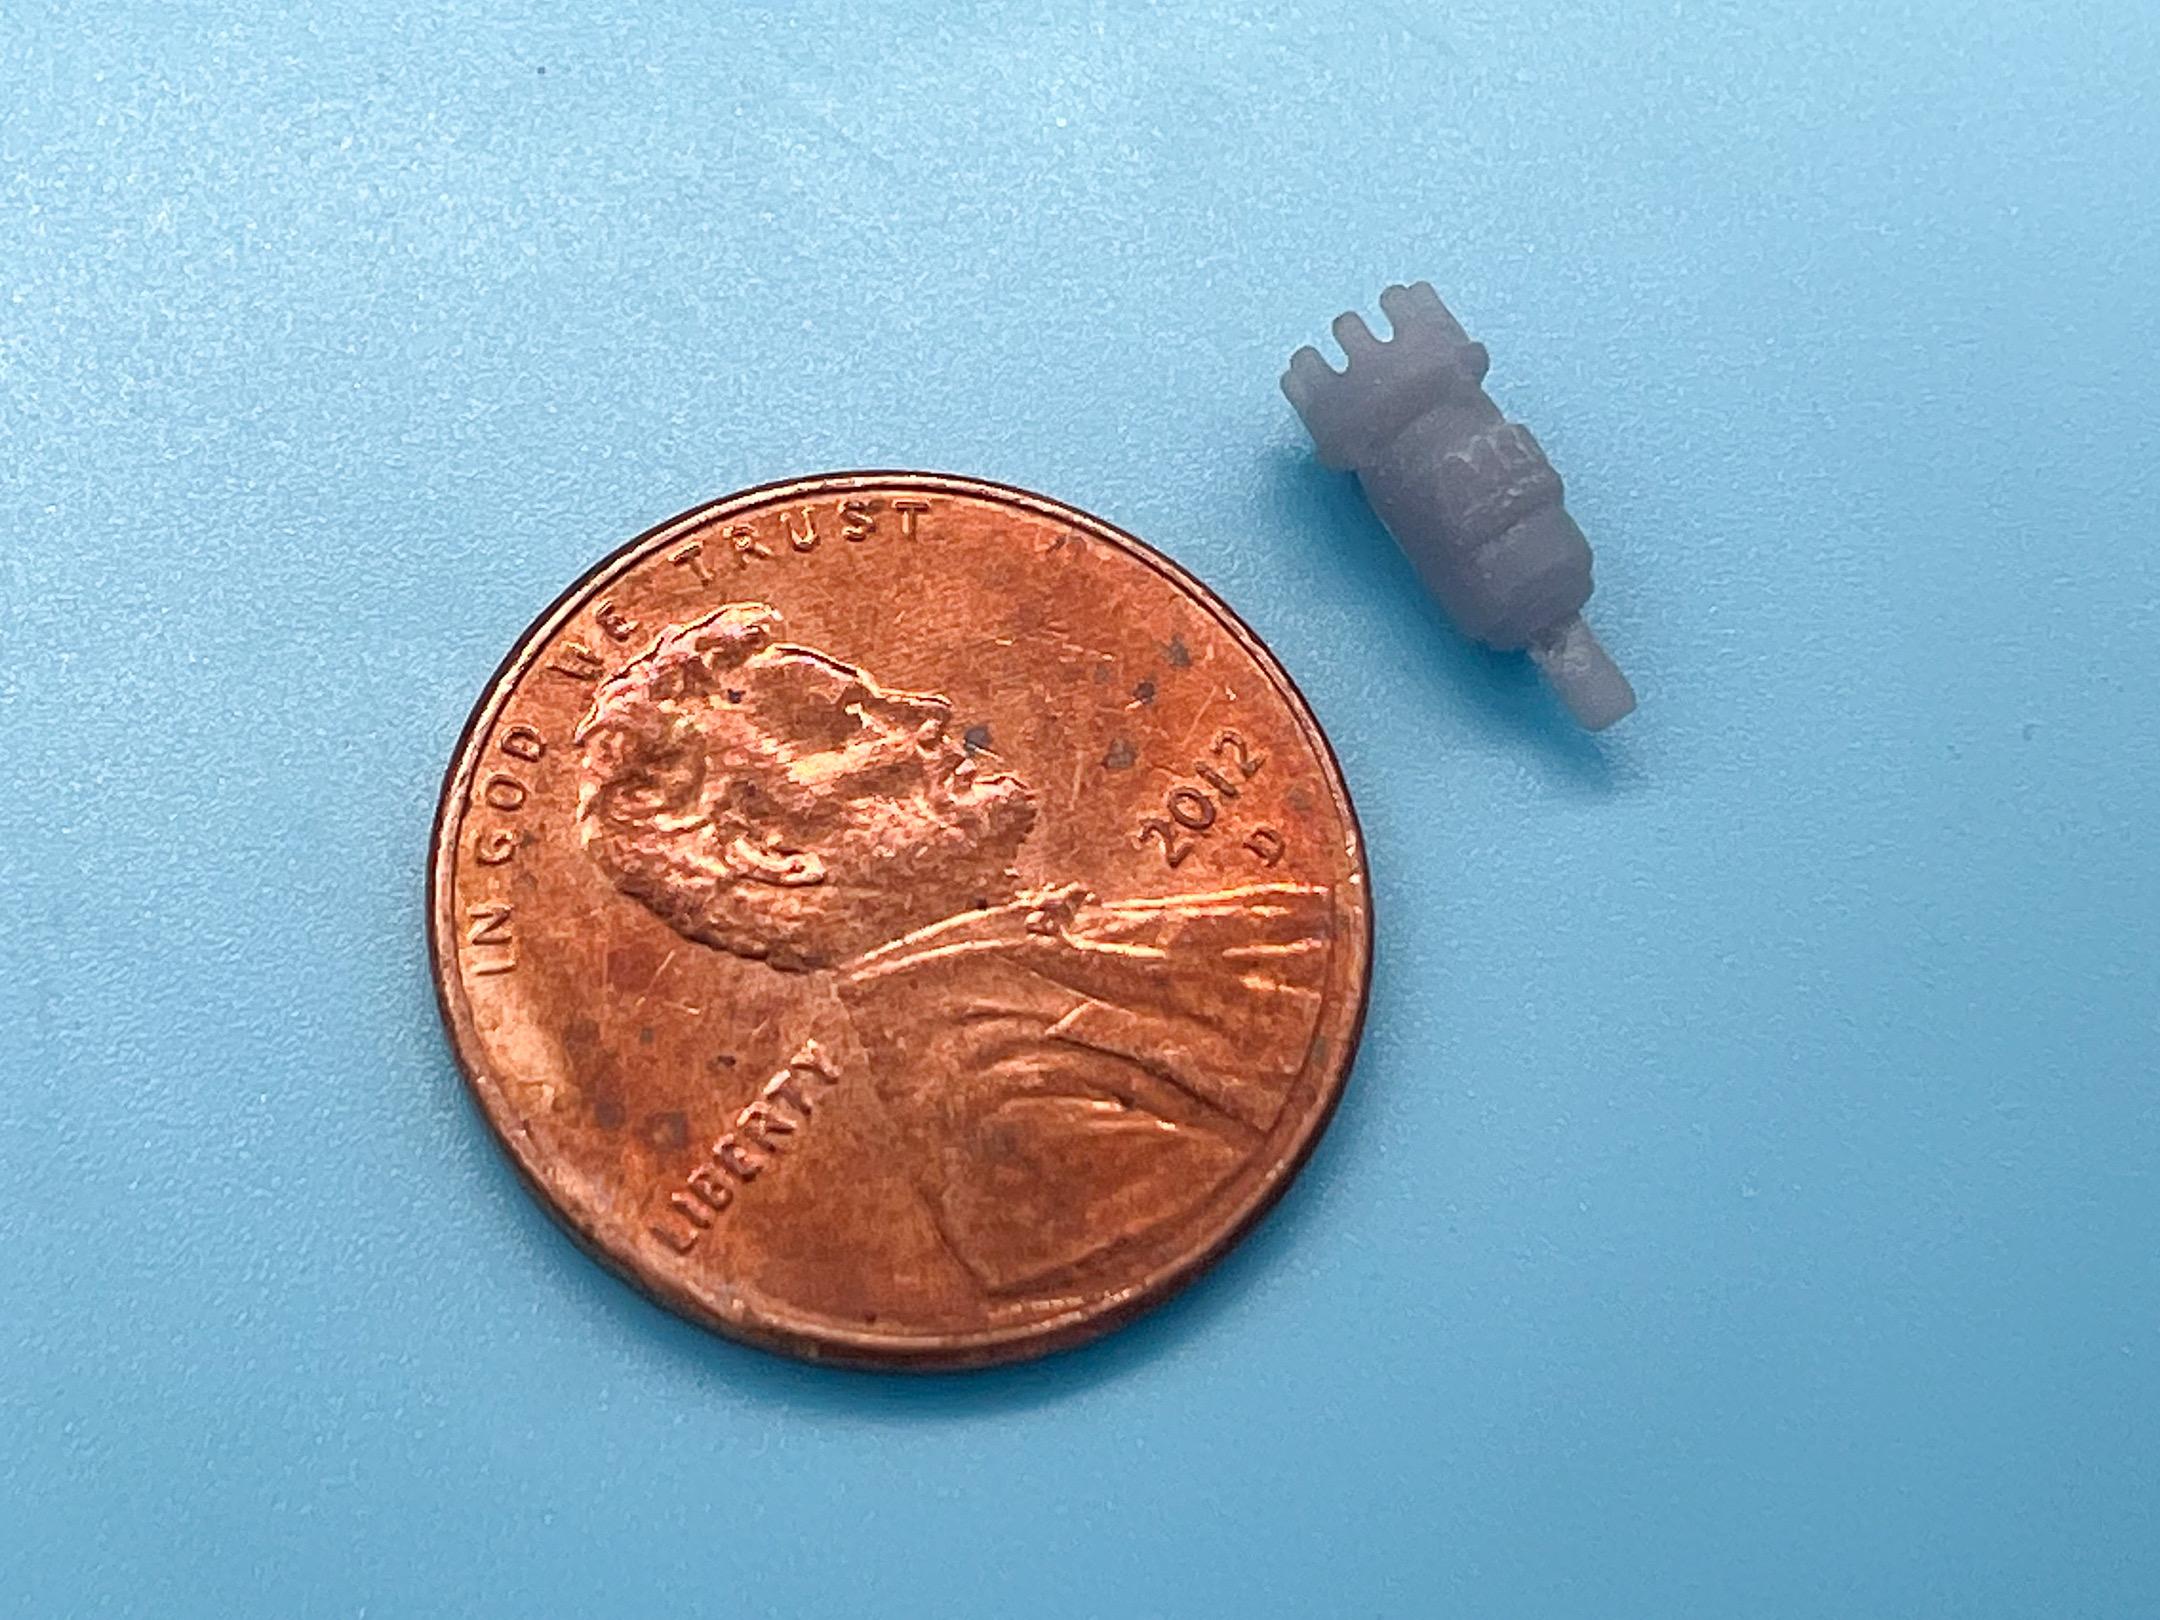
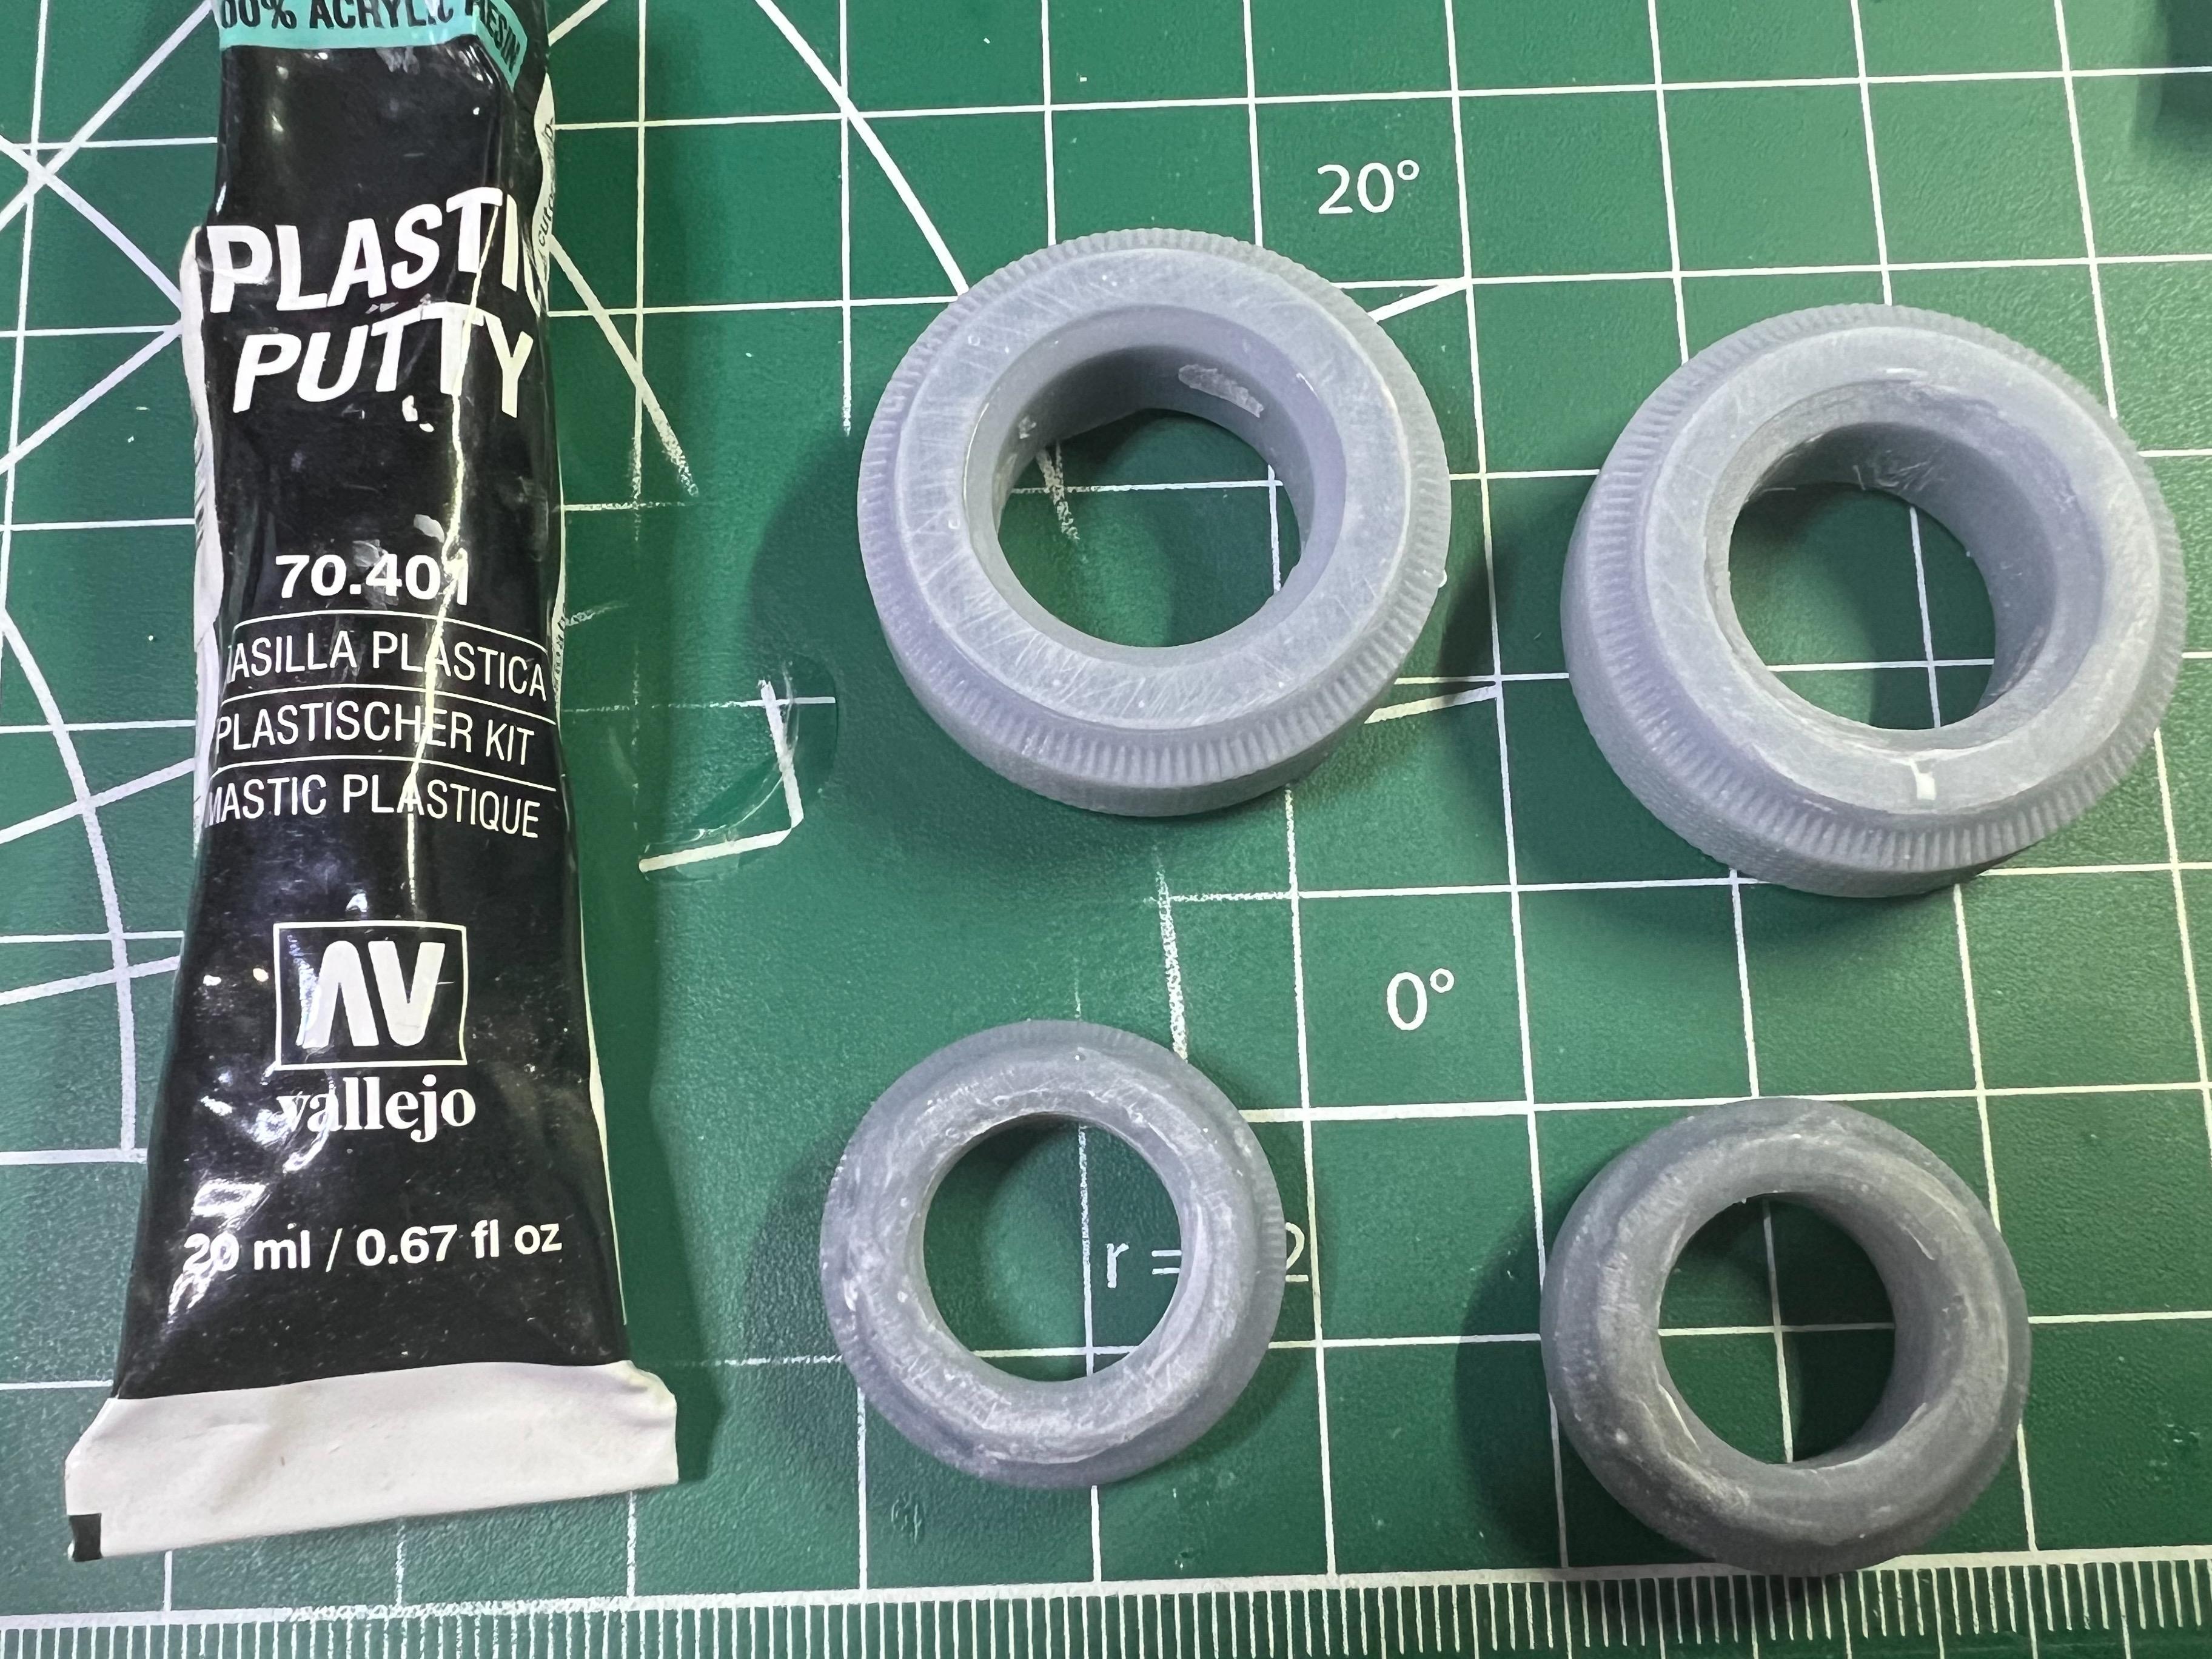
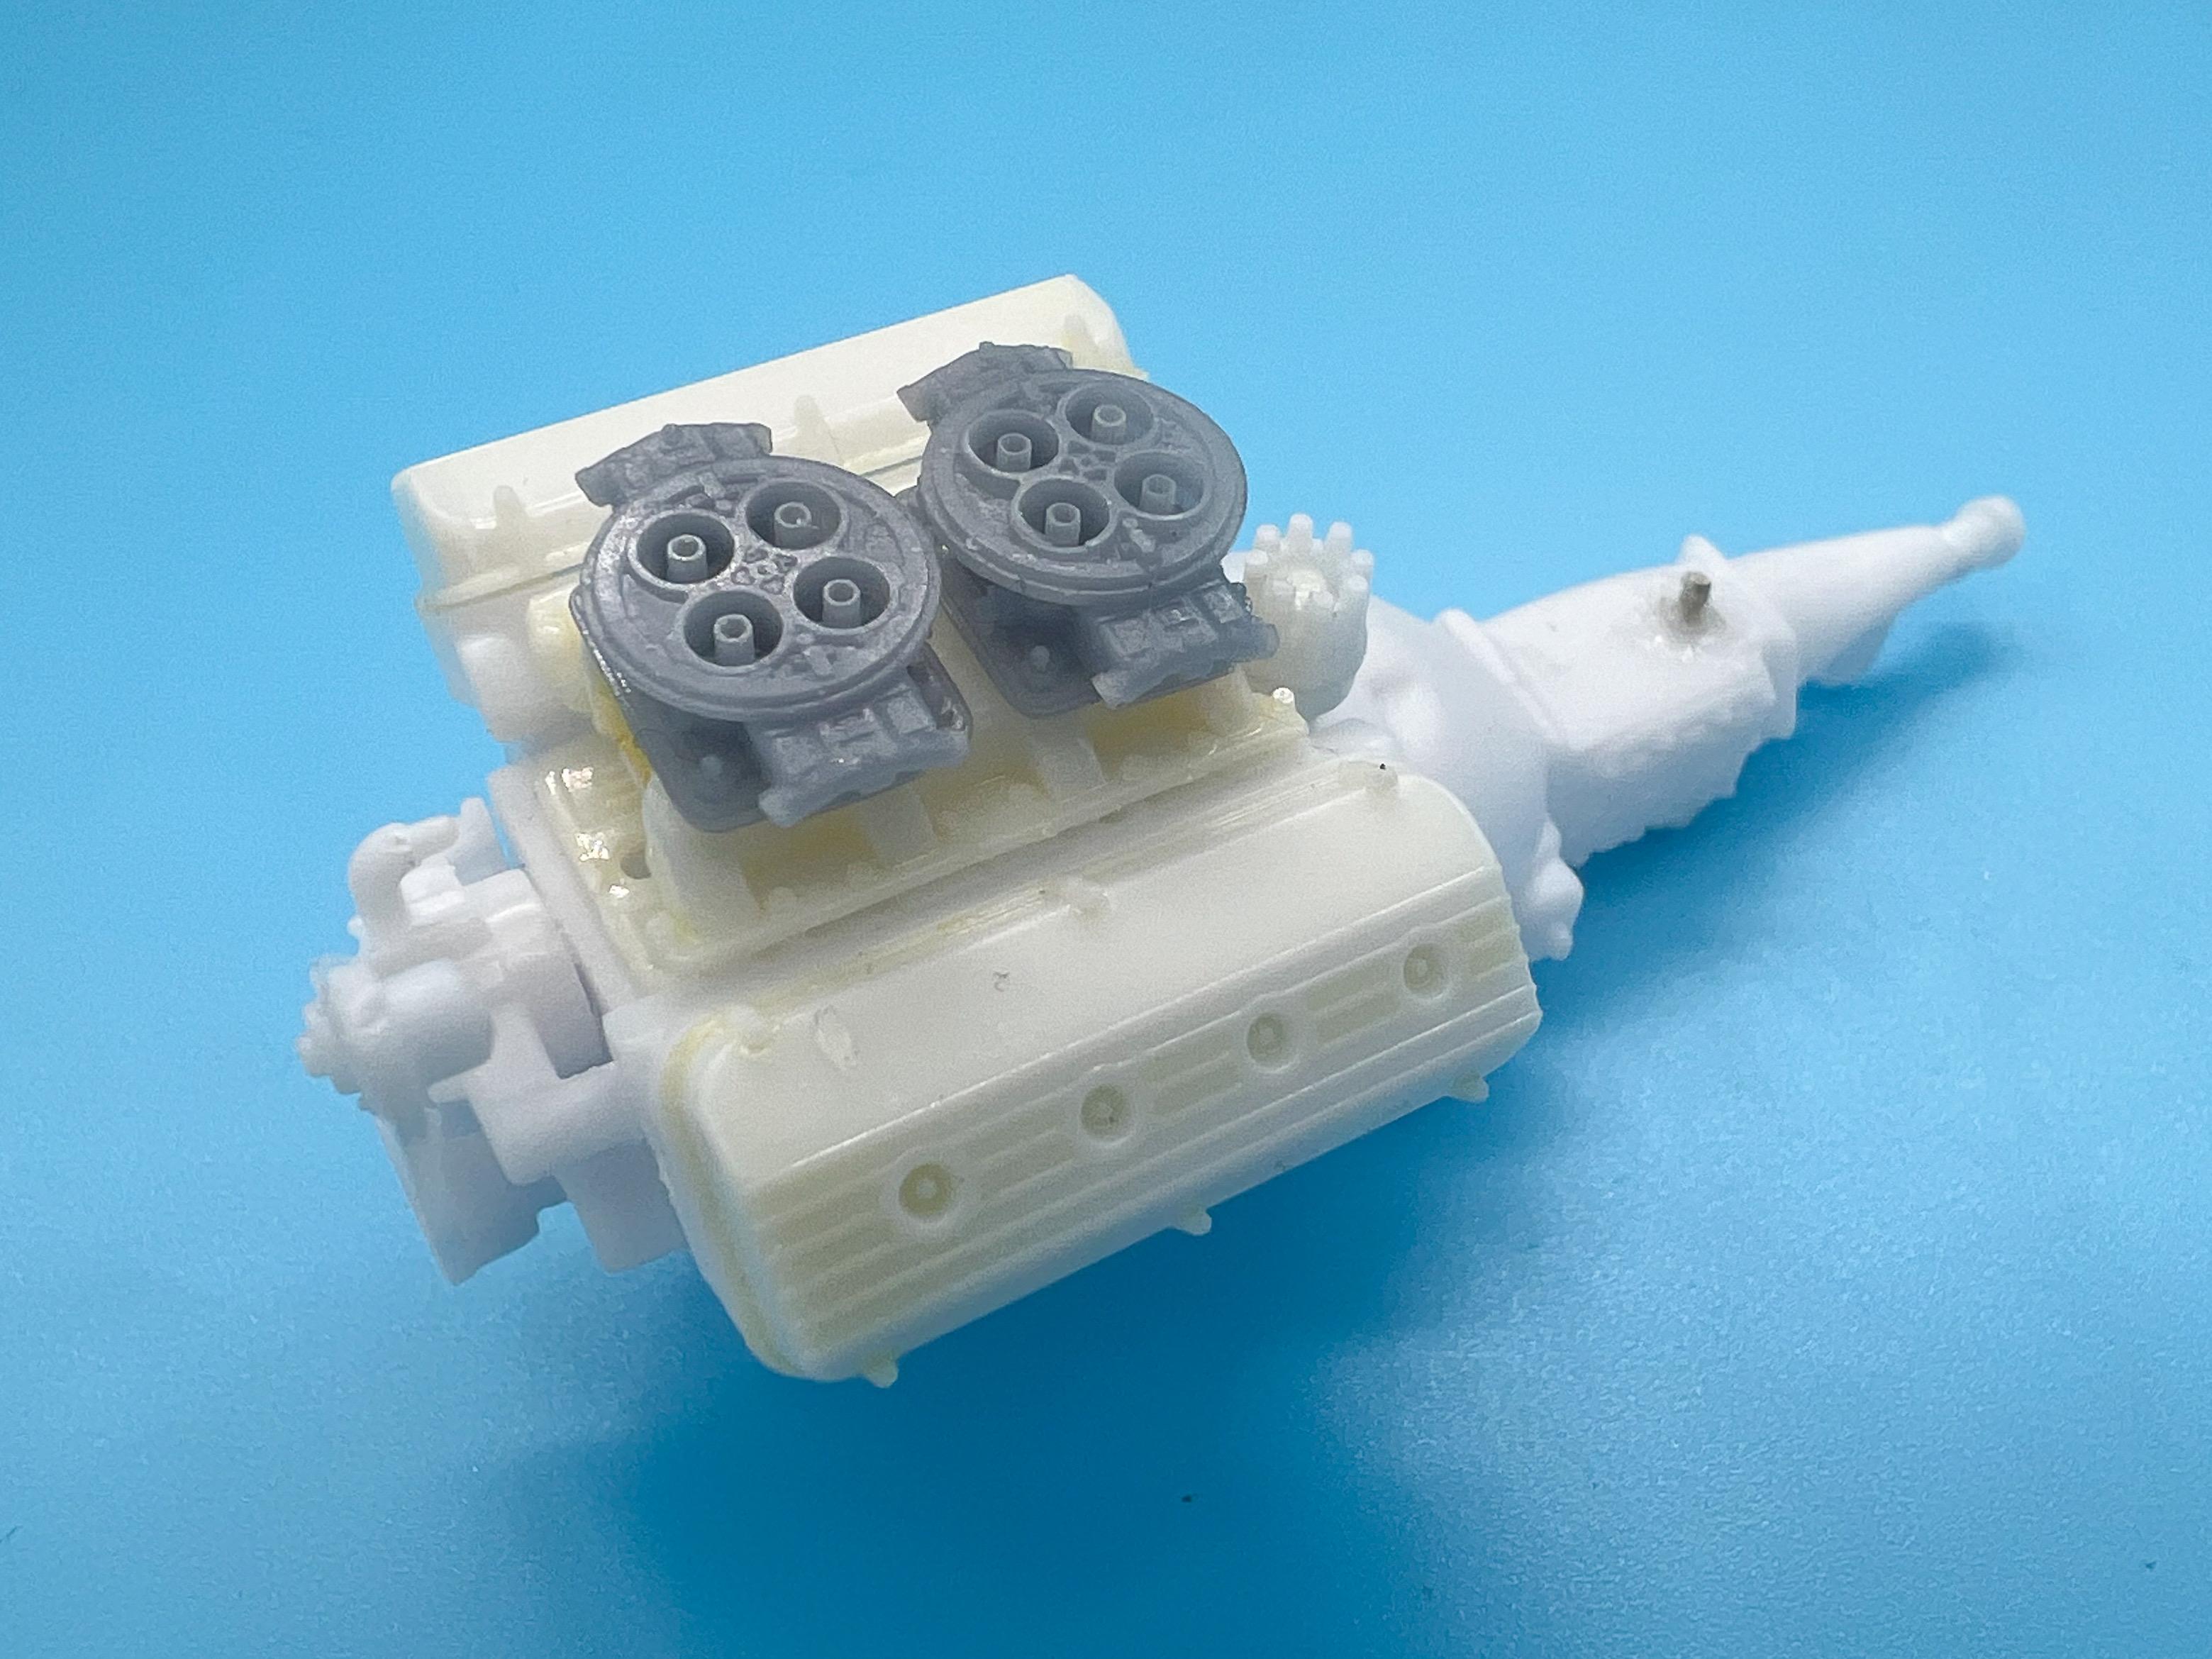
Thanks fellas! It’s Monday (and 5” of snow is predicted here tonight) and to top it all off, tonight’s project was a bunch of sanding and priming. Not the most exciting part of the process… Something I’ve been using a lot lately for filling tiny pinhole imperfections (especially the tiny pits left by removing the supports in 3D printed parts) is this Vallejo plastic putty. Works GREAT - you can water it down and brush it on, or smear it on like ‘regular’ putty. Good for tiny little fixes, and dries almost instantly…with no shrinkage: I brushed a little on a couple of the tires to fit some little flaws, and used it ‘straight’ to fill a flaw and some pinholes in the others…definitely good for little jobs that don’t warrant Bondo: Did a couple of projects on the printer today too, had it running whilst I was sanding and priming…printed up a couple of Holley Dominators to improve upon the kit carbs: And I started messing with the door cards - I’d like to figure out something un-upholstered seeing as I’m imagining a pretty sparse interior, but I’d like to use the kit pieces as a basis so I don’t have to scratchbuild new ones…removed and drilled out the door handles and window cranks and printed some replacements (a LOT of them, actually), and I’ve got an experiment to try tomorrow for my door card idea…more on that in the next couple of days: JusT a small update, but trying to make some progress every day…more soon, soon as I’ve done more!
-
Double post
-
Good tips, thanks fellas! Just picked up a tripod today so I can experiment some more…
-
-
What did you see on the road today?
OldNYJim replied to Harry P.'s topic in General Automotive Talk (Trucks and Cars)
Not sure if this is one of the 50 parade cars from last years race: https://www.indianapolismotorspeedway.com/news-multimedia/news/2023/04/03/04-03-FestivalCars Belongs to one of my neighbors I guess - would be interesting in asking them about it…
-
Hours of masking fun, to get to do minutes of painting fun - don’t you just love it? Turned out great though! Super clean!
-
That’s putting it politely…