The Modeling Hermit
-
Posts
33 -
Joined
-
Last visited
Content Type
Profiles
Forums
Events
Gallery
Everything posted by The Modeling Hermit
-
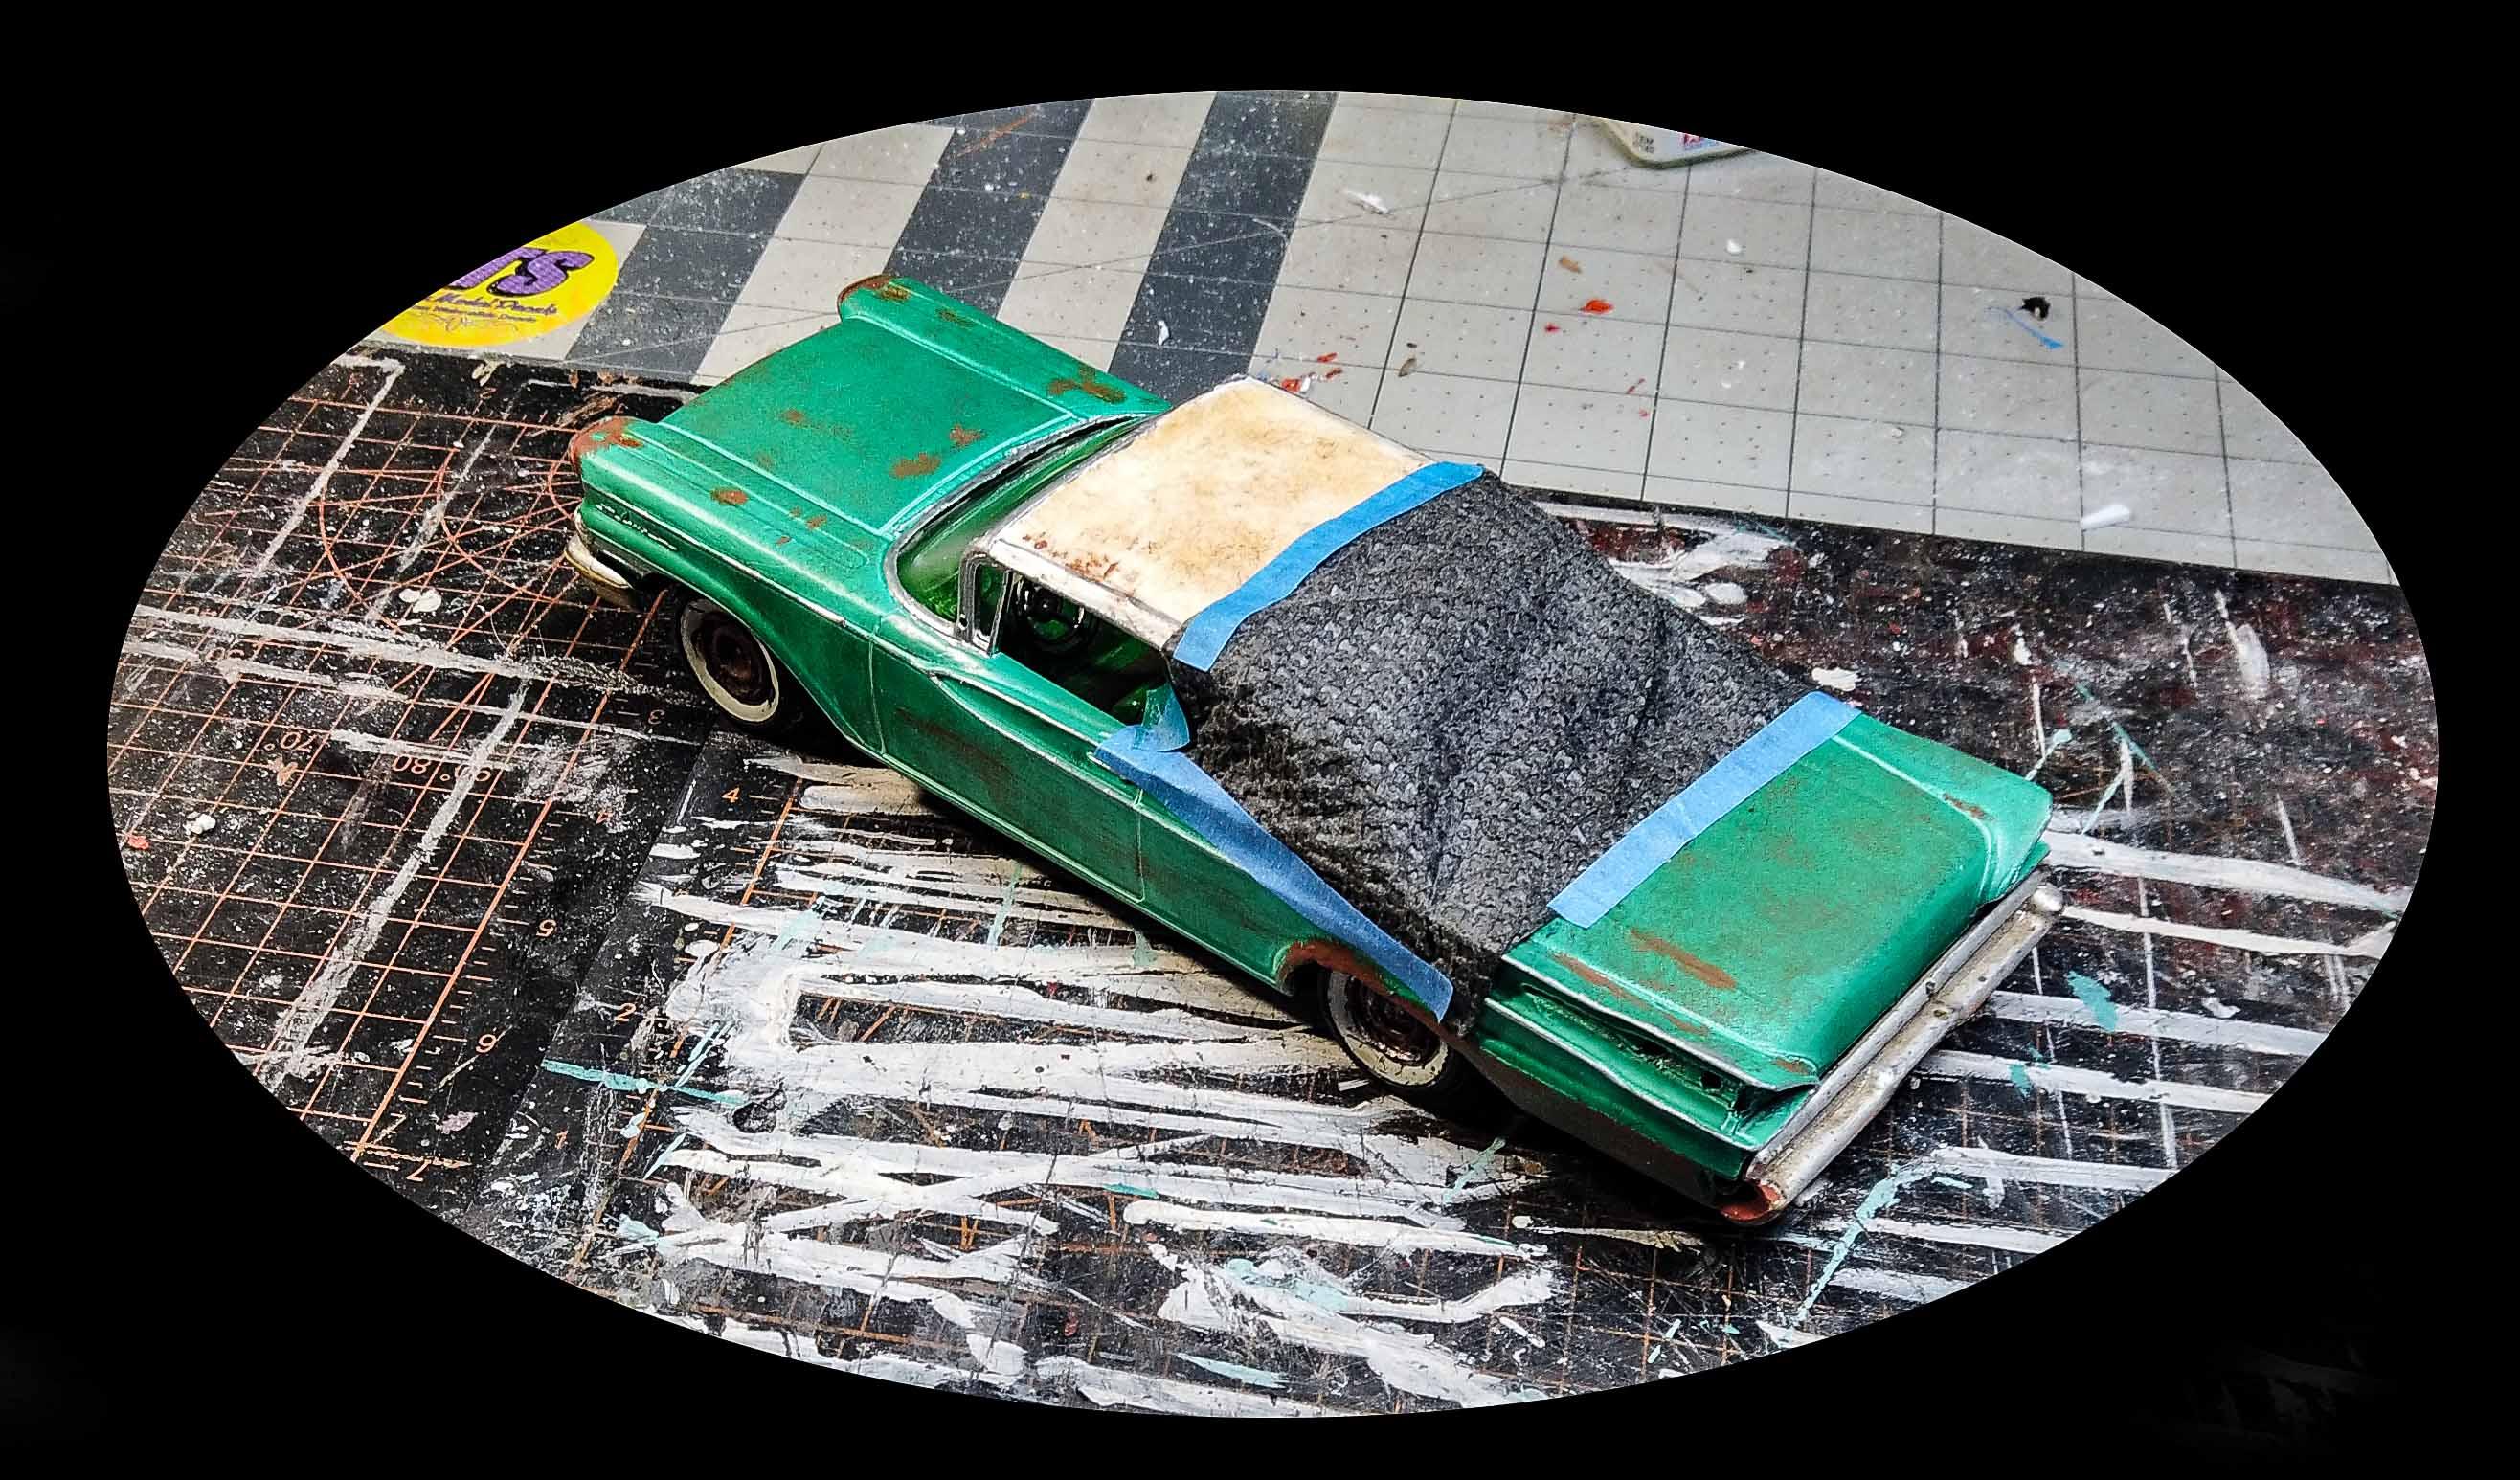
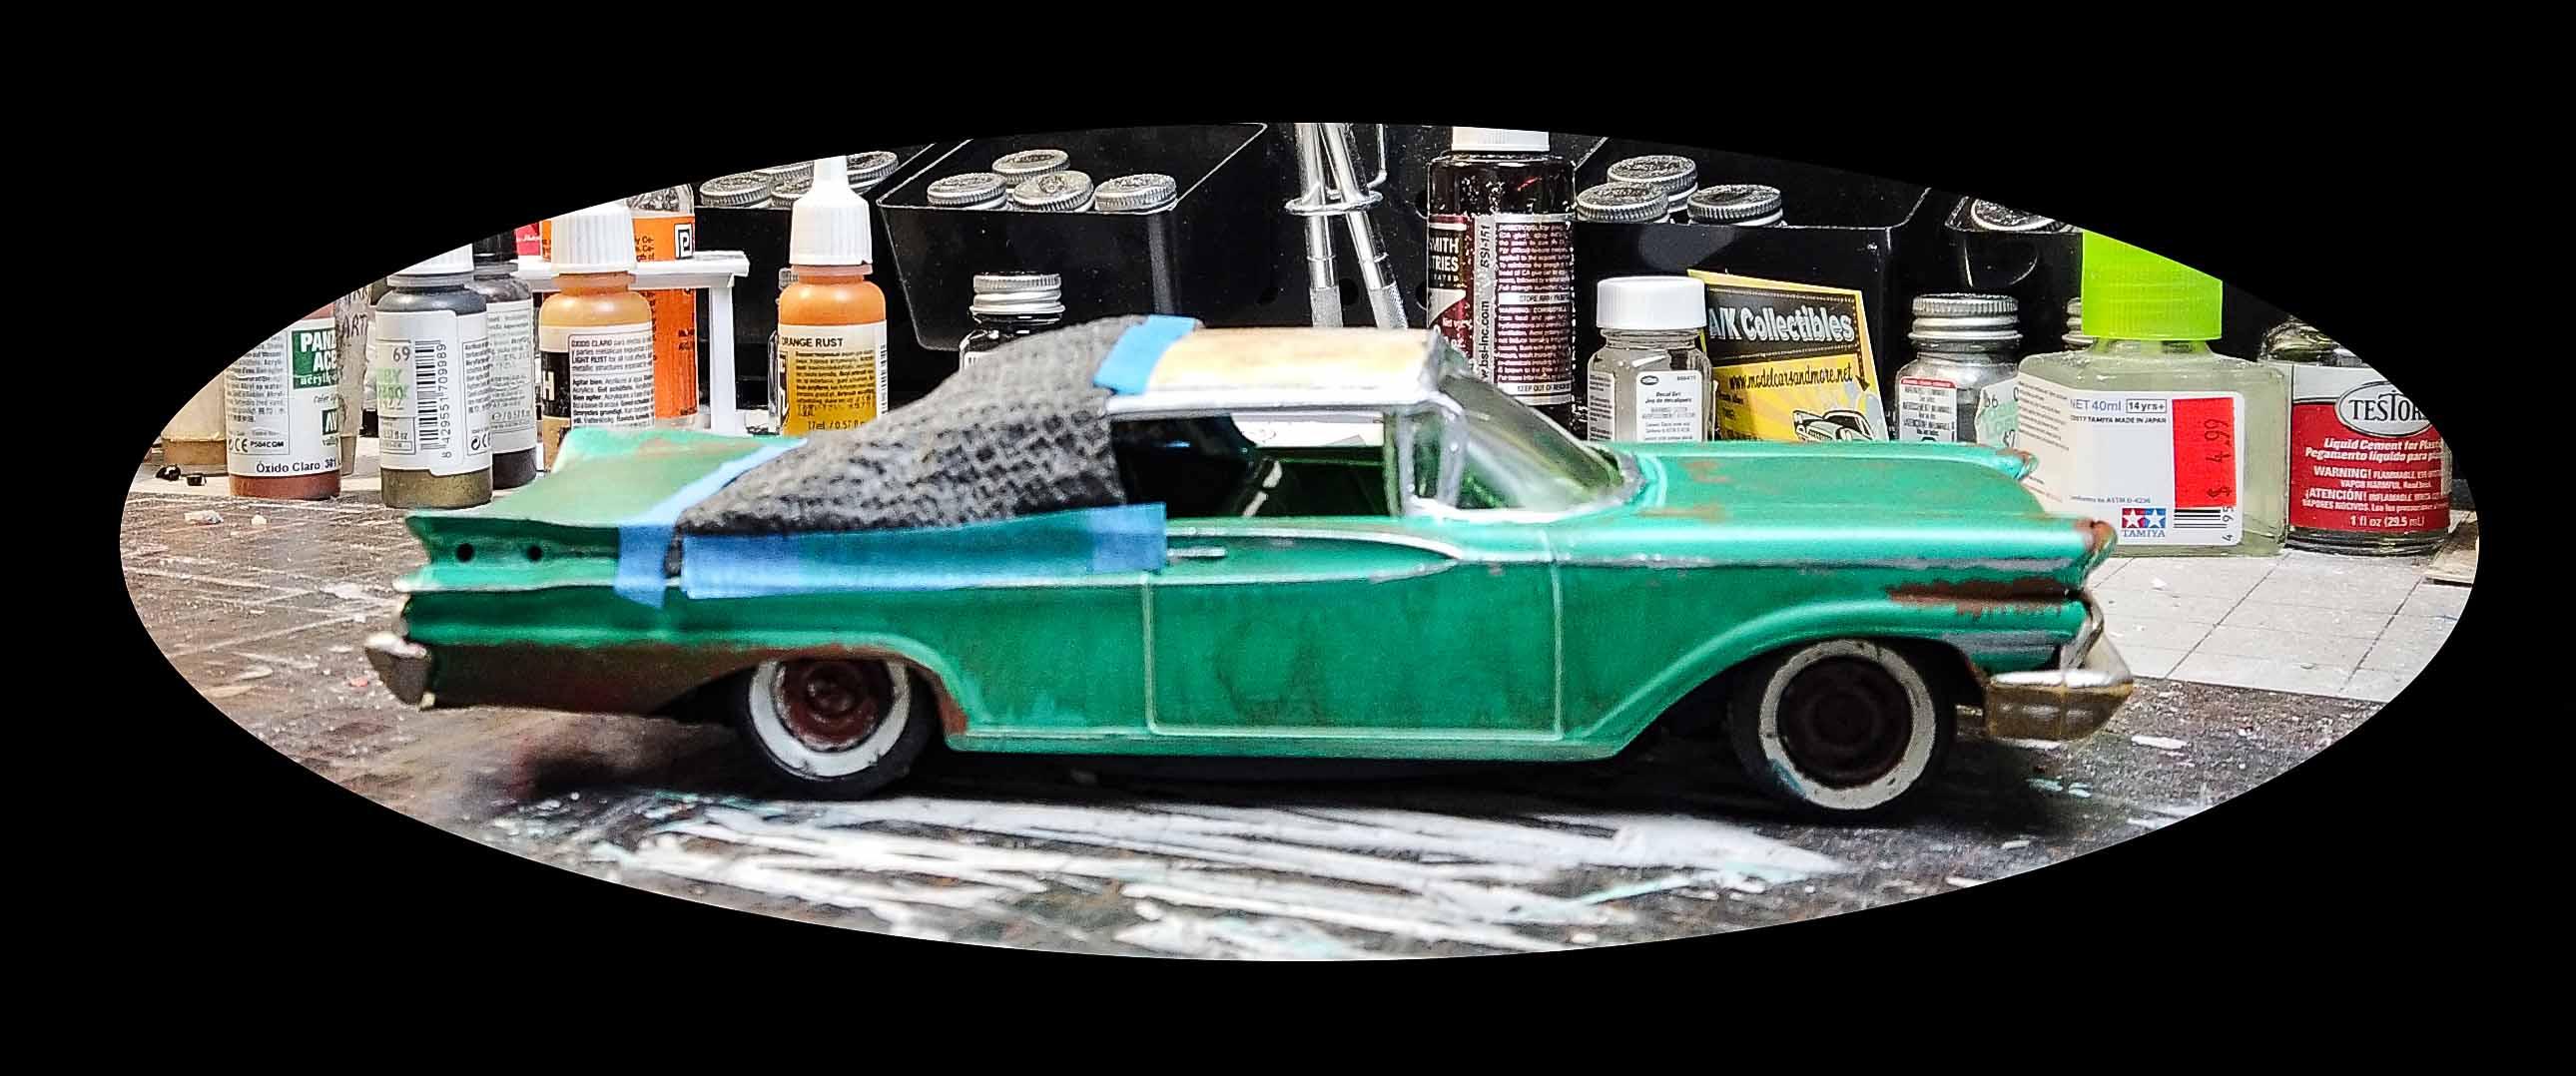
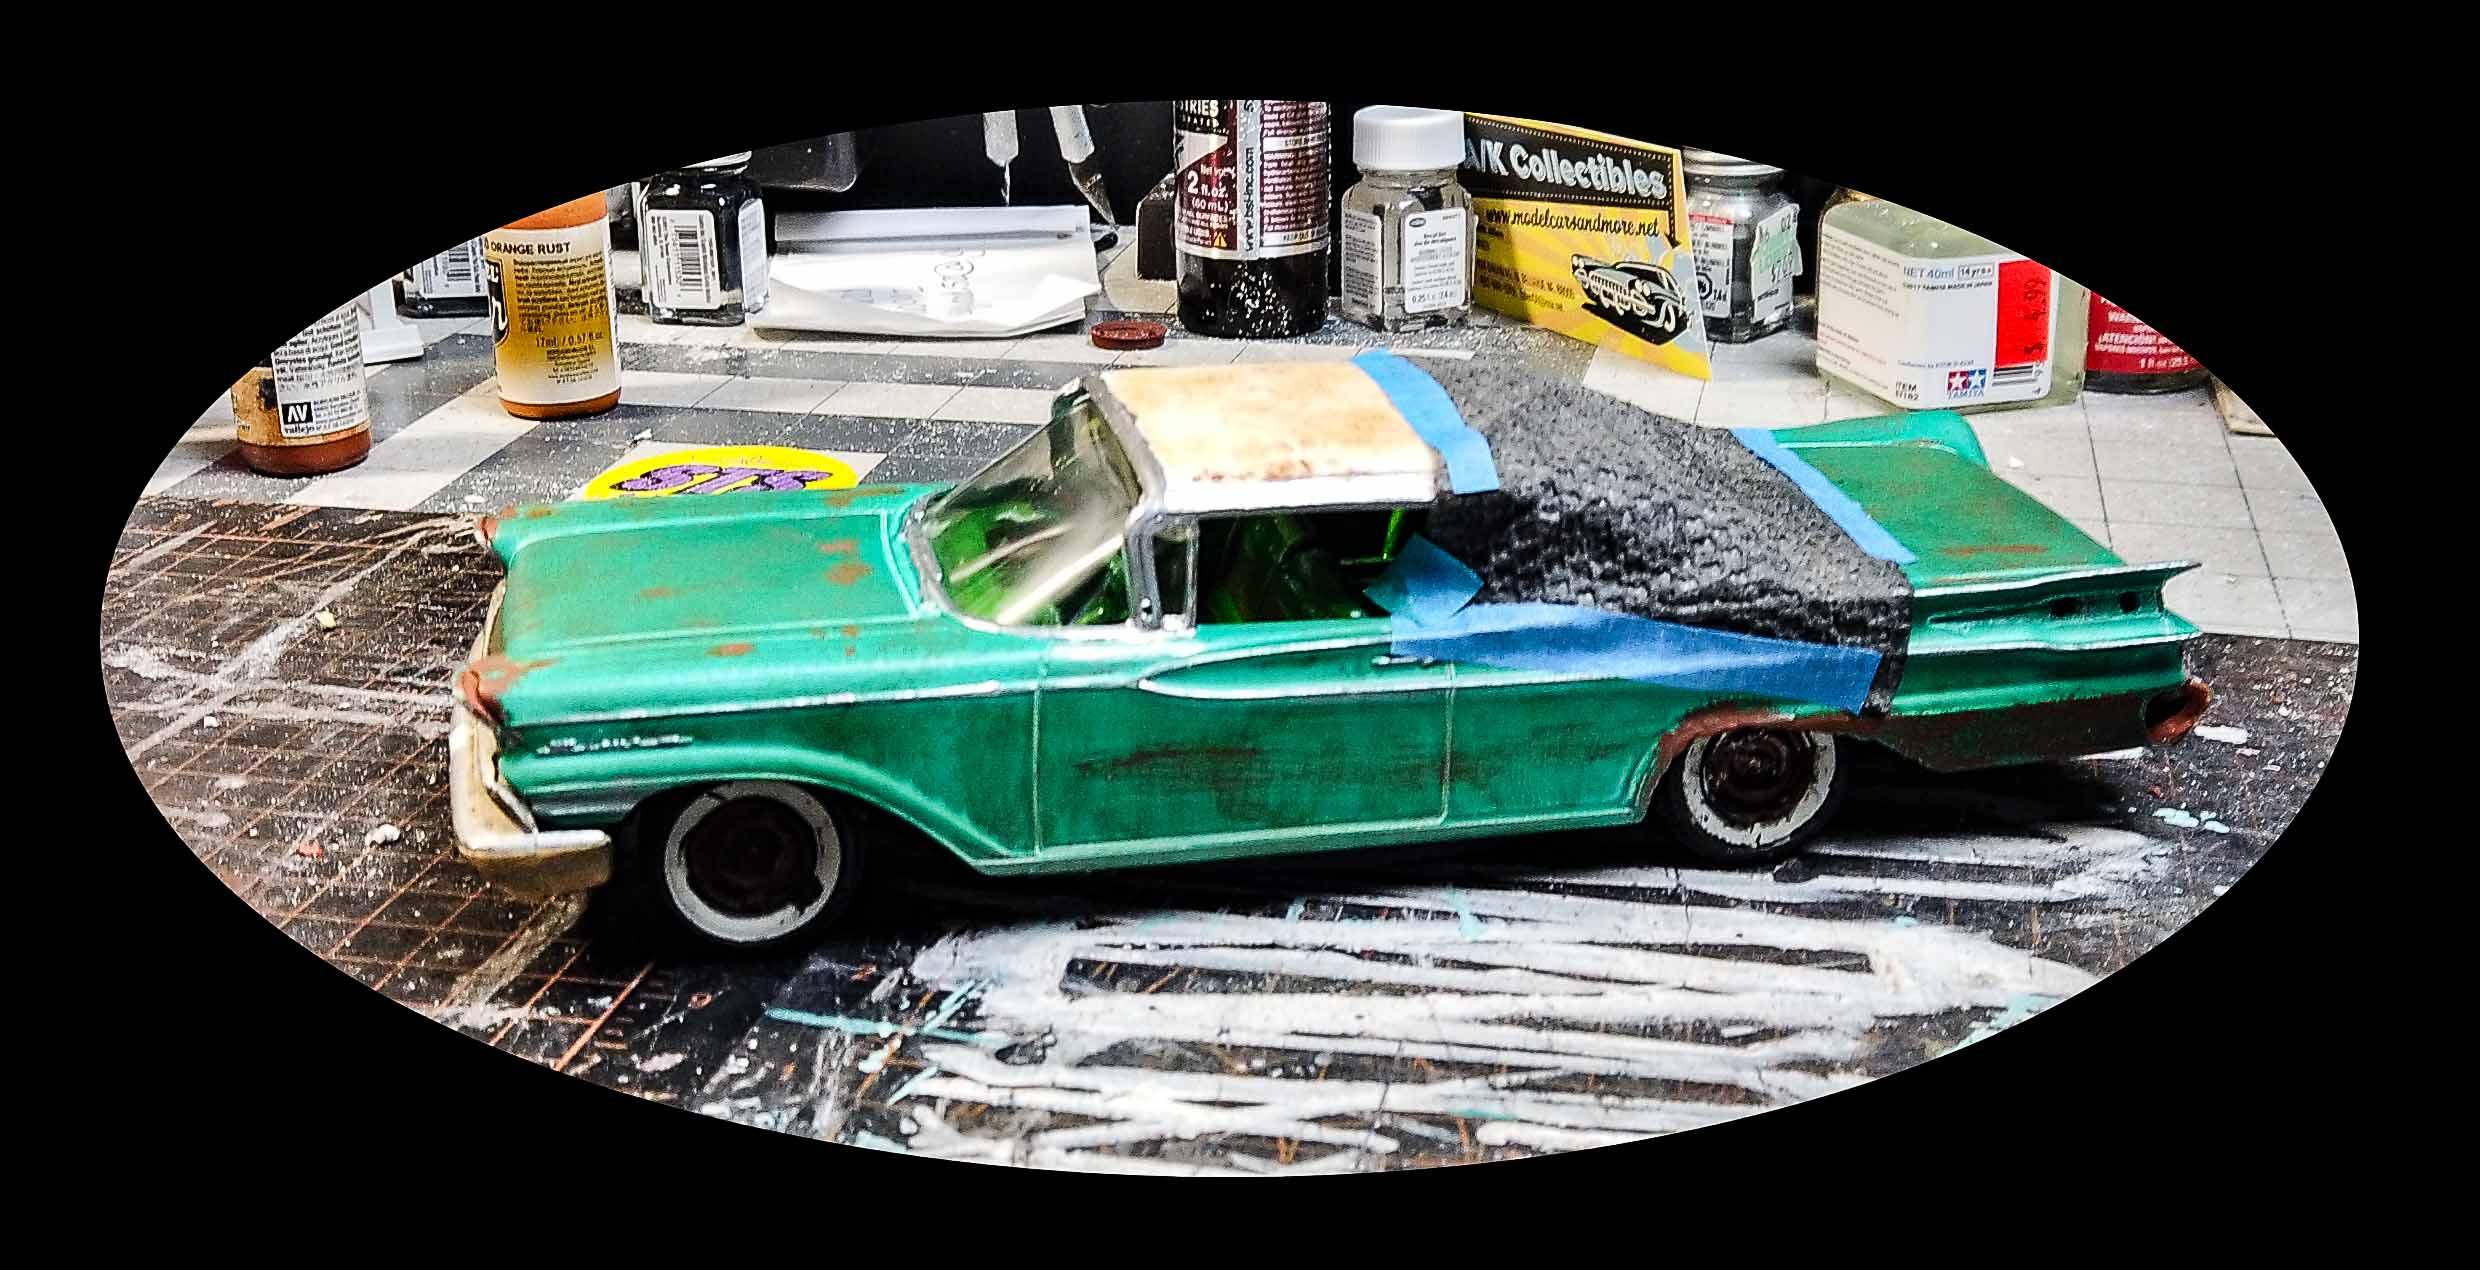
These are a couple of old AMT models that I got for my junkyard diorama. They were still in enough of a repairable shape as to make them worthy of a more 'elegant' place in the junkyard. I have the full story on my procedures with them on my 'the Hermits Den' YouTube channel. Here are some pictures to enjoy. Now before your 1/25 scale people get their hopes up, remind them that if they buy these cars they sit at the end of a dead end road, and they will have to cross 'the bridge' to get them home. Thanks for looking. I had a lot of fun building these two cars.

-
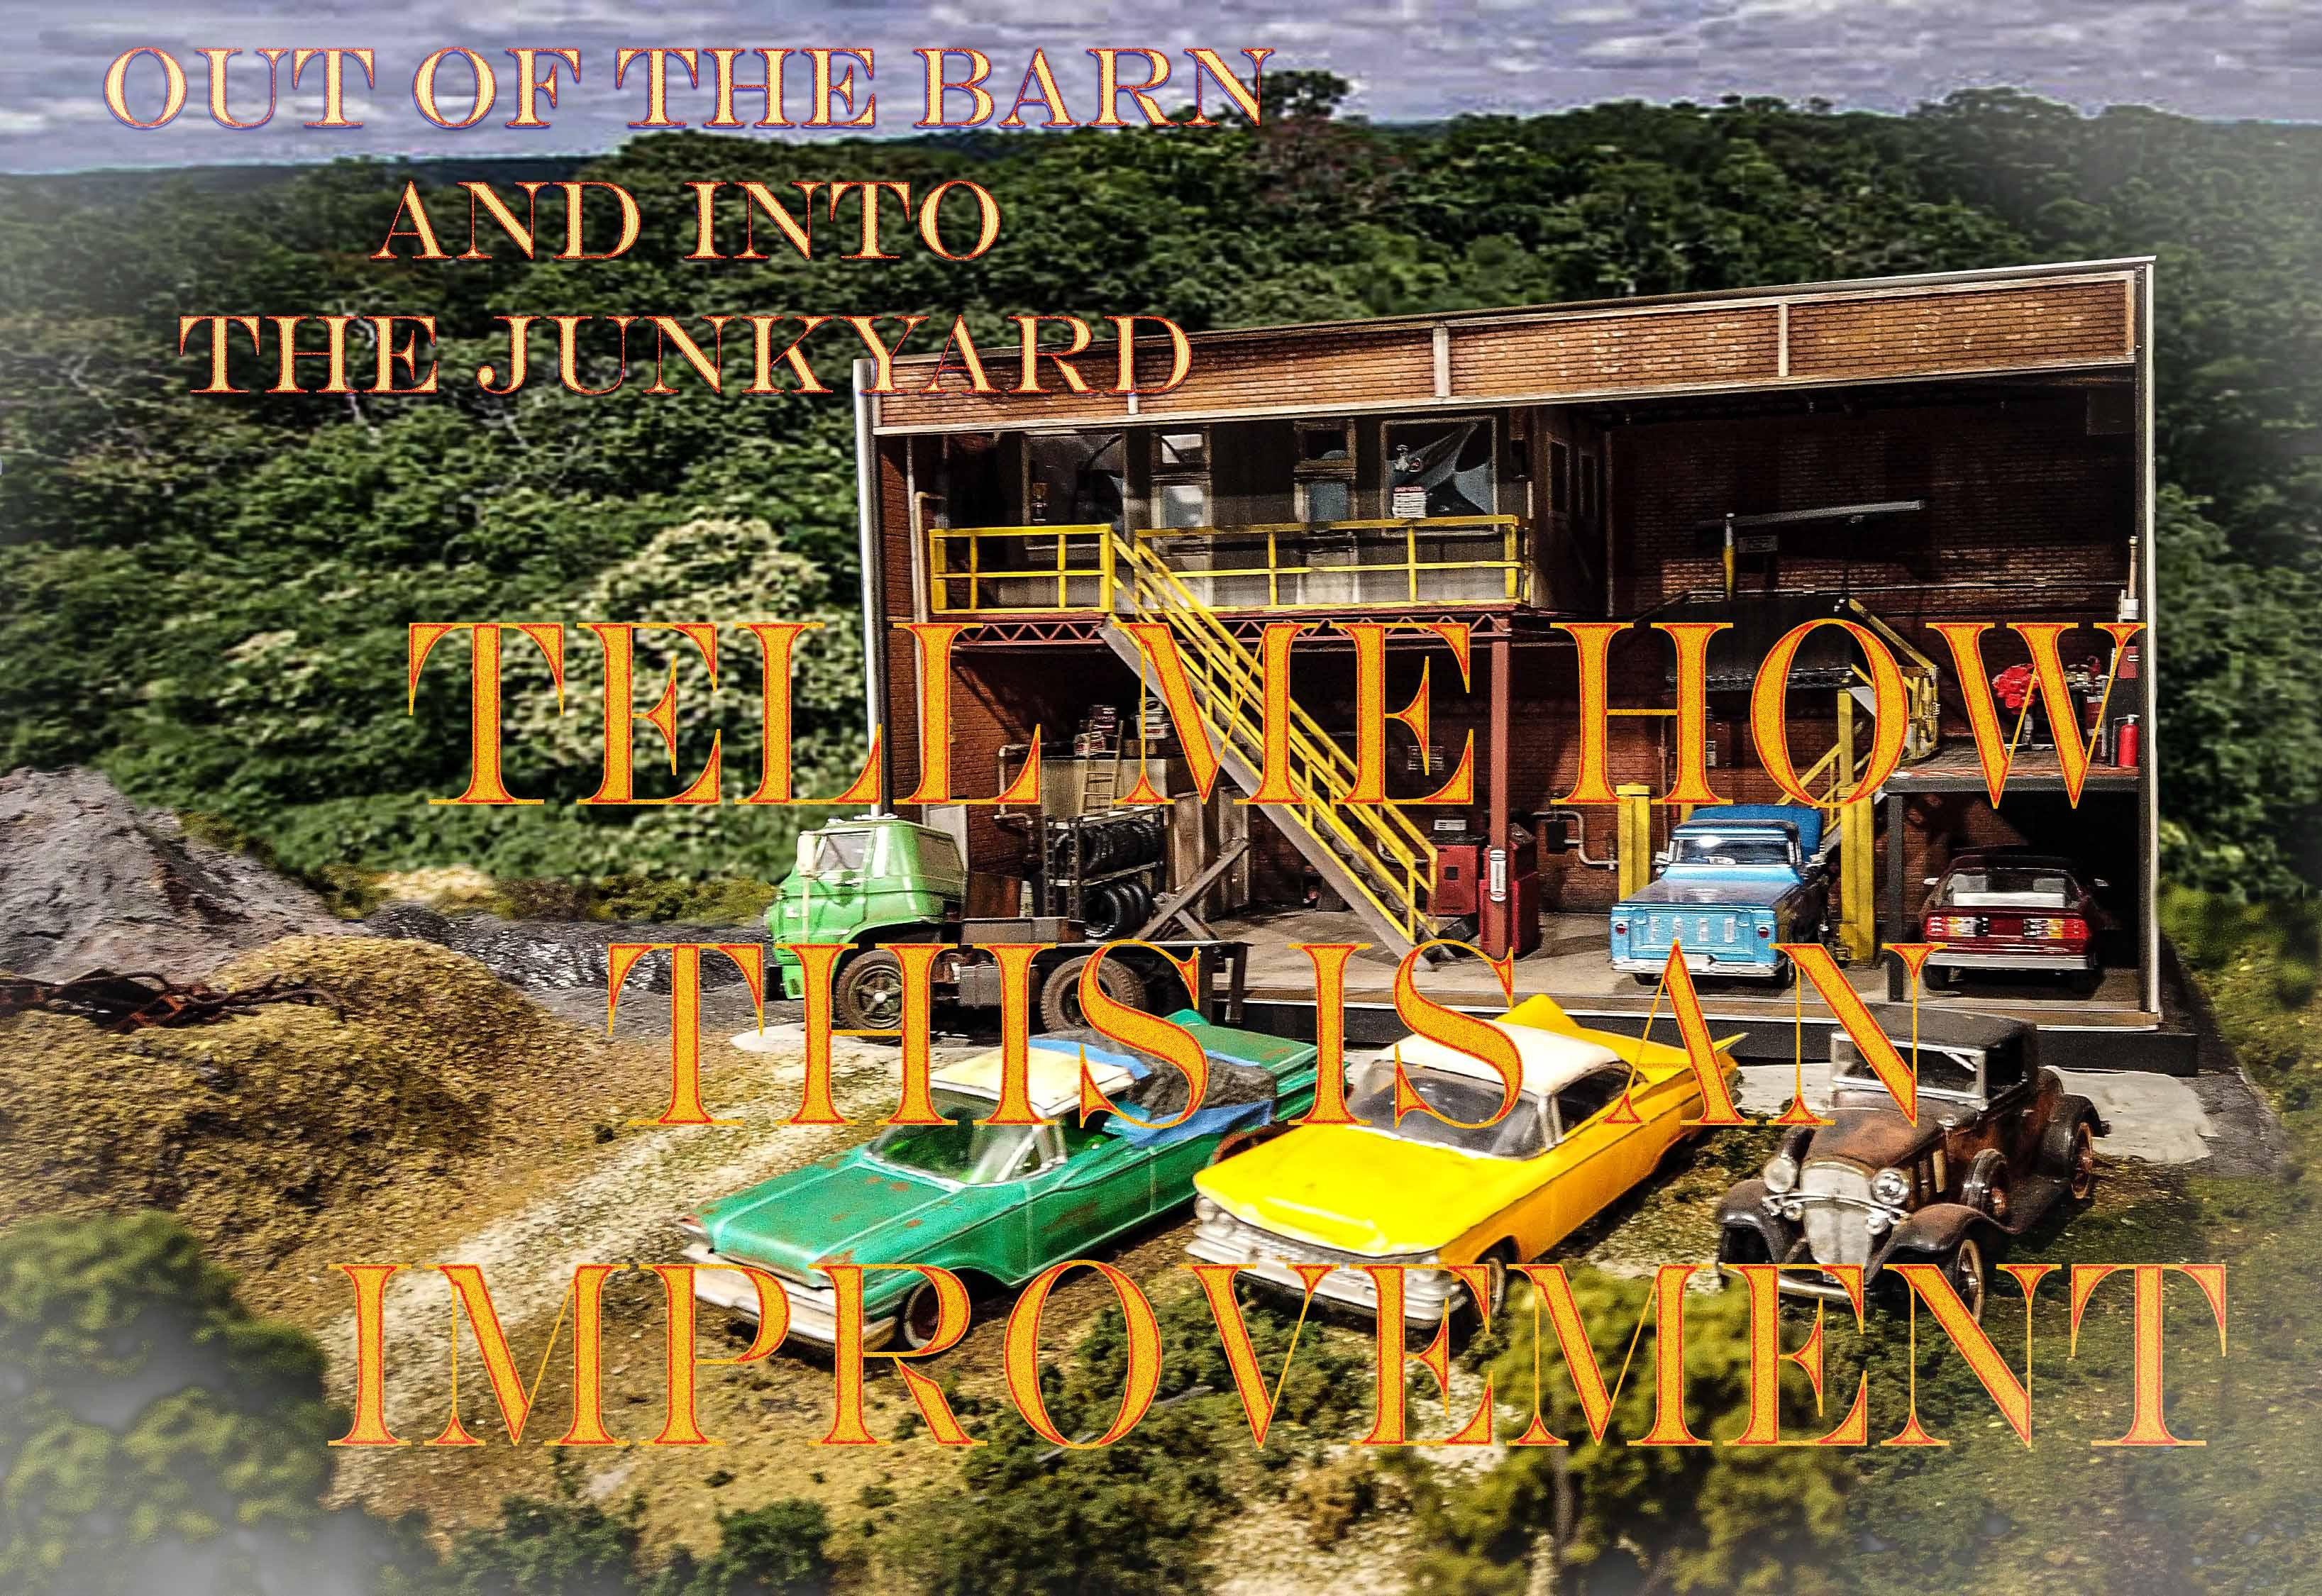
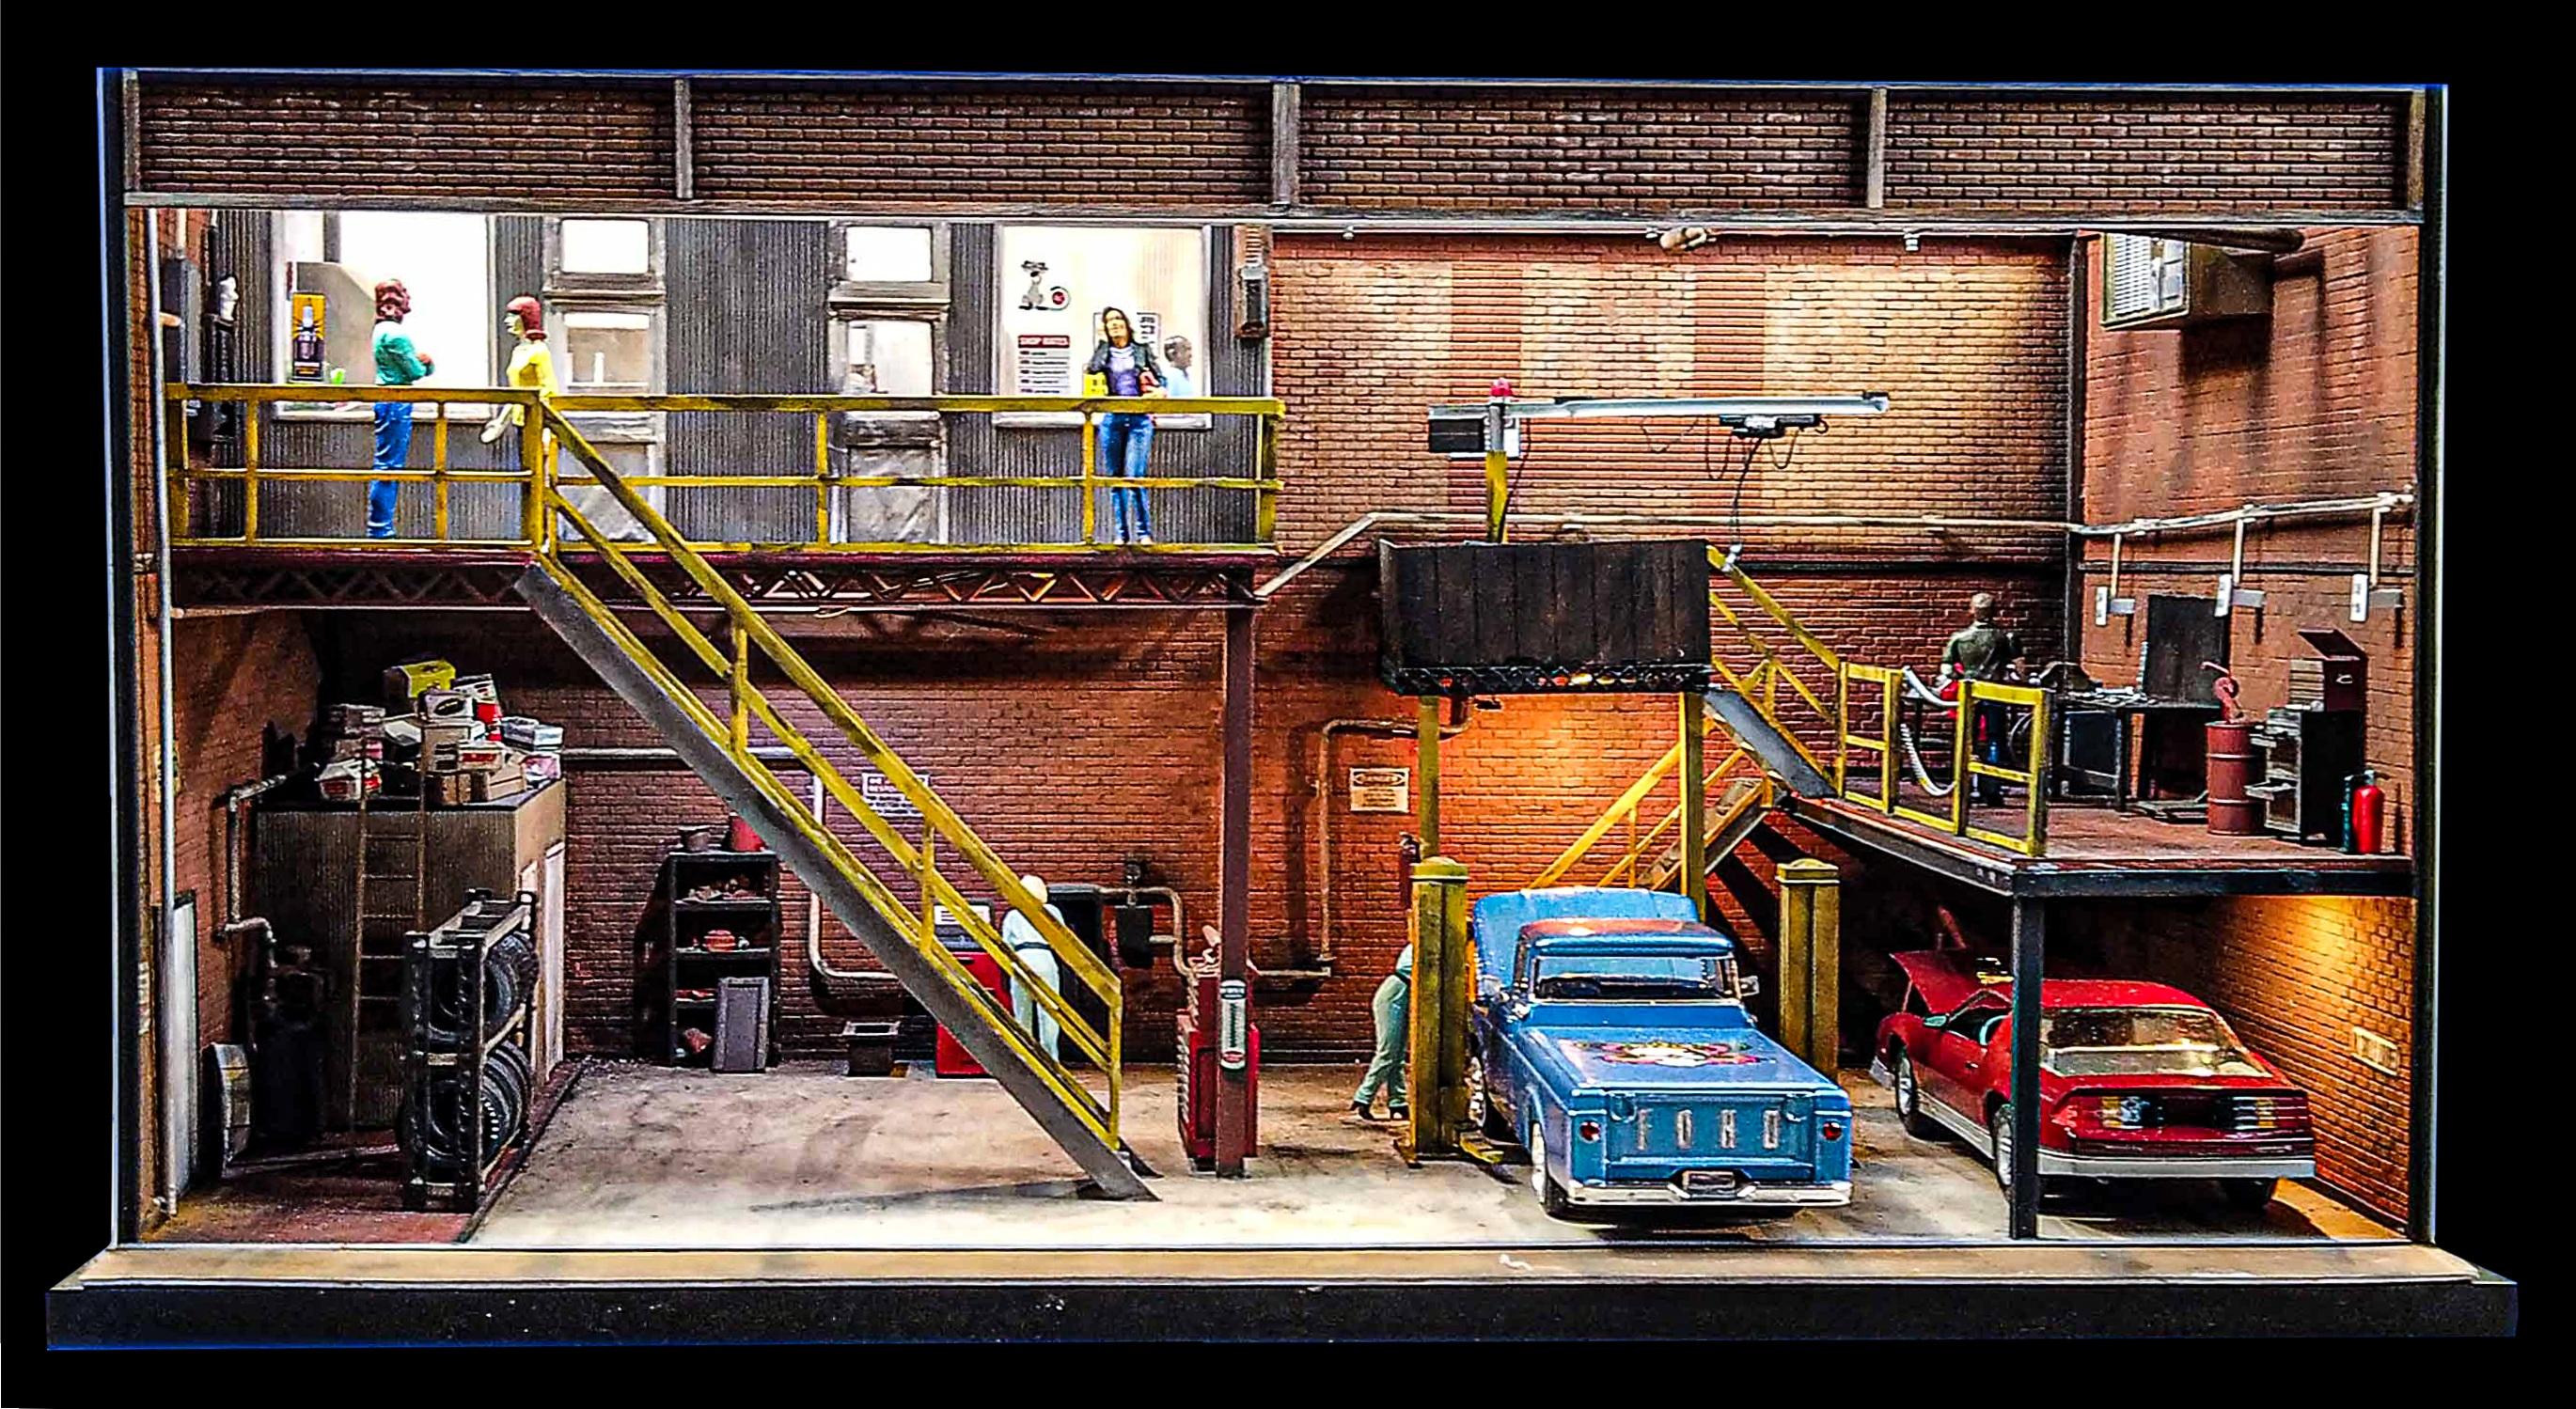
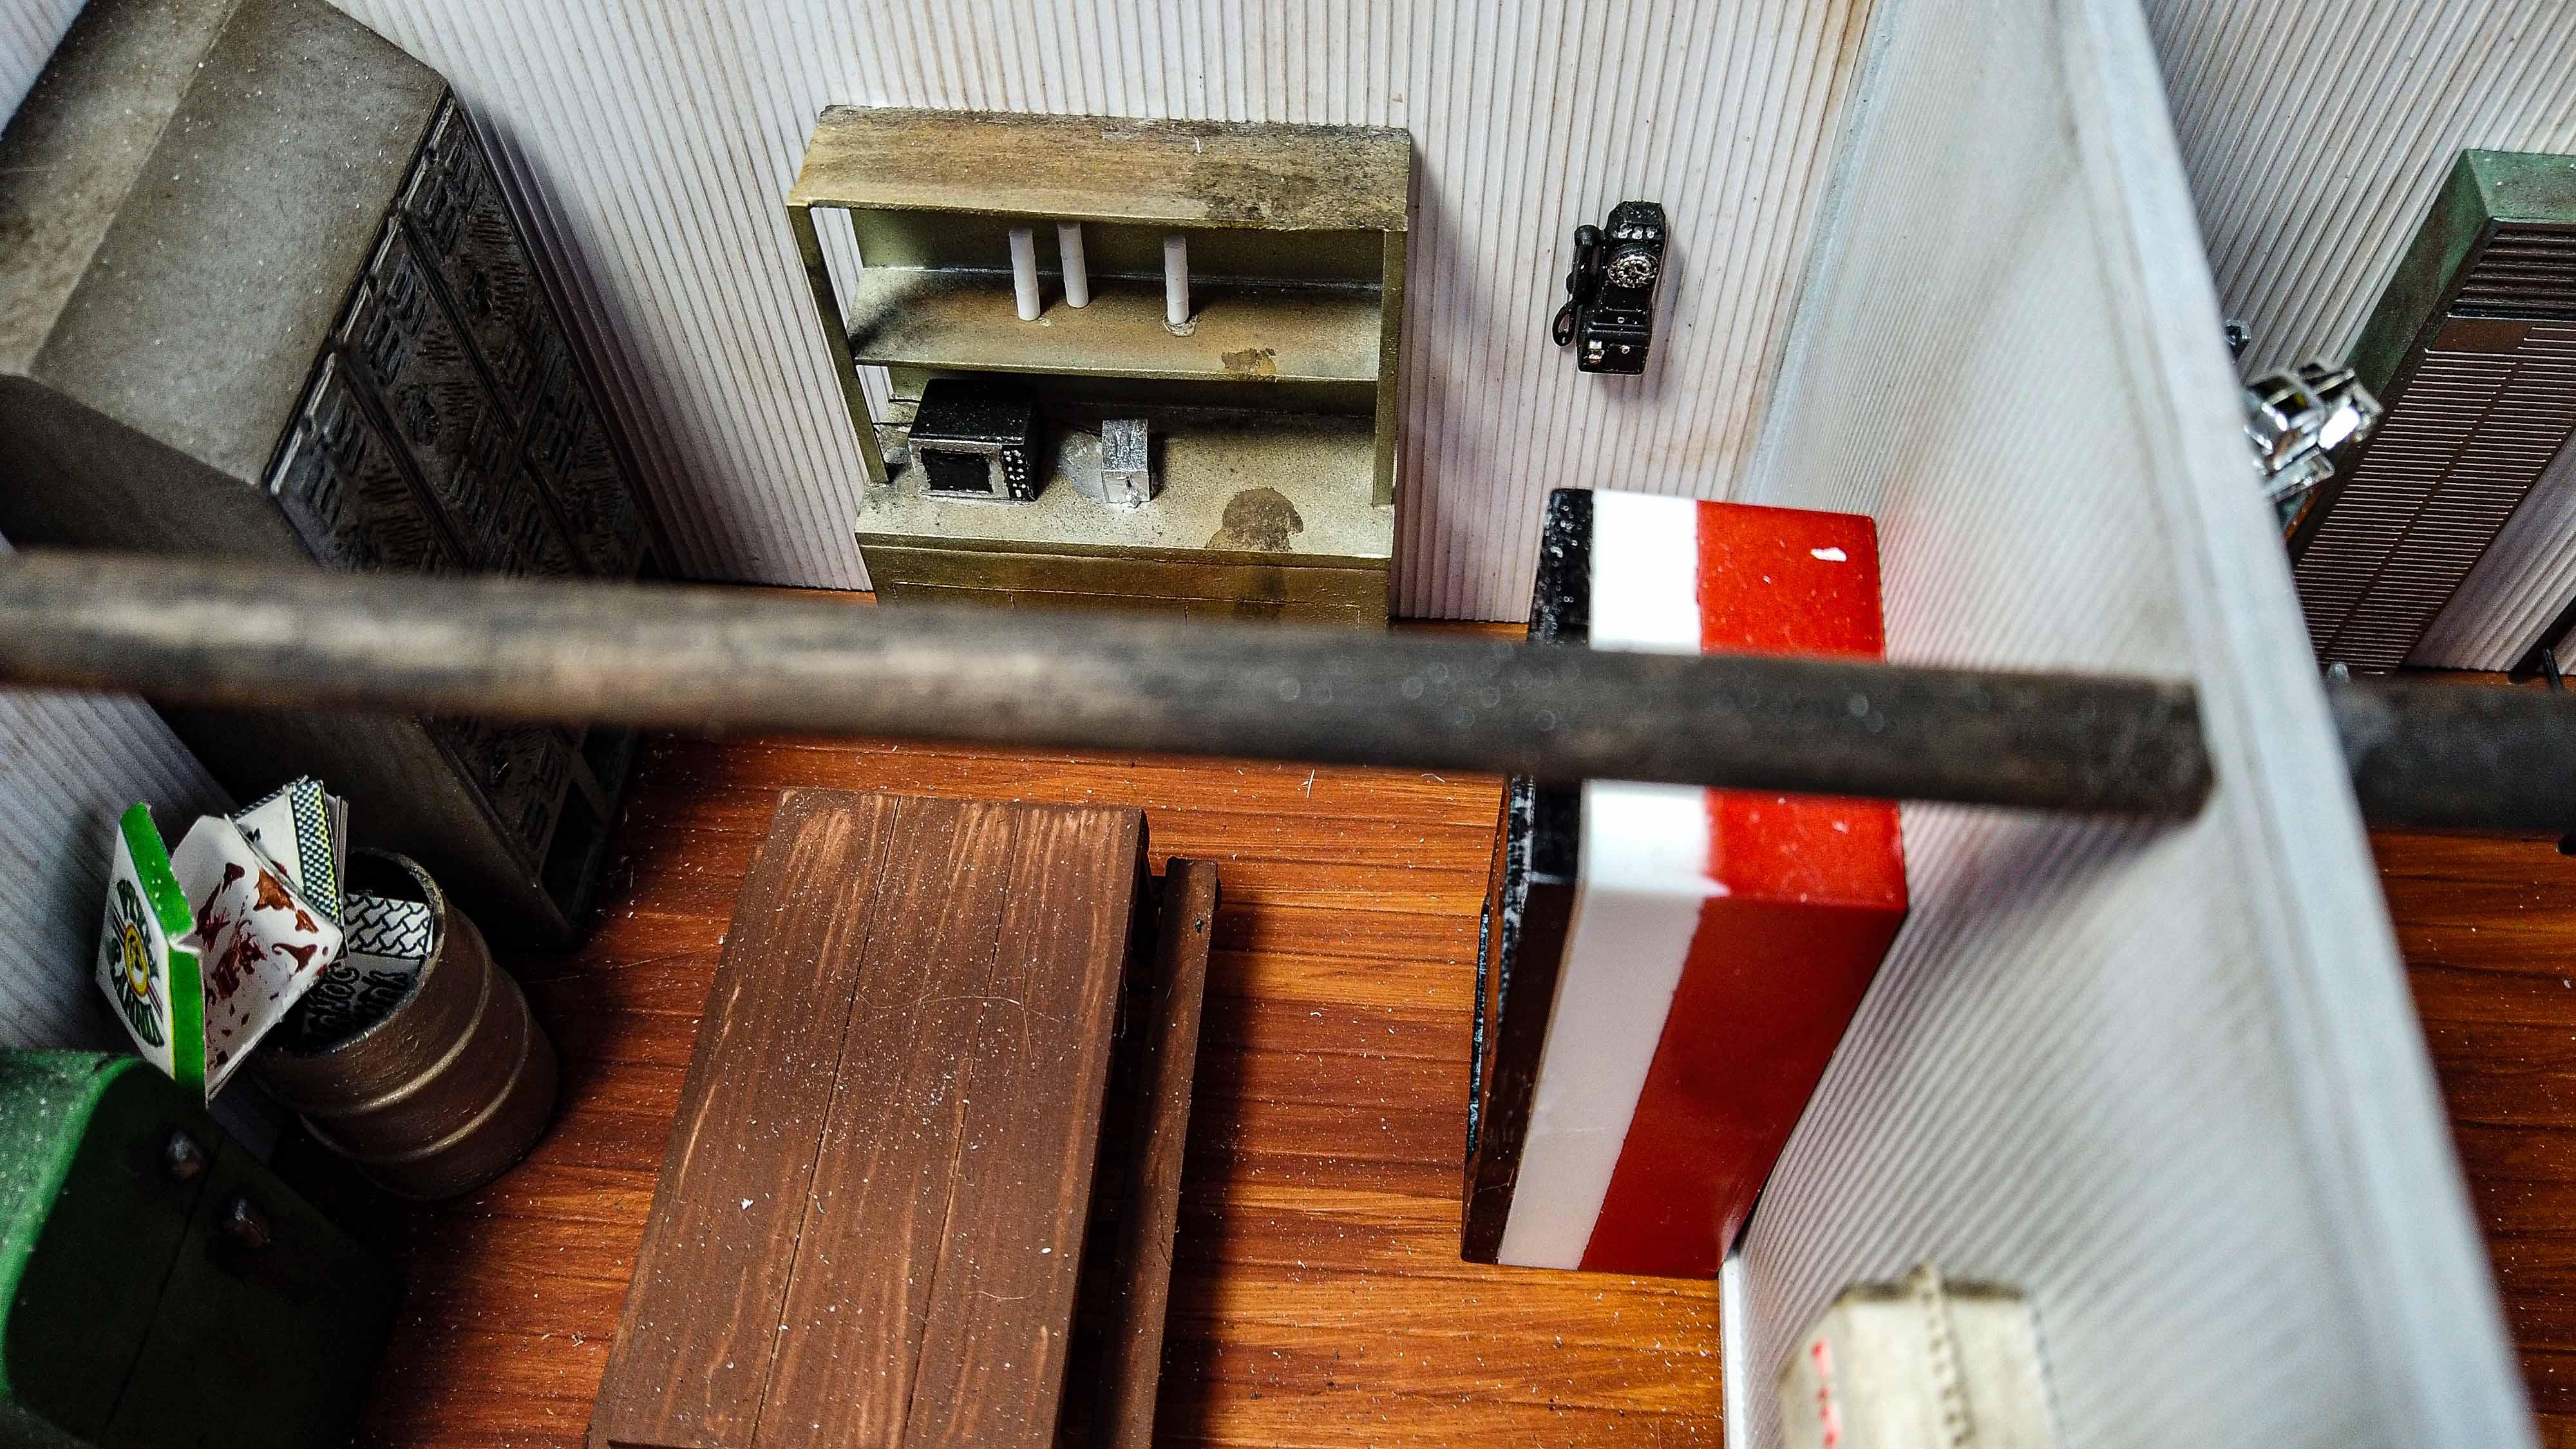
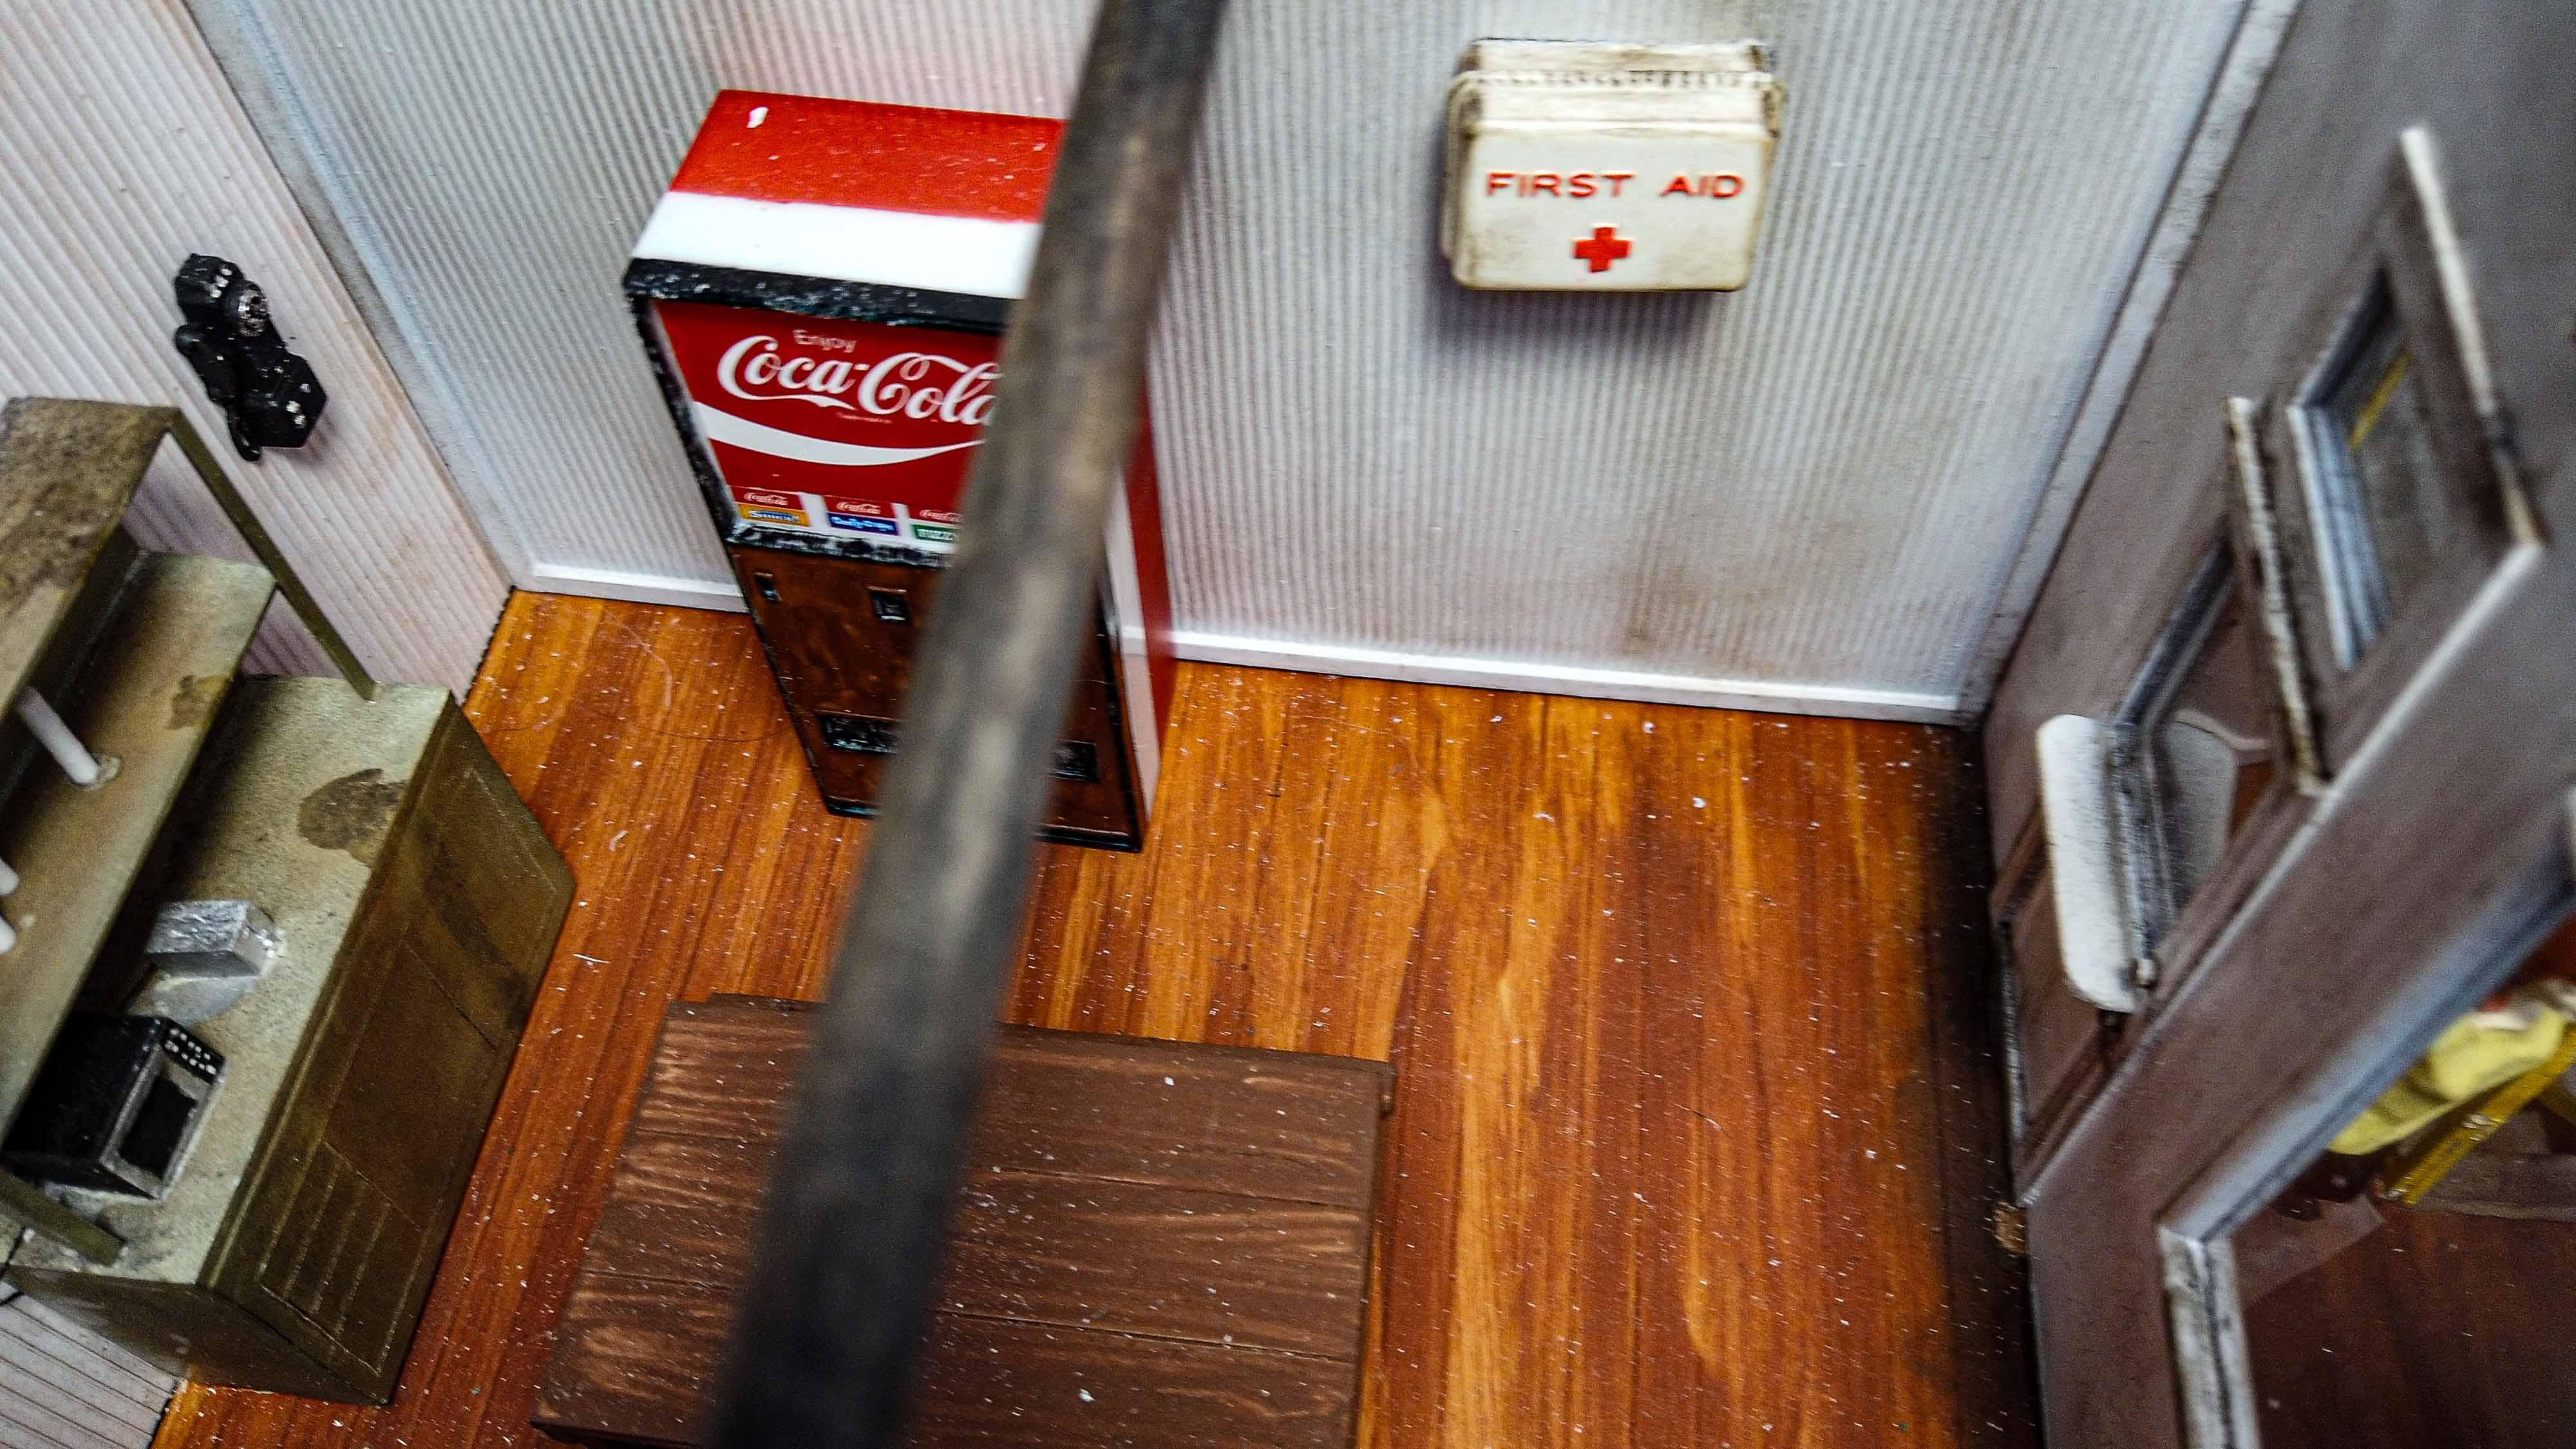
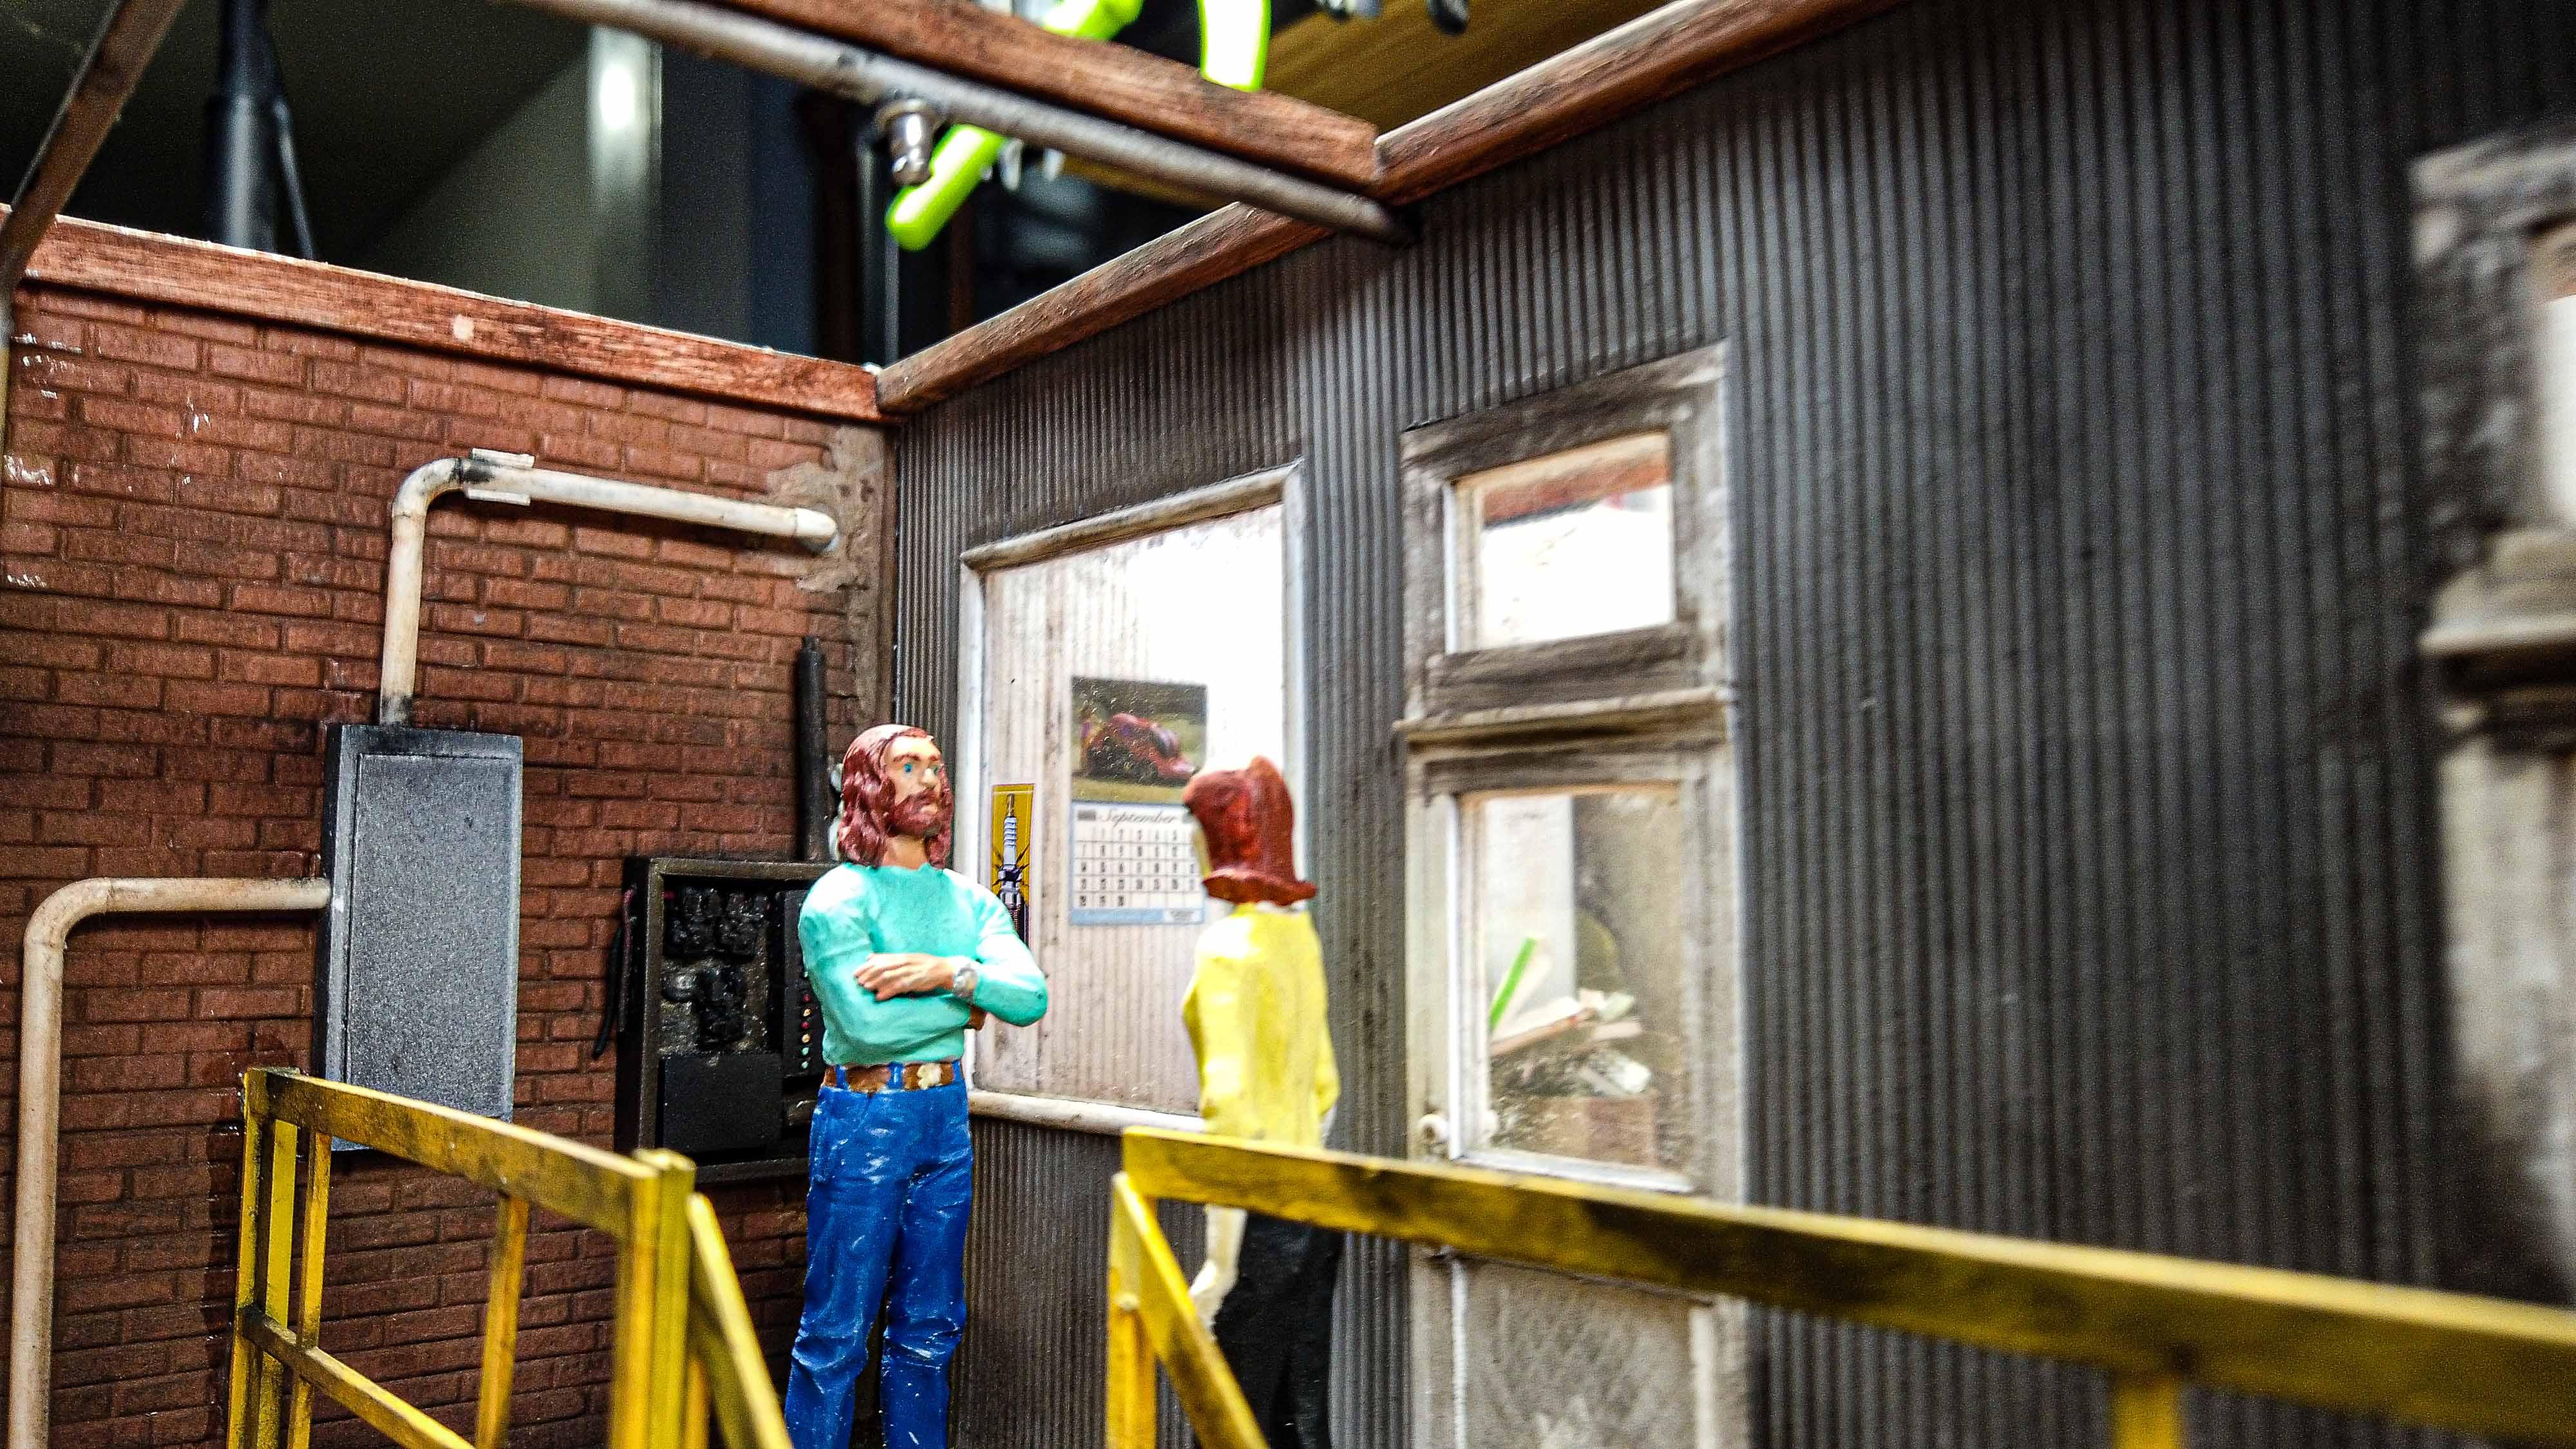
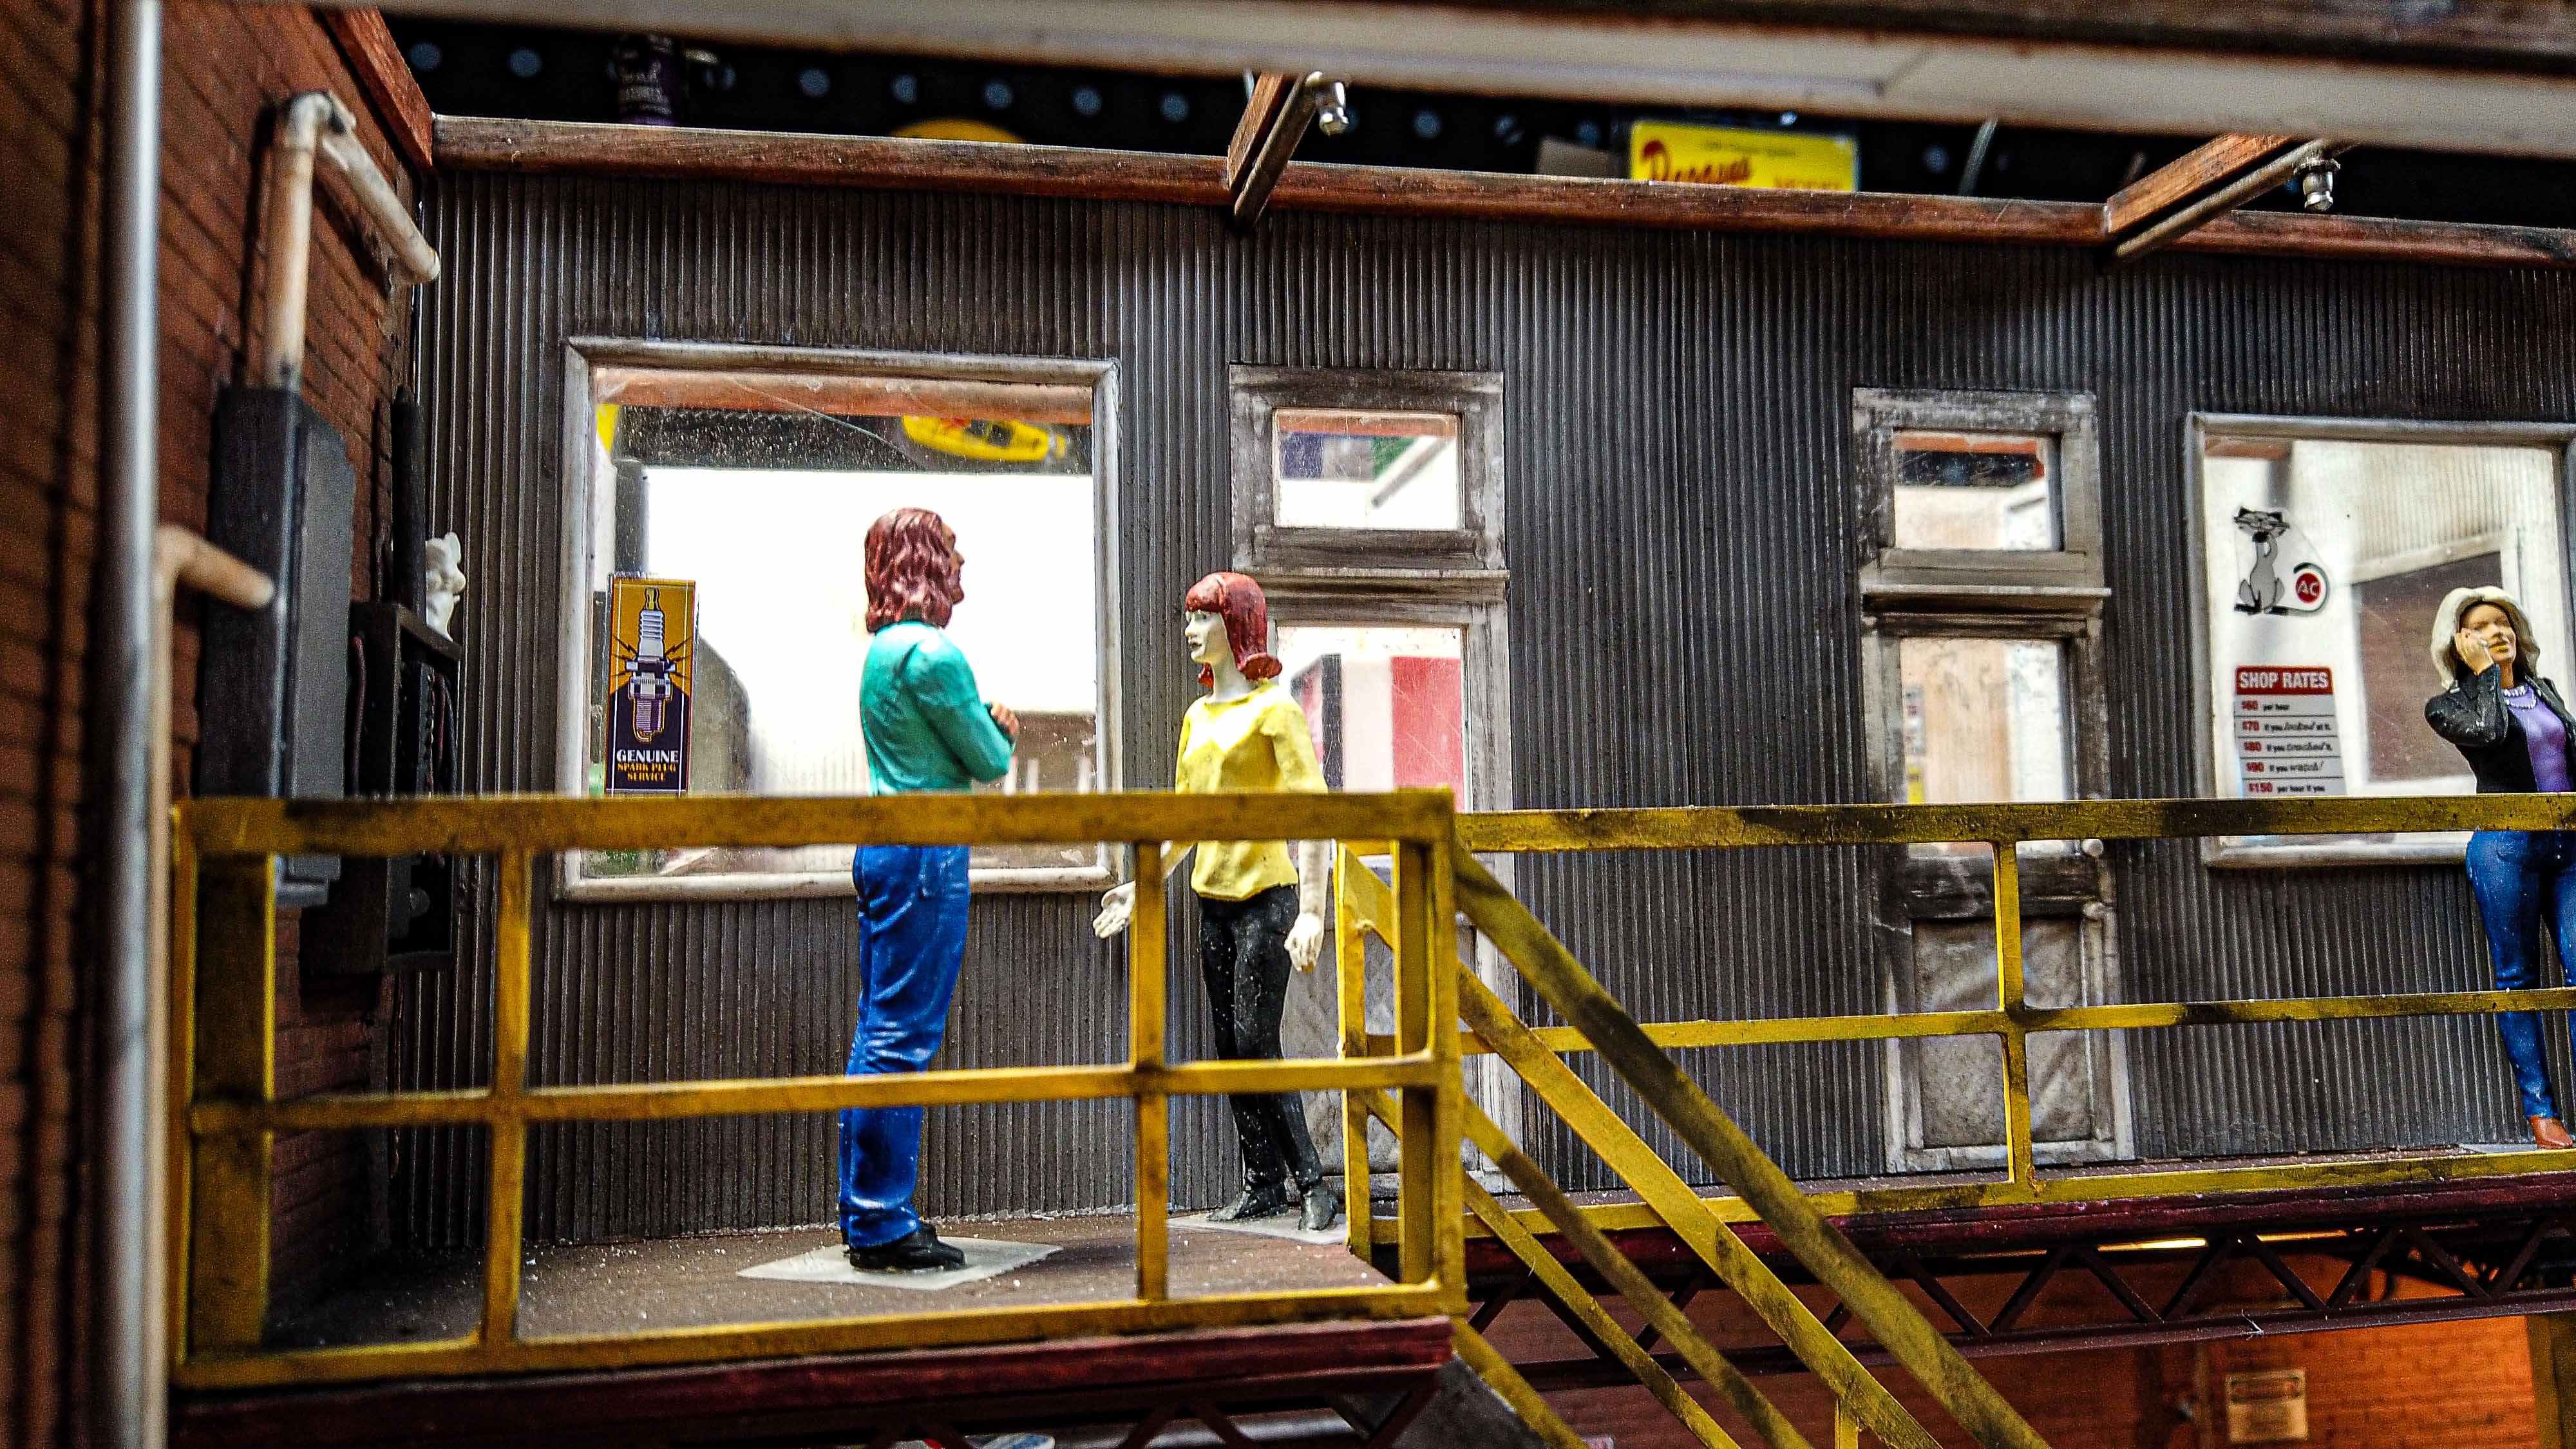
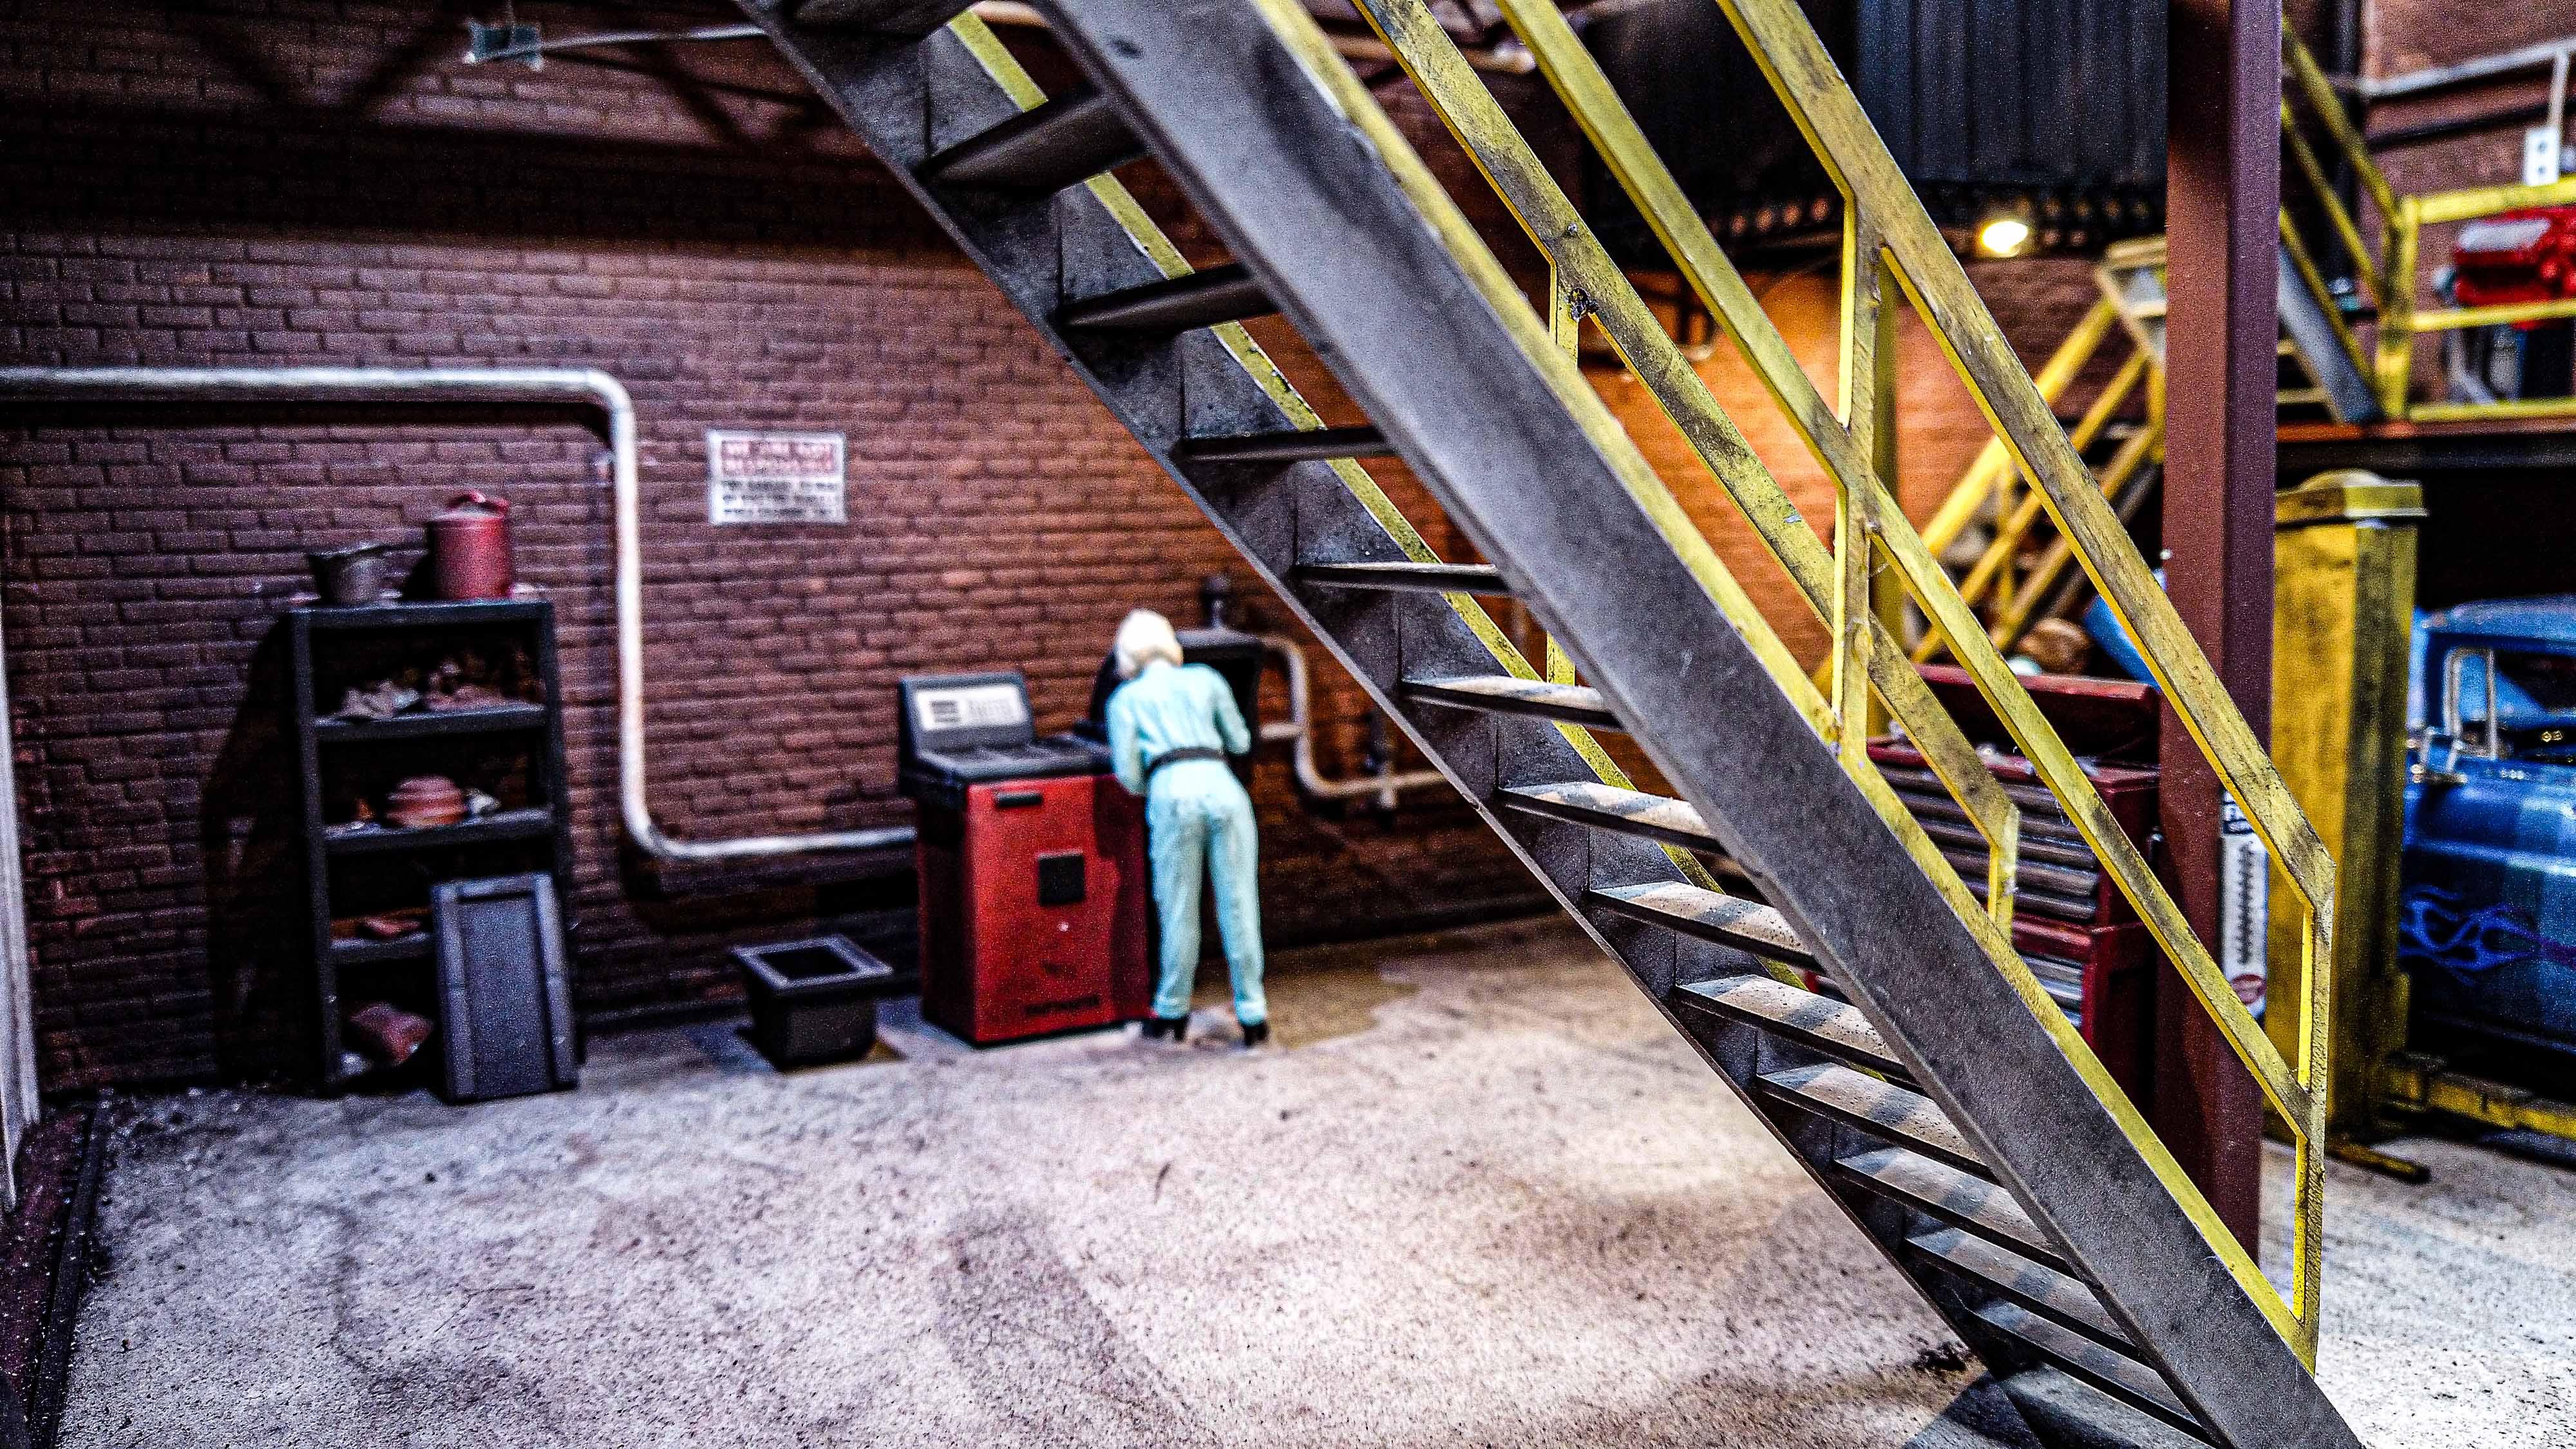
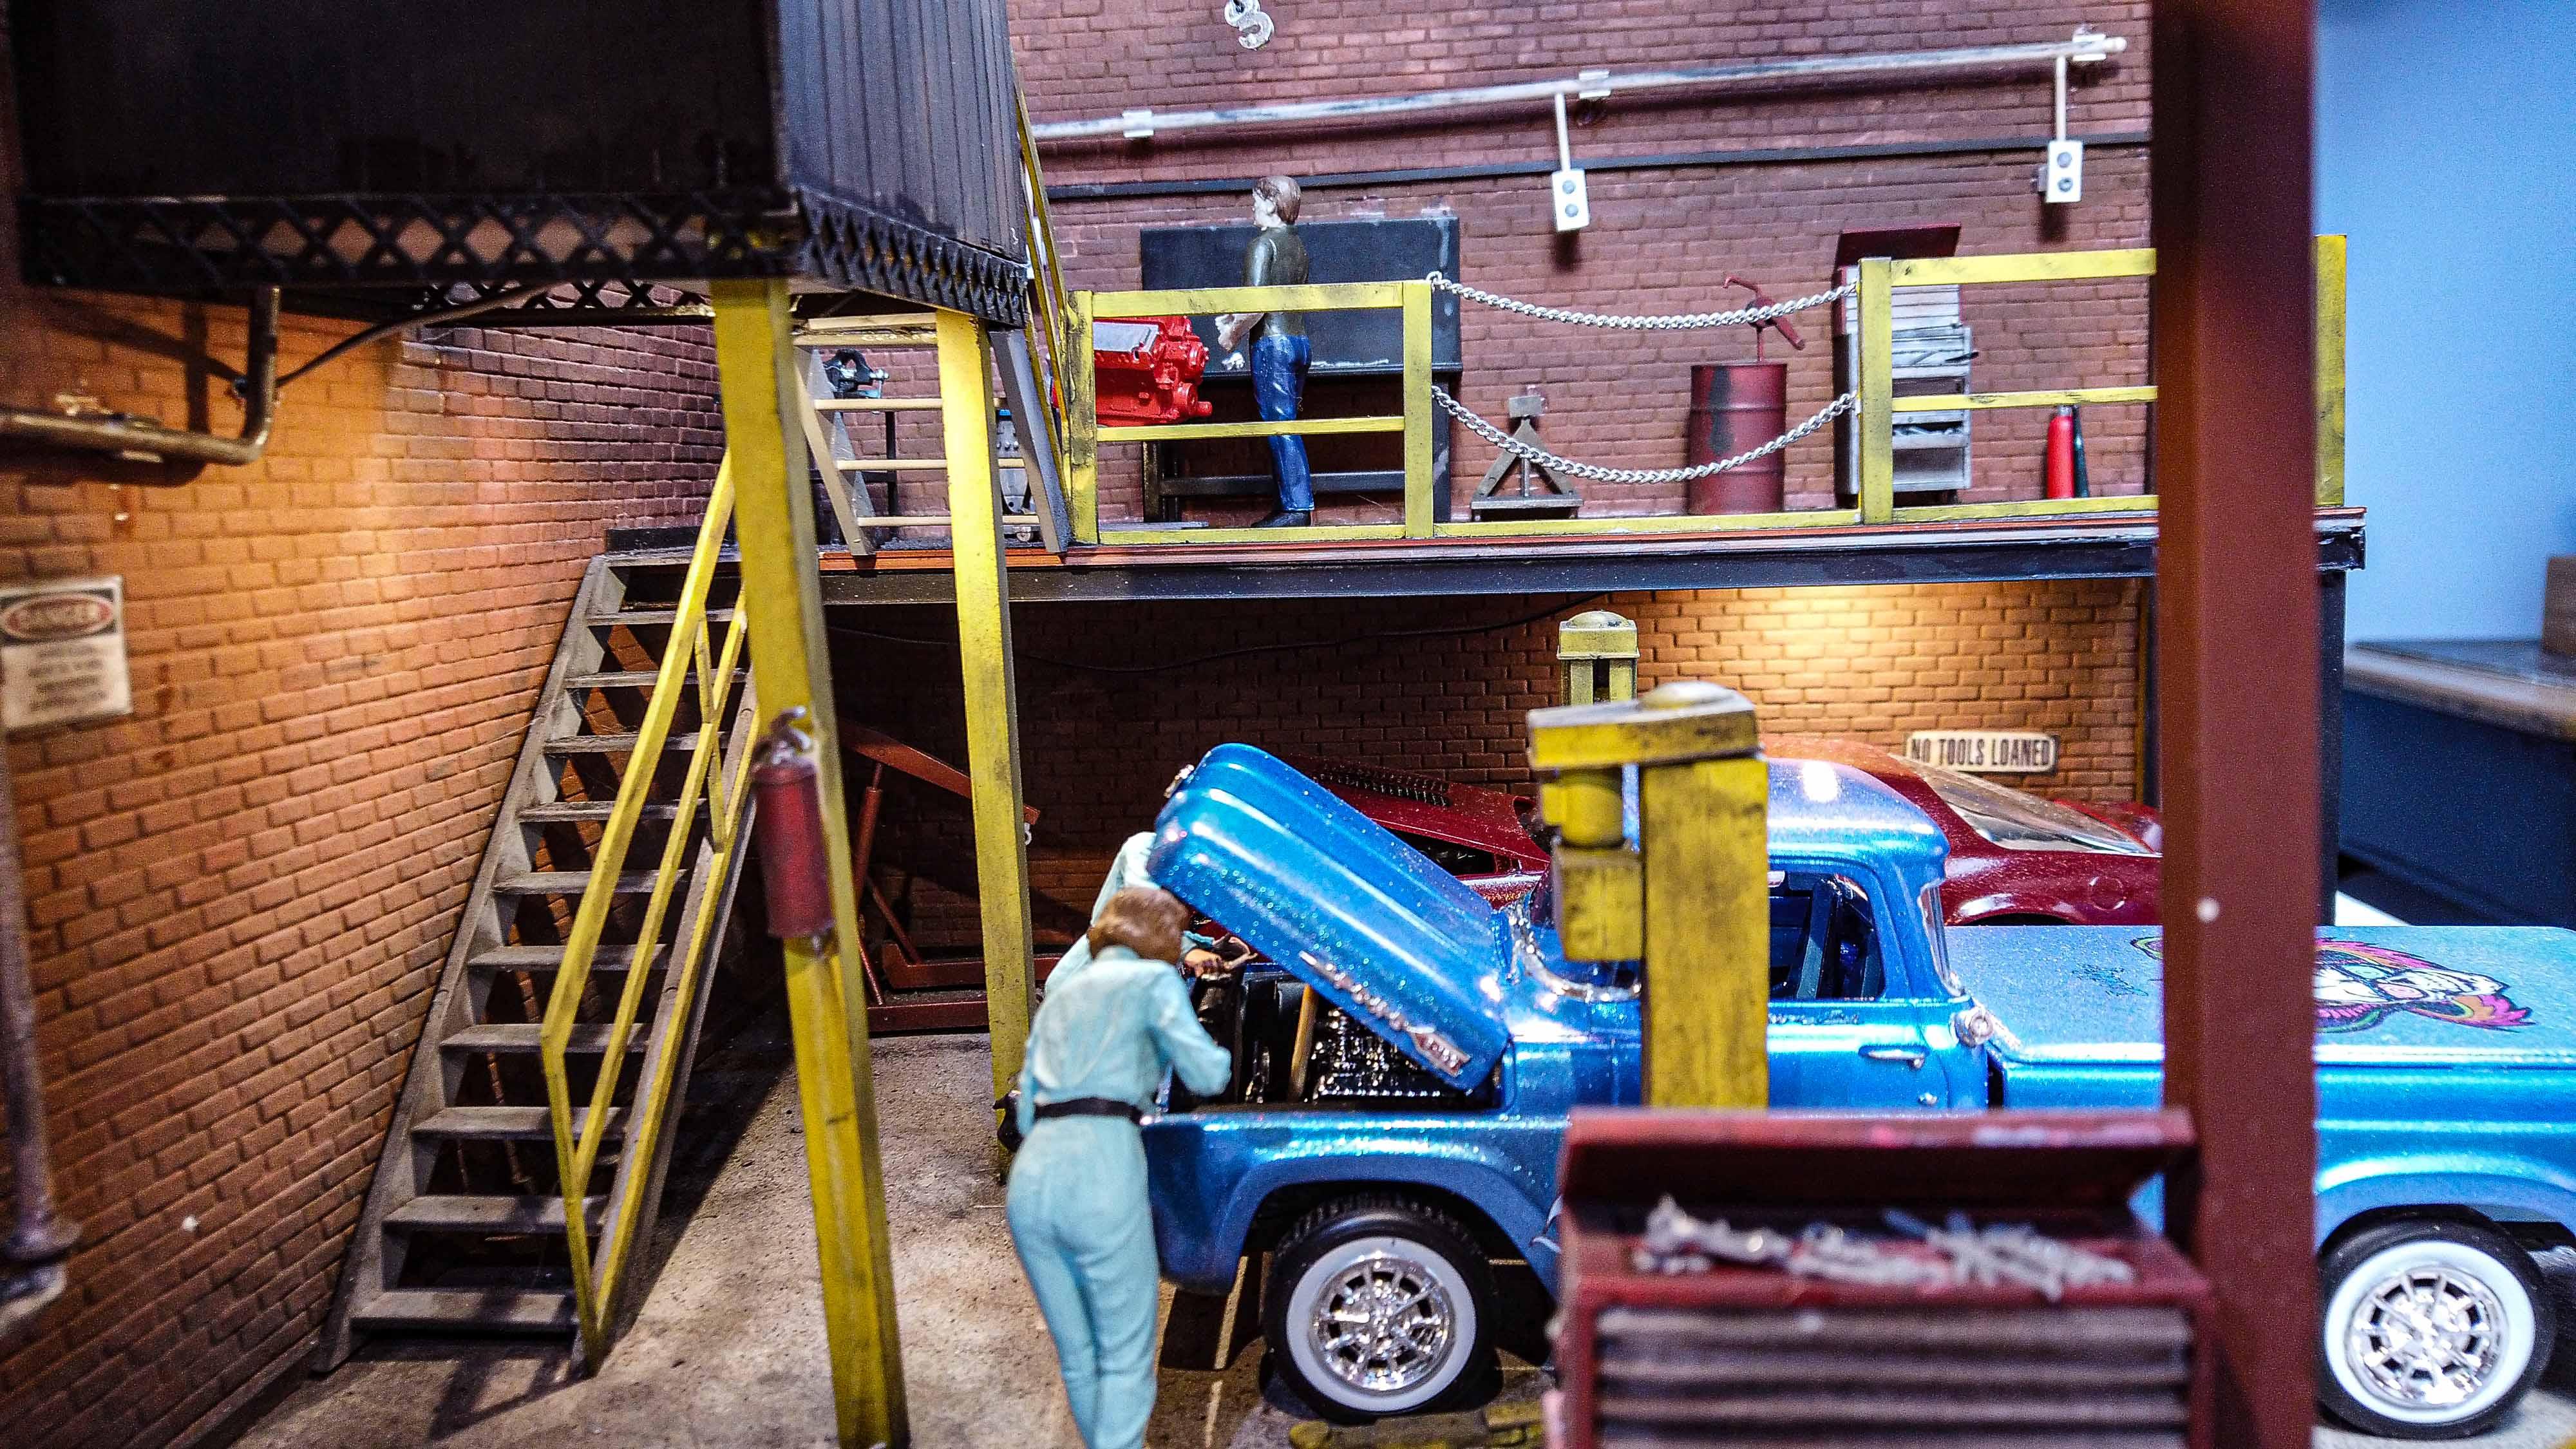
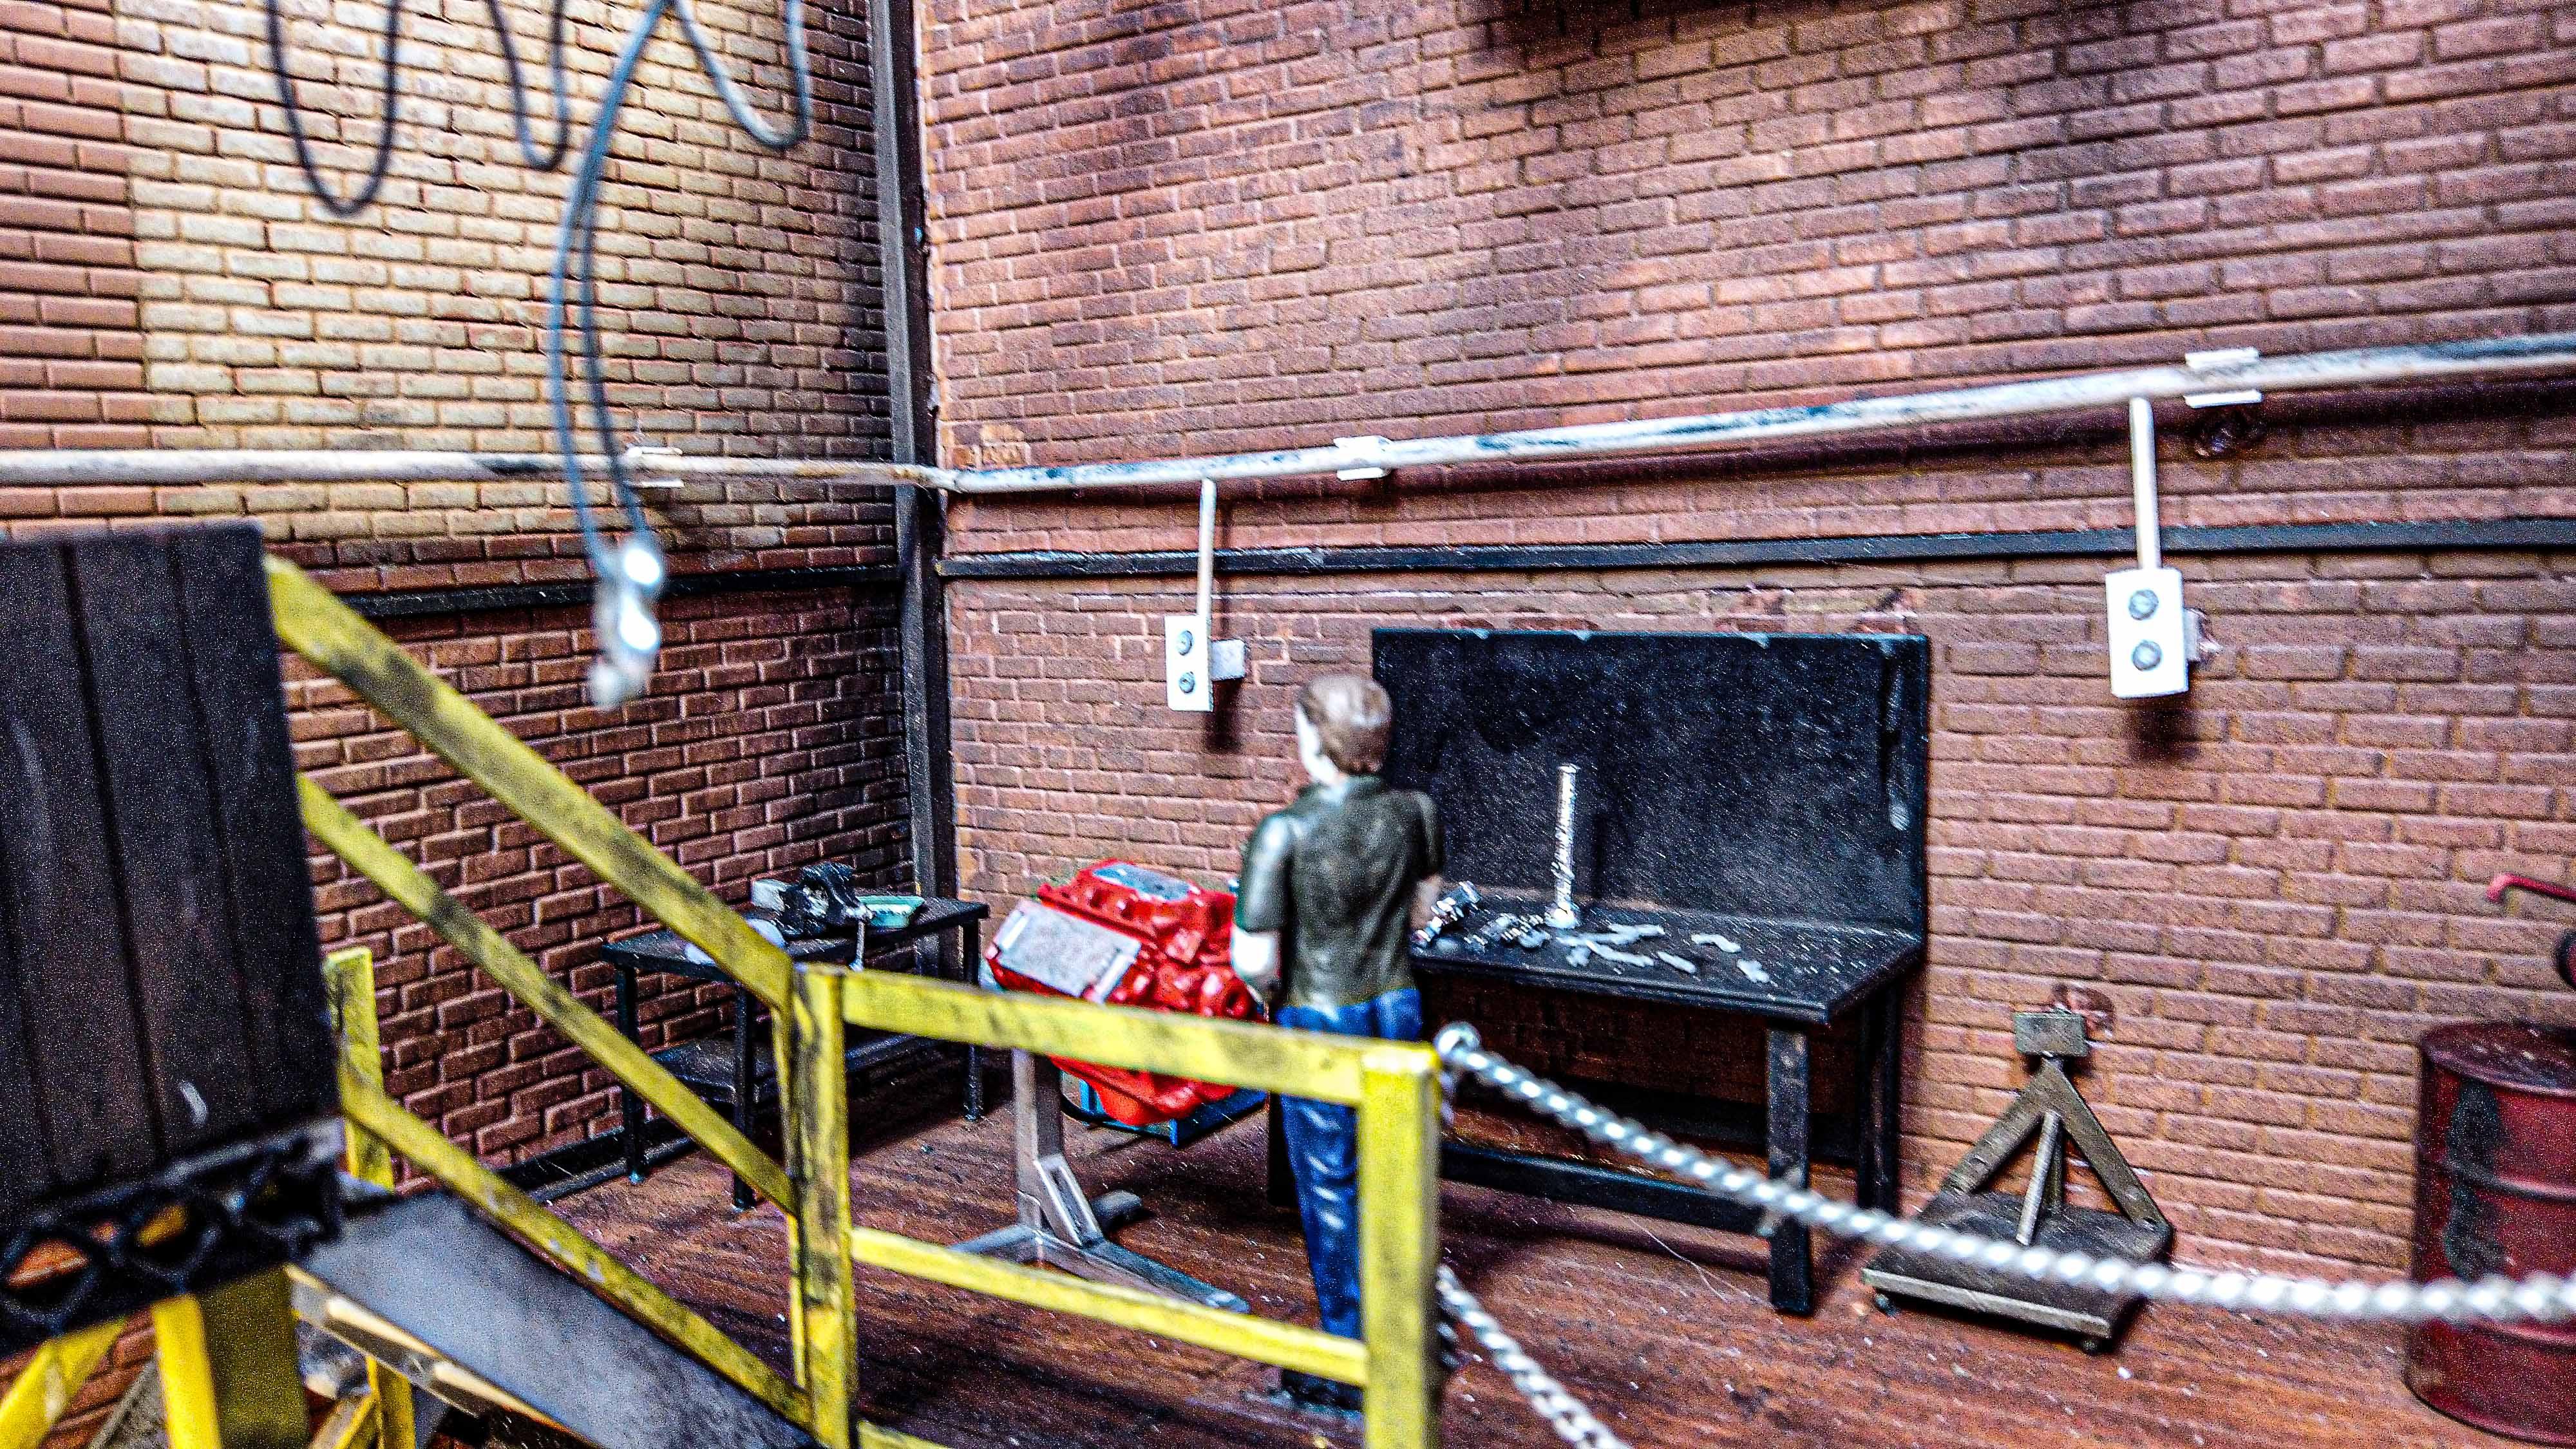
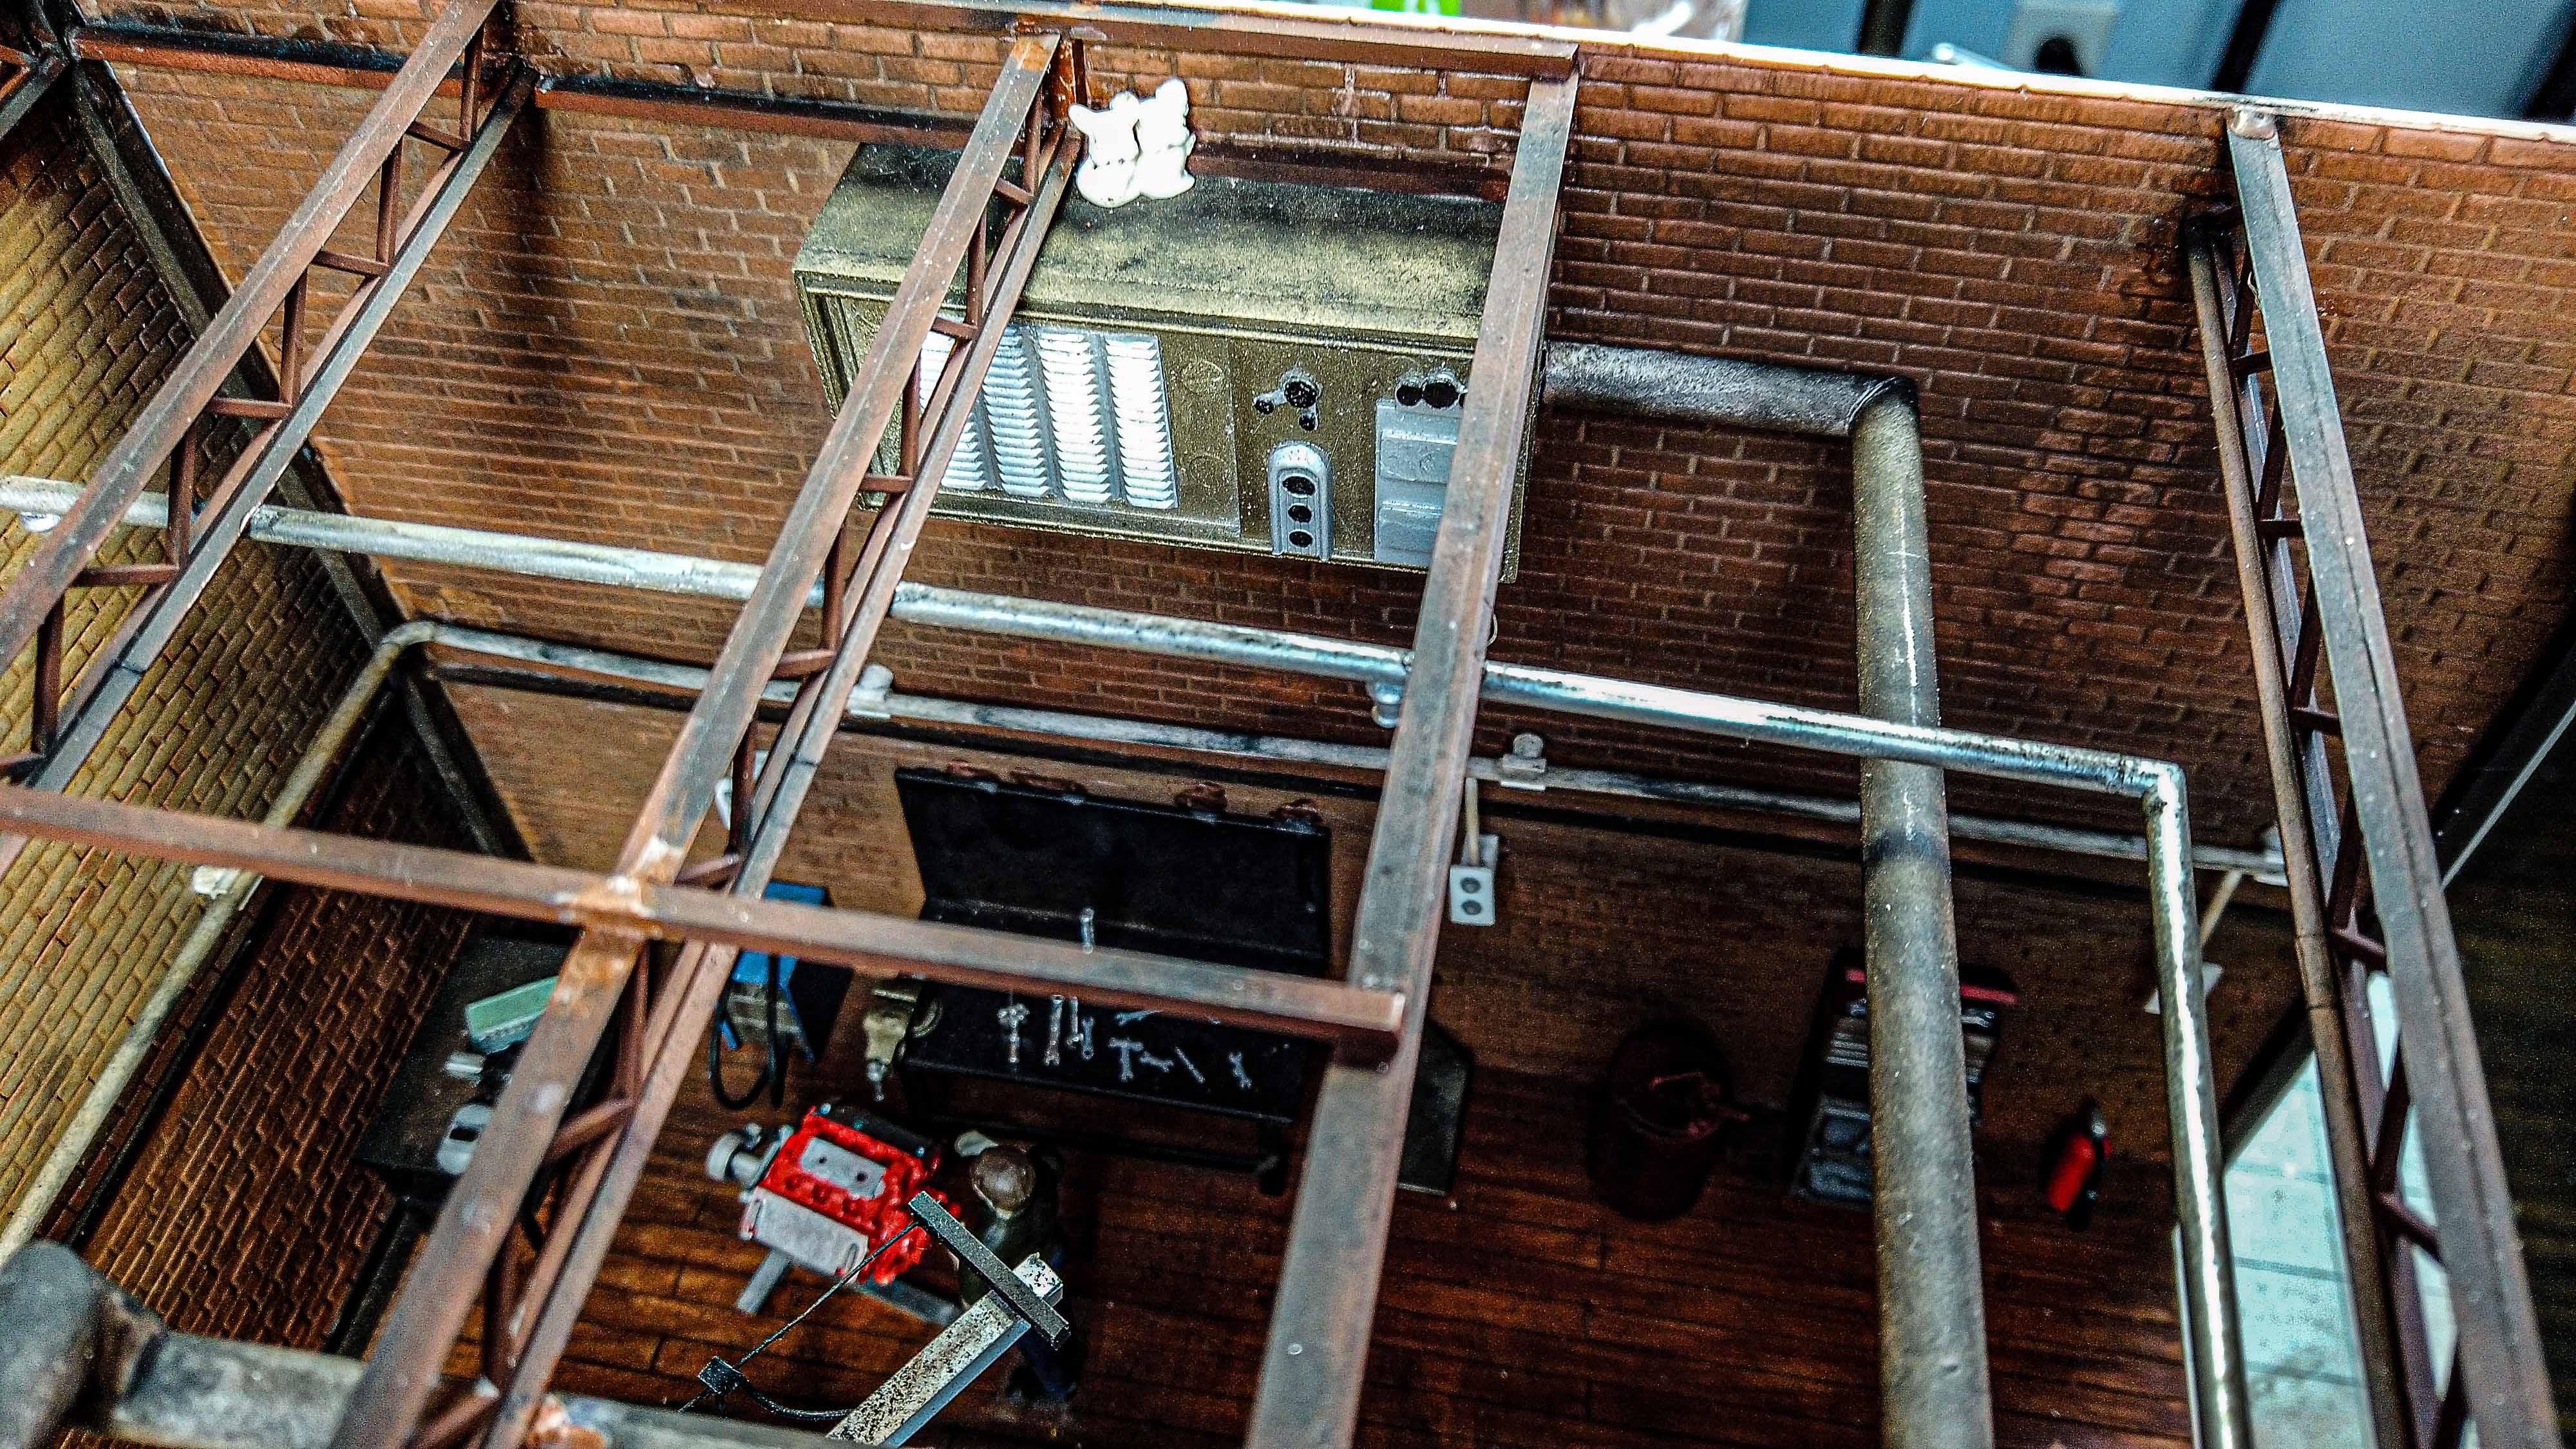
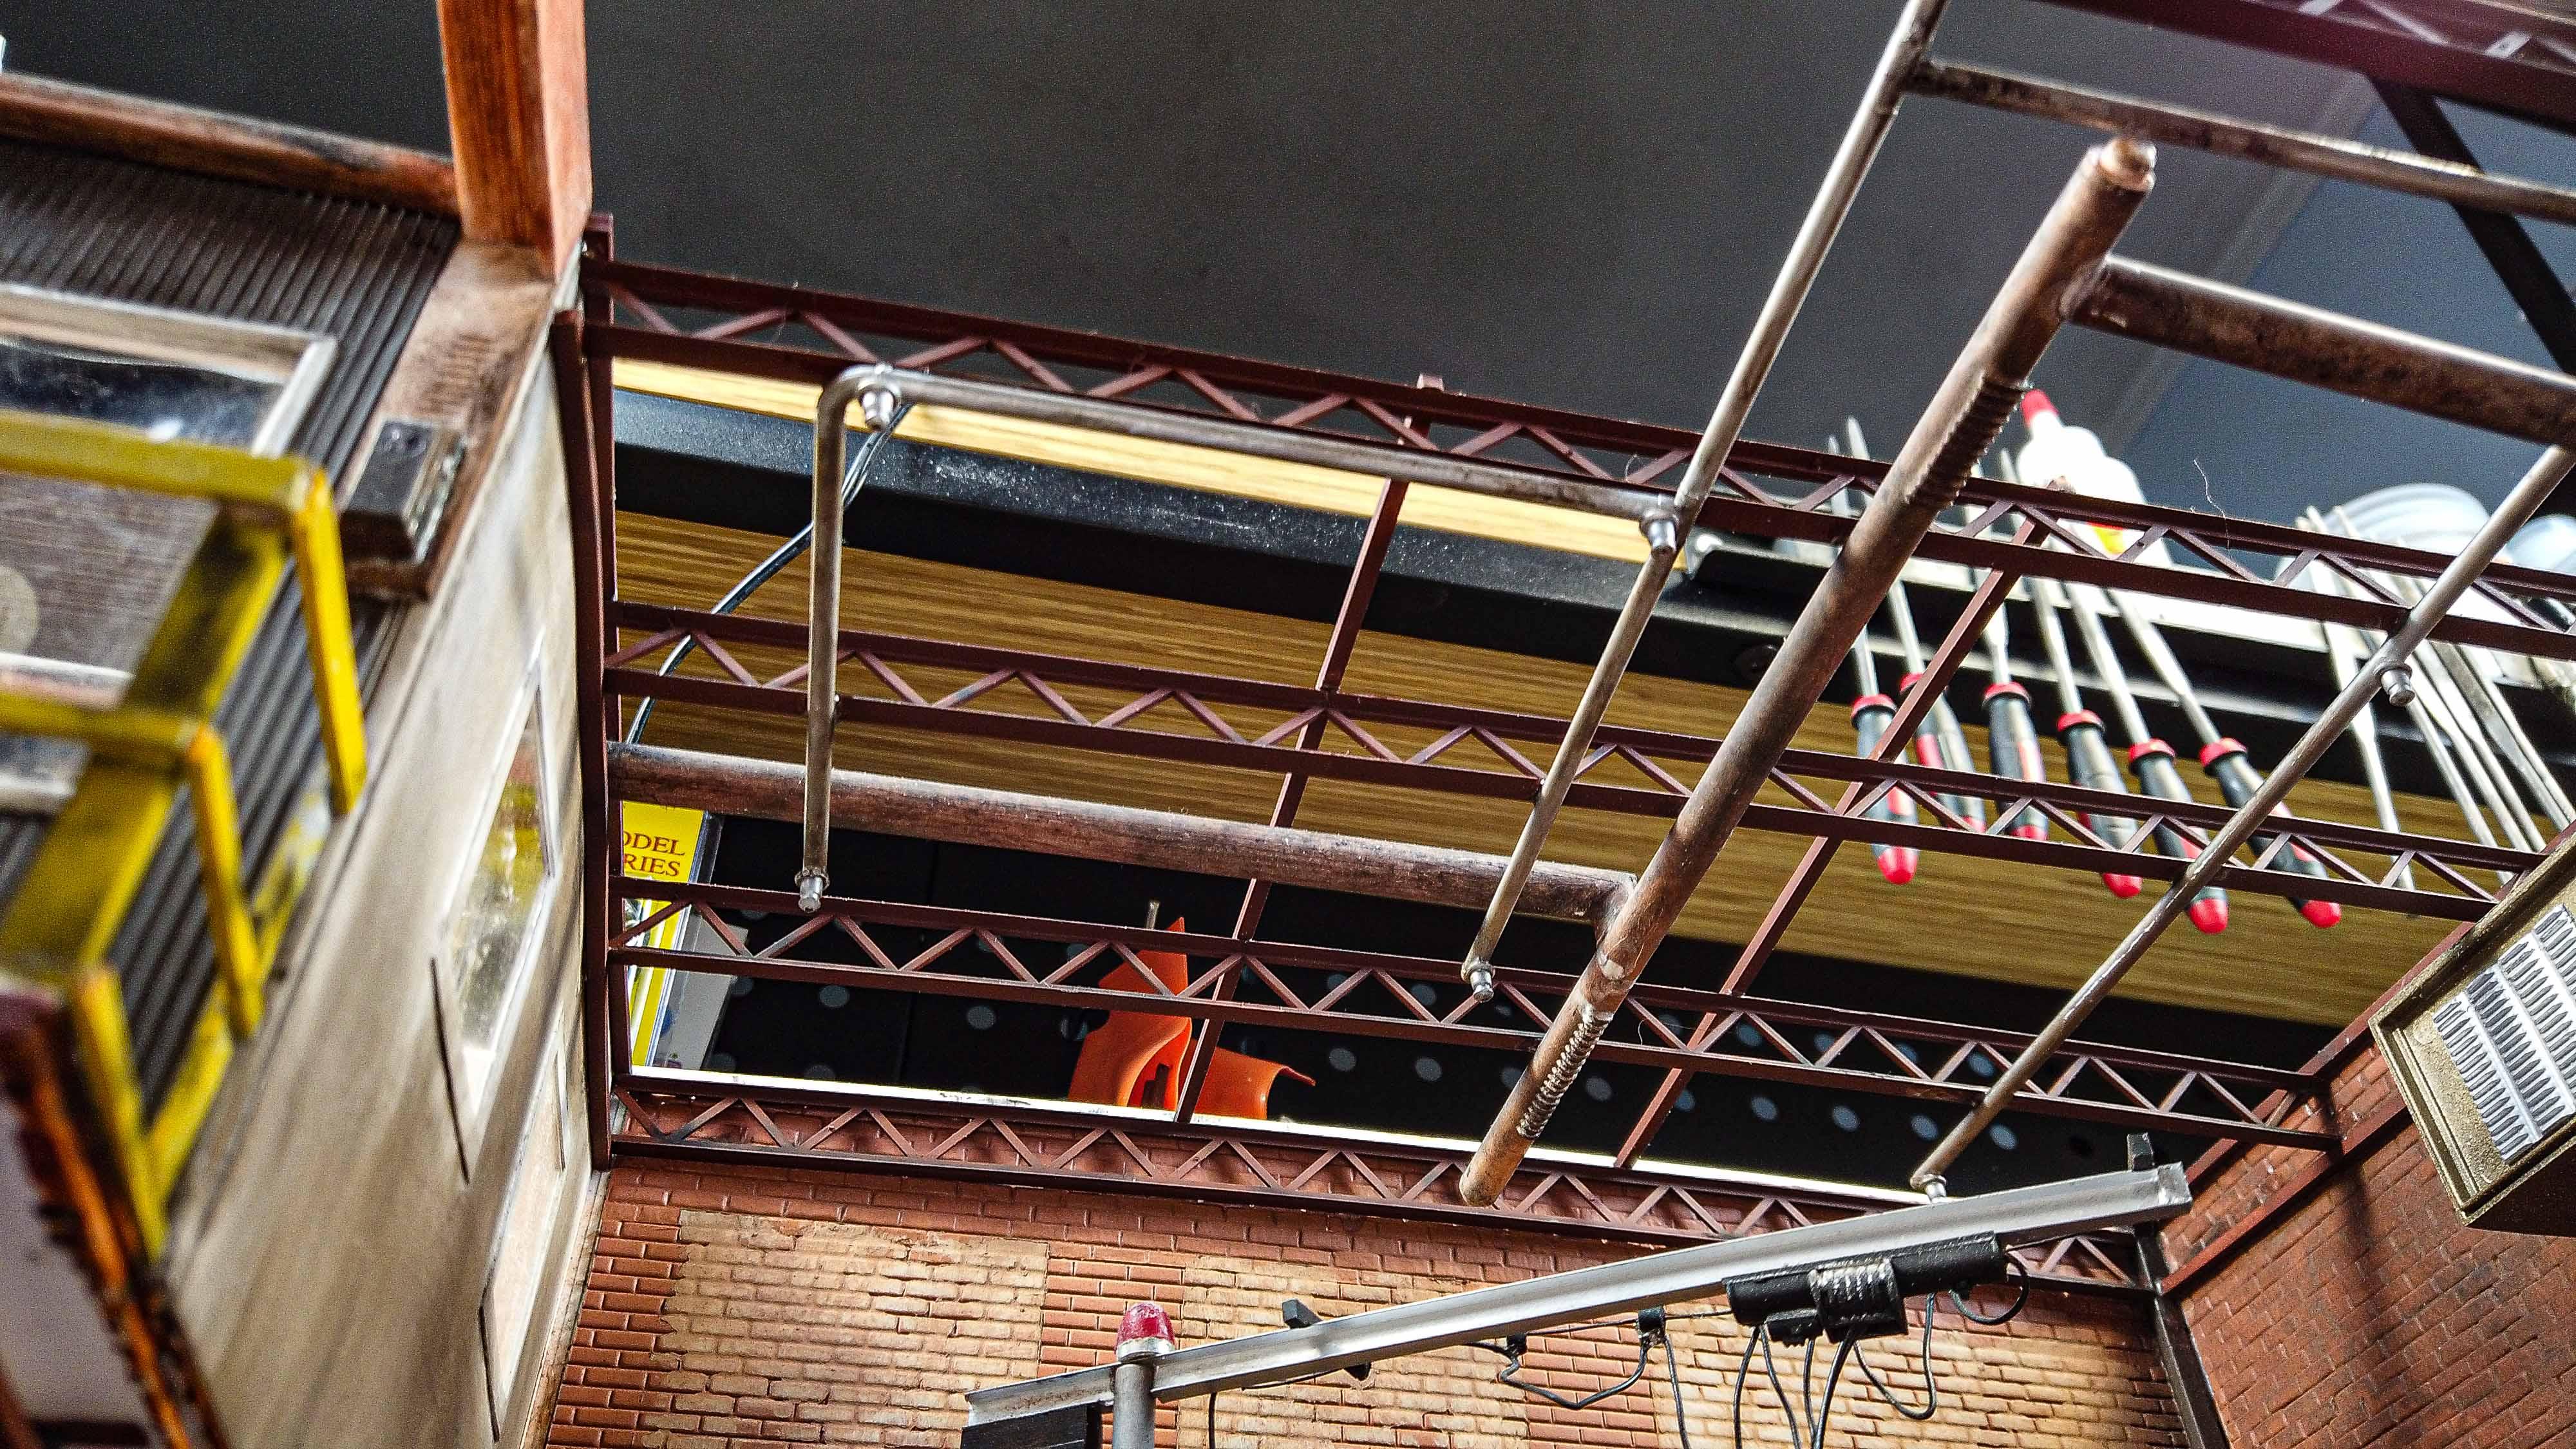
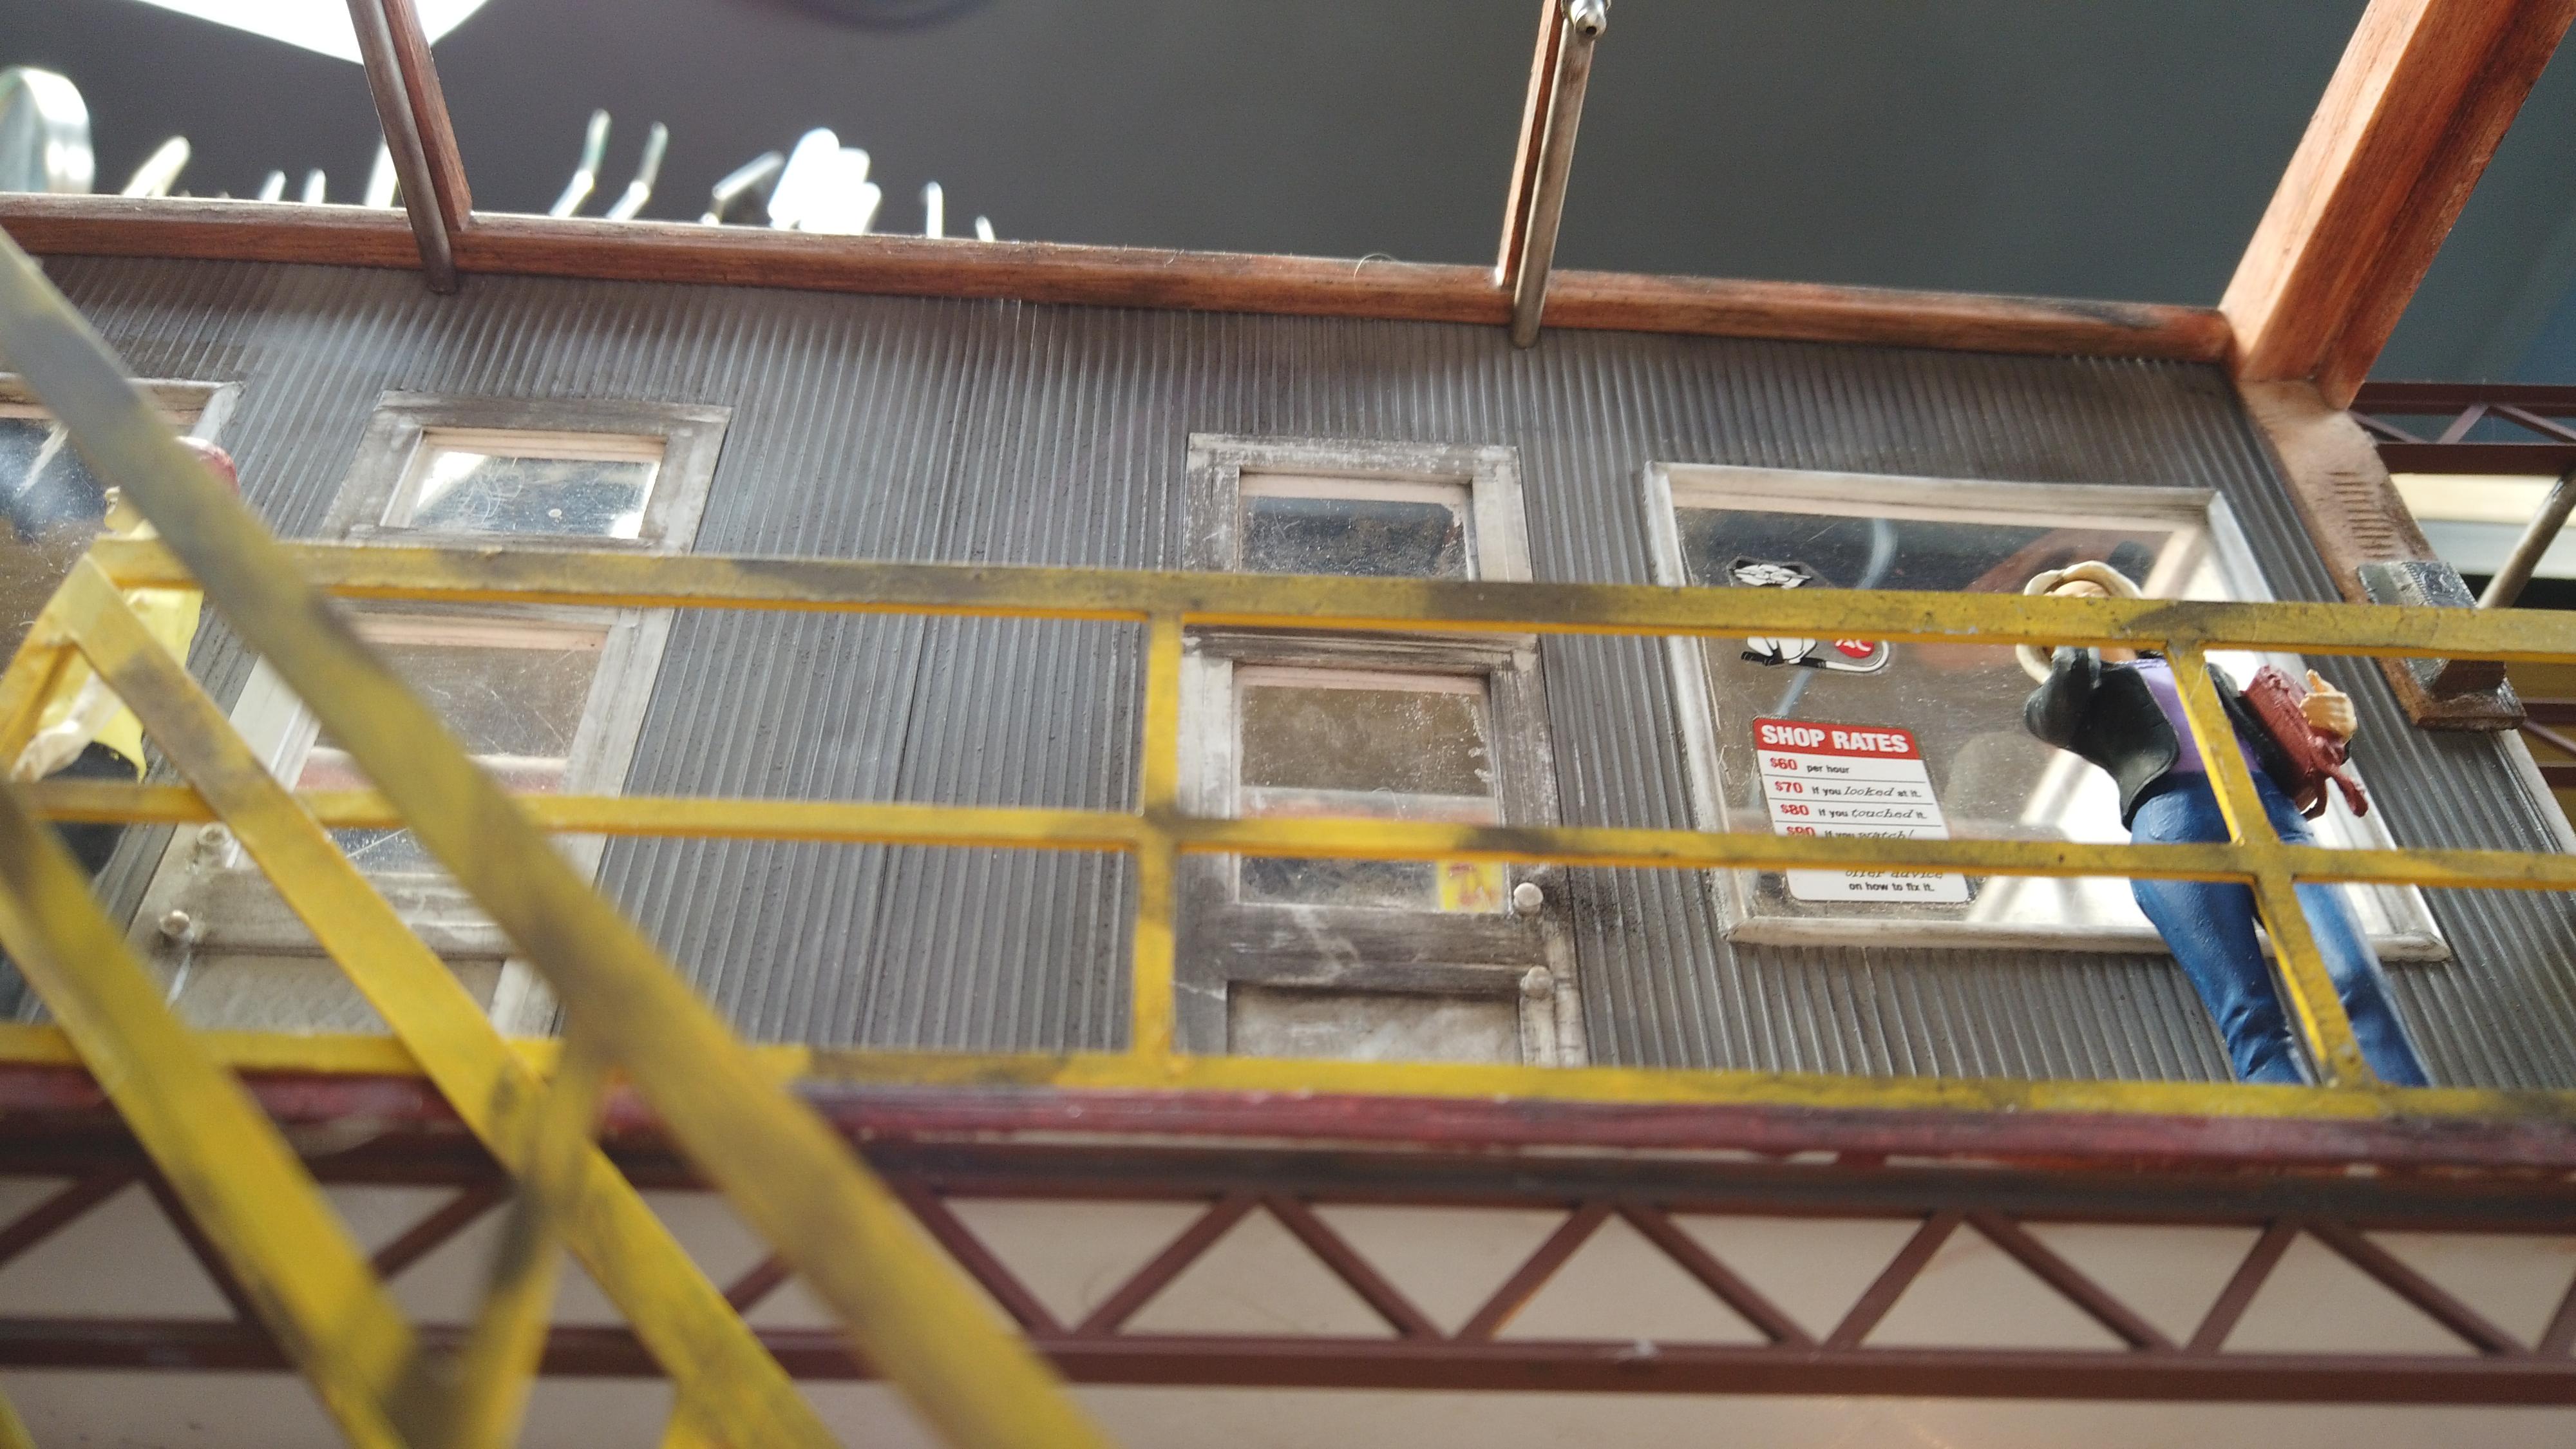
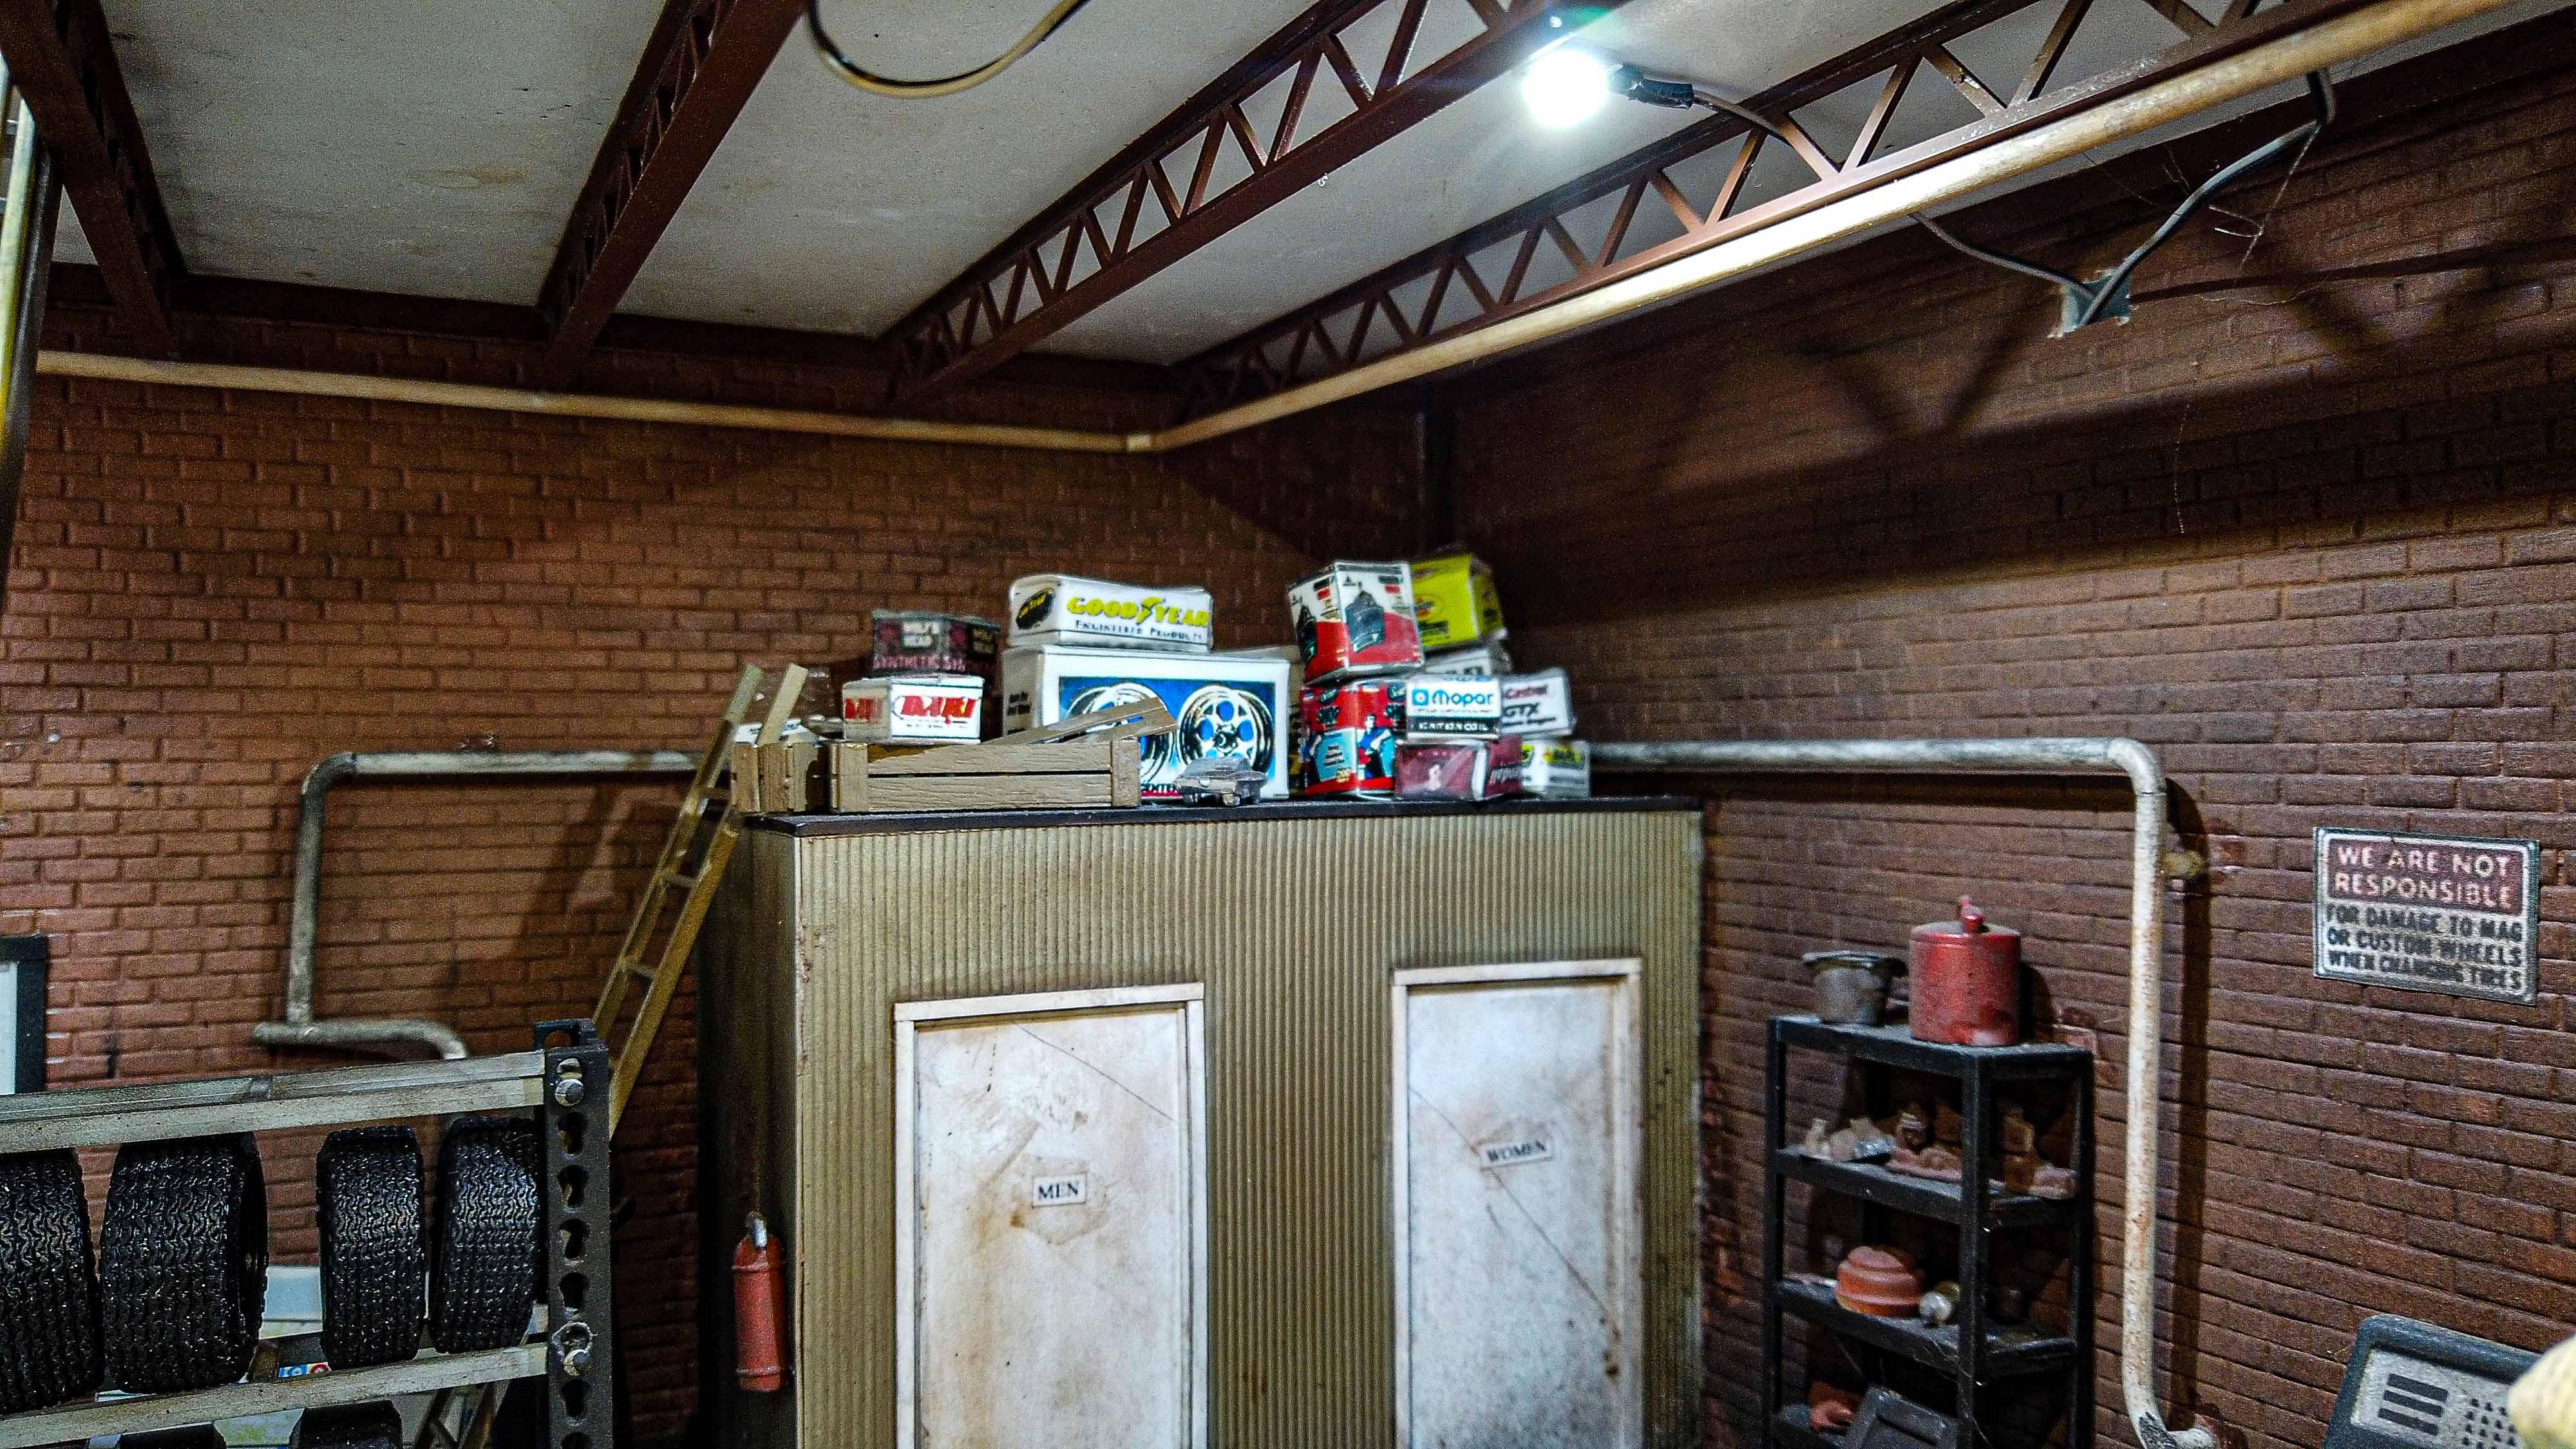
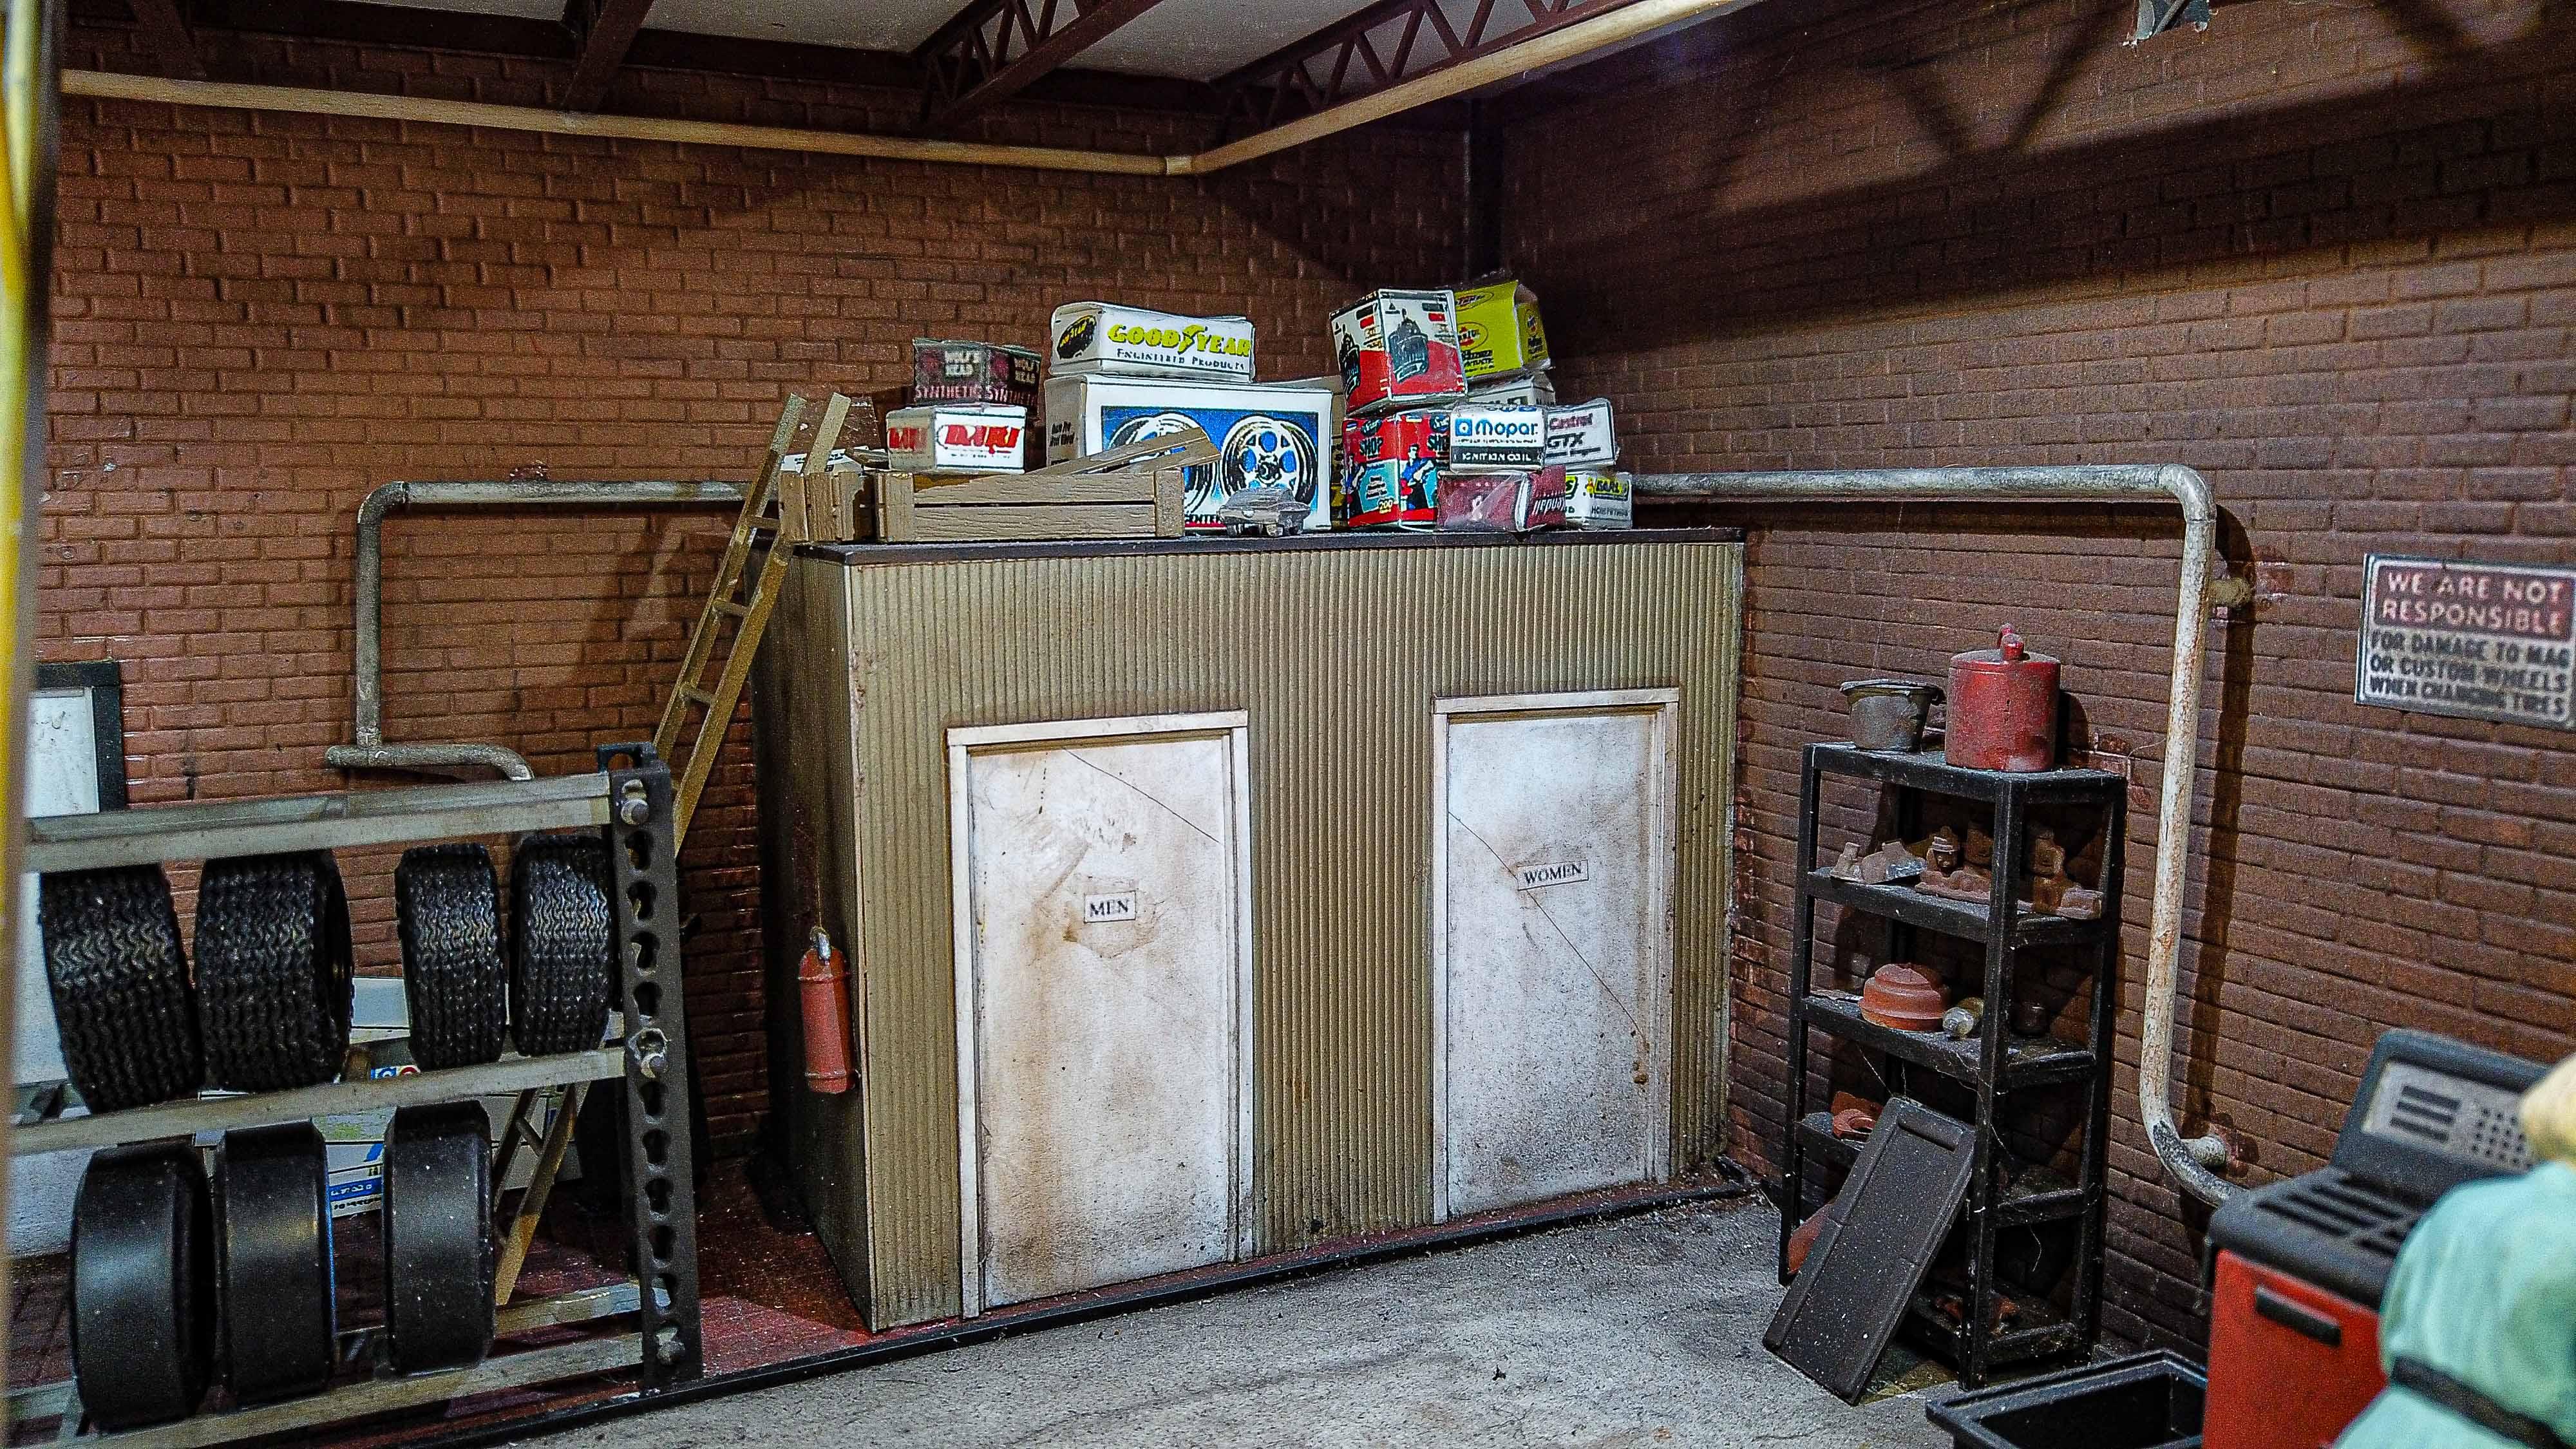
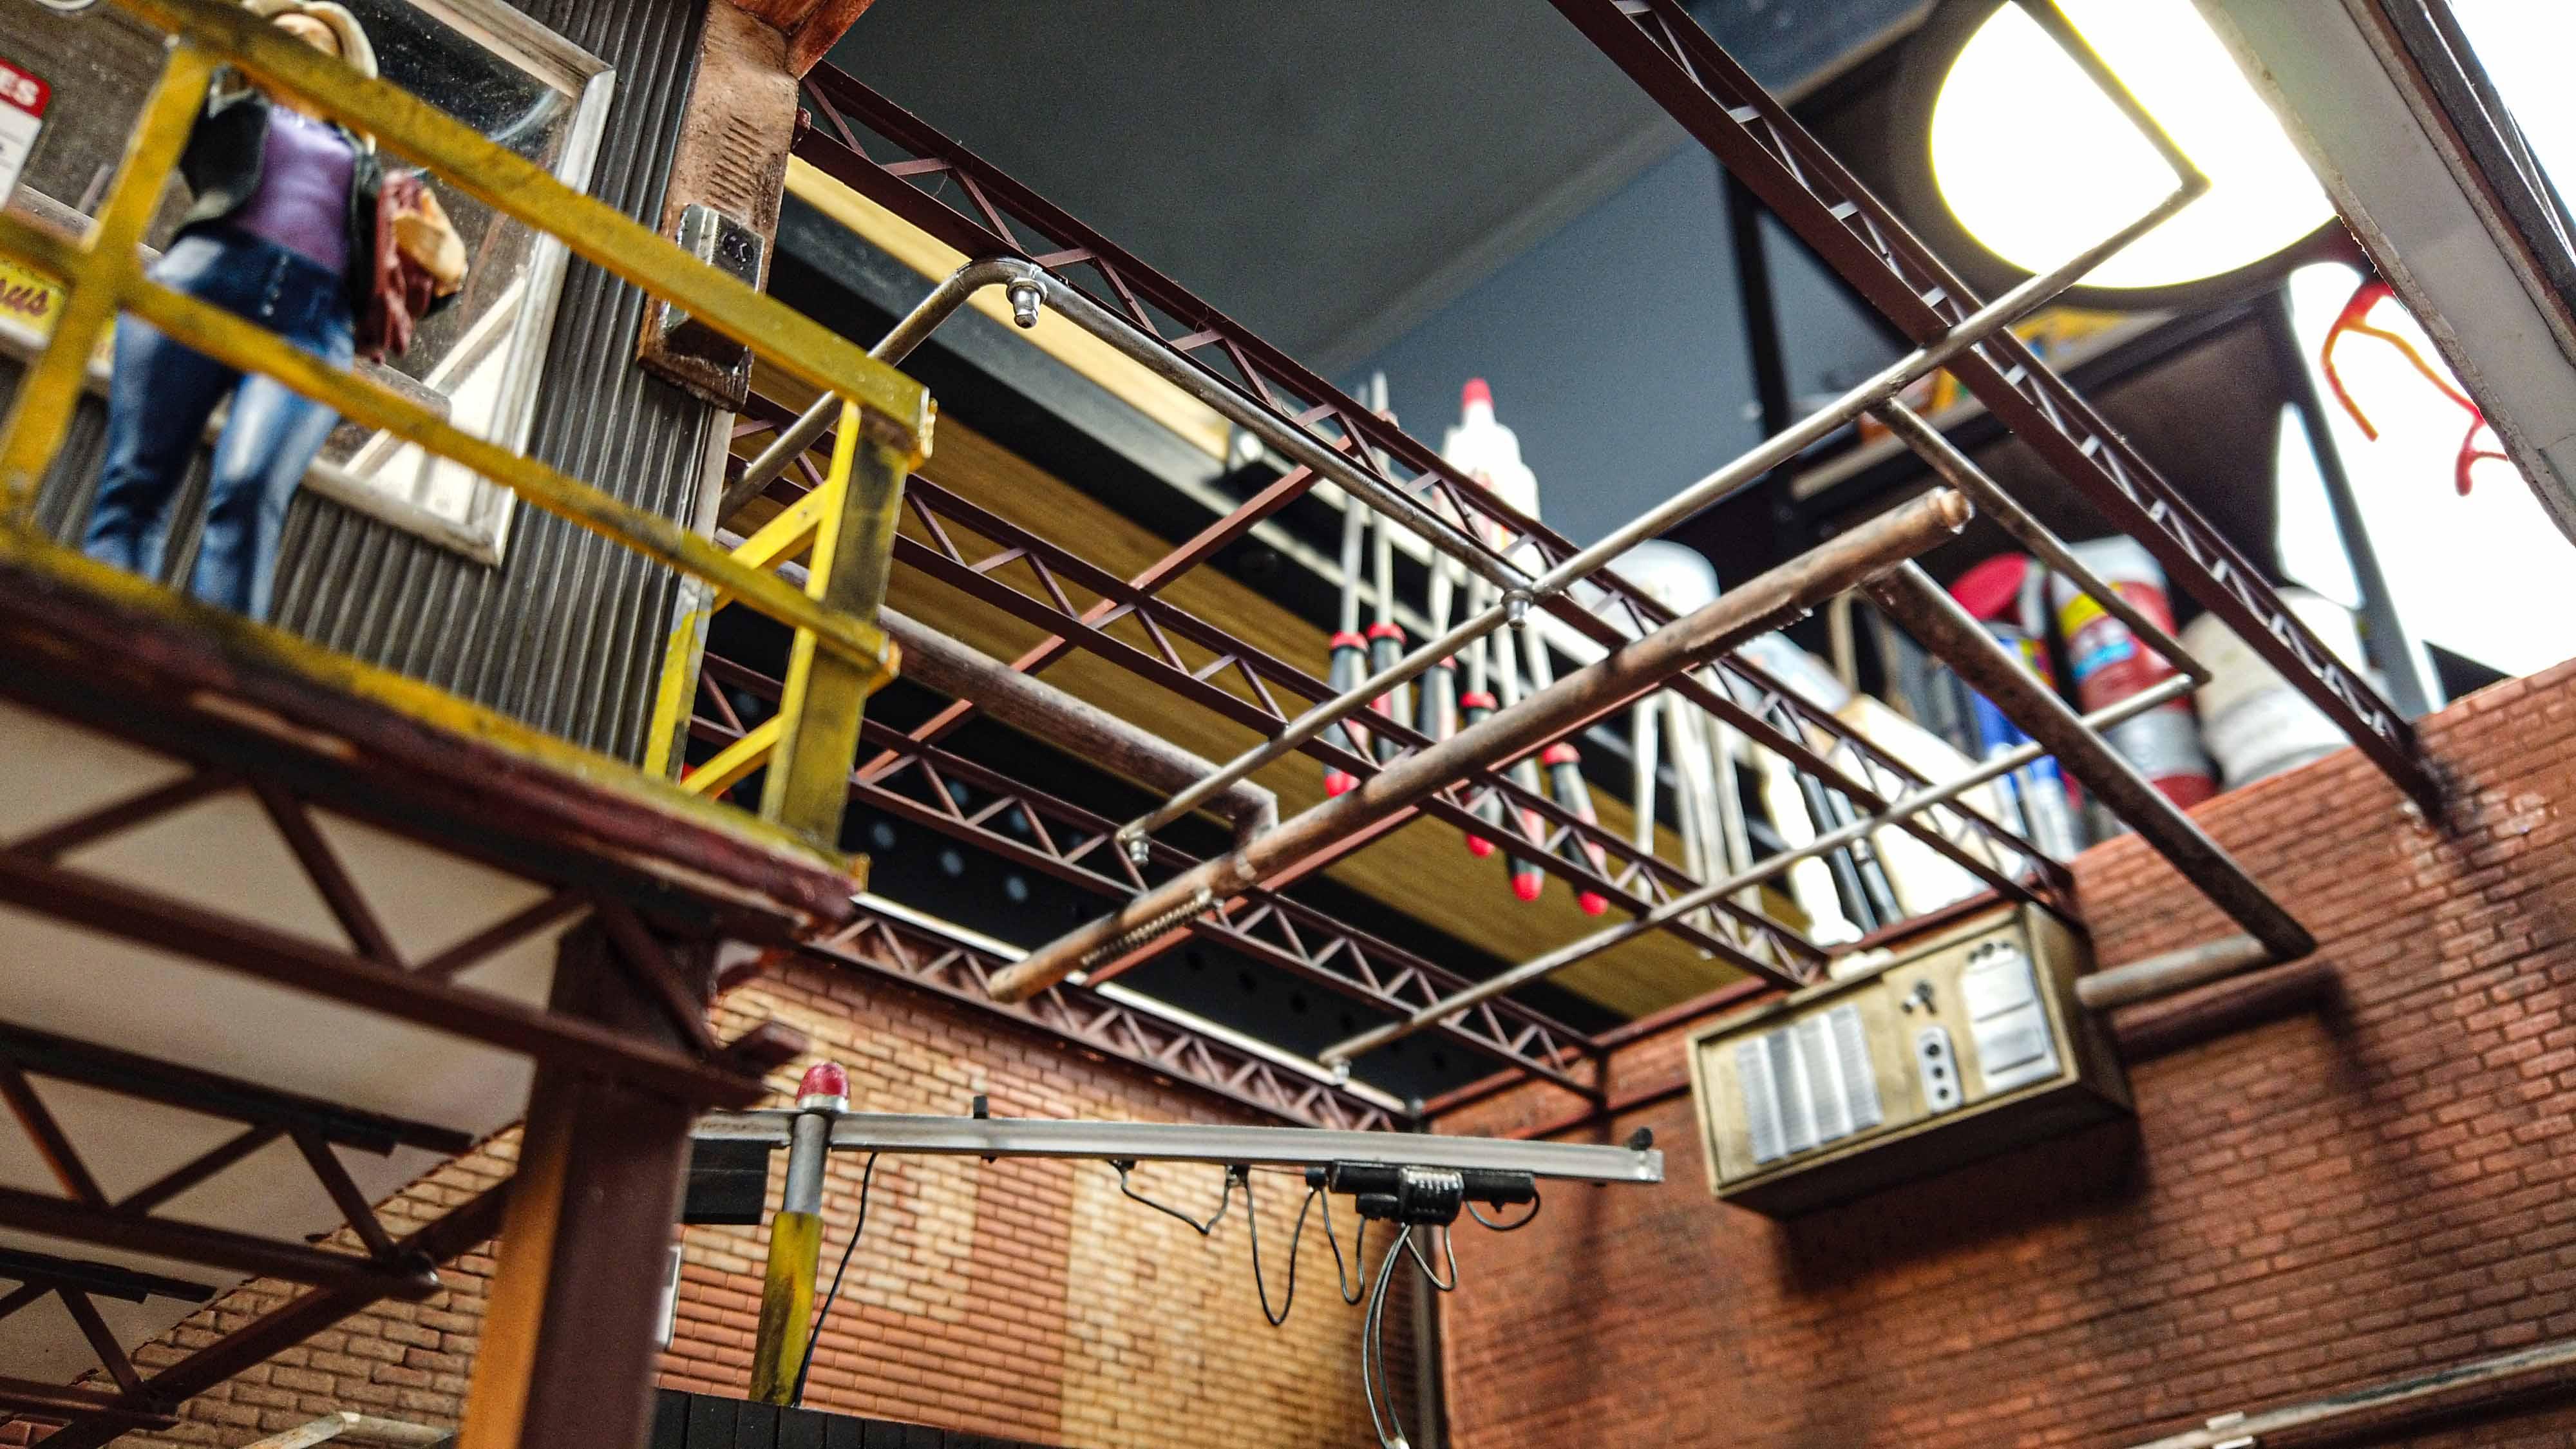
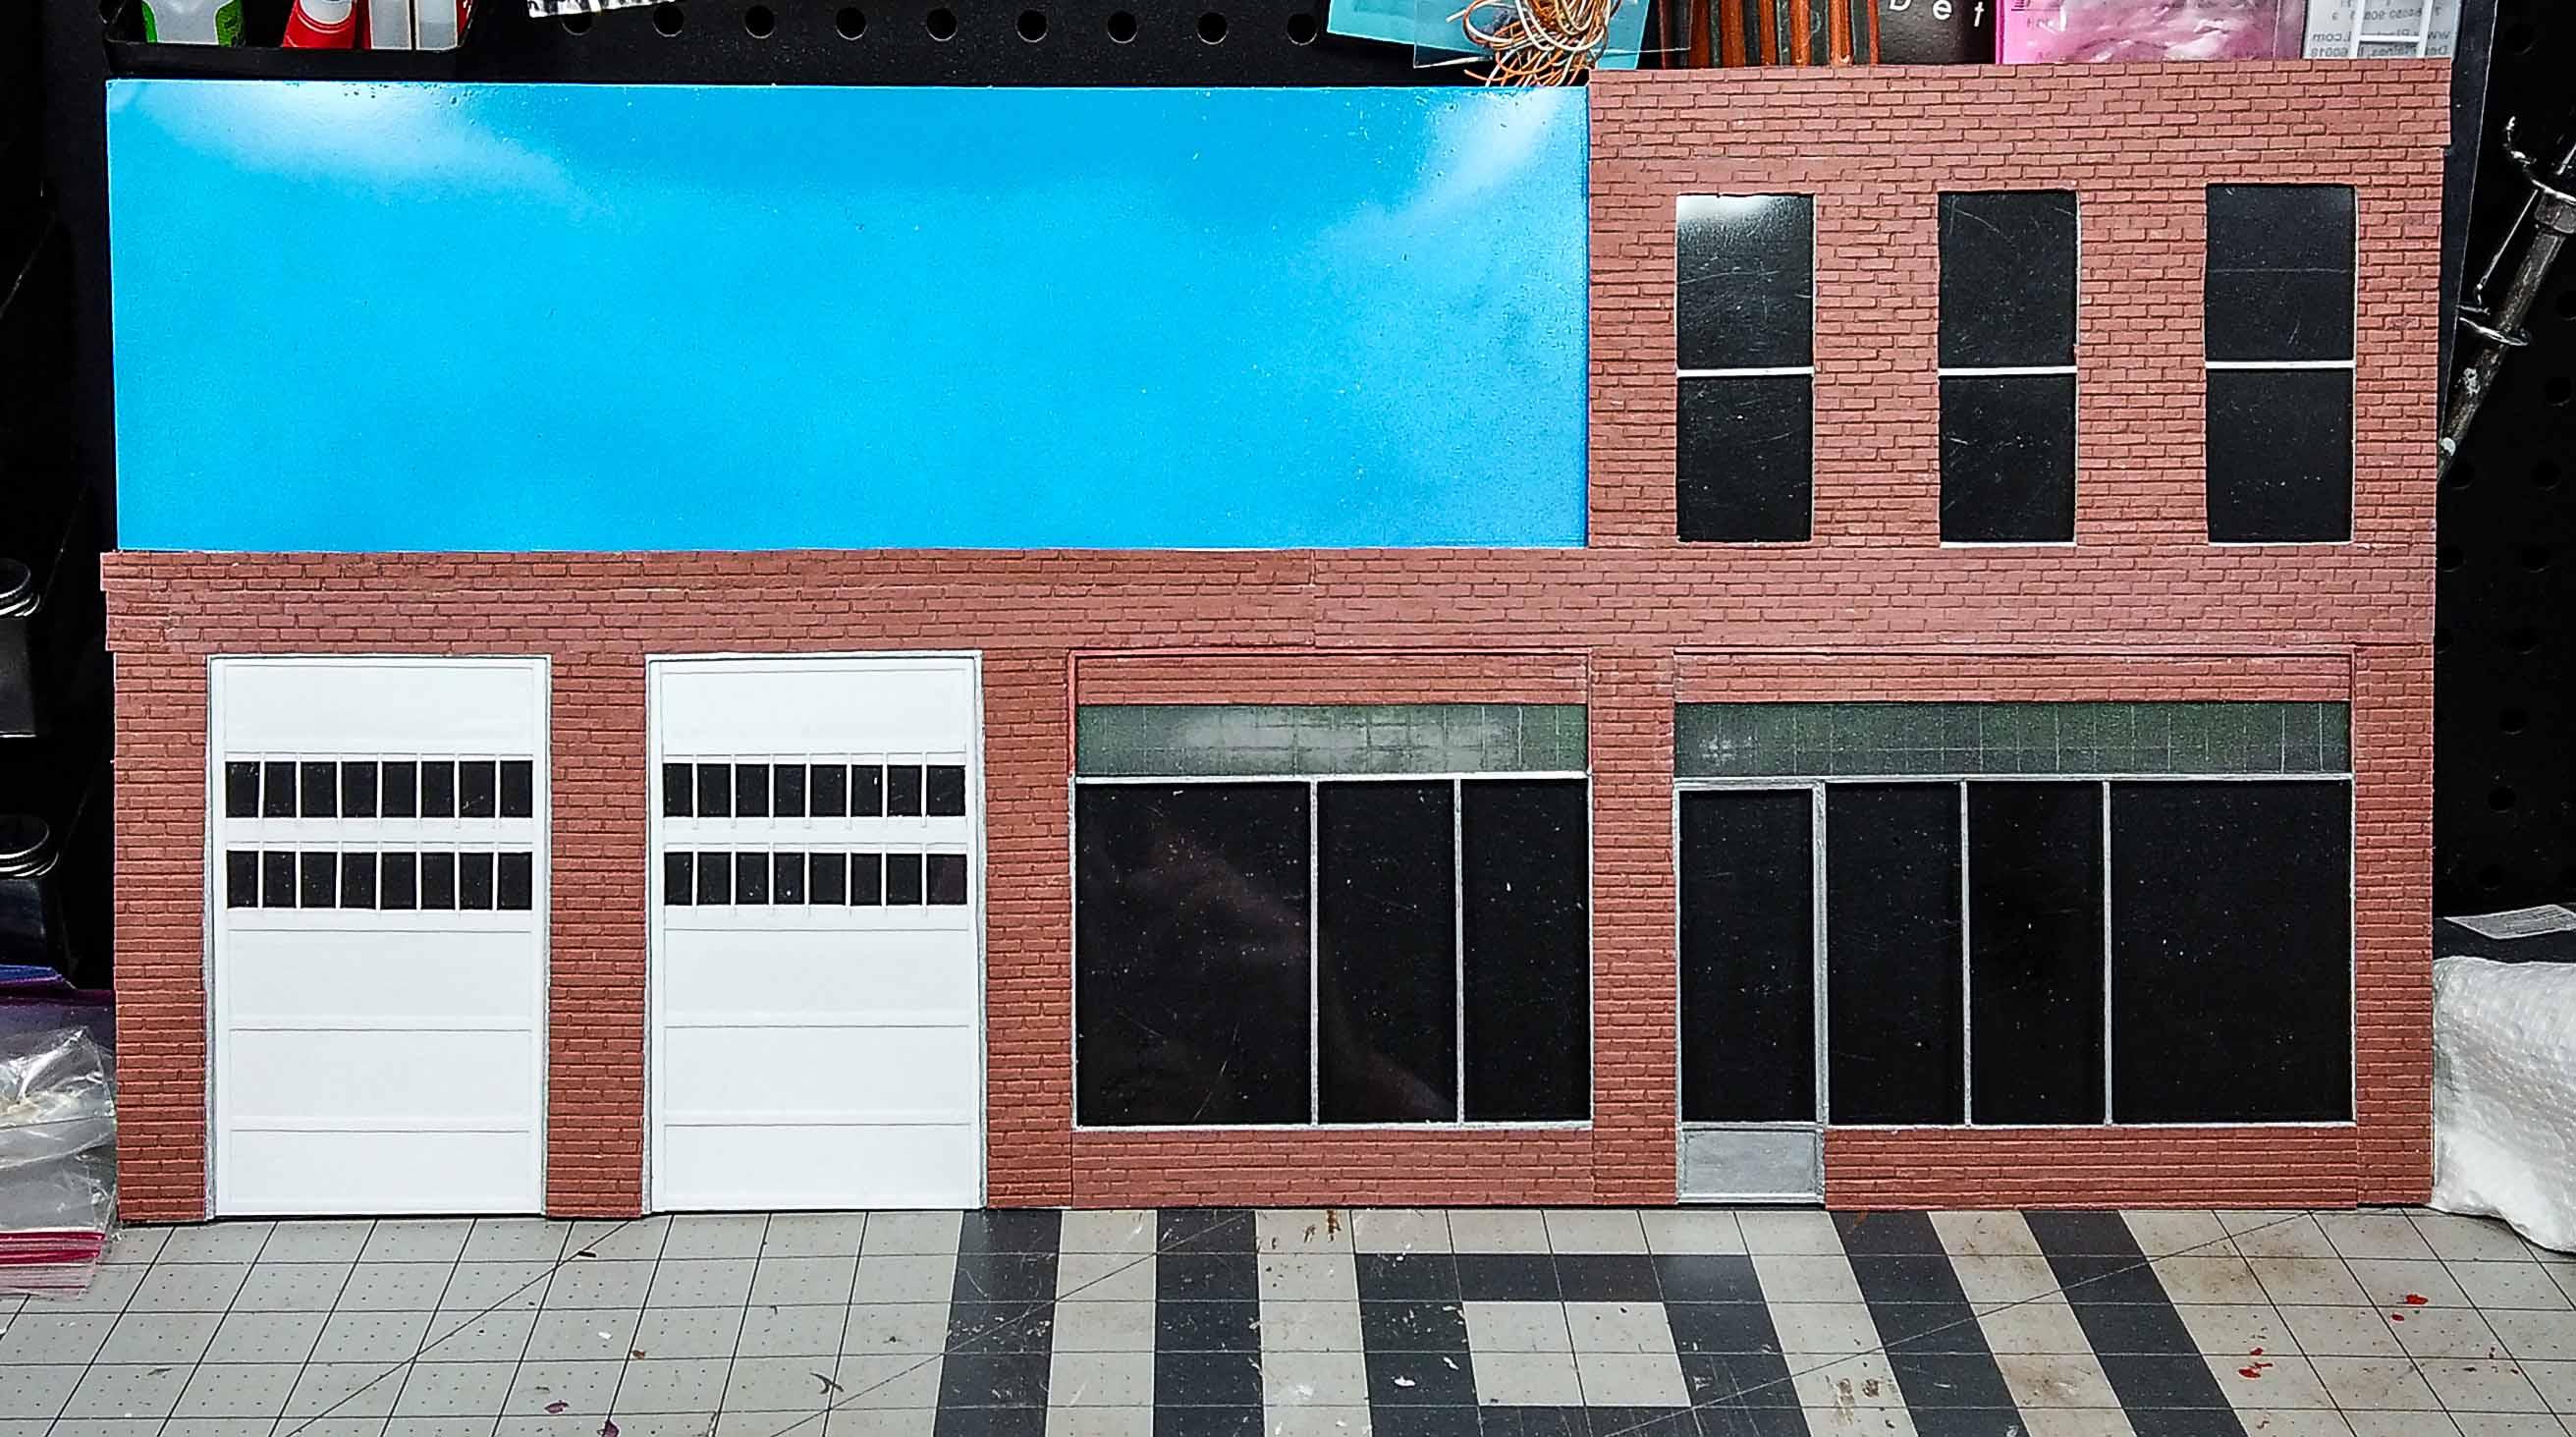
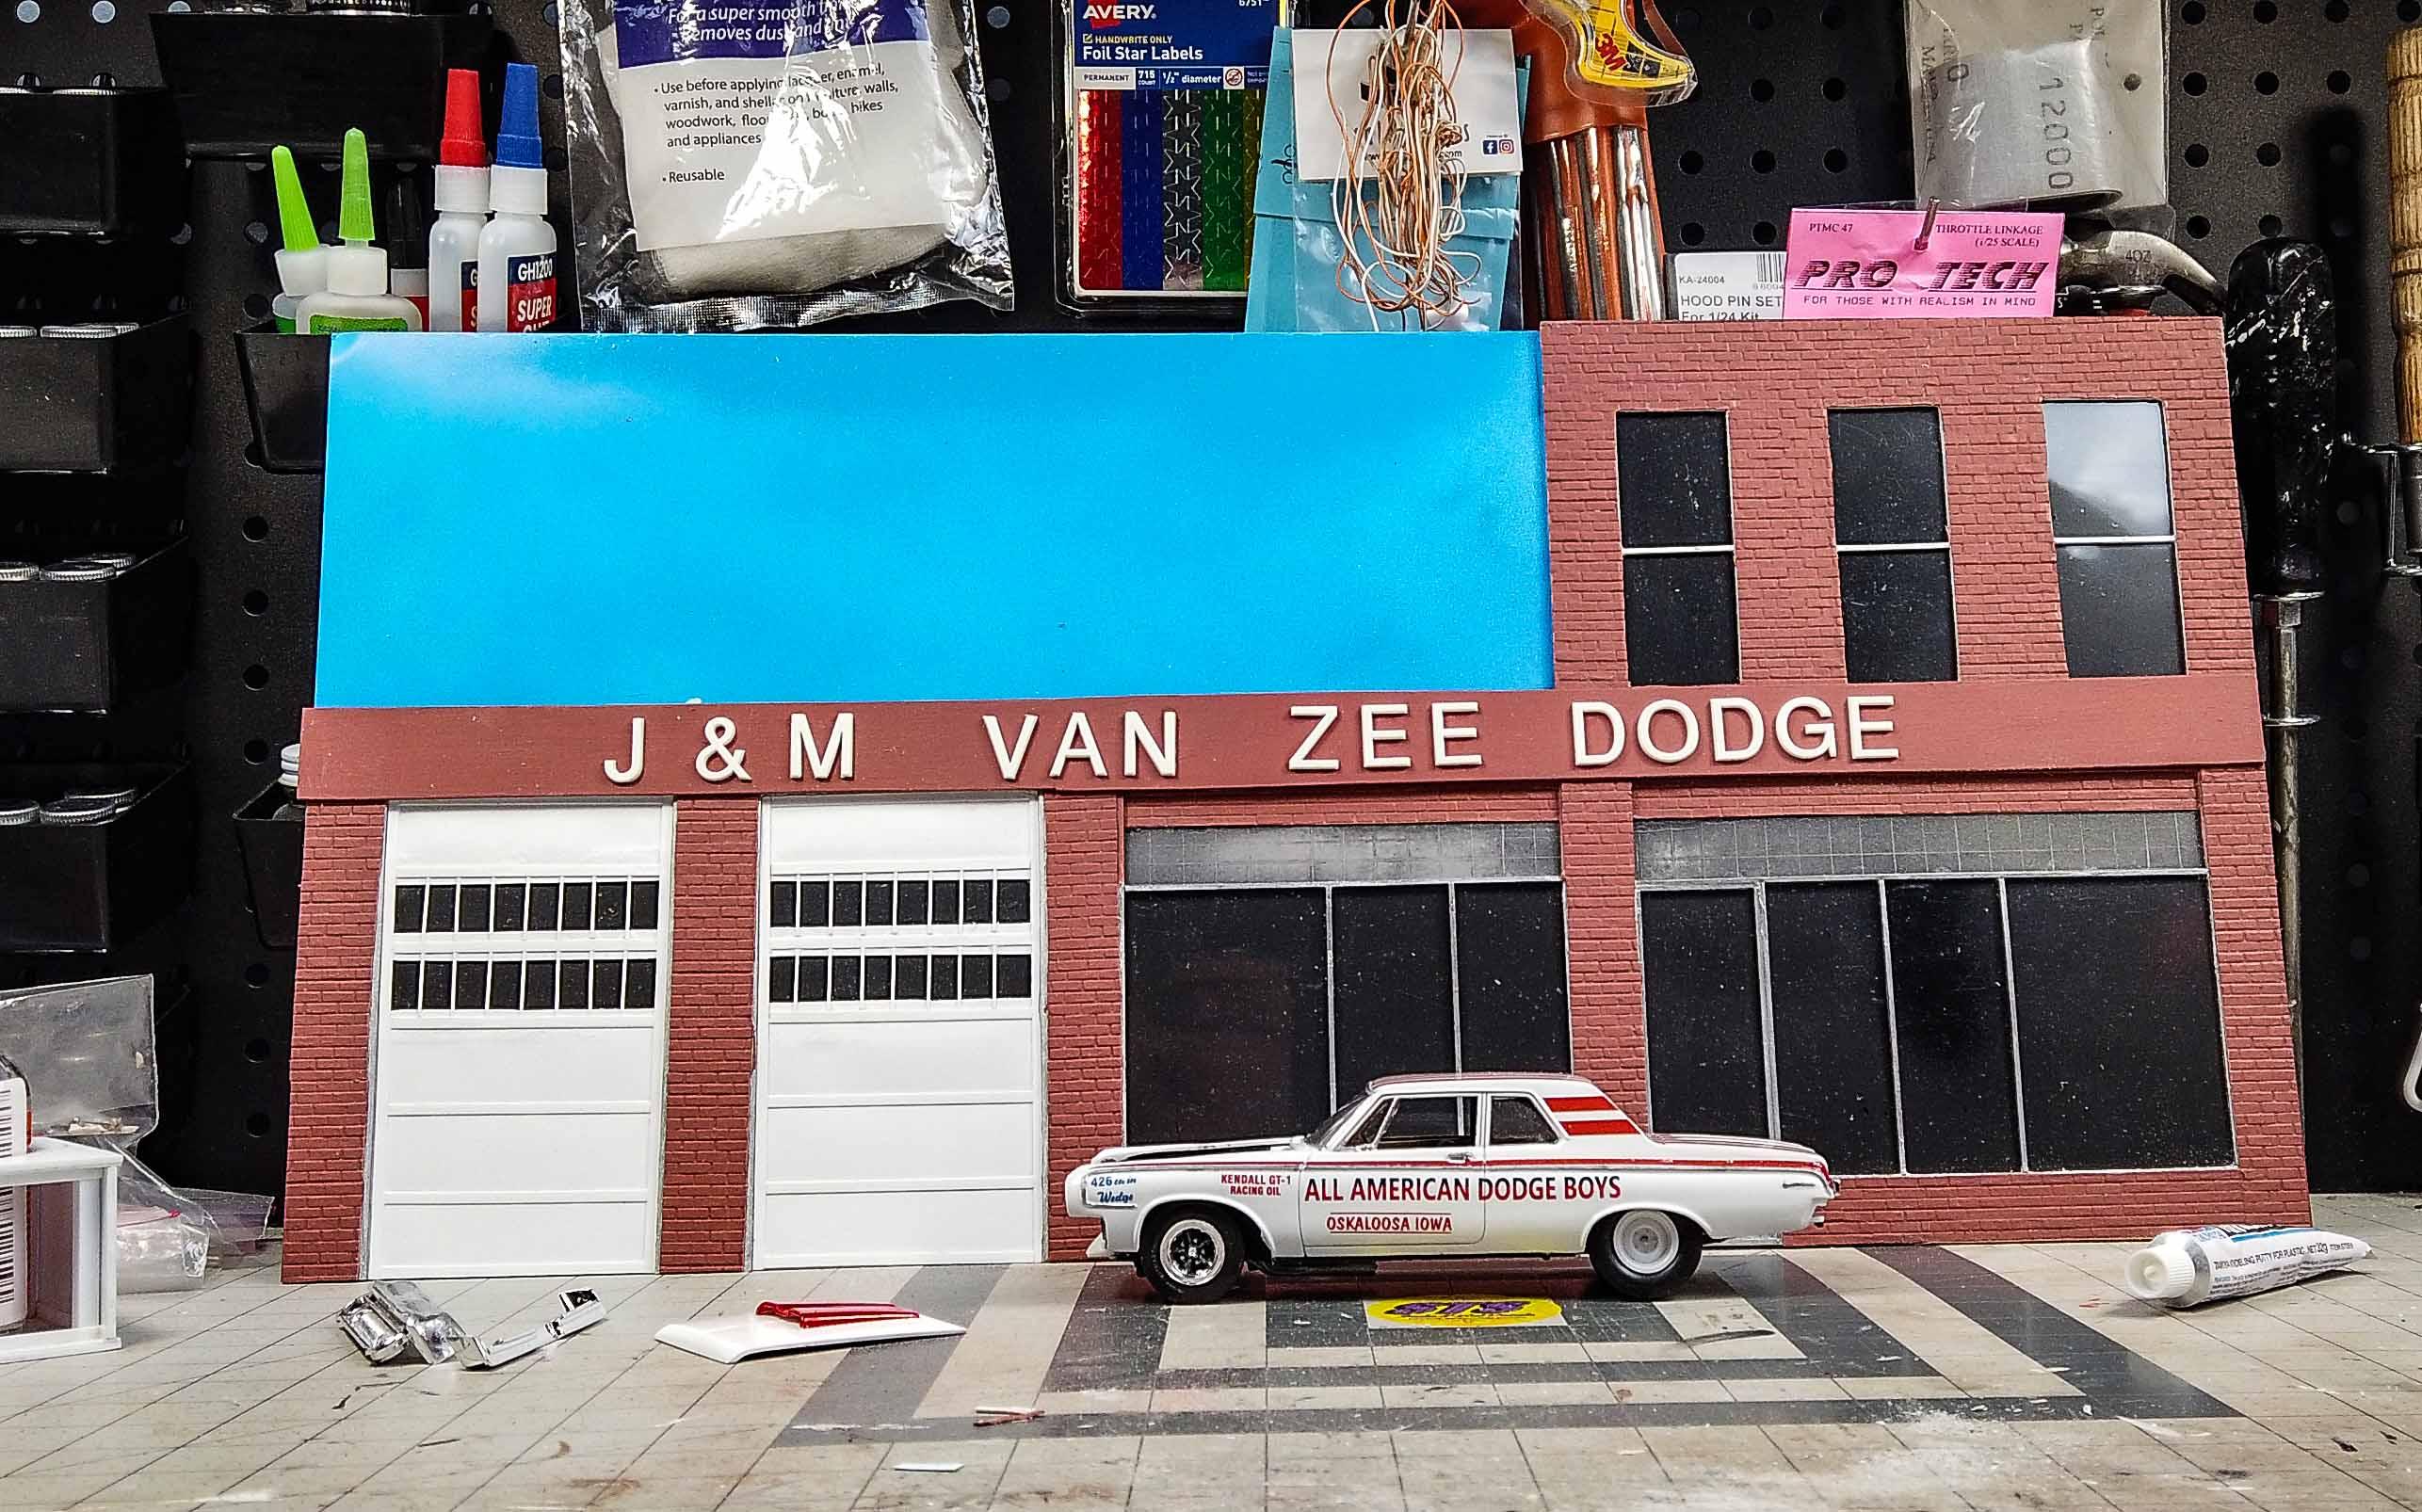
This is the completion of the first shop that I've built since moving back to Iowa. The premise is that it was originally built in 1873 as a newspaper publishing structure. Over many decades is has evolved into a classic car repair building. I learn a lot form each garage that I build, but from this one, I learned a lot of things not to do, and a lot of things to do in order. There were way too many times when I had to play contortionist, for things that I could have done easily at the bench, in an earlier construction period.
- 7 replies
-
- 11
-

-

-
- diorama
- model cars
- (and 2 more)
-
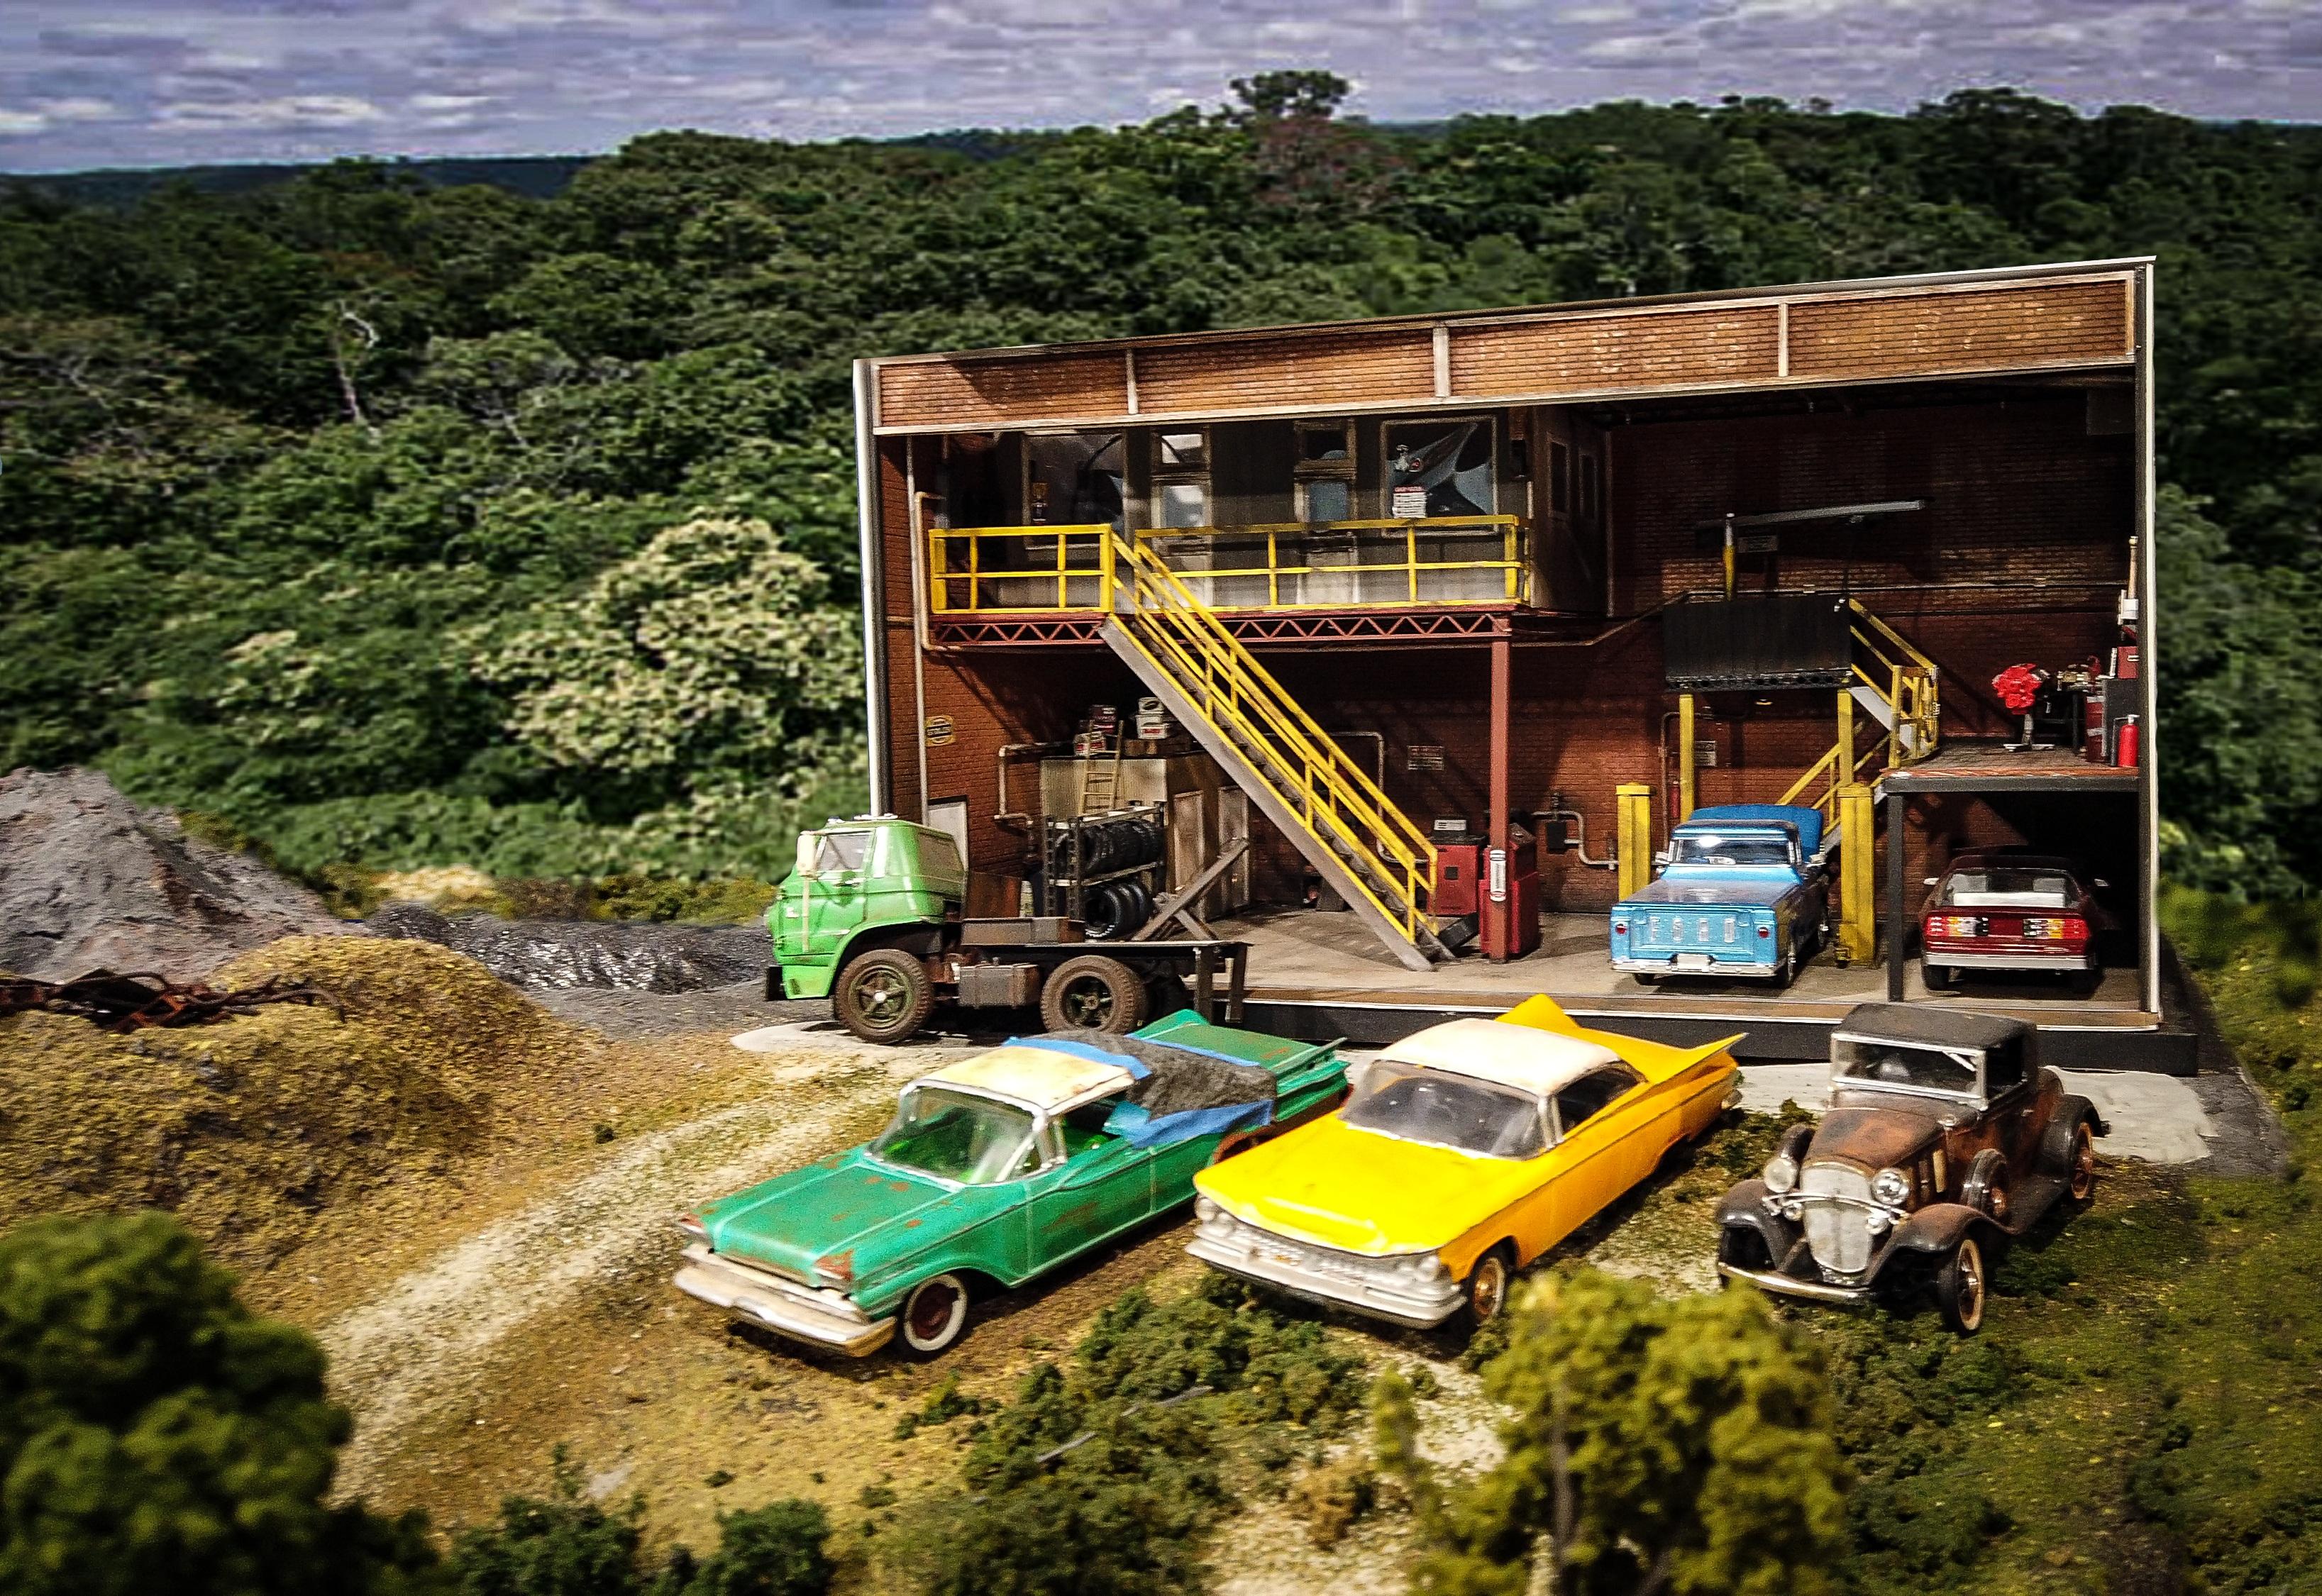
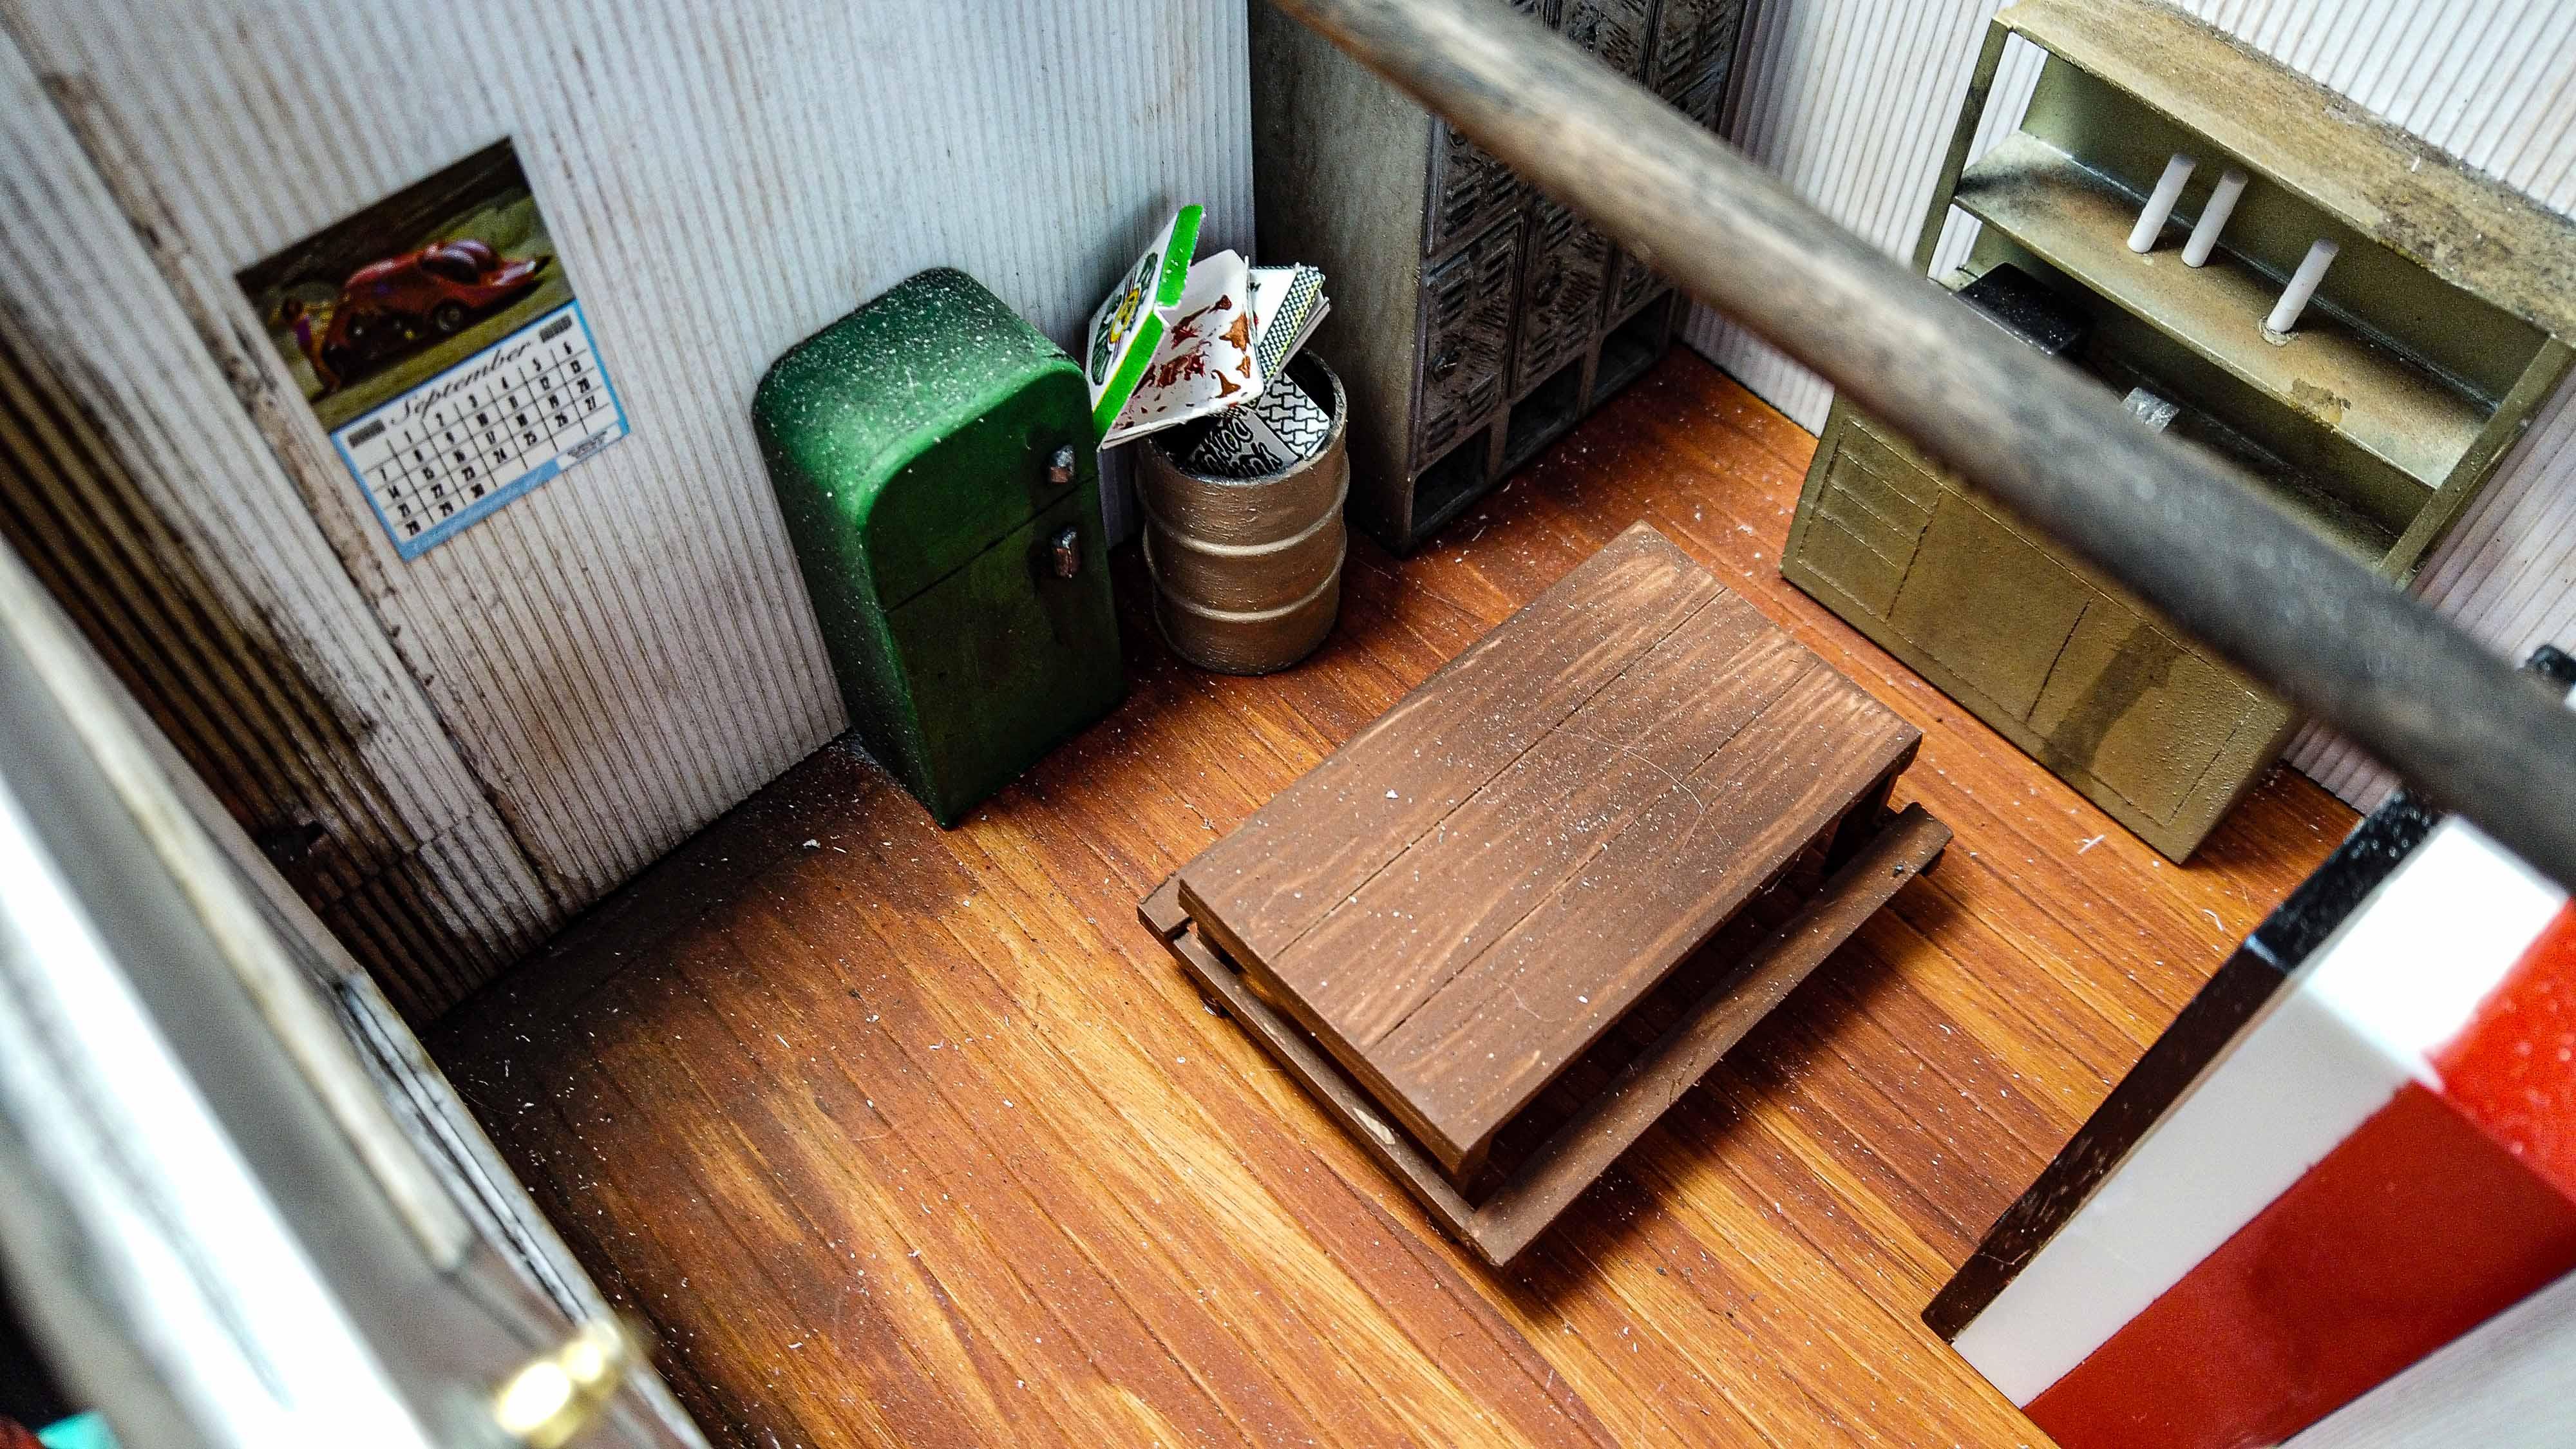
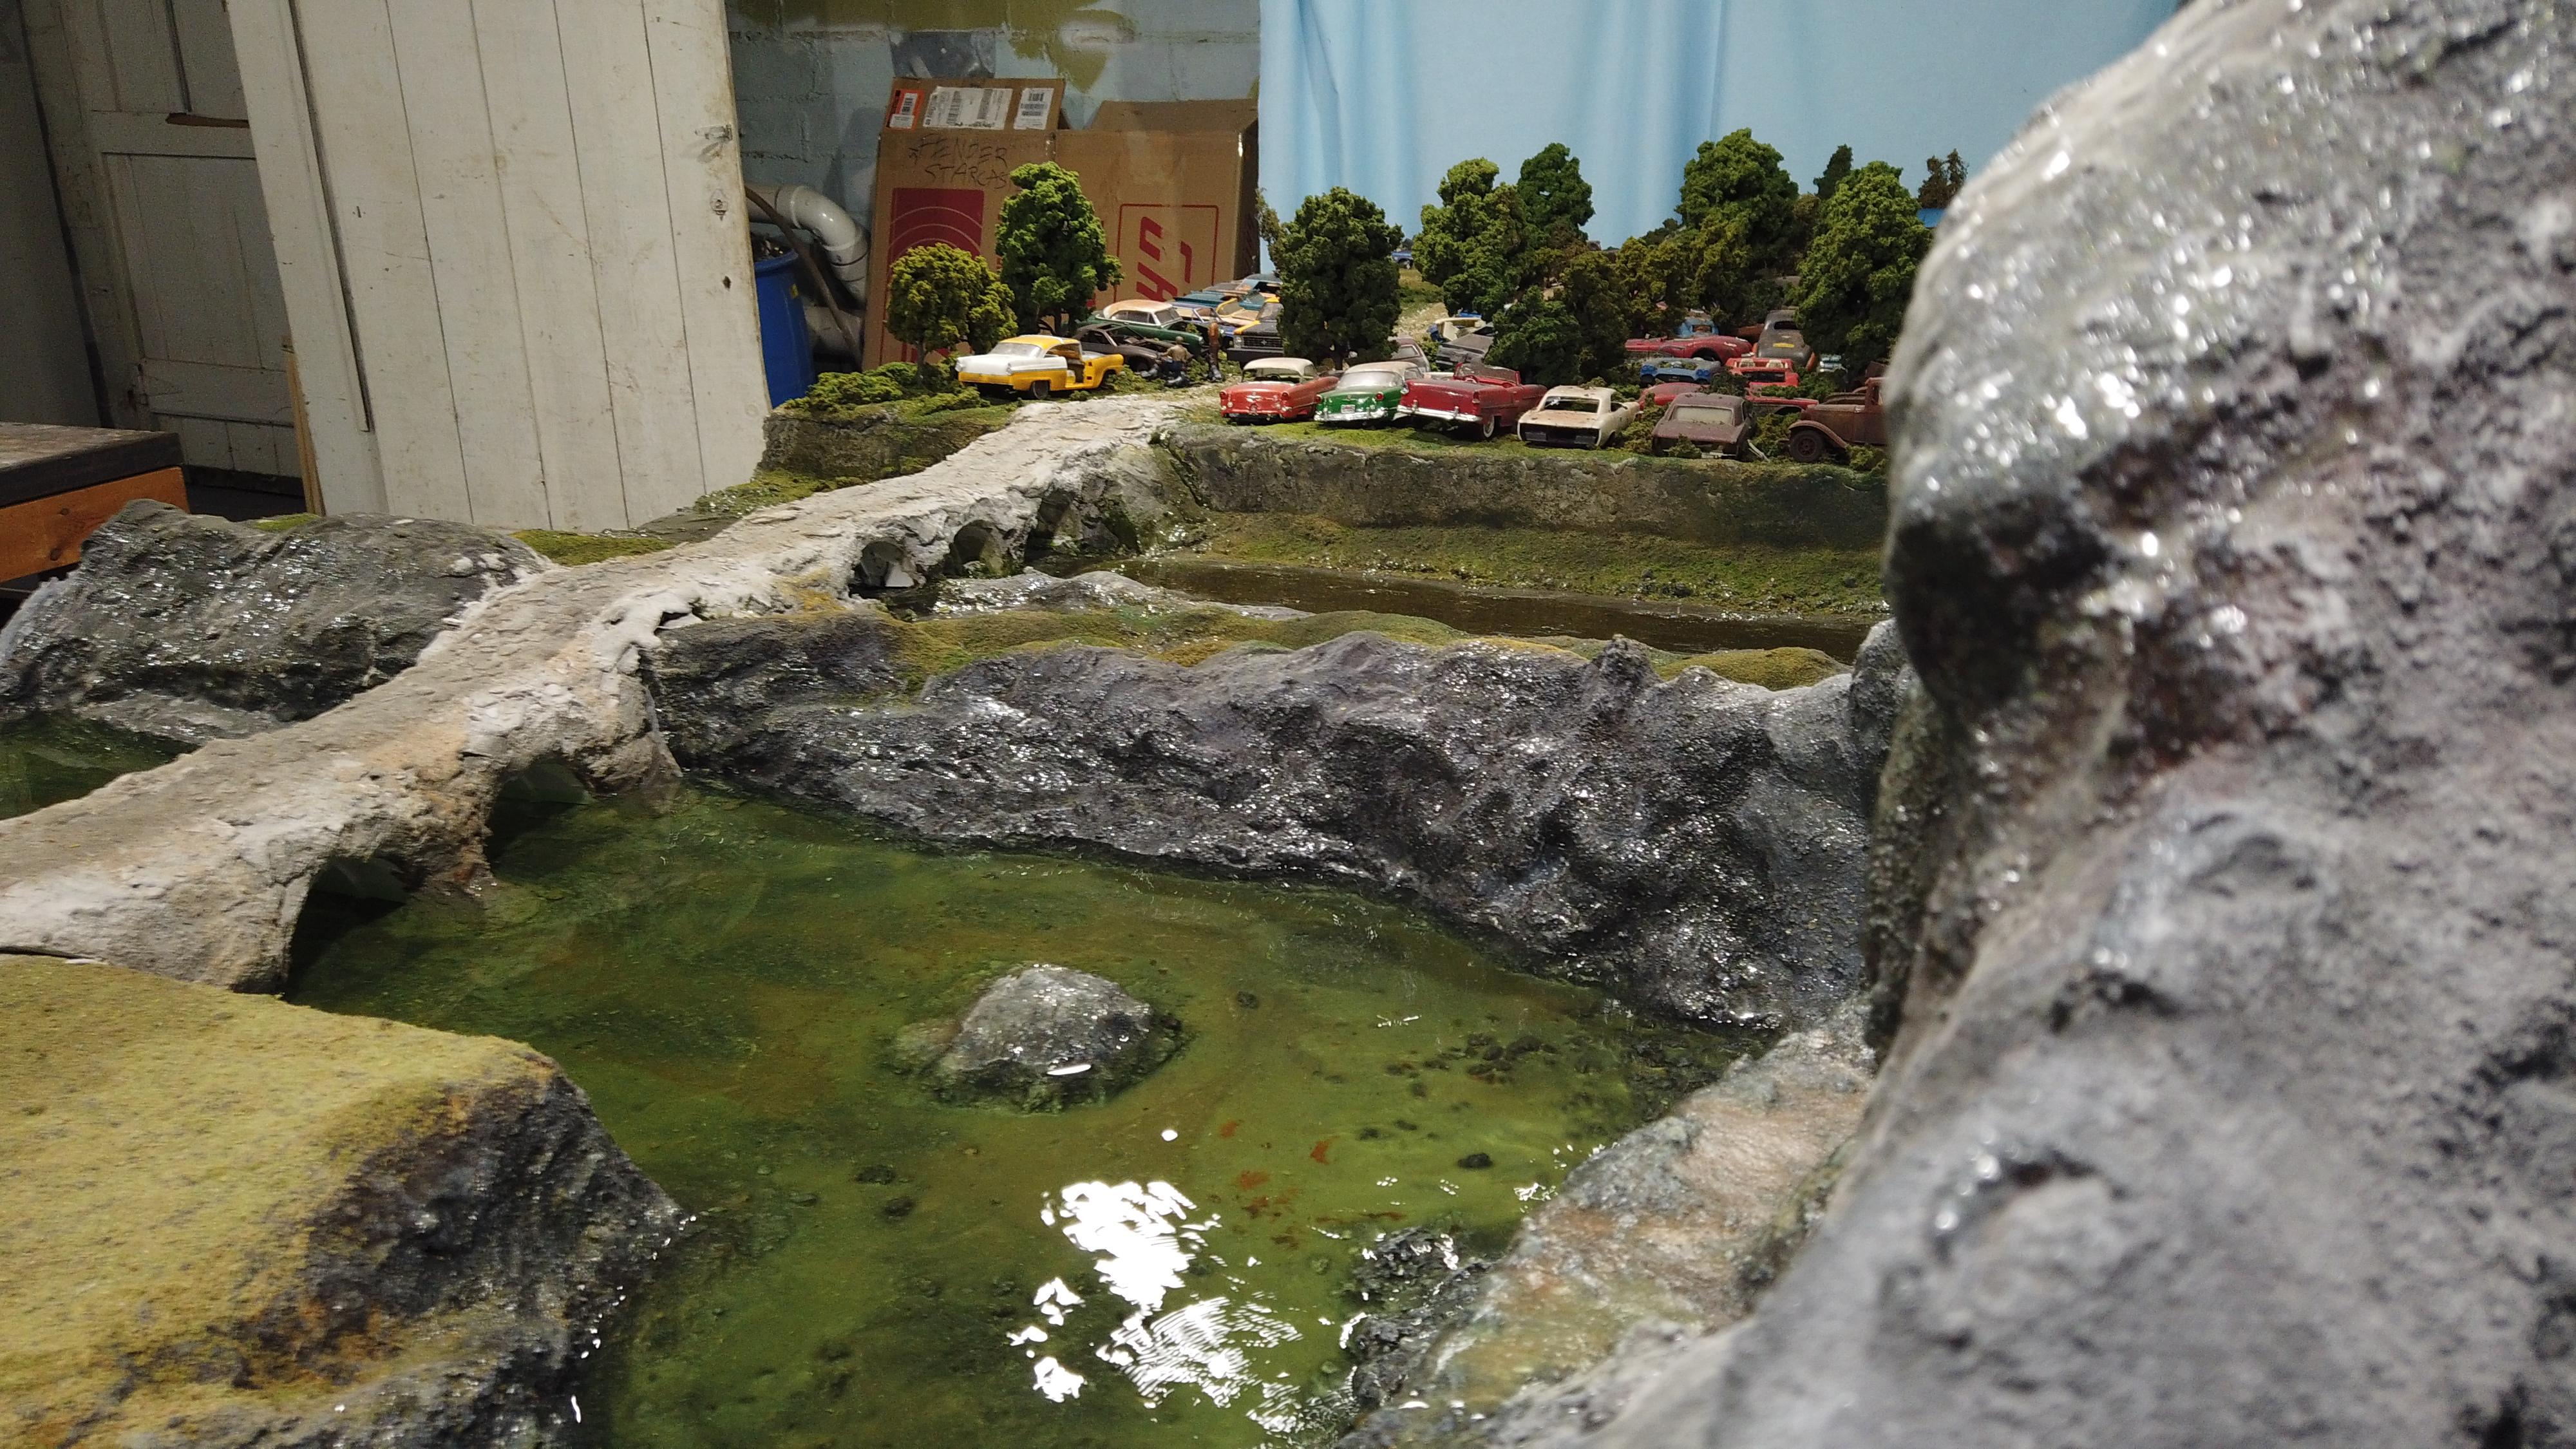
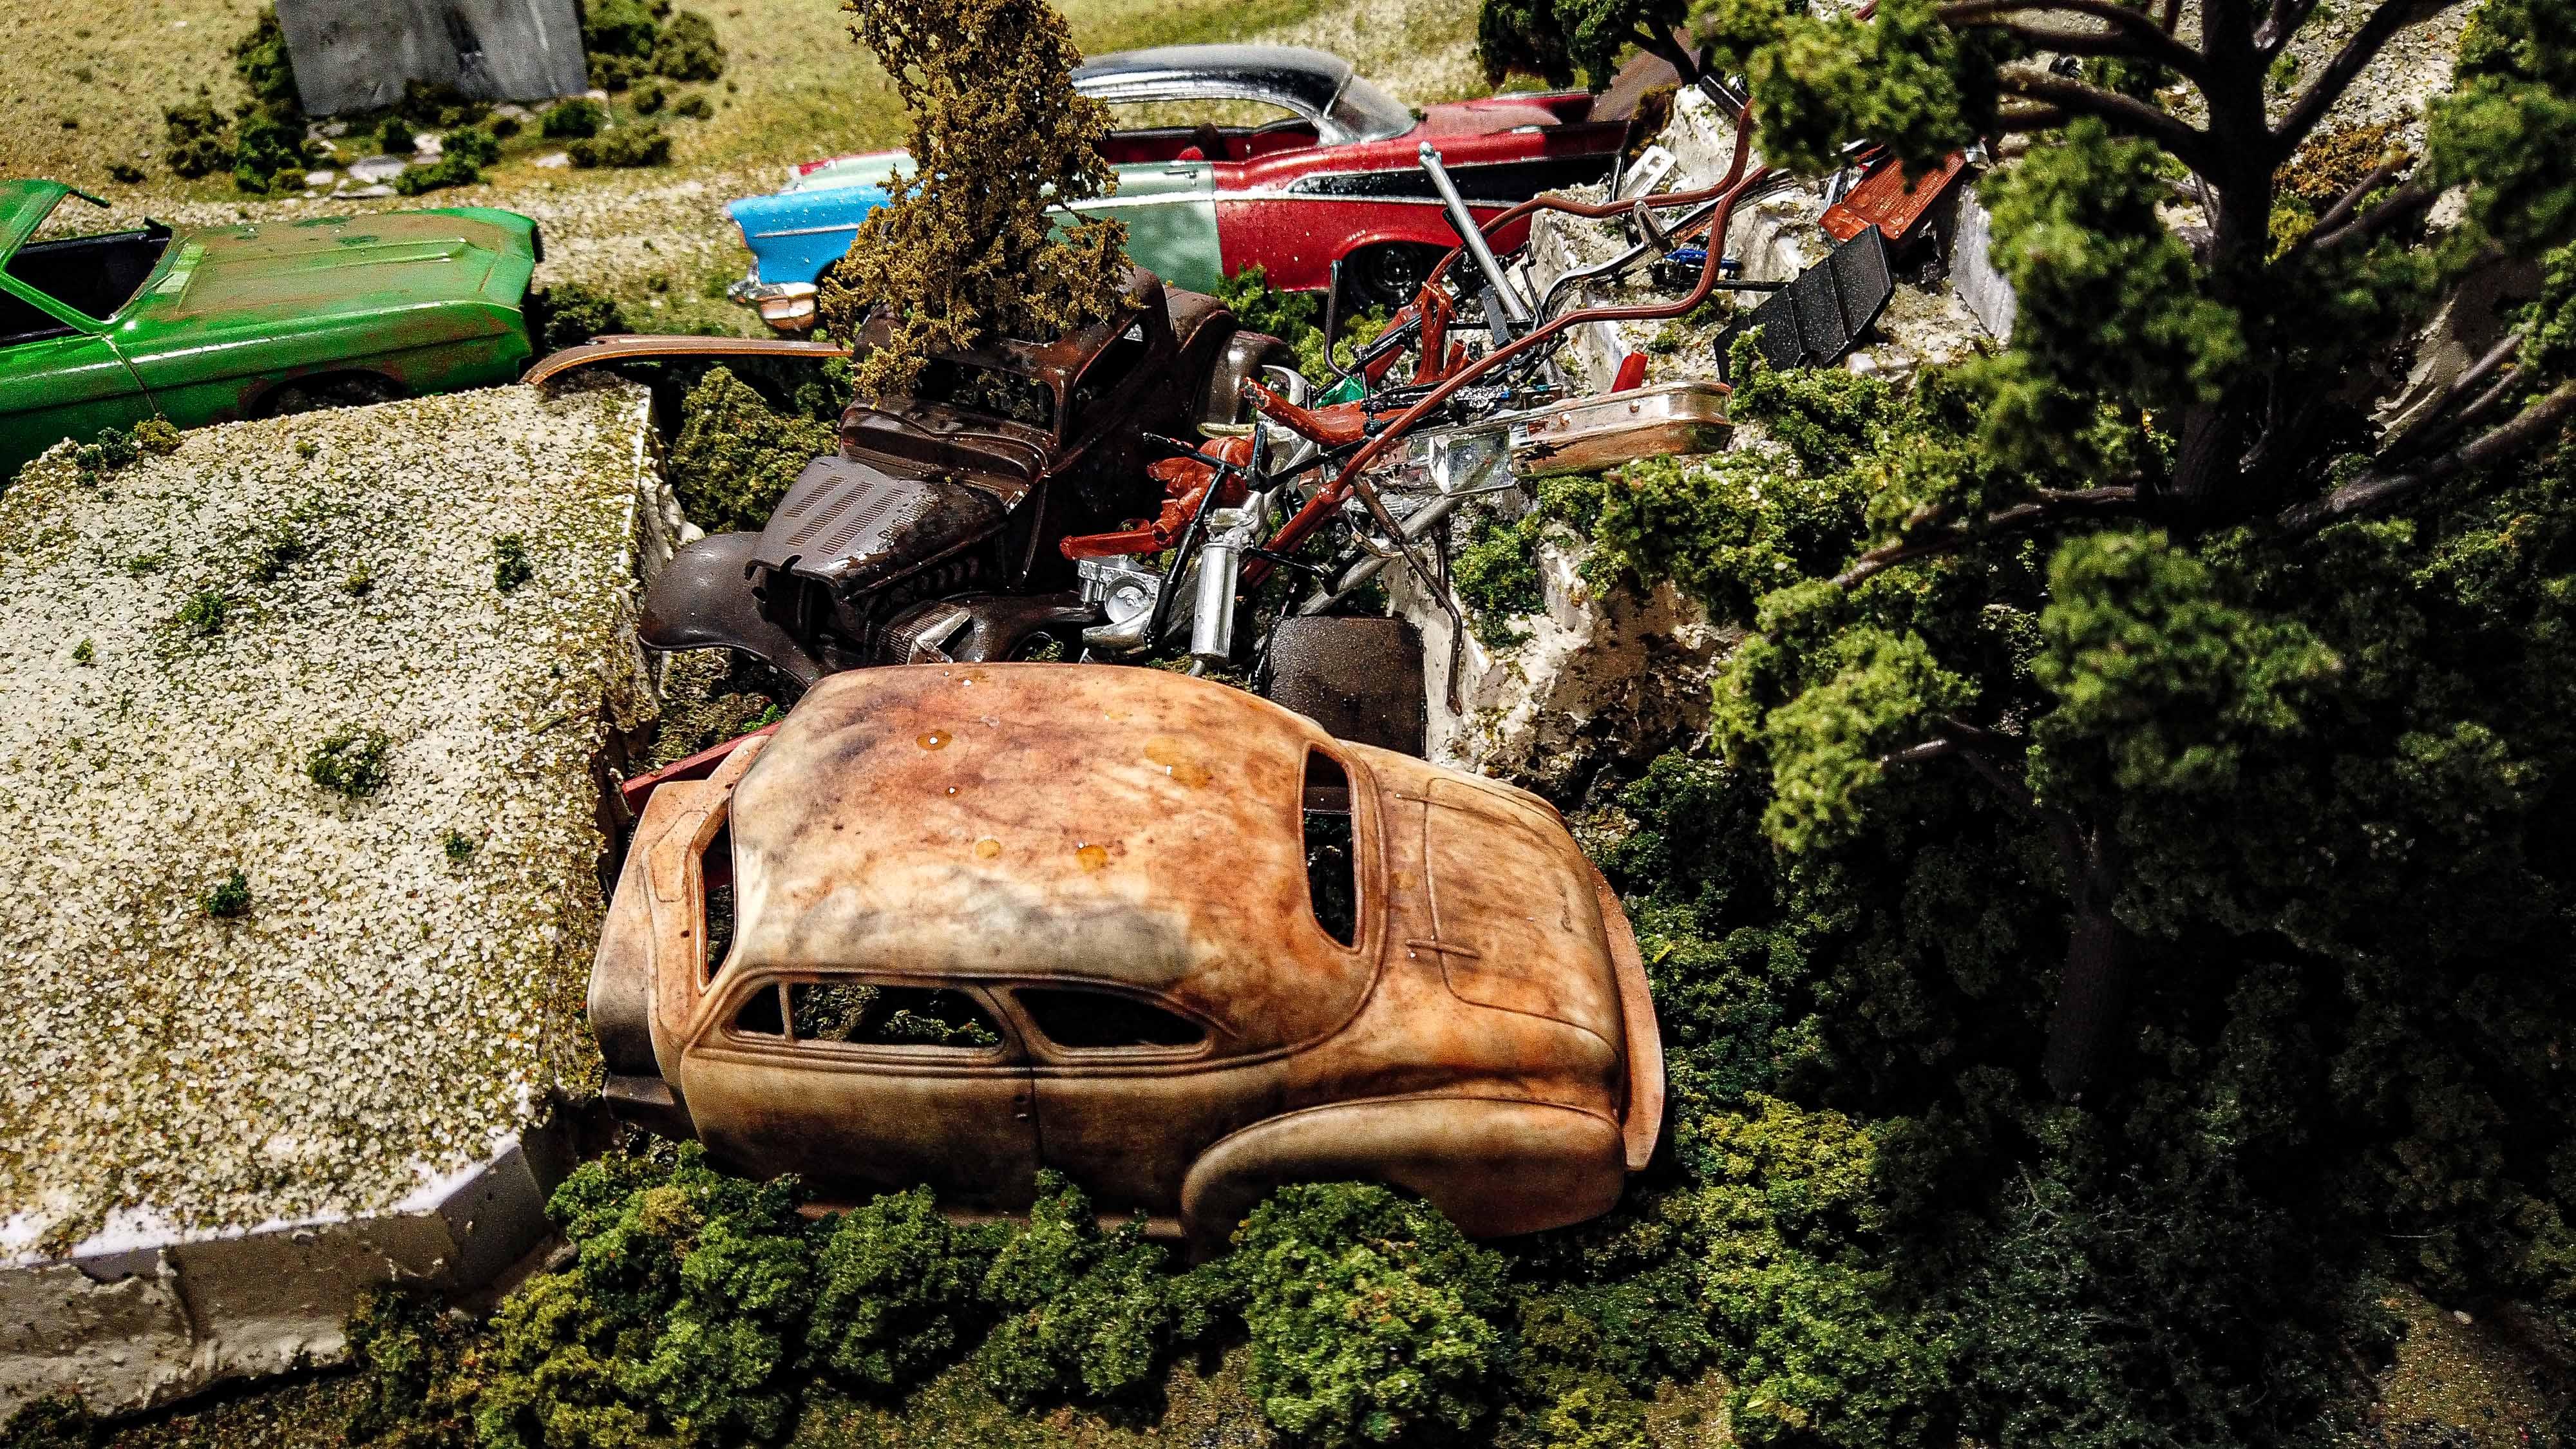
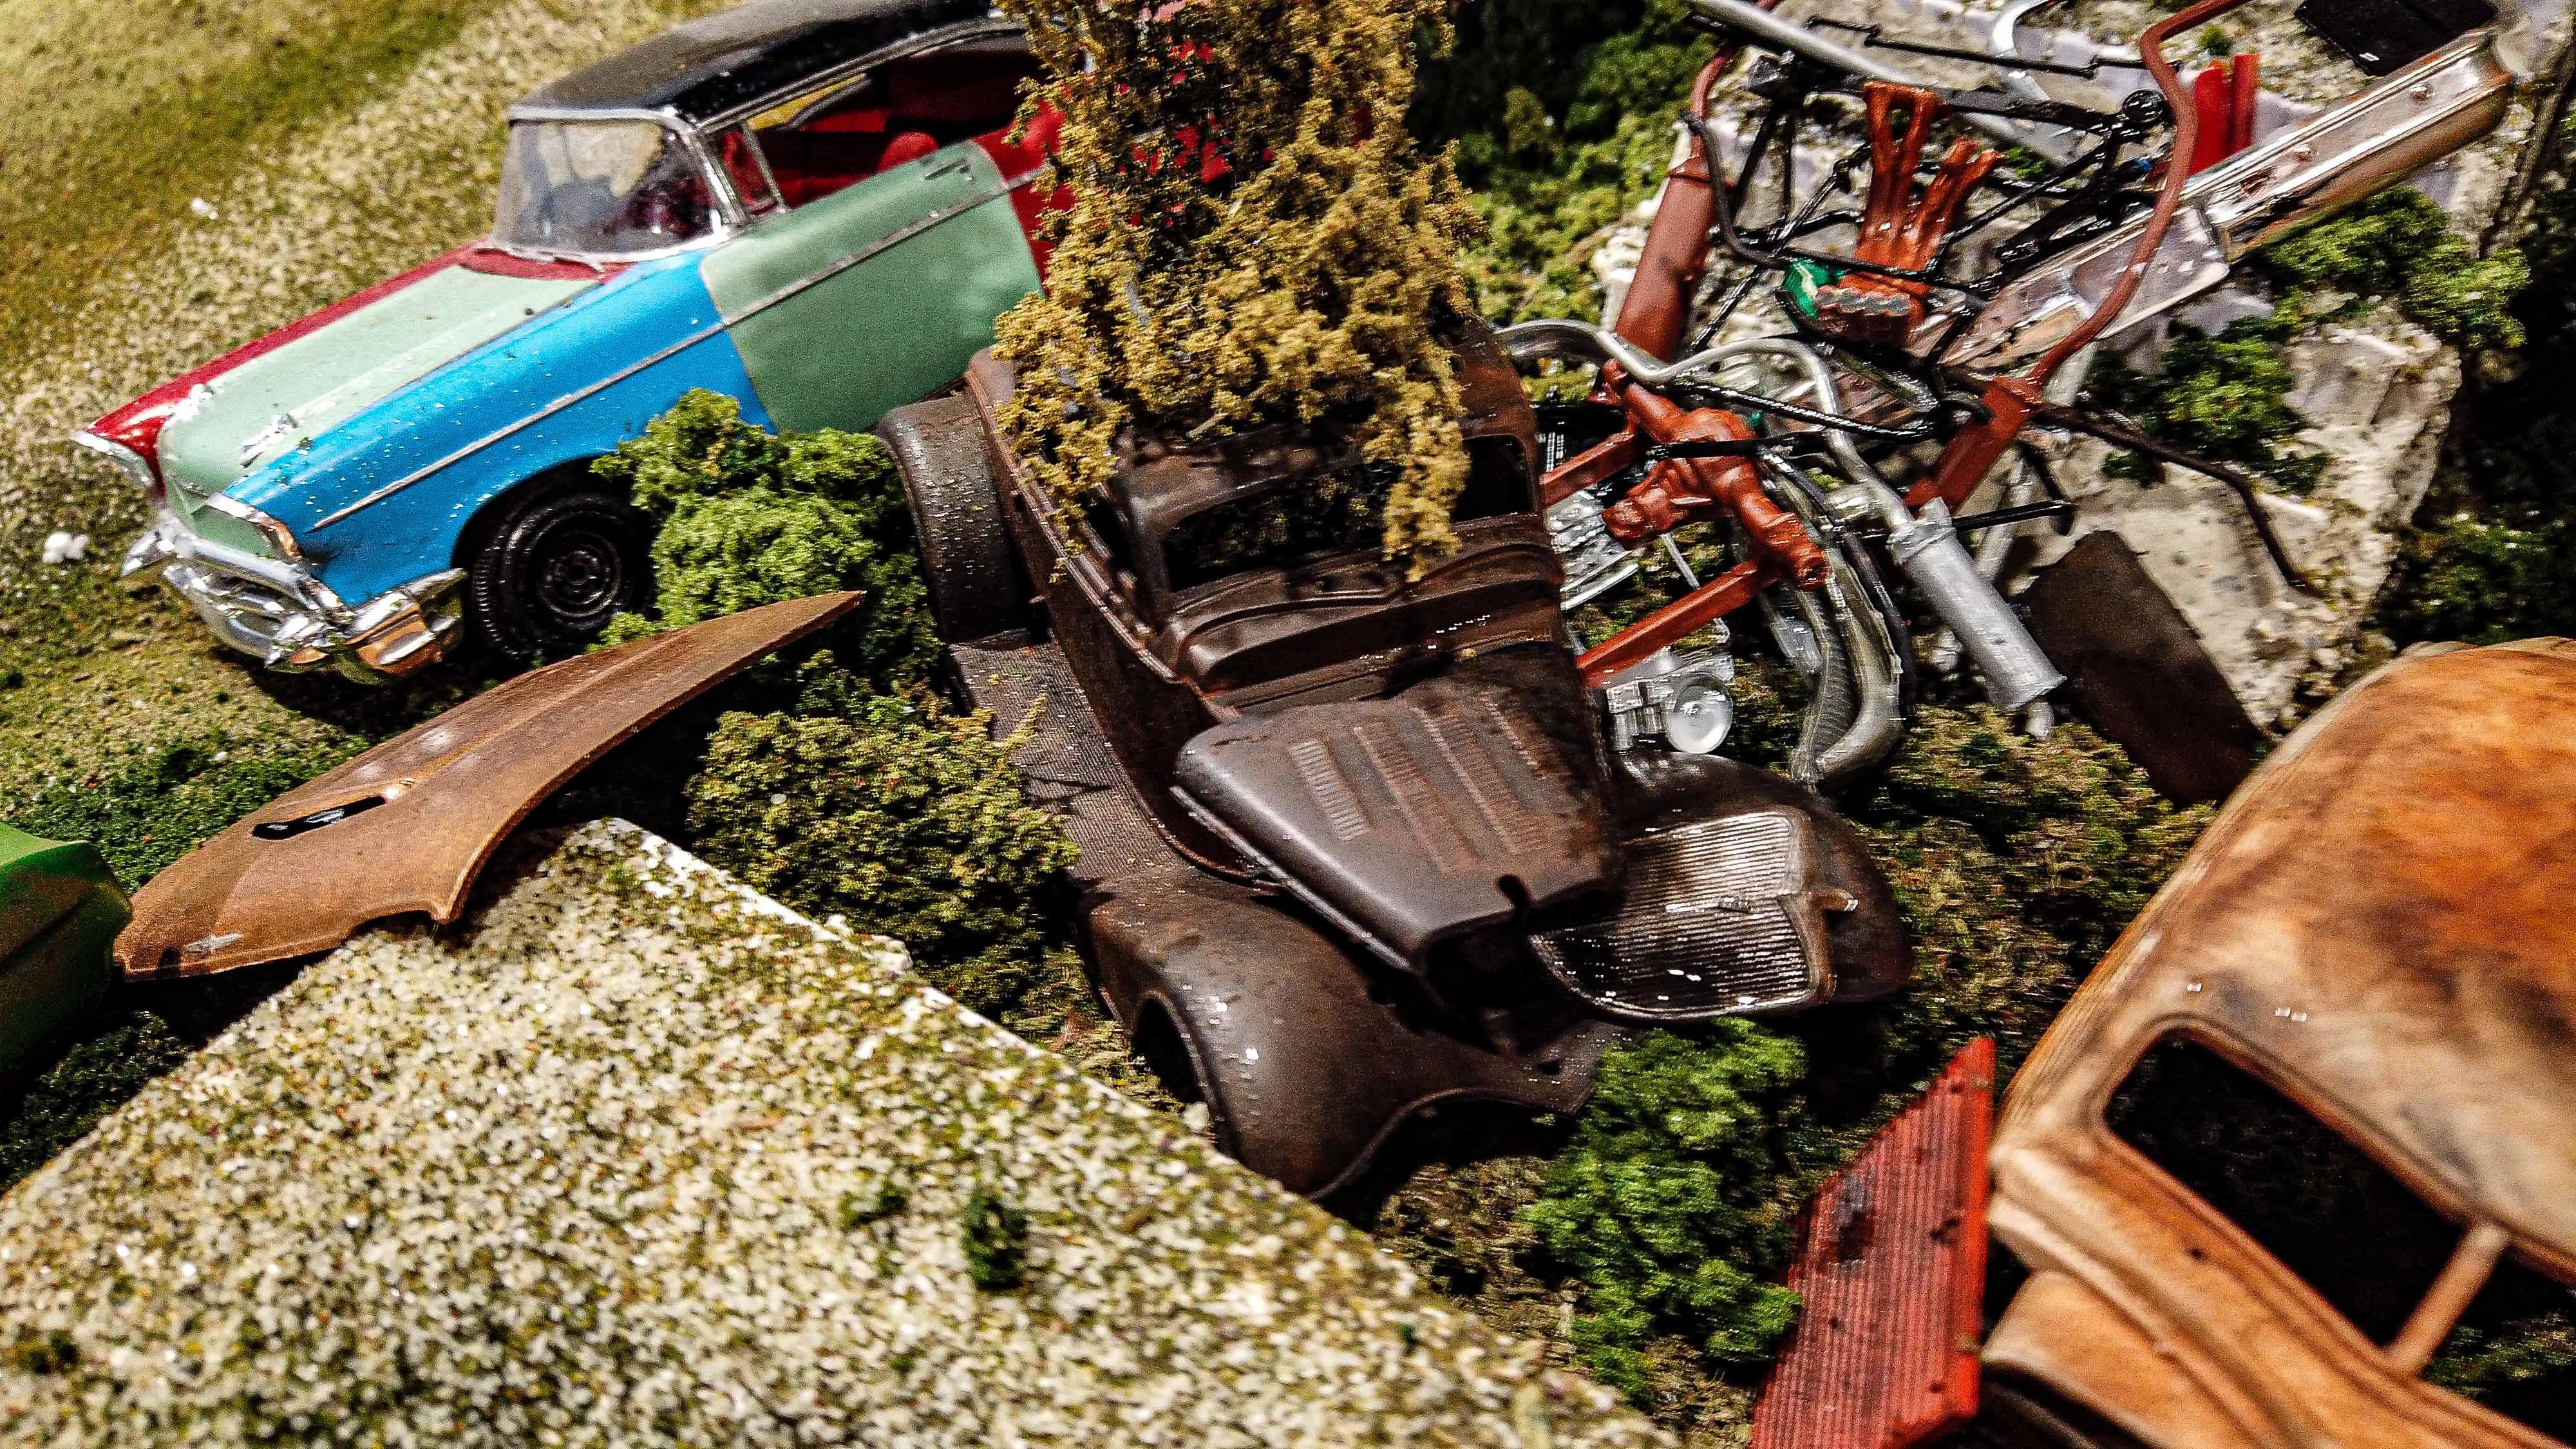
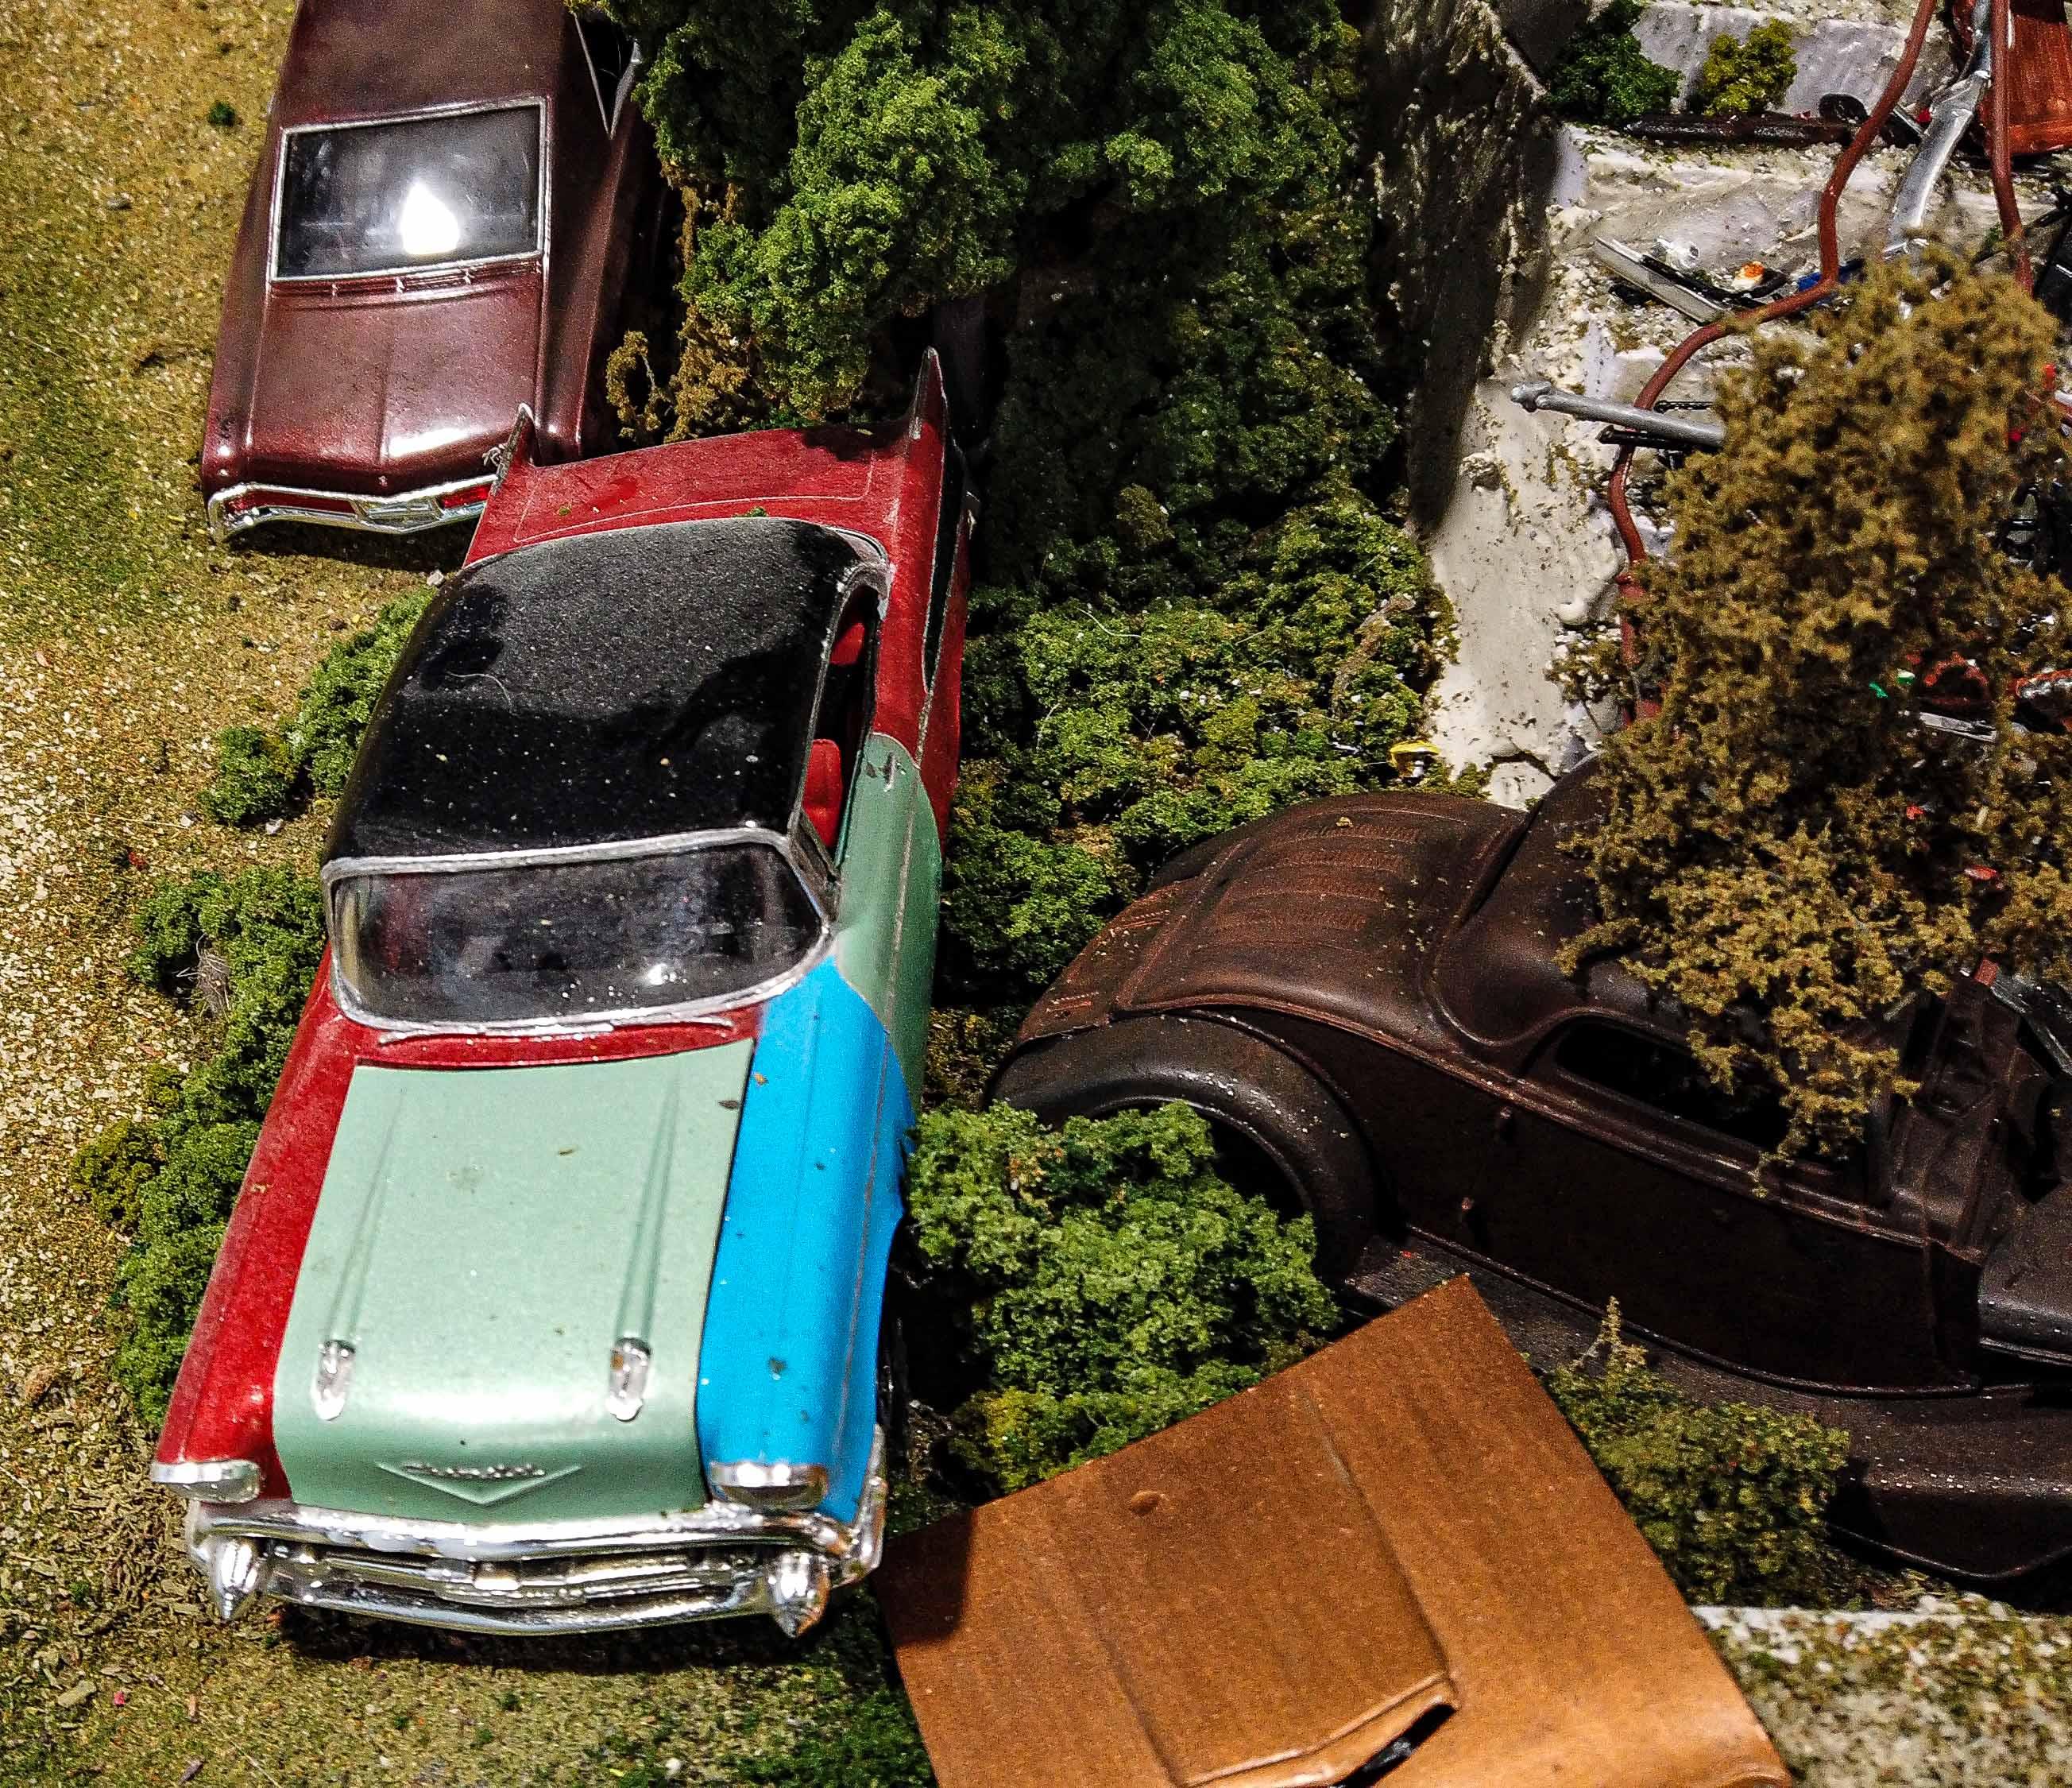
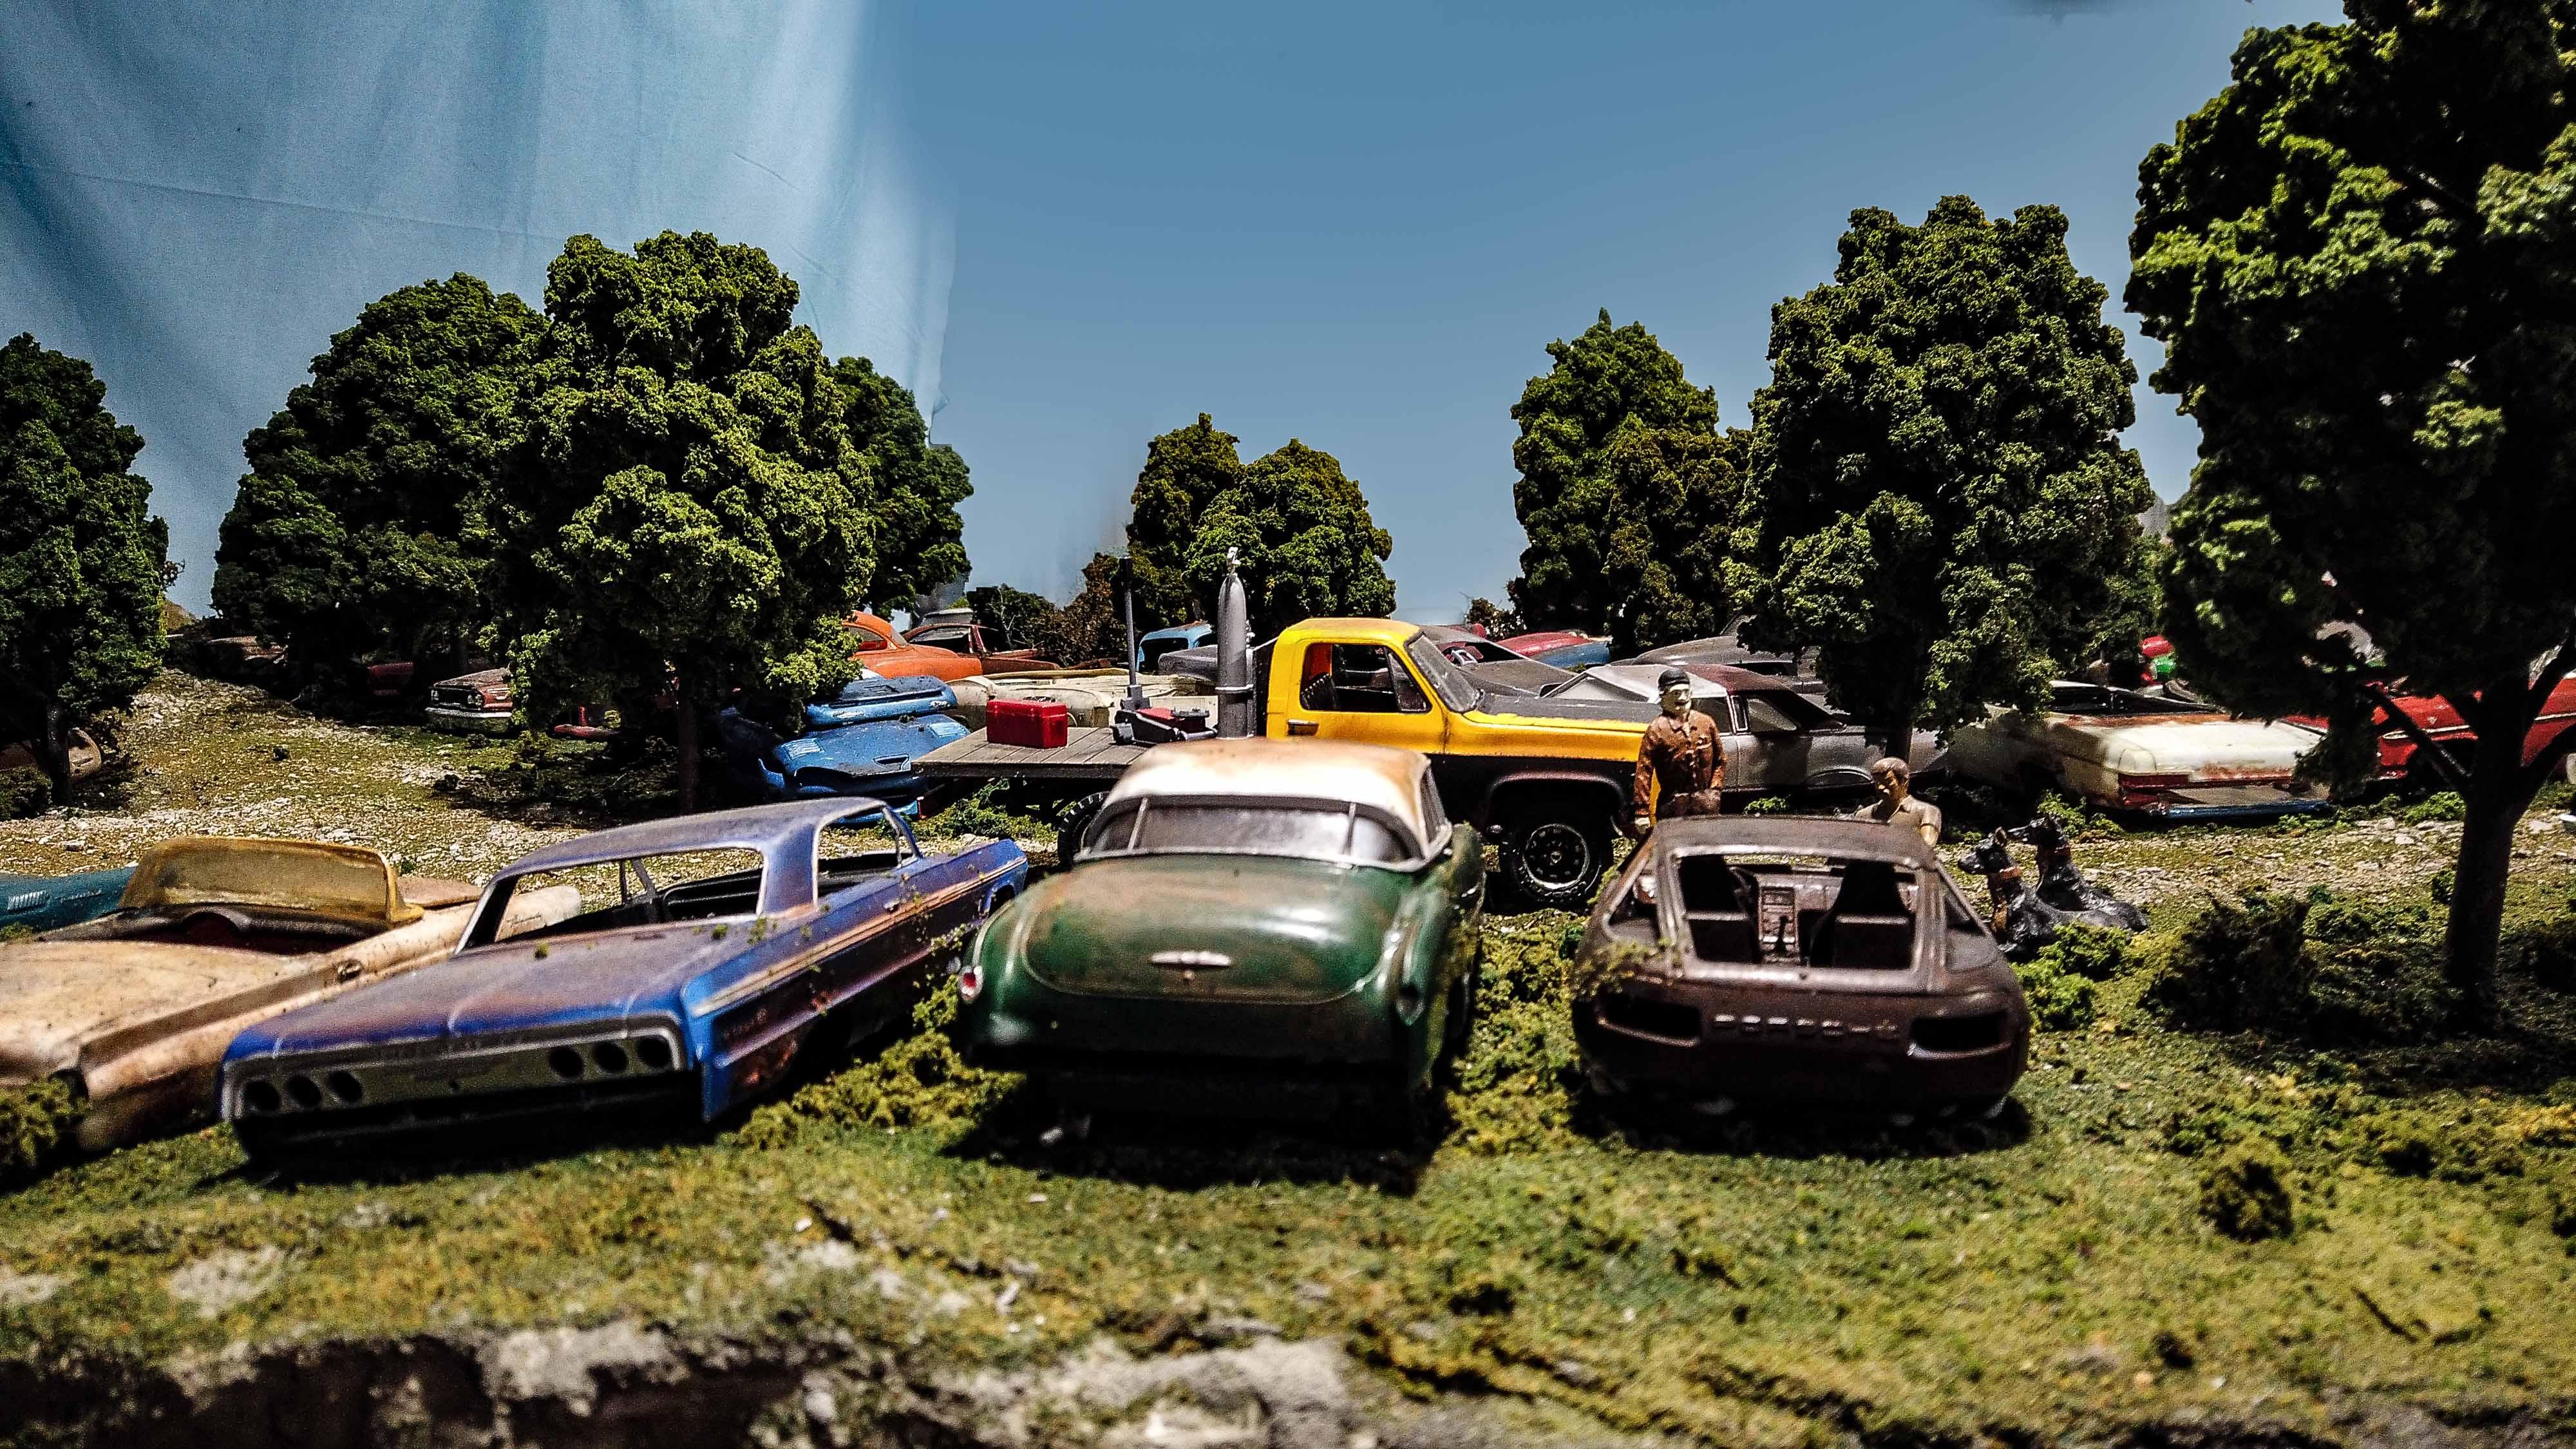
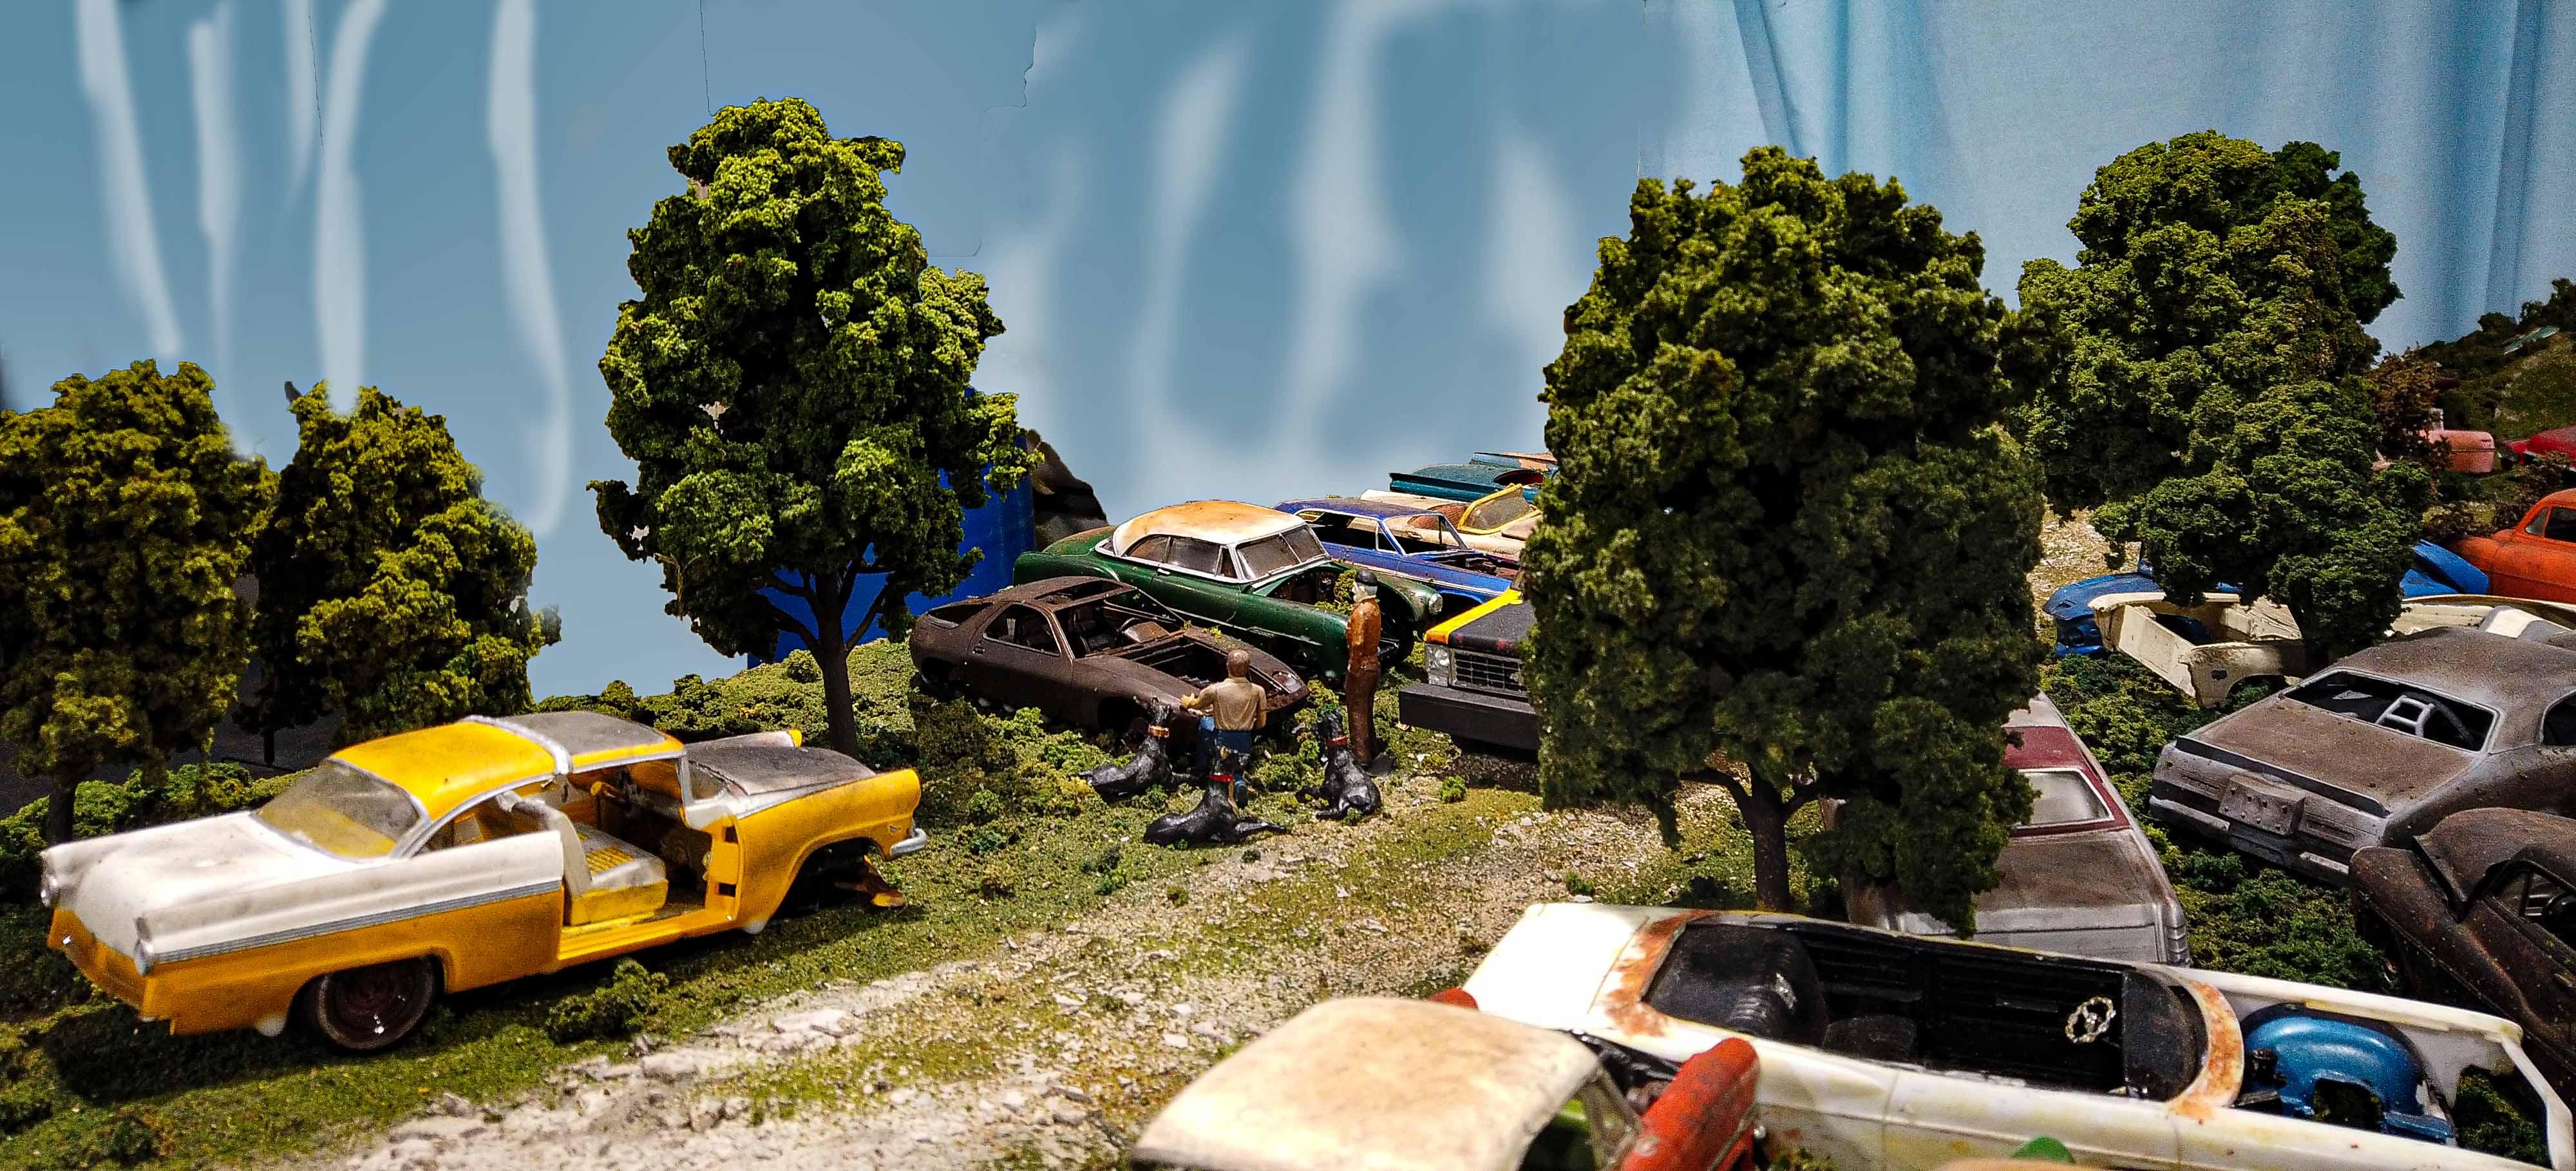
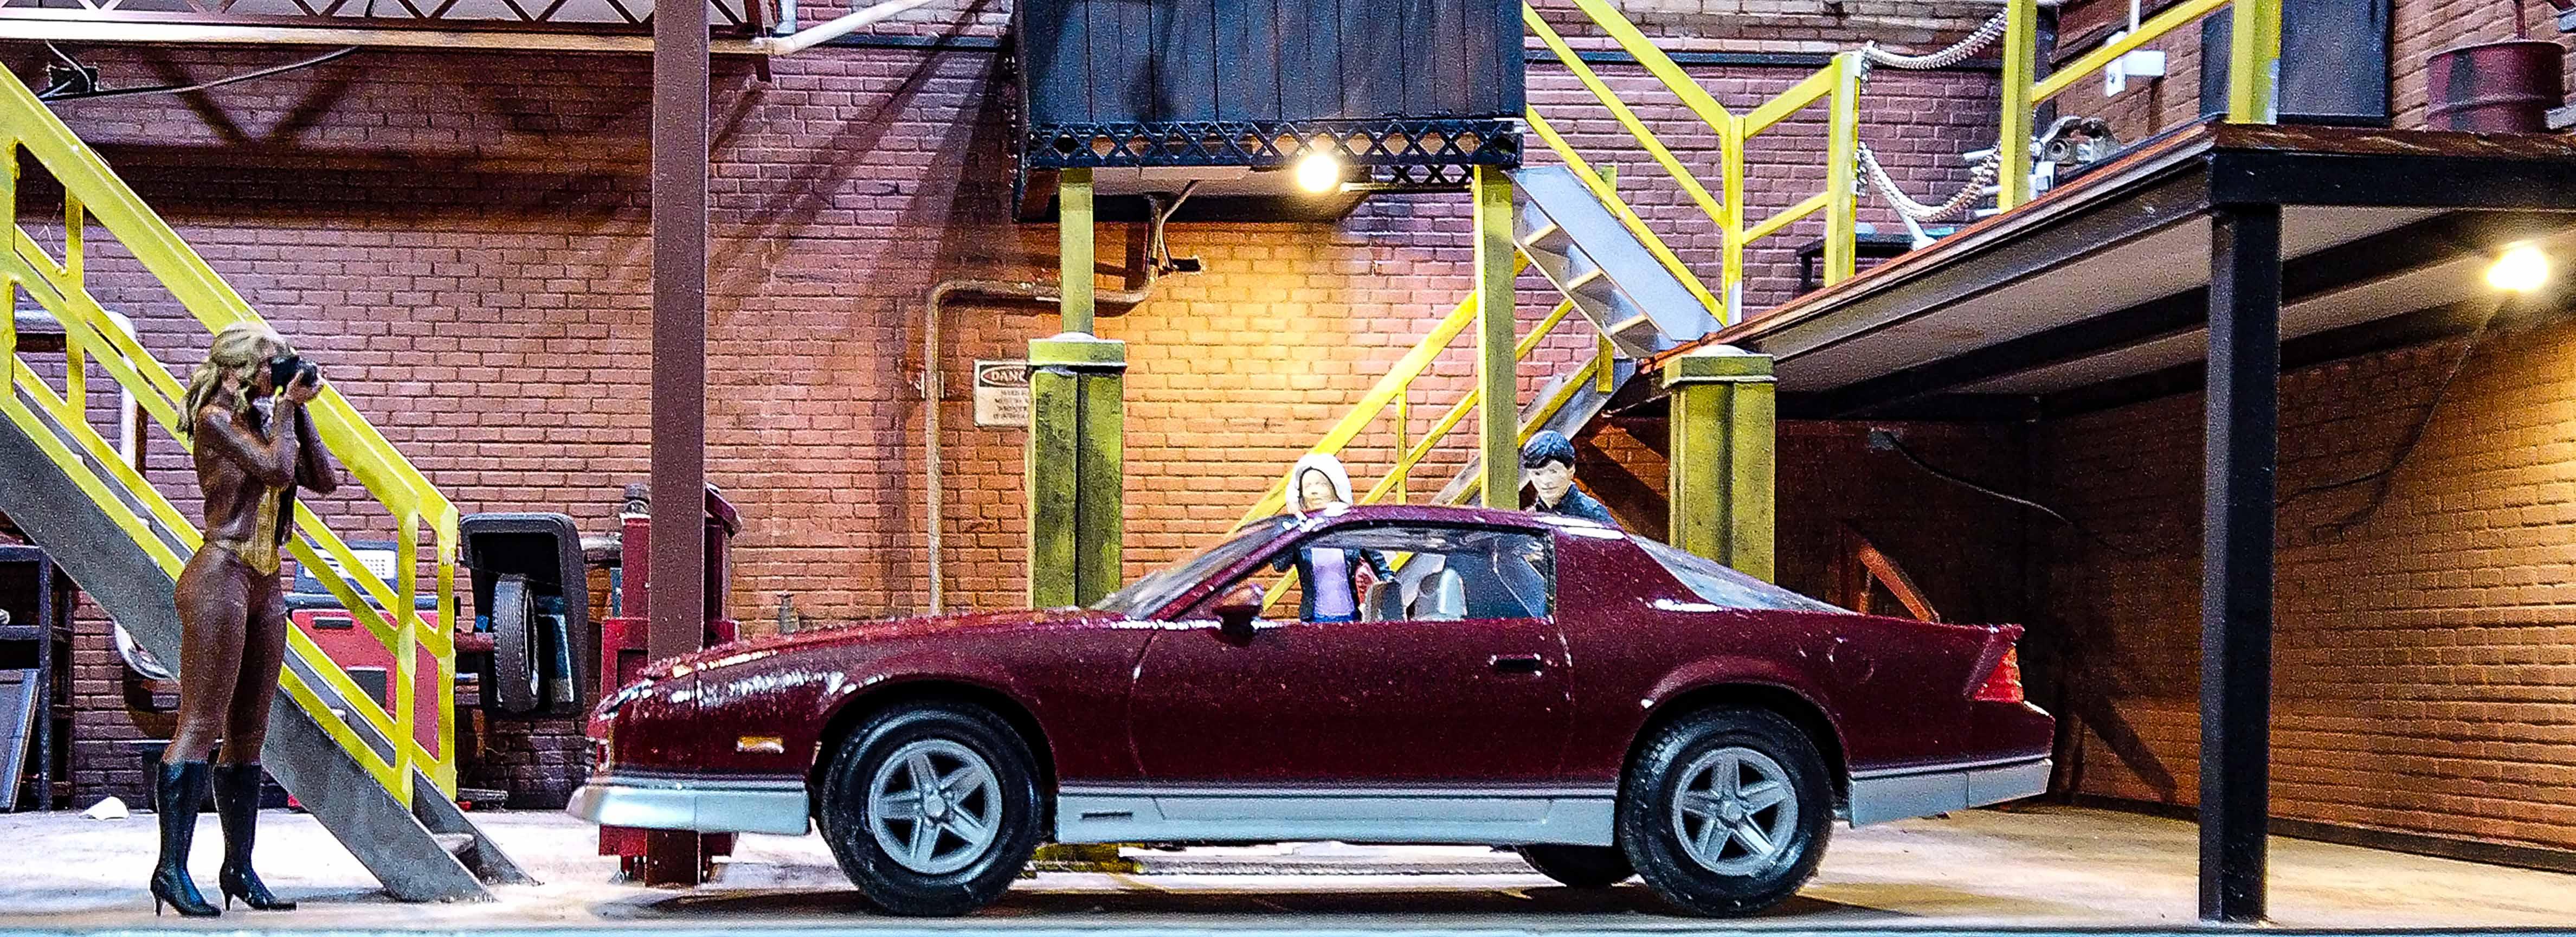
I have added some more details to the diorama. The first picture is an edited picture of the second. In it I have incorporated a calendar picture to represent the world beyond the diorama. Mostly, it hides all the basement piping and other clutter. This diorama is in a backroom of my basement. The second photo shows what I was hiding. In both, one can see the running water in the river coming from the waterfalls. You can also see the treacherous bridge that must be crossed to go from one side to the other. It's rather difficult to see the running water in this picture, but it is coming from both waterfalls. My daughter made this whole section. For the full impact. you may watch videos on my YouTube channel (the Modeling Hermit). In the next series of pictures, I display work that has begun on the other side of the river. I've placed, what appears to be either a set of steps or a set of bleachers on the hillside, along with a platform, probably having been a stage at some point. Around this I've placed several junk cars, and tossed on the steps/bleachers are assorted car parts. All of this blended into trees and weeds. In a couple of the pictures, you'll note that I've edited in sky and background to eliminate the basement debris. I did not alter the actual scenes in the pictures.
-
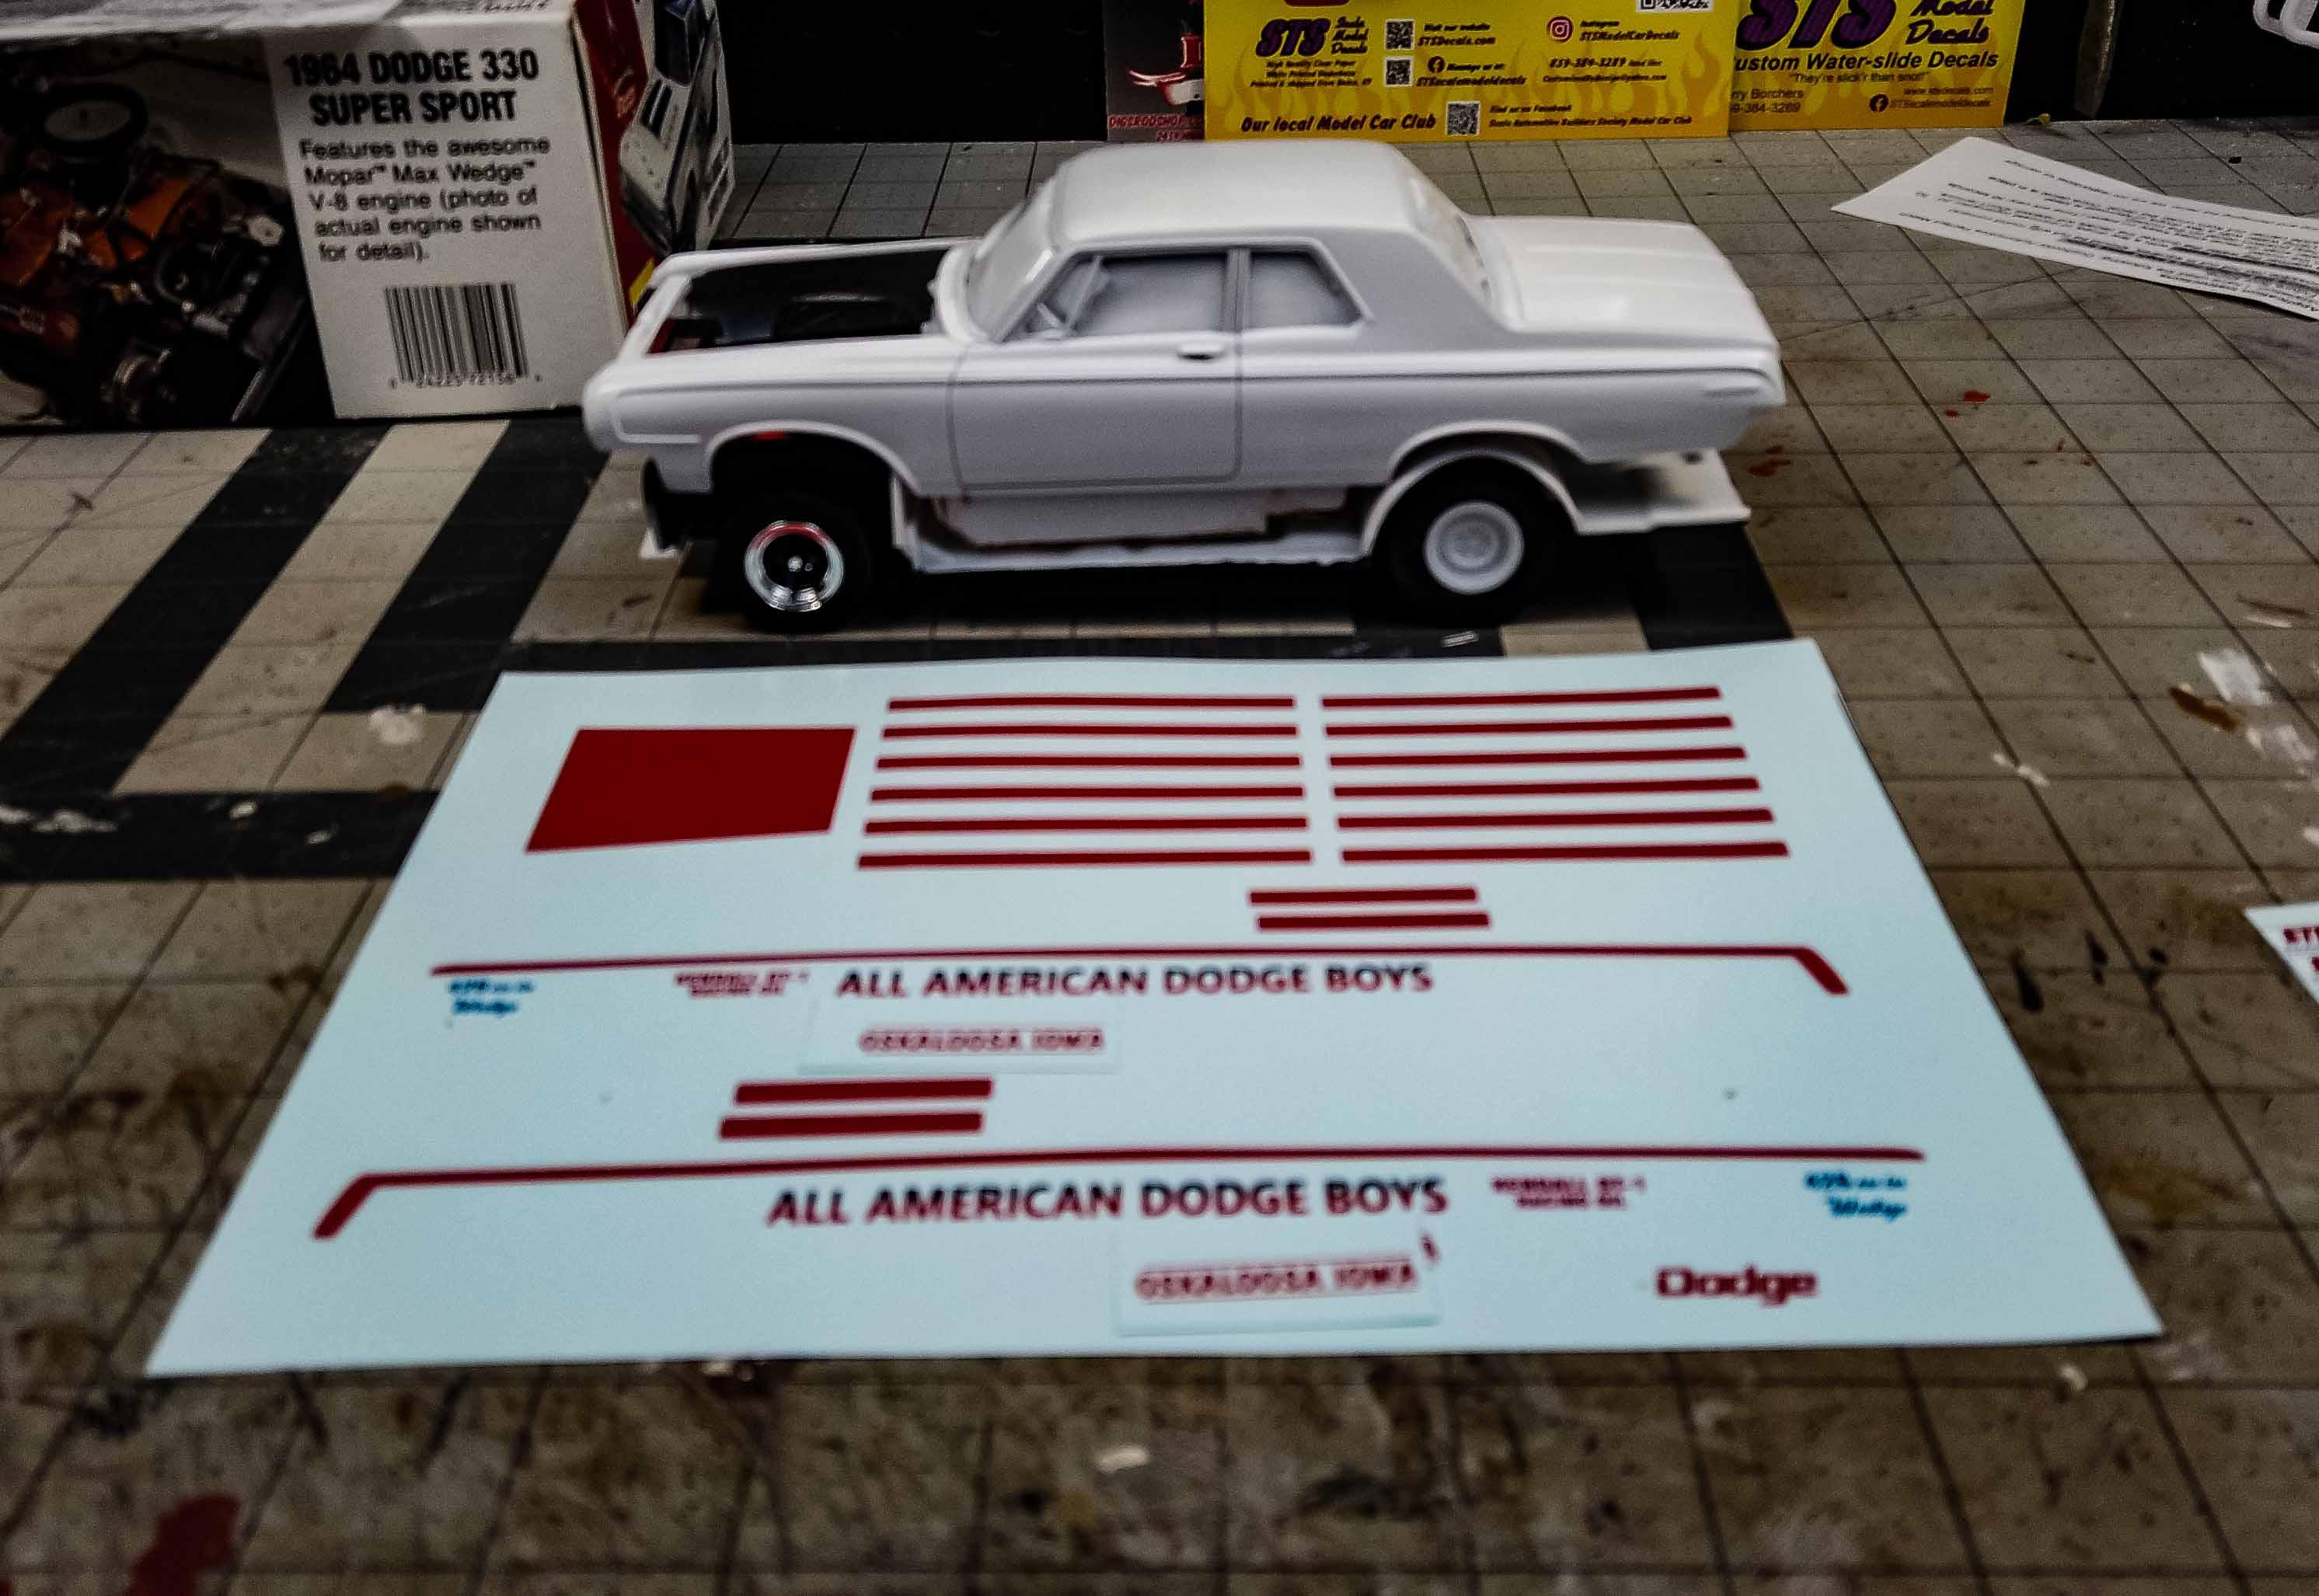
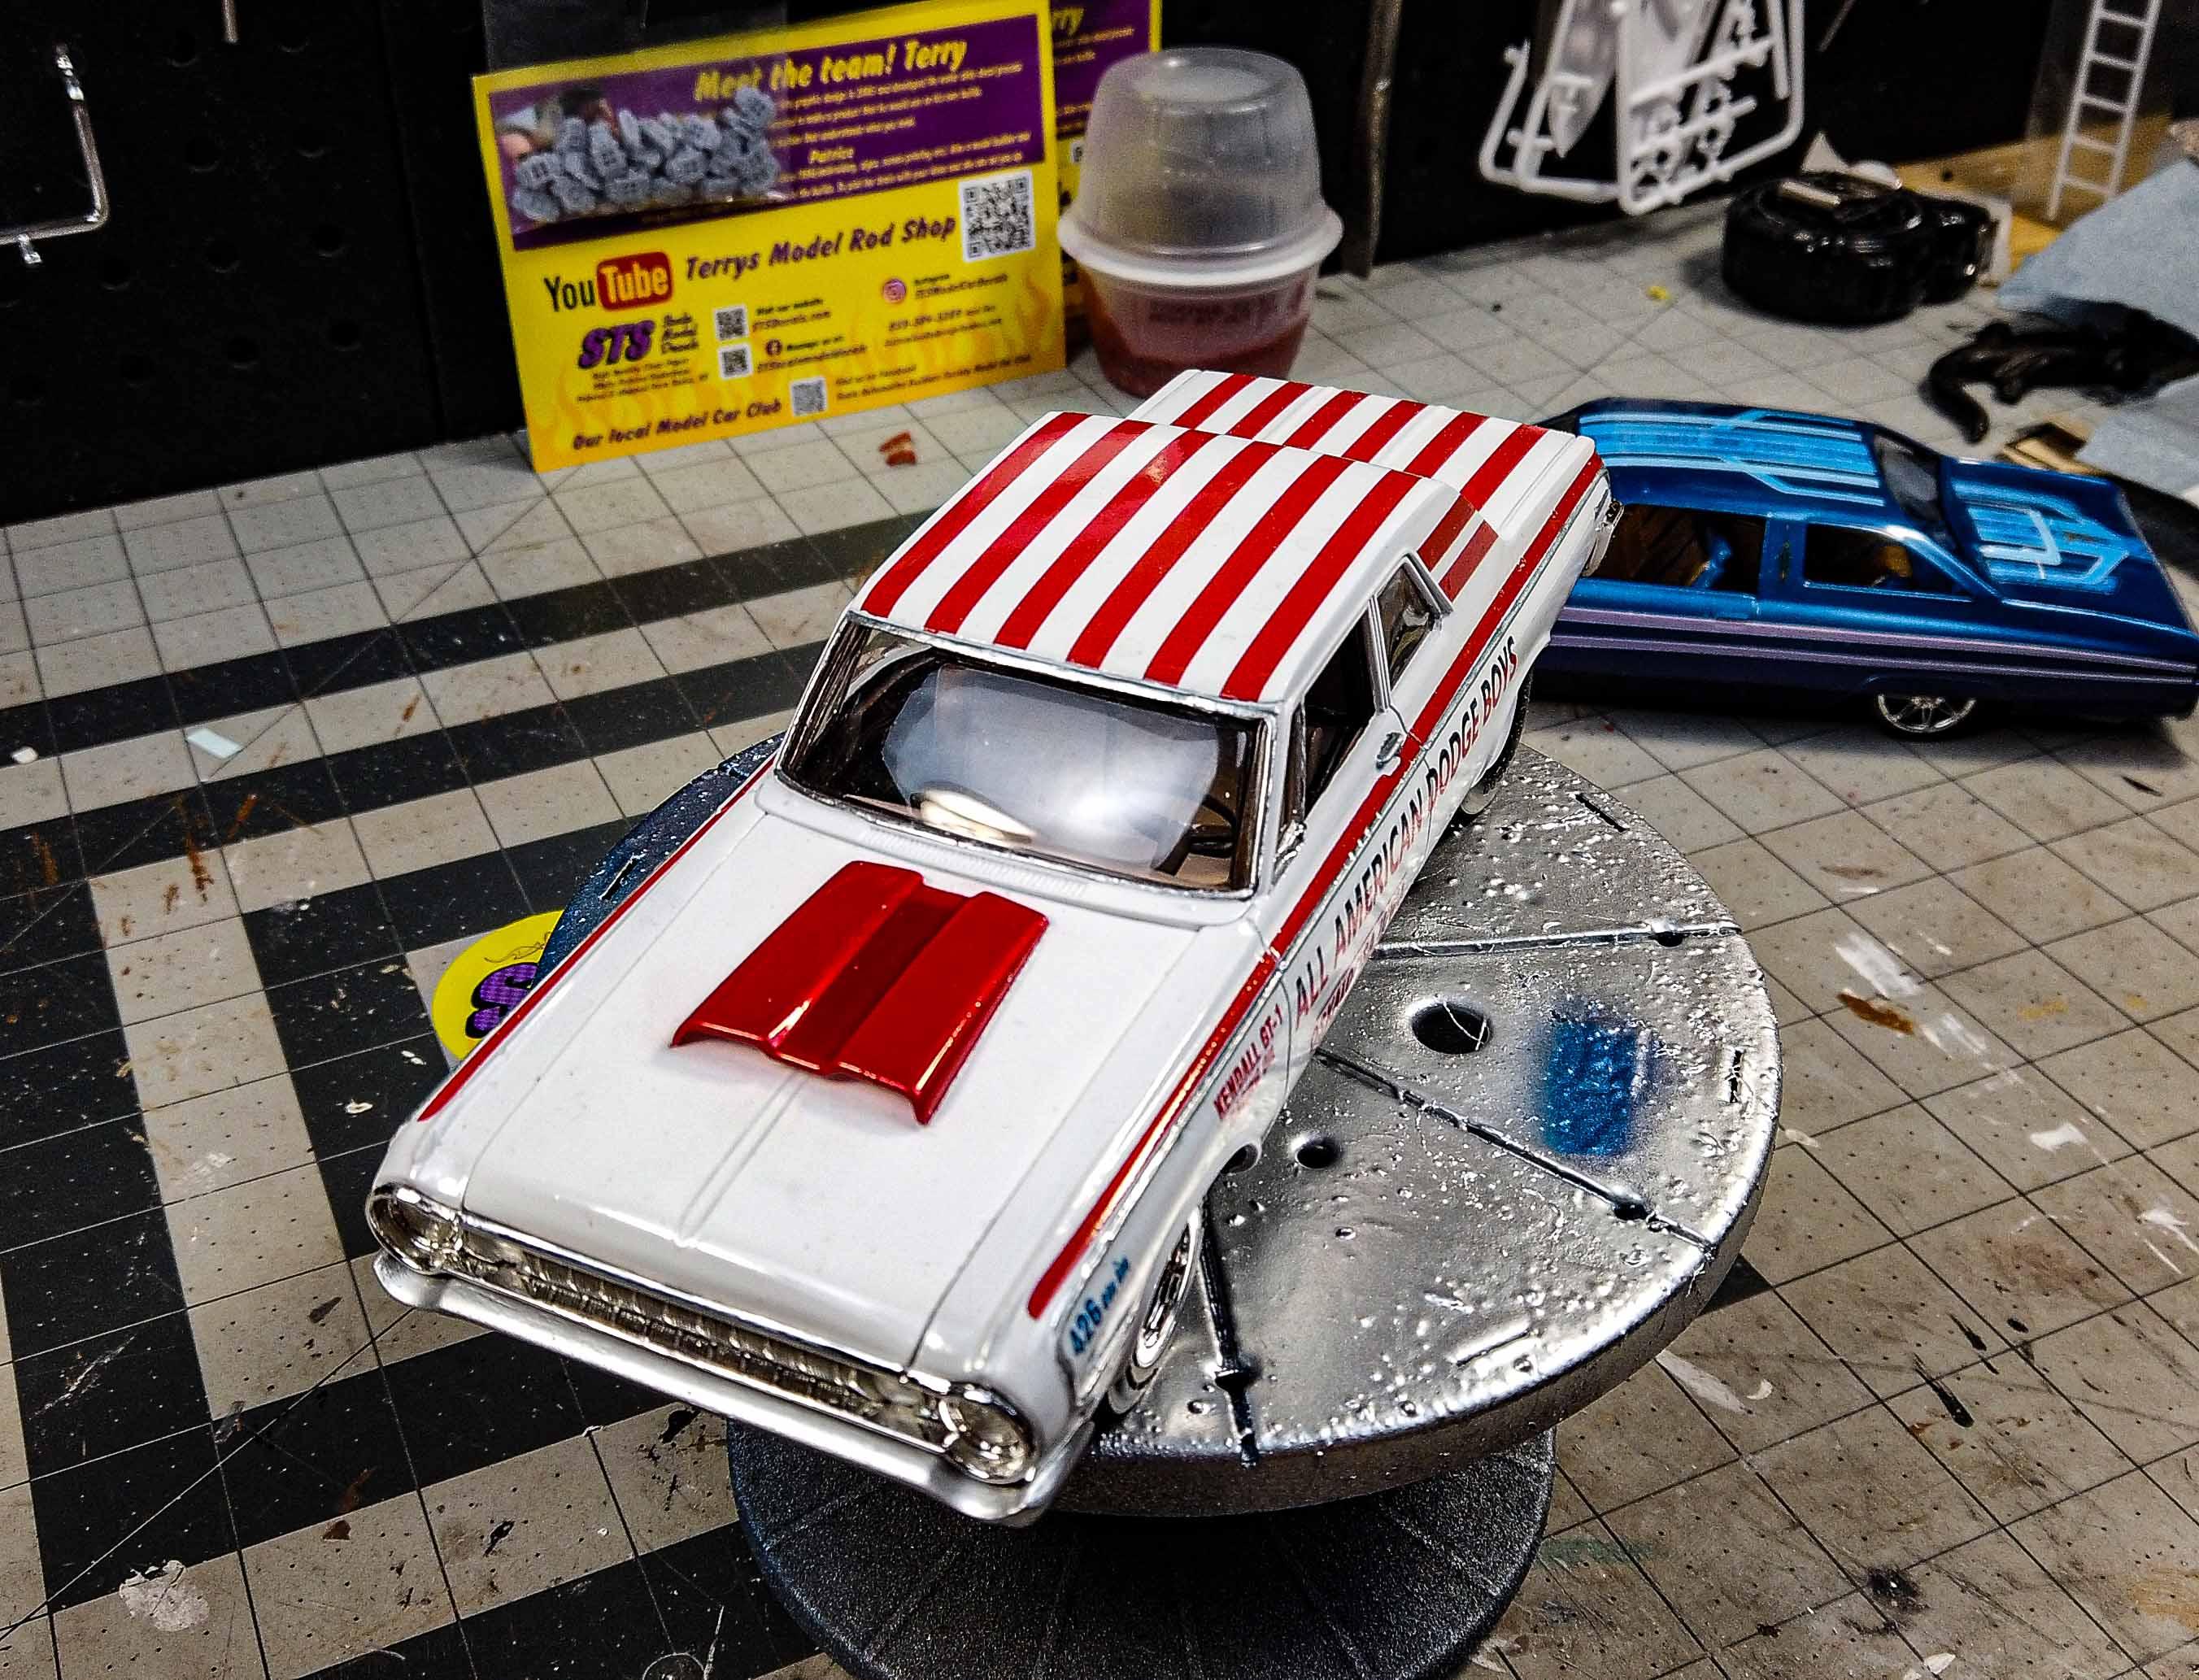
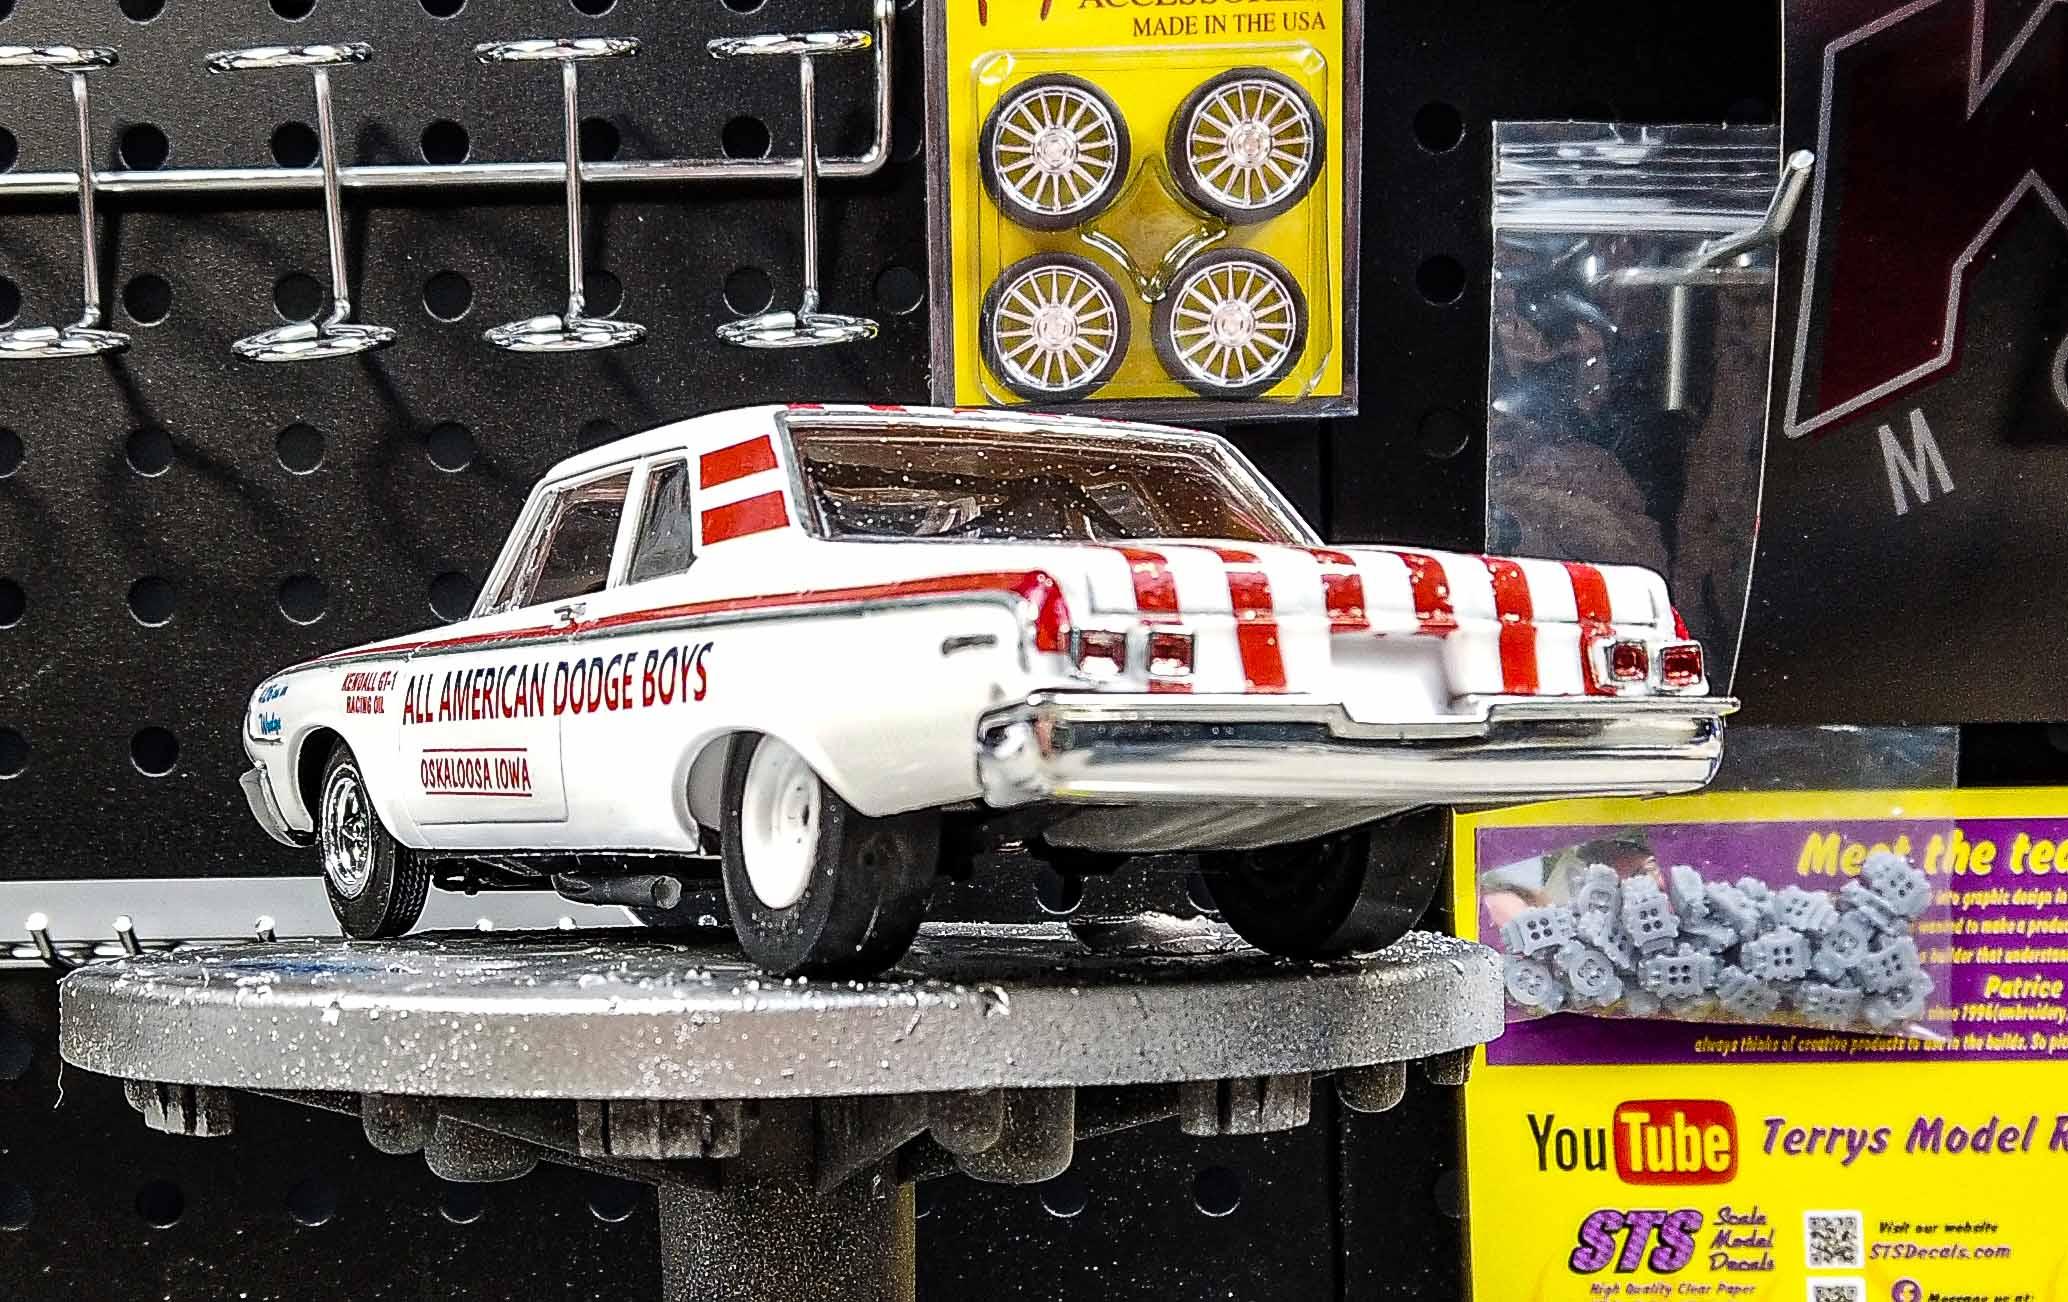
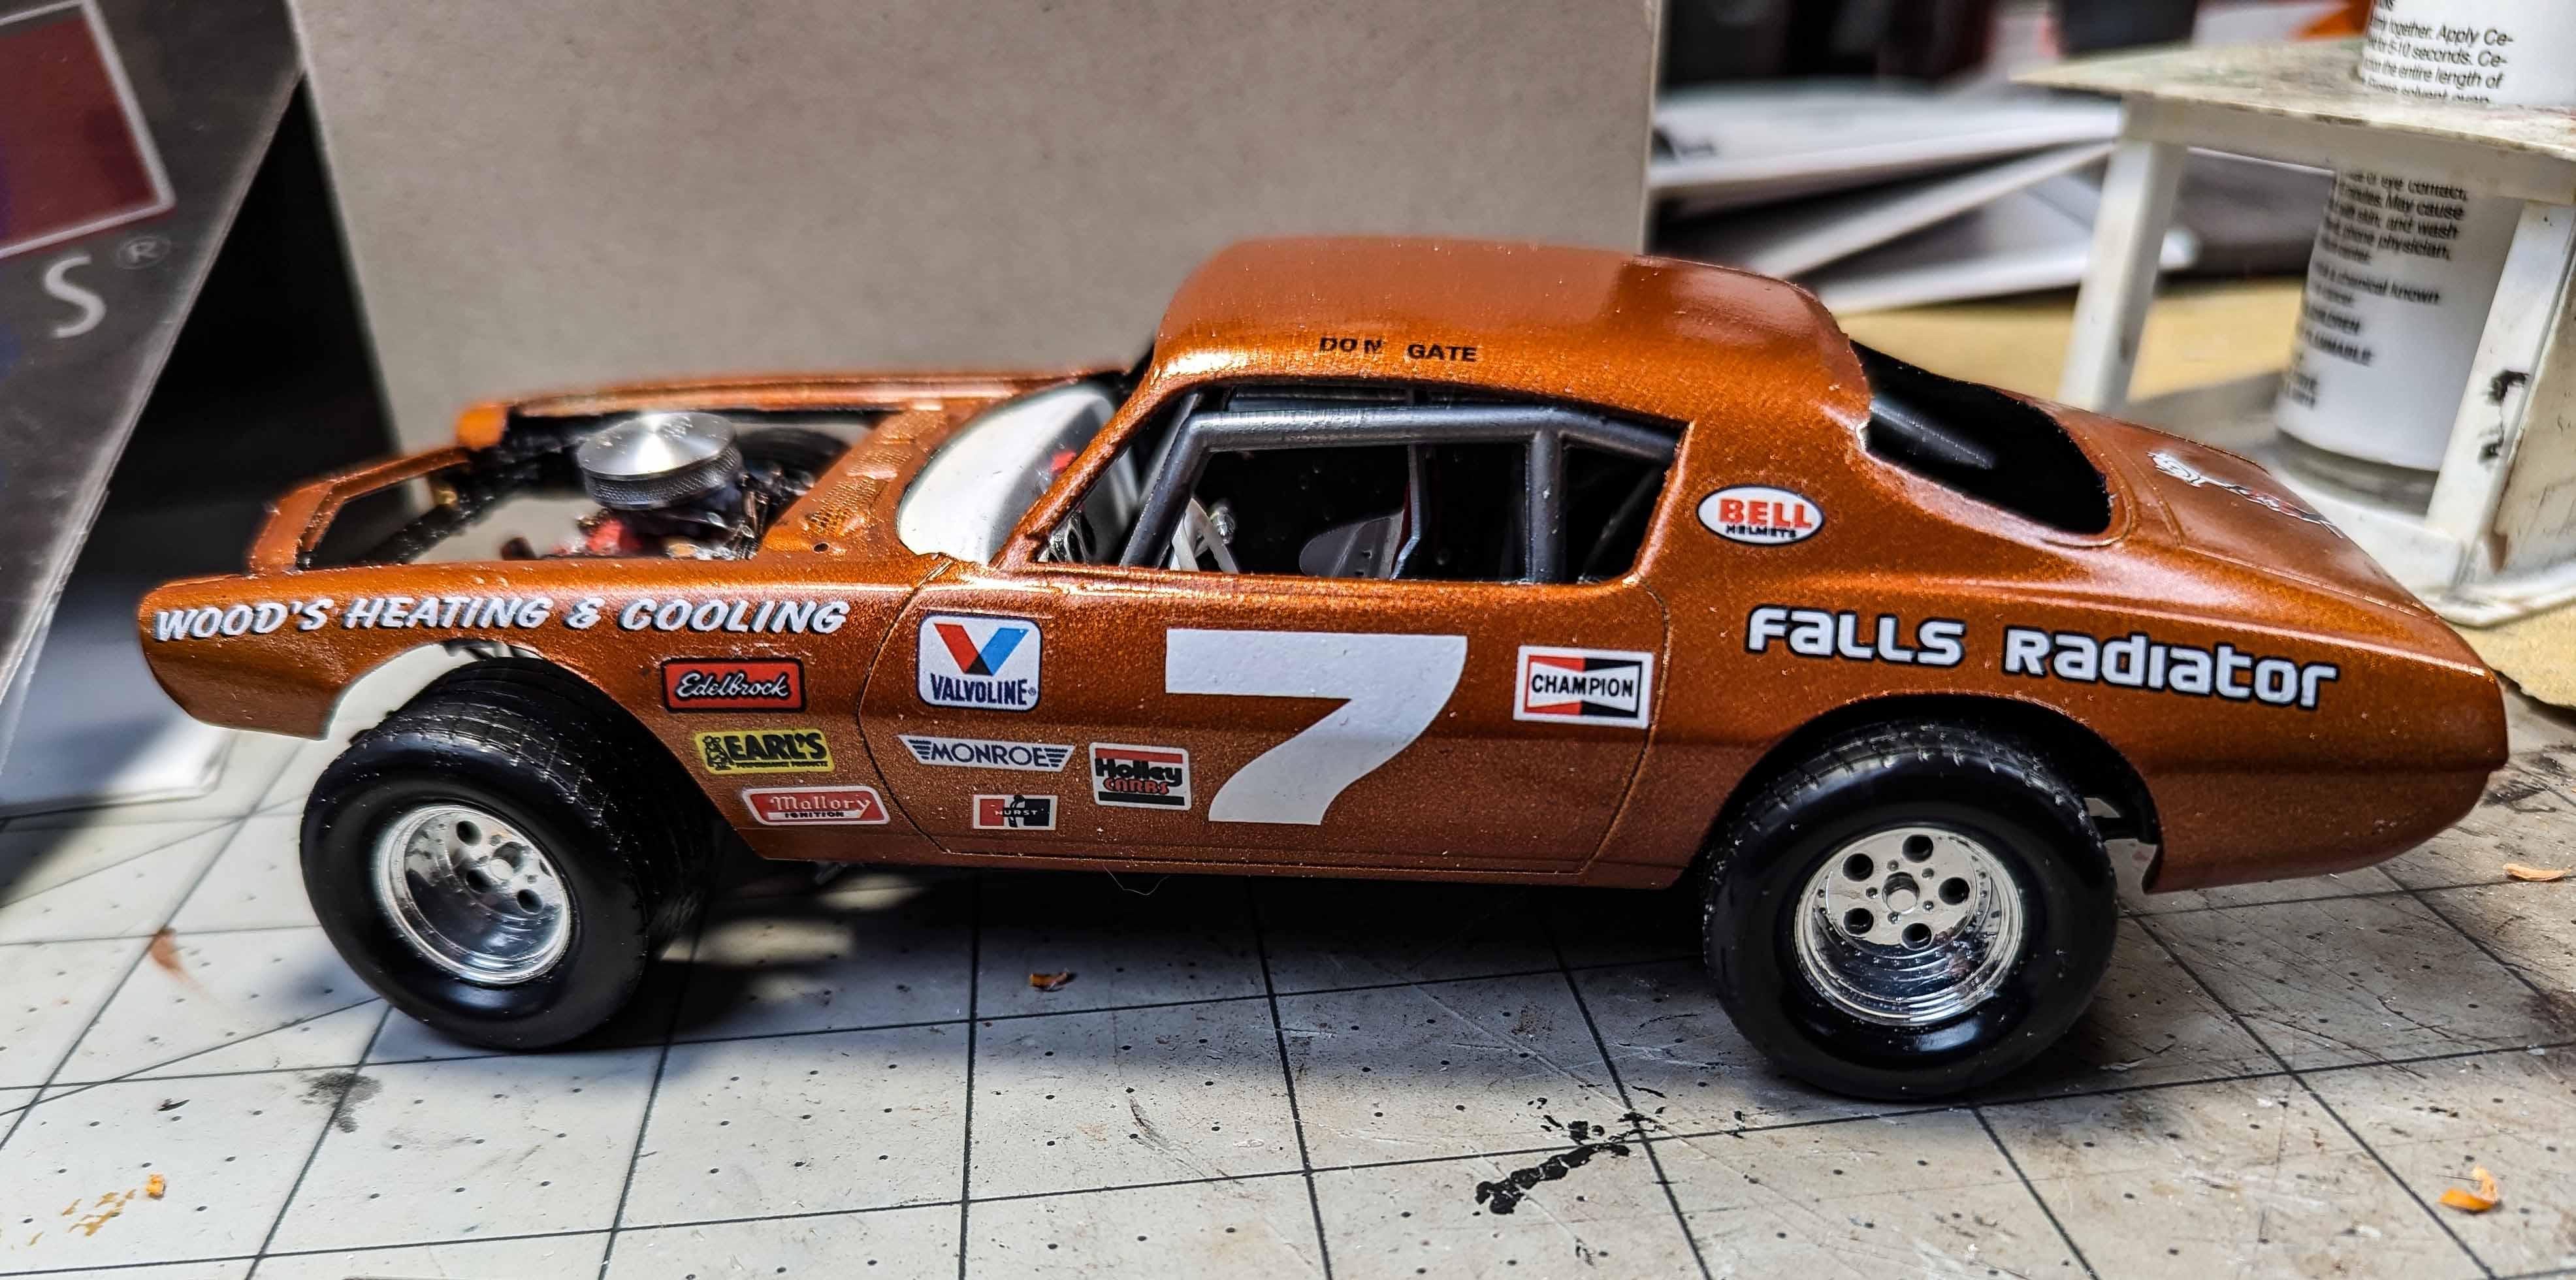
I have a life long friend that has been drag racing since returning from military duty in Viet Nam in the late 60s. He has become a local legend, and this is how I chose to pay my respects to him. I built a 1964 Dodge model of the car that he raced in 1971, along with a facade of the Dodge dealer building as it looked in the same year. I used STS decals, instead of trying to mask and paint my own, which was a very wise choice. I also had my work cut out reworking the front bumper. It seemed like e very simple job, but there was a line where I filled around the front bumper that just didn't want to go away. It was presented to him this morning, and the smile it brought to his face was worth every second that I put into the model.
- 7 replies
-
- 11
-
-
- dodge
- 1/25 scale
- (and 2 more)
-

1985 camaro 1985 Chevrolet Camaro
The Modeling Hermit replied to The Modeling Hermit's topic in Model Cars
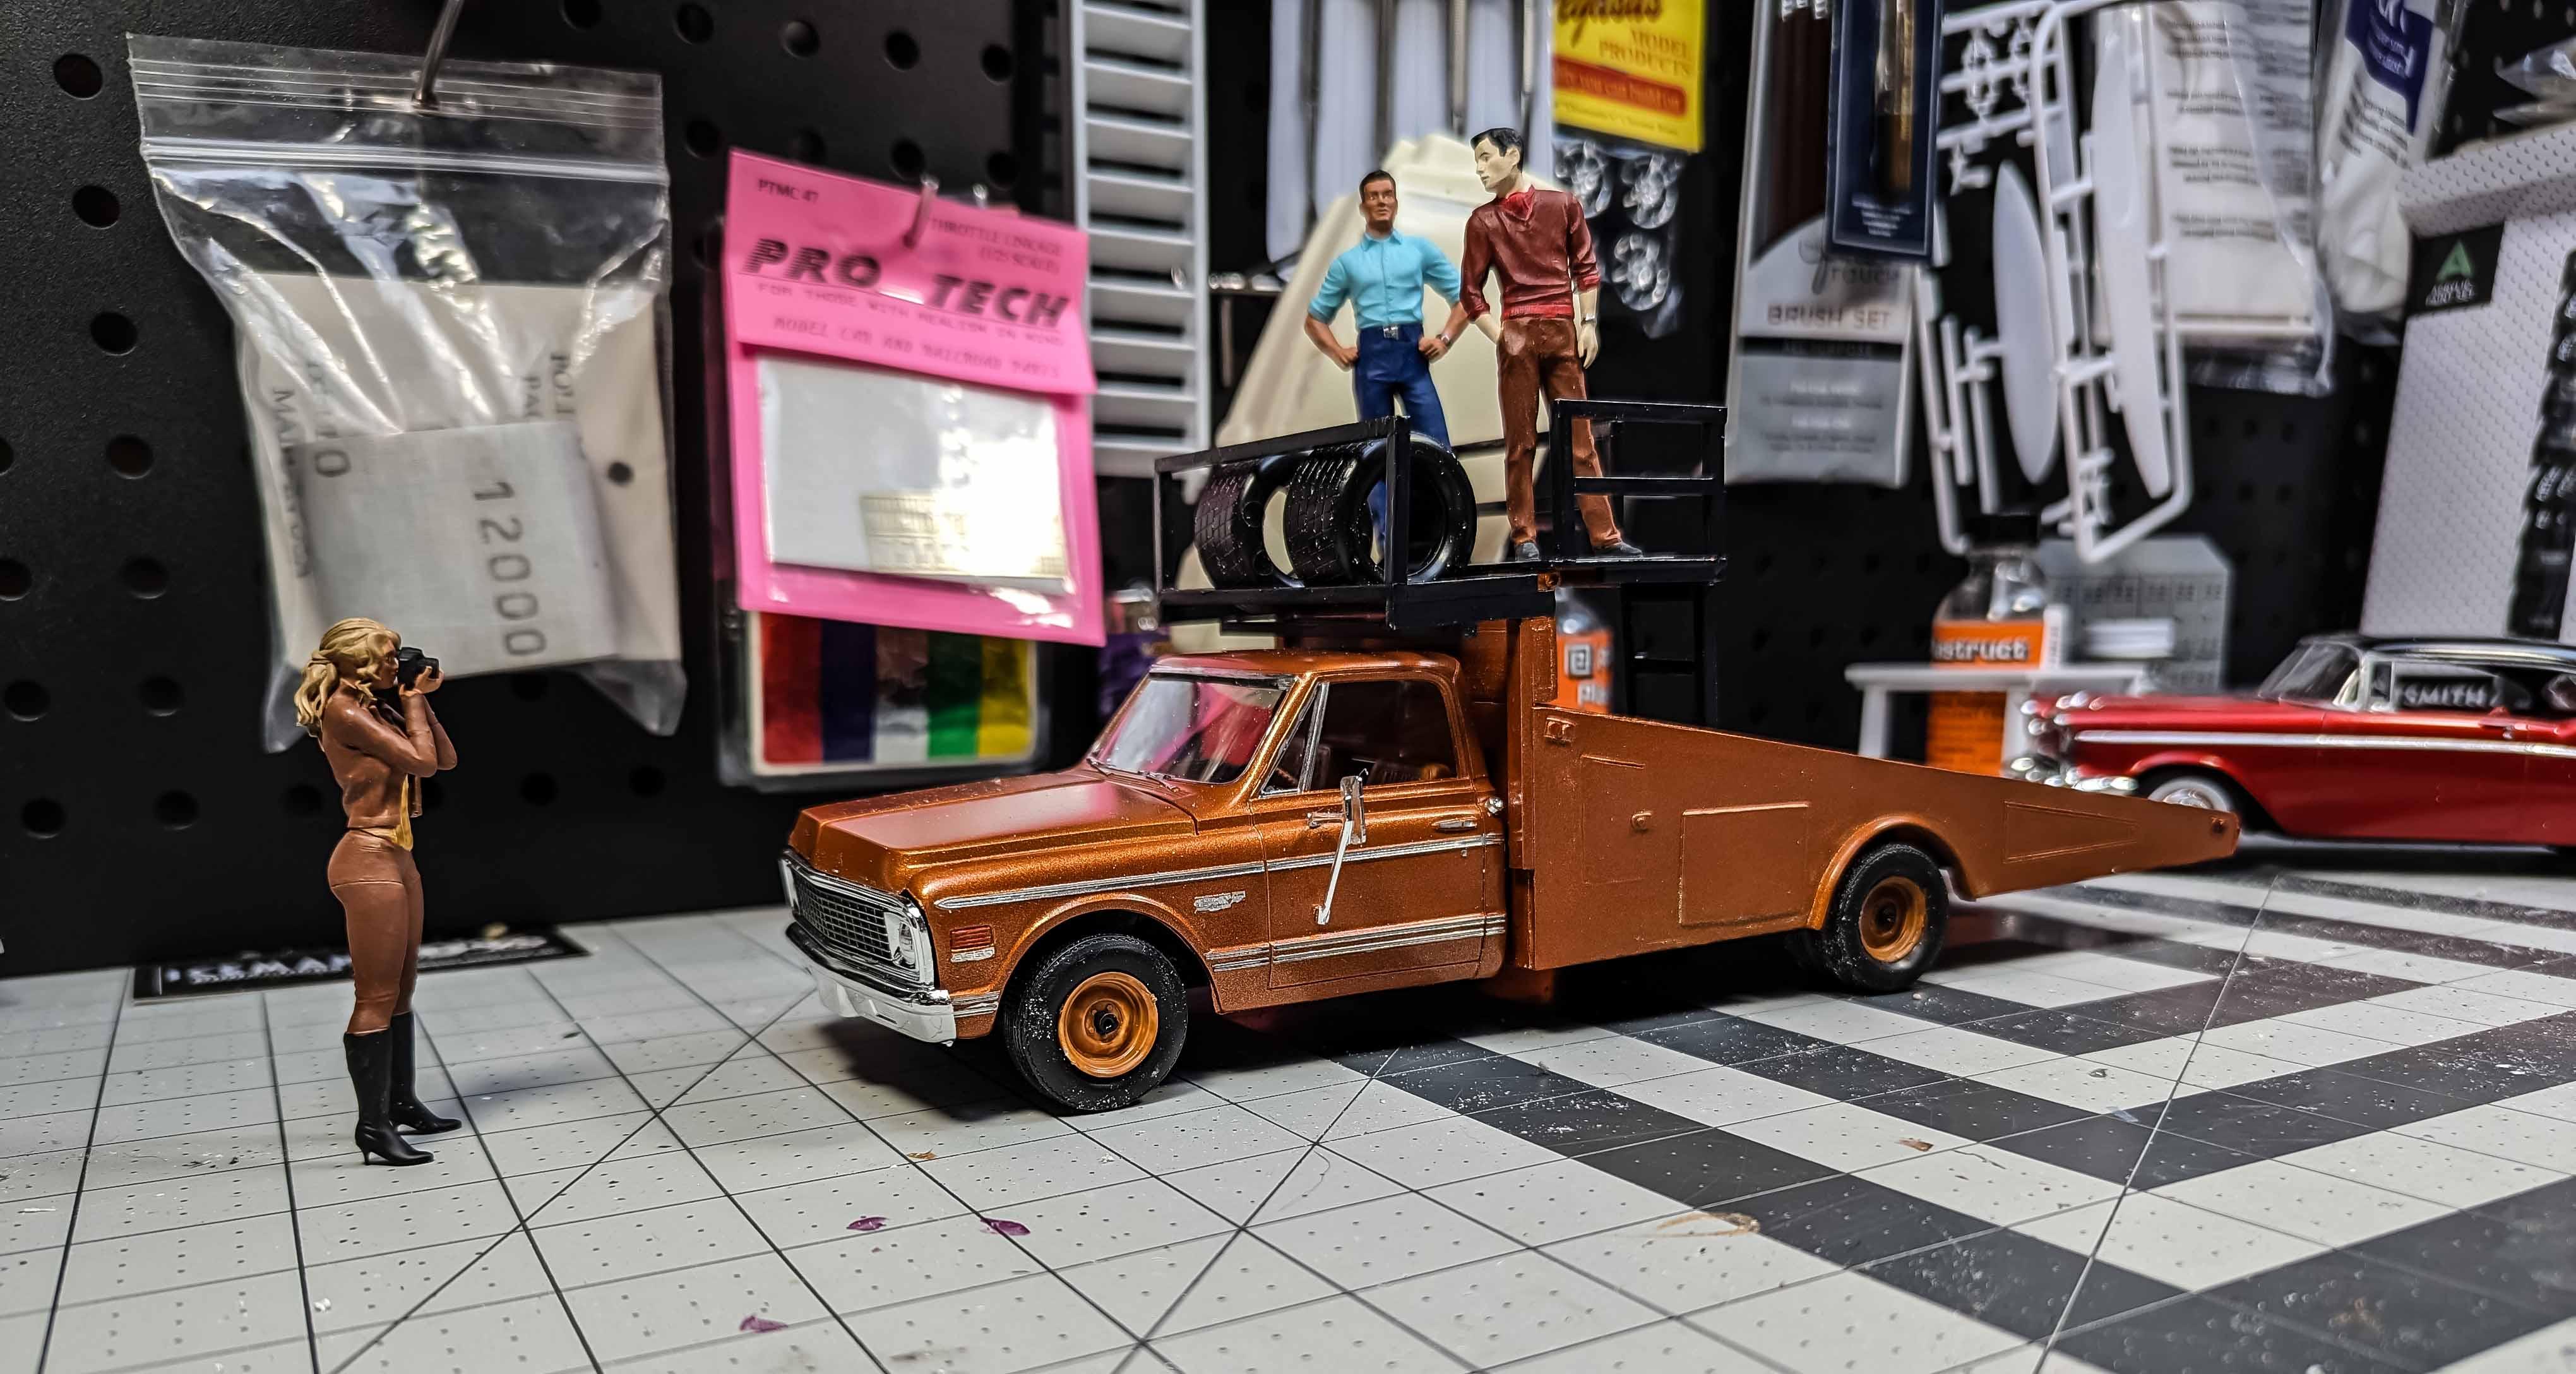
That would be Tamara with her camera. I never did trust her. -
Bugatti Fan is quite correct. Be careful in placing this collection. These are indeed of museum quality, and auction outlets are not the venue to consider for sales. Do much research, an some cases instead of a sale you might consider placing it in an automotive museum on long term loan. Much of my work is done for museums, and they are very careful of how the model is displayed and are almost always looking for something unusual such as your miniatures.
-
Quick junkyard diorama to keep my "parts cars"
The Modeling Hermit replied to fun9c1's topic in WIP: Dioramas
This is going to be fun, but be careful when you start weathering them It gets addictive. -
New salvage yard diorama in the works....
The Modeling Hermit replied to Shambles's topic in WIP: Dioramas
I am loving this, and your attention to detail really adds the element of authenticity to every scene. -
This is an ongoing project that has taken a year to get to this point. The unit is 4 feet wide by 16 feet long. It includes a working waterfall that my daughter built. The premise is that it had been an amusement park, many generations back. There are still some foundations left, as well as a man-made waterfalls, river, and water feature running alongside the river. The land has been taken over by a substantial sized junkyard, itself old and overgrown. An old arch type bridge spans the two sections, of which involves a certain amount of courage to drive across. This section to the right of the river is unfinished, but shows some of my vision for it.
-
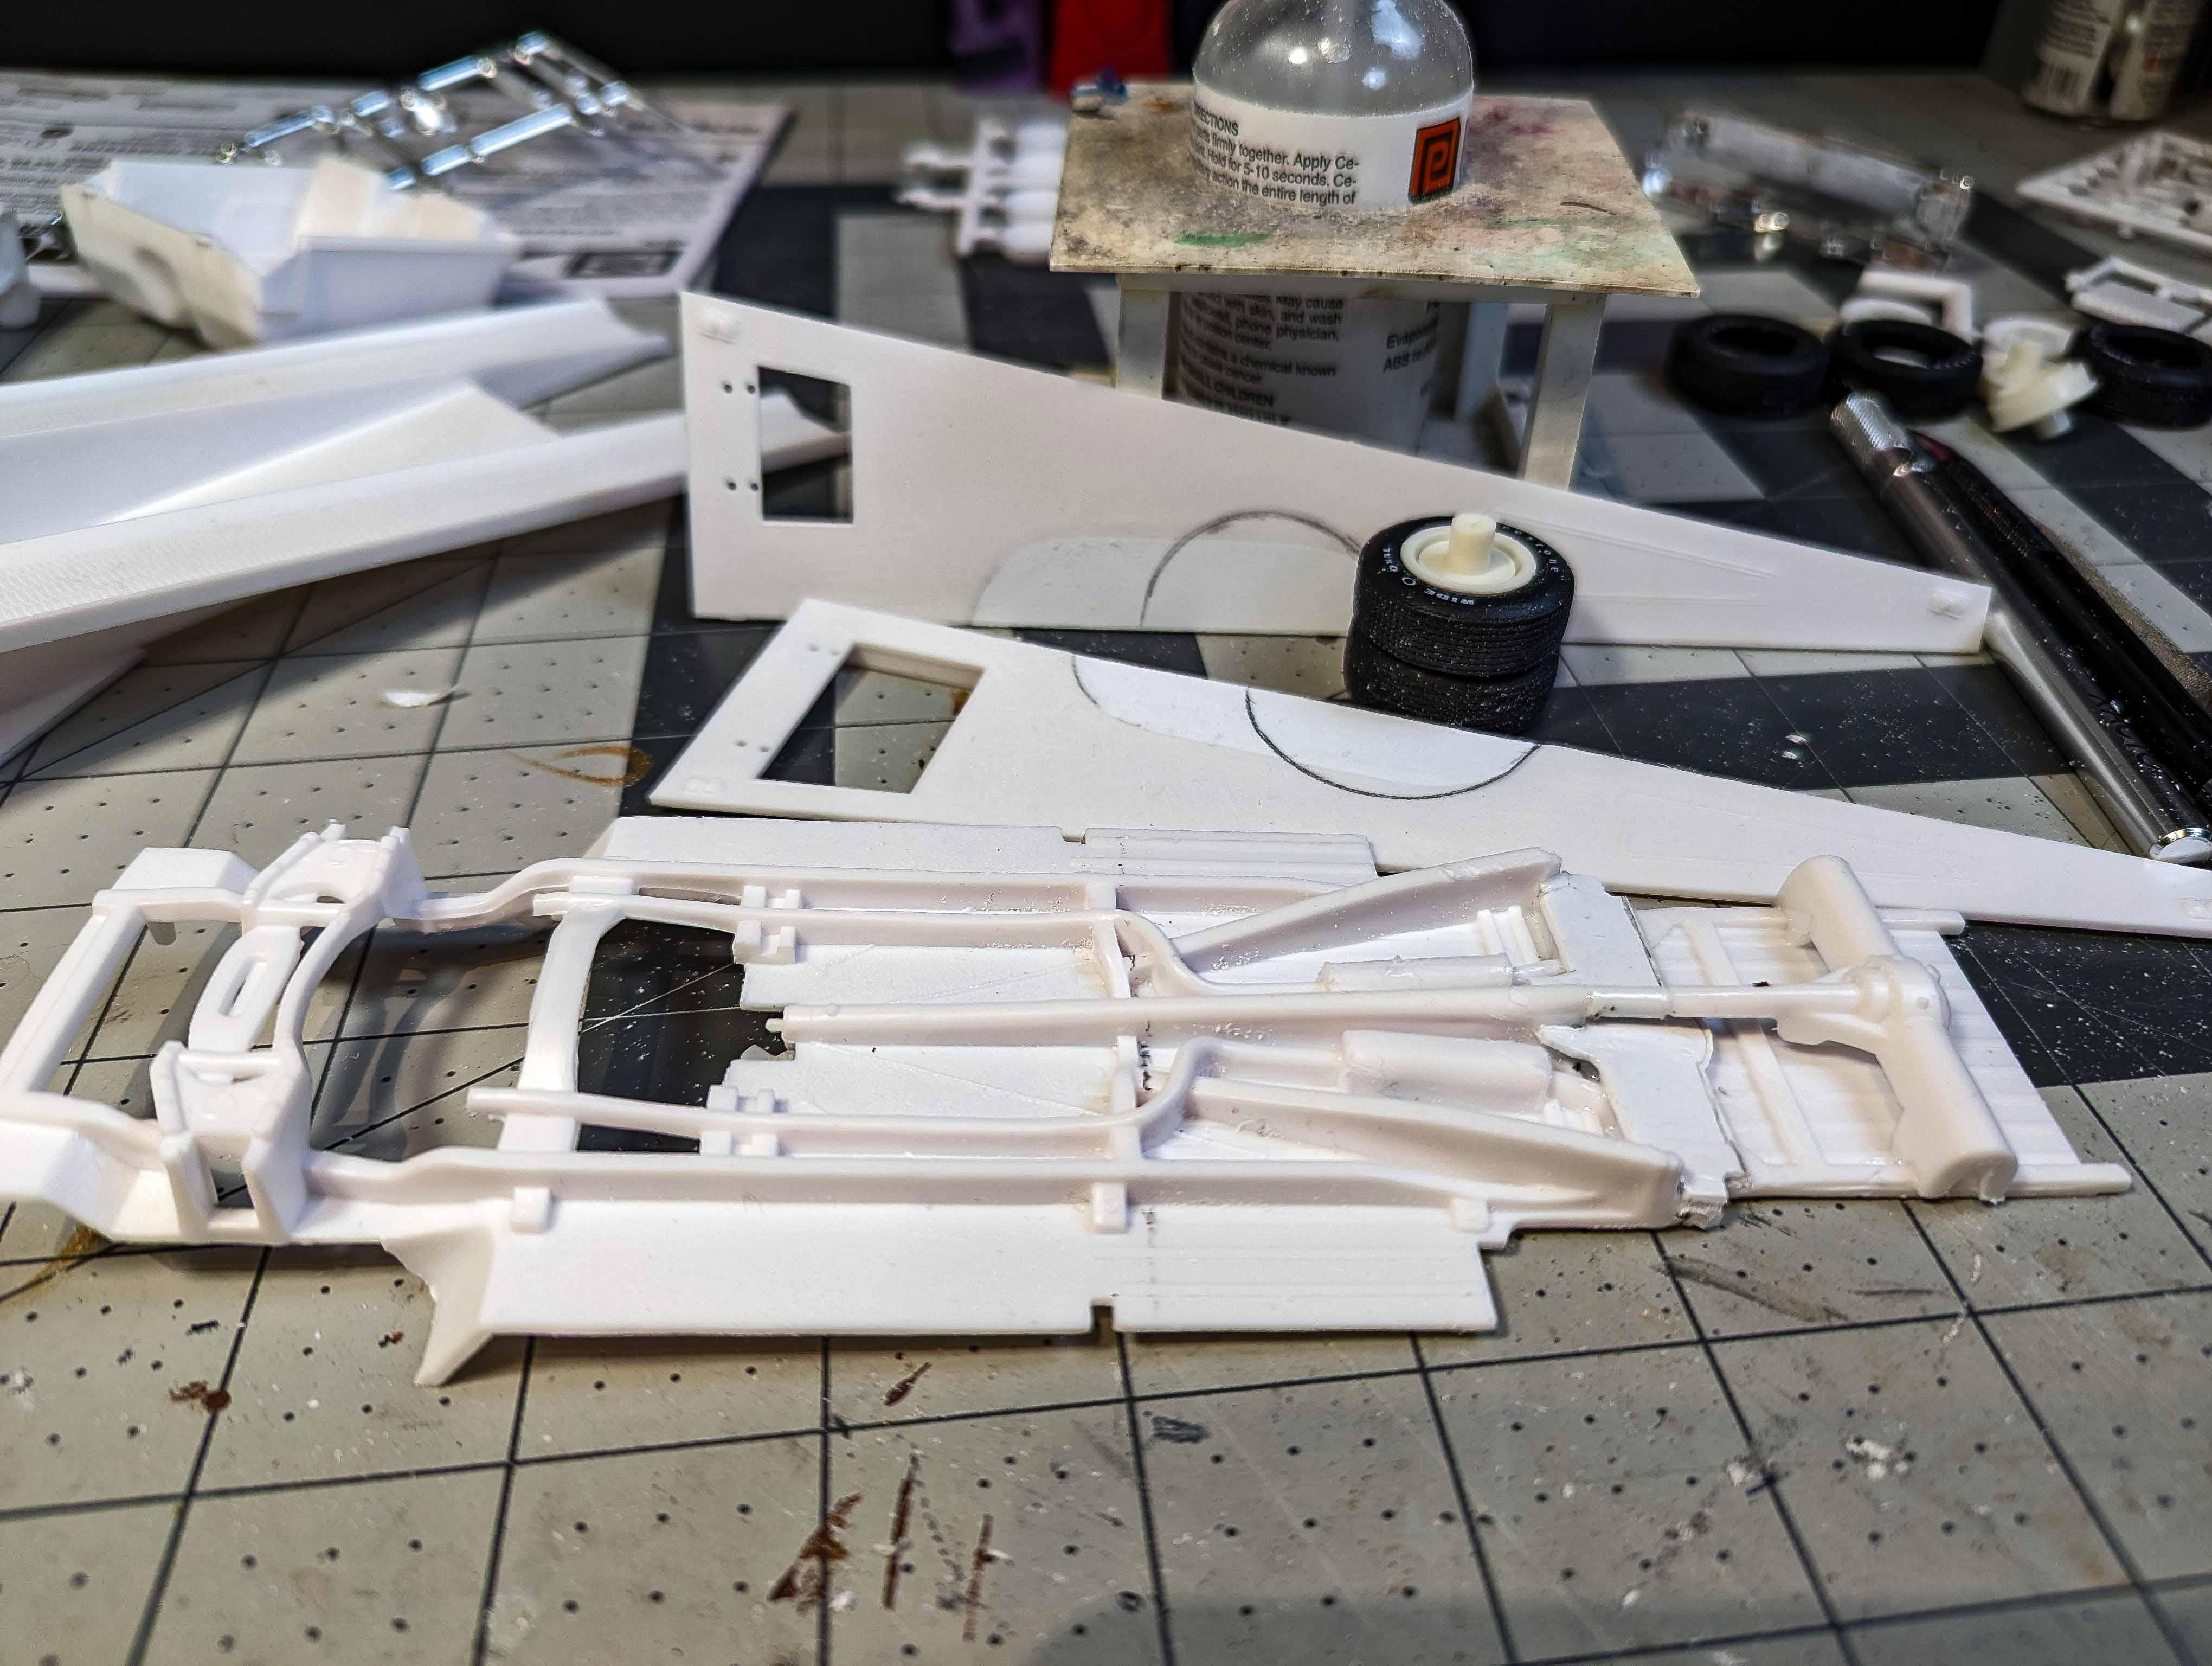
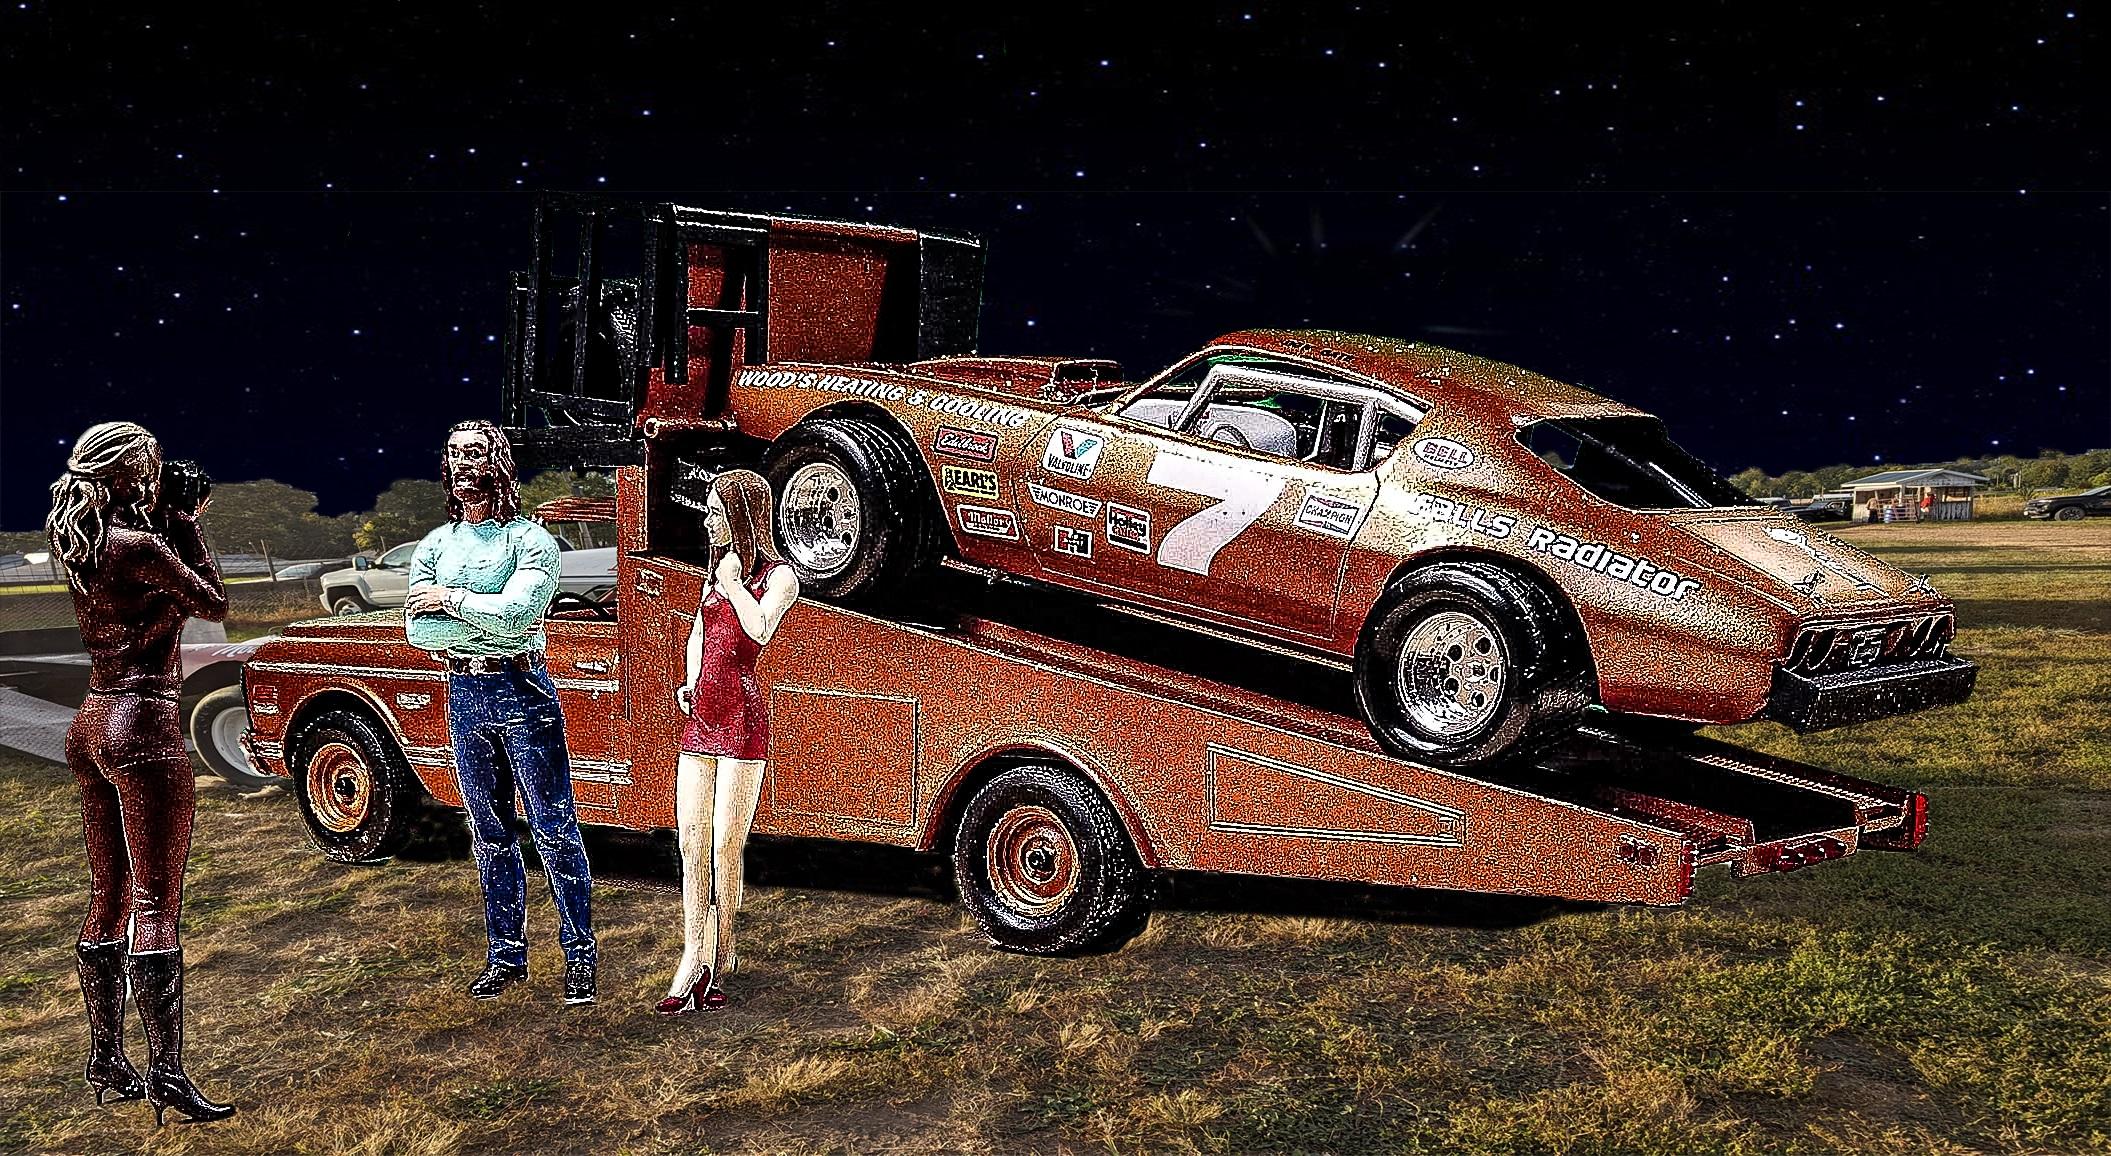
This is my version of the Racer's Wedge kit. I have this designed to haul a second generation Camaro dirt track stock car. The vehicle has been edited into a photo from the Eldon Iowa 1/2 mile speedway pits. This is how I adapted it to single axle.
-
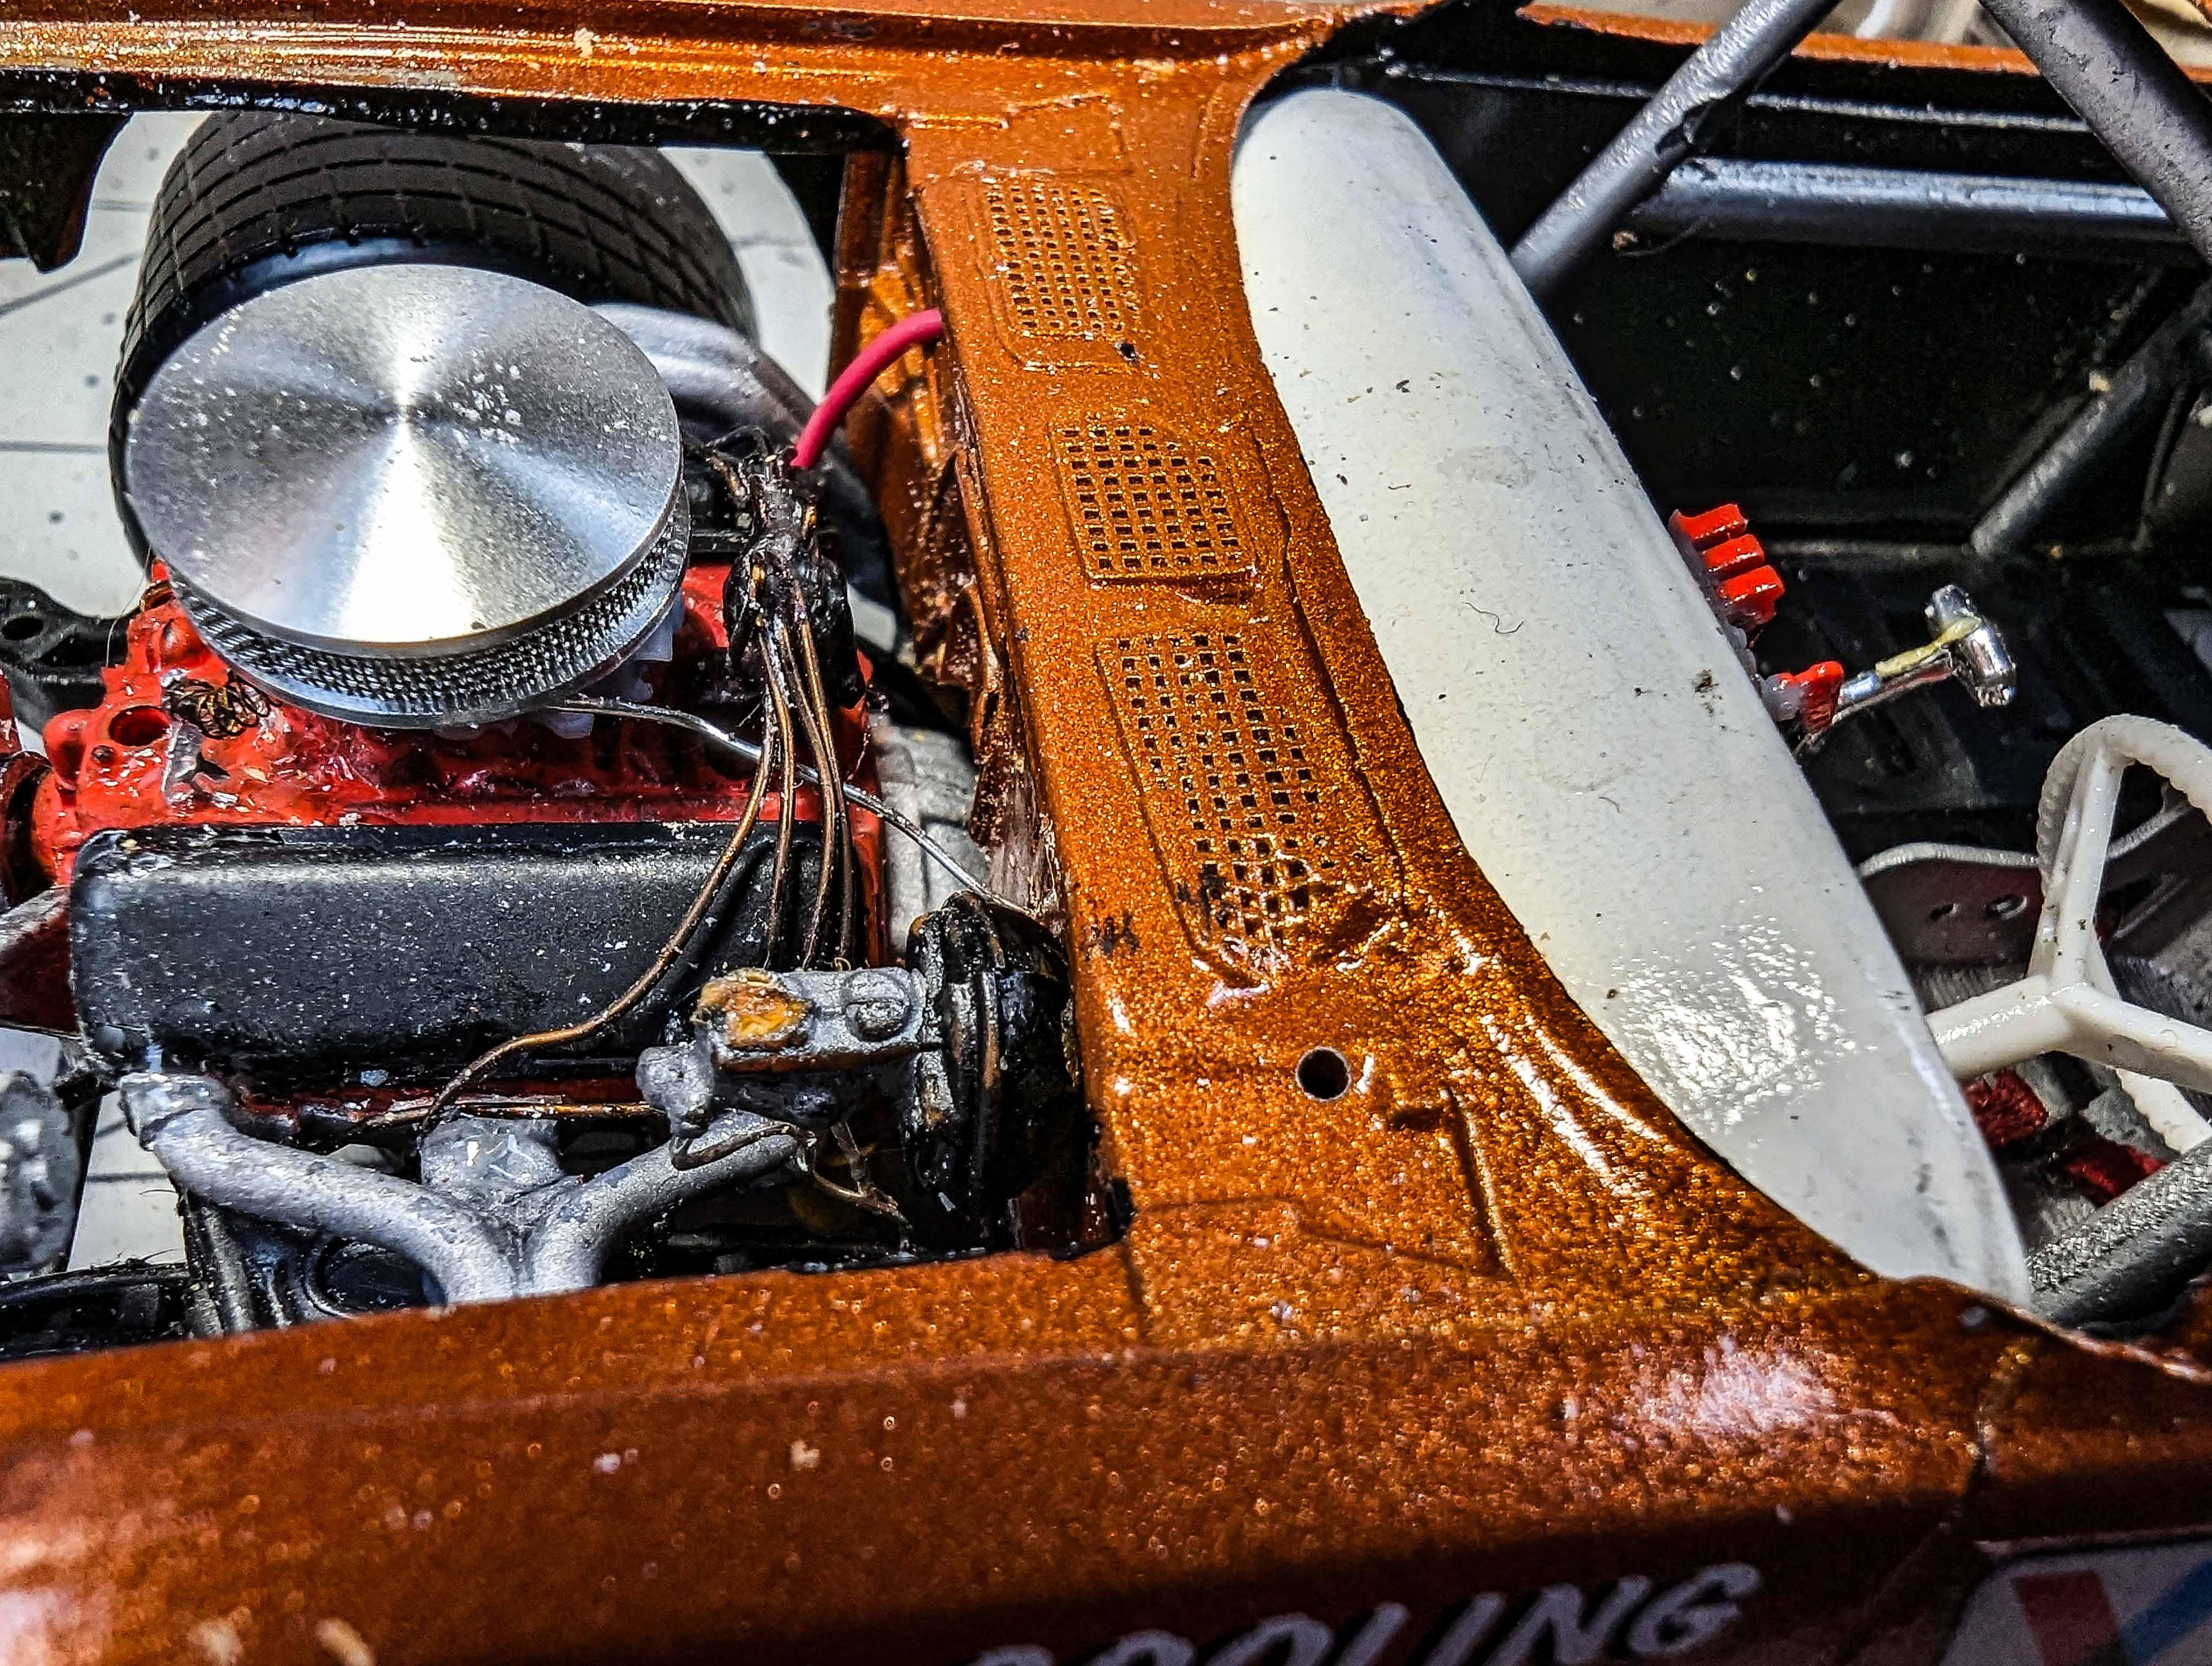
This is a second generation Camaro dirt track stock car that I recently completed. The first picture has it incorporated into the pits of the Eldon Iowa 1/2 mile dirt track, on the Racer's Wedge car hauler. I will also post pictures of it in the appropriate section. Pl P Please excuse the quality of the pictures. My usual photo editing service was being disagreeable at the time, so I had to use a lesser quality program.
- 7 replies
-
- 5
-
-
- camaro
- dirt track
- (and 2 more)
-
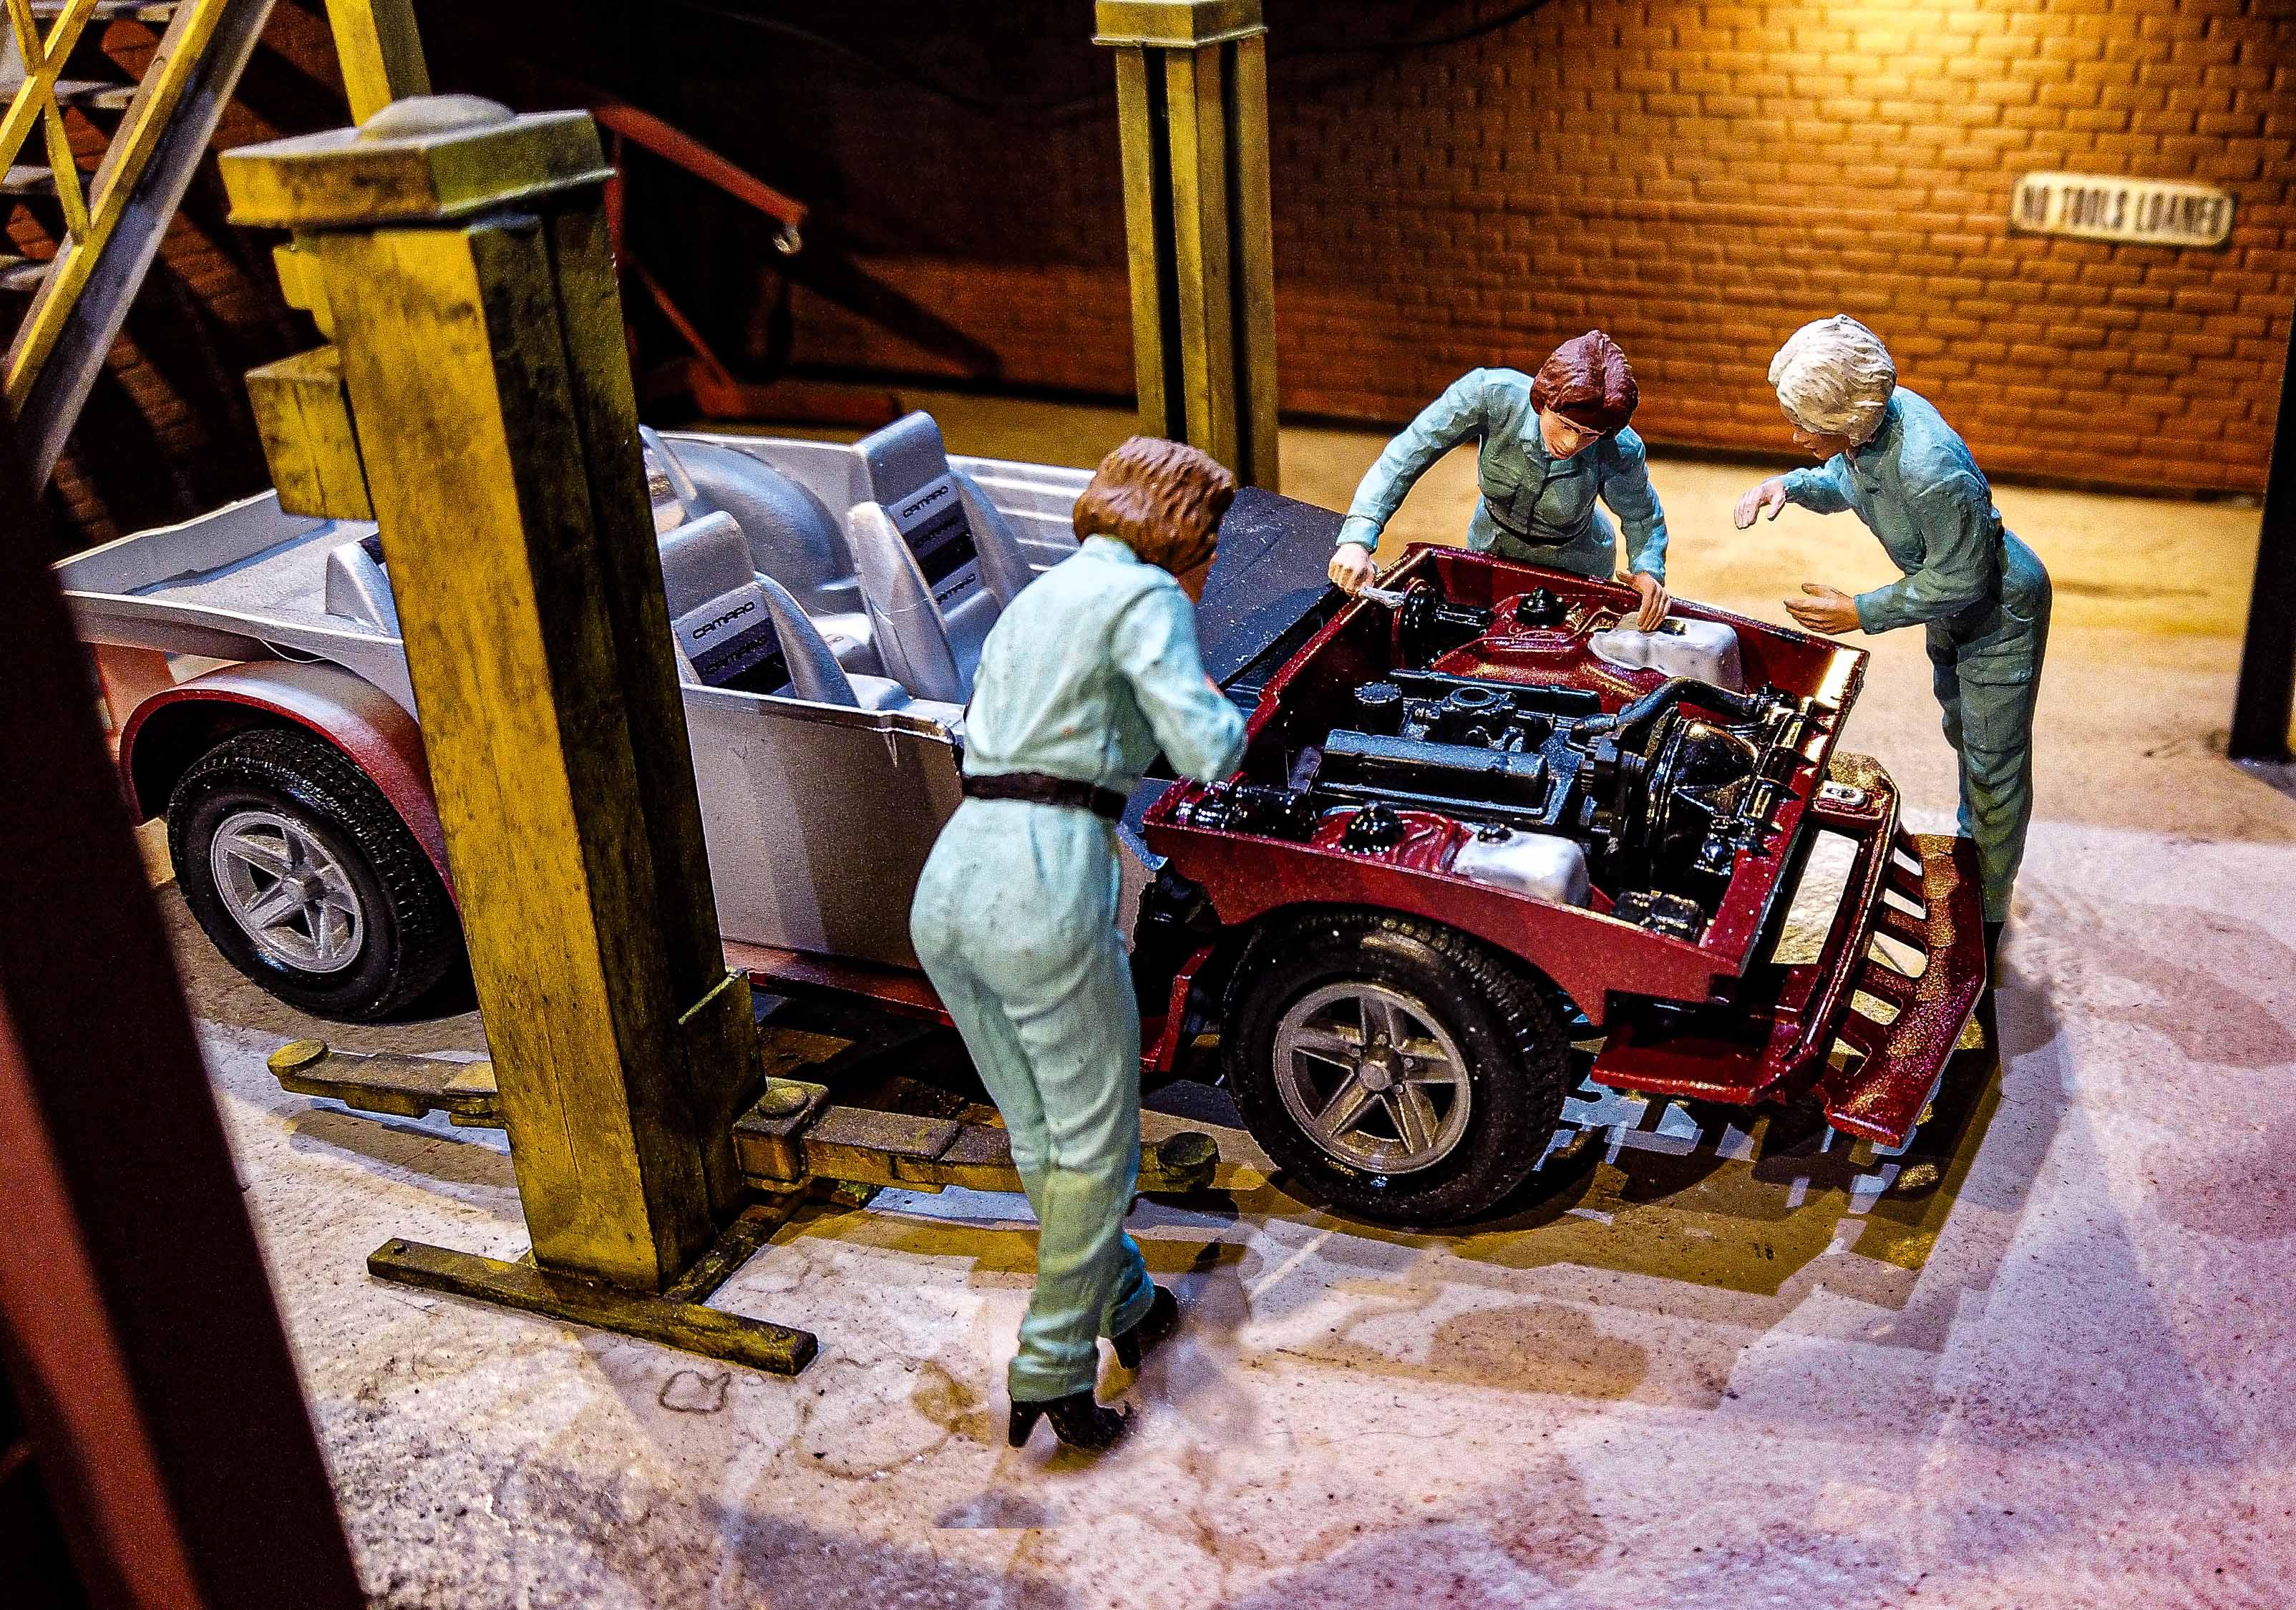
Mary, Curls, & Flo have put a lot of work into this one. Tamara has been tasked with taking pictures for the Otto Ray Sing Classic Car Center scrapbook.
-
1965 Oldsmobile saved from the junkyard
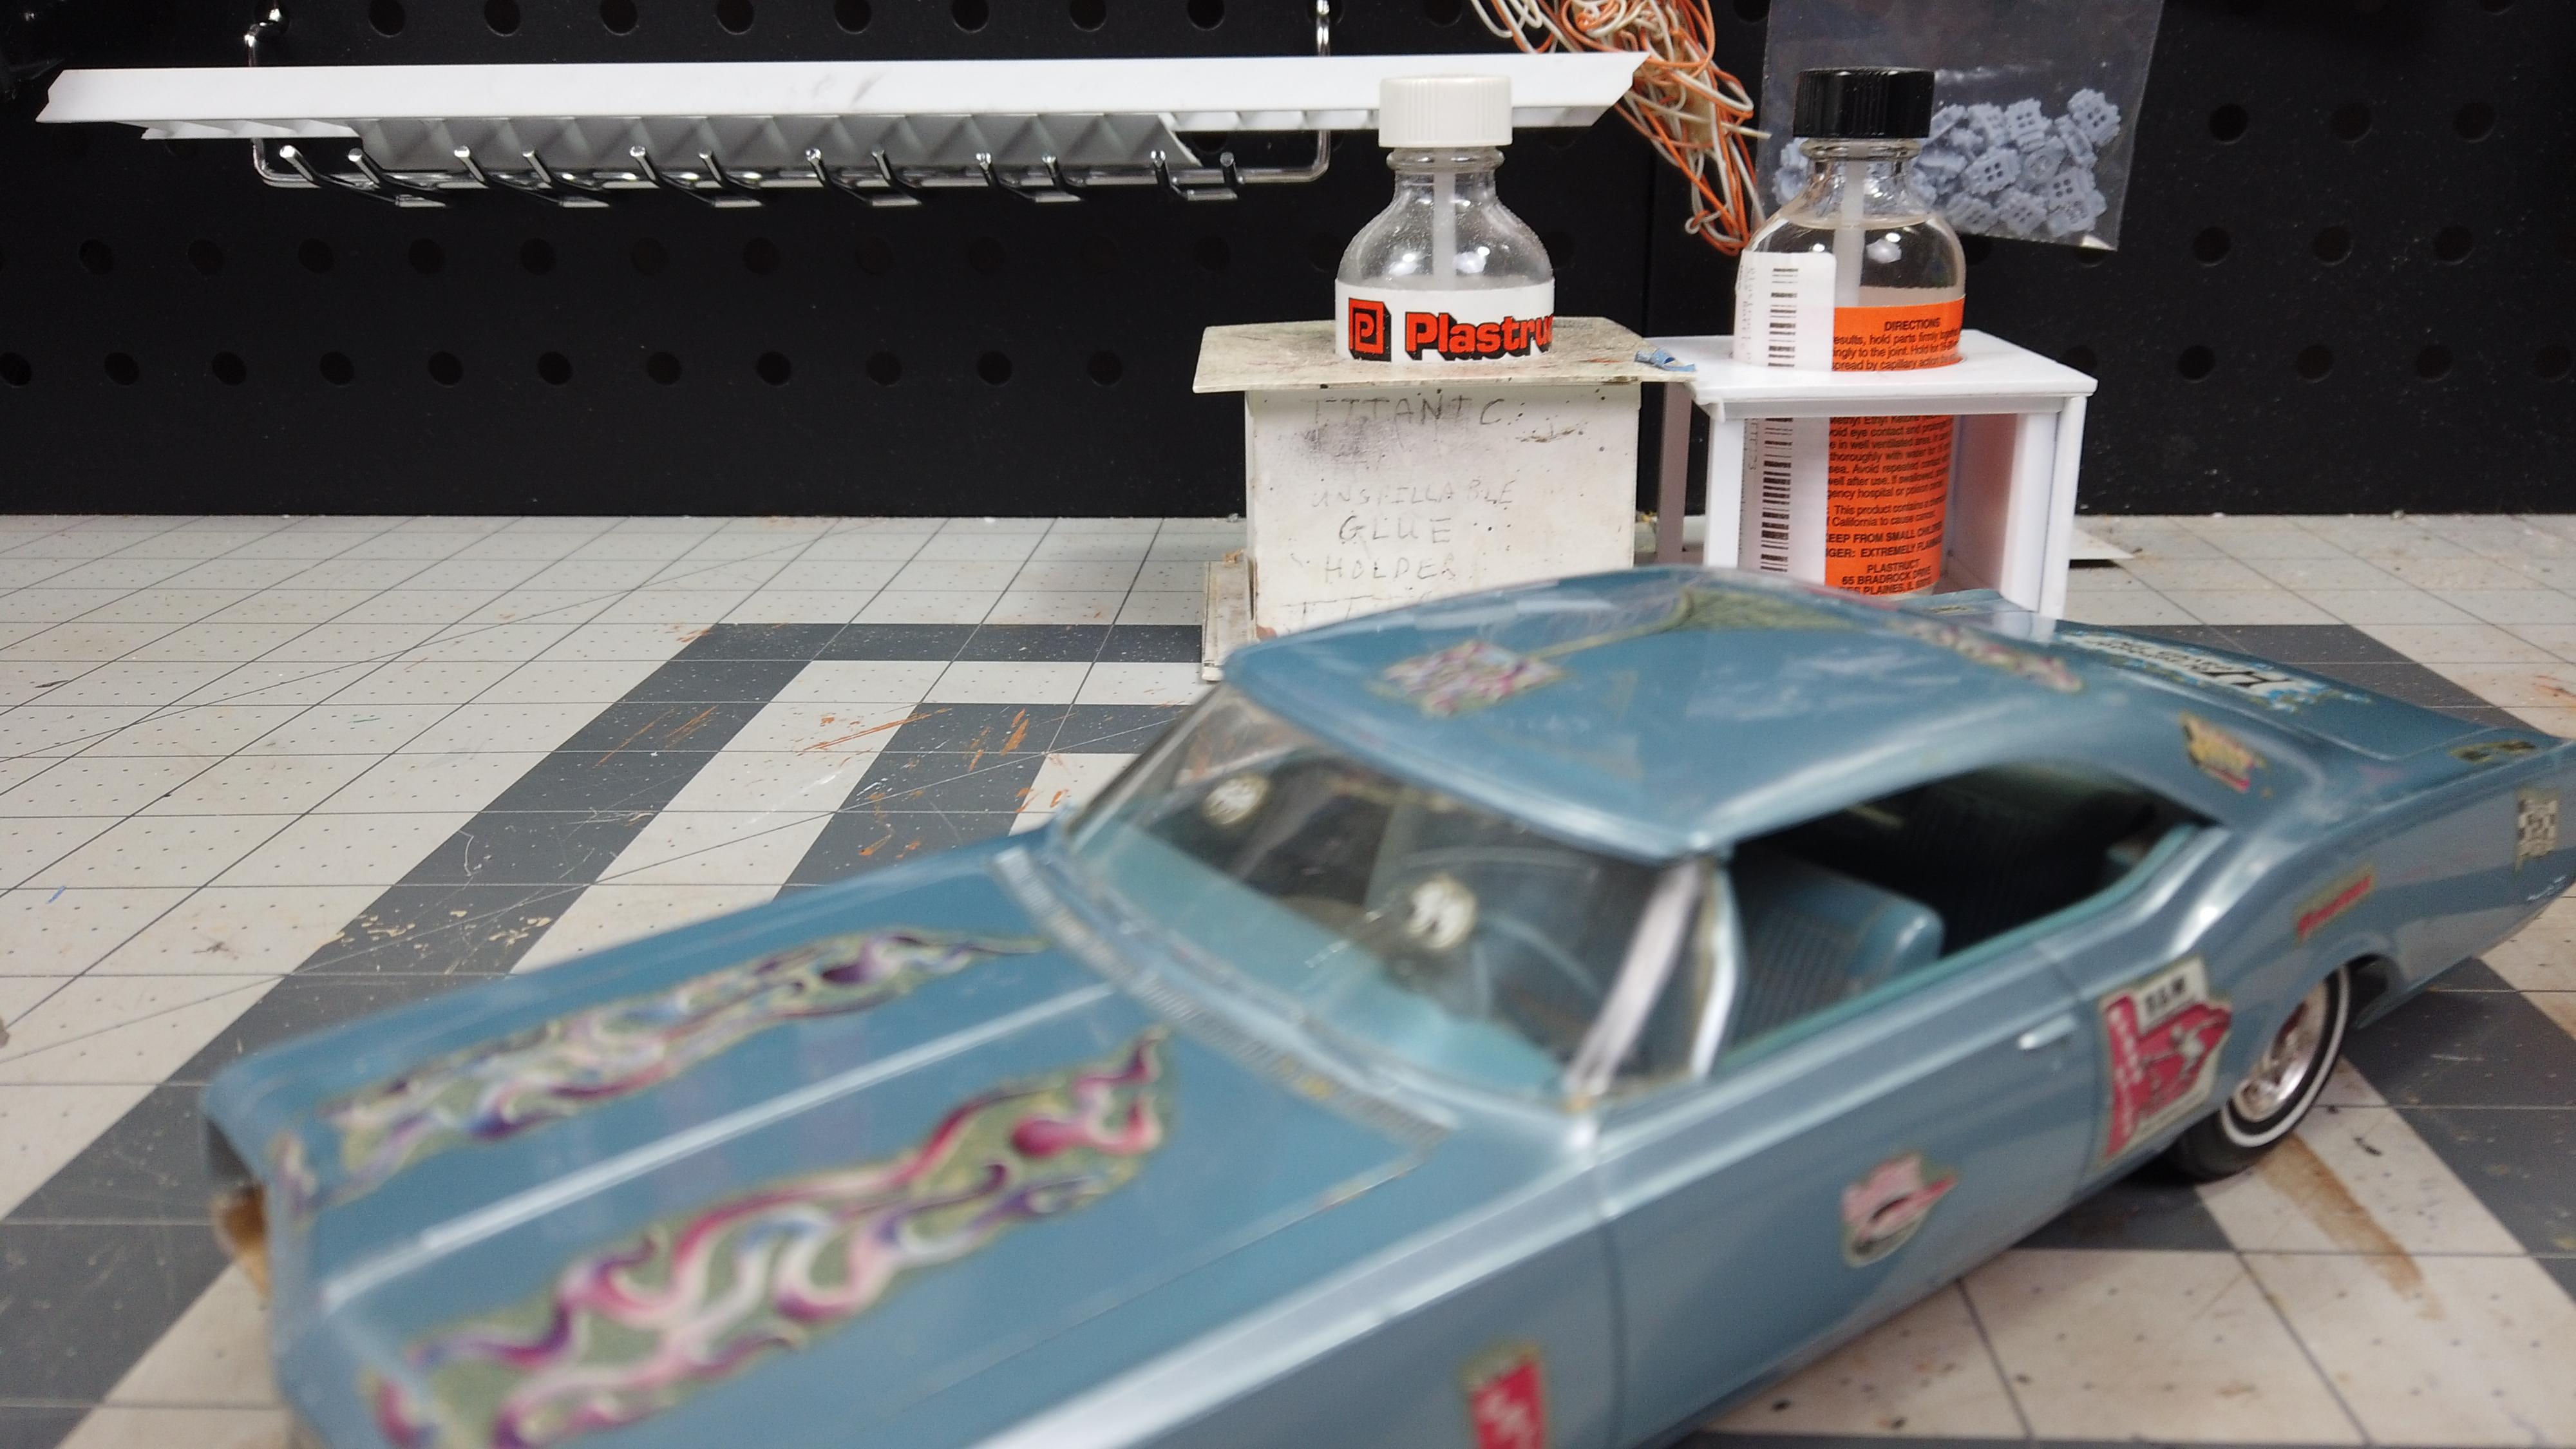
The Modeling Hermit replied to The Modeling Hermit's topic in Model Cars
I used Plastruct plastic strips. -
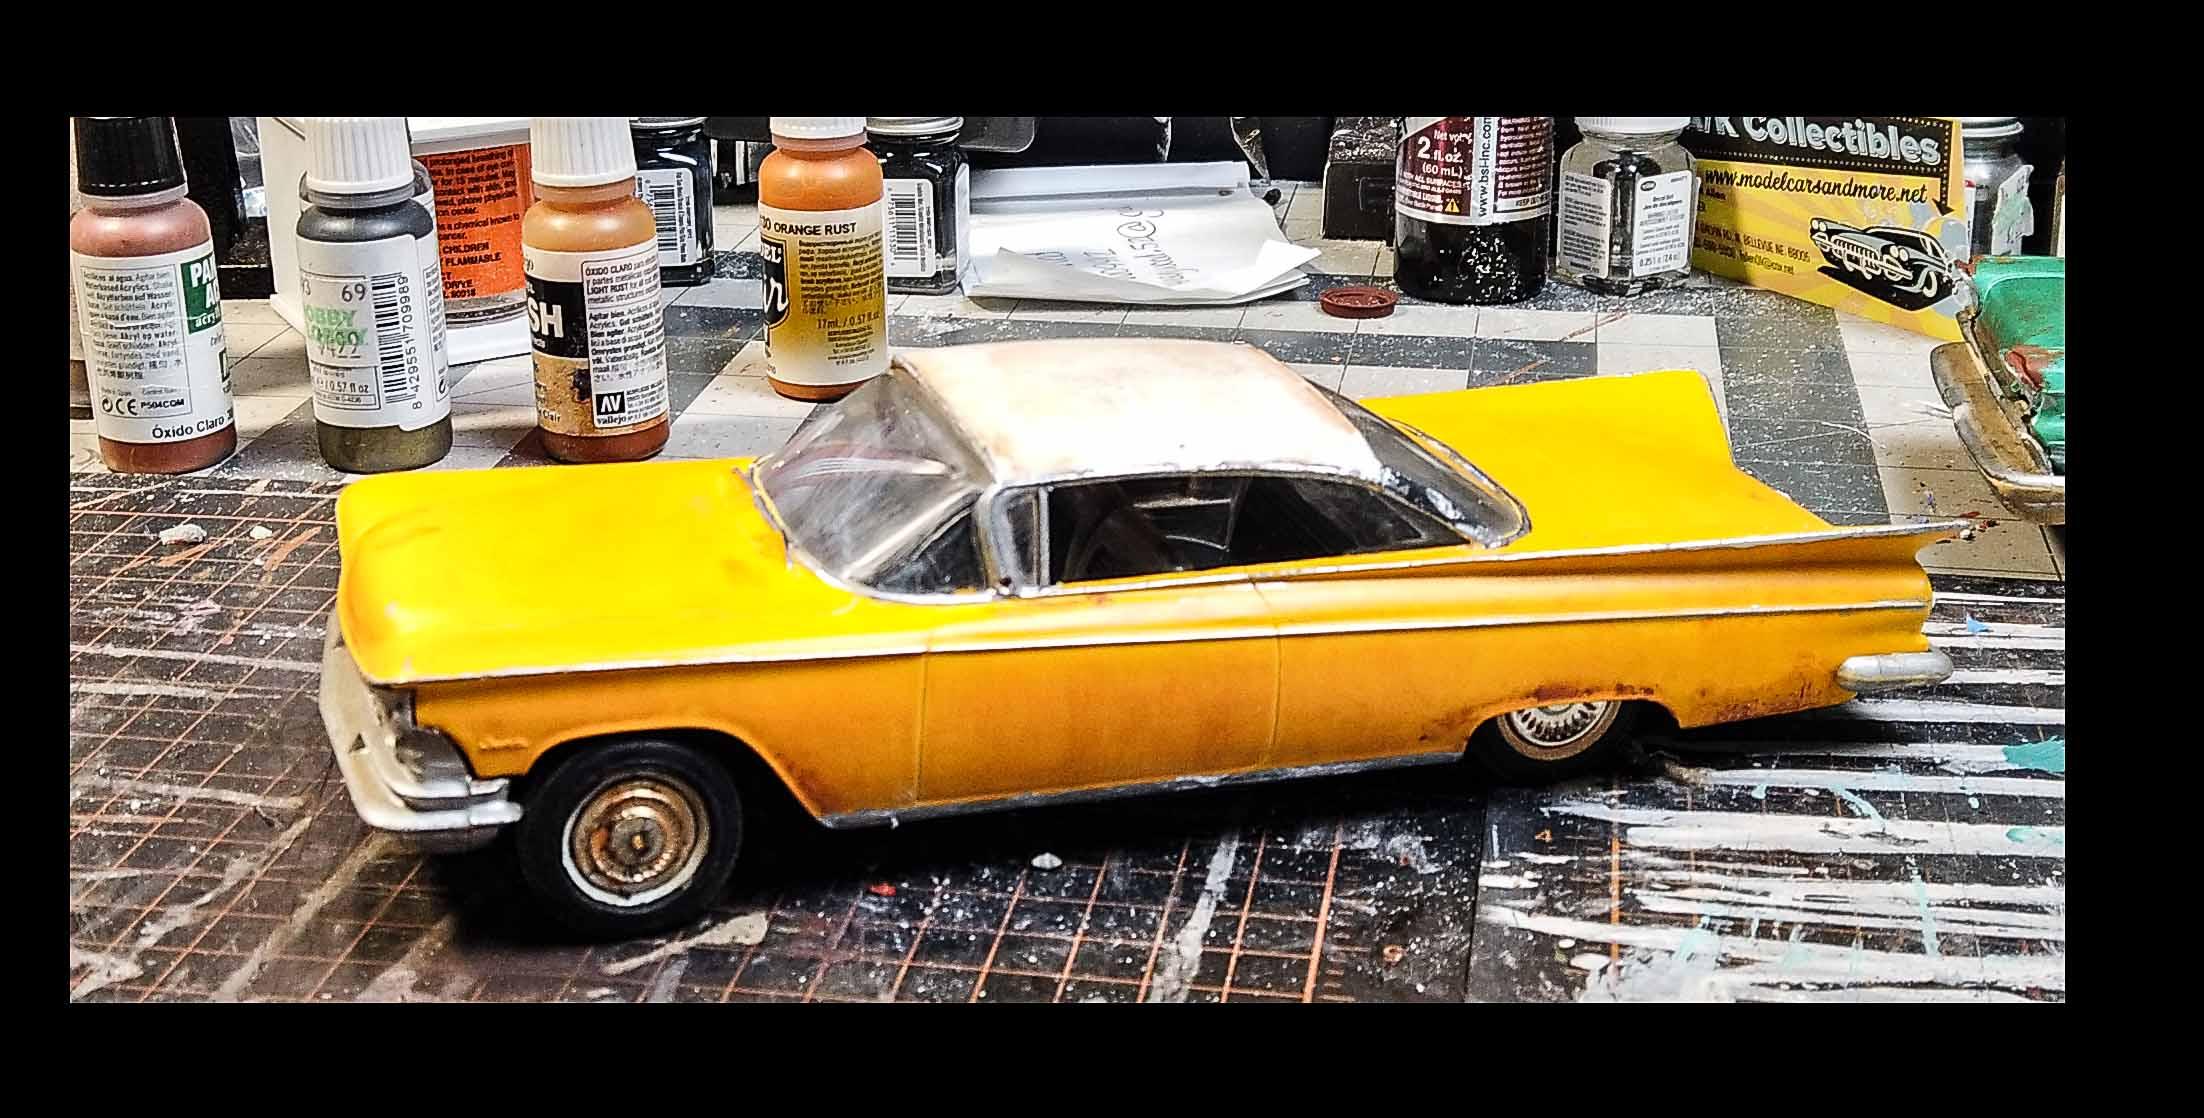
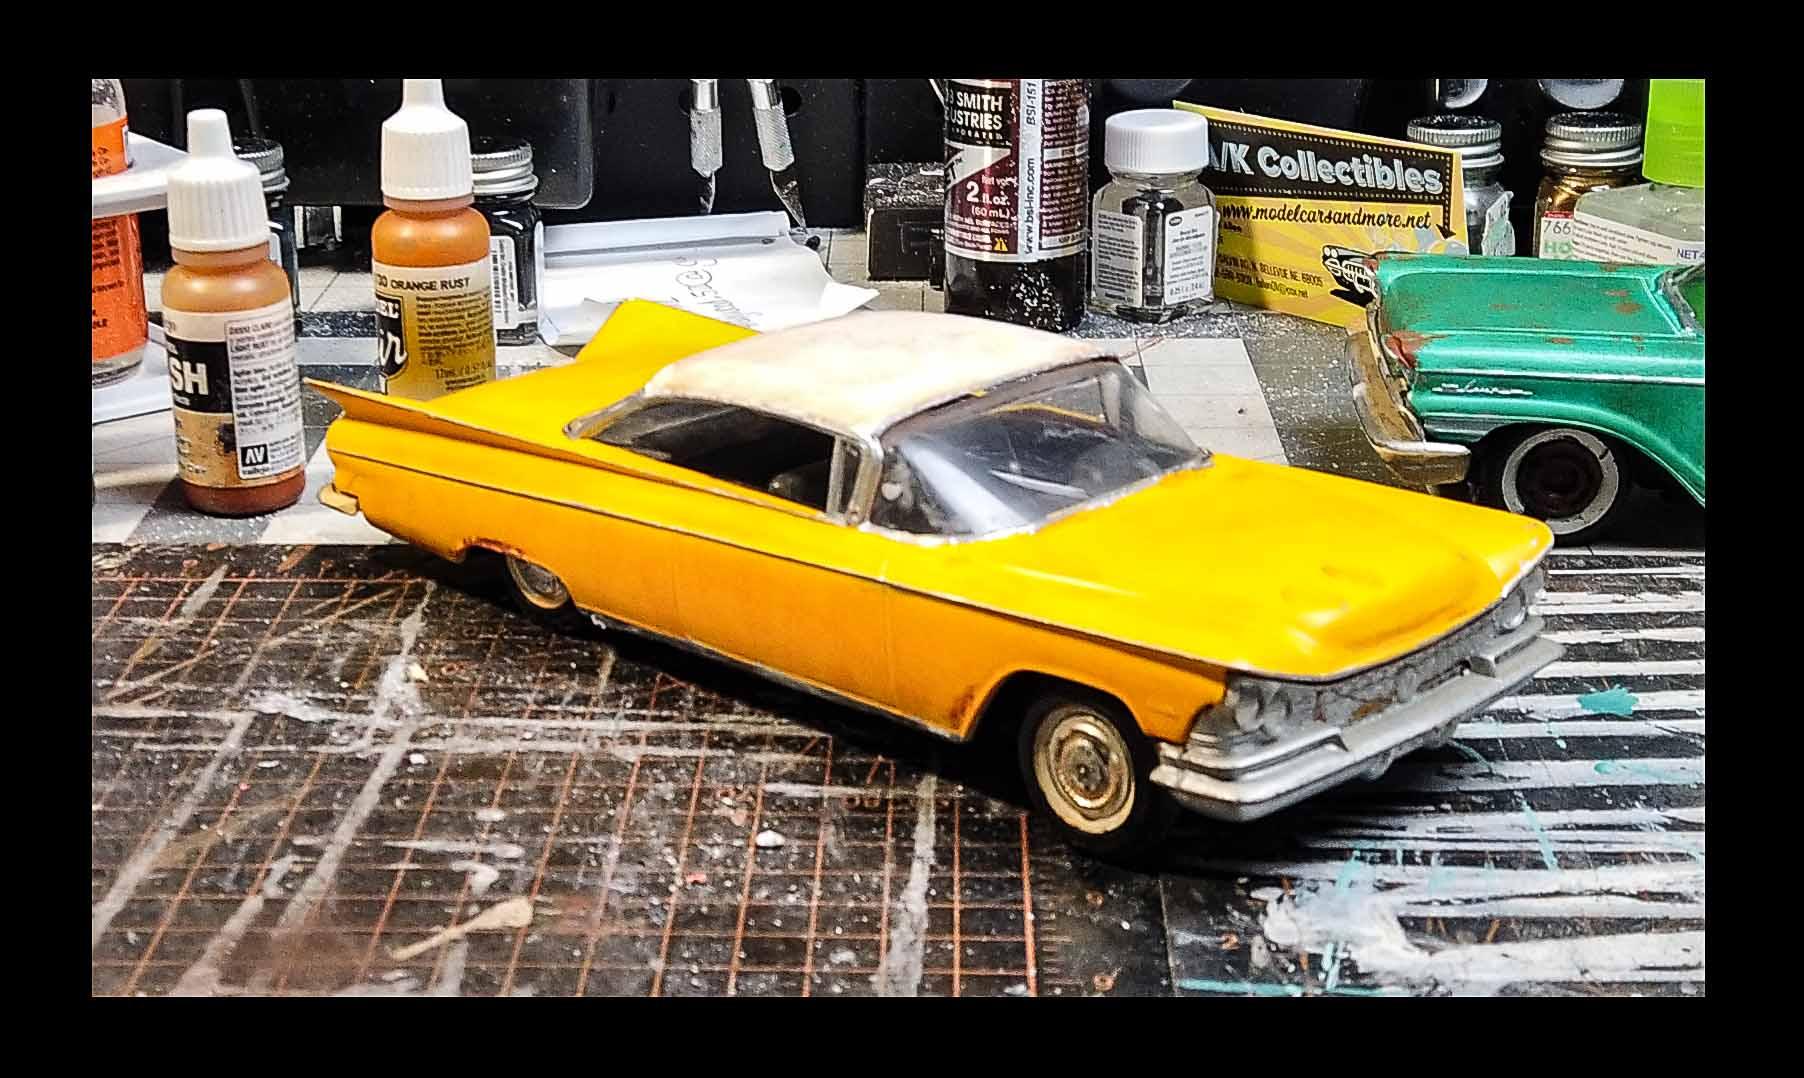
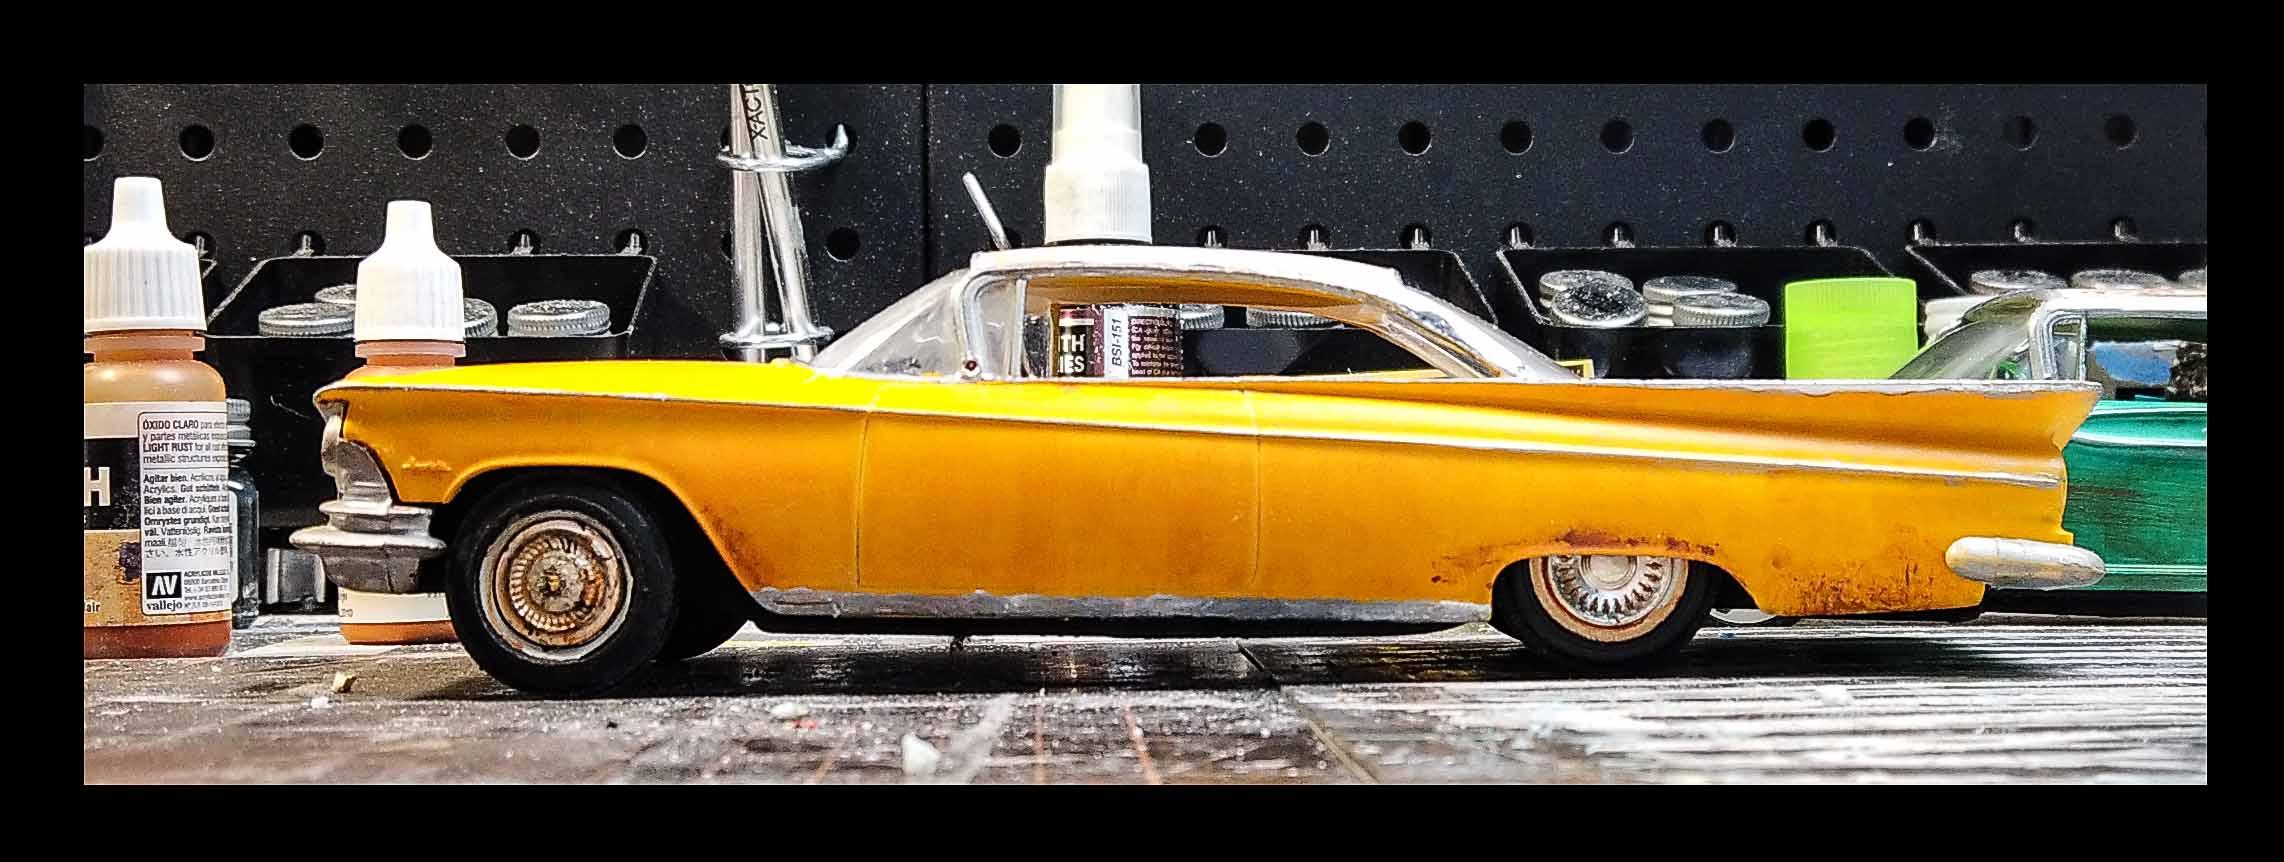
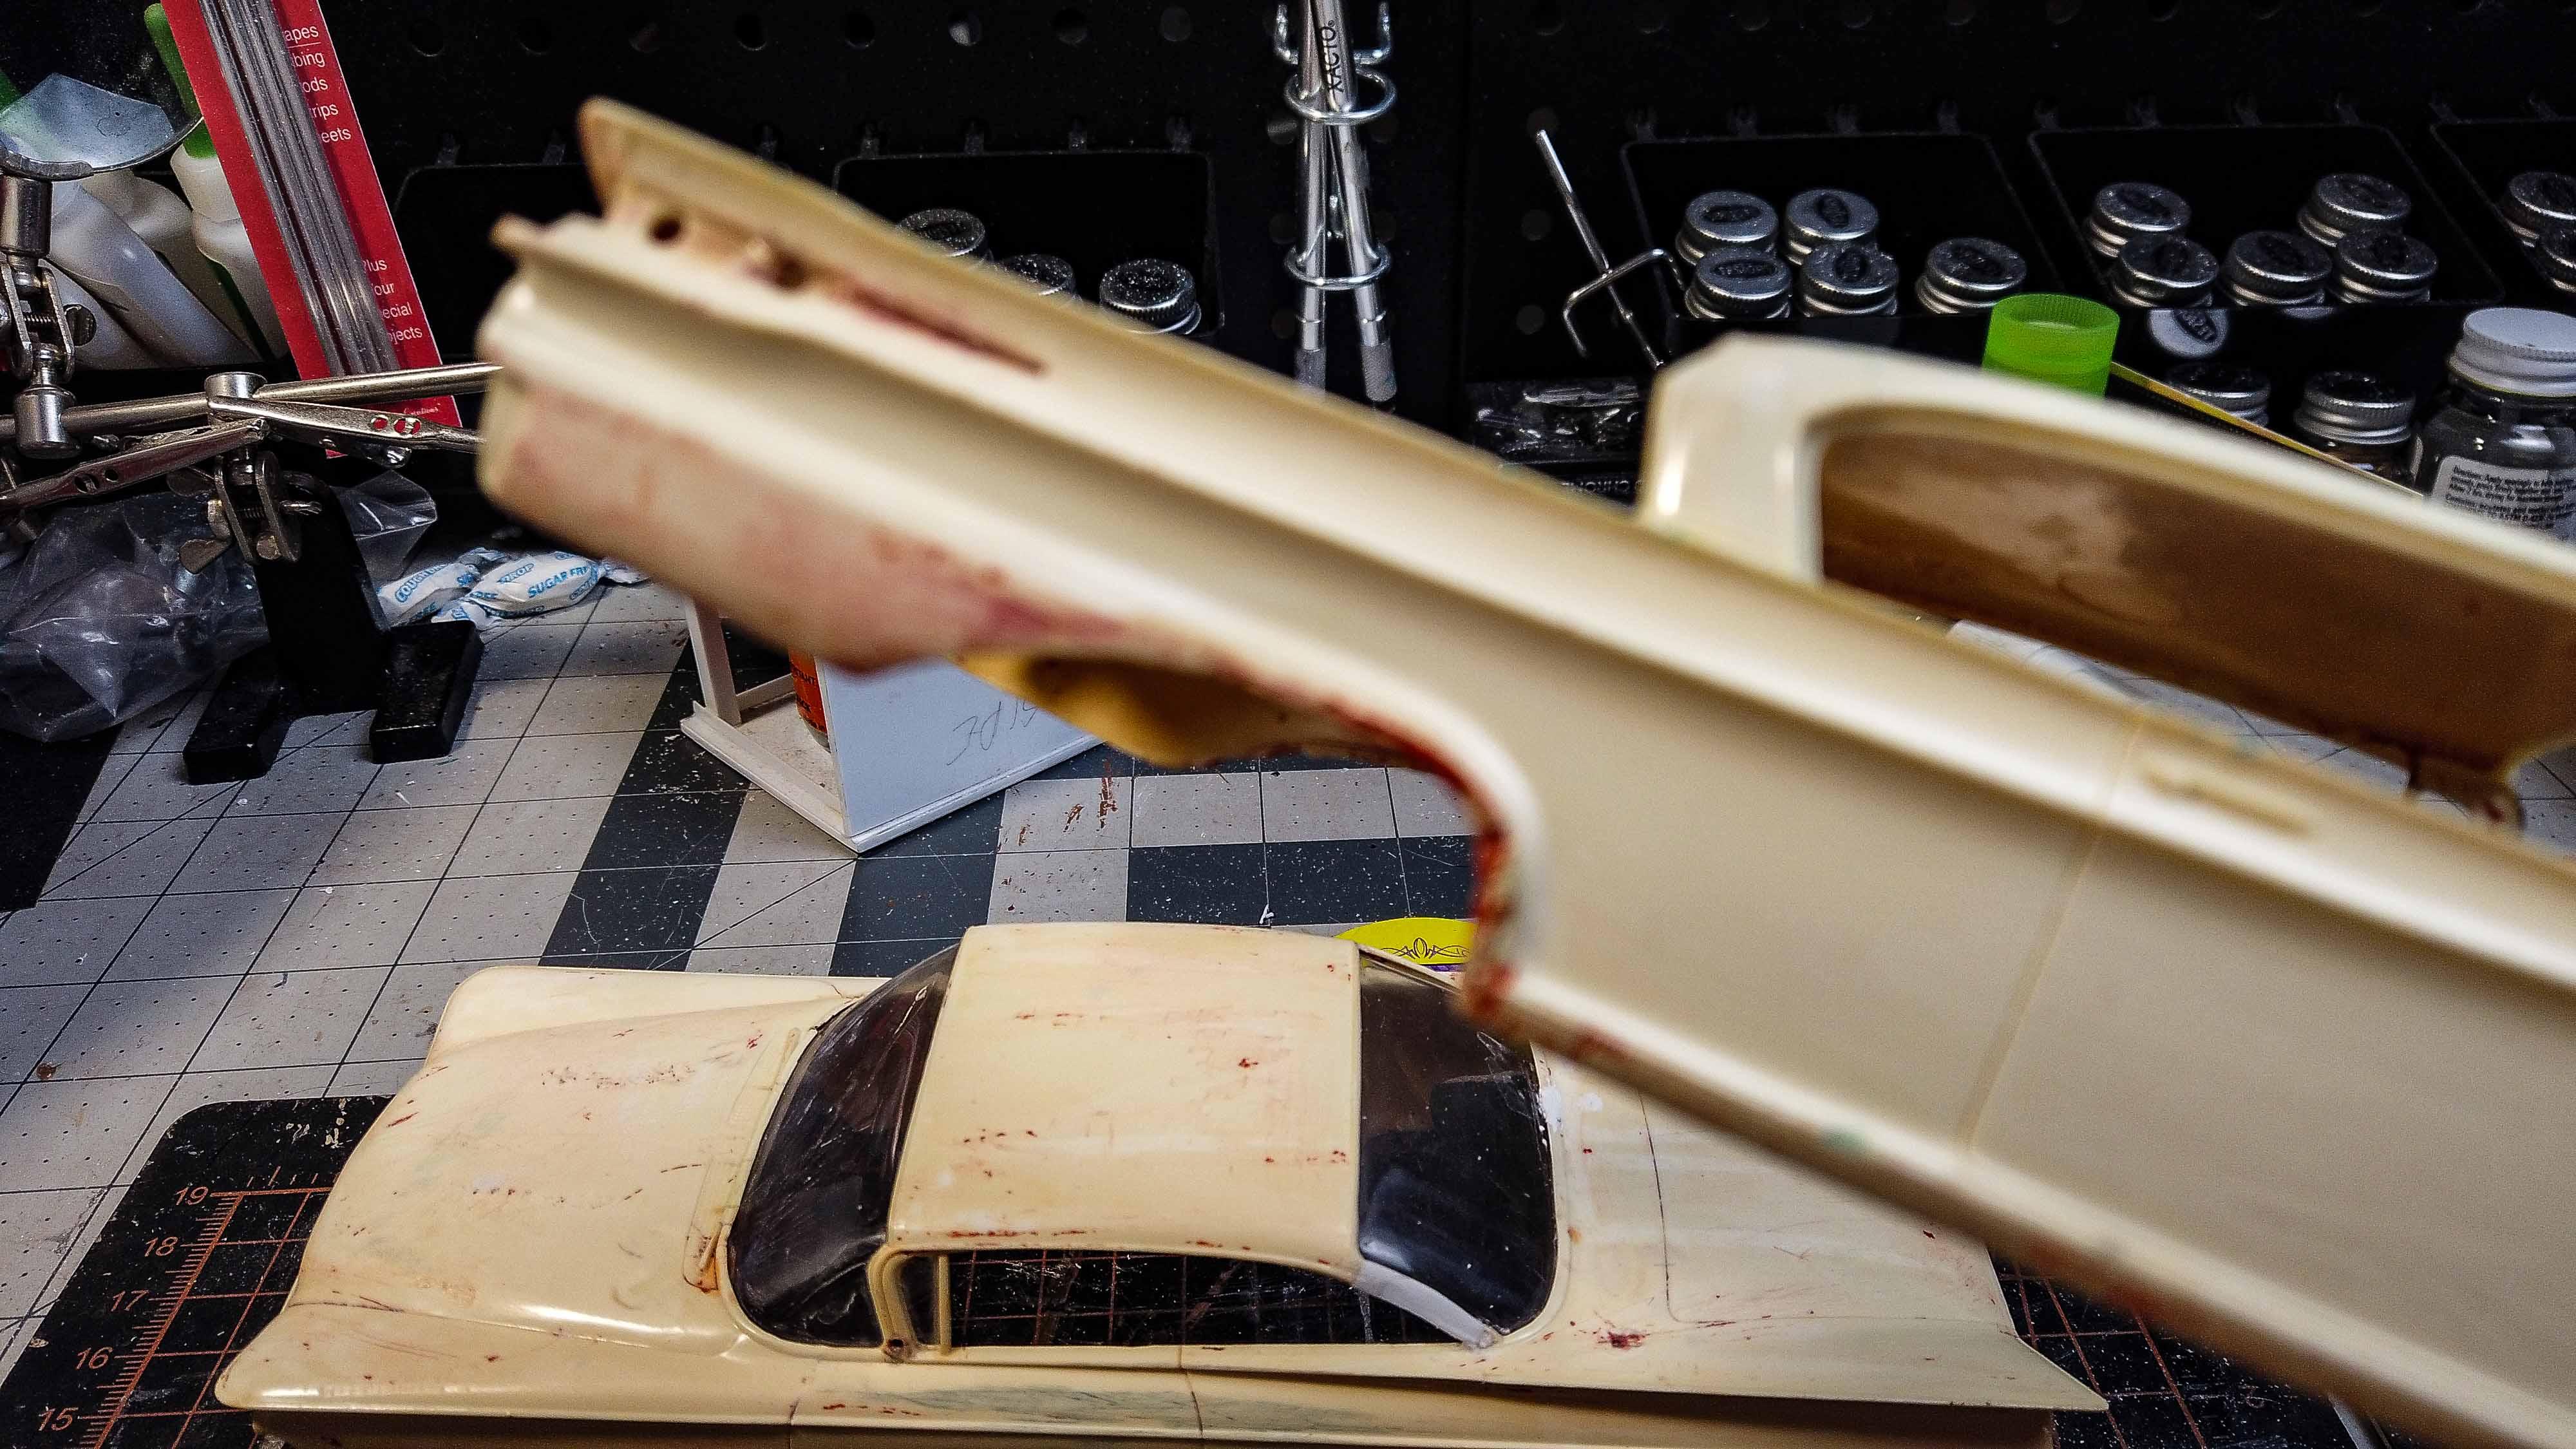
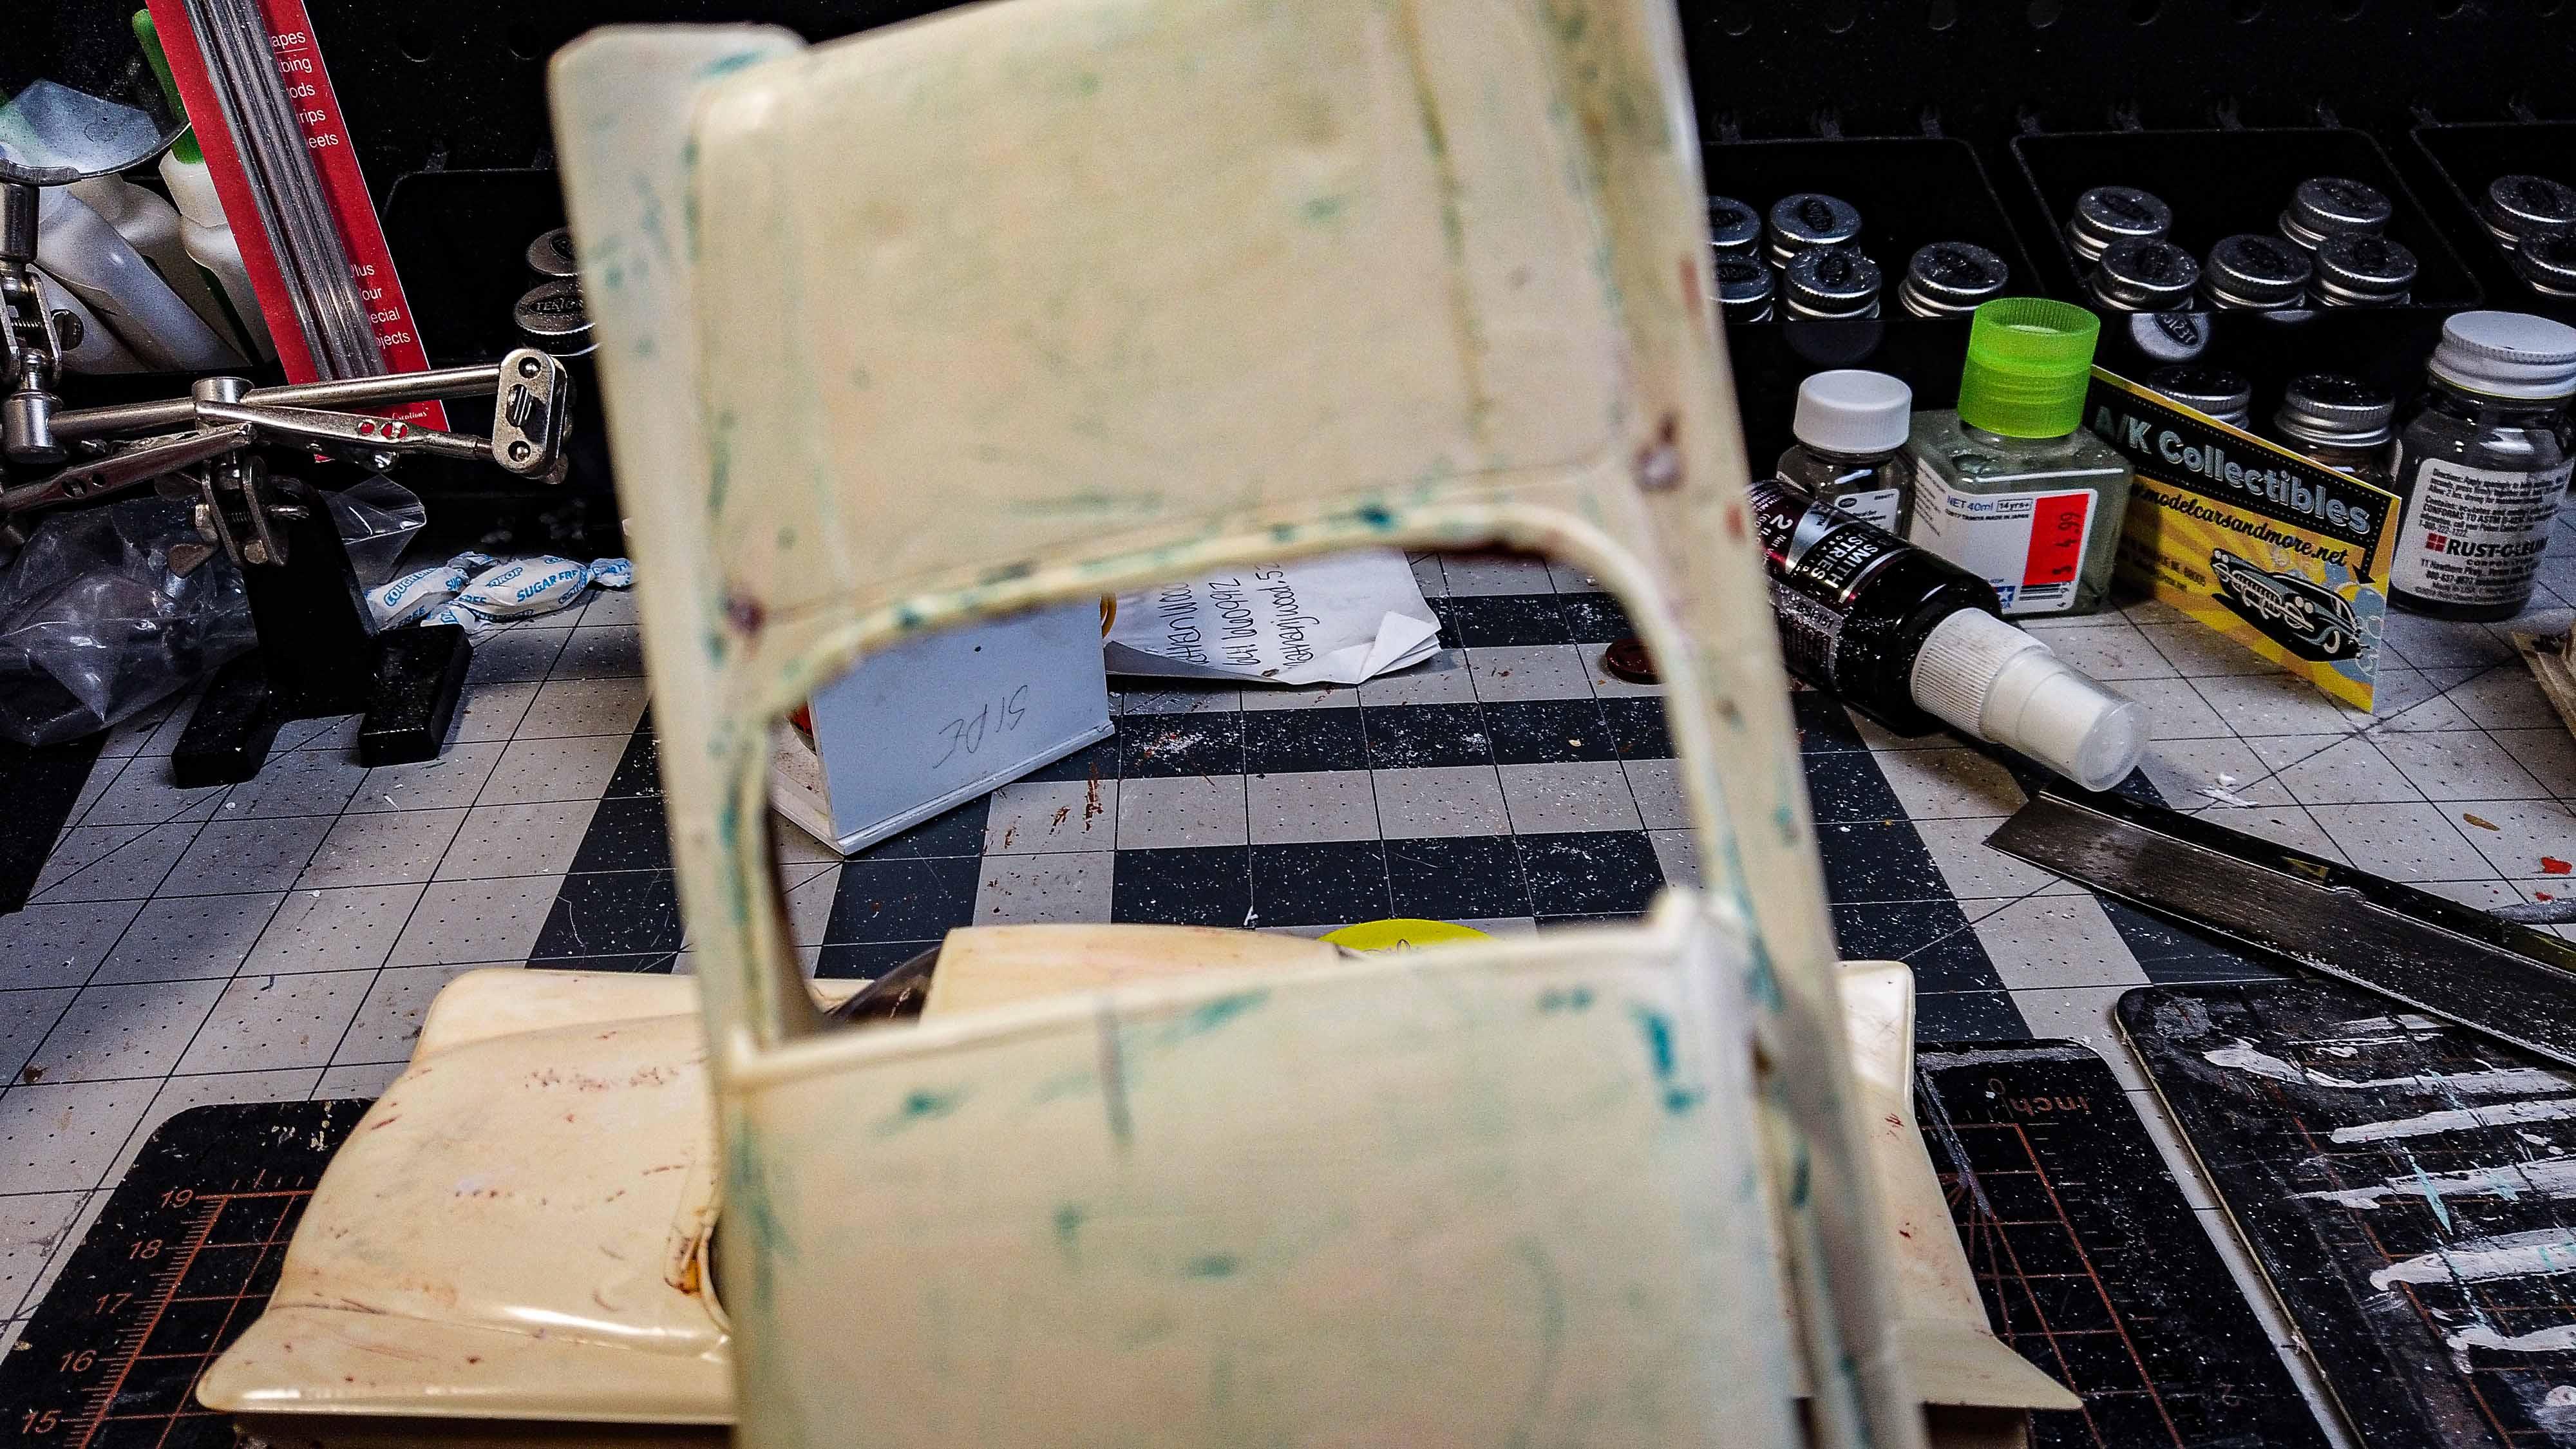
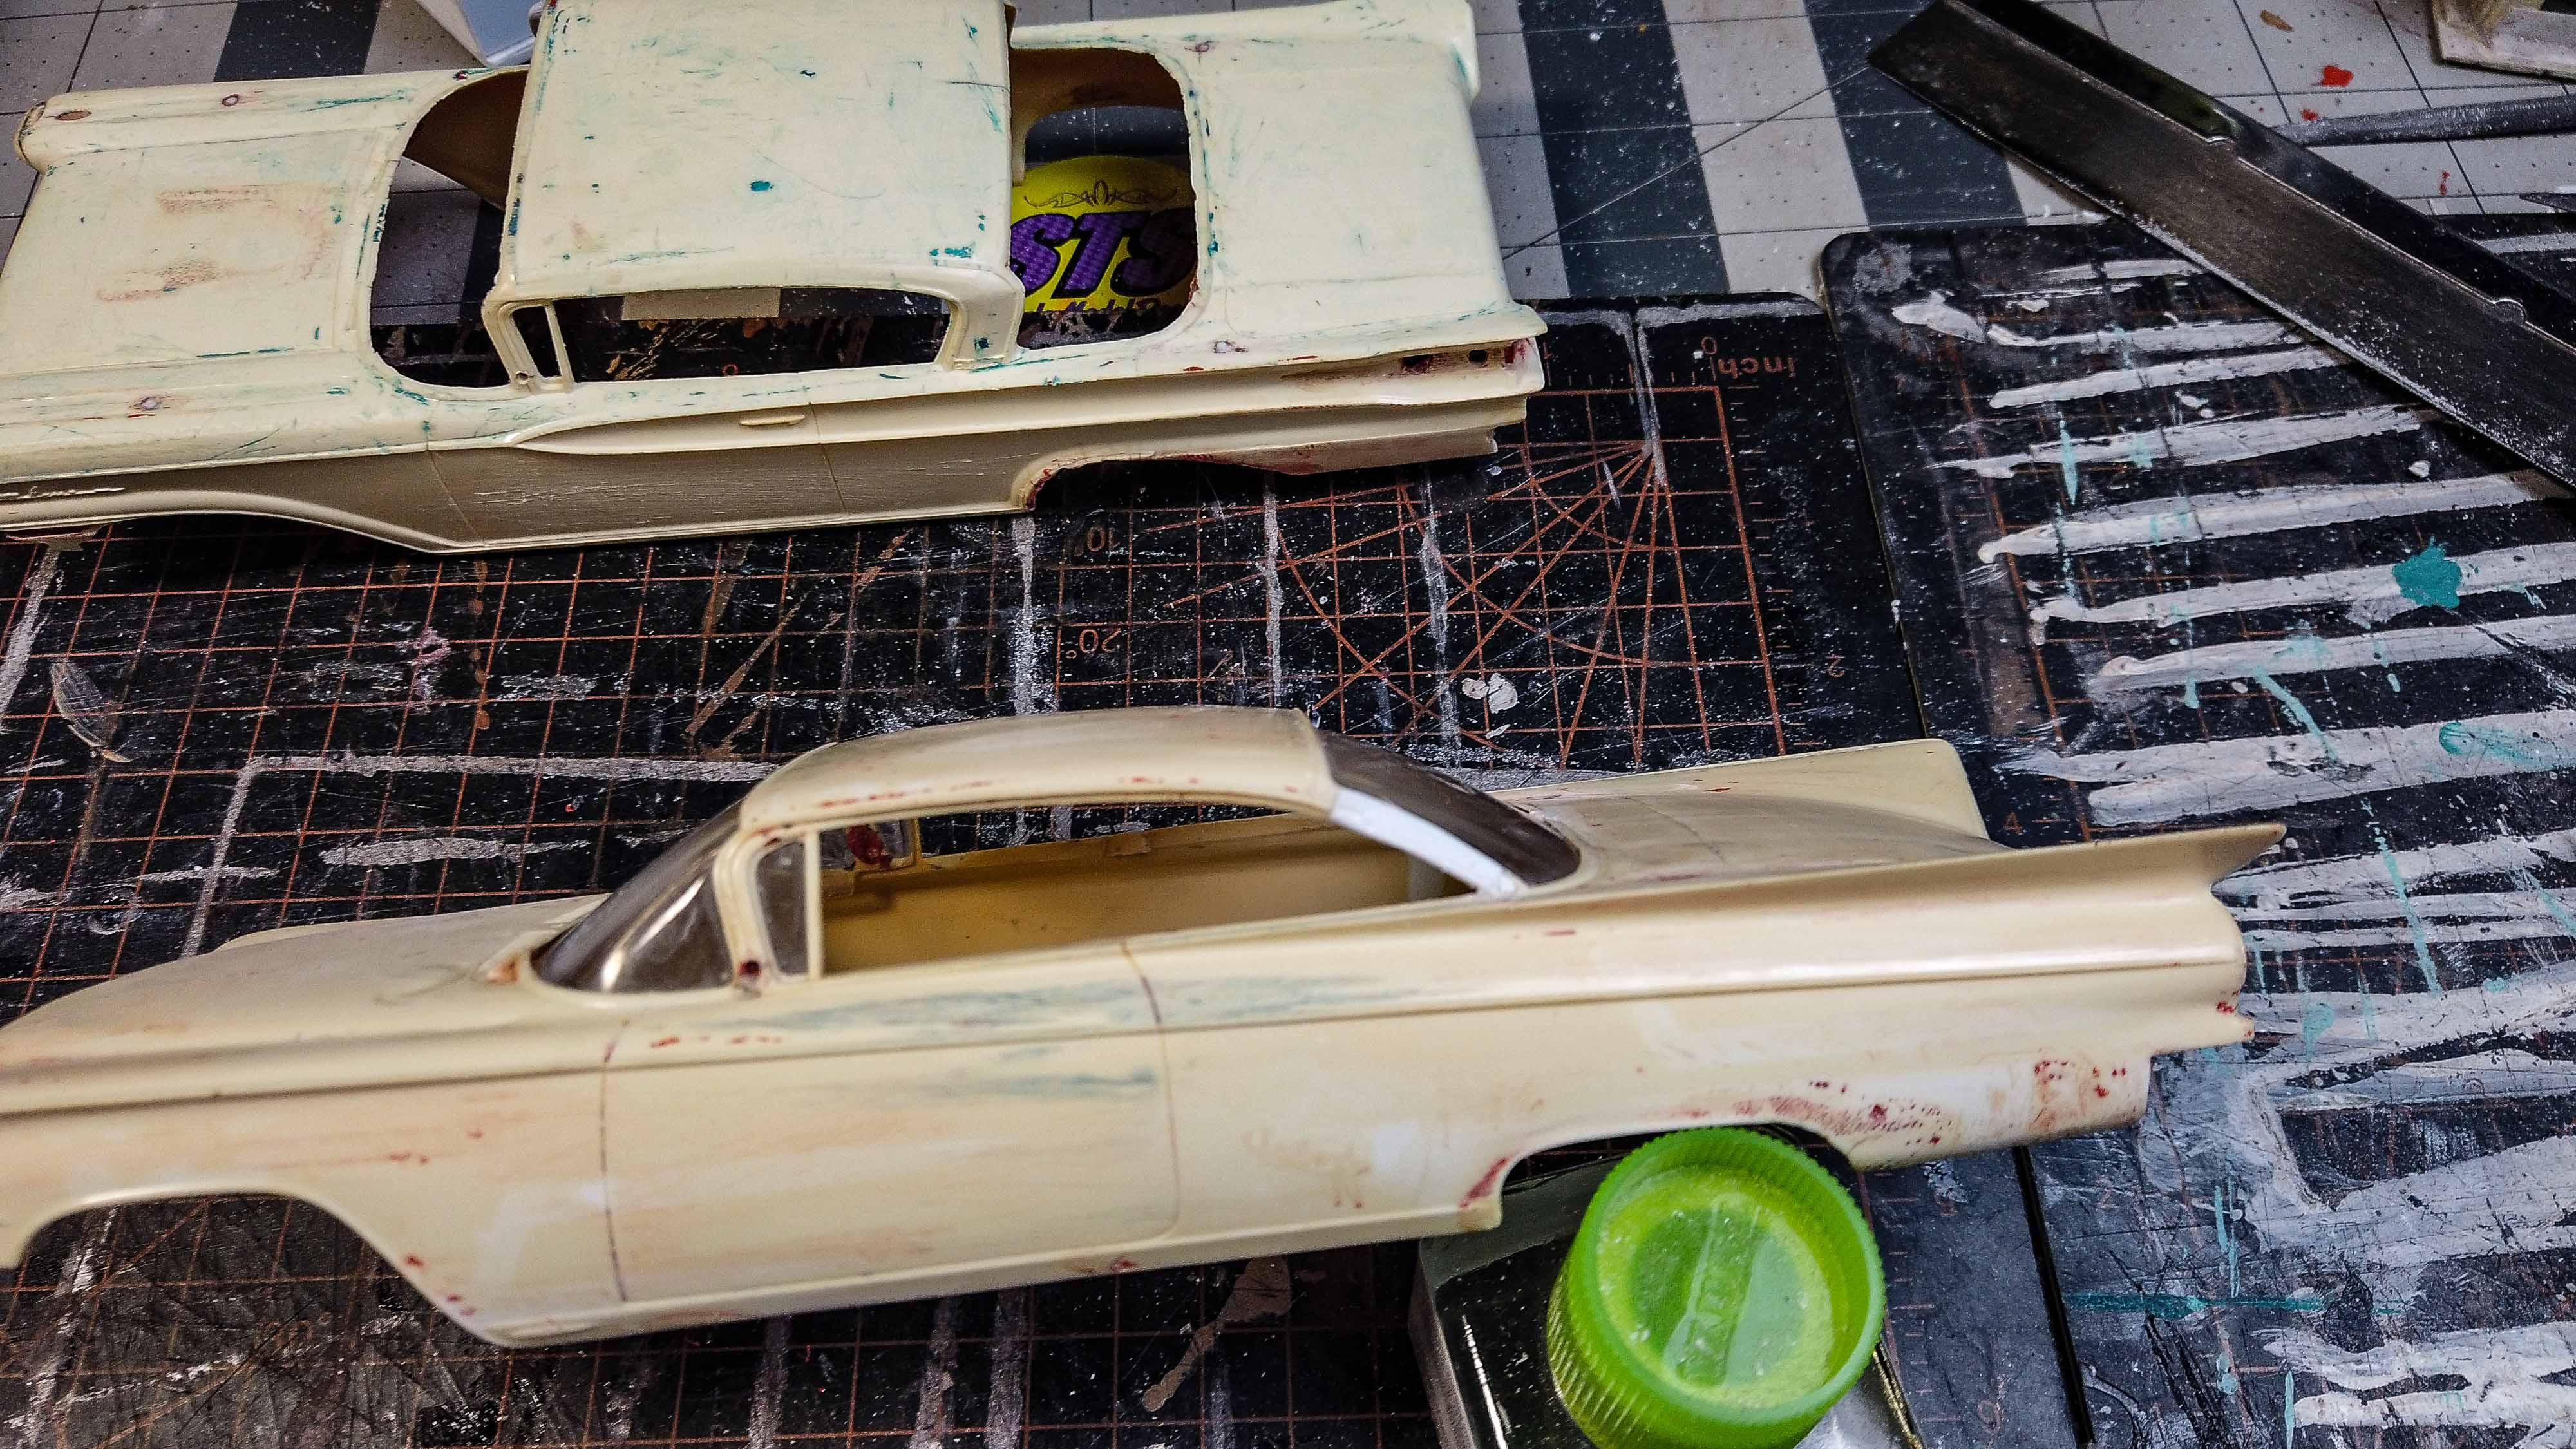
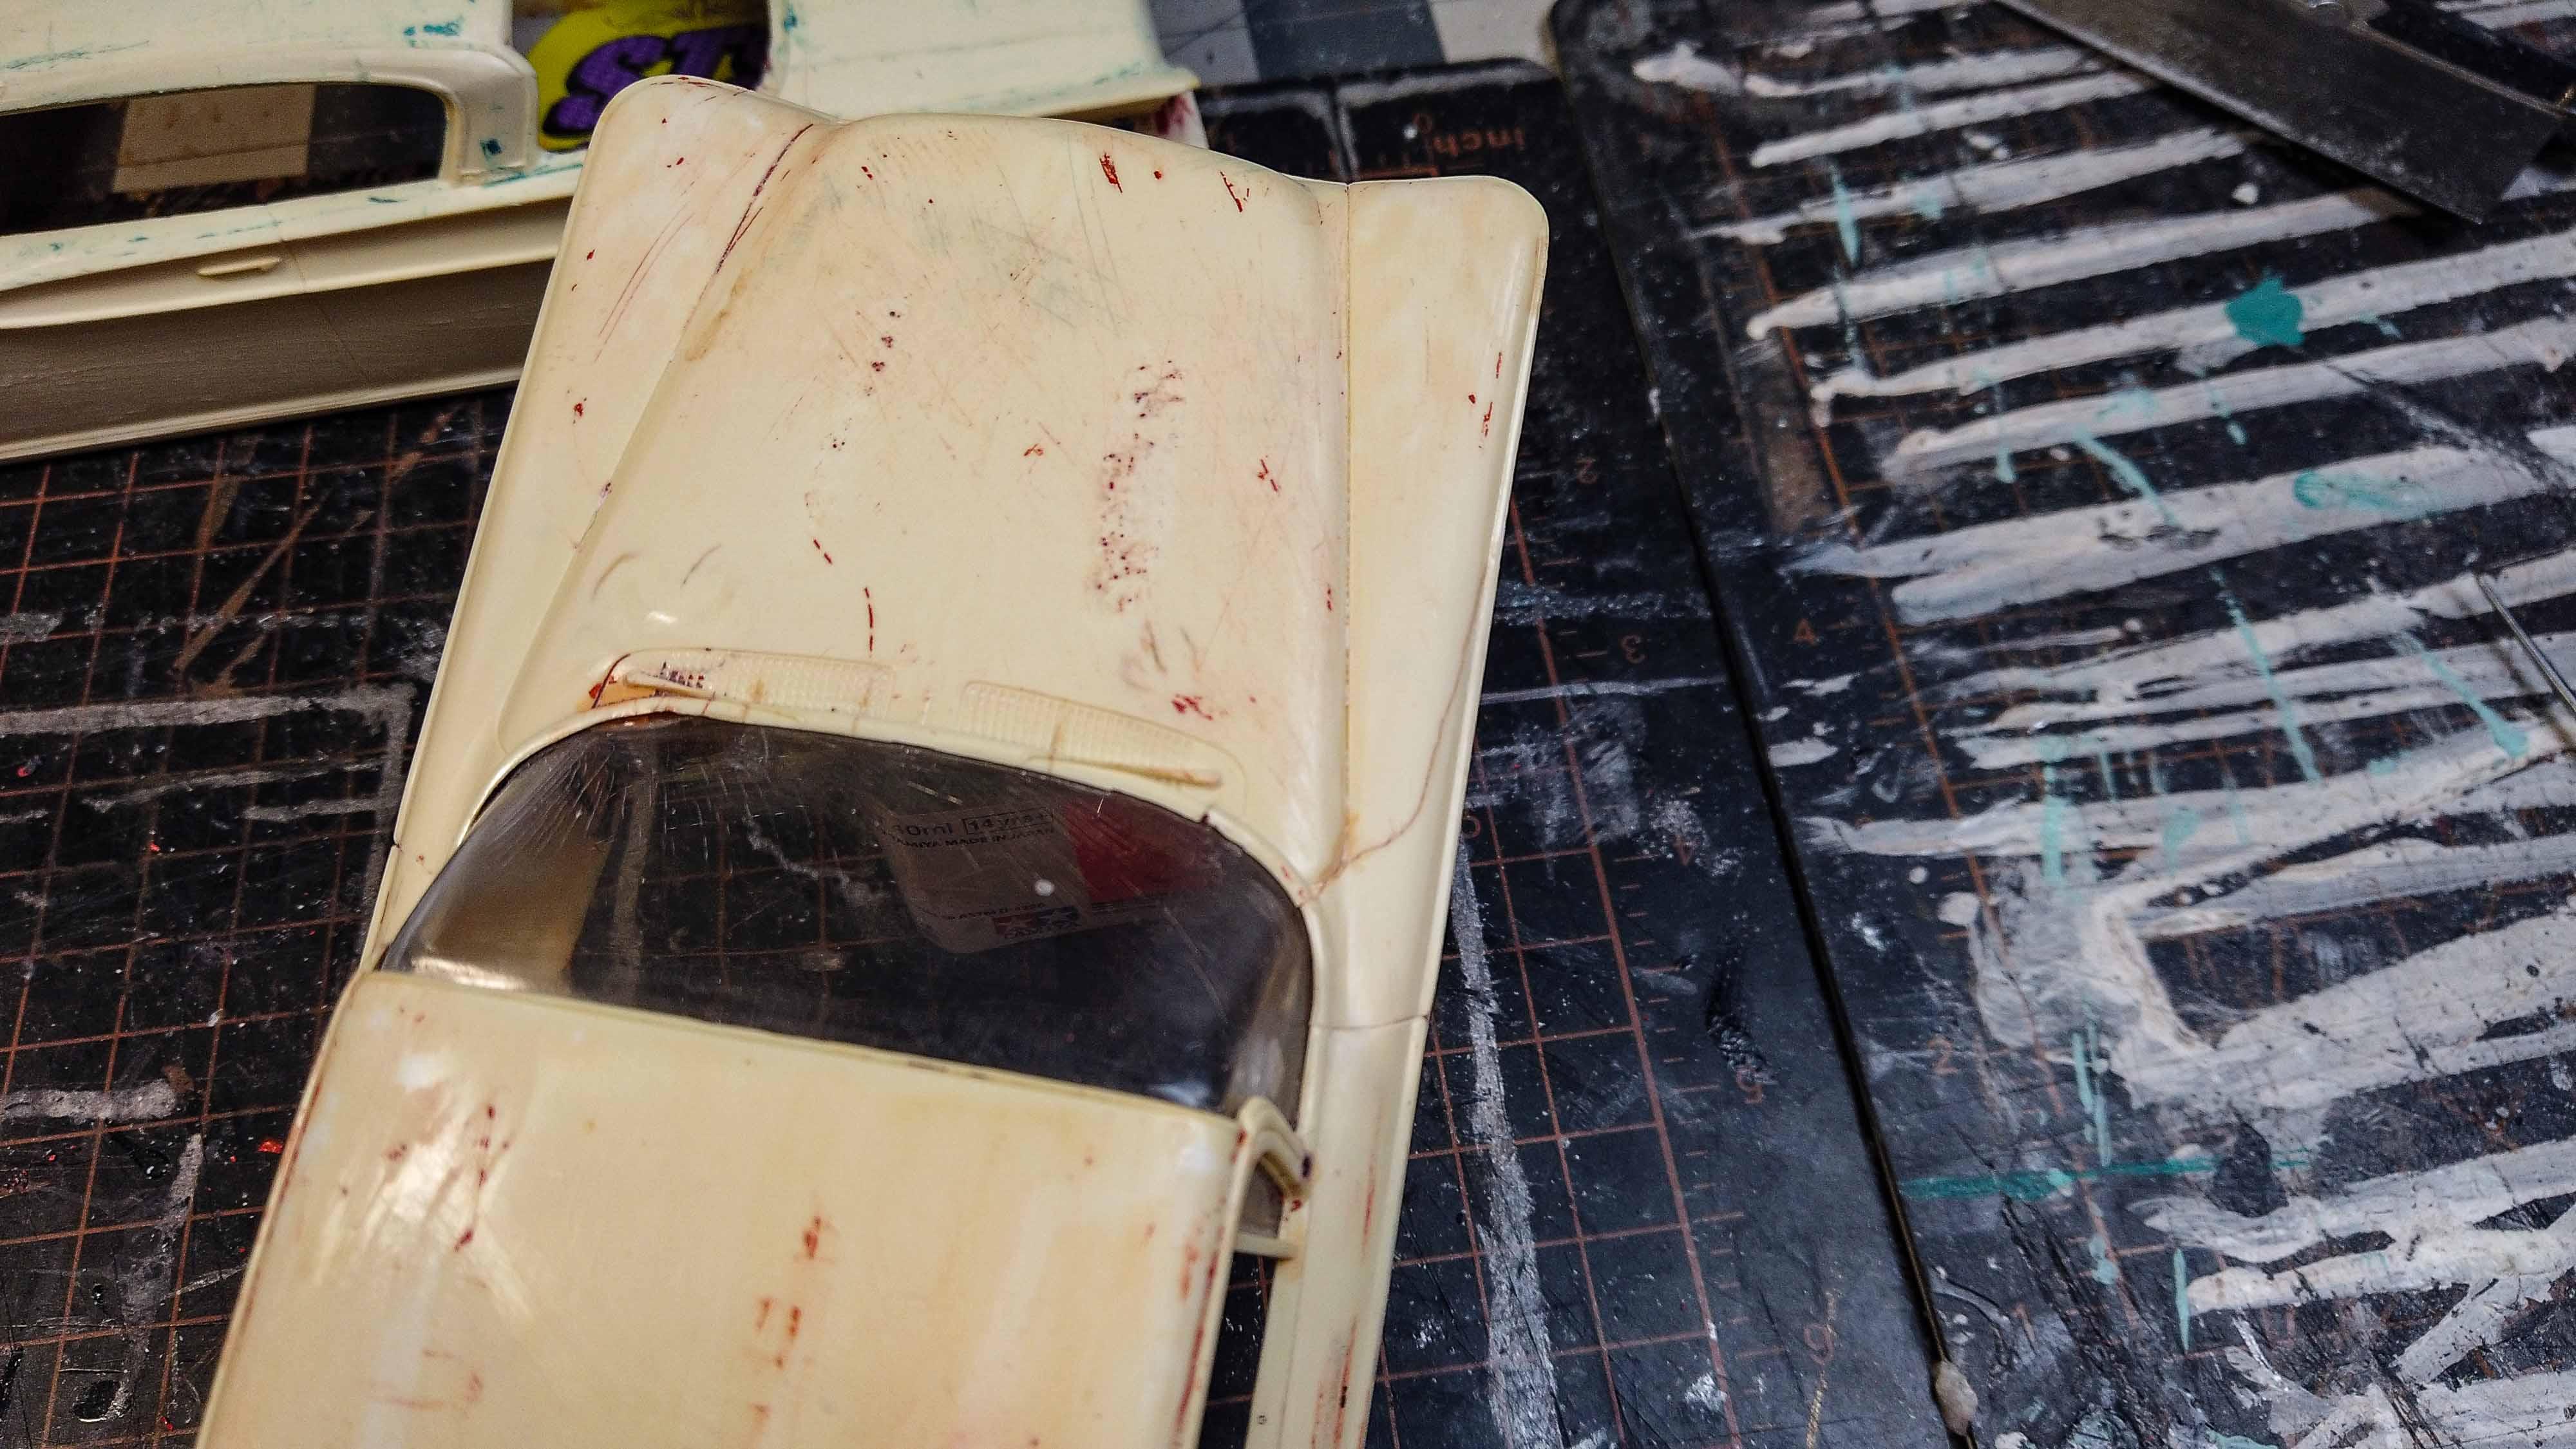
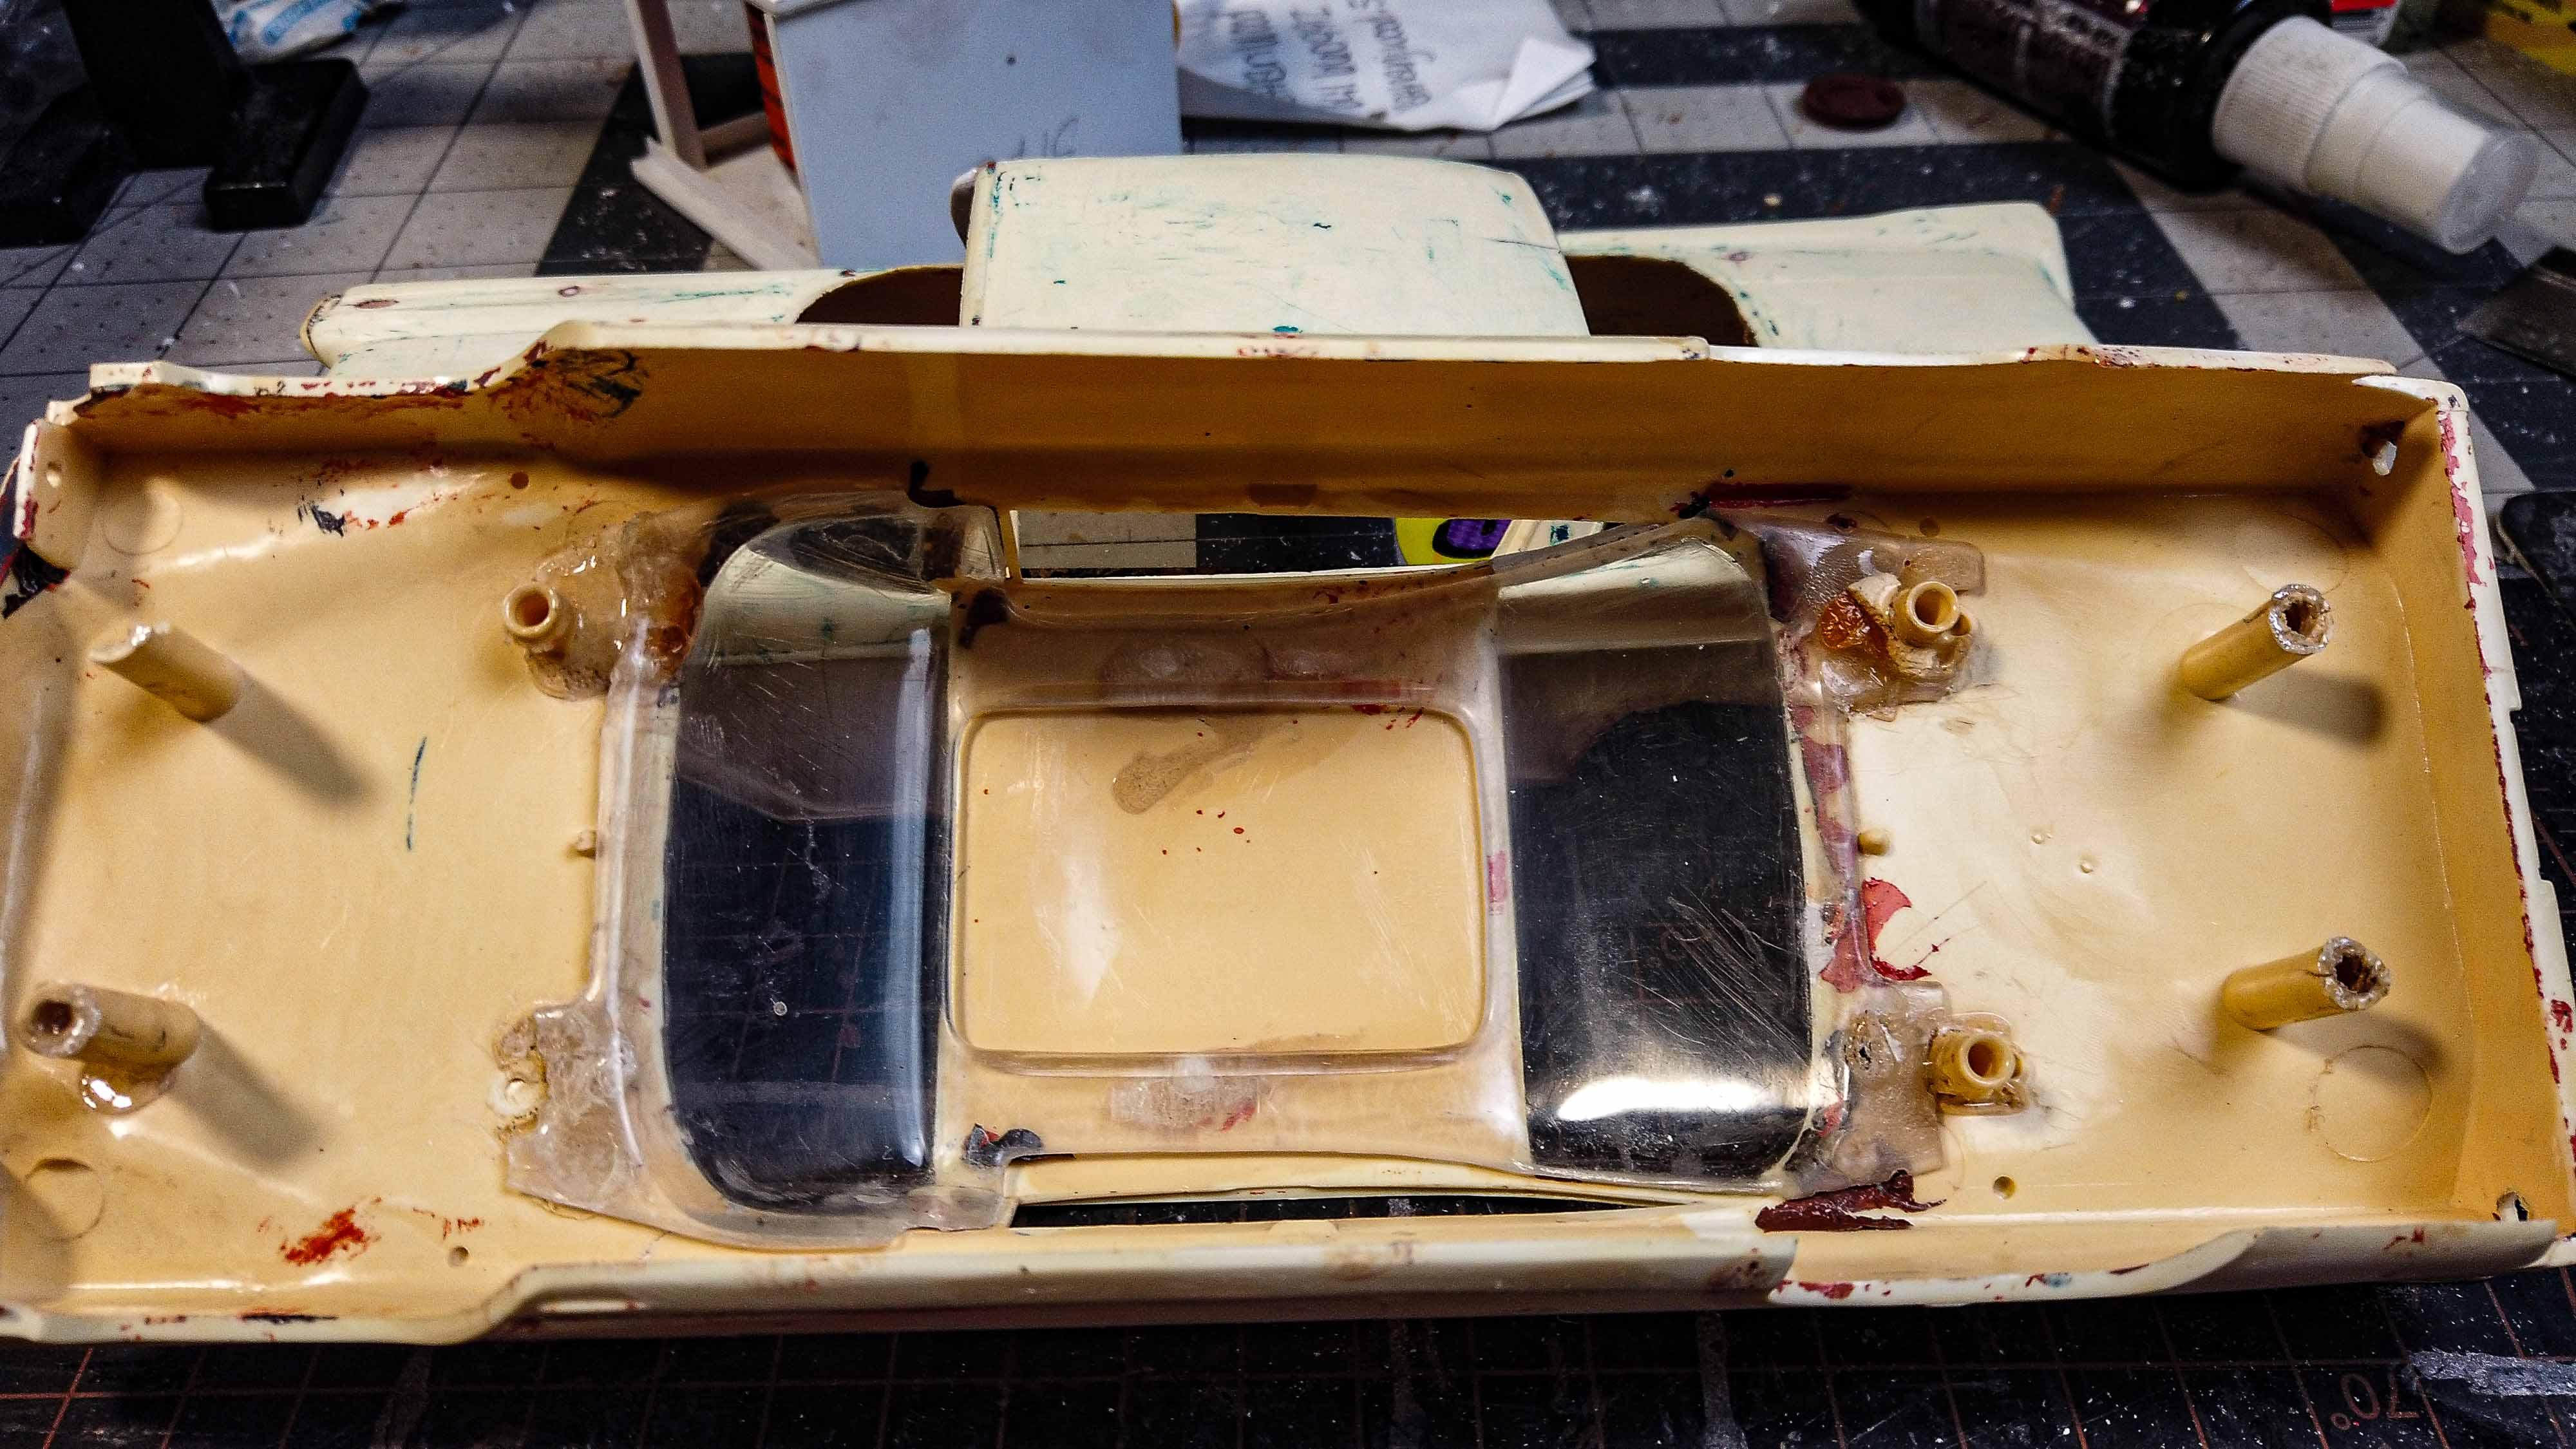
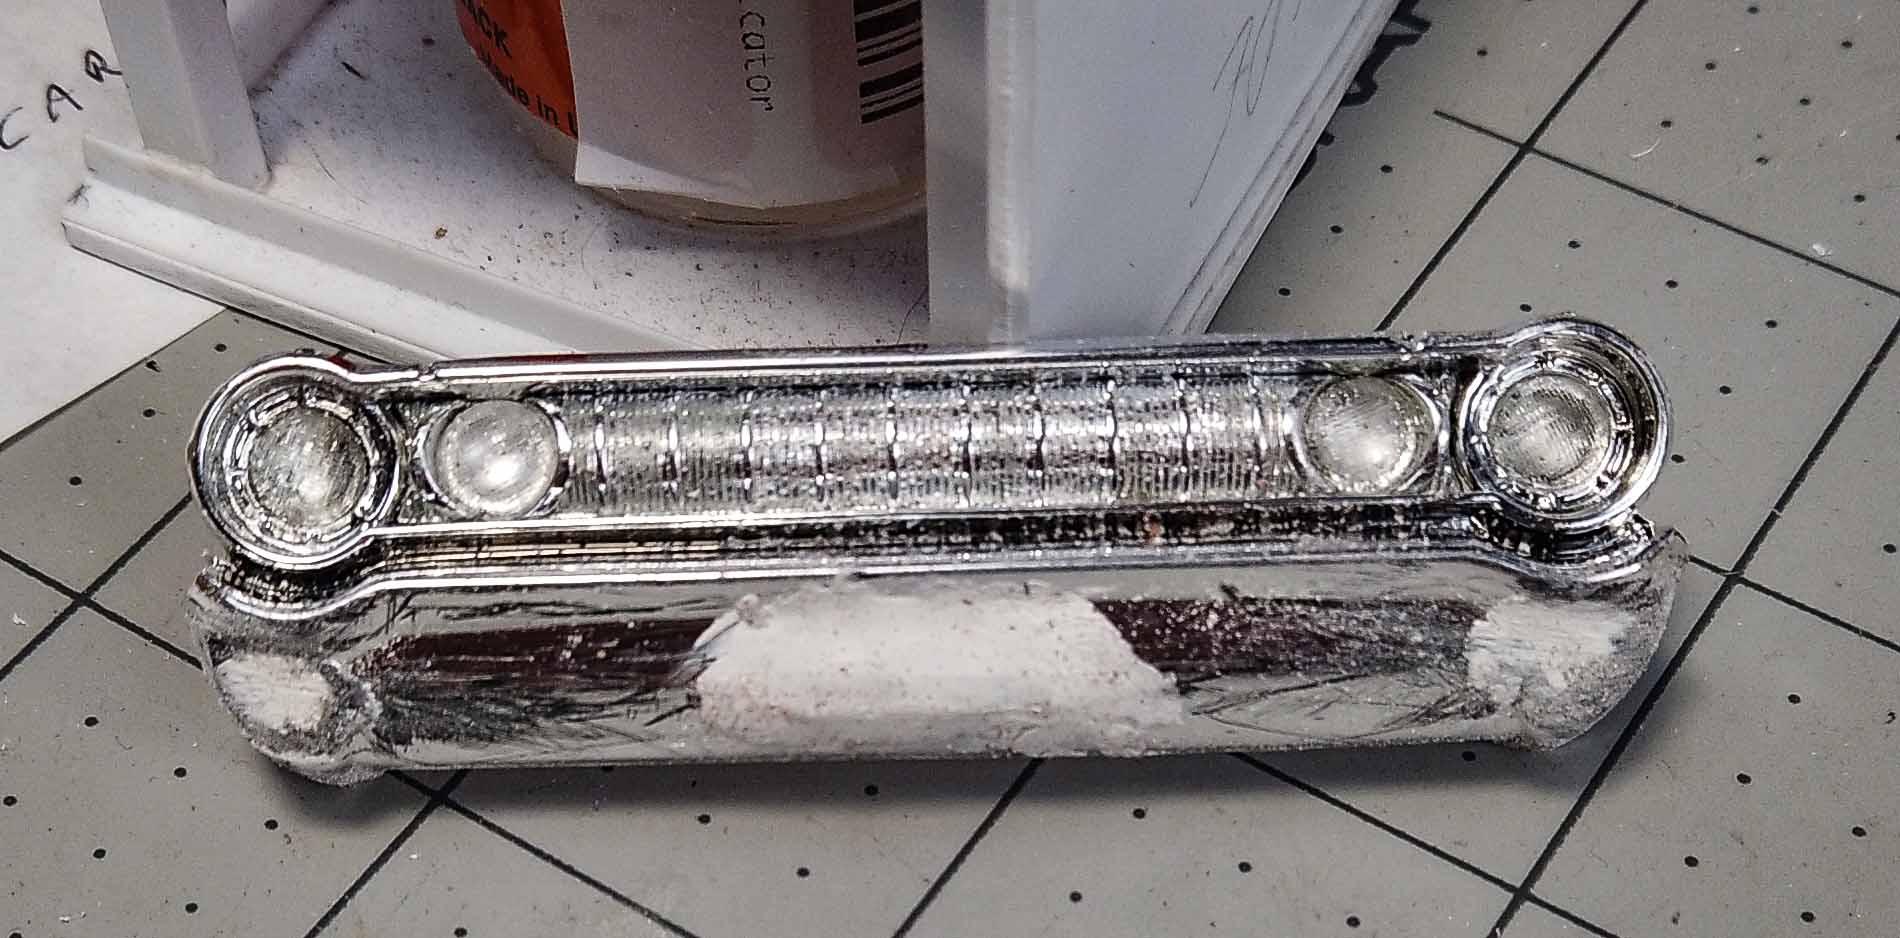
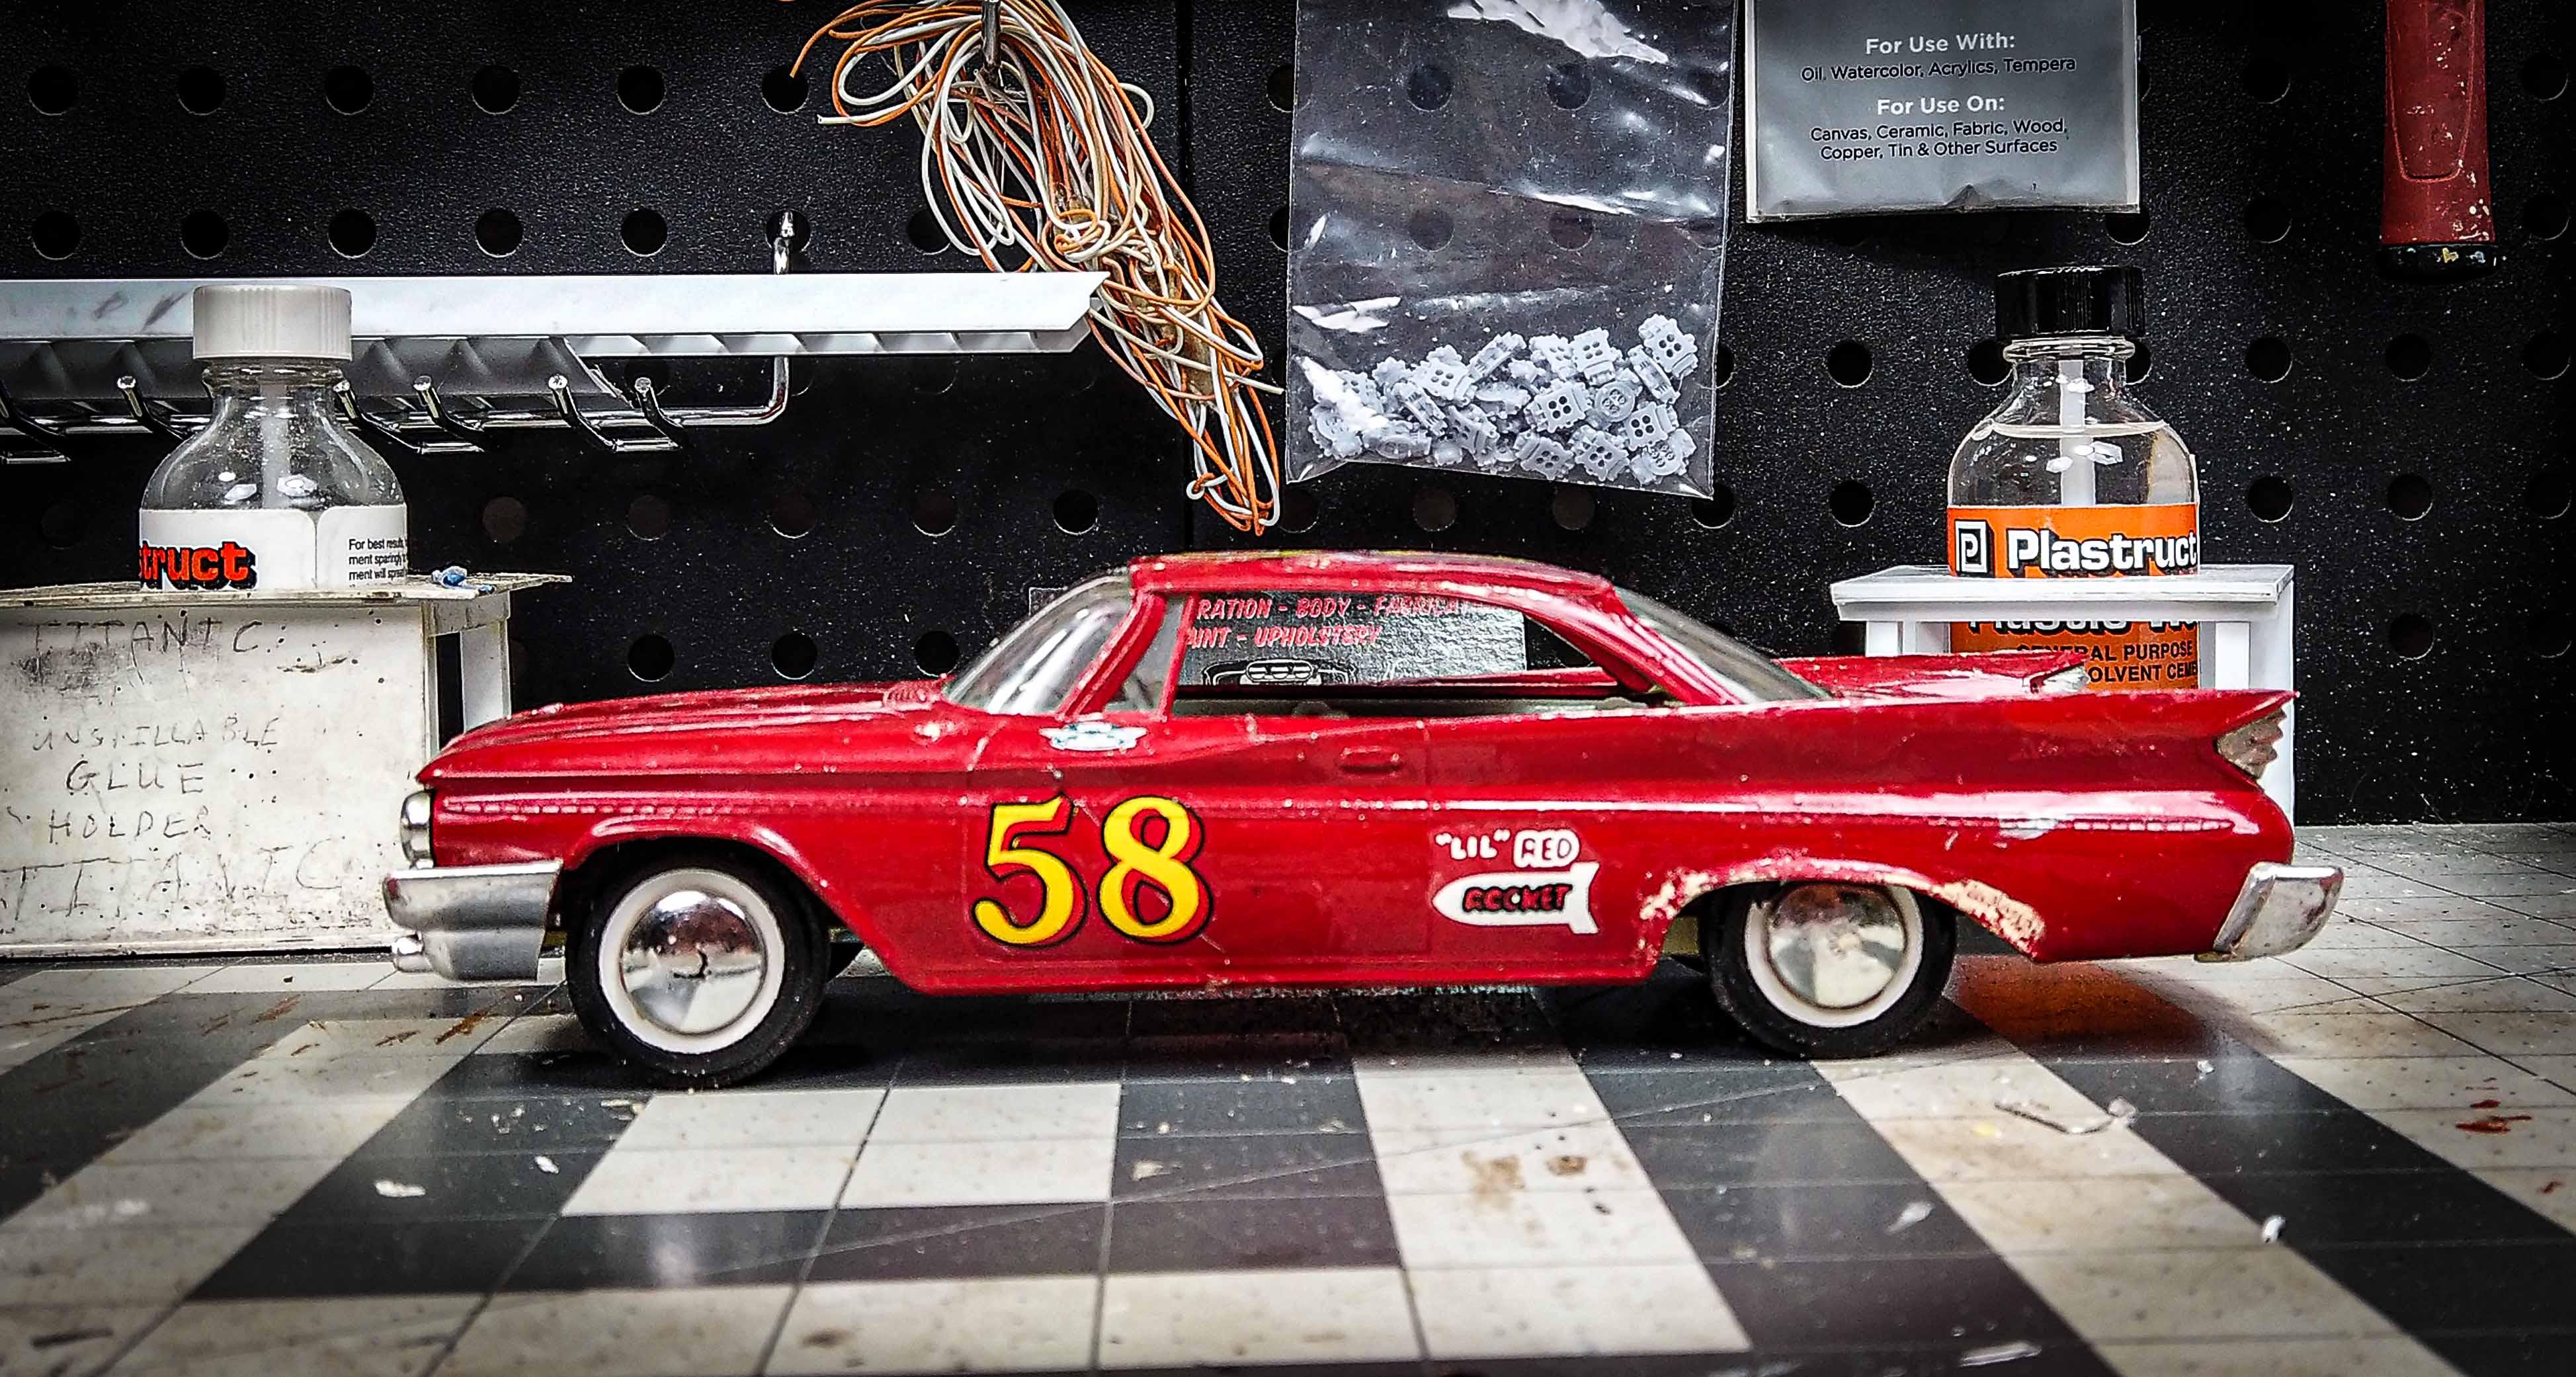
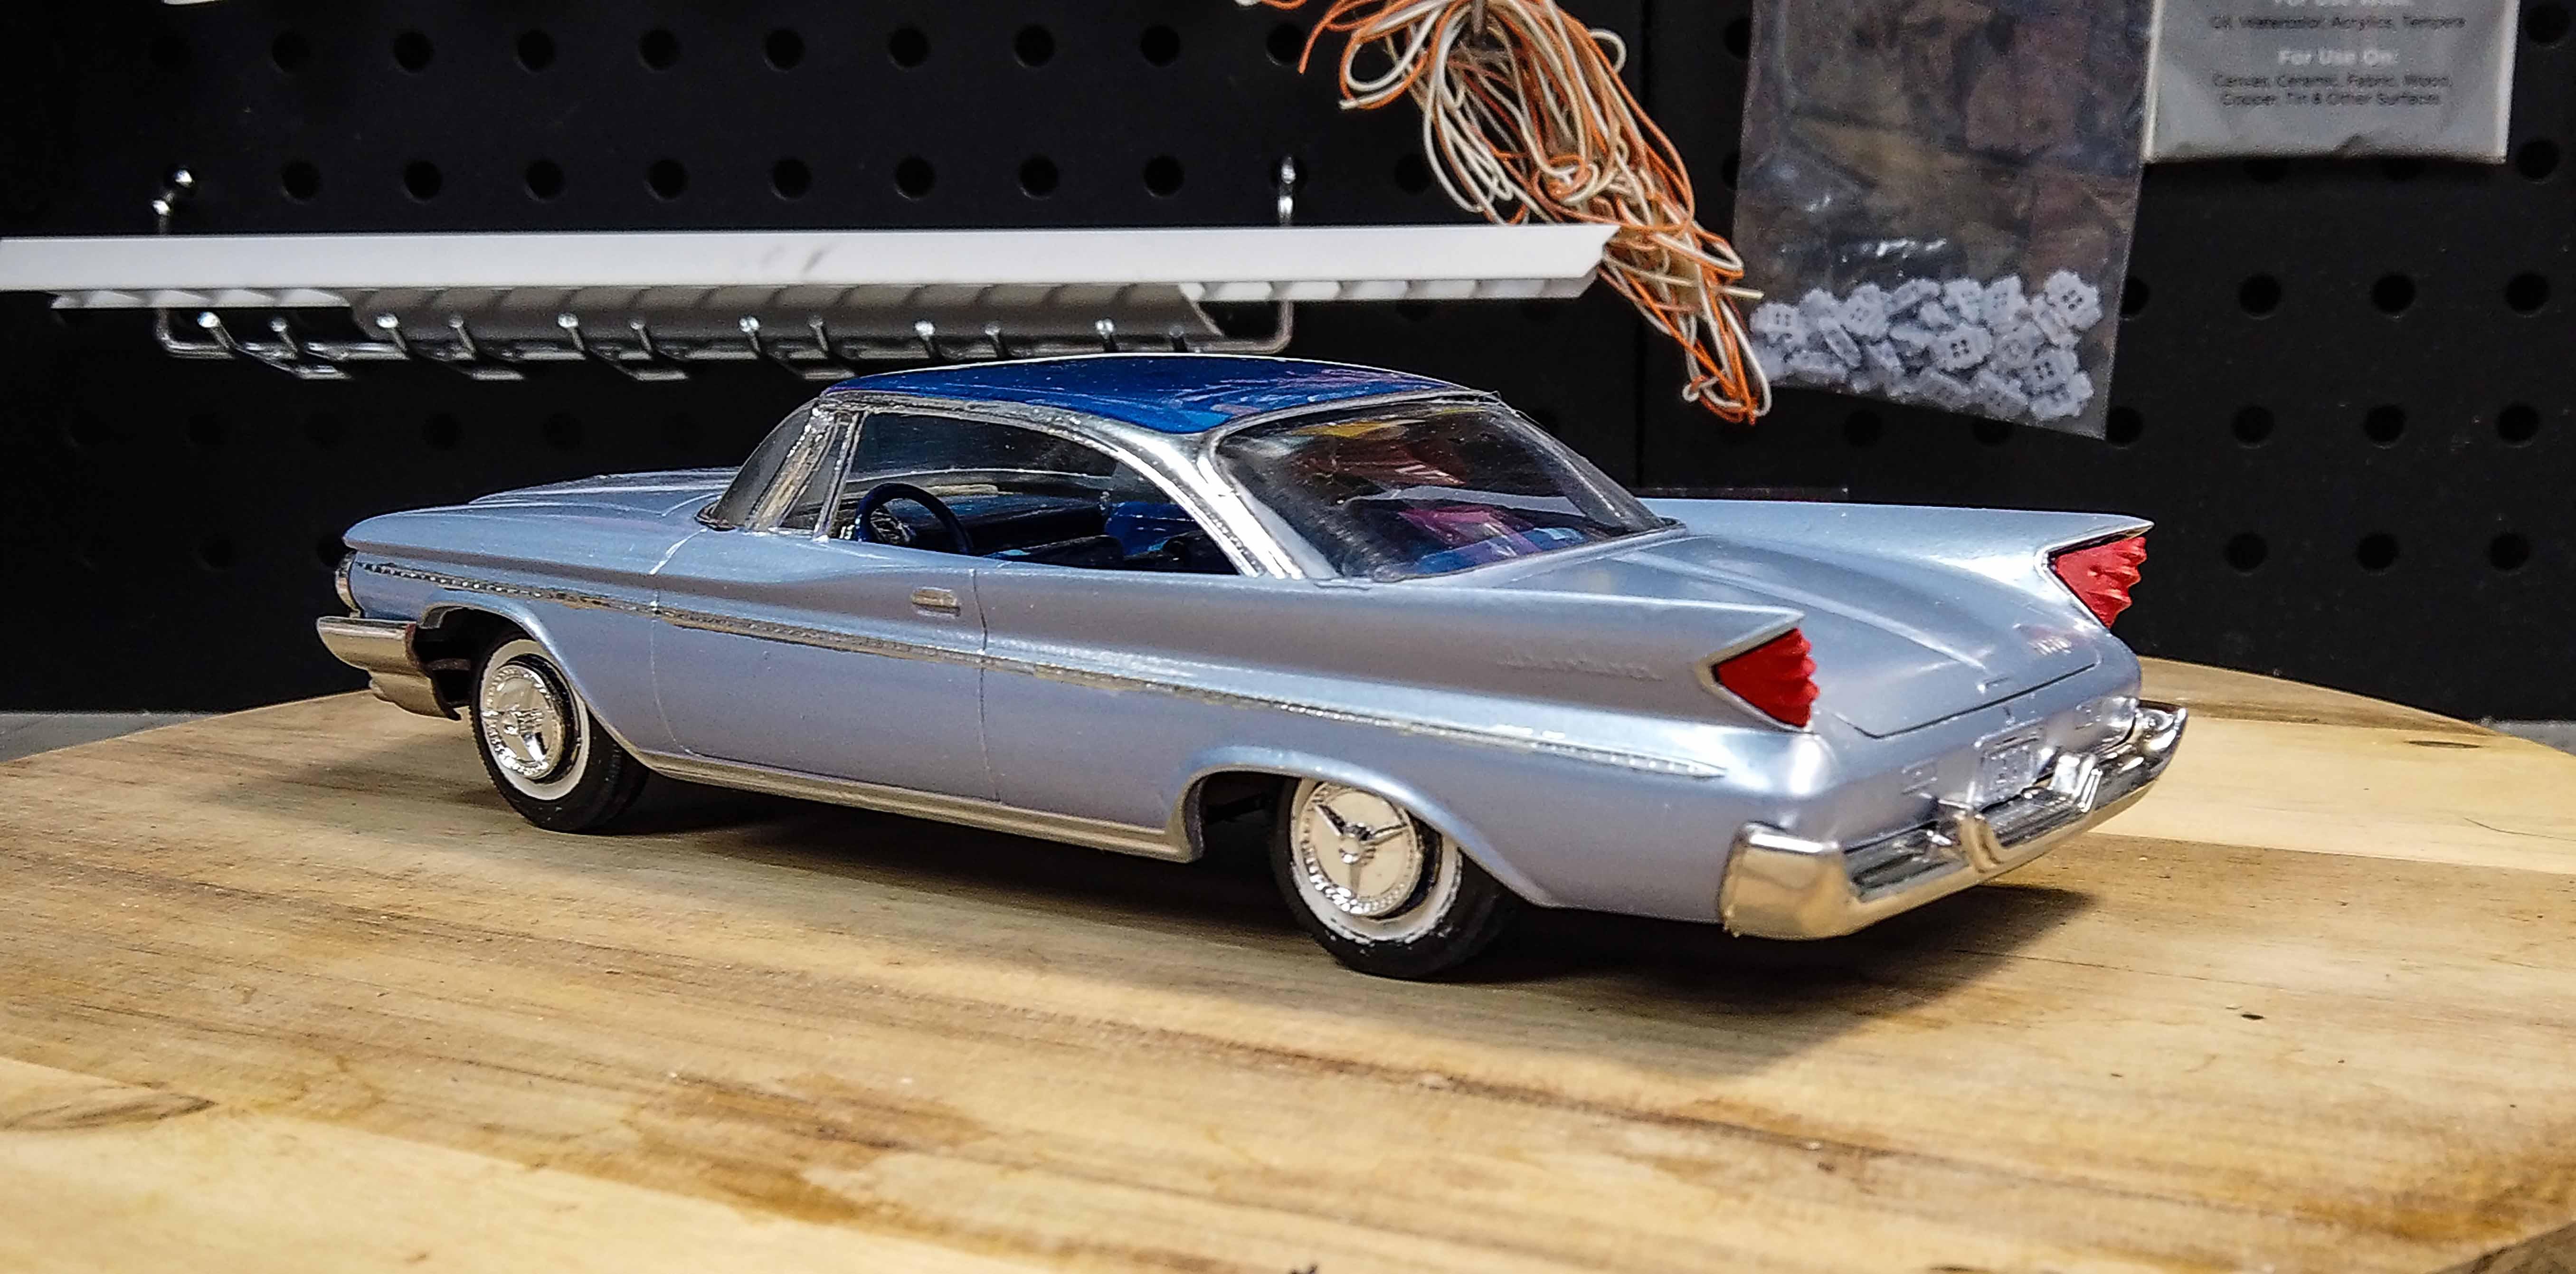
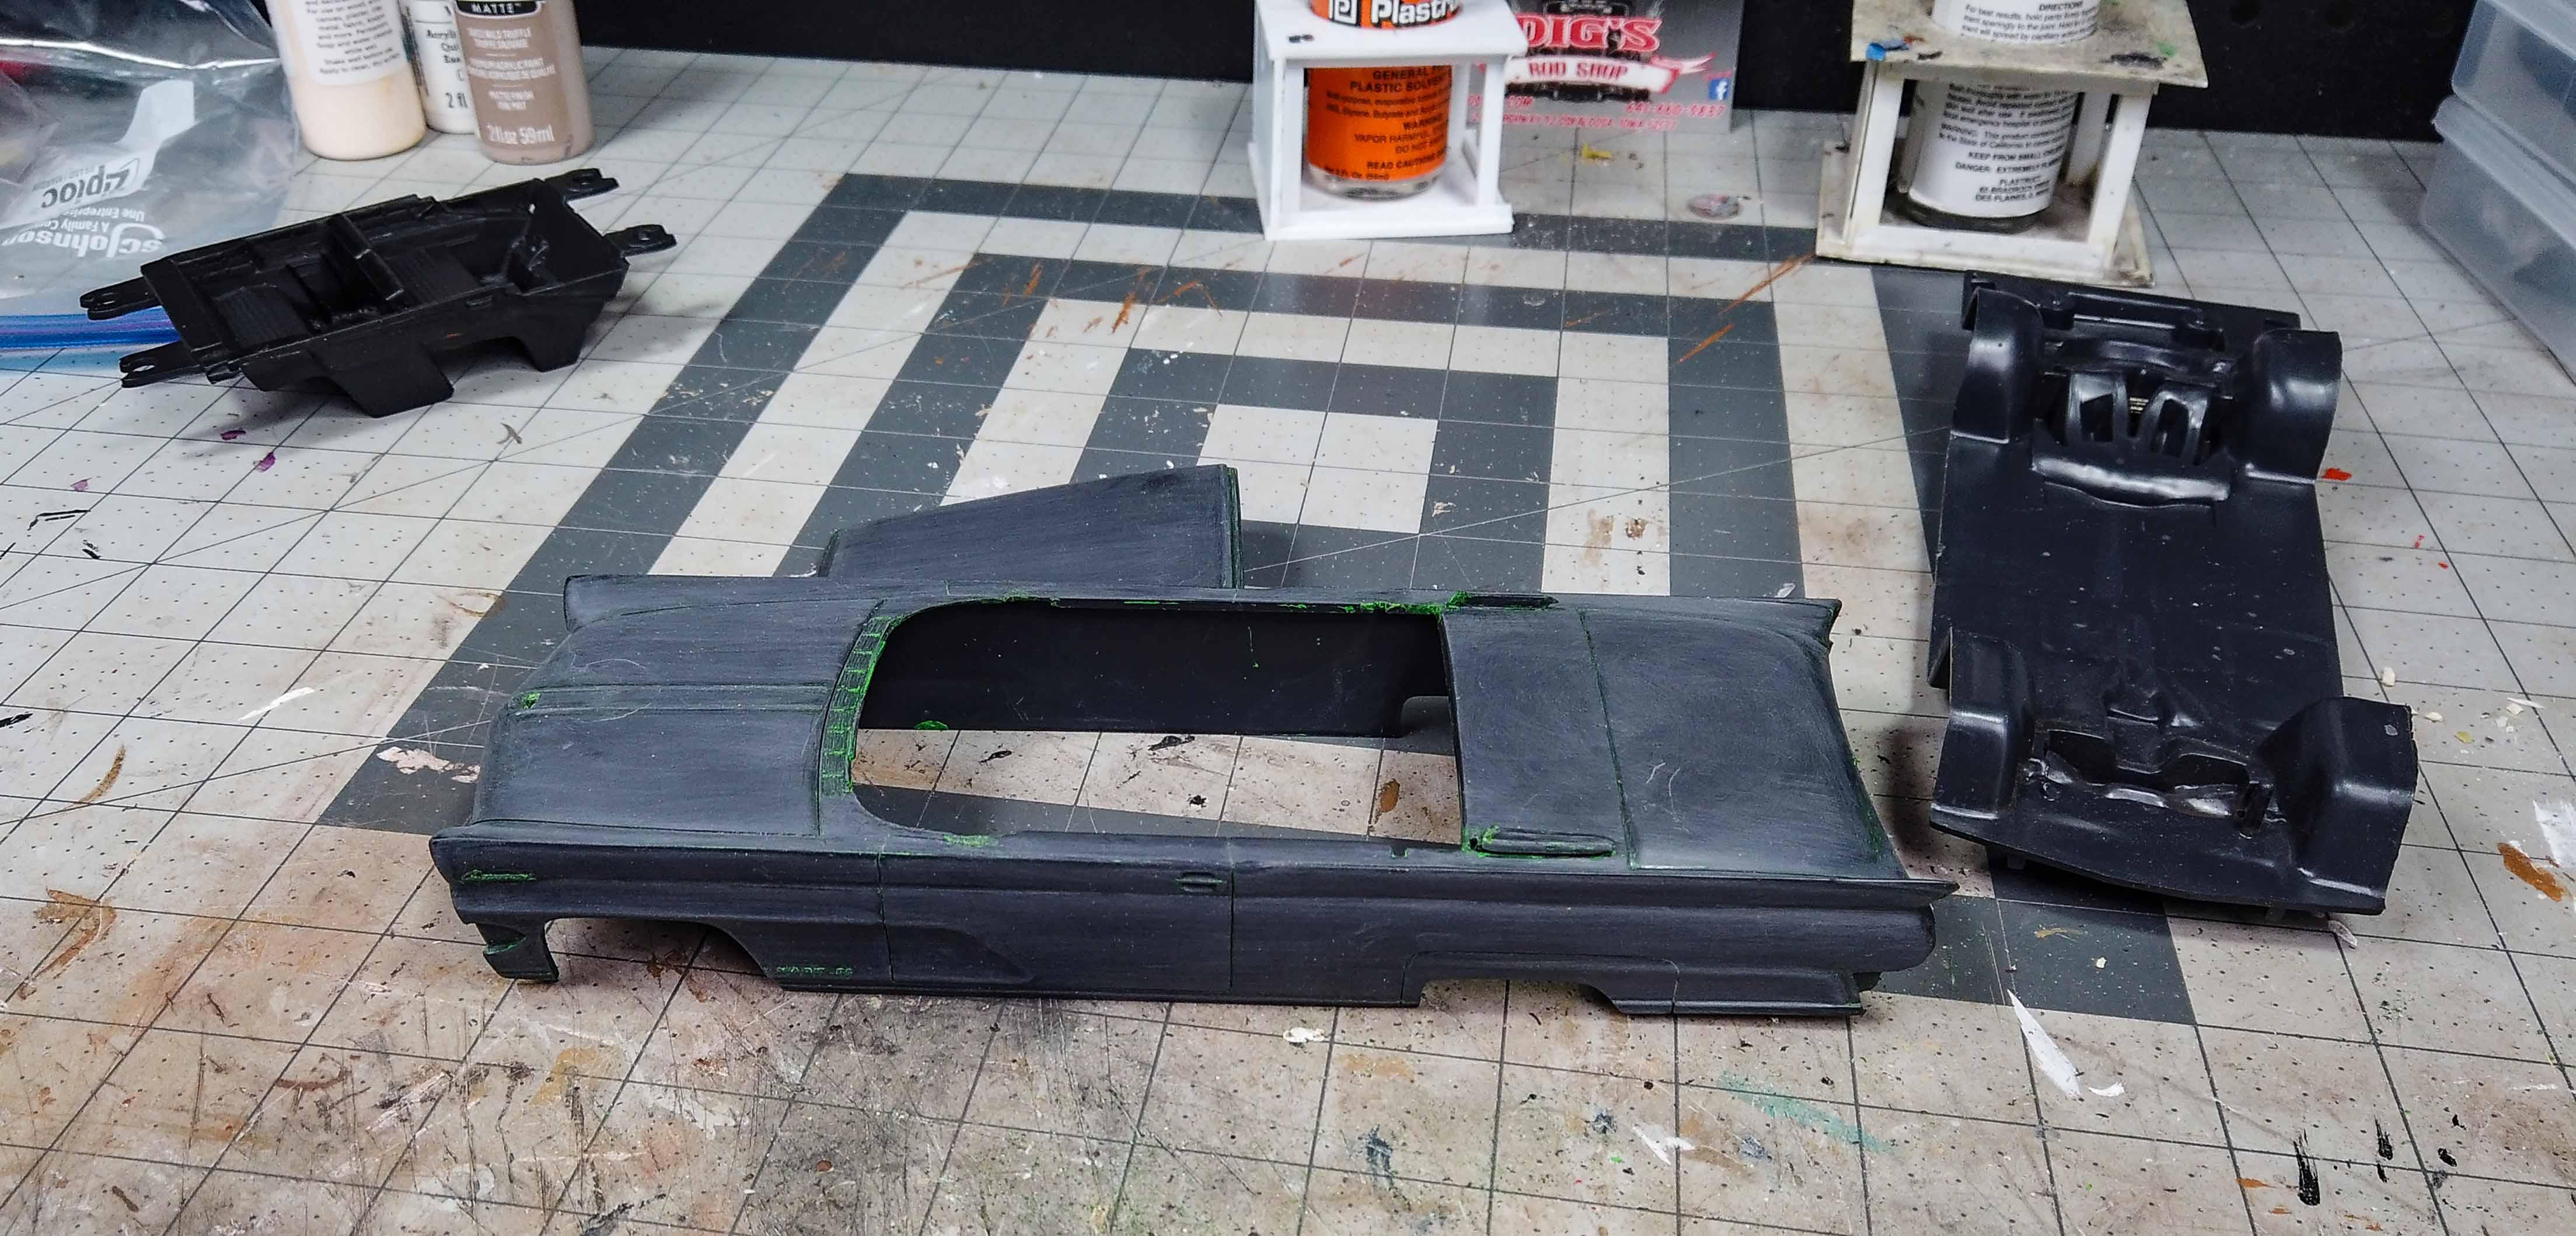
If I keep saving cars from the junkyard diorama, it will never grow. This 1960 Desoto did quite merit saving. After removing the paint, I did discover many body issues that needed addressing. The only thing that I was never able to conquer was the wheels, which had a very thick layer of glue on them. I chose to 'tack' hubcaps on them, until I find proper replacements. It is a respectable shelf model, and most worthy of the efforts to save it.
- 19 replies
-
- 12
-
-
- 1960 desoto
- johan
- (and 1 more)
-
This is another car that I got to place in the junkyard. It was a promo that appeared to need very little to make it display case worthy. I set about to replace the windshield posts, remove decals, and give it new paint. There was damage to the 'glass' but I was able to save and reinstall it without incident.
- 15 replies
-
- 10
-
-
-
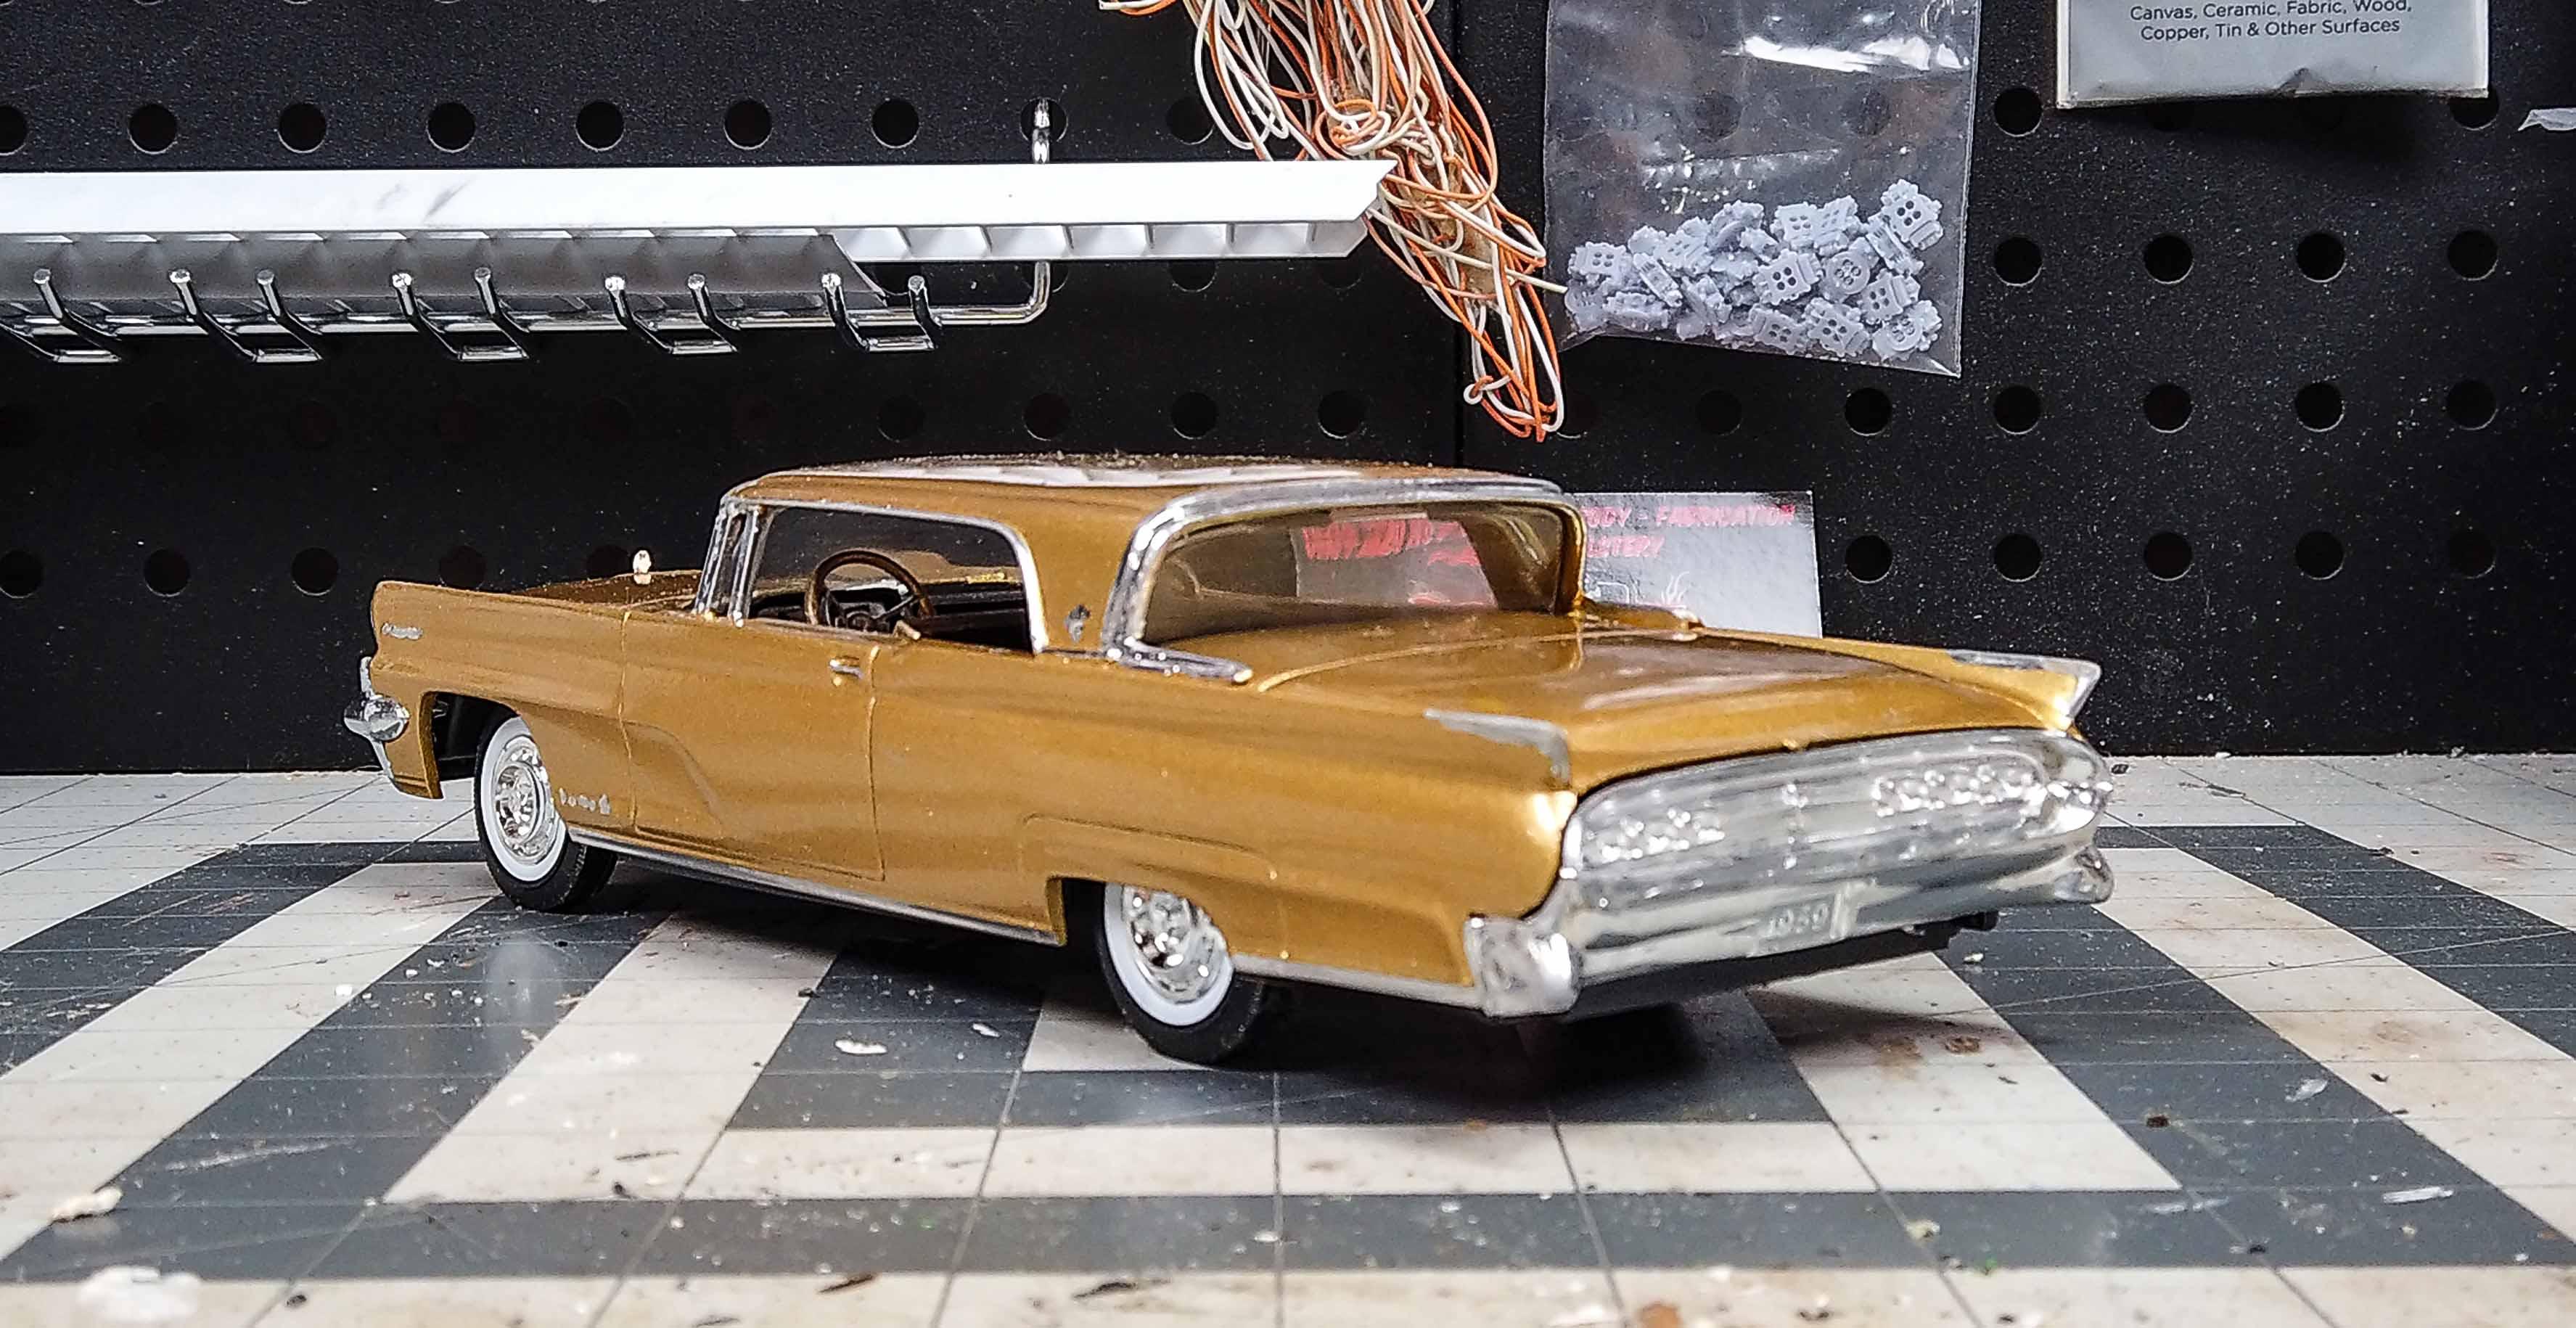
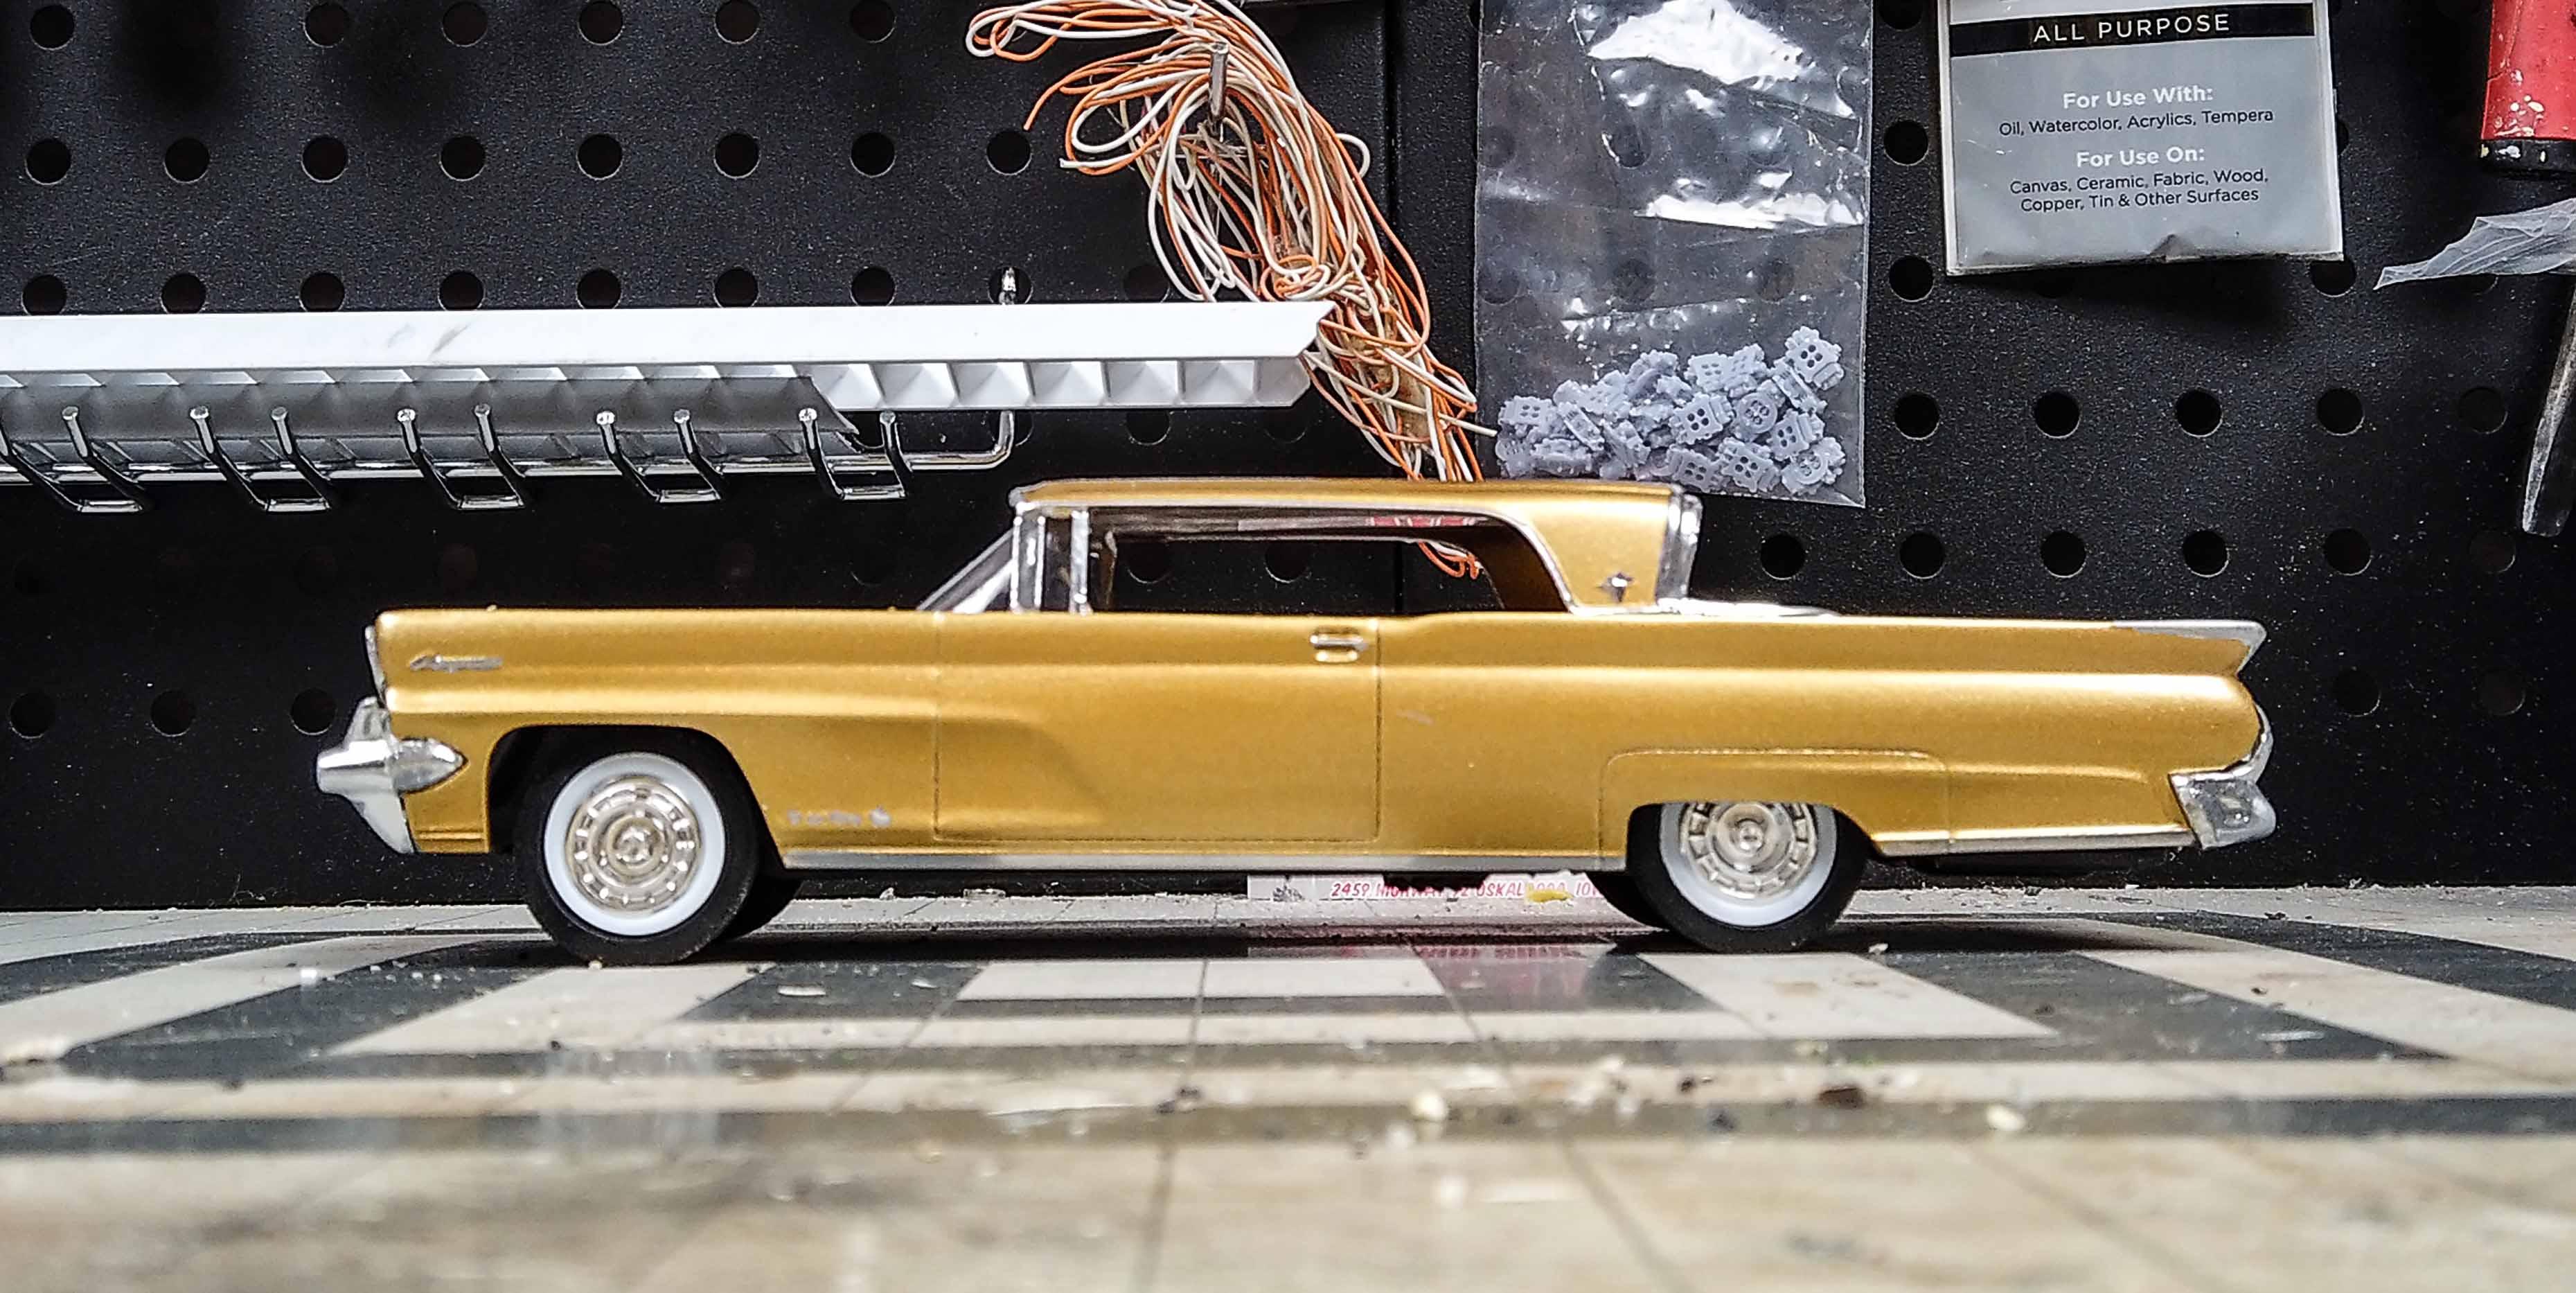
This Lincoln came to me for inclusion in my junkyard diorama. It had broken and missing parts, along with a most reprehensible coating of house paint. I took a fancy to it, and chose to see if I could save it. After many hours of work it has escaped it a dreadful fate and now resides in a display case.
- 21 replies
-
- 14
-
-
-
- 1959 lincoln
- amt
- (and 1 more)
-
I decided that the crew members need a place to watch the car when it's out on the track, and a place for tires would also be beneficial. Now I just have to build the car to go with it and the diorama for it to be displayed in.
-
I have it completed and it sits here as at a space port. I'm just using a phone for the pictures, so they're not very good, but at least you can get an idea of what it looks like. I had big plans for this, with some outrageous accents, but it just needed to be built with class. I was having trouble designing a chassis, so I broke into my stash of junk pieces. Thanks to those who watched and lent support for this. It is my hope that You've been inspired to step out of the box and try something unusual.
-
Yes it is. Go for it. It is a blast.
-
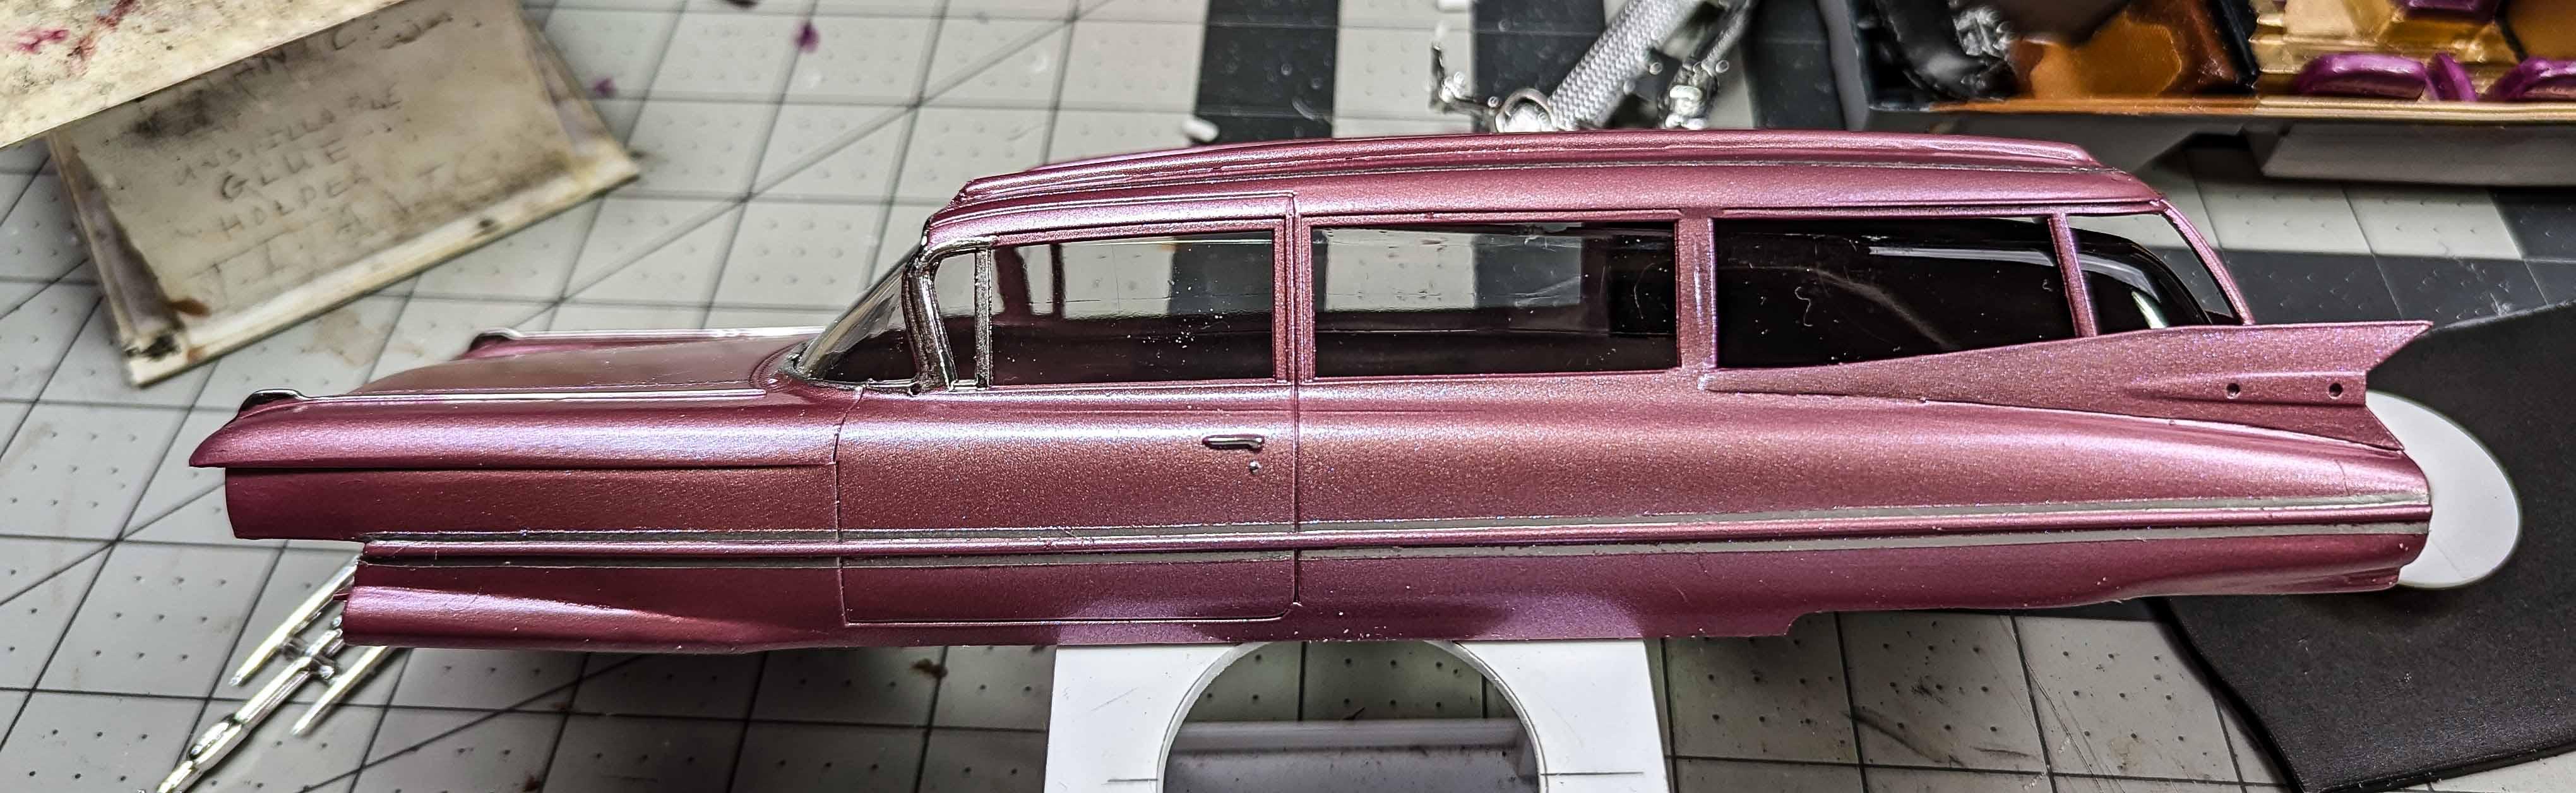
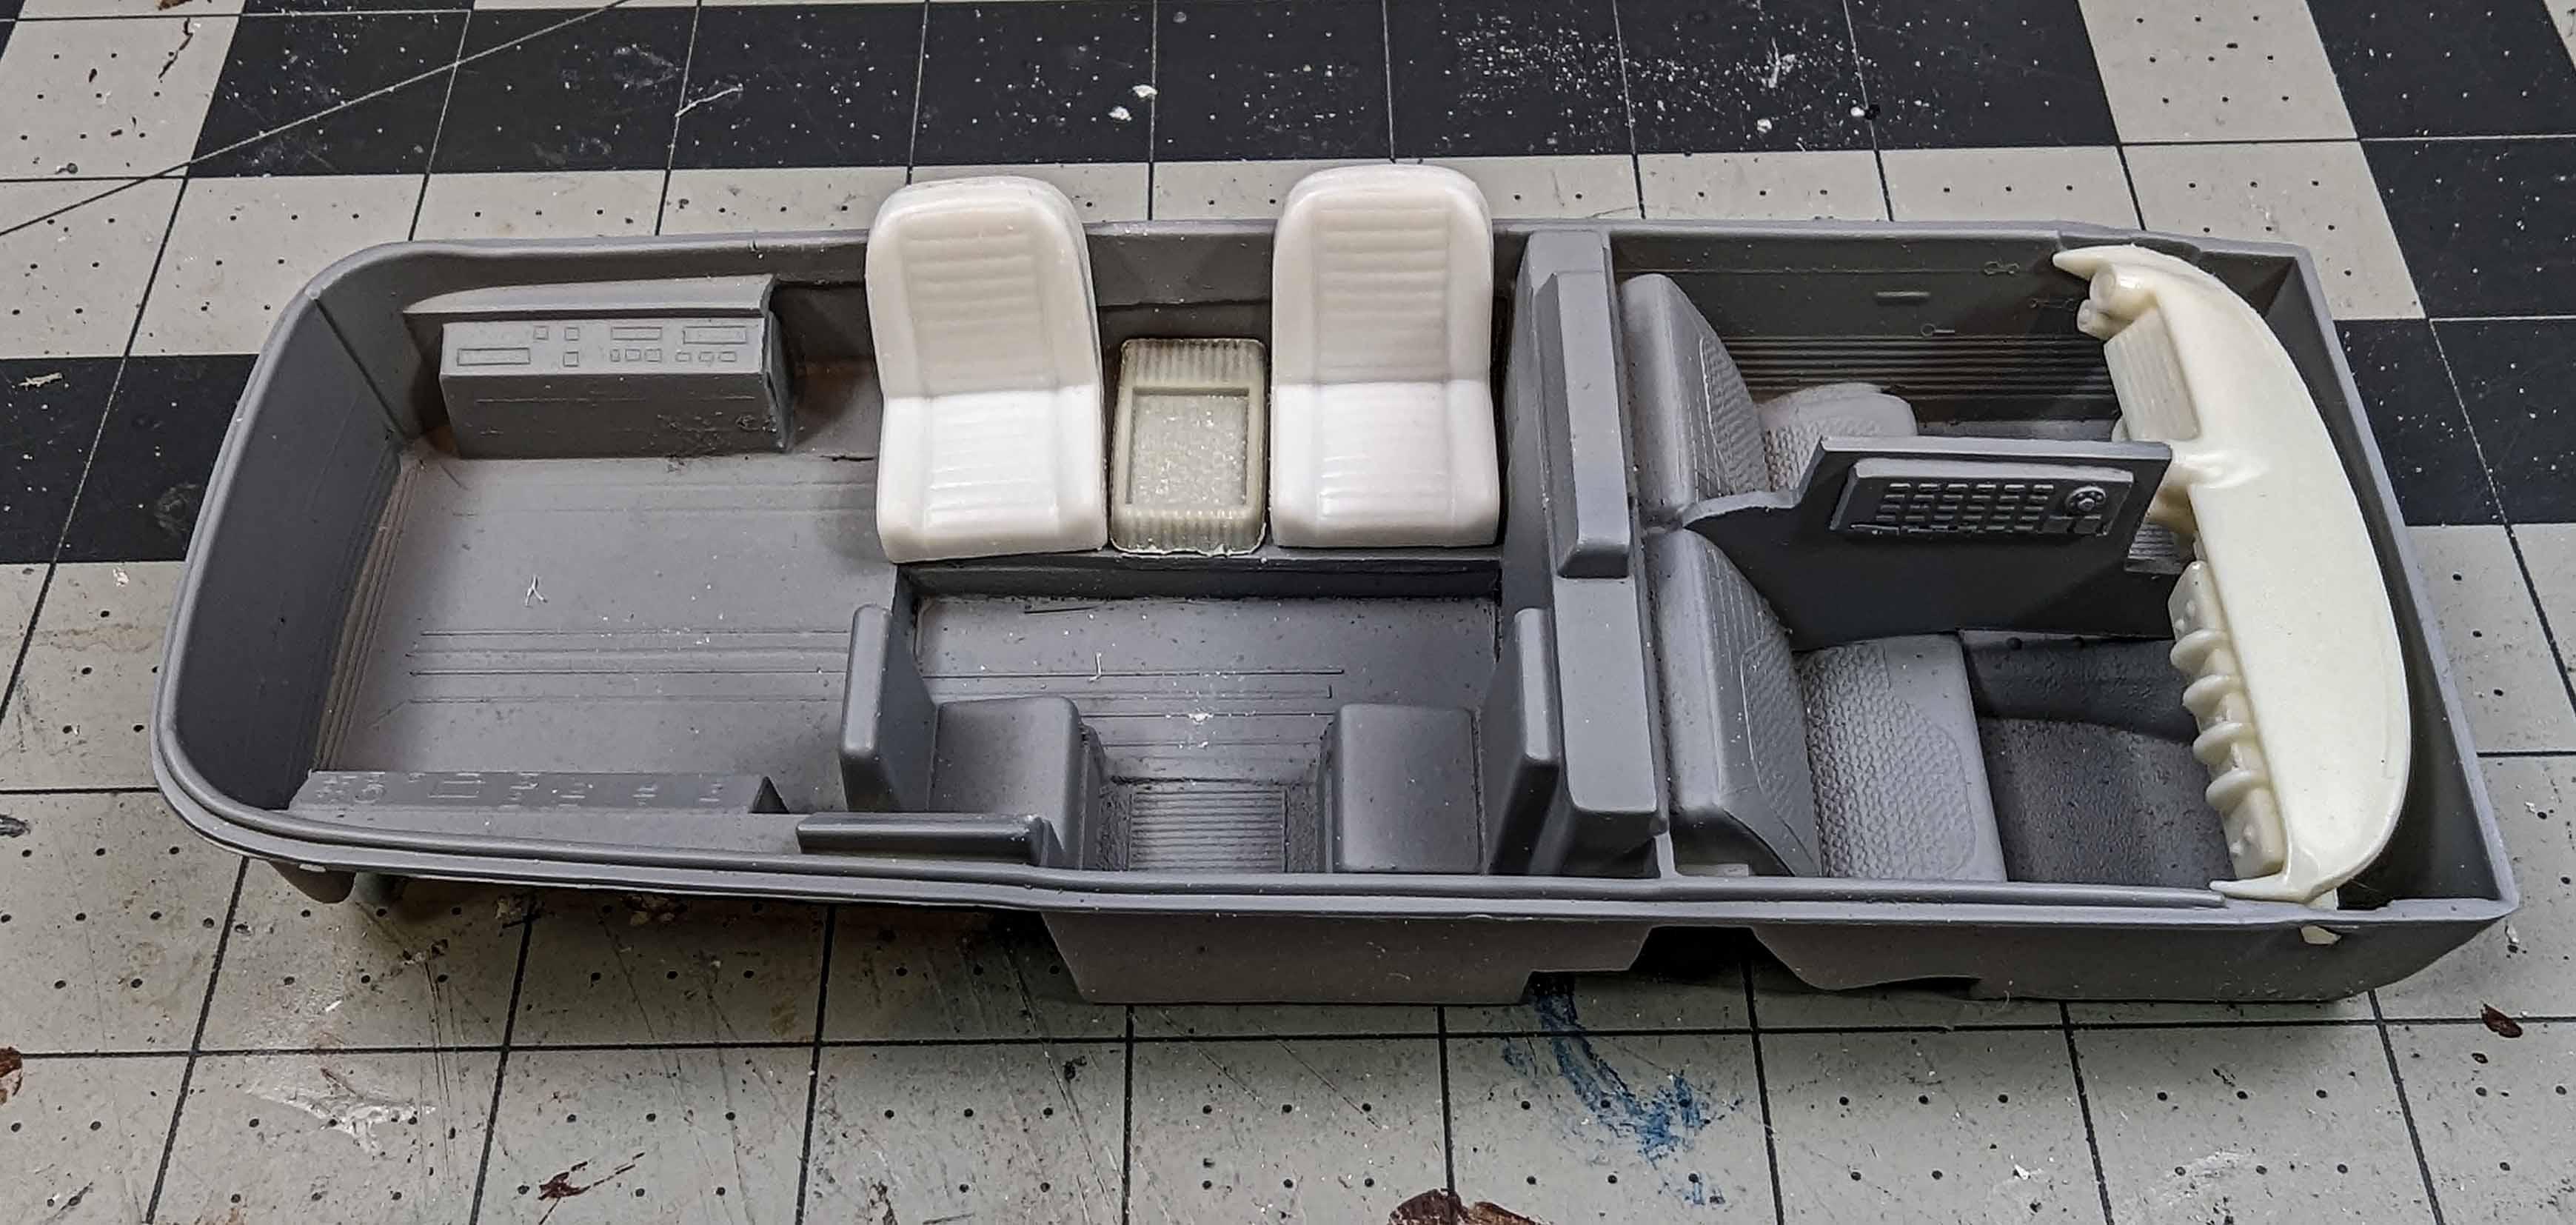
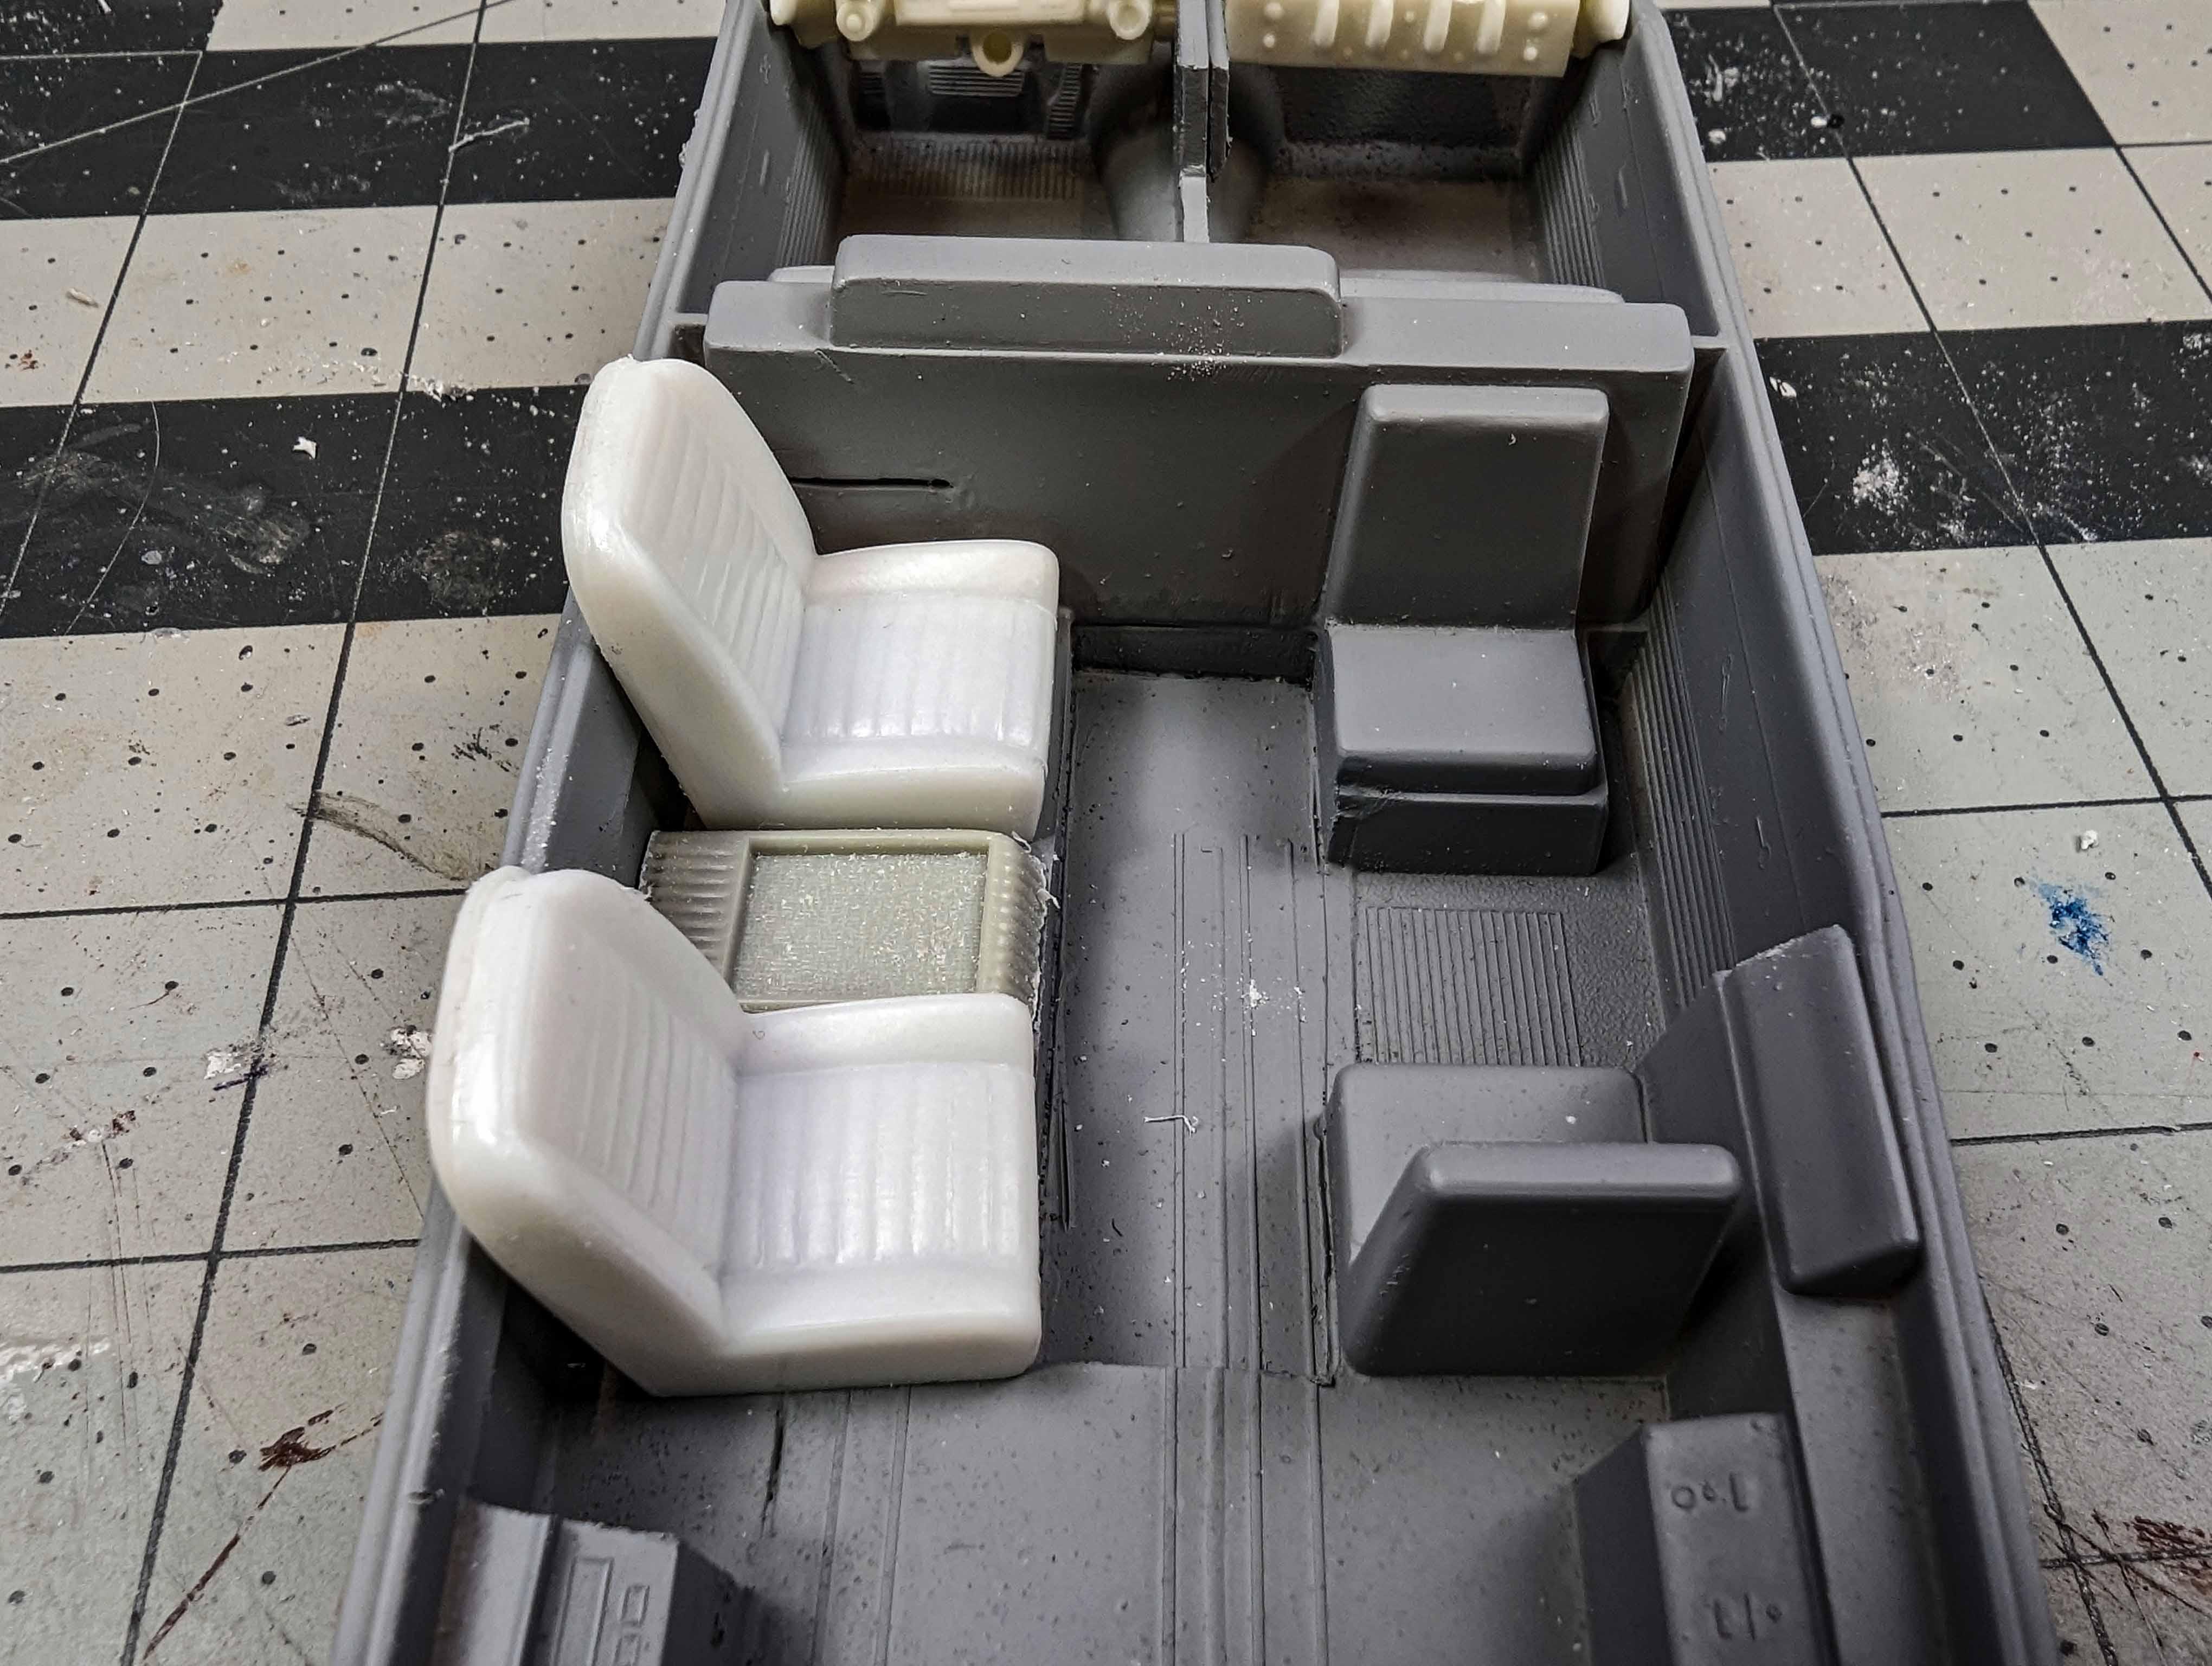
I have paint on the body. My first paint idea was to be fairly mild, and then I thought to go wild, but decided to hit in the middle. The interior has been separated into sections. The front is for the pilot who pushes buttons for control and has several control pods, and a security person with his own machinery. The rear is just for luggage. The center is for passengers with seating designed for their importance. I did give them a drink dispenser, and for the more important passengers, a little console to set their drinks on. They also get the better chairs. I'm just about ready for the "space stuff" so keep watching.
-
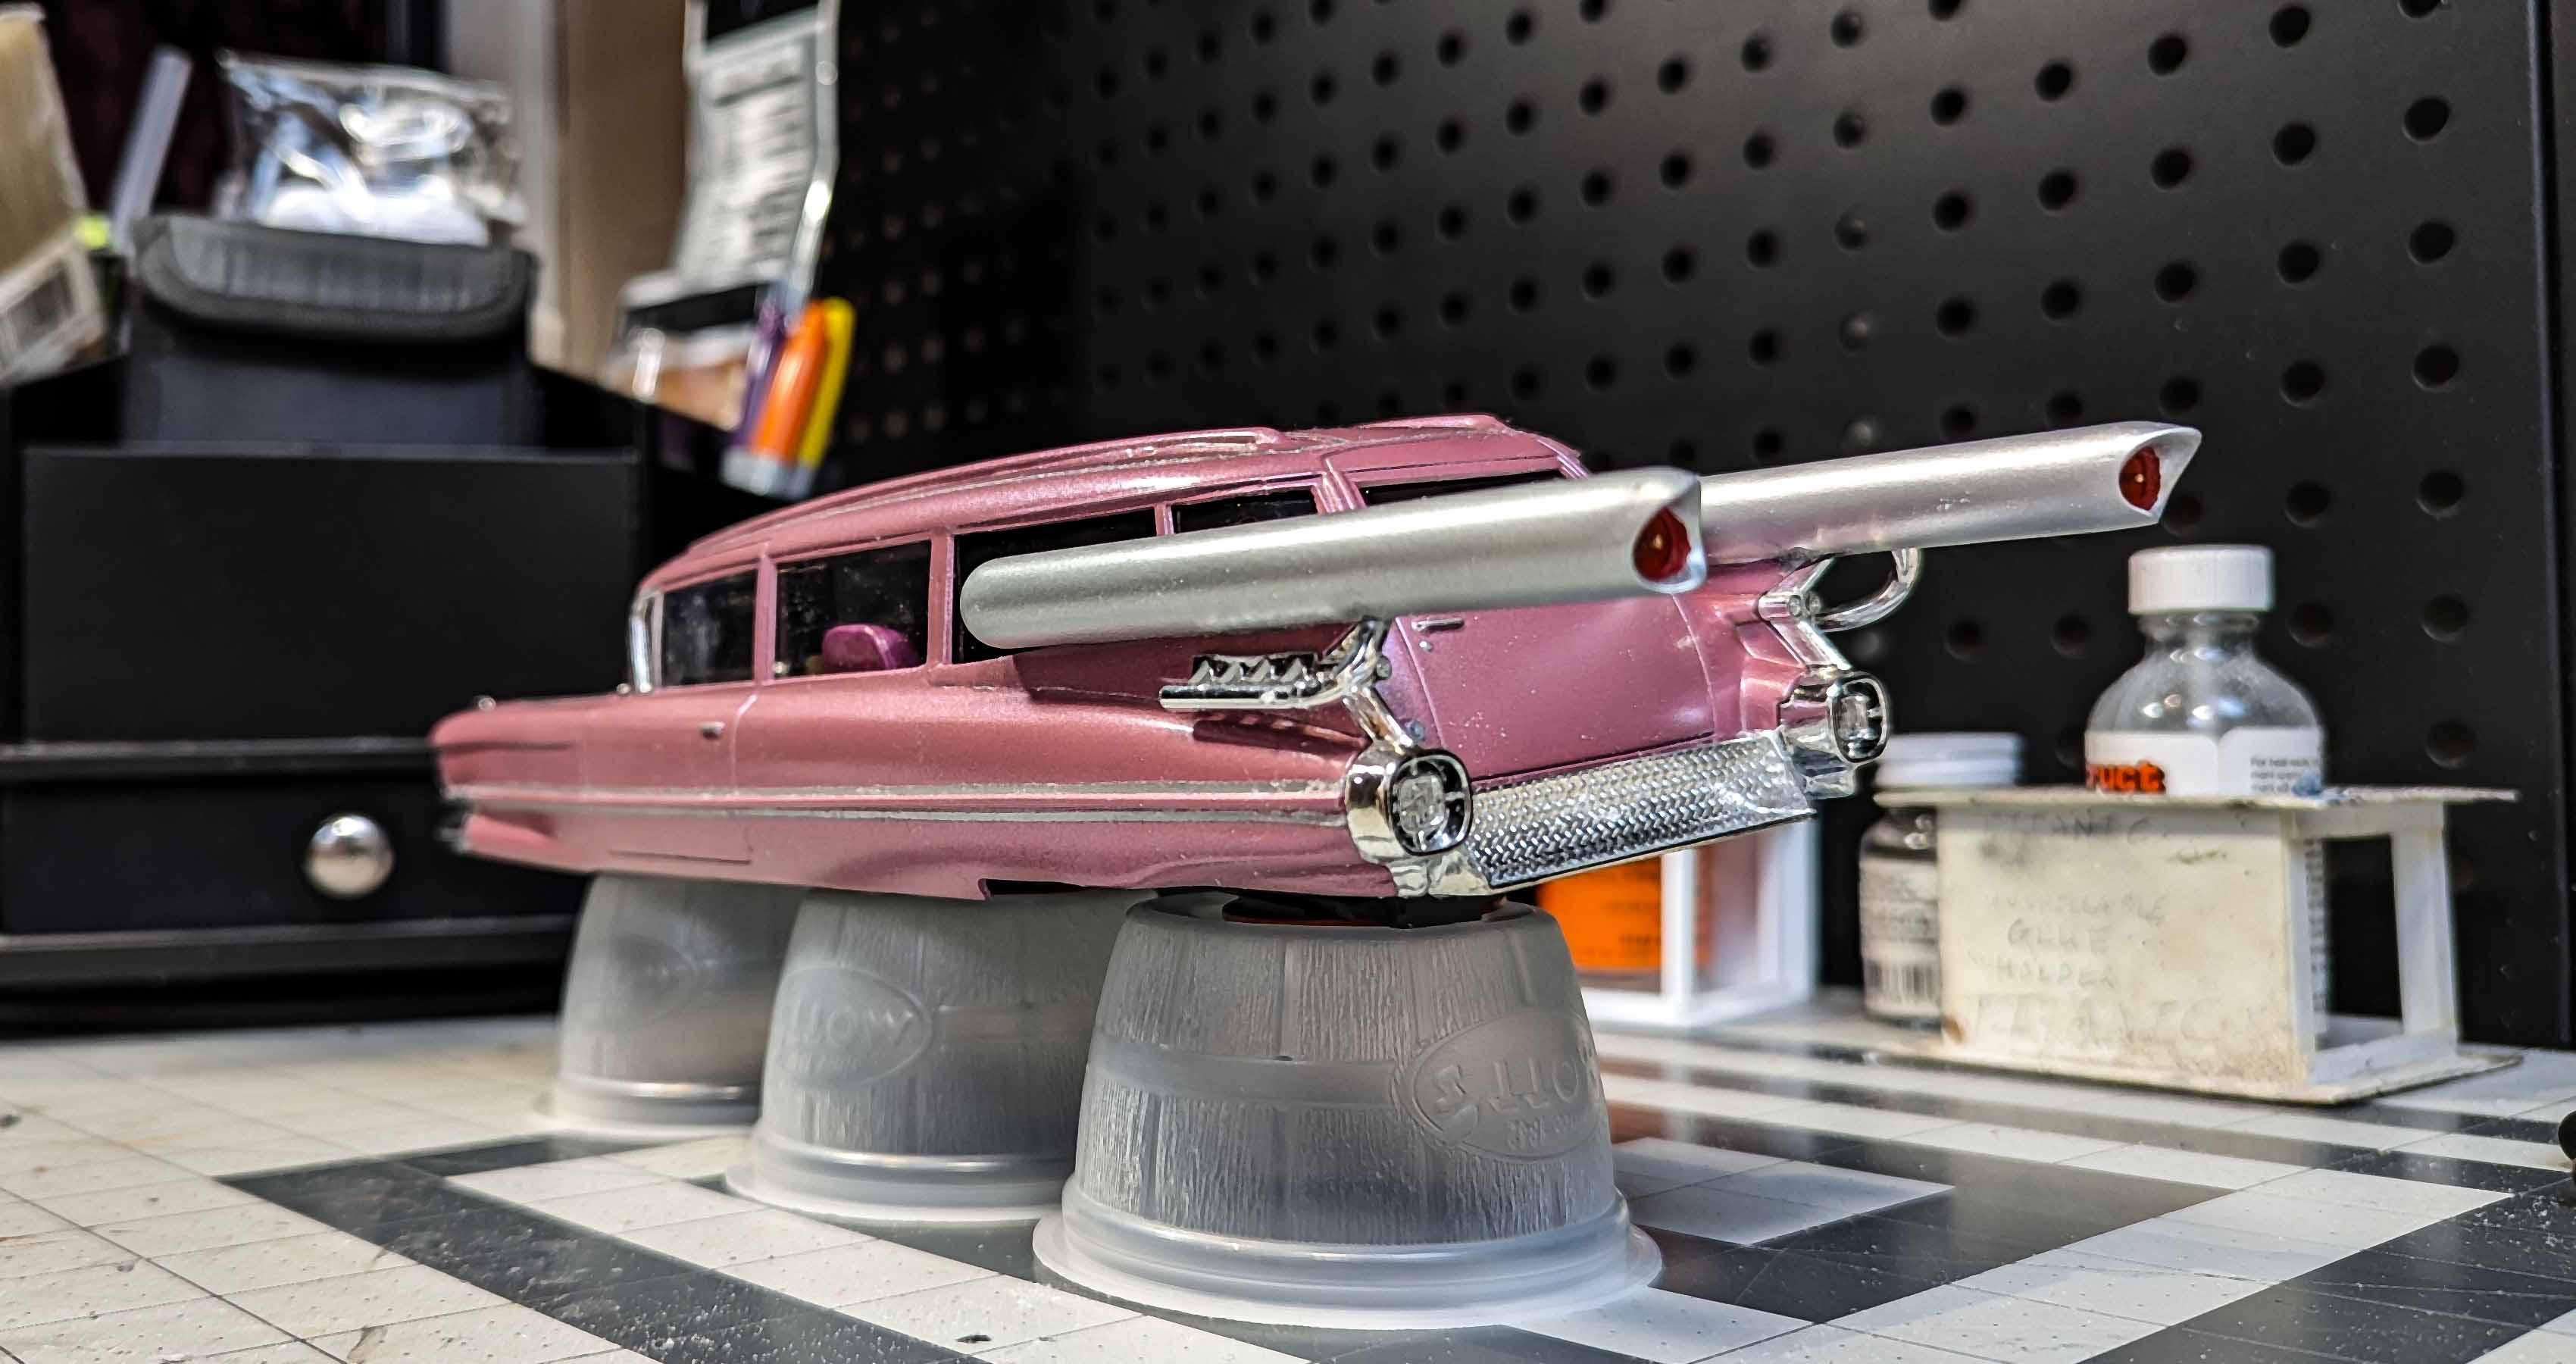
Space Caddy is starting to get some details.
-
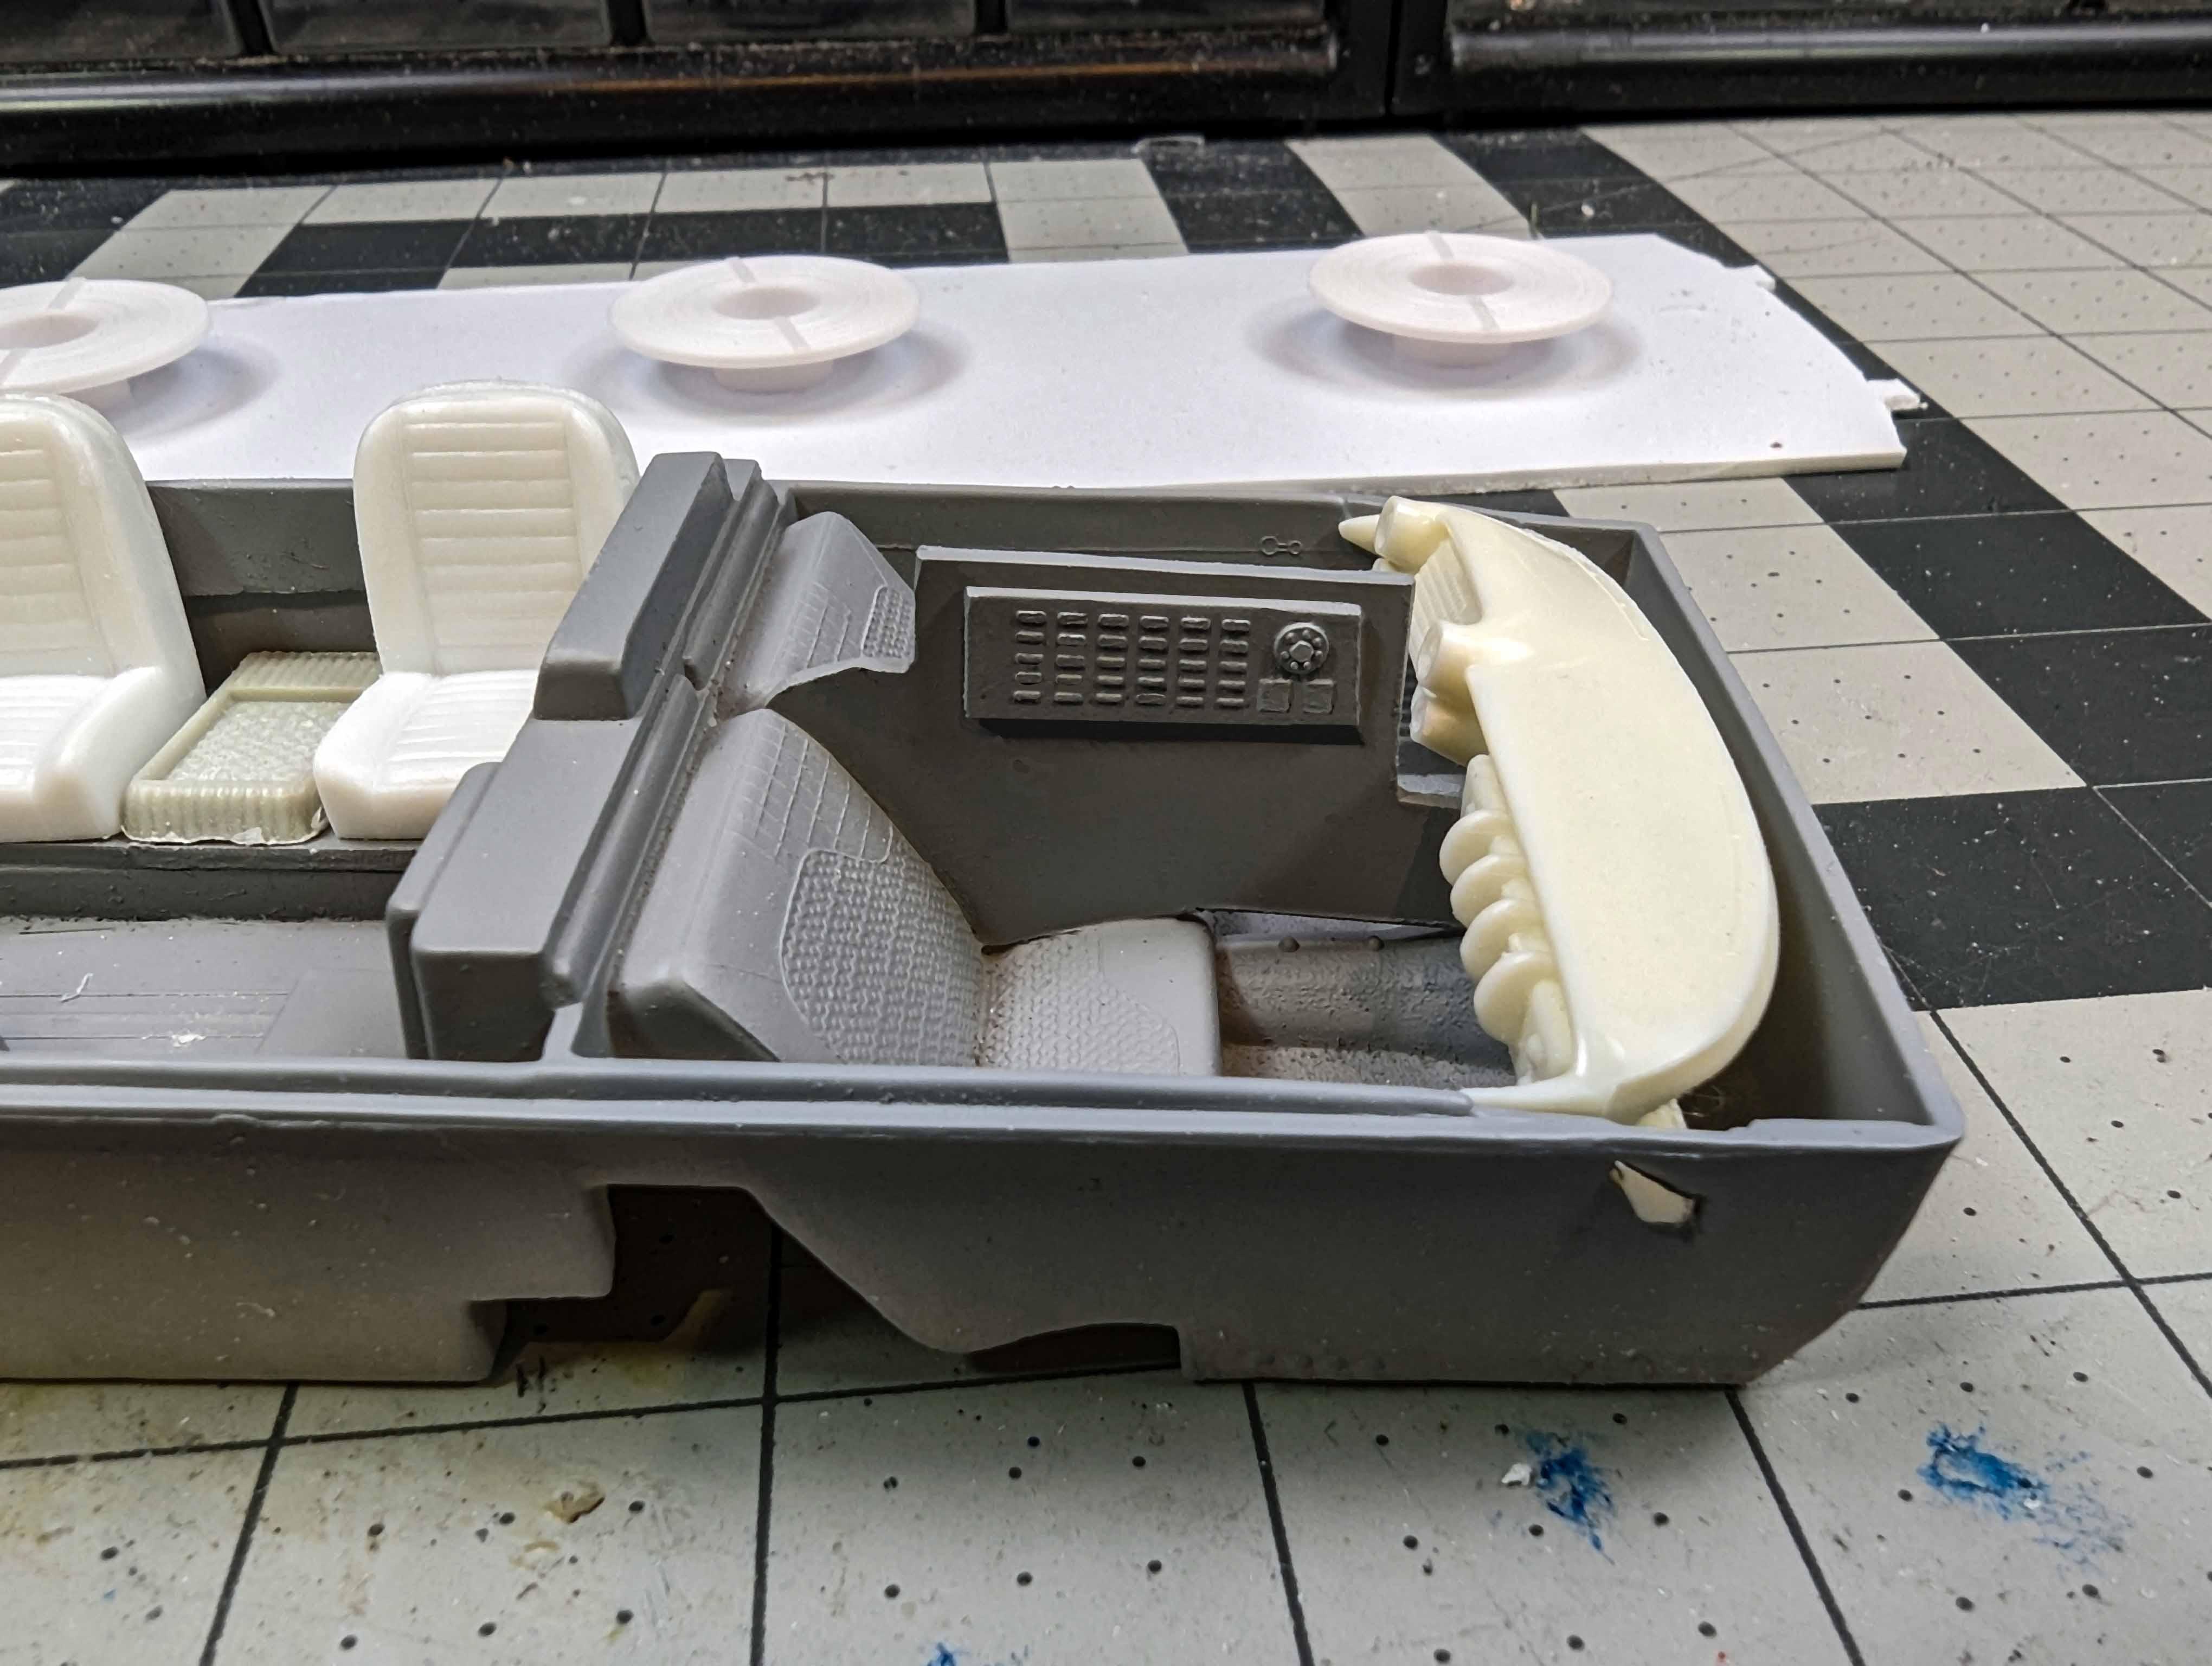
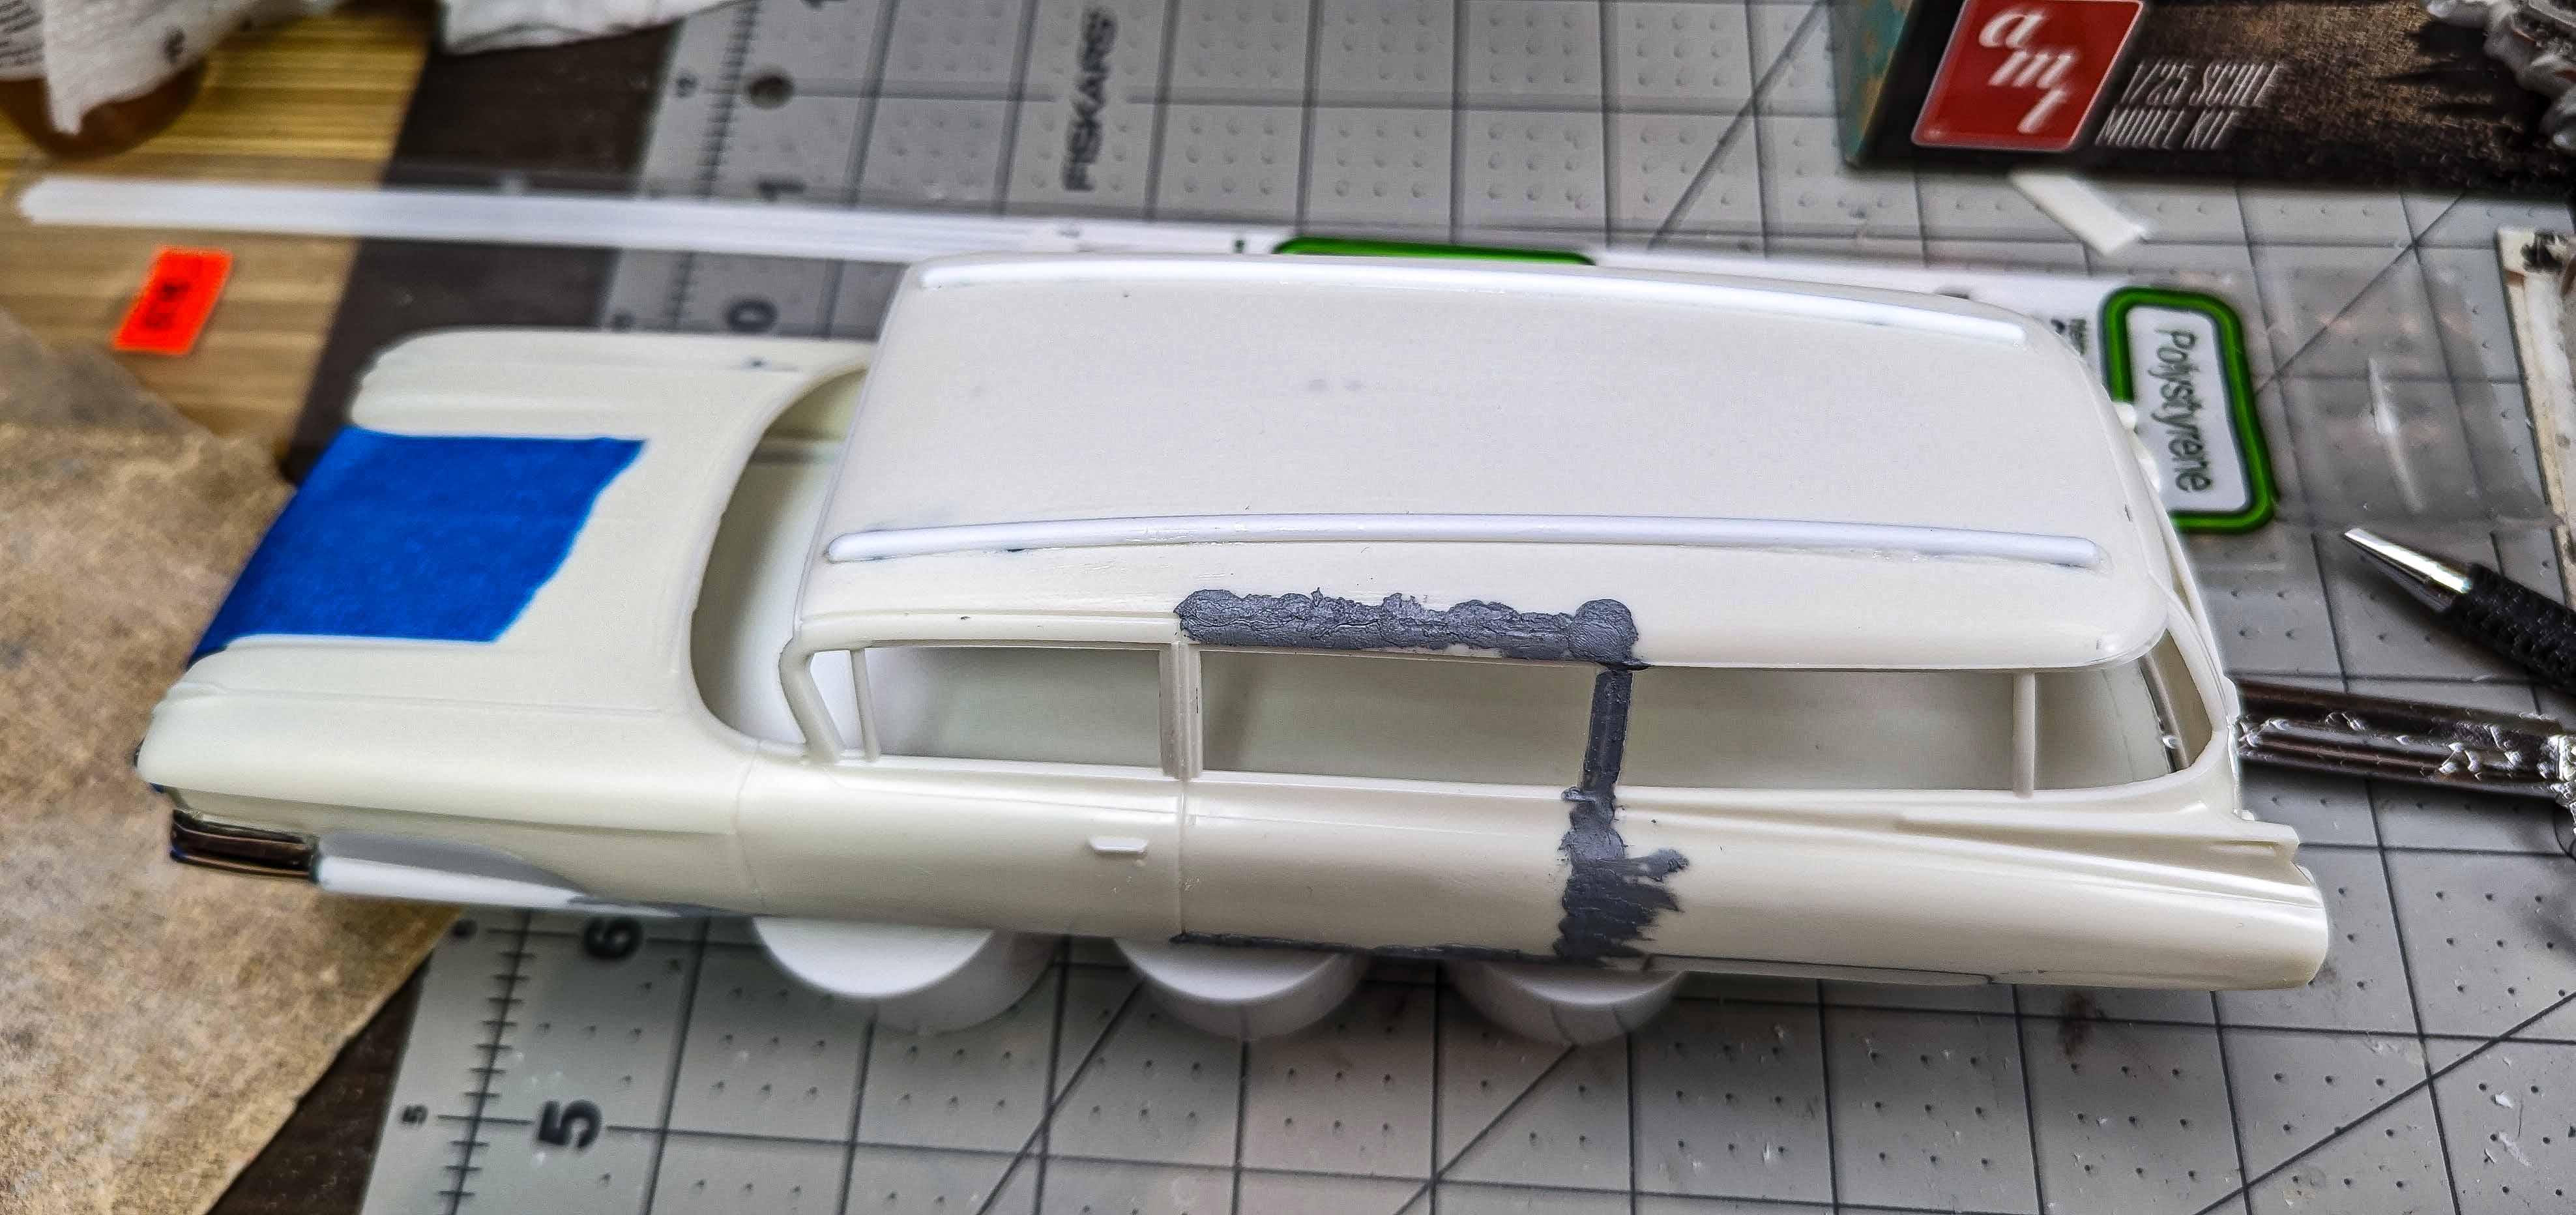
My mind is off in wild directions again. This time, I'm taking a 59 Cadillac ambulance and turning it into a VIP space shuttle craft. I call it the Space Caddy. I've enclosed the front wheel well and added some detail coming from the front bumper. The left rear door had to be sealed/eliminated to make room for the seating. The holes for the roof lights that I'm not using were being a pain, so I just added decorative strips over them. I am restructuring the interior with added seats and the rear section will be closed off for luggage. The steel roles from the AMT flatbed trailer are going to be repurposed as lift off pods/parking pads. I have plans of mating this to pieces from the AMT Star Trek Enterprise. The way that my brain works, who knows what will be the result? I'll also be covering this on my Modeling Hermit YouTube channel, for those that want to follow along. It will no where no Caddy has gone before.
-
This Moebius 1968 Ford F-250 pickup is being combined with the camper from the AMT 1965 El Camino. The camper is being modified to fit the truck, as part of a YouTube group build. The alterations for the truck consisted of moving the spare tire to the front, removing chrome from the grill/front bumper, and removing some side trim, to lower the model status. The camper had to be widened and have additional sheeting added to the side. Inside it gained a ceiling panel with lights, a reworked bed from the White Freightliner kit, cupboards/closets, table, seating, tile floor, refrigerator, sink, and stove. I still have some marker lights to add as well as tail lights for the camper unit. There will also be a boat added to complete the rig. These are only in construction photos. When I'm done, I'll get better quality photos and post the rig to the completed forum.
- 3 replies
-
- 6
-
-
- 68 ford pickup
- camper
- (and 1 more)
-
I found this forum in the old days when one had to use photo hosting sites in order to post photos. I just went back through some of my posts from the 2010-2014 era, and saw, not pictures that I'd posted, but notice that the pictures were no longer available from the hosting sites that I'd long ago closed out. In this modern time, we're able to upload directly from our computer, and even if the picture disappears from that computer, it's still here. It may be a small simple thing, but it is that attention to details that can make for a more cohesive partnership between the forum admin and the members. My point of this is to simply say thank you.