
The Modeling Hermit
-
Posts
33 -
Joined
-
Last visited
Content Type
Profiles
Forums
Events
Gallery
Everything posted by The Modeling Hermit
-
It's so real that I can smell the cheeseburgers. You have done masterfully on this work of art.
-

1/24 Scratch build building & Diorama base
The Modeling Hermit replied to tiking's topic in Dioramas
I think that there are two words that come into relevance for your diorama; nailed it! -
The only way it could have looked more real is if you'd used a shrink ray on the real thing.
-
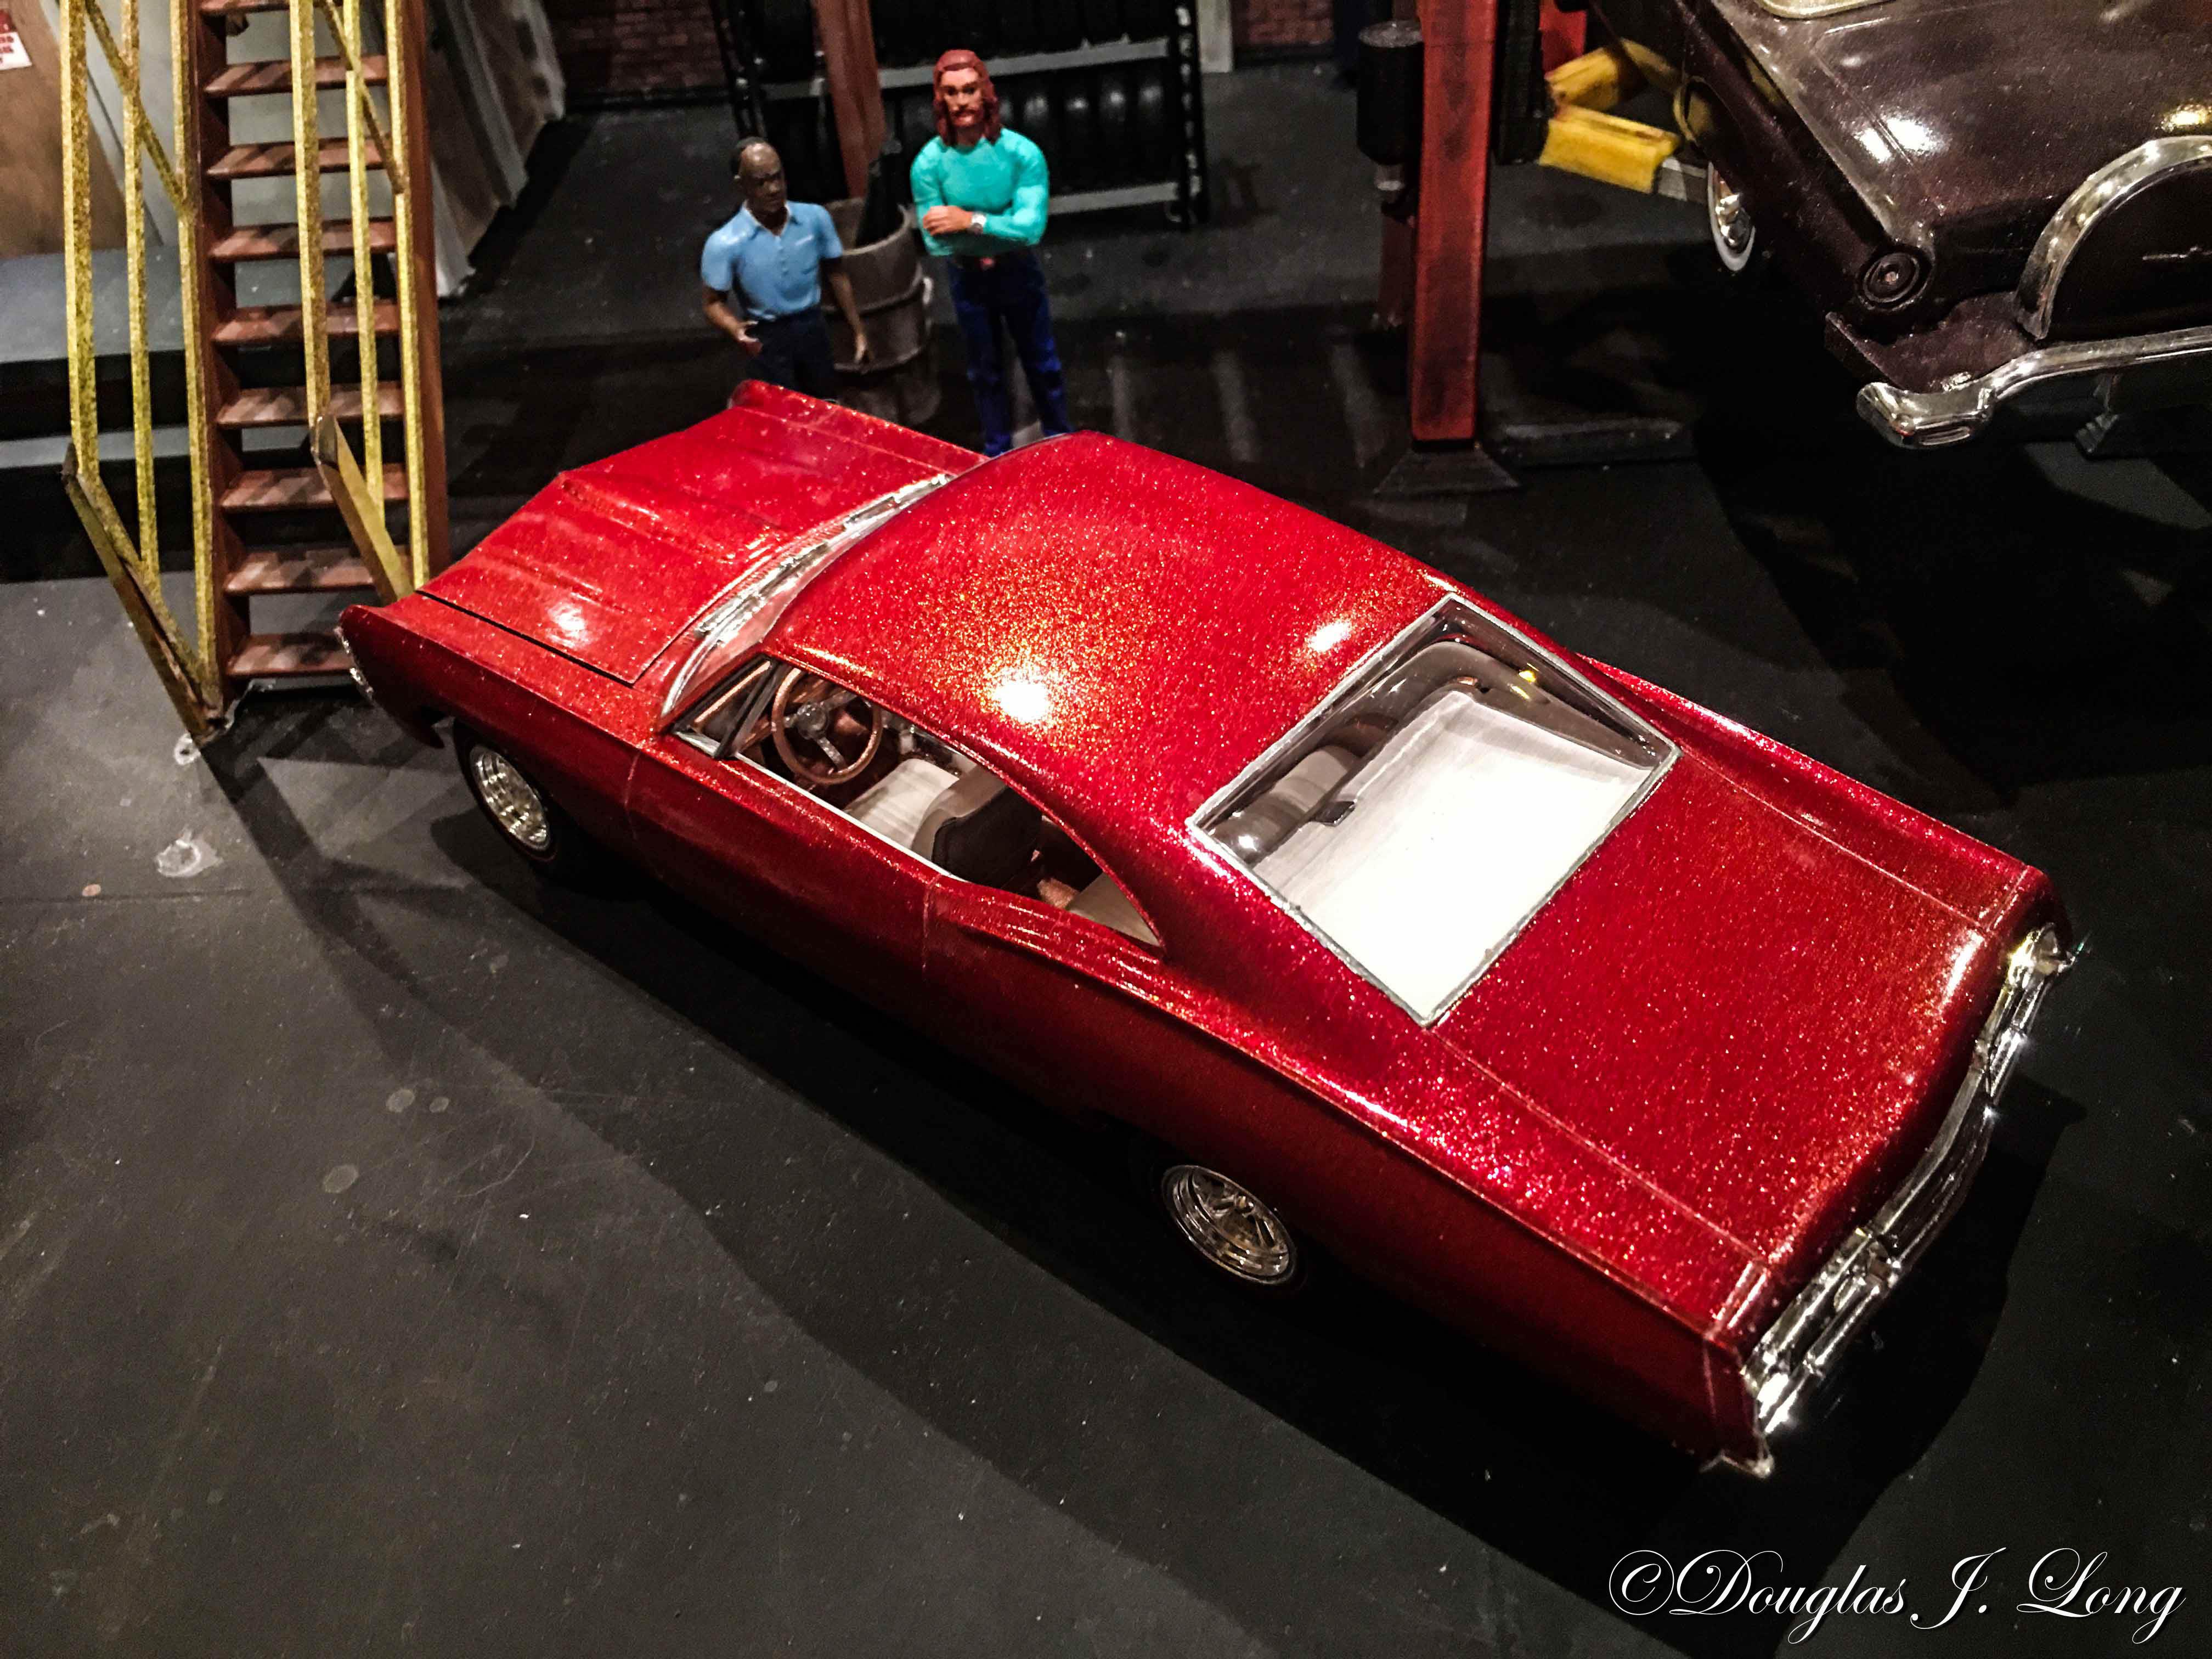
I have several of these Impala SS & Supernatural kits sitting around, so I like to dig them out and try experimentations upon them. This one has been approached as a mild street custom, with emphasis on the paint. I first laid down a coat of Copper, followed by light Silver fogging to highlight accent lines. I then sprayed Gloss Custom Red. For drama, I added Pink Champagne color shift paint, giving it somewhat of a crushed glass affect. That was followed by three coats of Wet Look Clear, with wet sanding between each coat. It was buffed out with Meguiar's polishing compound, and finished with Meguiar's Gold Class Carnuba paste wax. Unfortunately, my fogging is not evident in the photos; even moving it outdoors for natural light photos didn't help.

-
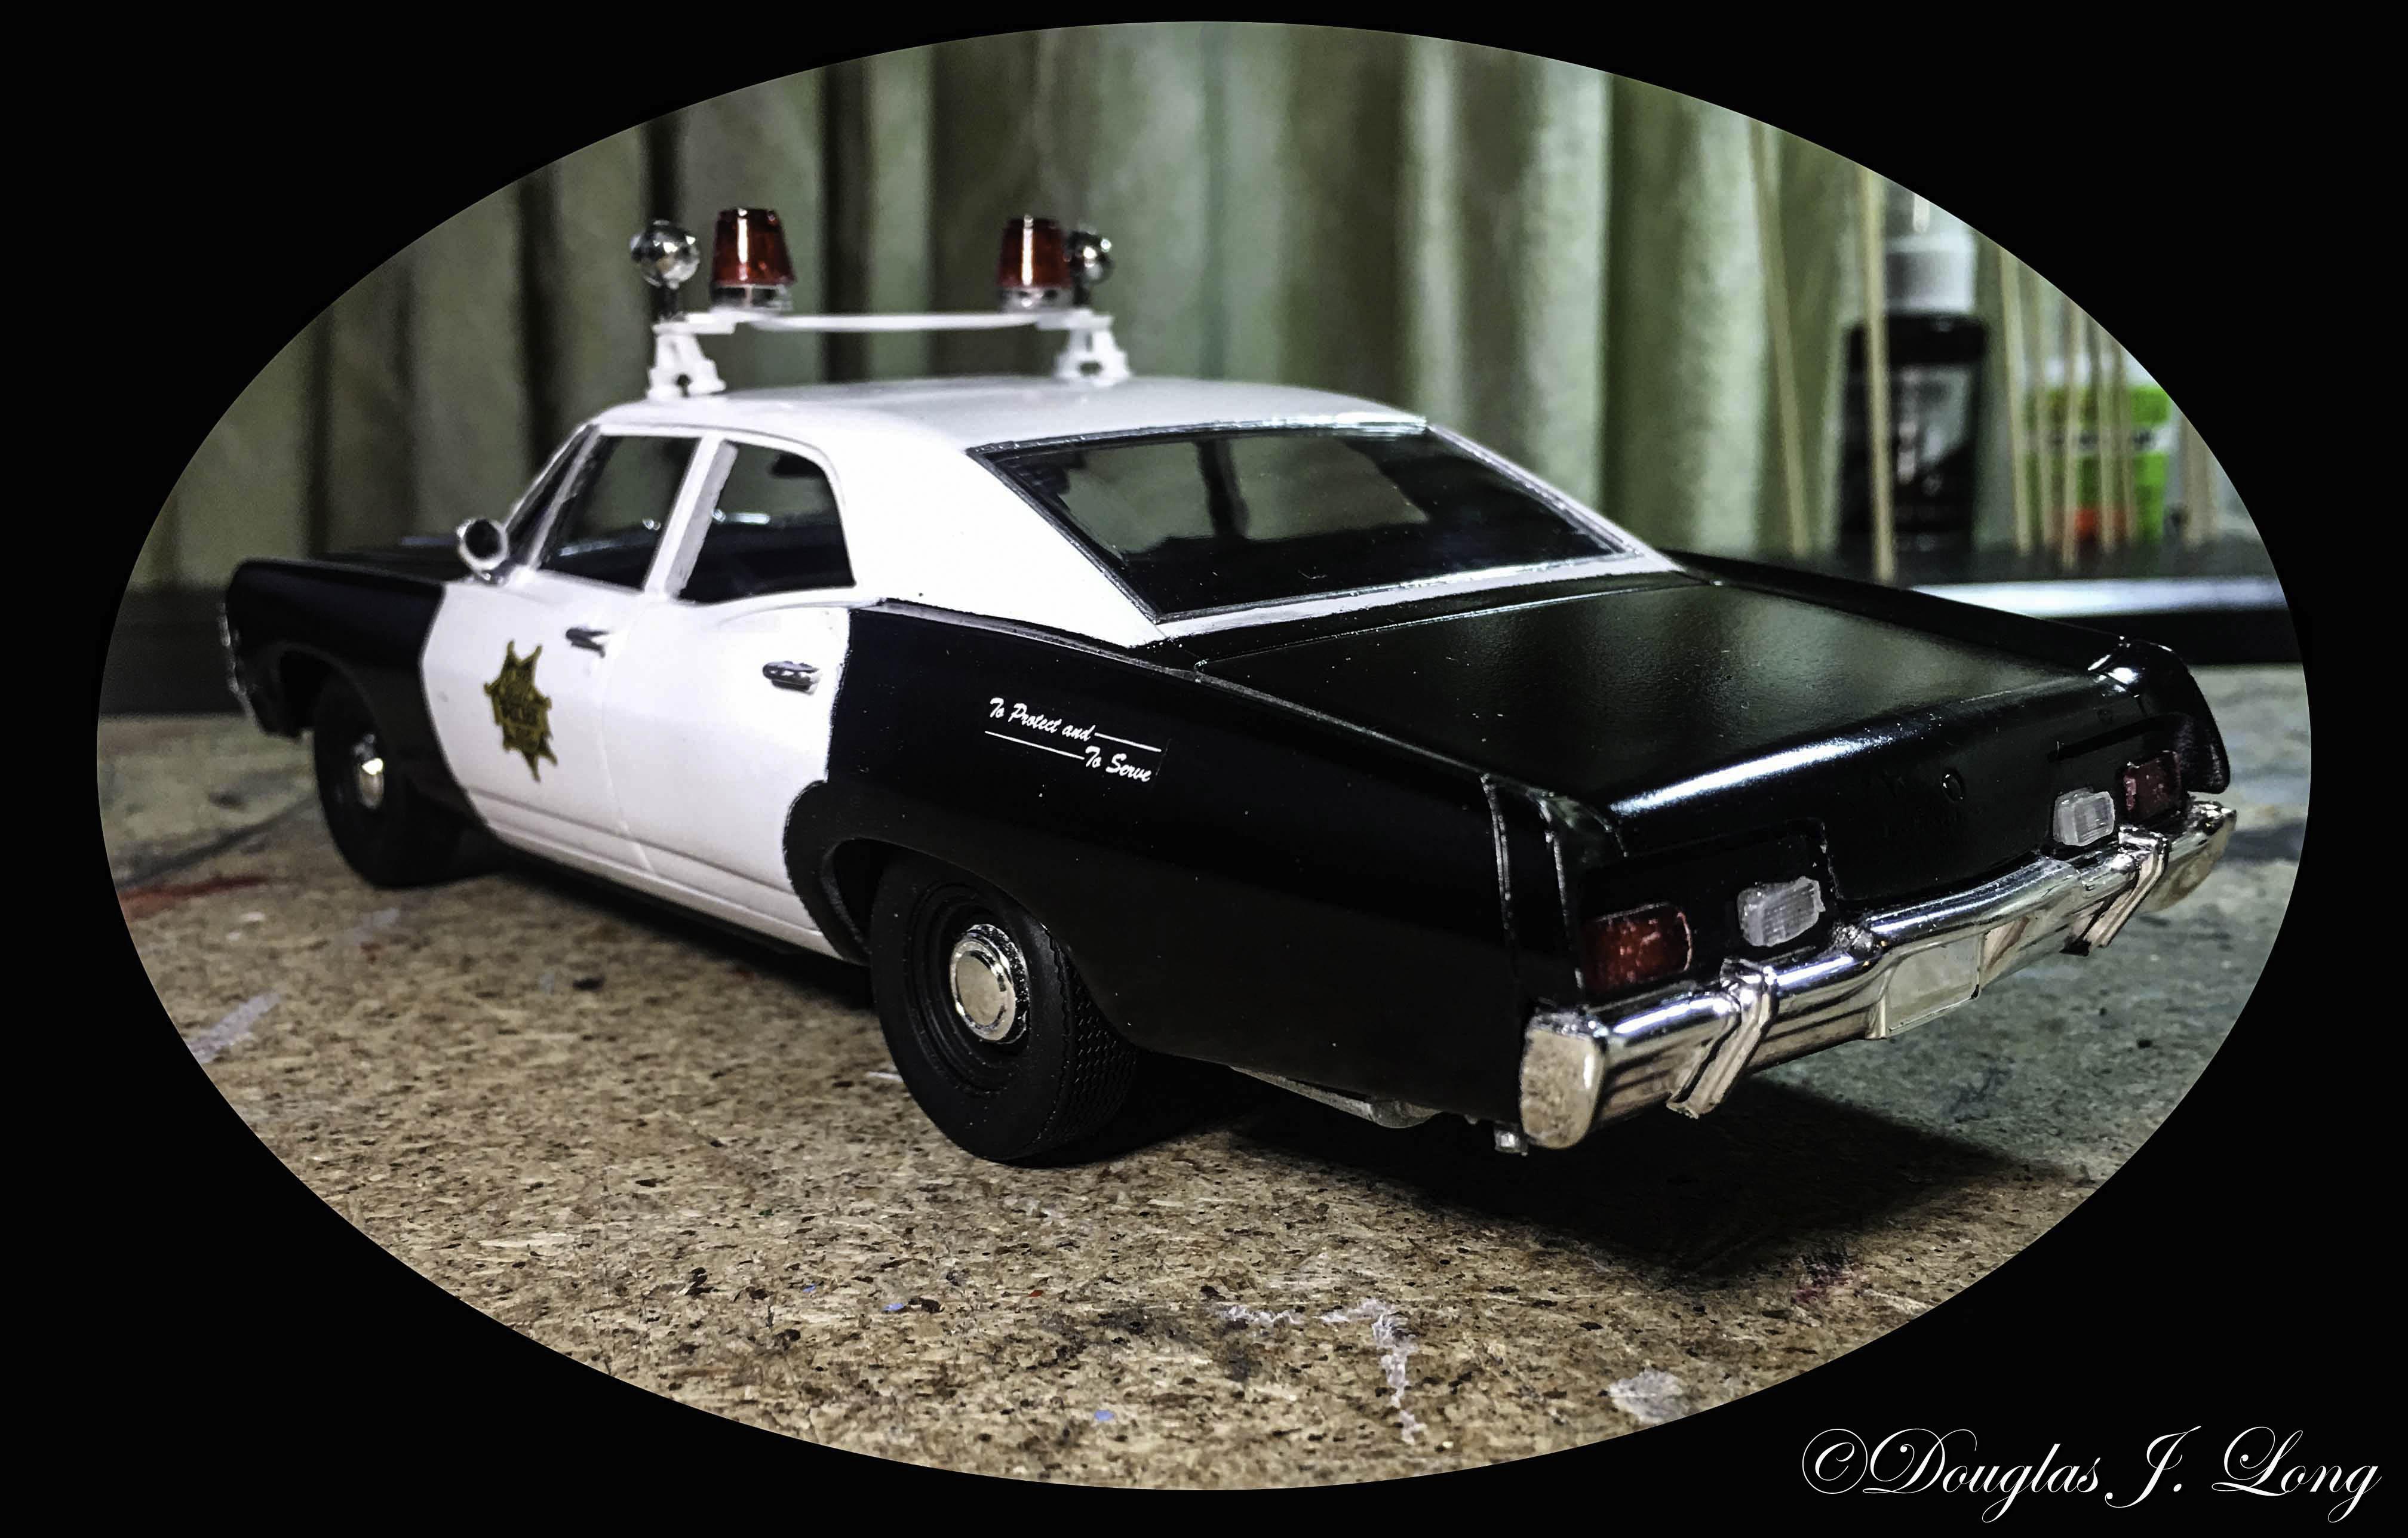
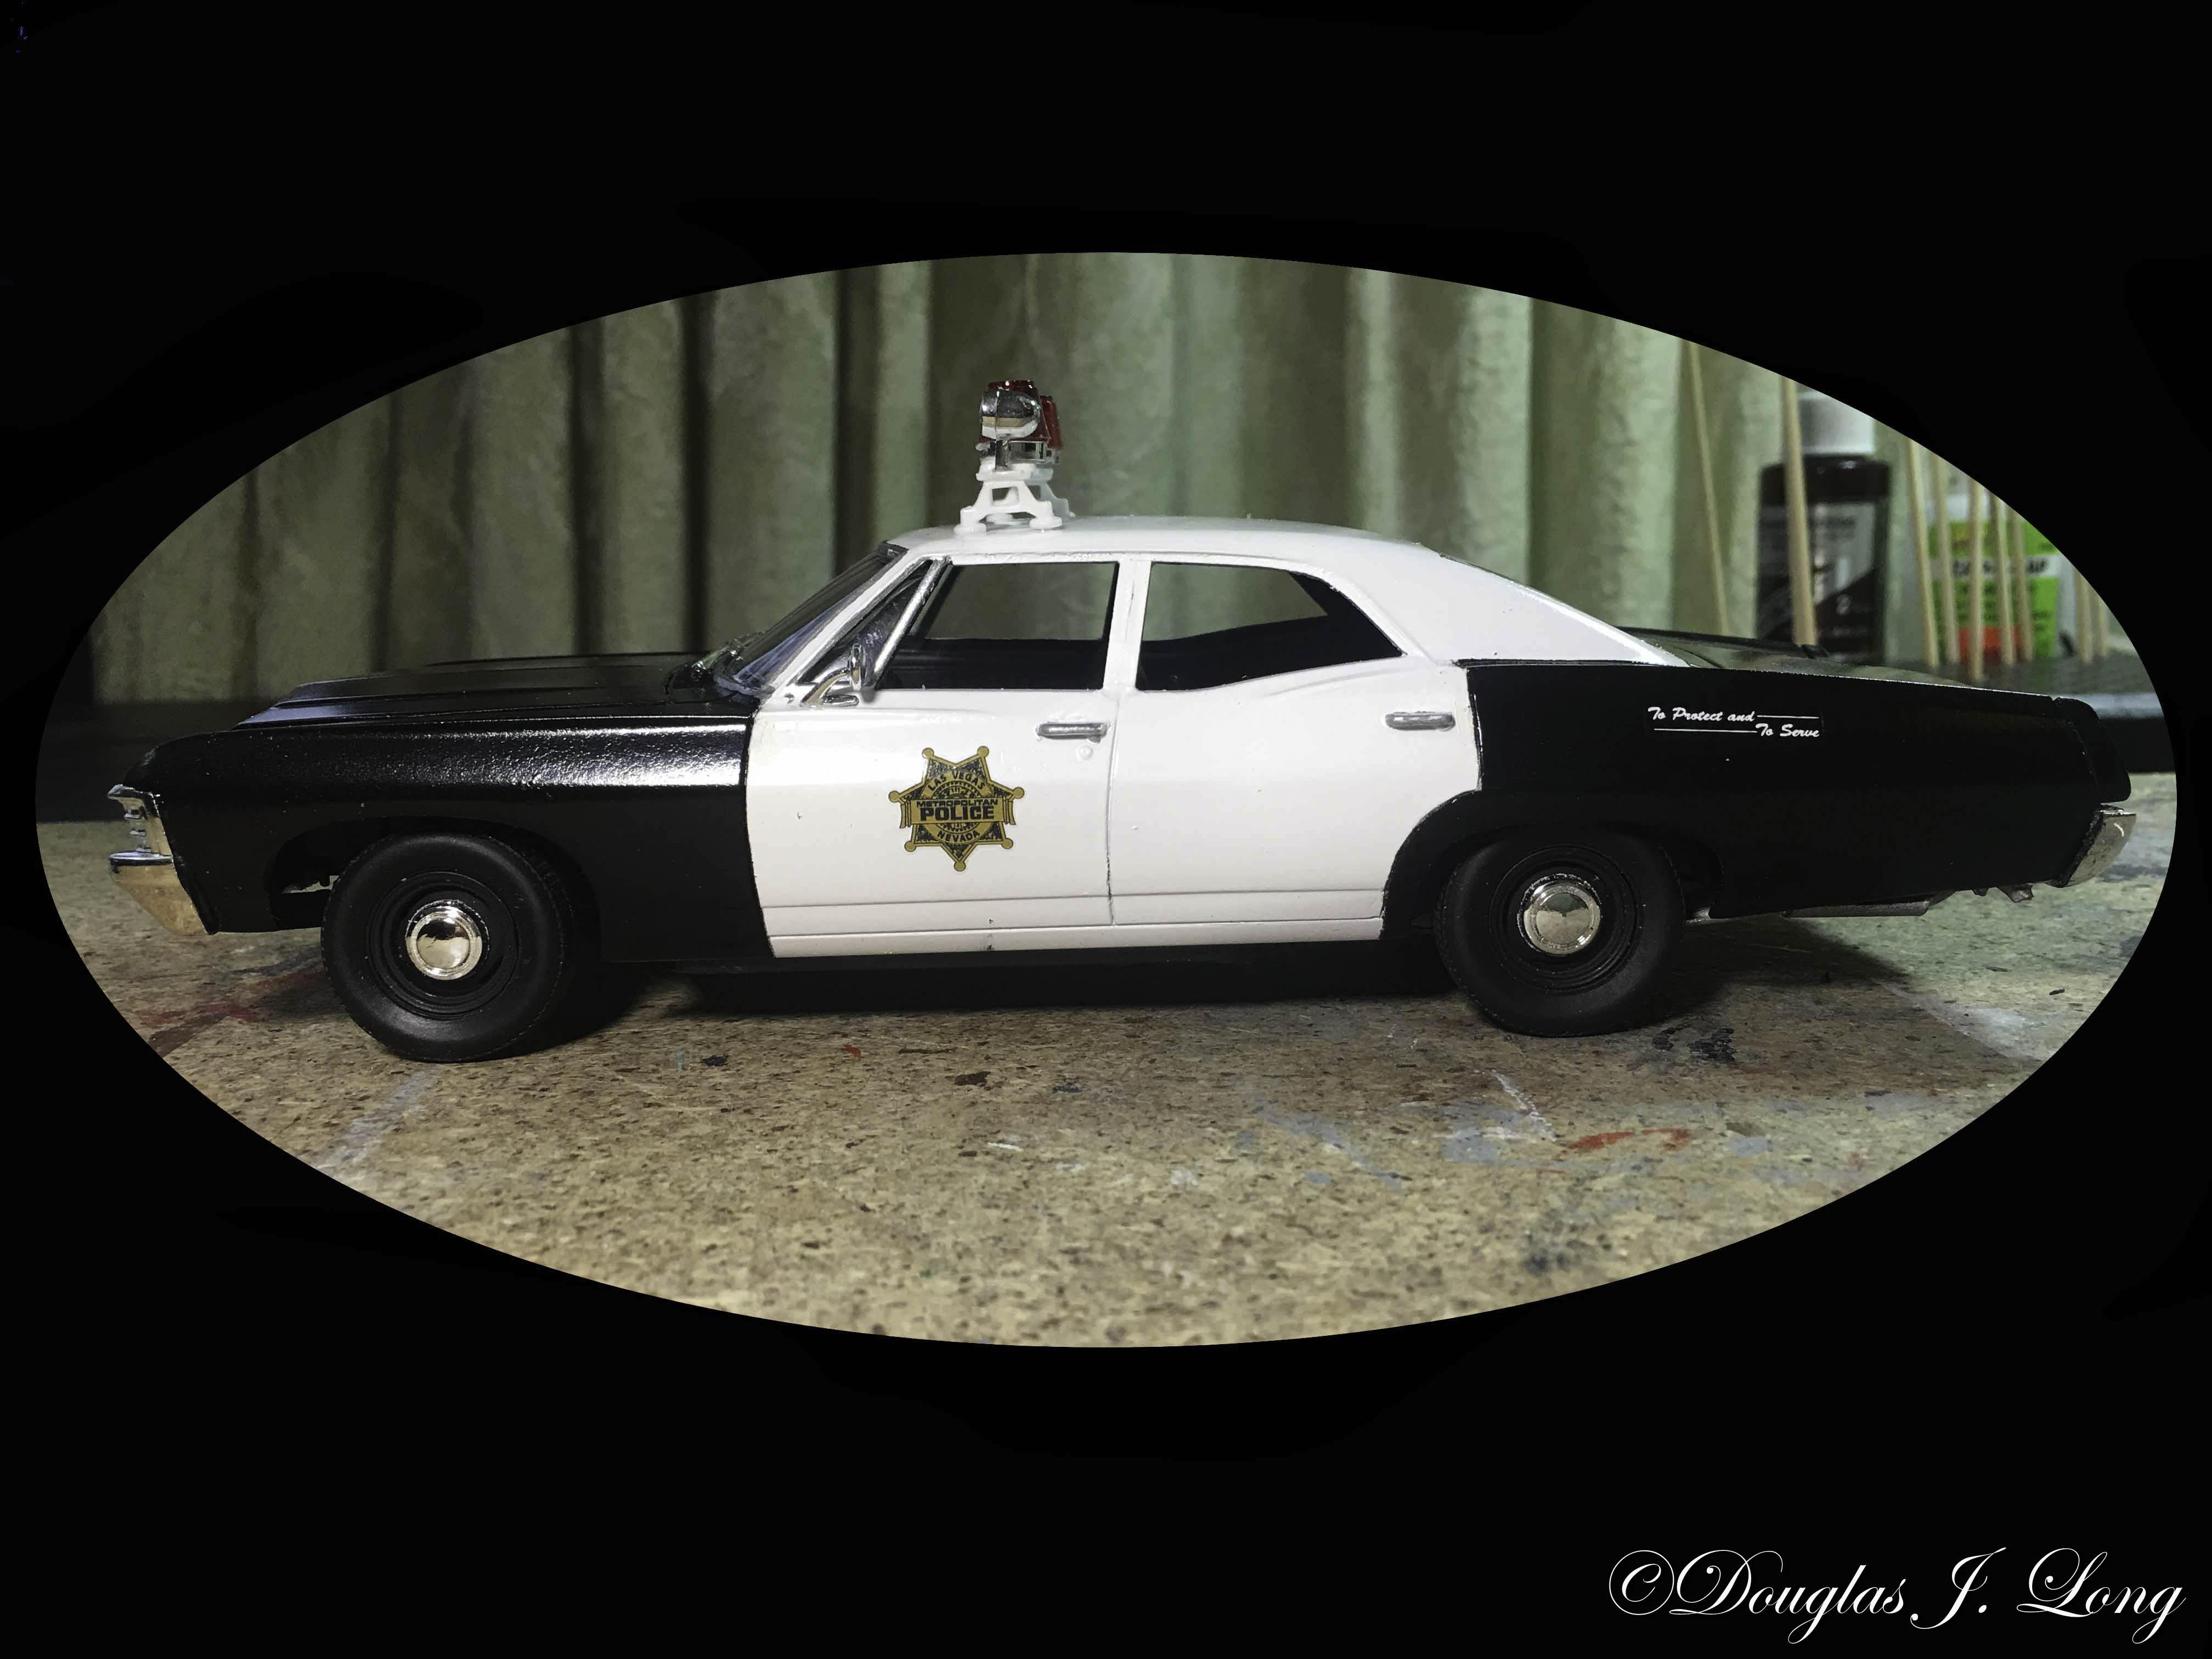
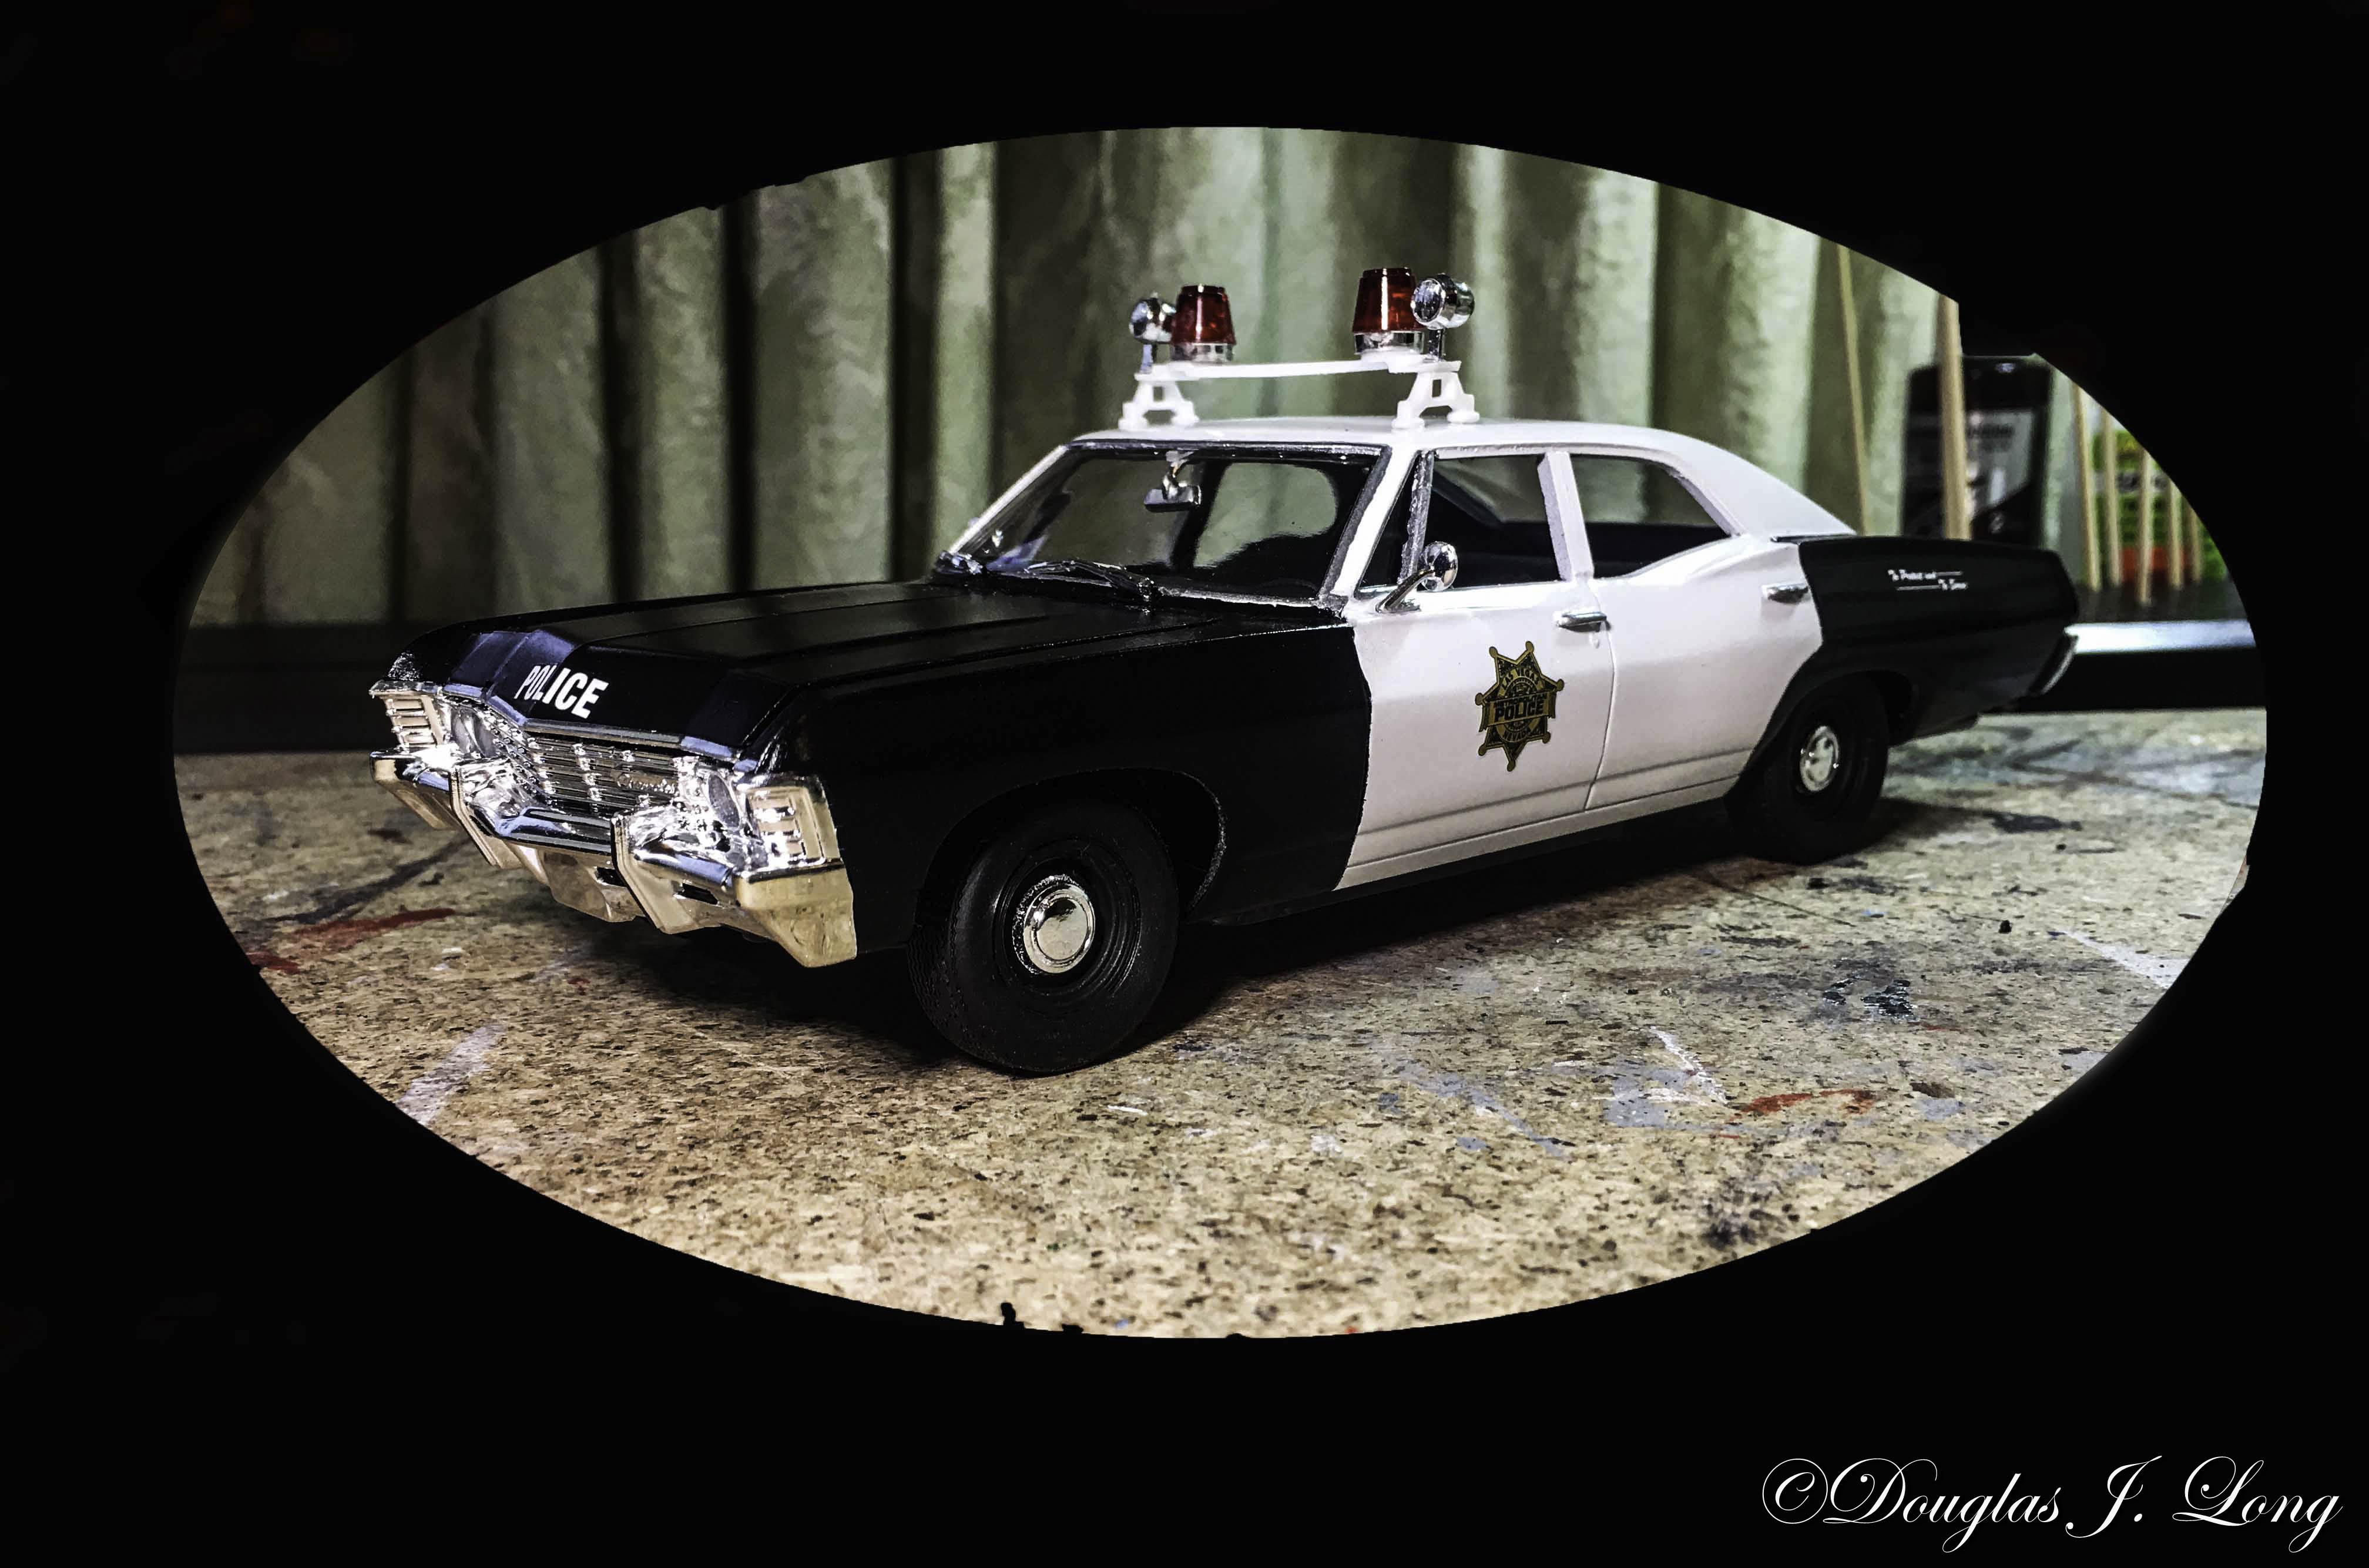
I made a couple of minor changes t the Supernatural 1967 Chevrolet Impala Supernatural kit. It is now a Biscayne police car. I probably don't have all the police items correct, as this is the first time that I've ever done a police car, and I'm out of my comfort zone. I did not include an areal as they have a tendency to get knocked off, or worse, broken. When I introduce it into a diorama sometime in the future, I'll then include the antenna(s). I really expect to see AMT produce a police car from the Supernatural kit as the interest for the kit wanes. For those of you who are considering this transformation, I have some information to add. The rear center of the trunk has to be reworked. Impalas had a trim piece on the lower edge of the trunk. The Biscaynes do not. This trim is molded on with the rear bumper. You will need to carefully cut that from the bumper, sand it smooth, and add it to the bottom of the center trunk lid. The tail lights are also different. Once again, turn to the rear bumper. Carefully file the upper trim from above the lights, leaving the backing intact. After the trim is removed, sand the detail from the light area. I used parts bins lights for it, which suffice quite well, since I'm just going for a shelf model. To reach a higher level of authenticity, I would suggest that you plan ahead and acquire slightly larger lights, and include the trim surrounds for them. The seats have to be addressed. Straight from the kit, the seats don't match each other. I resolved this by sanding both seats semi-smooth. I then added .010 strips for the detail. I did not alter the trim on the doors, as it would not be noticeable through the small window openings. If you're using the beige color that some departments used, you may want to give the door panels consideration. The 1965 Chevelle wagon comes with surf boards and a rack to carry them on. I used the uprights for the racks to build the sides for the light bar. The cross piece was in one of my miscellaneous parts drawers. It was a piece that says remove on it, and probably was from the hood opening section of a long built model. This one was perfect as it had to round areas on either side that matched the emergency strobe lights. Those strobe lights came from the red lens trees for big rig trucks.
-
That is an excellent stovebolt.
-
That is magnificent. You have captured the subject admirably.
-
I wanted a late 60s to early 70s period look, so I swapped out the kit tires and wheels for TorqThrust mags on the front with slot mags and Micky Thompson slicks on the rear. I do wish that I'd set the seat and roll bar back a little, but I guess that with each kit we build, we have to find one thing that bothers us and keeps us humble. This one was a two-fer though. Between tweezers that refuse to keep hold of the door handles and uncooperative fat fingers, I managed to set the door handles too high. The front valance on the kit had a factory defect on it that looked like somebody had laid a hot bar or something across it, so that was not used. The paint color was selected scientifically. I didn't want the orange, red, or even the black that is currently very popular, so I selected several colors of paint that I found interesting, laid them out on a table, closed my eyes and moved them around, and with my eyes still closed, picked up a can, and that's the color I used; Testors 1642 Gloss Custom Gold Metal Flake. I did make a couple of minor alterations to the engine and chassis from the kit offering. I'm one of the few modelers that really don't get much into engines, with most of my kits just receiving basic engines from the box, and the hoods glued shut. Once-in-awhile, I let loose and get serious in detailing. This Dodge got full engine and chassis detail. Here, Flo, one of the mechanics at Otto Ray Sing Classic Car Center inspects my work.
-
It is paint.
-
I'm just starting on one. I'll be following you build as I'm impressed with your determination and quality of work.
-
I can identify with that. My first car was a 1958 Oldsmobile 98 4 door hardtop with a continental kit, and I just didn't even consider parallel park it. Even with their parking issues, I still love continental kits.
-
I can just hear Mercury Blues playing in the background. Nice ride.
-
The roof is as it comes in the kit. It was one of the complaints about that kit when it first came out. In reality, it would have been a little crushing for rear seat passengers, but it does ad to the sleekness of what I was going for. The only concerns that I had with the kit was that it has warp issues, most of which I worked out, but I didn't notice the front fenders until I had the car nearly built and was attempting to put the grill/headlights on. Between rubber bands and clamps, I was able to get something that I could live with, but it still has a little of the old 1960 era JoHan promo 'smile'.
-
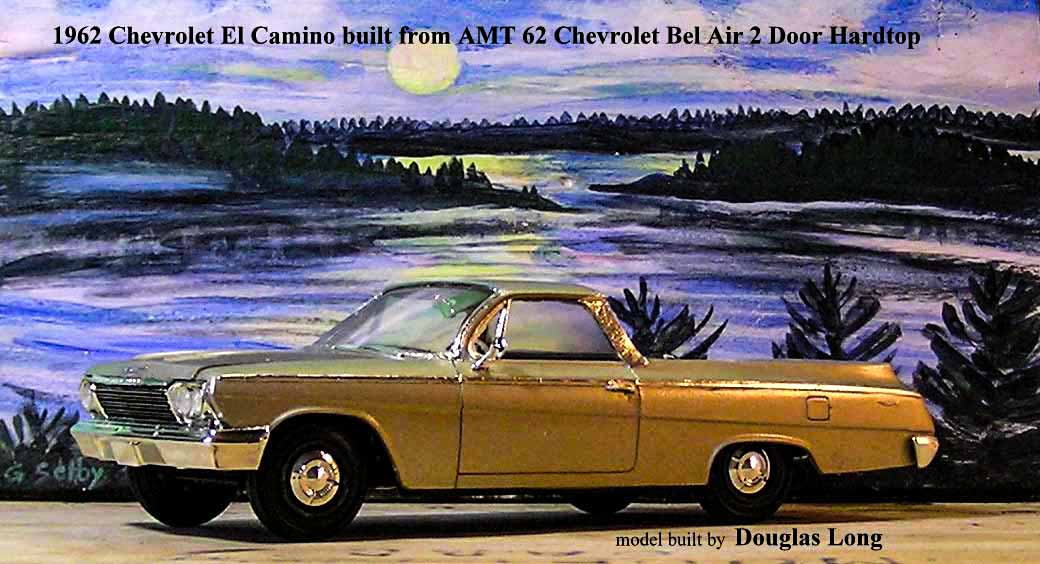
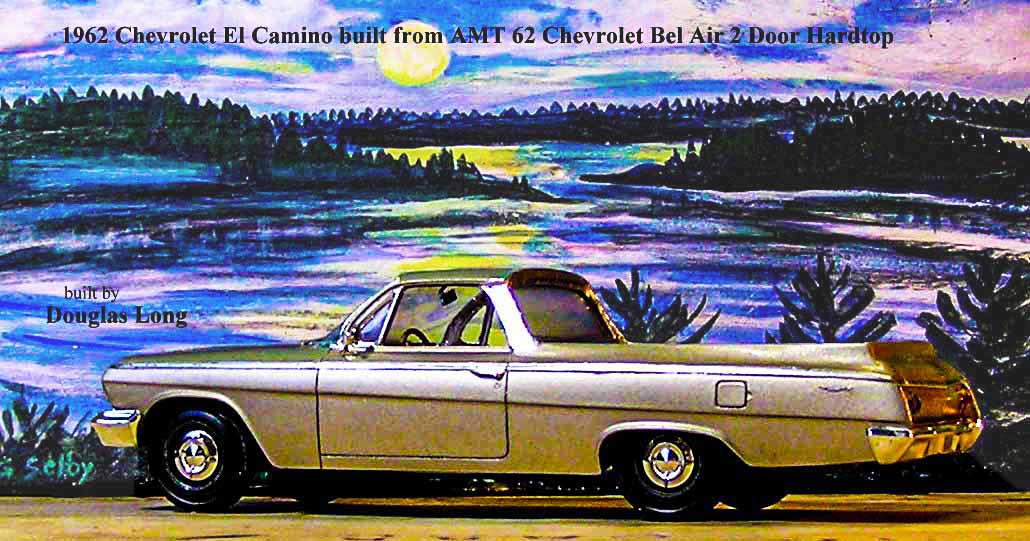
1962 Chevrolet El Camino that I built many, many moons ago. I attempted to keep it believable by using a "6", 3 speed stick on the column, black wall tires, dog dish hubcaps, and basic gold paint, based on the Bel Air model. I've actually had friends and guests get into arguments over whether Chevrolet really made one in 1962.
-
It's been years since I've attempted a lowrider or any type of custom. This one didn't start out that way, but took on a life of its own.
- 18 replies
-
- 1
-

-
- 1958 plymouth
- lowrider
- (and 2 more)
-
That was to save drive in theater admission cost.
-
Before After It's a special presentation day at Otto Ray Sing Classic Car Center. A young lady who had inherited her grandfather's 1960 Plymouth Fury, brought in in for restoration work. It is now completed, and just to make the moment more memorable, Mr. Williams, the dealership owner, had it brought into the showroom for presentation to her. Here we see him handing the keys to the proud young owner while several staff members watch in the background. This was one of the easiest rebuilds I've ever done. All I did was buff/polish the windows, rechrome the bumpers, and repaint the body. I left the tires/hubcaps as they were. If they ever bother me, I can always address them later.
-
These kits were made to build, so here's one straight from the box; a 1960 Pontiac Bonneville.
-
All that is needed is a shrink ray so we can make ourselves little and go cruisin'...
-
I love it.
-
They look good.
-
1972 Cadillac Fleetwood Eldorado Convertible
The Modeling Hermit replied to Jeffcad's topic in Model Cars
I will have to admit that I don't like it. I absolutely love it. These big Caddies rocked, and you have captured it to perfection. I'm going to have to try this myself, of course my attempt will not be as beautiful as yours. -
I love wagons. 1956 Plymouth Belvedere.
The Modeling Hermit replied to carbuilder1950's topic in Model Cars
Nailed it to the max! -
Never give up on it, and keep us posted of additions to this very interesting diorama.
-
Your attention to detail, and execution of quality construction is magnificent.

.jpg.7d1c2dc3776b48402075aaeace3ce82c.jpg)


.jpg.53780f6366a135384d7fe81c92e0c5a4.jpg)
.jpg.3f7db0f48bd286fa95b4eb89b7f53ebe.jpg)
.jpg.e5352fb22c41b0c38e3582b93f9a7441.jpg)
.jpg.5b10979b75a1a51a2d15562f6b41610d.jpg)
.jpg.5e915a54e73529143d19644b3fbf6638.jpg)
.jpg.f9d16473f83b59a80590c388a6d67ed0.jpg)
.jpg.4fe4579bfc90b241e18bfe888f247c5e.jpg)
.jpg.5179a7c5fe40dccdbe922b7f1072c024.jpg)
.jpg.53cc13c83b3c964d6eb379259755b31f.jpg)
.jpg.e69d6258c7f79b08efee2333e127e6fa.jpg)
.jpg.c08887b84e12c19b3abe4a92272682a7.jpg)