Kanada Kustoms
-
Posts
168 -
Joined
-
Last visited
Content Type
Profiles
Forums
Events
Gallery
Everything posted by Kanada Kustoms
-

1957 Ford Del Rio "Shooting Brake" Ranch Wagon
Kanada Kustoms replied to LennyB's topic in WIP: Model Cars
Great build... I like how you modified the trim! -
California Special
Kanada Kustoms replied to Rockford's topic in WIP: Model Trucks: Big Rigs and Heavy Equipment
Looking good! -
Bedford OLBD dropside
Kanada Kustoms replied to stitchdup's topic in WIP: Model Trucks: Big Rigs and Heavy Equipment
Cool subject... That tractor will look awesome in the bed! -
TIGERCAT SKIDDER 3D PRINTED
Kanada Kustoms replied to Swamp Dog's topic in WIP: Model Trucks: Big Rigs and Heavy Equipment
Great detail work on a cool subject! -
Great color on a cool build!
-
Love these cars... Cool idea! Nice start!
-
Thanks for the good words guys... Much appreciated and glad you like my build!
-
Nice looking builds... Love the 55!
-
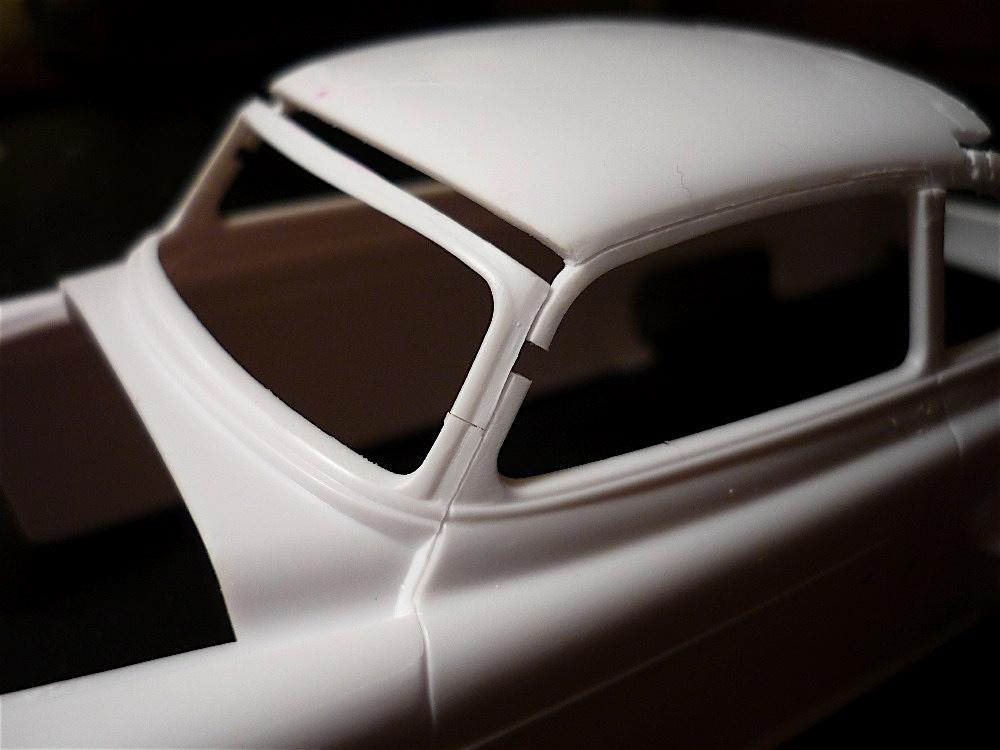
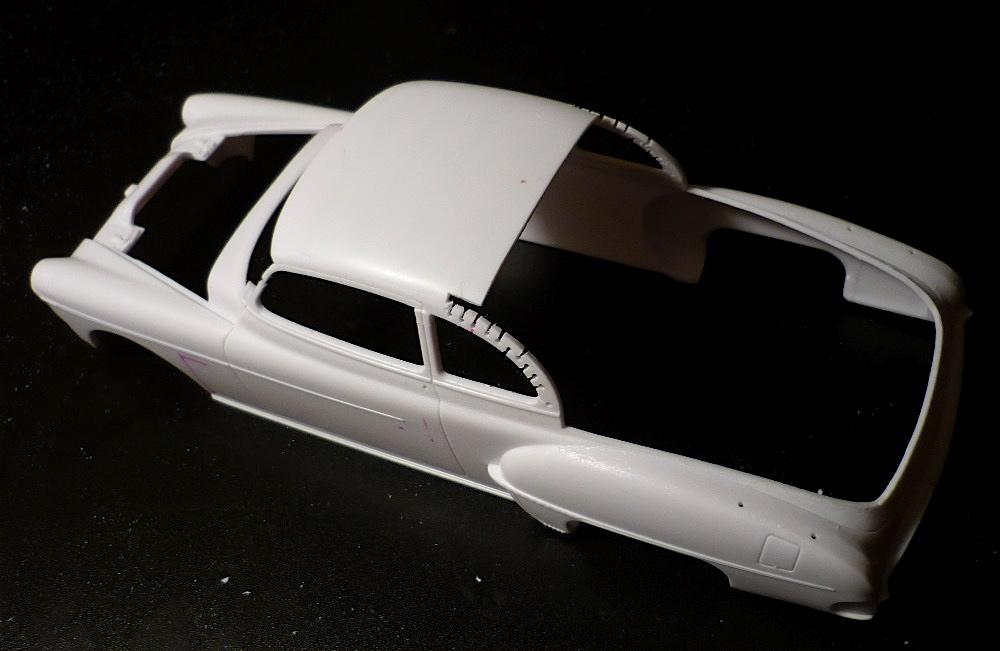
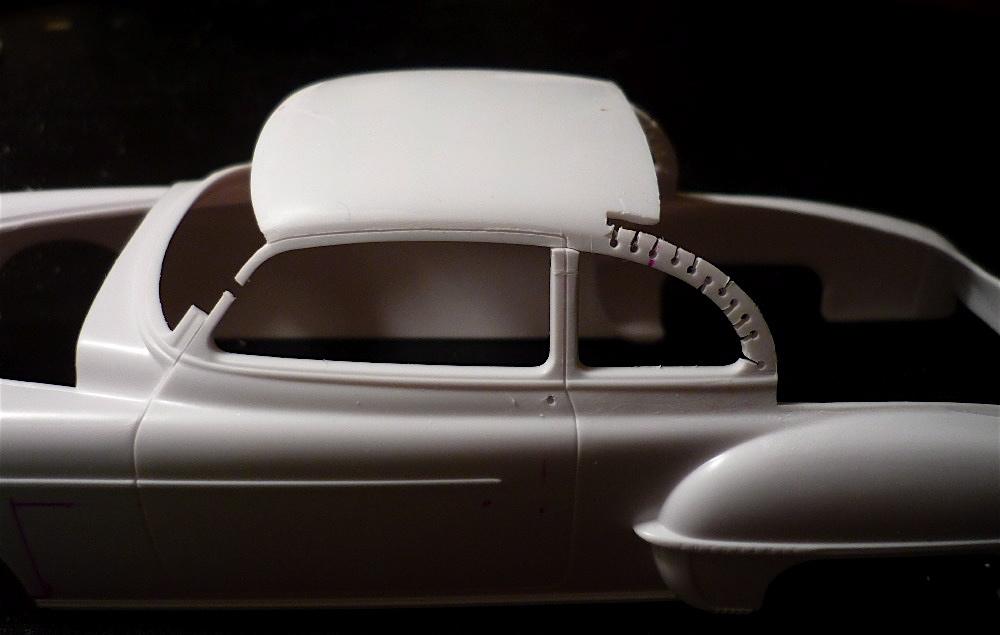
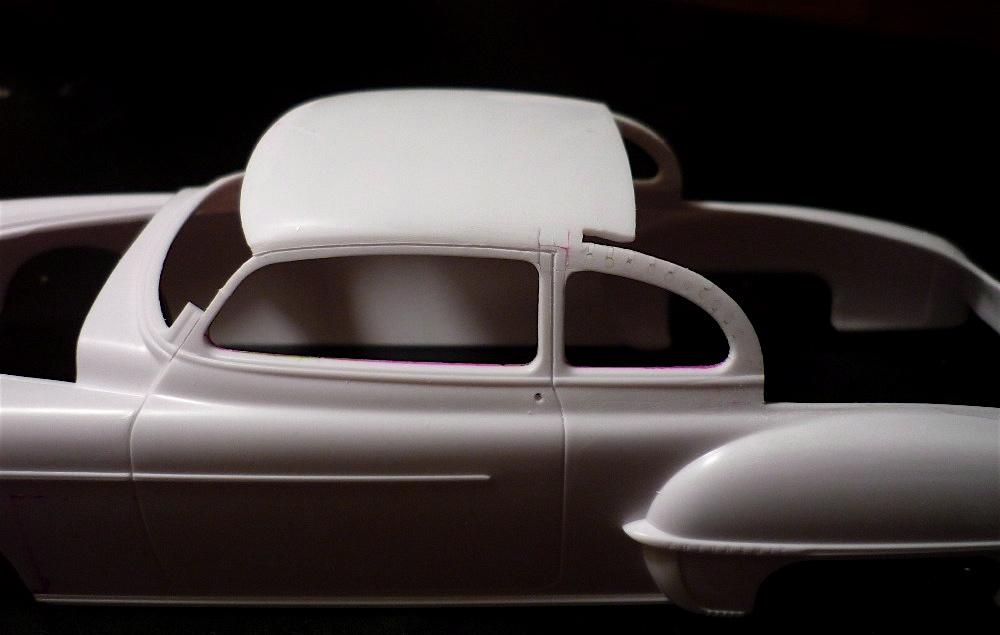
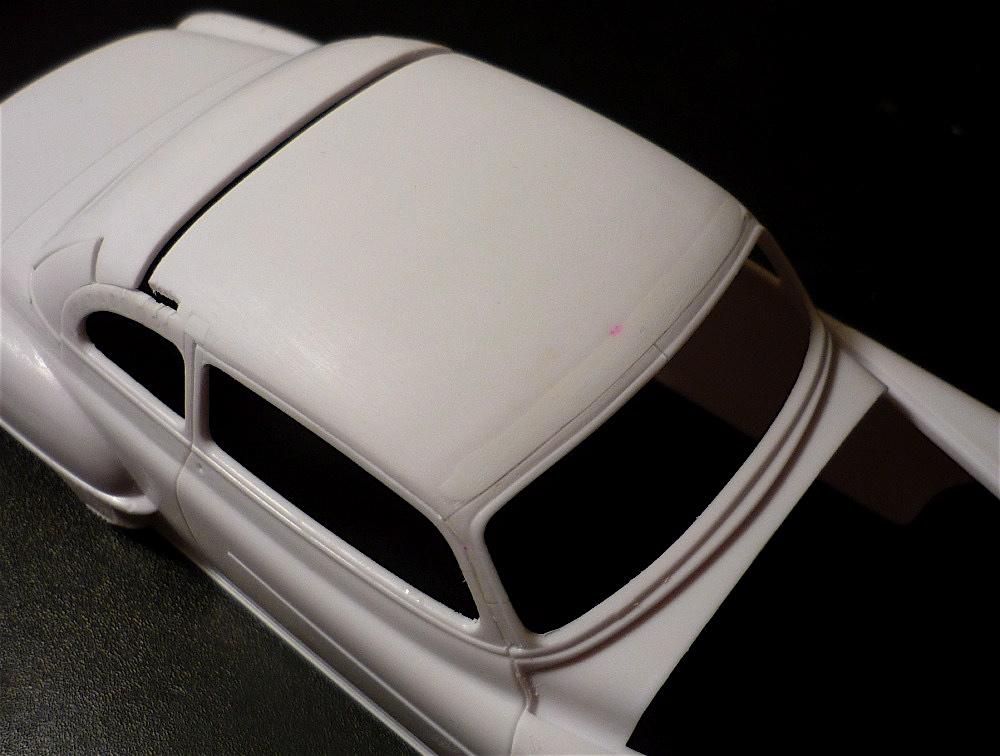
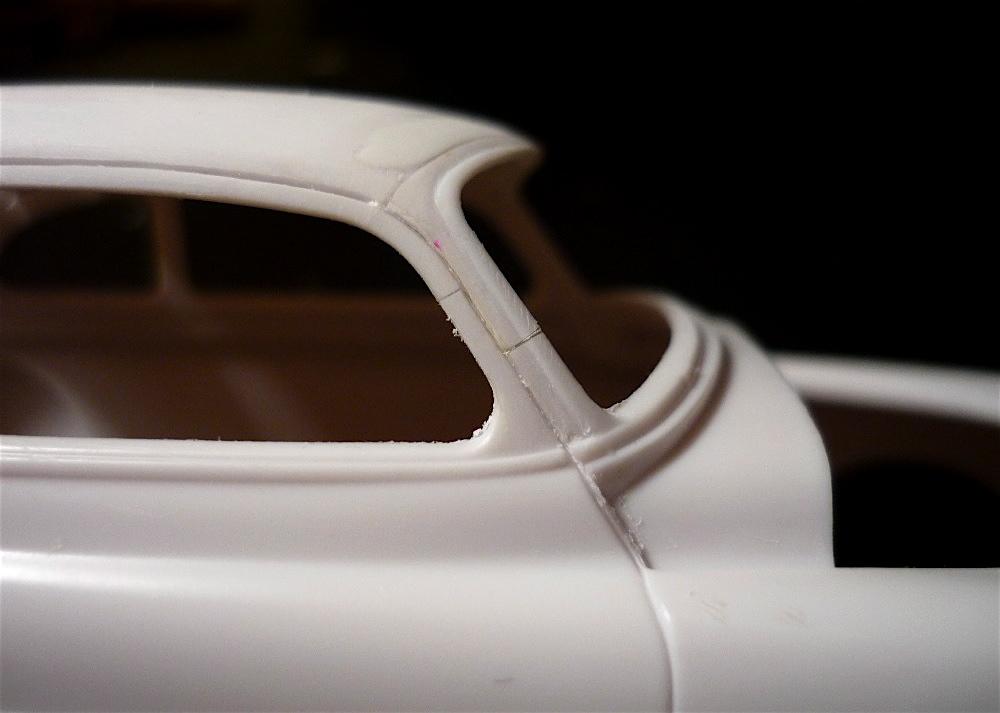
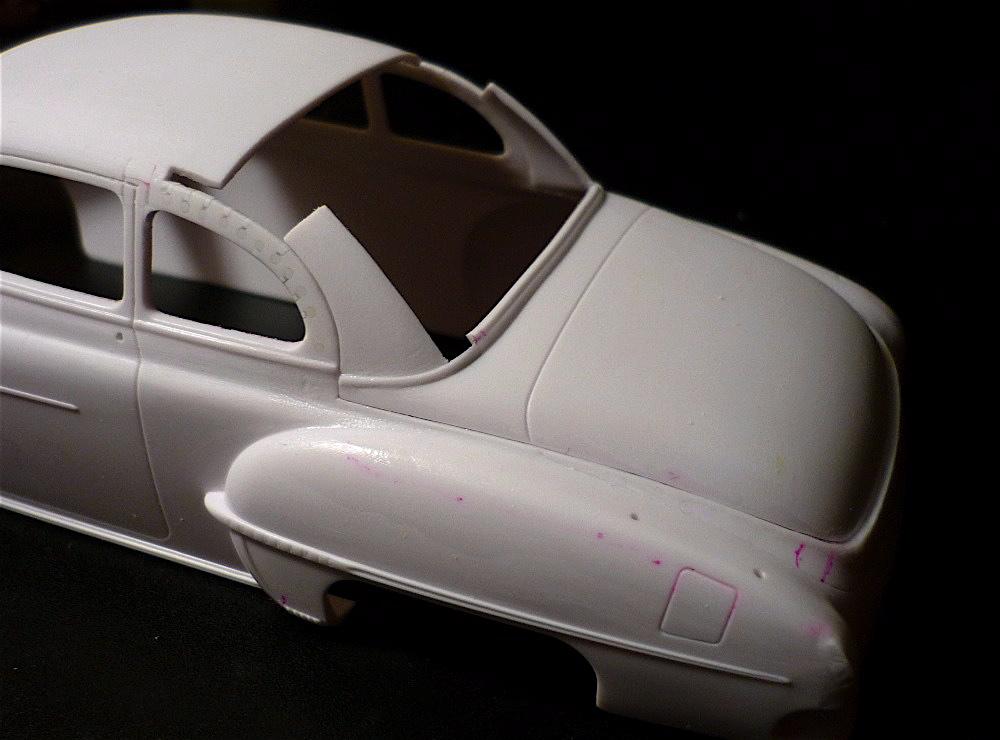
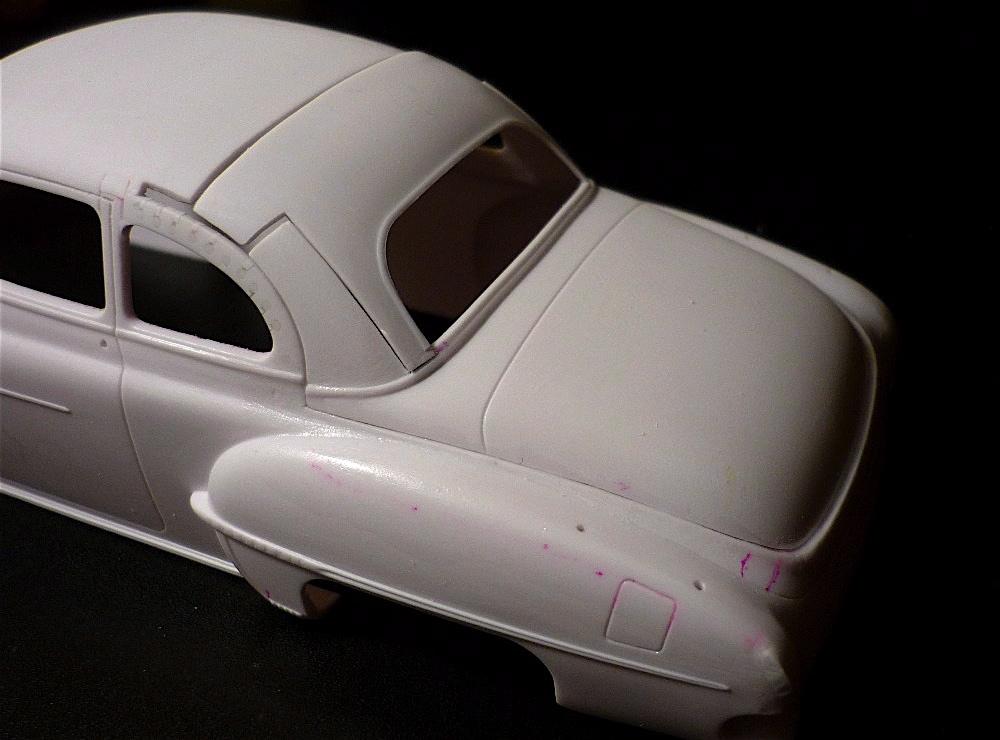
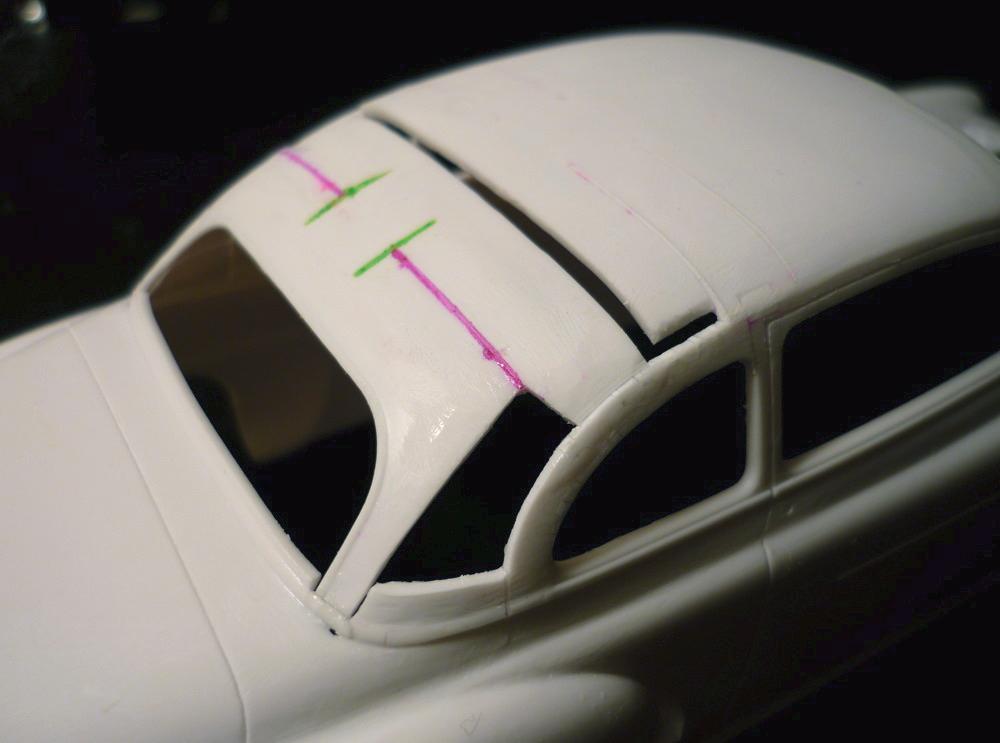
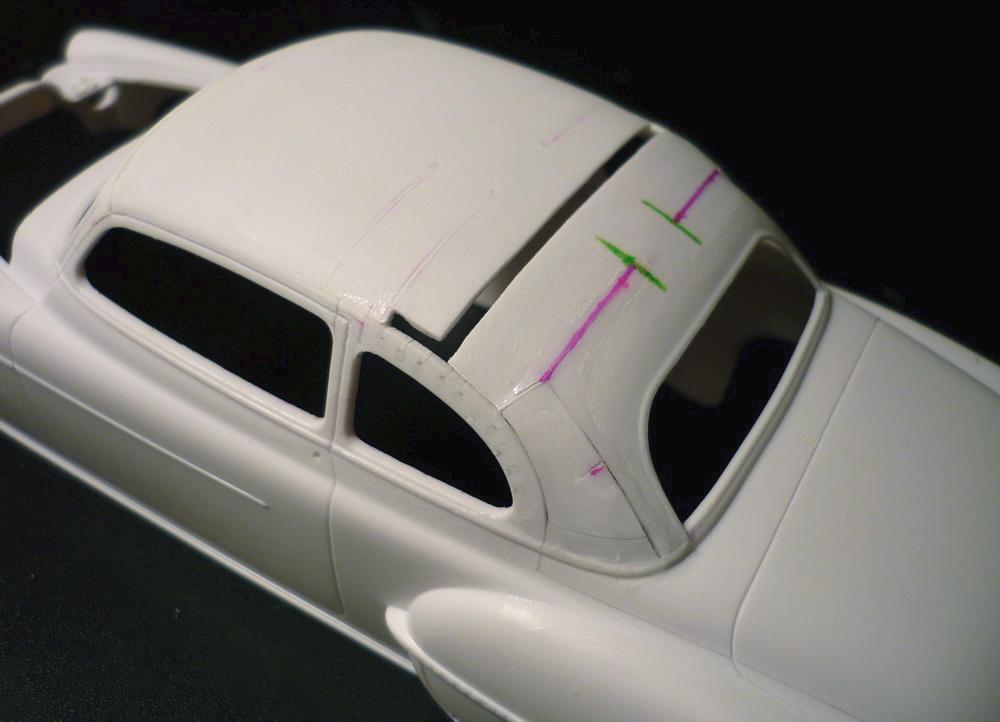
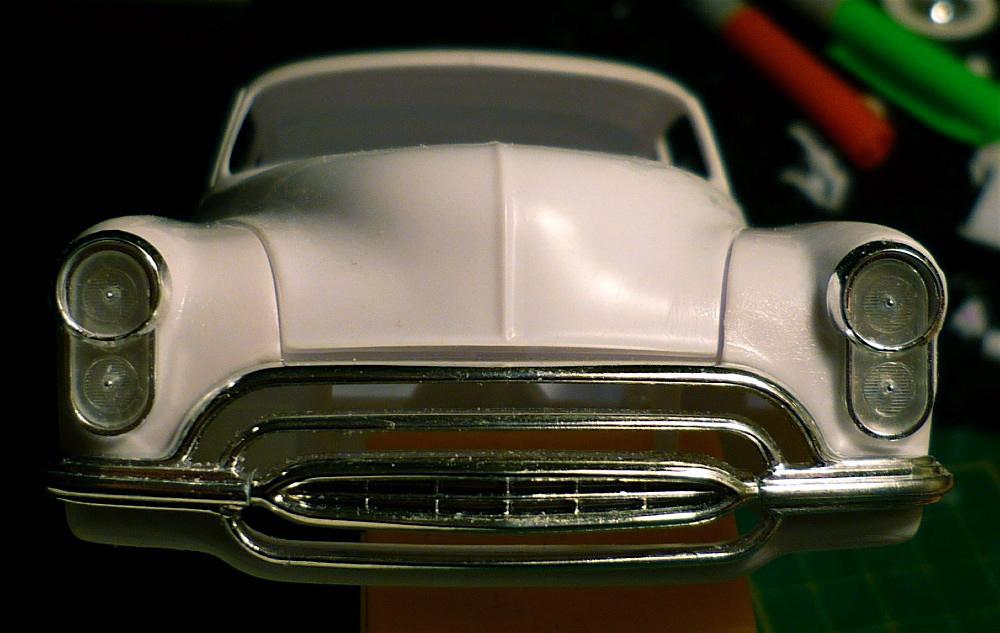
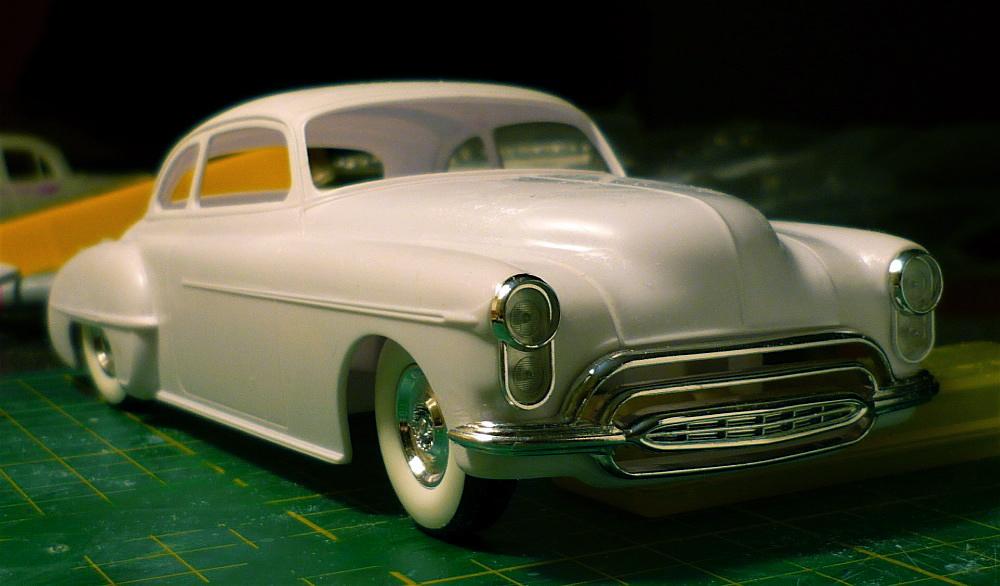
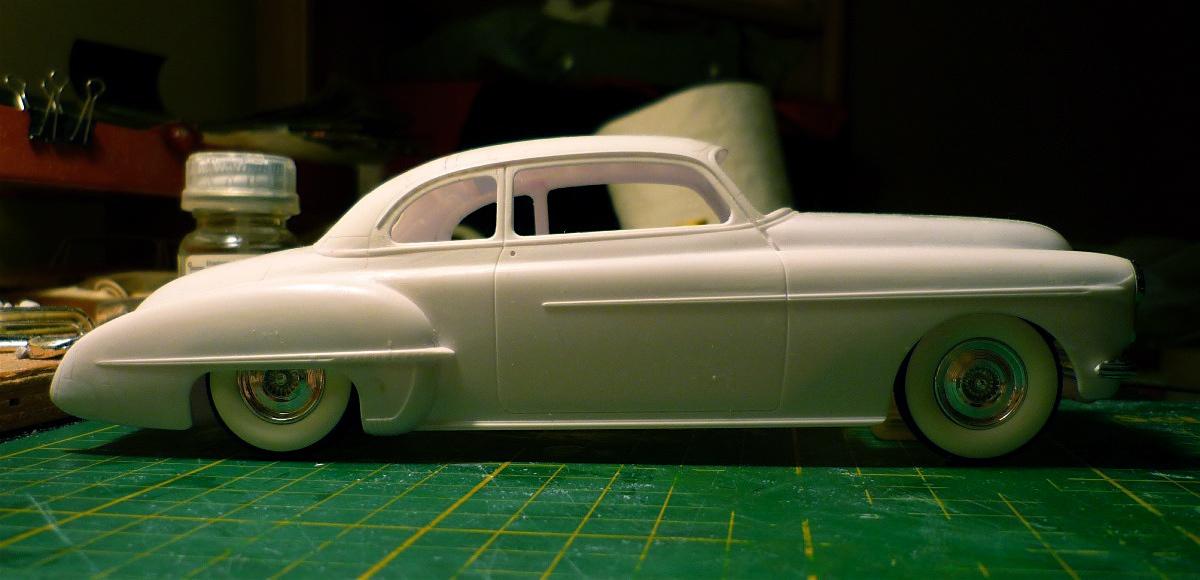
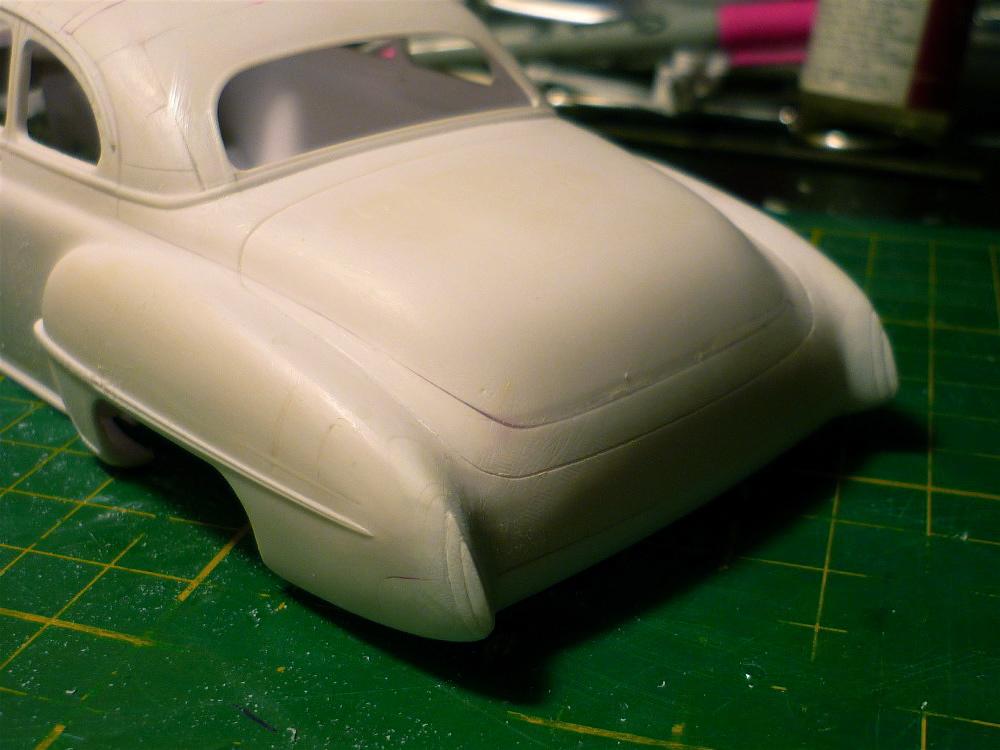
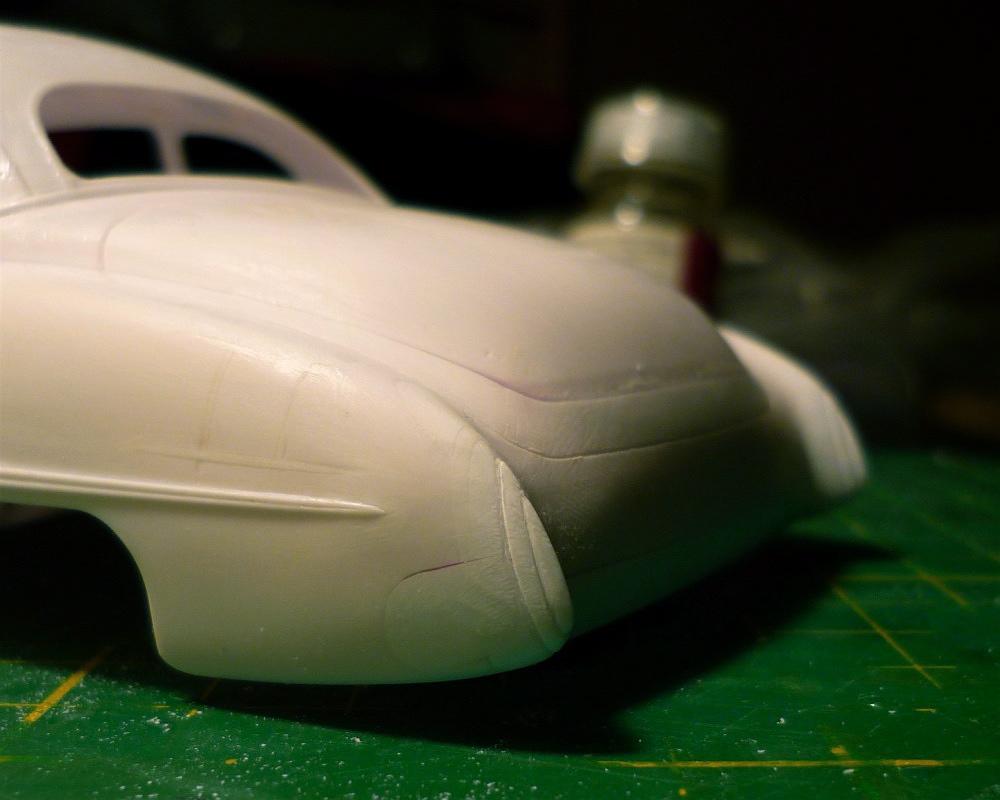
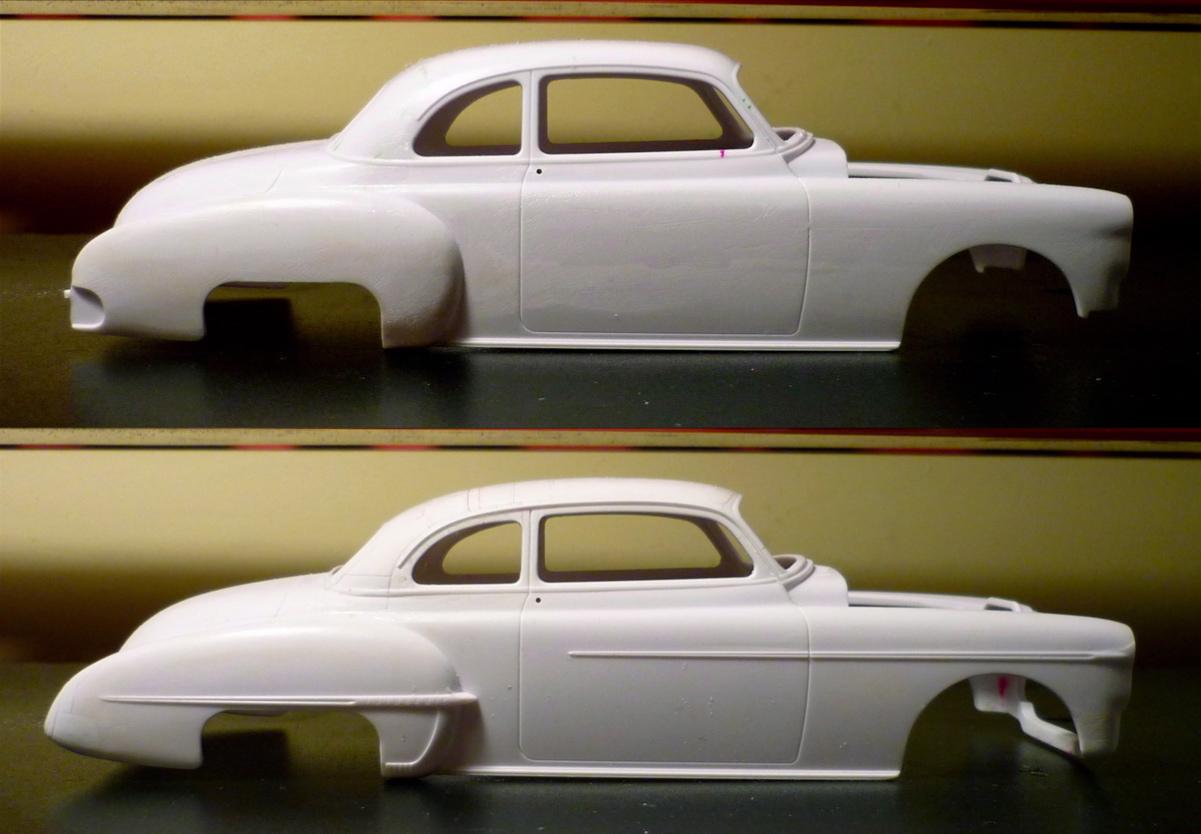
I dug out this old build of a 50 Olds to spray some primer on it. I took some pictures of the top chop when I did it, then some mock up pics. This is how I did the chop: I chopped the windshield 1 1/4 scale inches. I chopped the overall height of the roof two inches so I pushed the windshield up into the roof slightly so it doesn't look too chopped. Drip rail has been removed for the chop and will be added back on later: I took the whole rear section of the car off. I wound up sectioning the trunk area 1 inch. You can see I have drilled several holes in the 1/4 window frames. That is so they will bend and flex while I lay the roof forward and down 2 inches: Here's a better shot of the roof before lowering. I cut a groove in the roof, and let the B pillar slide up into the roof for a sturdier joint. I cut the A pillar to match how much lower I wanted the roof. And the frame of the 1/4 window is very flexible at this point and will bend to accommodate the movement of the roof: And here is the roof lowered 2 inches. The roof has been moved forward to line up the A pillar. Then the B pillar is fit to the roof where it naturally lands in its new location. I cut a channel in the roof for the B pillar to slide up into and filled the remainder. I have filled all the wholes in the 1/4 window, but the holes allowed me to create a new curve that flowed with the new lower silhouette as it was lowered and moved forward: Here you can see the top of the windshield frame back in place. I had to split it in the center as the center naturally wanted to dip when reattached. So I split it, that solved the problem. I wound up angling each side of the windshield frame up slightly to create a curve to the top of the window frame similar to stock. A filler piece was required behind the frame to blend it with the crown of the roof. You can see I have trial fit the rear section. Some relief cuts and filler pieces will be required. A shot of the A pillars all glued up. You can see how moving the windshield up into the crown of the roof reduces the forehead of the roof significantly. Cutting the door and the windshield frames in different places (staggered) creates a lot more surface area for gluing and a much stronger joint in my opinion: Later I'll address the misaligned trim at the base of the rear of the roof and will also have to blend the trunk and create new panel lines. Here's the rear roof section trial fit. I cut it so I could slide the roof section behind the trim at the base of the roof for a better, stronger joint: I had to cut out the sail panels to fit the rear roof section. The marker lines are where I'll cut to relax the crown and get everything to fit nicely: You can see some relief cuts I have made and filled to relax the slope of the roof so it will blend with the rear section. The rear section and the sail panels have been glued up. The rear window was chopped 1 scale inches (combined with the sectioning of the trunk it is in effect, brought down 2 inches but it remains more open looking, like the windshield, to keep the top feeling airy and light). just need to fill gaps now and sand joints and add a drip rail and the roof is done: With the major body modification out of the way, it's time for a mock-up. Headlights from the Revell Predicta Kit were fitted with the '50 Oldsmobile bezels modified to fit. I wanted to keep the Olds bezels to lay over the Predicta custom headlights to keep the front end looking like a '50 Oldsmobile instead of falling toward a too radical look. The grill bumper assembly is a combination of 2 '50 Oldsmobile bumper/grilles, some .040" half round plastic stock and the '53 Pontiac grill from the Revell '49 Mercury kit. I used Bare Metal Foil to cover up all the joints. I made a pan to match the new grill: It's starting to look like a kustom: With the drip rail put back on, it really anchors the roof. It's sitting on Modelhaus 284 tires with Chrysler Turbine wheels with a slight speedboat stance. You can see how the 1 inch section job and moving the windshield into the roof really lighten things up along with the extended fenders: You can see I fixed the trim at the base of the roof and cut new panel lines for the trunk. I extended the rear fenders quite a bit, like 6 inches or so. Then I cut taillights into the ends with lines to indicate a custom bezel and custom lens. They'll be covered in bare metal foil and the lens painted clear red when done: And a close up of the taillight cut into the fender. I made a roll pan for the rear to give it a clean, smoothed out look: And lastly, a comparison of the stock roof to the chopped roof and sectioned trunk. Big difference. But the chop still maintains the feel of the stock roof even though it has been significantly altered. The extended rear fenders also add length to the main body elongating the overall look: Thanks for looking... Primer pics to come!

- 26 replies
-
- 22
-

-

-
Sidewinder “Snake Bite” Slant 8 Warplane
Kanada Kustoms replied to Silvercreeker's topic in WIP: Model Cars
Looking good! -
Great job on the weathering of the chassis and engine!
-
Cool build!
-
Nice progress on a great subject!
-
Cool slot car... Looks great!
-
Vintage Salt Flats Racer
Kanada Kustoms replied to Glassparman's topic in Other Racing: Road Racing, Salt Flat Racers
Great build... Love the salt on it! -
Great looking build... Love the color!
-
Cool build... Came out great!
-
AC 289 Sports MkIII, aka an Englishman's Cobra
Kanada Kustoms replied to Matt Bacon's topic in Model Cars
Very cool model... Great photos too! -
1980 Kenworth W900A
Kanada Kustoms replied to Jay Lankford's topic in Model Trucks: Big Rigs and Heavy Equipment
Wow, awesome build... Great color choices! -
Kenworth Hustler garbage truck
Kanada Kustoms replied to Rbray47's topic in WIP: Model Trucks: Big Rigs and Heavy Equipment
Great job on the cab! Nice work! -
Western Star 4900 FA plow truck
Kanada Kustoms replied to BK9300's topic in WIP: Model Trucks: Big Rigs and Heavy Equipment
Wow... Amazing detail! Great build! -
That's so cool with the train on the bed... Great subject!
-
Great build!
-
Nice build... Great color!
-
Very nicely done!