mitchell
-
Posts
252 -
Joined
-
Last visited
Content Type
Profiles
Forums
Events
Gallery
Everything posted by mitchell
-
this is low version with only the tamiya PE. But i normally don't like to use that much PE. But with this one, i might need to get a extra aftermarket PE just for the dash and seat control details. Decals was ok in my opinion, but those metal transfer drove me crazy too.
-
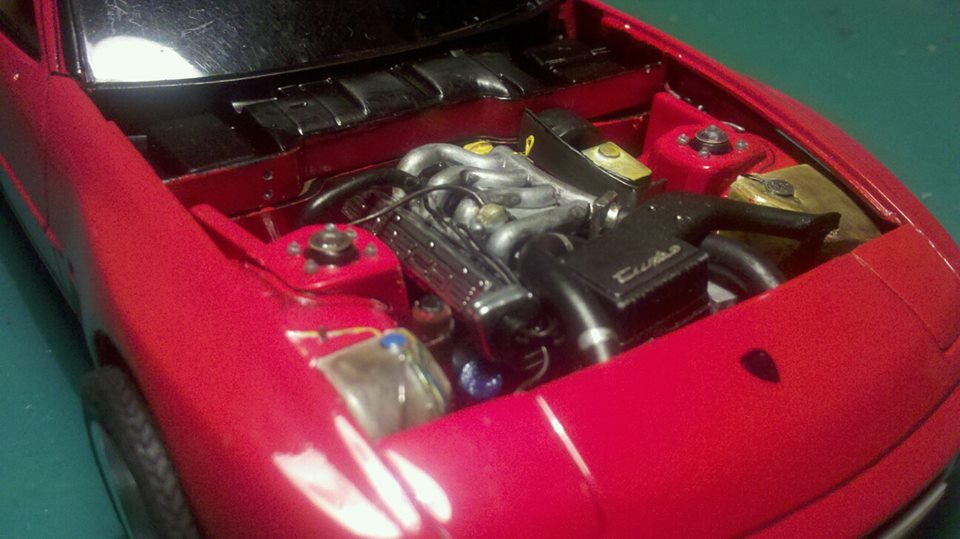
have a bit more progress on this today. i am super detailing it right now. But even with the detail on it, it still lack quite a few important pieces under the hood. And the casting of Hasegawa cannot be compared to tamiya. Tamiya tend to simplified stuff but their casting is unbeatable. With this Hasegawa kit, it tend to give you more detail but the casting is sometime too toyish. And the fit is also not as good as usual tamiya kit. Talking about panel lines, Hasegawa is also on the shallow side. I had to do a lot of work in the panel line before getting it painted or else it will be gone. I even sealed the sunroof since the panel line is shallow to begin with, so might as well seal it up. As the pictured tell, I mated the engine and interior tub on the chassis already. The engine is a bit of a pain to fit with the turbo plumbing. But it is in. I rework the shock tower and put better bolts for the strut bearing and bunch of wiring. more to come.

-
had a chance to borrow a professional photo studio and took some pictures with a good camera, it turn out pretty good and like to share it with the forum.
-
old Hasegawa kit.
-
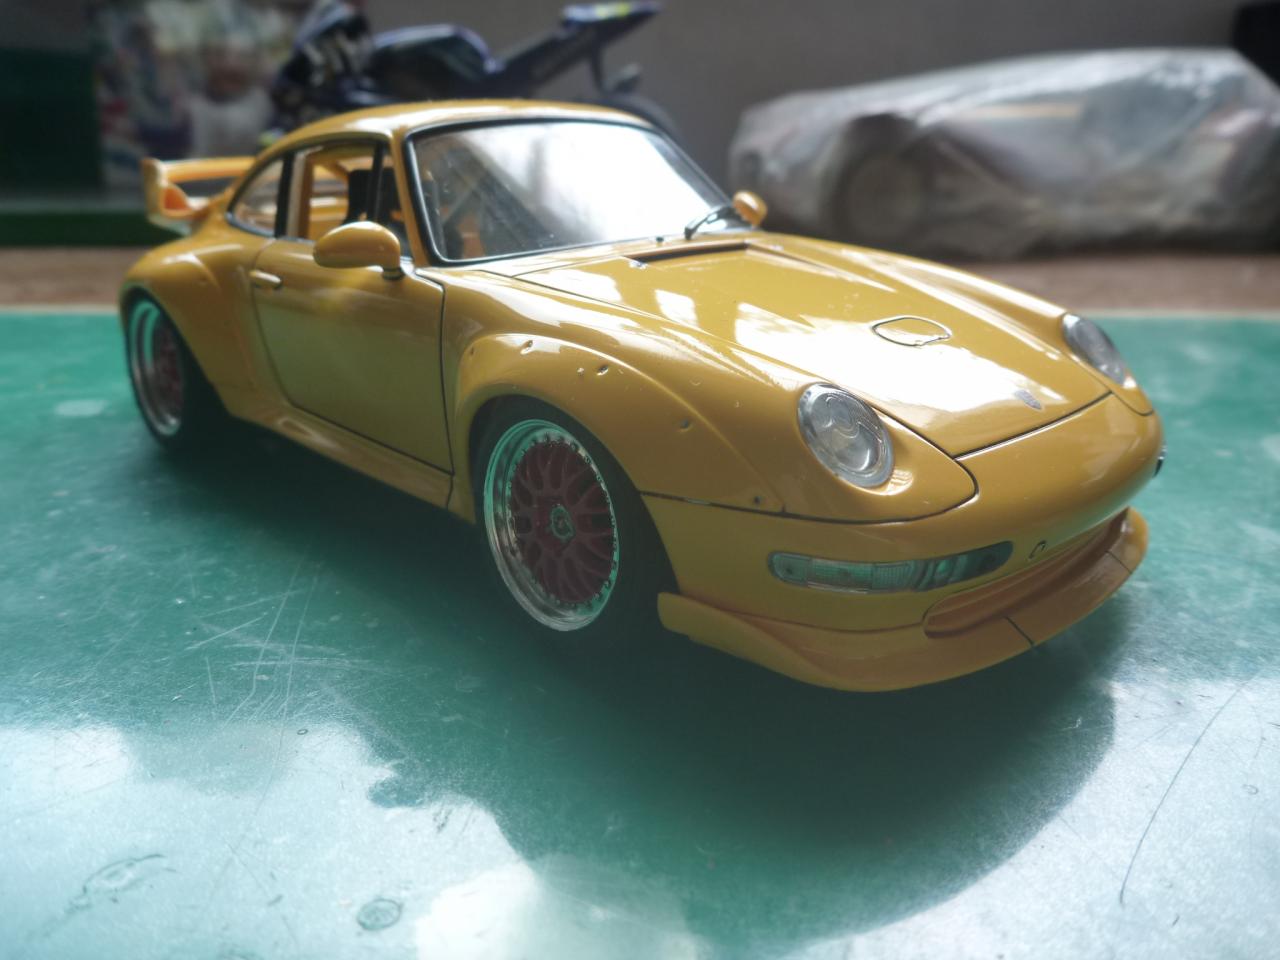
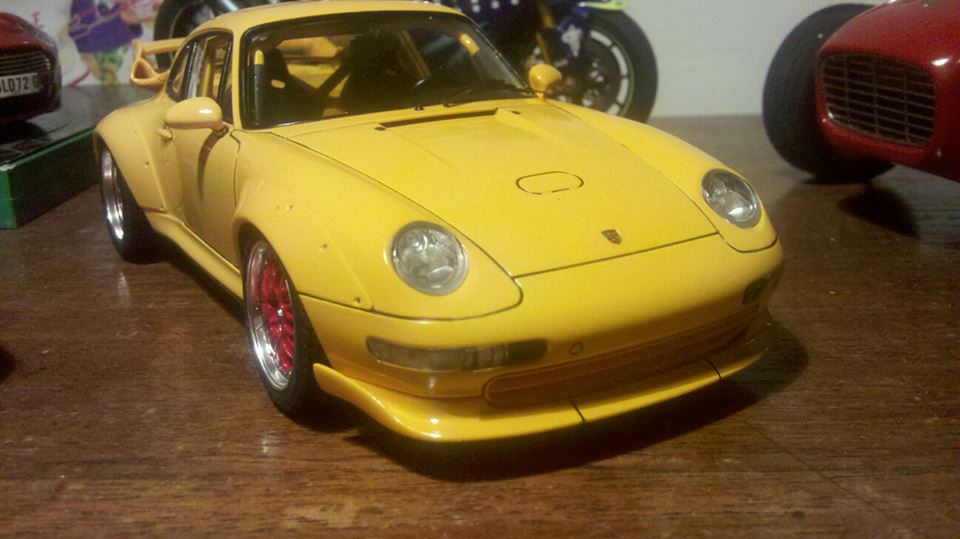
rescue this kit from a collection. It was started by the previous owner and then abandoned. Pick it up from him, must be collecting dust for 20 years. It was painted silver so I had to strip the paint and re-painted it red. This kit is one that I wanted for years but out of production. The details of the kit is amazing, it comes with carpet and all the details are presented while some parts have problem with accuracy, it is still a great kit. Not as sophisticated as modern kit but from 25 plus years ago, this is BLAH_BLAH_BLAH_BLAH good.
-
just a simple curbside kit from tamiya. Just did it because I want something easy to do between some complicated builds. Very good kit and it was fun little build. Still need to make a set of seat belt harness in the mean time. No much modification expect I detailed the wheels from reference pictures and drilled the rotors.
-
awesome looking
-
ready to move it to Under Glass. it is basically done except the harness, shopping for a PE kit for a full harness.
-
went outdoor and took some picture of this car. This one is how I treated the carbon brake disc. I did not want to use a PE brake disc because it fits a cast iron disc better. With some metallic grey paint and and soot smeared on it, it look more like a real carbon disc under use. Not shown on the picture, but i did drill the vents on the middle of the disc.
-
almost done.
-
great job. very natural looking with the weathering. Can't seem to find the tamiya beetle in my stores so maybe have to build the Hasegawa one, it looks good.
-
yes, this early Gulia Sprint is step nose, but there is a fit issue once the hinges are on. Need to tweak it a bit more for it lay flat at the rear edge, but for now, I can say it needs more cooling under the hood. I did build a functional hood support rod, which is quite functional.
-
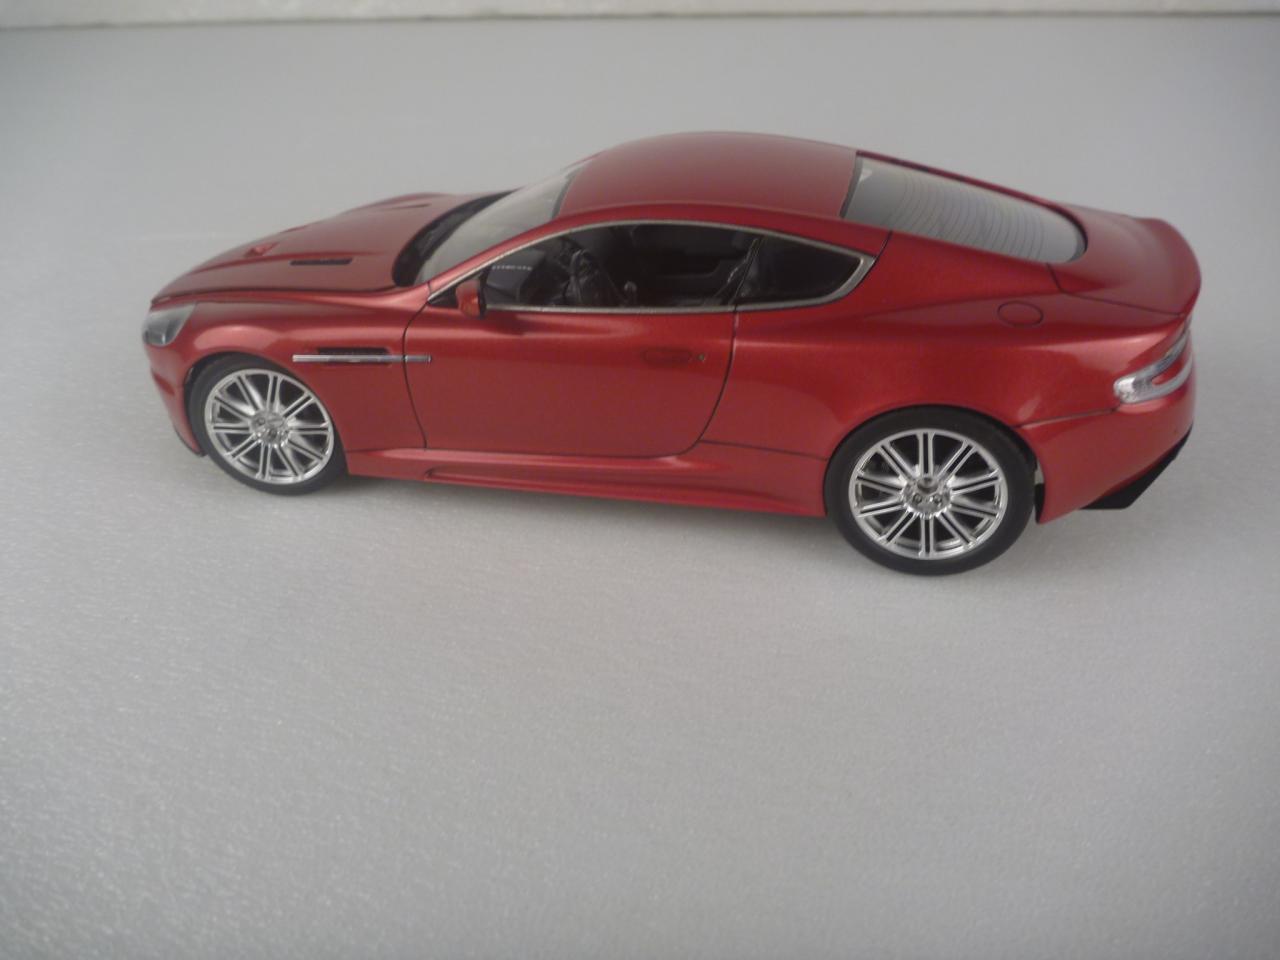
Jim, the decals are extremely hard on this aston. Need several application of the decal softener to make it lay flat. But once it's flat, i also painted it with clear. The effect of that is really good, it brightened it up by a few notch. Other than that, I find this kit extremely well executed. Everything fitted well but the body repair on the rear wing is a bit of a pain the butt. Other than that, compare to older kits, everything fits perfectly especially the clear pieces. I did change the tires out to a lower profile tires to make it look a bit lowered.
-
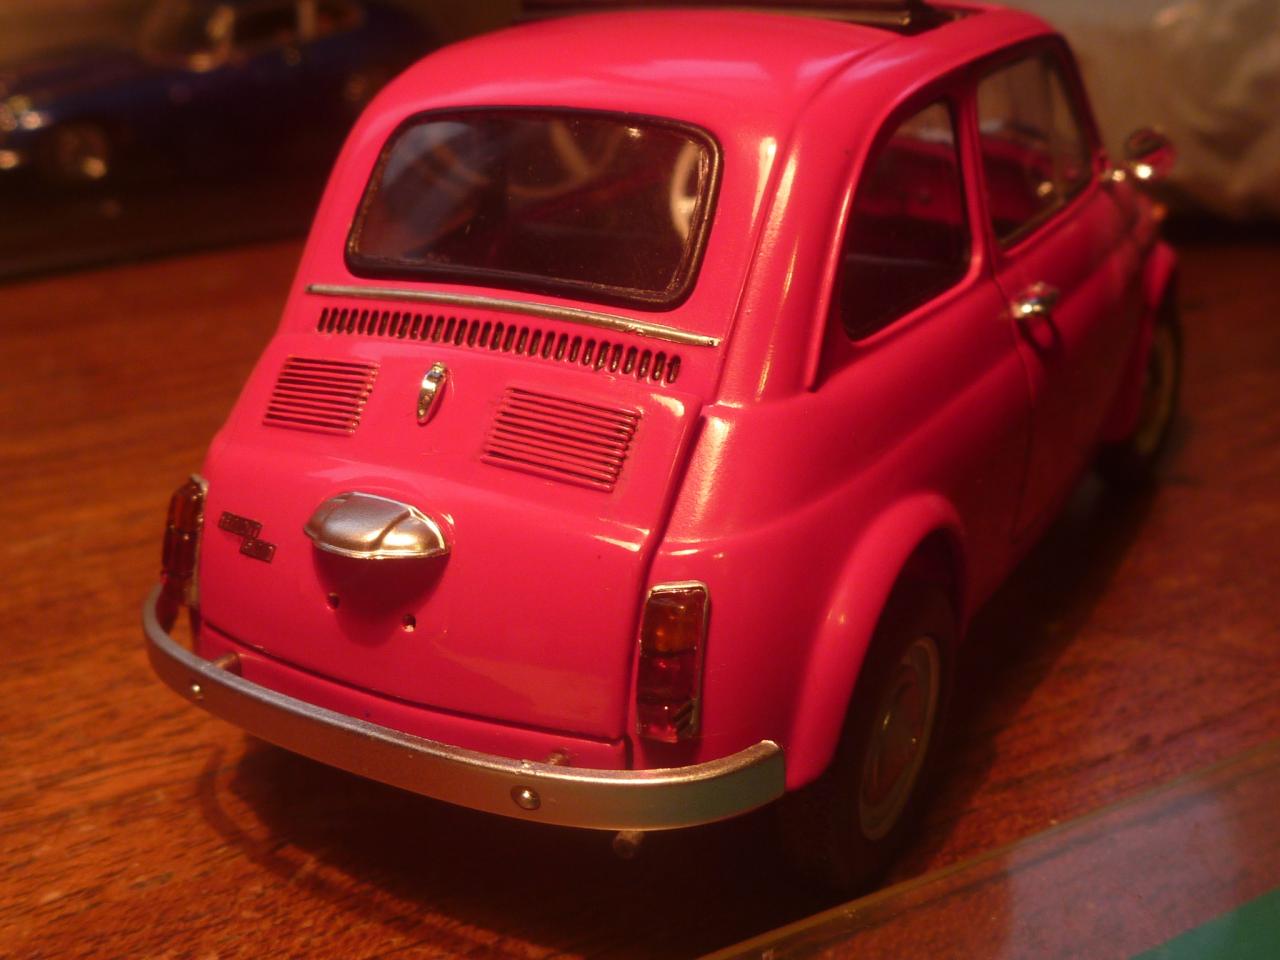
here are some outdoor photos that I tool with the Fiat 500.
-
this car was at the WIP section before the site was down. Got it done. Tamiya version. Very cute and accurate little car. Same as the Alfa GTA, Tamiya came up with another winner in this historical feature. Some problems with this car, the engine lid doesn't swing all the way down, have to scratch build a very simple solution for it. And the tolerances are tight, should trim the window down a bit before installing. Other than that, it's a great kit. thanks for watching.
-
the stitching is done by white paint with a needle. it turn out decent enough but painting with a needle is a pain in the butt. Also the details on the dial is also done the same way. Going to try another way next time in doing stitching and piping next time. I base this build on this reference picture.
-
Also build a Alfa Romeo Sprint GTA while the site was down. Tamiya's historical car series produces a few of the best model ever made in 24 scale in my humble opinion. The proportion is right and the details in it is just amazing. In this build, added engine room wiring to make it more complete. The theme of this car is a classic that participate in vintage rally race. Thanks for watching.
-
while the site was down, had a chance to finish up a few cars. This is an Aston Martin from Tamiya. Great kit but the pity is that it only has a half engine and it miss a few detail under the hood. Still manage to add some wires and pipes to make it more realistic. This car was a mistake from before. painted it metallic black and the paint was ruined by a mistake. So stripped it and painted it metallic red. This is a well proportion model. Looks stunning. Thanks for watching.
-
just a simple curbside build from Tamiya. very good kit, still doing the details on this car right now.
-
nice looking, should put this one down as a Buy.
-
getting most of the car slowly put together. Lots of wiring done under the hood and finish the interior. Painted the dash and steering into wood color. Since the engine lid of the car is forward, I have to trim the hinges a bit to make it open wider and i also made a proper hood prop, since the it will not stay open. This kit is so accurate that the tolerance in the window and the chassis is spot on, Since I got about 4 layer of paint on the car plus the BMF on, the window doesn't fit properly therefore causing a window to crack. My solution is to cut another window and make it open. Not the best solution but still work. Here are few more picture of the progress.
-
Box Stock Hasegawa '72 Toyota Celica Road Racer
mitchell replied to Art Laski's topic in WIP: Model Cars
love your chassis work. Especially the texture of the undercoat. -
this one is almost ready to go to Under-glass section, made a very simple hinge so at least the lid can be opened up to a reasonable angle. Call it done. Also a picture with a Karman Ghia.
-
working on another historic car from tamiya, this time a Alfa GTA. I love old alfa and this kit is also a gem. Build one before. But this time, more details to it. Working under the hood today.
-
Box Stock Hasegawa '72 Toyota Celica Road Racer
mitchell replied to Art Laski's topic in WIP: Model Cars
never saw this version before. Did the other version not so long ago. Not a bad kit. the finish product turned out pretty good. You look like you are heading to a very great build. here is a picture of the one I did, turn it into a street car version.