Dennis Lacy
-
Posts
2,487 -
Joined
-
Last visited
Content Type
Profiles
Forums
Events
Gallery
Everything posted by Dennis Lacy
-
Of course it looks easy when I post finished pictures but what doesn’t show is the 4-6 hours spent getting there! 🤣
-
Excellent bare metal finish!
-
Now months (3? 4?) later, I still need to order a can of Tamiya Matte Black so I can paint the top insert. Epic fail.
-

29 Ford Model A p/u with California street choper 1/25 scale
Dennis Lacy replied to Jack L's topic in Car Kit News & Reviews
The first issue of the 29 Pickup (and only the first issue) had stock wheels and tires. From the second issue and on they were deleted. The first appearance of the 31 Sedan body had it included with the Woody body so you could build one or the other and it had stock wheels. The 31 Sedan Delivery never had stock wheels. -
The Dominator Jiggler Kent Fuller Dragster
Dennis Lacy replied to Silvercreeker's topic in Drag Racing
ABSOLUTELY BITCHIN!!! ? -
@Speedpro Nice update, Paul! I’m digging the angled splash apron.
-
Traditional 1929 Ford Woody Wagon Hot Rod
Dennis Lacy replied to Dennis Lacy's topic in WIP: Model Cars
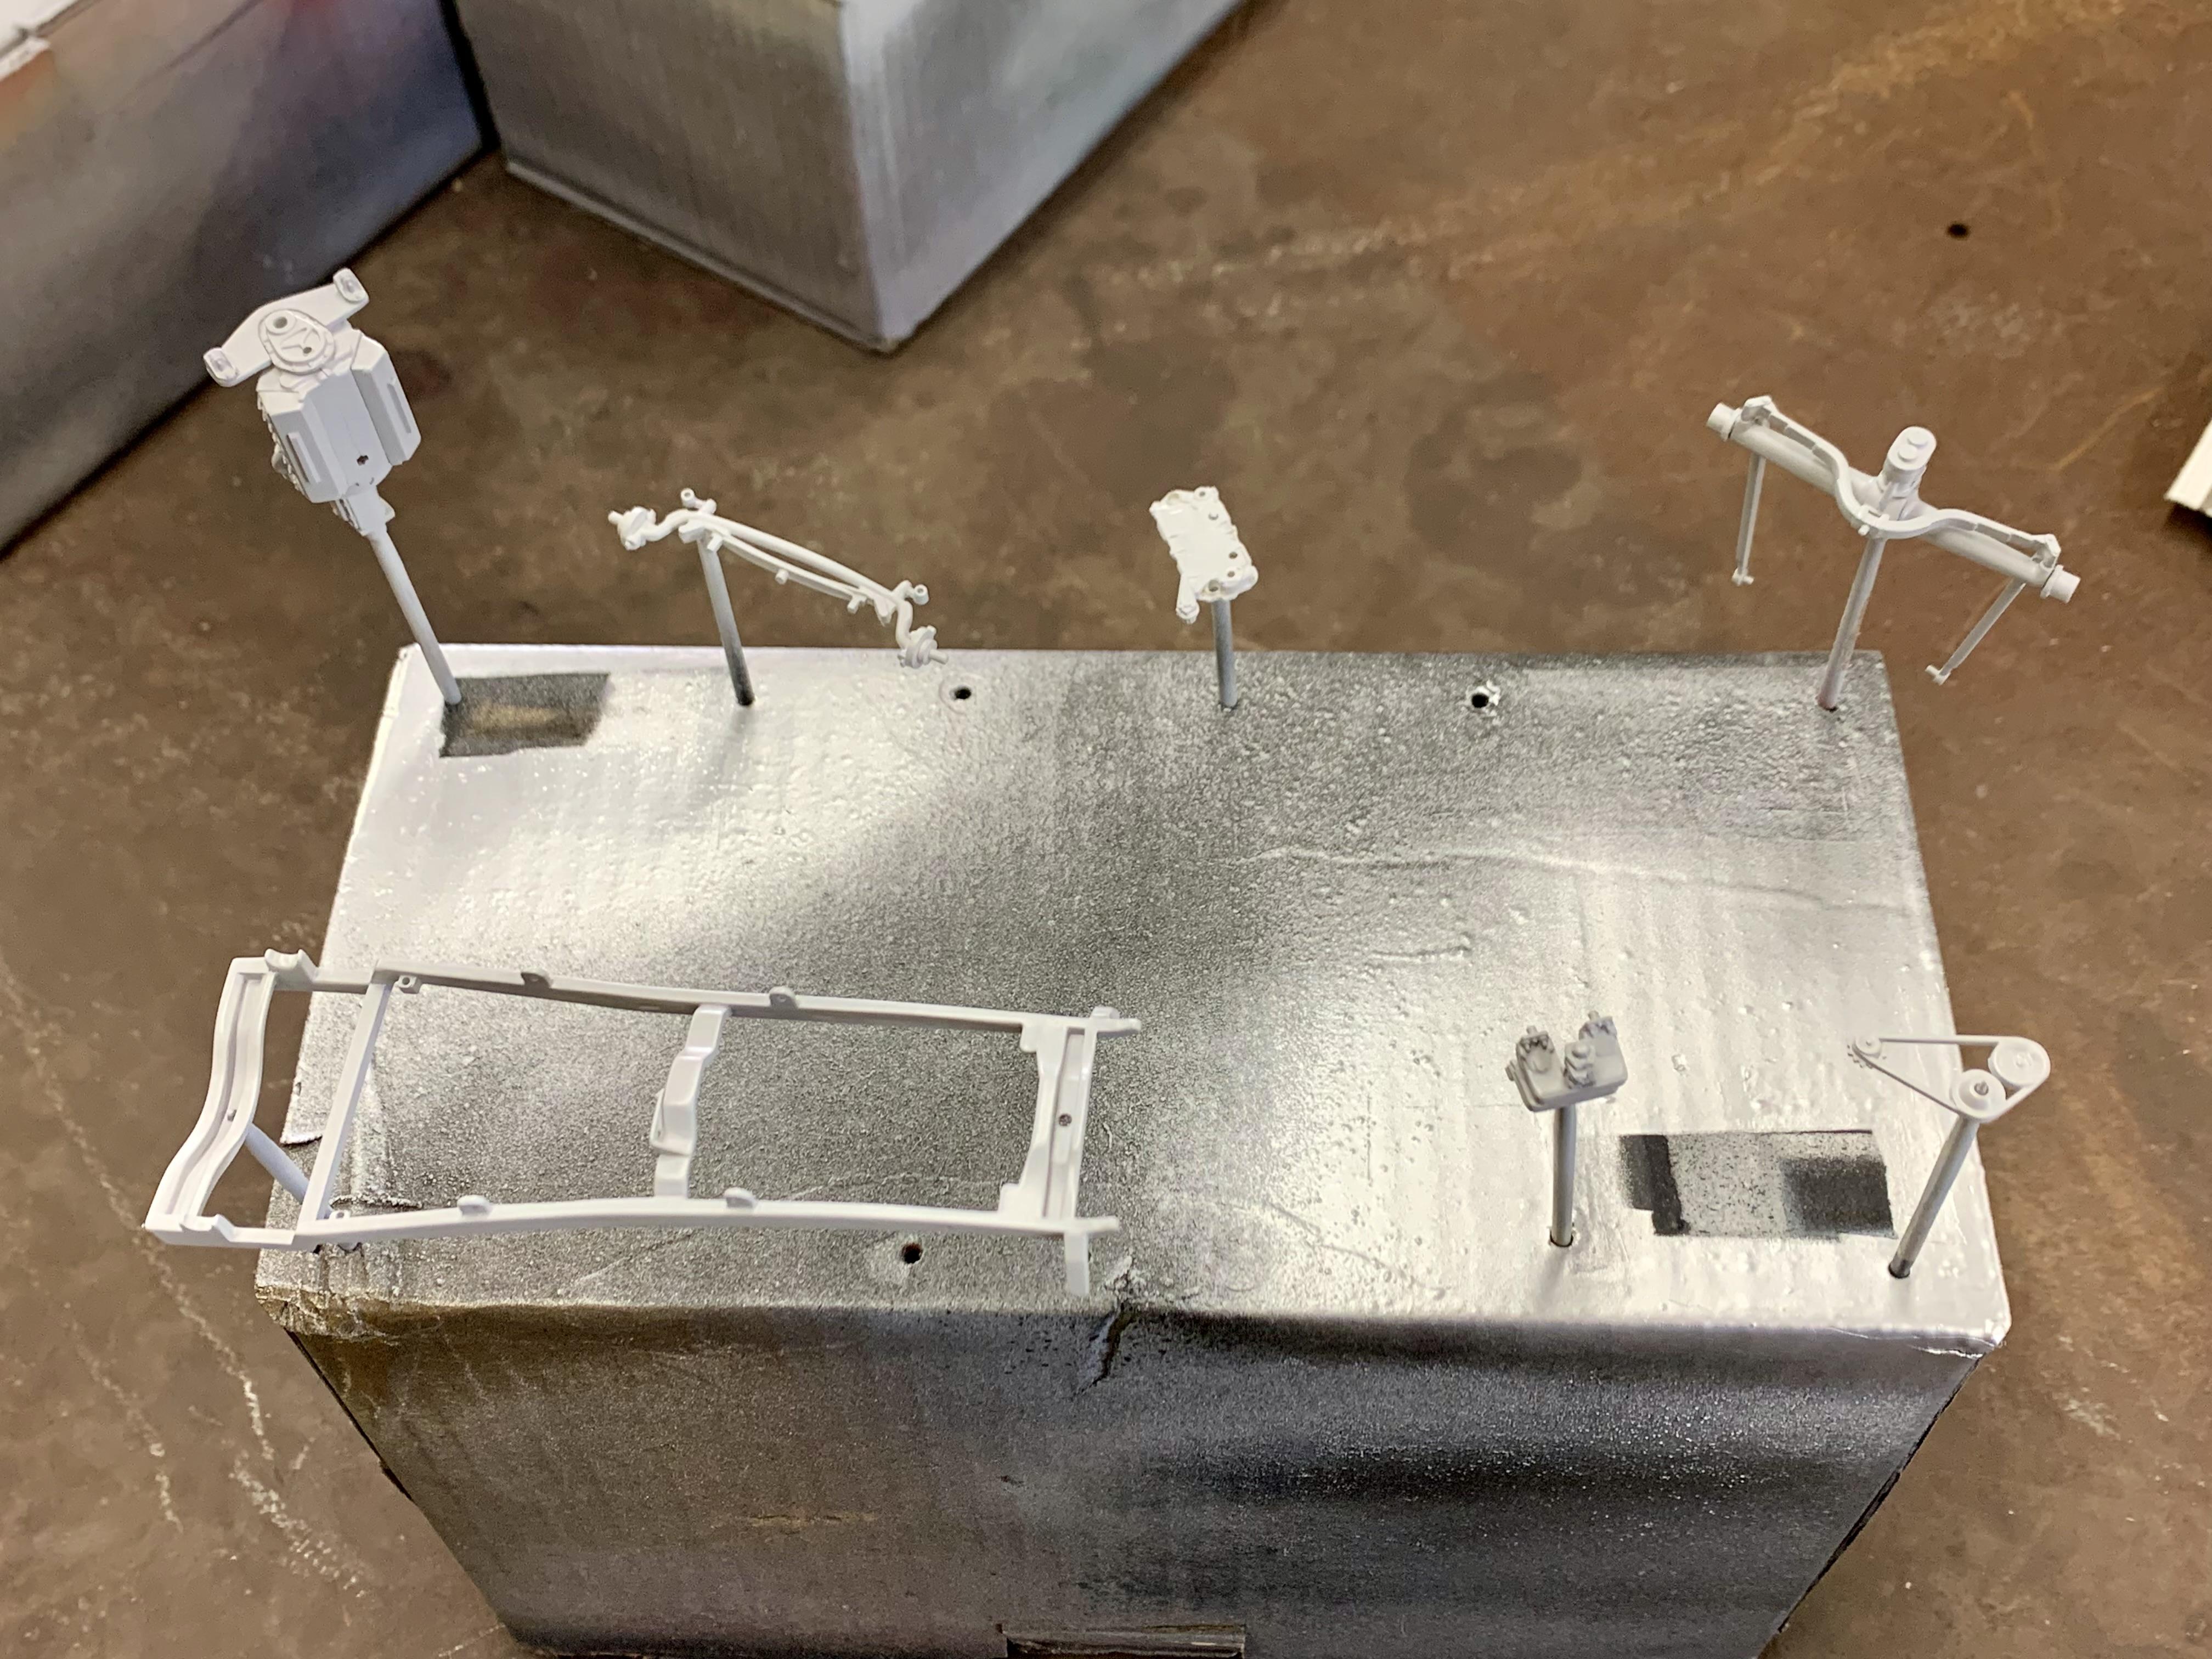
Today was a good one. All chassis and engine parts are primed with Tamiya Fine Gray. Picture proof below! I’m still not totally decided on a color scheme but I’m closing in. I’ll need to order some colors but I can paint a few things in the meantime. More soon! ?
-
Traditional 1929 Ford Woody Wagon Hot Rod
Dennis Lacy replied to Dennis Lacy's topic in WIP: Model Cars
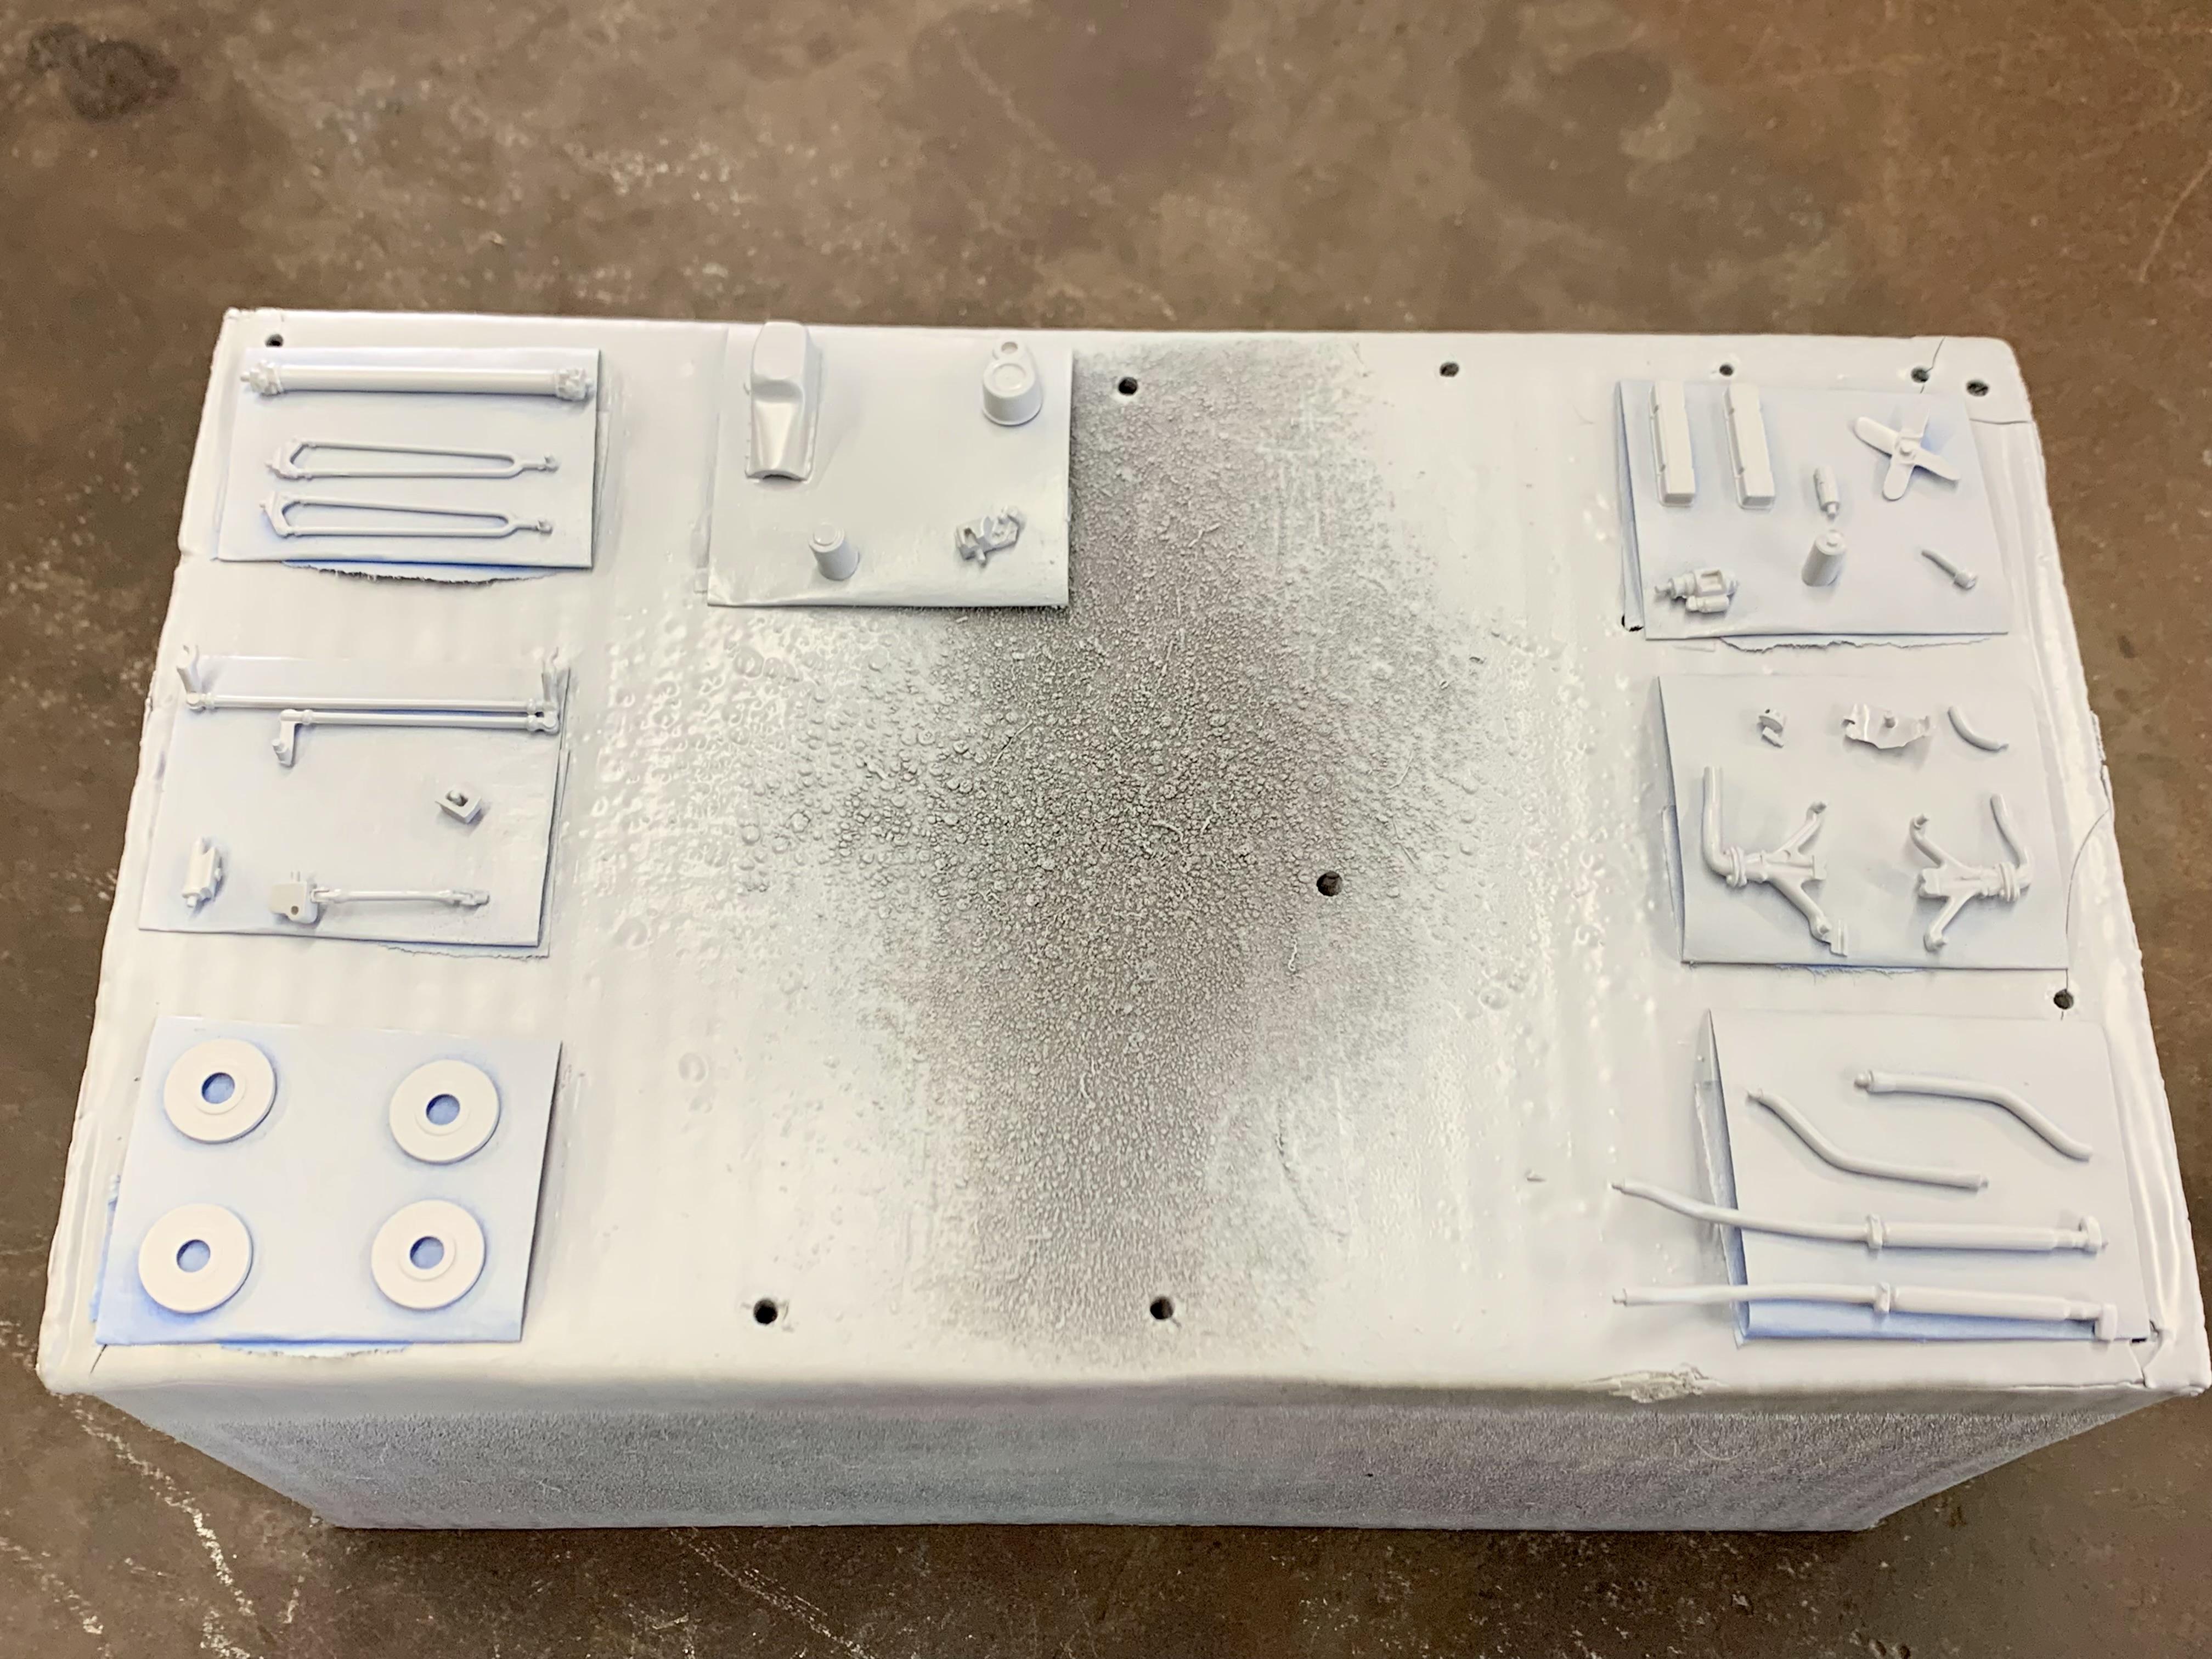
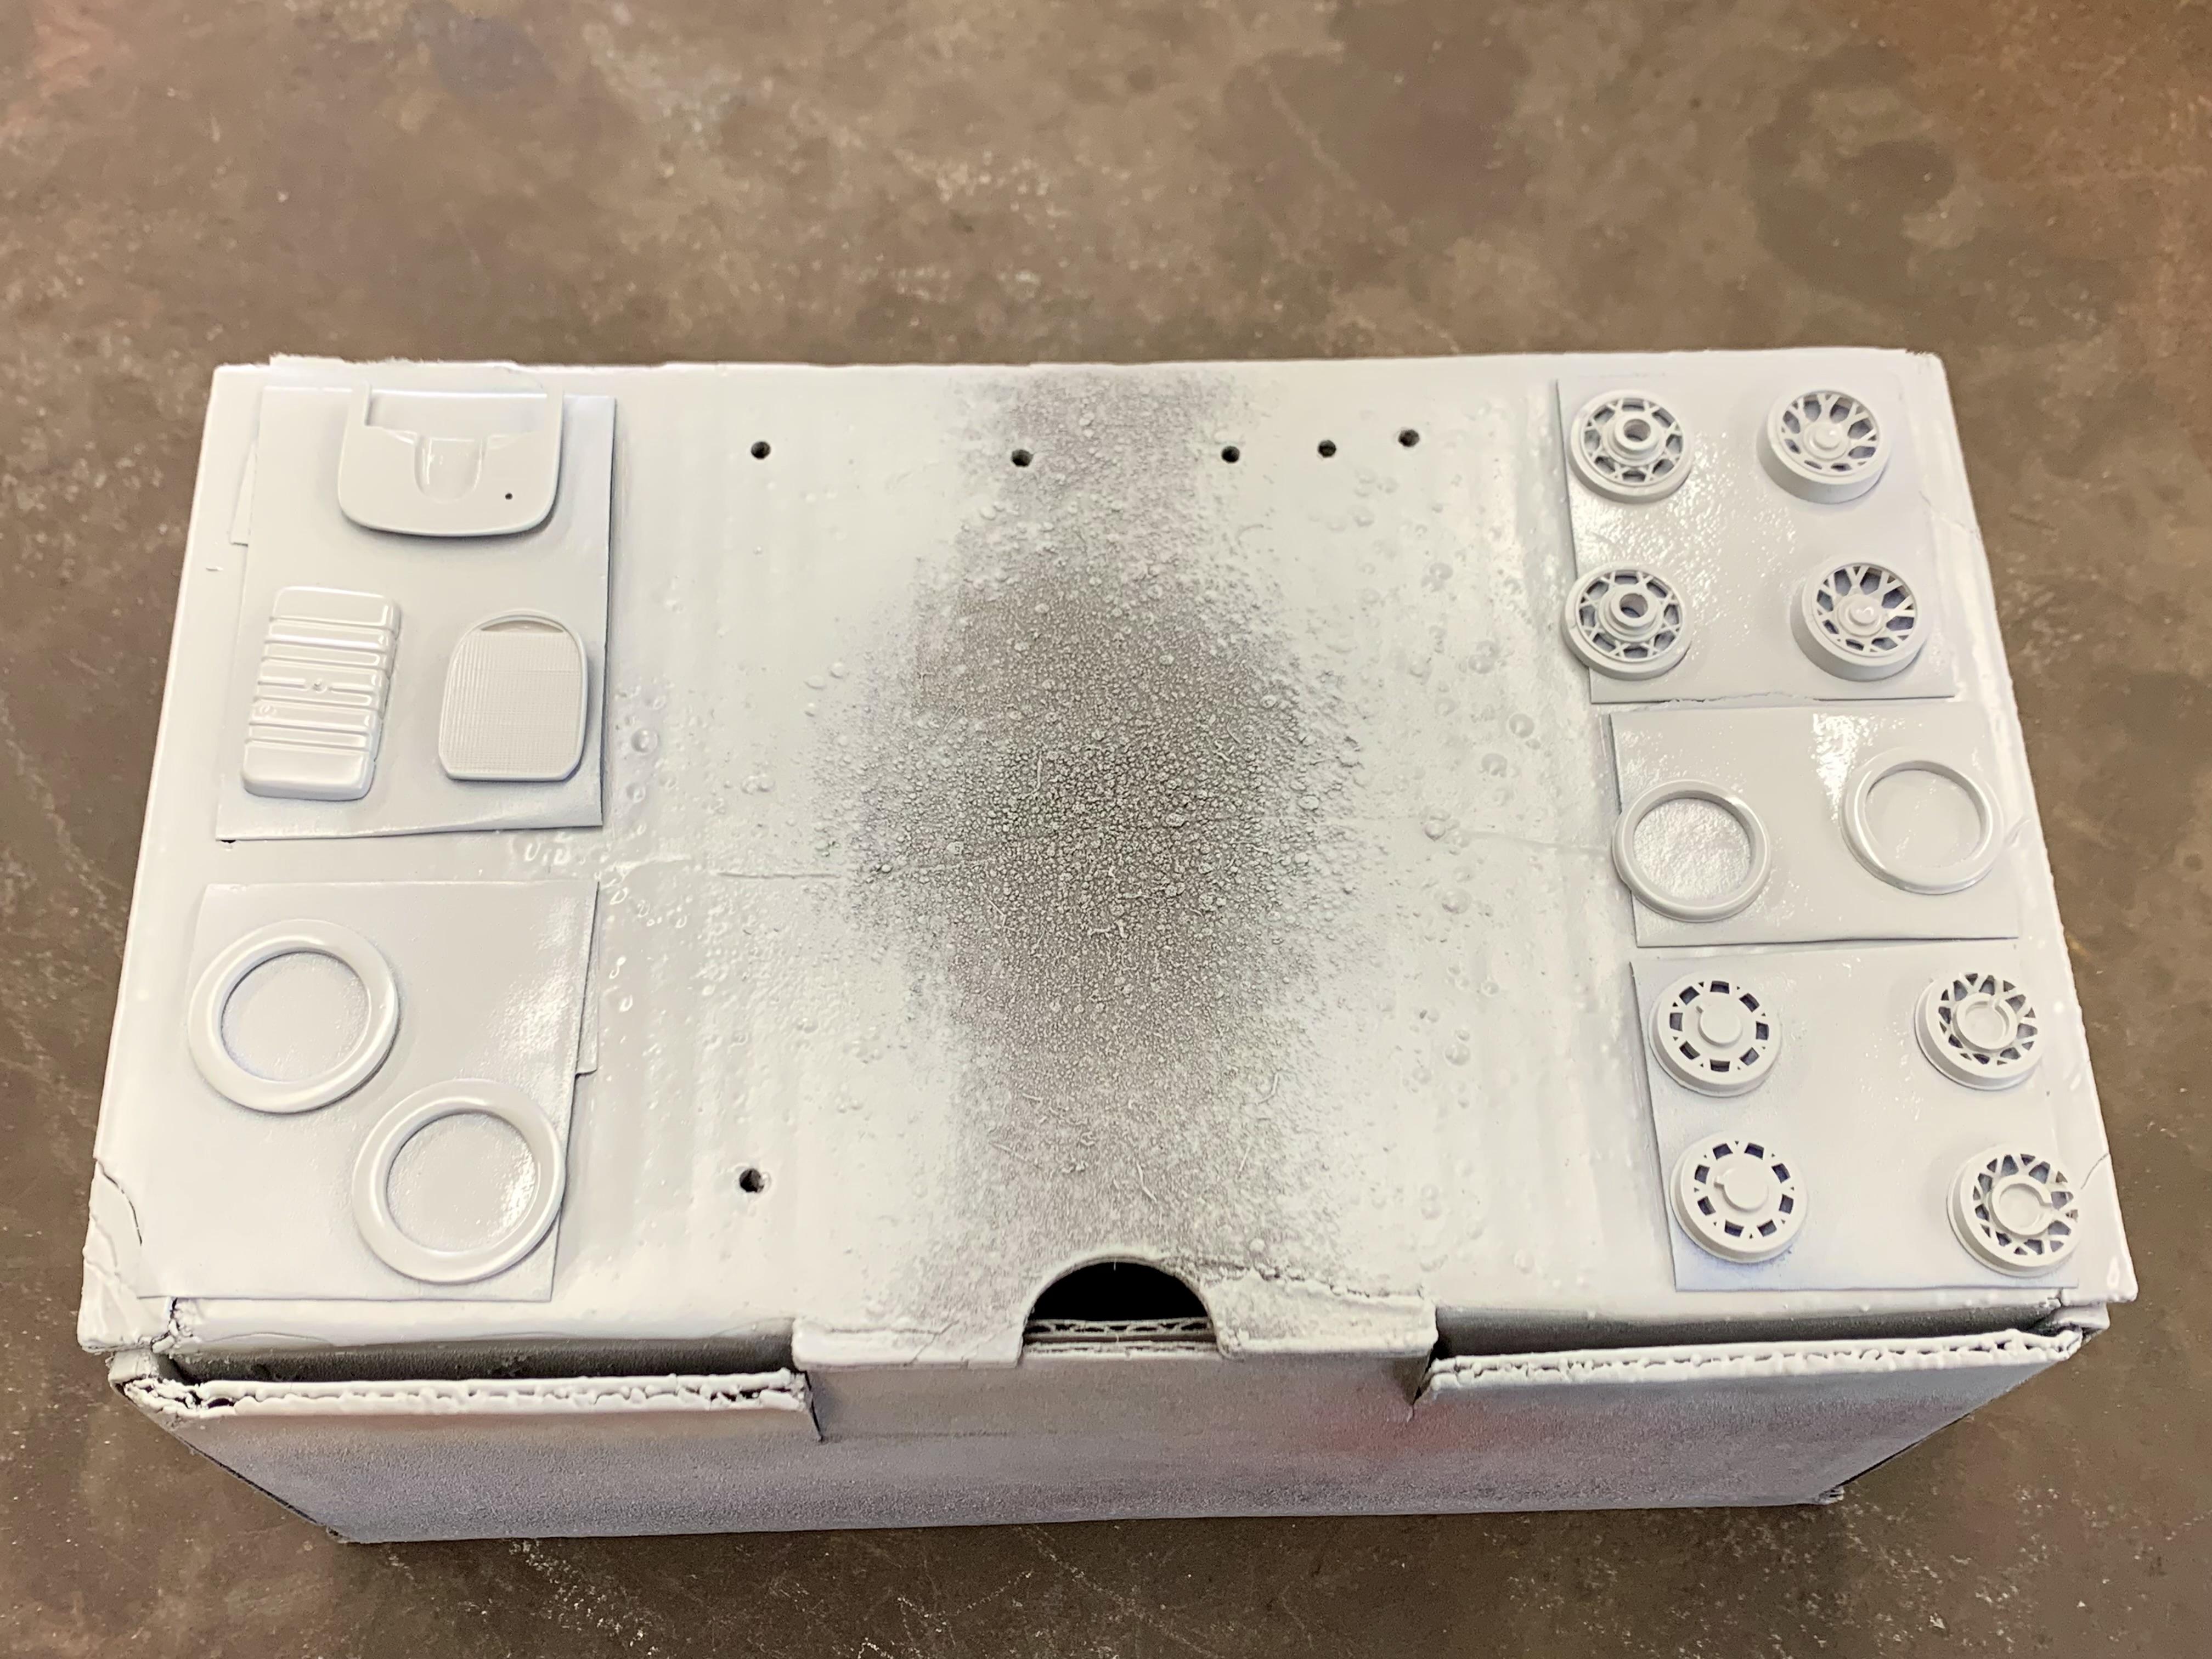
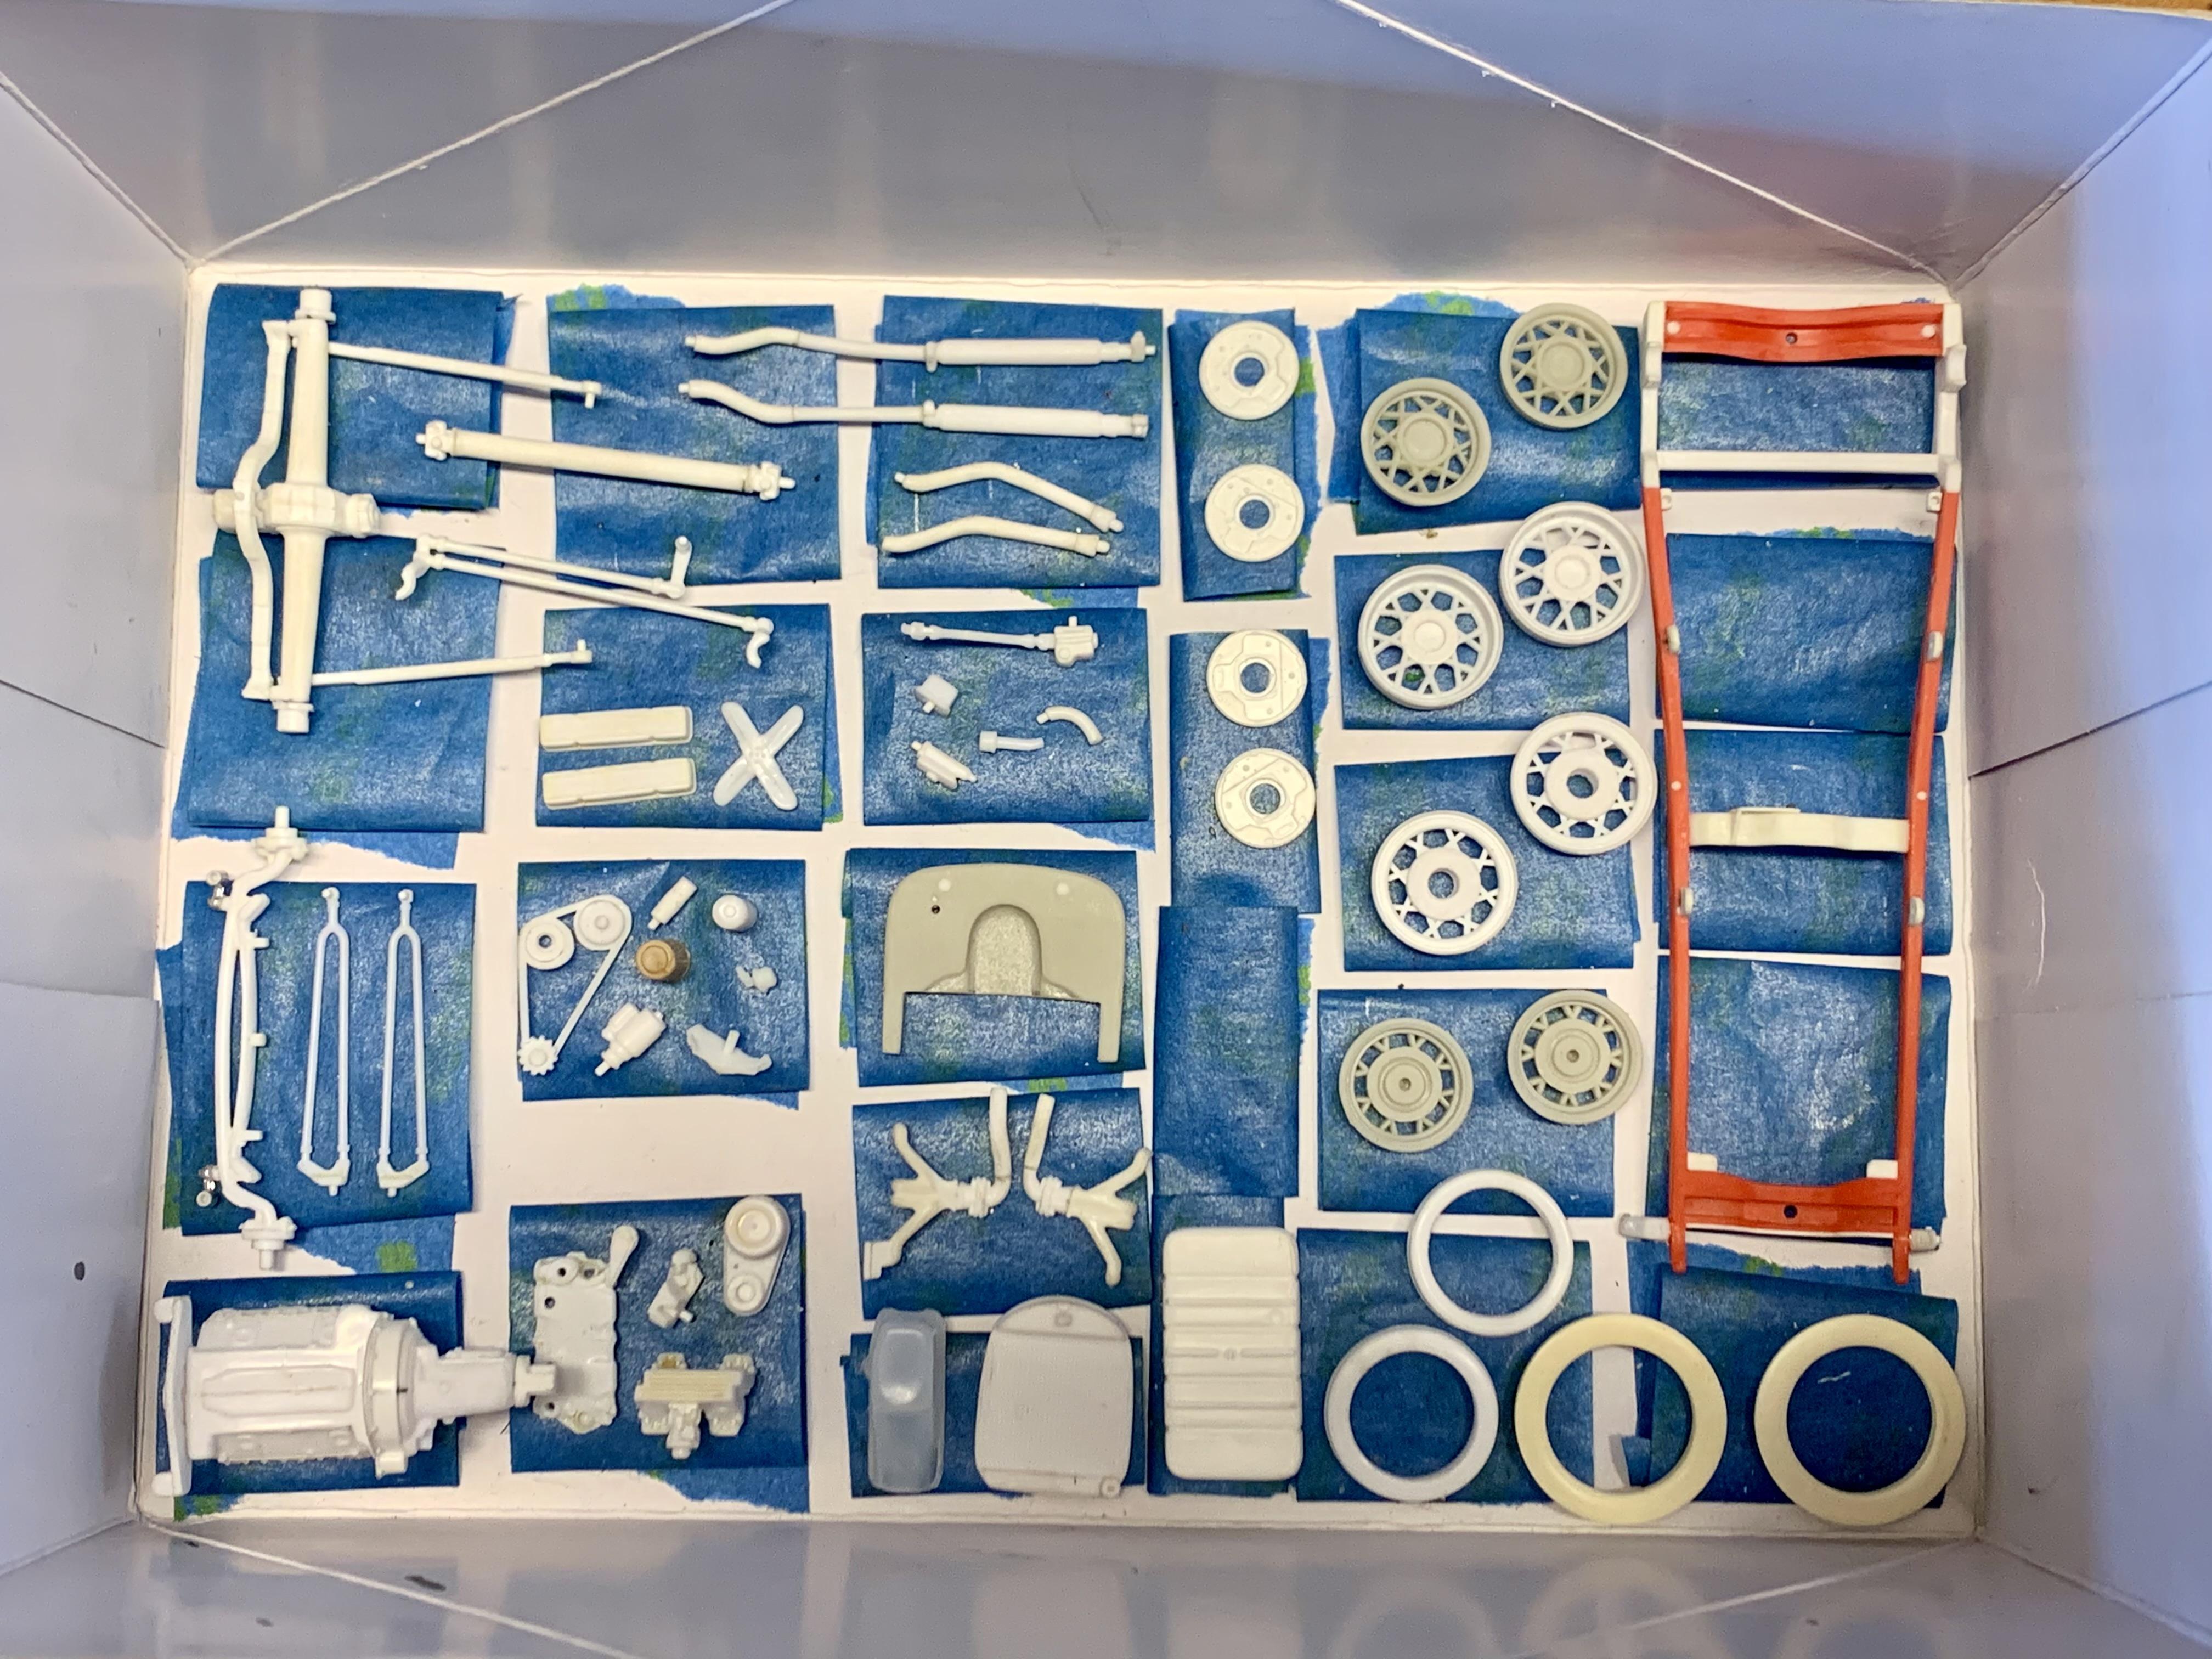
Good news! All of the chassis and engine parts are loaded up in my highly sophisticated travel box and heading with me to my shop to get going on primer and paint. ?
-
@Rocking Rodney Rat Interesting! It must be the resin body. The wheel wells fit it perfectly but maybe it’s just a little out of shape at the bottom.
-
Stunningly well done!
-
Good looking 40 Coupe! Just a few well planned tweaks to that kit to the next level of cool. Perfect color choice, too.
-
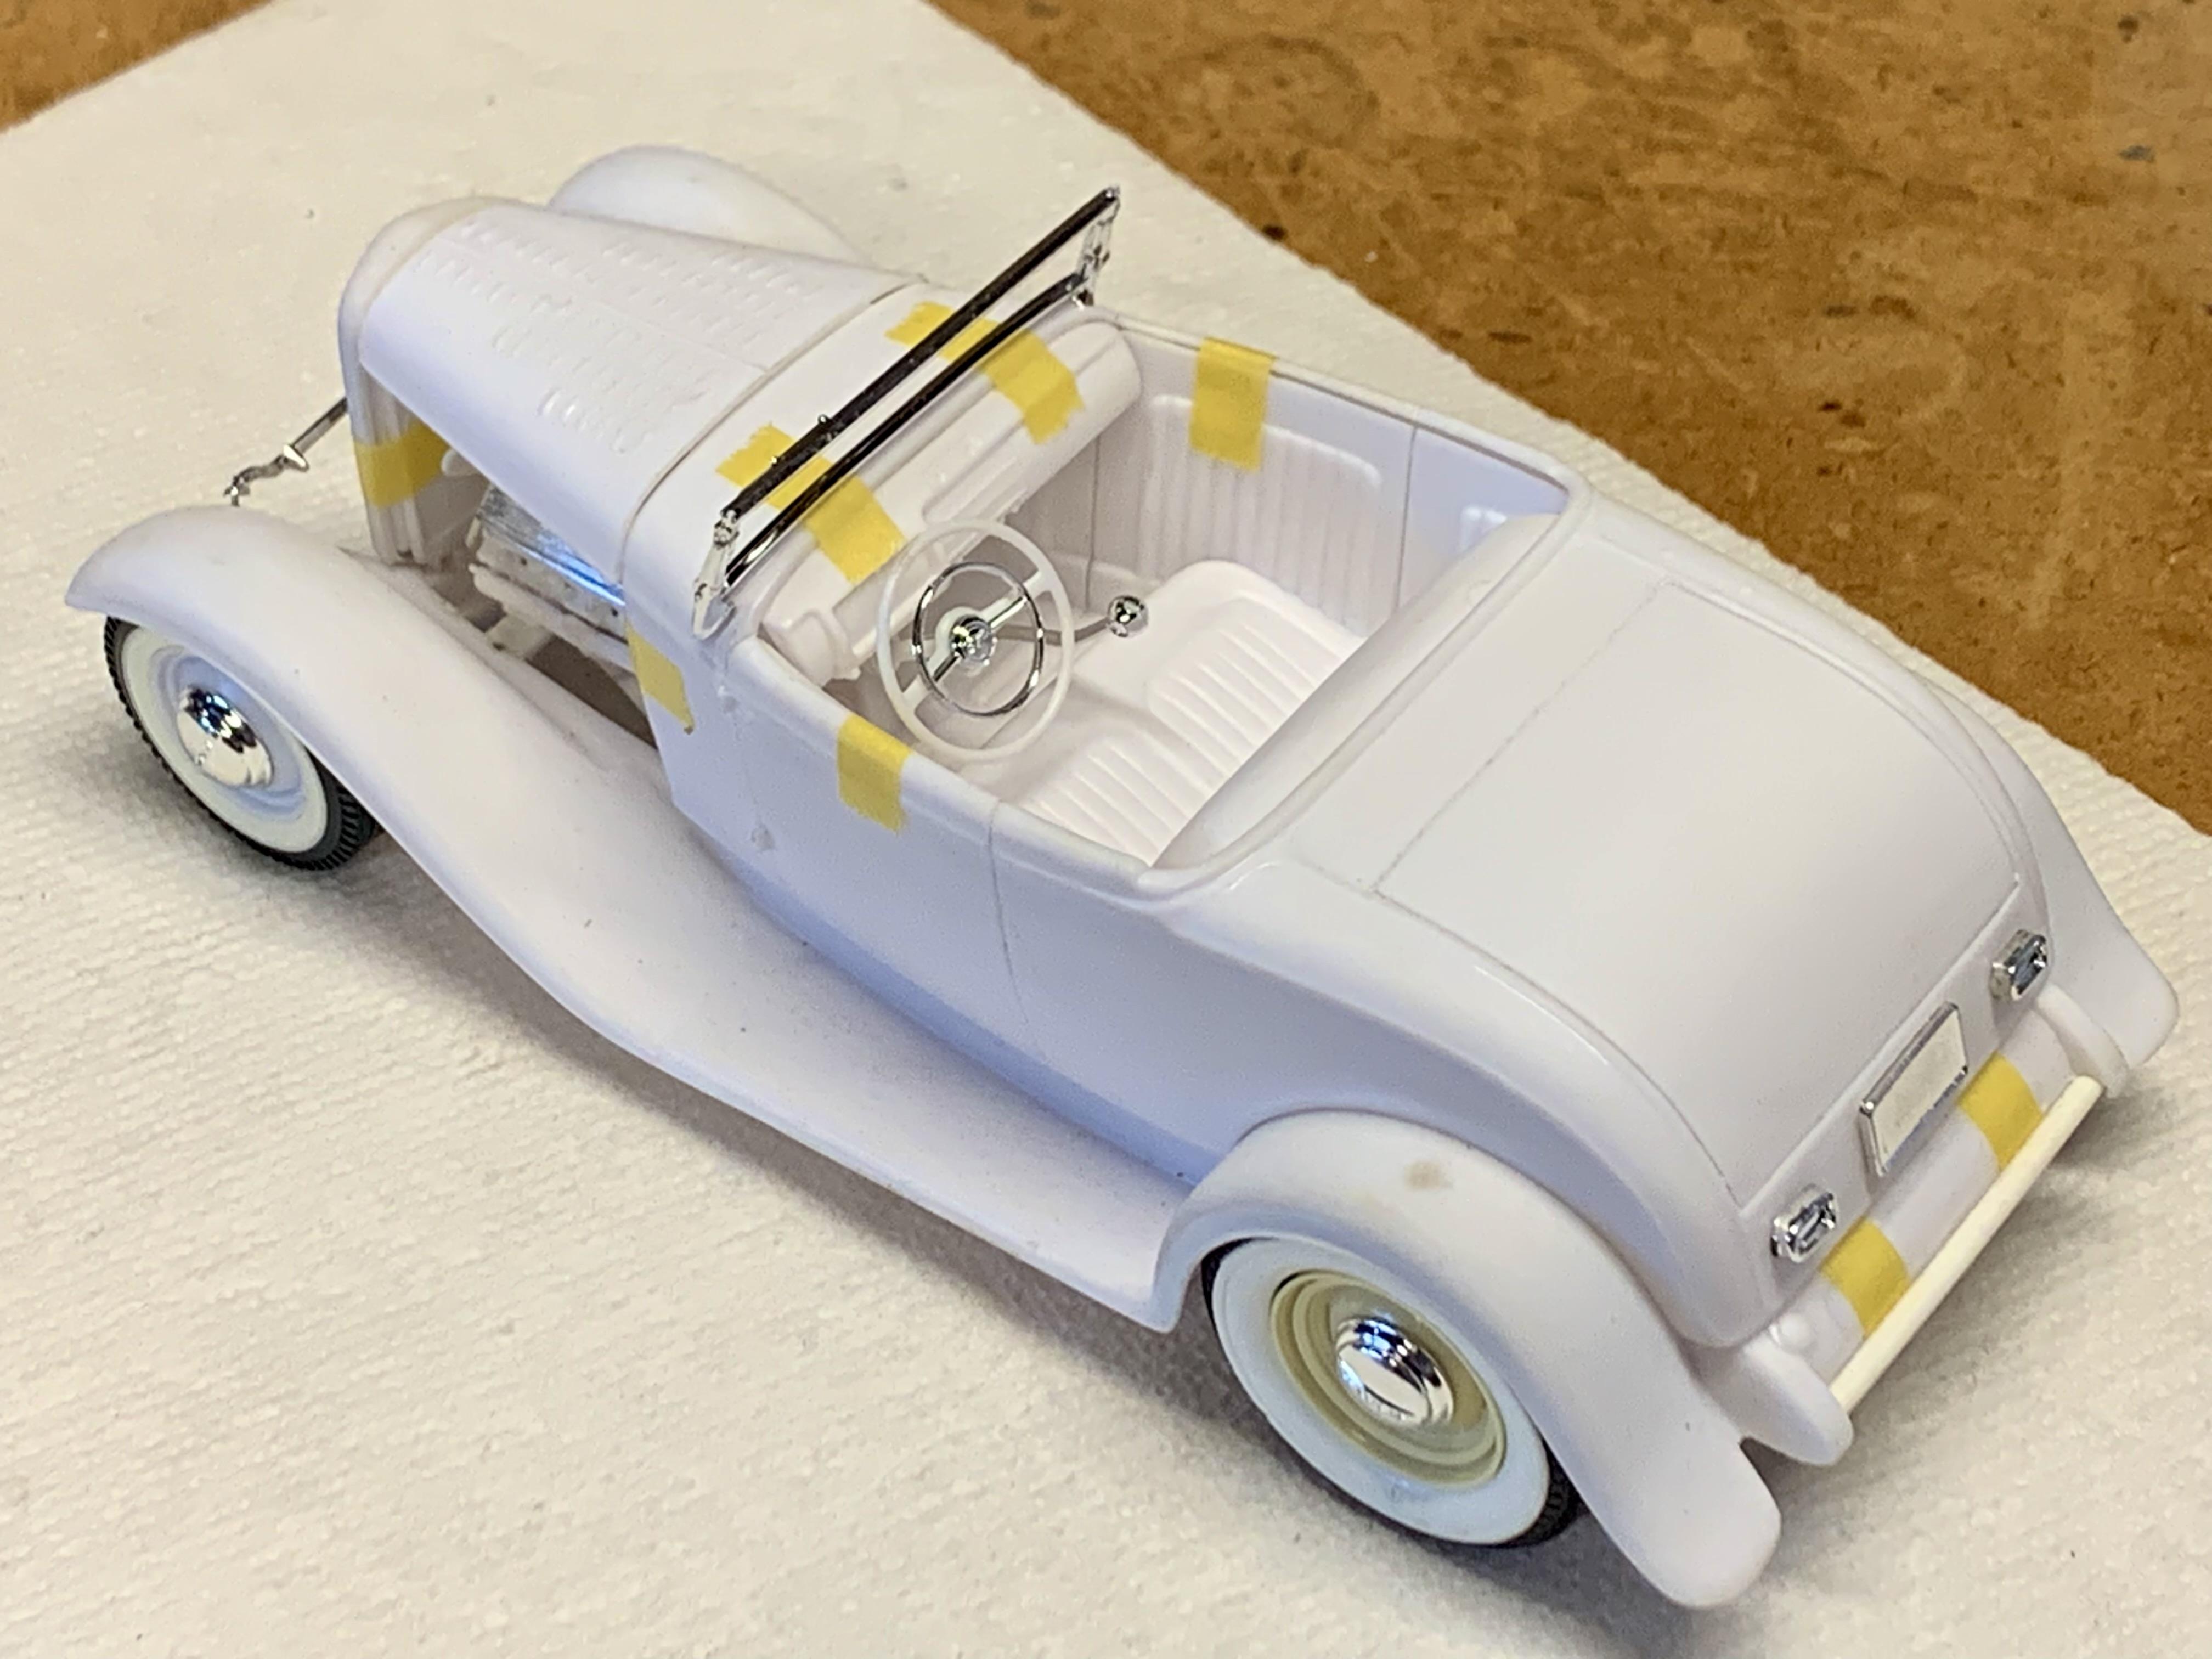
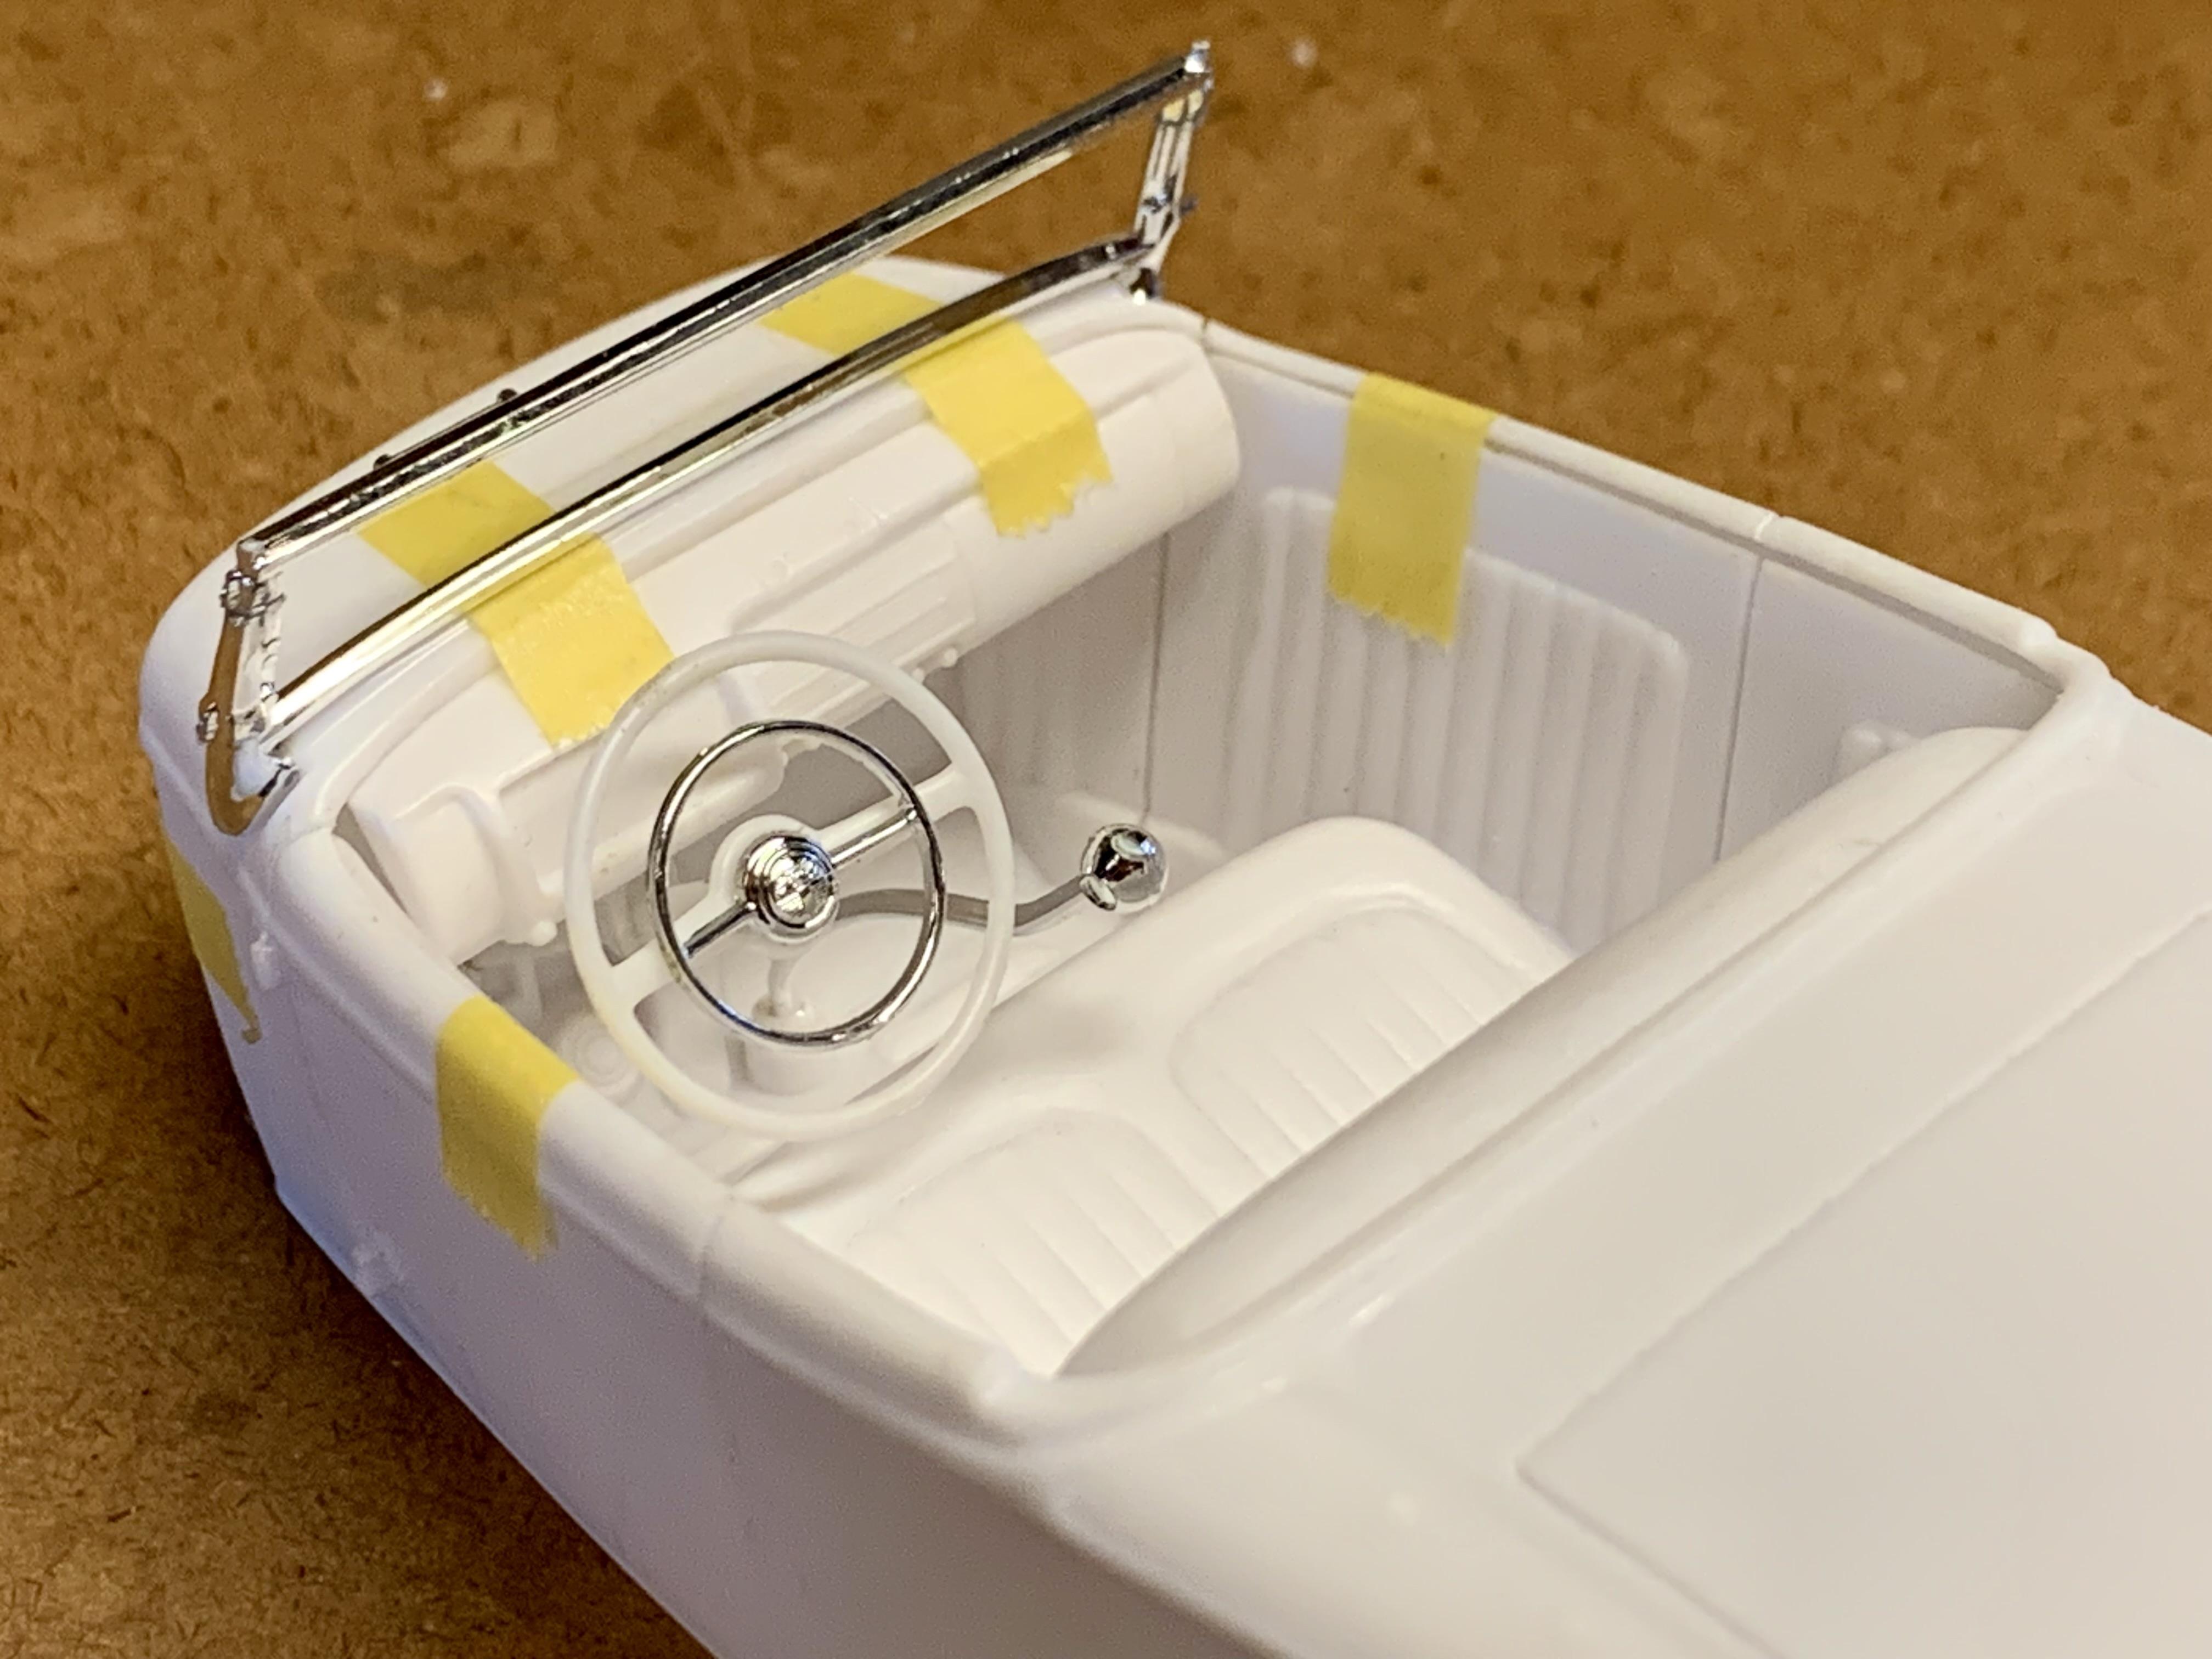
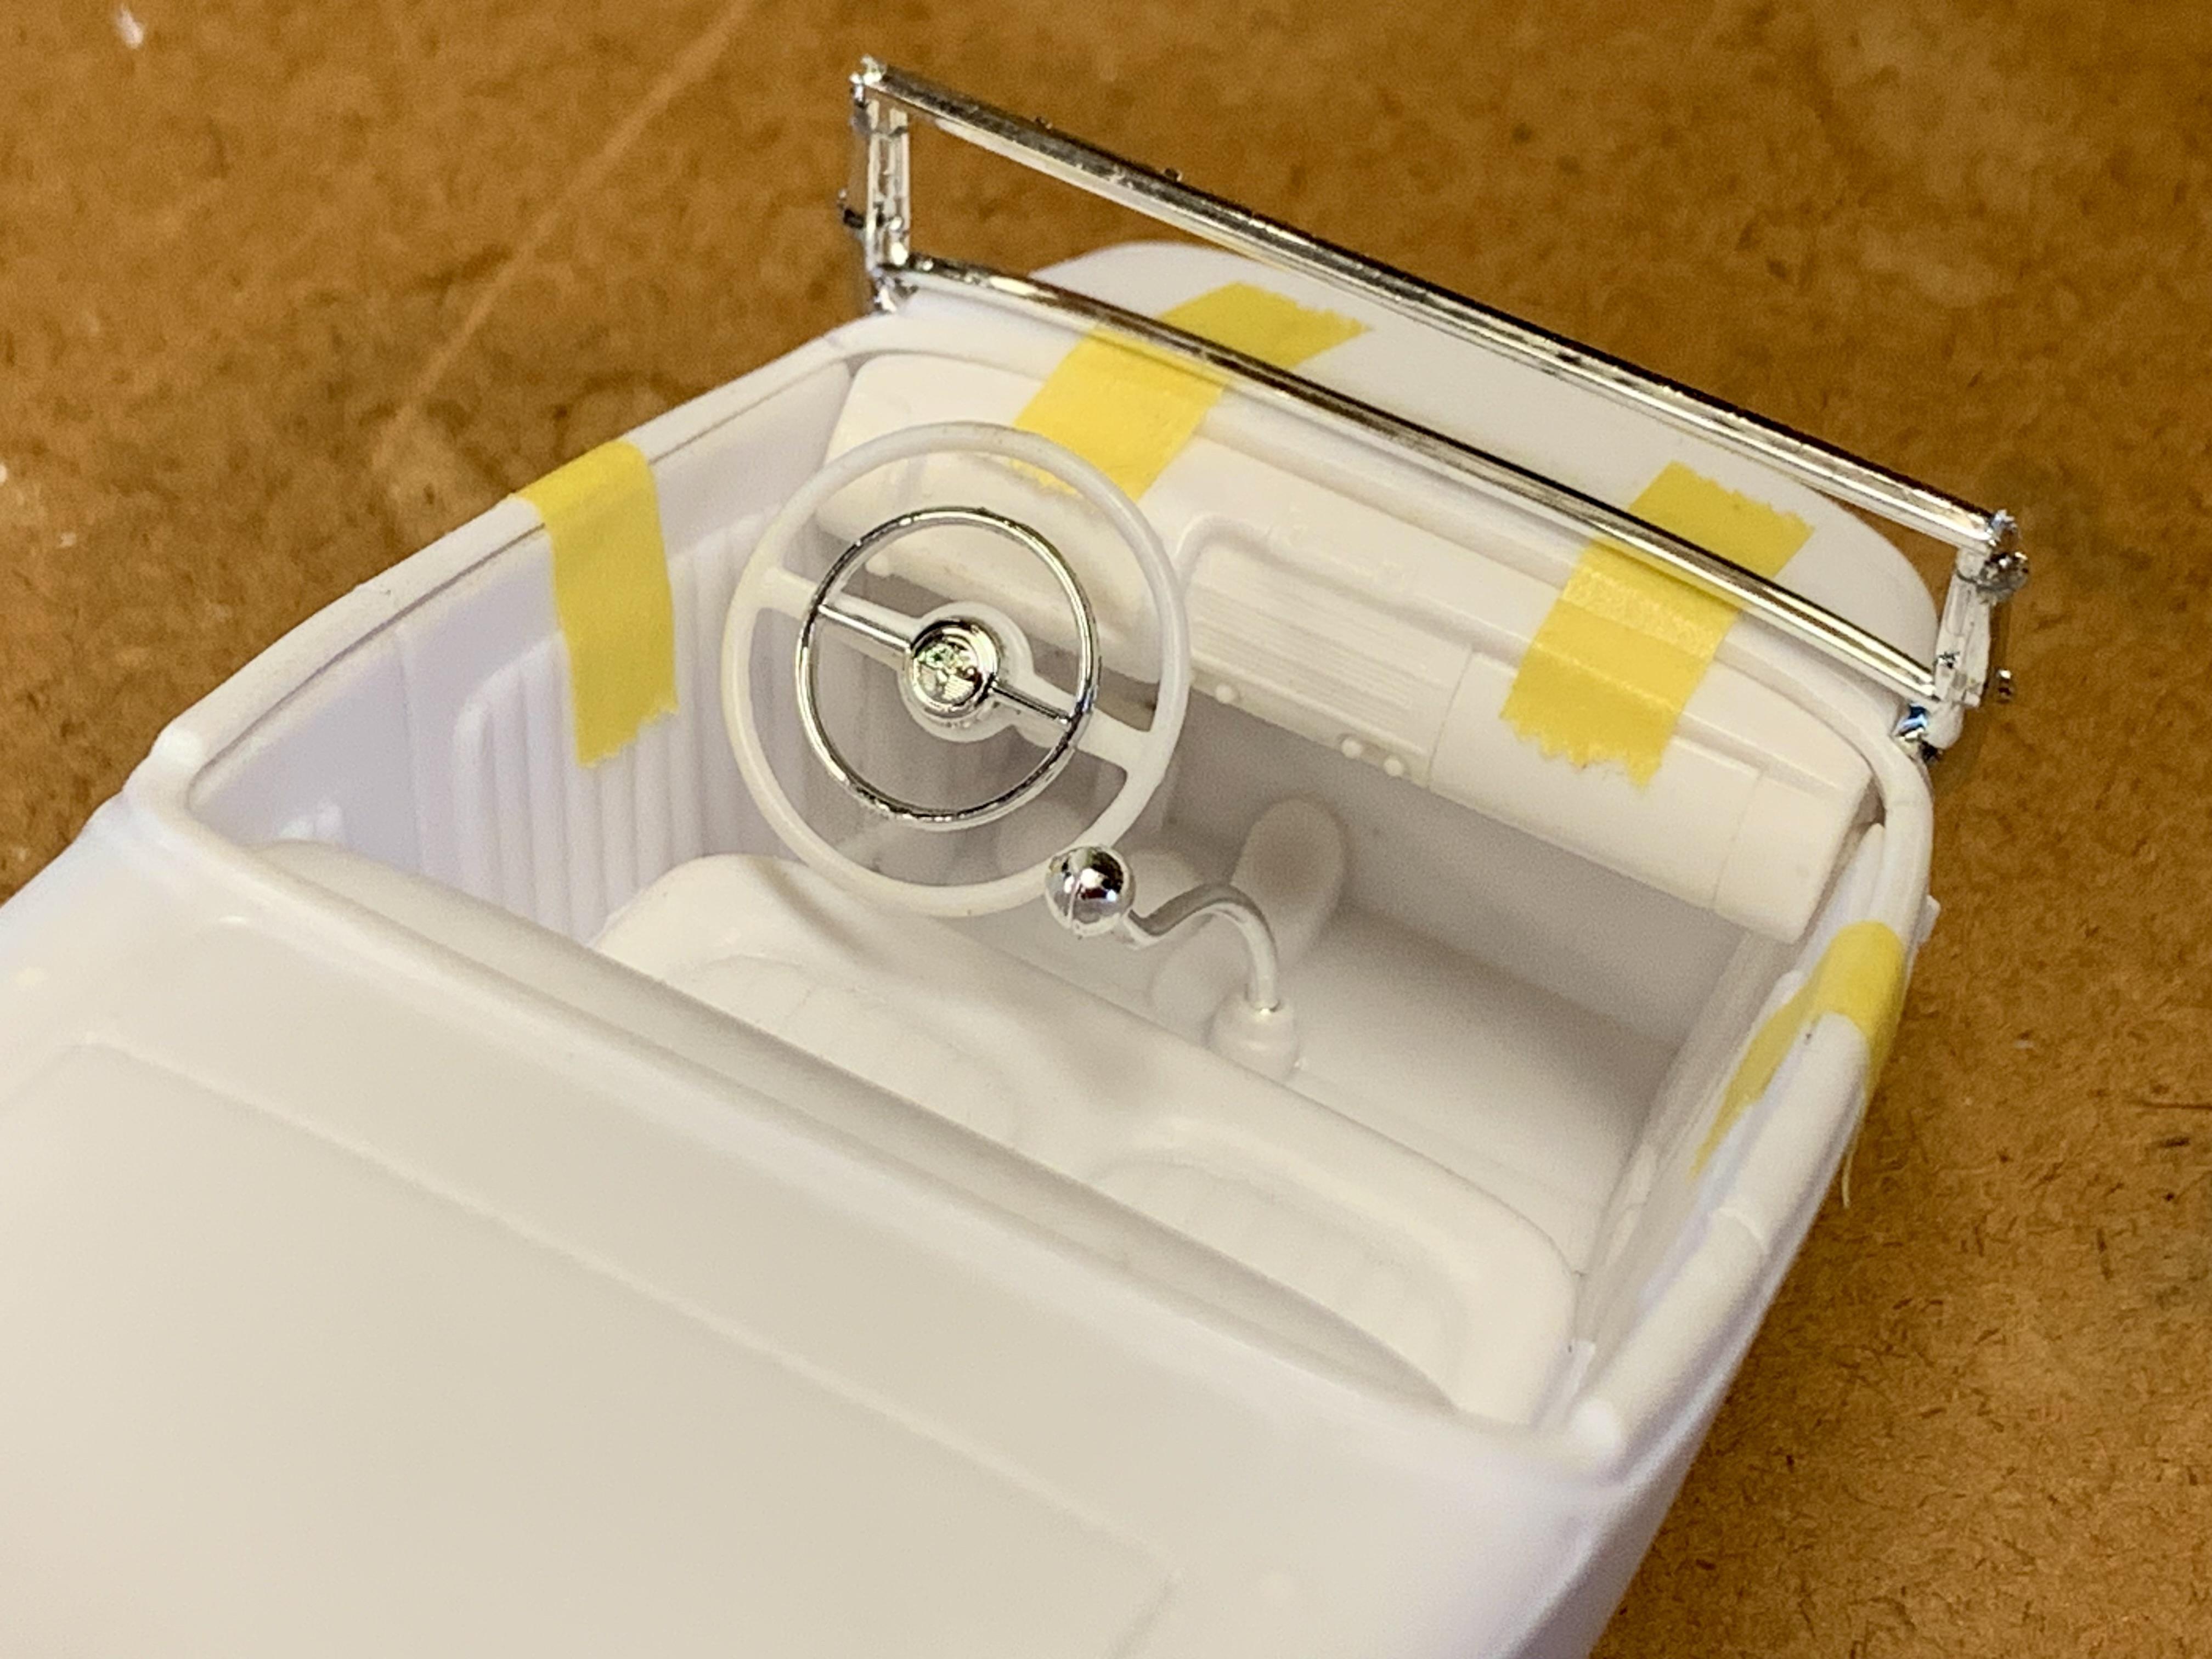
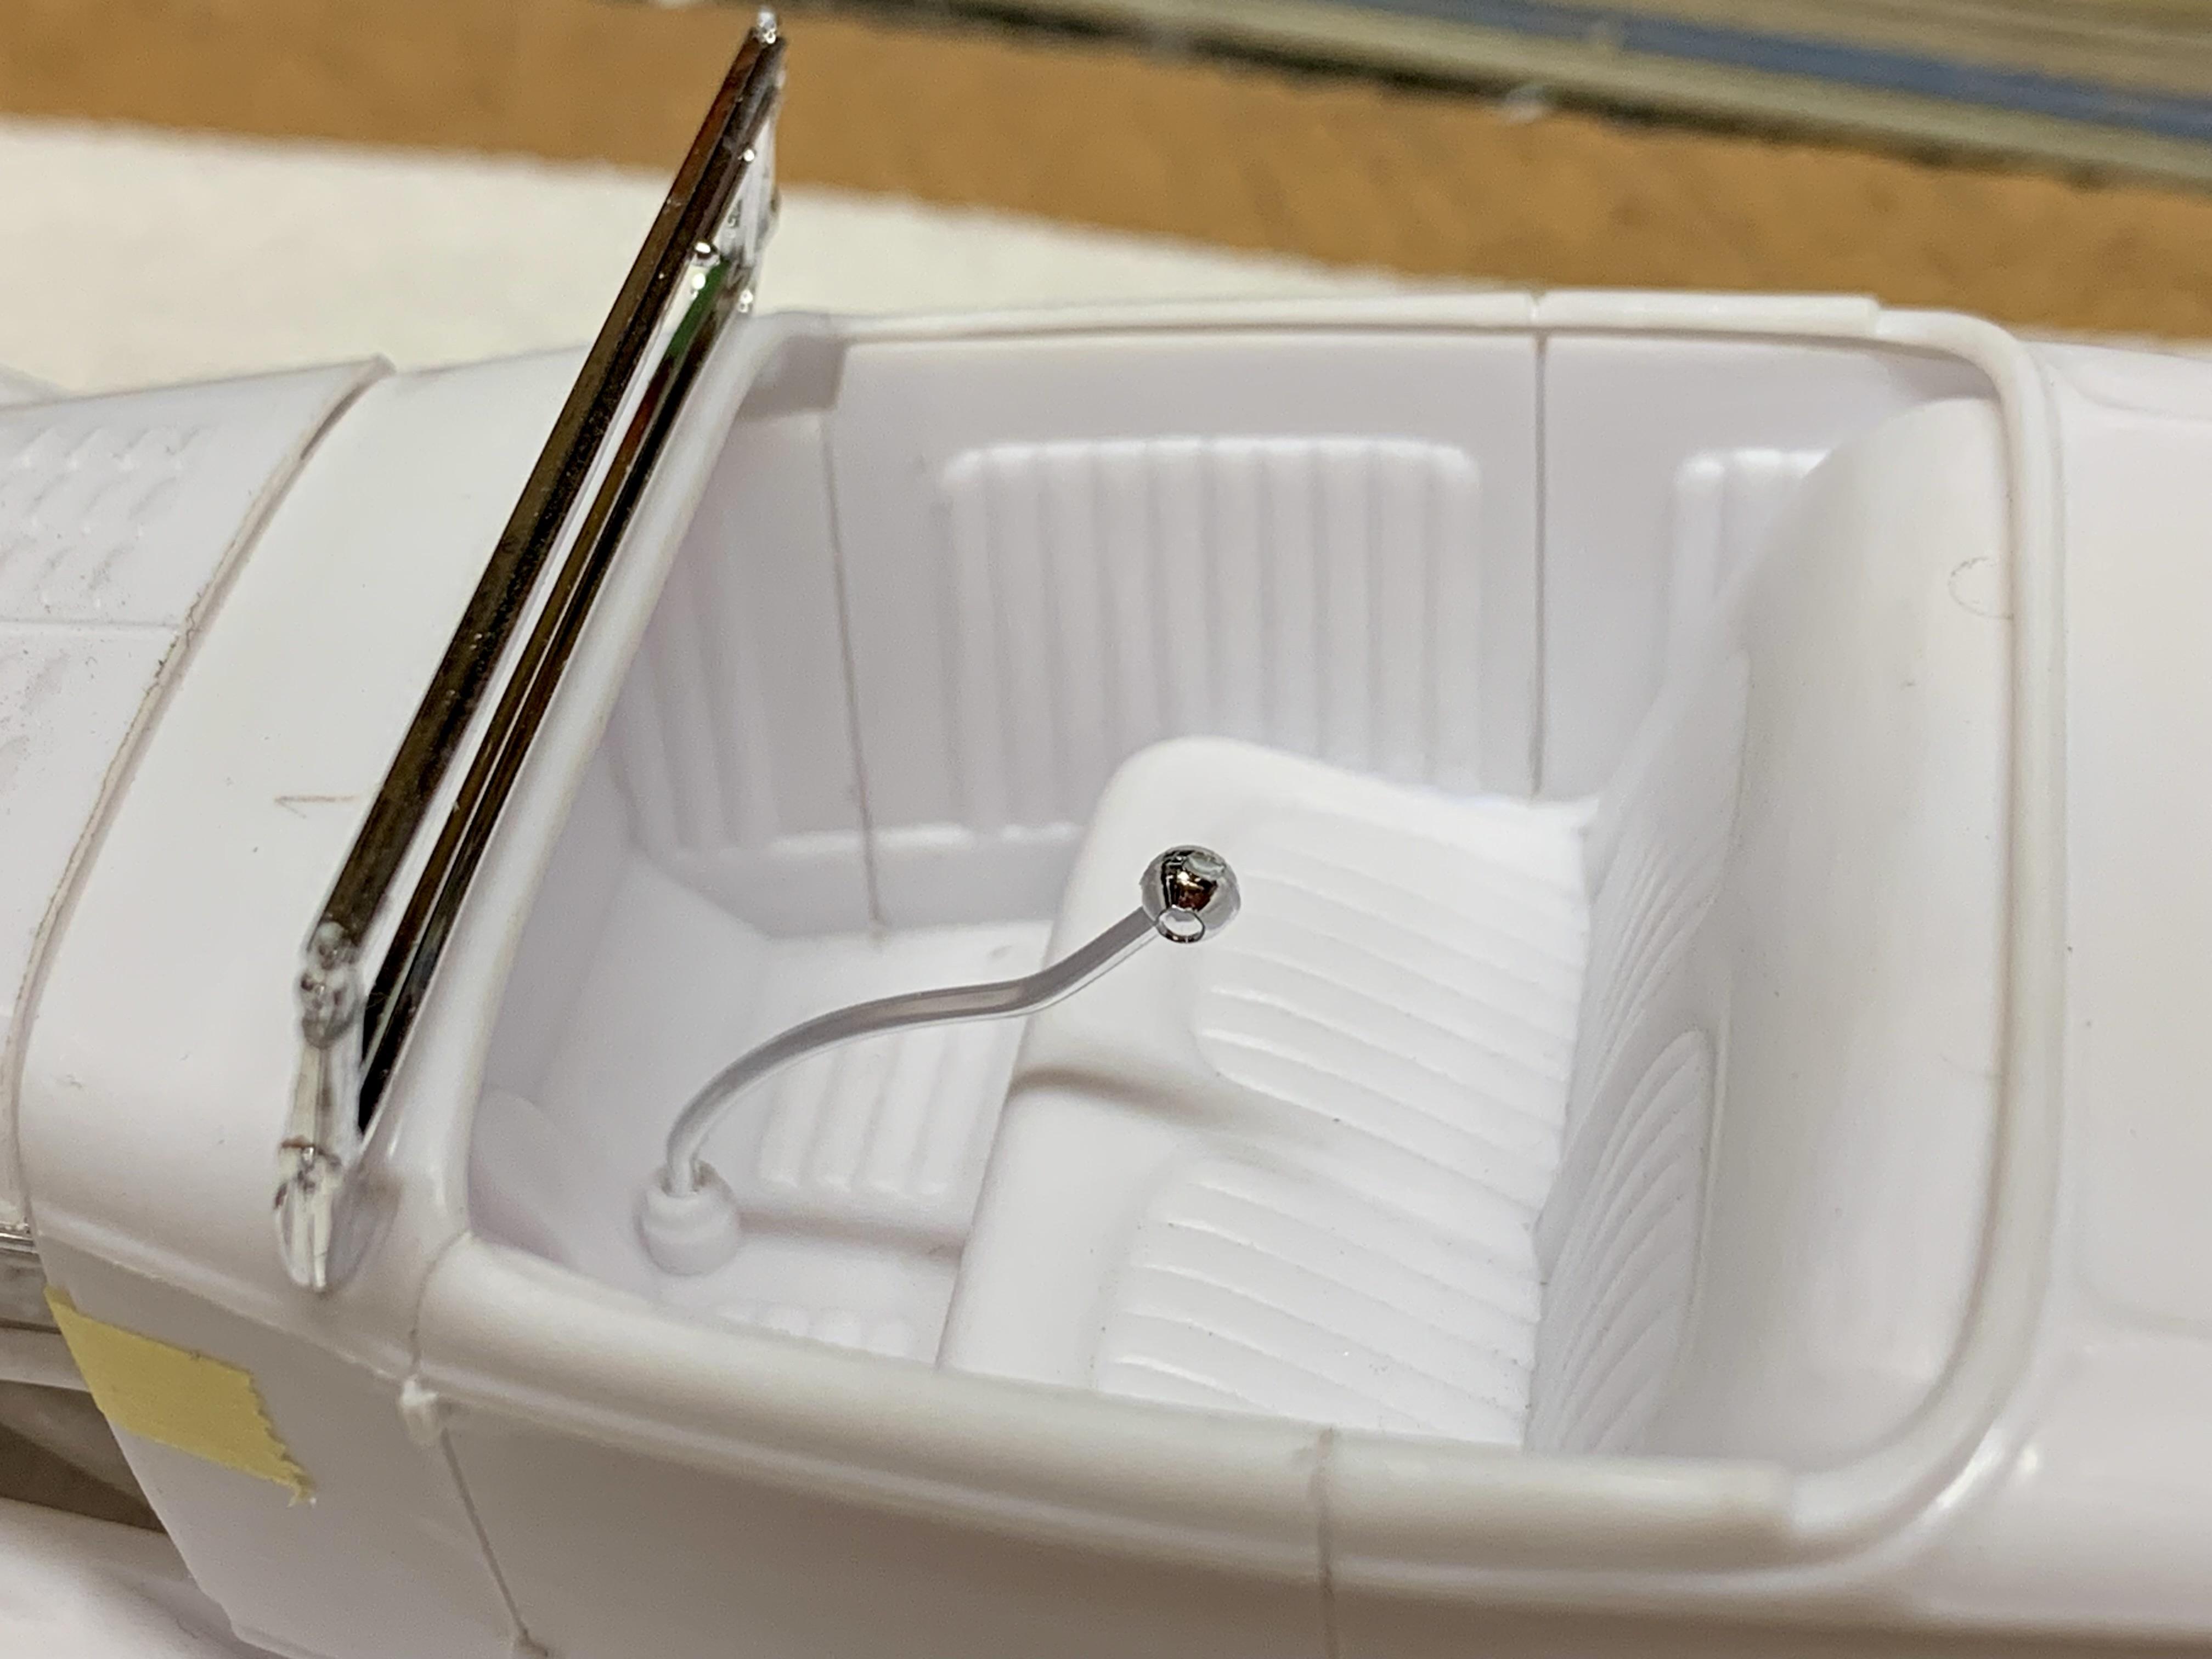
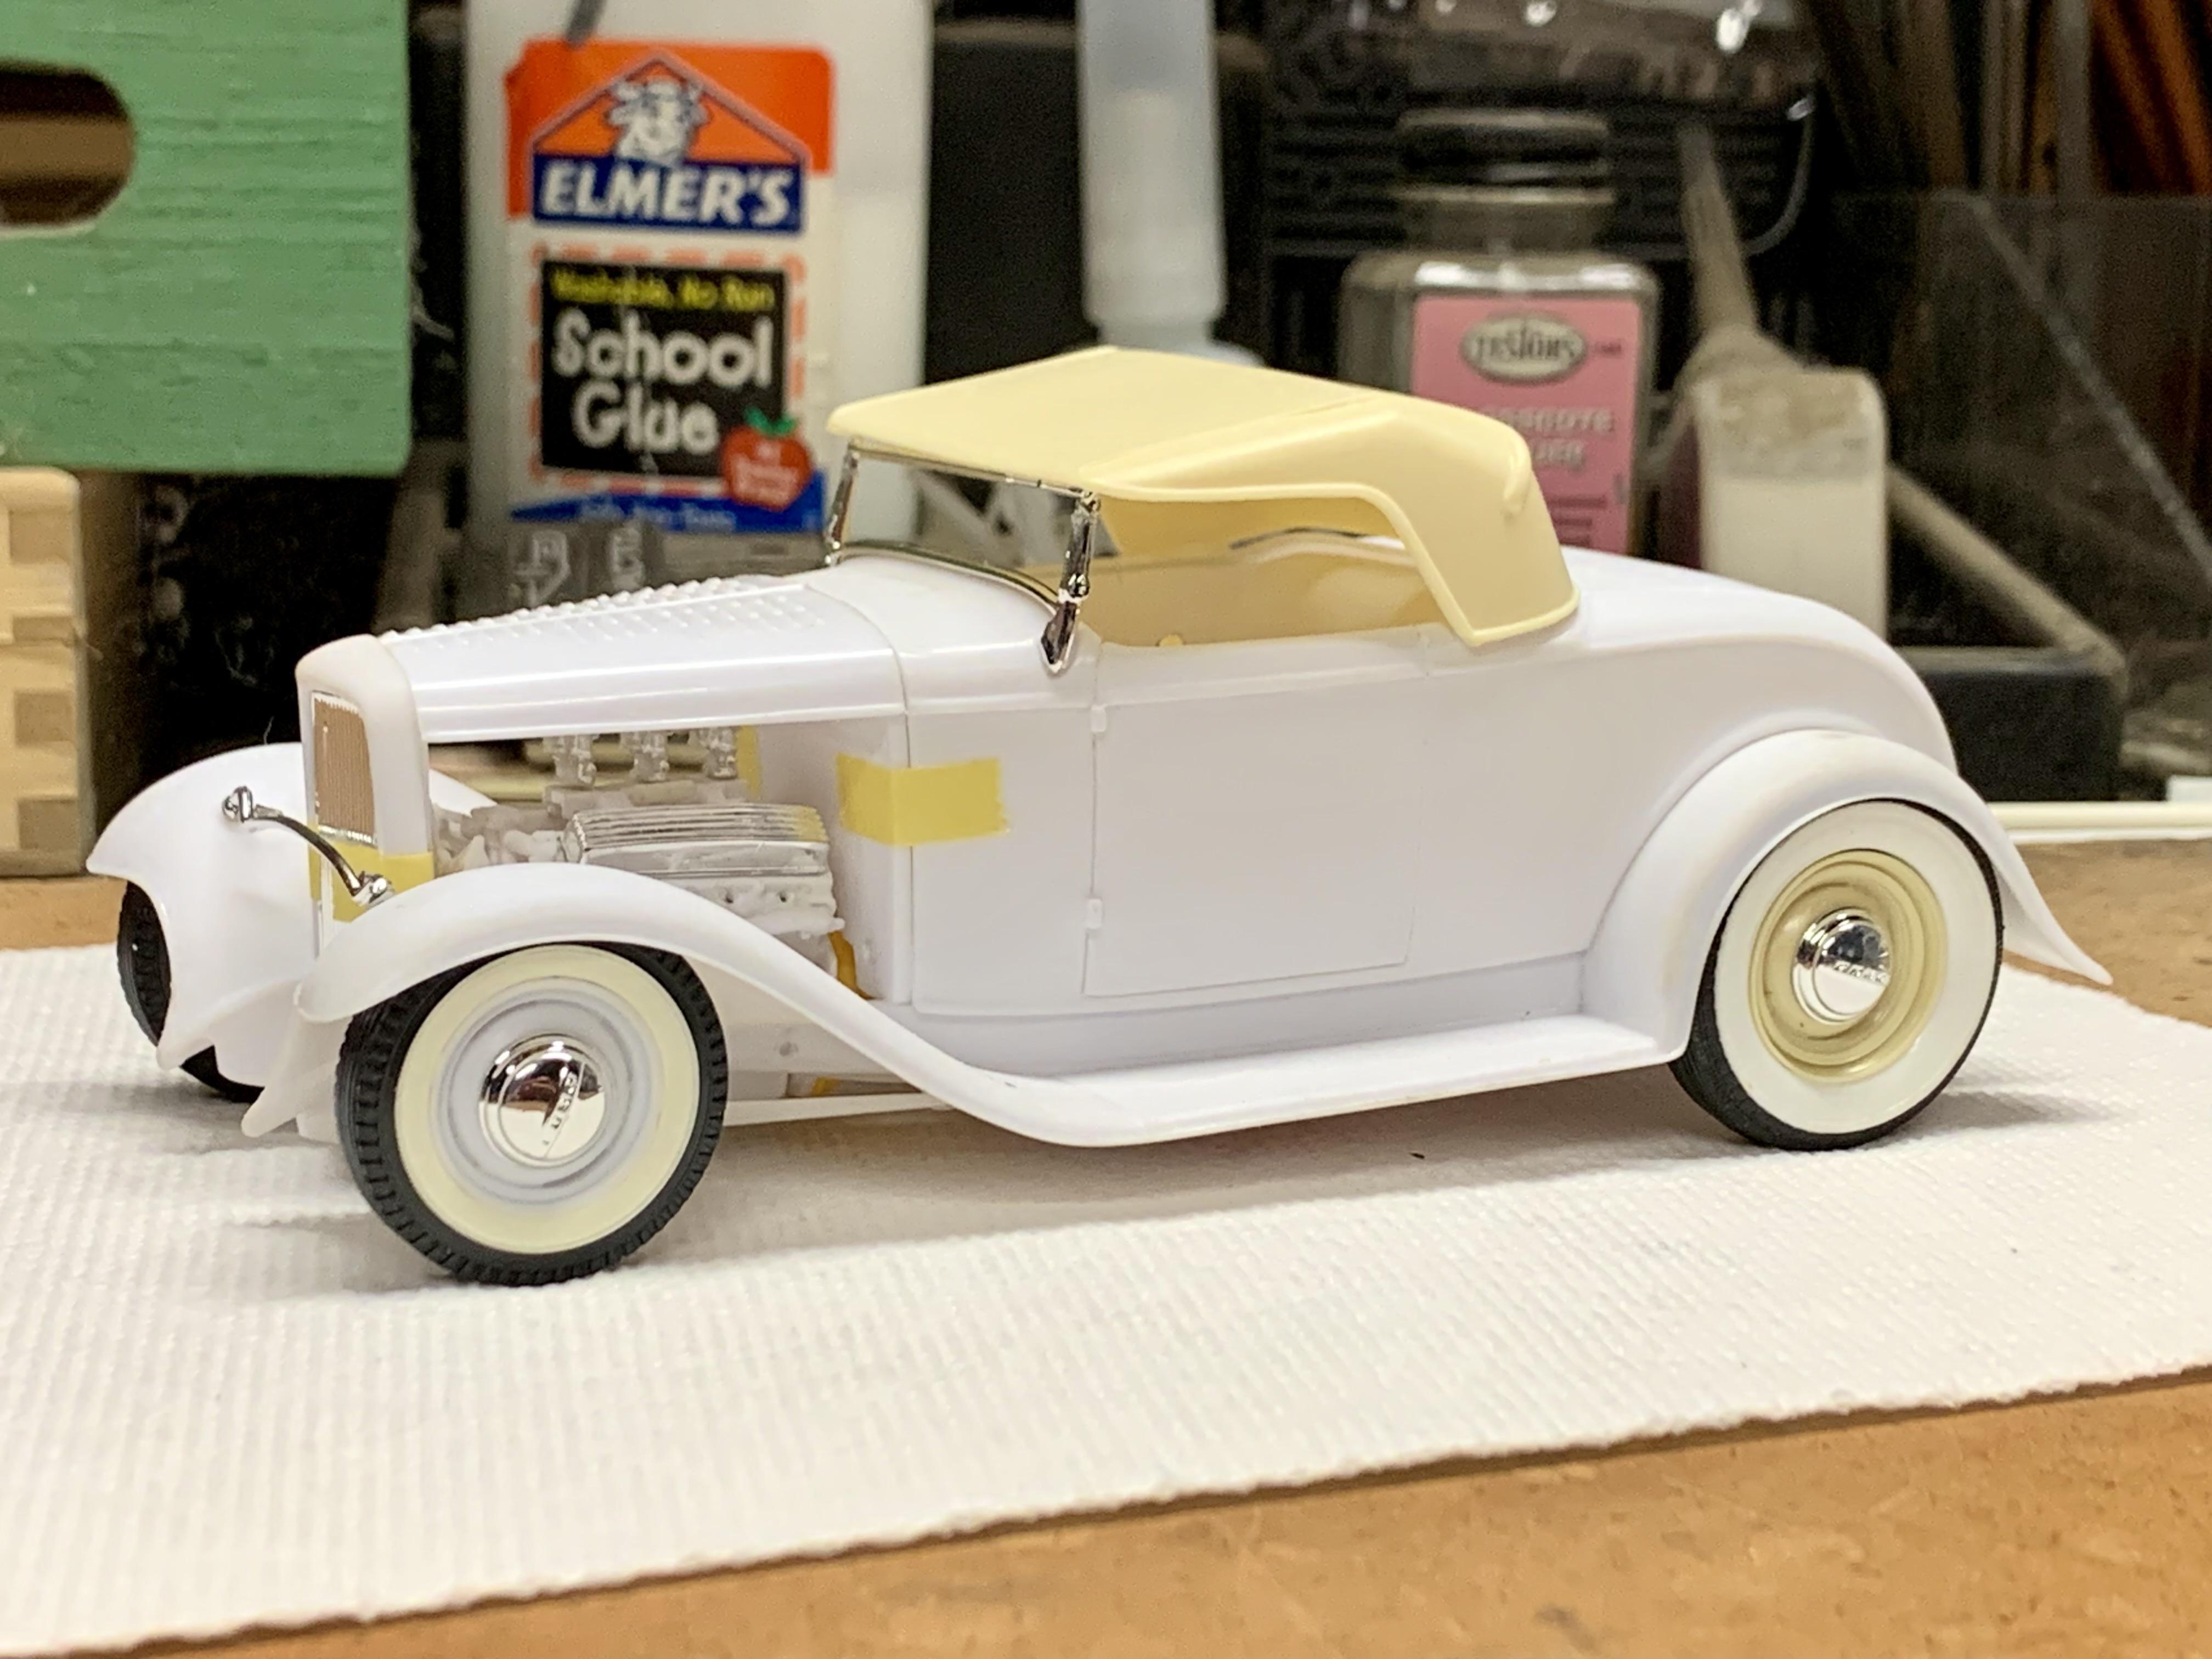
A little more work on the Roadster. I was originally thinking that I’d simply use the kit dashboard and maybe a 40 Ford wheel but got to thinking that this car needs something classier. I massaged a 40 Ford dash from Revell’s 32 5-Window to fit, added a new column drop to it, made a simple round rod column which now fits into an angled receiver hole at the bottom and mounted a Revell 1948 Ford steering wheel. Much better! ?
-
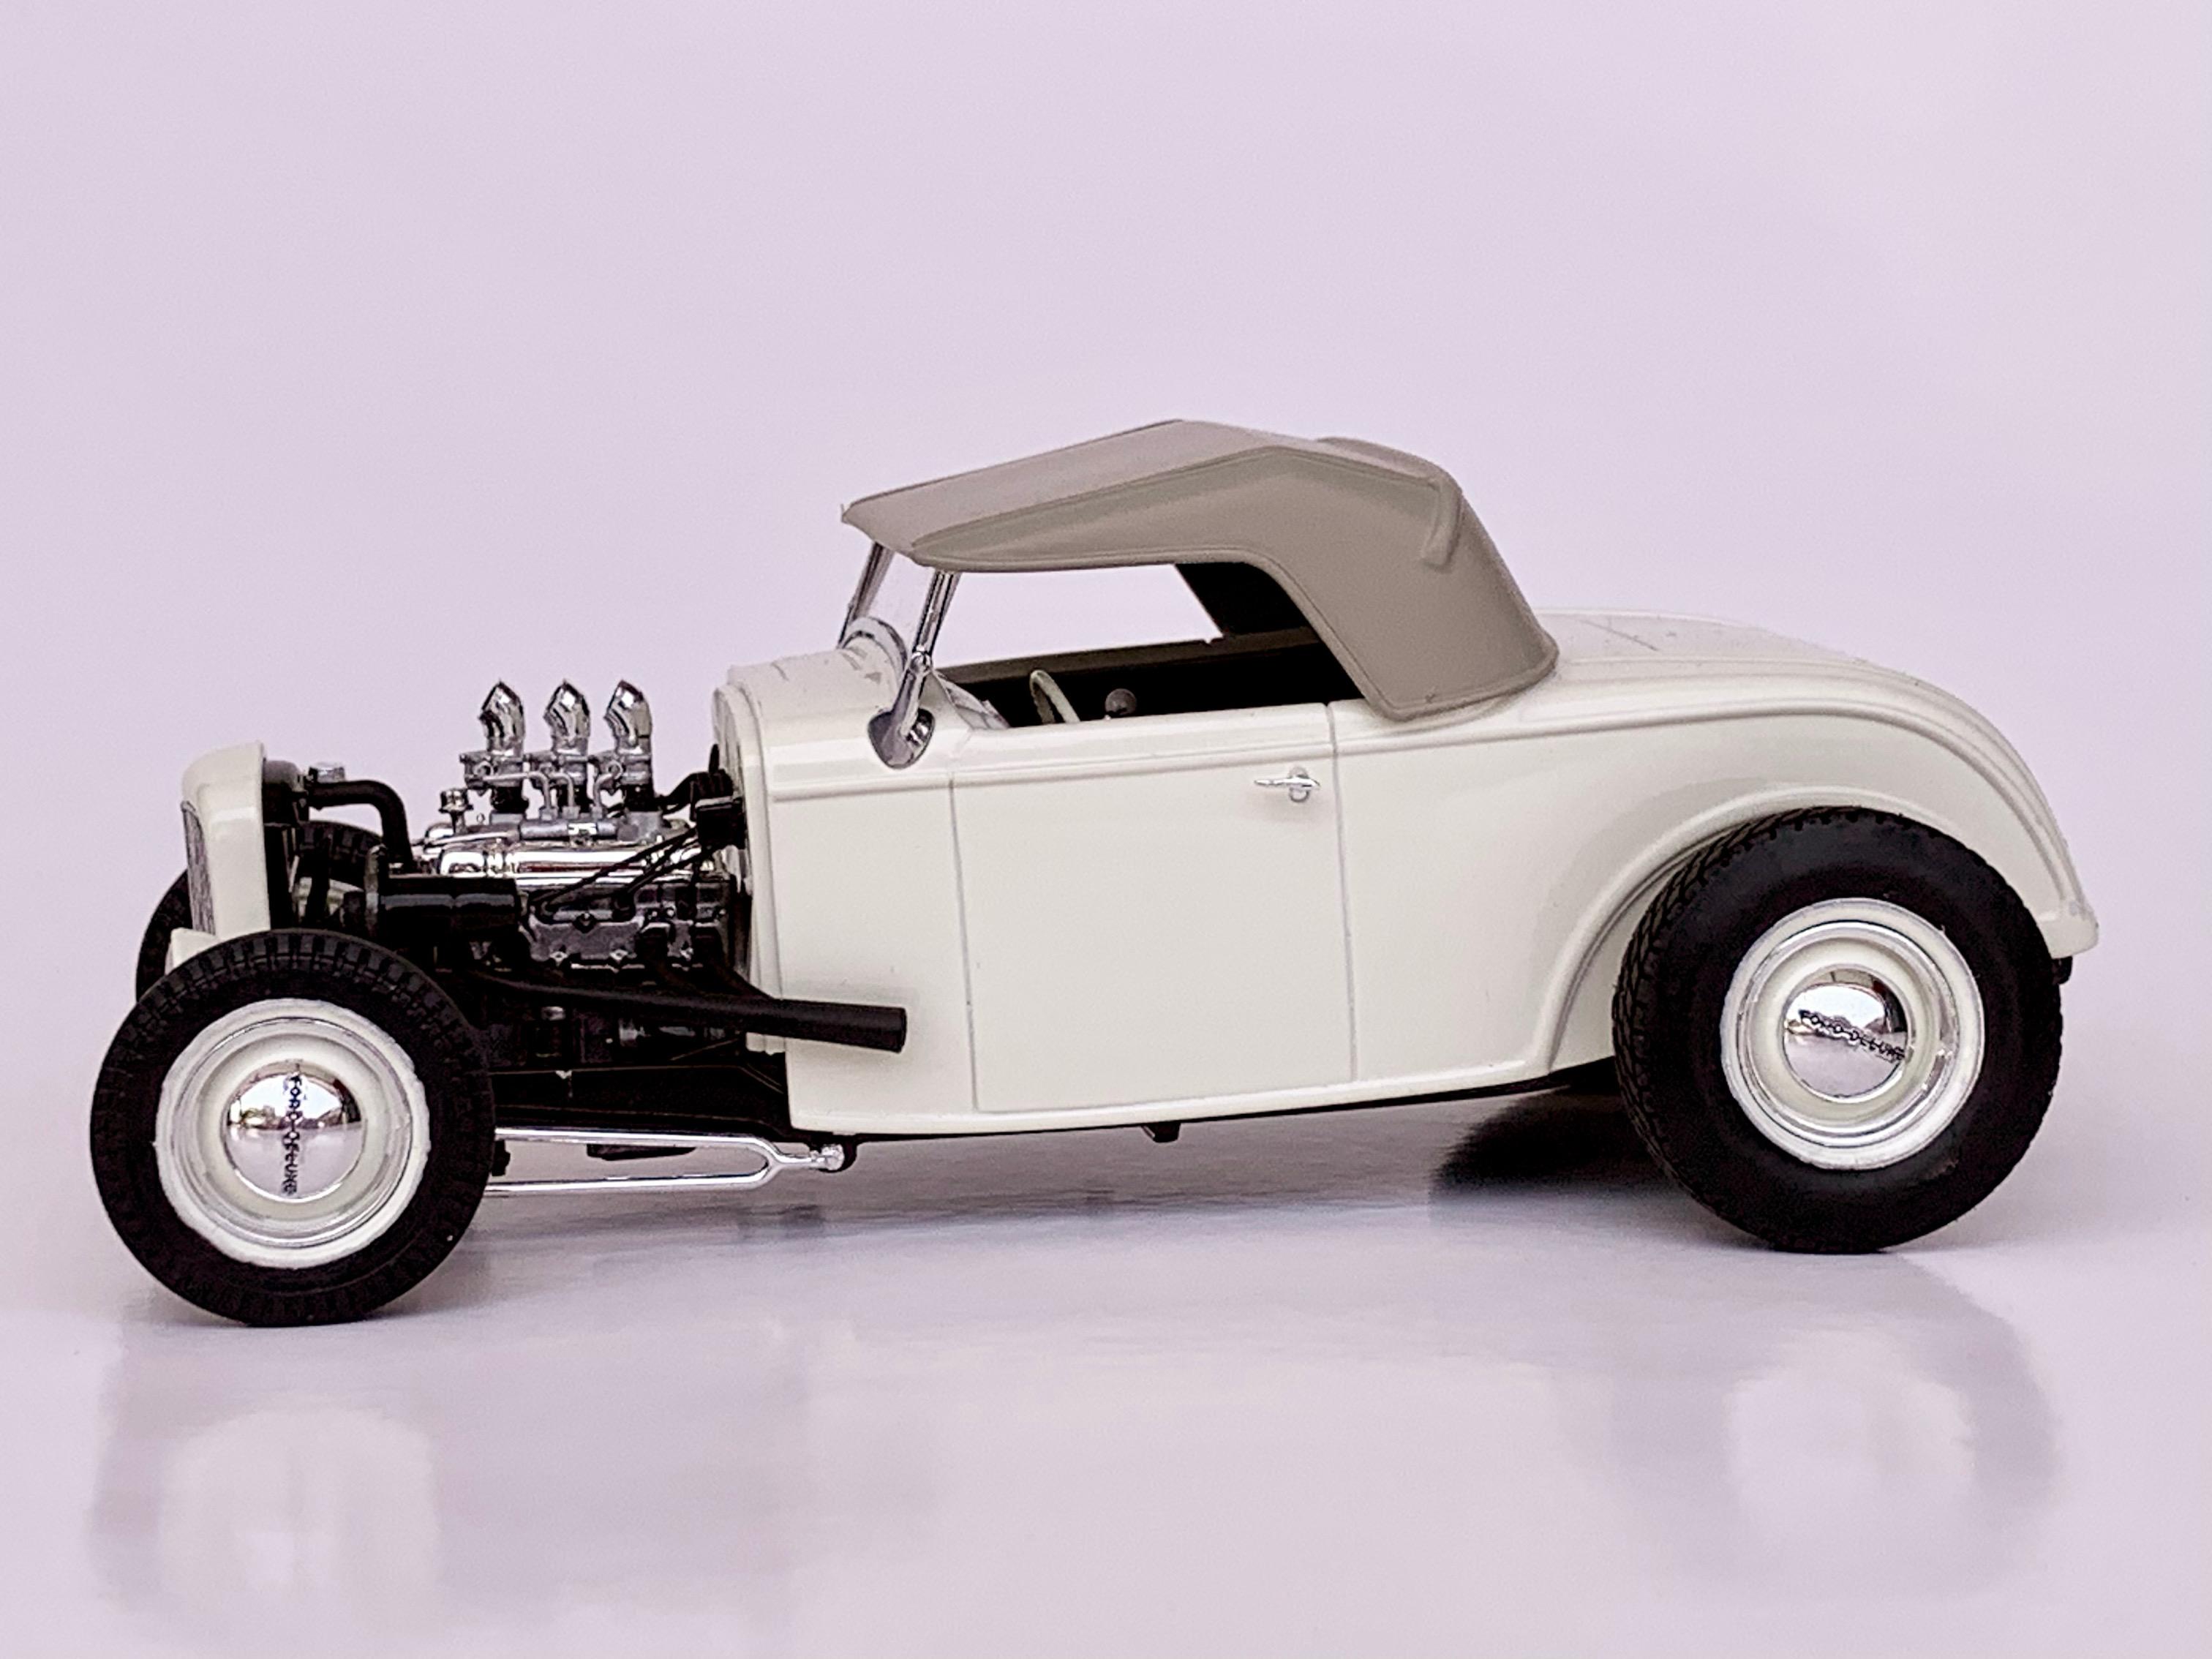
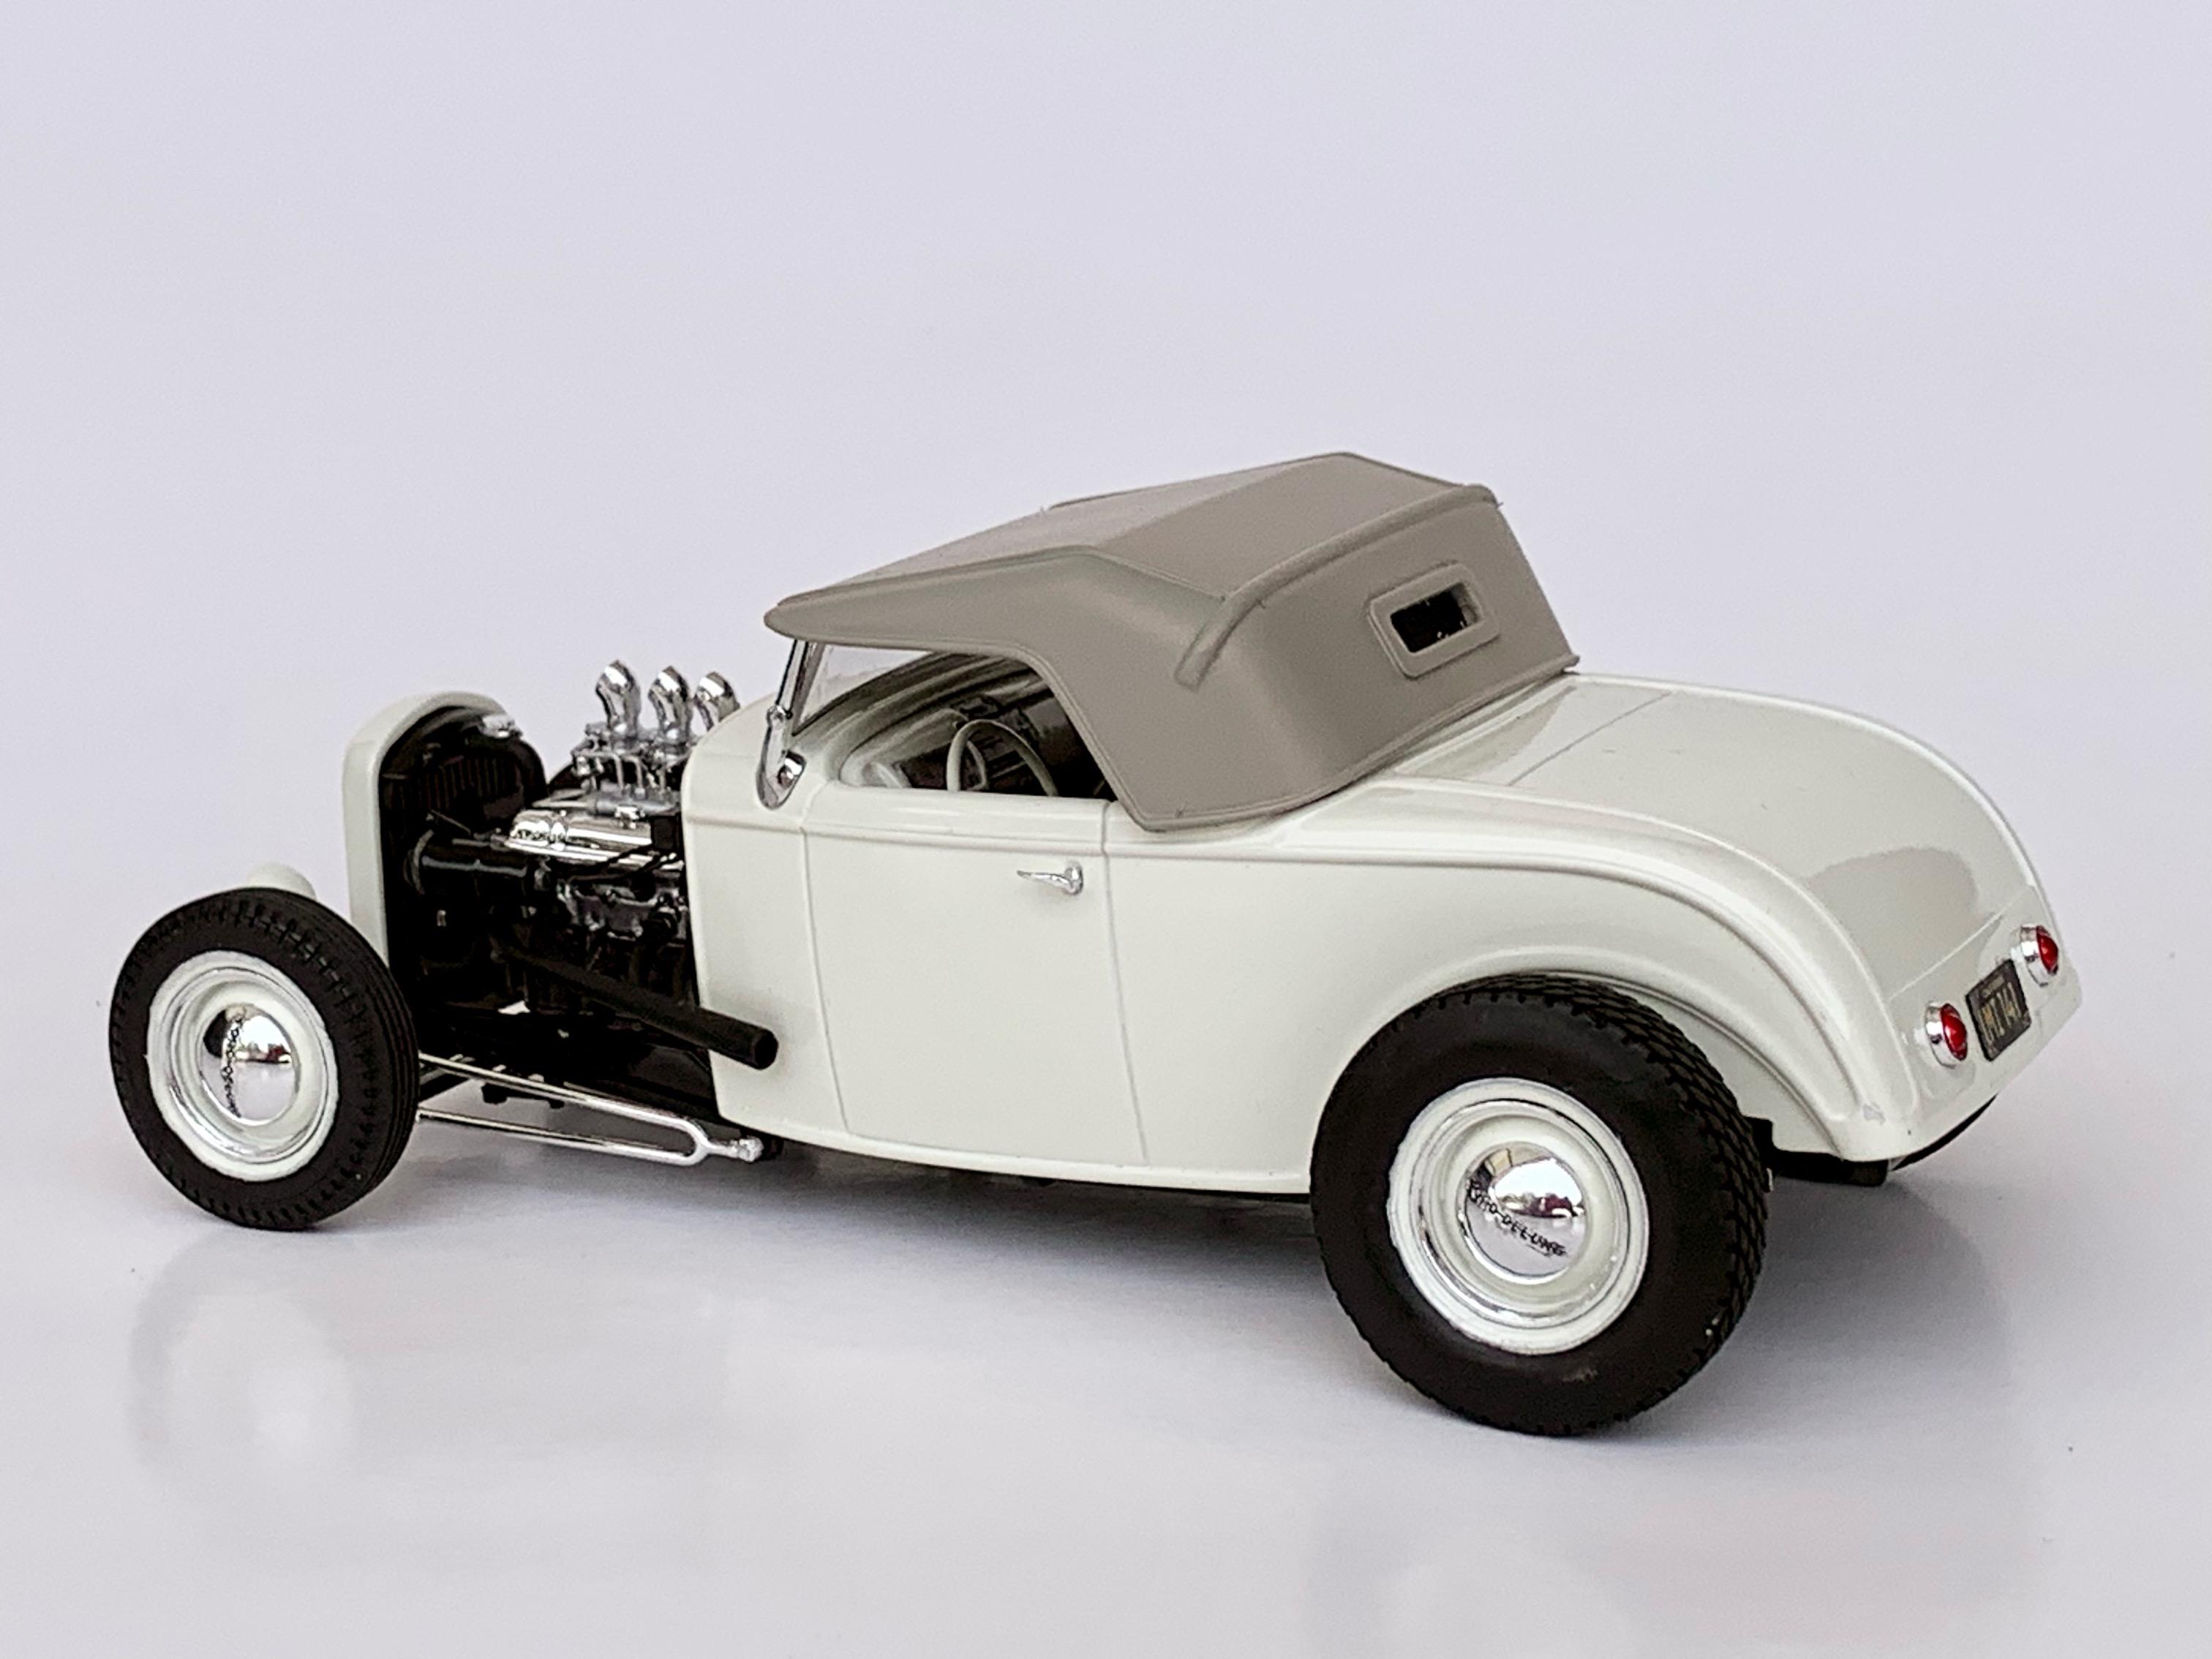
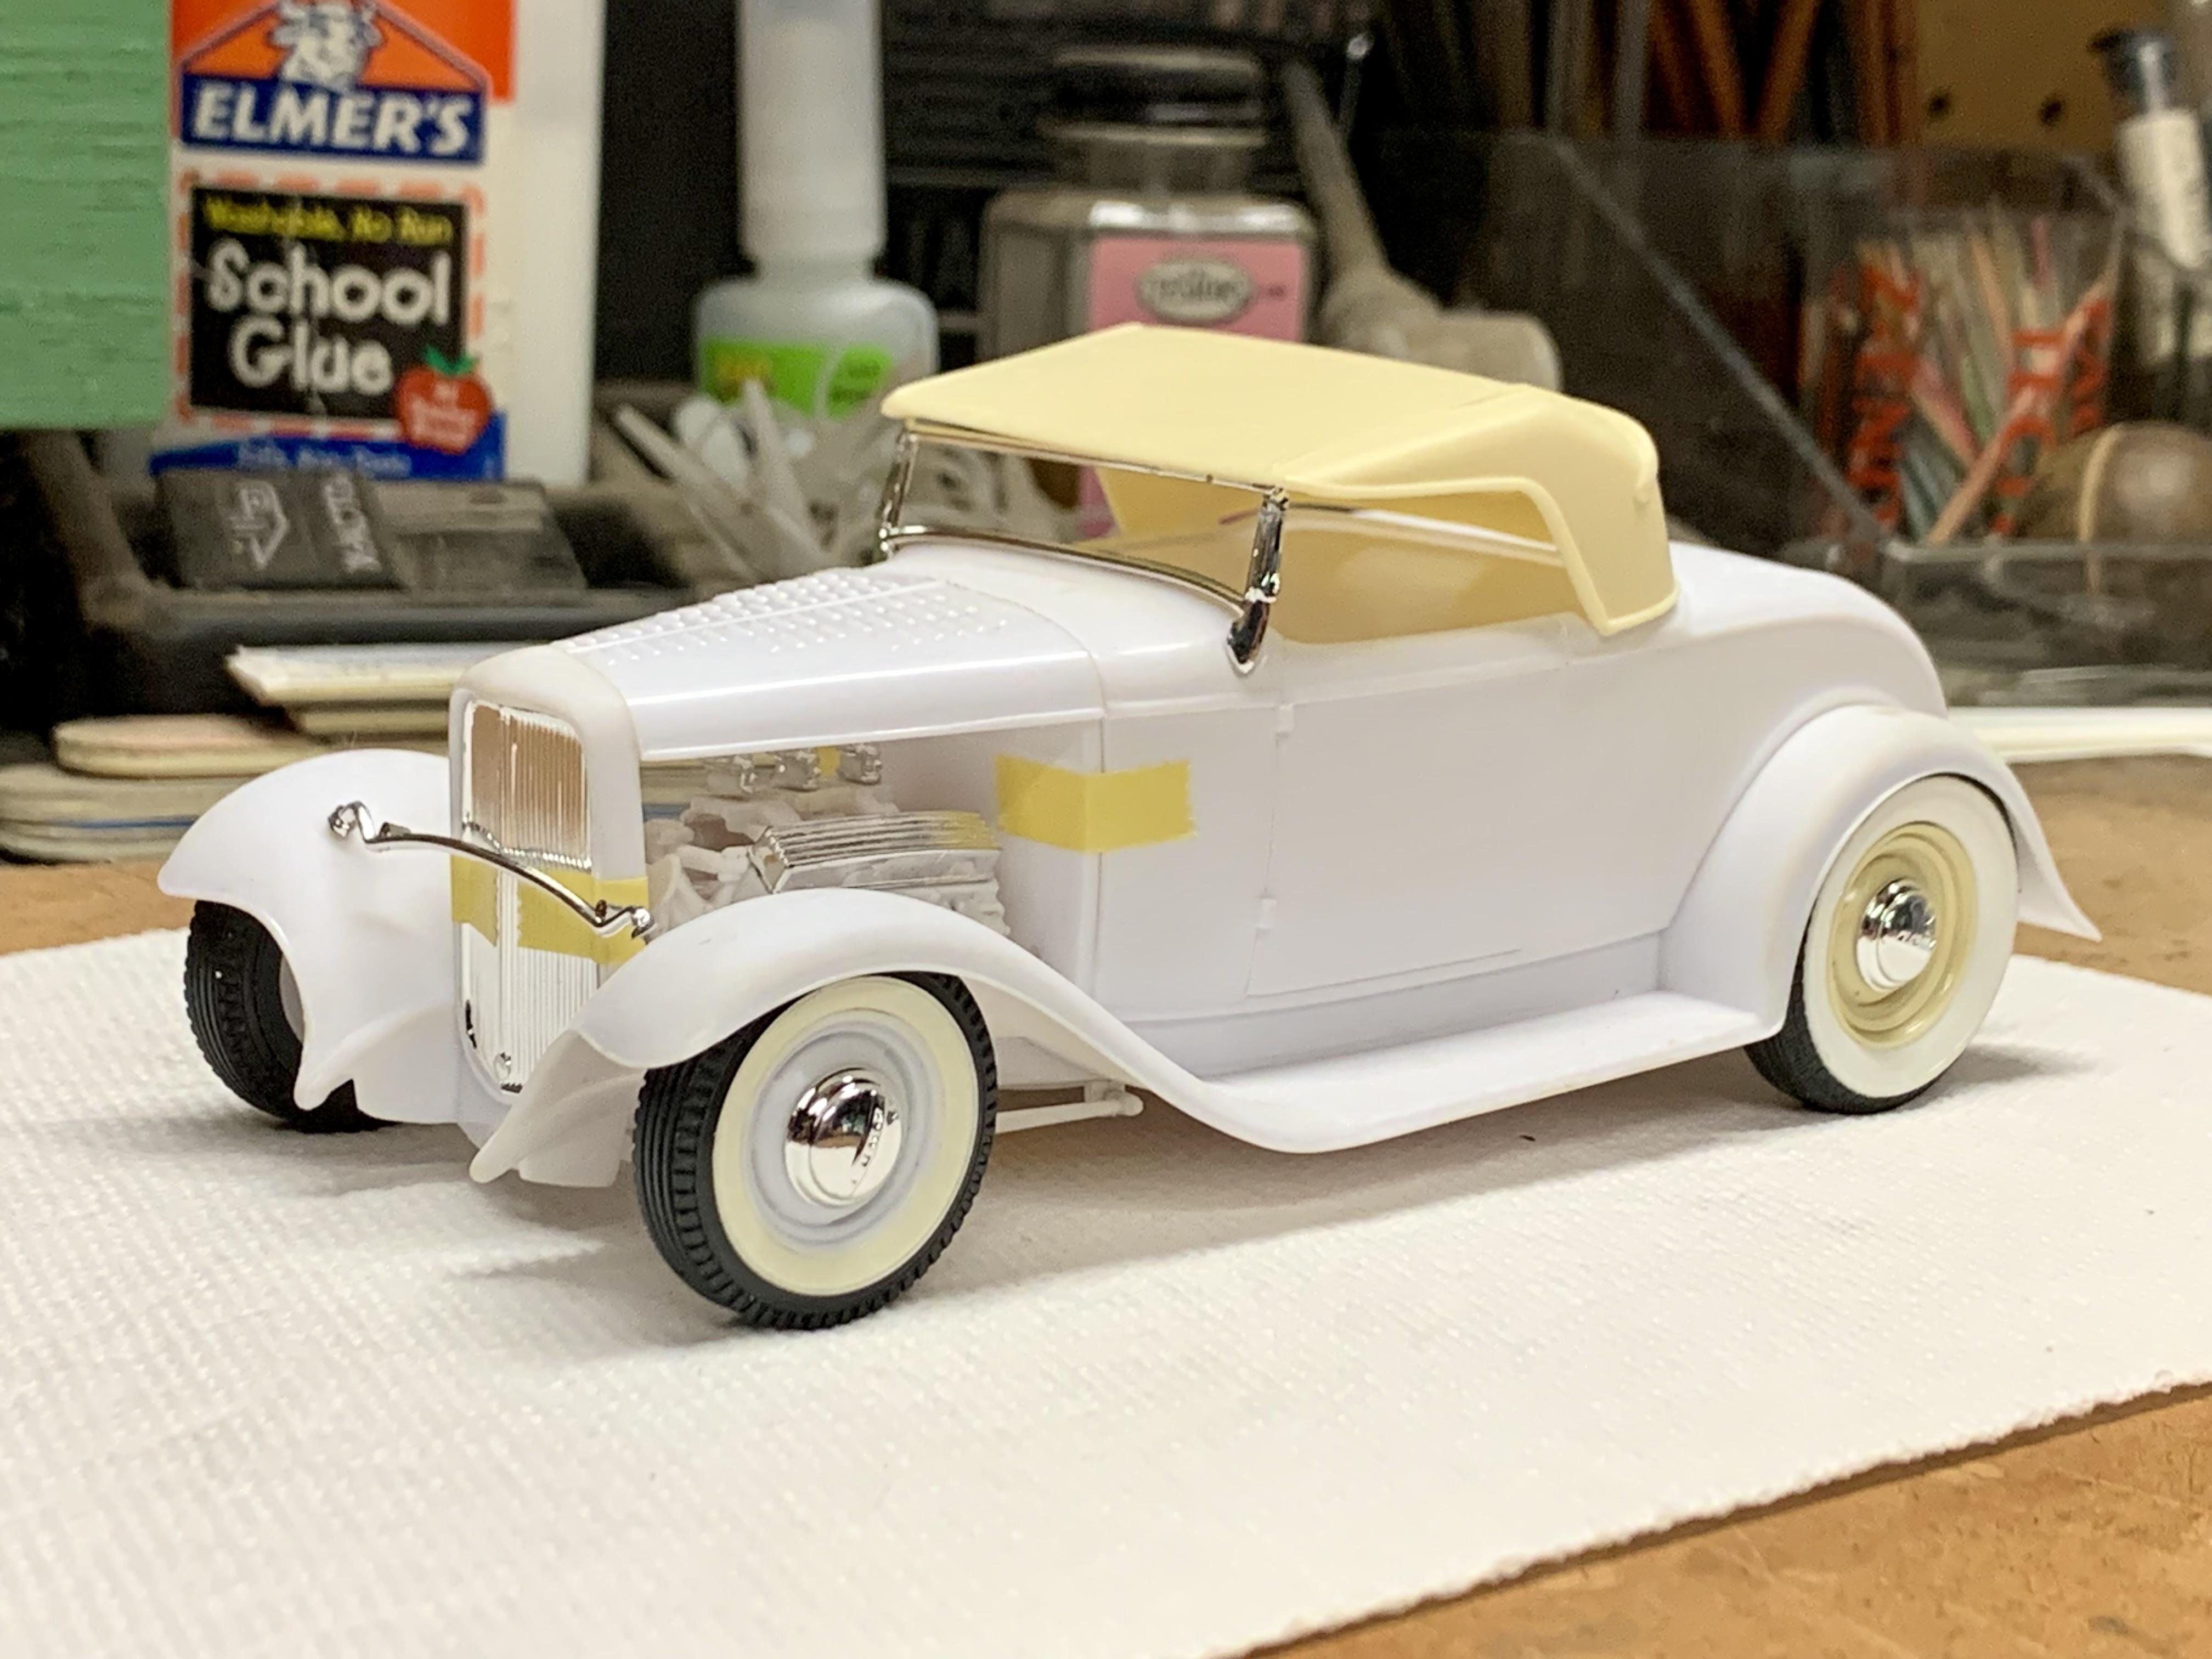
Thanks! Below is the kit-bashing breakdown: Box-stock Rat Roaster and newer chassis & engine (only mod is lowering the rear), radiator & grill. DCC body. Sedan kit firewall, hood top, wheel wells, stock 32 taillights and interior with some extra details and 40 Ford wheel. Original 1998 issue Hi Boy Roadster wheels and rear tires (which are now also in the new Sedan issue), Revell 40 Ford street rod front tires. So it’s more kit-bashed than it seems at first glance. ?
-
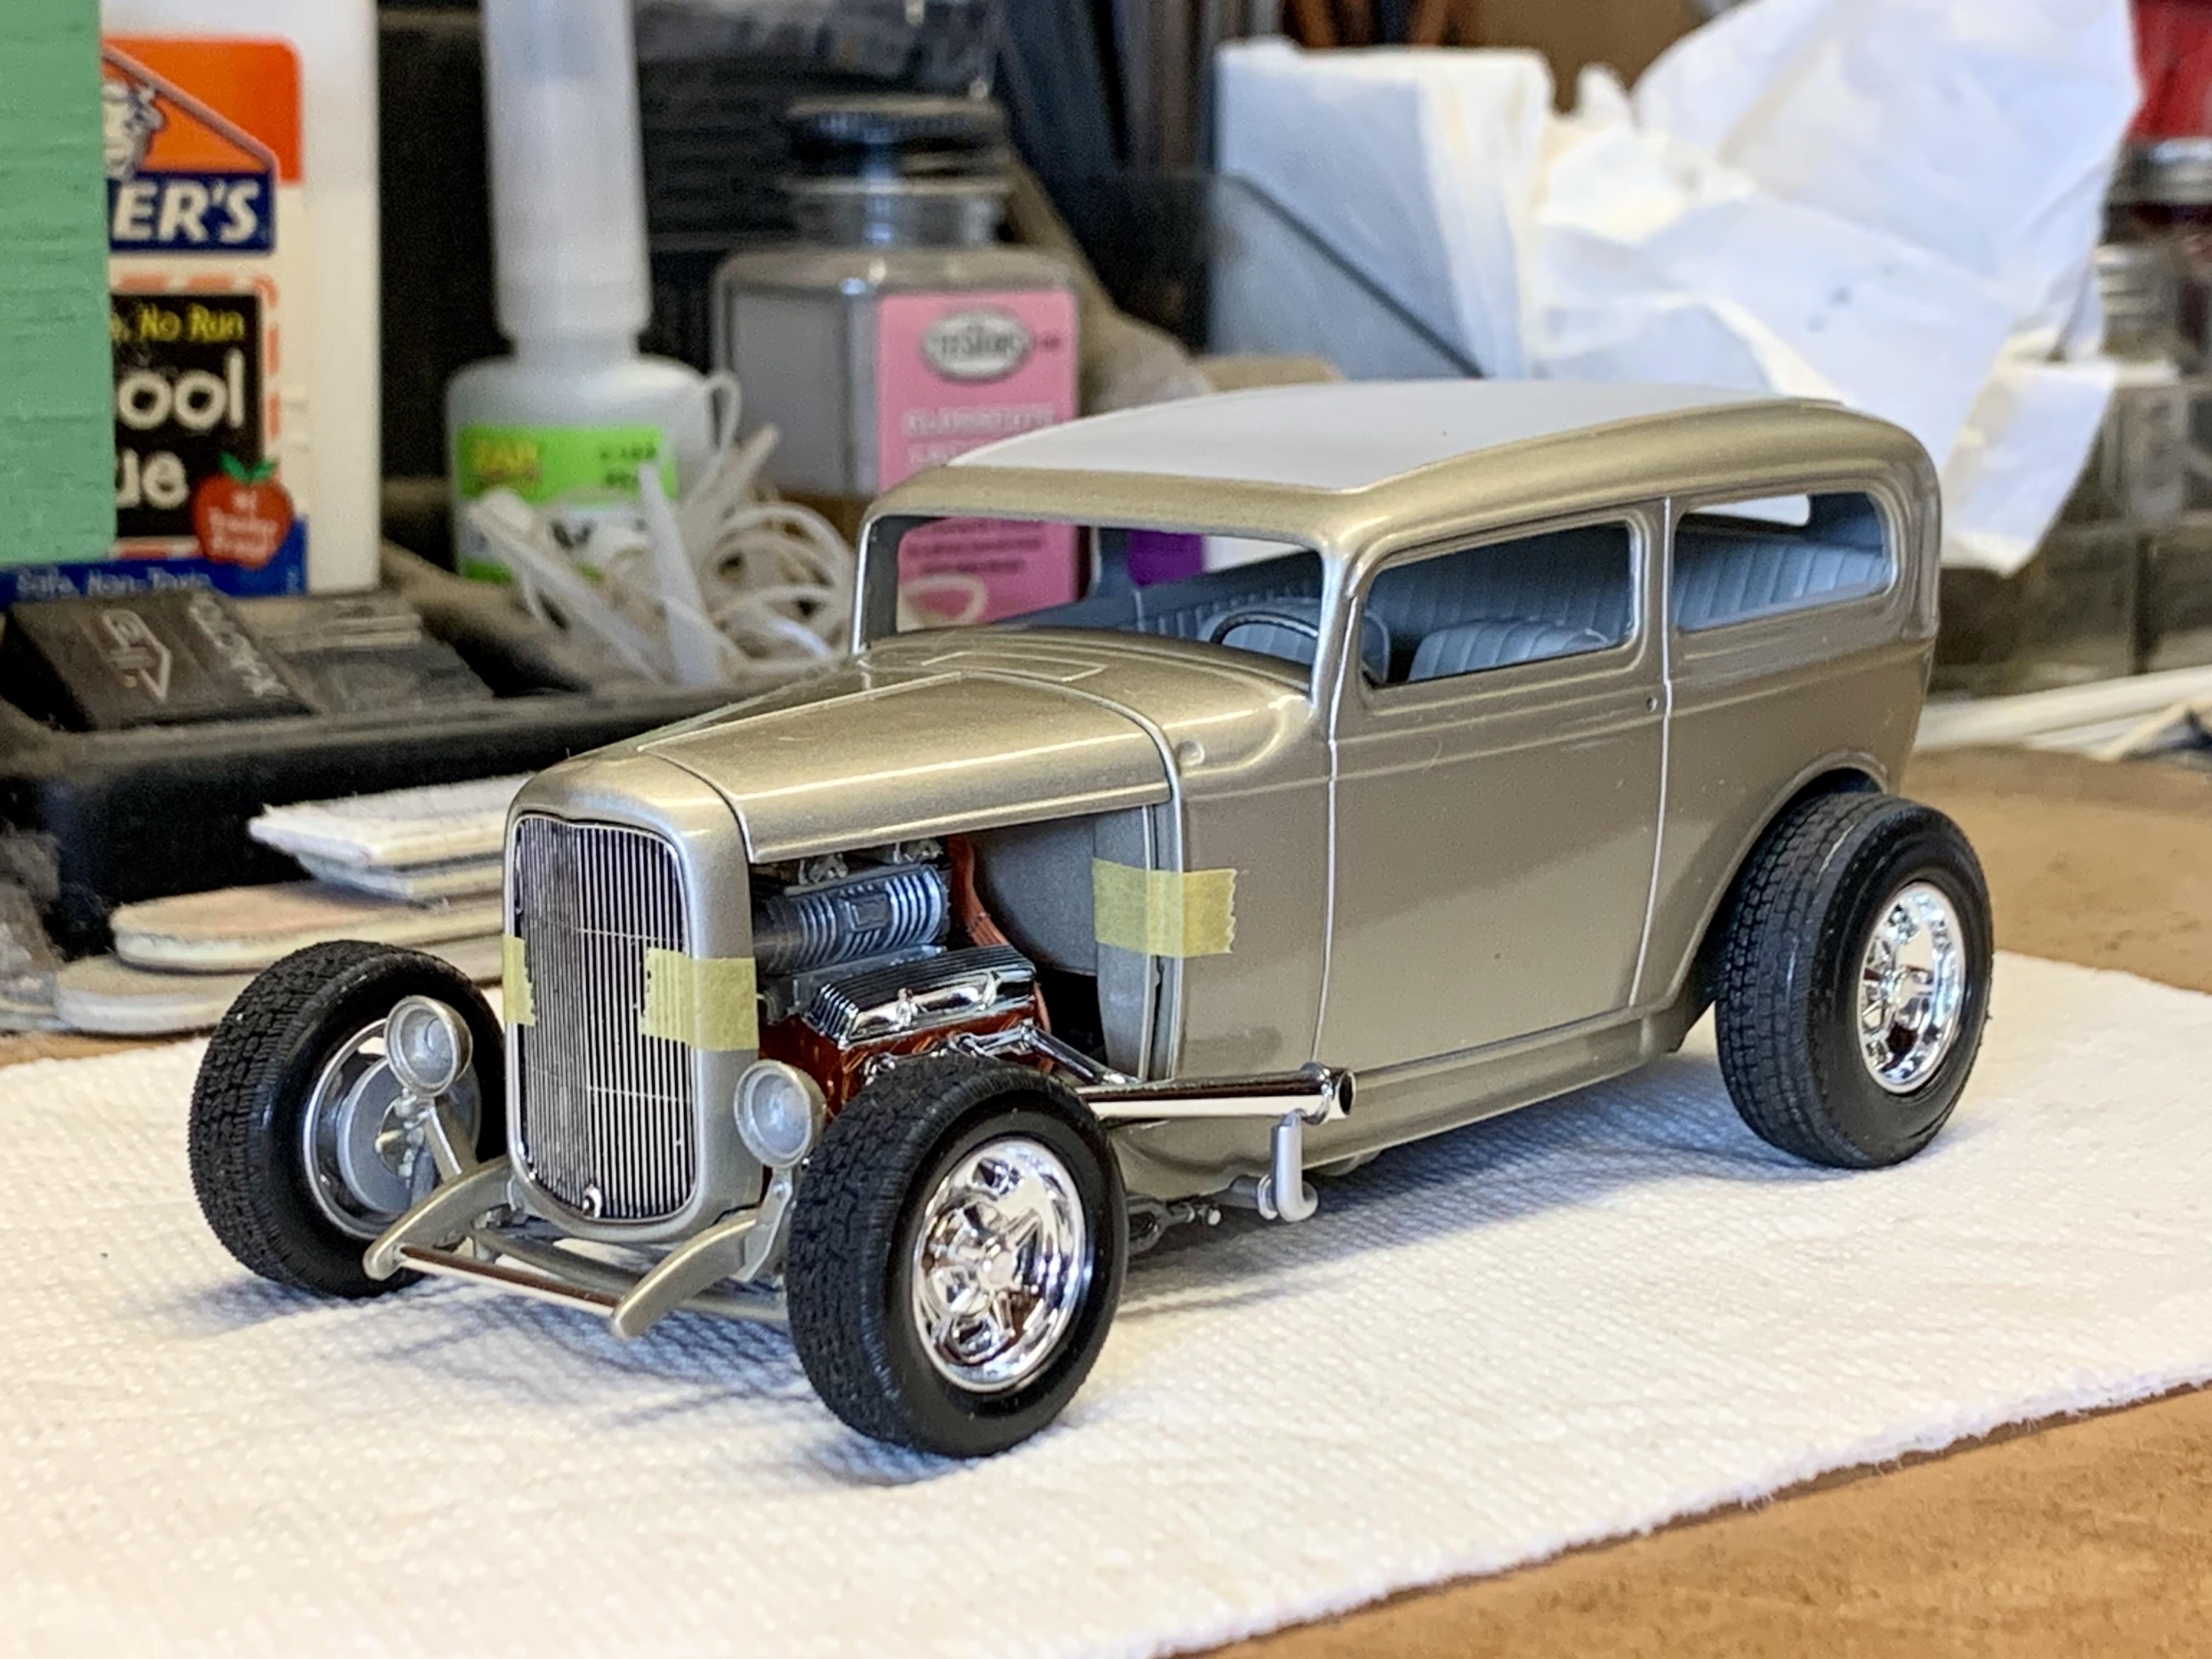
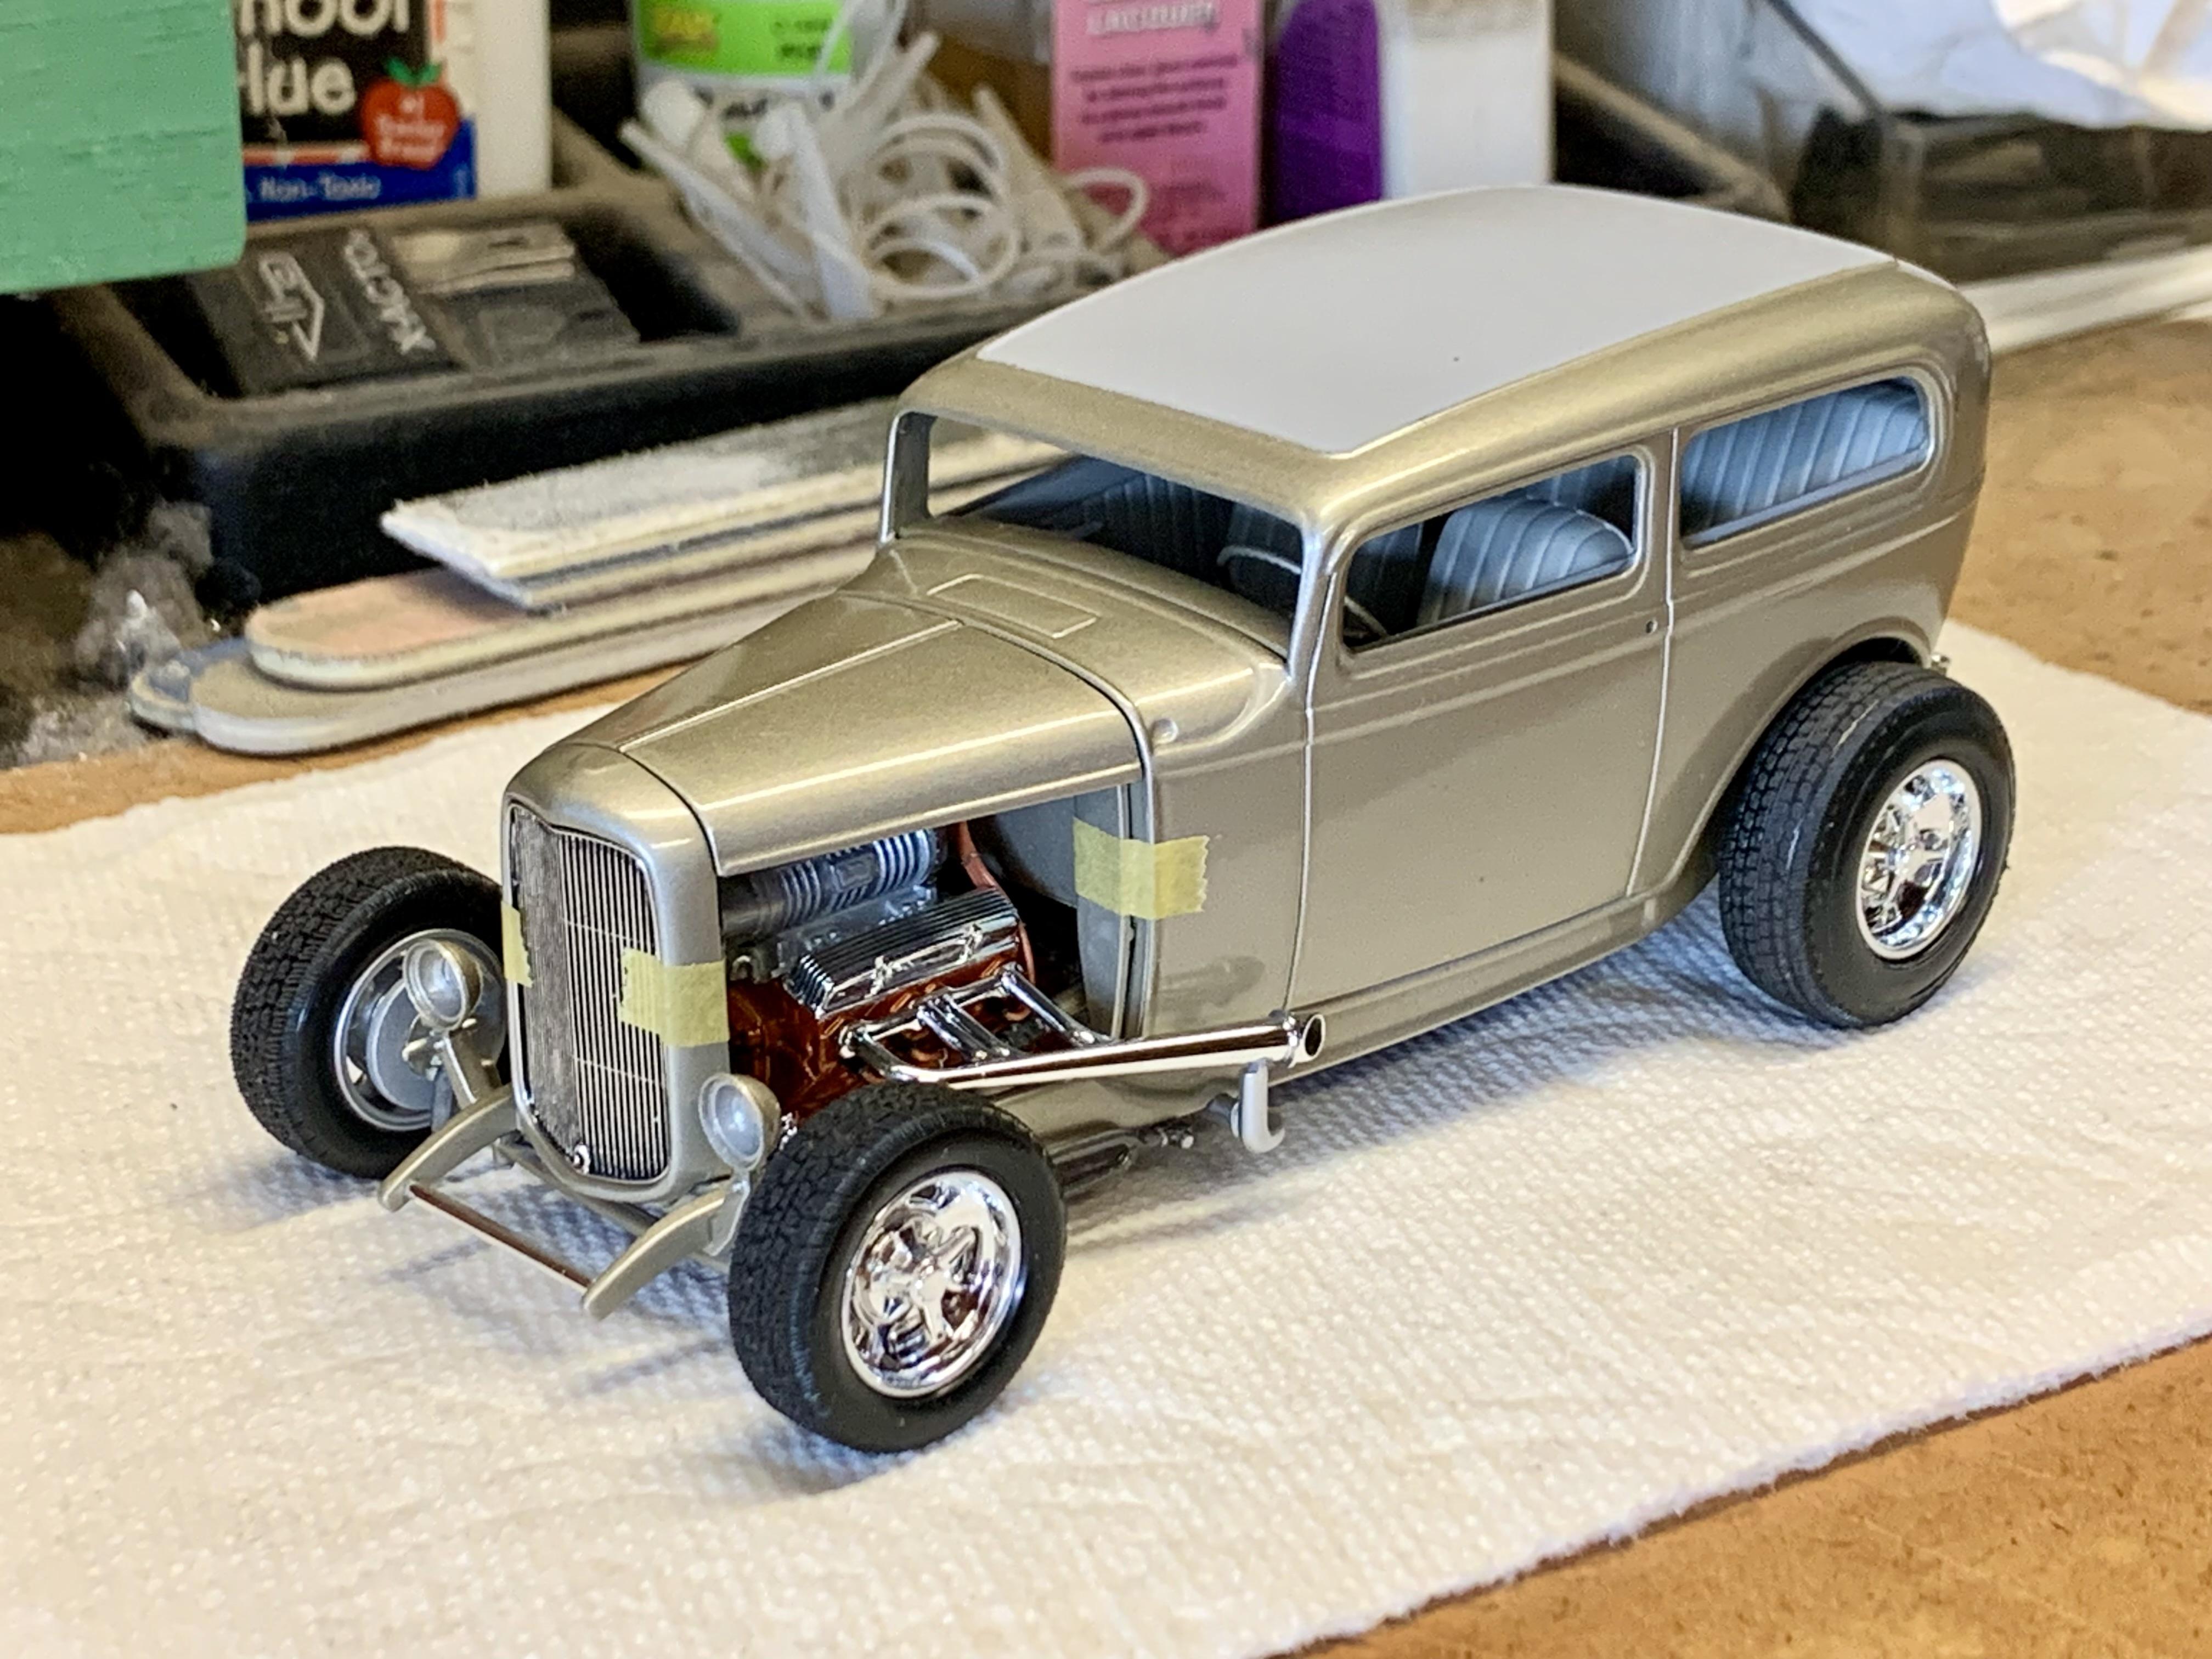
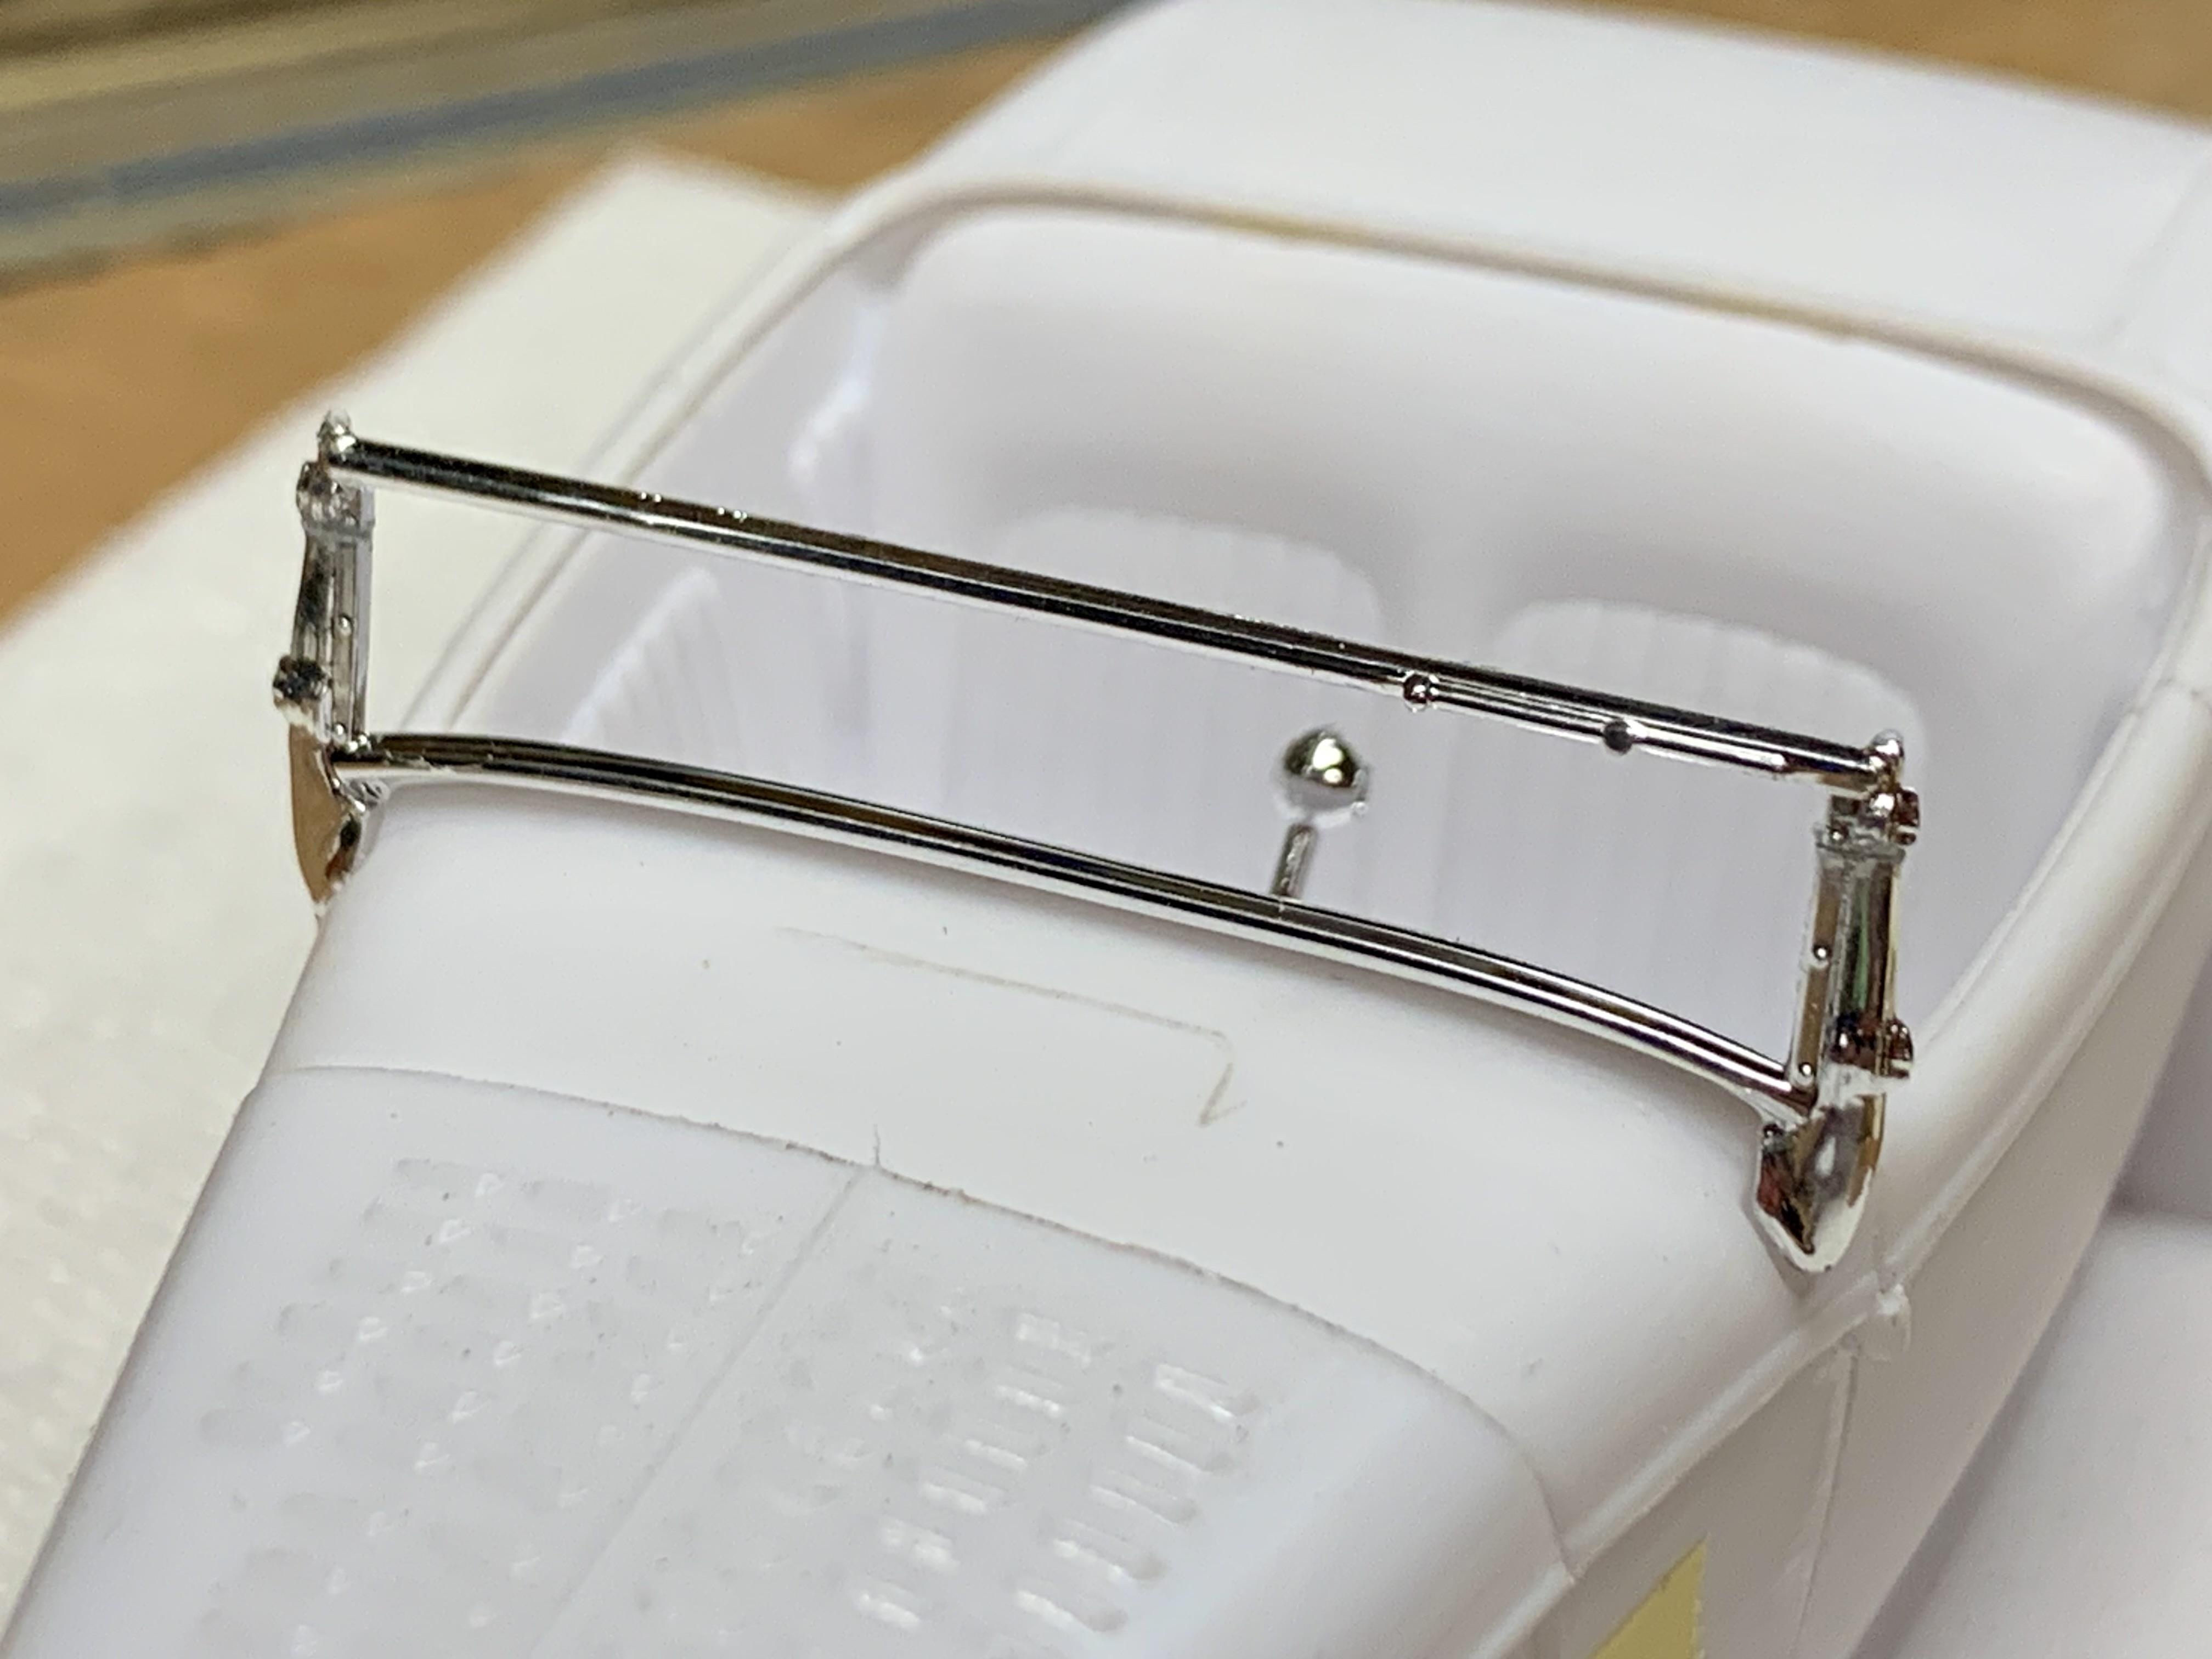
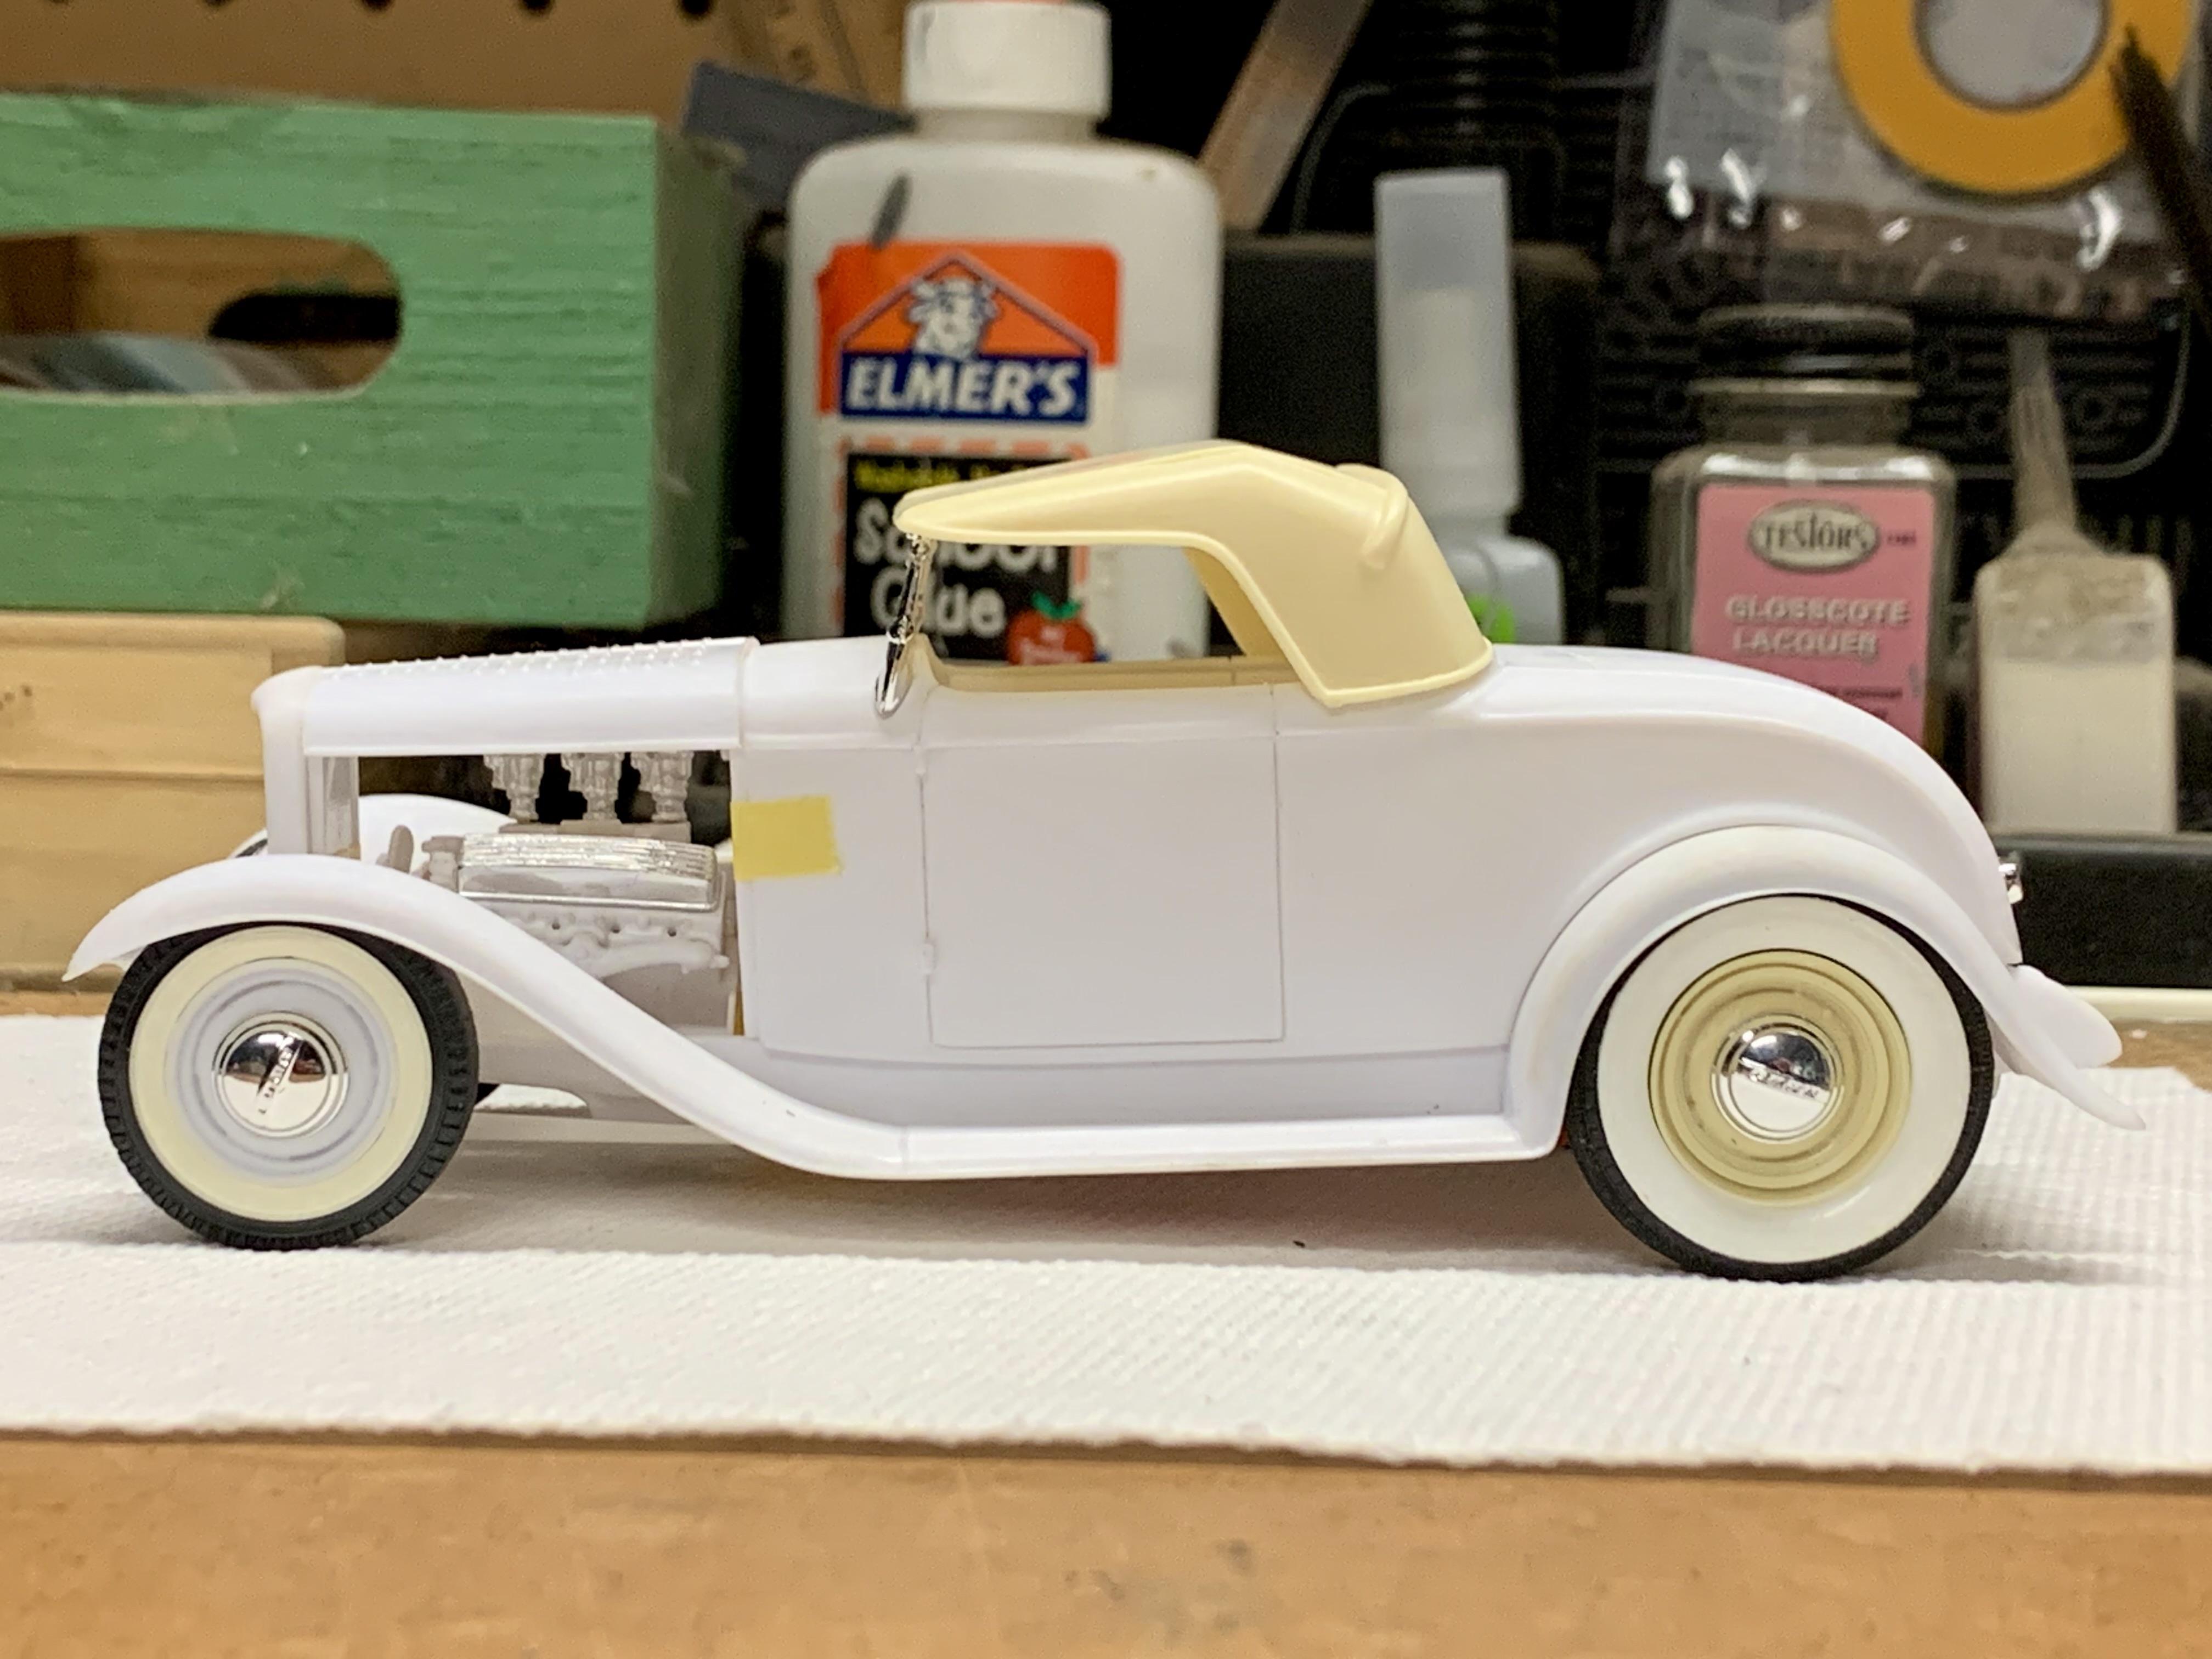
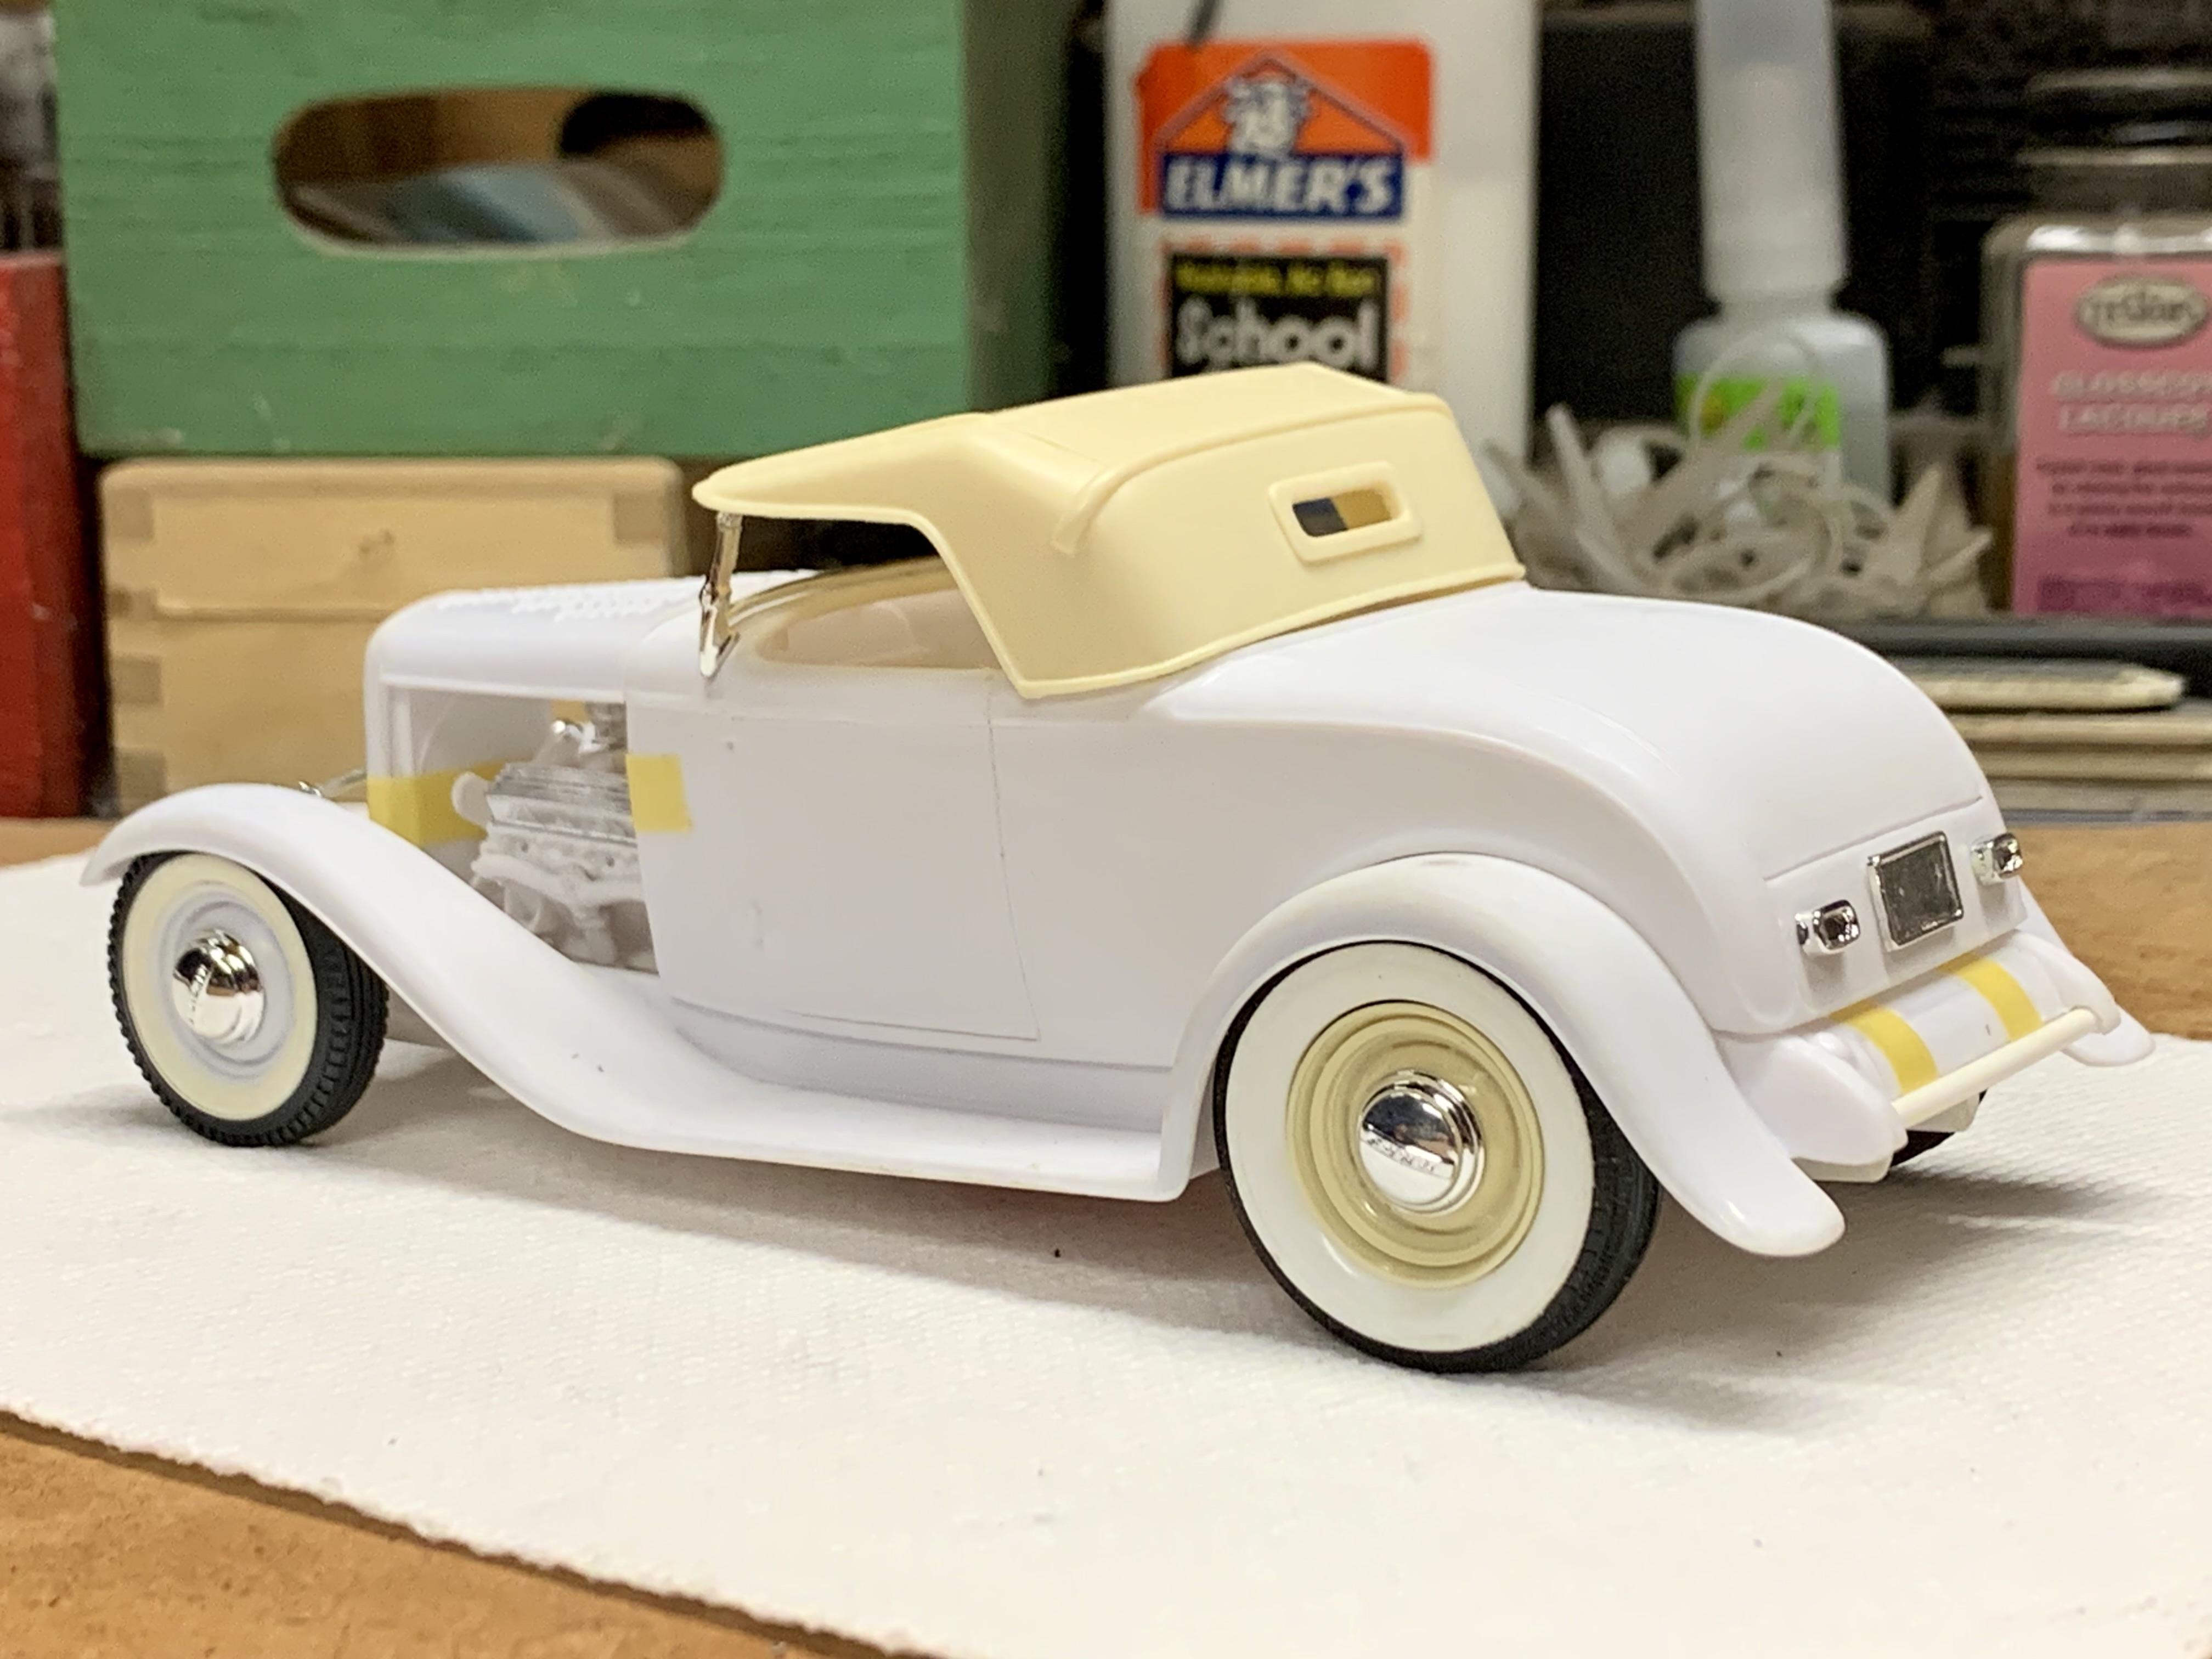
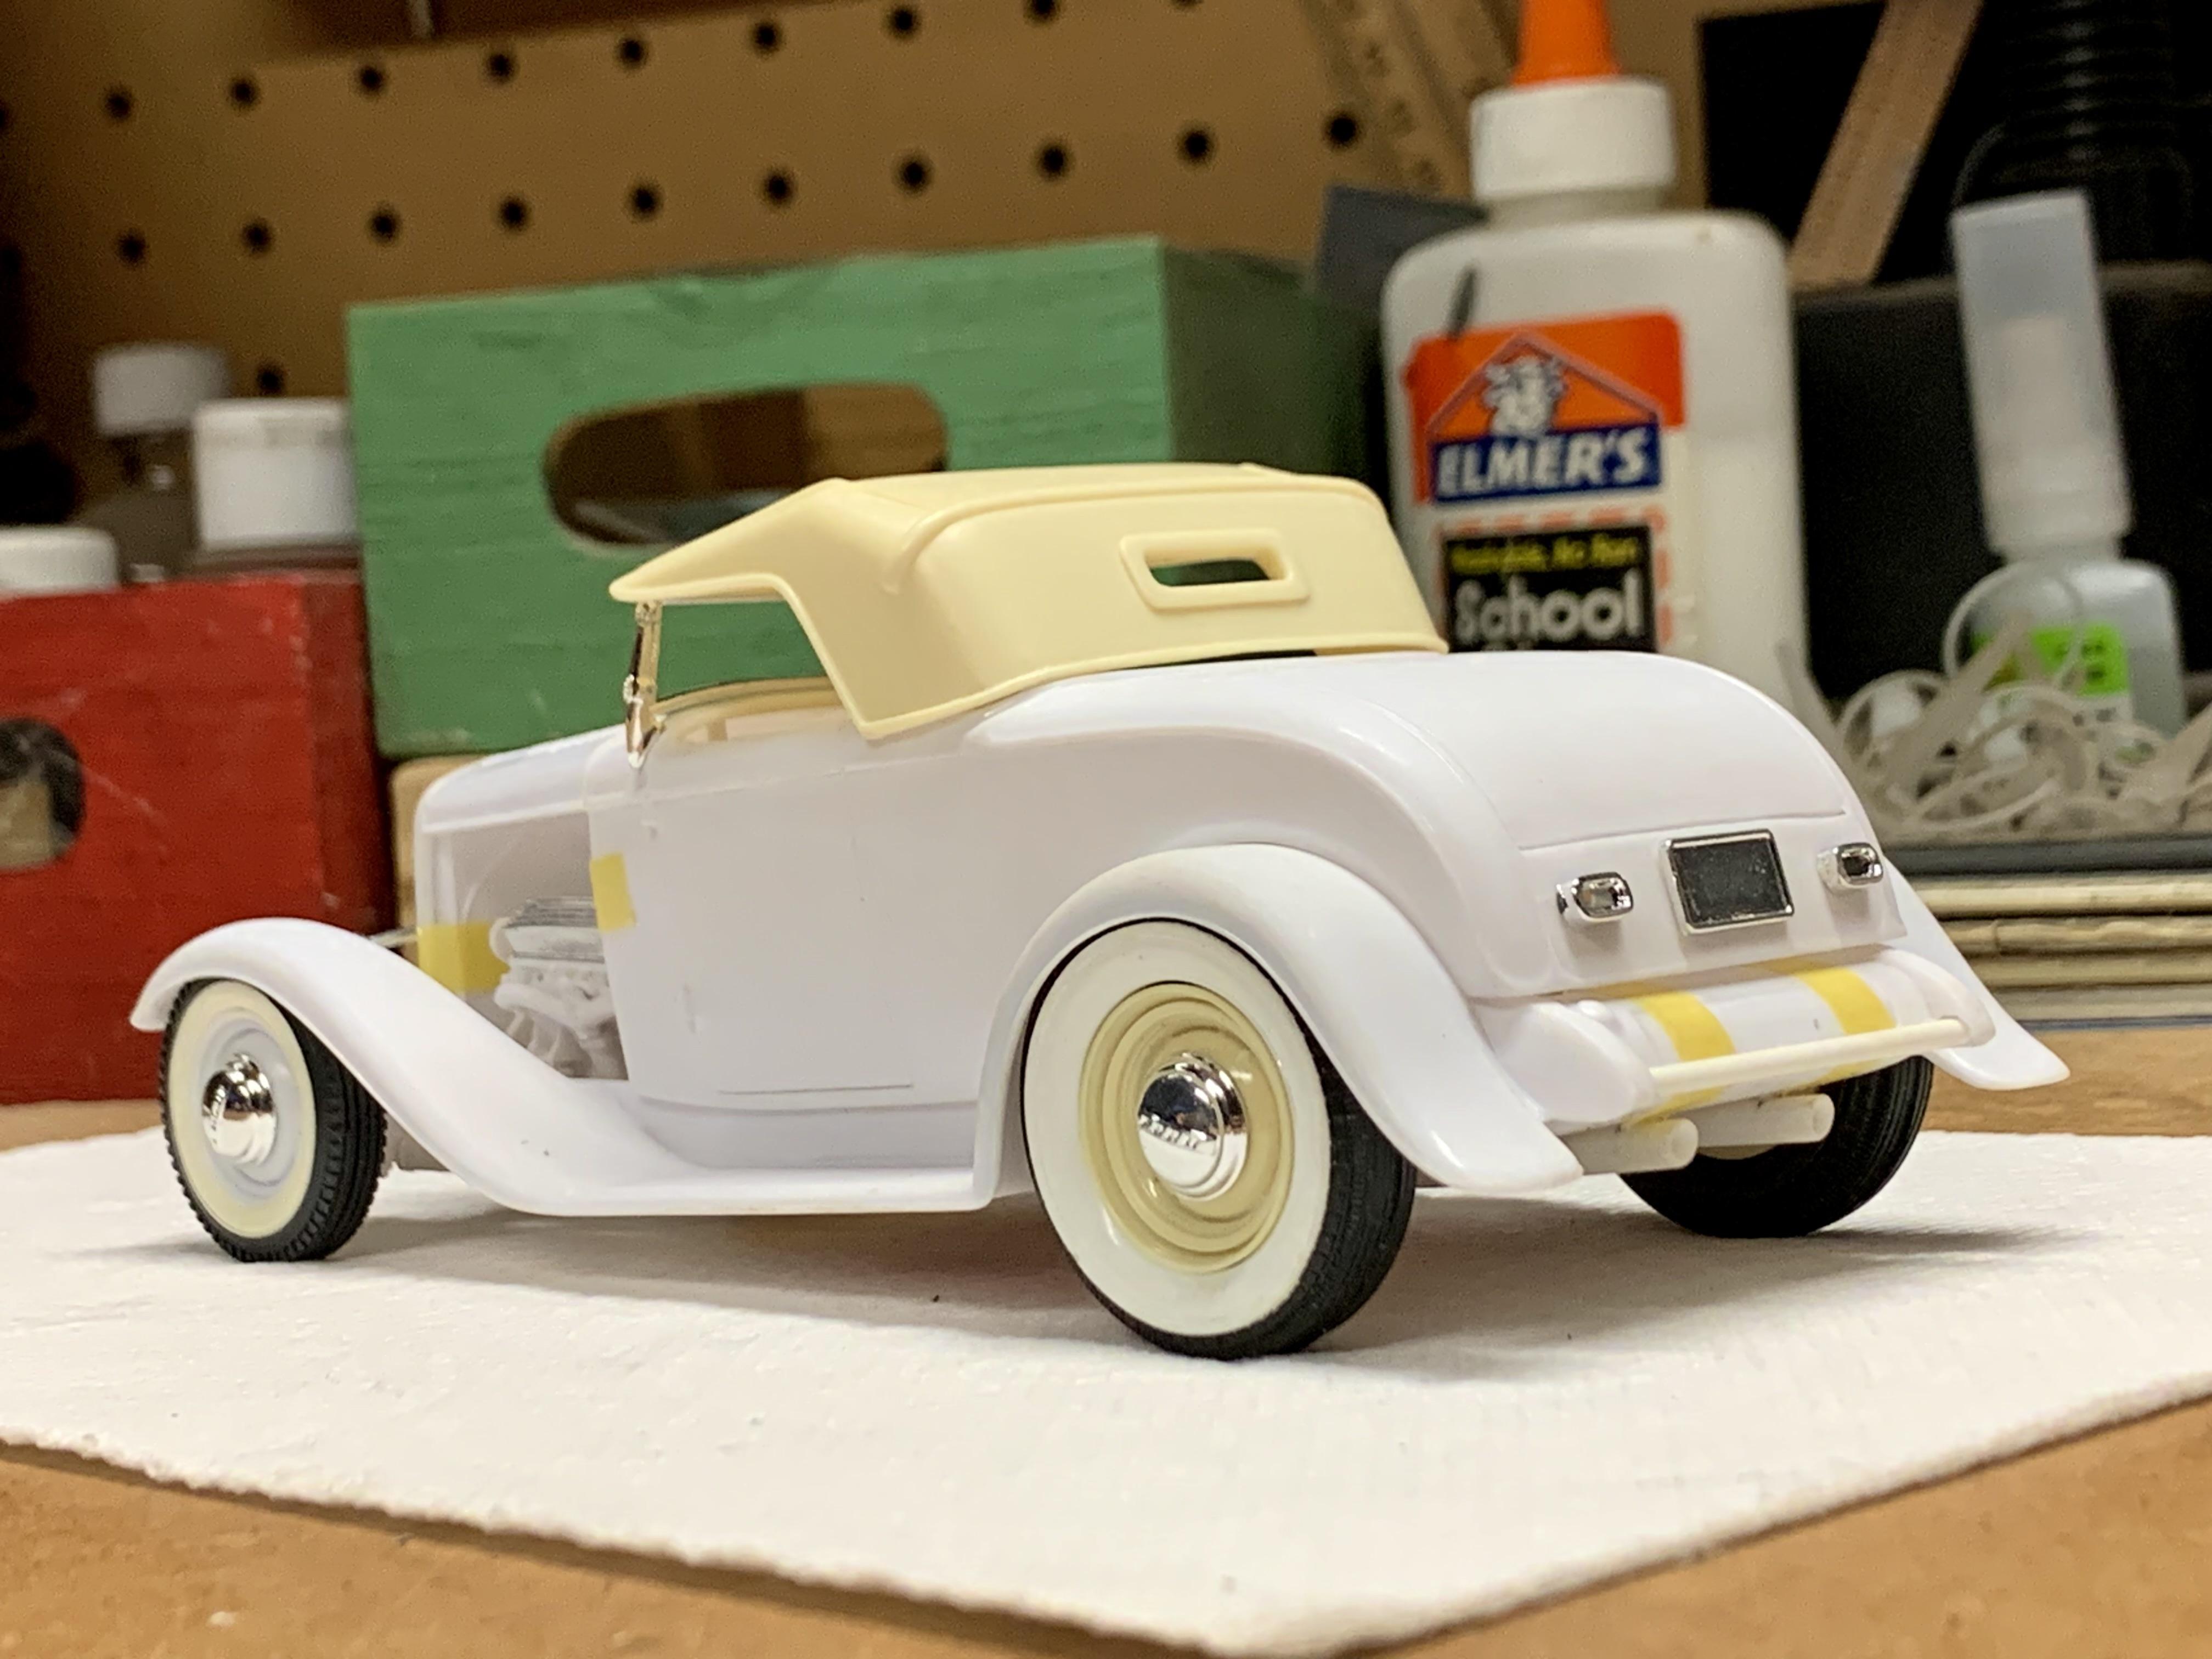
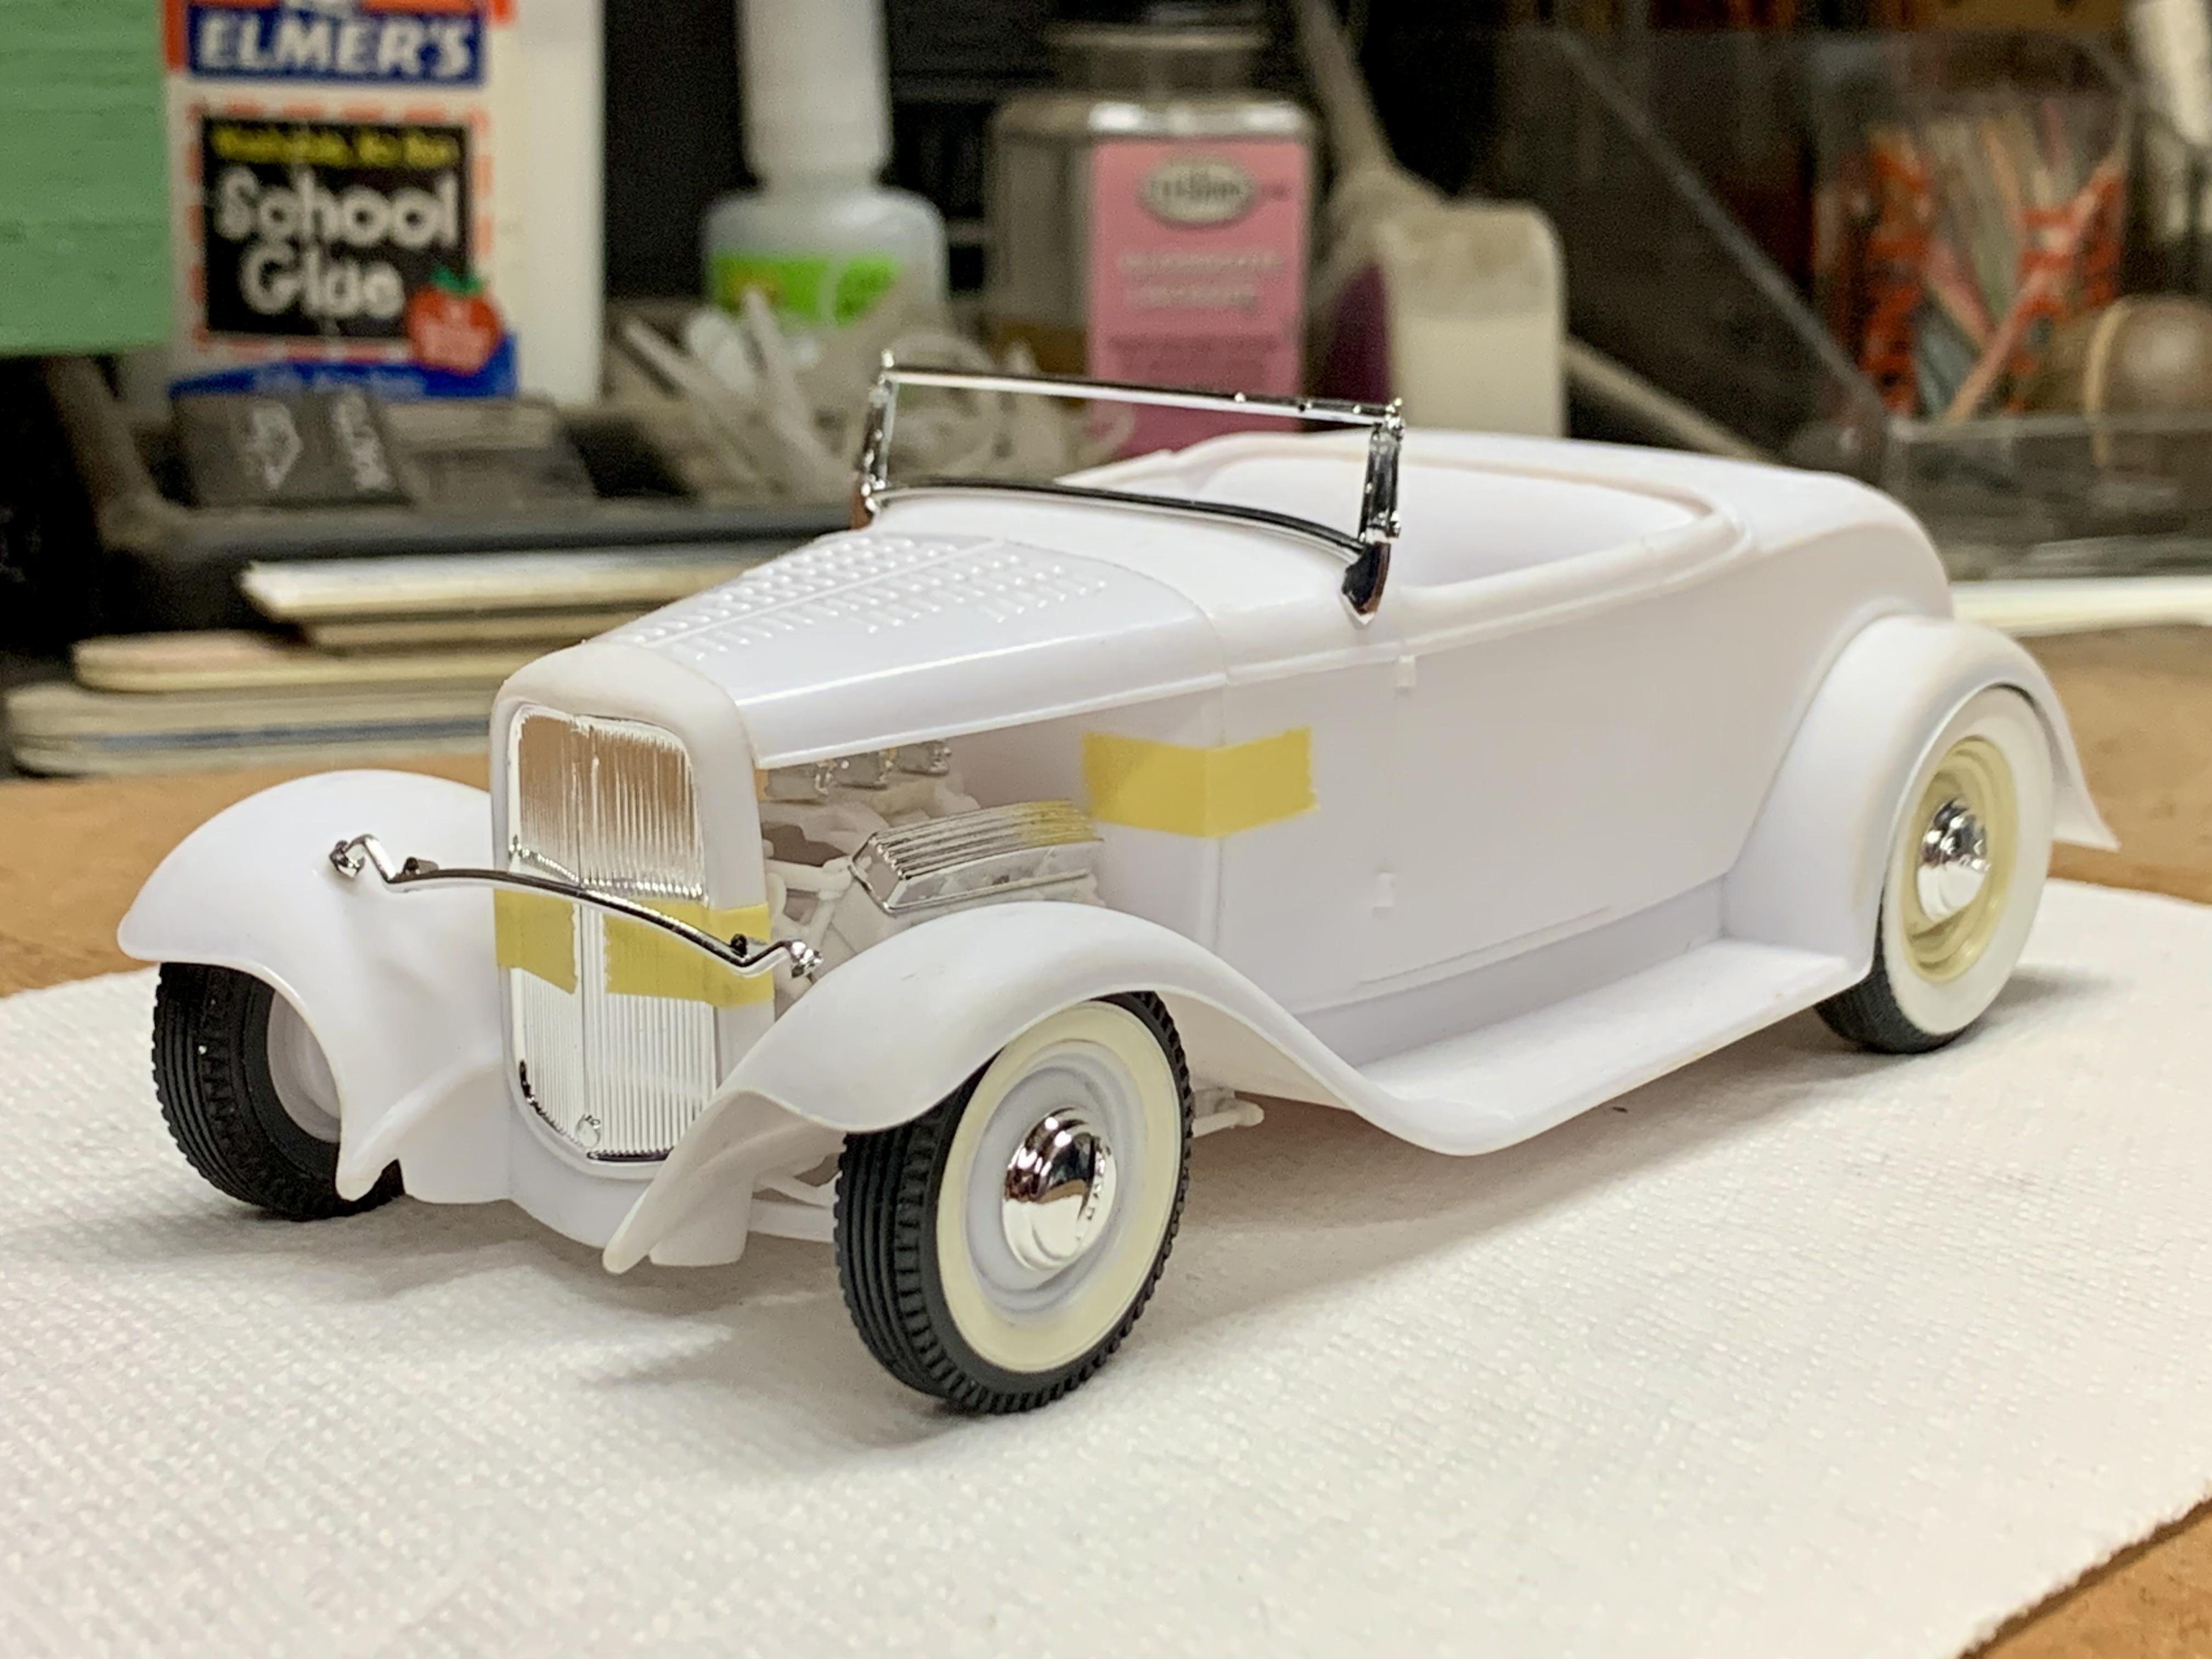
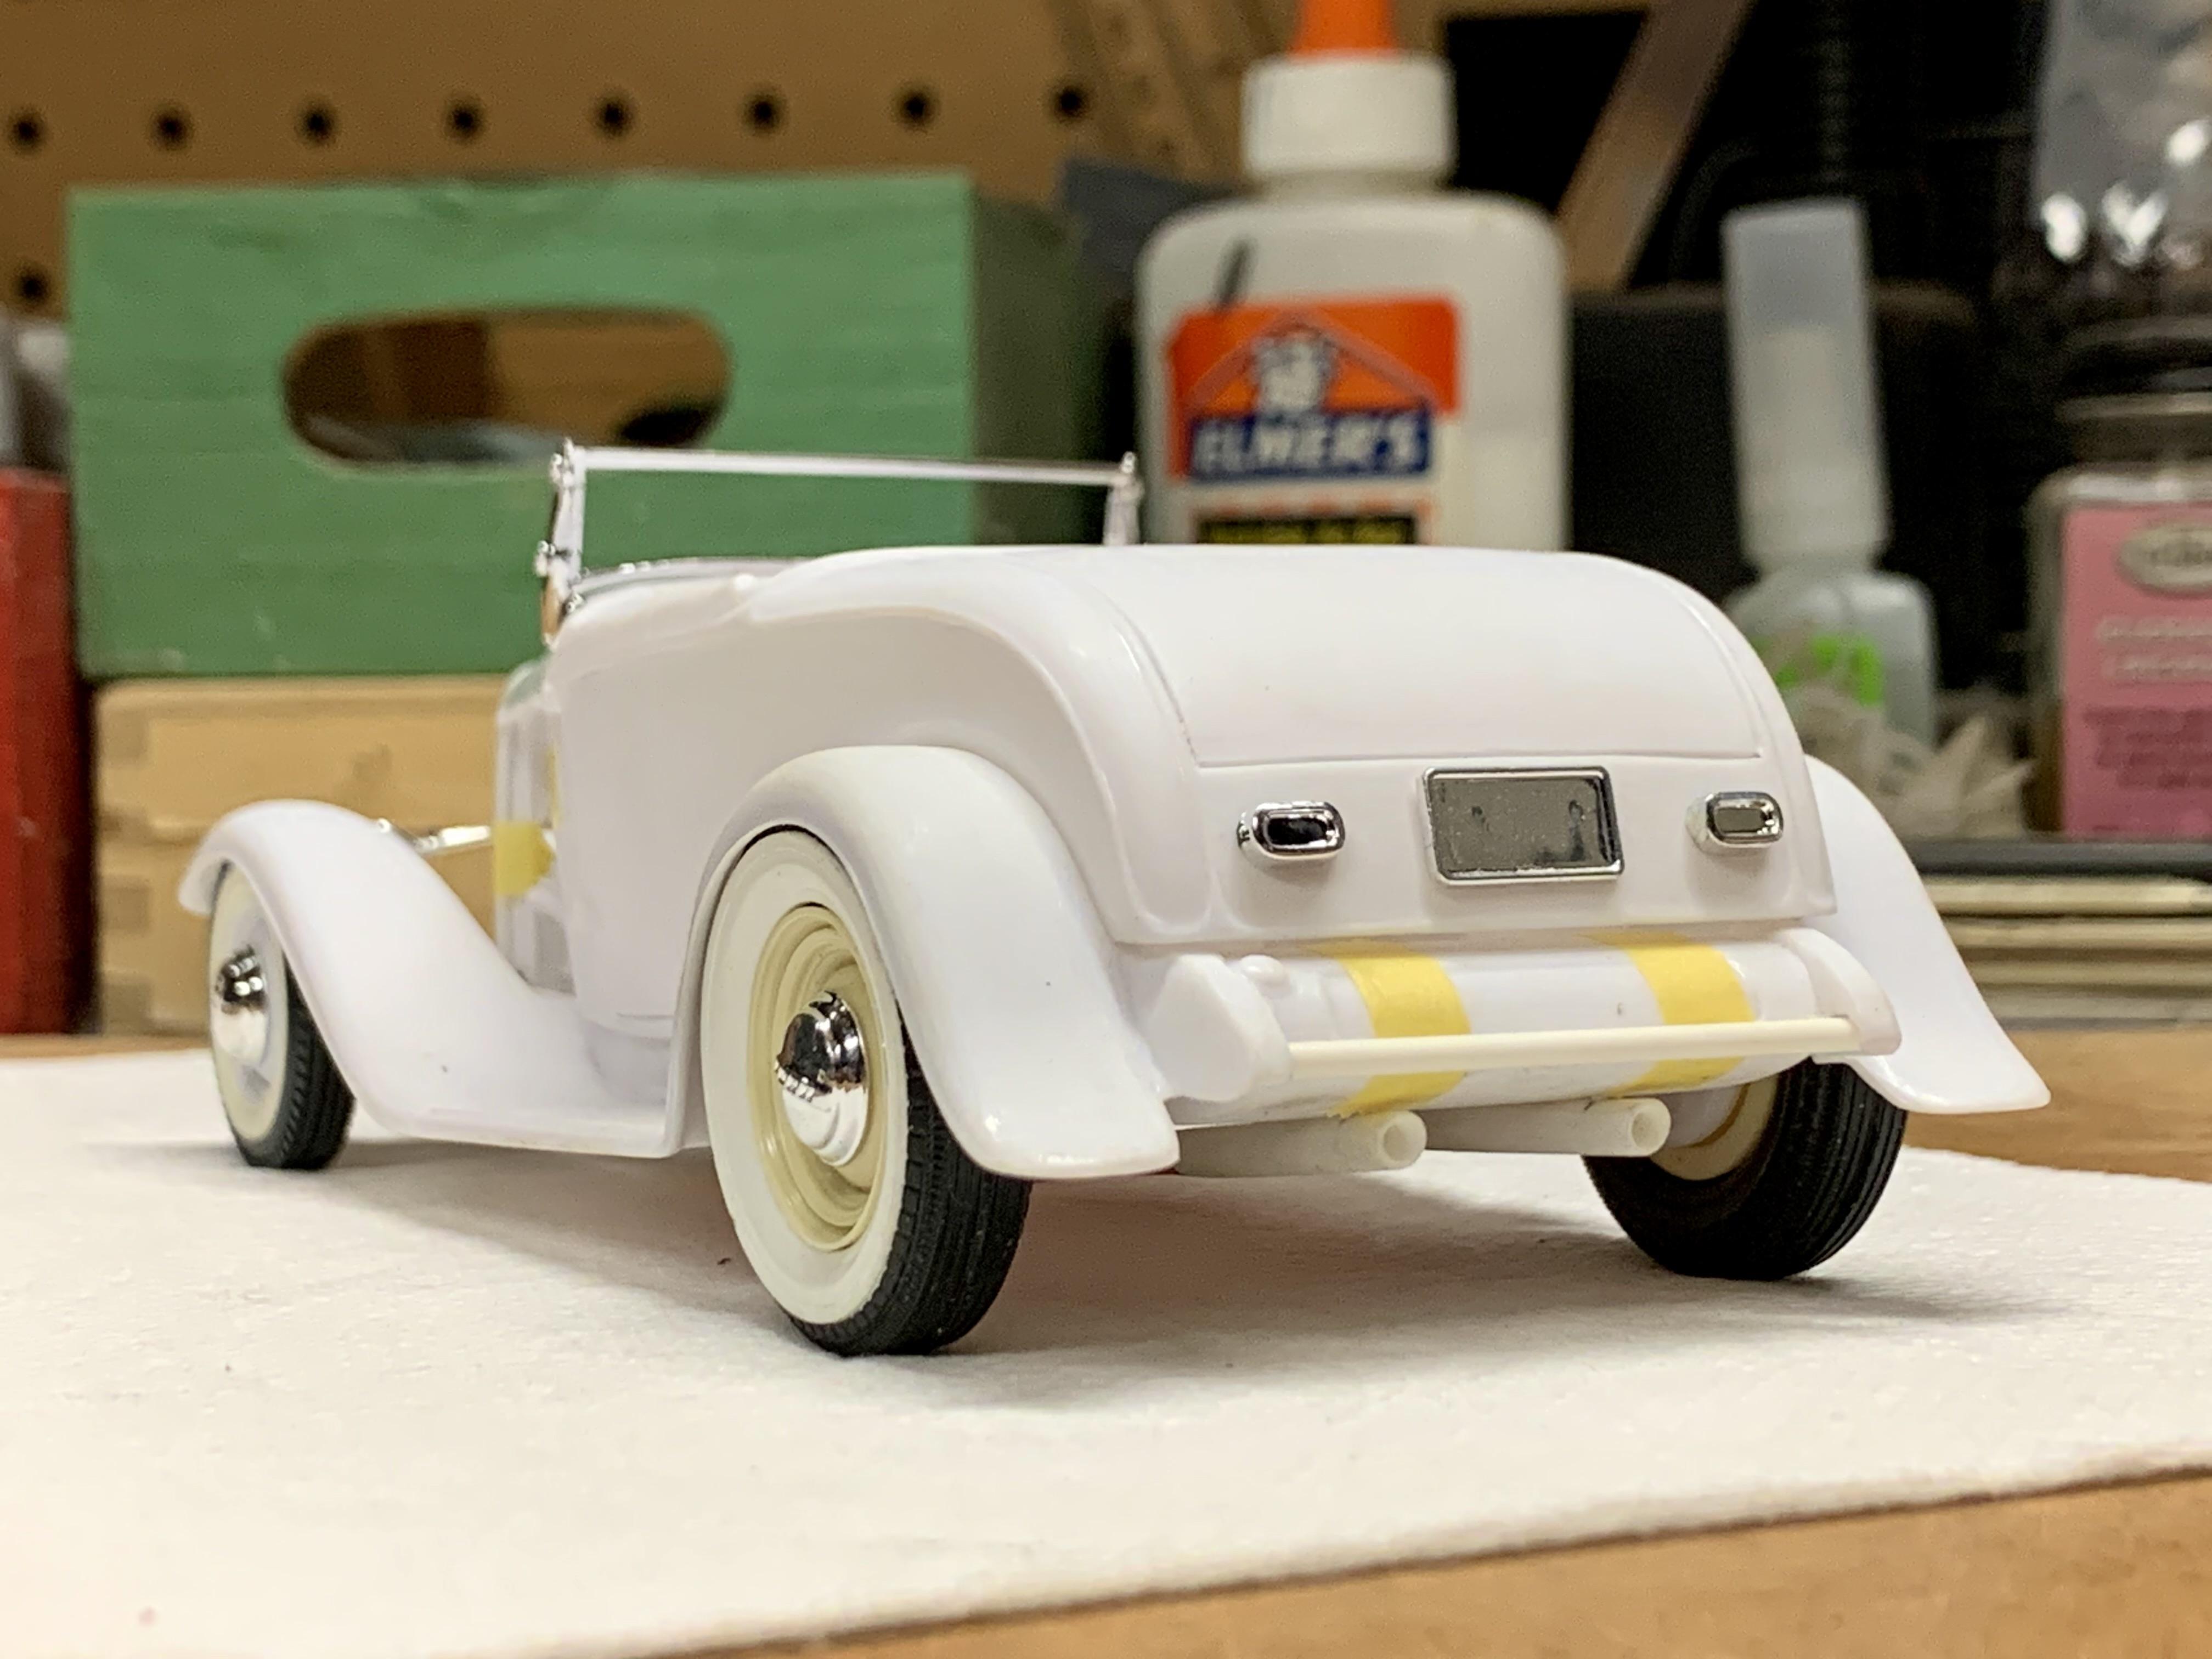
Here’s the first post-paint mock up. Really happy with the color I chose. If you look close you will see that the interior assembly is in the body. Happy to report it fits perfectly thanks to Drag City Casting bodies being the same exact thickness as the kit bodies they’re based on. The more pliable resin body makes installing the interior WAY easier than the stiffer kit Sedan body. Been there, done that! The two interior floor alignment holes align with the two studs on the frame floor of the newer Roadster chassis perfectly. Thank you, Revell. The only fit issue I’ve run into (and it’s my own fault for not checking during fabrication ?) is after taping the wheel wells into place the body will not fit down onto the frame properly. The “hat” section of the frame floor is a little wider than the other 32 series frames so it doesn’t fit between the Sedan wheel wells. Some strategic trimming will solve this but it’s a bummer to deal with after paint. I would guess this would also be a problem if trying to mount the 32 series 3-Window, 5-Window or even first gen Roadster body on the newer Roadster frame, so be aware if your thinking of those combinations. Also of note: 1) The roof insert and inside of body will be flat black after I get a fresh can. 2) The body has not been polished or waxed yet. ?
- 706 replies
-
- 11
-

-
THE DEFINITELY NOT TRADITIONAL '32 TUDOR SEDAN
Dennis Lacy replied to mrm's topic in WIP: Model Cars
Neat work on the hood! Also, the stance and proportions look great and I dig the ribs on the roof. ? -
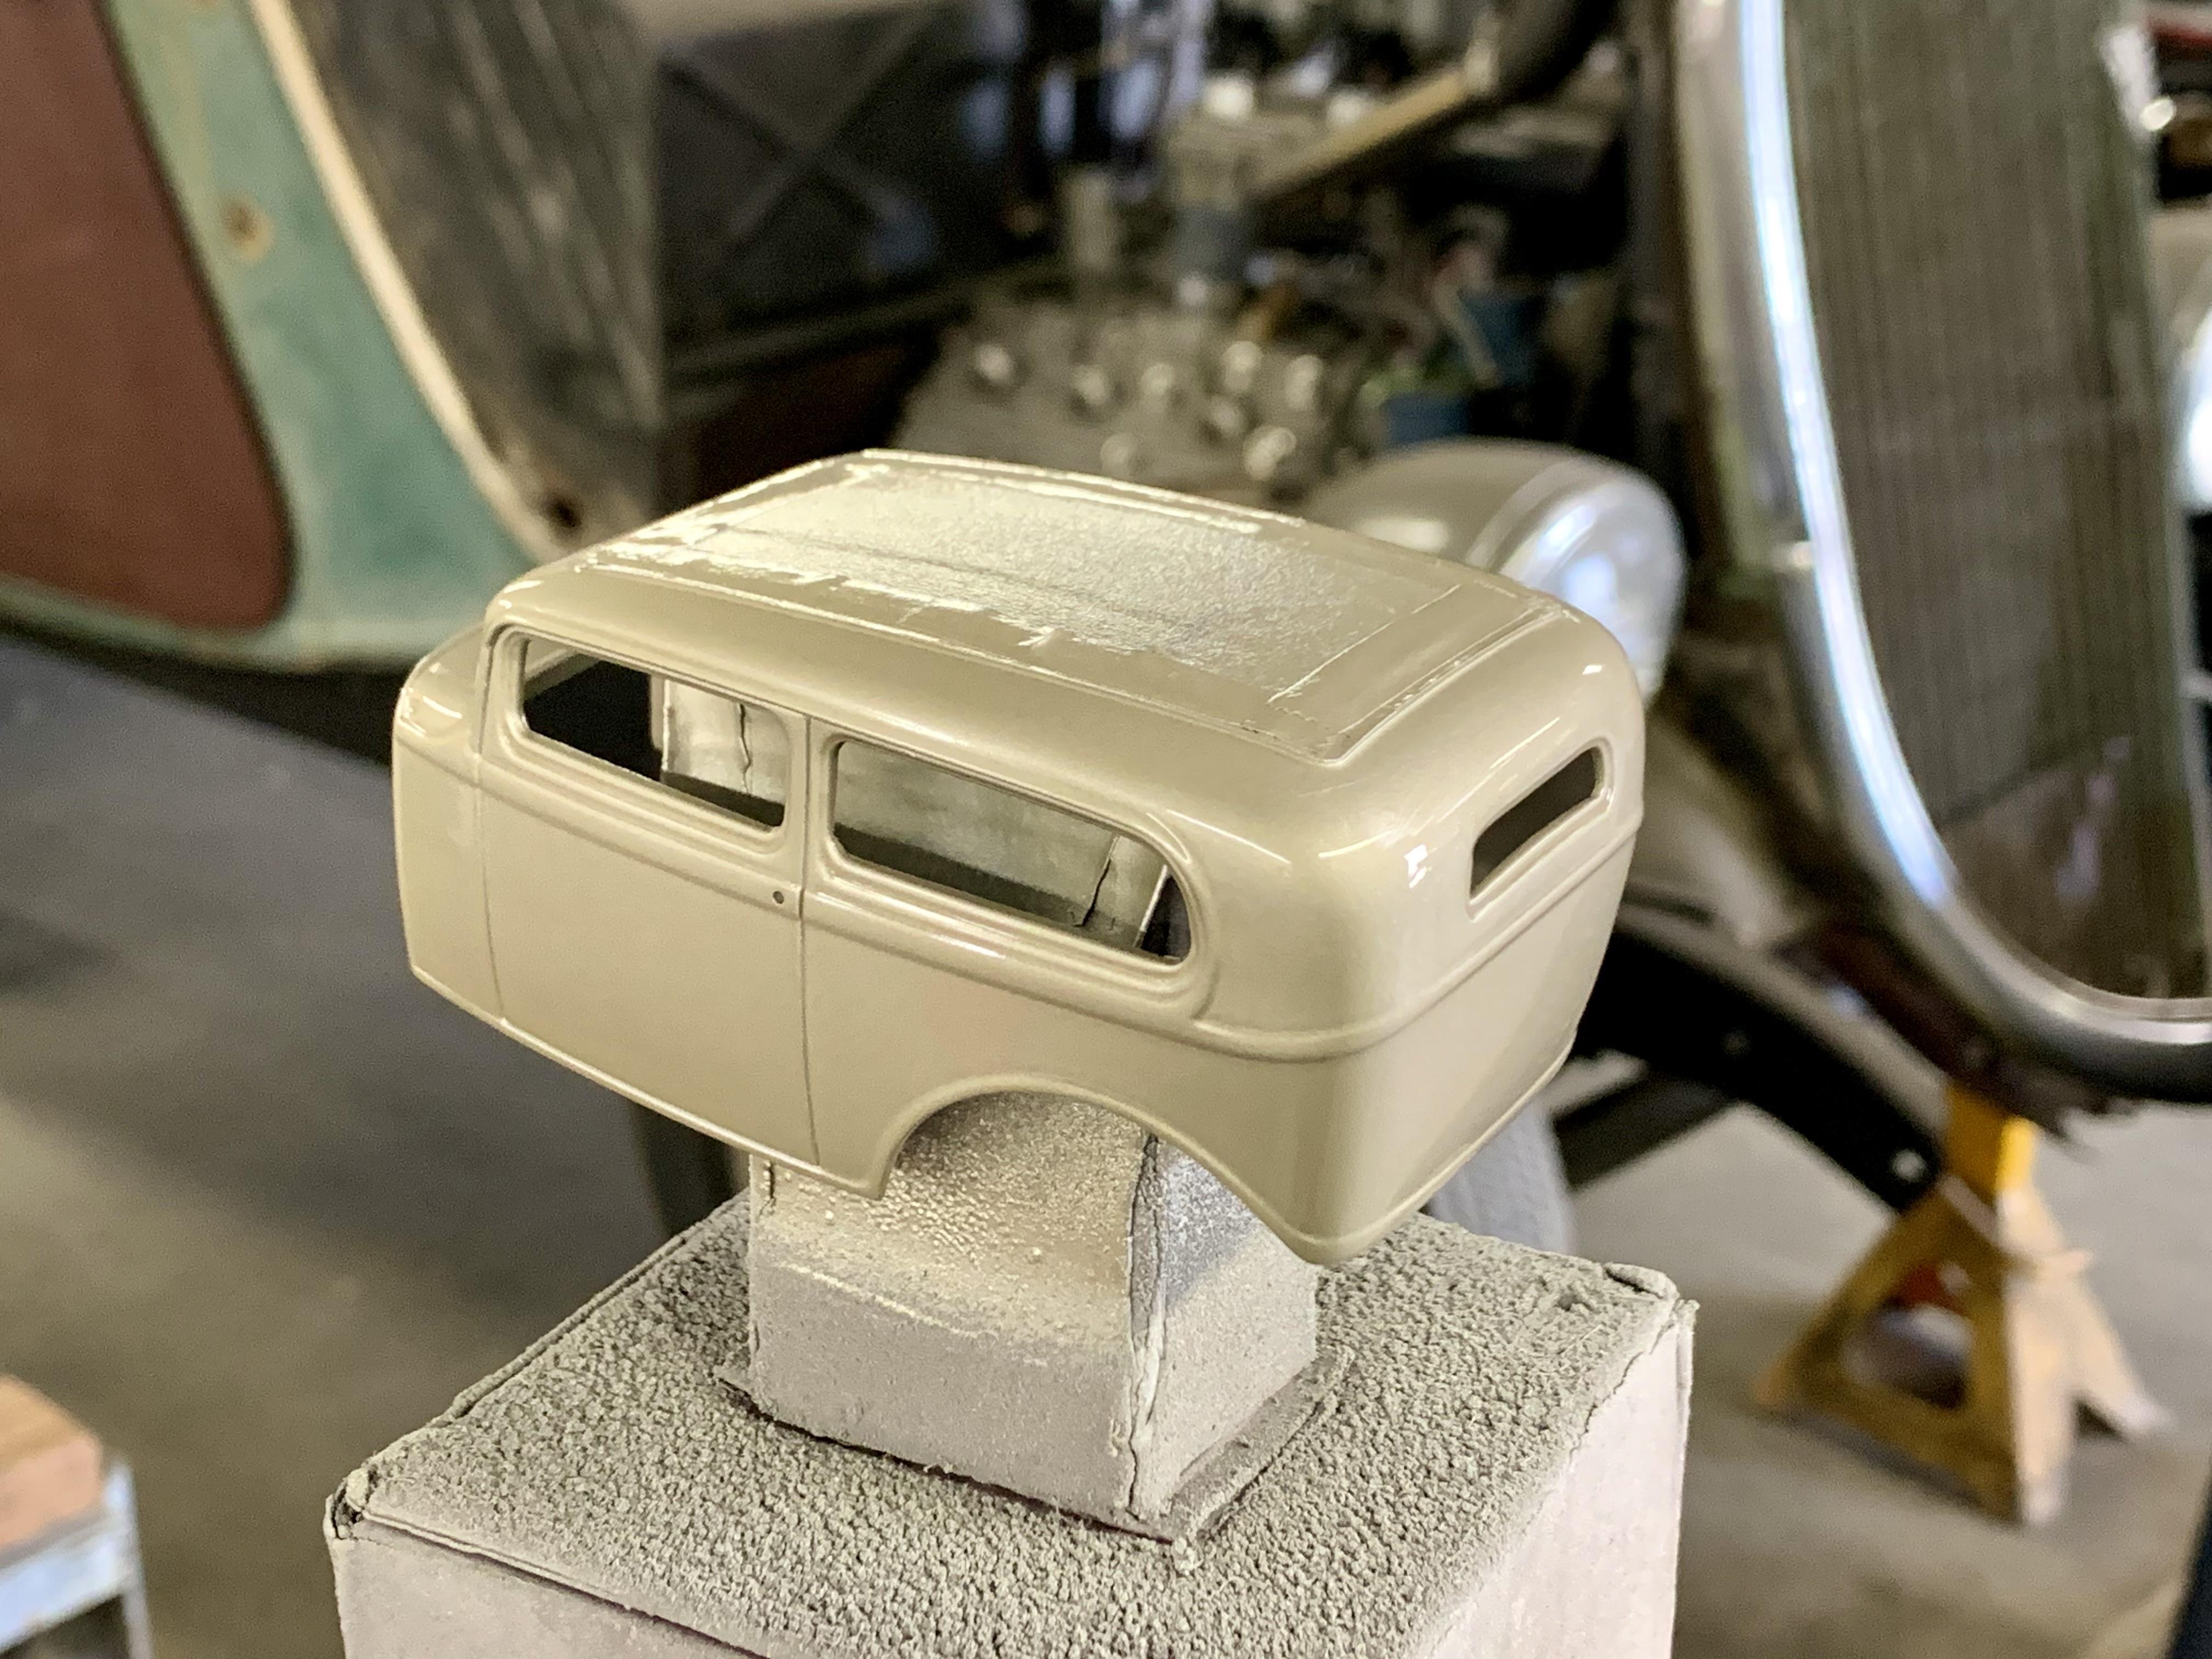
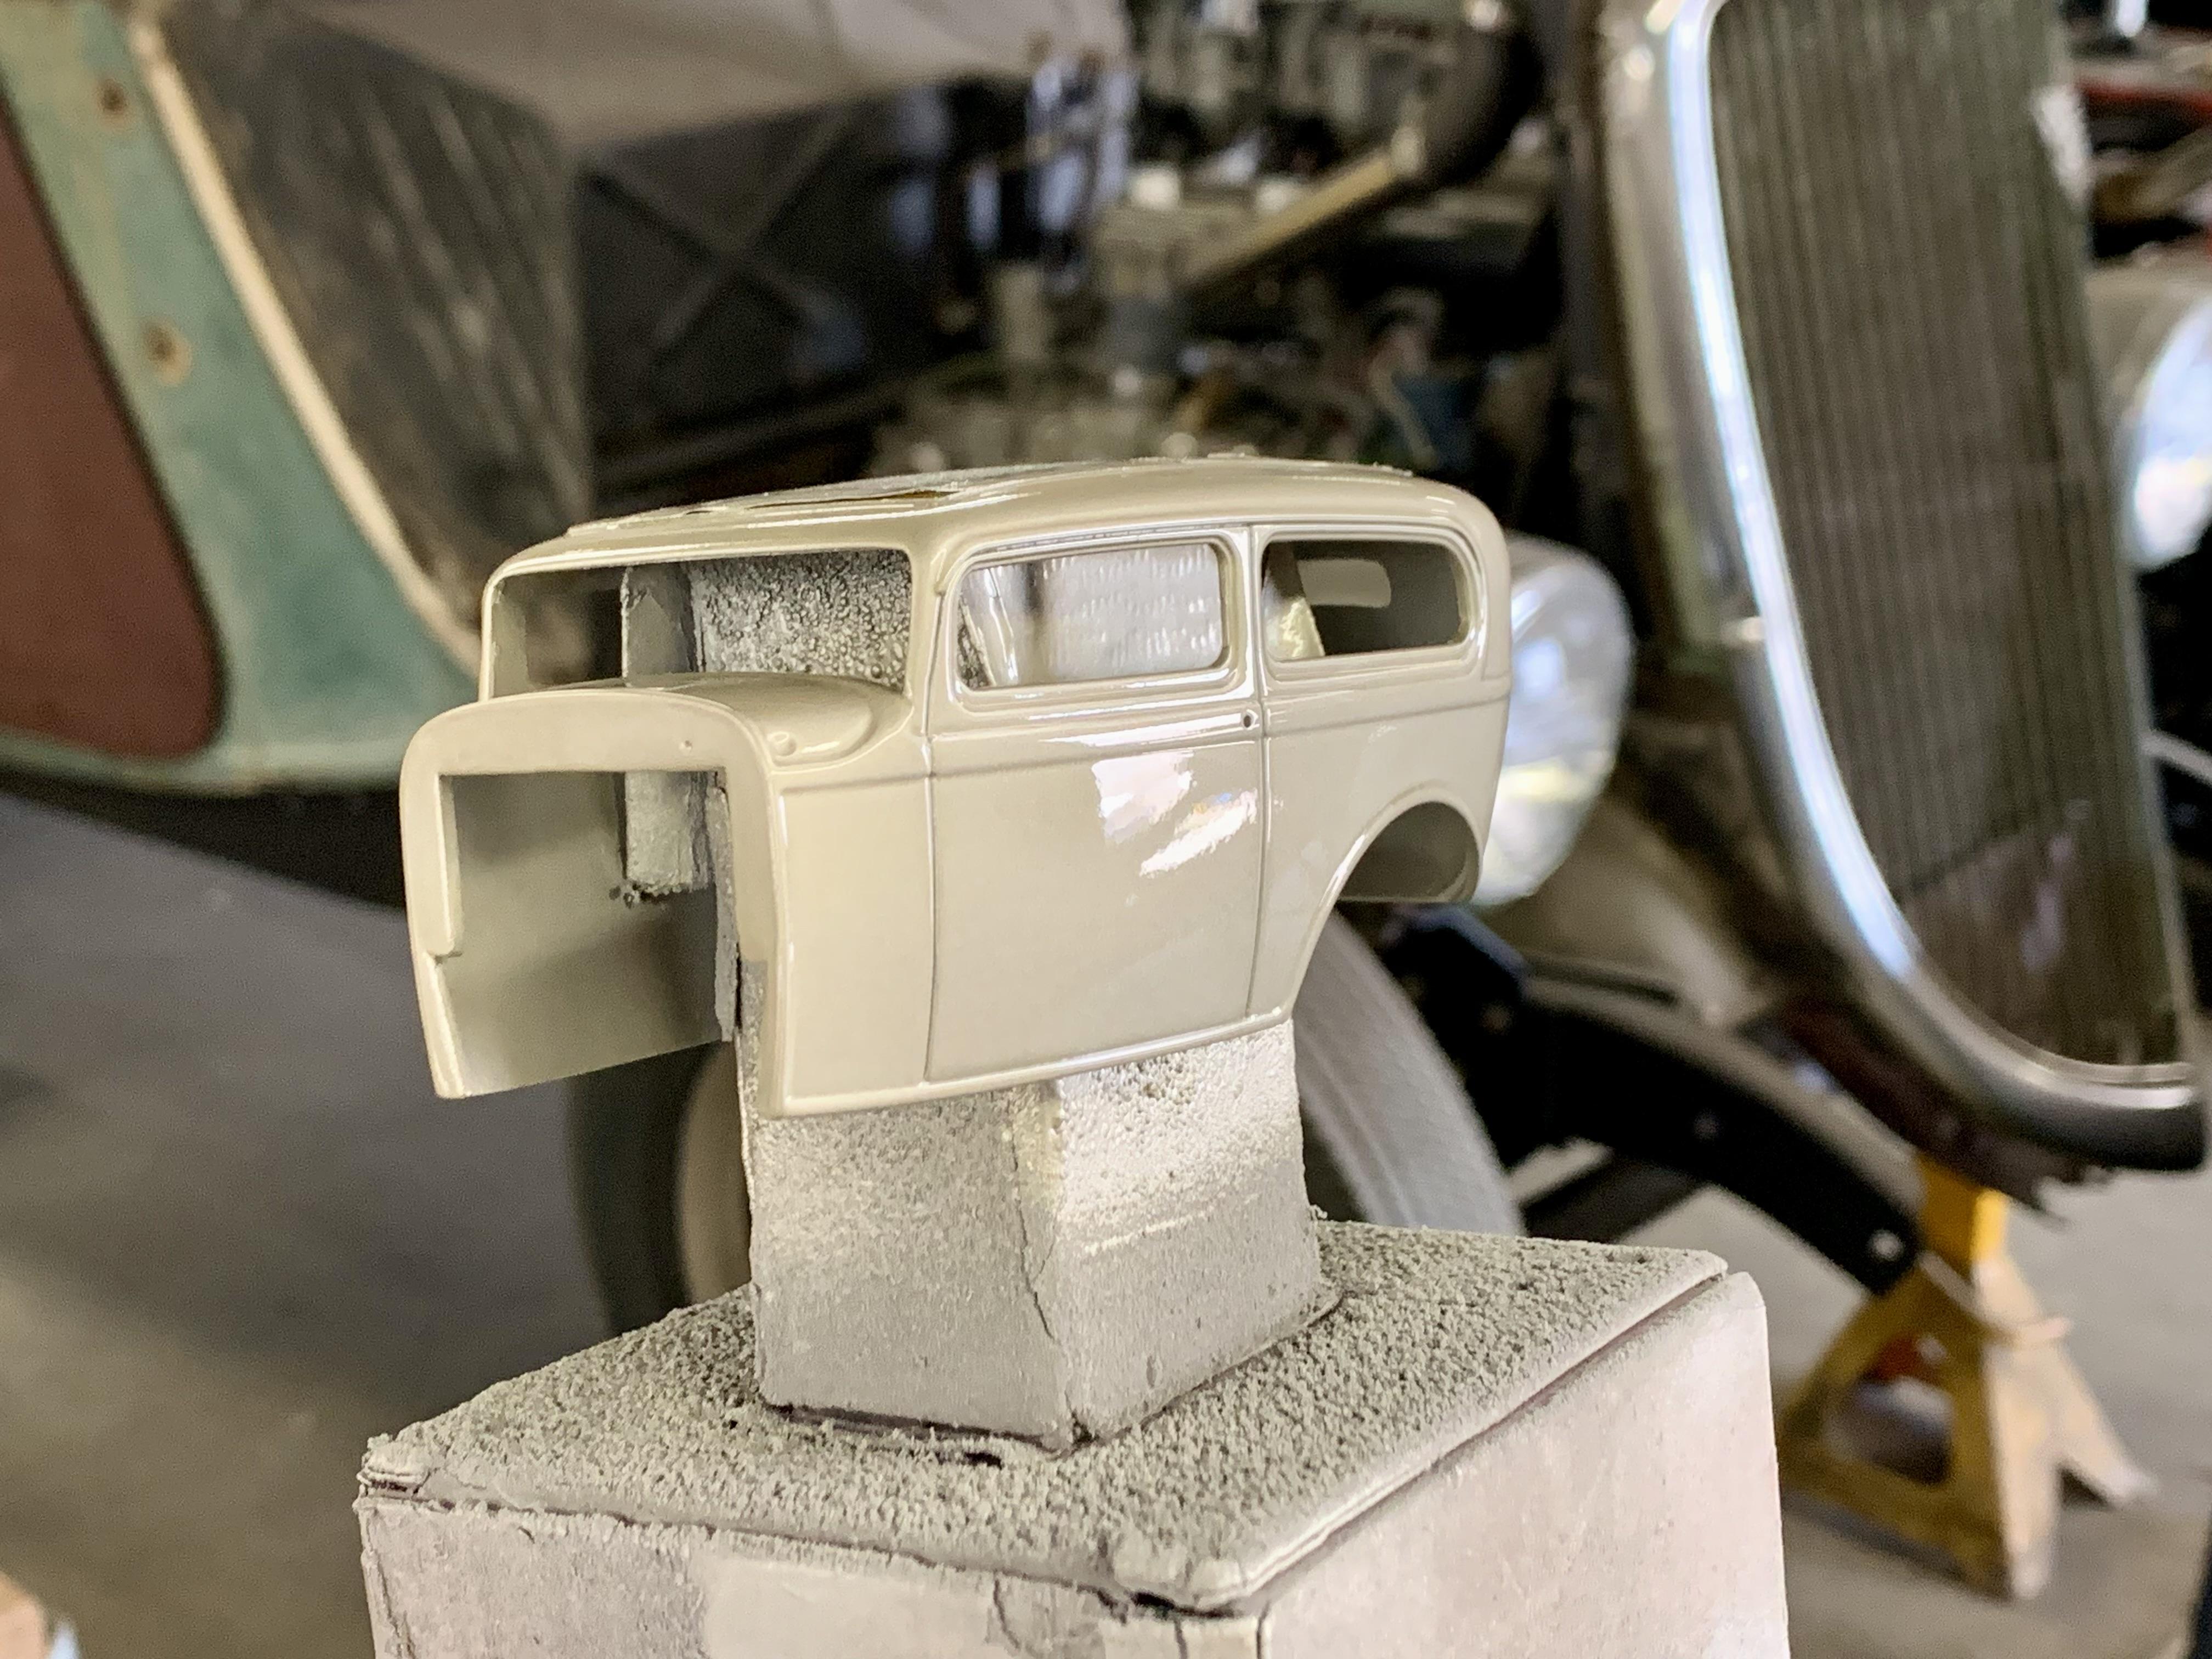
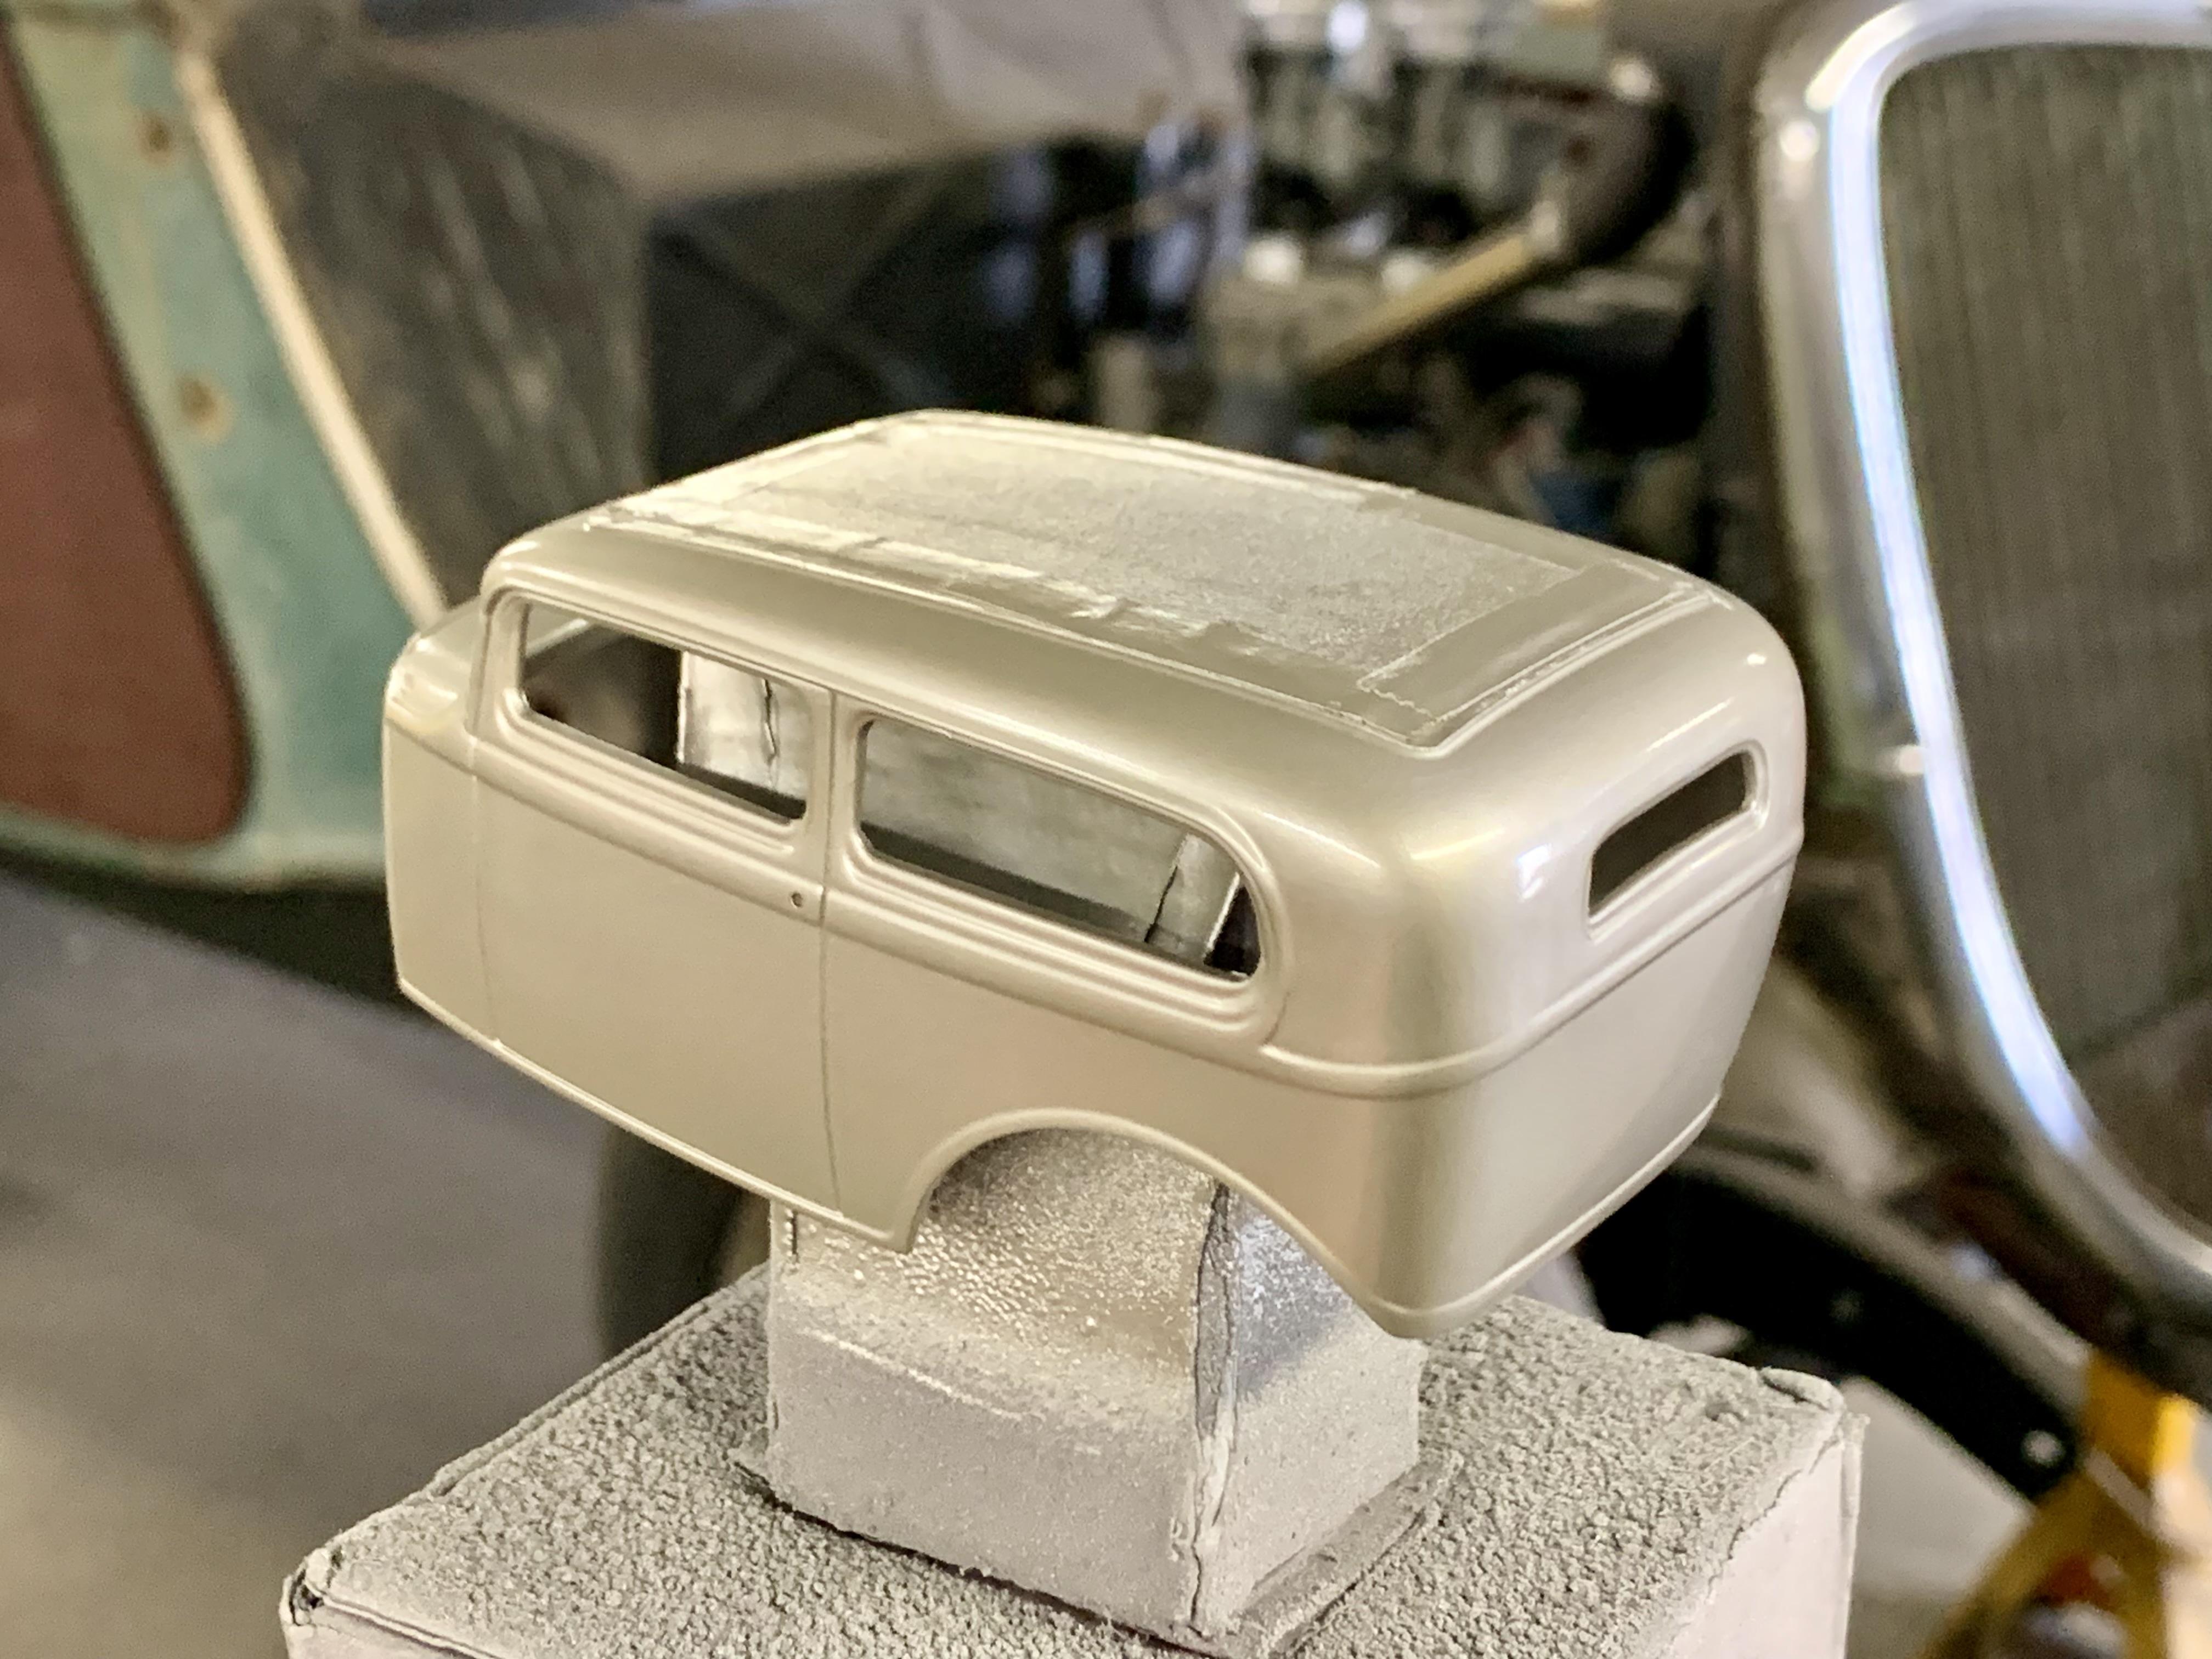
Actually, when I created this top for Drag City Casting the original fitment was for the Revell Rat Roaster and a model I had built out of that body and chopped windshield, seen below. If you look at old pictures of 40’s and 50’s 32 Roadster tops this is how they fit, covering the upper edge of the body around the seat. They don’t sit on the body like a stock top does. I had to relieve the lower inside edge a bunch to get it to fit this Monogram 1:24 body and chop the windshield an 1/8”. I’m gonna do a little more because by the time the body has primer, paint and clear on it the top probably won’t fit again.
-
Thanks, Steve! I had bought the spray can for a different project (one of Revell’s 90 Mustangs) a couple of years back but that project is going through a redirection (including a color change) so it was really a matter of, “What do I have on hand?” when it came to the sedan. That said, I’m really glad I went with it!
-
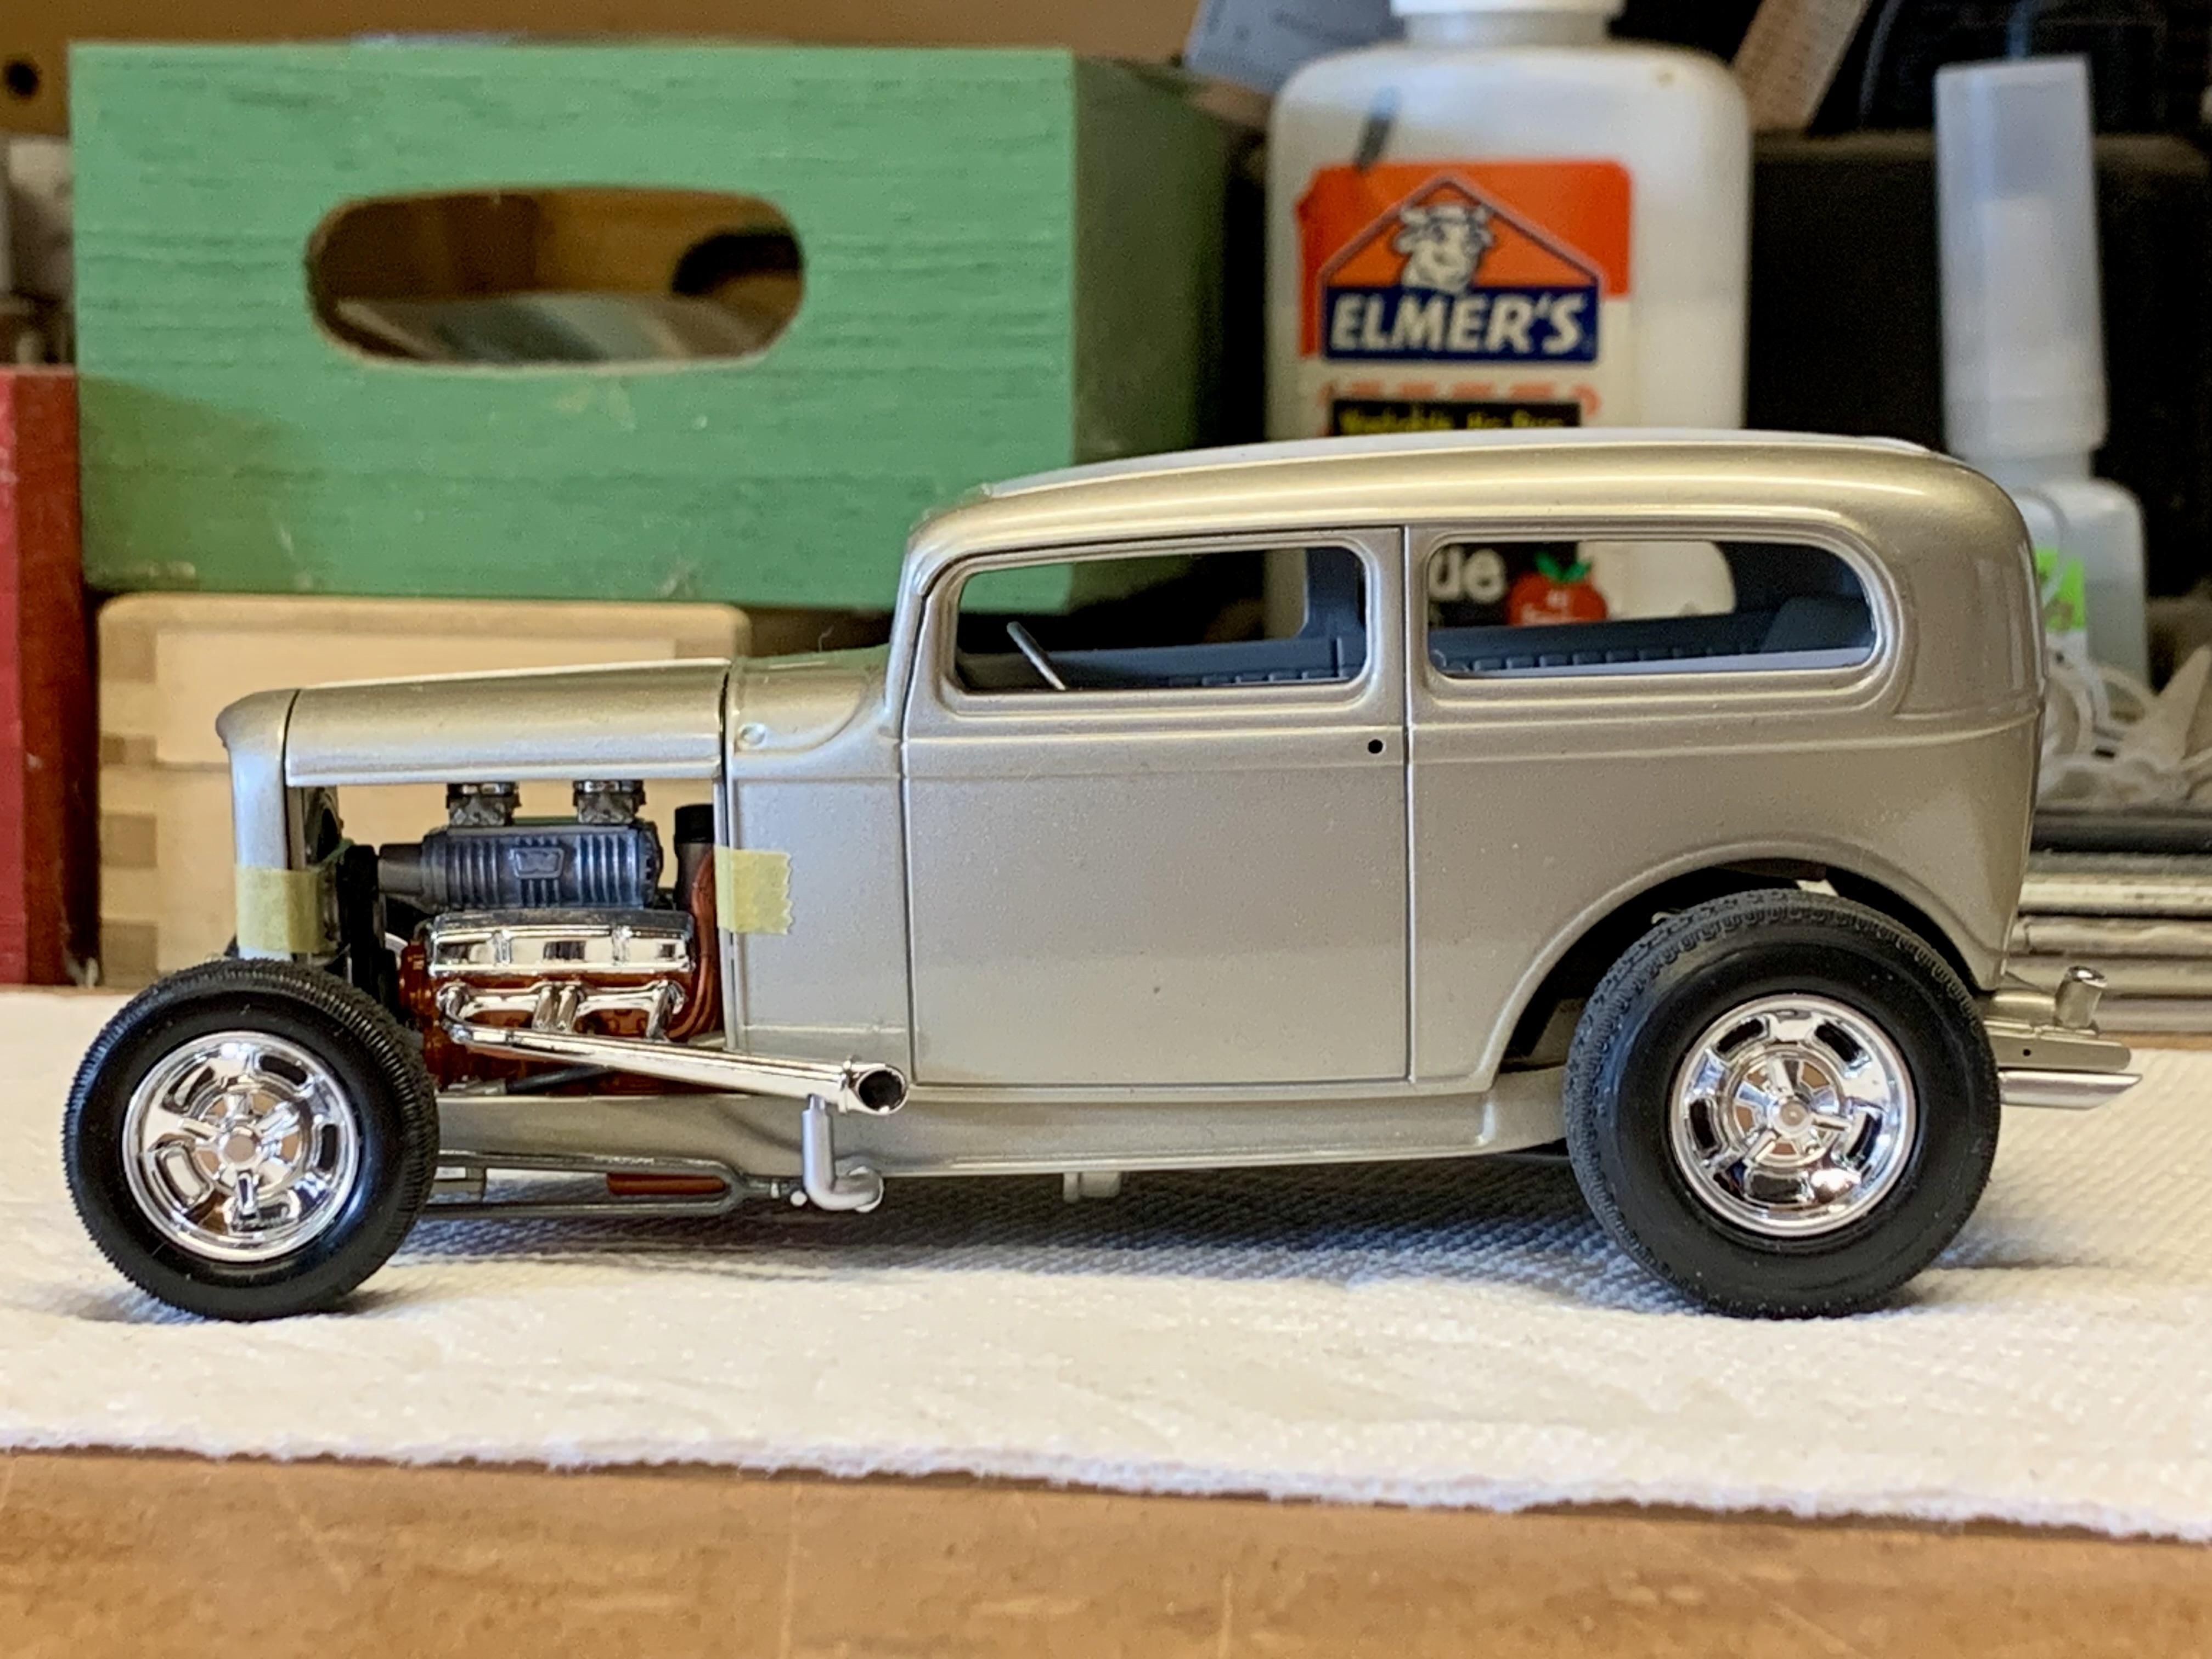
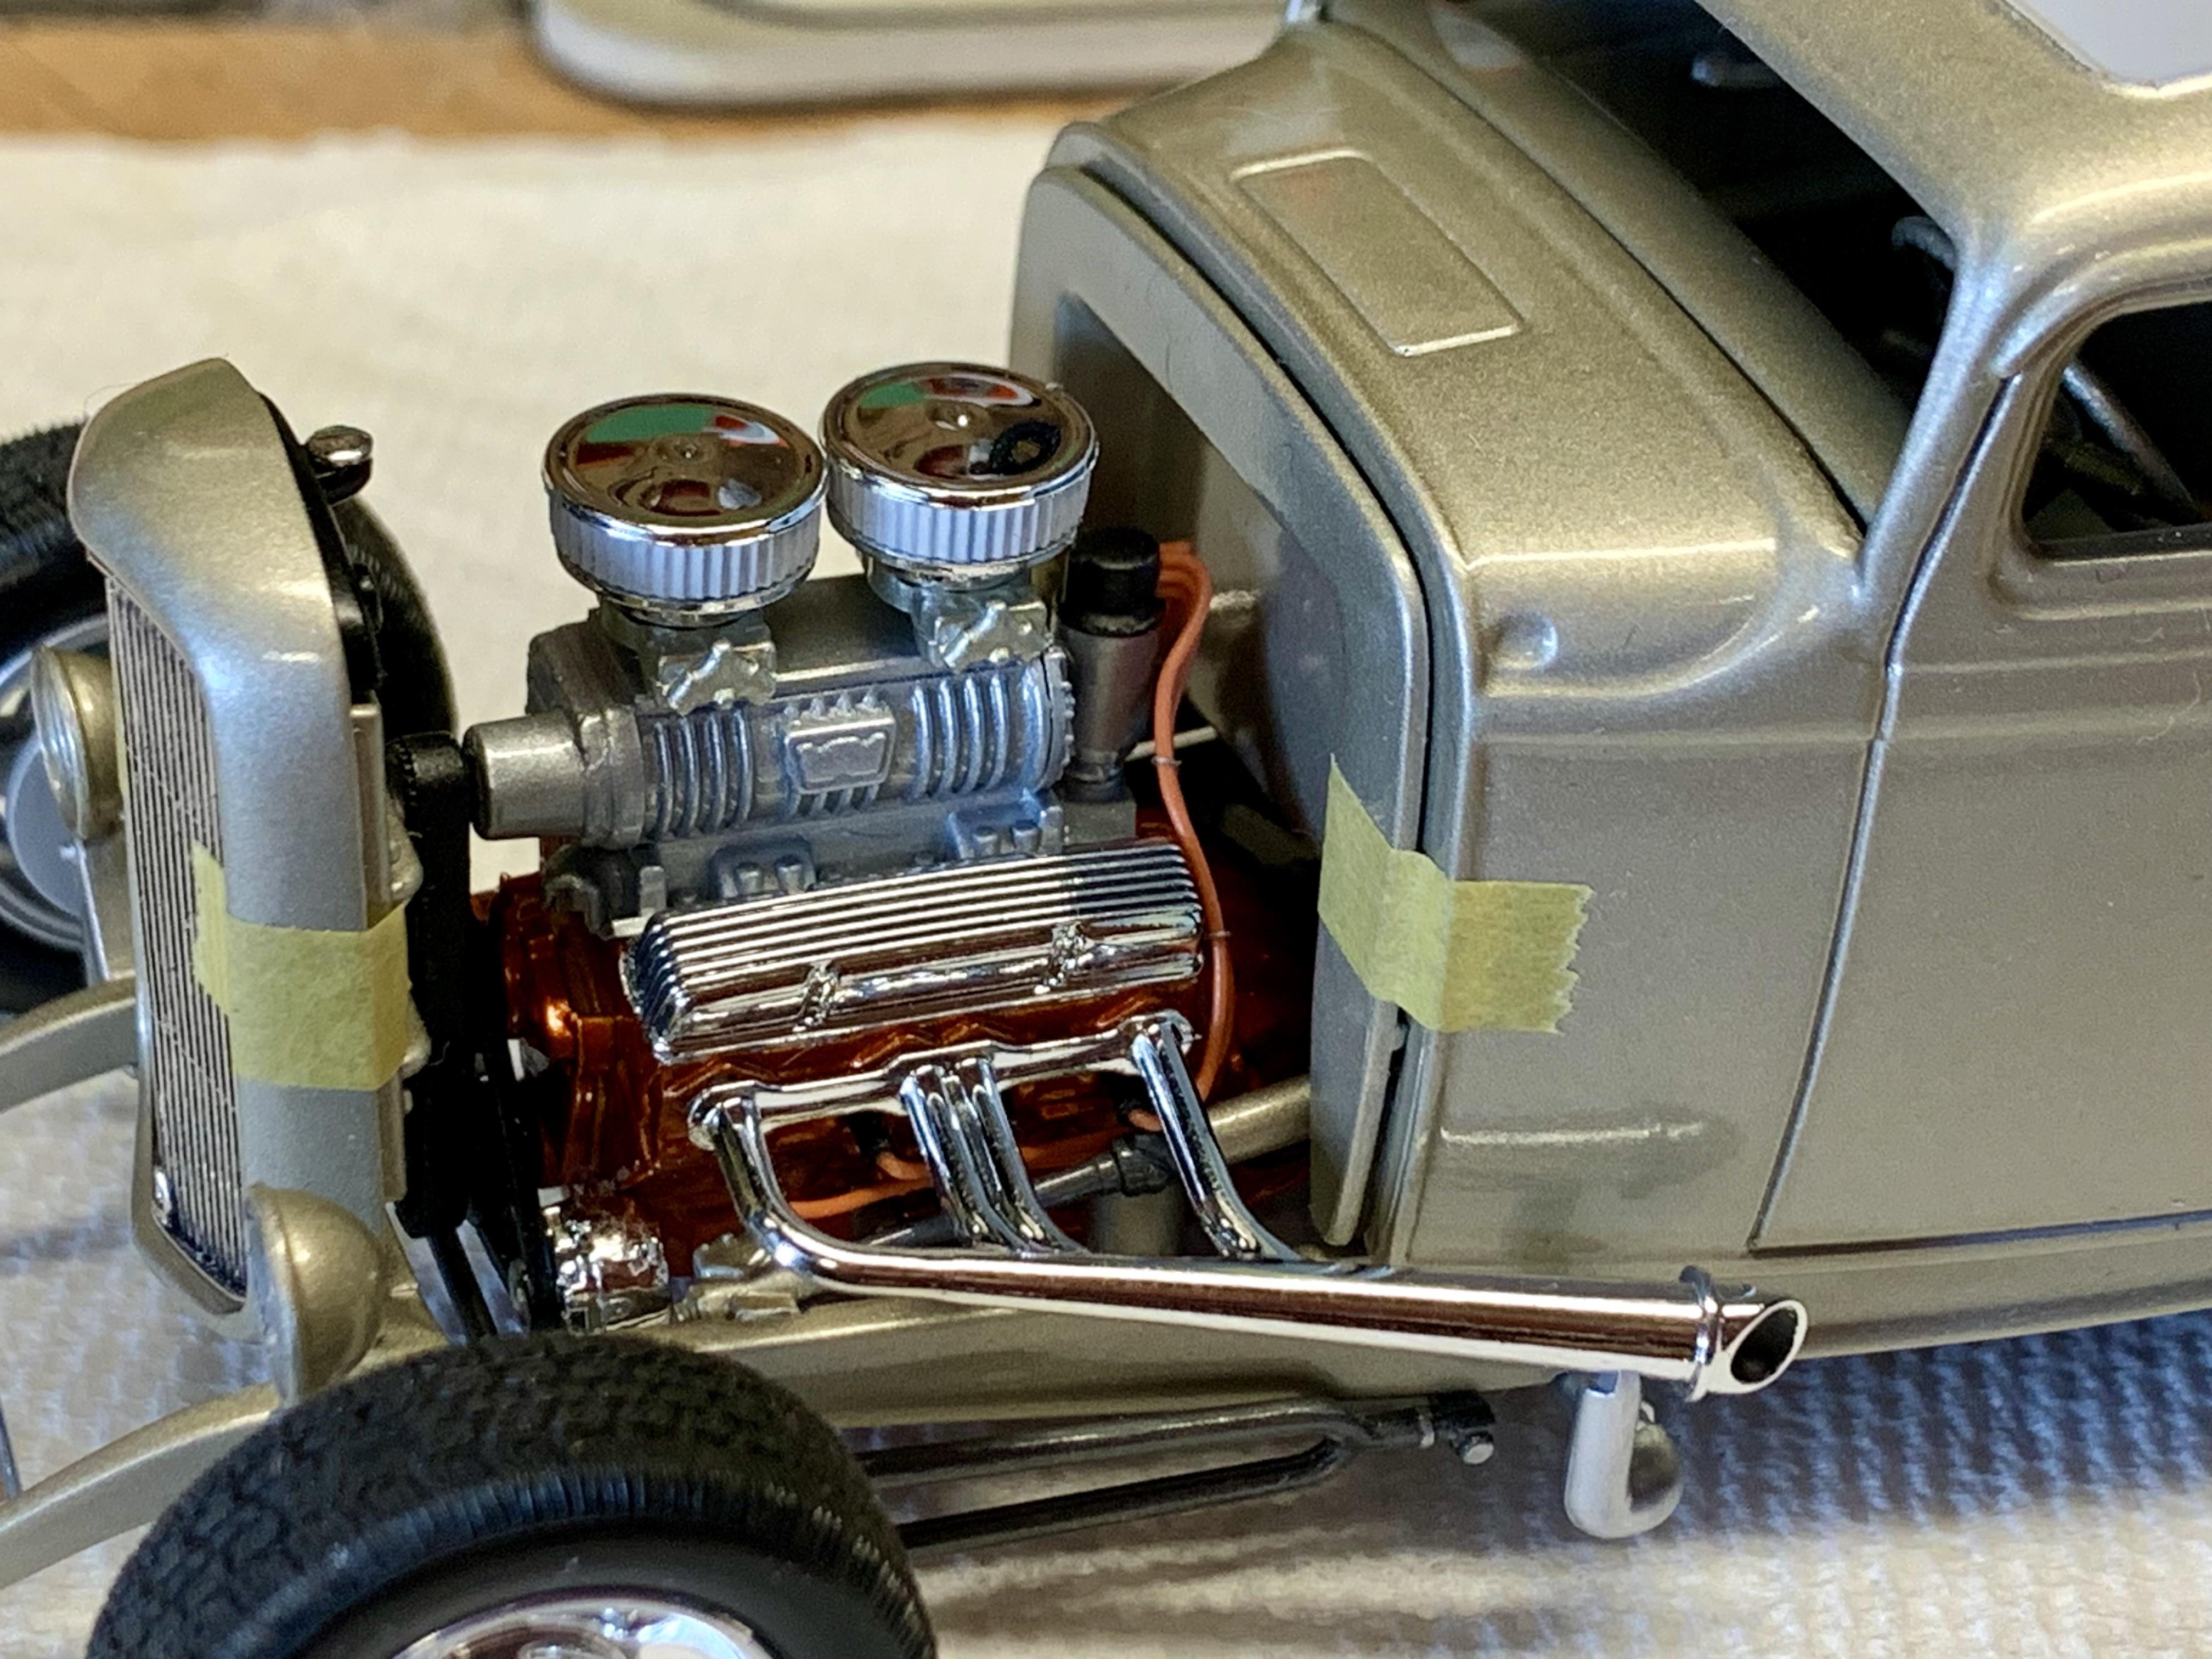
By the looks of the sky this morning I thought it might be too cold to clear coat today but the sun came out late morning I was able to get it done moments ago. Like the chassis, the base paint darkened nicely. This paint is a dead-ringer for Ford Titanium Frost optional on 90-92 Mustangs and others. I can’t wait to see this body polished and waxed. And yeah, I do all my spraying at the shop. Here’s the picture background NOT blurry or obstructed. ?
- 706 replies
-
- 11
-
-
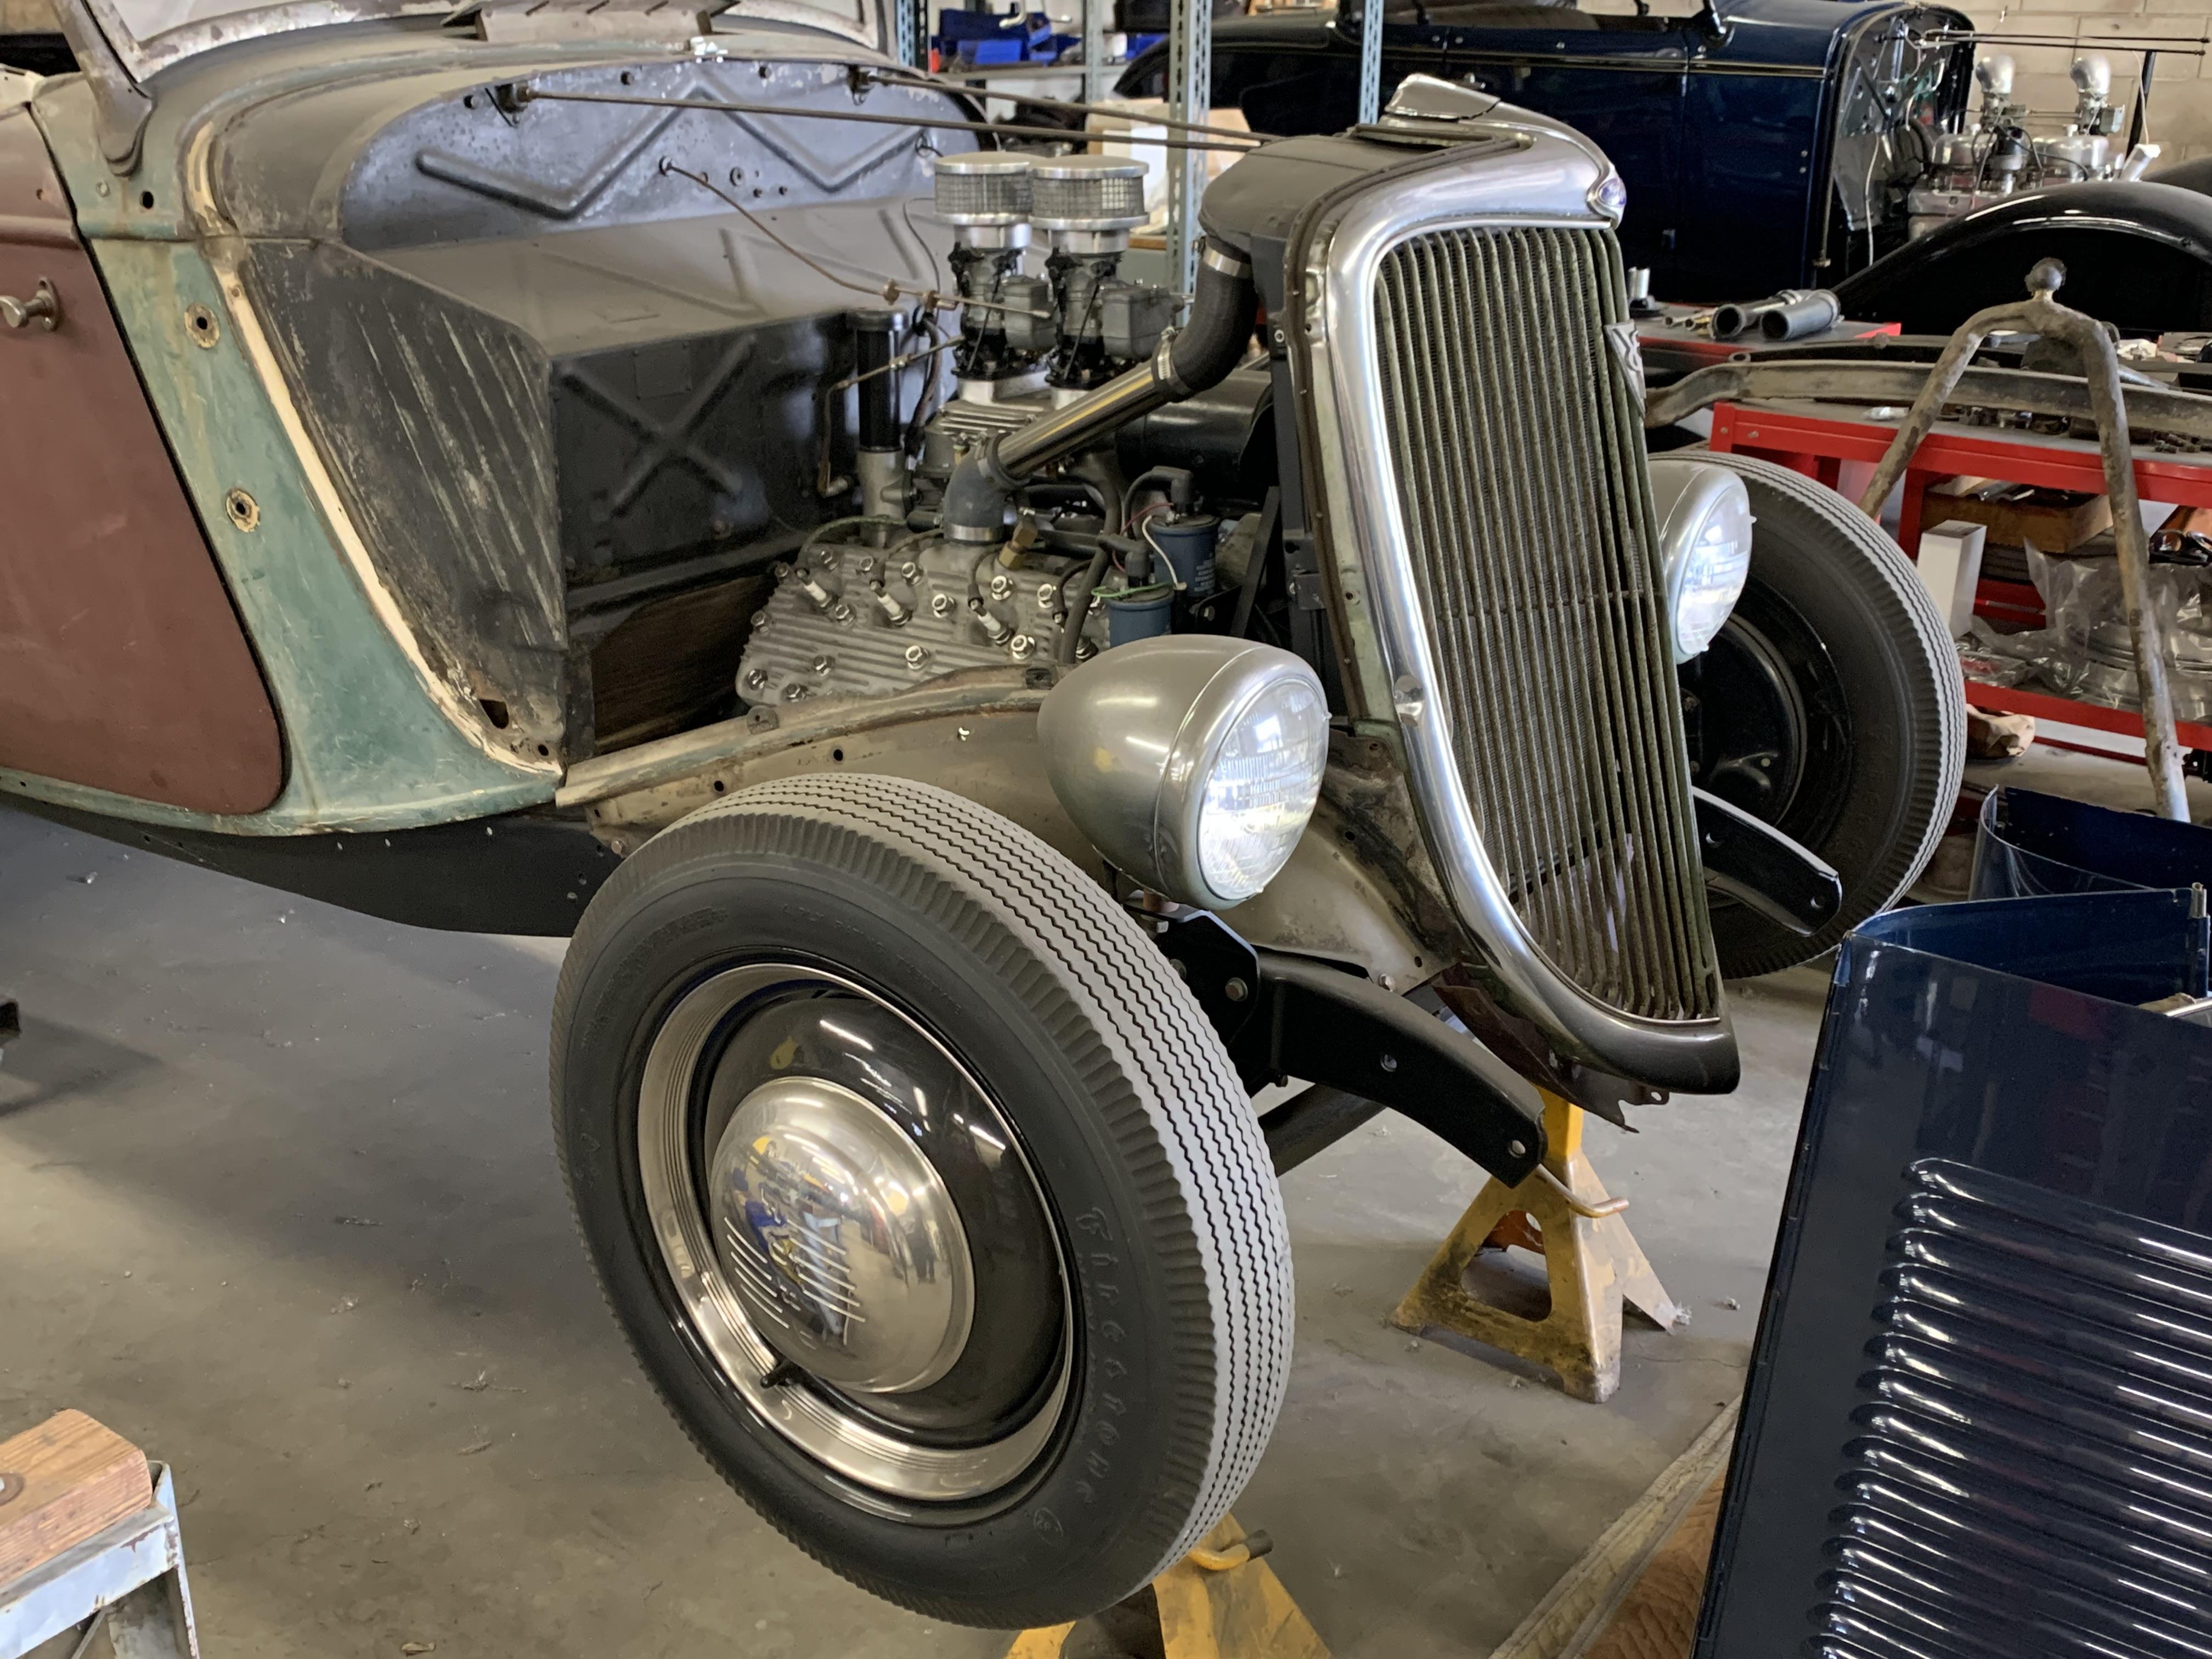
@Tom Kren Dang, Tom, that’s looking great! I think that’s the best look at one of Joel’s blown flatheads I’ve had so far. Neat stuff.
-
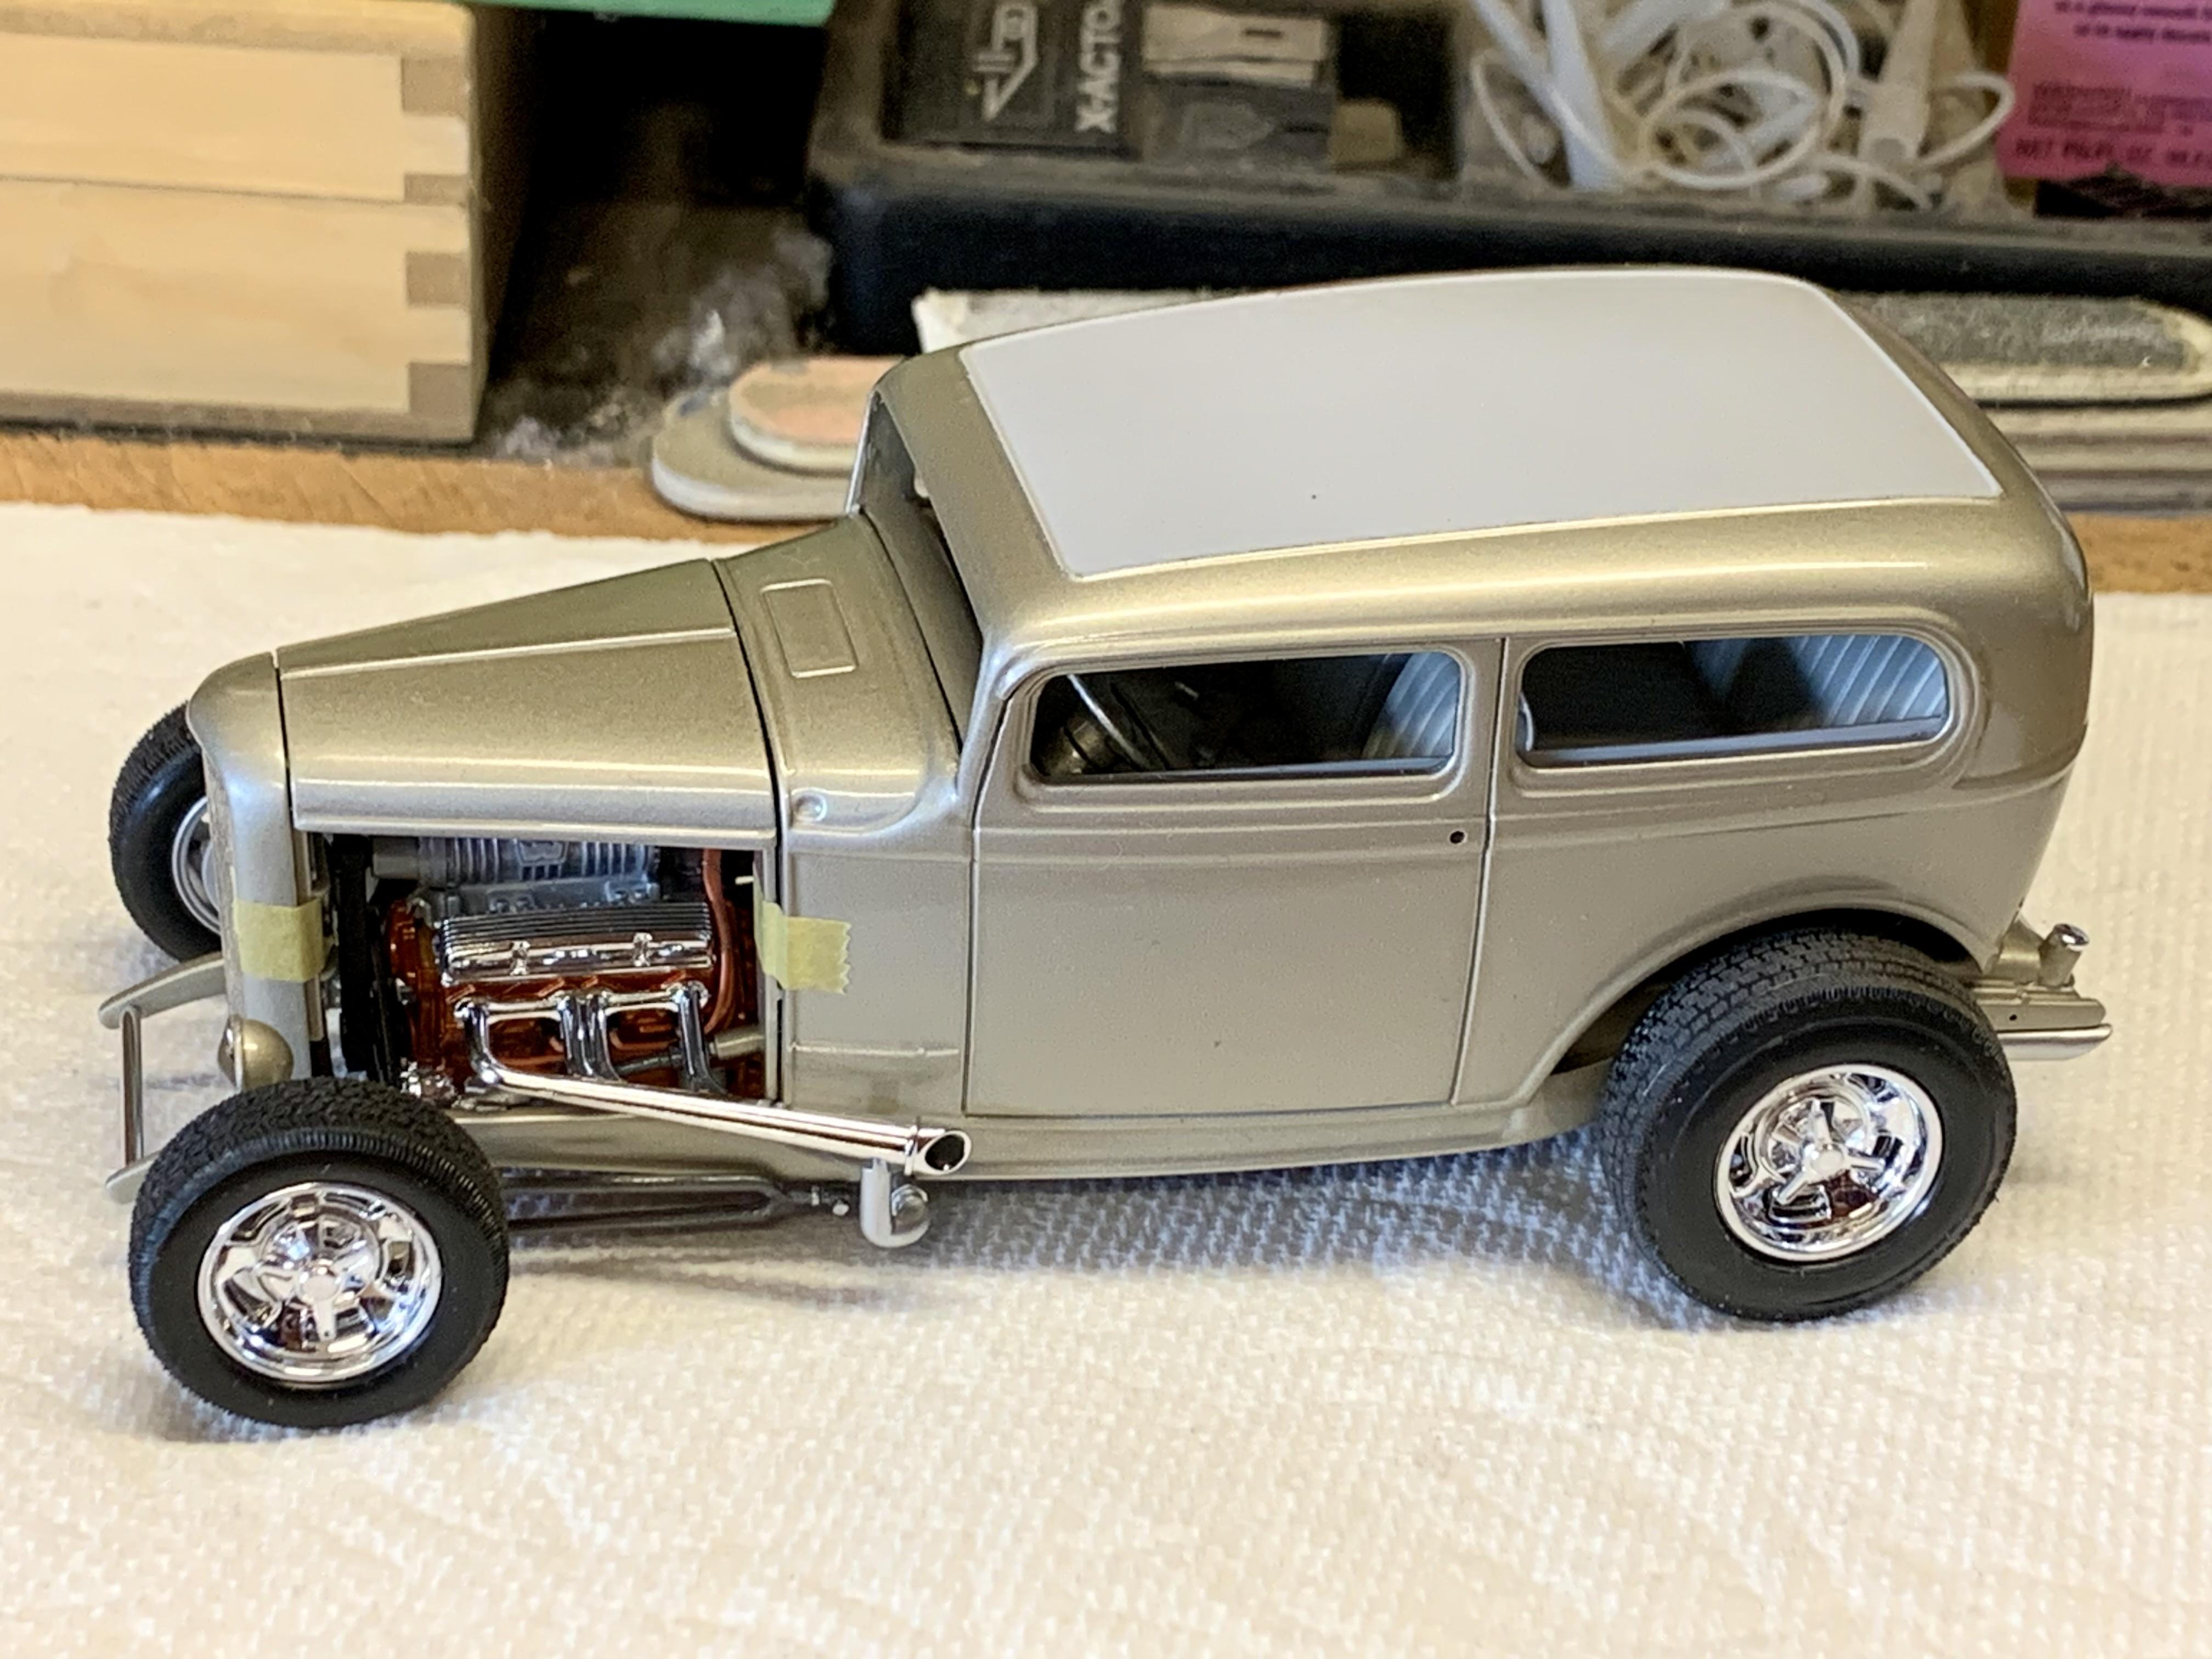
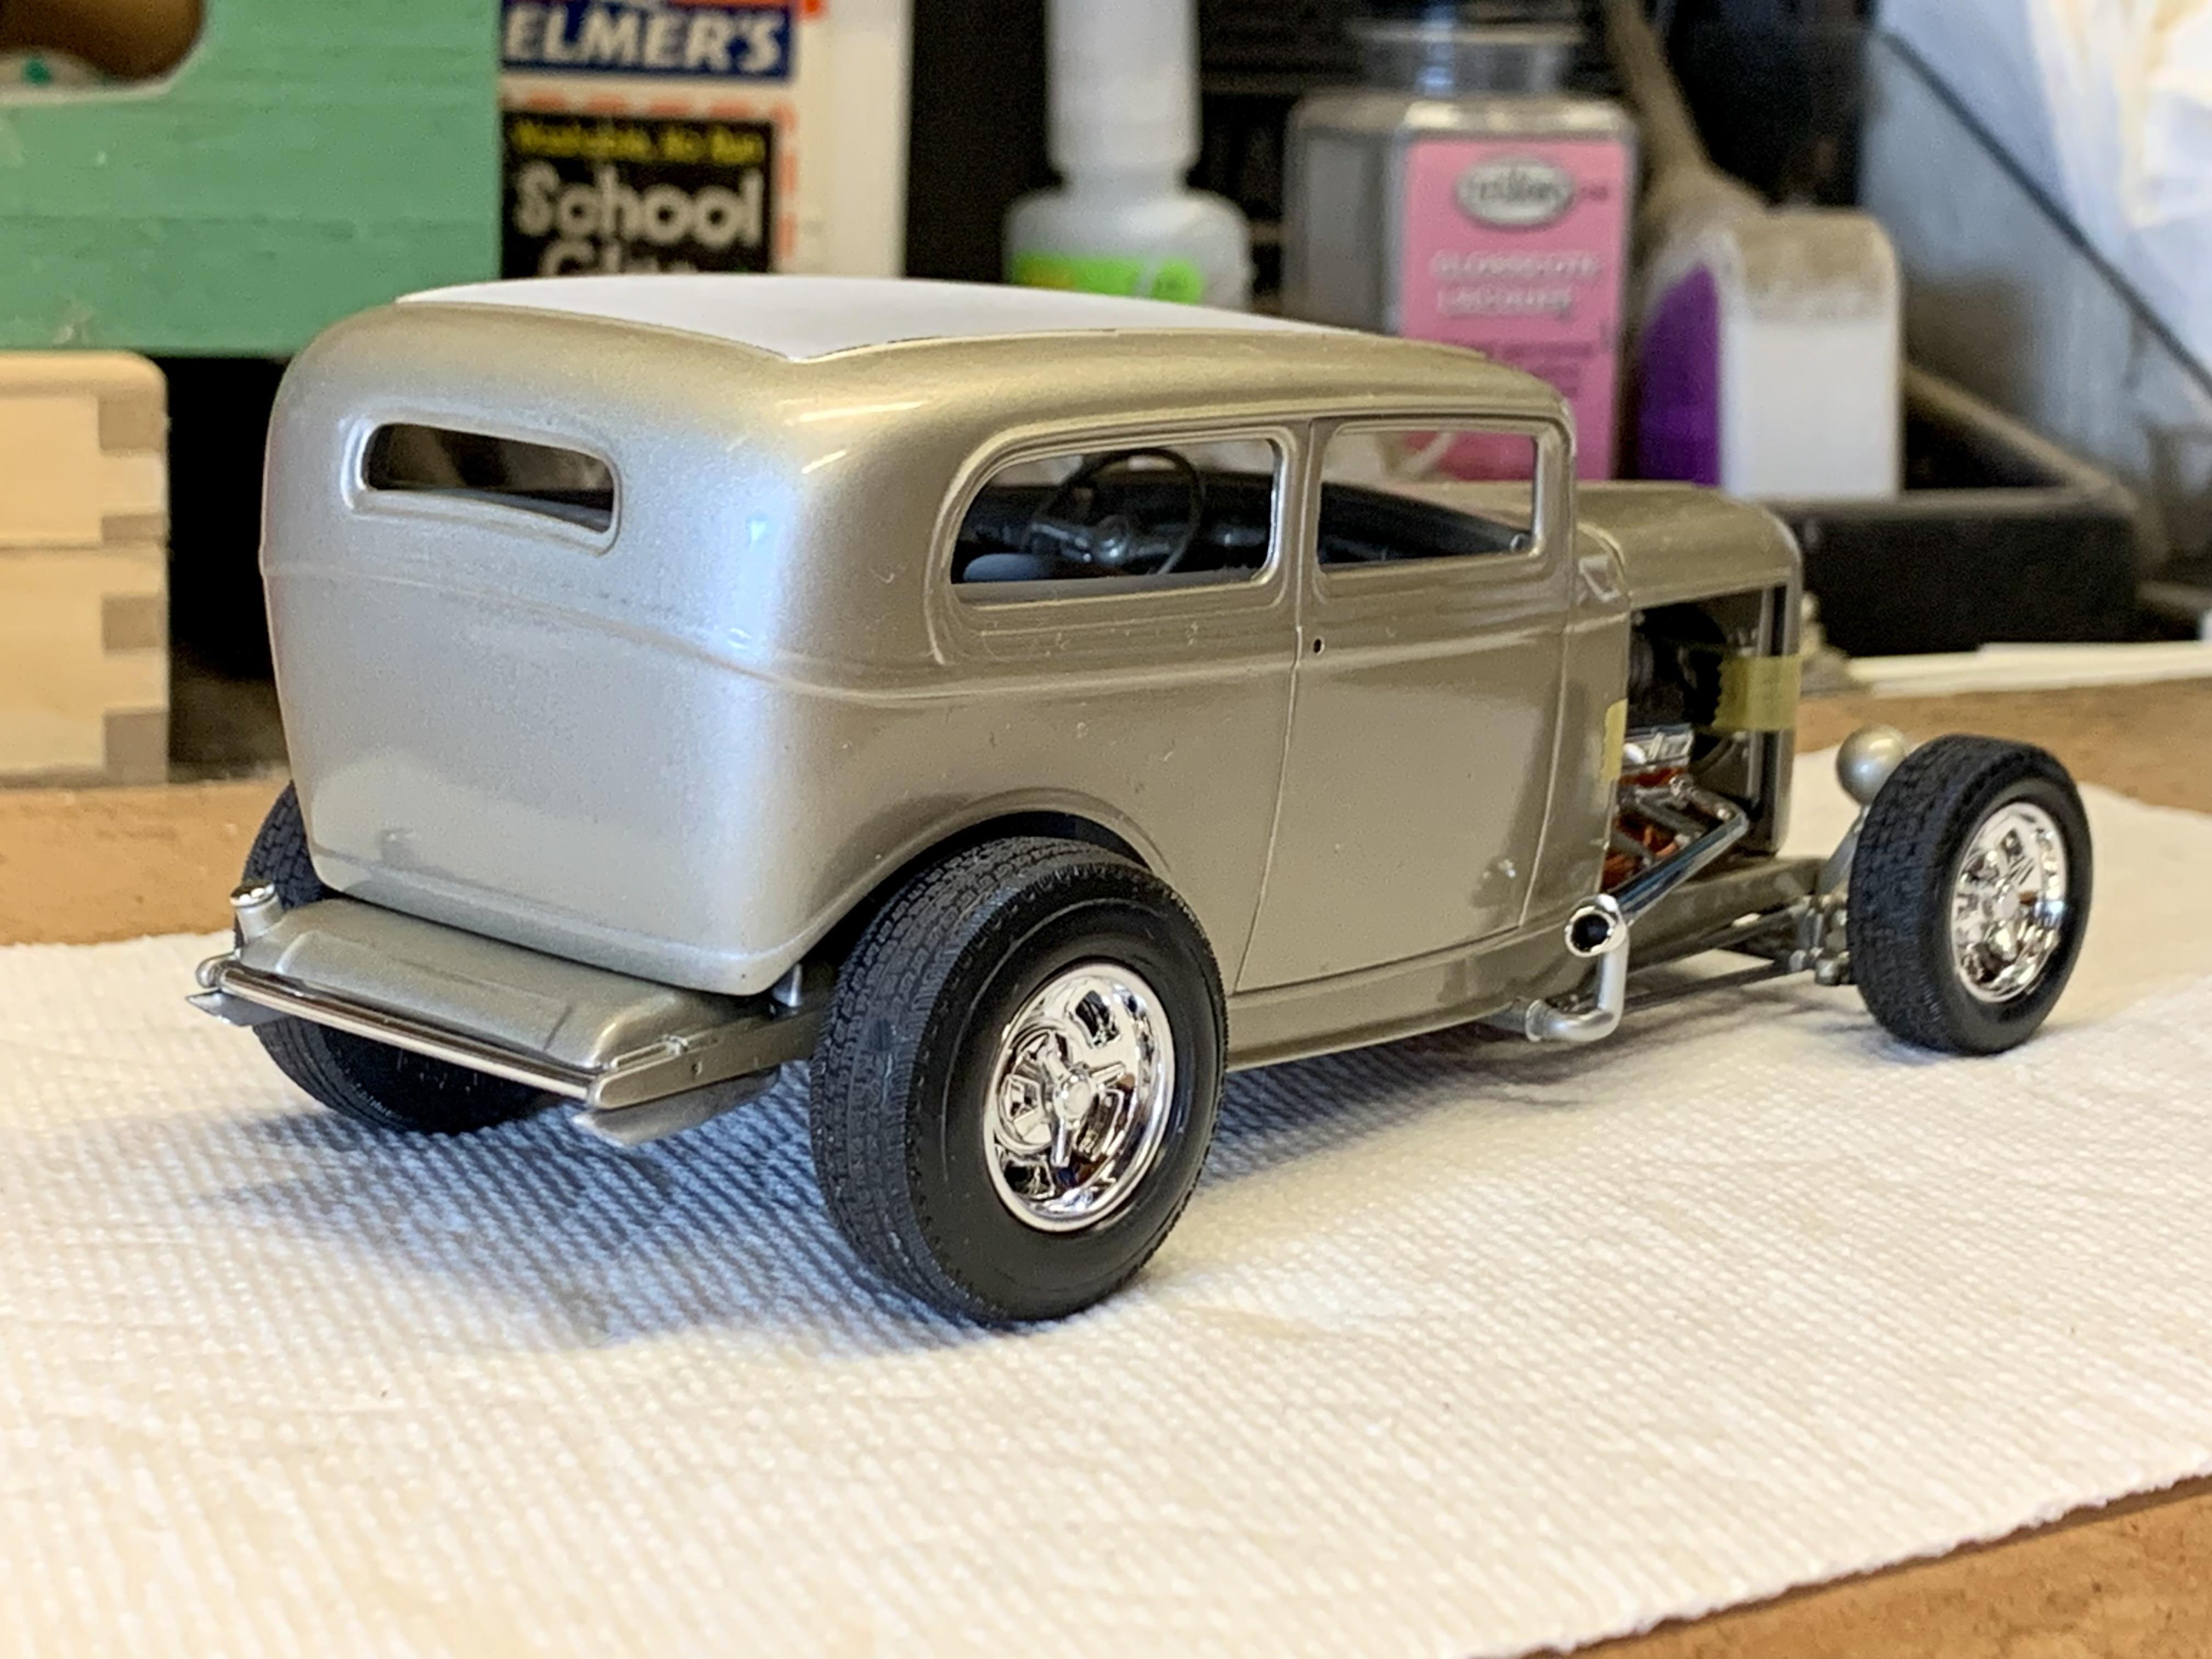
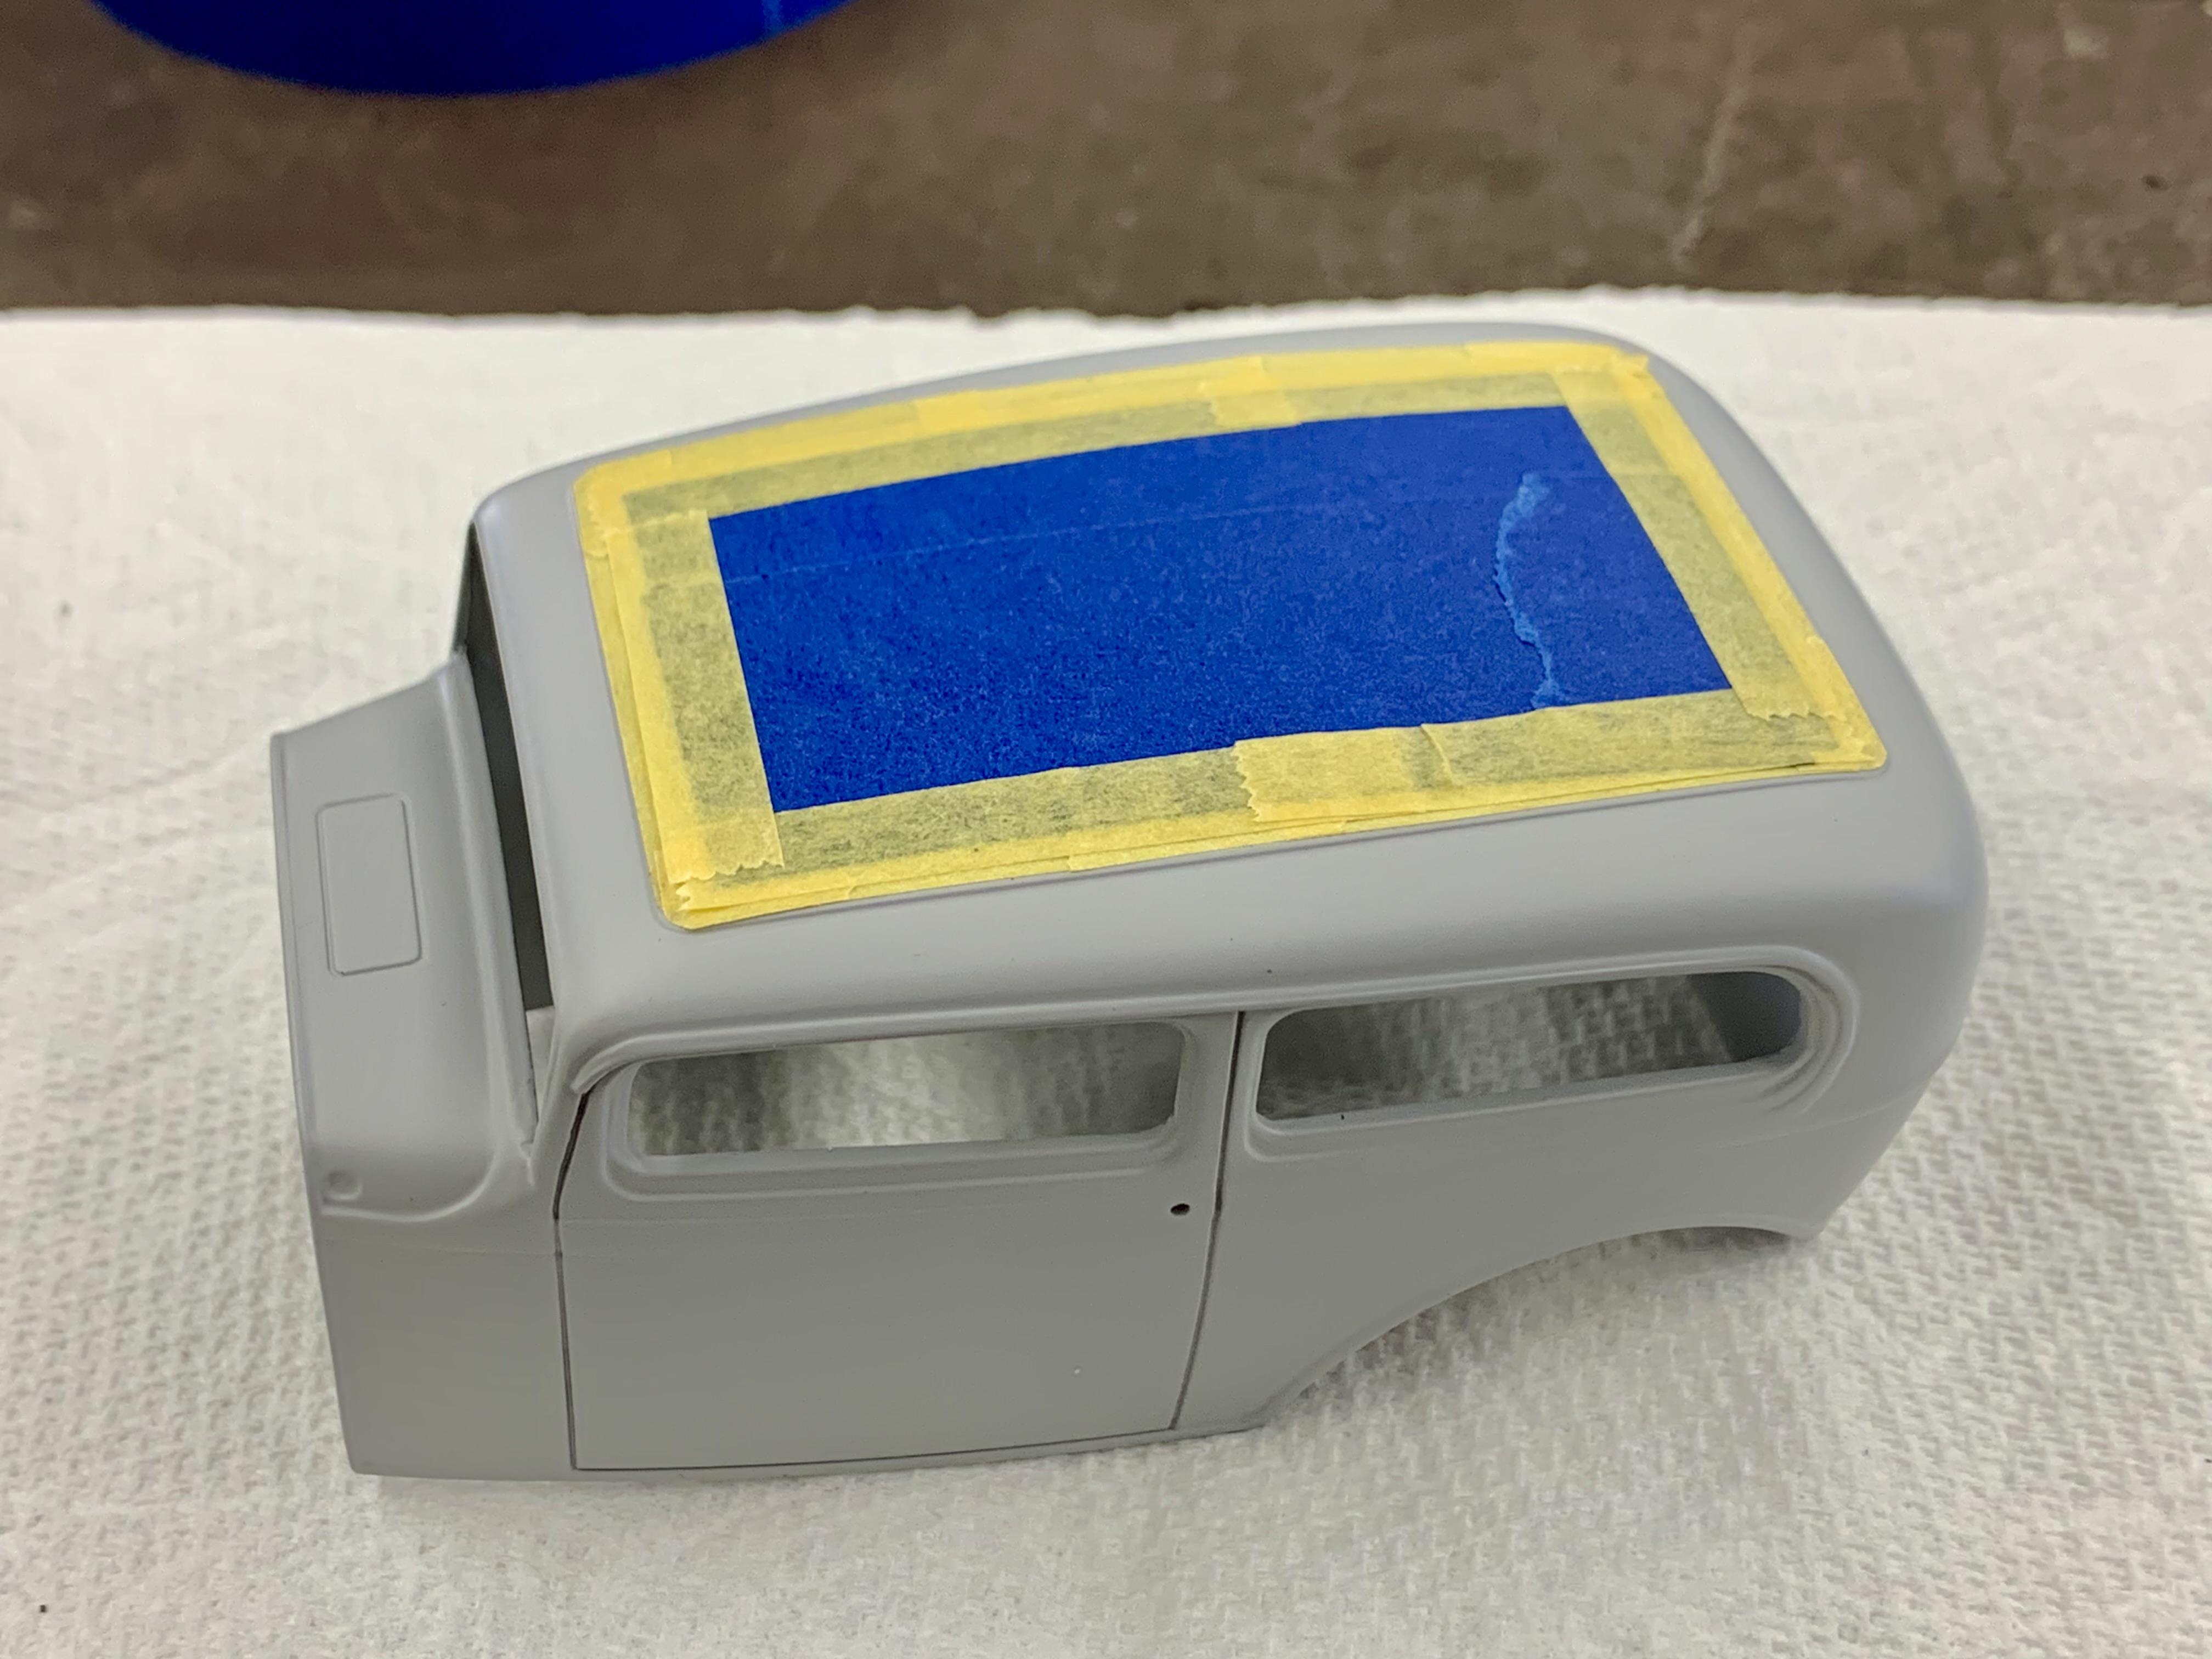
Last week I wet sanded the body and exterior parts with 1500 and re-primed. One wet coat just enough to cover for a super smooth finish. I also received a fresh can of paint in the mail. Today I masked the roof insert and sprayed the body and related parts with my fresh can of Tamiya TS88 Titanium Silver. Turned out really nice. Tomorrow, clear coat.
-
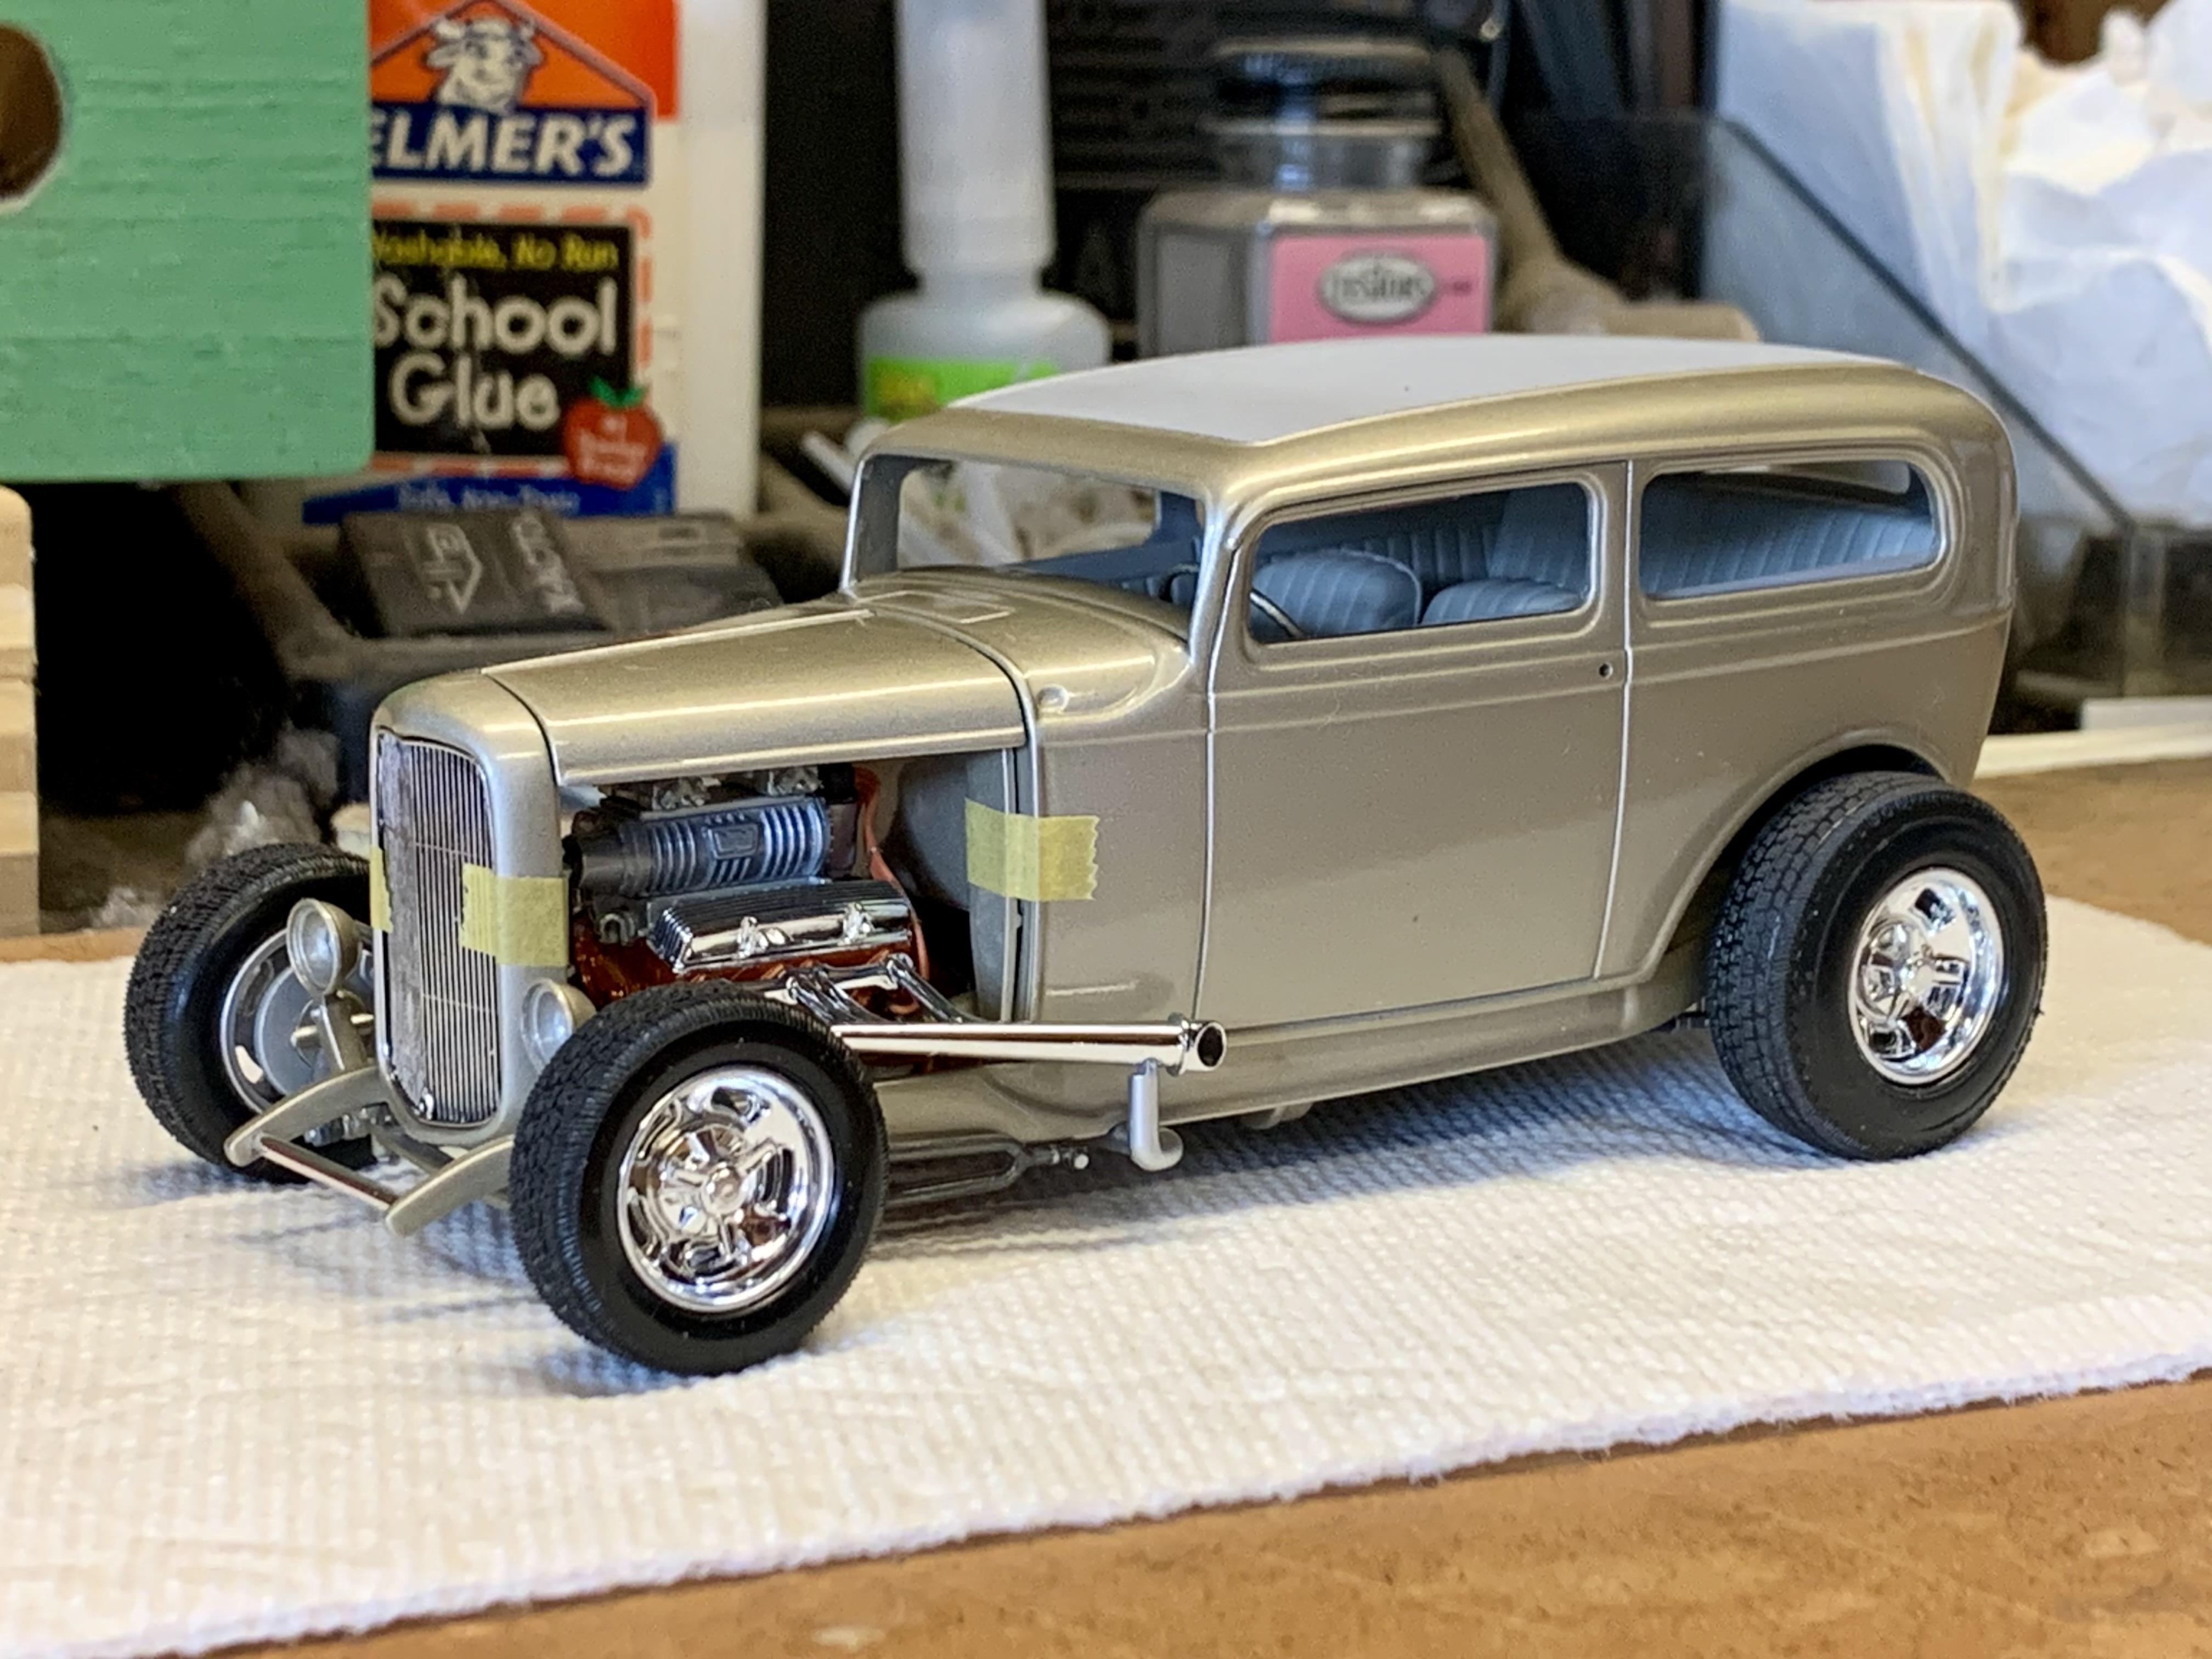
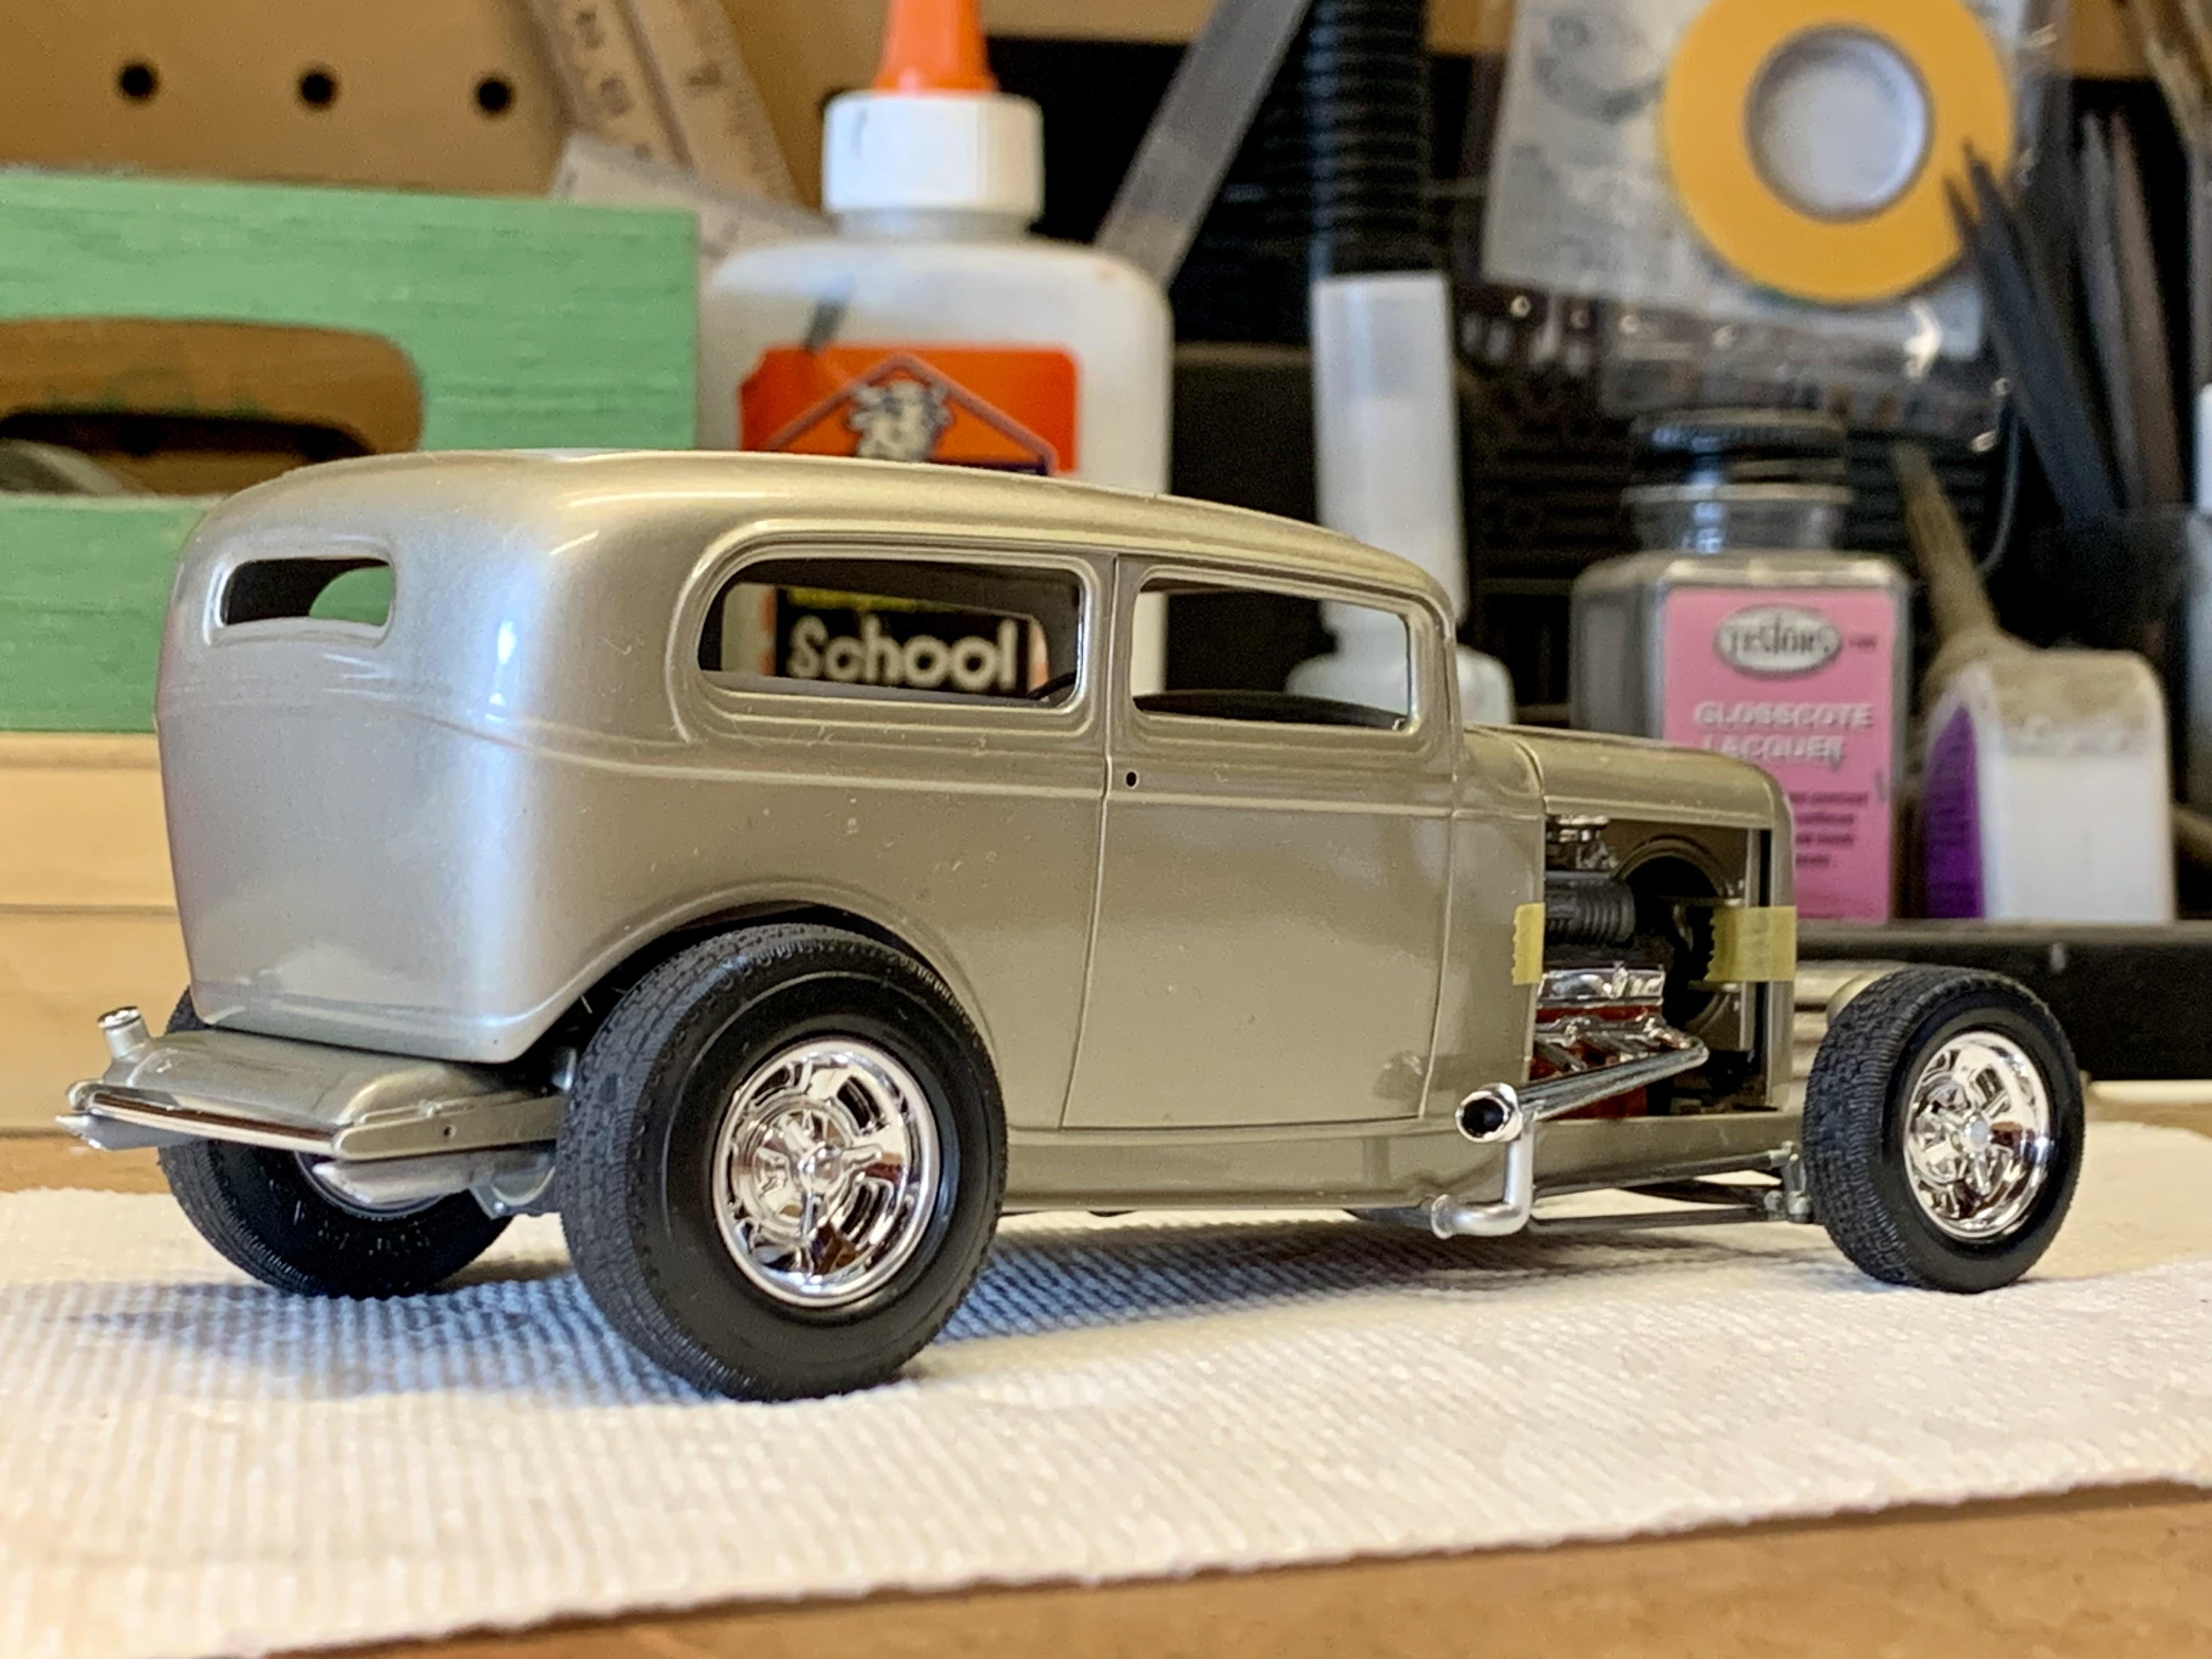
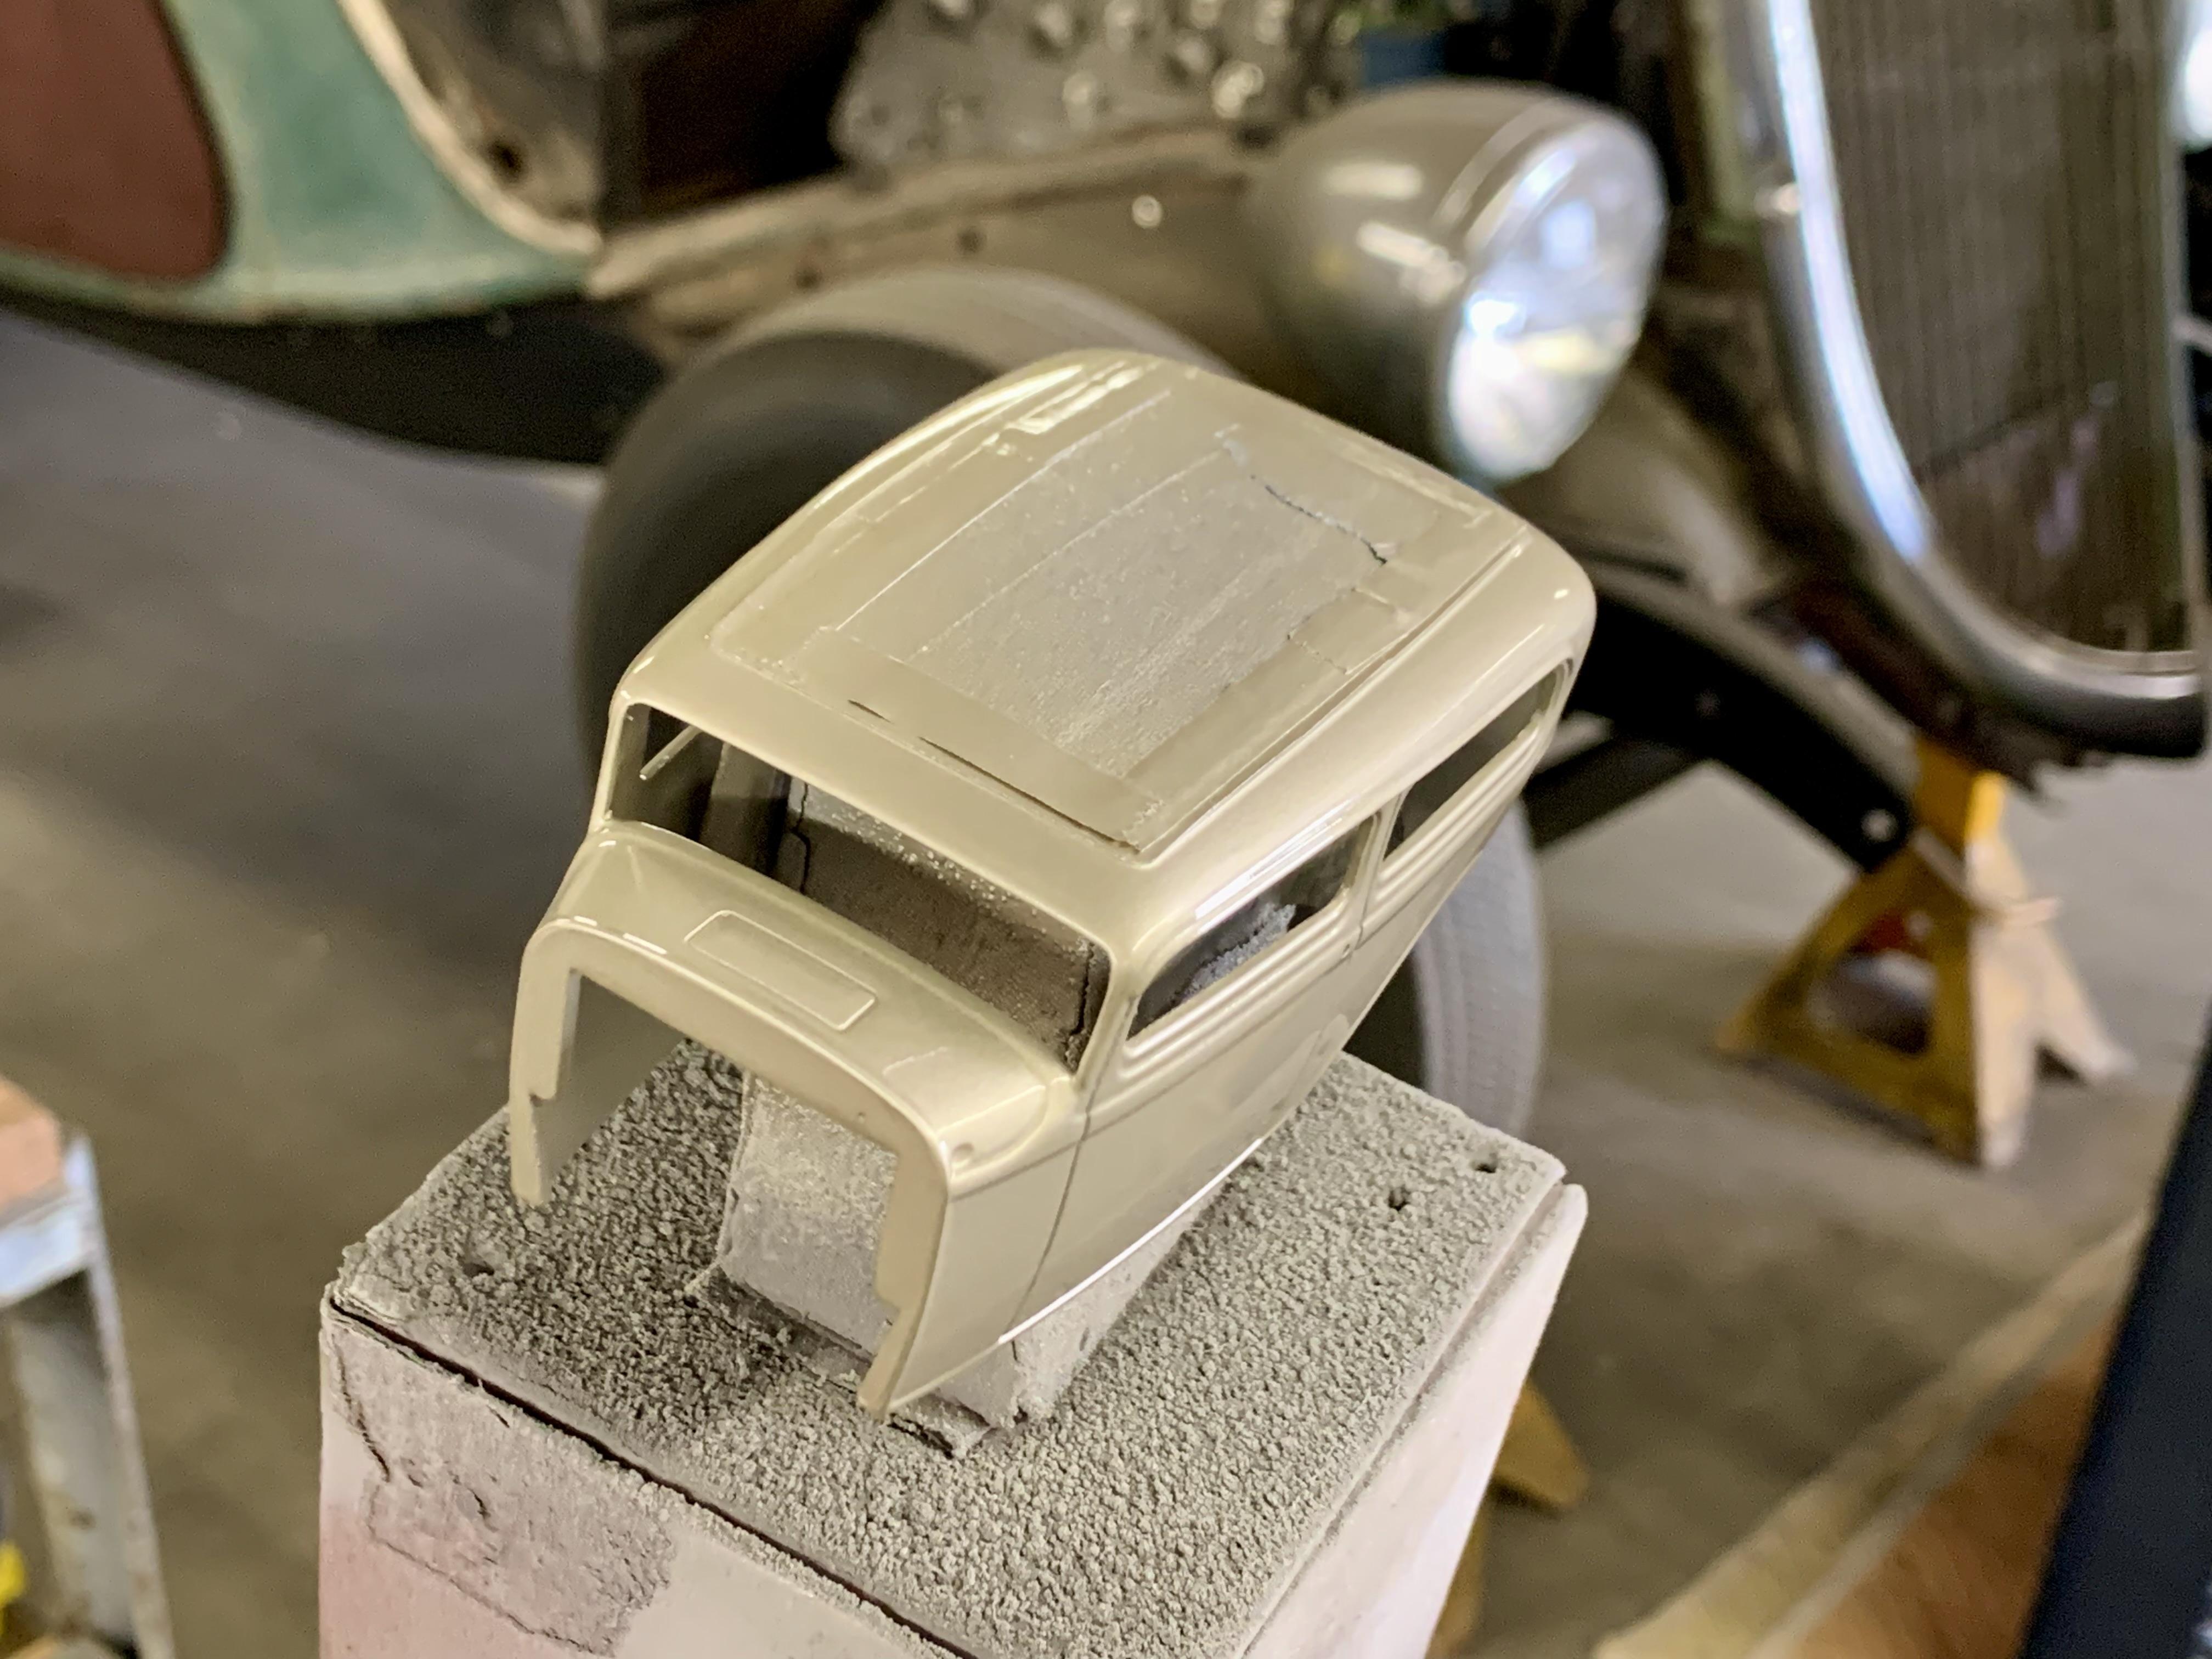
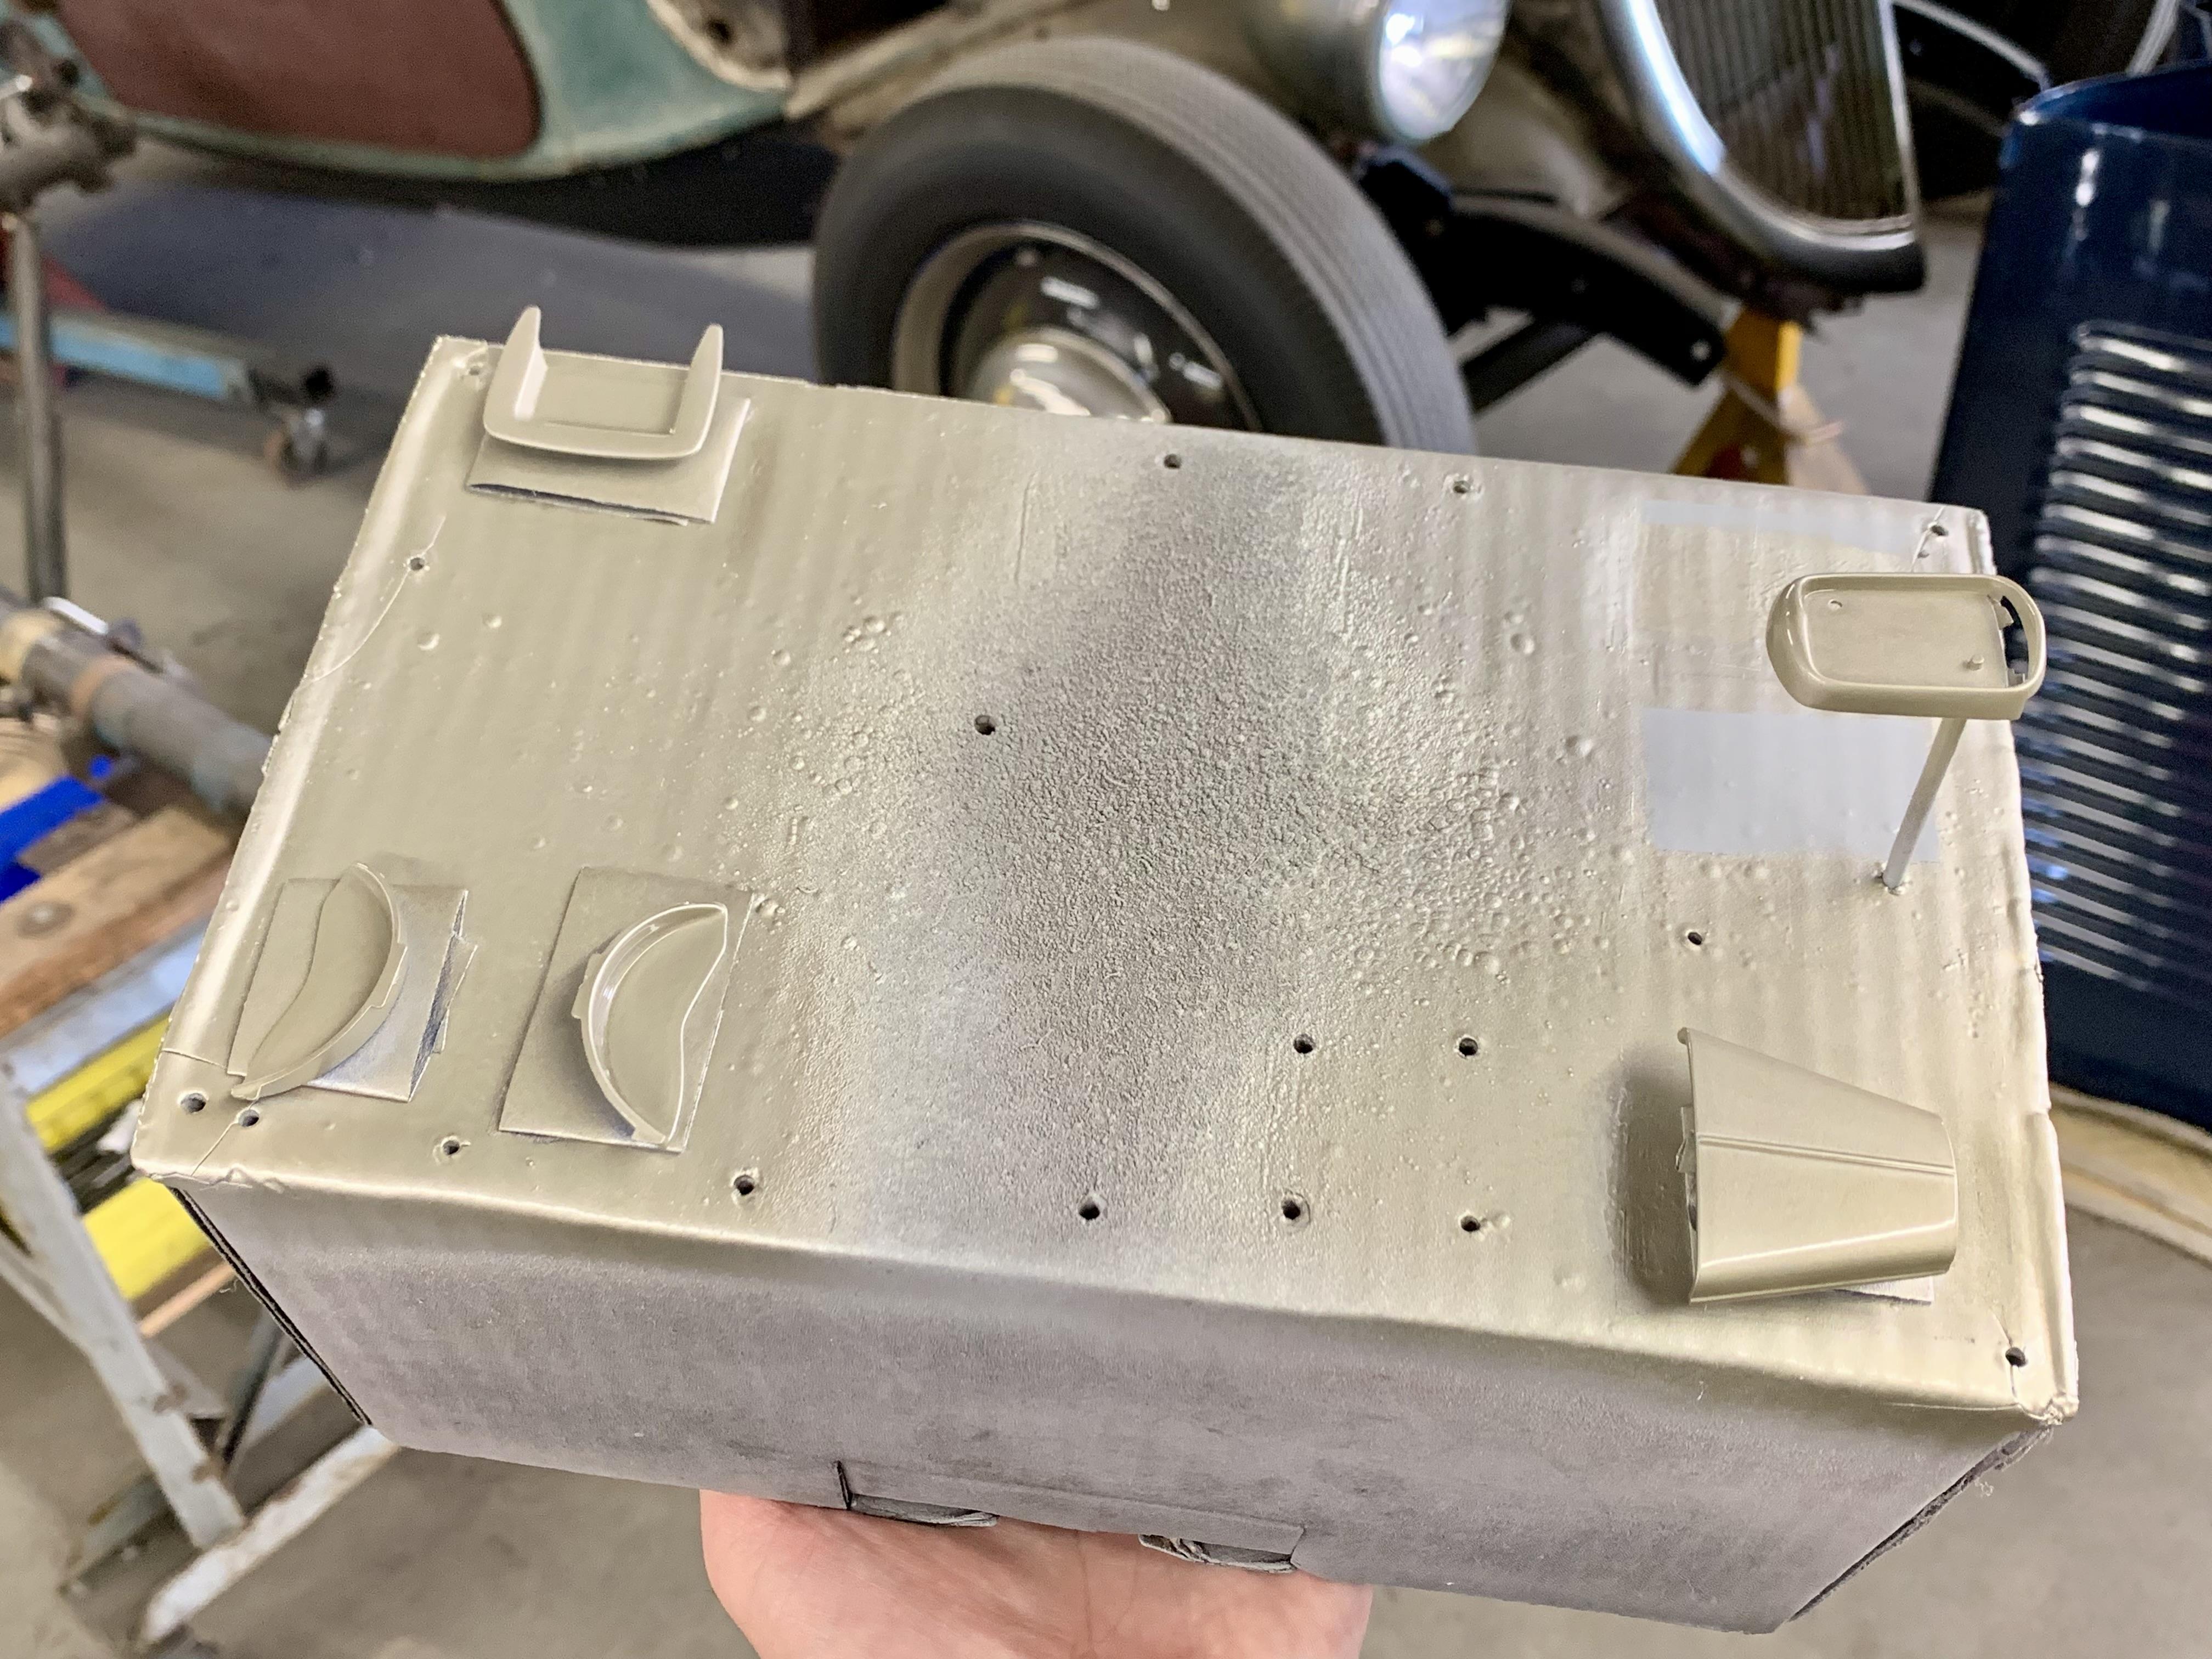
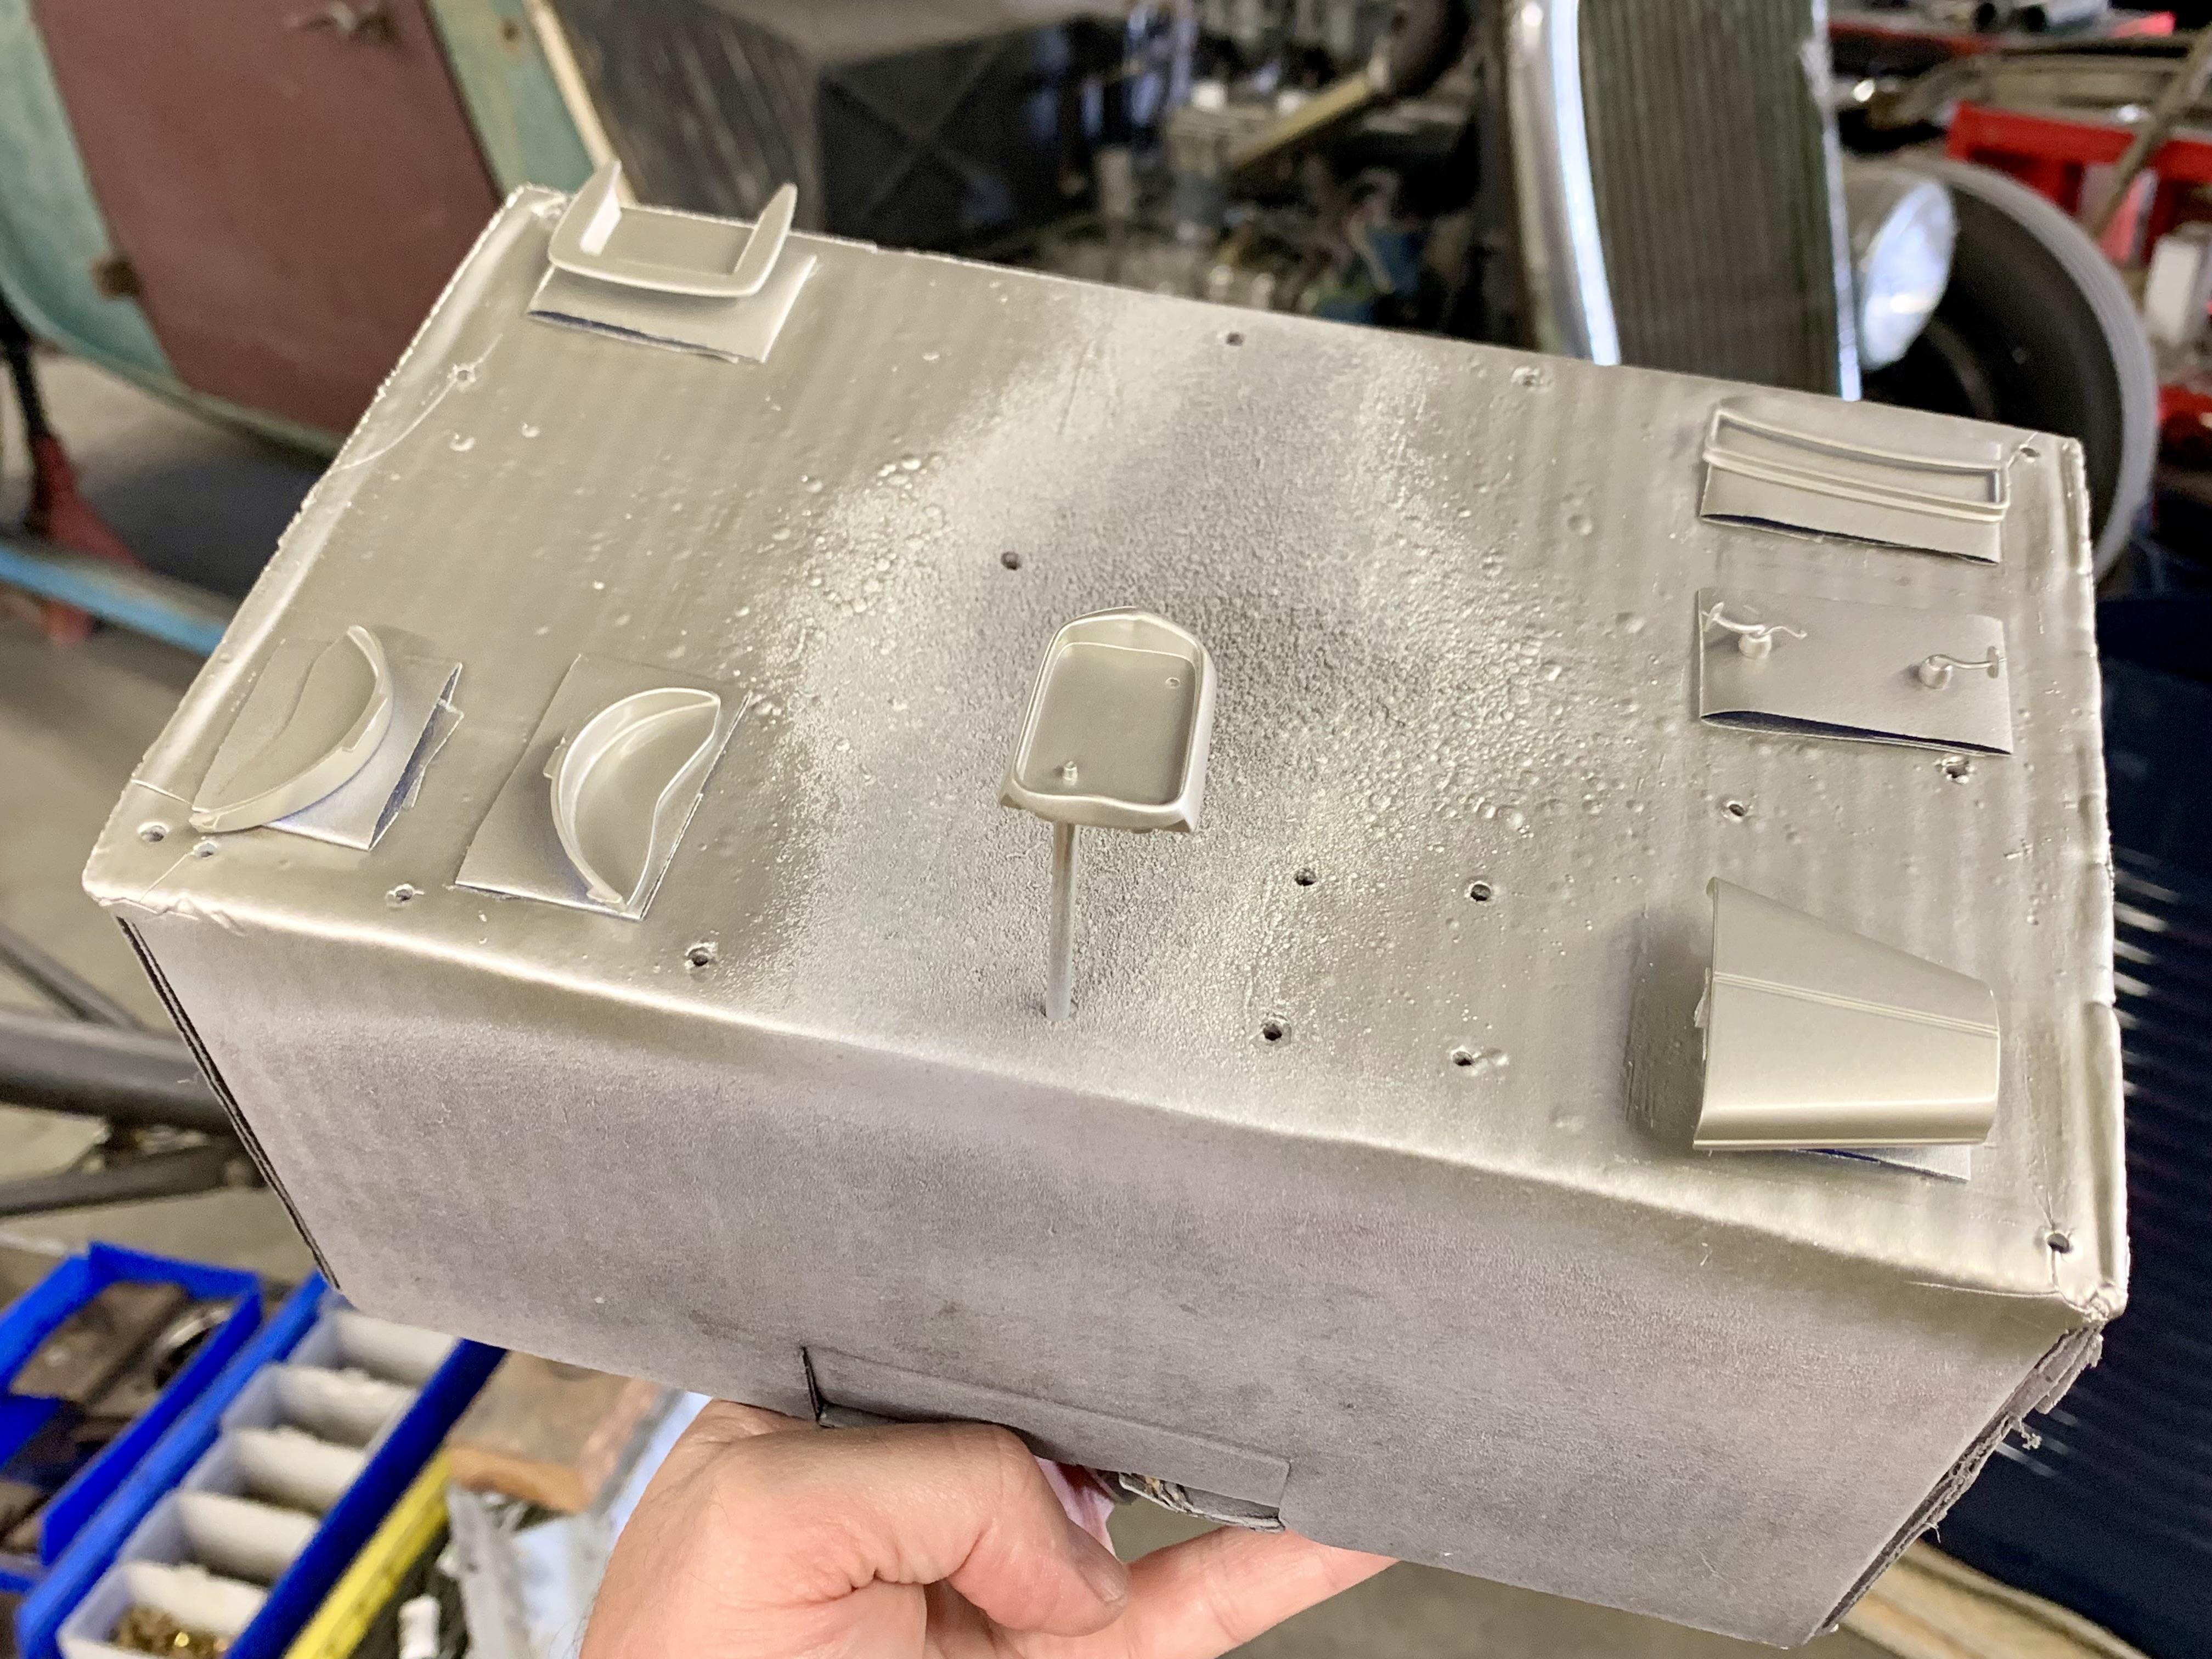
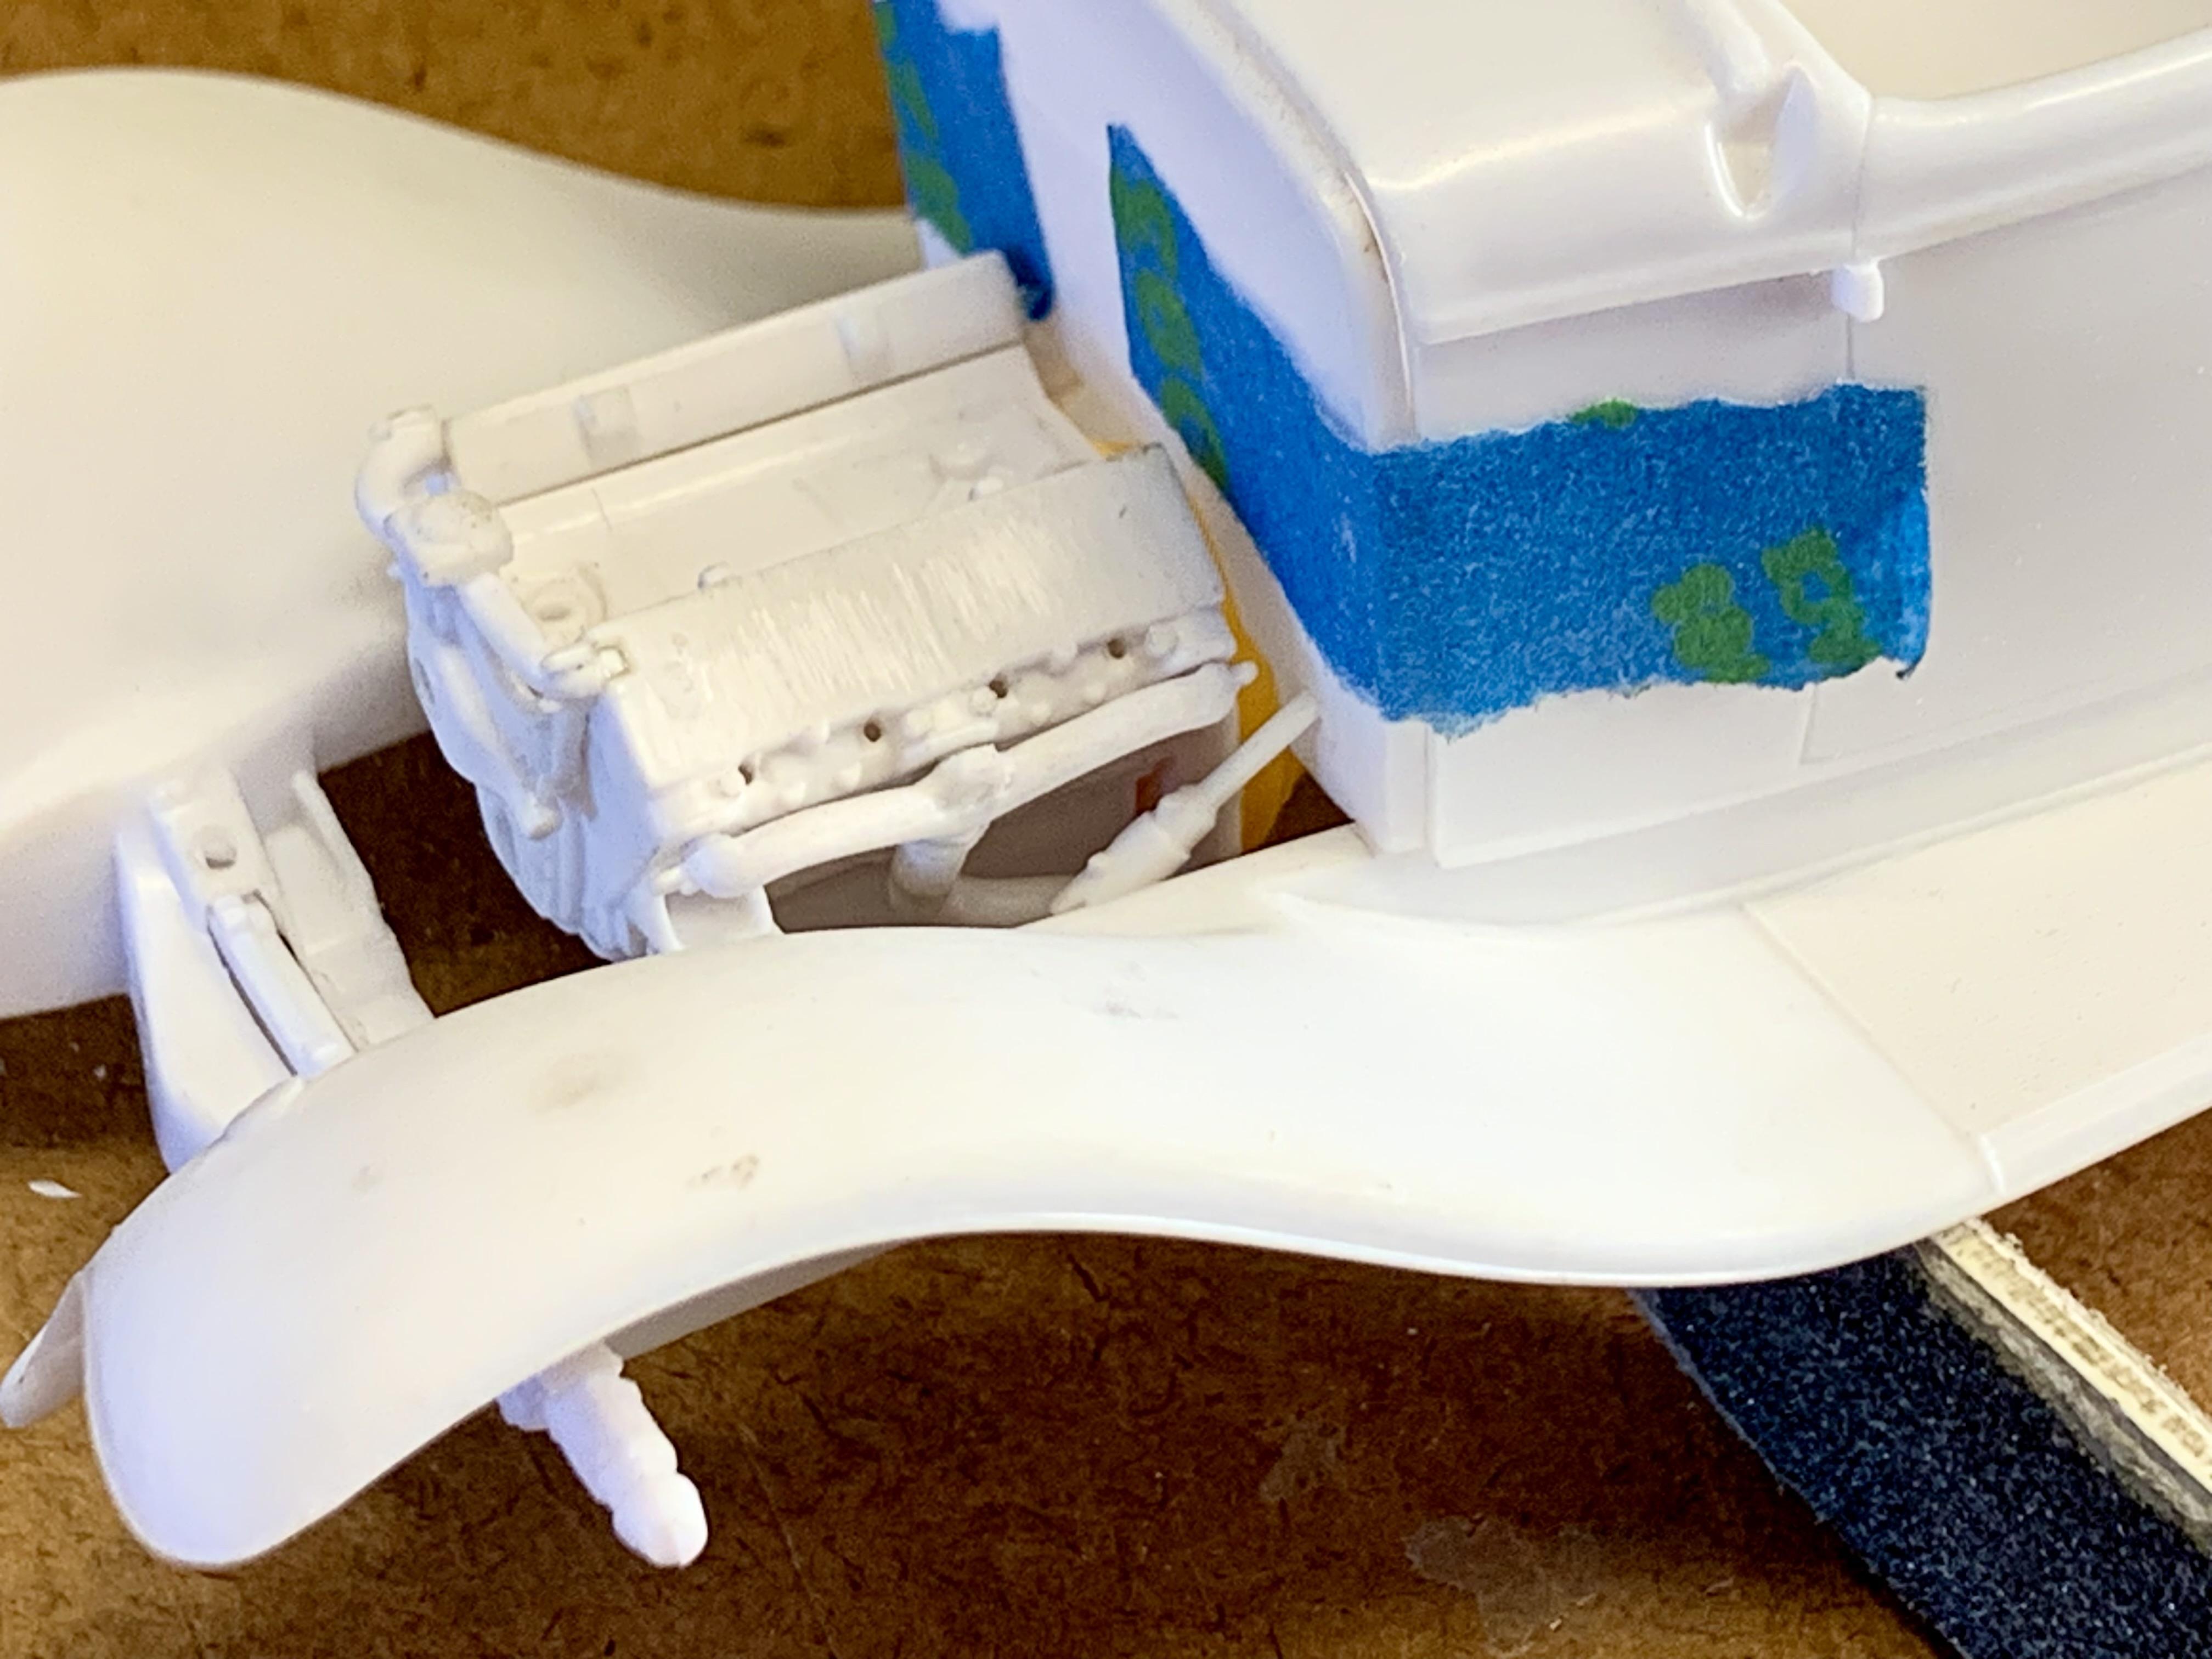
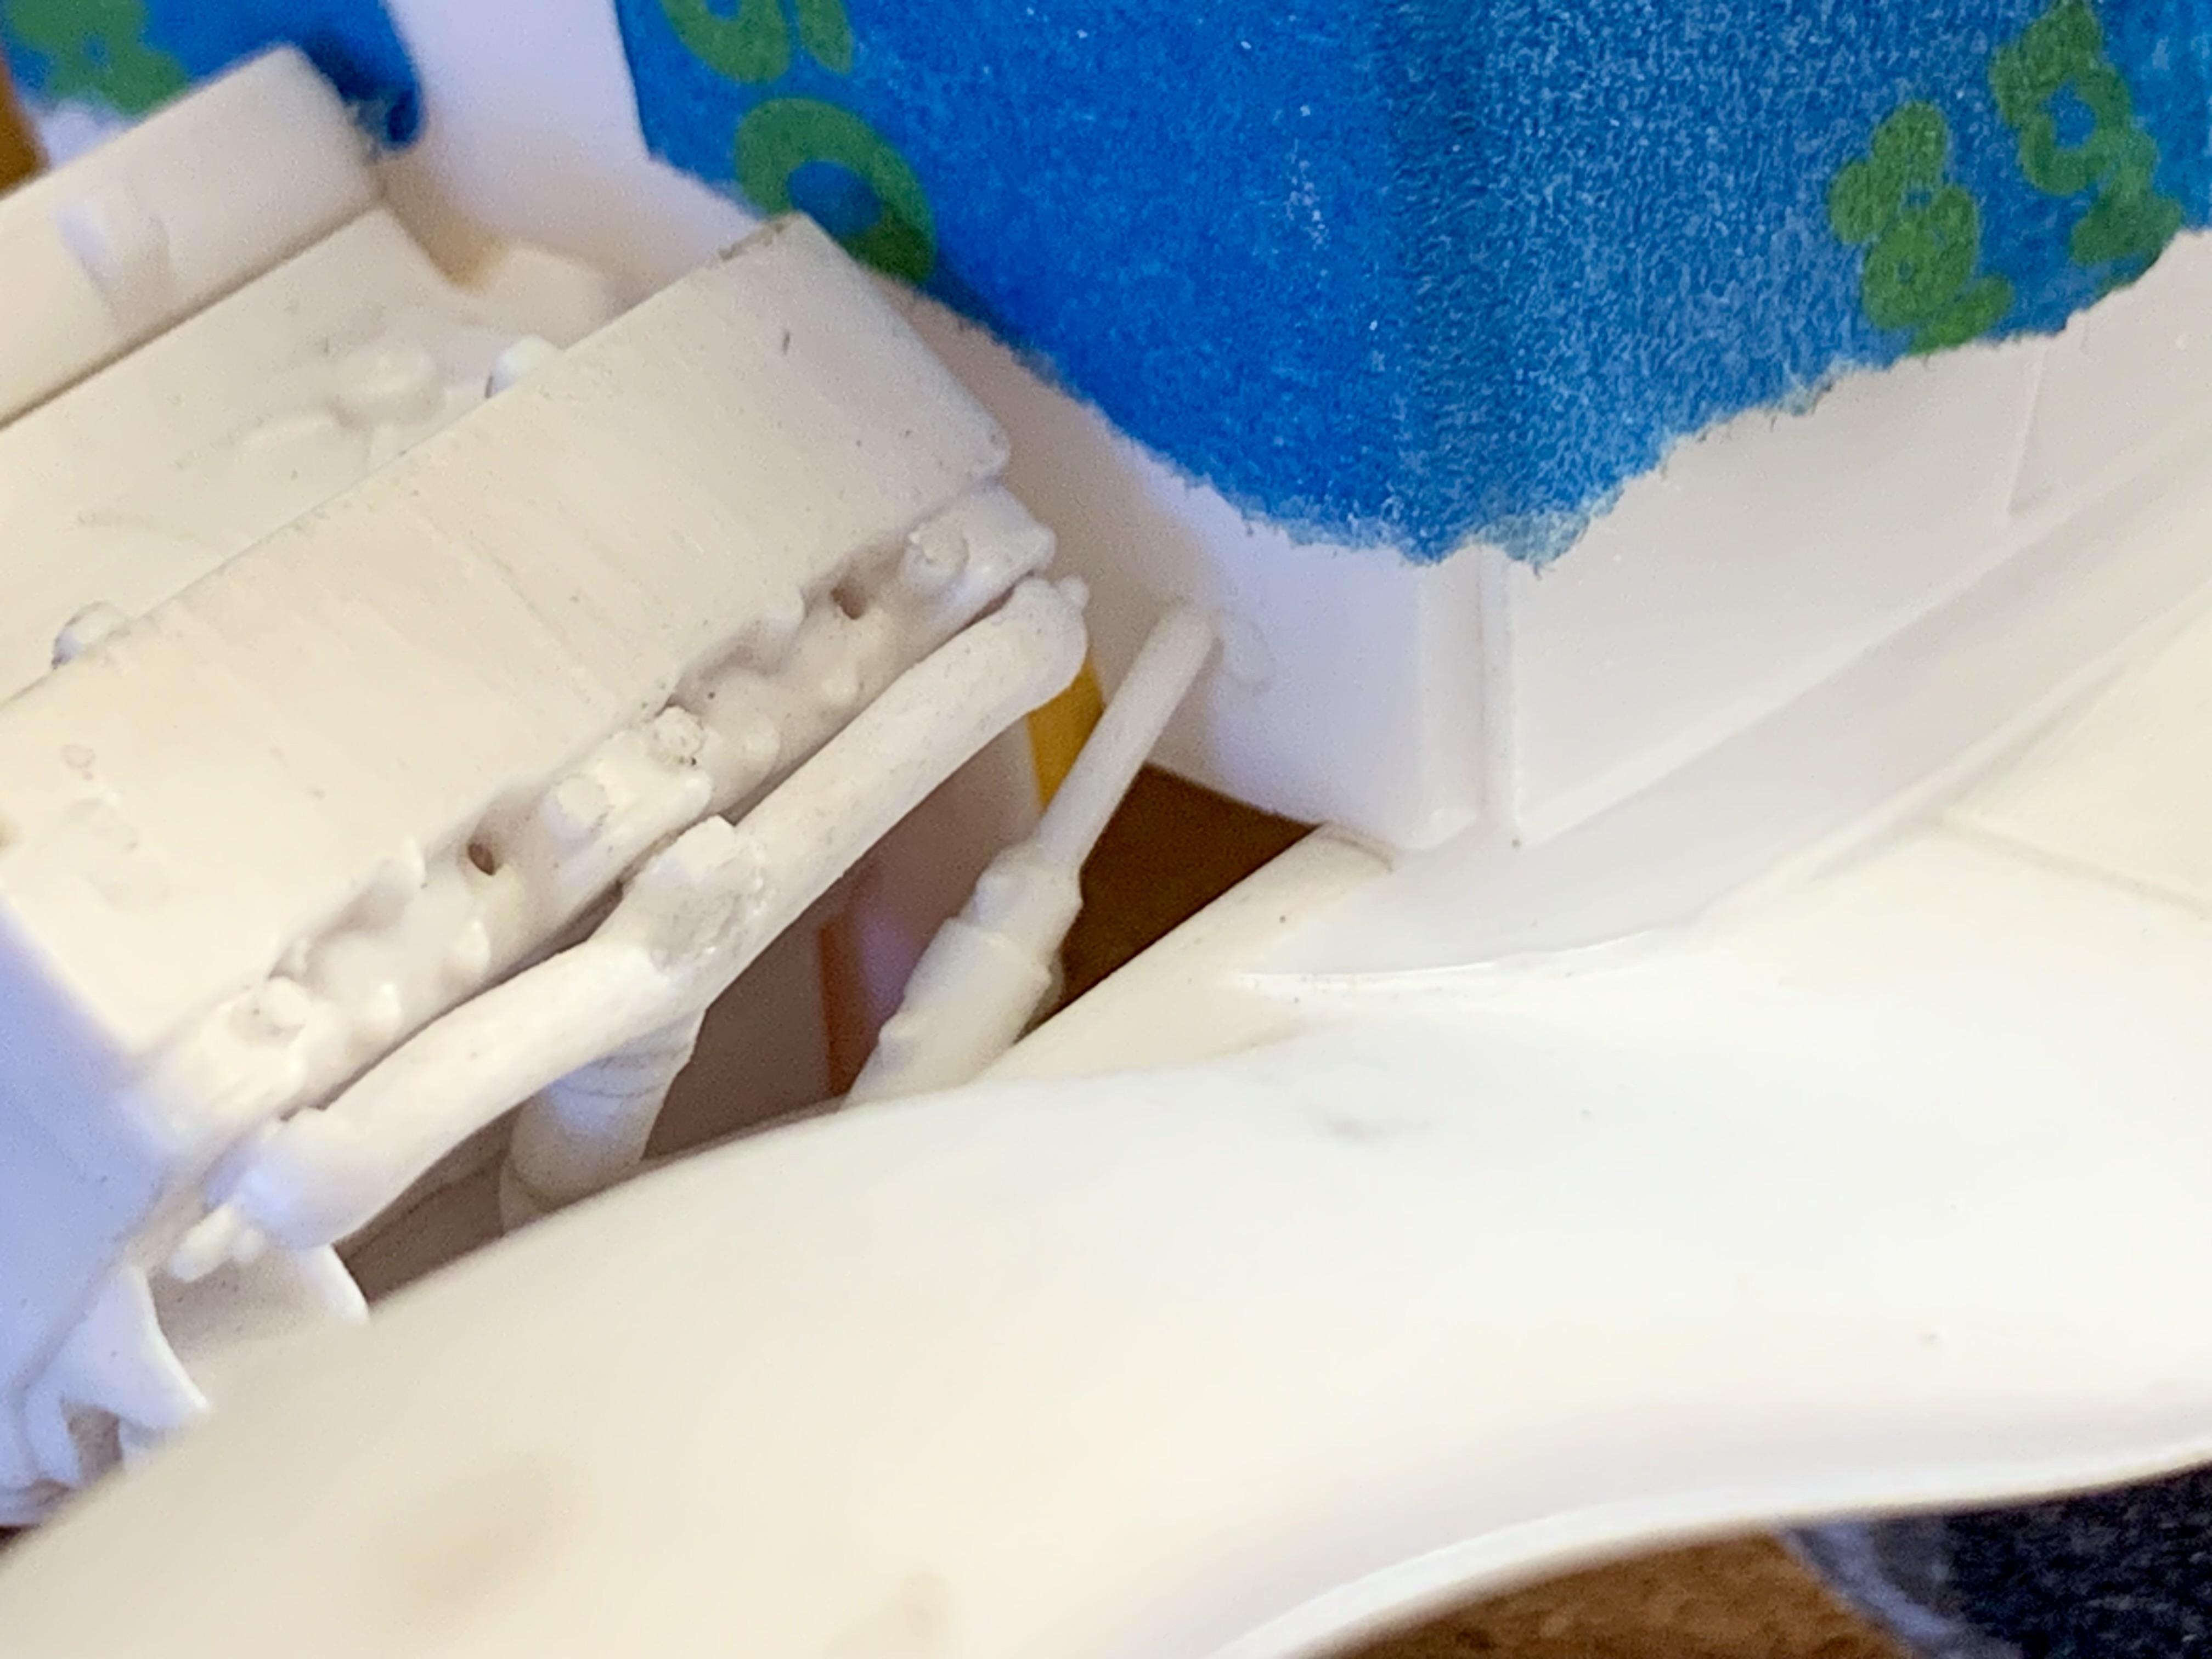
Another good day at the bench has this project just about ready for paint. Just a few things left to address. One problem most interior “tubs” share is the lack of door panel lines so I scribed them. A detail that goes a long way. I just couldn’t get happy with the fit of the Revell 1:25 windshield and decided to revert back to the kit piece and chopped it 1/8” (4 scale inches) to match the Revell version. This meant starting with a fresh body as I had trimmed on the first one to try and fit the windshield. After block sanding the wavy cowl top the cowl vent lines half disappeared so I filled the rest with super glue for a vent delete. The fresh body got its door handles shaved and the same license plate bracket and taillights added. From there the body was block sanded and the door and trunk panel lines scribed as they are very shallow out of the mold and may have gotten lost under paint. I also couldn’t warm up to the headlights and dropped bar from Revell’s most recent ‘30 Woody. I didn’t like the hard V peak in the center of the bar and I’m generally not a fan of BIG stock headlights on hot rods. I filled the kit mounting holes and fit the dropped bar from a Revell 32 which looks better and will allow me to use the small headlights from the 32 kits. That’s the last bare plastic mock up. I’m pretty sure I’ve picked a paint scheme so stay tuned. ?
- 107 replies
-
- 10
-
-
@catpack68 Looking good! I’ve used Mica Red twice and in both cases over Duplicolor (dark) gray sandable primer as an accent color. It’s interesting to see over a lighter primer on your Tudor how BRIGHT it can be.
-
Talk about first-class turd polishing! I was given one of those kits and about barfed looking through it. Very nice work making something beautiful out of nothing! ?
-
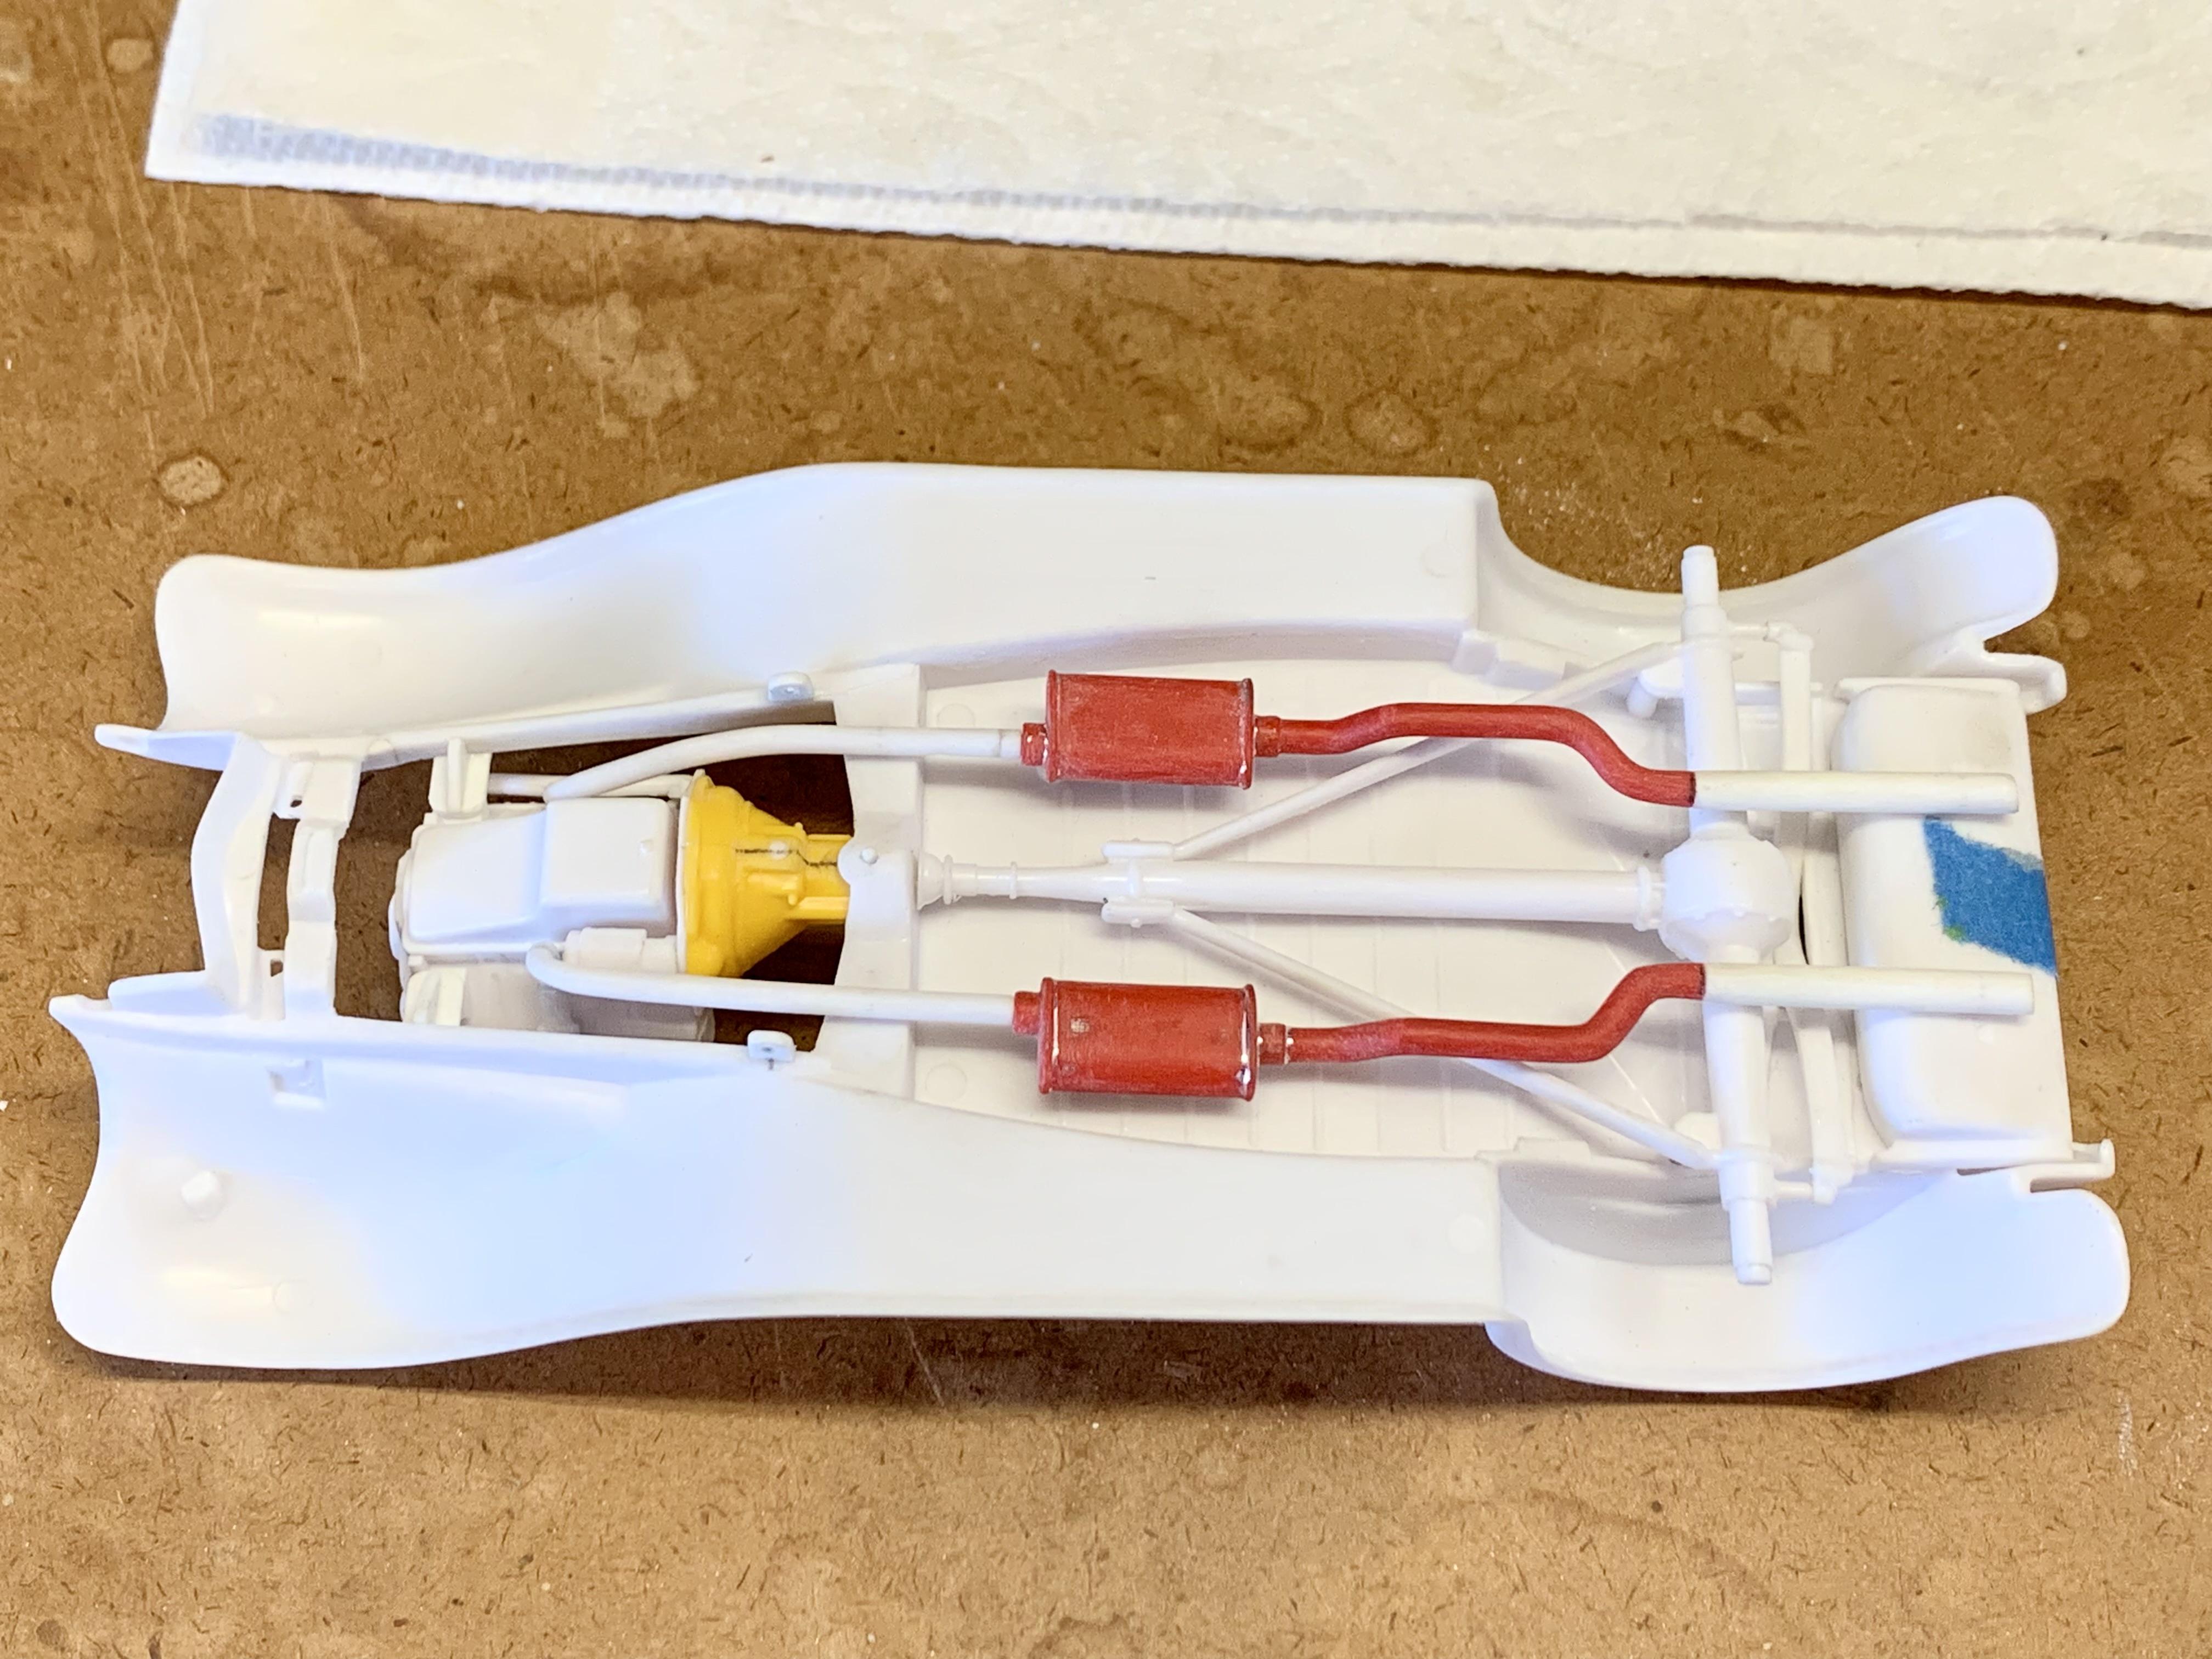
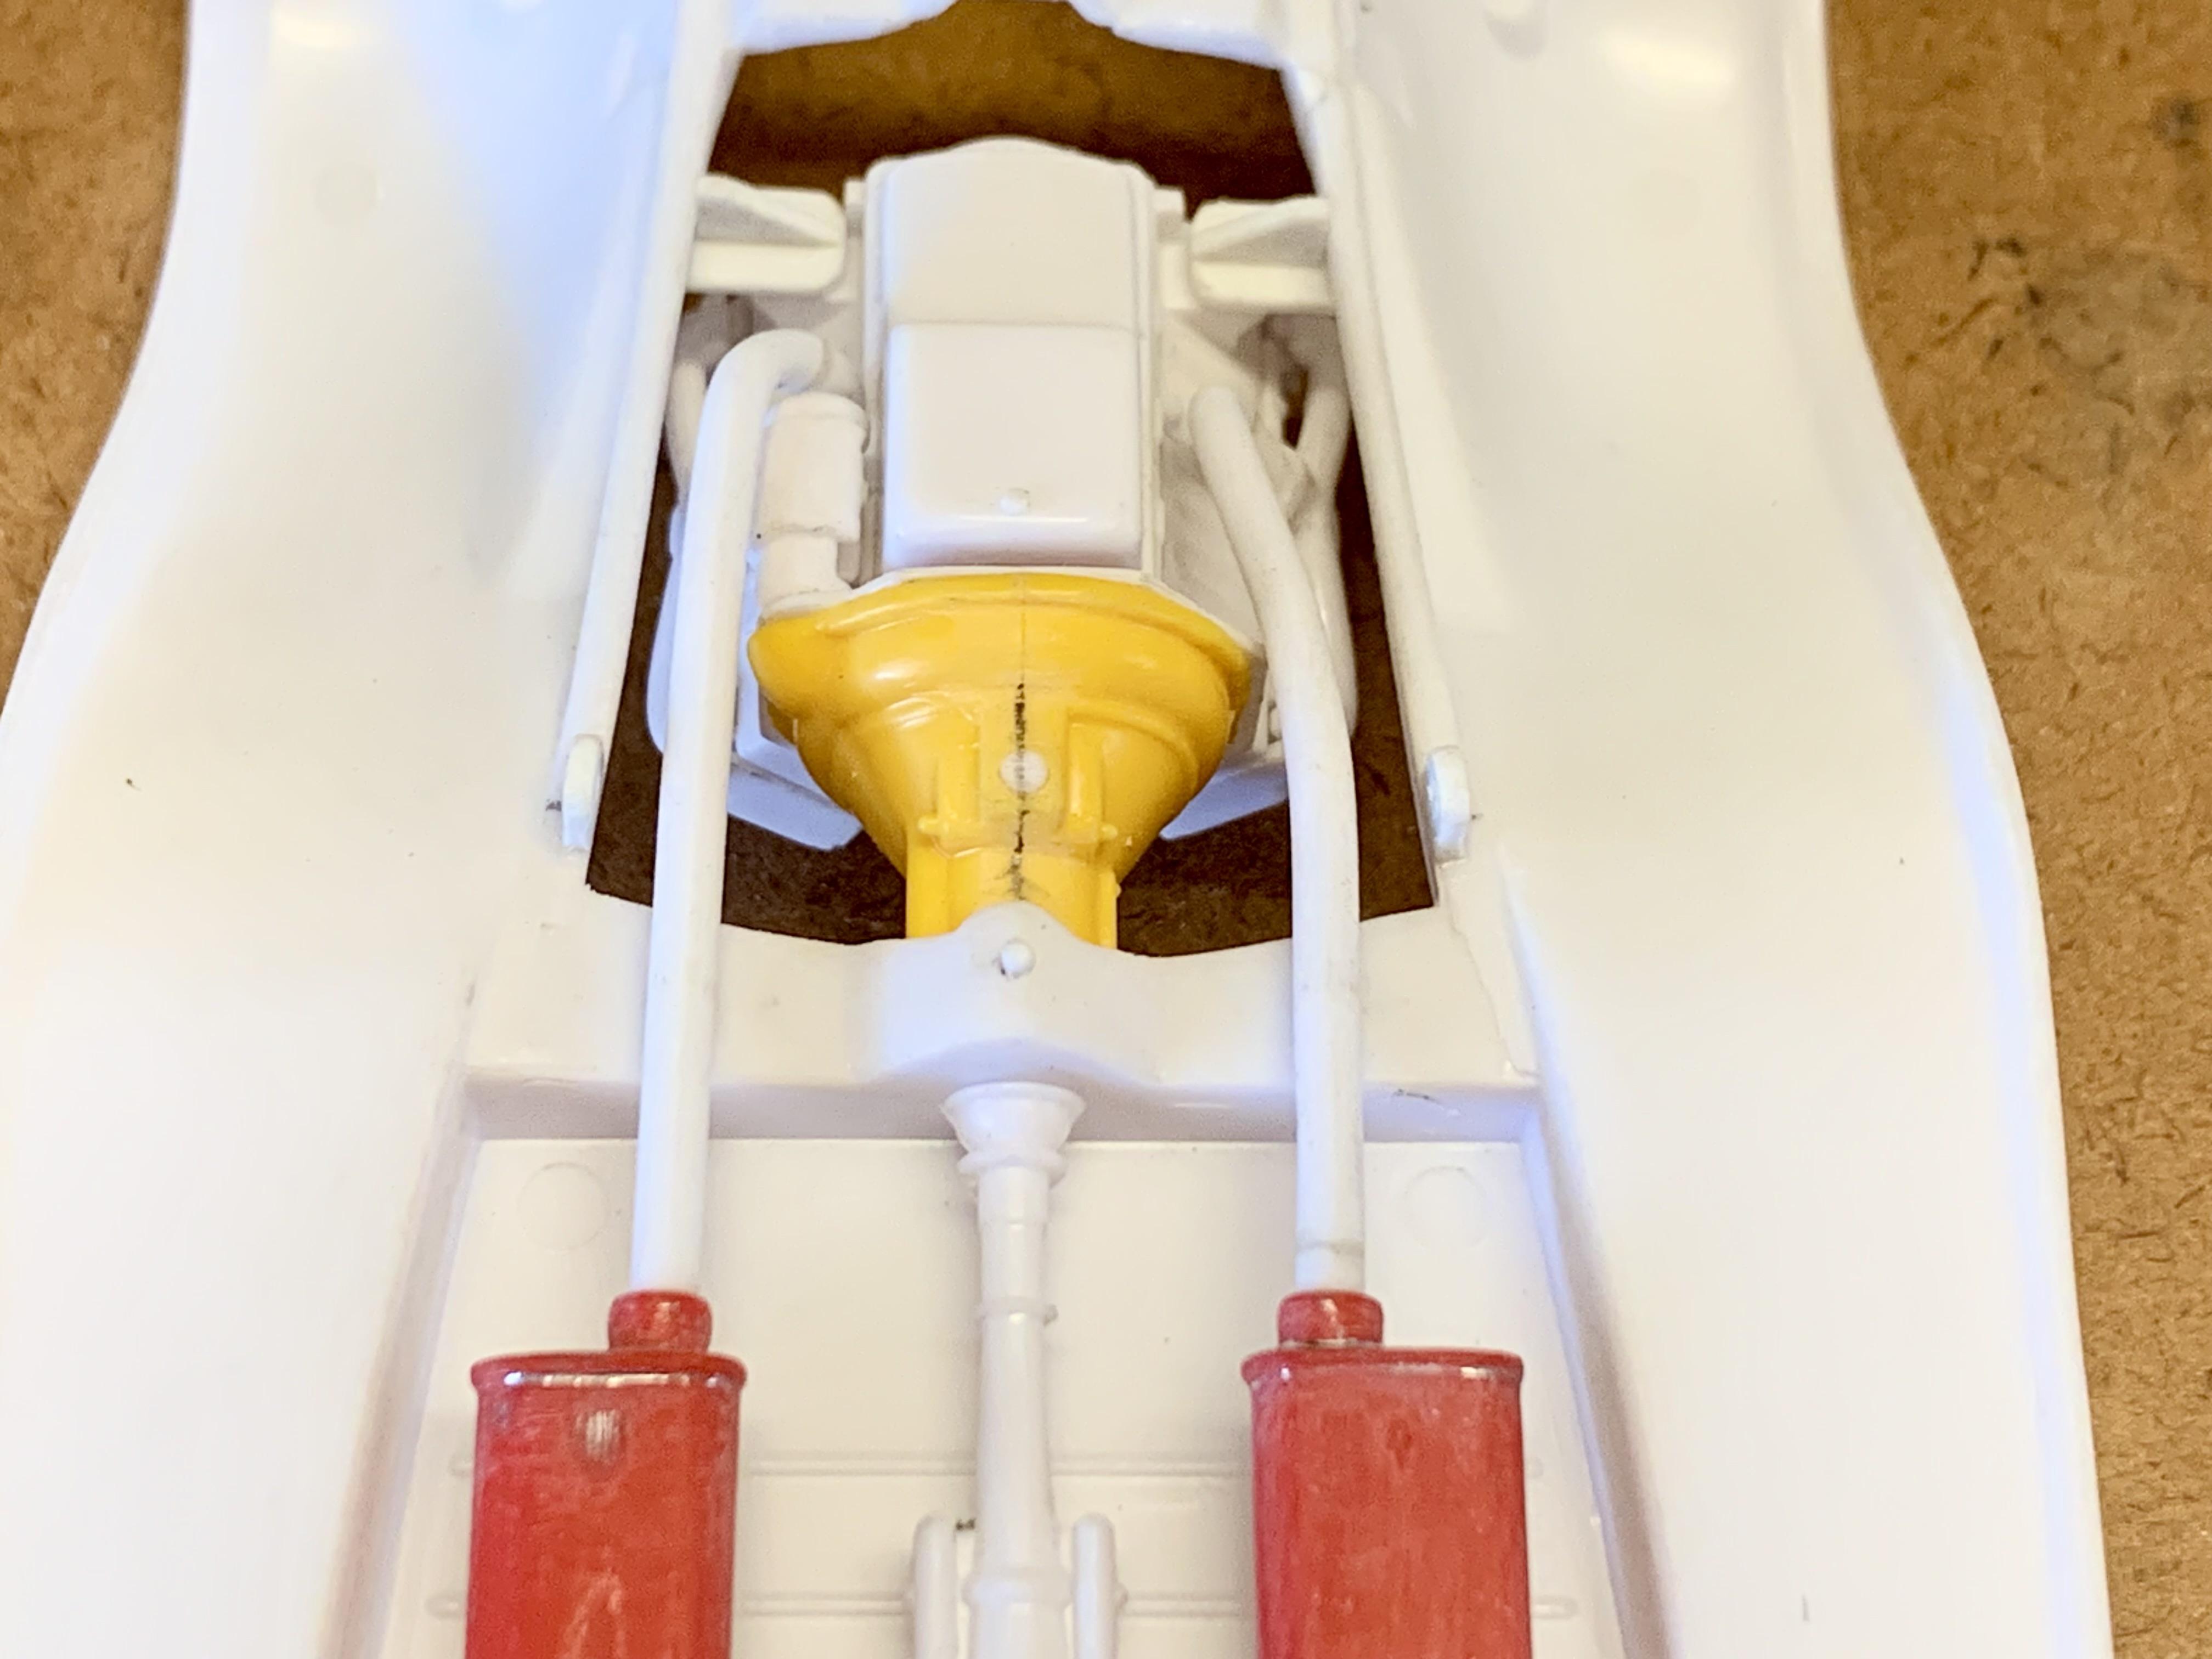
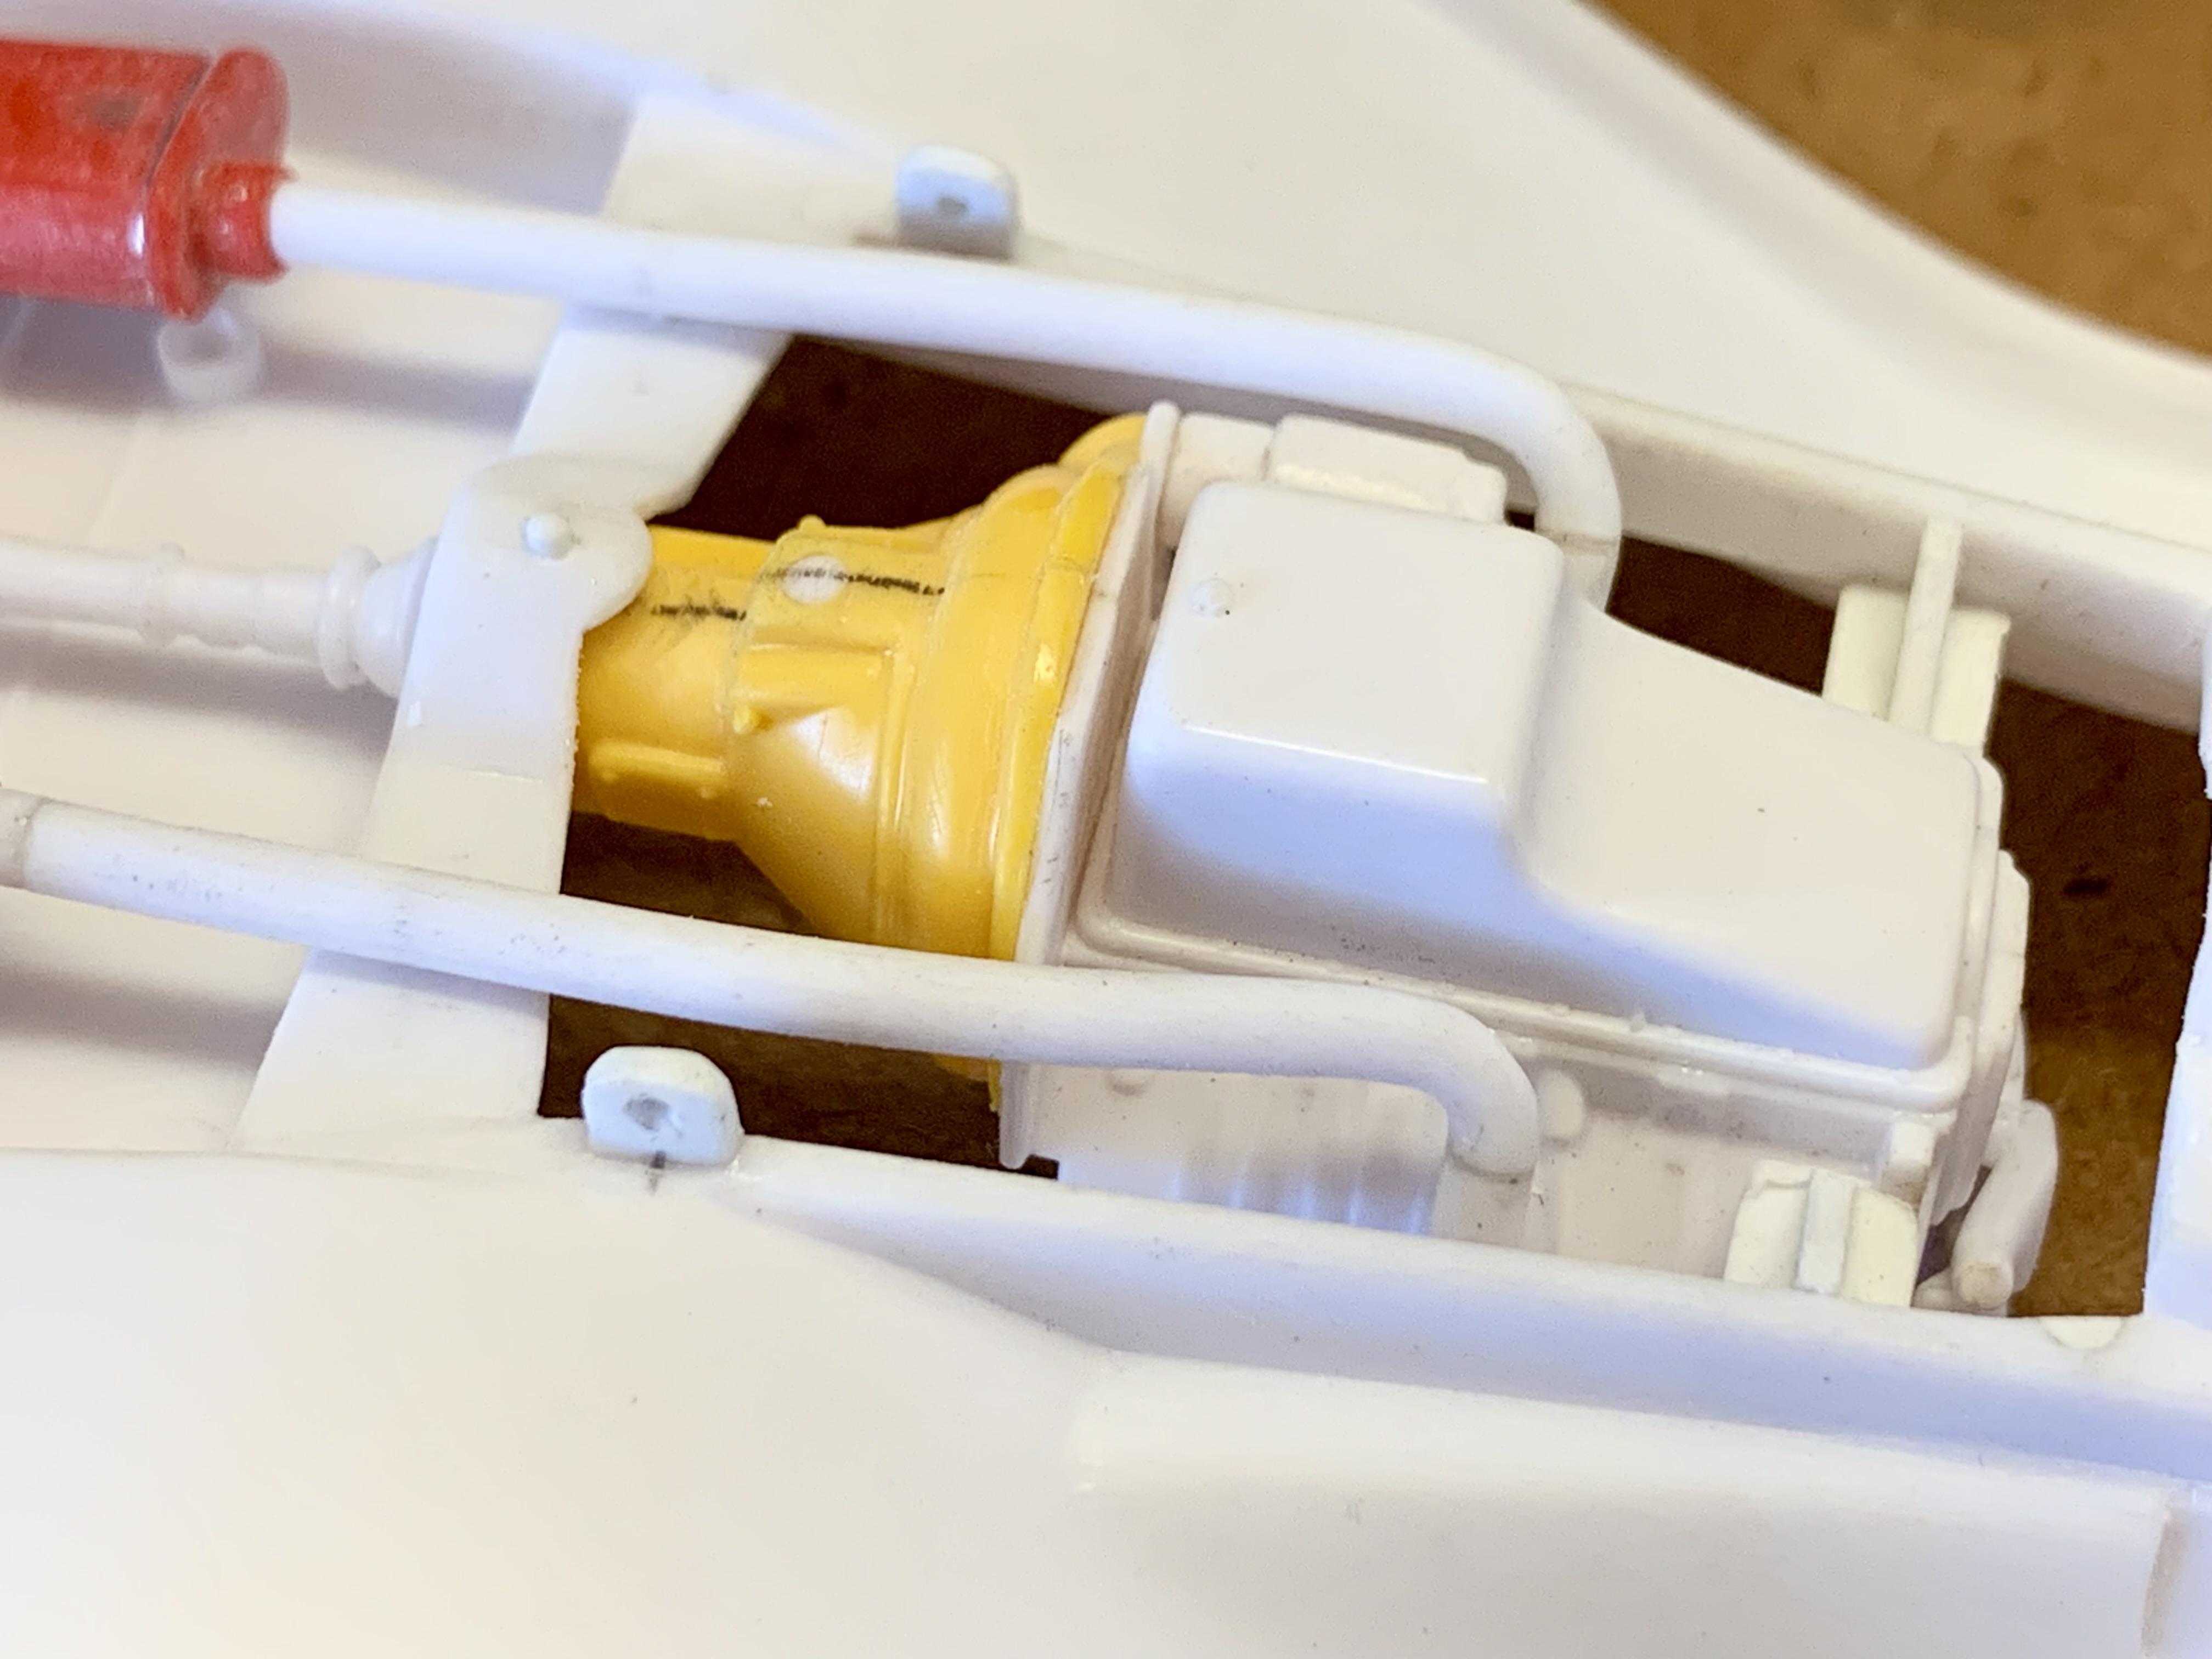
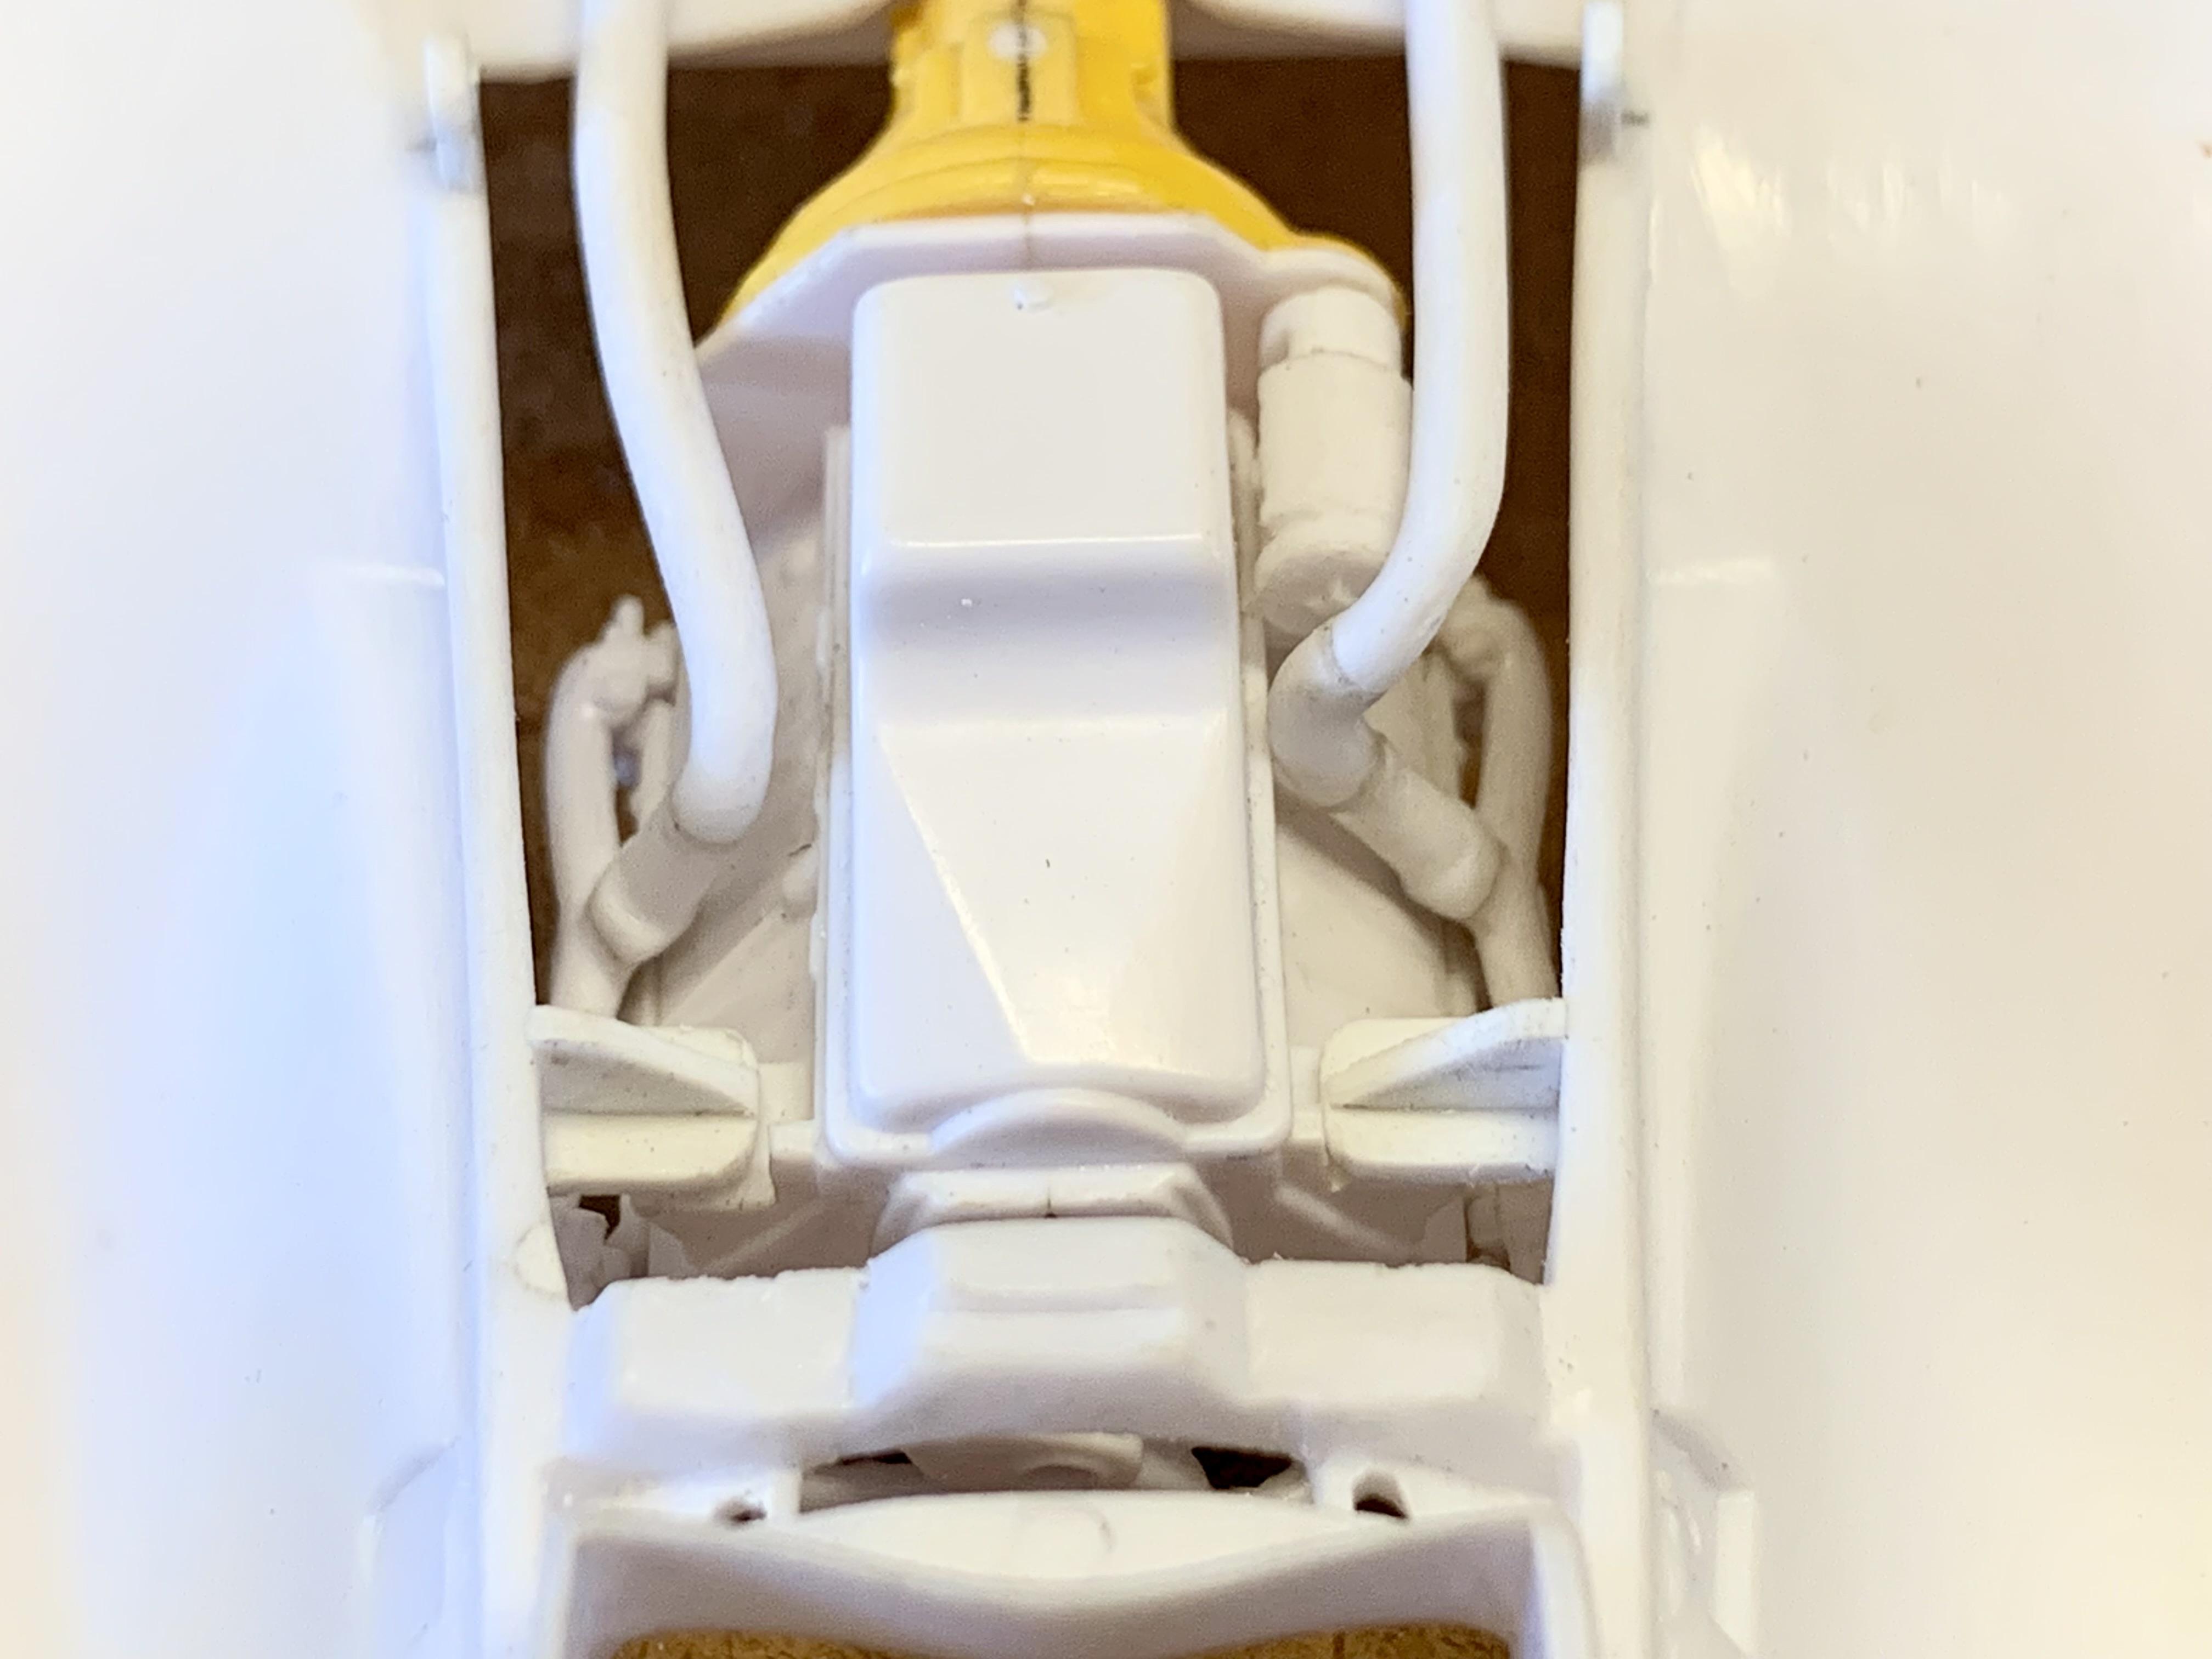
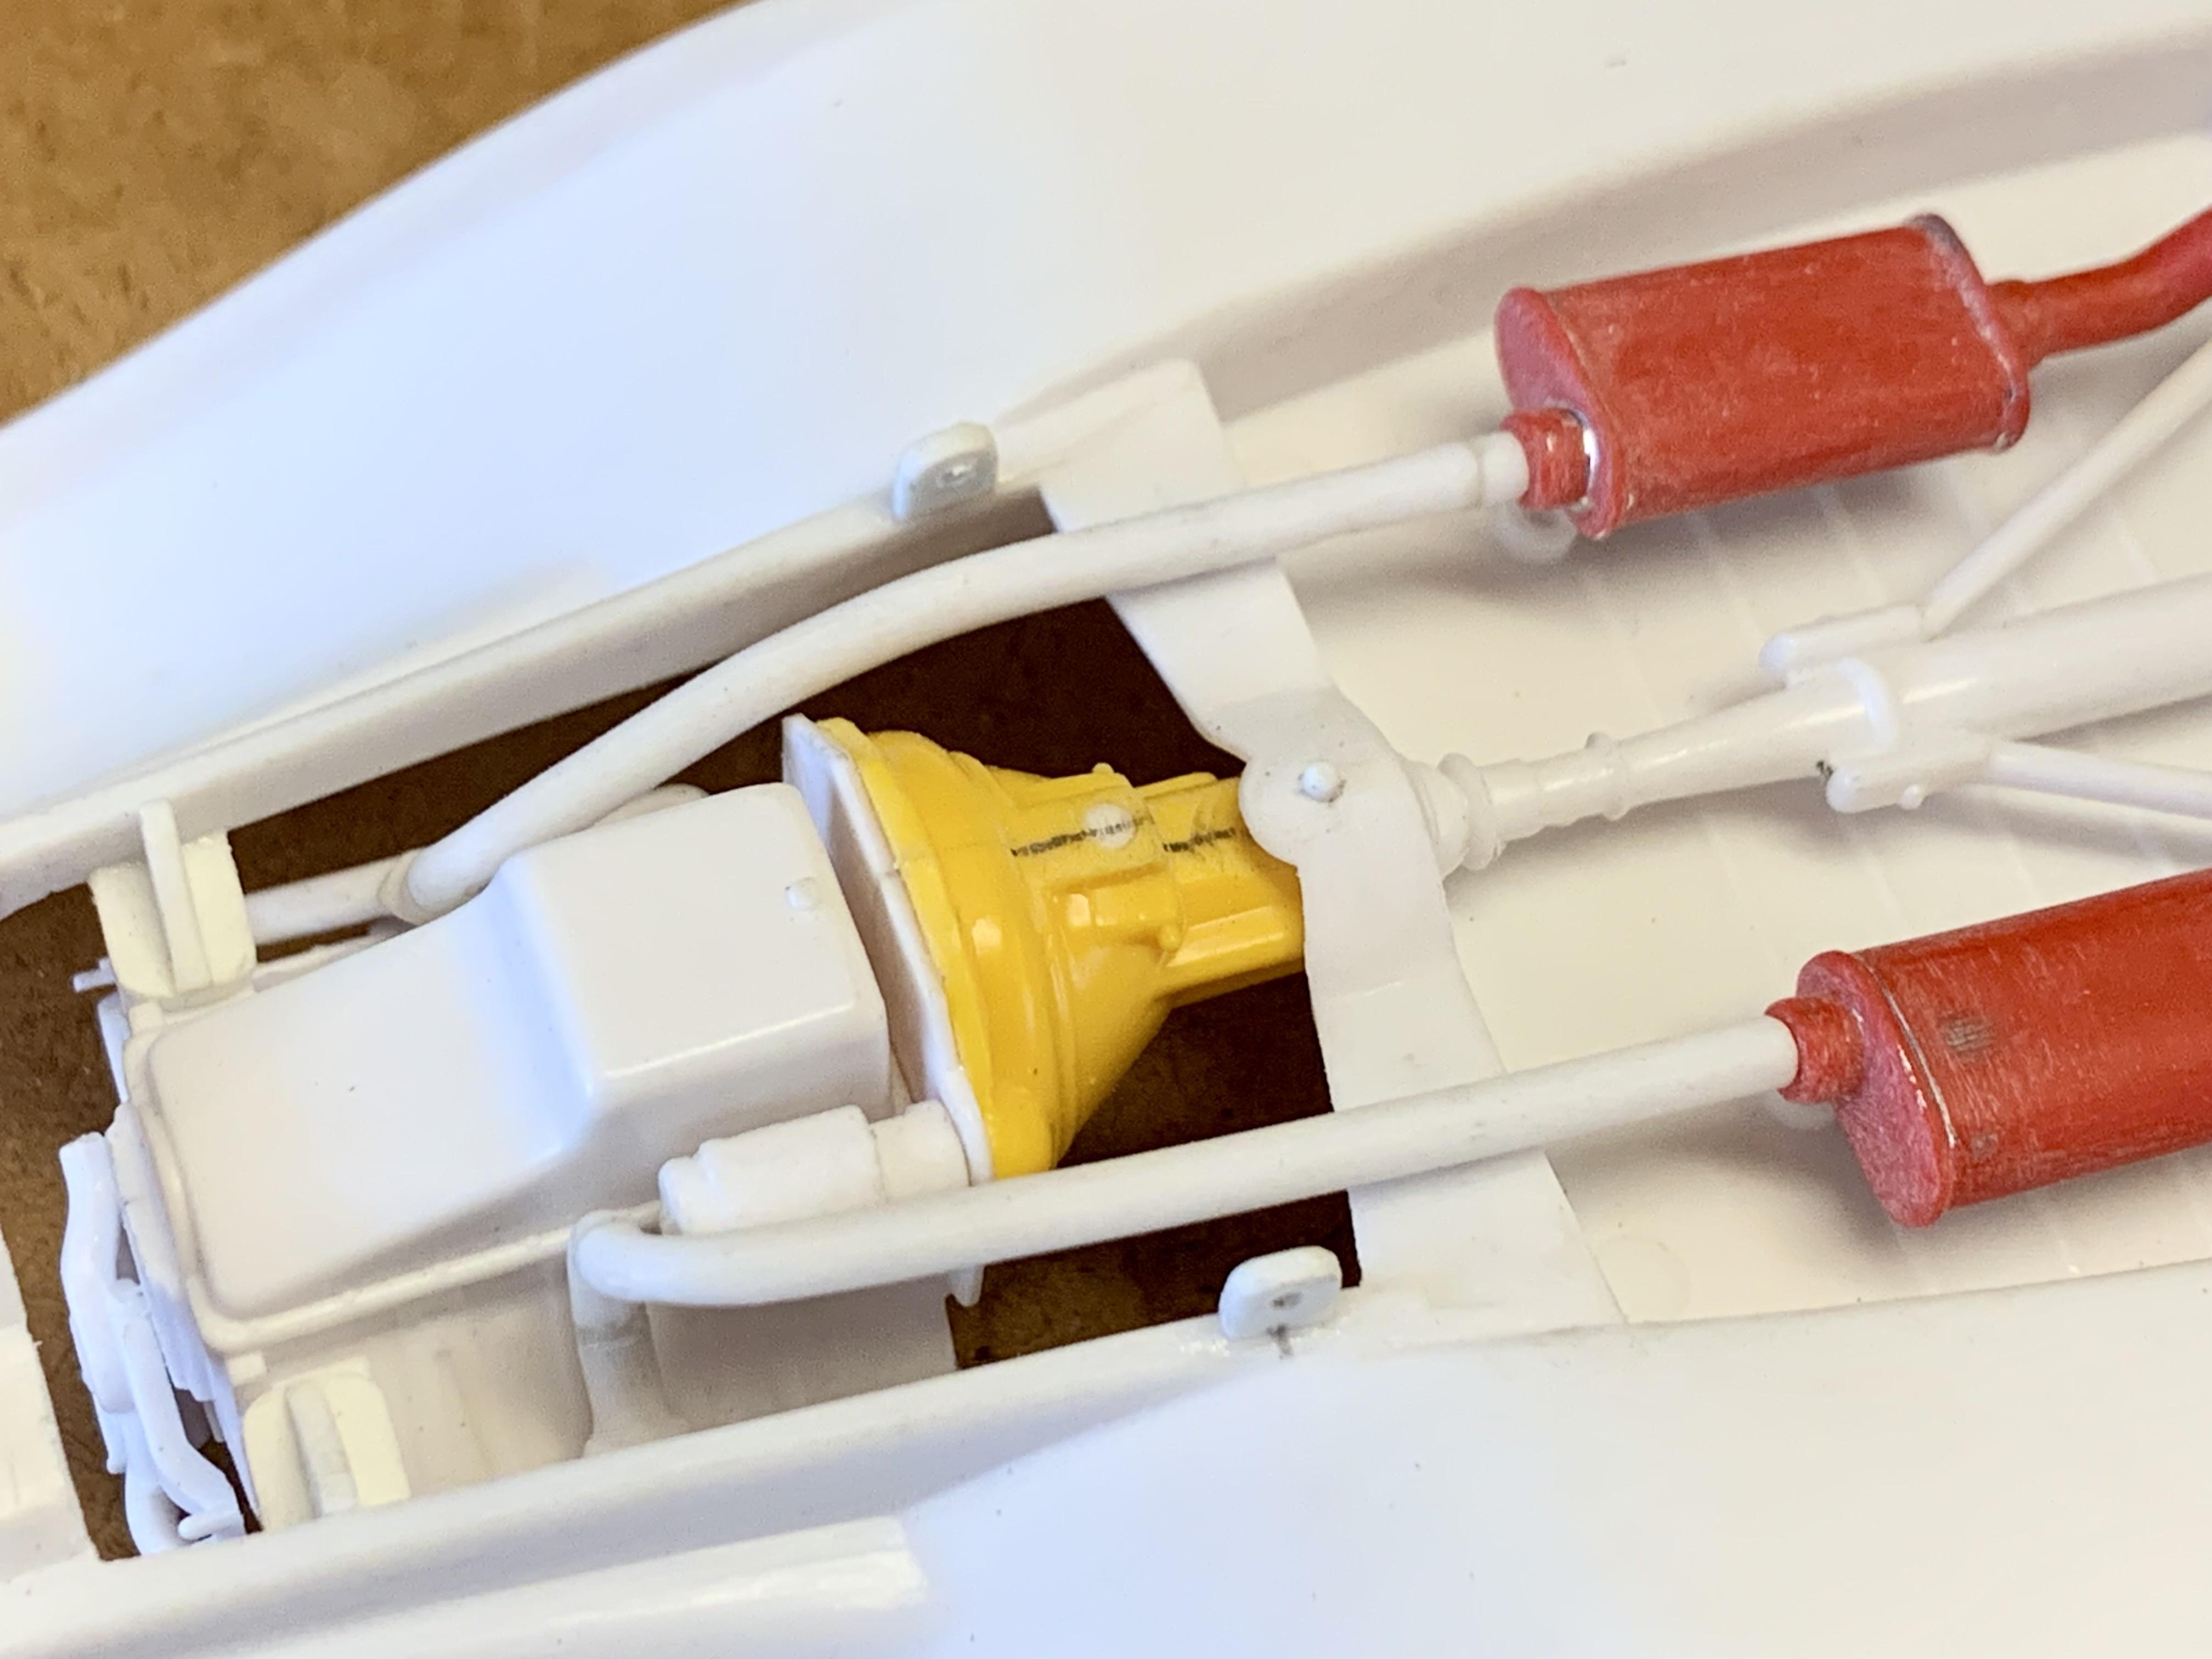
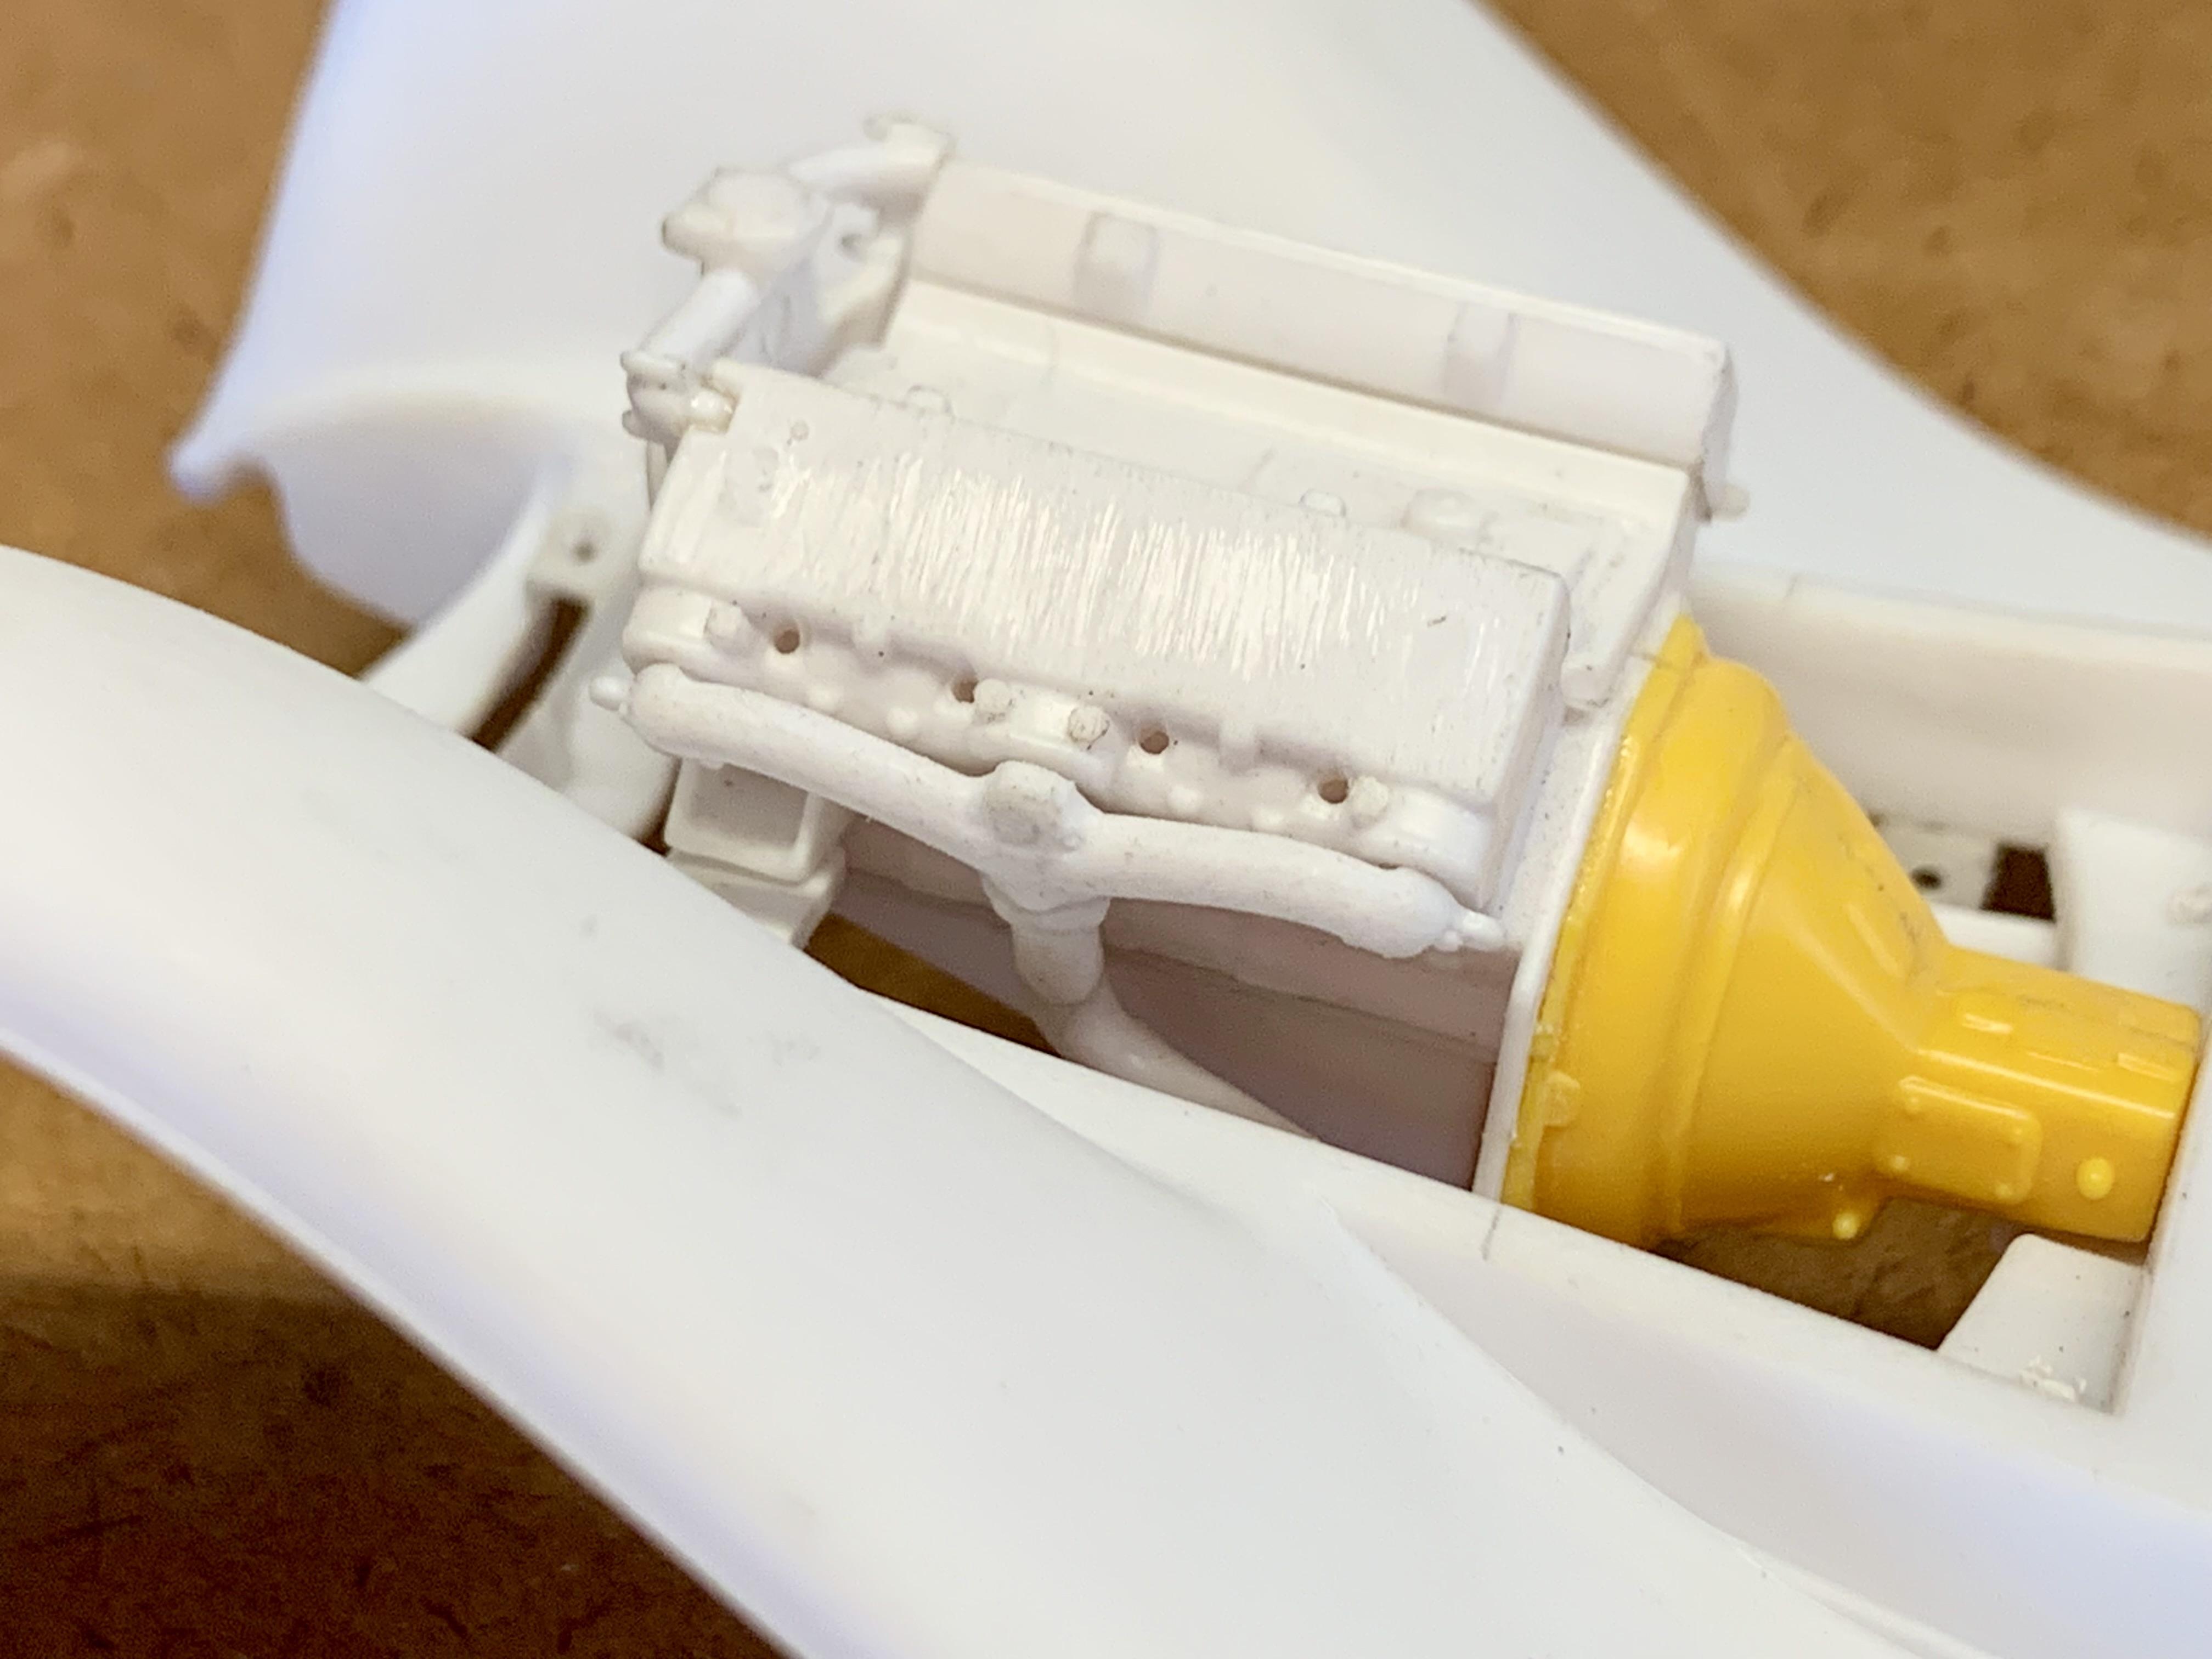
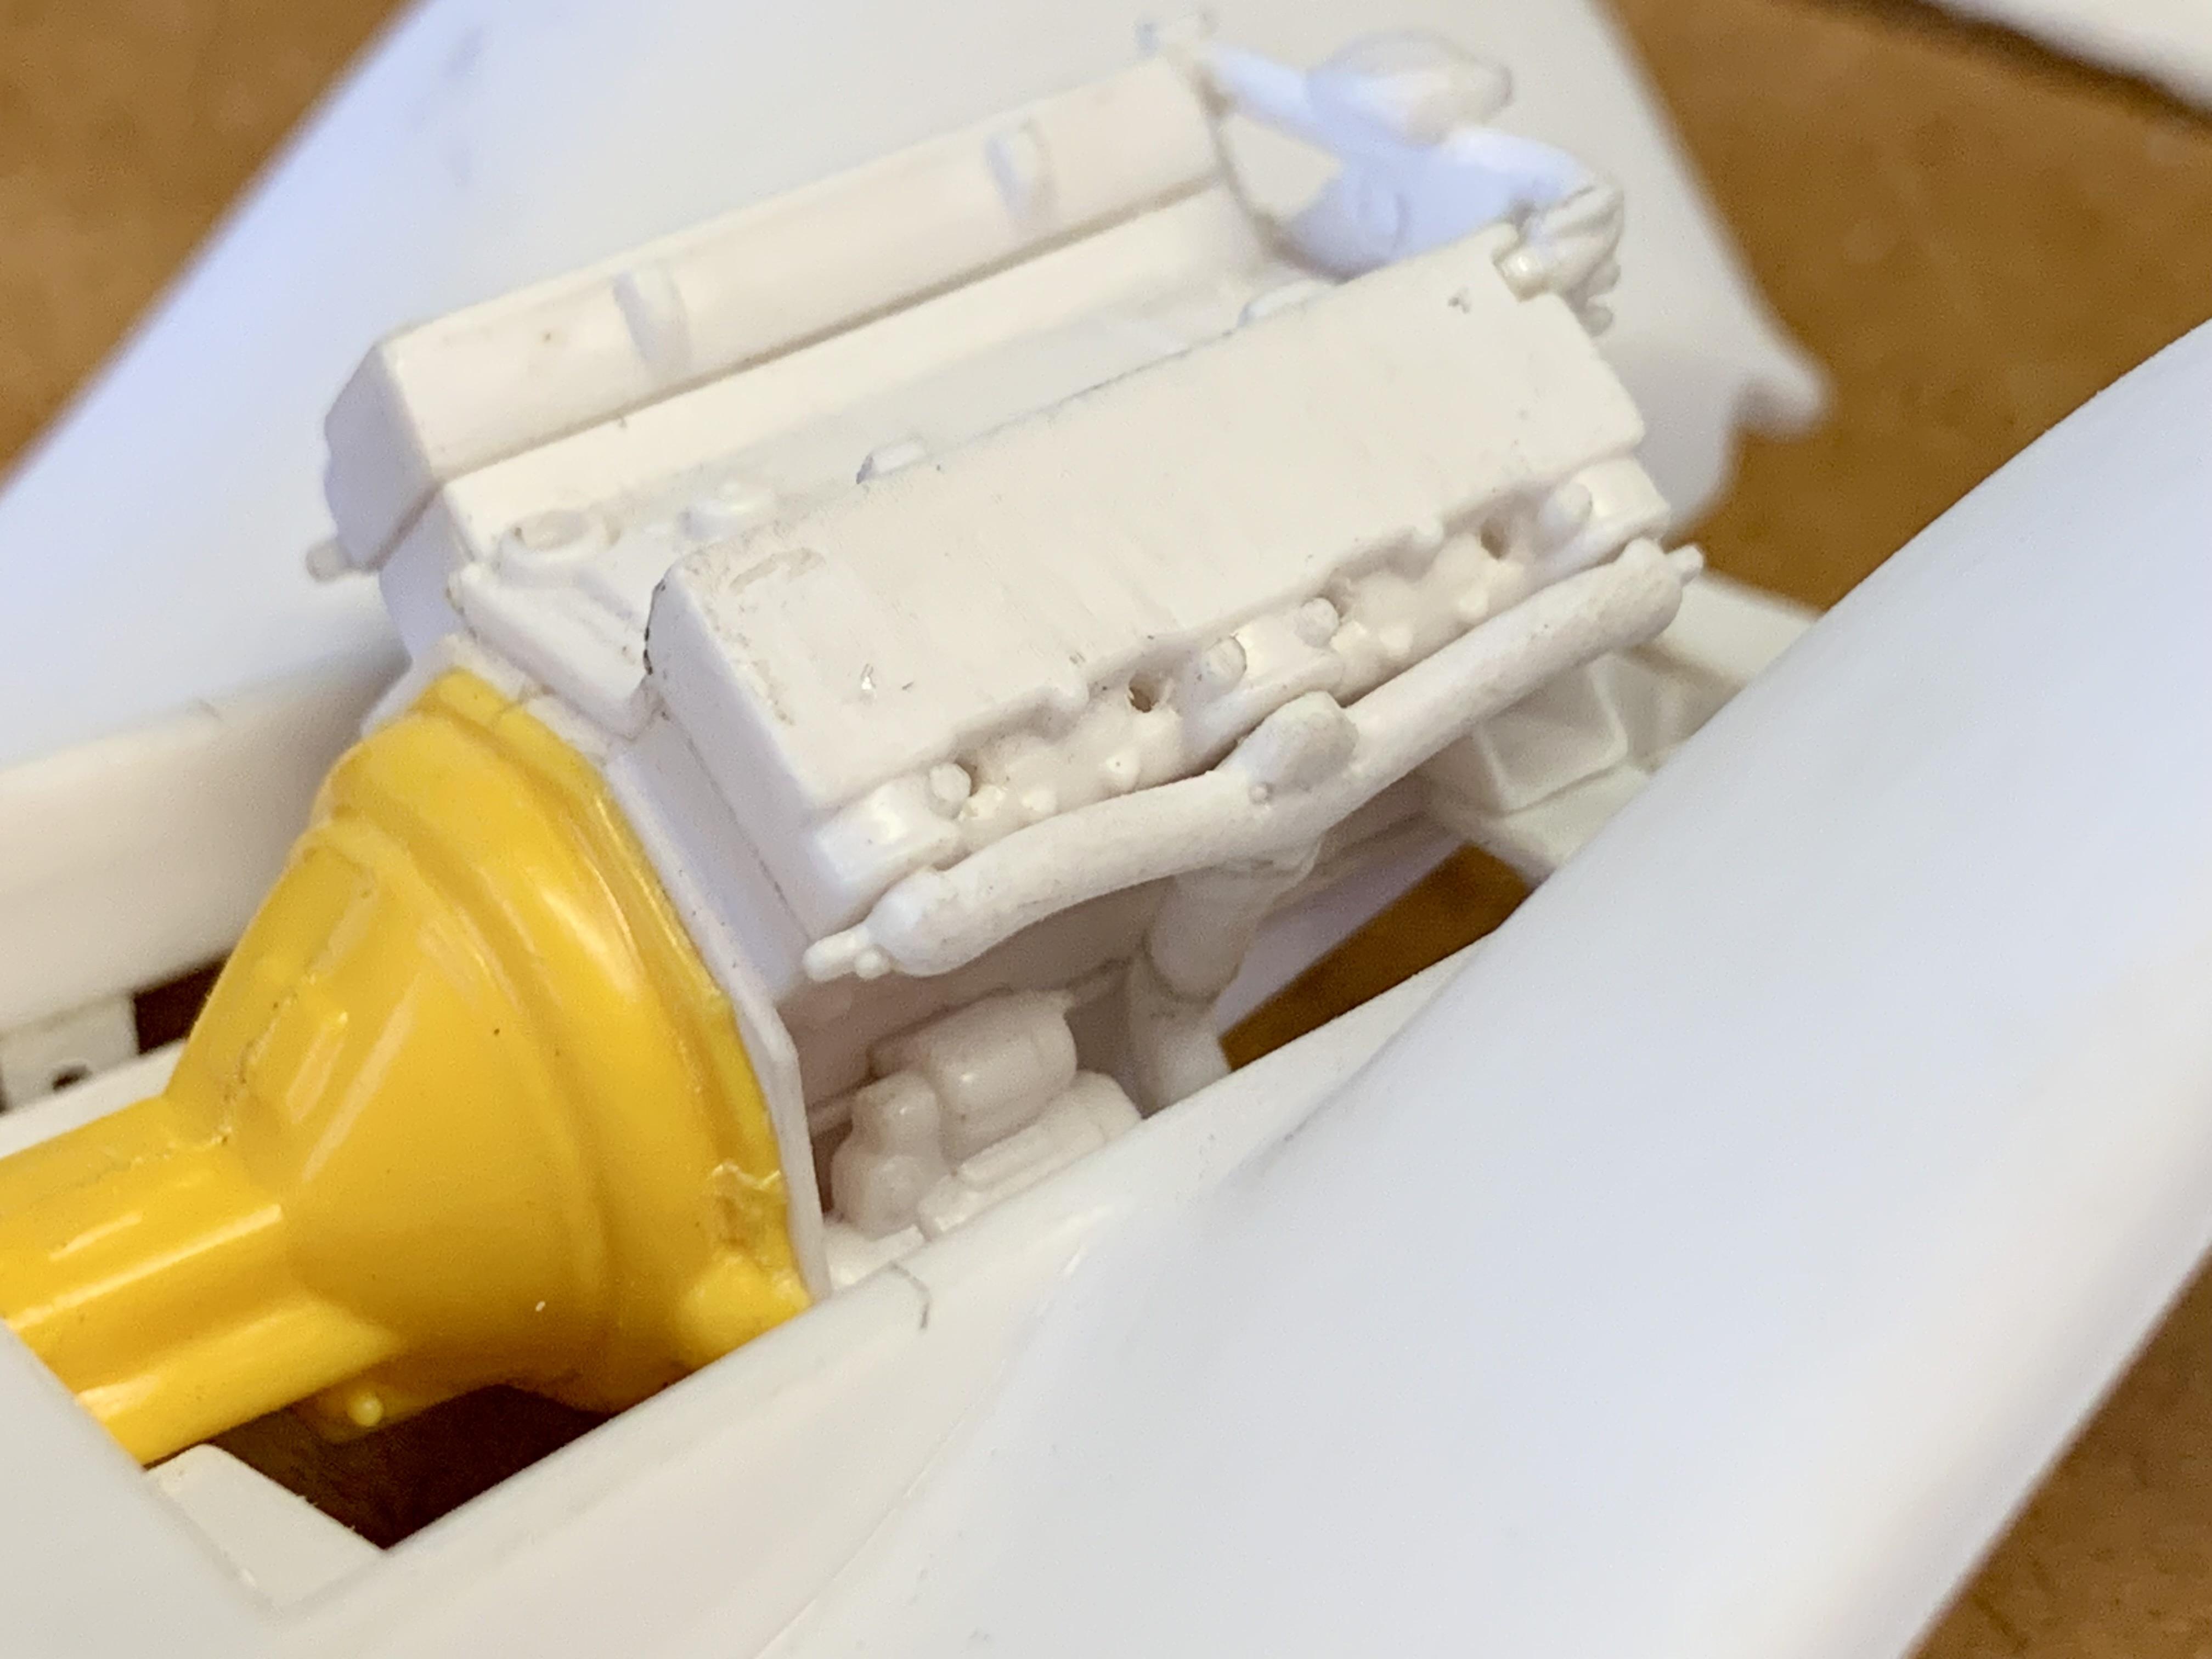
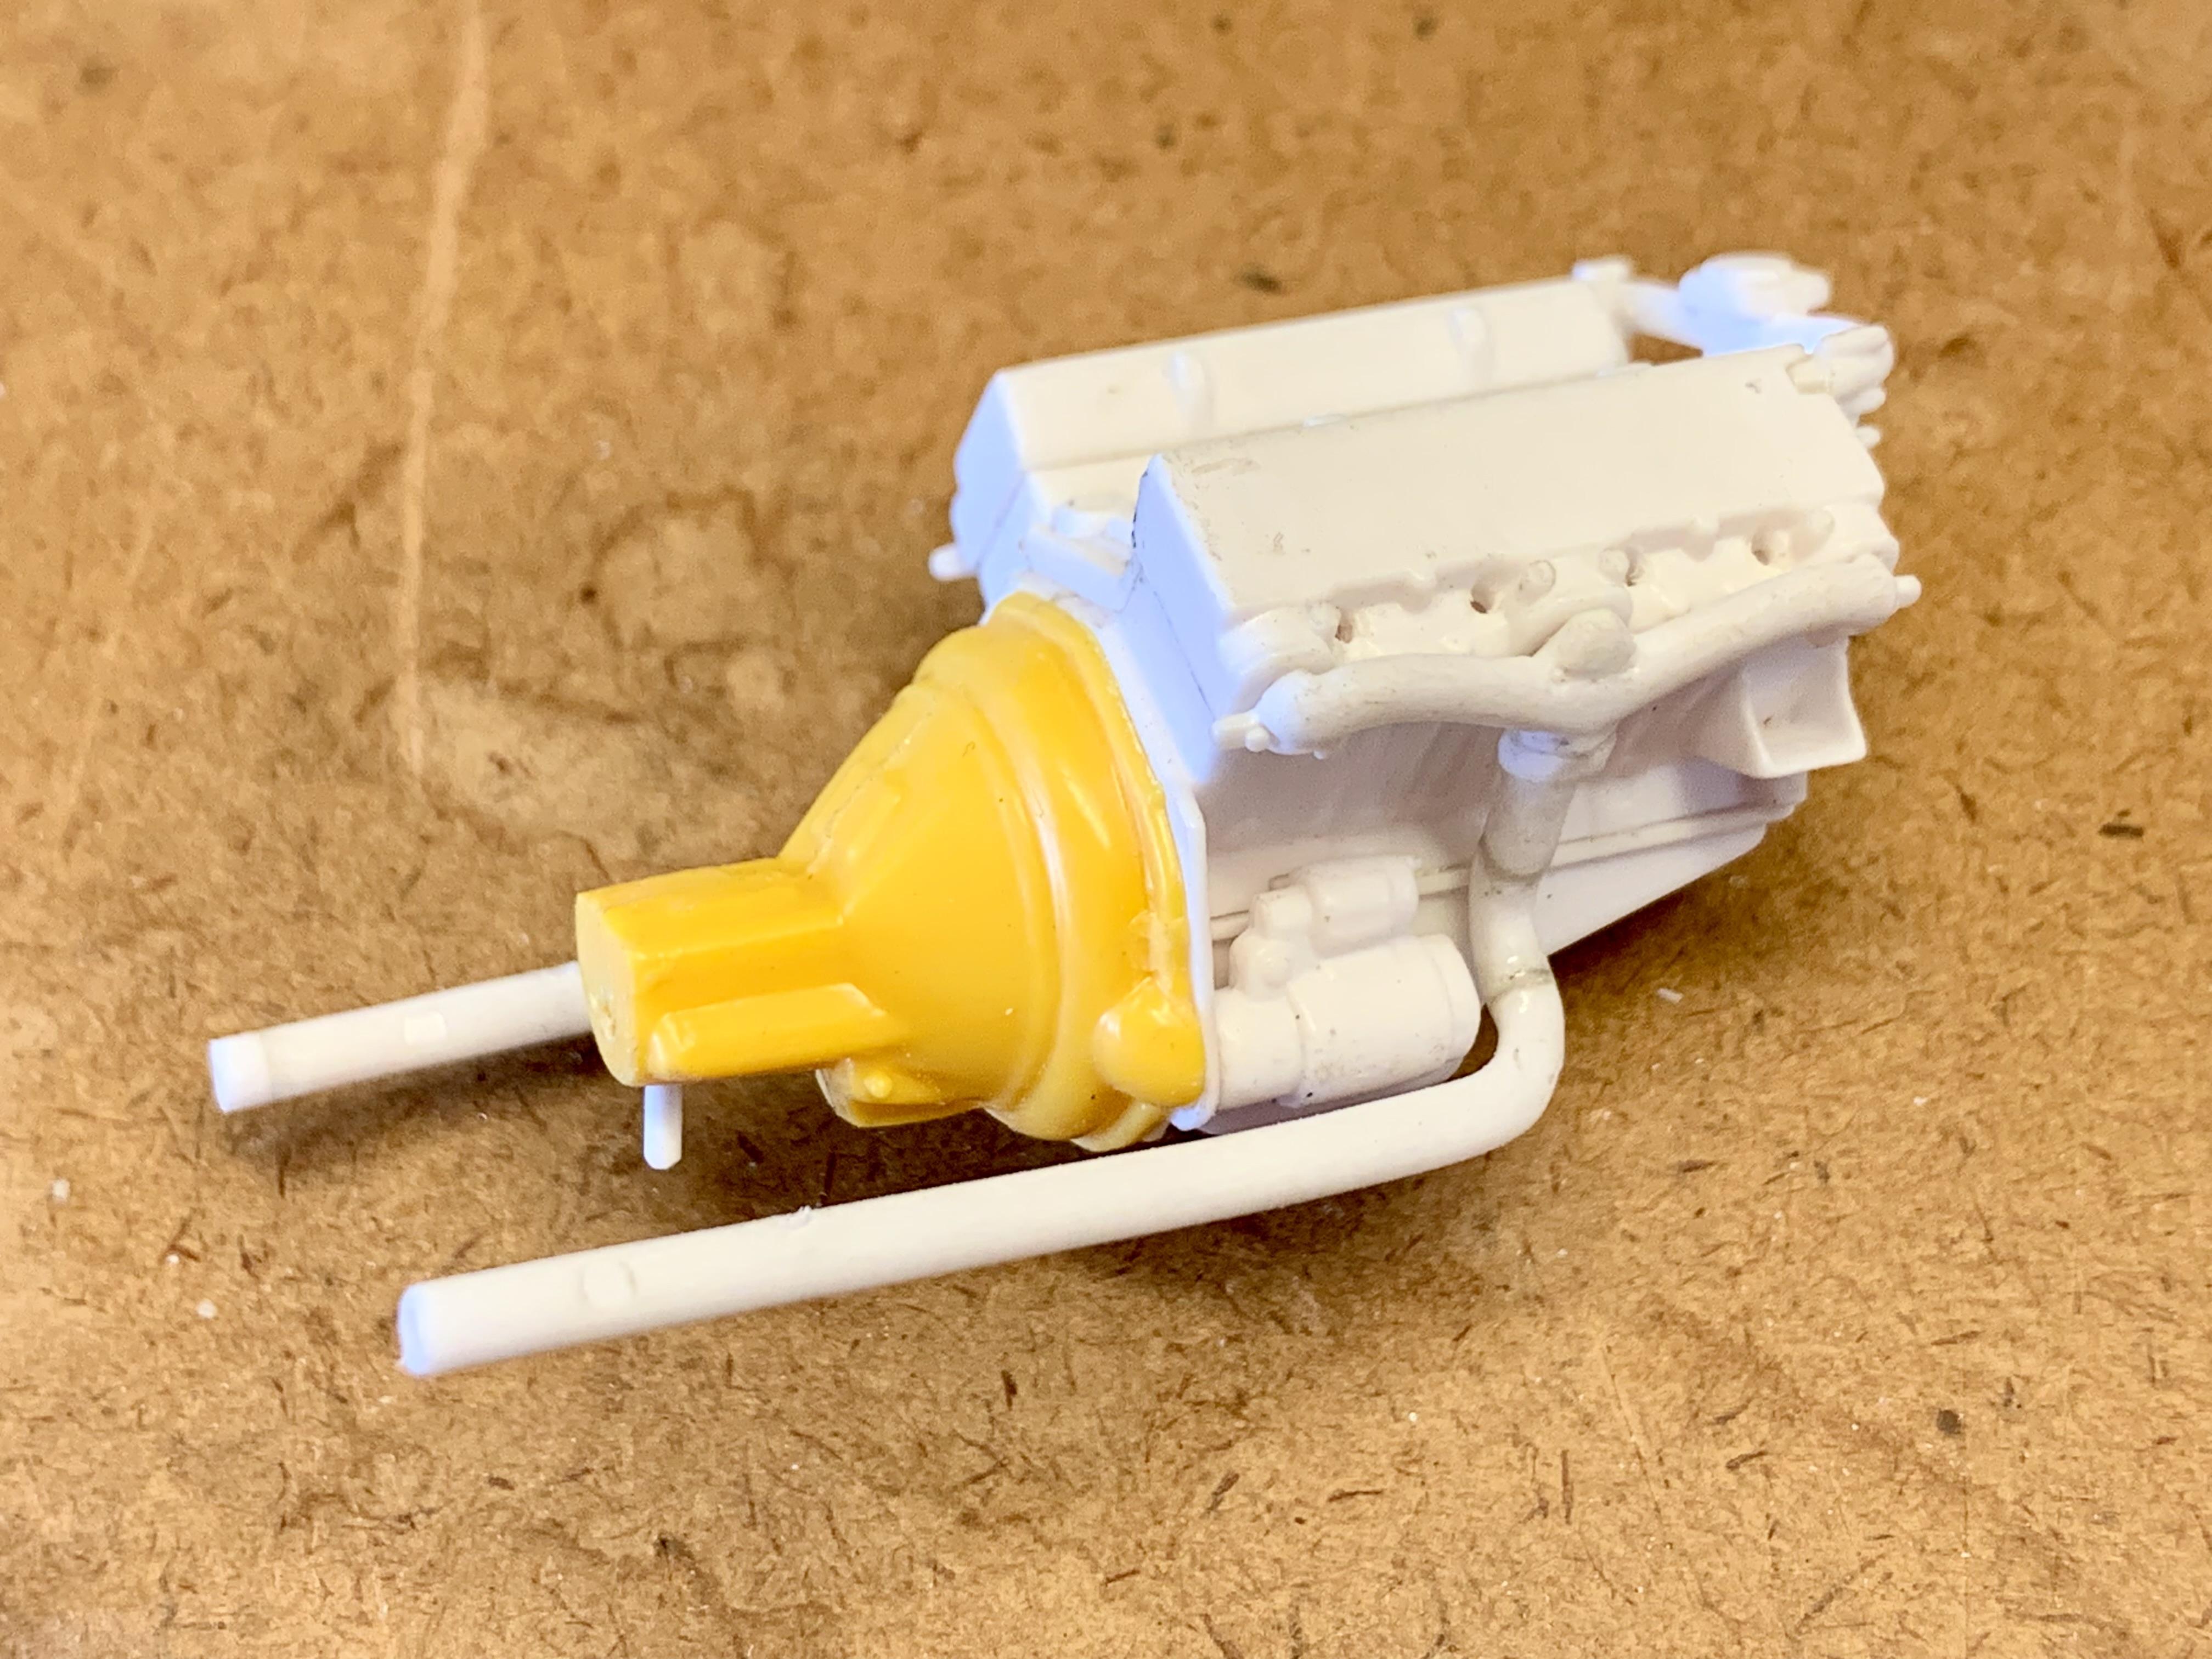
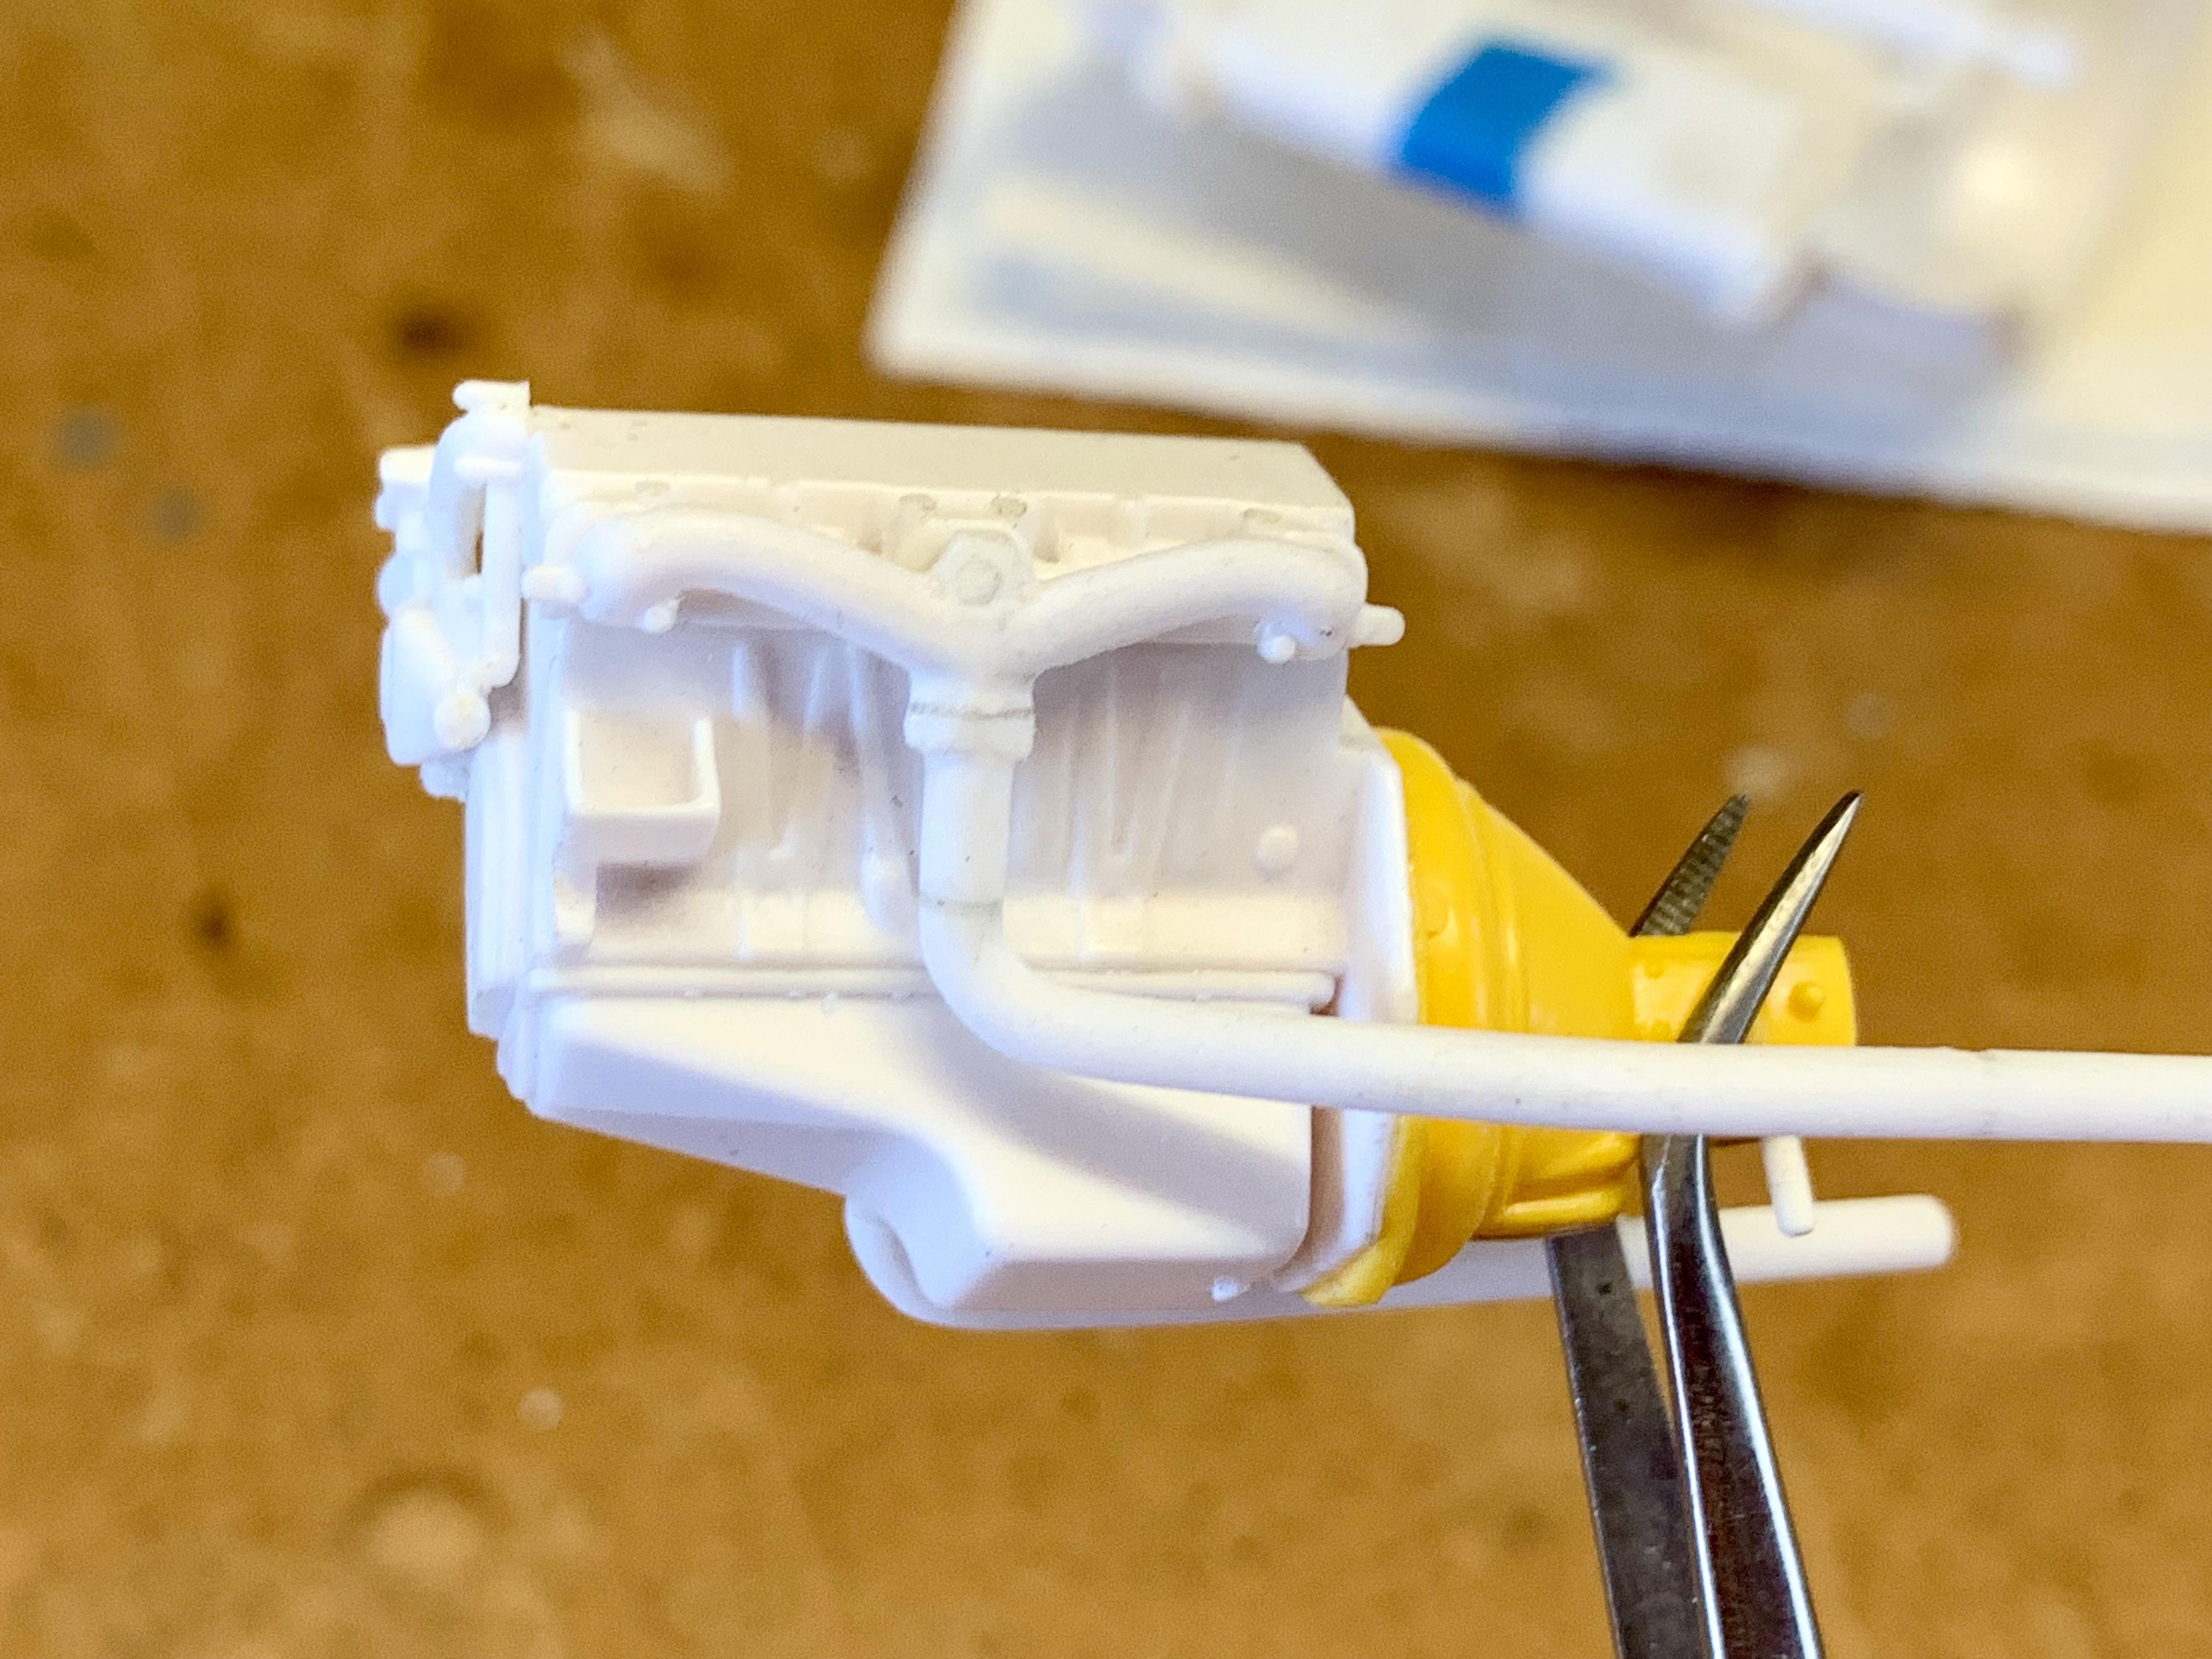
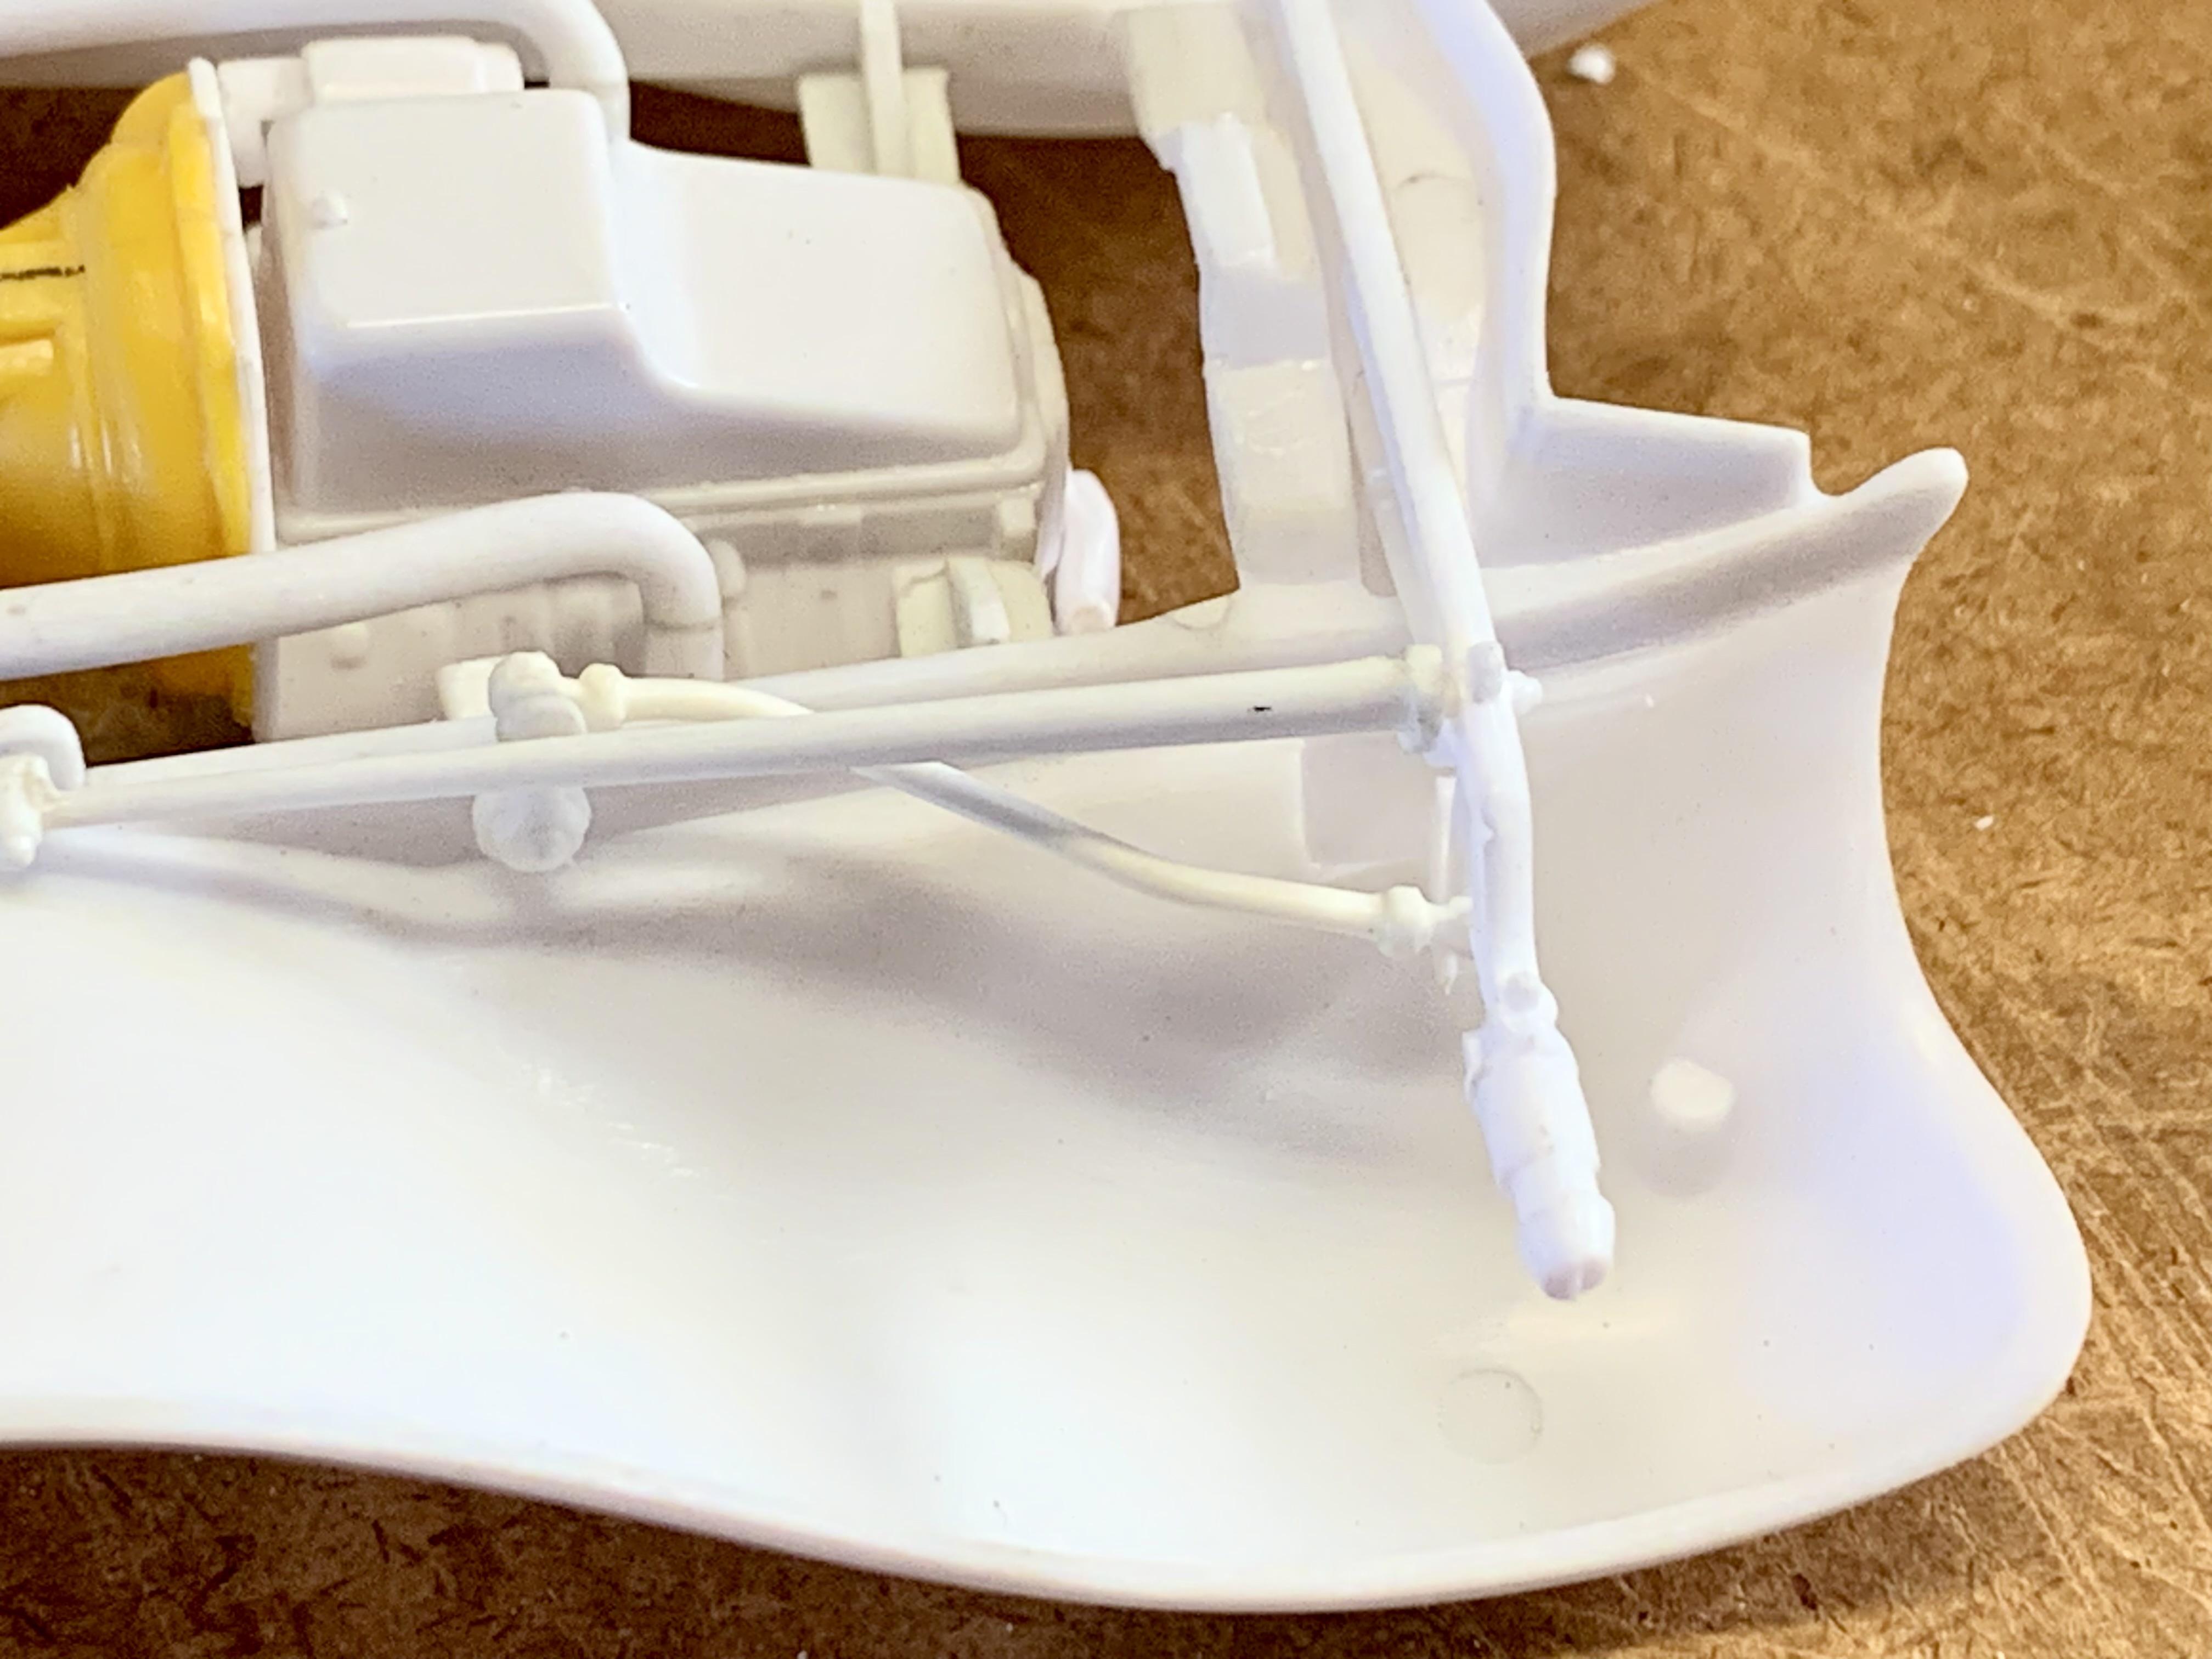
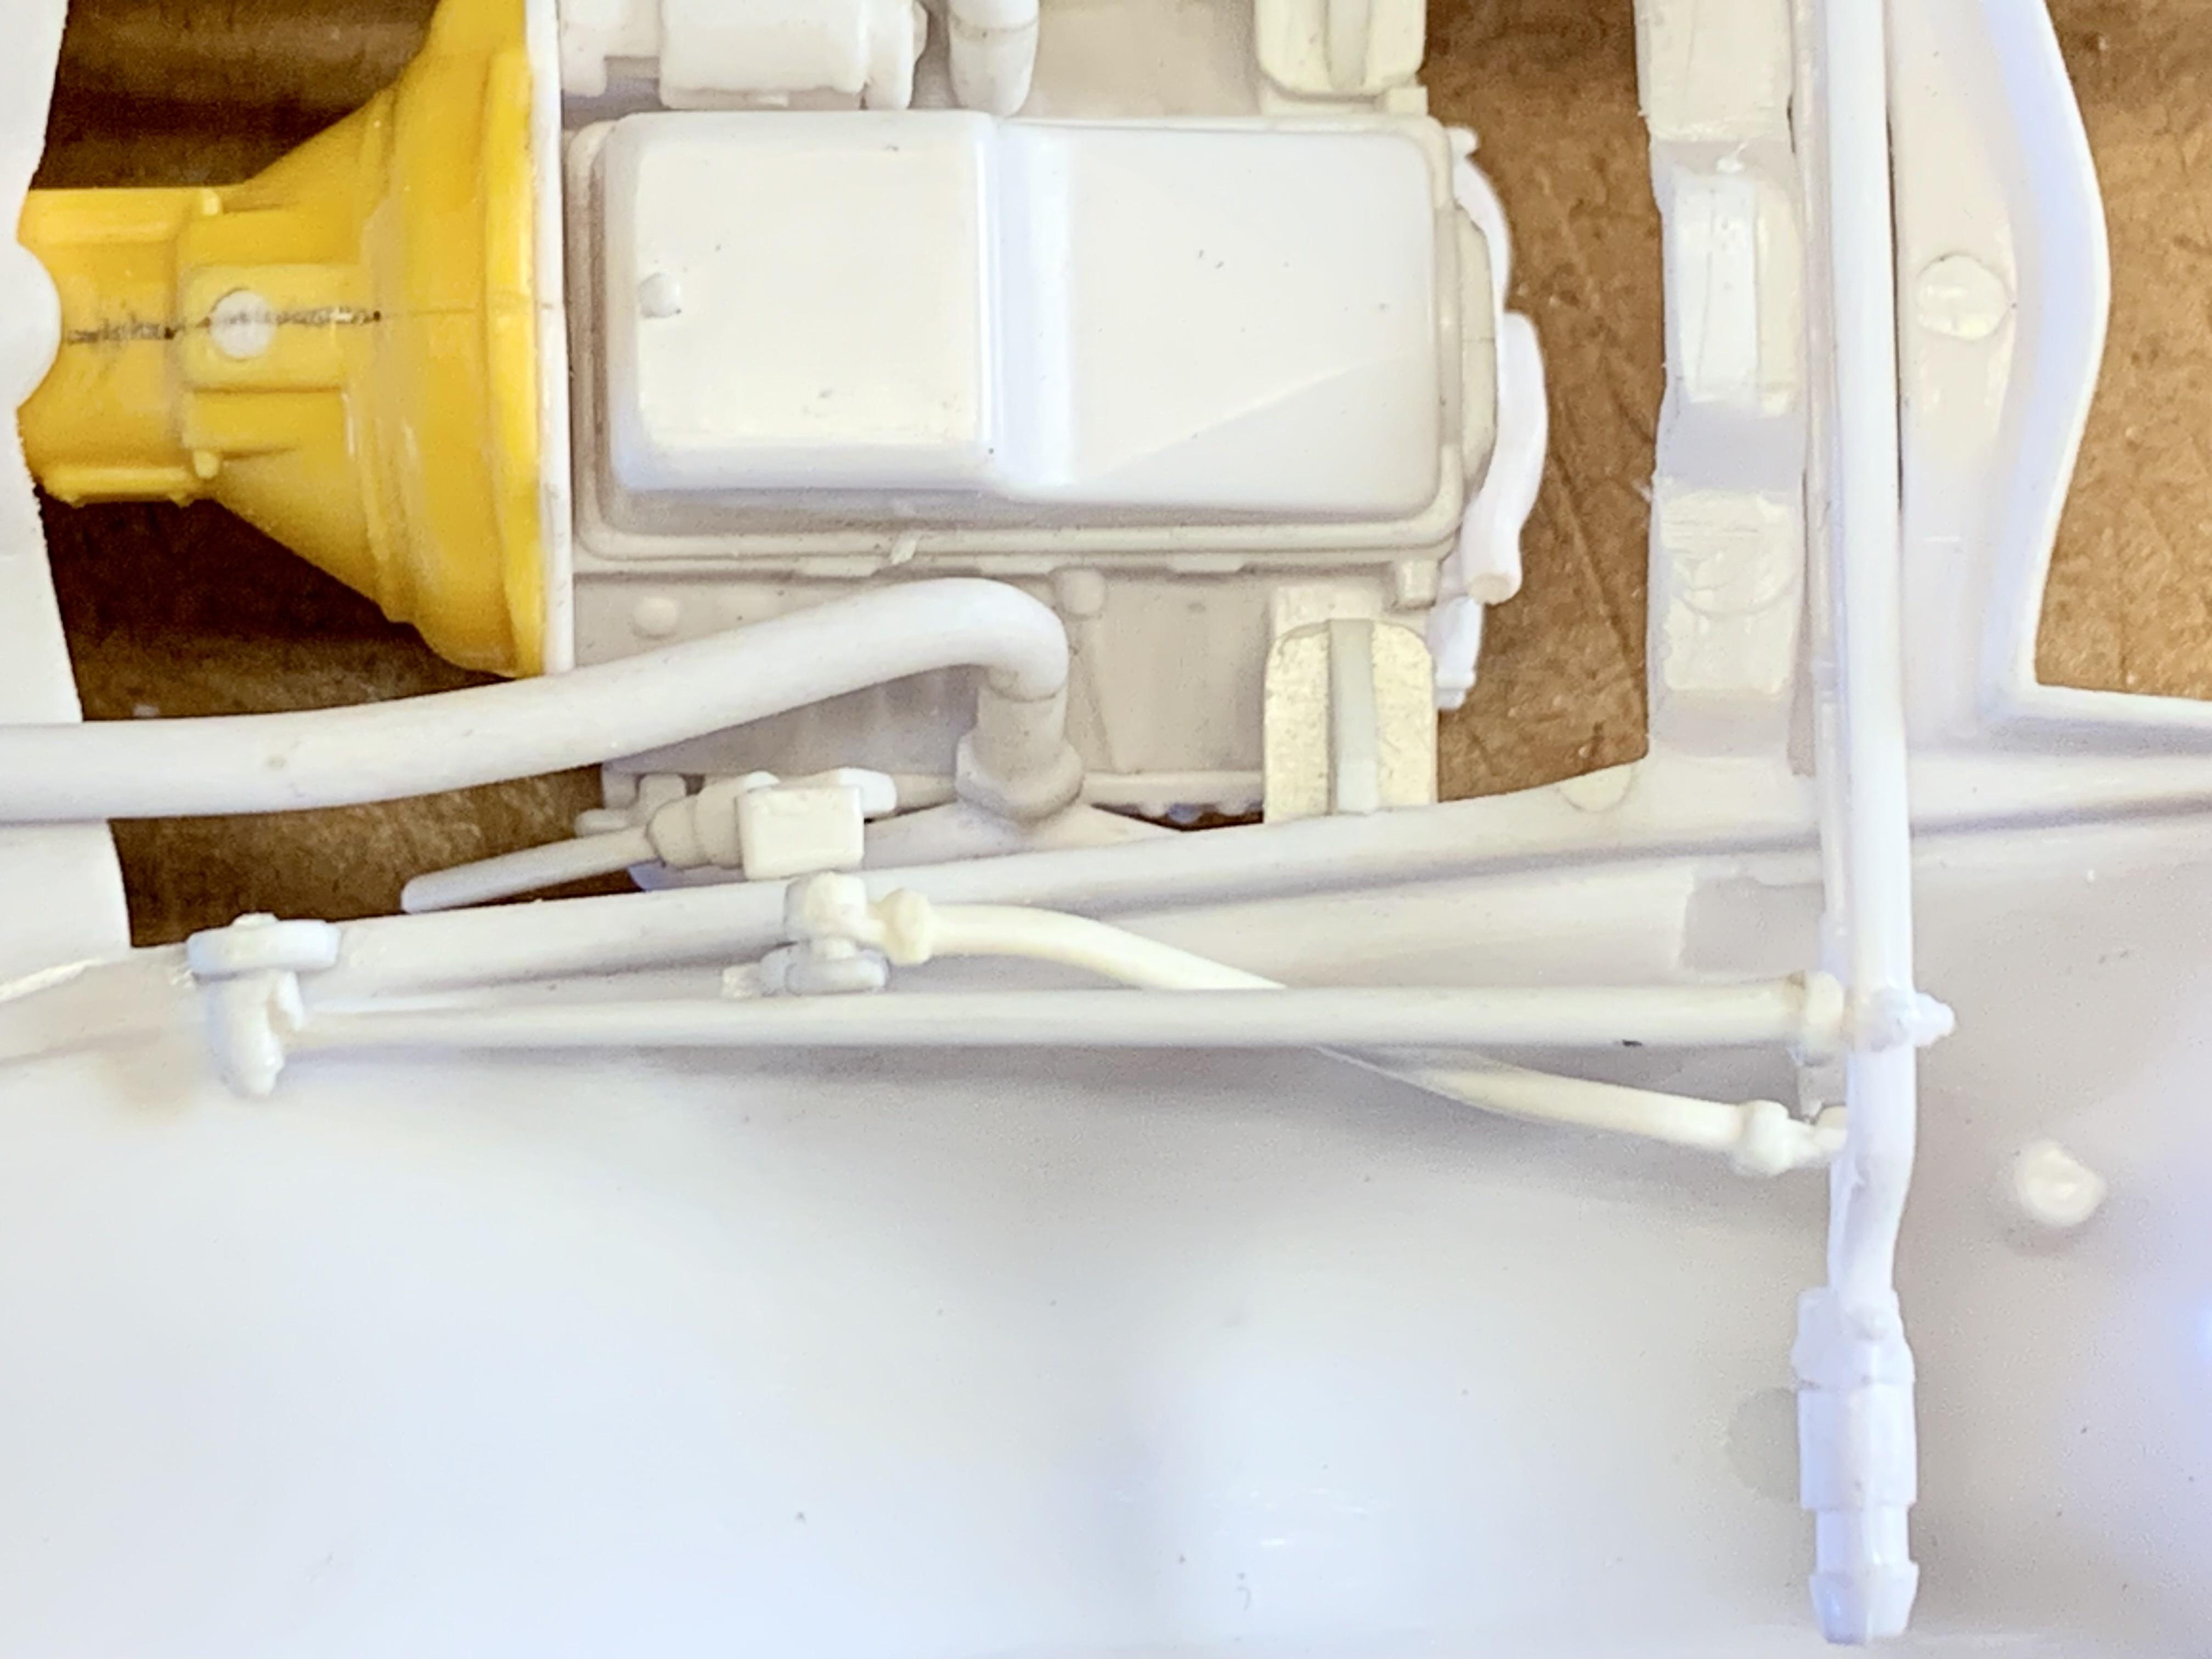
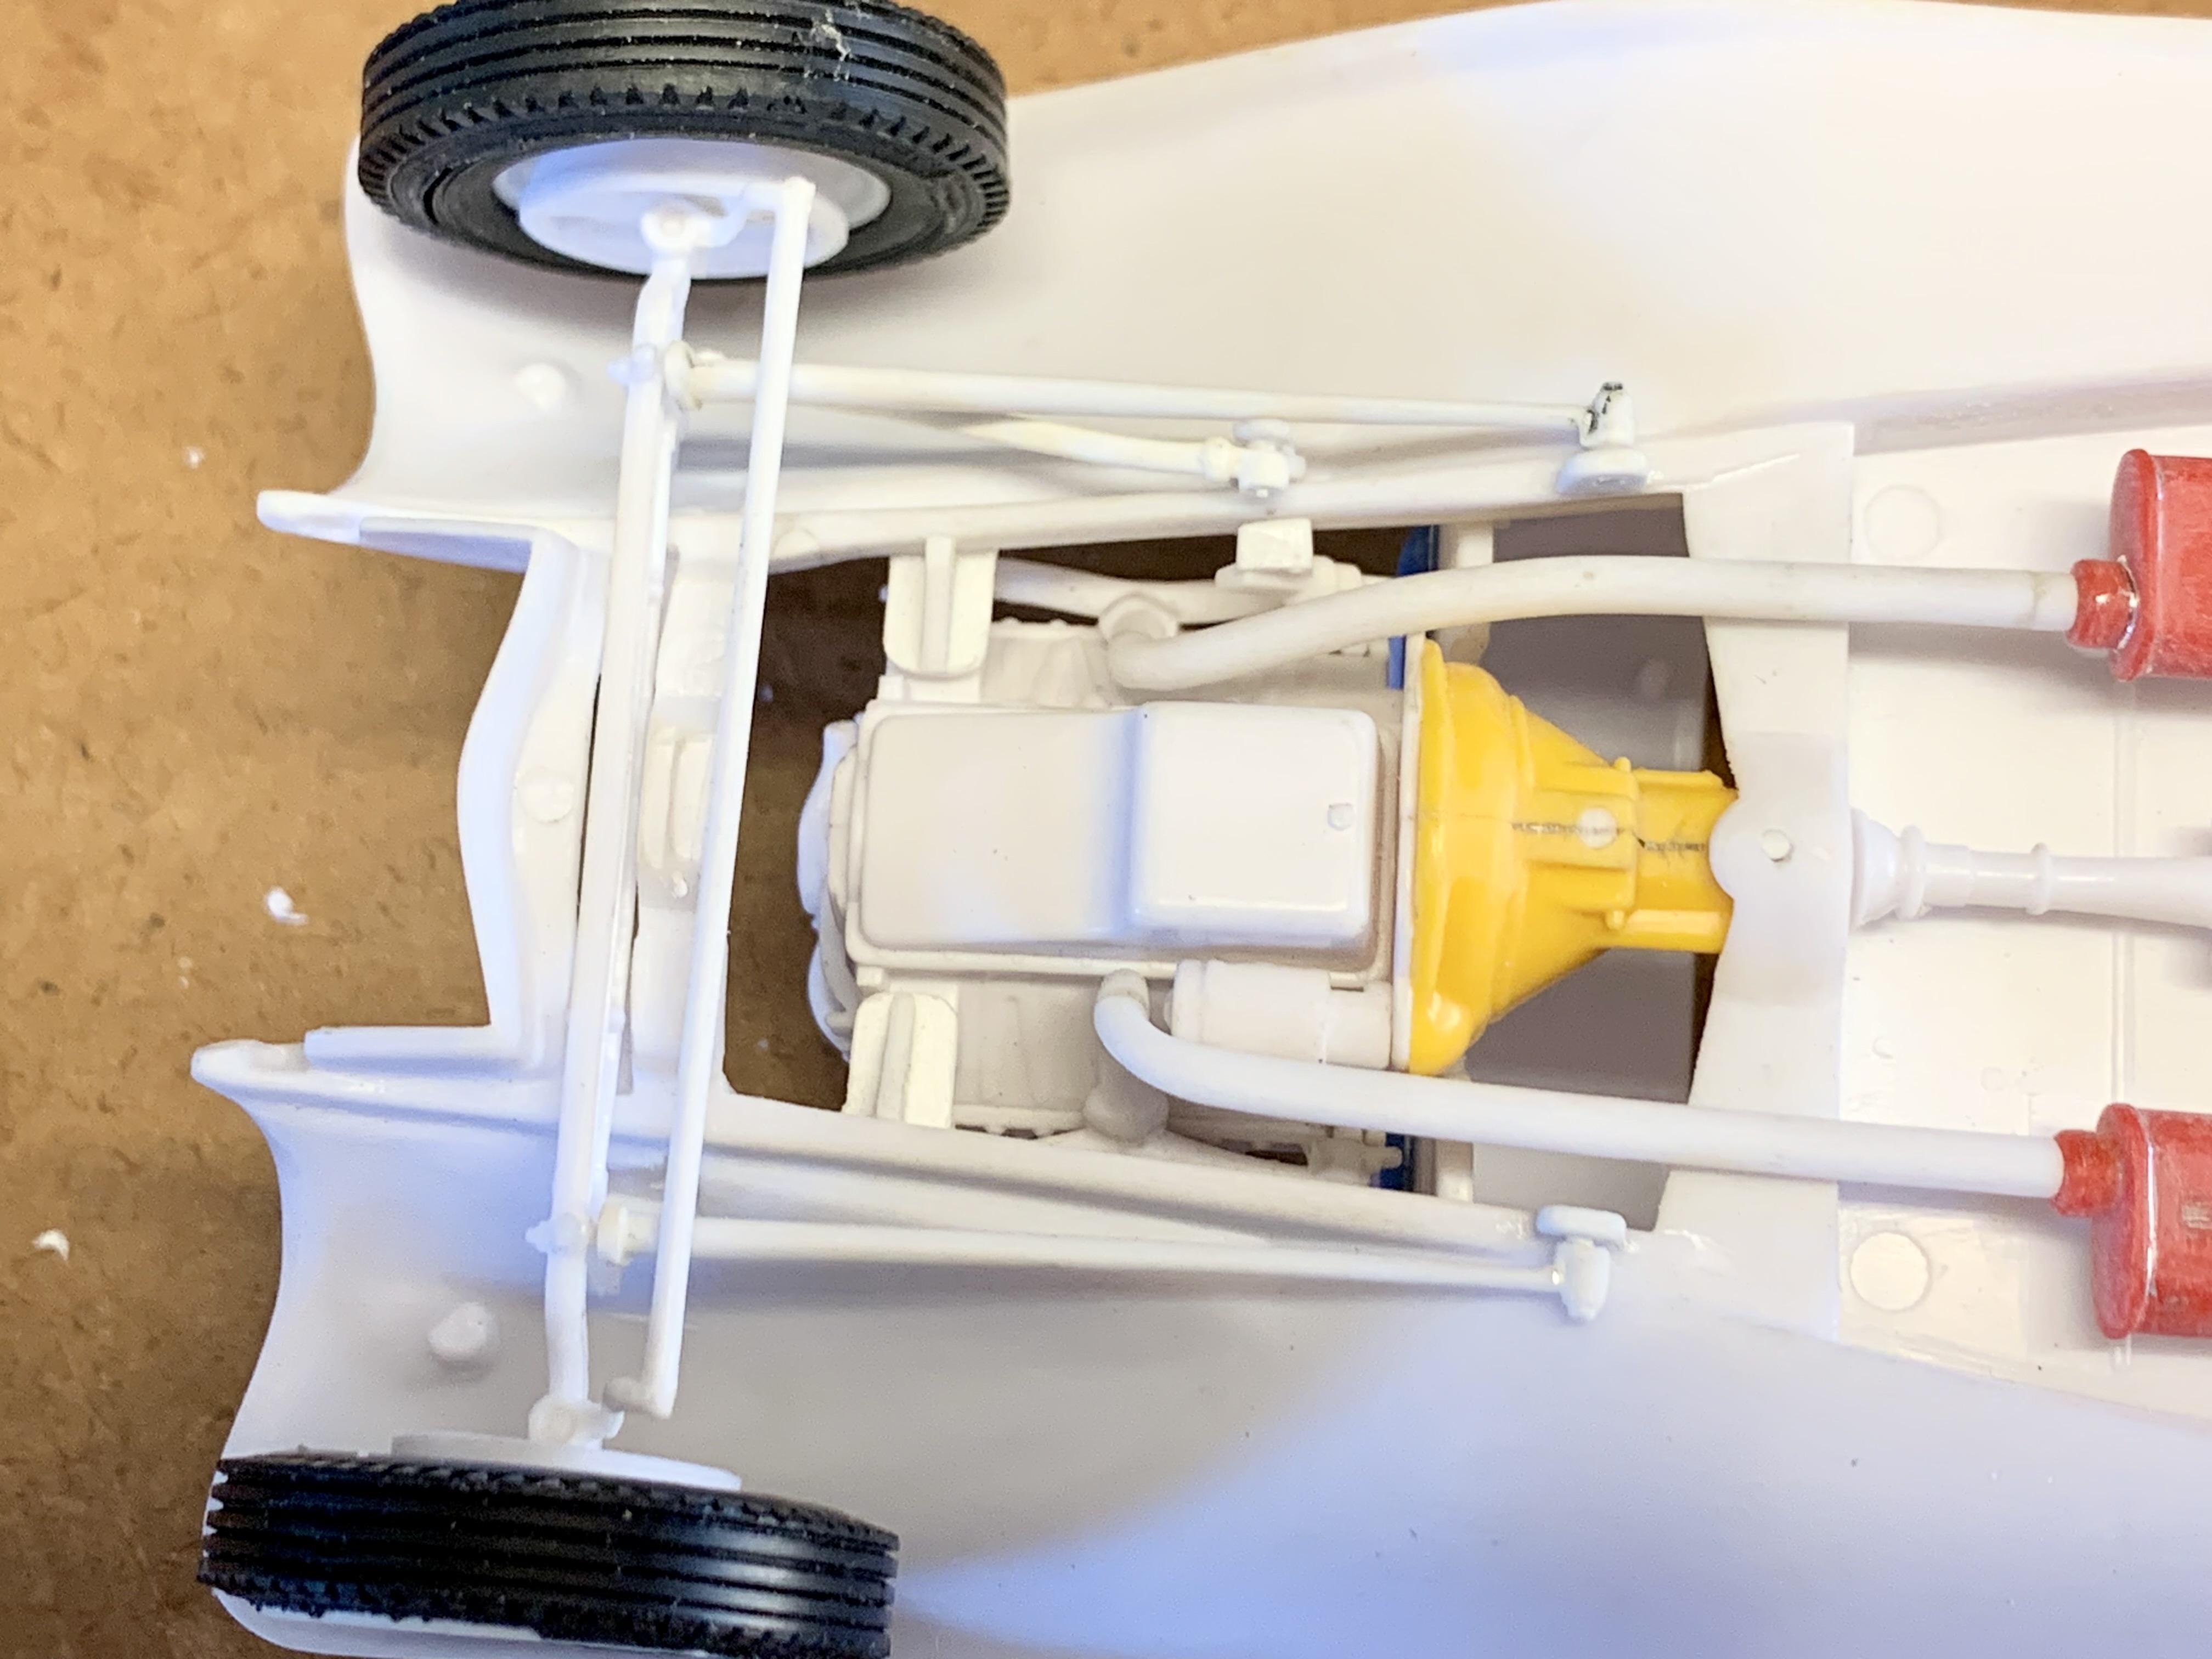
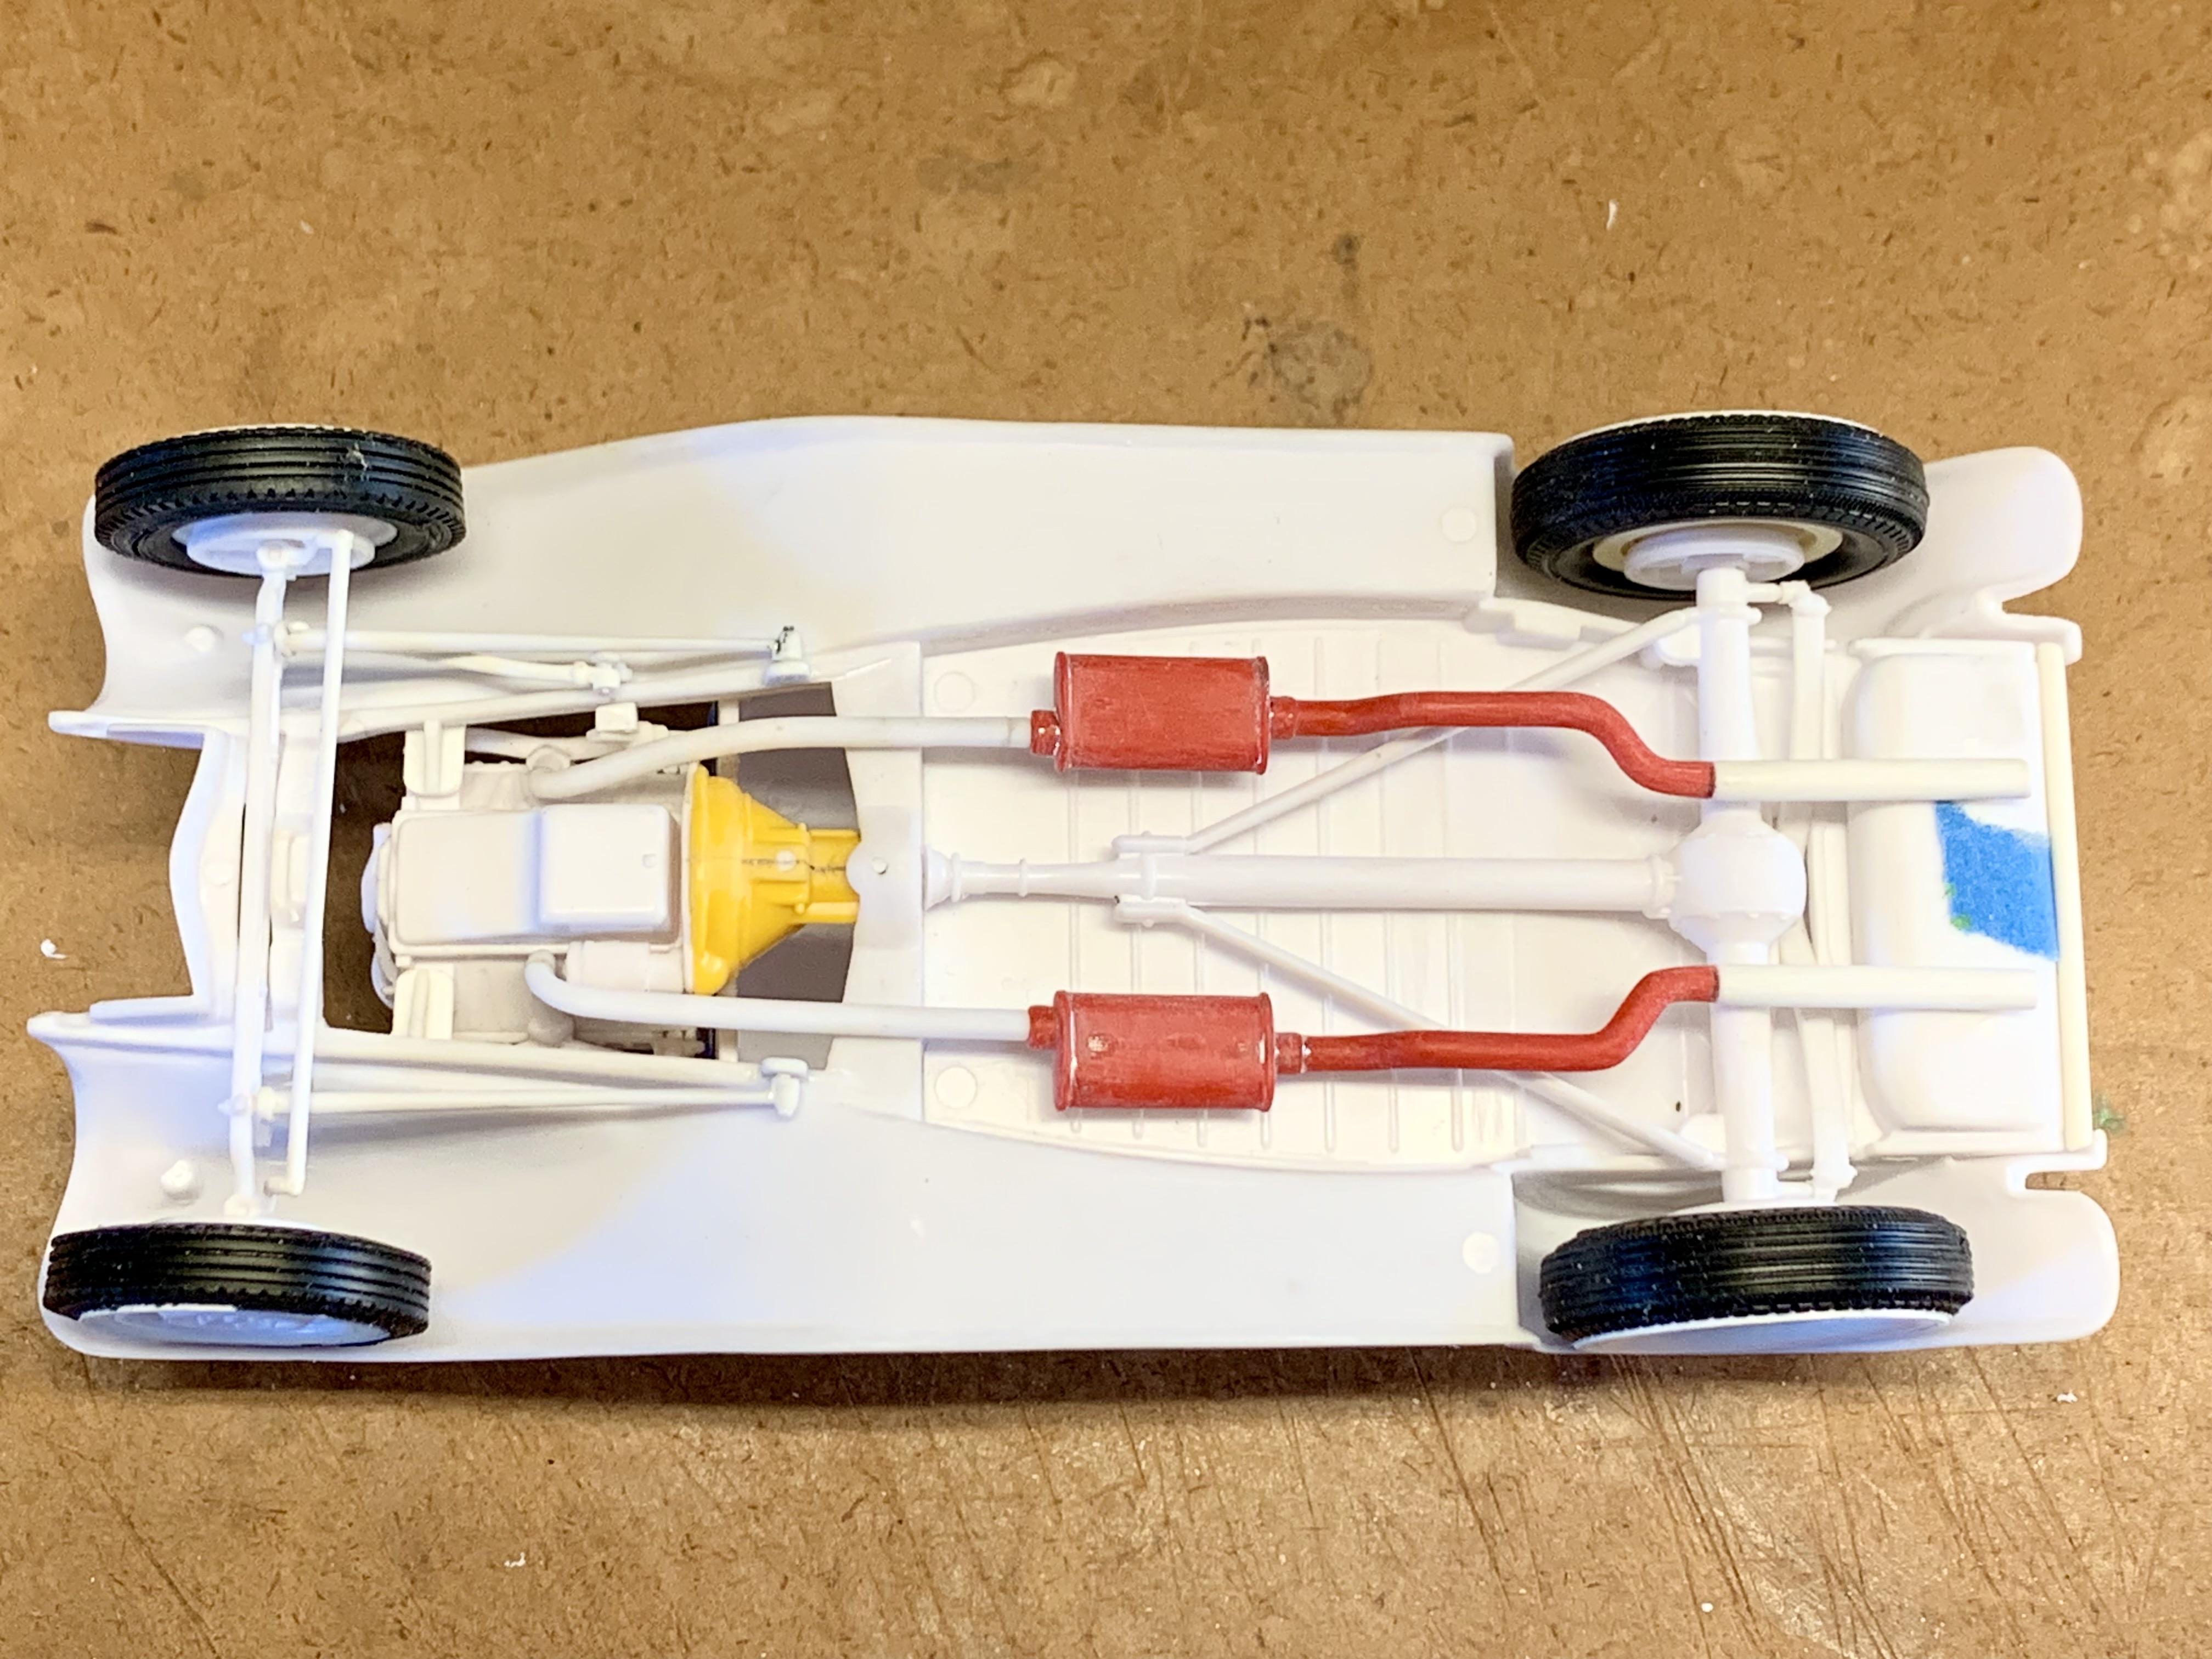
Finally, an update to report! Nothing more I can do with my 32 Sedan while I finish painting the body and exterior parts so I pulled the Monogram Roadster out. Where I had left off it was in need of new forward exhaust “pipes” made to connect the Cadillac engine to the existing mufflers and tailpipes. I grabbed a pair of passenger side exhaust manifolds from a pair of Revell 49 Mercury’s (same source as the engine), made them so they pin to the engine and then pieced together sections of pipe made from the previous forward pipes from the cast-off Chevy. Their shape was manipulated with careful bending to sweep back to the mufflers and I put some discrete pins in the tops of the pipes that go into the bottom of the transmission cross member to hold them tucked up and in proper alignment. Initially, I was considering changing the mufflers to glass packs but decided not to further complicate the matter. With the exhaust crossed off the list I mocked up the whole chassis to assess what else needed to be done. This kit never had a steering gear box and the instructions have you glue the end of the drag link to the frame which is totally inaccurate. Just as in the full scale world, split wishbones can cause a conflict with side steering but after some trial and error I found a solution. I grabbed the gear box and drag link piece from the modern Revell Model A hot rod kits. The link rod was cut off leaving just the pitman arm. An .040” hole was drilled through the side of the frame, an .040” rod inserted into the arm to pass through the frame and an .040” hole drilled into the box to mount on the other end of the rod, sandwiching the frame. From there I trimmed away the steering arms from a tie rod from the Revell 32 kit series, shortened the rod and carefully shaped it to jog around the wishbone and pinned it to the inside of the pitman arm. On the top side a hole was drilled at an angle through the firewall (second times the charm!) for the steering box shaft to disappear into. With that the car has a functional looking steering. ?
- 107 replies
-
- 10
-
-
Great Pumpkin ‘32 Chopped Ford Tudor Revell
Dennis Lacy replied to Silvercreeker's topic in Model Cars
Bitchin! Great to see another model get built with Drag City’s chopped sedan body. Has a great look with the oversized Radirs and very cleanly put together. I wasn’t aware the aftermarket offered a Jiggler conversion. Really neat to see in-scale considering how extraordinarily rare they are in the full size world.