Dennis Lacy
-
Posts
2,487 -
Joined
-
Last visited
Content Type
Profiles
Forums
Events
Gallery
Everything posted by Dennis Lacy
-
My shop is a 1/2 hour from Disneyland. You’re welcome to come by for a visit. ?
-
Getting more paintwork done. The frame and some other parts have been clear coated which darkened up the Titanium Silver nicely. Can’t wait to see the color polished and waxed! Gonna try on Friday to get the frame masked and the floor sprayed flat black.

- 706 replies
-
- 10
-

-
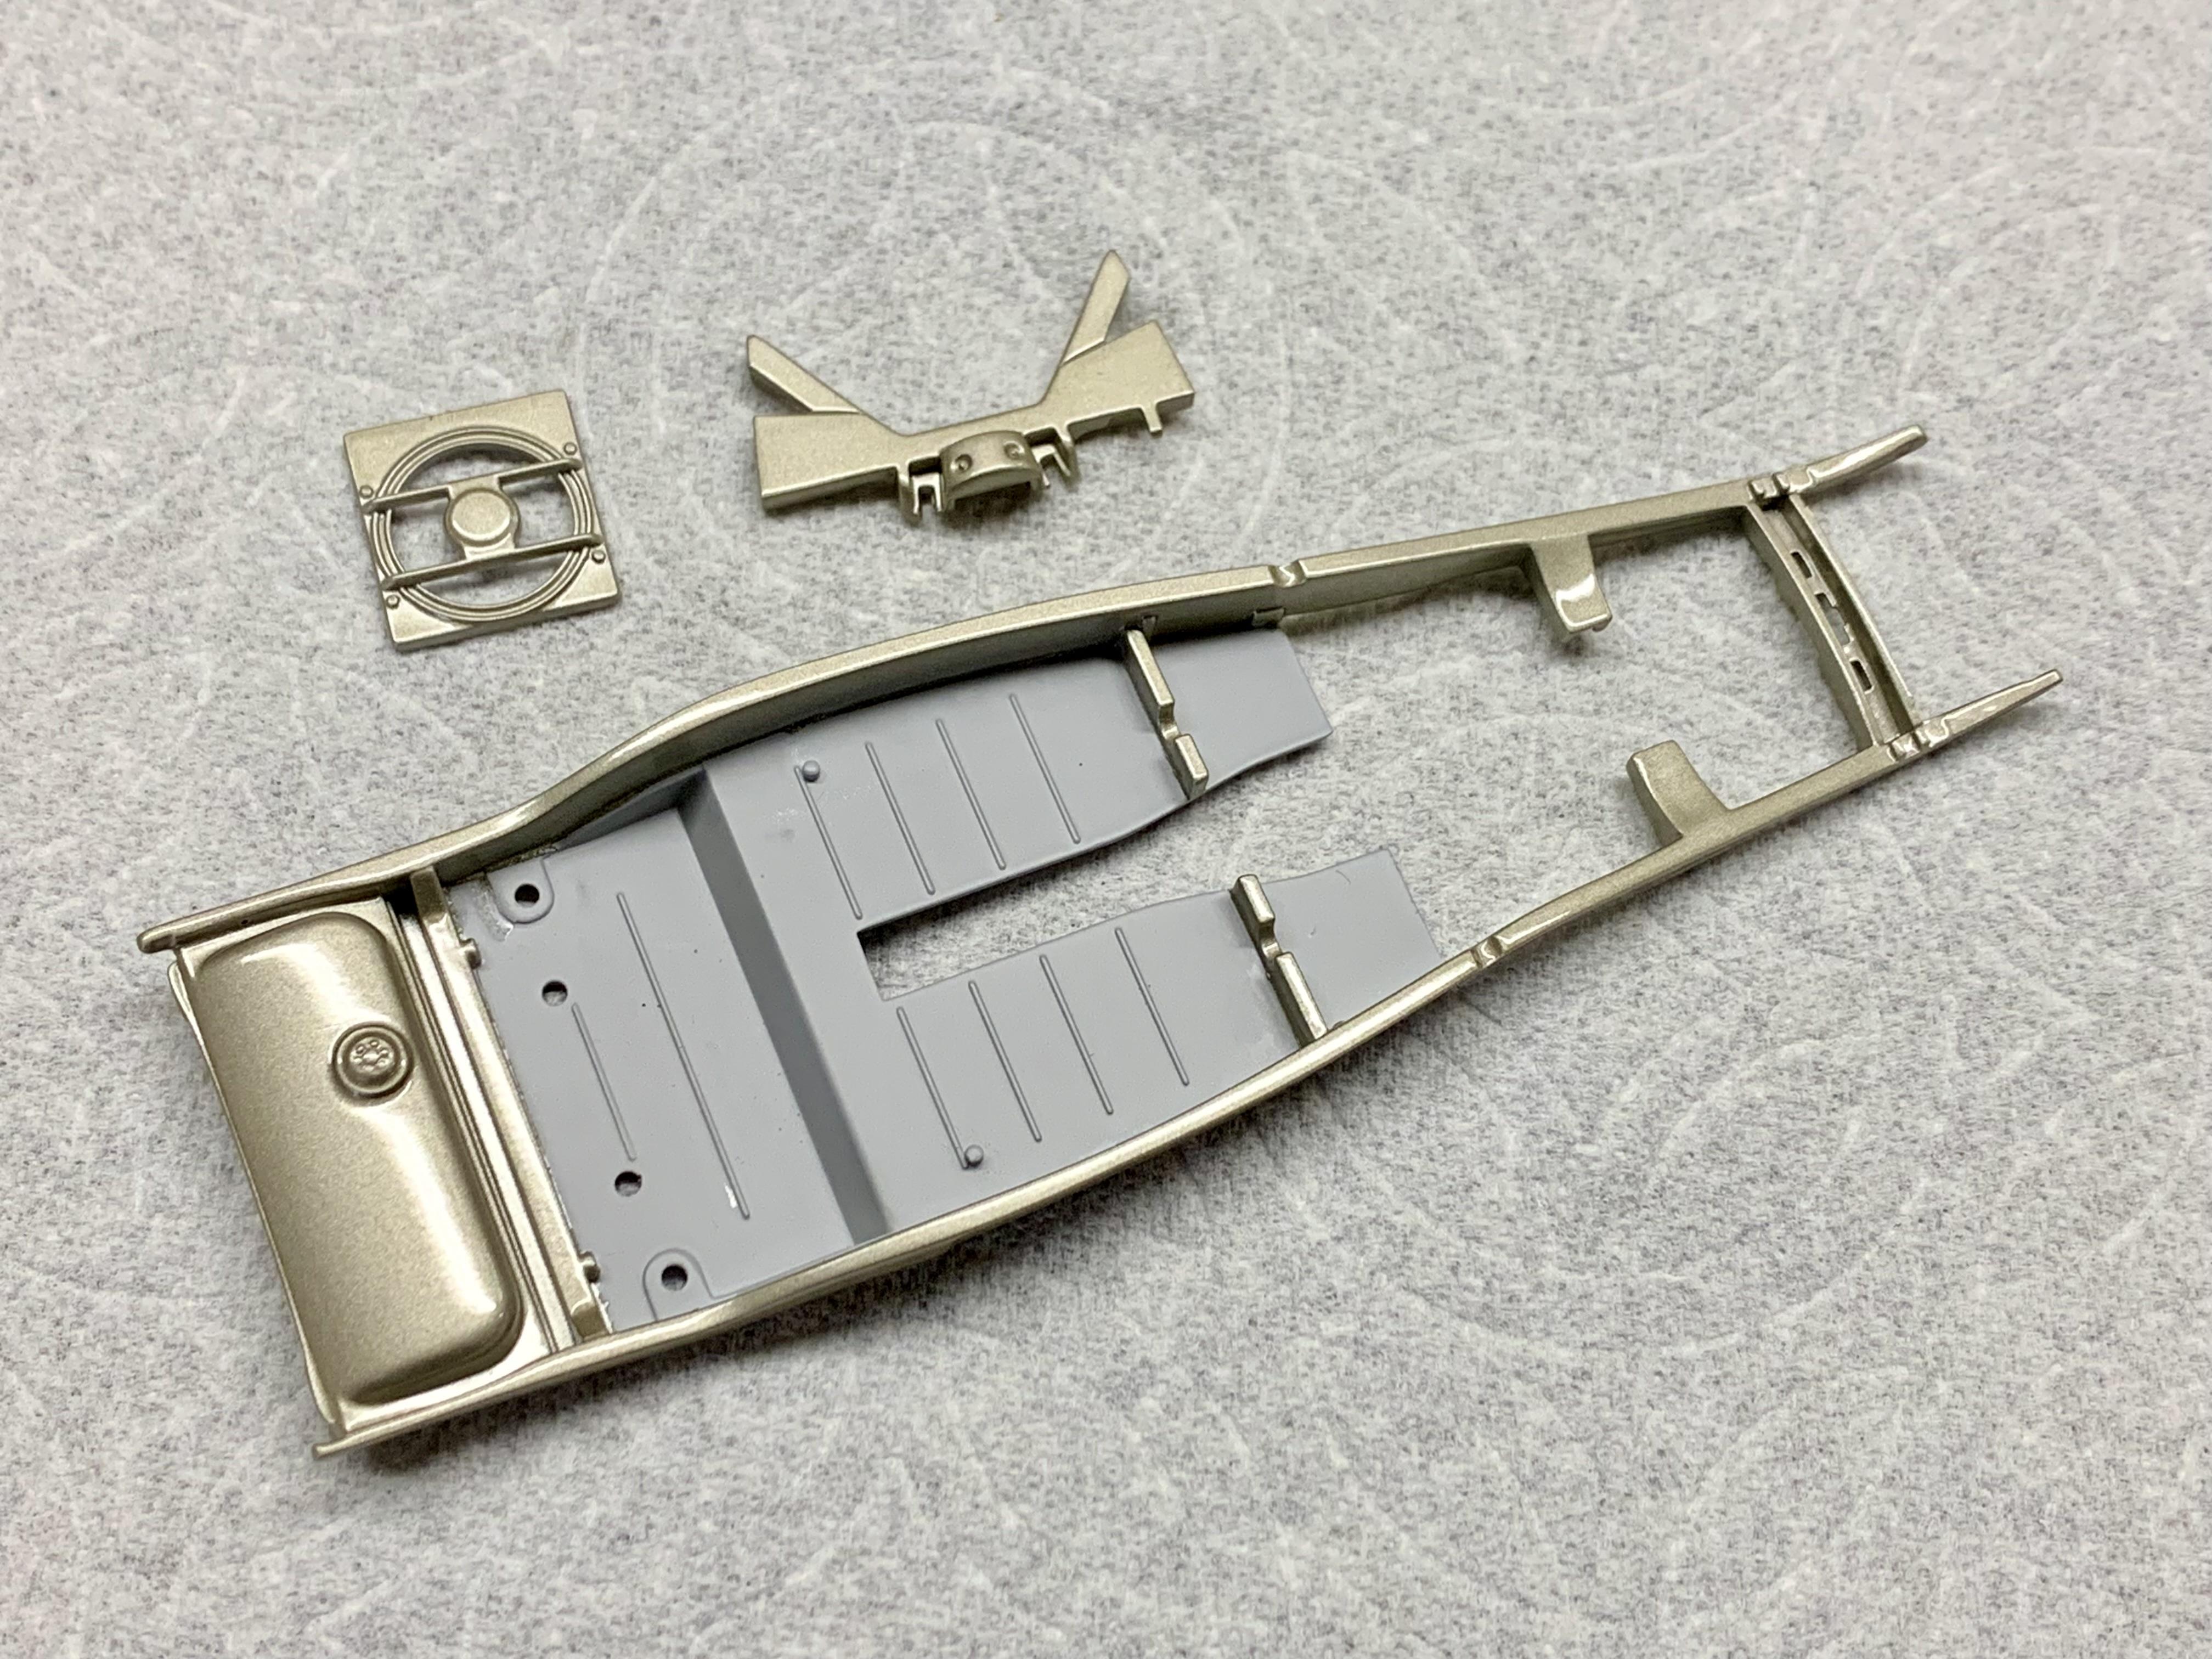
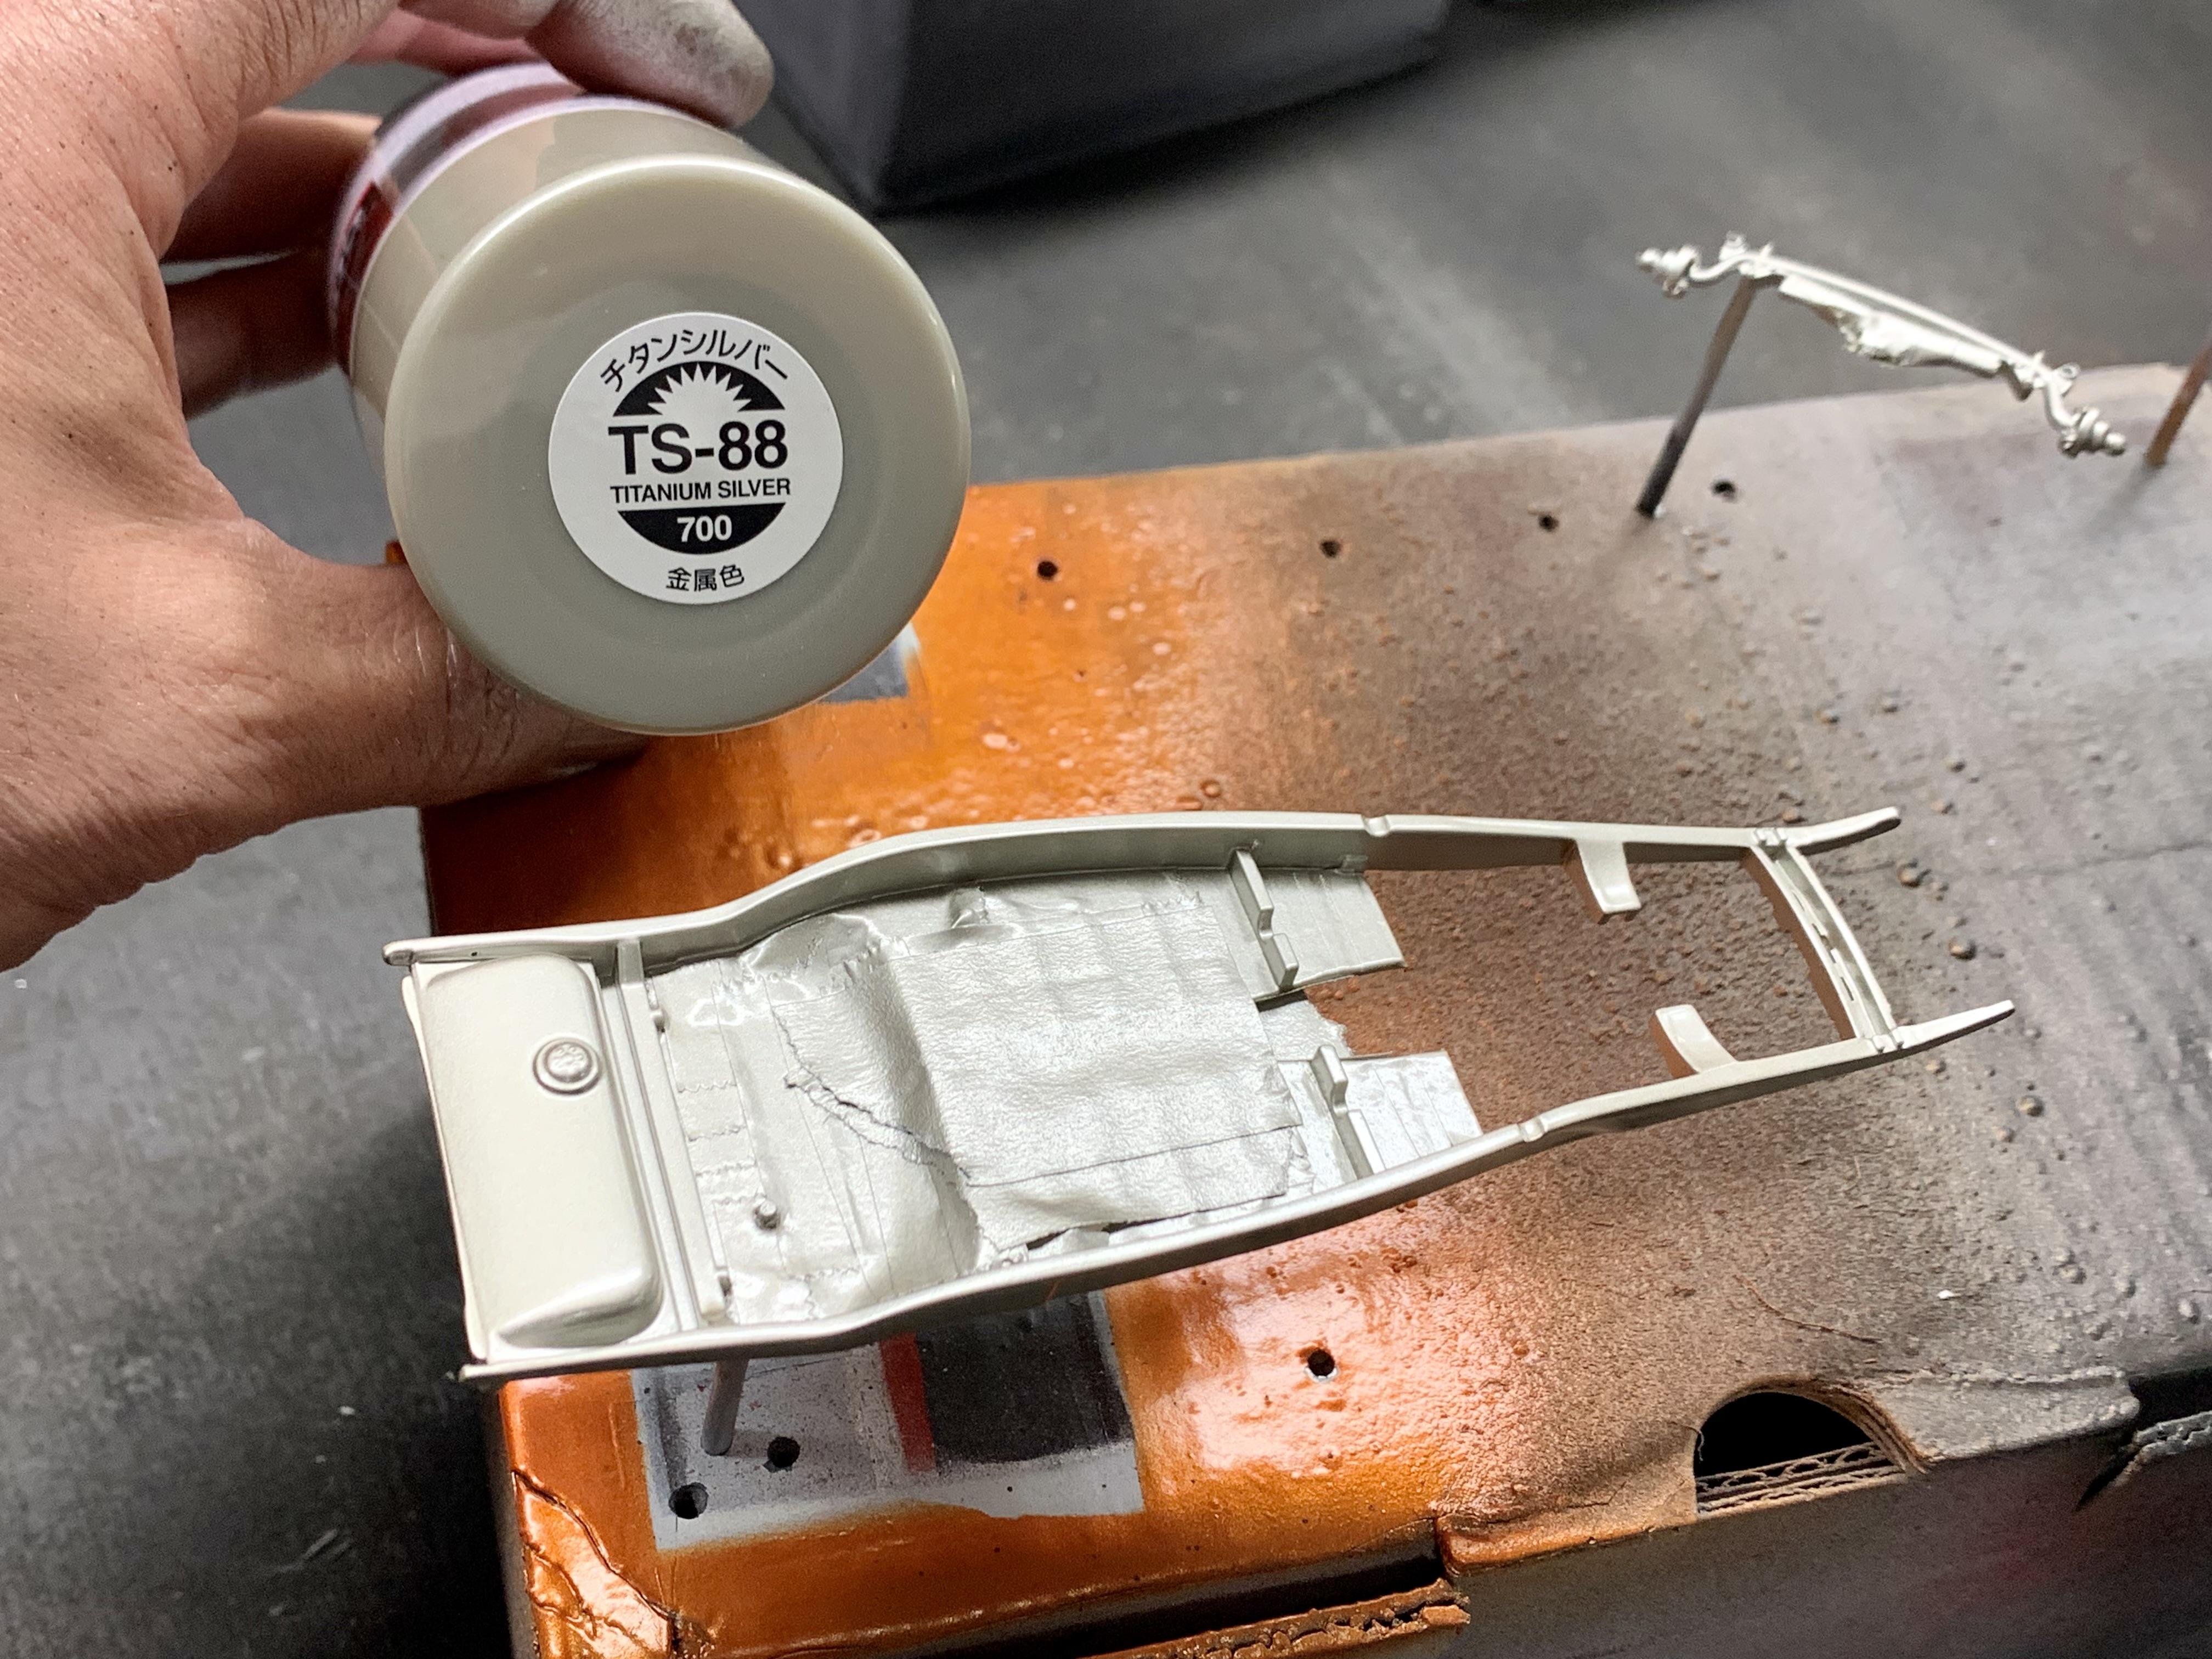
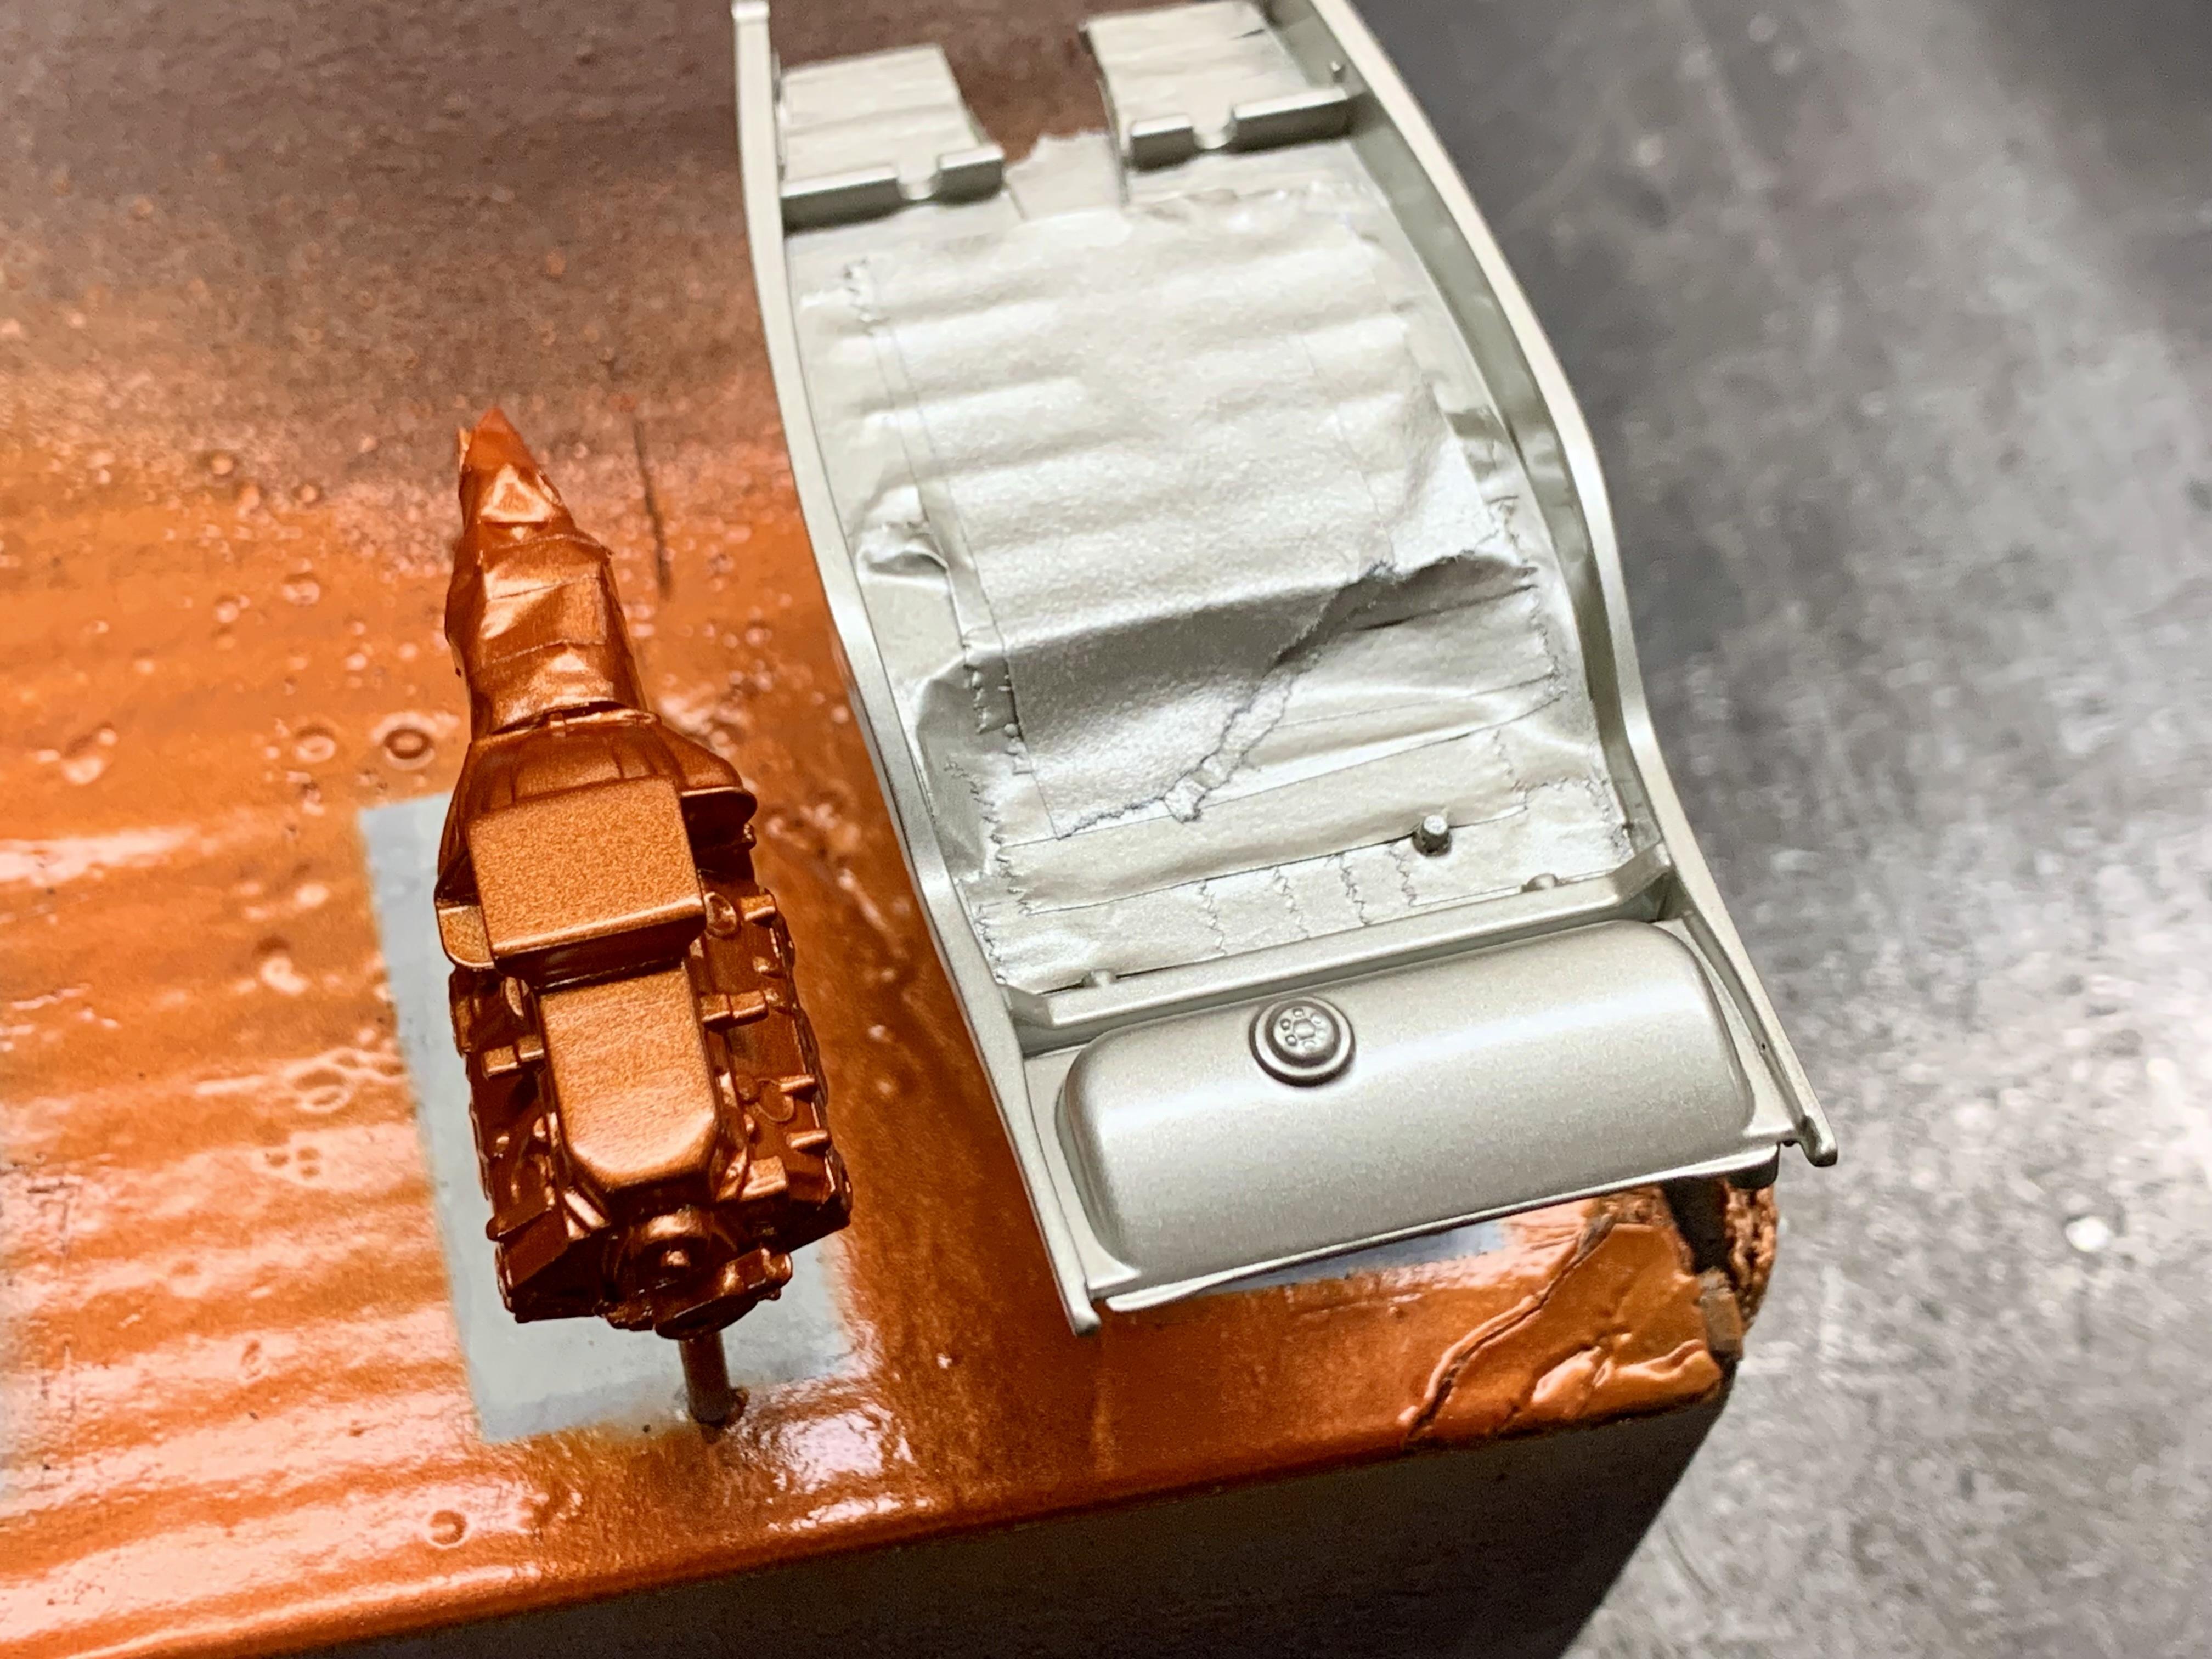
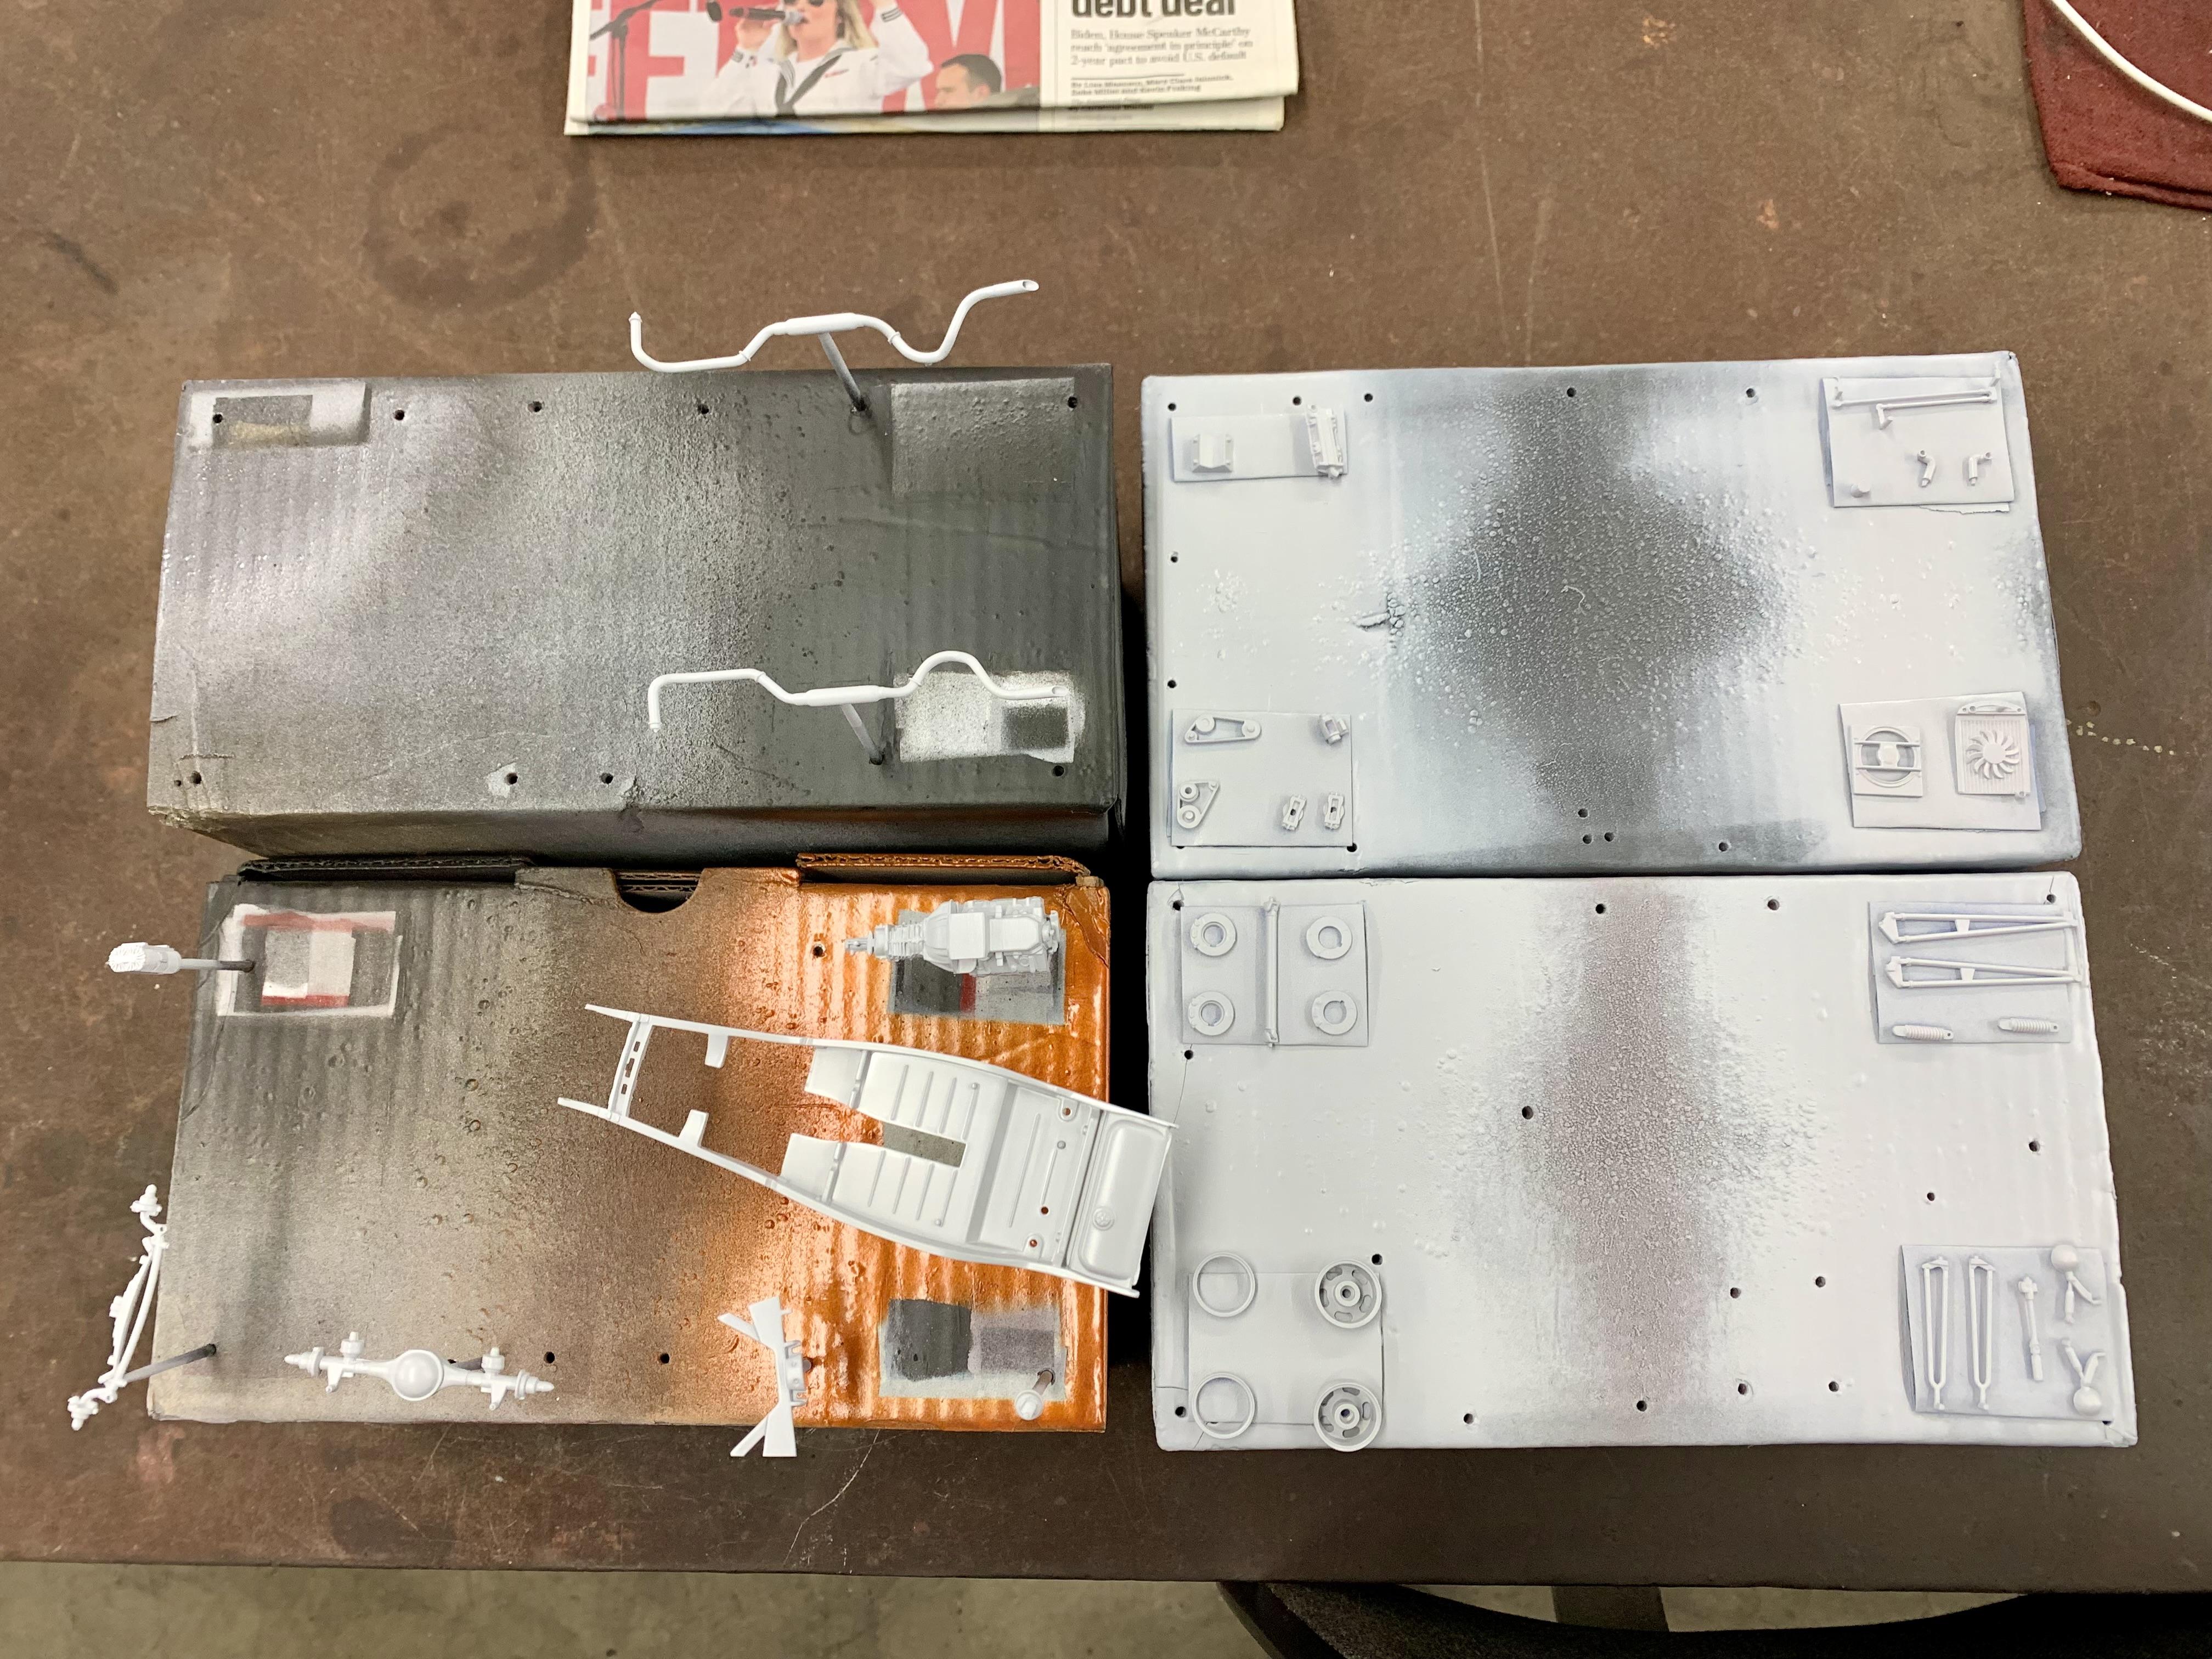
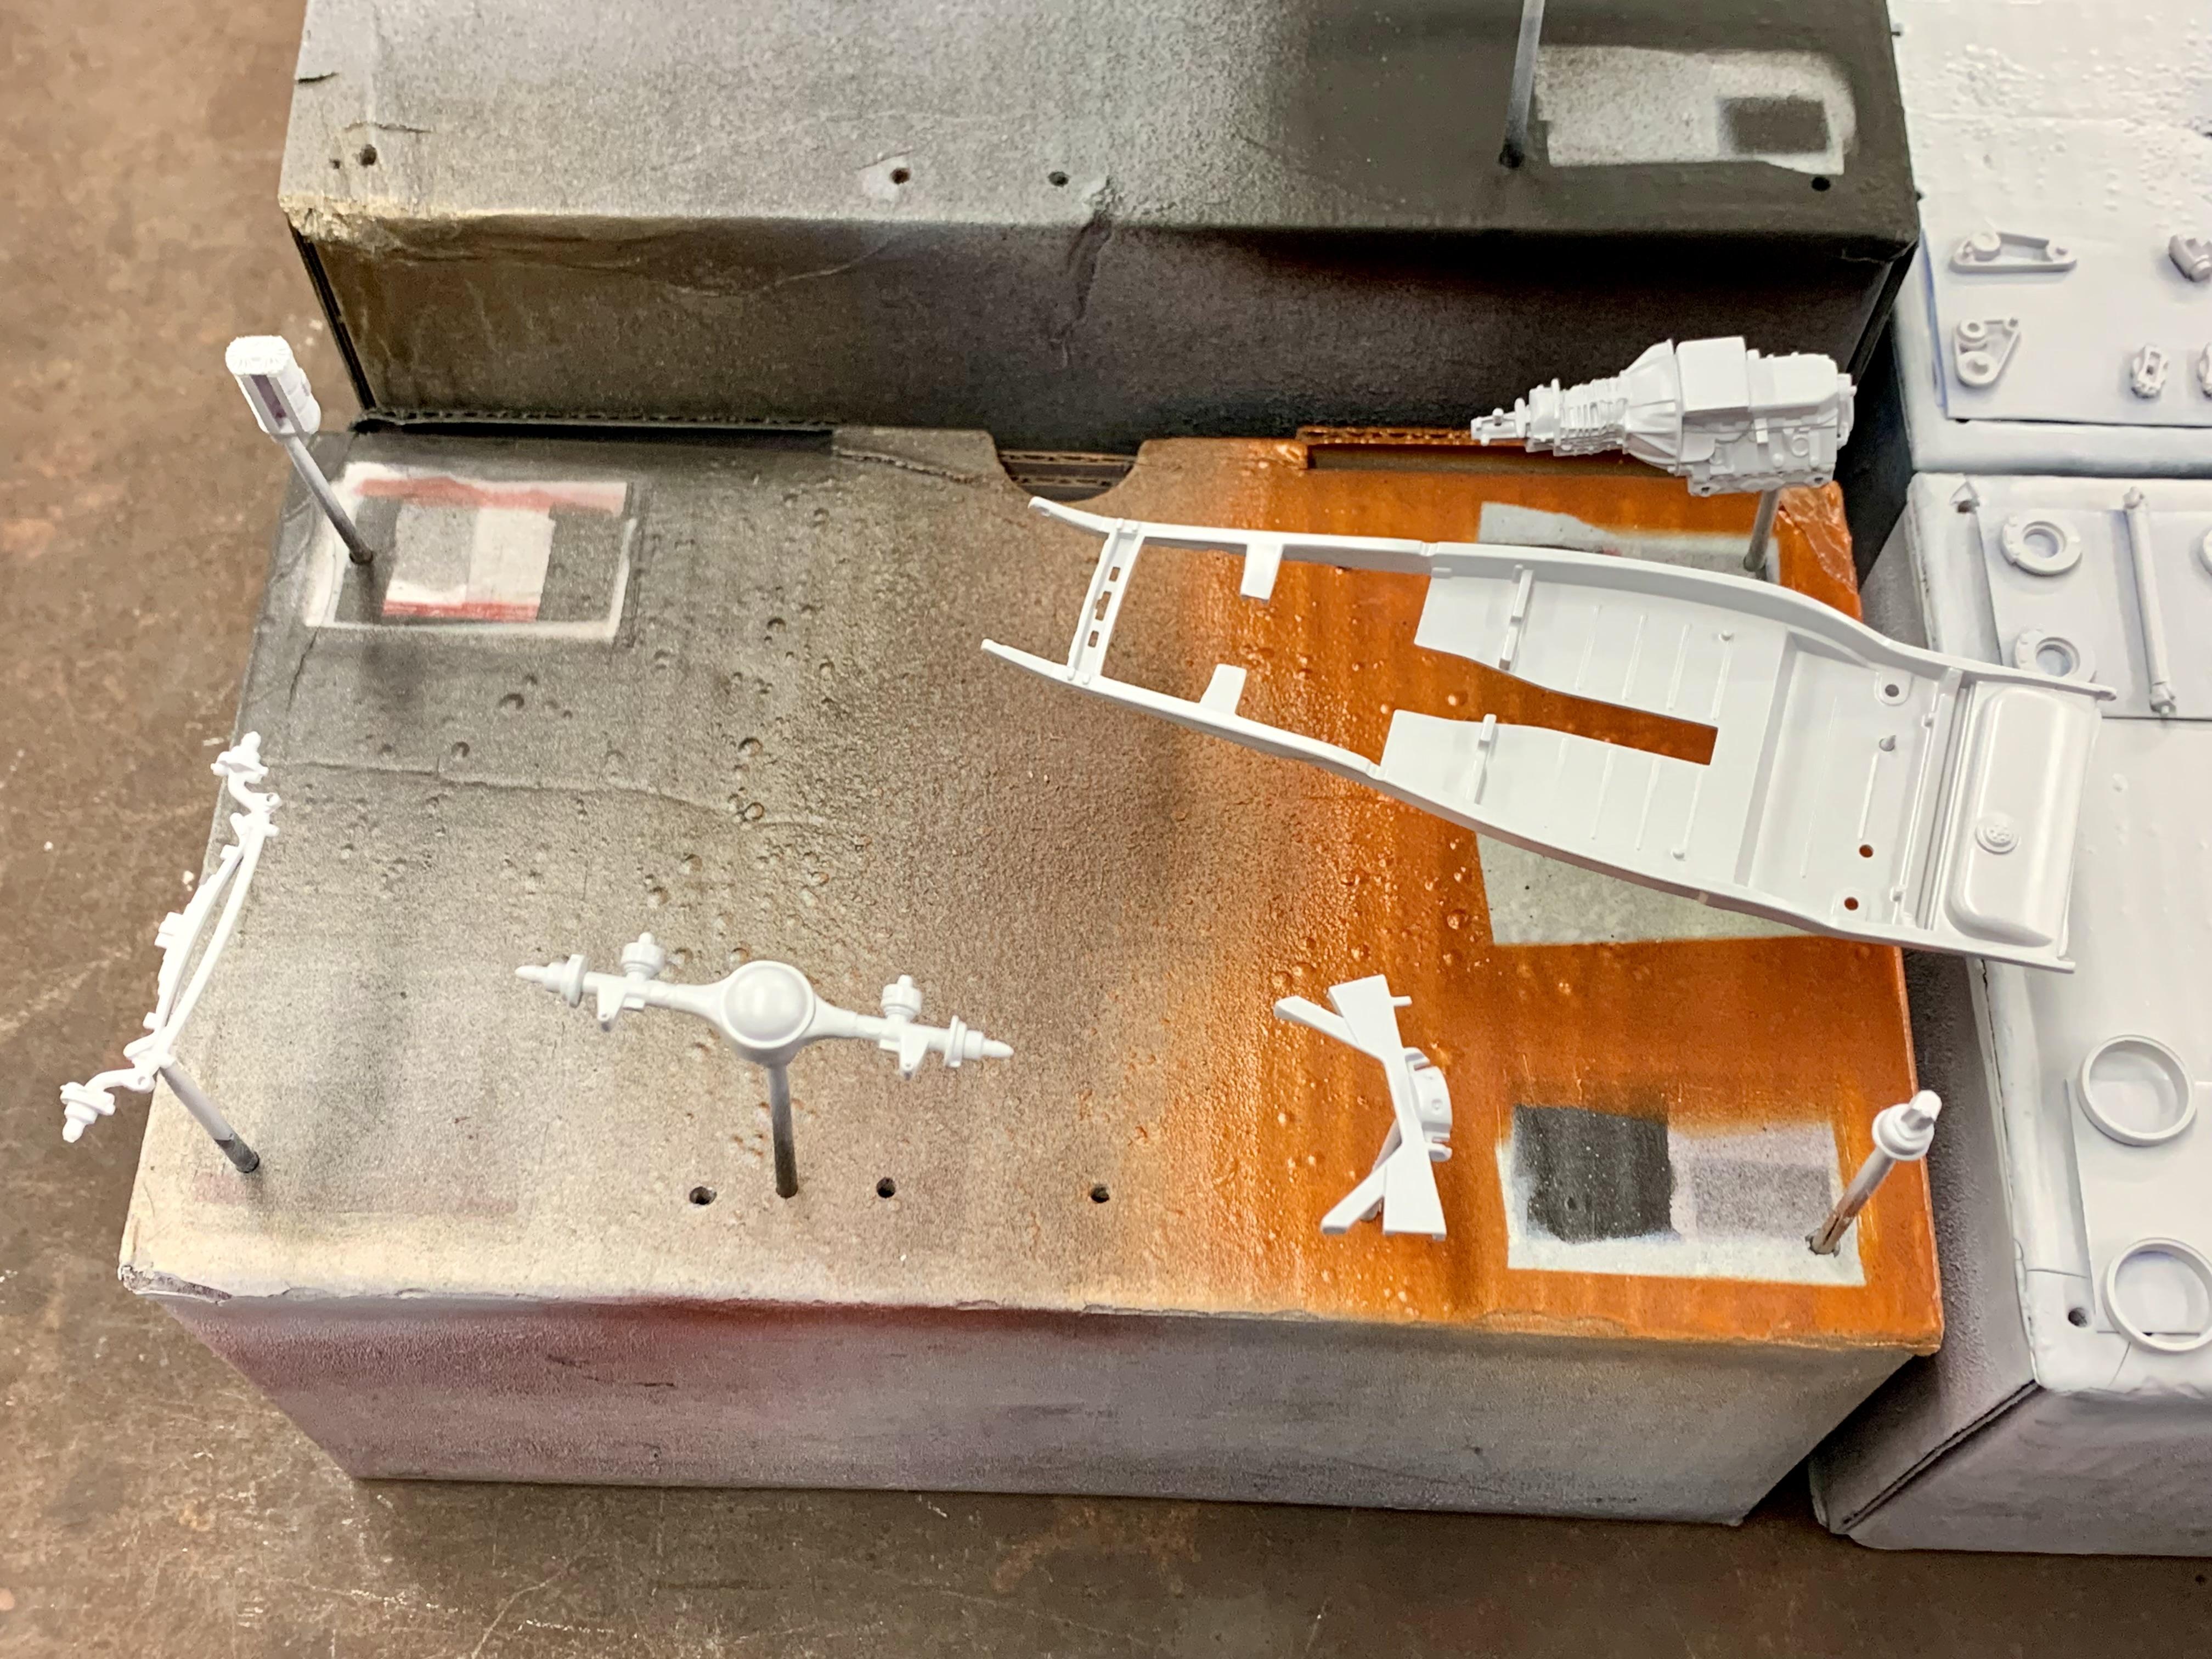
Moving forward. Sprayed the frame and chassis components today. Went with Tamiya TS88 Titanium Silver for the main color. Chosen largely because I had the brand new can on-hand and also because it’s a nice color that should look really nice on a street rod sedan. For the engine I had a partial can leftover of Tamiya TS92 Metallic Orange. I will also use this color to sparingly accent a few other small parts. These are just base coats. Everything will get a healthy coating of gloss clear. ?
-
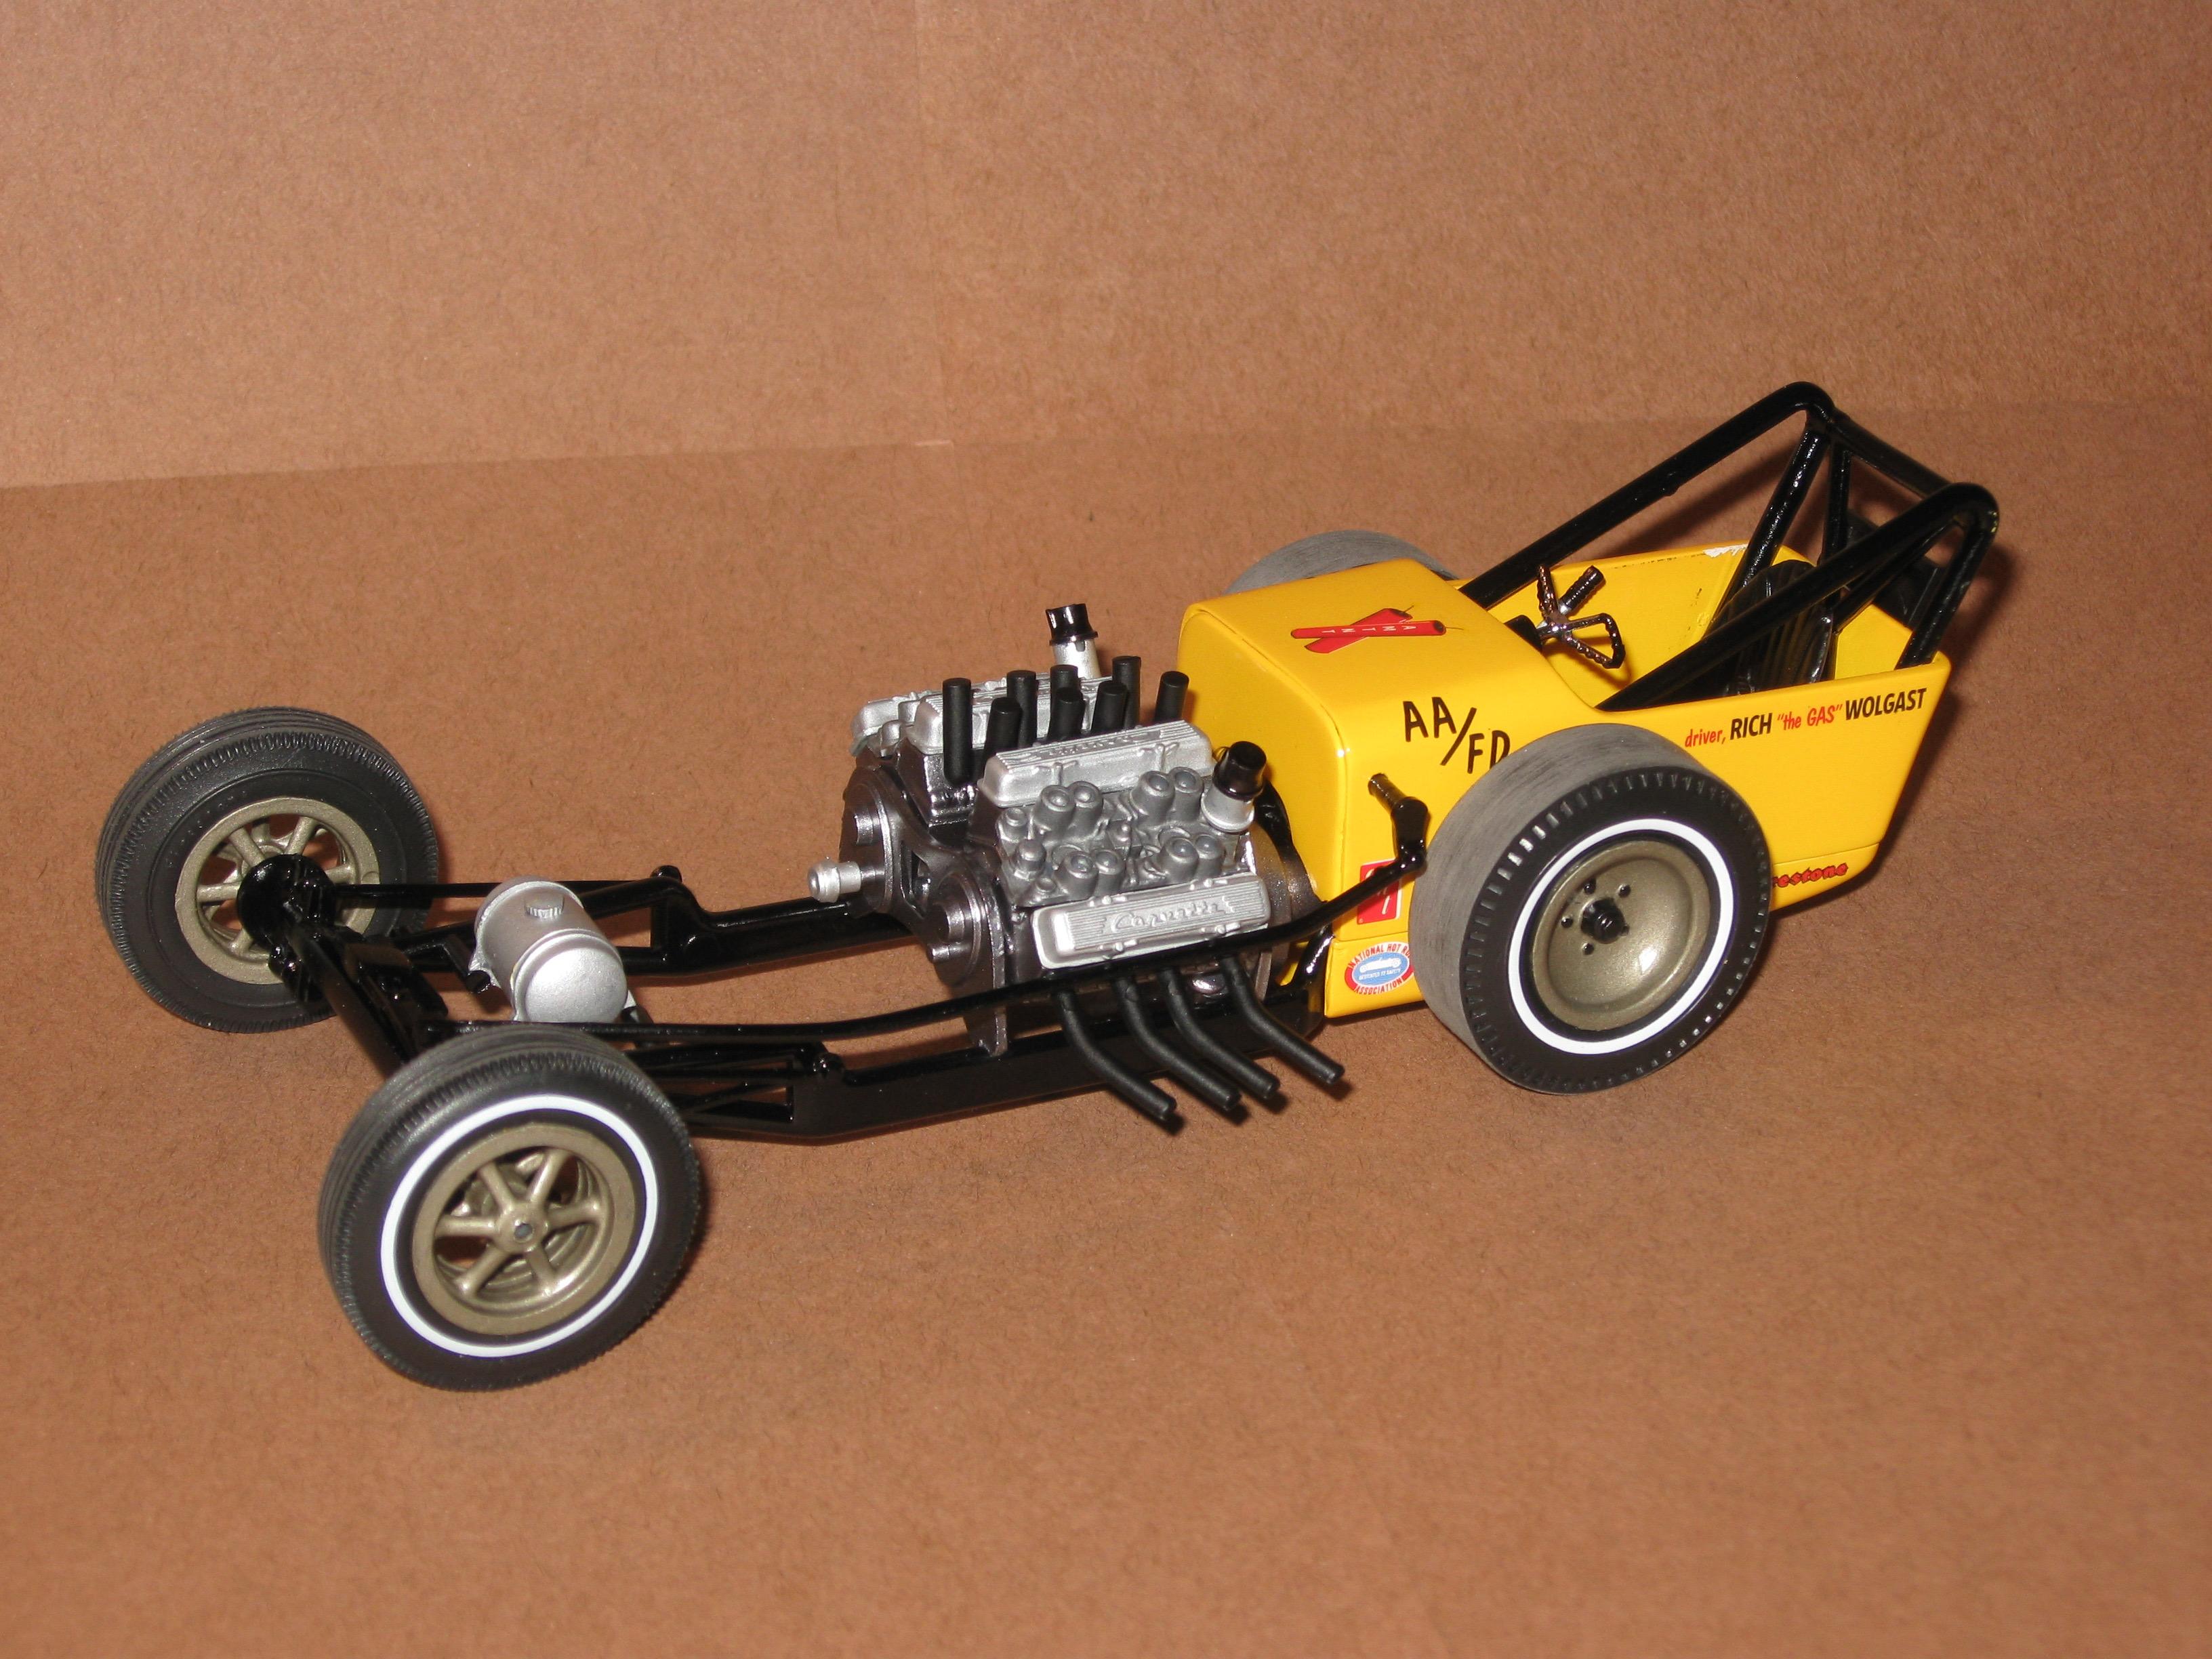
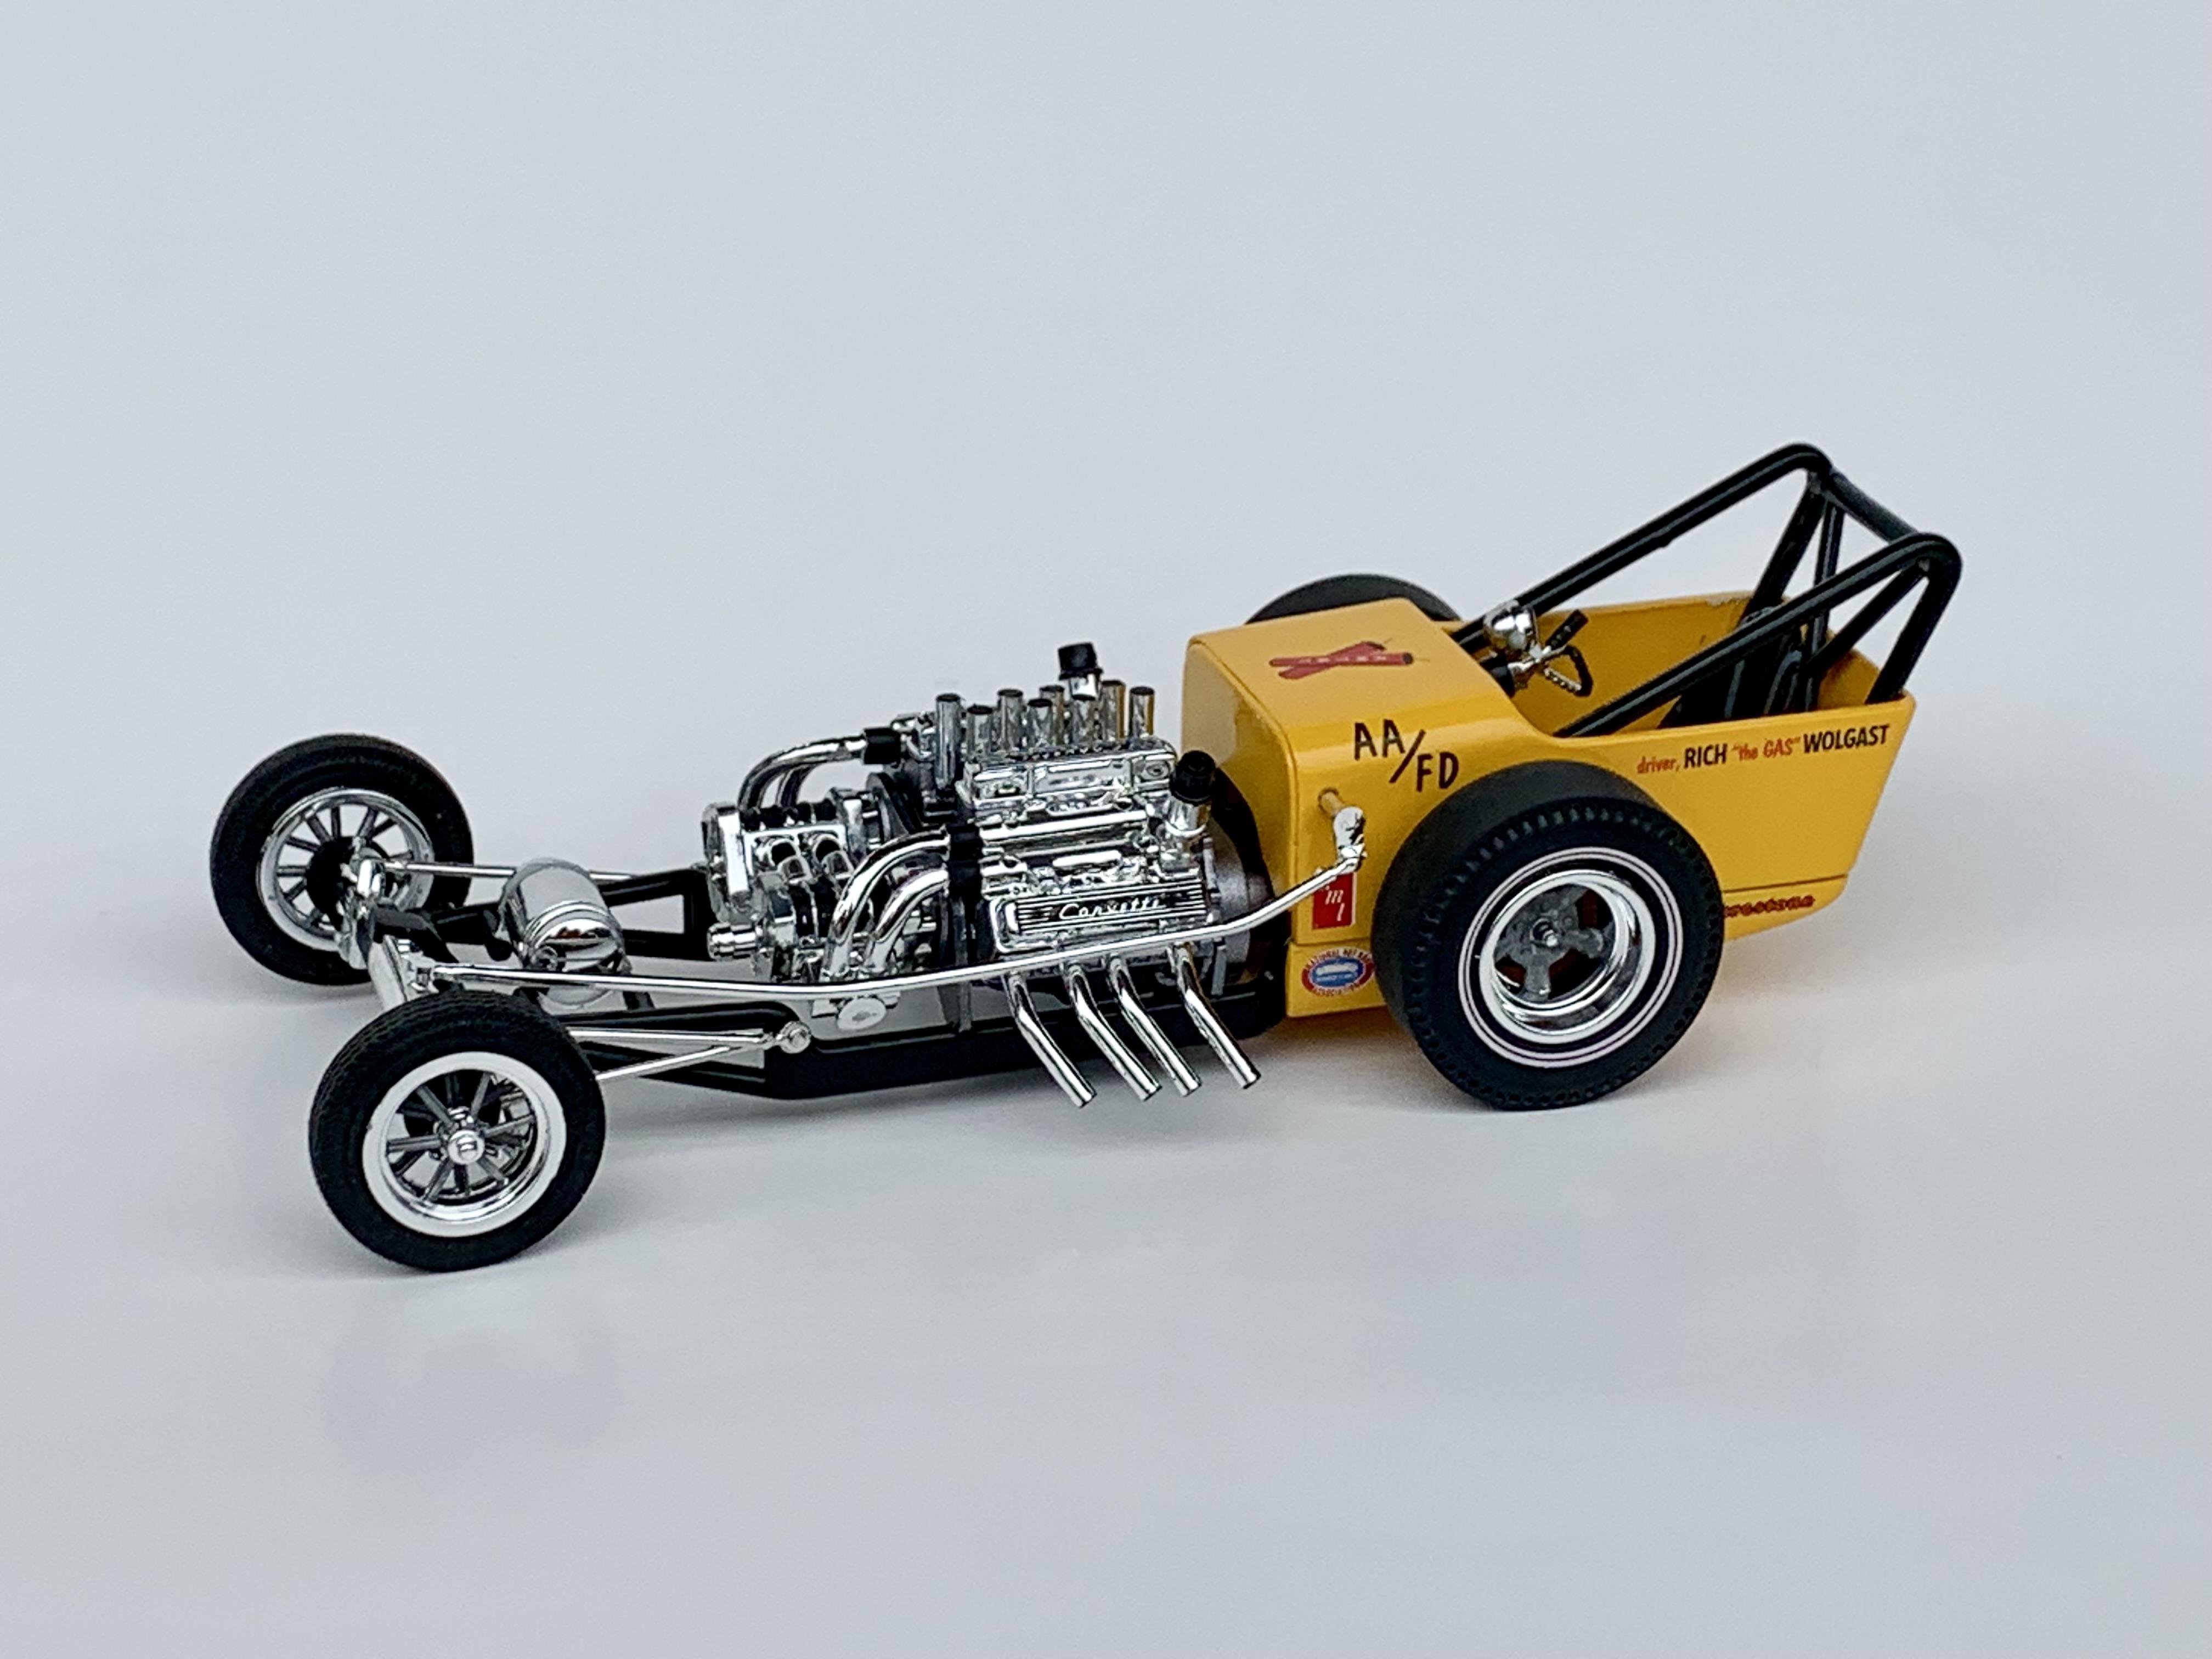
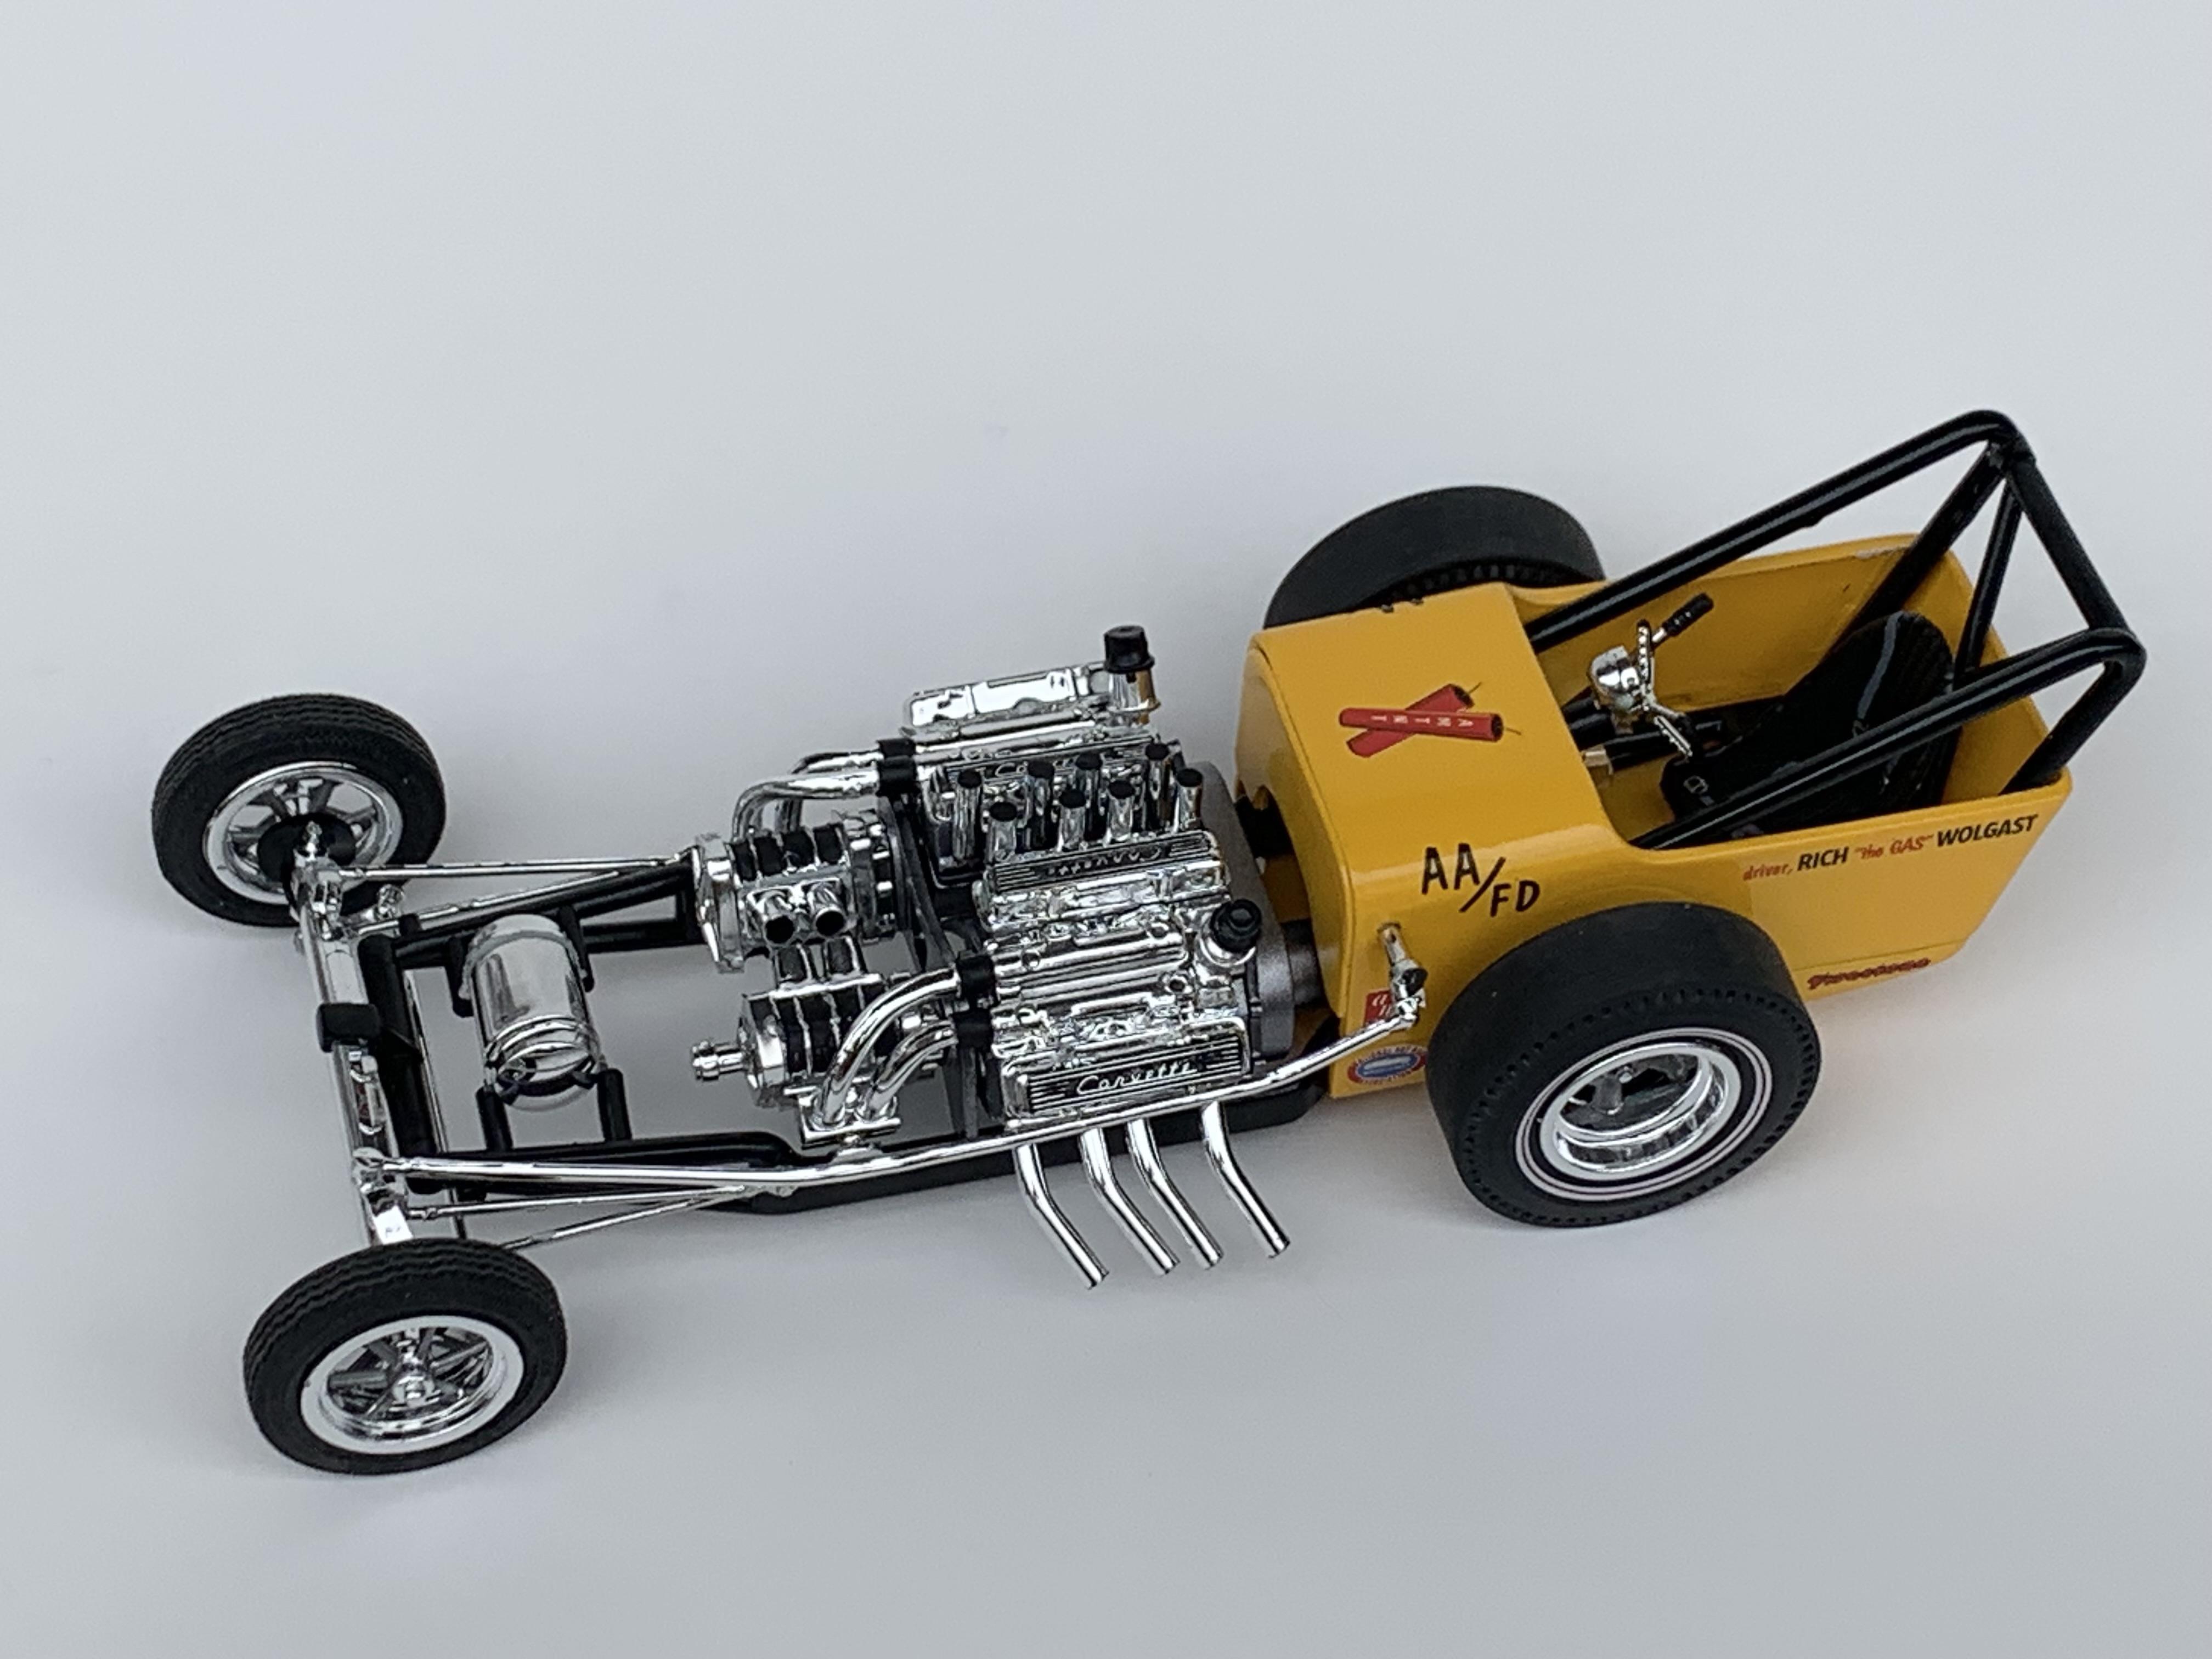
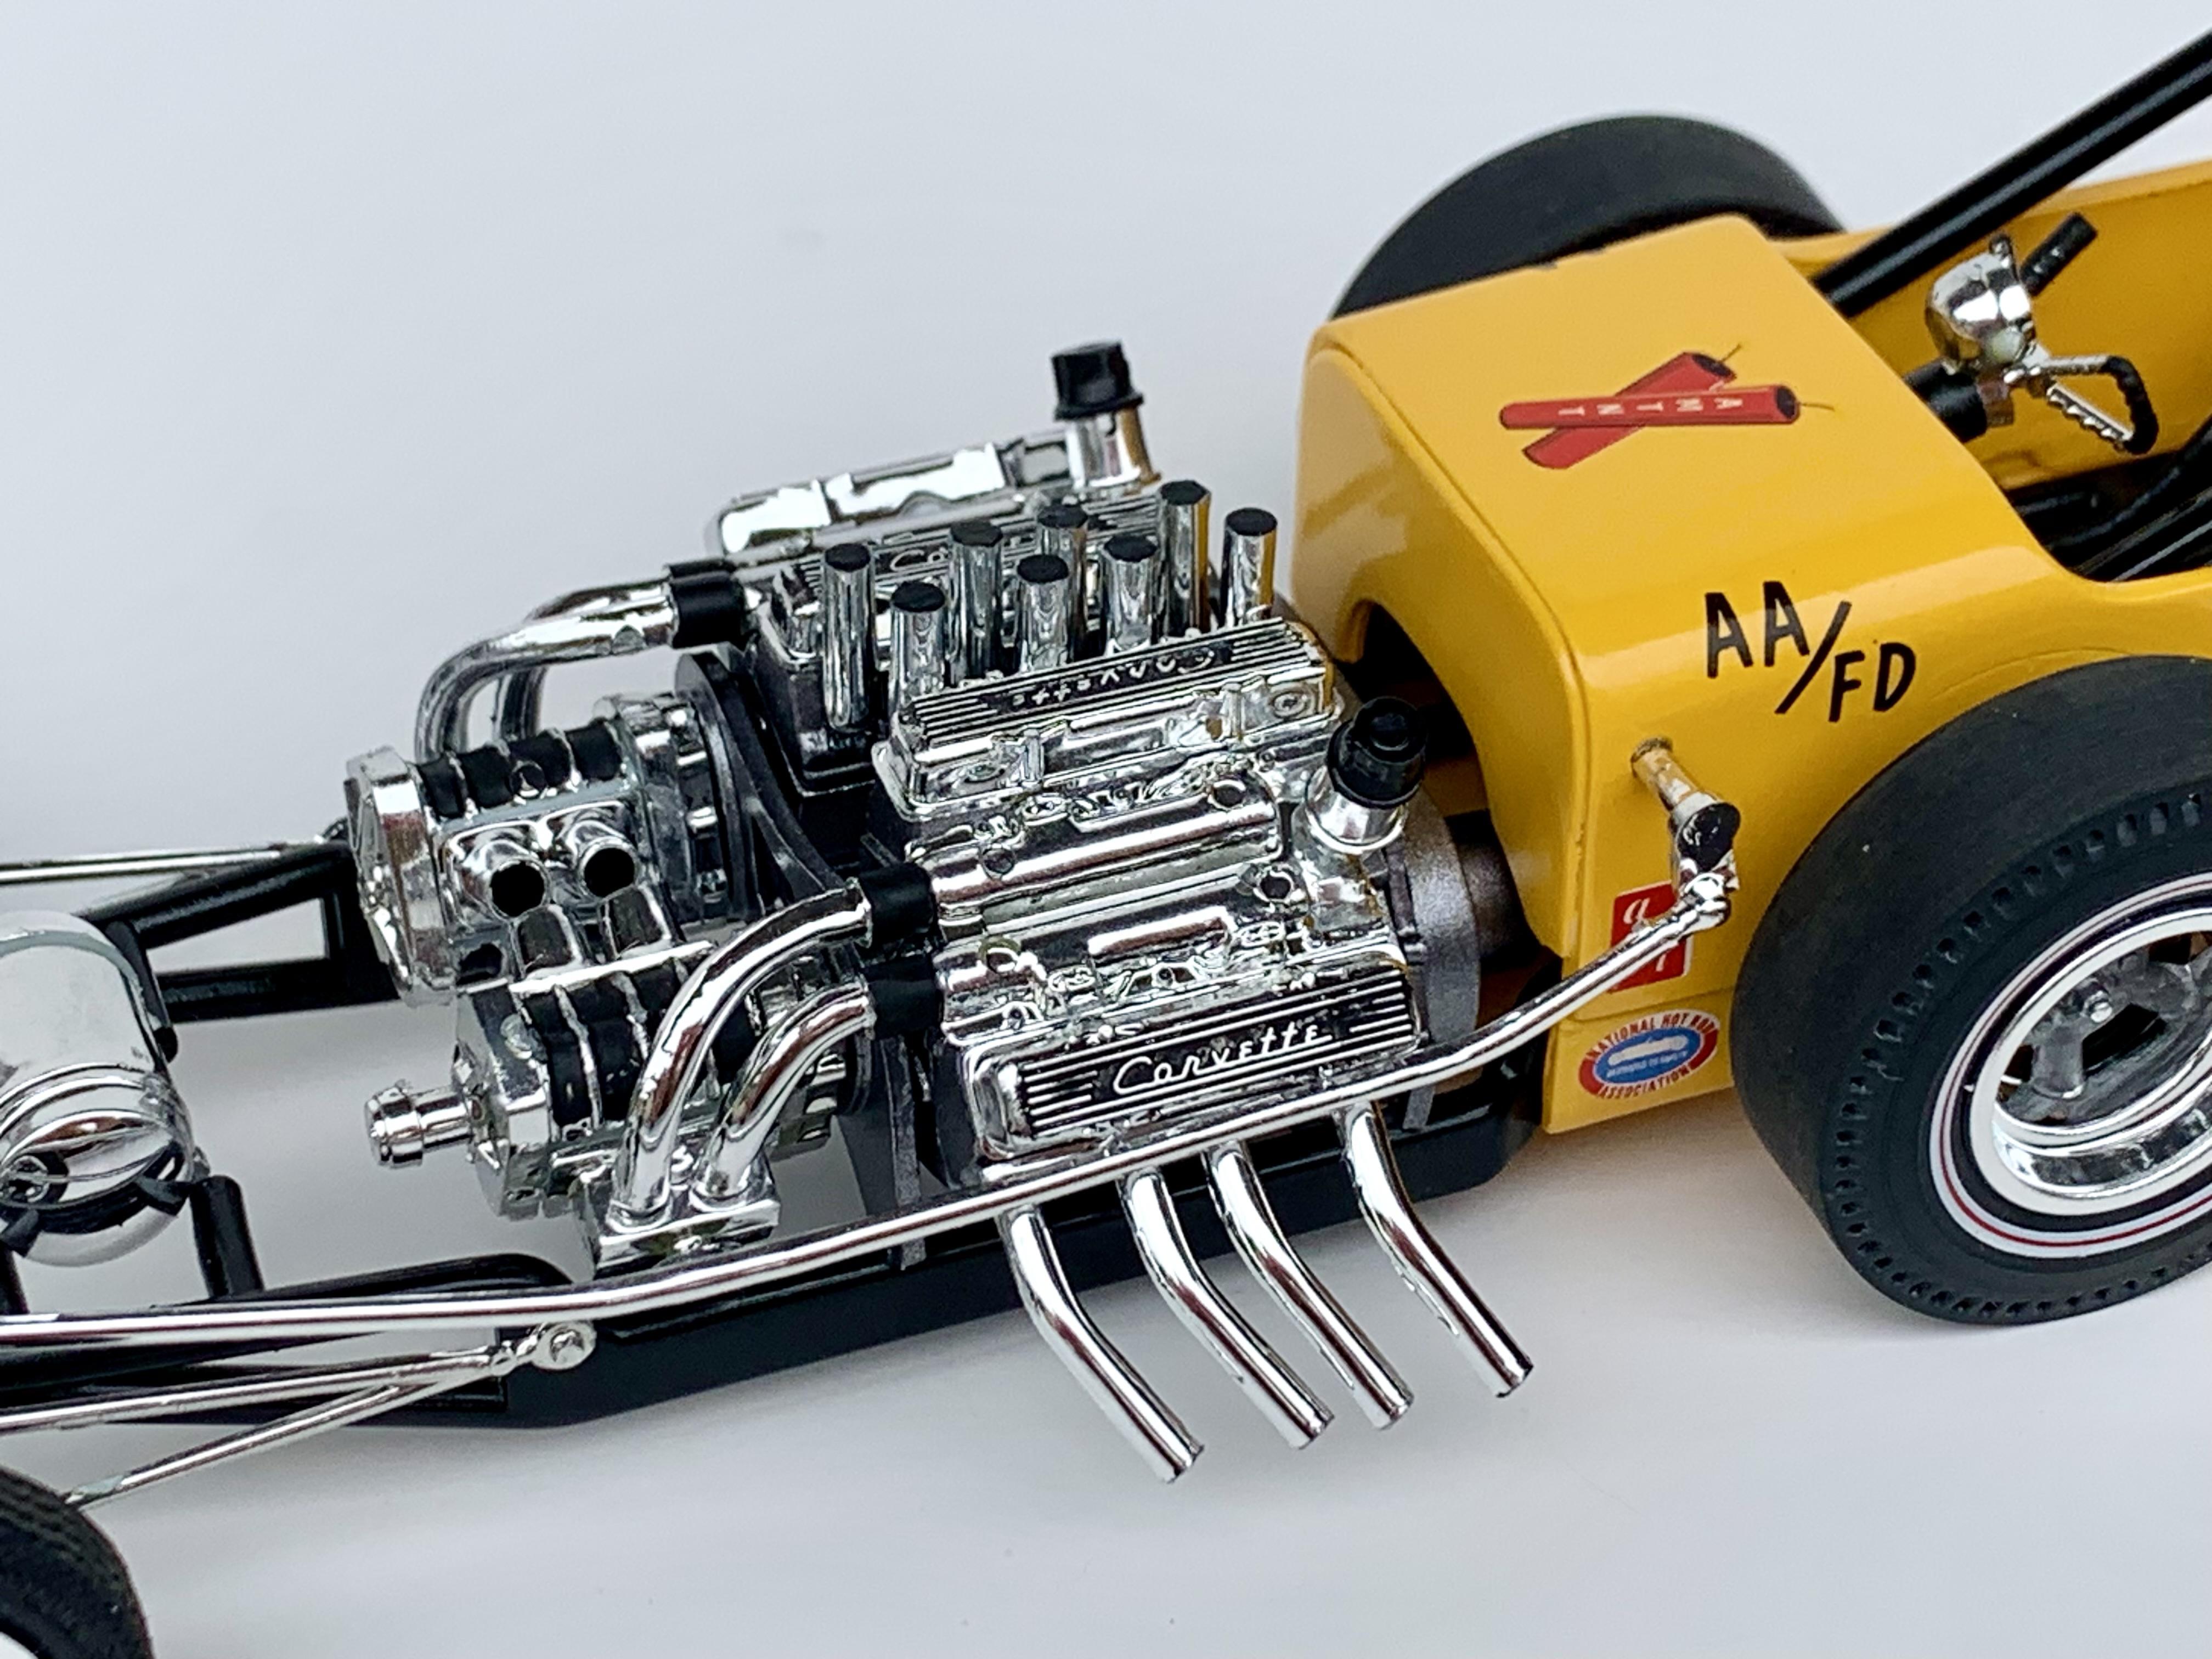
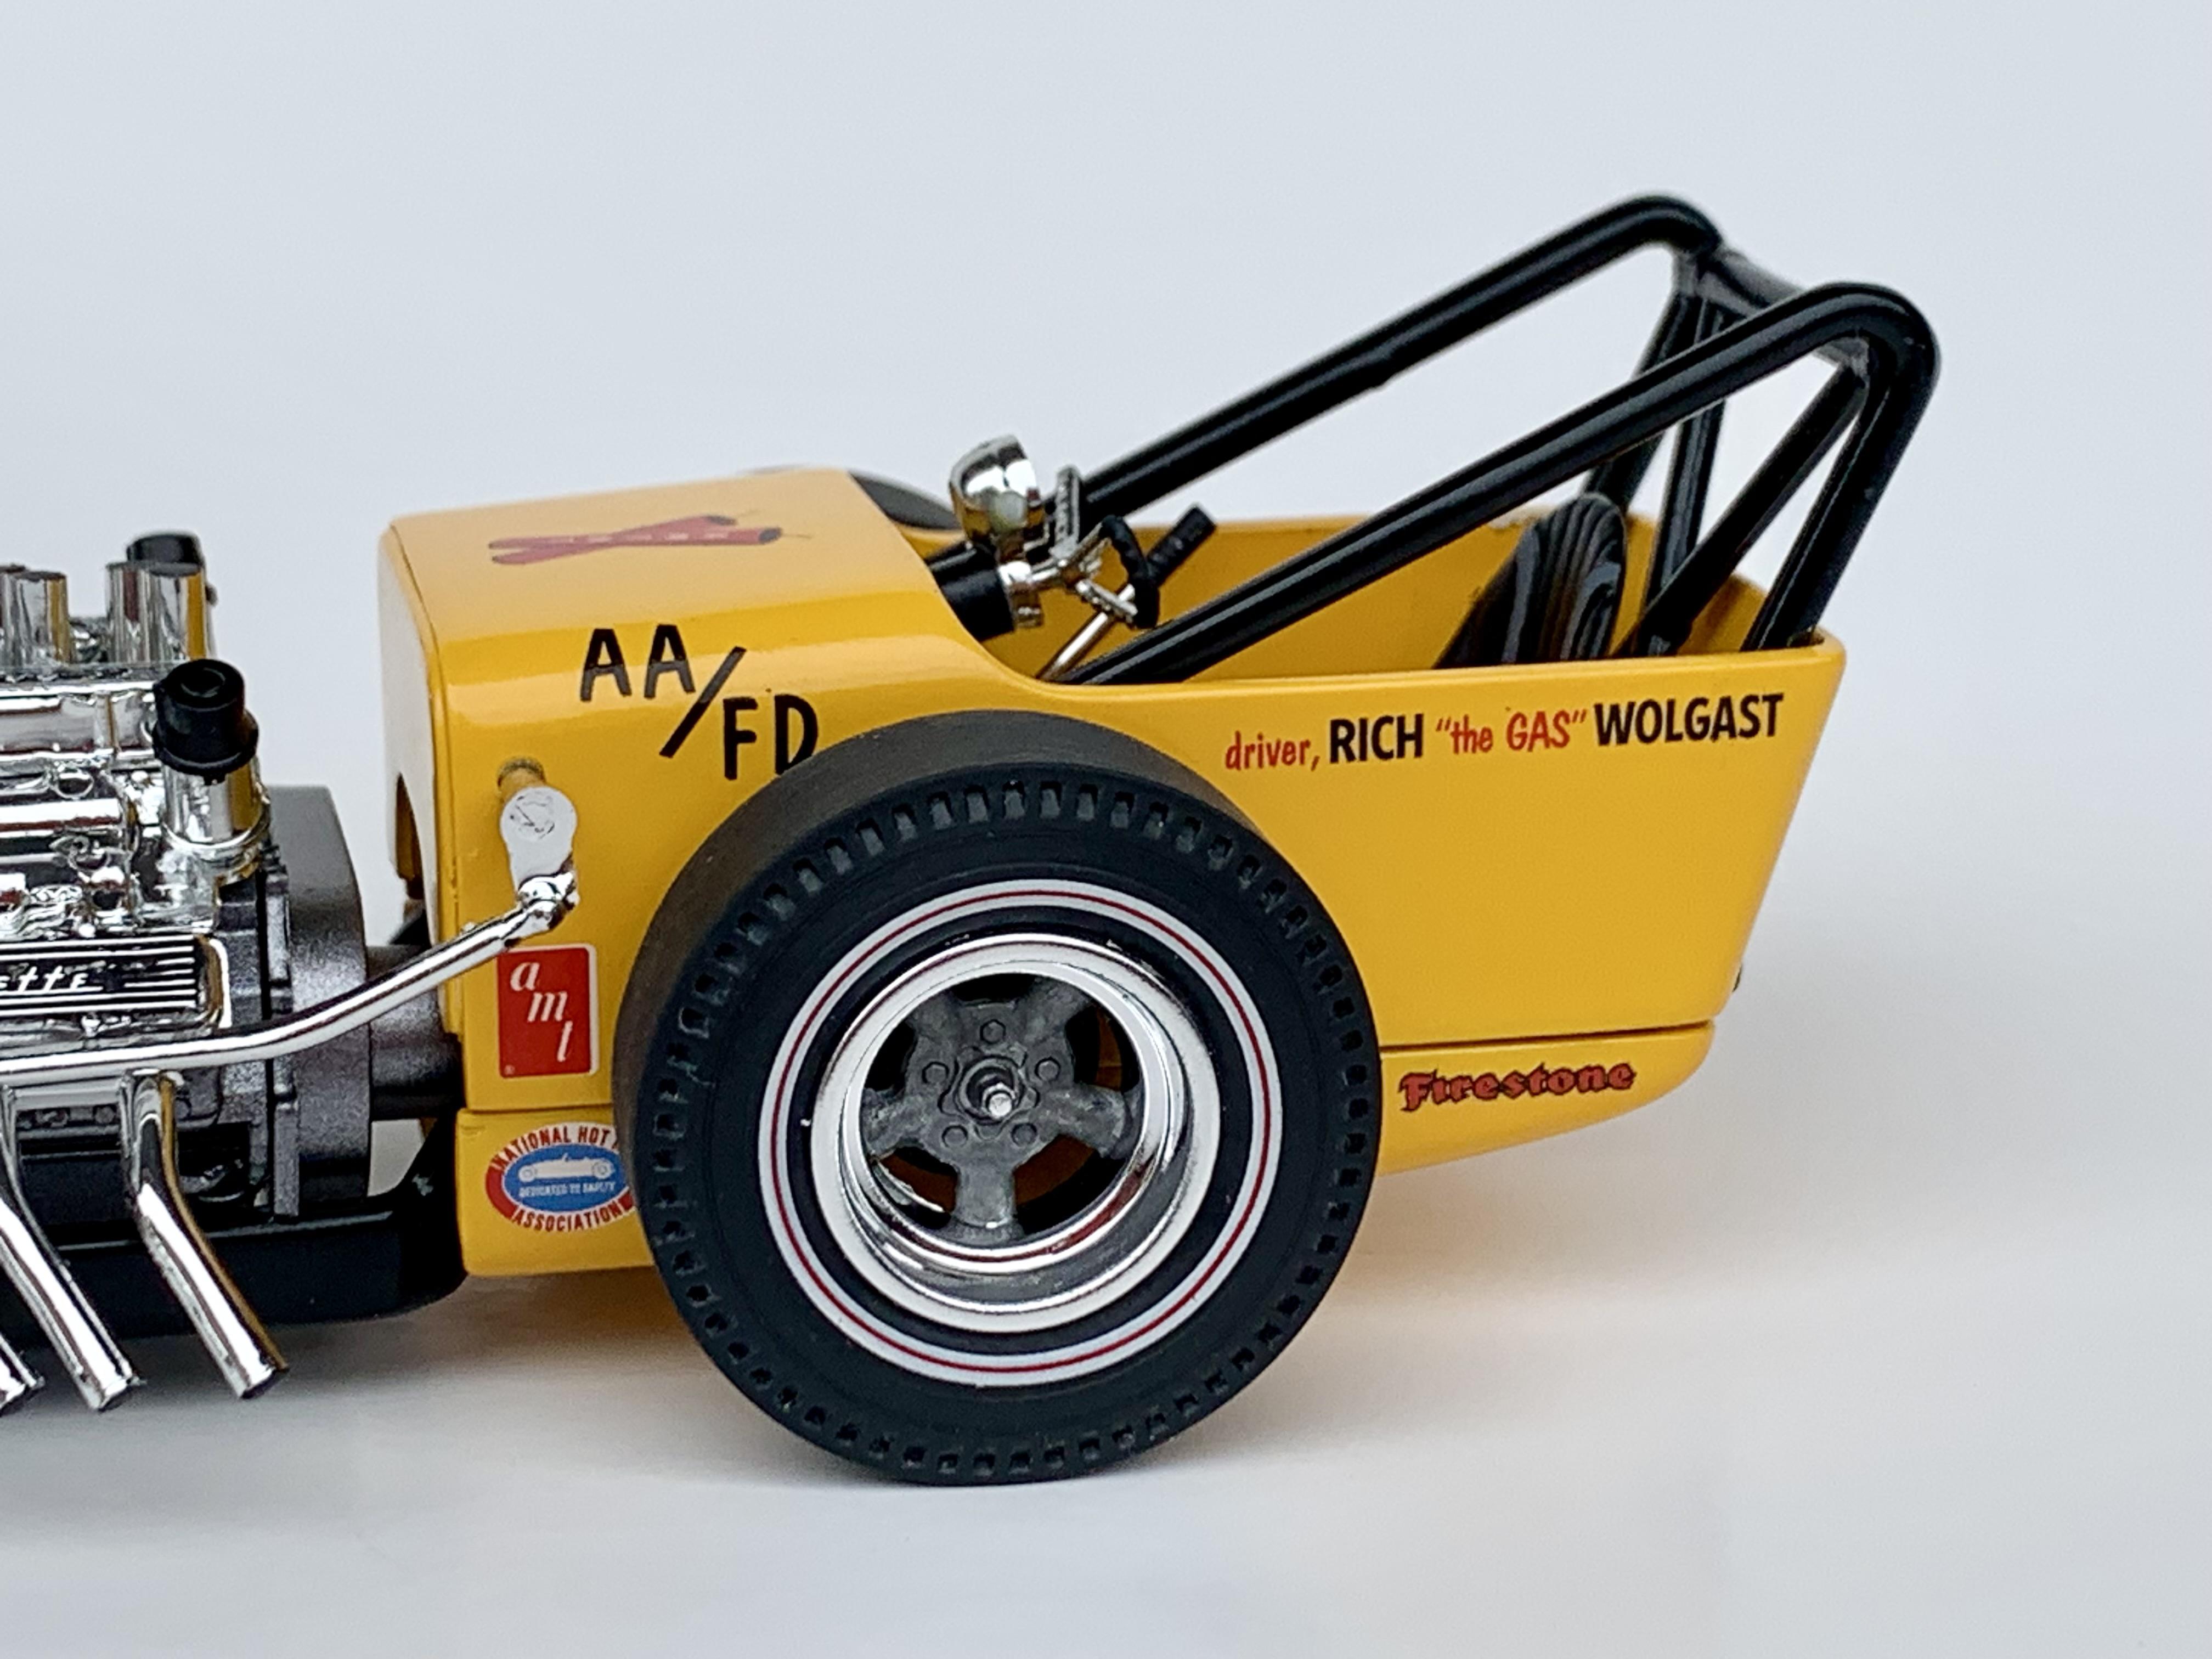
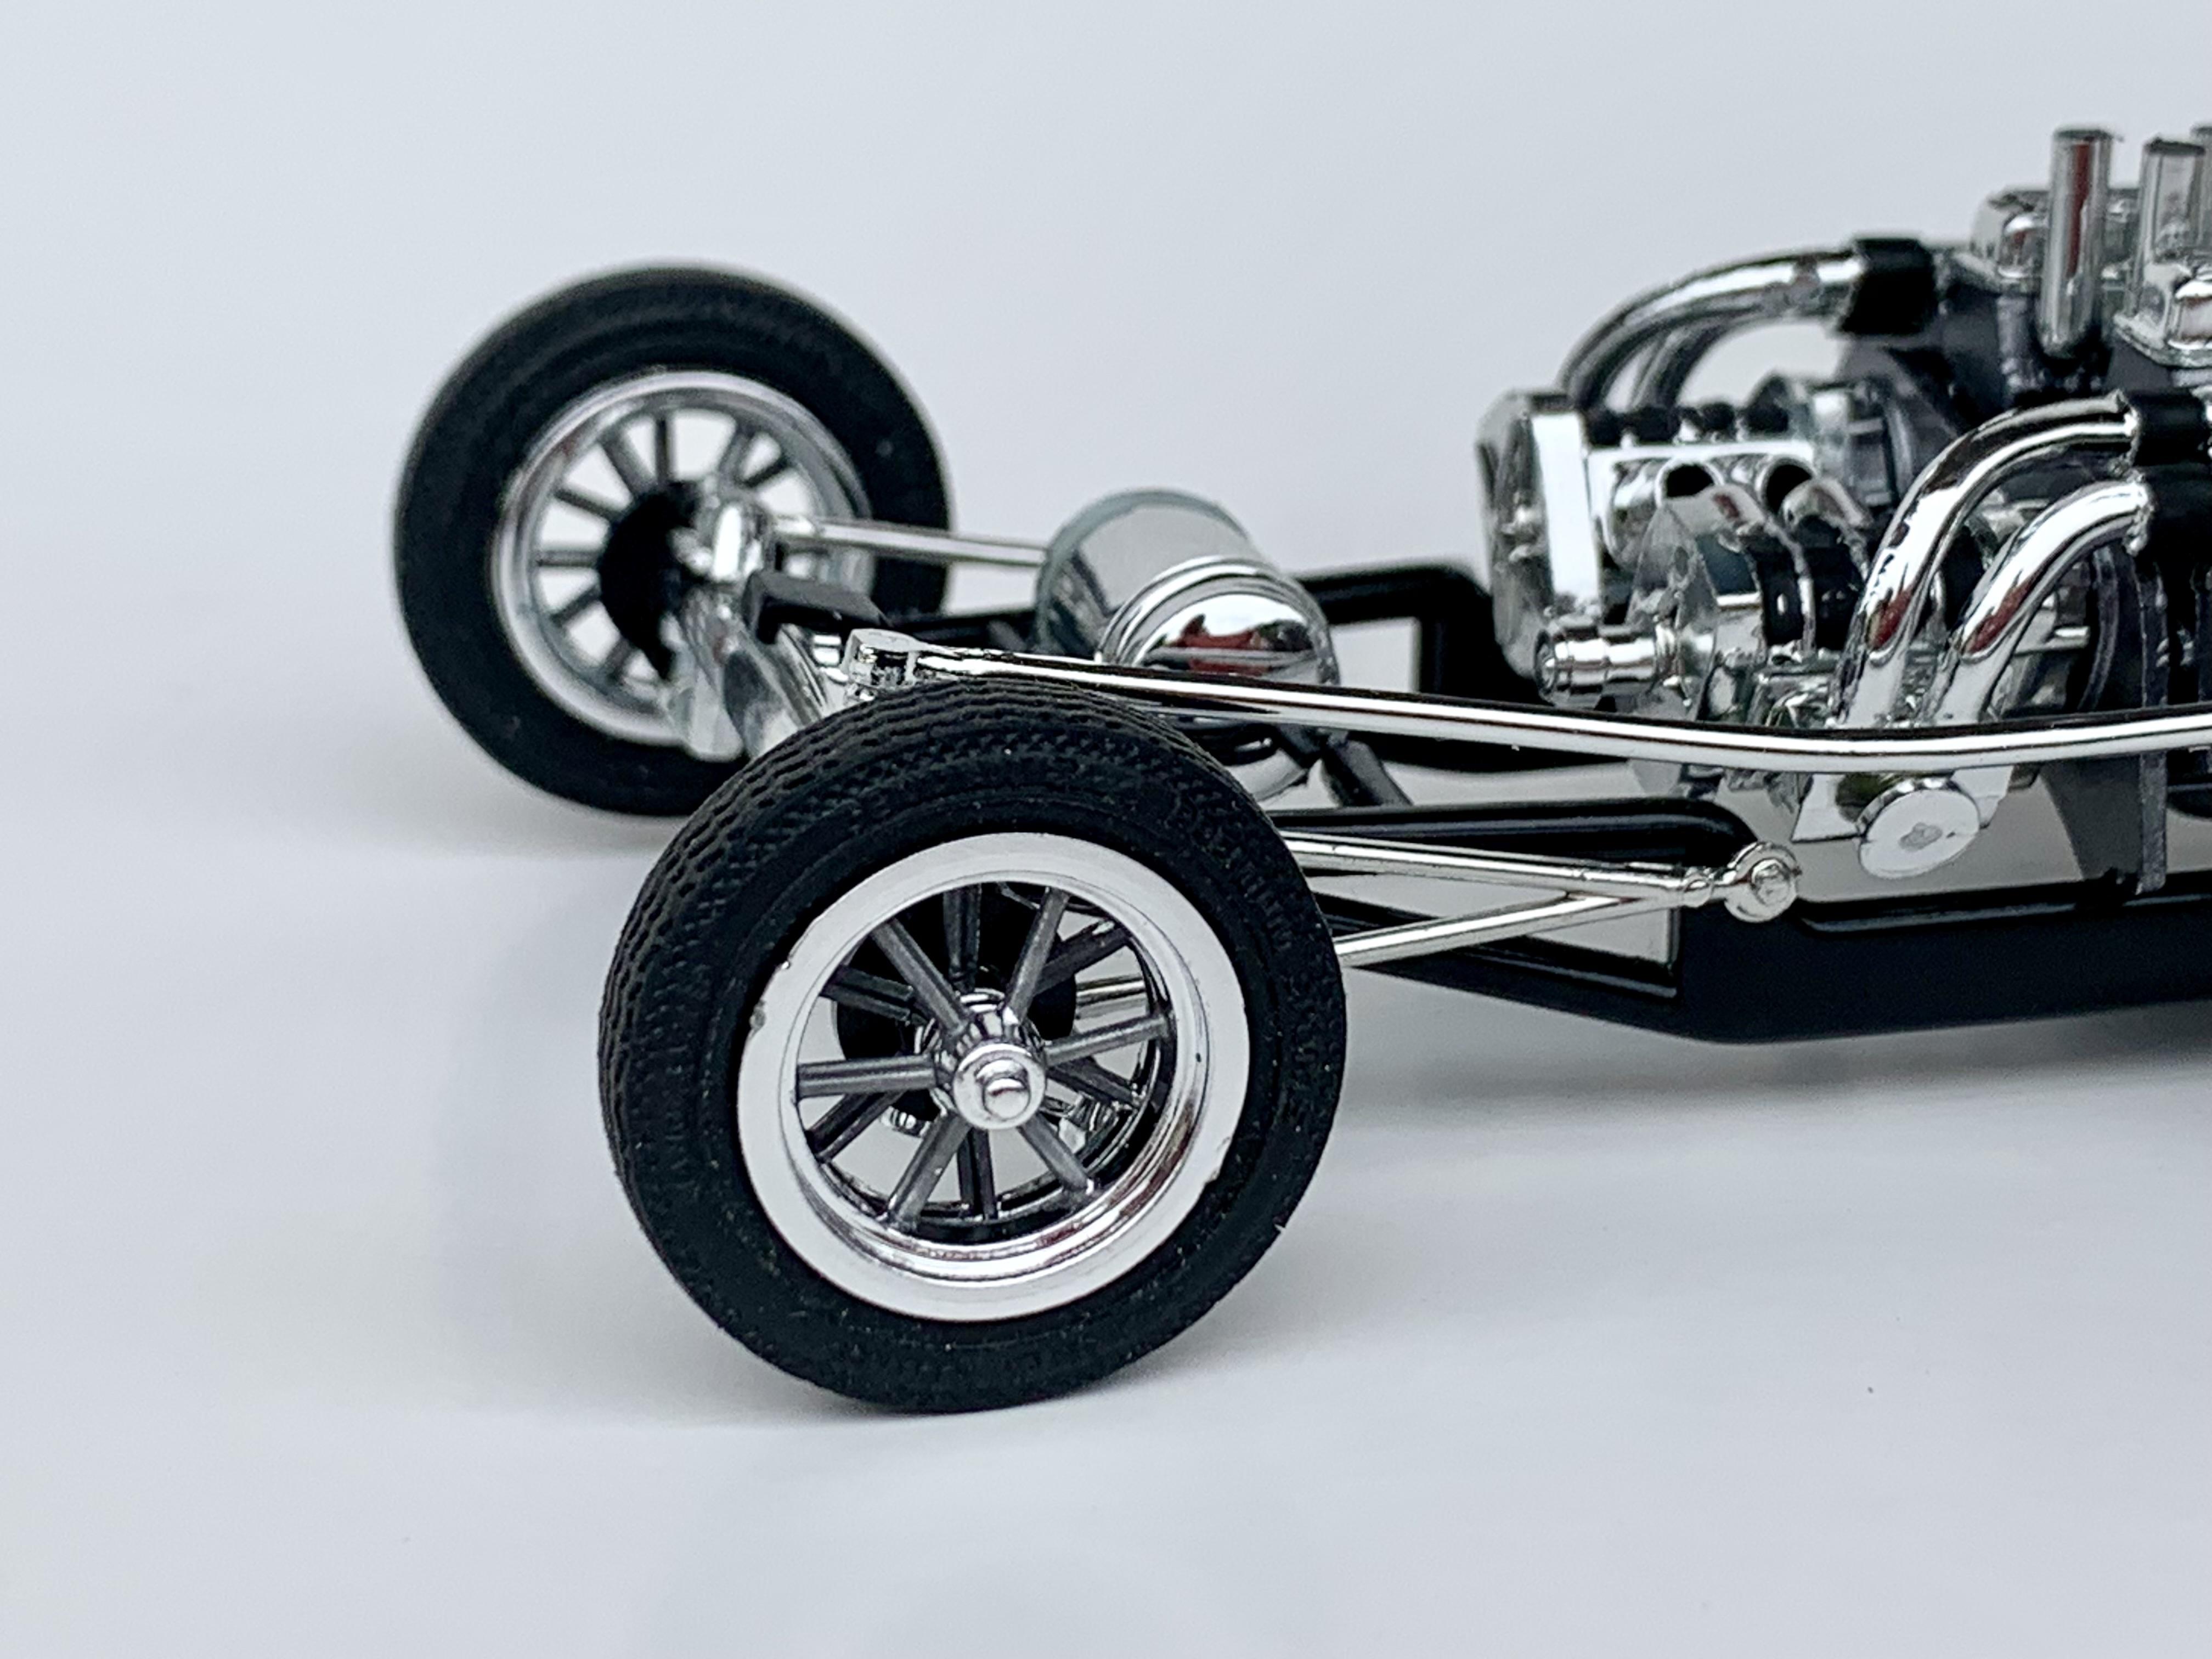
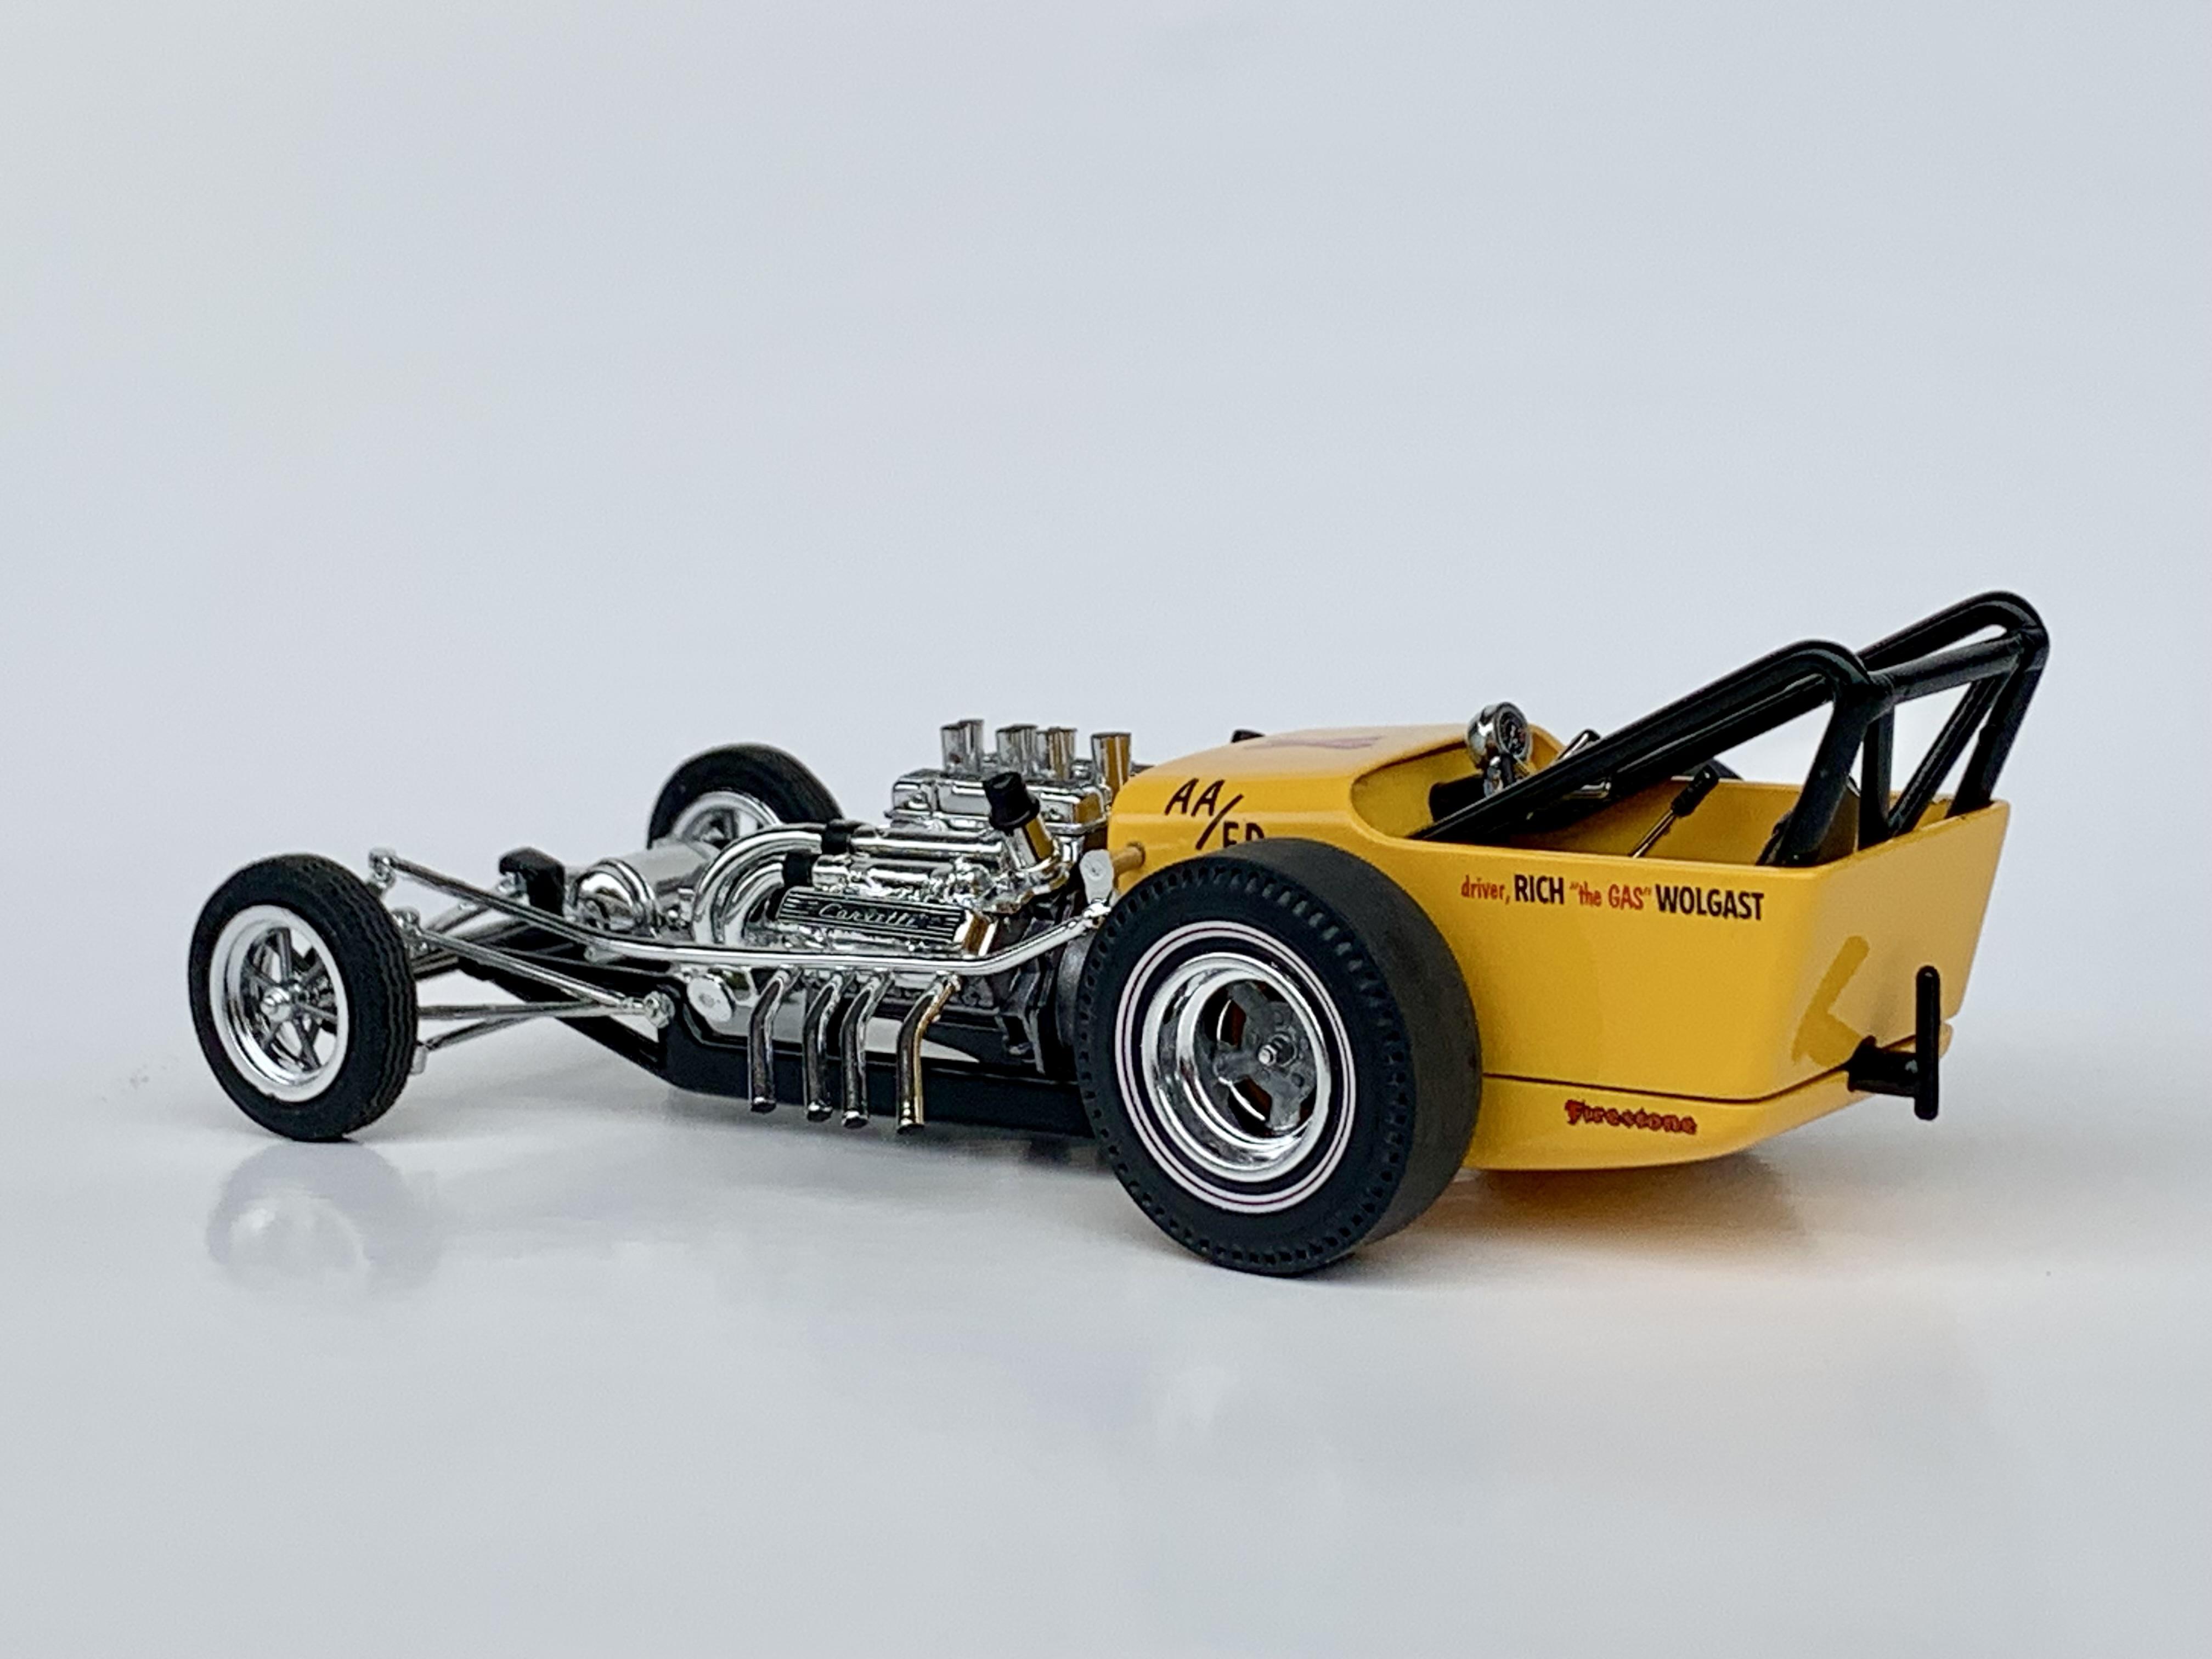
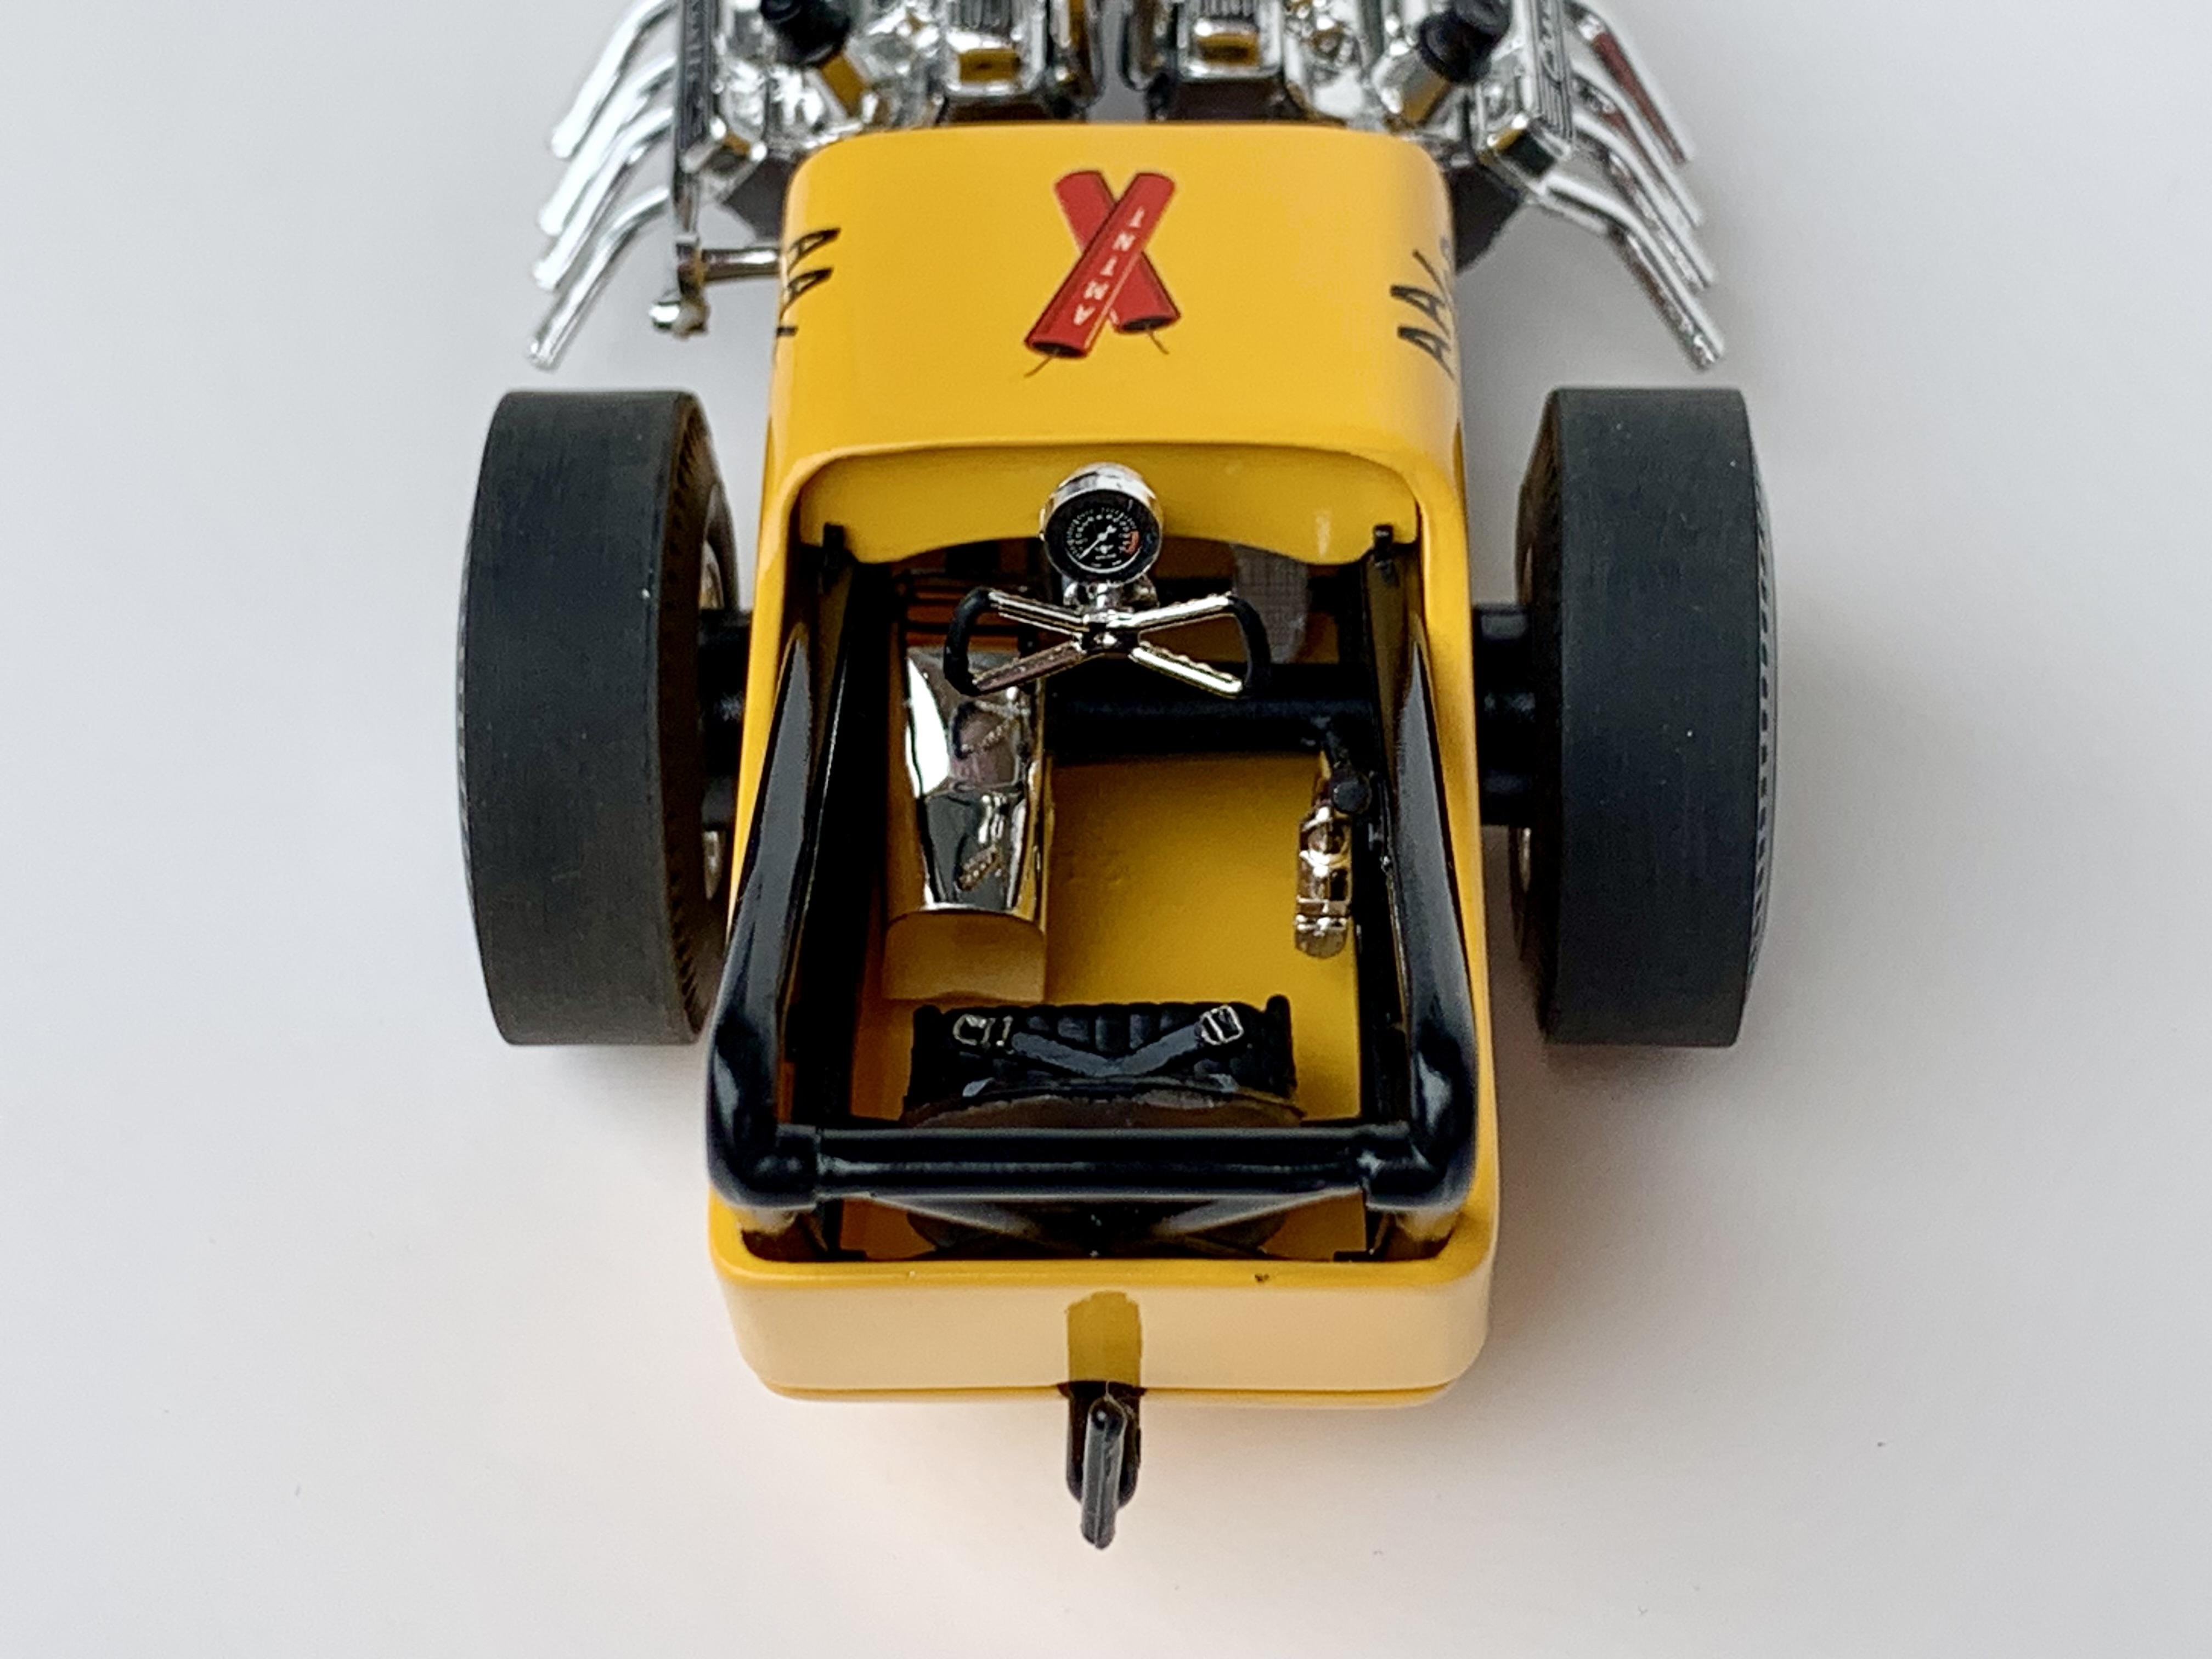
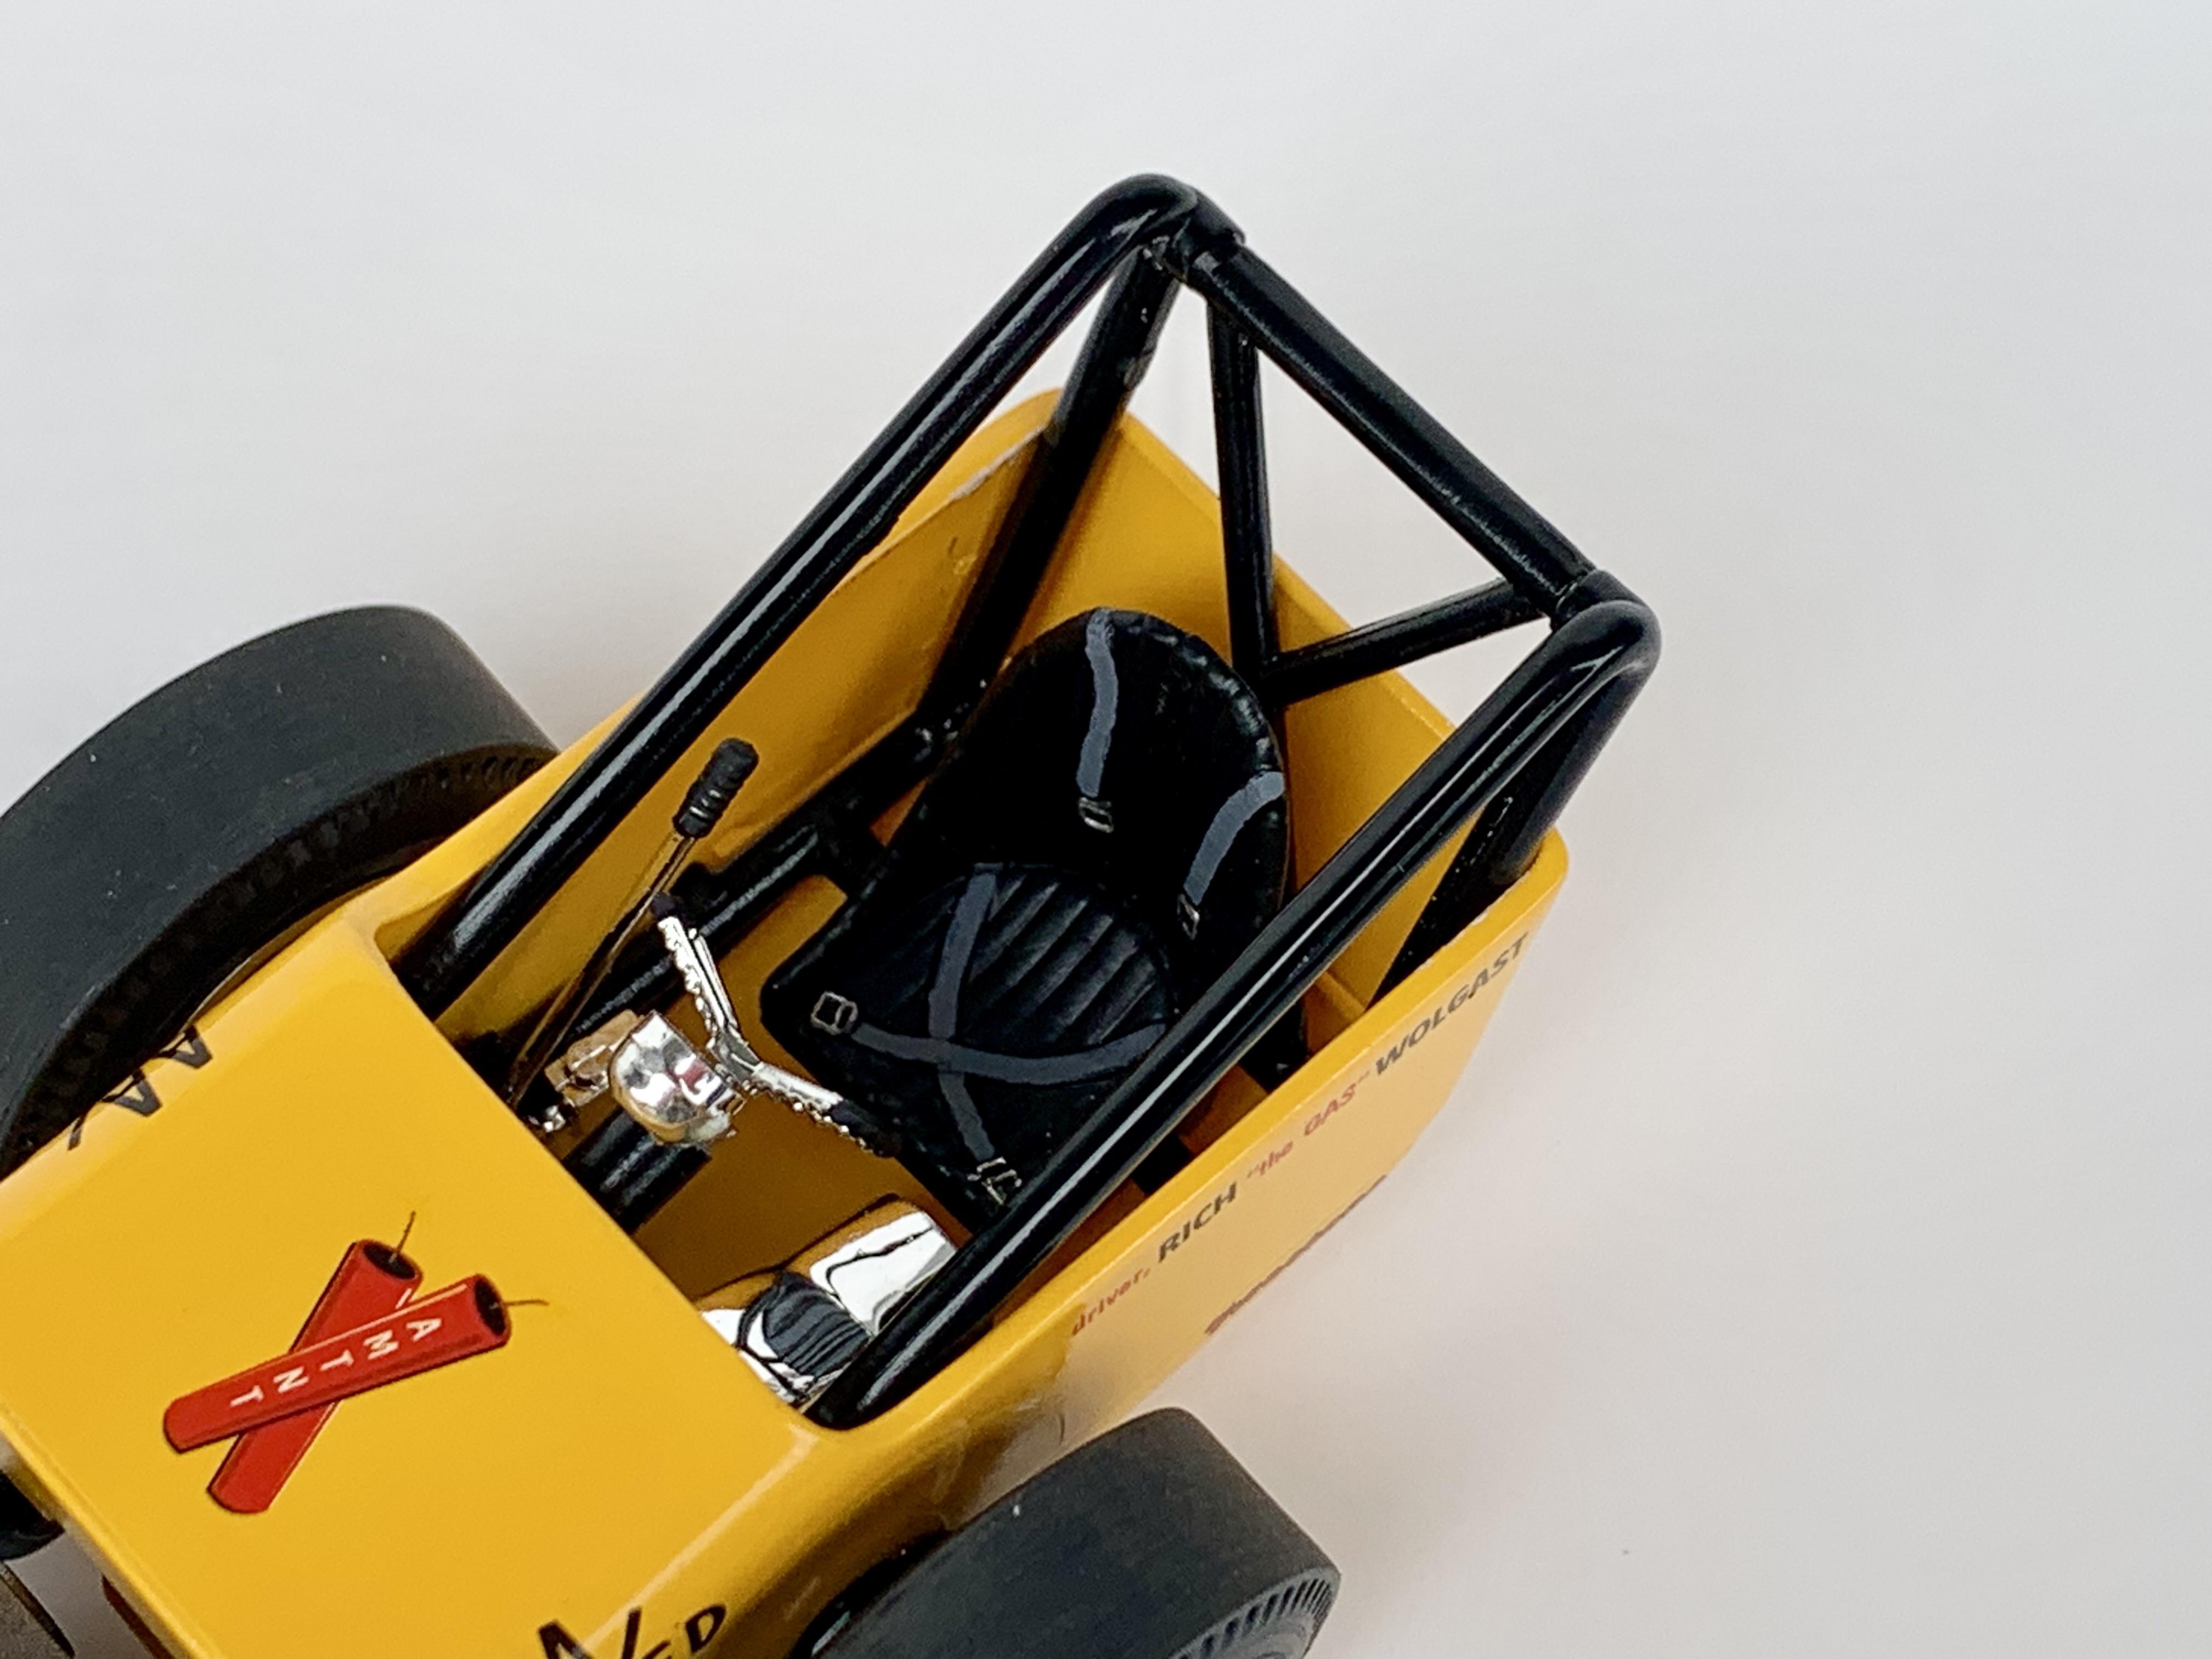
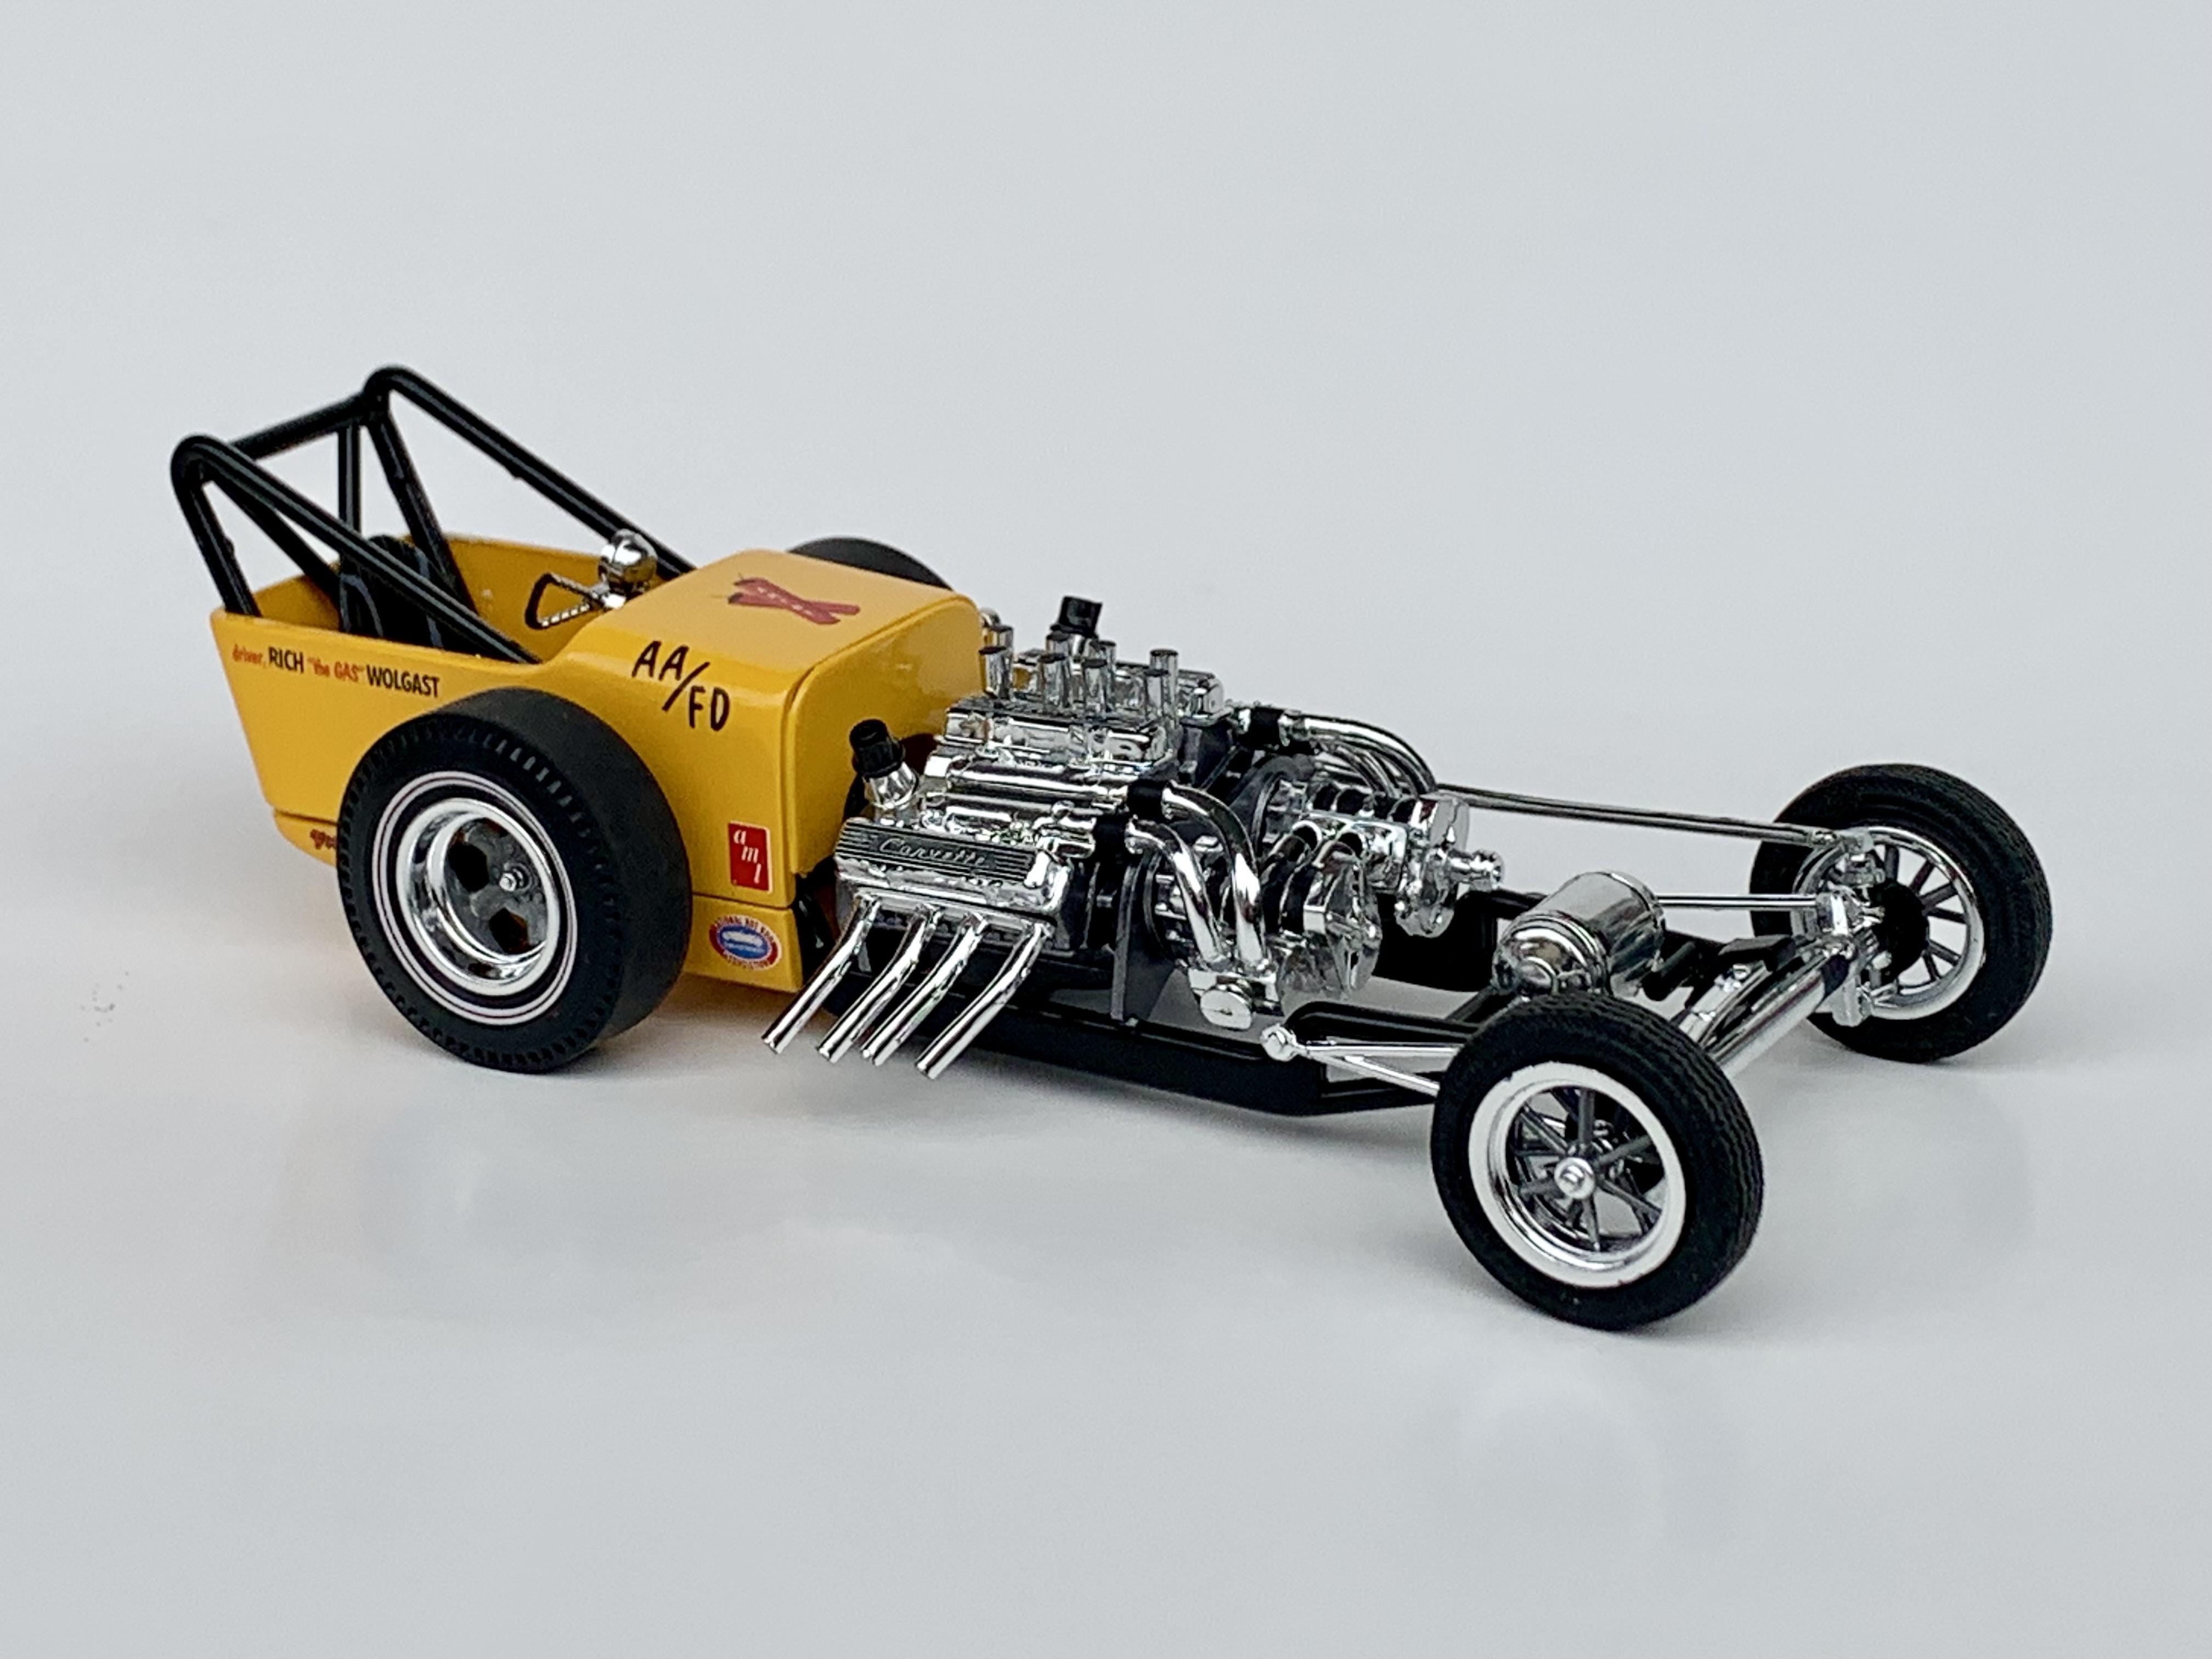
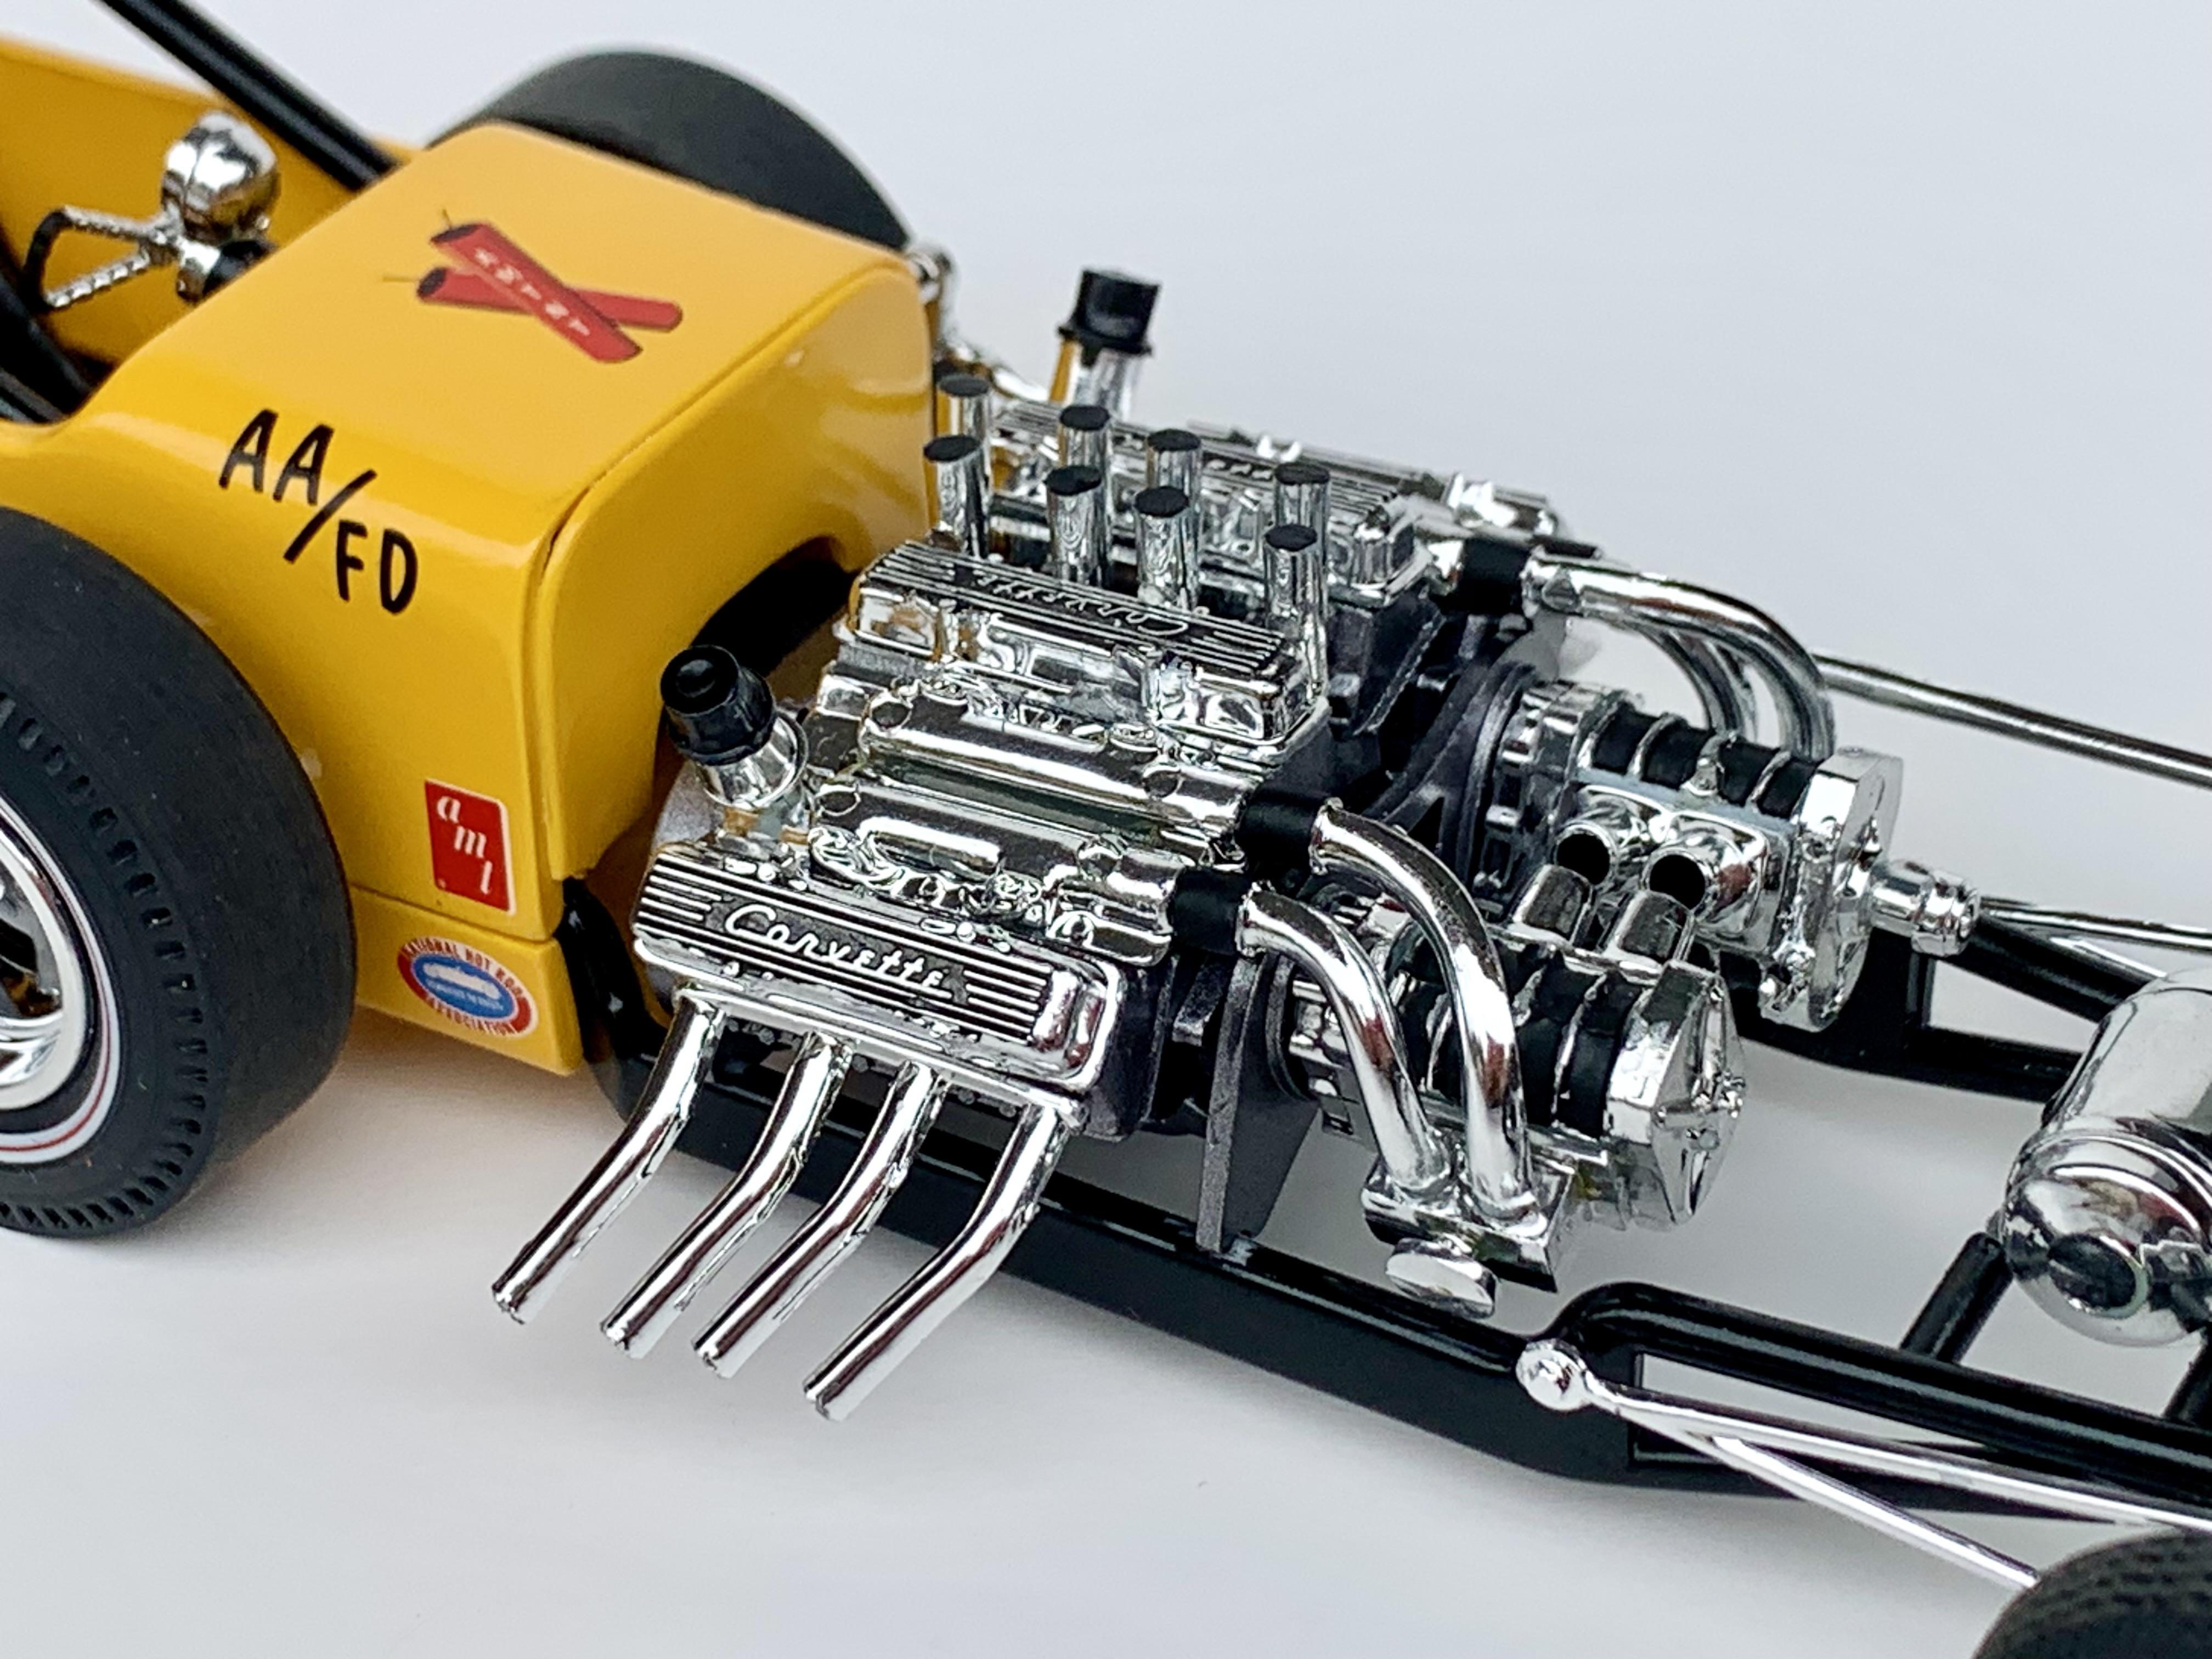
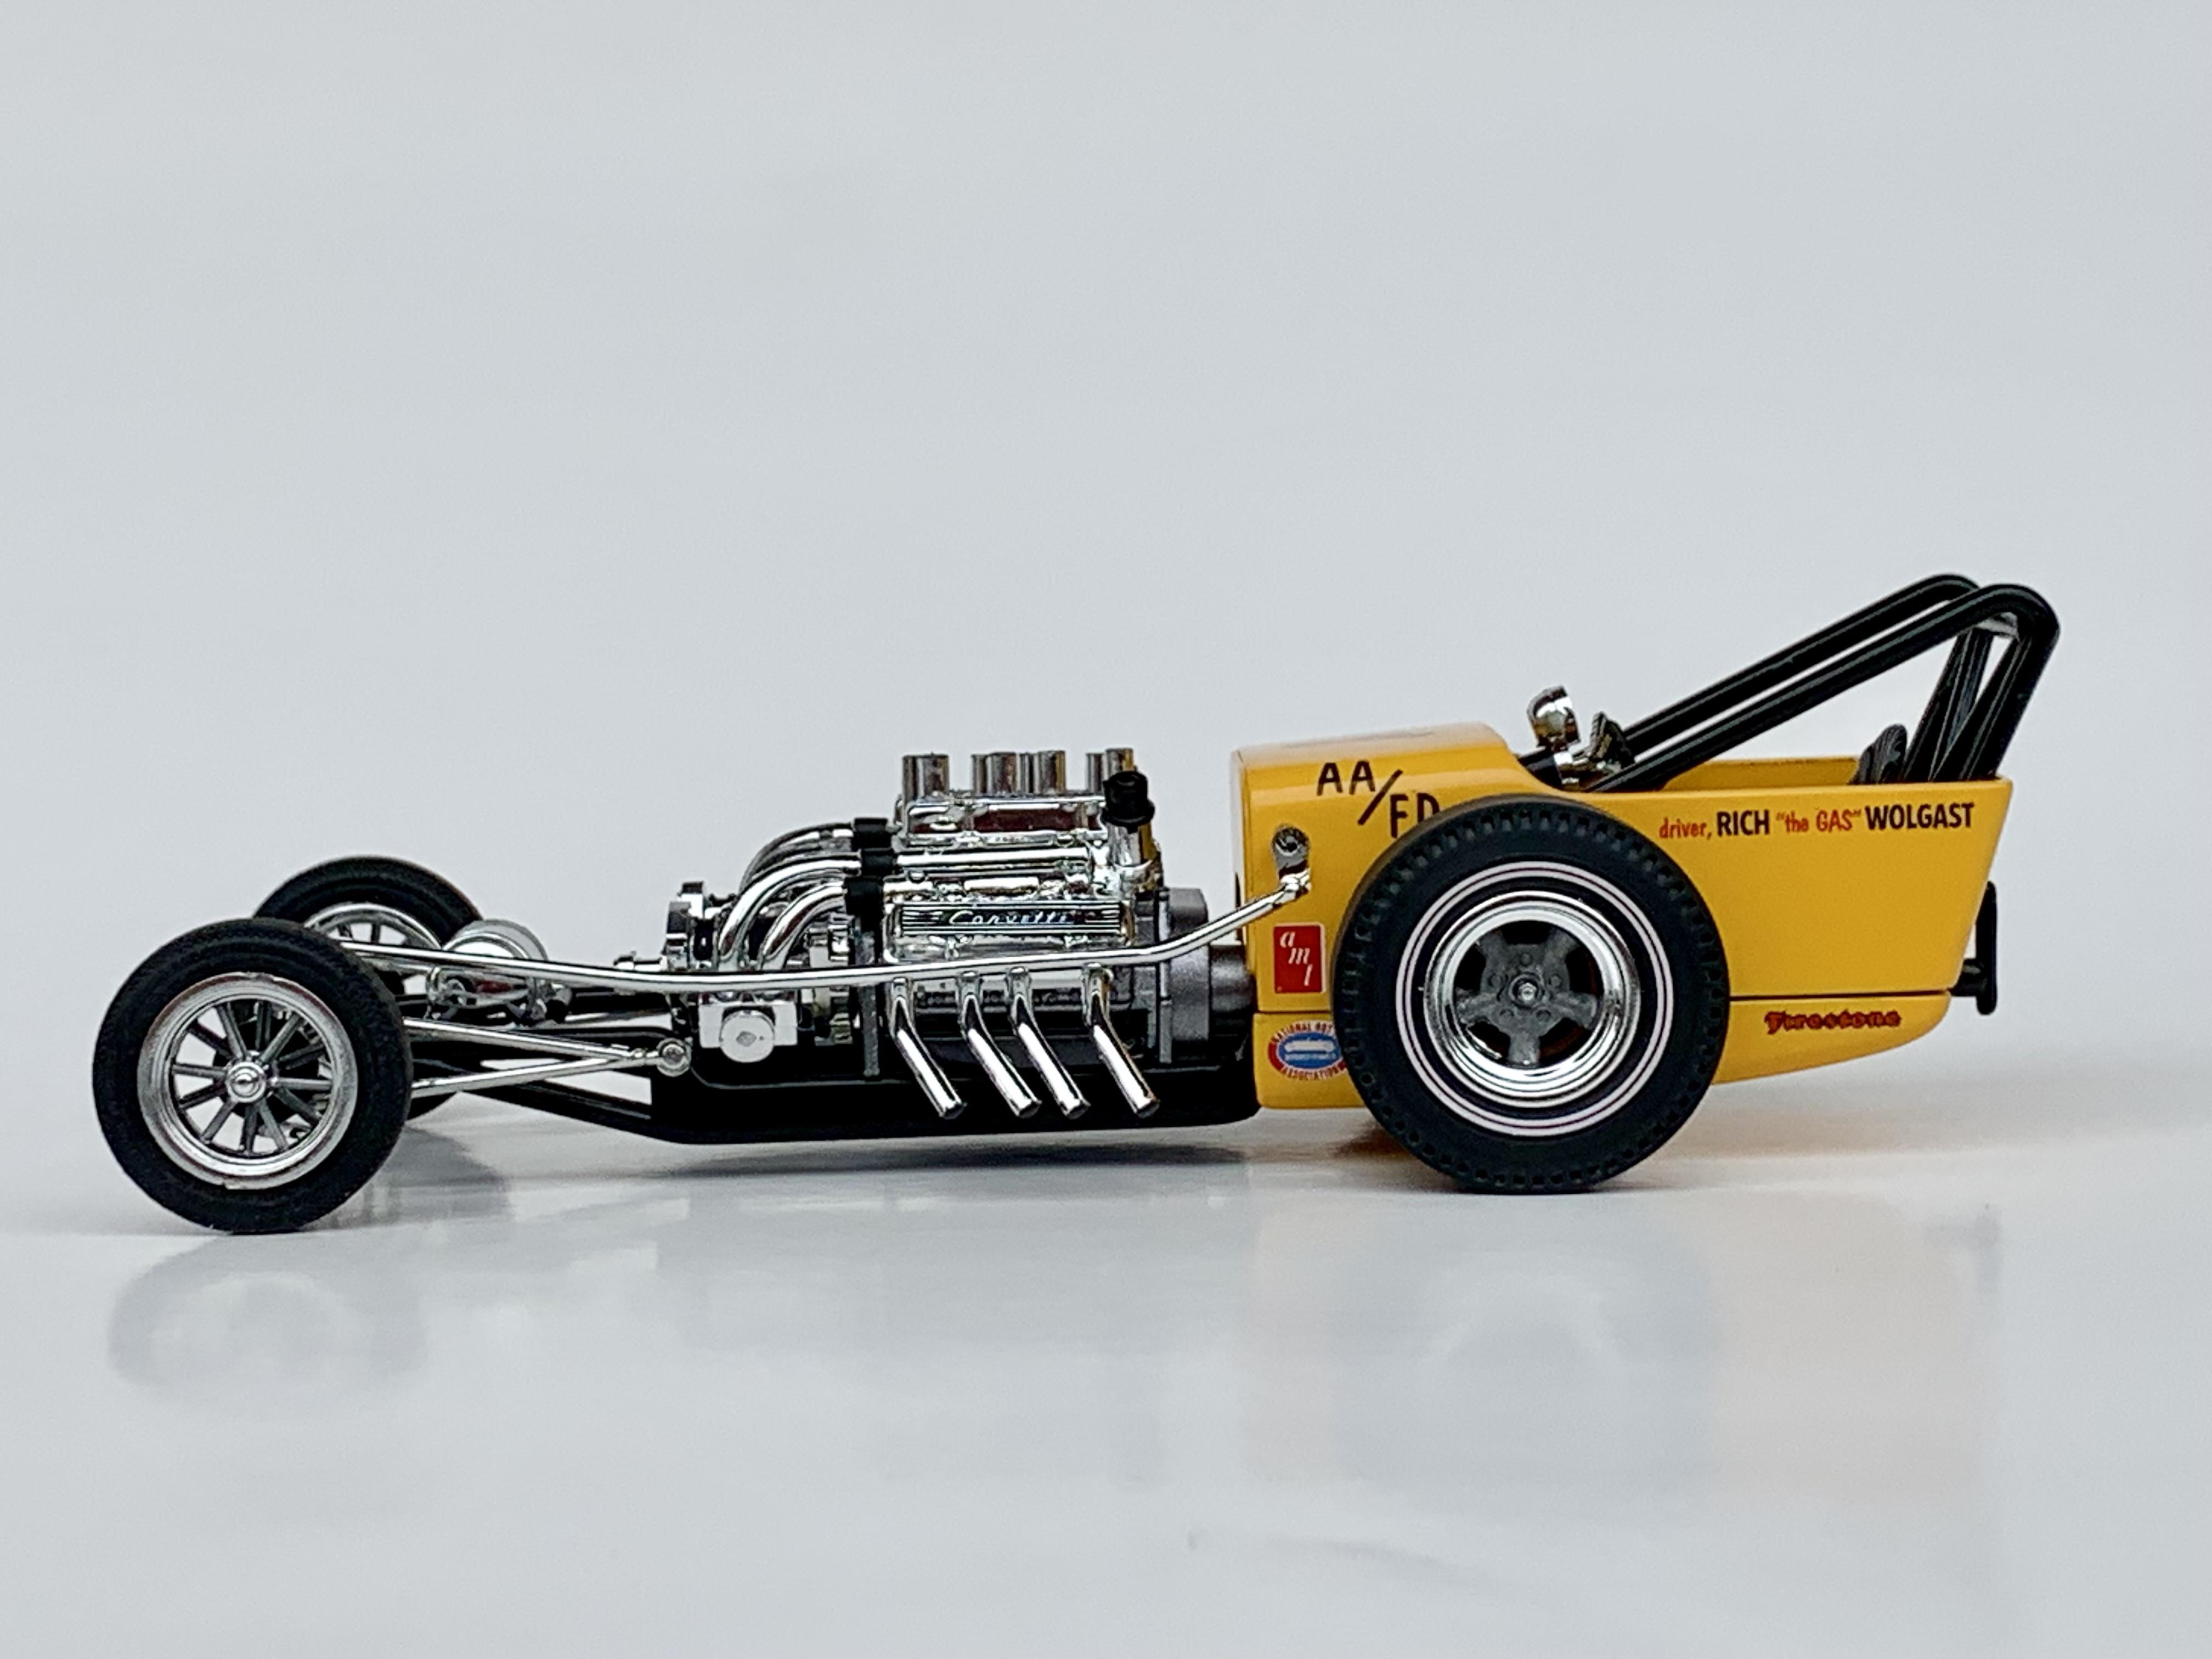
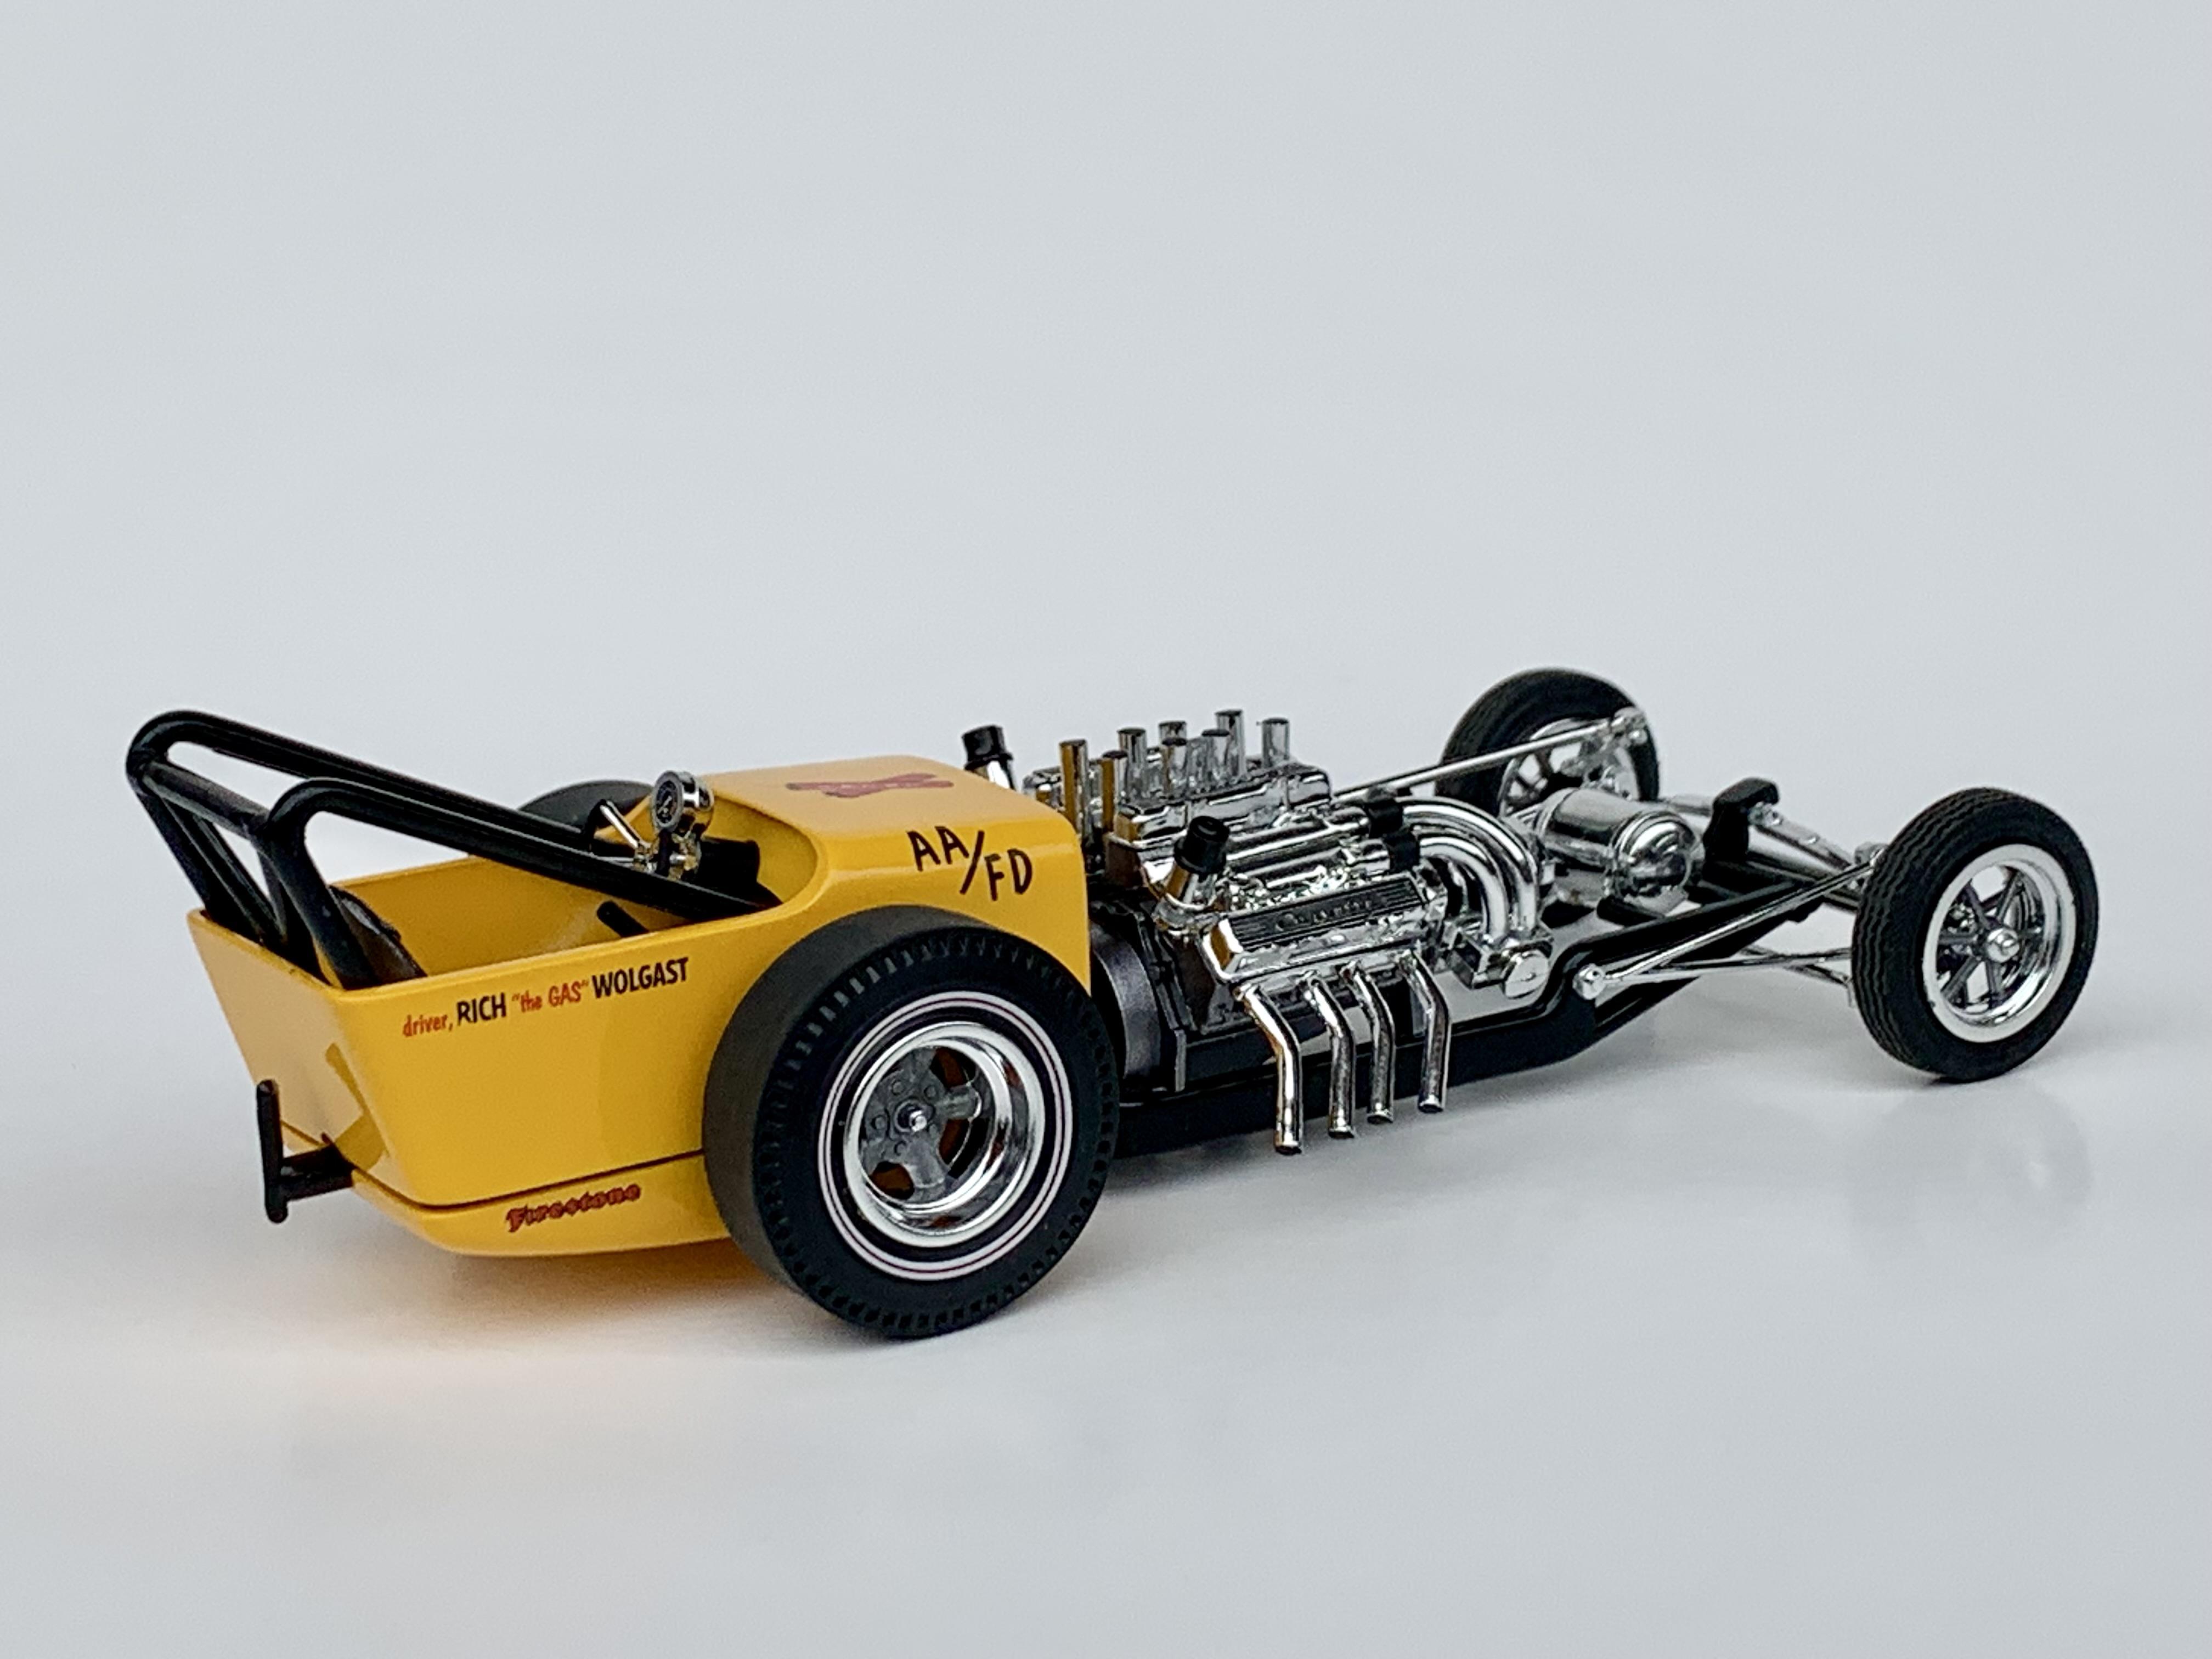
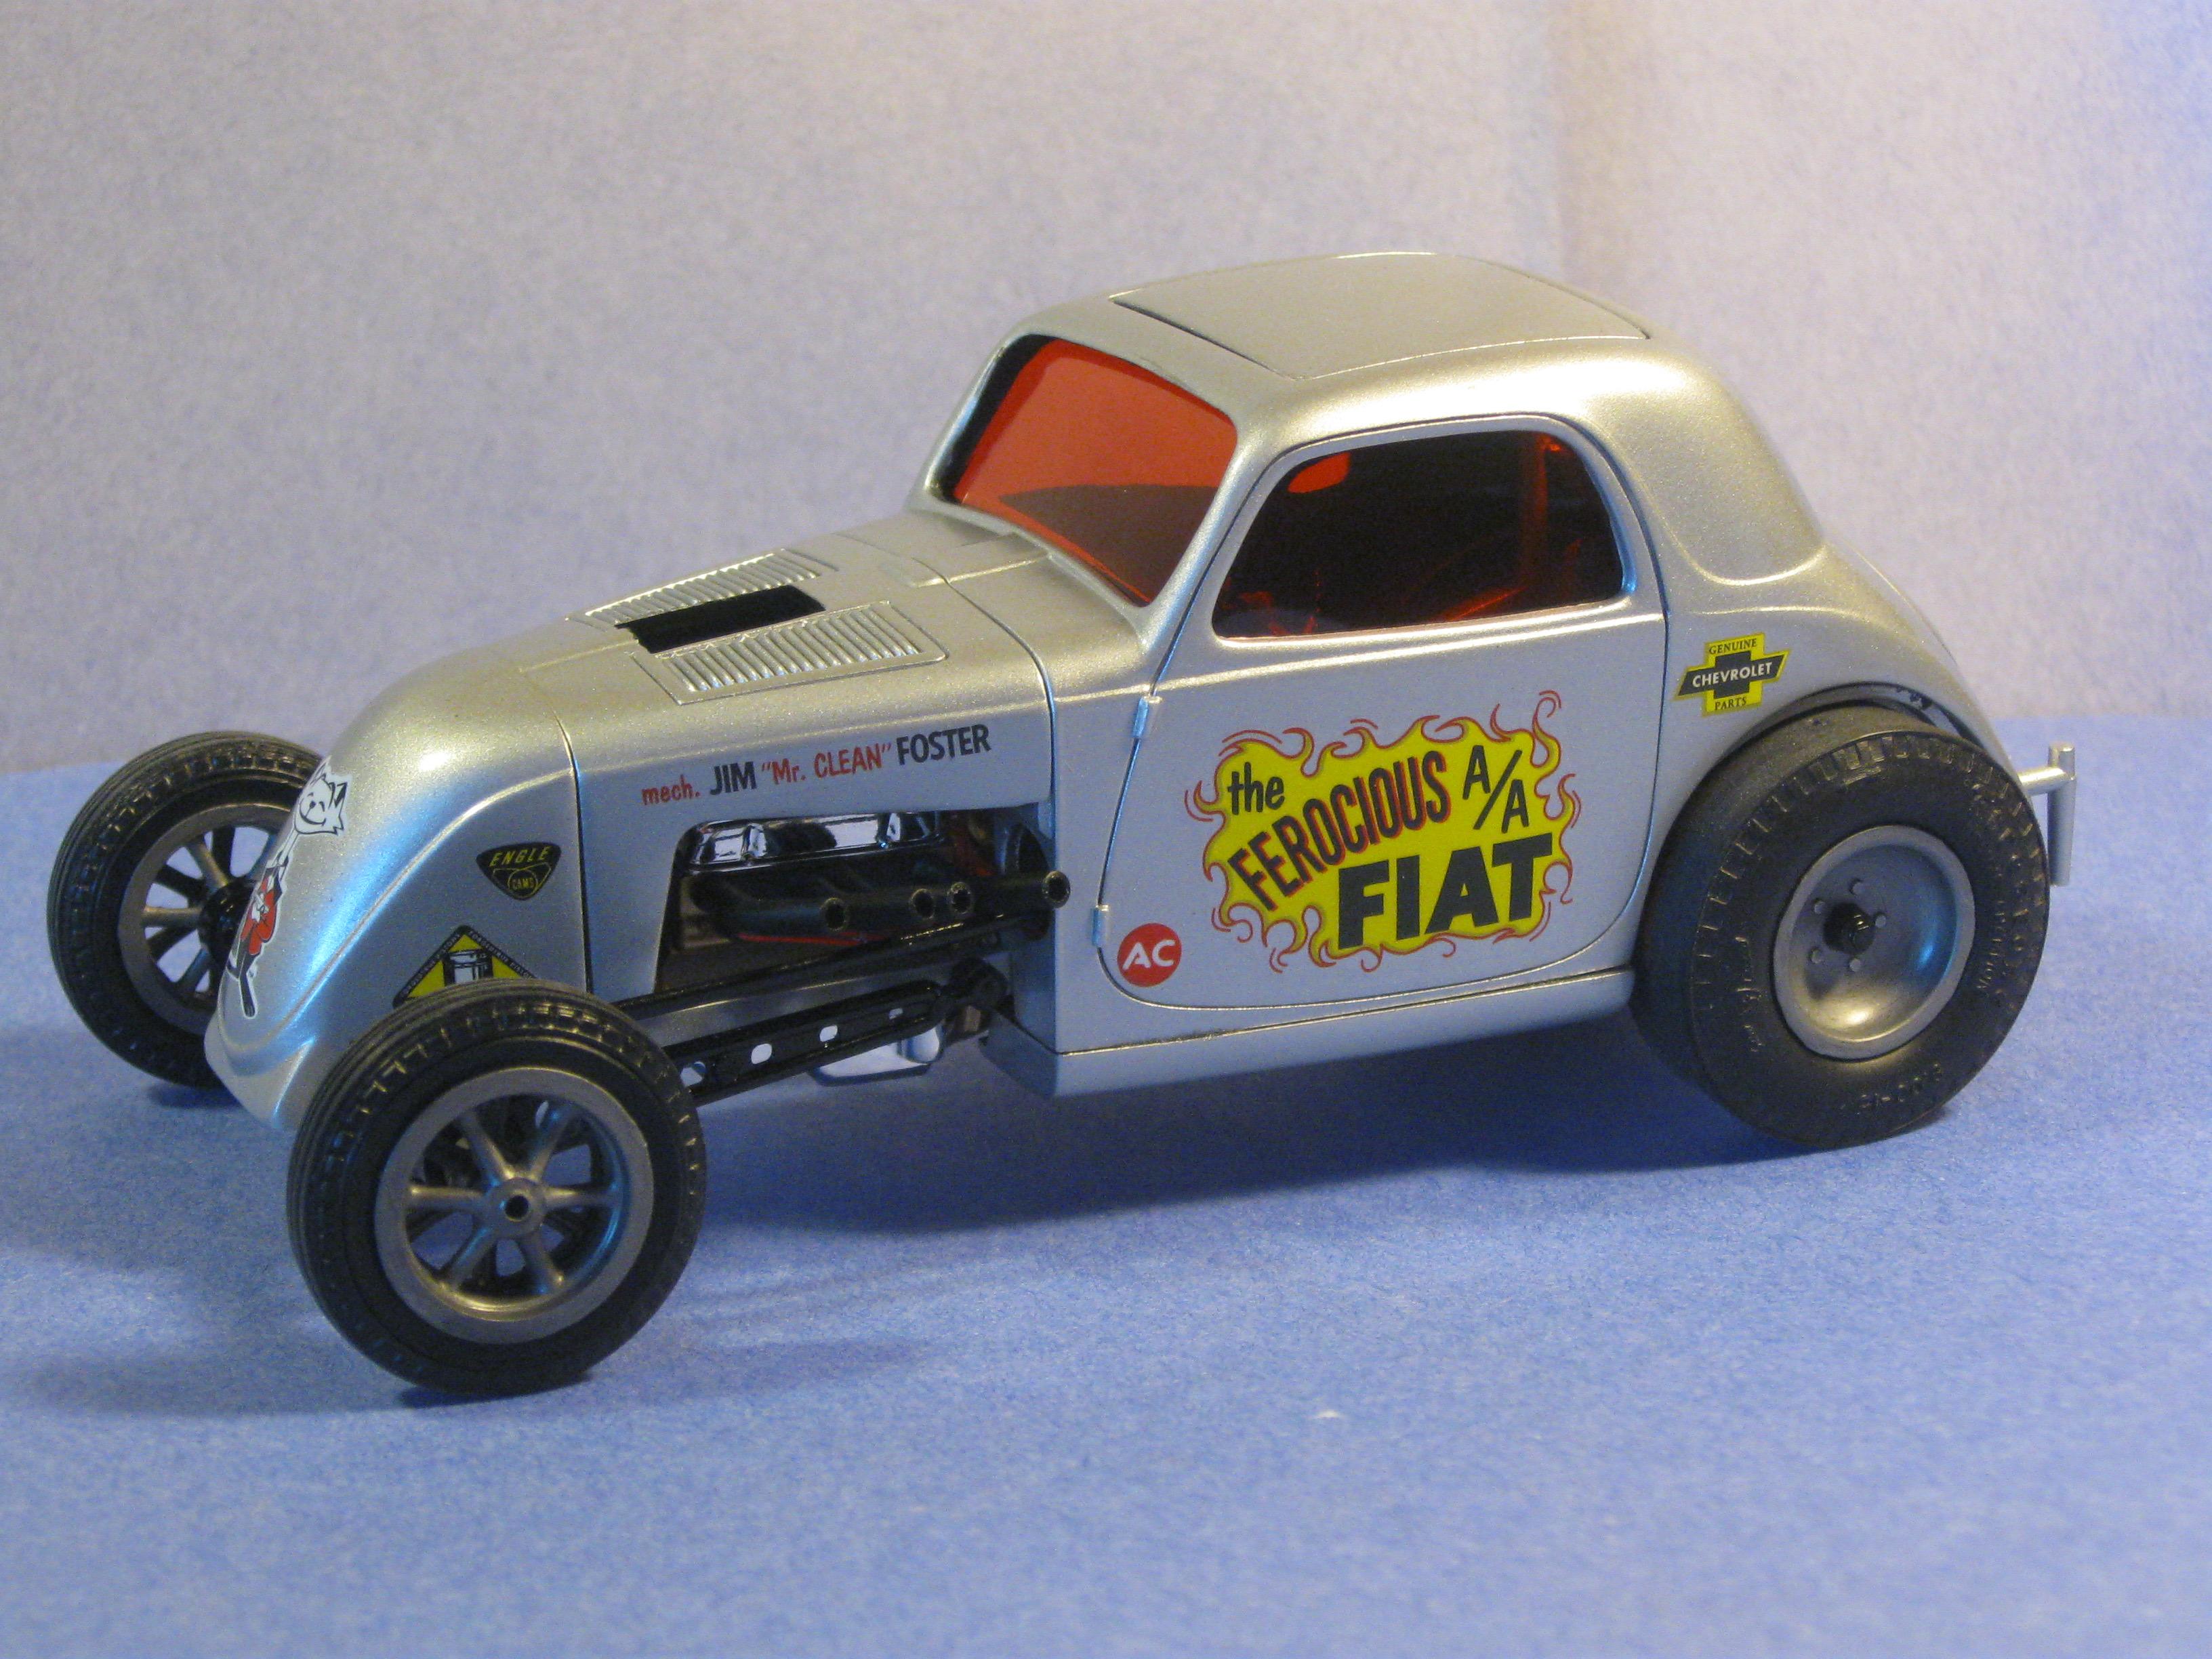
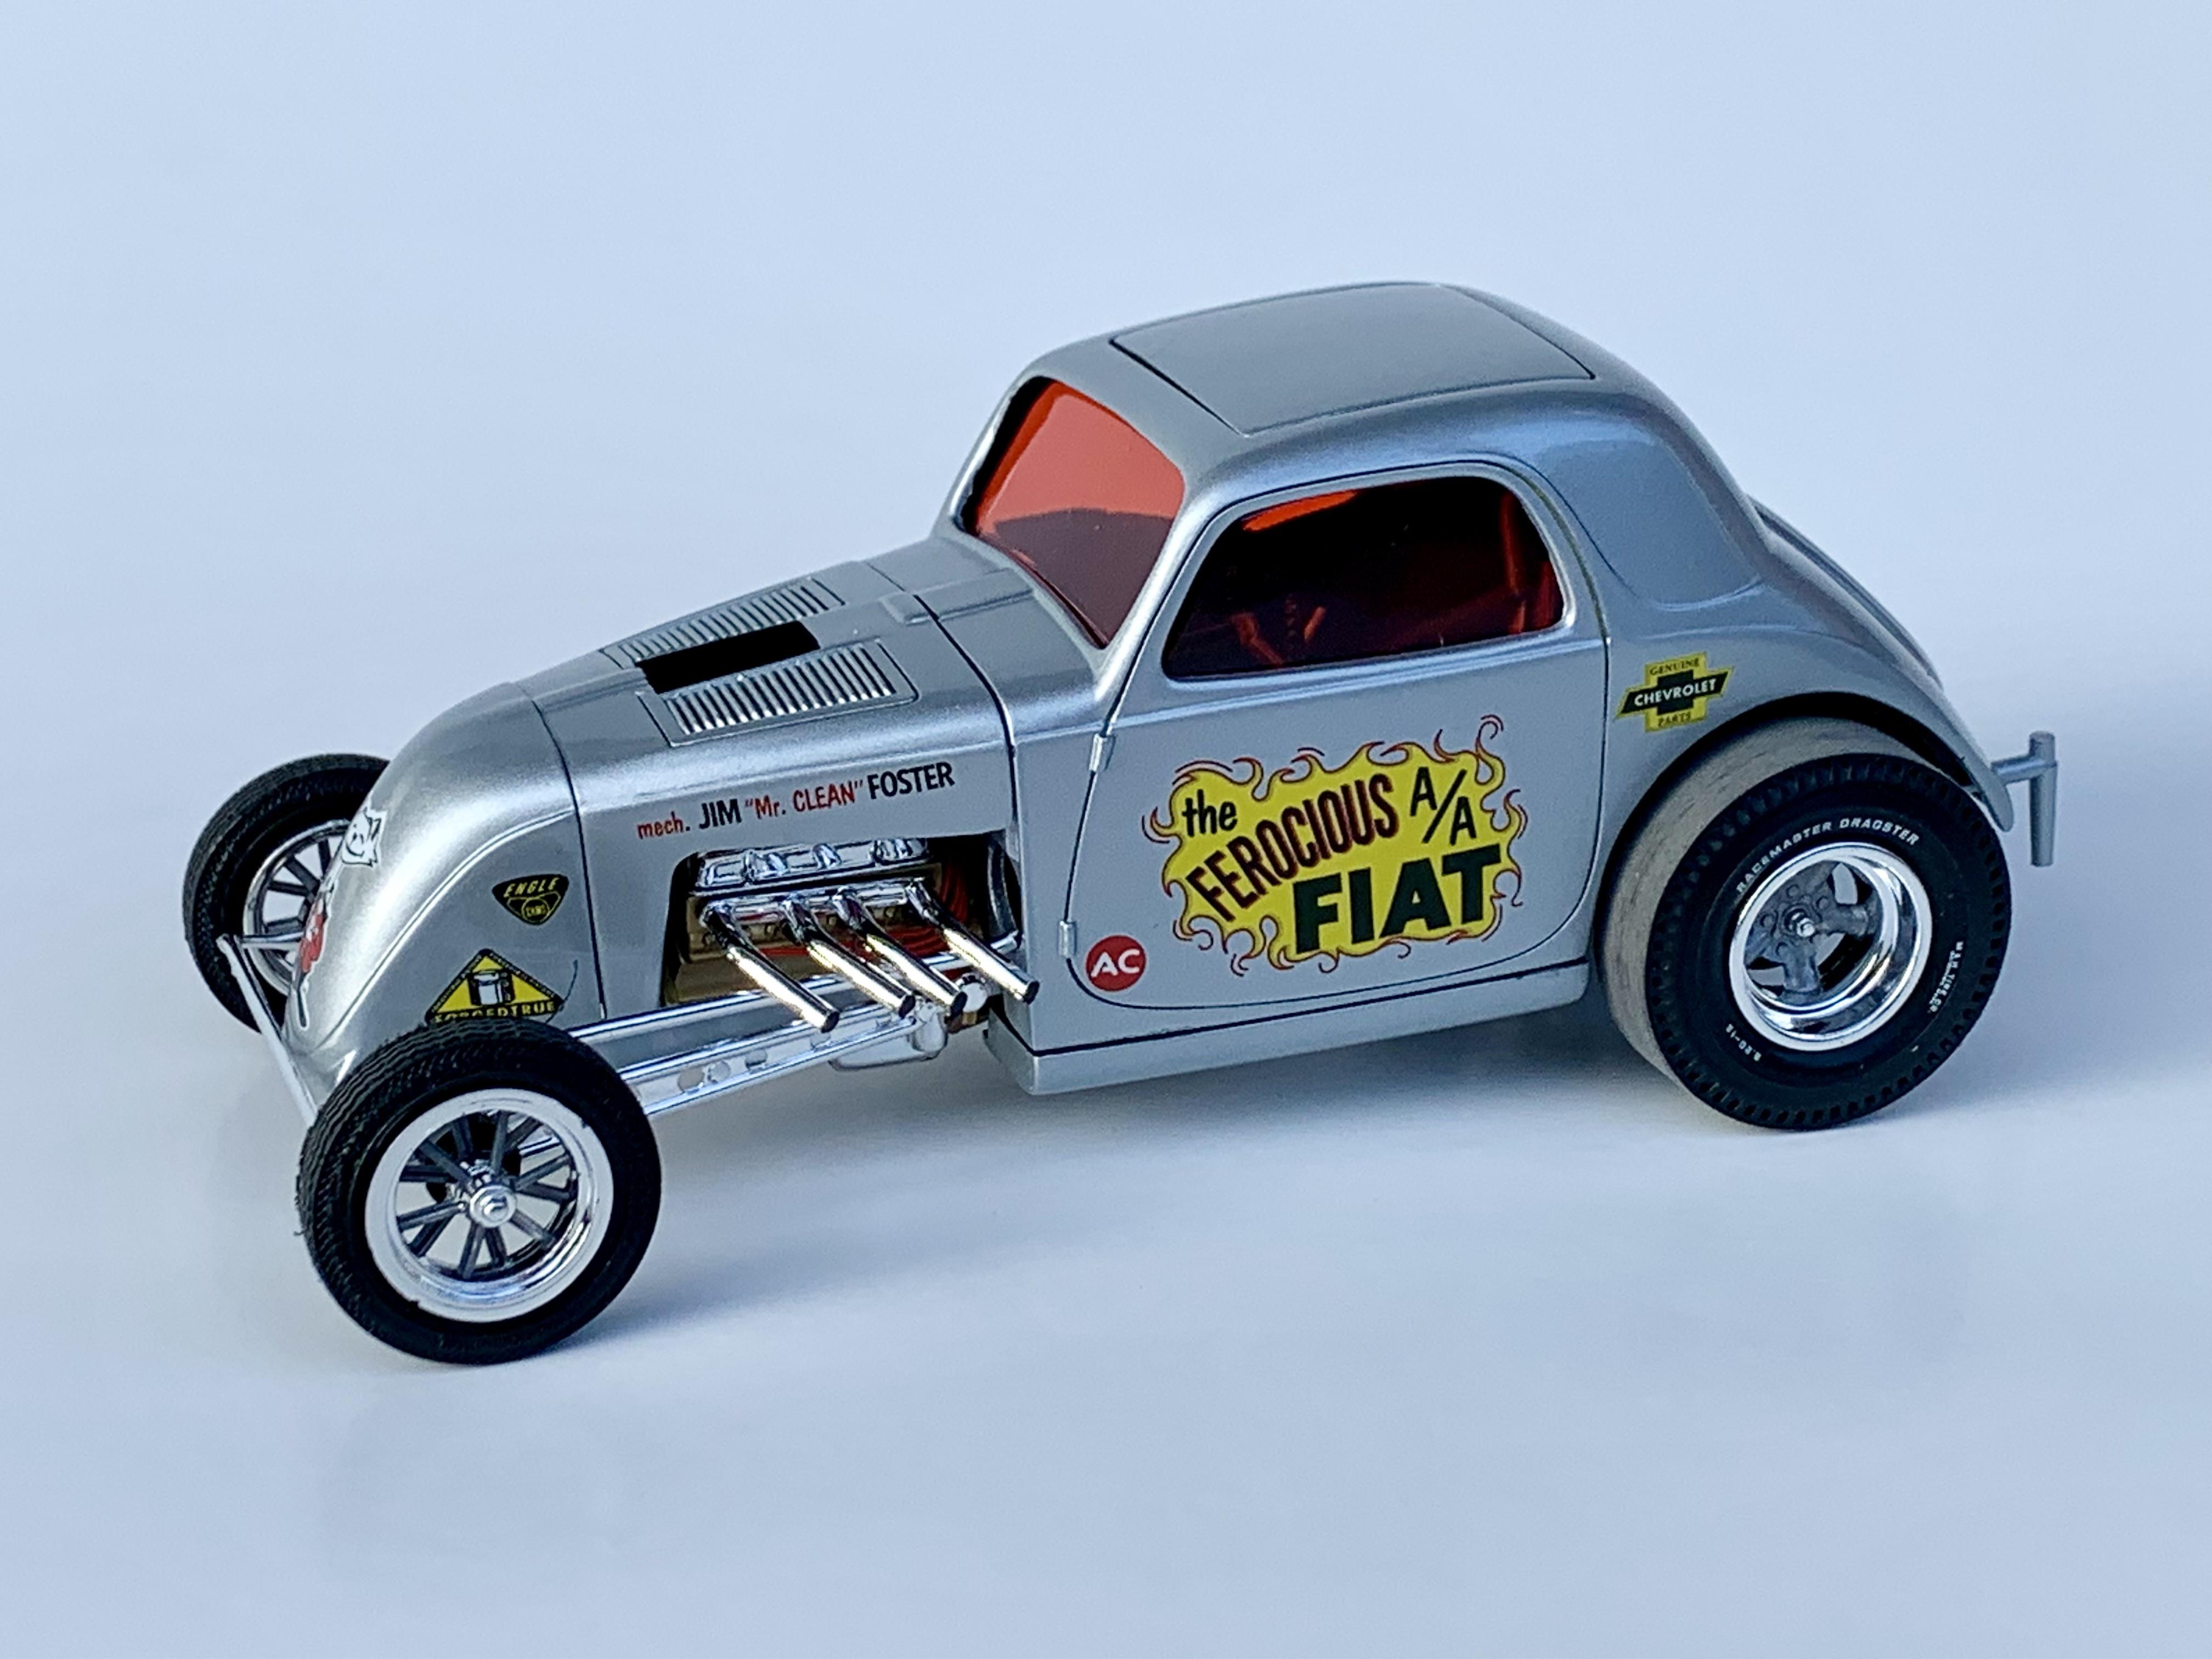
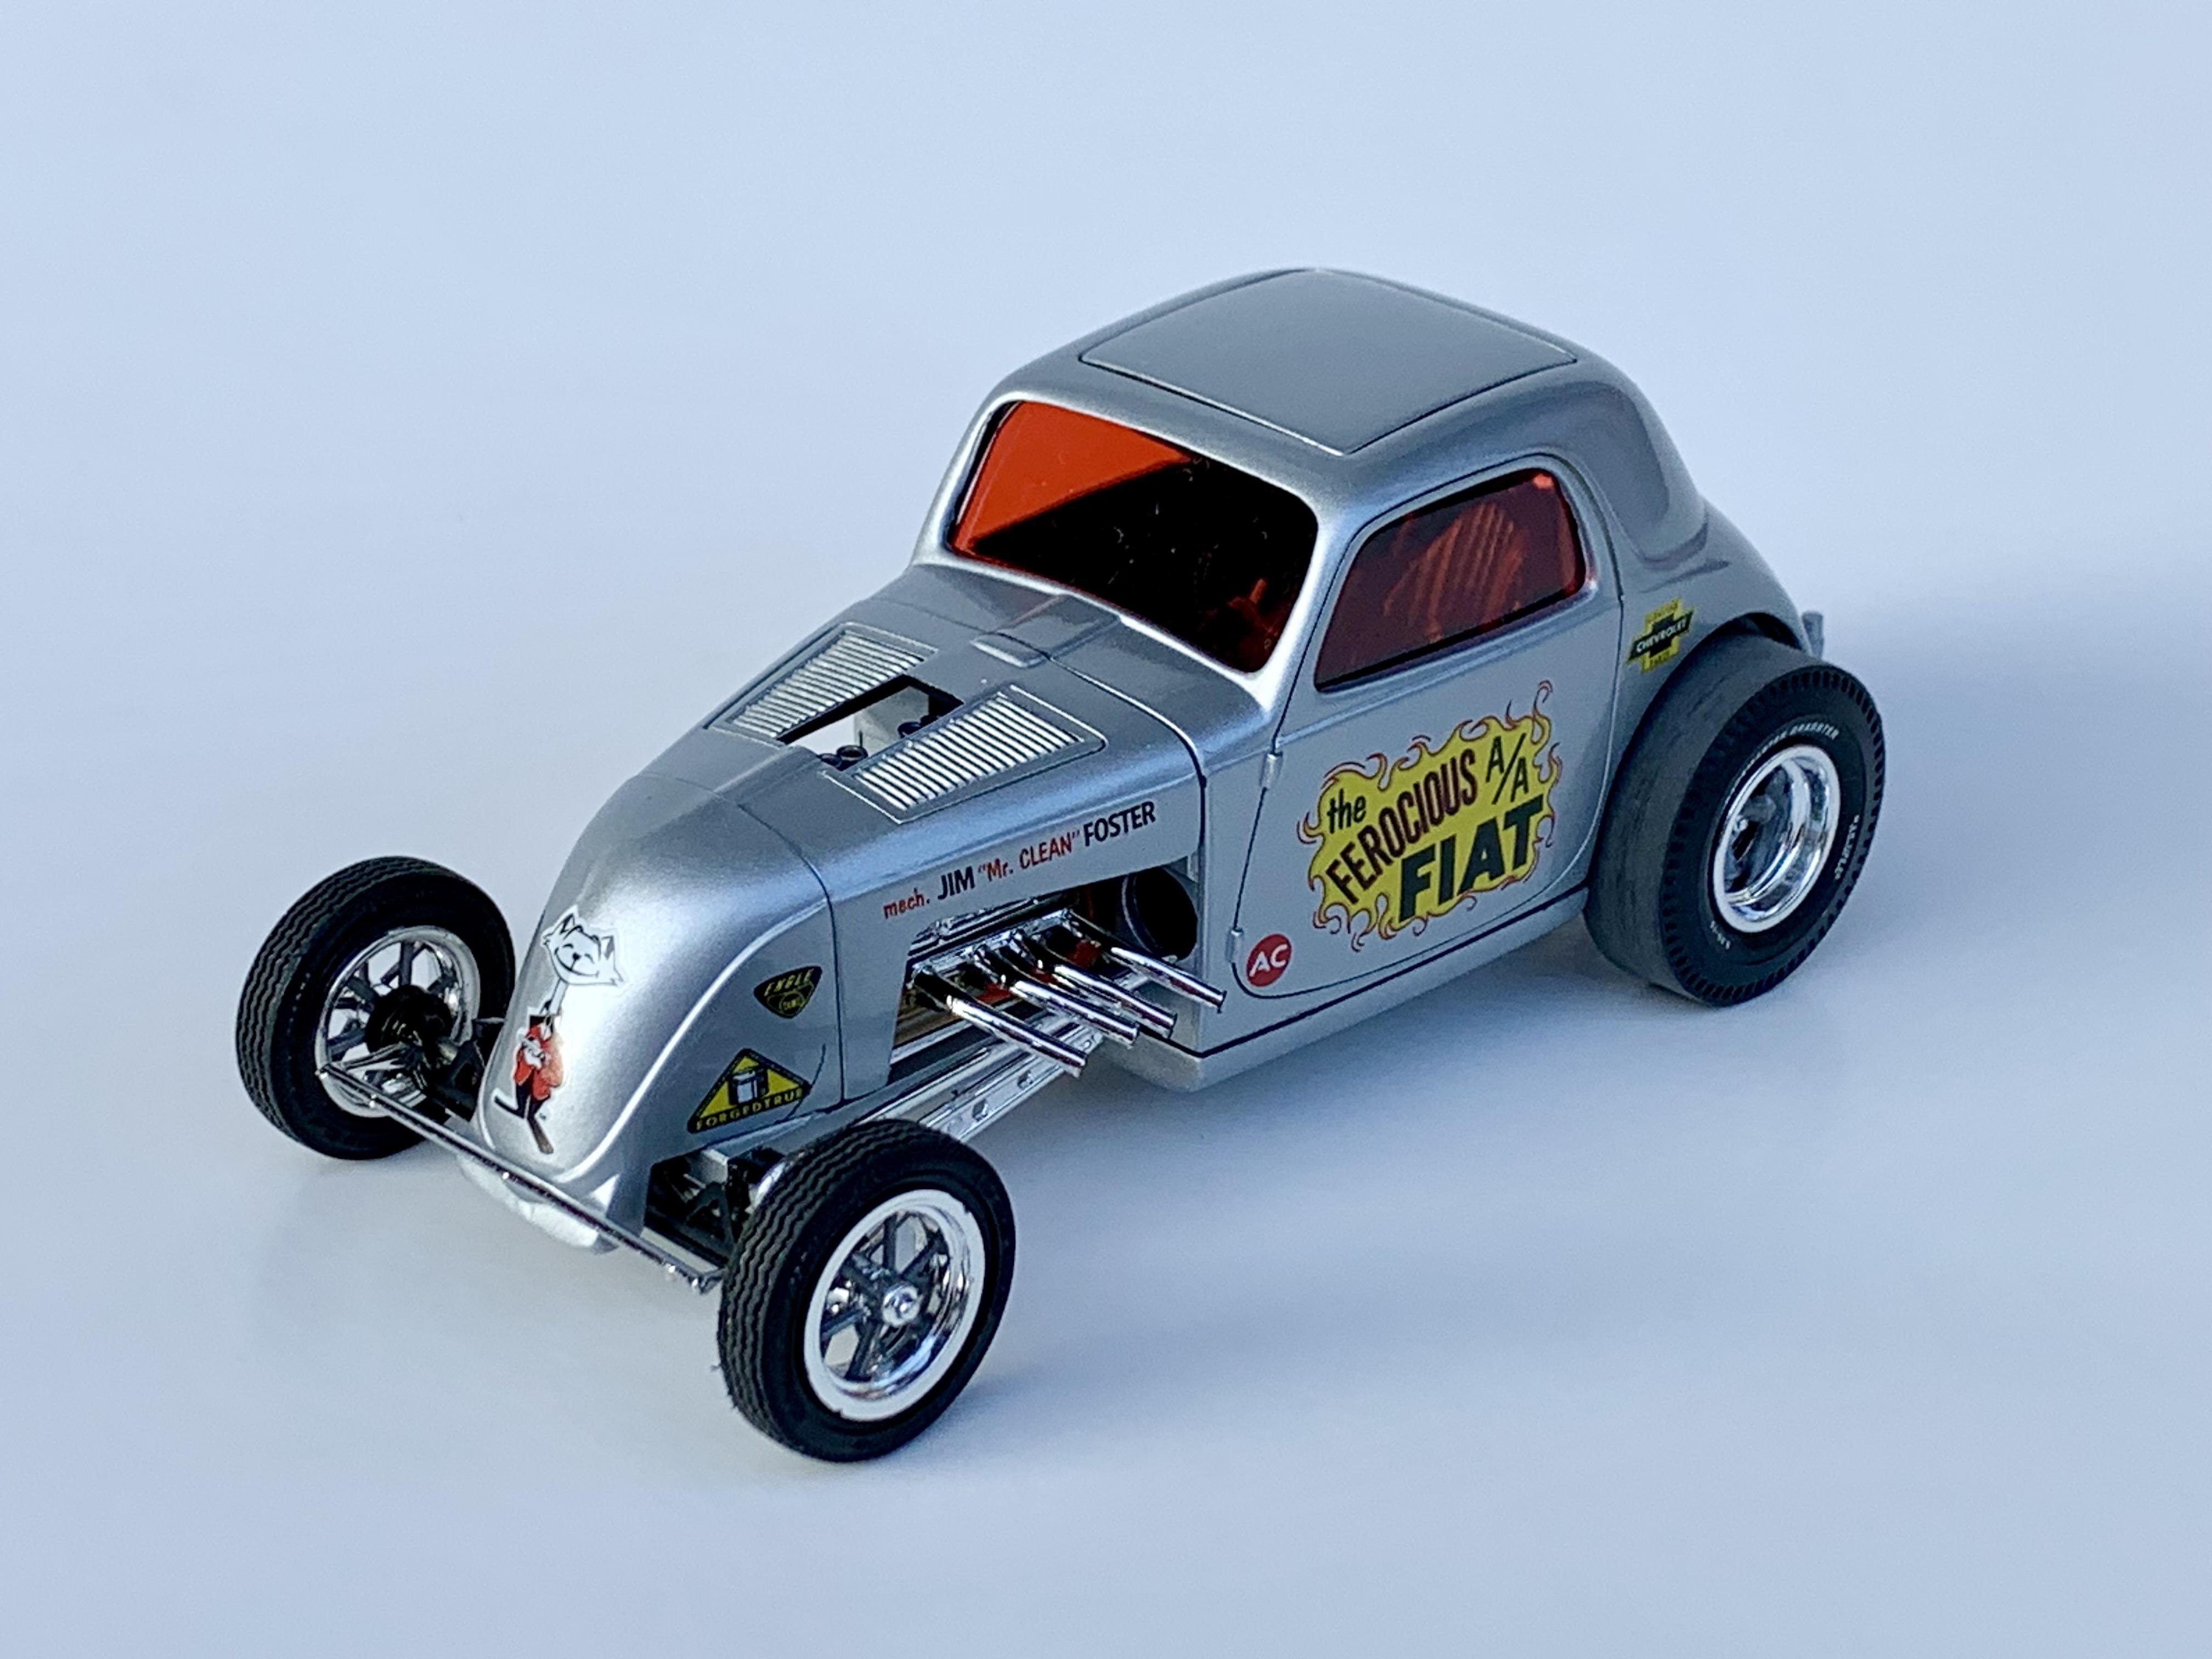
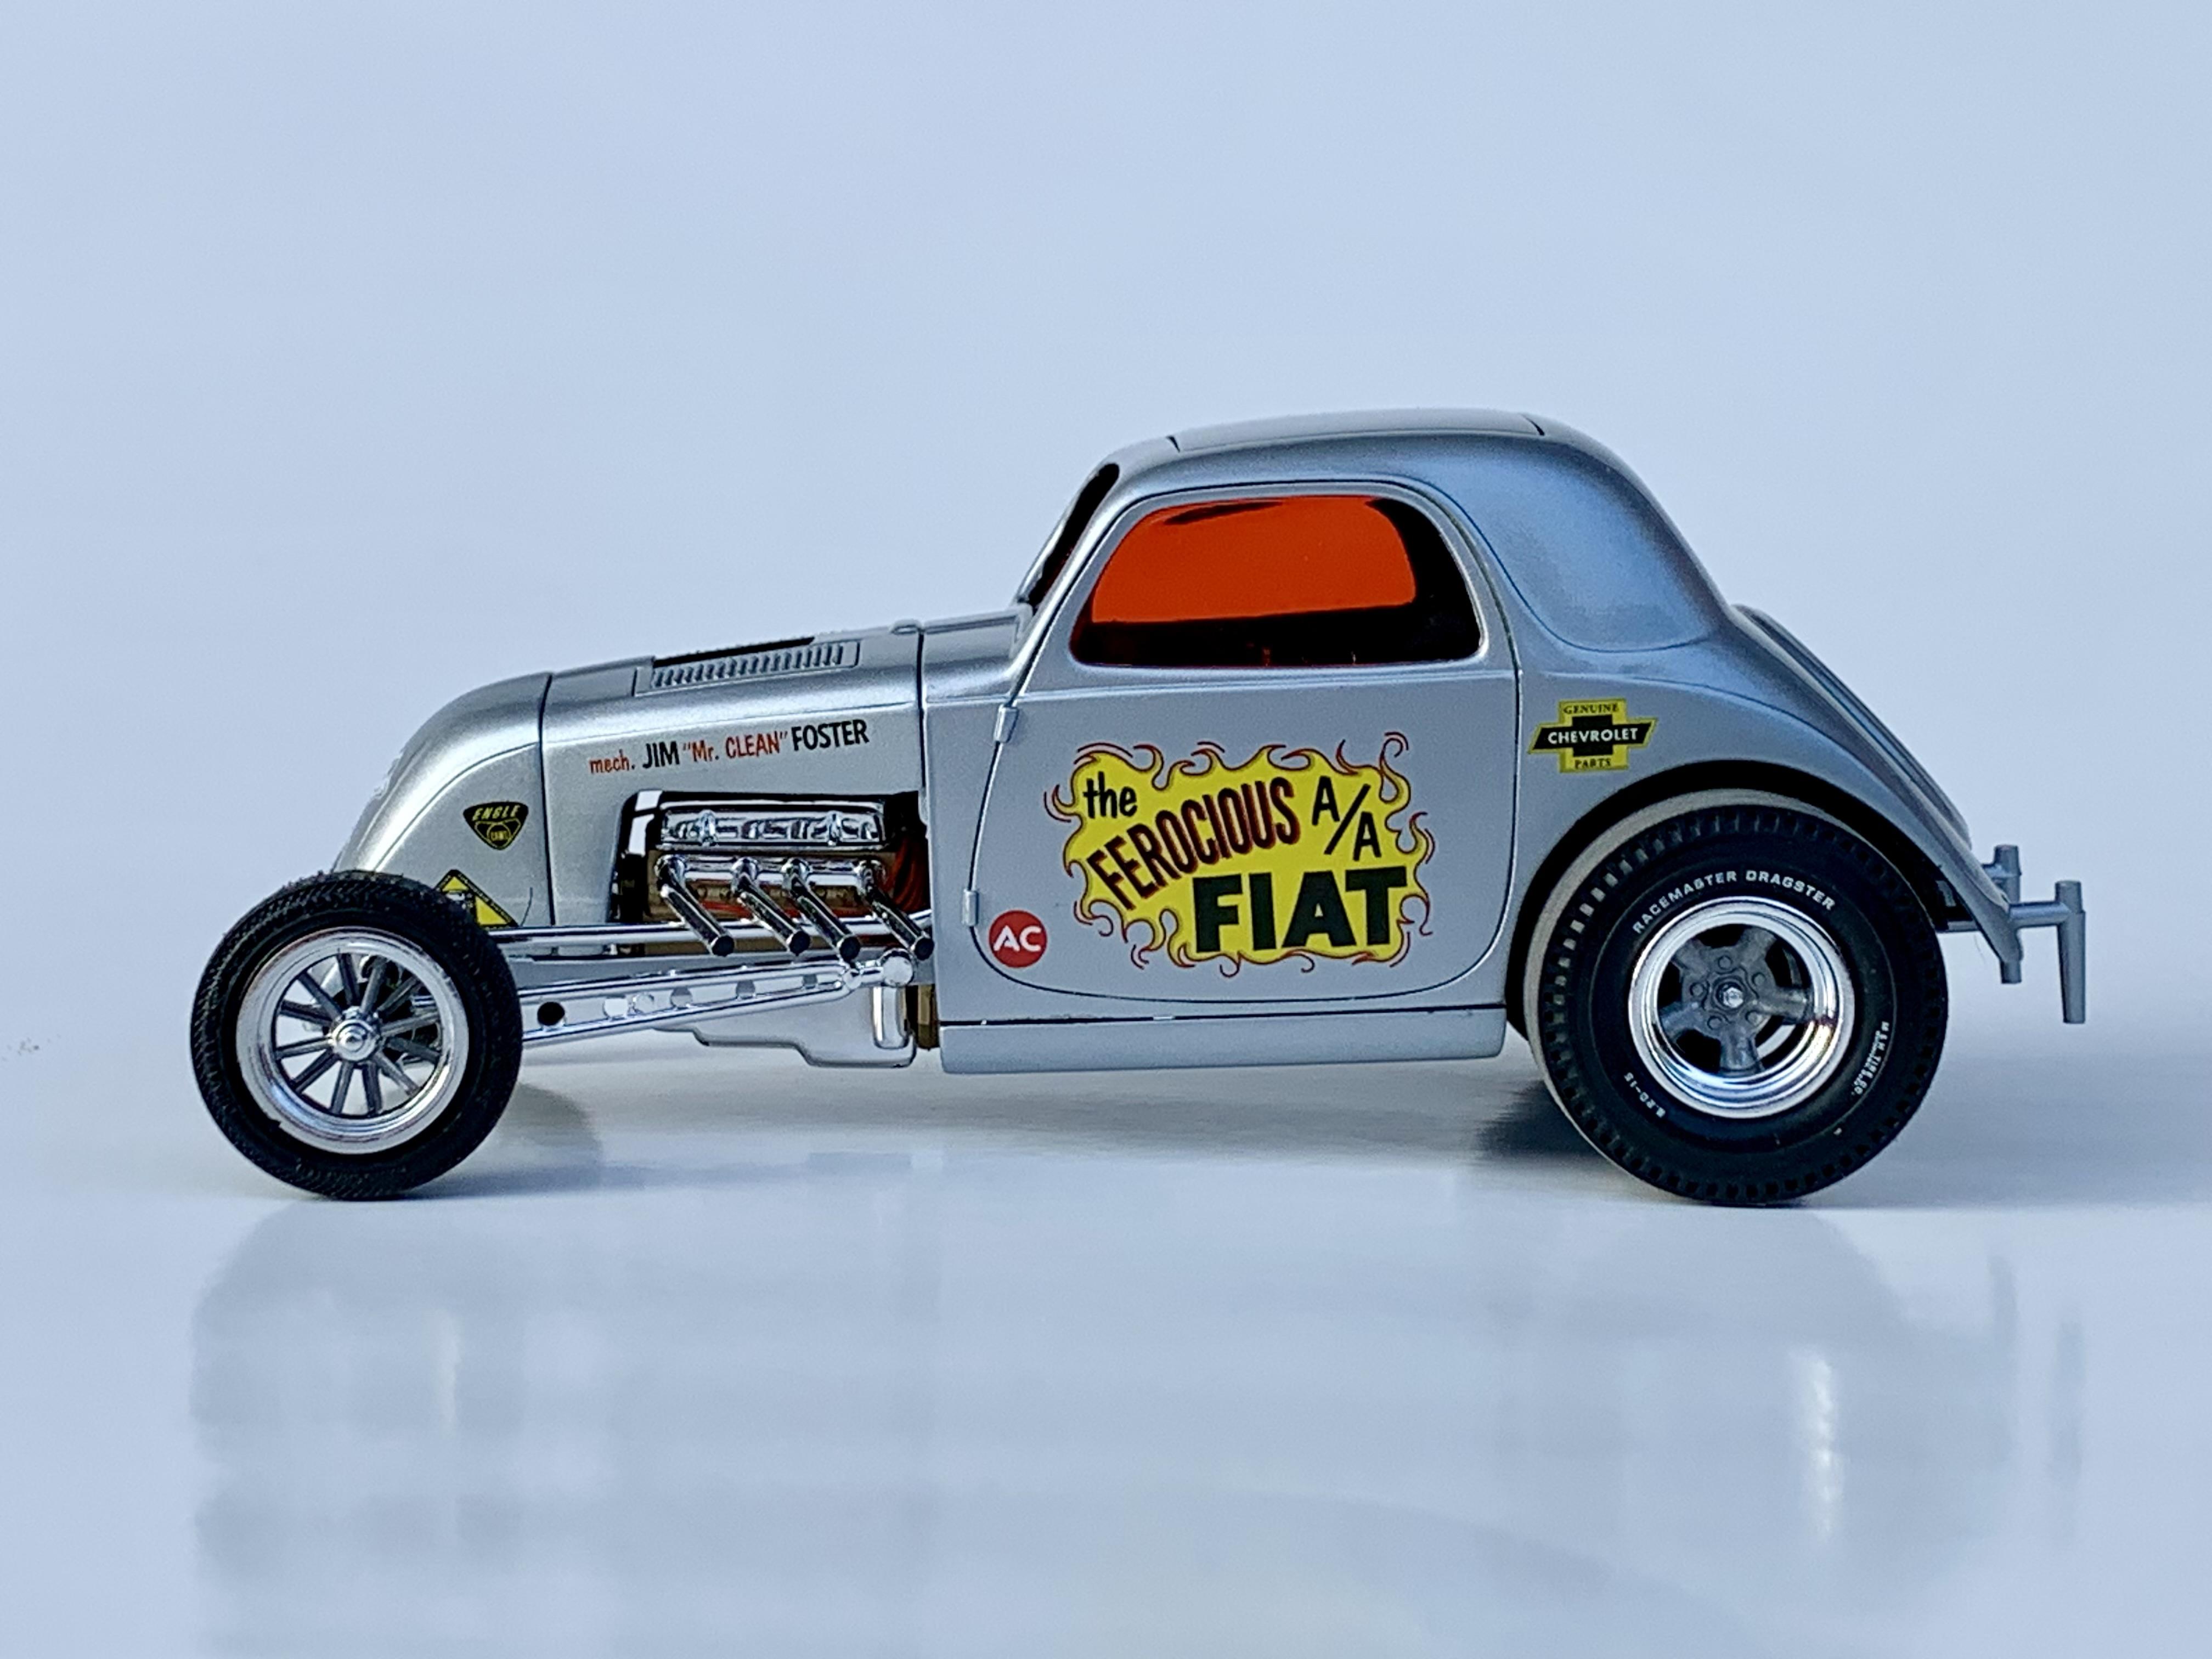
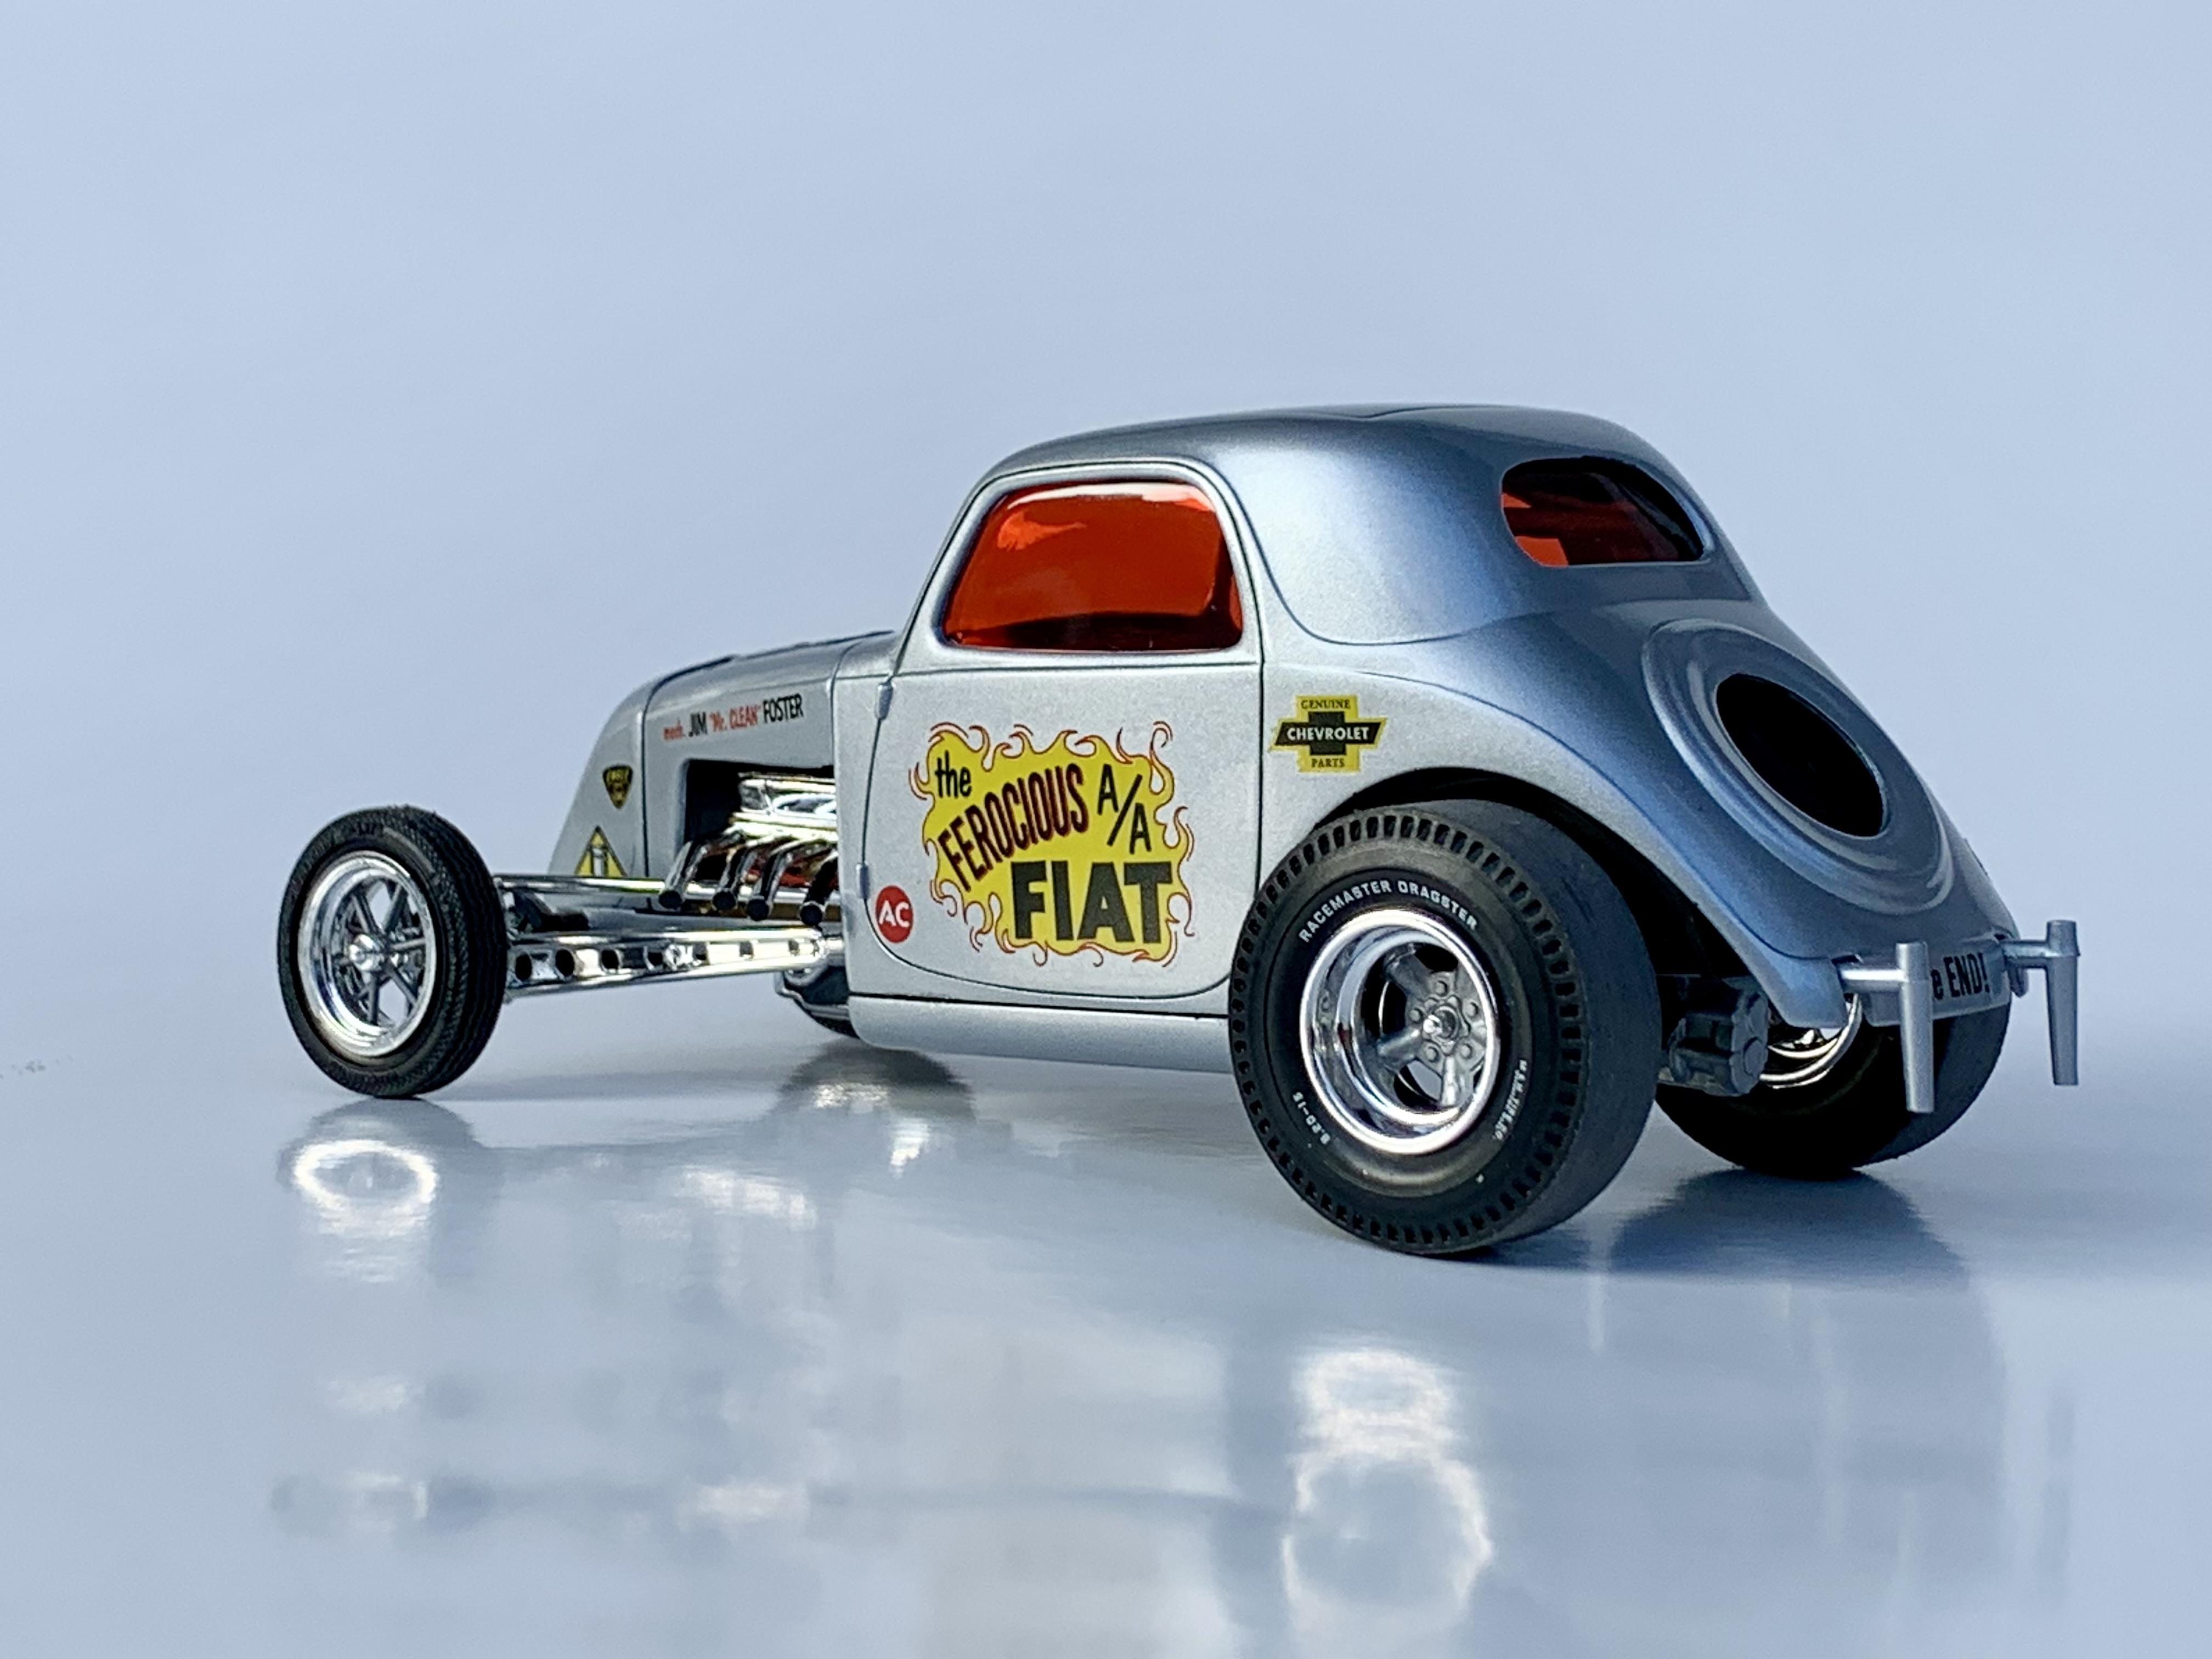
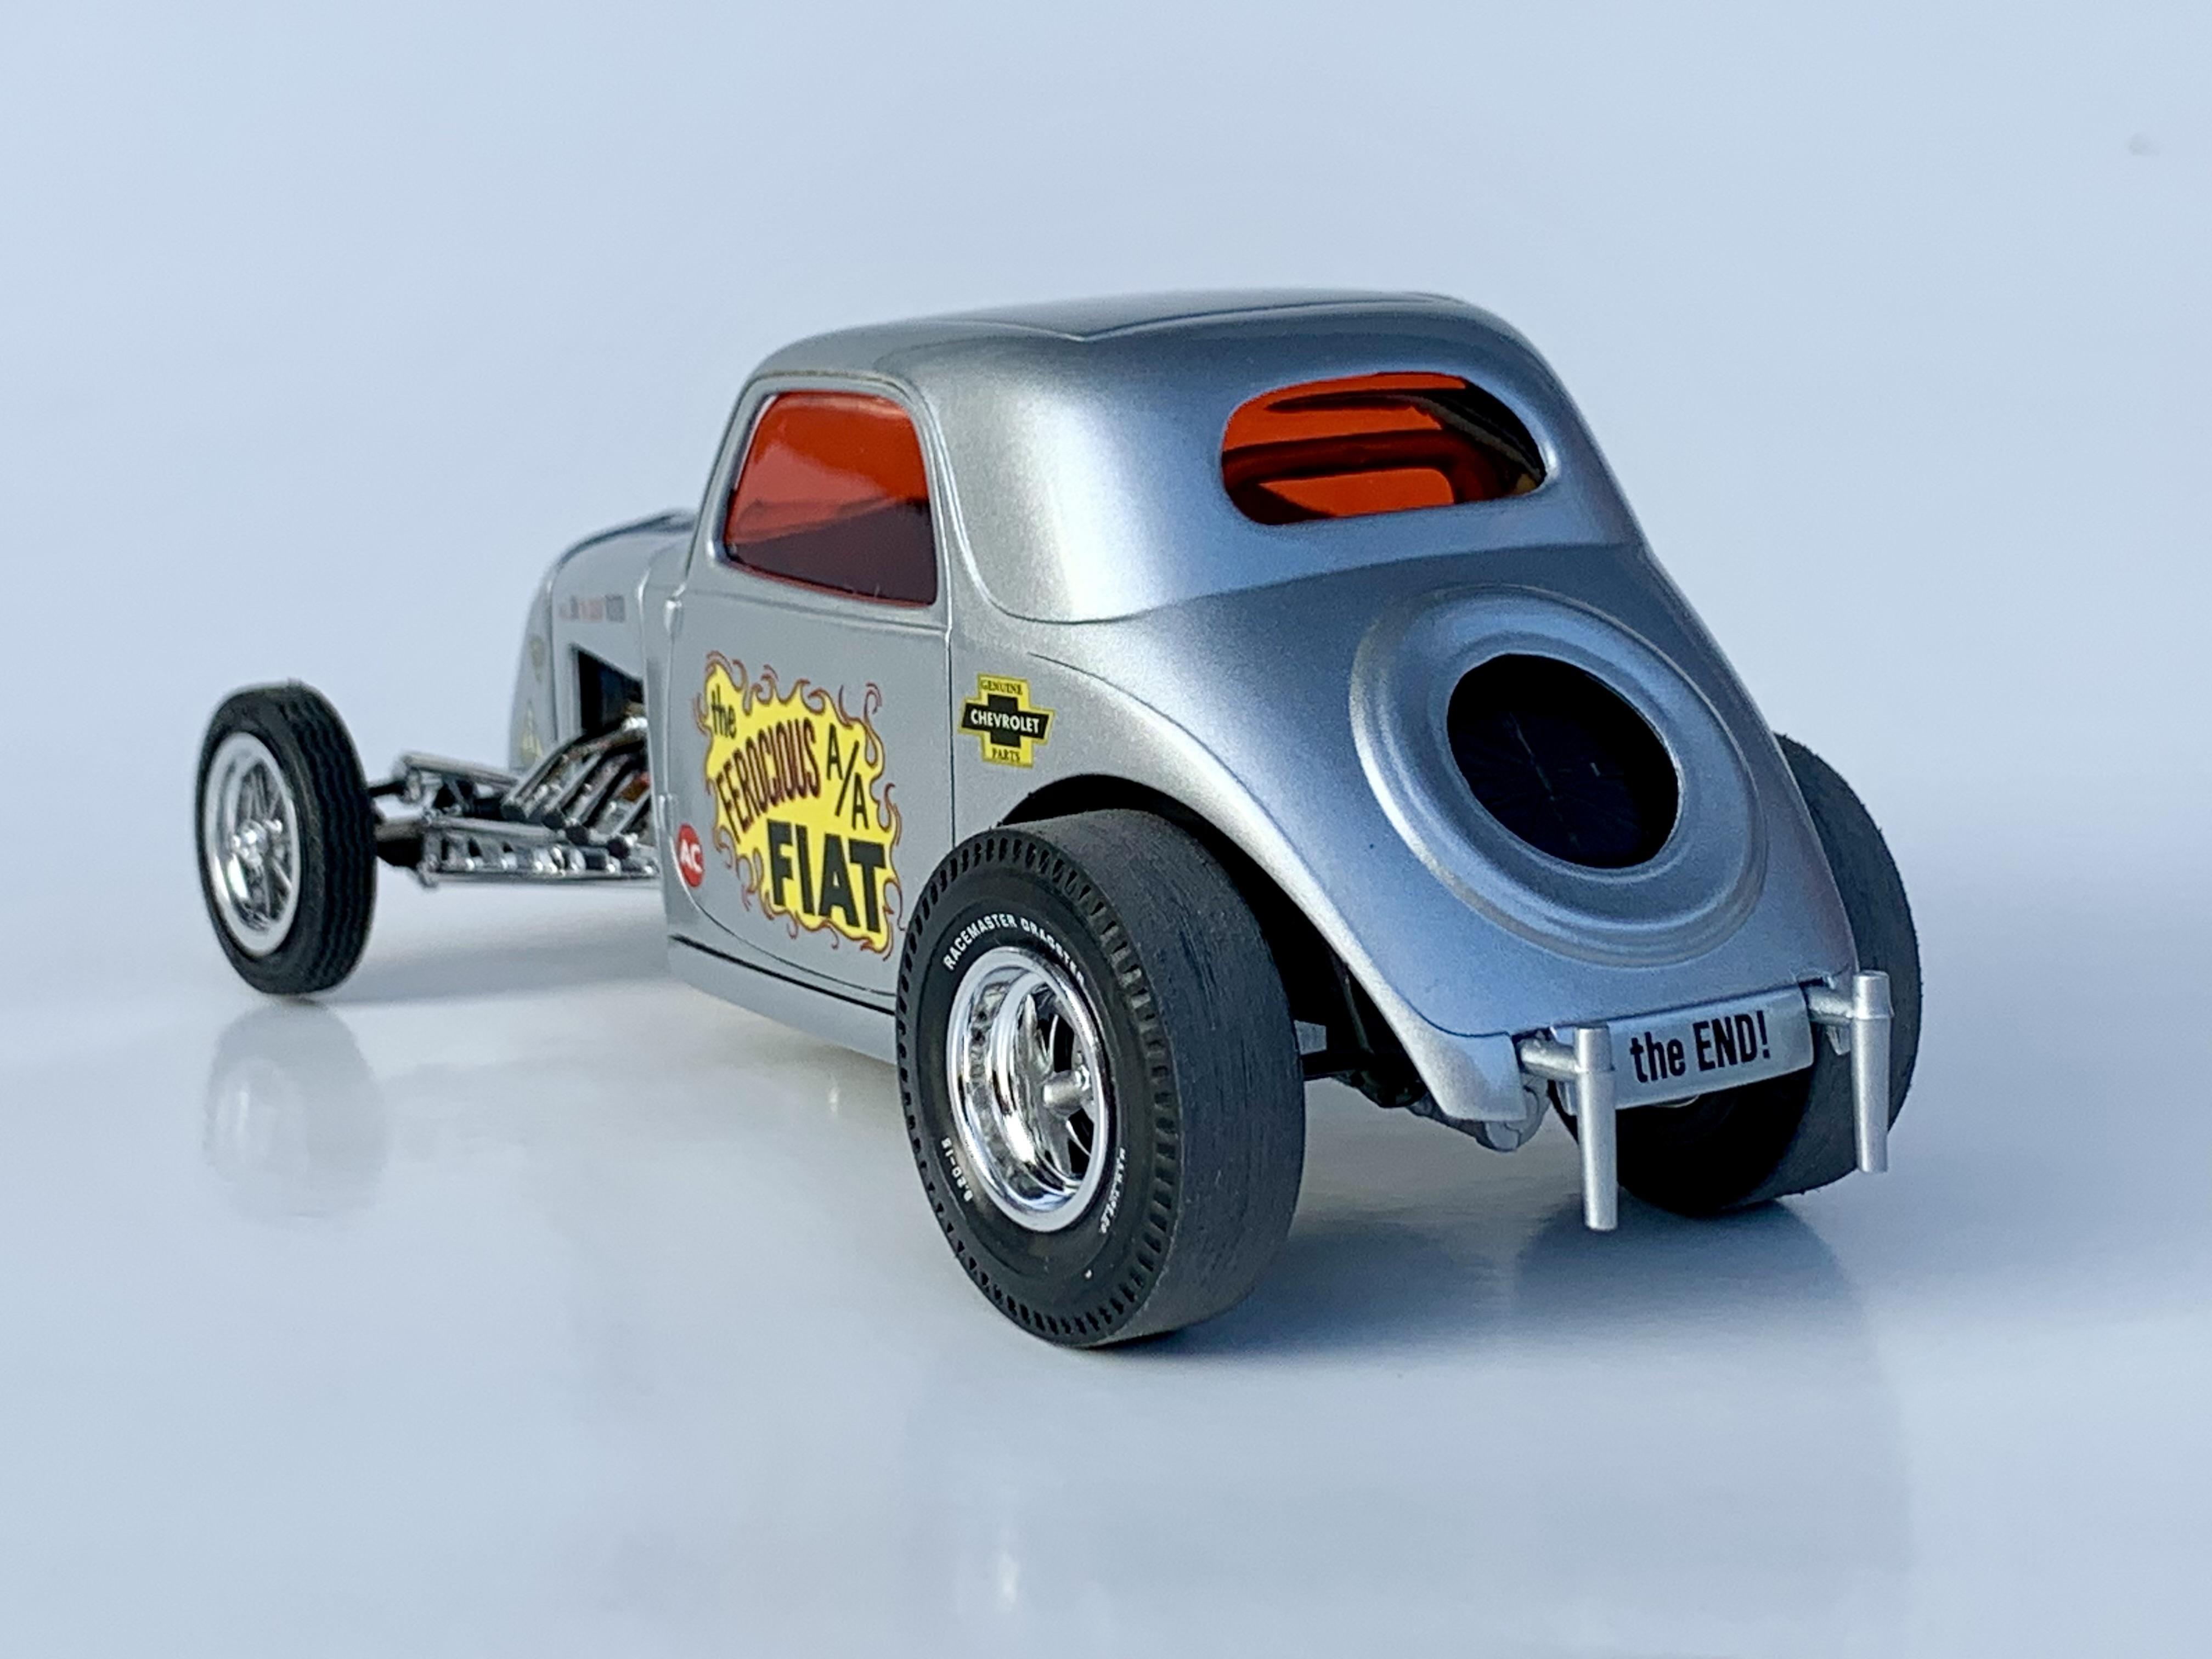
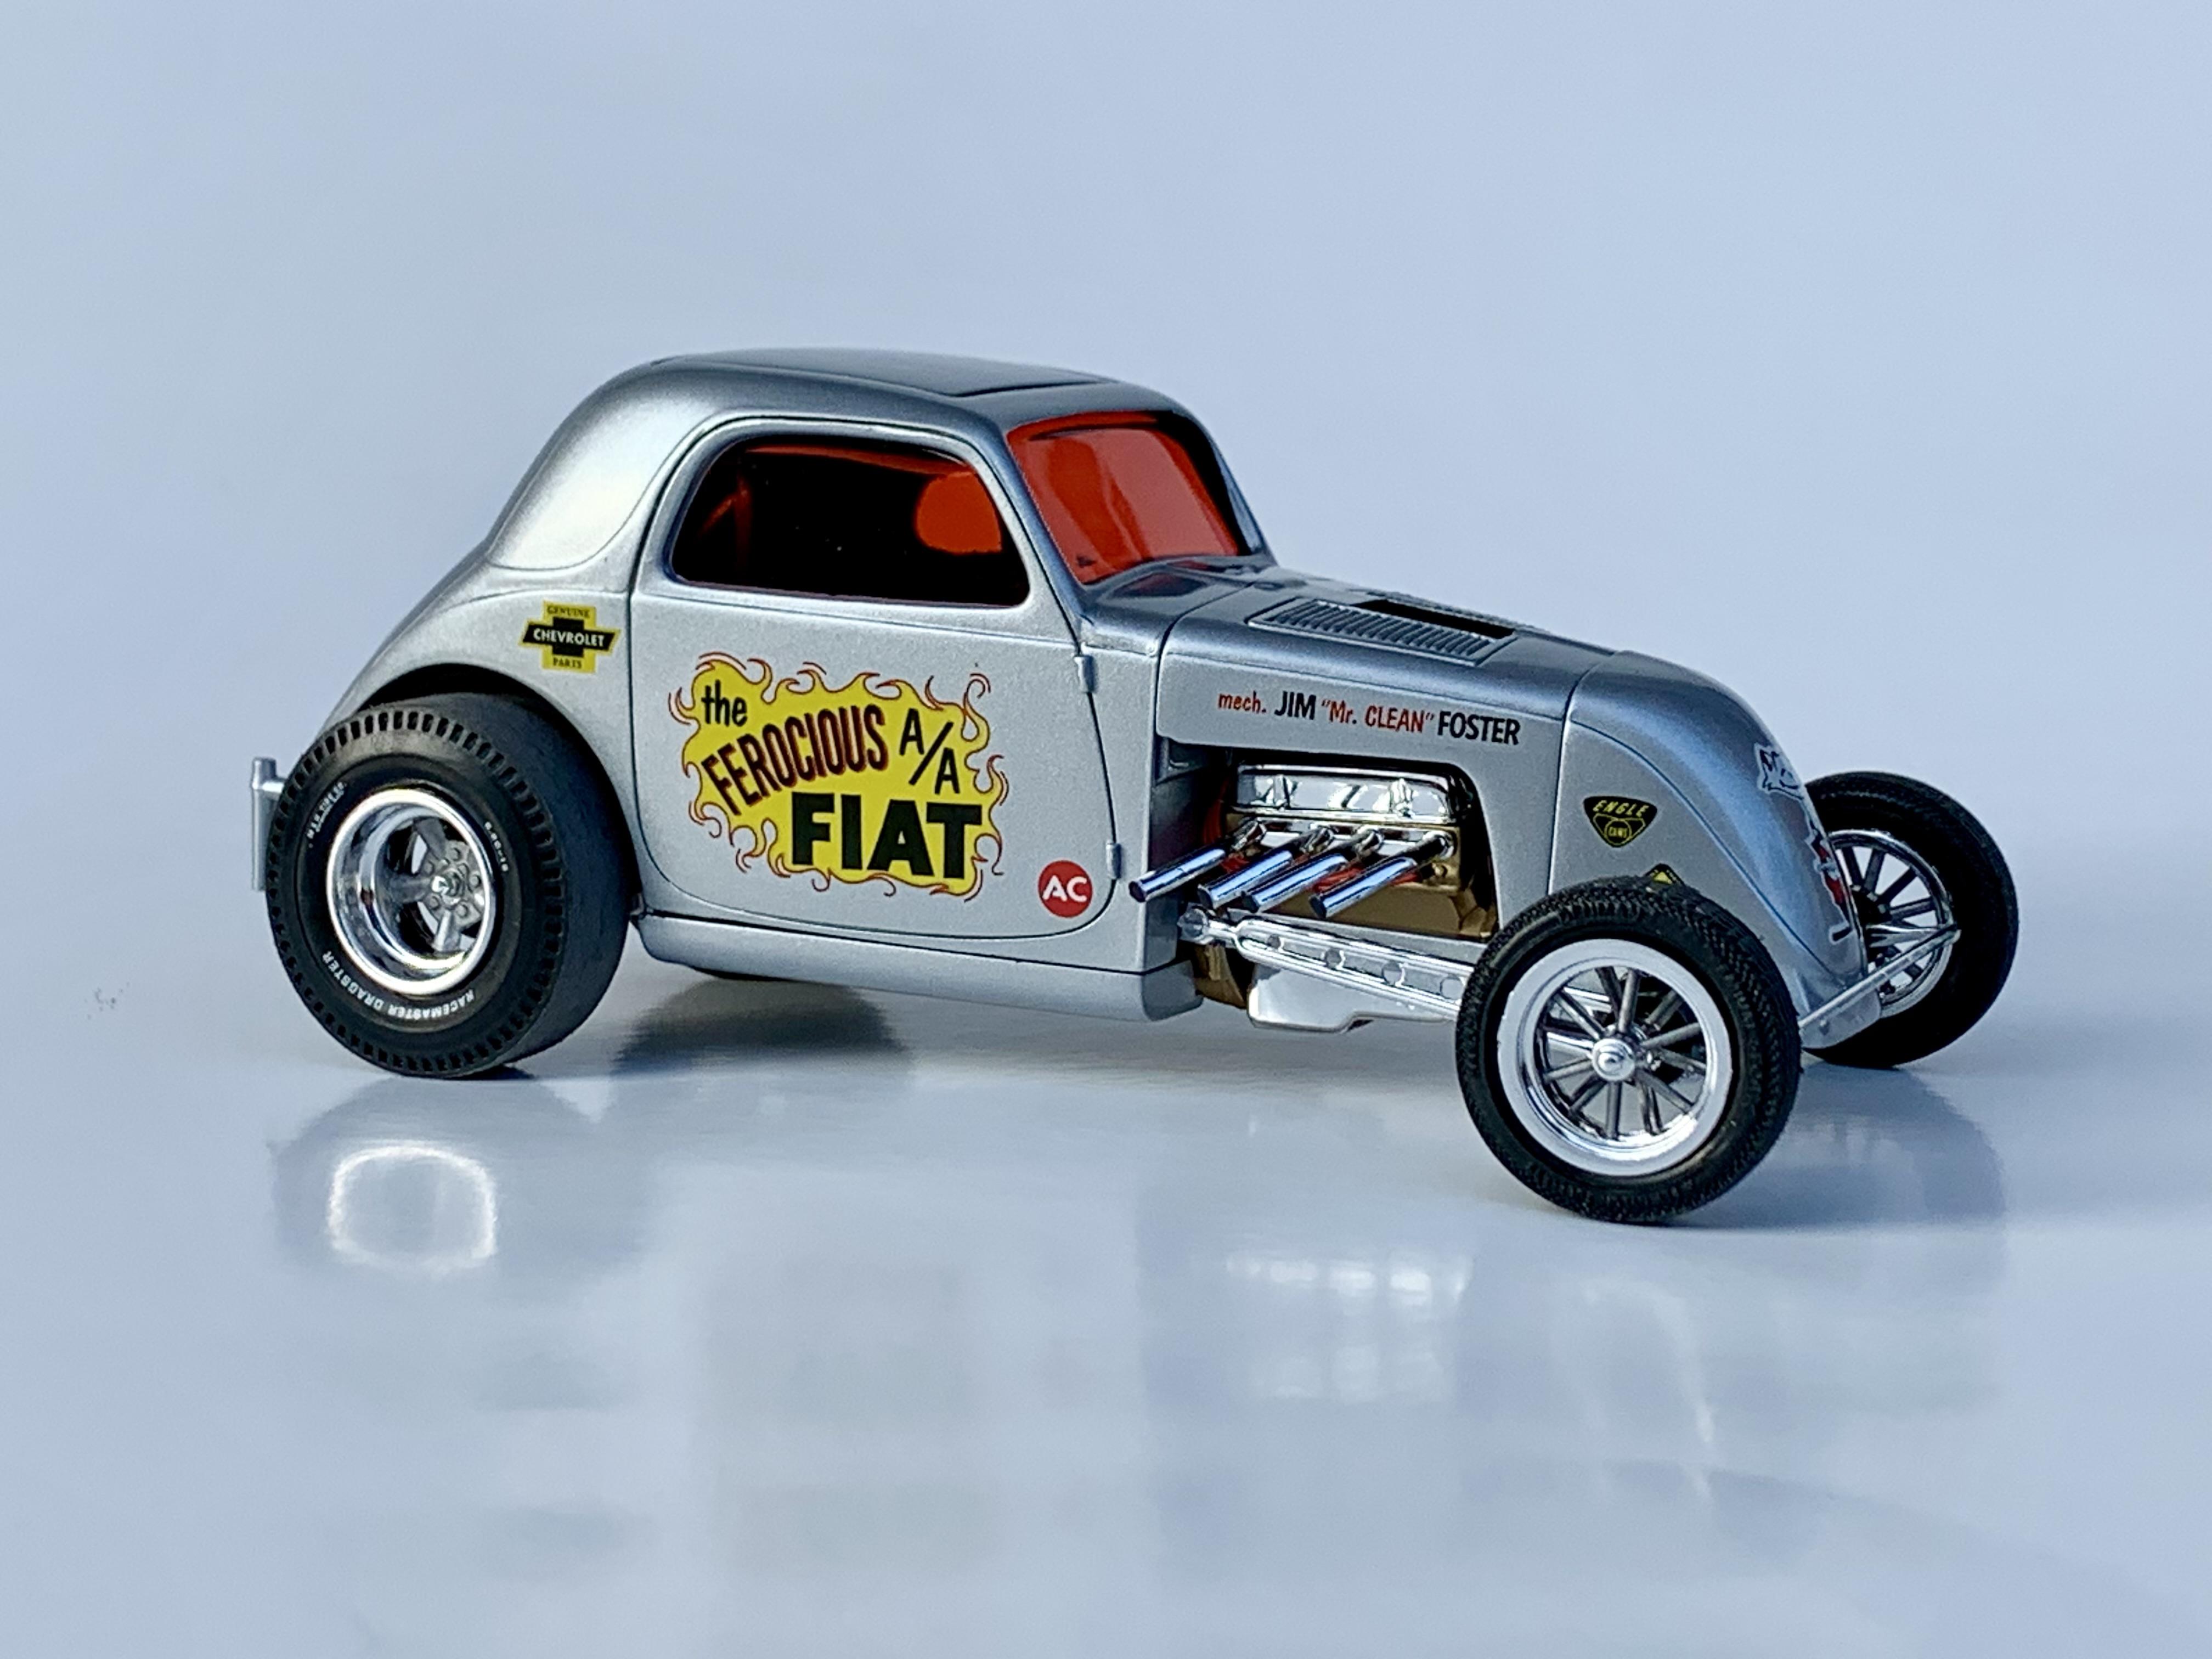
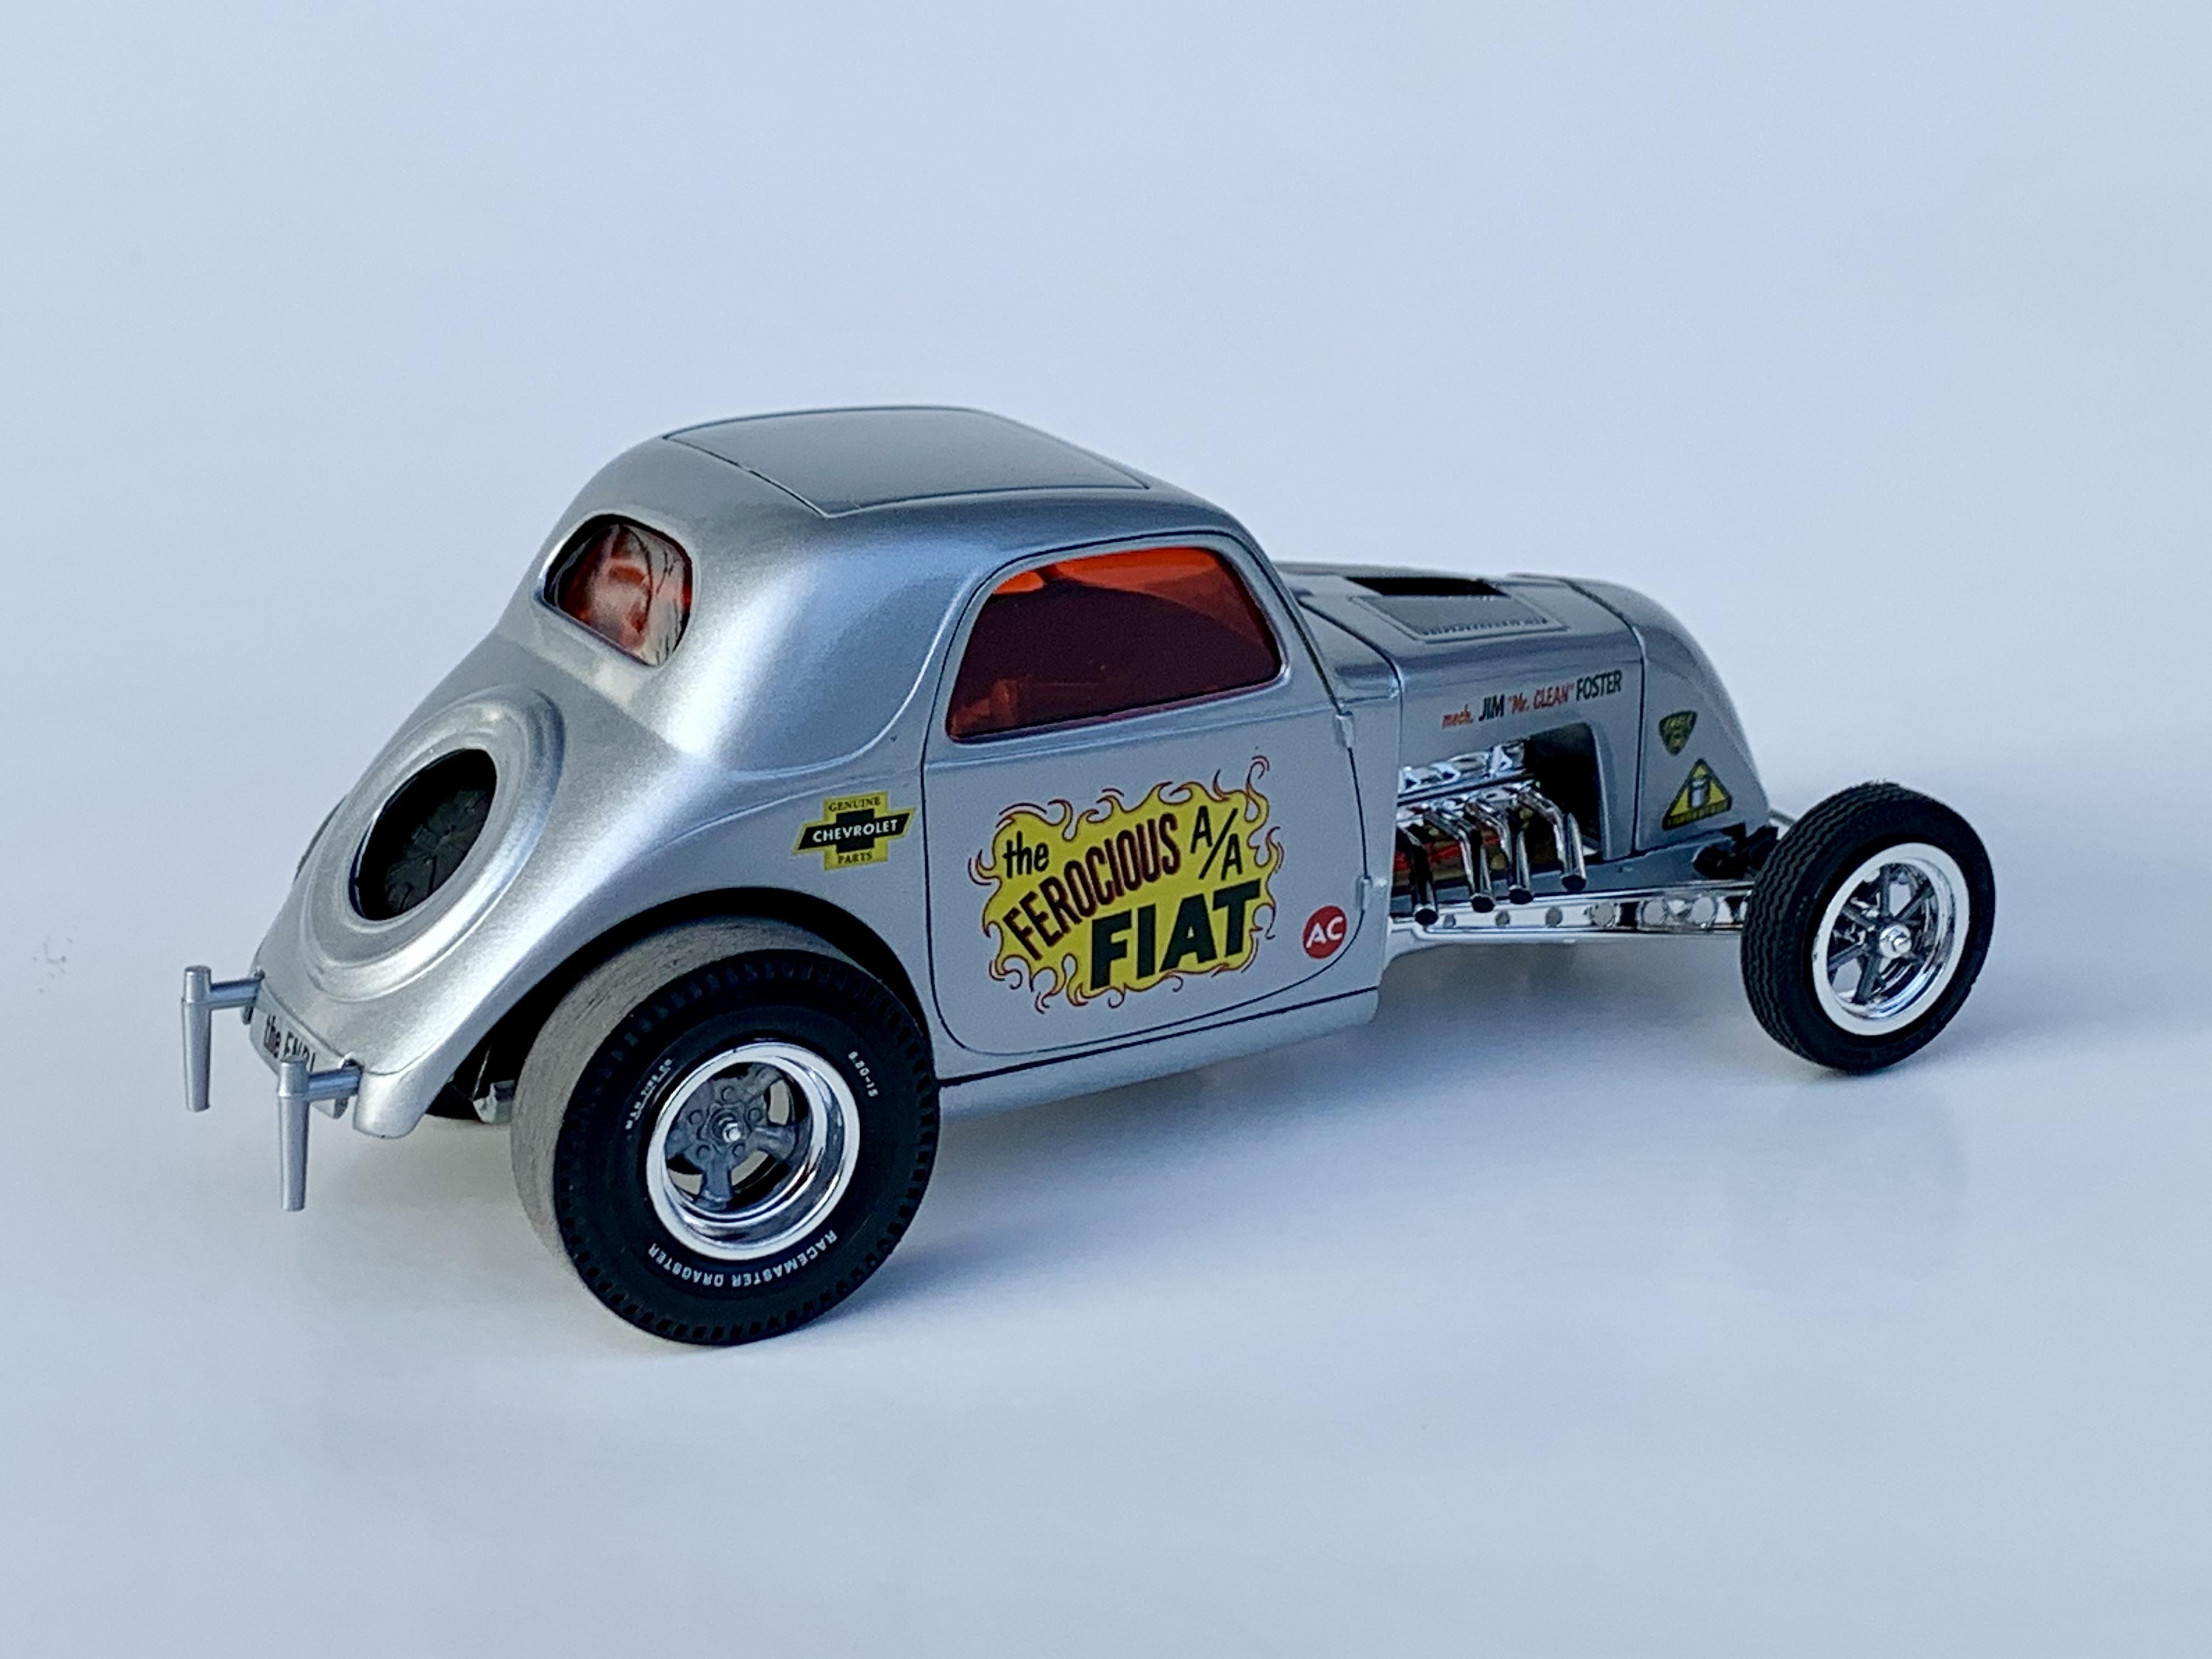
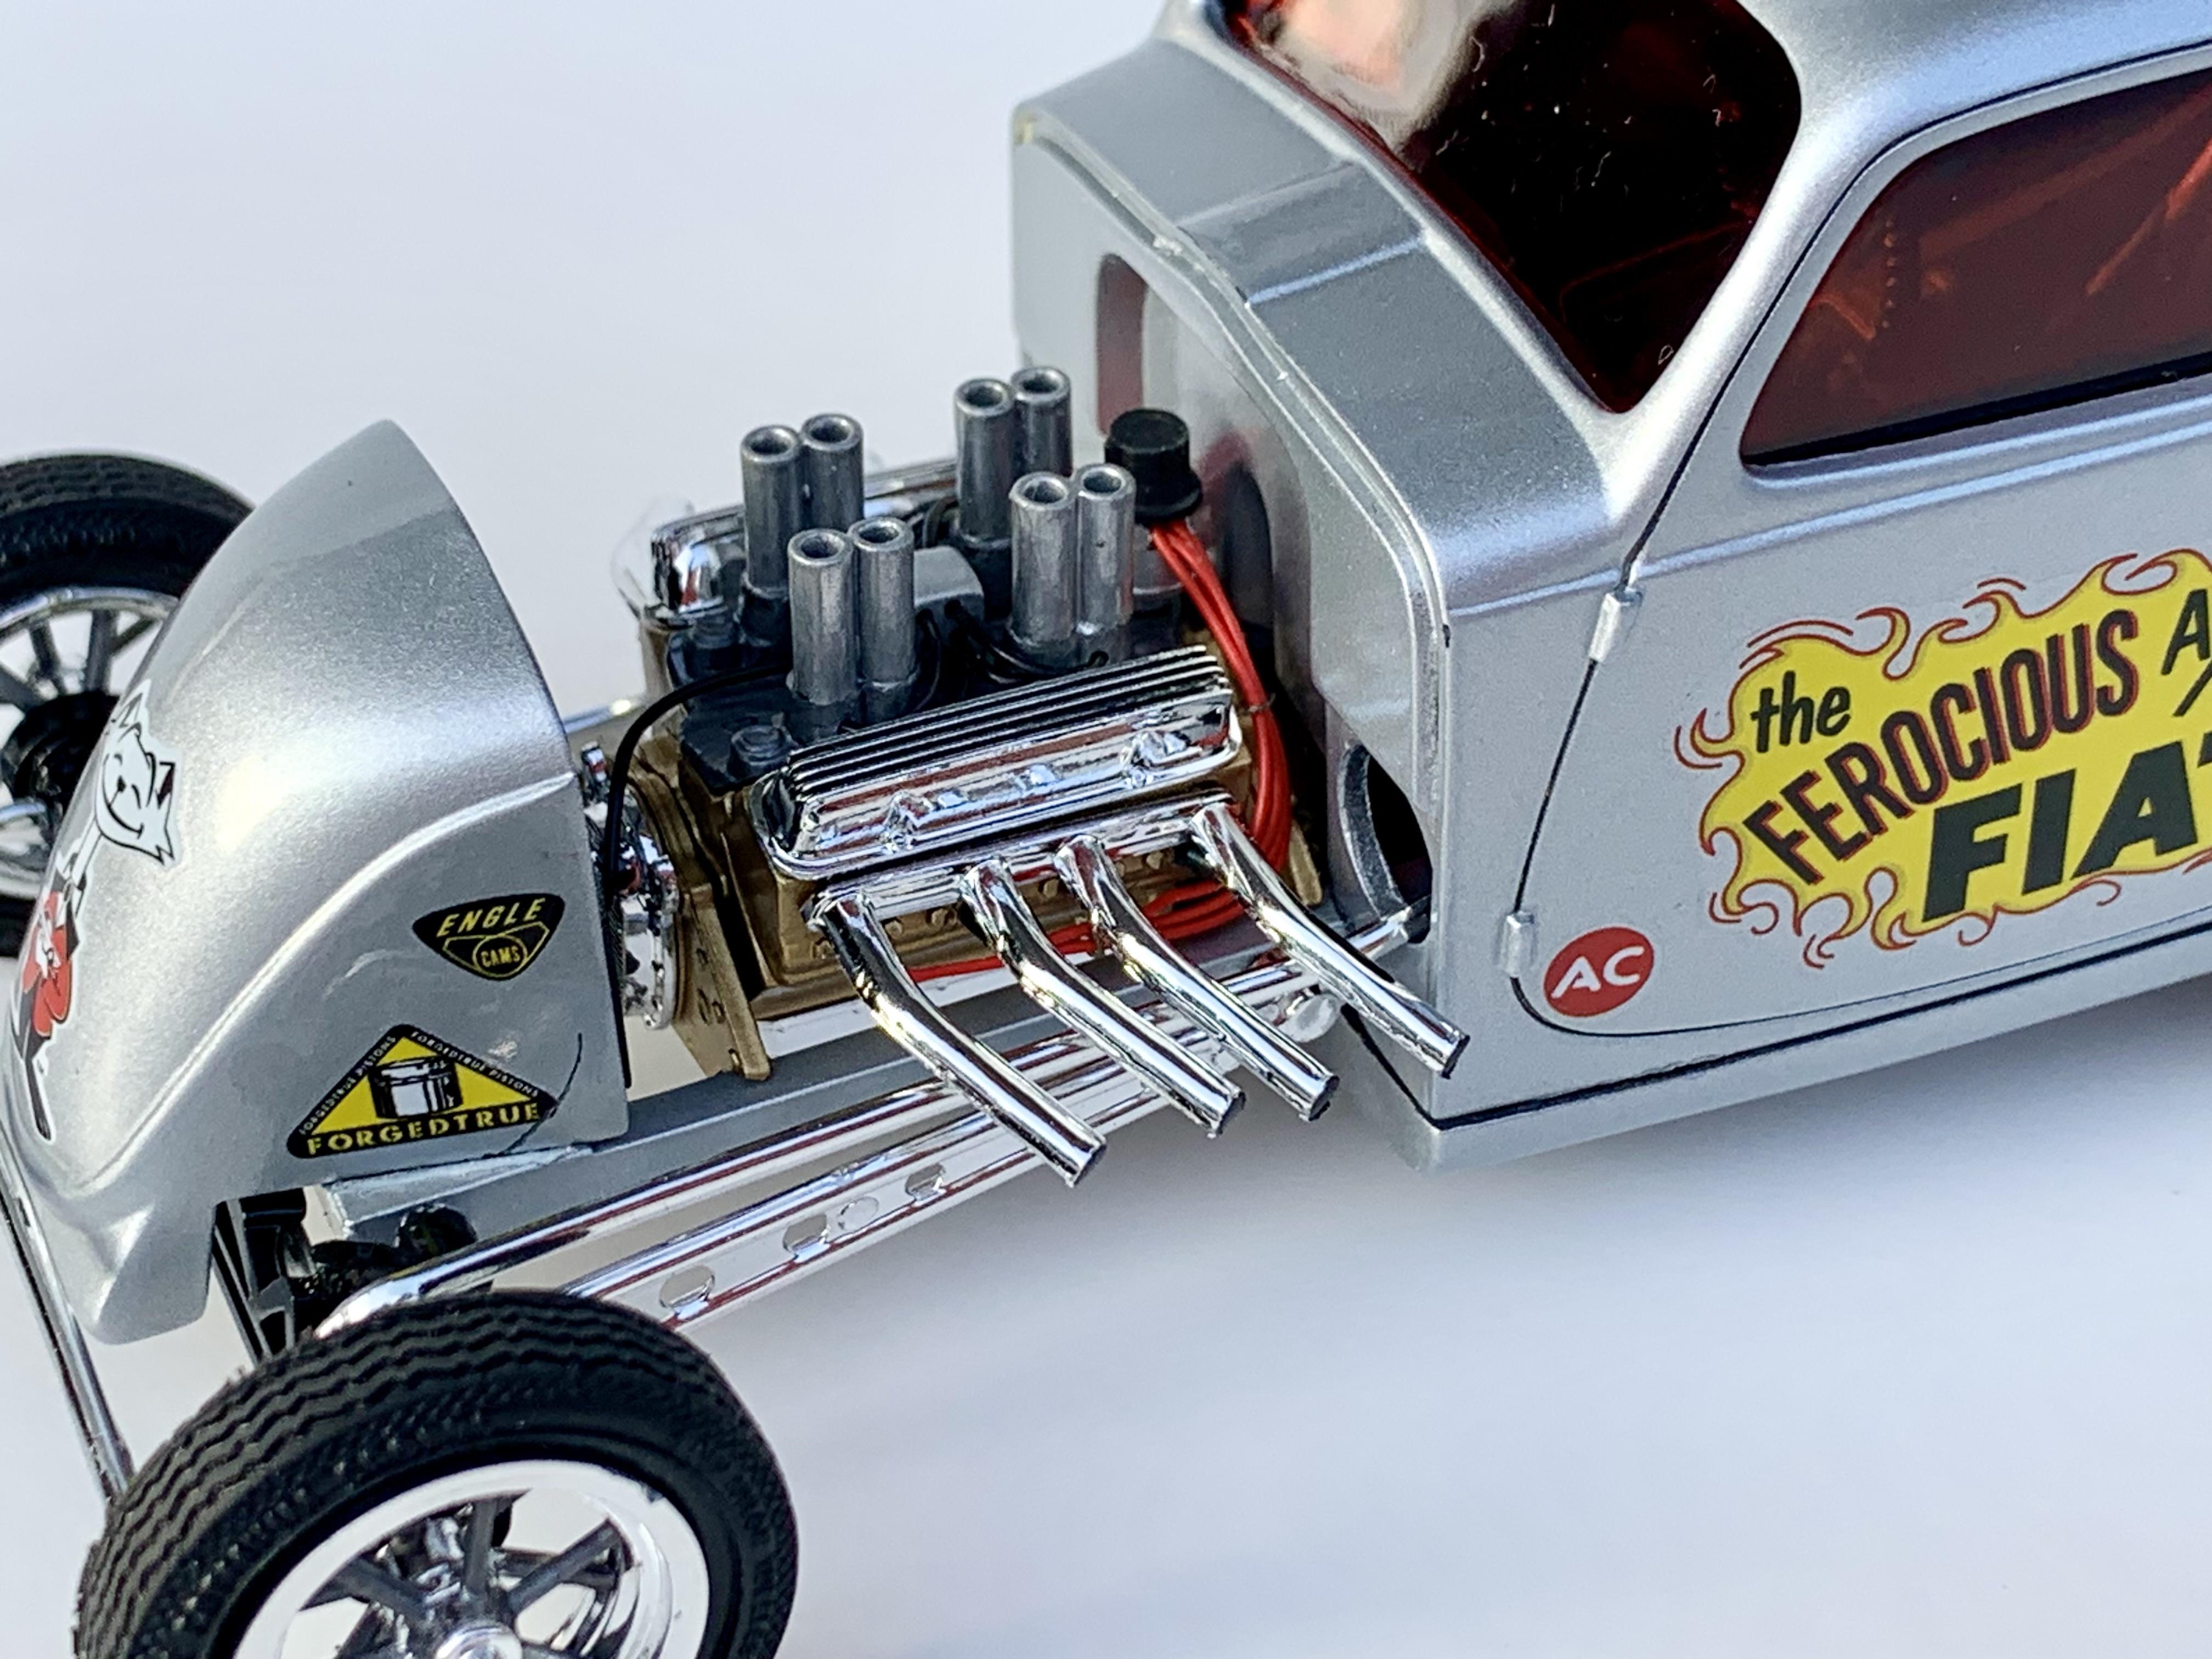
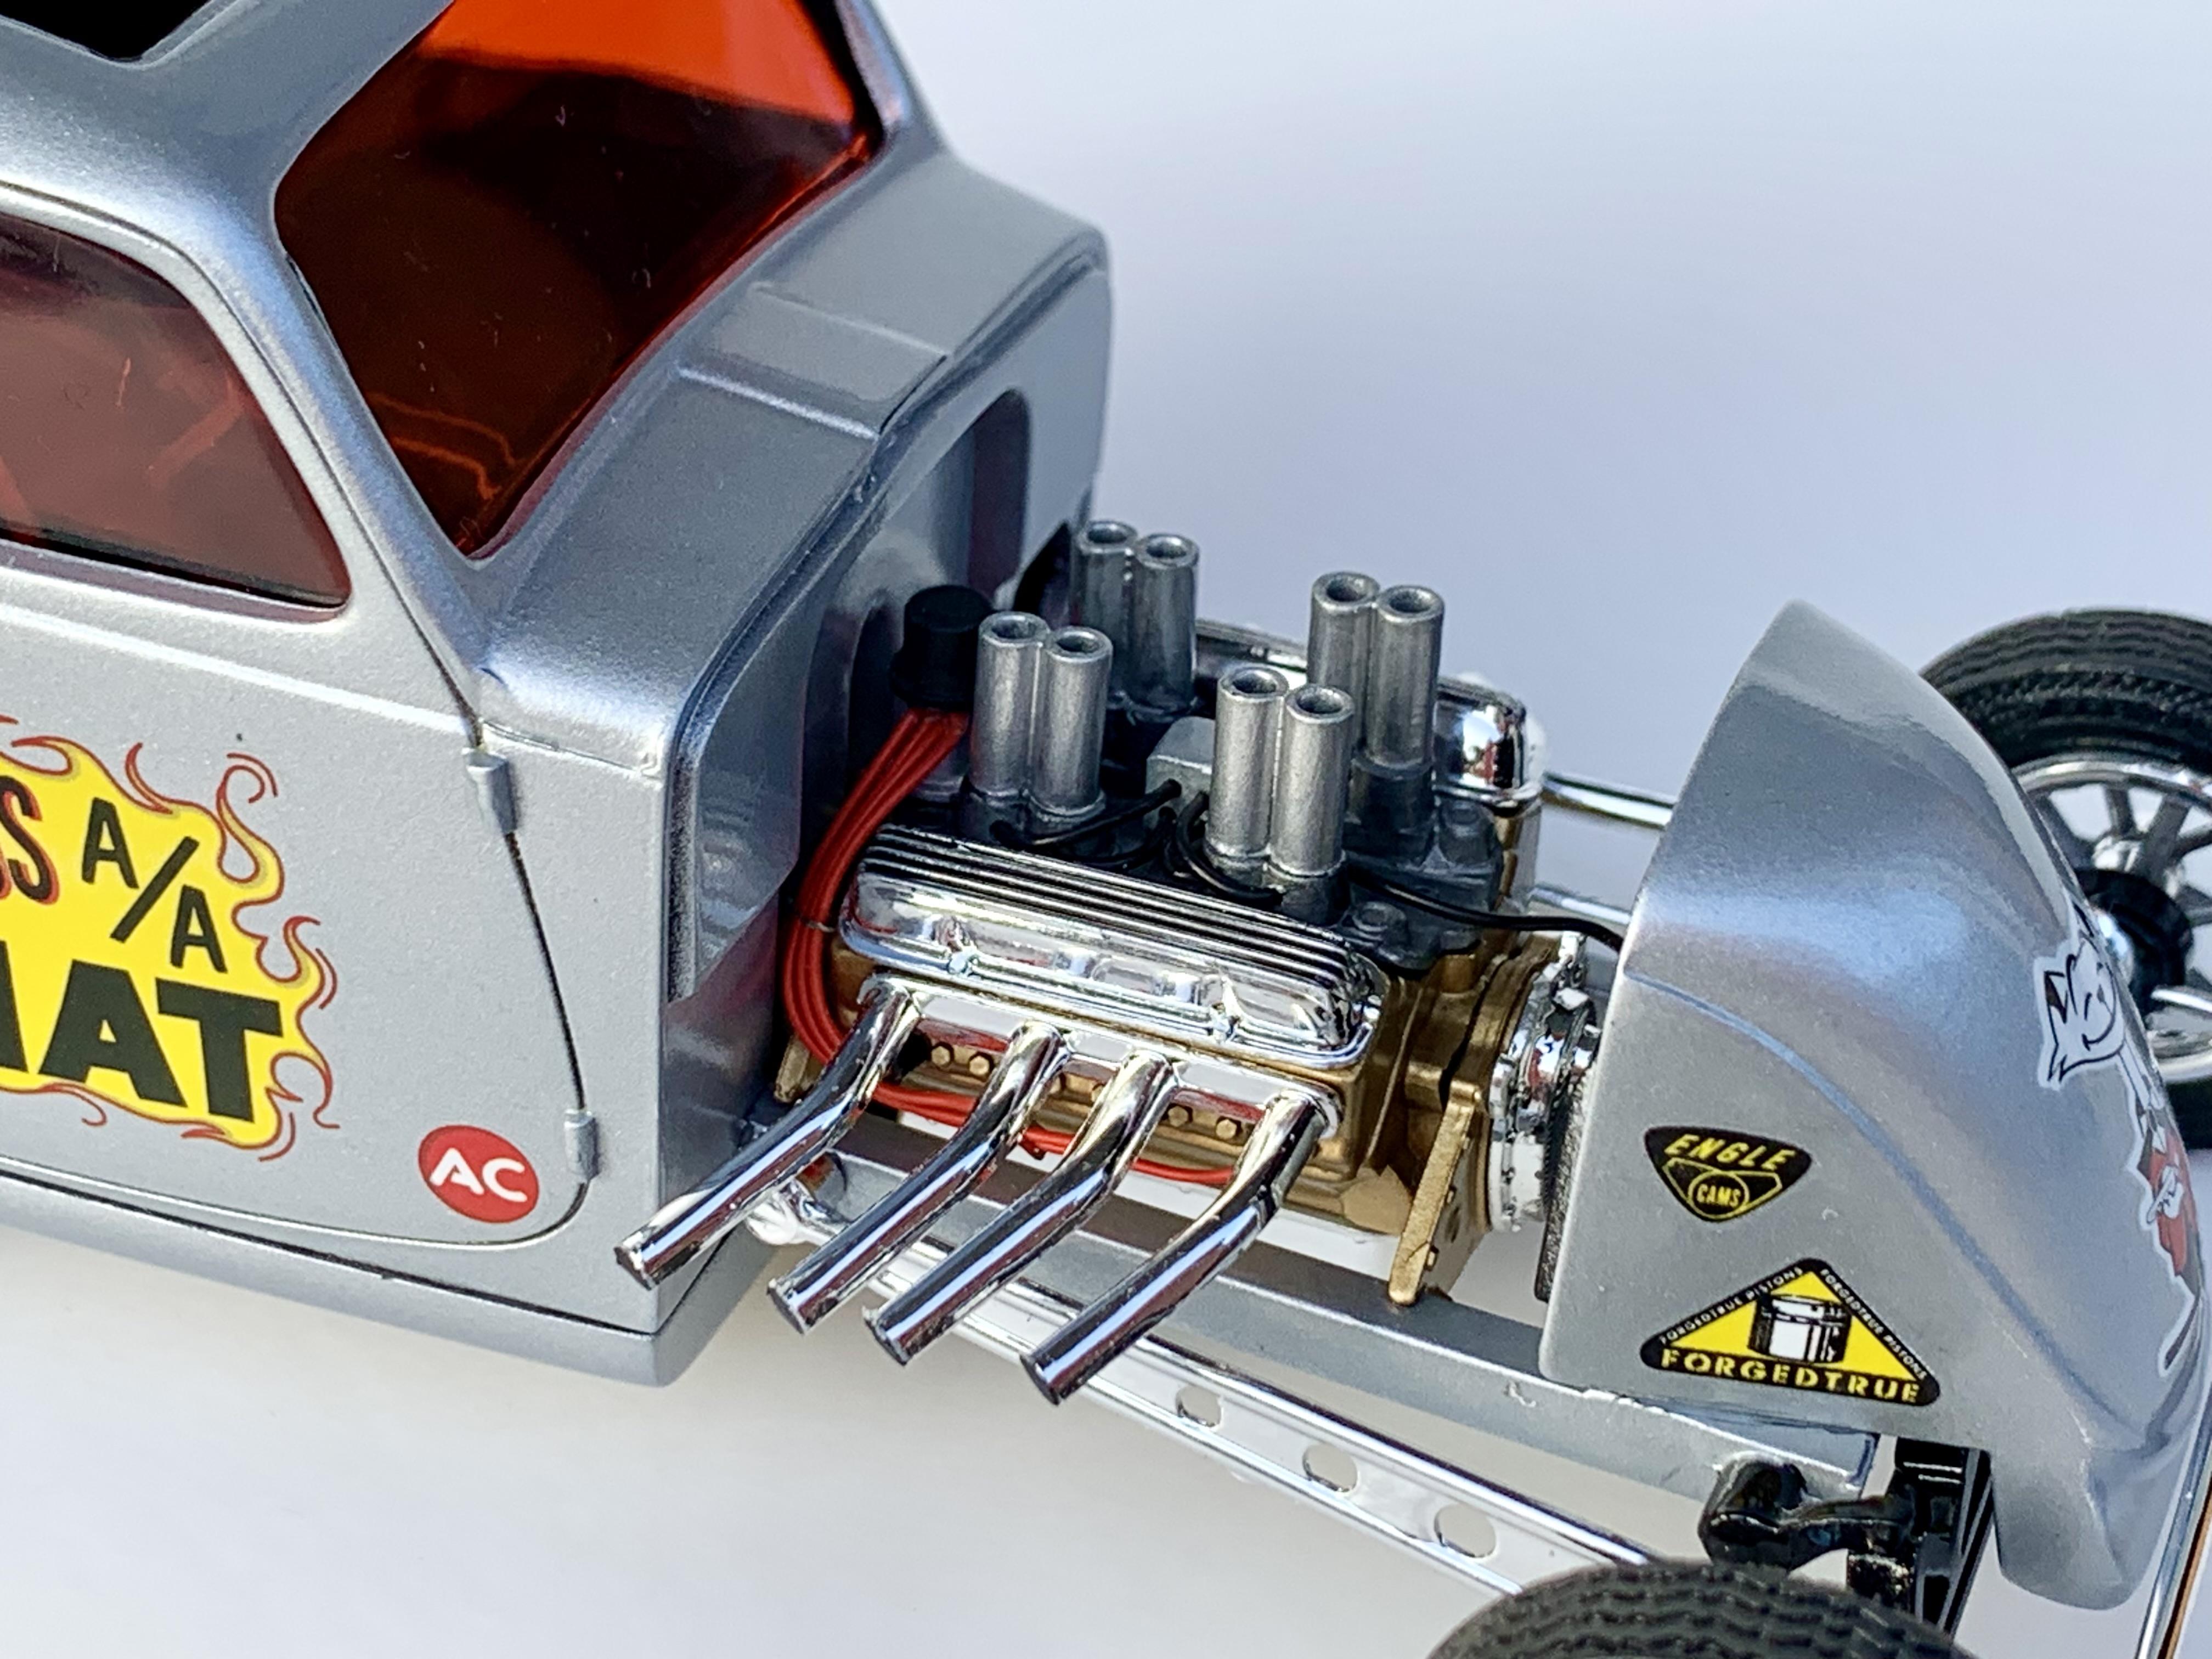
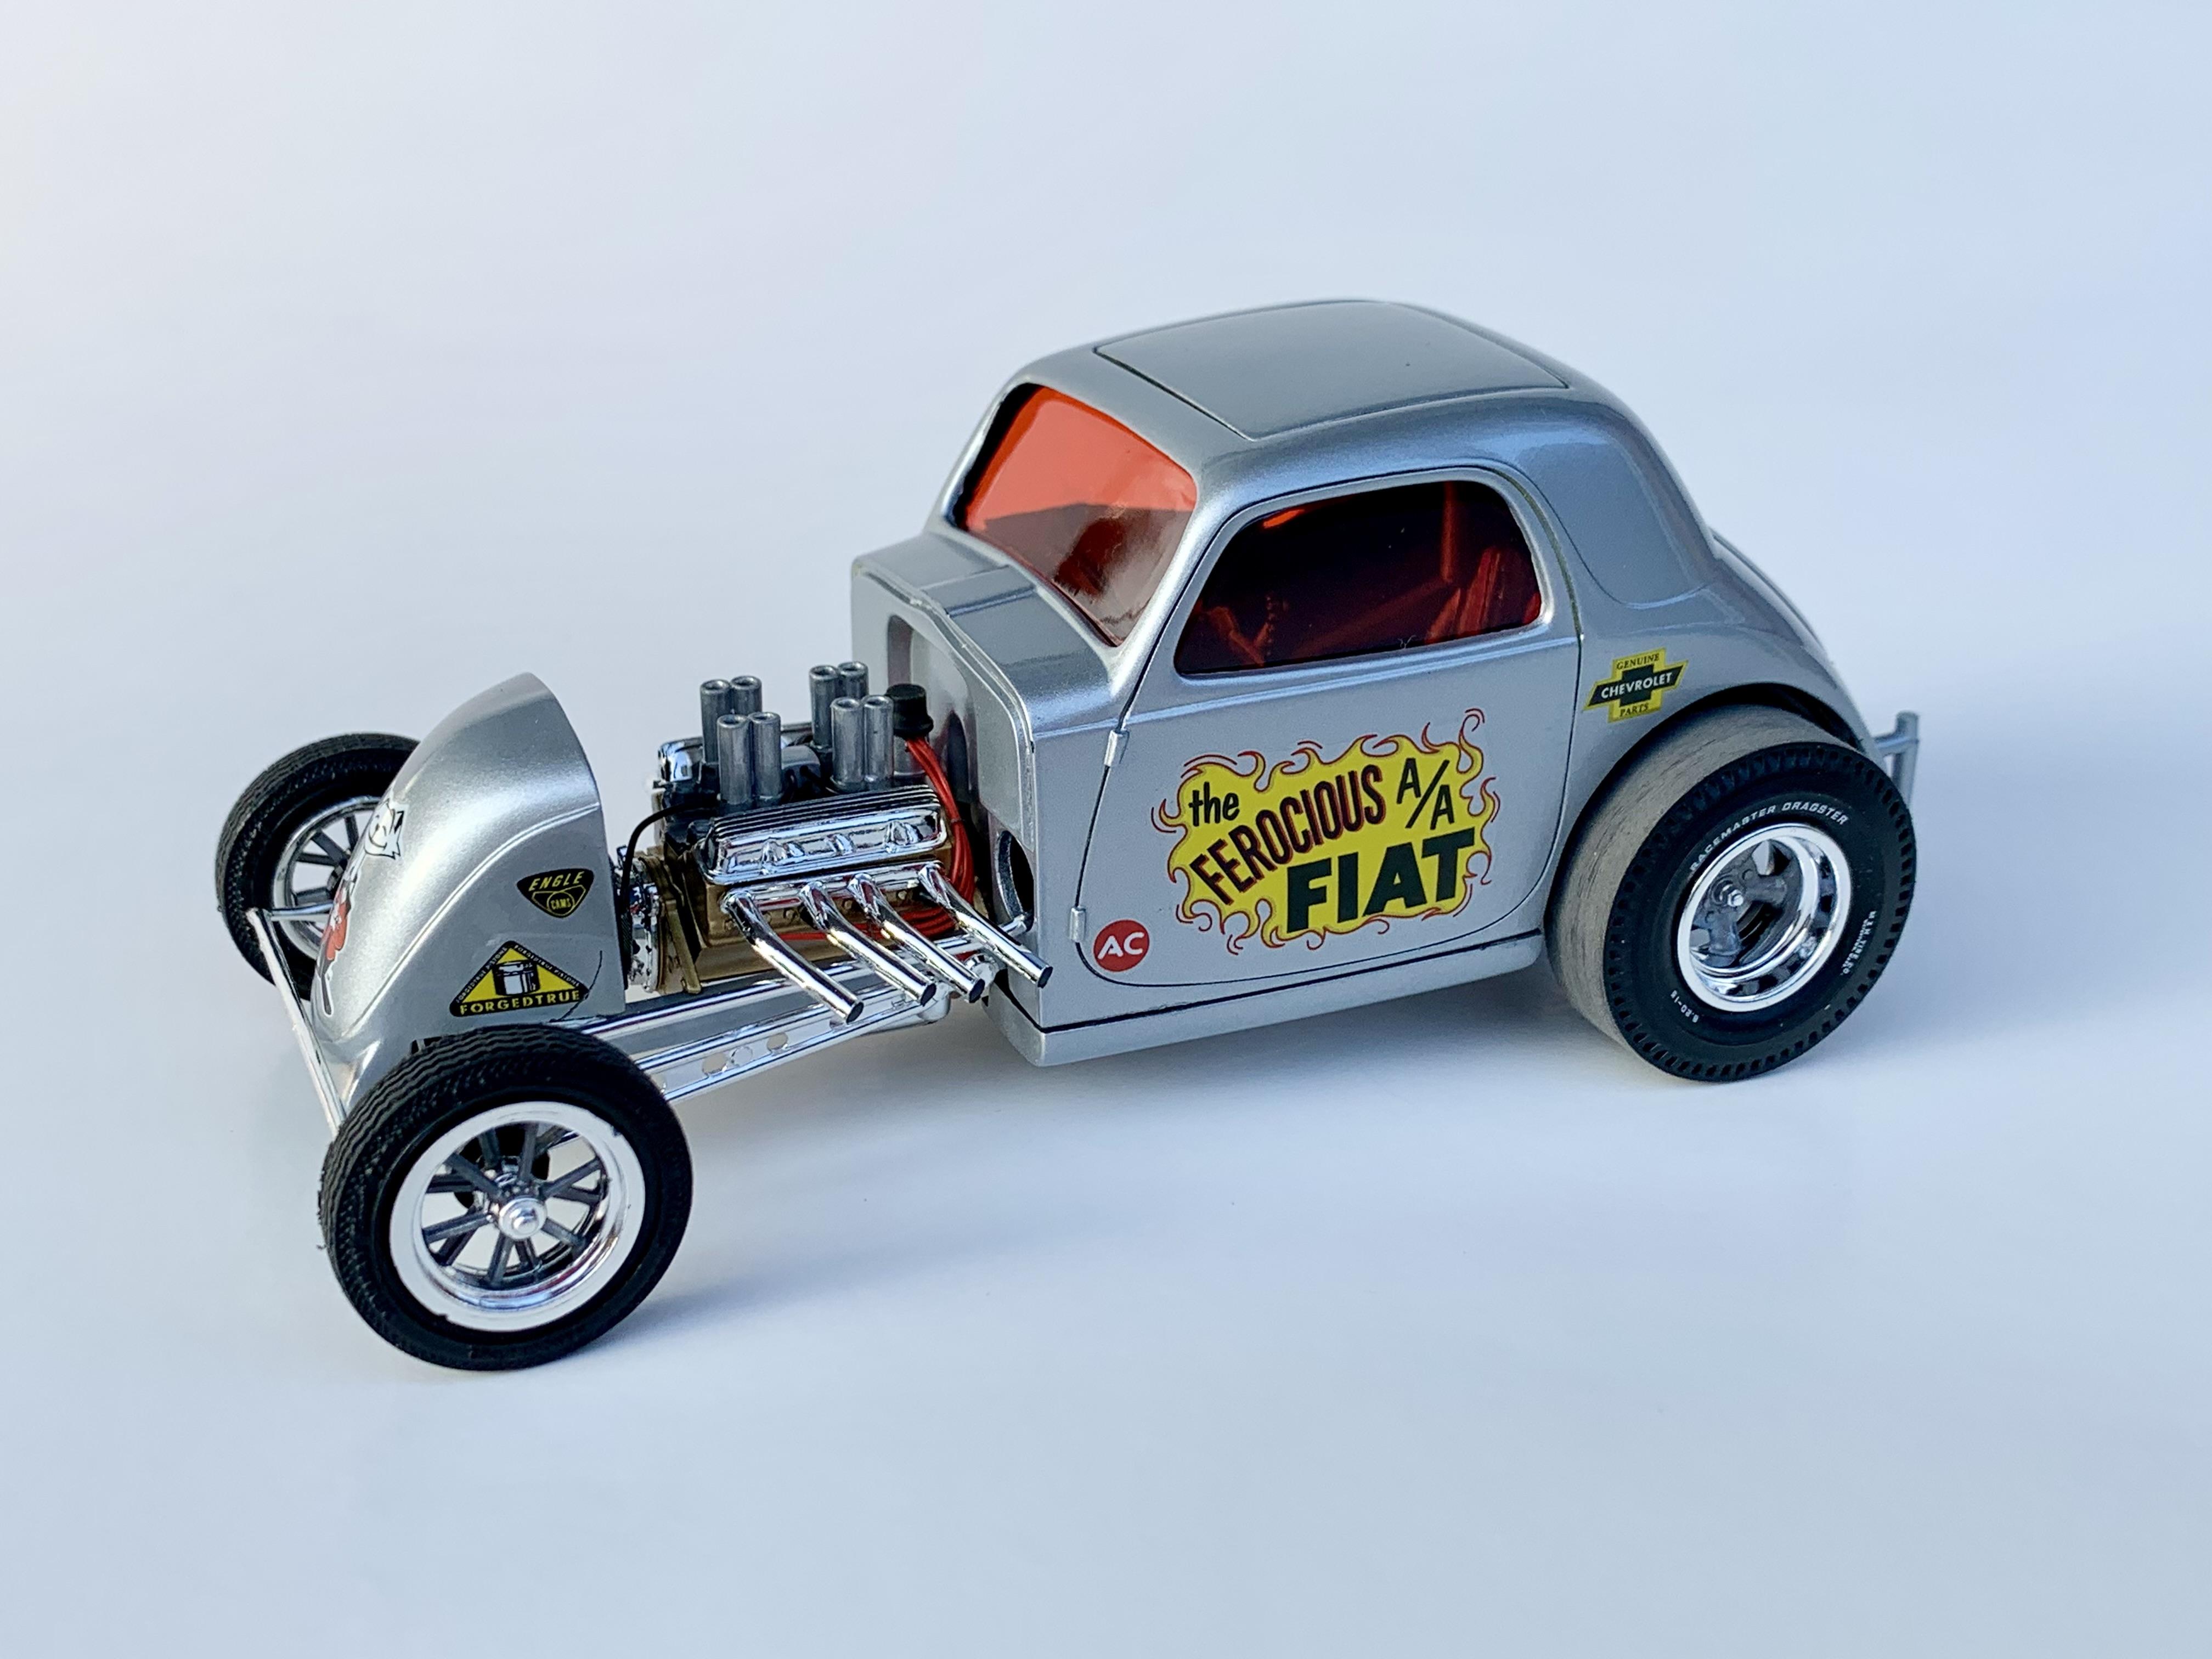
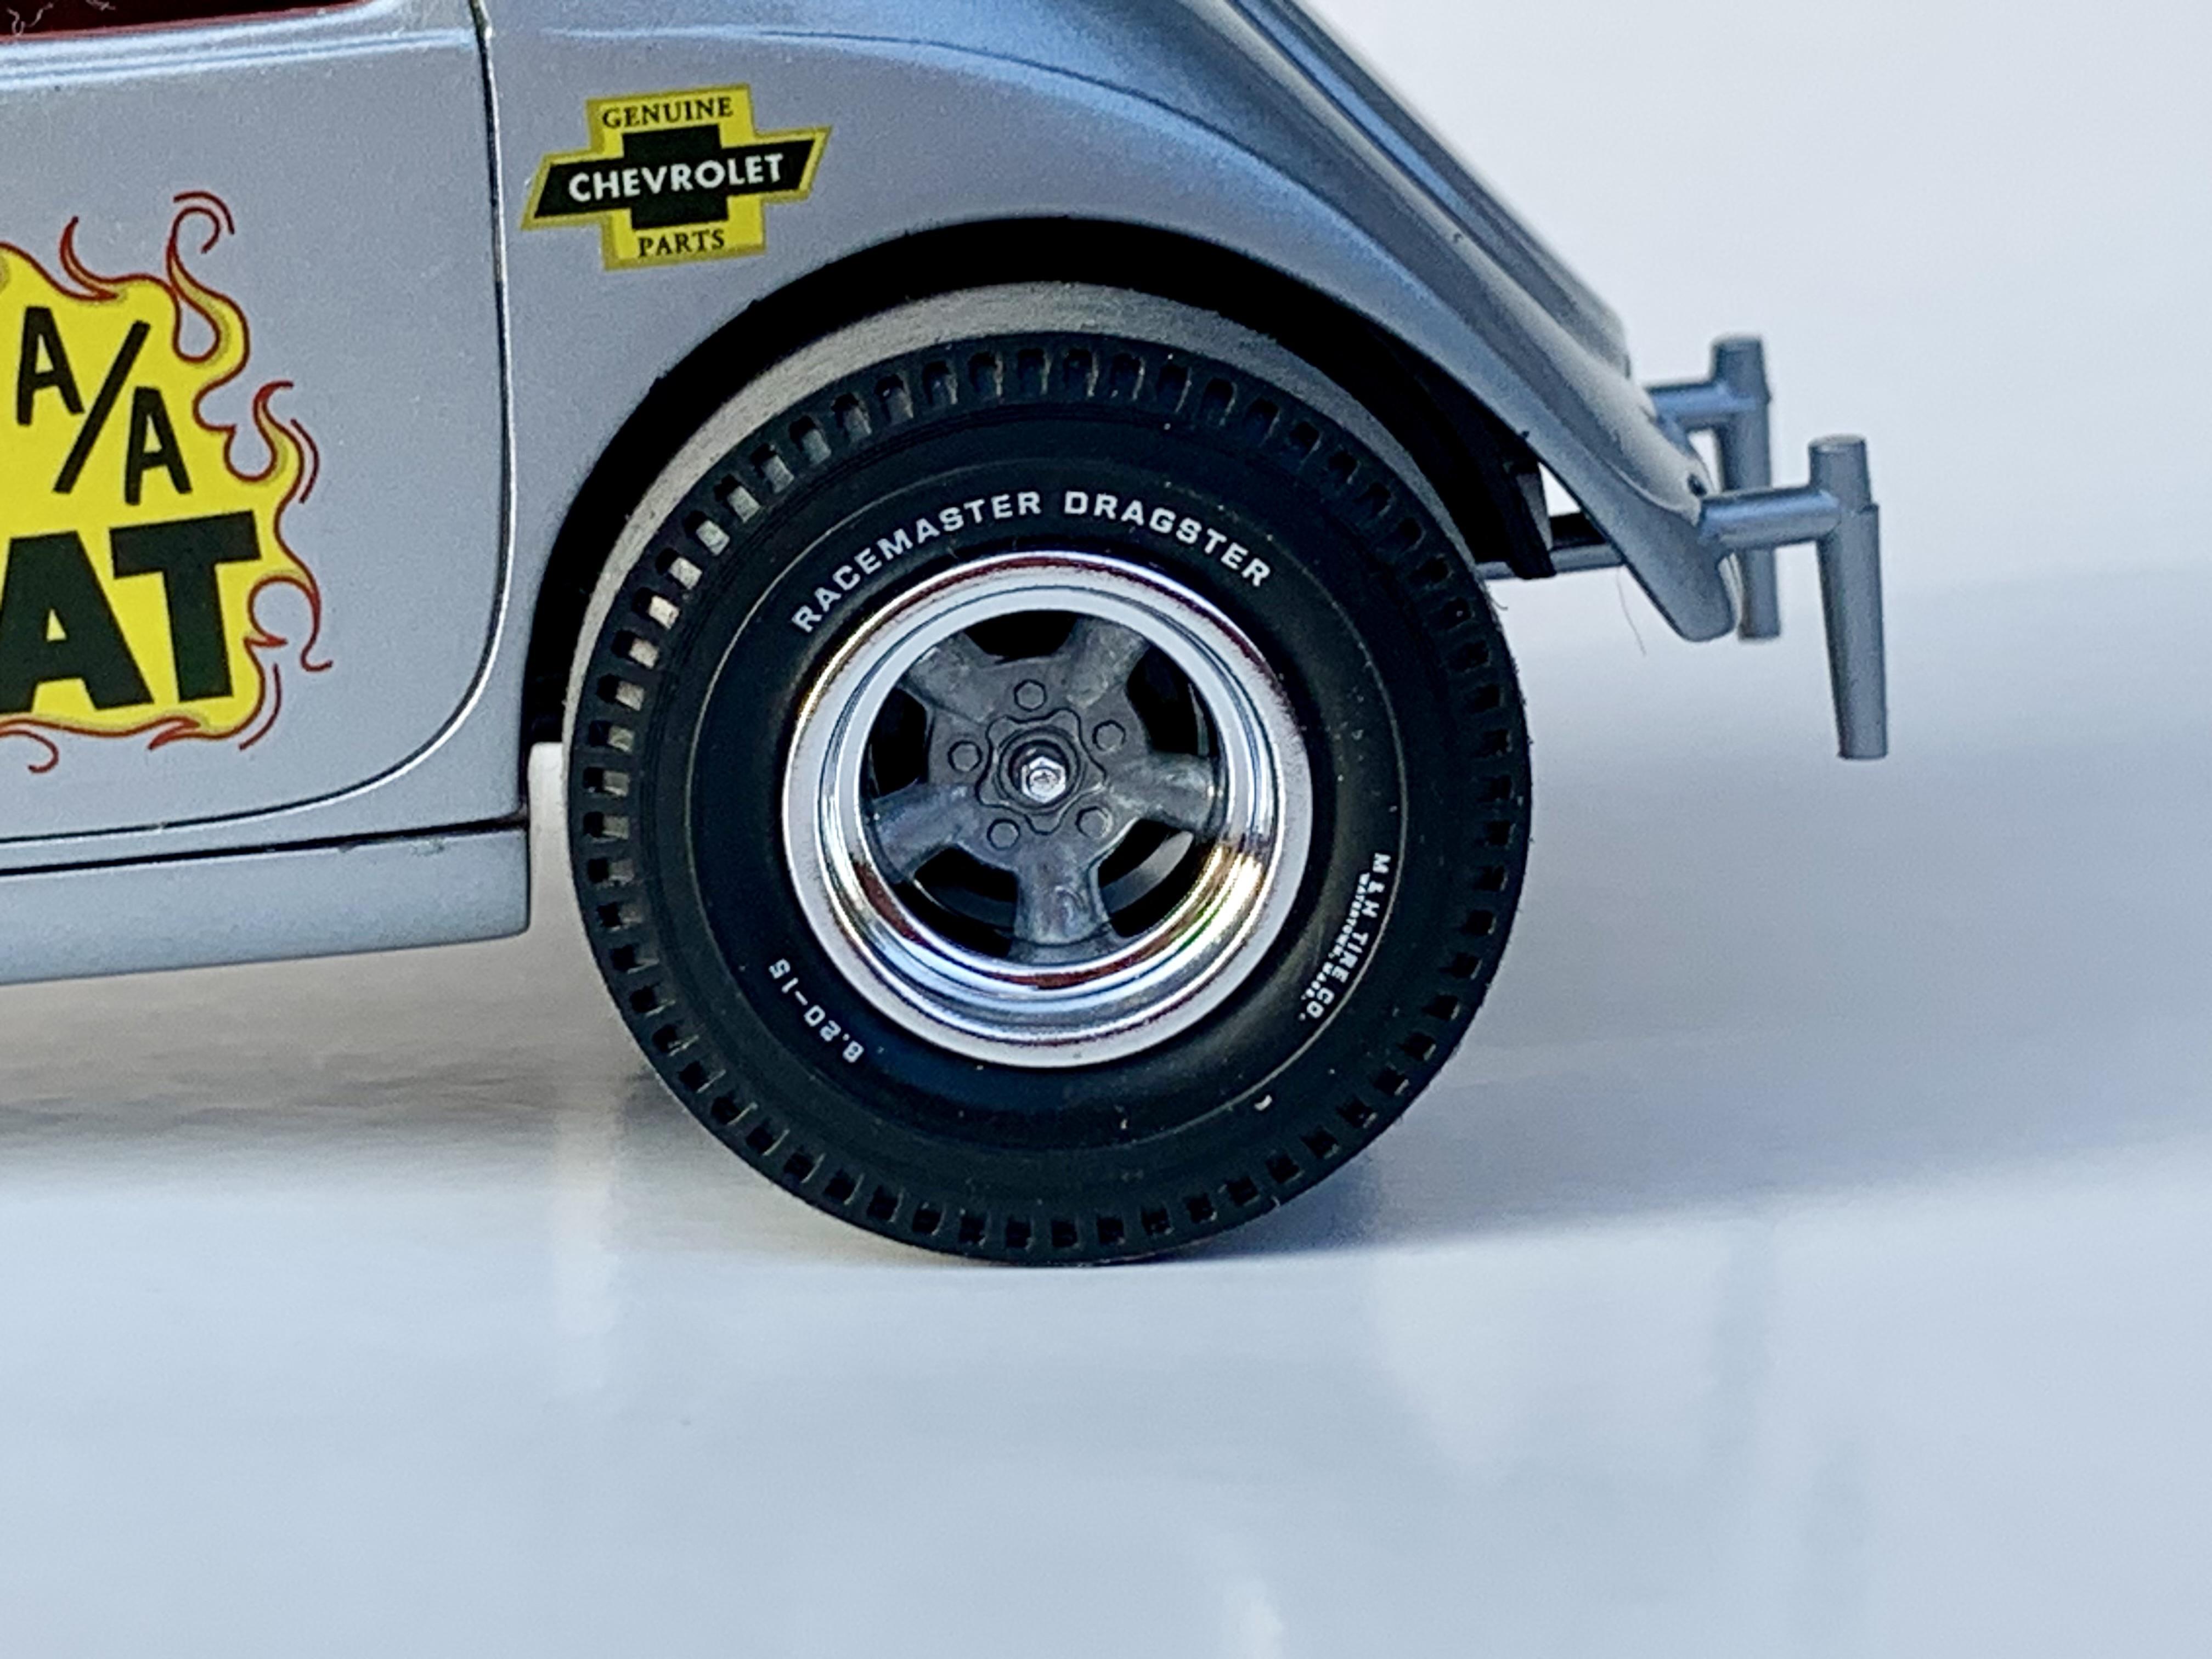
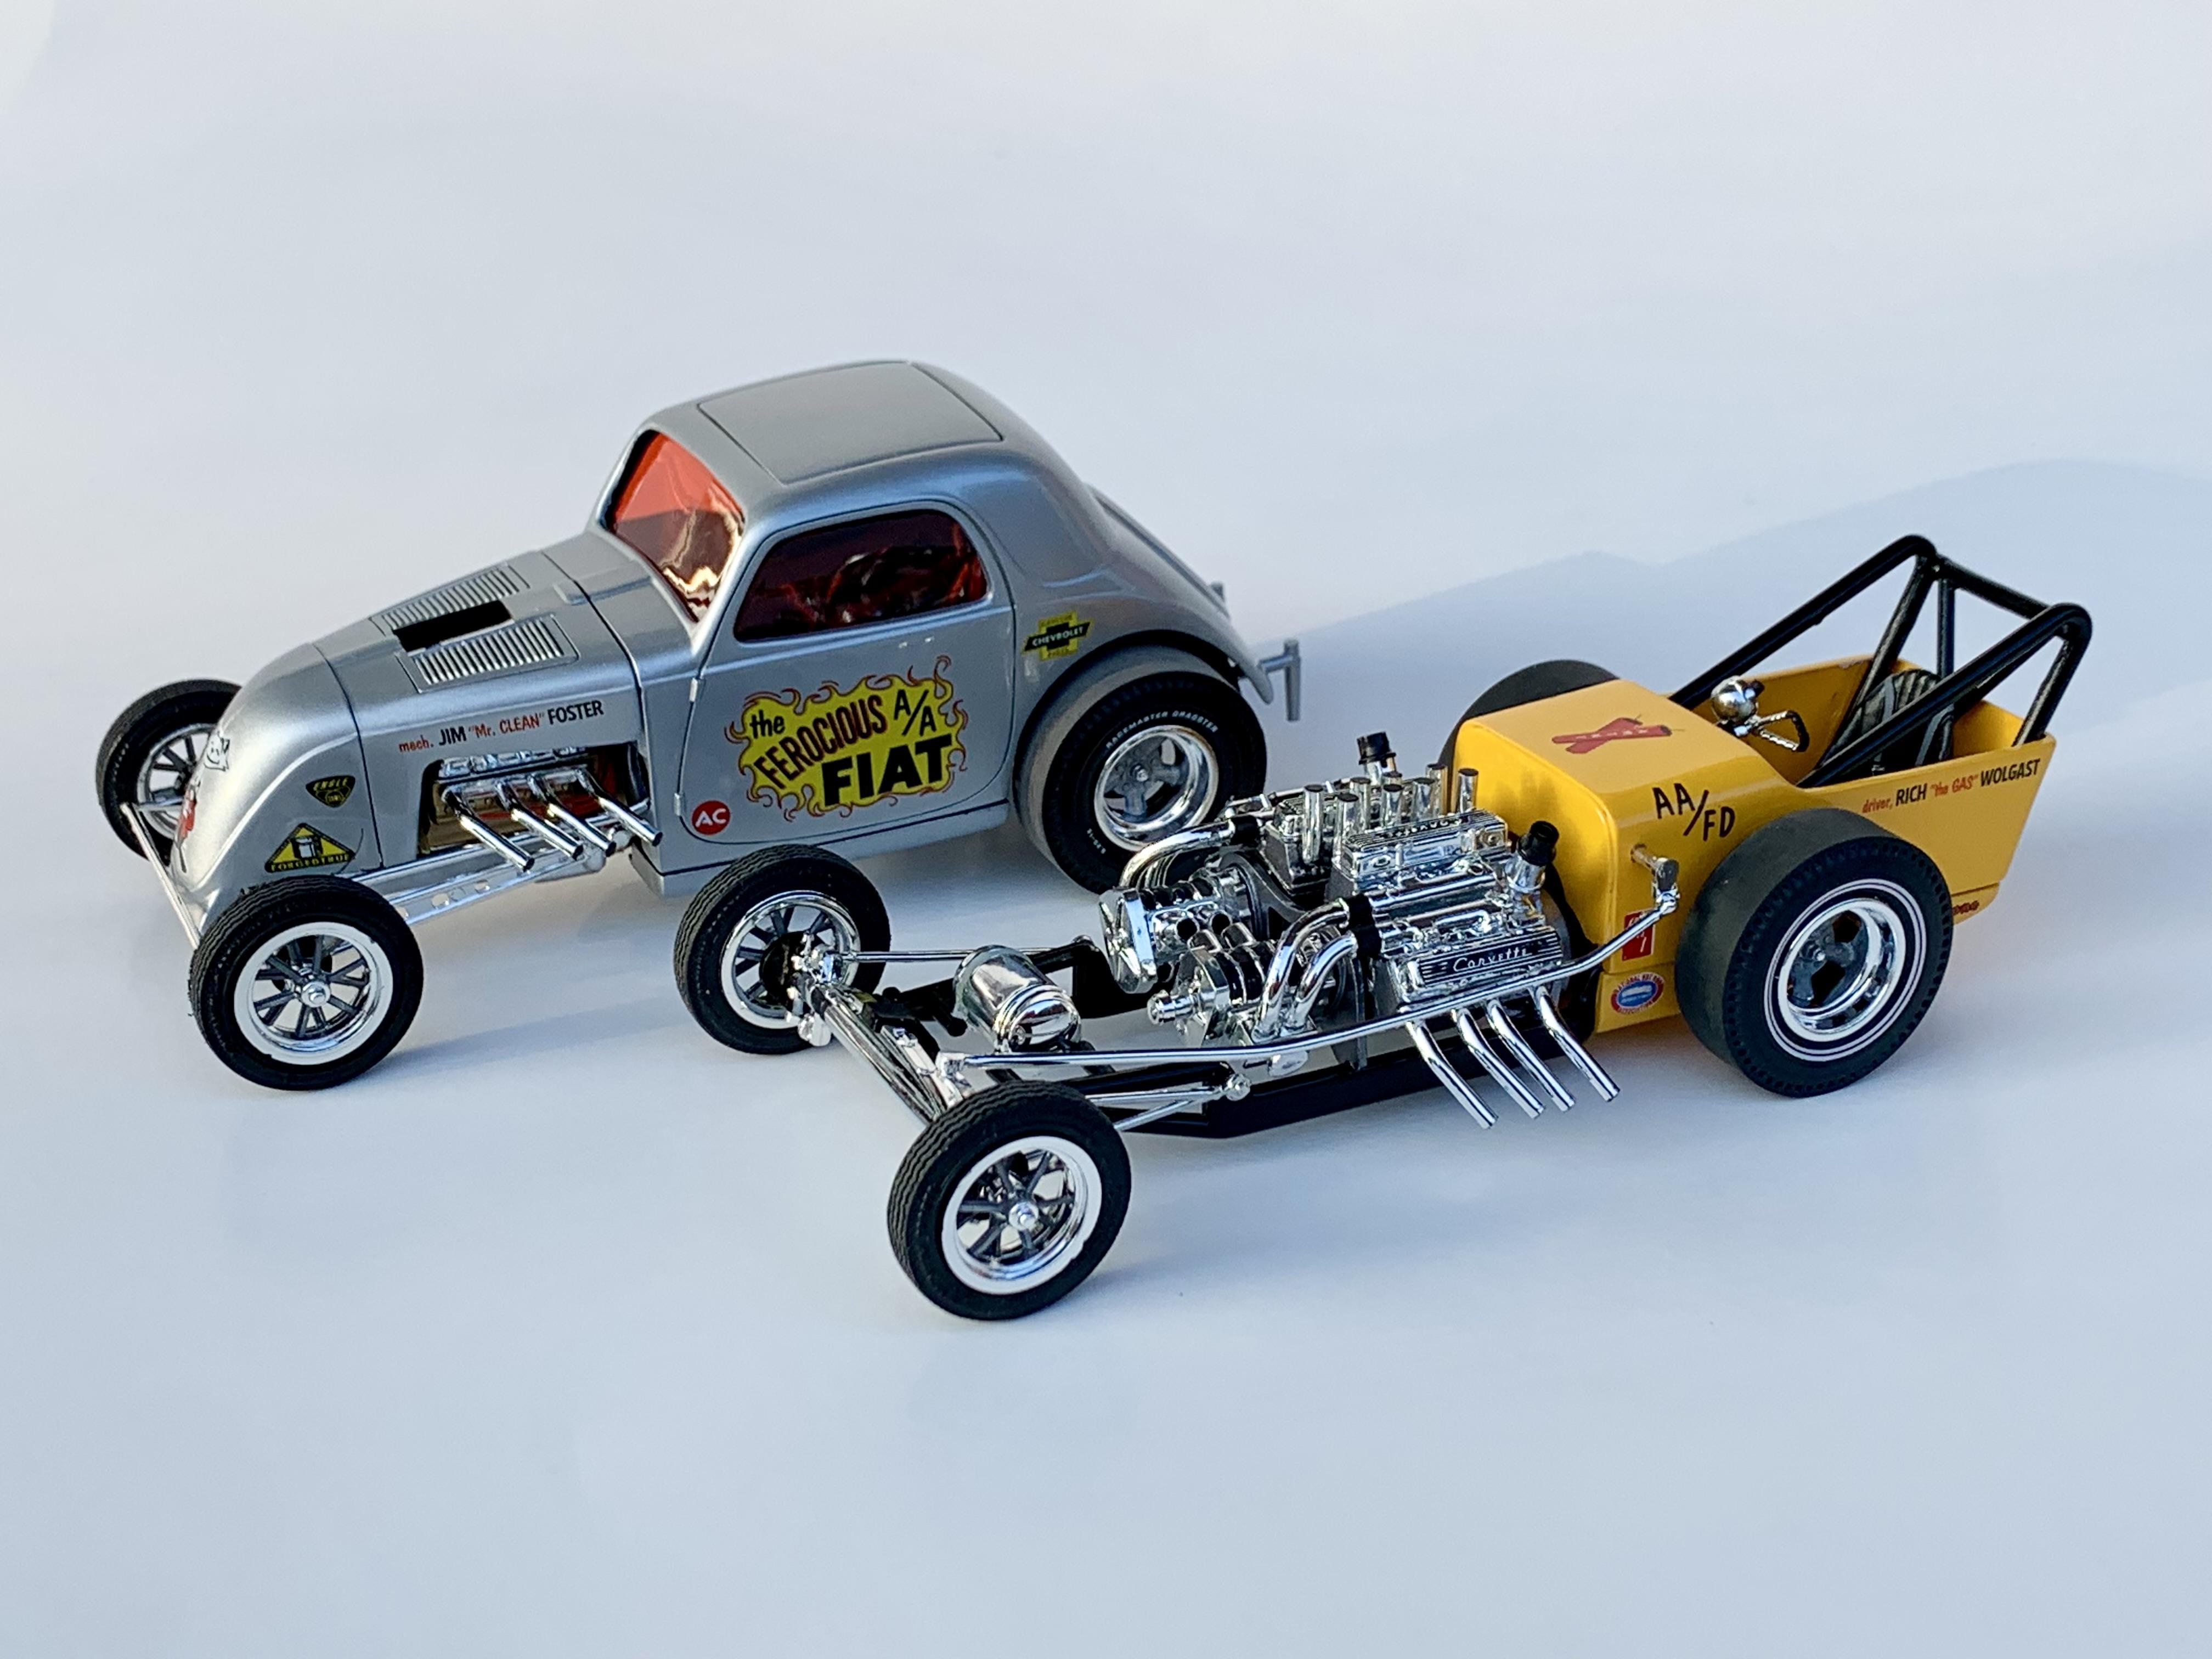
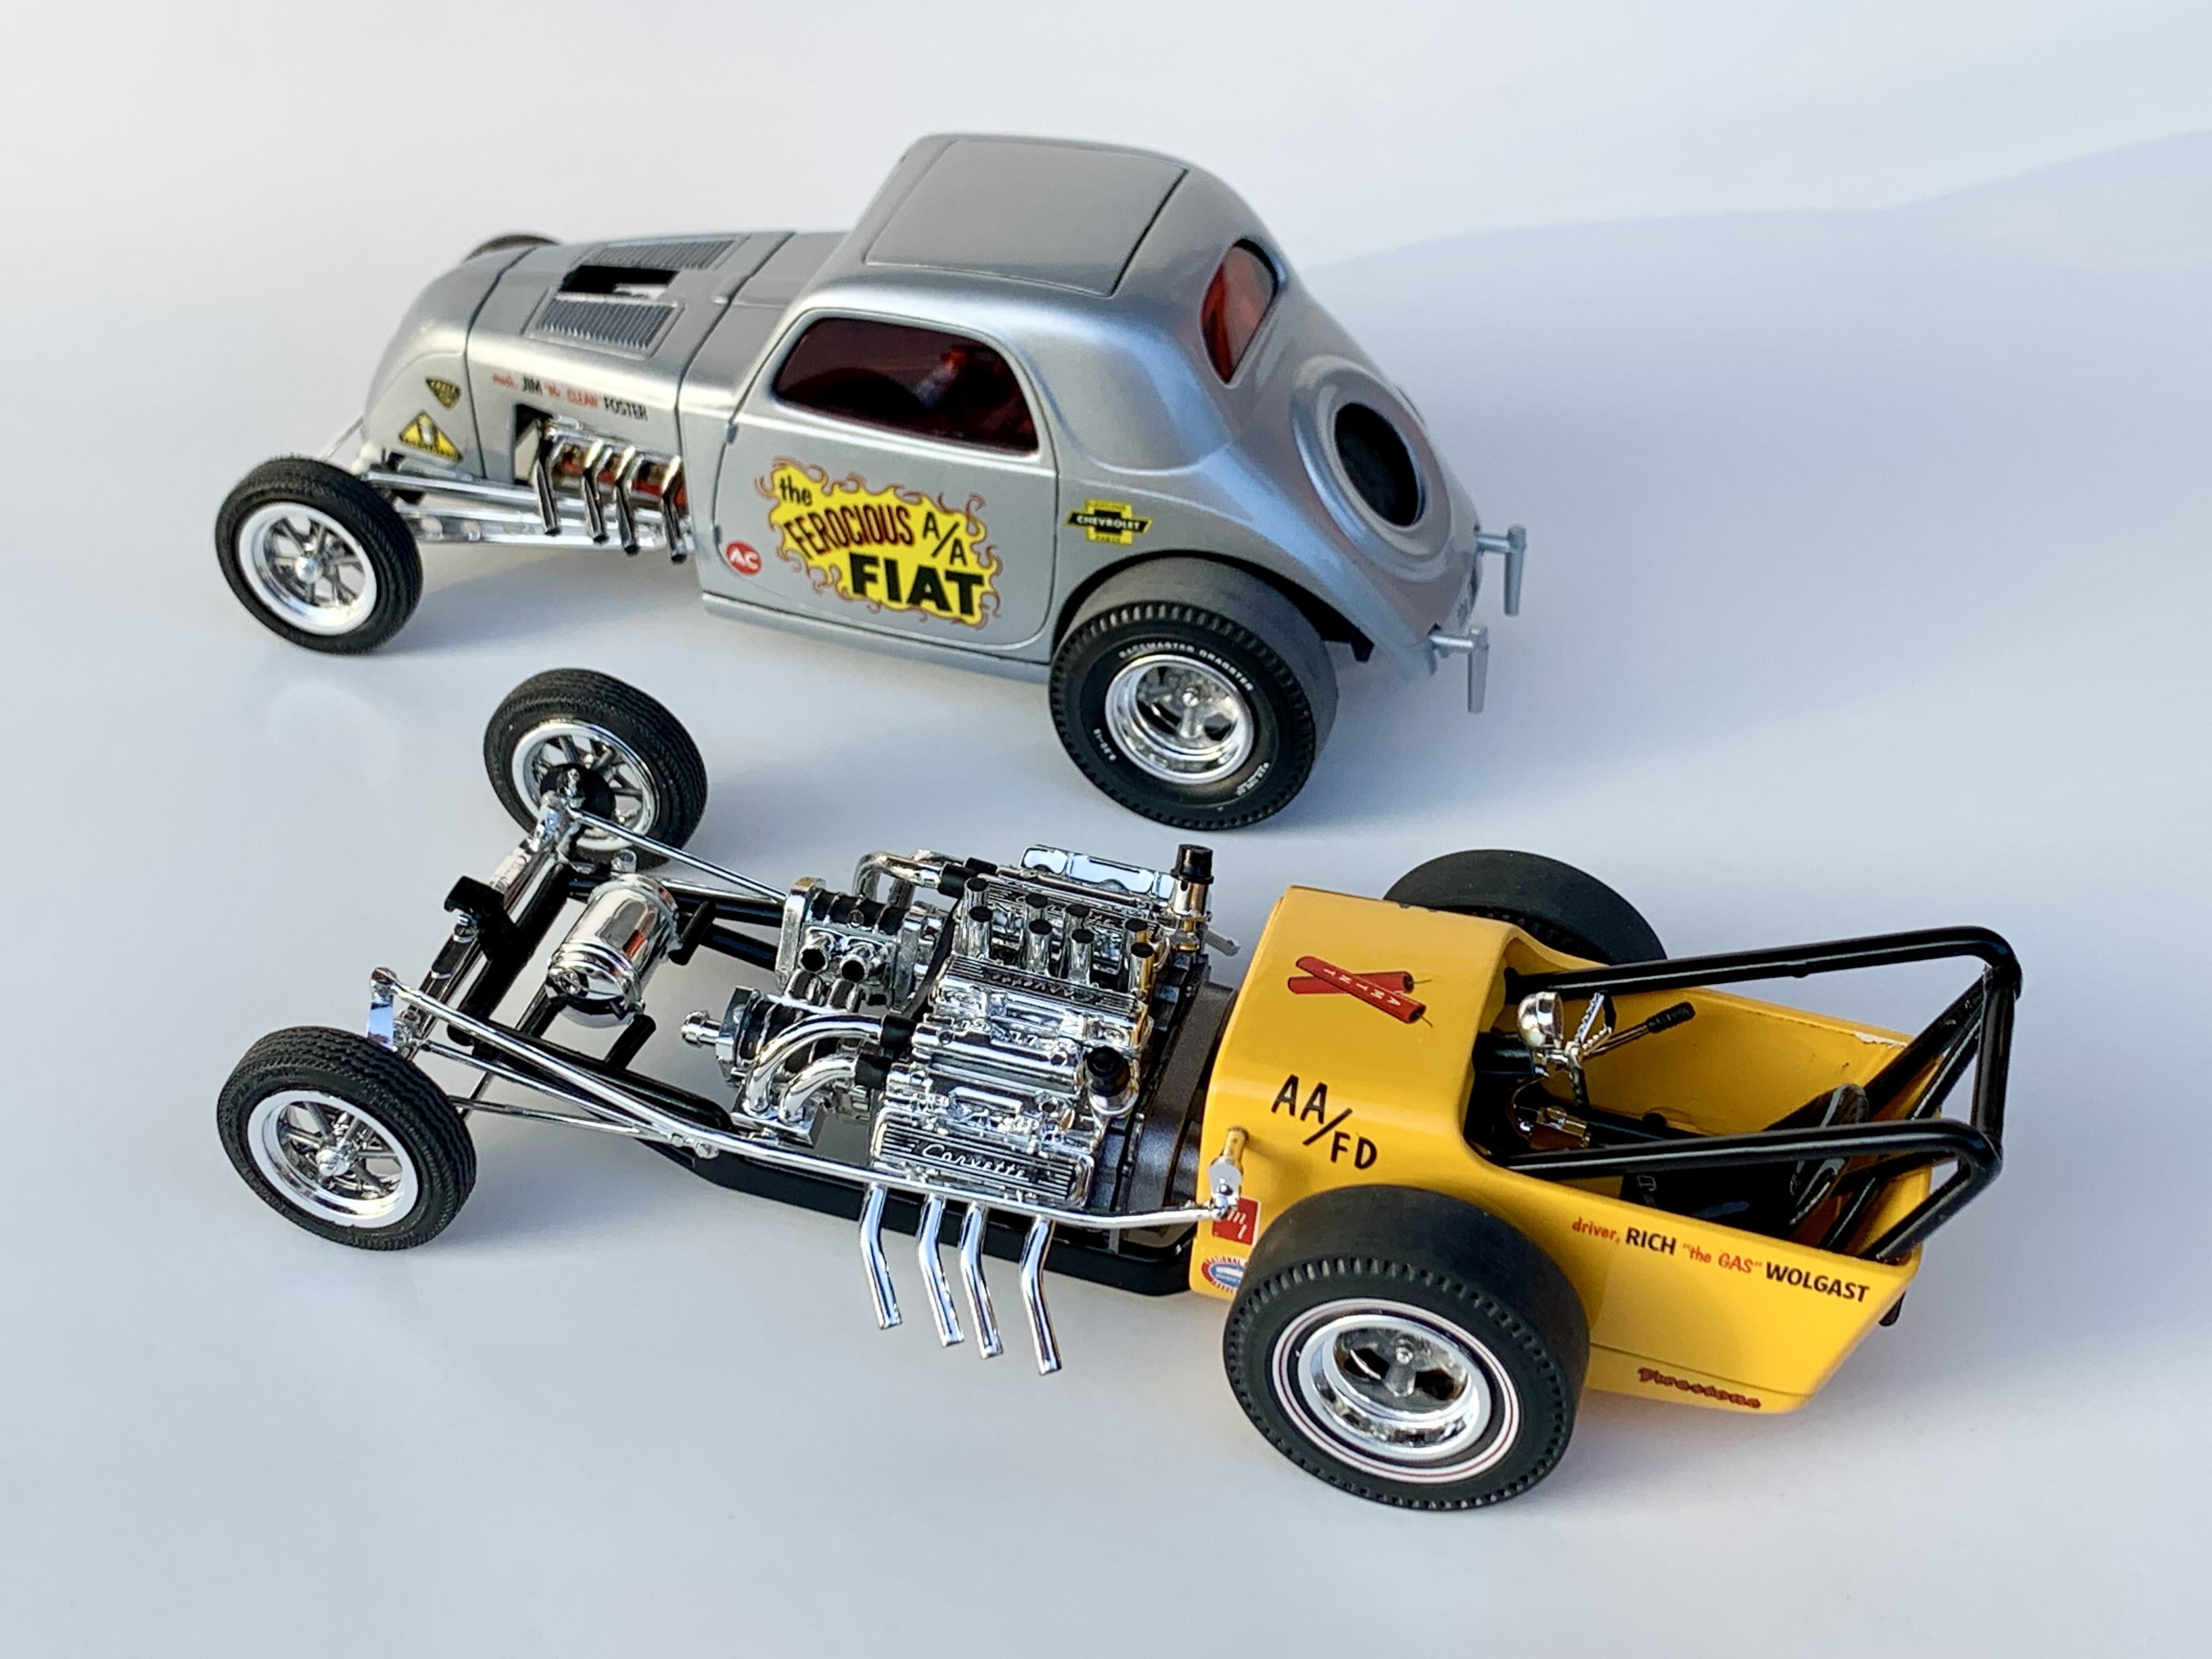
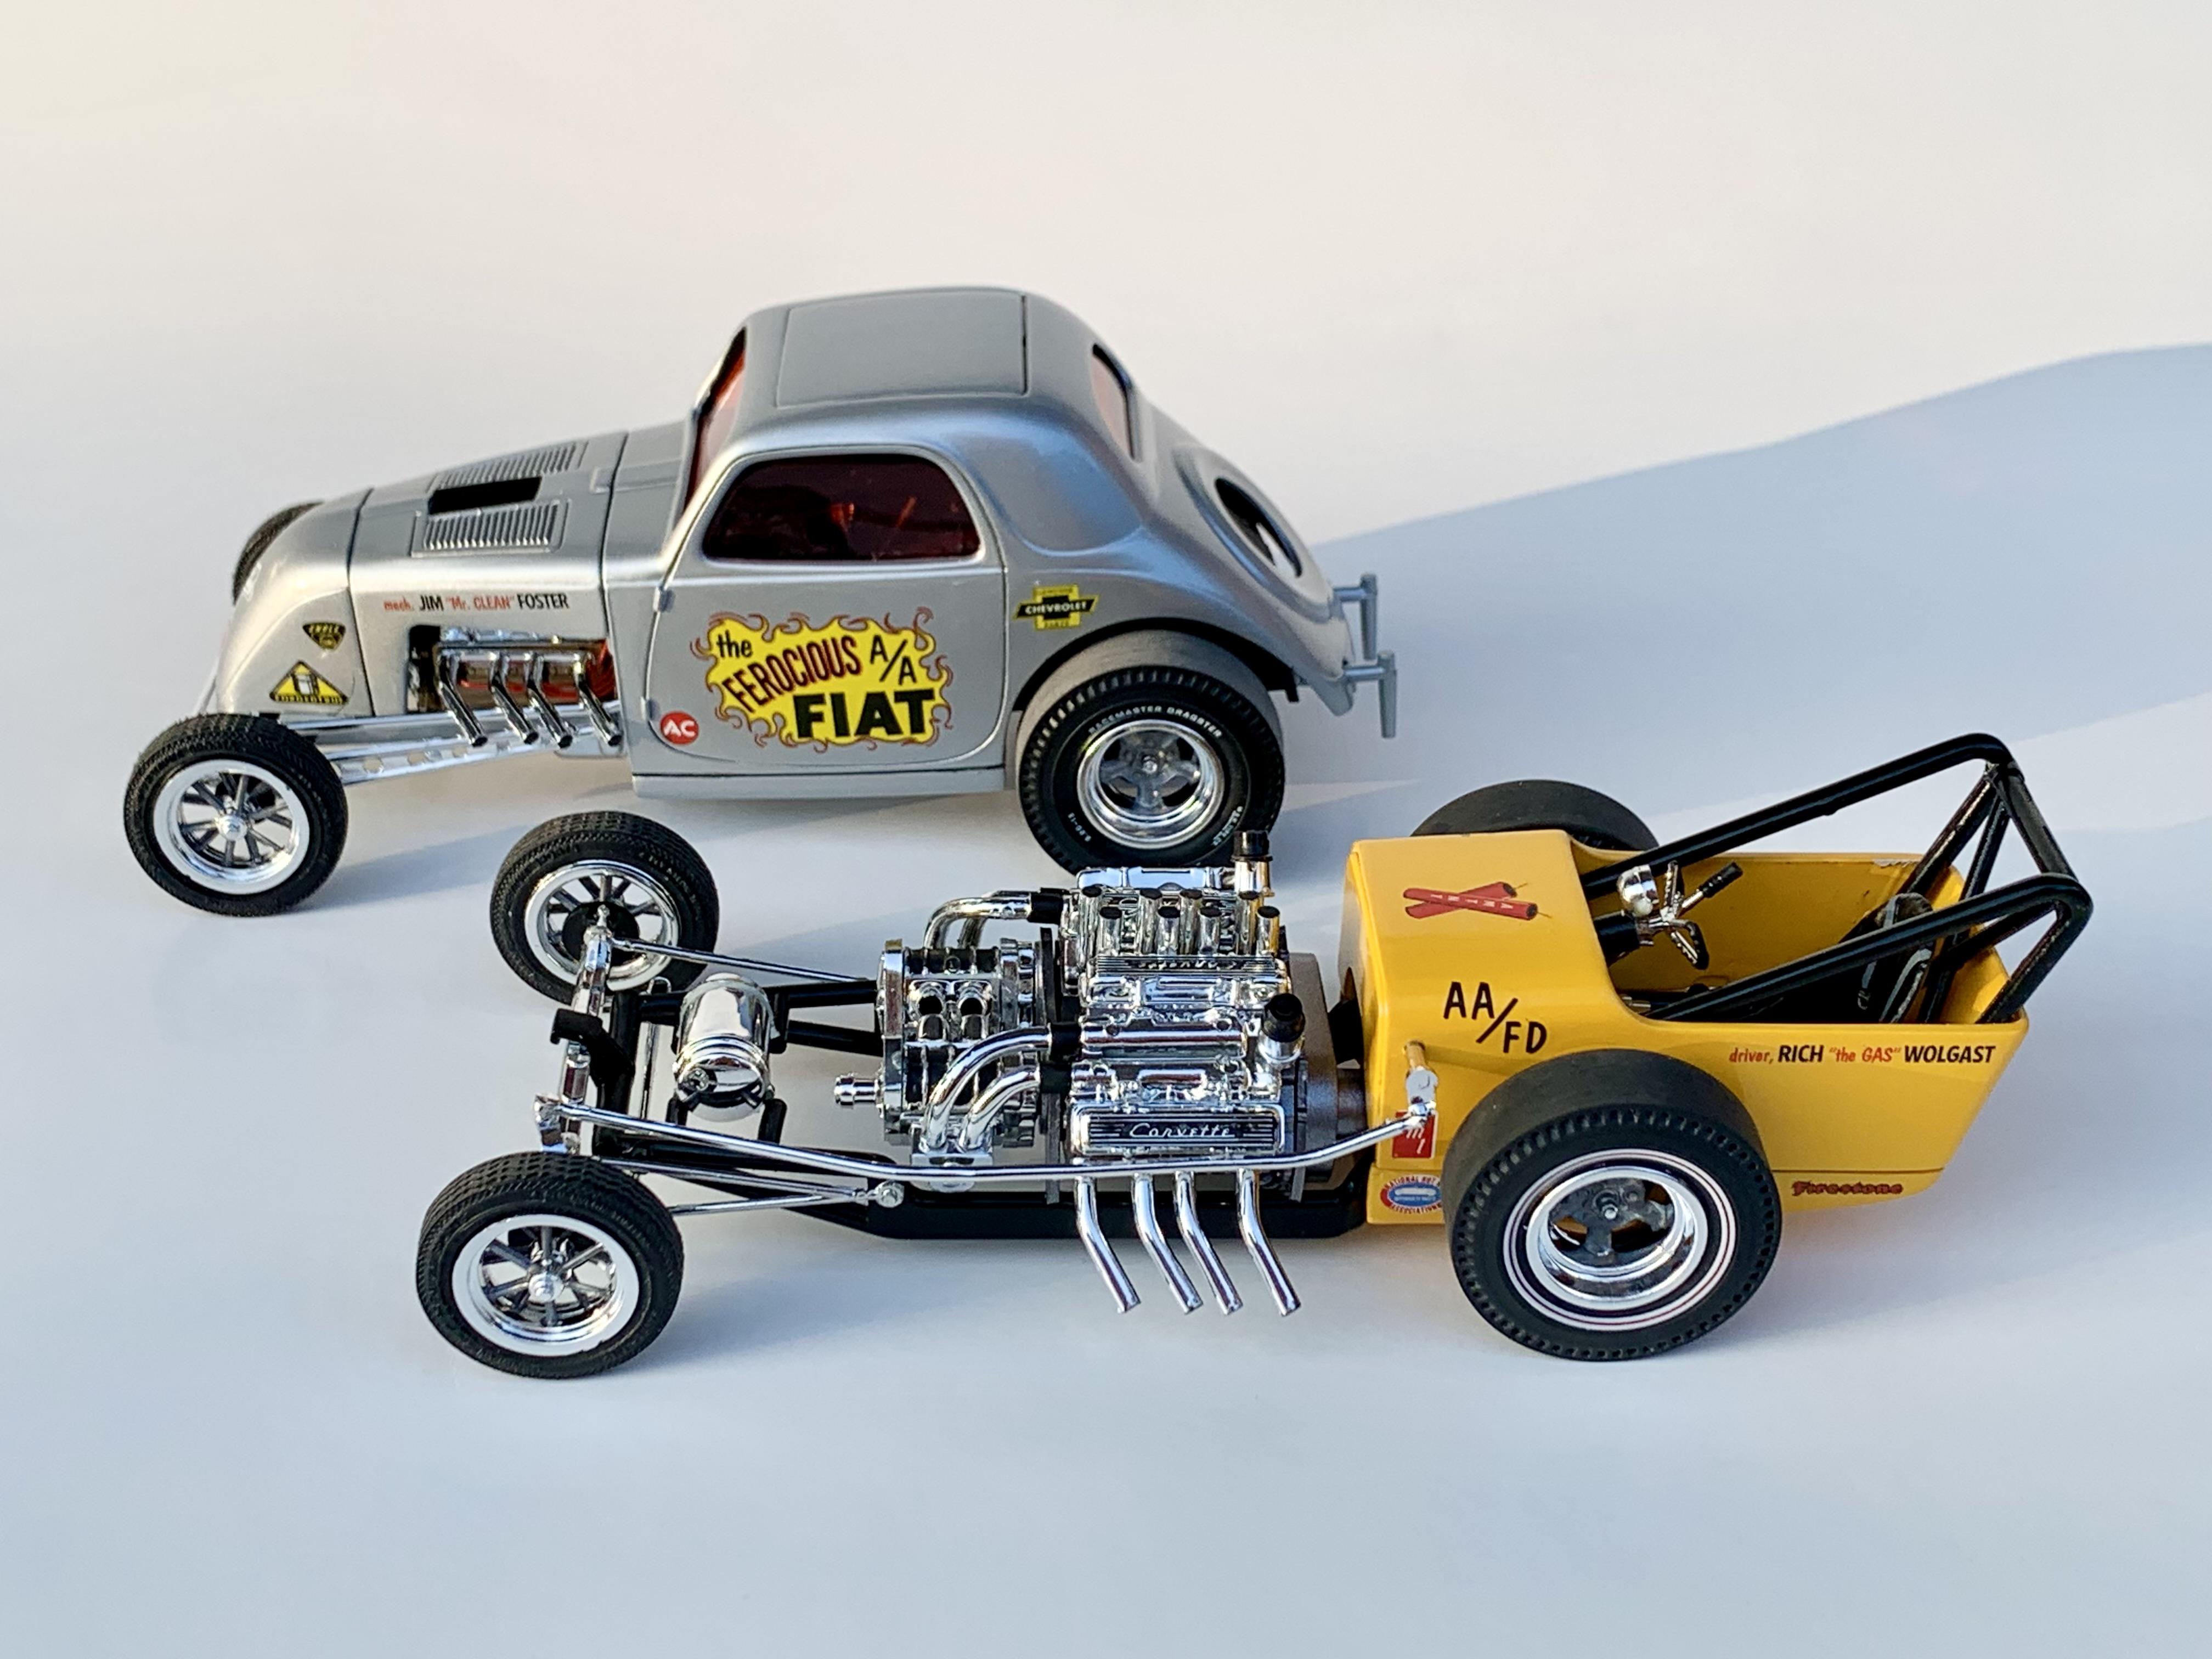
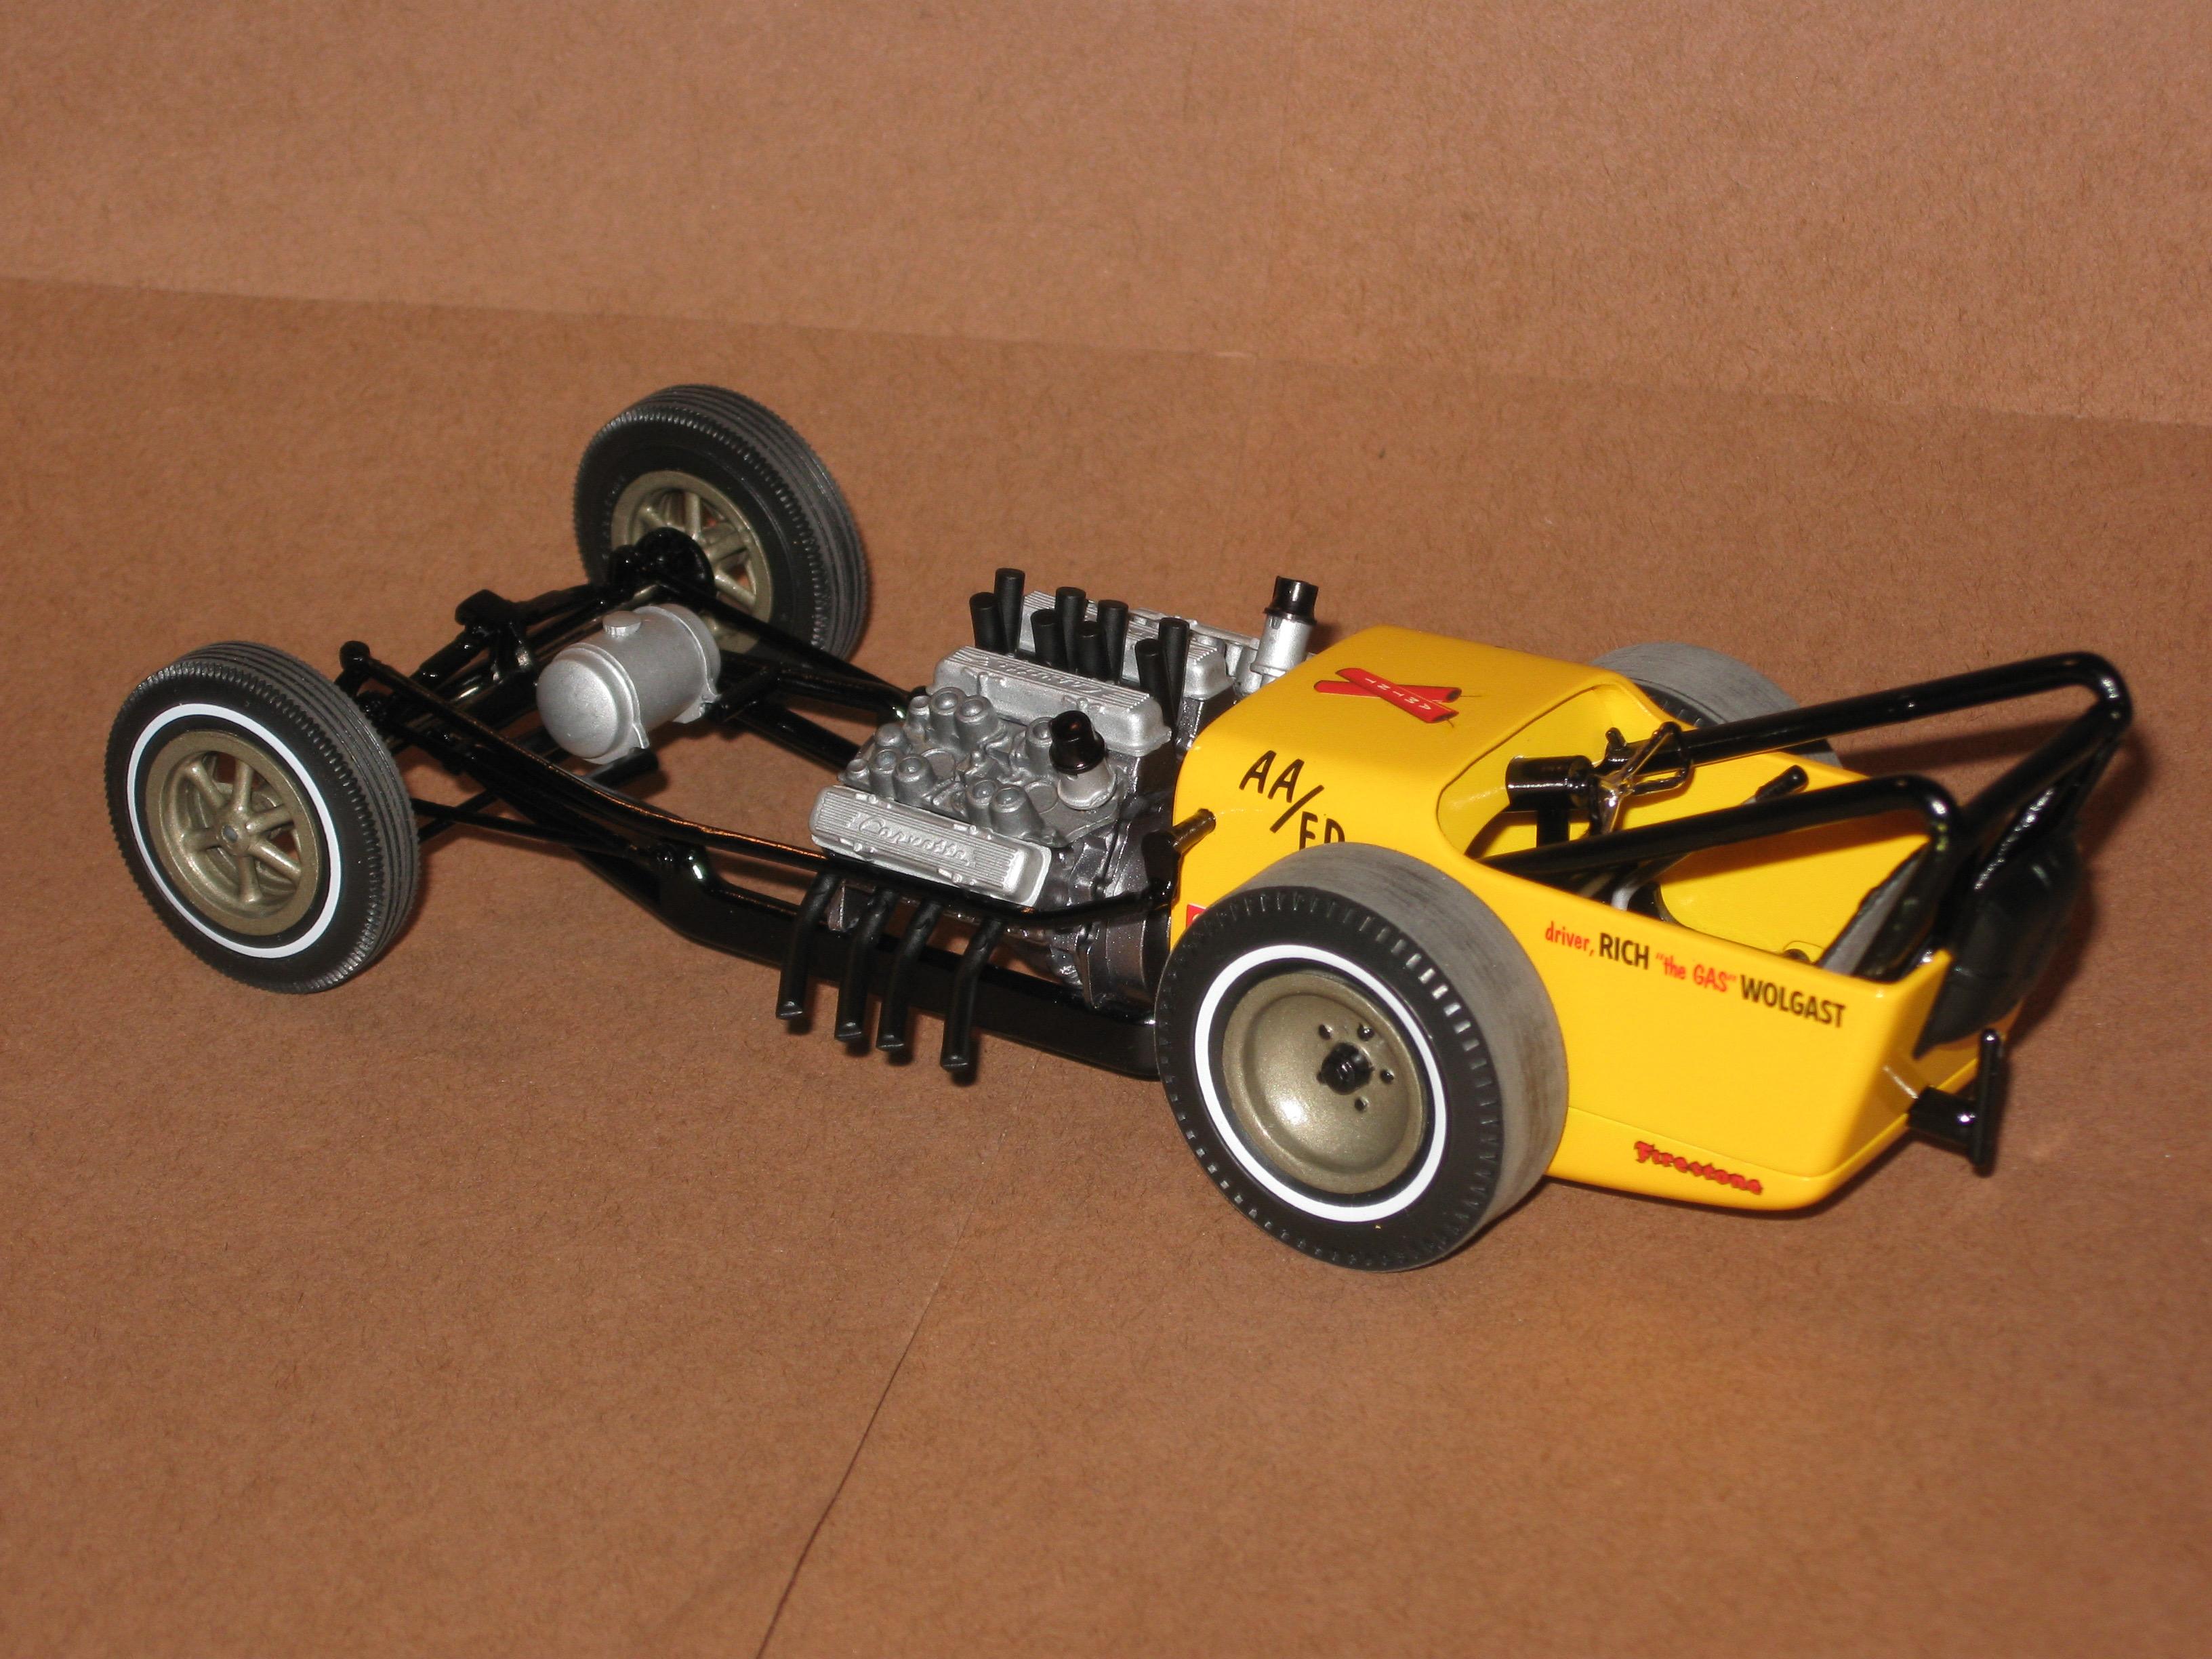
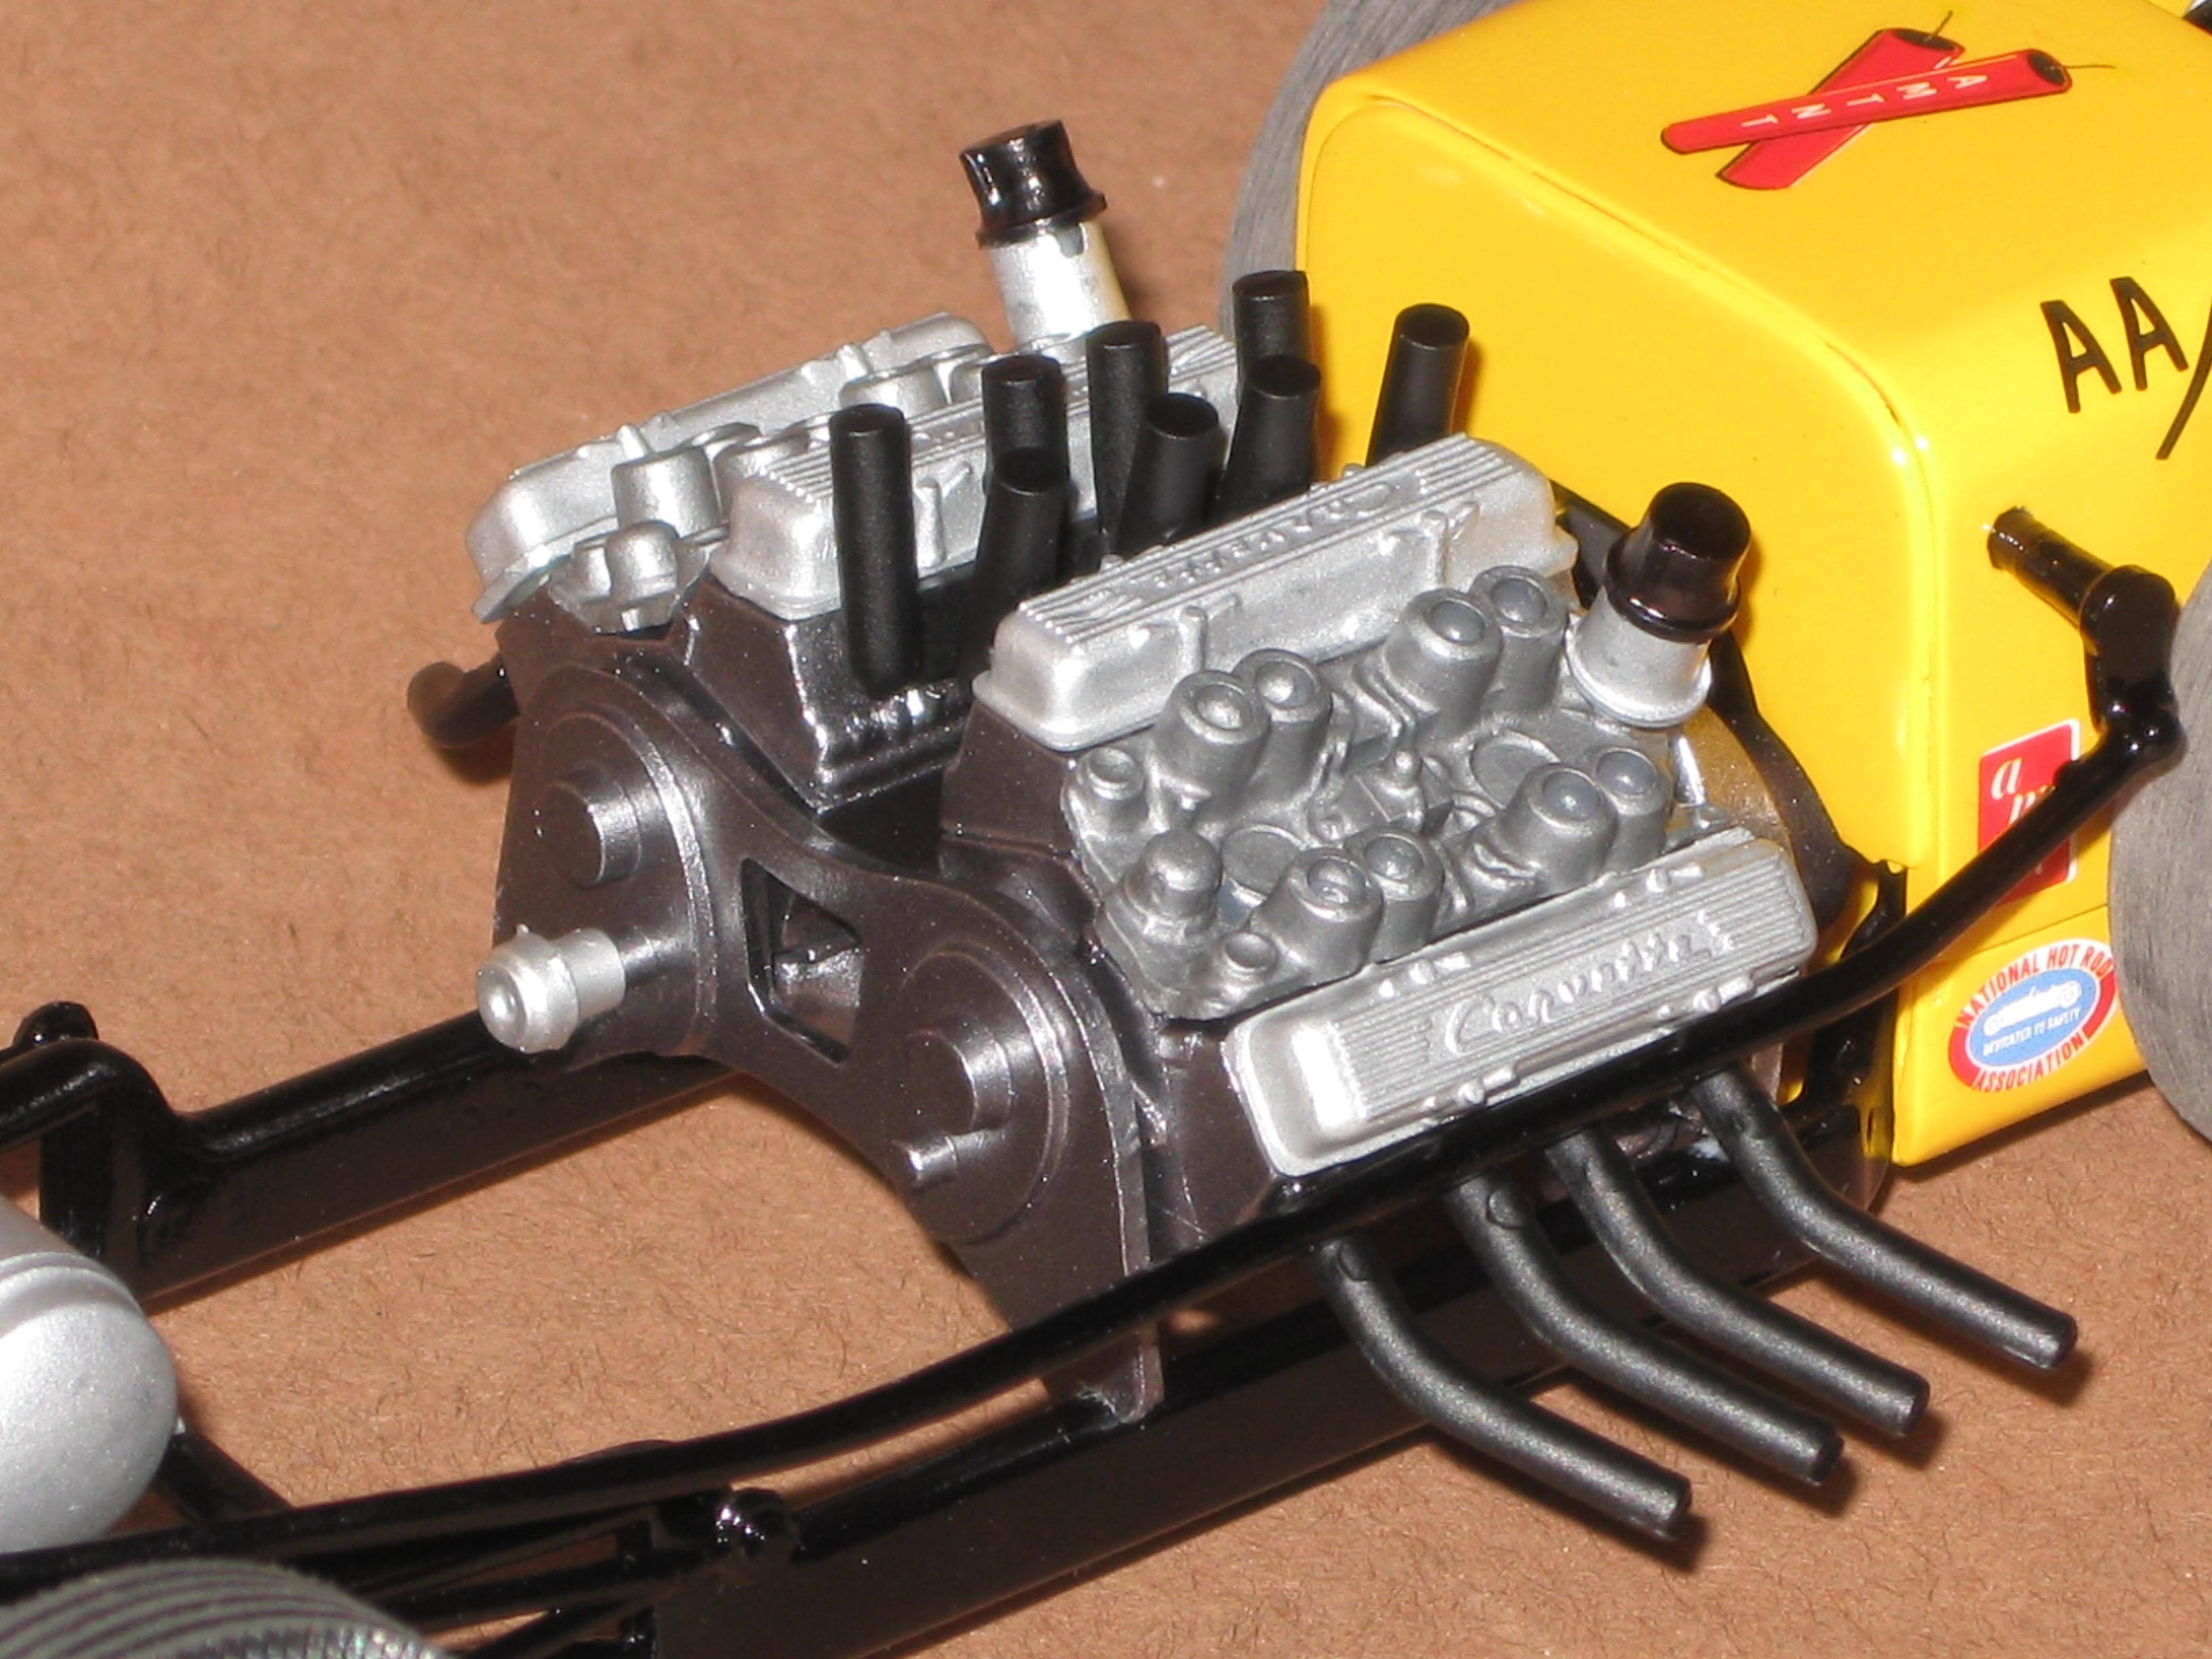
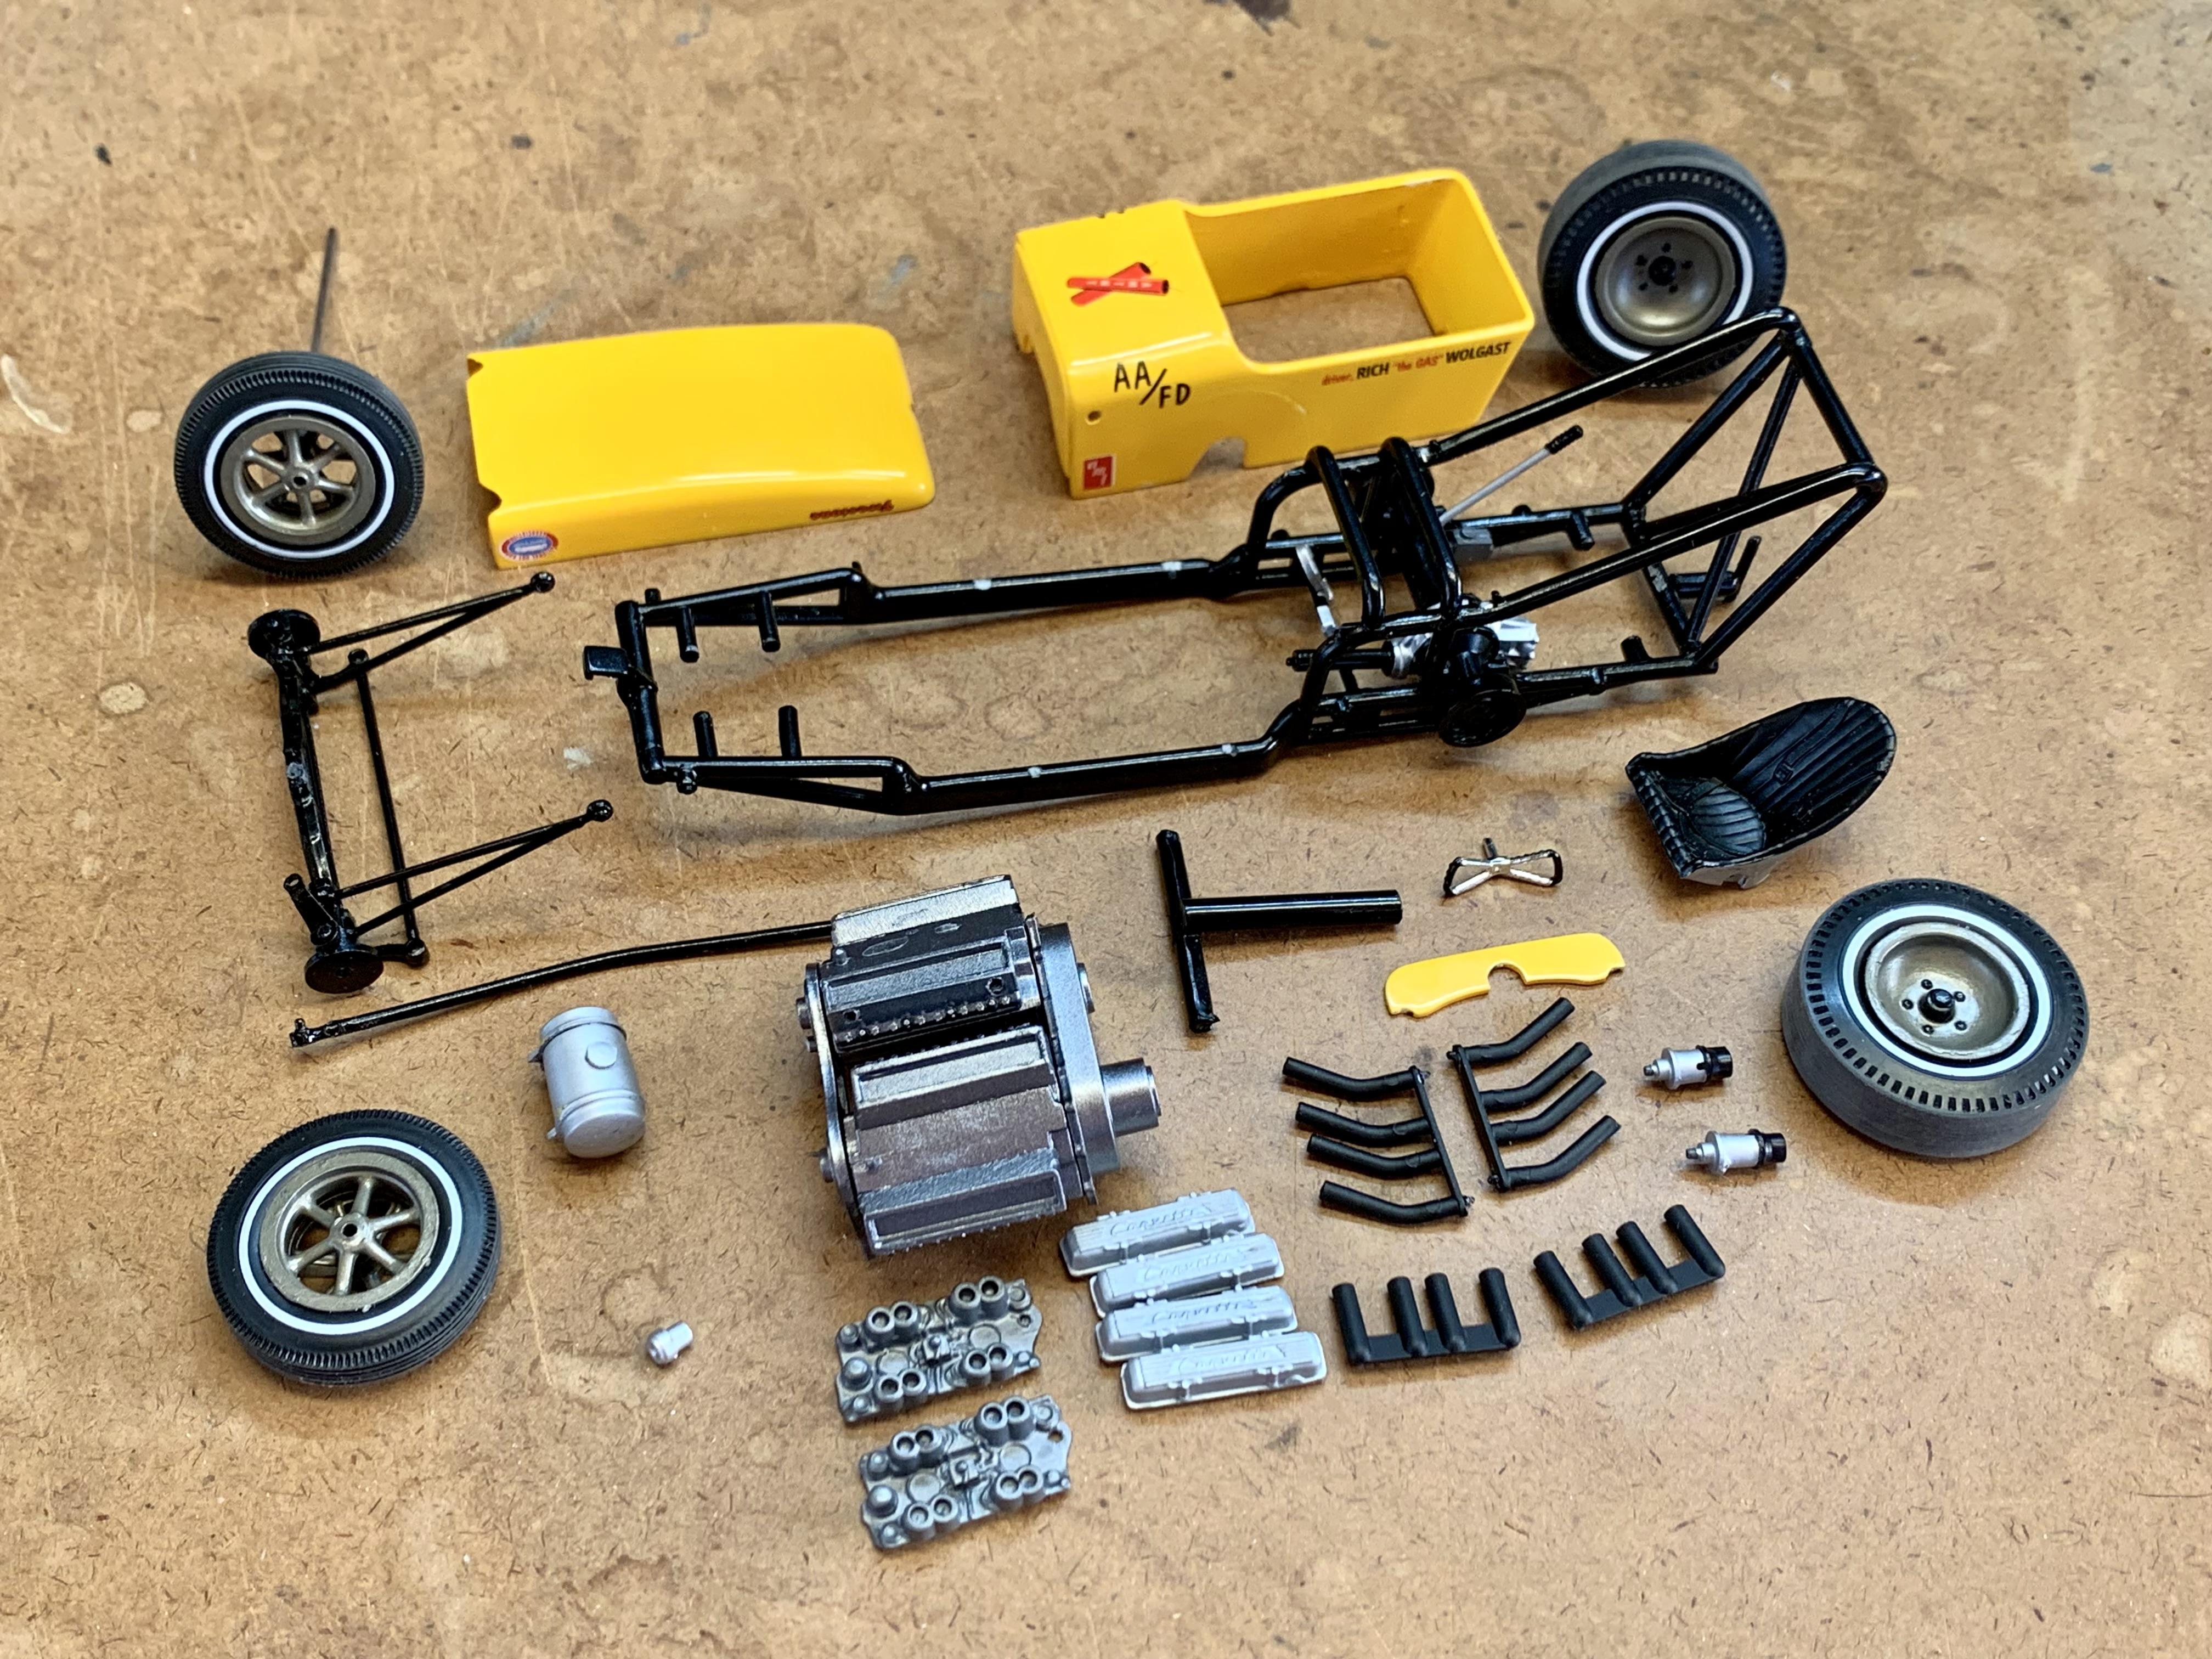
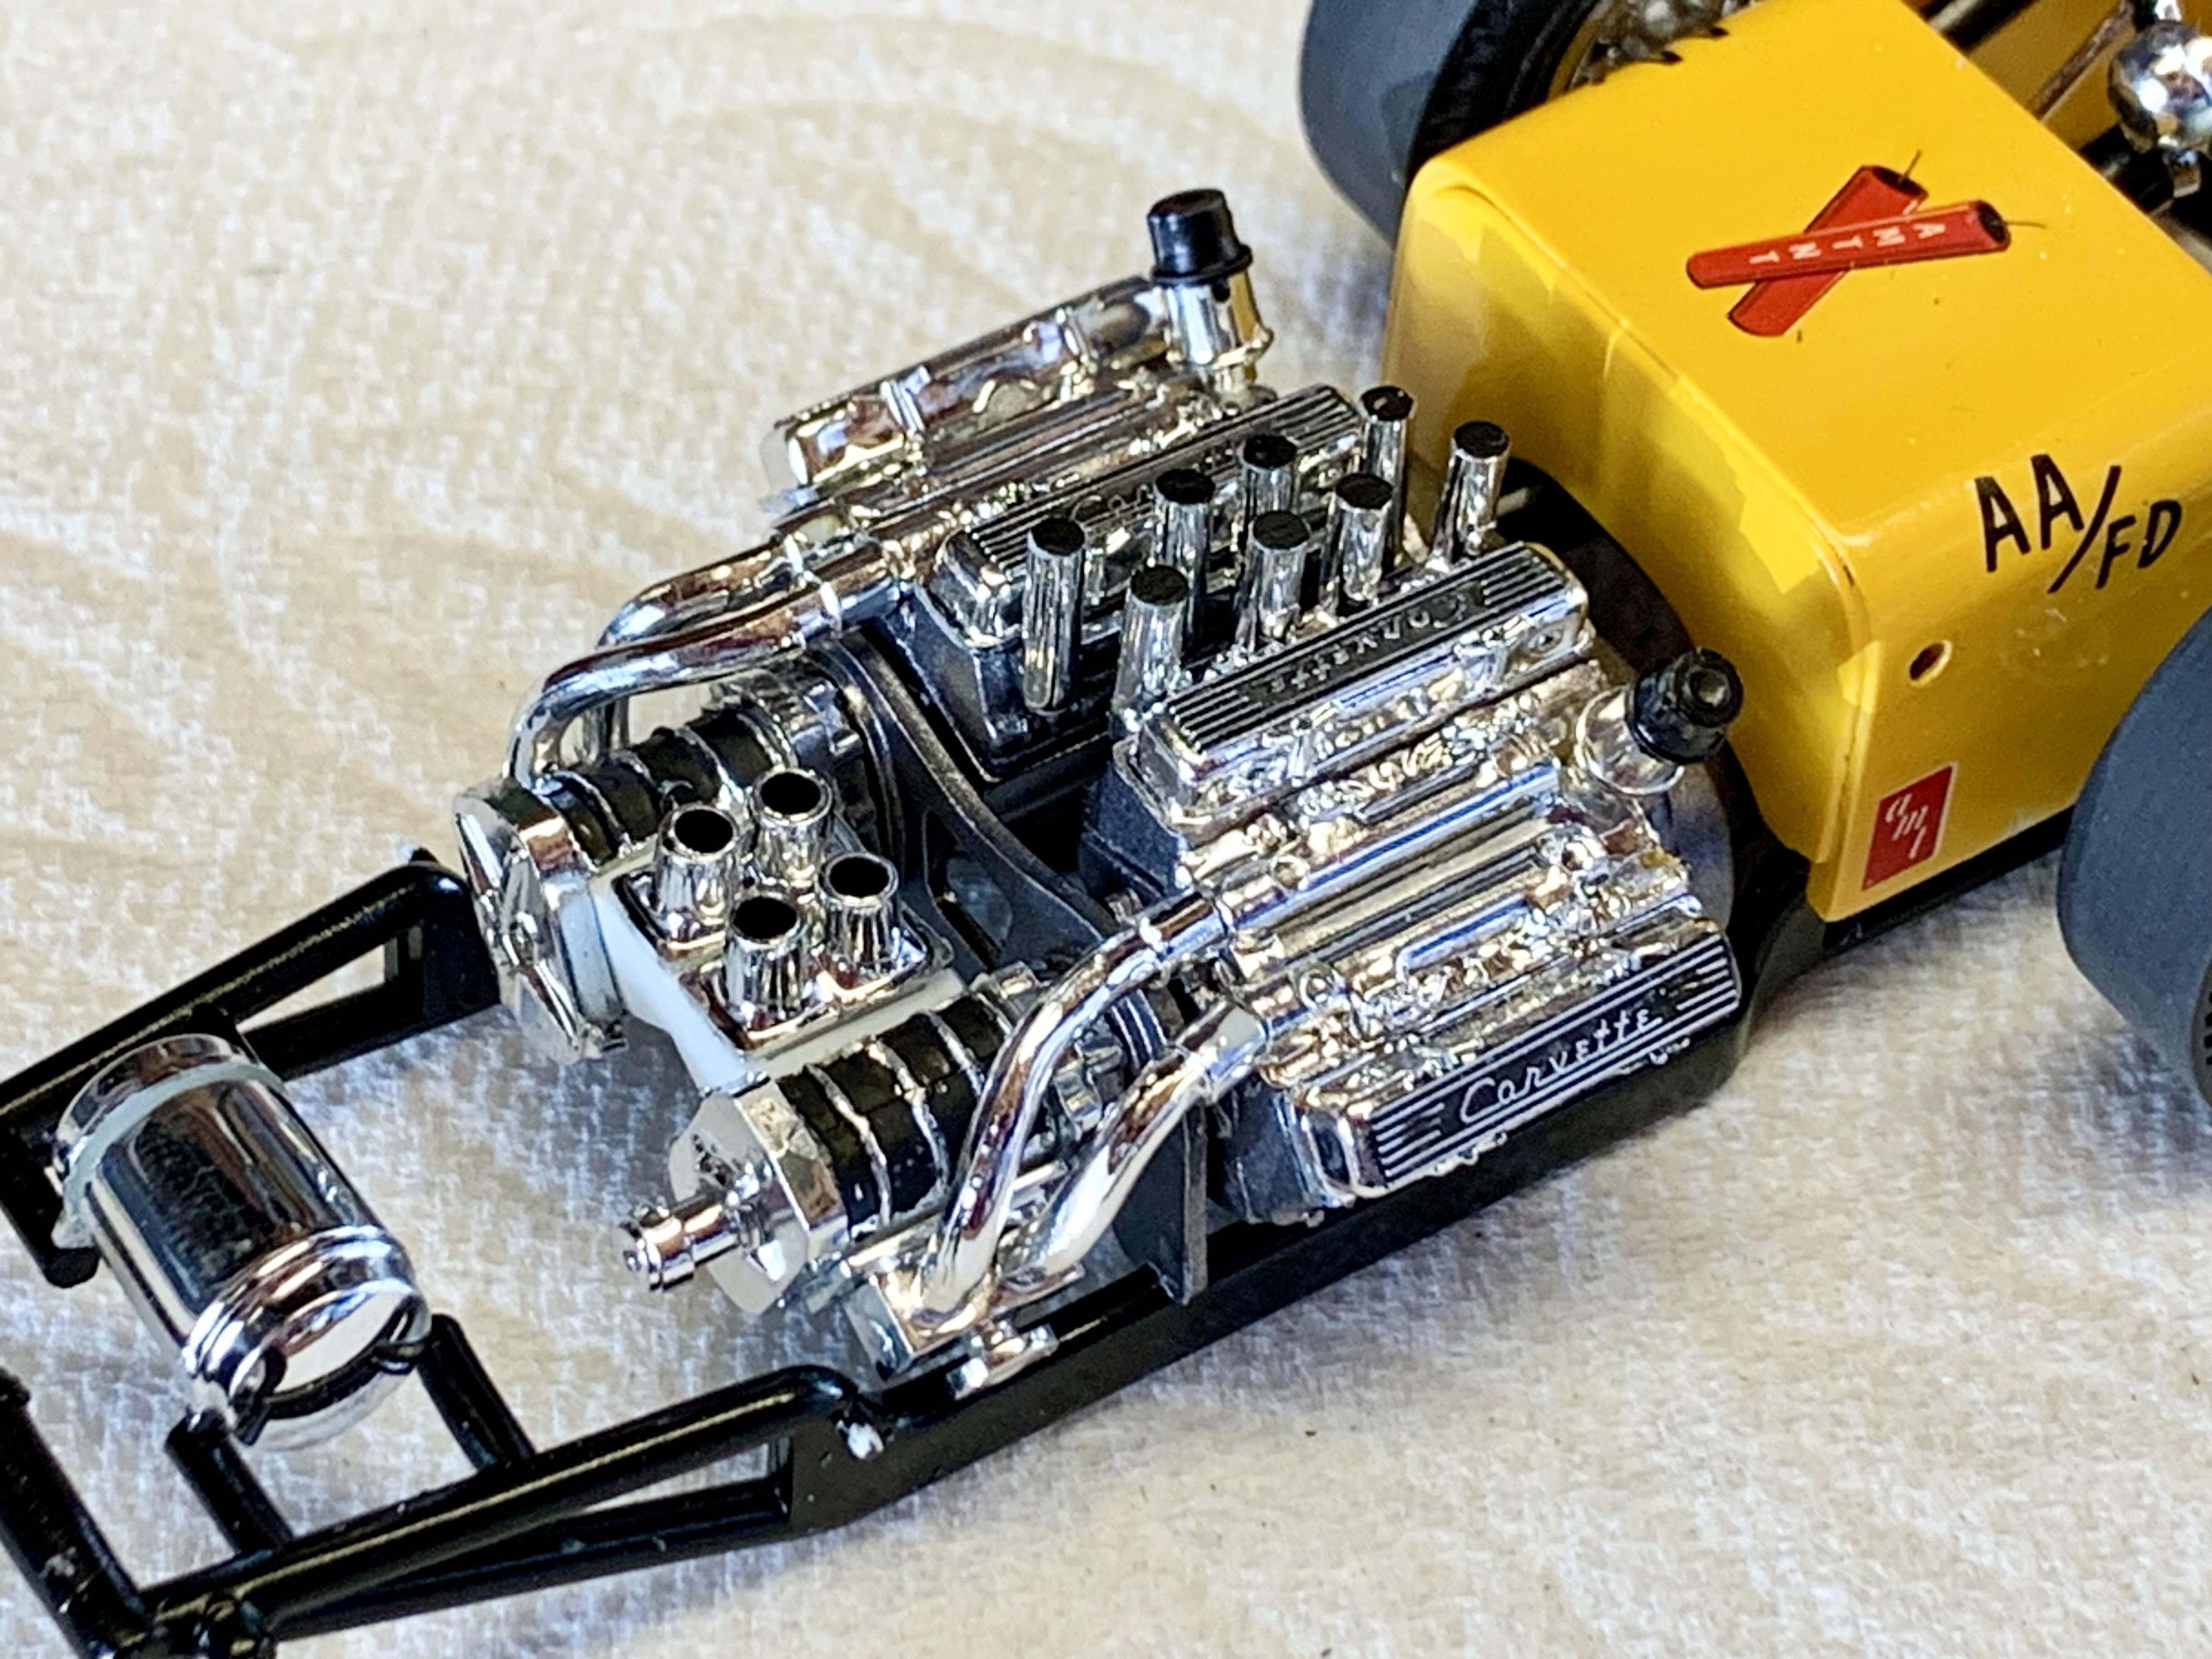
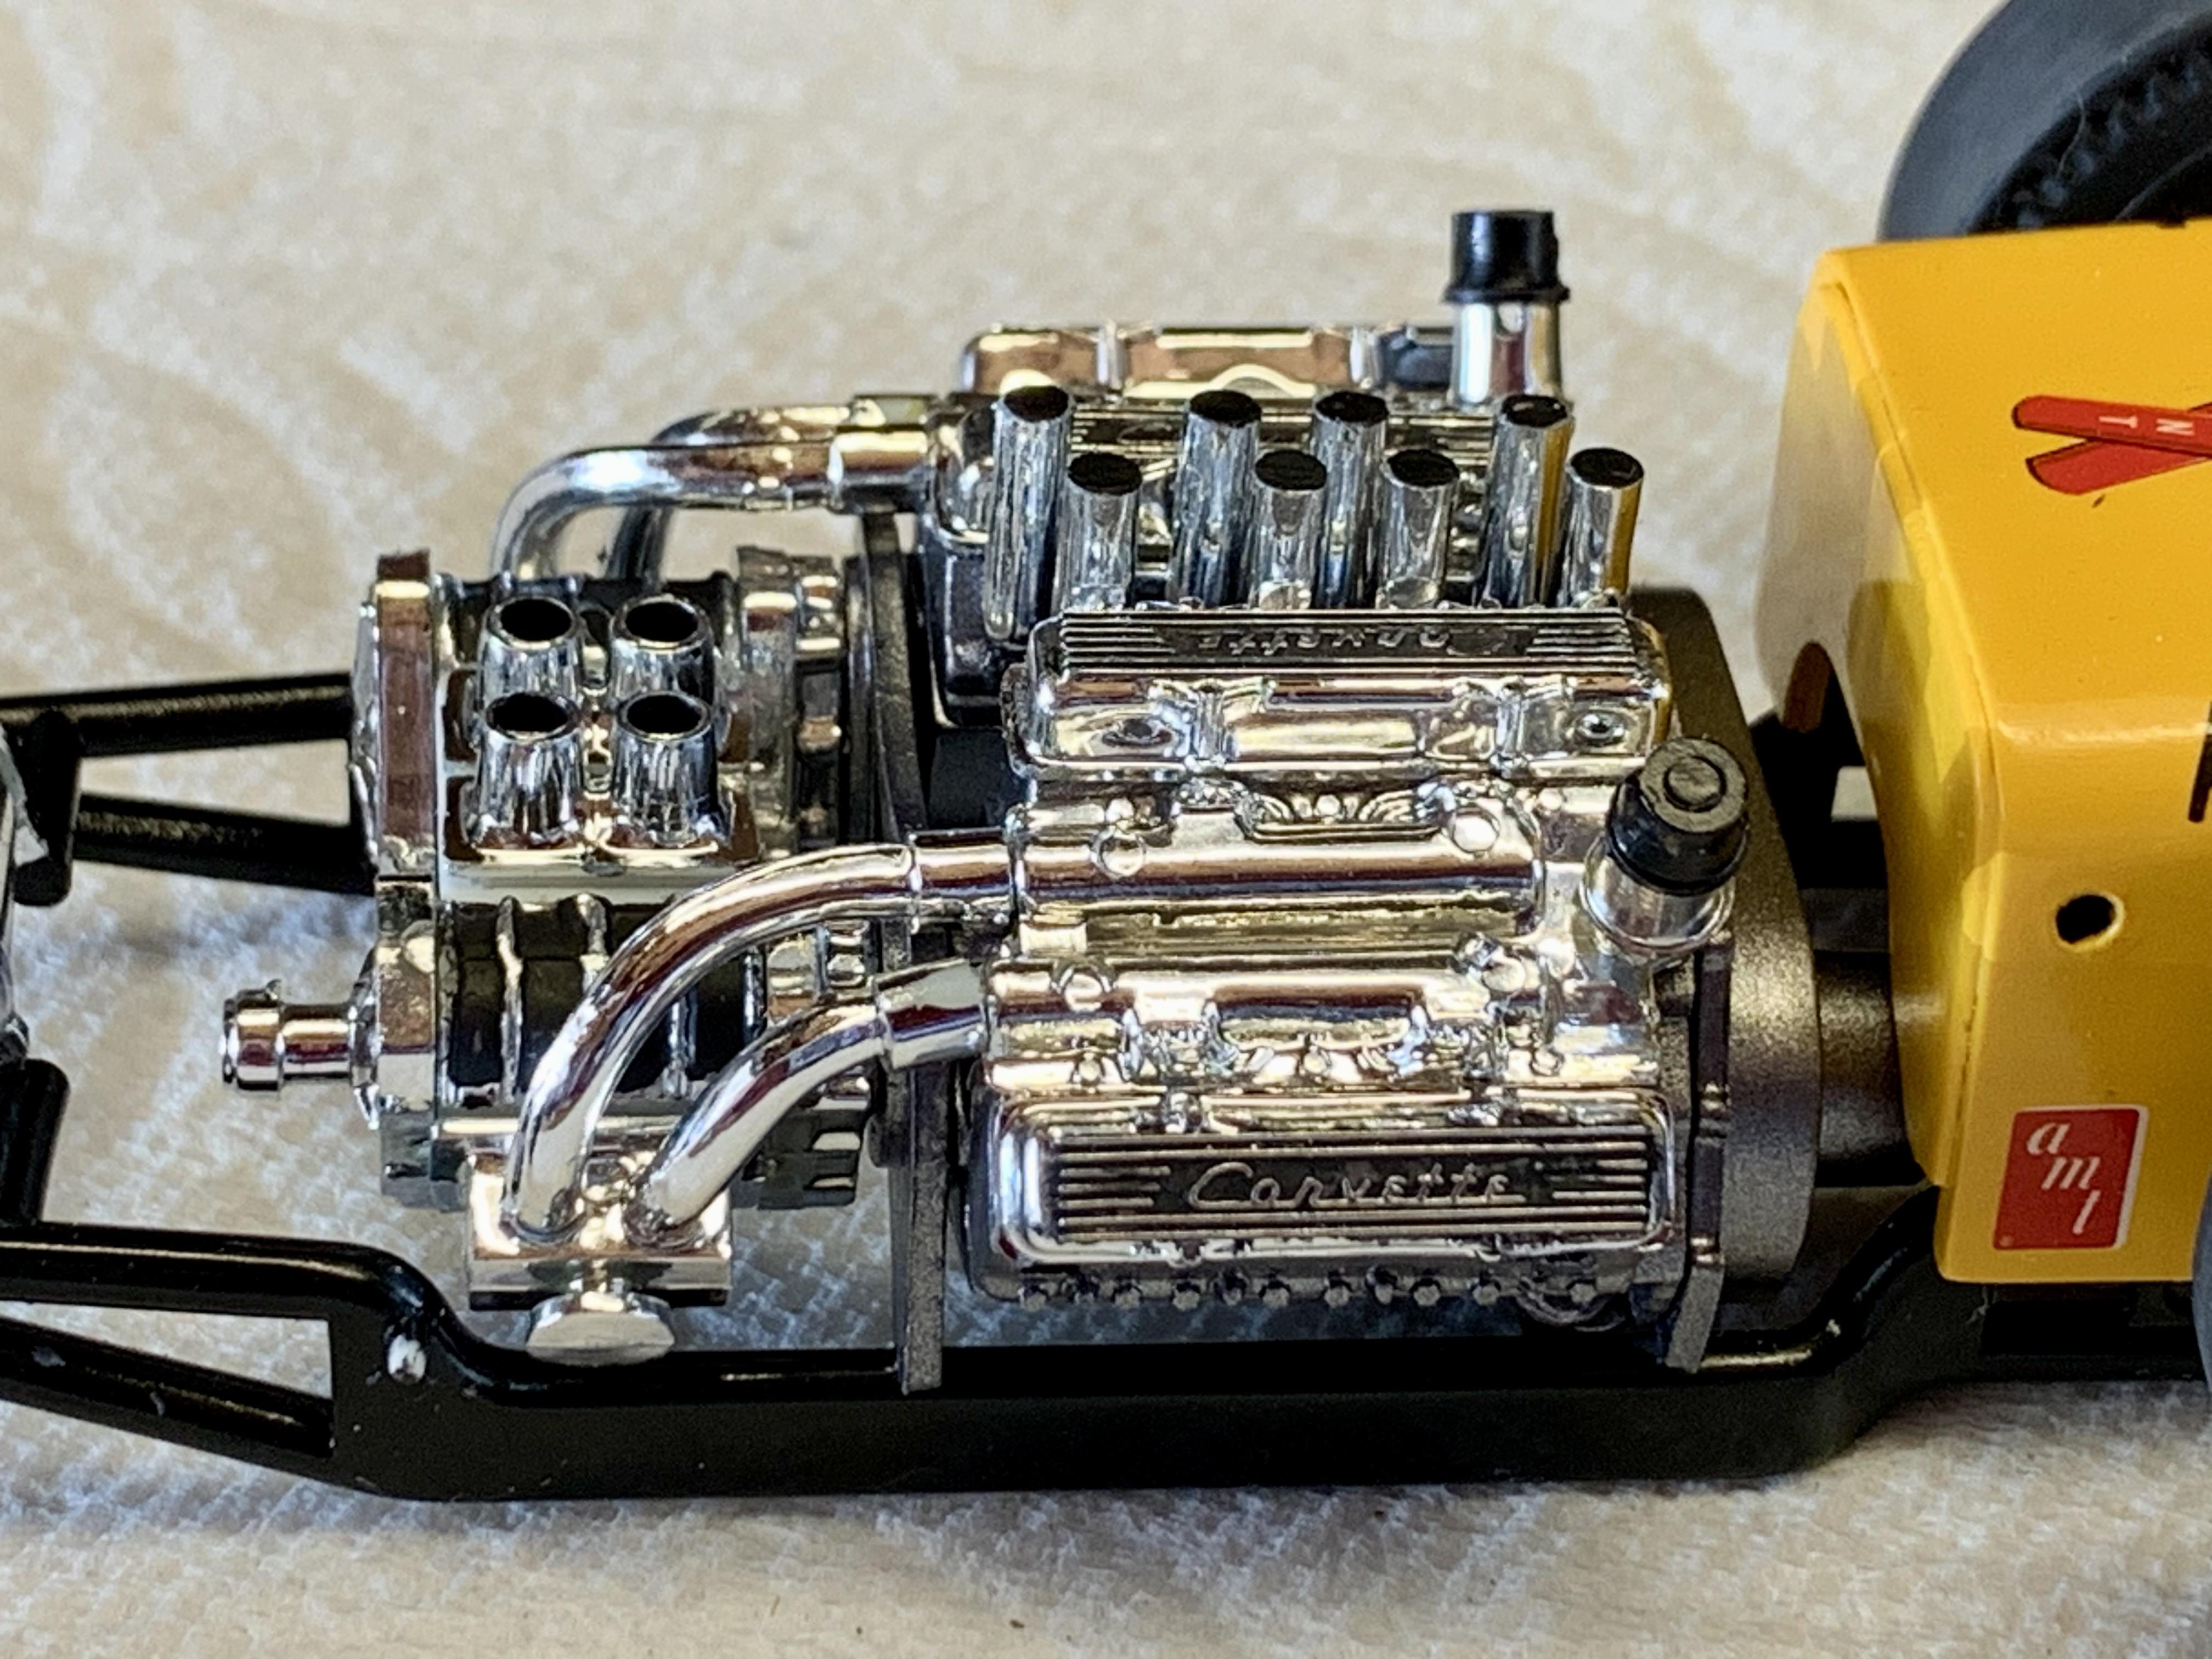
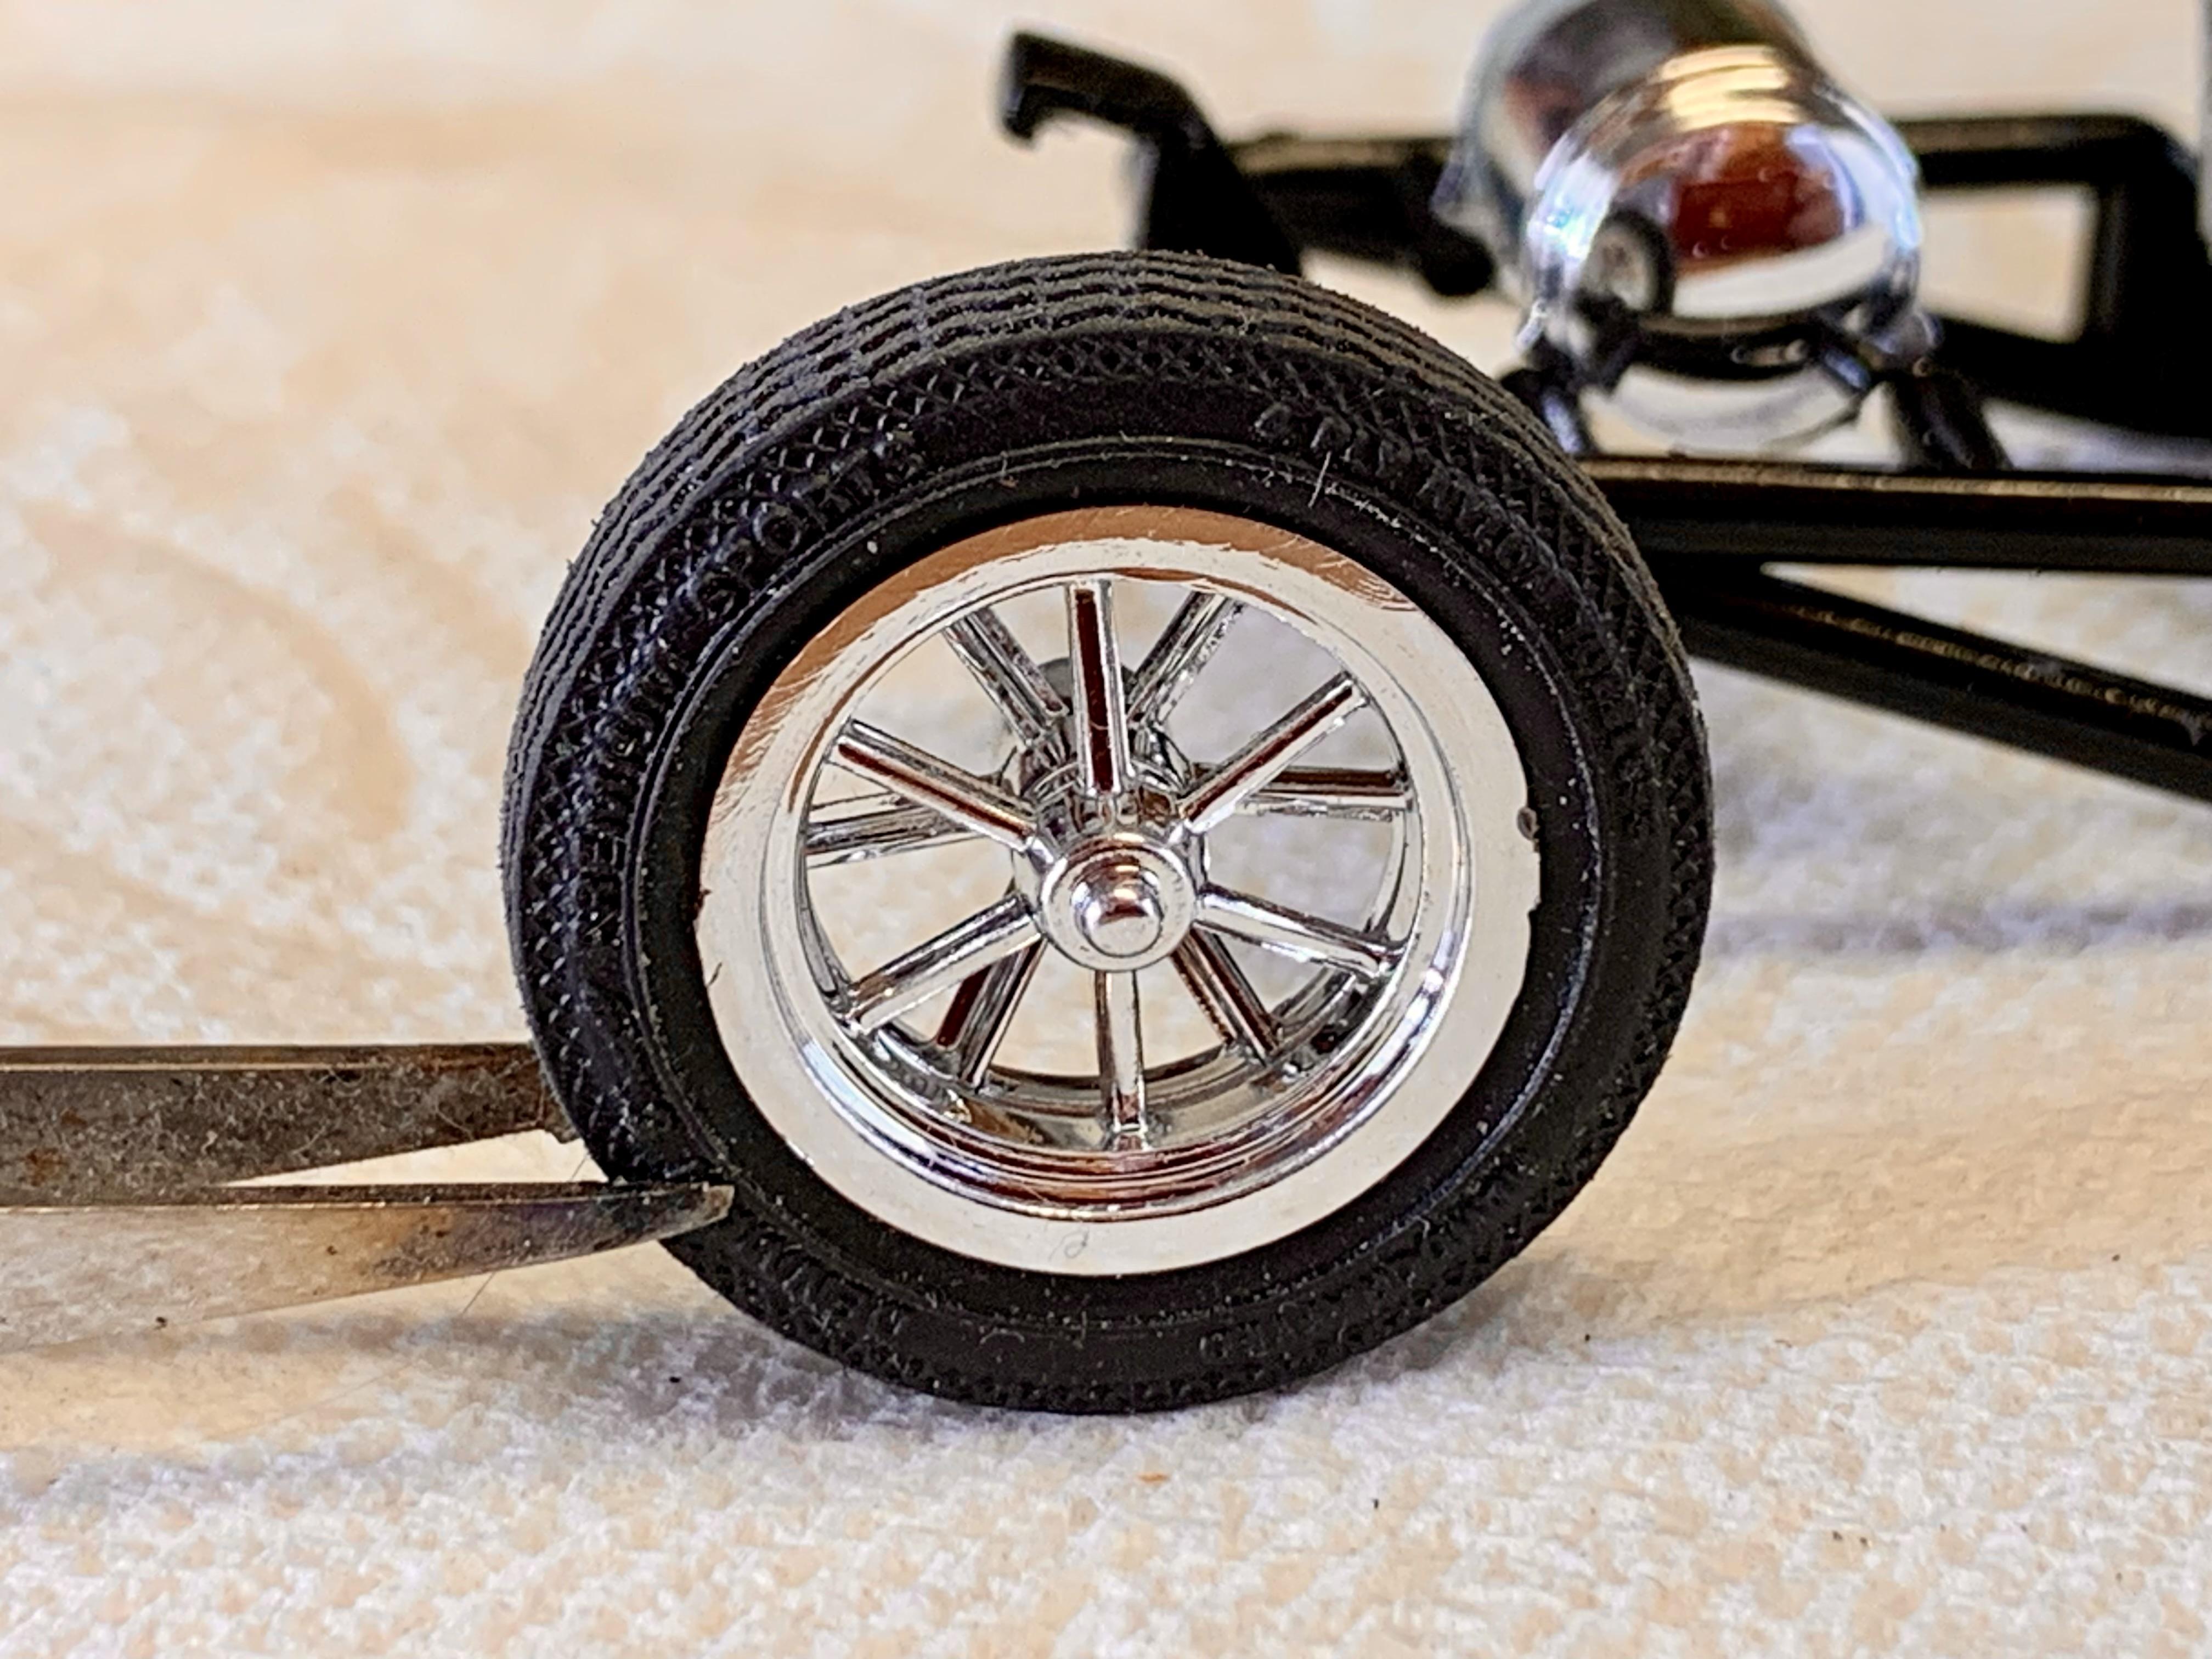
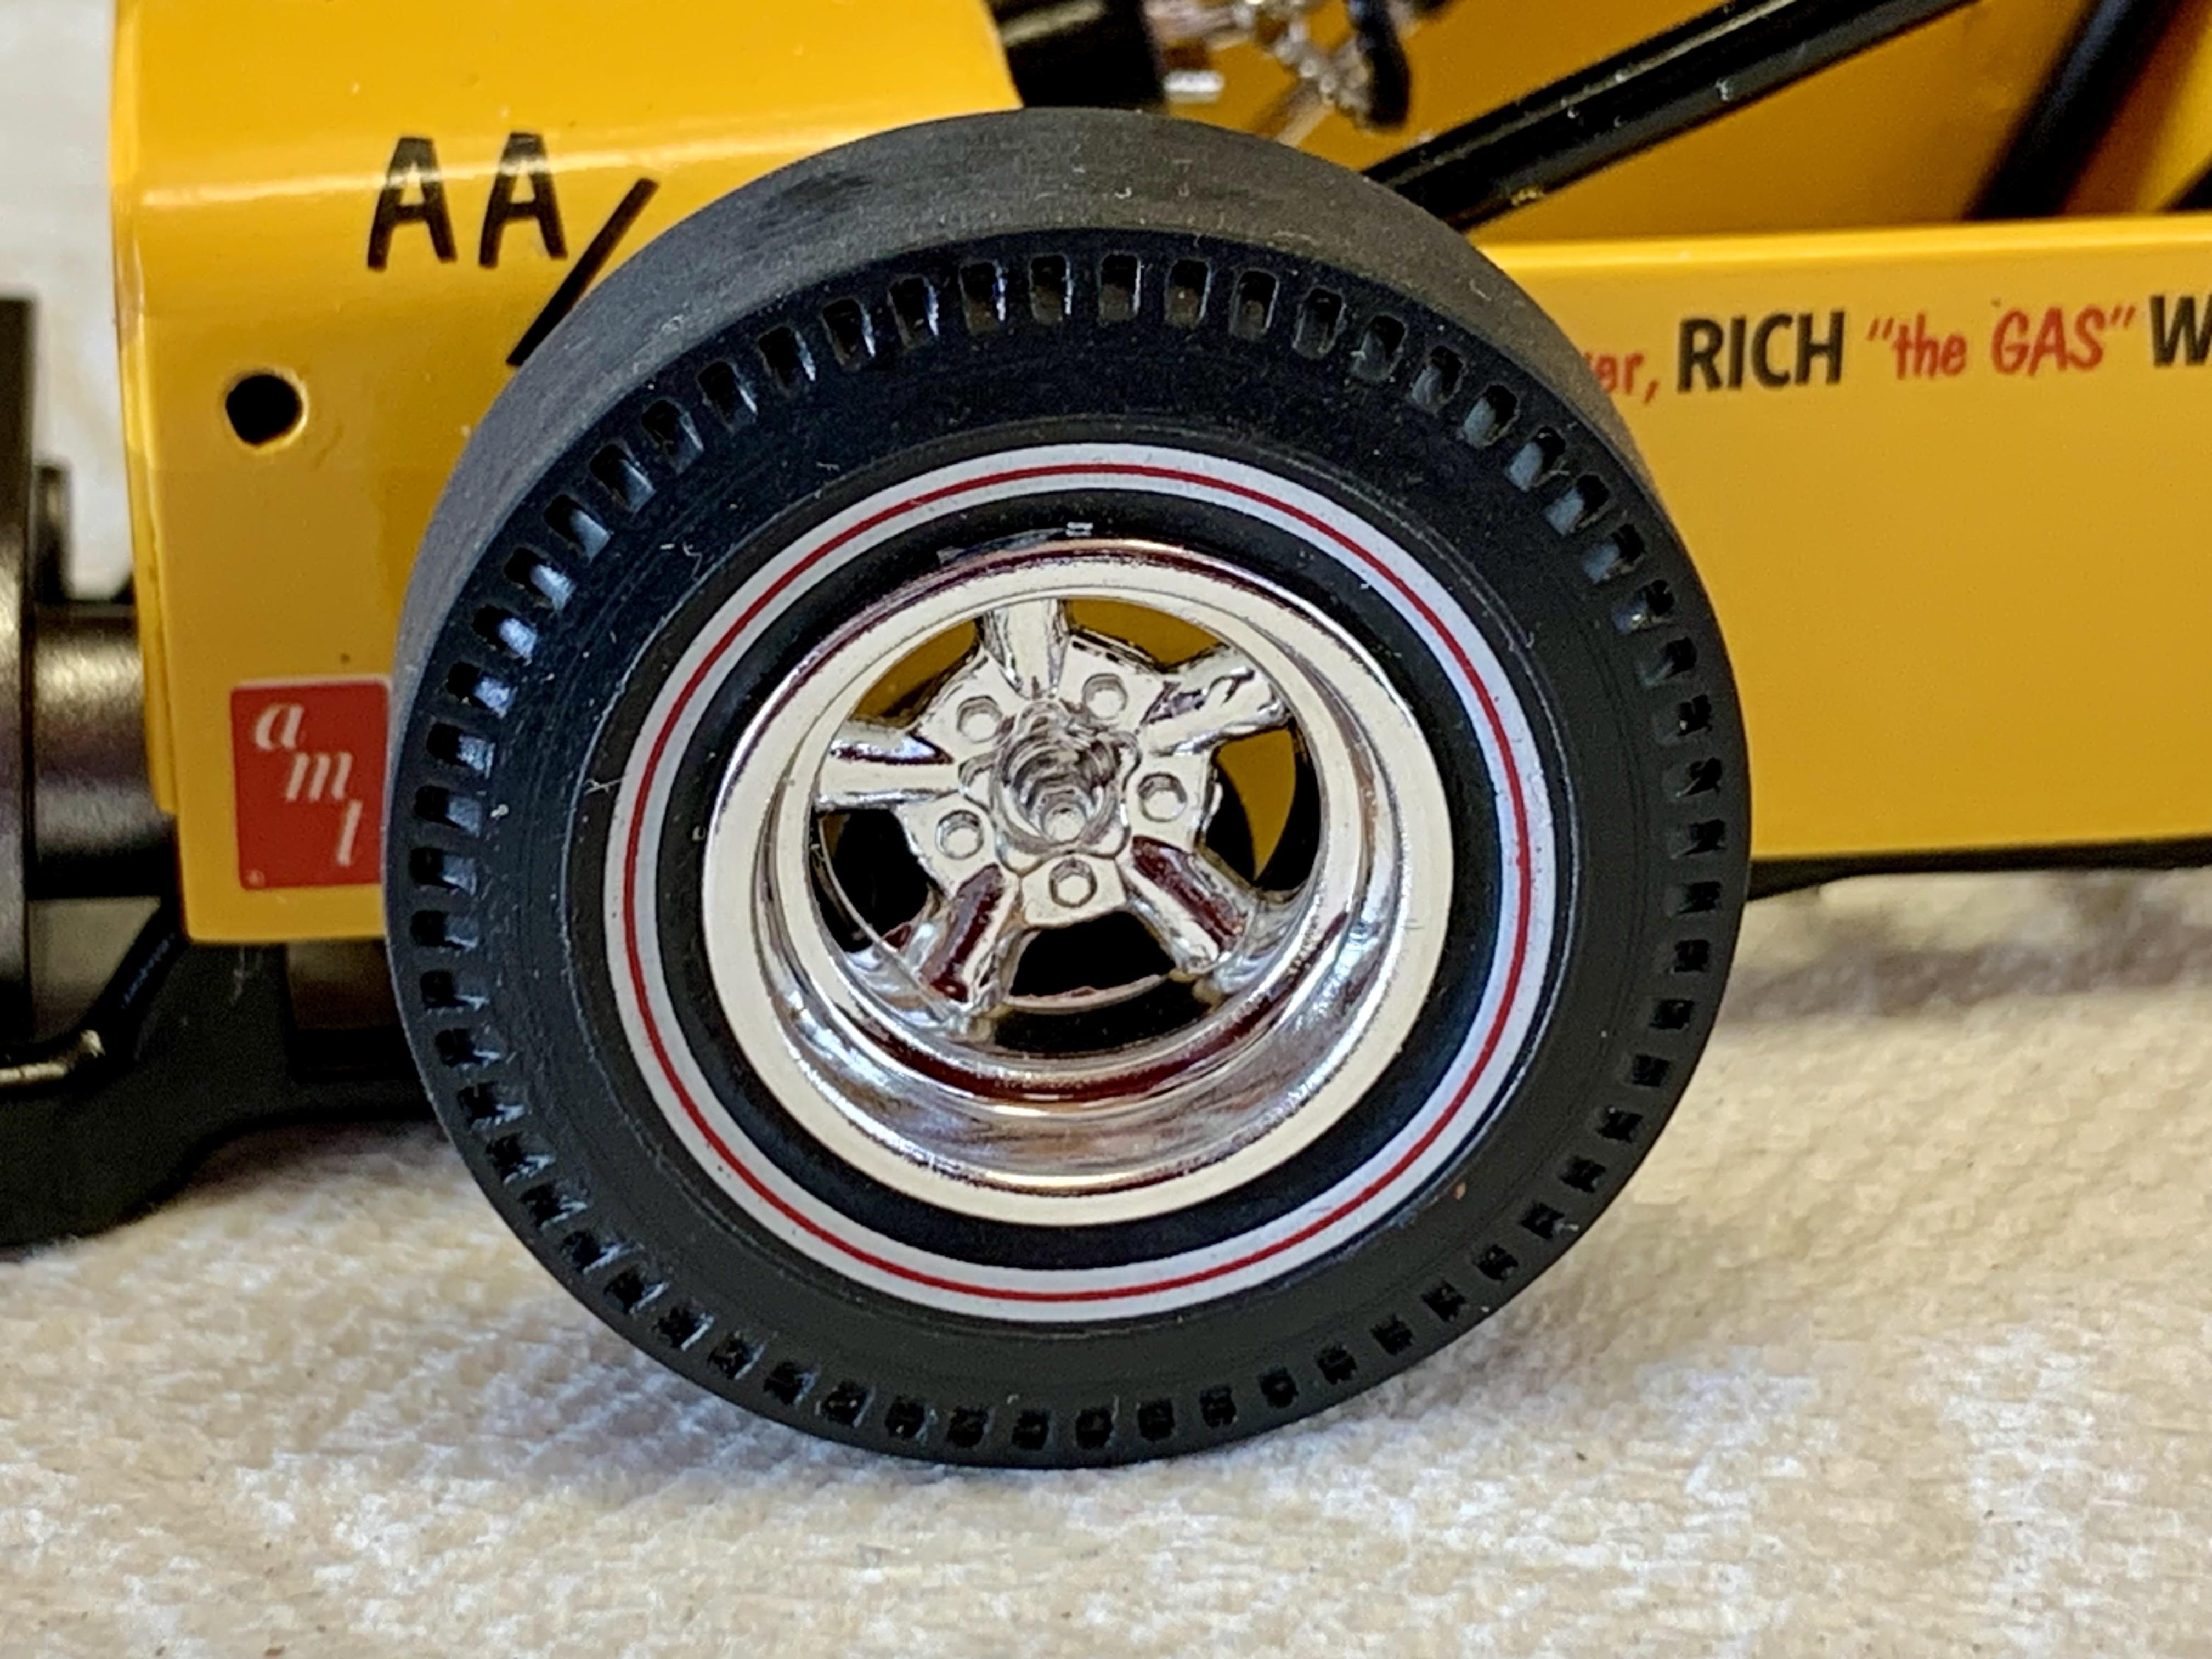
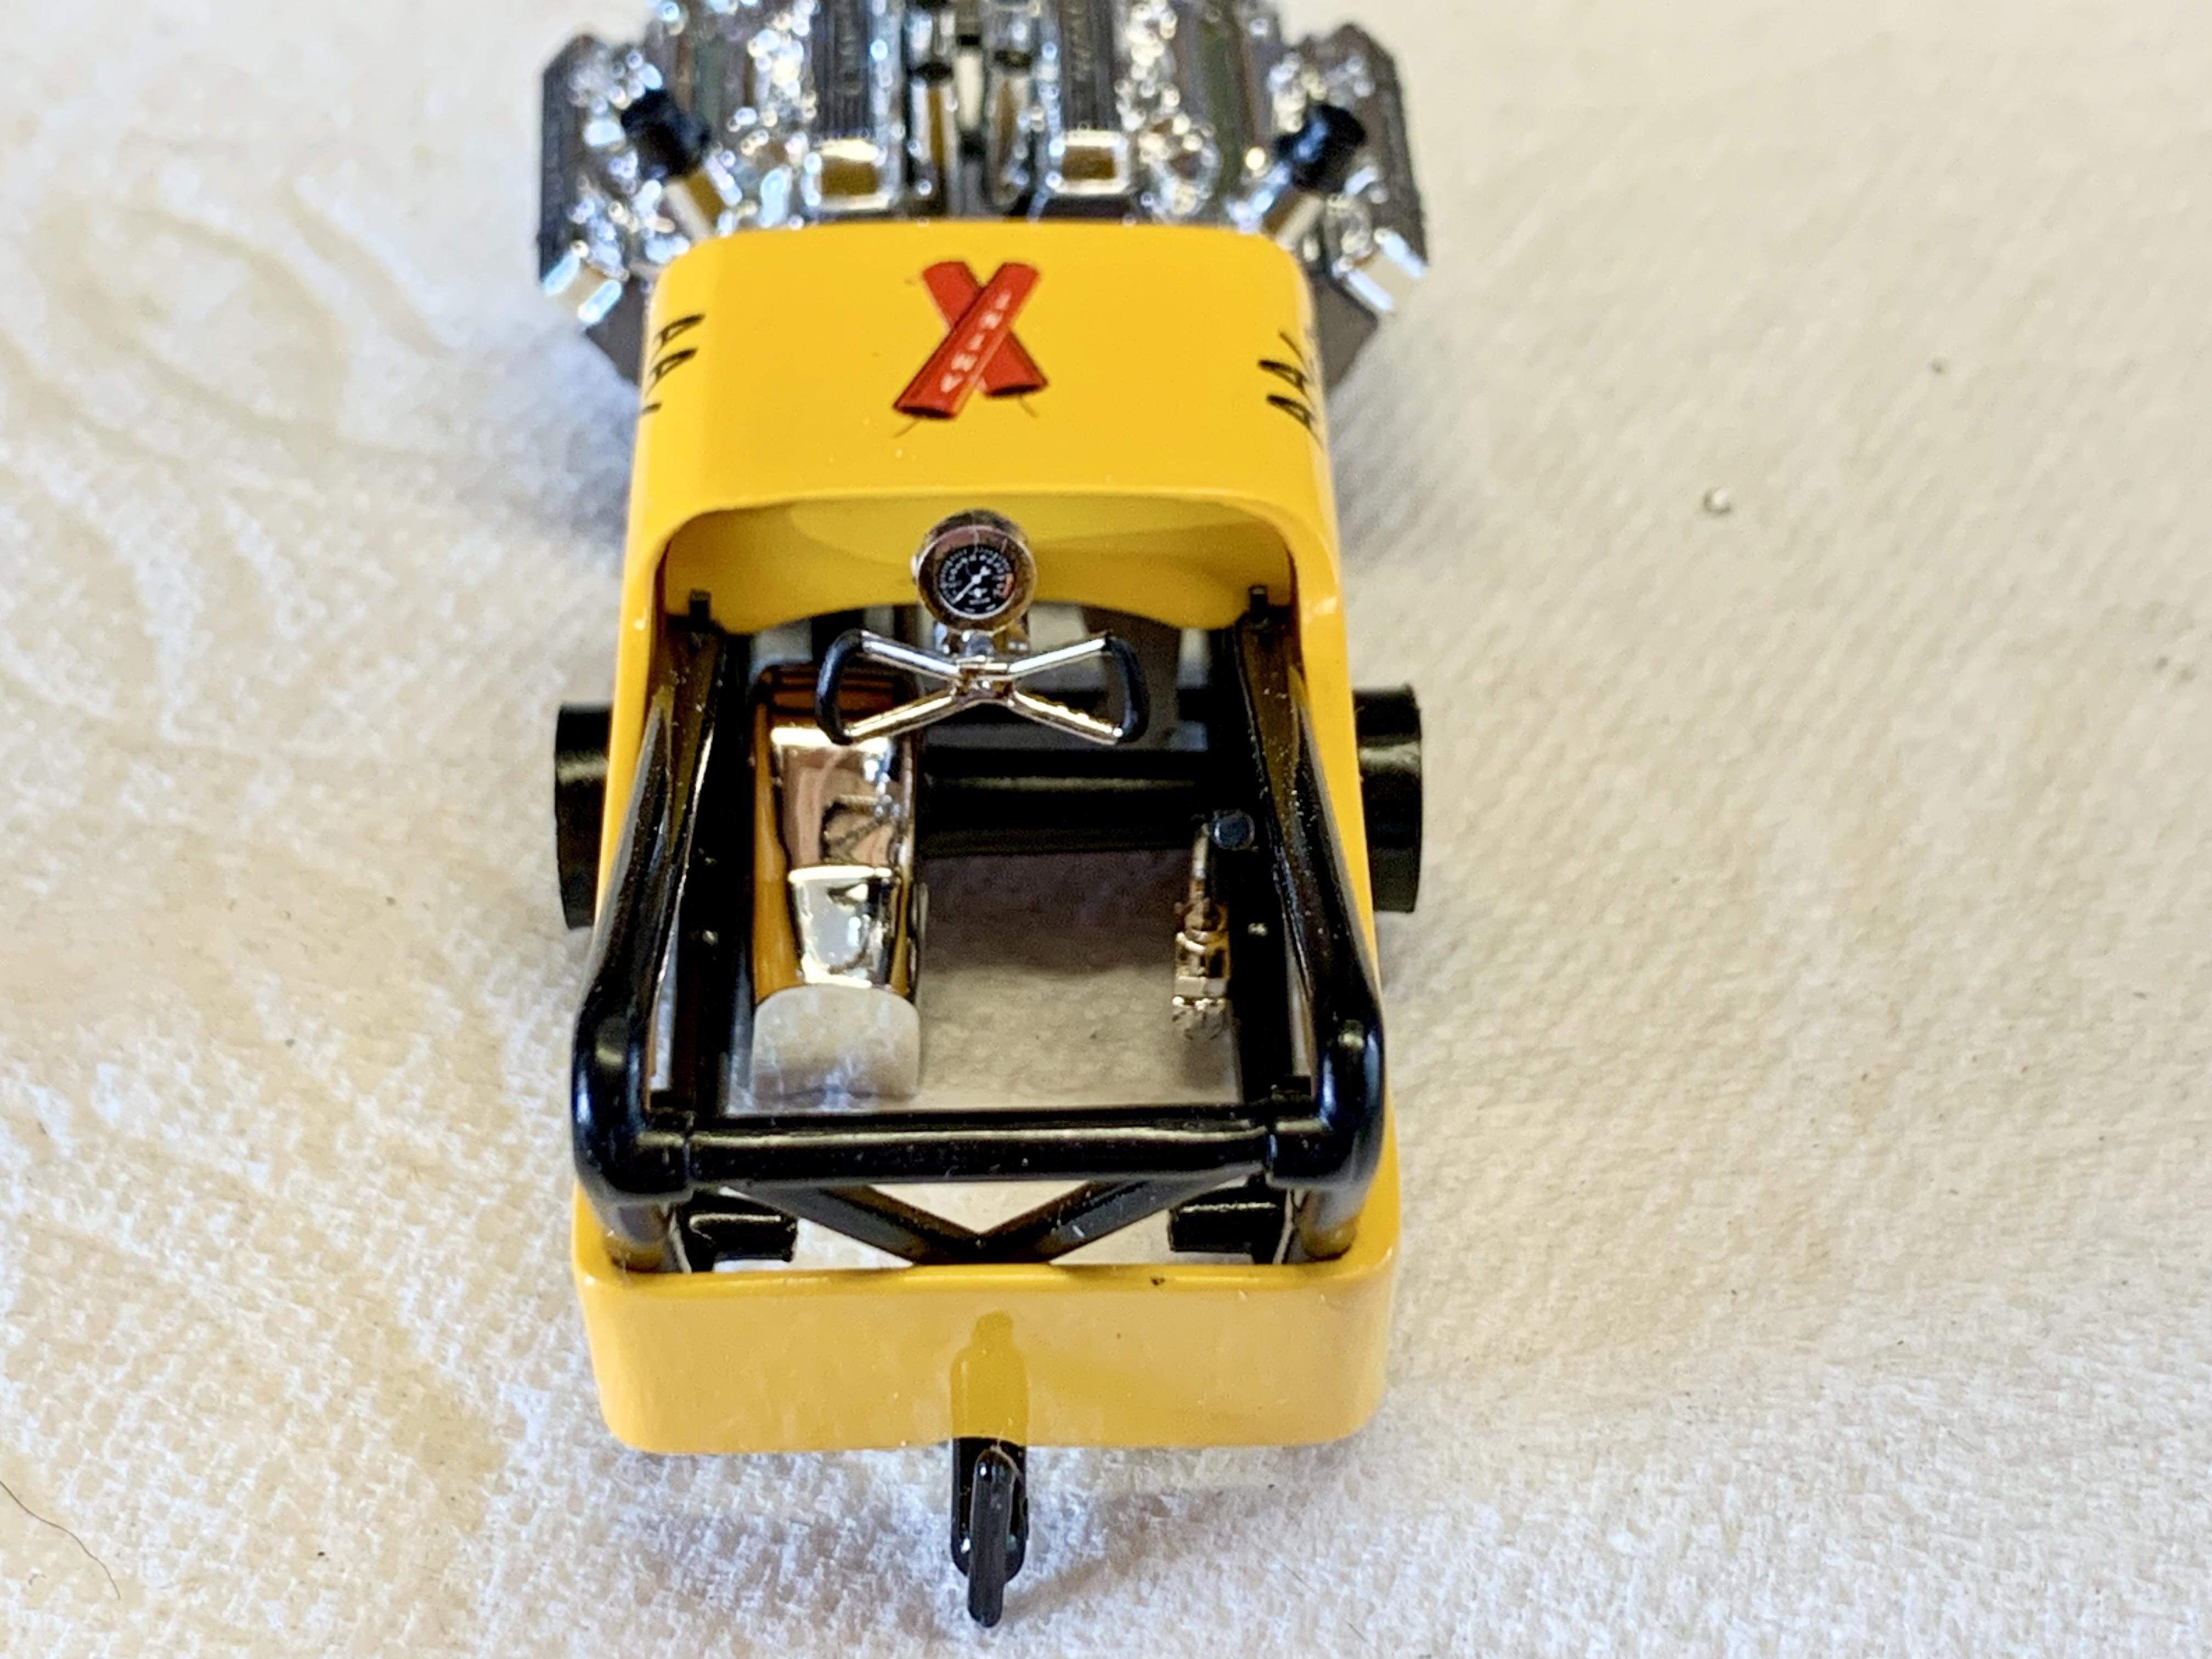
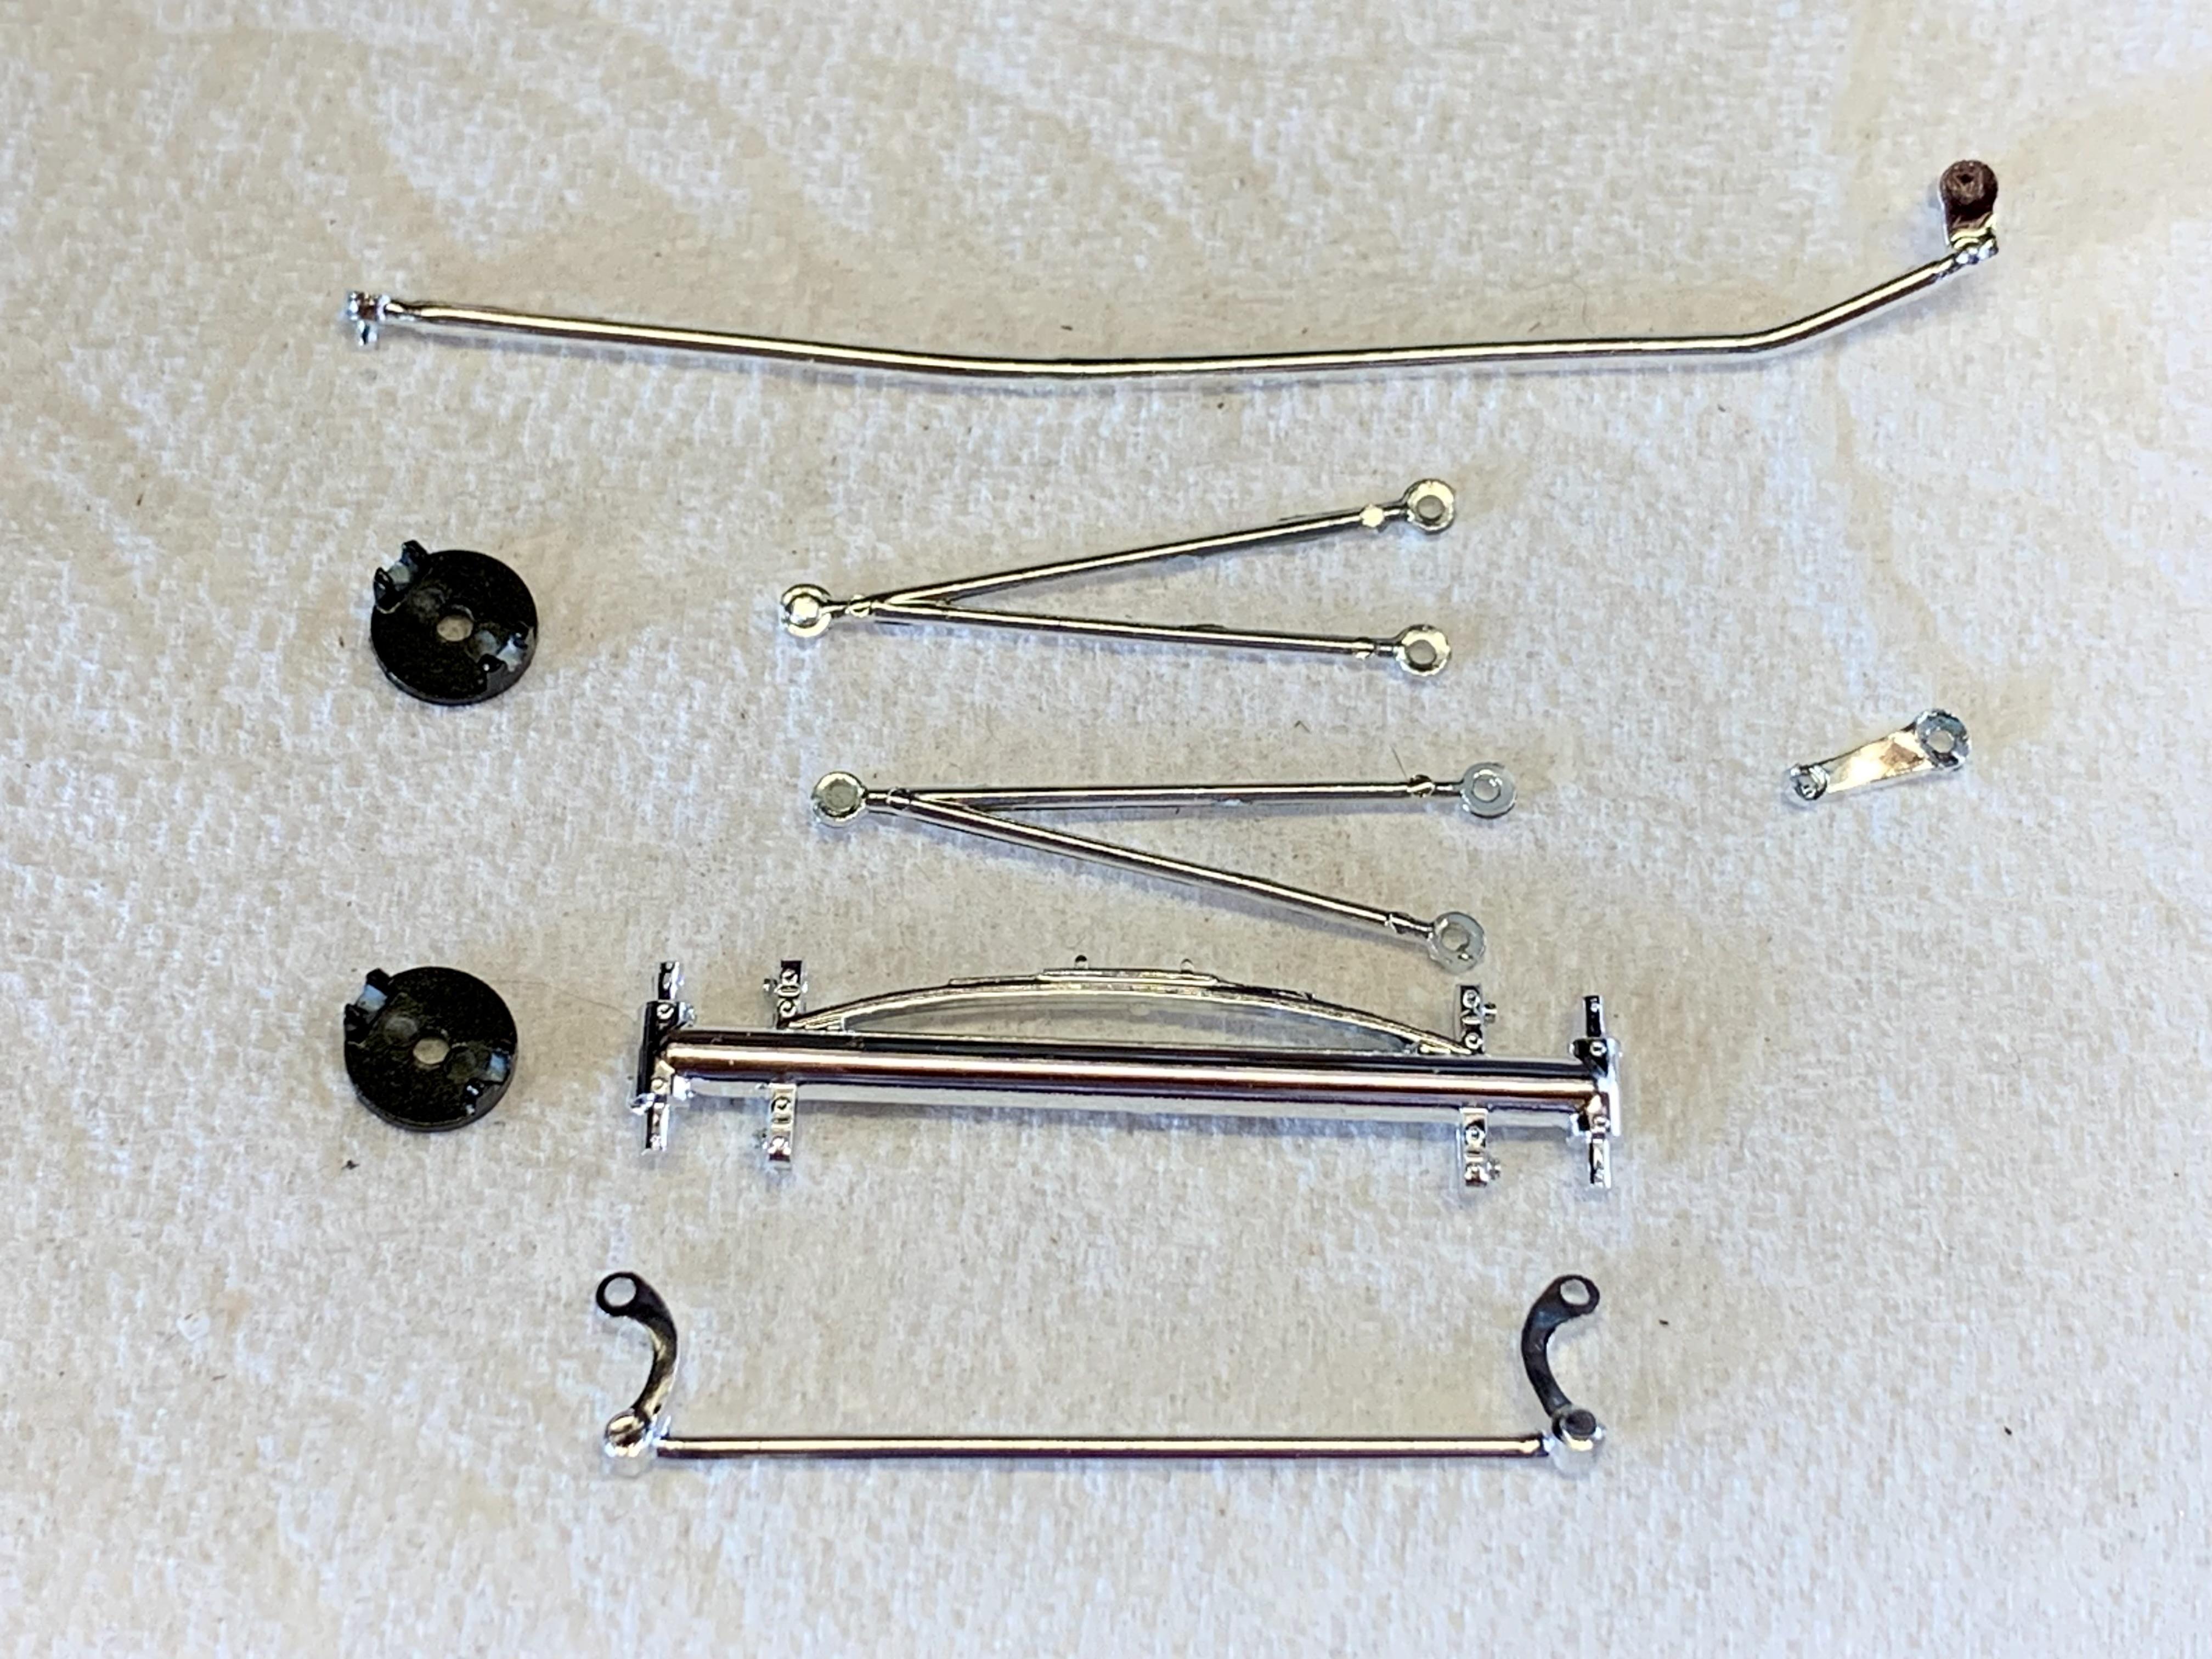
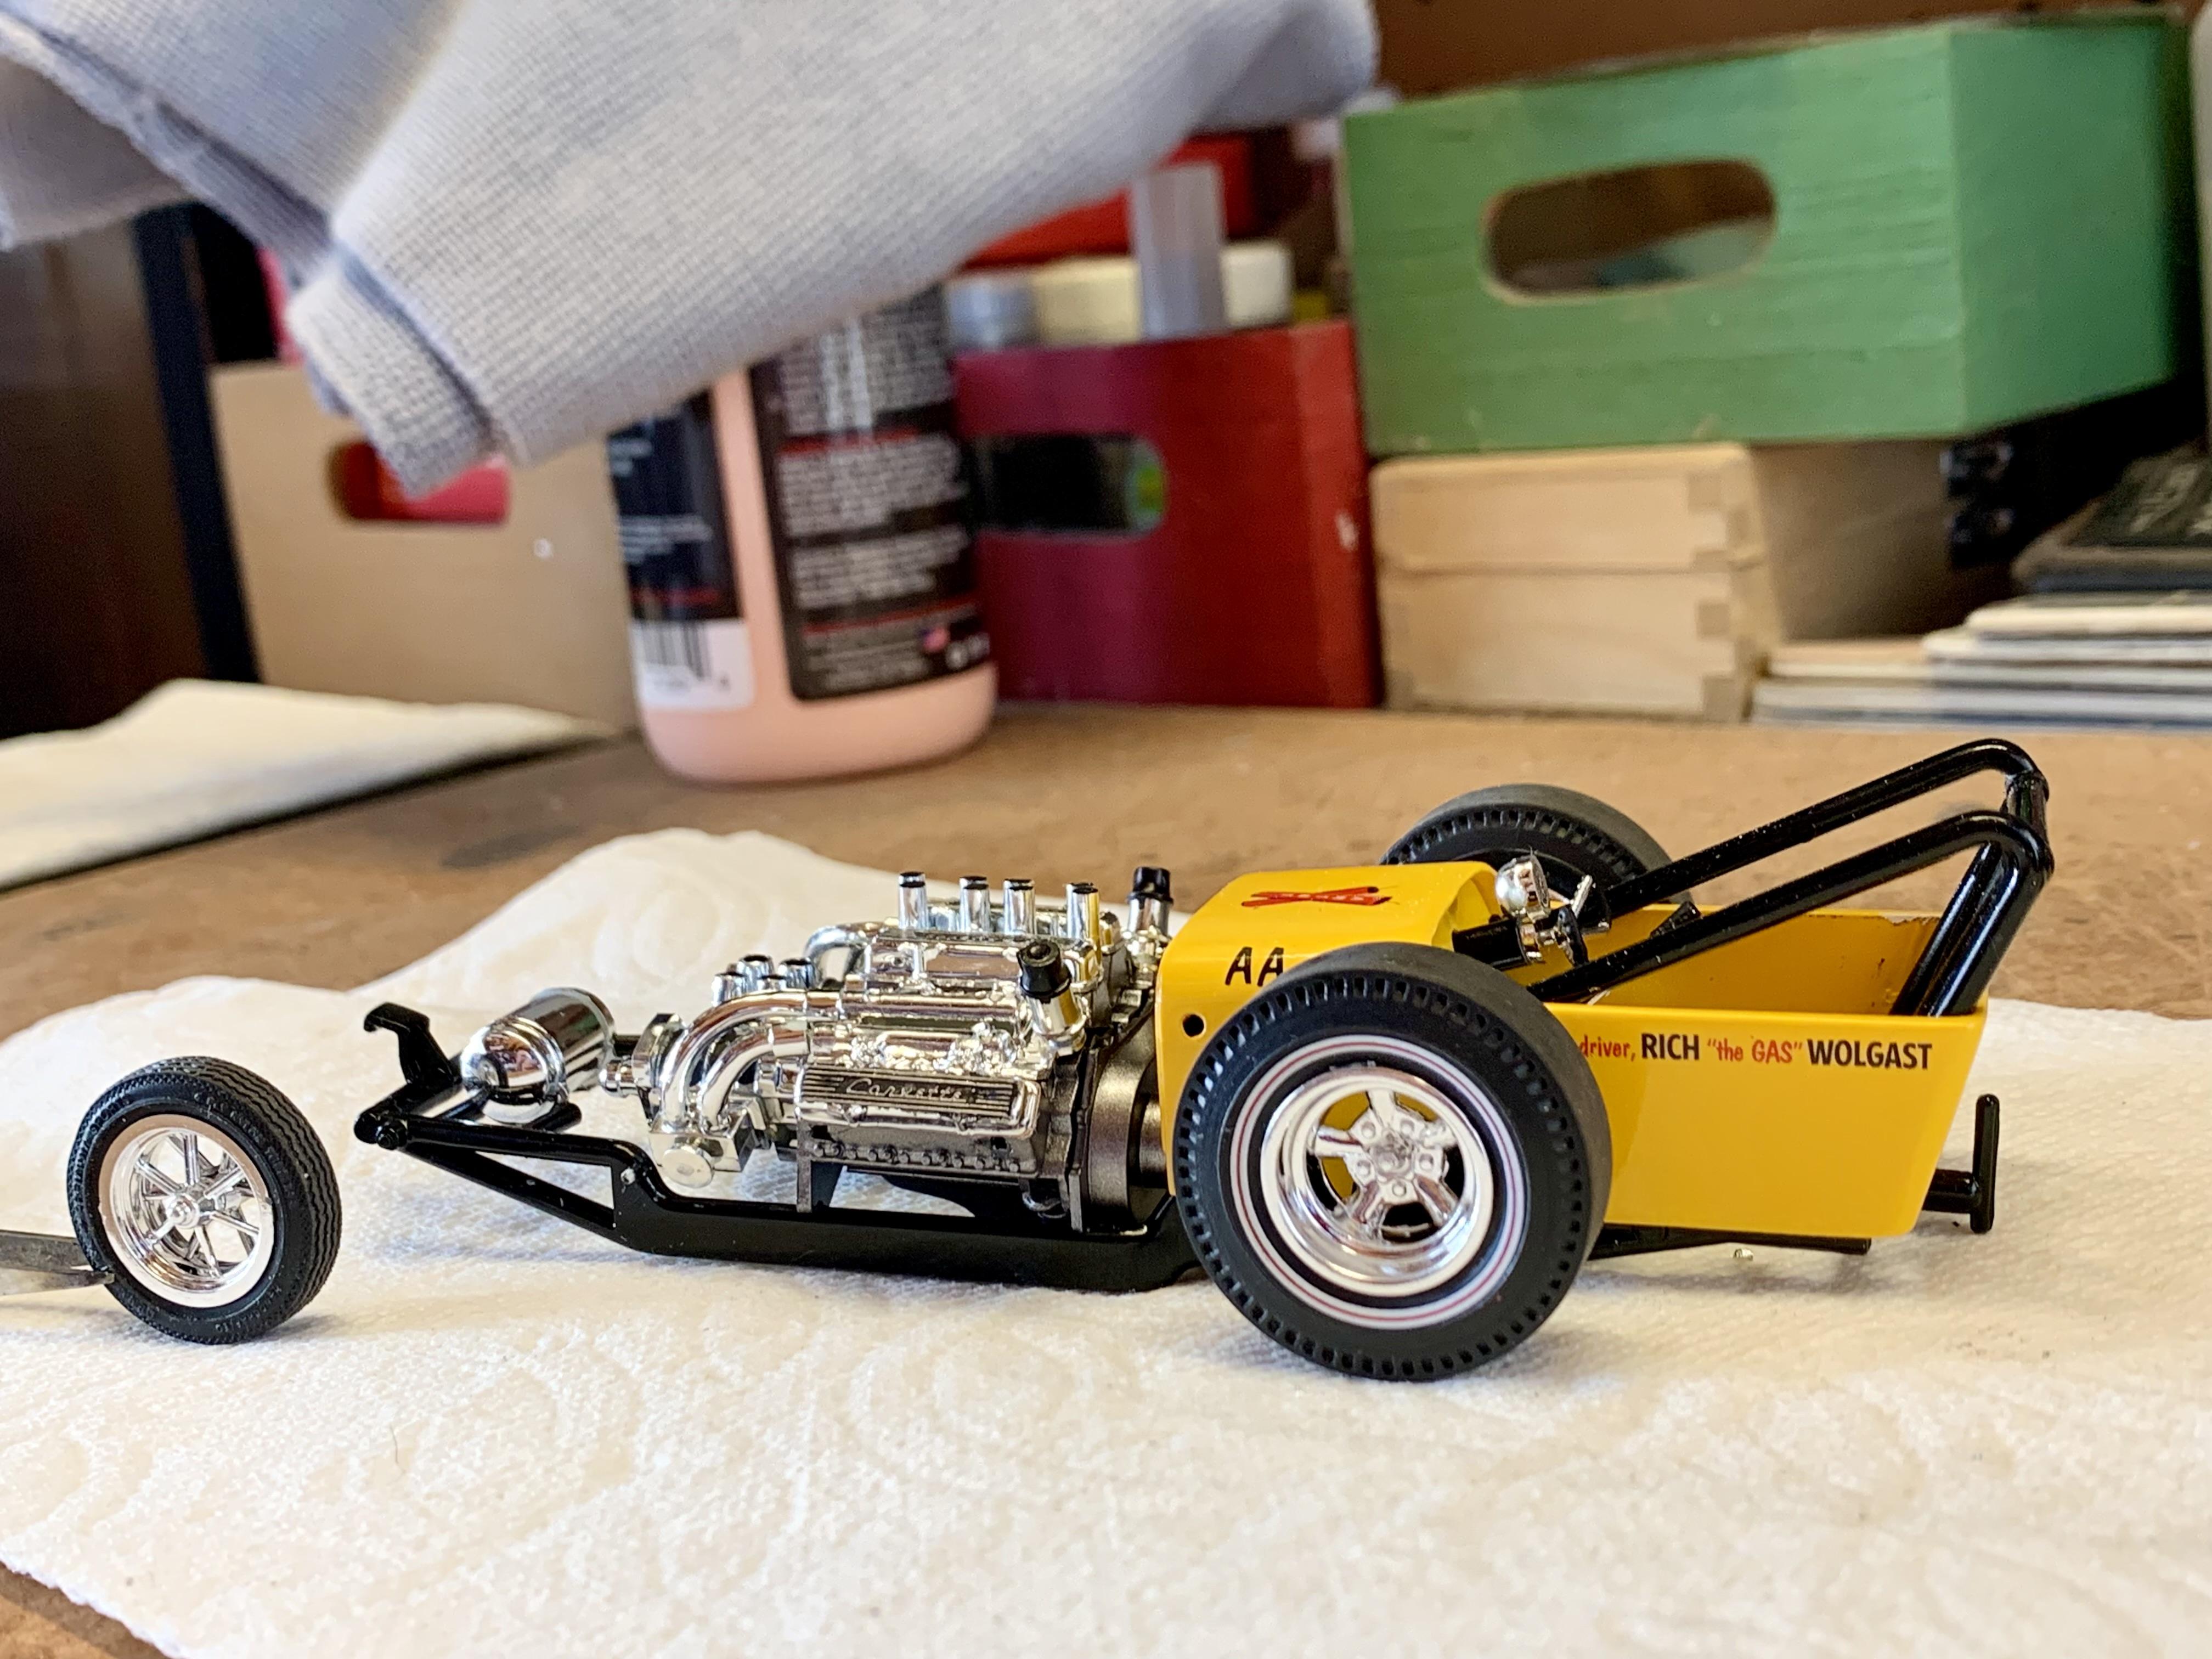
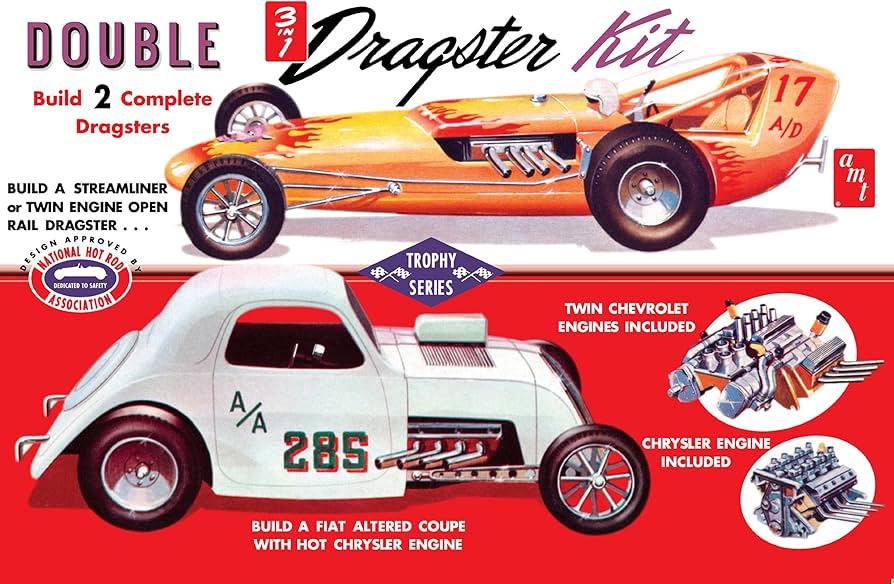
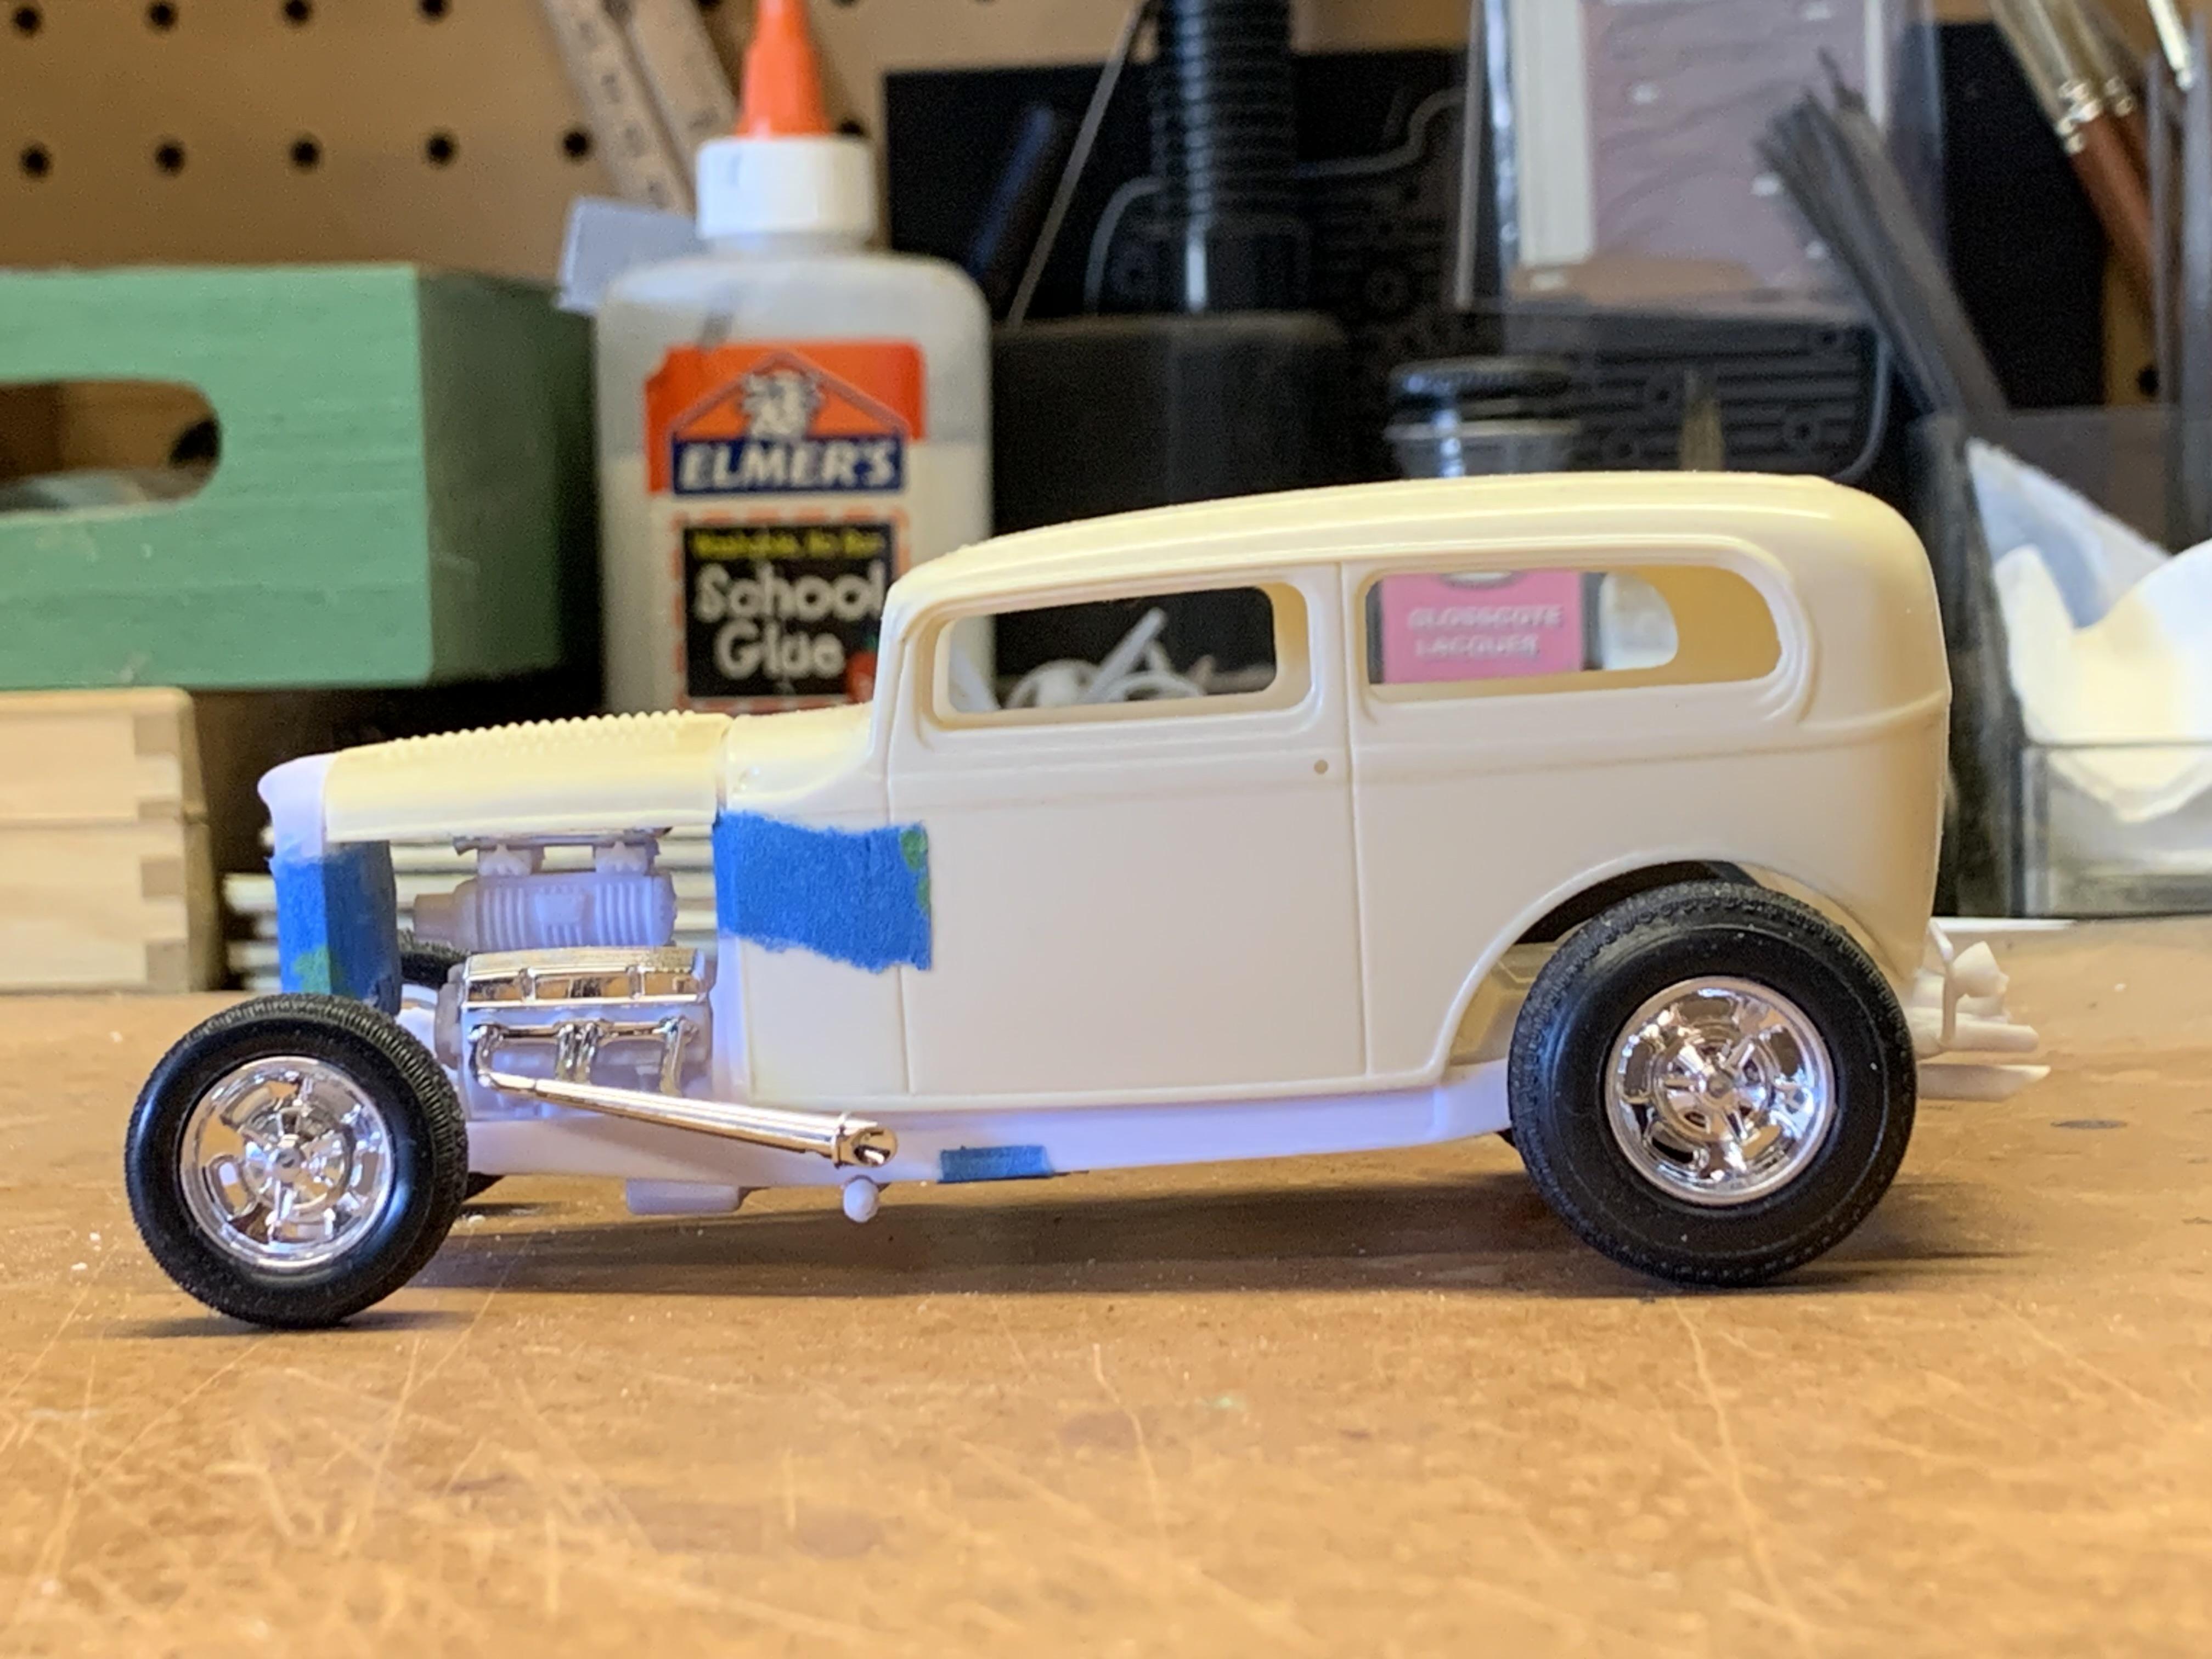
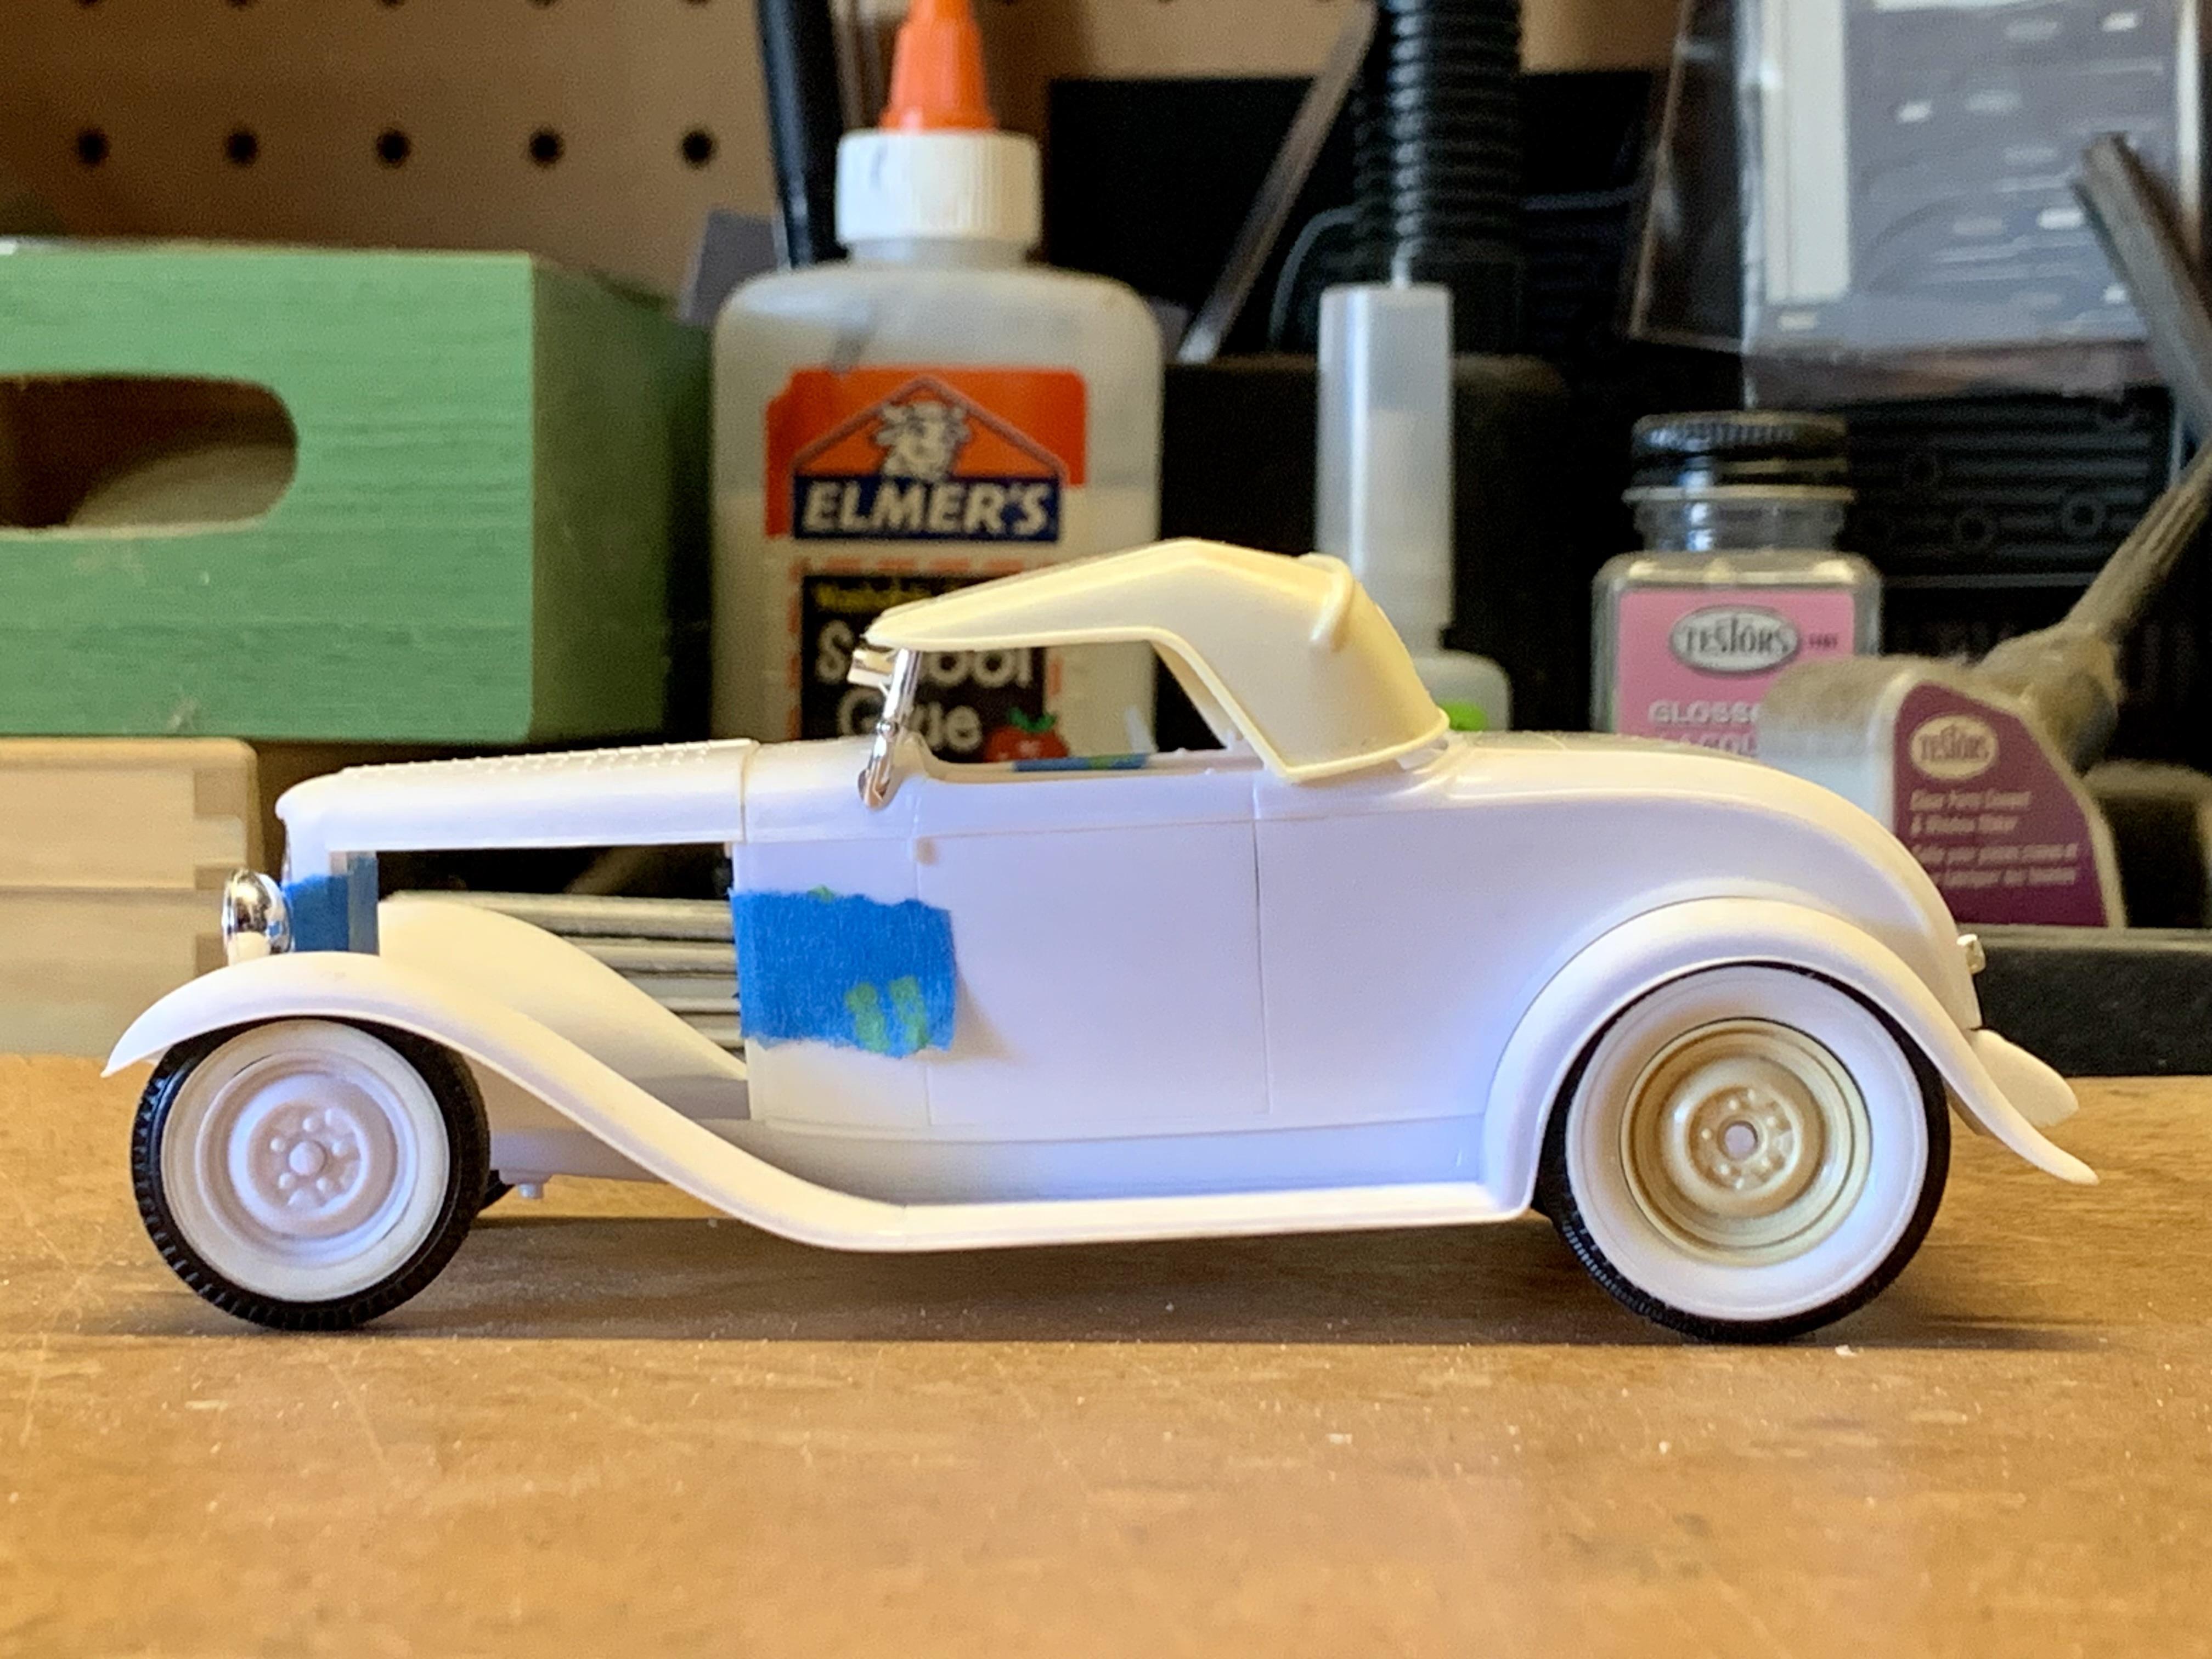
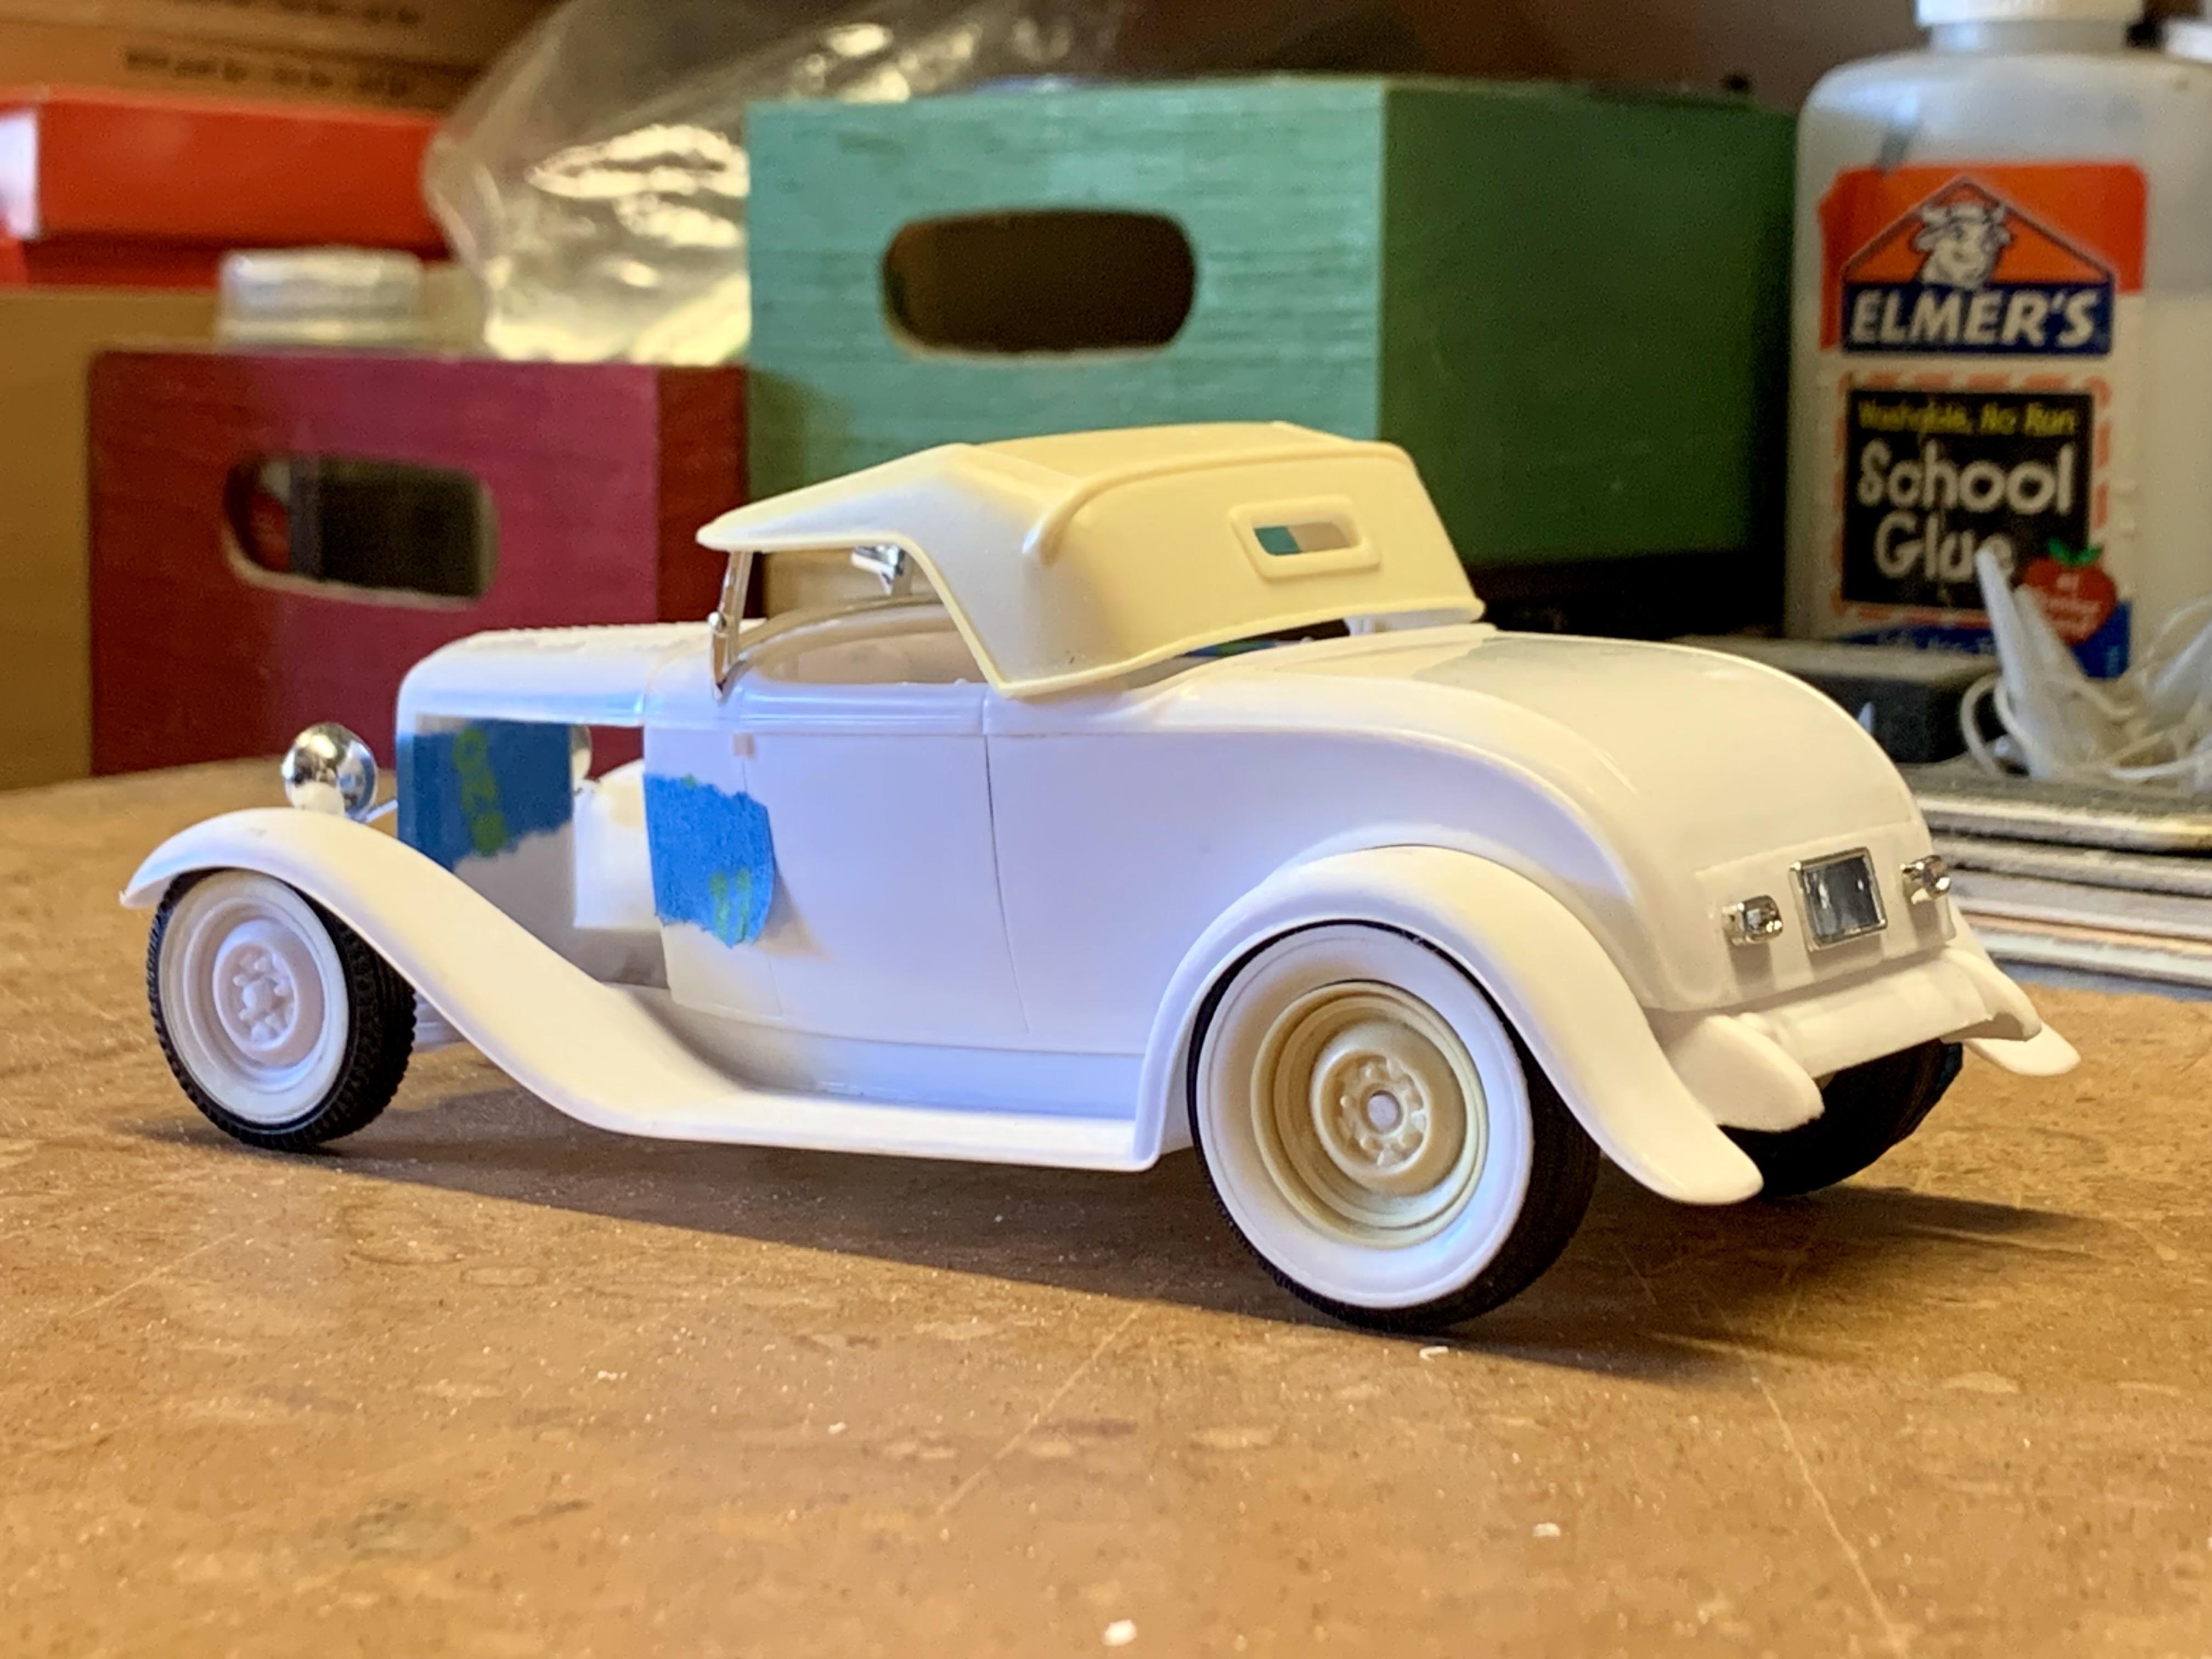
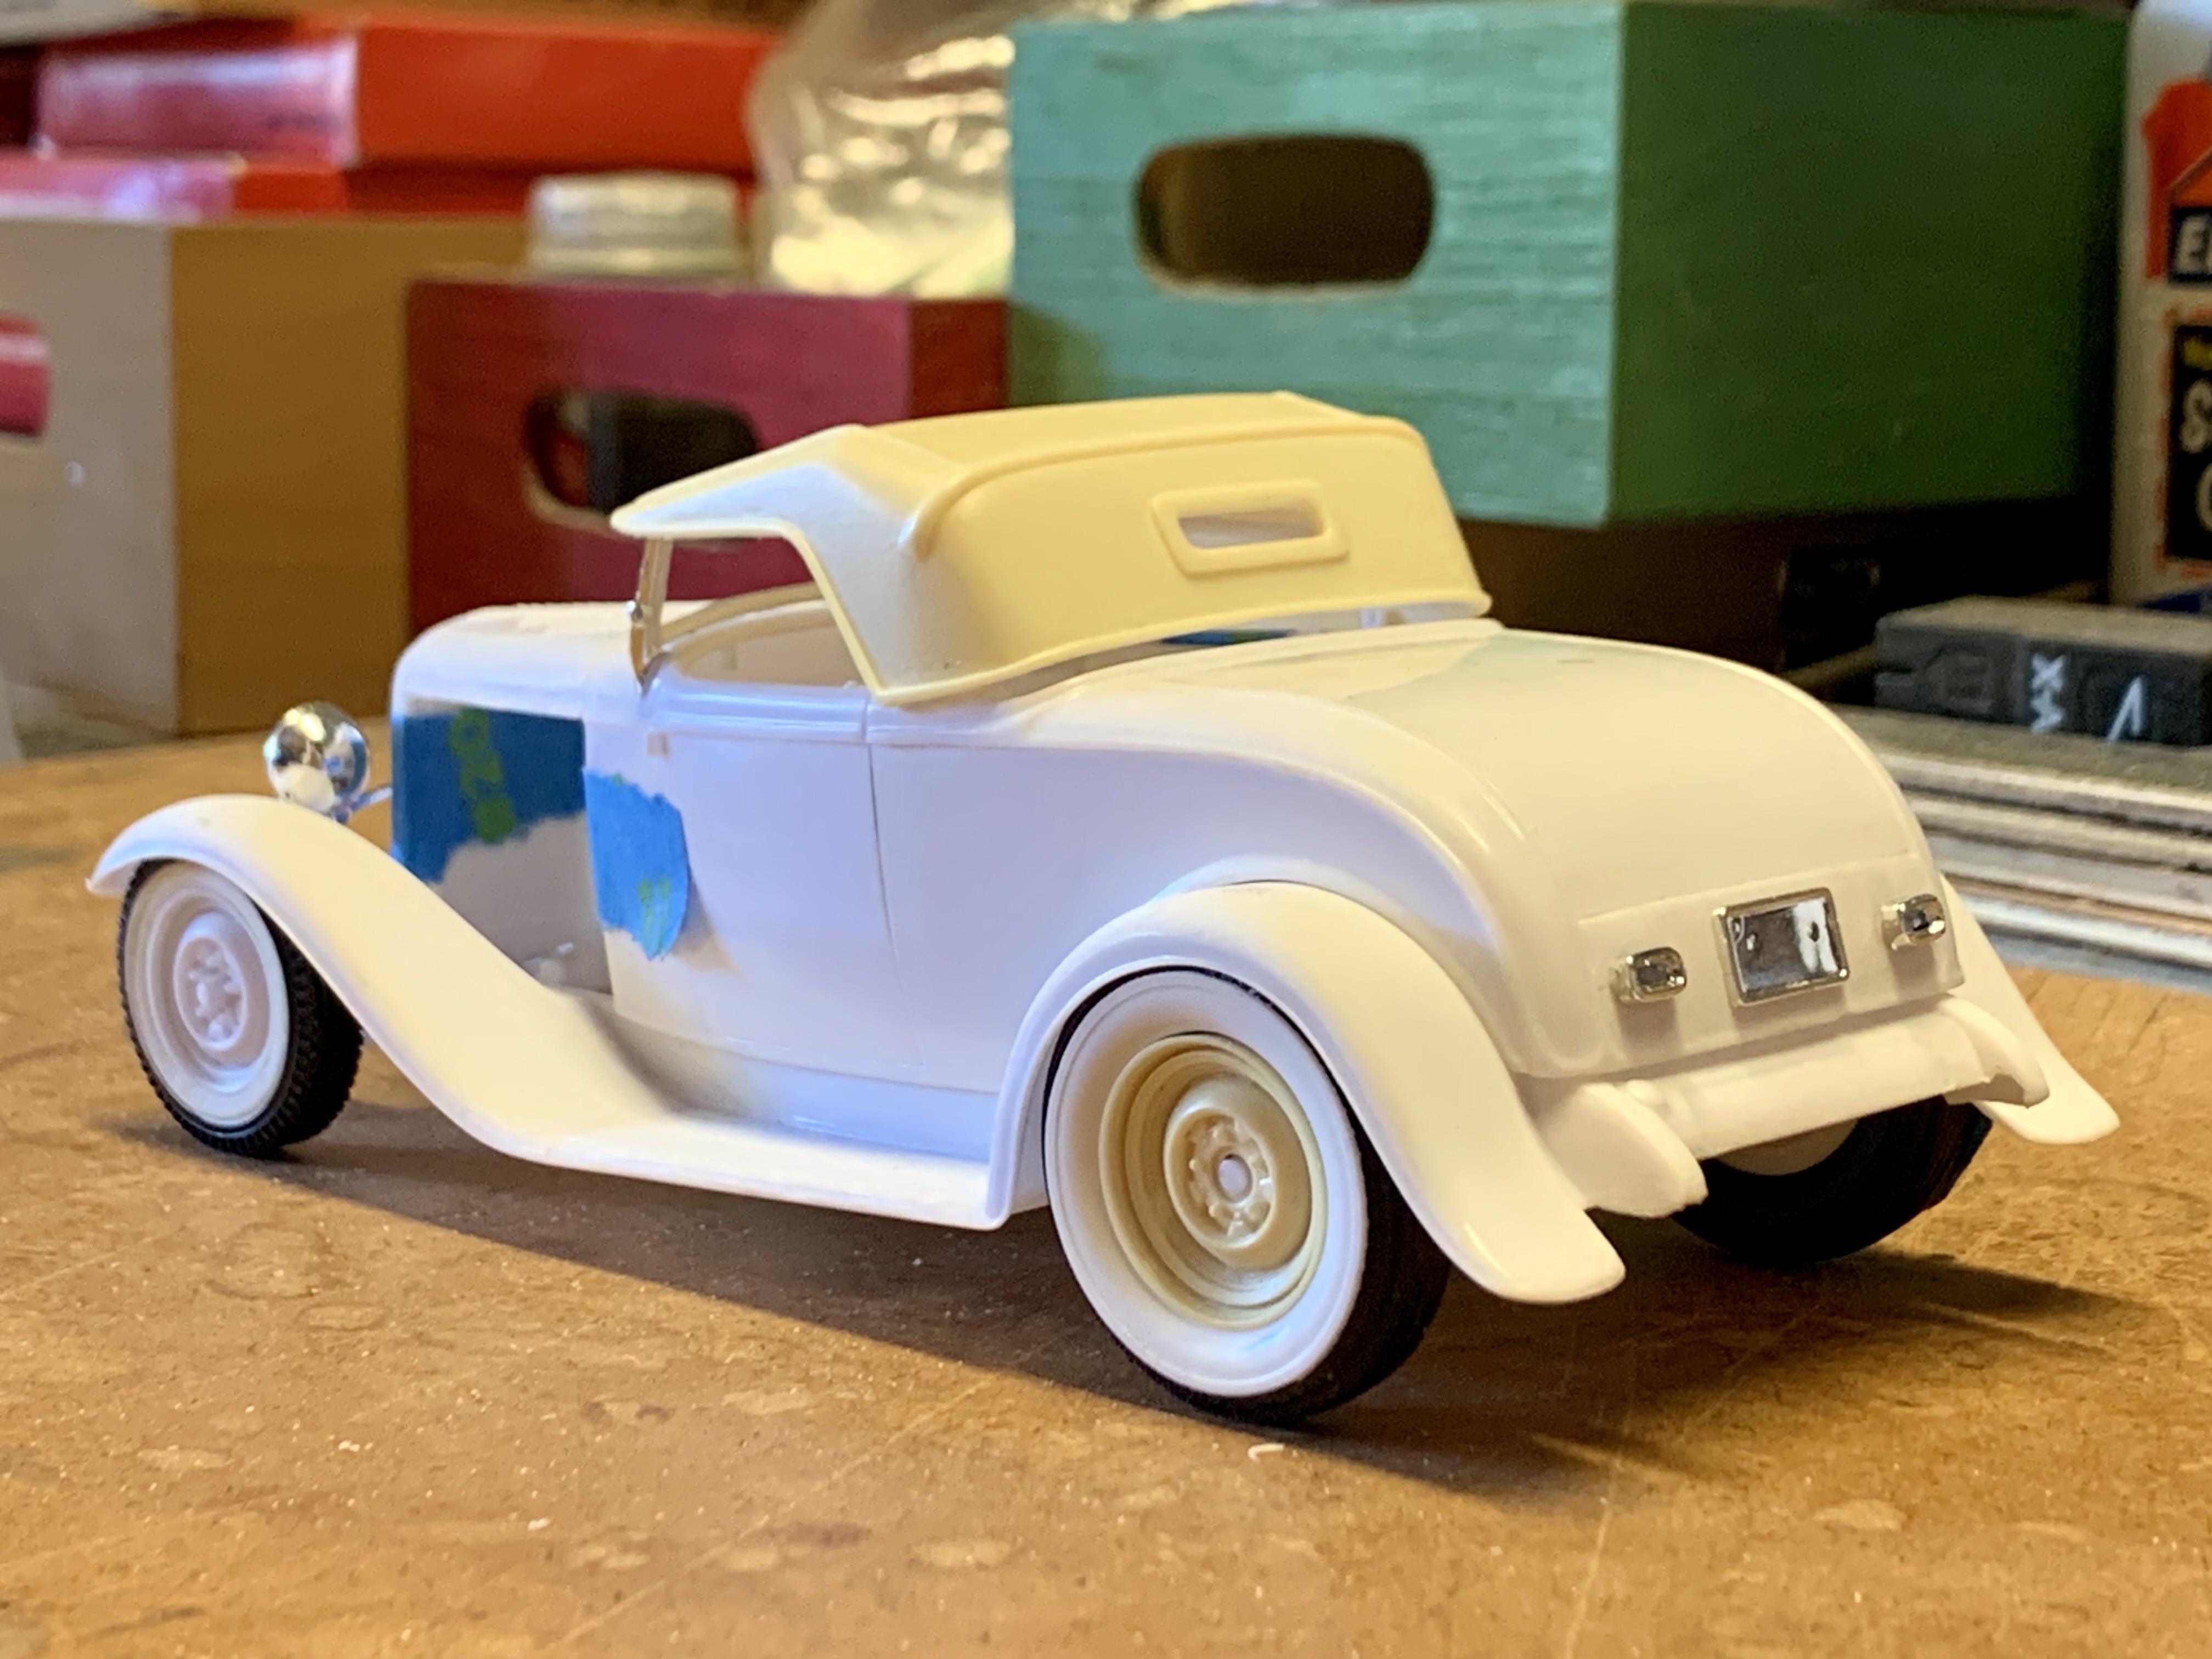
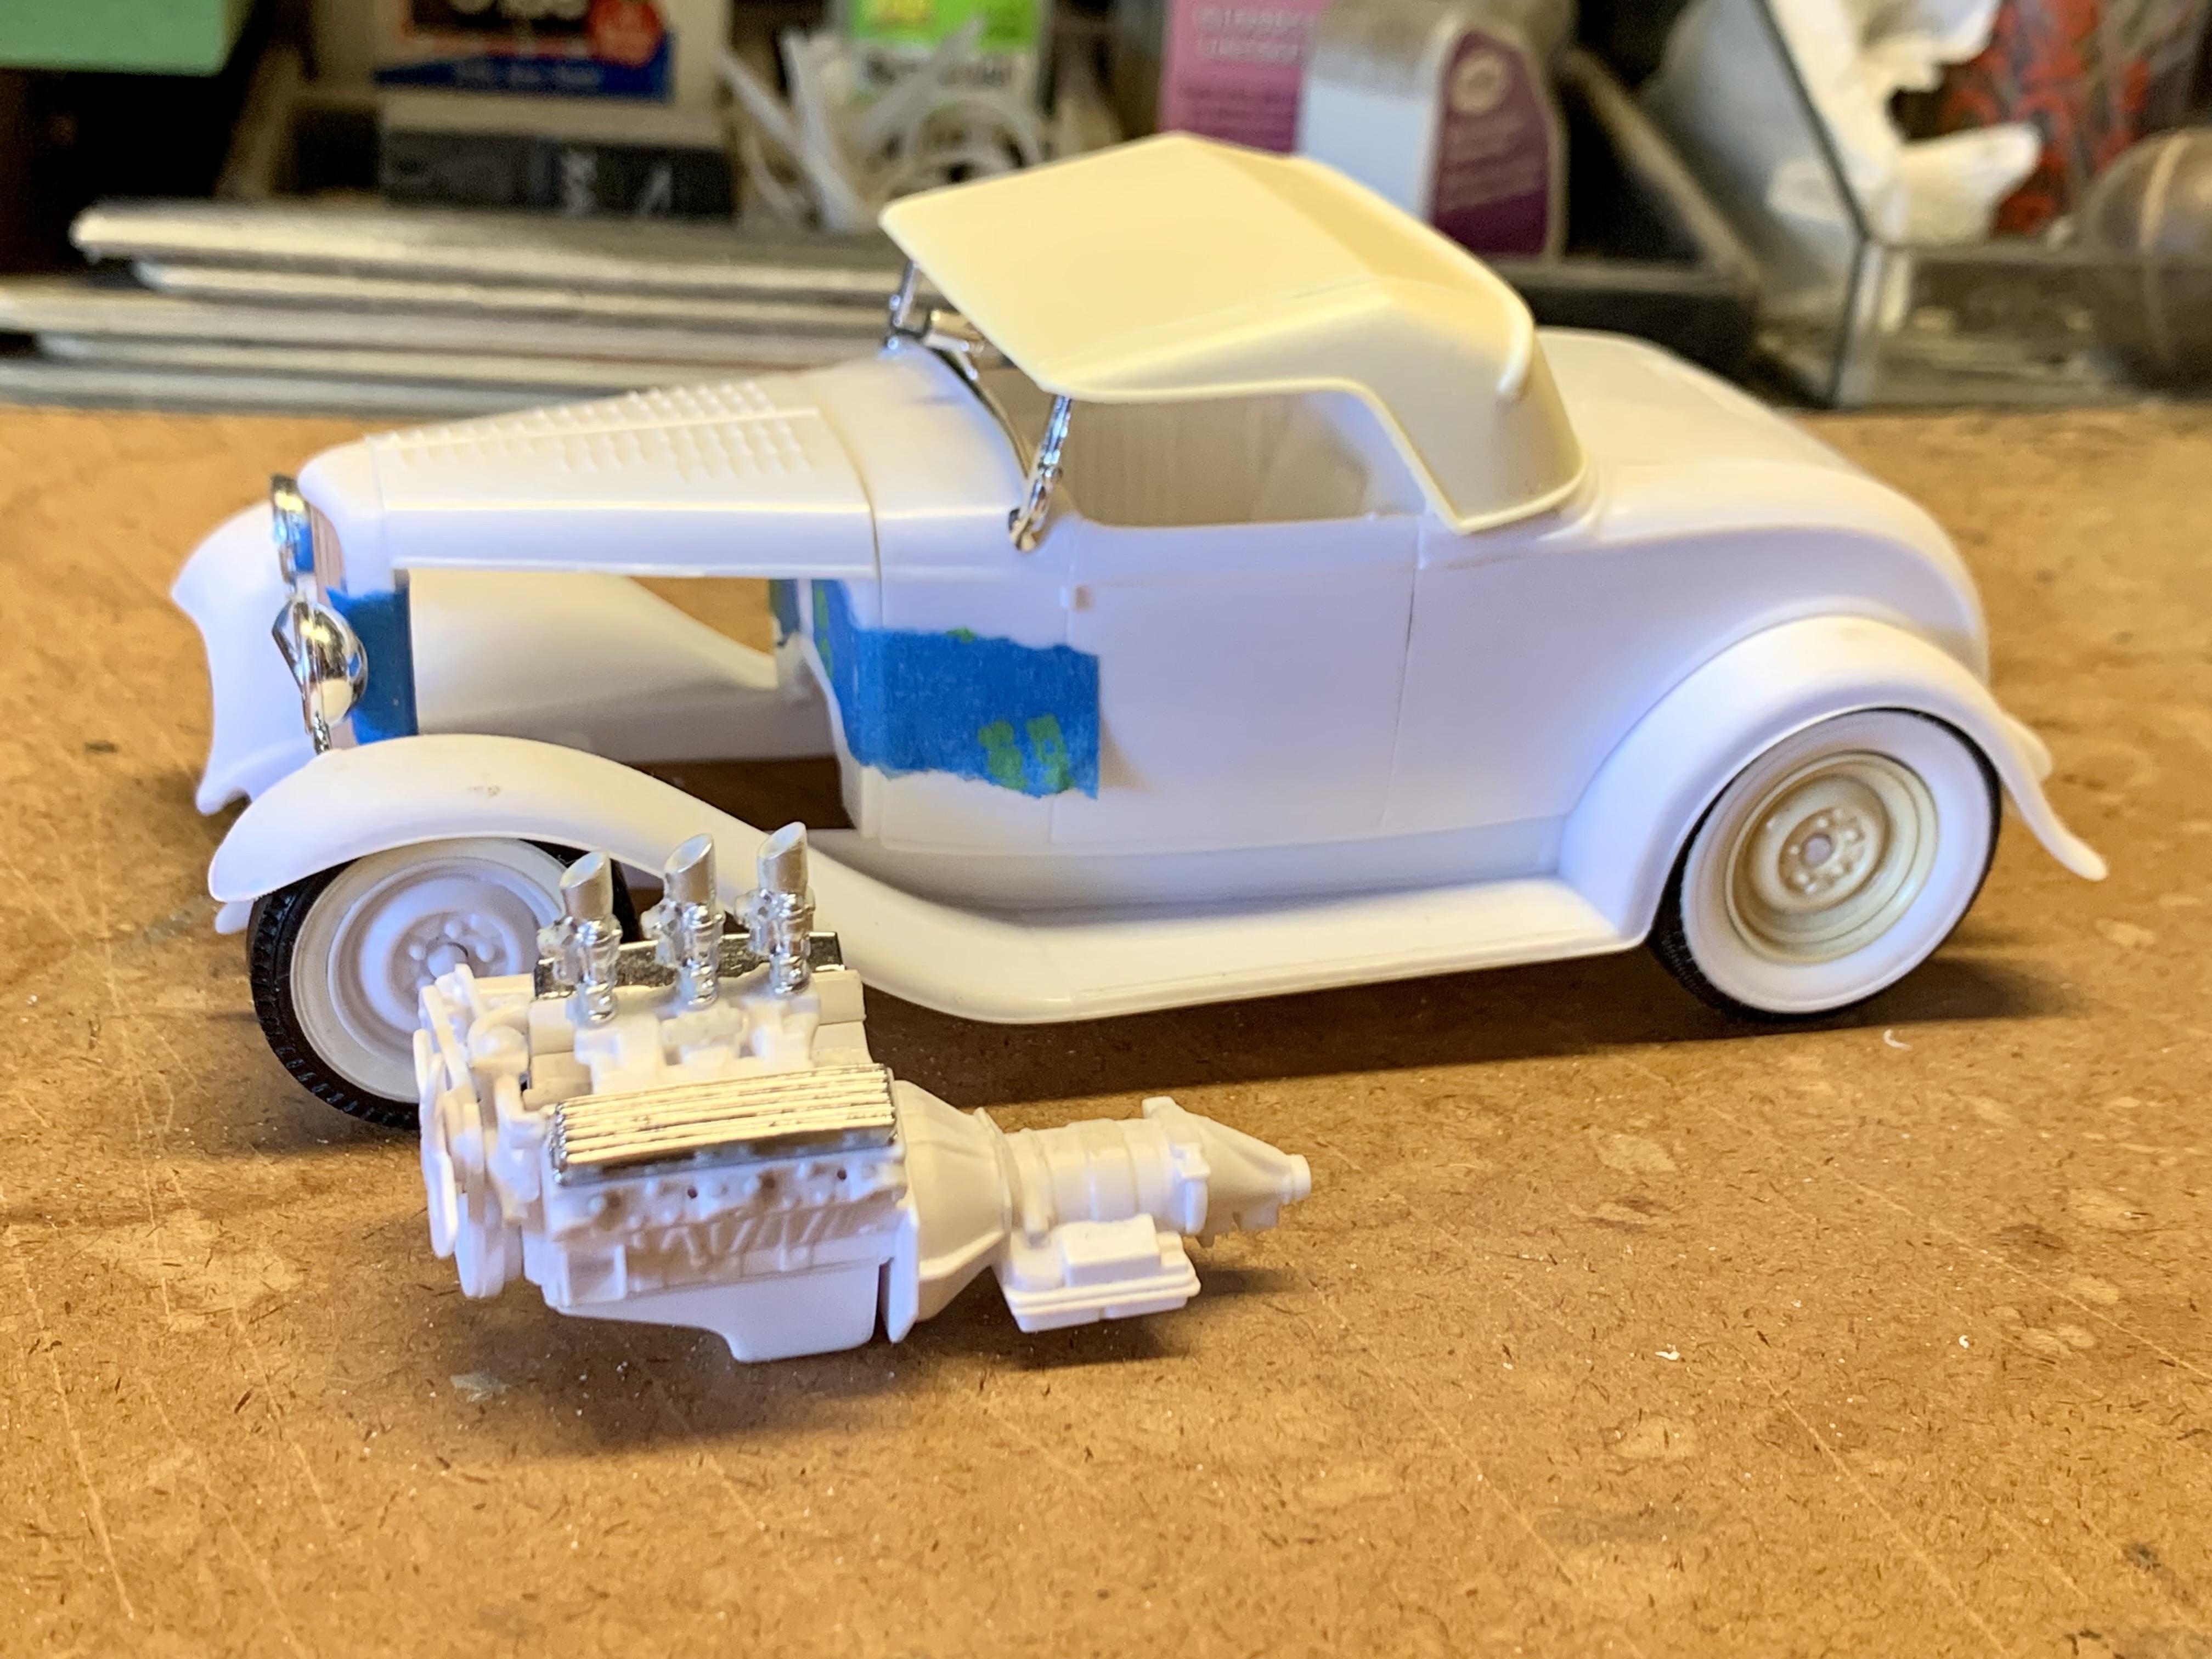
 The AMT Double Dragster was never on my radar until all of the hype ensued around its retro reissue back in 2009/2010. Another forum had a build-off to celebrate the Double Dragsters long-awaited return, which I participated in building the twin engine rail. Whereas most folks building the dragster opted for flashy paint, lots of chrome and the visually impactful dual supercharger setup I went low budget with no chrome and the basic looking Hilborn injection. The rail turned out nice but it was plain. About 5 years ago it suffered some glue failures and fell half apart. It was put in a box to be “fixed some day” and forgotten. Two weeks ago I was going through boxes under my bench, rediscovered the model and decided to fix it up with a host of upgrades. These included: Replacing the entire front axle and suspension with a full chrome assembly. Replacing the painted headers, valve covers, magnetos and fuel tank with chrome pieces. Replacing the basic injection with the dual supercharger setup. Fixing up the interior with chrome hand brake, tachometer with gauge decal, chrome axle shield and detail painting the molded seatbelt detail. American 12-spoke and 5-spoke wheels from AMT’s 32 Vicky. AMT “Gasser” parts pack Pirelli front tires and printed M&H piecrust slicks. The 14 year old Tamiya Chrome Yellow and Black were polished and waxed to restore their shine. After finishing up the dragster rebuild yesterday and having so much fun I decided to give my Fiat a quick facelift today! I had built this one about 13 years ago and deviated from the Chrysler engine to one of the Chevy’s from the dragster with the Hilborn injection detailed with fuel plumbing and Venturi tubes. The engine also got the chrome front cover, chrome oil pan and valve covers from AMT’s parts pack Chevy engine. Todays upgrades include: Chrome front radius rods, tie rod and drag link. The same wheel and tire setup as the dragster except different print on the slicks. Chrome headers. A fresh polish and wax of the 13 year old Tamiya Mica Silver paint. To say I’m happy with the updates of both cars would a huge understatement. It’s amazing what a fresh set of wheels and tires and some shine will do! I also love how the new front wheels and small tires very closely match the box and instruction artwork compared to the thicker spoked wheels and giant tires given in the kit. Not only do they look far better proportionately, the smaller tires vastly improve the stances, especially the dragster. ?
- 20 replies
-
- 15
-
-
Yup. Using one of Drag City’s bodies that I mastered. If you go back a page, or two, or three, you can see a full mock up.
-
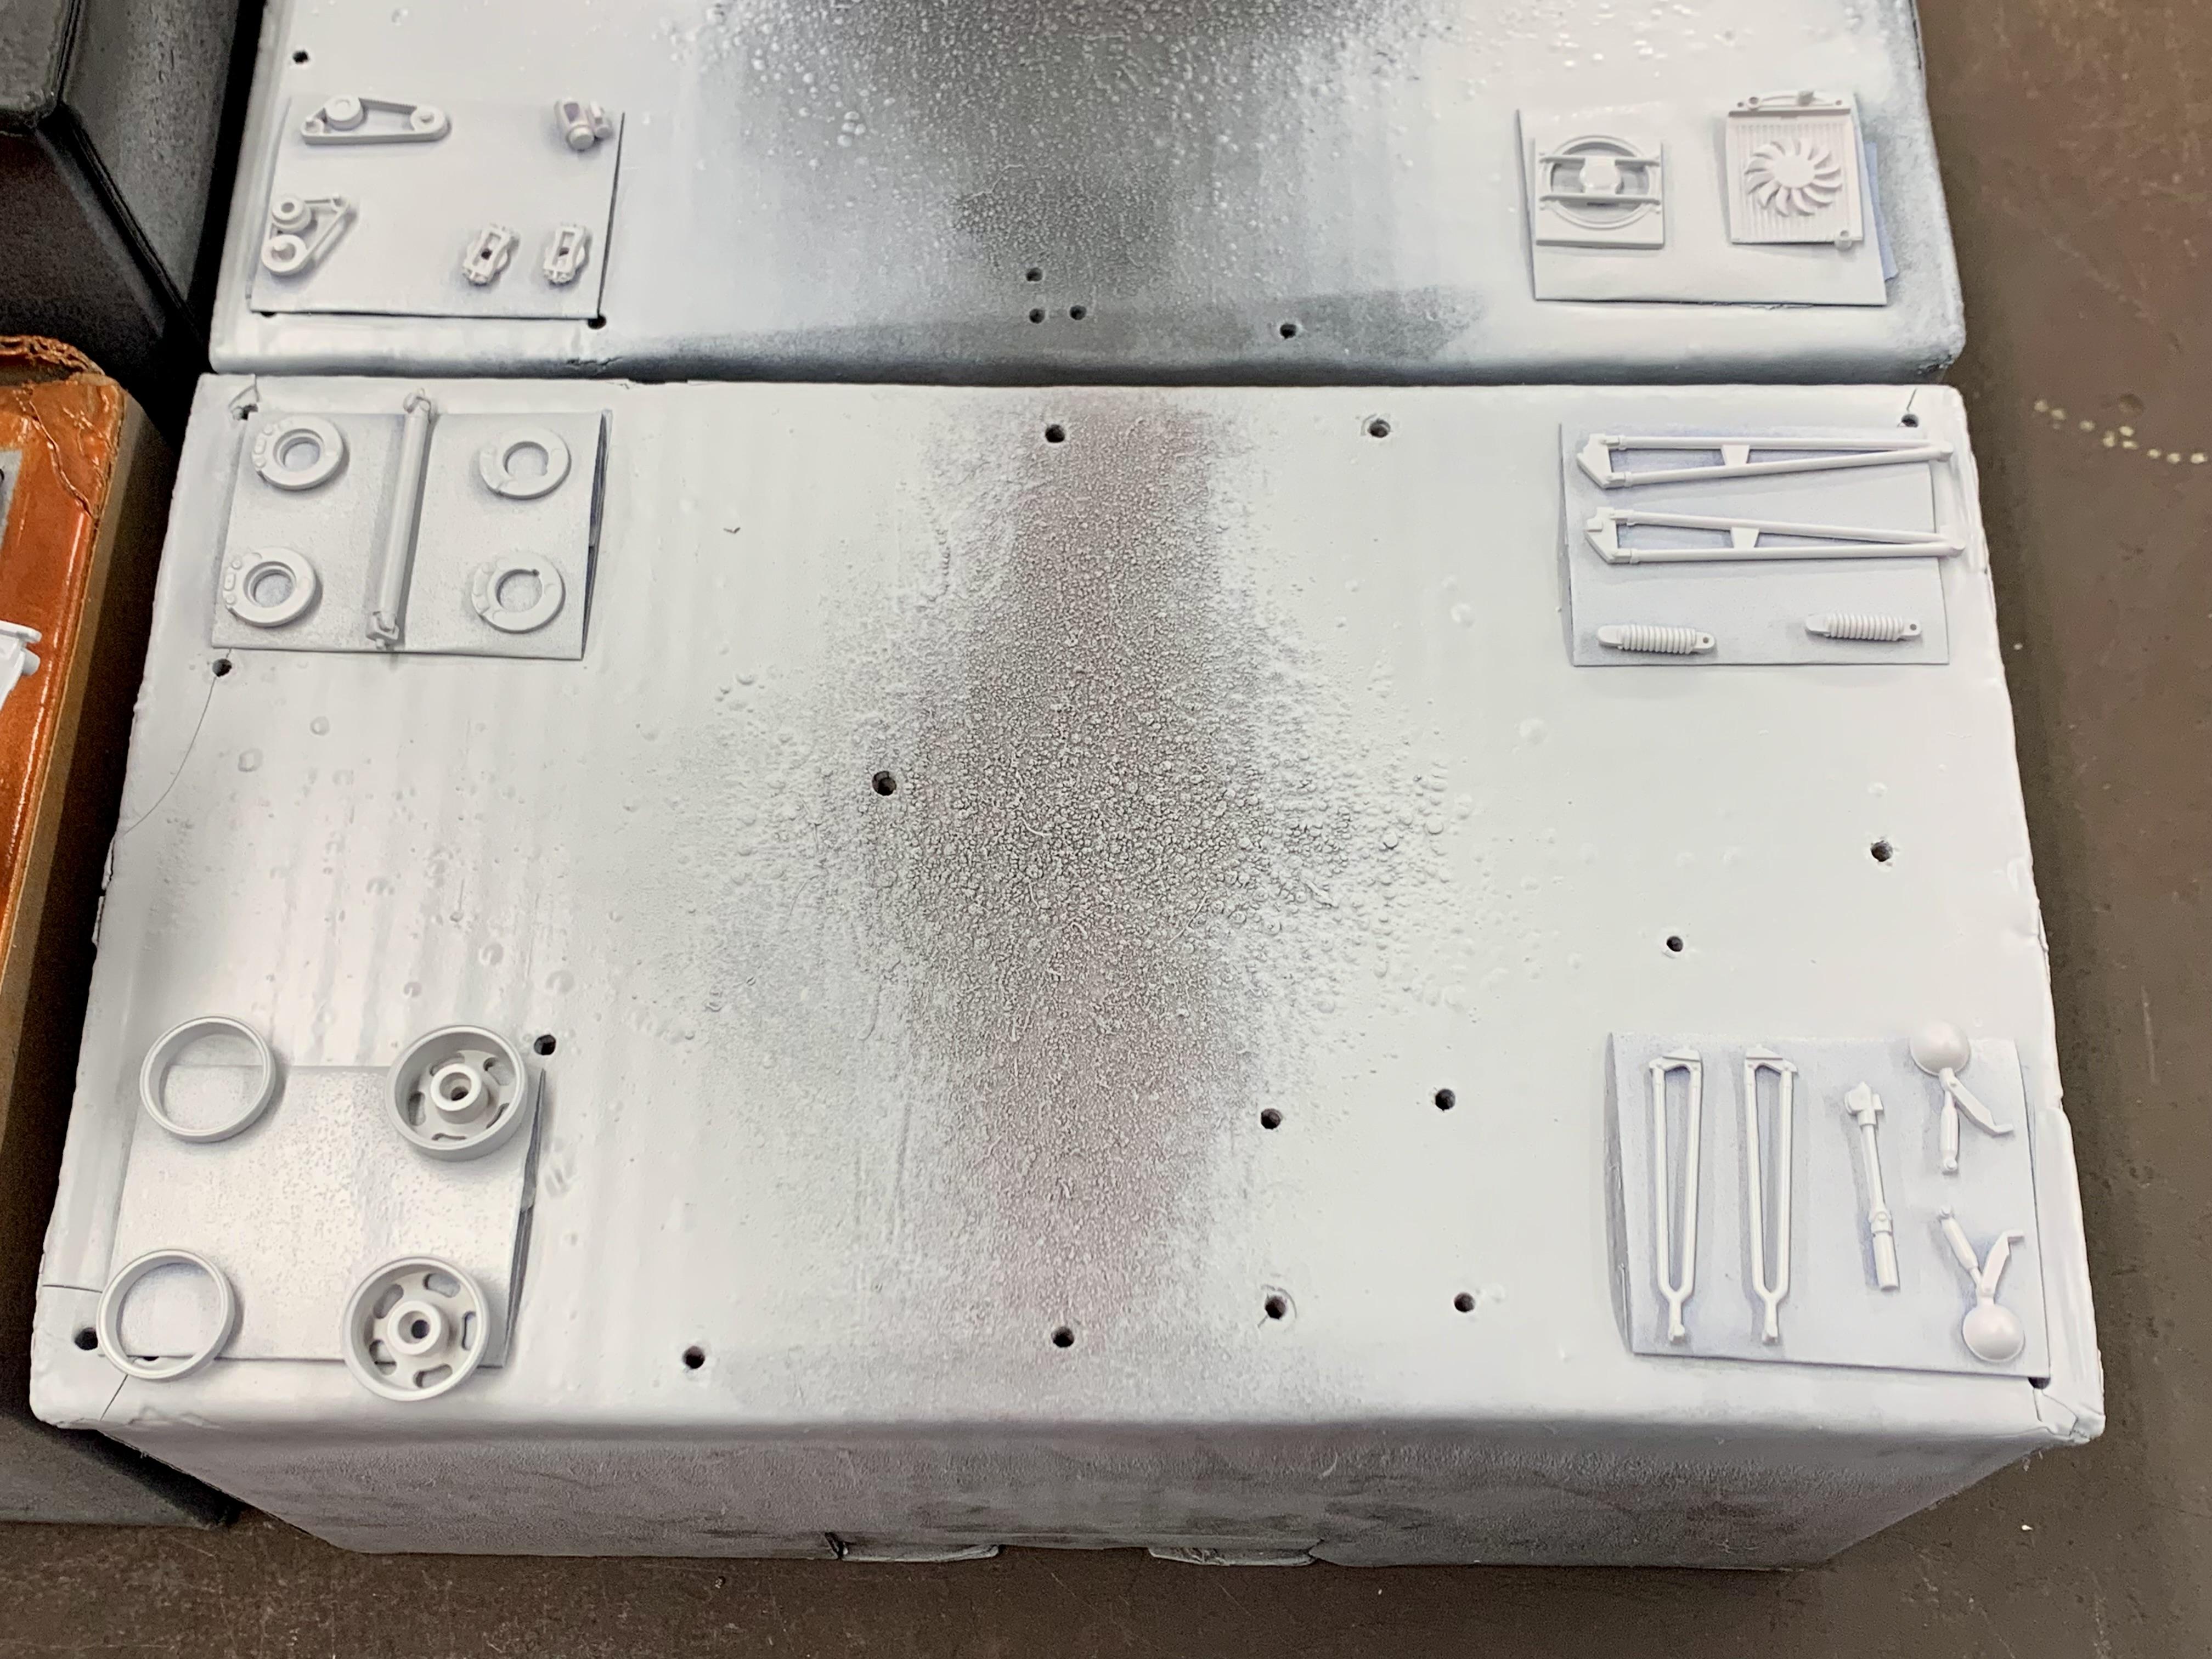
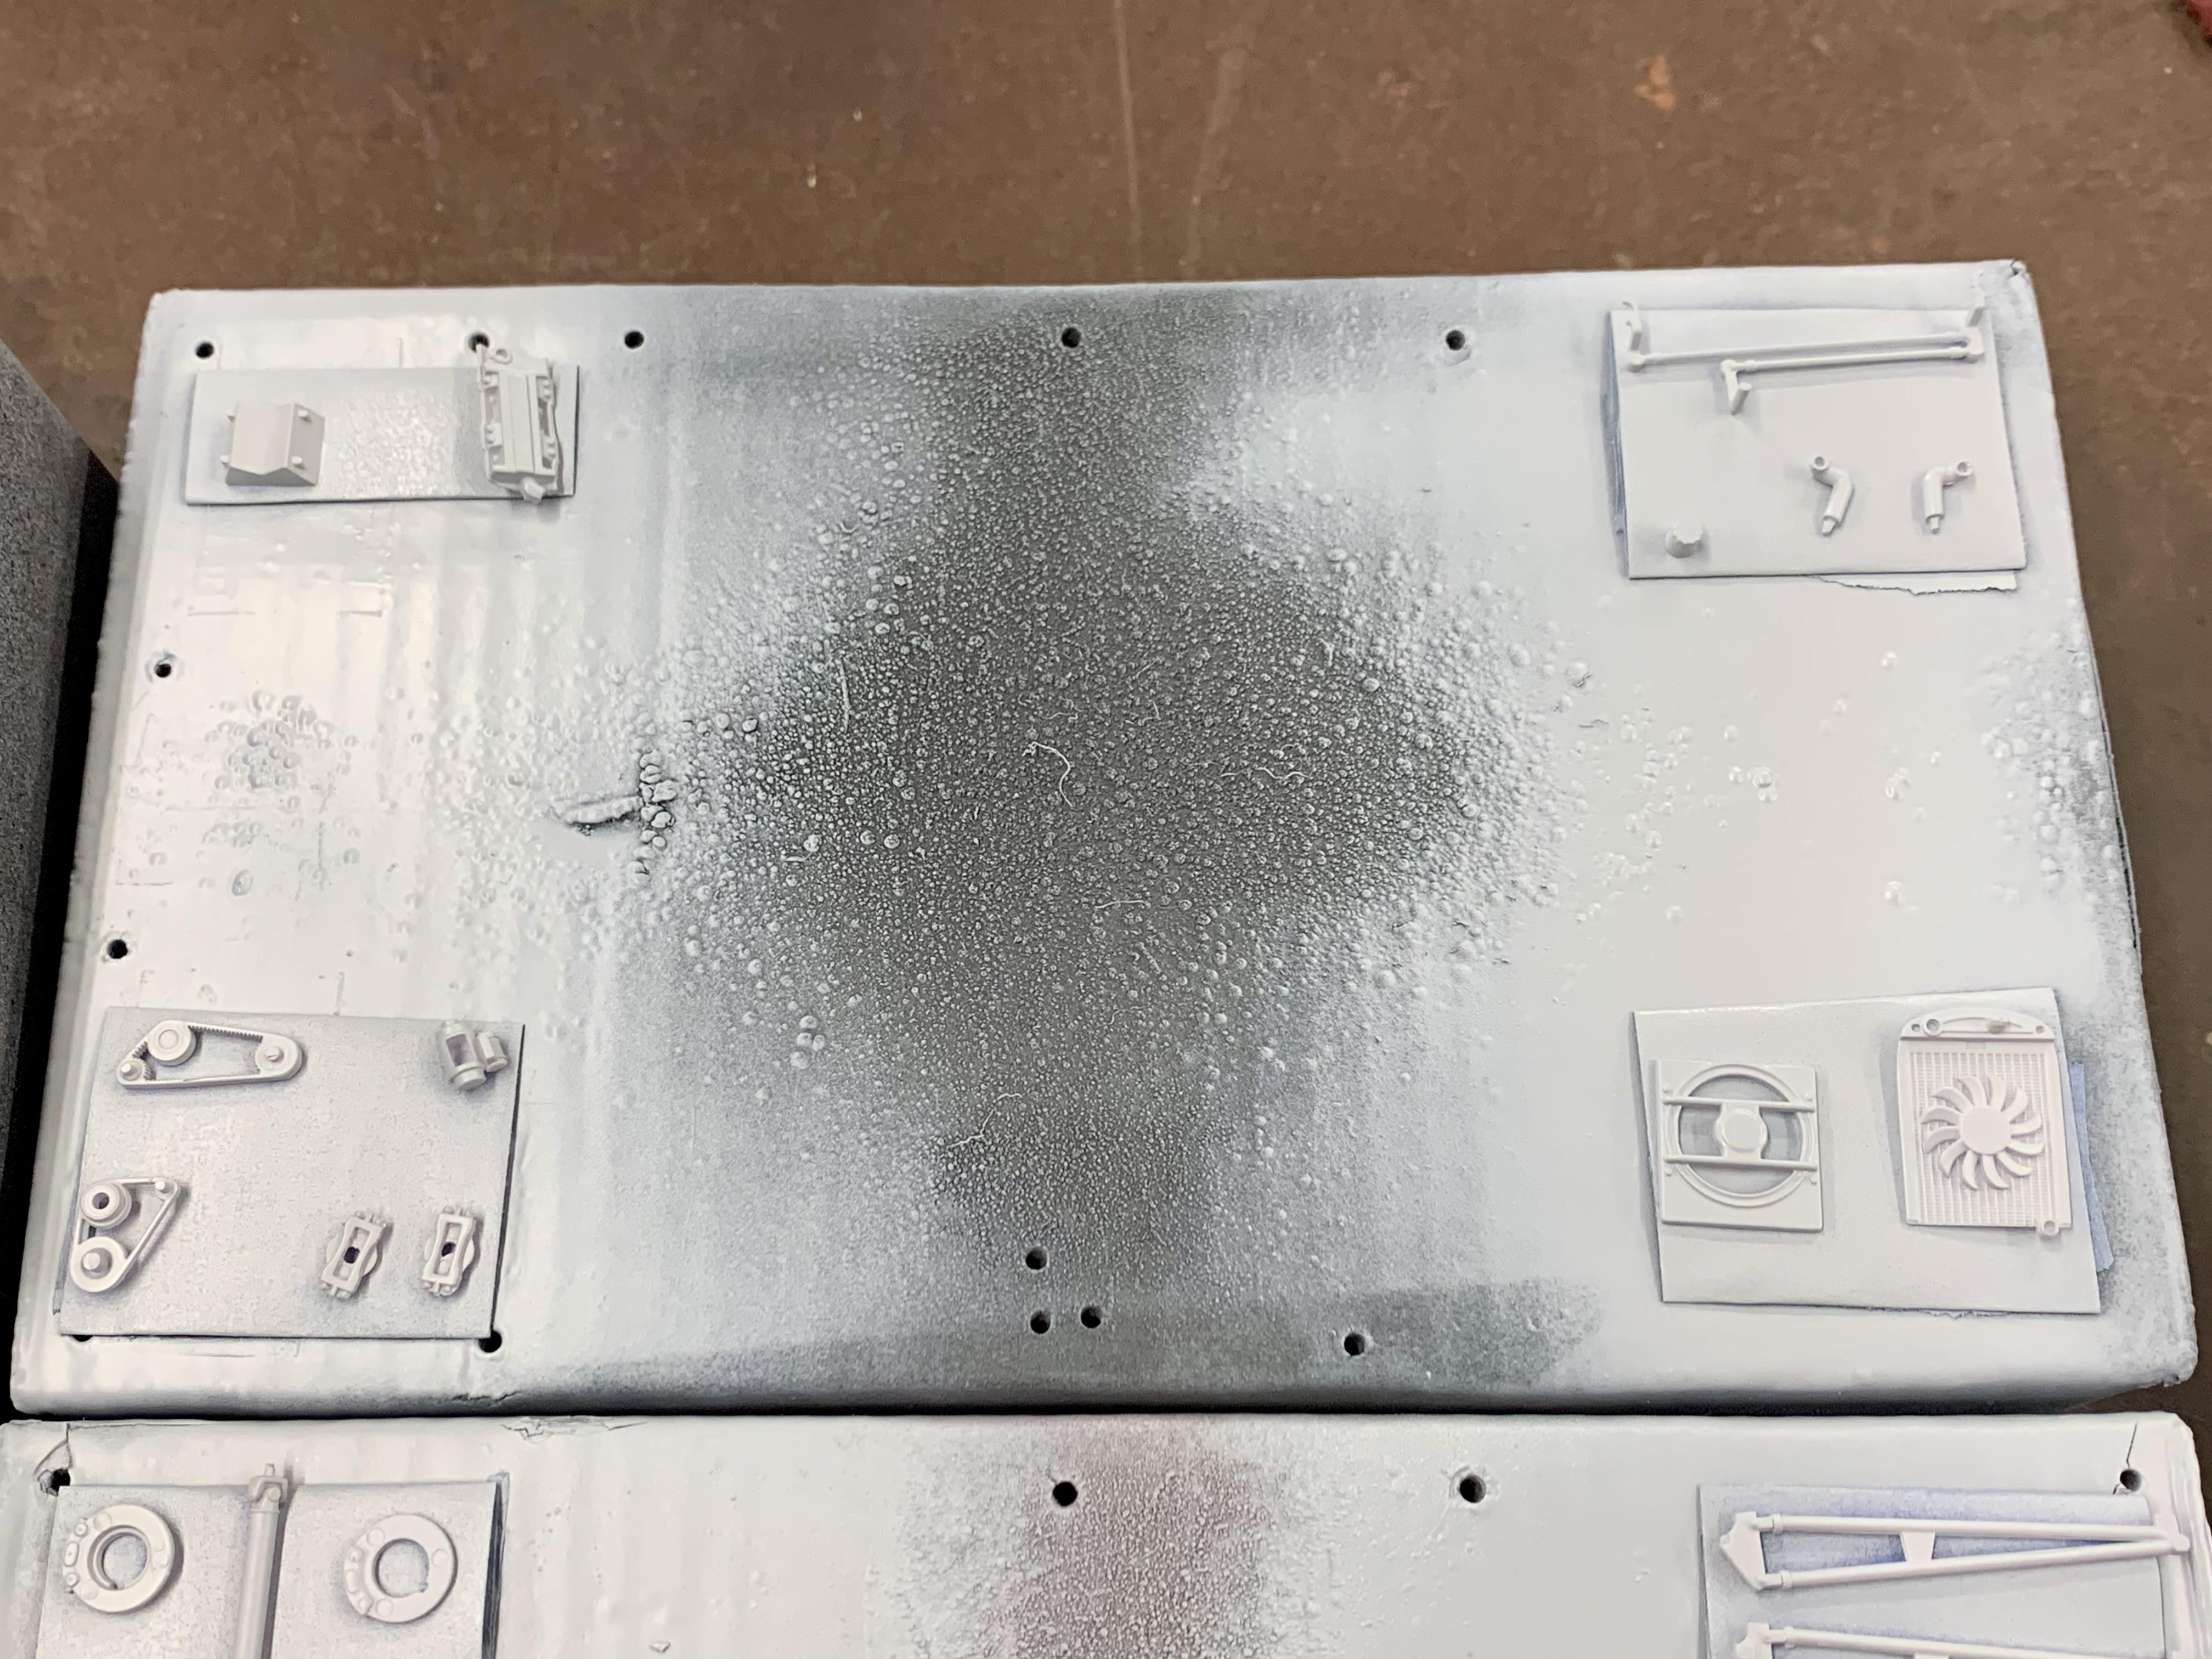
The nasty weather has gone away and today was a beautiful 84 degrees. Brought a box full of parts with me to work and got everything for the engine and chassis primed with Tamiya Fine Gray. Tomorrow I’m gonna wet sand the frame with 600 and prime again. Have a restock of Tamiya masking tape coming sometime tomorrow as well. Colors going on next week. For now here’s a redundant set of pictures incase people don’t know what gray primer looks like. ?
-
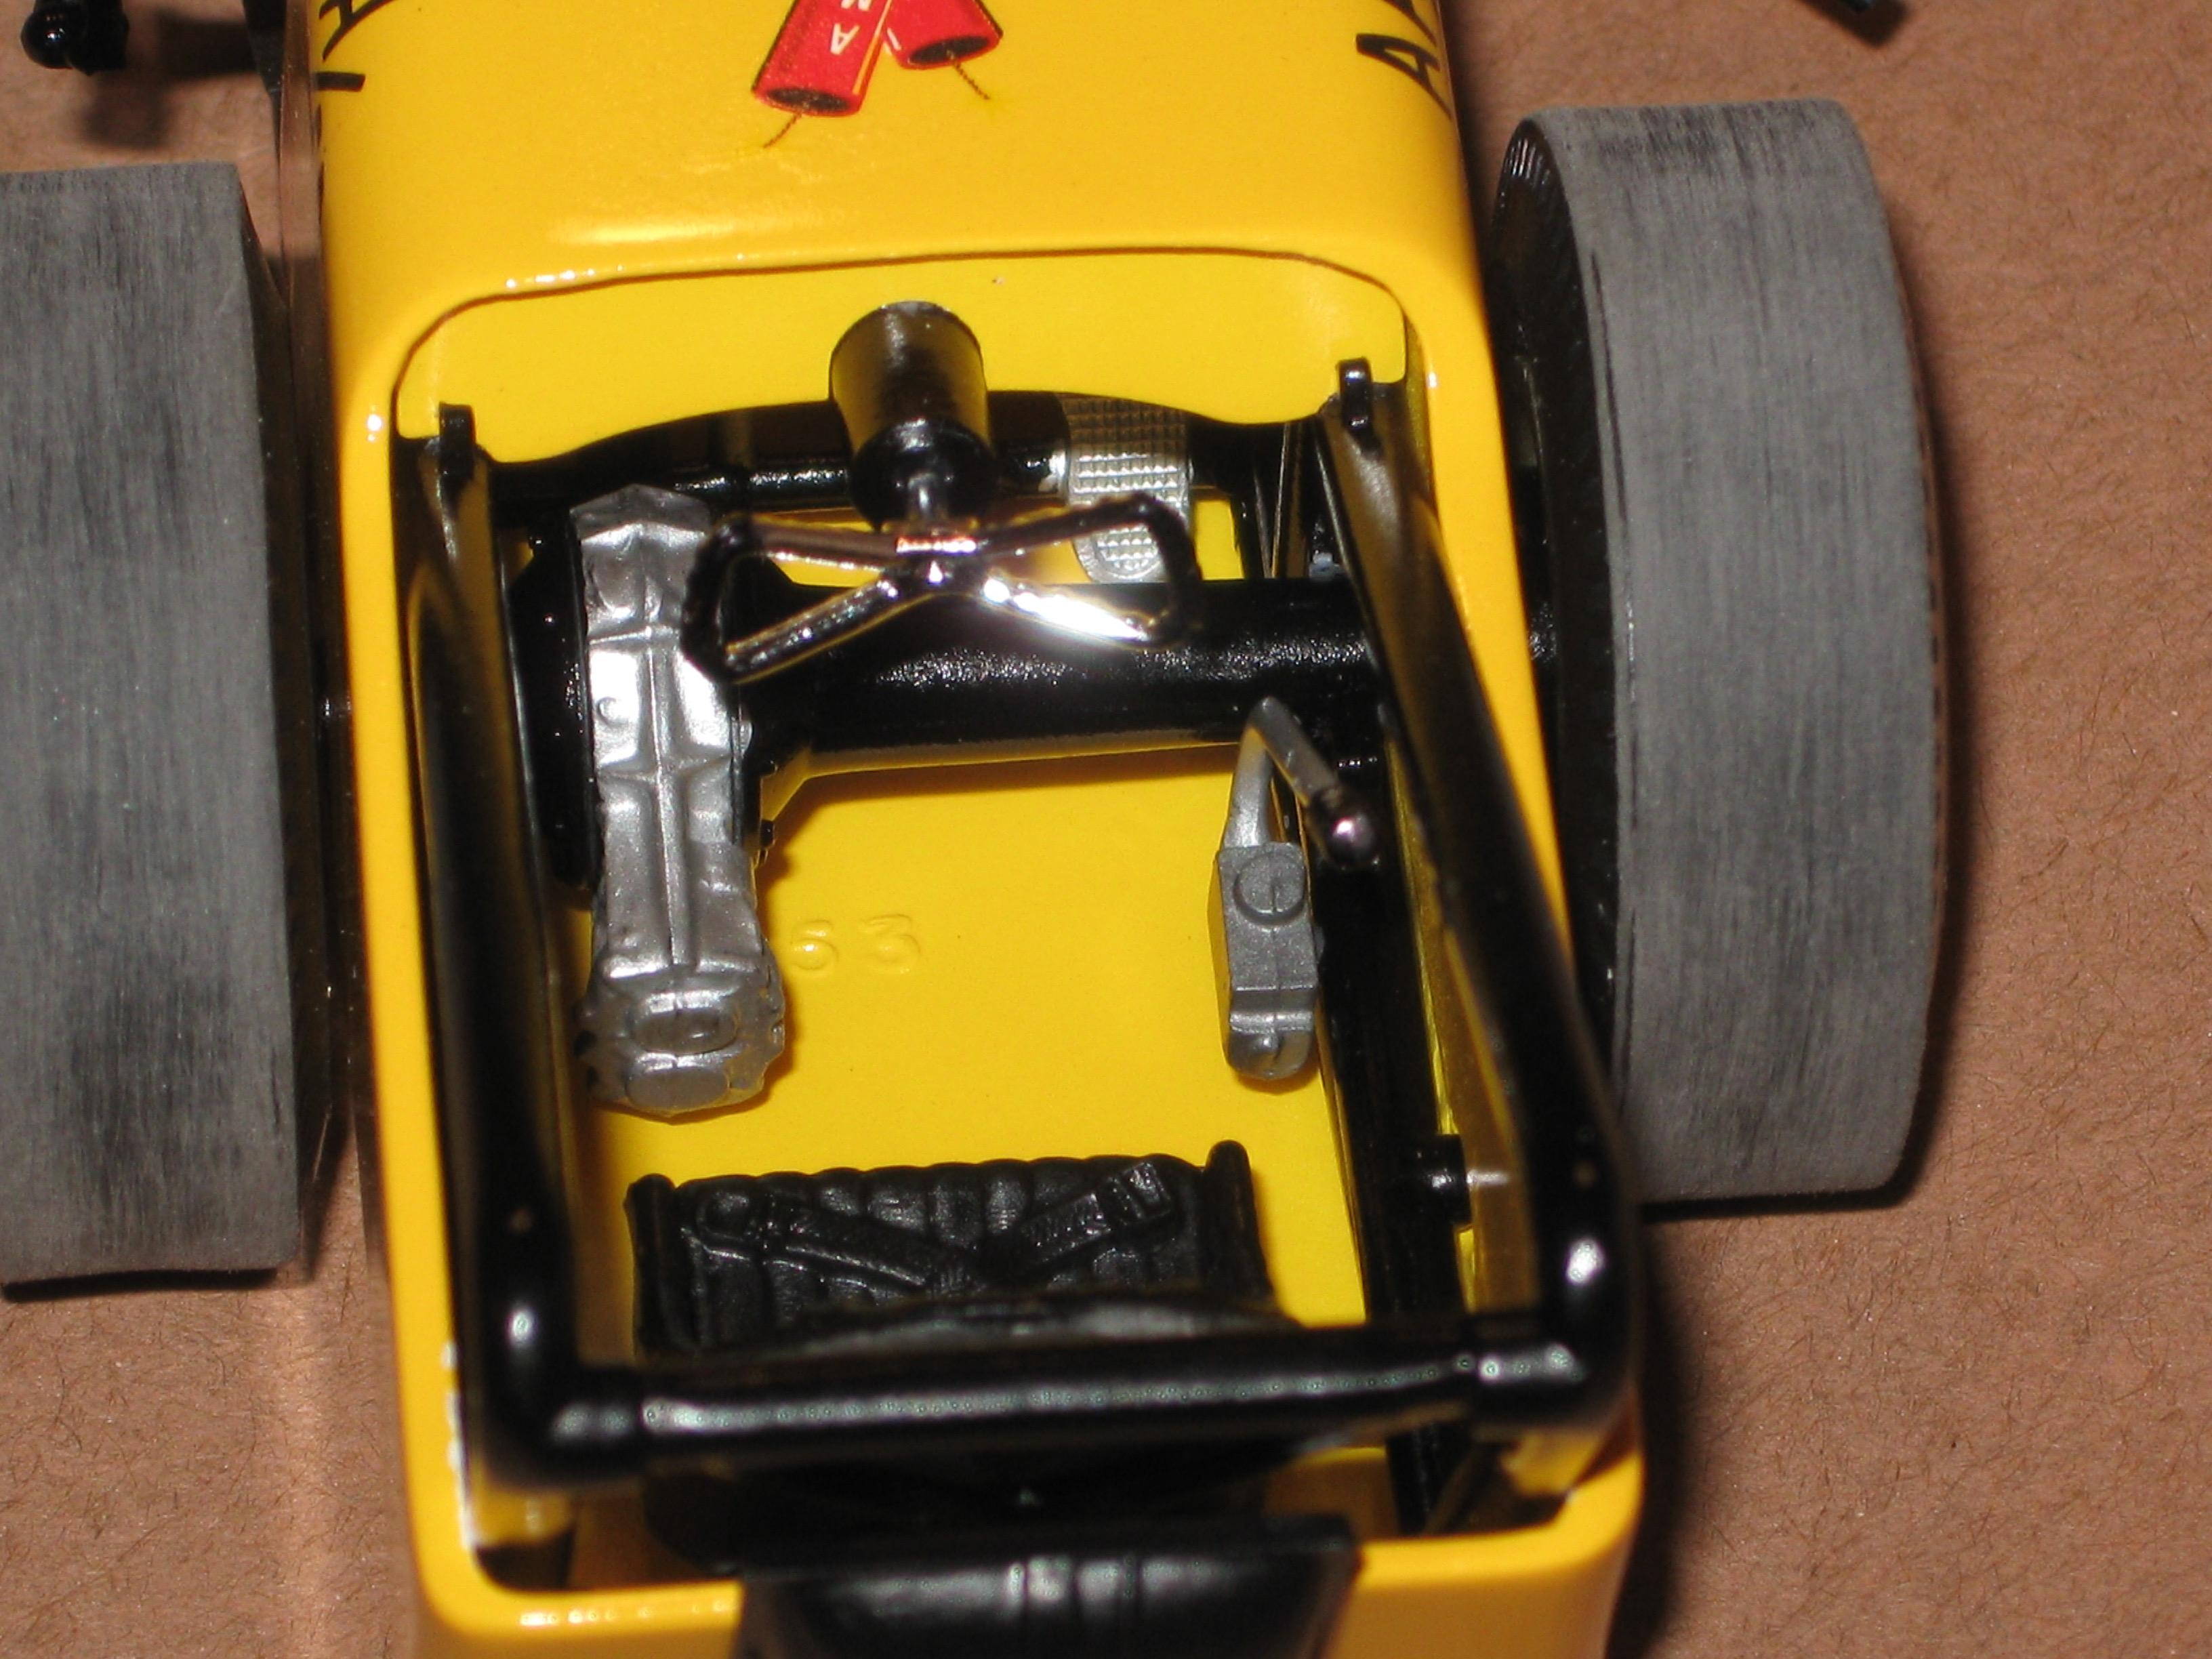
Back in 2010 (?) when AMT reissued their Double Dragster kit both in regular box and deluxe tin box I built the twin engine rail as part of a build off on another forum. Everyone was going for the dual Supercharger setup so to be different I chose the basic Hilborn fuel injections. I also stripped all of the kit chrome and painted everything for a lower budget look. The model turned out nice but was pretty plain. Some years back glue joints let go (because I glued directly on paint) causing the front axle/suspension and engines to become disconnected. It was put in a box to be fixed “later” and was forgotten until the other day when I opened the box it was in under my workbench. The paint is still nice enough that I thought it should be given a second chance at life. Luckily, the rest of it snapped apart effortlessly. Being that the first version was so plain I decided to dress it up substantially this time around as if the team had a successful 1st racing season and wanted to improve the car with lots of show and a lot more GO for season 2. I cracked open another Double Dragster kit and started pillaging chrome and dual Supercharger parts! So far the twin Chevy’s have been reconfigured with chrome valve covers, magnetos, headers and the dual Supercharger setup. The injector bridge still needs to be painted as do the couplers on the charge pipes as these items are currently set in place. The blowers, headers and valve covers received basic black detail painting. The fuel tank was also replaced with a chrome one. Inside the cockpit the hand brake was changed out for a chrome unit and the previously omitted chrome axle shield and chrome tach were installed along with a gauge face decal. The seat is still out being reupholstered. New wheels, the American 12 spoke fronts and American 5-spoke rears from AMT’s 1932 Ford Vicky retro reissue will be used along with a pair of AMT small Pirelli front runners and AMT Parts Pack slicks. A quick note about the front wheels and tires. In all of the box art and instructions illustrations small (and proportionately better looking) front tires are shown compared to the way-too-big front tires that actually come in the kit. The Pirelli’s found in several AMT drag kits and one of the competition wheel & tire Parts Packs are spot-on size-wise. The 12-spokes from the 32 Vicky also much more closely match the thin, spindly spokes shown in the art and illustrations as seen in the example below. I also pulled all of the chrome front axle parts to be installed next along with the spindles stolen from the original painted front end. This is as far as I got last Saturday morning before the weather got gross and I couldn’t stand to be in the garage anymore. Hoping to wrap it up this coming weekend. ?
-
I’ll take it! We are having our usual September heatwave for a week’s worth of days. Only 104 today but Thursday/Friday was 109. Supposed to be down to 80 by this Wednesday. Perfect painting weather.
-
Update: I have everything figured out and paint prepped for my Sedan. Supposed to be getting a serious reduction in temperature by mid upcoming week and plan to lay primer. ?? Checking in everyday to see what everyone else is up to. Great work by all!
-
This has to be one of the best takes on AMT’s 34 5WC that I’ve ever seen AND one of the best uses of one of Ed’s chopped 34 bodies. Looks awesome from every angle. Great color choice and beautiful finish. ?
-
Looking good!!! @Rocking Rodney Rat Love all the detail painting.
-
There’s a ton of killer work going on in here. Awesome job, everyone! My Tudor is impatiently waiting for tolerable garage temperatures. ?
-
@stavanzer I have been jumping around to multiple projects trying to edge them all closer to paint ready. This one is basically there except for needing to rework the front half of the exhaust to match up to the Caddy engine.
-
Unfortunately it was TFH to be out in the garage this weekend. Felt like an oven! So no progress for me. ? @Rocking Rodney Rat Nice custom color! @Bullybeef Nice patina finish!
-
'32 Chevy Delivery finished
Dennis Lacy replied to Can-Con's topic in Model Trucks: Pickups, Vans, SUVs, Light Commercial
So rad to see one of these get built. Looks awesome! -
Spent this afternoon getting the details sorted on my Tudor. Basically ready to start the paint process! Just need to decide on color. Hightlights: Complete chassis, engine firewall, grill shell and radiator from current Revell 32 Roadster. Rear lowered 3” in scale. Wheels and rear large radial tires from Revell 32 Hi Boy Roadster (which are in the new Sedan reissue) with front tires with matching tread from Revell 40 Fords . Drag City Casting 3.5” scale chop top body (master by me). 32 Sedan complete interior. 32 Sedan stock taillights tucked back instead of out at the tips of the frame. Super easy kit bashing on this one in hopes of finishing it by the deadline.
- 706 replies
-
- 13
-
-
Recreation of 1964 Model Car Science ad for AMT Trophy series
Dennis Lacy replied to Alan Barton's topic in Model Cars
What a seriously impressive display! Goes to show how prolific you are in this hobby. -
I’ve always loved Pro Street and you pulled this one off quite nicely. Those rear views with the fenders widened inward to cover the huge tires and quick change poking out between is where it’s at! The injected Boss 429 was a great choice backing up the aggressive look of the car.
-
Very nice, Phil. Excellent take on the modern style you mention. Not sure what to call it exactly. Kind of a “retro-understated”. I especially like the slammed stance and 5 liter engine with the Webers and use of those air filters that tie in with the valve covers. Not sure if you’ve seen it but a great example of this style is Kugels roadster “32 My Way”
-
Ya’ll are a bad influence! Drag City Casting chopped body (which I mastered so technically I did chop it myself), new issue 32 Roadster chassis and blown small block, front wheels and tires from Moebius 65 Chevy II Gasser, Revell M&H slicks with the old 32 HiBoy Halibrand wheels (which are now in the Sedan reissue) and Louver Works louvered hood. Just dumped a bunch of chrome parts in the stripper. More to come…
- 706 replies
-
- 15
-
-
Traditional 1929 Ford Woody Wagon Hot Rod
Dennis Lacy replied to Dennis Lacy's topic in WIP: Model Cars
@tim boyd I started pinning my parts from early into my return to adult modeling back in ‘08. Pretty sure I got the idea from someone on here. To be able to constantly mock up and do final assembly and always have the parts fit the same every time sure is nice. Not to mention the substantial additional rigidity they add to the finished model. Especially these old hot rods with spindly suspensions. ? @mrm I feel you. It’s tough having all these ideas in your head and wanting to flesh them all out. But, any serious model builder should have a minimum of 20 started projects at any given time. Especially guys like us that are heavy on the kit-bashing and fabrication. I have yet to build a woody model but I’ve got quite a few. I’ve forever been intimidated by painting the wood. Some people just go with some shade of tan and call it done but that’s not good enough for me. My Aussie friend, Bryce Michelmore, clued me in on the technique he used and I like his result so I’m gonna give it a whirl. More on that later… -
Traditional 1929 Ford Woody Wagon Hot Rod
Dennis Lacy replied to Dennis Lacy's topic in WIP: Model Cars
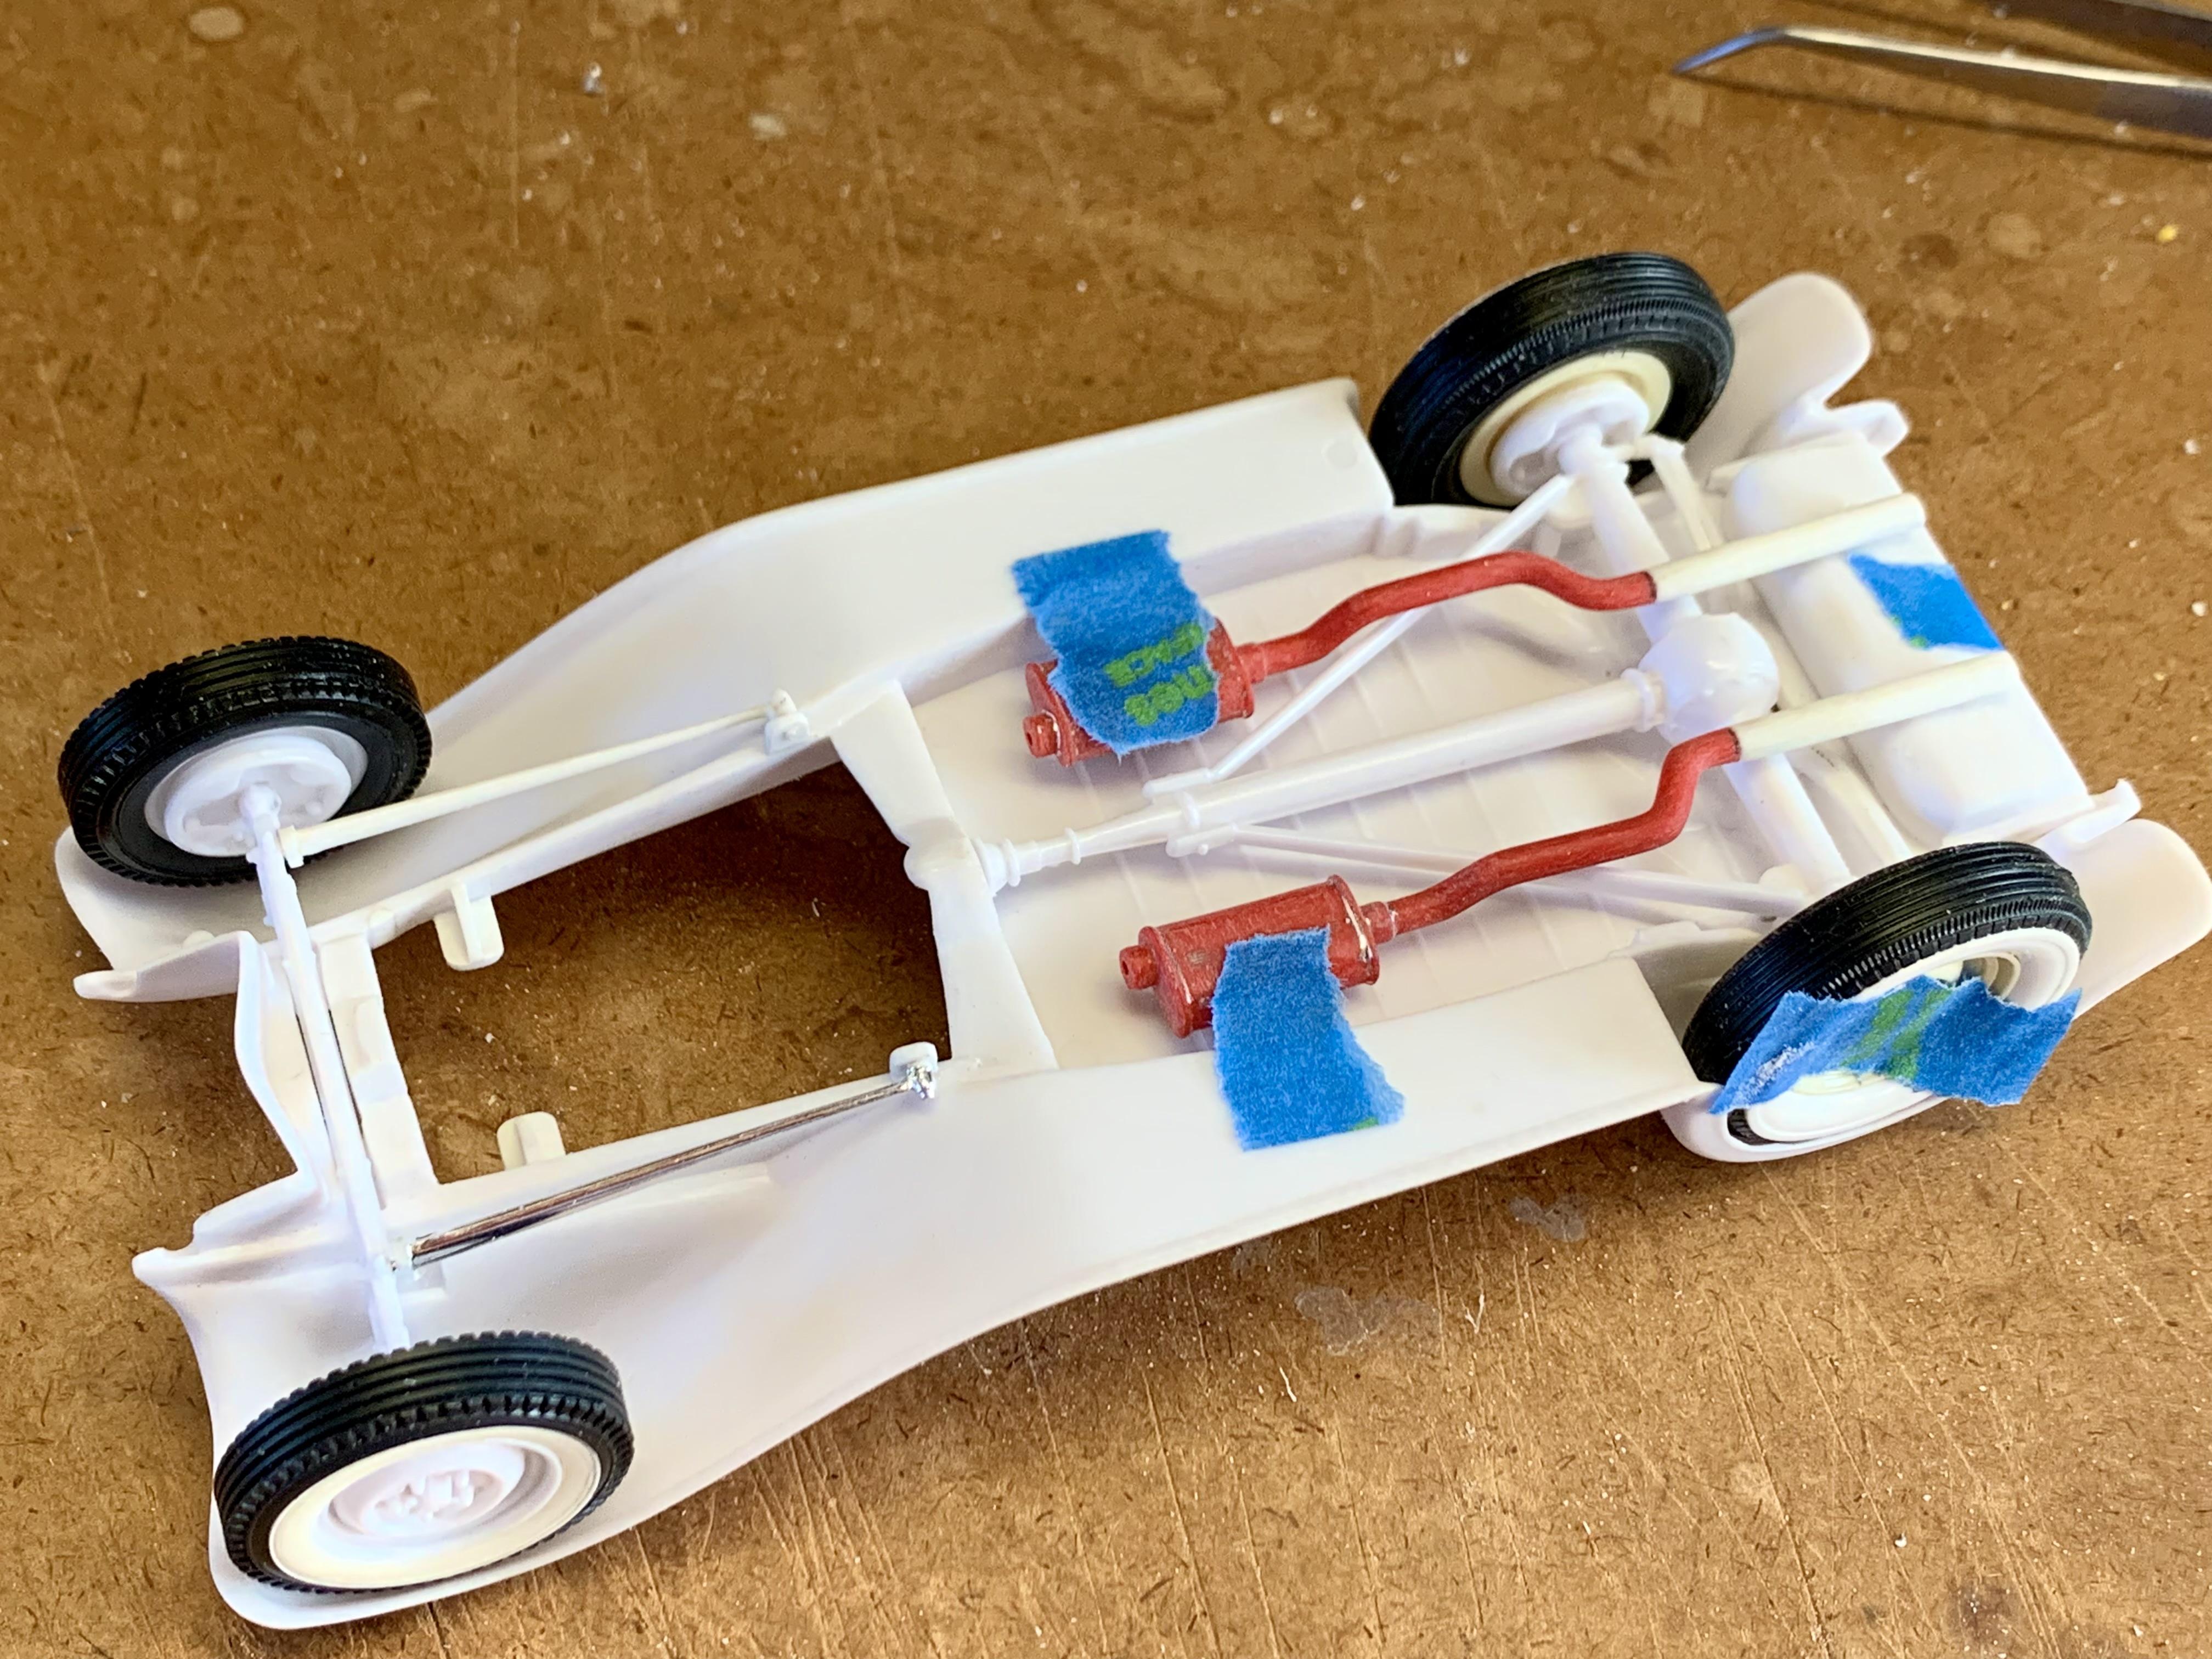
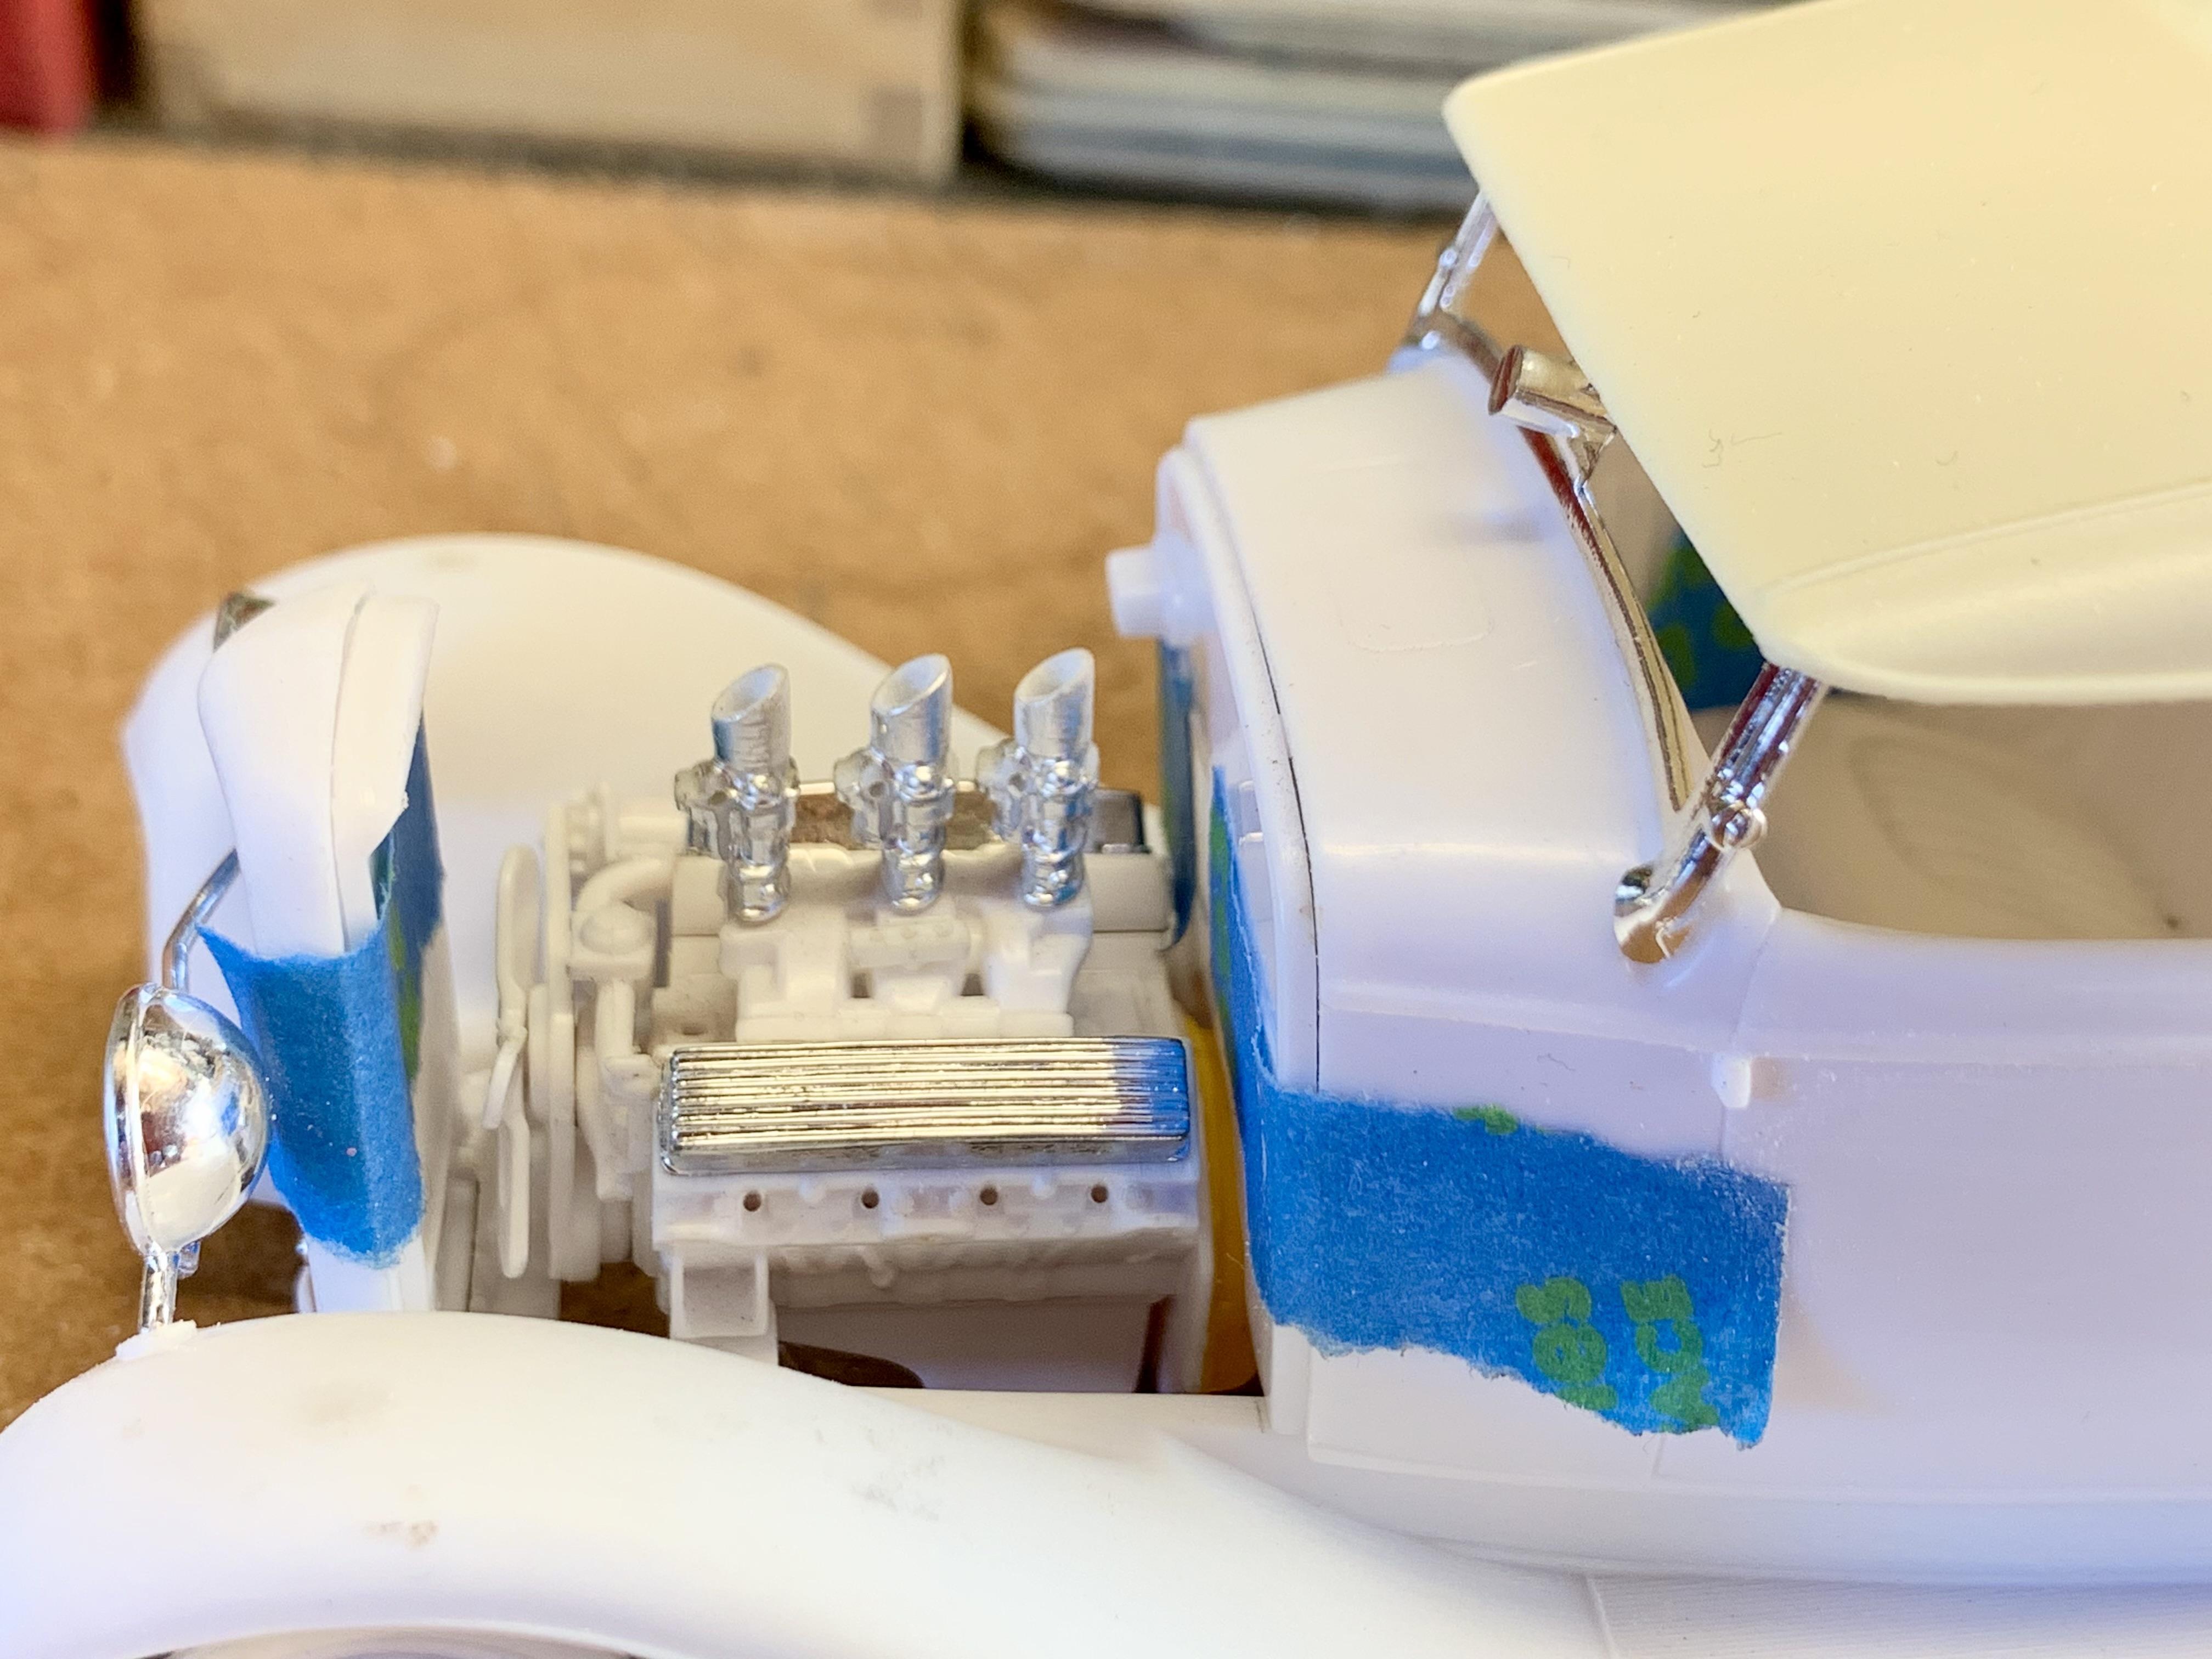
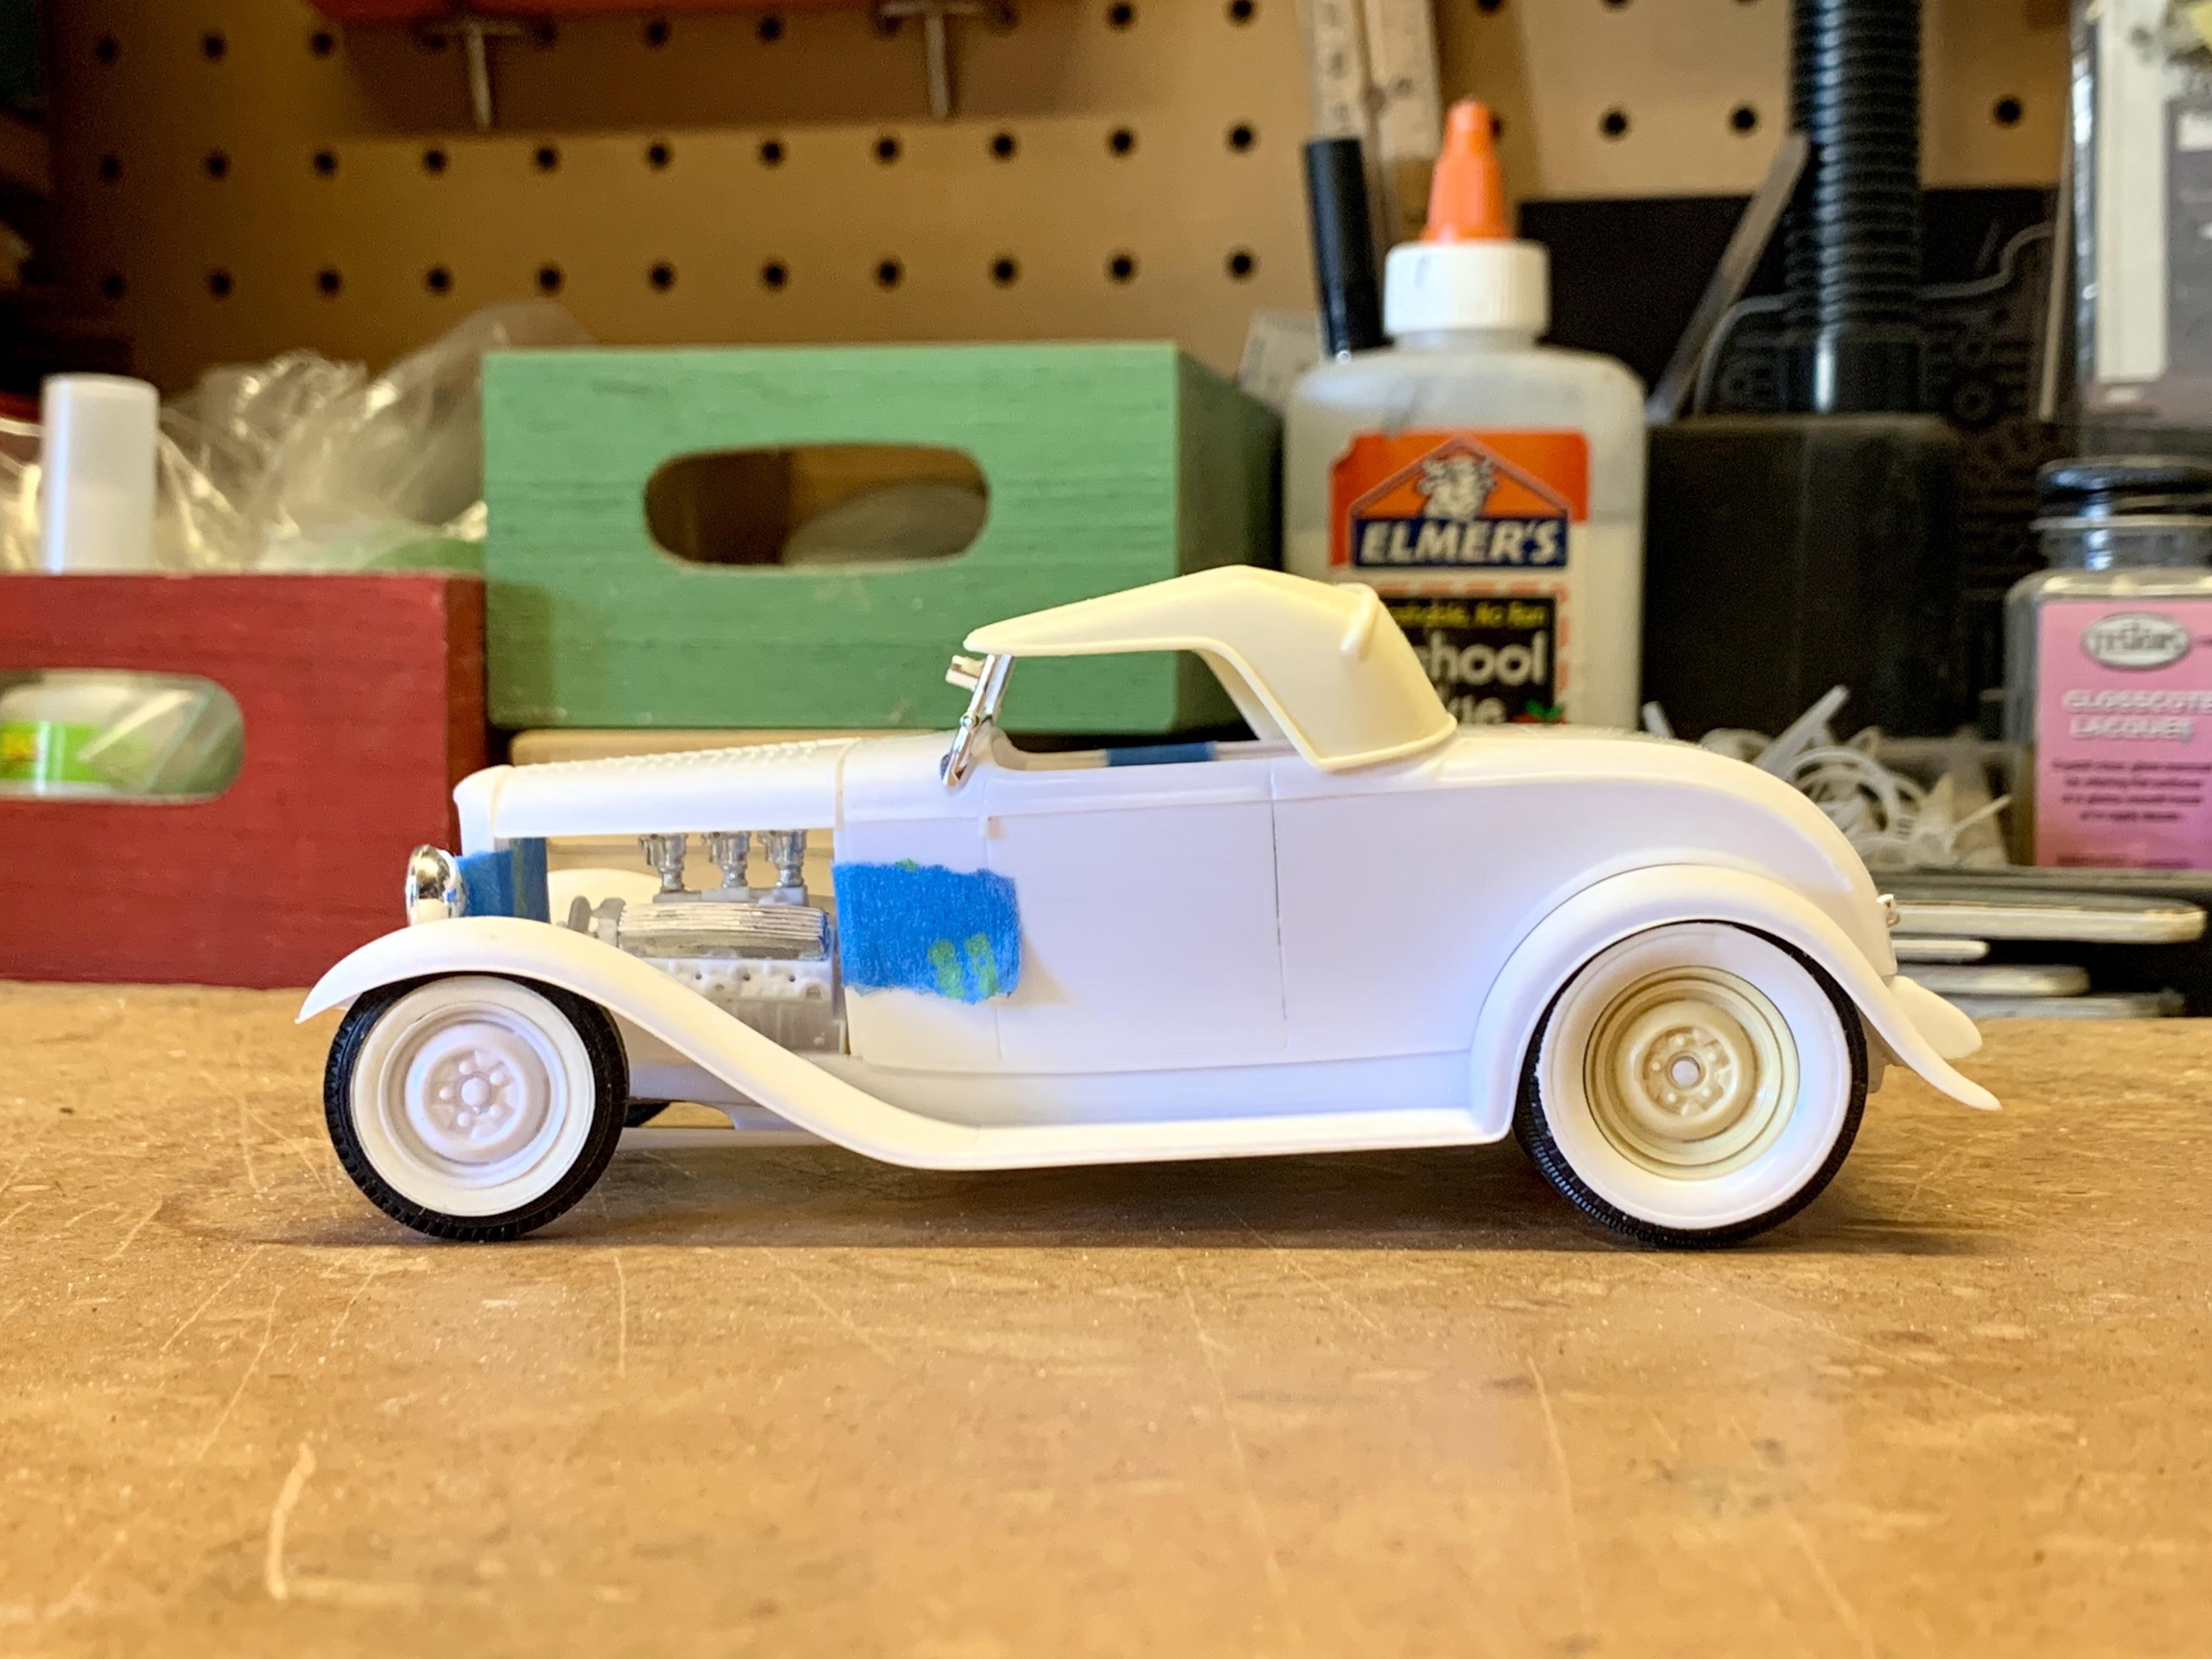
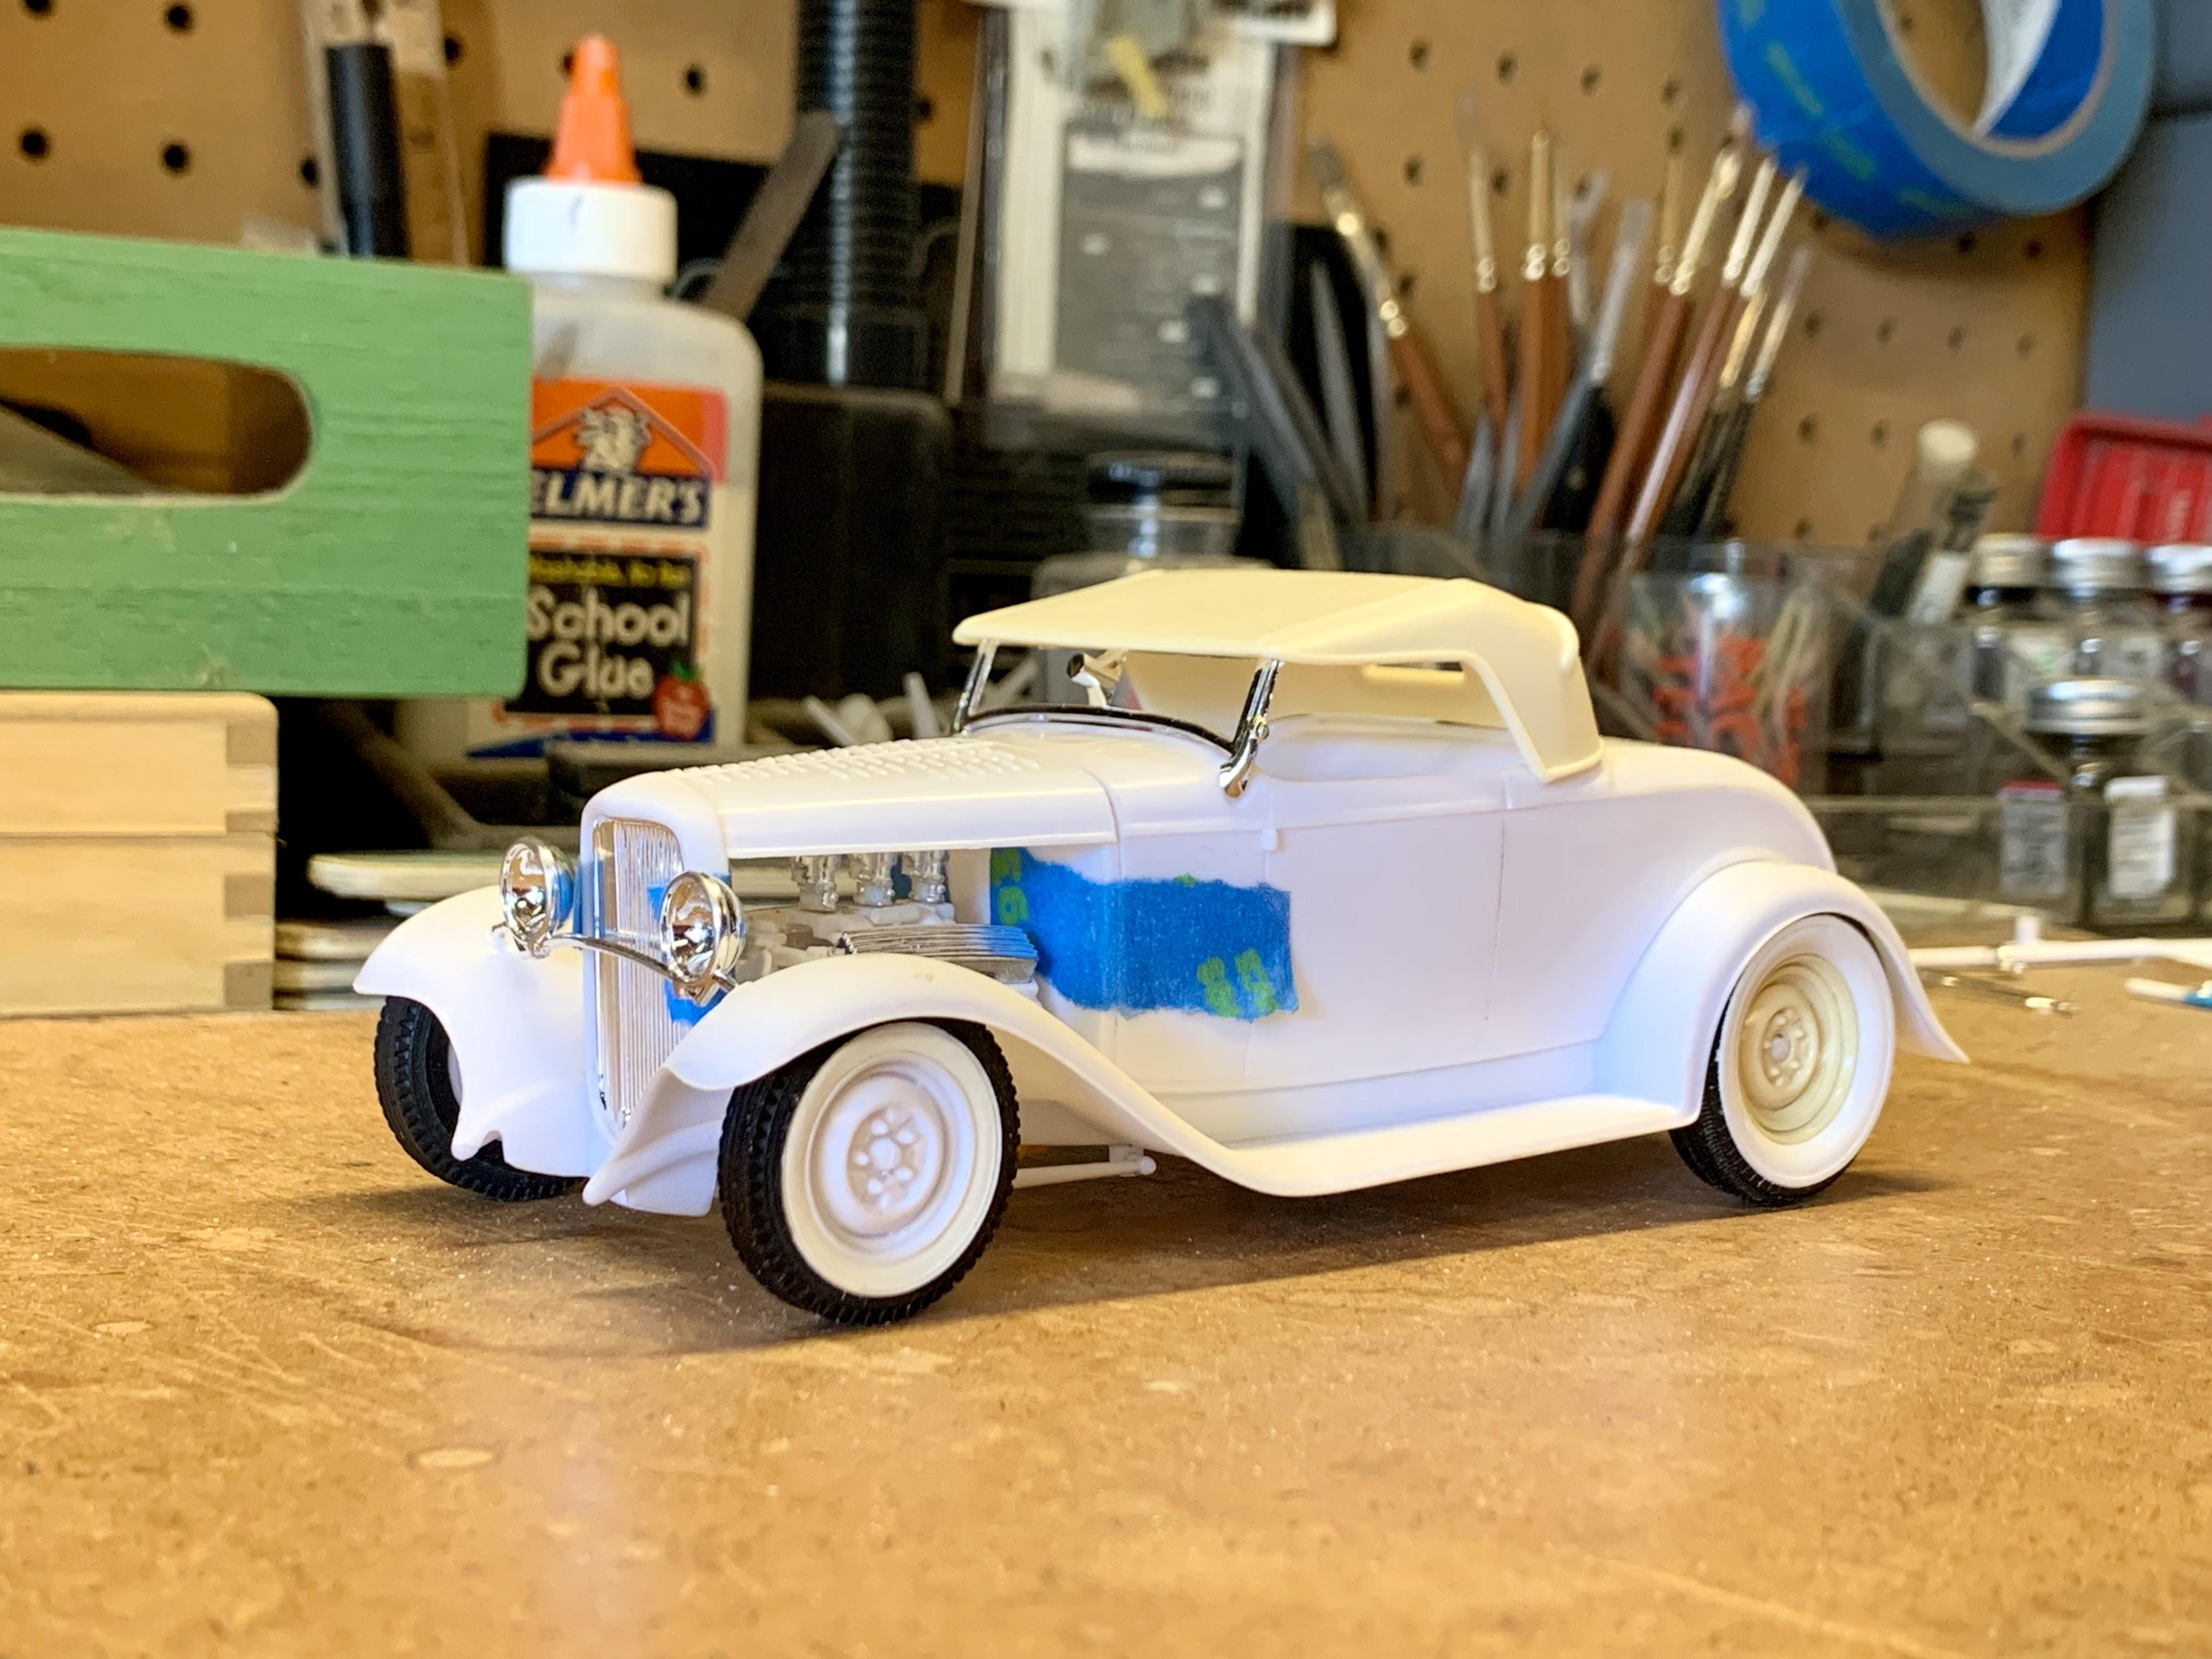
Finally, after a year (!) I pulled this poor project out of its box and put in an afternoon of work. With all of the major fabrication done it was down to the details or as my Aussie friend, Bryce, says “the fiddly bits.” 1. The steering system was built consisting of a box from the Revell ‘32 3-Window / Hi Boy Roadster with the double U-joint steering shaft from the new tool ‘32 Roadster and a receptacle added to the underside of the floor. The box pins to the frame rail and the steering link pins to the box. 2. A Revell 1940 Ford dashboard was slightly trimmed on the ends to remove its original mounting tabs and the shifter steering column from the same pinned for a positive connection. Also using the ‘40 steering wheel. 3. Way out back a Revell 1948 Ford gas tank was cut from the floor pan it comes molded to. 4. The radiator was tweaked with a round outlet fitting added to the lower right corner and a filler neck added to the top tank. 5. The lower radiator hose was made from one of the 10 that come in Revell’s modern Model A hot rod kits. 6. A voltage regulator from a Revell ‘40 Ford was added to the firewall. One of my favorite detail parts. 7. In previous mock ups I had been using the dropped headlight bar from Revell’s 1929 Pickup kit. The dropped bar came in one issue, the Hot Rod logo box from the late 1980’s. Problem is like every issue of that kit the headlight lenses are molded into the lights and chrome plated and there’s no way to make them look convincing. To solve that the nice dropped bar from any of the Revell ‘32 Fords was fit and pinned to the fenders. With this comes the added benefit of smaller hot rod headlights that are optional in those kits. 8. Out back the taillight mounting arm and license plate bracket from a Revell ‘29 Pickup was fit with a steel pin where it attaches to the underside of the floor and fit with a ‘32 taillight from Revell’s ‘32 Sedan. The plate bracket was also trimmed down to fit the size of the early 1960’s plate decal. 9. Not shown but equally important is that the engine and fuel injection were drilled for plug wires and fuel plumbing. After all of that I did some final sanding cleanup and meticulous flash cleanup in the webbing of the woody body. I’m happy to say that this project is ready to move on to paint. Finally! ?
-
Thanks so much! @stavanzer I also have The Beach Boys kit and looked at using the Corvette rear from it as my original idea was a 70’s era car and also strongly considered the Tru Spoke wires from the yellow issues of the Roadster. Problem I ran into was wanting it to sit tires tucked the way I had it with the same radial tires but lowering the back and being able to modify the rear end and the wheels to tuck them in wasn’t going to be easy. That said, the provided stance and wheel/tire poke out of the box is actually pretty 70’s era correct.
-
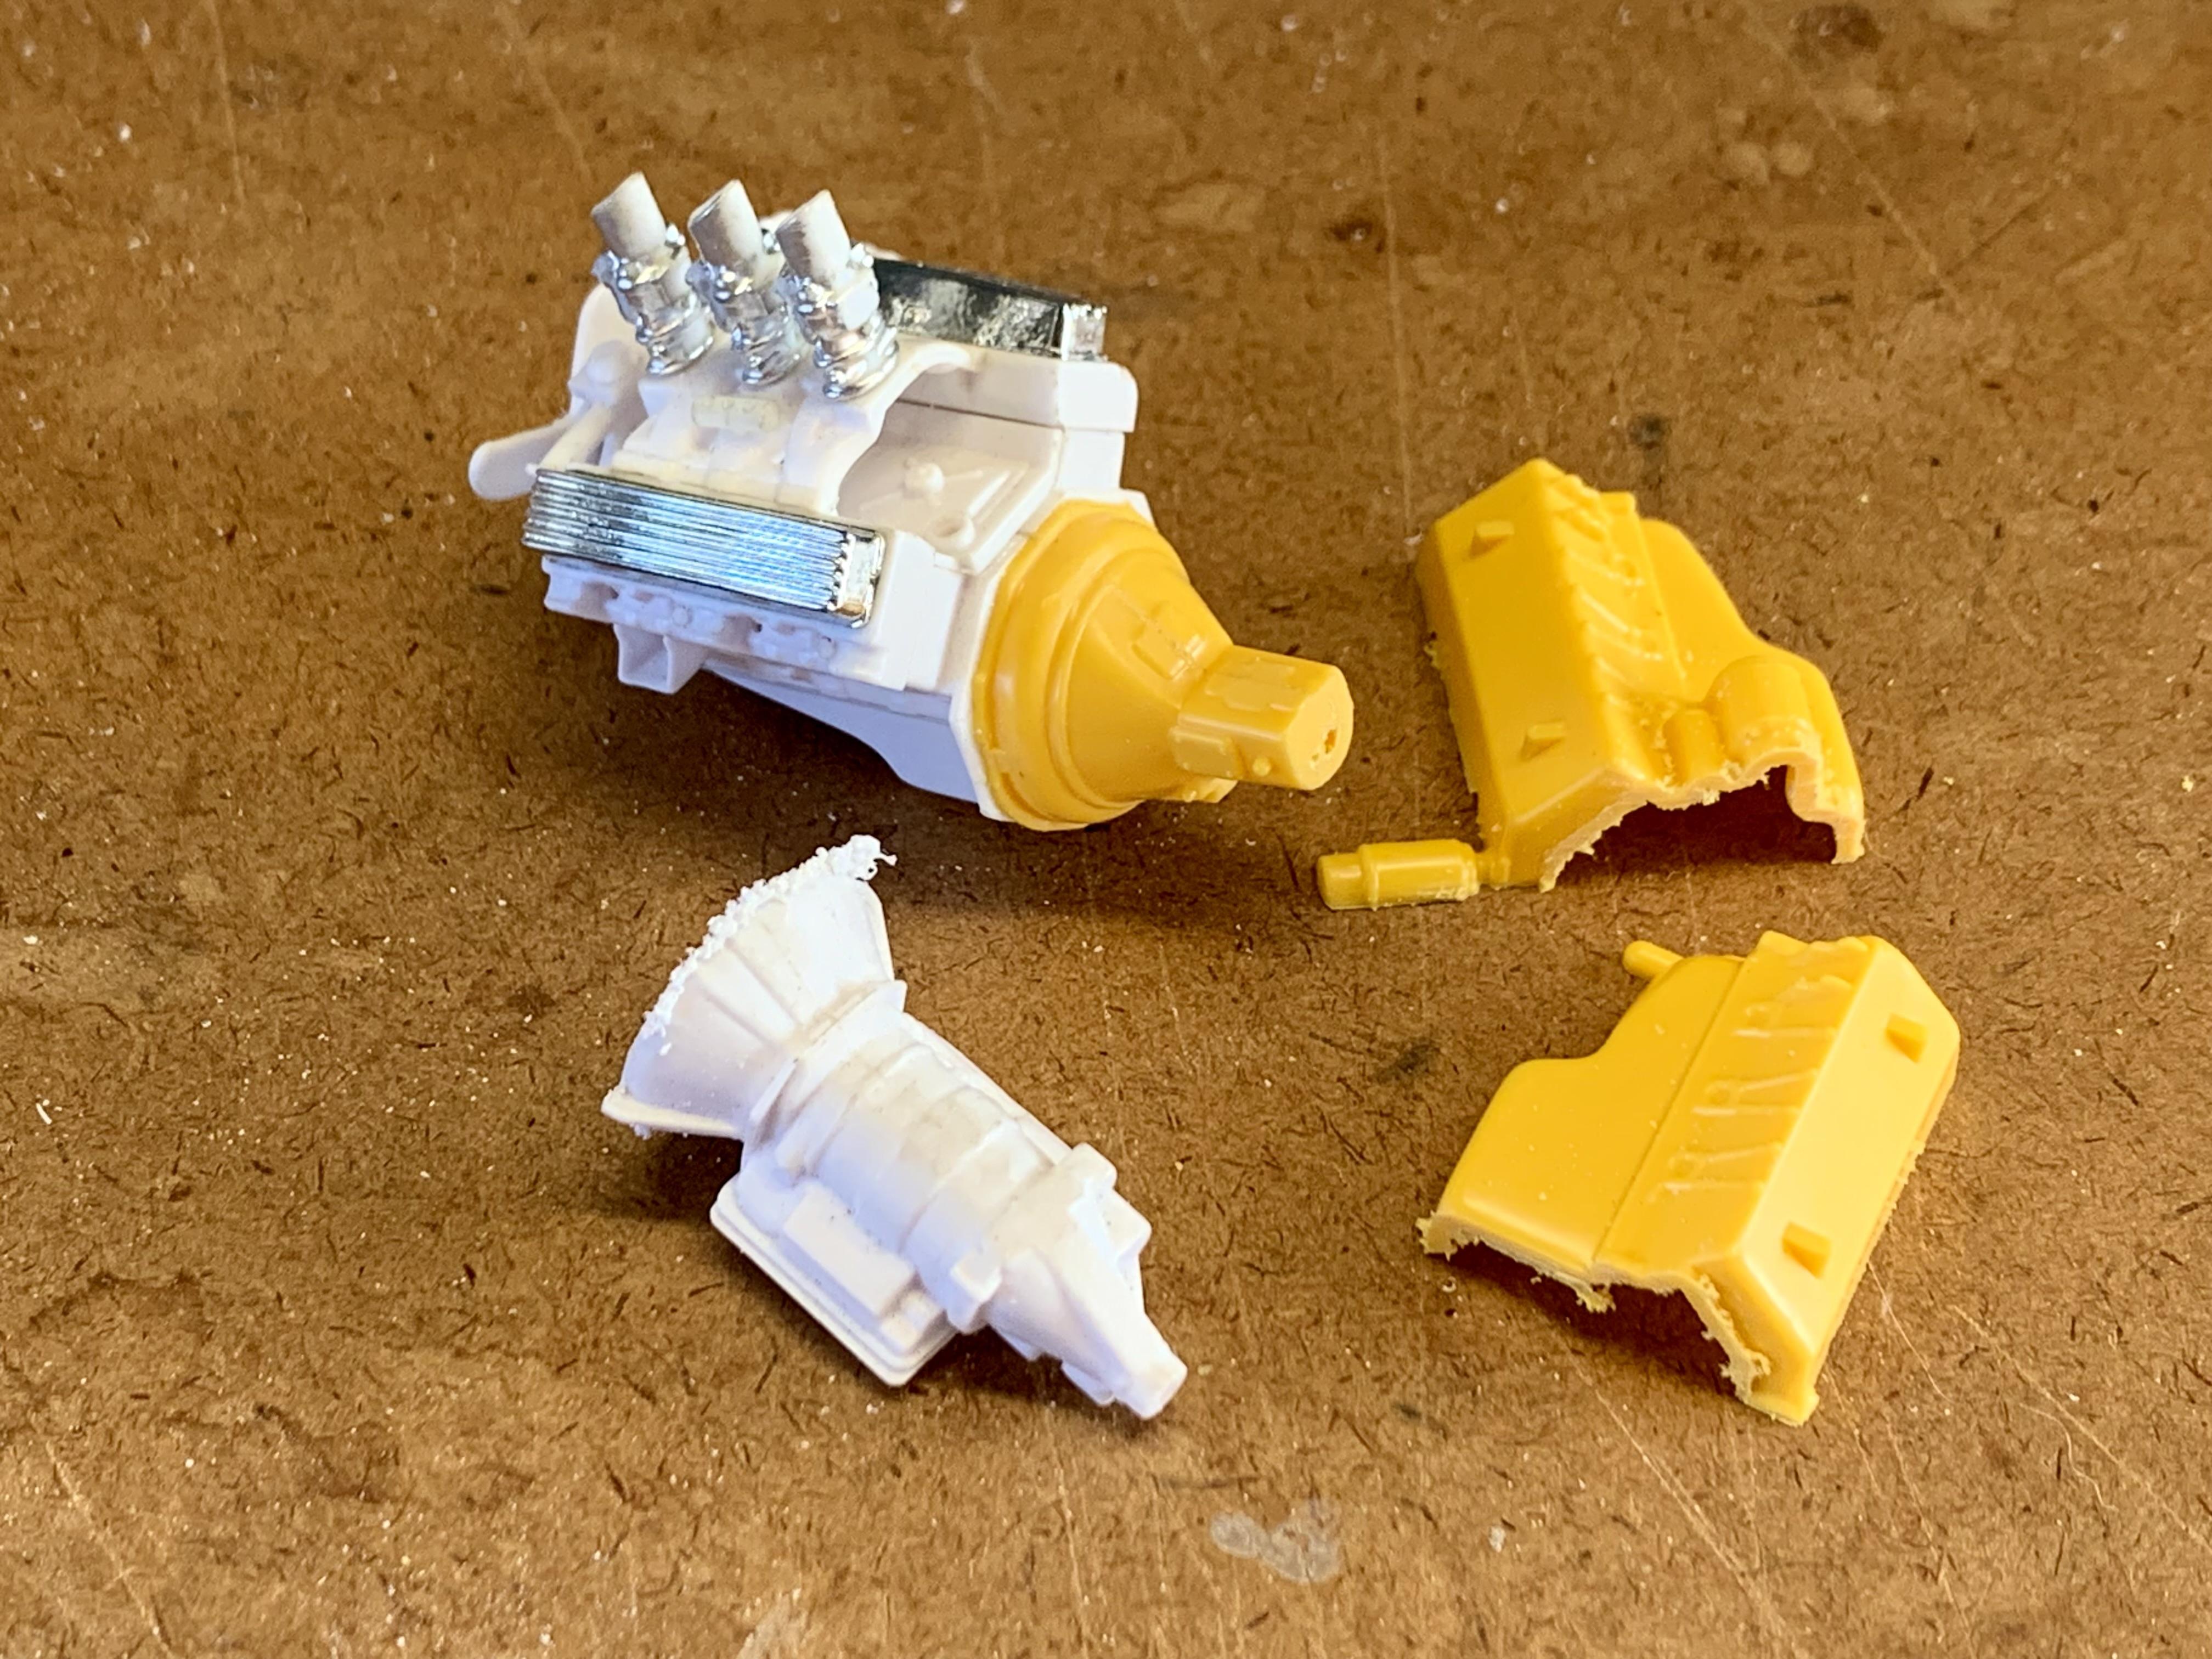
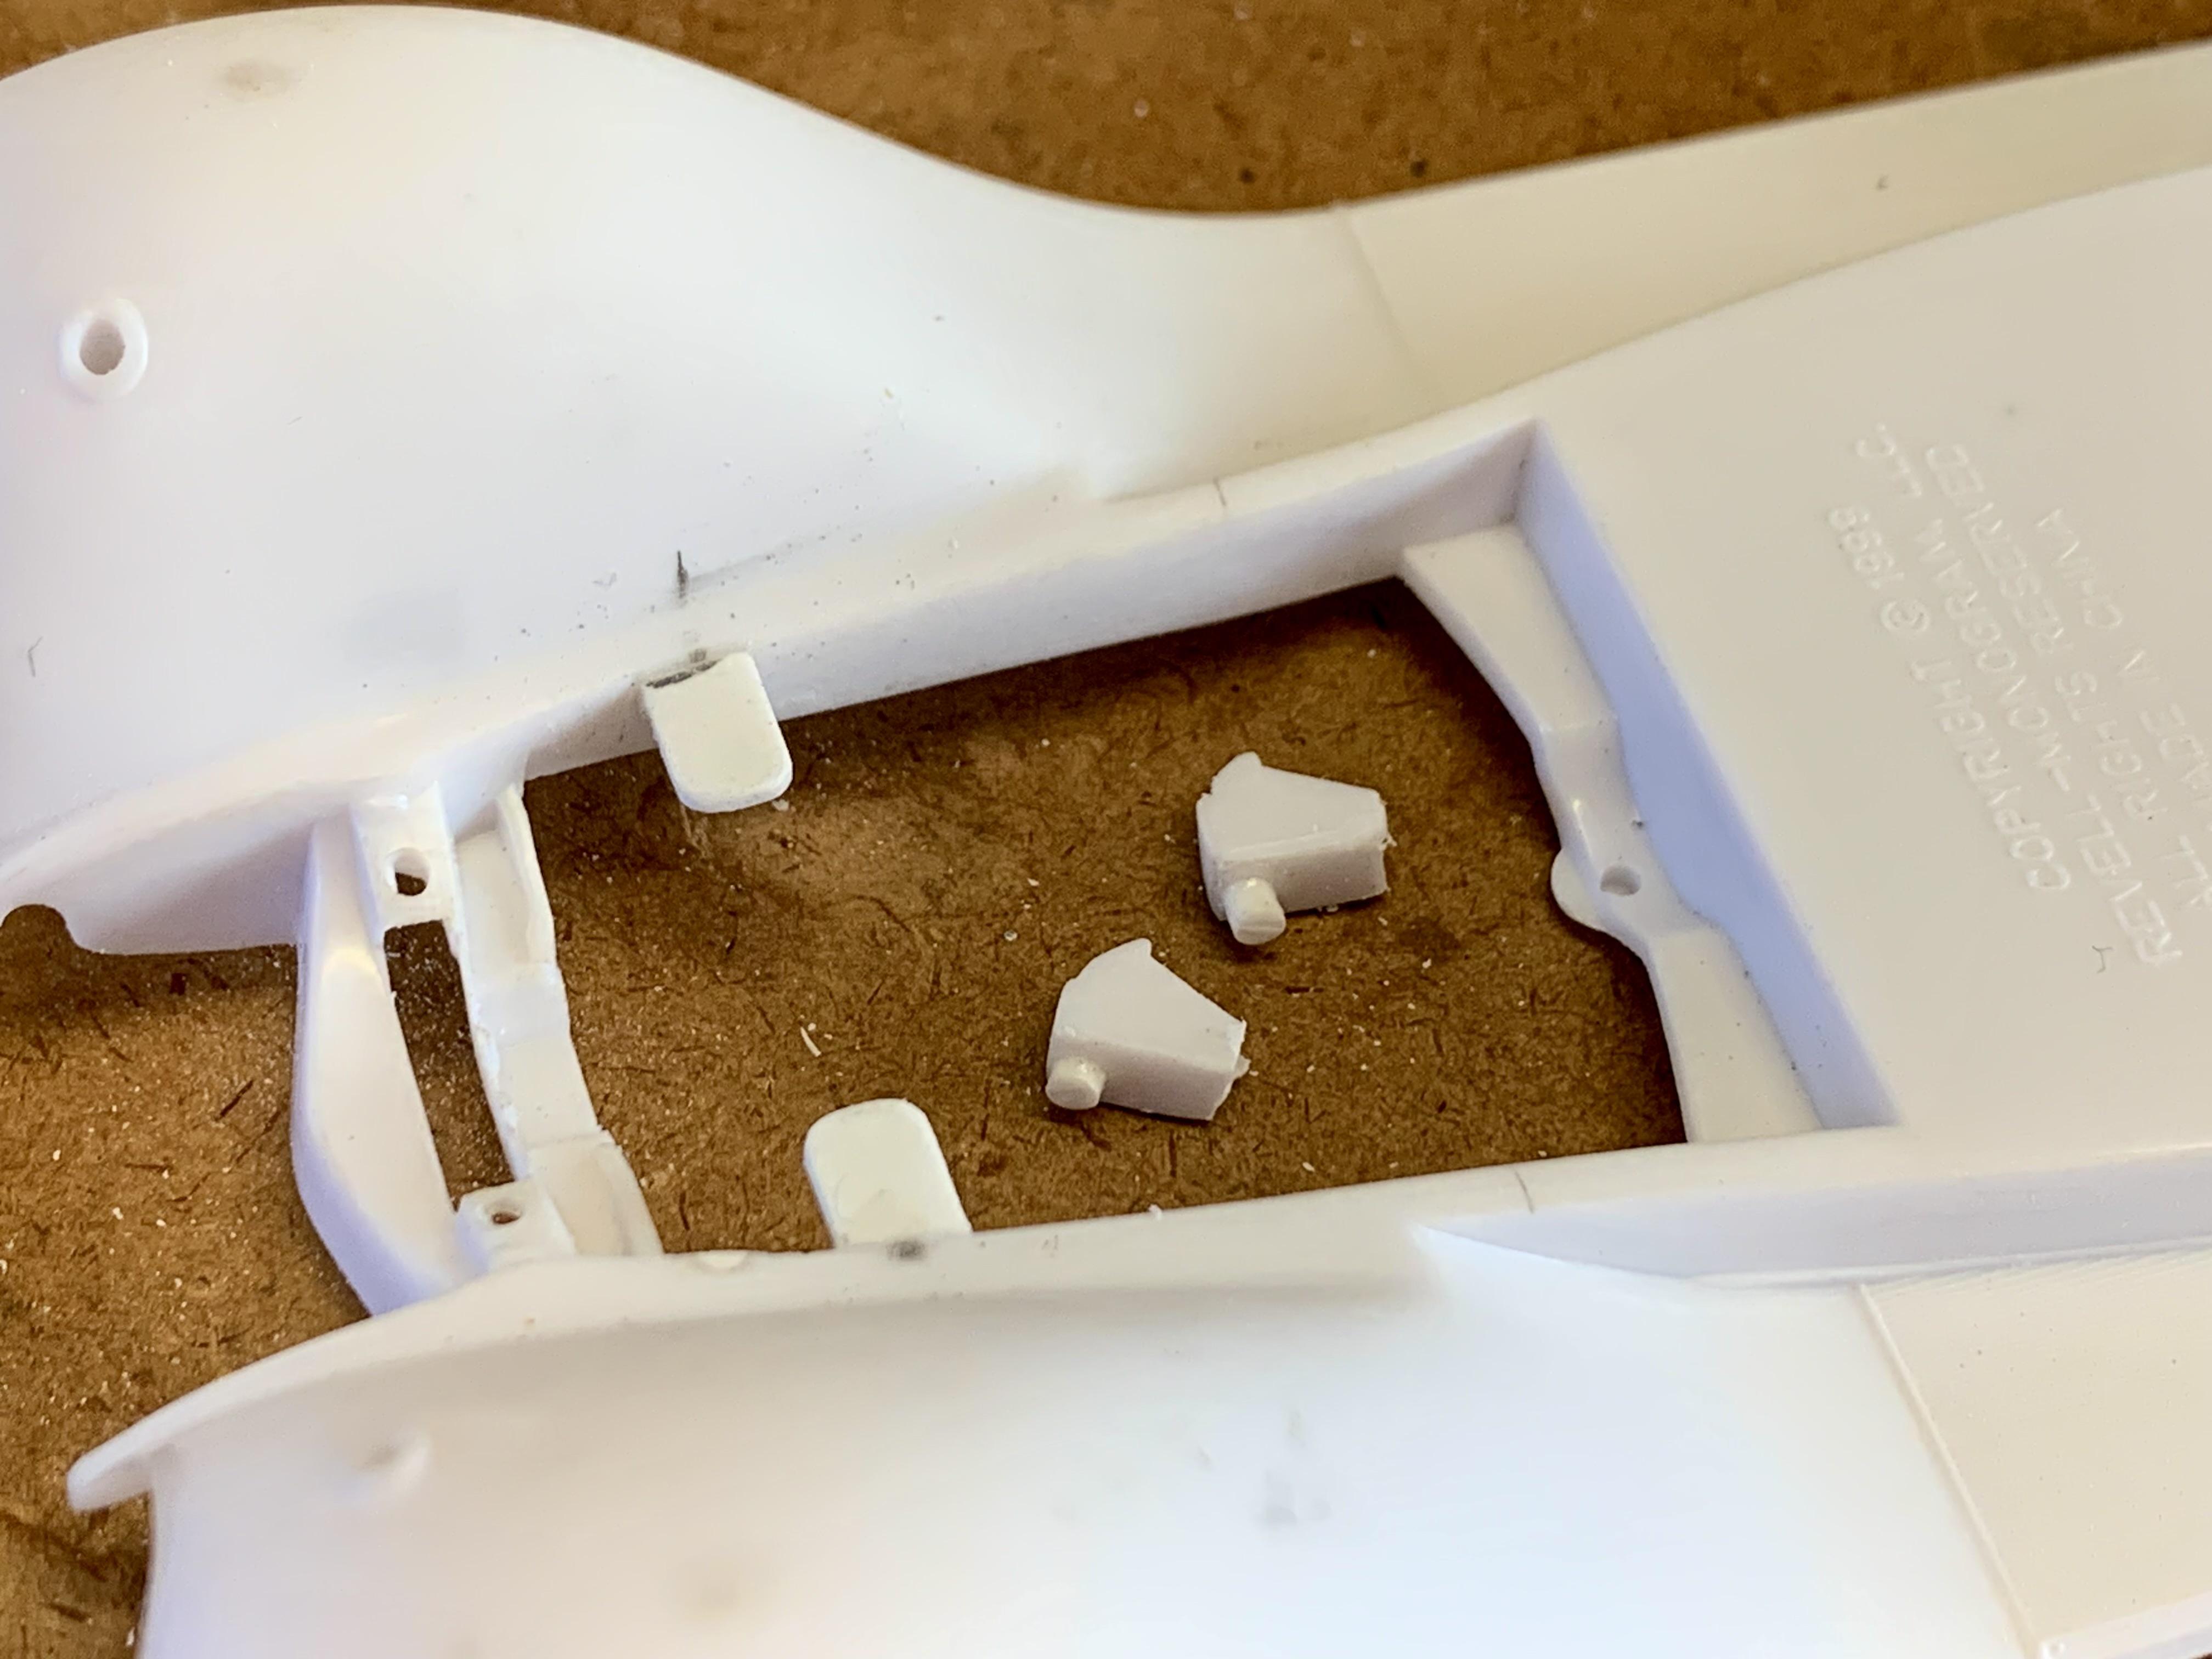
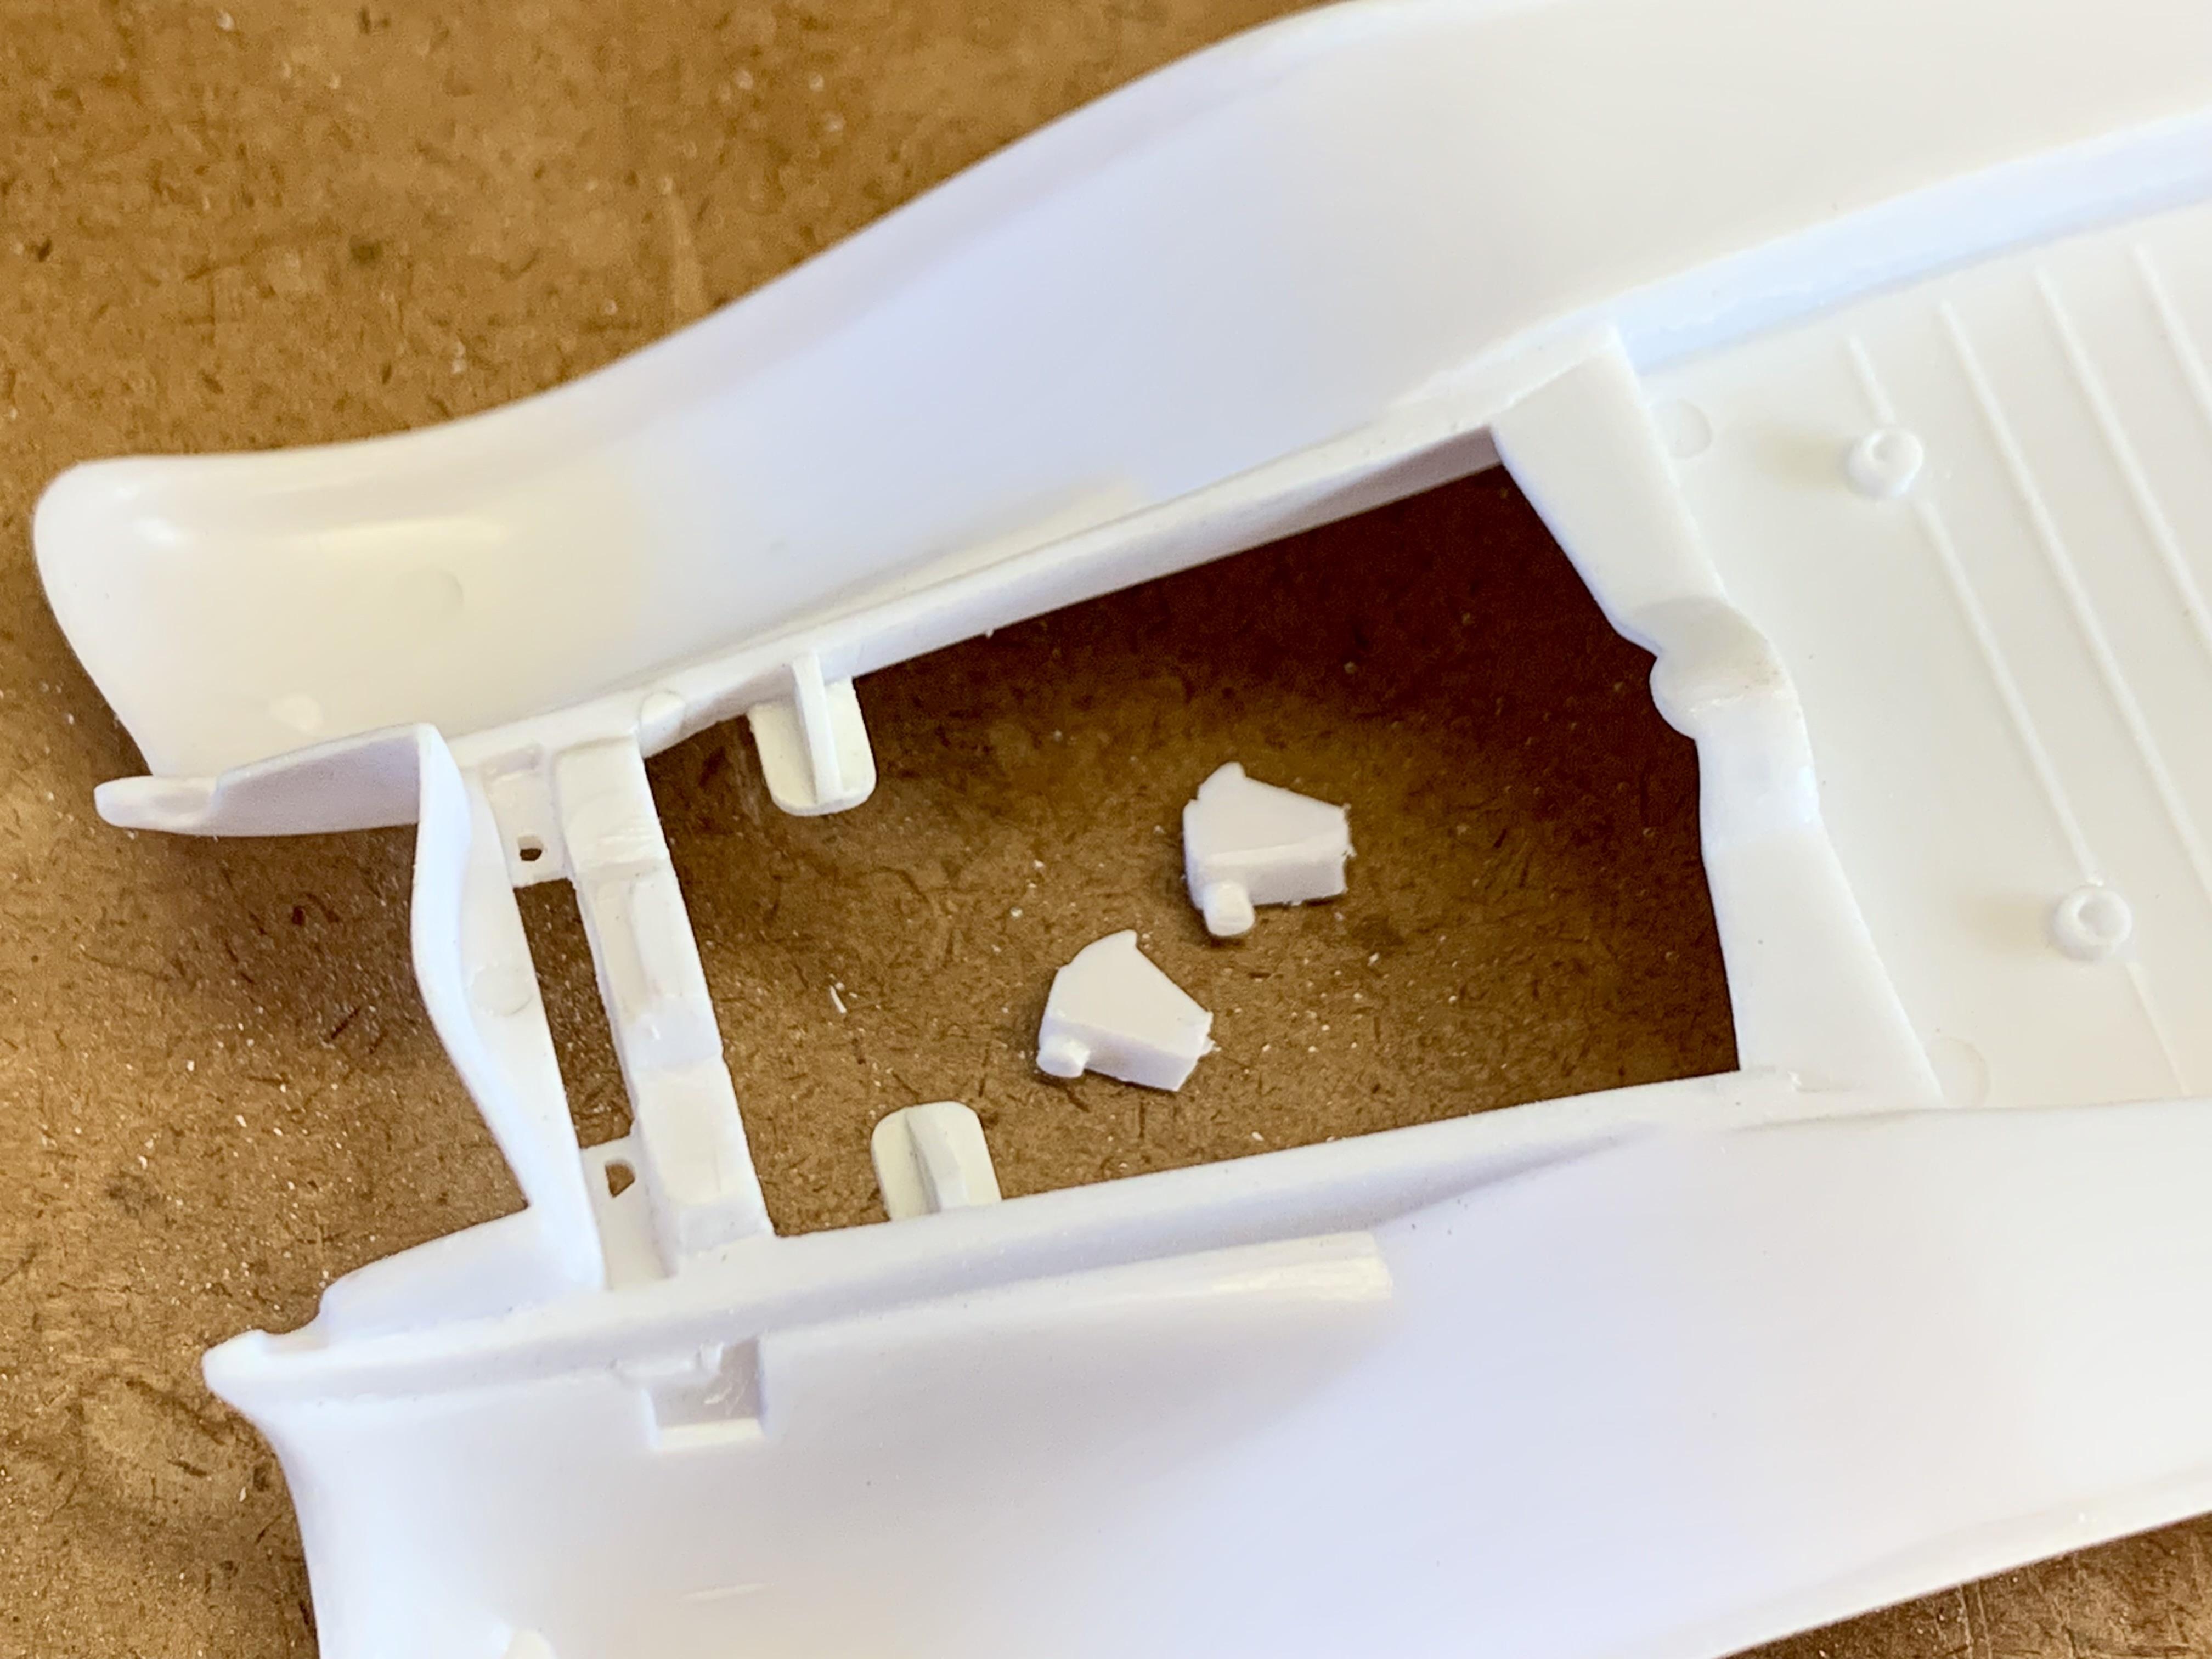
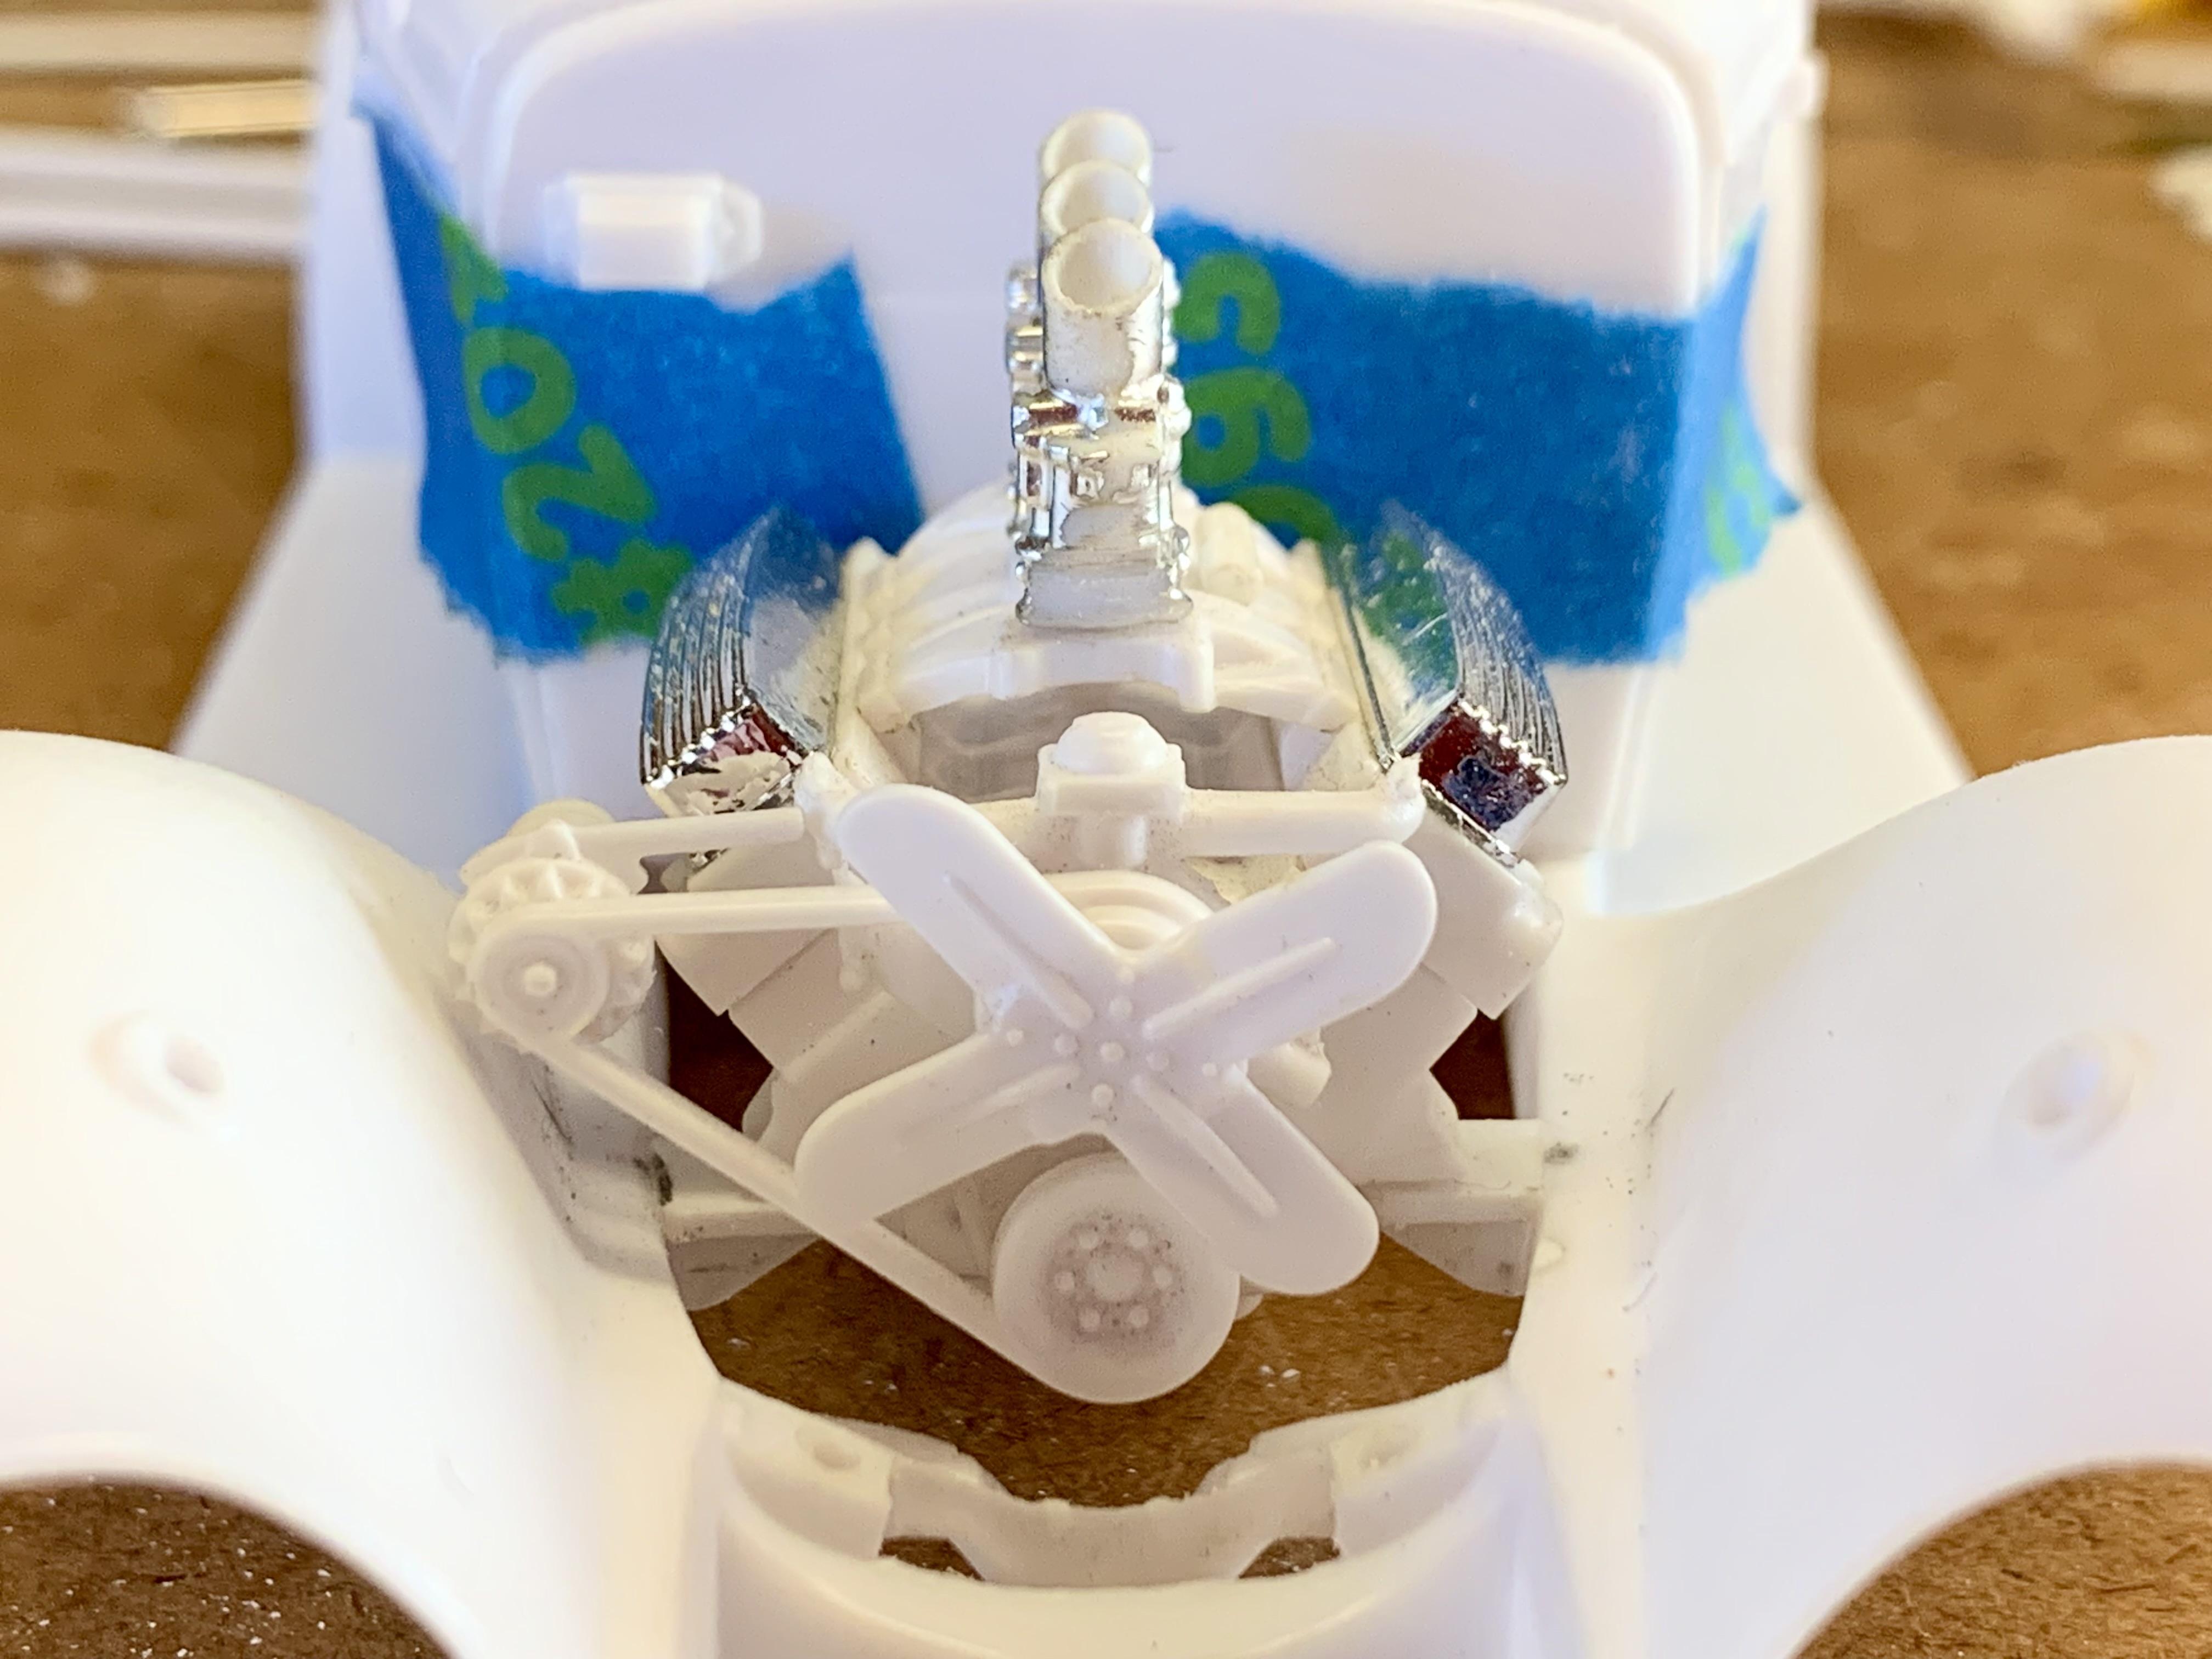
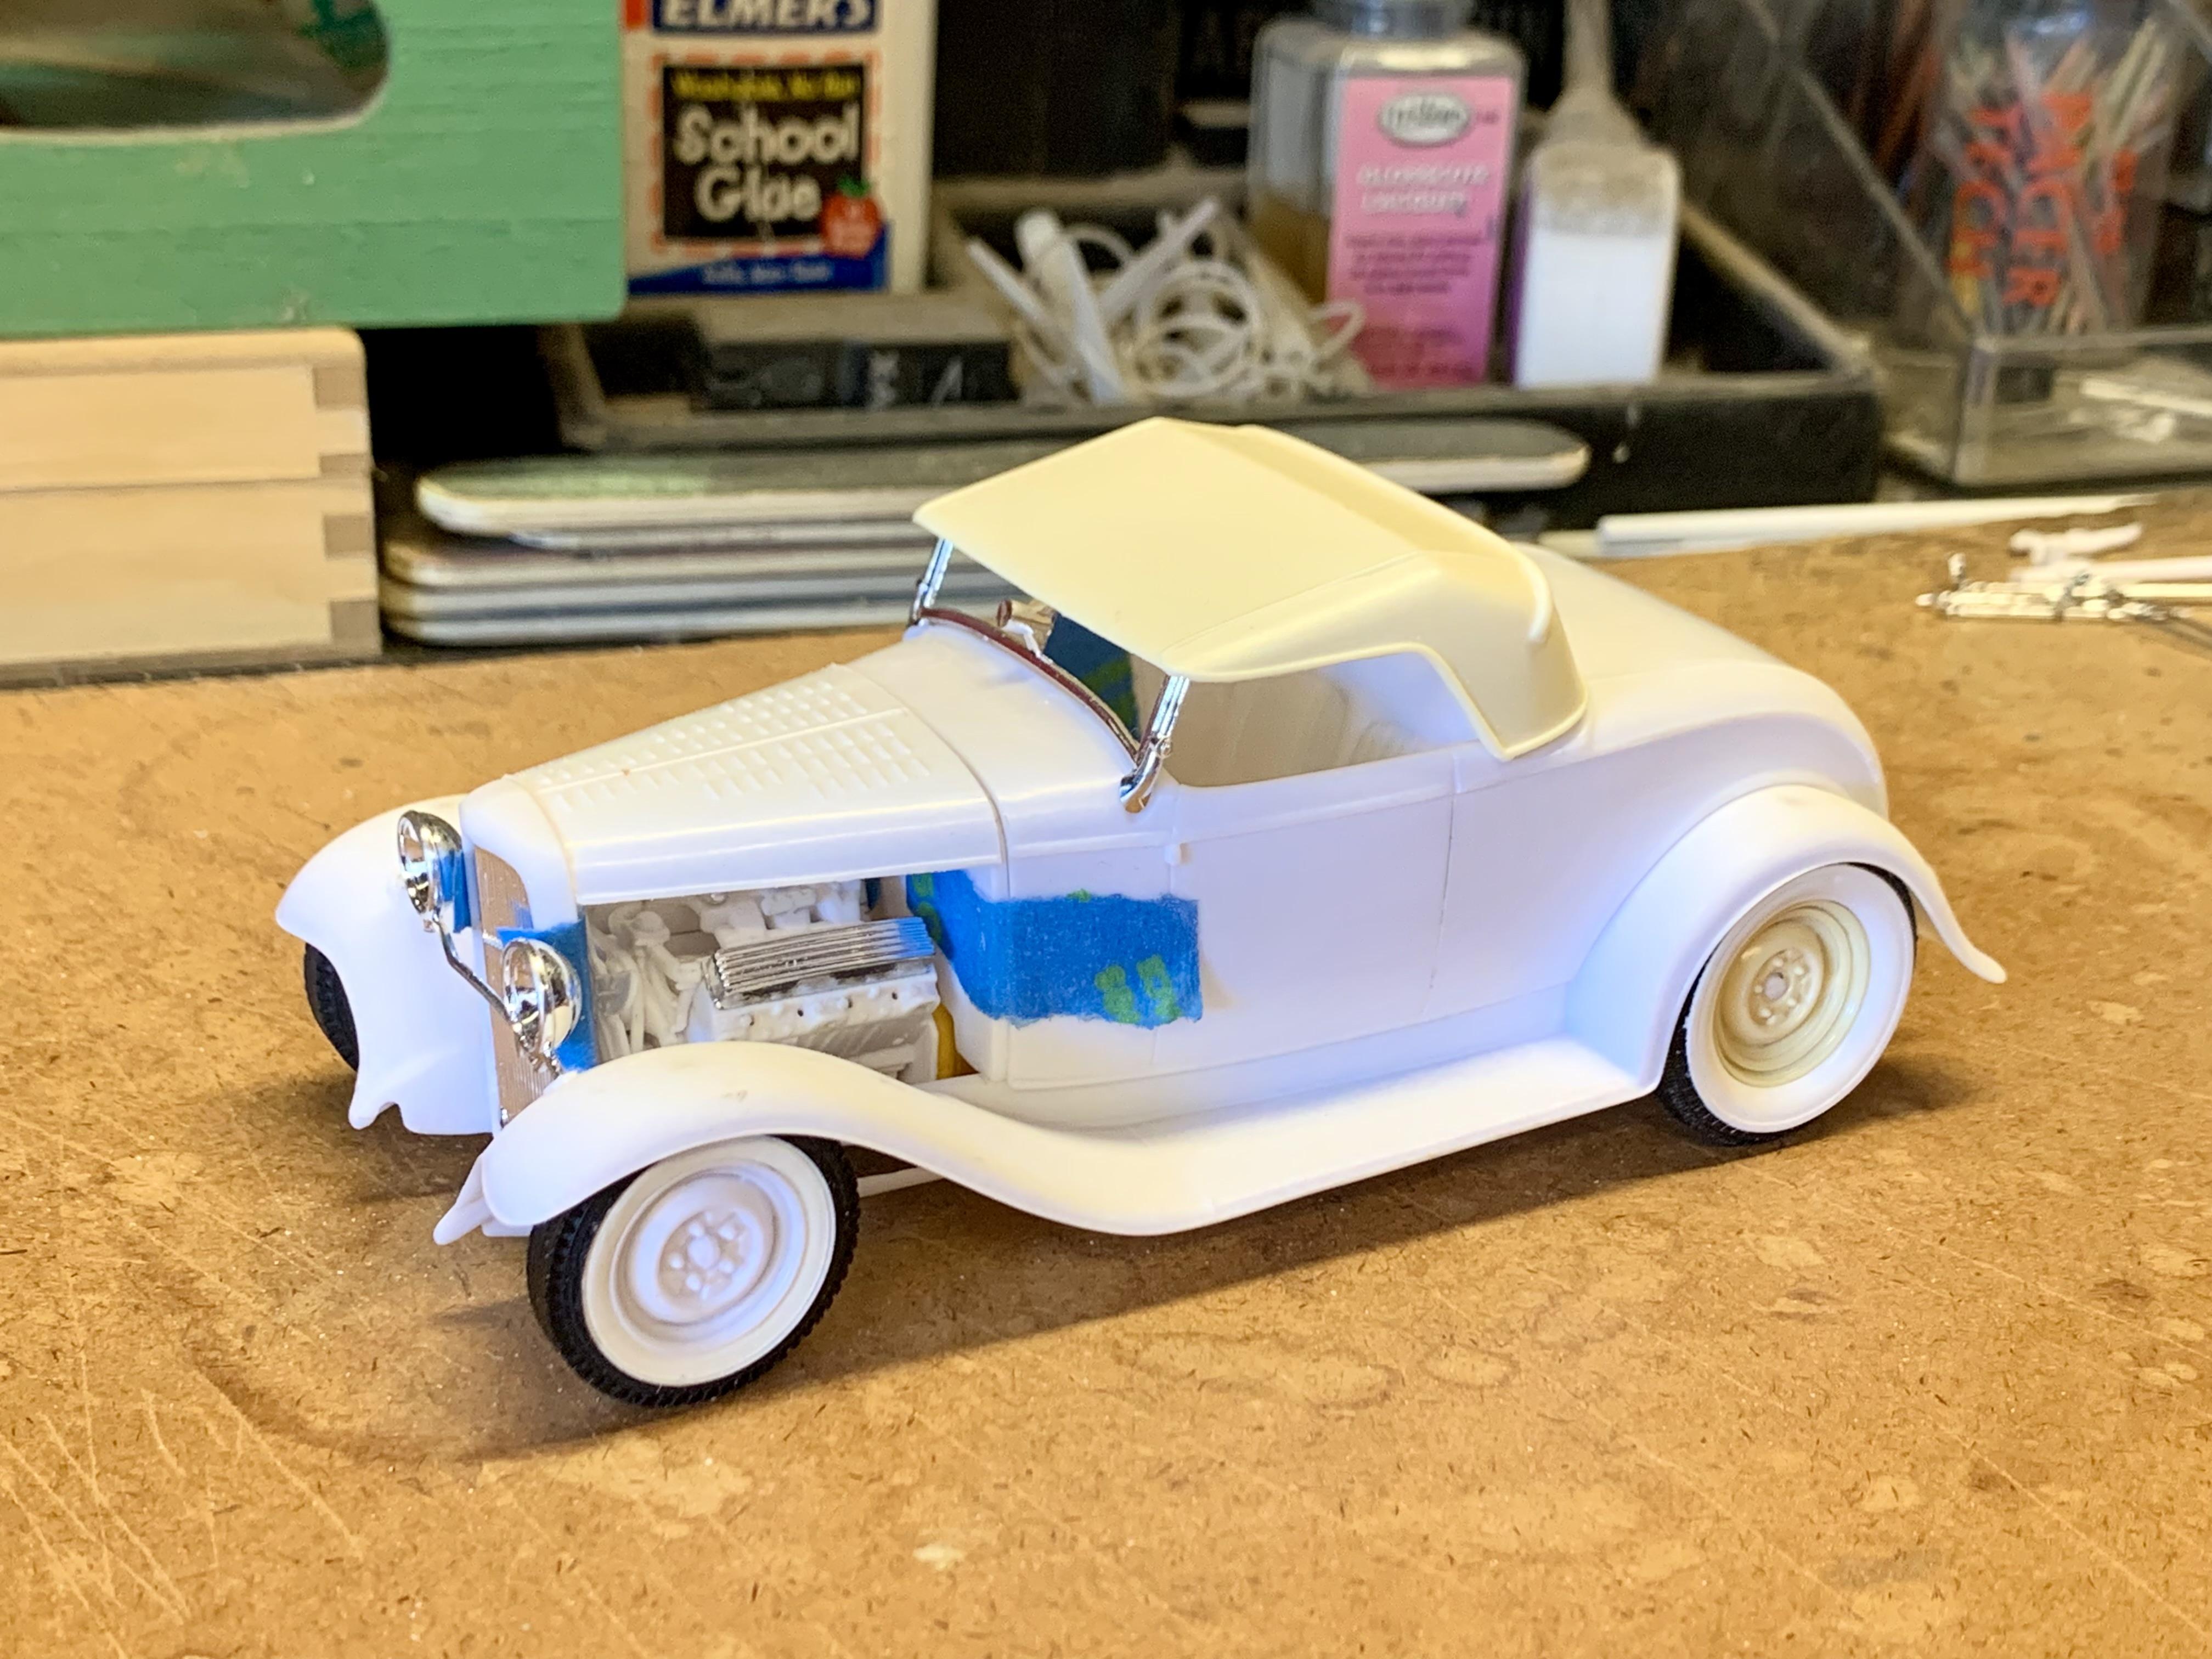
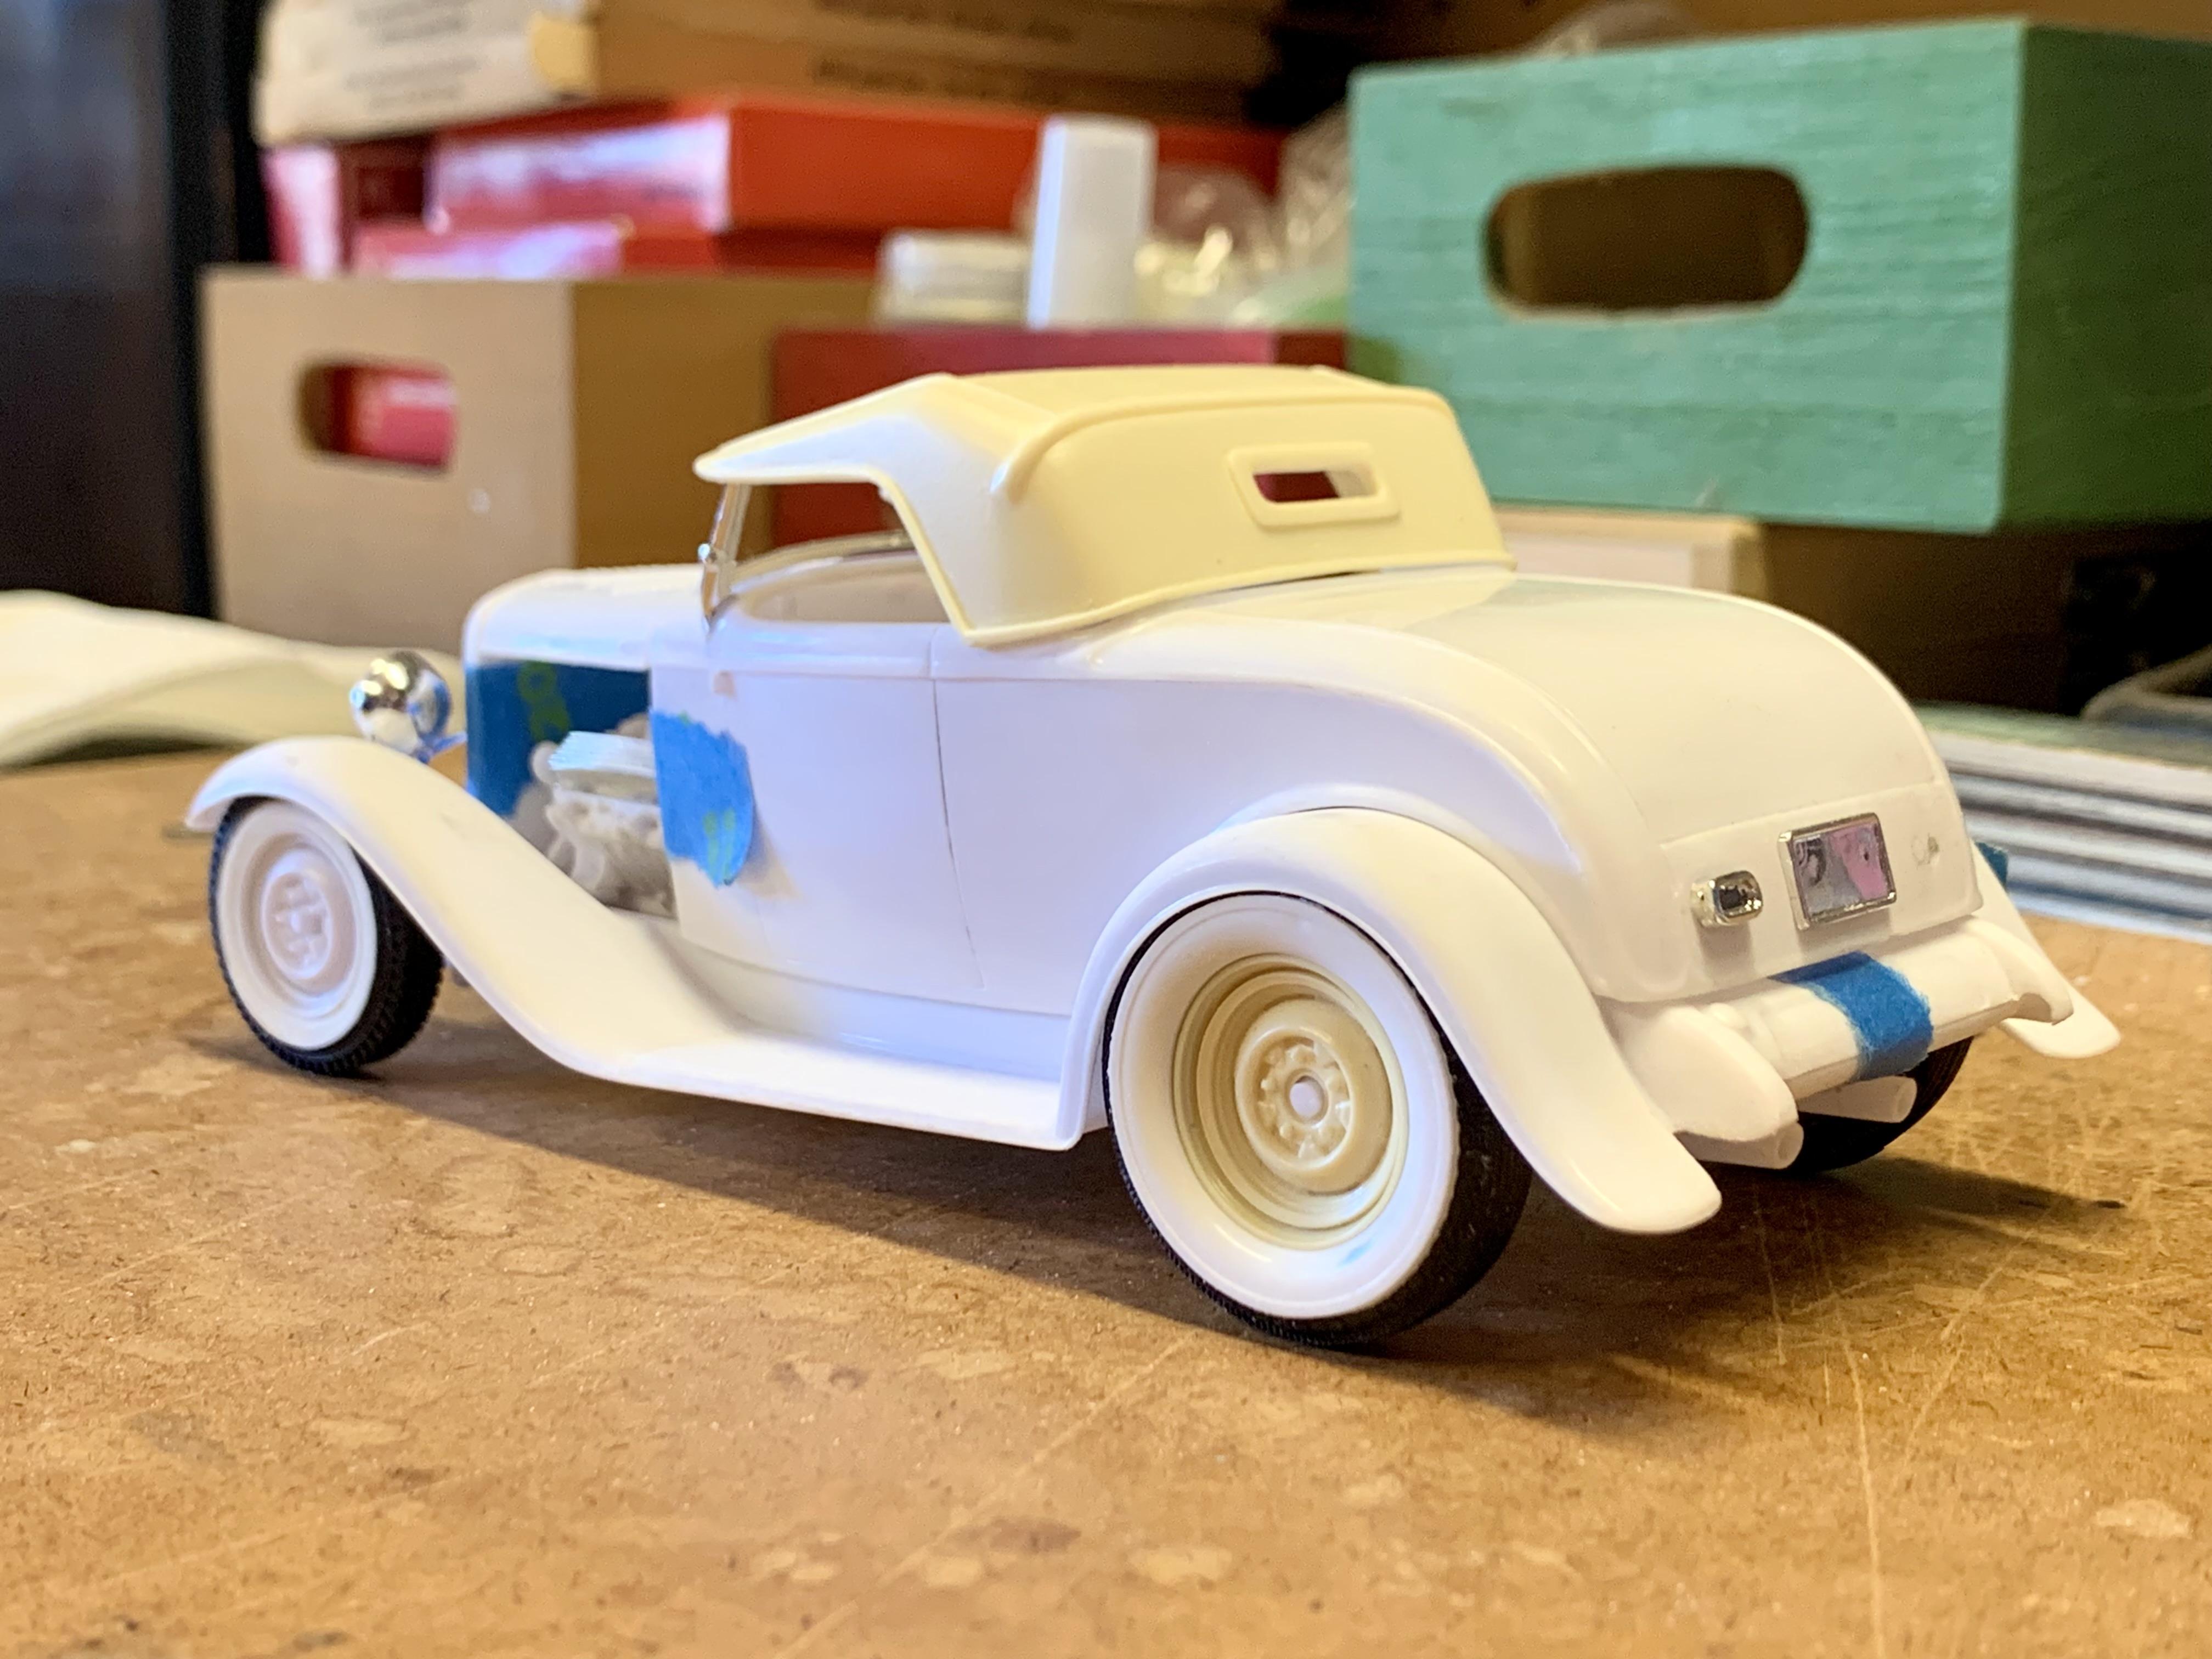
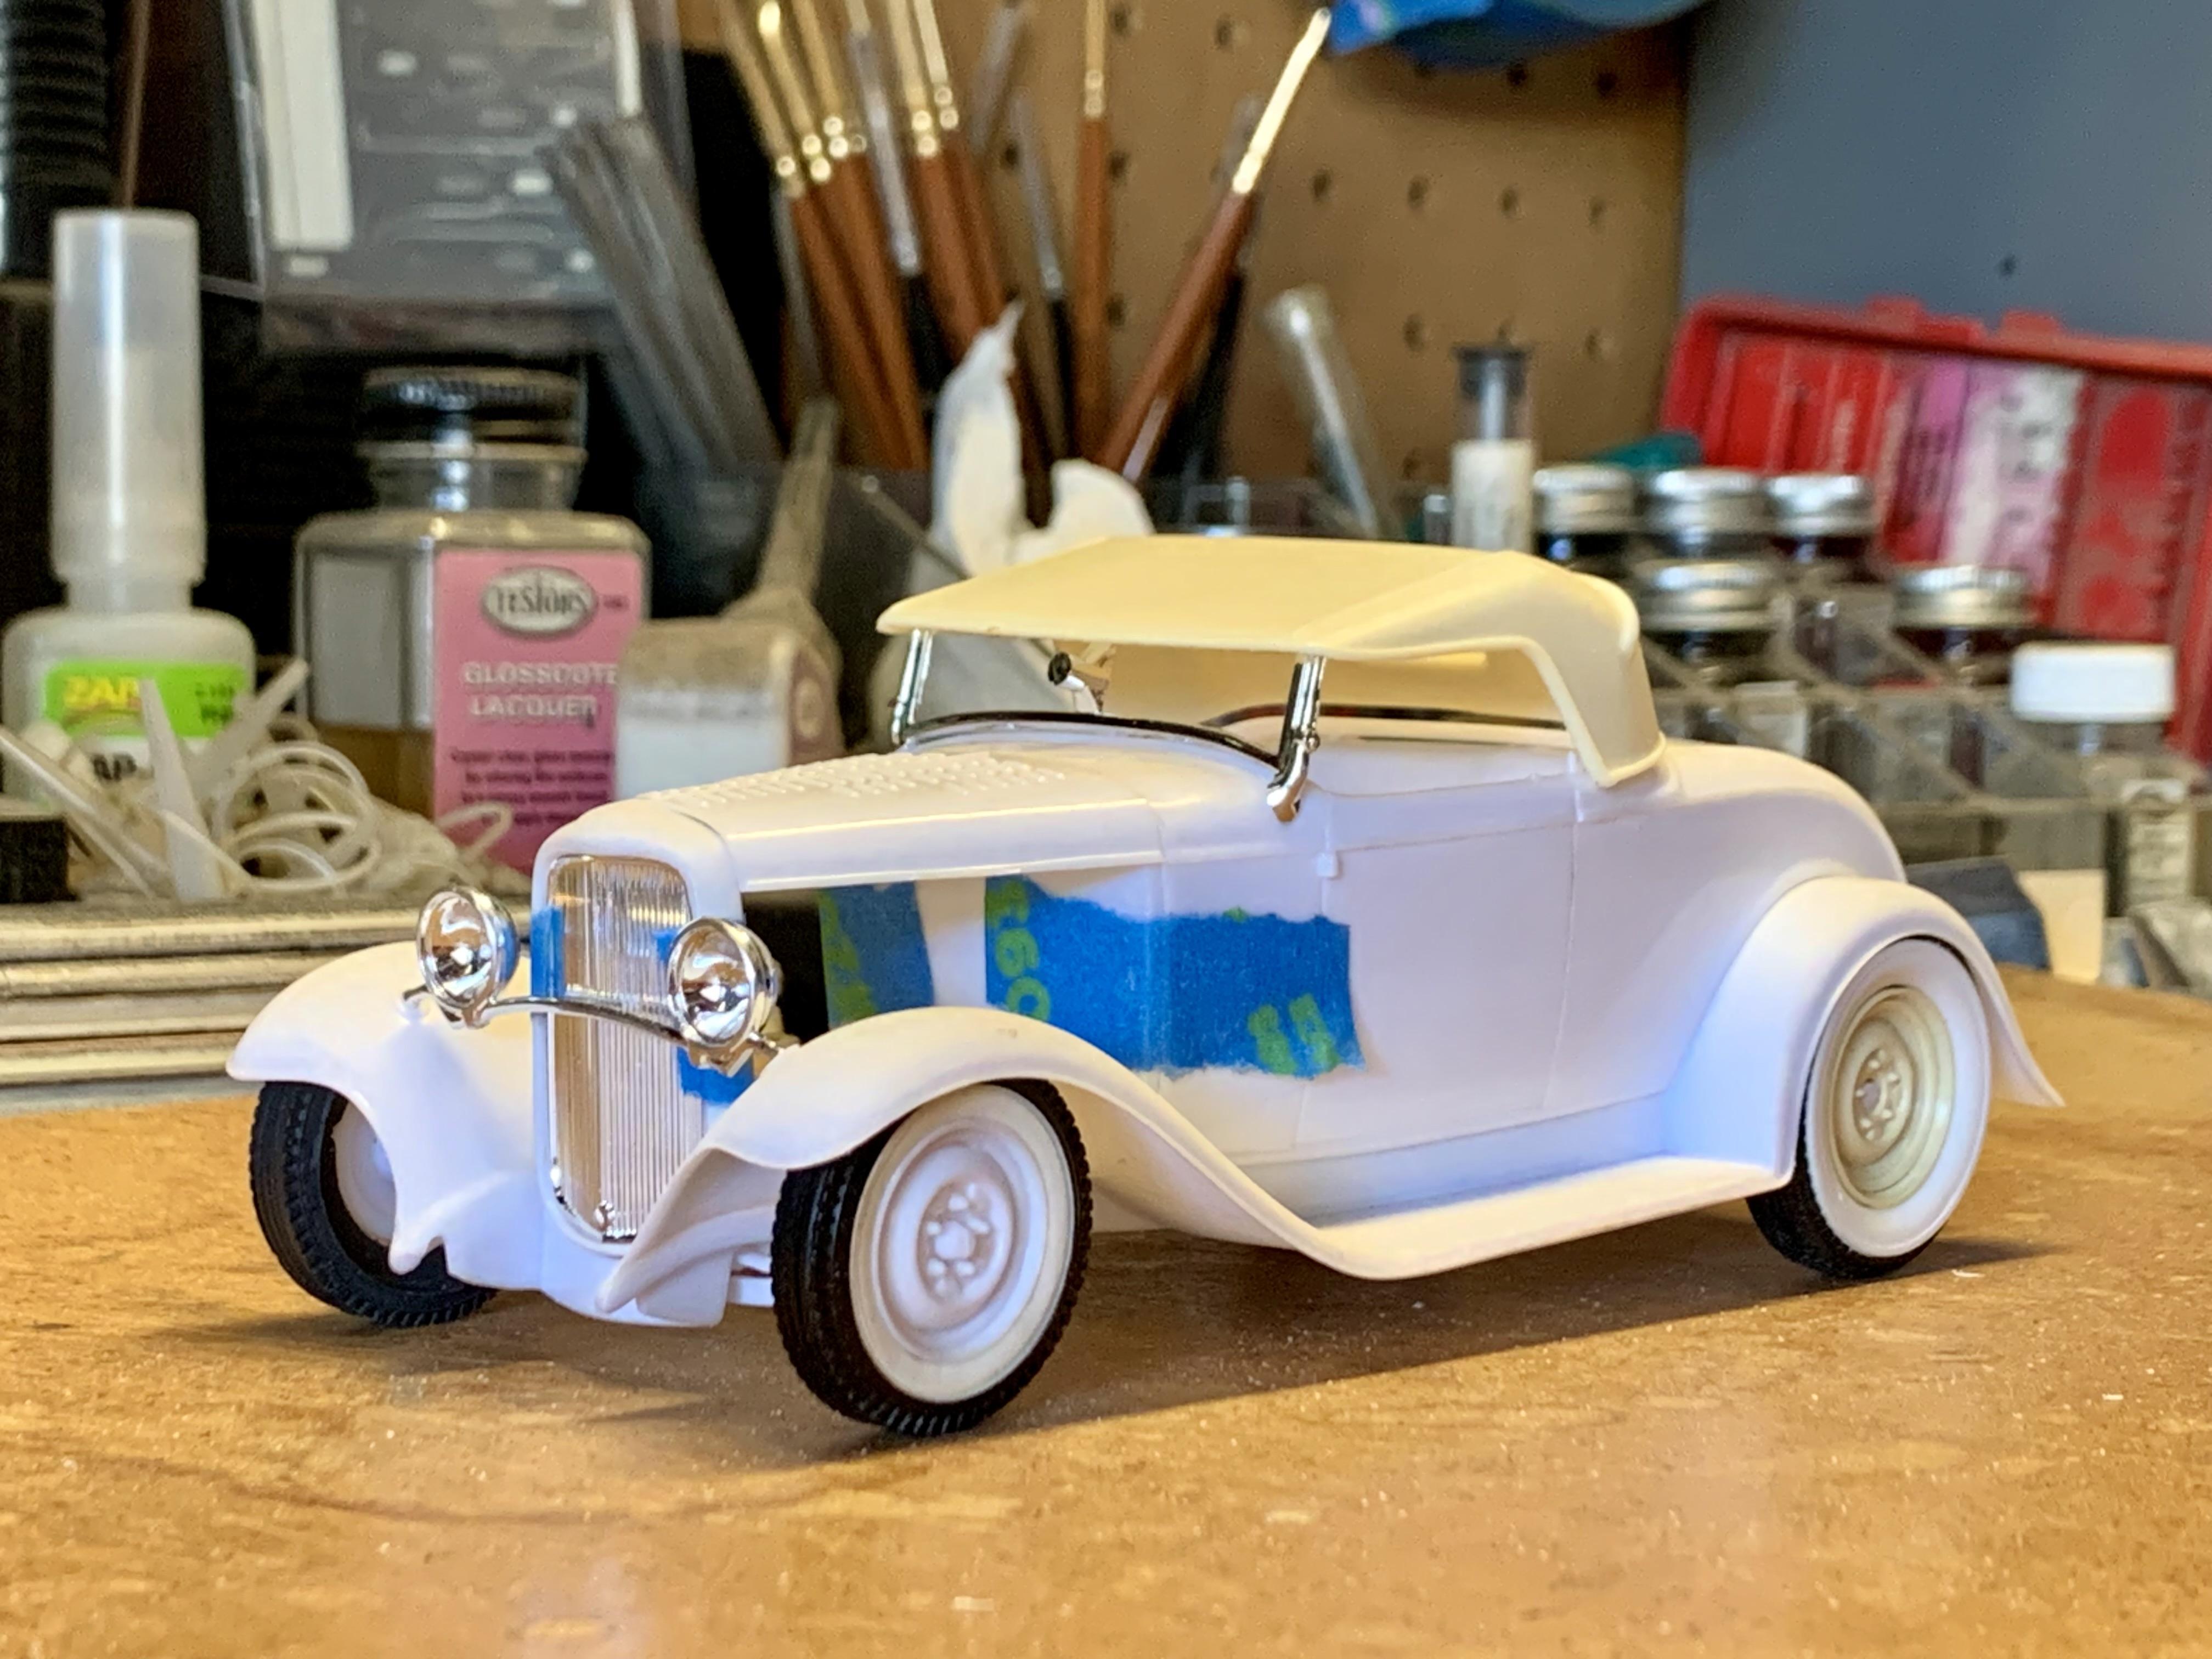
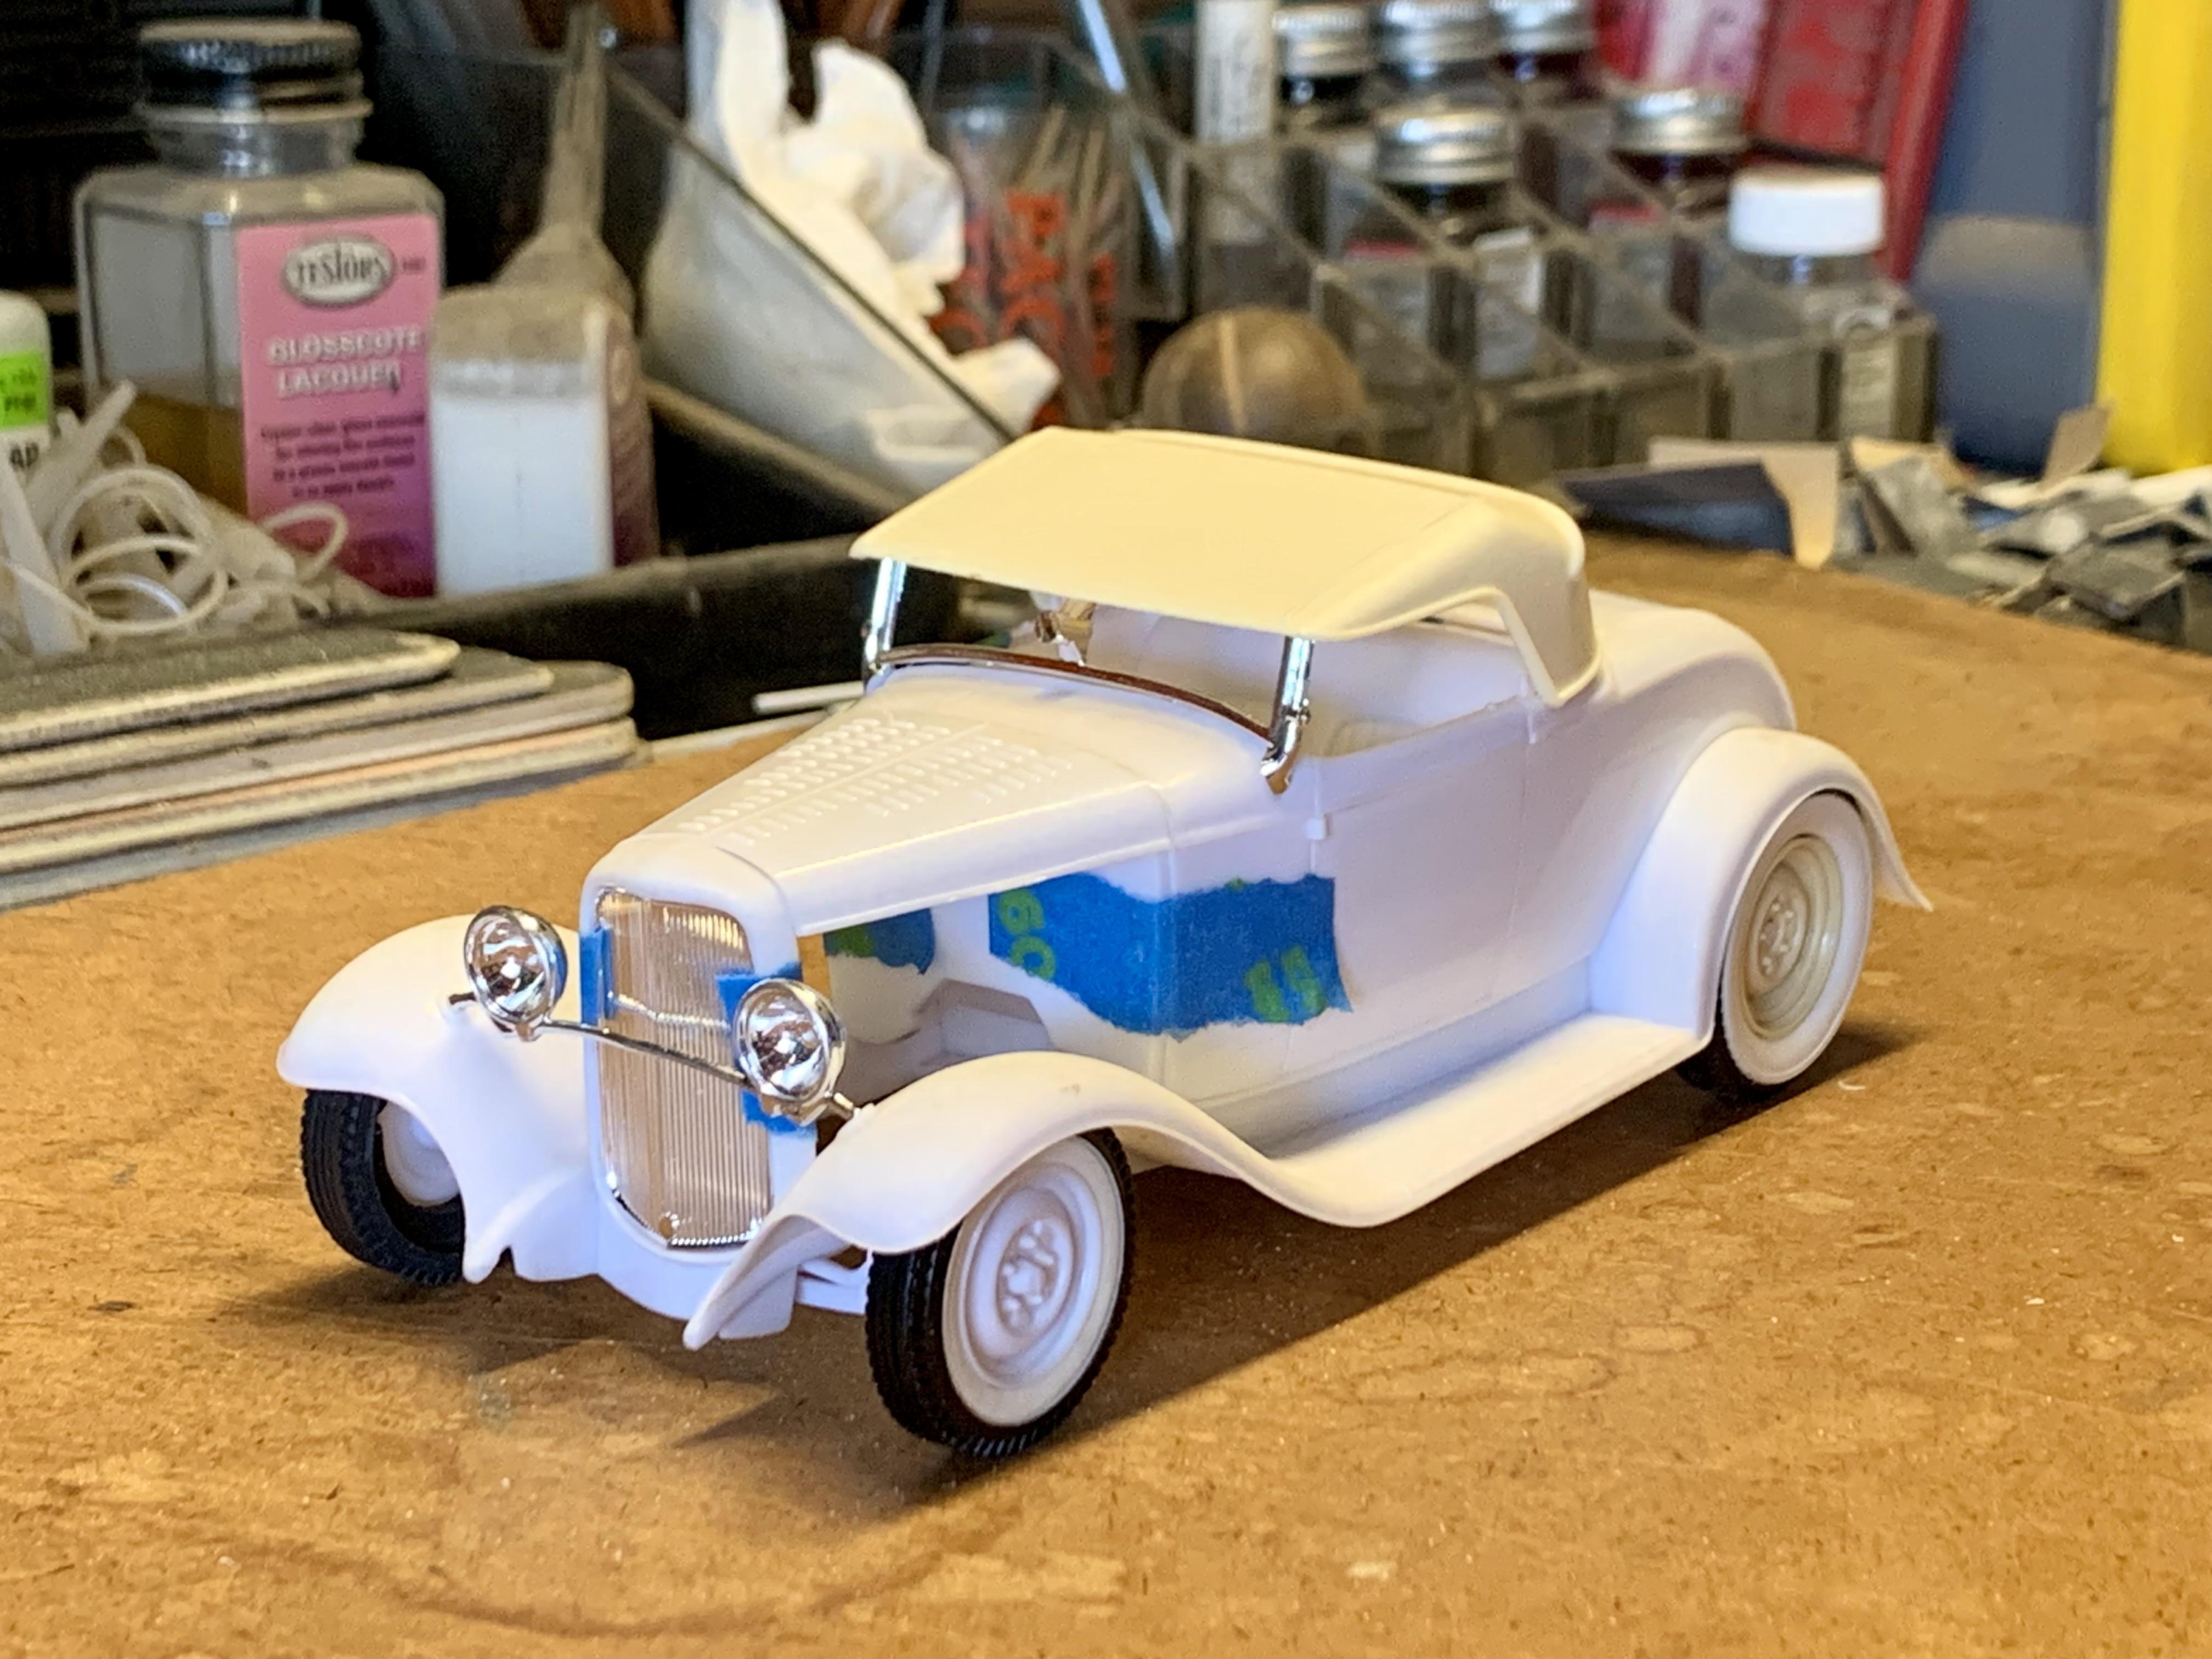
Made some progress on the new version of this Roadster project today. Starting with removal of the automatic trans and grafting on the early Ford trans from the Monogram ‘29 Roadster Pickup Cadillac engine. The kits molded engine mounts were removed and new ones built from .040” sheet. There’s also a half round relief just behind the front cross member on the left frame rail that serves no apparent purpose so it was filled with a scrap of round rod. Underneath the wheels and brakes were properly mounted to the axles and I replaced the kits split wishbones with the much nicer ones from Revell’s modern Model A hot rod kits and built some mount for them to pin to. I think I’m going to keep the rear exhaust pipes I had made before but change the mufflers to period correct glass packs and will need to make new front pipes because of the engine swap. Here’s the Roadster mocked up again, this time with the engine sitting IN the car rather than beside it. I also spent some time refining the fit of the roadster top to the body by relieving the inside lower edges. Still needs a little bit more then should be a perfect fit. That’s all for now.
-
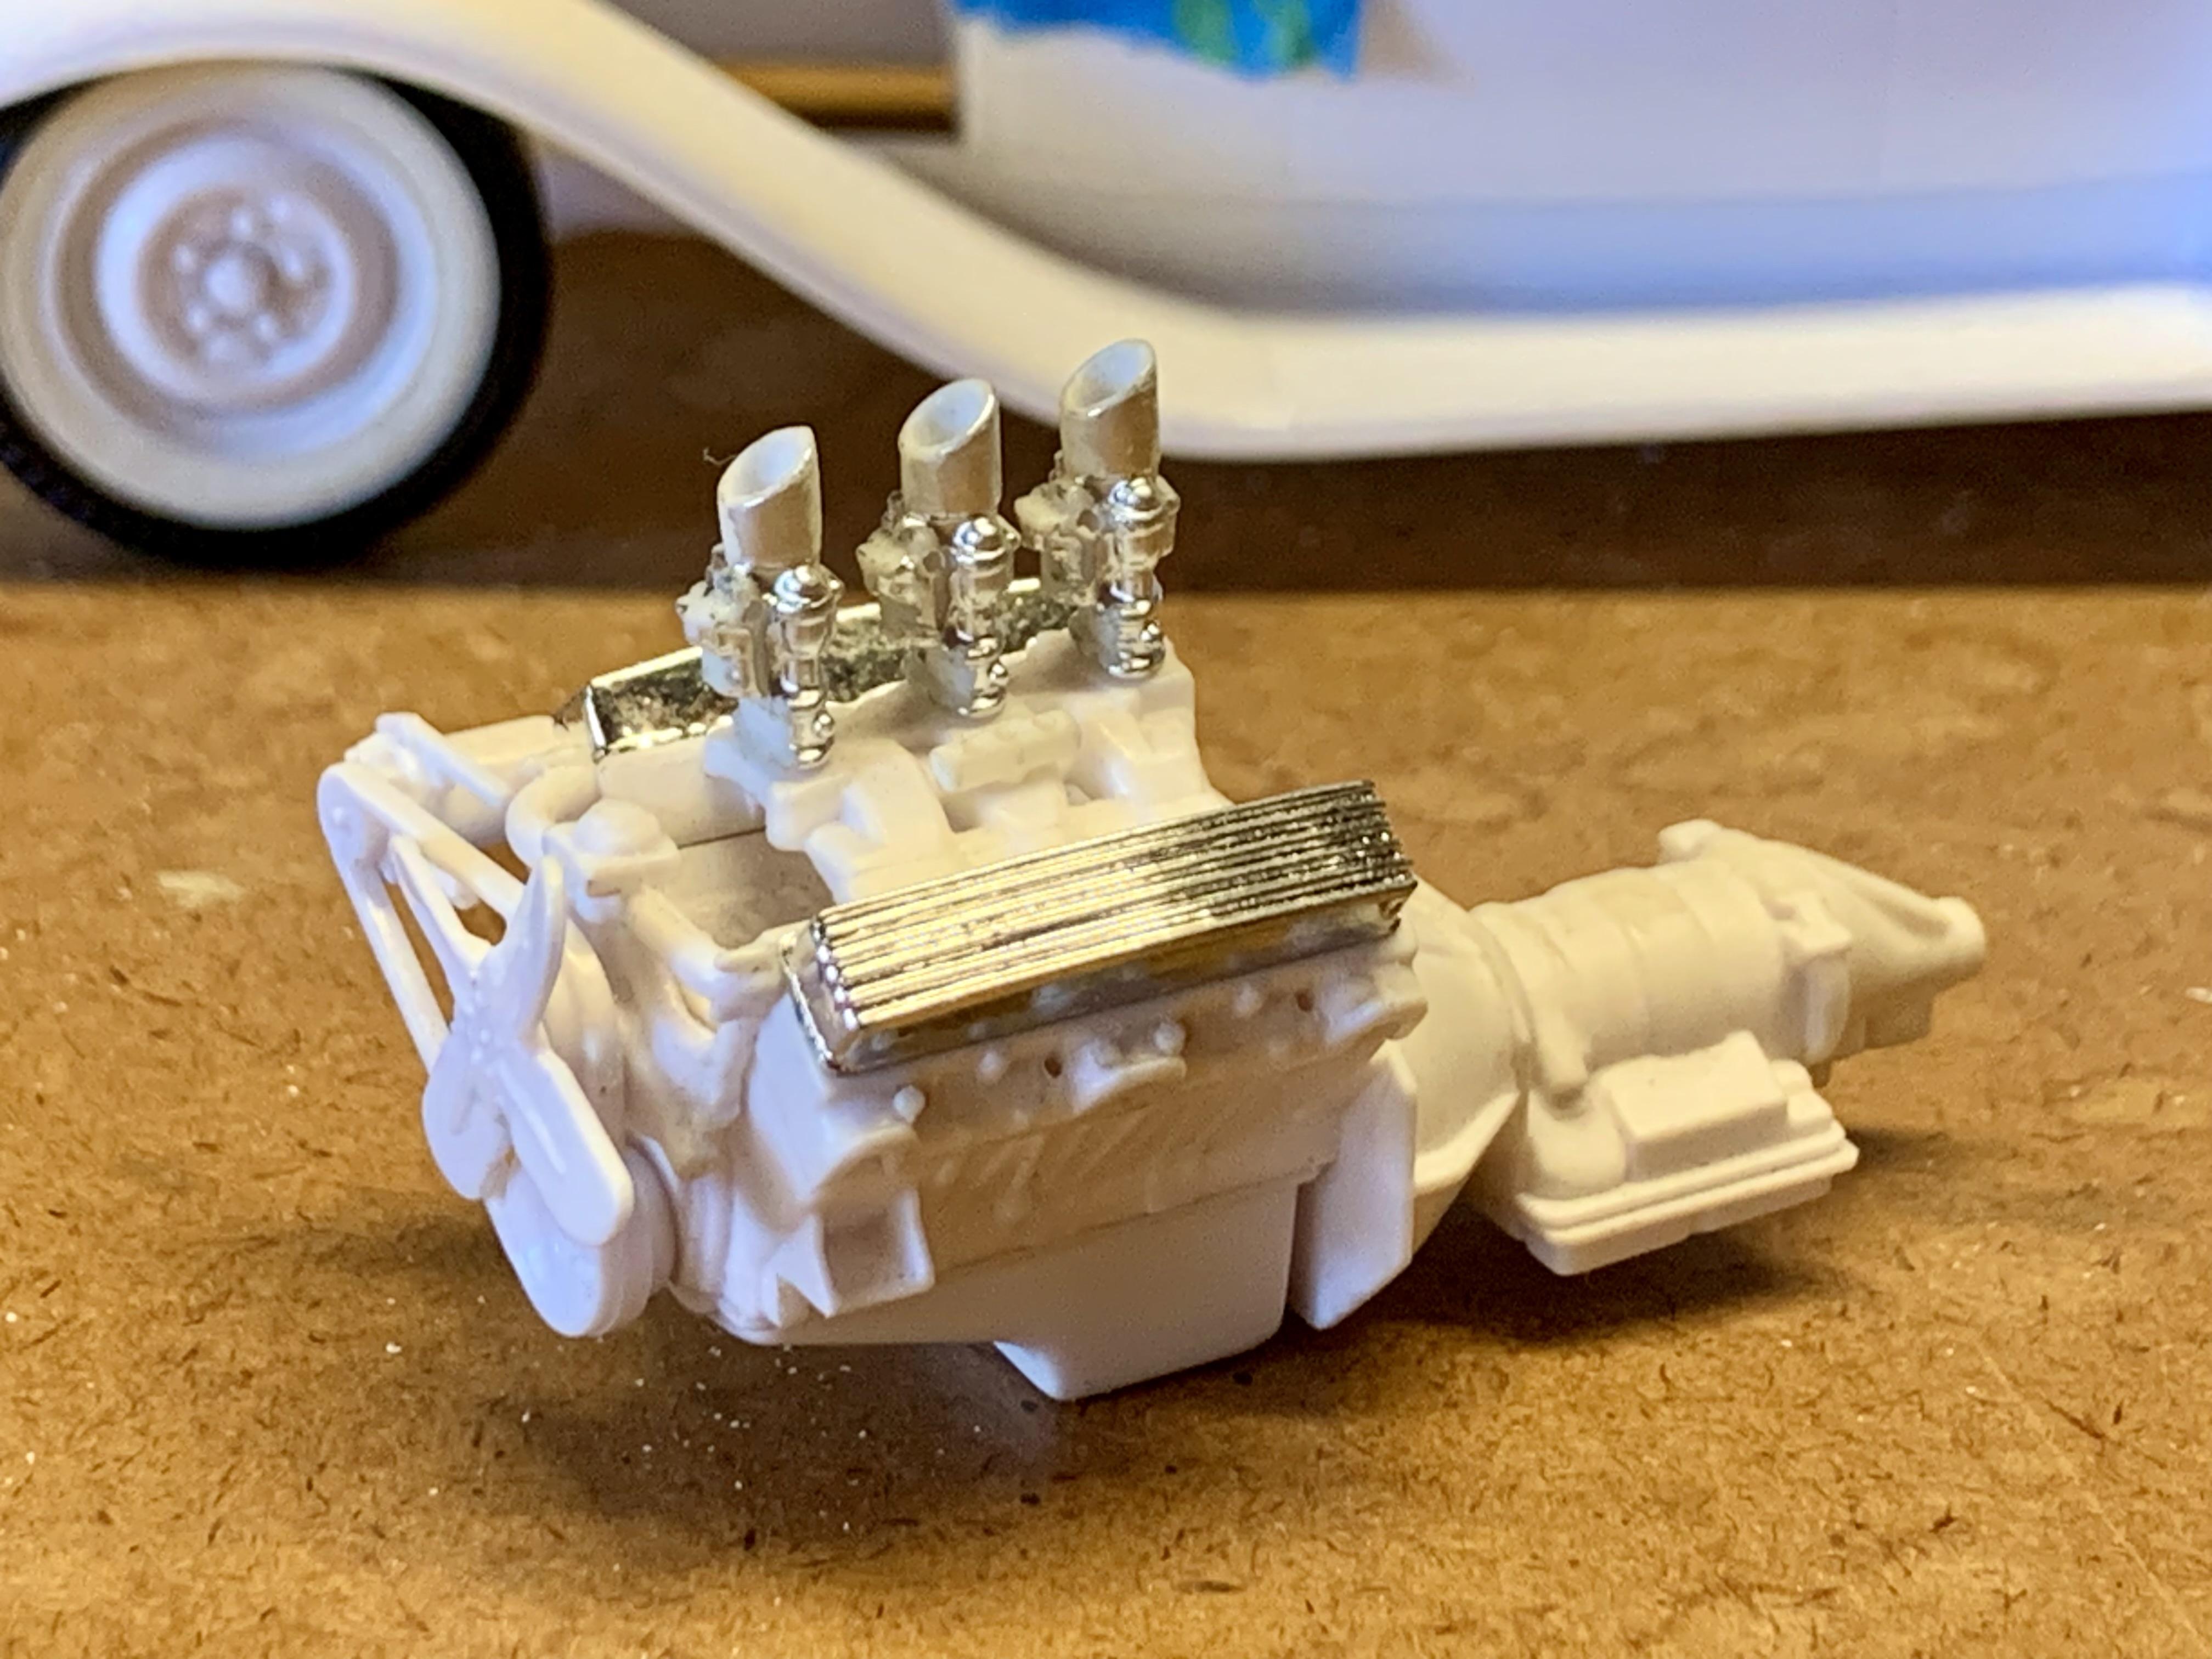
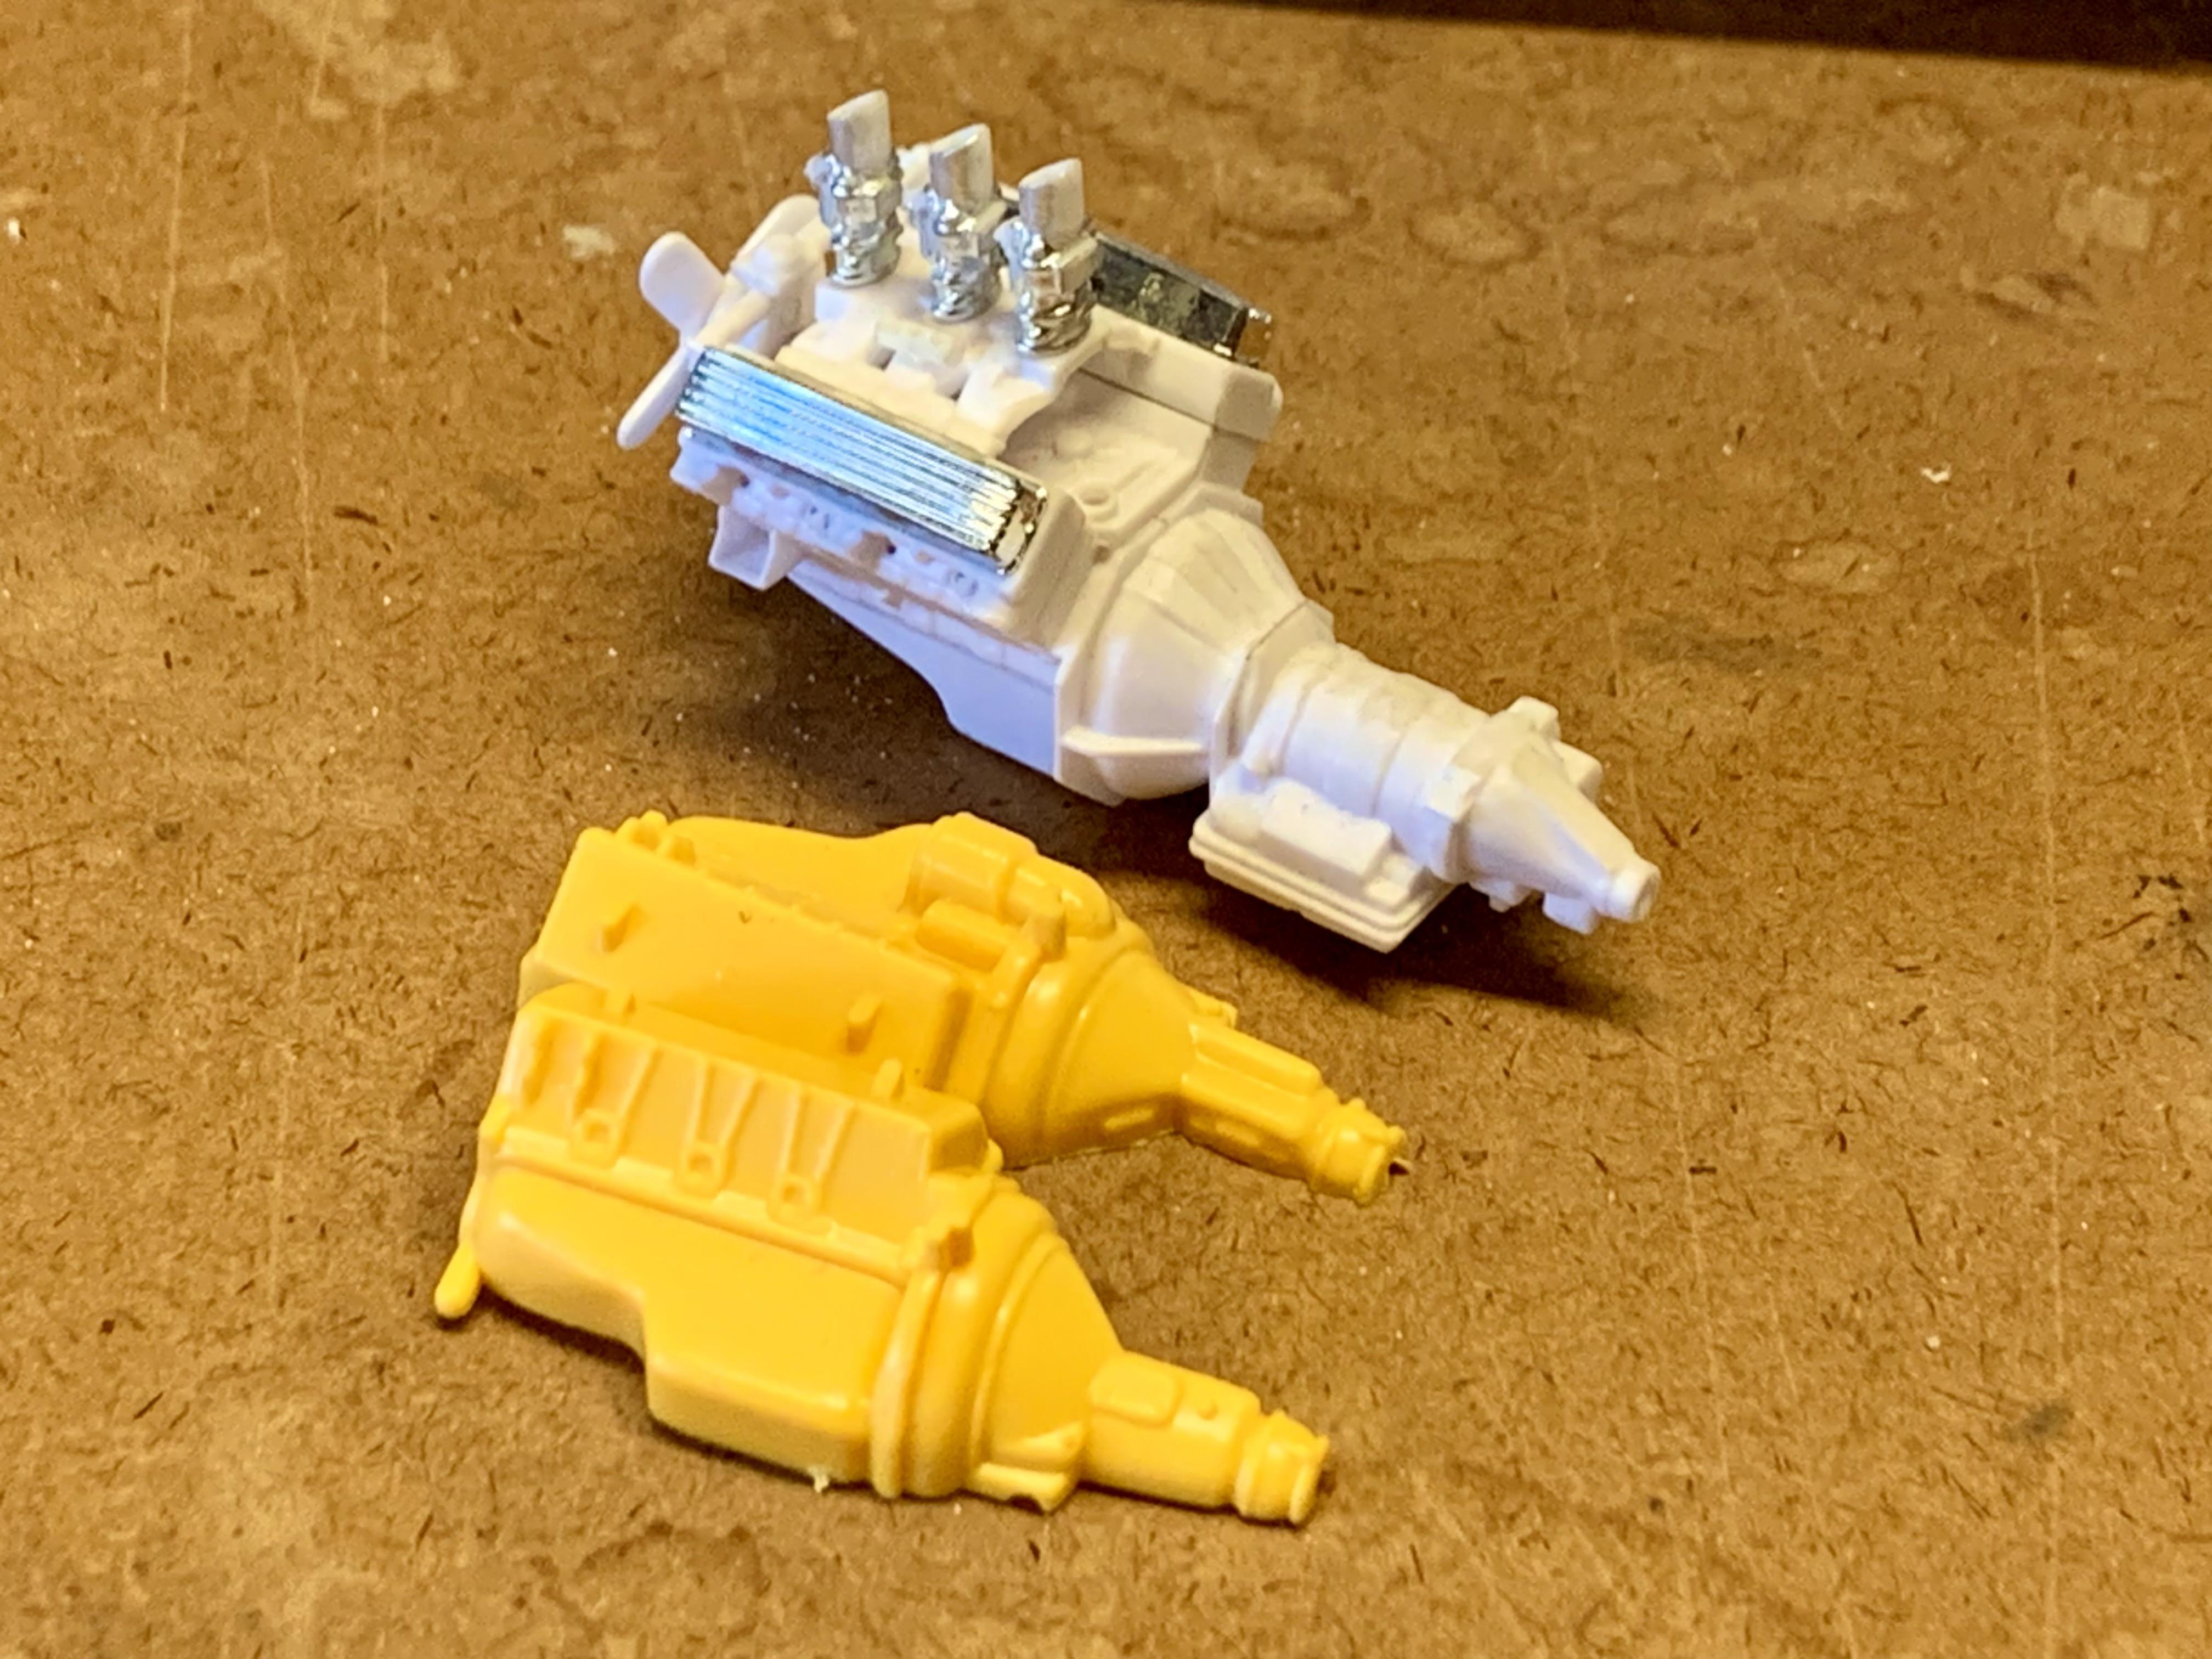
Haven’t touched this project since my last update in early March. Got to looking at pictures of it last night and realized that I really don’t like it. It’s a mish-mash of parts and eras with no continuity. Blown small block with fragile early drive line. Deep and deeper wire wheels with ugly radial tires. Dorky stock windshield and top. Then there’s the interior “tub” with pleated upholstery inserts that is hard to get away from without starting over. Just an odd combo. Today I actually had some free time and decided to see what I could do to improve it. My bread and butter is Traditional hot rods so that’s what I’m gonna do and what the kit readily lends itself to. Changes include: Modelhaus T120 front tires opened up to fit Revell 1948 Ford wheels. Monogram 1941 Lincoln rear tires with Drag City Casting steelie wheels that take Ford hubcaps that I mastered some years ago. Back to the kit dropped I-beam axle. Chopped windshield from newest Revell 1932 Roadster (which fit after some strategic trimming) and Drag City Casting 32 Roadster top that I mastered a few years ago. Revell 1949 Mercury Custom early Cadillac engine (left over from an abandoned project) fitted with the carbs & scoops from a Revell 1950 Ford F1 Pickup. Will cut the hydro transmission off and graft on the early Ford one from the yellow Caddy engine from the old Monogram ‘29 Roadster Pickup. So that’s what we’re doing now!
- 107 replies
-
- 13
-