Dennis Lacy
-
Posts
2,487 -
Joined
-
Last visited
Content Type
Profiles
Forums
Events
Gallery
Everything posted by Dennis Lacy
-

Chopped '32 Ford 3-window highboy - T.R.o.G. Style
Dennis Lacy replied to Bernard Kron's topic in Model Cars
I think you found your calling with the weathered finishes. So far they’ve been very convincing. Very cool to see a pair of those artillery wheels get used. I do believe you’re the first person (other than myself) I’ve seen use them. -
Turned out incredibly nice. One of the best Beatnik Bandits I’ve seen! As far as Roth cars go, it’s one of his better looking designs.
-
I mean, yeah, it did look pretty sweet! ??

-
Or have 20 donor kits on hand like some of us nut jobs do… ?♂️ ?
-
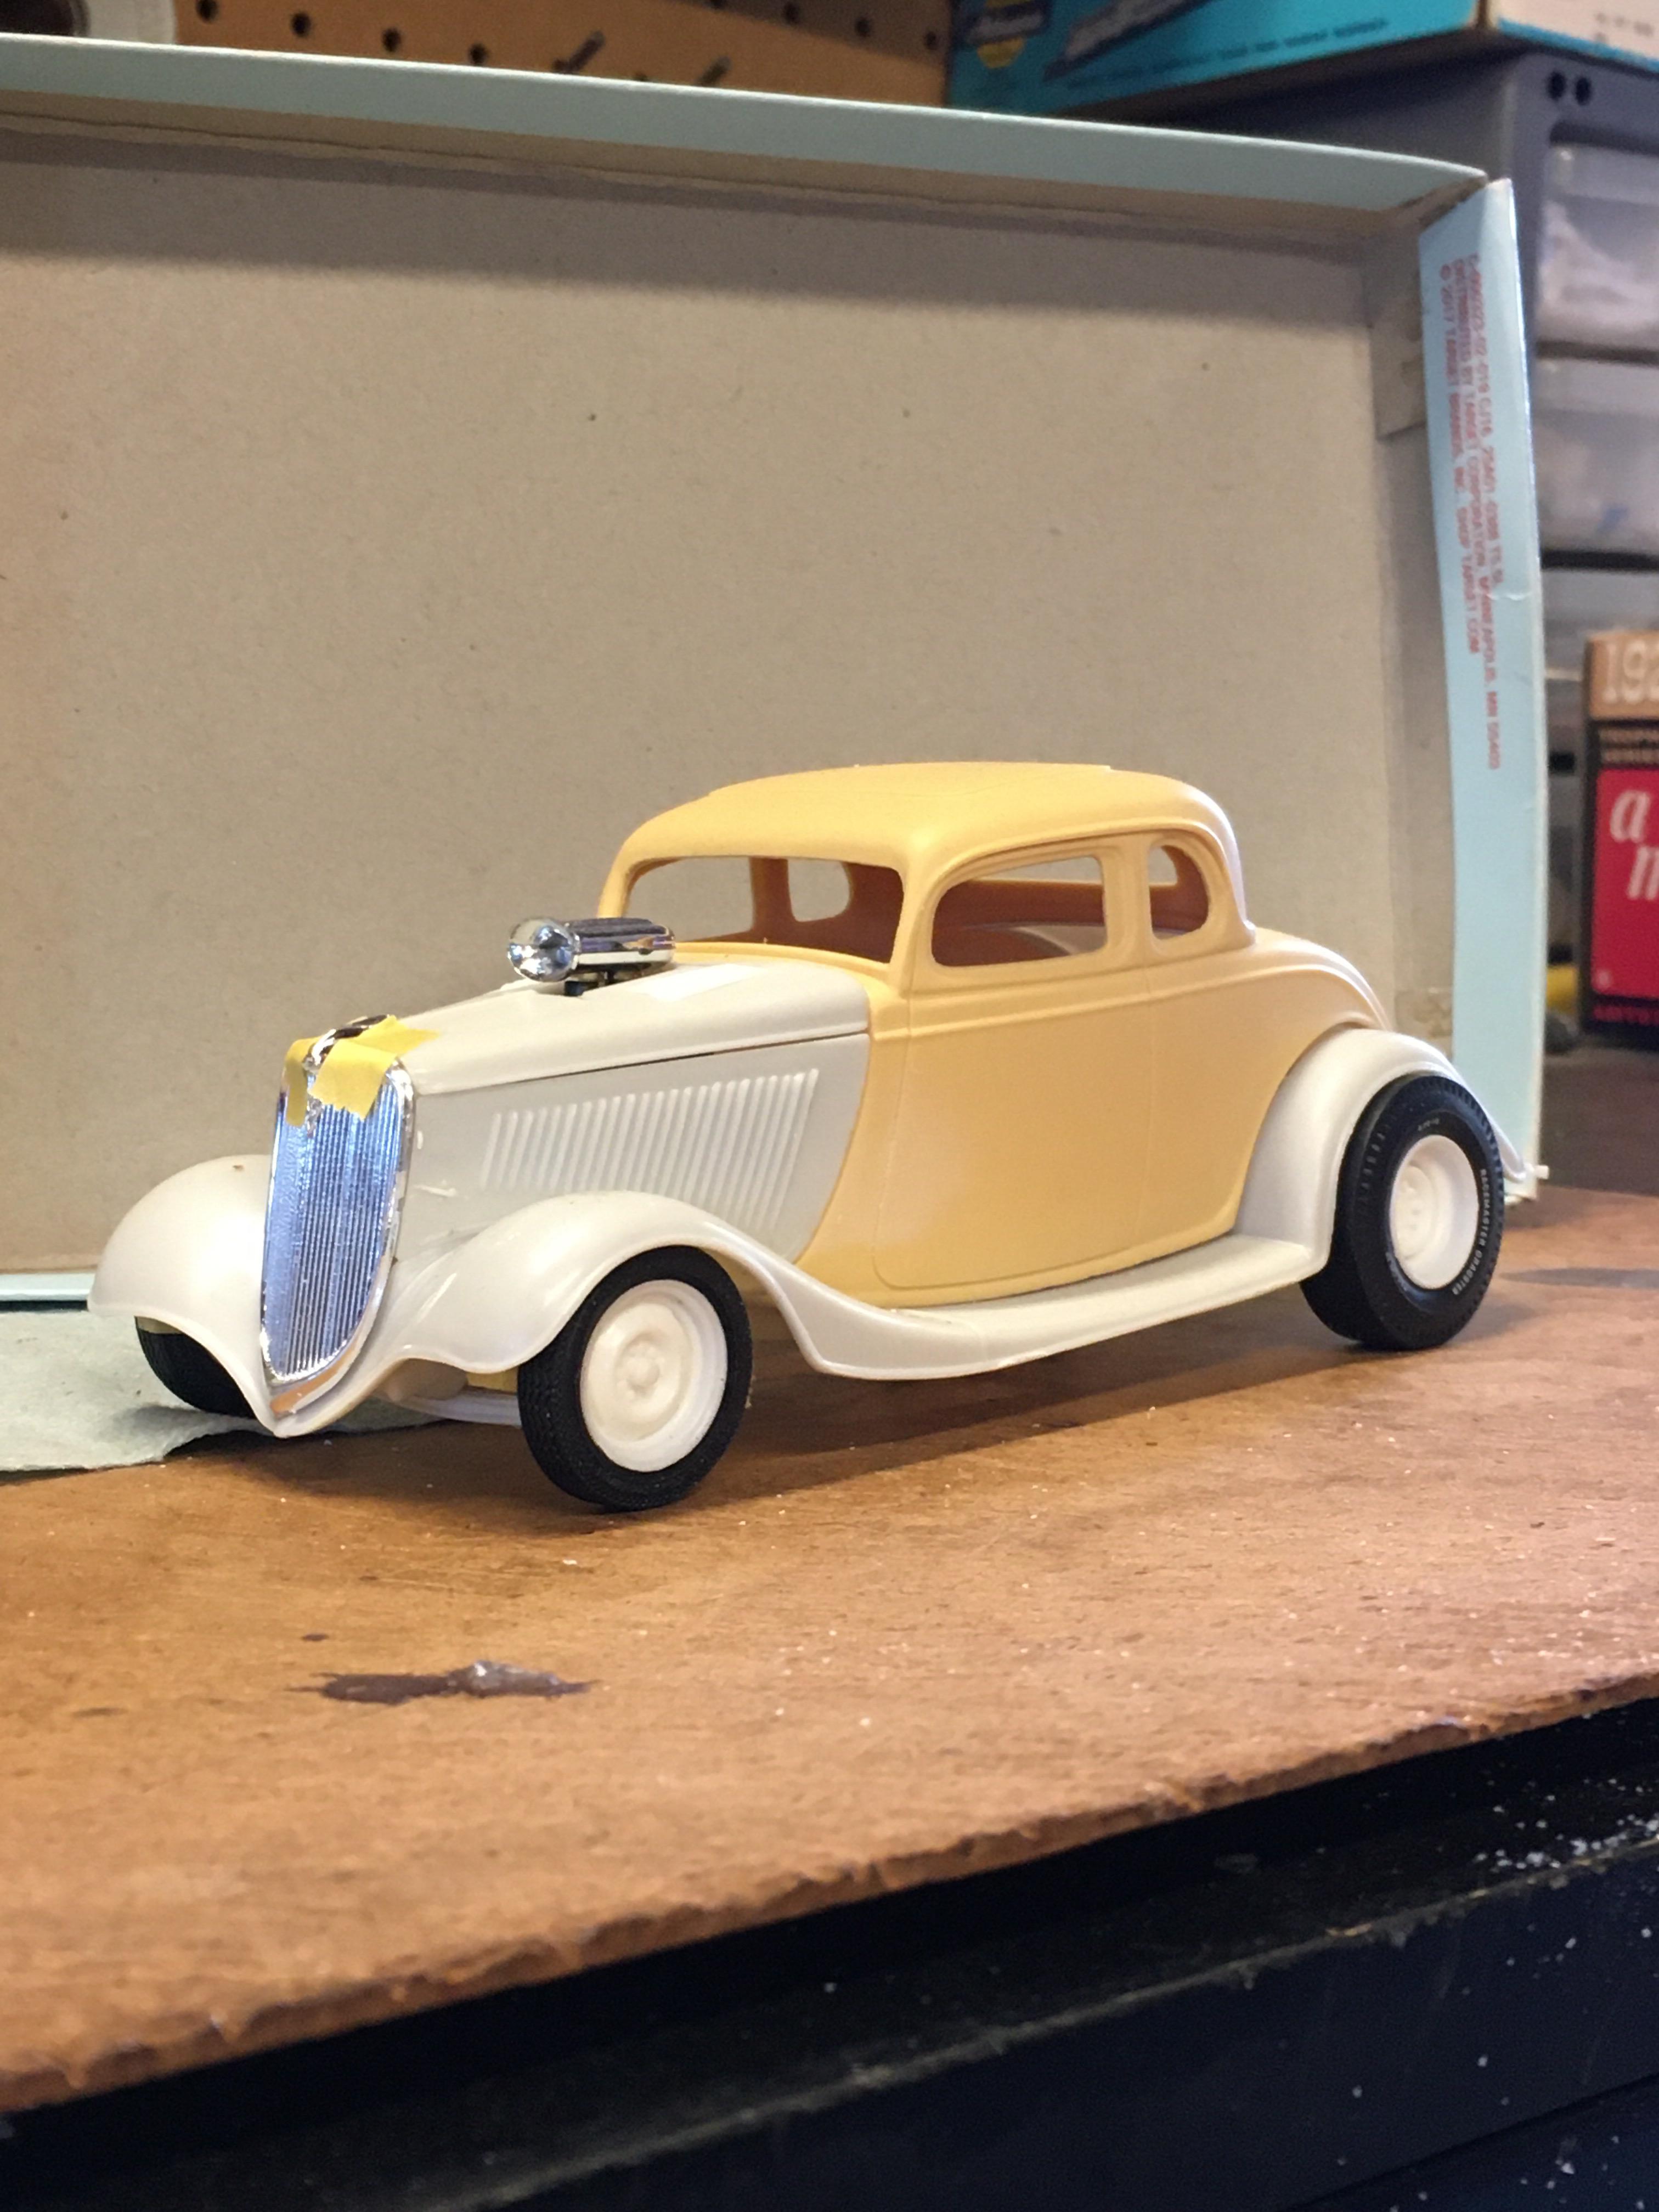
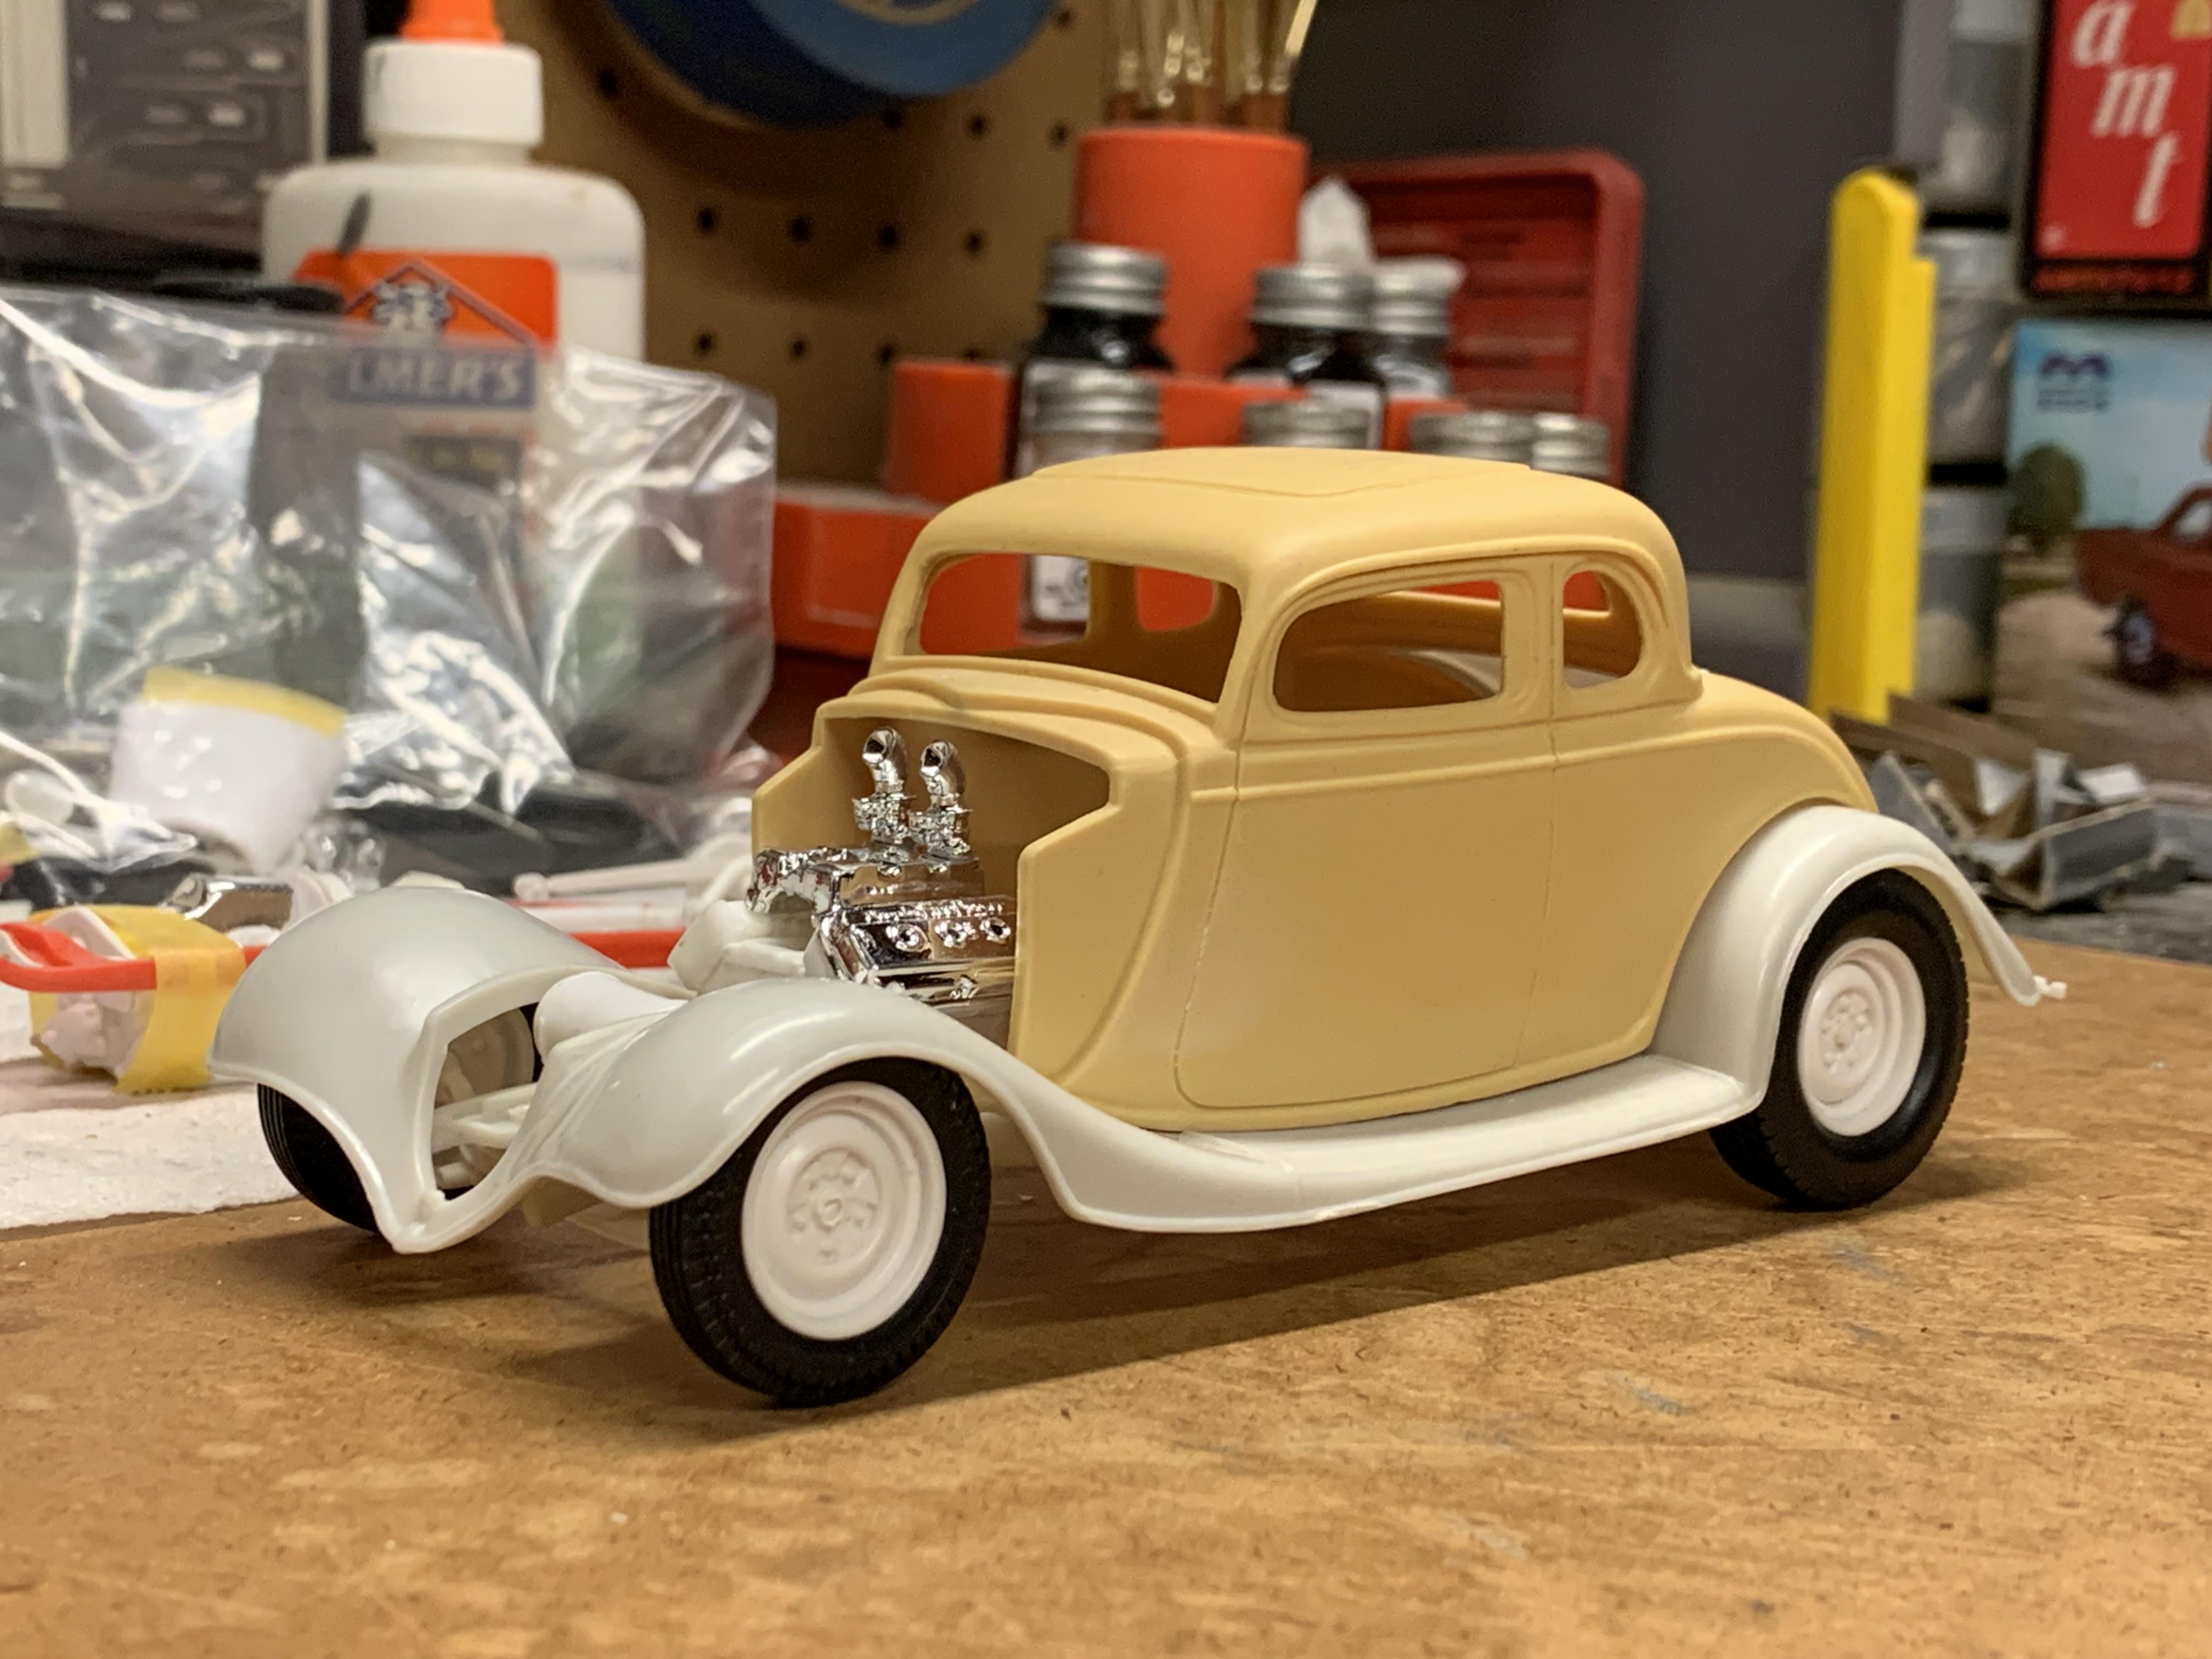
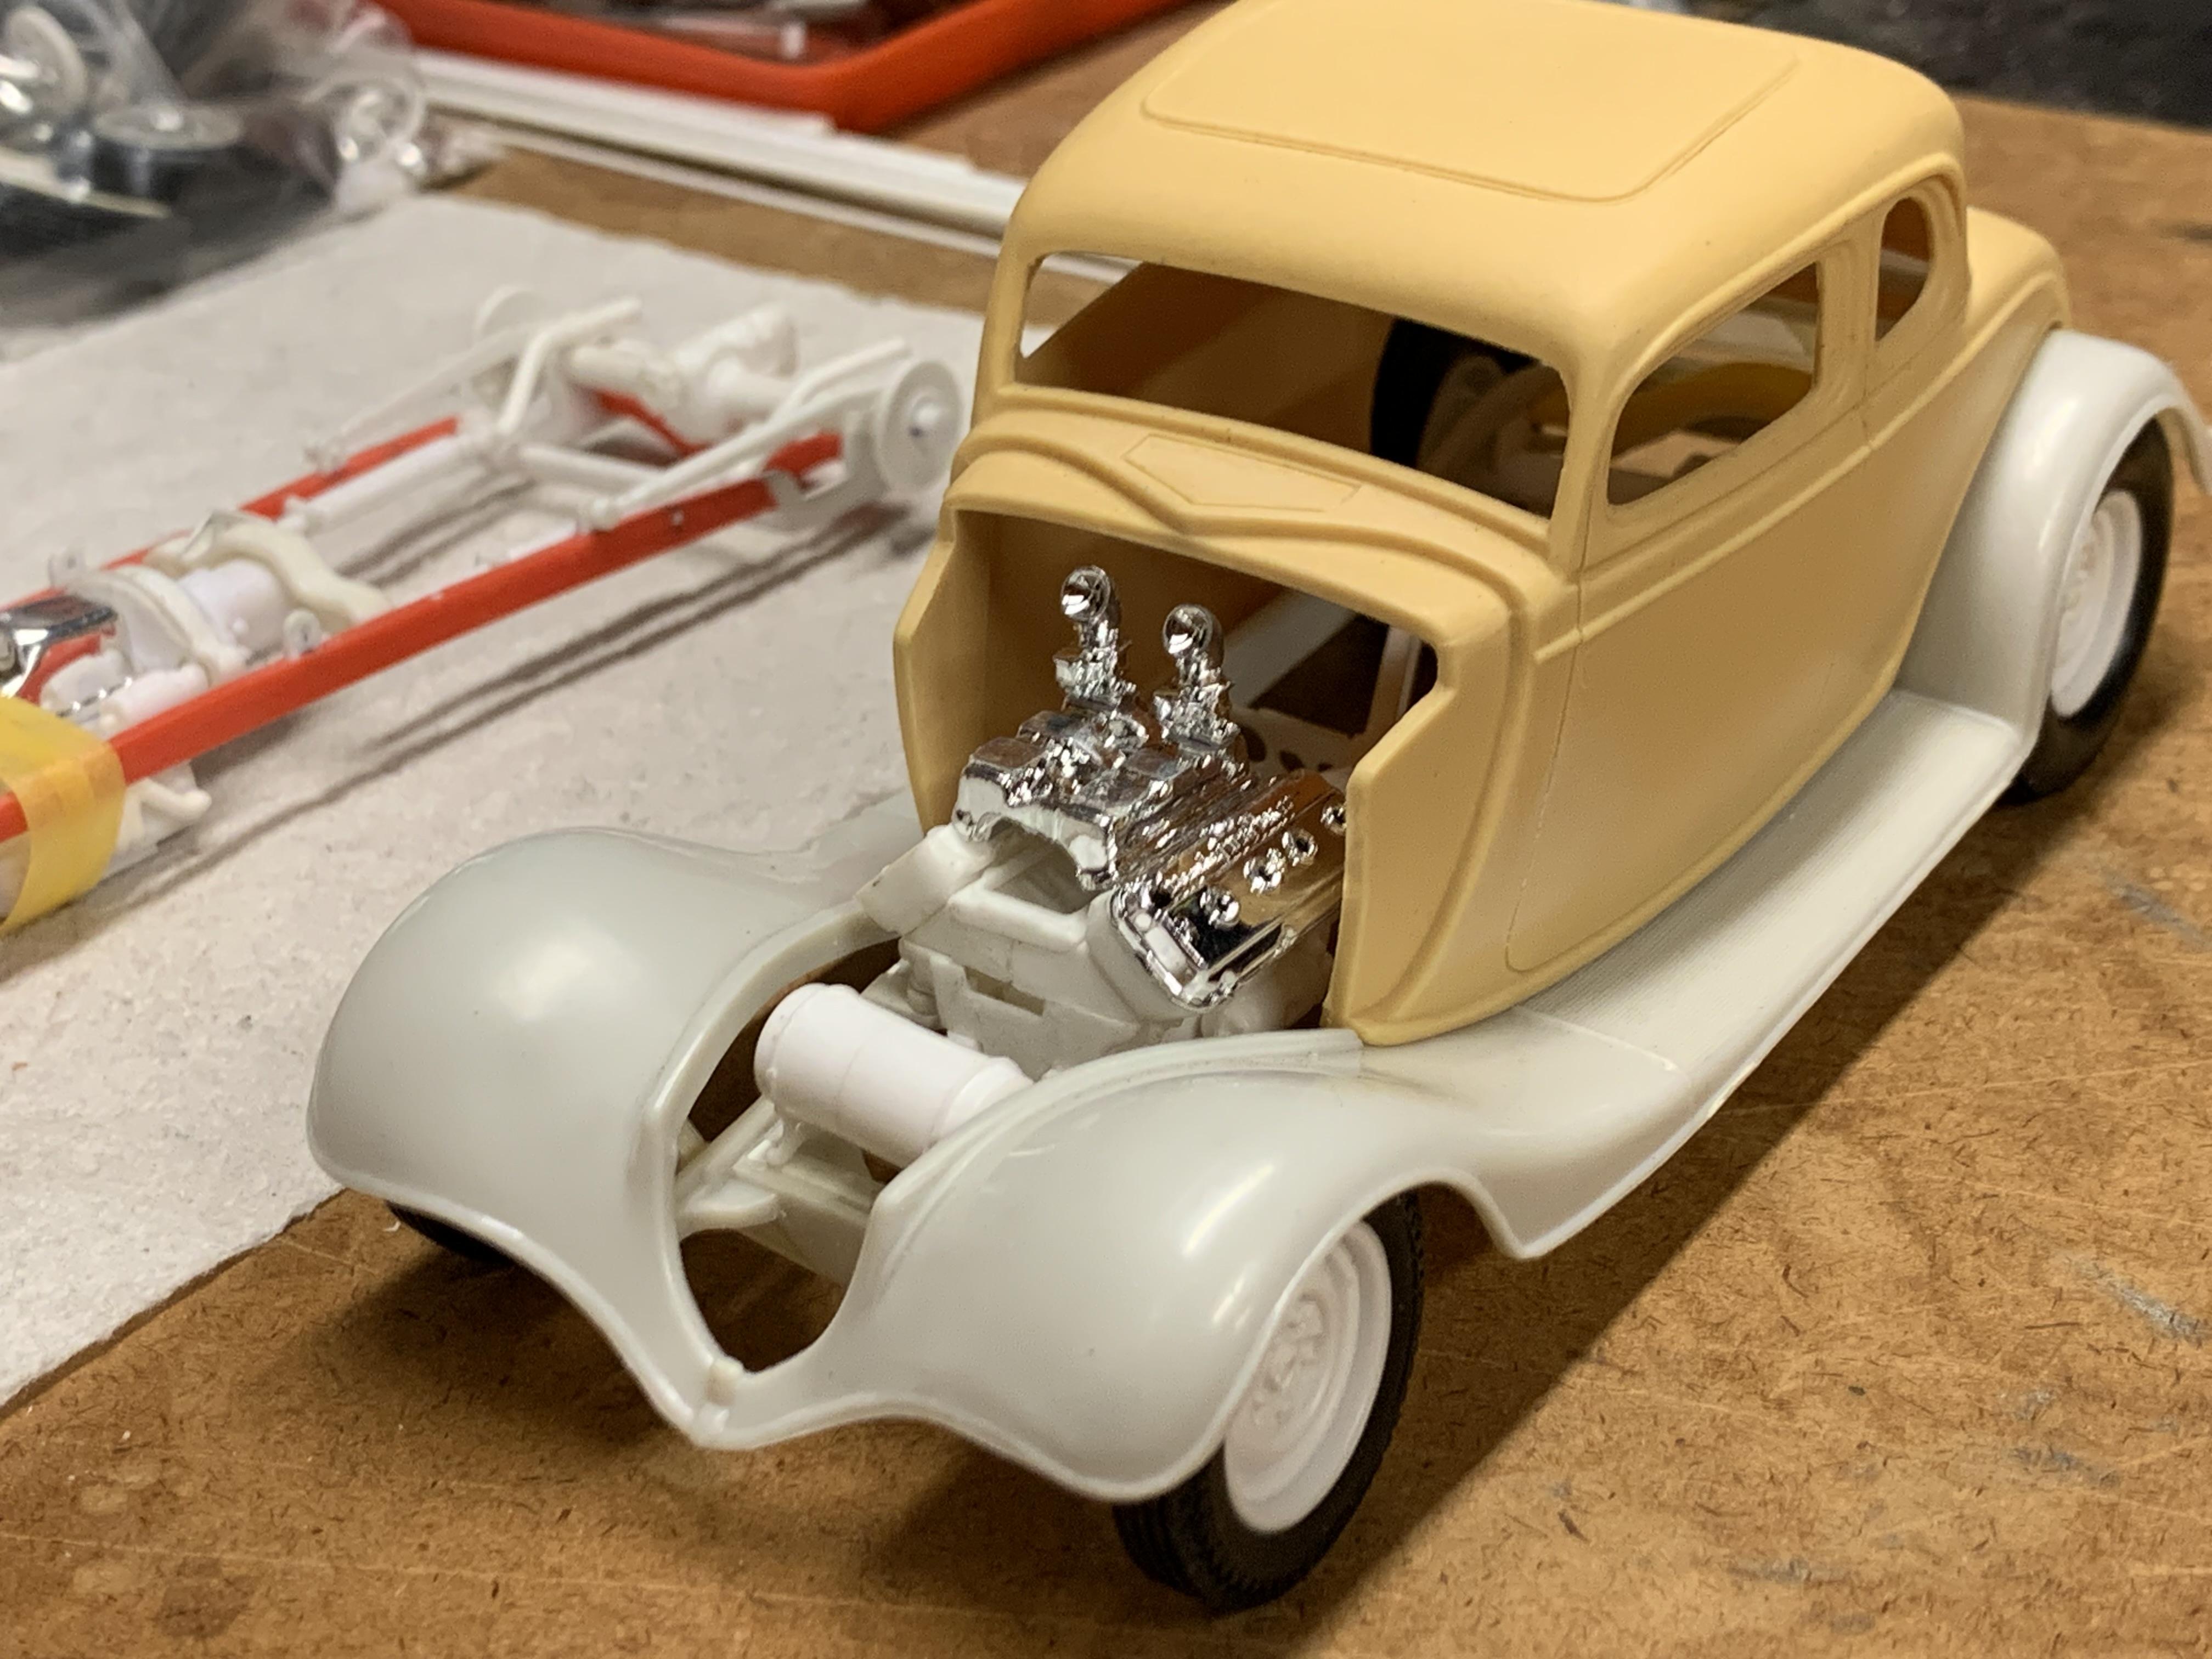
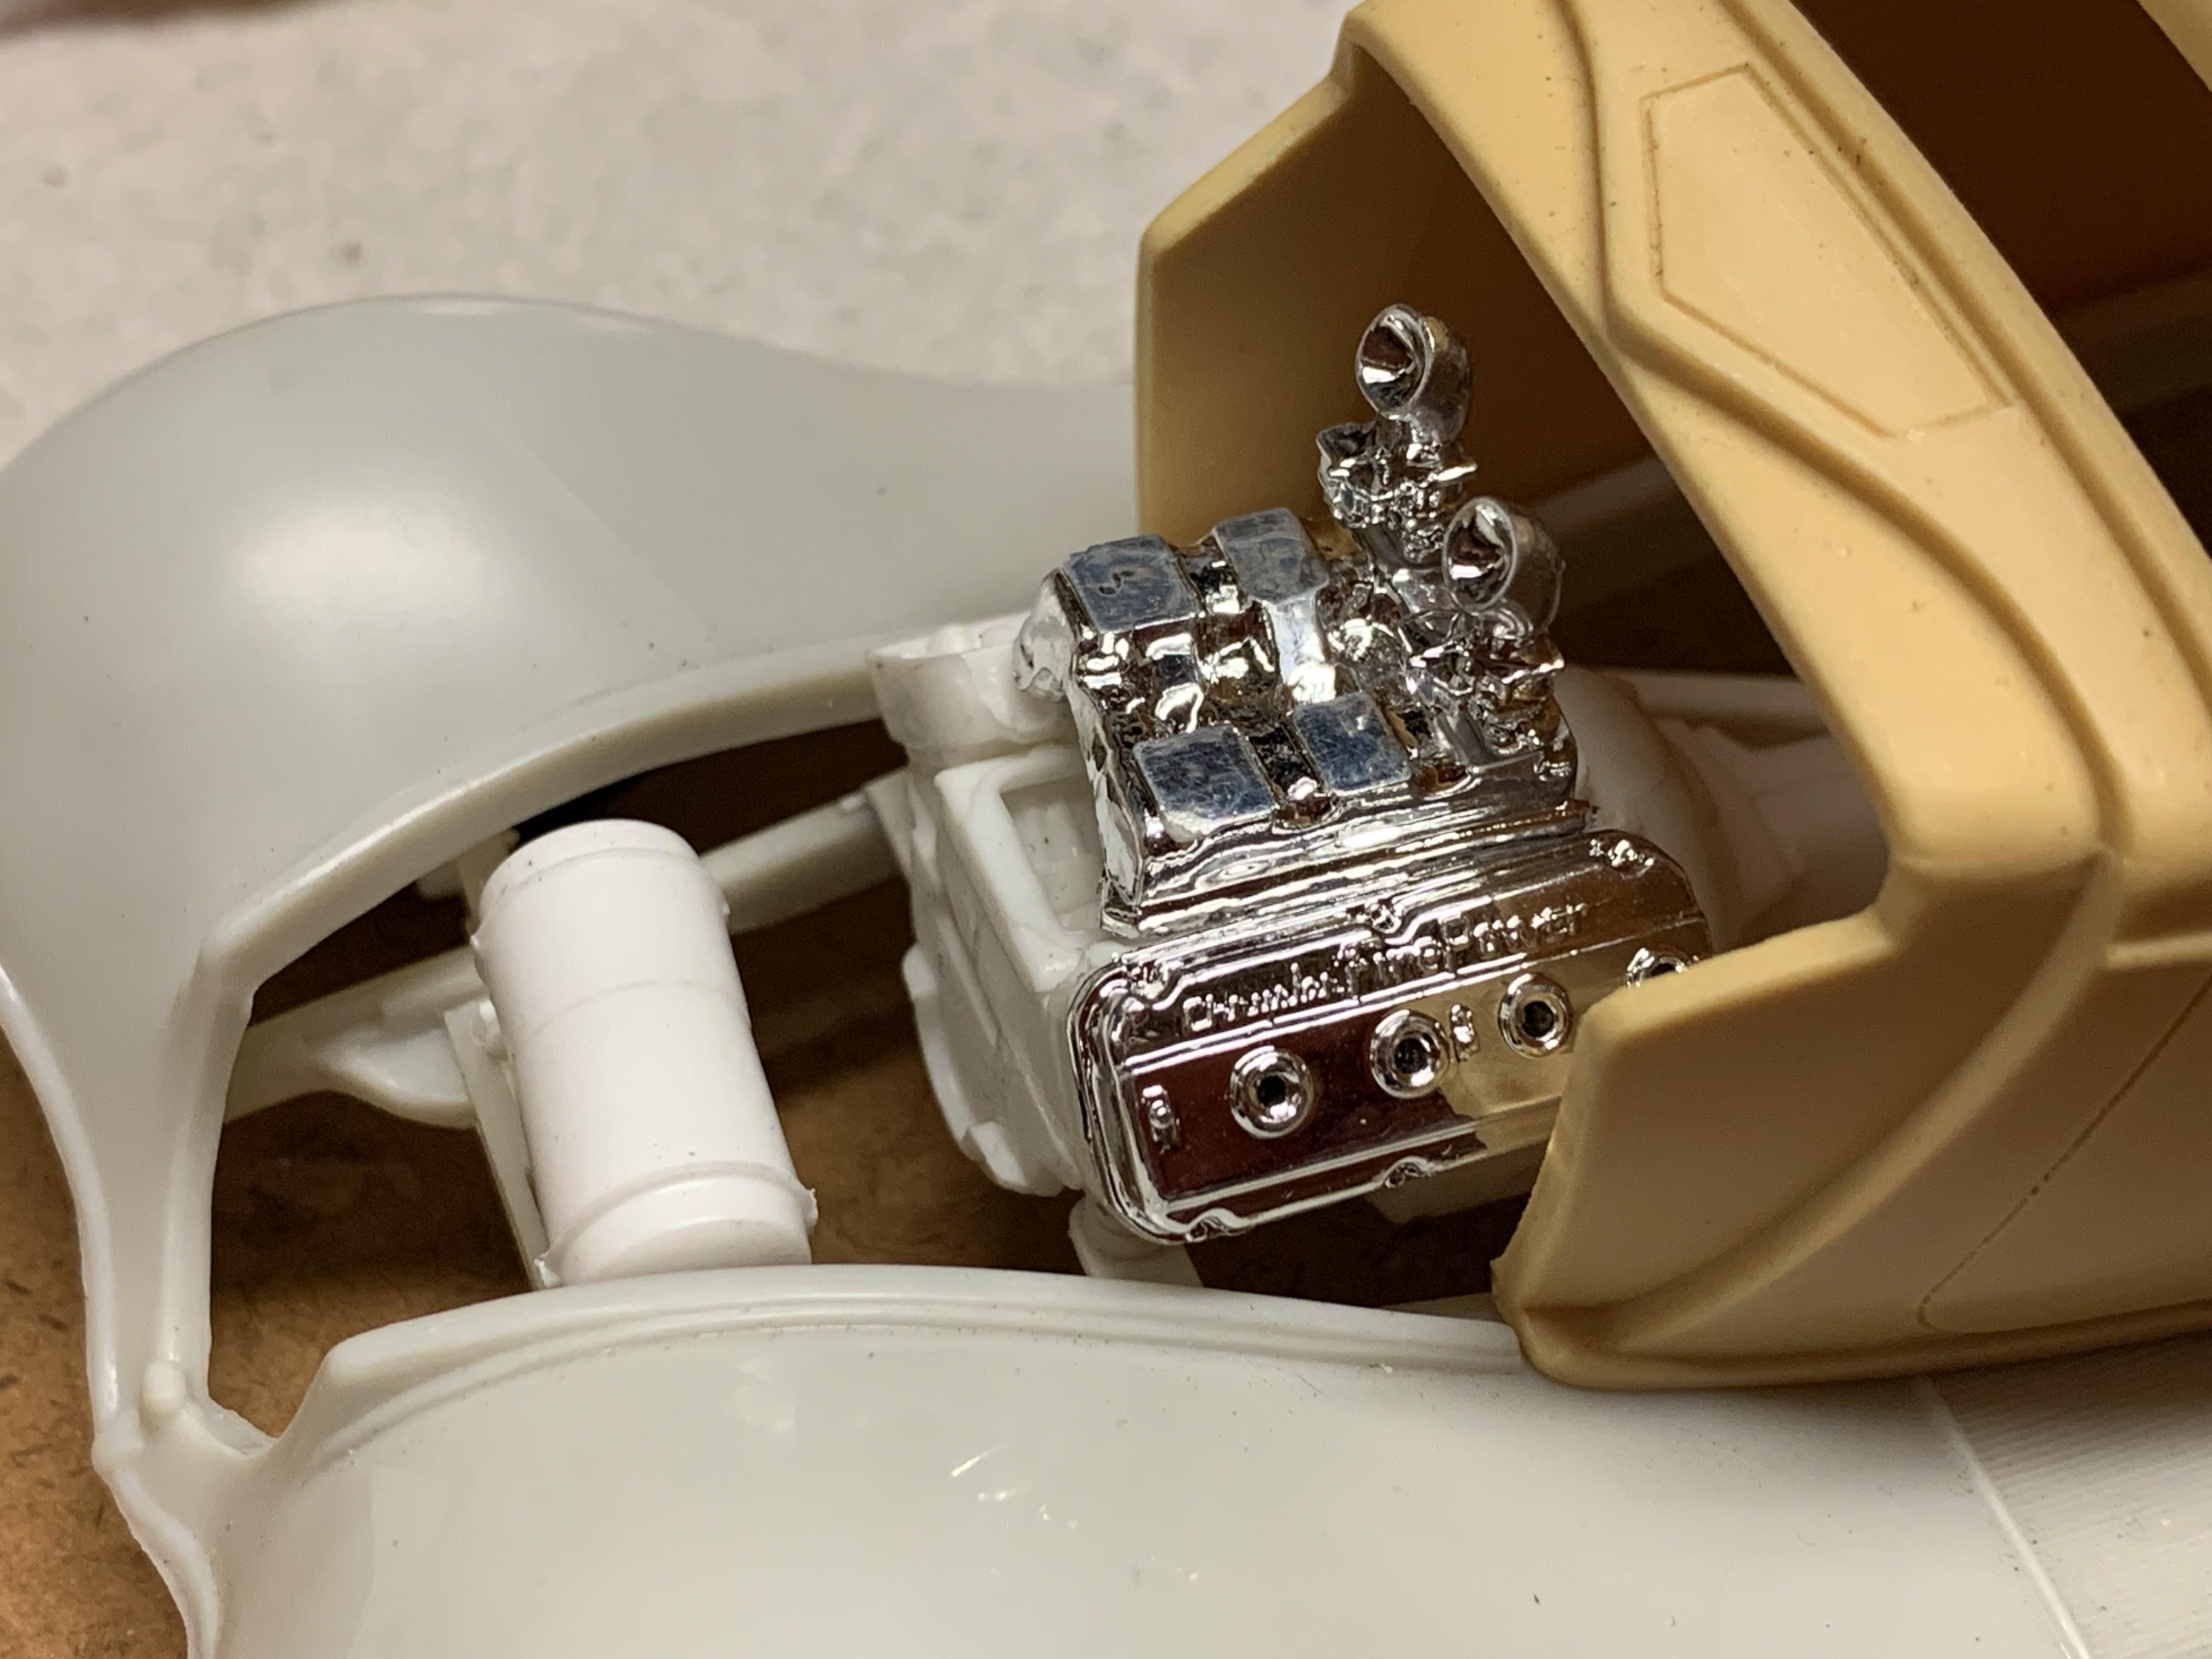
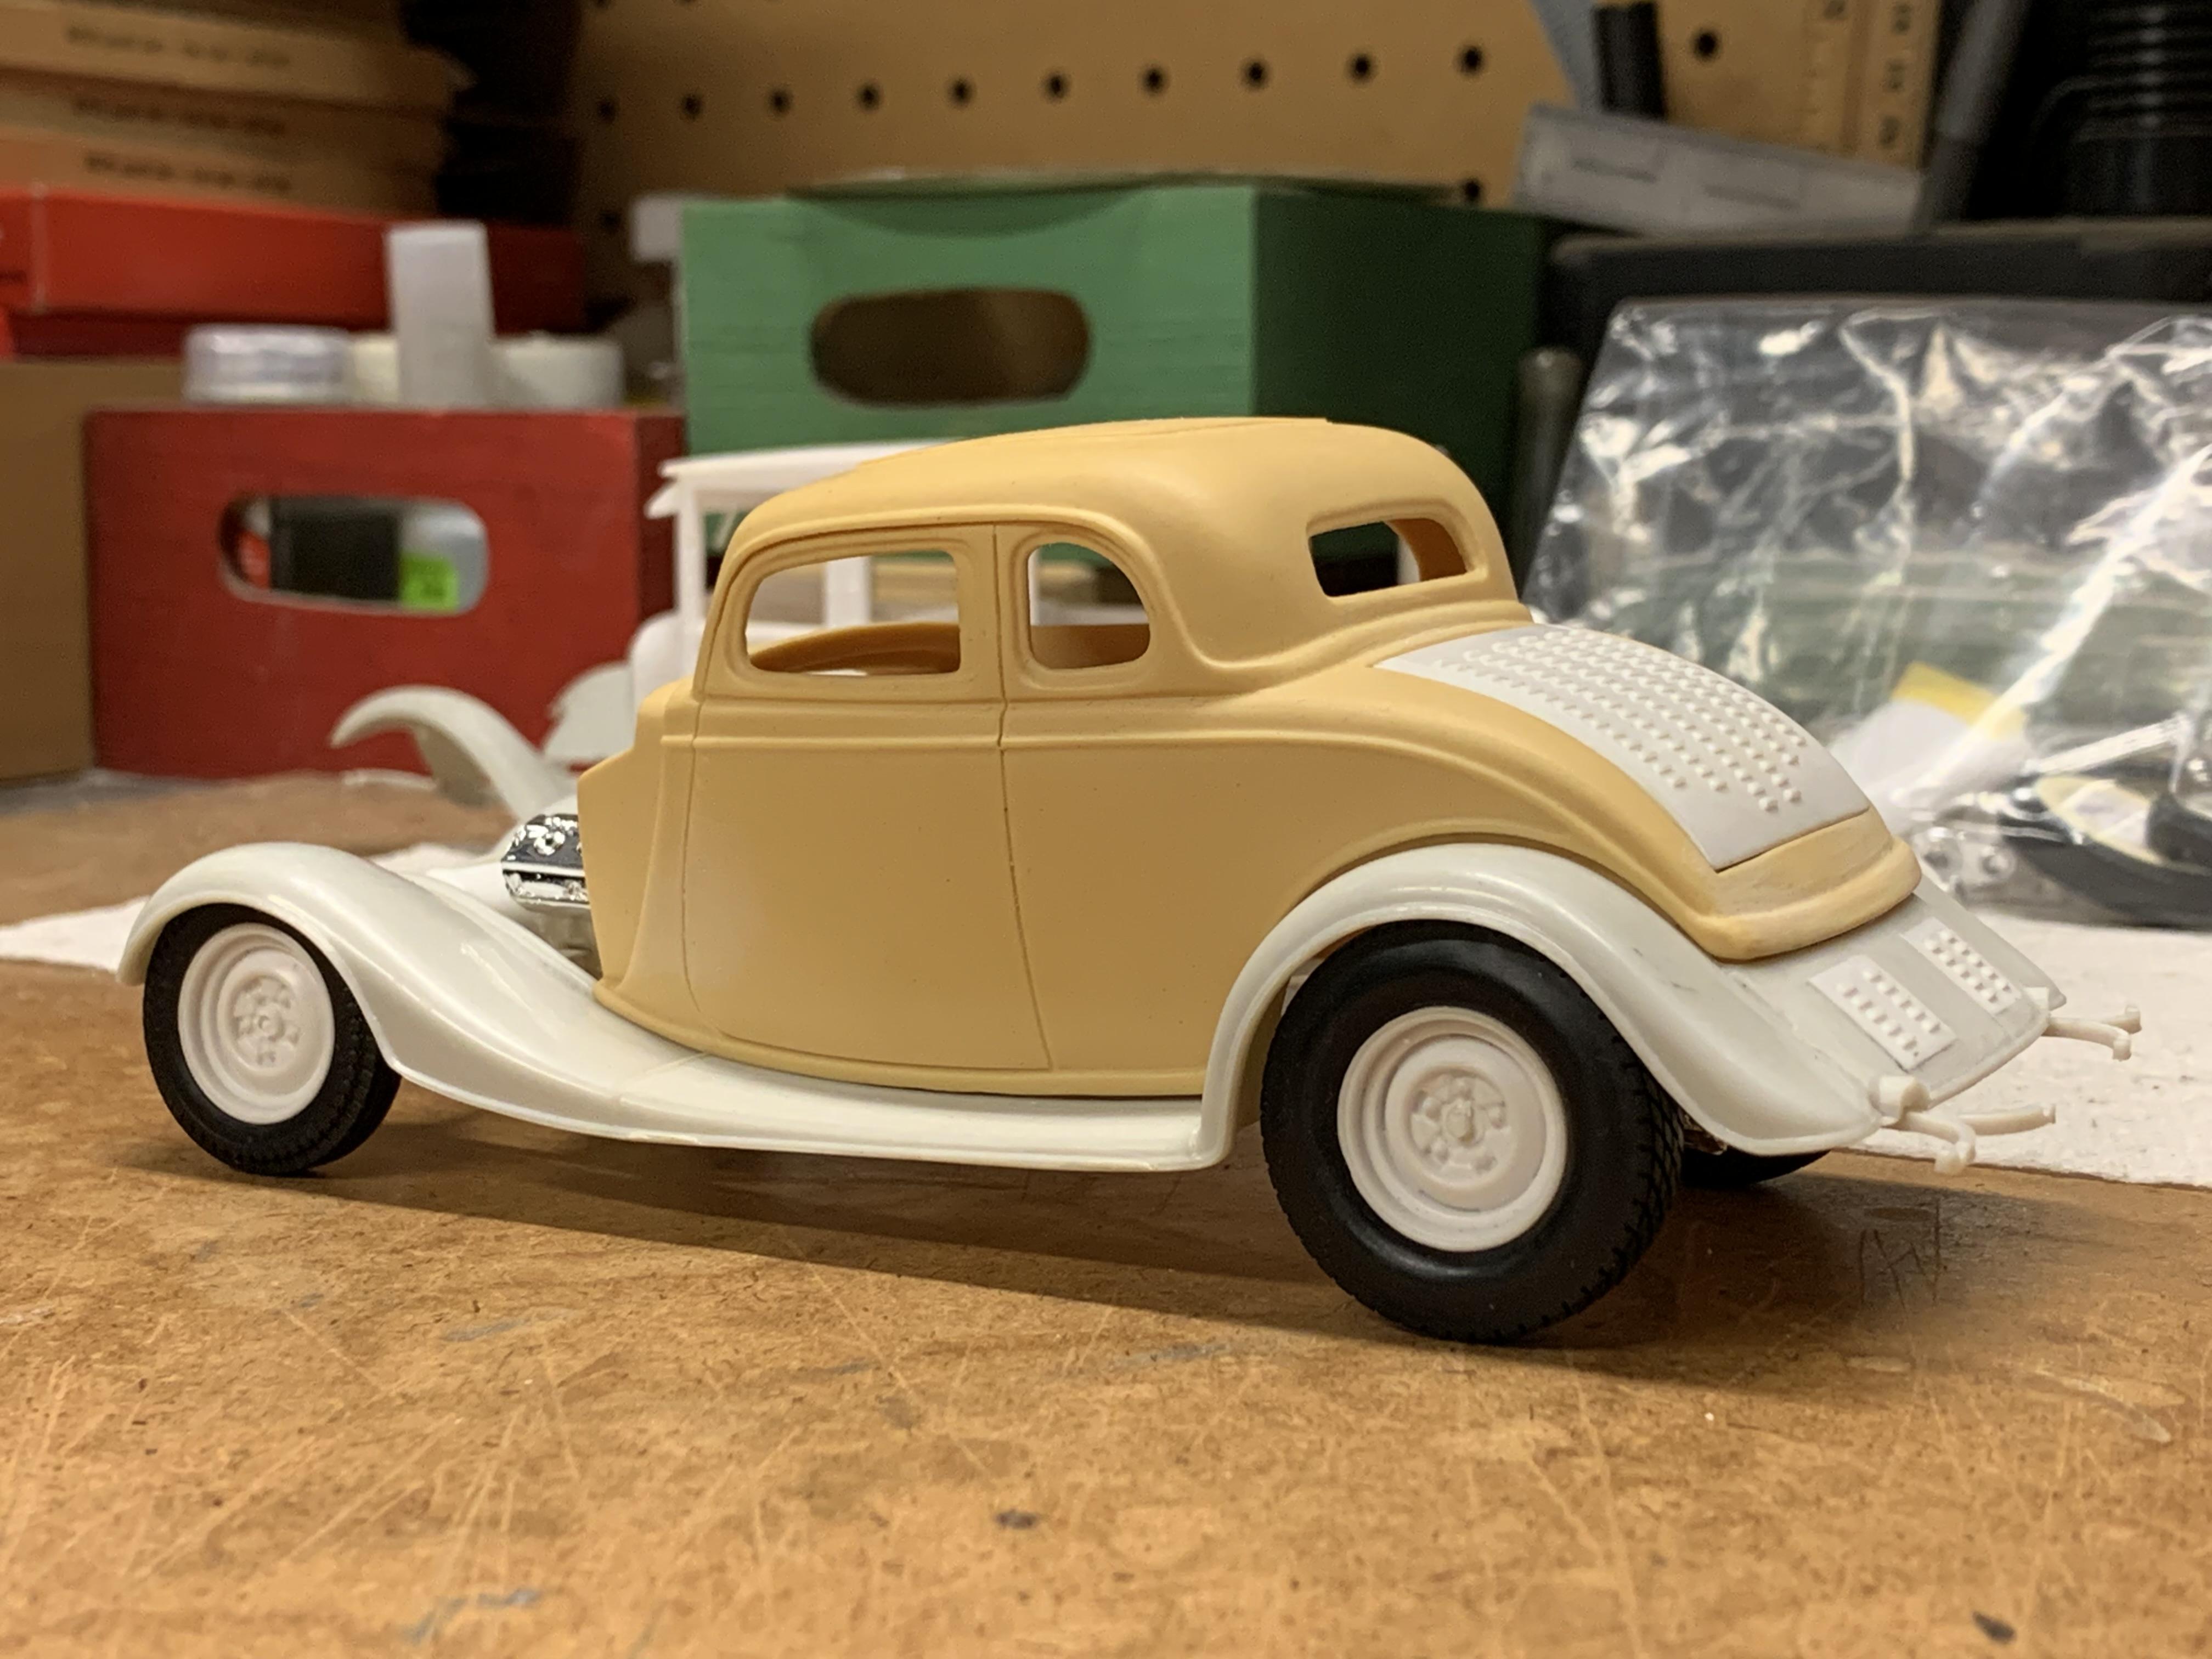
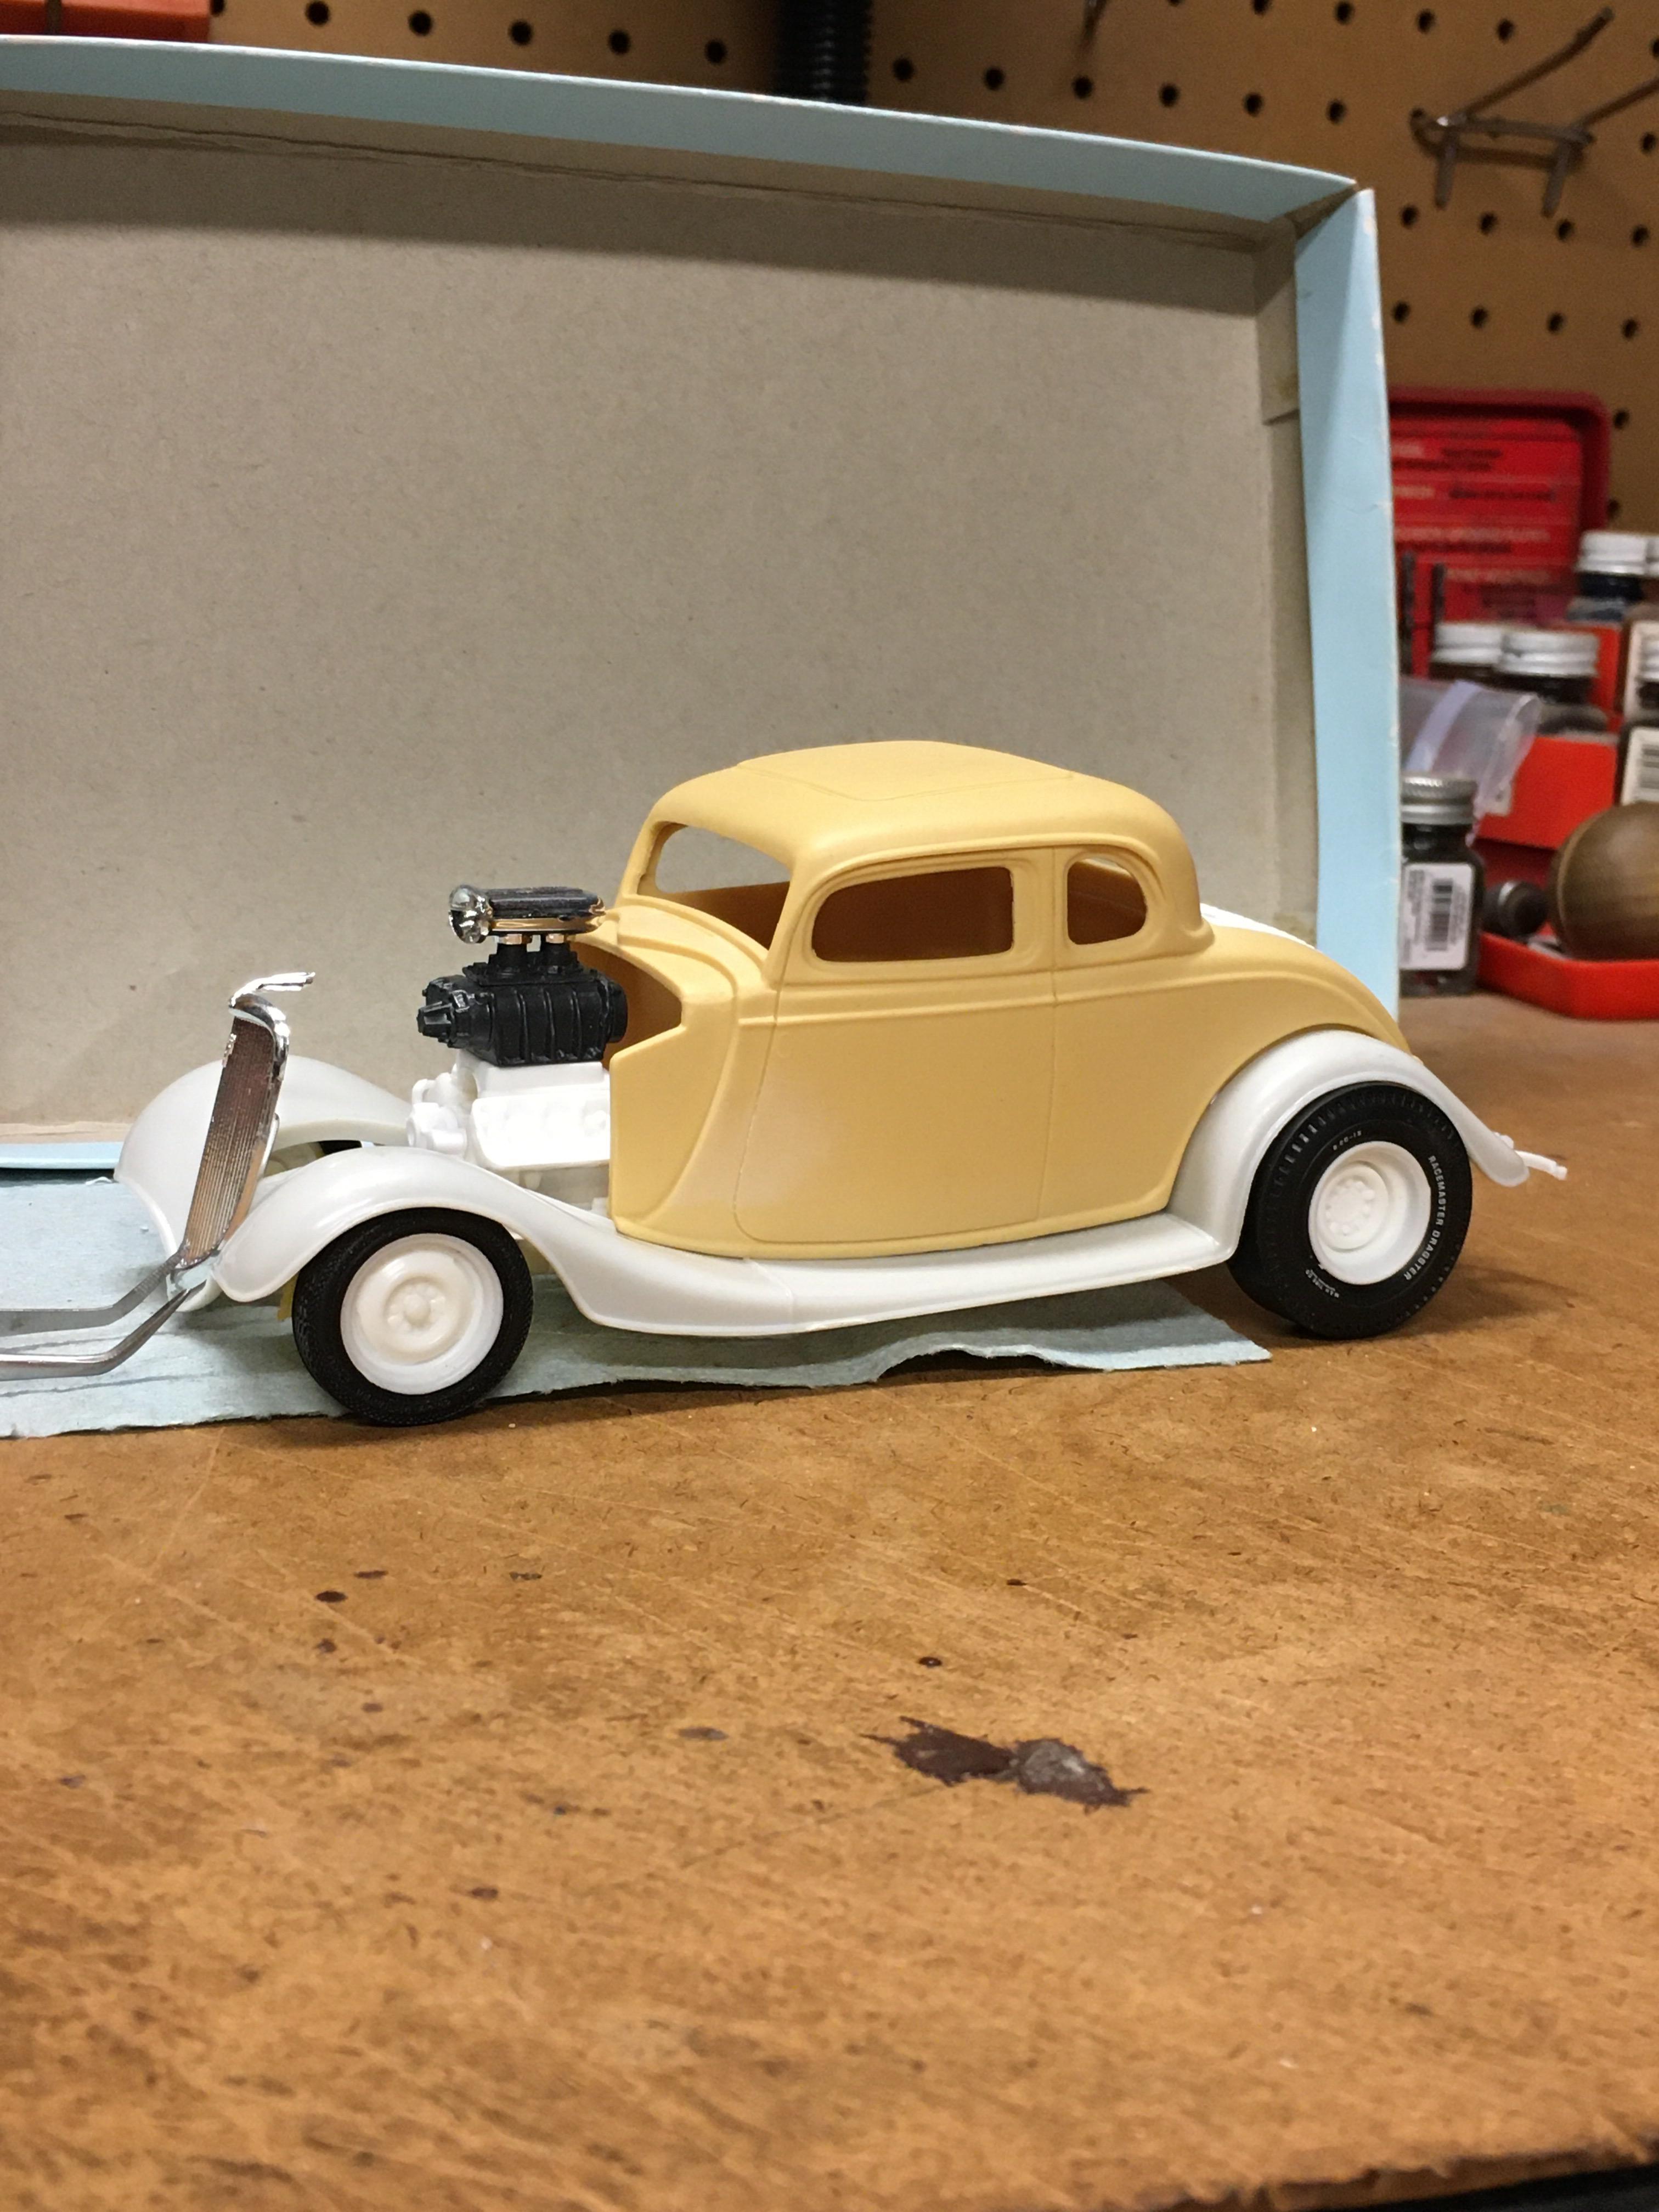
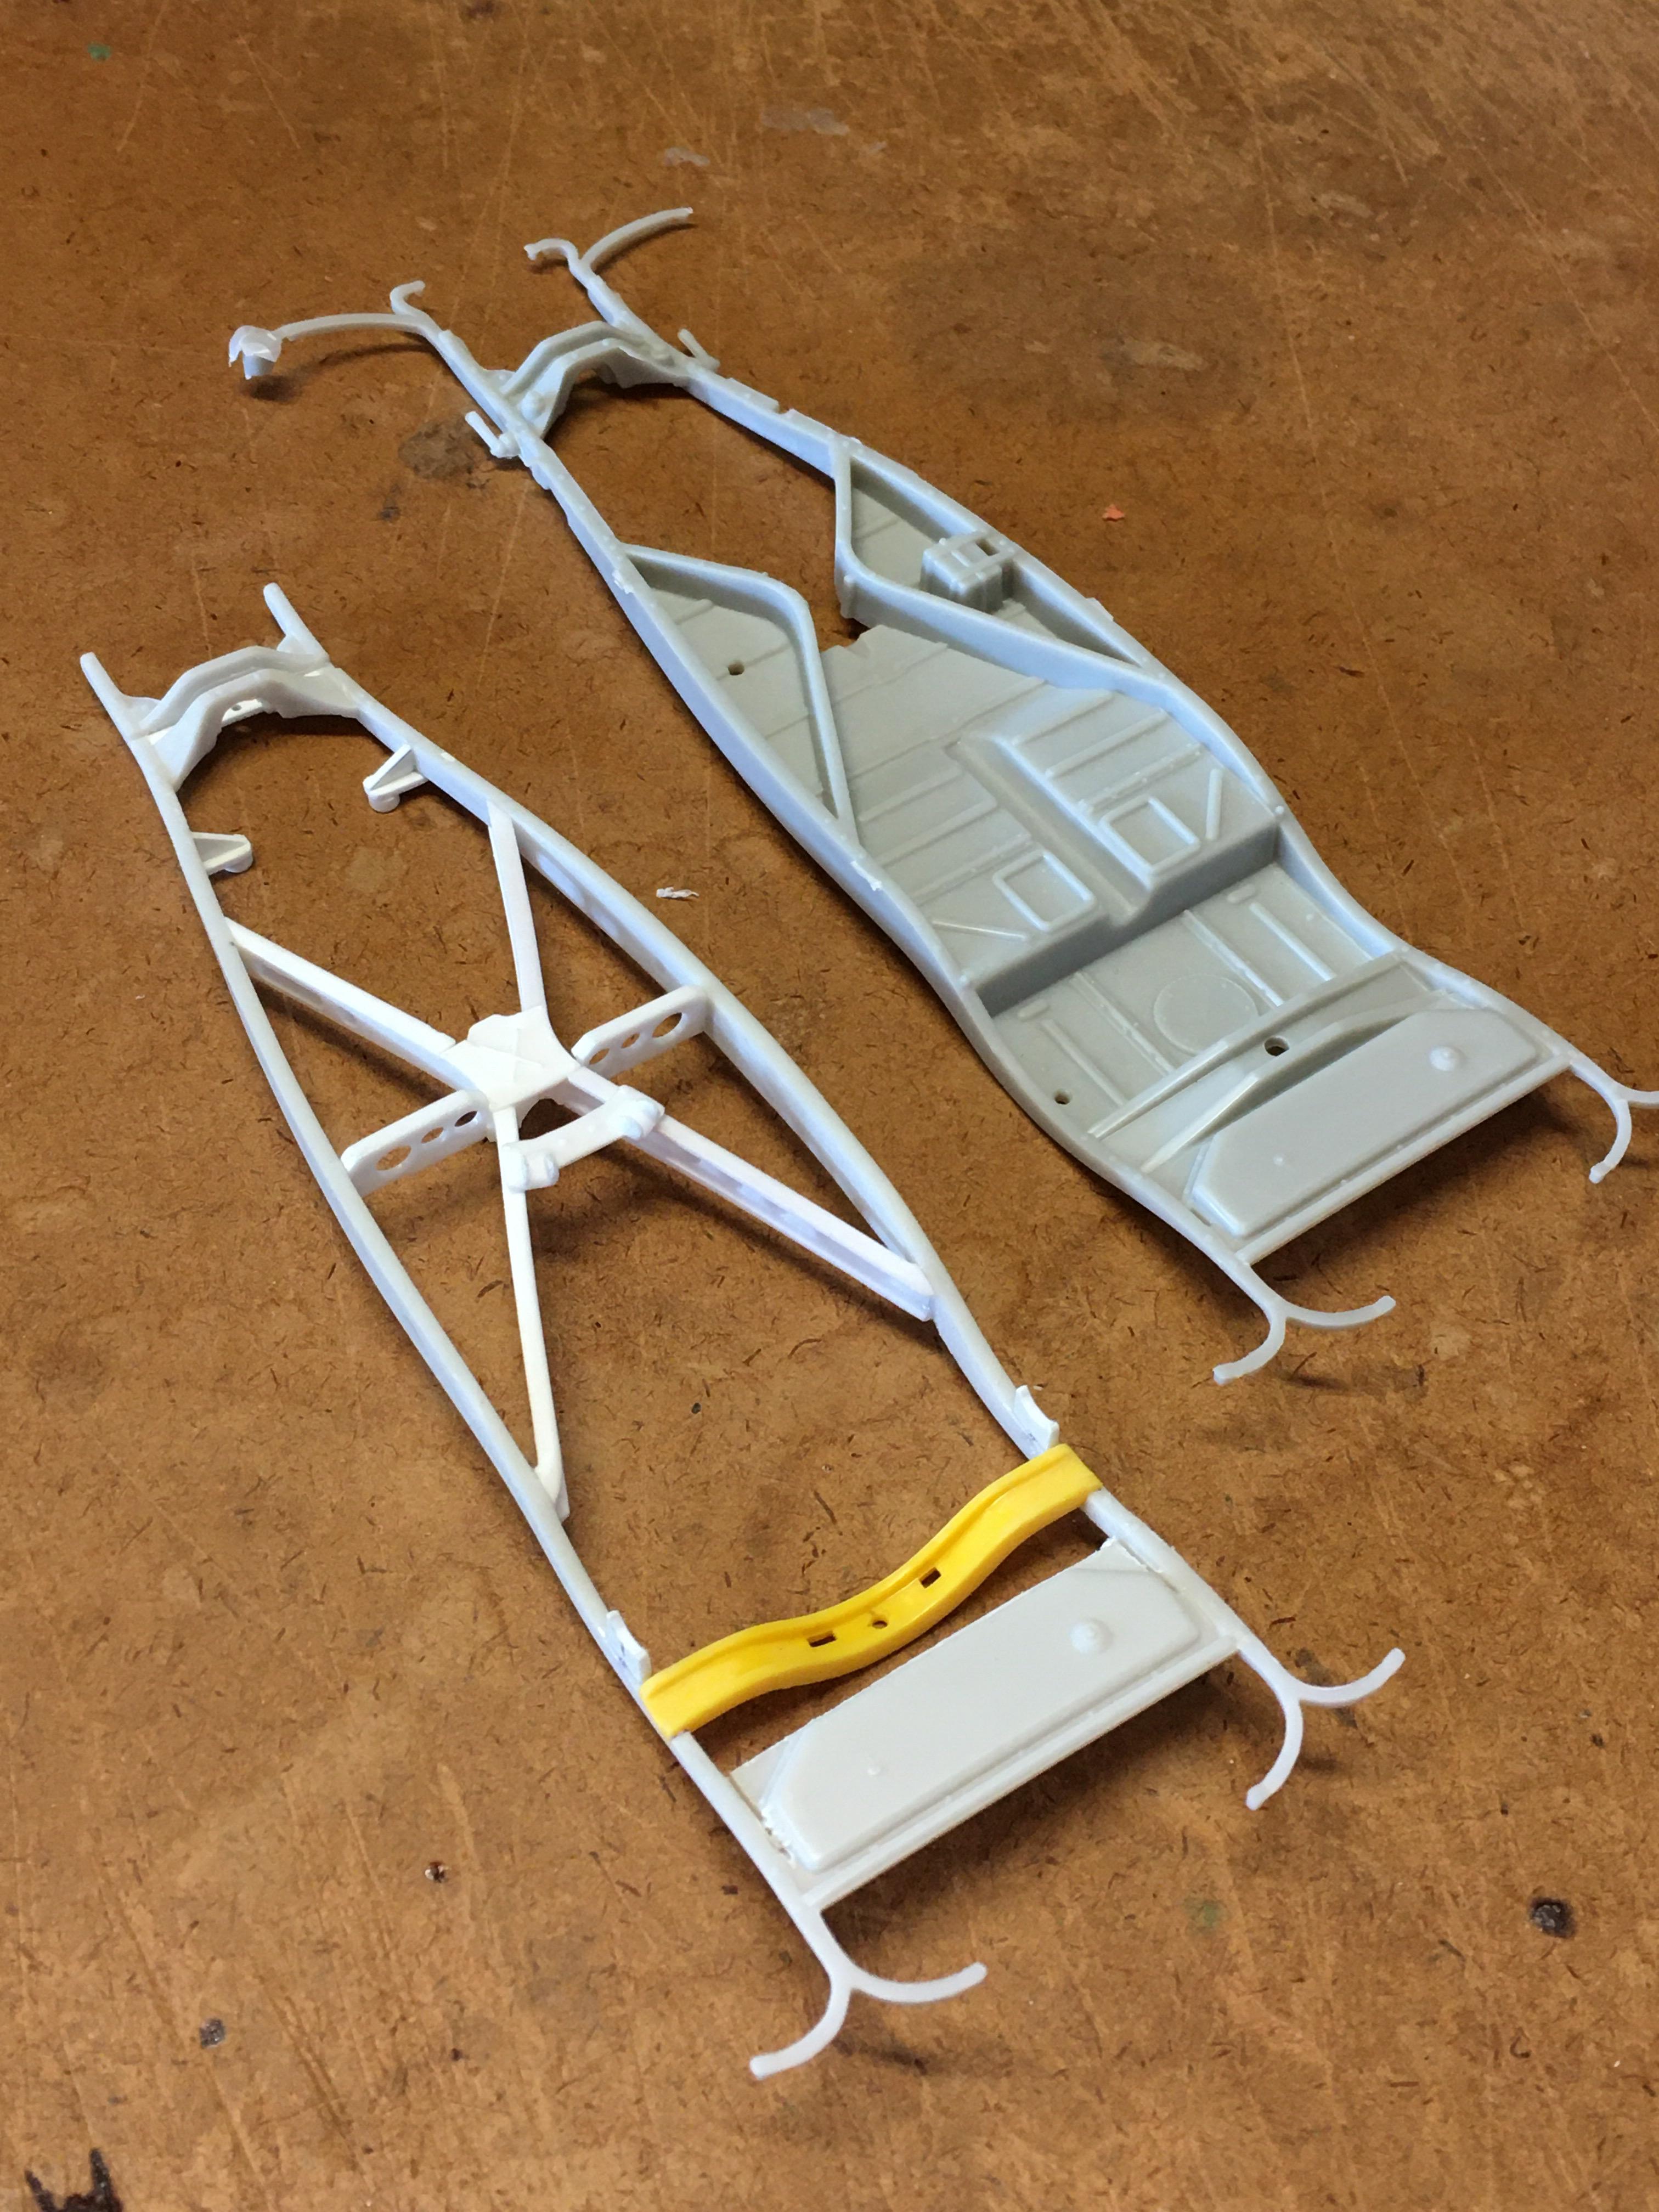
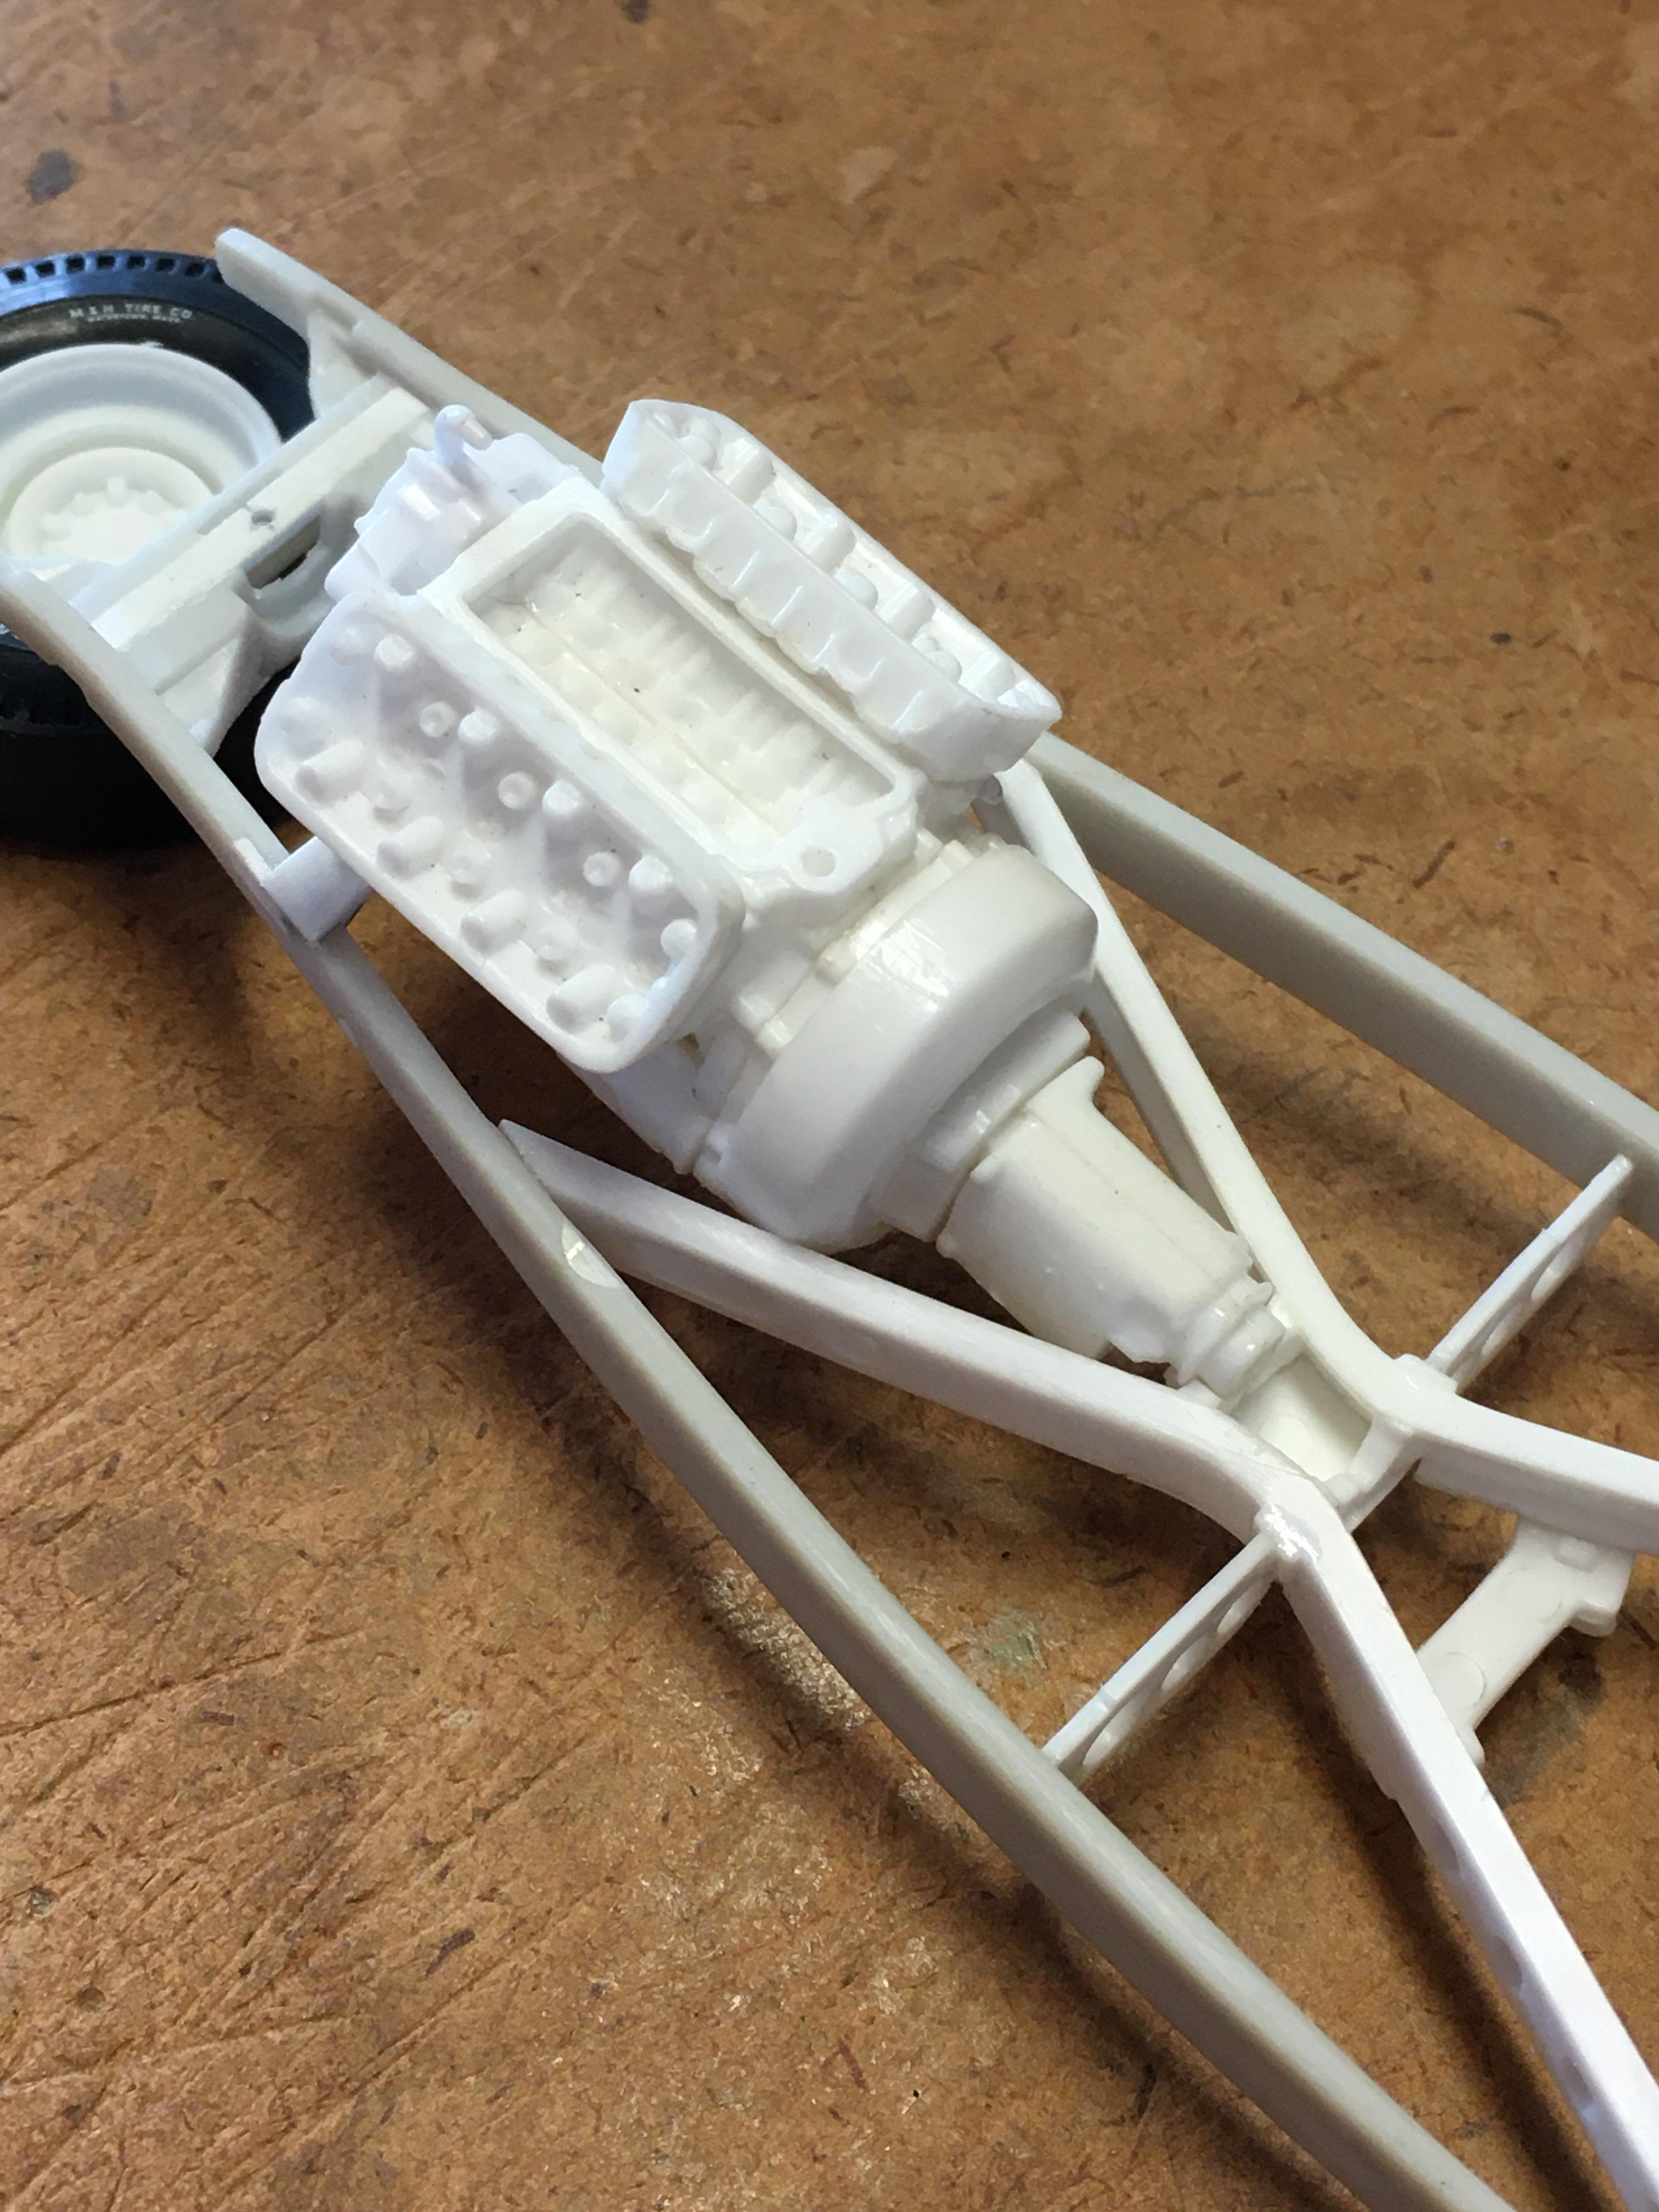
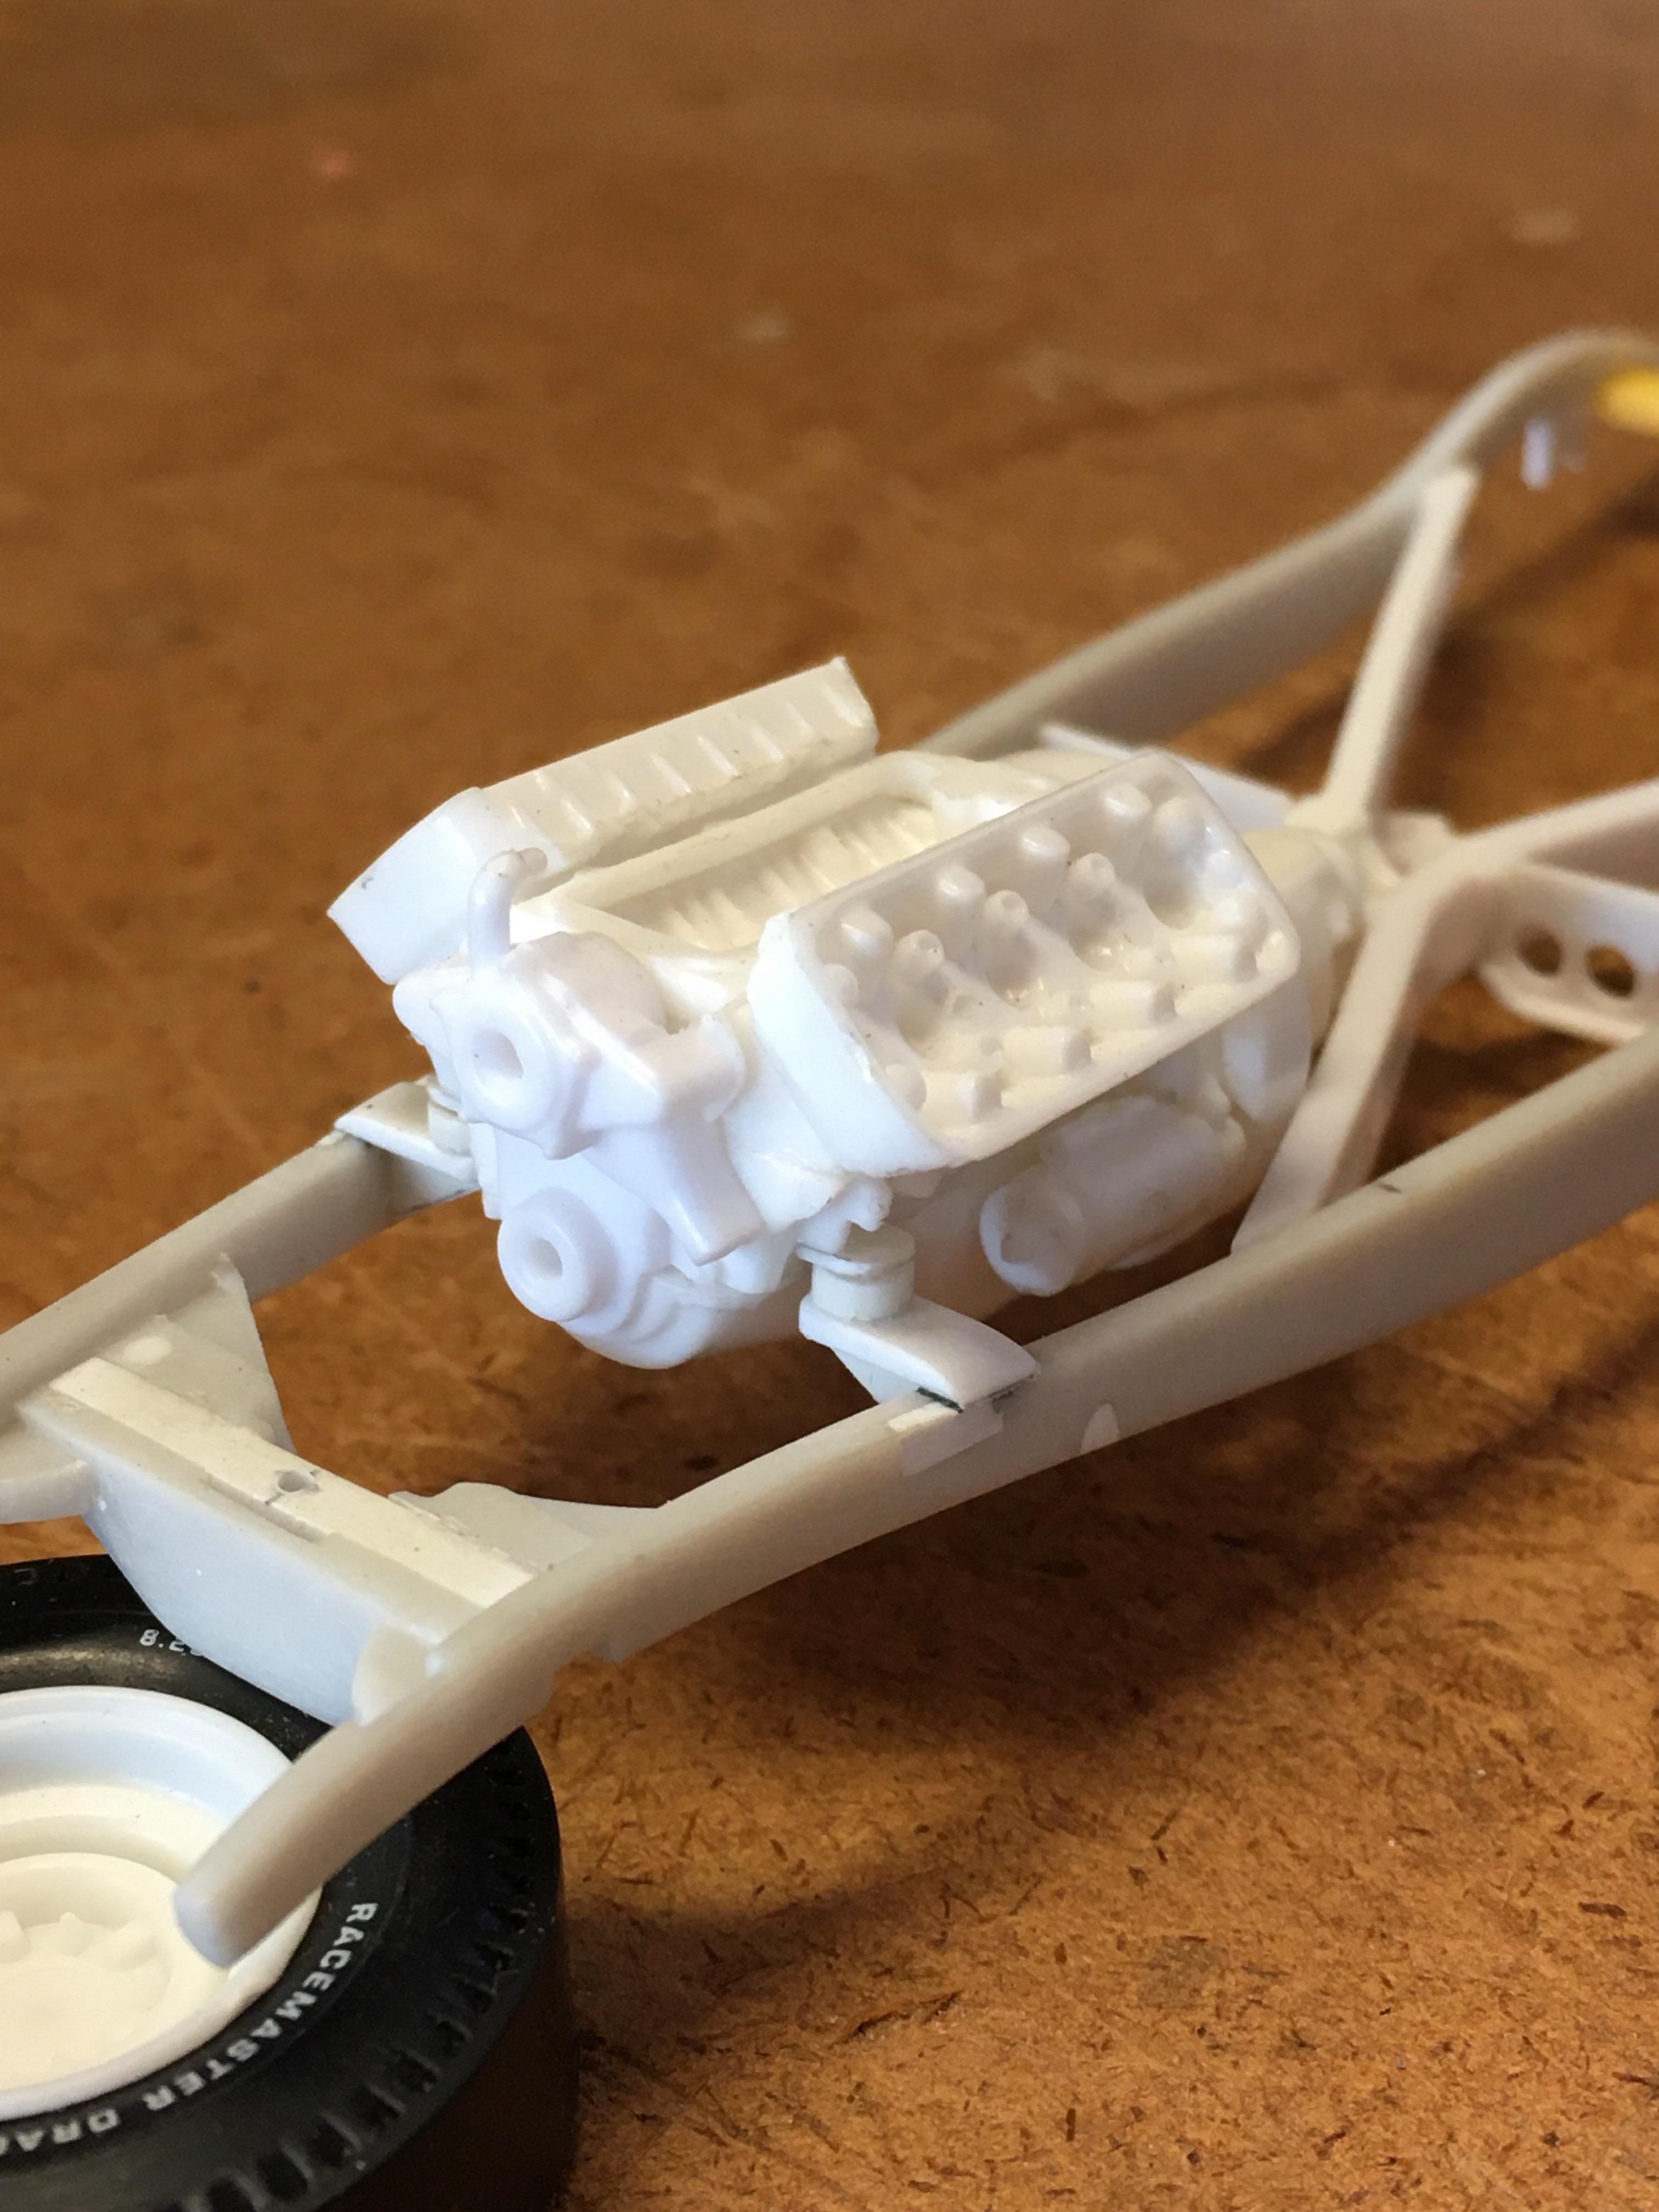
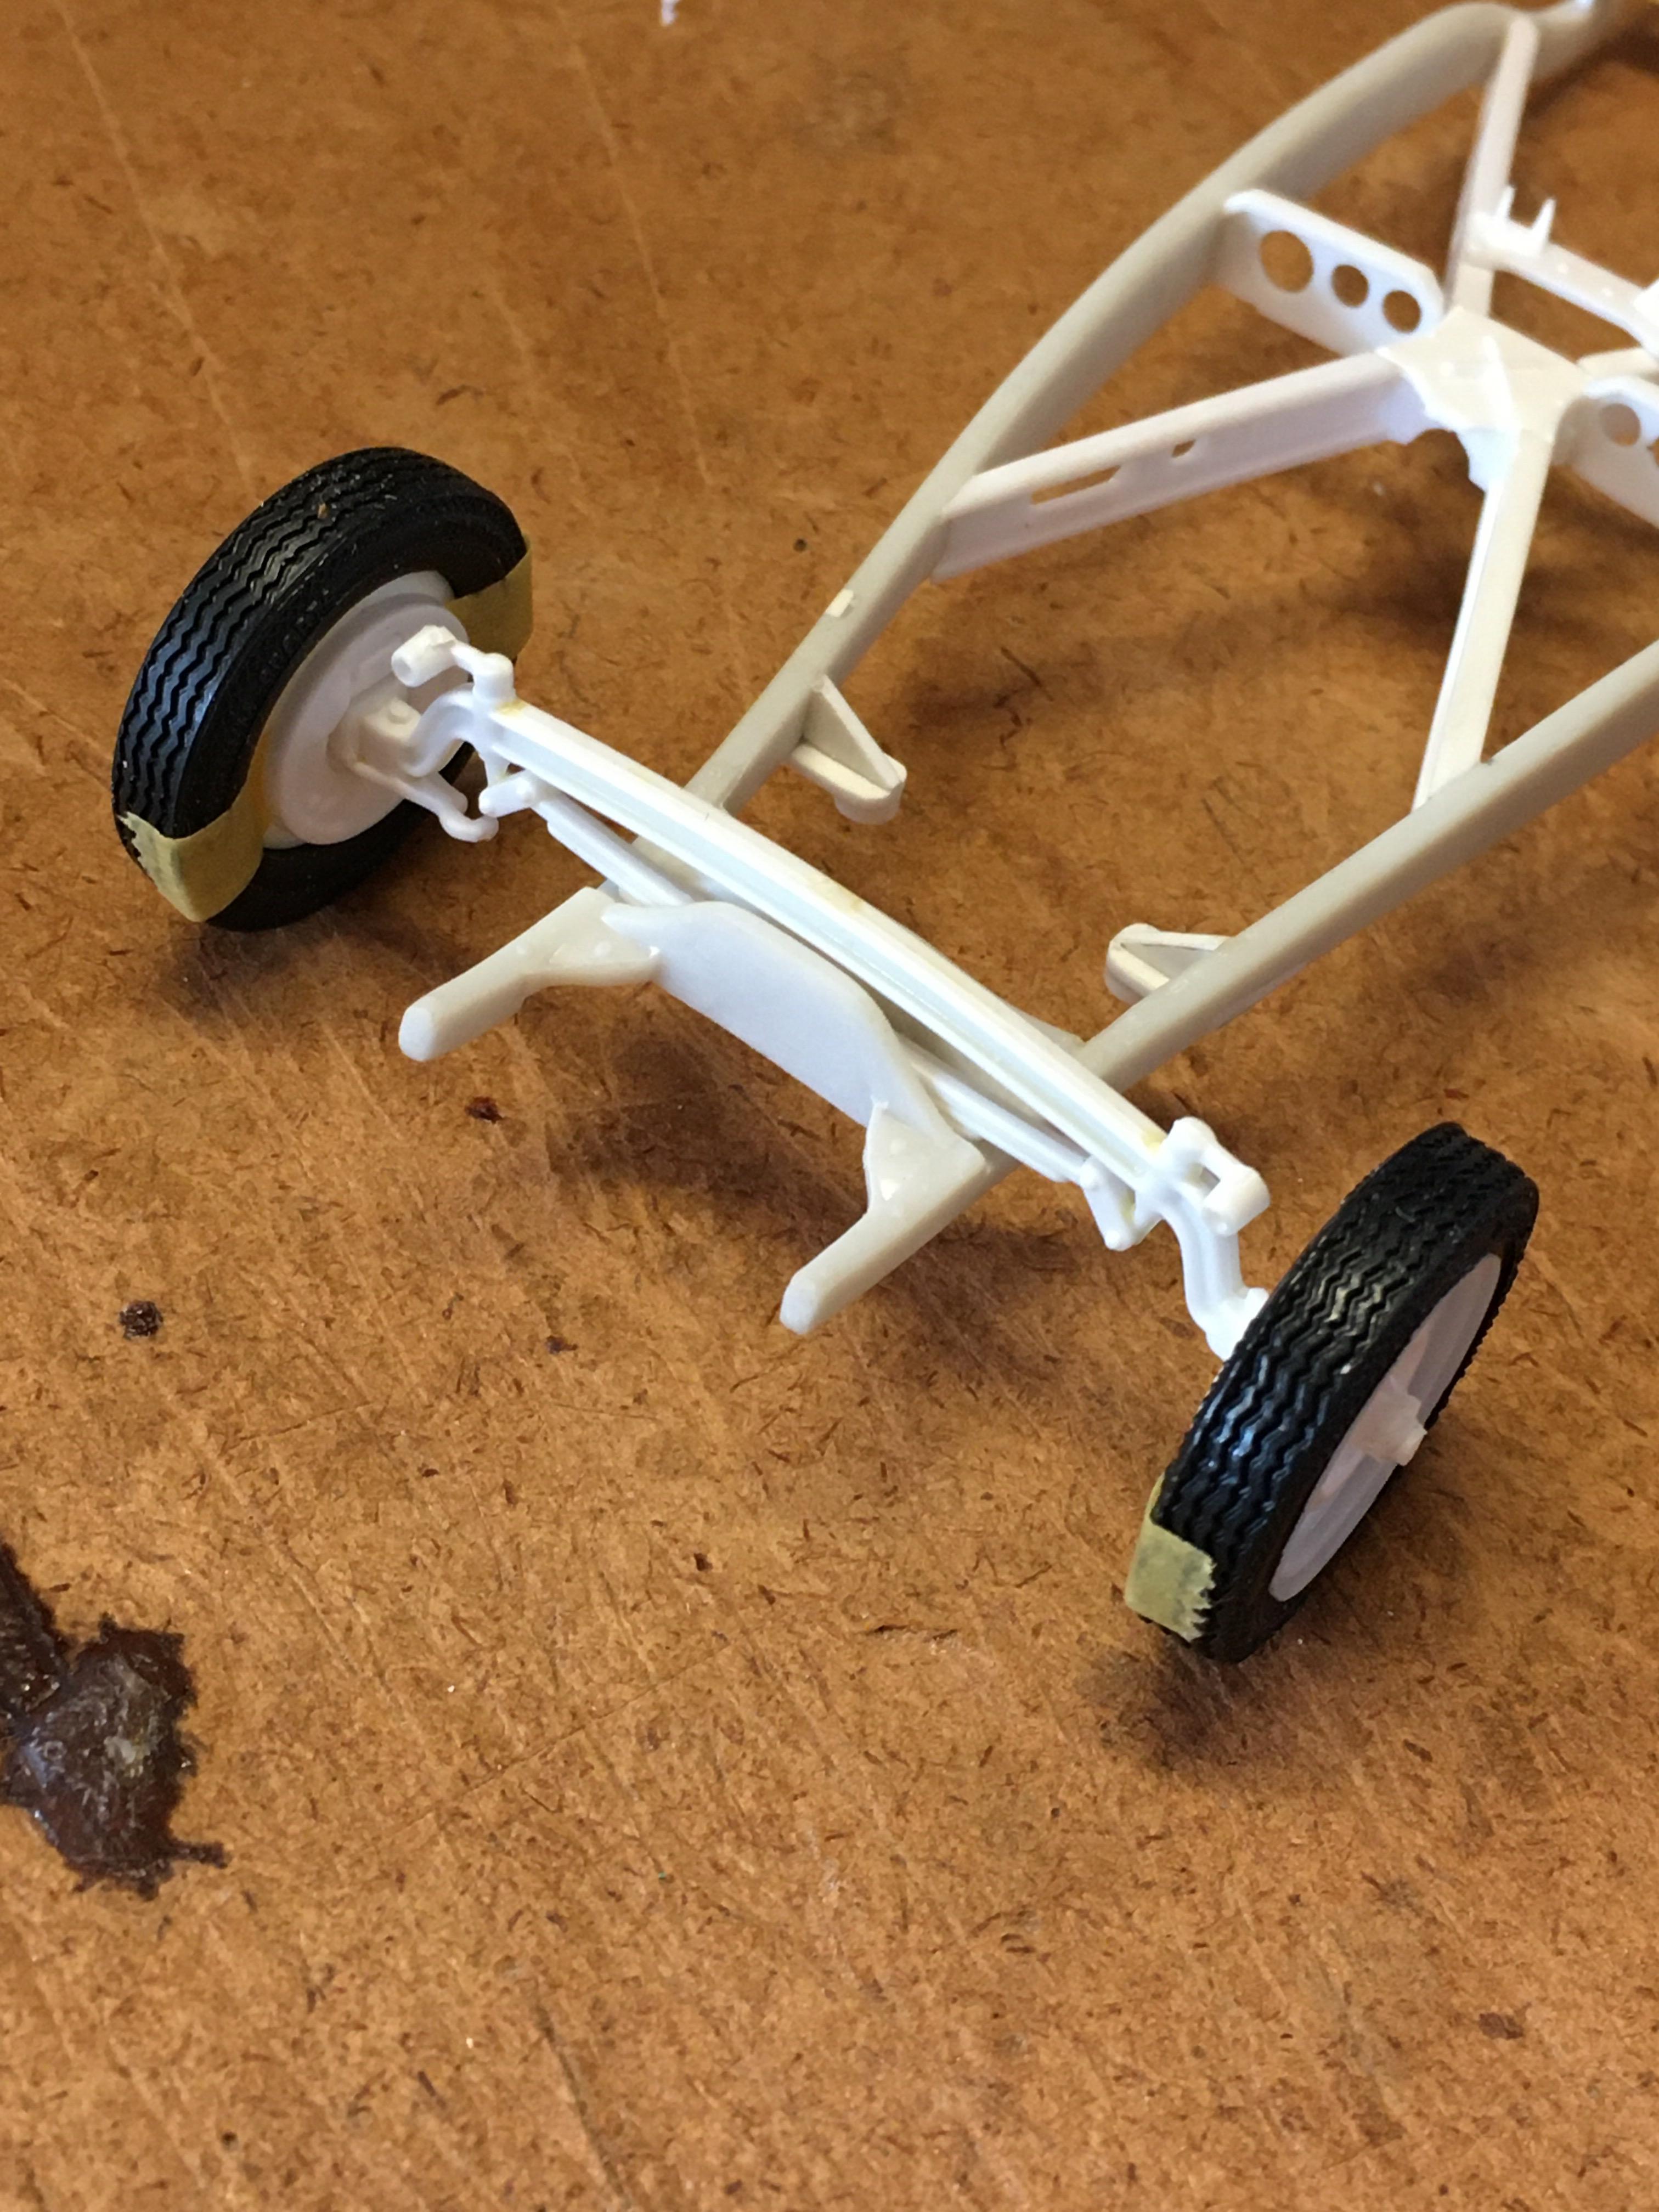
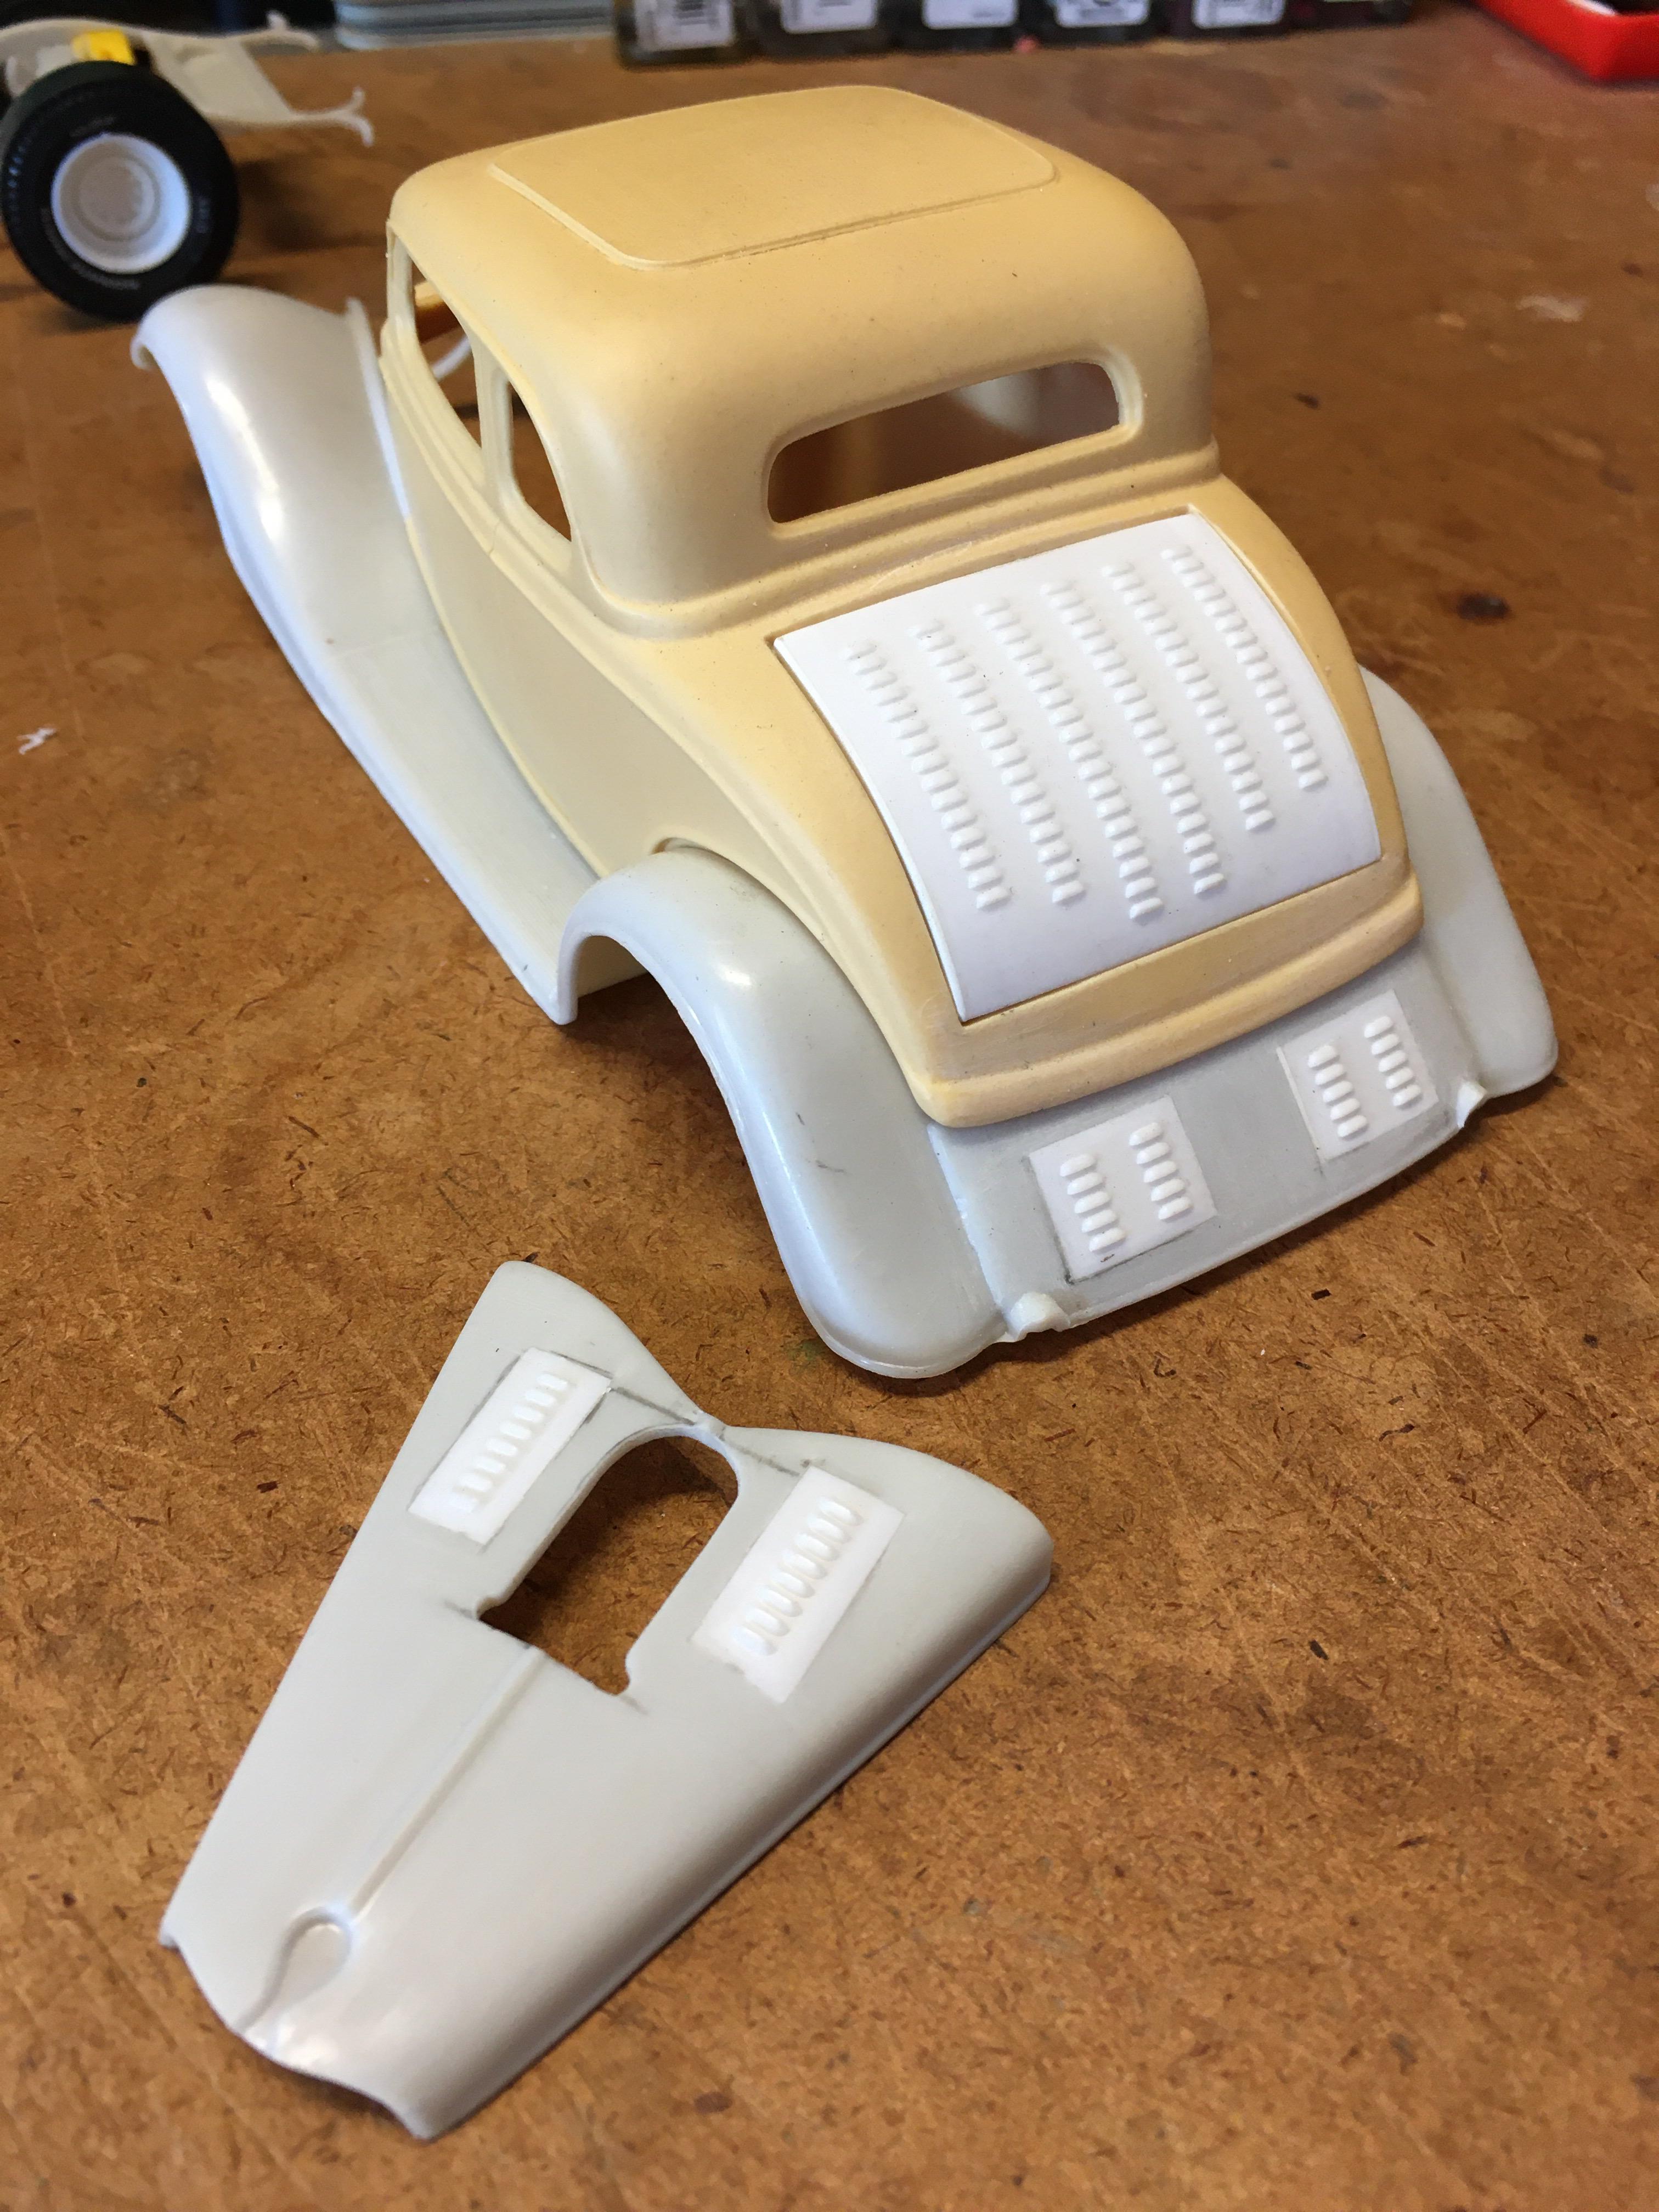
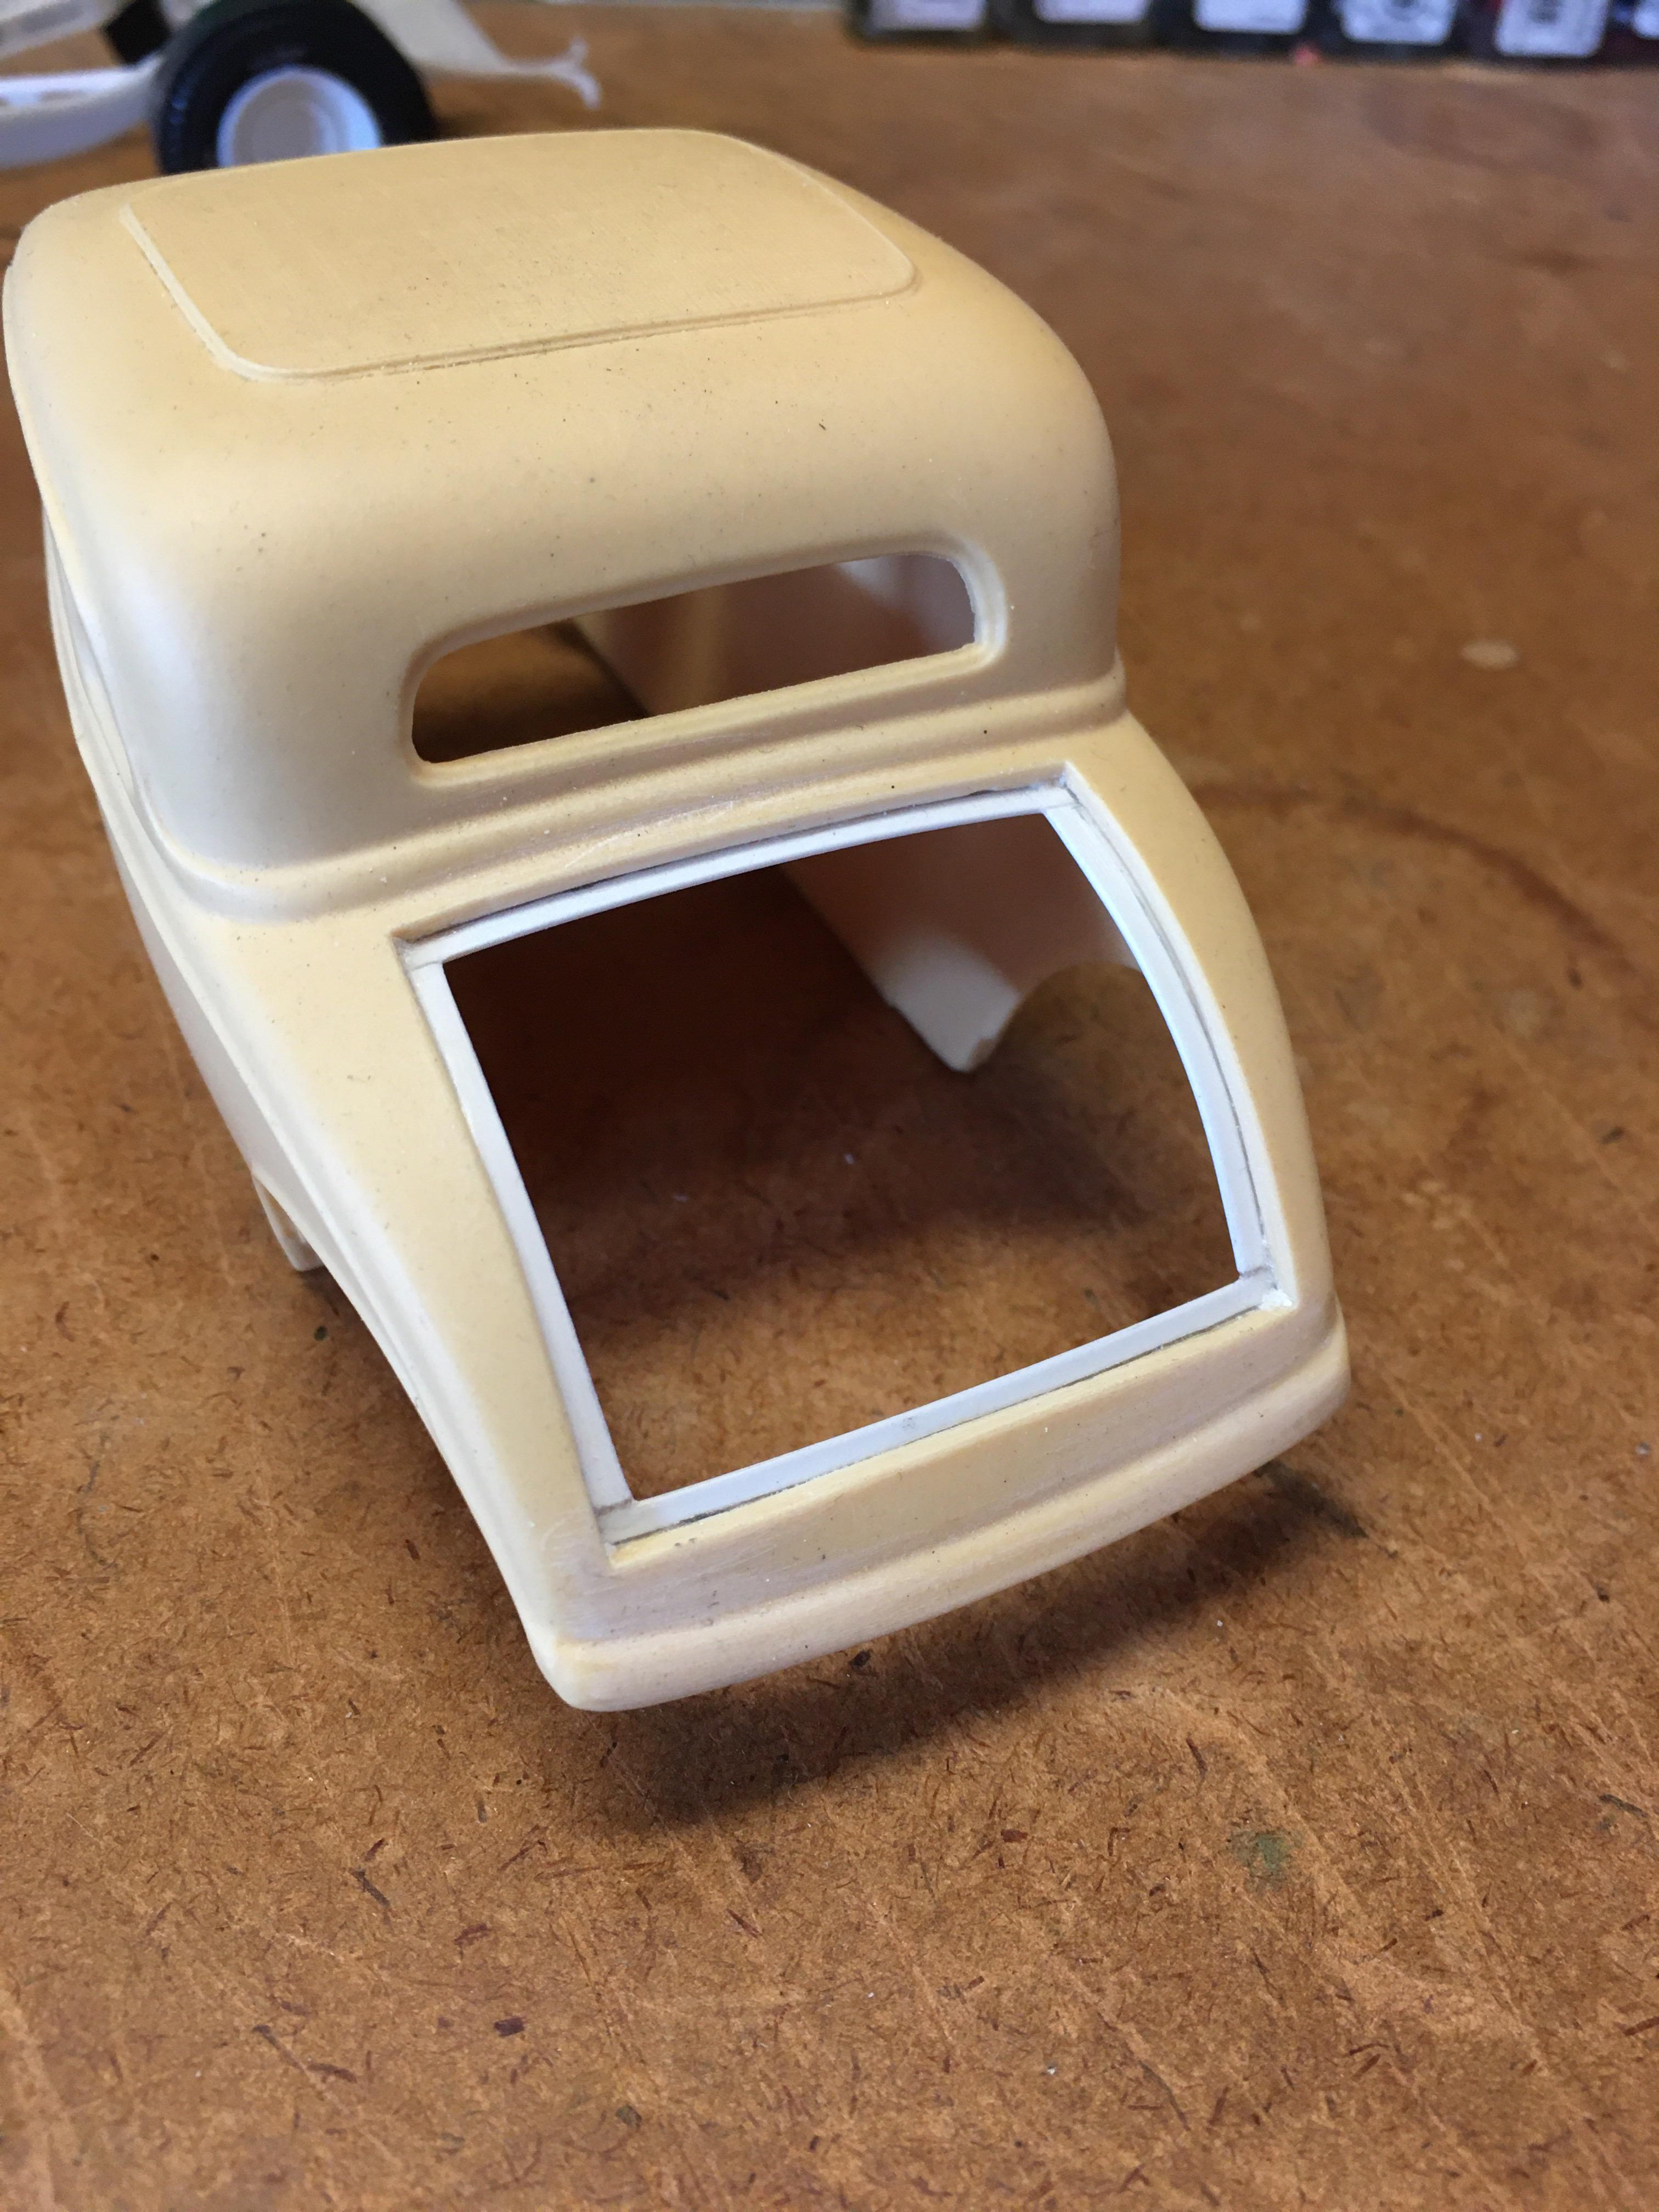
There’s some really cool stuff going on in this group build! I counted myself in months ago and have been so dang busy since that I haven’t been able to dig in. I also had a helluva time deciding what I wanted to build! Finally, this past weekend I was looking at a stalled project and got inspired to repurpose it for TROG. My entry is going to be this chopped, full fender 1934 5-window powered by an early Chrysler with a healthy set-back, La Salle trans and quick change rear. This project was originally slated to be blown Altered period correct for about 1963. I had a really good start then got distracted, lost interest, etc. It will now be back-dated to about 1955 by removing the 6-71 supercharger in favor of 6 Stromberg 2-barrels on the intake from Revell’s Hydro Hemi (thanks for the intake @Kit Karson) and ditching the pie crust slicks and little Pirelli front runners for tall & skinny bias ply tires on early Ford steelies (Revell 29 Roadster / 30 Coupe). Below is how the project previously looked. This is based on an AMT 1934 5-Window kit with a Drag City Casting chopped body. The entire floor and molded cross members were cut away with the detailed center “X” added from a Revell 1940 Ford, bashed together quick change axle, front cross member flattened with Revell 29 Roadster / 30 Coupe dropped axle and a Revell Miss Deal Hemi engine / trans. I had also modified the body by cutting out the trunk lid, adding in a ledge and modifying the louvered lid from a Revell 32 5-Window to fit. I also grafted some louvers into the tail pan leaving room between for a car club plaque. Also seen is the hood top that was going to be used with the blower which also had some louvers grafted in. That’s where I’m at. I pretty much have a complete plan in my head for how to fill in all the gaps. More to come in the near future. ?
-
Nice to see an update. This is looking really good!
-
@Rocking Rodney Rat and I basically didn’t give @Kit Karson a choice that he had to finish this model now that his ‘29 XPU and Roadster combo is finished. So for everyone else watching , you’re welcome! ?
-
Thanks @tim boyd for the excellent show coverage, especially including most everyone’s table card to put names with the models, many of which I have heard before and a few that I know personally! The quantity and quality of the models shown looks off the charts!! I did want to be there in Salt Lake but it wasn’t meant to be. Hopefully there will be another opportunity to meet in the future. Wes @Kit Karsonand Paul’s @Speedprocombined effort tribute truck looks phenomenal. The level of finish Paul put on it is both humbling and inspiring. When Wes texted @Rocking Rodney Rat and I pictures of it on the table last Thursday my jaw dropped! That reminds me, I need to keep working on the sister tribute Roadster Pickup. ?
-
It wasn’t painful, just plenty moist! ?
-
What a bad ass Roadster! Impeccably executed and beautifully finished. I especially like the Weld Pro Star wheels. A timeless wheel that looks good on just about everything but seldom seen any more. The lowered front immensely improves the overall look of the car. I love these new Model A kits but Revell really screwed the stance on them. Absolutely killer hot rod!
-
Group 29 - the thread for everyone's '29 Ford Roadster builds
Dennis Lacy replied to Phildaupho's topic in Model Cars
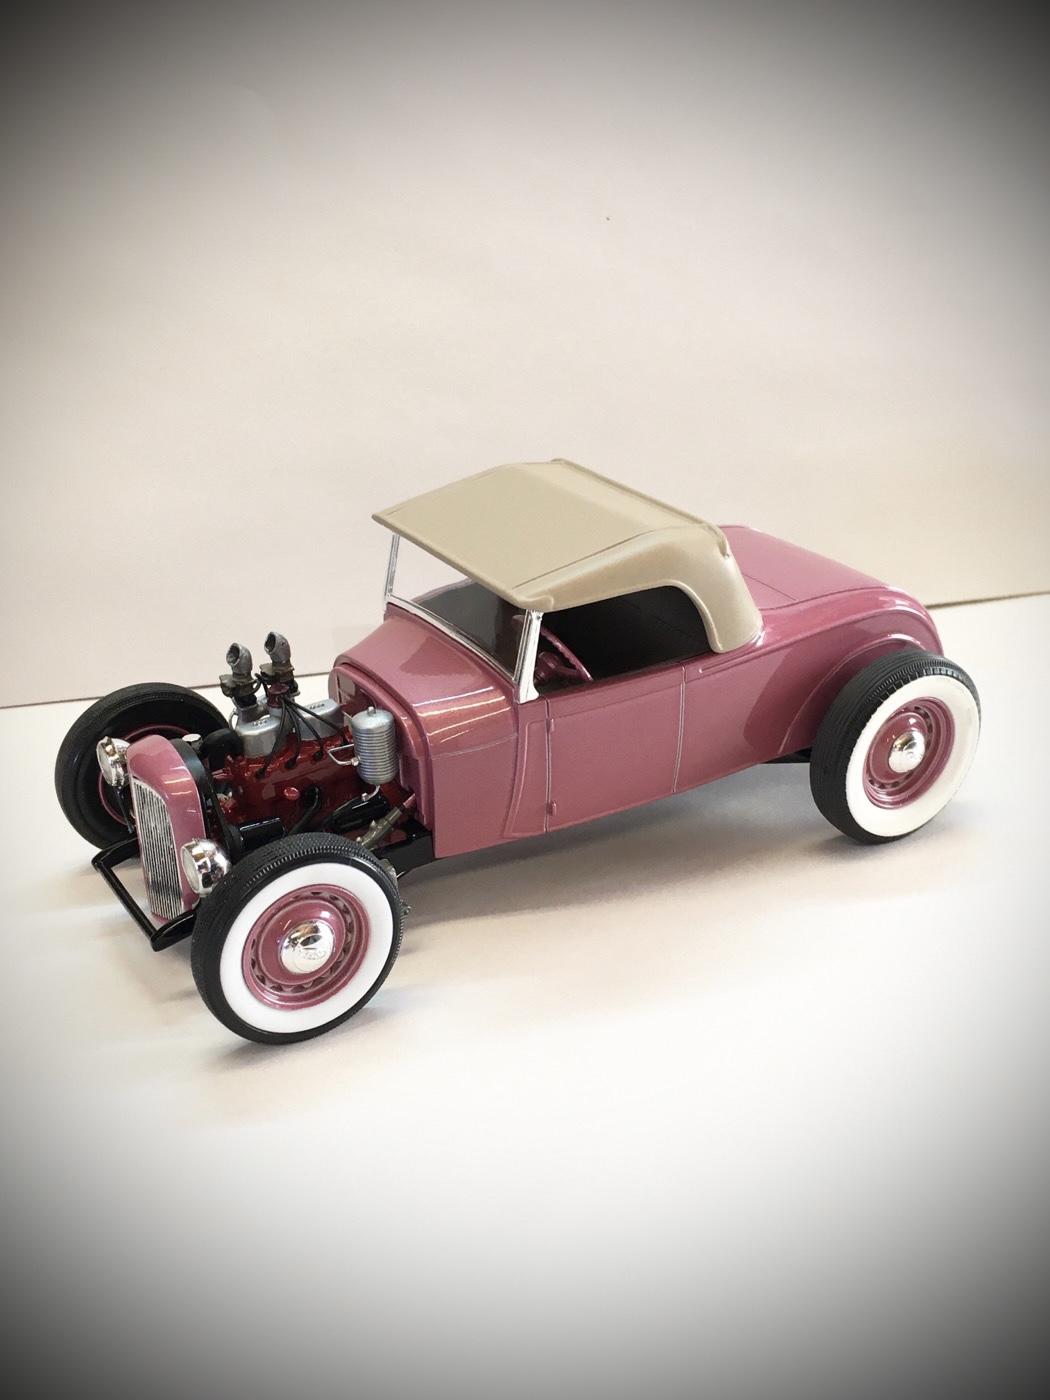
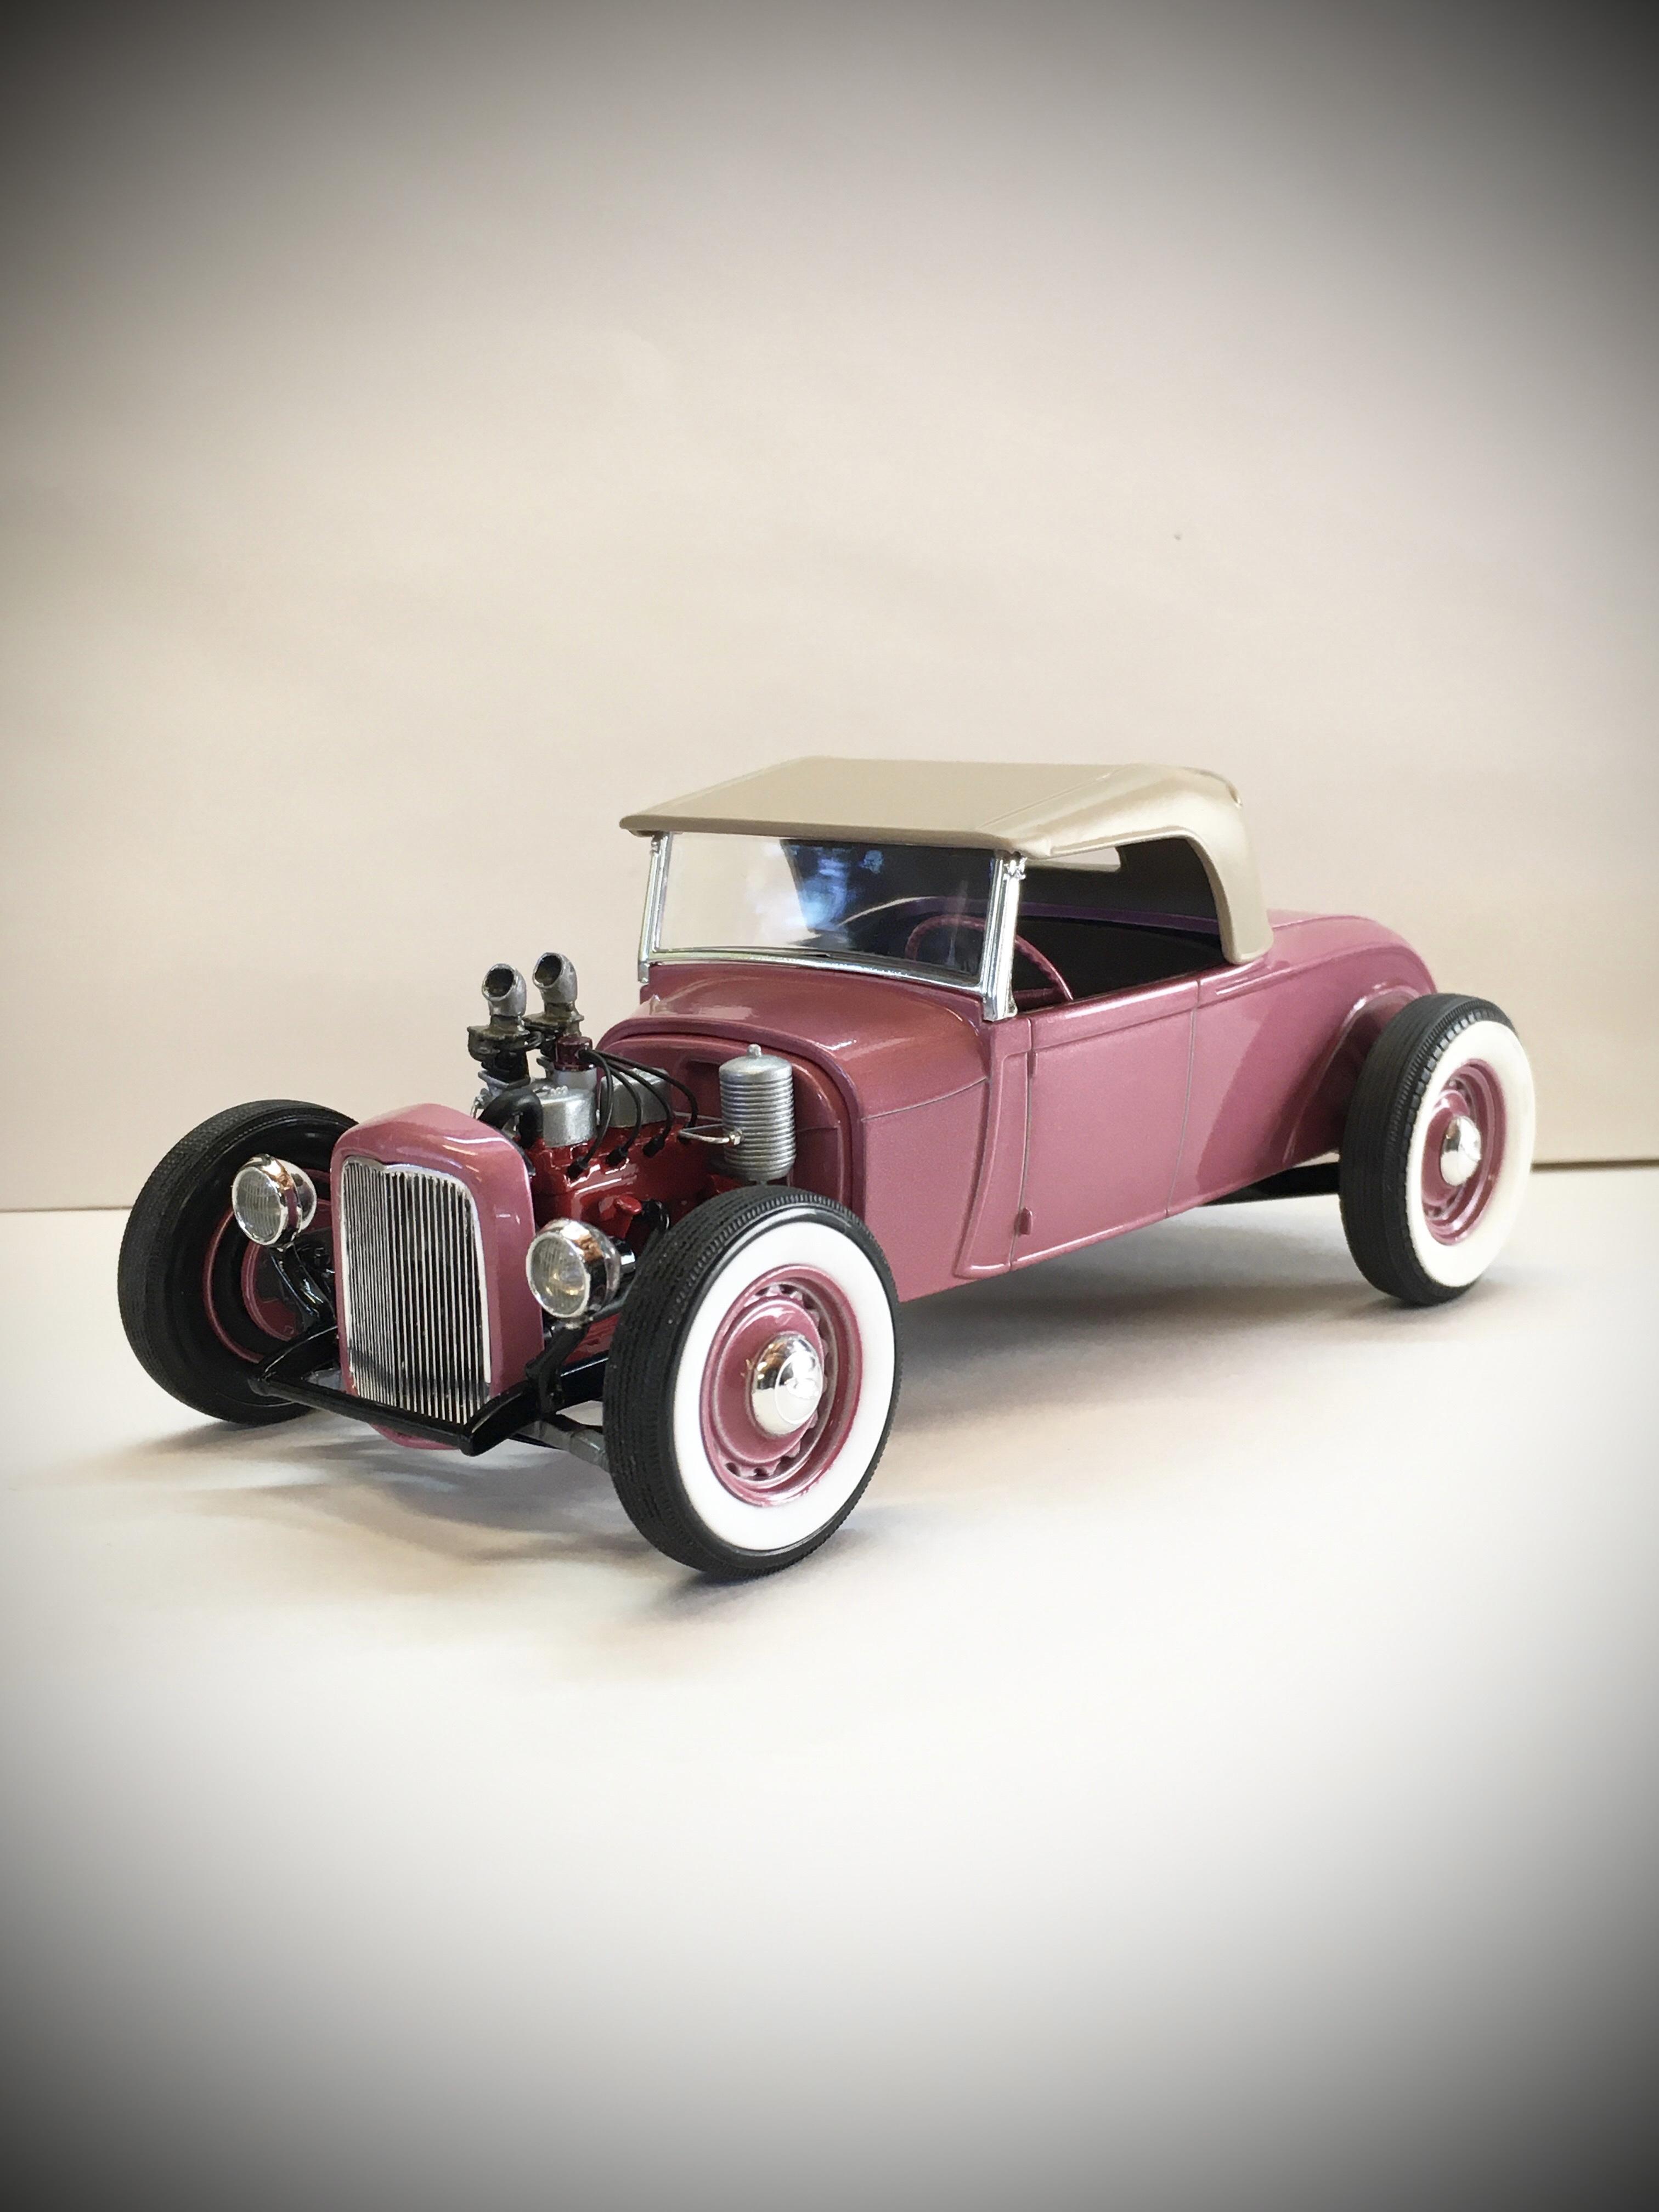
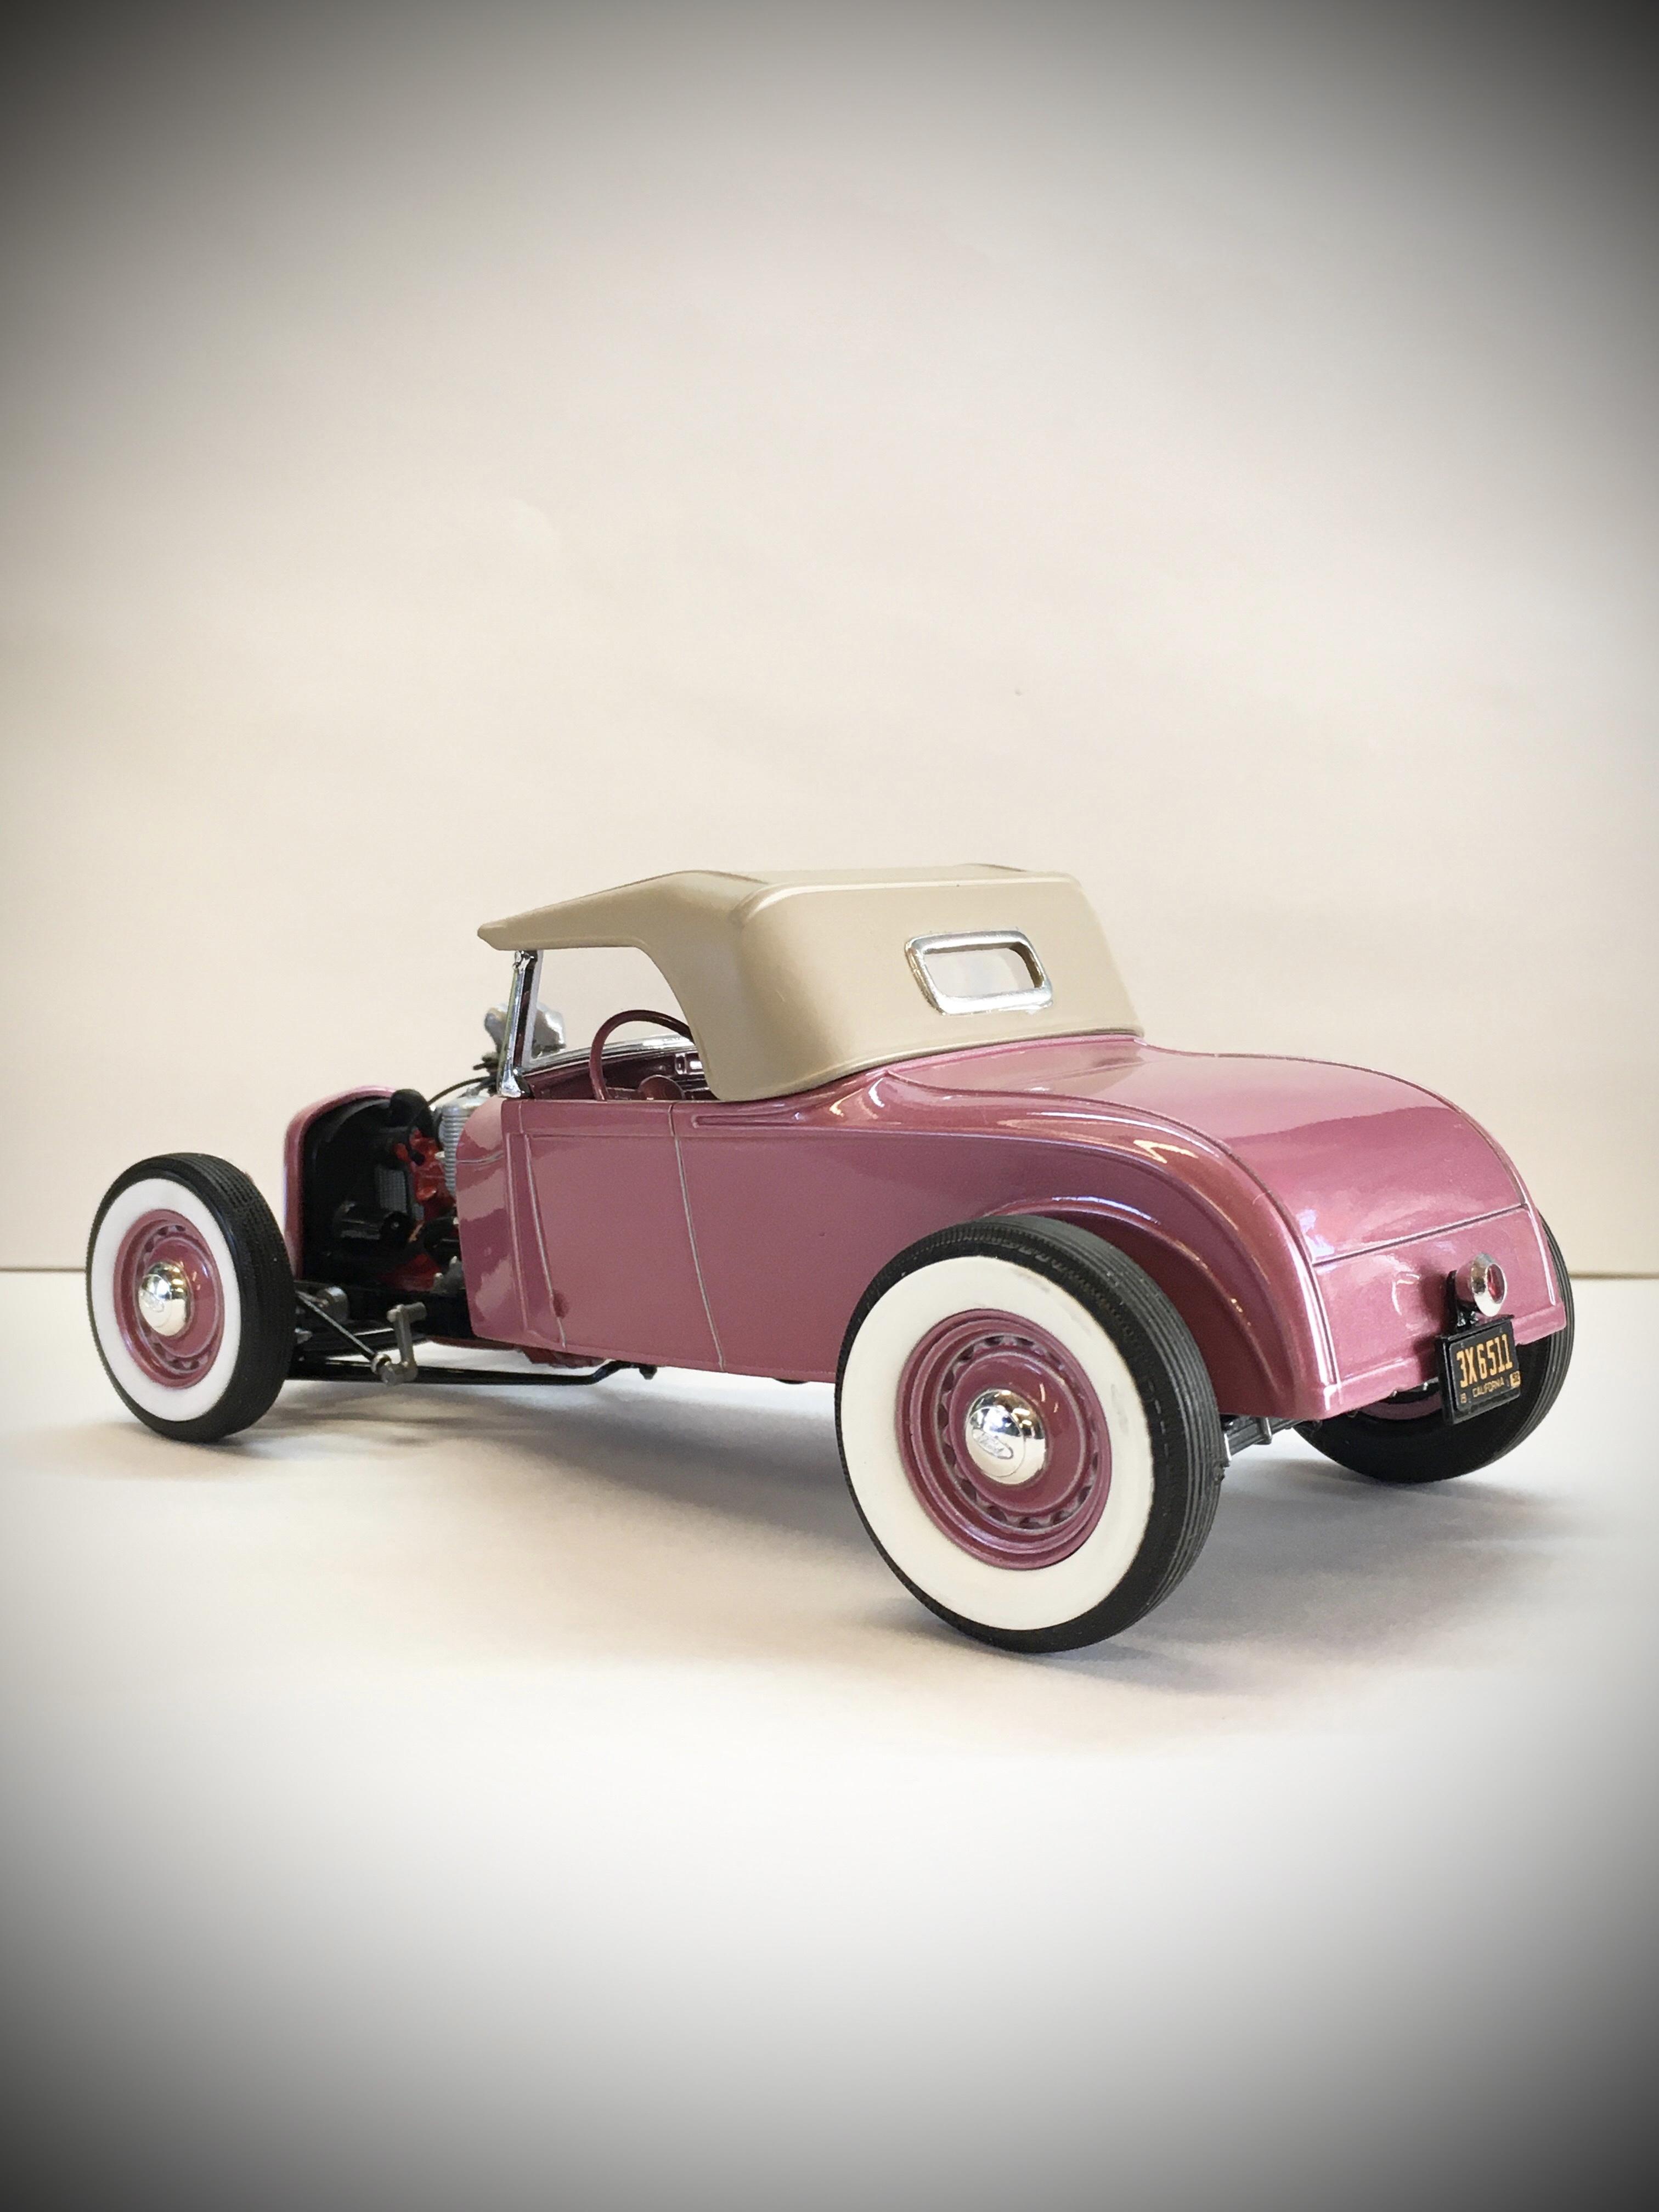
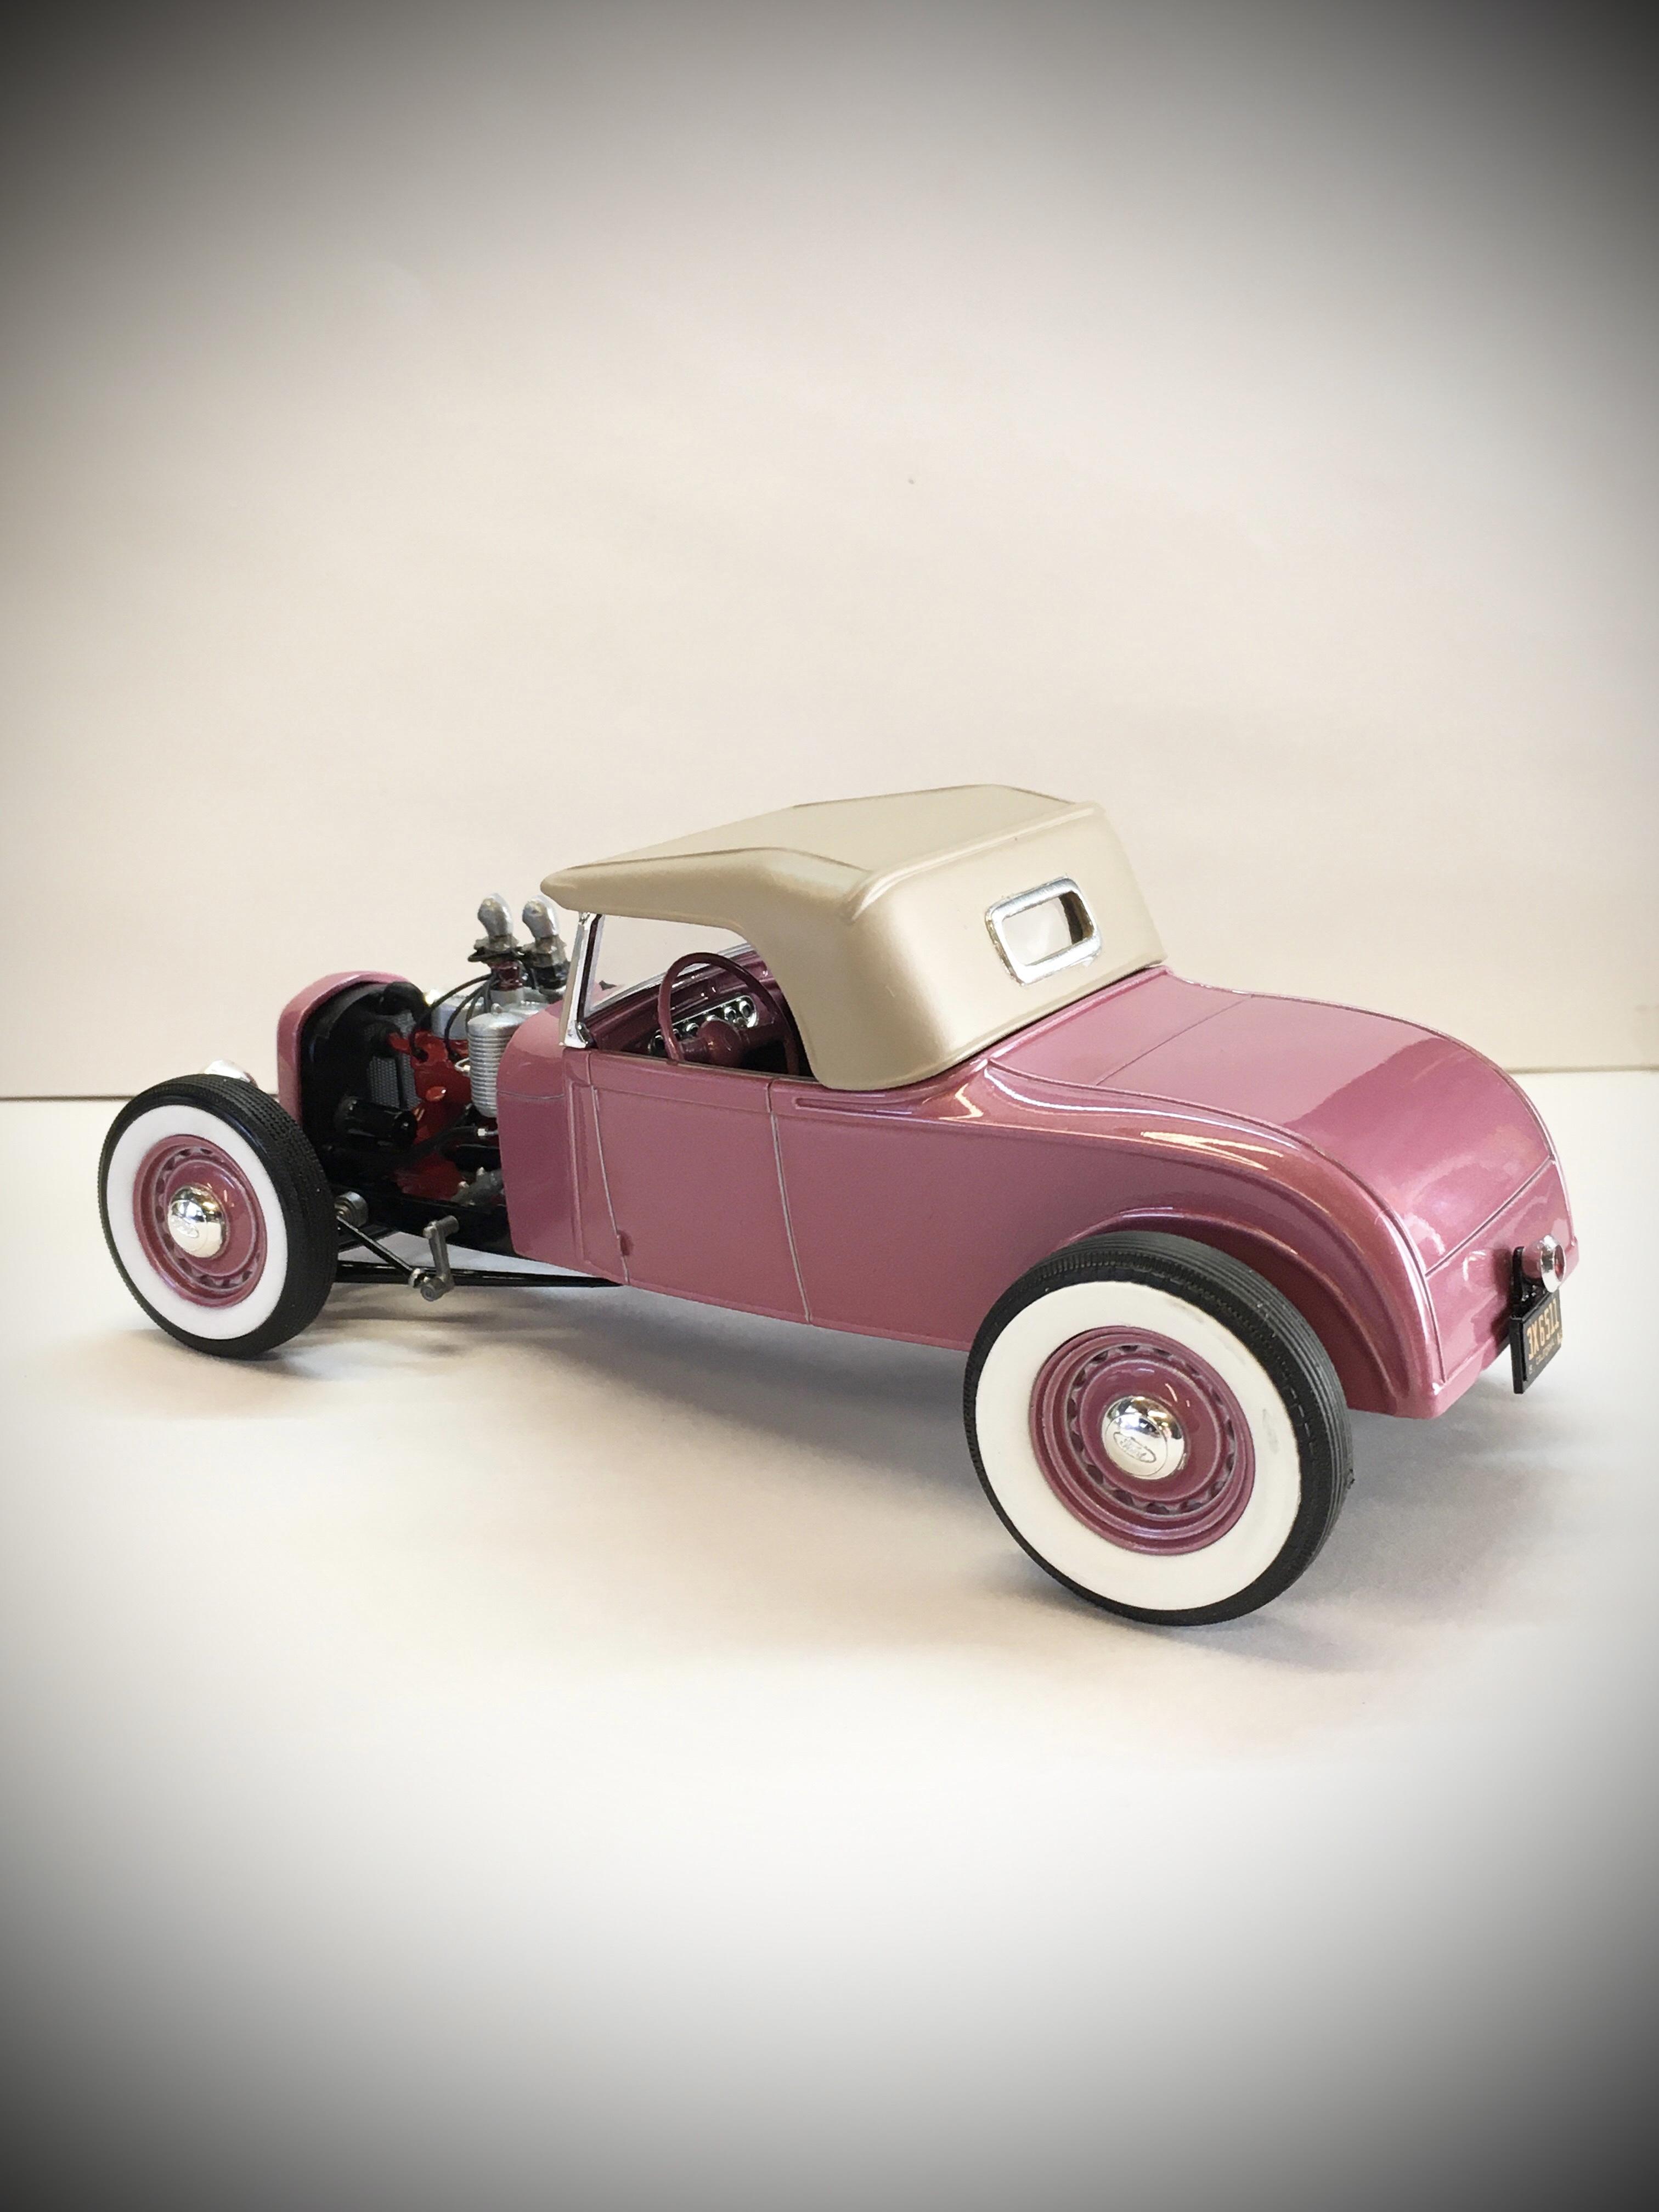
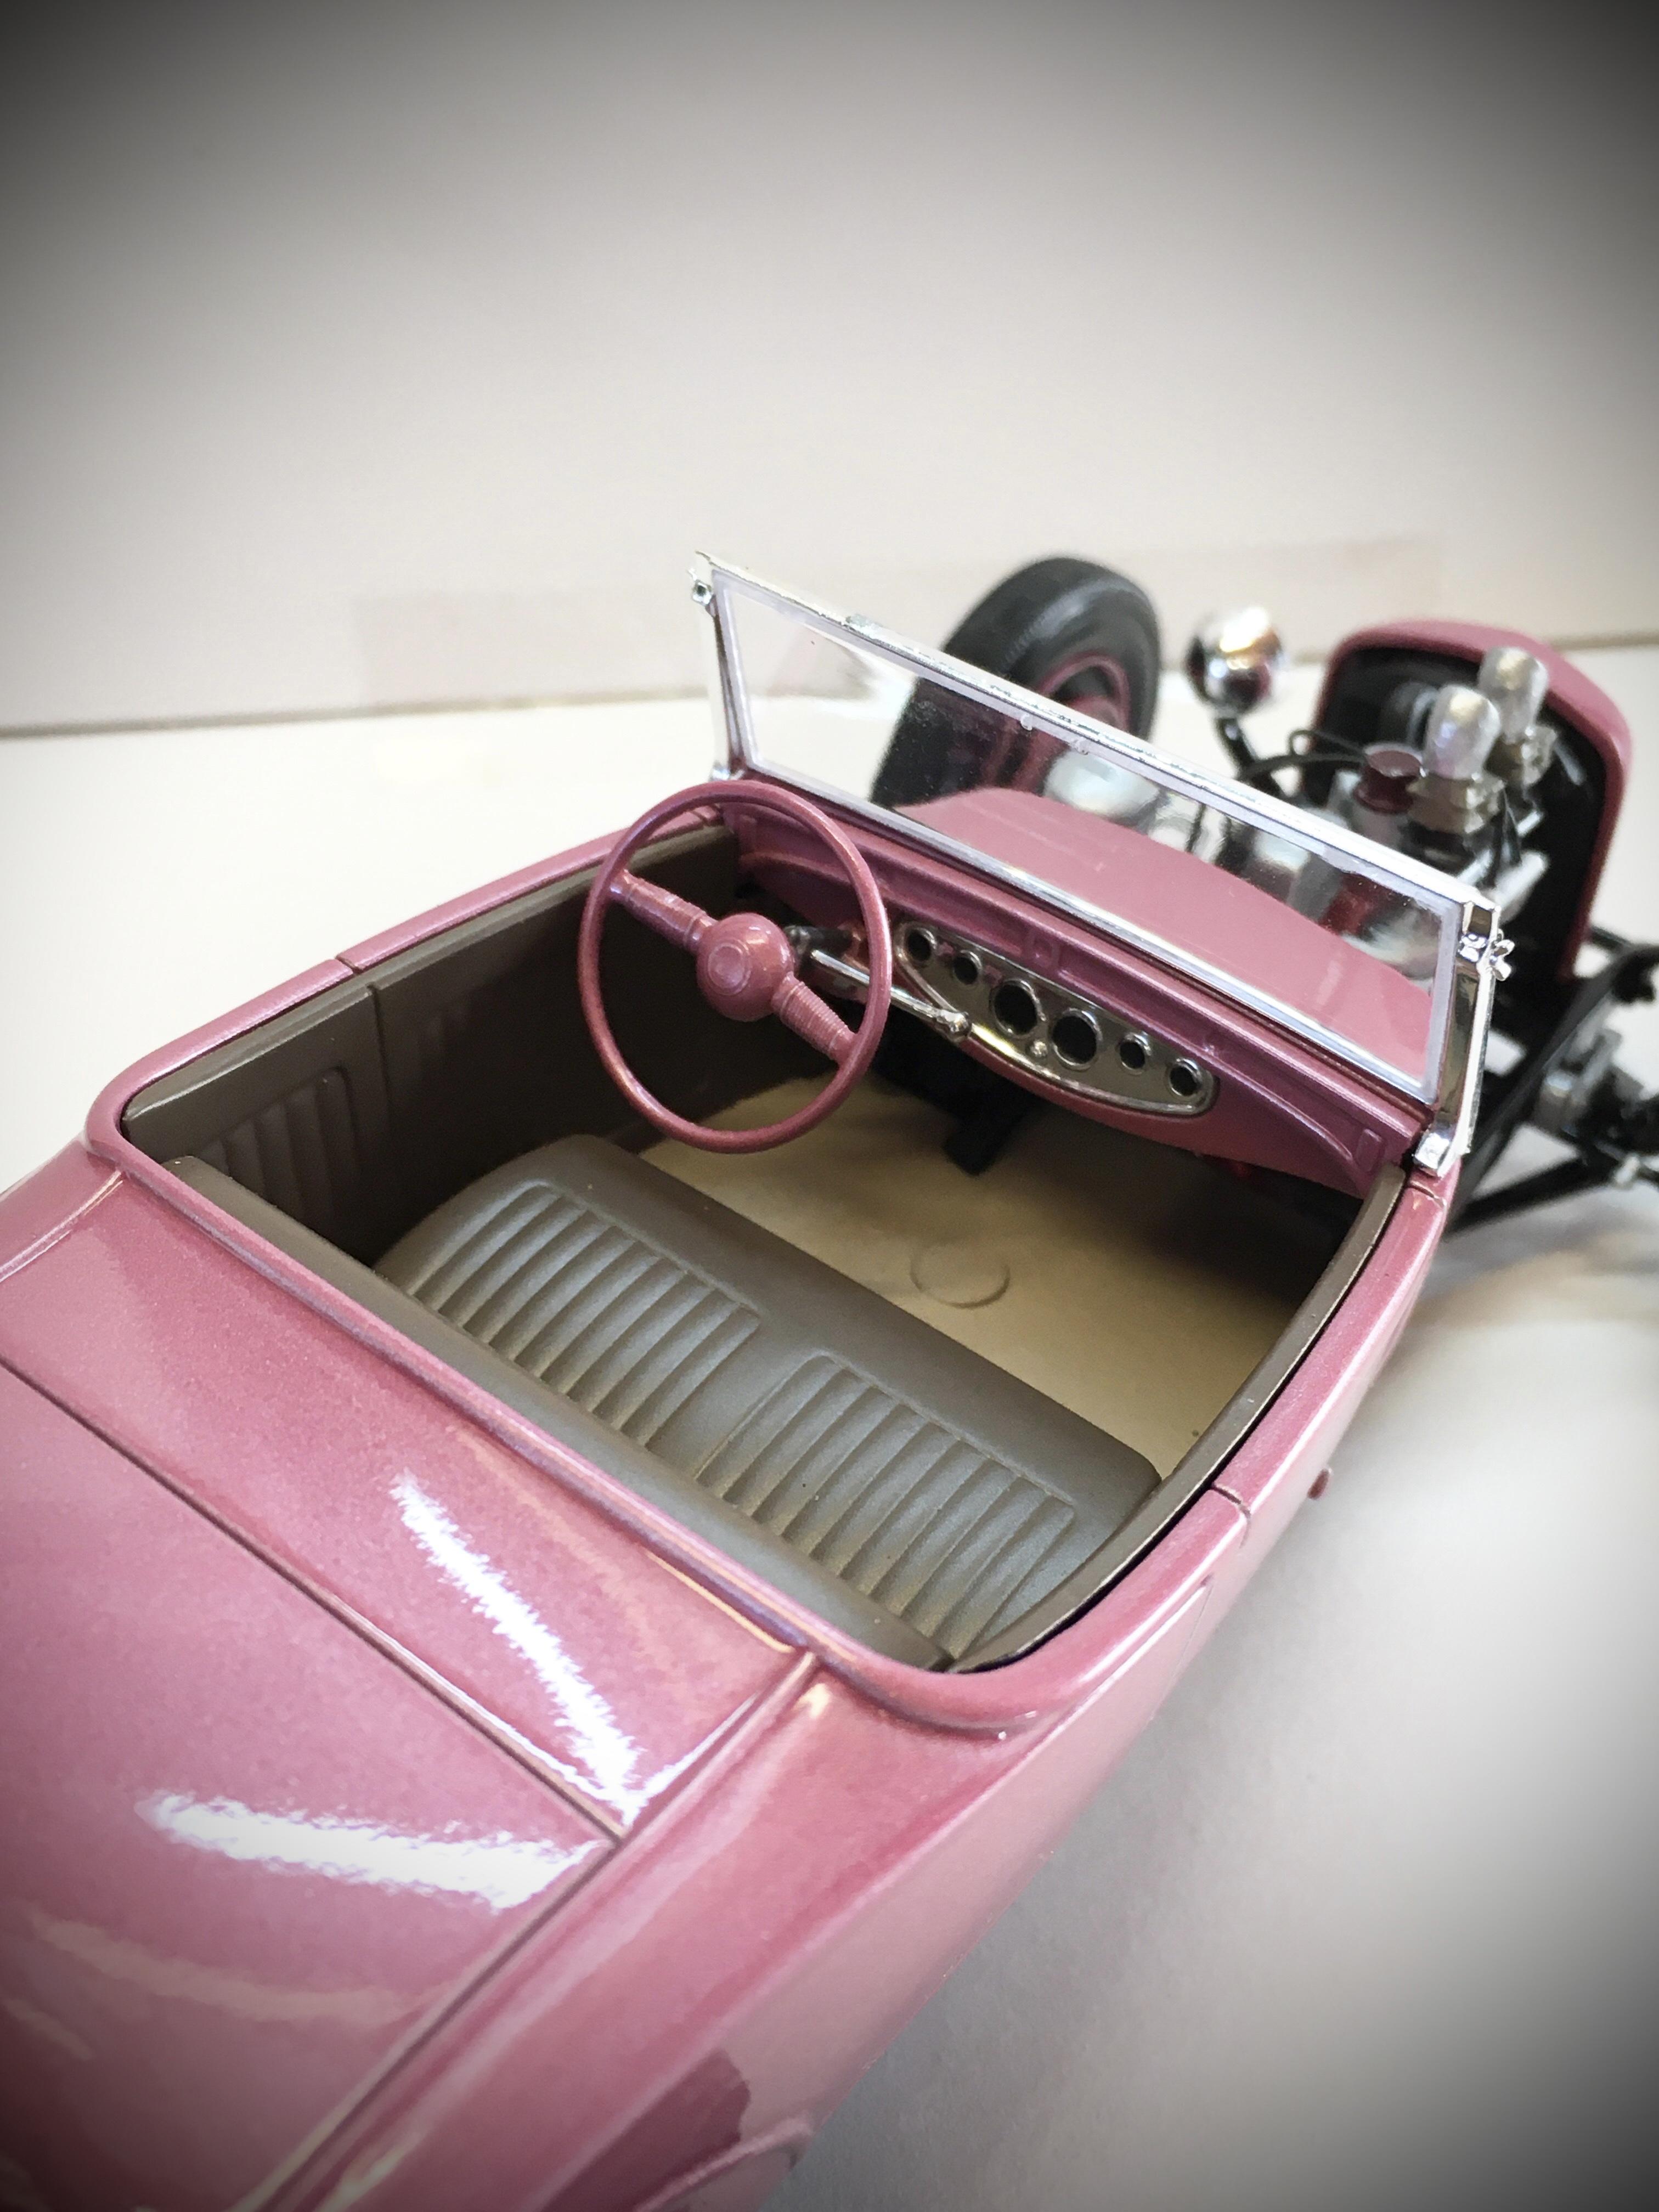
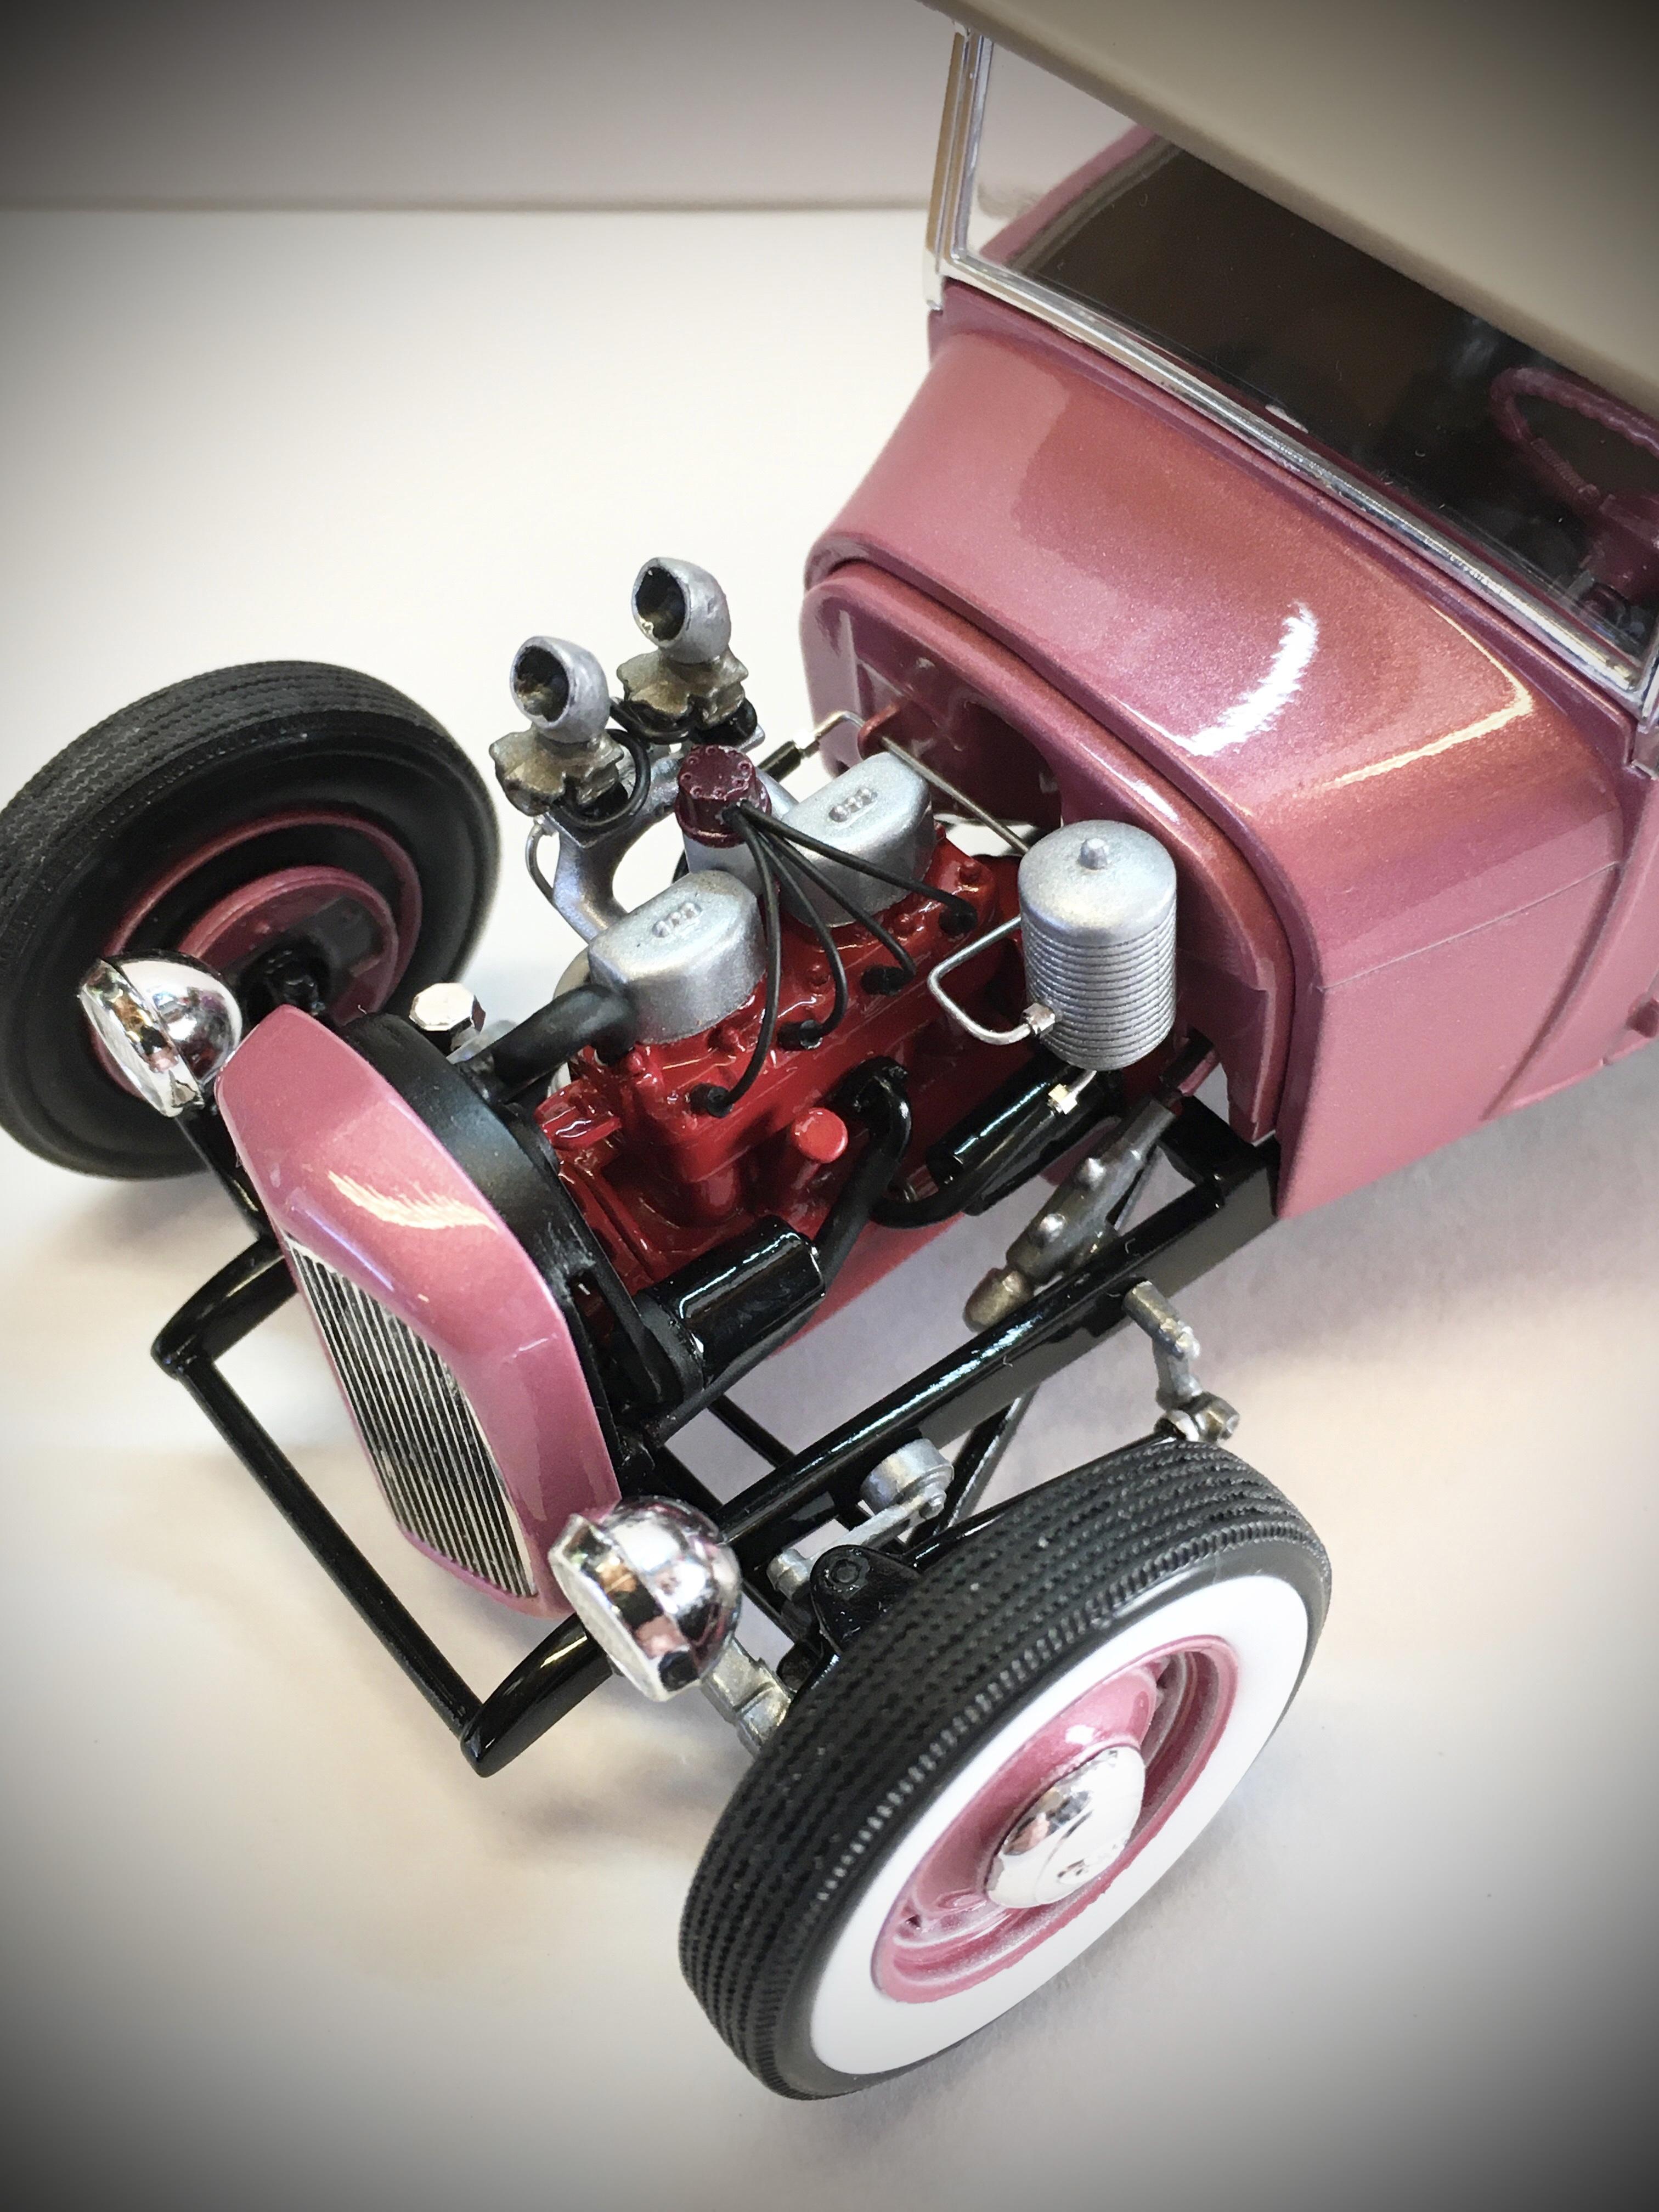
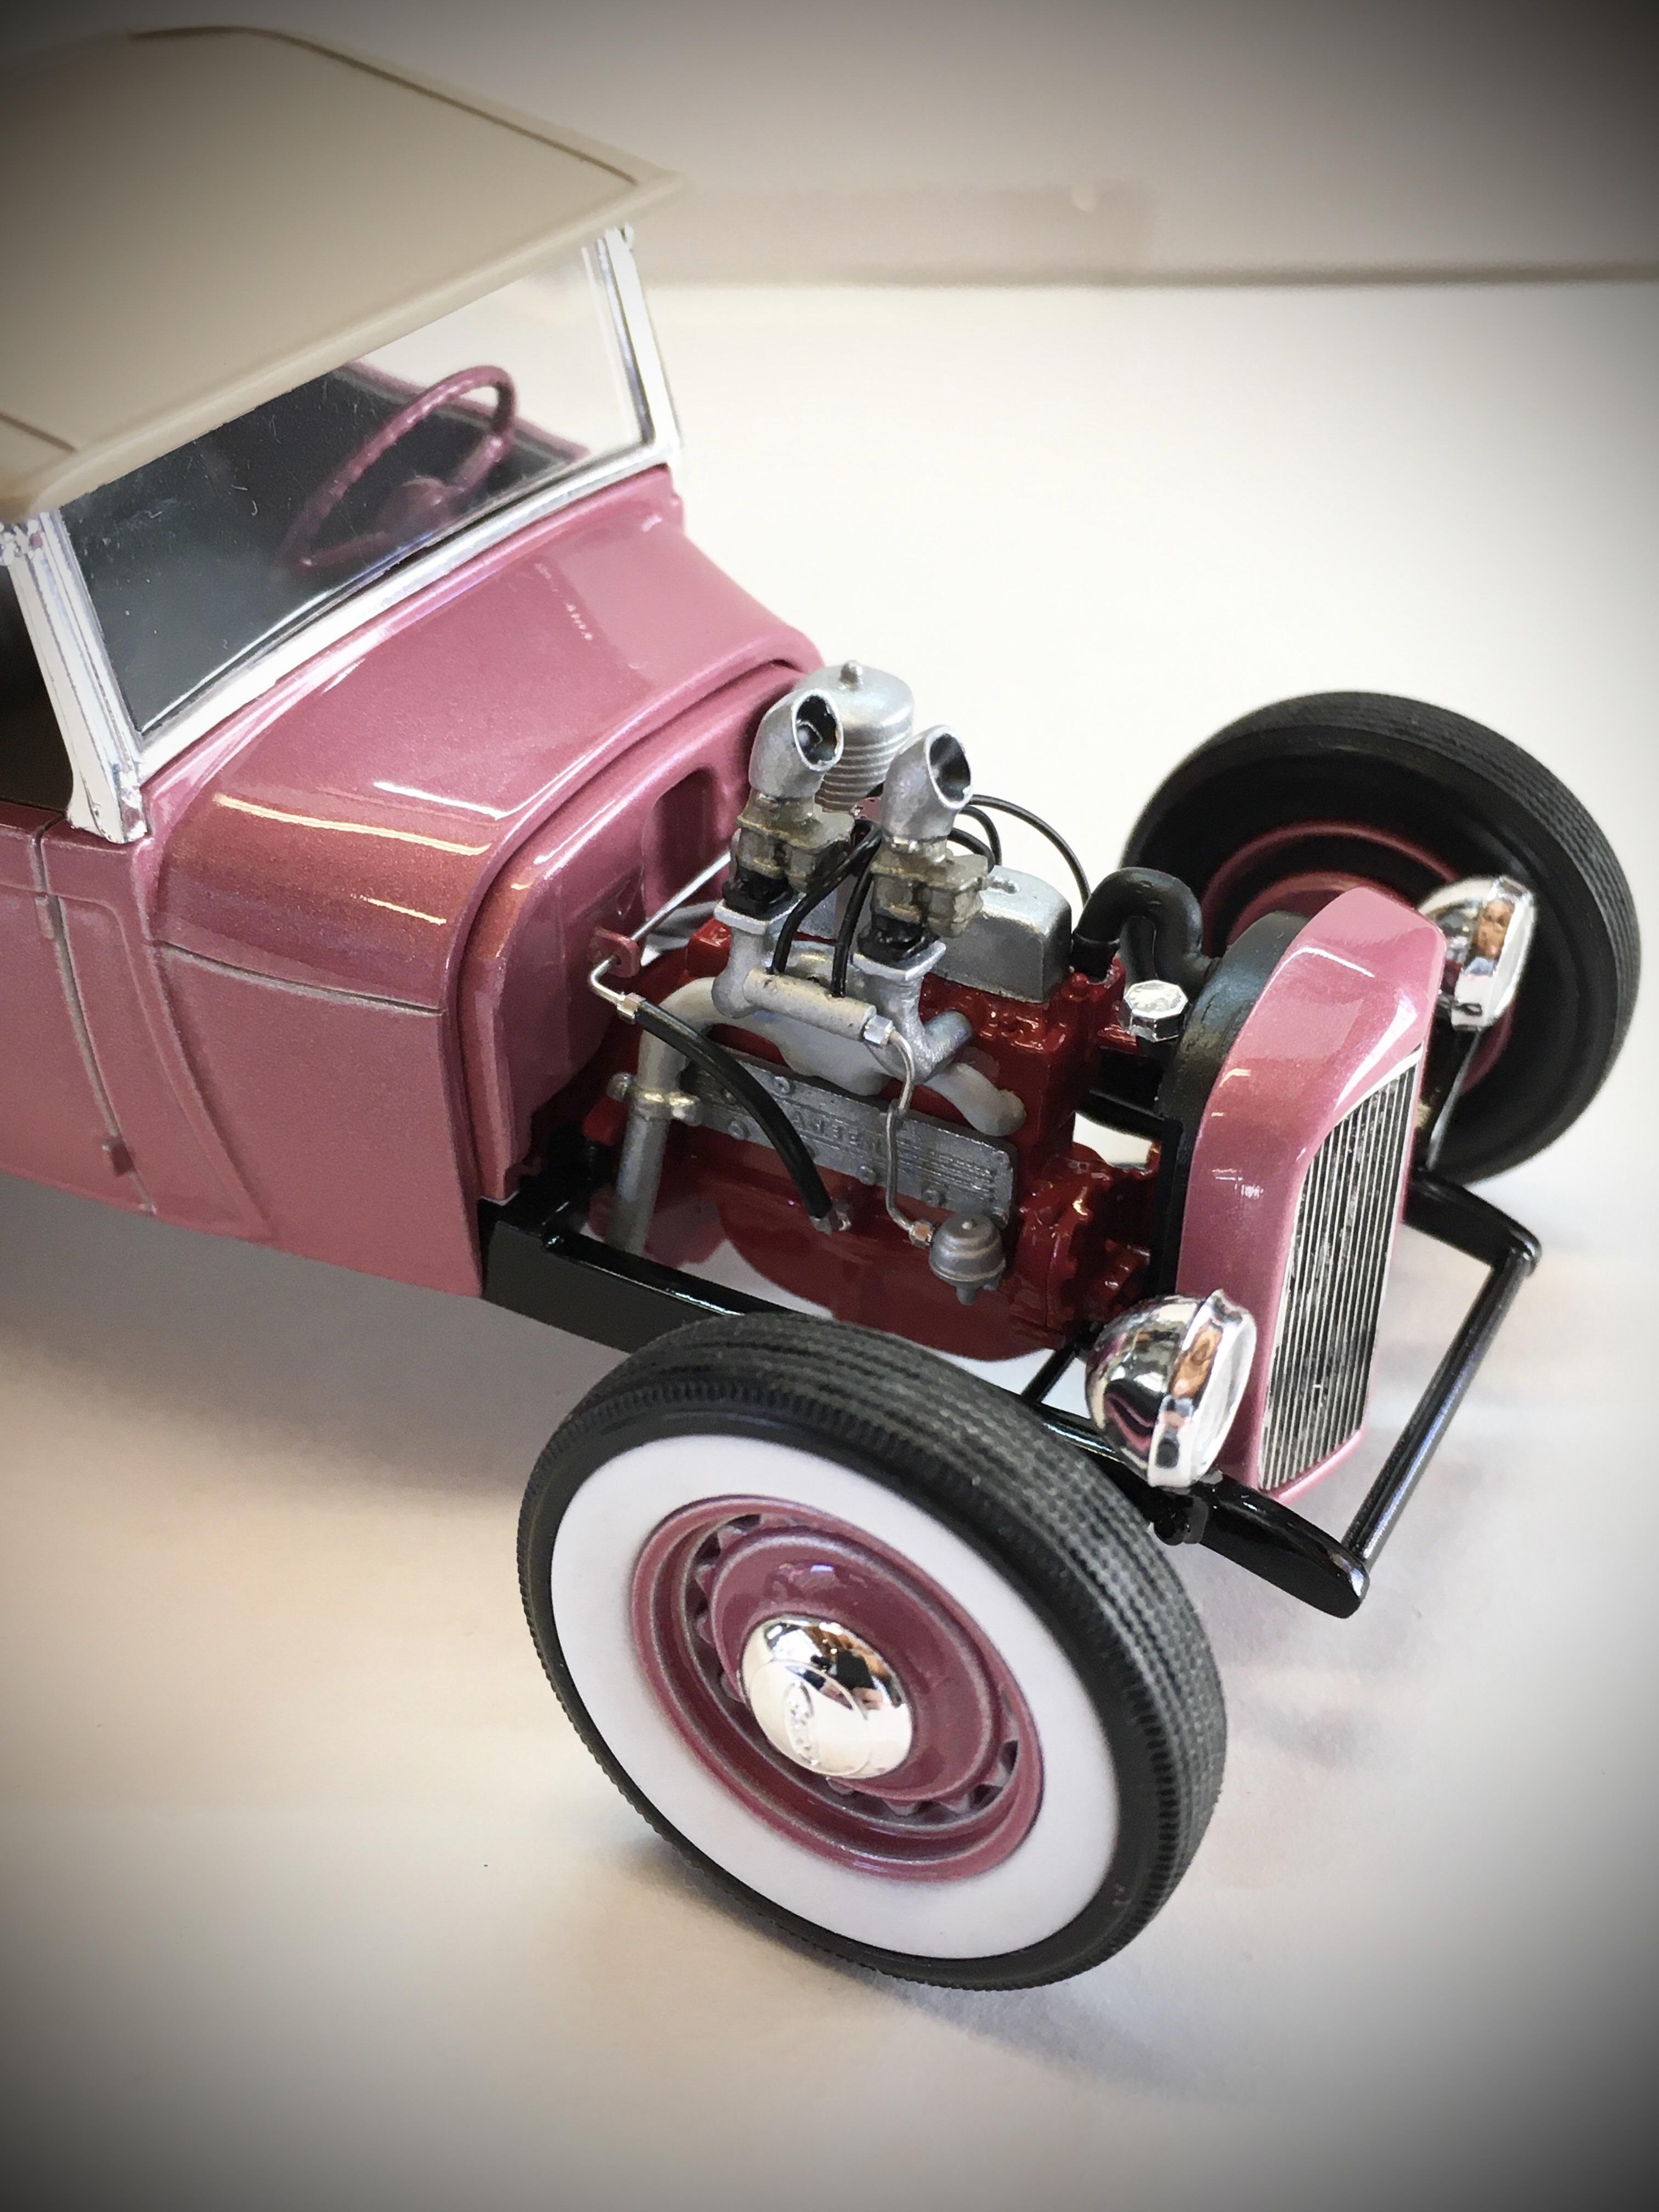
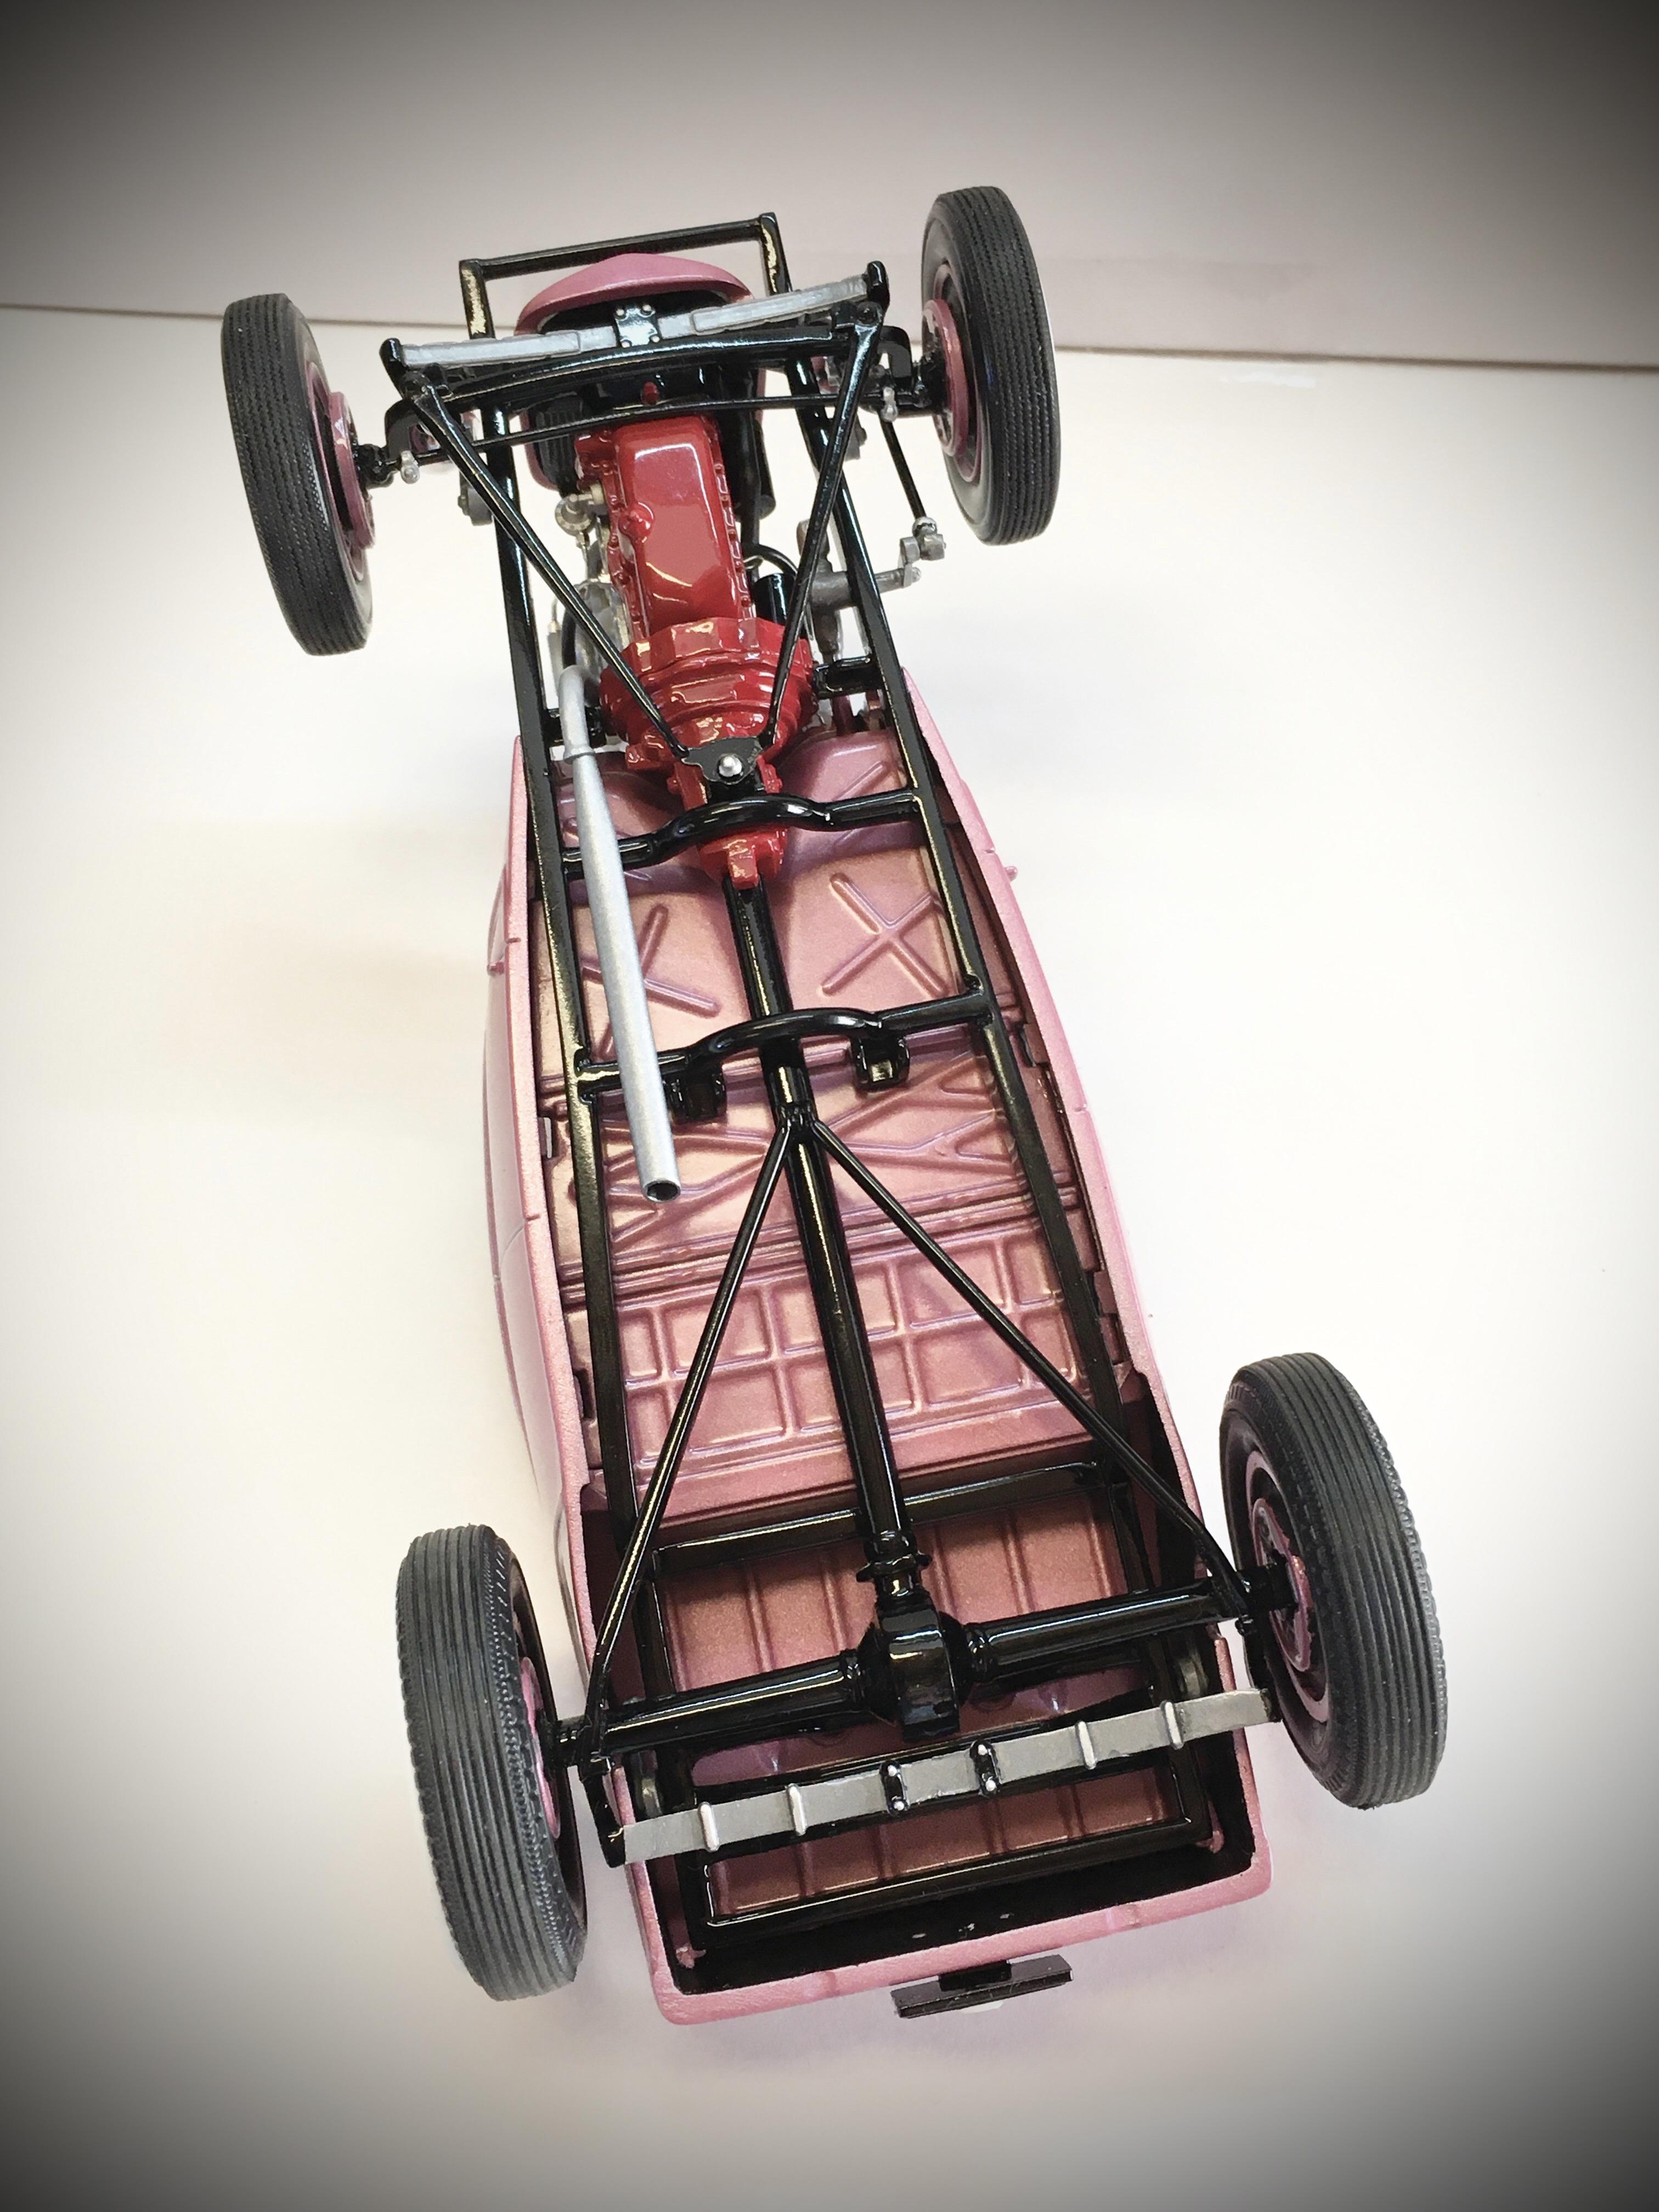
Another Revell based ‘29 Roadster also heavily Kit bashed into a 1949-1951 period correct hot rod which was the very beginning of metallic paints. Drag City Casting up-top again. Tamiya TS59 Pearl Light Red.
-
Group 29 - the thread for everyone's '29 Ford Roadster builds
Dennis Lacy replied to Phildaupho's topic in Model Cars
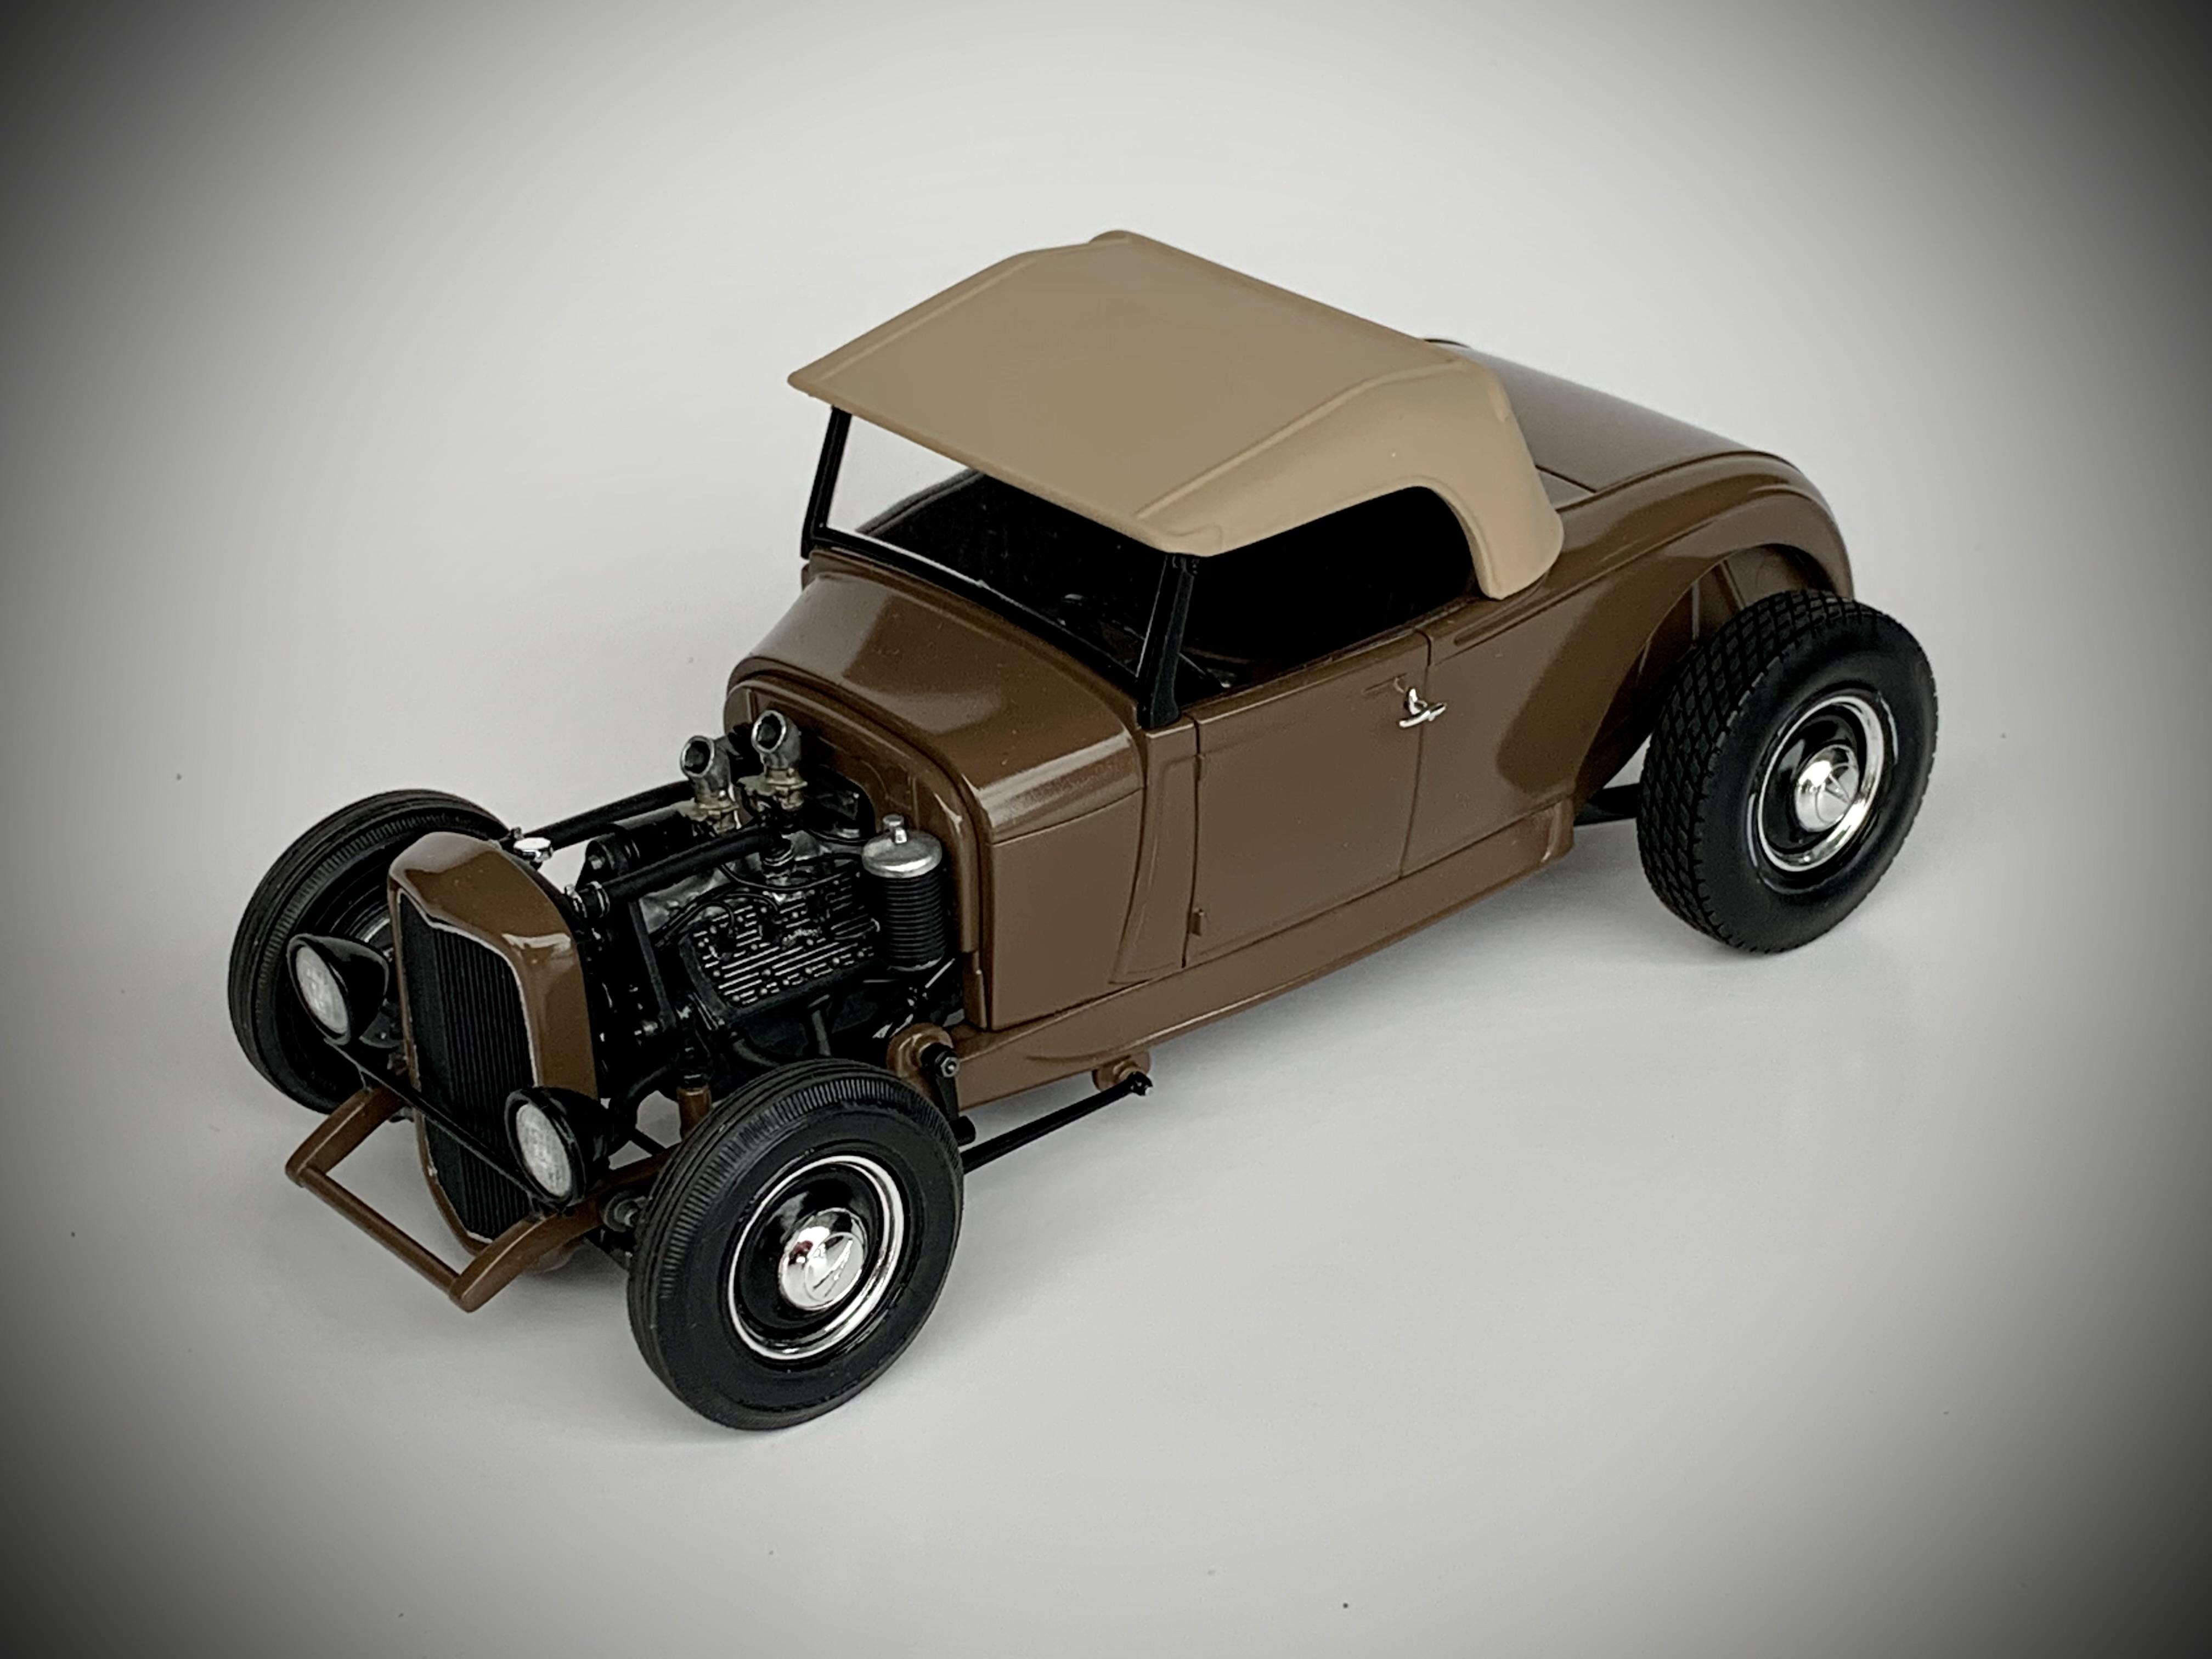
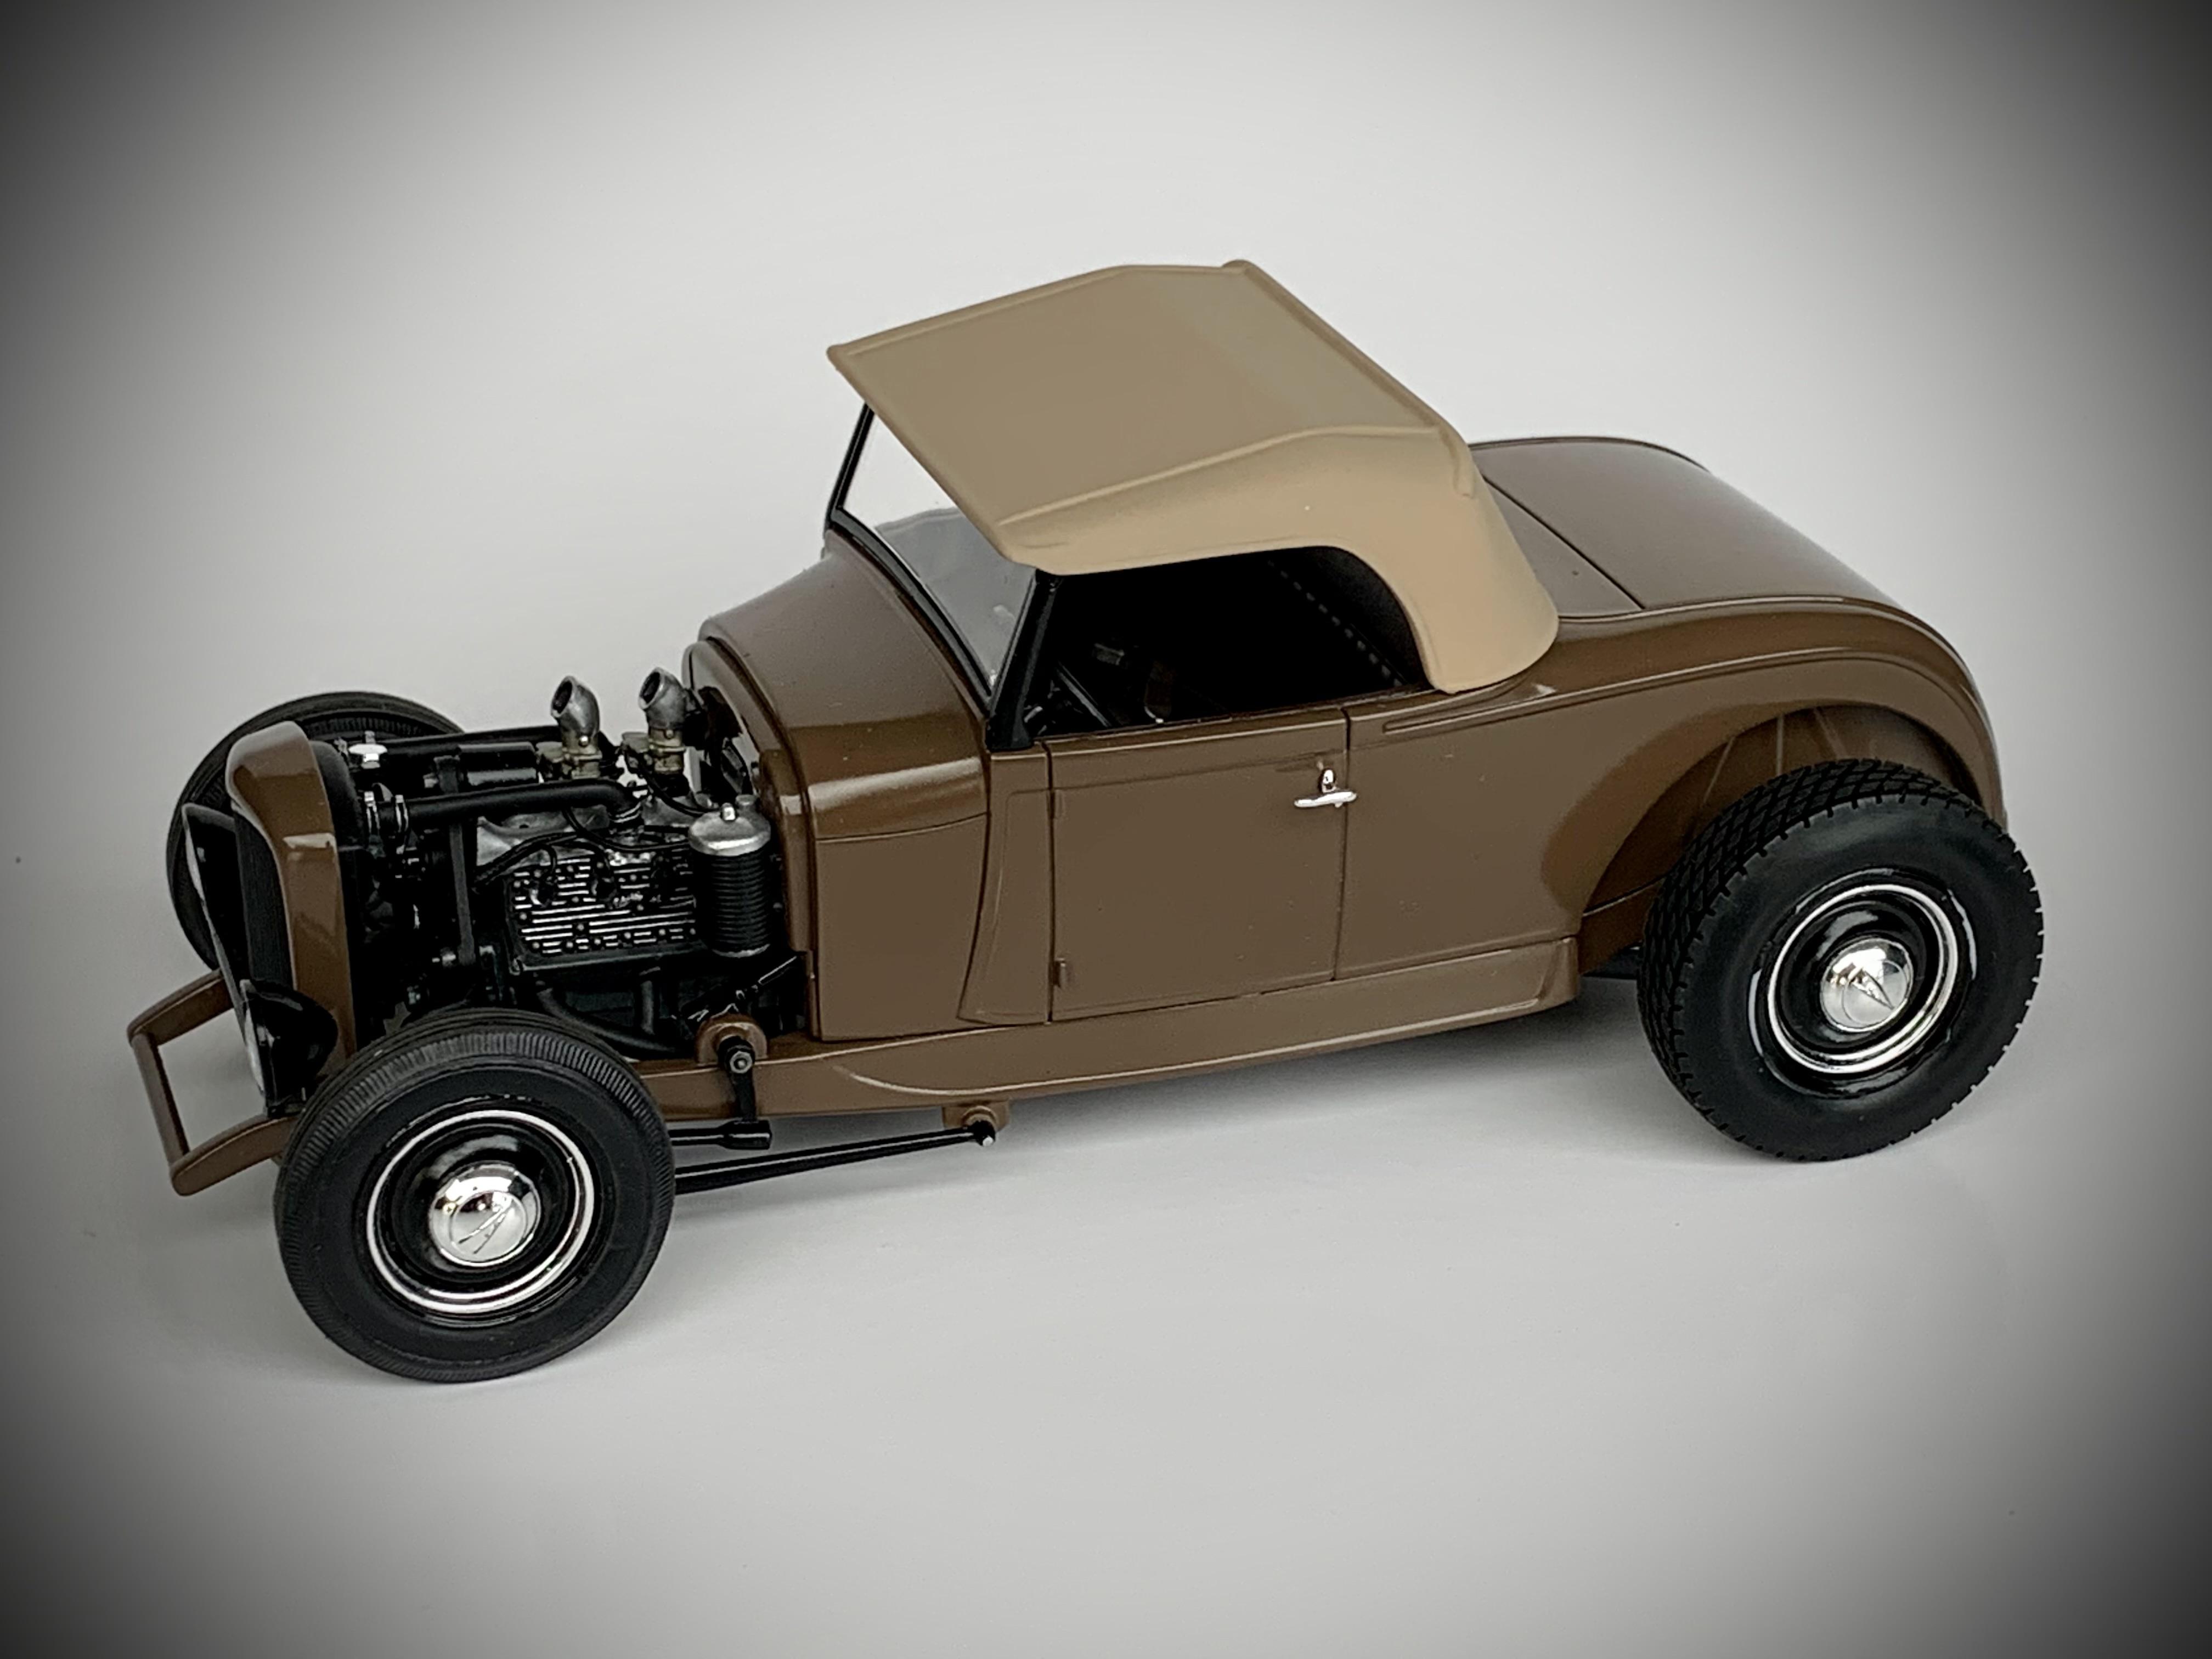
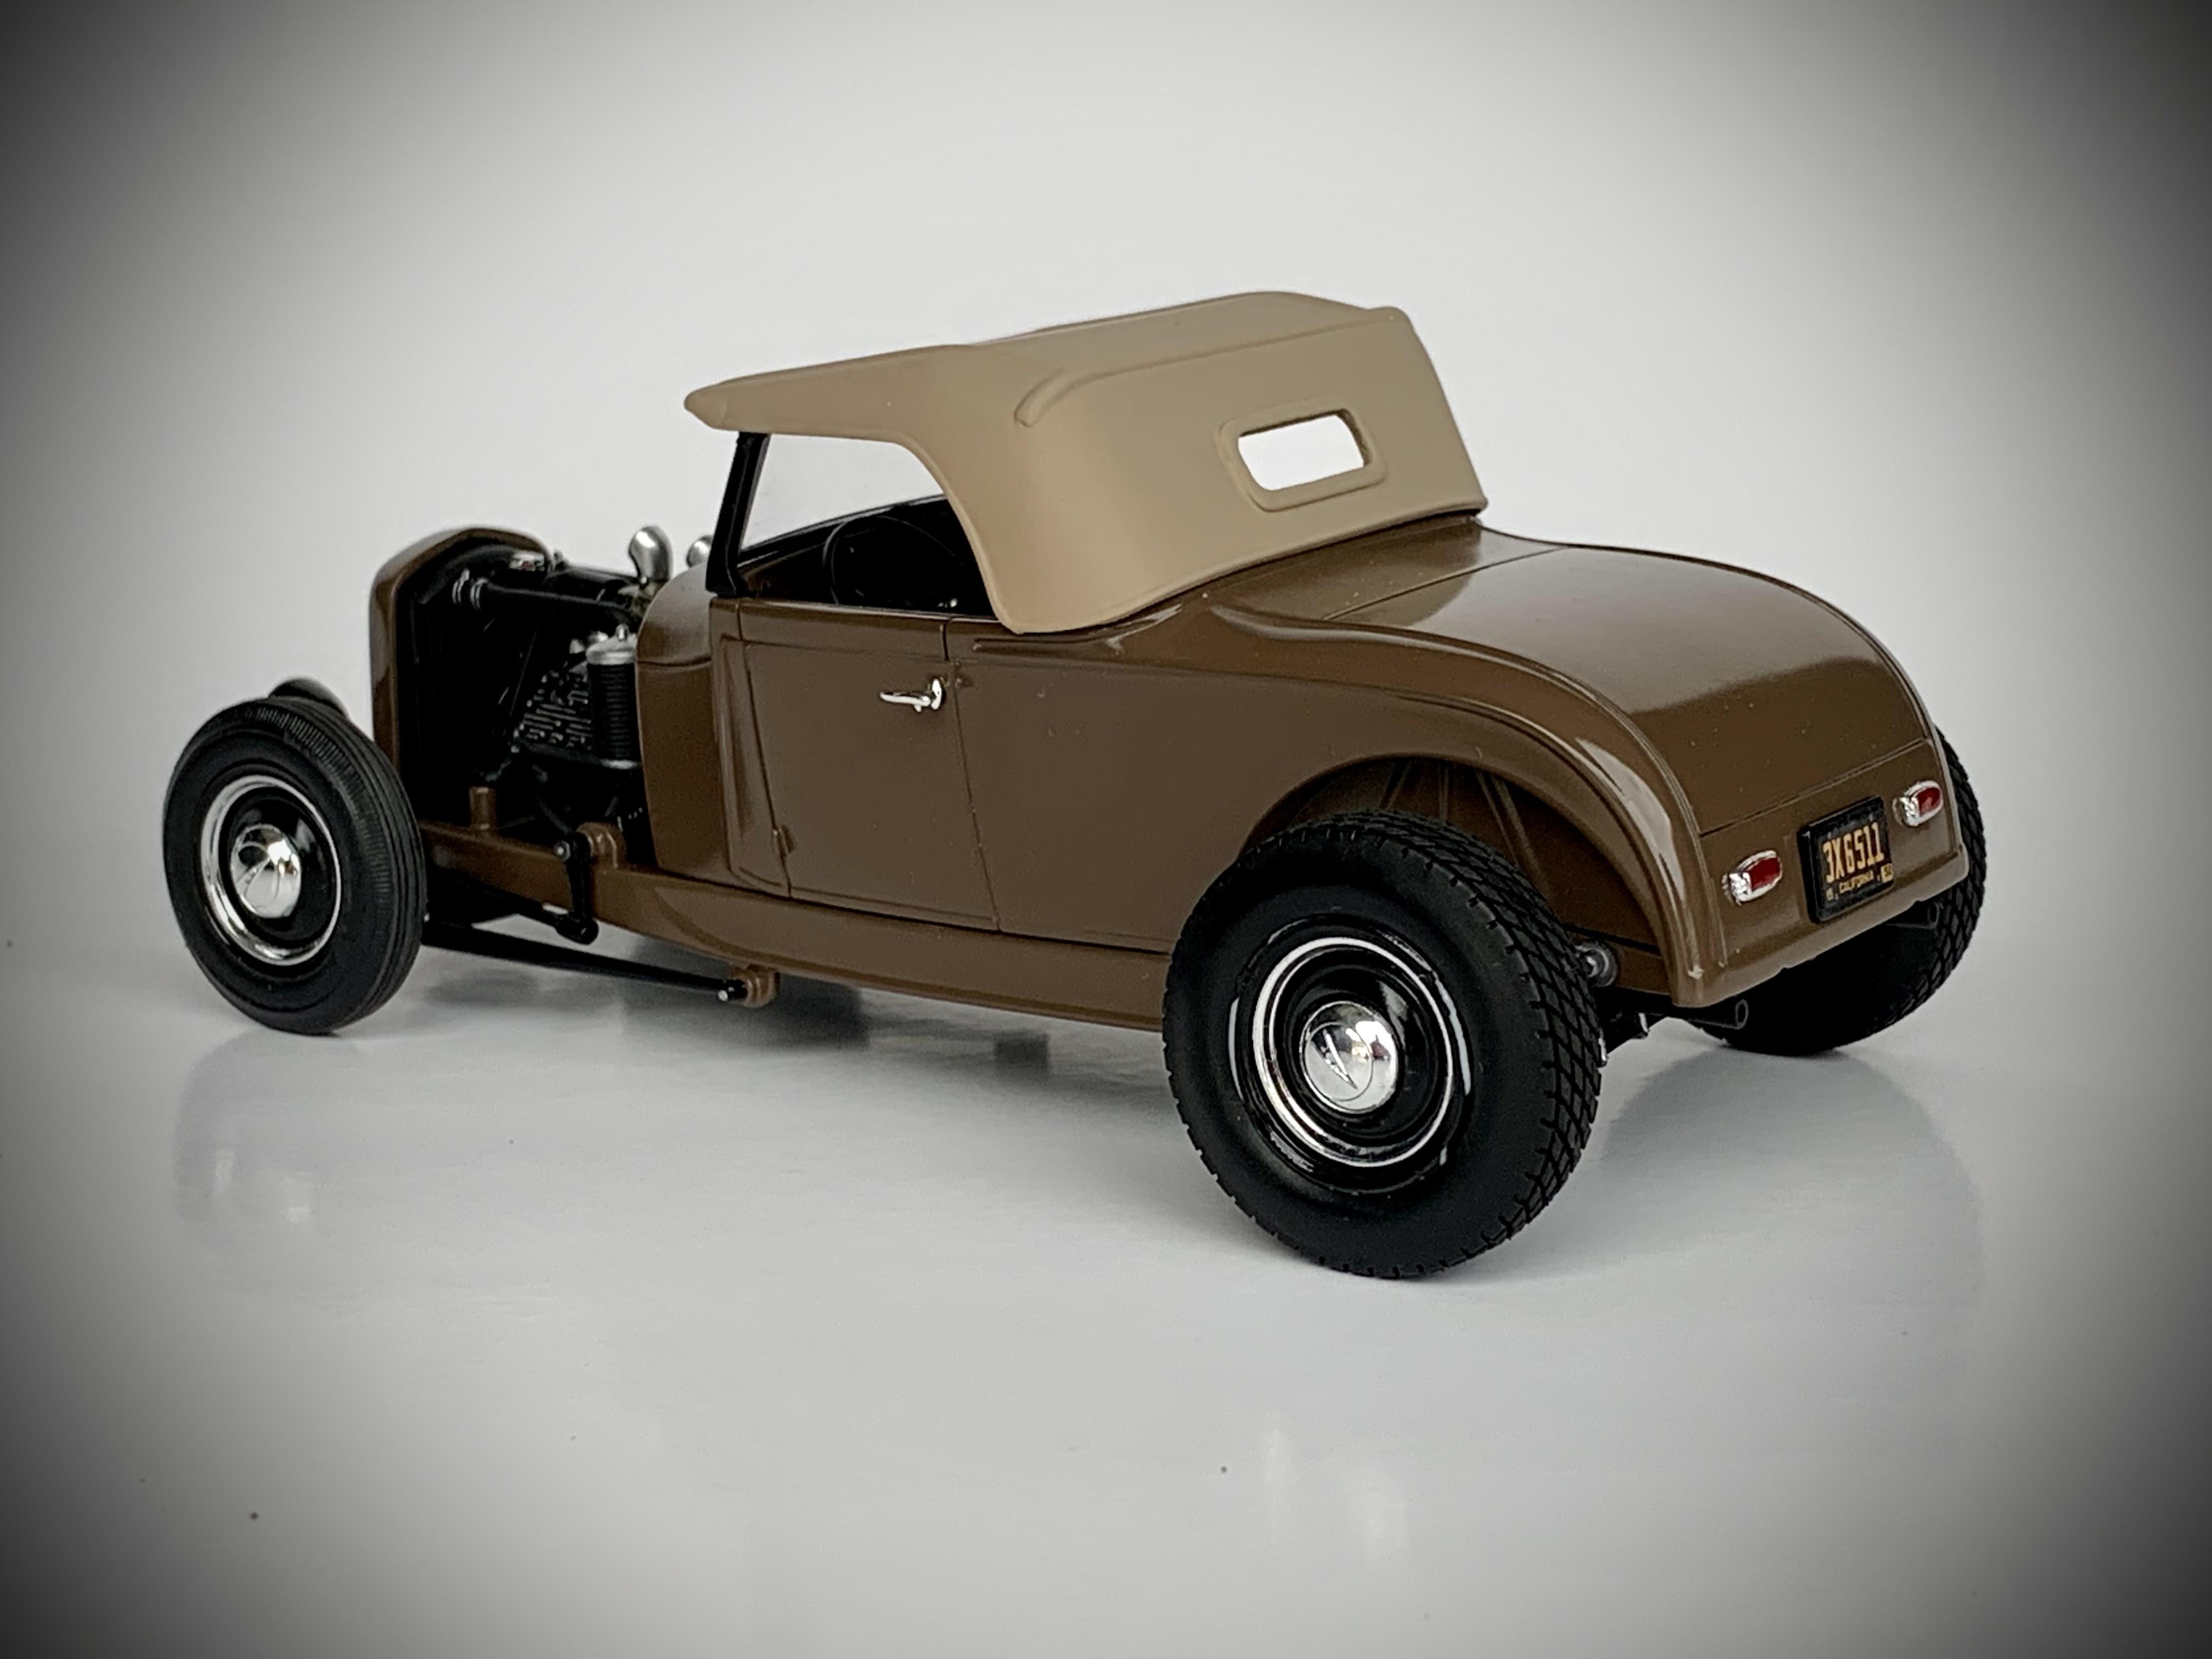
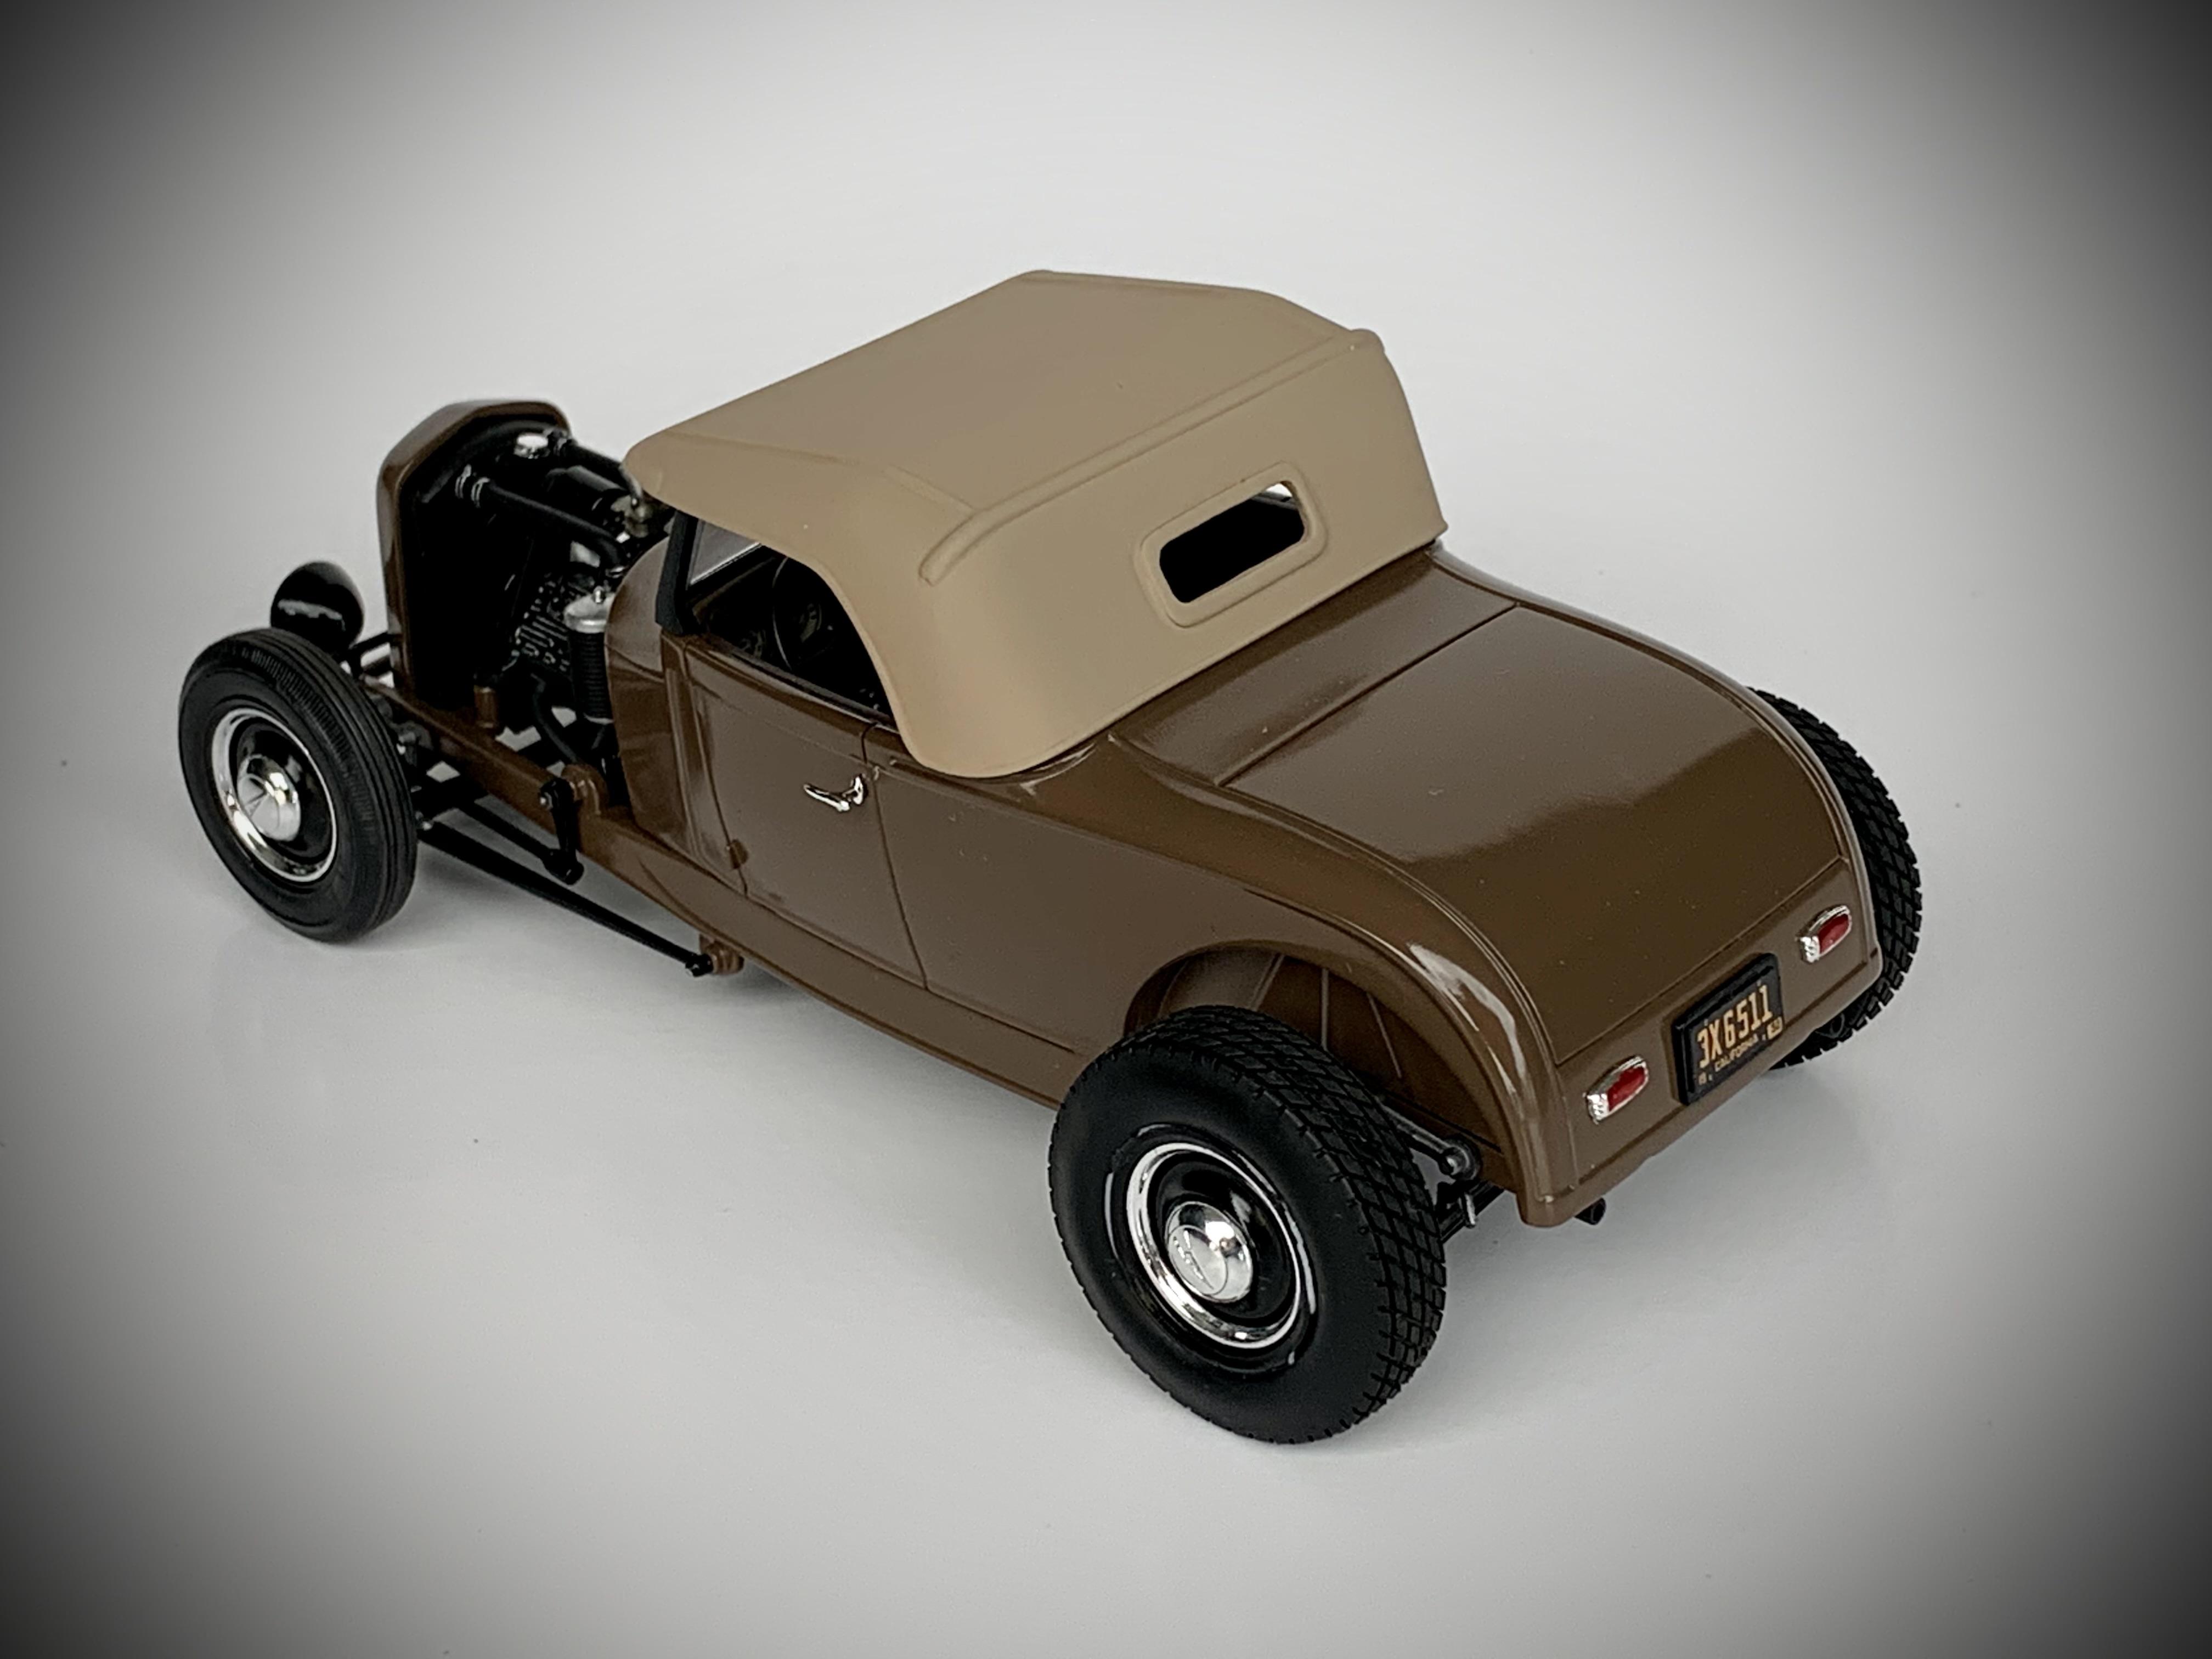
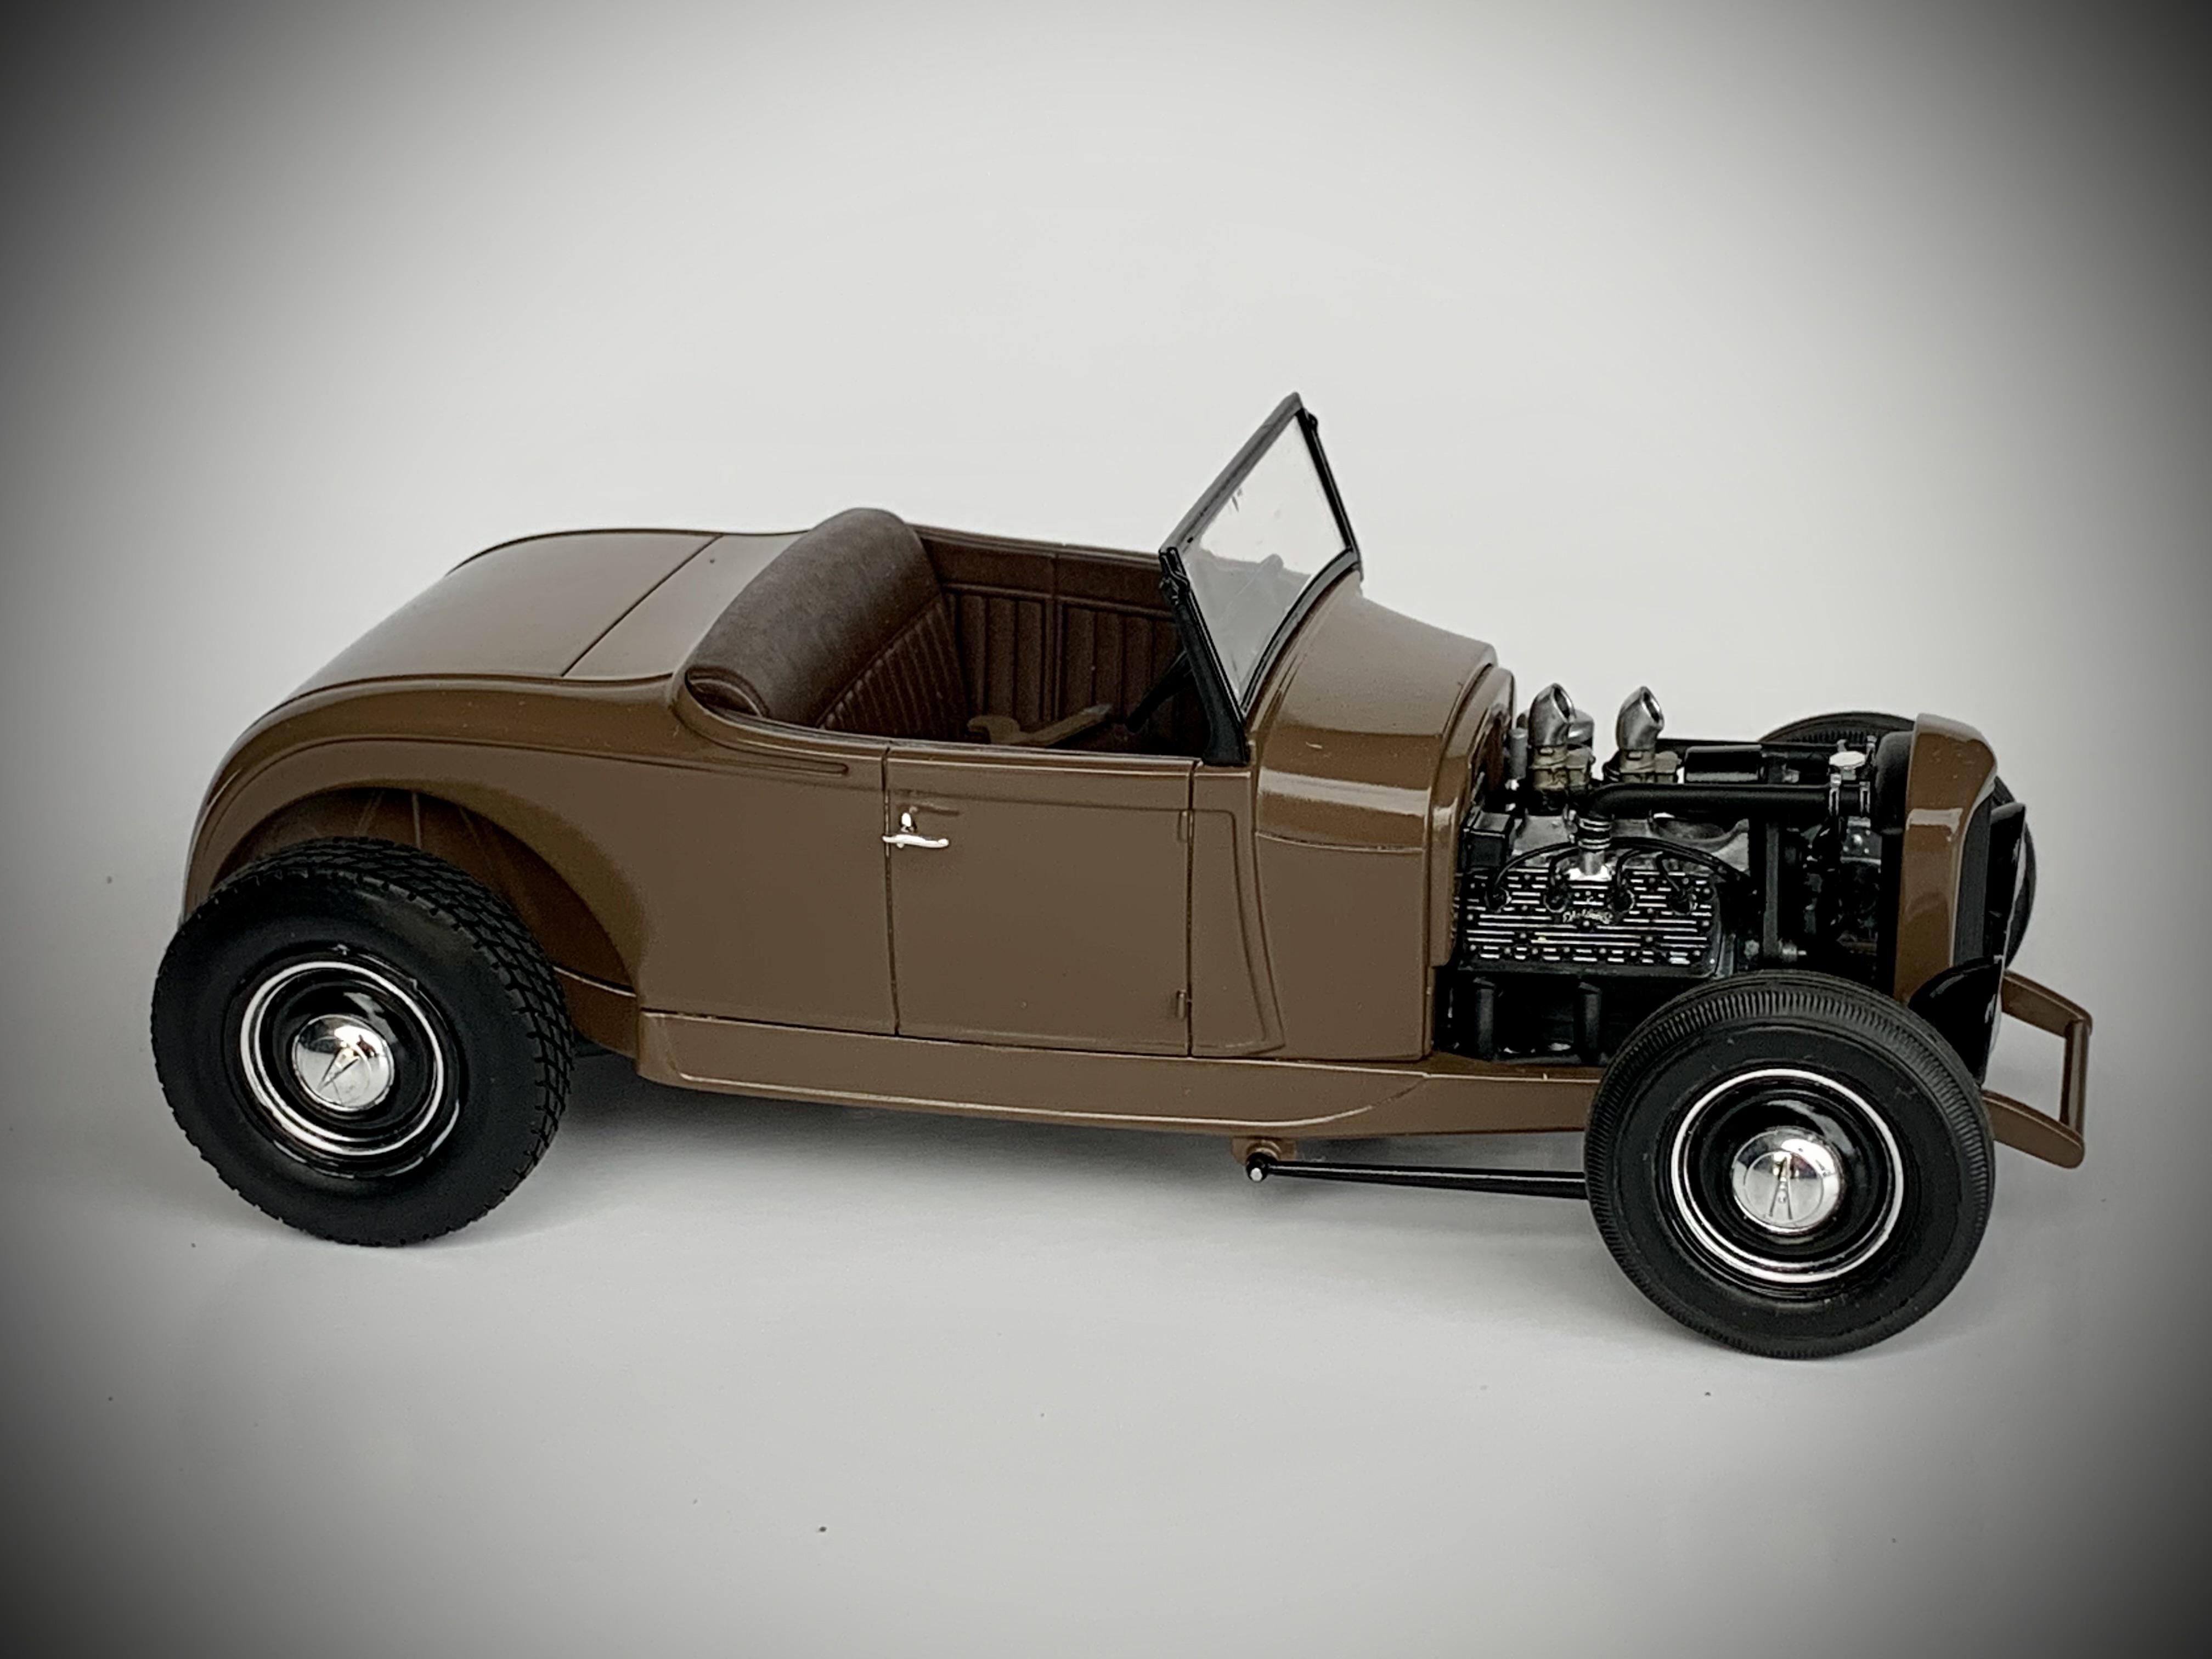
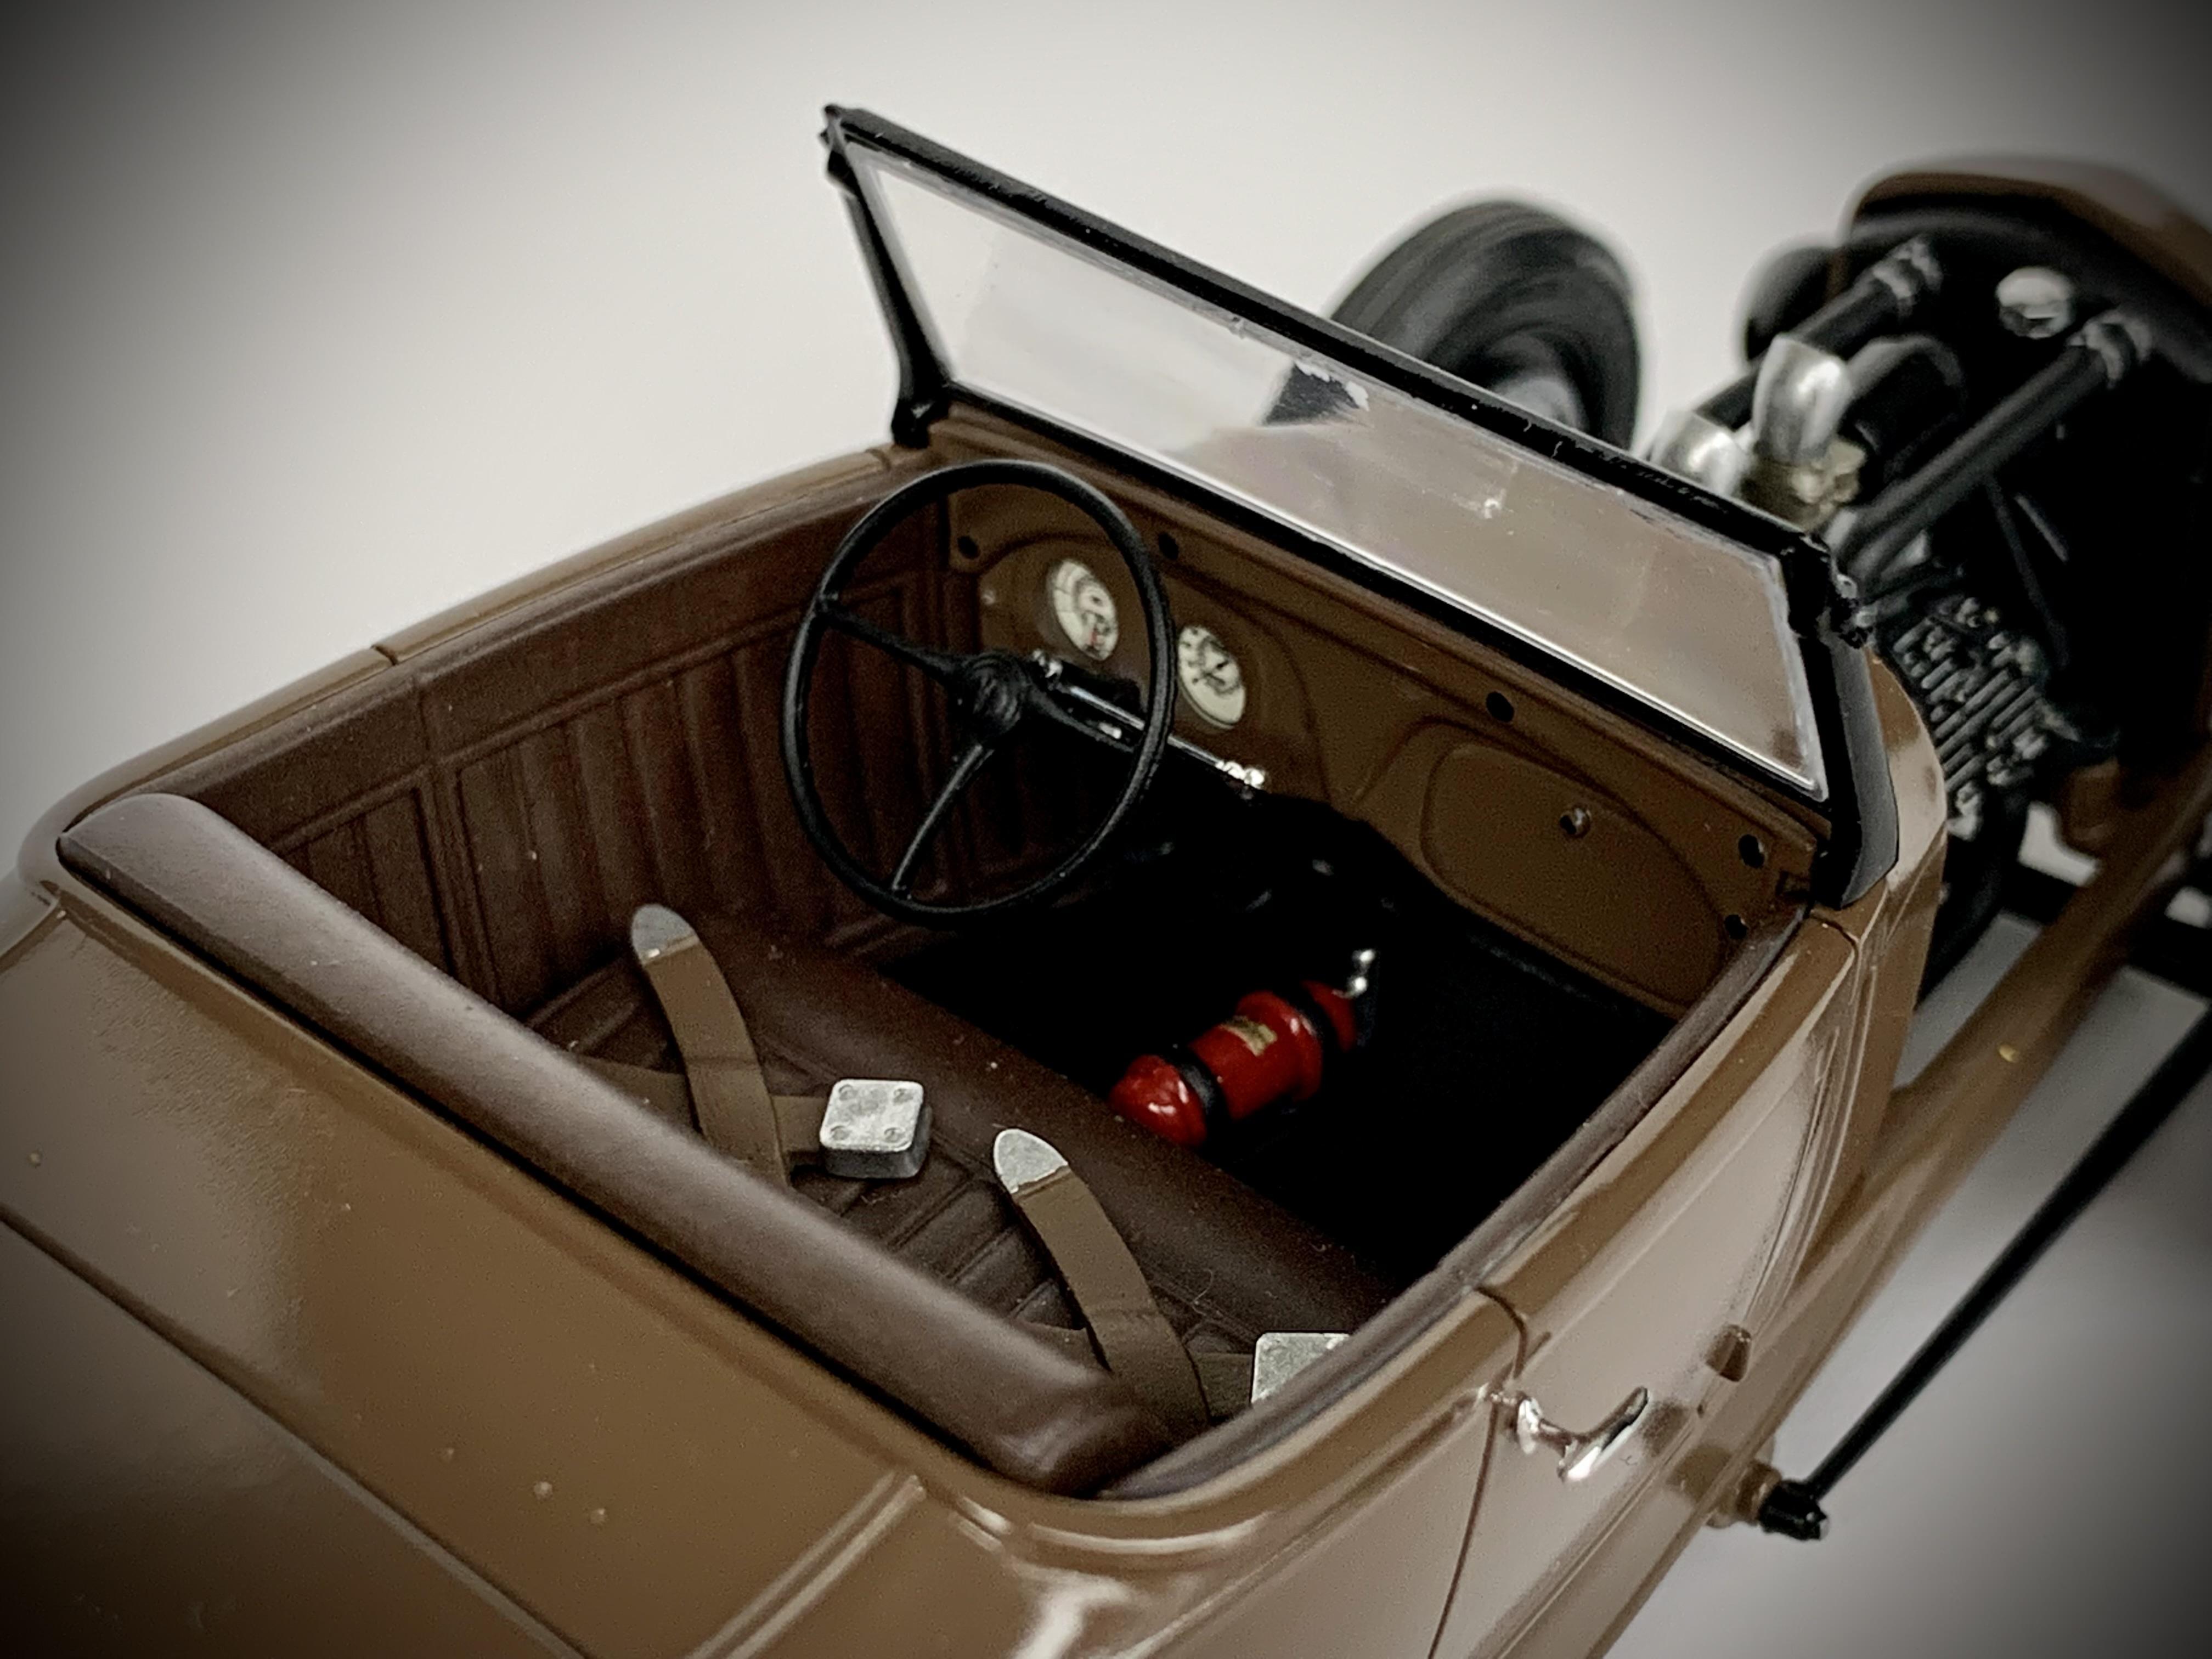
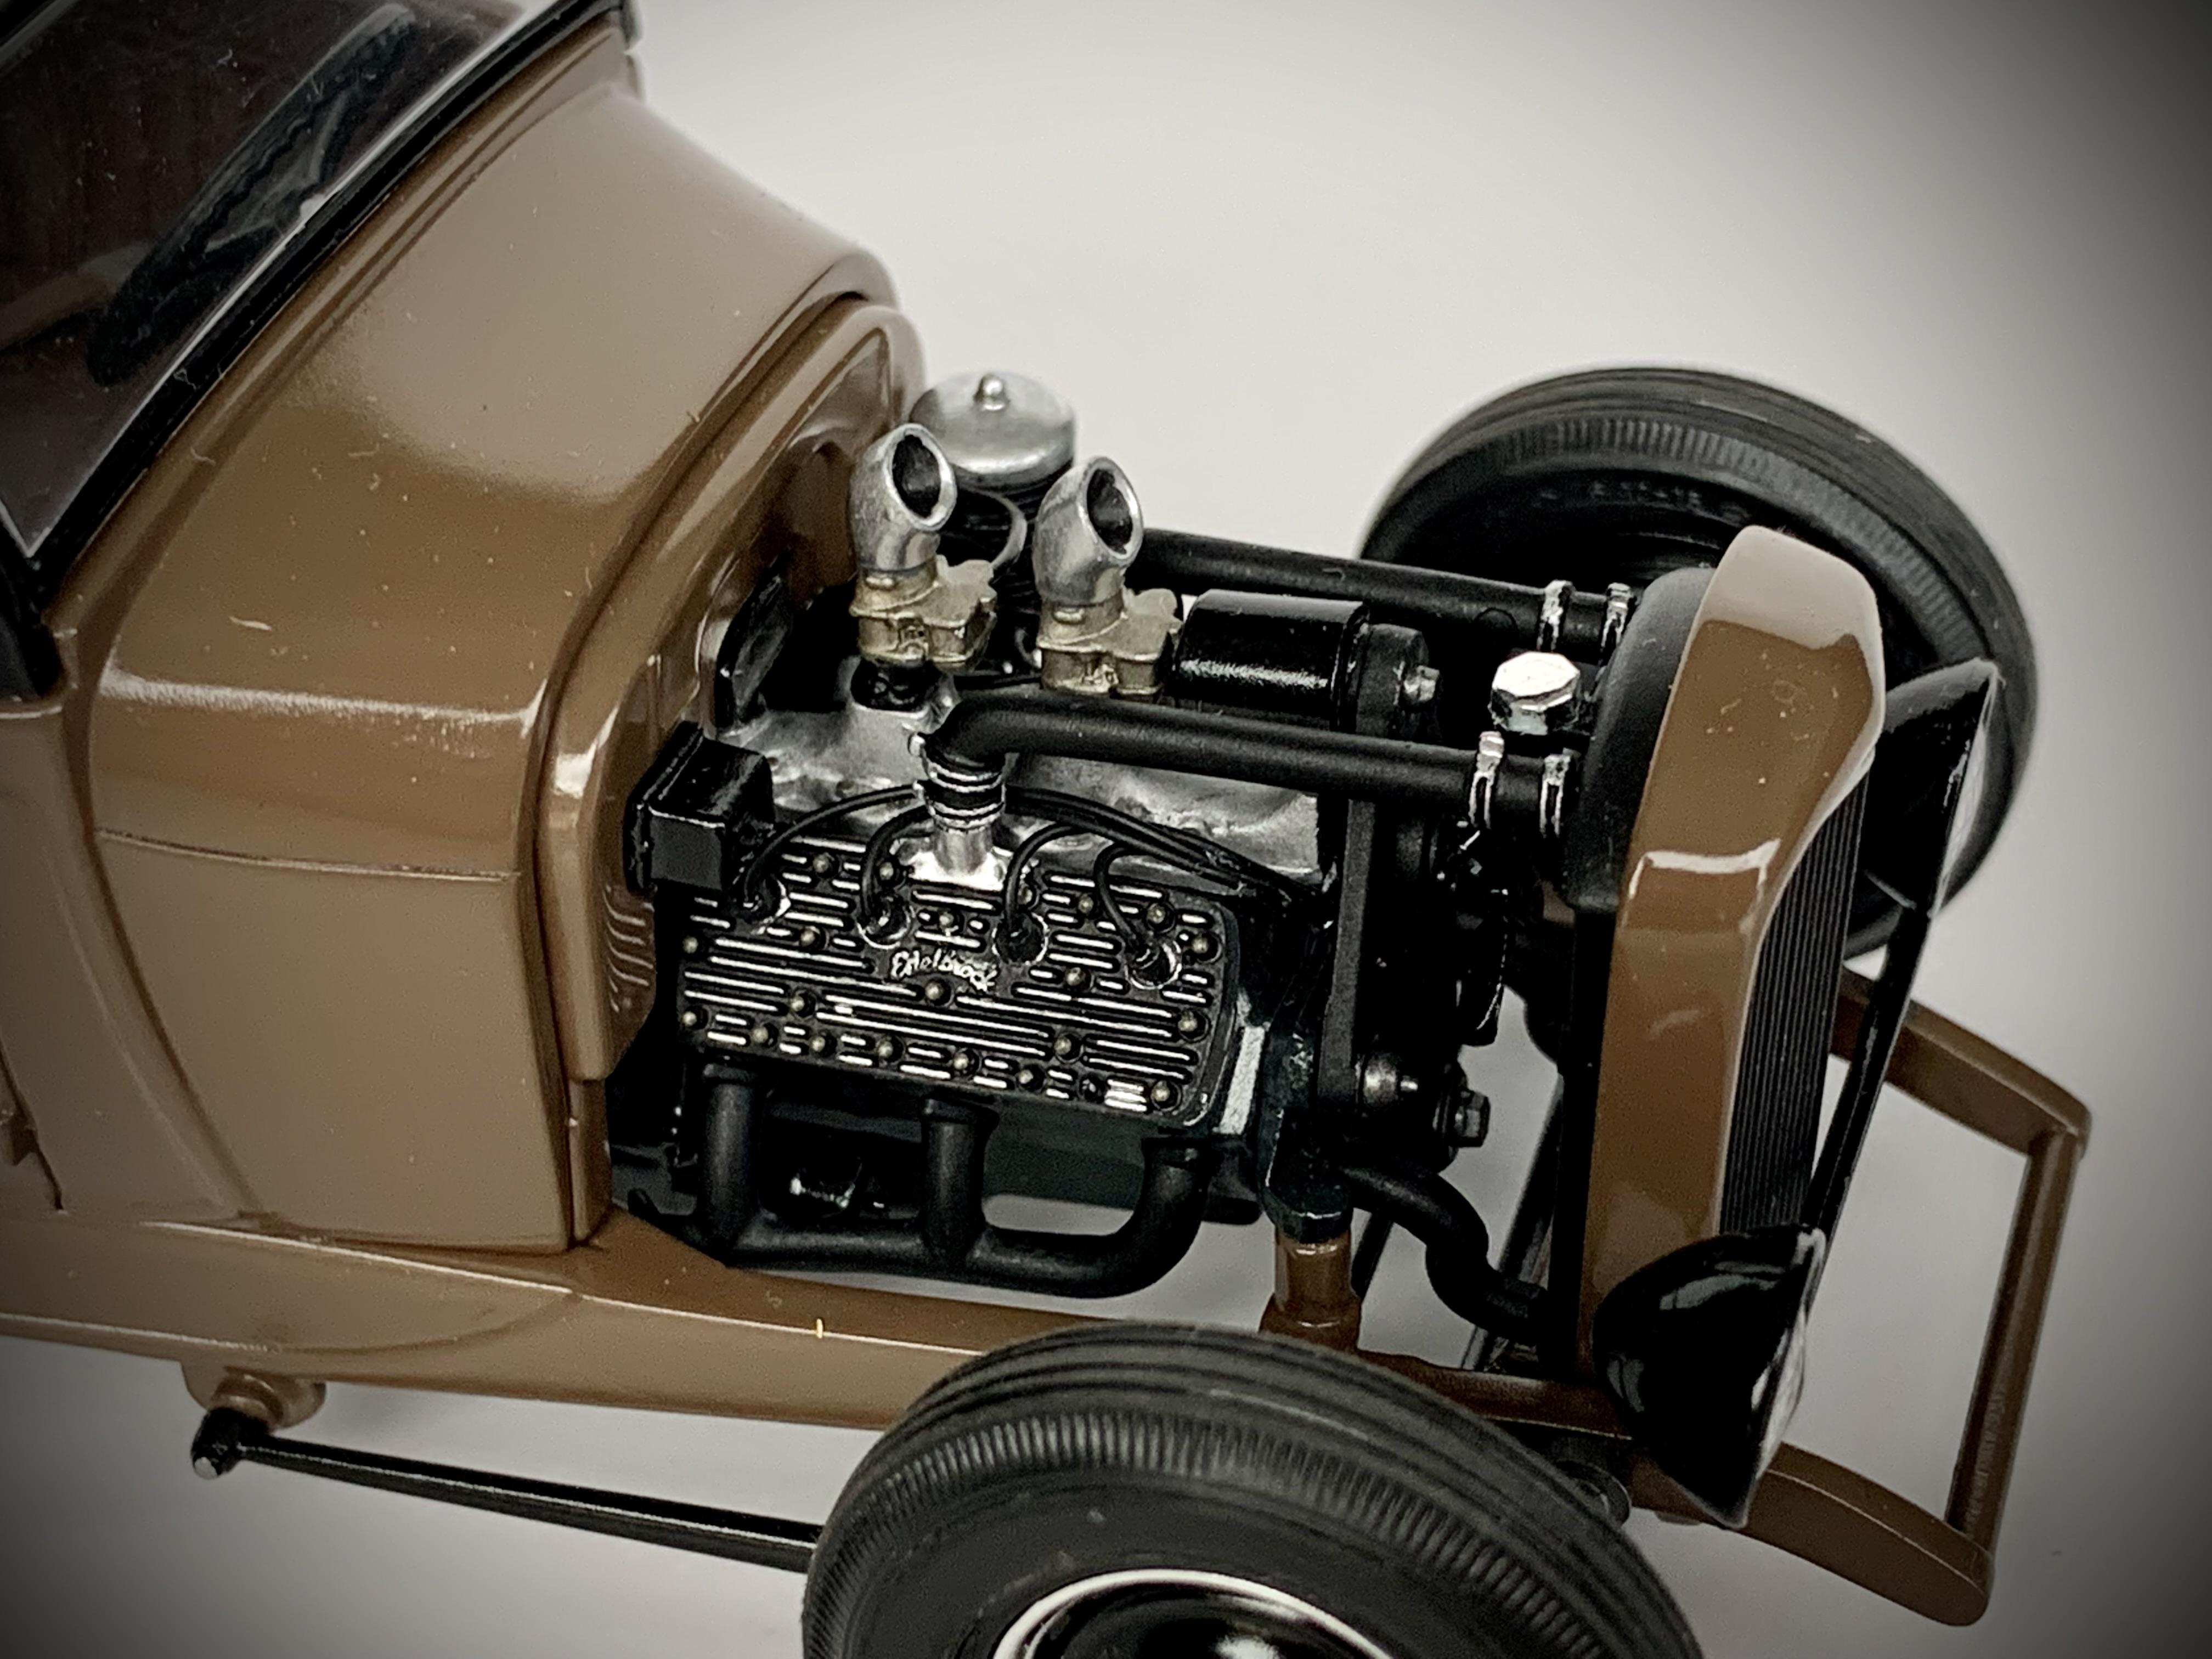
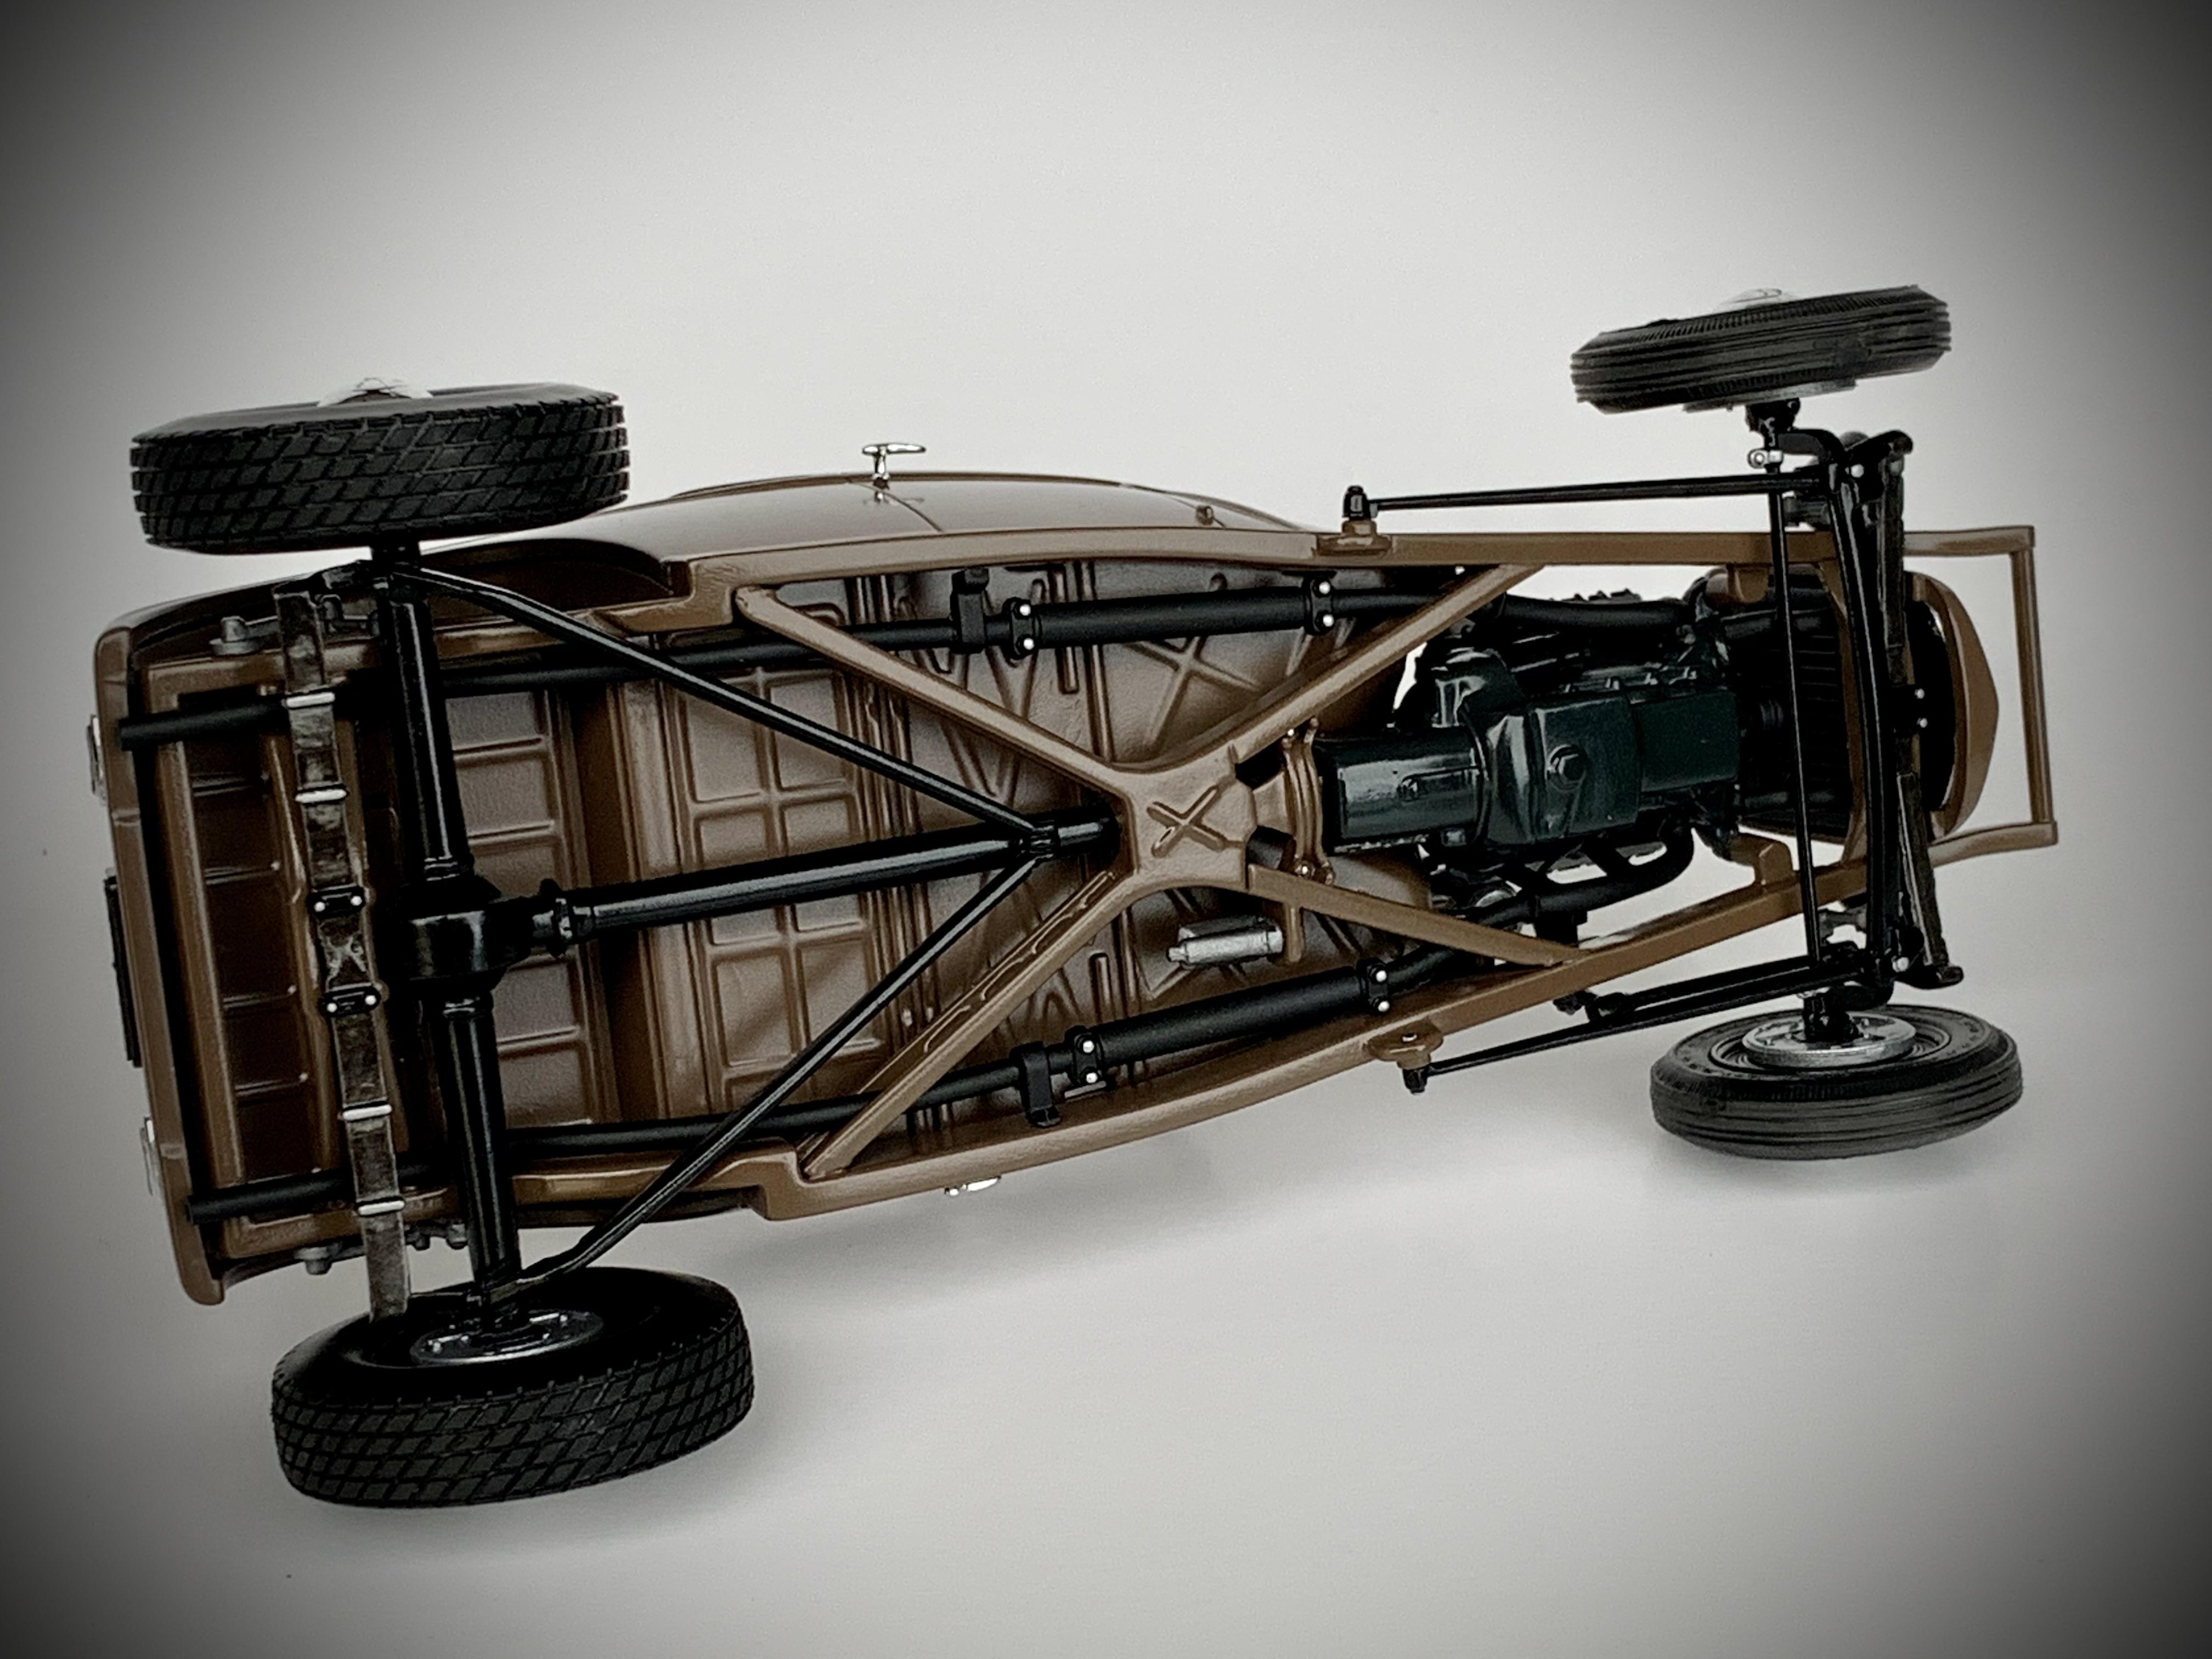
Looking back through this thread I was surprised to find I had not shared this roadster. Based on the Revell ‘29 and HEAVILY kit bashed to 1946-1948 period correct. Up-top by Drag City Casting (which I created the master for.) Paint is Tamiya AS22 Dark Earth with their TS13 gloss clear.
-
I learned the hard way that the exhaust manifold bolt holes on the French blocks go through into the water jackets. That explains why they came with studs installed in those holes! ?
-
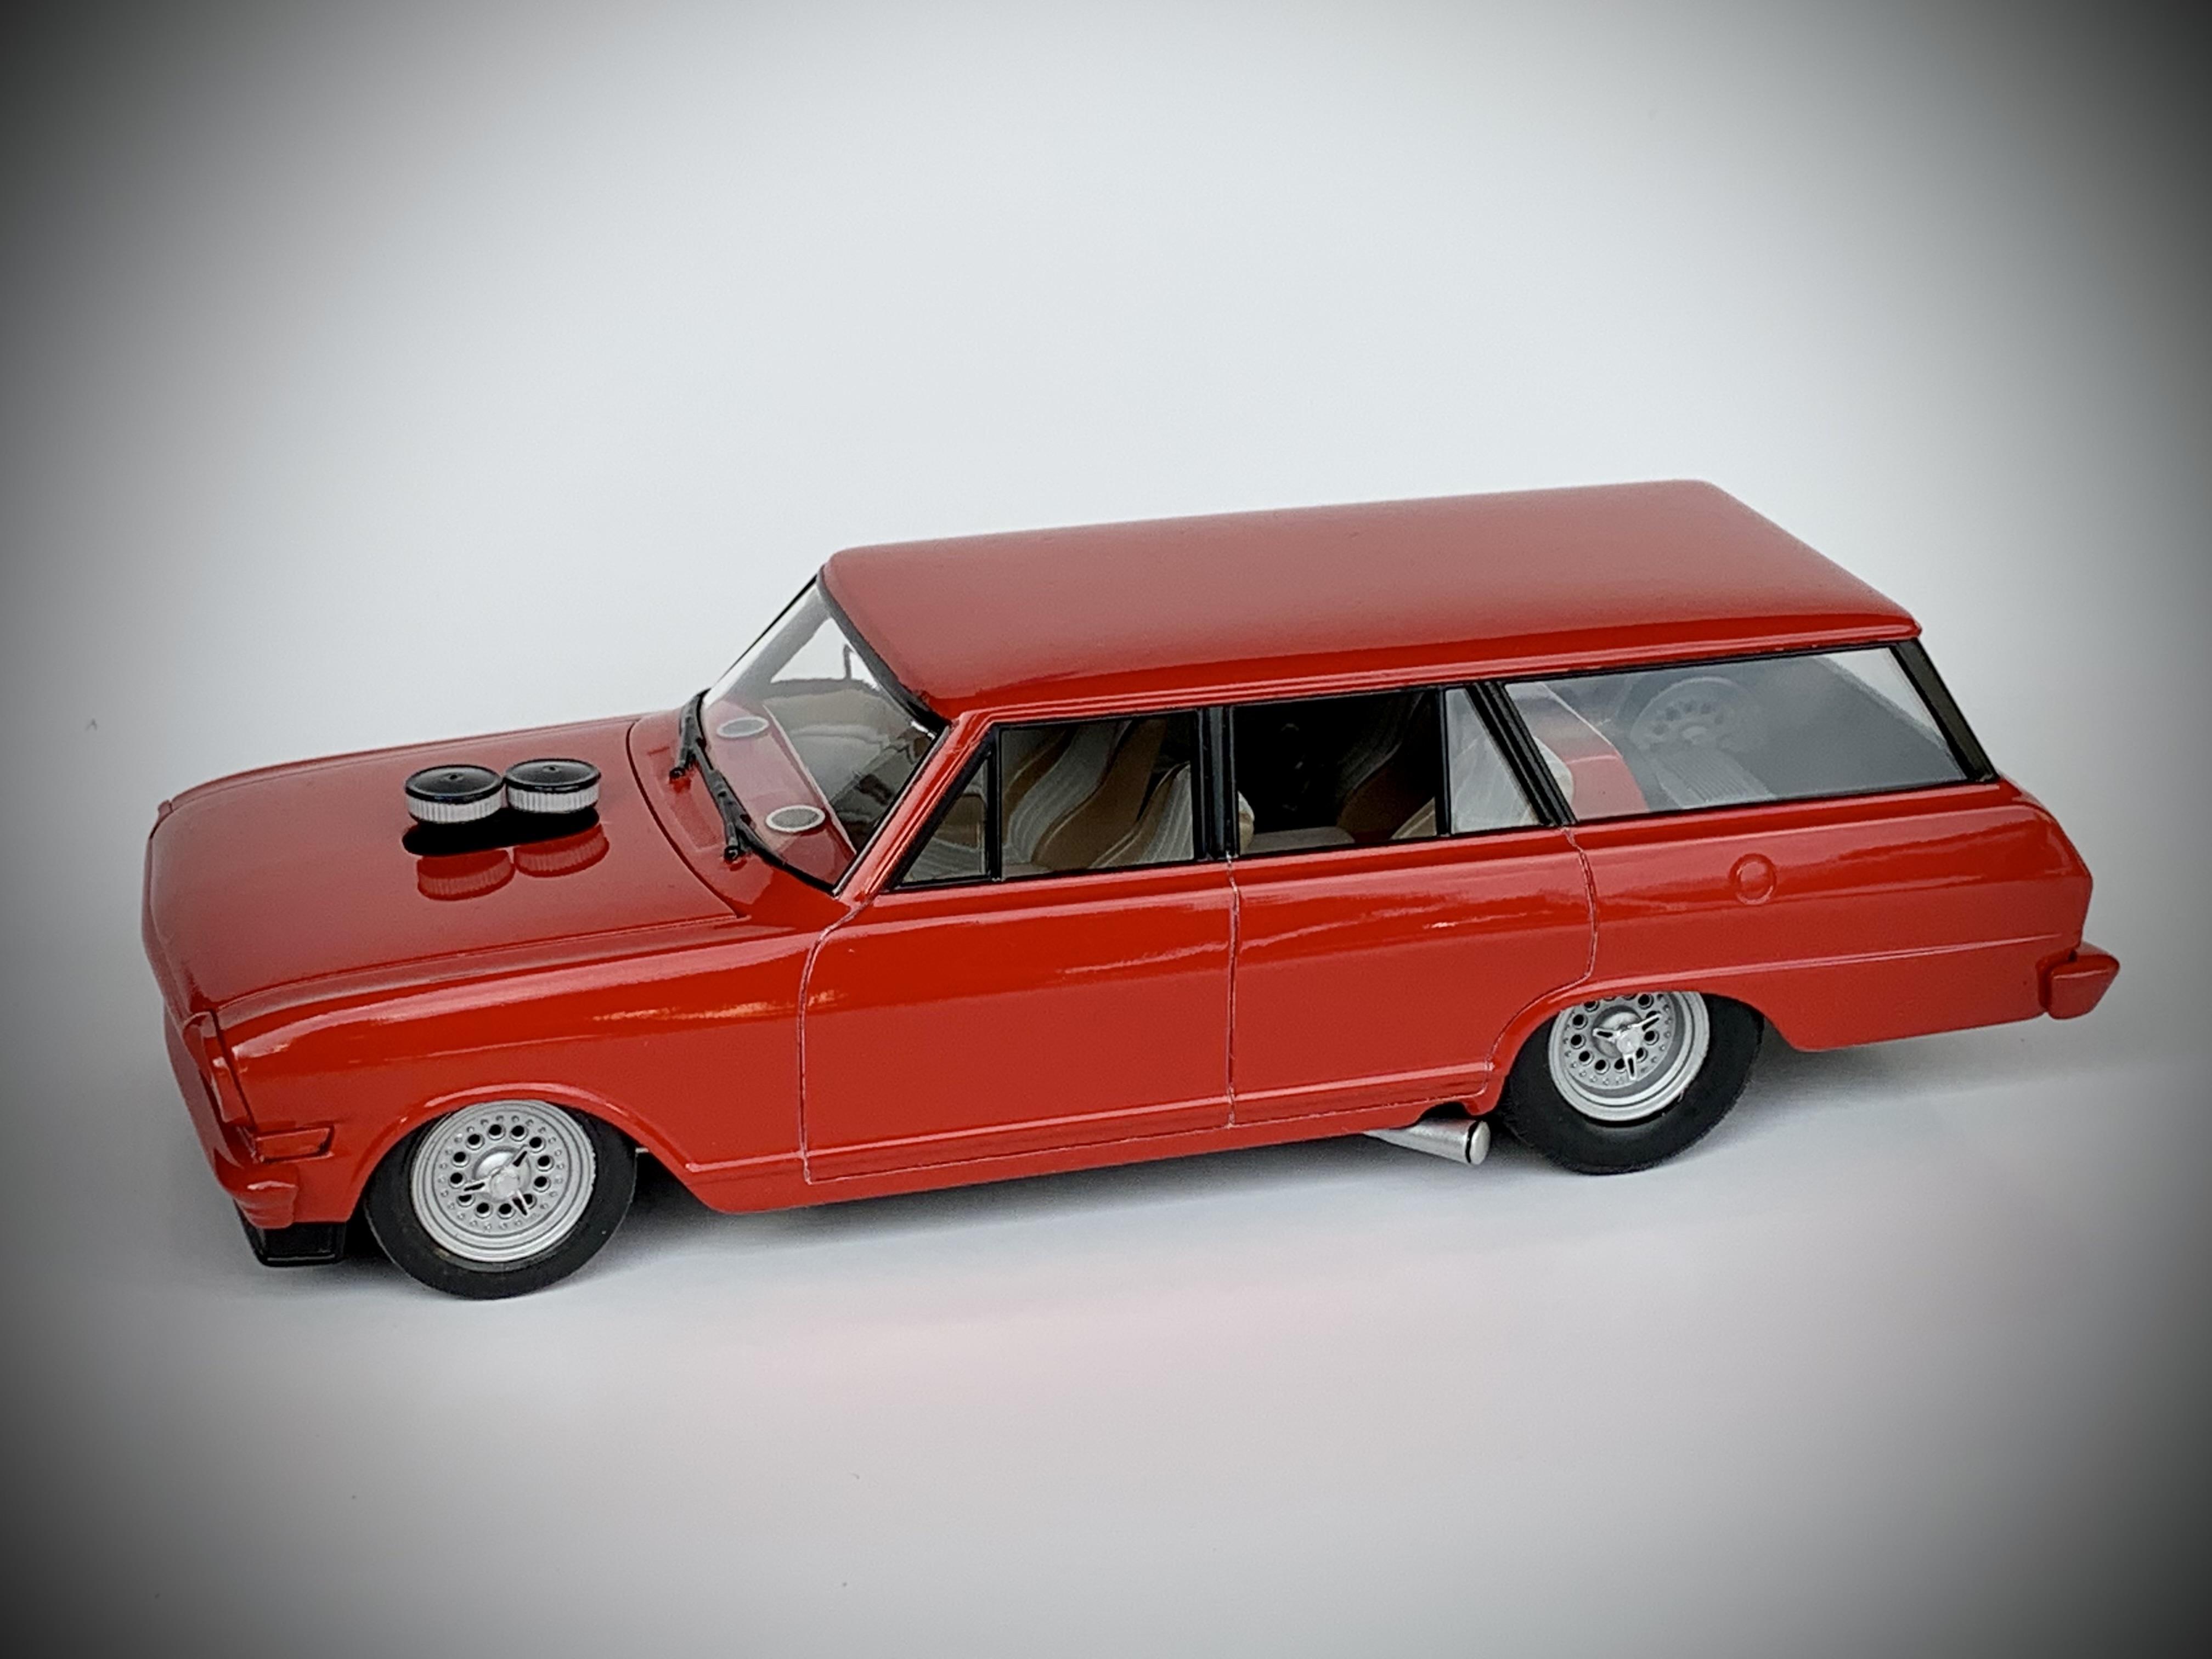
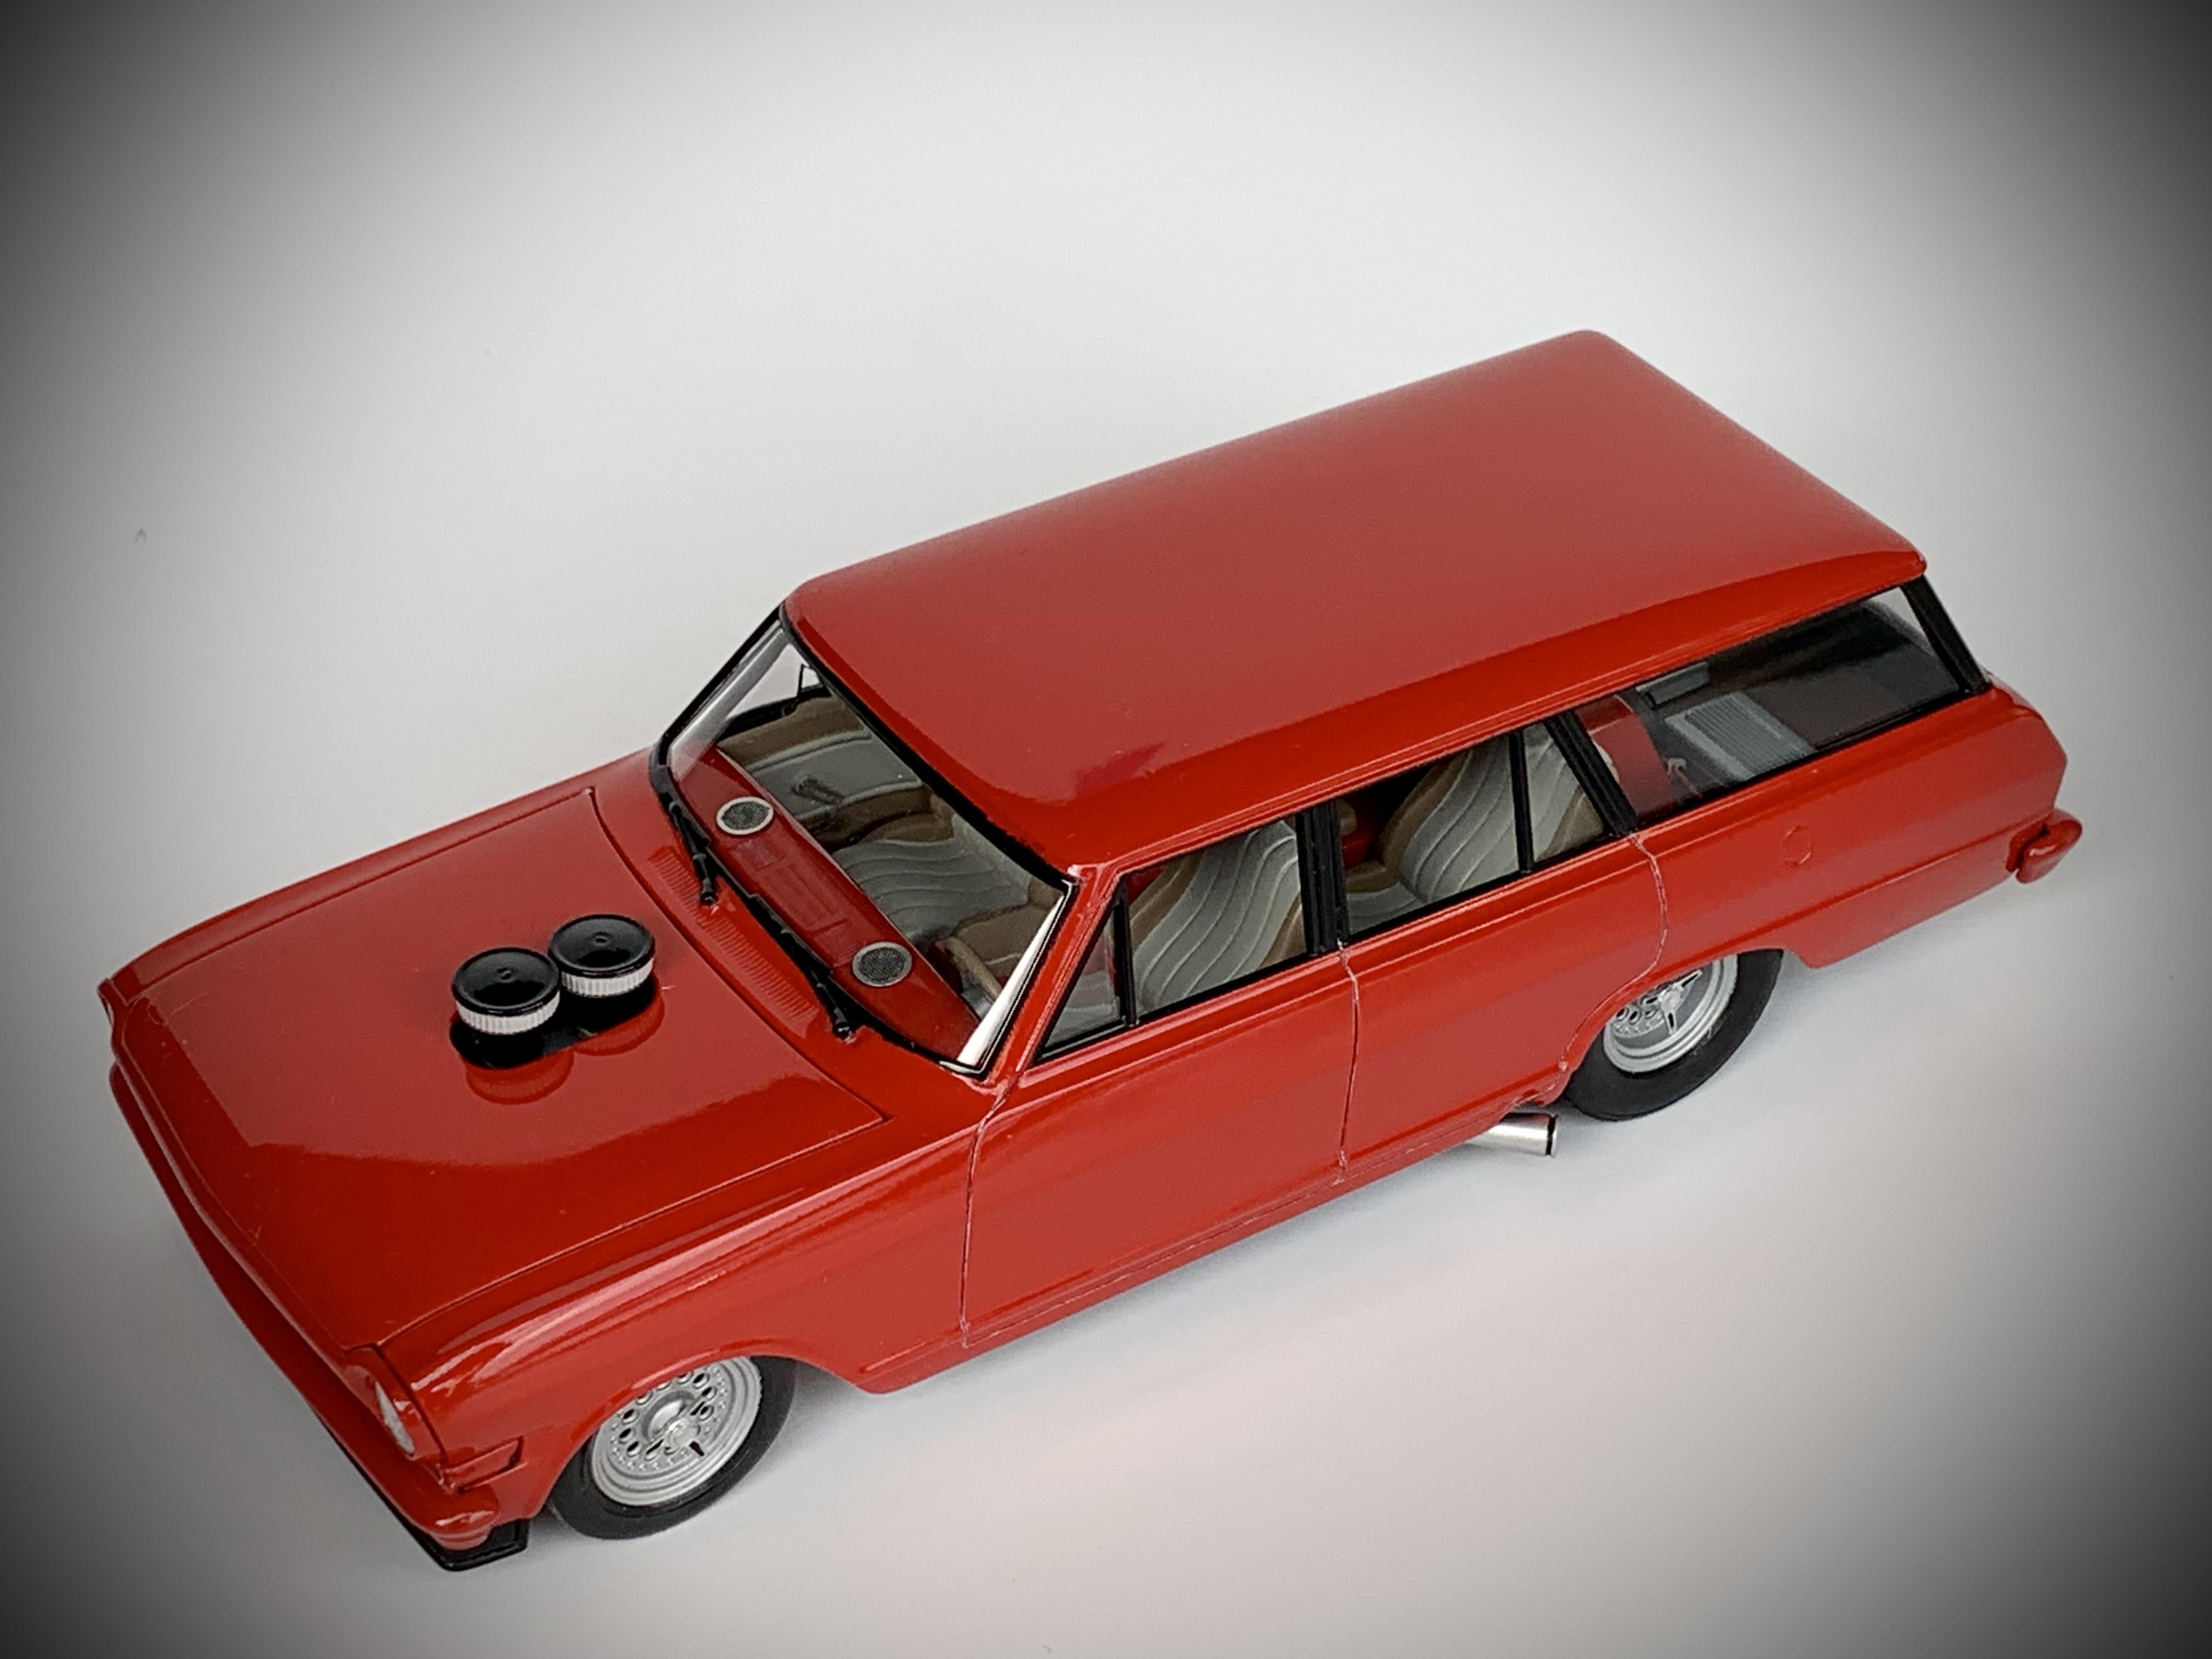
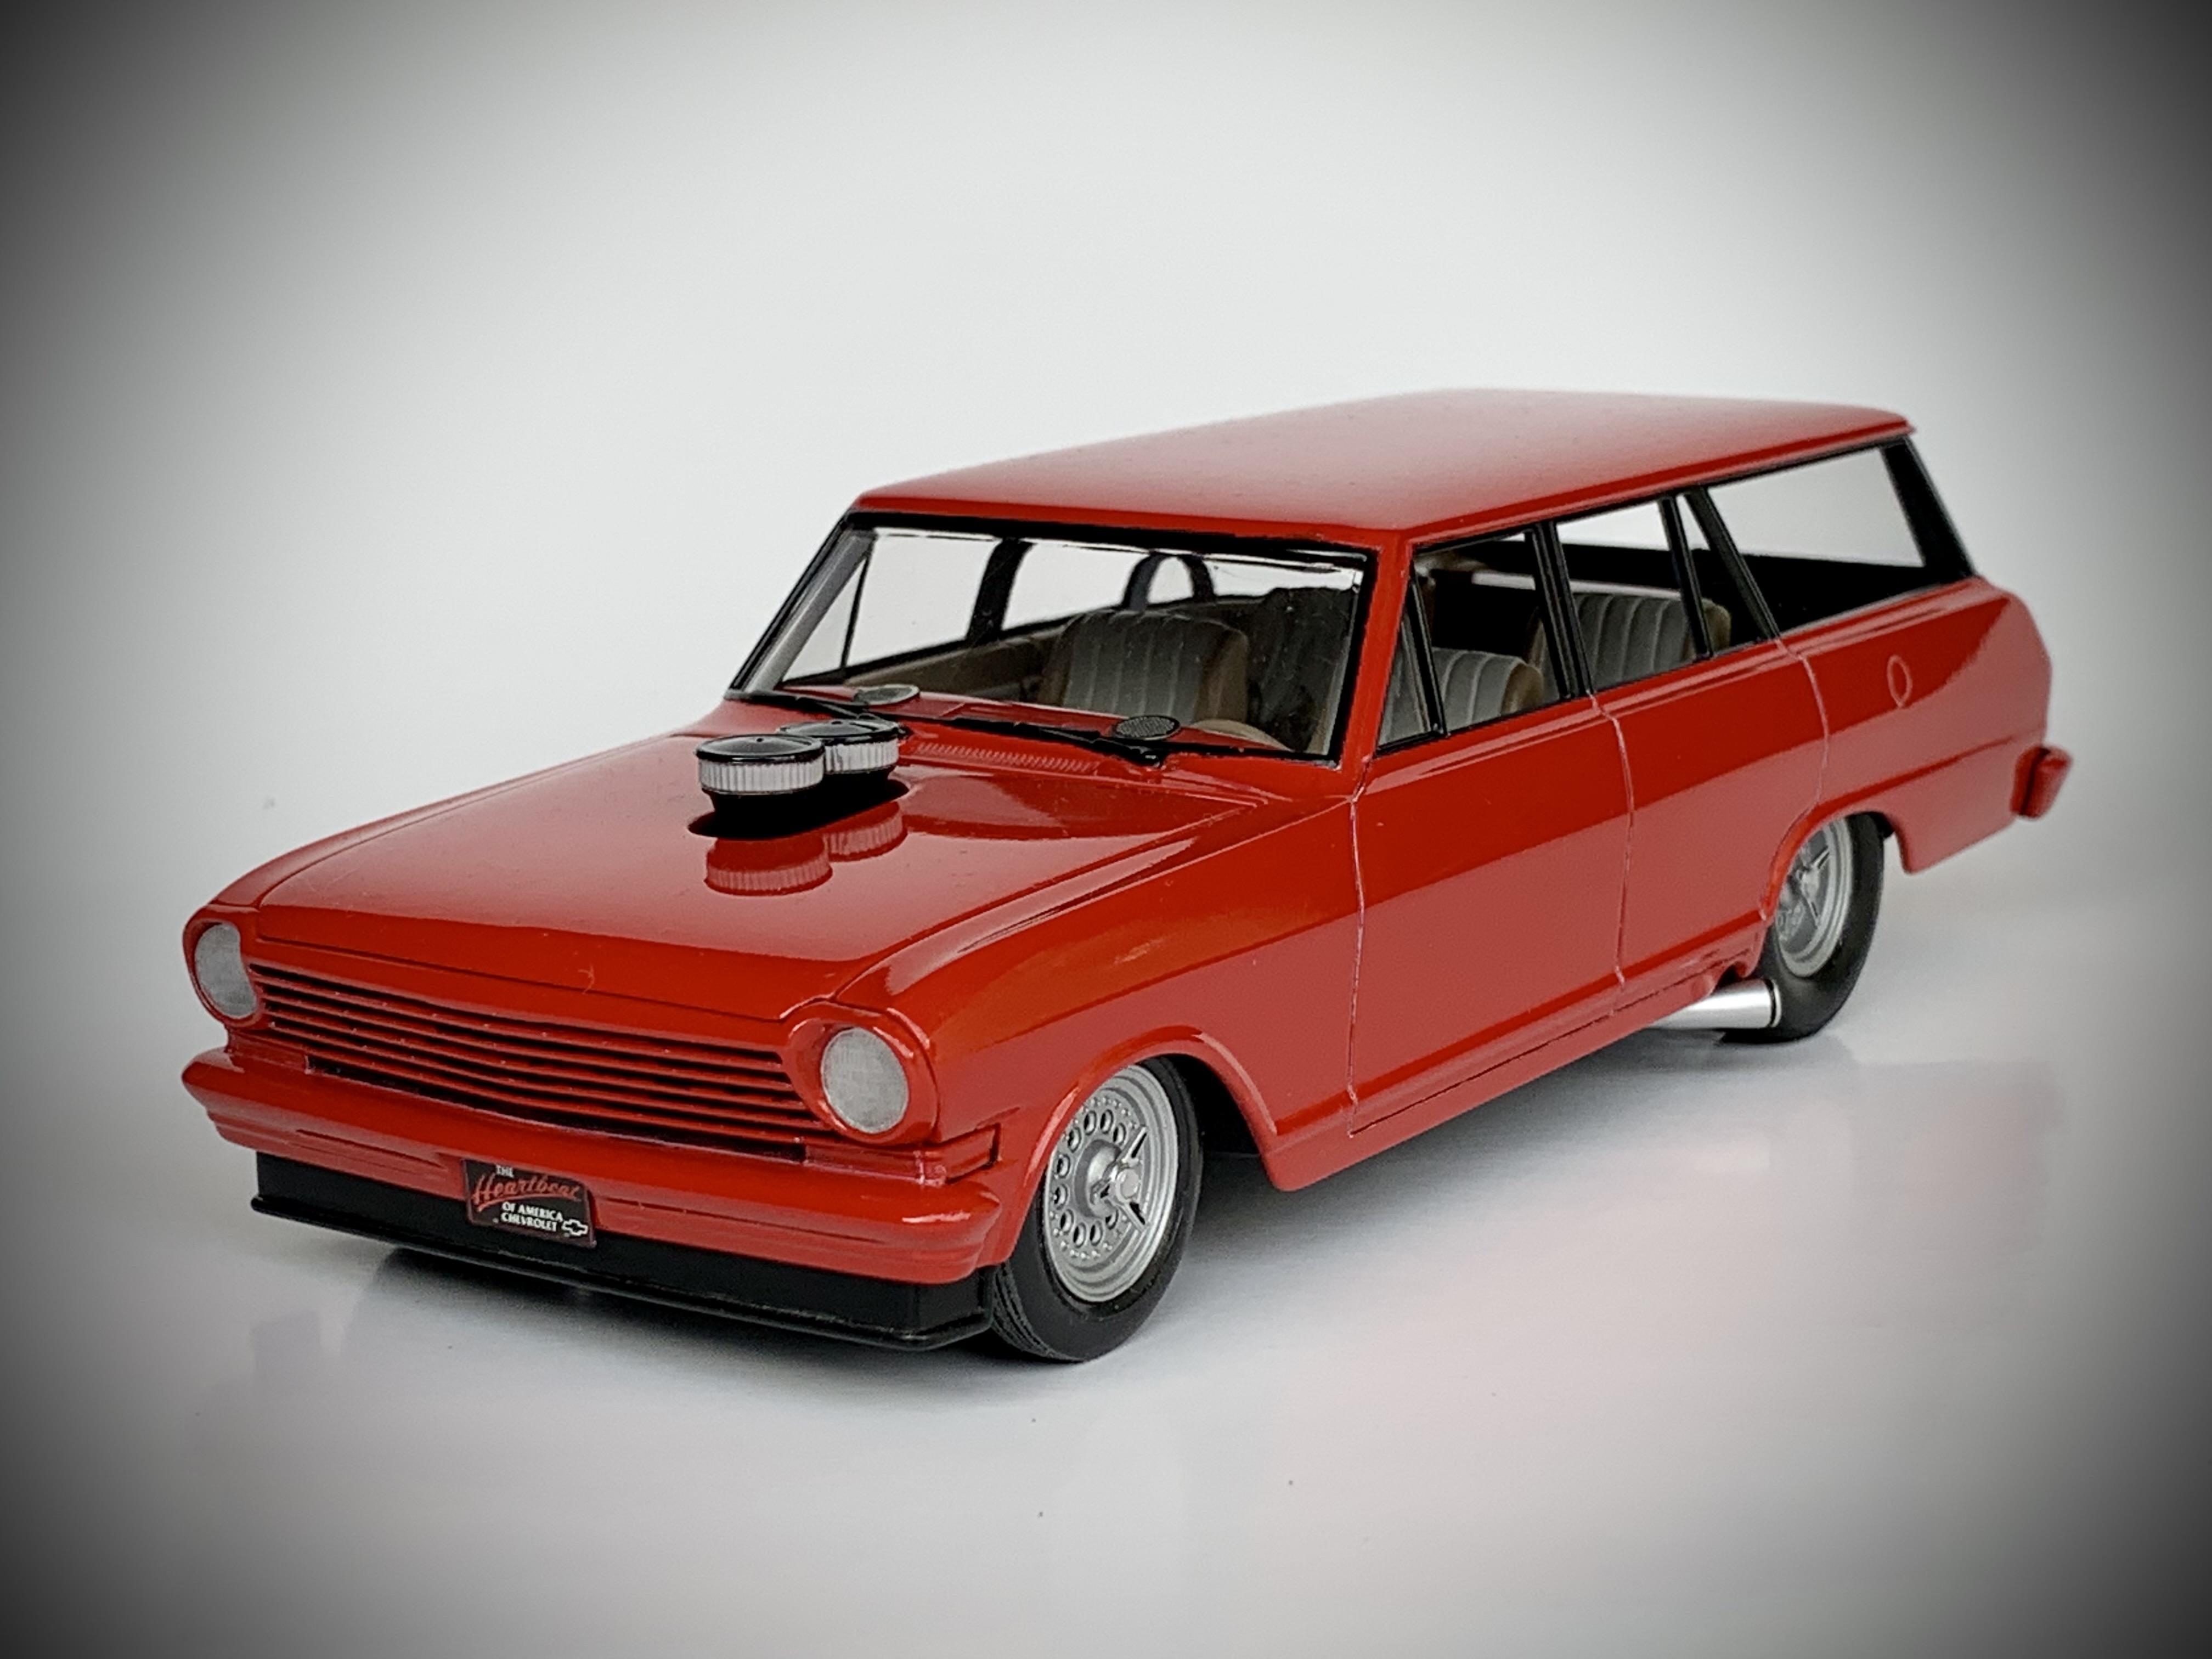
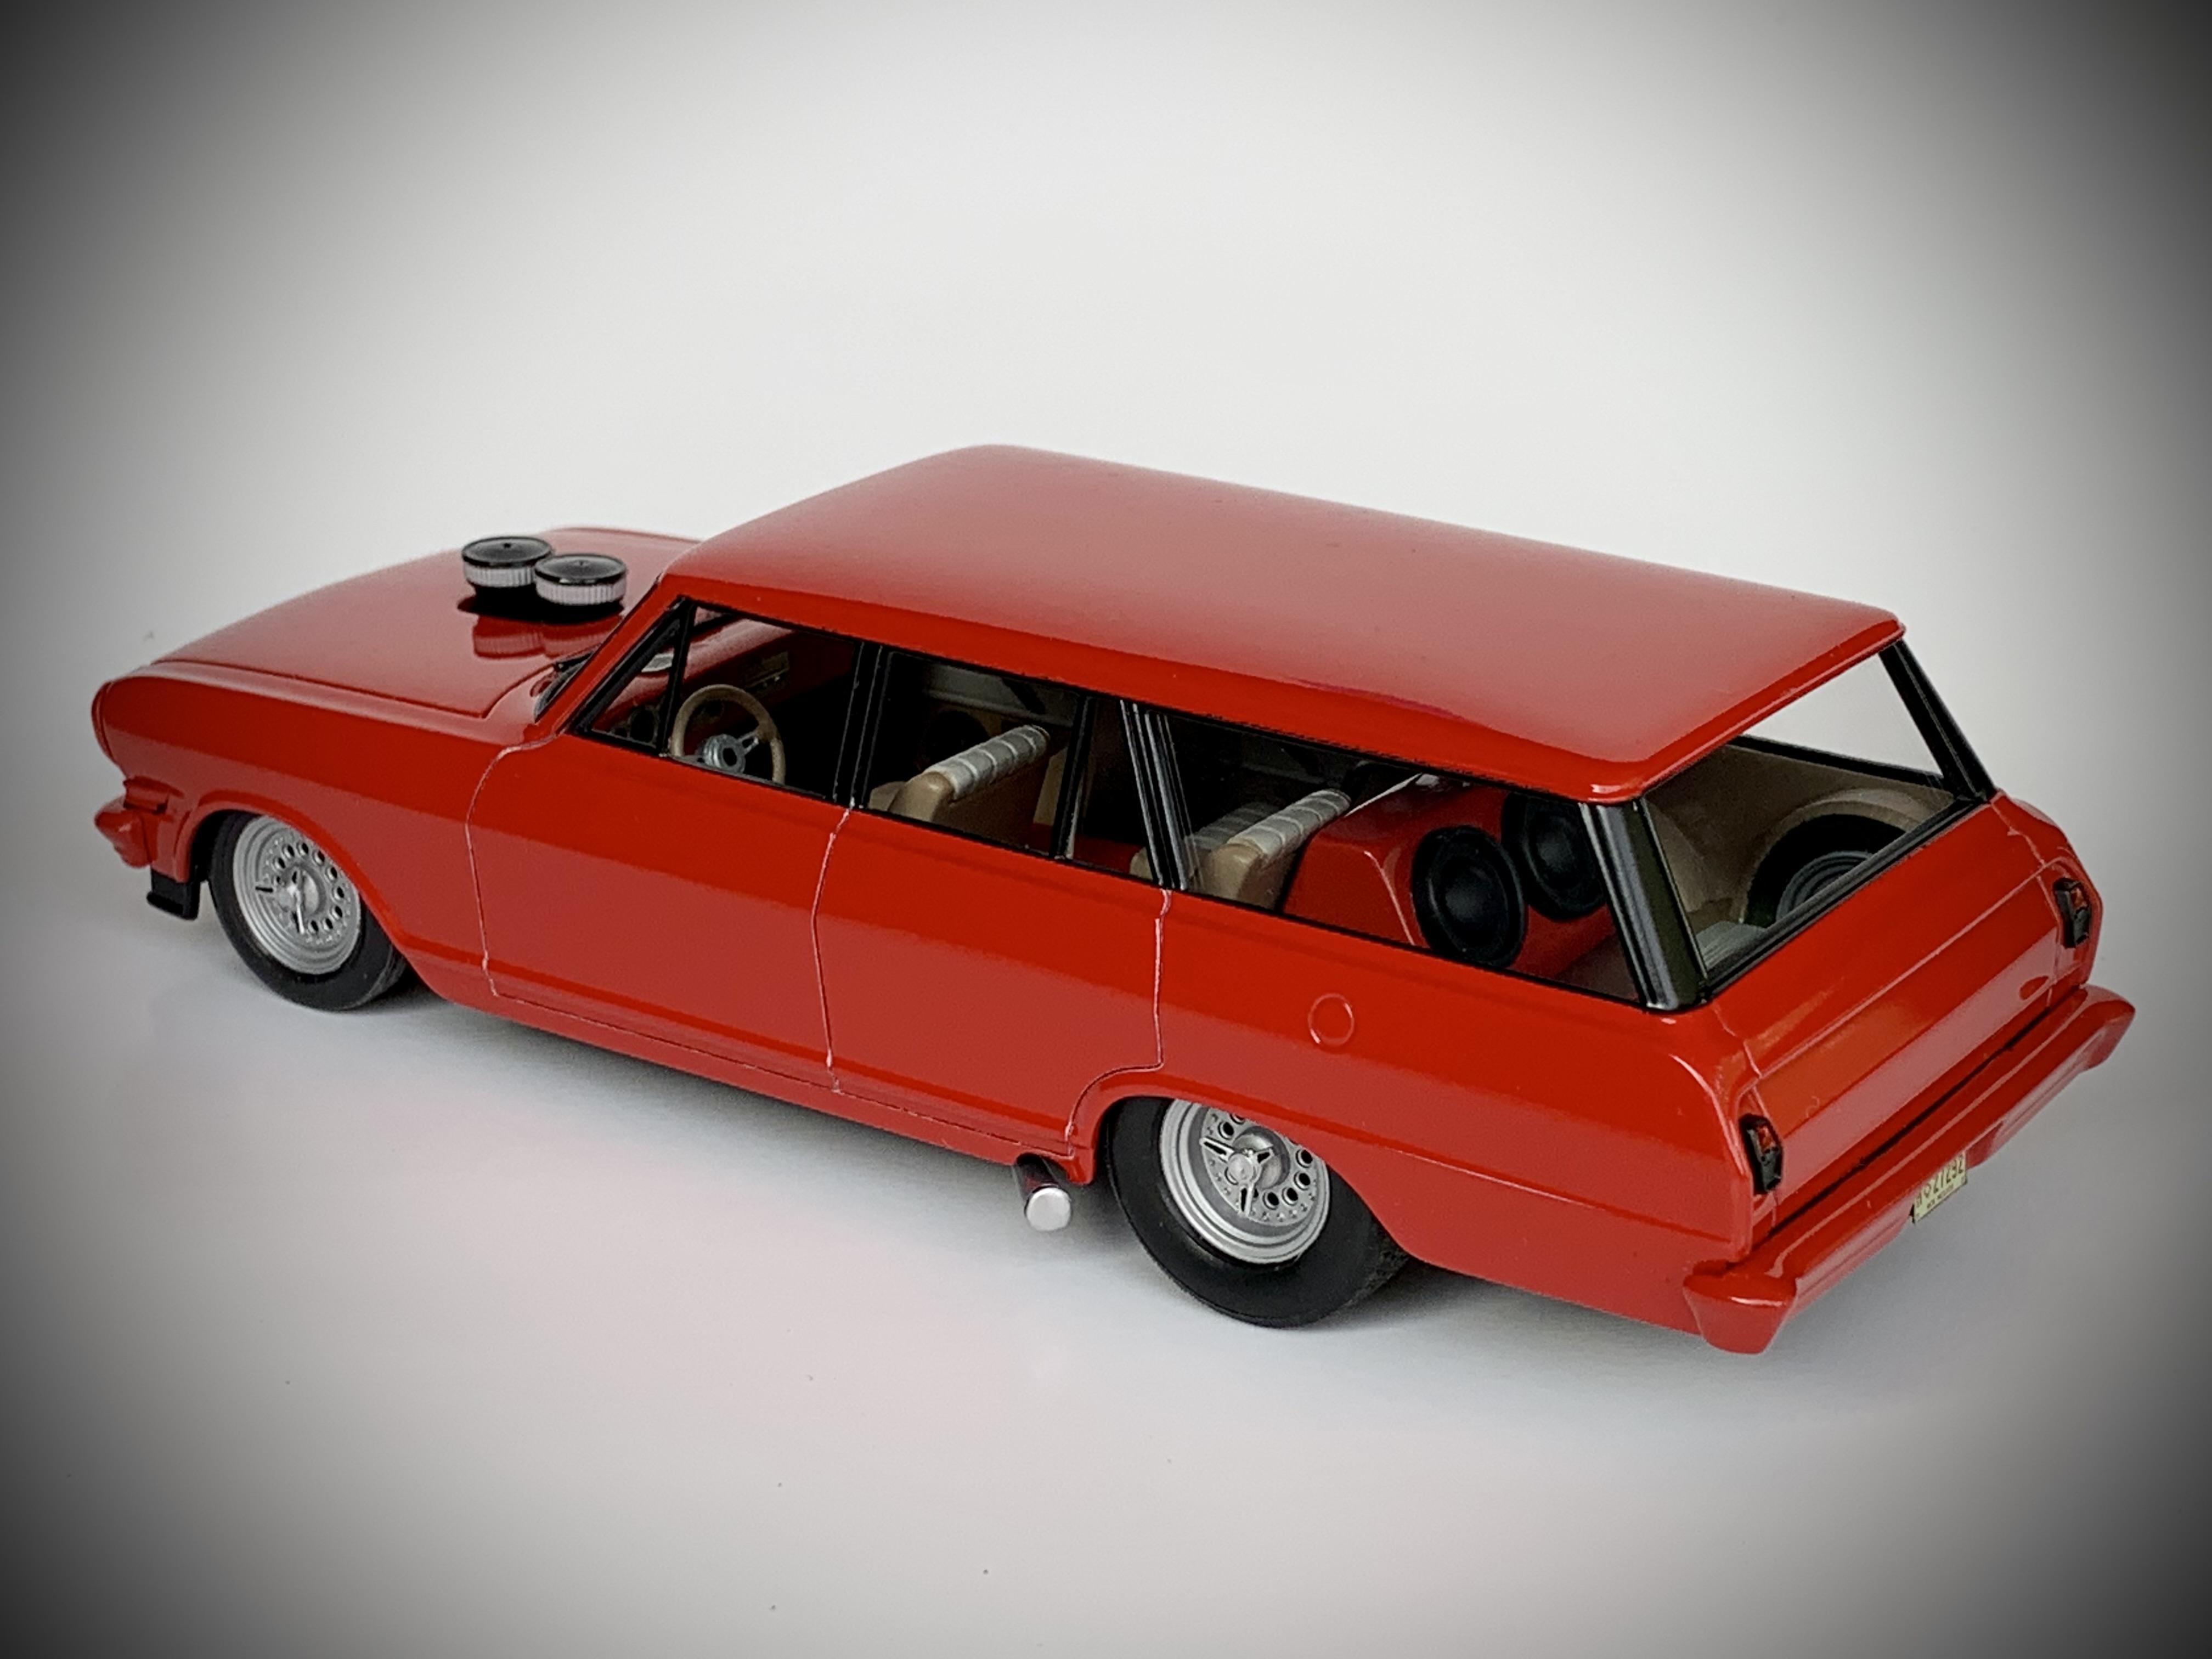
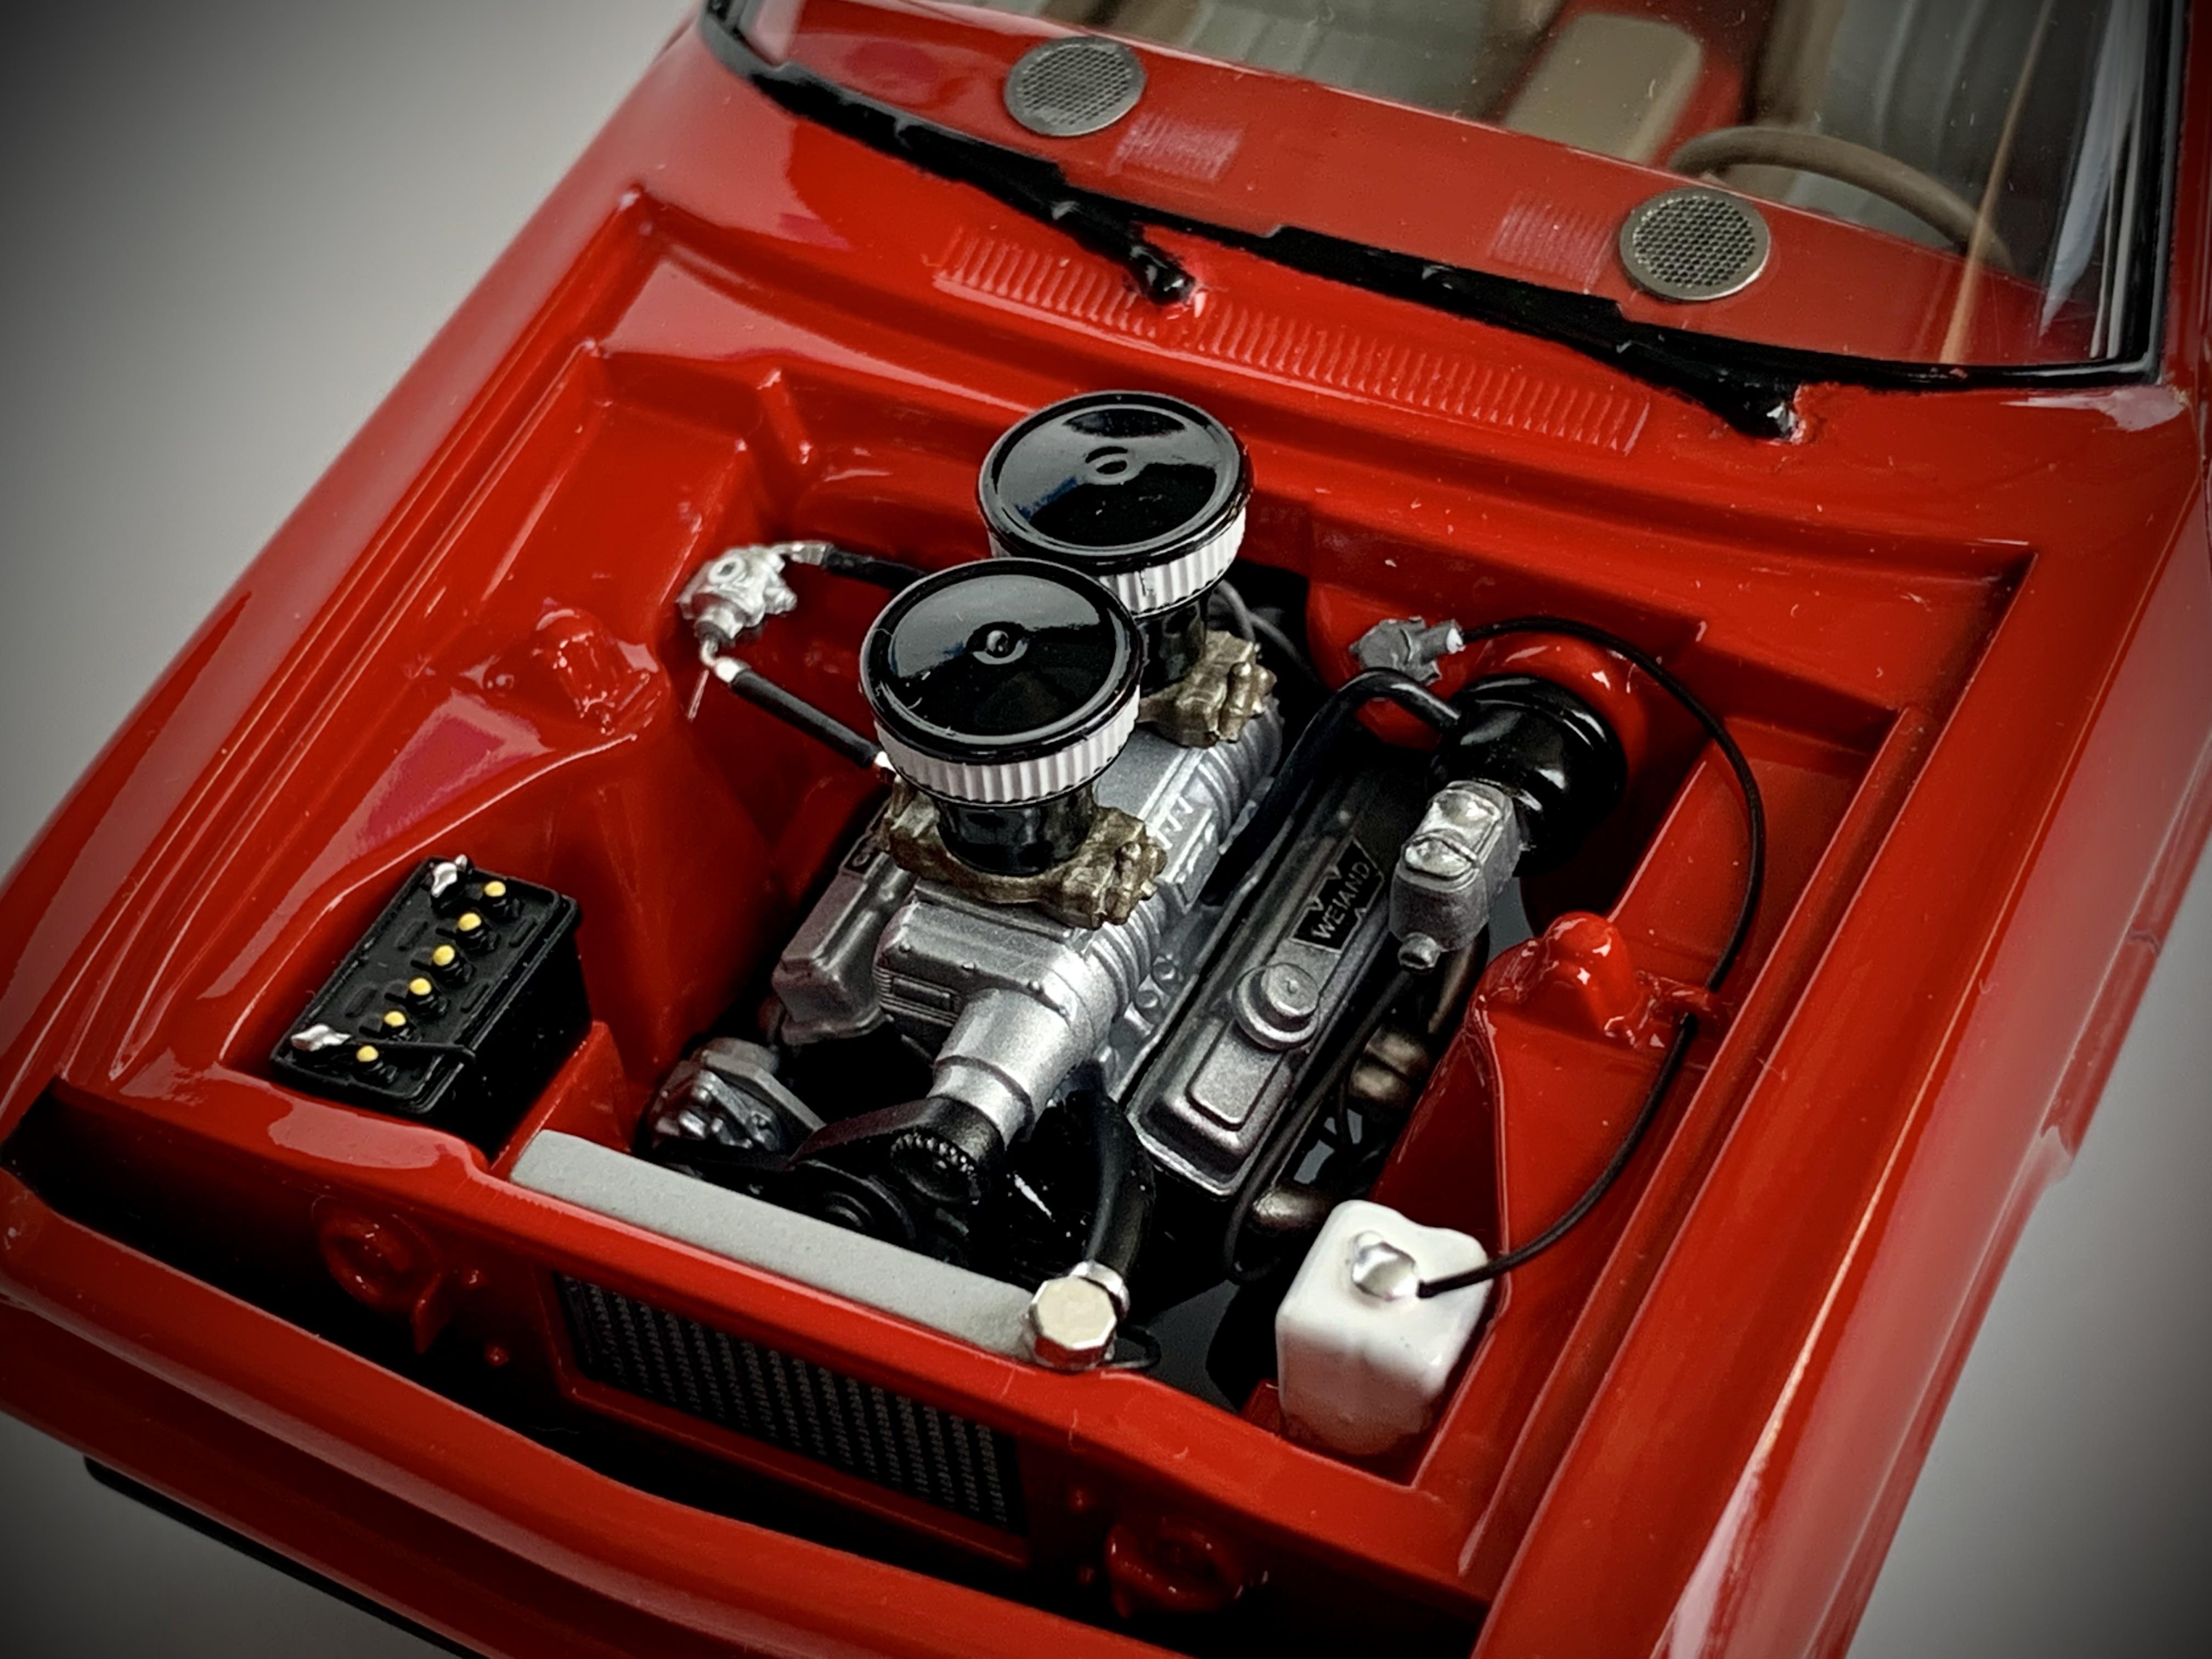
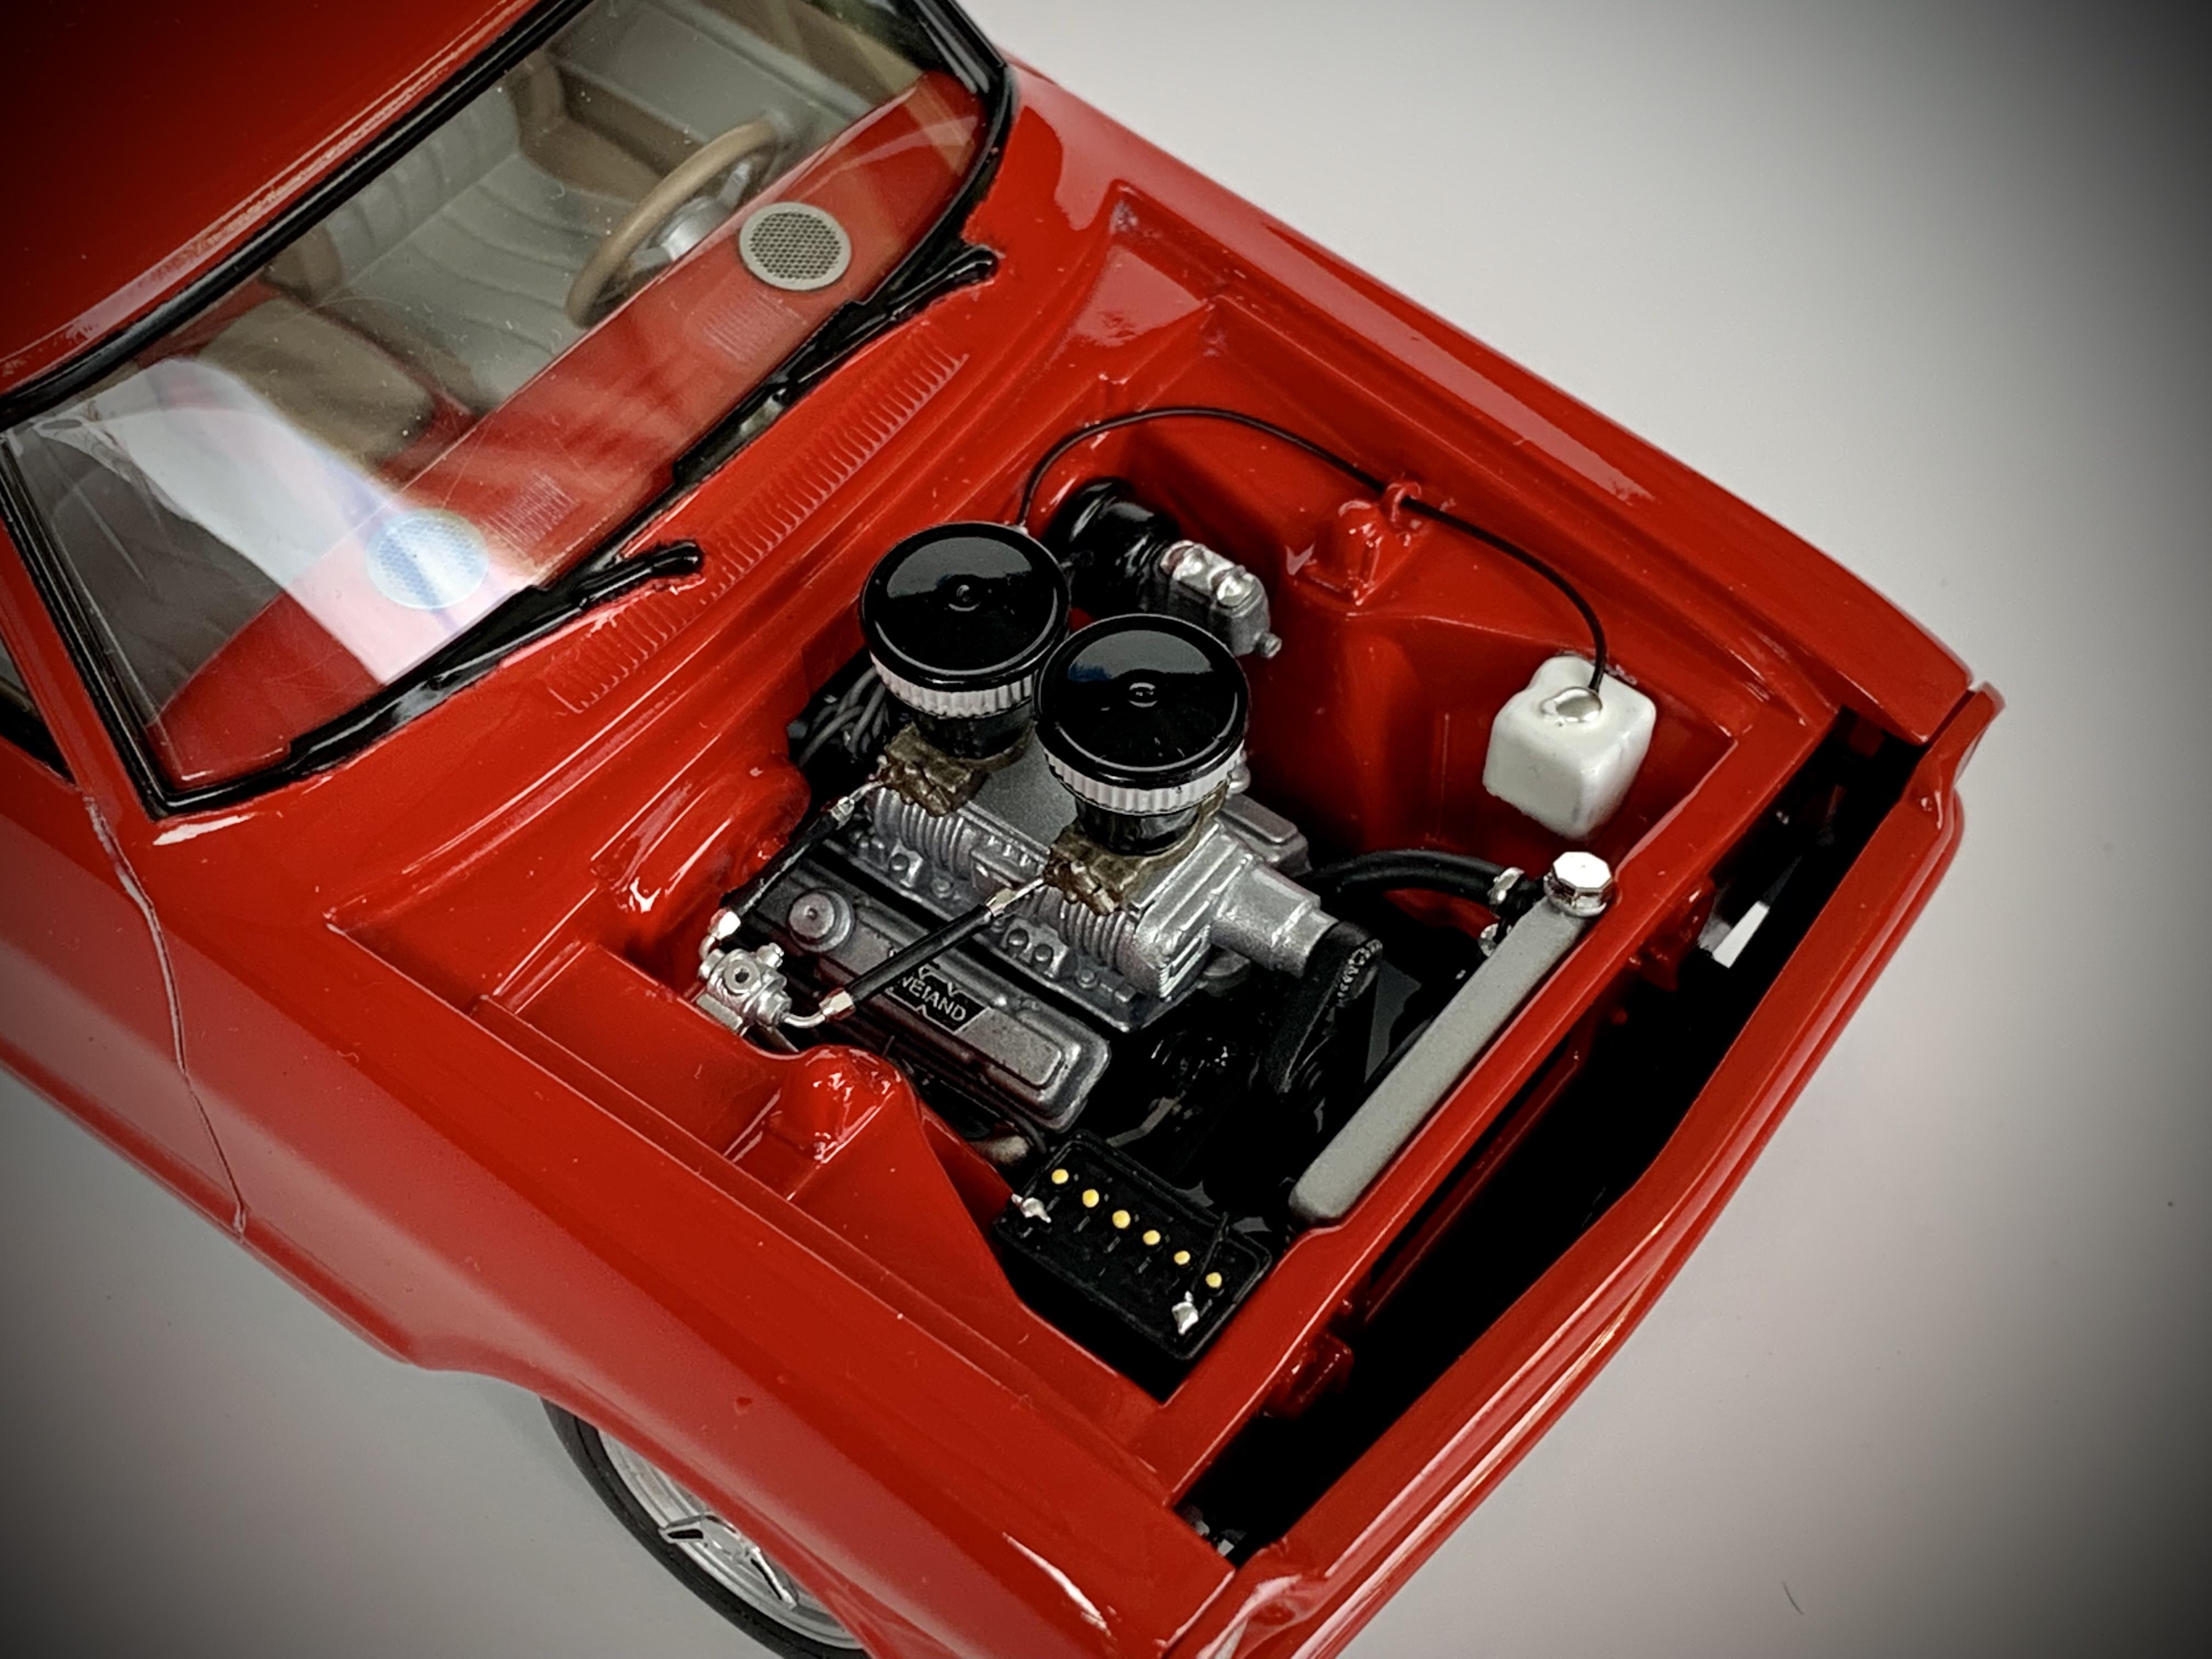
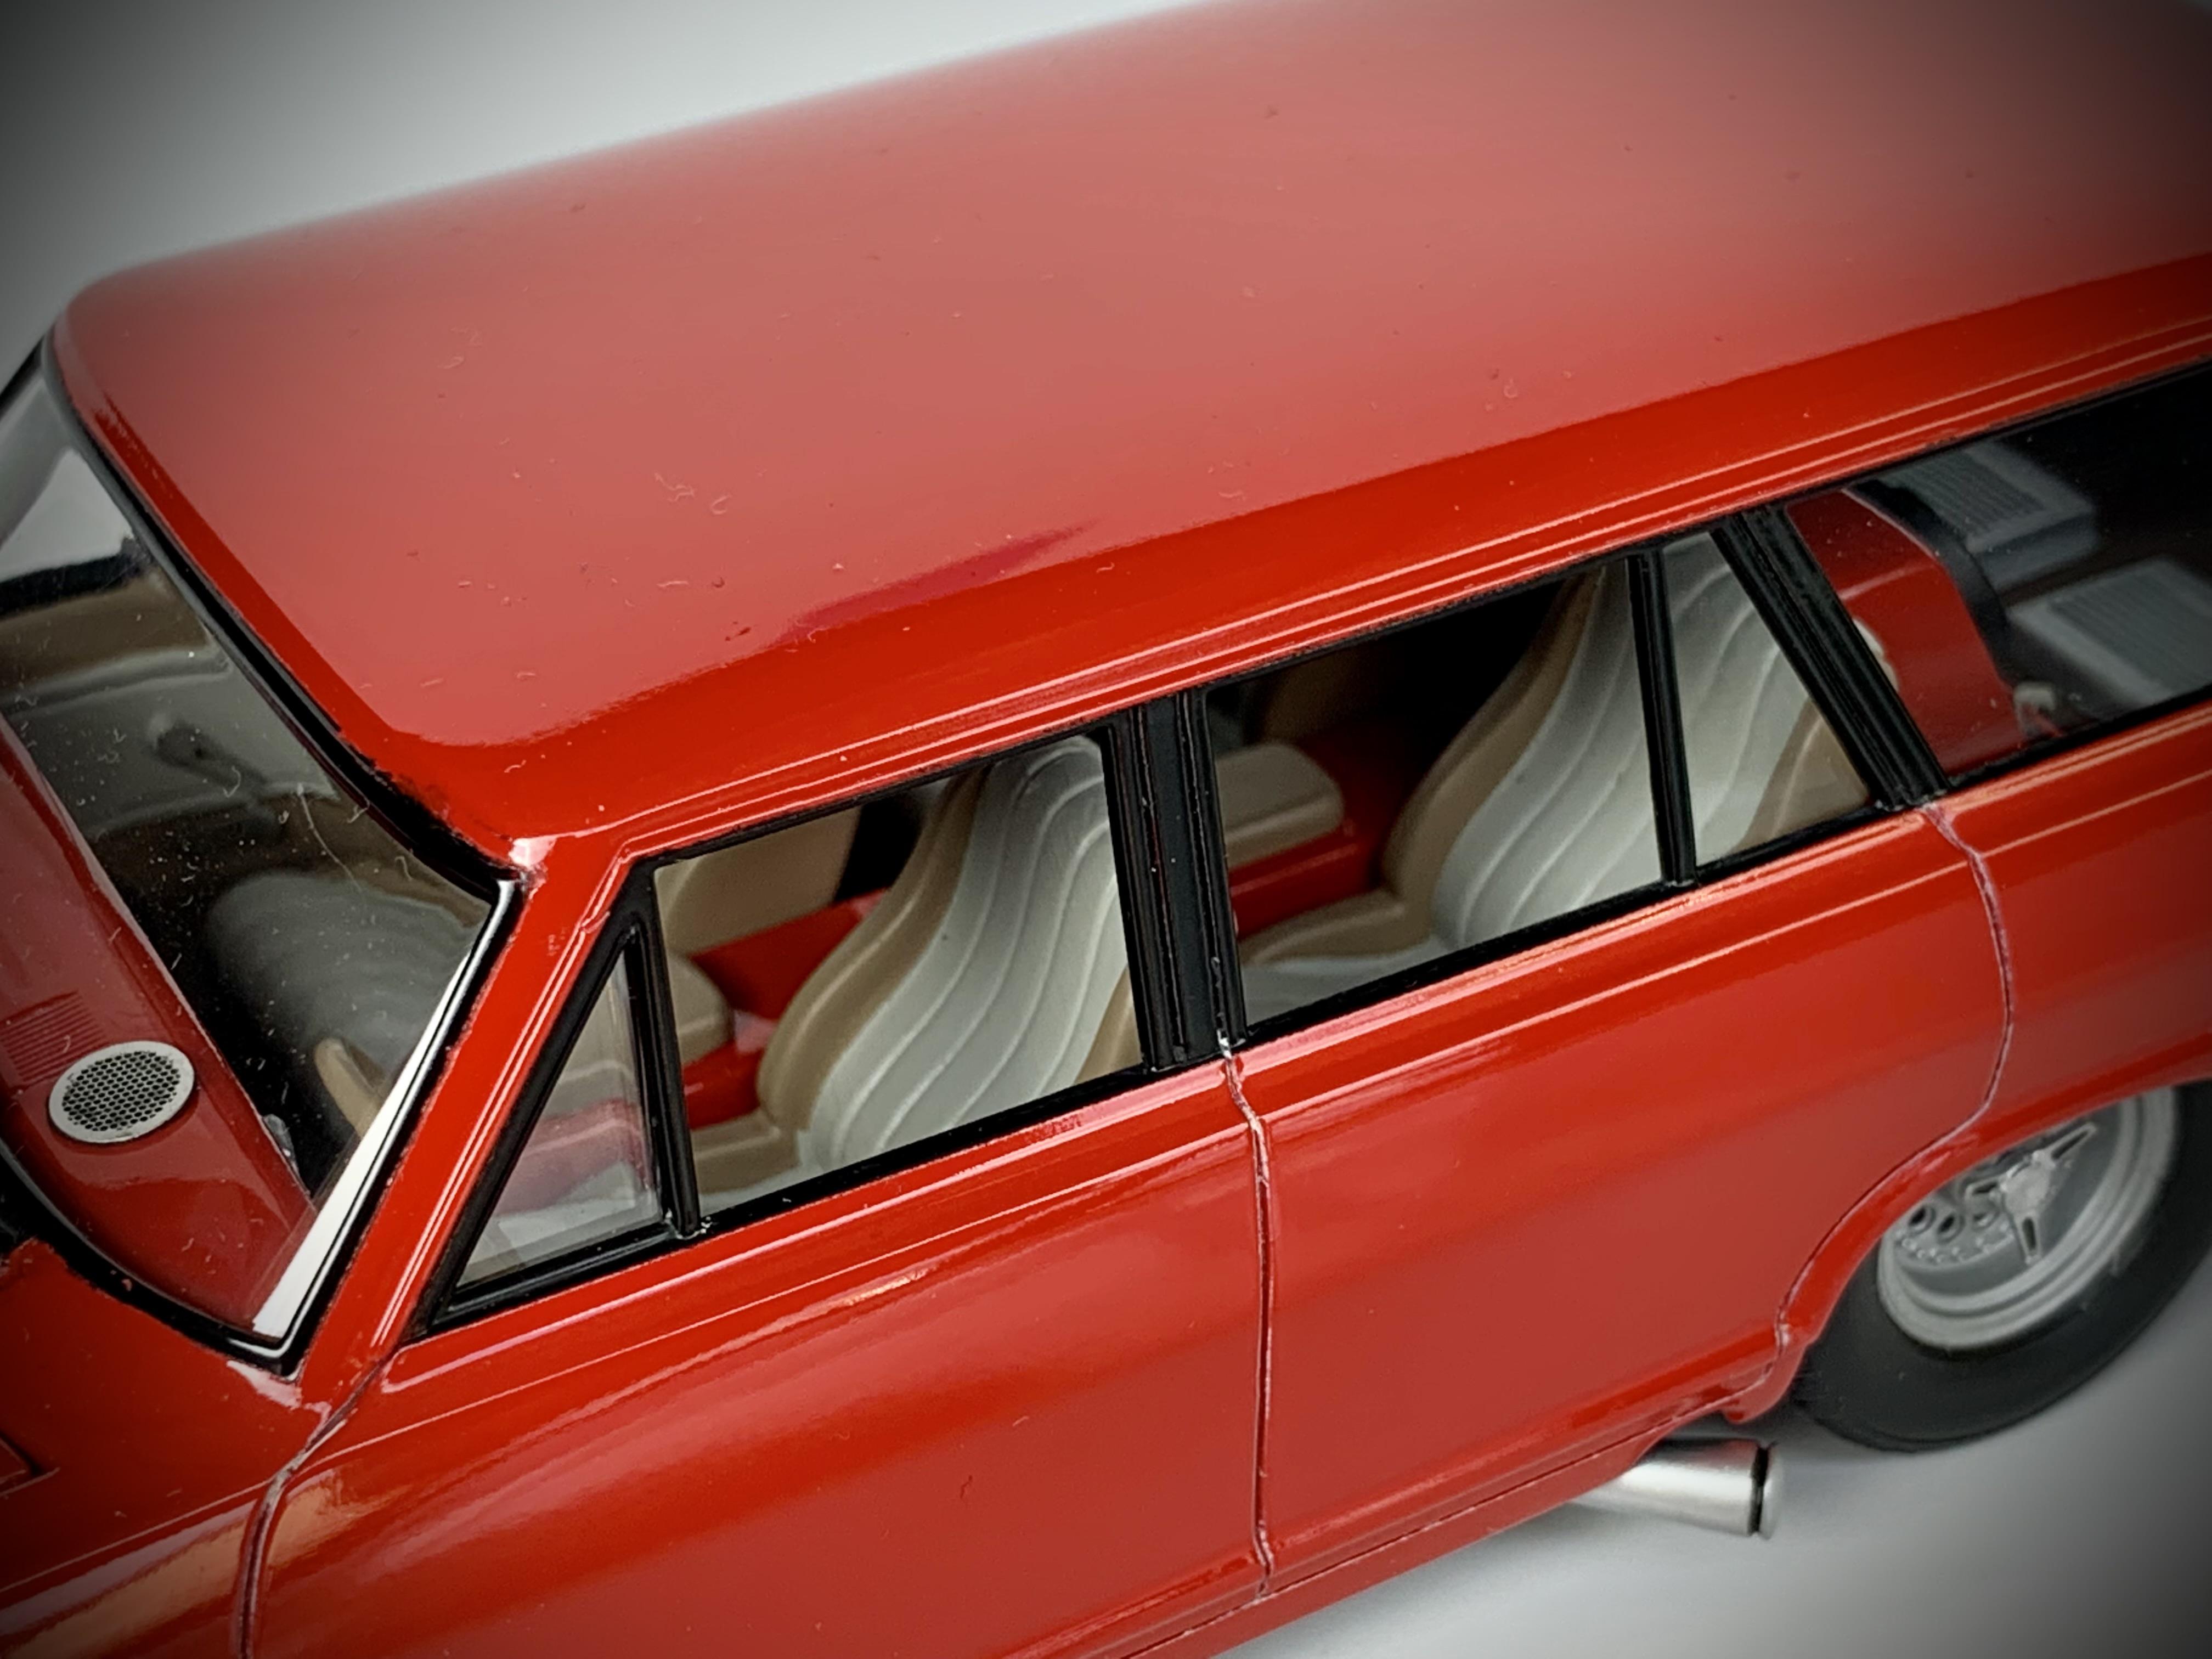
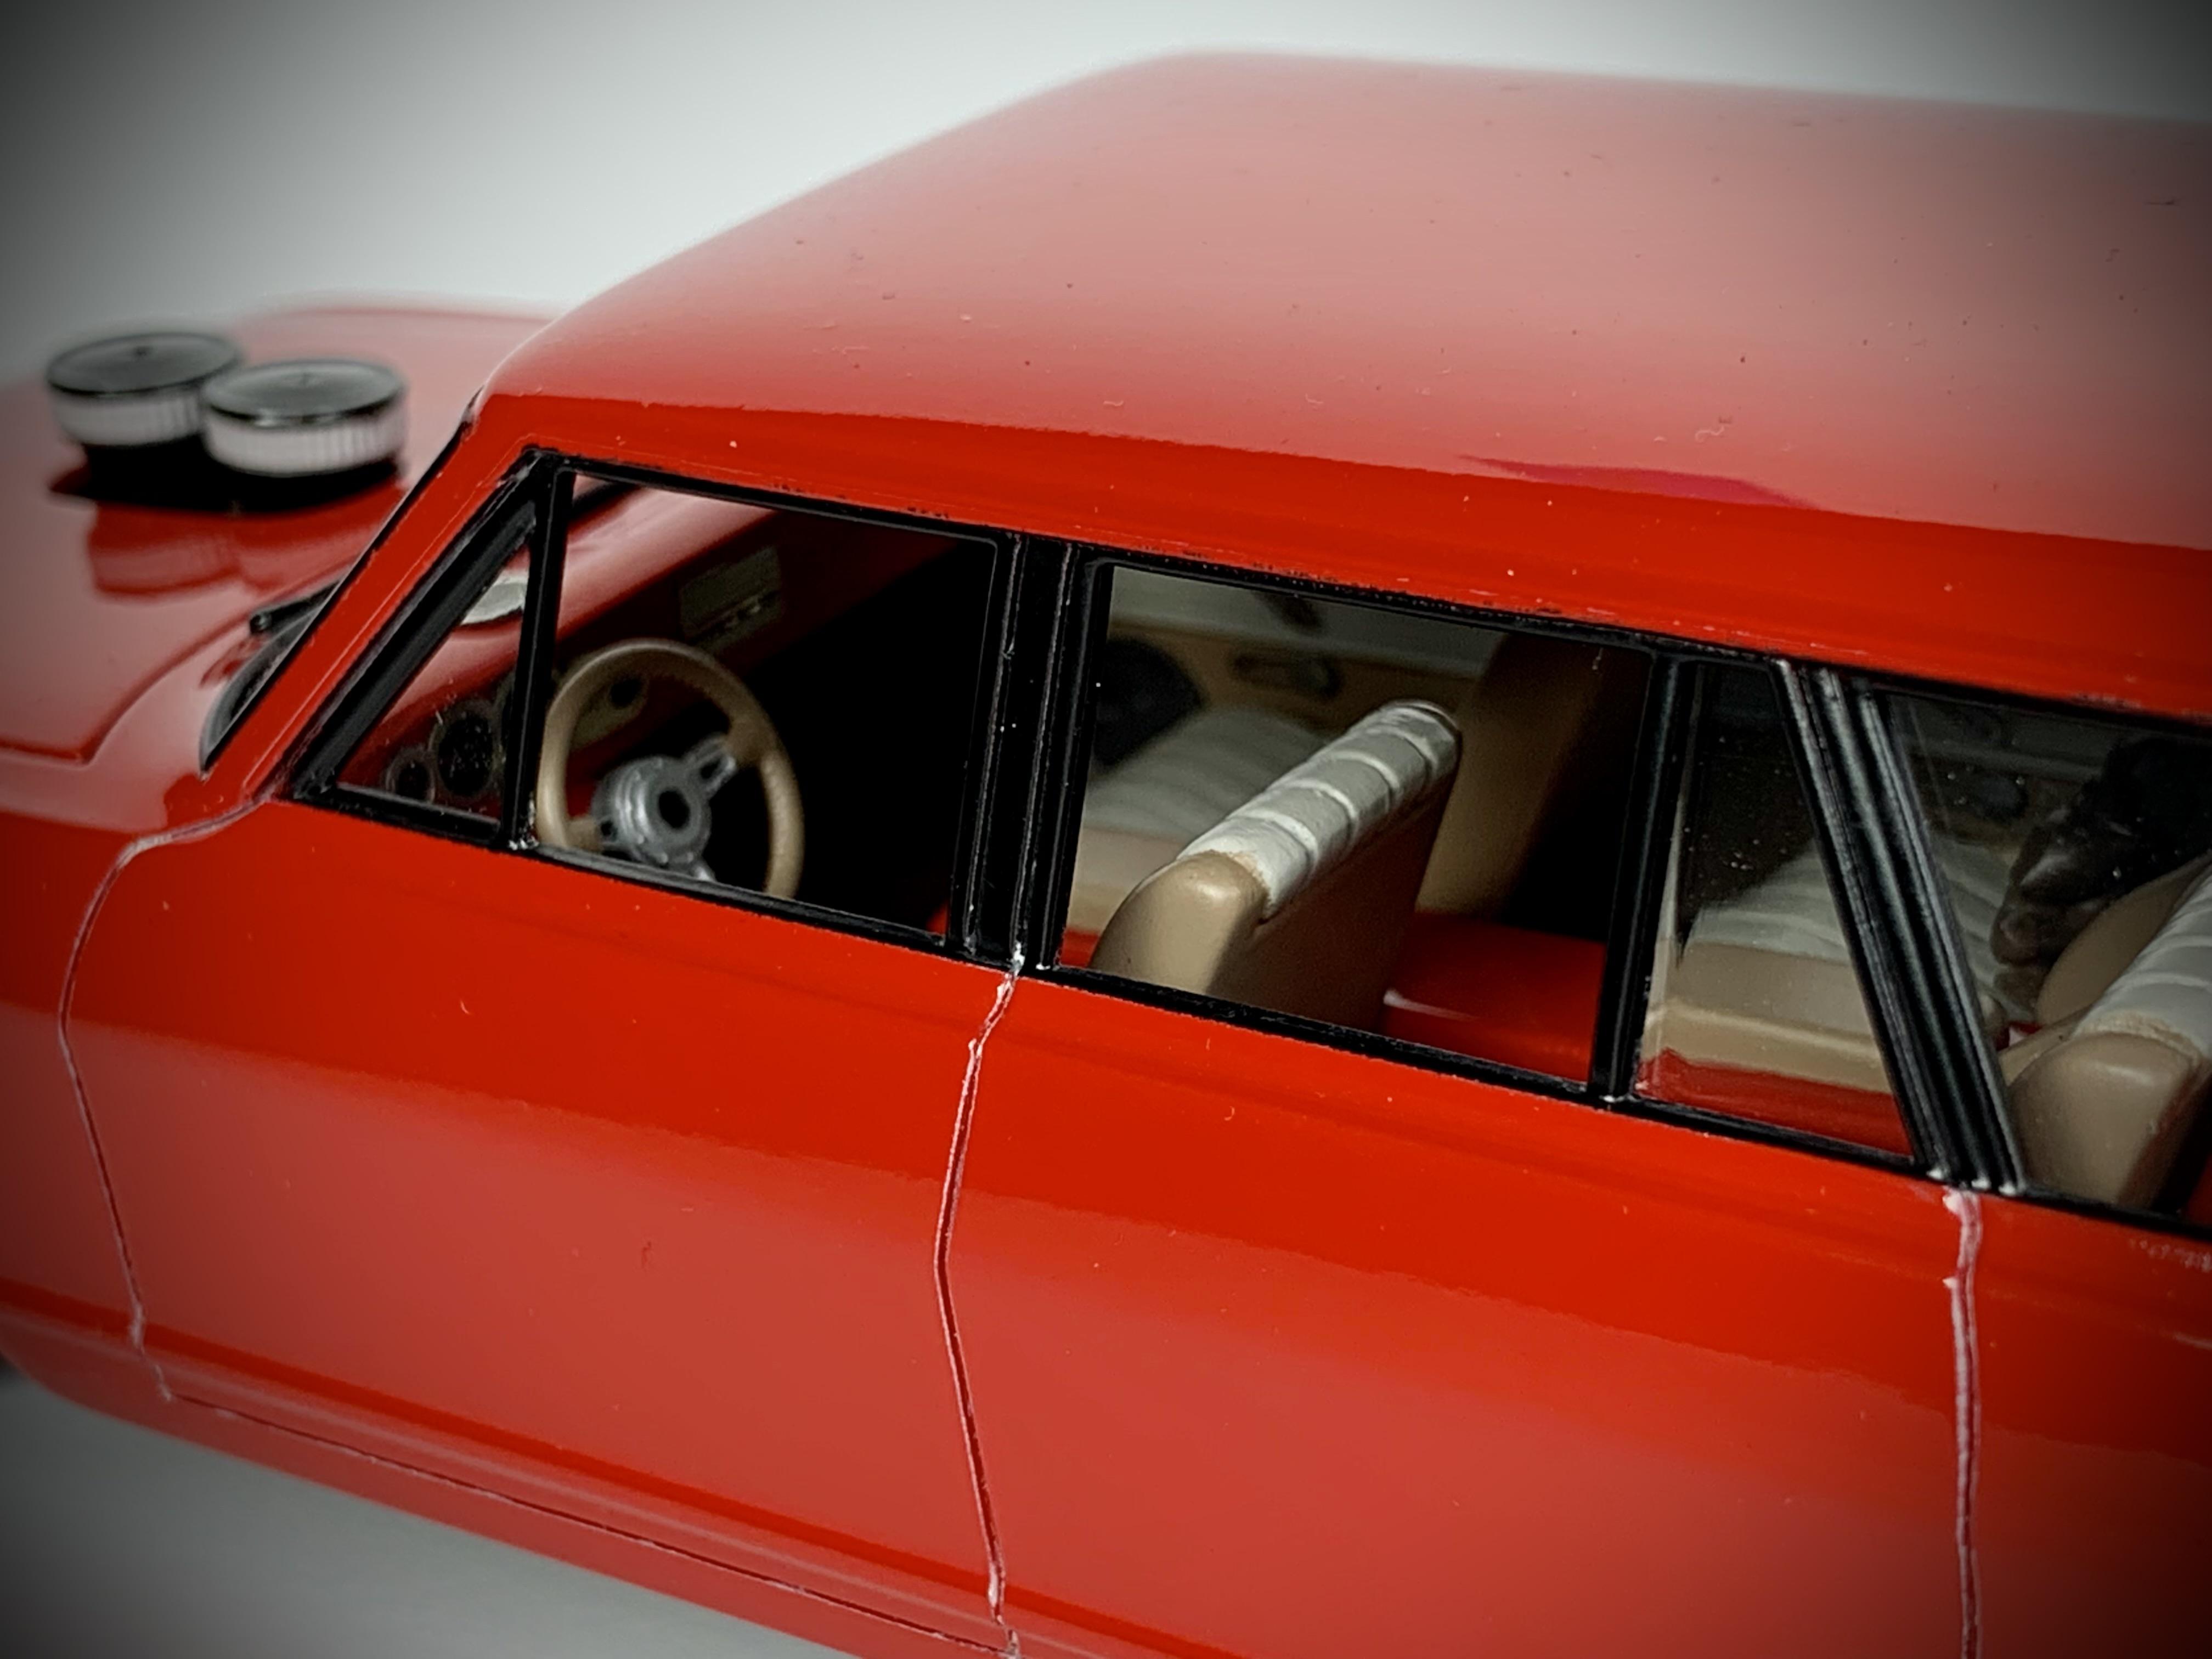
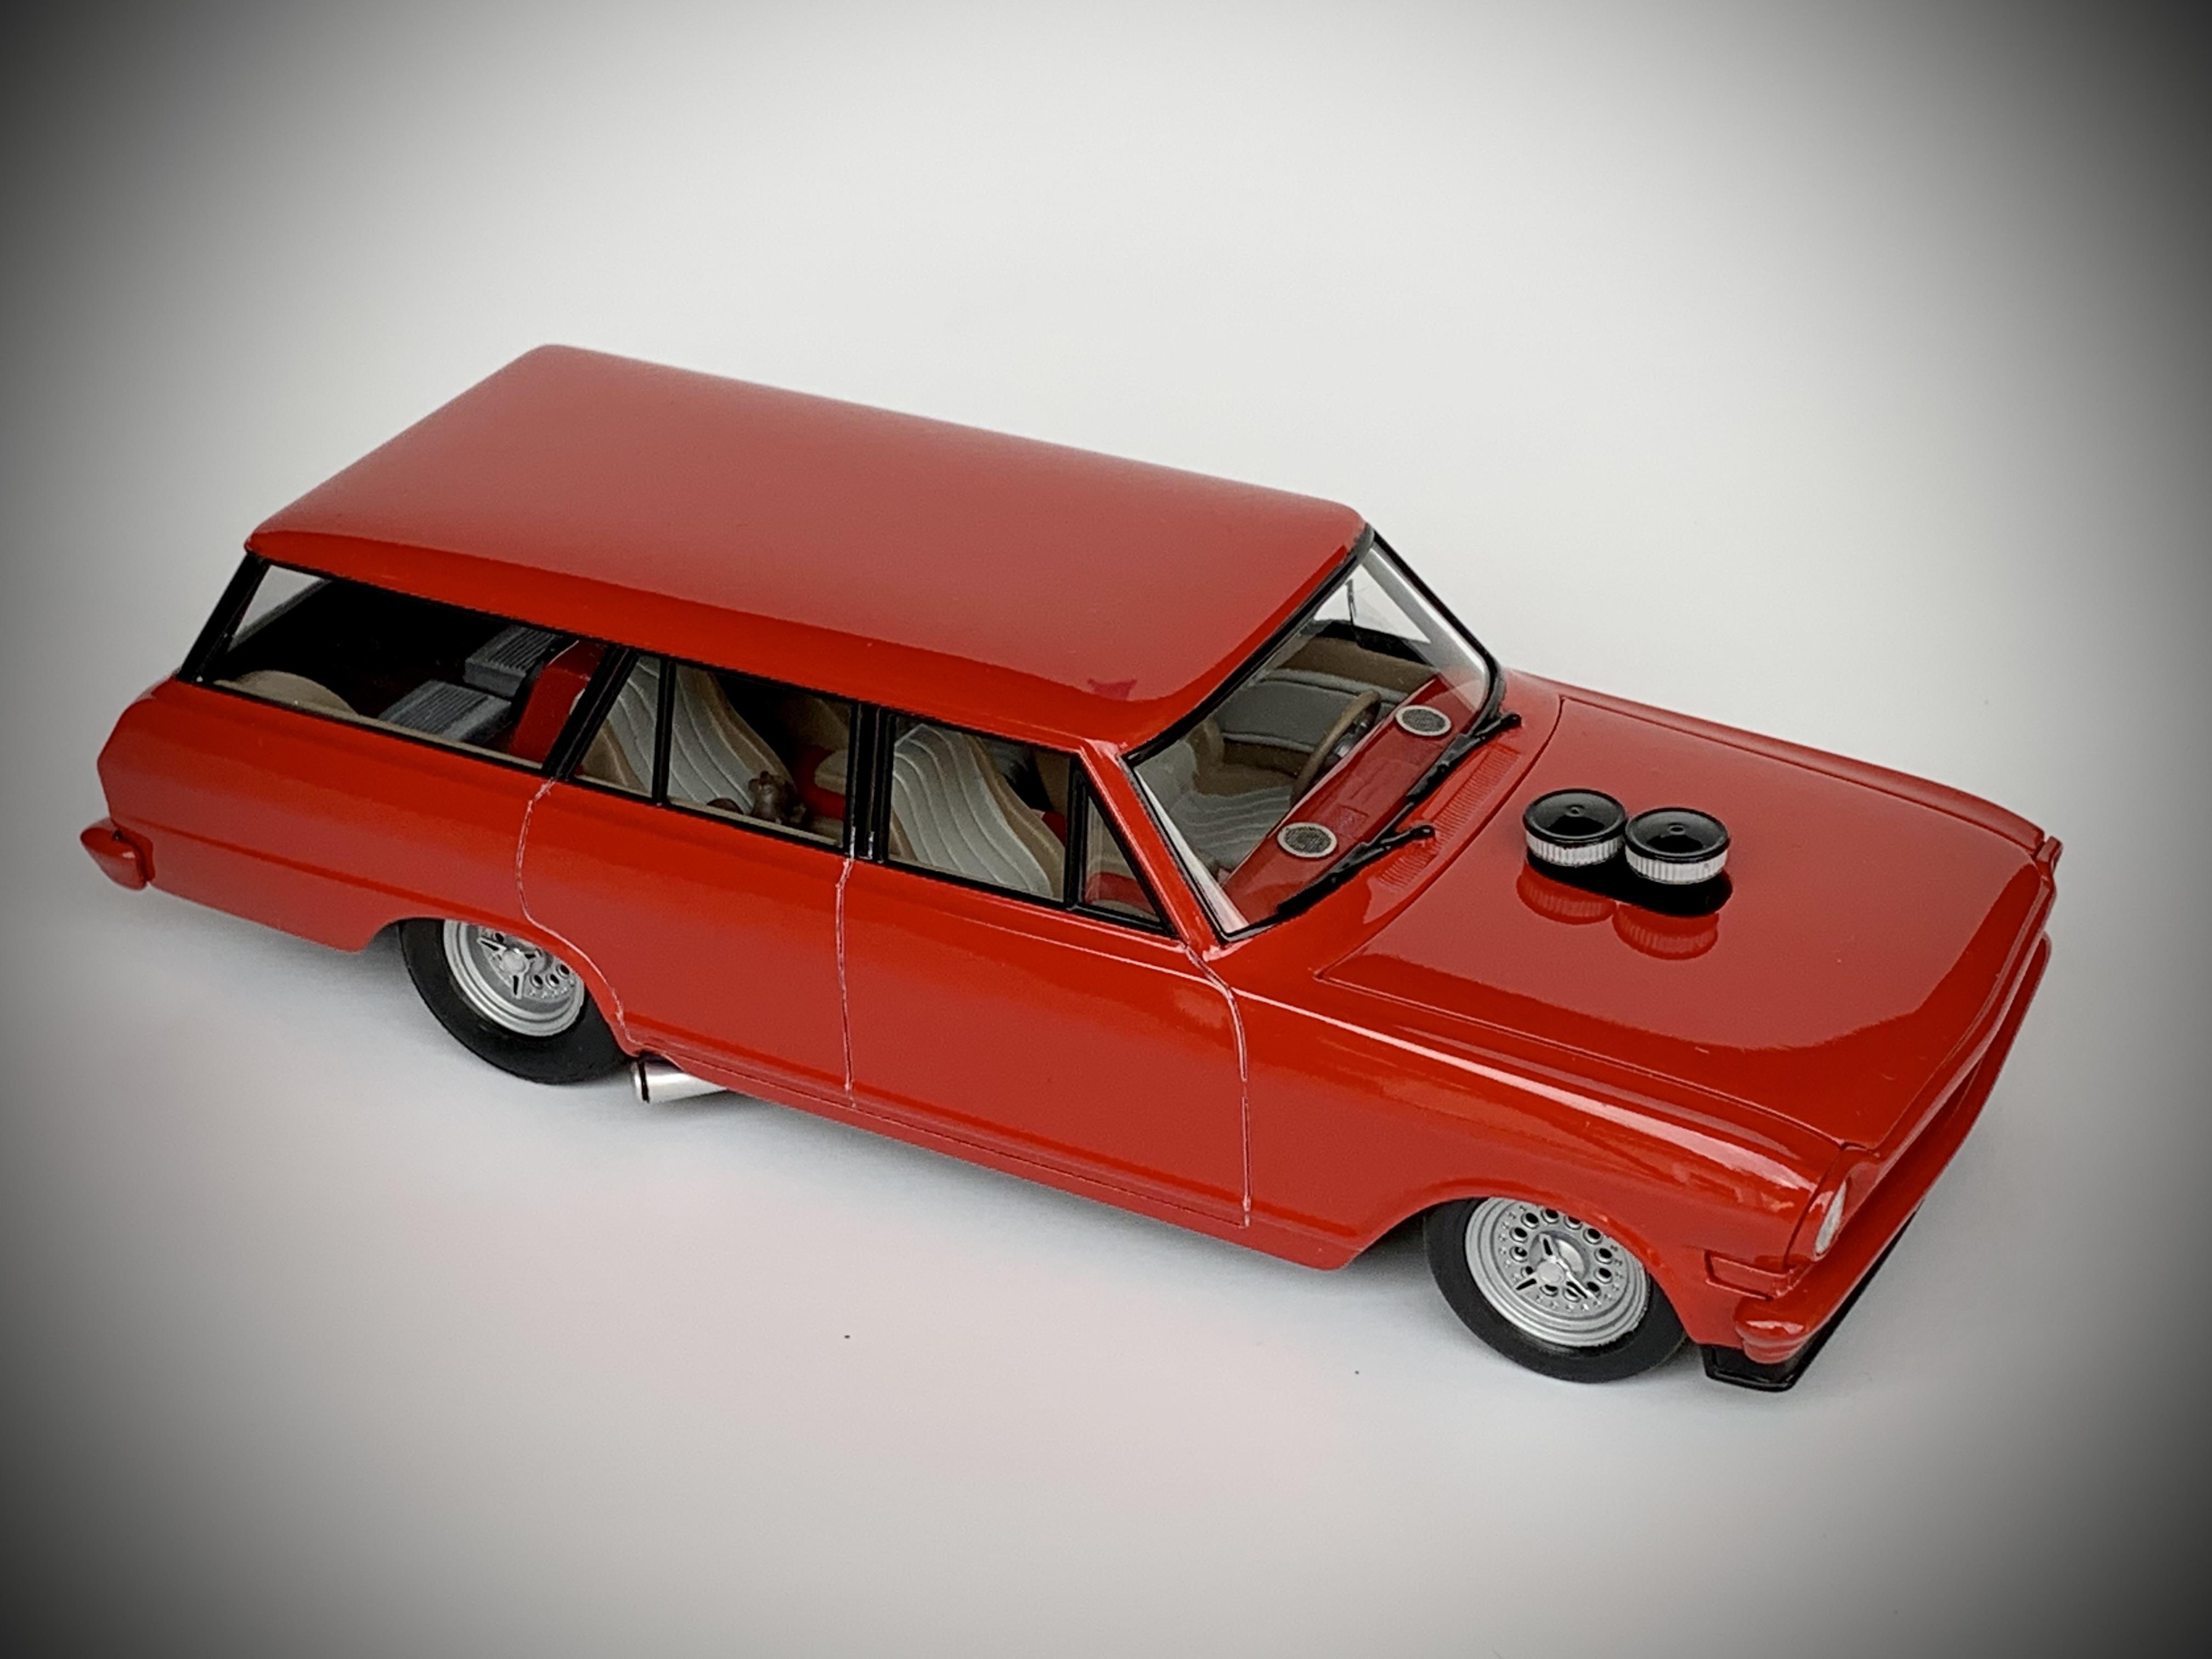
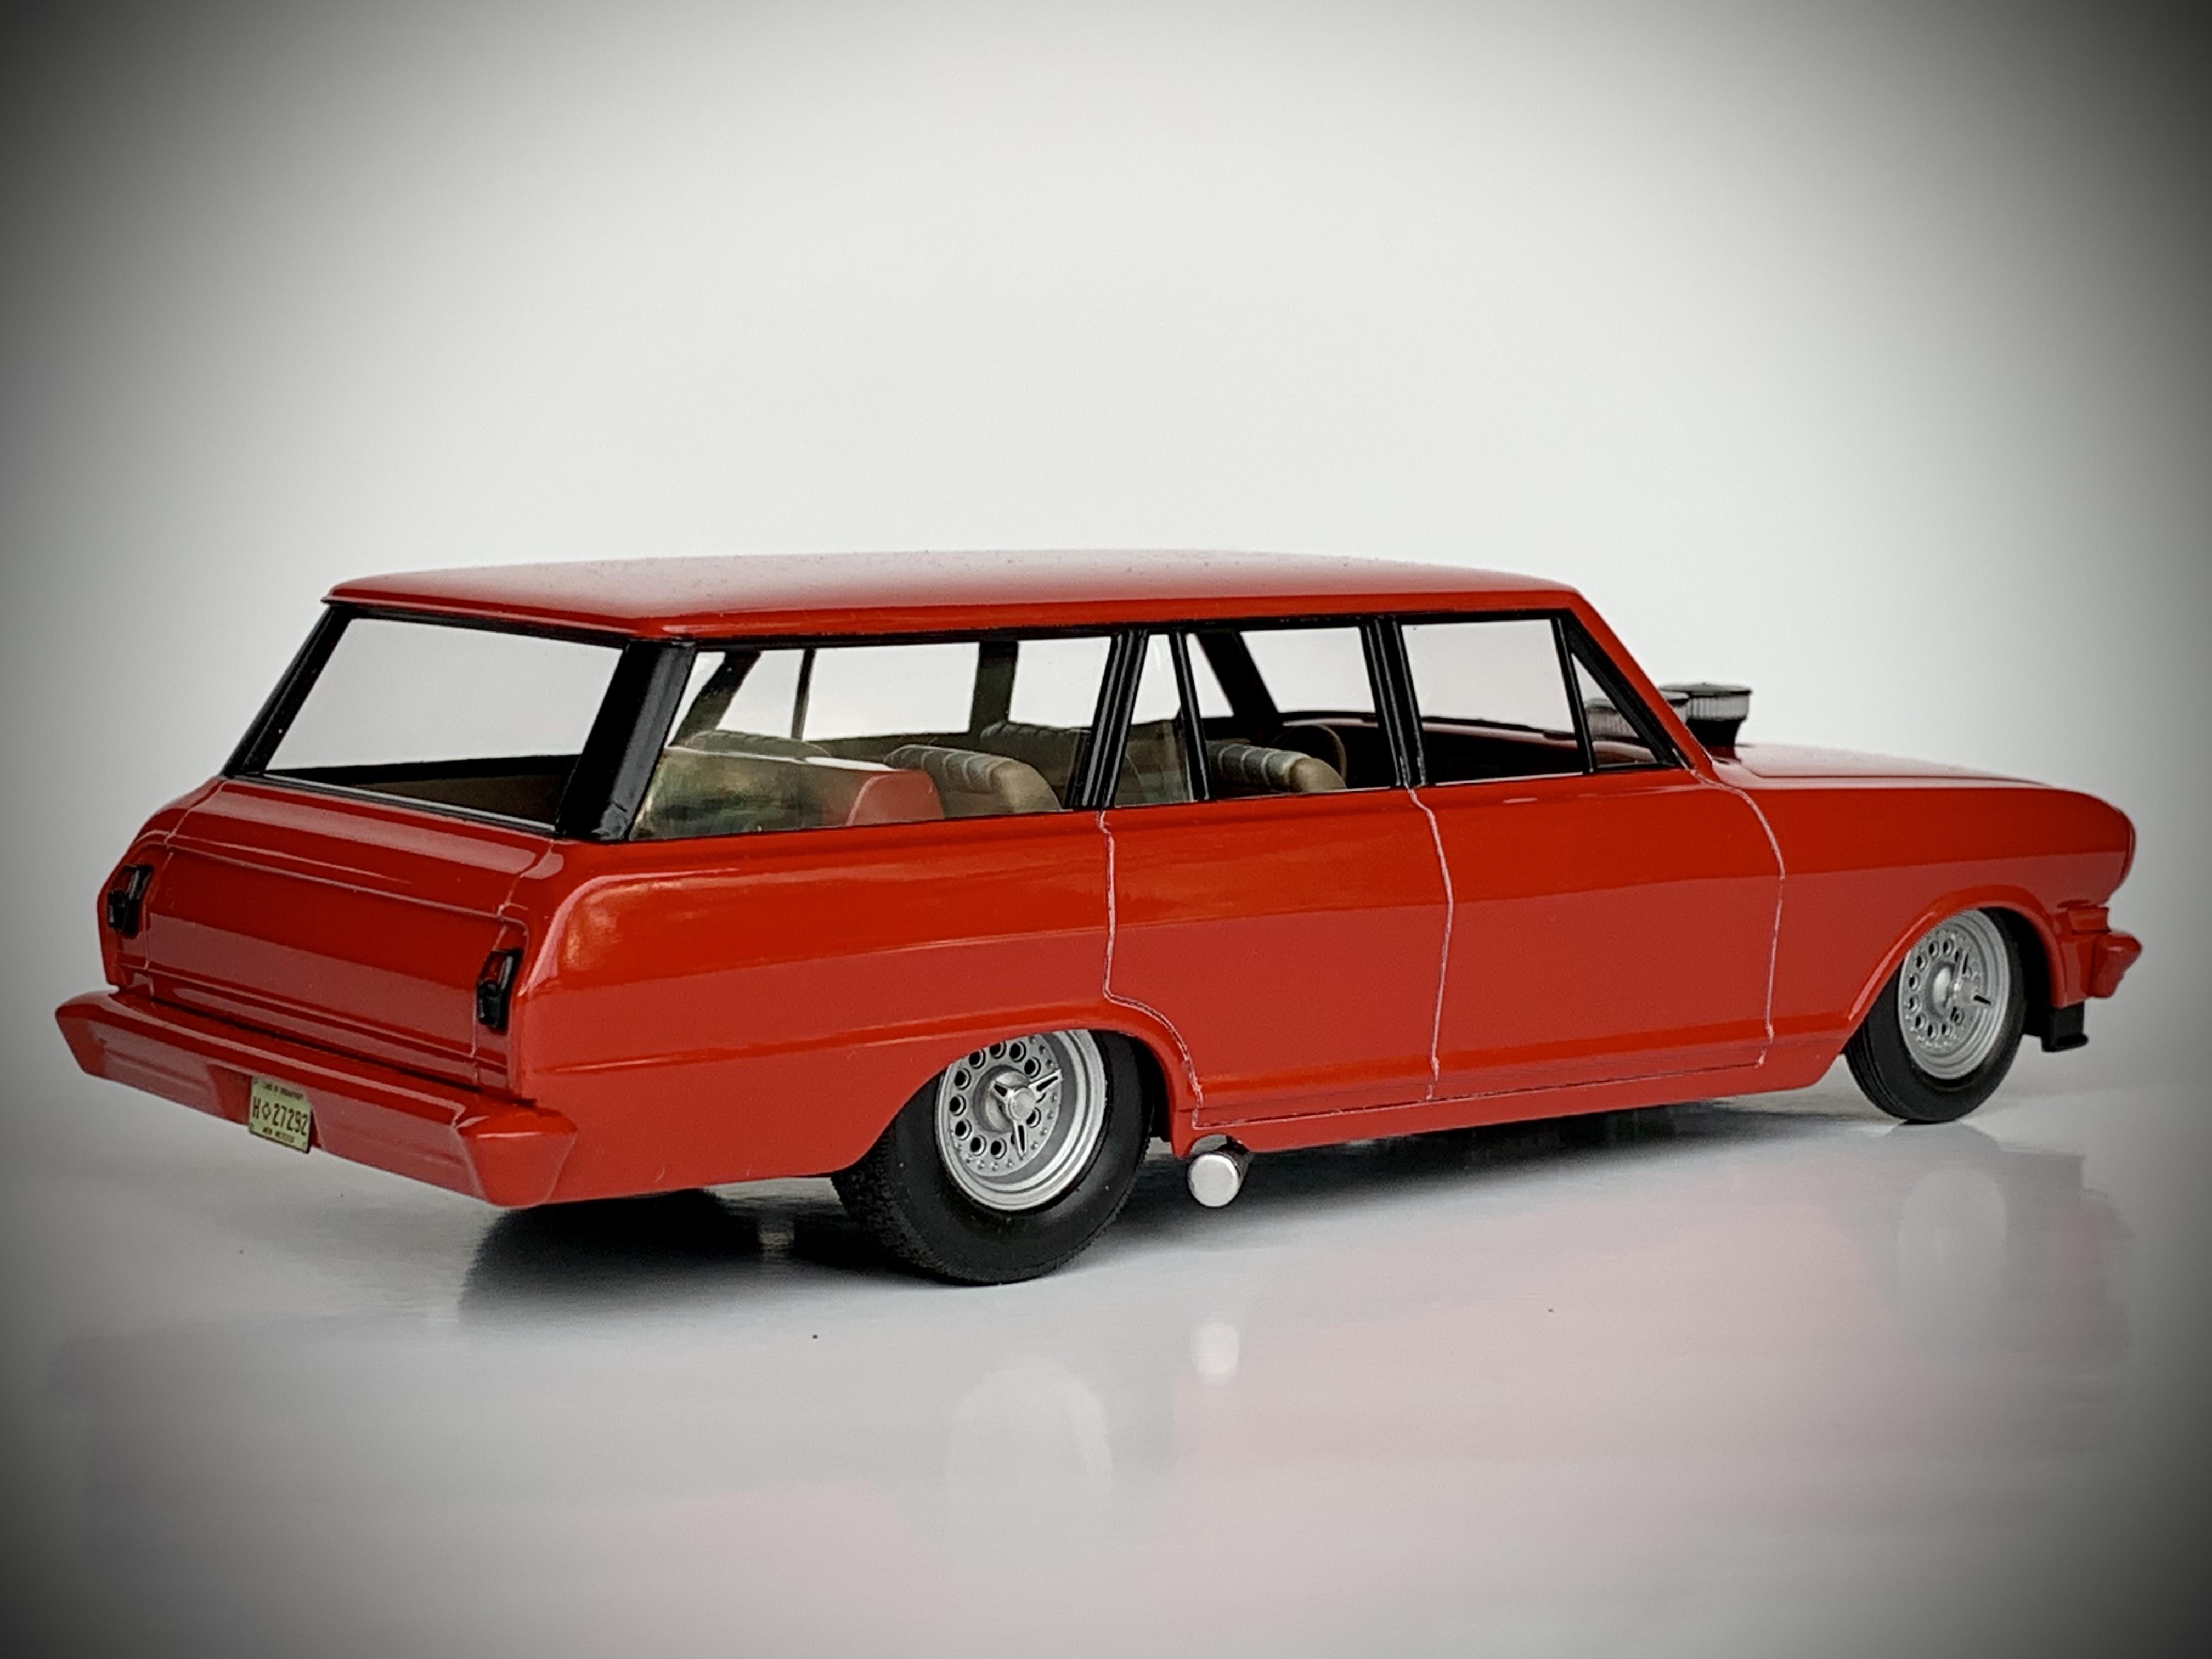
Some killer wagons in this thread! Keep them coming! Here’s my AMT based 1963 Chevy II that was finished last fall. Started as the curbside Craftsman issue to which I added a blown small block, and a fully customized interior. Built as an early 90’s custom like you’d see in magazines like Car Craft.
-
Chevy Sedan Delivery
Dennis Lacy replied to Limeyglue's topic in Model Trucks: Pickups, Vans, SUVs, Light Commercial
Somehow I missed this back in February but glad some folks bumped it back to the top. WOW! Beautifully done! -
Beautifully done! Absolutely love the two-tone color combo and the seats. Definitively 80’s!
-
Amt 60 chevy pick up
Dennis Lacy replied to Tom Kren's topic in Model Trucks: Pickups, Vans, SUVs, Light Commercial
Wow, Tom, this turned out killer! I like that with the stance and modern wheels that it still has the original stock I6 engine. -
Wow, this turned out killer nice. Love the color combo. Just something about 70’s two-tone trucks!
-
Looks clean! Can’t go wrong with black on red.
-
Nice work! Looks really cool with the display!!
-
Very nice post-War coupe! In the full scale world it would make for an excellent street rod driver.
-
This is my favorite model I’ve ever seen built out of the old Monogram ‘37 Sedan. That top is so awesome and the whole car is awesome with Maroon paint, Sombreros and matching early Caddy engine. Simply outstanding!!!
-
Killer start. You always do retro drag cars right!
-
GO GO GO! Man, you’ve been hustling. 99.5% of people looking at this model will have no idea how you built that extra cab. I wasn’t sure when you started cutting but it sure came out awesome.
-
This is bad ass! Nice job!!!