
Scott Colmer
-
Posts
1,665 -
Joined
-
Last visited
Content Type
Profiles
Forums
Events
Gallery
Everything posted by Scott Colmer
-
A friend of mine had a neat trick for making sure they were doorlines were straight AND consistent on both sides. He would cut the door shape out of thin styrene and shape it with sticks etc, then lightly glue it to the side of the body. Then scribe as you normally would using light strokes the back of with a #11 against the side of the styrene door guide. One you have your line, carefully pop it off and do the other side. There might be a little clean up from to spots where the guide was glued to the body. Scott
-
First, go look at a seat belt and look at the pattern. That will tell show you what you want to replicate. All the belts I saw had a vertical pattern running in line with the belt. To replicate that I used medical tape as found at the local pharmacy. First I laid the tape on a piece of glass being sure to keep the pattern as straight as possible. Then I cut the correct size strips with a new # 11 exacto. This is important because an old blade will pull the threads. Cut them longer than you will need. Use a straight edge to keep the pattern in line with the belt. Next , I carefully peeled them up and stuck one end on long piece of sprue to prep for painting. Choose your color and shoot. For the ones below, I used Tamyia bright red followed by a testors dull coat. When the paint was still tacky I laid the belts on a flat surface and rolled them lengthwise with some K&S tubing that had been scuffed with medium sand sand paper. The idea was to try to create the finer texture of the threads and to flatten the ridges. The thread imprint was not really visible. Maybe someone else will have better luck with that technique. Then I put them together using a Detail Master belt PE buckles. PLAN AHEAD as to what side will show, because the back side of the belts remains sitcky and the glue will still show and adhear. It takes time to get these belt systems assembled properly. Be patient. Finally, I added the Simpson patches. They were taken from the Simpson site, reduced to print at the right size through trial and error. They are on regular print paper. They were thinned by carefully shaving paper from the back side until they were thin enough to stick on with liquid tape. White glue might work too. Make lots of extra copies. Here they are. Hosted on Fotki Scott
-
Very Unique. Very well done VERY KOOL!!!!!! Scott
-
Hey Alyn This is coming out really nice! I like all the scratch building as well. I'll be stealing that headlight bucket technique. GREAT STUFF! Scott
-
Back on the pedal assembly. Here is the gas pedal linkage. The return spring runs on a shaft and winds out when the pedal is depressed. I copied the design from a computer gaming steering wheel/pedal set. Still a little more clean up to do and some frame mounting tabs to make. I also have to shorten the reservoirs for more clearance with the front axle. I'll also remake the brake fluid cap too. I did not like how the first made one from stacked tube came out. You can see the divider lines. The giant dime is back. Scott Hosted on Fotki Hosted on Fotki
-
BEAUTIFUL!
-

What defines Pro Touring?
Scott Colmer replied to Scott Colmer's topic in General Automotive Talk (Trucks and Cars)
LOL! Hmmmm I was thinkn' more along the line of stitches in belt patches. Von Seeetch, Two Steech Threee steeches. Scott -
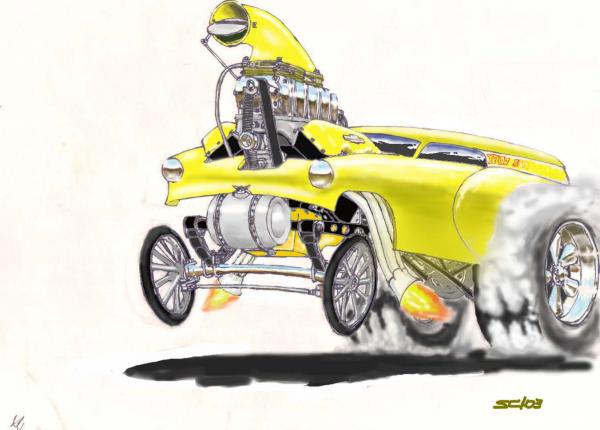
I am a BIG fan of Pro Touring. To me it seems to be a more reasonable version of another favorite - Pro Street. The question is - What does to be a real Pro Touring car? Here are a few of my thoughts: Mostly stock body - any 50's and above is usually OK with the look, but not exclusive. High output engine that does not block vision. Usually somewhere close to the stock location. Maybe some setback for better weight distribution. Wide low profile tires front and back on large rims- but not too tall. Modified suspension and brakes. Reenforced chassis and a roll cage. Mostly stock interior with upgrades. Paddle shifters are cool. Did I miss anything? Scott
-
WOW! That is looking nice! Excellent job on the subtle restyles, Raul. It's a winner! Scott
-
Thanks Hans. The link did not work. I could not "looga in". I think I know the person with the Pro Mod Nova. His screen name on "the other forum" is Rickard. I have been an avid follower of his Nova build. After I discovered the medical tape, I was looking at his post and saw his technique. Mine is a little different in that I run the ridges vertically. Just a little after I painted them red, I rolled them with a metal rod grained with sanding marks to flatten the ridges and add in thread texture. I felt this was a close to real seat belt material as I could get. Raul - I've seen your stuff. Maybe YOU will go home with the people's choice. Thanks again for all the encouragement. Scott
-
Wow, this is really cool. Great craftsmanship!
-
Here it is. The red and green buttons are thumb shifters. They will operate a double thow solenoid linked to the sequential shifter. The two red buttons on the black box are for the fuel shut off and fire bottles. The screw heads (Thanks Raul!) are recessed. They actually pressed into the holes. The handles were knurled by rolling them under a file. The little ring in the center is for the pull pin on the quick release wheel system. There are a little over forty pieces in this. I went with the brushed finshed over polished. It was a pretty productive weekend over all. Scott Hosted on Fotki The collar on the back is still not secured. Hosted on Fotki
-
As always - thanks to everyone for the encouragement. Progress is slow, but it is progress. Finally got the belts done. I ended up using medical tape with pattern running vertically to match what I have in my real car. The logos are printed on printer paper and then shaved thin on back side with a sharp exacto. Hosted on Fotki The cage plates are painted and ready to instal. This is a rough thermoform next to the buck and then the final parts. The package in the back is the brand of materials. Hosted on Fotki More building tomorrow. Scott
-
This is really nice. I checked out your album a few weeks ago. It good to see progress on this one. I've always like this kit. It will be fun to see one done at a high level. Scott
-
Oh my God. How did you make that car look so good? Amazing!
-
What was your hardest build yet?
Scott Colmer replied to vizio93's topic in General Automotive Talk (Trucks and Cars)
Seems like every one is harder than the last one. That's not bad - I just keep trying to do more. It's actually fun. But THIS was a pain because I made mistakes I had to correct. It all started with using gloss white instead of primer white, then wiping it down with lacquer thinner and consequently wiping a layer of thickness off the molded gauge detail off the tank. I had to etch it back in and build it up with BMF. Scott Hosted on Fotki -
1/25 '63 Spirit of America
Scott Colmer replied to Terry Jessee's topic in General Automotive Talk (Trucks and Cars)
That's stunning, Terry! I would really like to se someone do the Redhead. Probably one of the most beautiful LSR cars i have seen. You can catch a cameo in the Worlds Fastest Indian. Scott -
Well the seat is DONE! Thanks to Z-Man for coming through with the PE screw heads. This time the carbon fiber went on like a dream. I even cleared it with Tamyia lacquer - no problem. It's Modeler's. The bolts on the seat back are recessed. Even though they look like they stick up, they look flush when viewed on end. Hosted on Fotki There it is in place. Black and red make a good contrast and it will be picked up a bit in the exterior. Sorry, but I like my race cars shiny Hosted on Fotki And from the rear. The silver patch is cigarette paper heat shielding with a BMF tape boarder. It's to keep the driver's backside from getting too hot as the oil tank in the background sort of wraps the rear of the cage. Hosted on Fotki Now to find a really good seat belt material. These two types of ribbon still look too coarse. I'll be off the to the fabric store. Hosted on Fotki Till' next time. Scott
-
I'd like to thank the academey.....
-
Zooooooooot I see you pulled the skirt down a bit on the side. I like it better that way. The flow of the profile is nicer. The exhaust will be a nice touch. The mill looks good too. Keeeeeeeep buuuuildiiiing Scott
-
7, 77, or 777?
-
Loosely wrapped in toilet paper then paper towel. Be sure to sort of "fill" with the toilet paper. Then placed in a box with more paper towels to keep things from moving. I just traveled on a plane with some delicate models that way and had only 1 small part come off after I got home. And I was the only guy at the contest with a LOT of extra TP. LOL. Scott
-
Thanks for the tips on Replicas and Miniatures. I saw they had some tiny nuts. I'll be calling for the catalog tomorrow and to see if they have the screw heads. Also might have someone's leftovers coming. THANKS! Just goes to show how much planning is needed on this stuff. Scott
-
MCM May/June showed up today!
Scott Colmer replied to RodBurNeR's topic in General Automotive Talk (Trucks and Cars)
I got mine two days ago. And it wasn't even torn up. Also what a thrill to see my article! Thanks for the consideration Harry! -
Thanks for the Pro tech tip, but I need the Phillips head screws. If it is S&S, I might be screwed too. Does anyone know if they are still in business? Hey Zoot, Harley let me know Terry Ross is around, but not feeling well right now. If I am lucky enough to get pics, I'll send them to you. Scott