jjsipes
-
Posts
1,671 -
Joined
-
Last visited
Content Type
Profiles
Forums
Events
Gallery
Everything posted by jjsipes
-
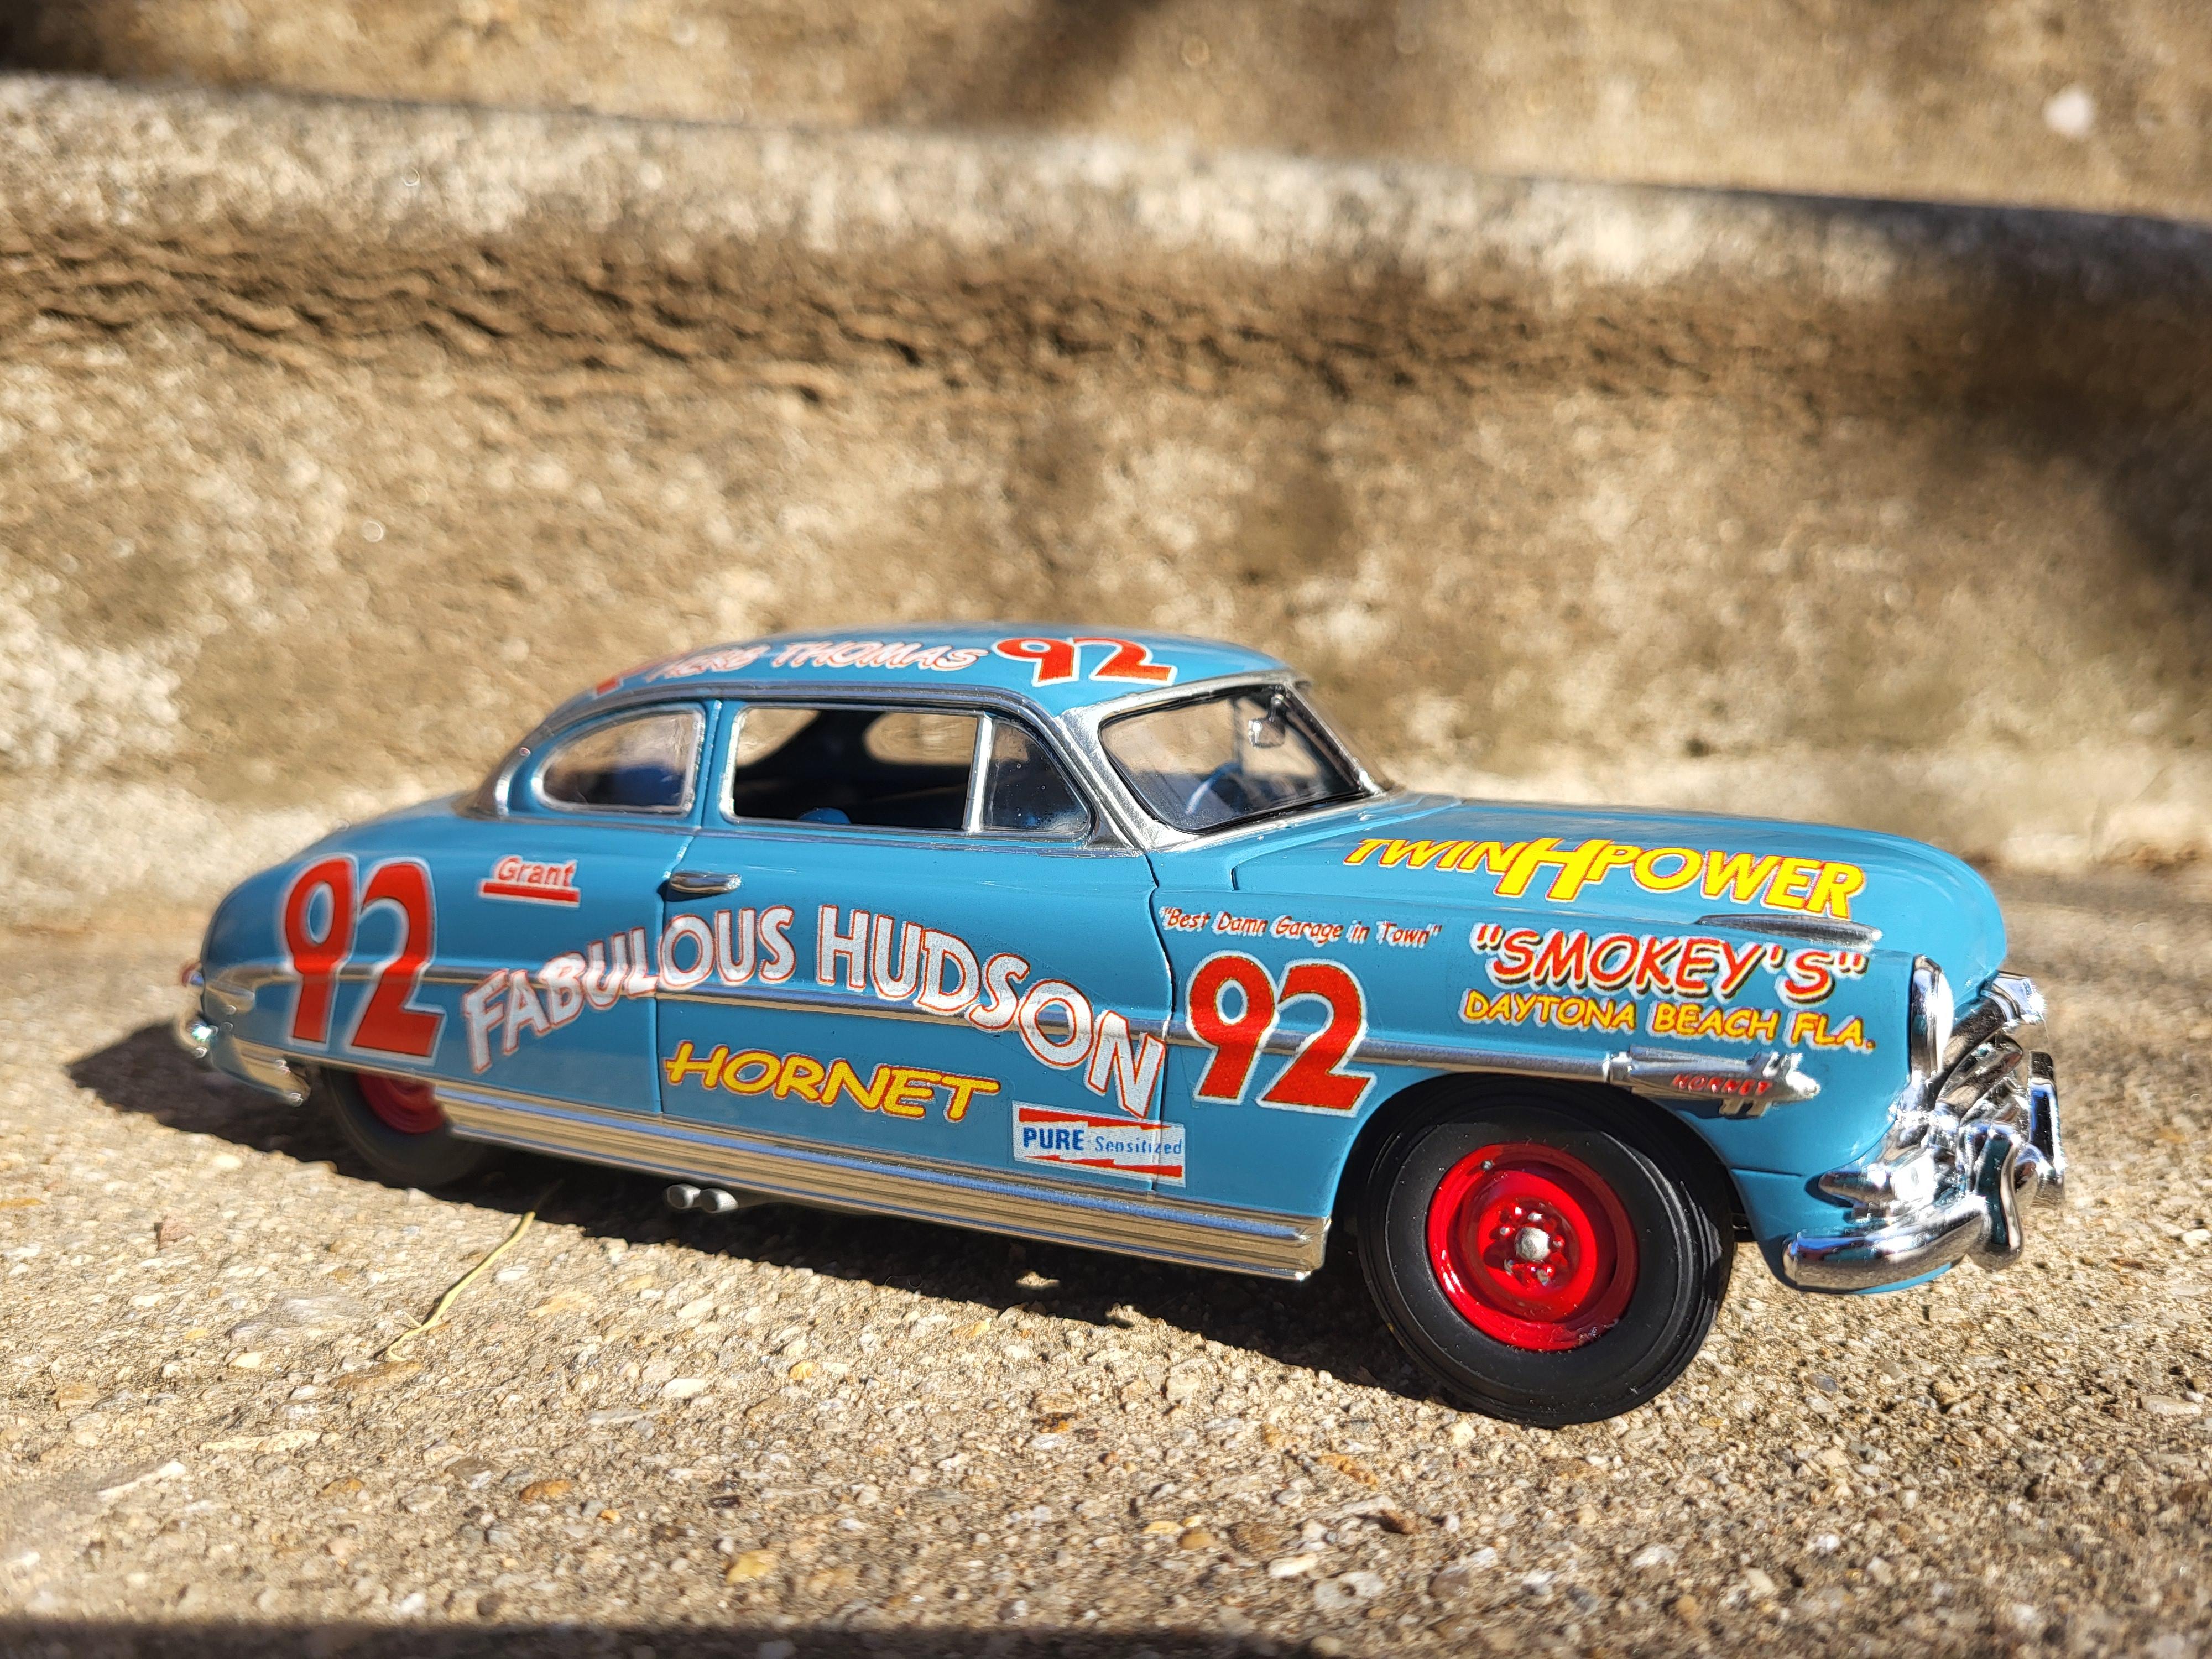
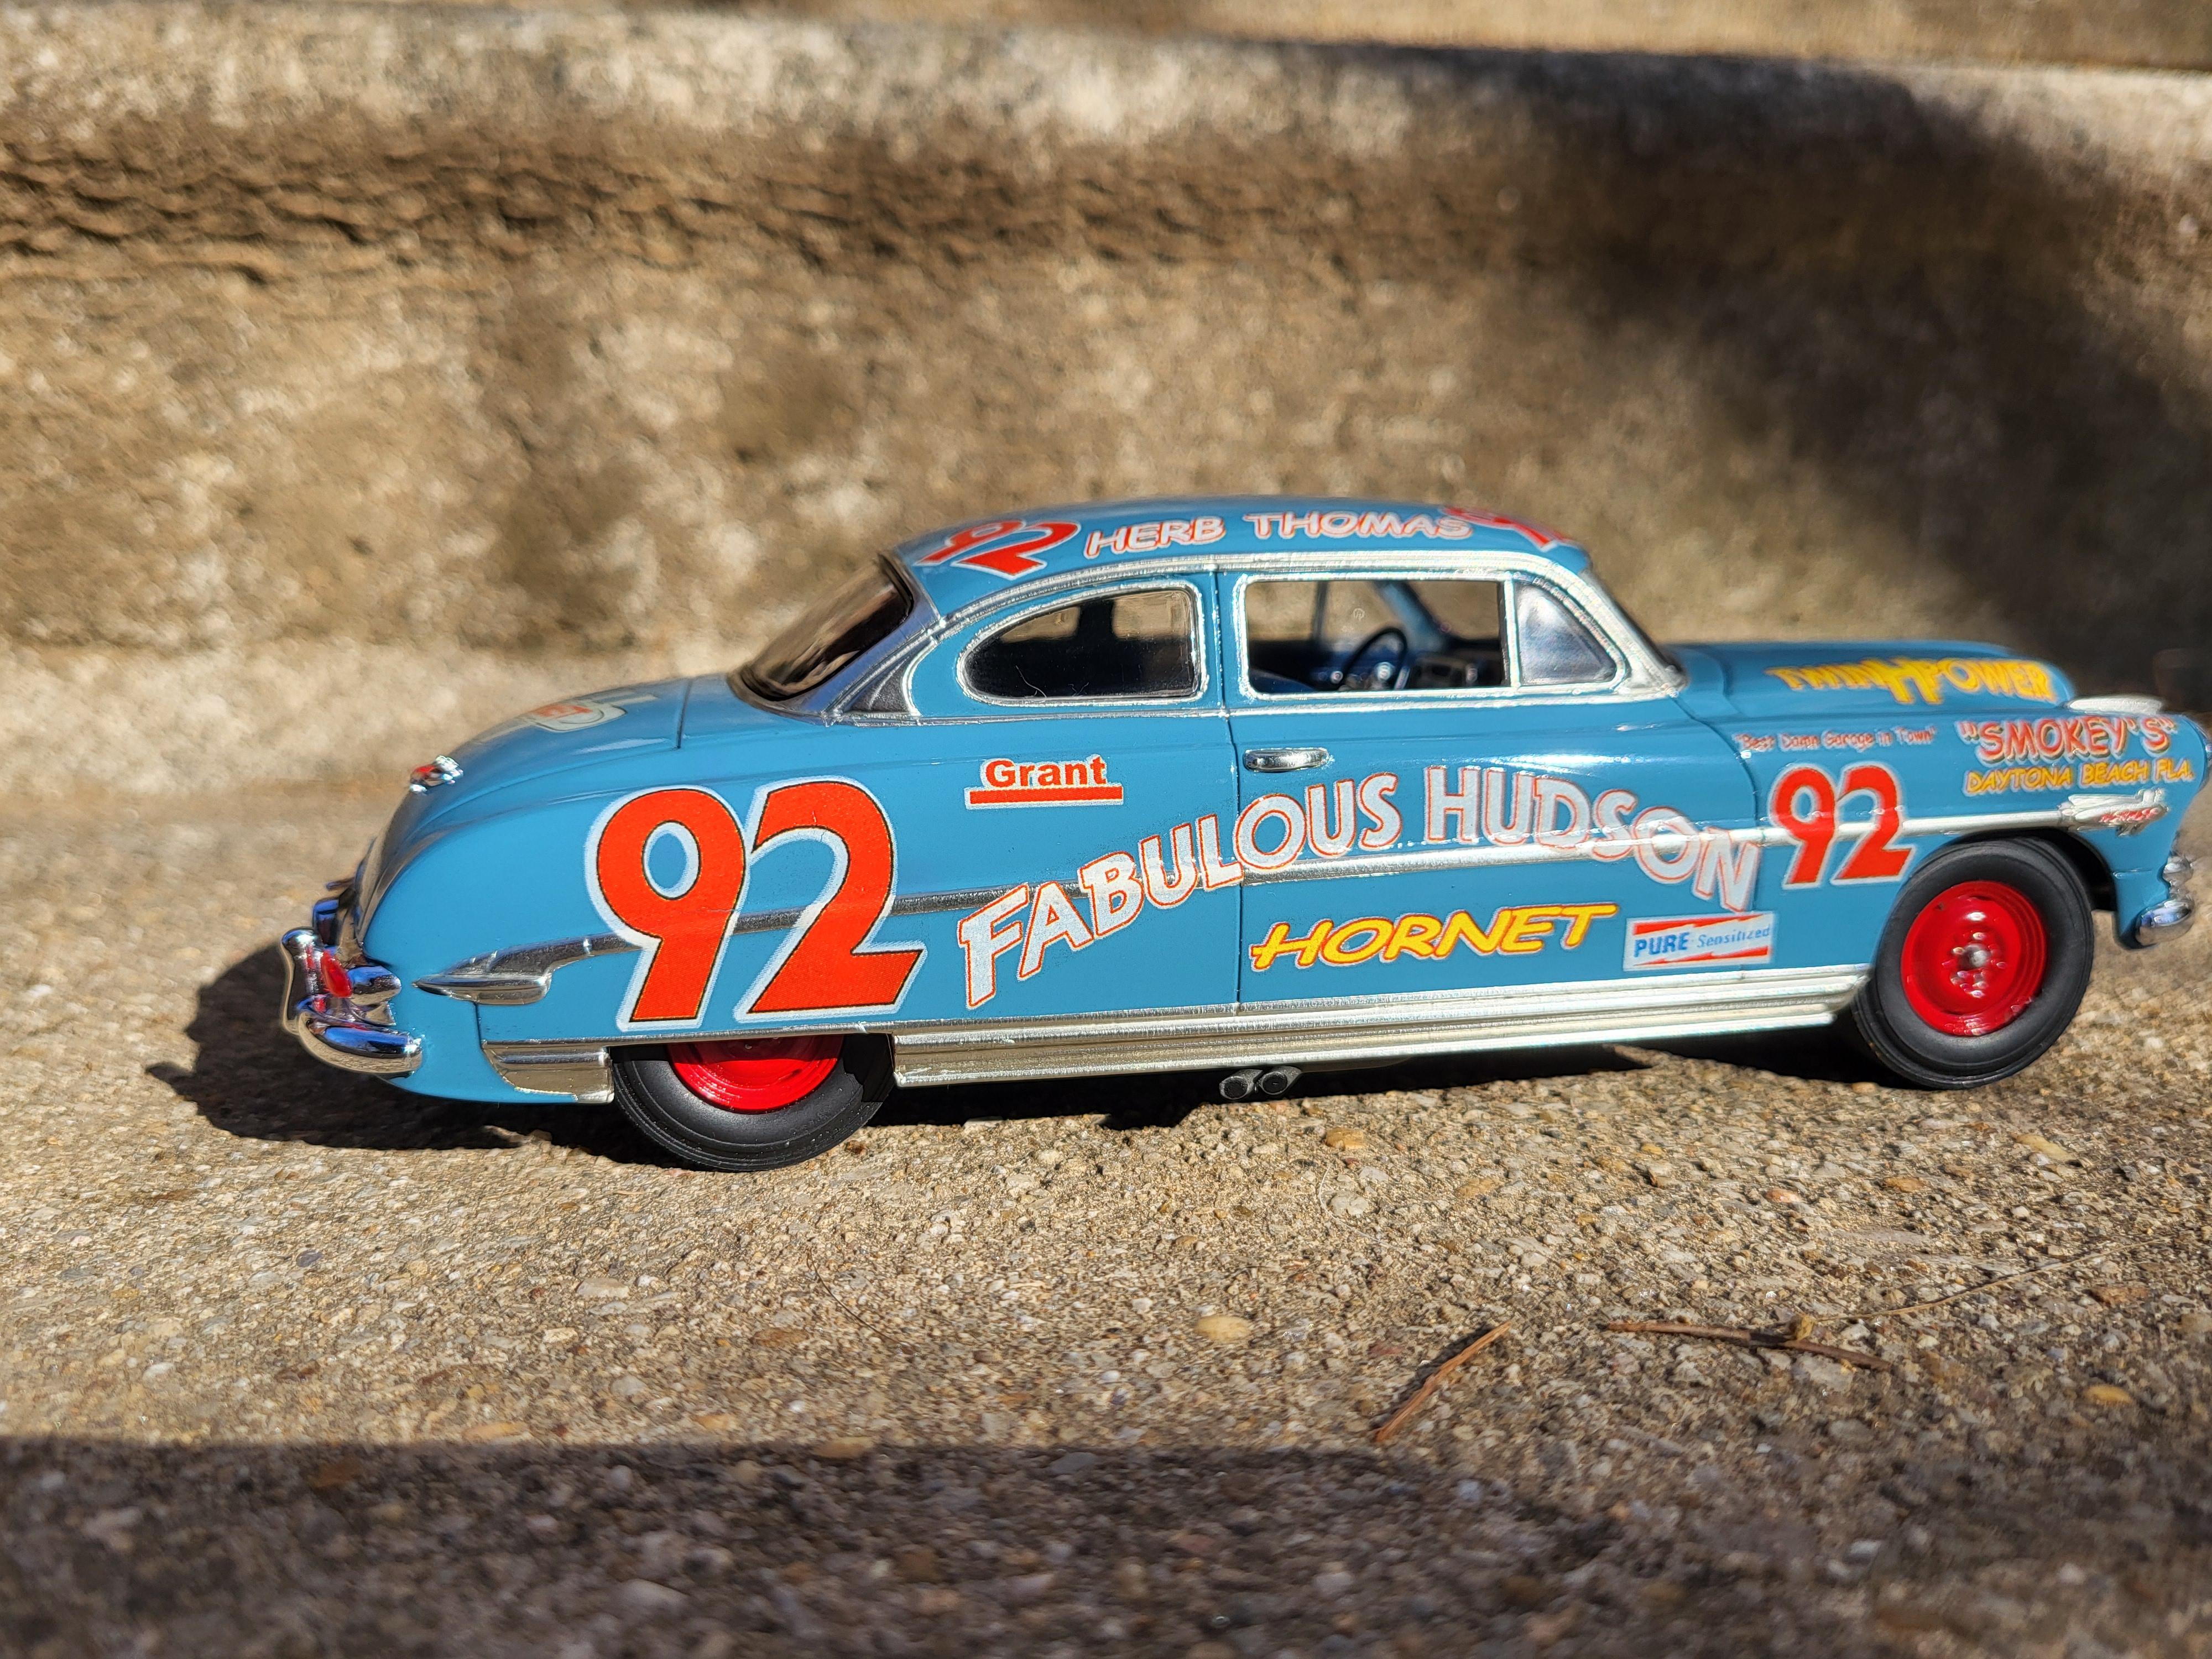
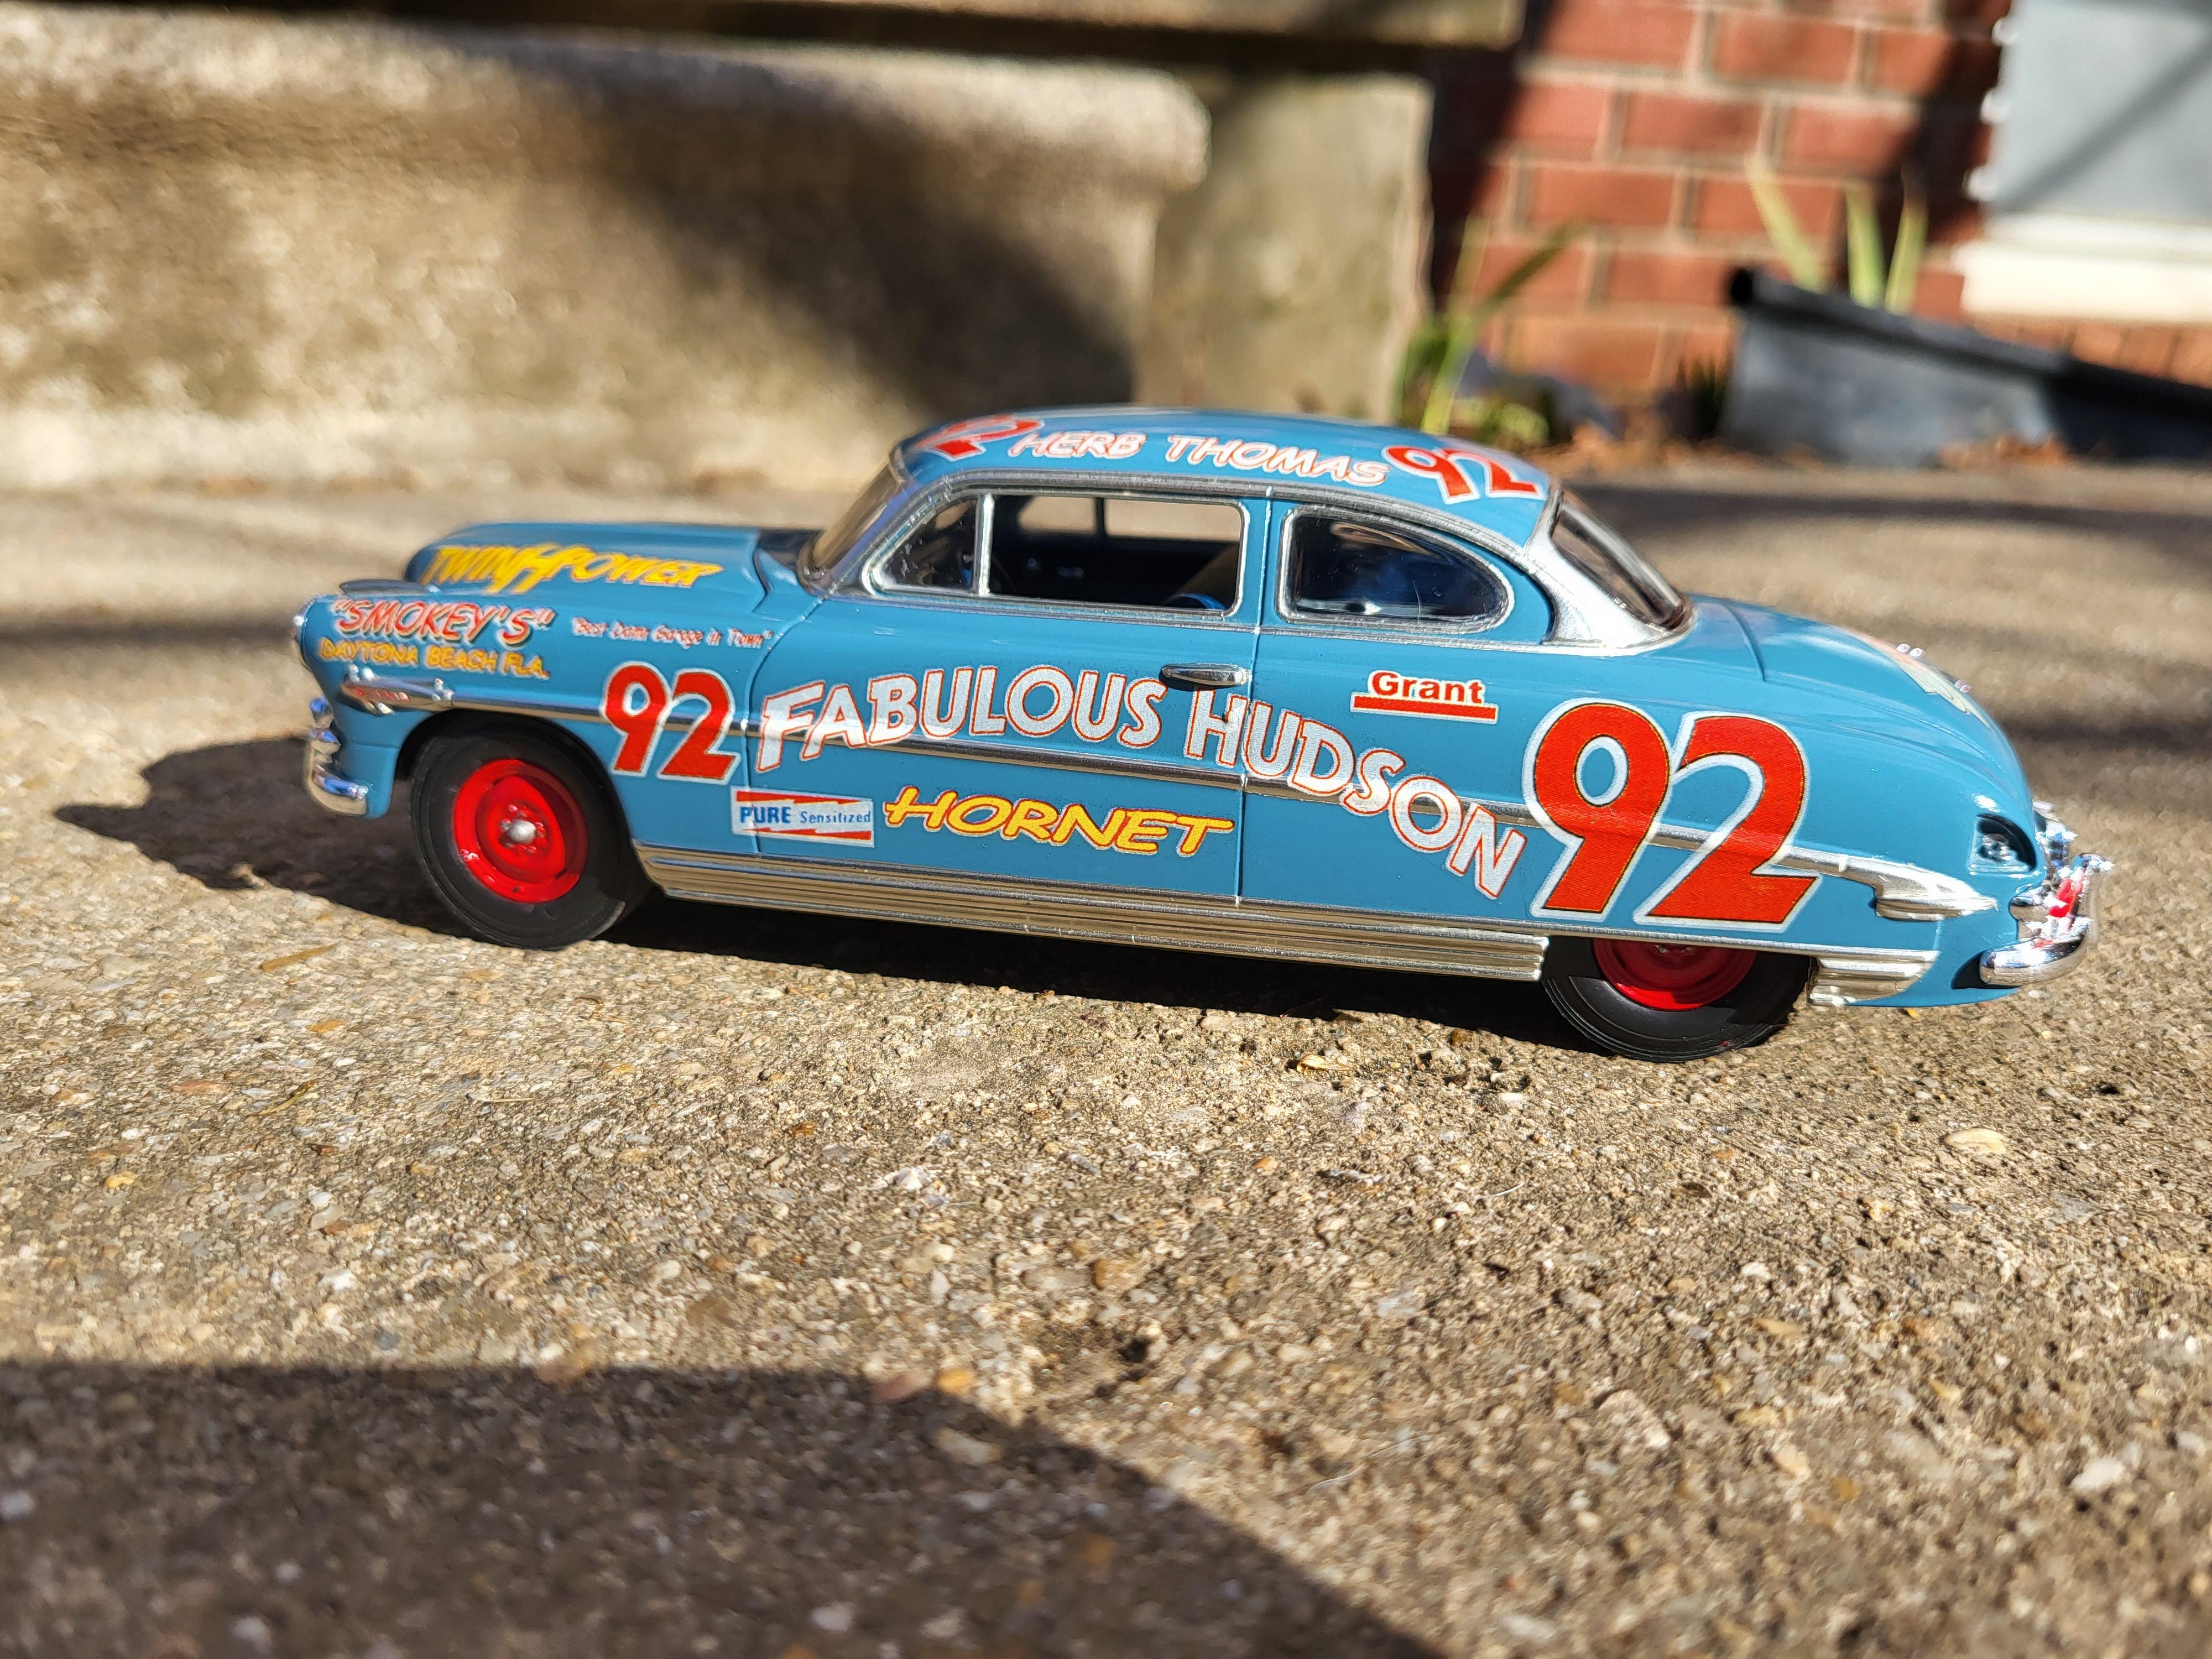
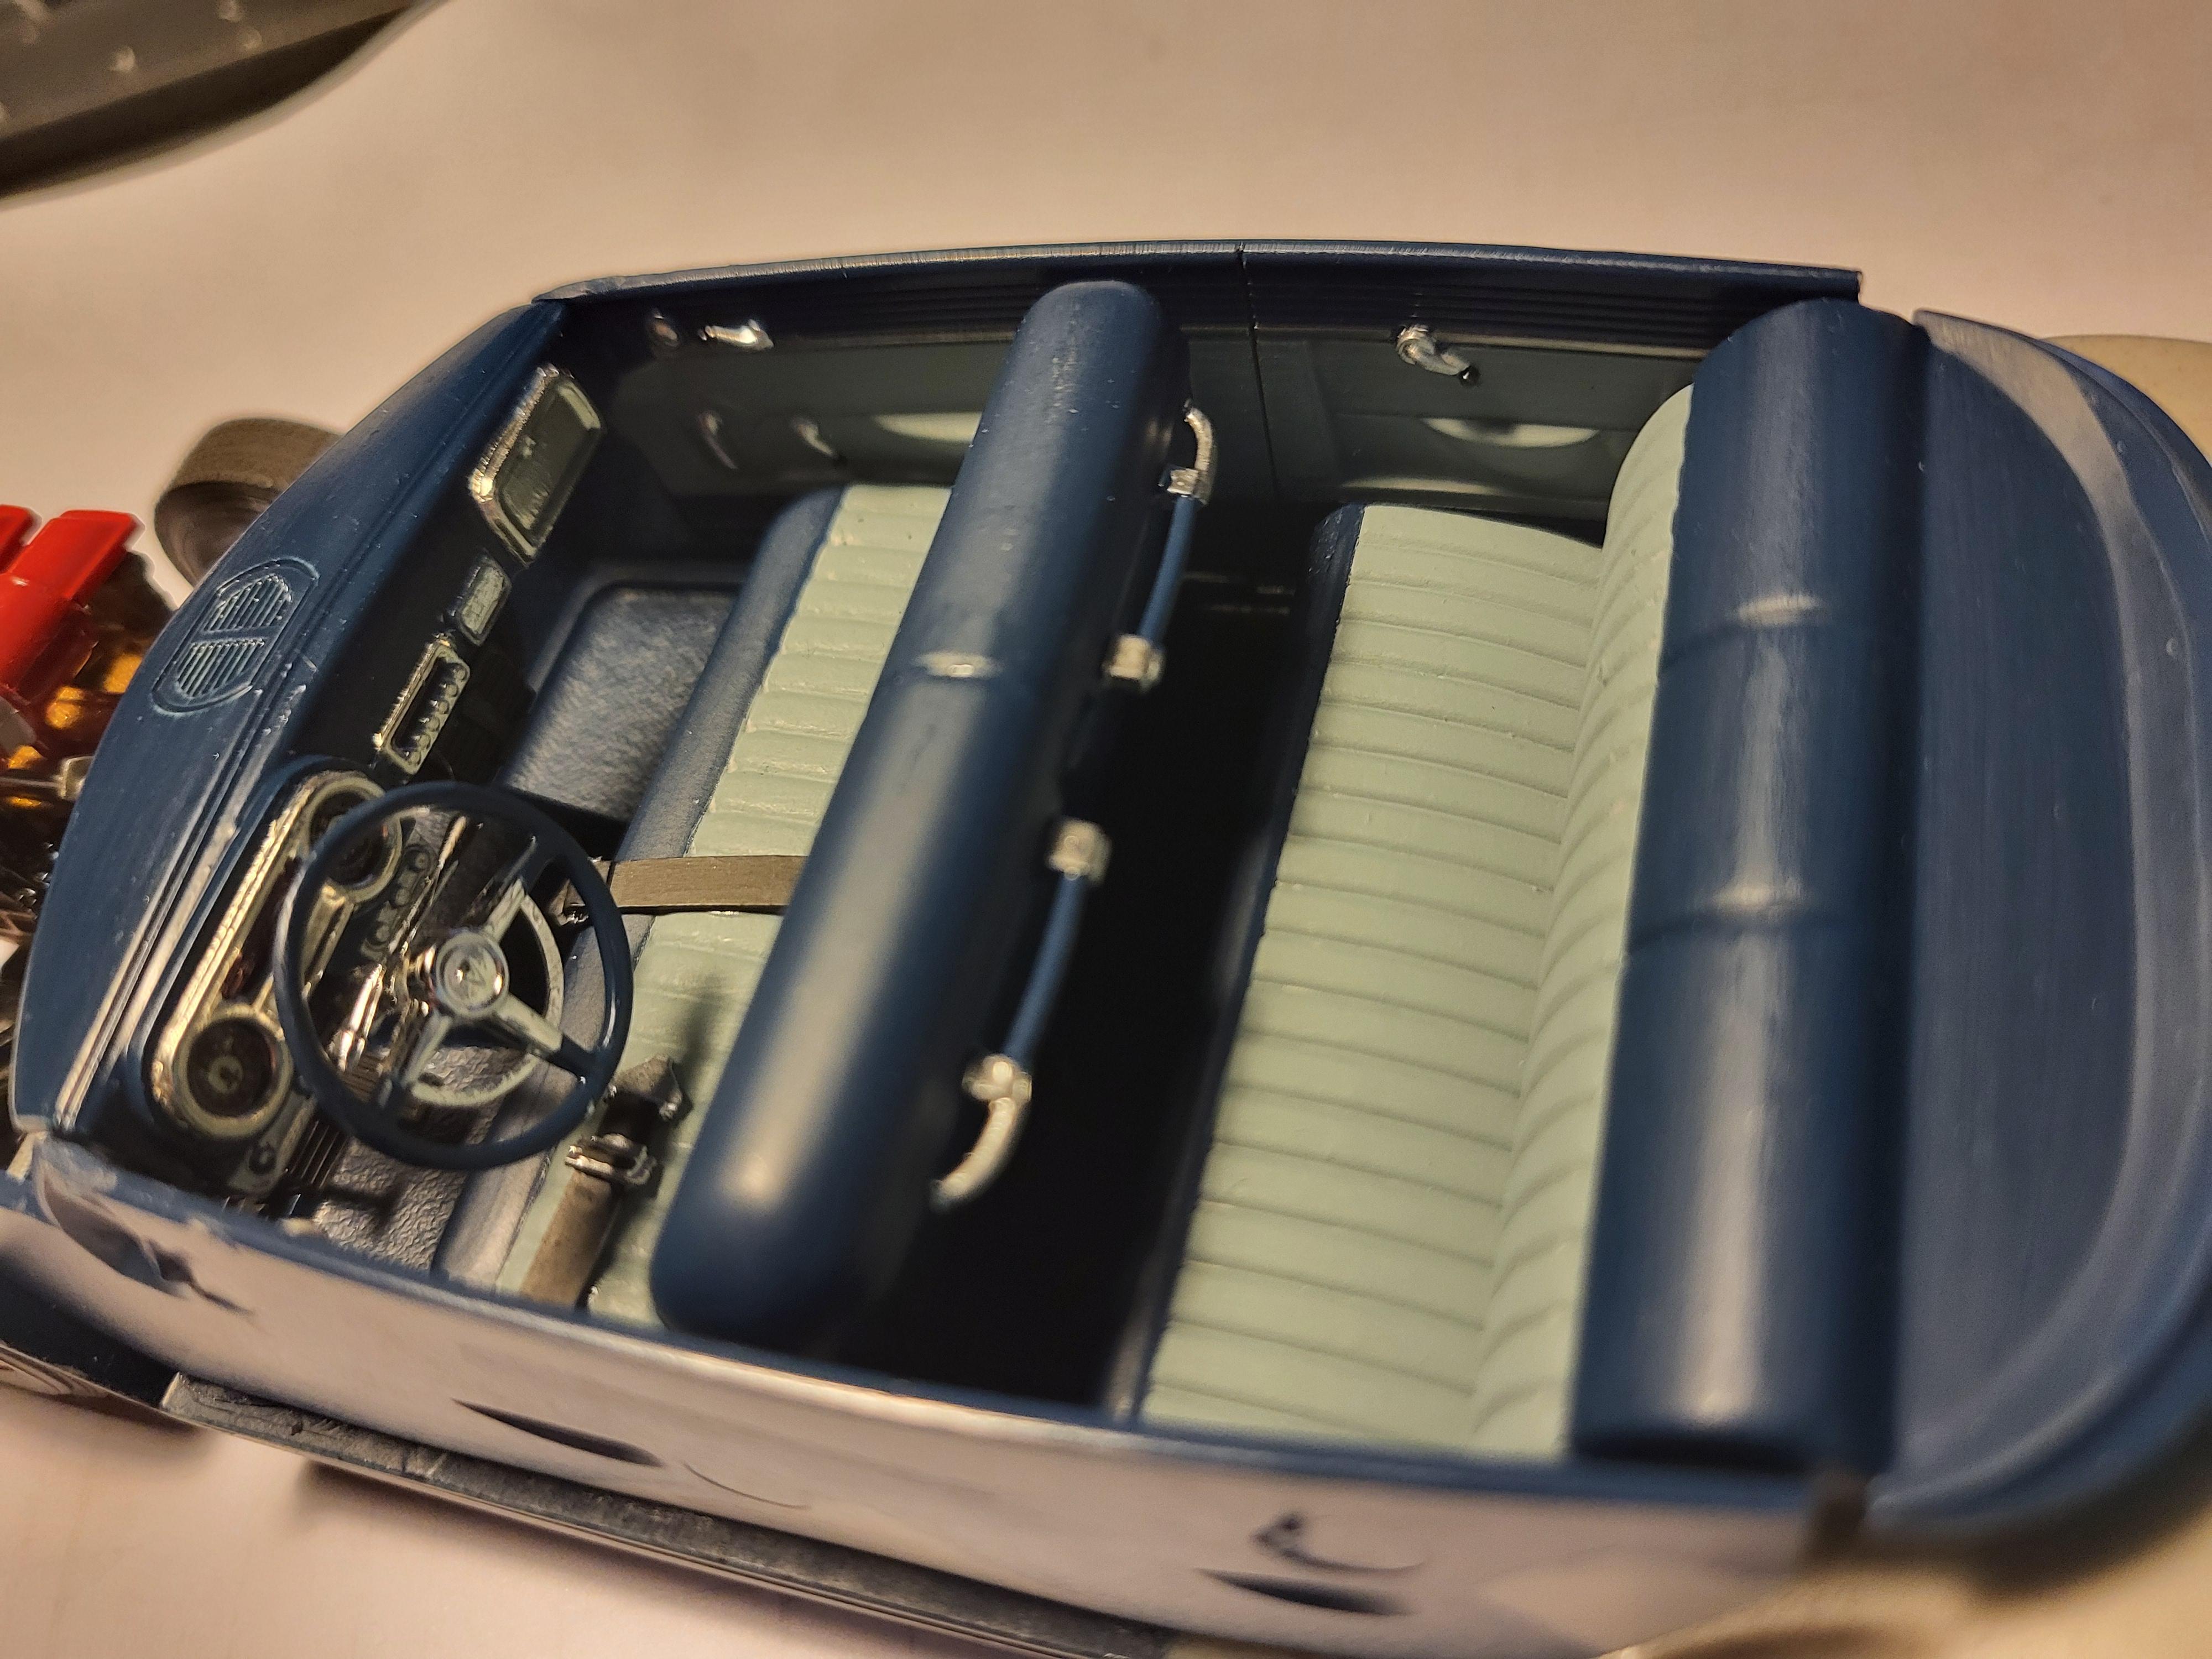
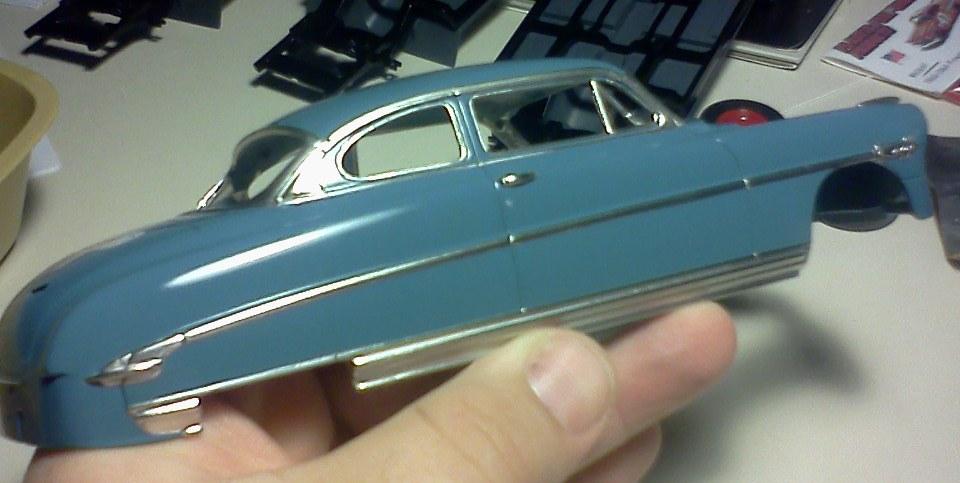
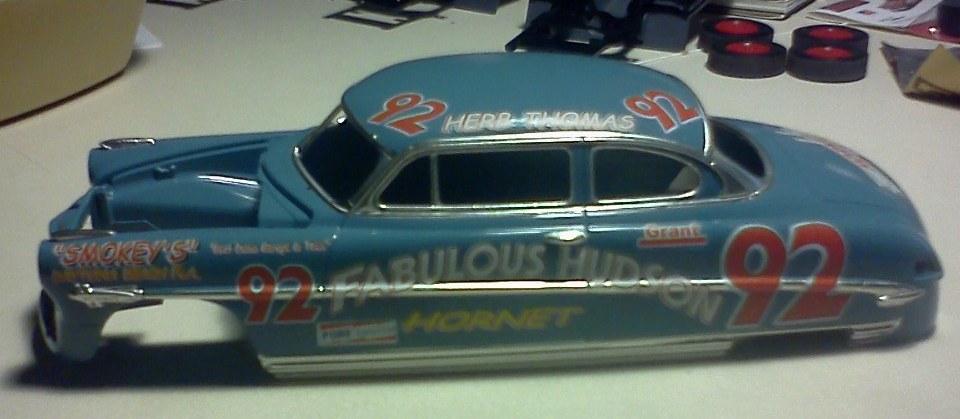
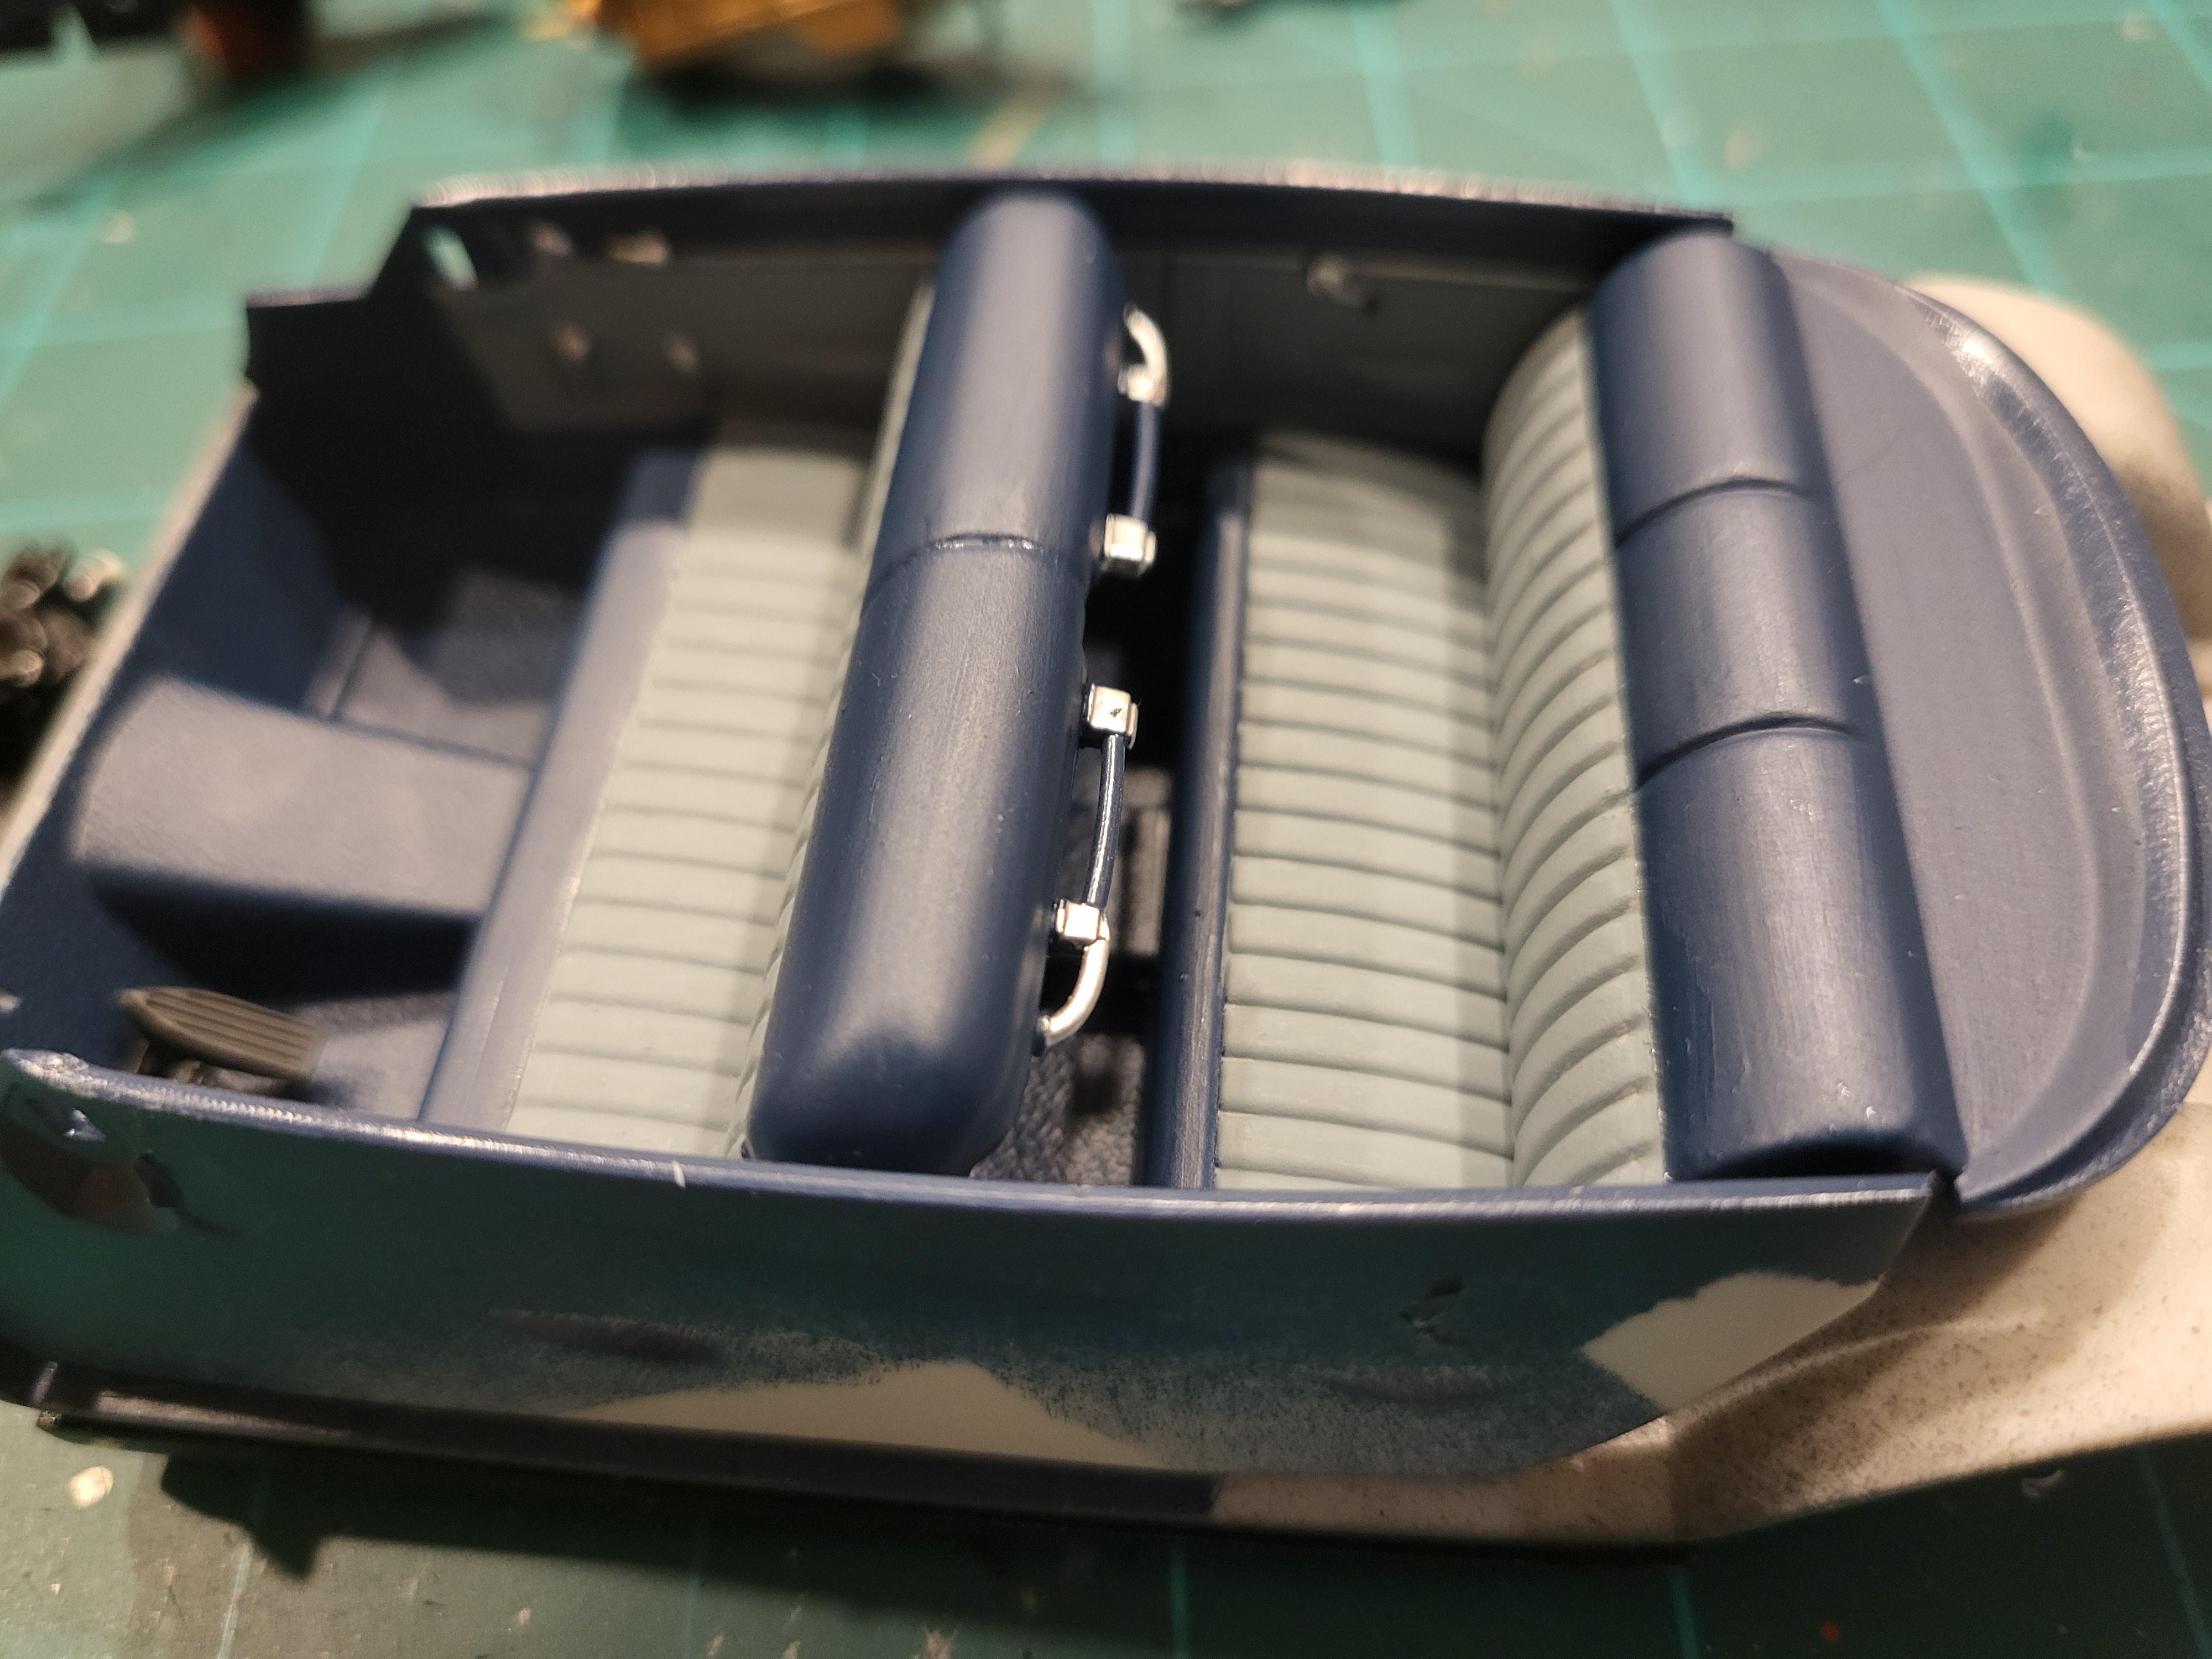
 Dug this one out as well when I dug my Herb Thomas Hudson out to finish. This is another one that was painted and decaled back in 2012. Moebius kit and kit decals. Testors spray paint but don't remember the actual color used.ned to clean up a couple areas of Bare-metal.
-
1953 Herb Thomas Hudson Hornet
jjsipes replied to jjsipes's topic in WIP: Stock Cars (NASCAR, Super Stock, Late Model, etc.)
Thanks everyone for the comments. Just completed it and have it in the showroom -
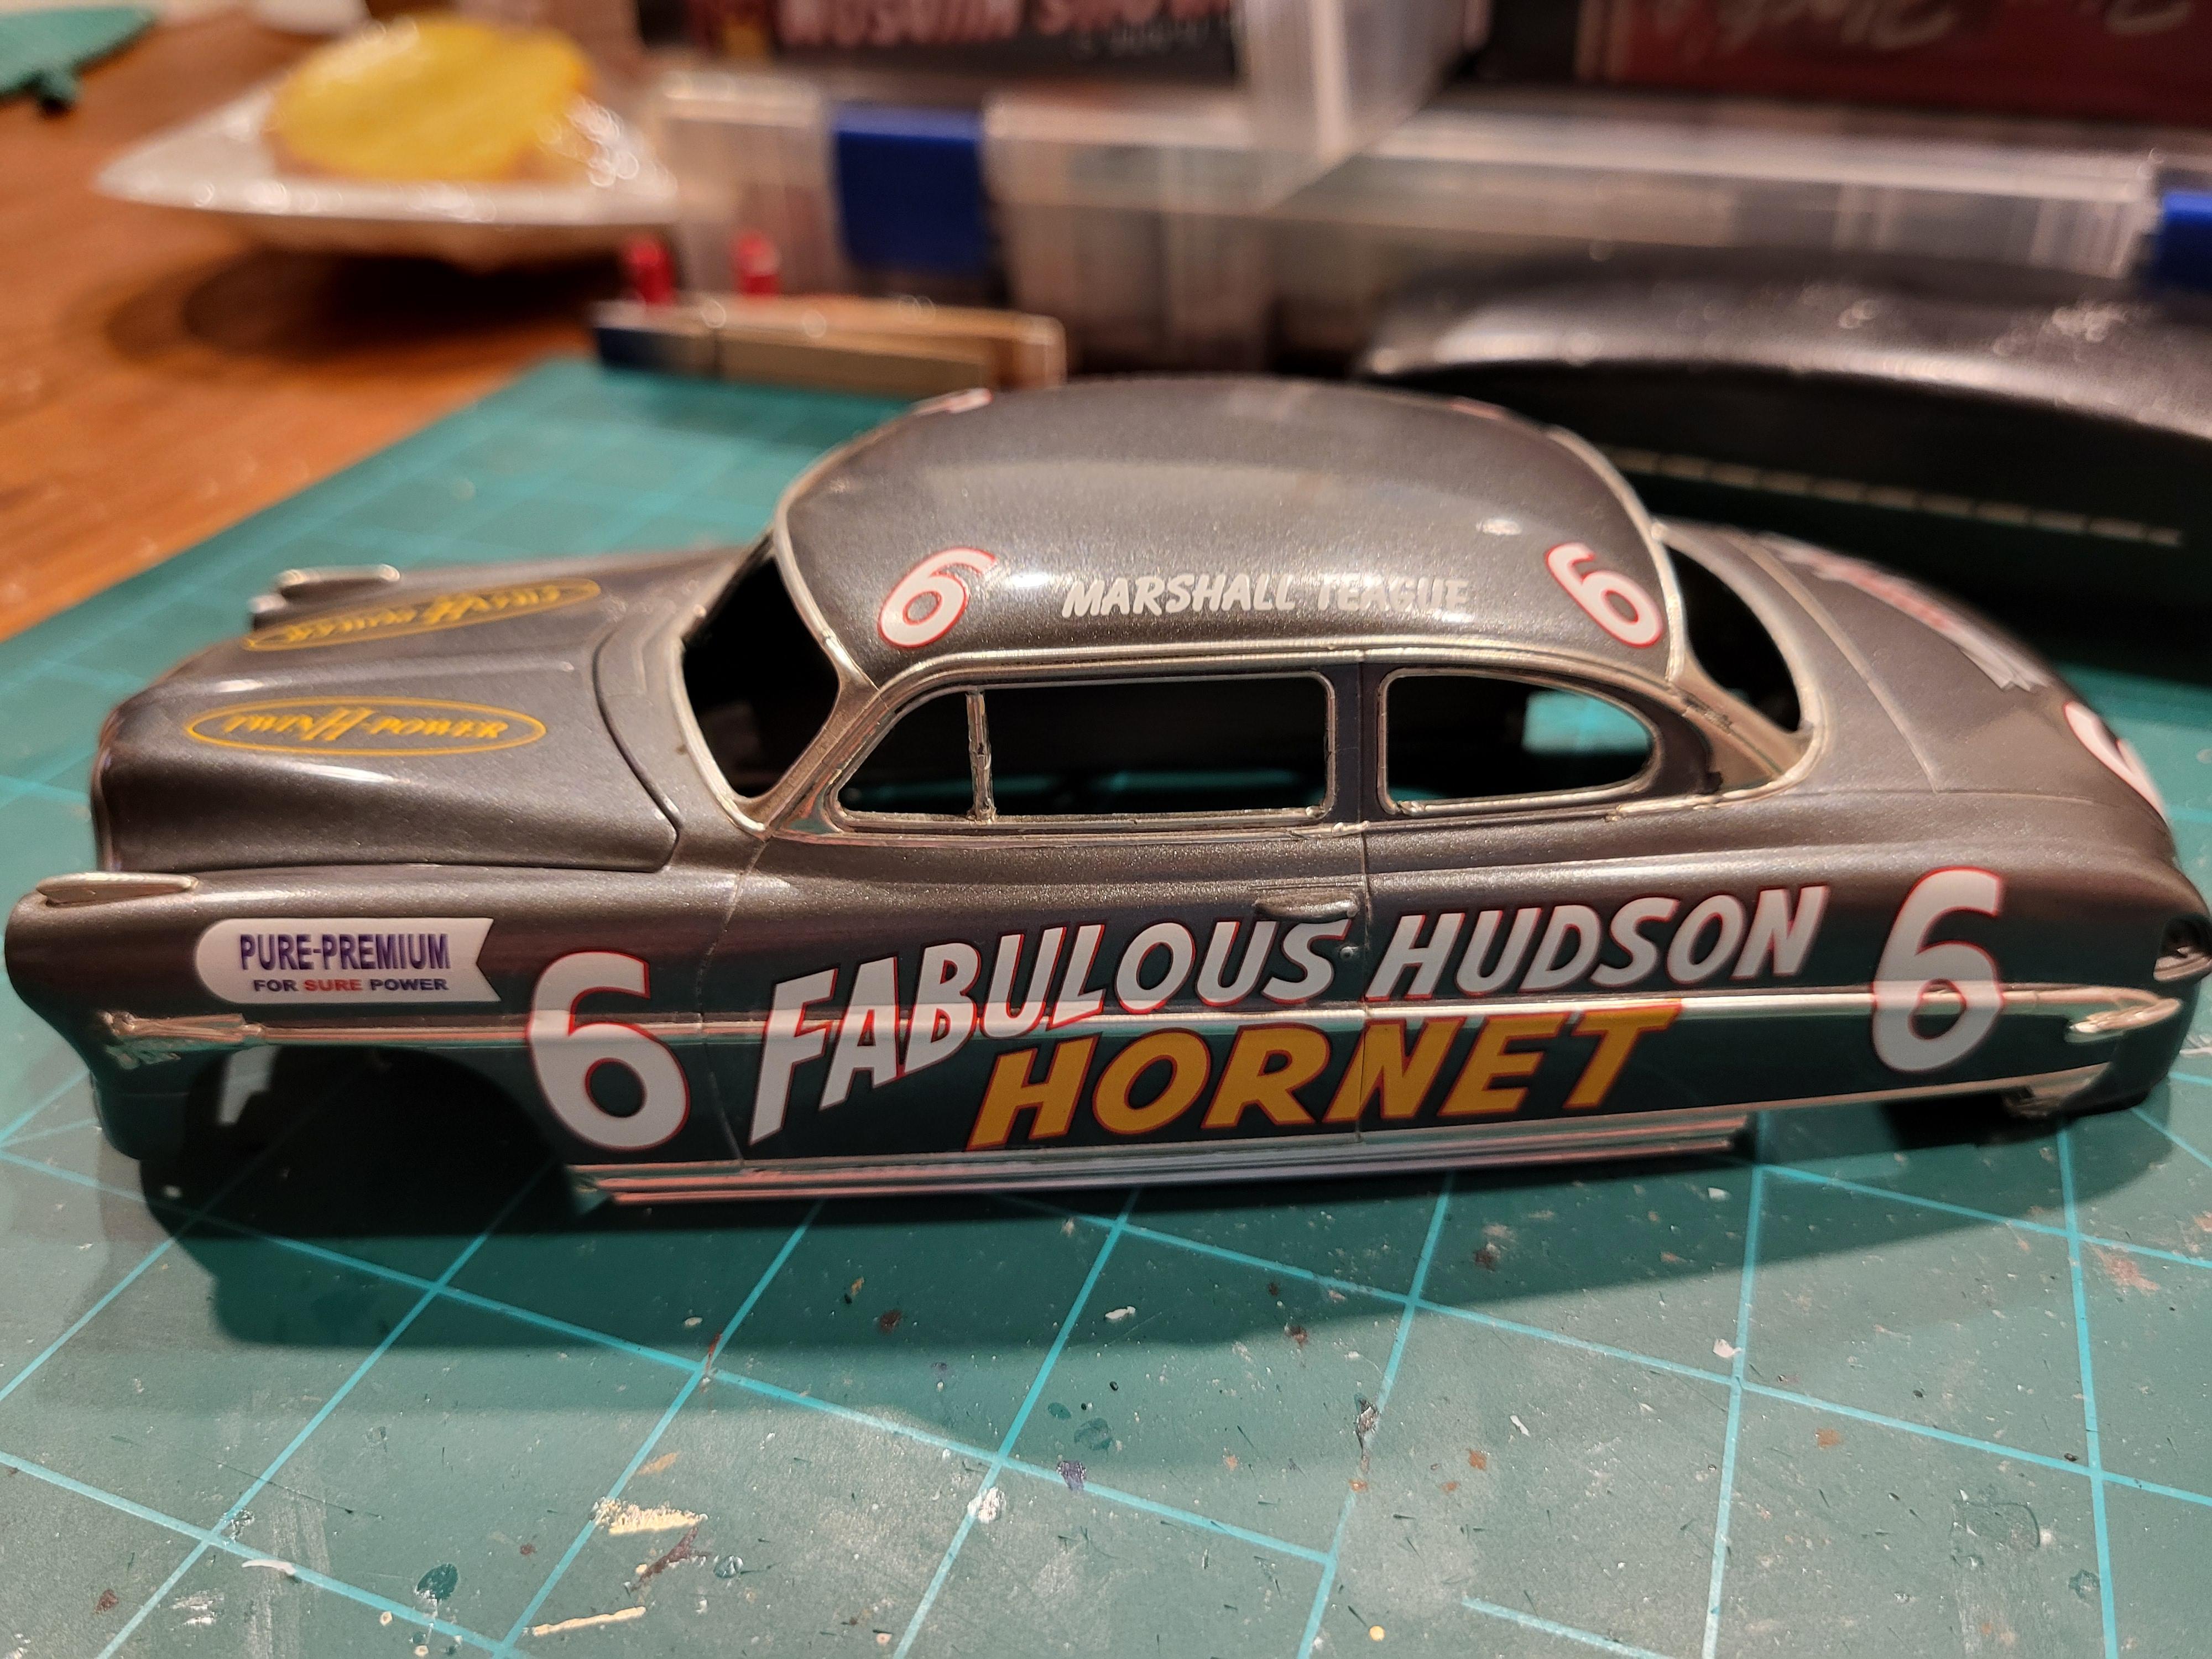
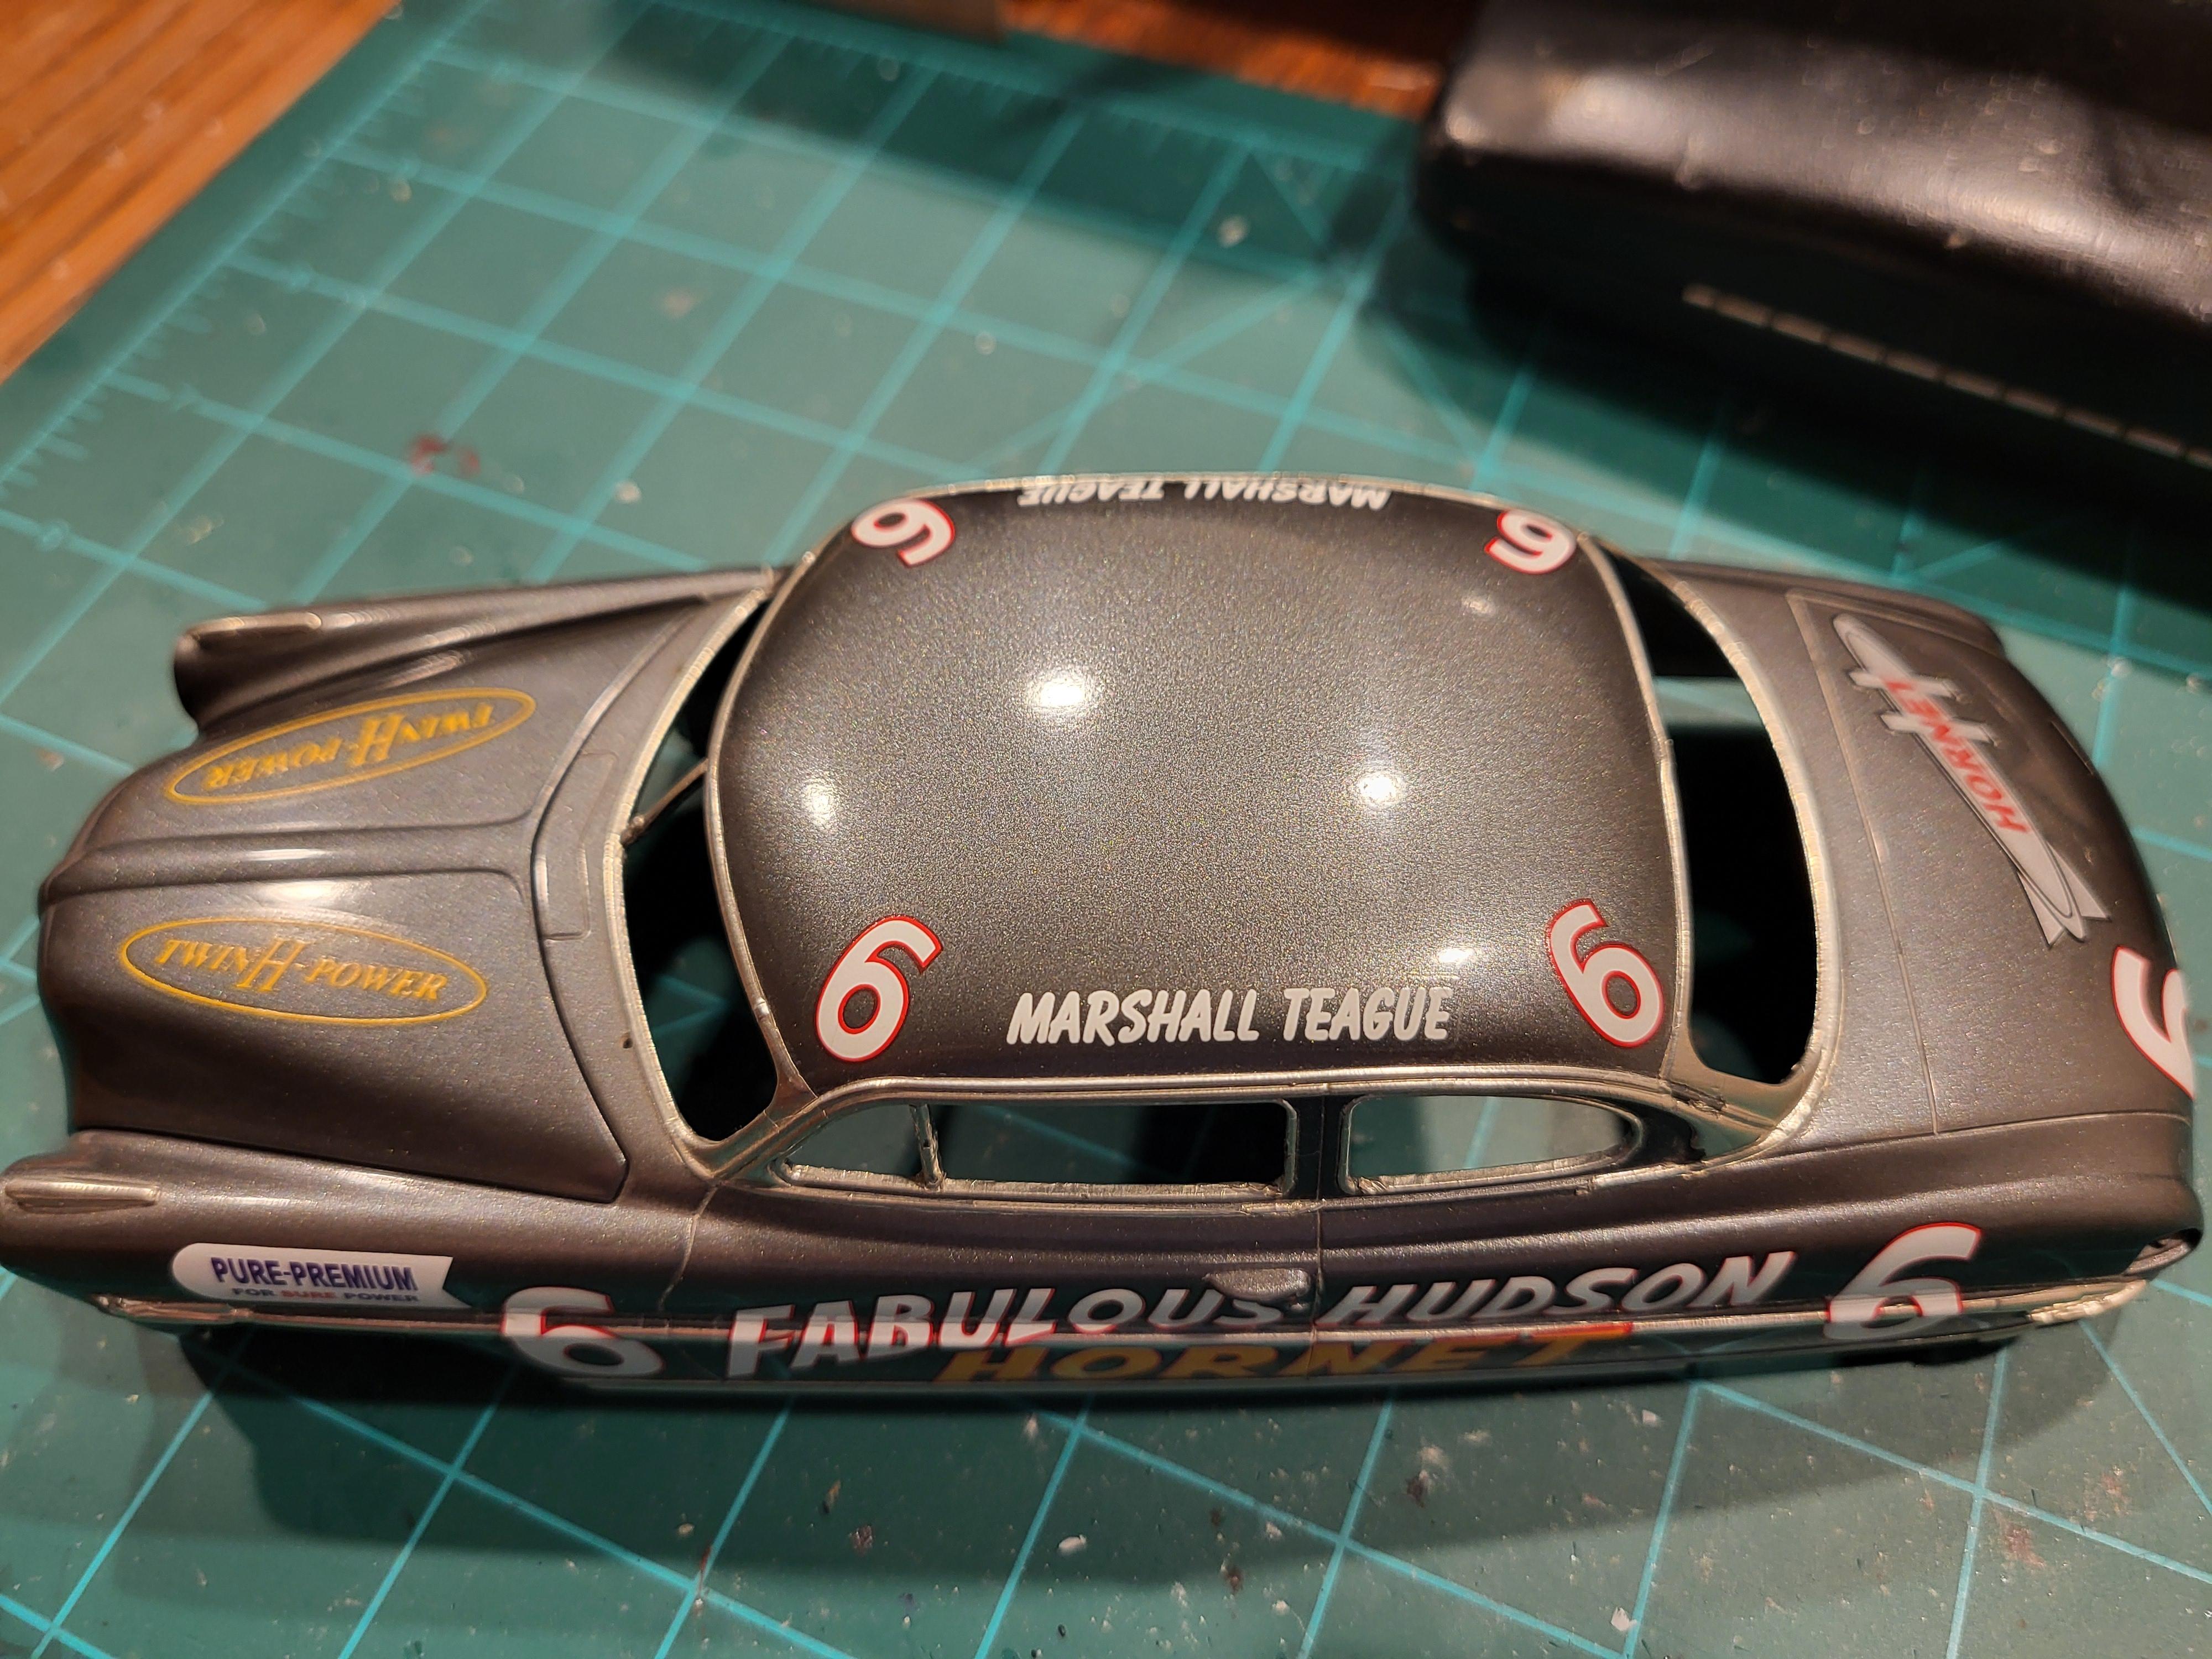
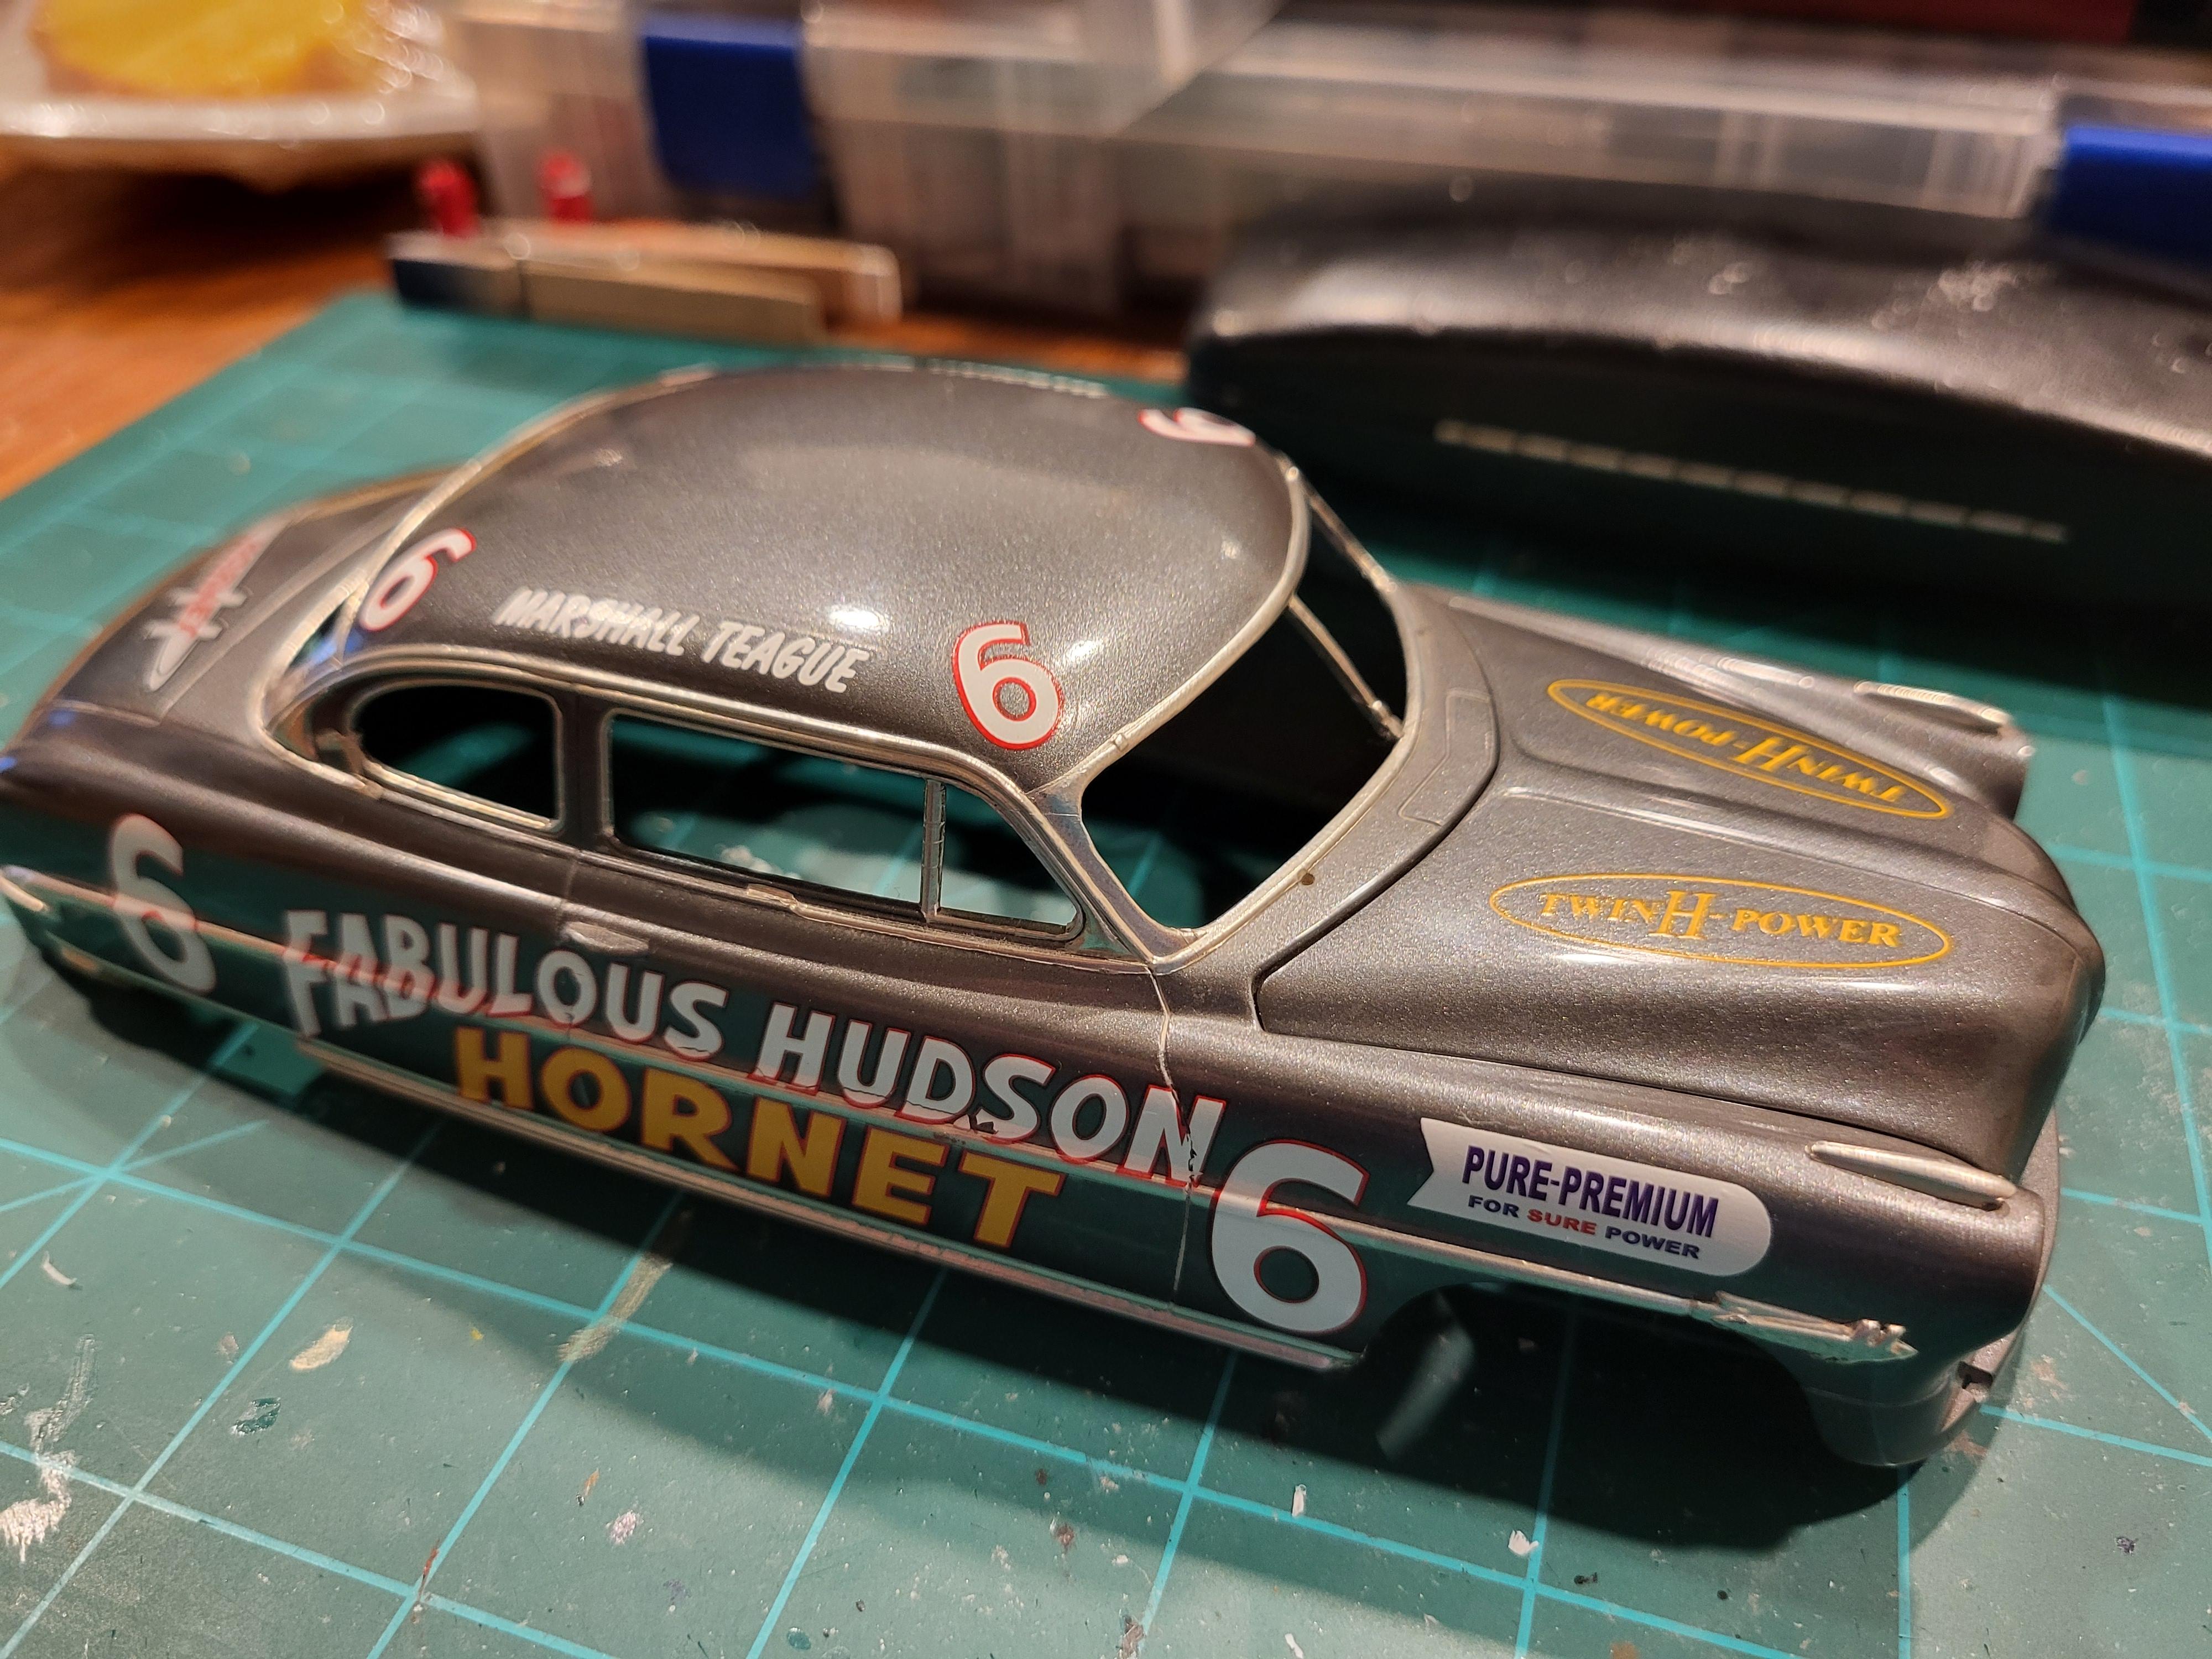
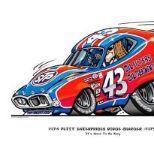
Just completed another Championship winning car for my collection. This is based on the Moebius Hudson Hornet. I used the 1953 Hudson and the stock car parts from the Tim Flock 1952 Hudson kit. Custom mixed the paint and airbrushed the body. Decals were an Ebay purchase. Started this one back in 2012 and has been sitting in a box painted and decaled waiting for assembly. Final done. Not sure how accurate it really is but it will pass for me.
-
1953 Herb Thomas Hudson Hornet
jjsipes replied to jjsipes's topic in WIP: Stock Cars (NASCAR, Super Stock, Late Model, etc.)
That's what I've been doing for awhile now. Postimg.cc on other forums and just loafing from my device be it phone or computer. Thanks for the comments -
1953 Herb Thomas Hudson Hornet
jjsipes replied to jjsipes's topic in WIP: Stock Cars (NASCAR, Super Stock, Late Model, etc.)
Since everybody is familiar with what went on with Photobucket, I thought I'd see what pictures I had prior of this build and reupload some of them.
-
3rd gen Camaro
jjsipes replied to MarkJ's topic in WIP: Other Racing: Road Racing, Land Speed Racers
Looking good. Keep the good work up. -
Thank you. Appears as if I will get what I need
-
1953 Herb Thomas Hudson Hornet
jjsipes replied to jjsipes's topic in WIP: Stock Cars (NASCAR, Super Stock, Late Model, etc.)
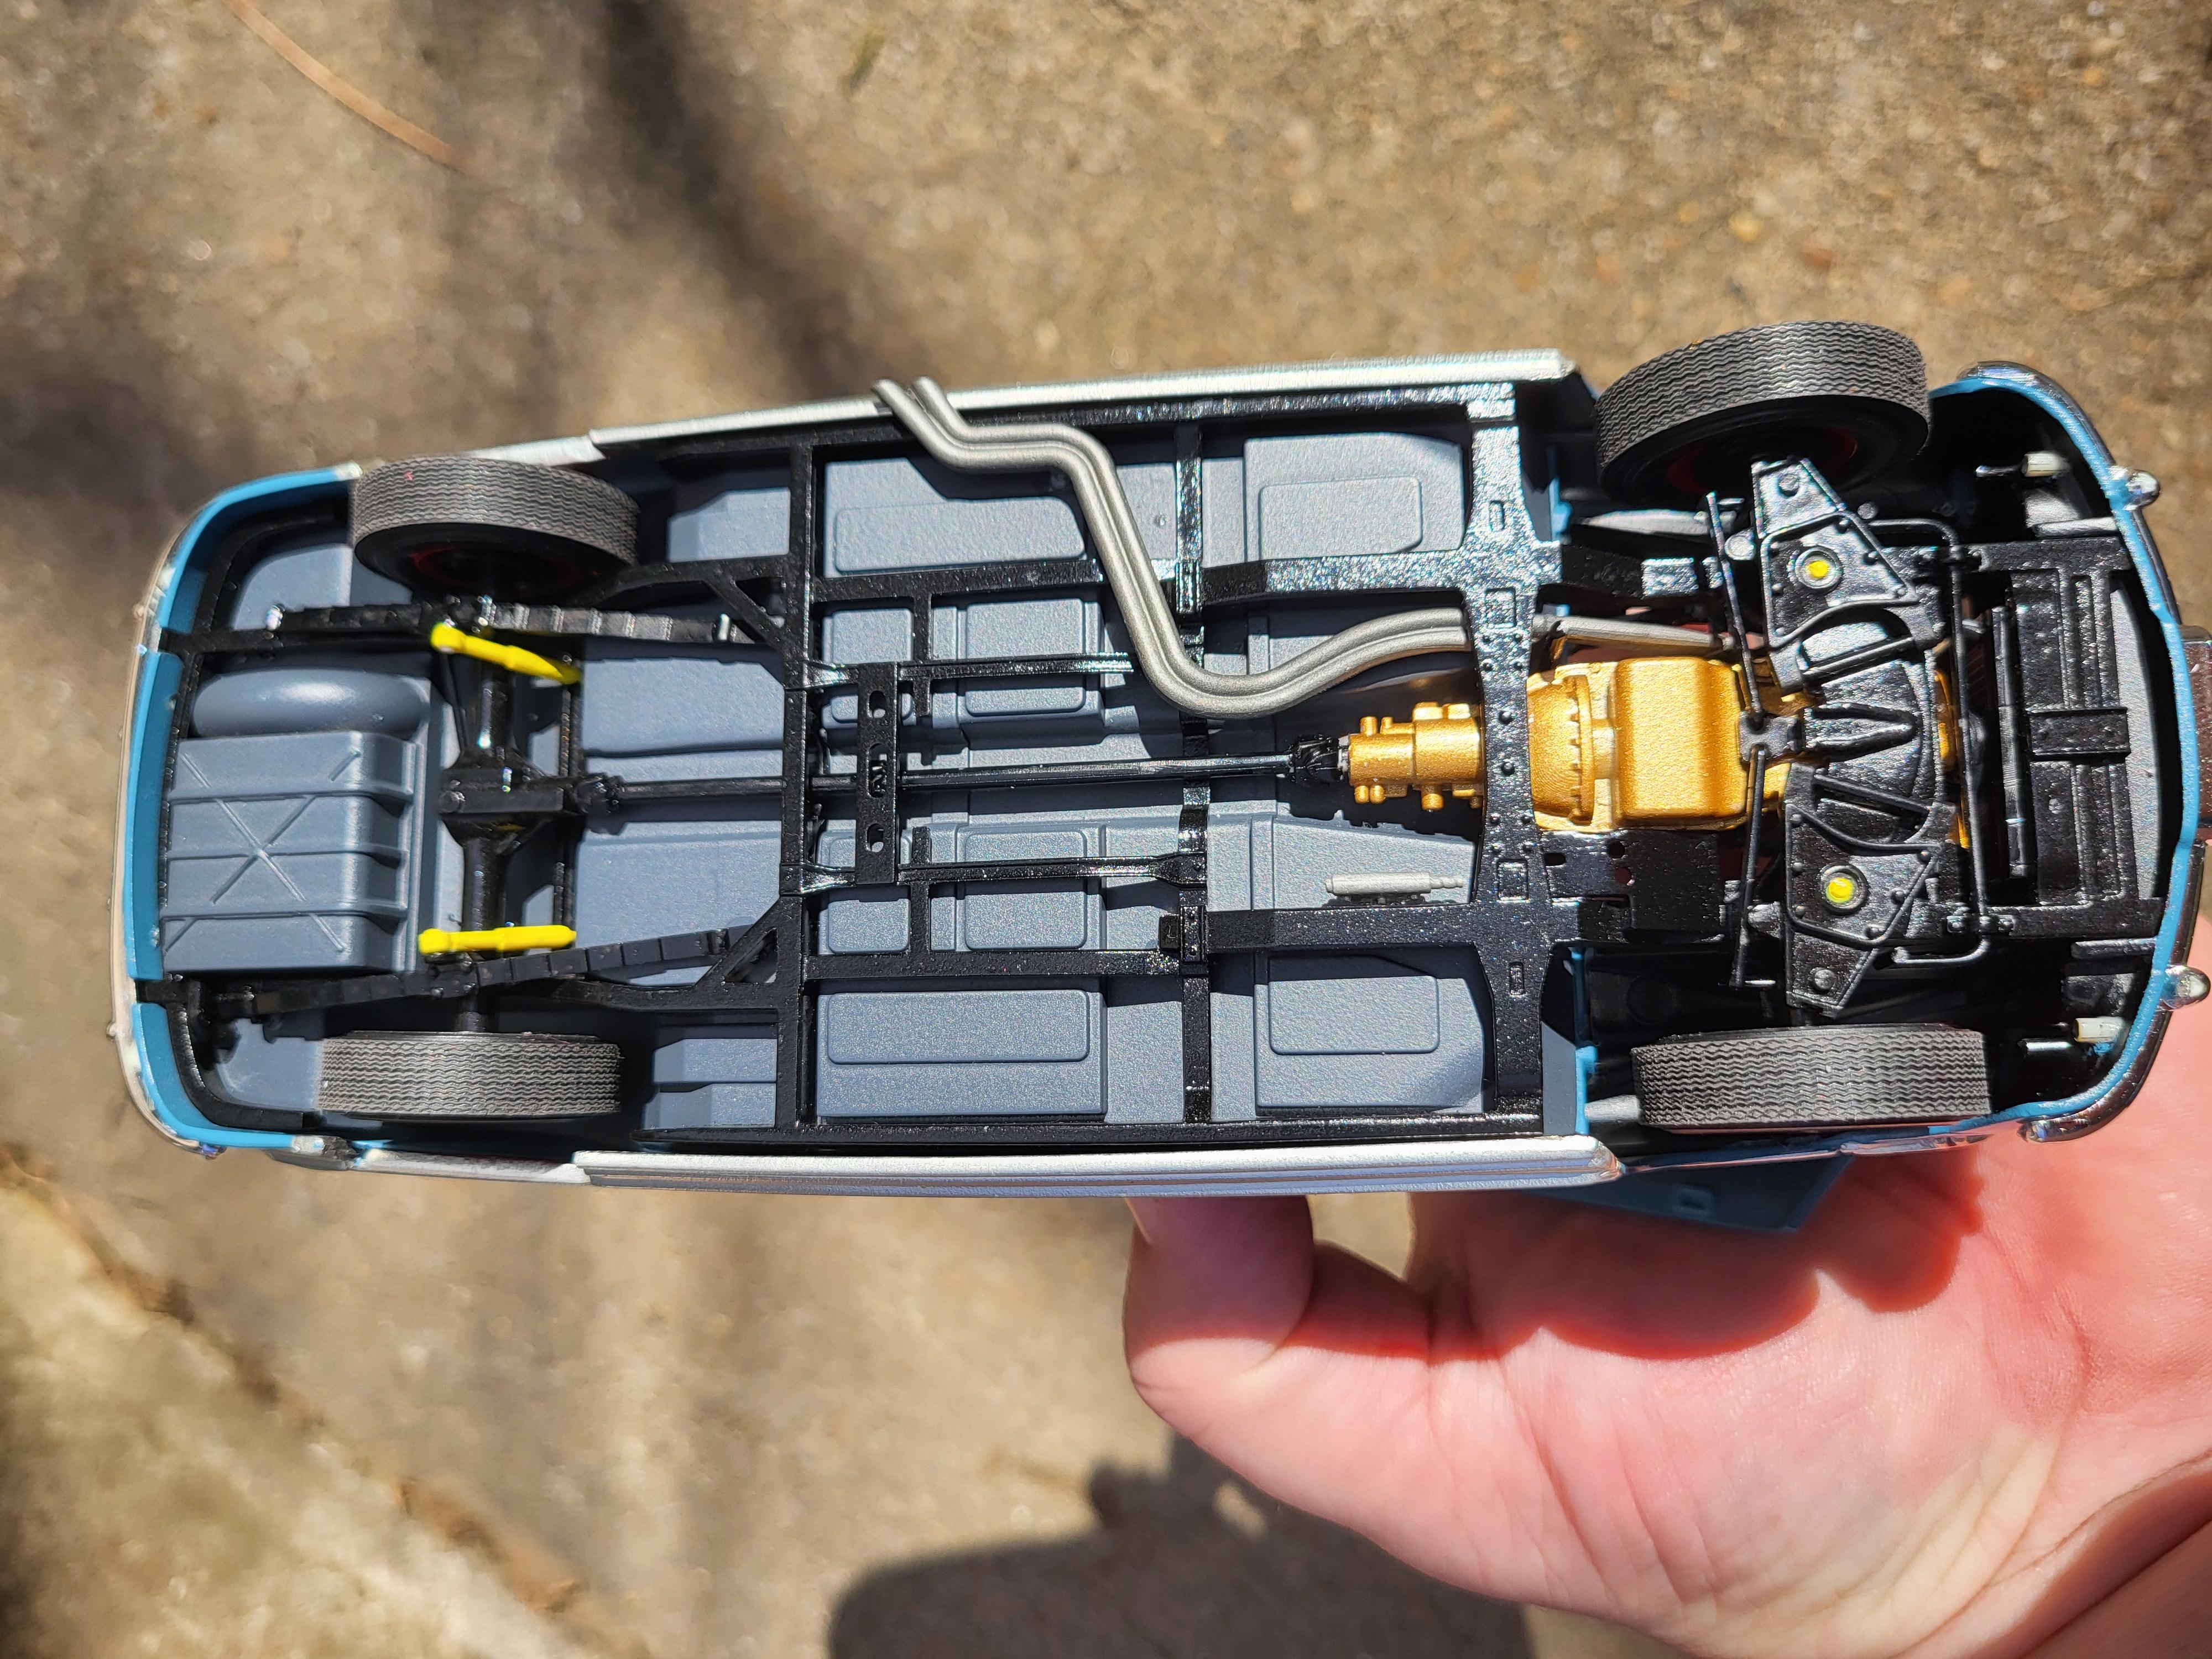
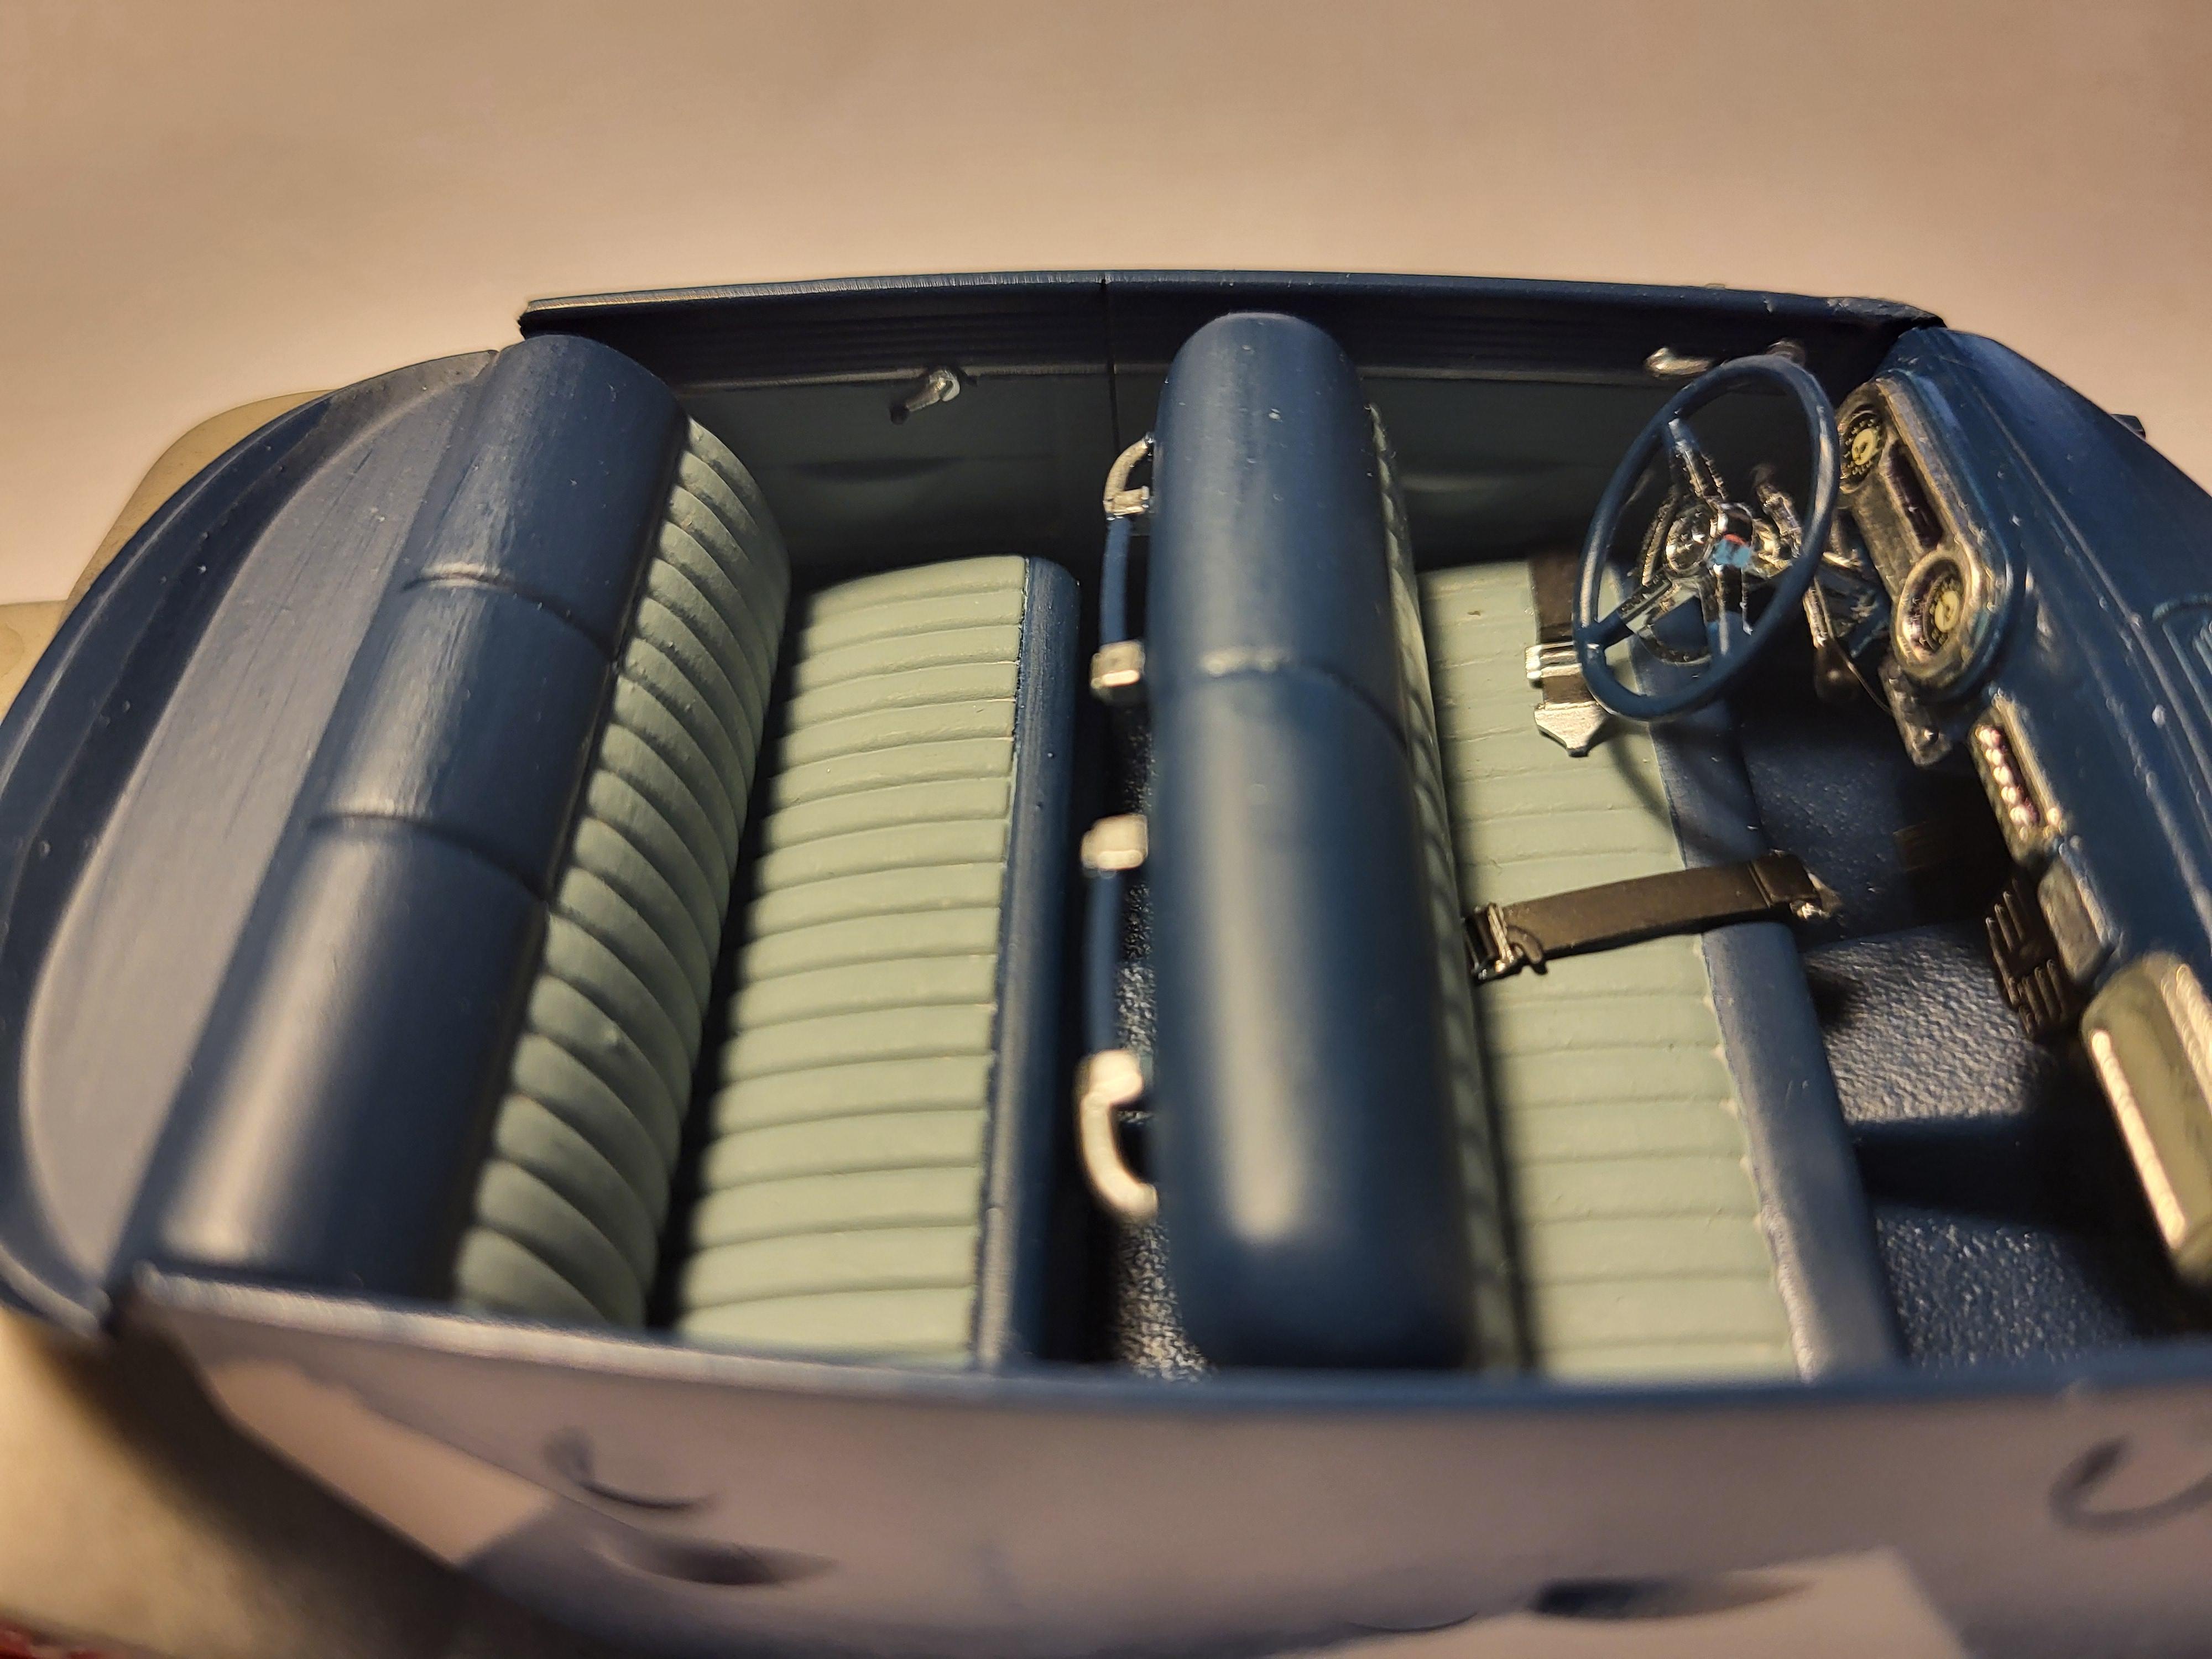
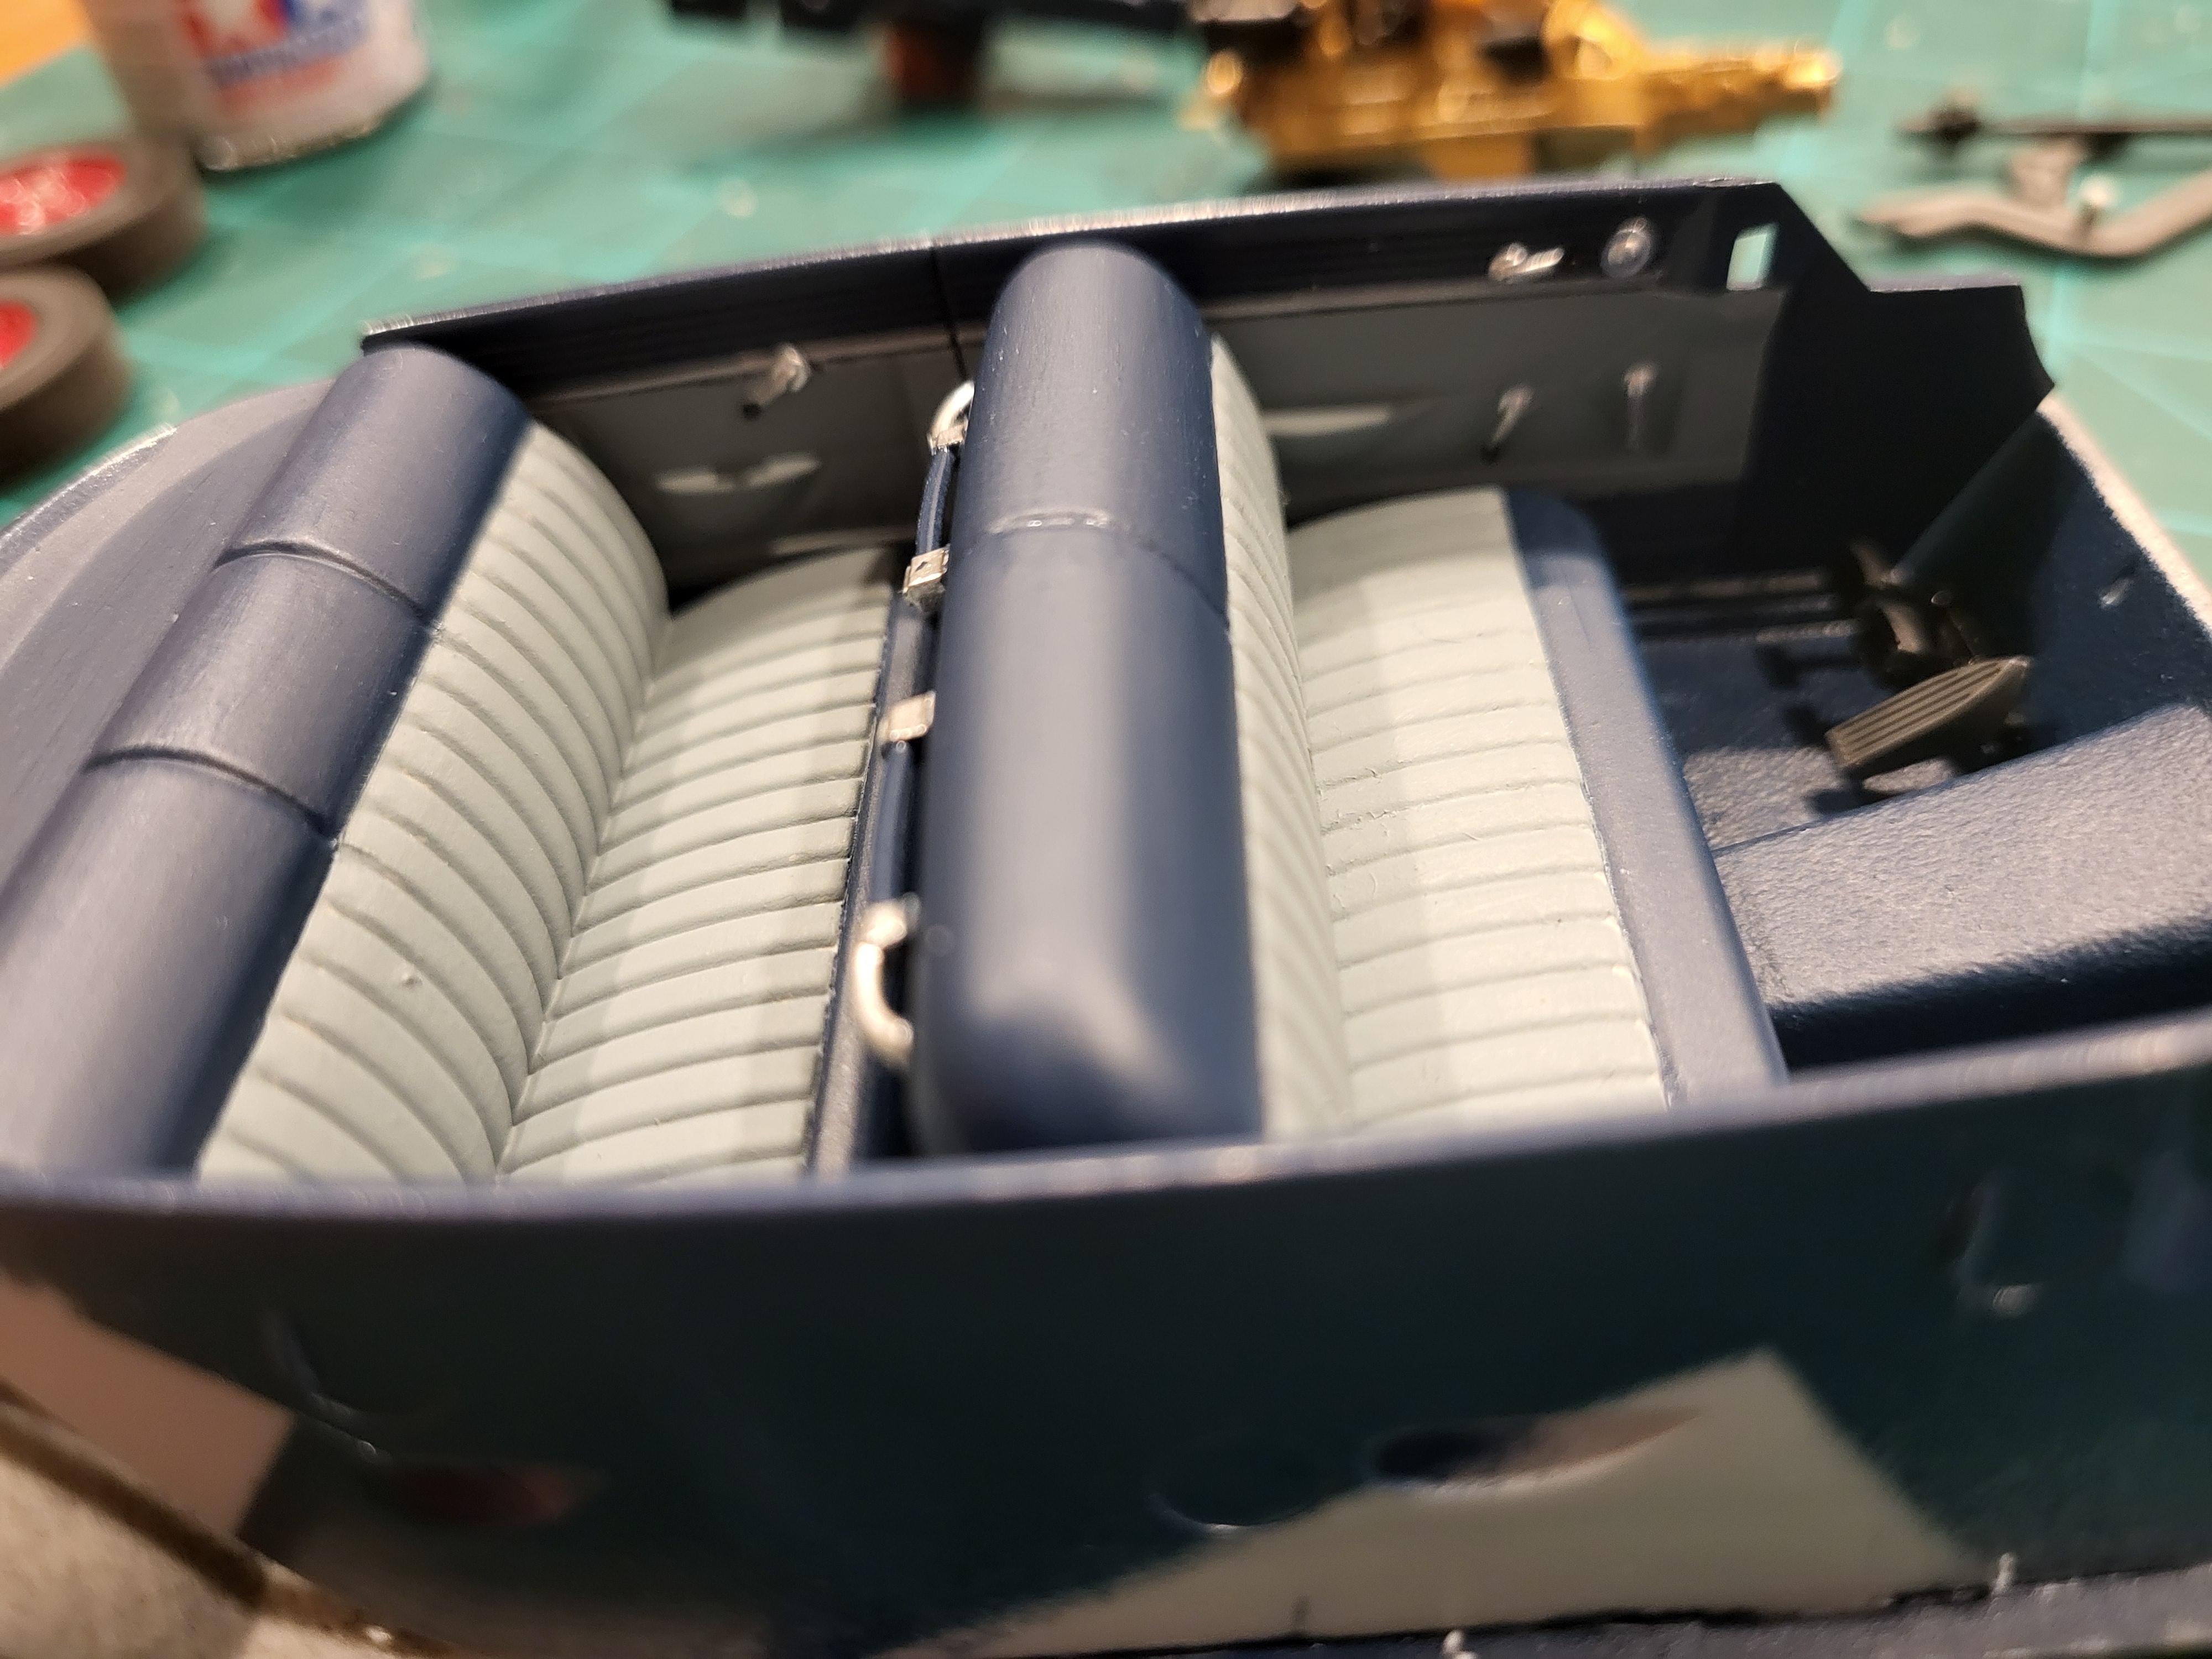
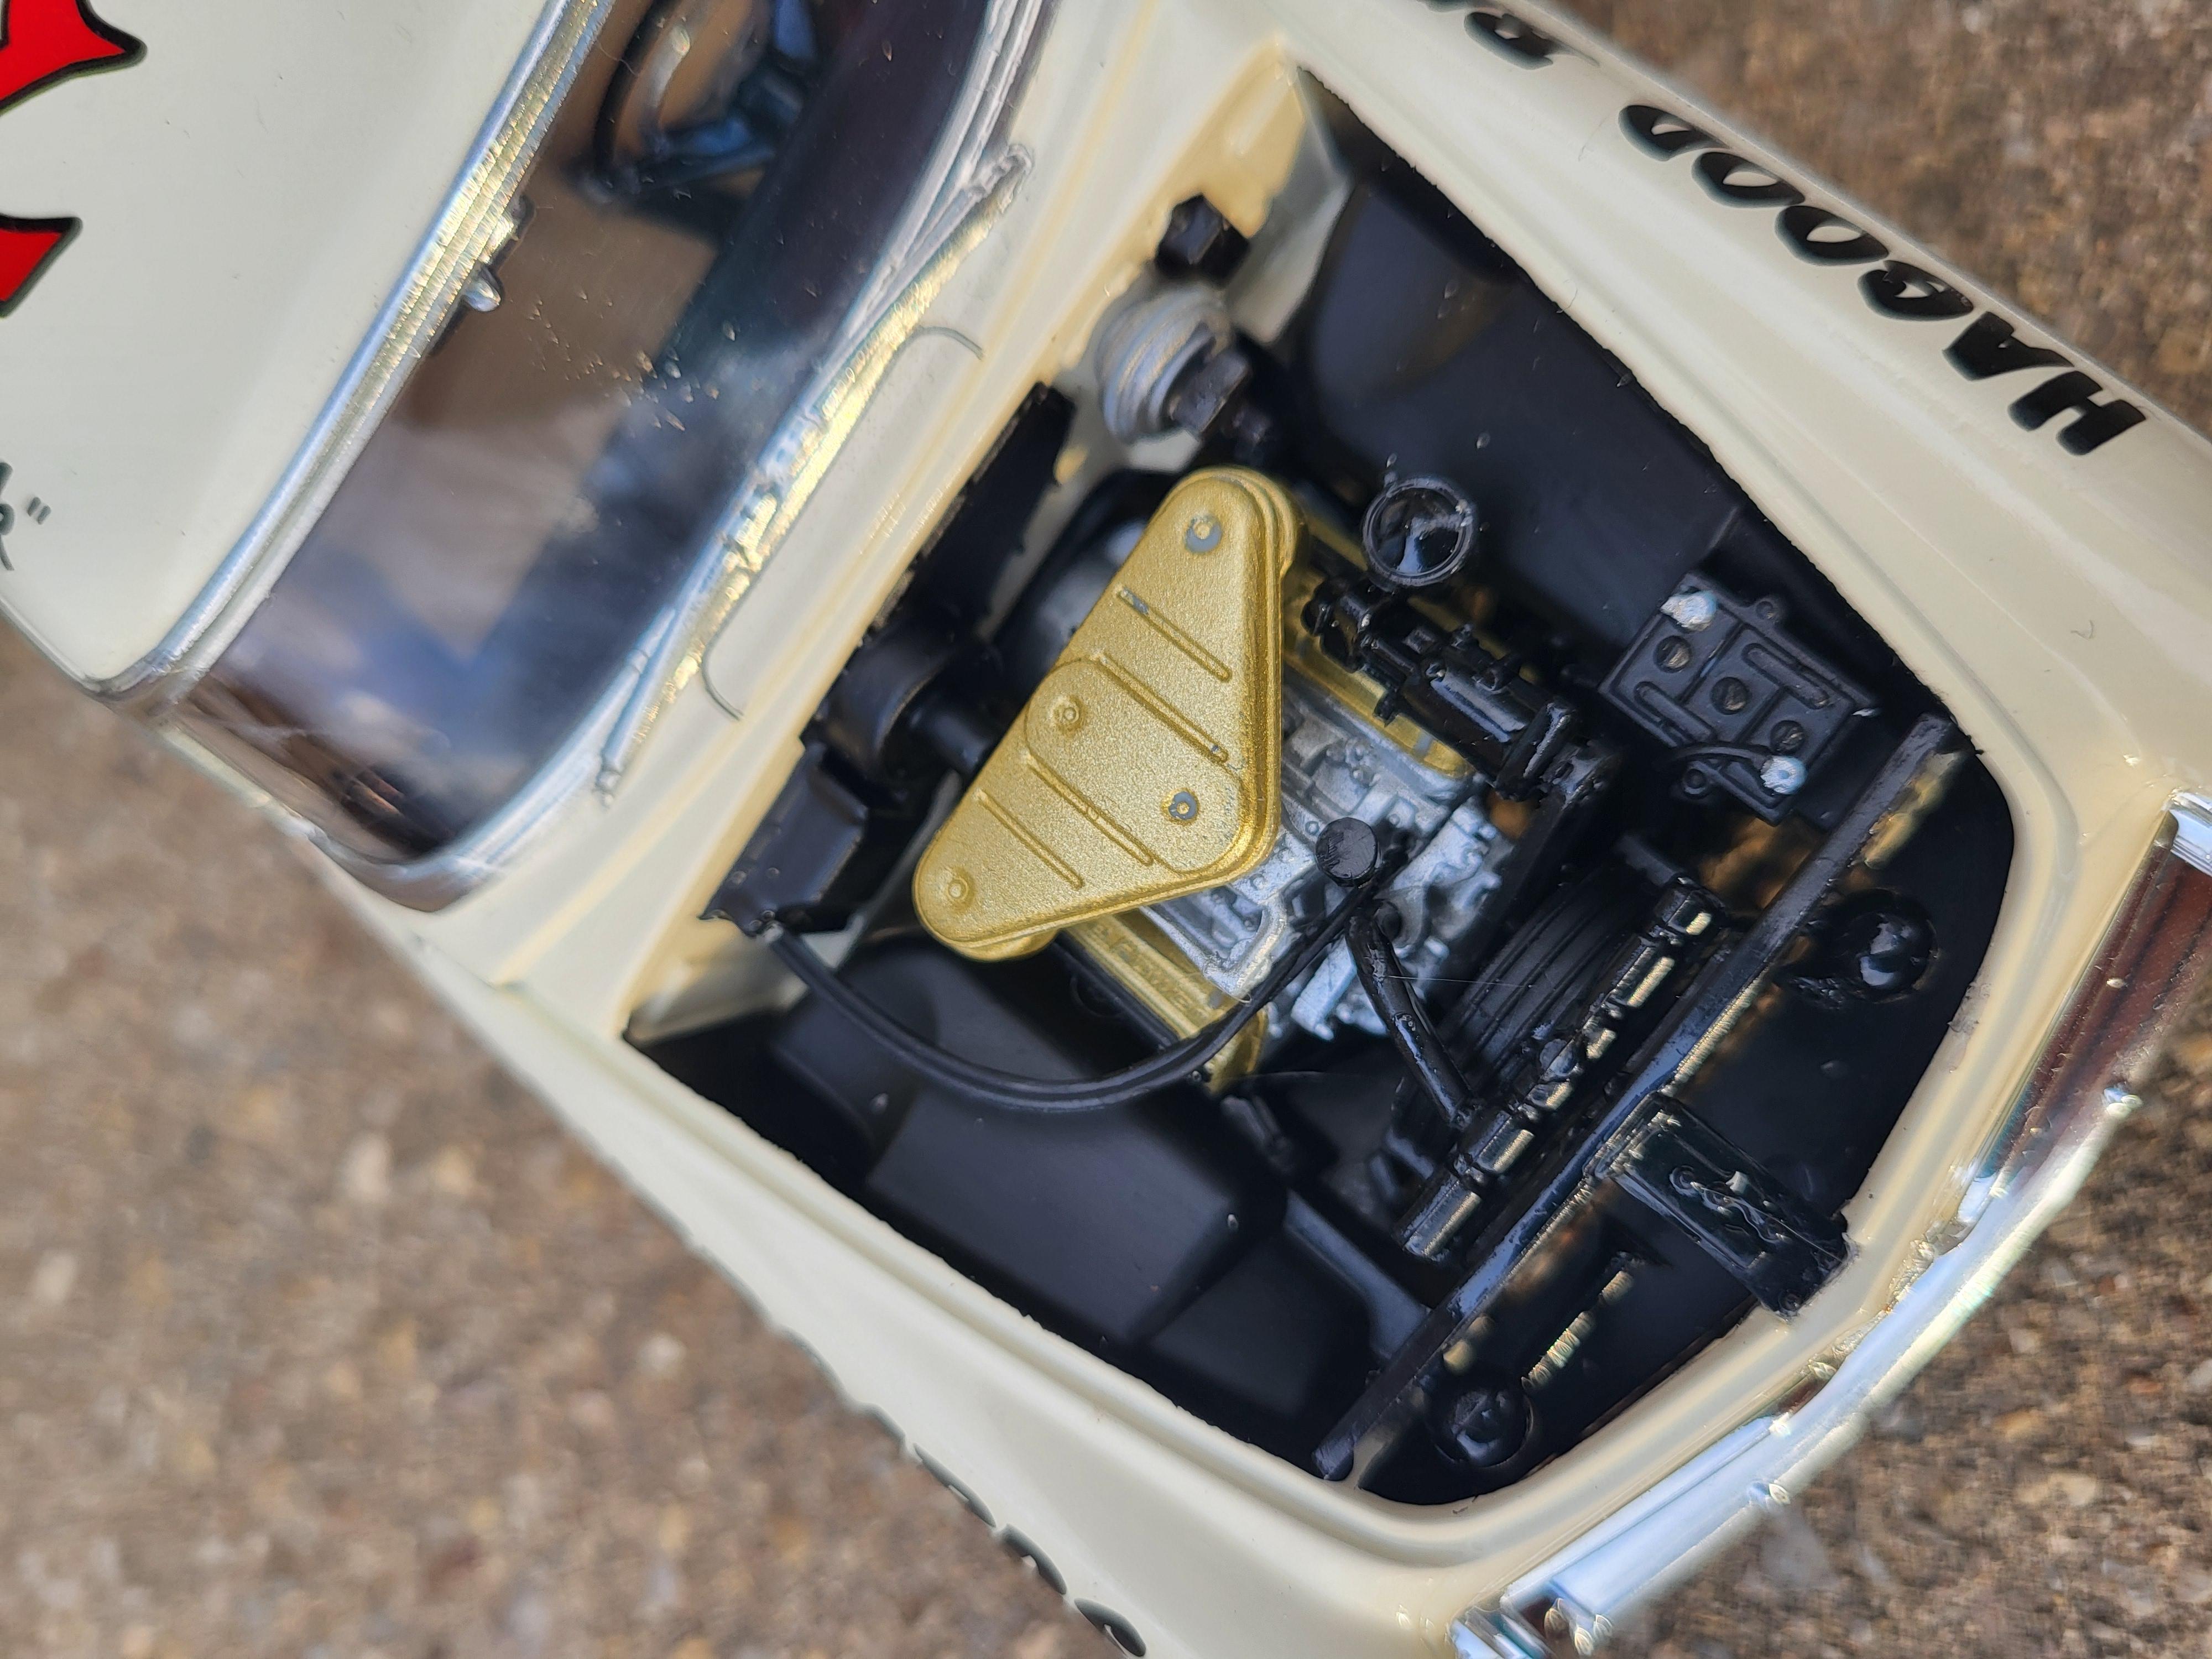
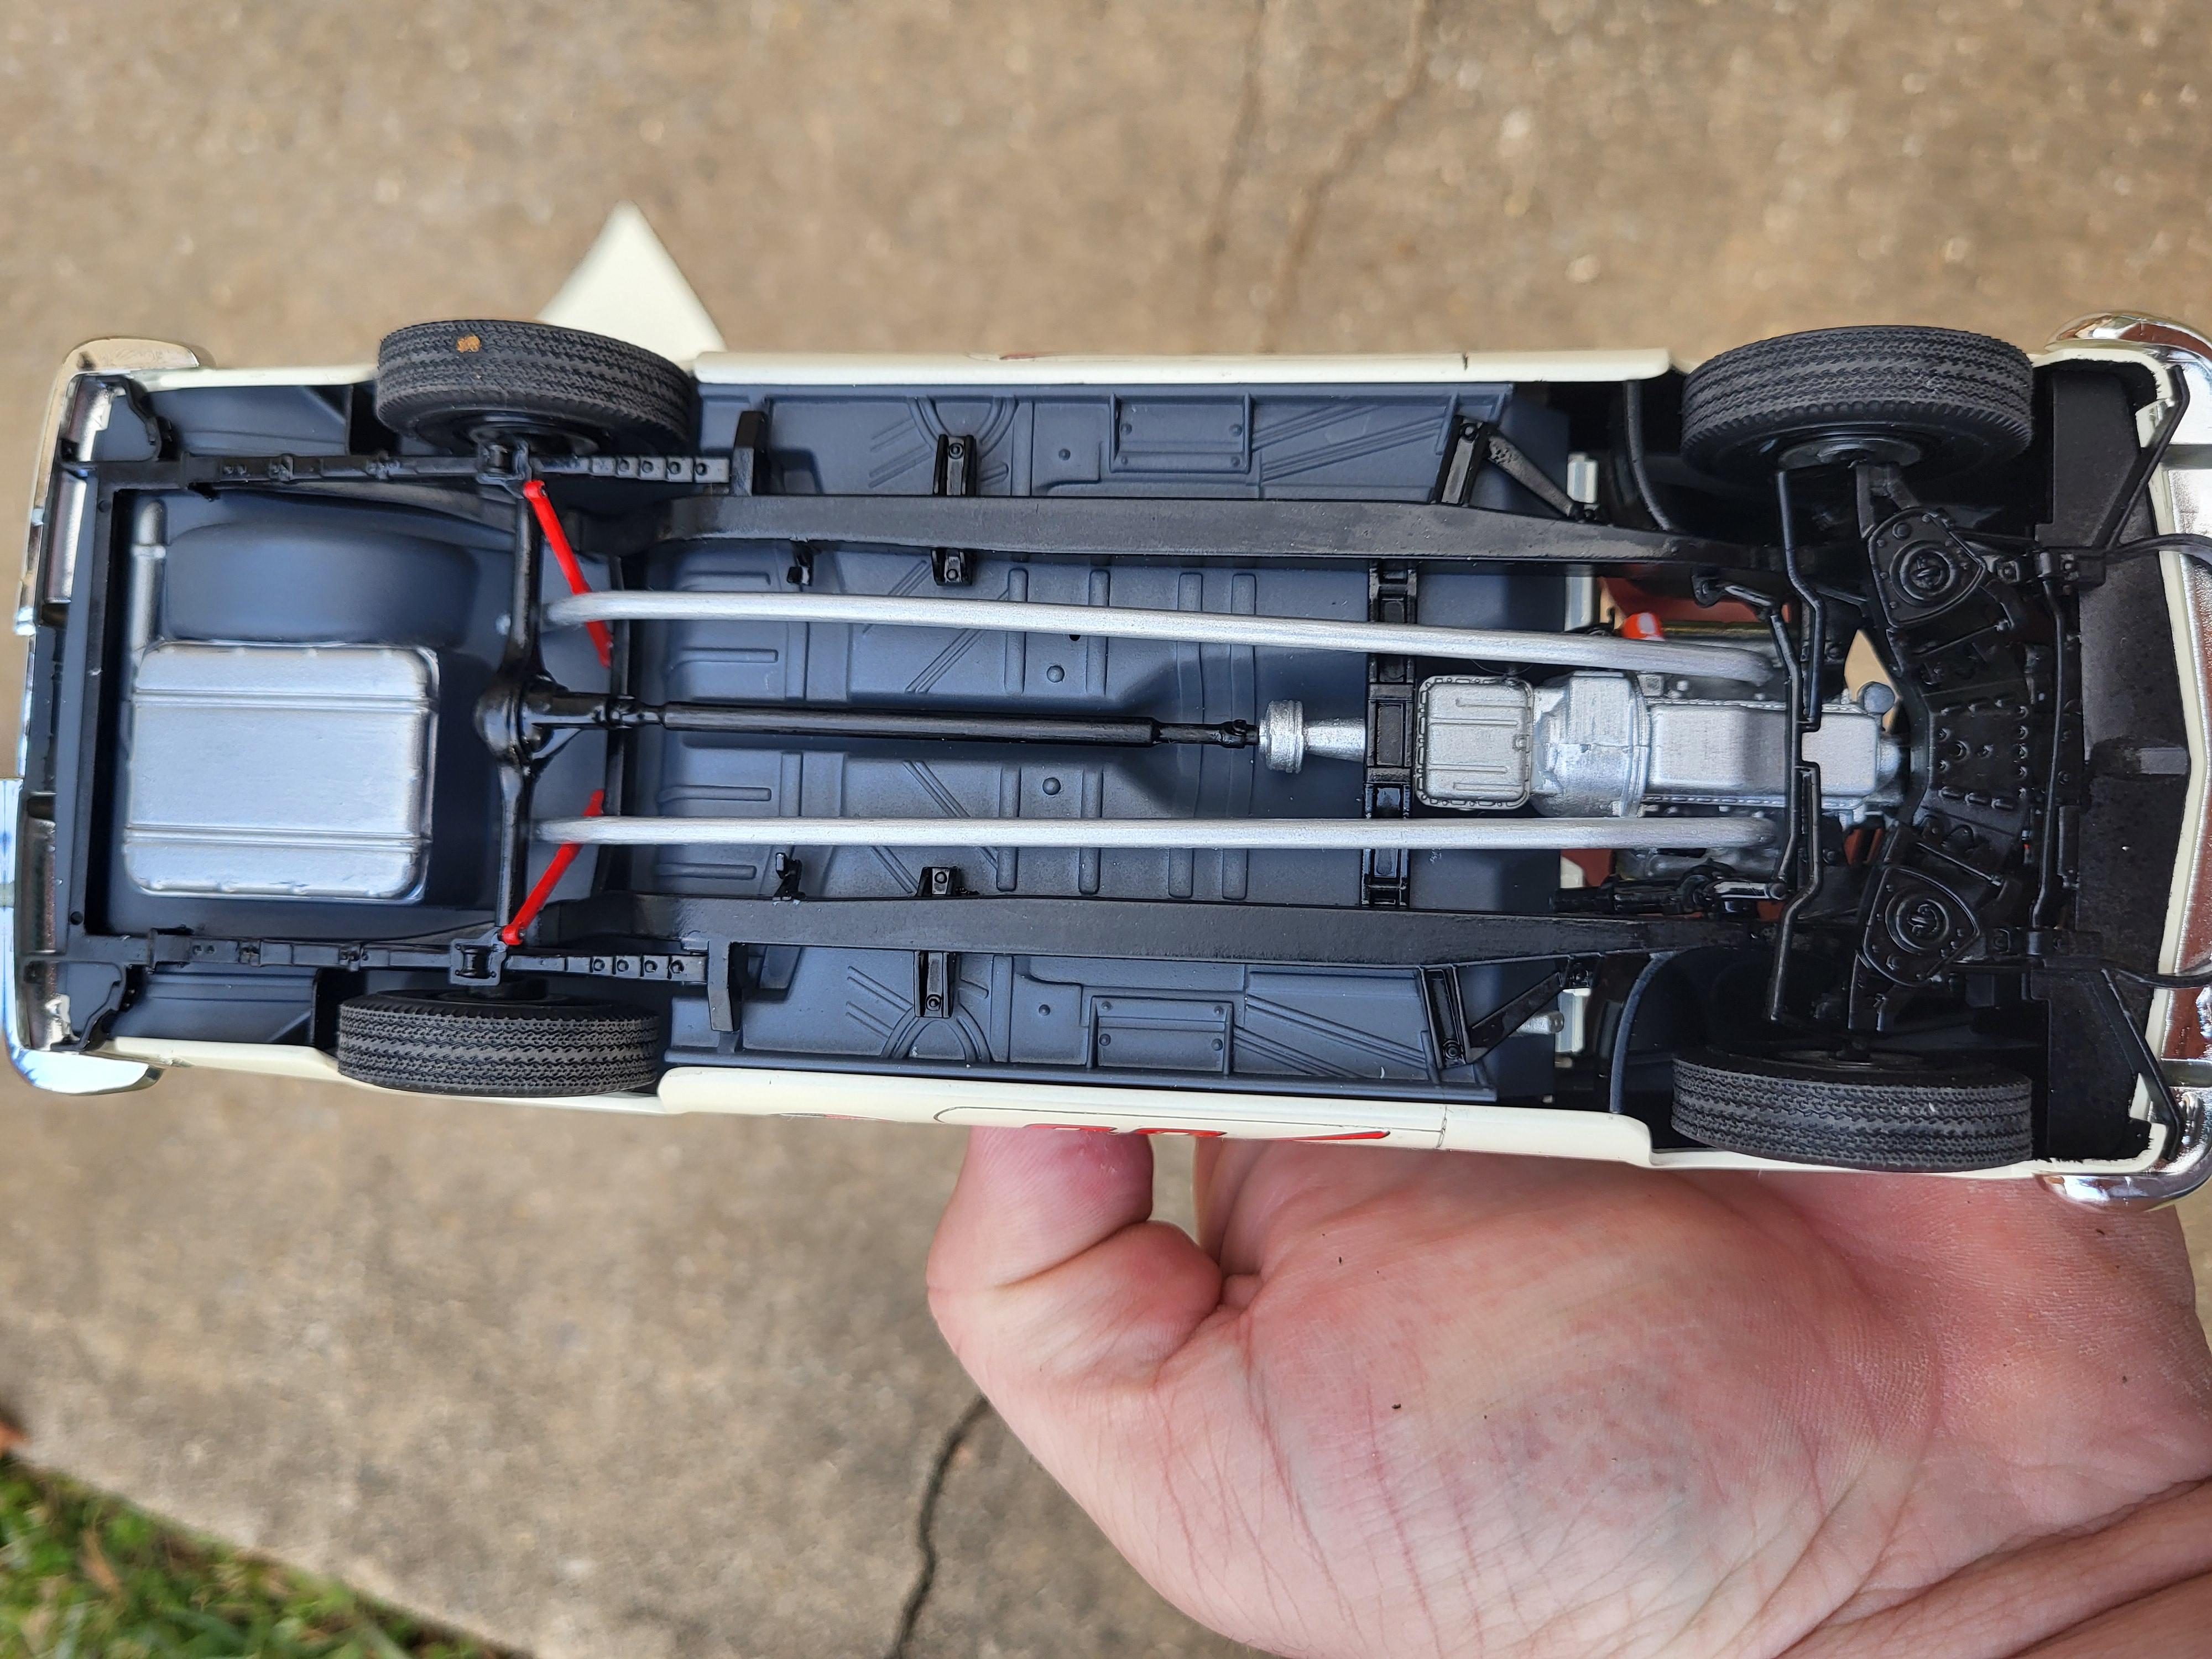
I guess after 11 years, it's time to try and finish this one. Making some good progress. Interior and engine work.
-
Thank you Rick. I still need one more emblem if anybody would have one.
-
Would anyone that has build a Moebius Hudson Hornet as a custom and didn't use the rocket trunk emblem be willing to sell their emblem? I'm looking for 2 of them for a project that I'm thinking of doing and think they may work for it. It is part # 122 in the kit.
-
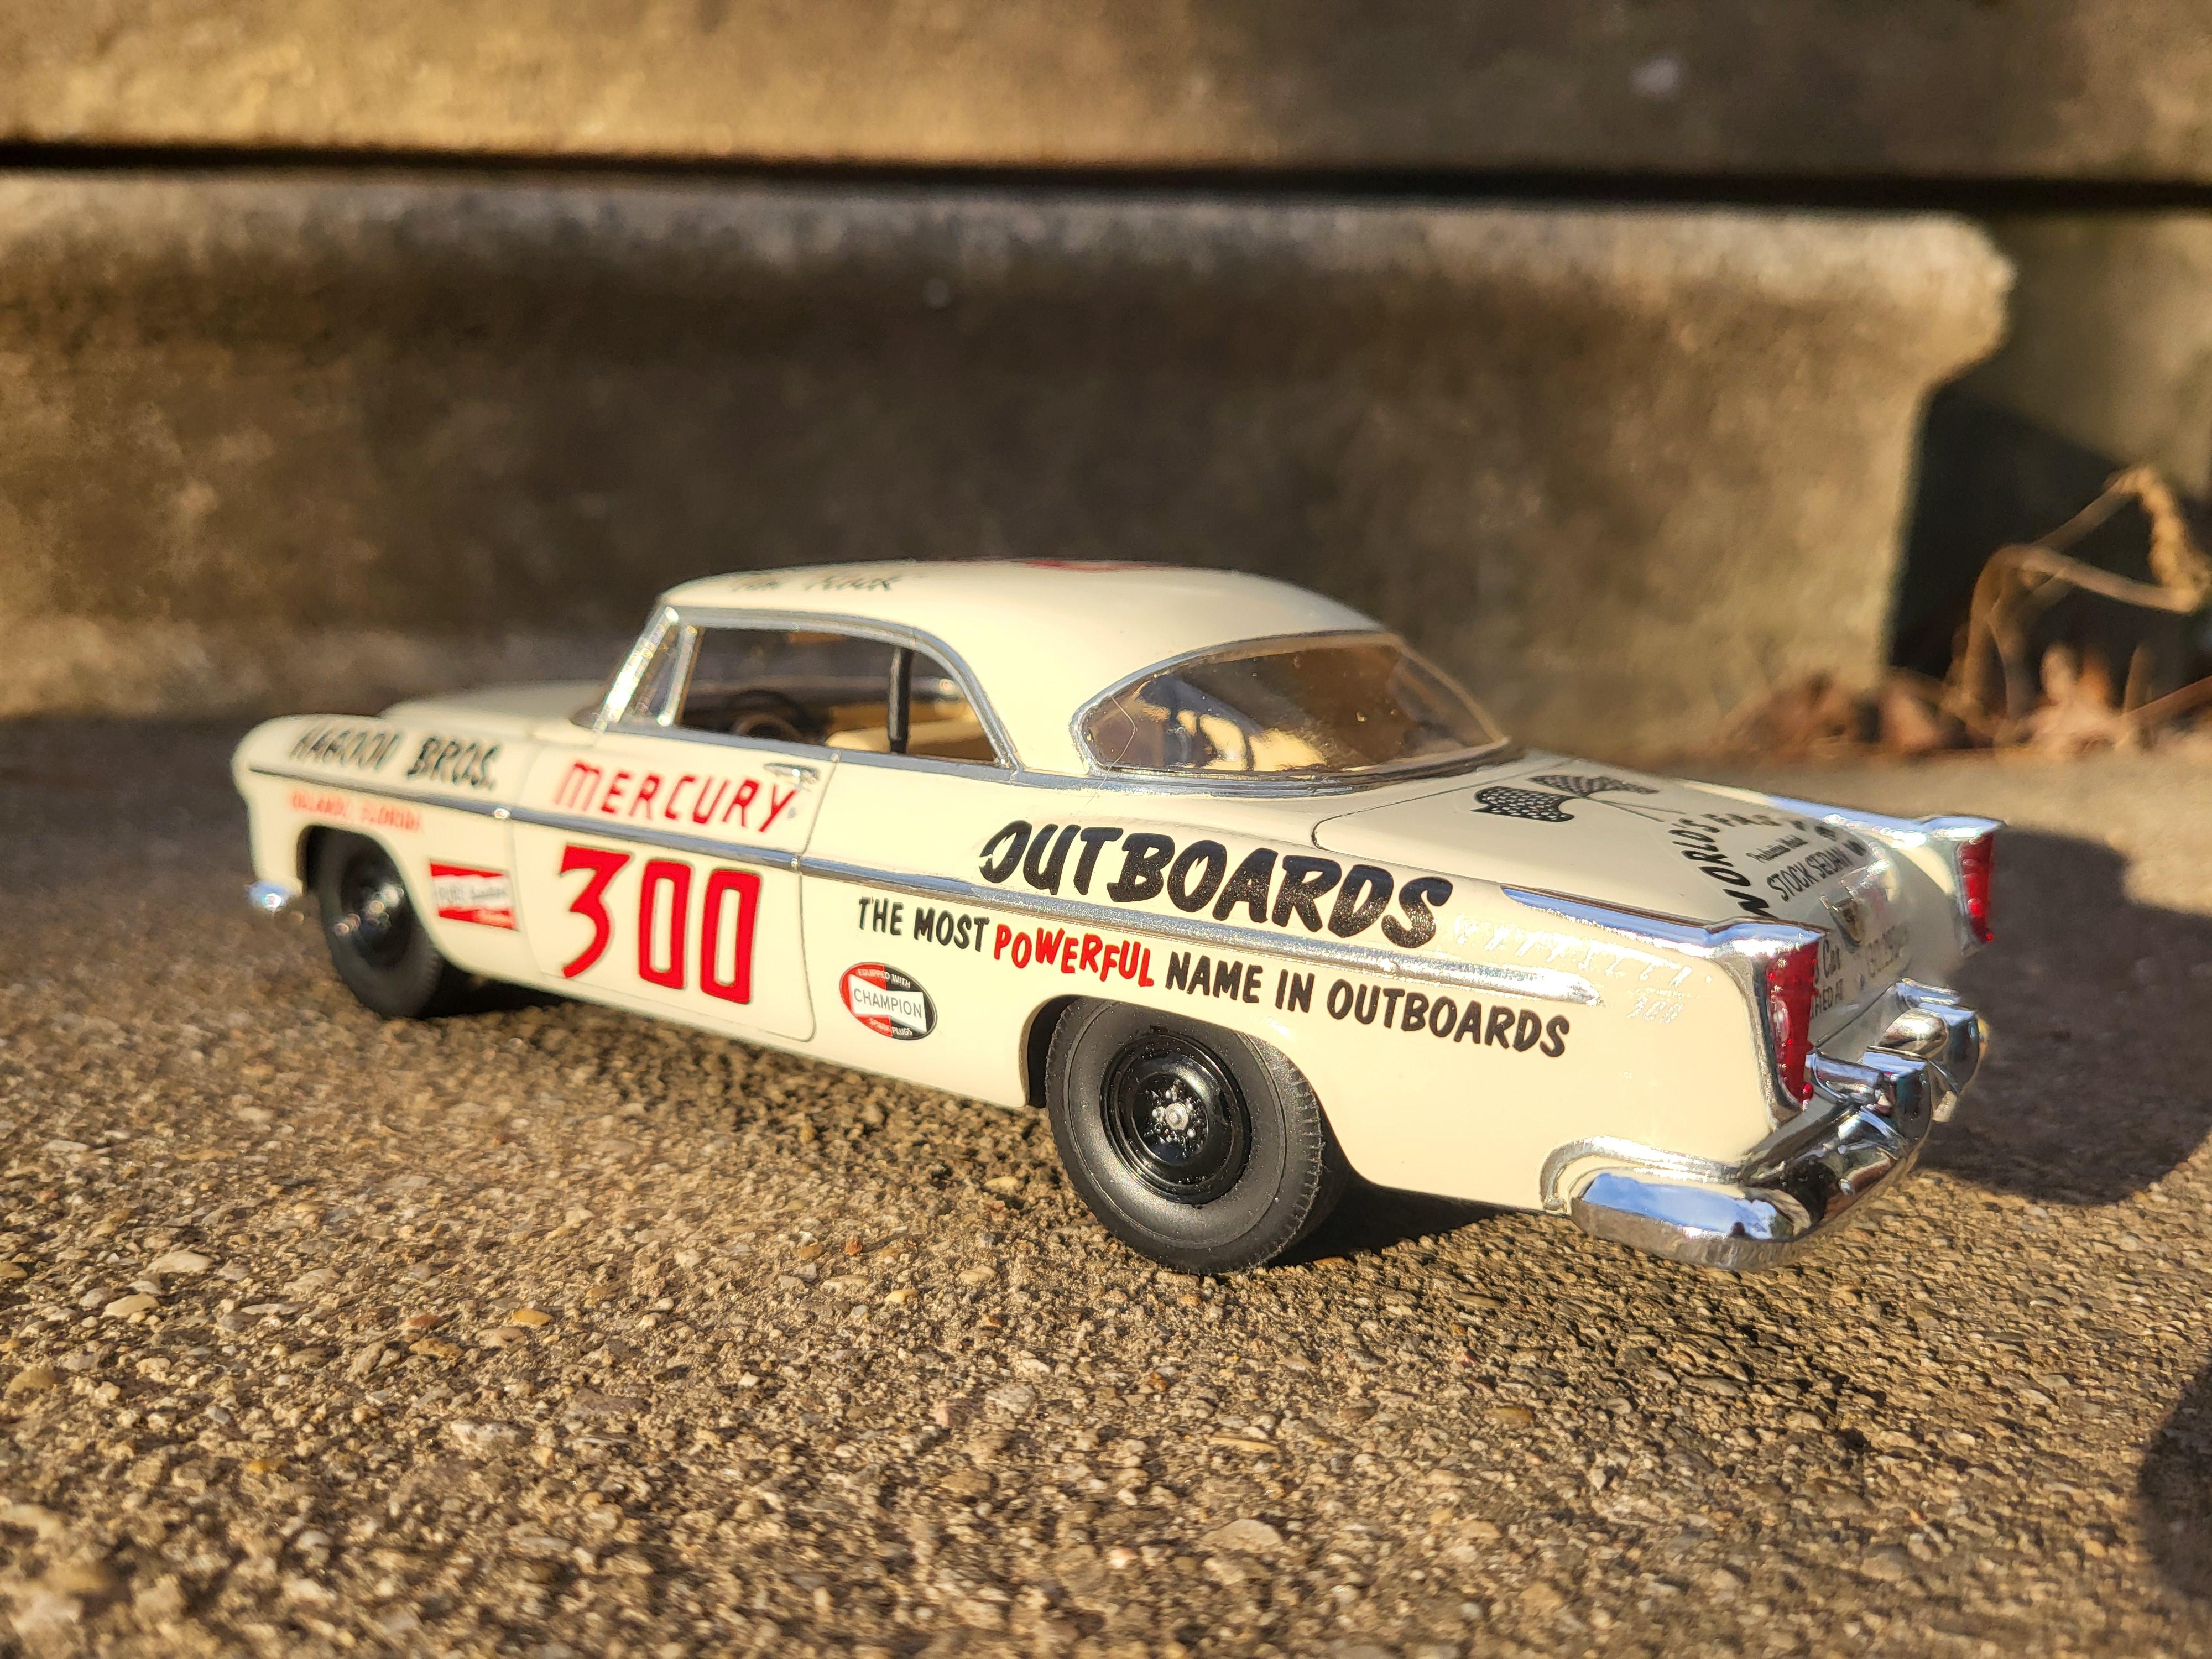
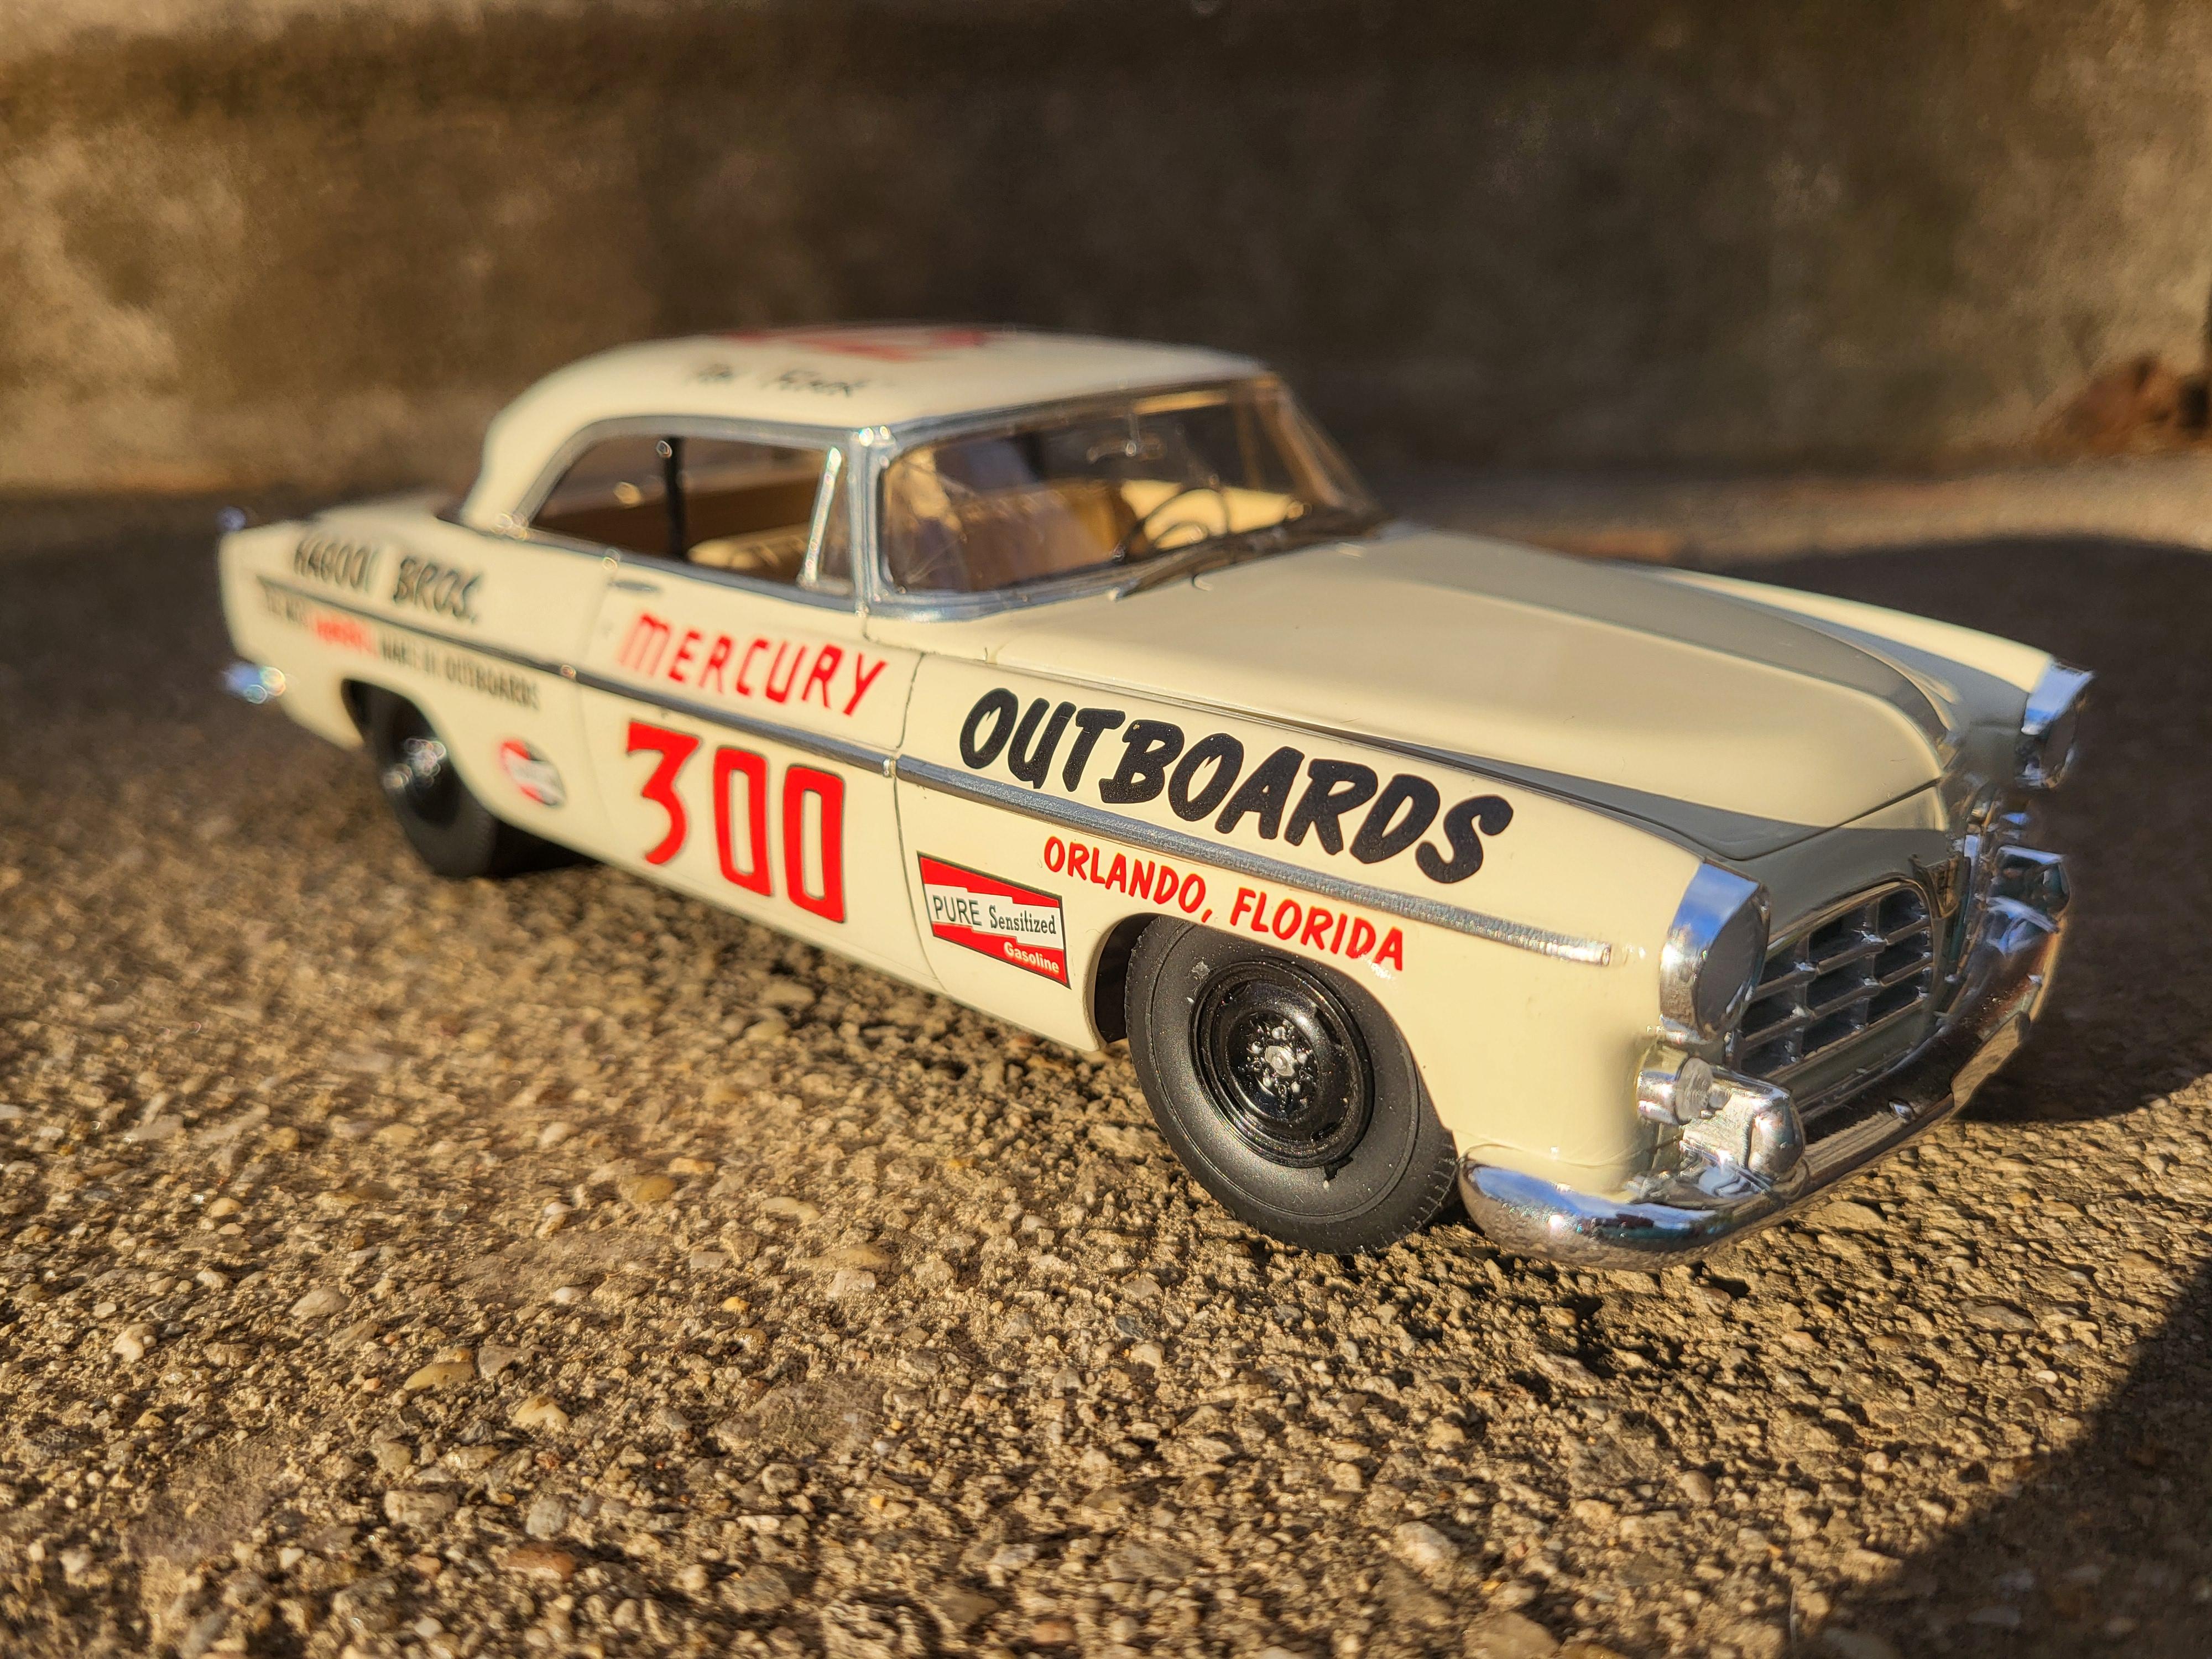
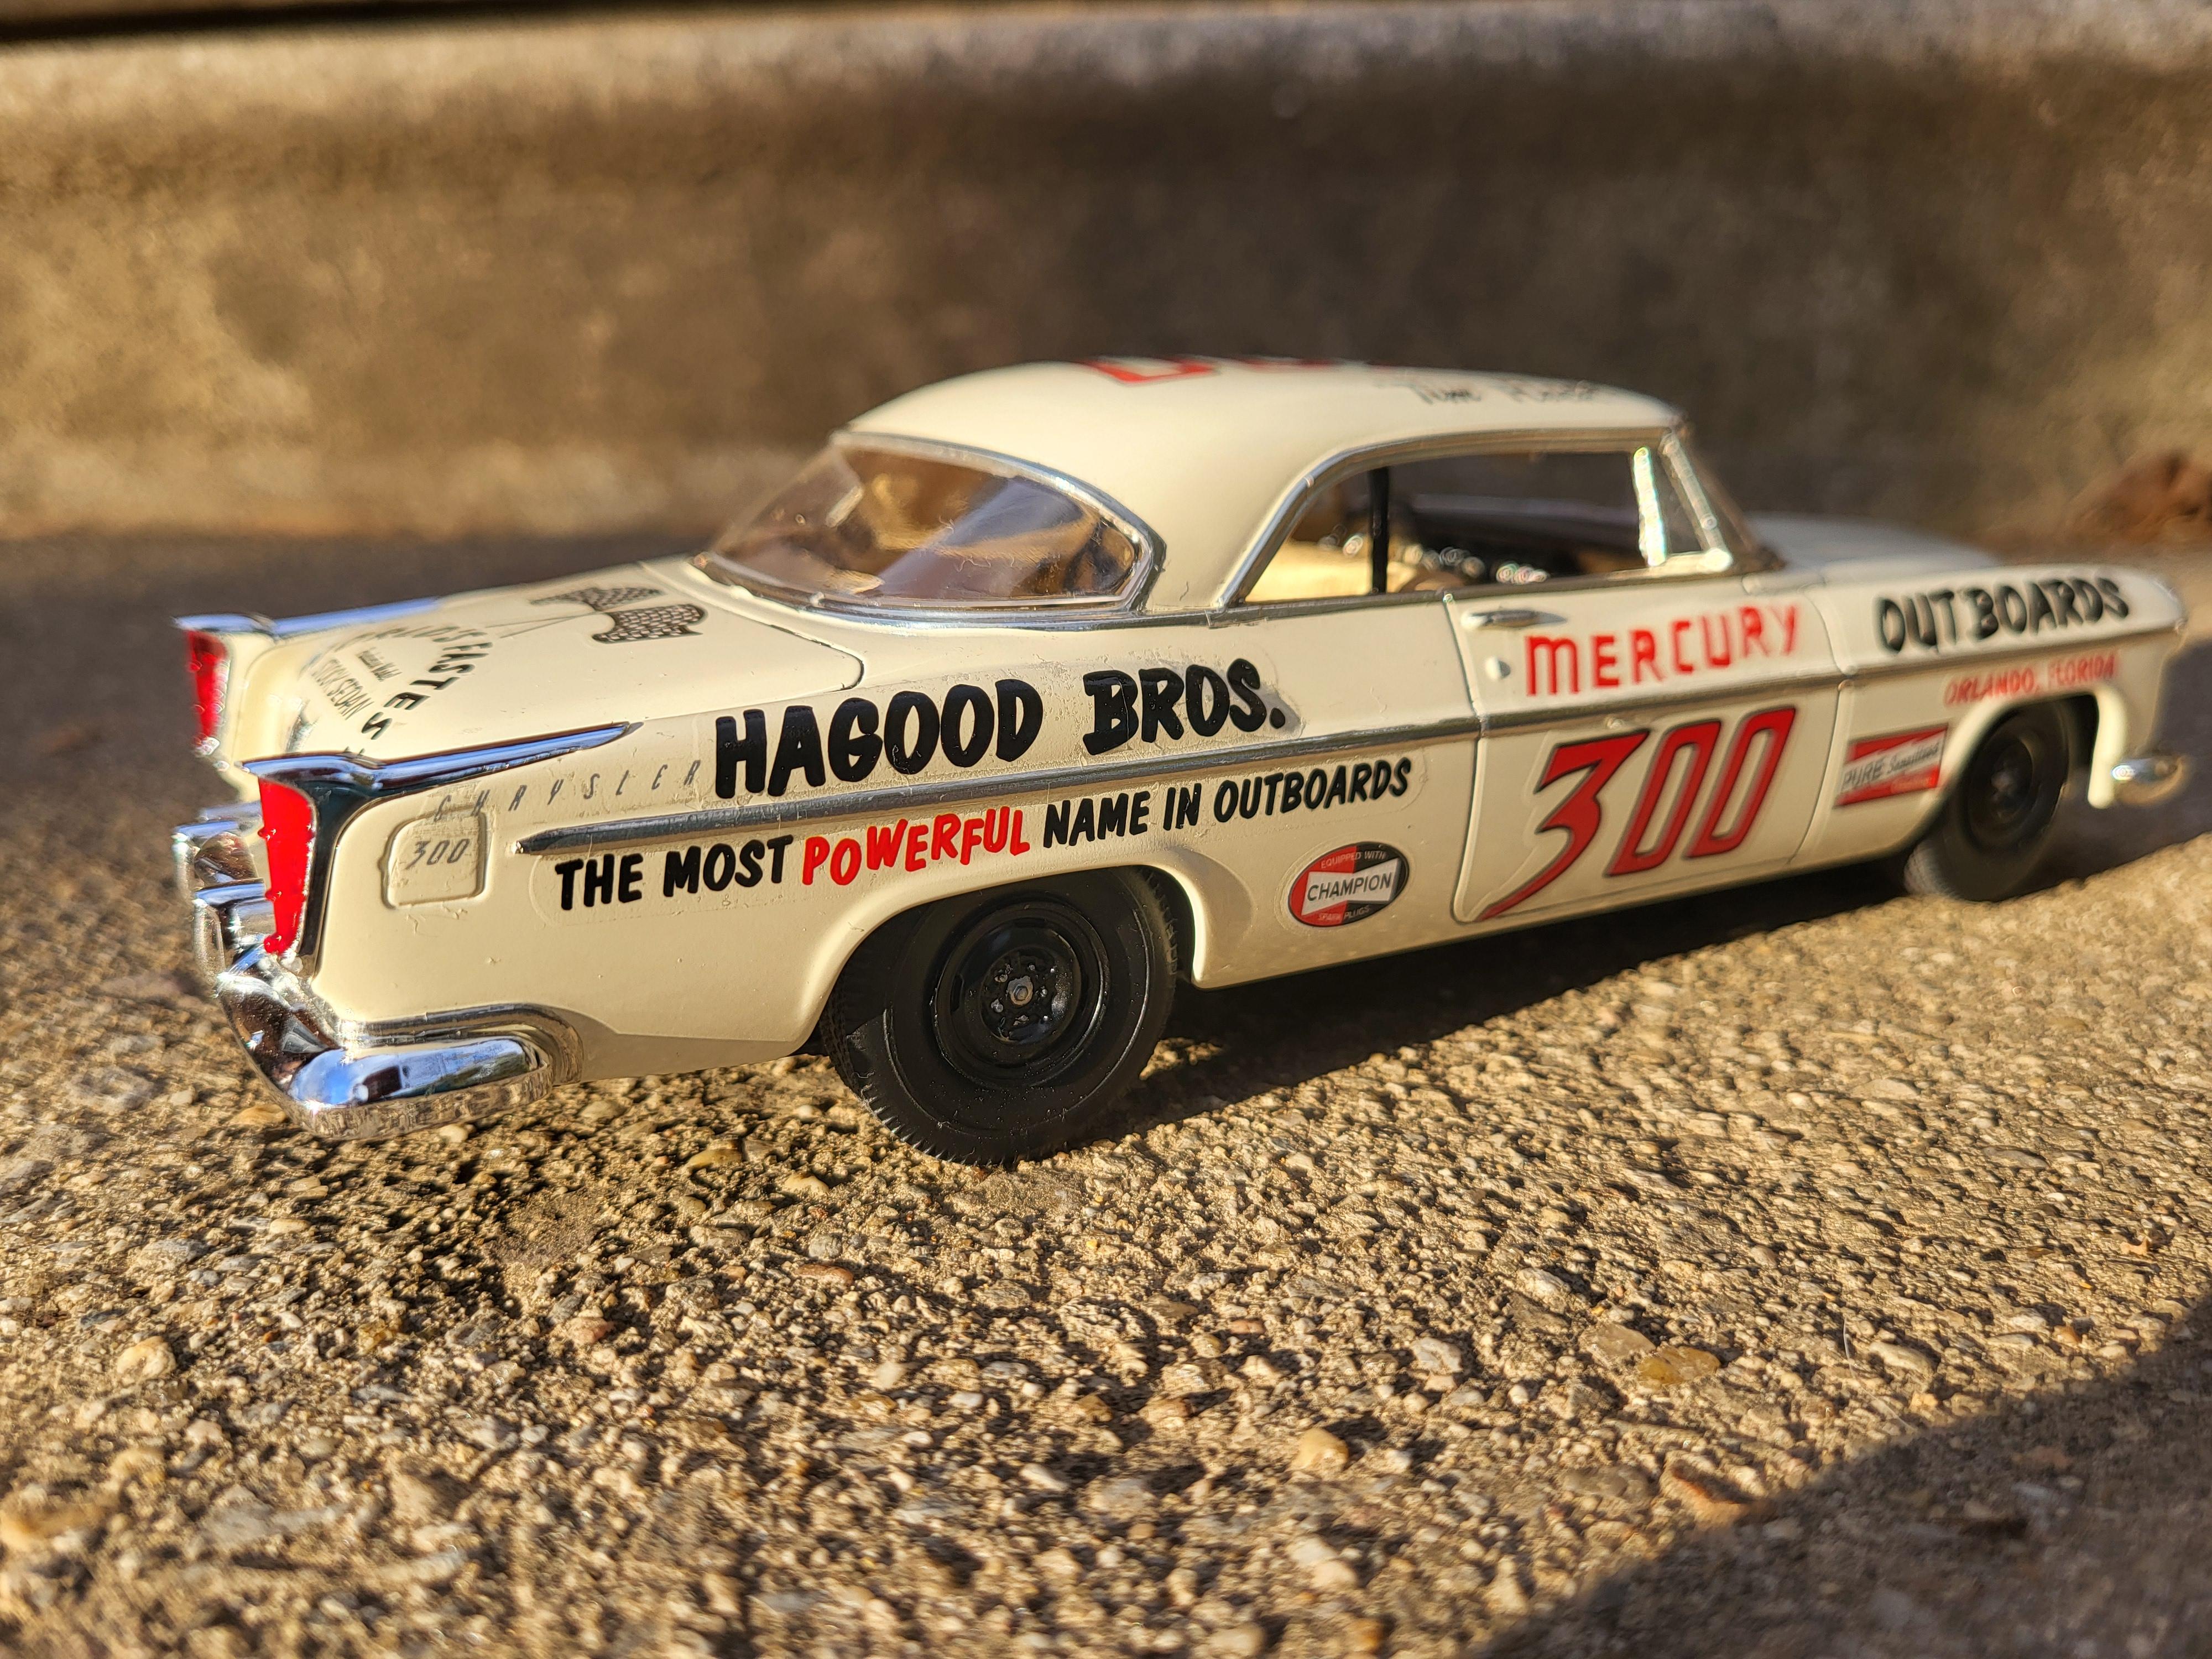
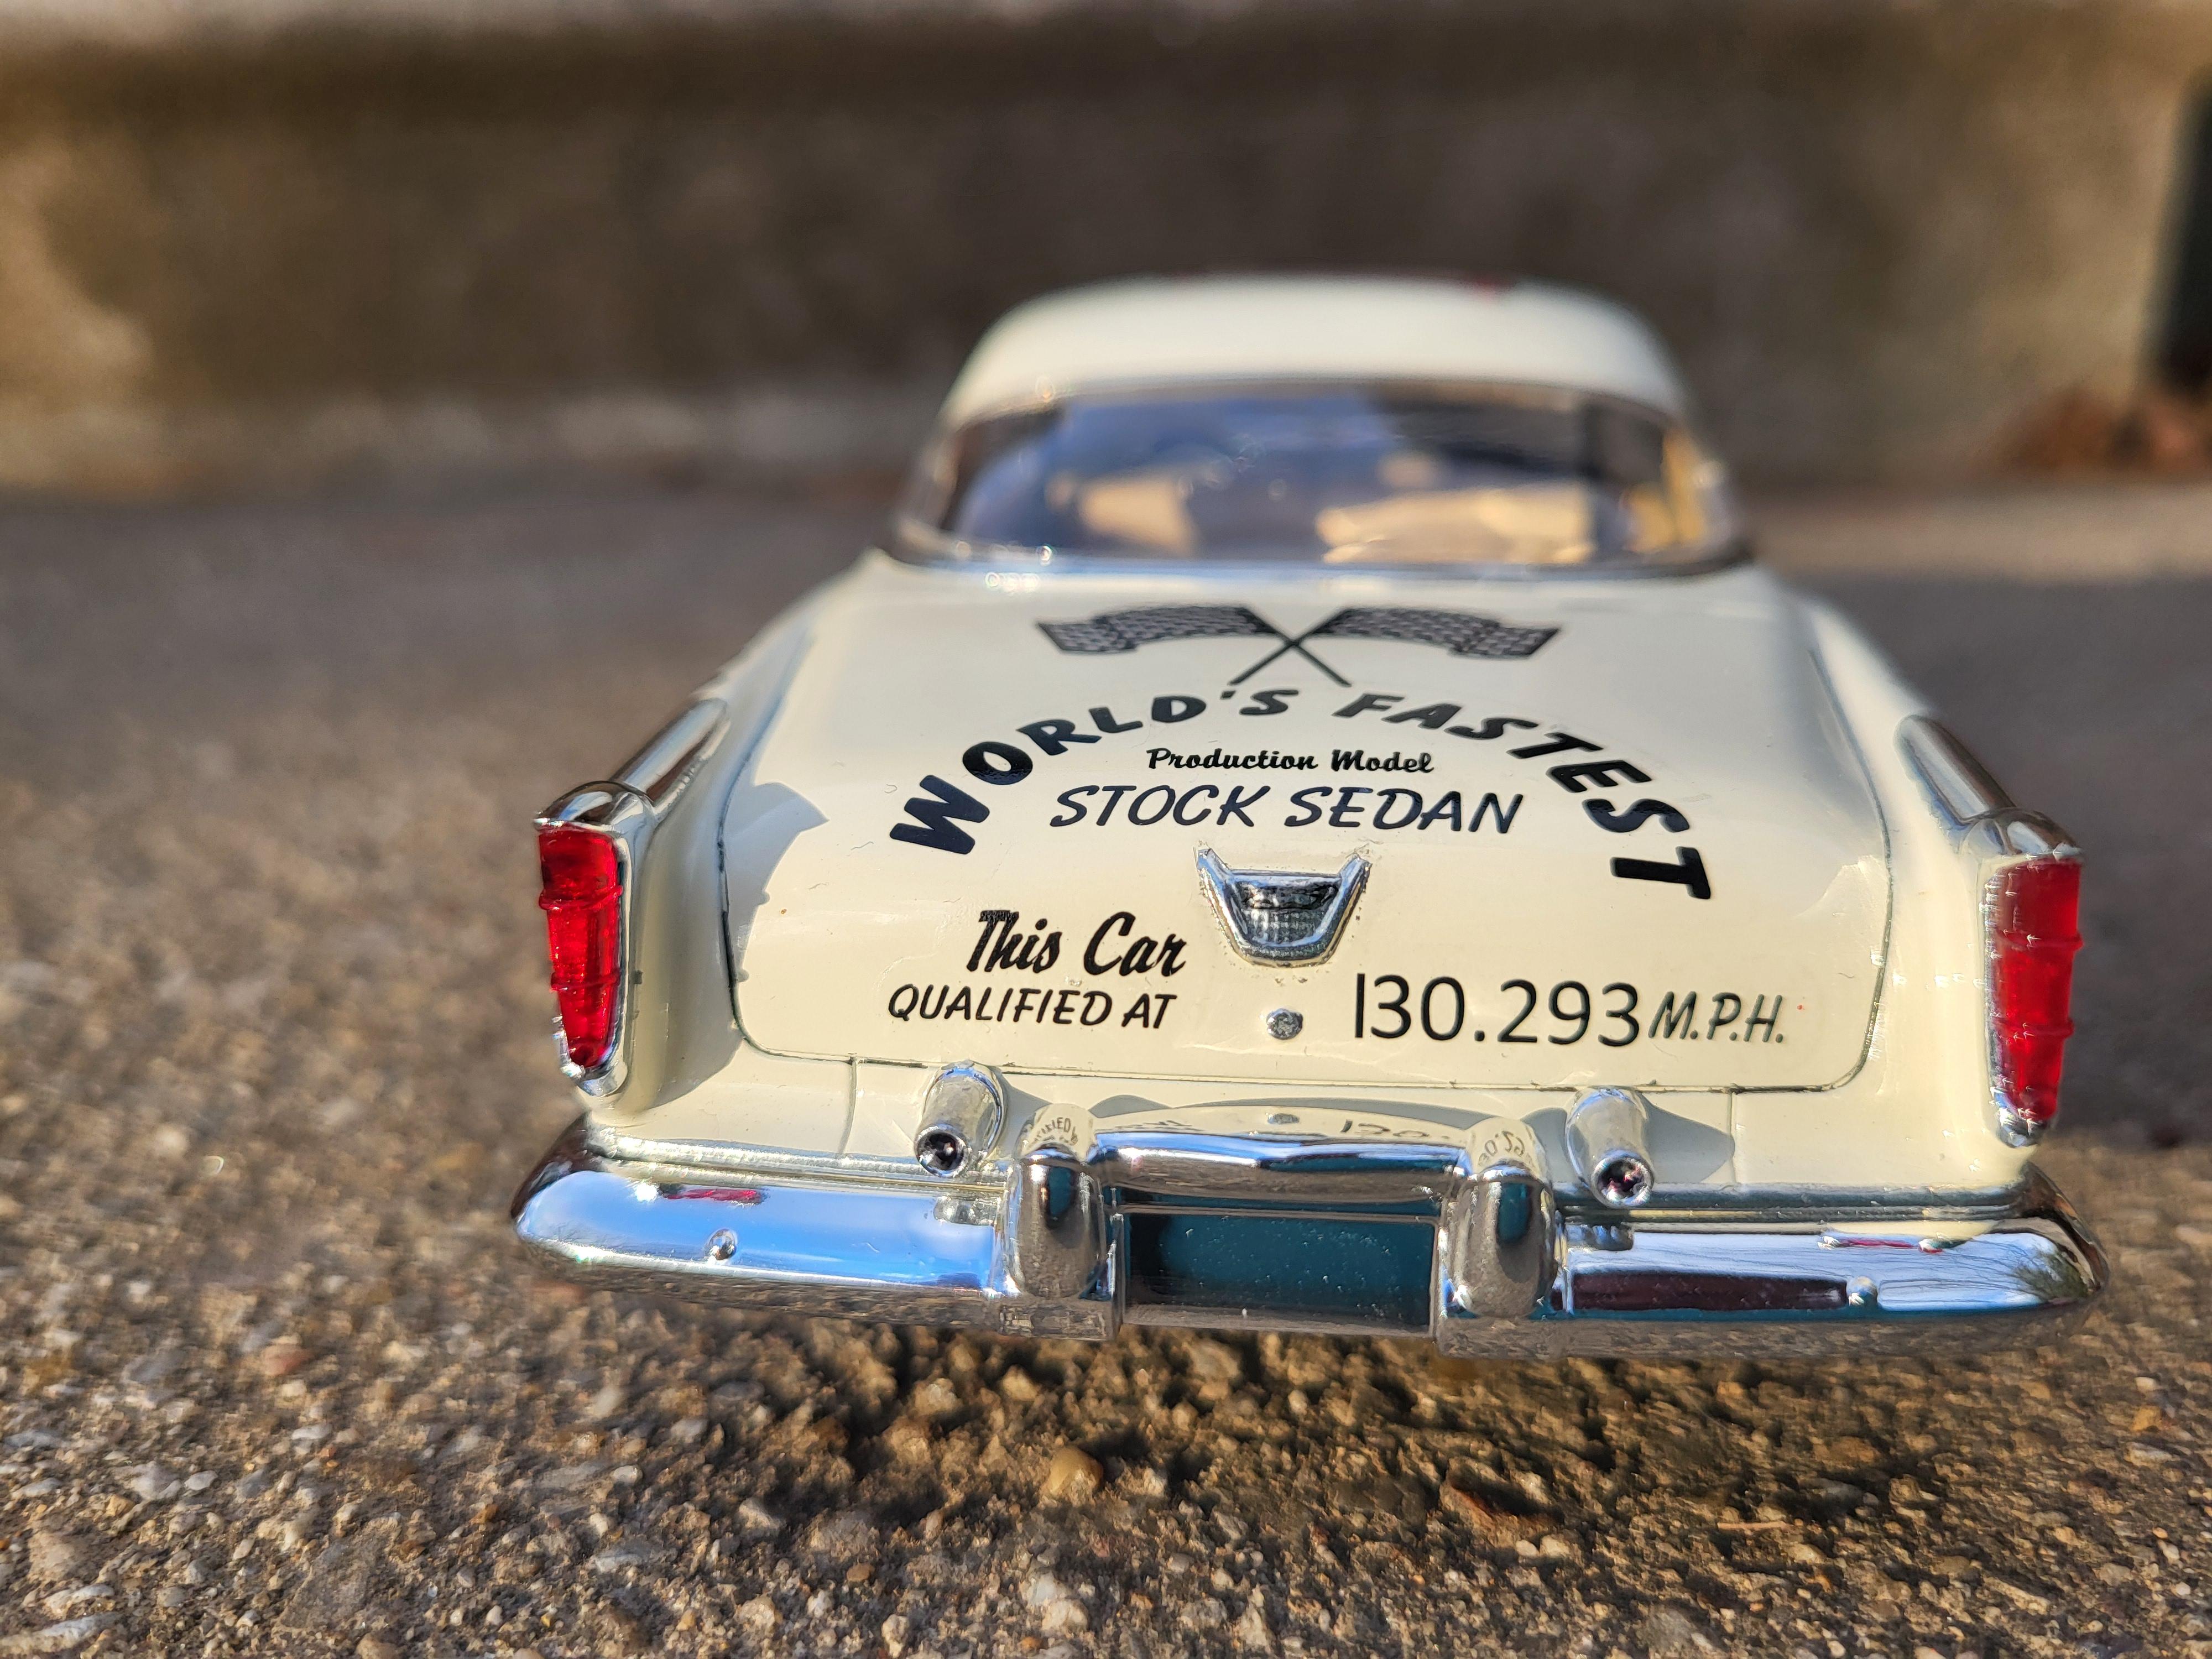
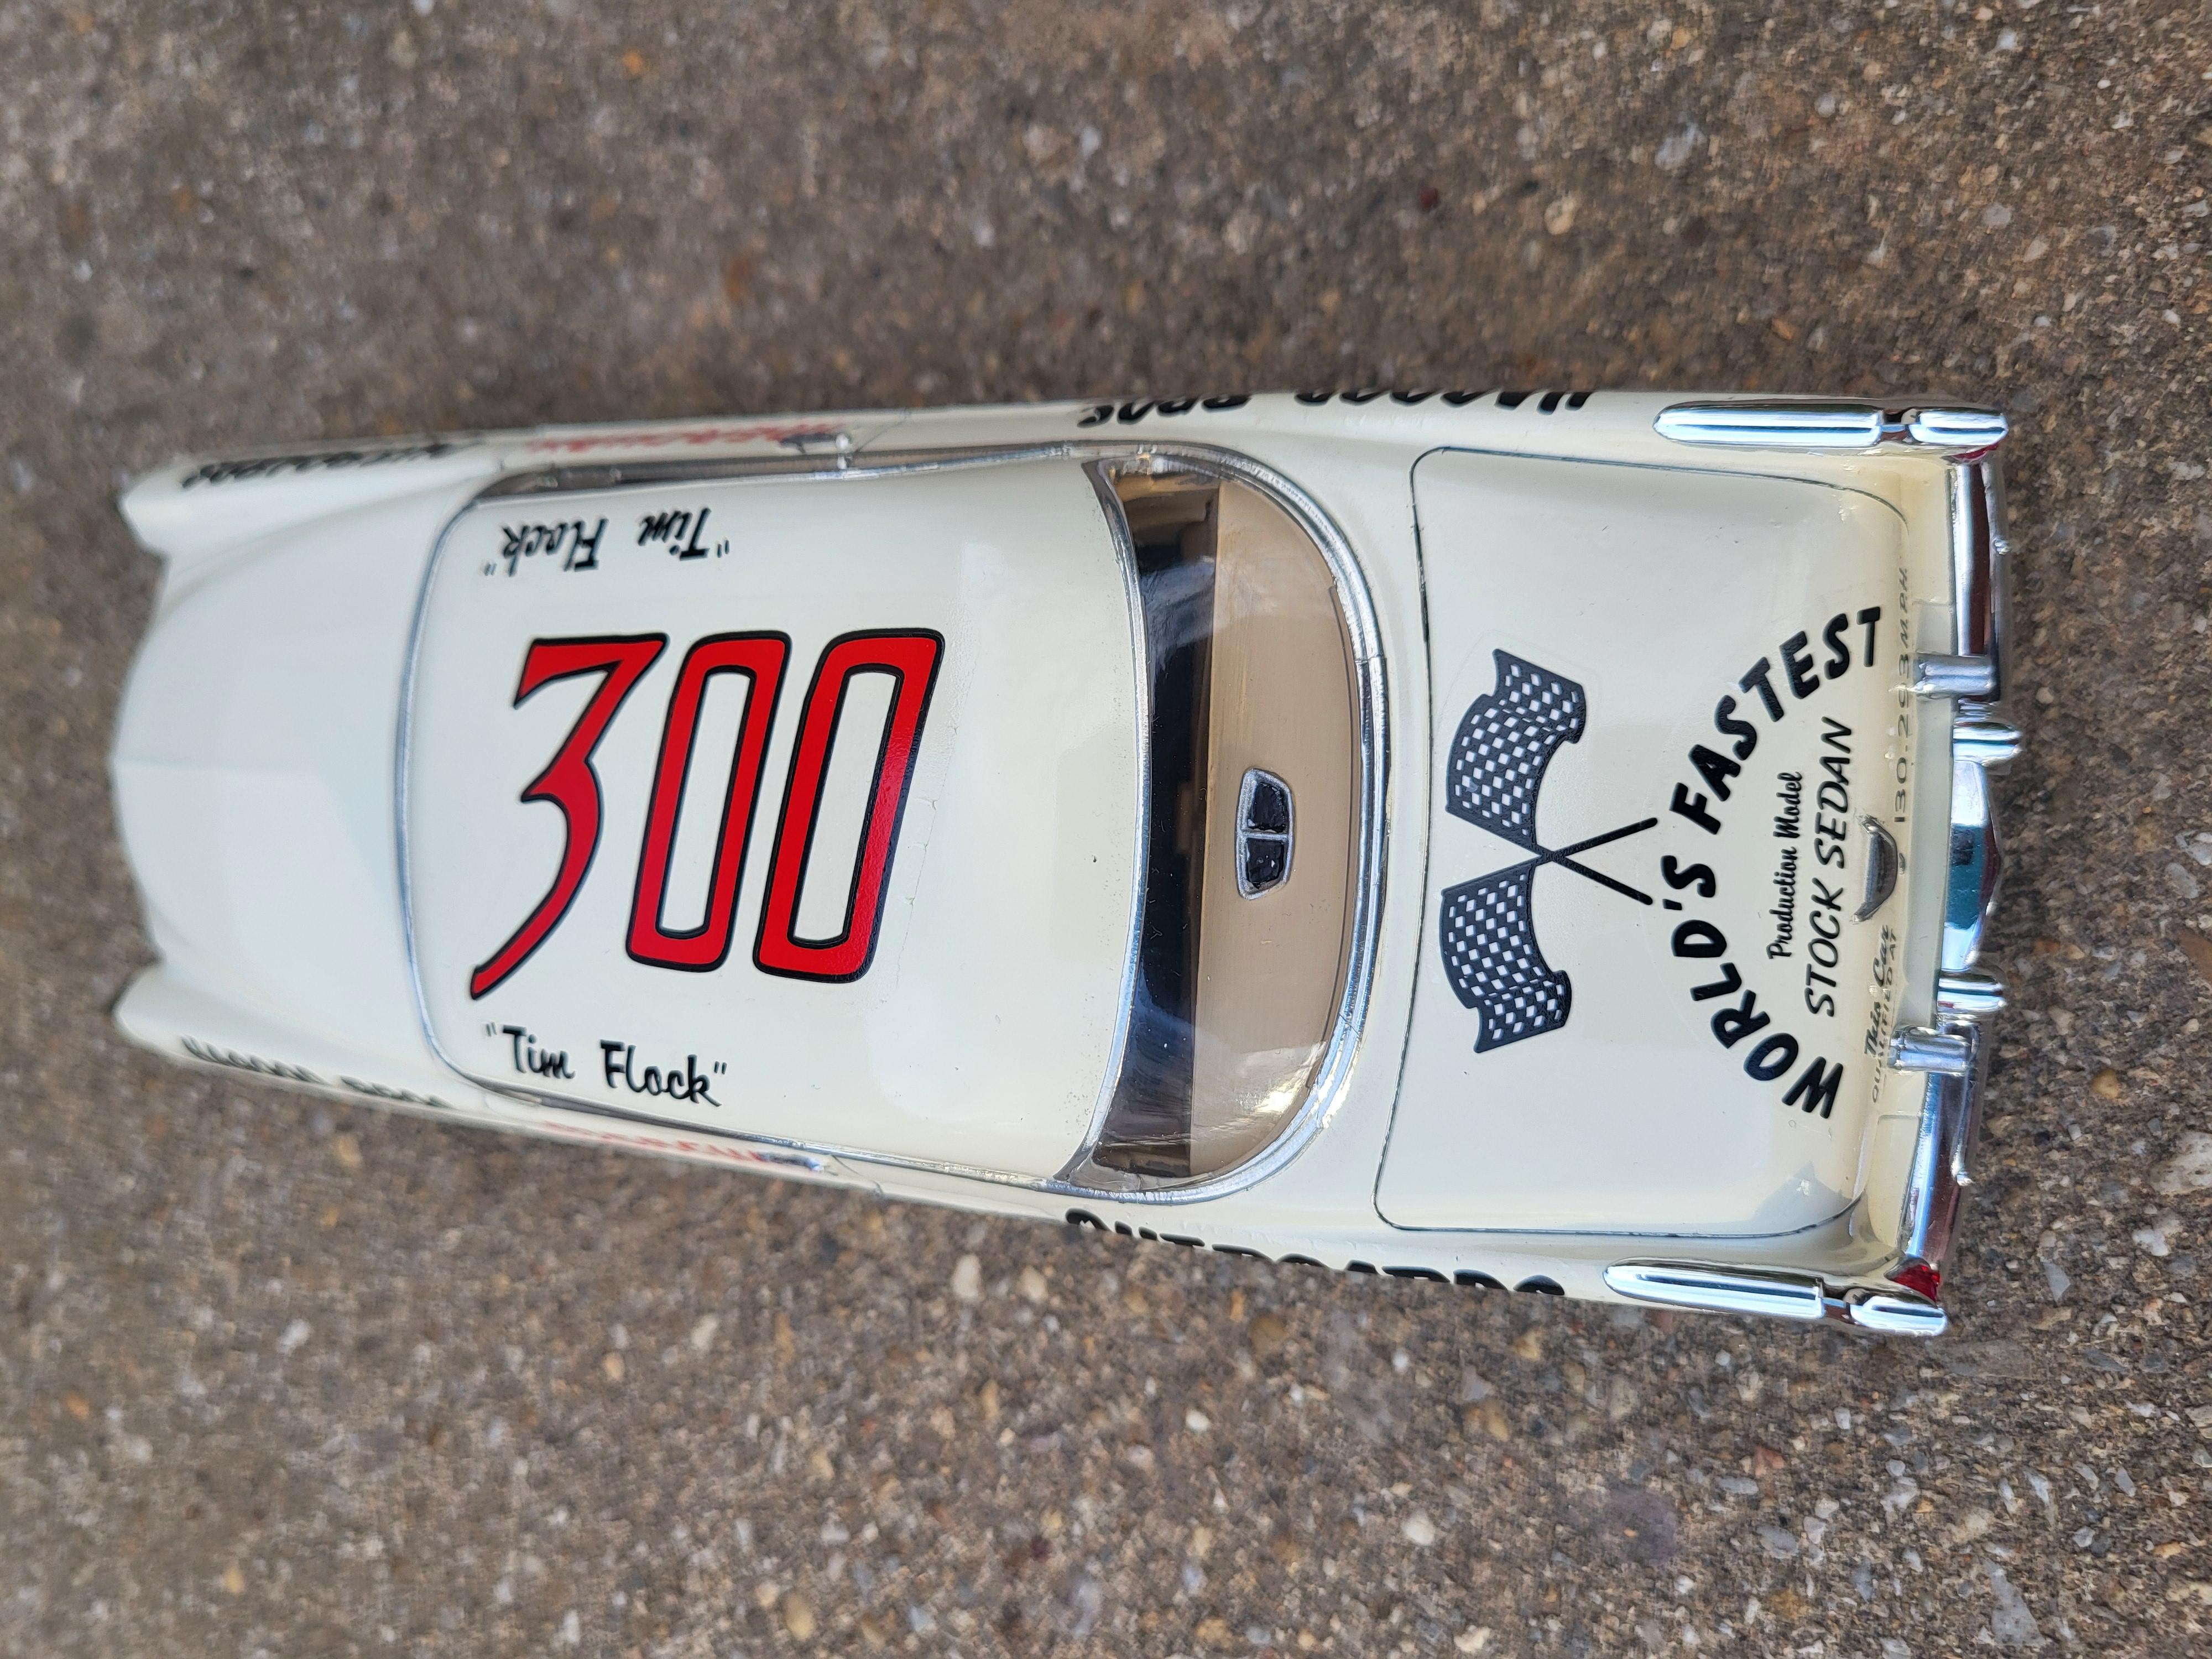
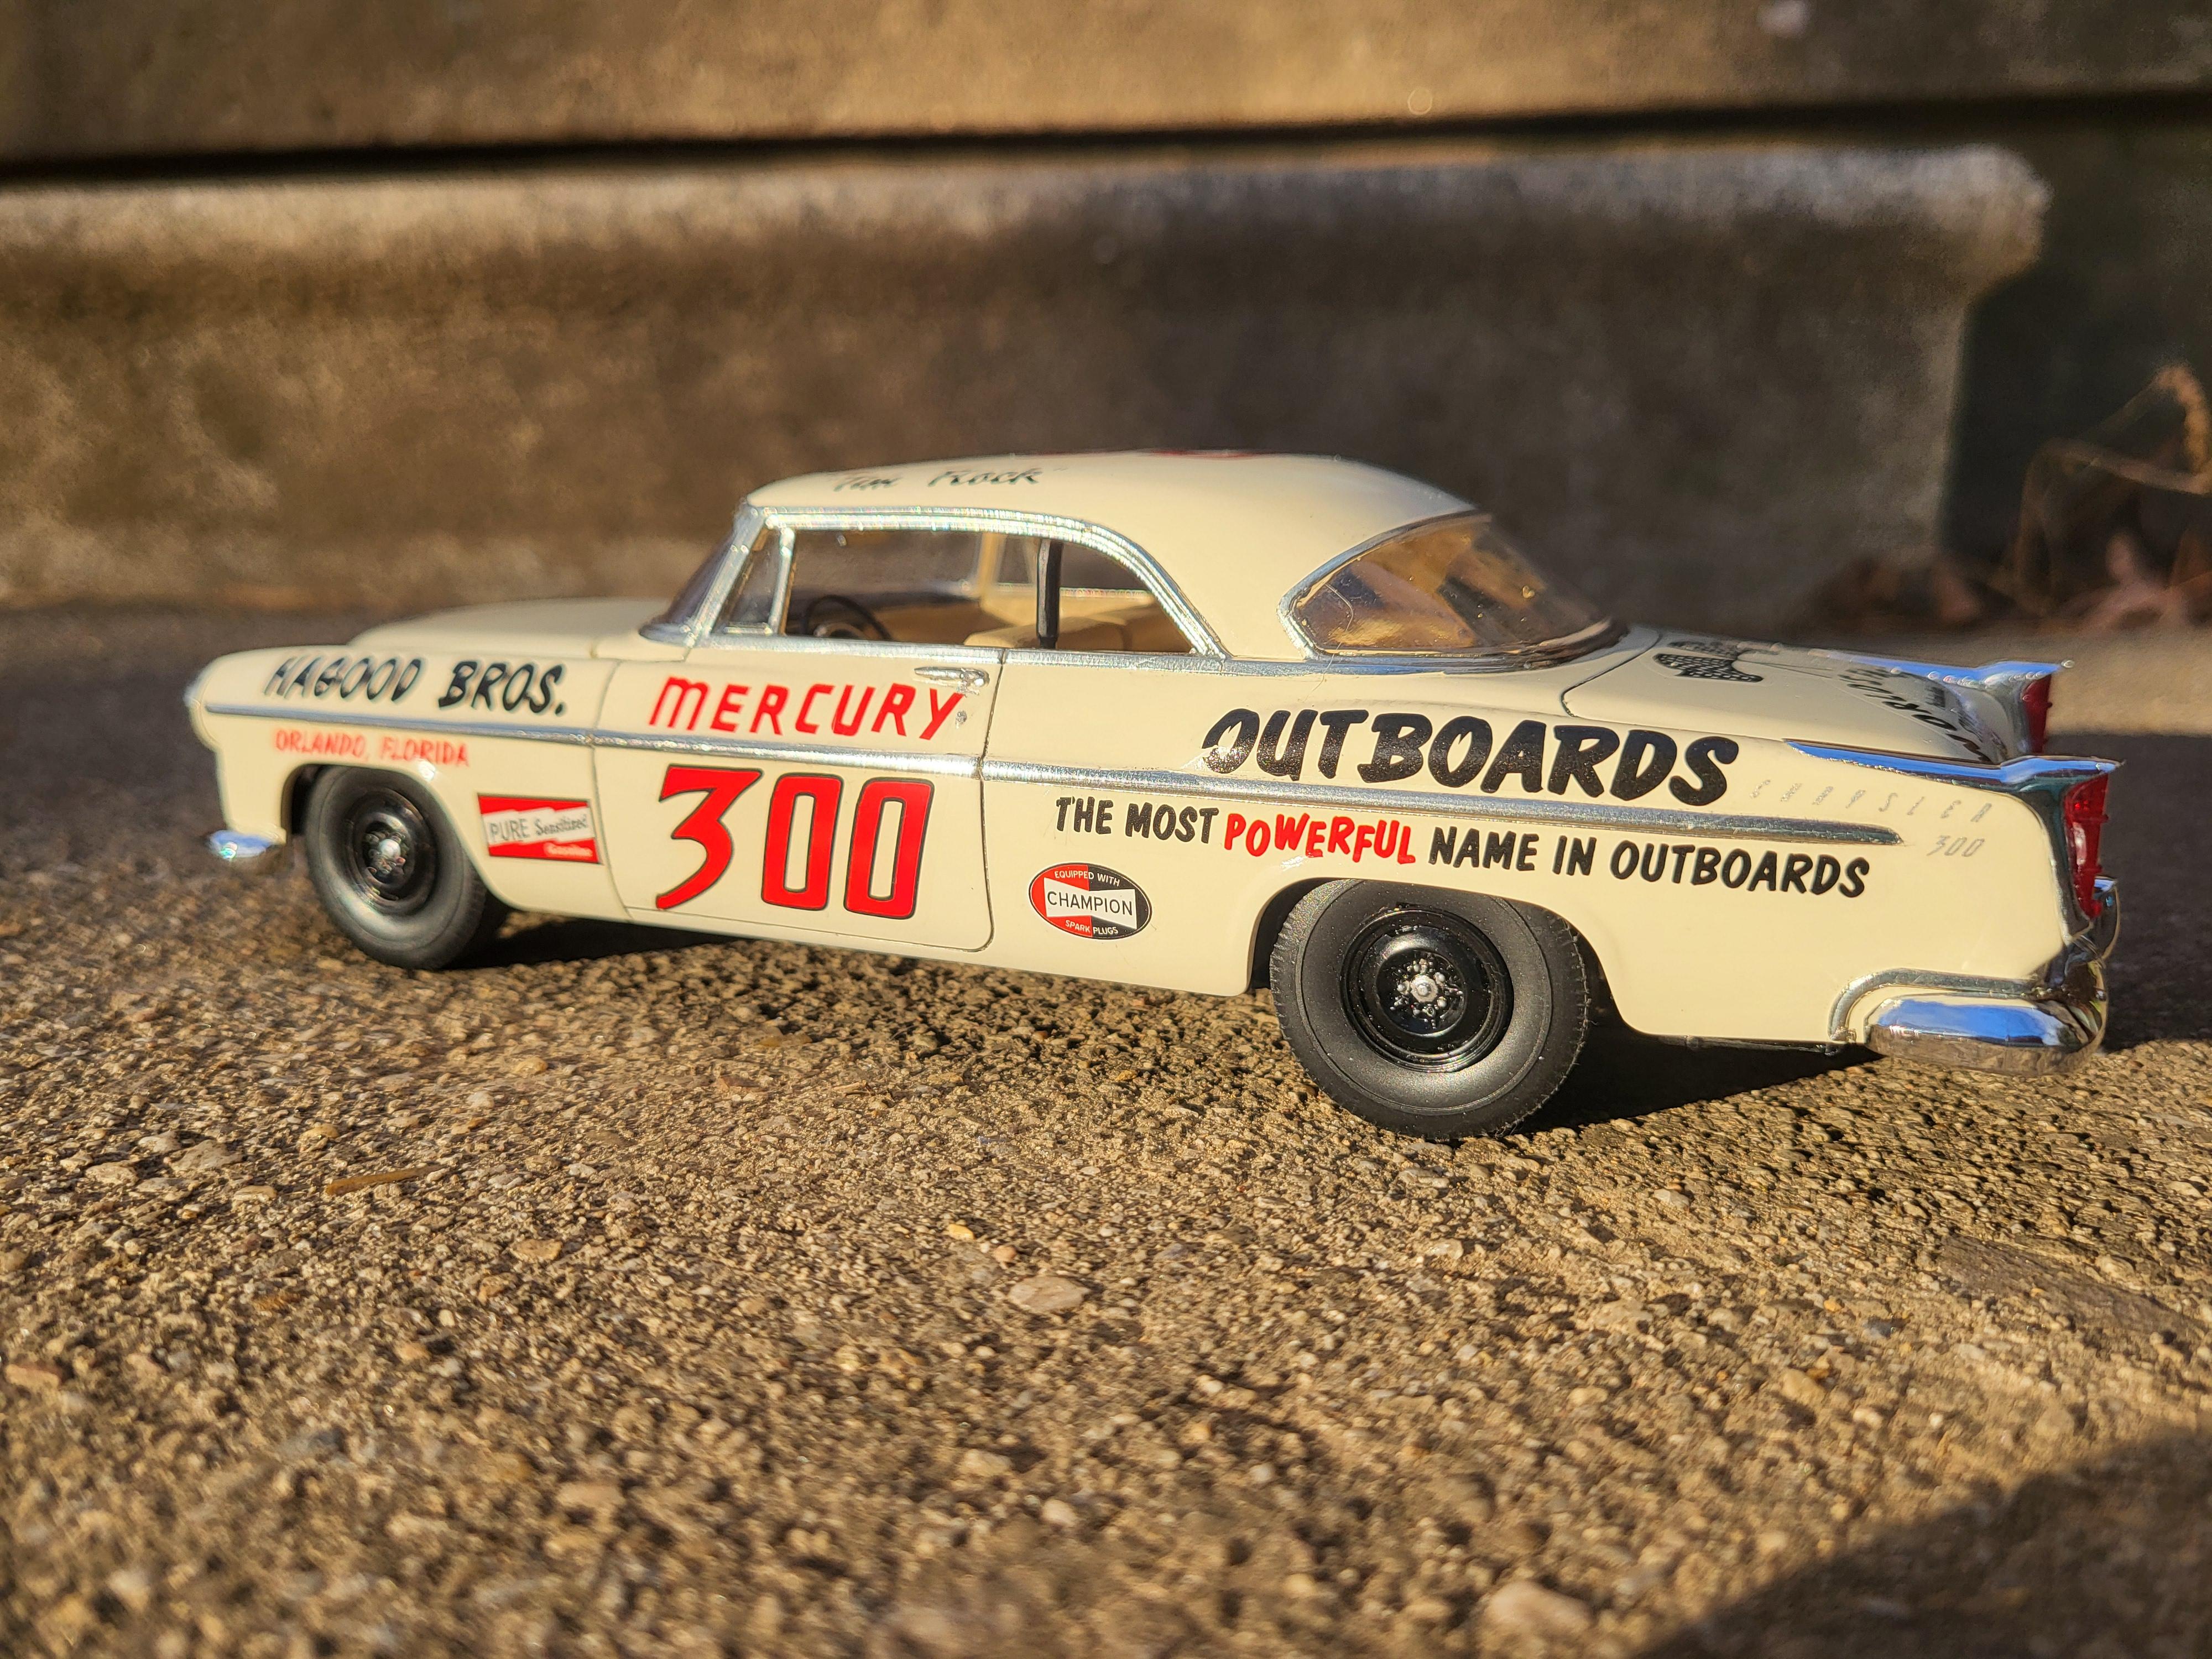
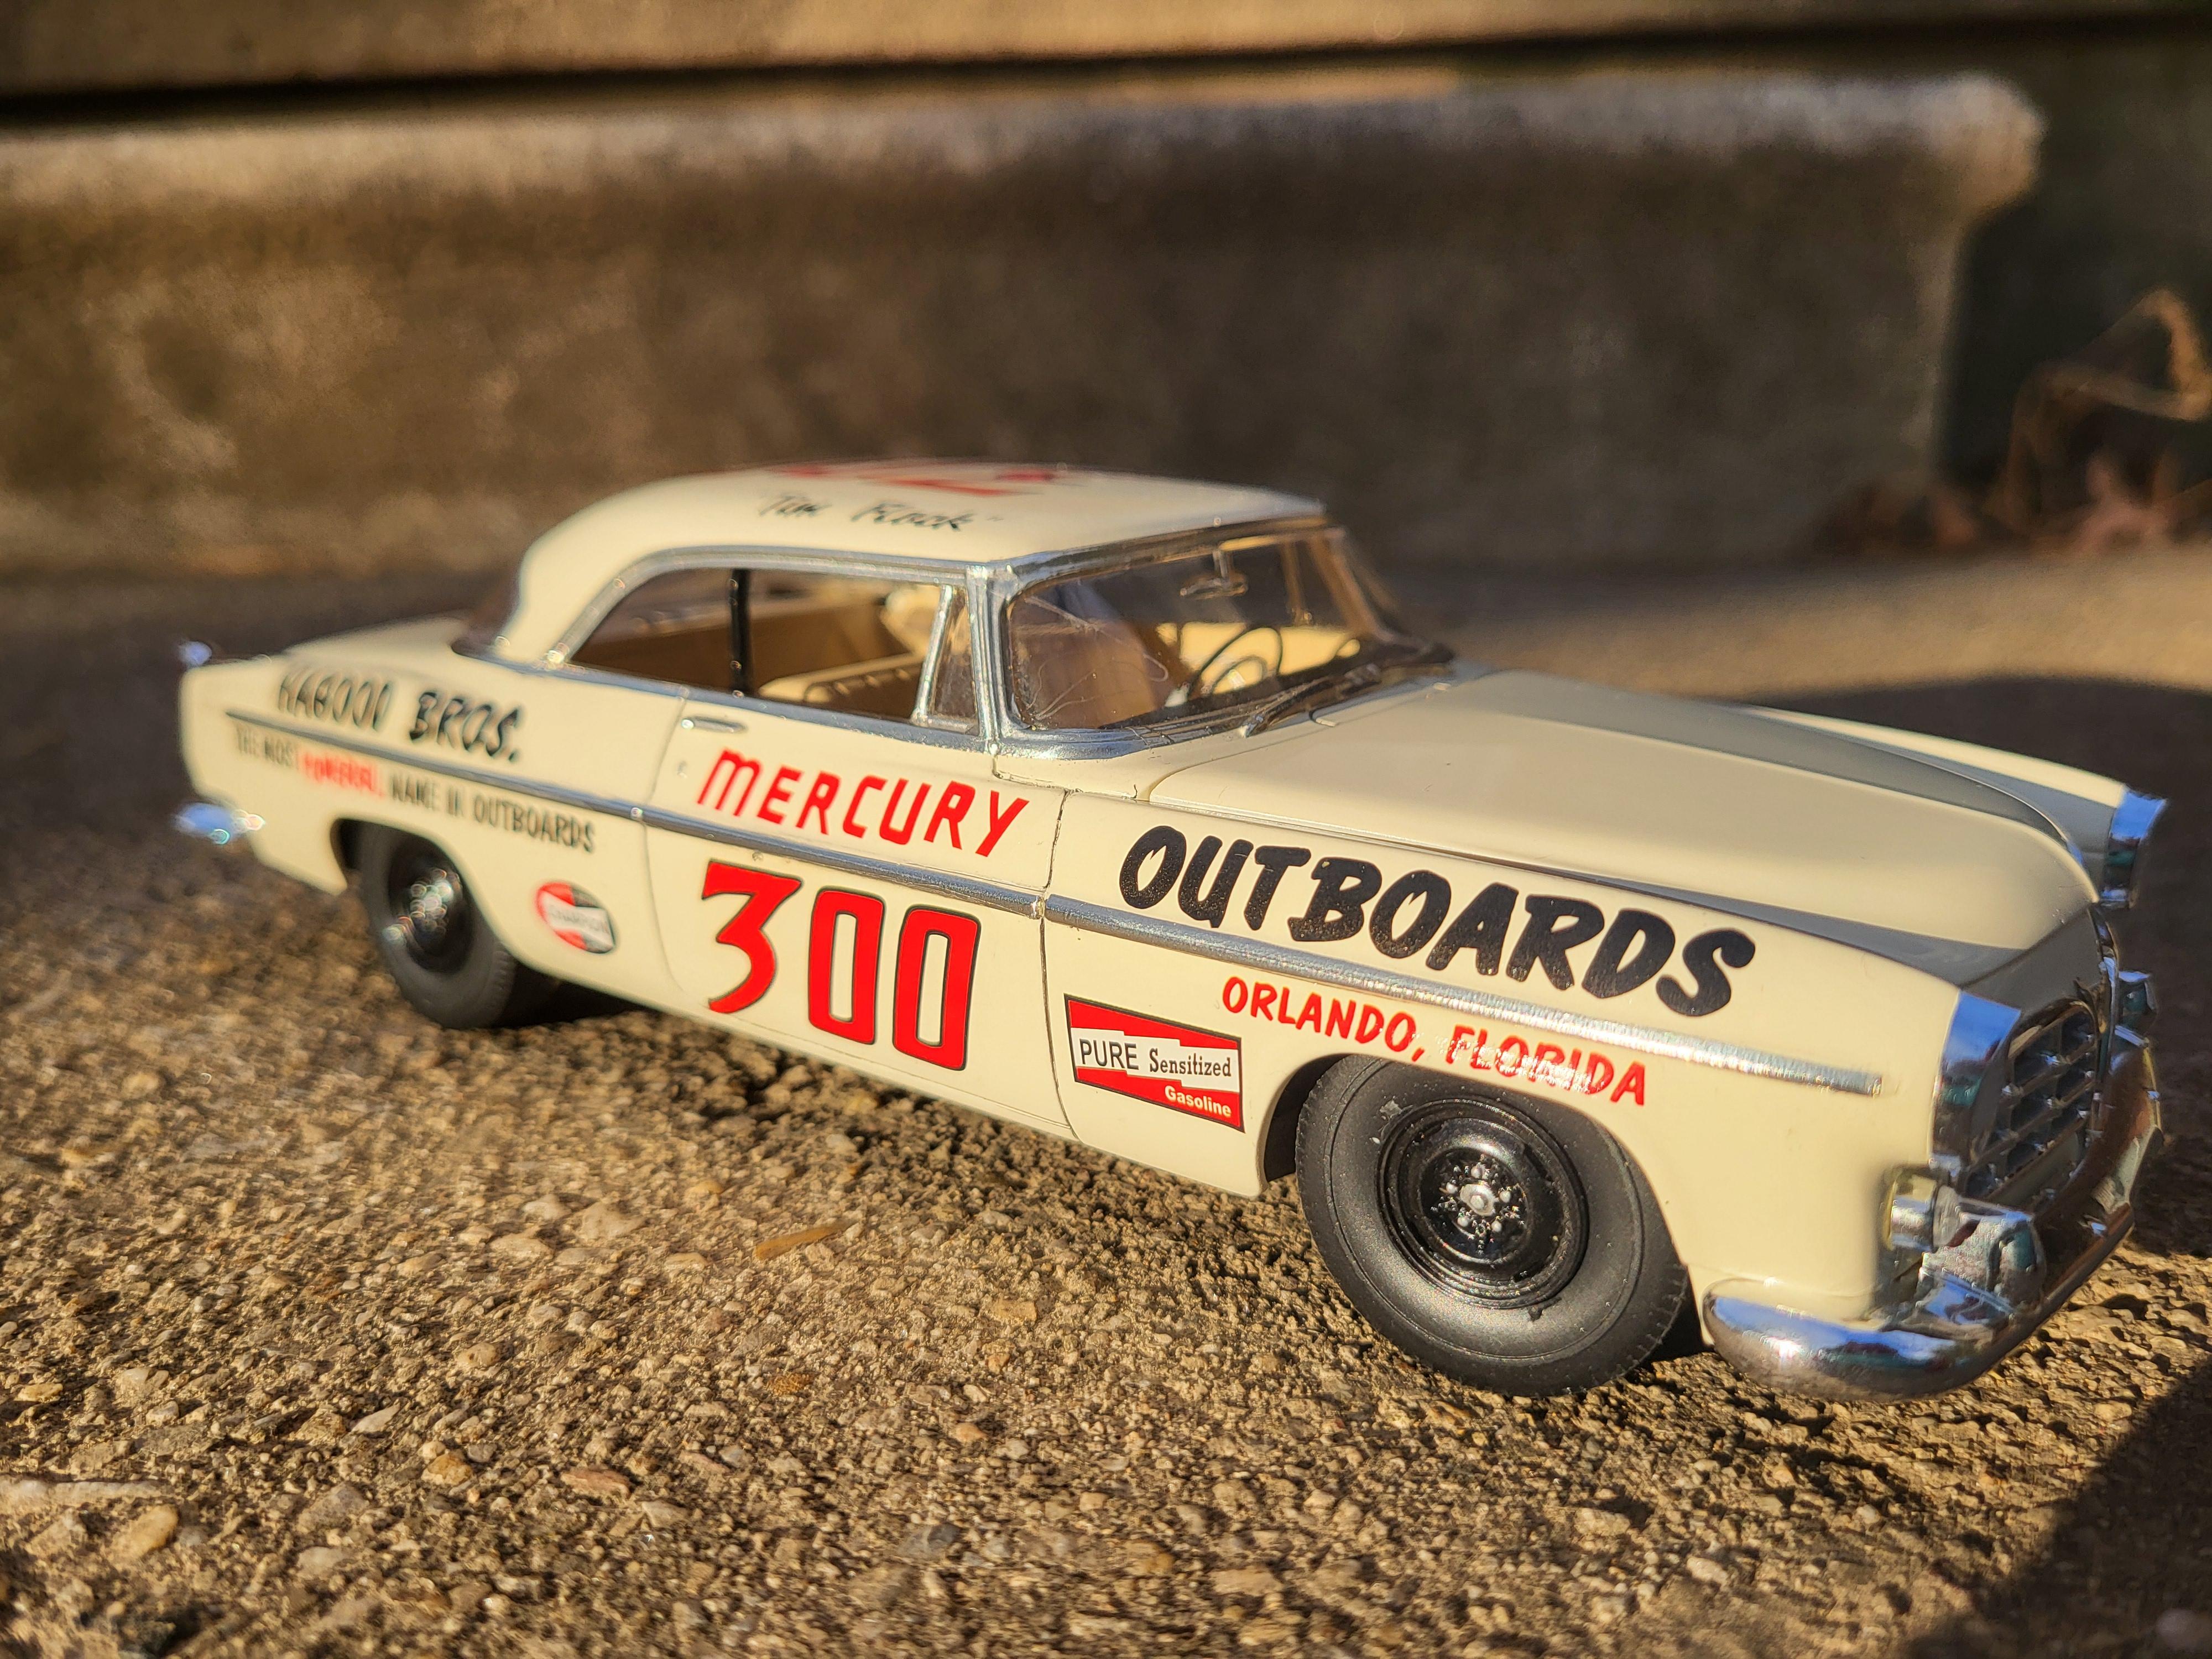
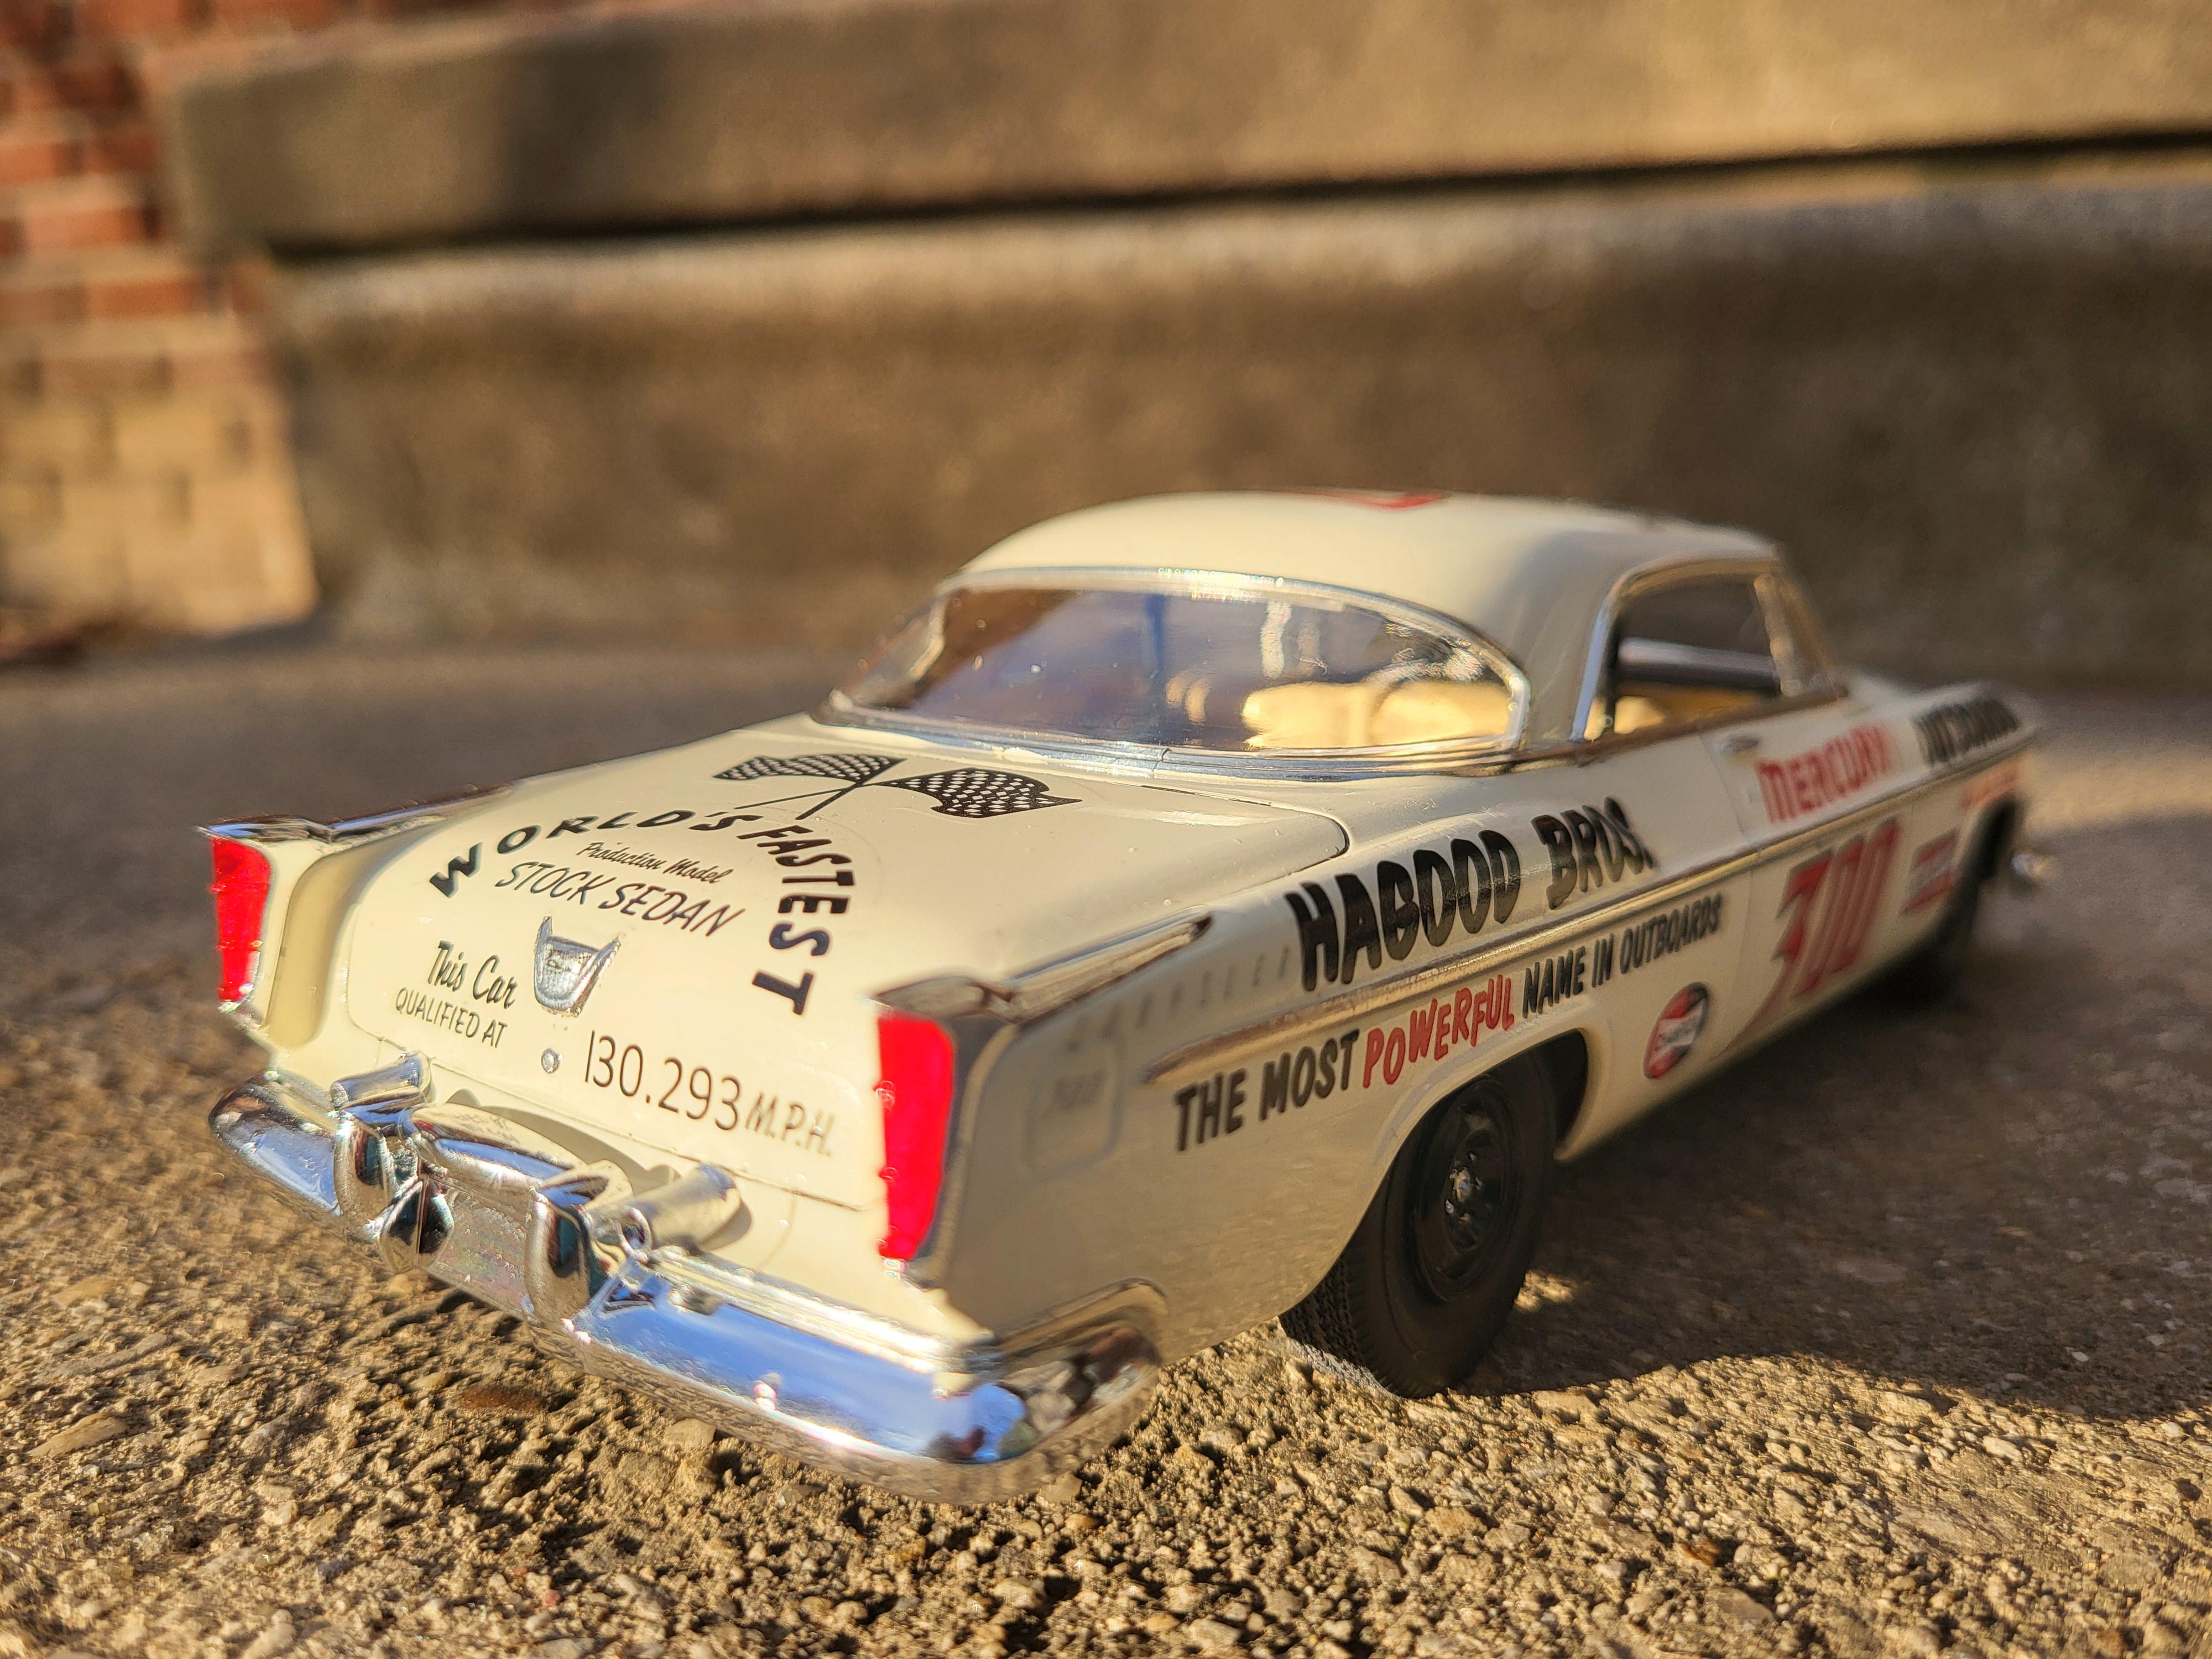
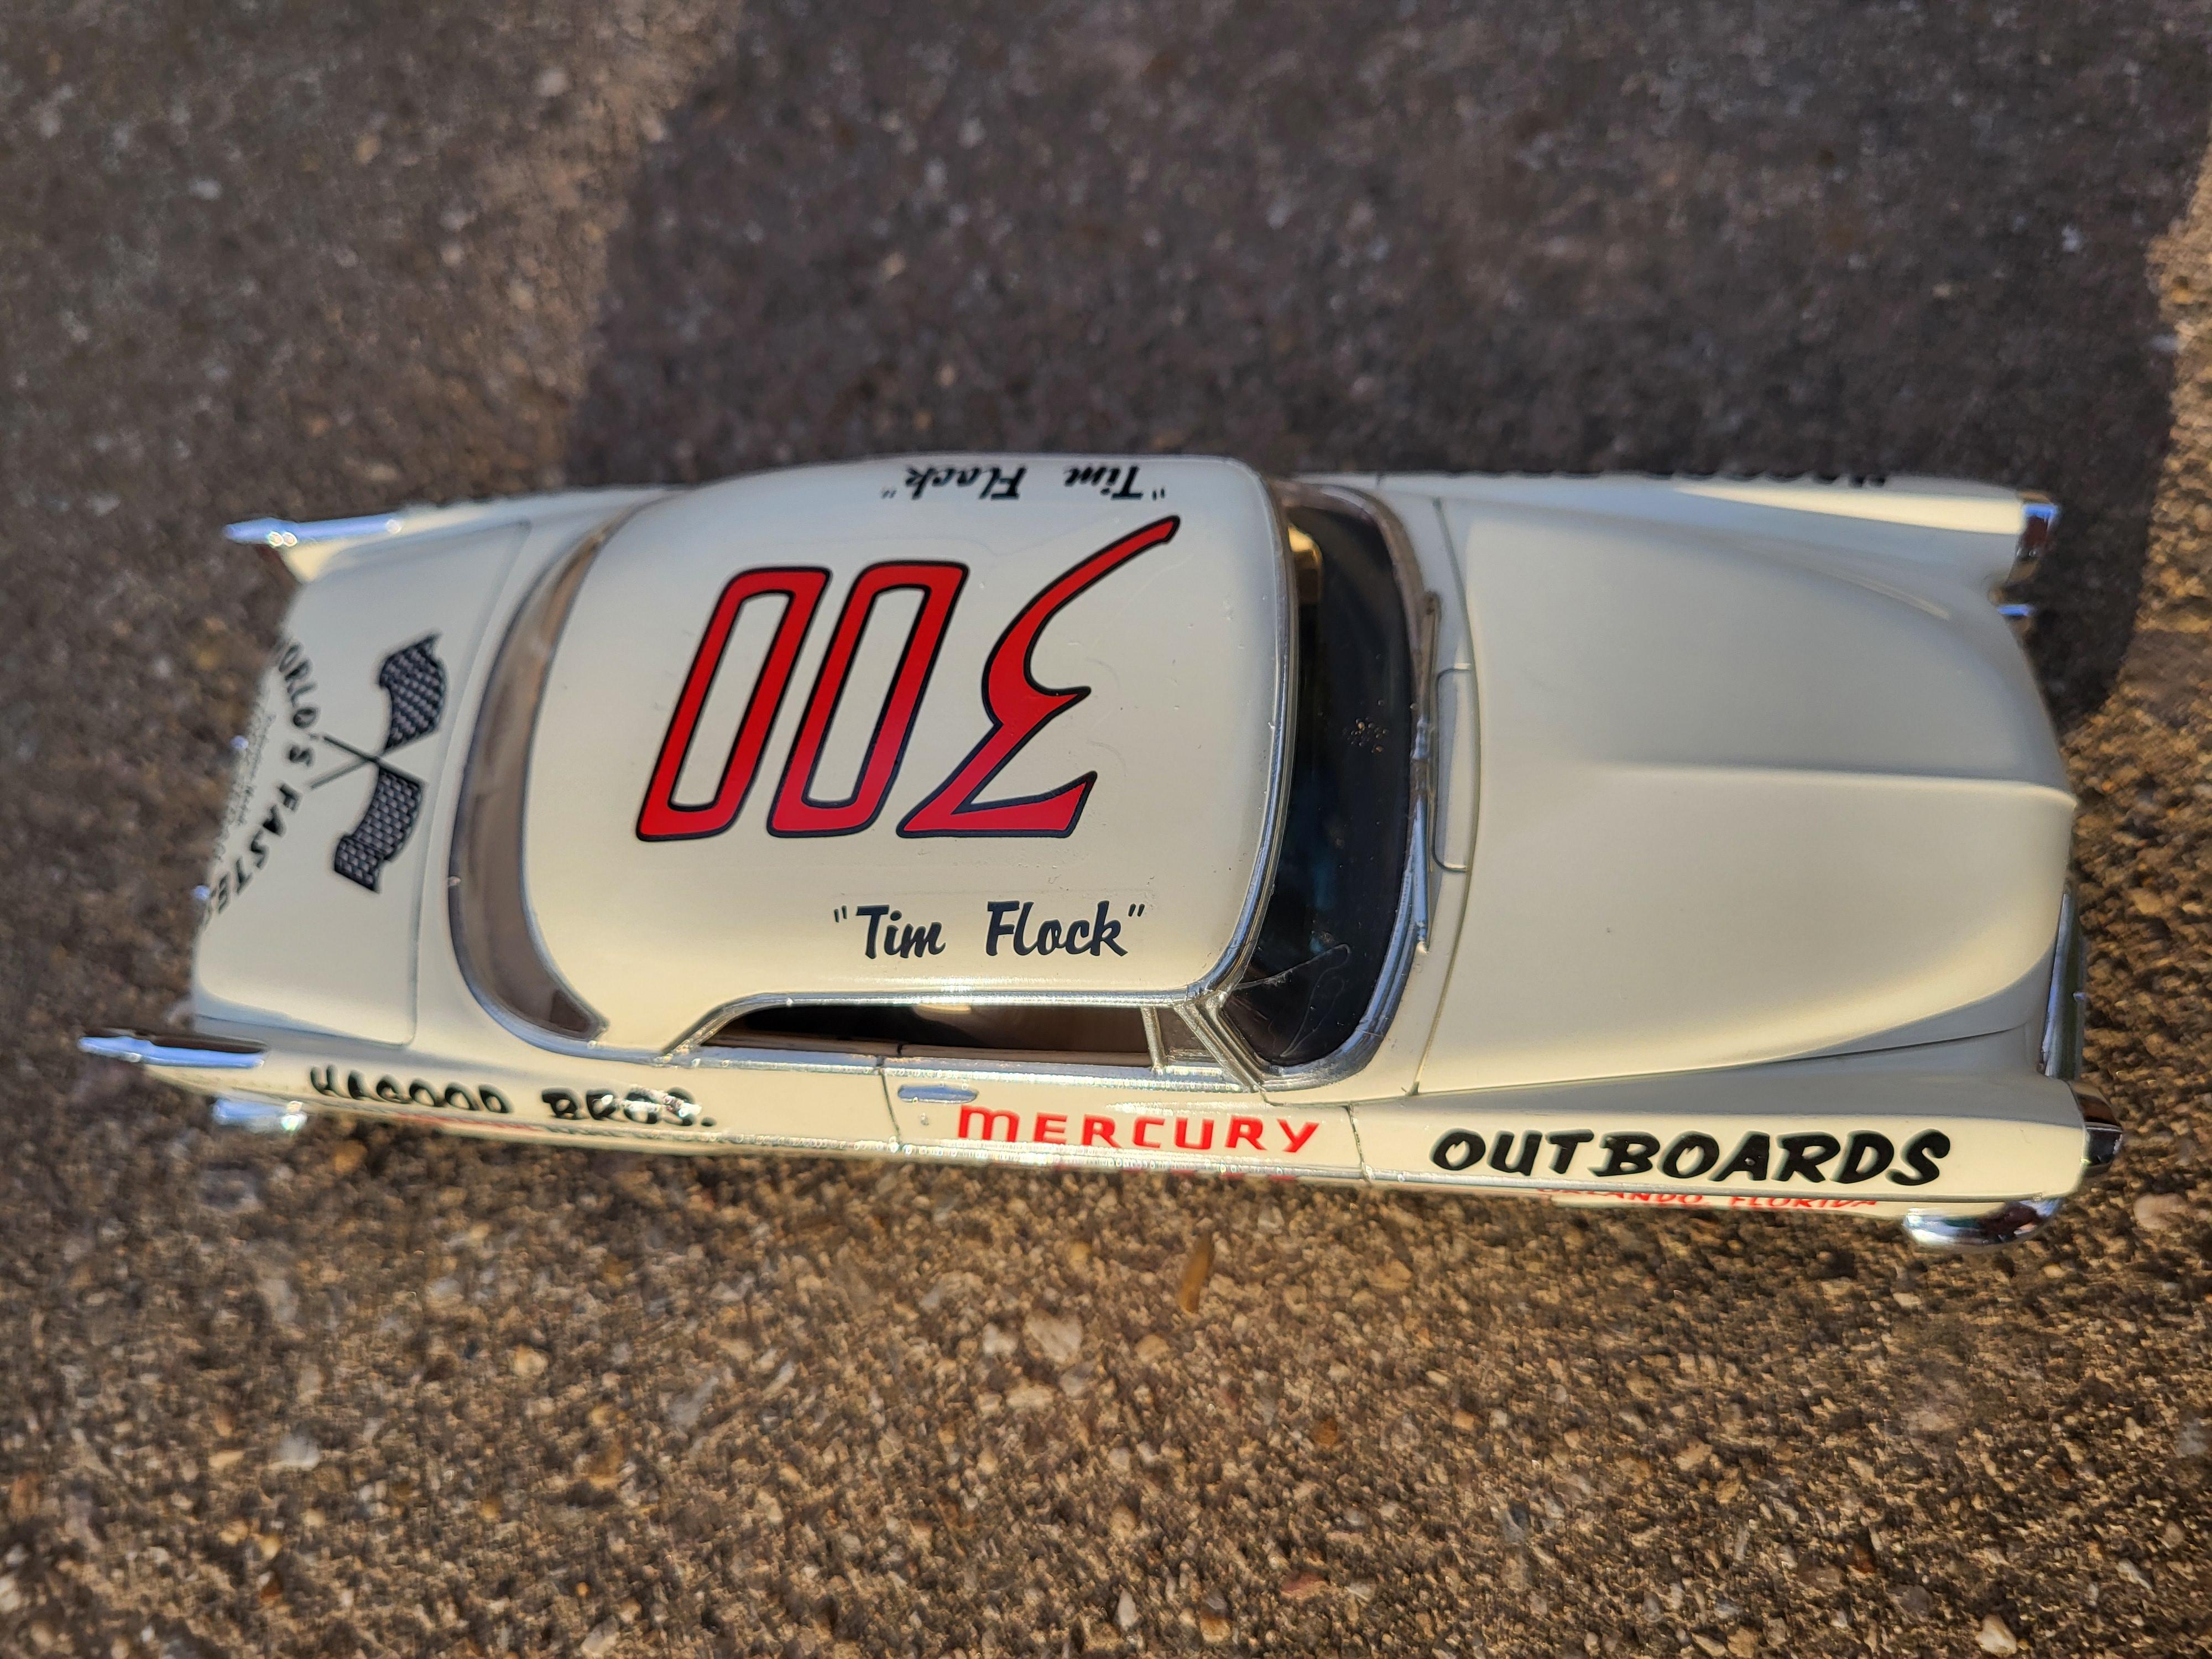
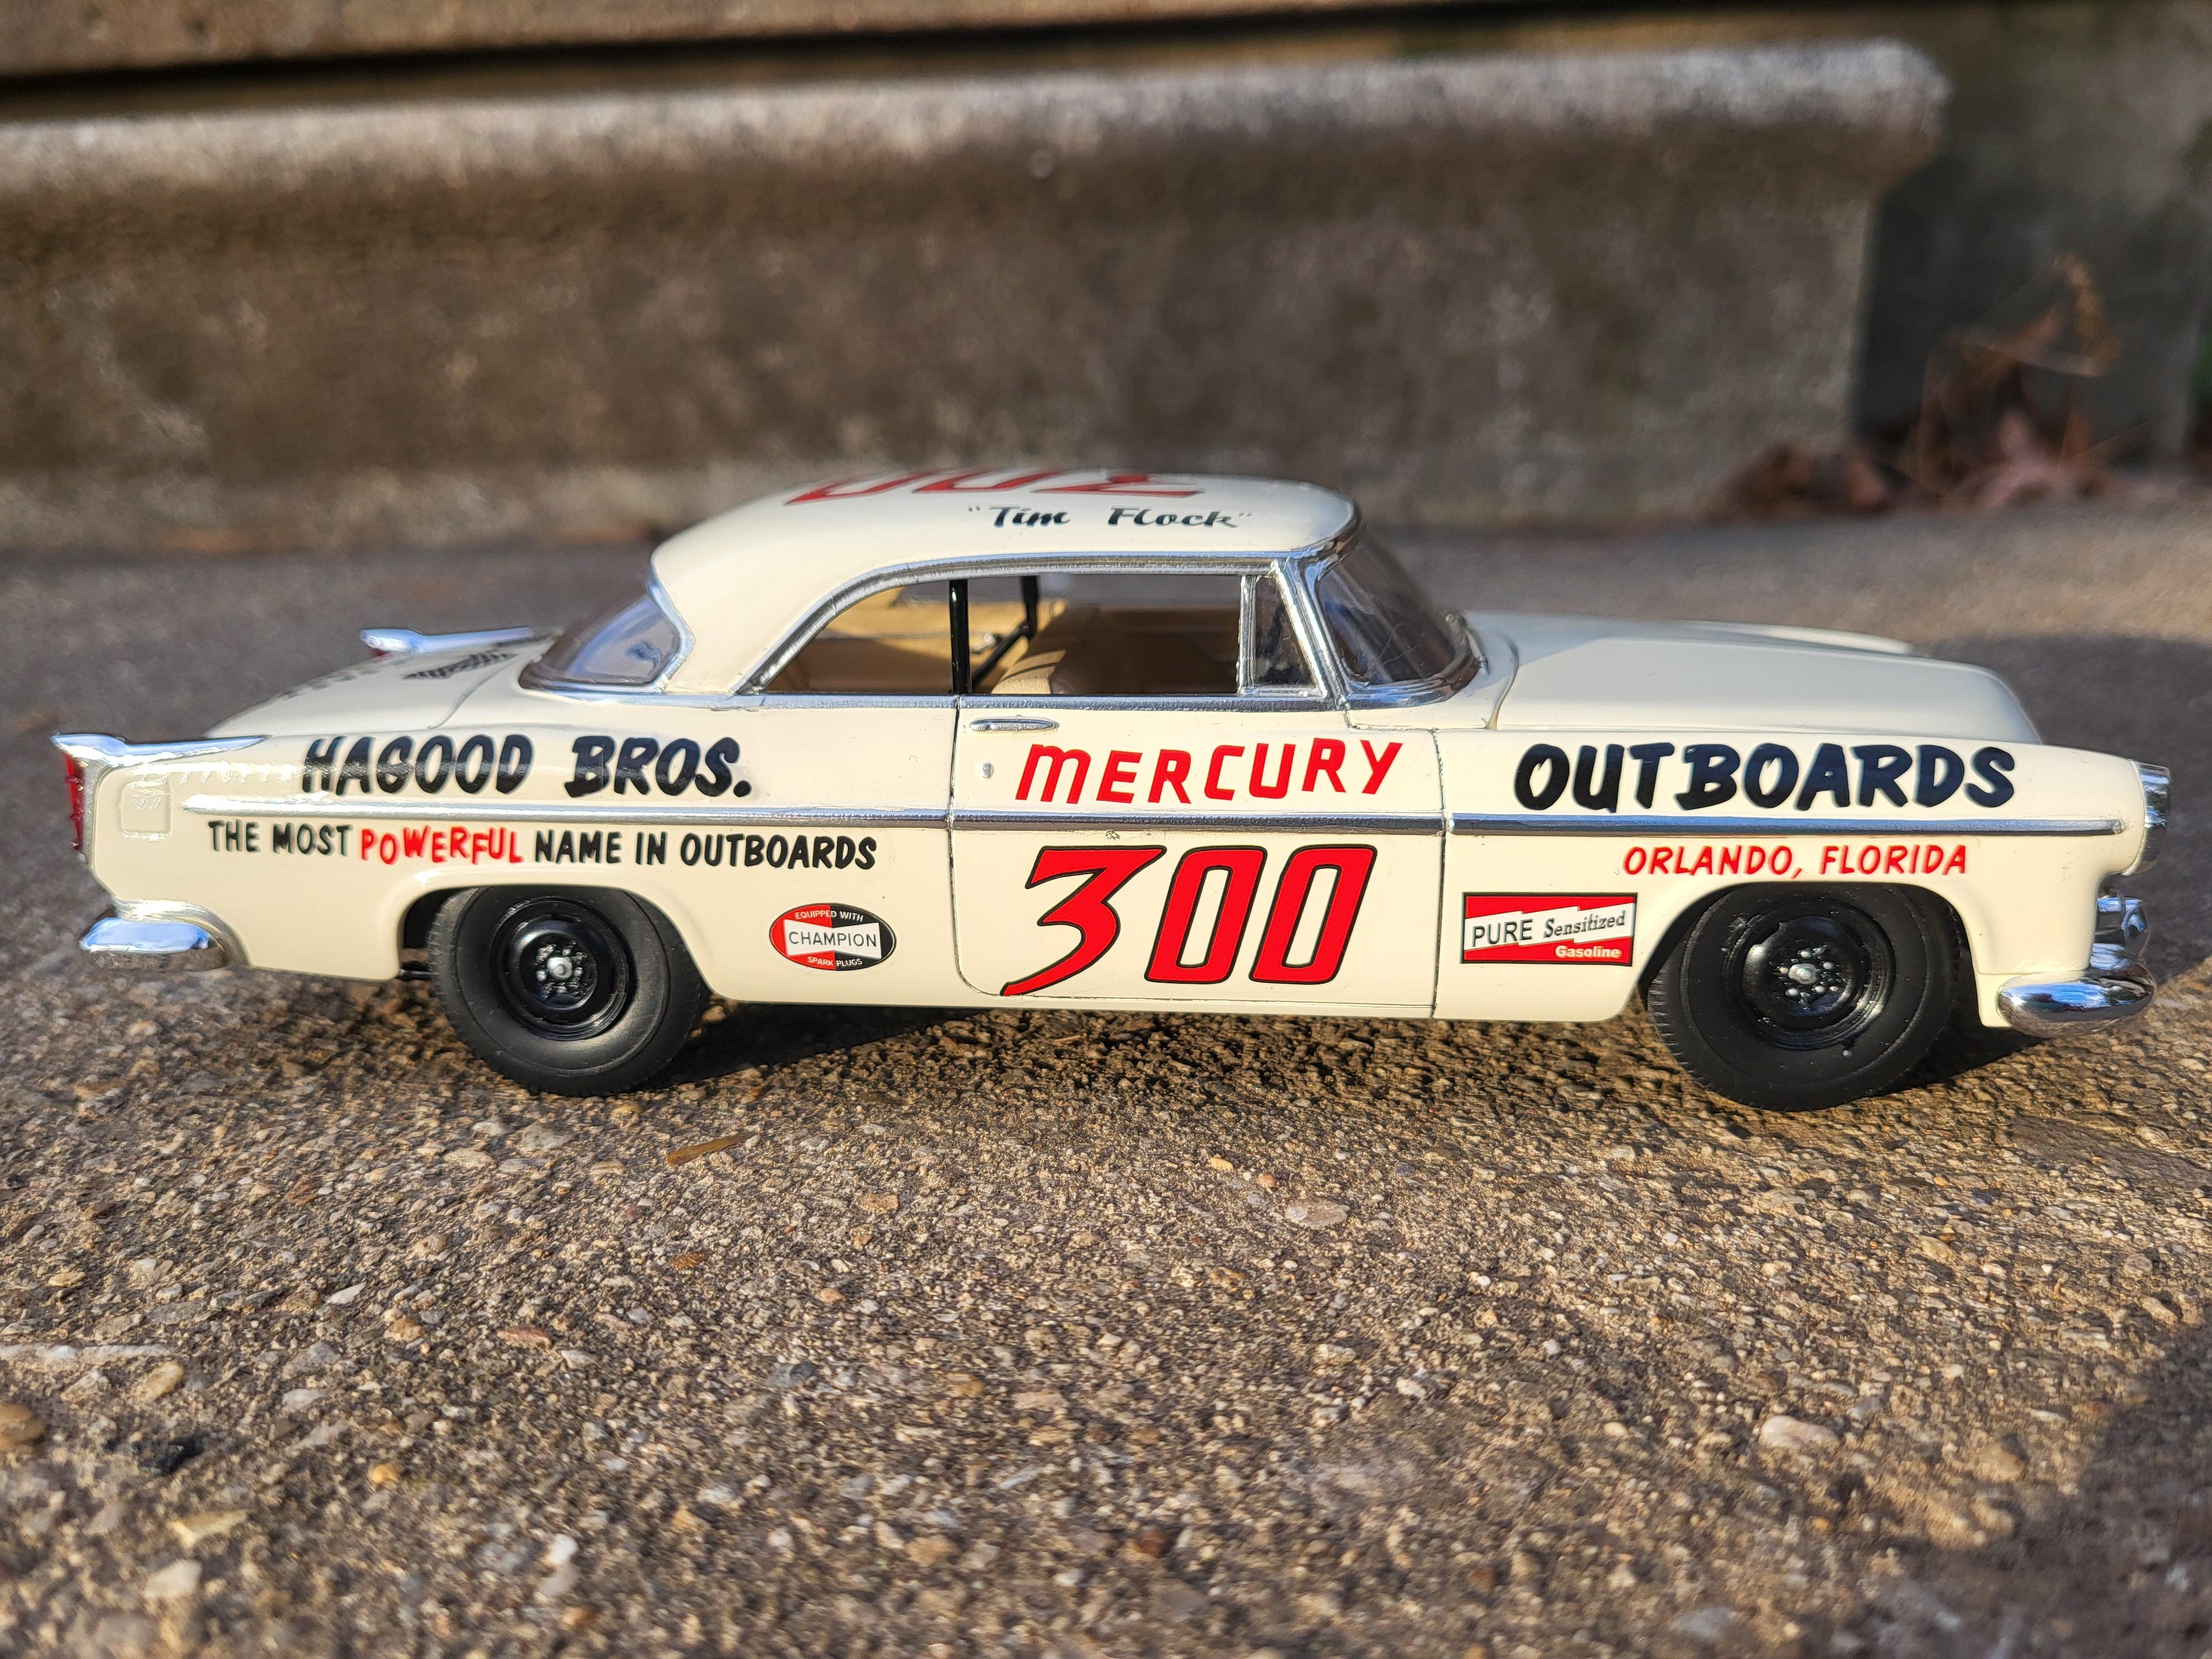
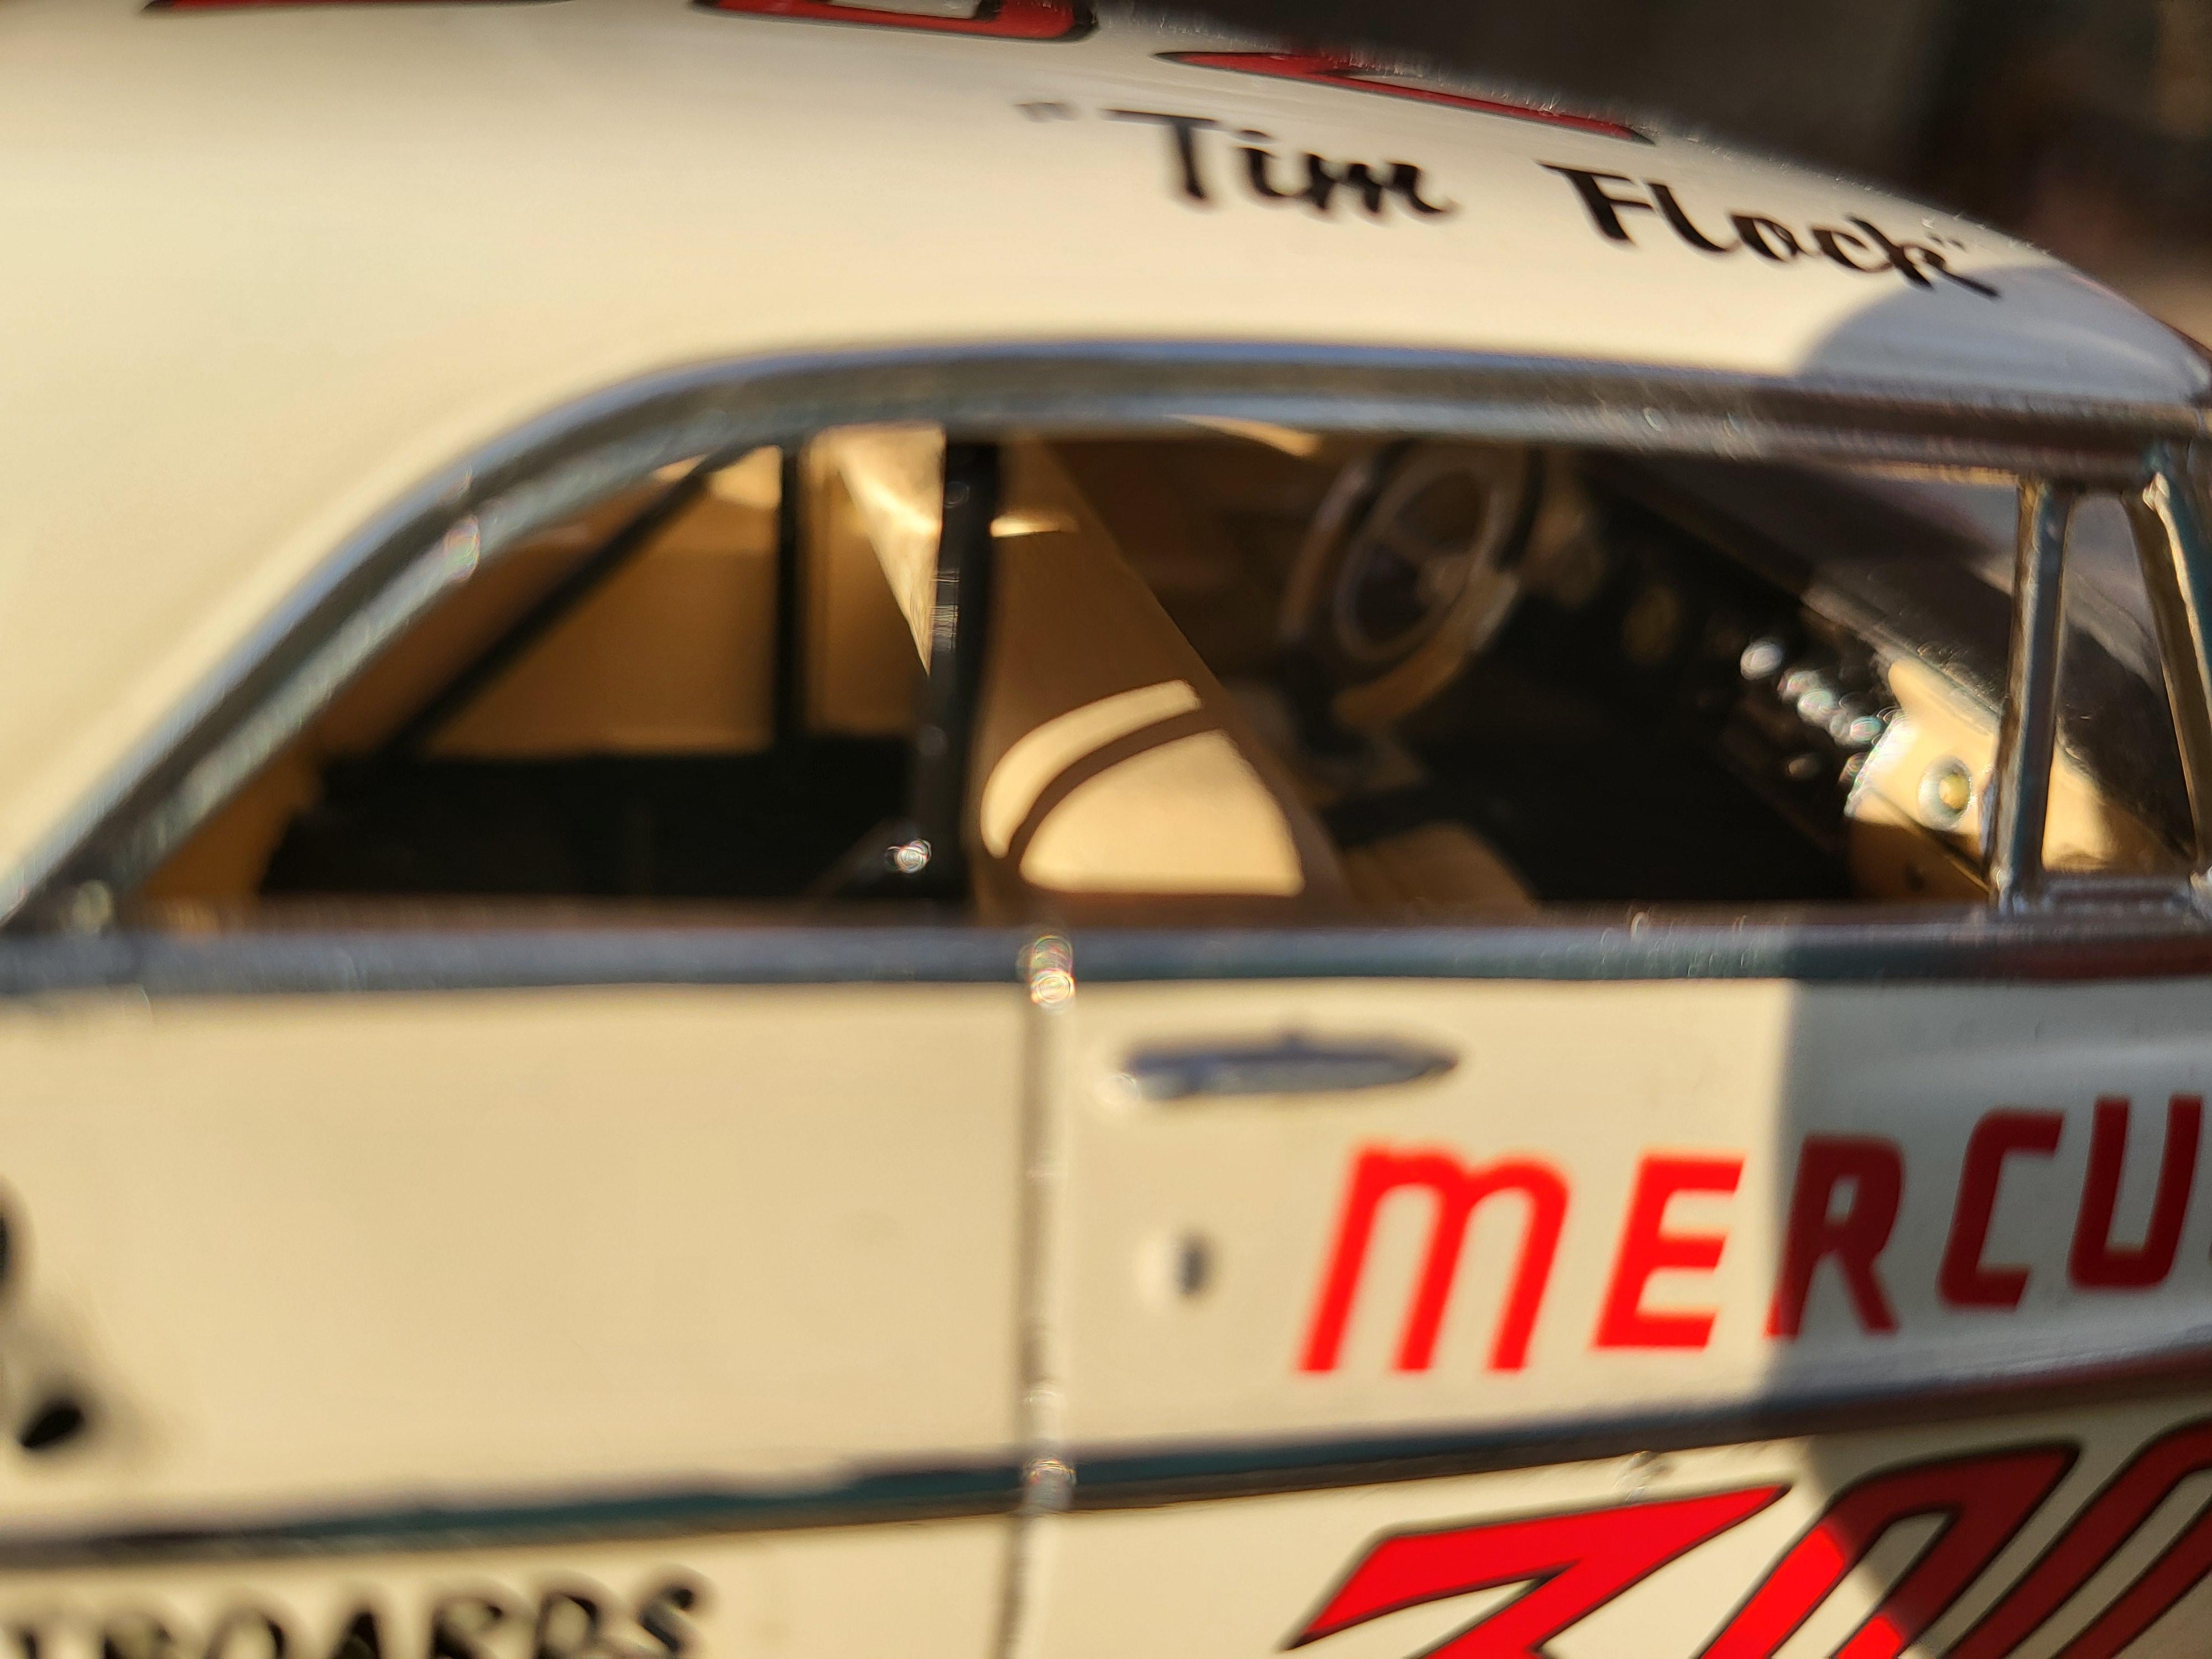
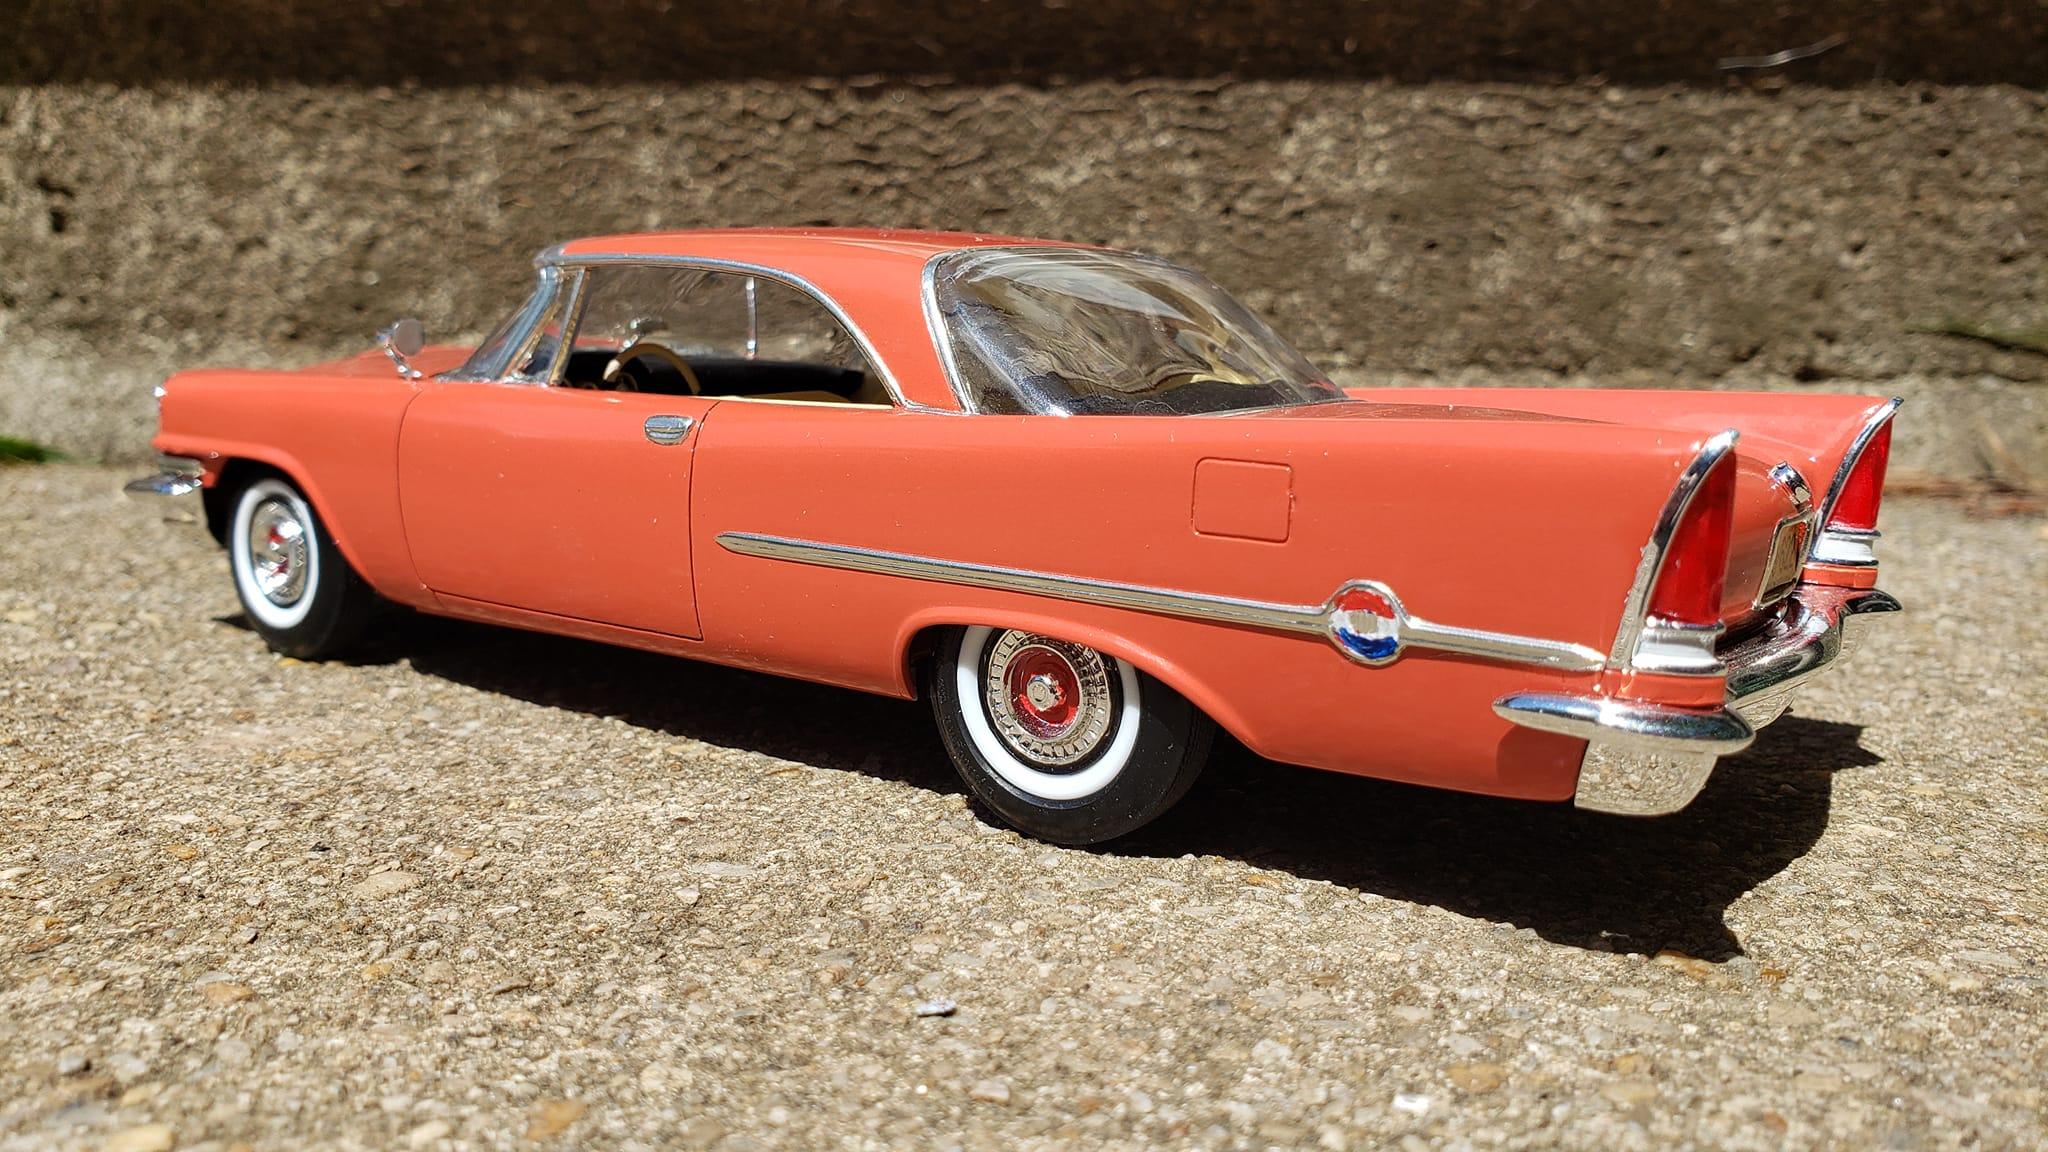
Just completed my 1955 Championship Chrysler 300 as driven by Tim Flock to his 2nd Championship. Moebius kit, Tamiya Racing White. Just box stock.
-
Not too bad of a year for me.
- 22 replies
-
- 10
-

-
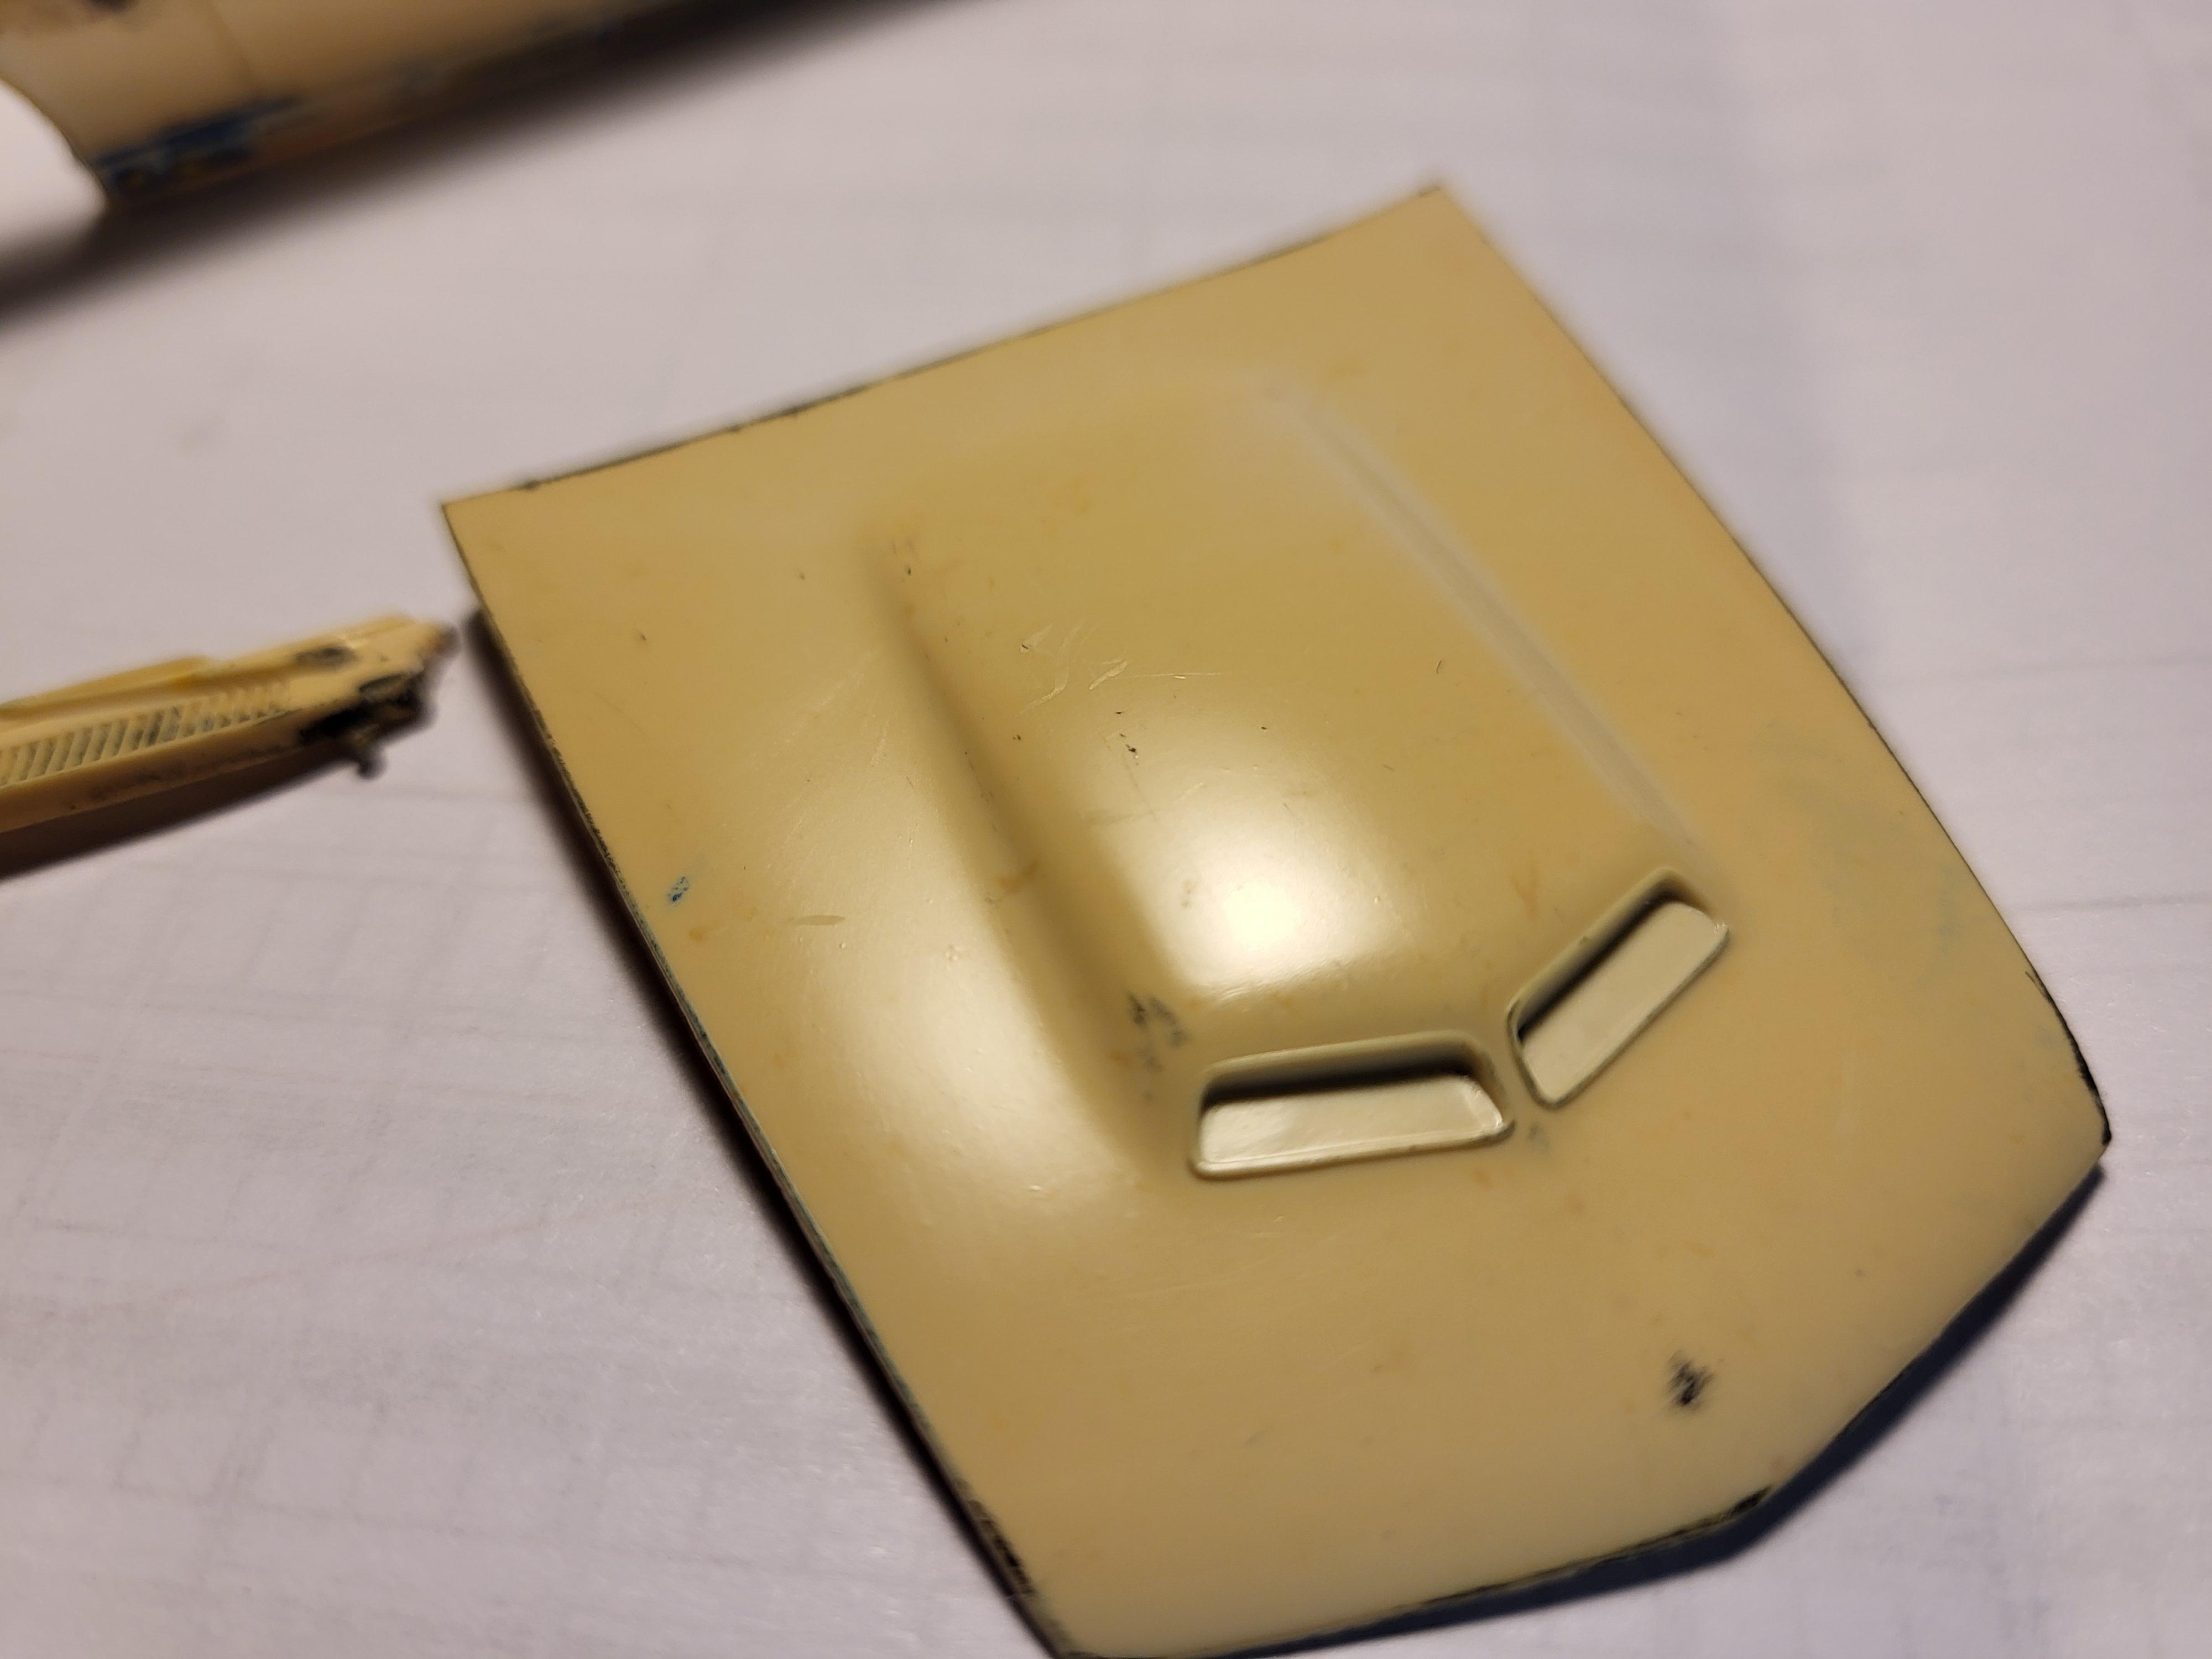
After a couple hours in oven cleaner and little sanding, I think the hood is workable now.
-
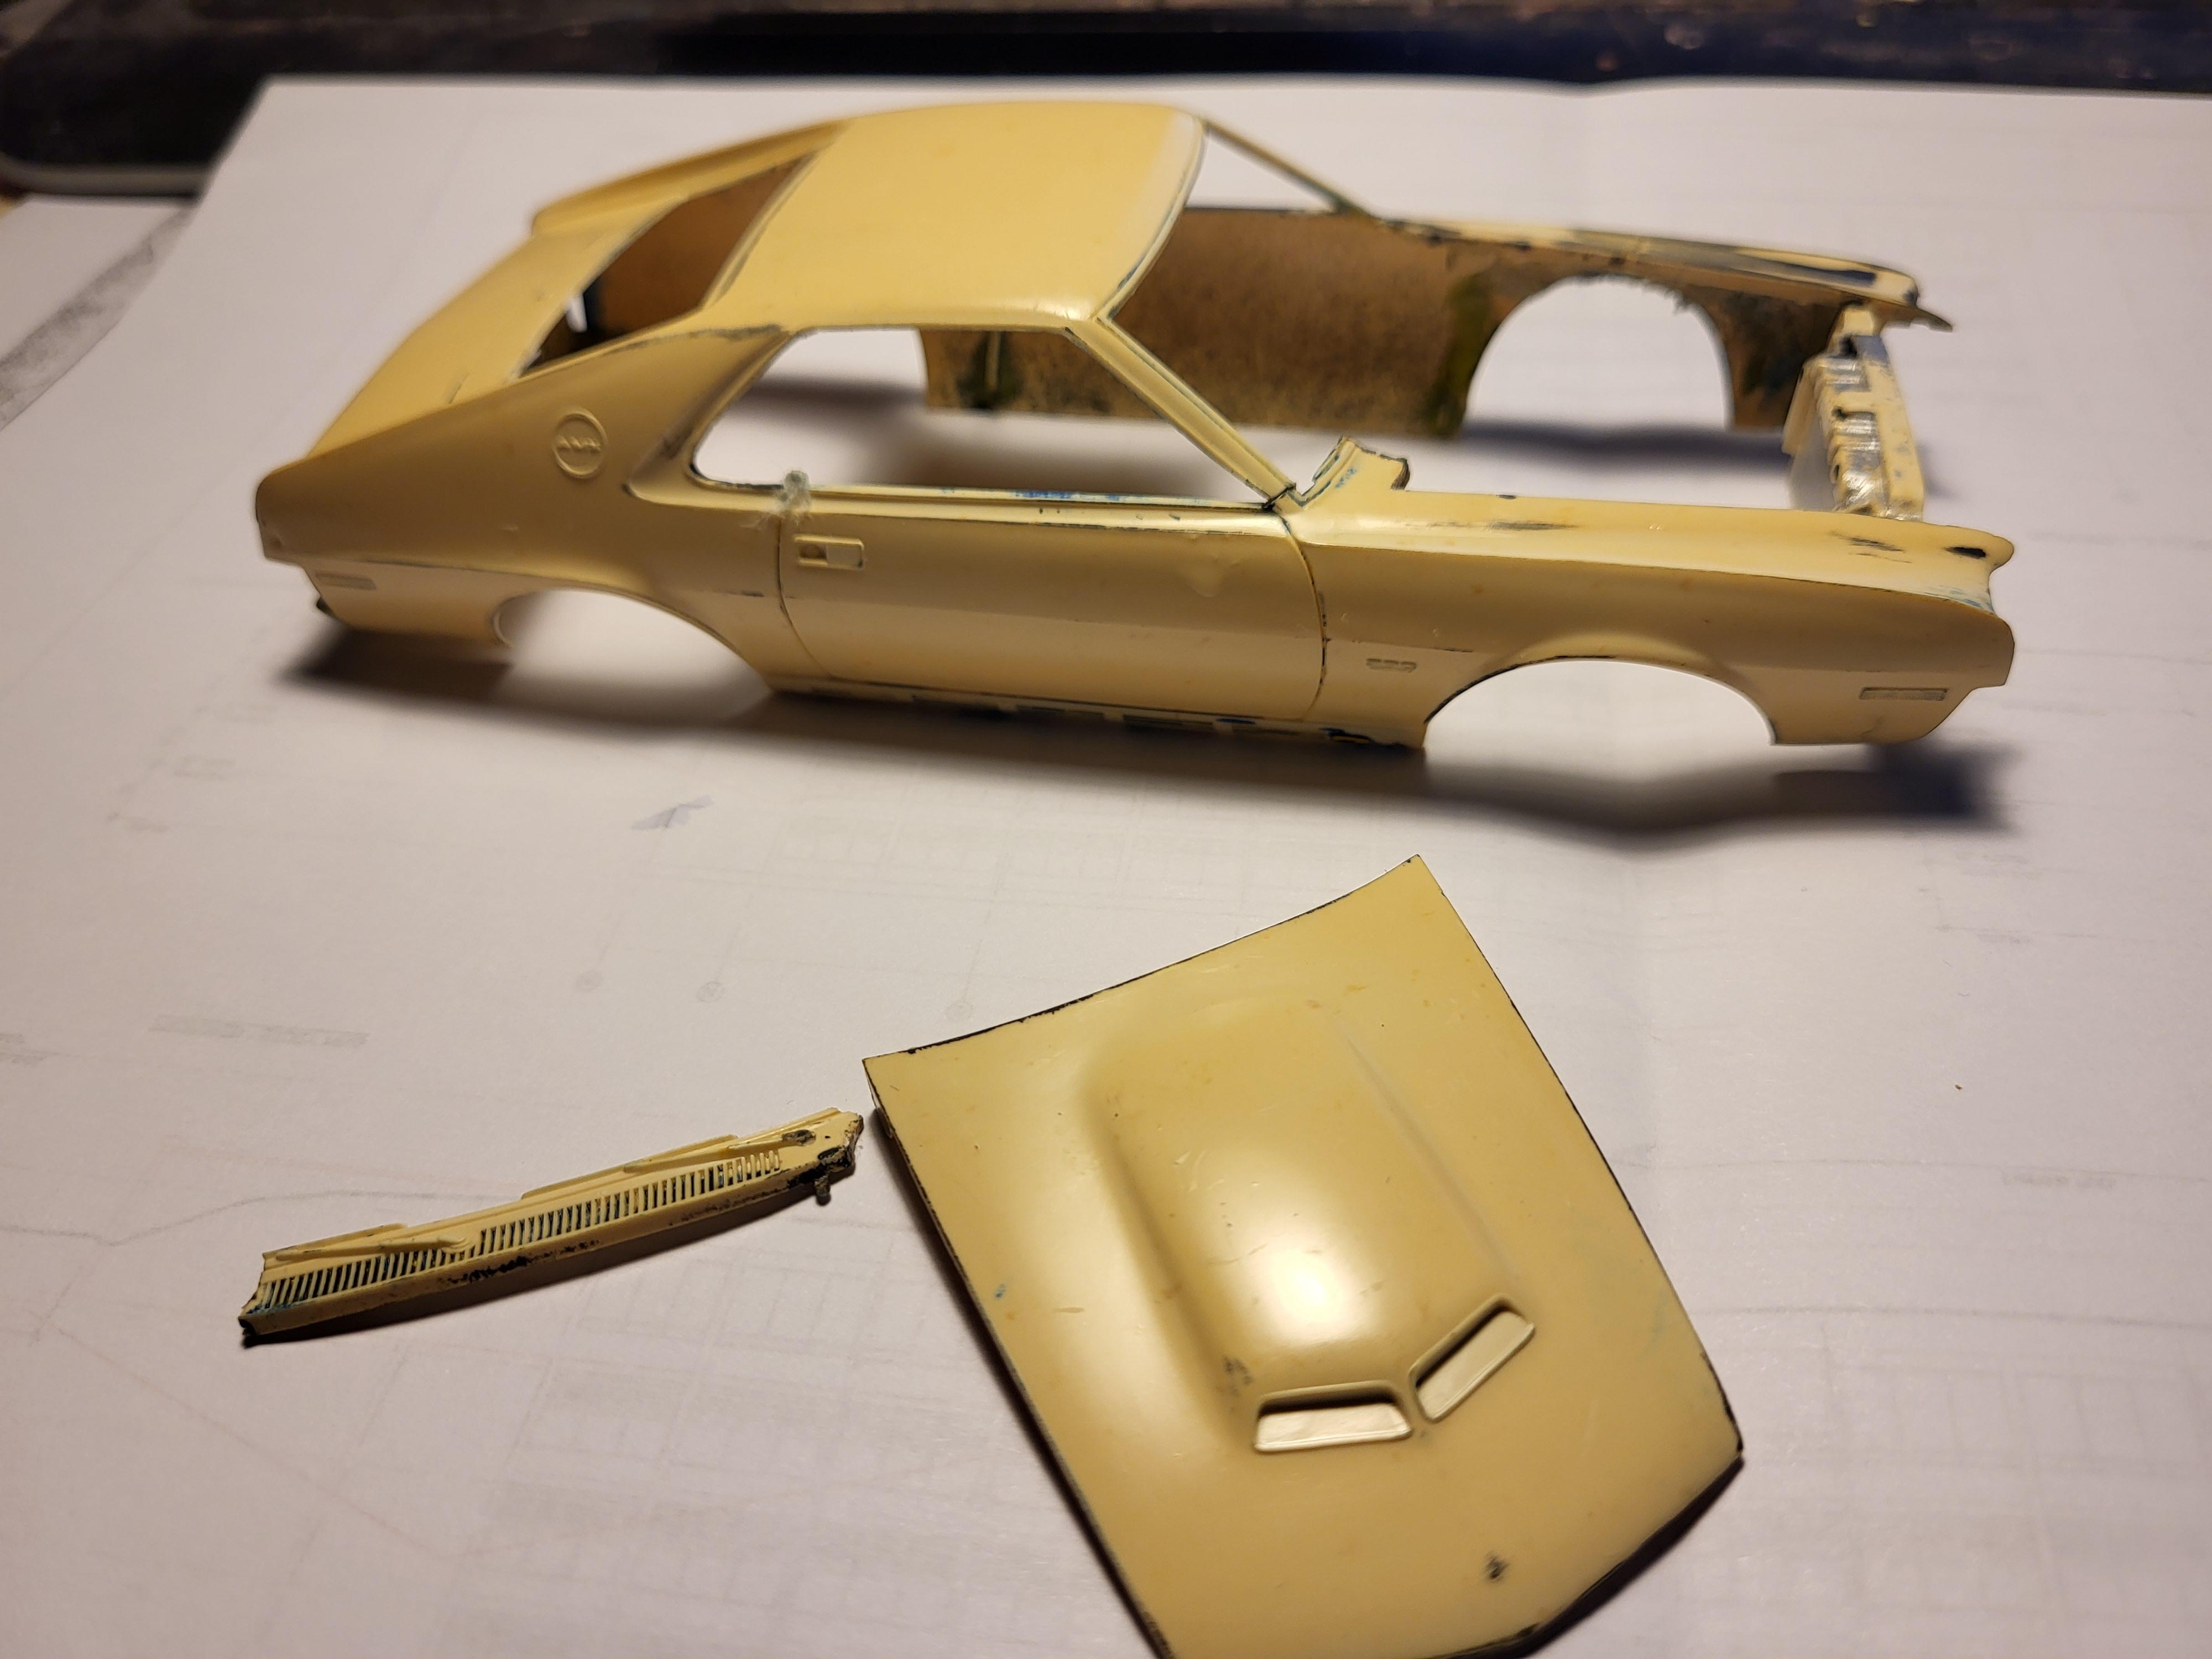
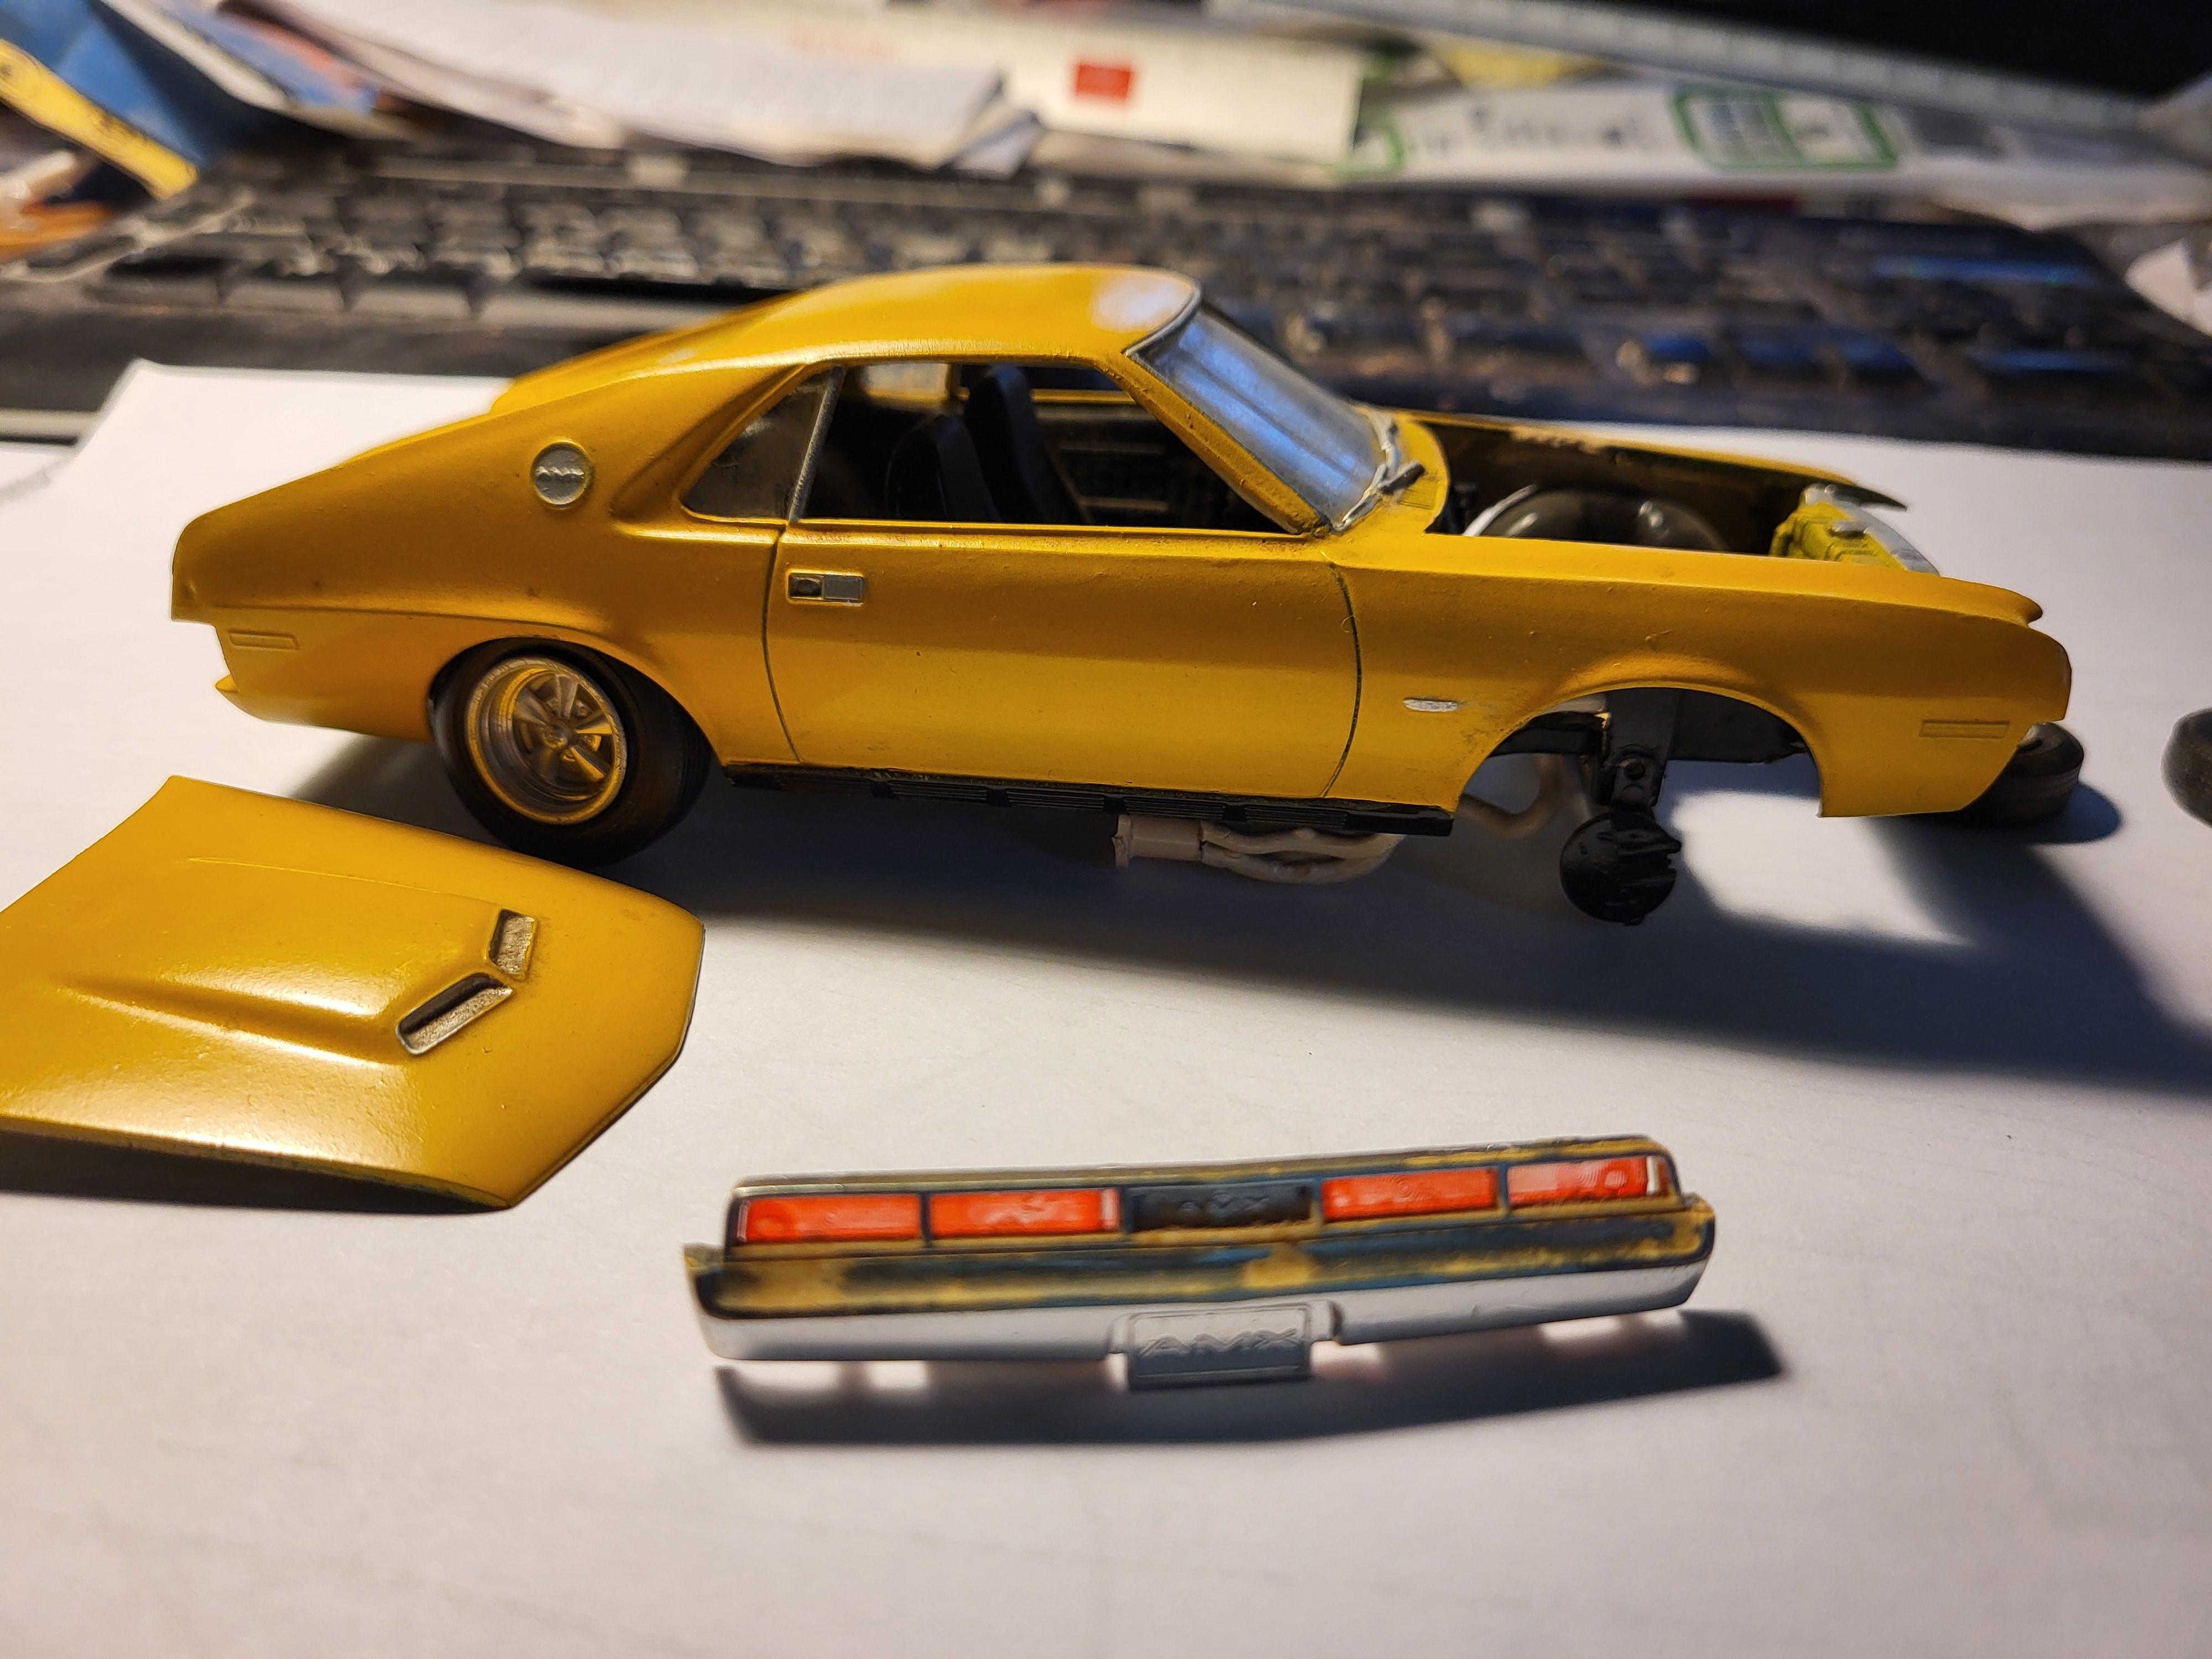
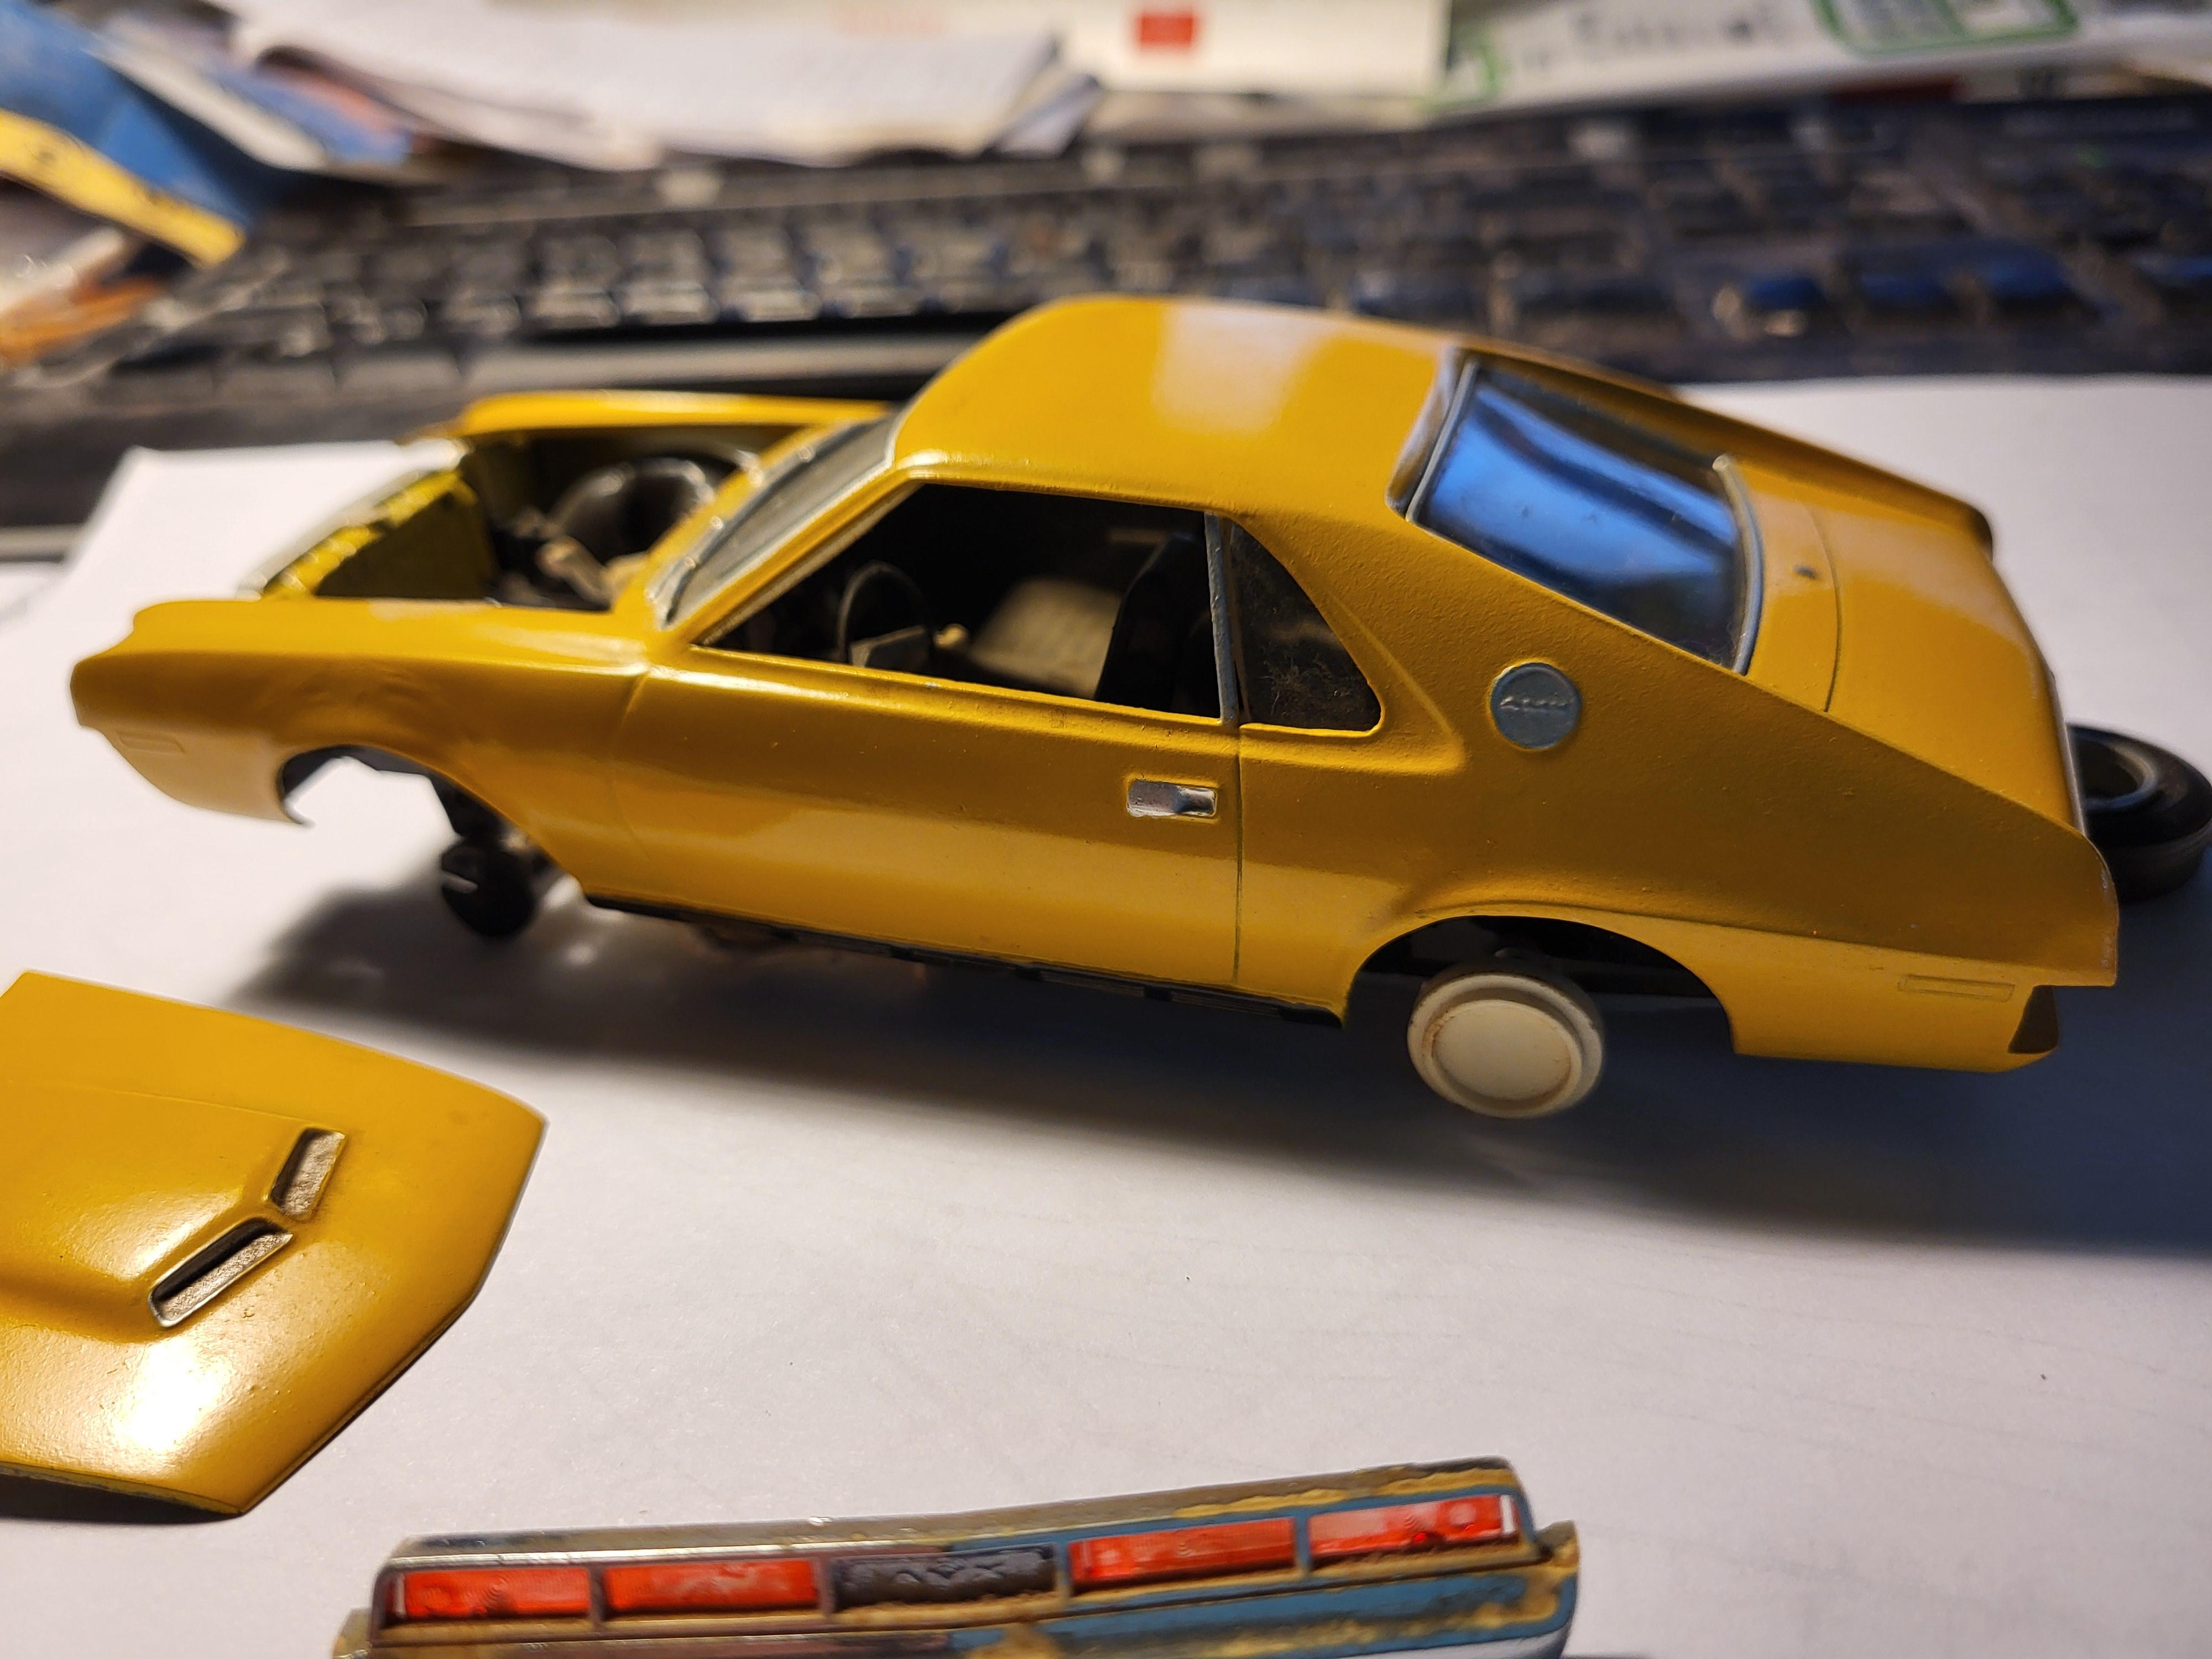
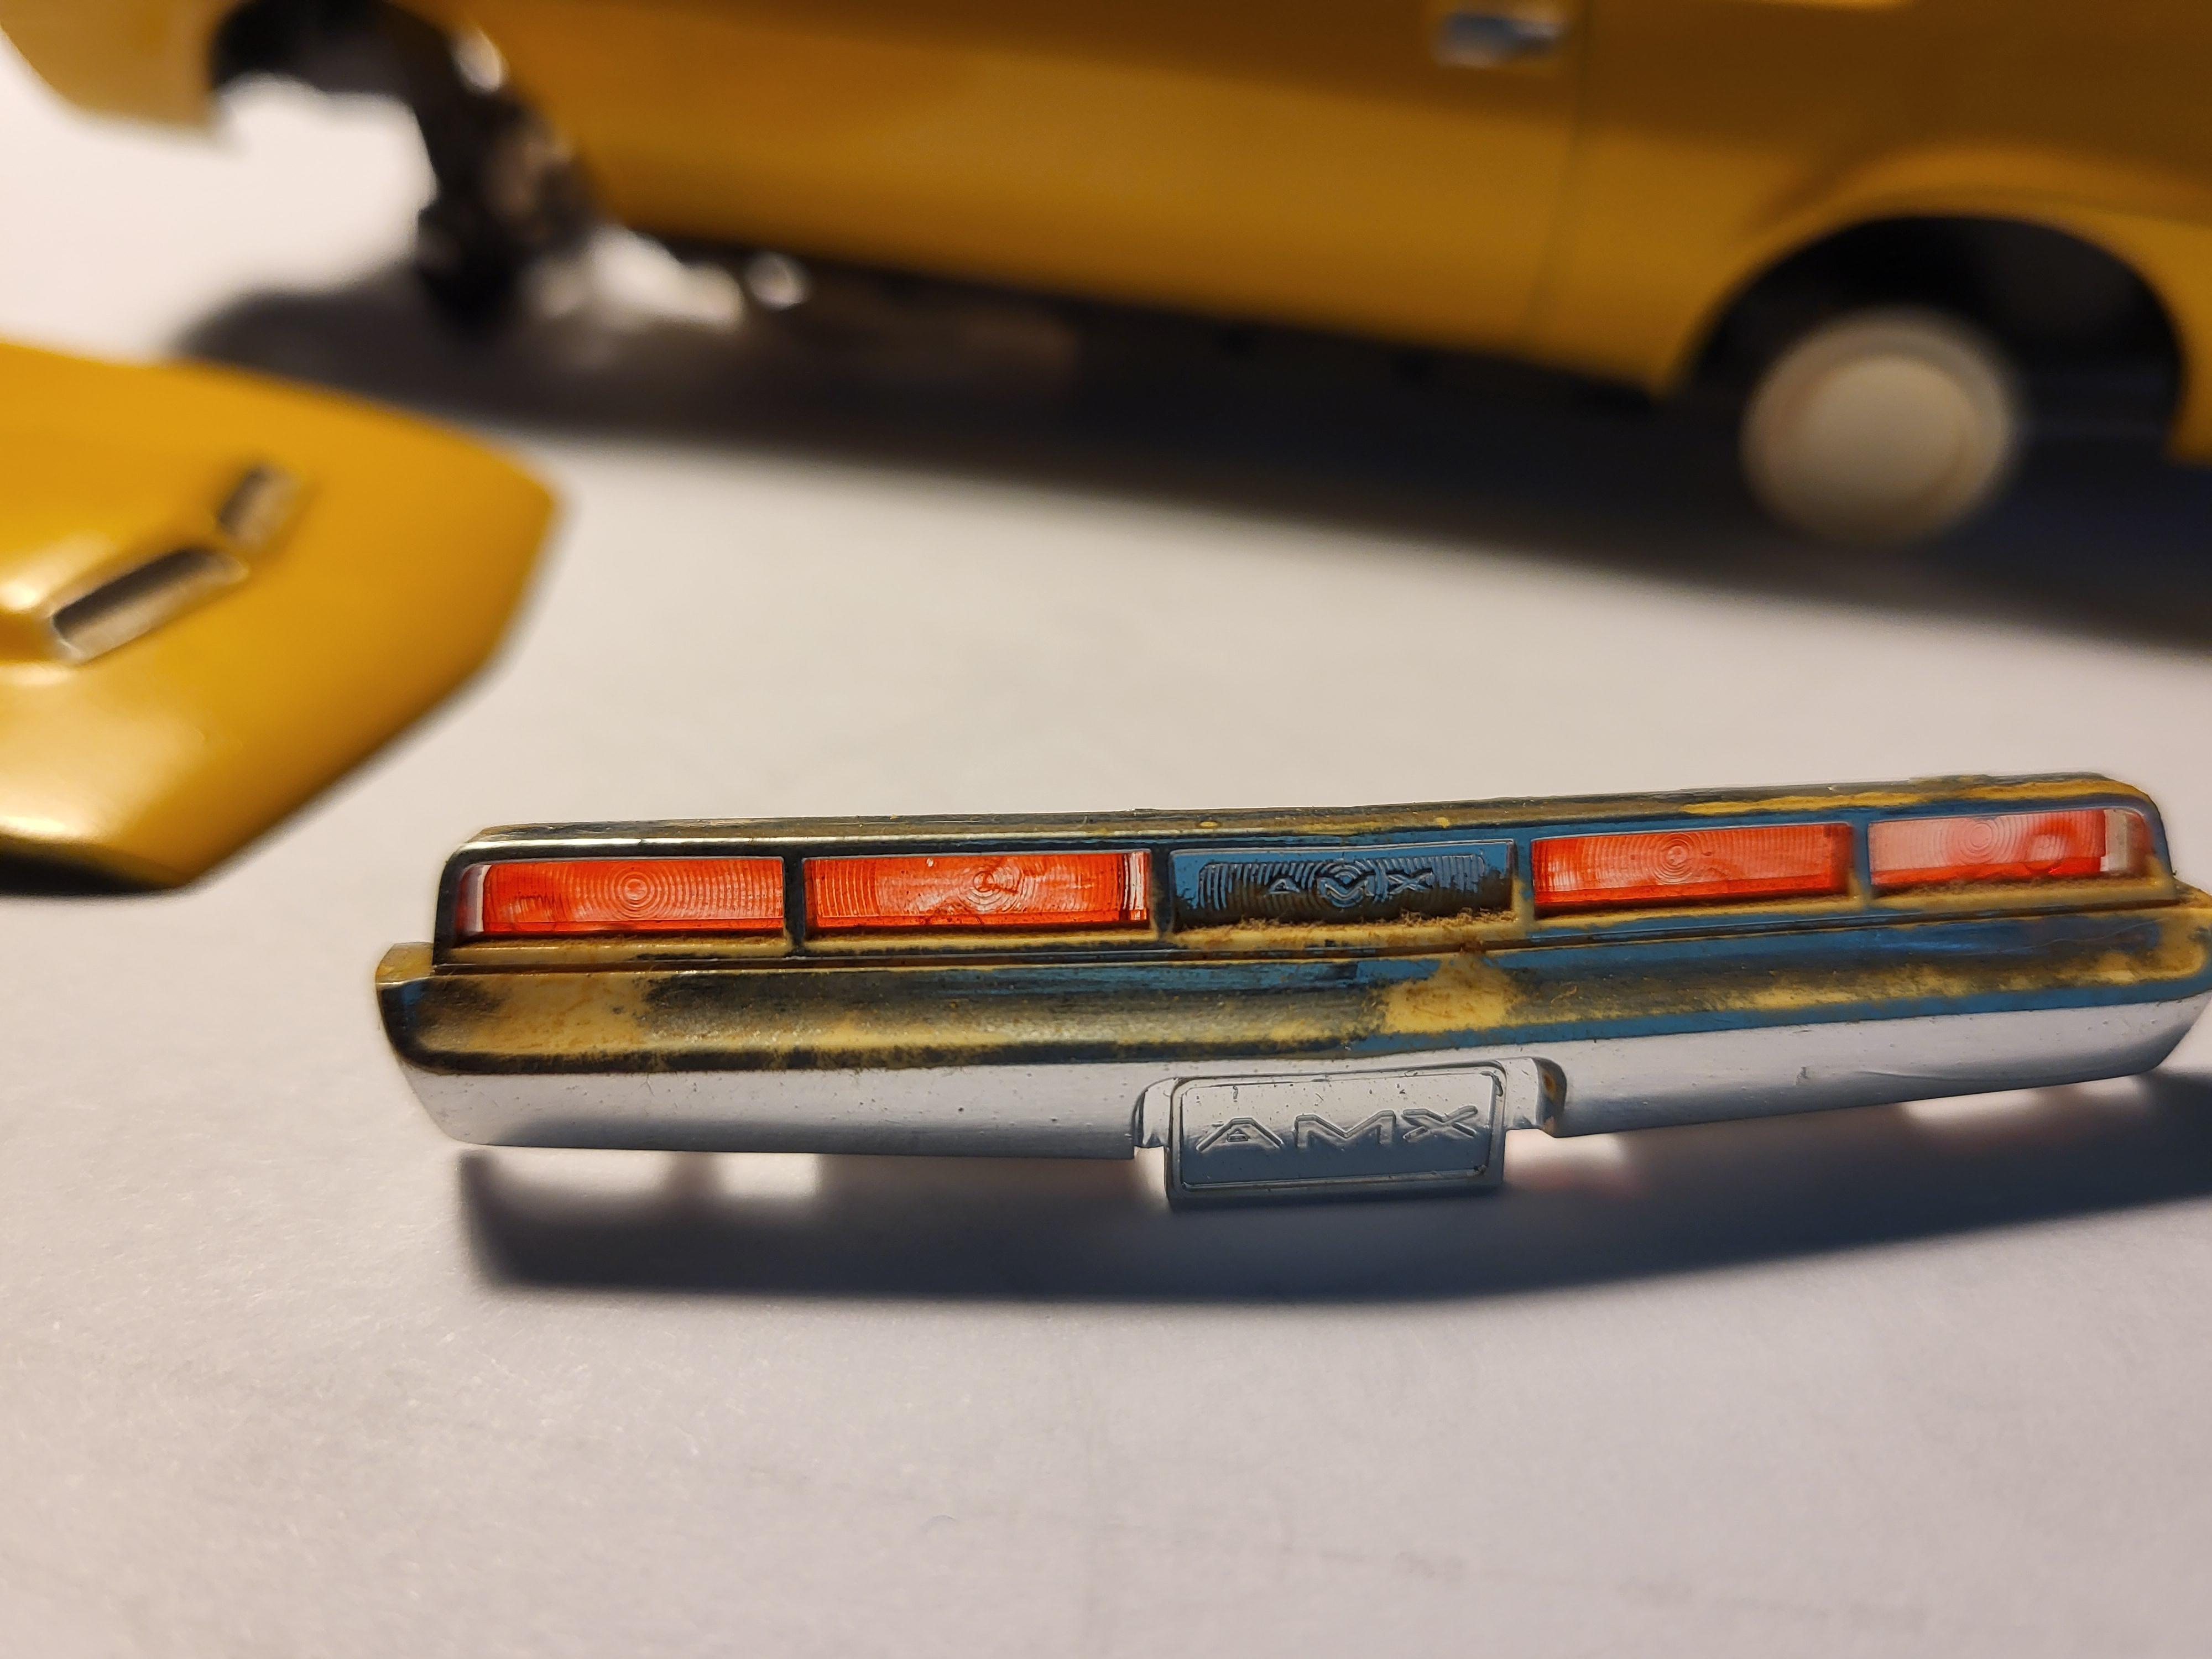
Had the body in the purple pond for a week. The decals came right off. The white paint the was goobered on the cowl panel has been striped. The grille has popped put. The taillight panel on the other hand didn't fair out to well. I've got the hood in oven cleaner now to see if that will do anything to the white paint that was heavily applied as the purple pond didn't touch the hood. I was able to find some windows, a grille shell and front bumper on ebay.
-
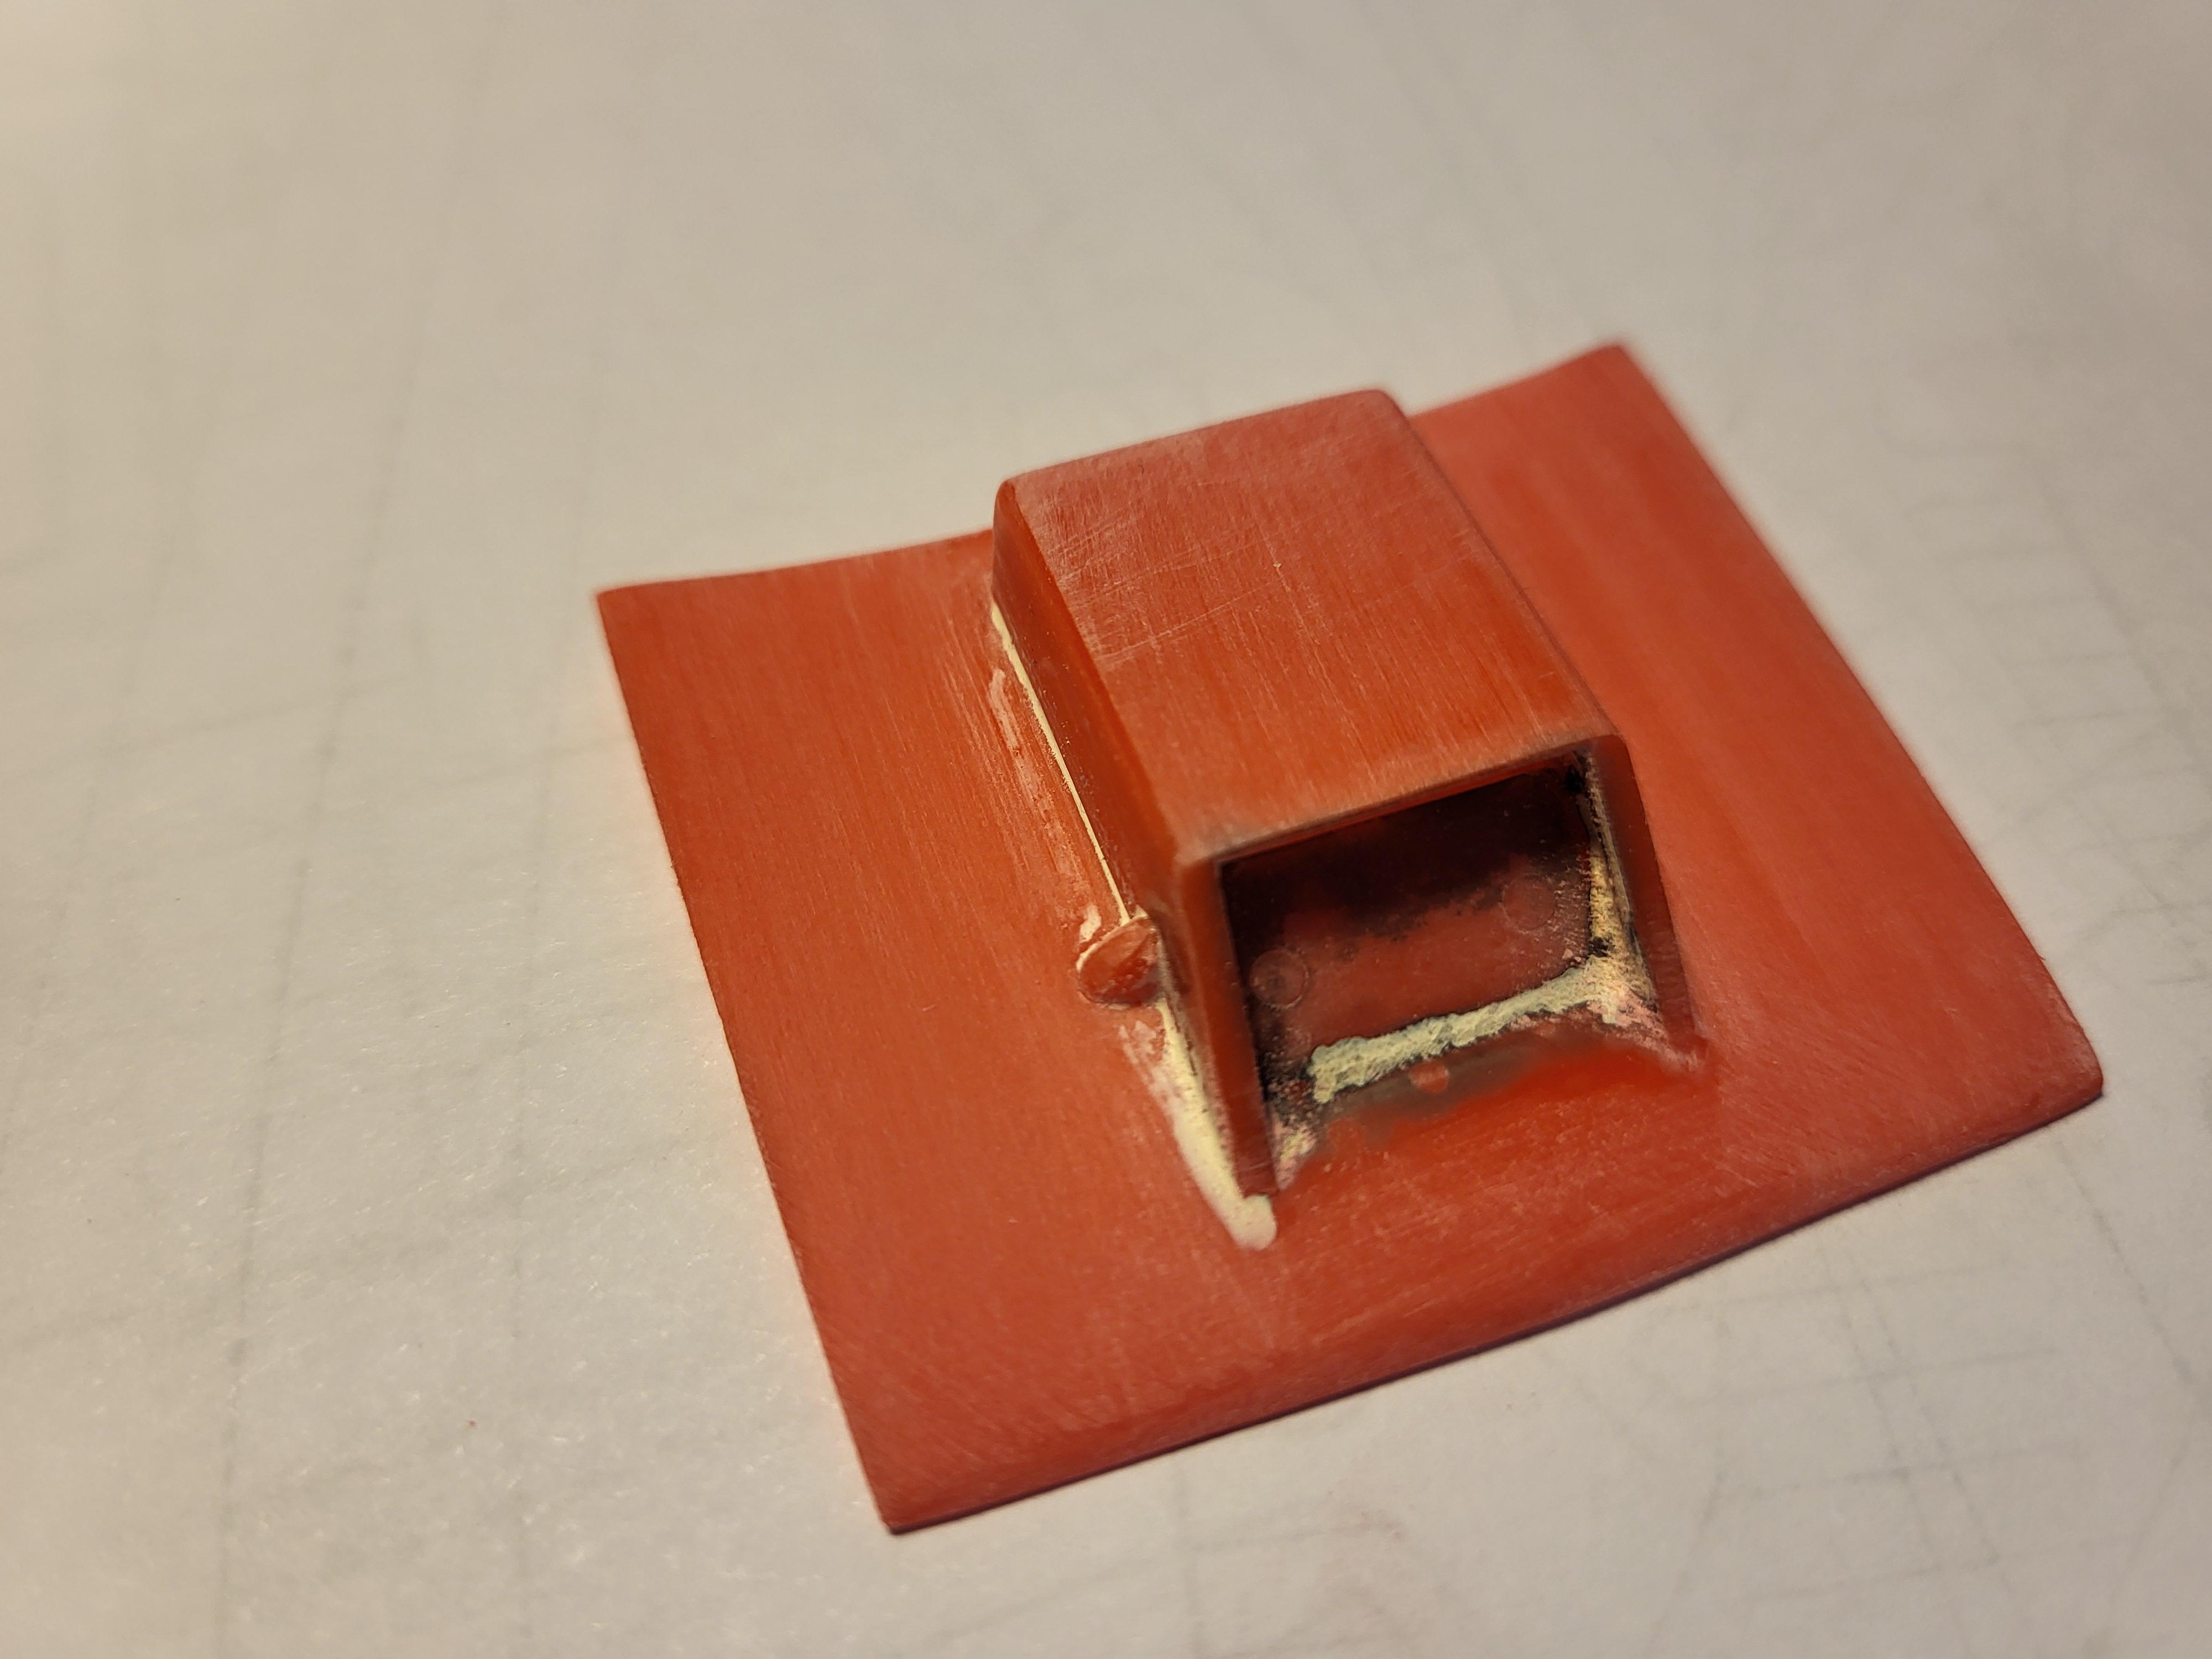
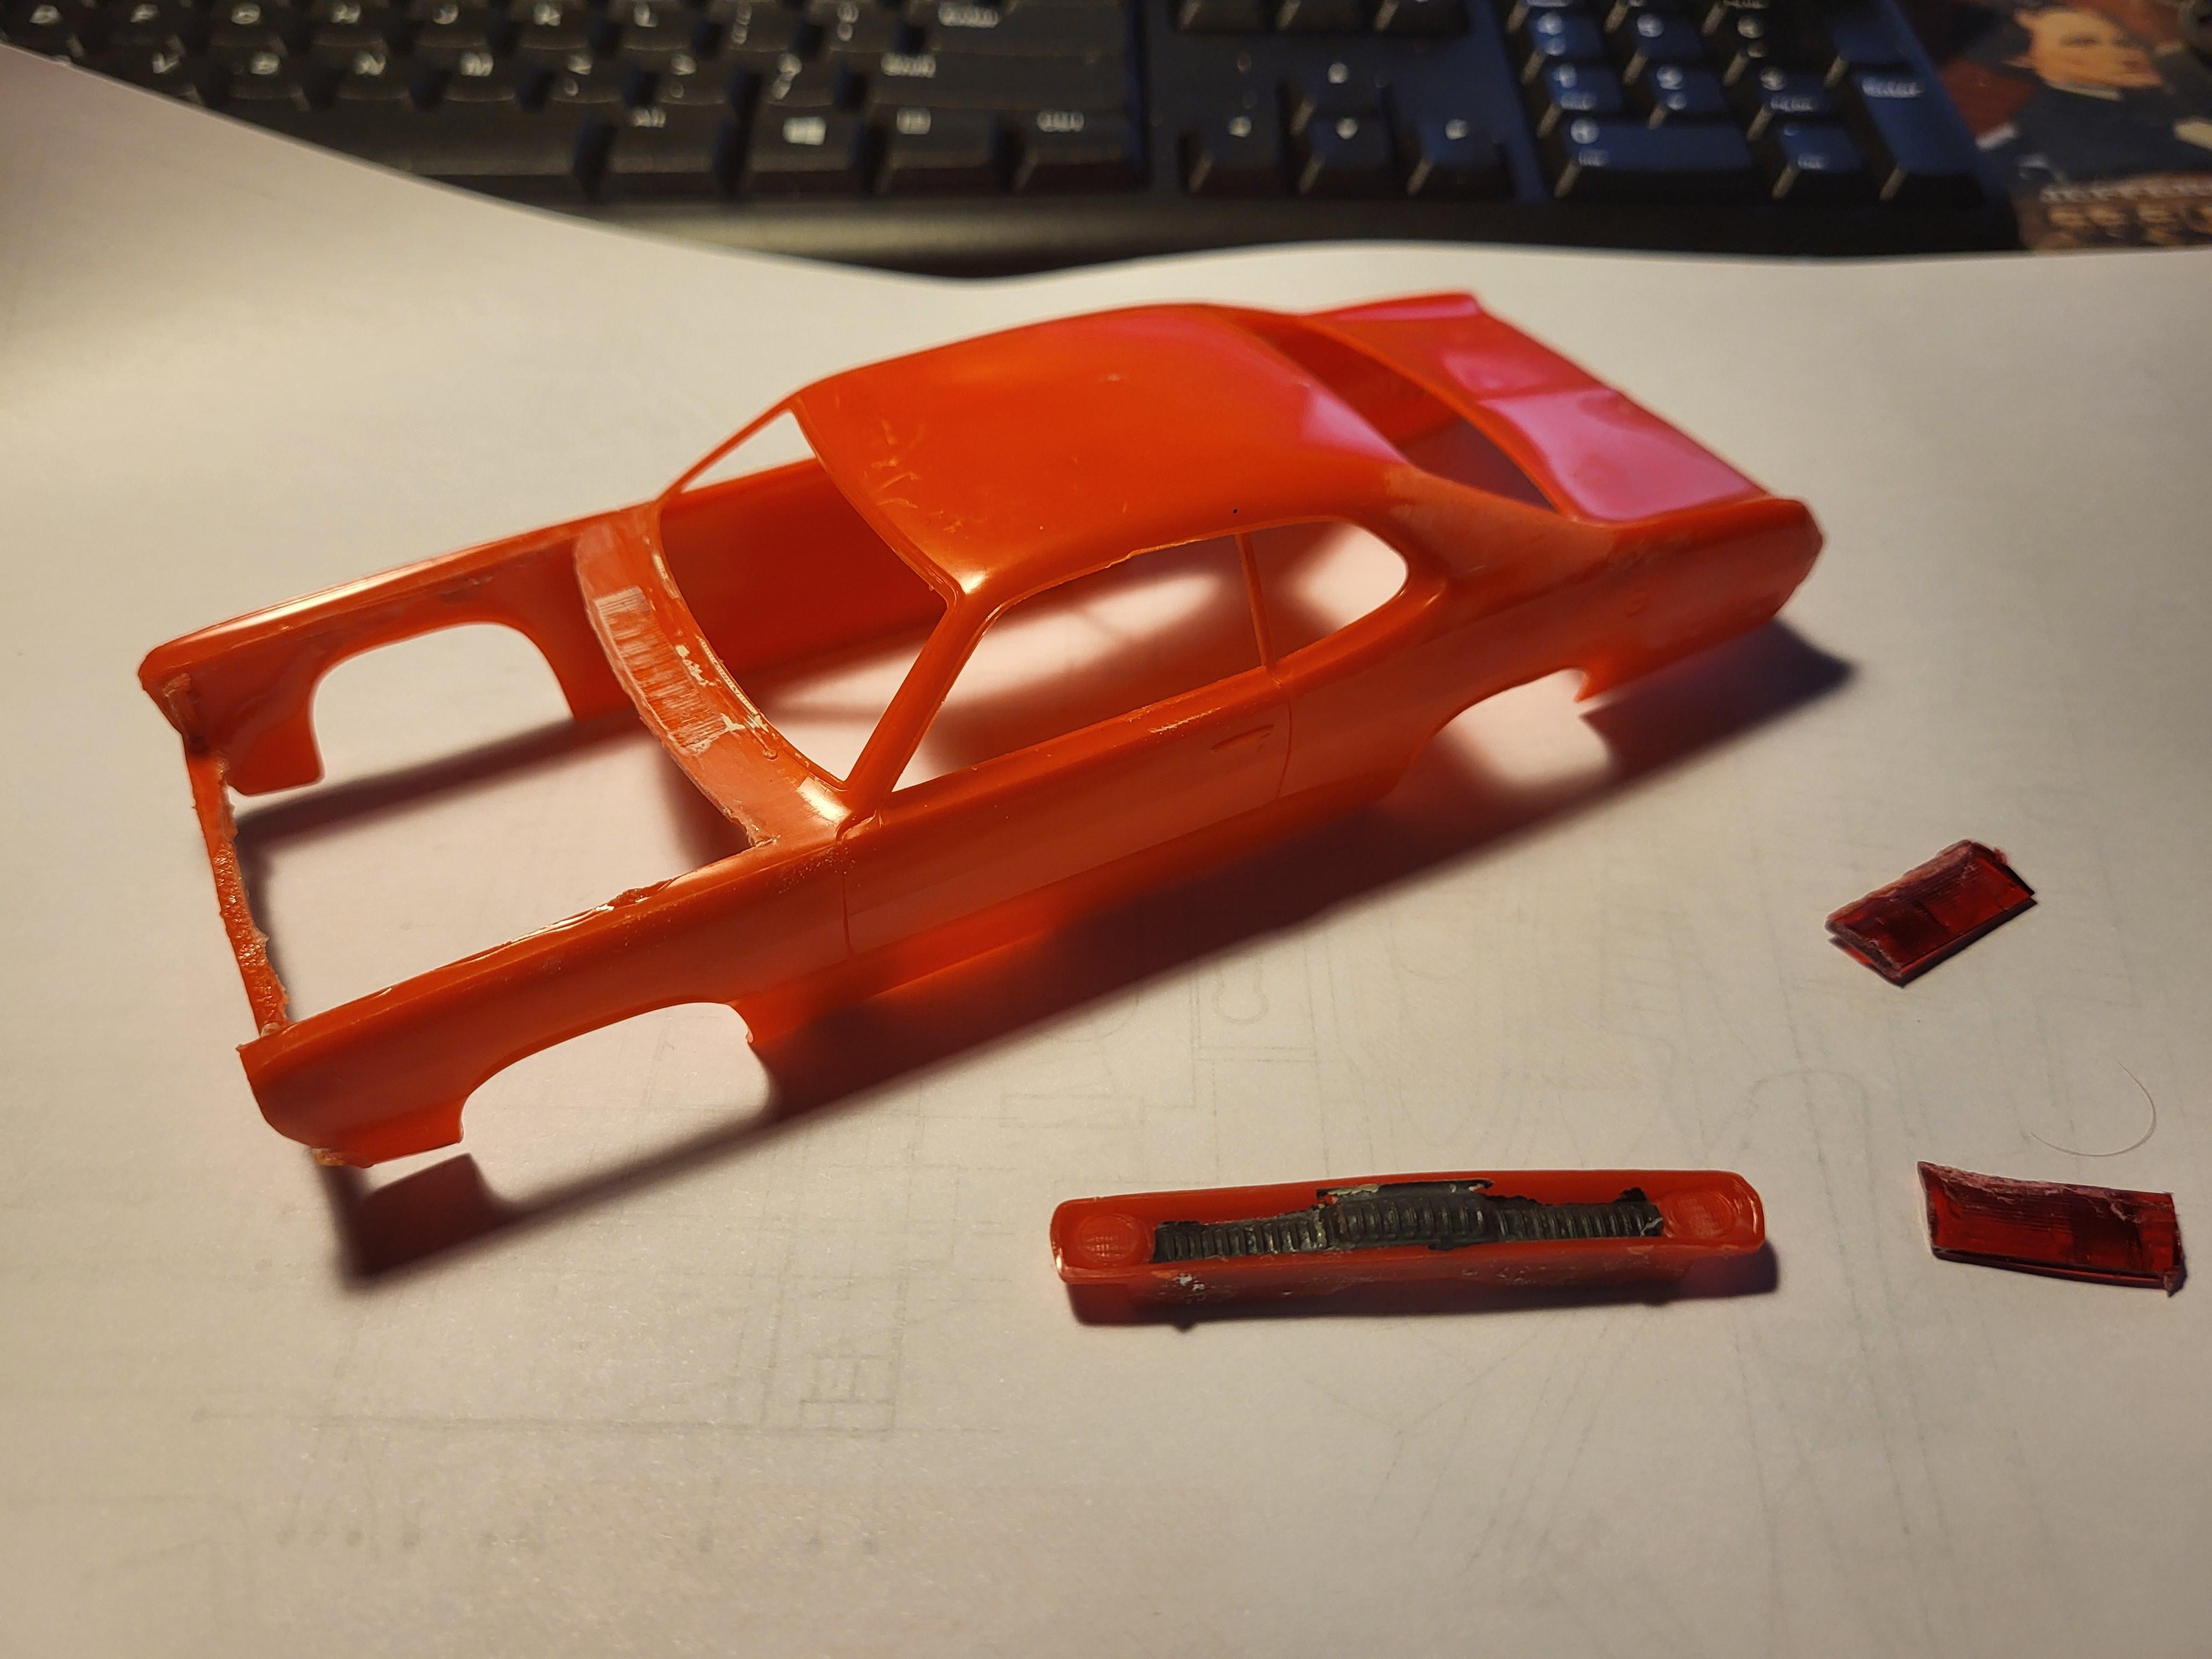
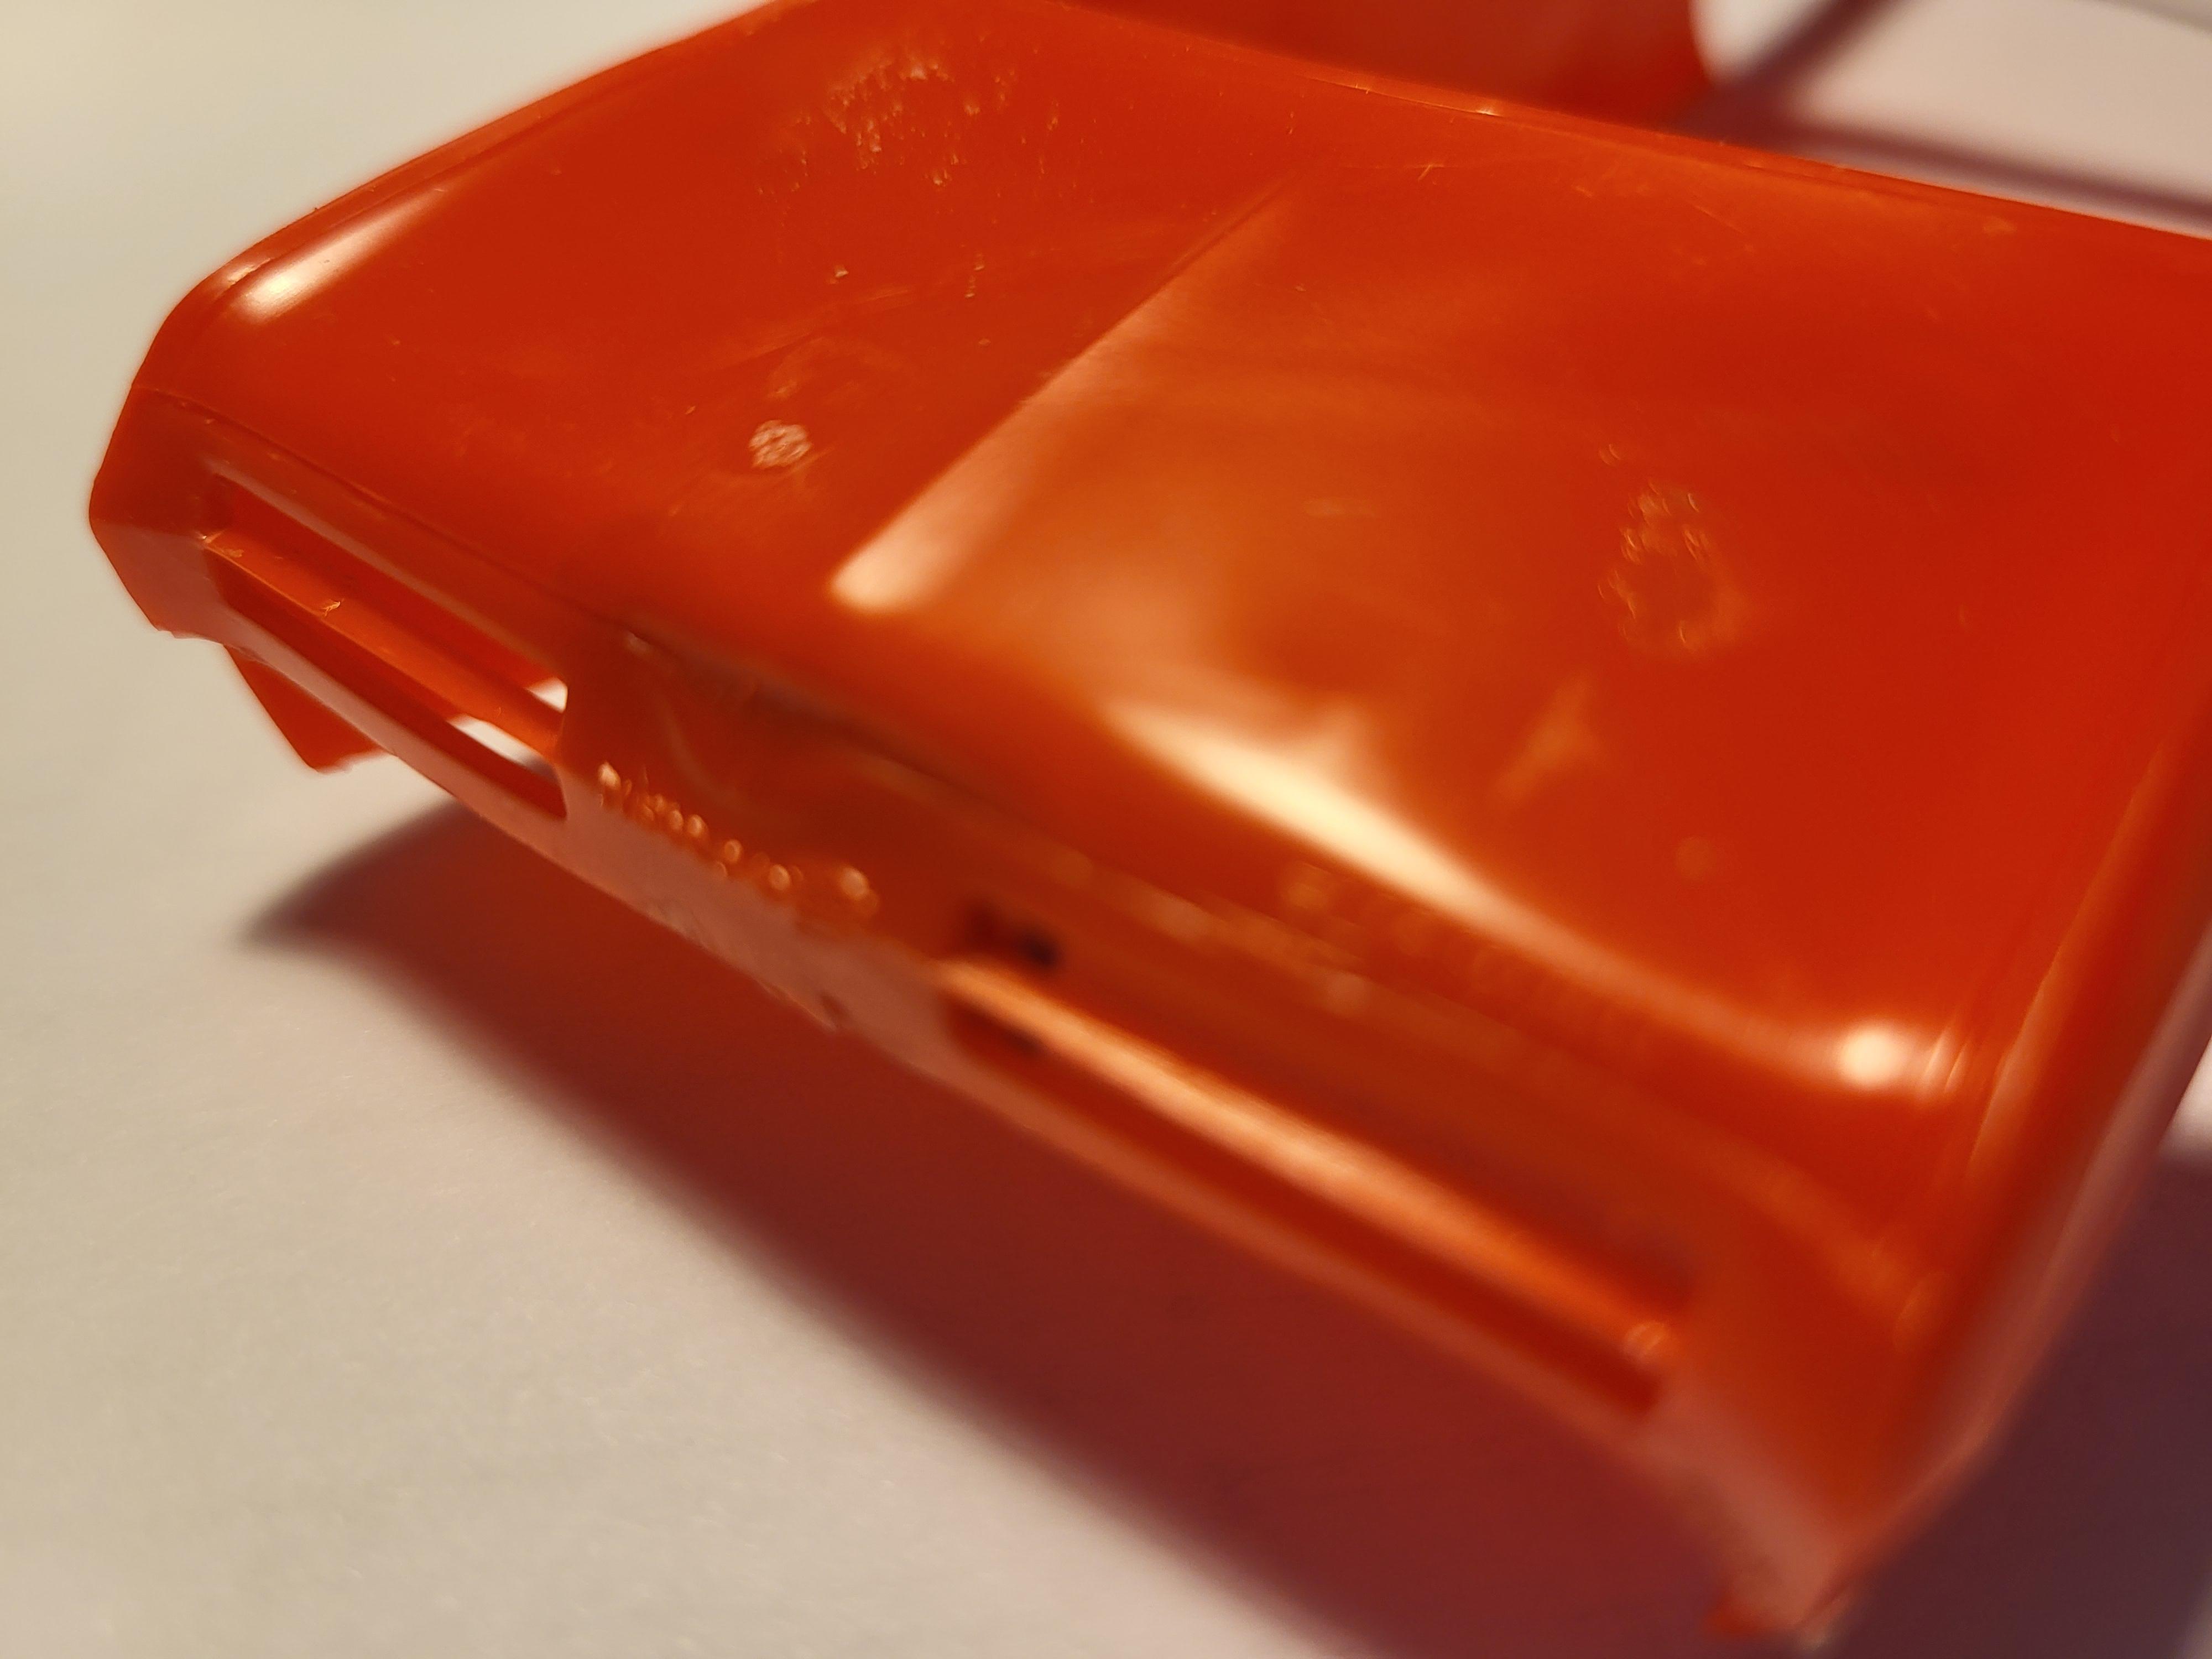
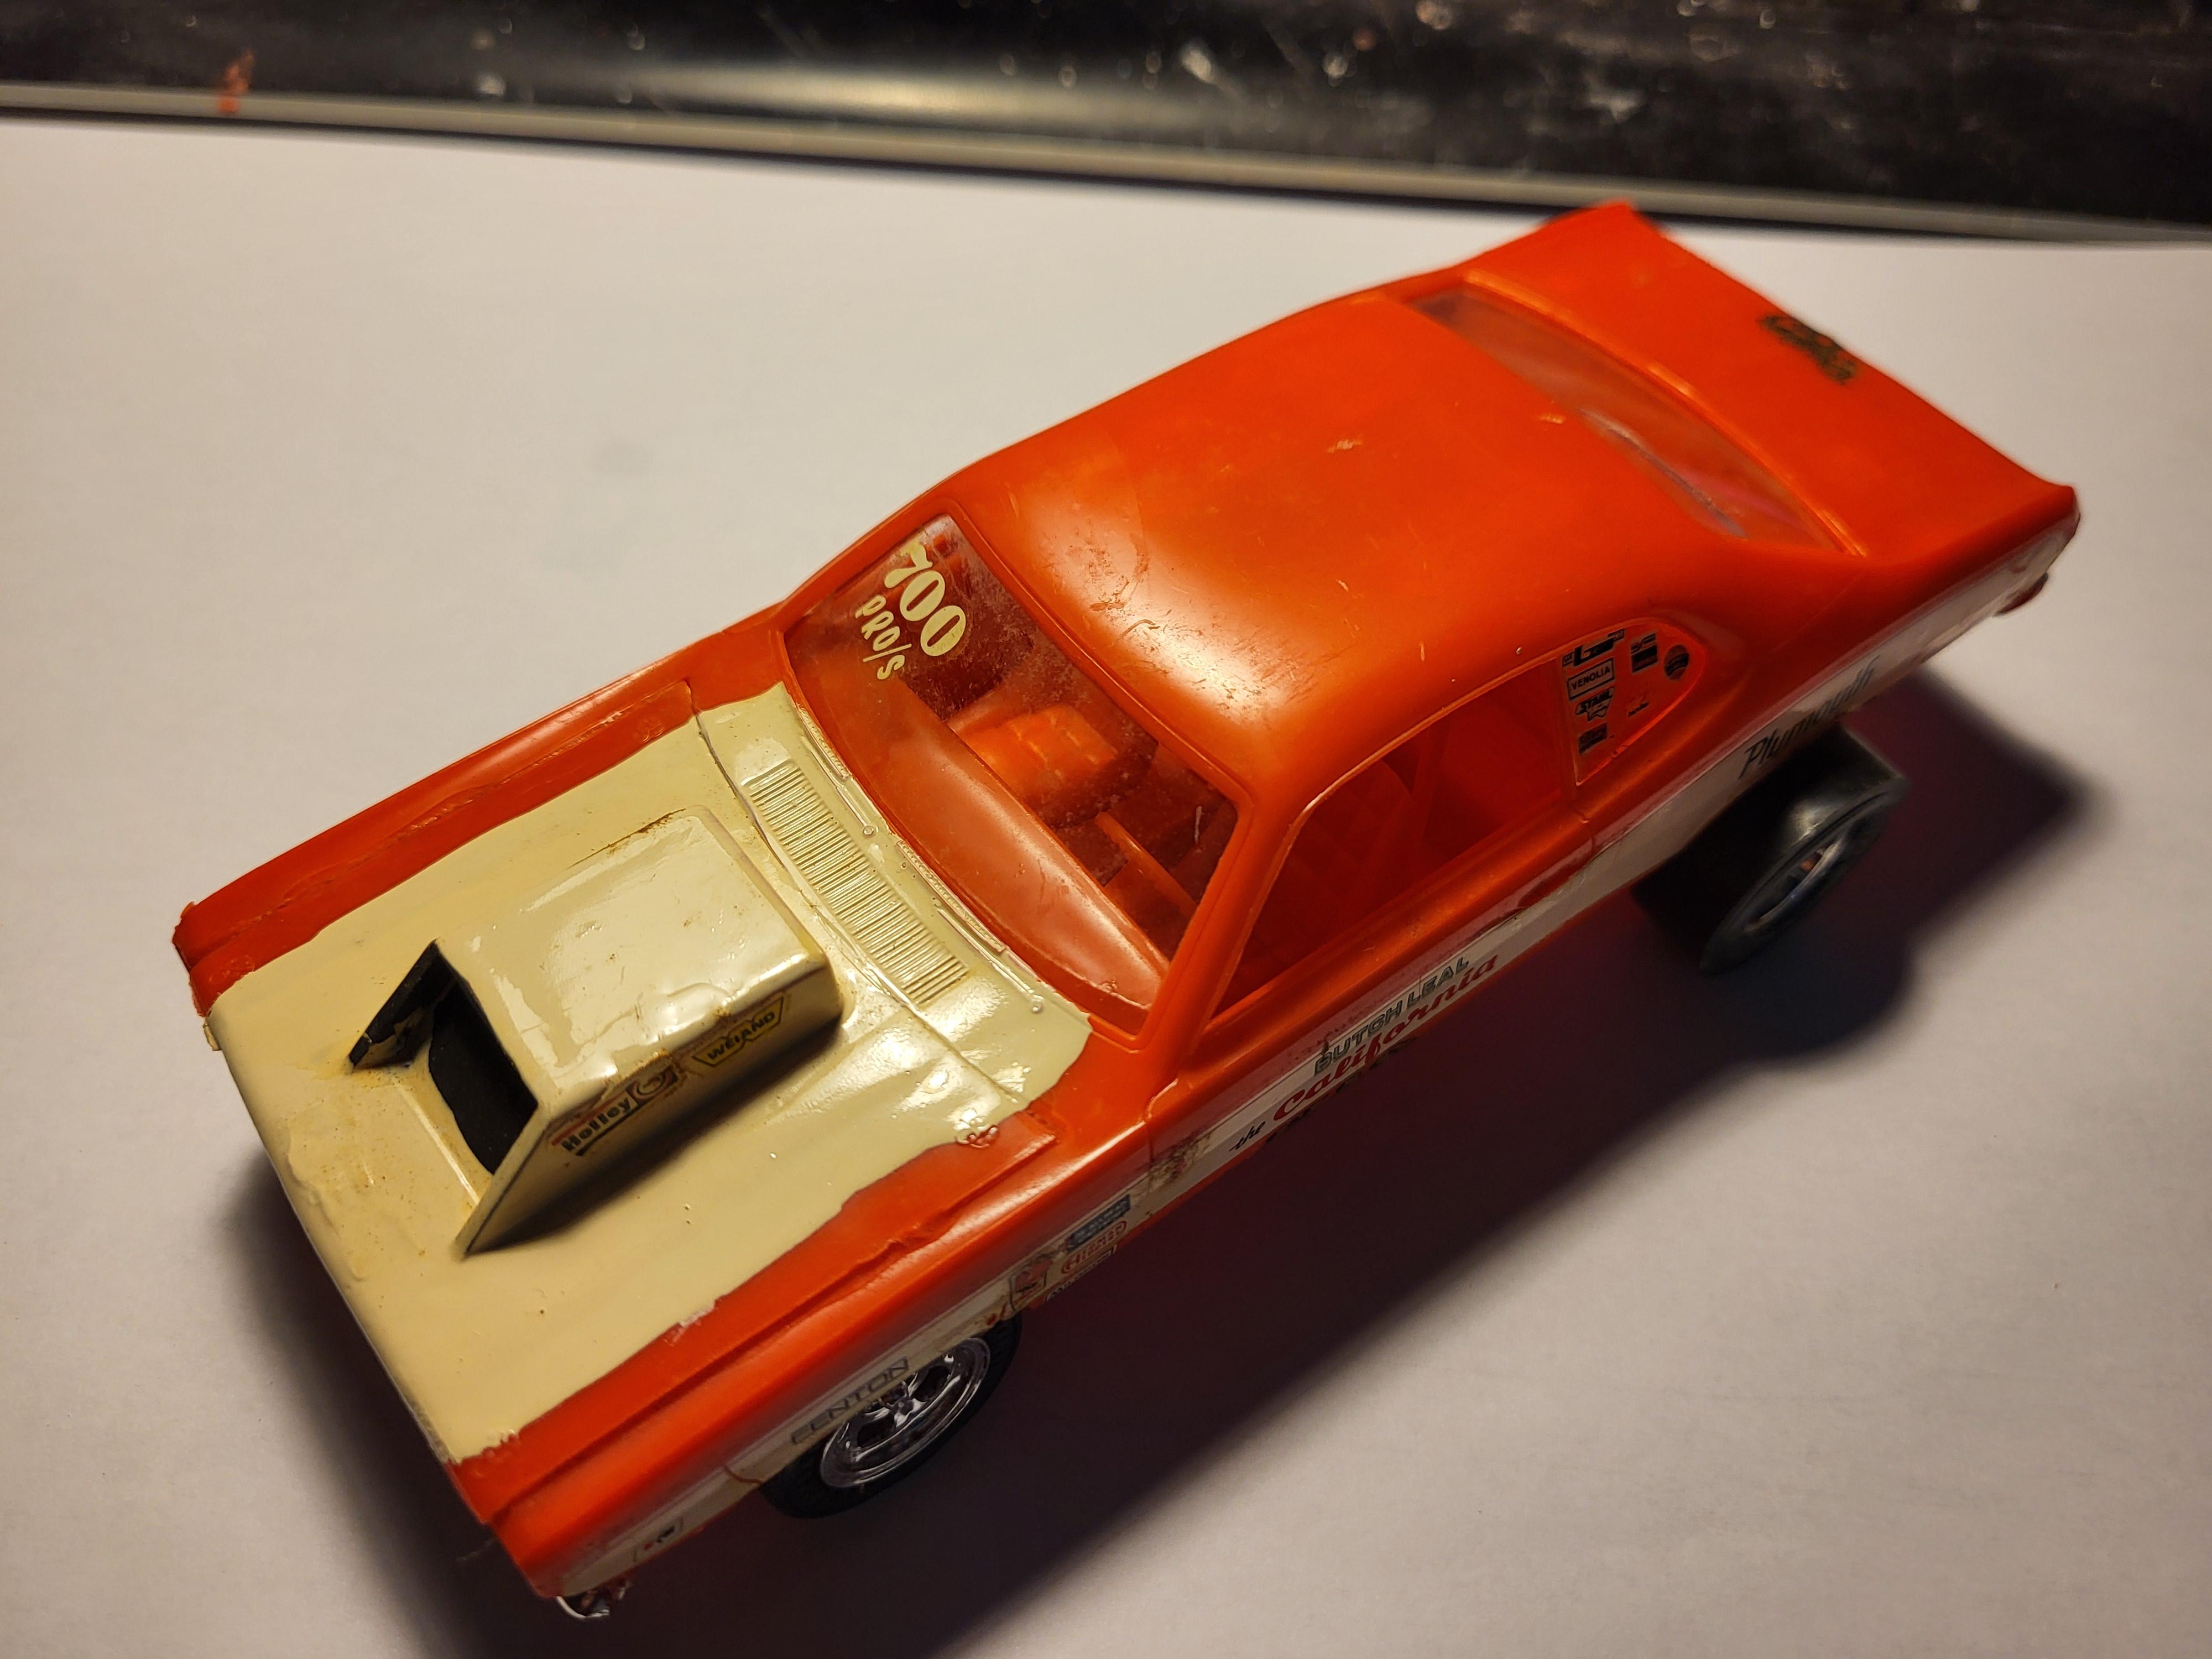
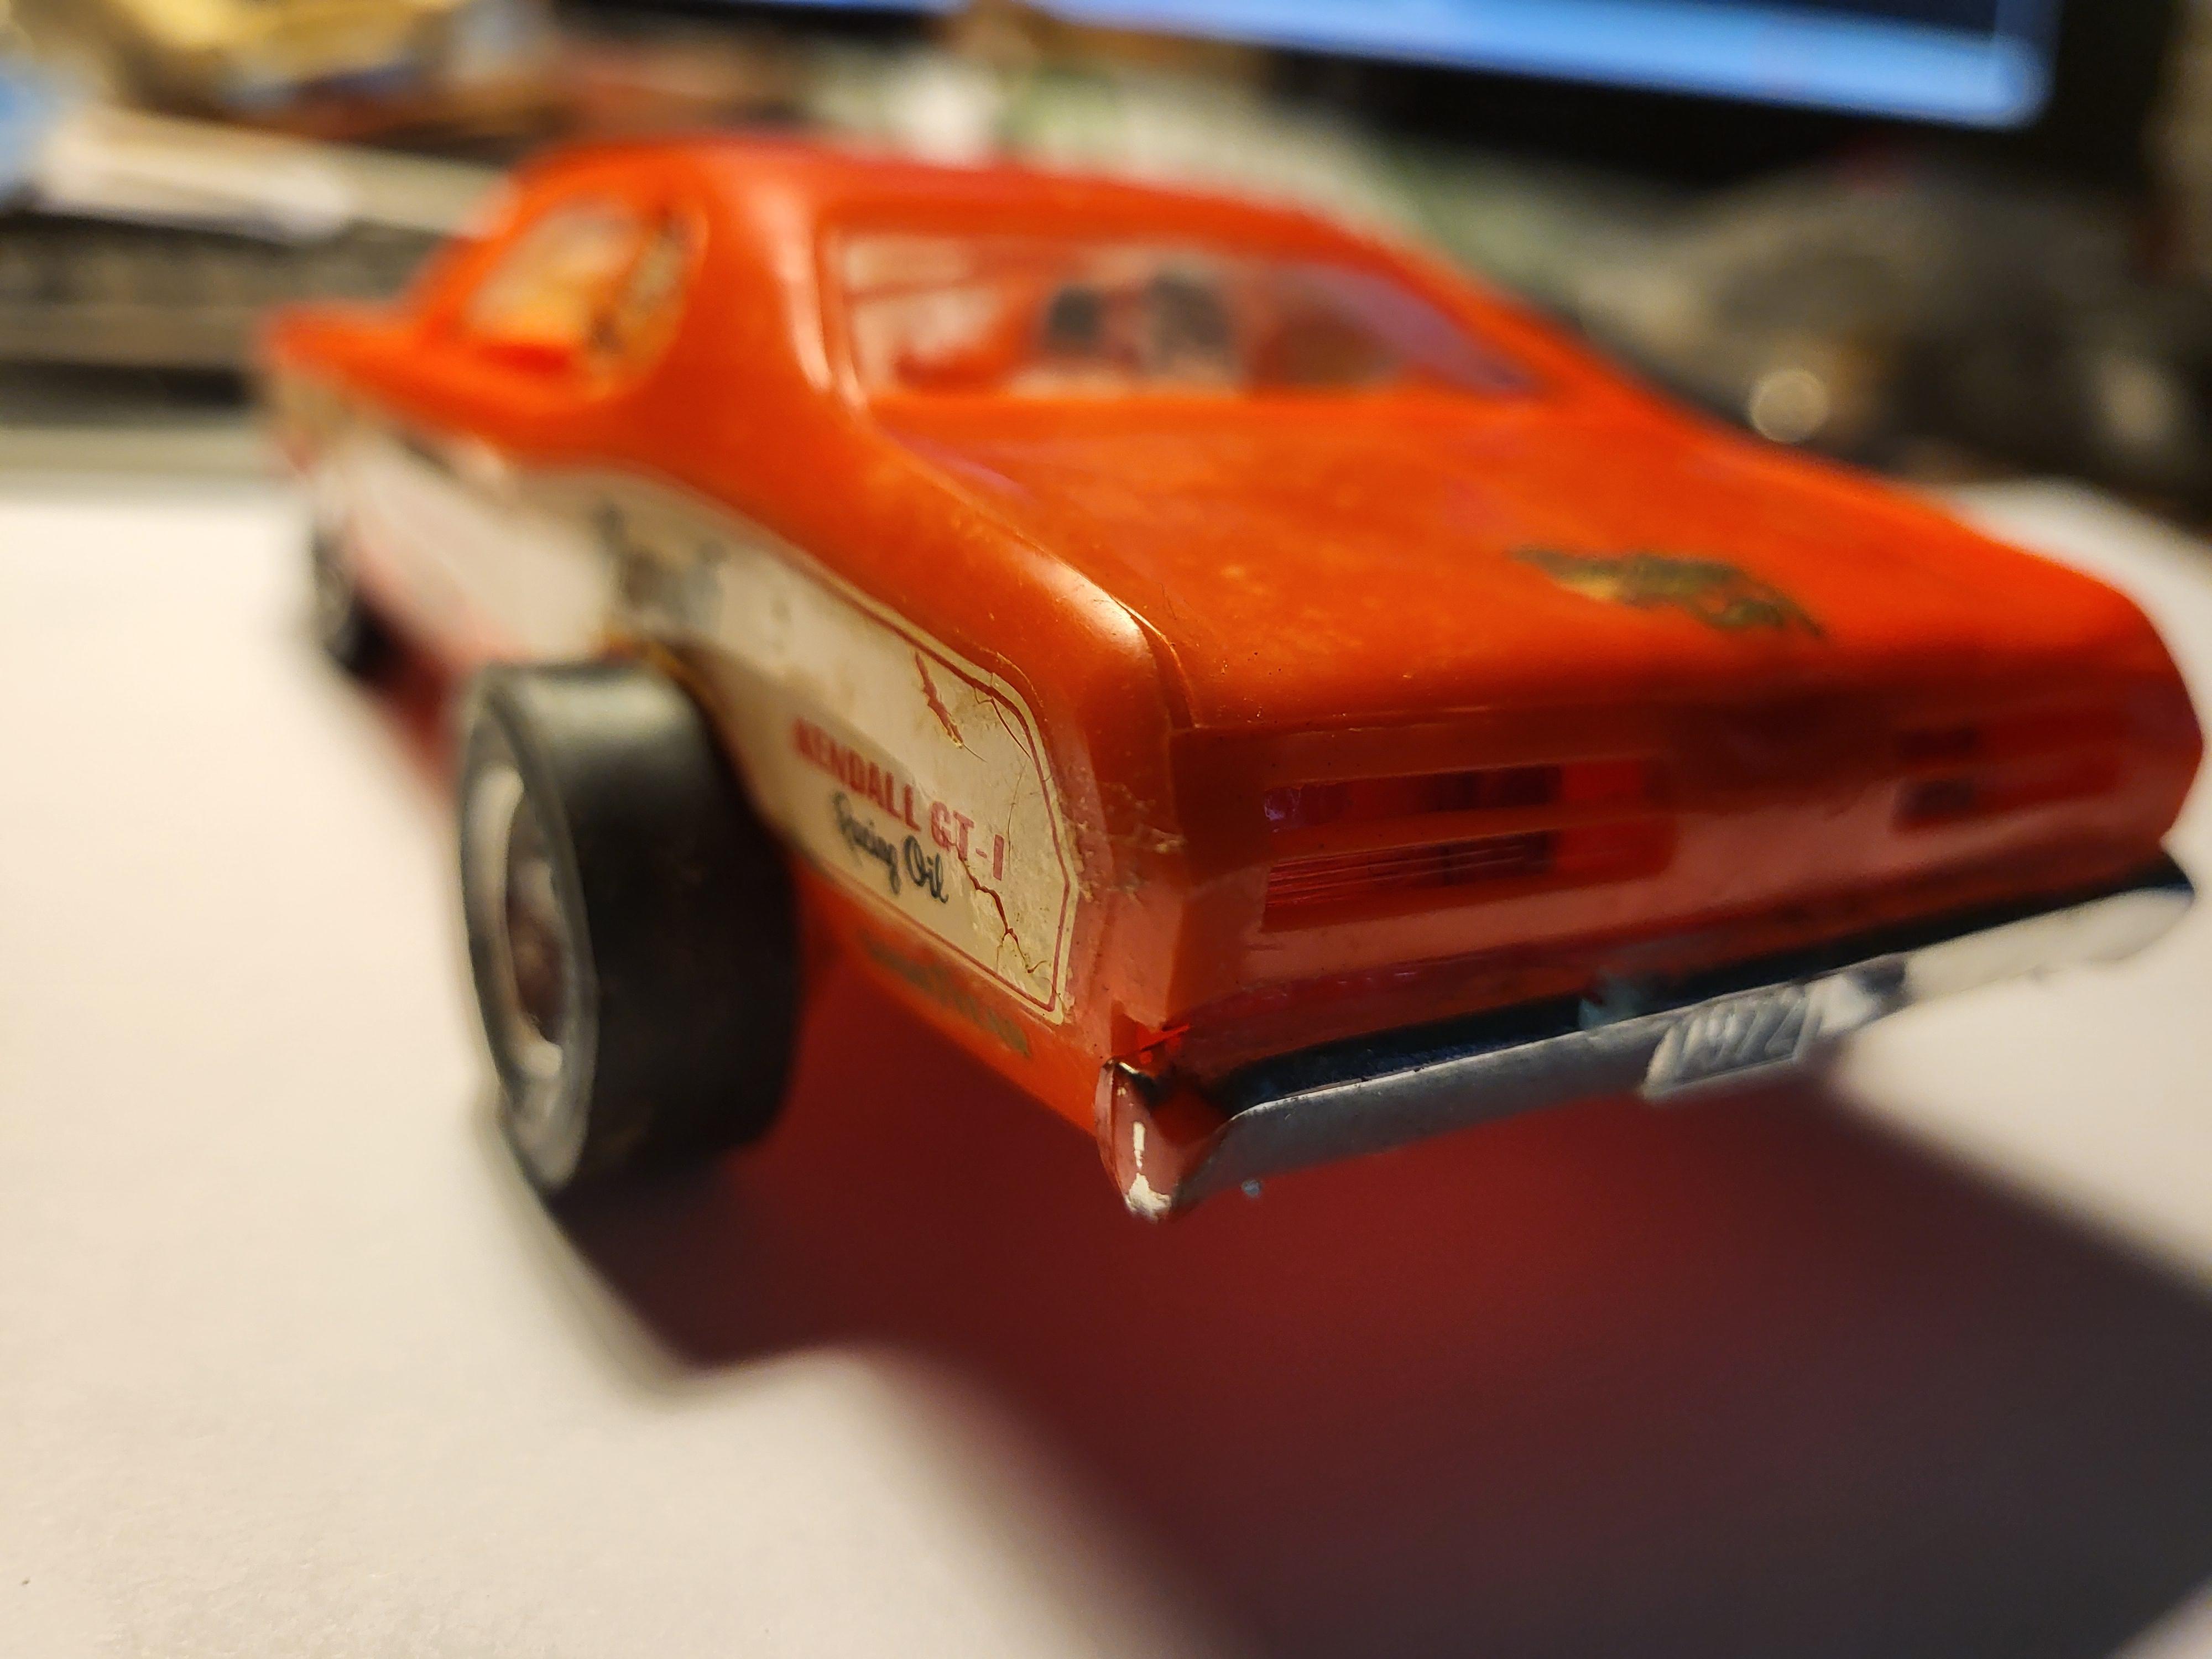
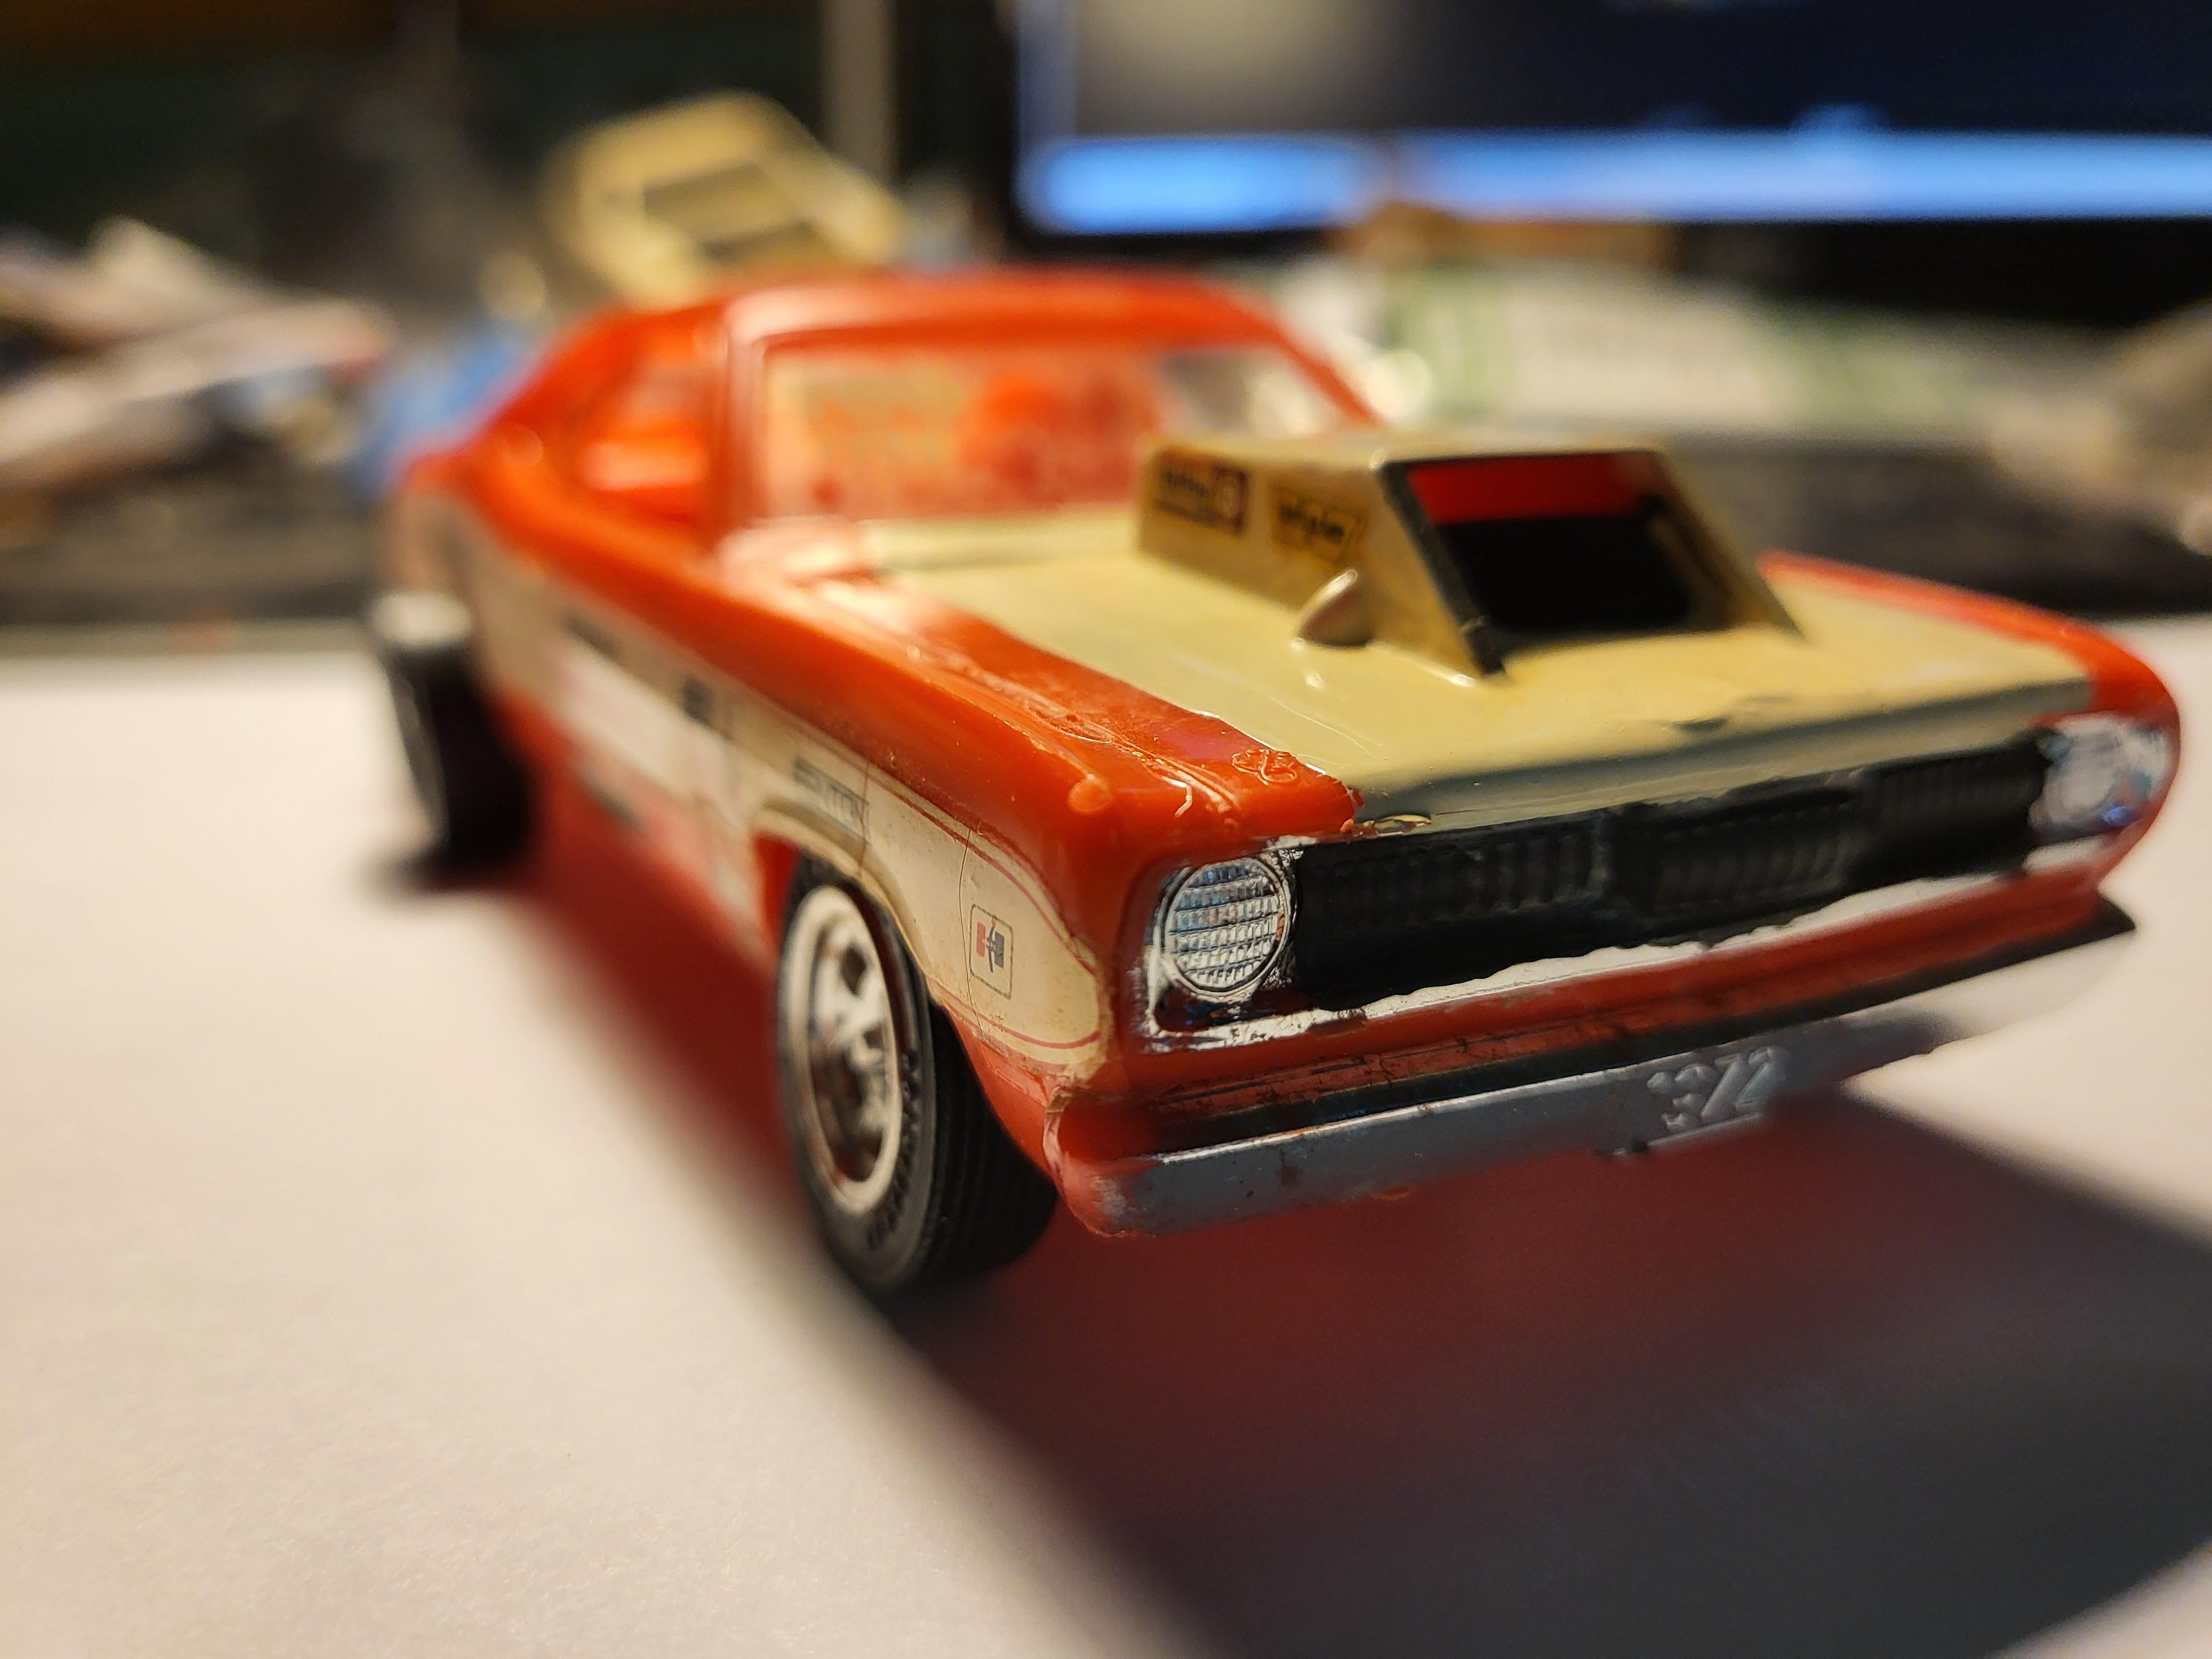
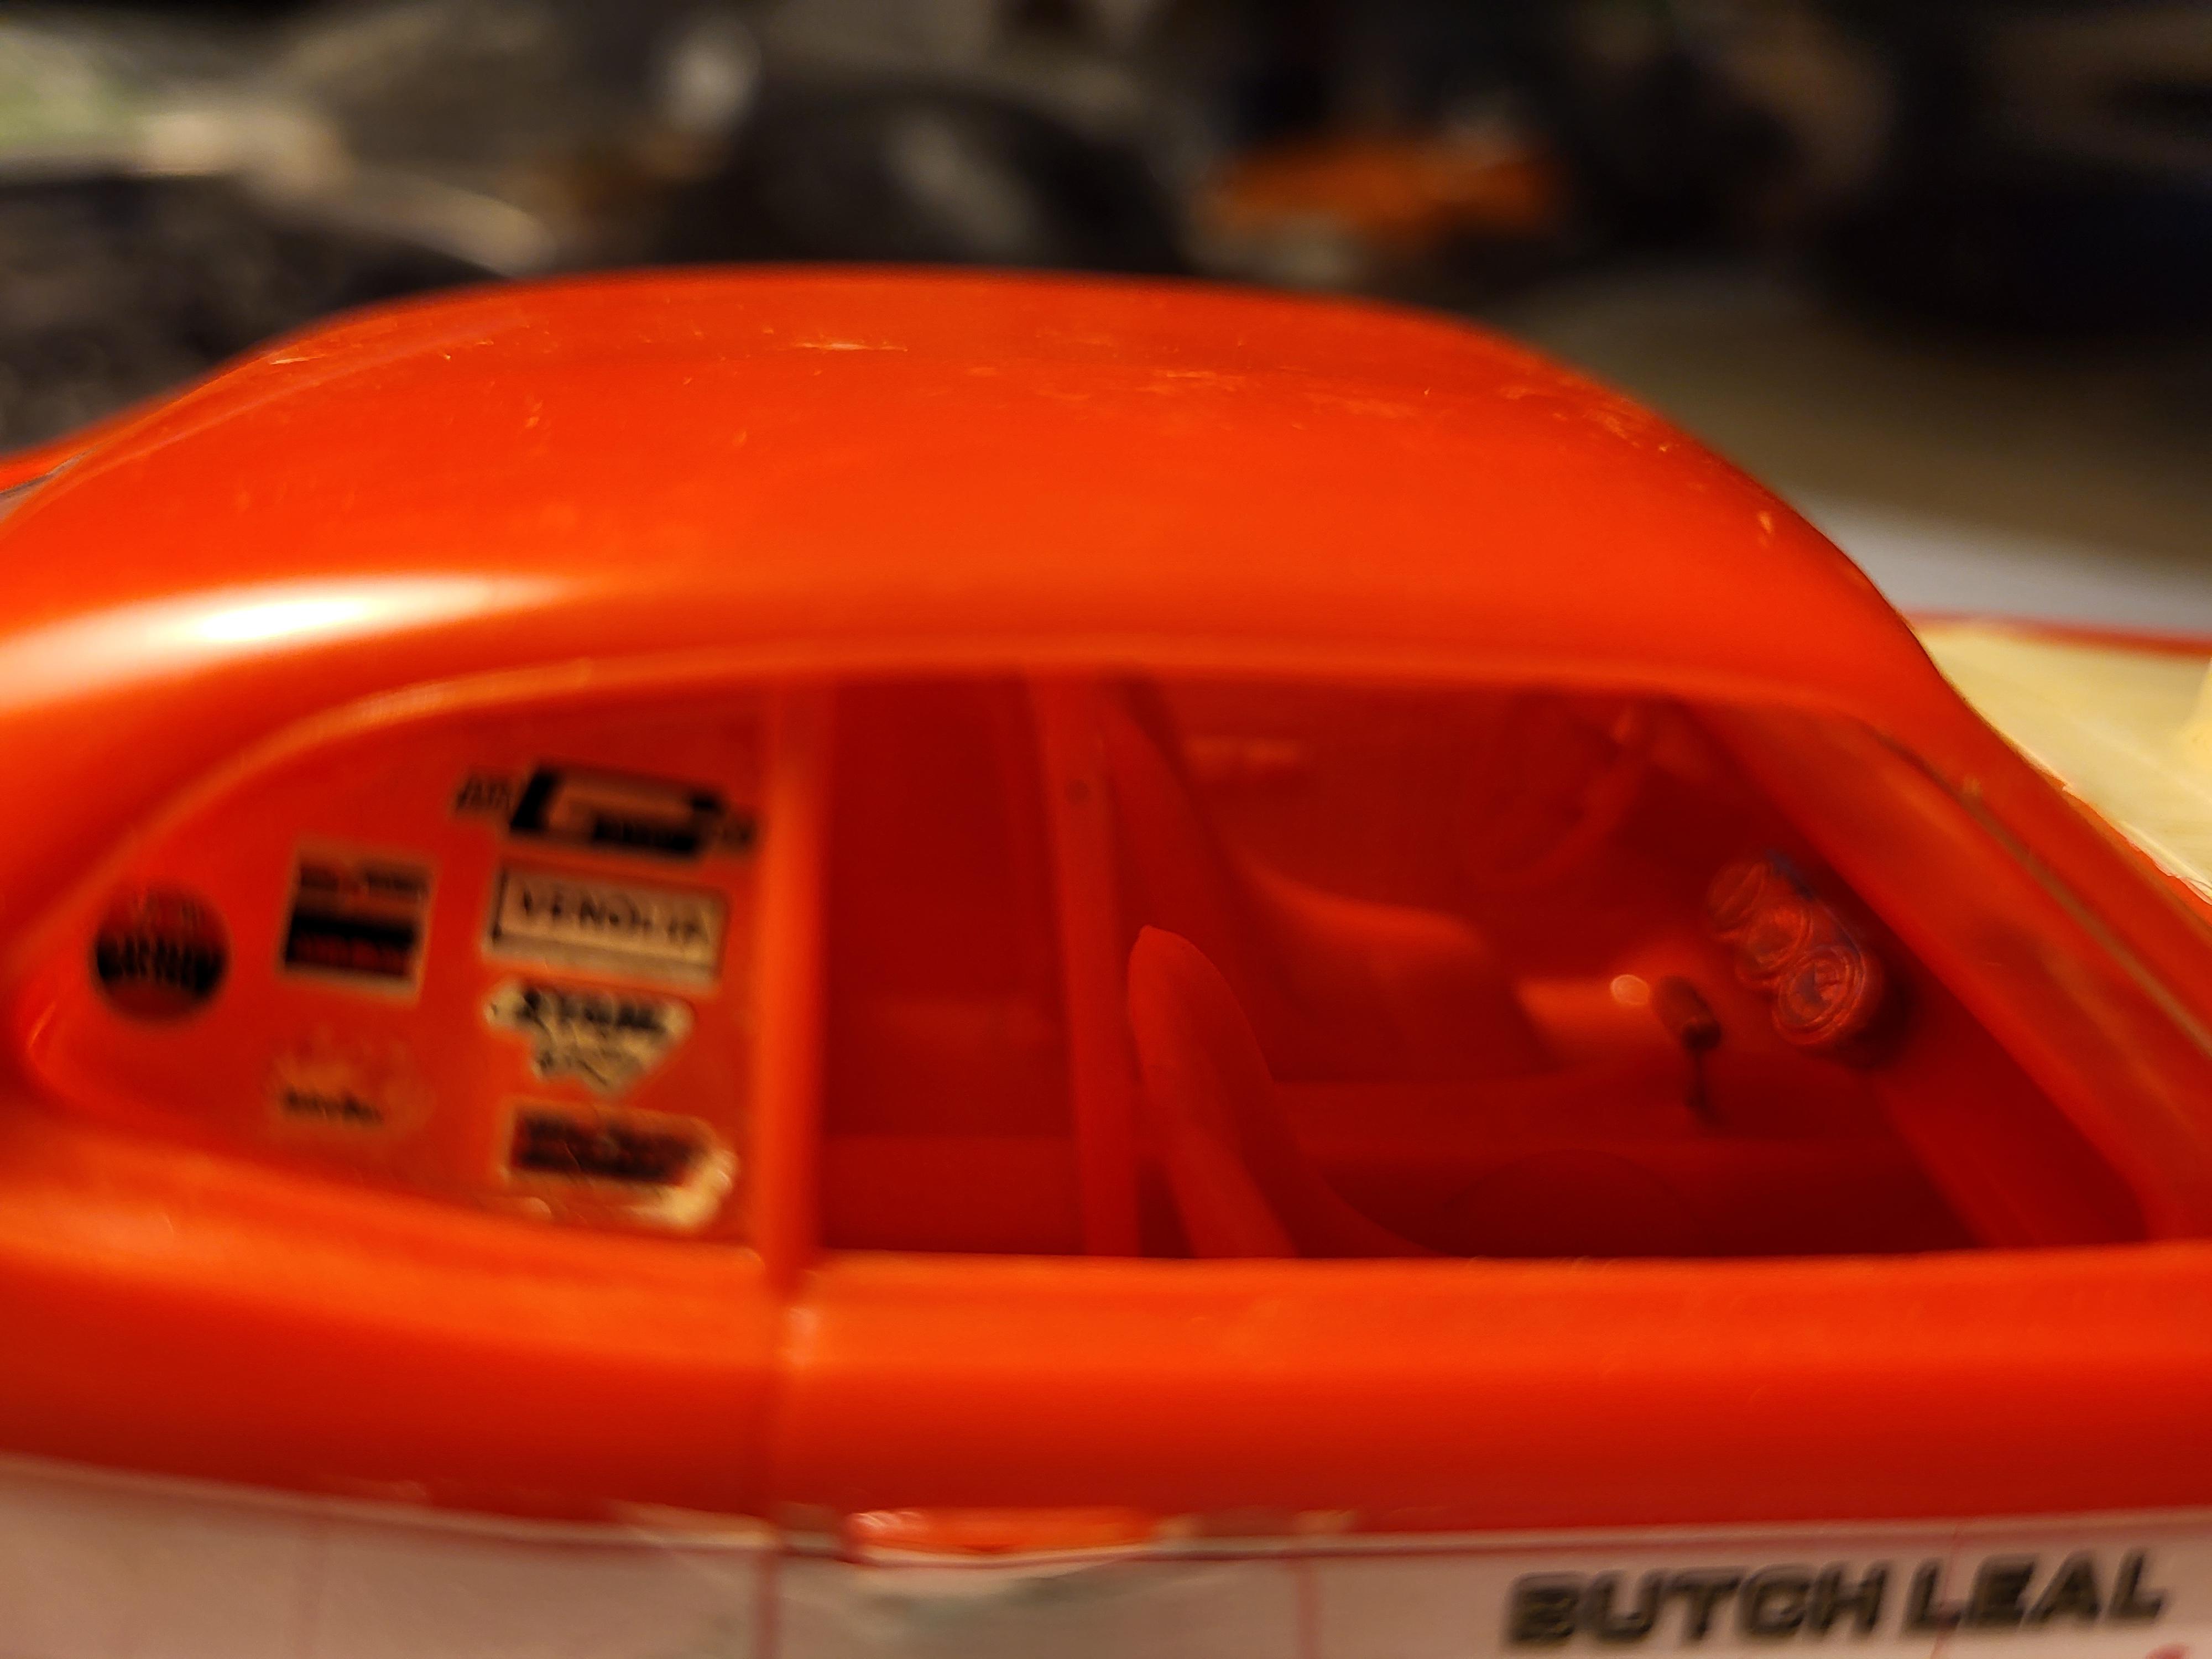
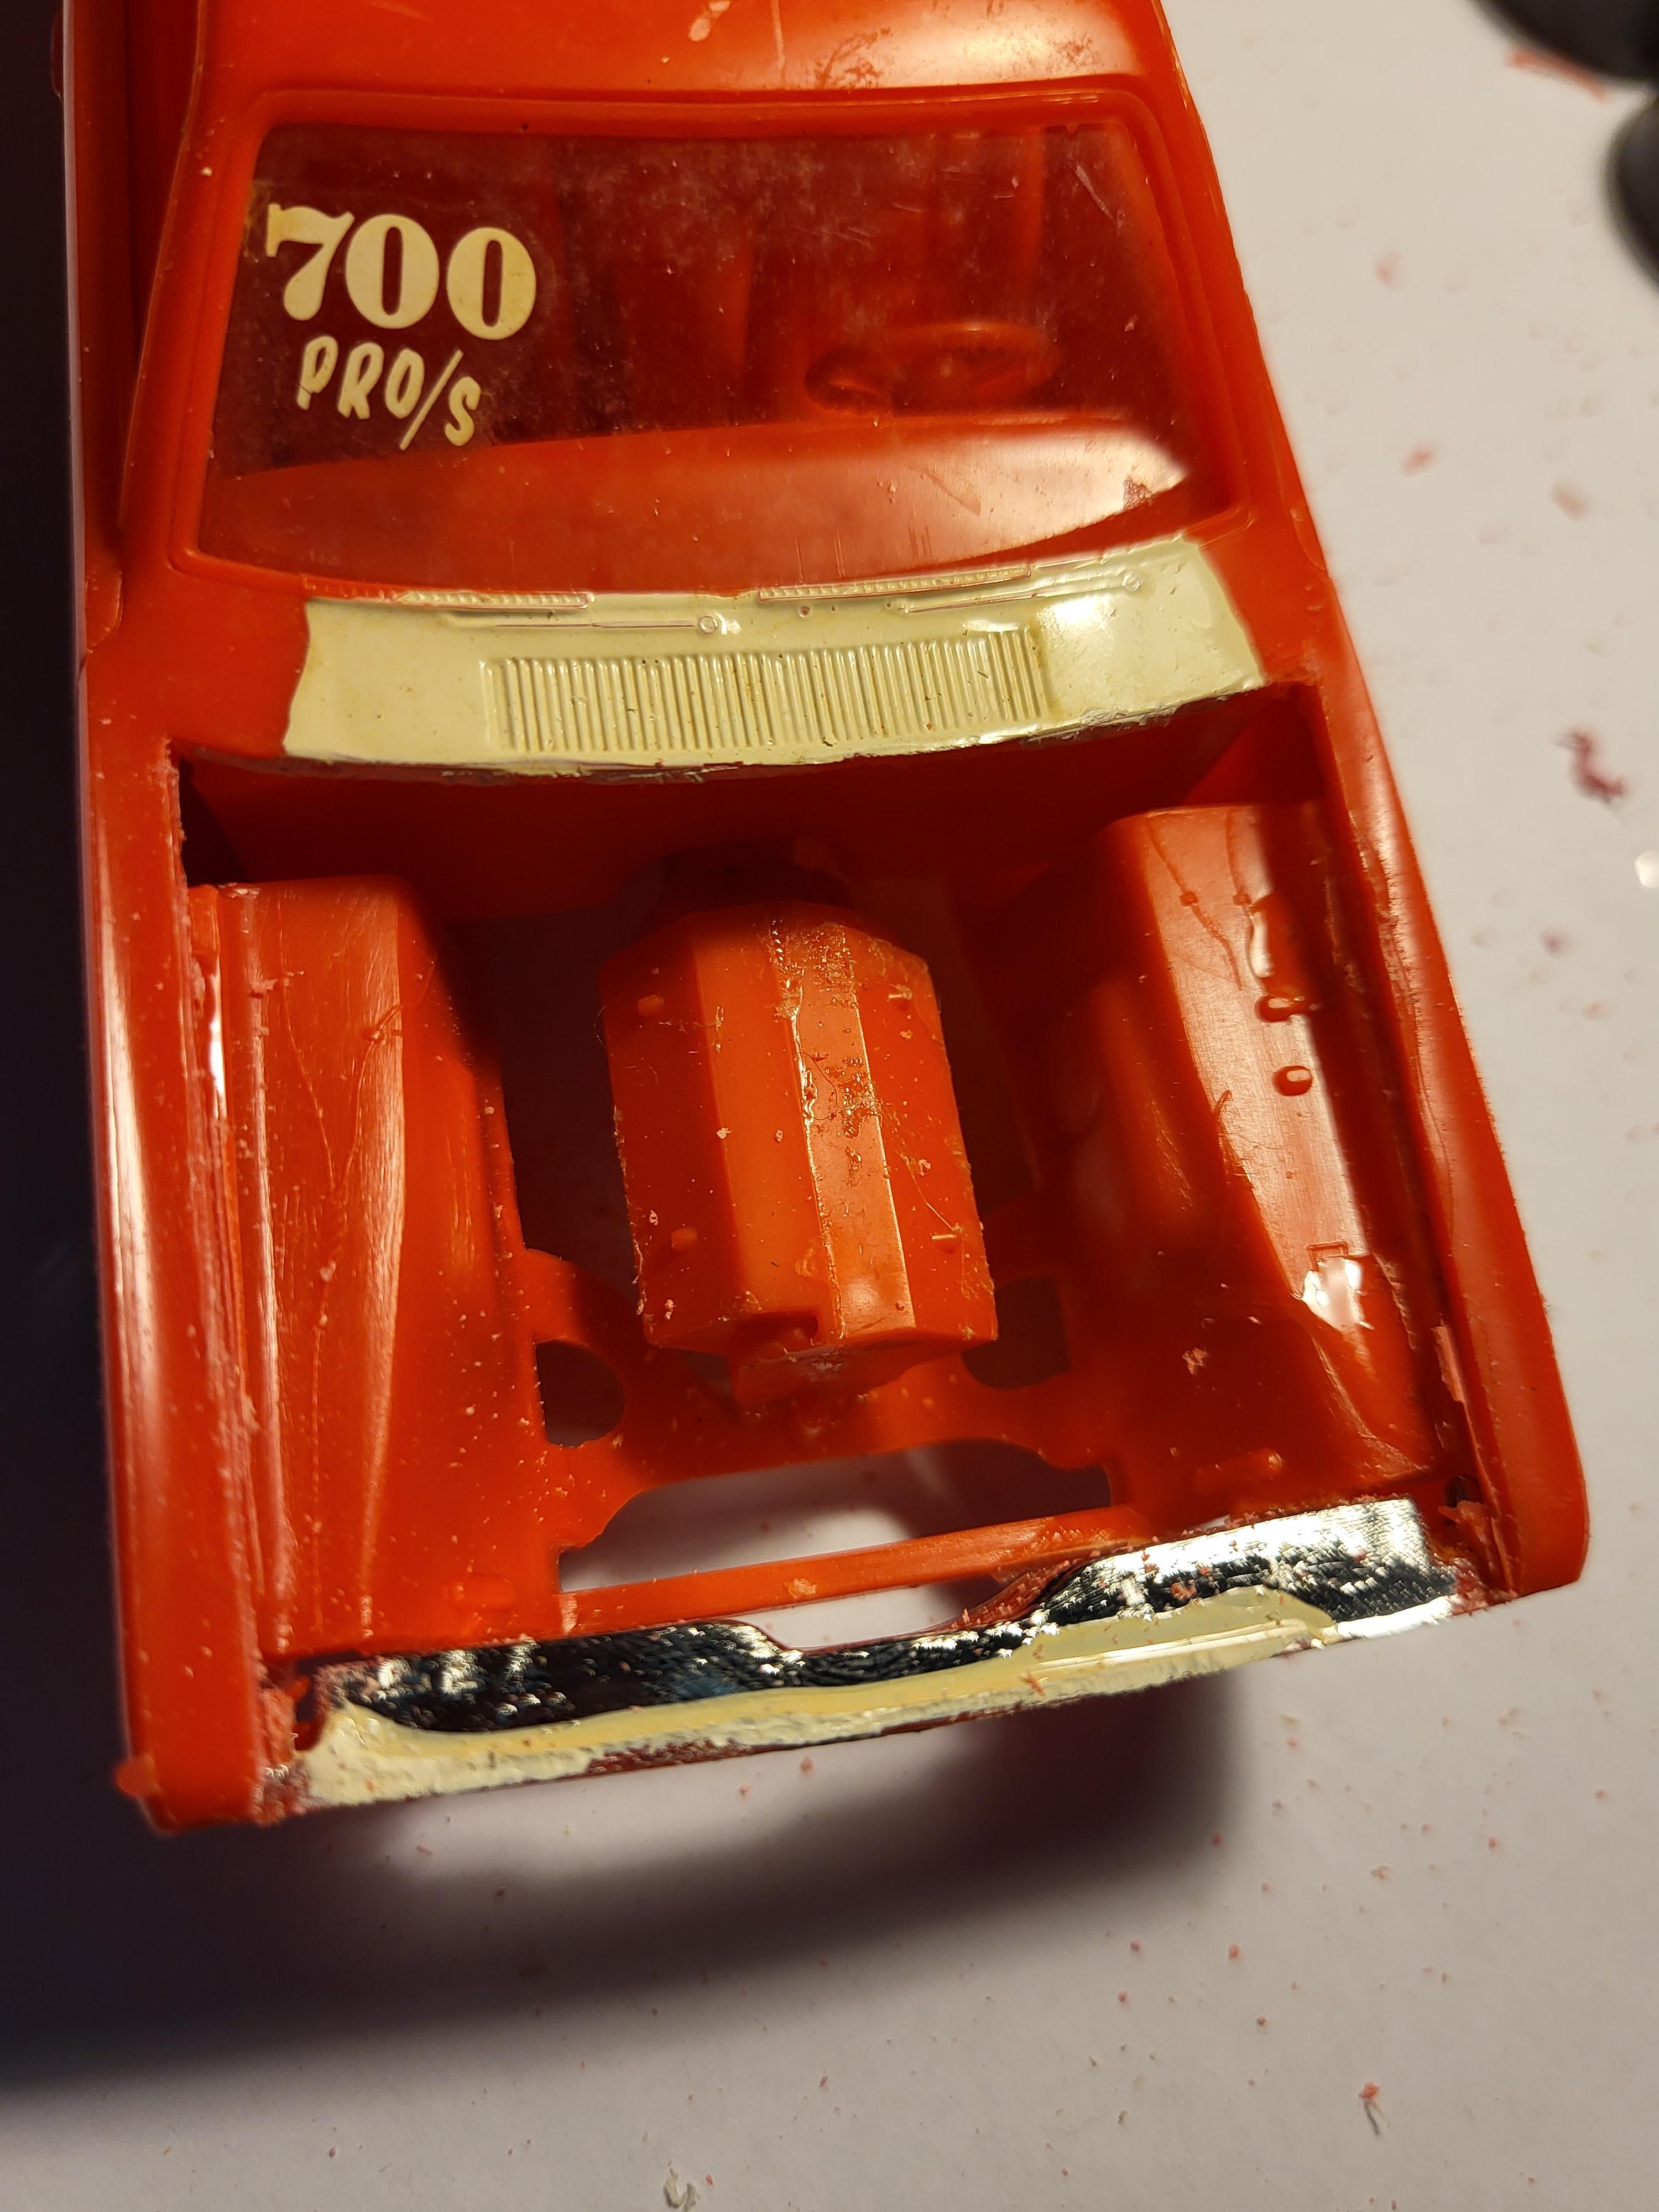
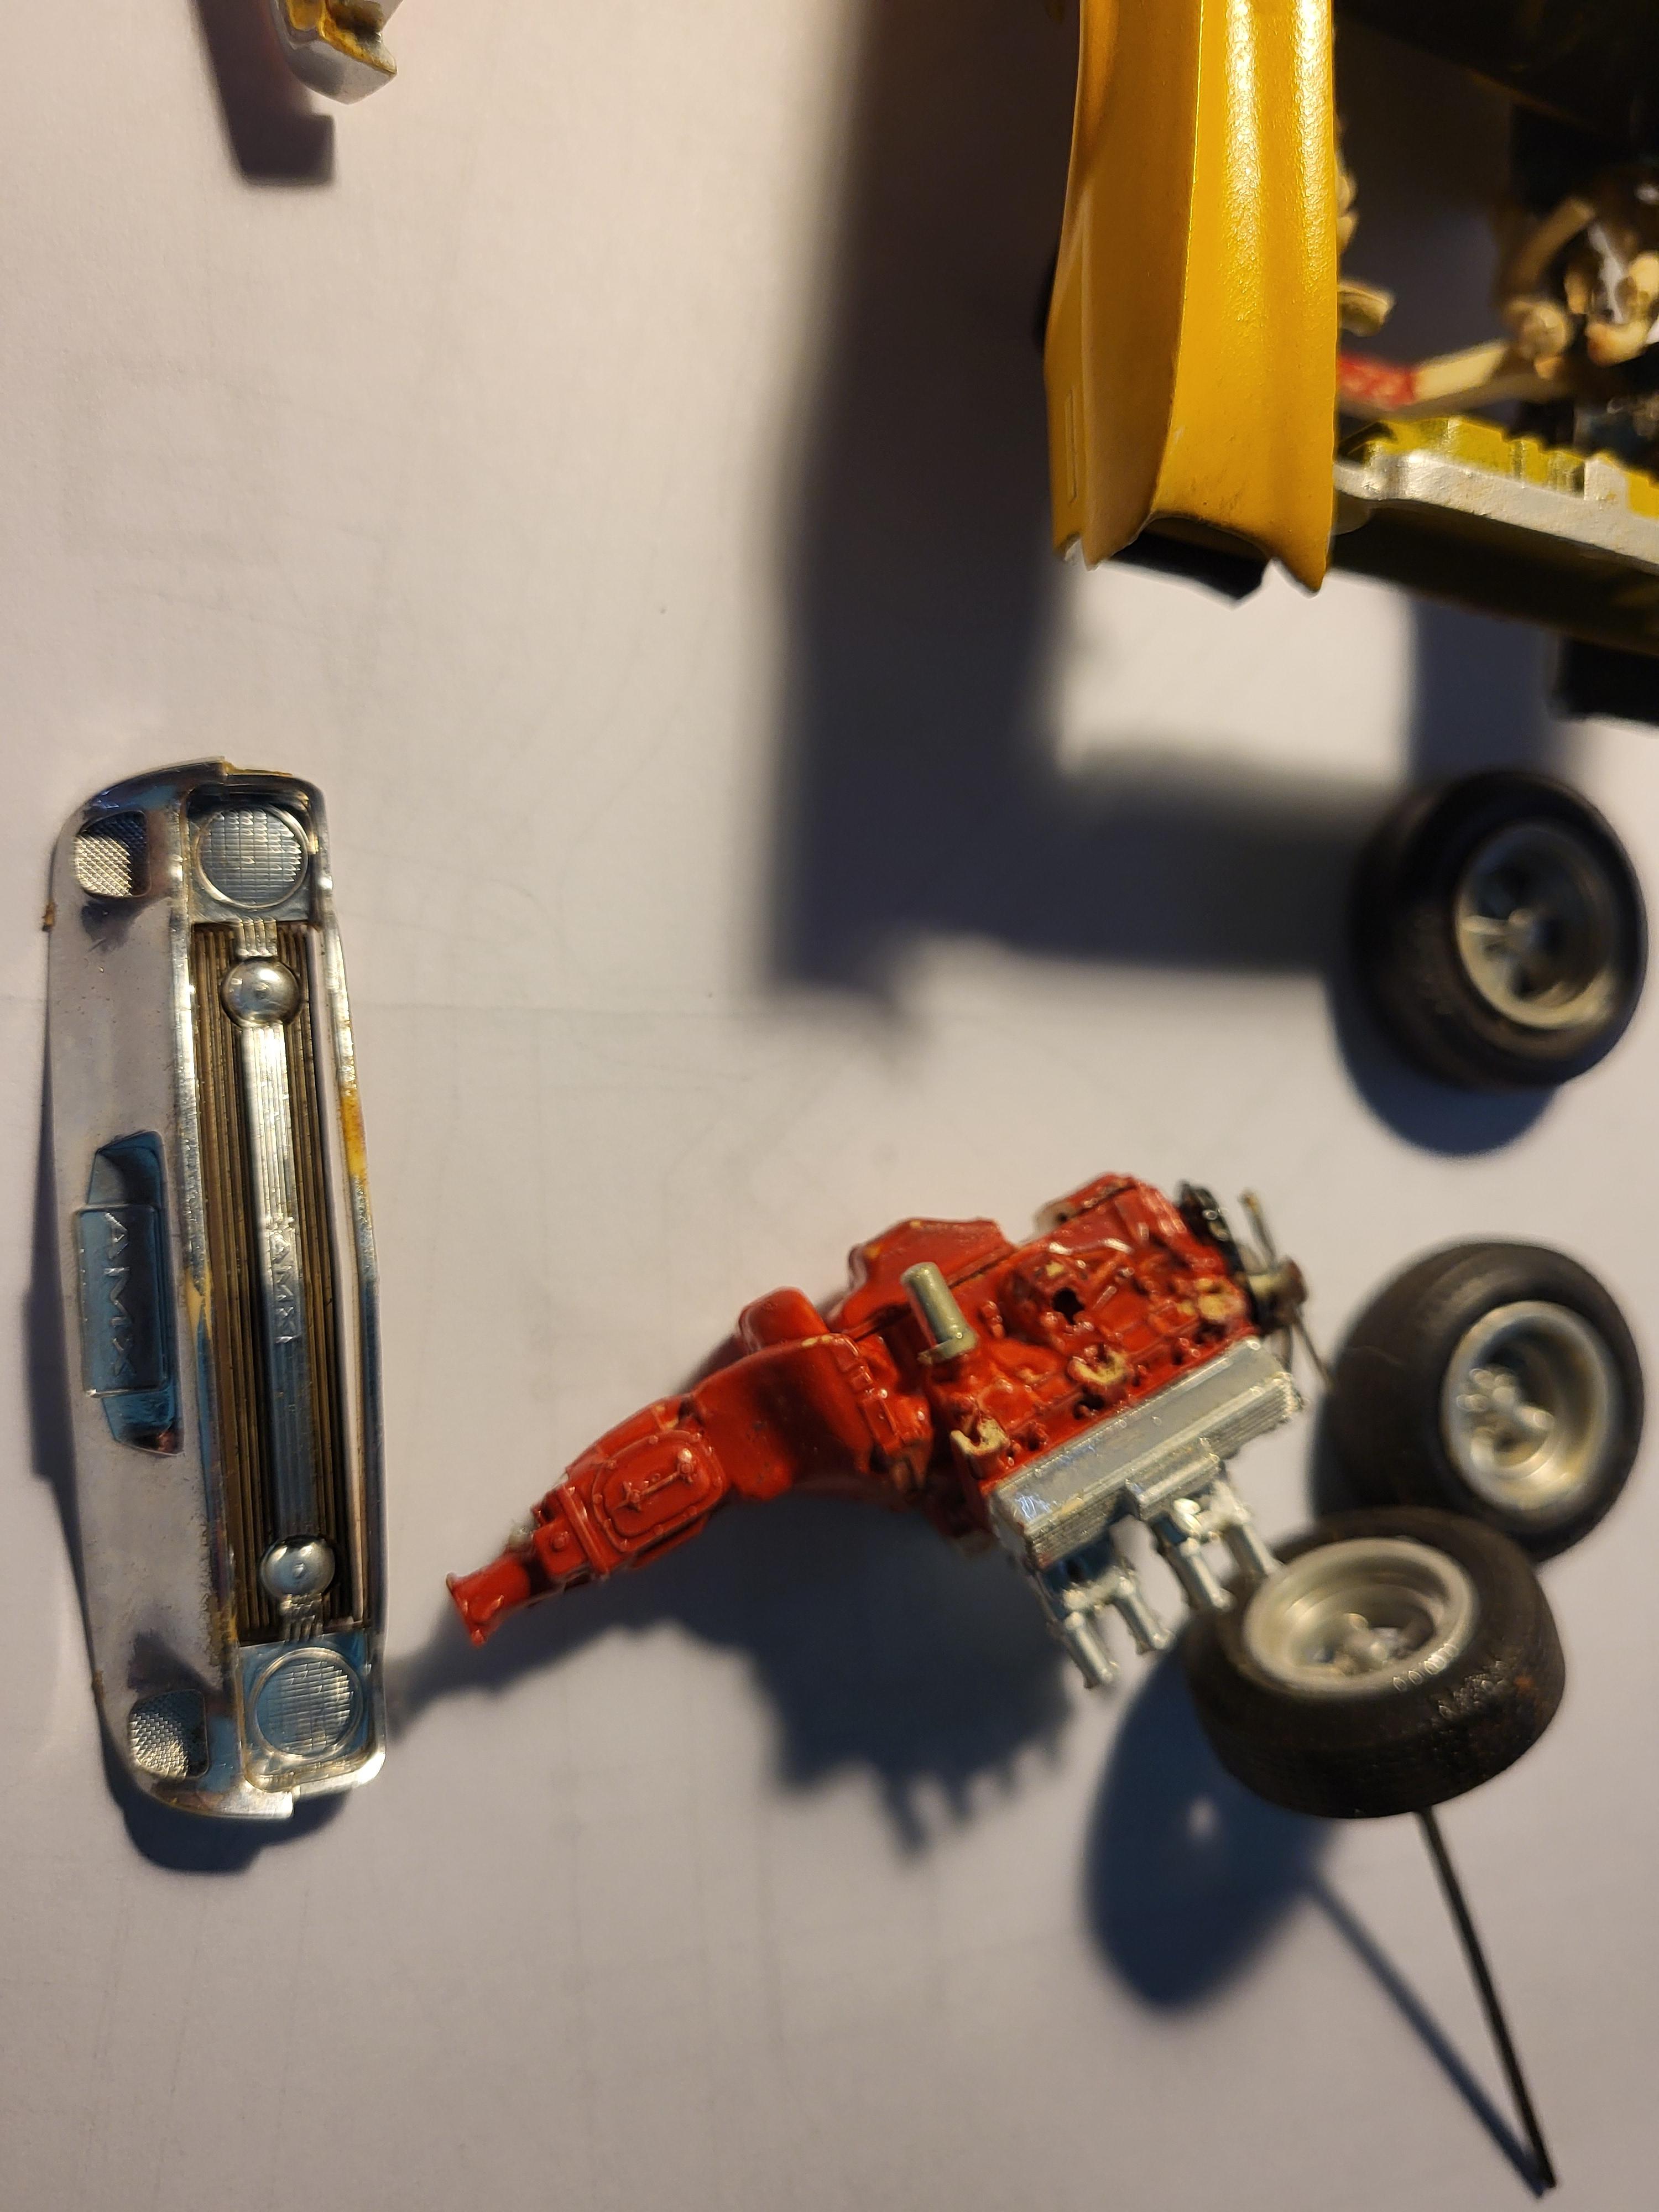
Here's another glue bomb that I got from my local hobby shop from a collection they purchased and selling off. It's an old buildup of the MPC Butch Leal 1972 Duster Pro Stock kit. Not much was painted which is a good thing but the glue, it was had to disassemble. So much glue on the grille that I'm afraid that if I try to get it out, that is will break the grille or the body. Not sure what to do about that. The same for the clear red piece for the tail lights. The rear window already had a cracked in it and that was a total casualty of disassembly. Nothing on the engine block as it had the hood glued shut. I had to saw cut the hood out. Overall not bad for $15 I'd say.
-
Not 100% what happened here in the past. Need to clean this up
-
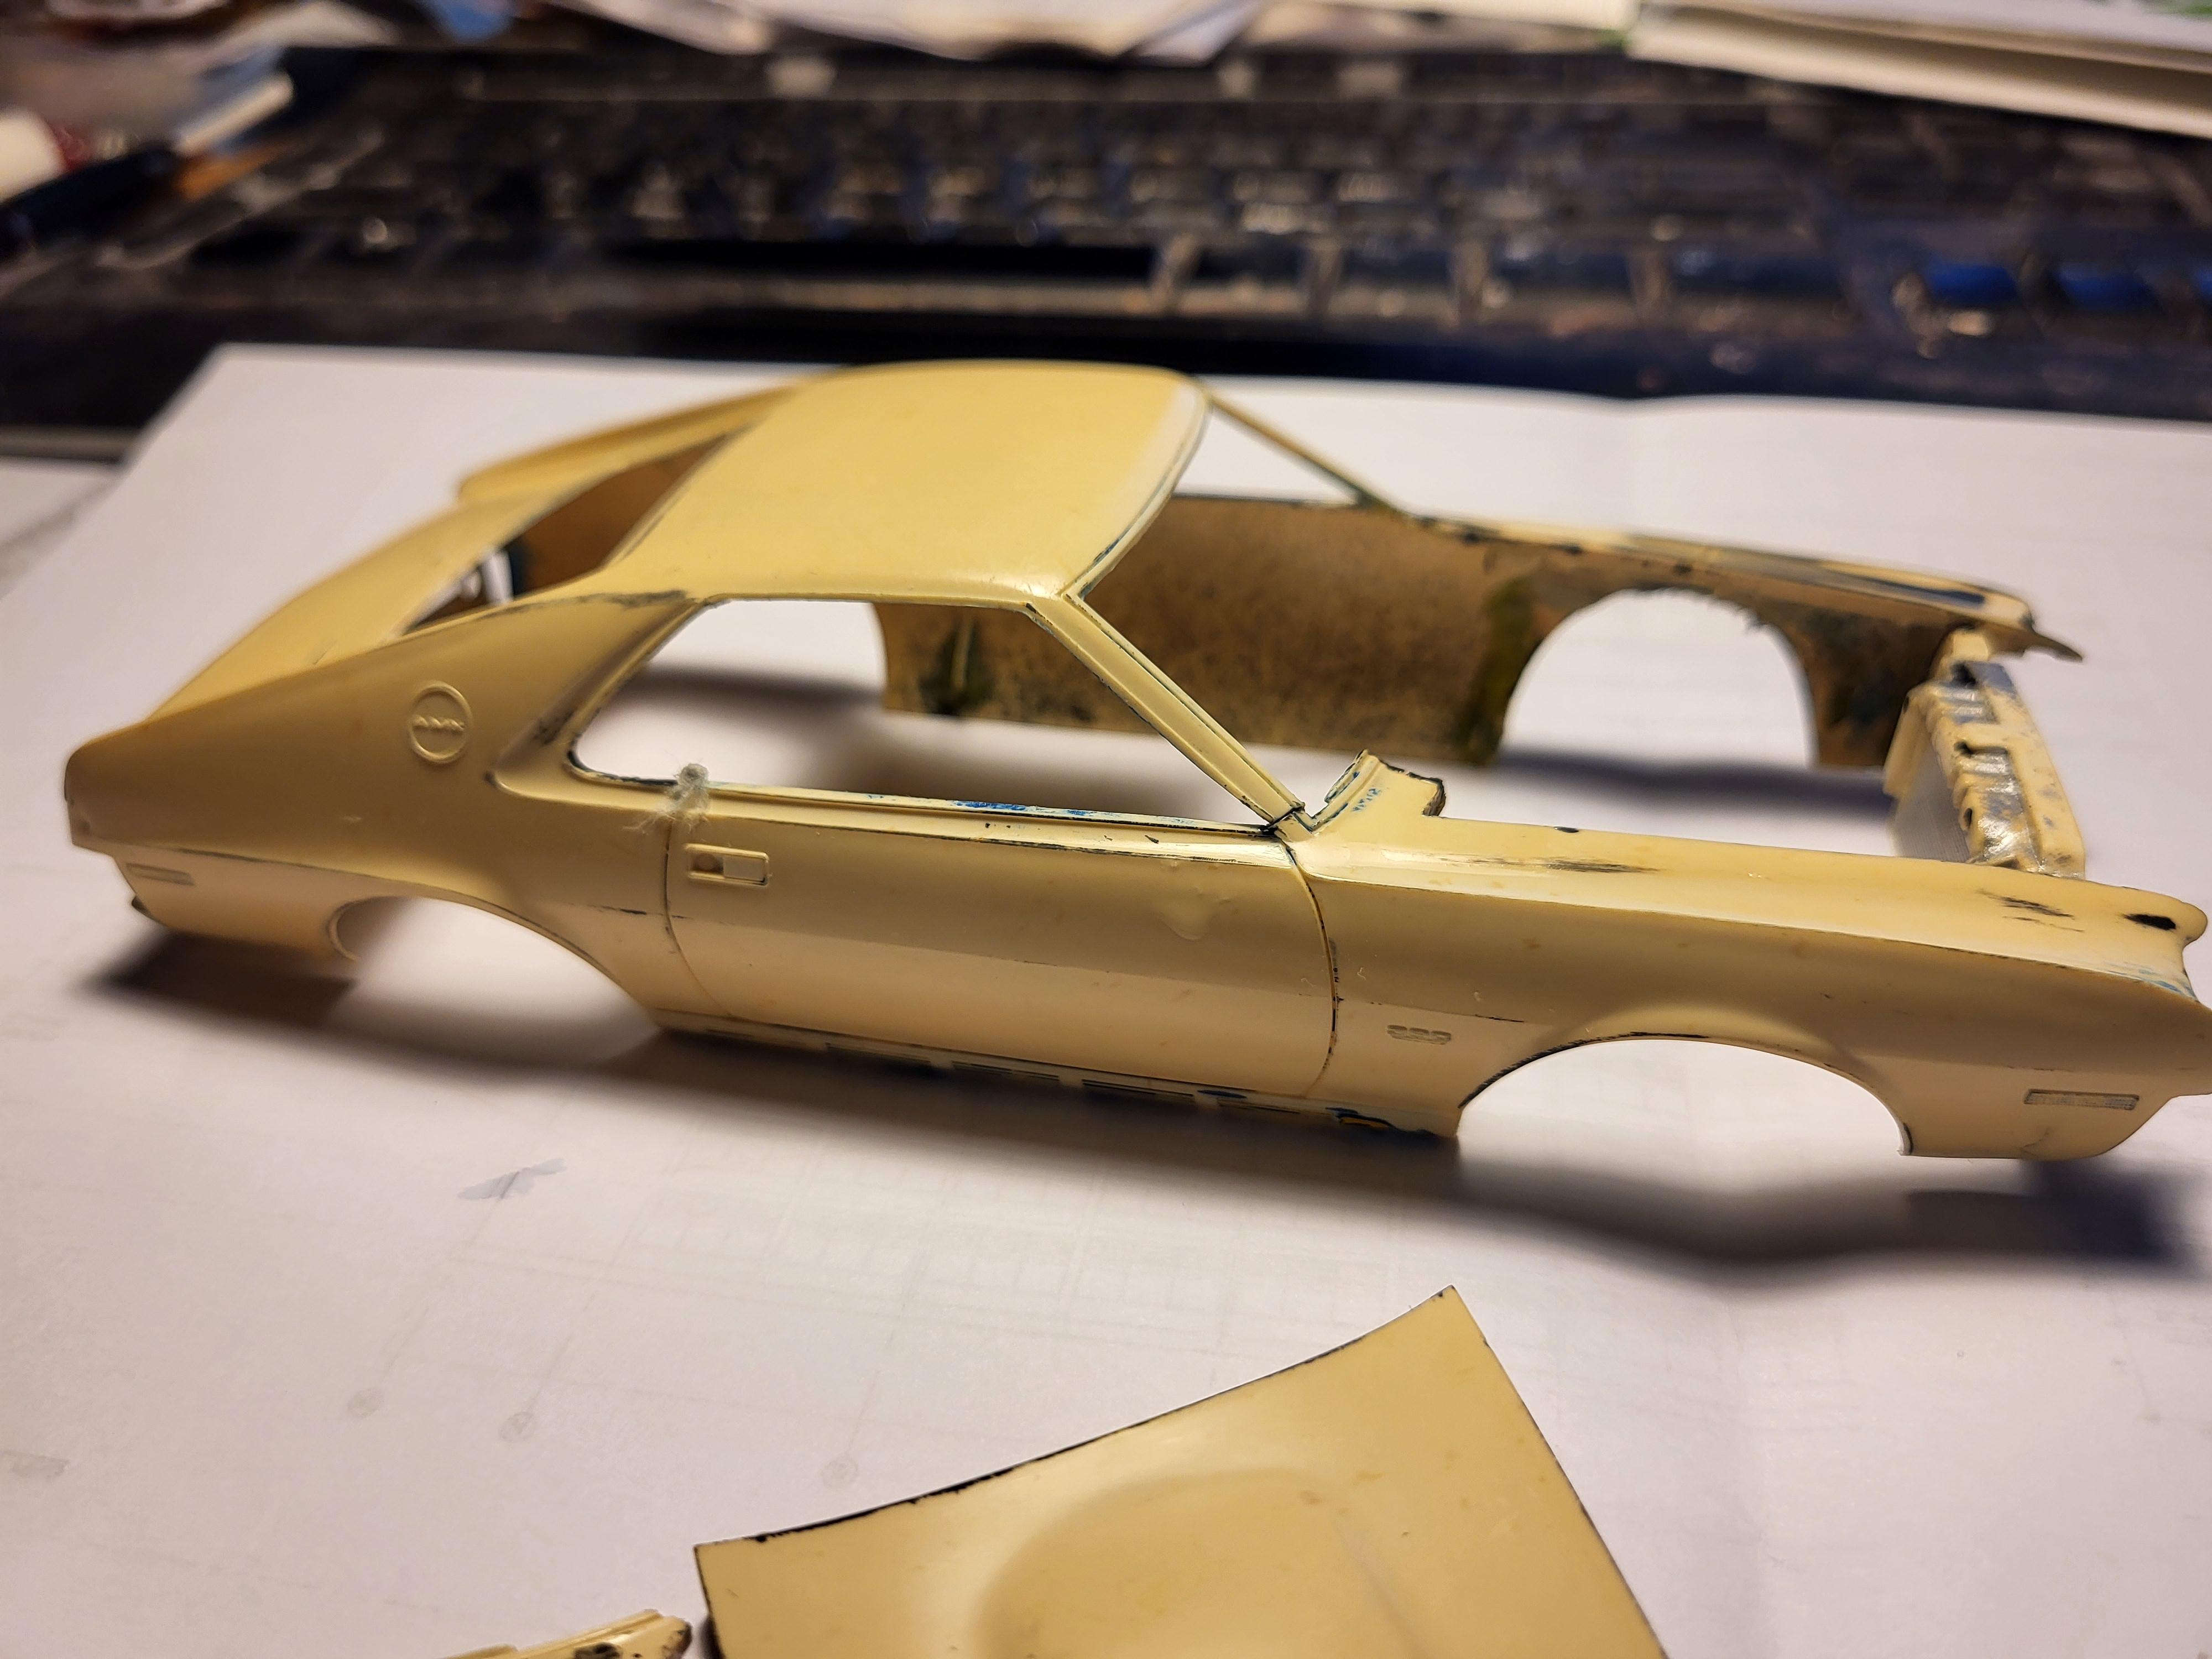
After letting the body sit in my stripper, the body has cone out fairly clean. Down to bare plastic. Looked like it may have been painted 3 times, blue, a green and the mustard yellow. I see some body damage on the driver side front fender I will need to tend to as well as gluing in the cowl panel and fixing a cracked passenger side a post
-
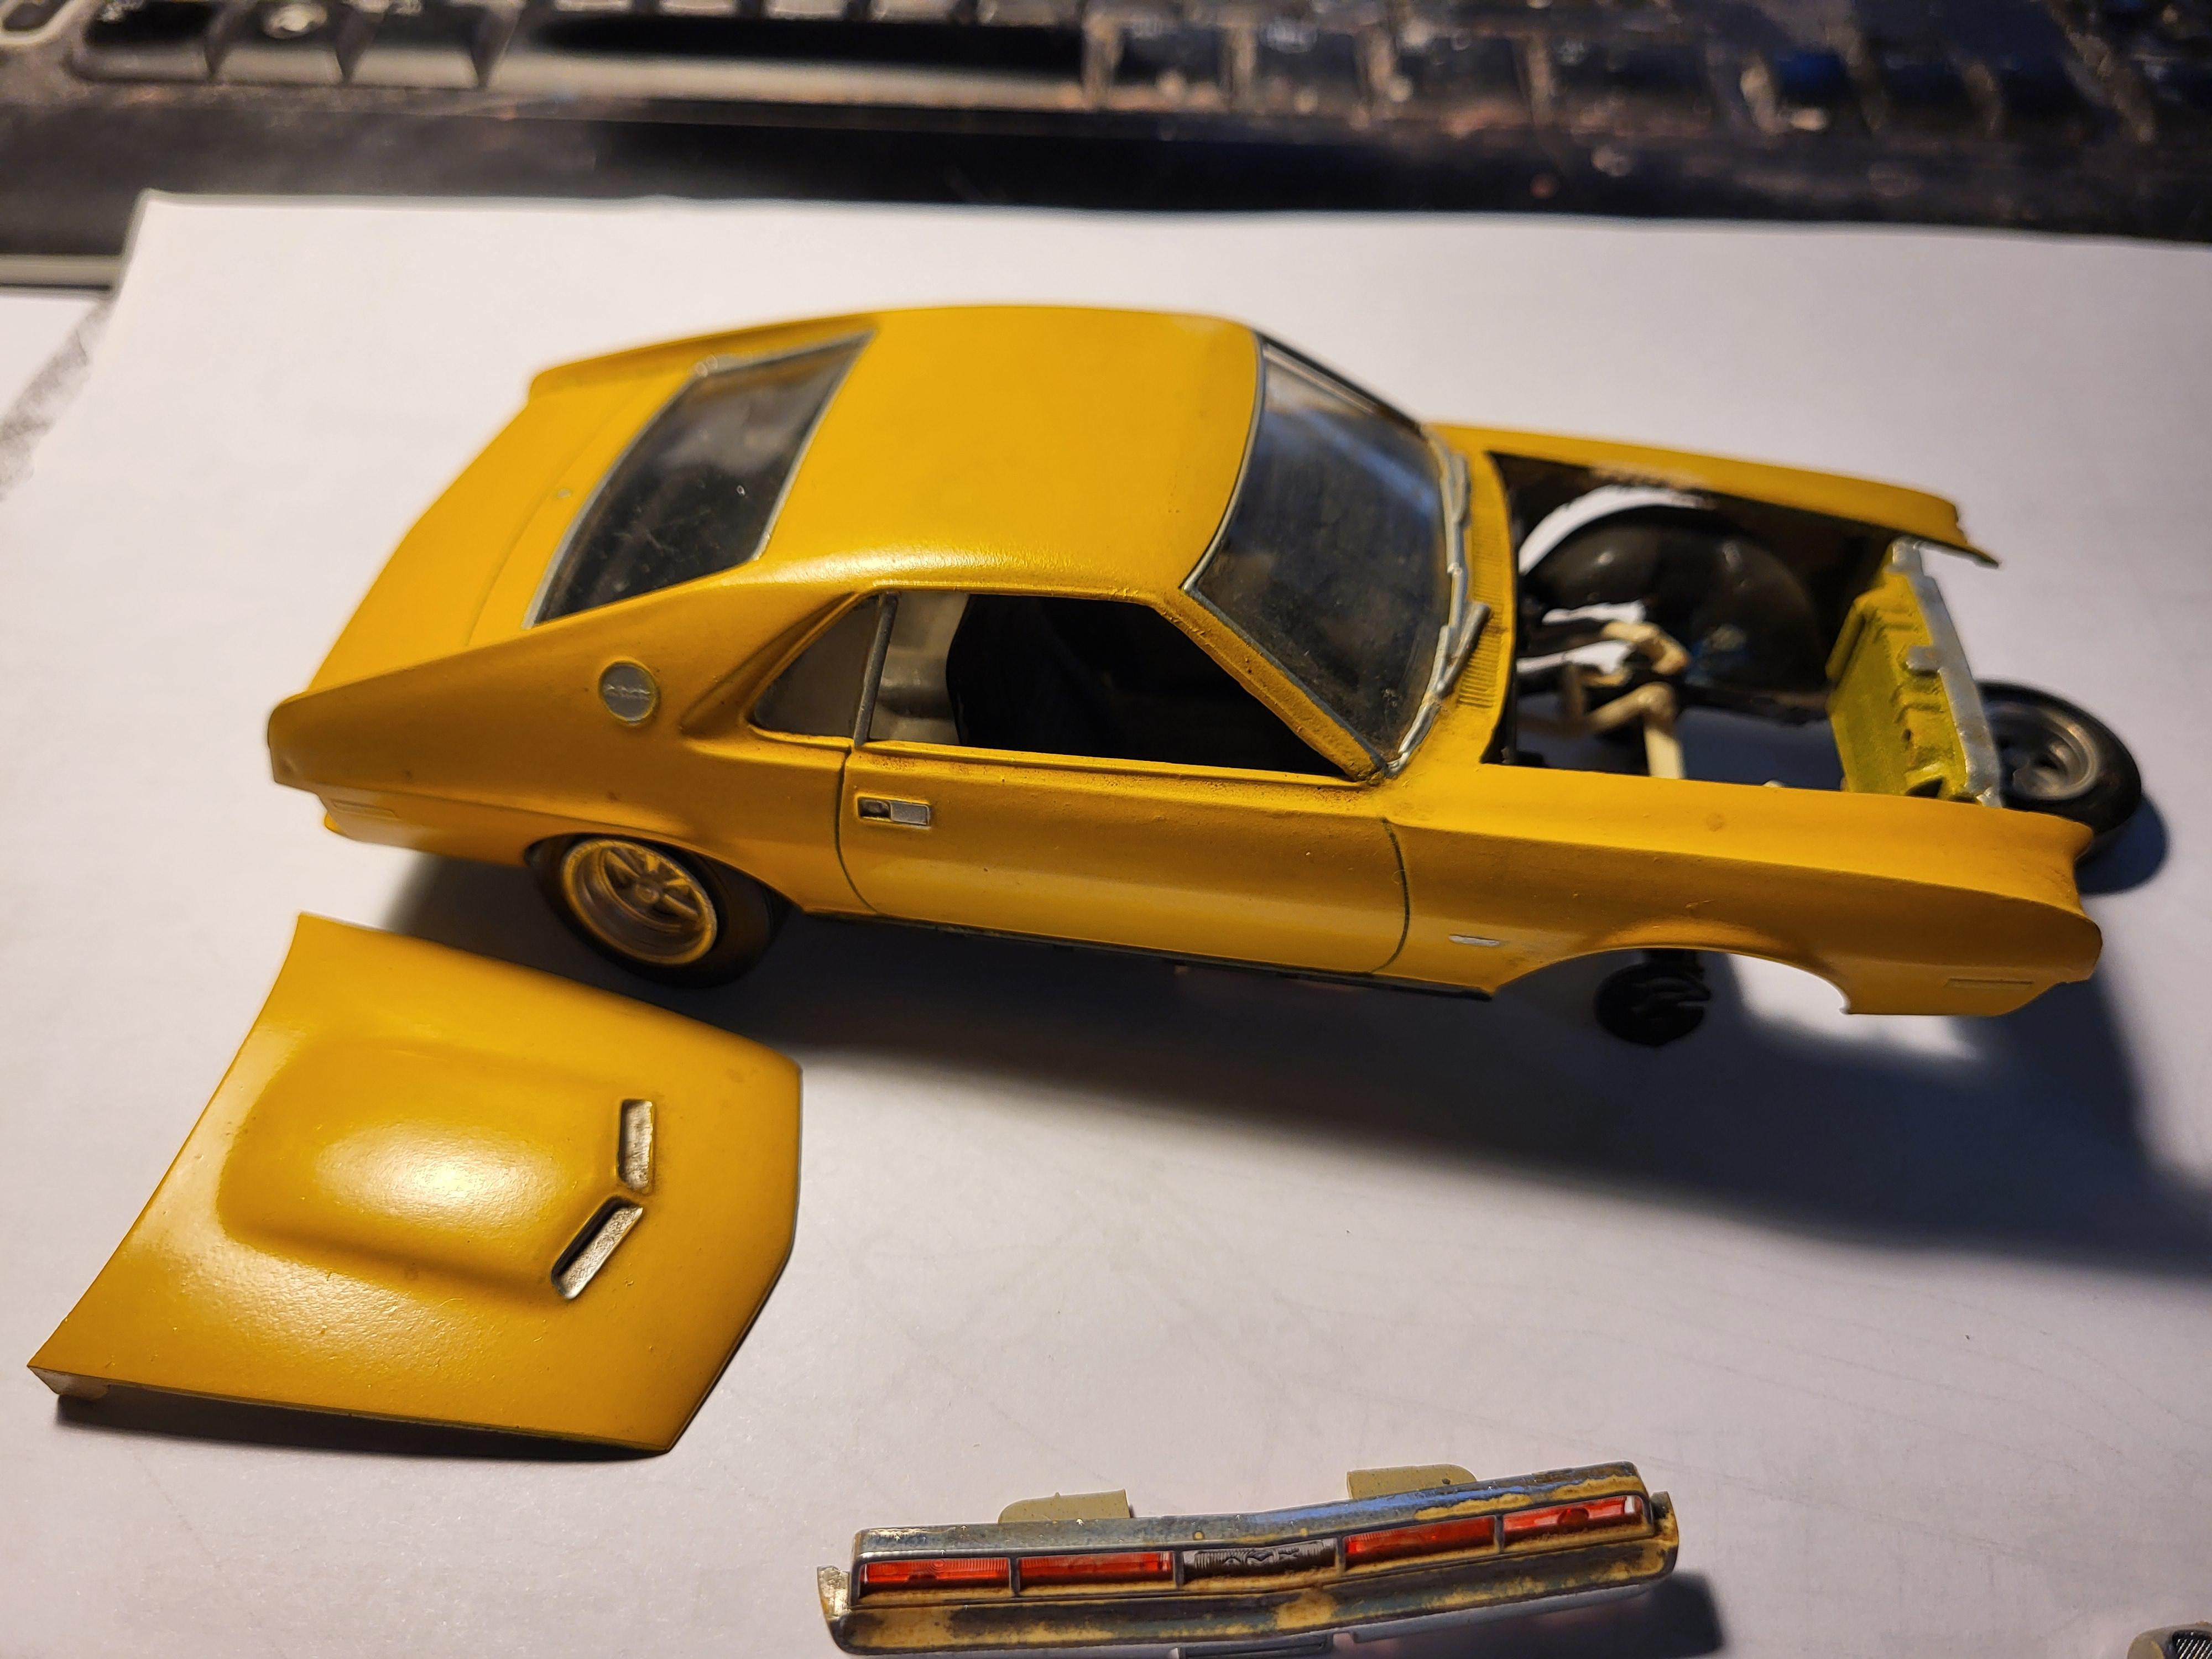
My plan is to go back to stock or "Day2" appearance.
-
Just picked this up at my local hobby shop. They just bought a collection off a couple that had no interest in models. Not sure how they got a hold of them. Anyway., grabbed some pictures of it prior to throwing it in the purple pond. Gonna be a long process. It appears a though it has been painted a few times. I can see some blue under the yellow. The chassis is junk, not sure what to do with the engine. The body is very brittle. The cowl panel has fallen out just looking at it.
-
Very nice
-
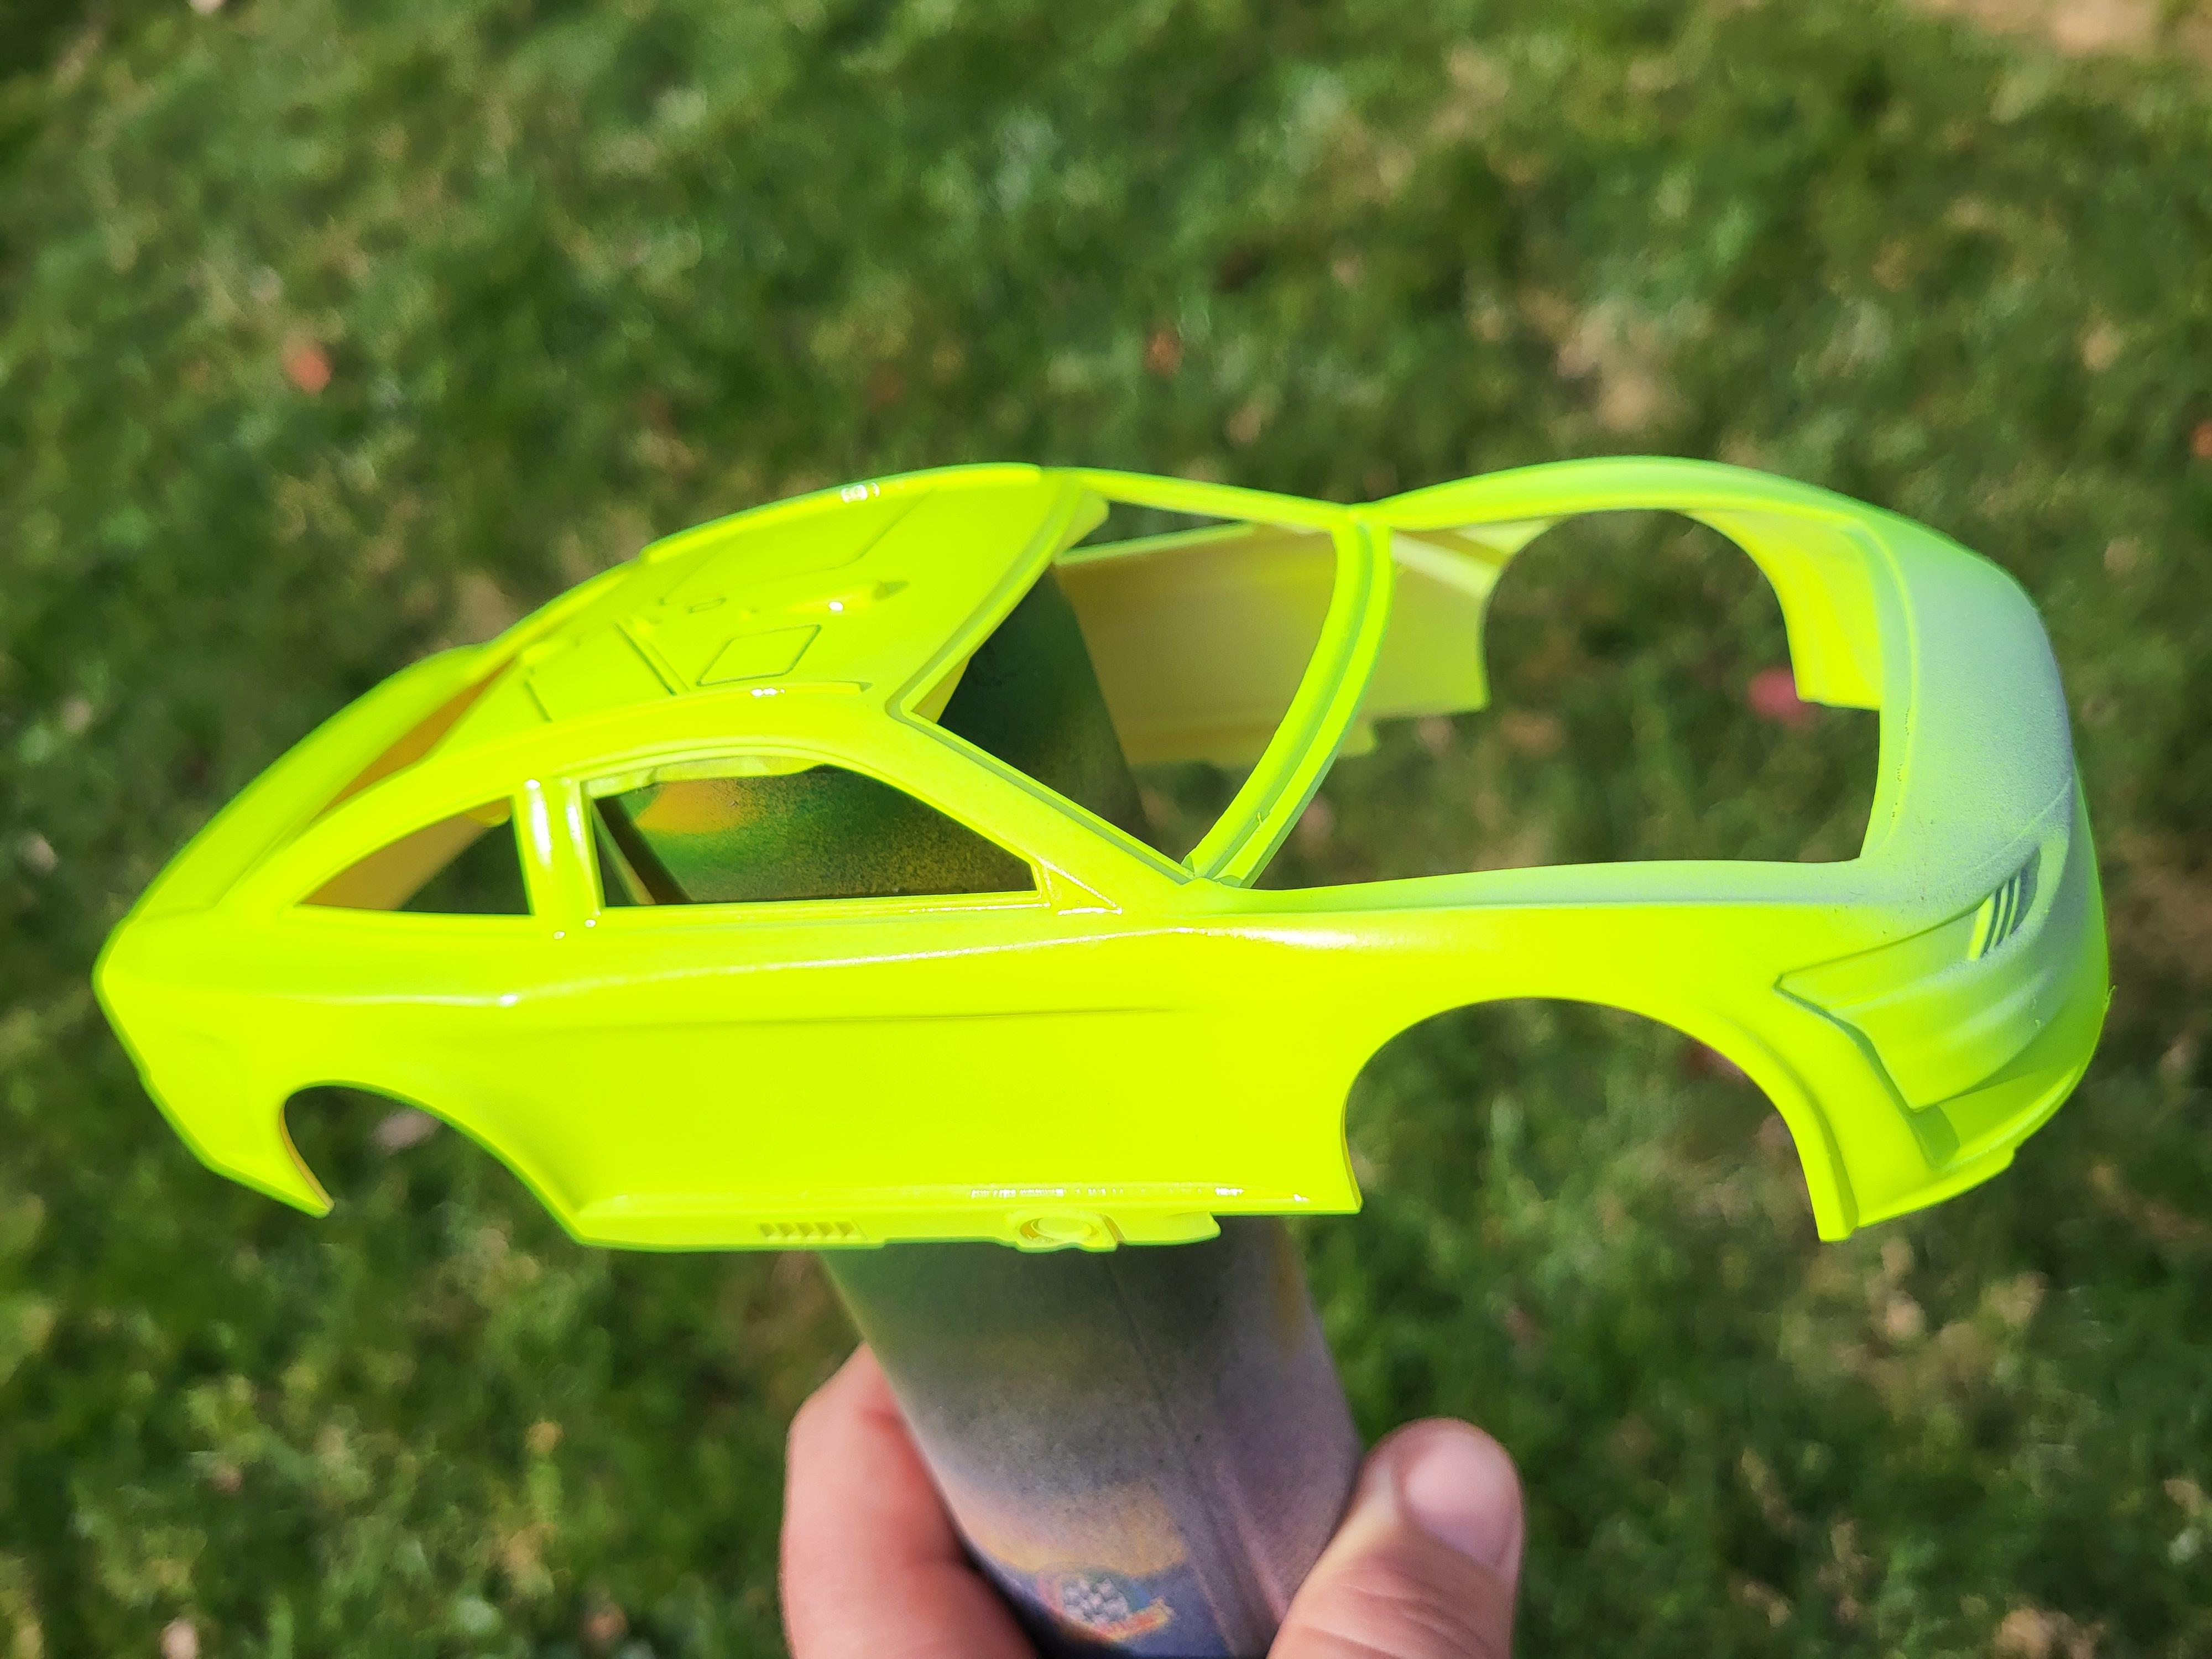
Decided this week to respray. Scuffed and primed with Tamiya White primer. Then I broke out my airbrush and a bottle of Testors Fluorescent Yellow. Looks much better I think
-
Picked this kit up prior to his wining of the Championship. Bought a can of Krylon Fluorescent Yellow. Scuffed the body and sprayed directly over the Yellow body was molded in. Turned out bright but not right. Never had much success spraying Fluorescent Yellow for some reason.
-
Thank you all for the comments.
-
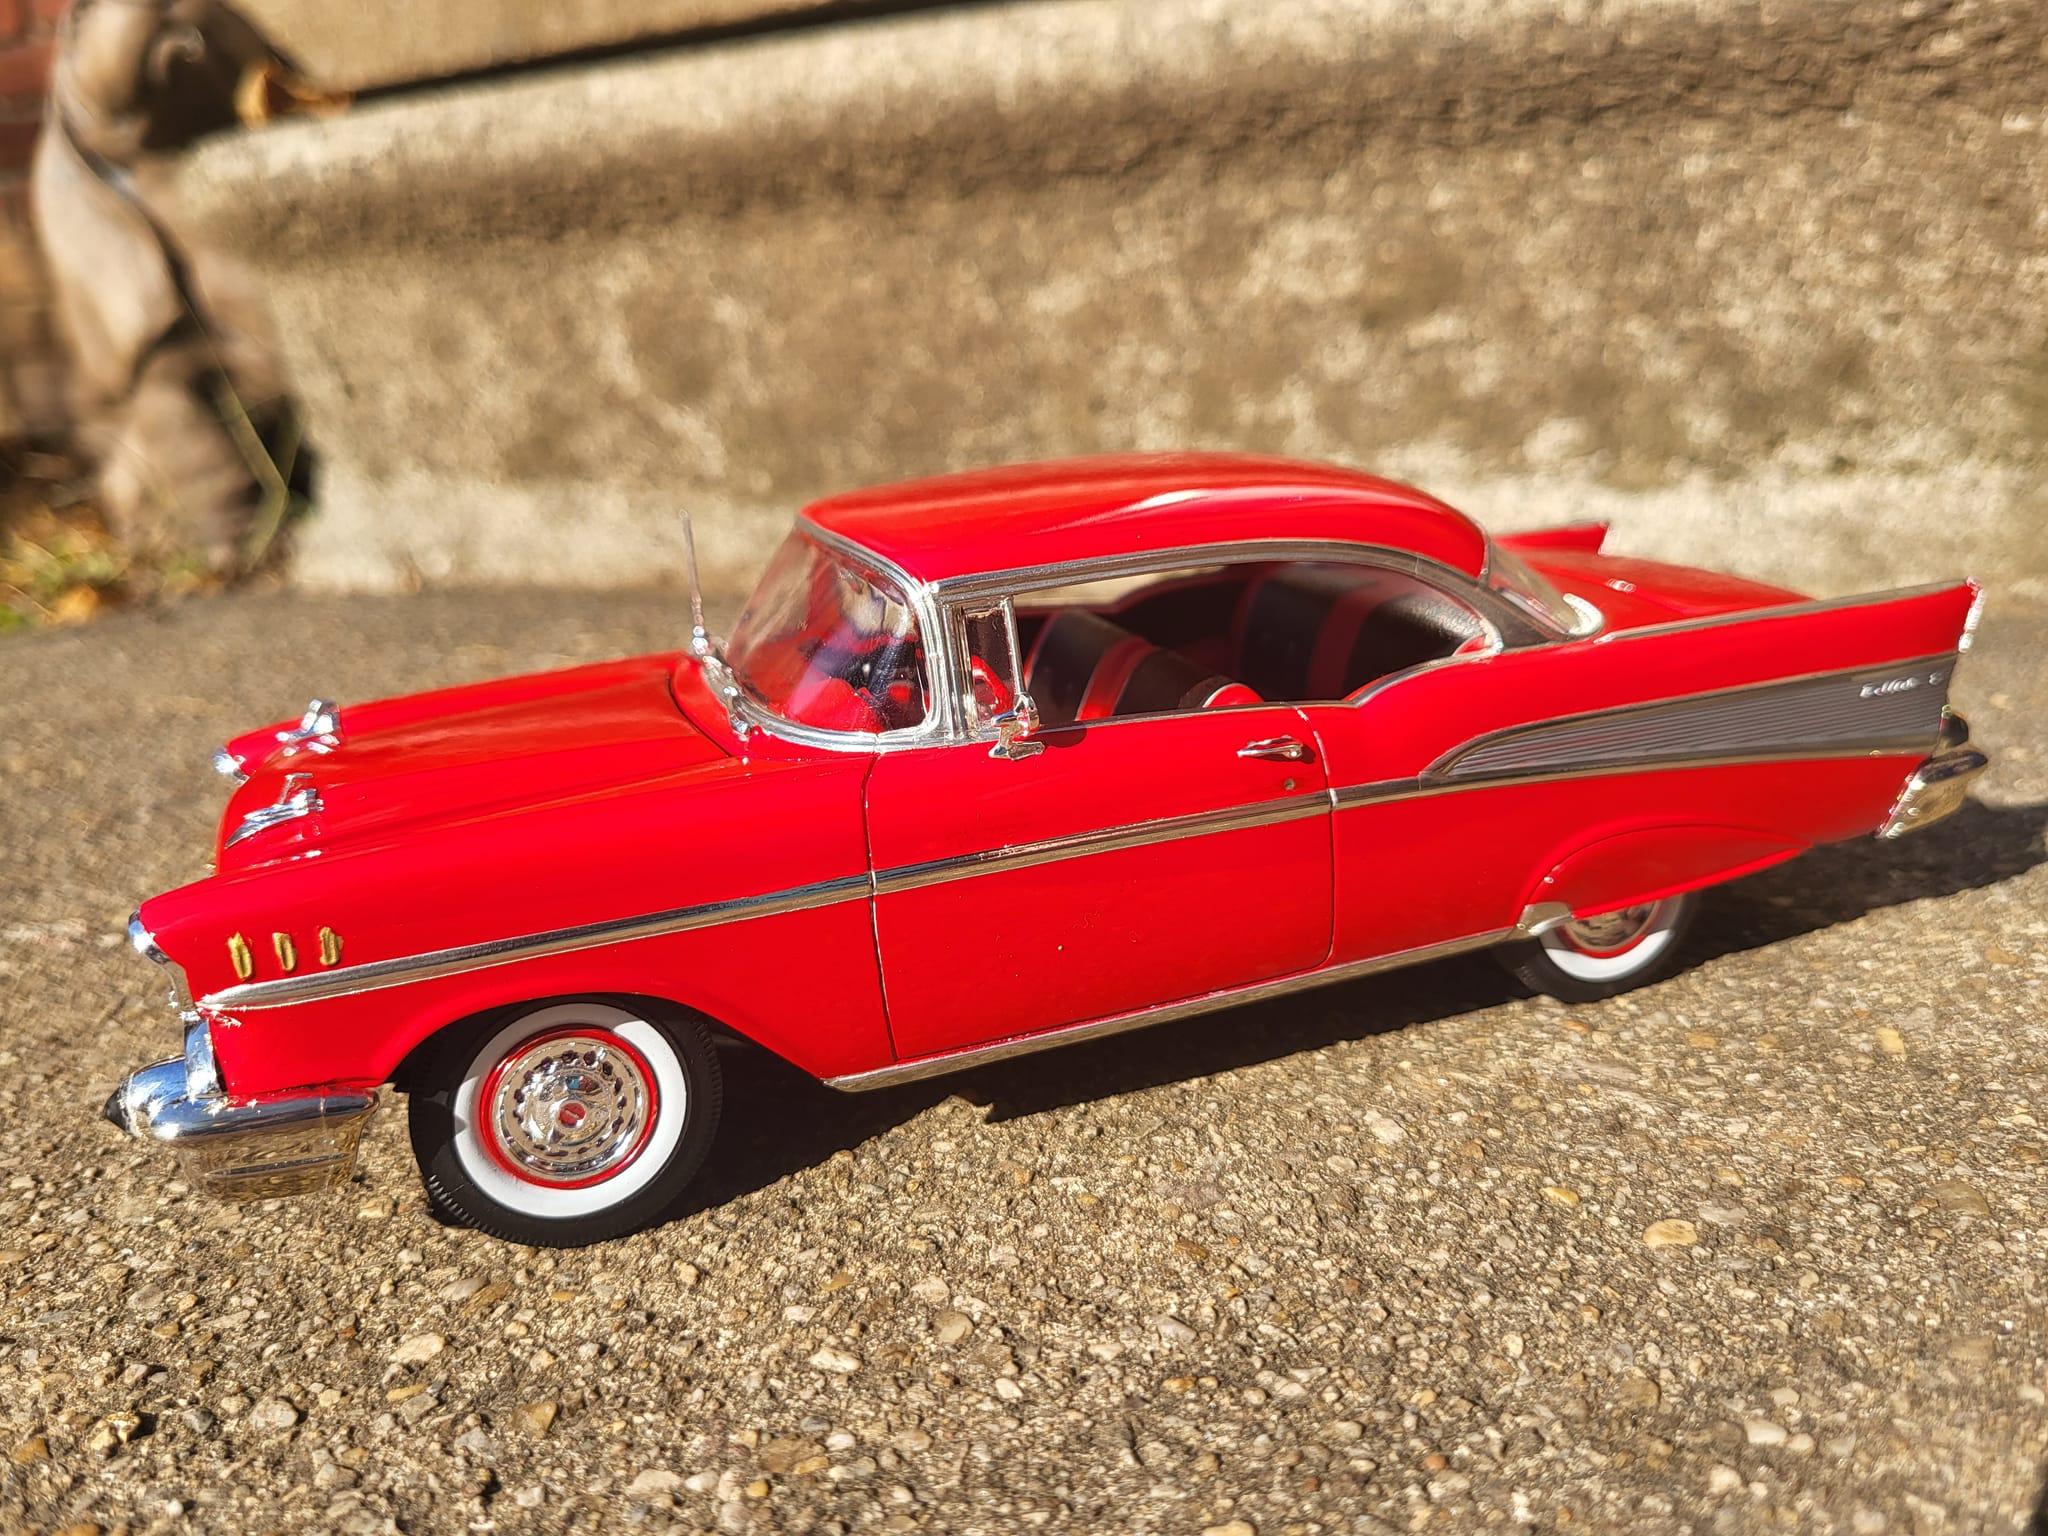
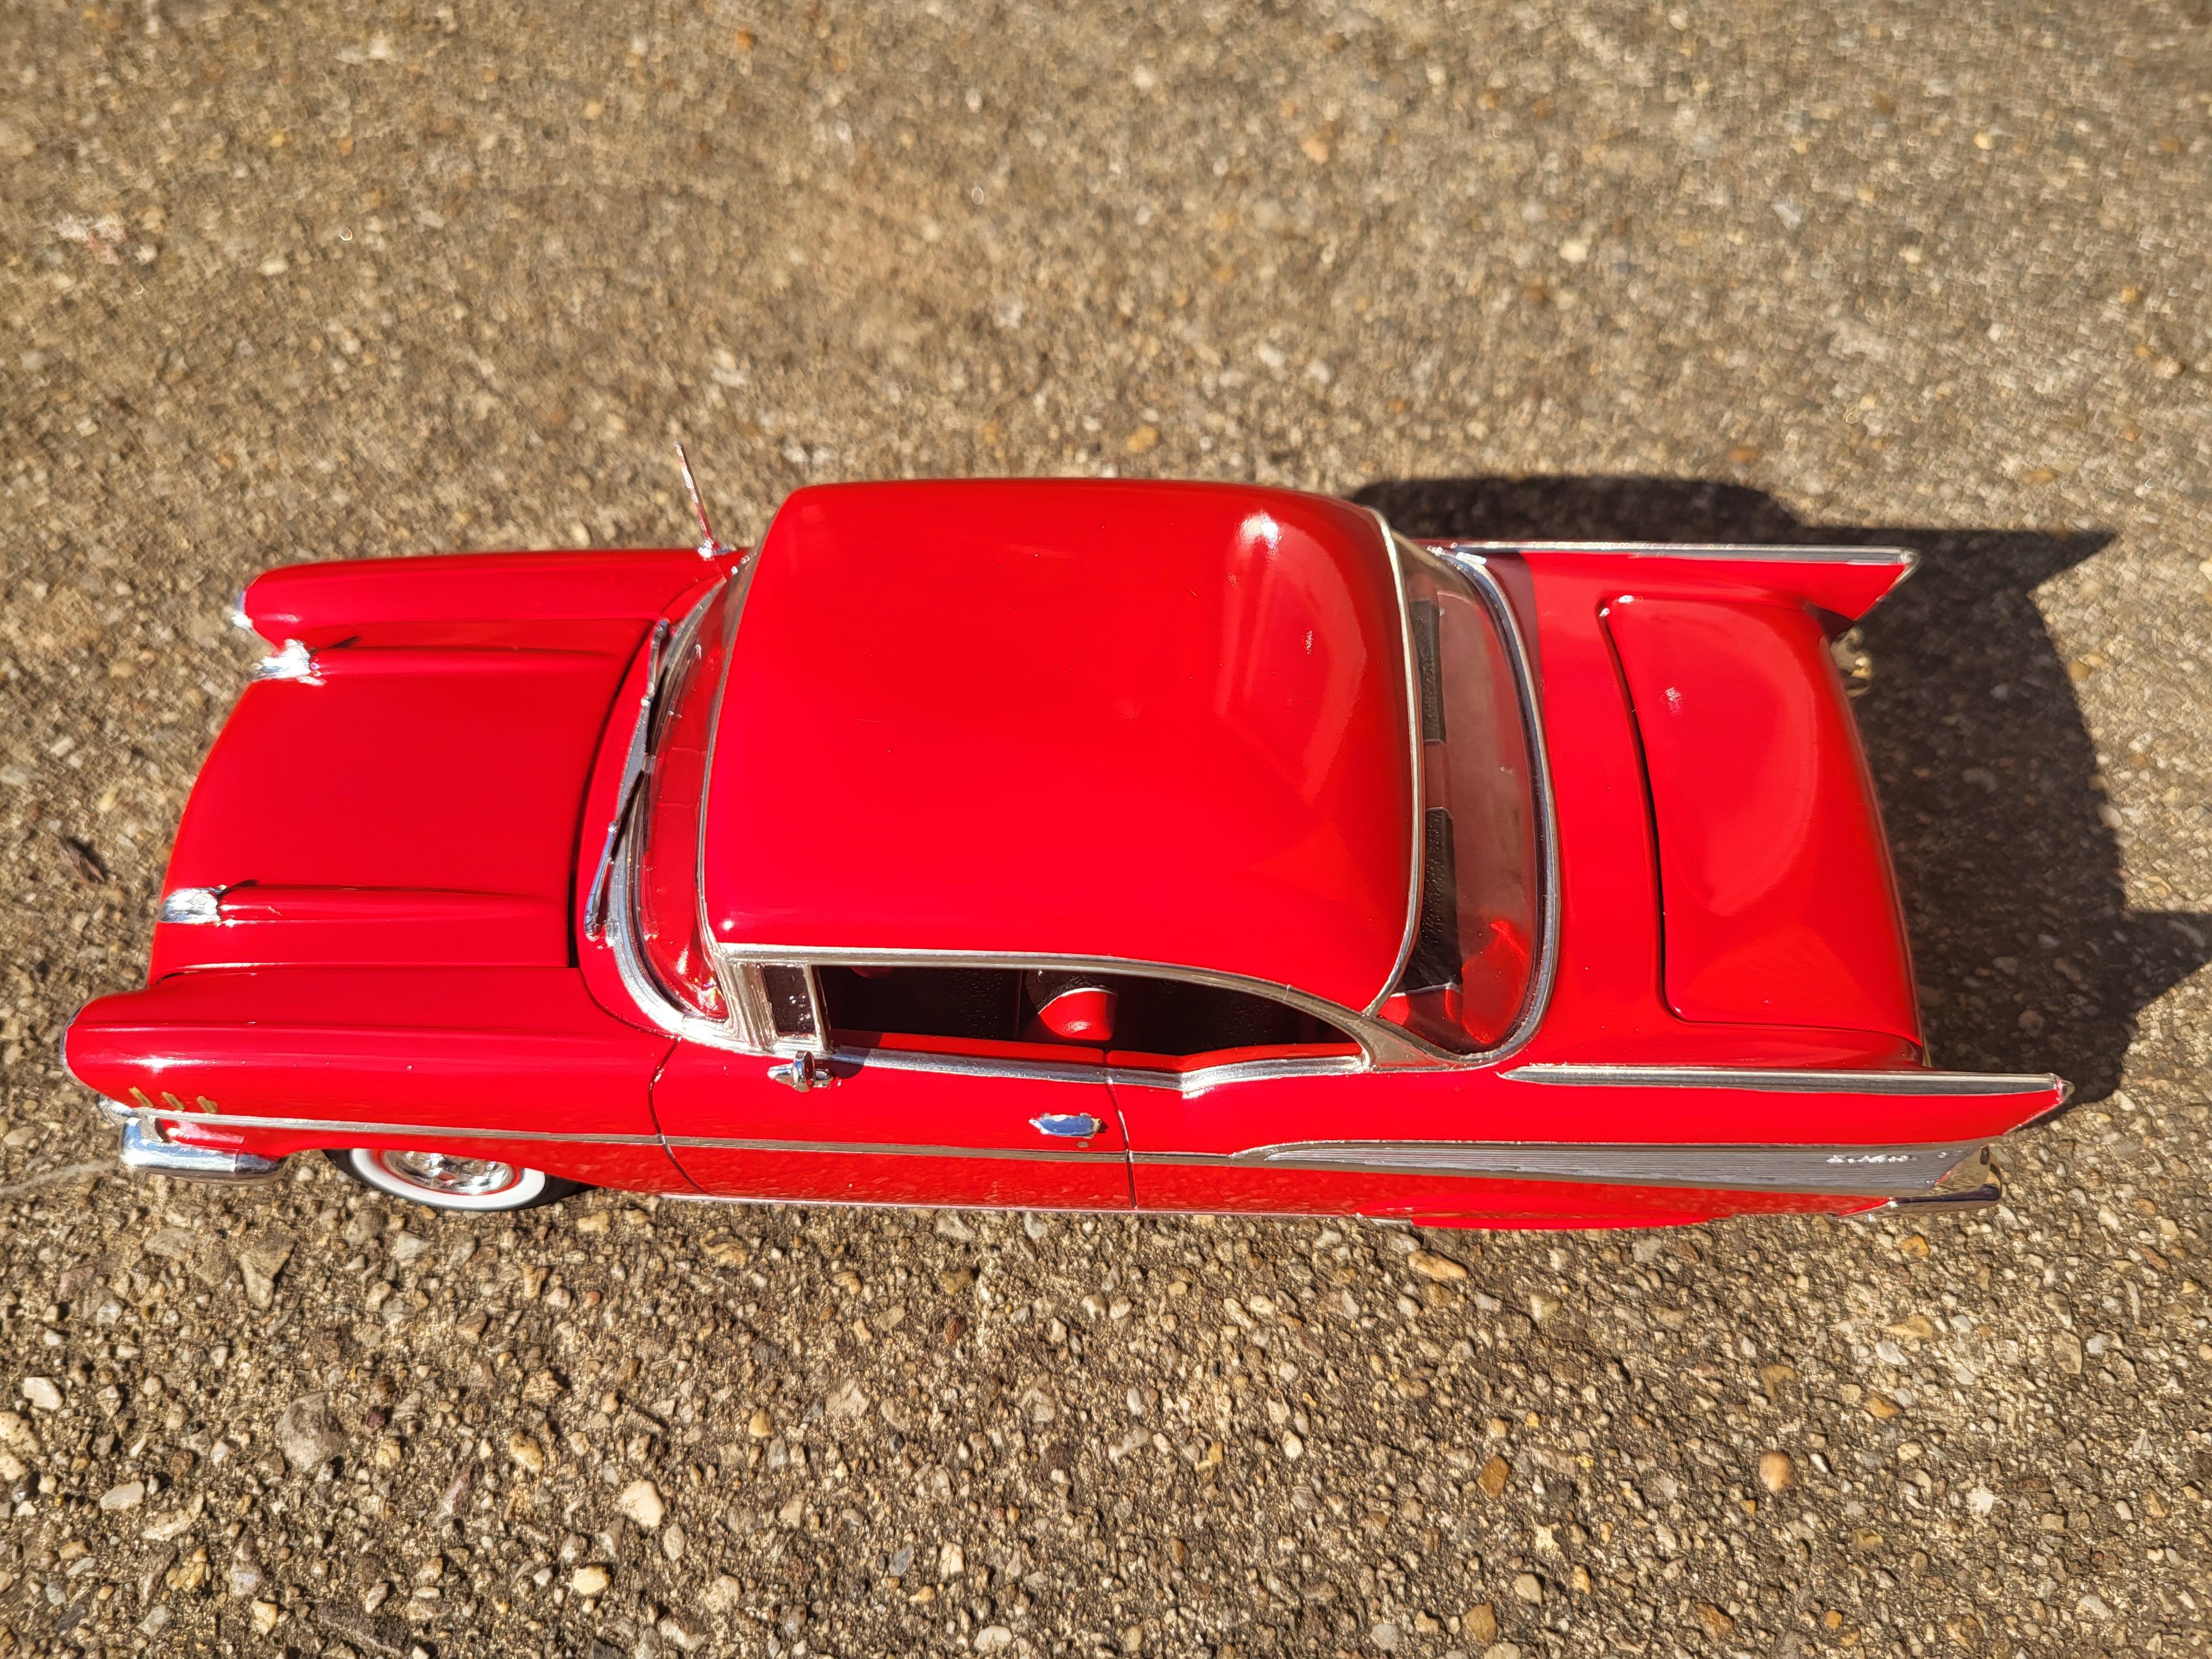
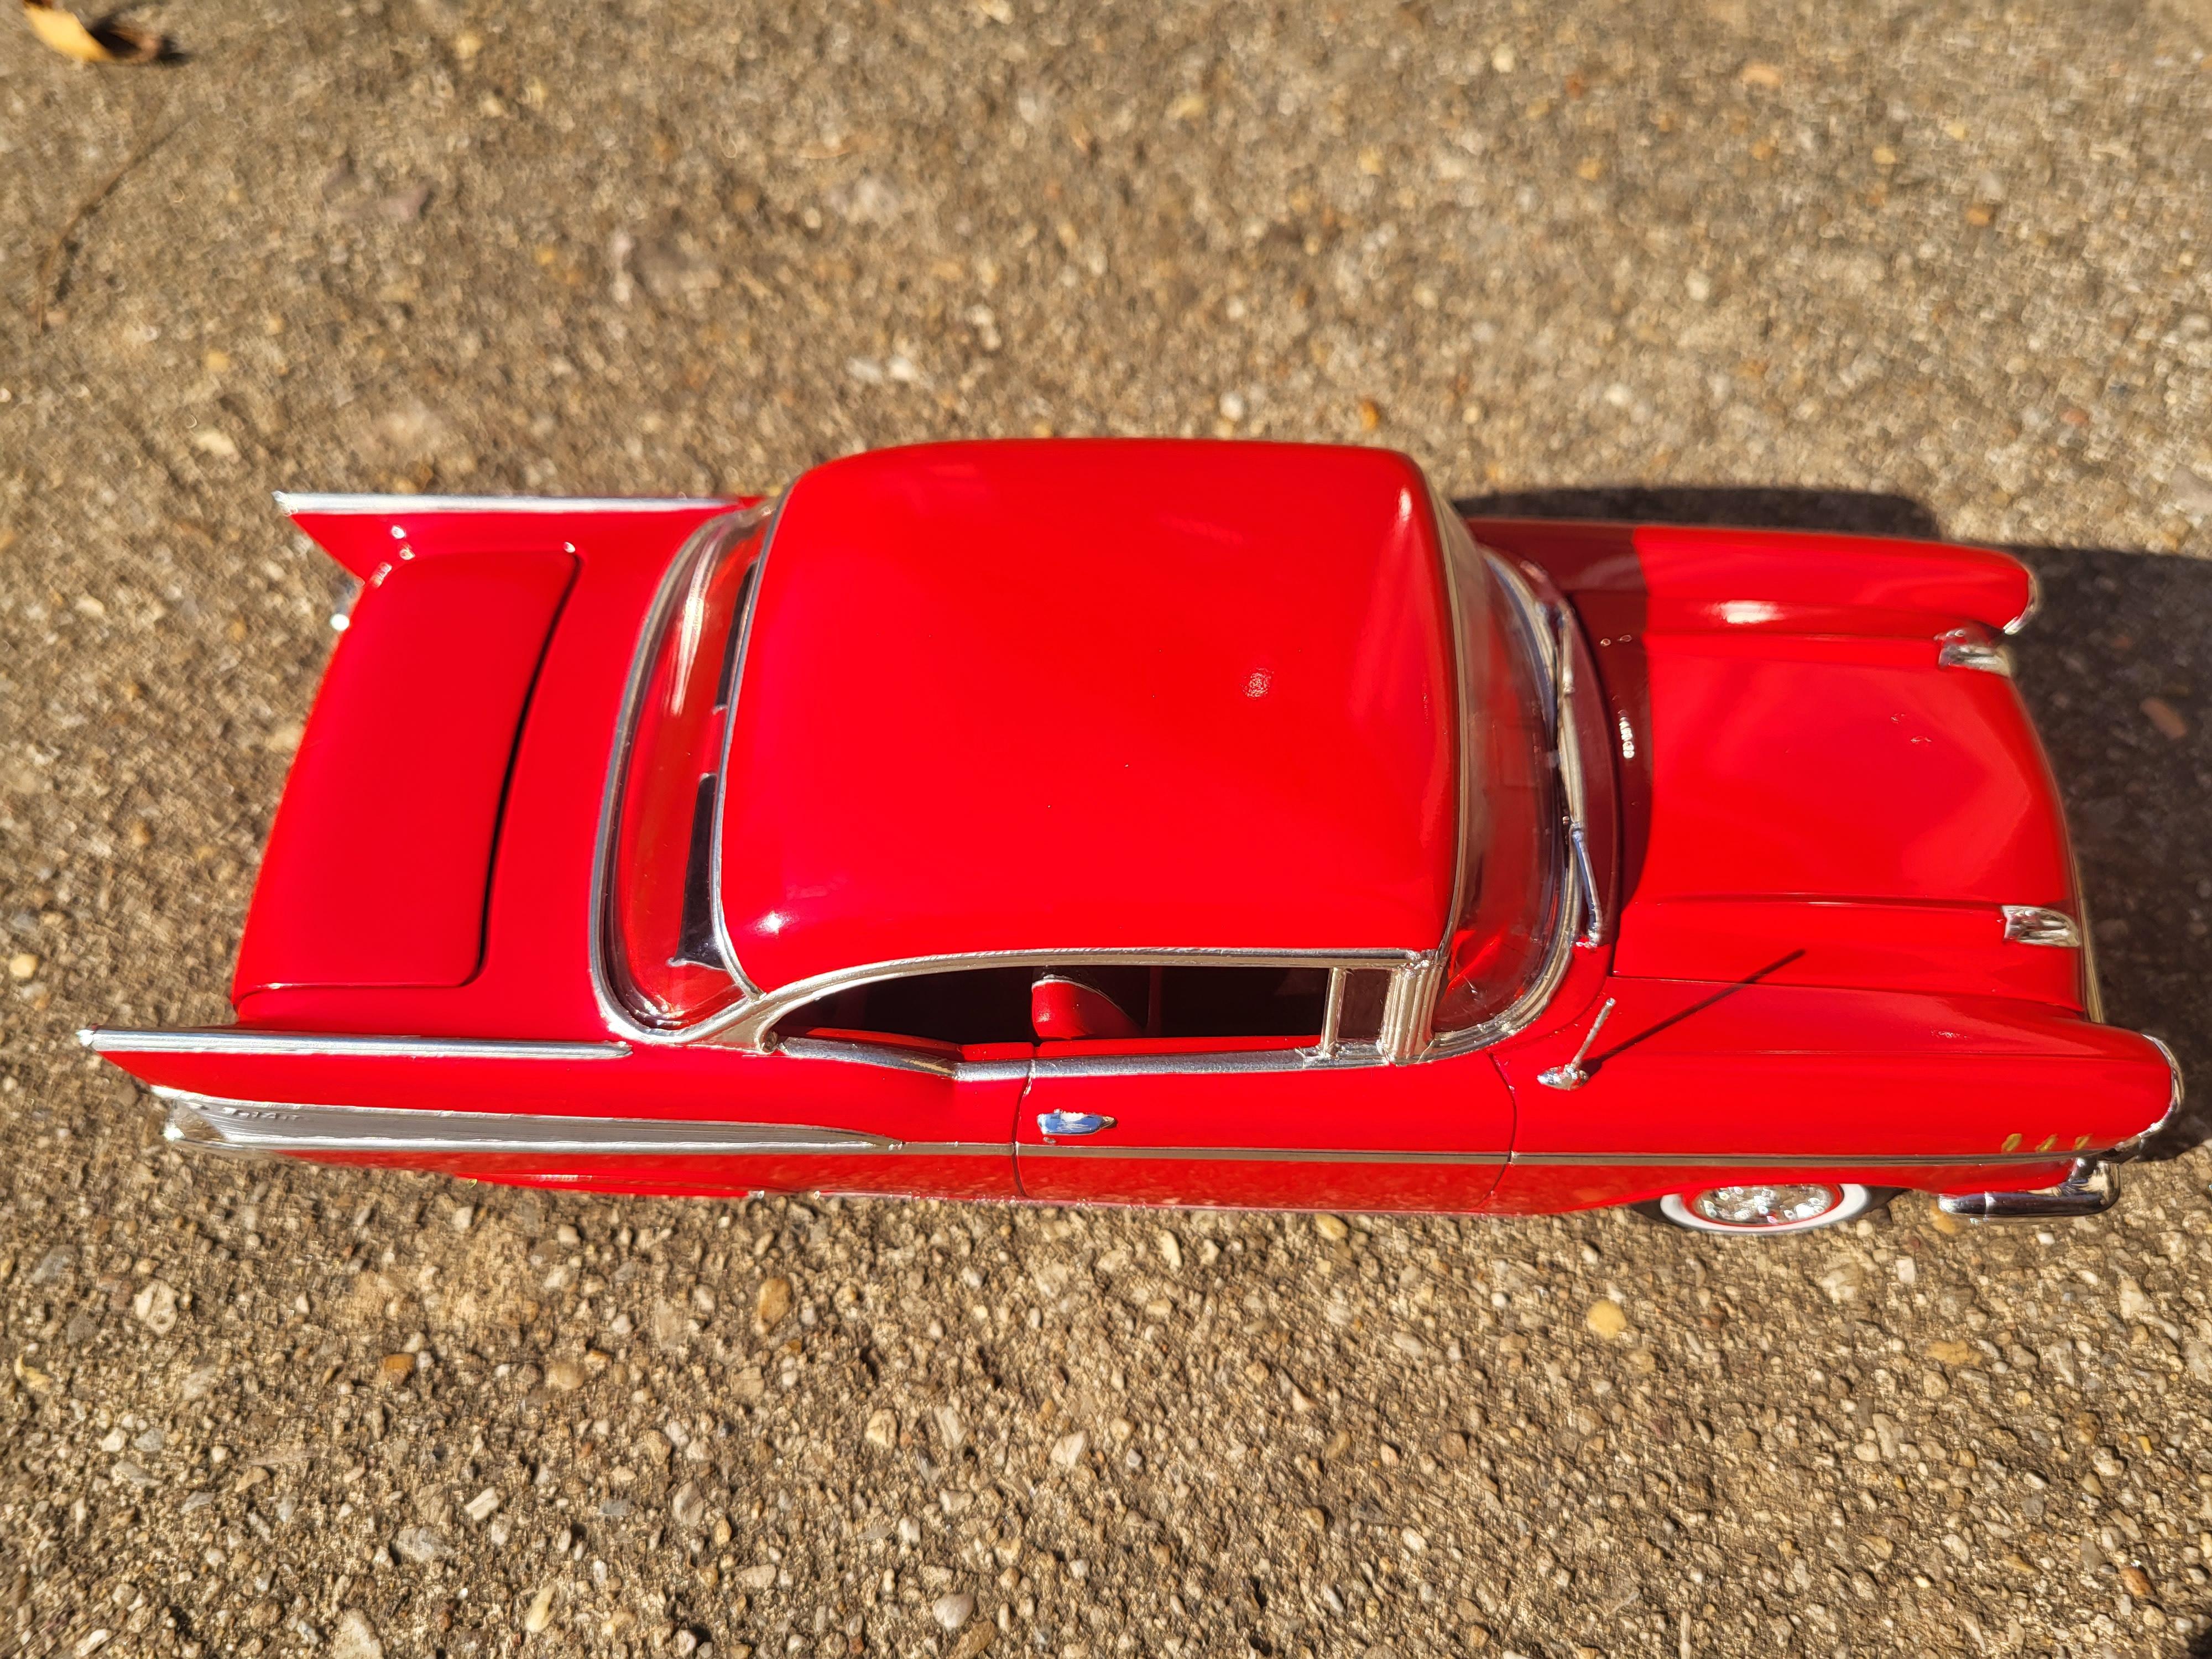
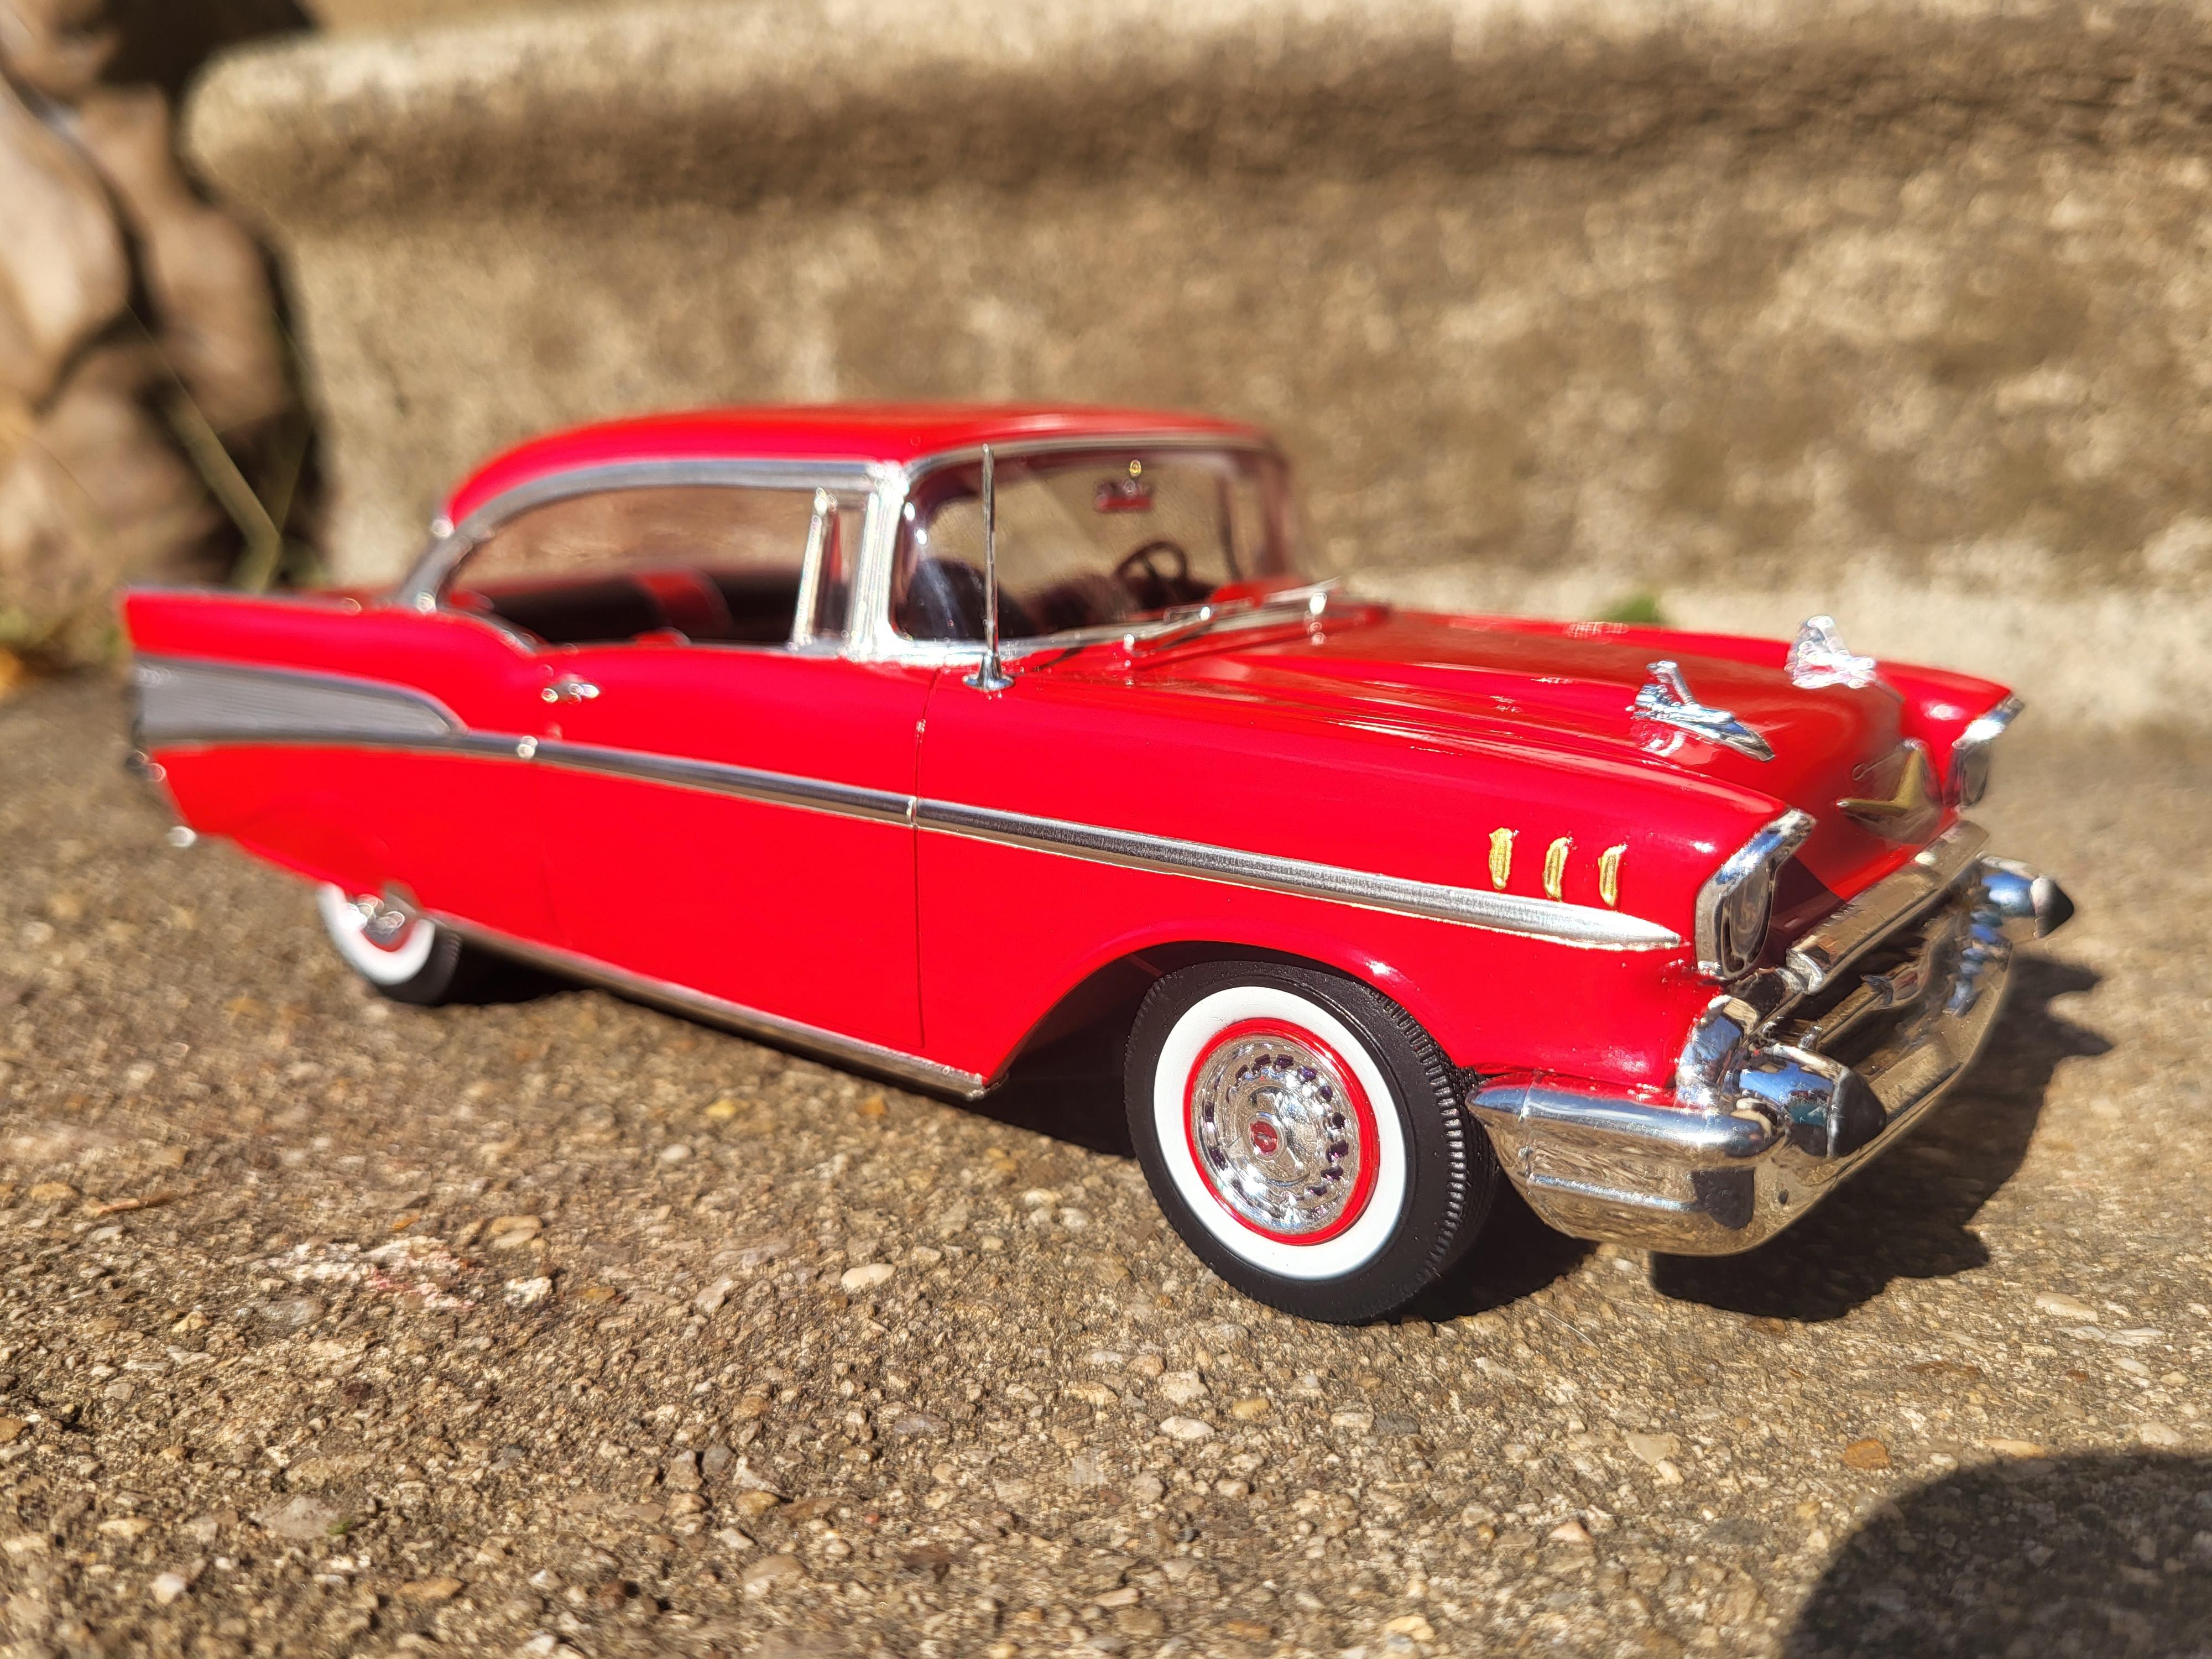
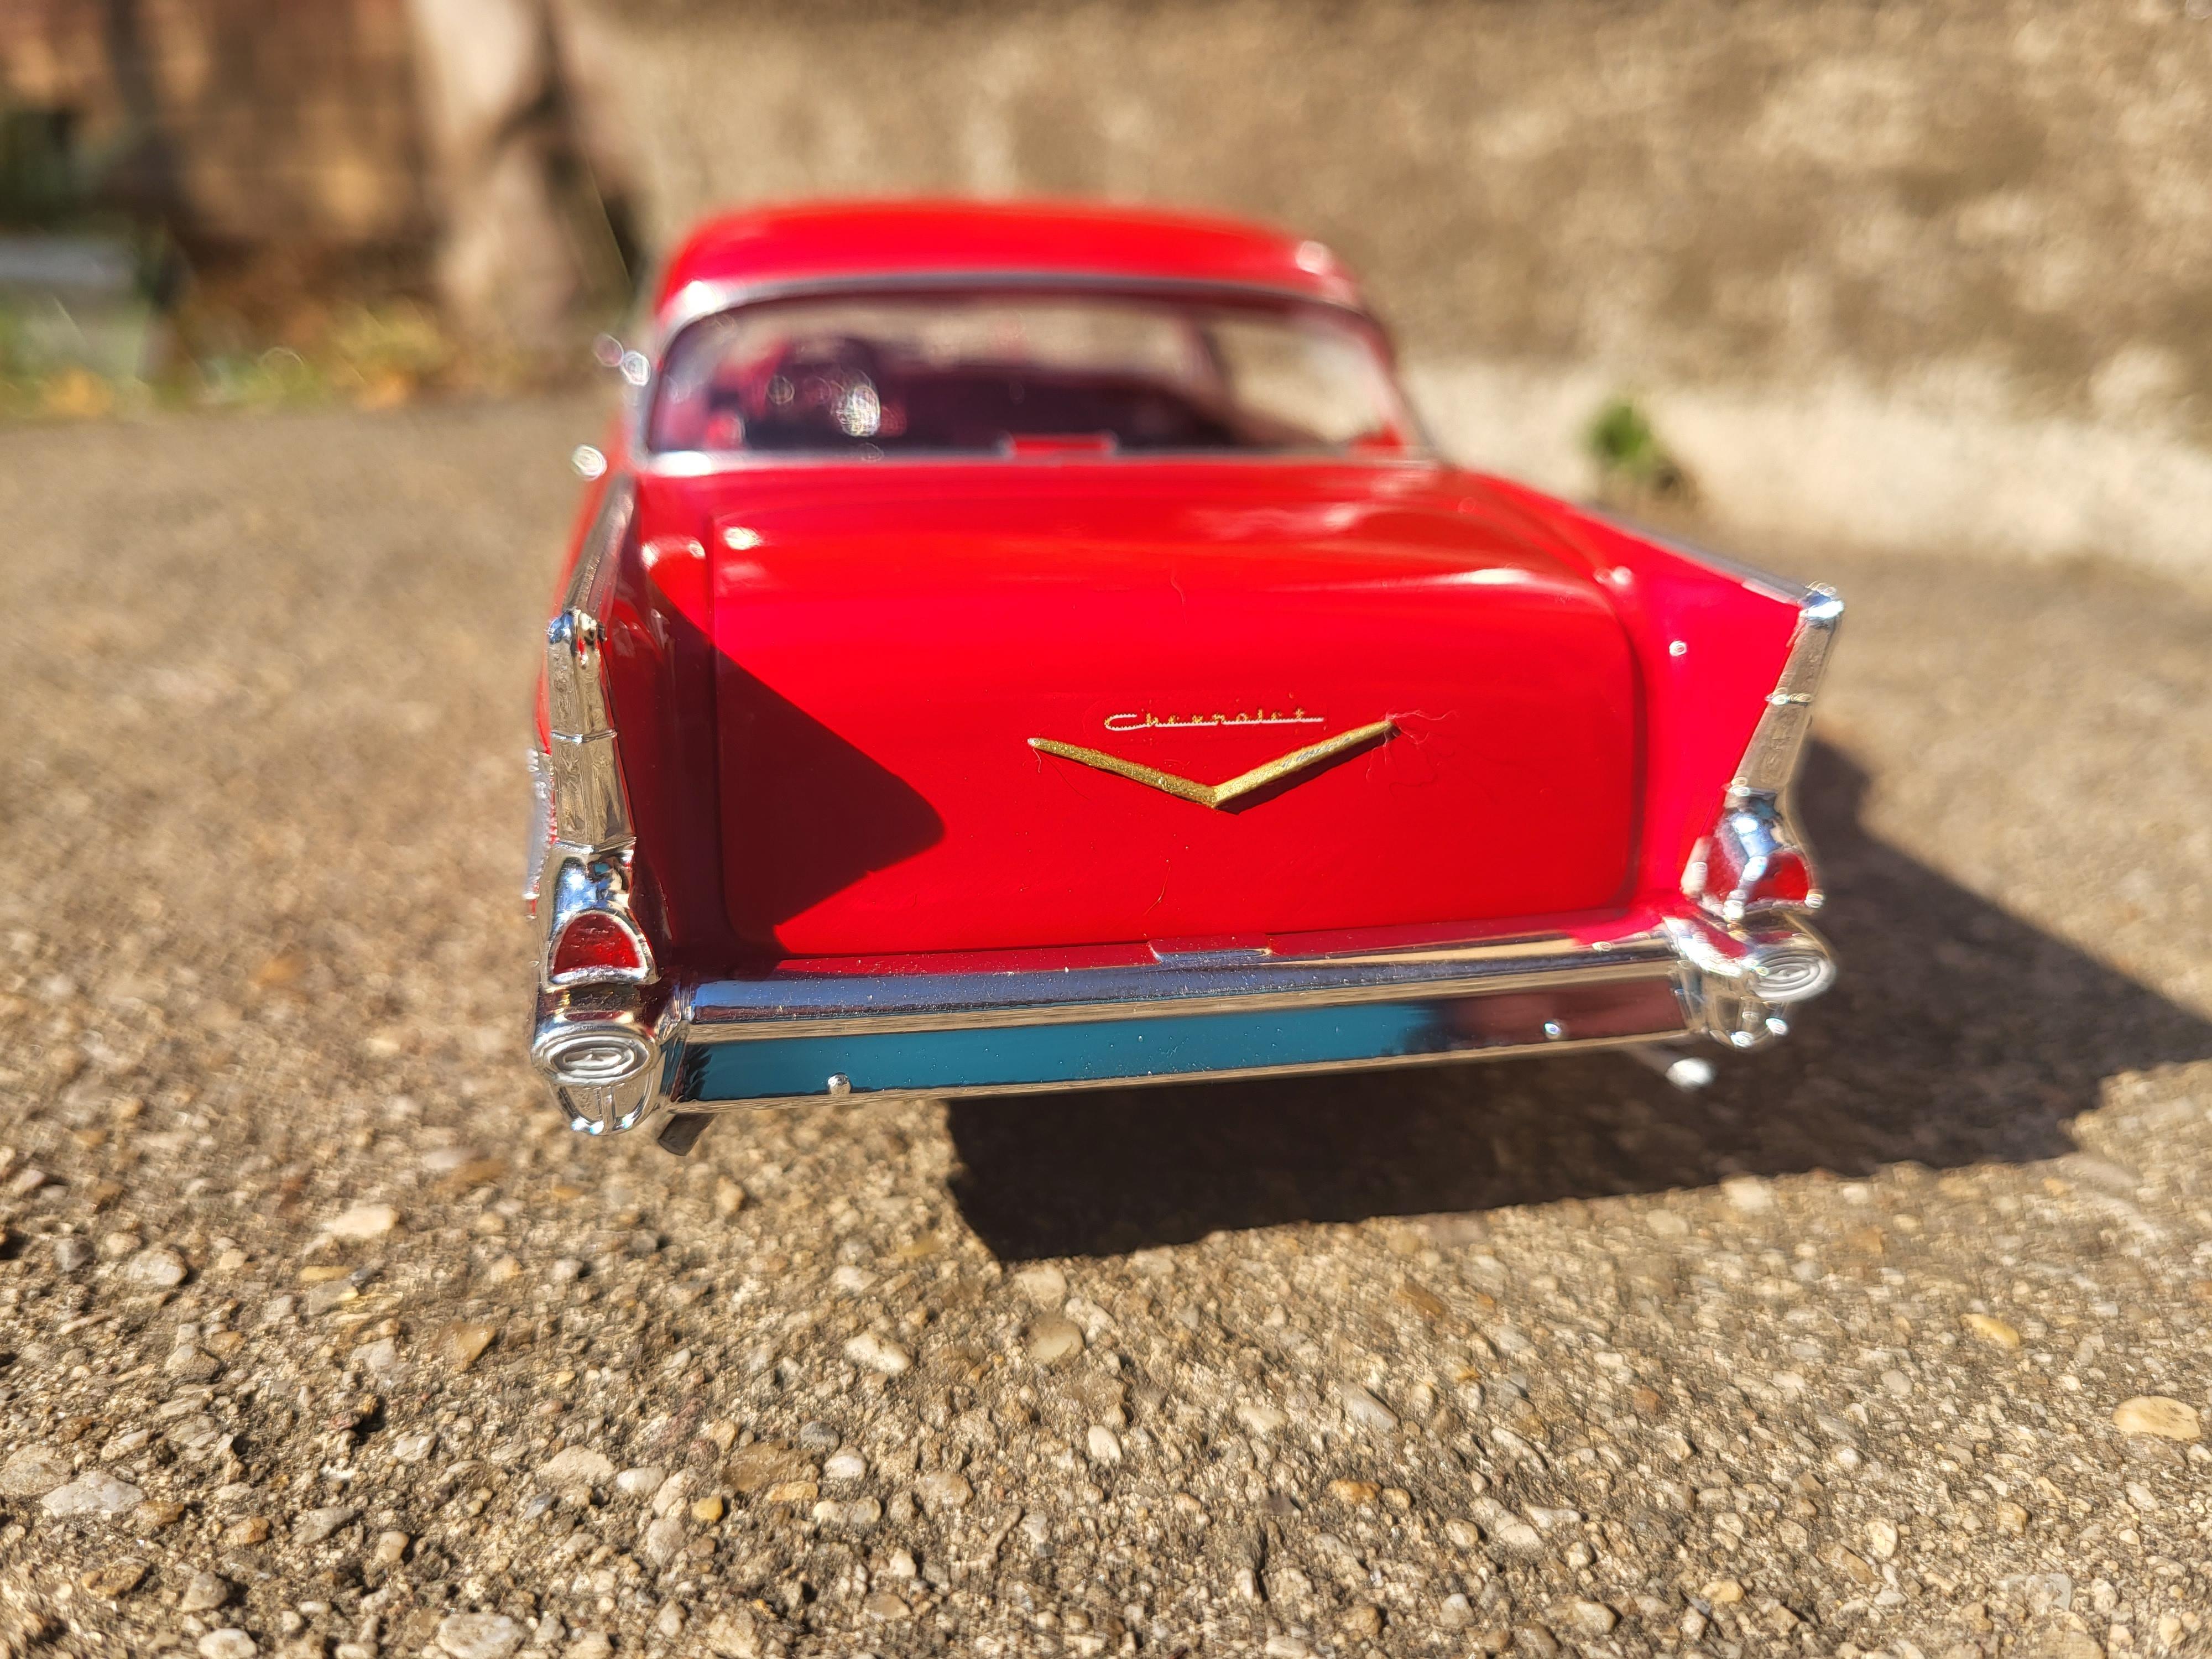
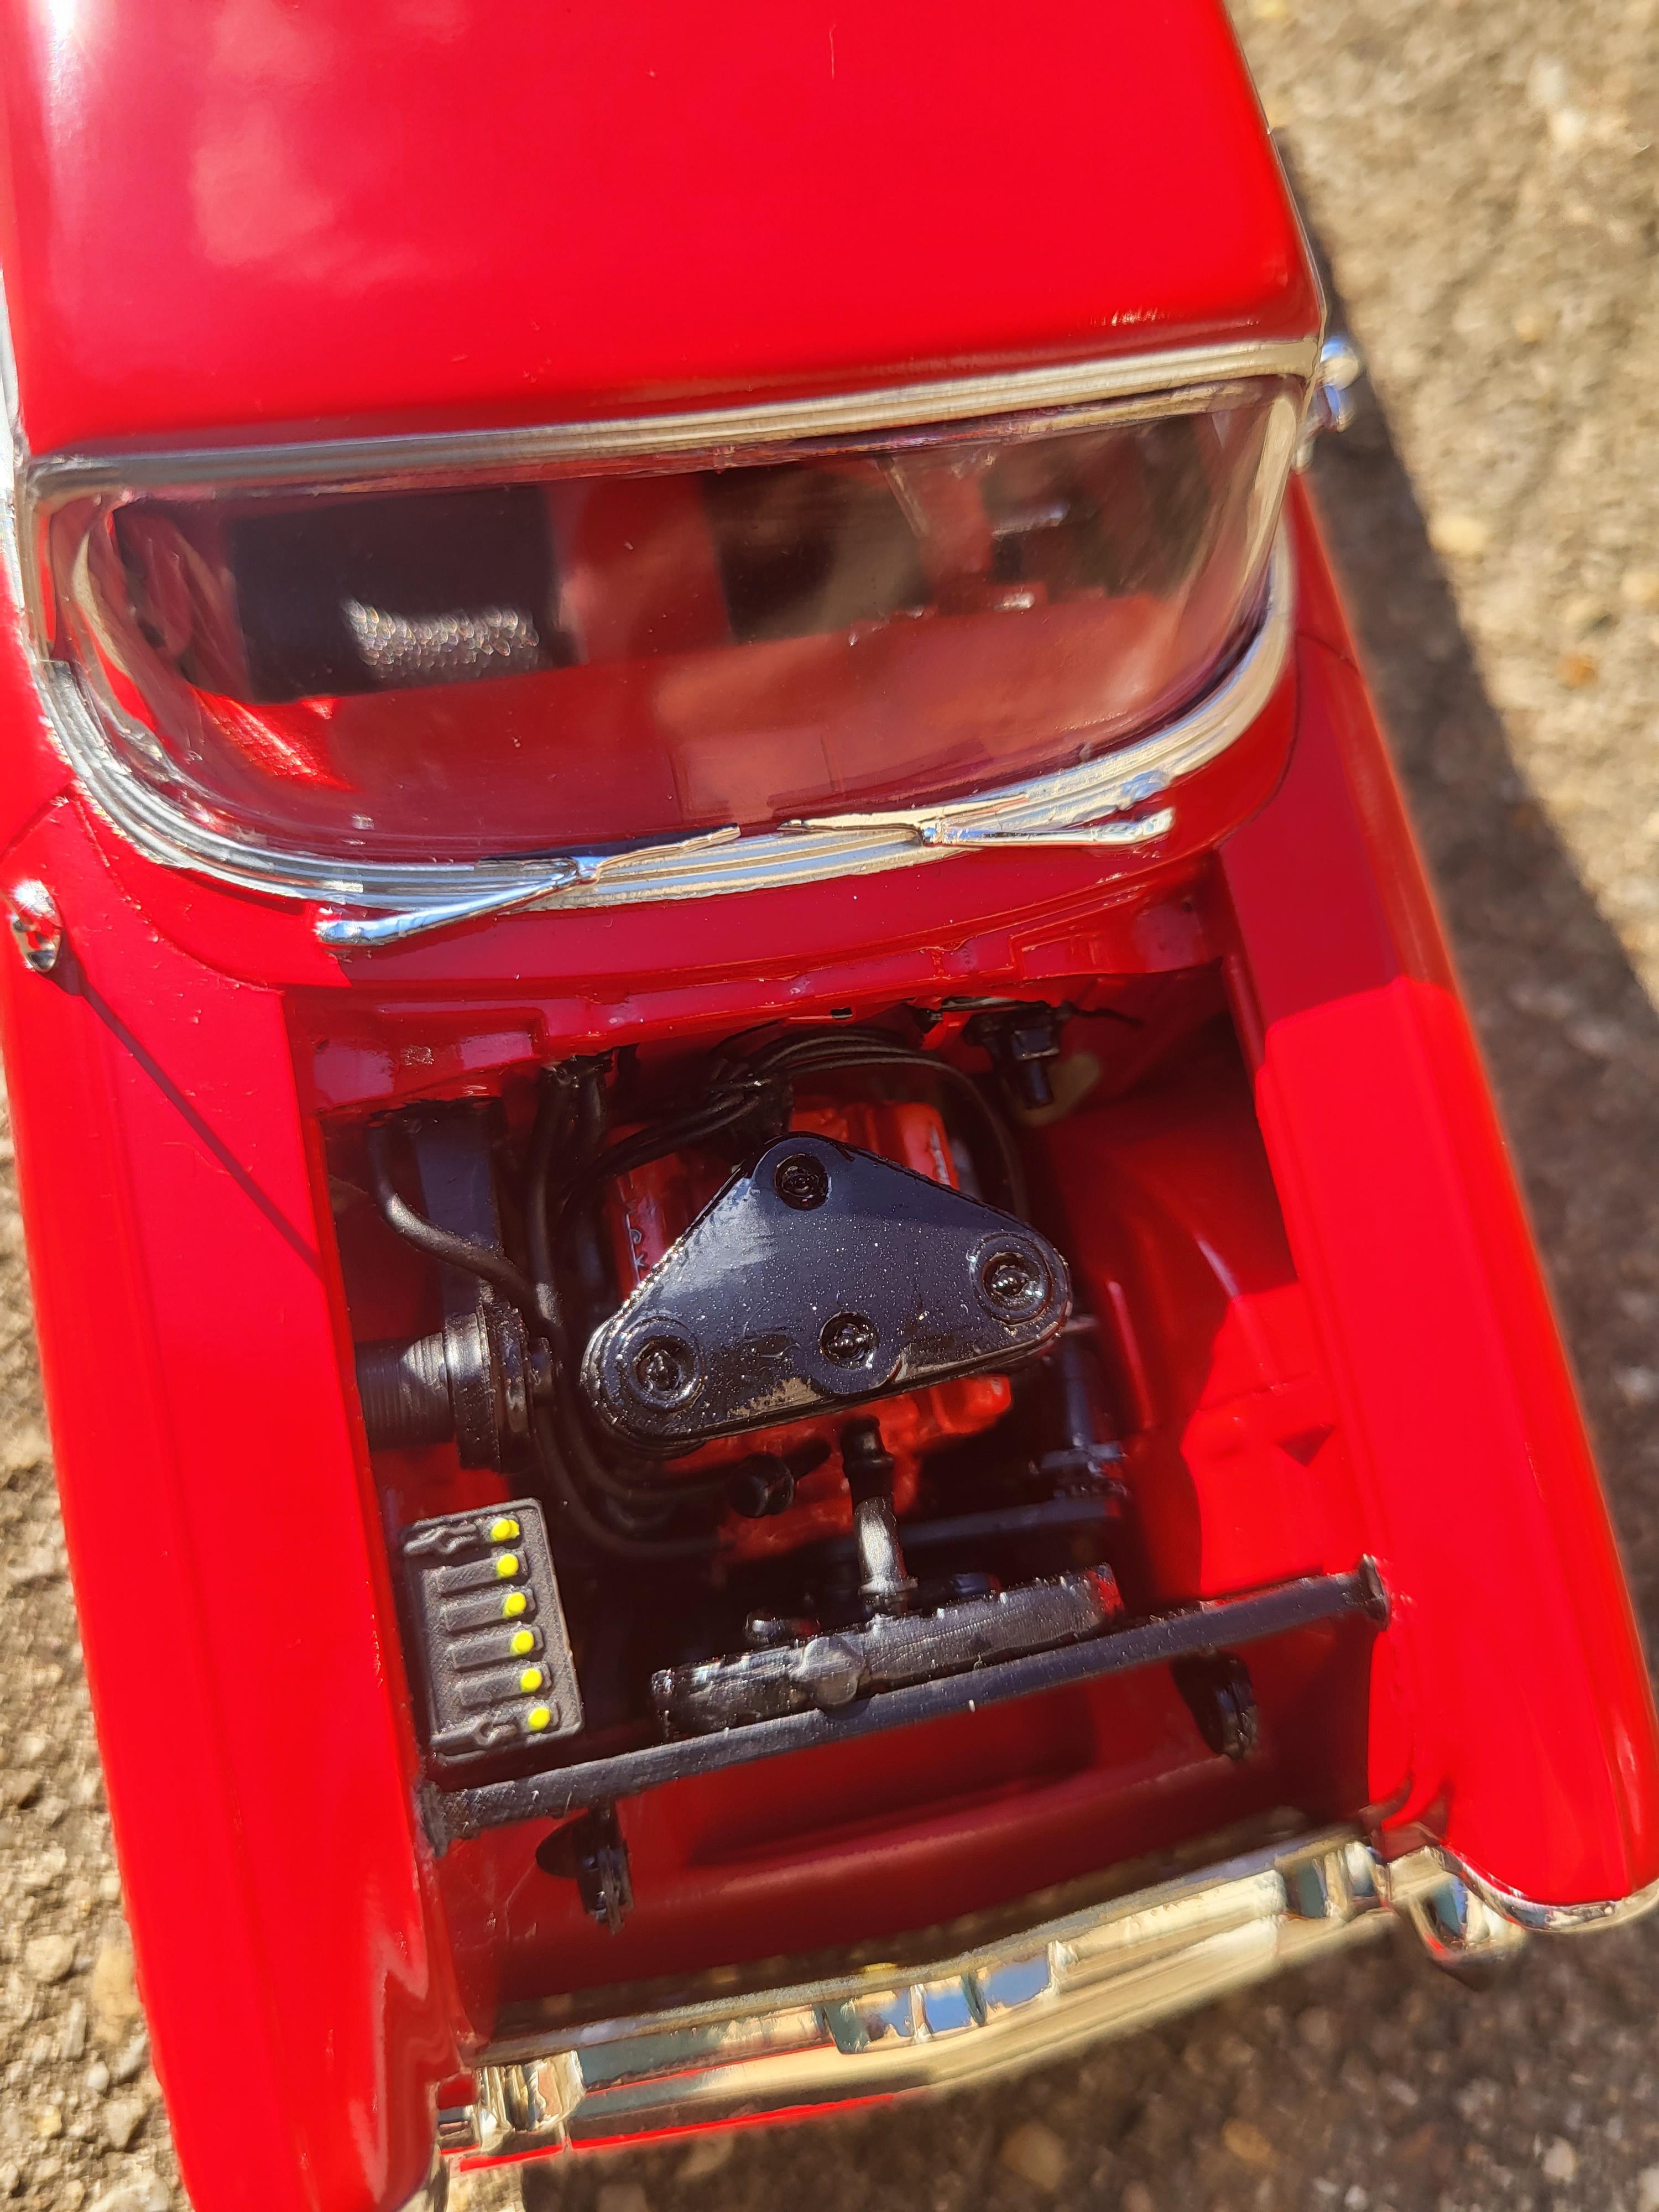
Just completed my 1957 Bel Air Hardtop. Built straight out of the box except the tires. Found a setfrom a Parts Pak that the wheels fit better in. Airbrushed with Tamiya Red with no clear. Bare-metal foil on the trim. Red and Black interior. First time trying to detail up a set of stock wheel covers, I don't think they look to bad. Really pleased with how this turned out.
-
WOW! My local hobby shop has one of these out of a private collection they have purchased and selling. Was thinking about picking it up but haven't. May have to after seeing yours.