

Modlbldr
-
Posts
6,876 -
Joined
-
Last visited
Content Type
Profiles
Forums
Events
Gallery
Posts posted by Modlbldr
-
-
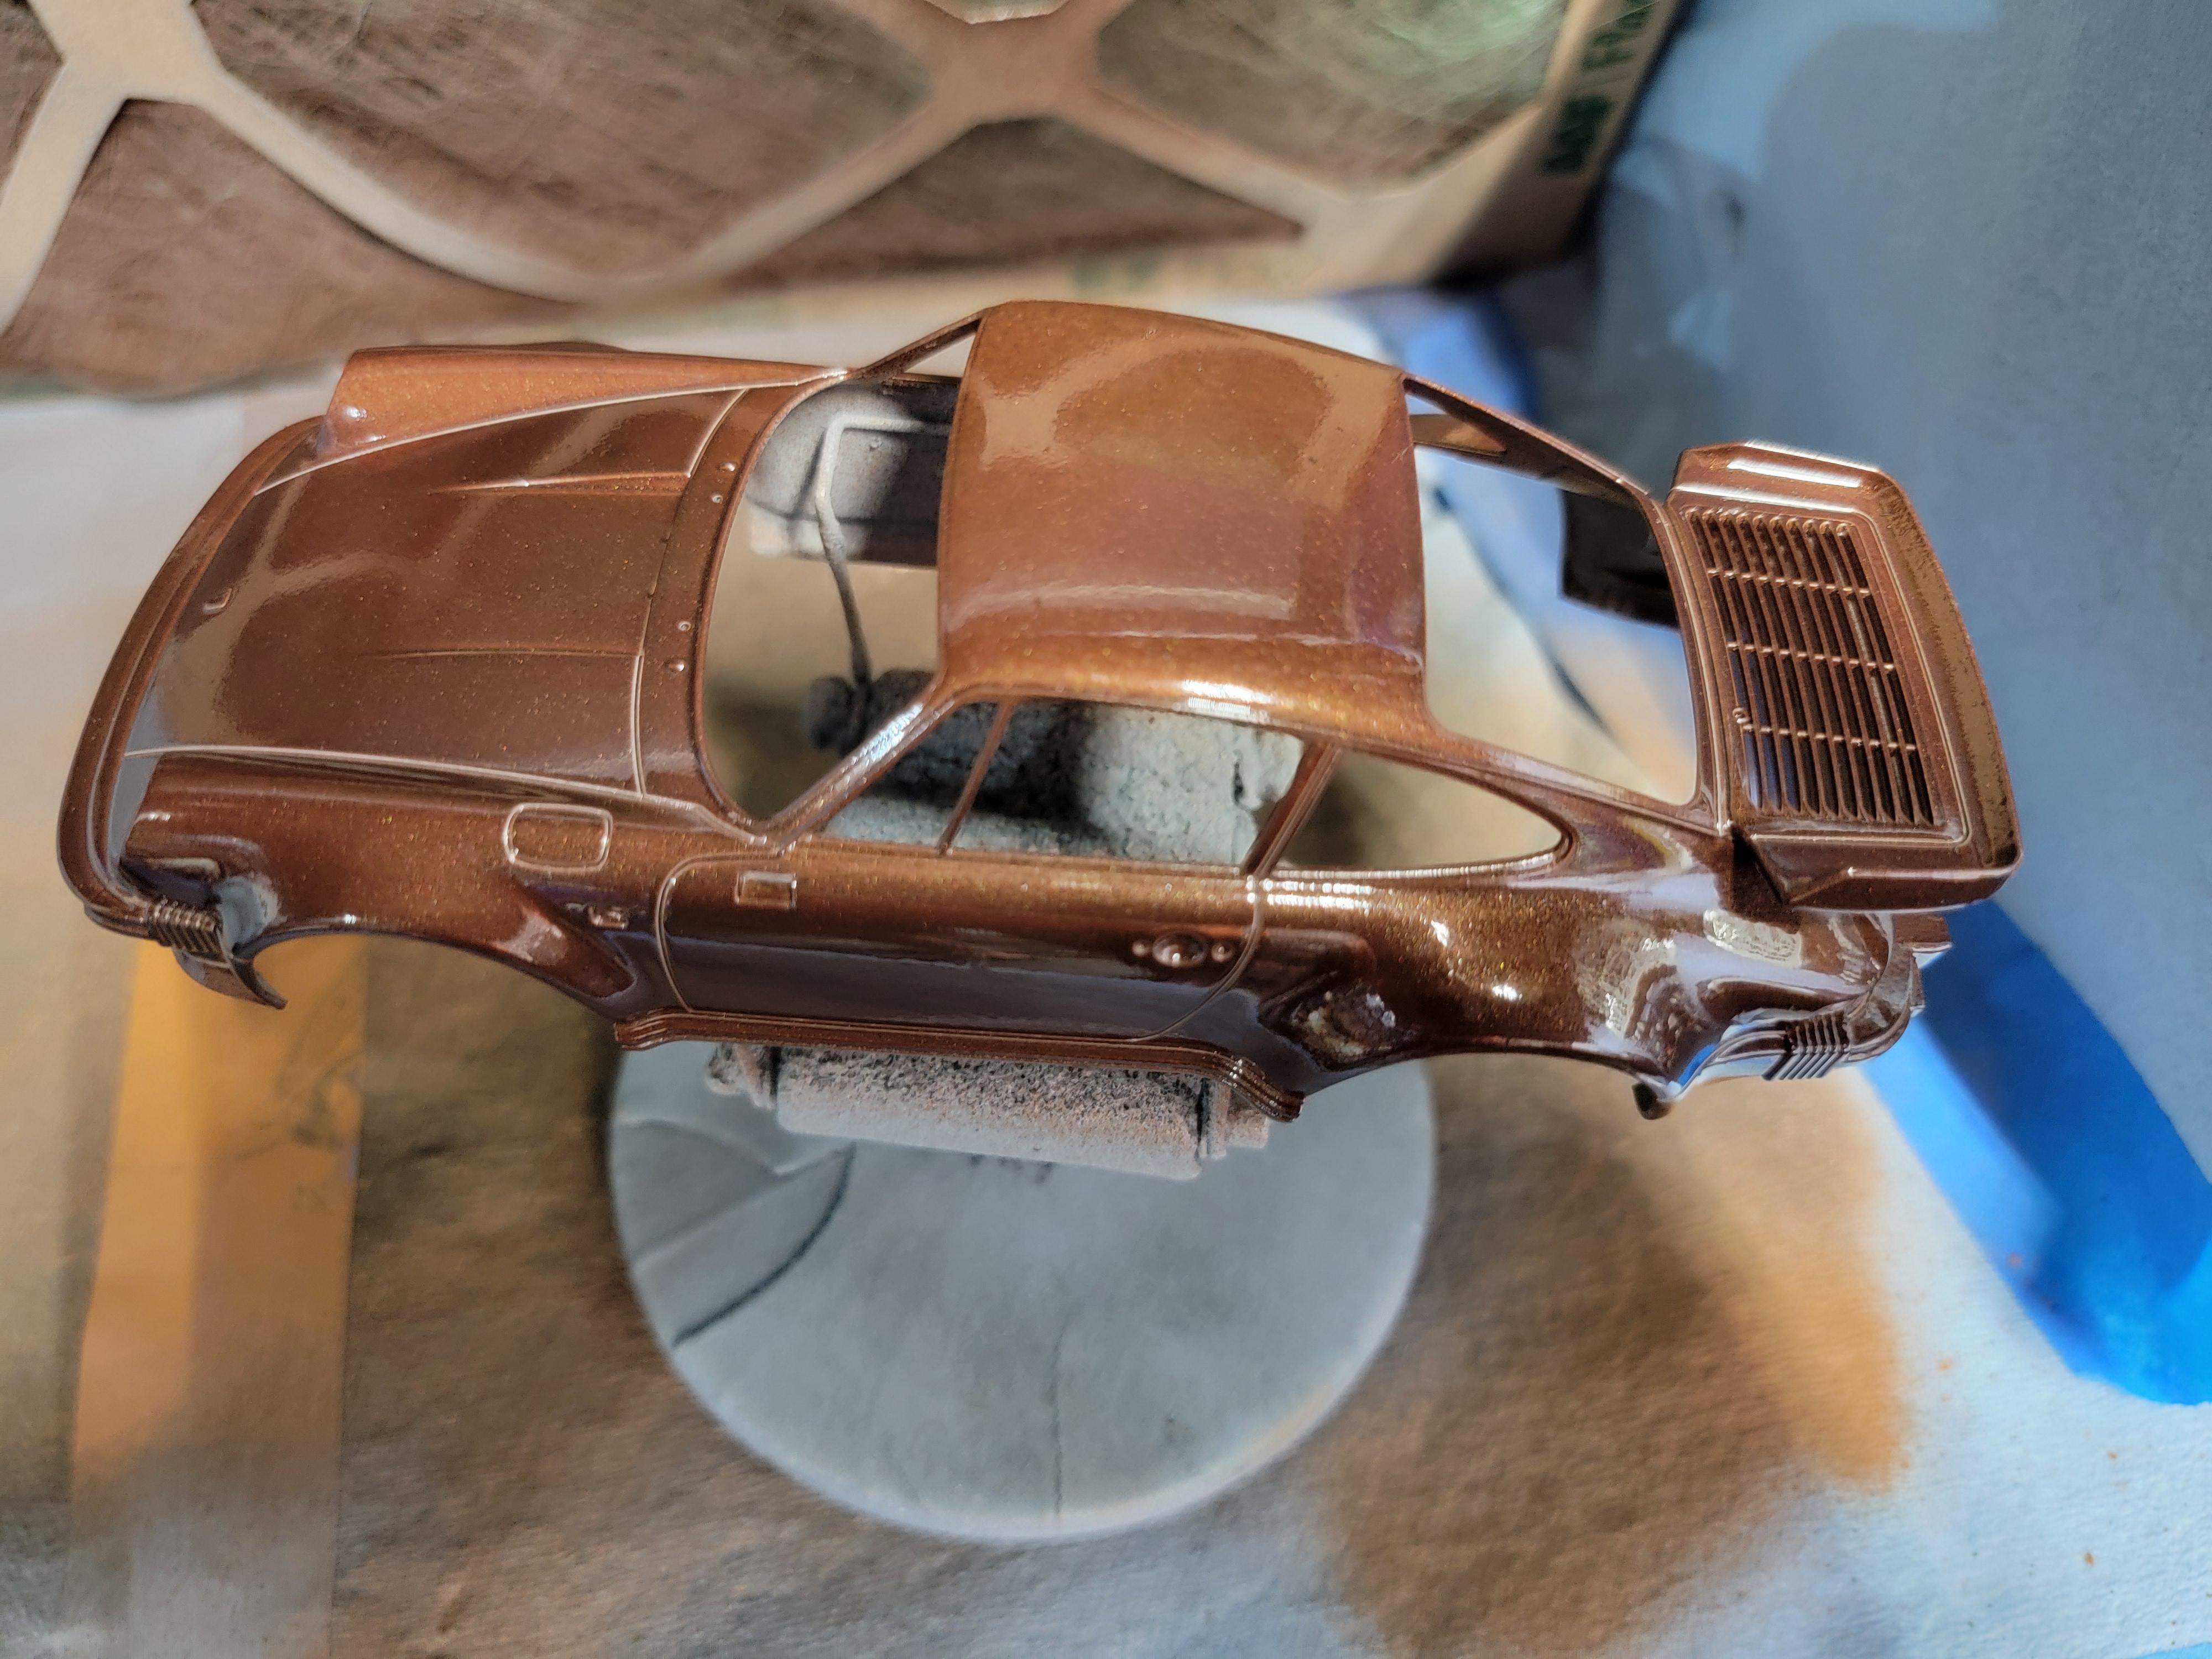
I'm a bit over 2 hrs in and I have the first couple of coat airbrushed on the body and the chassis painted black. A bit more done too.
Later-

-
 2
2
-
-
11 hours ago, Zoom Zoom said:
Good luck with the build! It's a good kit for such a build, though when I built mine I masked all the black rubber and trim places on the body so I could airbrush it (hand painting requires steadier hands than mine), that was the worst element of building this kit.
Yeah, my plan is the same. Mask and spray the black. Going to have to make sure the body is dry.
Later-
-
On 7/17/2024 at 5:27 PM, espo said:
One of the best-looking body configurations for the 911.
My thoughts too.
19 hours ago, Zoom Zoom said:Nothing identical whatsoever. The Tamiya kit is curbside only, based on an earlier snap kit of a 911 Speedster. Revell's latest 911 kit is a narrow-body G50 non-Turbo, full detail and really nice, the tires being the only real negative. Tamiya, Monogram, and Fujimi have made 1/24th 911 wide body Turbo kits. Fujimi's are either Enthusiast kits with full detail, or curbside. Monogram's is full detail. All should be close enough to work w/3D printed bodywork which itself is a lot of fitment work regardless of the body you start with. You have lots of options.
Thanks for your answer. The only other kits I am familiar with are the Fujimi Enthusiast kits, of which I have a few. Glad you could answer the questions.
The build-off starts tonight. I need to do some bench cleaning an paint locating today in preparation.
Later-
-
Thank you everybody! Glad you like them.
Later-
-
Thanks again everyone! Much appreciated.
Later-
-
This is the next kit on my bench. Doing a 48 Hr build-off on FB starting Fri, July 19 at 8 PM until Sun, July 21 at 8PM.
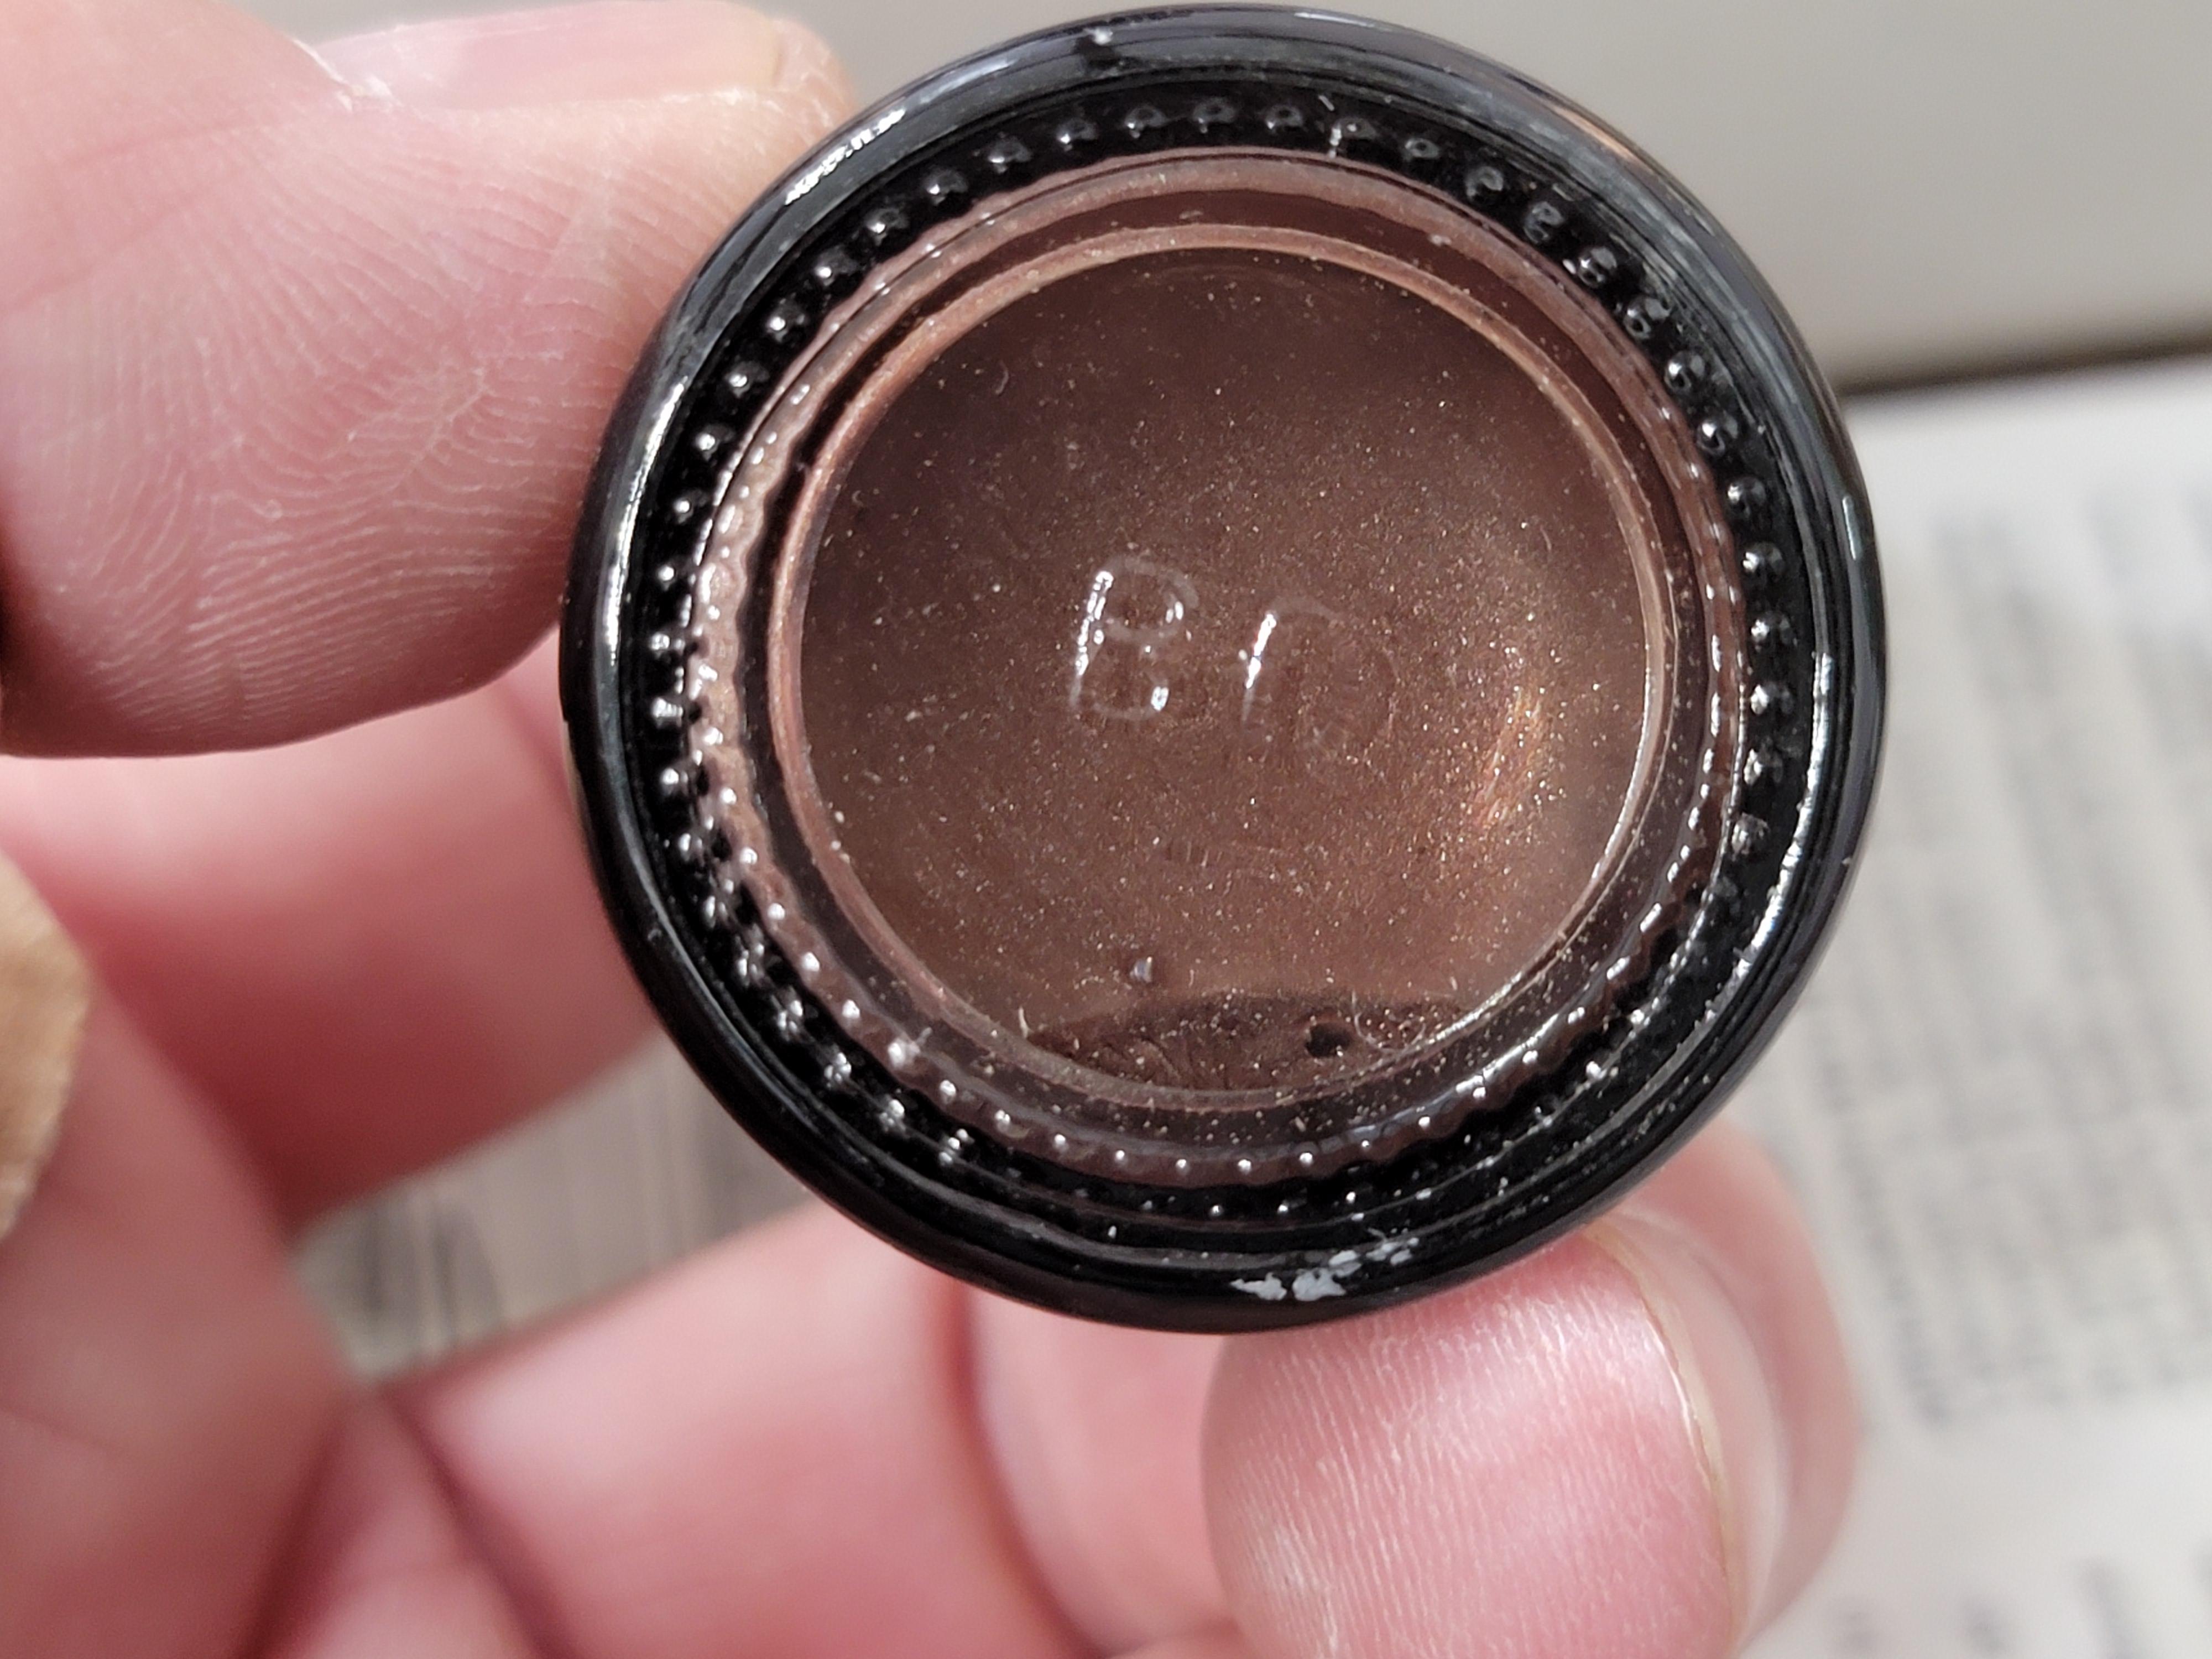
Going to paint it with an old bottle of Testors Manganeze Brown Metallic. I've been hanging on to this bottle for probably 15 years to do this build. I poured the paint into a bottle and mixed with thinner for the airbrush.
I will post pics along the way during the build-off.
Later-
-
2
-
-
On 7/14/2024 at 9:15 PM, SandCrab said:
I have these if it is what you are looking for. Both are from MPC kits. If you want them send me an address and will drop in mail.

Those are a great start. PM sent.
Later-
-
On 7/12/2024 at 10:18 PM, stavanzer said:
Would the ones from the New Revell CJ-7 work for you?
Not sure what kit that is? Got a picture?
Later-
-
17 hours ago, espo said:
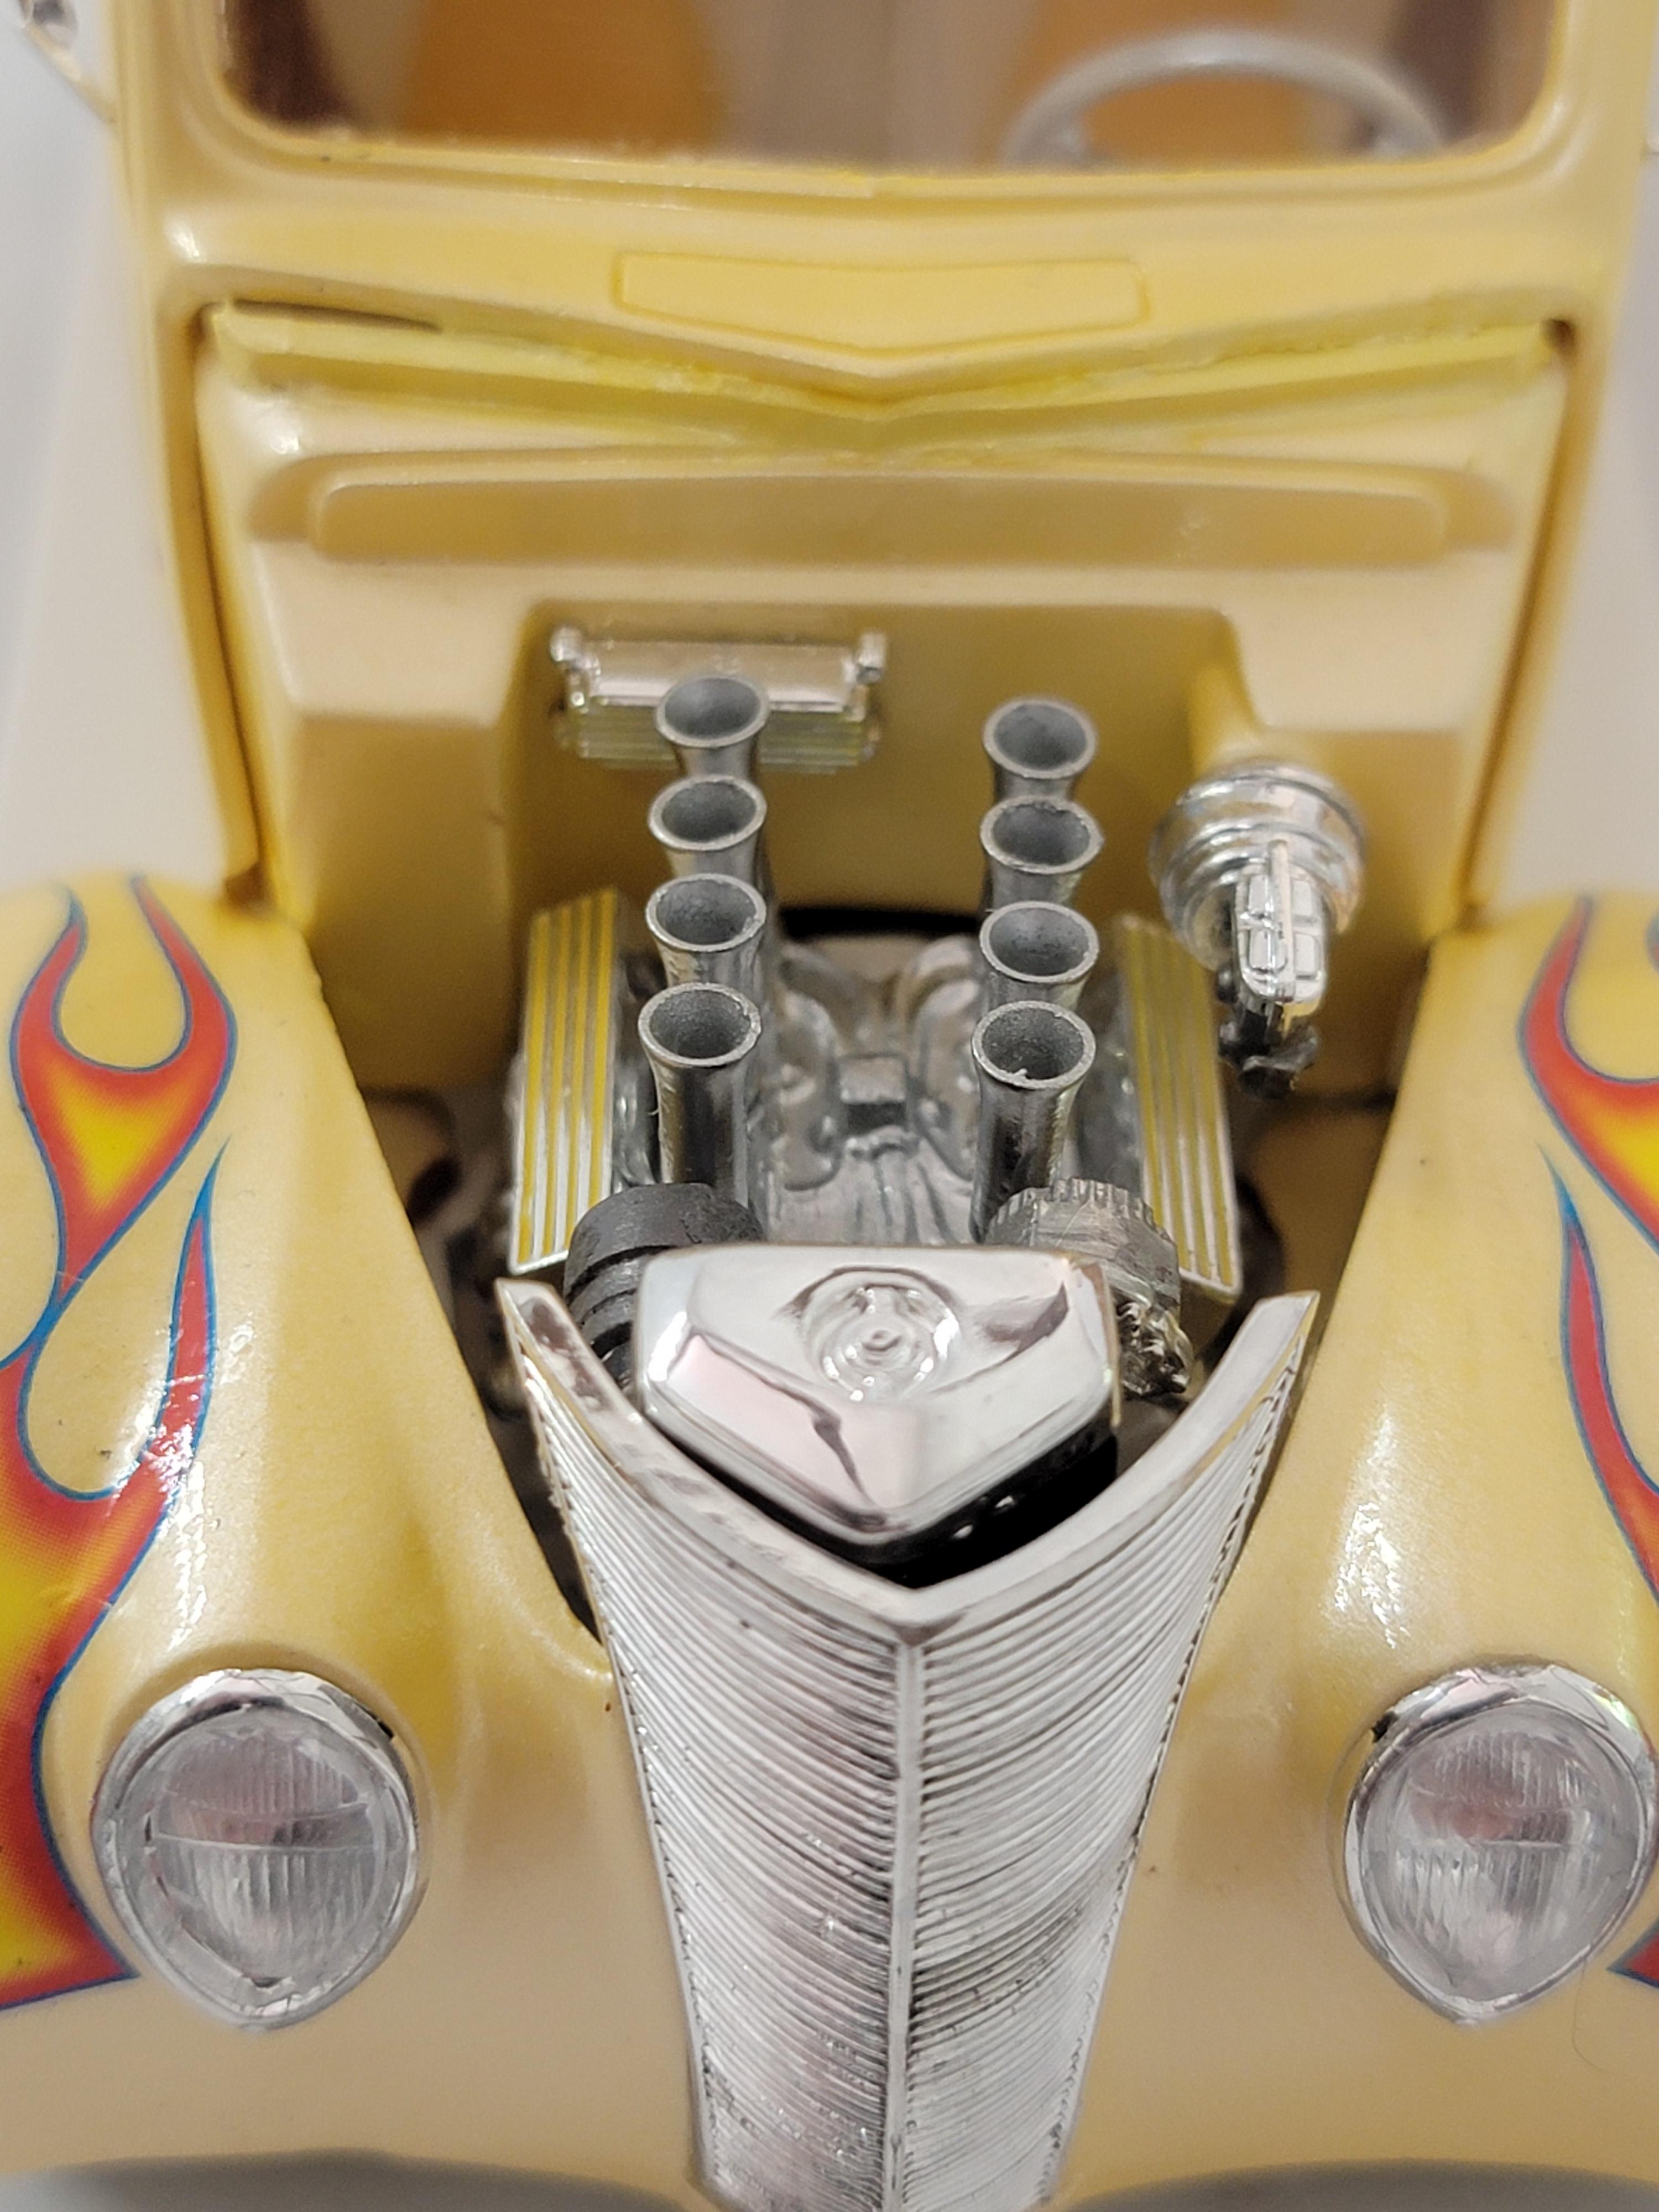
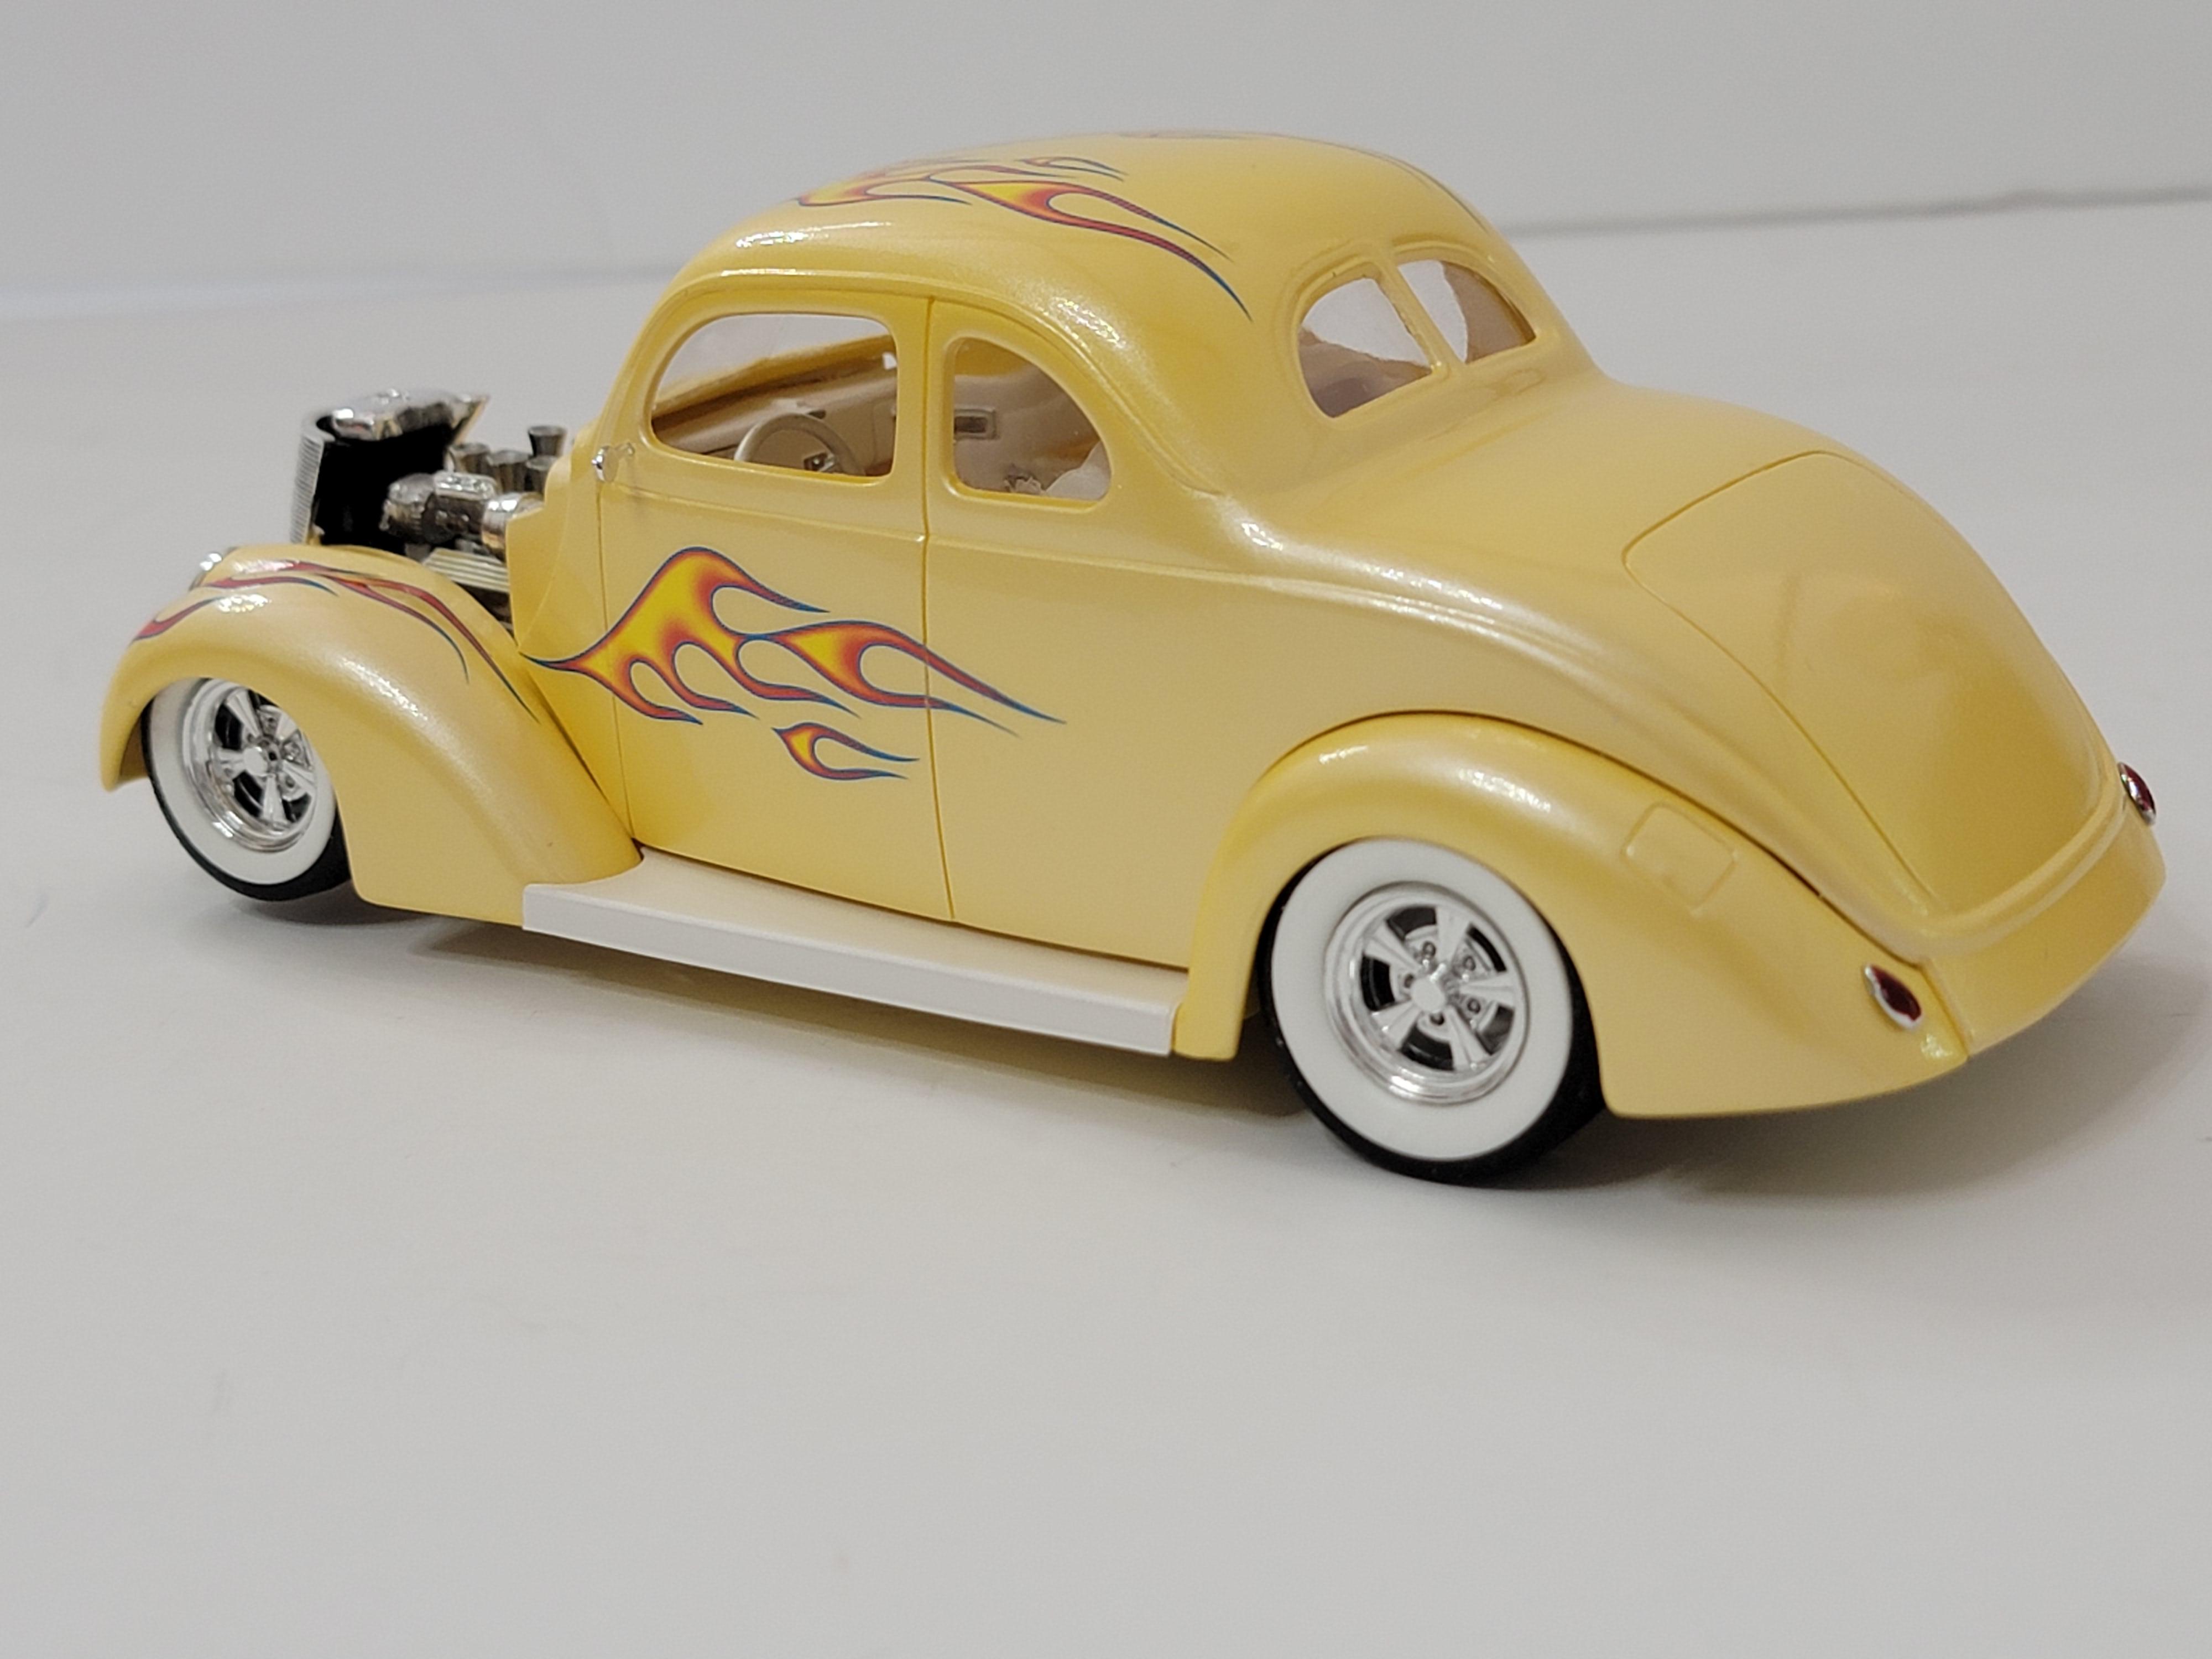
Great looking build style and color. I like the flame decals, were they in the kit? There was a time when the '37 Ford was called "The Ugly Duckling". Hard to imagine why looking at your '37 Ford builds. They all have the stance and the smooth paint and engines done right.
Thanks! No, the decals were not in the kit. I believe they came from a 55 Chevy.
16 hours ago, ncbuckeye67 said:That's beautiful! Is the yellow a pearl coat?
The yellow is Testors Daytona yellow with Testors White Lightning over the top.
15 hours ago, JollySipper said:These are really fun kits, aren't they? and They always turn out great, just like yours did! Where are the Radirs from, if I may ask?
Thanks. Sorry, I can't remeber. I'd love to have a few more sets.
Later-
-
1
-
-
I just finished my third 37 kit last night. It's not perfect but I love the look.
Here is my trio of 37's. I'm done building this kit for a while.
Later-
-
11
-
-
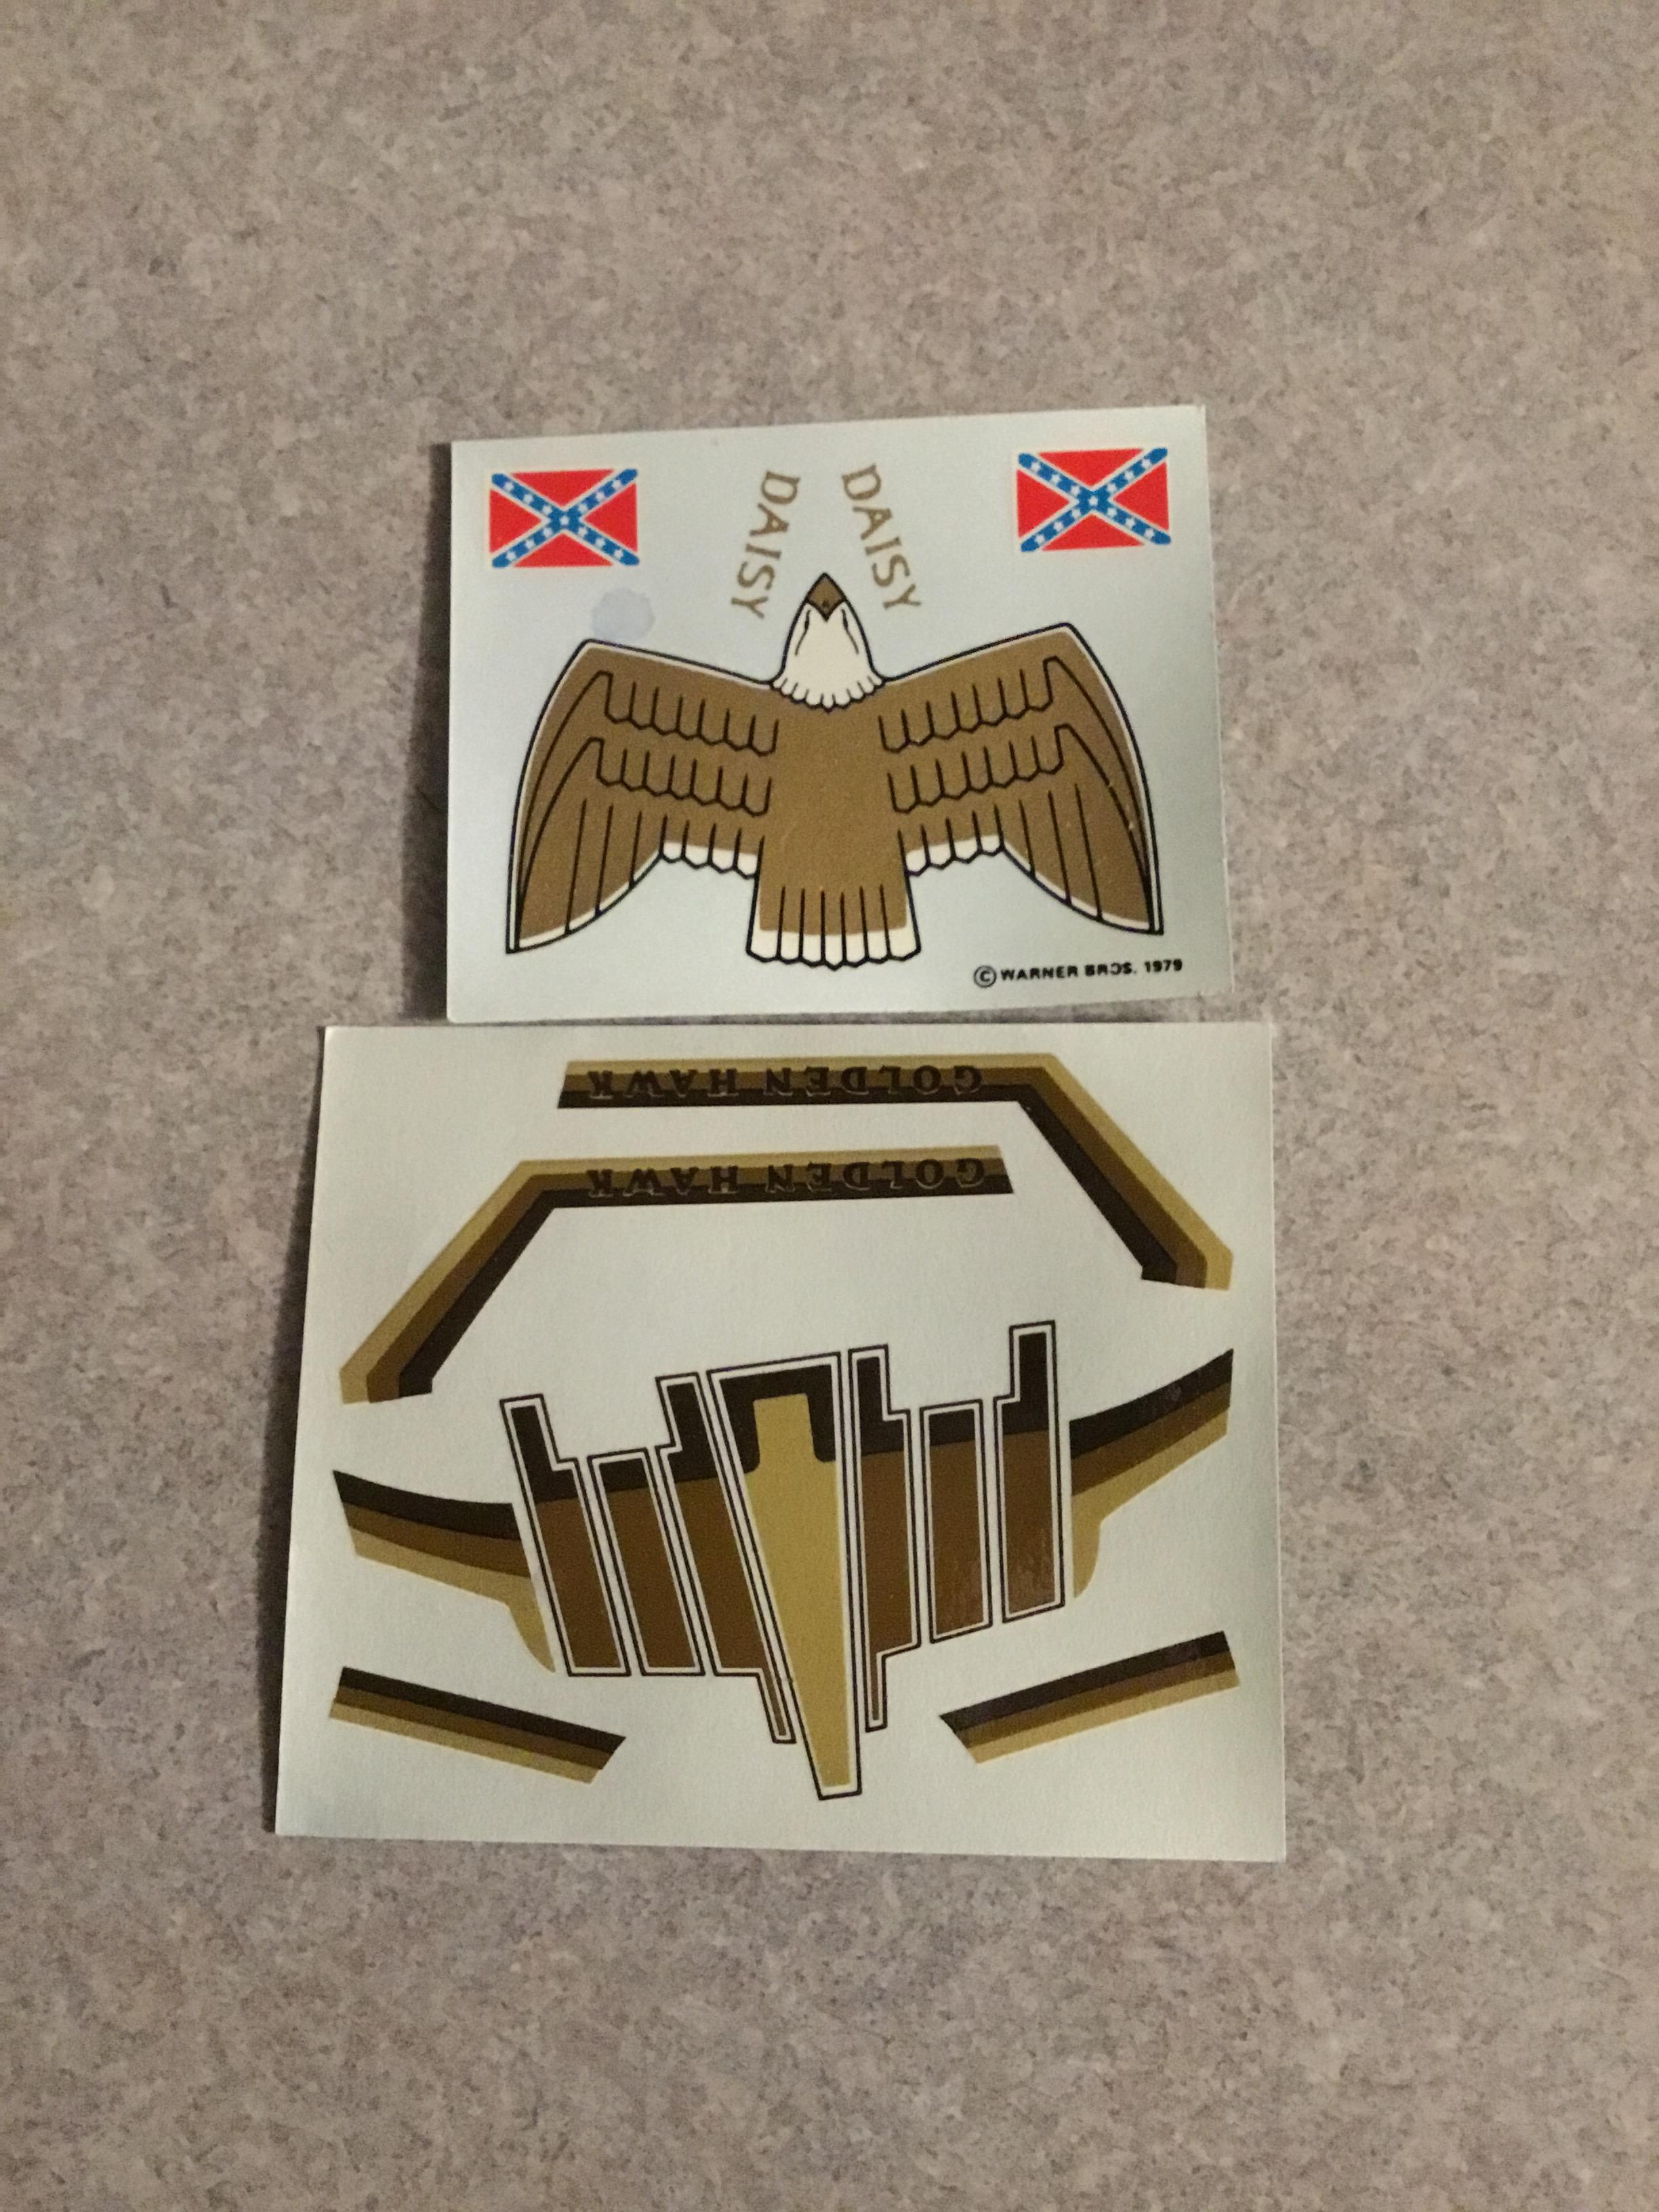
I am looking for the Golden Eagle decals from the Daisy Duke jeep or any other issue that has them. I'd like to do something similar to this.
Later-
-
Just read through this entire rebuild. Fine work bringing this one back to life. Great paint and details! Looks just like they did back then. Fantastic!
Later-
-
1
-
-
That is a nice looking pickup. Still need to get me one of these reissues. I have an original rebuilder to do someday.
Later-
-
So, I have a couple bottles of Alclad II Chrome and want to chrome some bumpers. It says it may be sealed with Alclad Aqua Gloss but I don't have any. What have you used to clear Alclad Chrome?
Later-
-
Thank you everyone! It's much appreciated- and, as always, I posted this in the wrong place since it is completed.
Later-
-
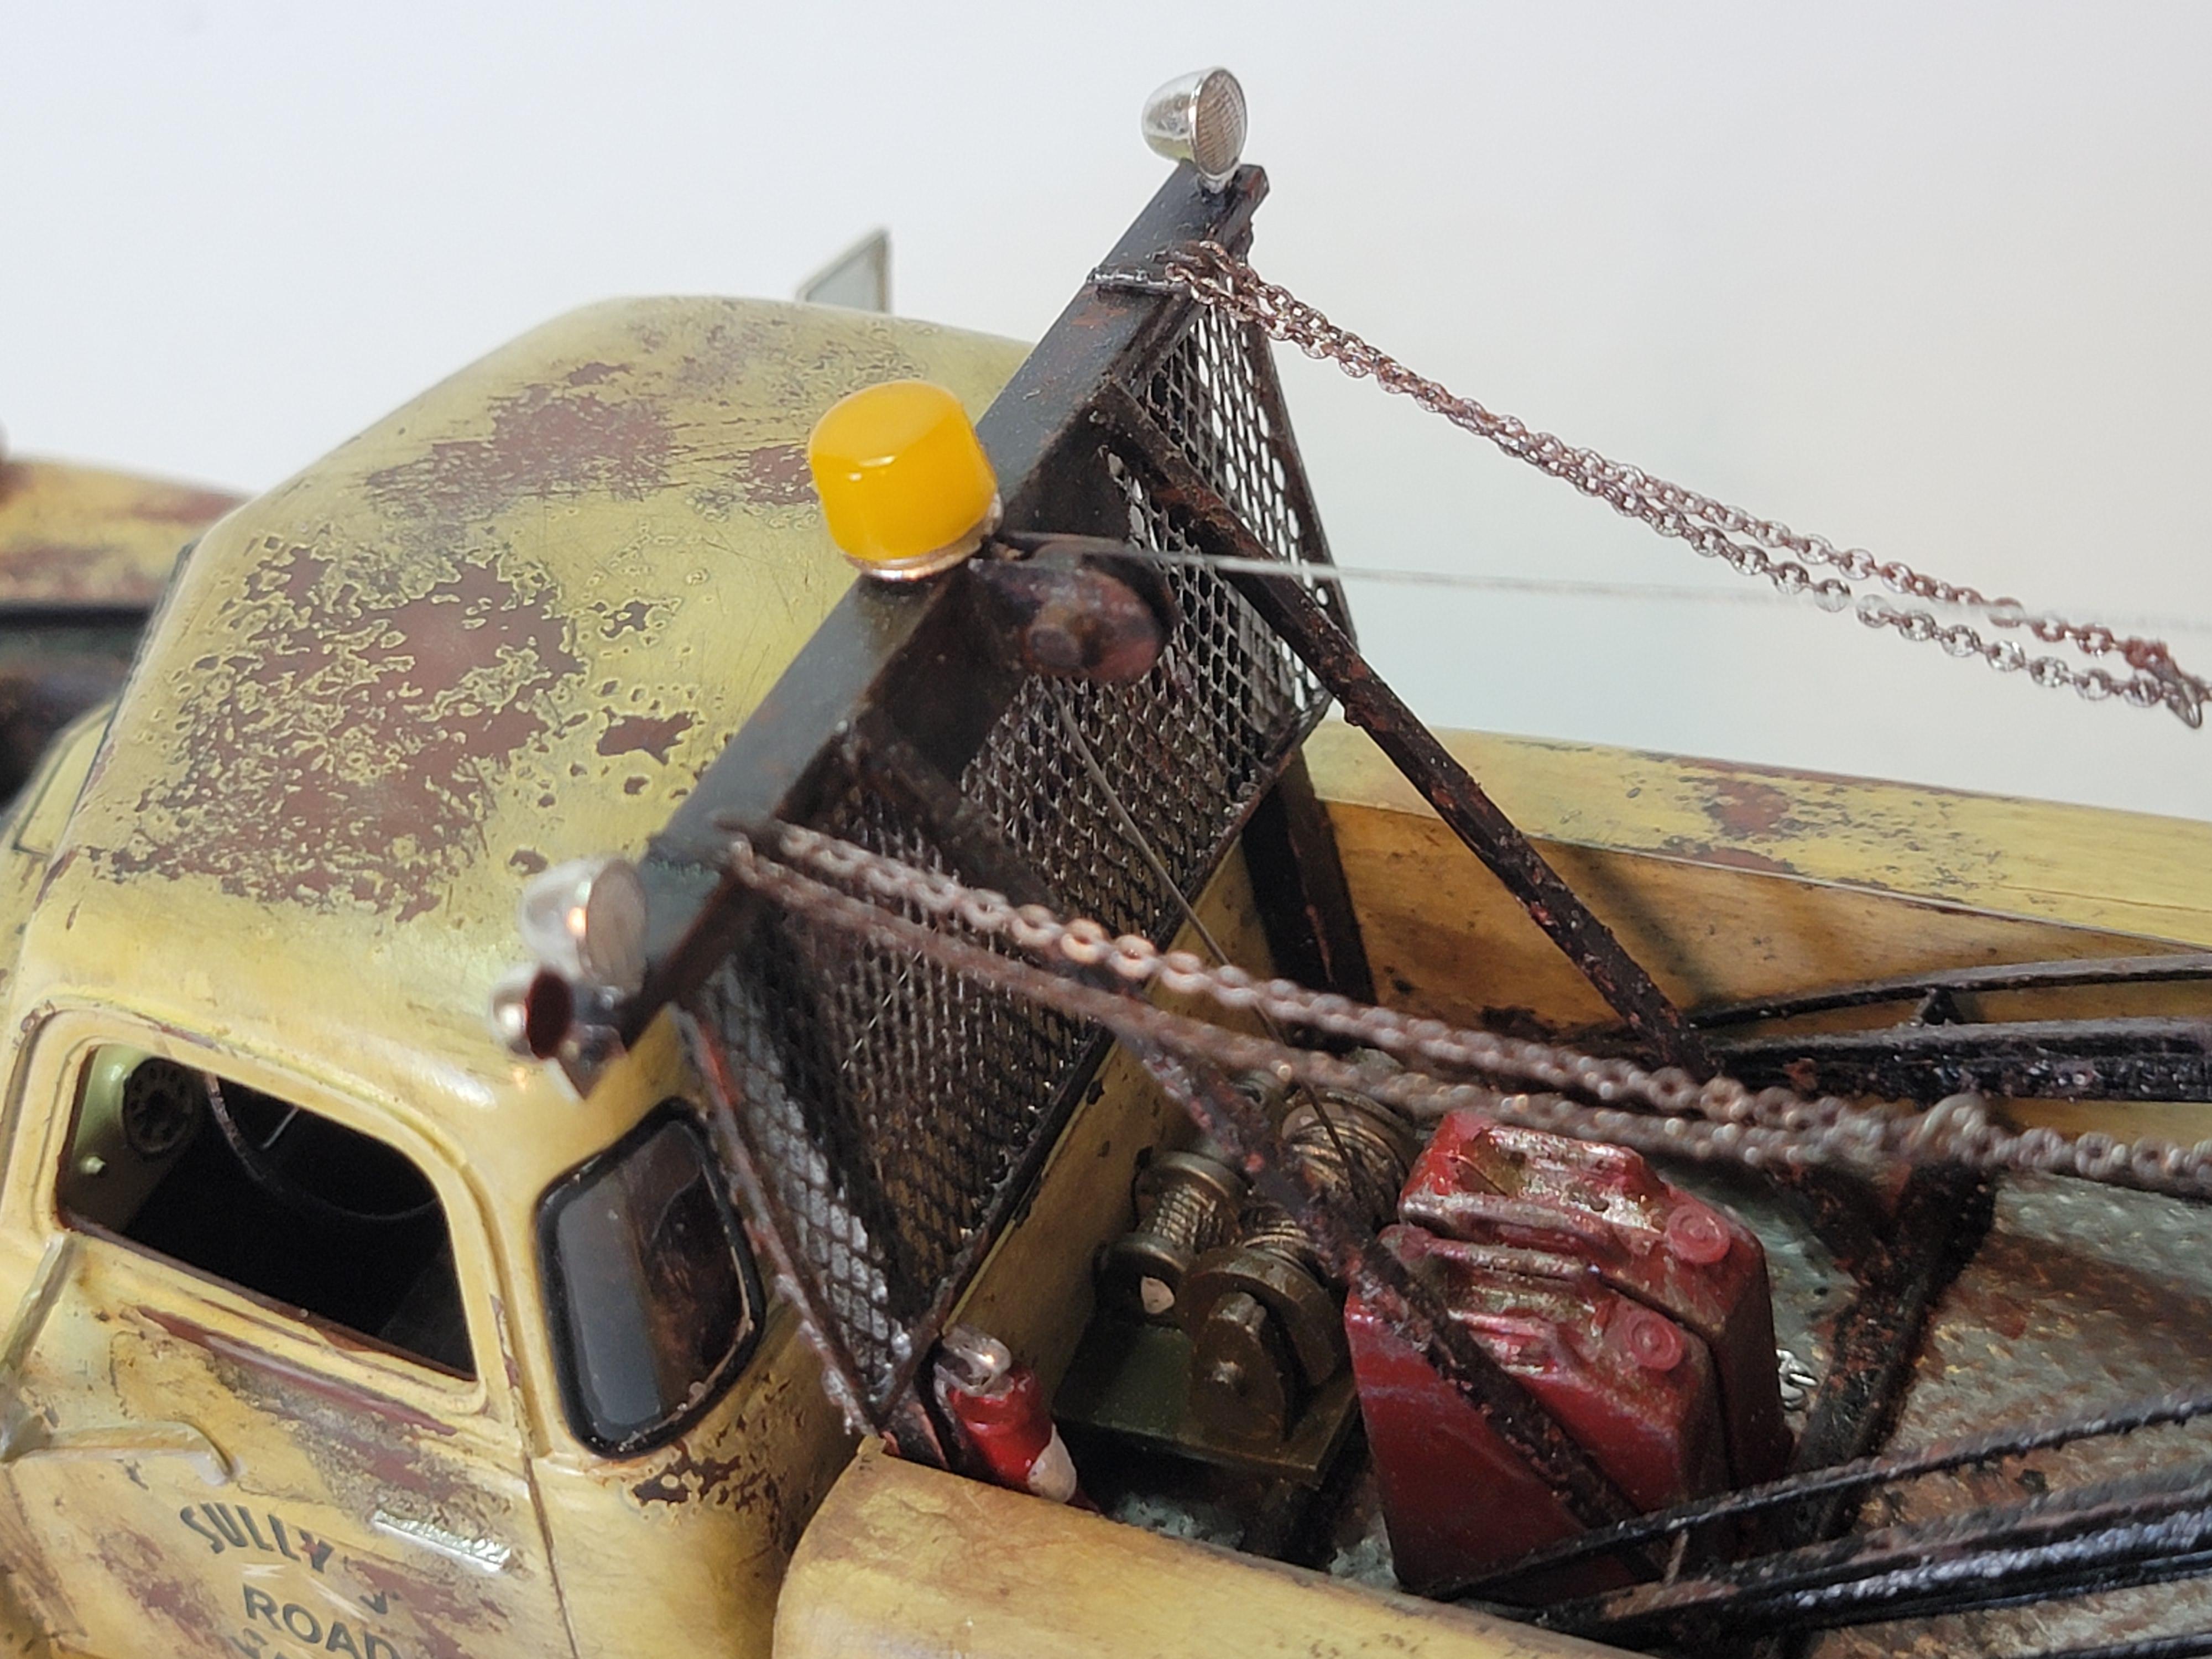
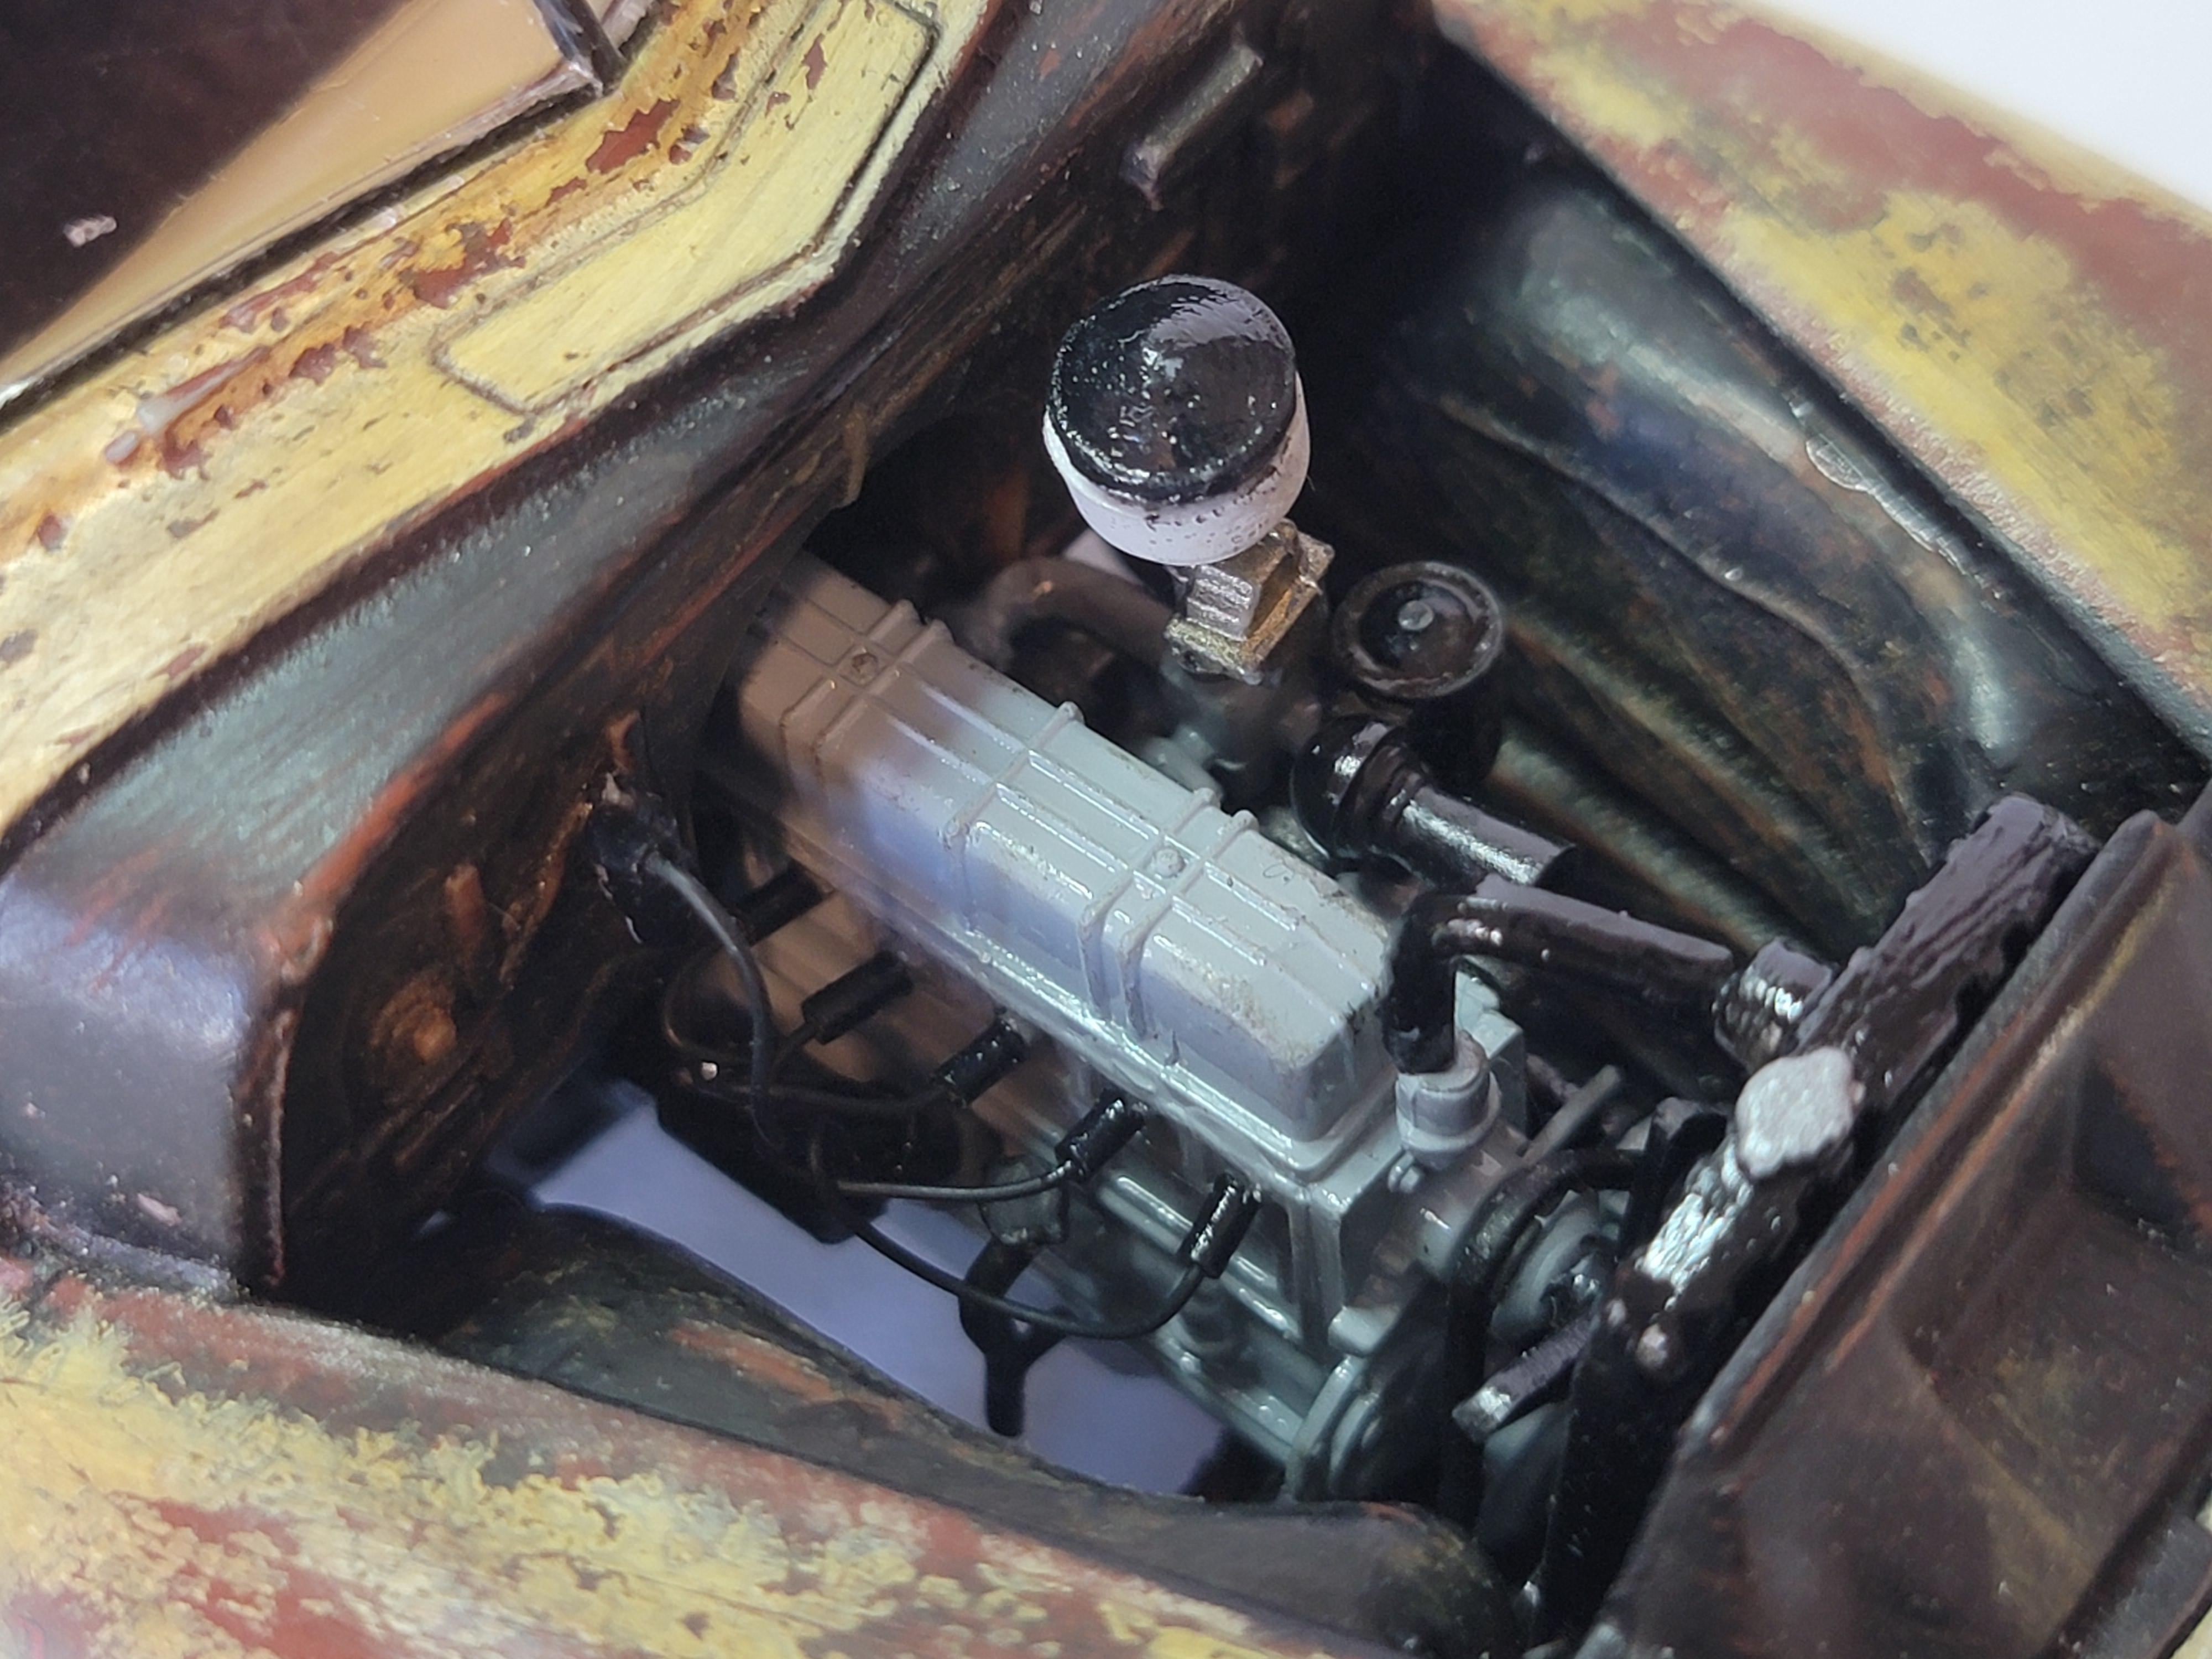
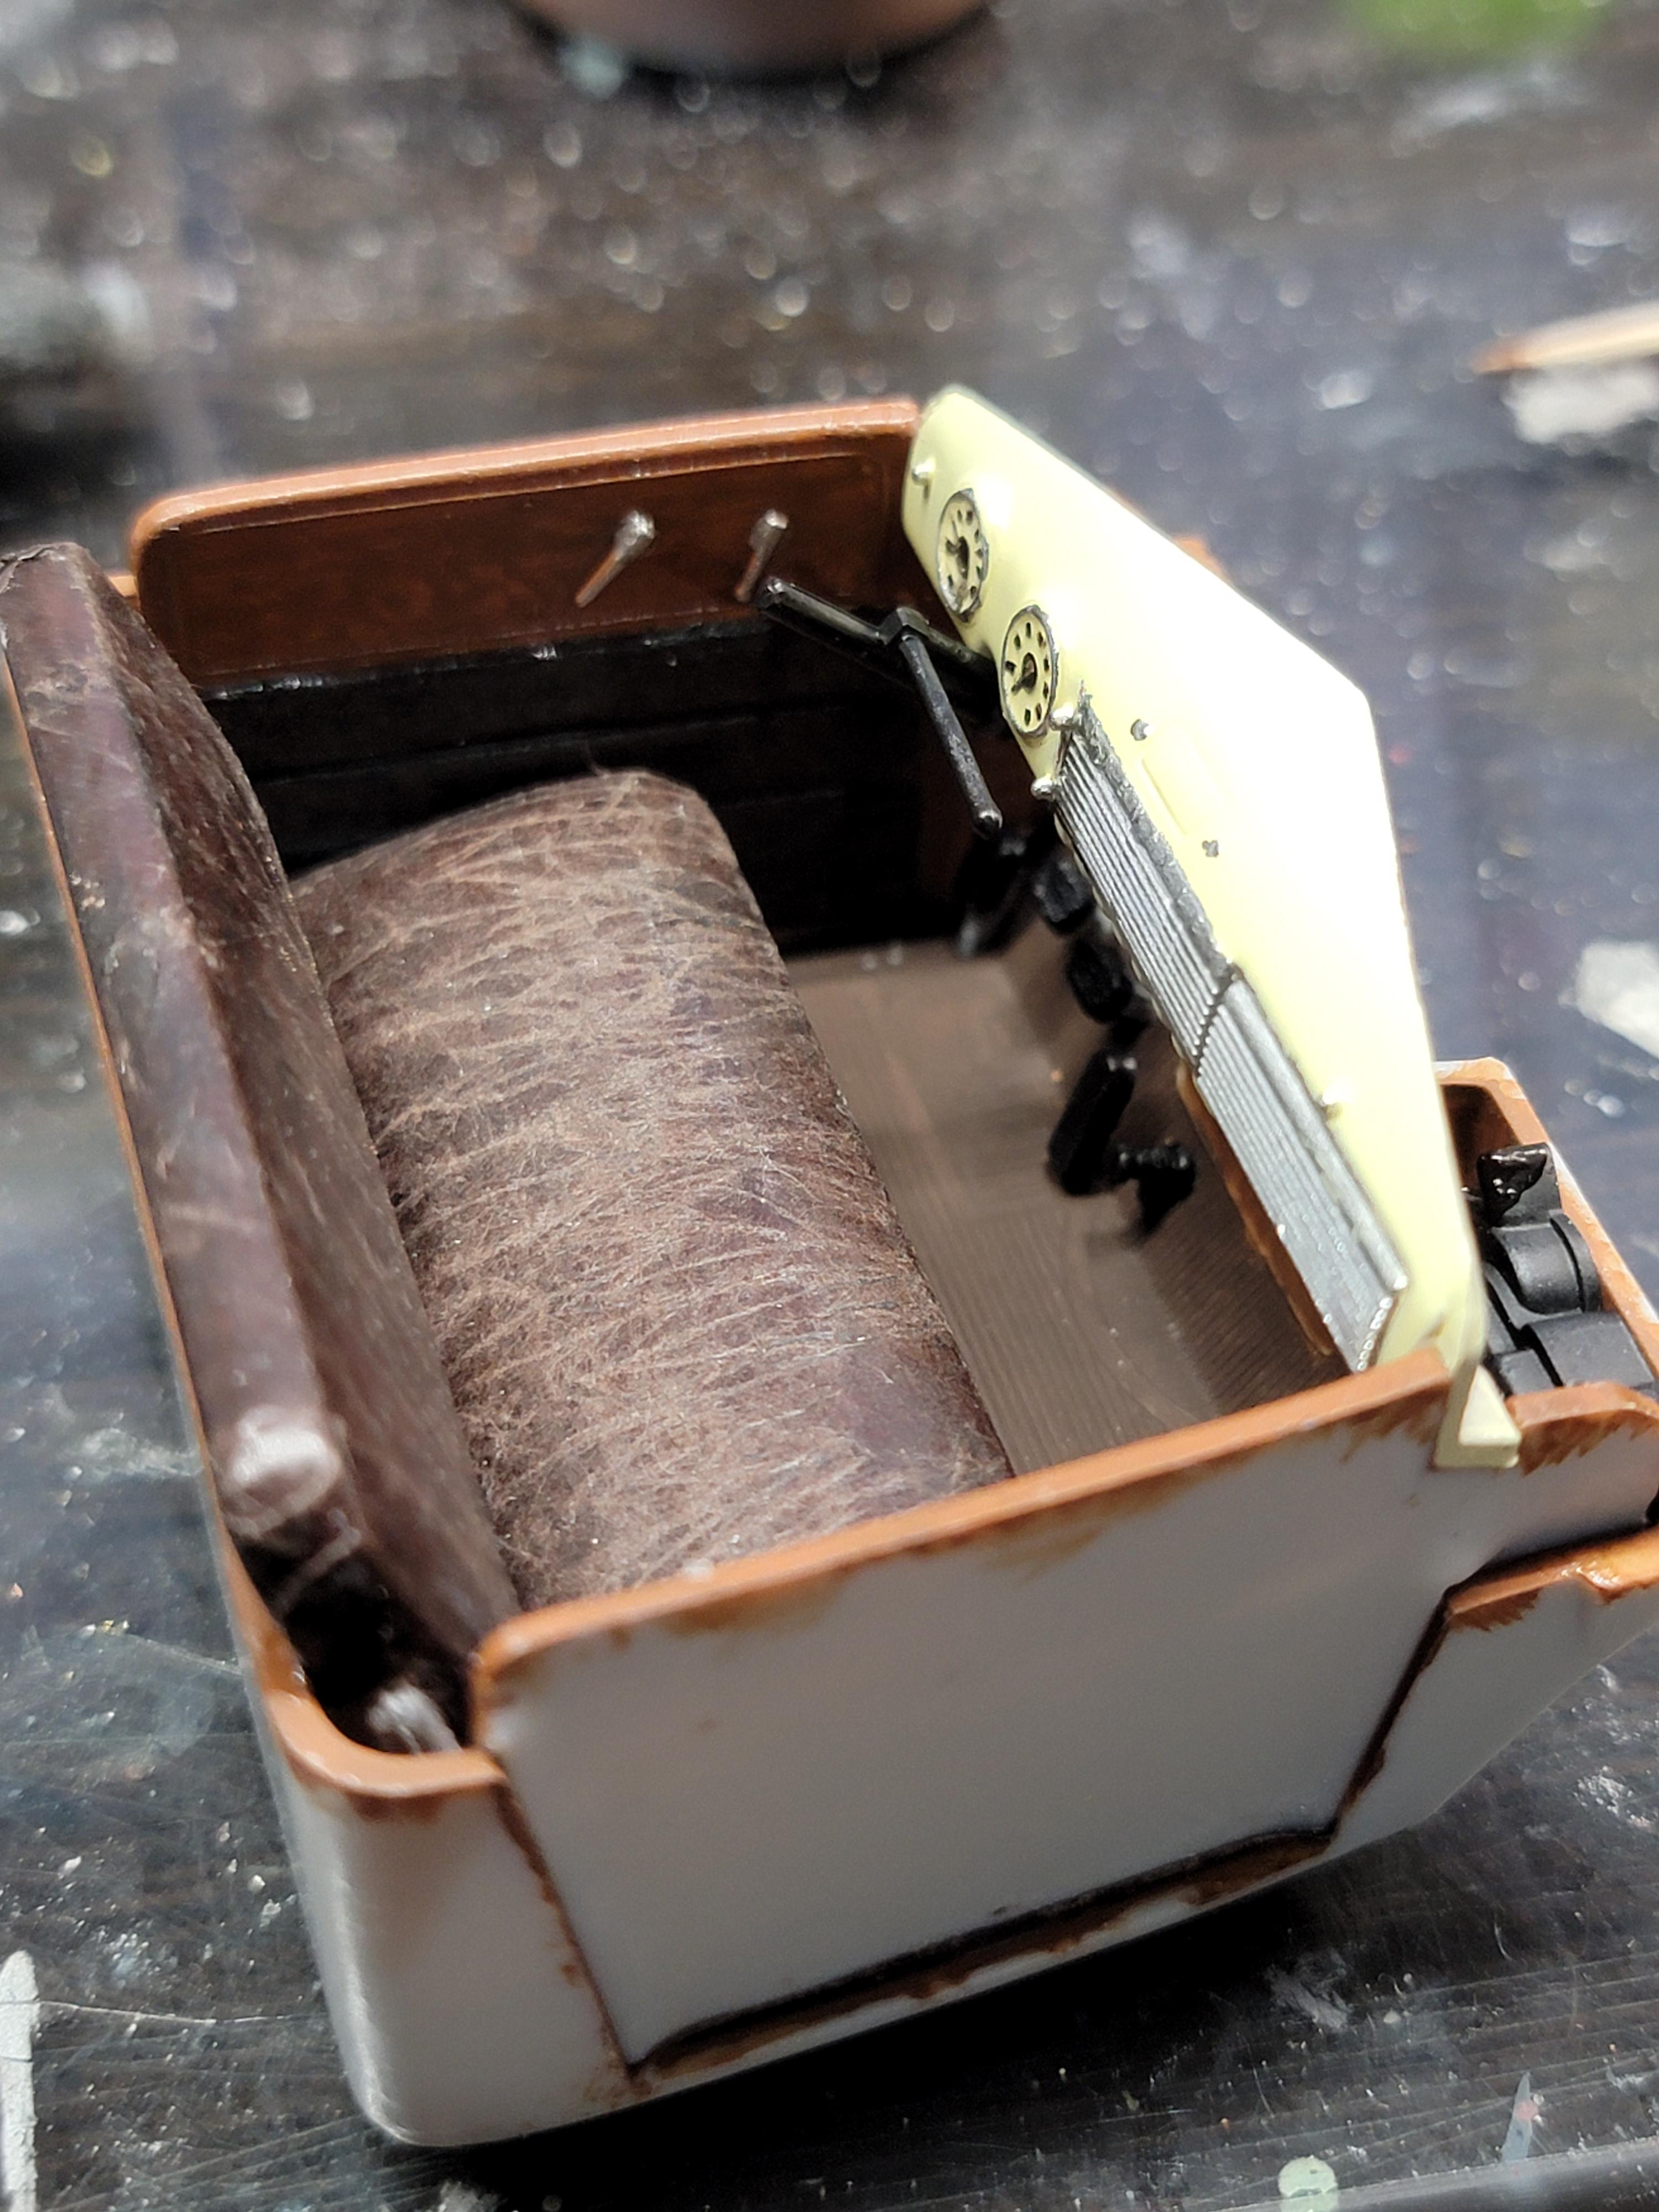
I finished this one last night. It was for a two month FB build-off using the 50 Chevy as a basis. You can vote for your favorite at Street Dreams In Scale on FaceBook. Lots of good looking builds entered.
I named her "Marge".
The bed is the front of the 50 Ford convertible with the custom front clip. Everything from the cab back is scratchbuilt except for the tools.
For the seat I glued a candy wrapper to the kit seat with wood glue. Gave it a worn leather look.
This was a blast to build.
Later-
-
2
-
-
Anybody?
Later-
-
I am looking for the chrome windshield frame for the IMEX 58 Cadillac Eldorado Biarritz. The frame from either of the two convertibke kits pictured will work. Let me know what you need.
Later-
-
On 5/20/2024 at 11:35 AM, Paul Payne said:
I have a partial tree of yellow lenses. PM me if interested.
Thanks. Not sure that I need any yellow lenses.
11 hours ago, mikemodeler said:Thanks. The site won't let me open their products list. I was able to open their gallery though. I'll have to see if I can contact them in a different way.
Later-
-
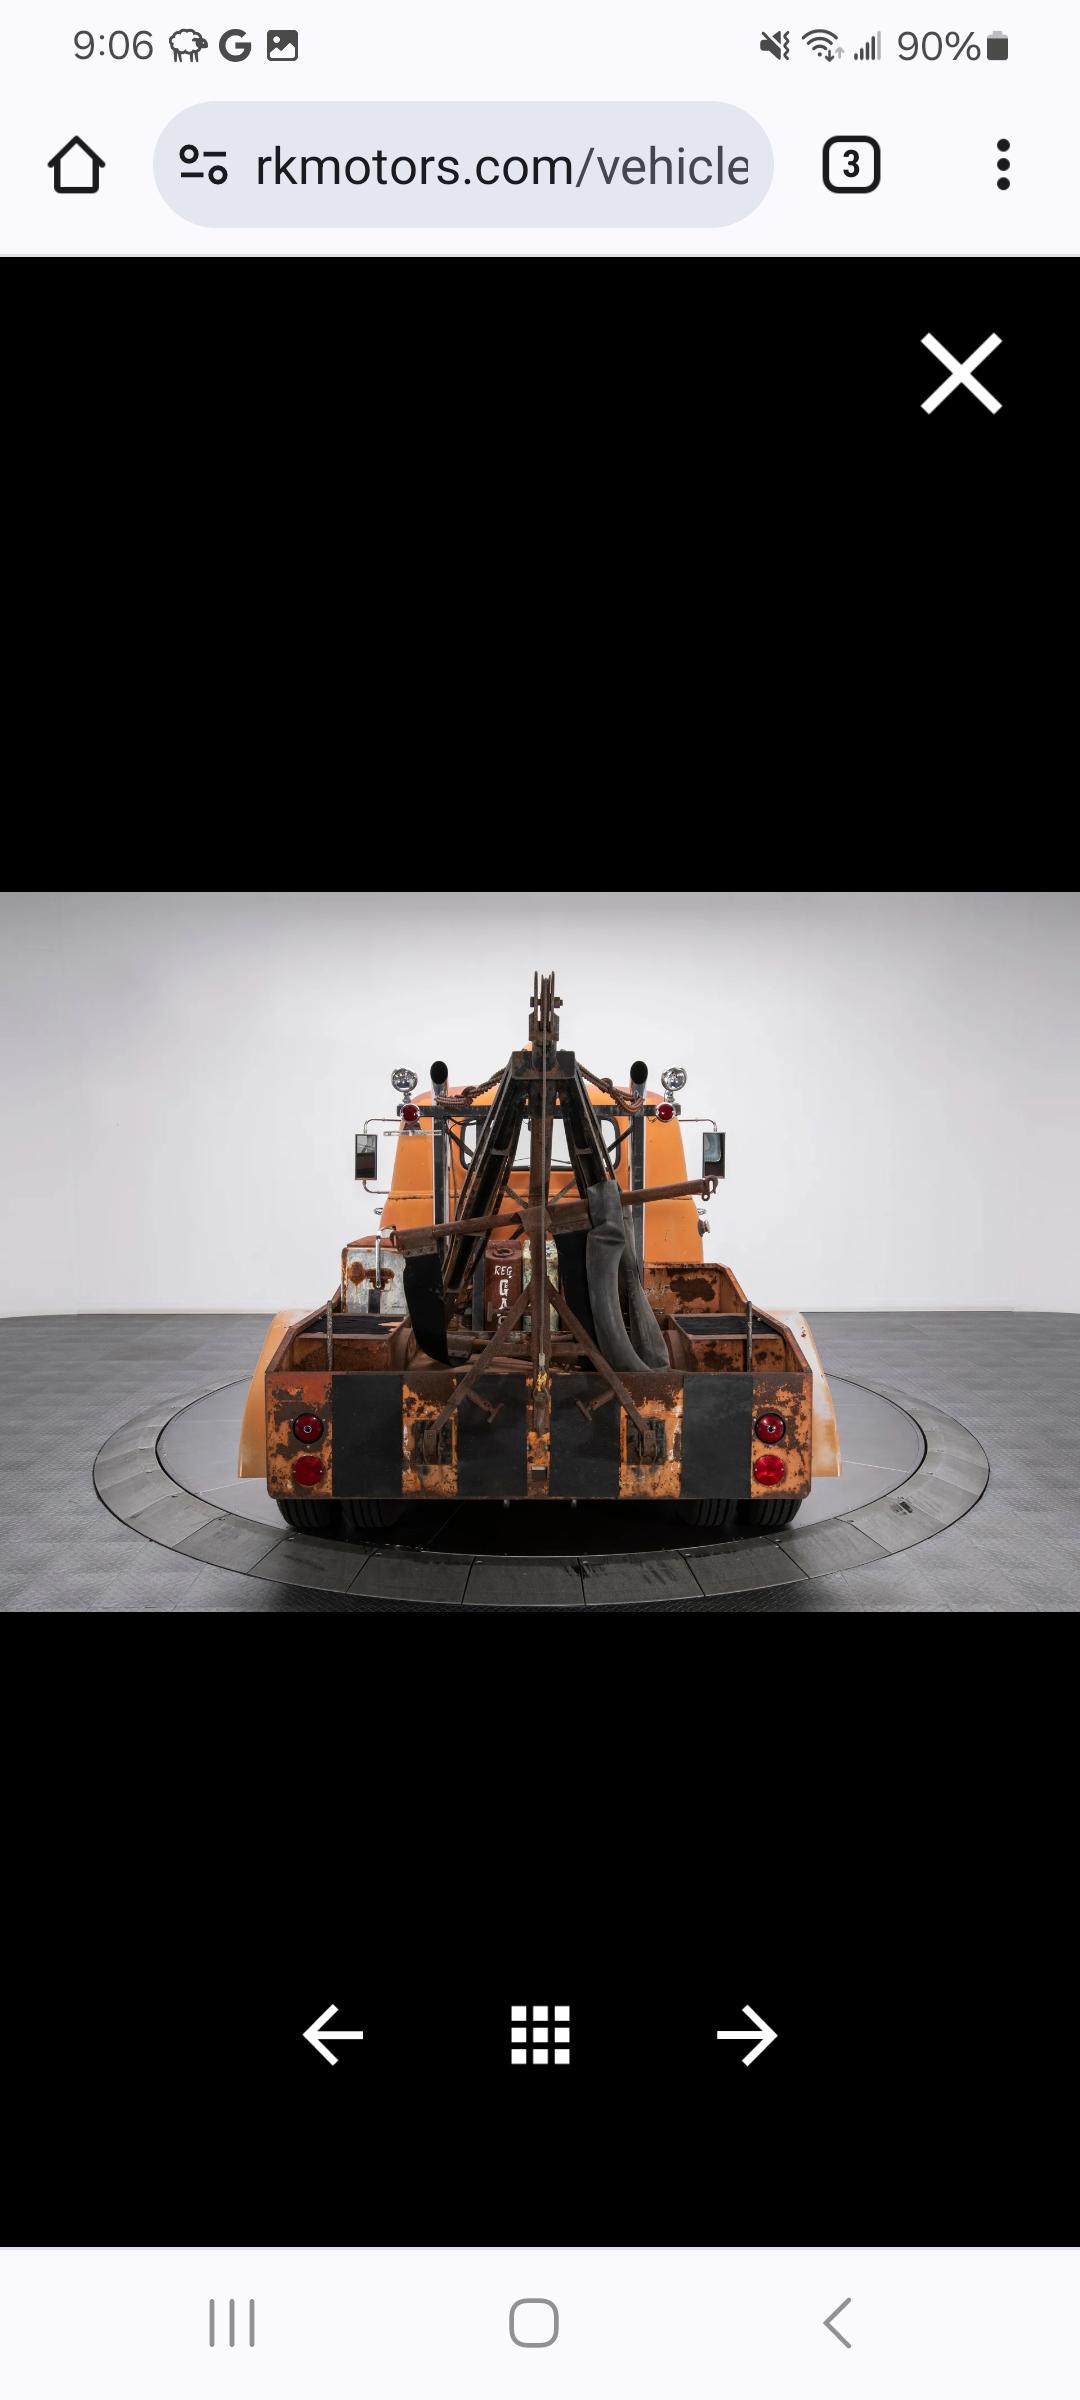
I am building a 50's wrecker and I am looking for lights, spotlights and reflectors and any other parts such as hooks or etc. Pictures for reference of parts (or anything close) needed.
Let me know what you have and what you need for them.
Later-
-
On 5/9/2024 at 5:55 PM, styromaniac said:
Needed to finish a '27 T Resin Body that required corrective work after the stuff decanted from a rattle can (that leaked) created a pitted finish. I know its probably an extinct variety...but maybe someone has some left in a can they would like to deal? The equivalent PurpleLicious color doesnt work...nor does Plum Crazy.
I have a partial can (very little in it) in pretty sorry shape. You're welcome to it. May be enough to decant and airbrush.
Later-
-
12 hours ago, bobss396 said:
Nice idea, looks sturdy. Where did the case come from? I could use something like that.
Thanks. I got it off of FB Marketplace.
Later-
-
1
-
-
8 hours ago, JollySipper said:
Congratulations!

Thank you!
Later-
-
6 hours ago, peteski said:
Your wife is one smart cookie! You're a lucky guy!
Thanks! 35 years tomorrow!
6 hours ago, 1930fordpickup said:Looks great. Now is there a lock on the door to keep little fingers and hands out?
No lock on the door but it sits flush and there is a slot to open it about 3 feet up, out of reach of the grandson.
Later-
-
1
-


Tamiya 88 Porsche 911
in WIP: Model Cars
Posted
Nearly 5 hrs and I've got the final paint and a couple of coats of clear on it. Looking decent!
Later-