
SteveG
-
Posts
1,212 -
Joined
-
Last visited
Content Type
Profiles
Forums
Events
Gallery
Everything posted by SteveG
-
Trumpeter 65 Ranchero ..... Box Stock
SteveG replied to SteveG's topic in Model Trucks: Pickups, Vans, SUVs, Light Commercial
Harry your preaching to the choir, I doubt there are more then a single handful of real executives at the Wasan Plastic Model Co (Trumpeter) and I'd gladly bet you that none of them could tell you a Ford Falcon from bird by the same name before their US distributor suggested they produce one. Even the guys with the good jobs there like R&D, CAD design, Plant Managers .... you name it don't live half as well as Joe Smith working the loading dock at Revell. I'm sure all those mid level guys all work hard and do the best they can with what they get to work with. Your right, the blame should go to the exceutives who run the company. The Falcon kits are at least an improvement over their previous releases which is the right direction. However, based on their history, the only way we're really going to get top quality kits from them is for somebody on this side of the ocean to get tough. Demand proof of quailty through photos or test shots or whatever they have to do. Maybe if they sent a whole boatload back to Zongshan (China) they might get the message. -
Trumpeter 65 Ranchero ..... Box Stock
SteveG replied to SteveG's topic in Model Trucks: Pickups, Vans, SUVs, Light Commercial
Not to start a cultural debate but your making the assumption that your average Chinese worker has the same internet freedoms we all take for granted here. Even if he managed the access and found the photos, do you think that same Chinese worker could just go tell his supervisor or another co-worker he's wrong or made a mistake ? ..... My limited contact with the kit industry on that side of the world and my close contacts who deal with them on a regular basis tell me that it's totally different ball game over there. Even with an American company paying the bills getting changes made is like pulling teeth. Trumpeter has no big U.S. company holding on to the cash until it's done right. Just a U.S. distributor with limited input on what we're getting. I wish the situation was different but what can you do ...... ? -
Trumpeter 65 Ranchero ..... Box Stock
SteveG replied to SteveG's topic in Model Trucks: Pickups, Vans, SUVs, Light Commercial
My point exactly for doing the online build up was so everyone has a chance to see what you could do with what's in the box and to have a good discussion about this kit on it's own merits. I really wasn't seeking praise or criticism of my workmanship but I certaintly do appreciate the comments. I did notice the lack of "FORD" lettering on the tailgate, same issue as on their other Falcon kit deck lids. I missed the bedside wall issue, good catch Harry ! Price notwithstanding, I think it's still a decent kit worth building ...... It could have been a great kit if Trumpeter had worked closer with their associates here in the US to get the details right. Why they didn't is something I don't understand considering the digital age we live in. For those who still plan to buy and build this kit I would like to challenge you to take it to the next level and work outside the box a little. I would really like to see how it would look with some kit bashed wheels and tires, and apparently some minor corrective surgery could be applied to some areas I didn't address. I may take another shot at it myself down the road ..... -Steve -
Trumpeter 65 Ranchero ..... Box Stock
SteveG replied to SteveG's topic in Model Trucks: Pickups, Vans, SUVs, Light Commercial
That works for me Mike, thanks for cutting me some slack ...... If I could do it over again I would swap out the tires and wheels, use some stainless wire for the antenna mast. Maybe use some photo etch scripts assuming they're out there. I would also fix the intake and exhaust to something more realistic. Some plug wires and underhood labels would help it too. I'm thinking of doing one as '64 model using parts from the hardtop kit like the dash, grille and tail lamps ..... -Steve -
So here it is ..... the first Trumpeter 65 Ranchero to be built .... Other then a couple of minor issues that I easily fixed, it's straight foward build right out of the box. In my rush to get it done I placed the Ranchero scripts in the wrong spot. They should be just above the side moulding not below it like on the '64 model. For those who want to see it up close it will be at the upcoming iHobby Expo on display in the Stevens International booth along with the '64 Falcon HT I recently showed you. If you missed the build up just follow the link below. http://www.modelcars...showtopic=47496 Thanks for looking ! -Steve
-
Trumpeter Ranchero build up
SteveG replied to SteveG's topic in WIP: Model Trucks: Pickups, Vans, SUVs, Light Commercial
Sure can Gregg, the photos isn't the best quality but it should work. The brand I have is USC but I've tried others and they all work very well. Any place that sells Body Shop or Refinishing supplies should be able to fix you up with a good brand of Icing. Most come in the Giant tube like mine but some come in metal tins. Both come with a little mini tube of Hardener. Make sure the Hardener has a color, typically Red or Blue so you can tell when it's completely mixed. One caution, like many body shop products it has a strong smell until it cures so use it in a ventilated area. Steve
-
Trumpeter Ranchero build up
SteveG replied to SteveG's topic in WIP: Model Trucks: Pickups, Vans, SUVs, Light Commercial
From this point on it's a pretty straight foward build. The body was primed with Duplicolor Scratchfill Grey, wet sanded with 3200 polishing cloths and then top coated with same Duplicolor Light Blue metallic lacquer I used on the interior, wheels, etc .... I normally let my paint jobs gas out for several days to a week before applying foil trim then clear coating everything. While the body is drying I went ahead and finished painting and detailing the engine assembly and installed in the chassis. The engine bay was painted Semi-gloss black and then installed next, followed by the brake master cylinder and upper hoses. Here's the body all foiled and clear coated with the glass attached and ready to install on the chassis. The instructions show to mount the bed to the floor. I found it's better to attach the bed assembly to the body first so I could be sure to get good alignment of the tailgate. All that remains is to drop the body on to the chassis, install the tail gate and attached the chrome parts. For some reason I always wait to attach the air cleaner as one of the last steps just in case I have to modify it to clear the hood. Luckily it clears no problem, force of habit I guess. Im going to save the final photos for the "Under Glass" section. If you've been following along, Thanks !! .... I hope you find this build up to be useful. It's hard to tell as I haven't seen any comments after the last few posts but that's the way it goes here sometimes. -Steve -
Trumpeter Ranchero build up
SteveG replied to SteveG's topic in WIP: Model Trucks: Pickups, Vans, SUVs, Light Commercial
With the spare fuel door removed I'm down to one last problem, how to attach the tailgate. With the assembled bed taped in position a test fit of the gate shows me that tailgate sides don't touch the side jams and there is no bottom jam. My first sample also has a warp in the rear body. The back up kit I checked was fine but I'm going to fix this one. Since I have no plans to make the gate work all I need is a some surface area for the gate to contact. Now I happen to have plenty of scratch building supplies and I'm lucky enough to have a good Hobby Shop five minutes away in case I need something. Unfortunately, that doesn't help you and If I did that I would no longer be building out of the box, what to do..... I started looking through the box at the parts I wasn't going to use and then it hit me. On a couple of parts trees there were some long sections of flat rod..... BINGO That just what I needed for a bottom jam. I just cut a suction of the flat rod off the tree to the width of the tailgate and attached it with some liquid glue. Then I re-drilled the holes to attach the bumper. The warp was fixed at the gate had something to rest on. Easy ...... OK that's half the problem but what about the sides. Again I looked at the parts trees and decided the the number tags looked to be about the correct width so I cut away a couple of small pieces and installed them like "latches" in side jam. That's all there was to it. I wonder why the kit designer didn't think of that ? ...... good question right ! With the body work now out of the way I can finally prep the body for paint. Yea !!! 'til next time .... -Steve -
Three wheel choices, two sets of tires, two intake and exhaust choices if you count the parts they call a single exhaust as a choice. Two sets of valve covers, three different shifters and a small hood scoop. If you chose to use the "custom parts" you'd have a mild street machine. Steve
-
I agree completely, poor research and or quality control on their part. However it was an relatively easy fix which I posted in "in progress" section. http://www.modelcars...pic=47496&st=20 It actually took me more time to write it all down and post the photos then to do the repair. I'll let someone else figure out a solution for the grille. Hopefully a resin caster will come to our rescue. -Steve
-
OK, I see it now. Your right the kit part is shaped more like '64 grille. I'll add that to my list although on the model it doesn't look terrible. Here's a sneek peak at my finished '65 Ranchero, it's the best photo I have showing the installed grille. I'll post the rest when when I'm done with the "On the Workbench" build up.
-
Looks like a '65 Falcon grille to me, other than there's no decal for the center ornament what am I missing ?
-
Trumpeter Ranchero build up
SteveG replied to SteveG's topic in WIP: Model Trucks: Pickups, Vans, SUVs, Light Commercial
At this point it's just a matter of repeating the steps in the previous post on the area above the trim line. Mask the area you want to preserve. Apply the filler of your choice, sand and smooth when dry. Here it is, no more extra gas door ..... ready for primer. It took me longer to type these two posts and add the photos then it actually did to make the repair. Here's how it looks with the primer applied ...... like that extra gas door was never there. Next time I'll tackle the "floating" tail gate with an even easier fix ..... stay tuned Steve -
Trumpeter Ranchero build up
SteveG replied to SteveG's topic in WIP: Model Trucks: Pickups, Vans, SUVs, Light Commercial
OK it's time to tackle a couple of issues. First up is the extra gas door, I'm going to fill that in. You might ask how I'm go to do that without messing up the side trim and the the body lines. It's actually pretty easy if you break it down into sections. Before doing any repairs to the body, make sure it's been cleaned and all the mold release removed. The first thing I did is fill in the small gaps in the side trim with some Super Glue and kicker. The glue dries pretty hard and it will help preserve the trim lines. The I carefully filed and sanded it flush with the surrounding trim. At this point I'm going to use an old body repair trick, since my trim line is good I'm going to mask it off so I don't damage it. I used Tamiya tape here but any tape that has a clean edge and will follow contours will work. I also masked off the lower body contours and then I slightly roughed up the area with a medium grit sanding stick. Now I'm ready to apply some filler. Everybody seems to have a favorite filler or putty they like to use. I prefer to use a bodyshop product which is generally known as Icing. There's all kinds of brand names but I find they all work the same way. Basically they're all a two-part catylized putty that can be applied very thin. It's designed to fill pin holes and small imperfections on the real deal but it works great on models too. The big advantage is Icing dries very fast and it doesn't shrink at all. After about 15 minutes the Icing is dry and it's ready to sand. I usually start with a medium grit sanding stick or some fine sand paper wrapped around any object that will match the contour I'm sanding. As that shape gets closer I'll switch to finer grits until the filled in area is smooth and blended in. If needed I'll lift up the masking tape to check my work. So that's the basic technique I use to make any model body repairs. Since there's more photos then I can post at one time I'm going to continue this in the post below .... -
I'm thinking along the lines of the Sedan Delivery which could also produce a 2dr wagon; The Rachero kit includes the passenger car floor as an extra part. Combine that with the Ranchero bed and you'll have a good start on the Wagon & S.D. Interior. A Hardtop roof section could probably be used to extend the roof to make the Wagon & S.D. You'll still have plenty of scratch building to do the but the roof shapes look pretty simple. -Steve
-
Trumpeter Ranchero build up
SteveG replied to SteveG's topic in WIP: Model Trucks: Pickups, Vans, SUVs, Light Commercial
With the underside painted it's time to work on the interior. I already filled in the floor shift mounting location and the interior floor has been primed so I'm ready for paint. I've decided to go with a matching interior which was a typical '60s color scheme. The kit represents the Deluxe interior trim option. It's a straight foward build at this point. I applied BMF to the door trim panels according to my reference photos, then installed them. Next up was adding paint detailing and decals to the dash. After that the pedals were installed one by one, the steering column was added to dash which was fitted between the door trim panels. With the steering wheel installed and a decal applied to the horn button the interior is complete. Next up is to address a couple of issues with the body, prime an paint it. Stay tuned for more ..... -Steve -
The chassis pan is probably the weak point of the kit, especially the rear section. The shape of the exhaust behind the rear axle doesn't help either. It should be more flowing. I could fix the exhaust pretty easy but I'm not sure what the chassis needs to look better as underside photos are hard to find. As far as the rear bumper goes, proportionately it matches my reference photos pretty close. The edges are a little too crisp just like the rest of the kit. There should be more of a gap between the rear body trim and the bumper with some body color showing through. It's fixable but not worth effort to strip the chrome and do the minor reshaping needed, then replate it. I'll probably add license plates front and rear which will help. For this build I limited myself to what I could do with just the kit parts, paint and foil. The kit decals didn't include any plates unfortunately. -Steve
-
Looking real good Tom !!! I can't wait ot see it finished.
-
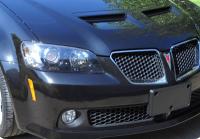
Thanks for all the compliments !!! Yes, that's the new Trumpeter kit..... The paint is a current Duplicolor GM paint color. It's actually a very close match to 64 Ford Vintage Burgandy. It was overcast when I took the photos and the color looks washed out in some of them. I'll try to take some more photos next time it's nice out.
-
Here's a few more photos .... I'm very pleased with how it came out and it was fairly easy to build. With some added detailing and or minor kit-bashing it could be a great model. If you want to check out more in progress photos just follow the link below. http://public.fotki....ects/page6.html For those who've been waiting for udates on the 65 Ranchero build I hope to do some more posting on it over the weekend as I've made a lot of progress on it this week. Stay tuned.... Steve
-
.... built virtually straight from the box. The outdoor photos don't show the color well. Here's the interior shown just before the final assembly
-
I say yes to the fender and side skirts. Somebody's going to have to be the one to show us how to blend those side skirts into the body. So It might as well be you. It would make a great MCM "how to " article for the next issue ....
-
Trumpeter Ranchero build up
SteveG replied to SteveG's topic in WIP: Model Trucks: Pickups, Vans, SUVs, Light Commercial
Just a quick update showing the basic chassis built up and detail painted. The front inner sheet metal, exhaust and rear axle assembly are dry fitted for now. The engine and drive shaft will have to go in first before mounting the other items. If I were to change anything it would be the exhaust, the rear section should be better flowing. Those bends are too tight behind the rear axle. Look for another update later this week ... -Steve -
Nice work Gregg !!! You can't go wrong with Black. So tell us, what paints did the "da Big Kahuna" use ?
-
Trumpeter Ranchero build up
SteveG replied to SteveG's topic in WIP: Model Trucks: Pickups, Vans, SUVs, Light Commercial
I'm building a 64 Falcon Sprint at the same time, it goes together in virtually the same fashion. It's also being done out of the box. So far the only deviations are the same trans mount and how I plan on mounting the rear view mirror to the windshield which I'll show here. If there's still any interest, I'll show some in progress photos of the Falcon Hardtop after I'm done with the Ranchero. As for that right side gas cap, I'm hoping to fill it with some 2 part glazing puty using an old body shop trick to preserve the trim. We'll soon find out. -Steve

