mrmike
-
Posts
5,325 -
Joined
-
Last visited
Content Type
Profiles
Forums
Events
Gallery
Everything posted by mrmike
-
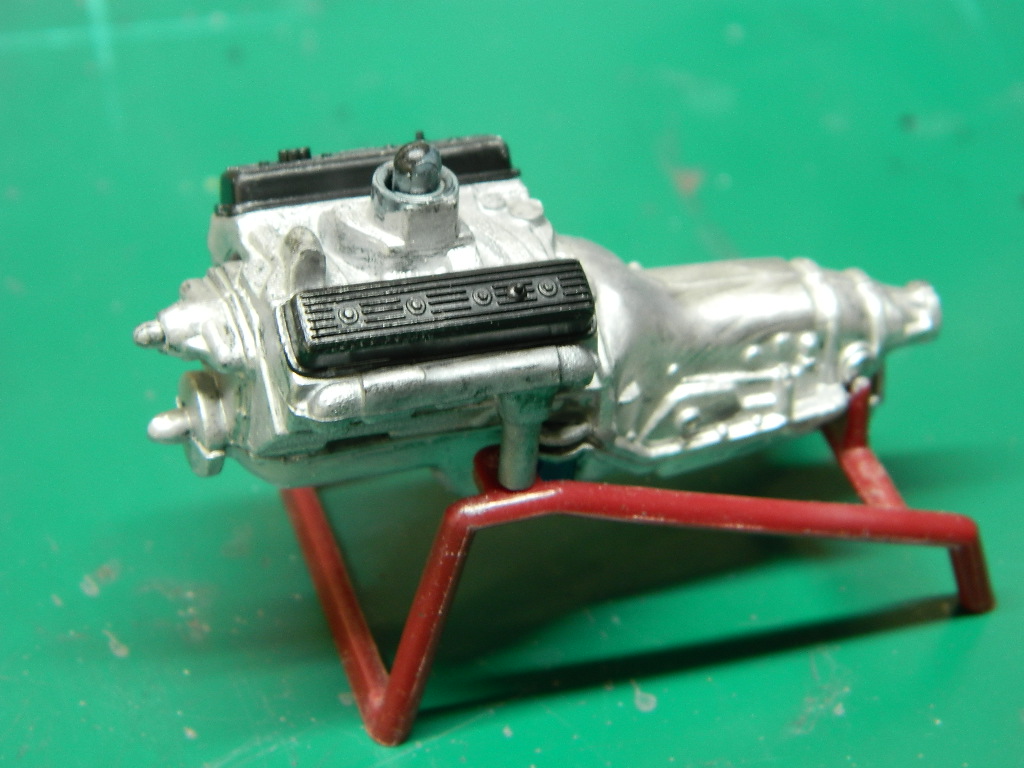
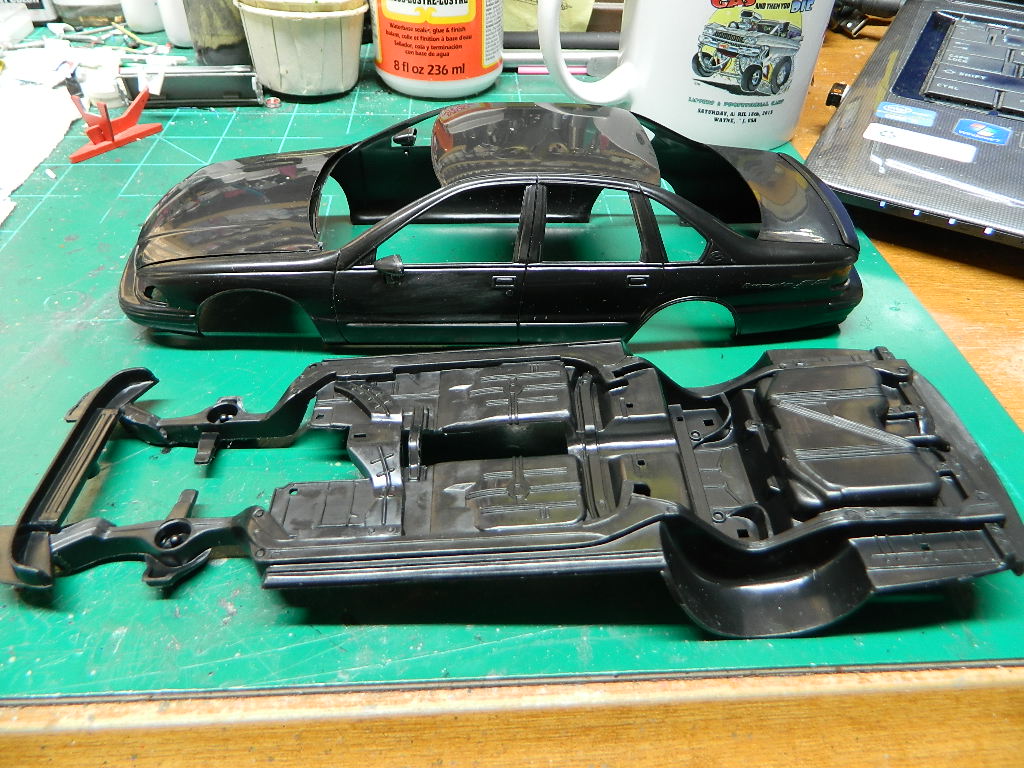
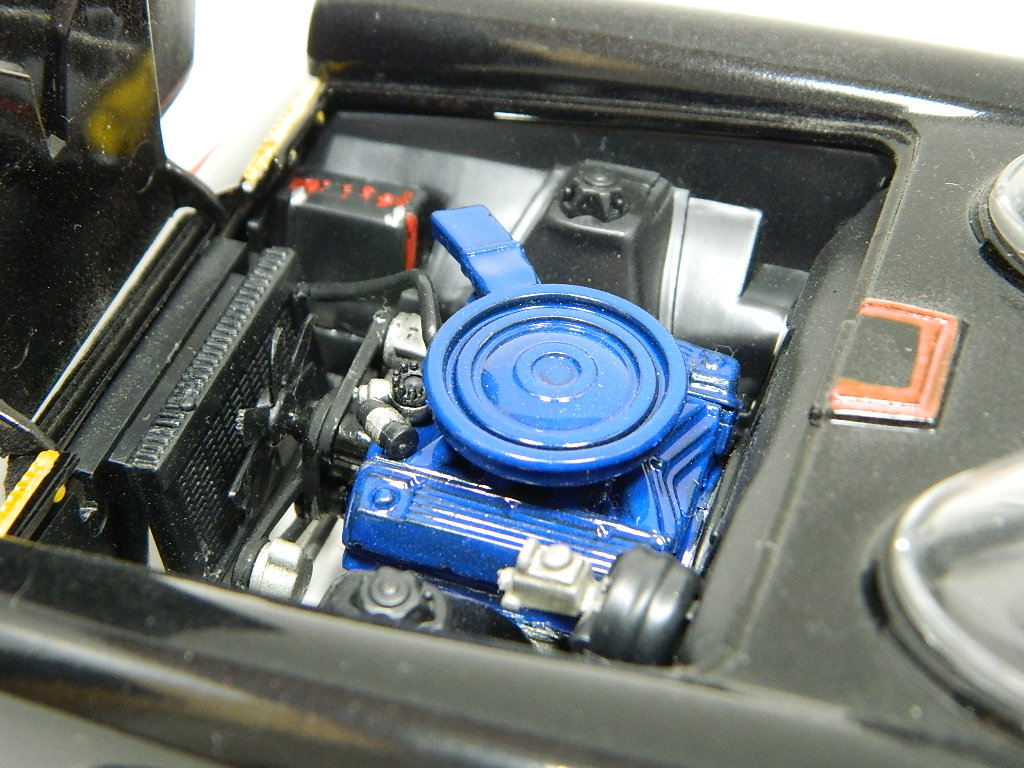
The Story McNally is placed in an Interrogation Room and chained to a metal table by Det. Darvell. A woman walks into the room and McNally is shocked to see who it is...Caitlyn Scotsen, his ex-girlfriend! She is the ADA on this case and was about to question McNally when Attorney Charlotte Rothmann walks in exclaiming that the interrogation was over and McNally was to be released with all charges dropped. McNally wasn't Mirandized by any cop or detective. Lt. Det. Troy walks in and gives a folder to the ADA and she reads it and announces that McNally will be released with all charges dropped. Charlie and McNally are stopped by the exit by ADA Scotsen who tells them that McNally is in big trouble. He may have gotten his PI License back without his gun and permit and she is in the process of his license revoked. Charlie demands that no investigation was conducted and her client is innocent and McNally gets between the two ladies and he says that he will find the guilty party with or without a PI License and no body will stop him. The Build I assembled part of the engine followed by body cleanup. I wondered how the Impala SS would look with white lettered tires. I used my white Gelly Roll pen for the letters. If I don't like the look of them, I'll wipe the tires off. McNally will return...

-
Thank you Carl!
-

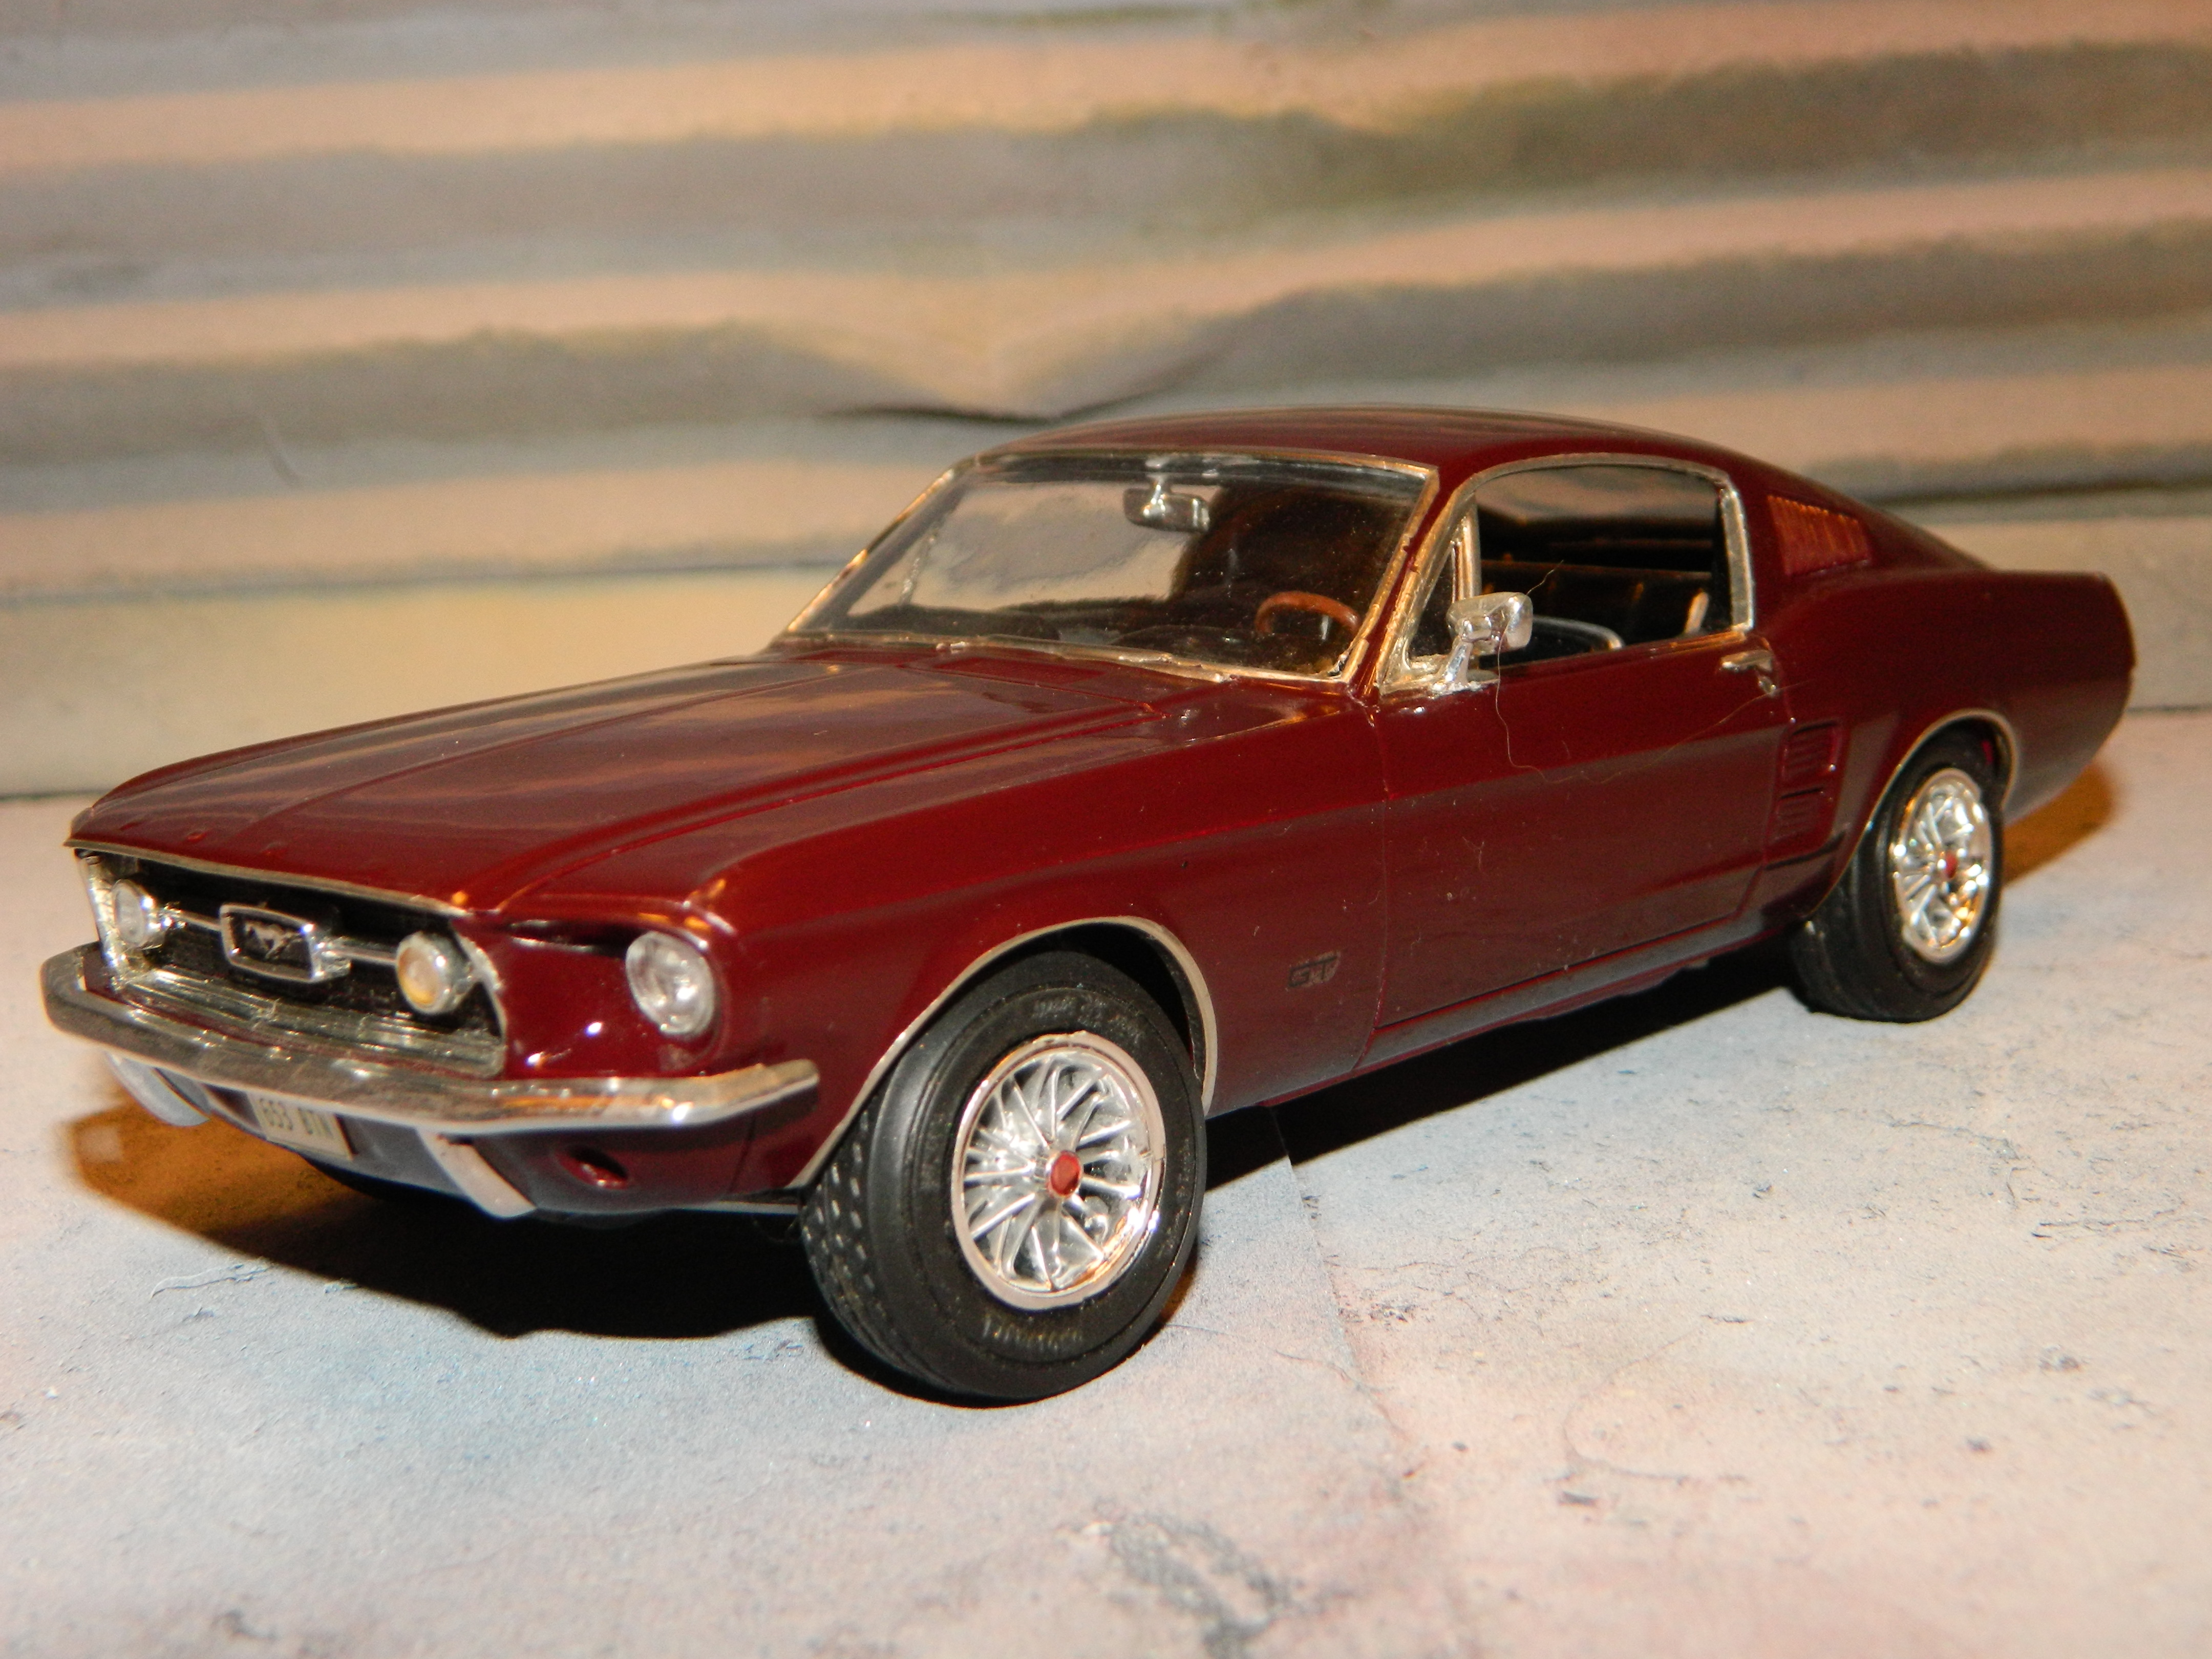
AMT '67 Mustang Fastback-Now in Under Glass Section
mrmike replied to mustang1989's topic in WIP: Model Cars
I know about the model that you have since I have built and rebuilt it over the years. The first time was as a cheap knockoff of the Bullitt Mustang. The rebuild turned it into the car driven by the late Robert Urich as Spenser in Spenser: The Judas Goat and Spenser: A Savage Place. It's close, but not quite like it. I wonder if the molds were really cleaned up or are they the original molds untouched? I like the stance that is on the boxart, but my old build sat on its rear honches with the nose in the air.
-
Thank you David! Yes. Something has changed on the nose of this model since I didn't have this issue on the first Barracuda that I worked on. As much as I like working on these older Barracudas, I doubt I will ever bother with another one.
-
Thank you Josh and Michelle!
-
Thank you Hector!
-
Thank you Matthew and Larry!
-
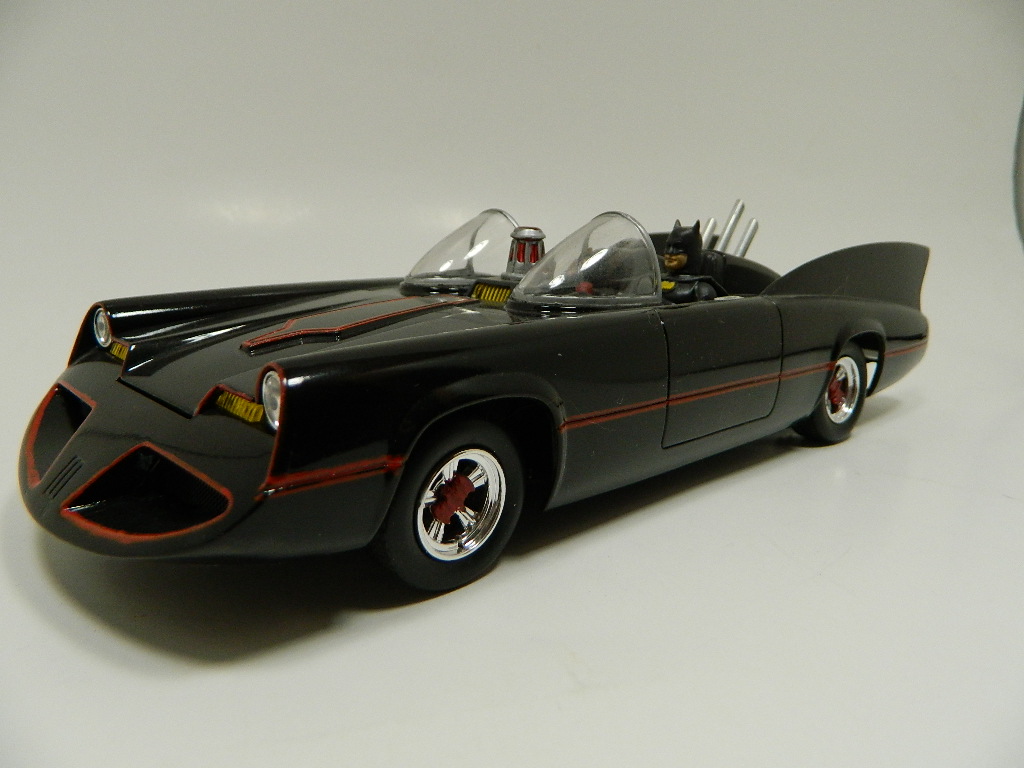
The Bat Cave (Post your Batman themed builds)
mrmike replied to David G.'s topic in Community Builds
Thank you David! -
Thank you Ray!
-
The Bat Cave (Post your Batman themed builds)
mrmike replied to David G.'s topic in Community Builds
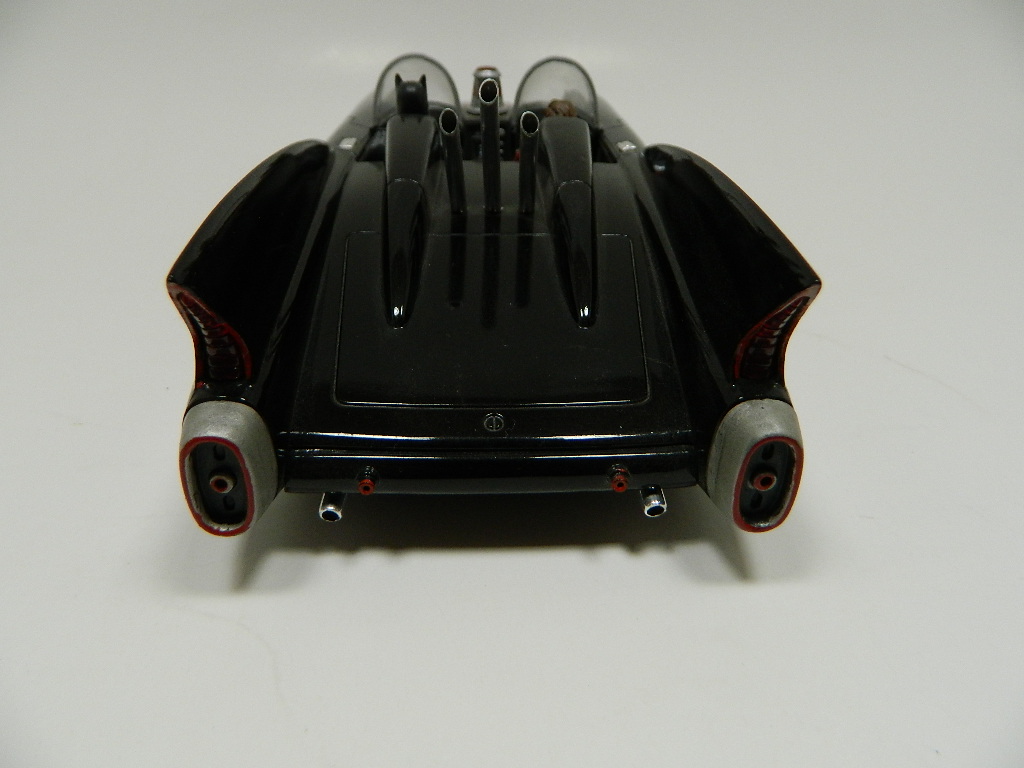
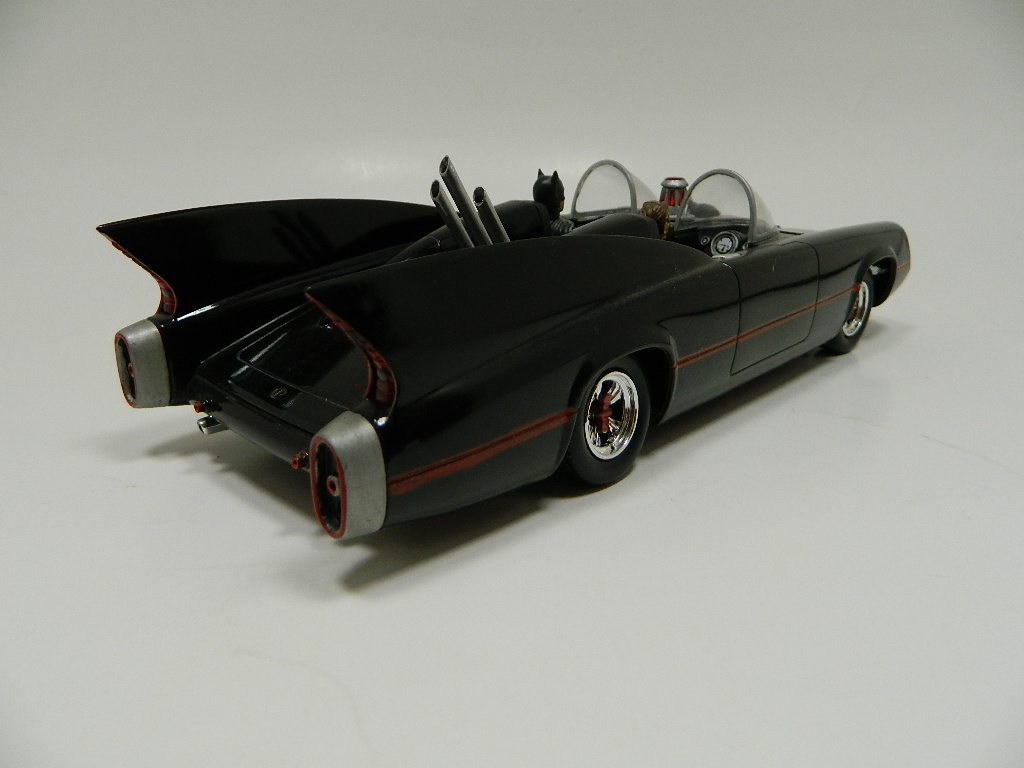
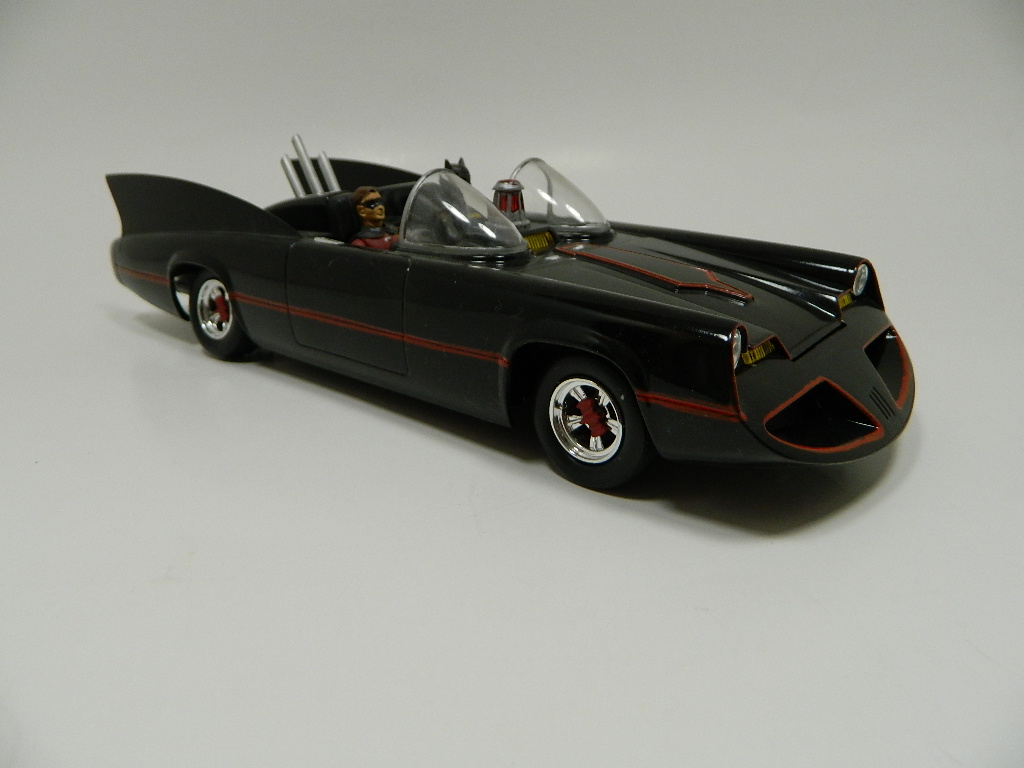
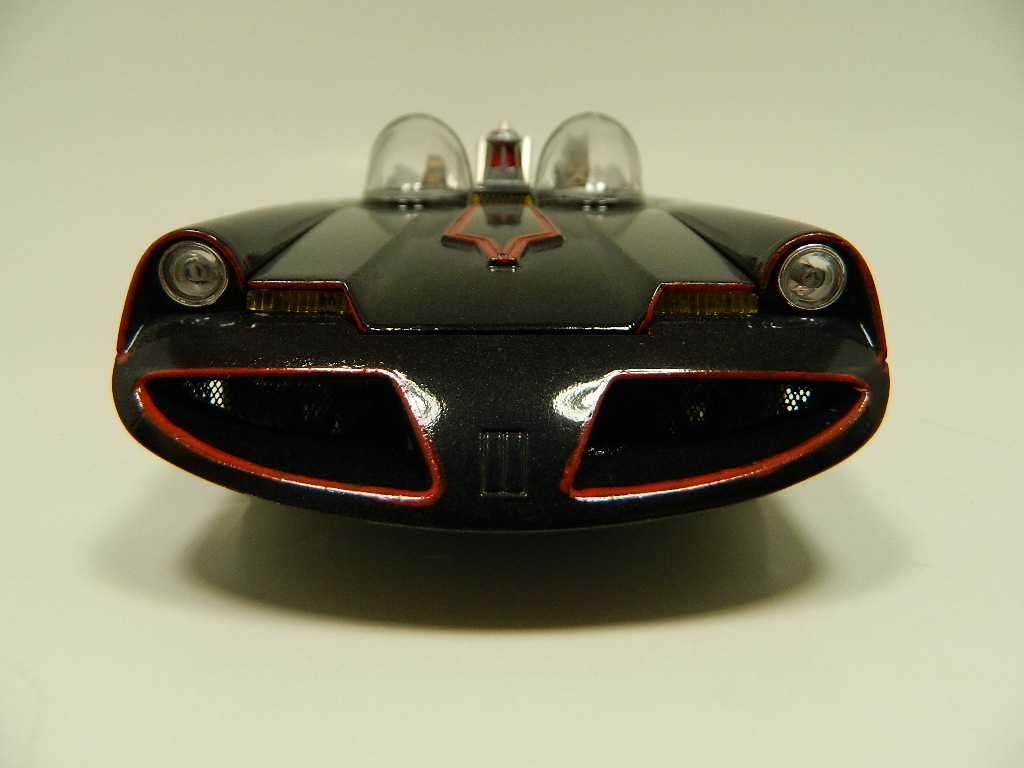
I'm in! This is an Polar Lights Batmobile with a few touchs of my own. I wanted to build the 1966 Batmobile, but this was all the LHS had at the time. I built this MANY years ago!
-
Thank you Tom, Tom, Bob and Chris! I wanted to try and build a better Barracuda. The only real letdown is the all-in-one chassis.
-
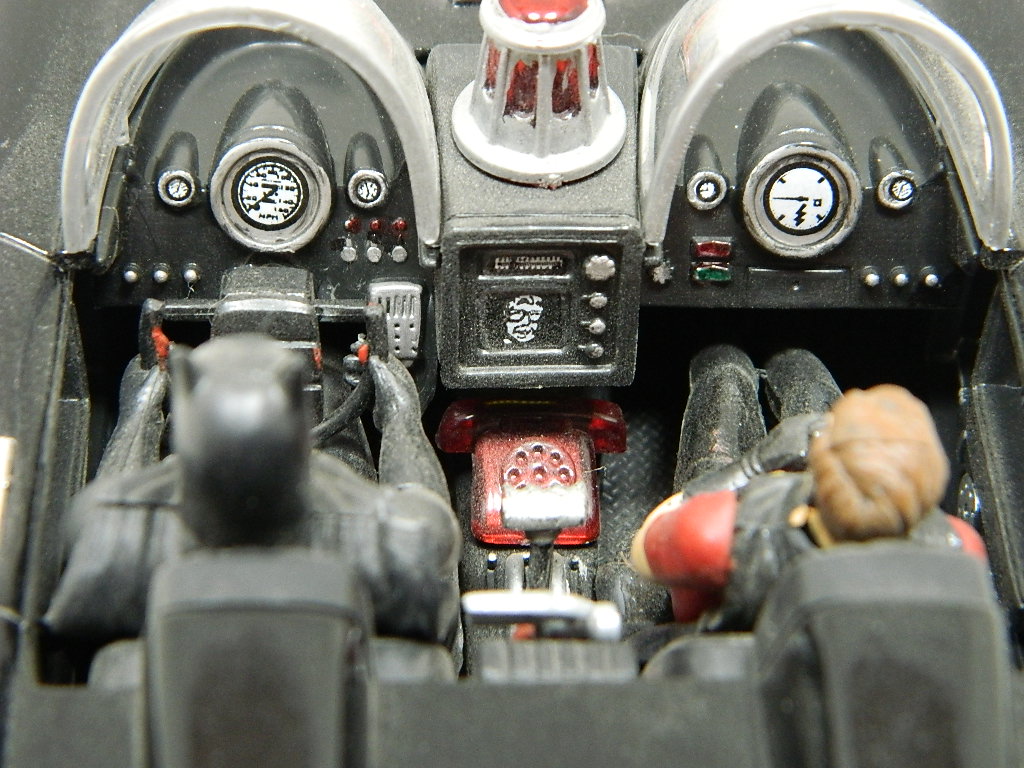
Thanks Ron, John and Bob! From what I have determined, the model is a 1994 with the console with the shifter up on the steering column. In 1996, the shifter was relocated to the console. The mirrors are 1994 vintage. Basically, the model is a 1994, but for my story, it is a 1996.
-
The cloudy sky is getting dark and the wind is starting to blow! It is starting to rain and it is falling harder and harder! The ground is shaking as the wind blows harder and harder! Oh no, oh no, OH NO!!! Mr. Mike is build another Chevrolet! Yes folks, I am building another Chevrolet and I am also including another McNally, Boston PI story with it. Nobody in this story resembles anyone dead or alive. The Build This is the Revell Impala SS Snaptite kit #6399 from many years ago. My goal is to paint the body with Tamiya TS-18 Metallic Red over a black primer with a medium grey interior and the wheels will get a coating of Testors Dullcoat to knock down the shine of the chrome. The Story Jonathan Trenton is telling Det. Steven Darvell about the attempt on his life. Trenton decides to stay at a Hotel since he feels unsafe at home and he walks back to his condo as Darvell gets into his car. Then, BAM BAM and Trenton is dead on the steps of his condo. Darvell gets out of his car and he waddles quickly to Trenton's lifeless body and he sees a man getting into an orange Dodge Charger and speeding away. Darvell fires a couple of shots from his Glock G22 .40 Caliber pistol, but he doesn't stop the car. McNally pulls into his driveway in is Charger SRT8 Super Bee and he stops at the back door. He gets out to unload his groceries from the trunk when he is surrounded by cops with their guns drawn. He raises his hands and says, "What's going on, guys?" Darvell walks over to him and places him under arrest and places him in a Patrol Car for the trip to Boston Police Headquarters. There is a bag of groceries on the ground and Darvell kicks it with a smile on his face and a milk carton in the bag starts leaking through the bag and onto the ground. McNally will return...
-
Thank you David!
-
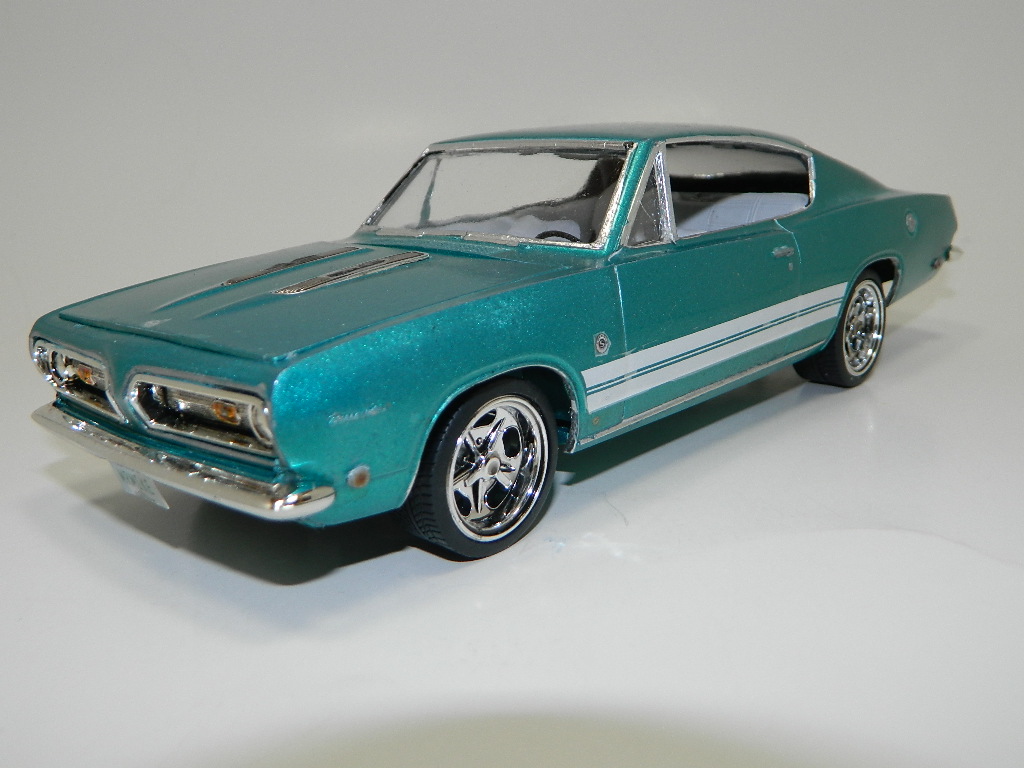
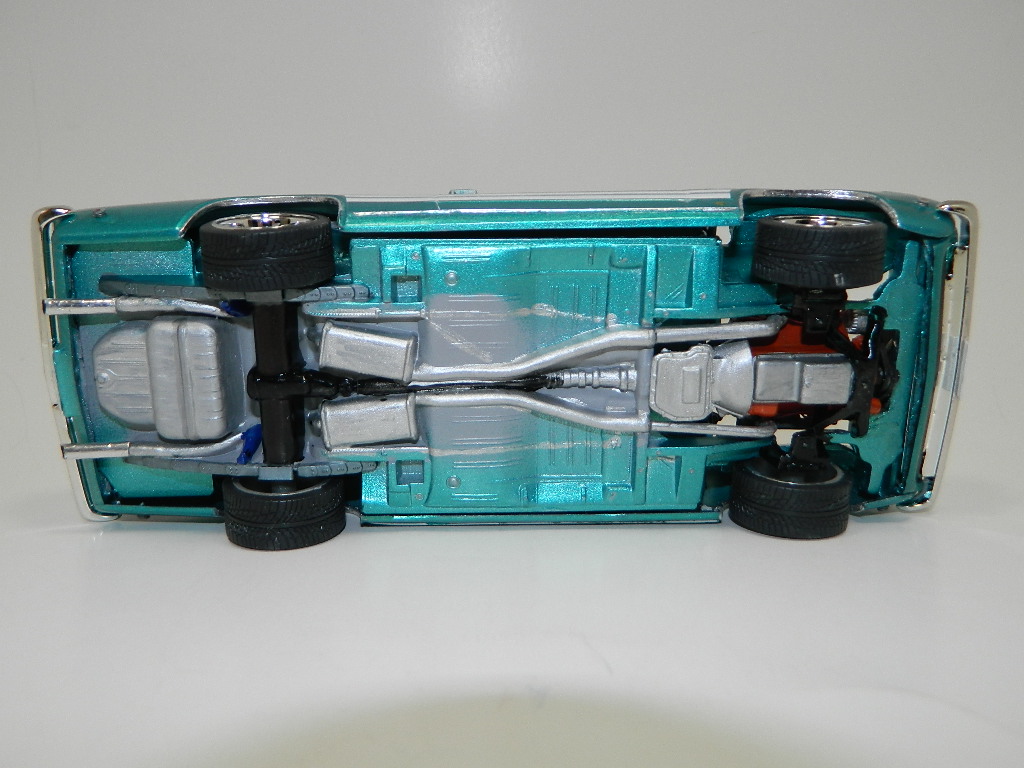
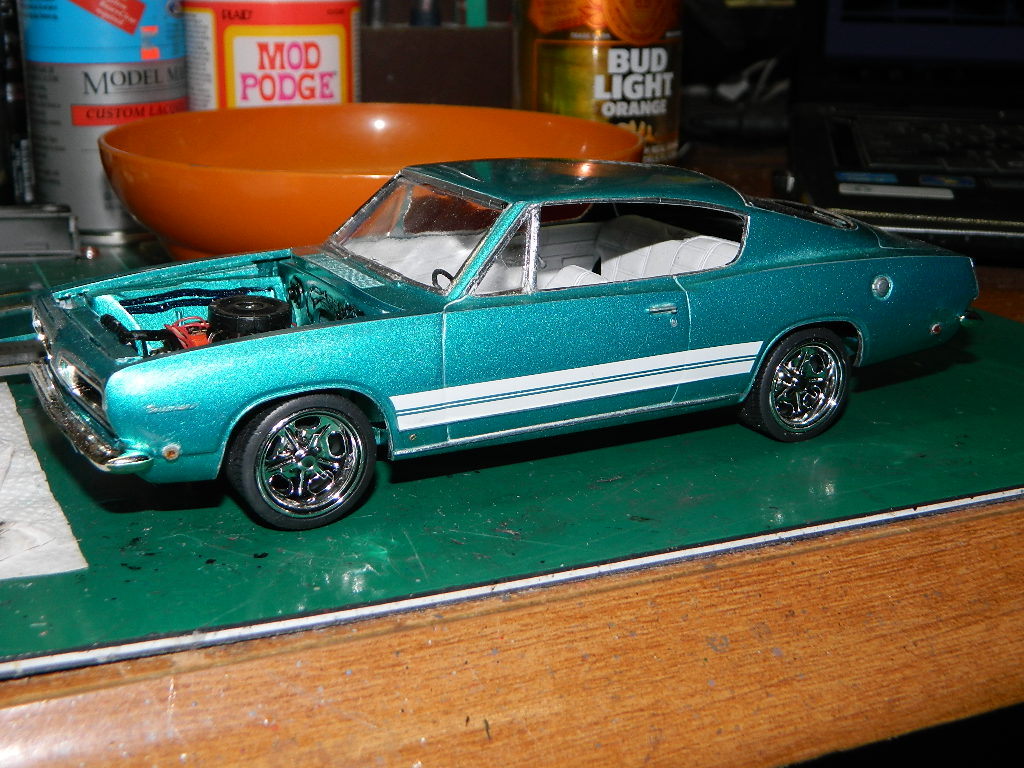
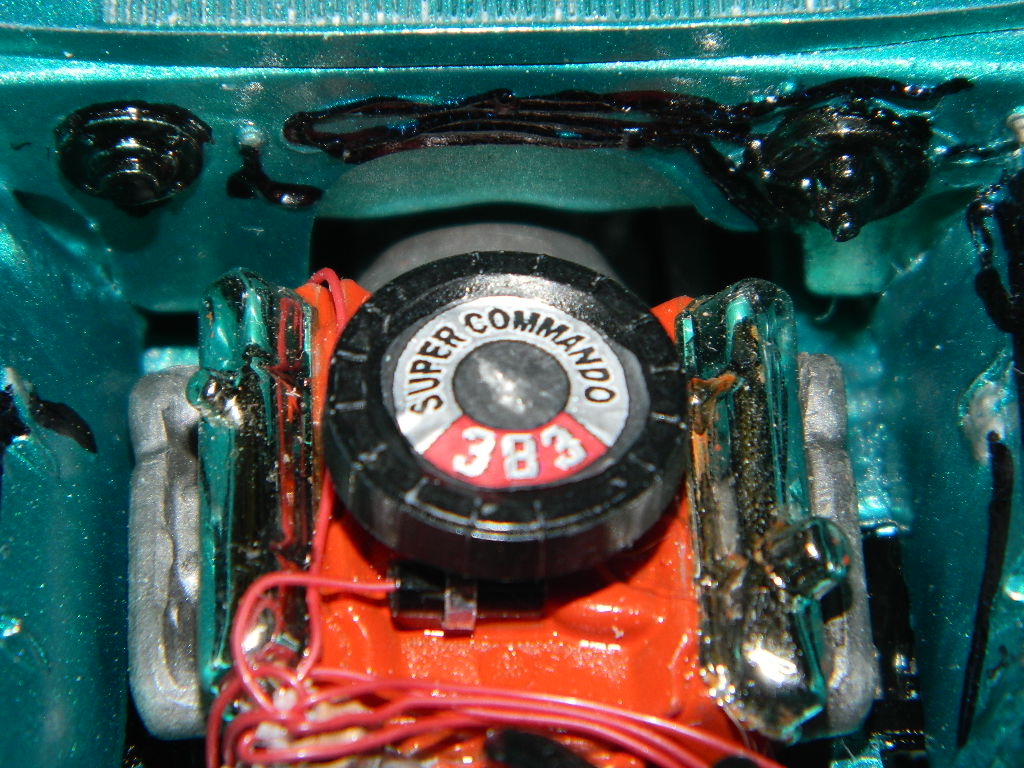
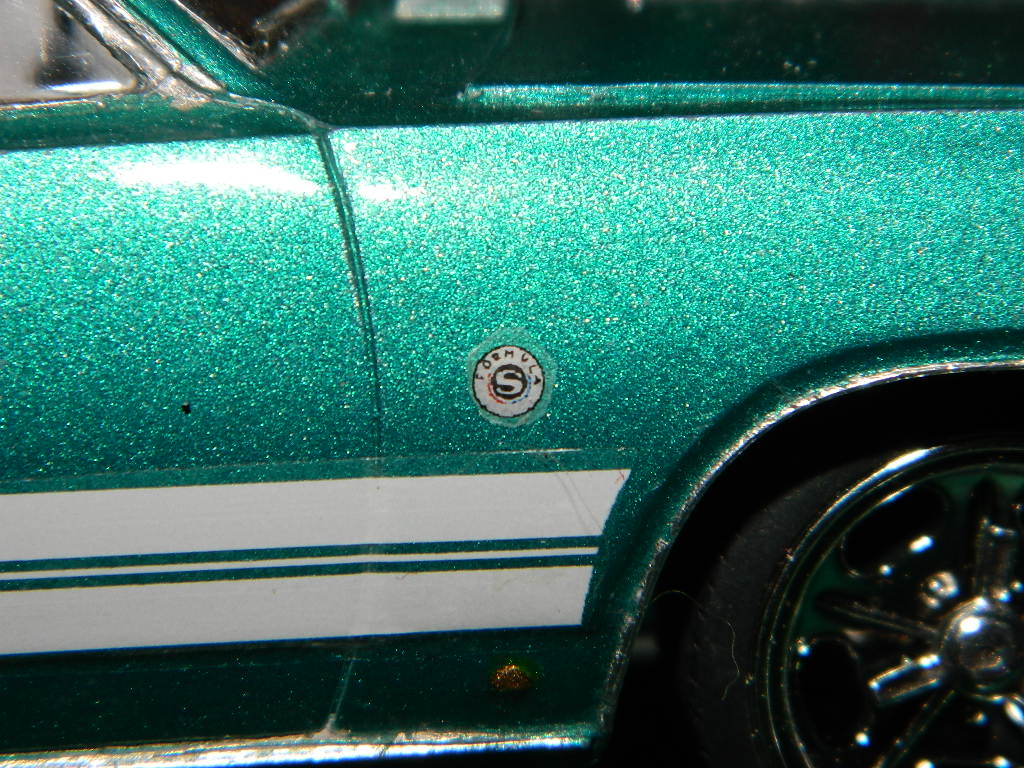
This is my '68 Plymouth Barracuda Formula S 383. It is painted with Model Master Bright Calypso Metallic with a white interior. The interior has a console and automatic transmission from the Revell '68 Hemi Dart. The Shuey wheels and tires are from Pegasus. The engine compartment has side panels from an old MPC chassis. The decals are from Keith Marks.
-
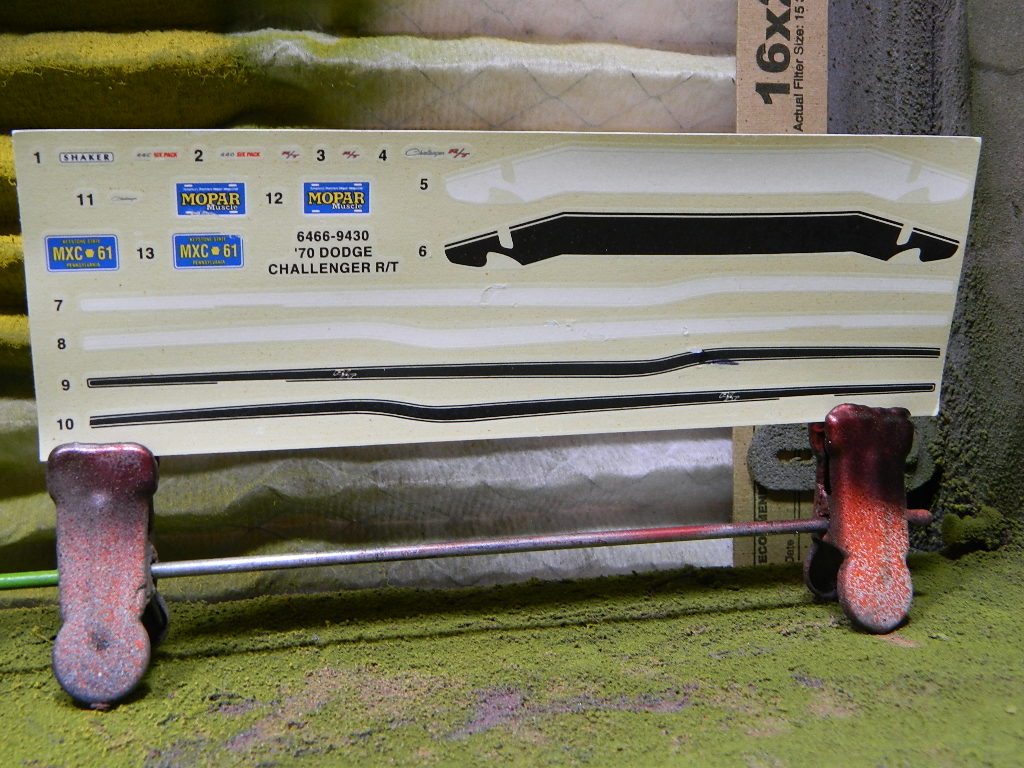
I applied the Keith Marks decals to the '68 Barracuda. Now it is finally done! More Barracuda to come...
-
1971 Ford F100 Ranger XLT Pickup
mrmike replied to mrmike's topic in Model Trucks: Pickups, Vans, SUVs, Light Commercial
Thank you Terry! -
So far, so good! Keep moving forward and show what you have done on your Morgan. I built one myself and I noticed the excellent engraving of the wire wheels. Nobody seems to do that kind of work anymore!
-
I would have never noticed that especially since I didn't know what Rockford's license plate was. Good catch! Thanks David, Ken, Greg and John!
-
Thanks David! I used the lowered front suspension on this model. Just for the heck of it, I went back and looked at my '71 Satellite and '71 GTX and I lowered the front suspension on the Satellite, but not on the GTX. I used really wide tires on the GTX and I needed the clearance on the fenders.
-
Thanks Carl! Now that the body has been painted, I can polish it, BMF and final assembly.
-
8 second electric Ford Mustang
mrmike replied to Vietnam Vet67's topic in General Automotive Talk (Trucks and Cars)
I was reminded of the Zombie Mustang 222. 1,000 HP 1,800 Lb. Ft. of torque, 0-60 in 1.7 seconds! -
I coated the old decals with Microscale Liquid Decal Film with the hope of saving them We shall see... More NCIS to come...
-
I masked off the rear bumper and valance and then I painted them with Tamiya TS-29 Semi Gloss Black. And, I couldn't resist doing a mockup. I'm liking this! More Mopar to come...
-
Thanks Carl!