mrmike
-
Posts
5,325 -
Joined
-
Last visited
Content Type
Profiles
Forums
Events
Gallery
Everything posted by mrmike
-
When you say "varnish" I think of a thick gooey substance that is used for woodworking. This does contain Propyl Alcohol and is flammable. It is thicker than water and it did spray through my airbrush without any problems. A 'thin varnish"? Maybe.
-
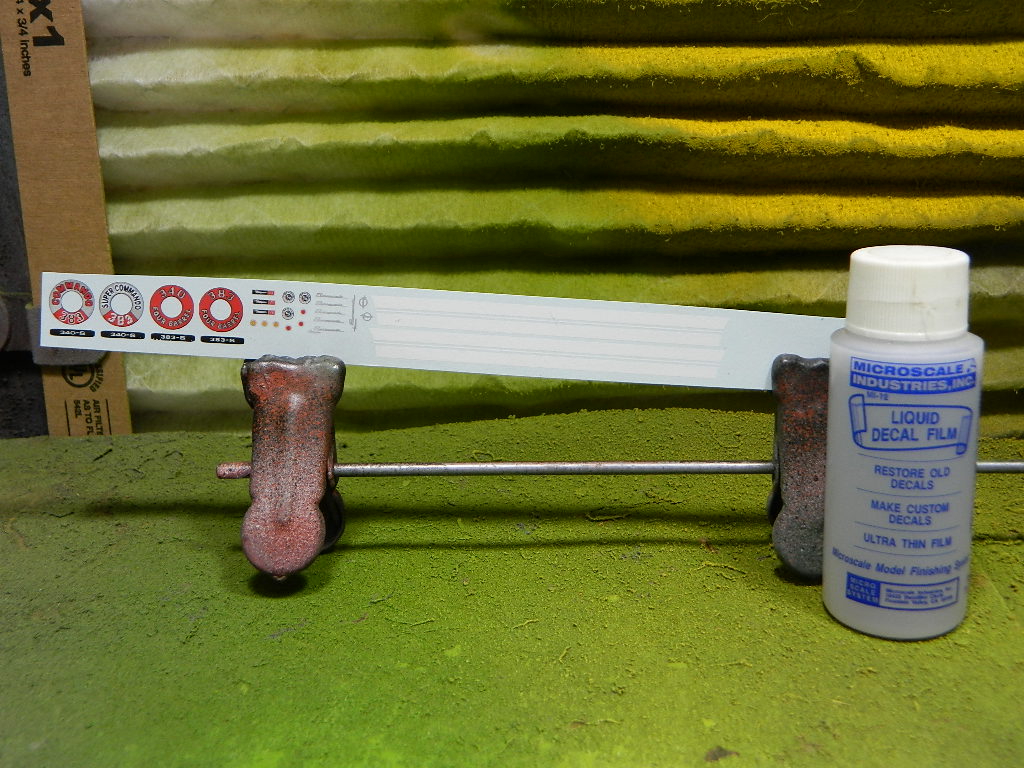
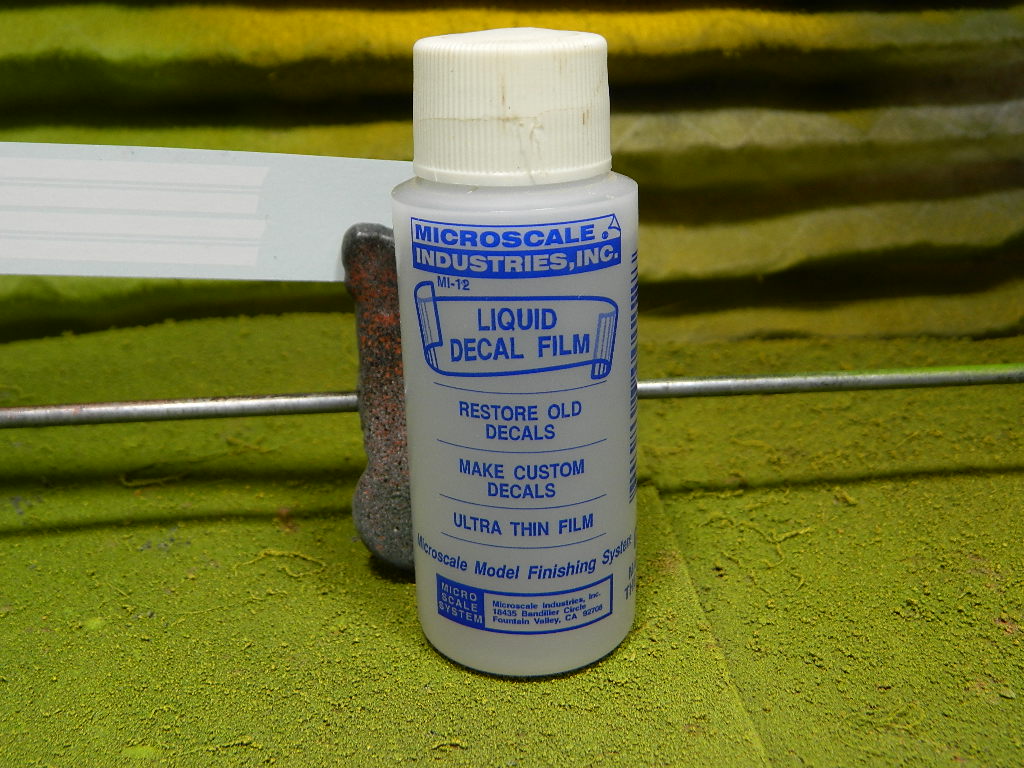
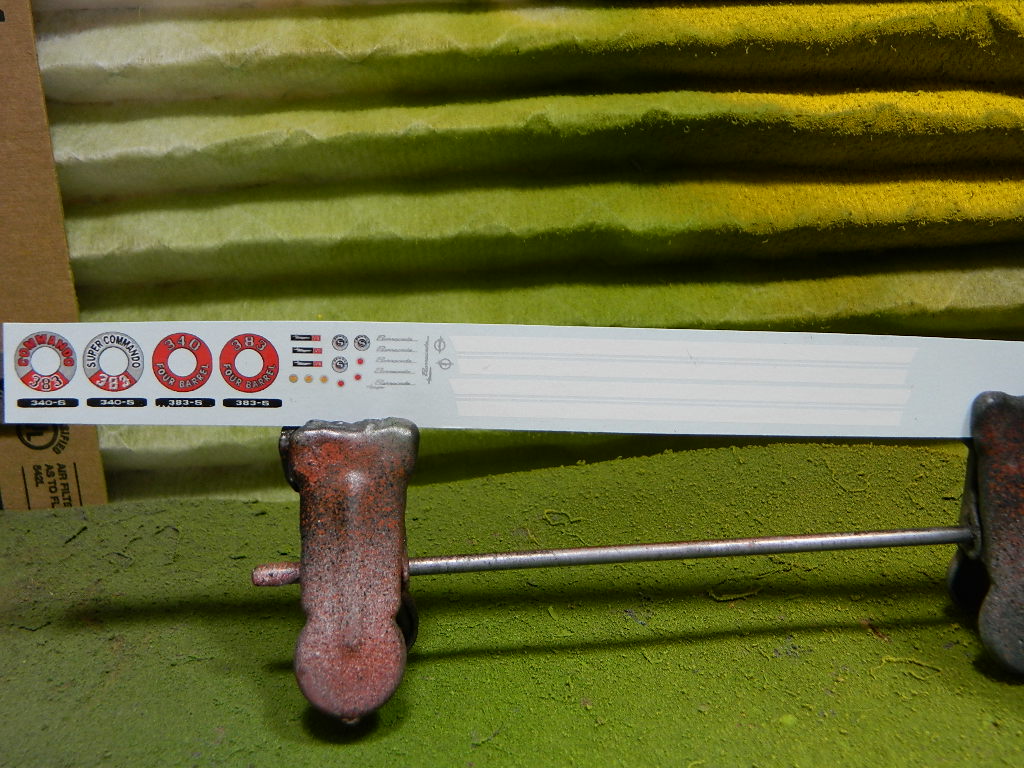
I coated the Keith Marks Decals with two coats of Microscale Liquid Decal Film. I'll let this dry for a day or so and then start decaling. More Barracuda to come...

-
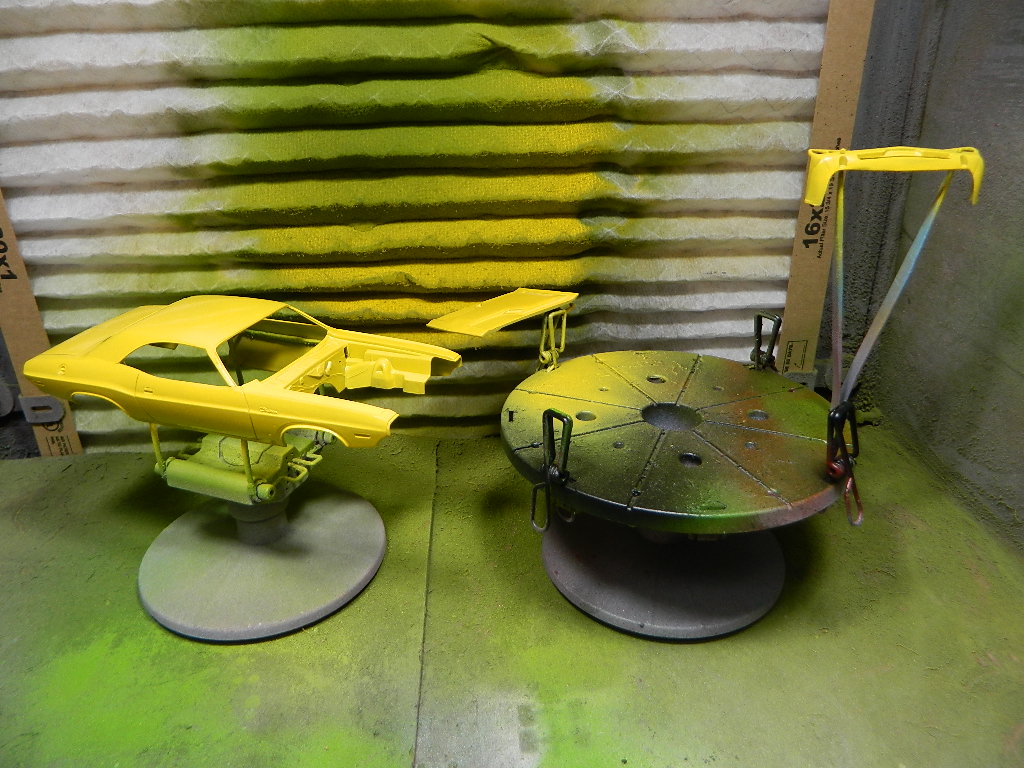
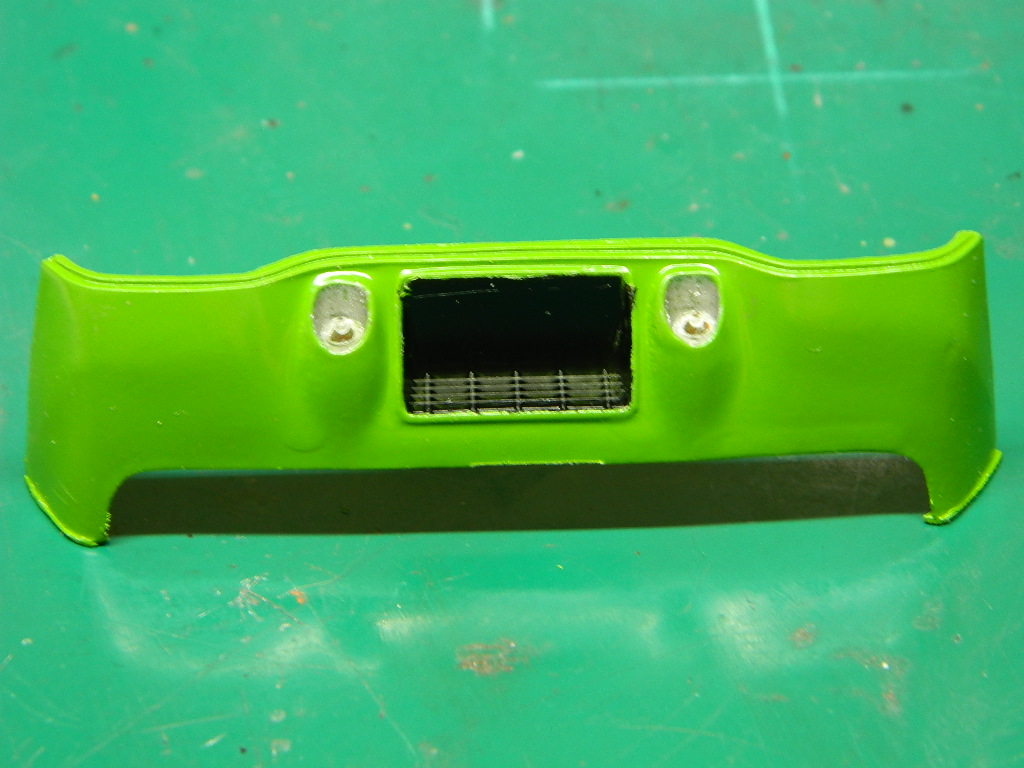
It has been a few months since I worked on the Challenger R/T and I decided to get back to it. I painted the hood, front valance and grille and the body with Tamiya TS-16 Yellow. Now to let this dry. More NCIS to come...
-

1971 Ford F100 Ranger XLT Pickup
mrmike replied to mrmike's topic in Model Trucks: Pickups, Vans, SUVs, Light Commercial
Thank you Chris! -
Thanks David! I find that it depends on who you listen to. Some say use the decal over the molded script and some say to remove the molded script before painting and then use the decal afterwards.
-
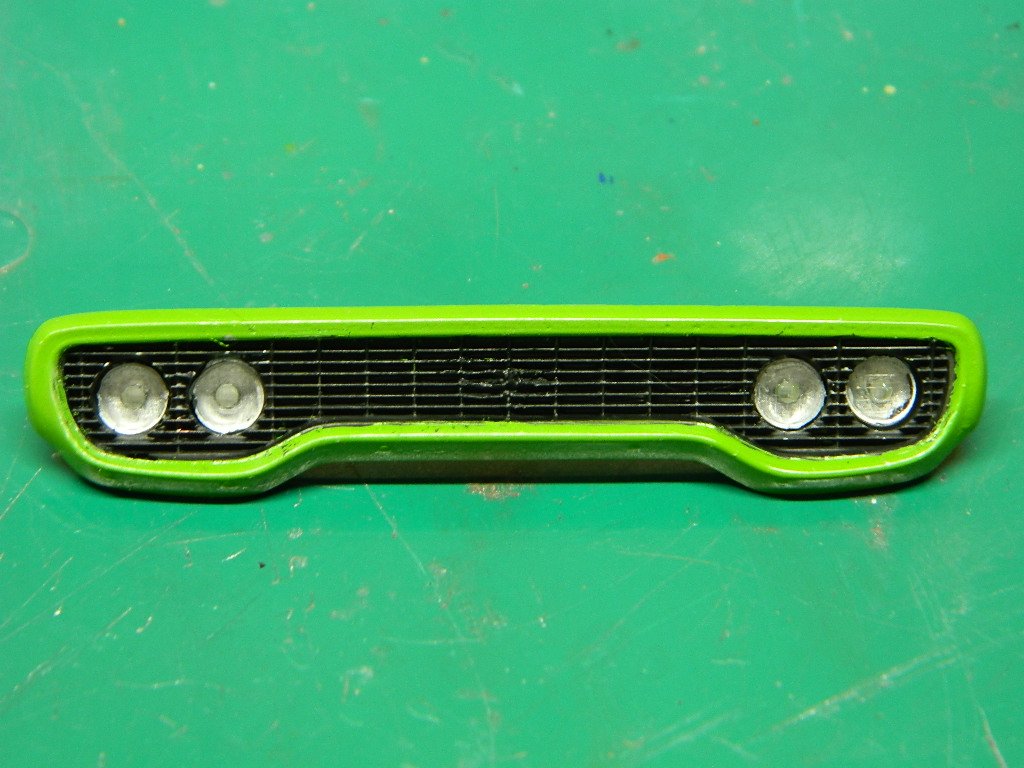
I went and finished the grille and front valance with lights and prepped the rear valance for additional stripes coming down from the taillights. More Plymouth to come...
-
1971 Ford F100 Ranger XLT Pickup
mrmike replied to mrmike's topic in Model Trucks: Pickups, Vans, SUVs, Light Commercial
Thank you Bob! Like I tell my wife and grandkids, better late than never! -
Looking good John! I want to see what your channeled Roadster looks like.
-
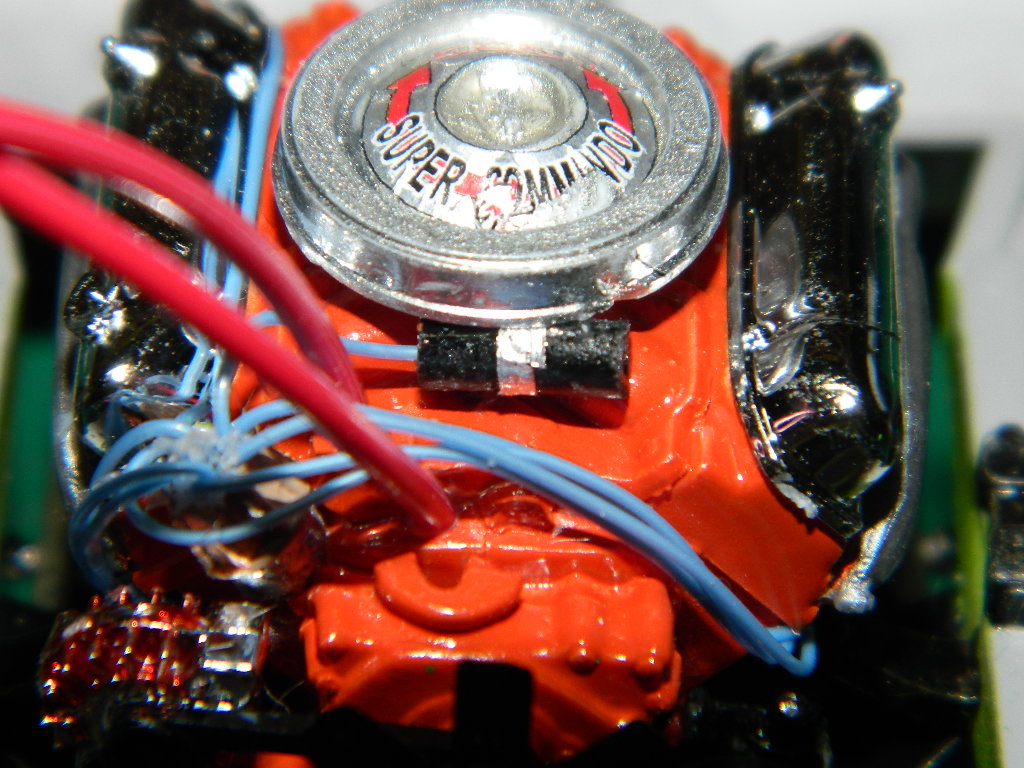
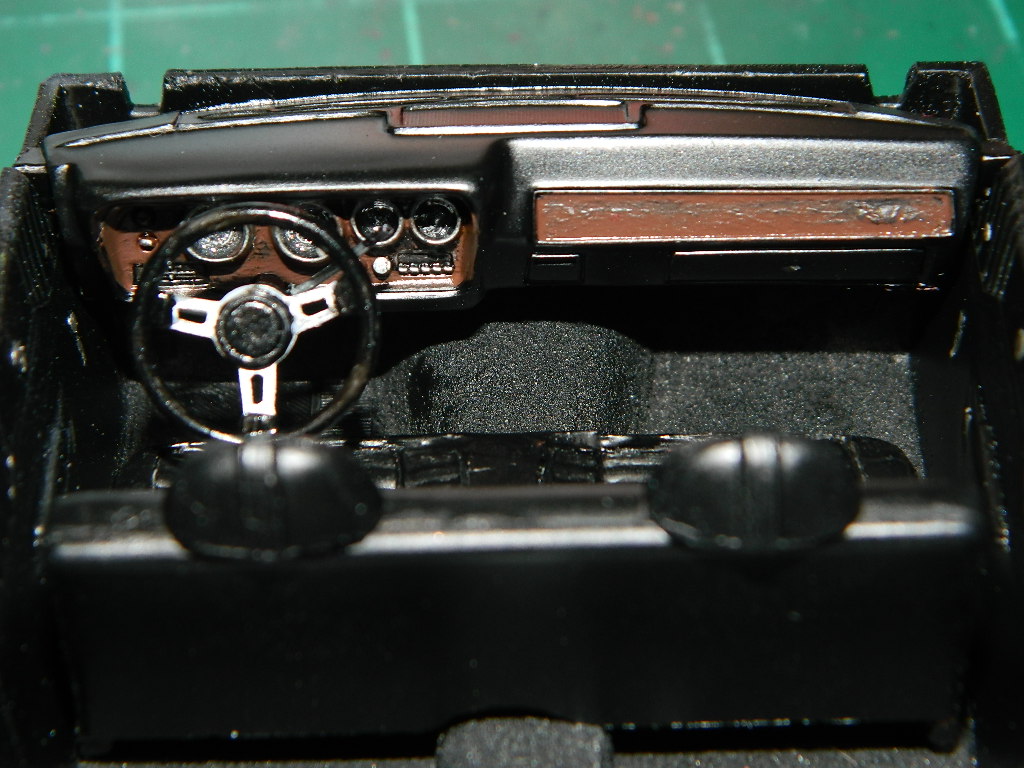
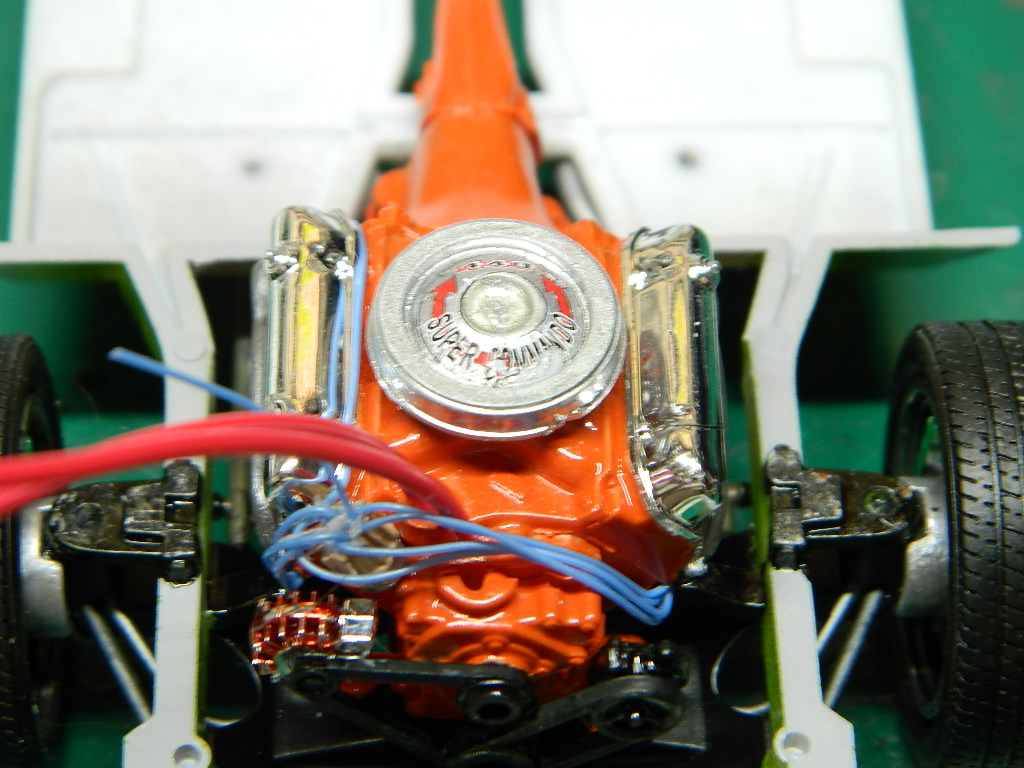
I wanted to add a tachometer and I had a PE tach from Detail Master that I thought would fit the bill. It was a scale 5 inches in diameter and the more I thought about it, the more I thought that it was too large. I used a spare tach that came in the Revell Foose '67 Coronet kit and I detailed that to my liking and installed it. While I was at it, I made an ignition coil and installed that as well. Then I detailed the grille with Tamiya X-11 Chrome Silver for the headlight buckes and Tamiya XF-1 Flat Black for the grille itself. More Plymouth to come...
-
I finished the interior for now. I still want to add a tachometer to the dash. The engine and drive shaft has been installed and the chassis is complete. More Plymouth to come...
-
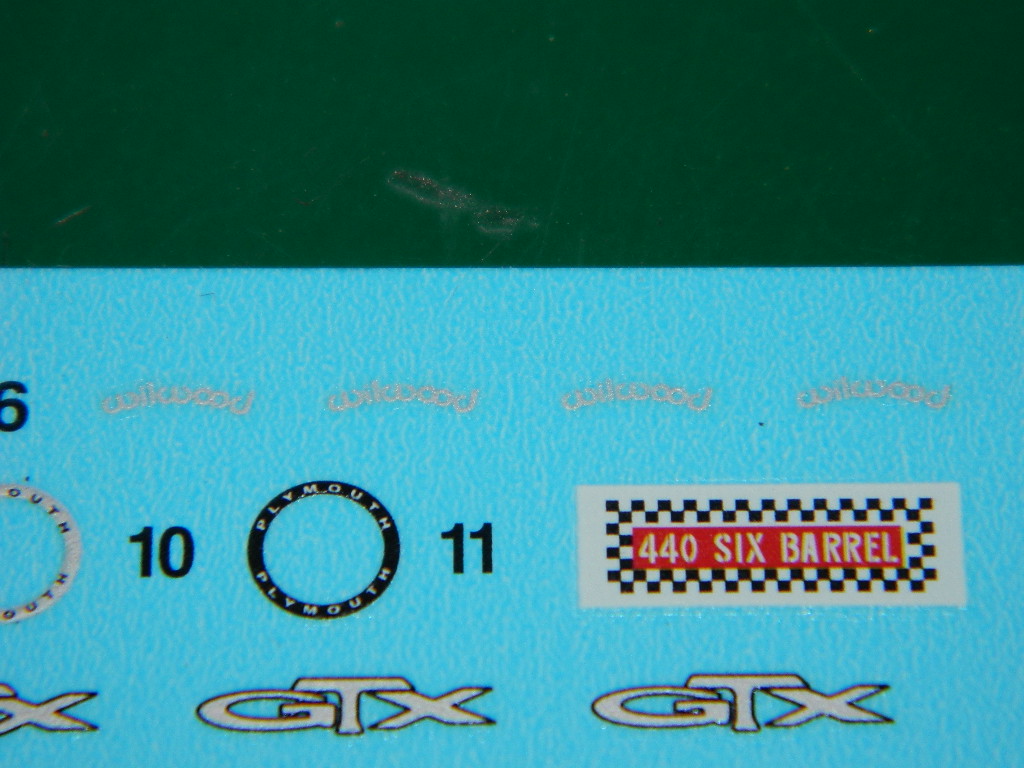
Thanks John! Yes, the Six Barrel air cleaner decal is correct, but Revell left off the decal for the 440 4-bbl engine which is included in the kit! We will never know if the Wilwood decals fit since I did glue the wheels on and they were not mentioned in the instructions.
-
Well, chock up another screw up to Revell. I went and looked at the decal sheet and the decals don't fit the hood since they are a little on the short side. Then I looked at decal no. 6 and then I went to the instruction sheet and there is no mention of no. 6 decals or decals for the caliphers. I wonder what the decals and the instruction sheet for the Revell of Germany kit looks like. I heard that the decal sheet is bigger! I painted the dash and the radiator. The radiator has be detailed and the dash is next. More Plymouth to come...
-
Thanks Jim and David! I must admit that the paint did come on rather nicely. Better than some of my past paint jobs!
-
Thank you John! I appreciate the nice words and I am looking forward to seeing your '29 Model A!
-
This afternoon, I wired the engine, added exhaust manifolds, heater hoses and decals. I need to add an ignition coil. Then I painted the bench seat, steering column, radiator, dash and the body. More Plymouth to come...
-
Thanks David! i used Model Master Green-Go (aka Sassy Grass Green) for my paint. I had a partial can that started to leak and I tossed it in favor of a new can that I bought a few years ago and it hadn't started to leak yet. I need to get the body and interior painted!
-
Looks good! I like the color.
-
Thanks Mike! I used this color on a Revell 1970 'Cuda years ago and I was told that the color was wrong for the model year. I told that person that this color was added at mid year and it sold rather well. He never replied back.
-
Lookin' good! You also appear to be farther along than I am with my '71 GTX (Roadrunner). But, then I am doing more to mine than you. Keep up the good work!
-
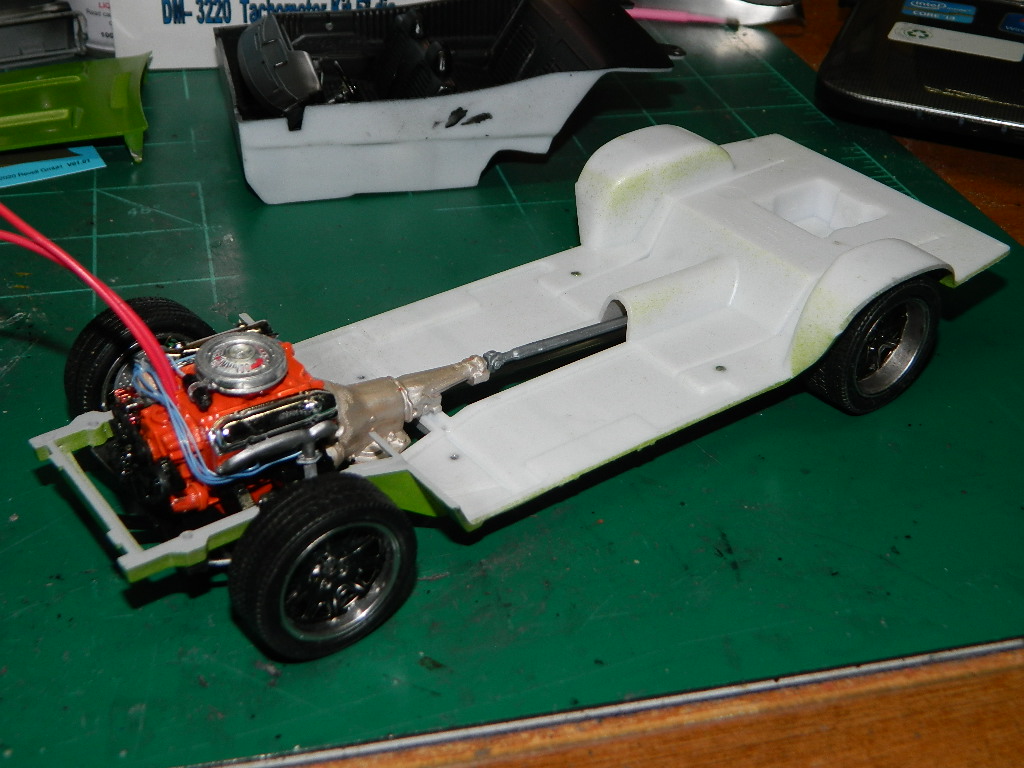
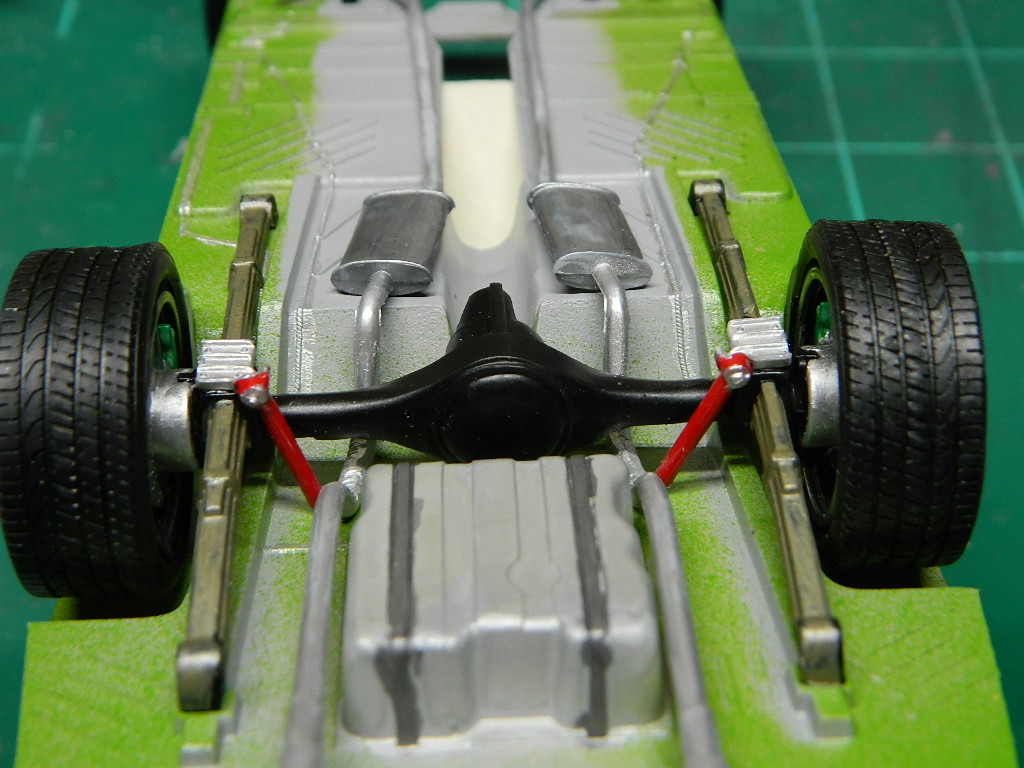
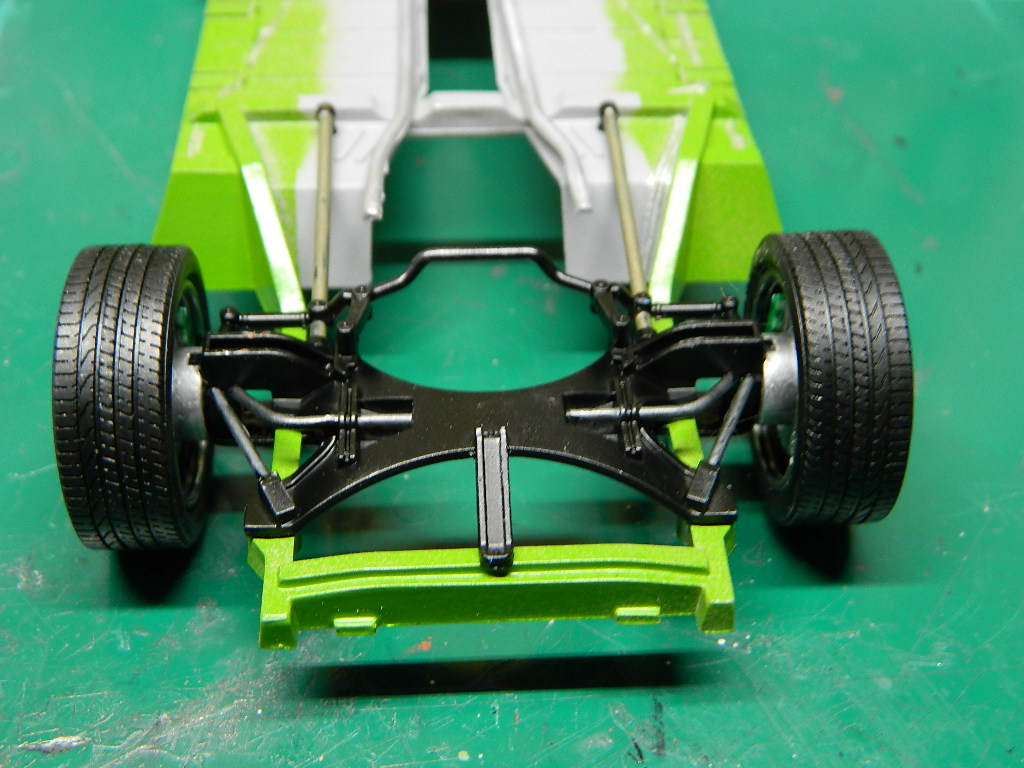
Thanks Carl! I finished the chassis this afternoon. I found a set of extended shocks from the Revell '68 Charger kit. I cut them down to fit and painted them red for contrast. The rear wheels and tires are a very tight fit! More Plymouth to come...
-
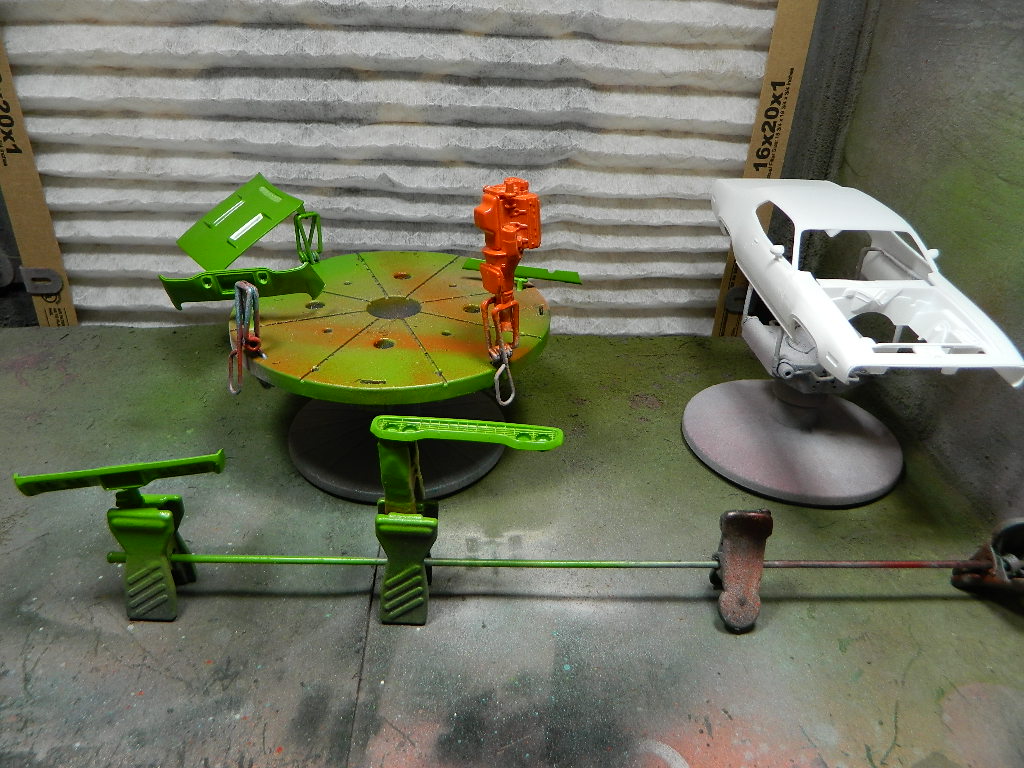
While the paintbooth was up and running, I painted a few more parts including the engine, front and rear bumpers and the body. I noticed some mold lines on the front fenders and I removed those and reprimered the body which produced a large paint run. I used a piece of paper towel to stop the run and in the back of my mind I heard, "Don't!", but it was too late and I made a mess out of the primer. I'll sand the primer and then I'll paint the body later. More Plymouth to come...
-
I held off long enough and I started painting today. I painted the wheels with Alclad II Gloss Black and then I painted them with Alclad II Chrome with my Badger 150 airbrush. The wheel centers will be painted with Tamiya TS-29 Semi Gloss Black. Then I painted and detailed the disc brakes. I spent some time on the bench seat and added headrests using the tops of the bucket seat headrests. More Plymouth to come...
-
Thanks for the tip, Pat! I have spent the last two days (a few minutes here and there) removing the GTX from the grille. The GTX scripts where removed from the body rather easily, but I wasn't sure if I wanted to attempt removing the script from the grille. I used a No. 11 blade, an angle blade and a pick to remove the scripts. It's not perfect, but it does look decent and it will be painted flat black. The wheels have been cleaned and now to painted them with Alclad II Gloss Black Base followed by Alclad II Chrome. Them to paint the wheel centers with Tamiya TS-29 Semi Gloss Black. More Plymouth to come...
-
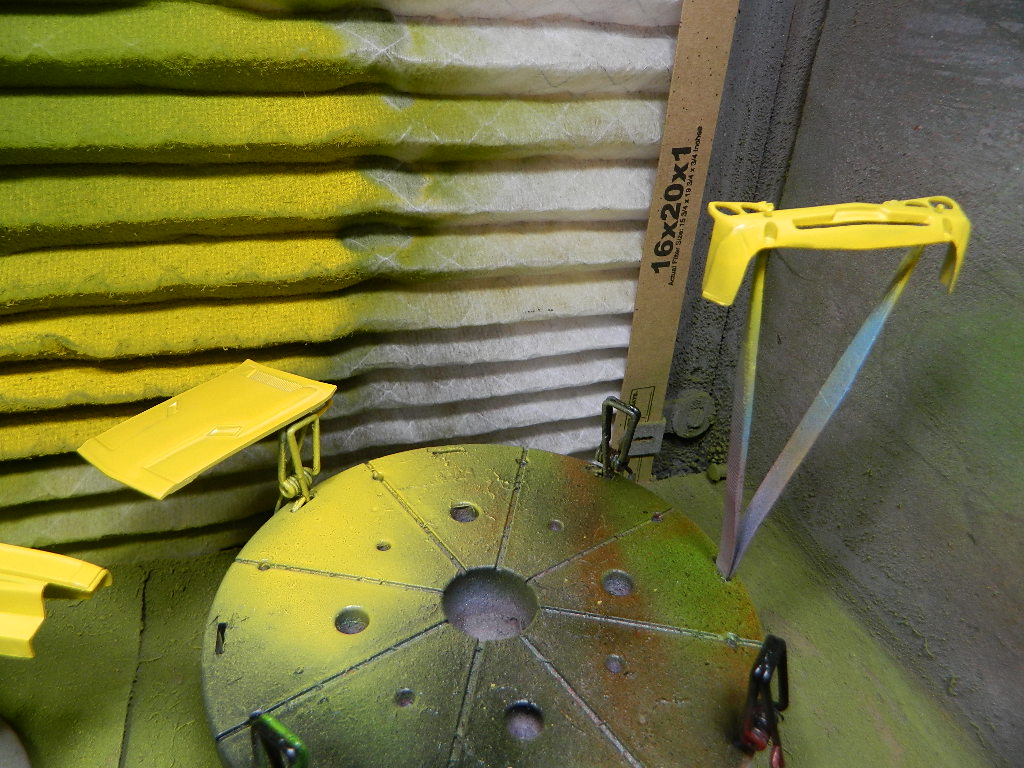
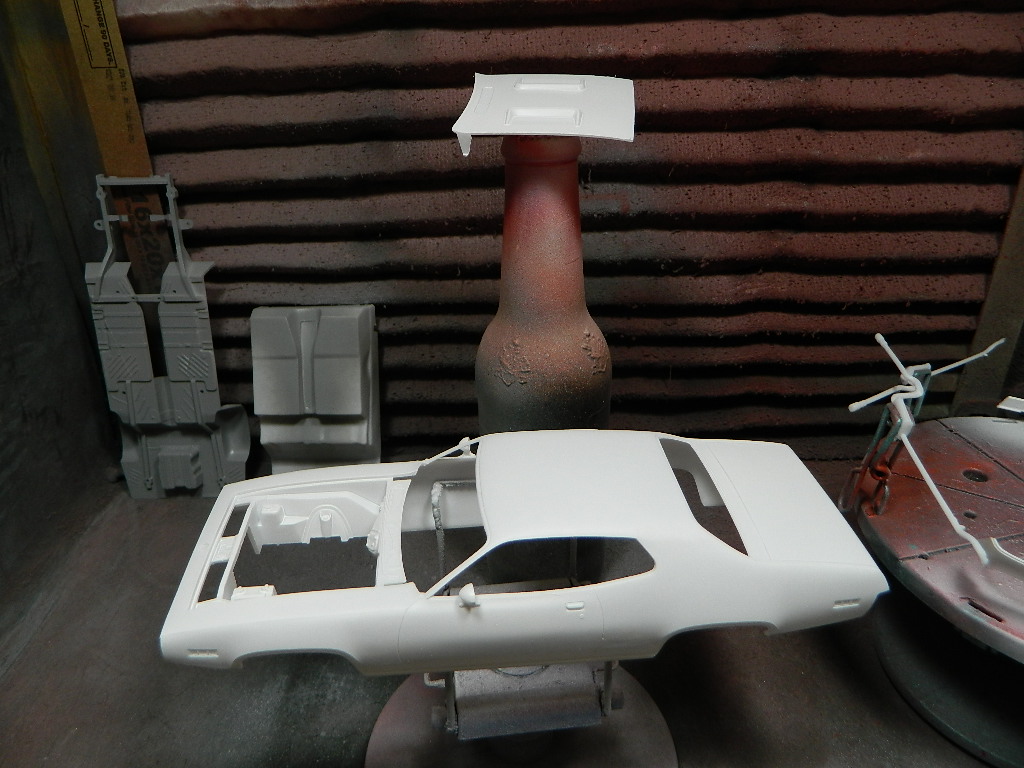
I sprayed the chassis and the interior bottom with Tamiya Grey Surface Primer and the body, hood, engine, valances and exhaust system with Tamiya White Surface Primer. I decided to leave the front and rear bumpers in oven cleaner a while longer to be sure that all of the plating and undercoat was removed. They have been removed from the cleaner and washed and will be primered when they are dry. More Plymouth to come...
-
Does that mean that it will leak if the hole is in the engine block?