MrObsessive
-
Posts
9,785 -
Joined
-
Last visited
Content Type
Profiles
Forums
Events
Gallery
Everything posted by MrObsessive
-
That Buick looks FANTASTIC Doug! Dan does excellent work as he finished up last week the '63 Corvette Rondine for me, and I've since formatted that to print. I may run that in the machine over the weekend, but there's another file I may do ahead of that. I asked Dan about doing another car for me, but I don't want to mention it until he's able to see it through. All I can say is it's a car you hardly ever see at a show, let alone on the roads, especially here in the states. ?
-

1958 Woman of the Year, or the unwanted '57 Chevy
MrObsessive replied to ChrisBcritter's topic in The Off-Topic Lounge
Yep..........I can remember as a kid my Mom buying her first new car, which was a '68 AMC Javelin. I do remember her saying that it would be three years before it was paid off (she bought it in October of '67). She ended up trading it in about a couple years later for another Javelin (a '69 SST), and I think she ended up paying for two years with the other one as a trade in or something like that. I do know the SST back then went for something like $3200, where the previous Javelin was maybe $2800? Back in those days, a few hundred dollars was a BIG deal, and could make or break a sale. -
You'll love this one Bruce! I built one a couple years ago, and I have a rather strange story about how I got mine, and what ultimately happened. In early '20 when Eaglemoss announced they were coming out with the kit, I jumped on it almost IMMEDIATELY. I was very impressed with the prototype they showed, and I put in the order, and within a week or so parts showed up just like the ones you showed above. Things went well for about six months or so, as I was building up the chassis and engine-----then the Covid "stuff" hit, and my receiving parts came to a trickle. I didn't get parts at all for several months, and stopped getting them altogether around December '20/January '21. On Eaglemoss's site, there was a page that showed the status of deliveries since everything was brought to a screeching halt due to Covid (don't get me started on that). They also said they were moving to a new warehouse, and that was also holding up deliveries for any ongoing subscriptions. Fast forward a number of months, and it's the same story-----no parts, no GOOD explanations as to when things would resume. Meanwhile, I see on other forums where guys were getting their parts, and getting the cars near completed, while others like myself were getting absolutely nothing, and getting no good explanation as to WHY things were held up so long. Around June/July of '21, I decided I was no longer going to wait on Eaglemoss, and decided to see if I could find the ENTIRE kit on my own. I checked around on eBay, and a seller in France happened to have the whole kit, but it was a pricey $2000 for everything including shipping. I went and bought it, and near the end of assembly, I noticed that the rear fender "eyebrows" were missing. I looked high and low through all the parts that were sent in the box, and they were nowhere to be found. I suspect what happened was those parts were paint damaged (I had heard other complaints), and the original seller got tired of waiting for a replacement, and decided to throw in the towel and get rid of the kit. I finished the car, and then it occurred to me with so many leftover parts, I could make a separate chassis, engine and wheels to display right next to the finished model. Meanwhile over at Eaglemoss----they've since gone out of business as I would find out later on, and Agora now has the tooling to make this really super car. I'm typing this from my laptop, and I don't have pics of the car on my hard disc..............they're all on my phone. I don't want to hijack your thread, but I can send you pics of the finished car. There are some pitfalls to the kit.........the doors I found to be especially troublesome since they didn't fit quite right out of the box. I had to do quite a bit of bending and twisting to get them to fit halfway reasonably. Also, the switches for the interior lights can be fussy also. They're supposed to trip the lights when you open the door and shut off when you close them. Well, that's not always the case, and I just flipped the switch on the bottom of the car to turn everything off. Sorry for the long post, but I thought I'd mention the strange issue behind the one I was trying to build, and ultimately ended up with a complete kit. I would like to ask Agora if they would eventually have spare parts such as those fender eyebrows. Why those bolt in from the inside is a mystery, but they are indeed separate pieces. The ones I scratchbuilt I was able to match the contours of the original exactly, but getting the silver paint to match was the challenge. The shading is a weeee bit off, but the folks at my club meeting who've seen it didn't know they were scratchbuilt and painted until I said something. ?
-
Four Door 1957 Chevrolet?
MrObsessive replied to Jonathan's topic in Car Aftermarket / Resin / 3D Printed
There are some resins out there as I just sold one on eBay not long ago. I let it go because I came across what's IMO THE BEST '57 Chevy four door file I've ever seen! It's on my to-do list one of these days, but I've not seen 'em any more correct than what this fellow did in creating this file. Just a matter for me to format it for print. A nice set of fender skirts, which I can create, and she's good to go!
-
My Future 3D WIP's (LOTS of pics)
MrObsessive replied to MrObsessive's topic in Car Aftermarket / Resin / 3D Printed
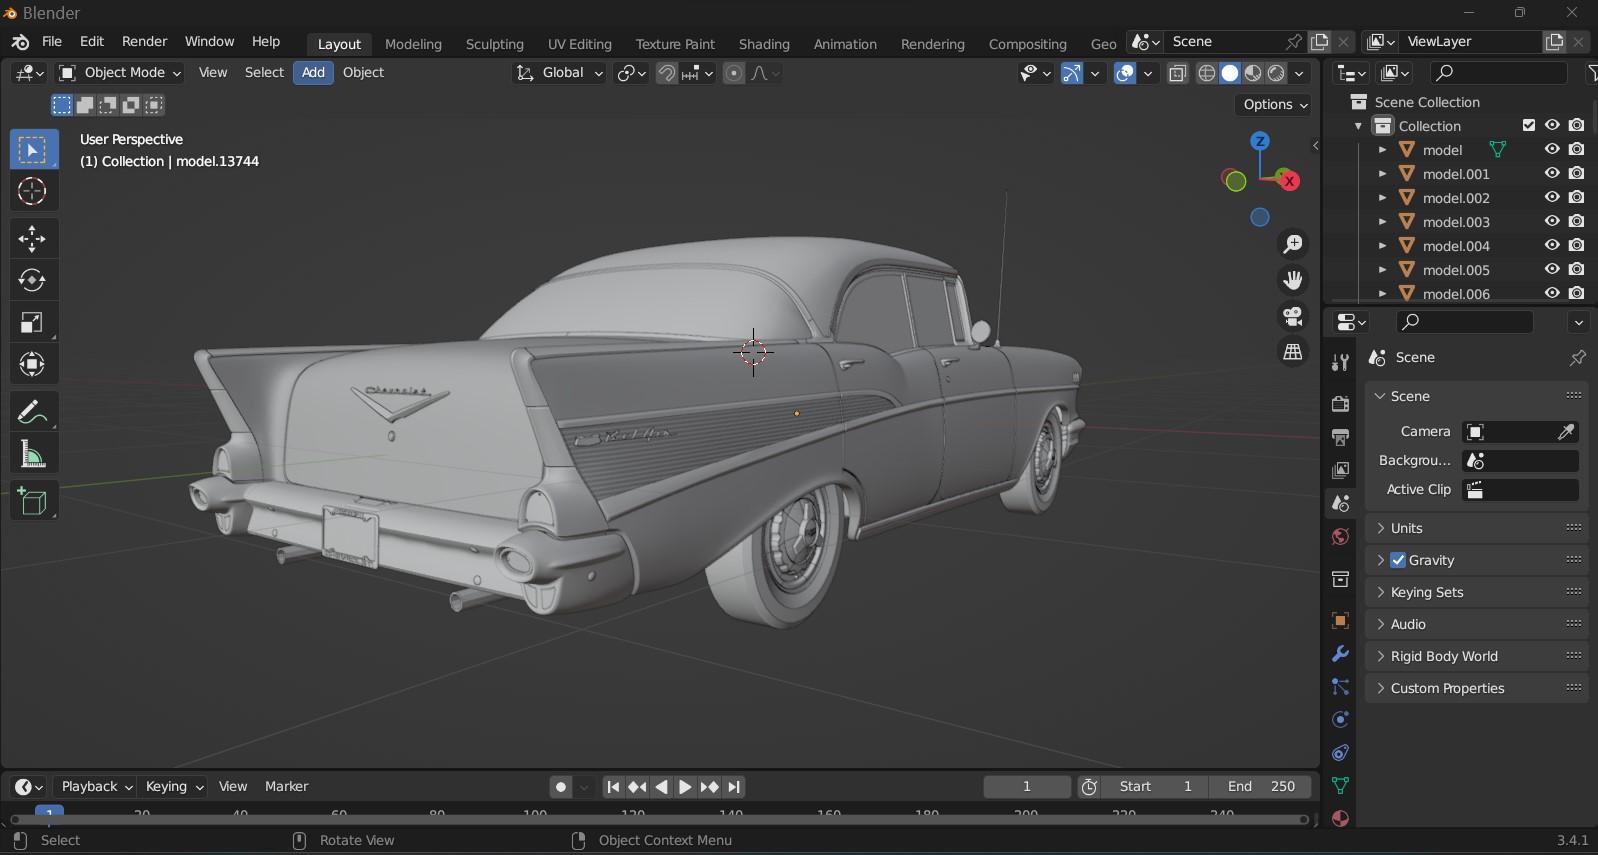
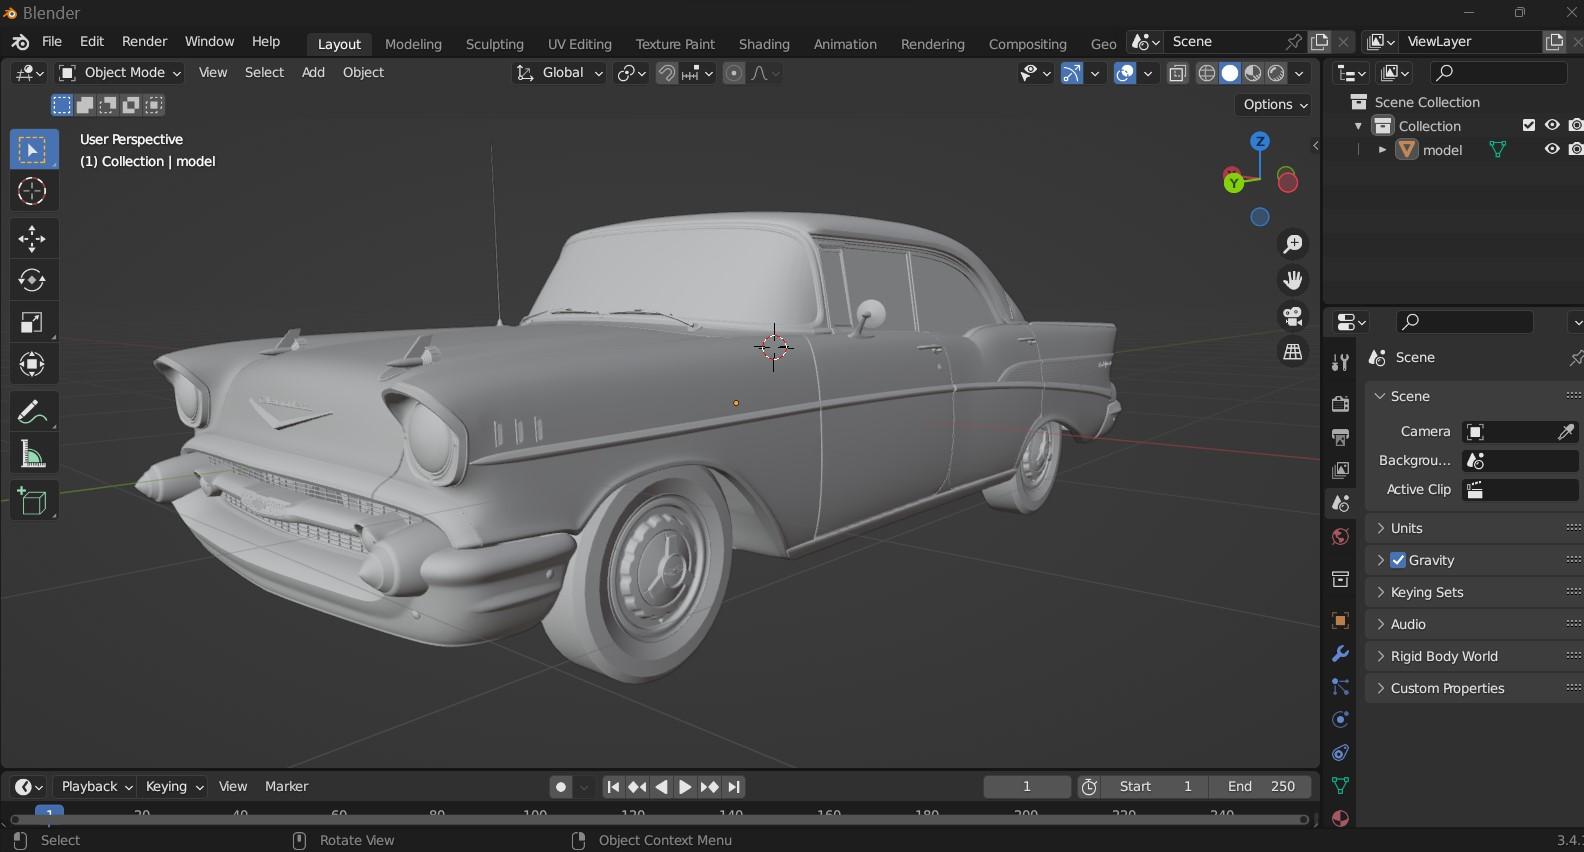
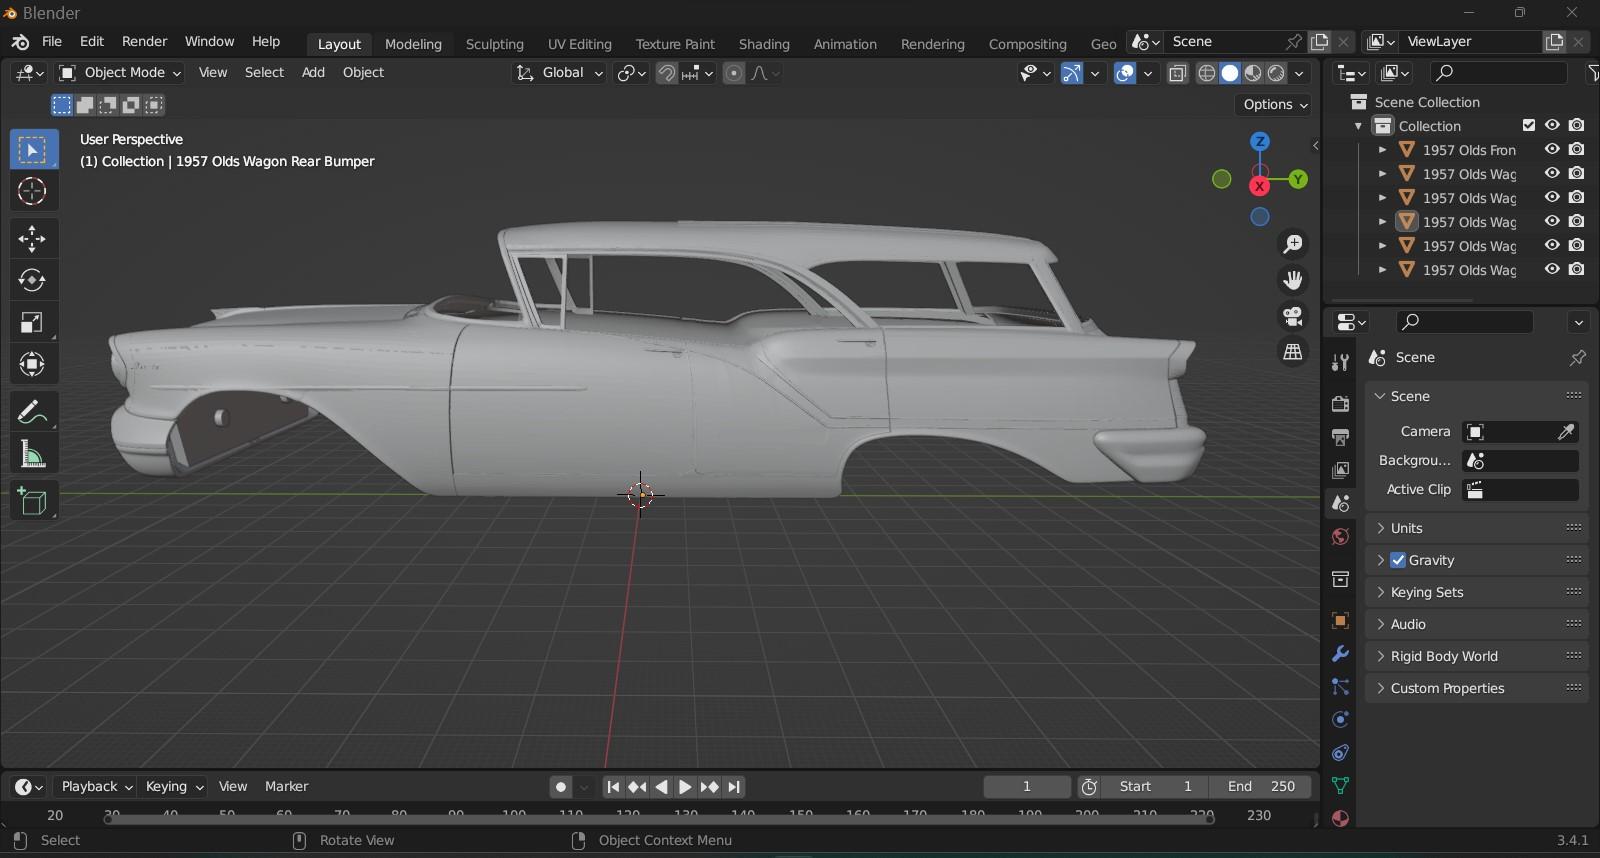
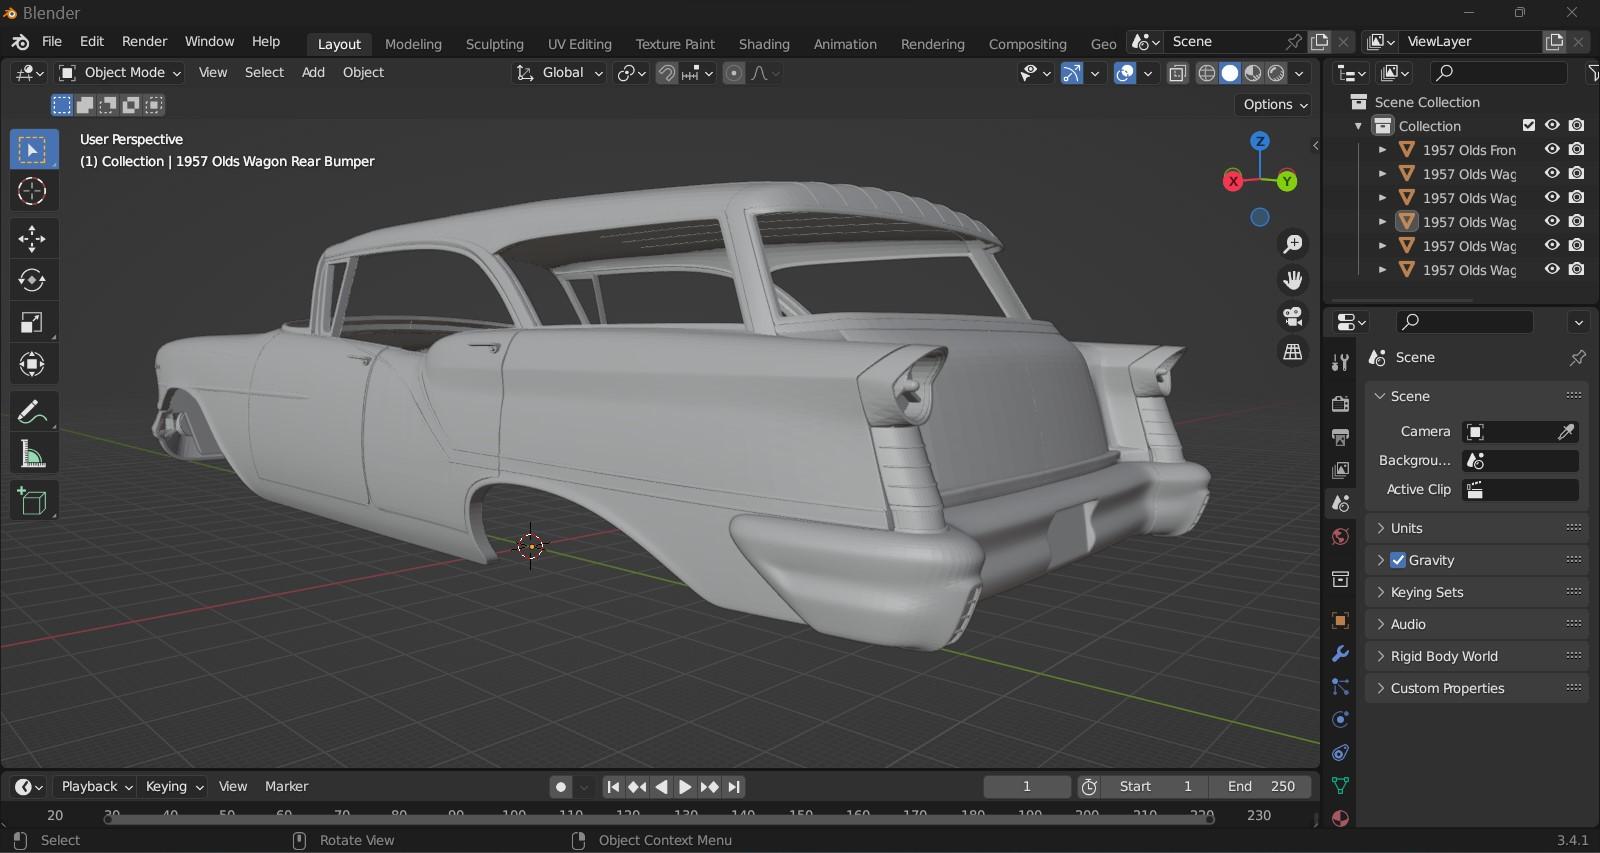
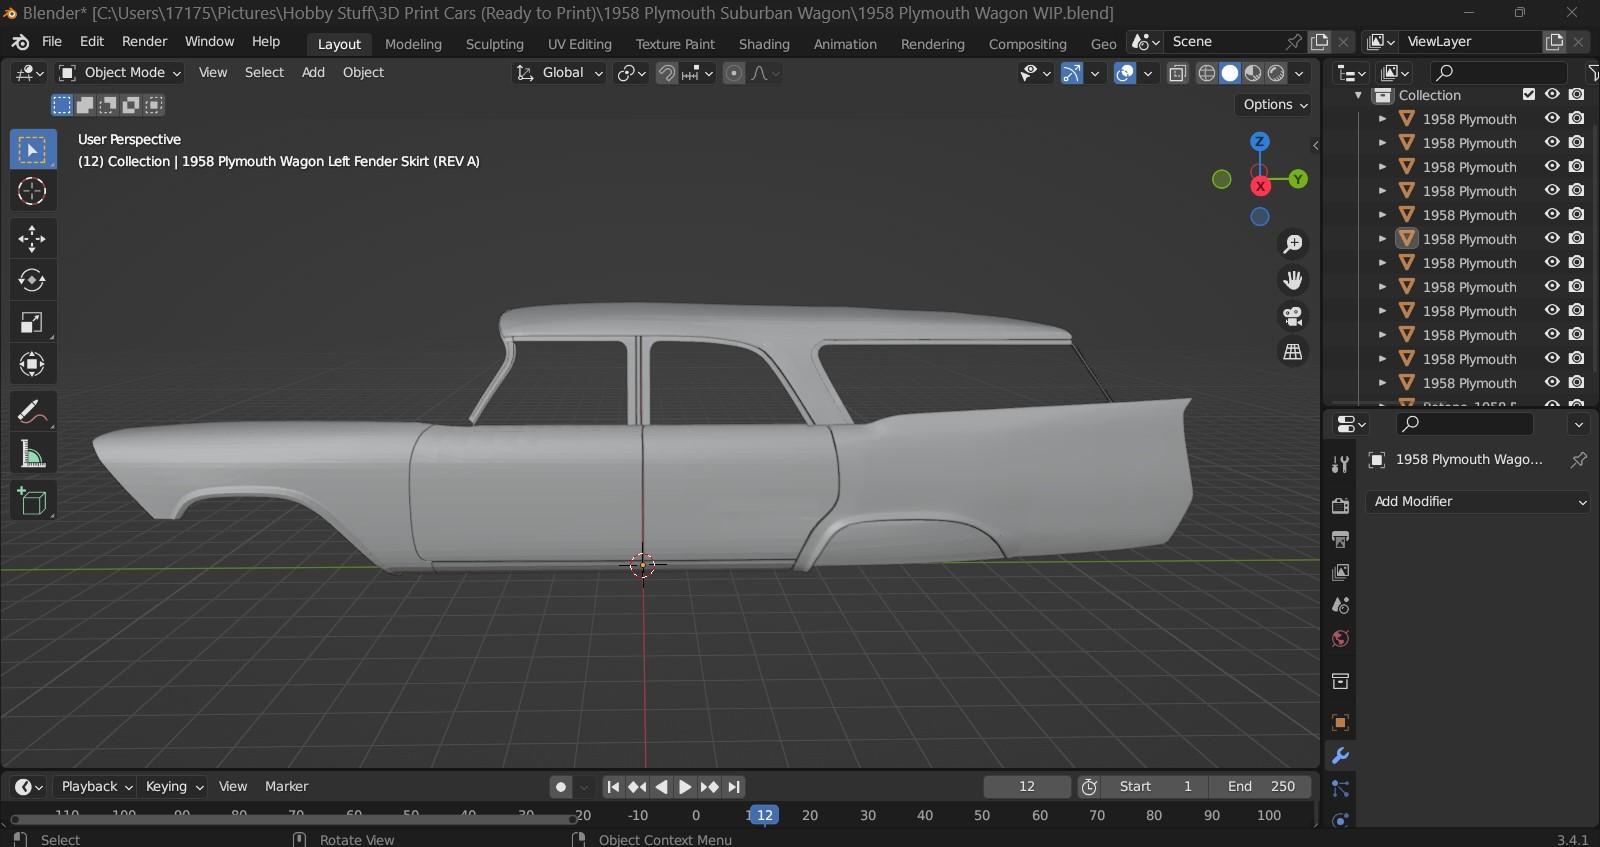
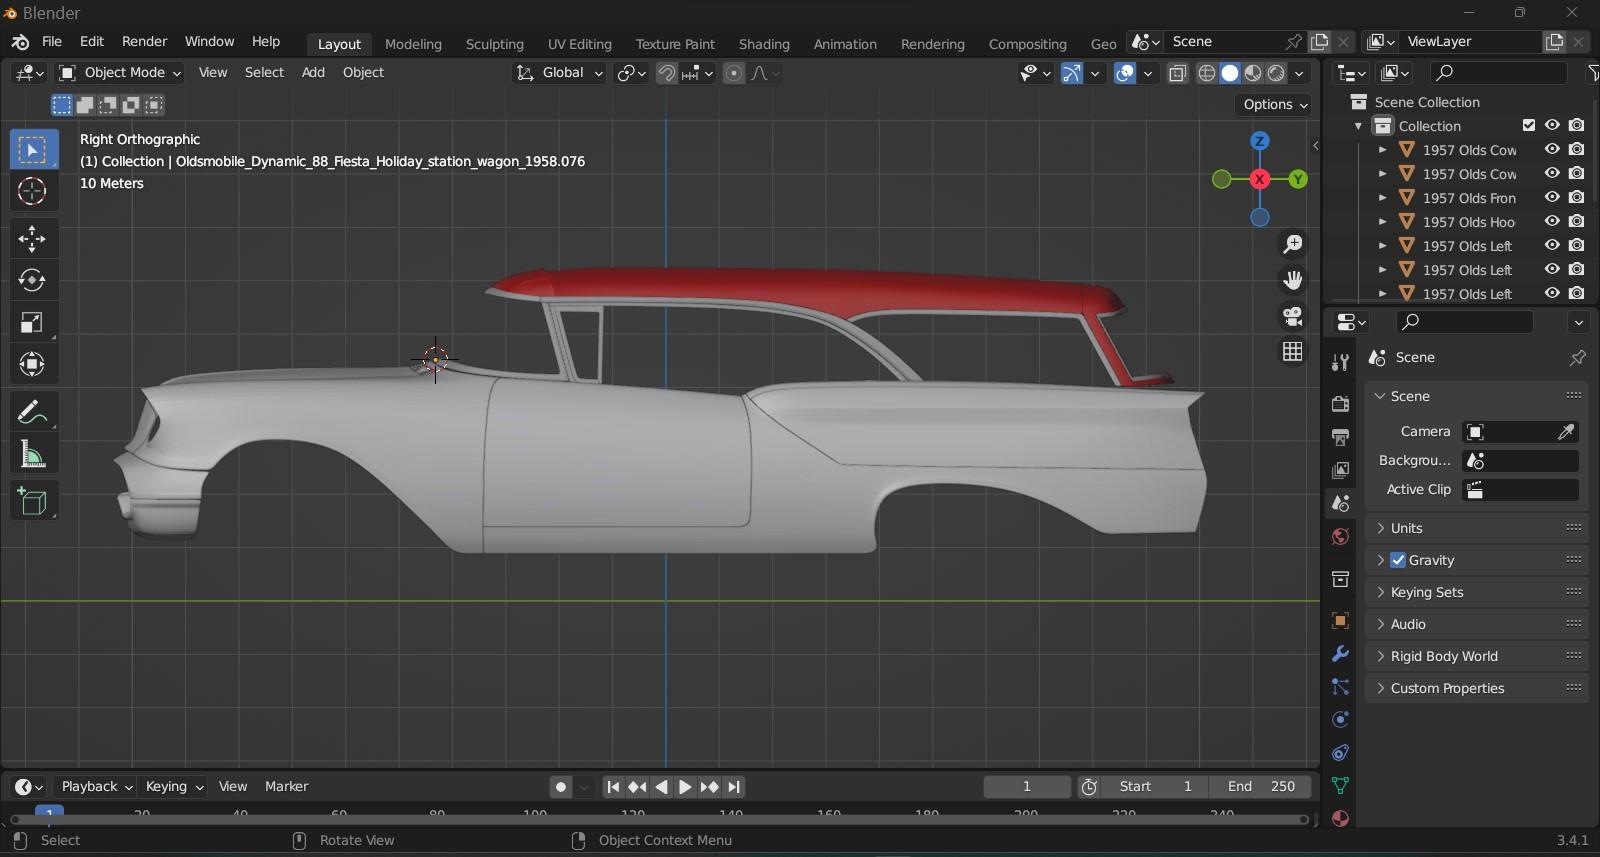
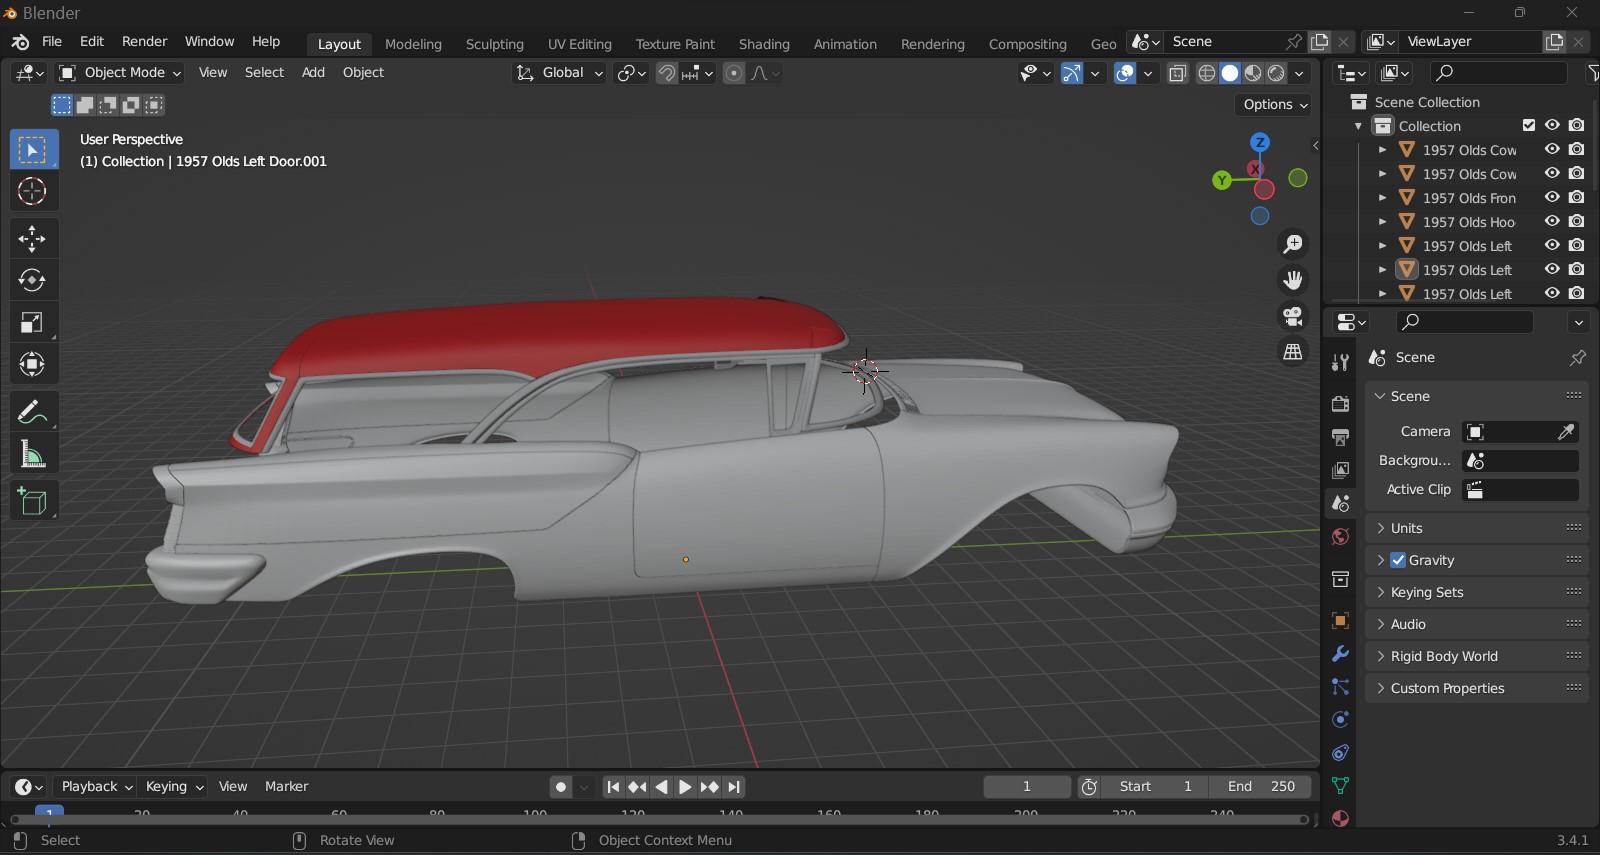
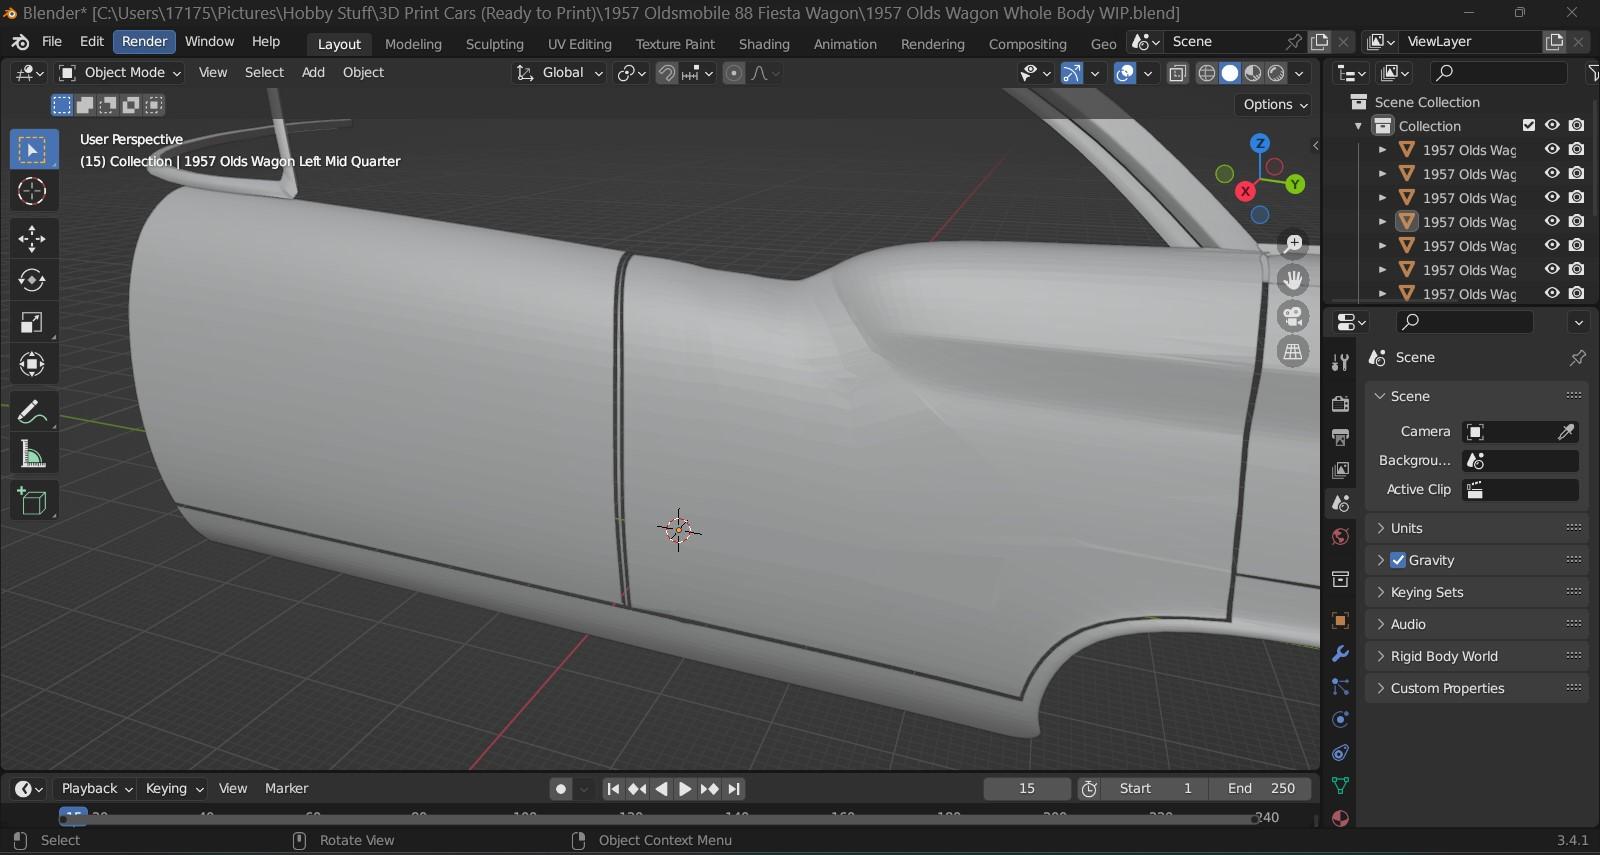
Well, the '57 Olds Fiesta file is done, except for the OLDSMOBILE script on the tailgate, the emblem, and the handle/lock. A few pics below of the finished file, and I've since started a new file-------1958 Plymouth Suburban wagon which there are absolutely no files out there whatsoever of that one. The Olds will have a separate hood, as well as headlight bezels, bumper/grille, front and rear bumpers. I also created fender skirts based on the shape of the rear wheel wells, and I can also use those on the two door hardtop I created if I ever print that. Now the '58 Plymouth Suburban.................. The wagon started life as a four door hardtop that I created, and that one came from the '58 Plymouth Fury file which to date I've still not seen any good files of that car. I had to create an entirely new rear roof wagon section, reshaped the rear doors as they don't have the "bump" for the tailfins. The rear quarters came from my '57 Desoto file, and the lower quarters were reshaped as they were too rounded, and not suited for the wagon. BTW, all 1957-'59 Plymouth wagons were Chrysler based as they had longer wheelbases-------122" vs. 118" for the other models. The last two pics show the car with a modified C pillar. I thought it appeared too broad and slanted, so I narrowed it a bit, and rotated it to be a bit more upright a few degrees. Like the Olds, I also made fender skirts based on its rear wheel wells.........I want to add some more details to that before I ever print it. The skirts can be removable by way of magnets........I have an idea to how to make that work. Many more changes were done as in effect, this shares very little with the four door hardtop from the front doors on back. I've yet to create the inside left rear quarter area, taillight housings (unique to the wagons), tailgate which I may use a reworked Olds tailgate (or Pontiac Safari), and add some some details to the created door frames which weren't a part of the four door hardtop. Then there's the tailgate bodywork between it and the left side of the fender. All that has to be created yet. I may get daring later on and make a two door wagon based on this............we'll see!
-
Where do you find files to print?
MrObsessive replied to ctruss53's topic in Car Aftermarket / Resin / 3D Printed
I'd just do a search for whatever you're looking for, followed by "3D files". It also wouldn't hurt to look in the image portion of the search engine, as you can see by the pic what is a file, and what's an actual part. There really is no one stop shop place for files, as they can come from anywhere in the world from anyone. That's how I find my files, although I get very few printable ones anymore. I'd rather take the original .obj files and convert them to print. -
REALLY?? ❤️❤️ Hmmm..............I was gonna hold off on buying anymore big scale kits, but this one.............I think I may just break the bank for that! Gotta see how things go in the next several months. With 3D printing taking a lot of hobby time (I can see the screen MUCH easier), I've yet to even start Agora's '61 Jag convertible, or even finish the GT40---both of which I have all the parts now. Ray, that Cobra has turned out reeeeall nice! Yes, I do remember having to turn over the one I did quite a bit. I think Agora recommends keeping the styrofoam packing it came in, and using that as sort of ledge to set the model on to keep the windshield off the surface. I put chamois cloths on the packing as I didn't quite trust that to keep it from getting scratched.
-
IMC Ford Cougar II Concept 1:25 - the model of dreams and nightmares!
MrObsessive replied to ea0863's topic in Model Cars
That turned out great! ❤️ Thanks for the nice words! Yes, I had to re-engineer practically every body panel on that kit to get it to cooperate. Hard to believe that model's almost 15 years old now. Time sure does fly! -
My Future 3D WIP's (LOTS of pics)
MrObsessive replied to MrObsessive's topic in Car Aftermarket / Resin / 3D Printed
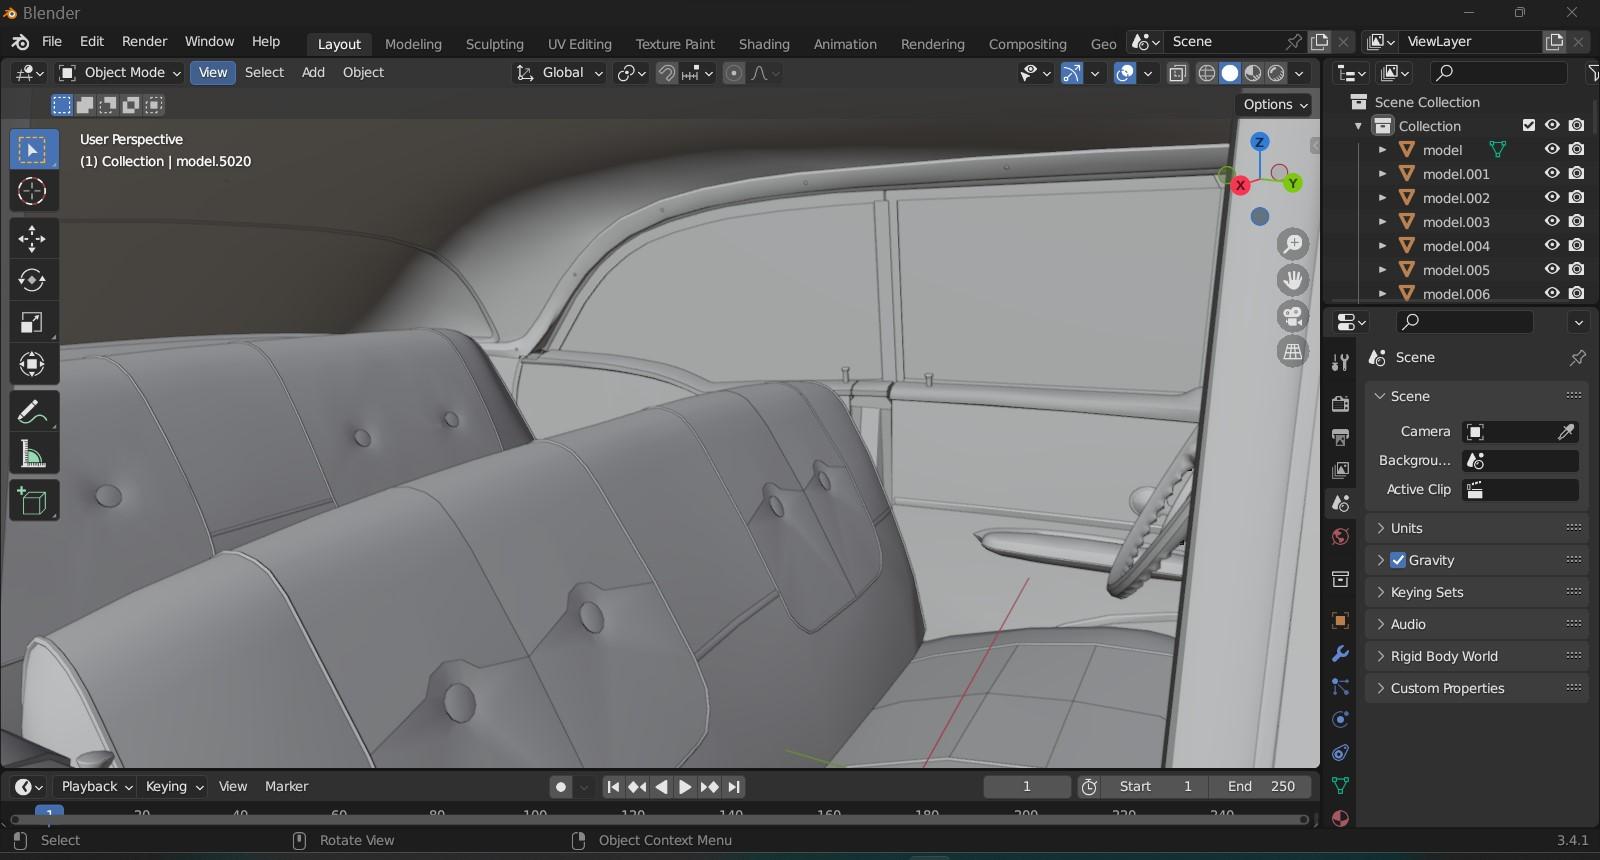
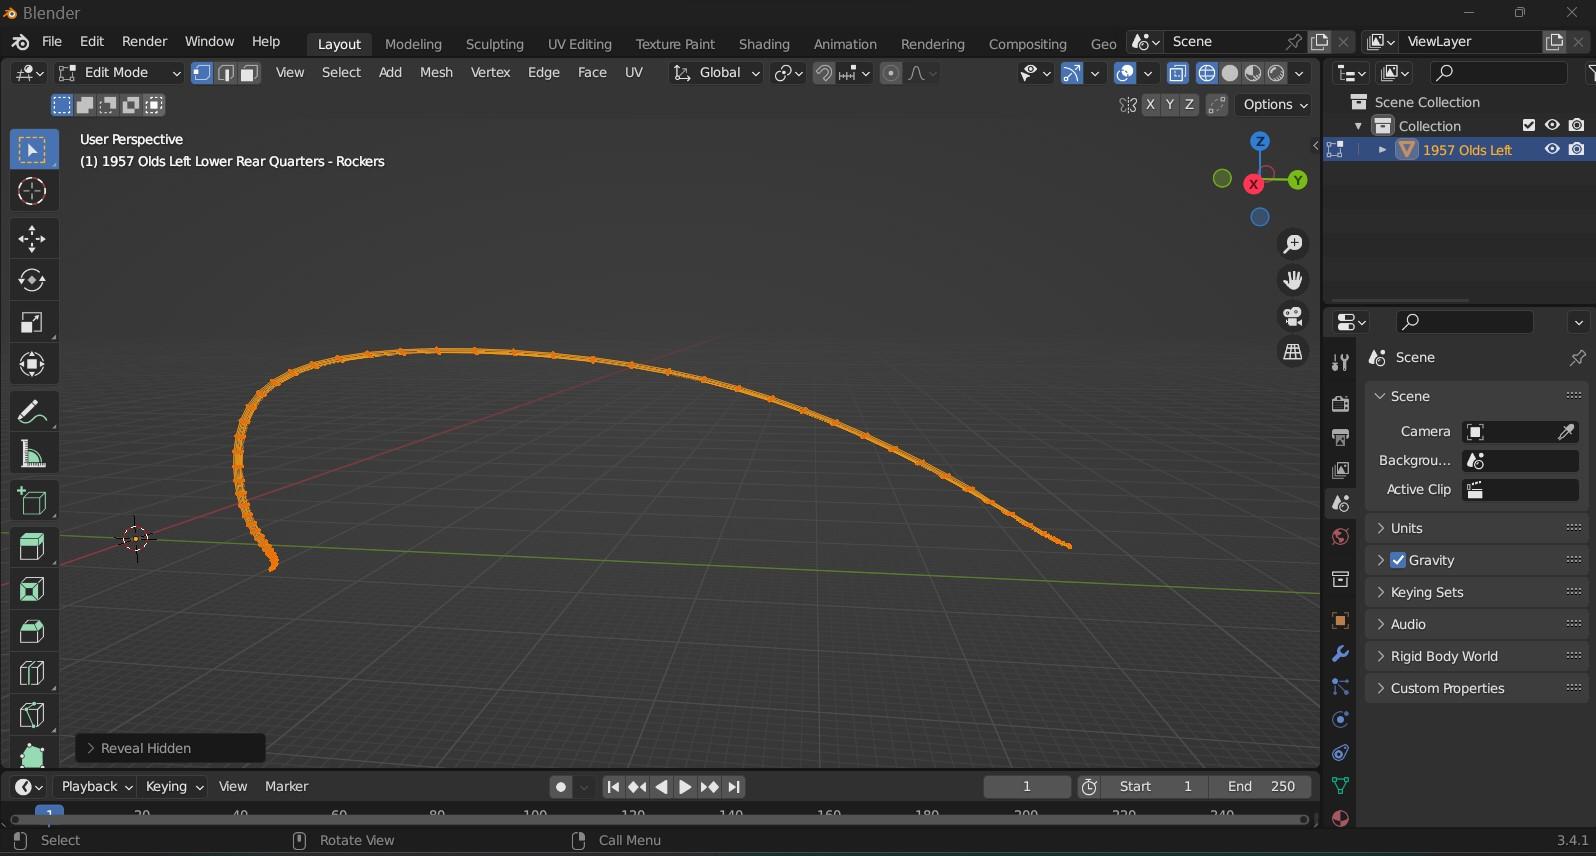
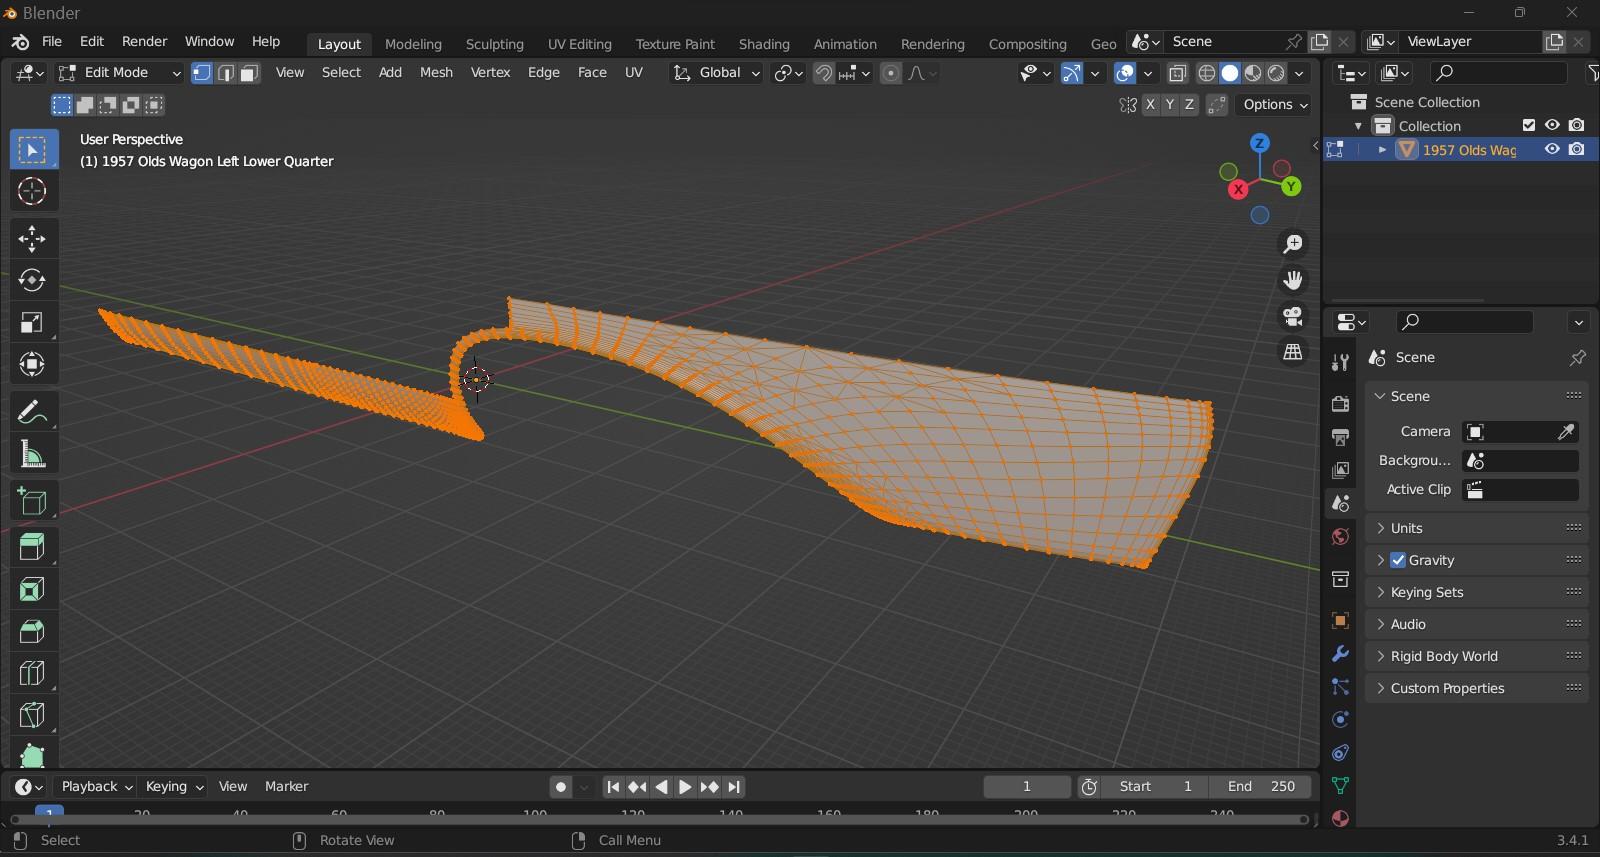
Got this in my program now........NO ONE does a file in the least for this car. 1958 models are everywhere, but no '57's. So...........I'm taking the base .stl files (no wall thickness) that I did for my '57 Olds 88 Two Door Hardtop, and I'm turning it into the four door Fiesta wagon. Some pics of what I have so far-----just started on the wall thickness today. What I started with----basic non thickened files of the '57 two door hardtop, and the roof section from a '58 wagon file I have. MANY, MANY changes were needed, and I pretty much re-engineered the entire car from the leading edge of the doors, to the tailgate. The front clip I'll use as I can lift that from the two door file printable file, so no need to touch that as it's already thickened up. I had to change the angle of the A pillar. As it was it was too "upright" and need to be leaned forward a few degrees. I got rid of the sun visor on the windshield header (don't like it), and that meant reshaping the roof at the leading edge, as removing it left a huge void. I was in the process here of creating new front and rear doors. The front door is of course shorter than it would be on a two door, so some scaling and deleting of faces was in order. Creating the rear door using part of the front door, lengthening the "dip" in the beltline as that's not the same as the two door, and then adding faces which needed re-contouring in certain sections. I spent some time in rounding off the corners of the doors. I took the corner off the front door and saved it as its own part name. This was then later grafted on to the front and rear doors. The very thin door divider you see in the above pic was made by taking a slice off the front door, and making that its own part in the files. Once again, the corner of the front door served as a template of sort to create the section for the bottom of the divider. Lots of Blender "magic" had to be used to get reverse positions to create what's seen. I was reluctant to do fender skirts at first, but decided to create a set since they do seem to "suit" this type of wagon. I highlighted a section in the car's wheel wells, hid that for a moment, deleted the rest and kept what's seen here. All I need is the inside vertices to create the skirt........... The inside vertices were connected to created the horizontal faces seen here----but that type of layout won't do................. A series of "loop cuts" were added to the horizontal faces in case I need to do any bending or twisting of the skirt in either direction later. Completed skirt with a flared flange at the bottom, and the leading edge has the extension that angles downward I created. I'm going to eventually print these separate, as I may want to use magnets of some type to take them on and off. I can also use them on the two door hardtop as they're essentially the same car at the lower body. This rear section was NO JOKE to make look halfway reasonable. I ended up using the reverse side of the outer left fender to make the inner portion, the tailgate was waaaay too narrow from the '58 file, so that had to be widened, and a ton of creating new faces to form the section between the side of the tailgate and the left fender. At times, a FRUSTRATING task. All the body changes are done now, and it's on to the wall thickness. This should move along fairly easily, but I can bet I'll run into a hangup or two.
-
My Future 3D WIP's (LOTS of pics)
MrObsessive replied to MrObsessive's topic in Car Aftermarket / Resin / 3D Printed
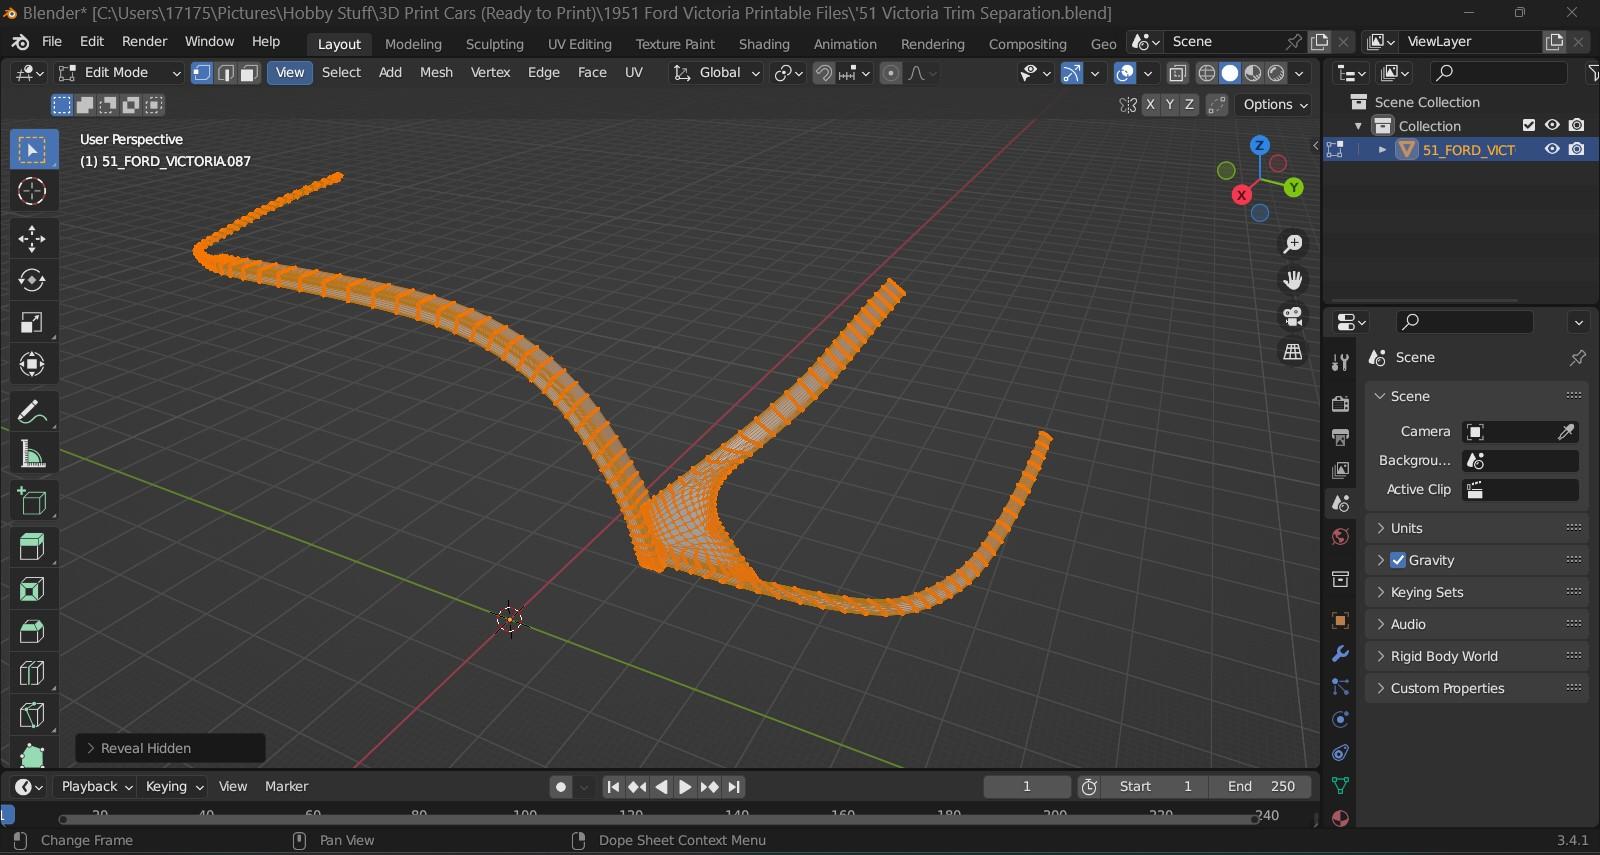
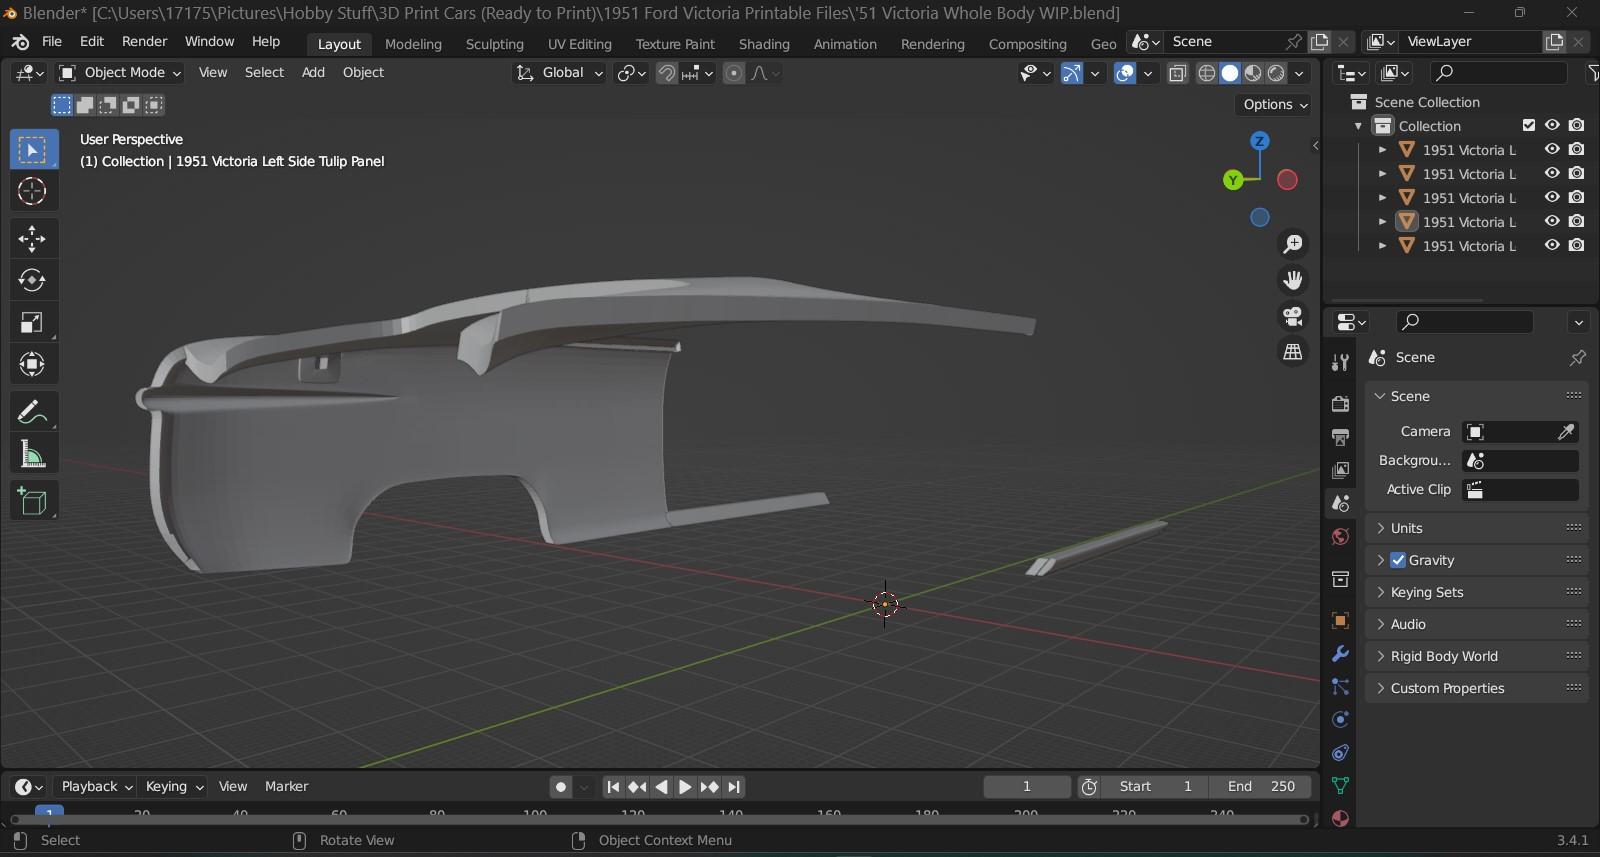
Just finished making that printable Chris----not sure when I'll print it, but it's ready to go when the fancy strikes to run it in the printer. This file was a bit of a challenge as there were some things that had to be separated manually such as the trim. Not an easy task, as it requires that you leave no faces or vertices left behind, lest you end up with a misshapen part. Some things will be printed separate such as the hood, front and rear bumpers, grille, headlight bezels, and taillights which I can print in clear resin. The AMT '50 Ford kit may work, but I never quite trust any kit will fit right off the bat despite the same scales because of completely different design origins. It probably would, but not without a lot of major fuss.
-
A bit ago, I uploaded a video to my YT channel on how I do wall thickness for 3D files so they can be printable. Now this is just one basic method I do for certain car body parts, but there are other ways one can get the thickness needed depending on what it is, and the shape. Hope this can help some of you out!
-
My Future 3D WIP's (LOTS of pics)
MrObsessive replied to MrObsessive's topic in Car Aftermarket / Resin / 3D Printed
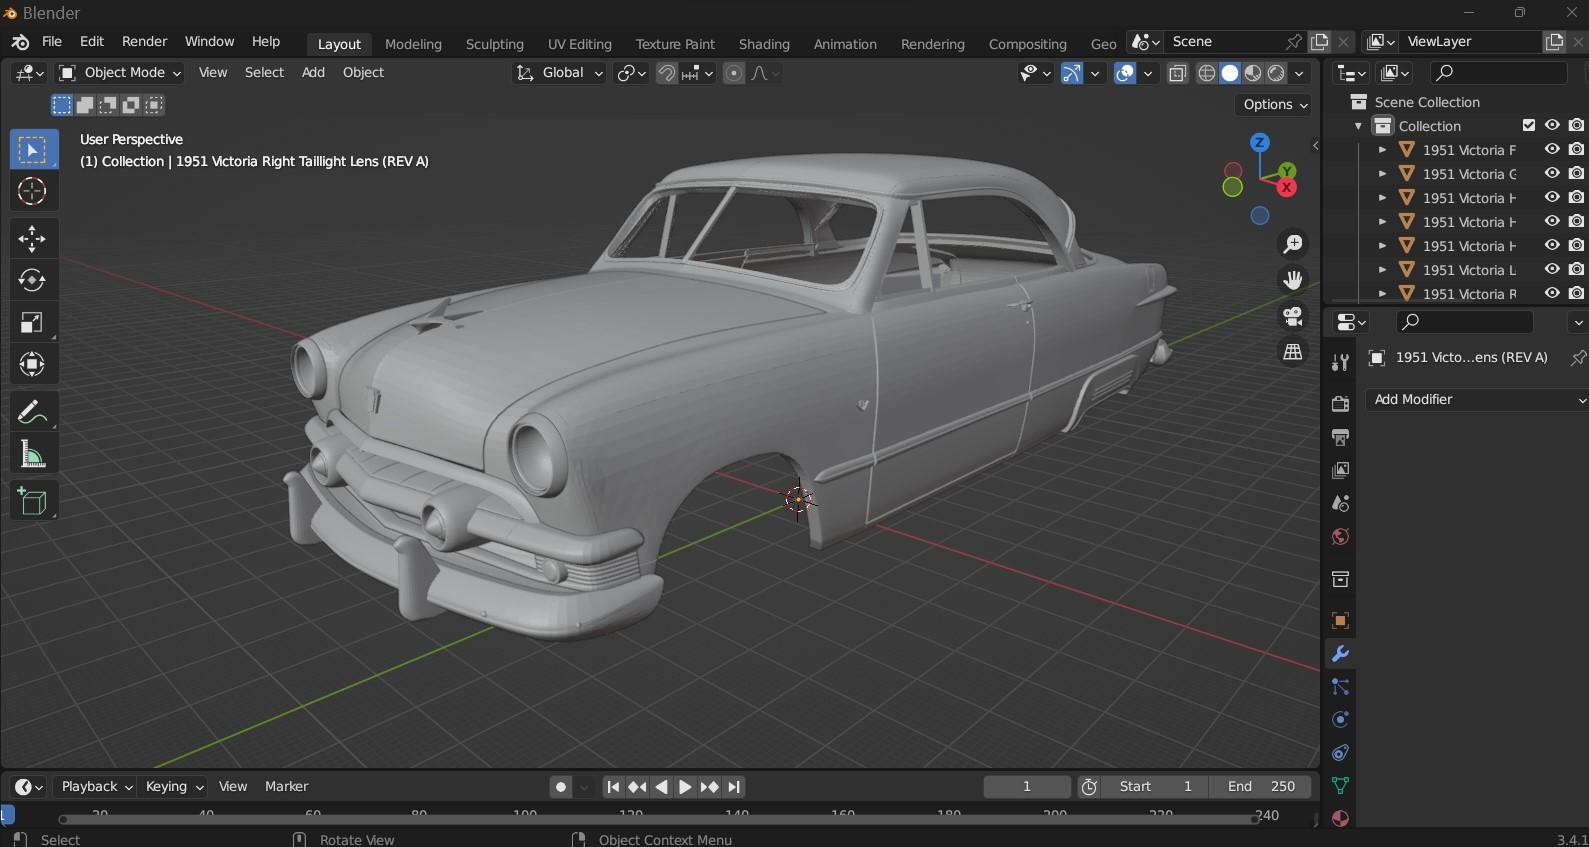
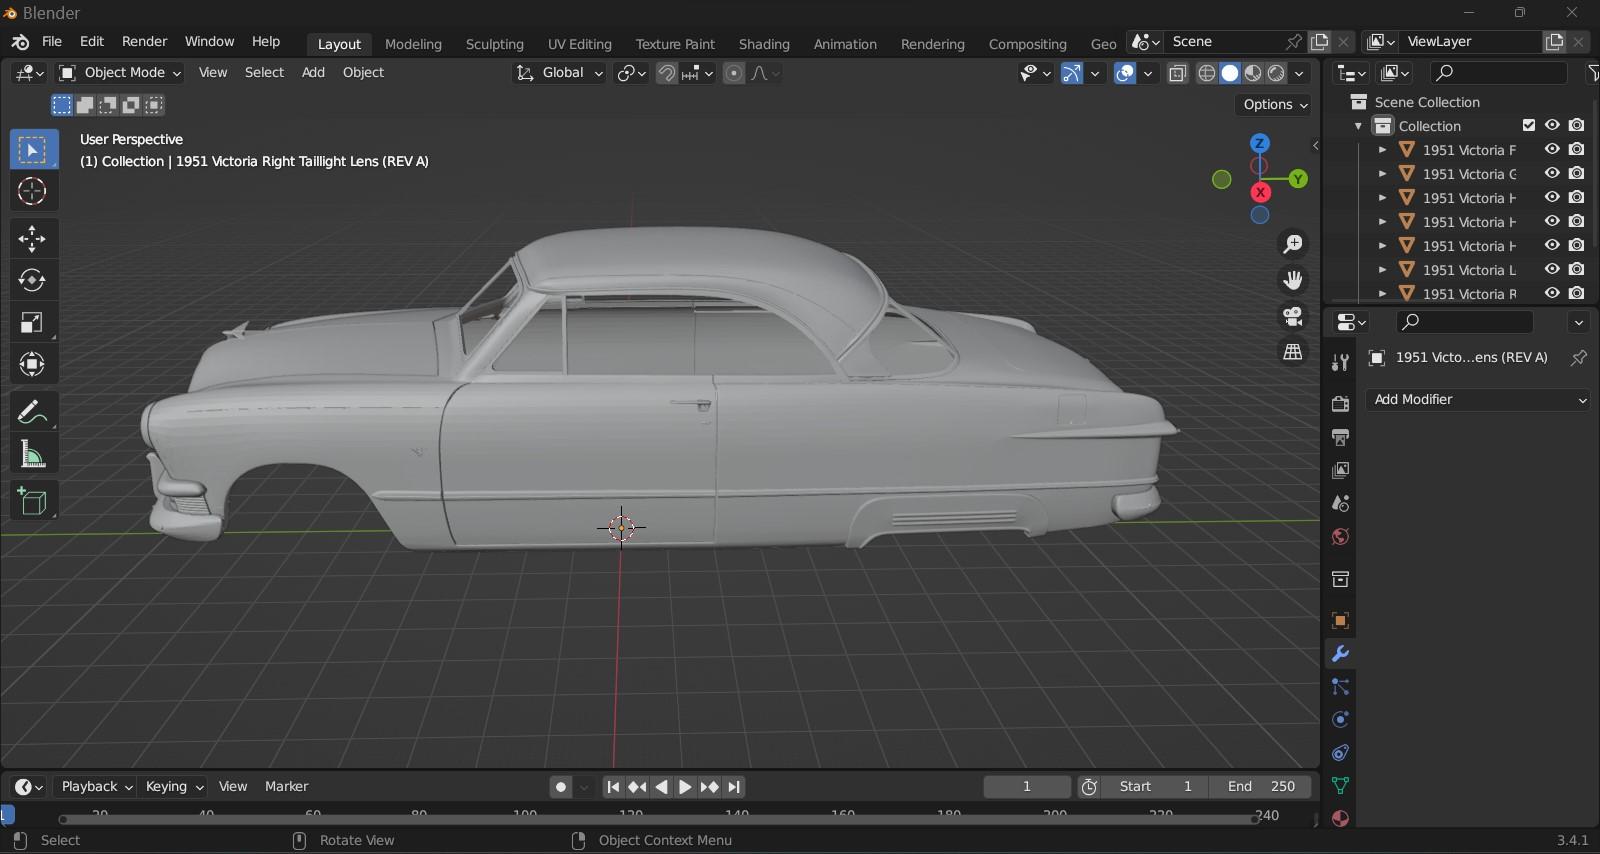
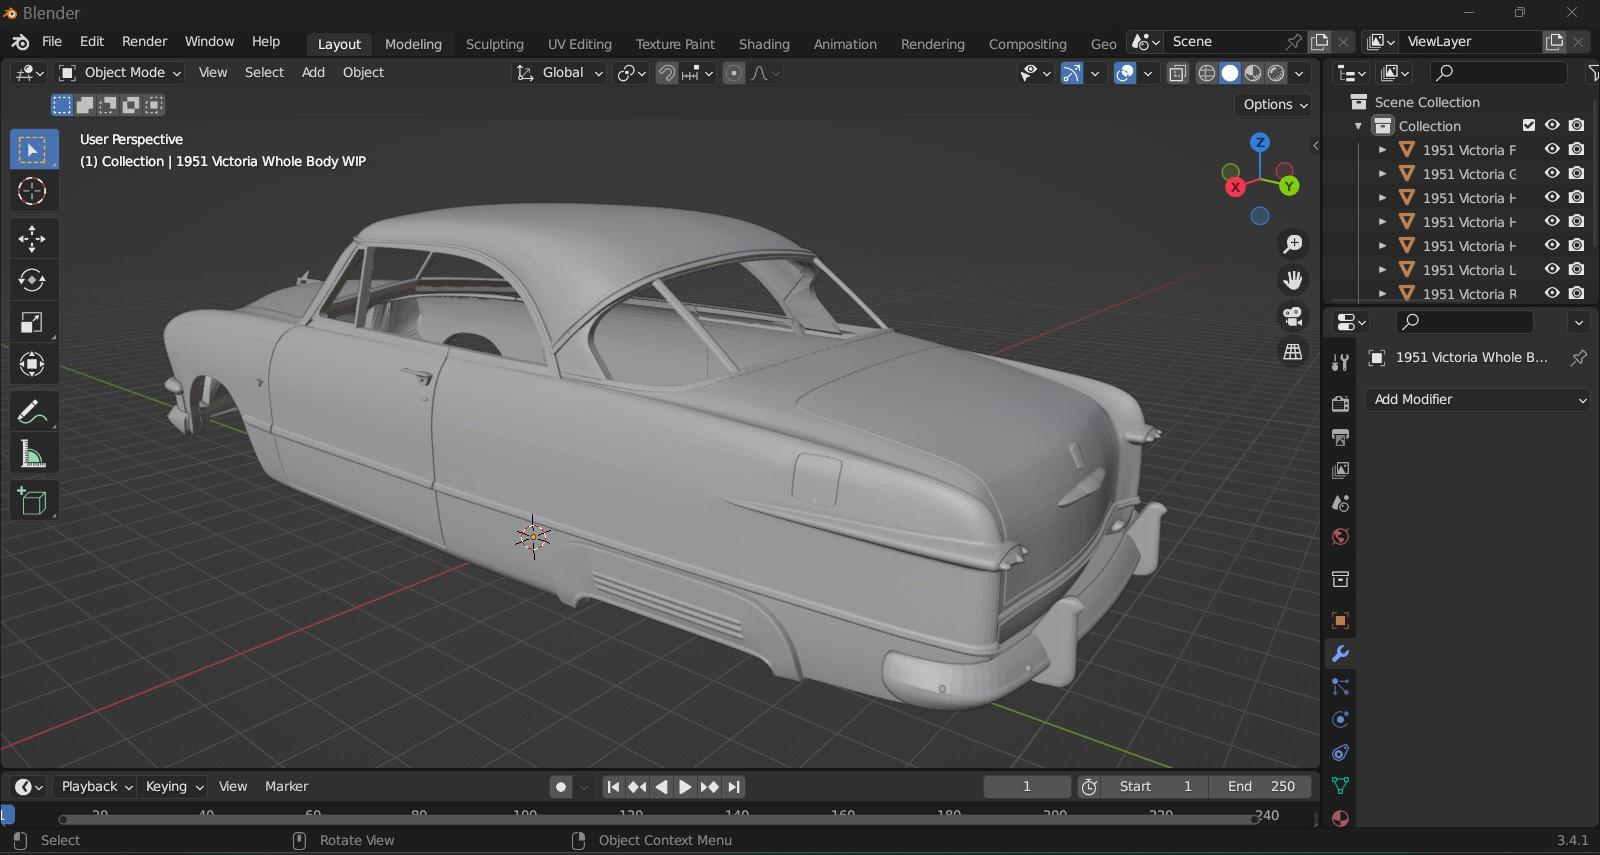
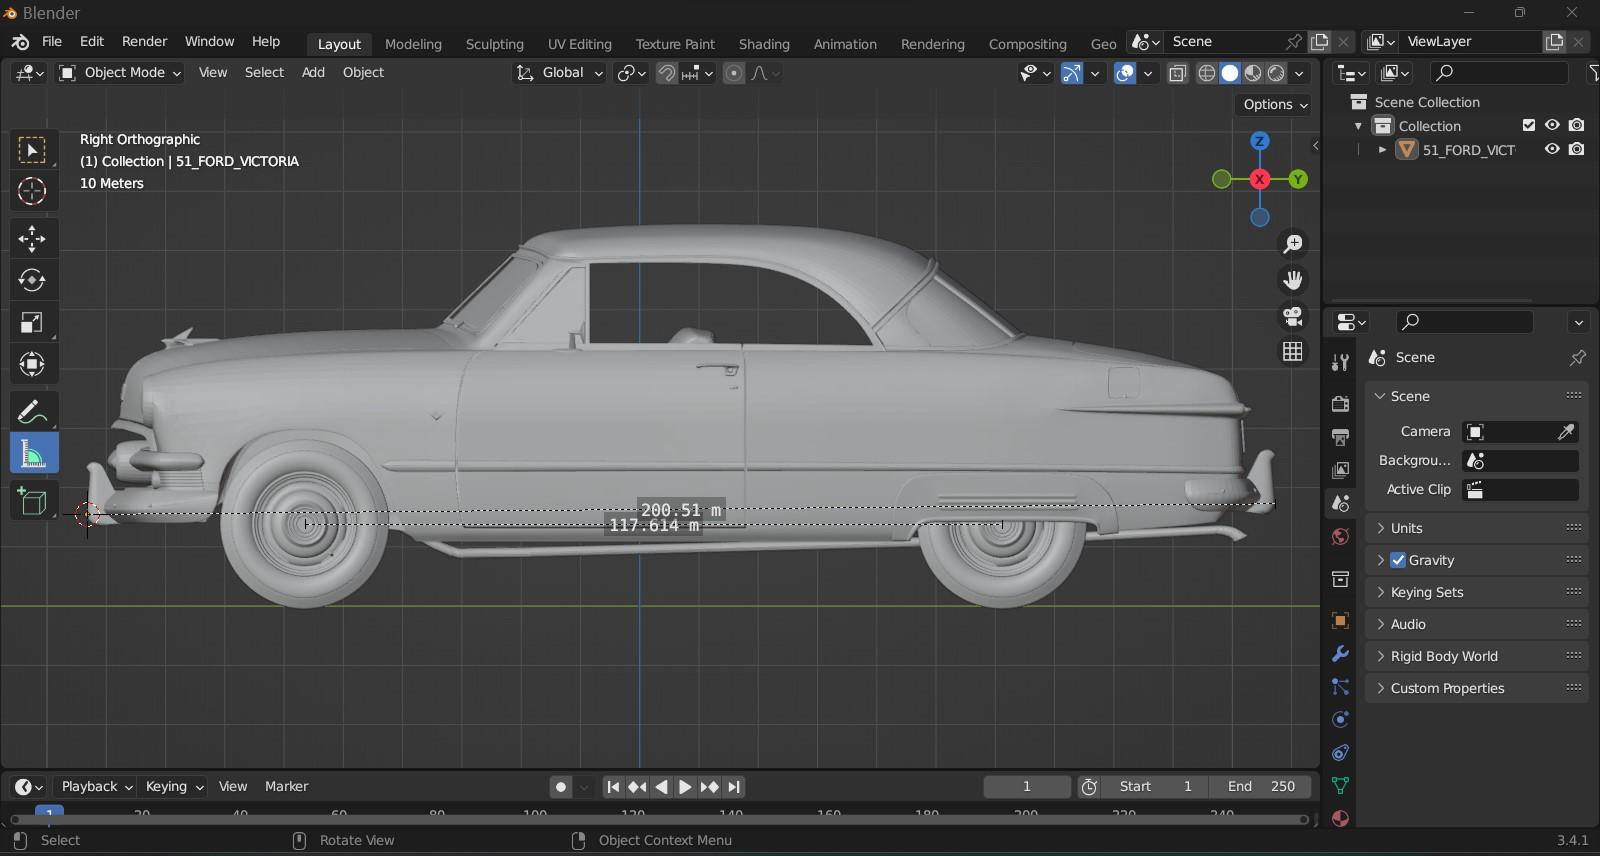
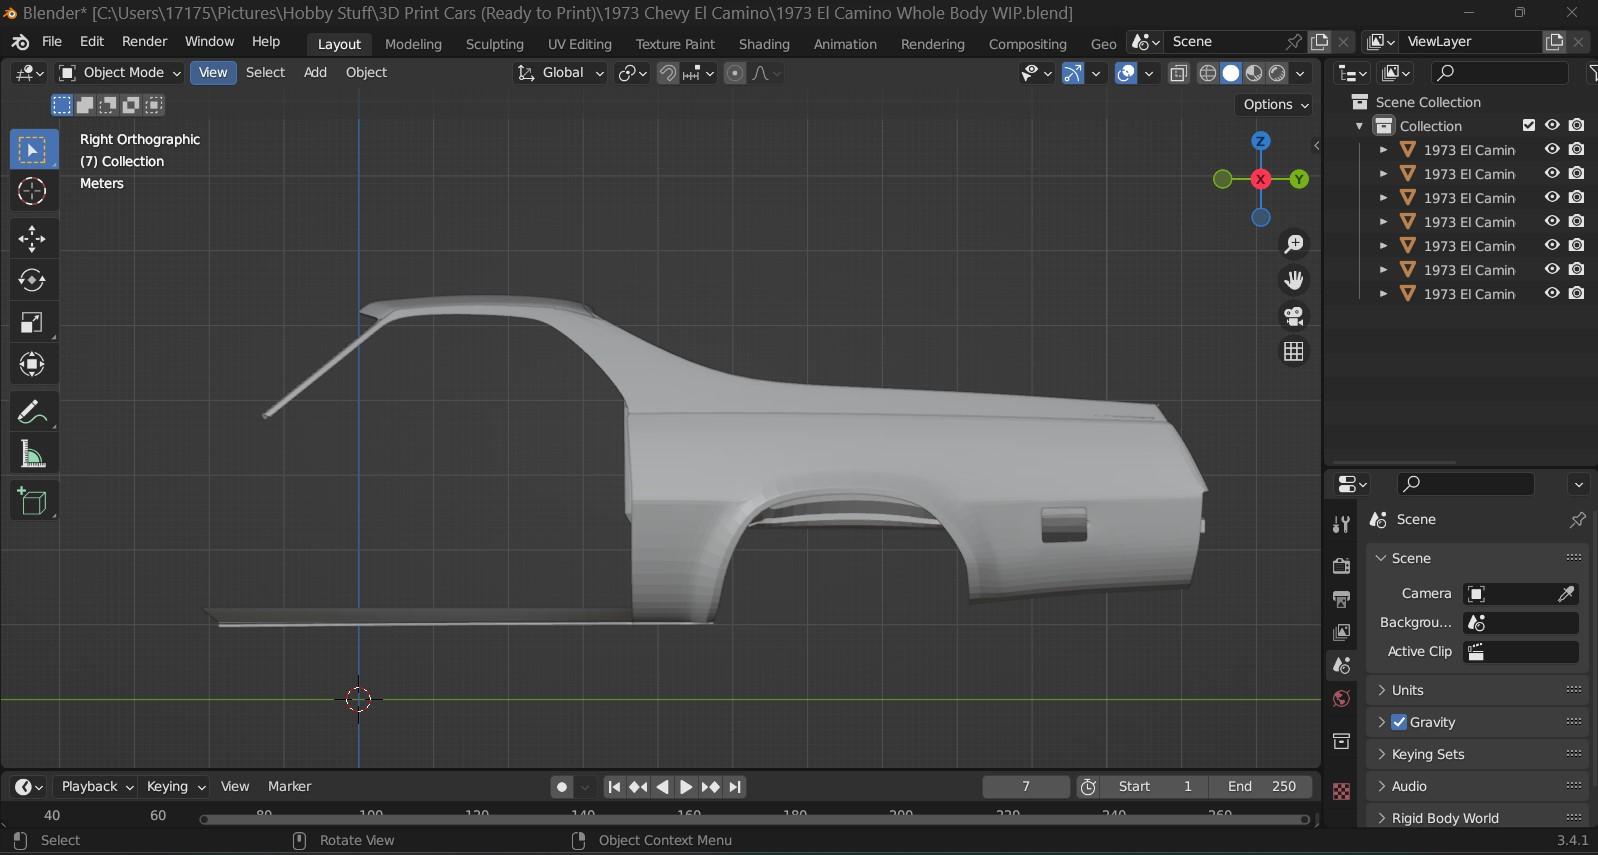
The latest and greatest that's on my Blender program at the moment. The '73 El Camino is all done and ready to print when the fancy strikes-----now I've stepped back in time a bit to do this one. 1951 Ford Victoria Got it all scaled out, divided up, and now establishing the wall thickness.
-
My Future 3D WIP's (LOTS of pics)
MrObsessive replied to MrObsessive's topic in Car Aftermarket / Resin / 3D Printed
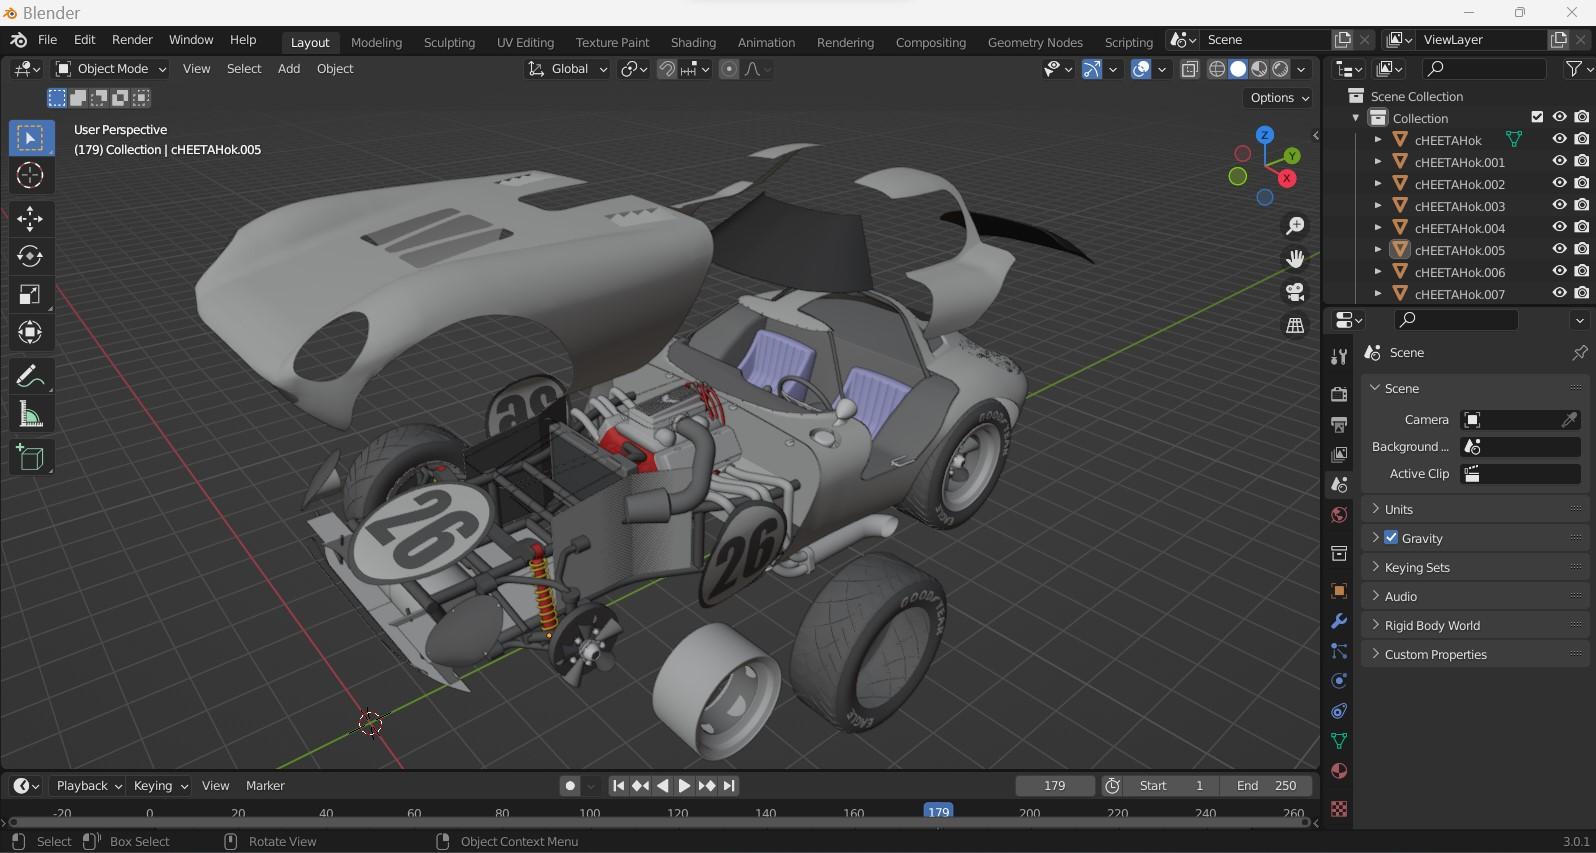
In fact I have! This.........................1964 Cheetah......... I've done nothing with it yet........maybe in the not too distant future I'll make this one printable.
-
Wish round 2 would release some obscure stuff
MrObsessive replied to jeffp60's topic in Truck Kit News & Reviews
Well said! That's pretty much it in a nutshell. There's no way for example you'd ever get Round 2 to do a 1958 Plymouth Belvedere Four Door hardtop. It's one of the reasons I like 3D printing as I just created and printed that very car. If the file is out there (or can be created), the sky's the limit. No need to wait or hope that X company will produce Y. Now, some may cringe when I say this, but for the long foreseeable future, 3D printing is the way to go to get those never before (and never will be) done cars and items. Yes, it's a steep learning curve, but I've already been able to make cars that I know will never see the light of day on a hobby shelf. That's the reality we live in today. -
My Future 3D WIP's (LOTS of pics)
MrObsessive replied to MrObsessive's topic in Car Aftermarket / Resin / 3D Printed
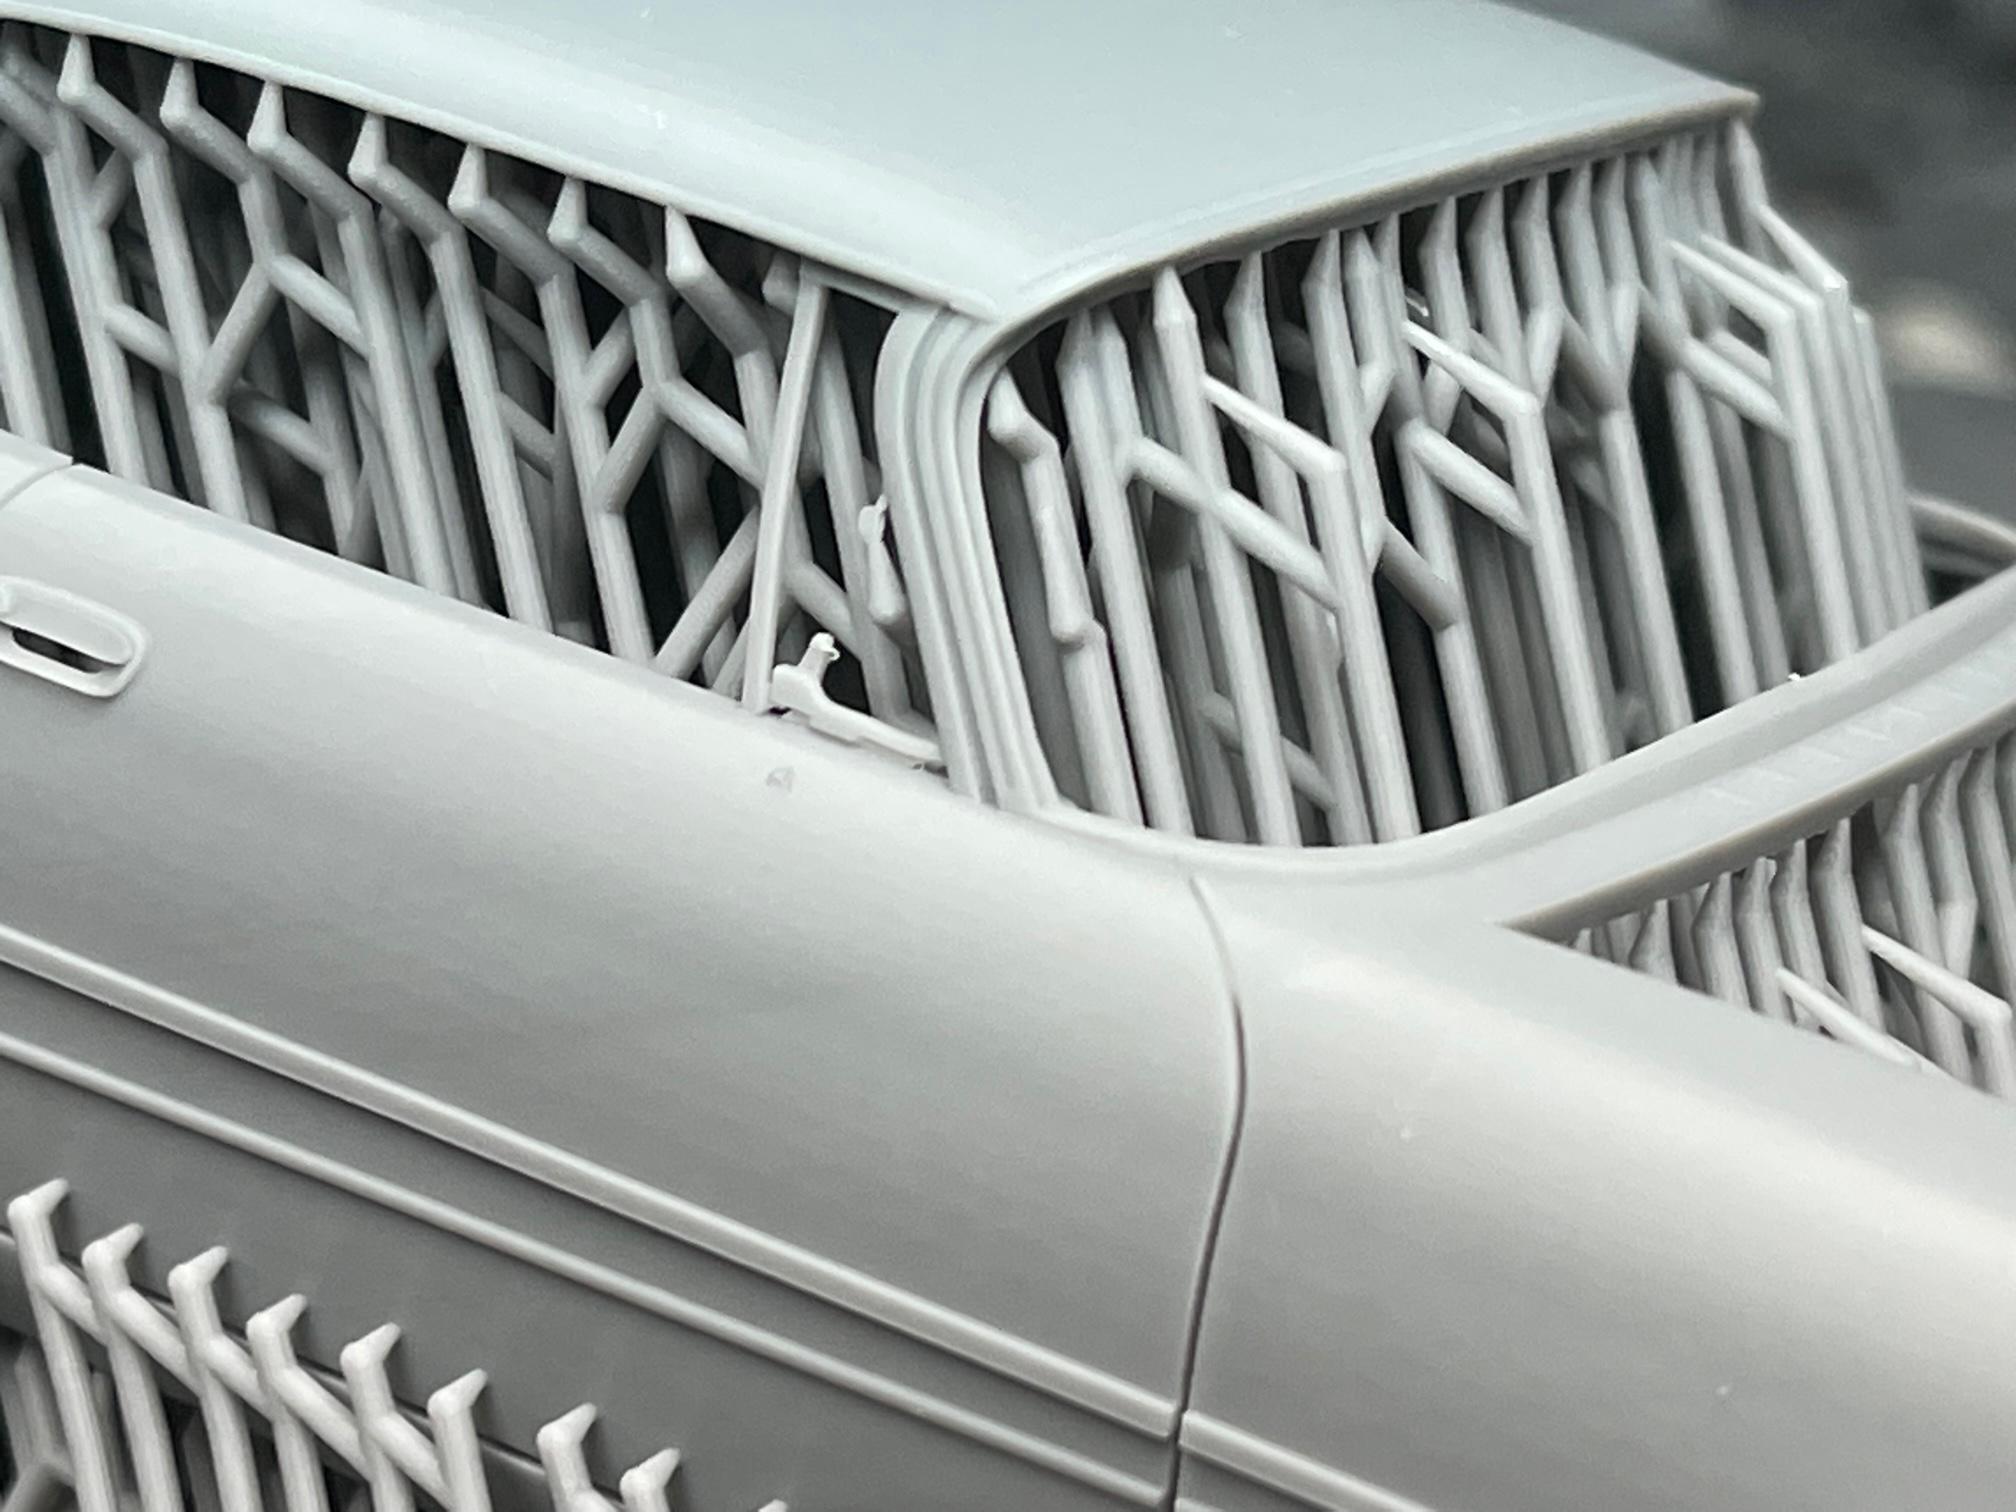
I did print the '58 Belvedere just the other day............here it is below..................
-
My Future 3D WIP's (LOTS of pics)
MrObsessive replied to MrObsessive's topic in Car Aftermarket / Resin / 3D Printed
Bob, my intentions from the VERY BEGINNING was to keep this as strictly a HOBBY. I don't want to get into the trap of being some sort of file or model factory with these 3D items. That's the fastest way for me to end up hating doing it, and then I won't do this at all. I might put something on eBay every now and then, but to get into making this or that on a constant basis for others would be too annoying for me at this point in life. -
My Future 3D WIP's (LOTS of pics)
MrObsessive replied to MrObsessive's topic in Car Aftermarket / Resin / 3D Printed
Chris, that would be unknowable because we're talking about two completely different origins of this particular model. I do believe that Johan's were never quite true to scale, so it's possible that their Desoto may not be quite 1/25 scale. Just the same, I wouldn't need the promo bumpers because the file comes with everything but the interior. I did request that an interior be done for it, but he's quite busy, and I could always scratchbuild the interior if he's never able to get to it. I do have the interior files now for the '77 T-Bird----just got that yesterday. Here are a couple pics of the front and rear bumpers.................. A tiny test print of the '71 'Cuda on the right.......on the upper right are the wheels for the Desoto. I had forgot that I had meshed the taillight housings on to the bumper.......now I have an extra set of housings. ? I also printed a bit earlier taillight lenses in clear resin.......those are parked in a container somewhere.
-
My Future 3D WIP's (LOTS of pics)
MrObsessive replied to MrObsessive's topic in Car Aftermarket / Resin / 3D Printed
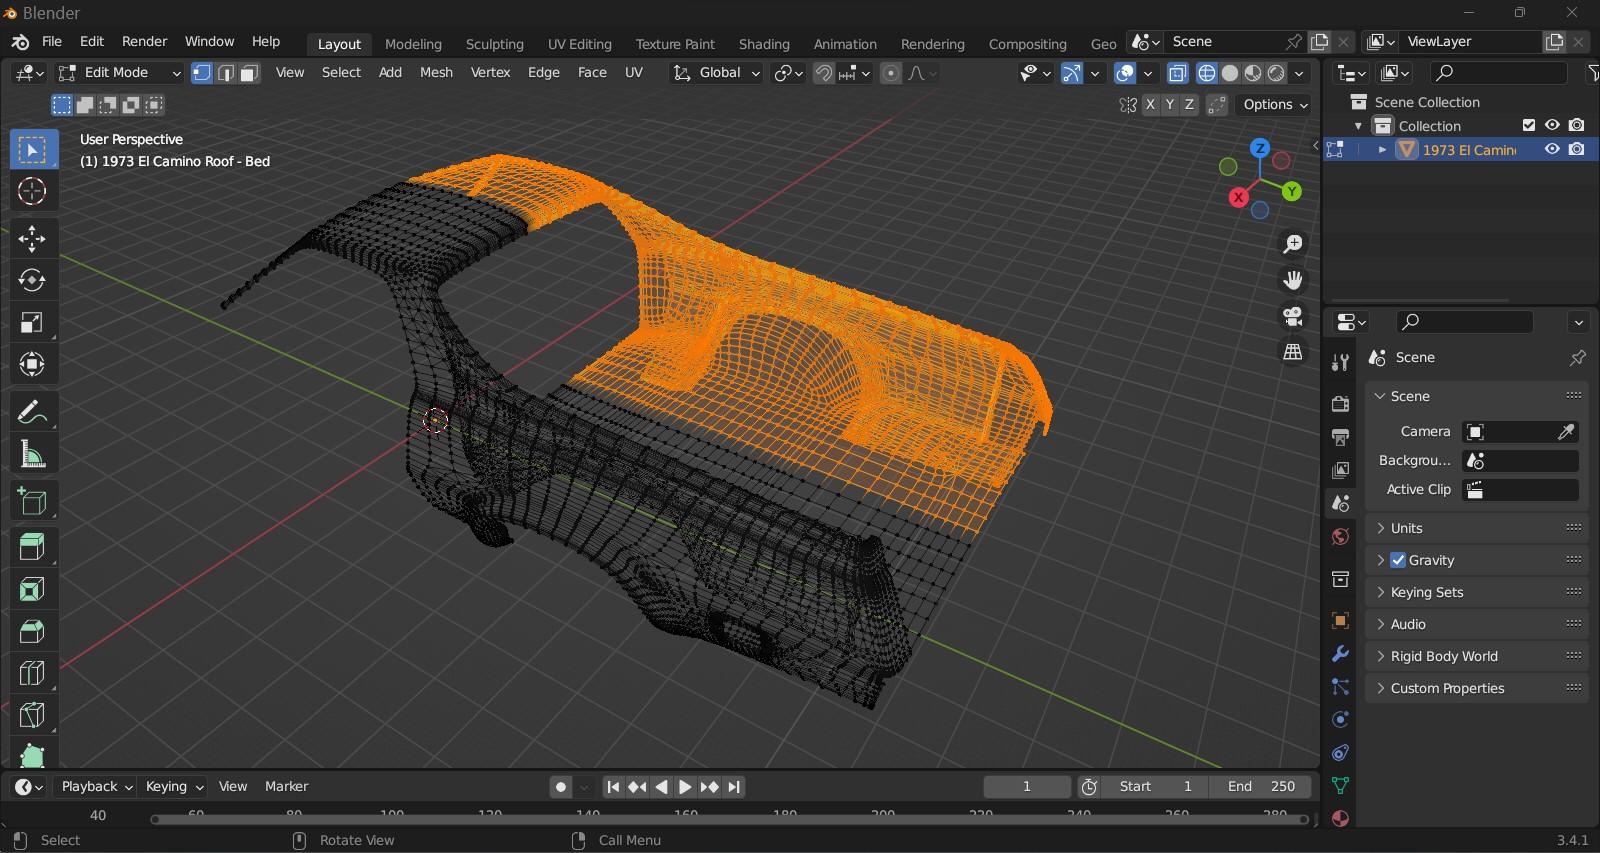
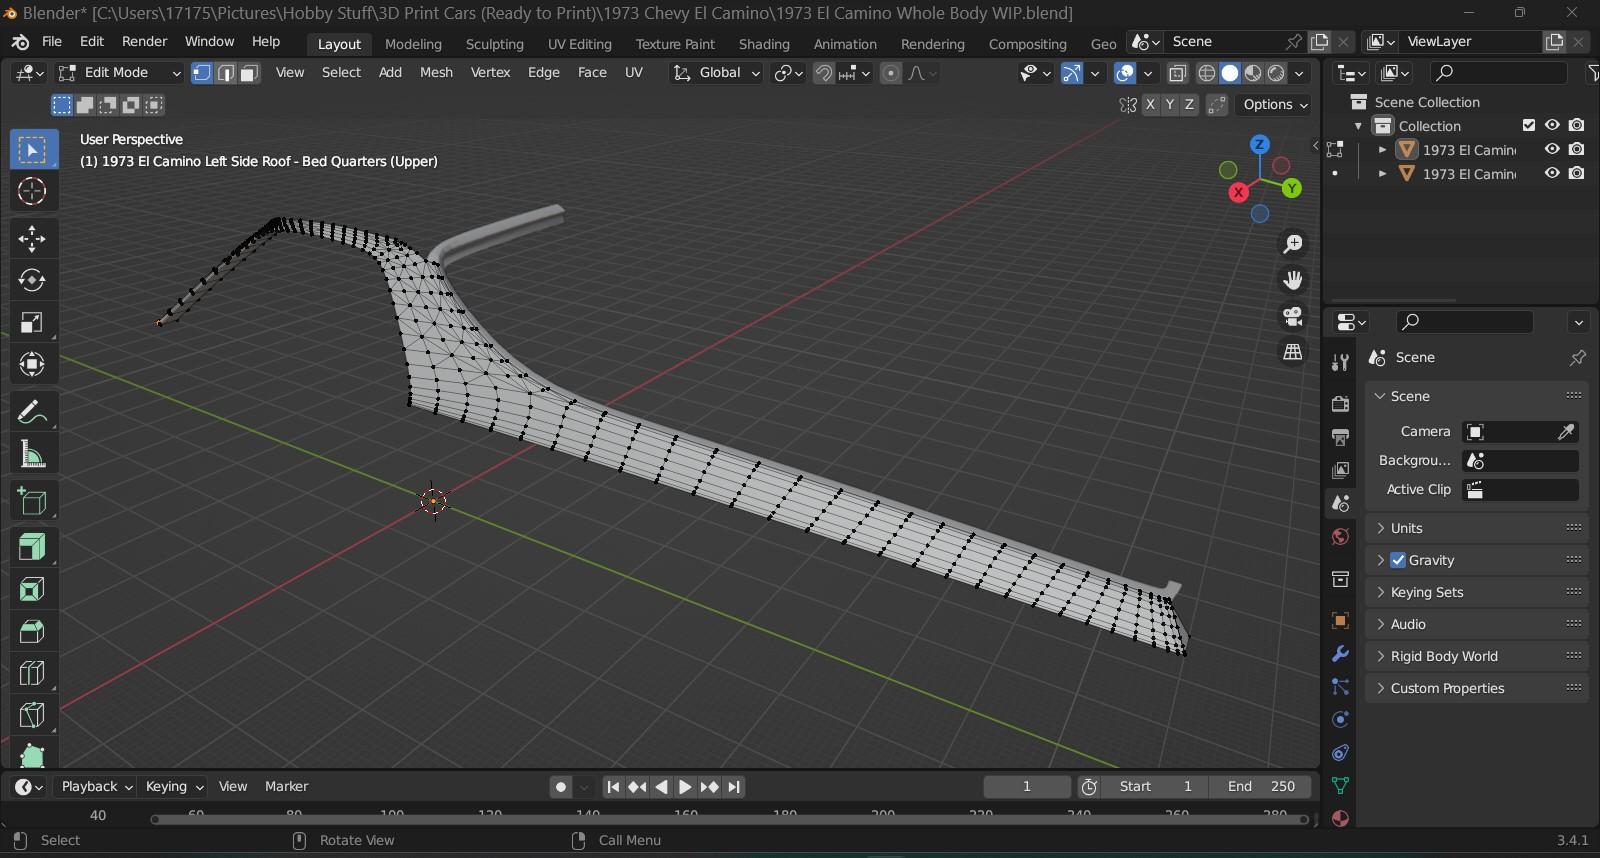
What's currently on my drawing board?? This.....................1973 El Camino. Another file from EDM 3D Garage. In the beginning stages as I'm doing the wall thickness now, after the body was dissected into different parts. So far, no major hangups, but I can see some changes will need to be made around the wheel wells----namely the front. There's an odd crease at the trailing edge that's a bit strange looking. I'll see if I can get rid of that.
-
My Future 3D WIP's (LOTS of pics)
MrObsessive replied to MrObsessive's topic in Car Aftermarket / Resin / 3D Printed
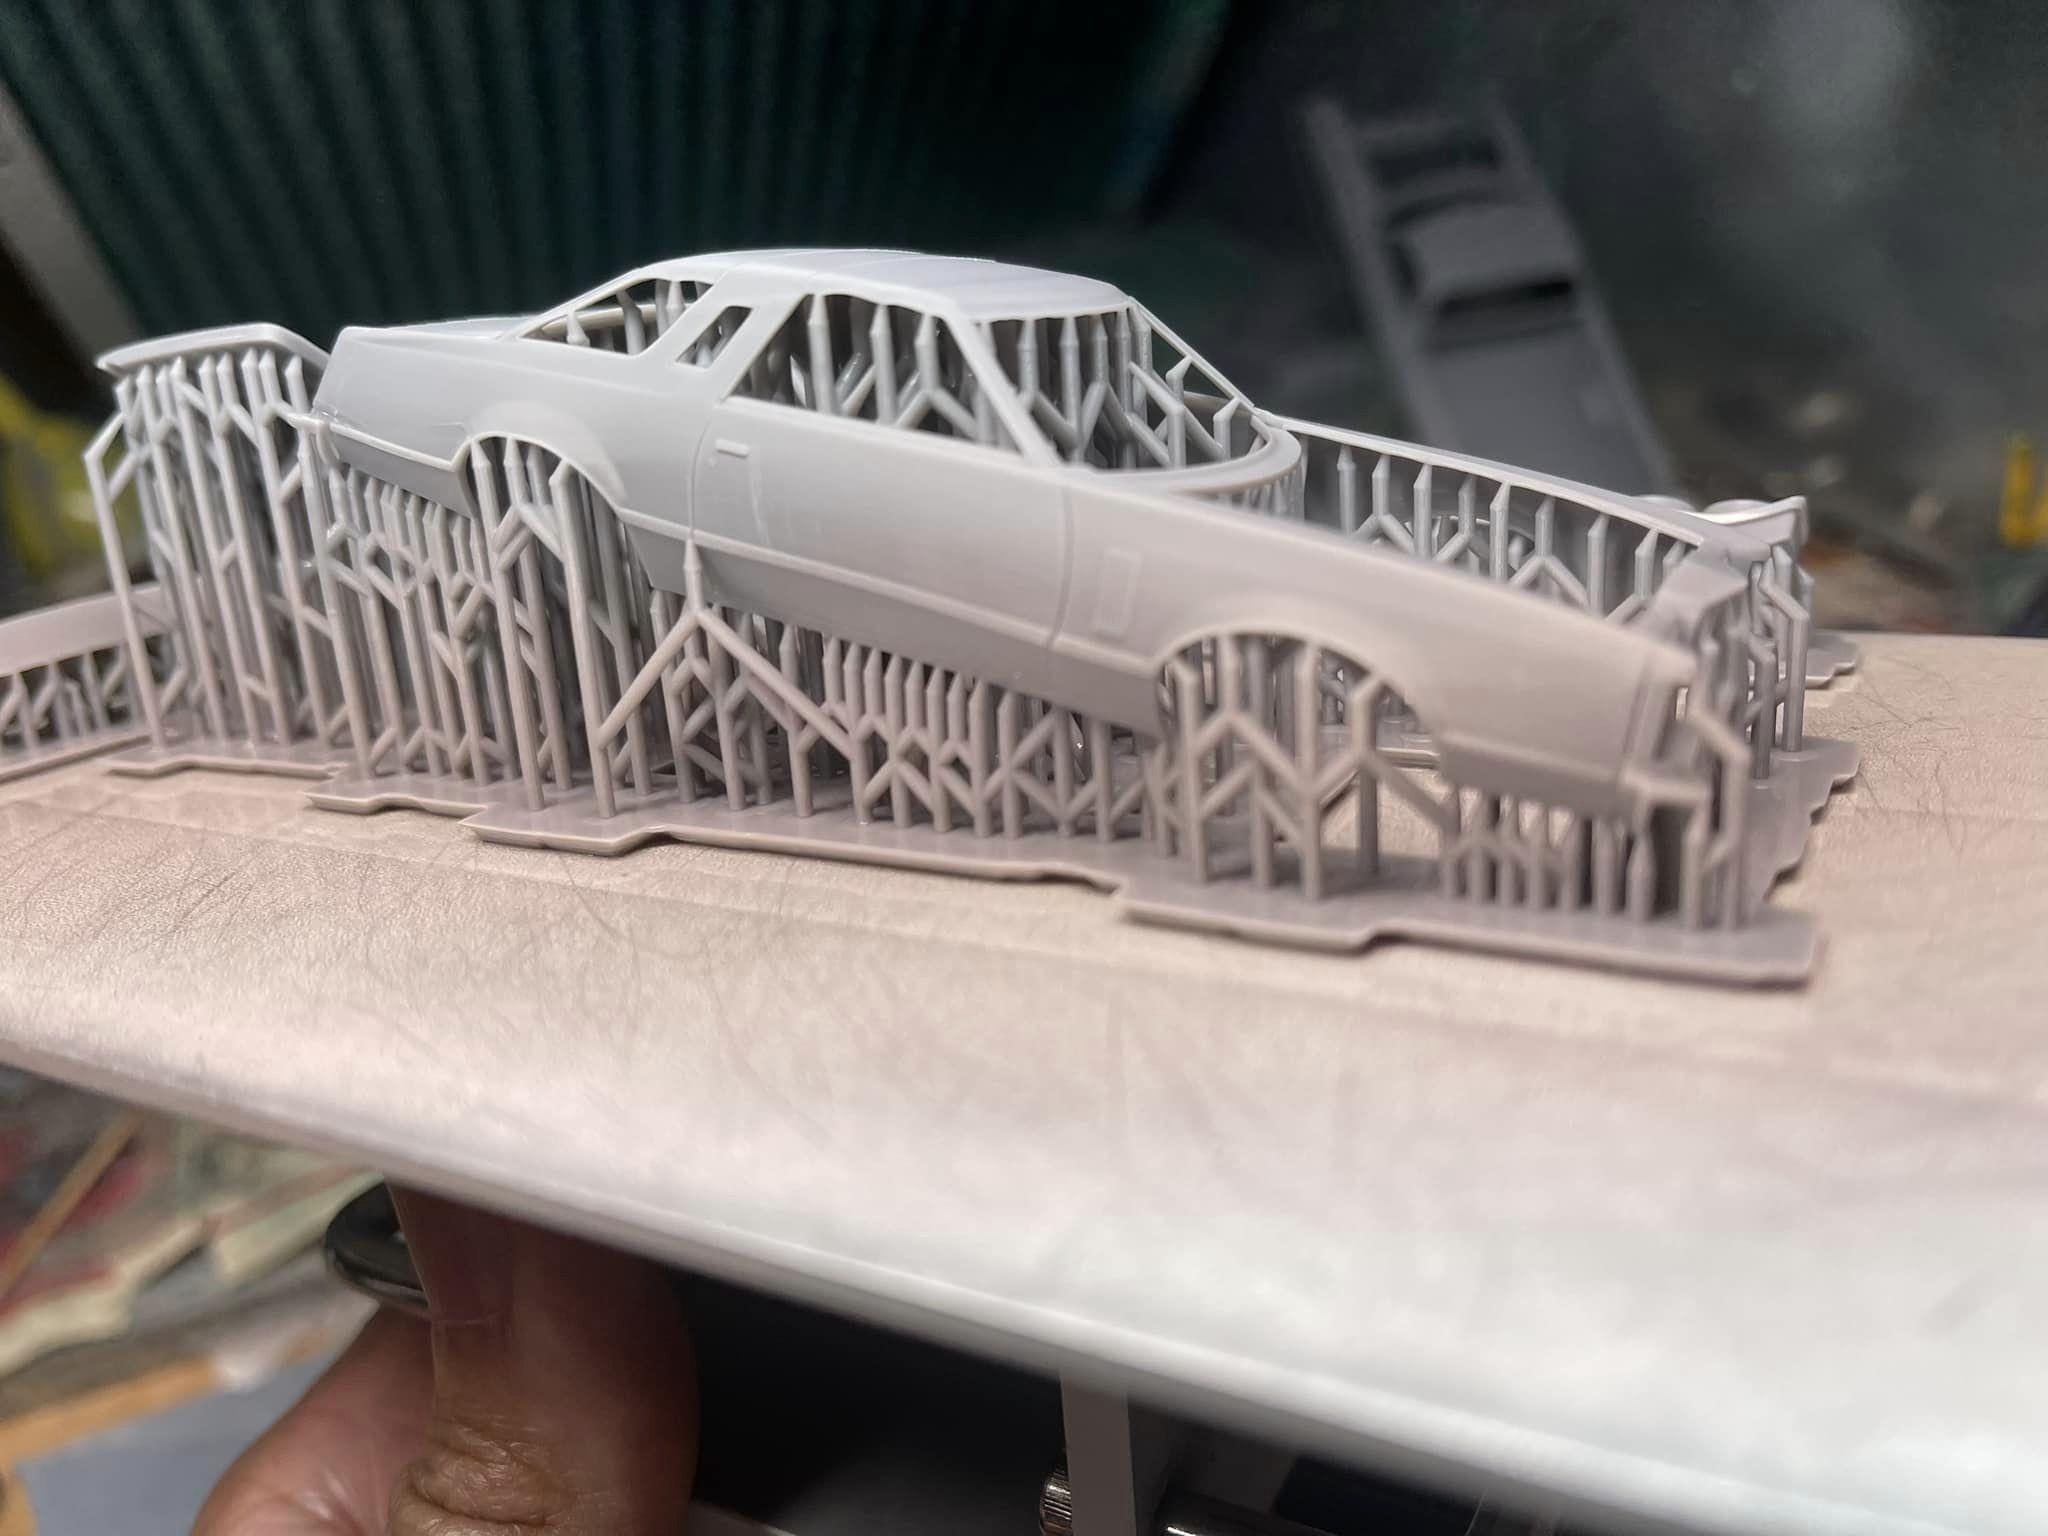
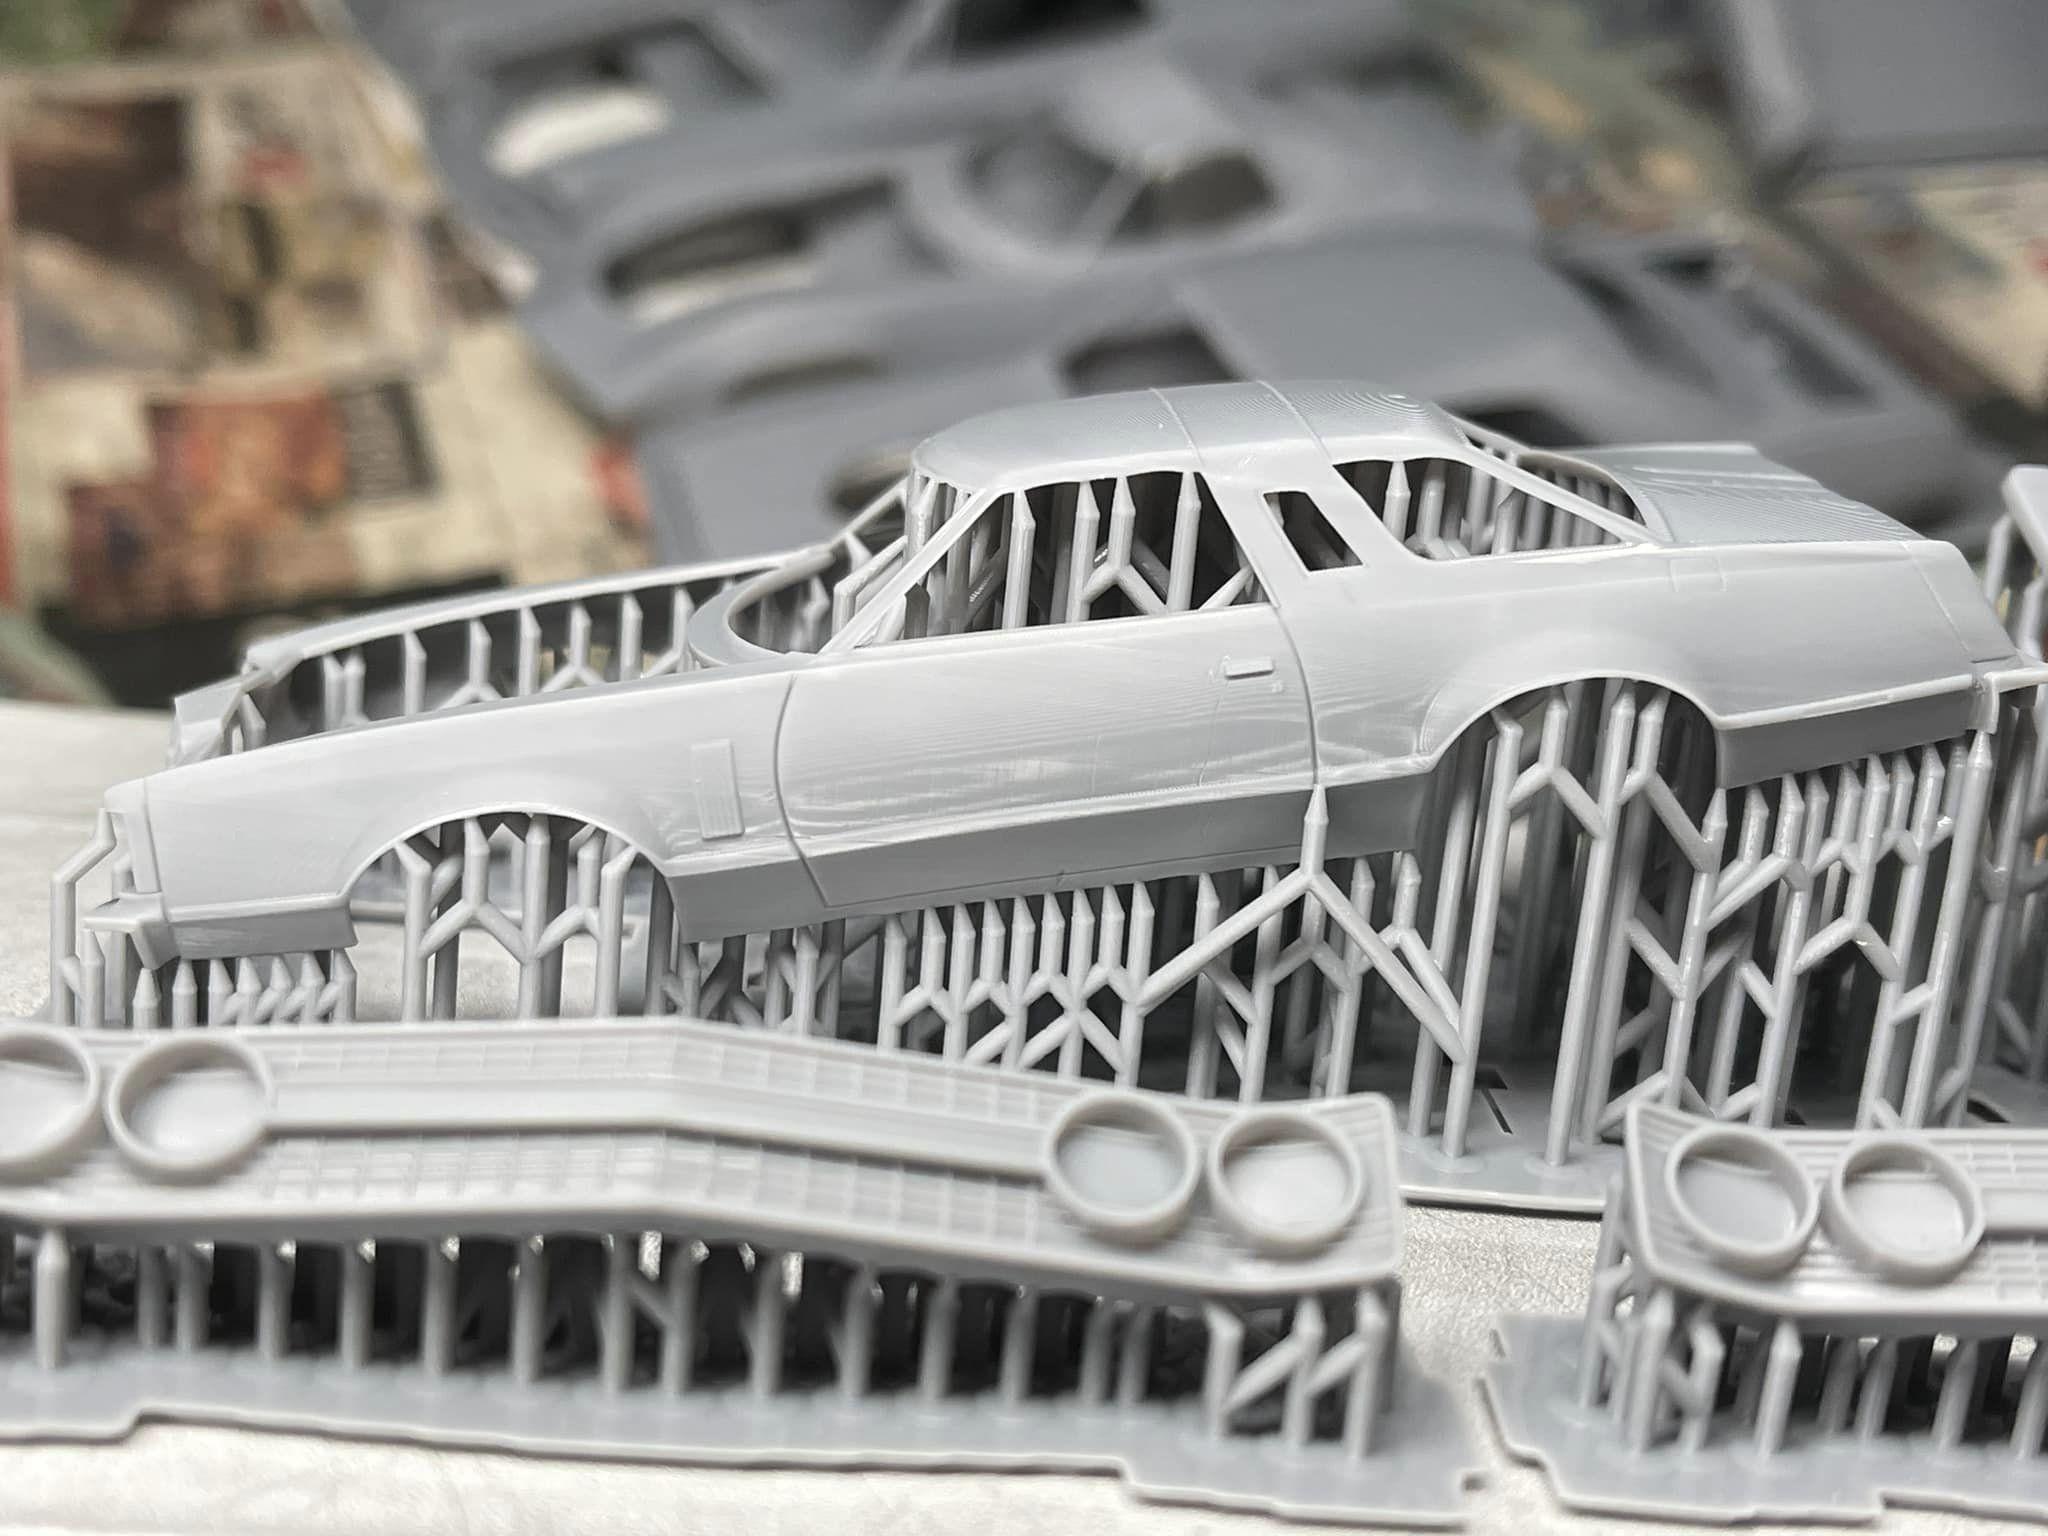
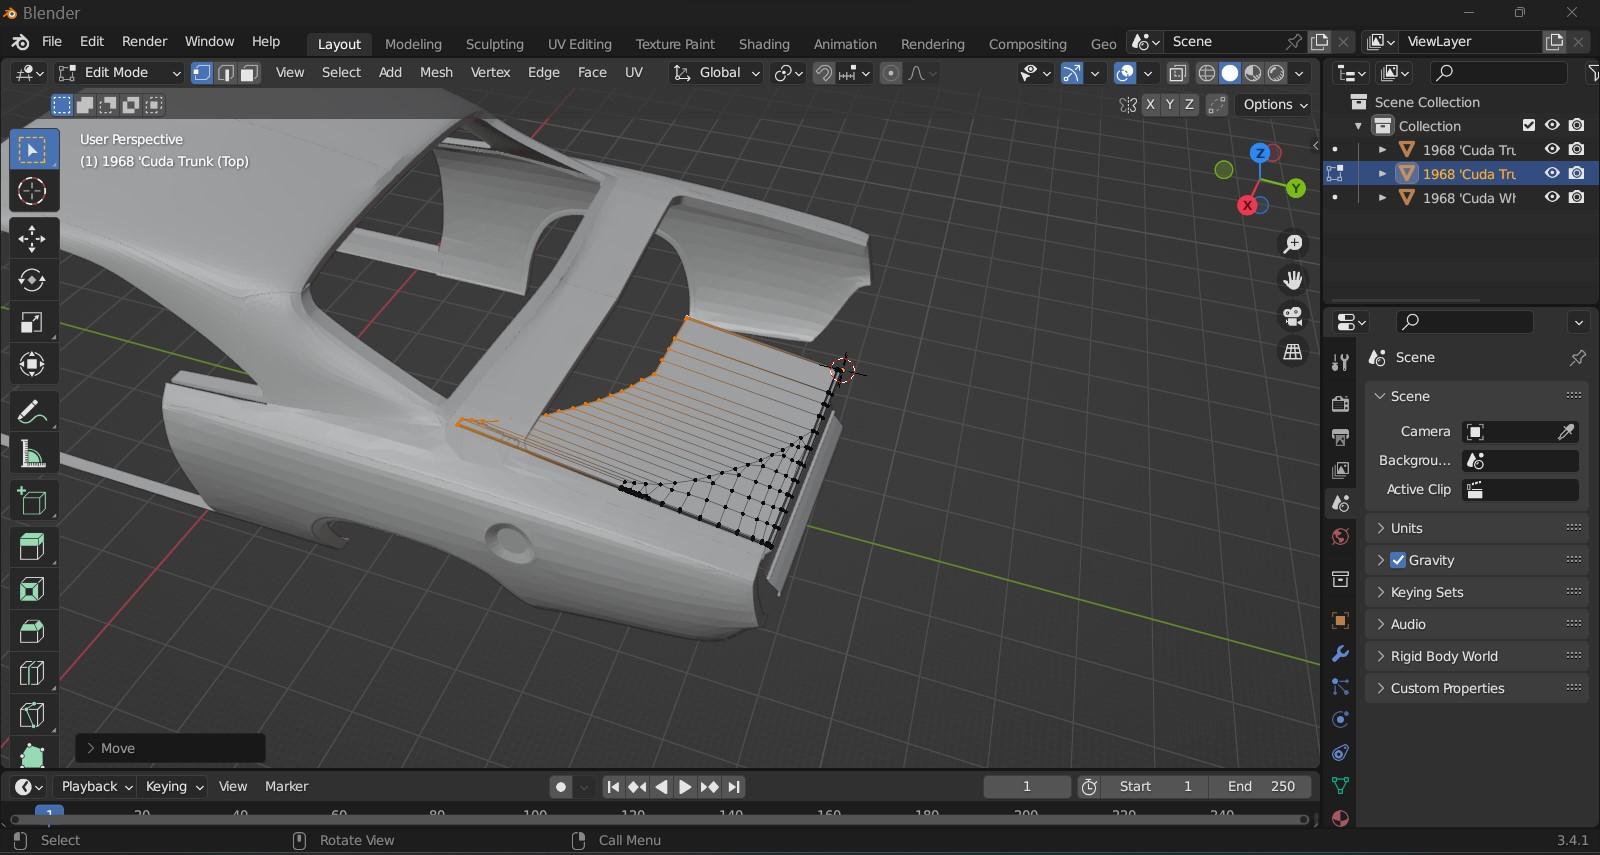
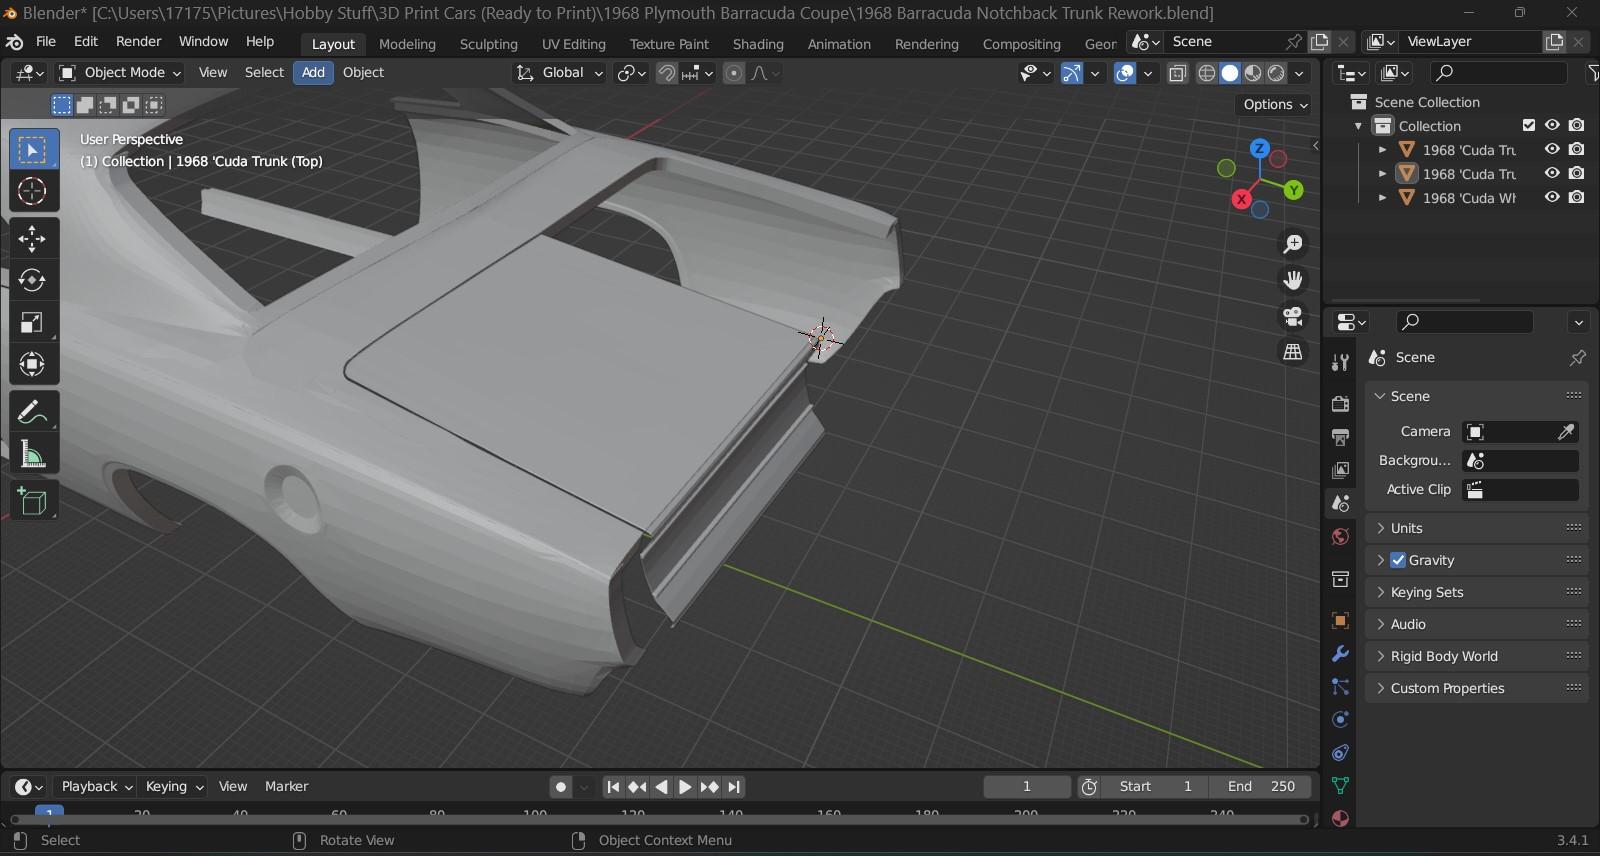
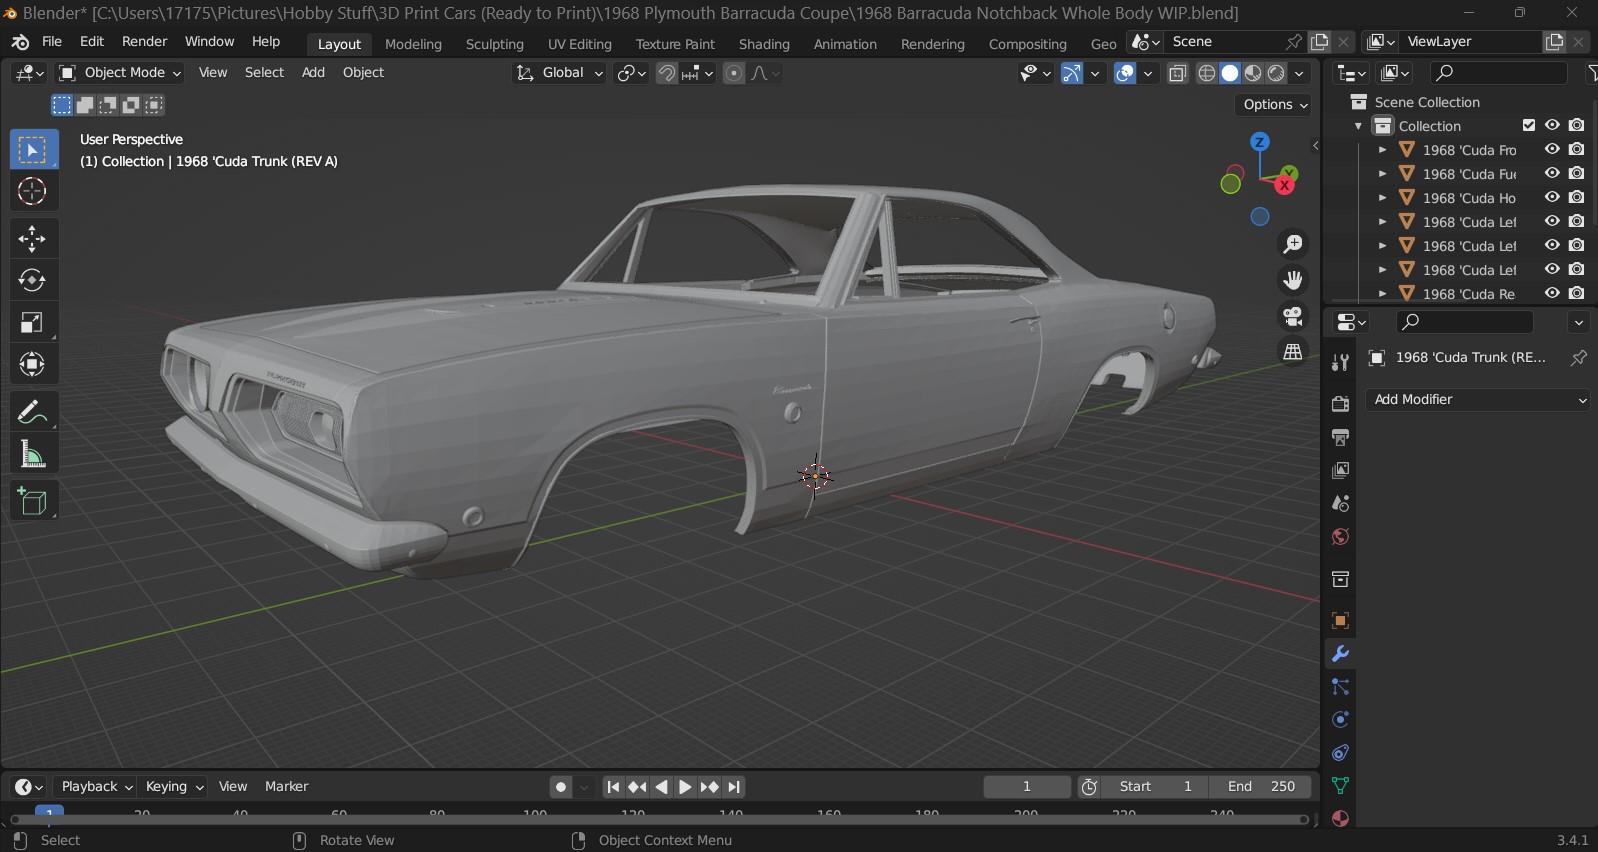
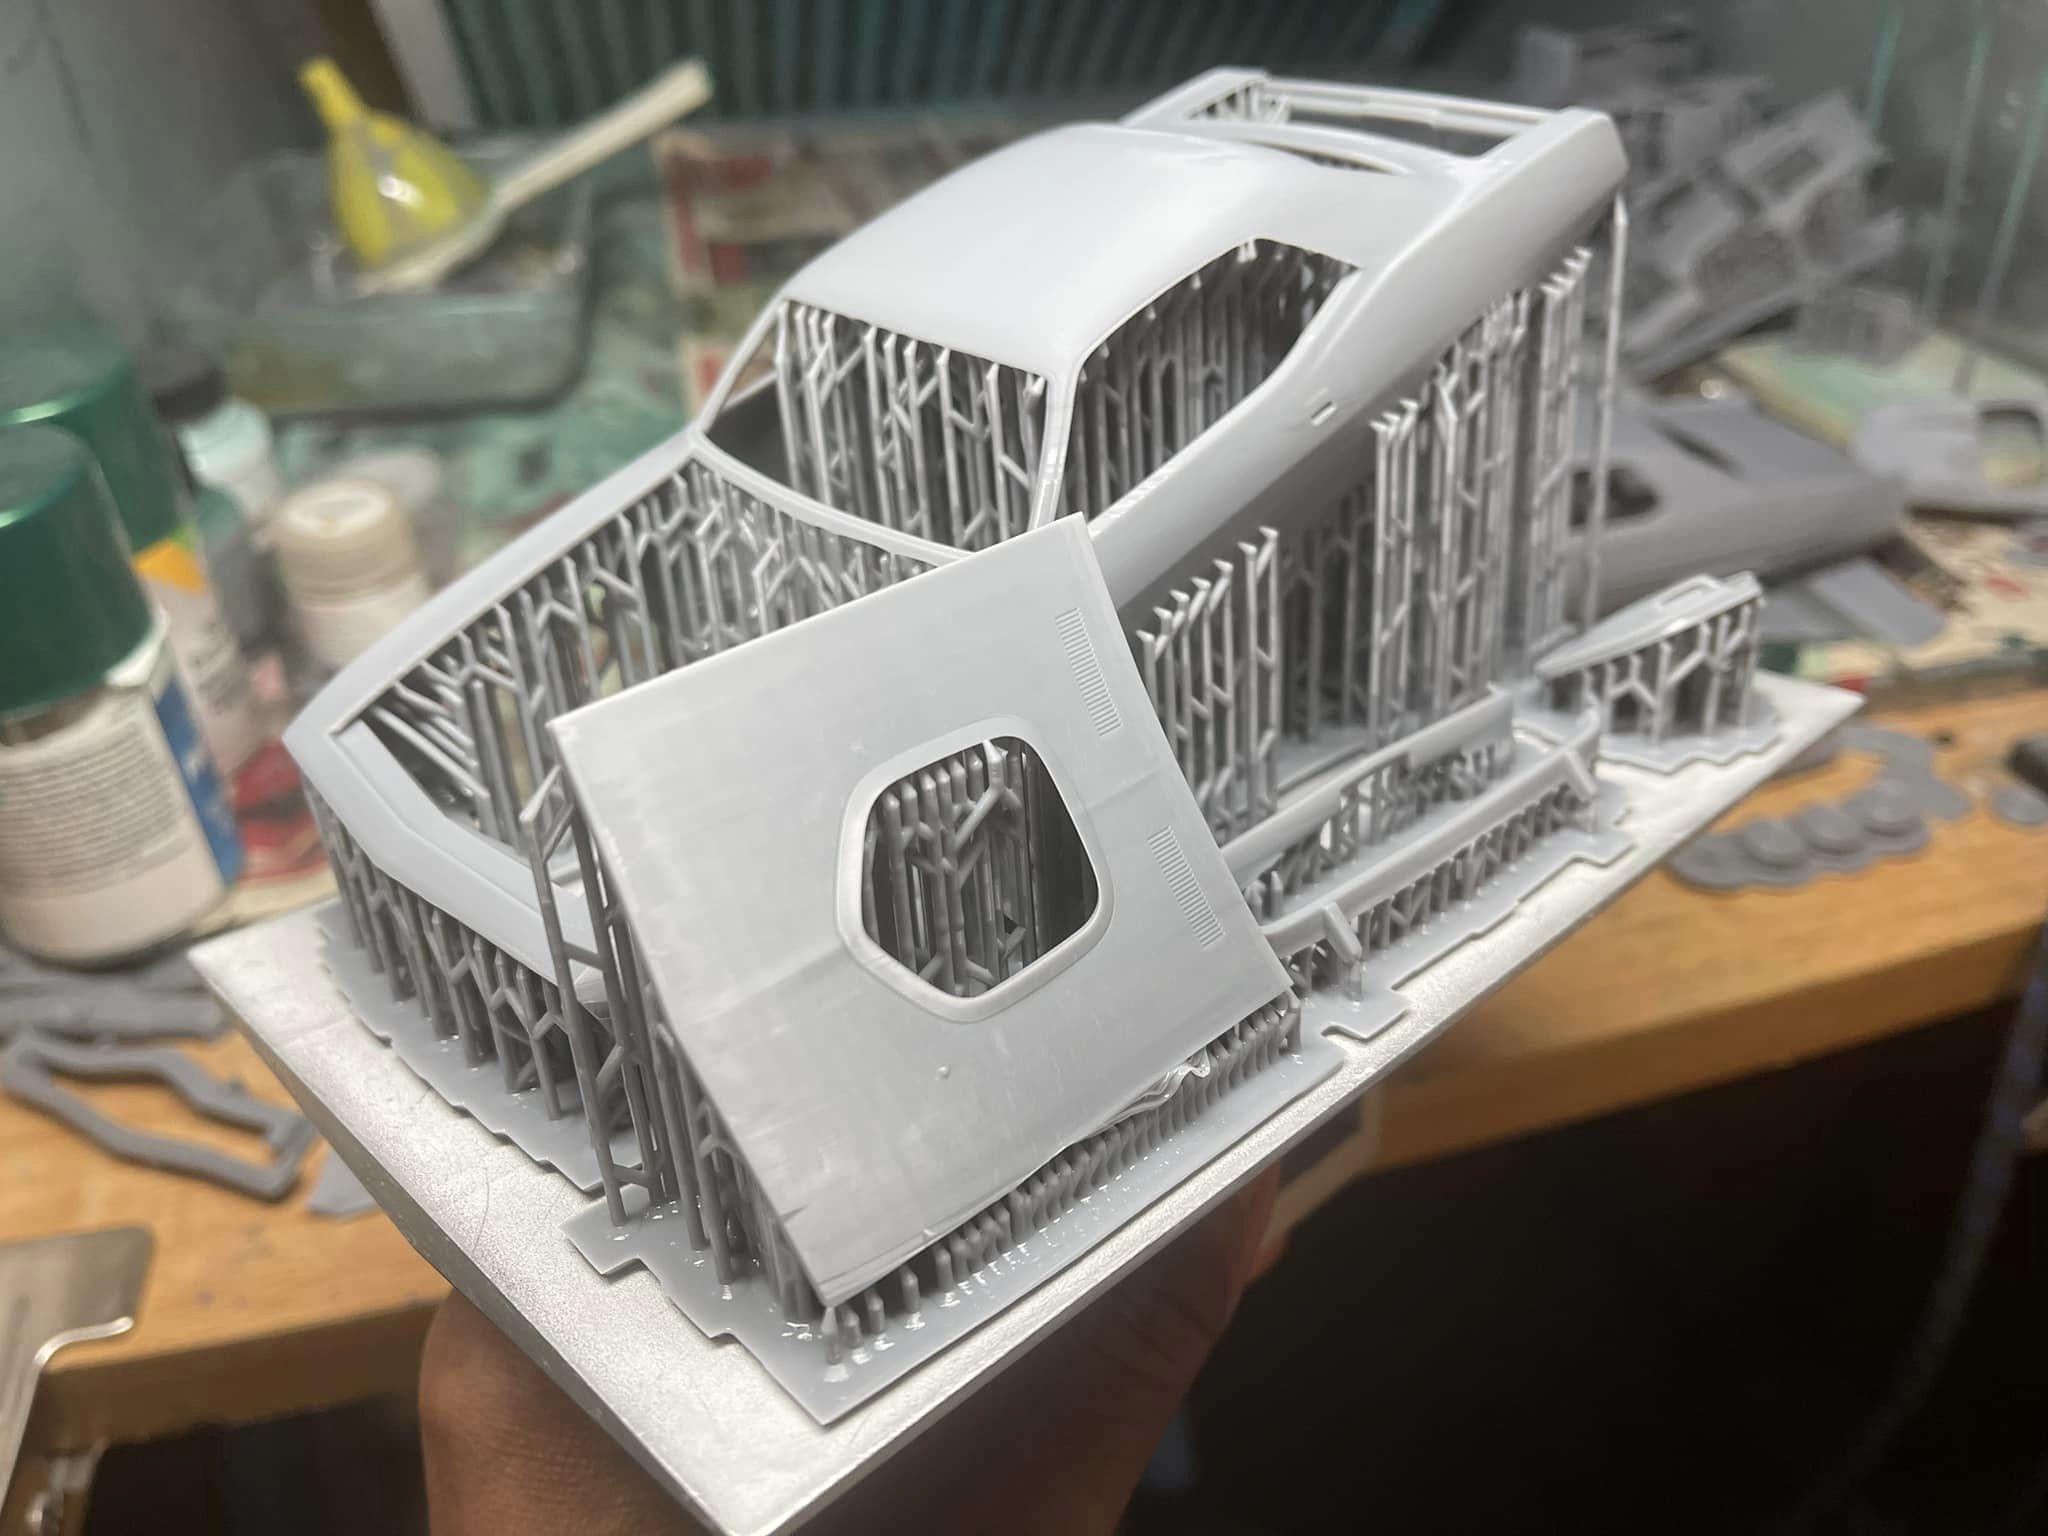
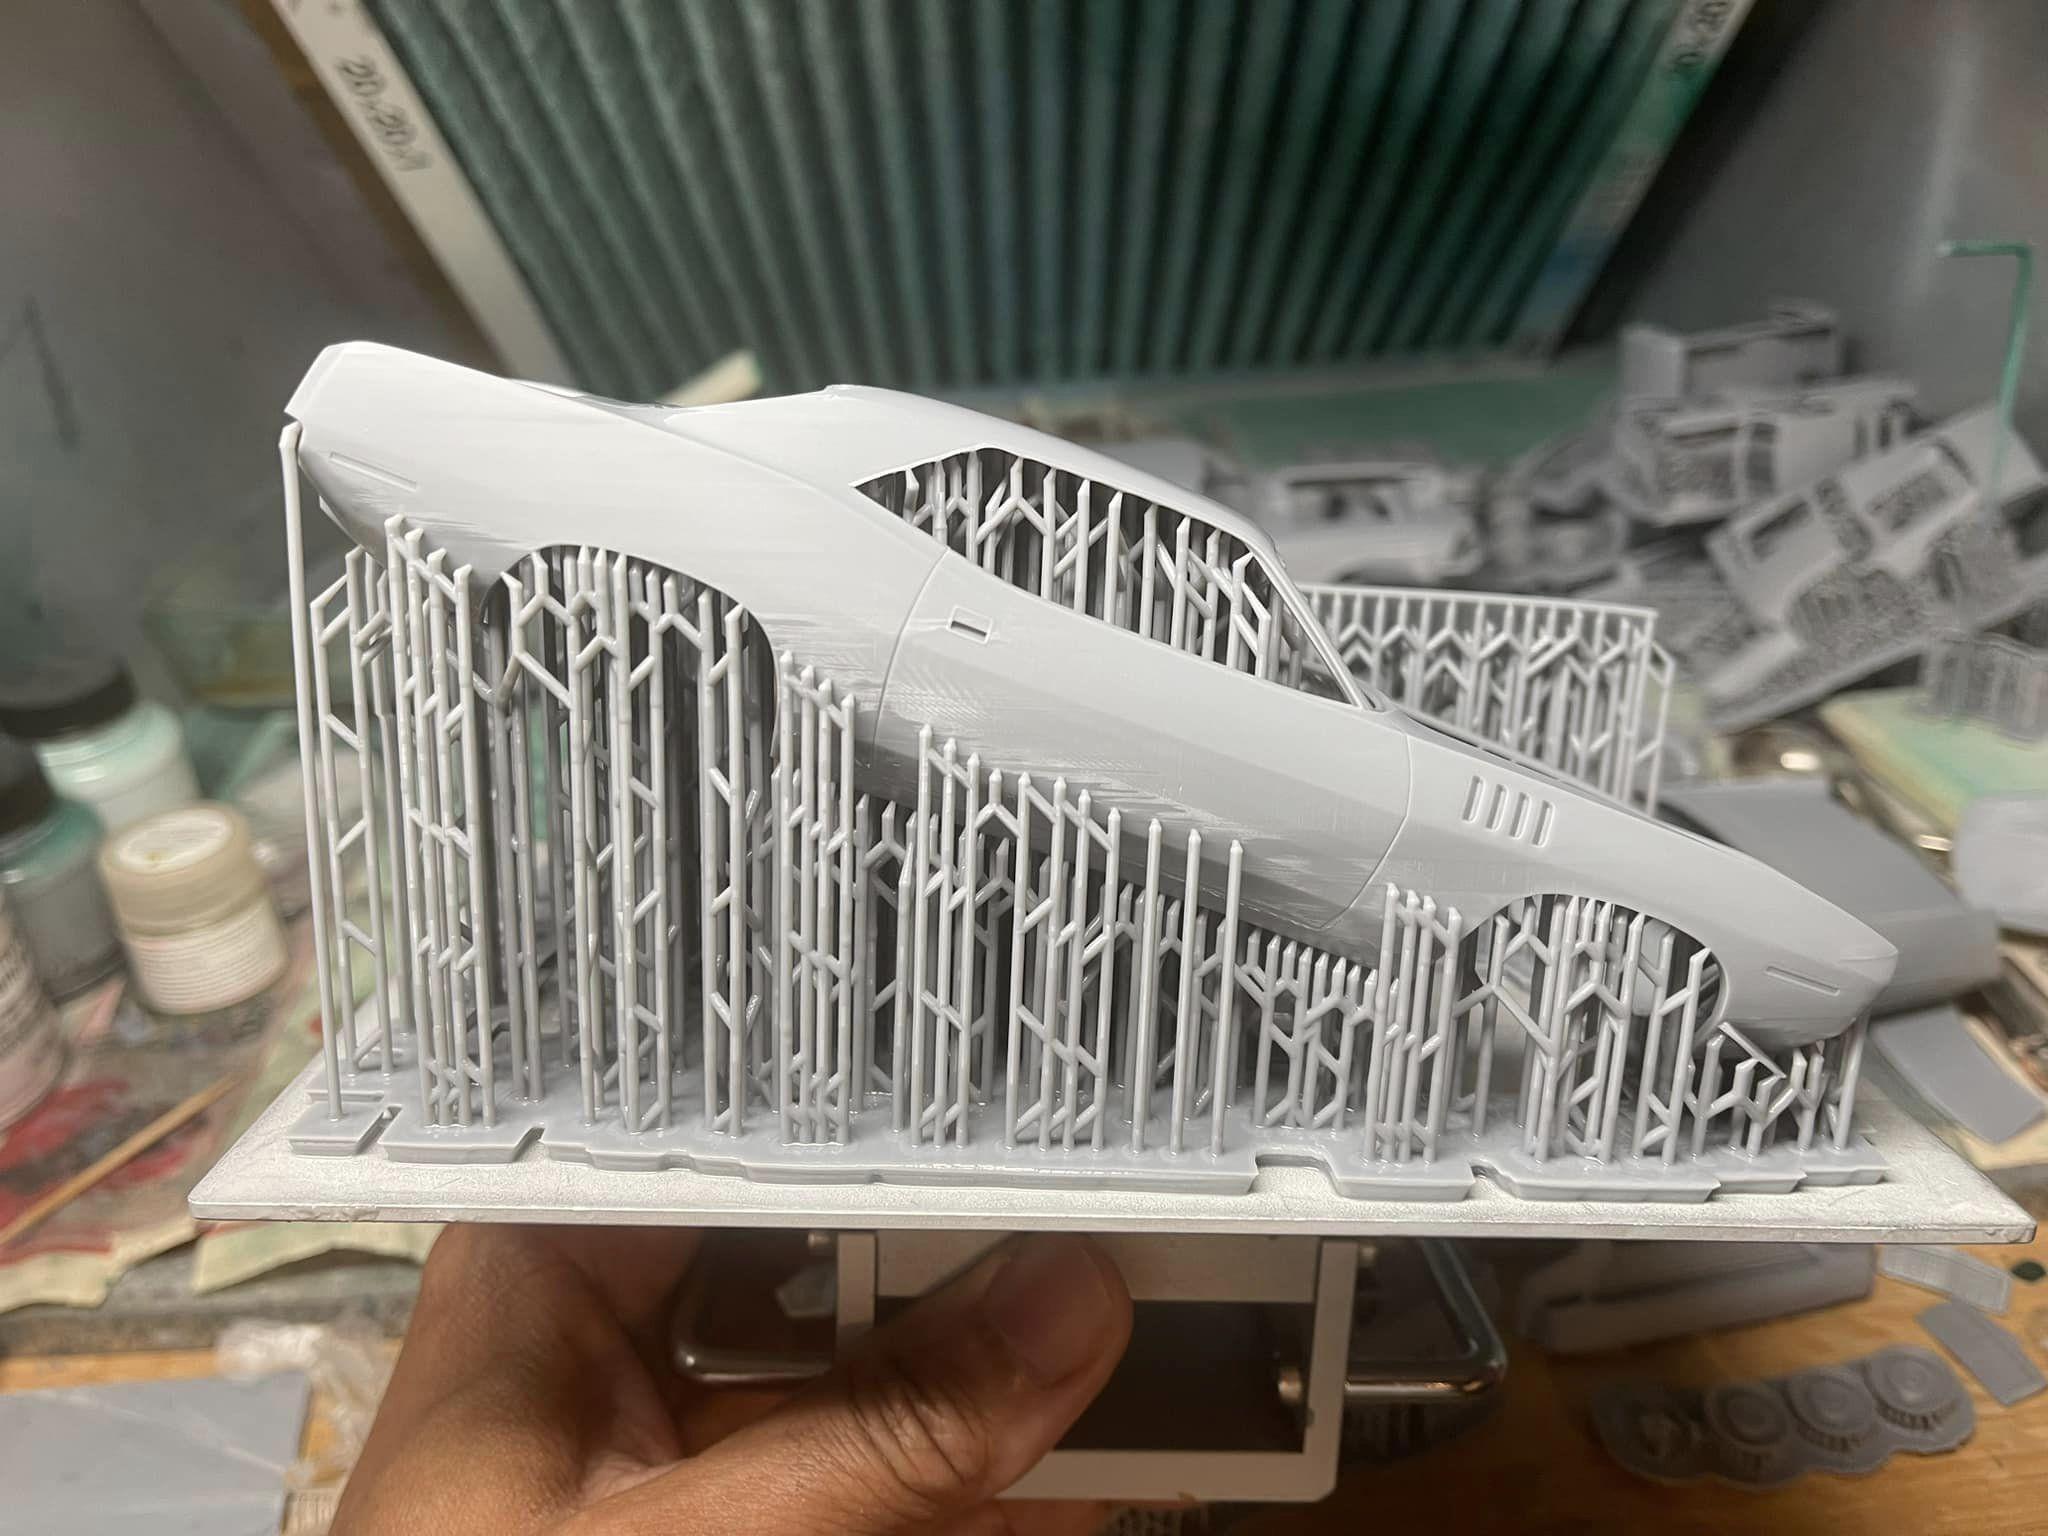
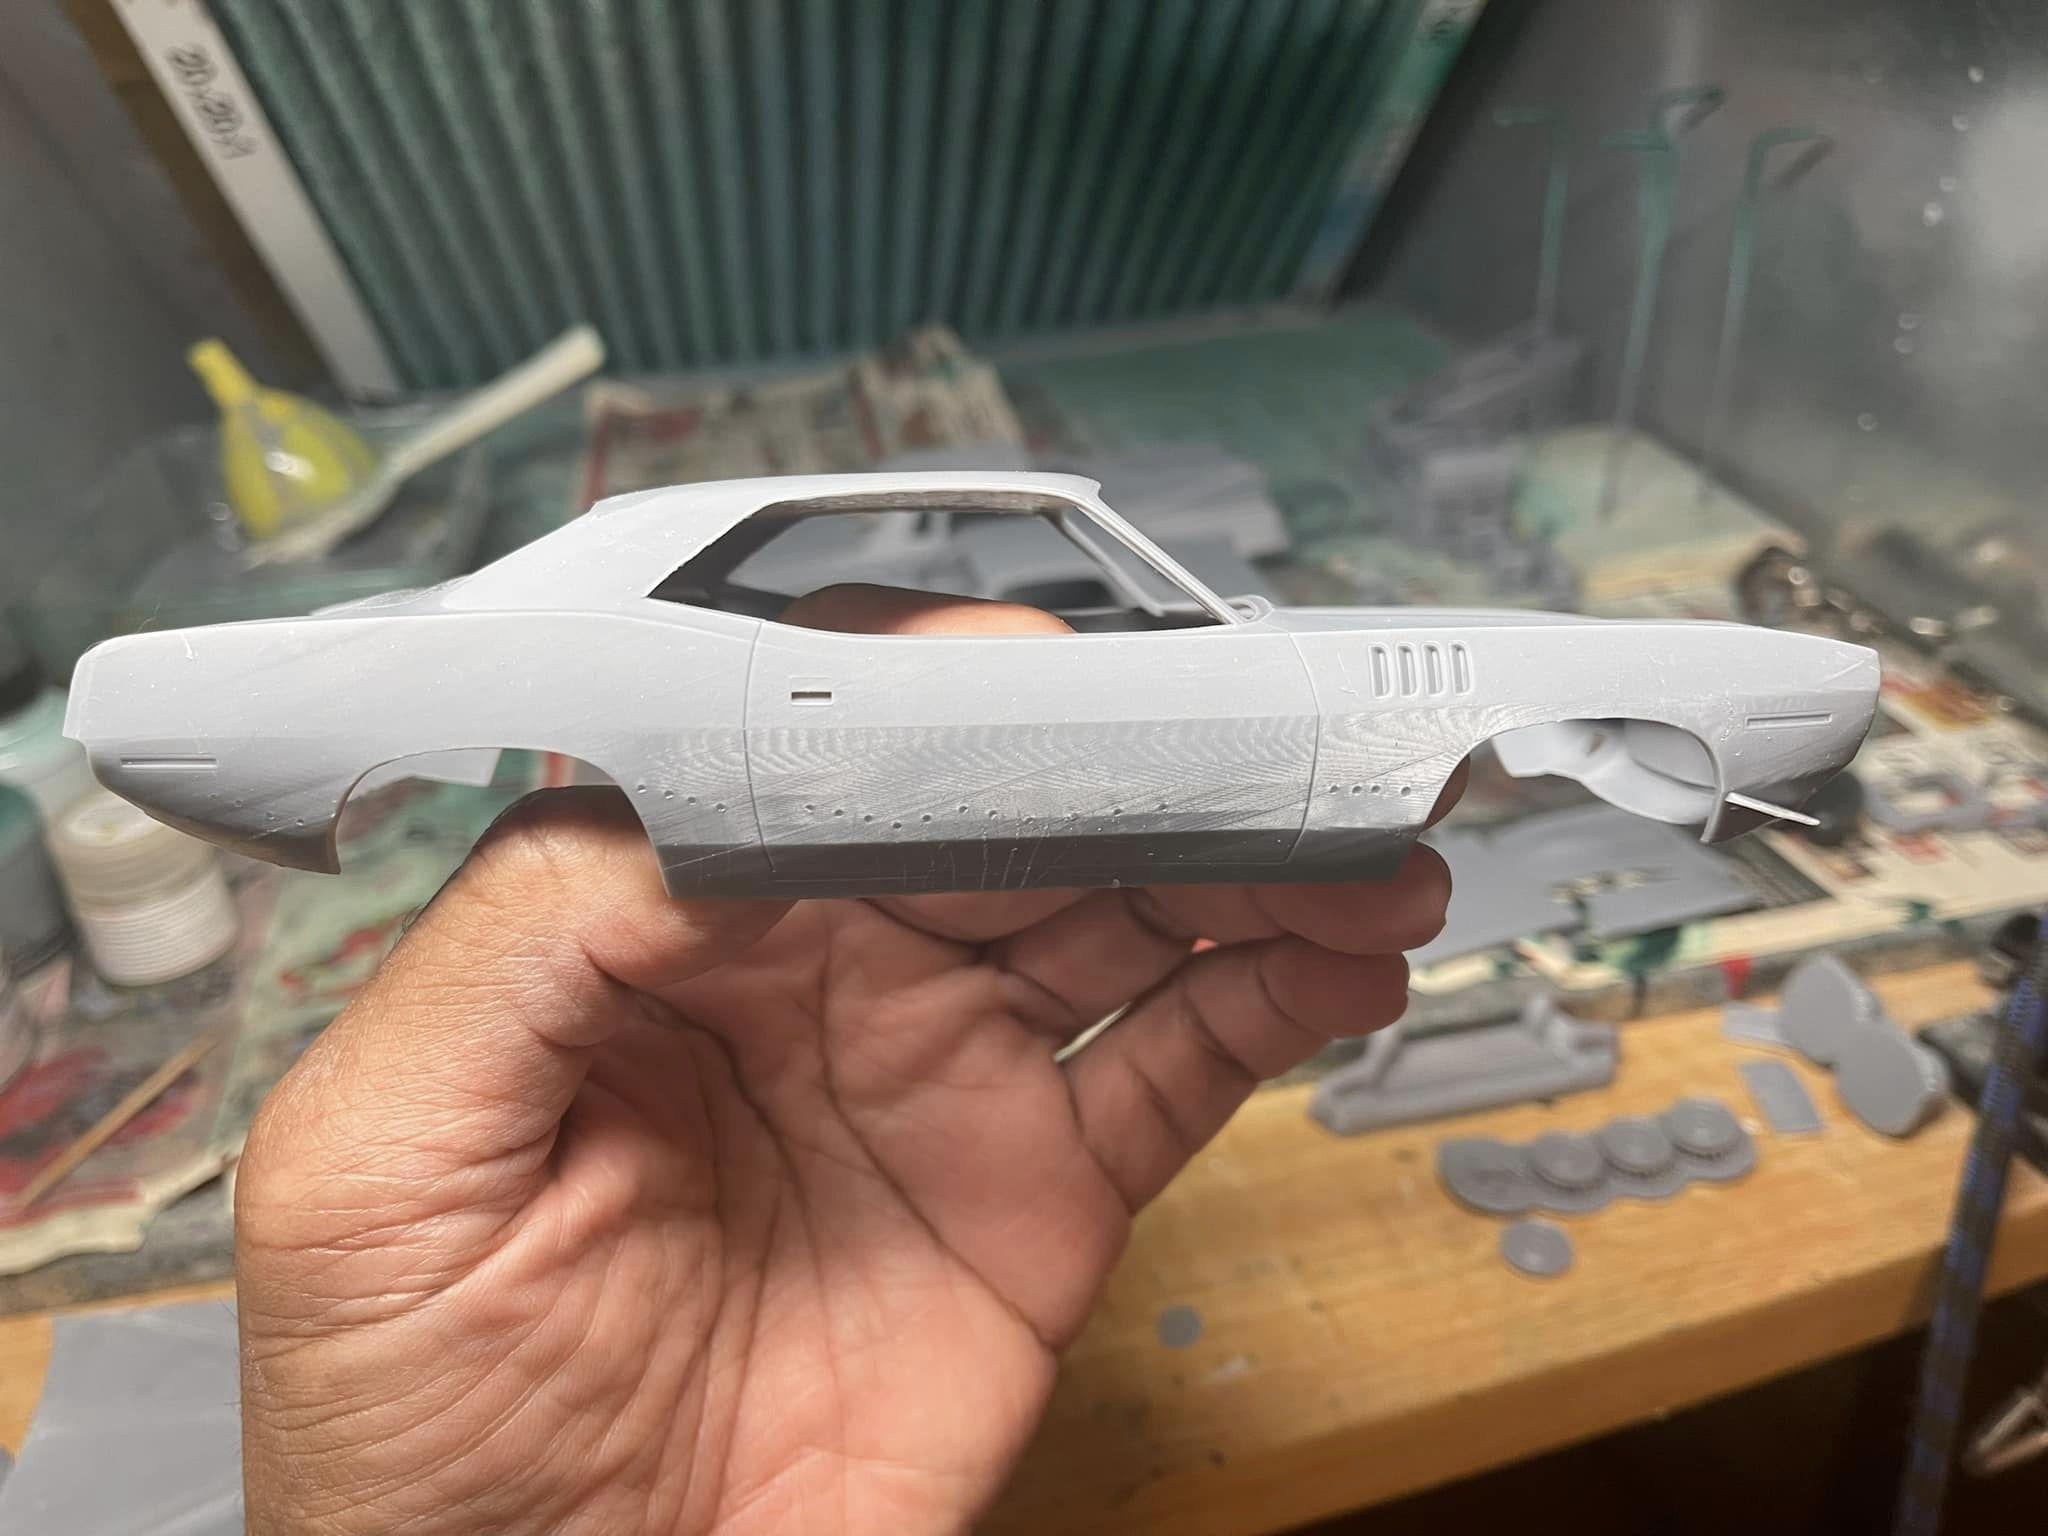
I thought I'd post some more files that I got done recently, along with some prints that have come out very well in the last number of weeks. First, a file I finished maybe a couple weeks ago, and printed out almost immediately because I really like this car. 1957 Desoto Firesweep----a file created by EDM 3D Garage on the 'net. I've done quite a few of his files over the past year, and this one came out well. A few changes from his design I did, as I changed the windshield frame that I used on my '58 Fury. His was "okay", but the frame on the Plymouth to my eyes looked a lot closer to what MOPAR used in '57. Another one of Eric's files is a 1977 Ford Thunderbird file that literally he released a week or so ago. This one came out of left field, as he and chat back and forth, but he mentioned nothing about it until I happen to see it show up on FB. Well........I IMMEDIATELY stopped what I was working on, and jumped on this! I got the file done, and I made a small scale test print to check things out. Later, I'll print the 1/25 version as this is a car I'd like to build sometime. Eric did mention that he's working on an interior for it-----that'll be a plus as I can use one of Revell's Torinos for the mechanical bits. A couple days ago, I finished up a file conversion of a car that's 'bout impossible to find files for, except for a very crude example on Cults3D. 1968 Barracuda Notchback coupe which I created using a Fastback file I recently finished. I used only the roof section, and grafted that onto the lower Fastback body. A bit of work had to be done to the tops of the rear quarters, and the roof needed a complete overhaul as it was very faceted looking due to the very low poly count of the file. A new deck lid had to be created too. I'm pretty pleased with it, and this will be printed out in the not too distant future. Some of the trunk work that was done..........I used a small section of the Fastback's trunk (mostly the top) to create what's seen. Finally (for now), I made printable a file of a 1971 Plymouth 'Cuda......since Revell can't seem to get this car right on their THIRD ATTEMPT, I had on my hard disc a video game file of the car, and set about to make it like the car should be. Not an easy file in the least, as vid game files are no joke to first extract, then the hoops you have to jump through to make them printable. Some pics of it on the build plate----I have no timeline as to when I'll build this......the main thrust of doing this car is that there CAN be a correct version of this one done, and if 'lil 'ole me can do this with a 3D program out here in the hinterlands, WHY can't the major kit manufacturers get these cars correct?? ?
-
Confused about 3d printing
MrObsessive replied to jeffp60's topic in Truck Aftermarket / Resin / 3D Printed
Understand that if you try and create the body on your own, it can easily end up being a hobby within itself because you'll be essentially building the car "digitally" before you can build it physically. I don't know of any files out there that are printable. I've not seen any, but it's searchable by simply typing in the name of the car, followed by "3D files". -
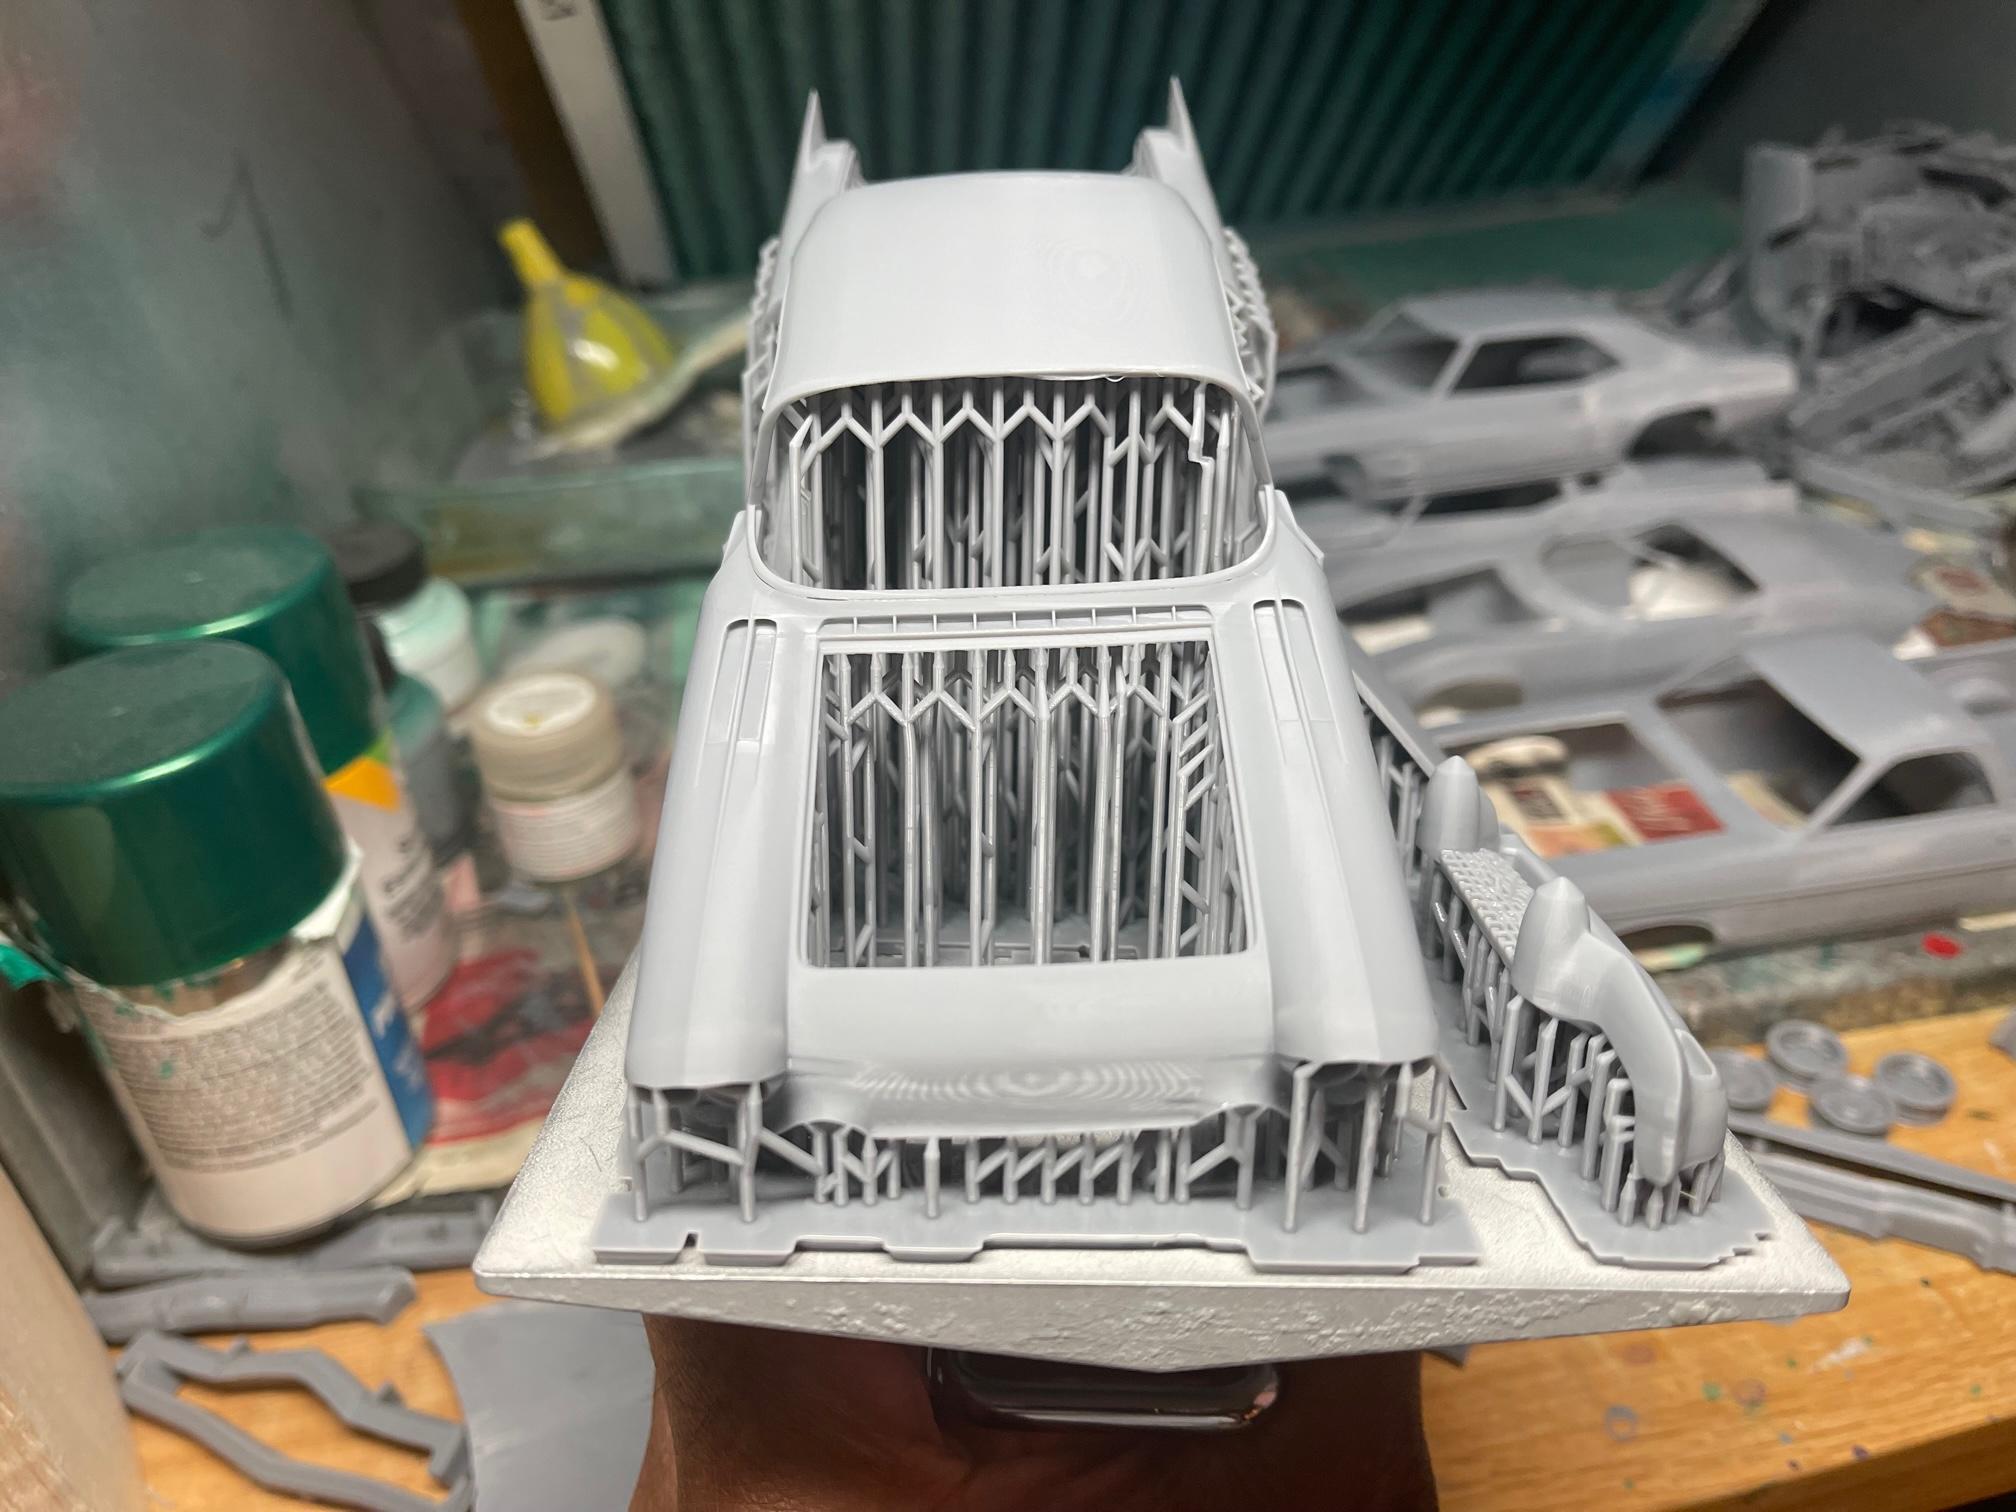
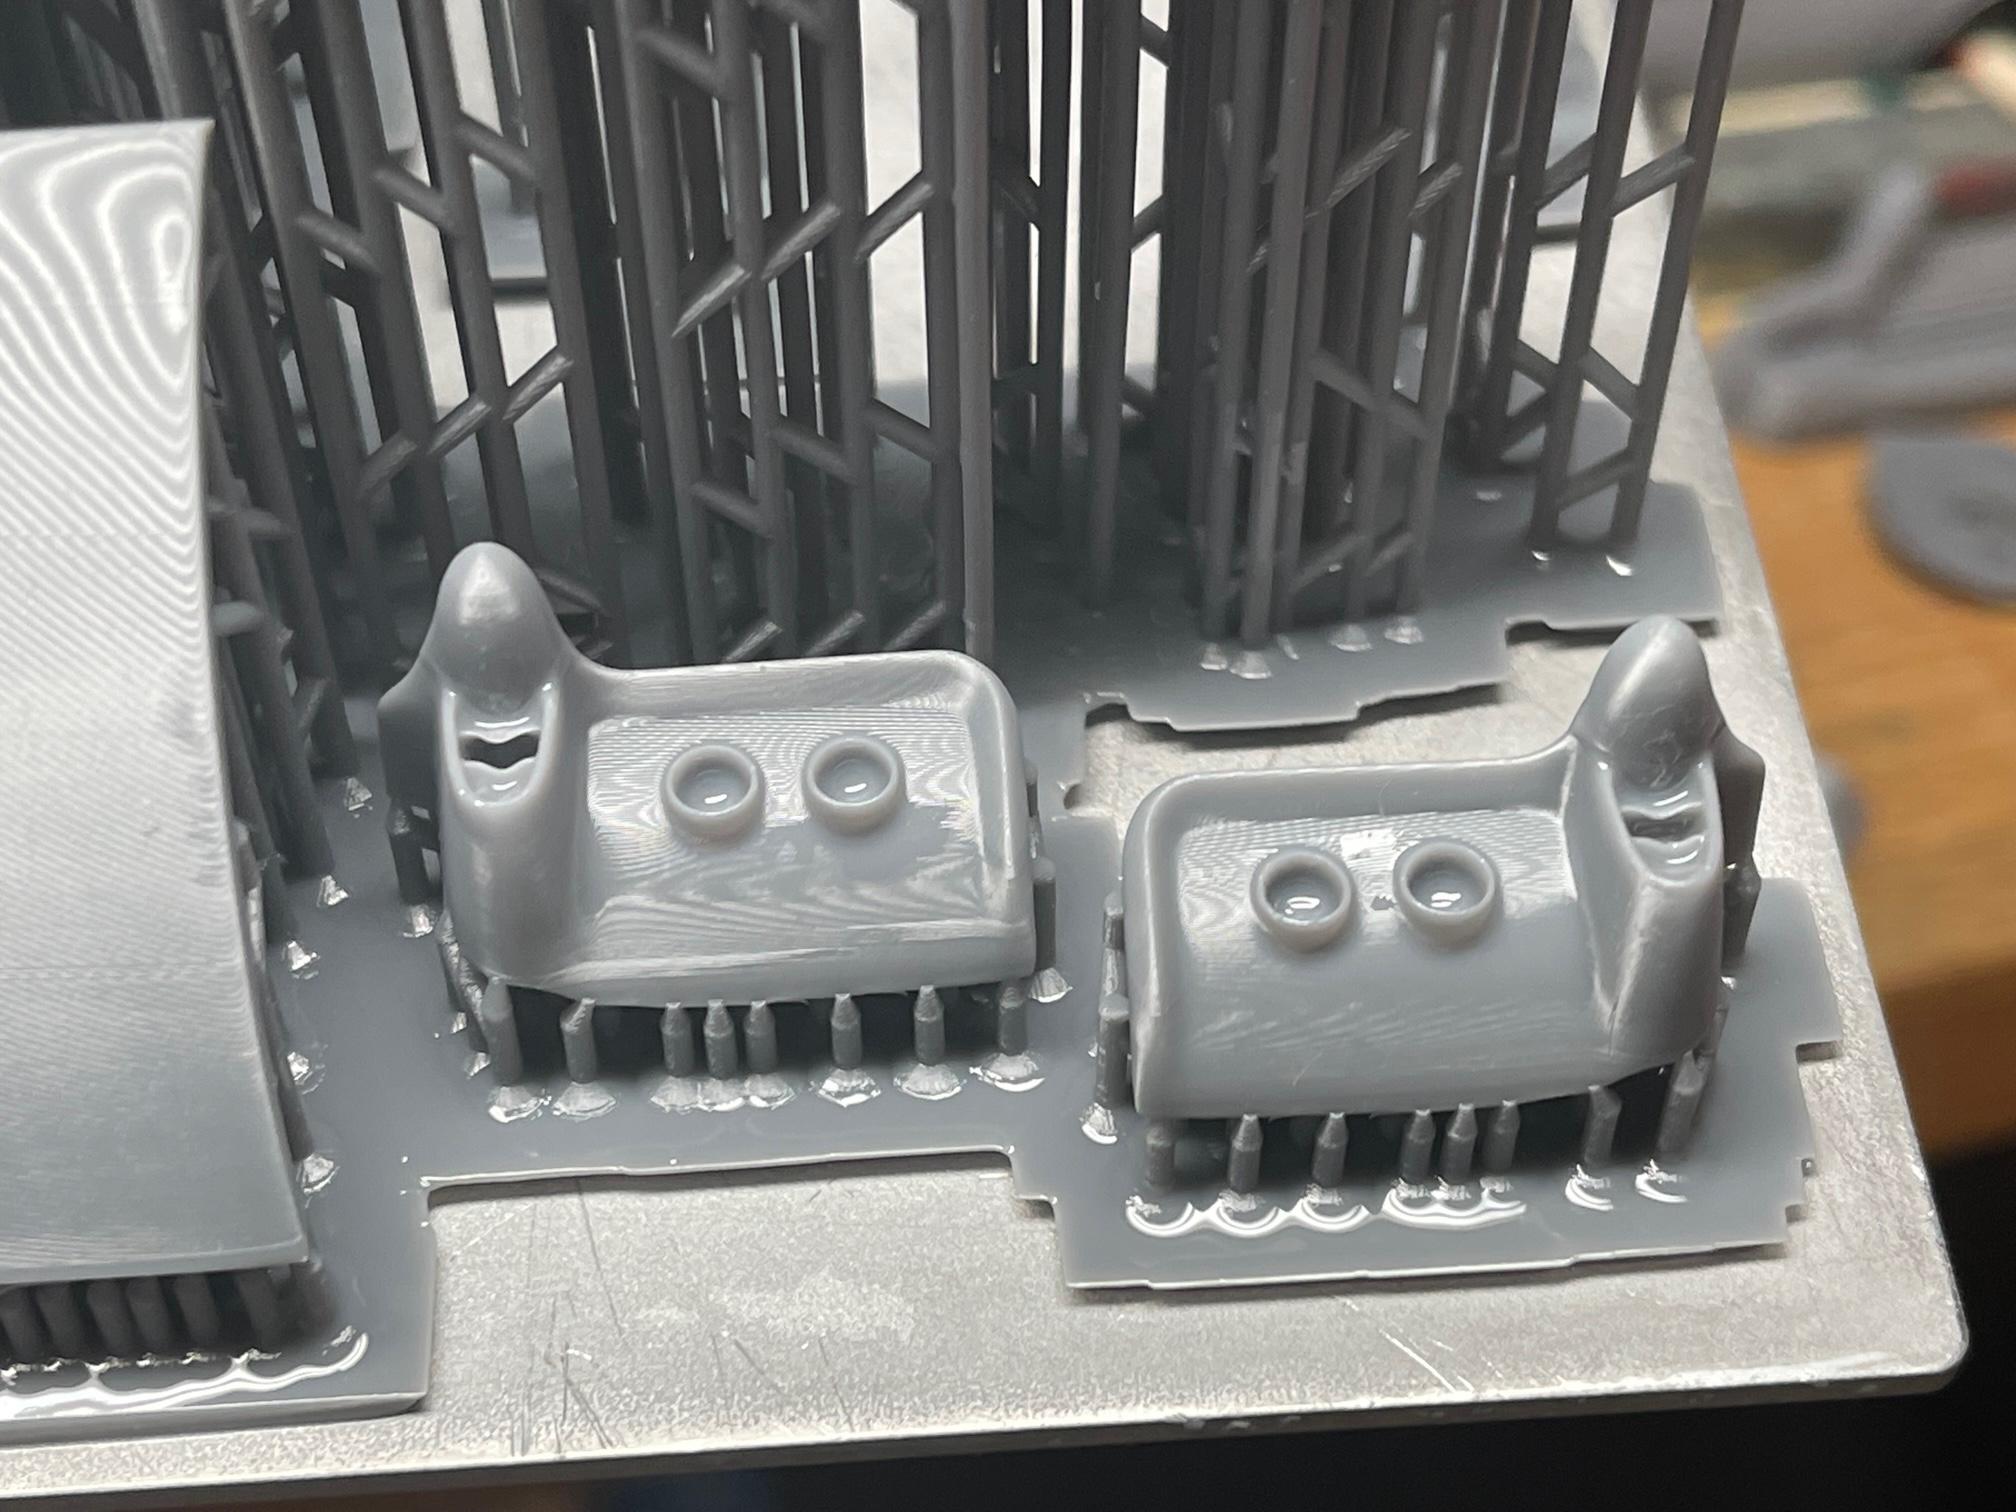
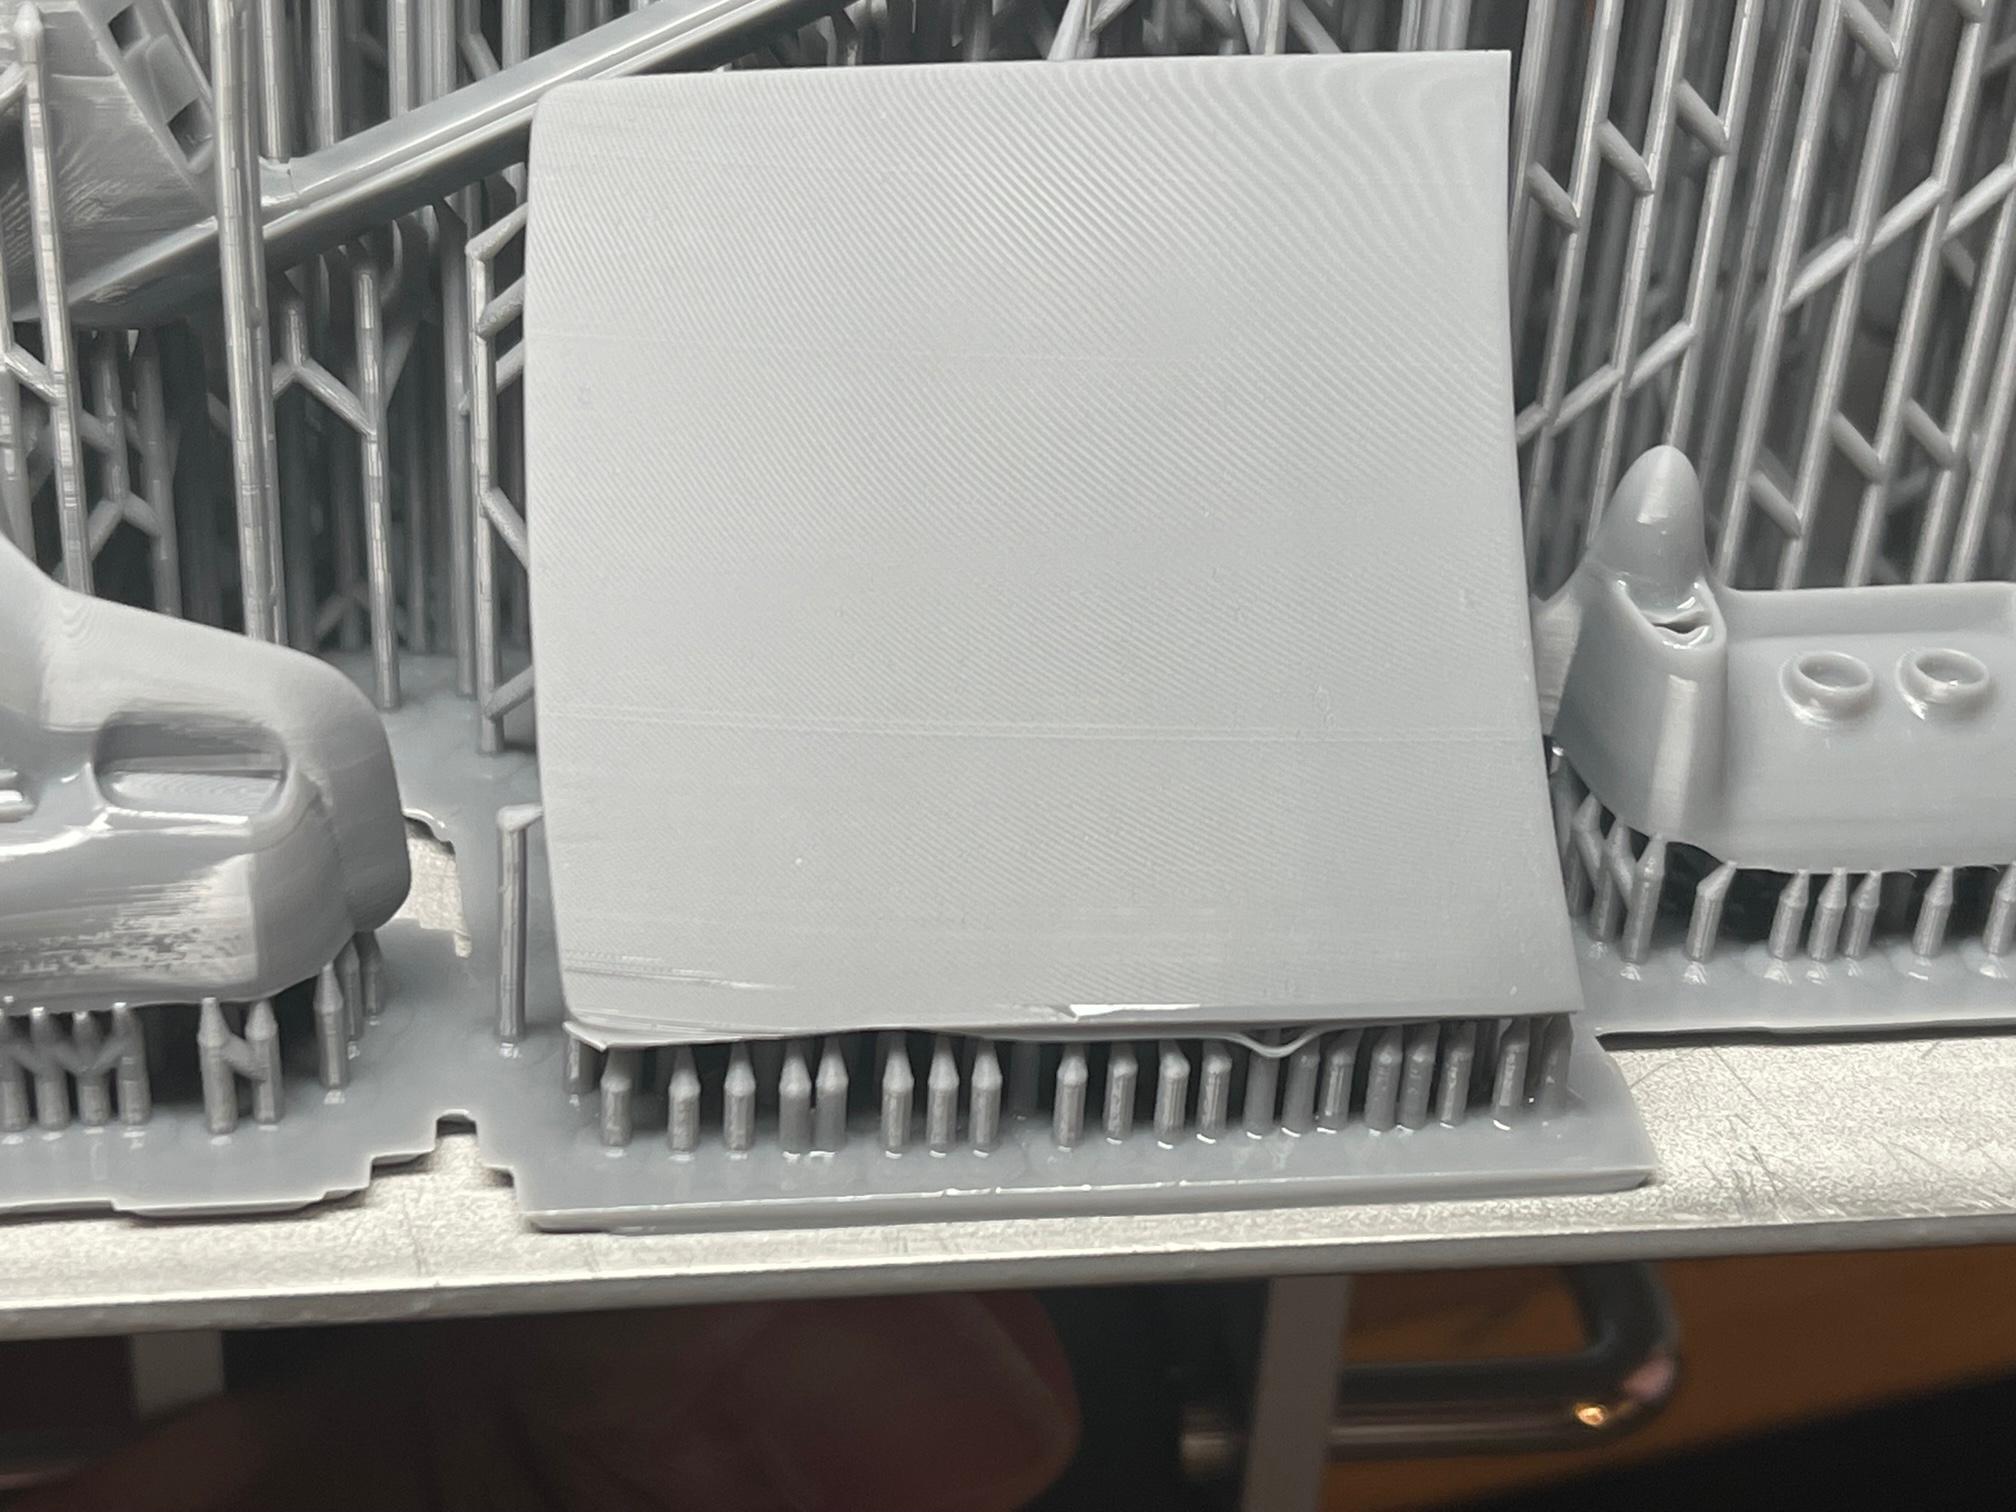
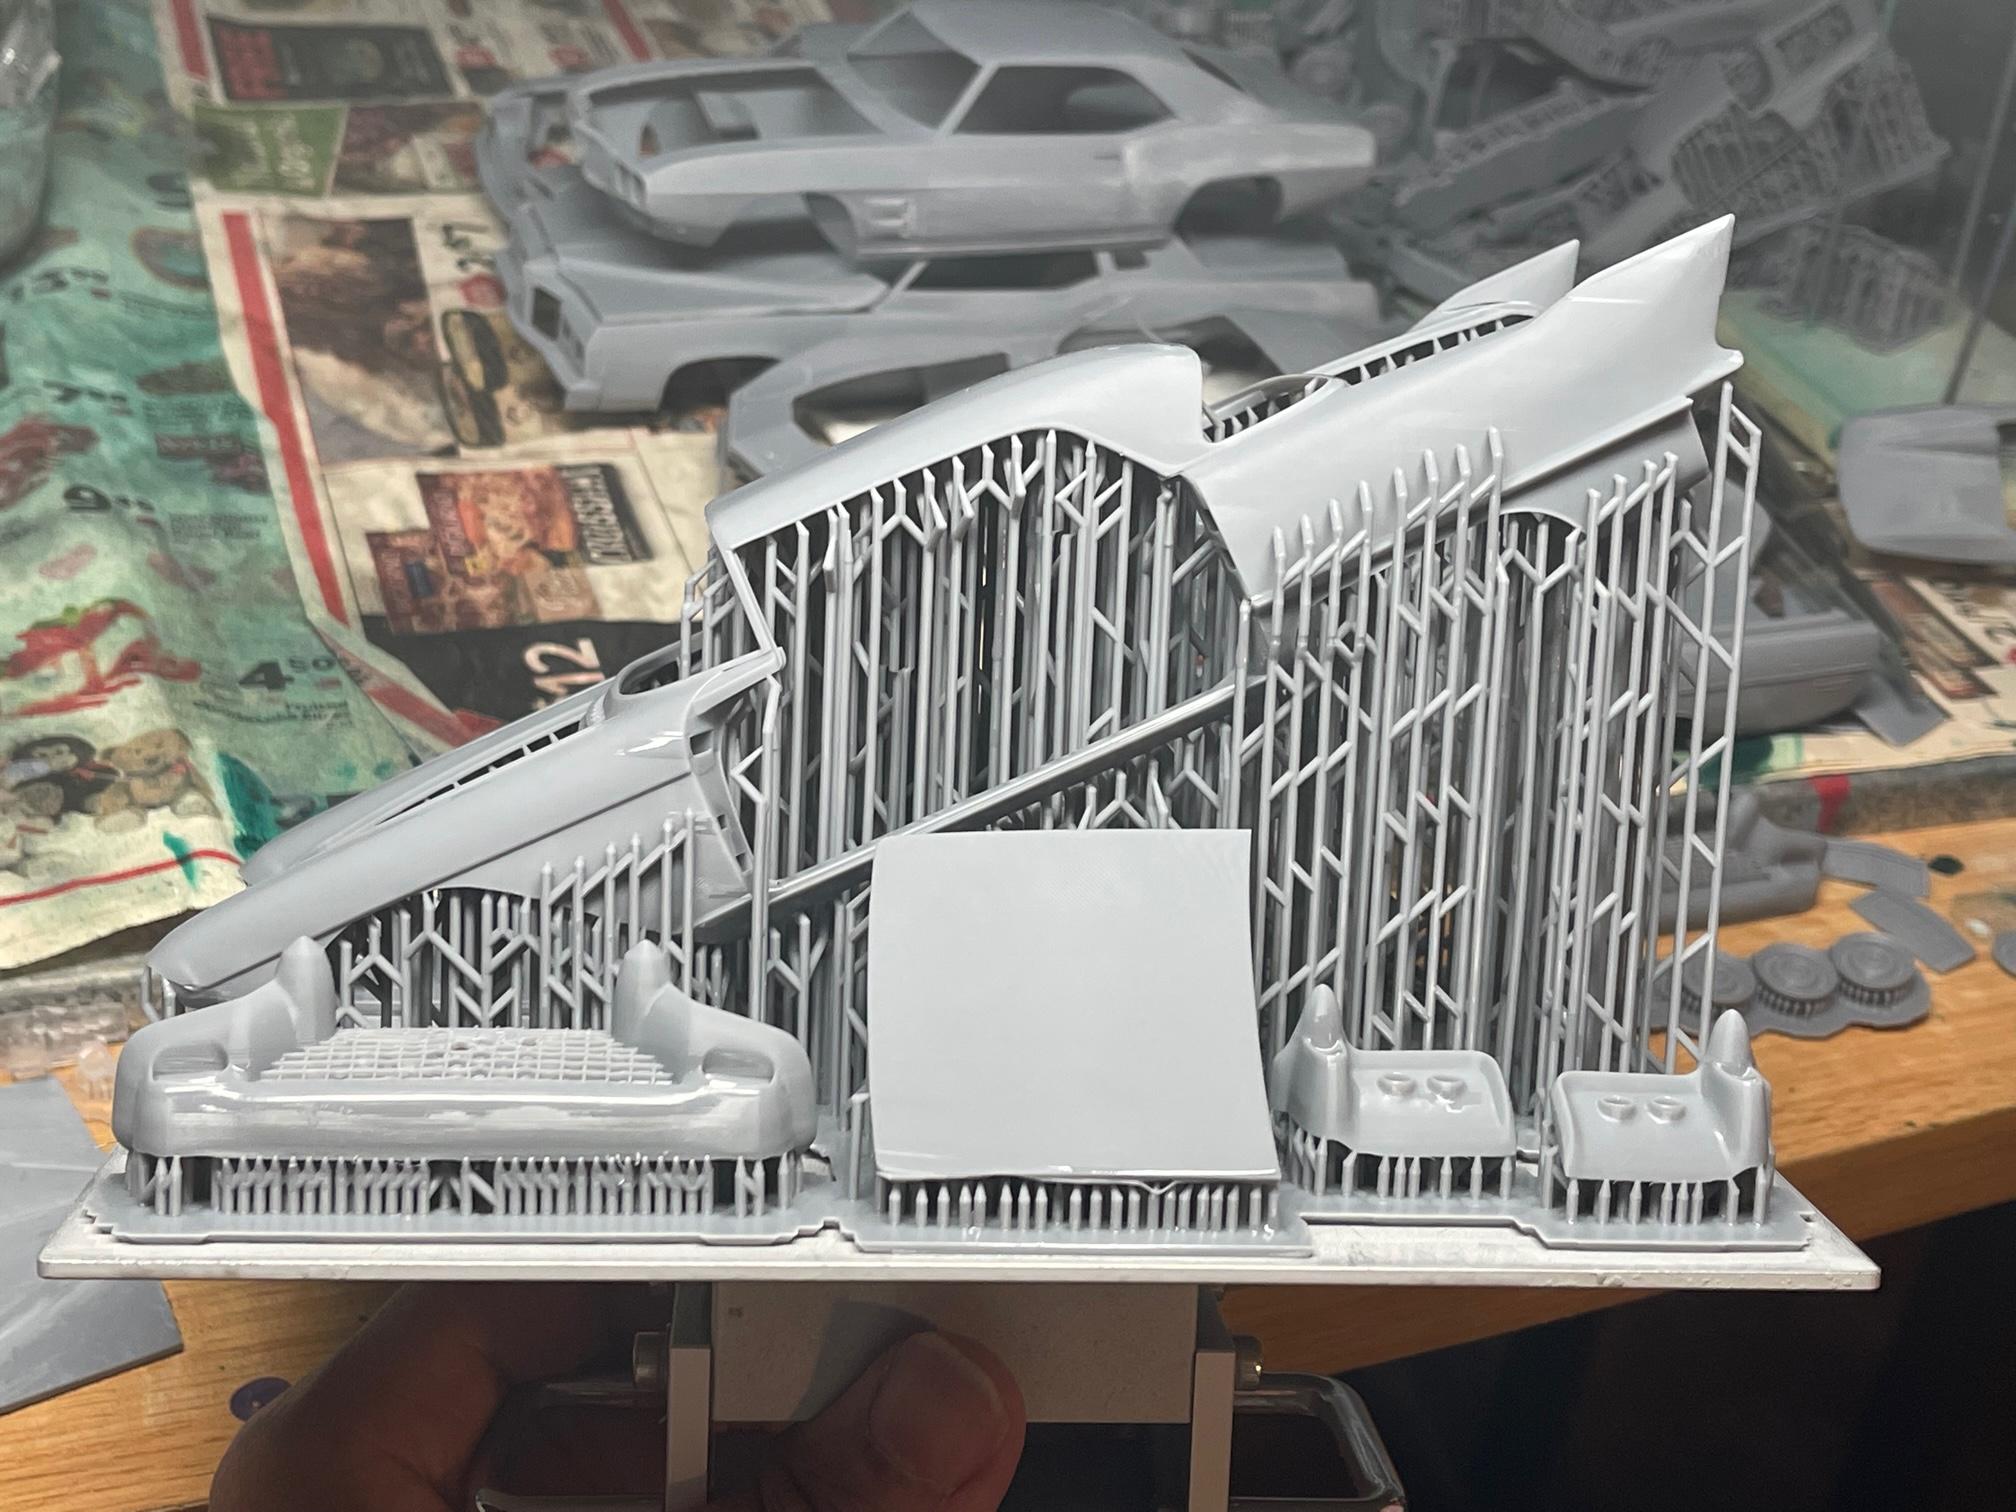
Yes, many of us have tried to deal with the hoary Revell kit that was kitted back when that car was new. I attempted to make a bunch of corrections to it back in the '90's and was fairly successful, but unfortunately the model fell on the floor, and shattered in several places-----right where I did the bodywork. So, I shelved it and never touched it again. Enter 3D printing: About a year ago, a few months after I got my first printer, I got interested in getting away from "printable" files, and wanted to start creating my own by learning how to take .obj files and make them printable. I downloaded a file which I fell I fell in love with immediately----the 1957 Cadillac Eldorado Brougham. I got the file, and while it looked excellent in the .obj format, converting it to .stl told quite another story. VERY faceted appearance due to the low poly count of the body, and no amount of smoothing made to the surface looked correct for my tastes. Around the end of last year, someone who follows me on FB and runs a 3D printing business, offered to take the file and see if he could smooth out the surface. I got the file back, and it was a terrific job he did (he used Turbosmooth), but it left the vertices in a lace like pattern and very criss-crossed which makes it VERY difficult for me to divide up the body panels for wall thickness. So-----back in the hard disk it went. I didn't say anything, or complain, I figured someone will come along and do the car eventually, and I'll just wait for a decent file. Well, Doug Craig mentioned an extension a while back which I had heard of before, and actually had it as a part of Blender. It occurred to me to try it out on the Caddy, and wonder of wonders......it made the quads MUCH neater on the surface, and there was yet hope I could finally get this car printable, and get a CORRECT version of the Eldorado Brougham in 1/25 that the kit makers won't touch. I've got a lot of pics below of the printed car, and it'll be on my radar to fully build one of these fine days. So, IMO----the Revell kit has just been rendered obsolete with the print I did, and chalk up another good reason to get into 3D printing. If a kit of a car is not to your liking, you can always find the file of the car, make any changes need if needed at all, print it out and keep steppin'. No need to wait for them to correct anything which seldom happens. OK.........enough with being so long winded..........here are pics below. I did print the other body parts a couple days ago, but those pics are on my phone and not on my laptop where I'm composing this post. Maybe later on I can add those. Some touchups here and there with some liquid resin and a UV light-----not a big deal and it's easier to use than trying to use putty actually. The extra effort in getting this file straightened out was worth it, but I'll admit it was one of the TOUGHEST files I've had to deal with to date. I hope not to have to deal with another one like it for some time. BTW, the file originally came from a site called Animium.com. I found out later on though that the exact same file I could have downloaded for free on Gamemodels.ru. Oh well, that's how it goes. Thanks for lookin'!
-
That looks great Doug! ❤️` I did a tiny test print of my '57 Dodge Coronet two door hardtop and it came out pretty good for such a small scale. In the not too distant future, I'll run the 1/25 version and see how that comes out. Except for maybe an old promo, I don't think the '57-'58 Dodge dash has ever been kitted. Those old promos could have been empty shells like the others, and then the '59 Dodge dash was kitted by Johan with the interior, but that's a completely different animal.
-
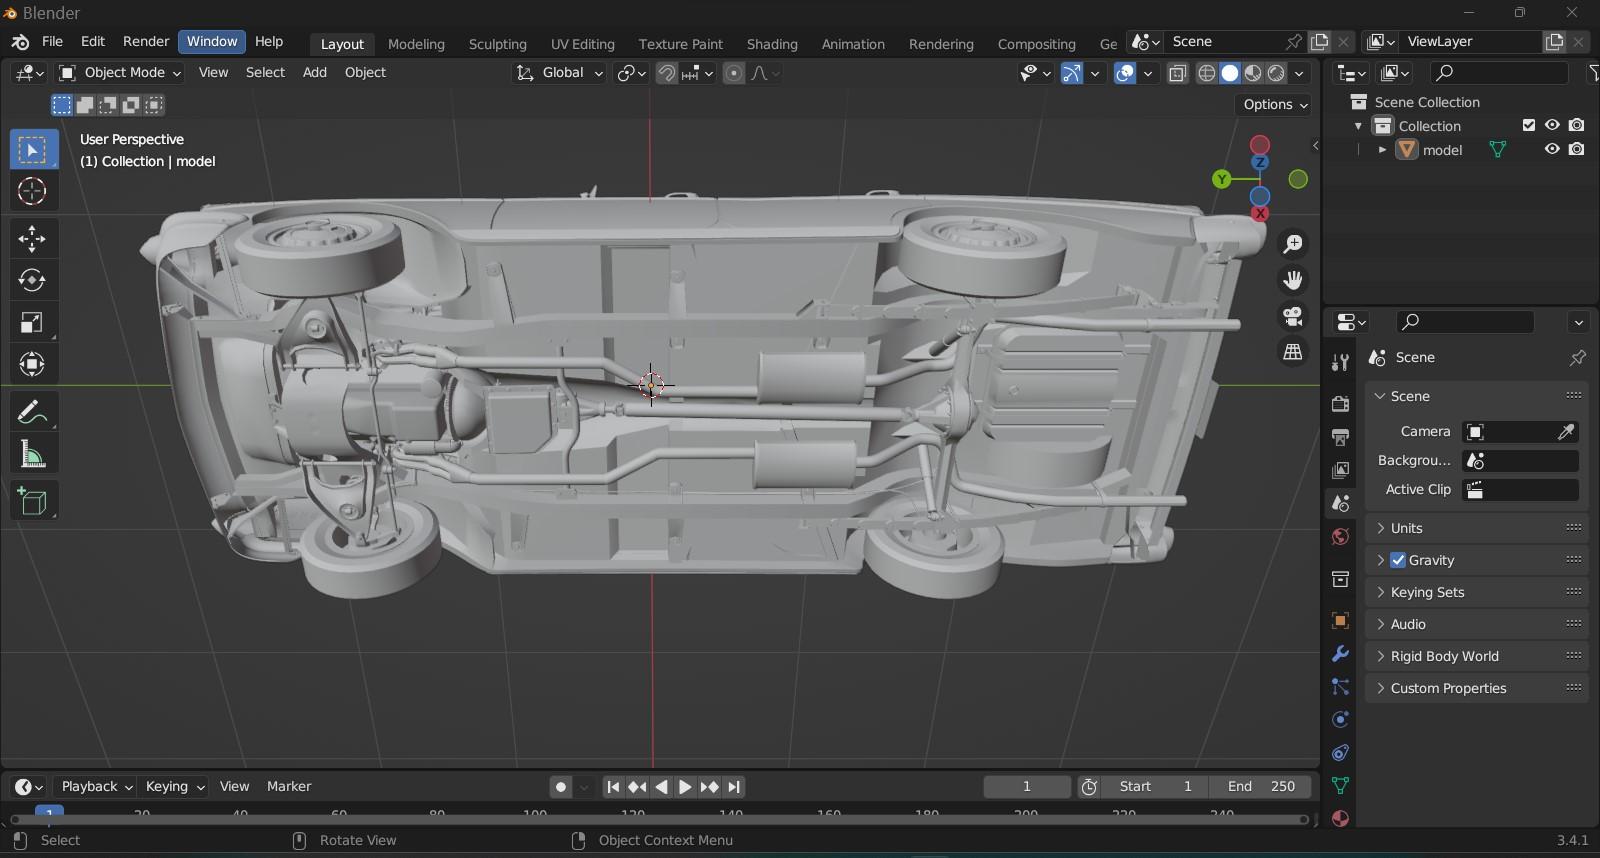
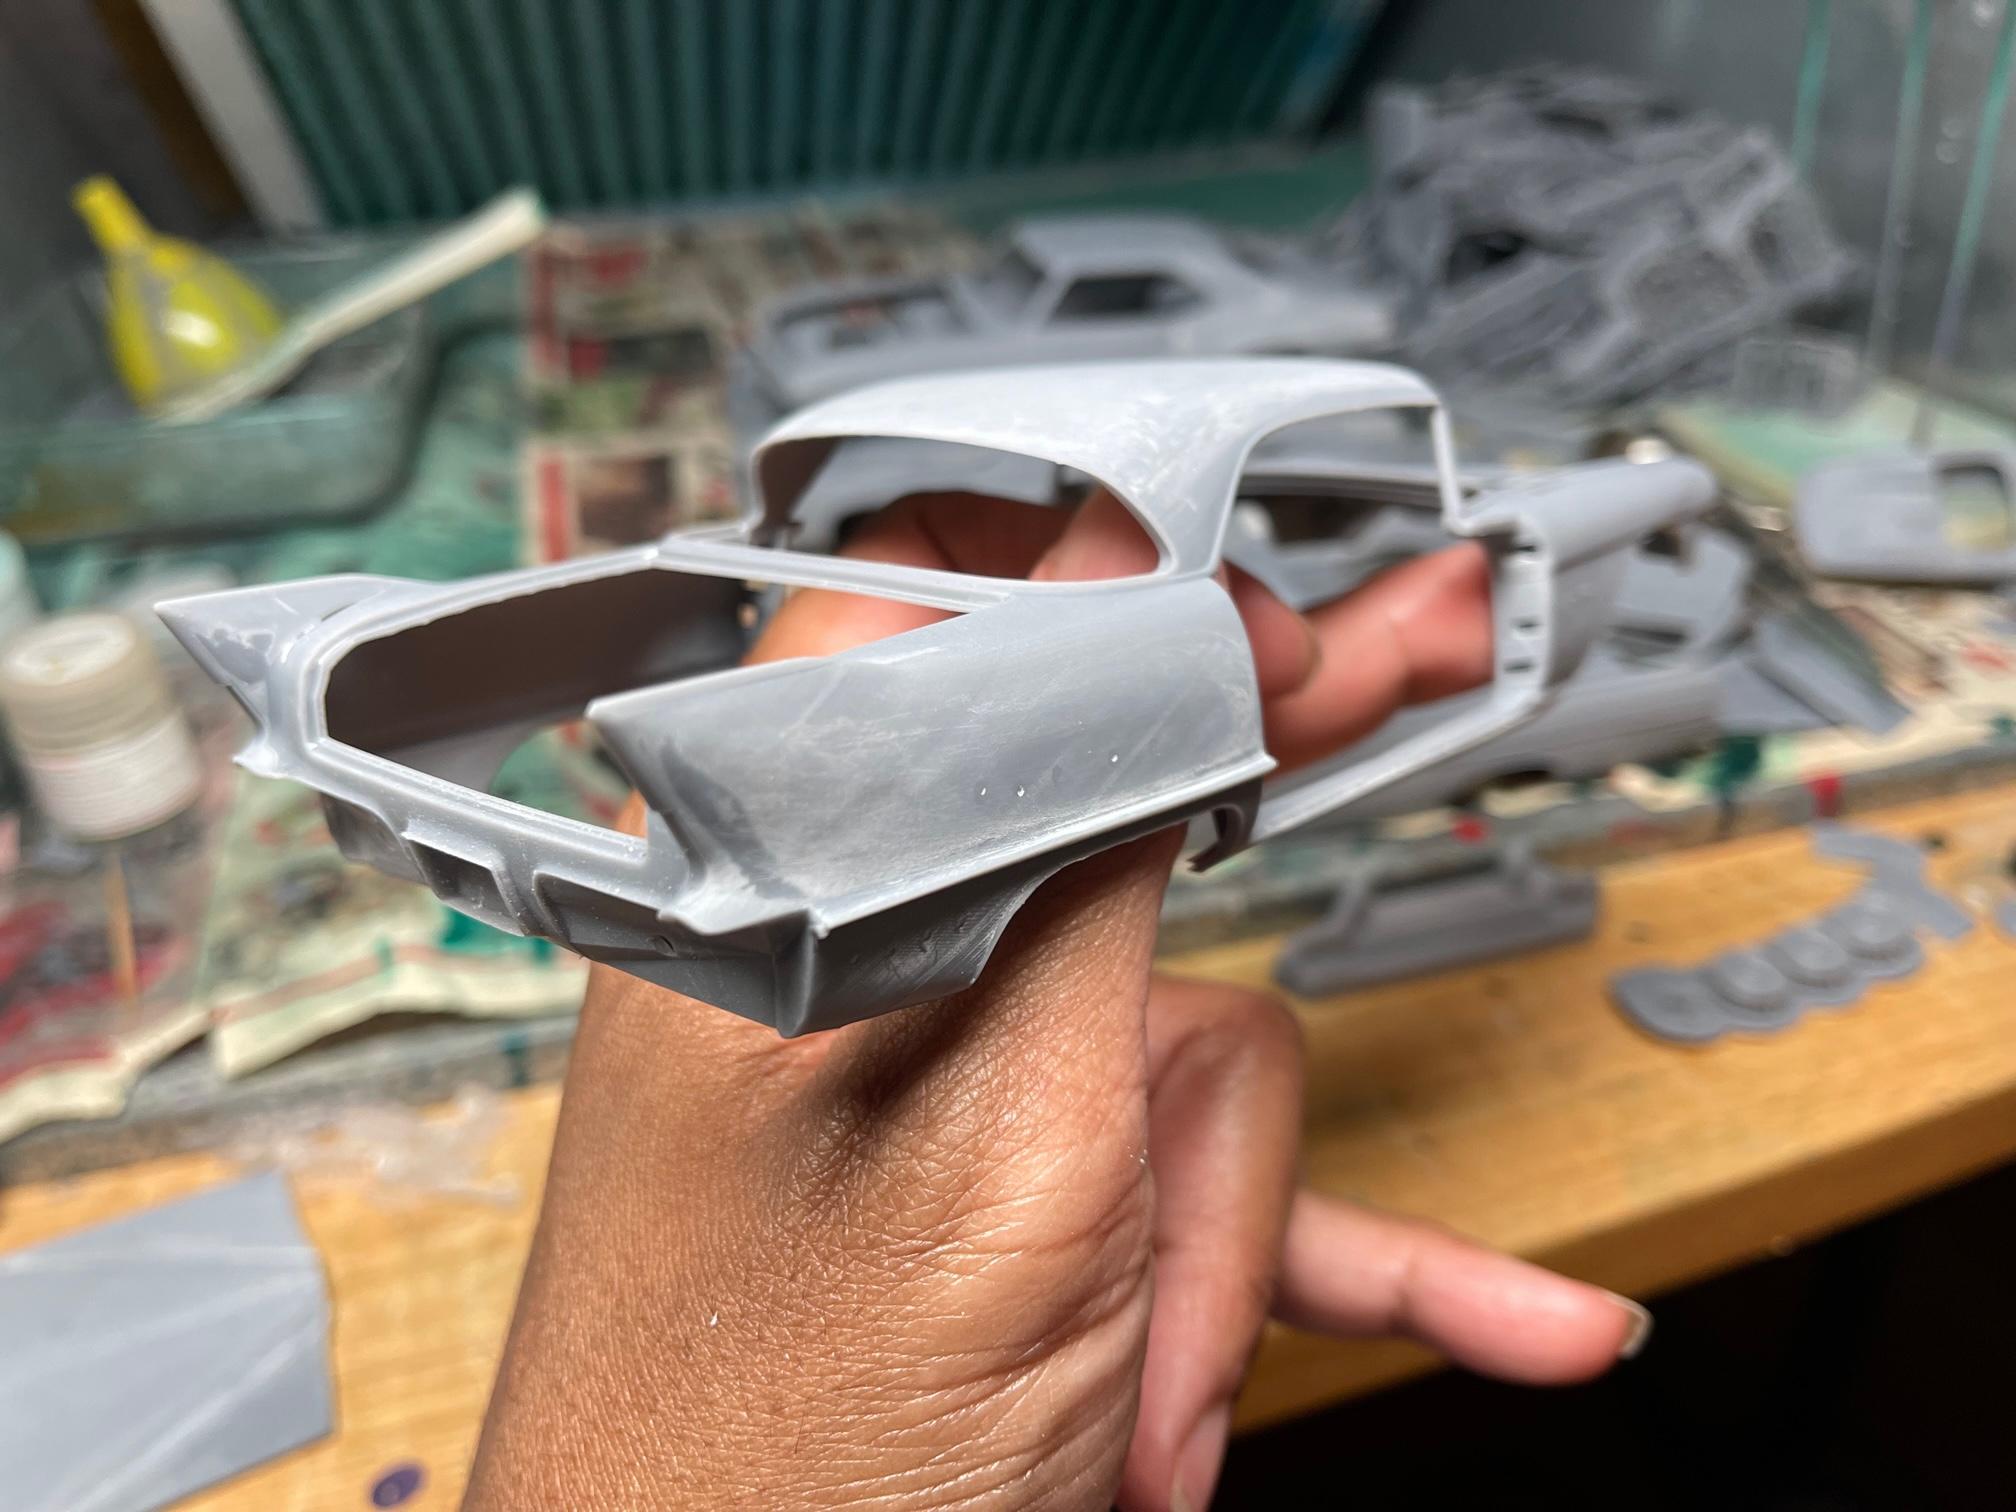
MOPARS of that era that I've seen used a gray primer for the chassis (Ford loved red oxide primer), but depending on where the car was sold, and what dealer it ended up in, it could have been sprayed with a black undercoat to retard rust. When I did my '69 Charger Daytona years ago, I remember using a gray primer on the underside, as that's what MOPAR aficionados said that's what came out of the factory, and then spraying the edges with the body color. There was no robot painting in those days, so it's highly doubtful you saw the entire underbody of the car painted like you see today. Hope this helps!
-
Just saw this posted by Joseph Osborn of Fireball Modelworks on Facebook----some good news! ??
- 8 replies
-
- 14
-

-

-
I can tell you Ray, that will be one ambitious project! Not a super difficult kit to build, but you will need to stray from what they tell you from time to time. It would be a good idea if you've not done so, to download all the PDF's for the build. Just in case their site takes a dump for some reason, you'll at least have the instructions at the ready. The kits may already have the instructions included-----I don't know as I had to download all of mine when I had the sub. I hear you about changes in the hobby. I've done that quite a bit in the last year as I've focused a lot more on 3D designs and prints, as opposed to building the physical objects. Due to my eyesight, which gets worse by the year, it's MUCH easier for me to do 3D files on my laptop as I can see the screen so much easier, than to manipulate tiny parts barely 3" away from my eyes. If you need any help with Cobra at any point, you can drop me a line. One rough area might be the working suspension as you have to follow the instructions almost to a T. Some parts require hammering pins in with serrated edges. Once those are in, they're almost impossible to get back out so you have to double check to make sure what goes with what. In the end though-----you'll have a model that very few others will have as production due to its price is rather limited. Michael, that can be had here.....