-
Posts
7,265 -
Joined
-
Last visited
Content Type
Profiles
Forums
Events
Gallery
Everything posted by Ira
-

MOON BEAST! 12 Cylinder, 2000 HP Drag Strip Terror is Finished!
Ira replied to Ira's topic in WIP: Drag Racing Models
Thanks for the kind words Carl! I really appreciate it... -

MOON BEAST! 12 Cylinder, 2000 HP Drag Strip Terror is Finished!
Ira replied to Ira's topic in WIP: Drag Racing Models
Thanks Dave! -
Looks Great!
-
Wonderful Project! Great Start...
-

MOON BEAST! 12 Cylinder, 2000 HP Drag Strip Terror is Finished!
Ira replied to Ira's topic in WIP: Drag Racing Models
Thanks Gene! Glad you like it... -

MOON BEAST! 12 Cylinder, 2000 HP Drag Strip Terror is Finished!
Ira replied to Ira's topic in WIP: Drag Racing Models
Thanks Seth! -

MOON BEAST! 12 Cylinder, 2000 HP Drag Strip Terror is Finished!
Ira replied to Ira's topic in WIP: Drag Racing Models
The Last Few Photos... That's All Folks! Hope you enjoyed the MOON Beast... -

MOON BEAST! 12 Cylinder, 2000 HP Drag Strip Terror is Finished!
Ira replied to Ira's topic in WIP: Drag Racing Models
On & Off - Finished Photos! More Photos Coming... -

MOON BEAST! 12 Cylinder, 2000 HP Drag Strip Terror is Finished!
Ira replied to Ira's topic in WIP: Drag Racing Models
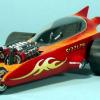
MOON BEAST is Finished! MOON Beast started out as a Monogram Baja Beast. I Sectioned It, Chopped the Top, Narrowed It, Cut Out the Windows and removed a Scoop from each side. Then I added an AMT Allison Engine, Tamiya Driver and Drag Racing parts from a few Dragster Kits. Here are the Finished Photos of the MOON Beast! More Coming... -
Saucer Bumpers! Here is a photo of the Underside. I am going to use Quarter and Half-Round Strips to finish the outer Edge. I glued 2+ Quarter-Round Strips to the underside of the "Overhang" of the Top of the Dish, all the way around. Here is the Top side of the Dish. Next I glued 2+ Half-Round Strips to the Edge, right under the Quarter-Round Strips. The Side View. Now that the Strips are in place, they kind of remind me of Bumper Car Bumpers. More Coming...
-
STRIPS! I glued down the second Strip to form a ring. I needed to add some thickness to the Ring so I glued 2 Strips, that are half as thick as the first 2, over the first 2 Strips. That was the thickness I needed for a good fit. Next I glued the Top on to the bottom of the Disc. With these modifications and the UFO Saucer Sections in place, the Interior Height of the Saucer is now an inch Taller. The UFO Sections are not glued in yet. More Coming...
-
More Headroom! I decided to make the Saucer about 1/4 inch Thicker. The plan is to glue 1/4 inch Plastic Strips between the top and the bottom of the Saucer. I wrapped the Plastic Strips around small paint bottles to make them curve. Much easier to glue this way. I'm using Zap-A-Gap Glue and only gluing part of the Strip at a time, to the bottom of the Saucer. More Coming...
-
Saucer Bumpers! Here is a photo of the Underside. I am going to use Quarter and Half-Round Strips to finish the outer Edge. I glued 2+ Quarter-Round Strips to the underside of the "Overhang" of the Top of the Dish, all the way around. Here is the Top side of the Dish. Next I glued 2+ Half-Round Strips to the Edge, right under the Quarter-Round Strips. The Side View. Now that the Strips are in place, they kind of remind me of Bumper Car Bumpers. More Coming...
-
Vents! I'm going to add several Vents to the McSCAREN. These Plastic Stairs will work just fine. I cut a length of Stairs and used it the mark the areas to be cut out. I cut the areas out with a Drill Bit and a Cut-Off Wheel. After a little cutting and sanding, I got a pretty good fit, so I glued the first 2 Vents in place with Zap-A-Gap. More Coming...
-
Lower... I decided to cut a 1/4 inch section from the Chassis so I can Lower the McSCAREN a little. Before I did any cutting I glued a temporary brace inside the Chassis with Zap-A-Gap. Using a Cut-Off Wheel, I cut the Center Section as close as I could. Then I cut 1/4 inch from the Center Section and glued it back in place. Here is the Top Side after I removed the Temporary Brace. I should be able to lower McSCAREN Now! More Coming...
