Exotics_Builder
-
Posts
3,635 -
Joined
-
Last visited
Content Type
Profiles
Forums
Events
Gallery
Everything posted by Exotics_Builder
-

Alpha Models 1/24 McLaren P1
Exotics_Builder replied to Exotics_Builder's topic in Car Kit News & Reviews
That is what it looks like to me as well. I looked a bit more at it last night. Love the kit overall. Big deal to me is what color scheme. Happy Thanksgiving -
Alpha Models 1/24 McLaren P1
Exotics_Builder replied to Exotics_Builder's topic in Car Kit News & Reviews
Lusso is just started. Finishing off a 66 GTO and 69 Camaro Pace first. I've only done body prep and am deciding on the color options. Look for the build to soon start. It may be. That is why I said there may be a problem. Need to spend a little more time grokking this one. -
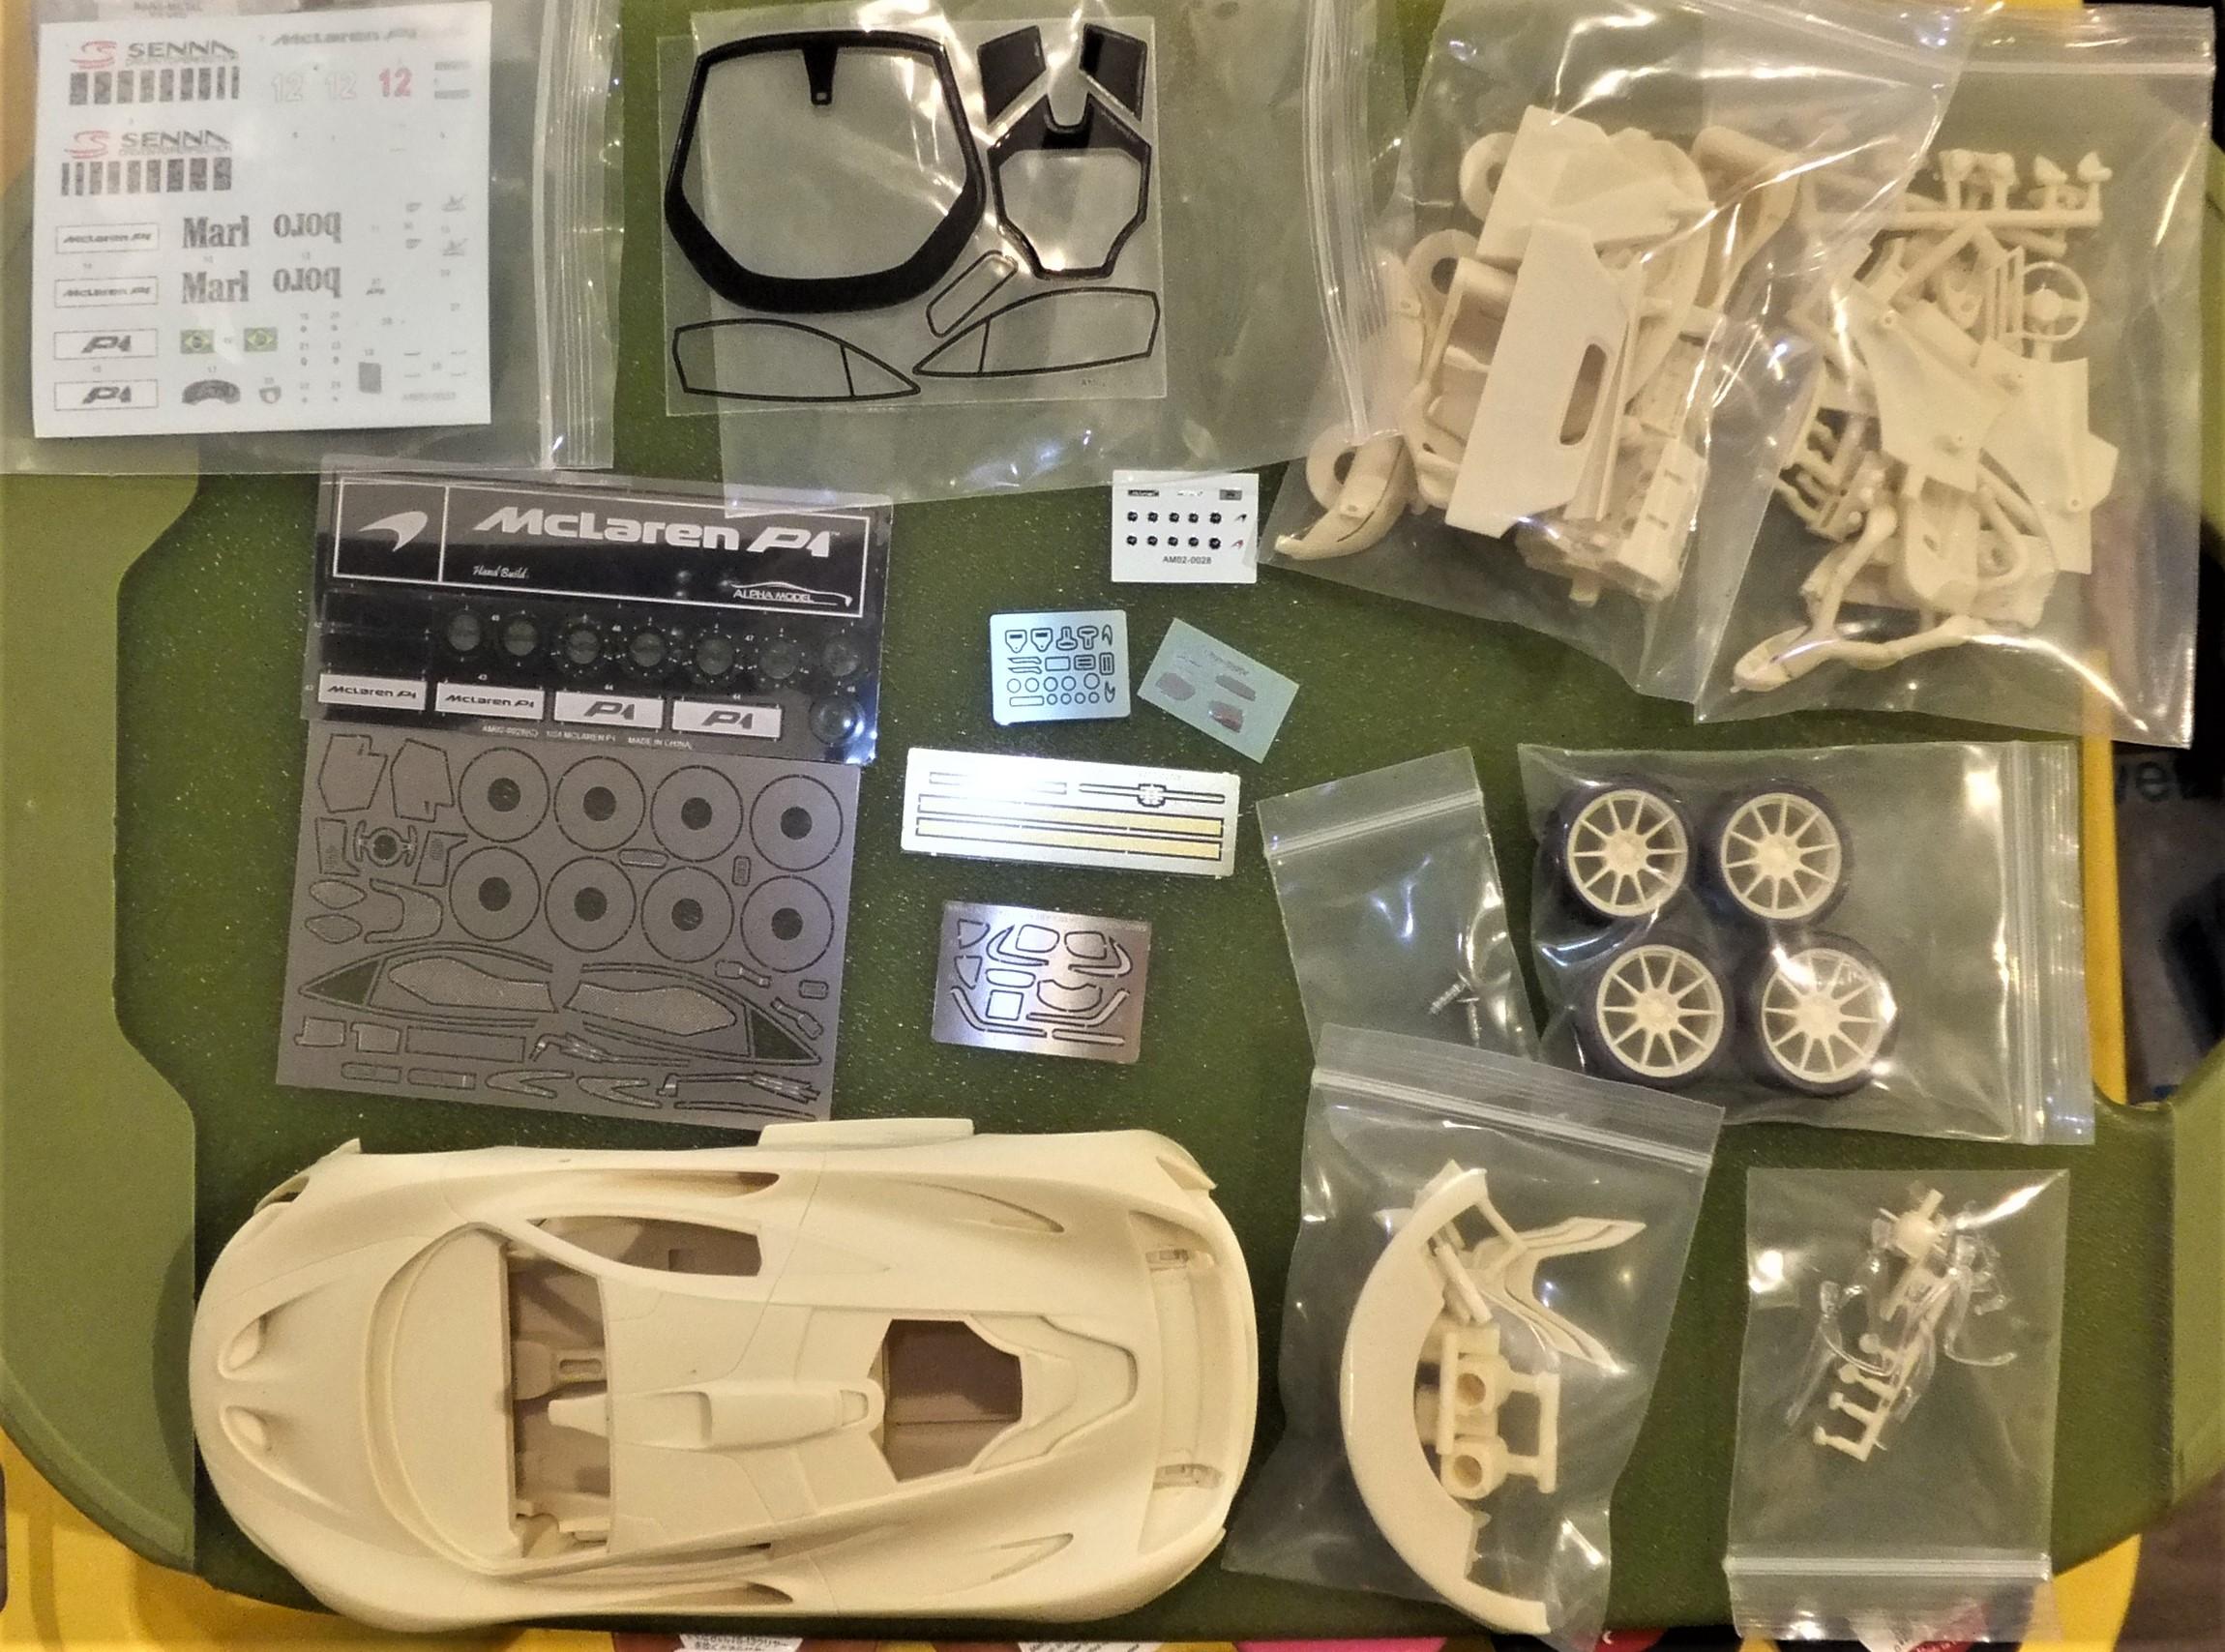
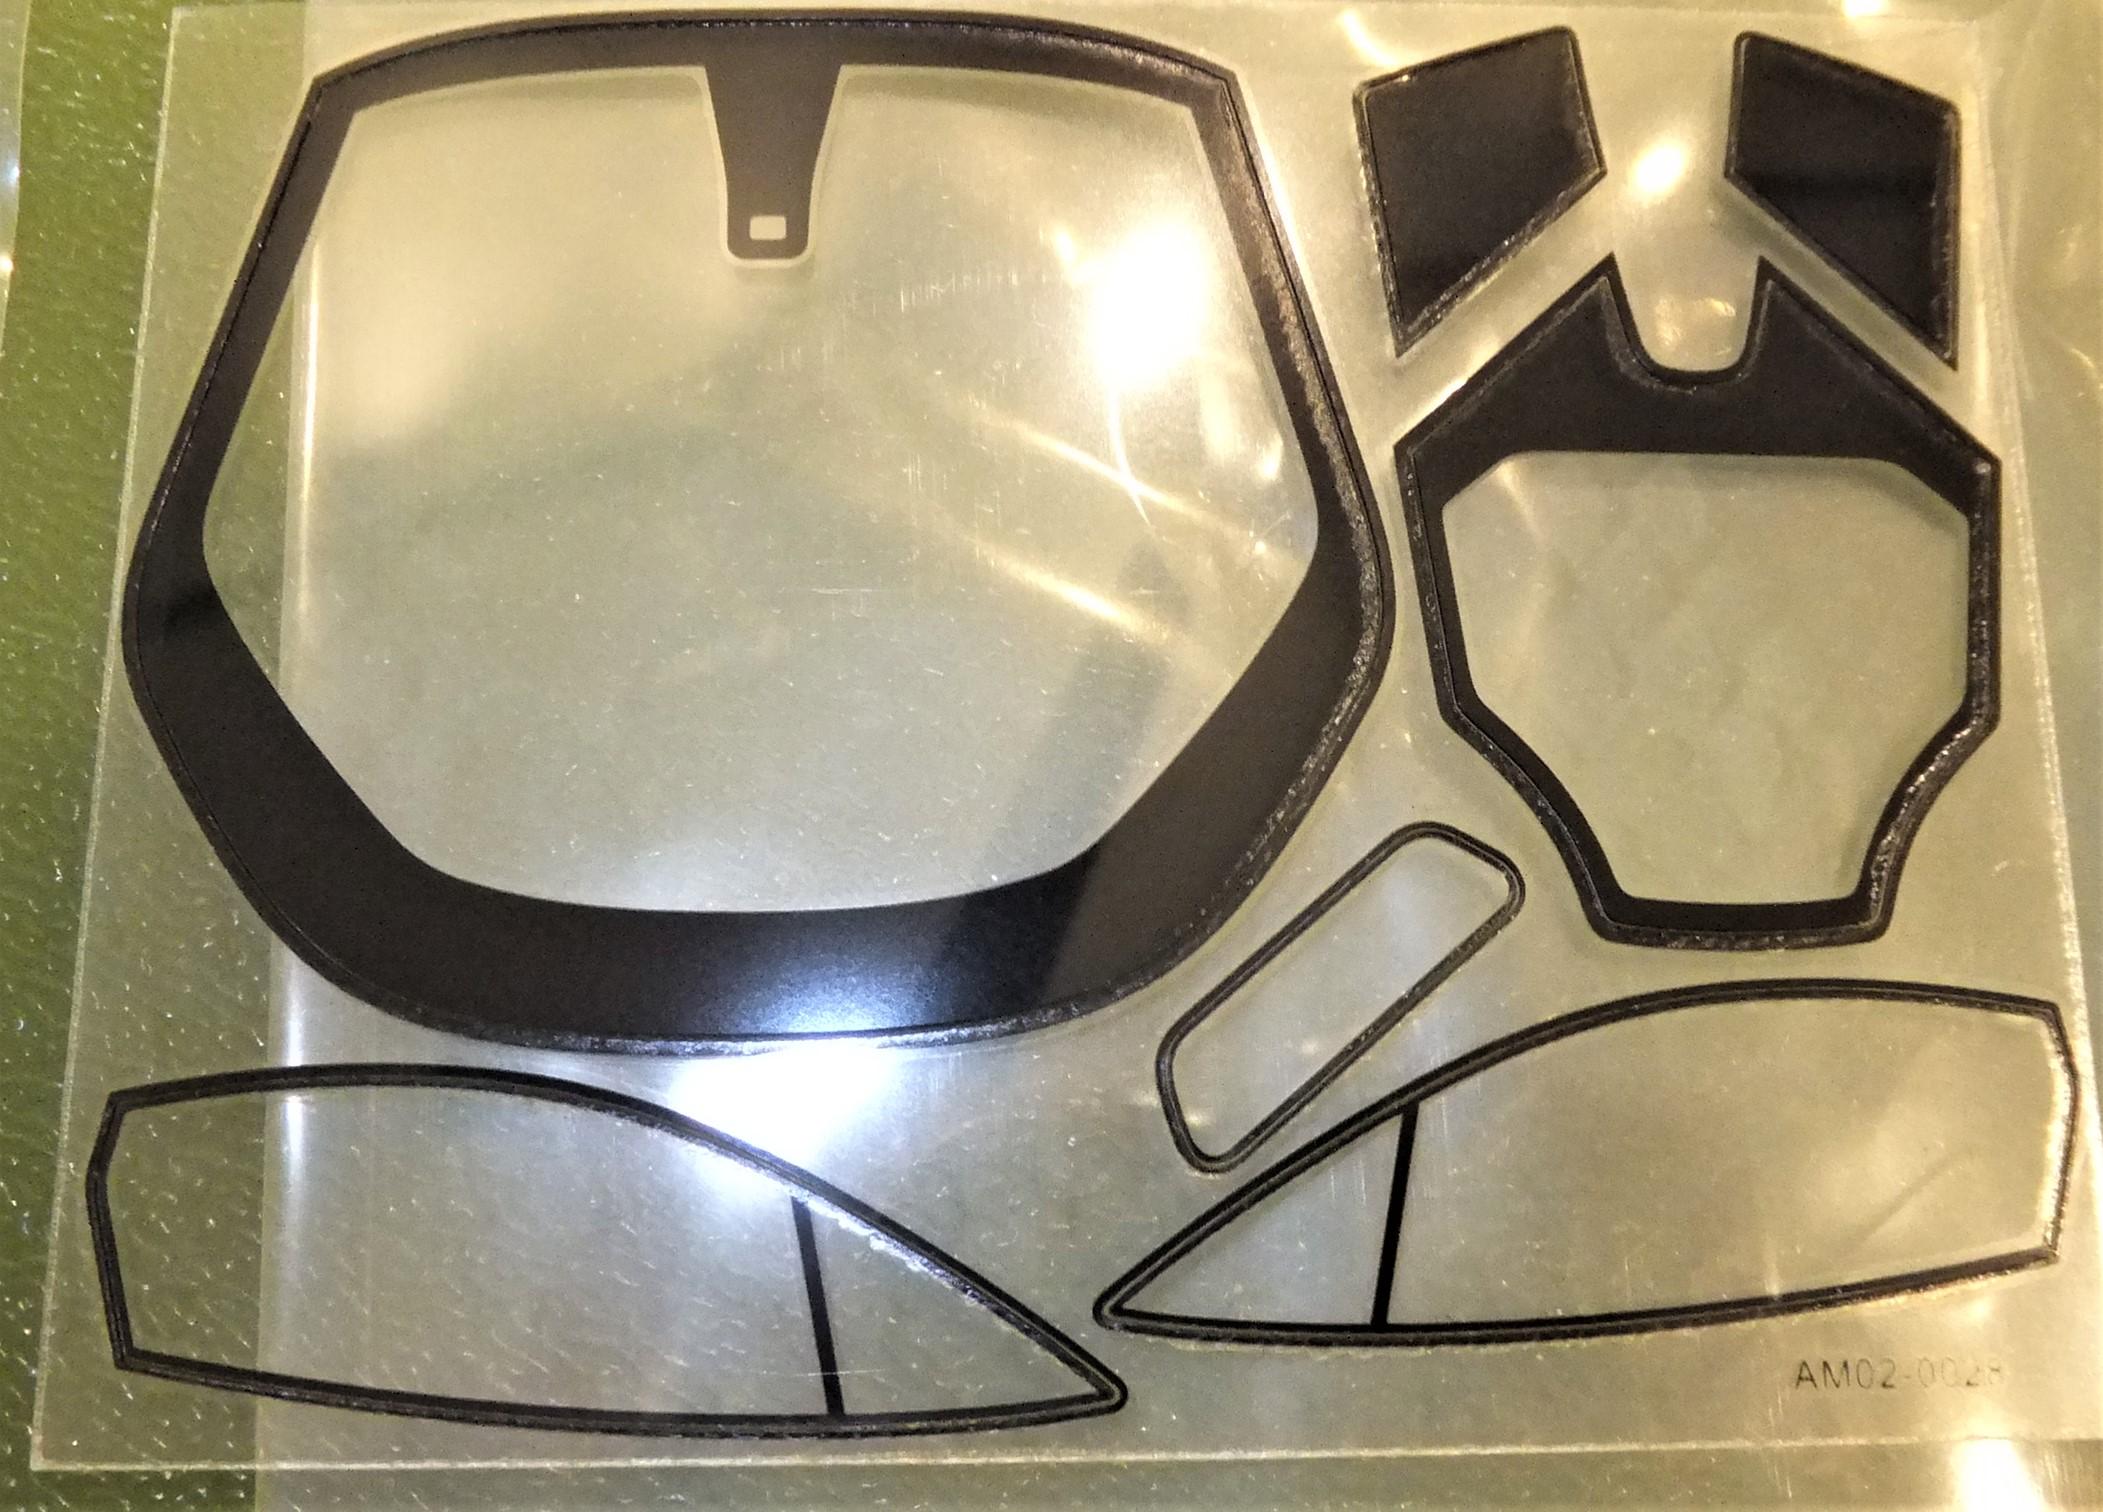
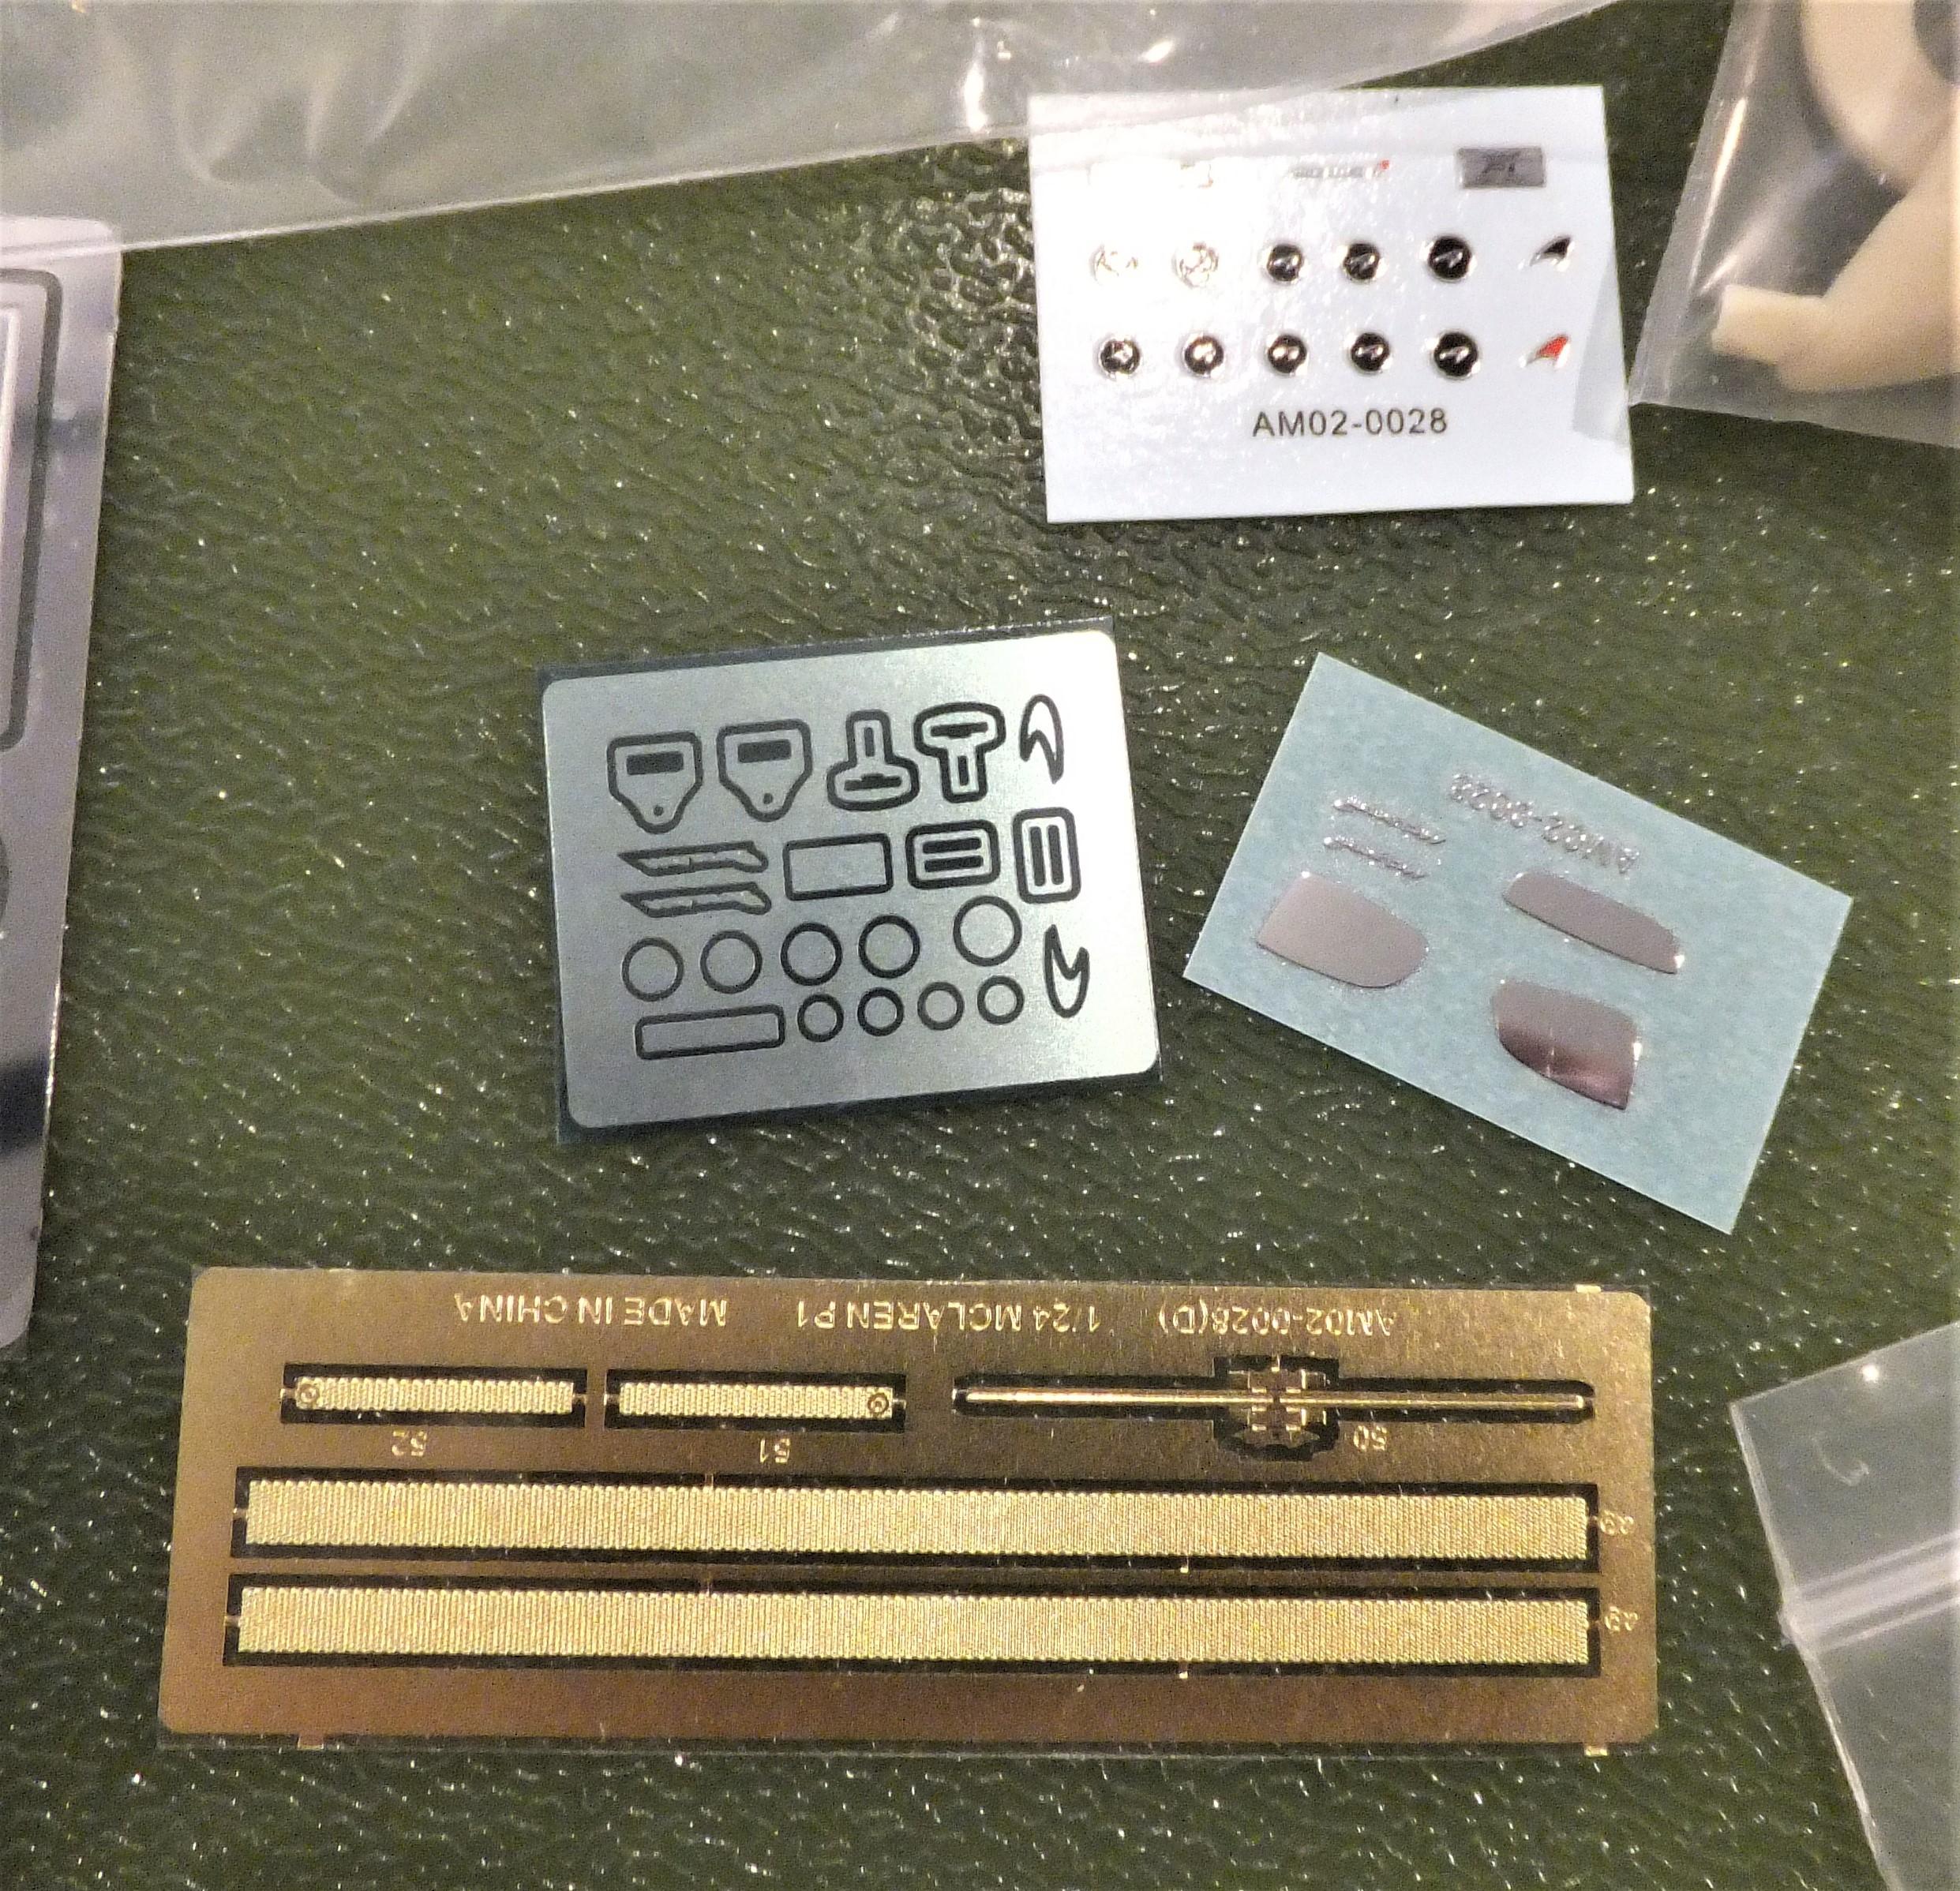
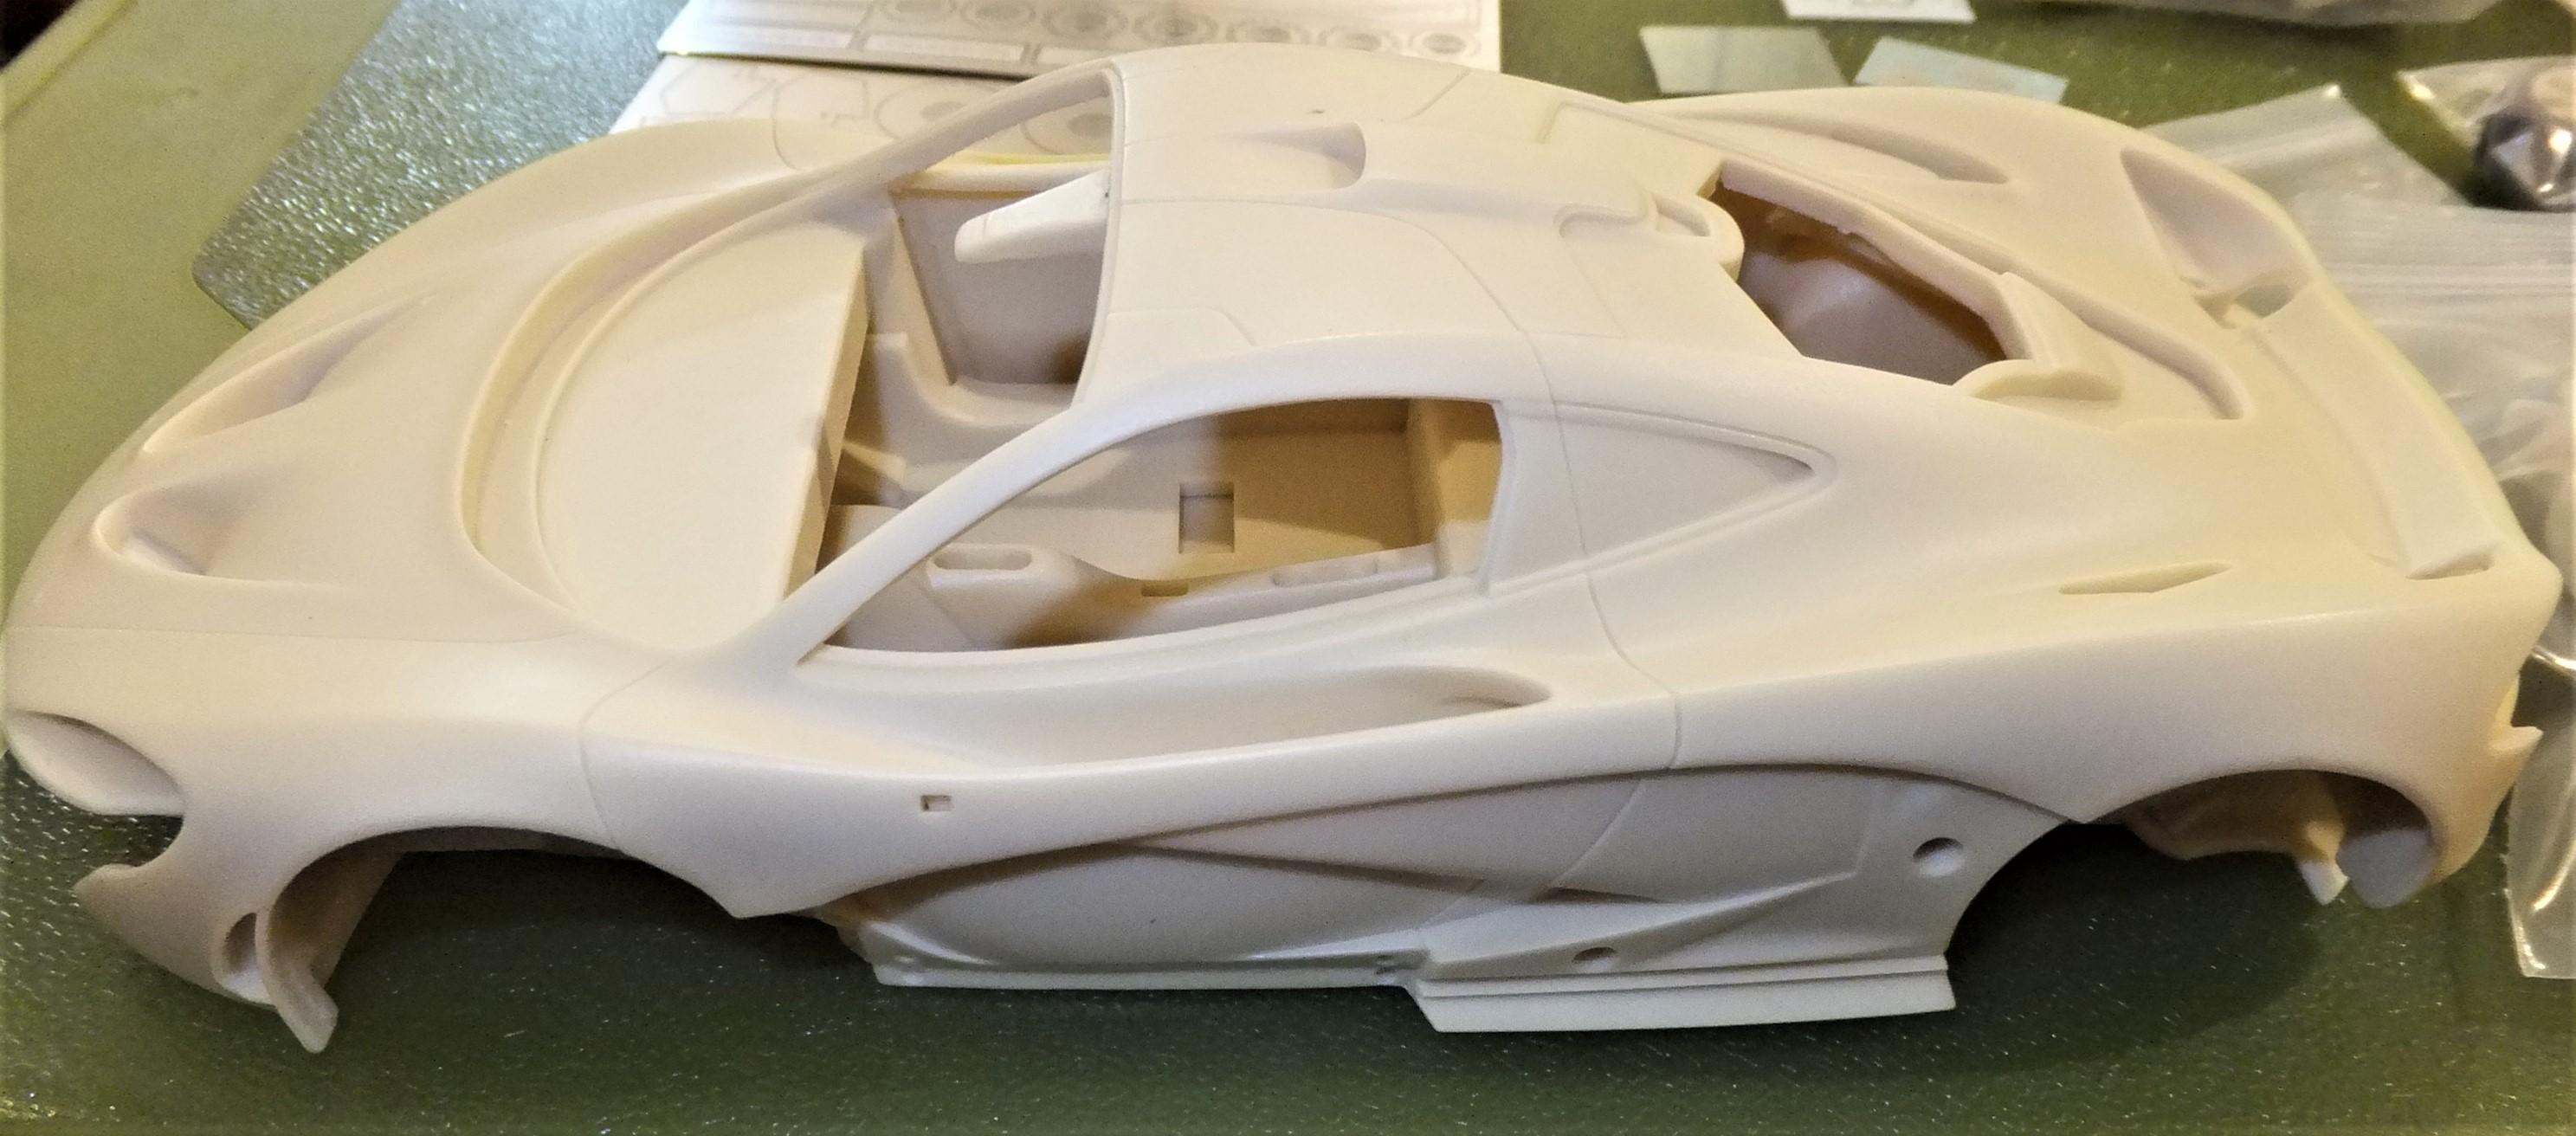
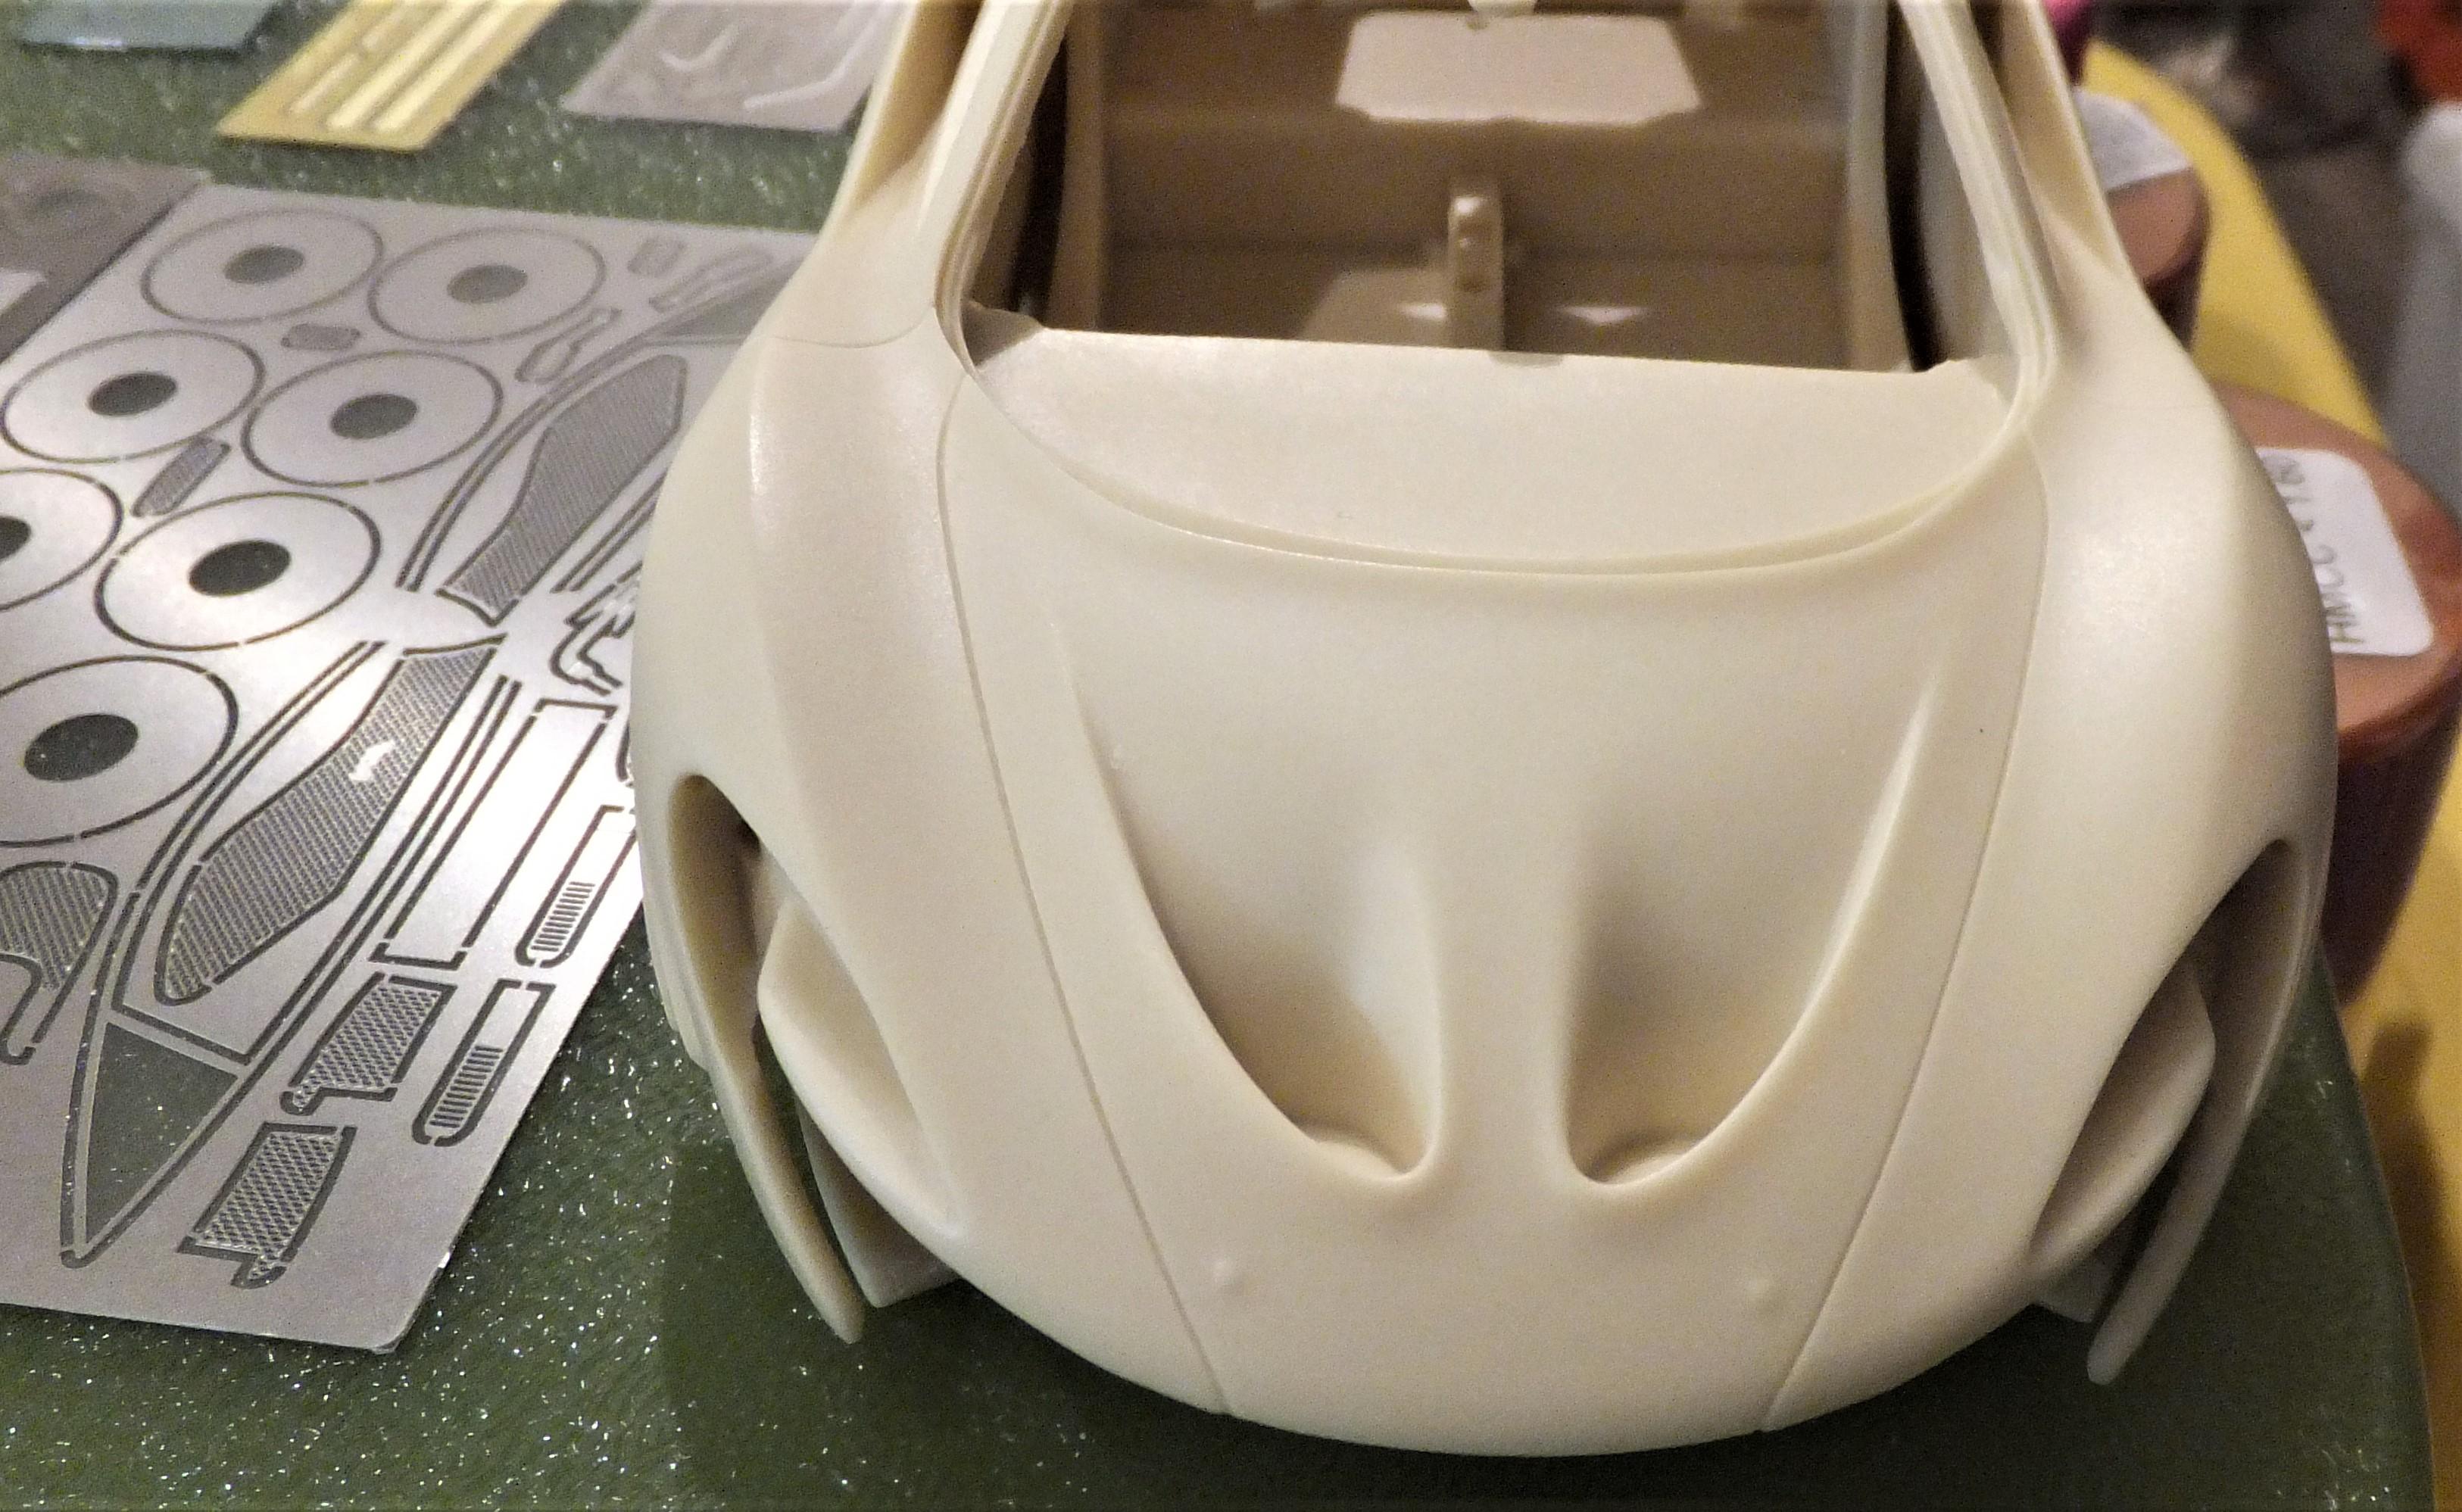
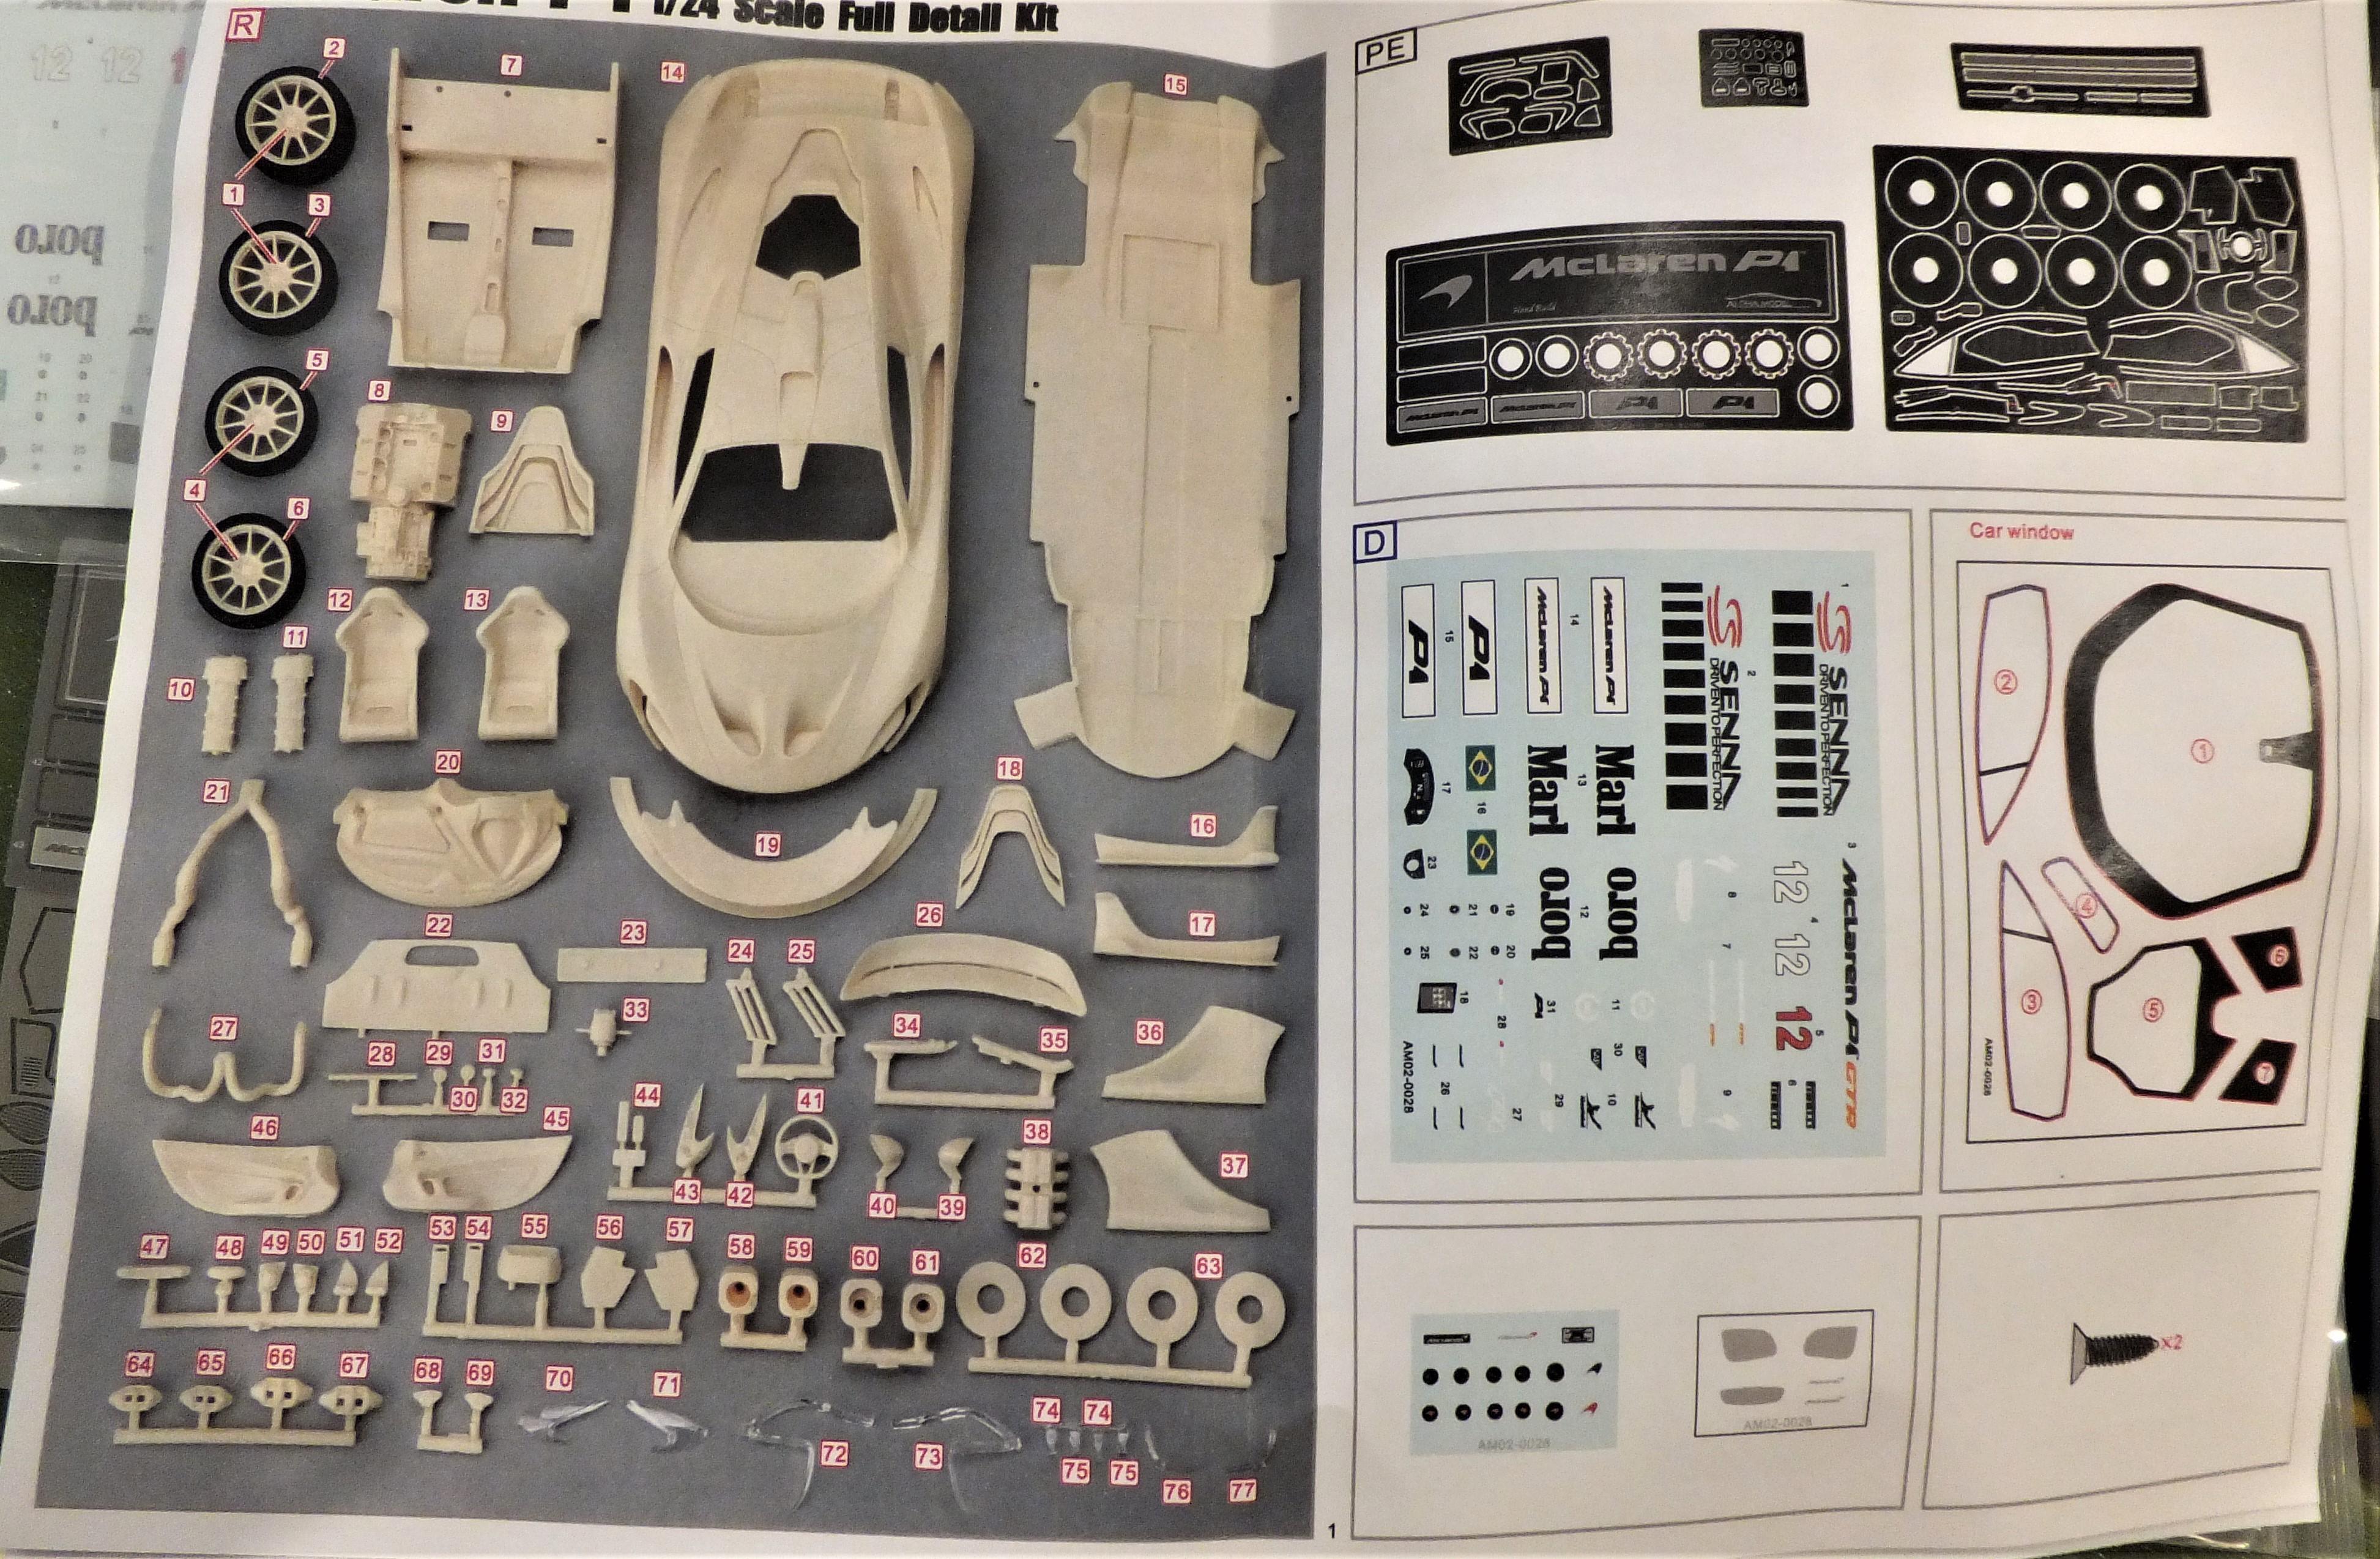
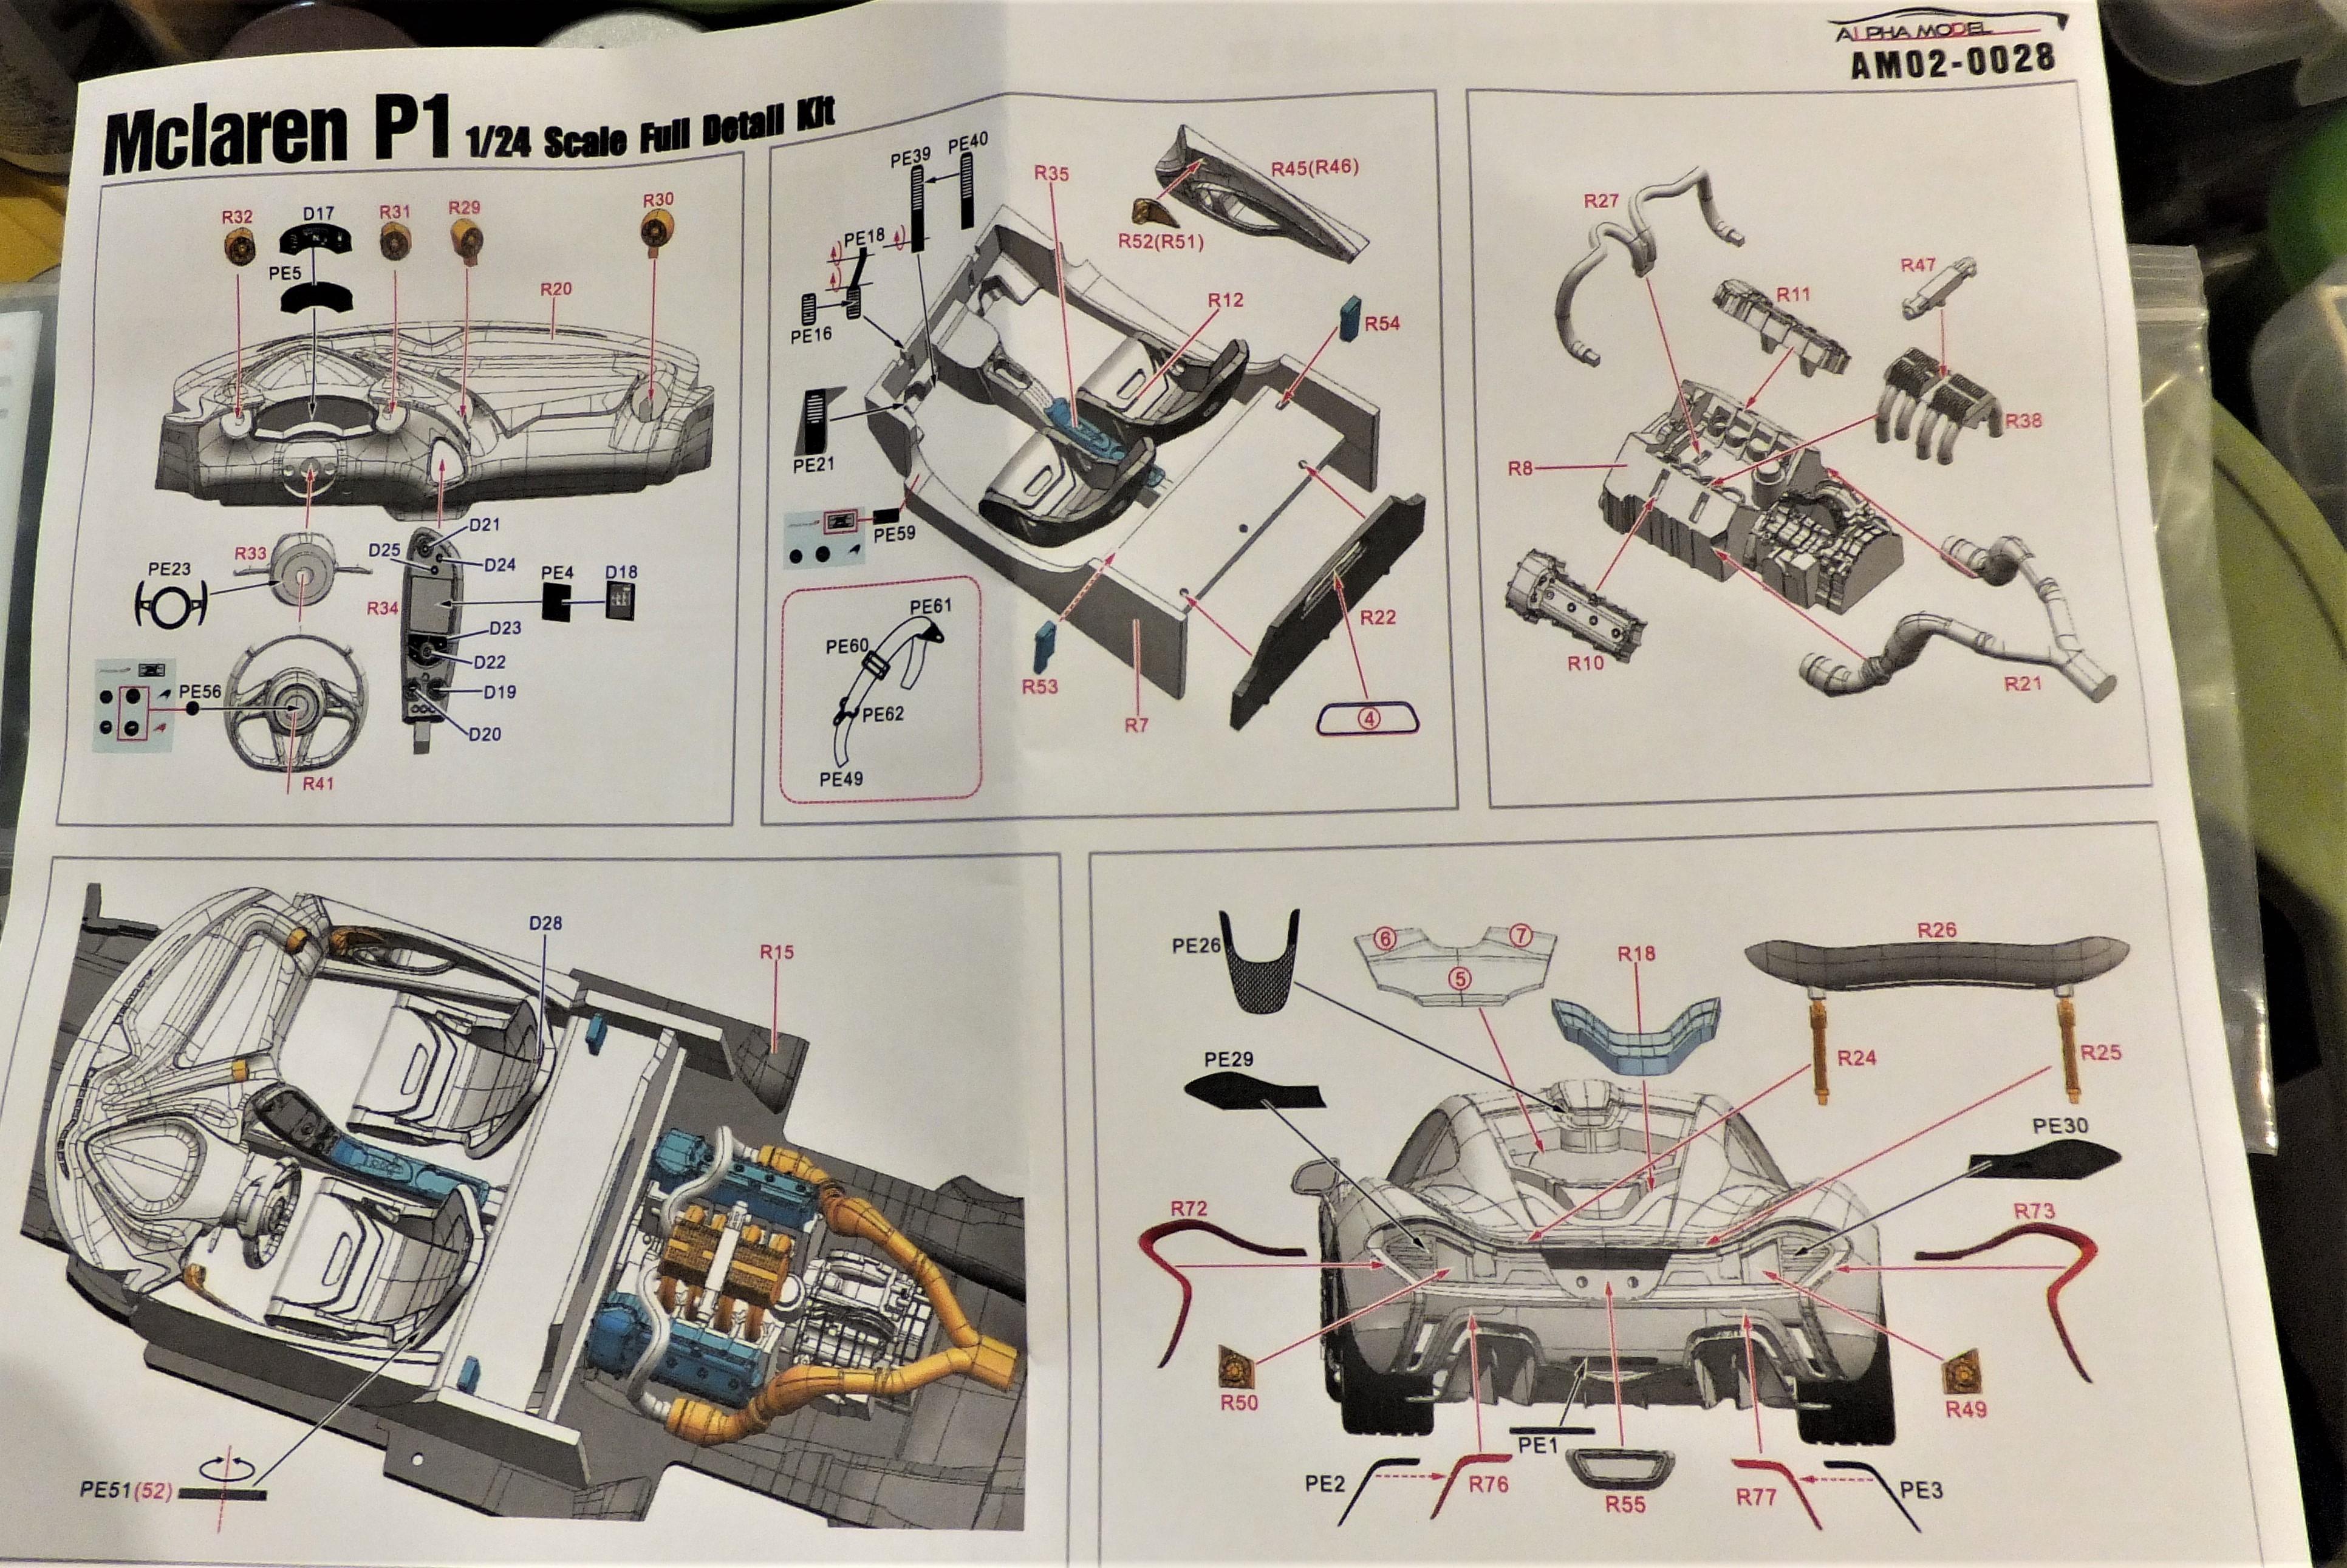
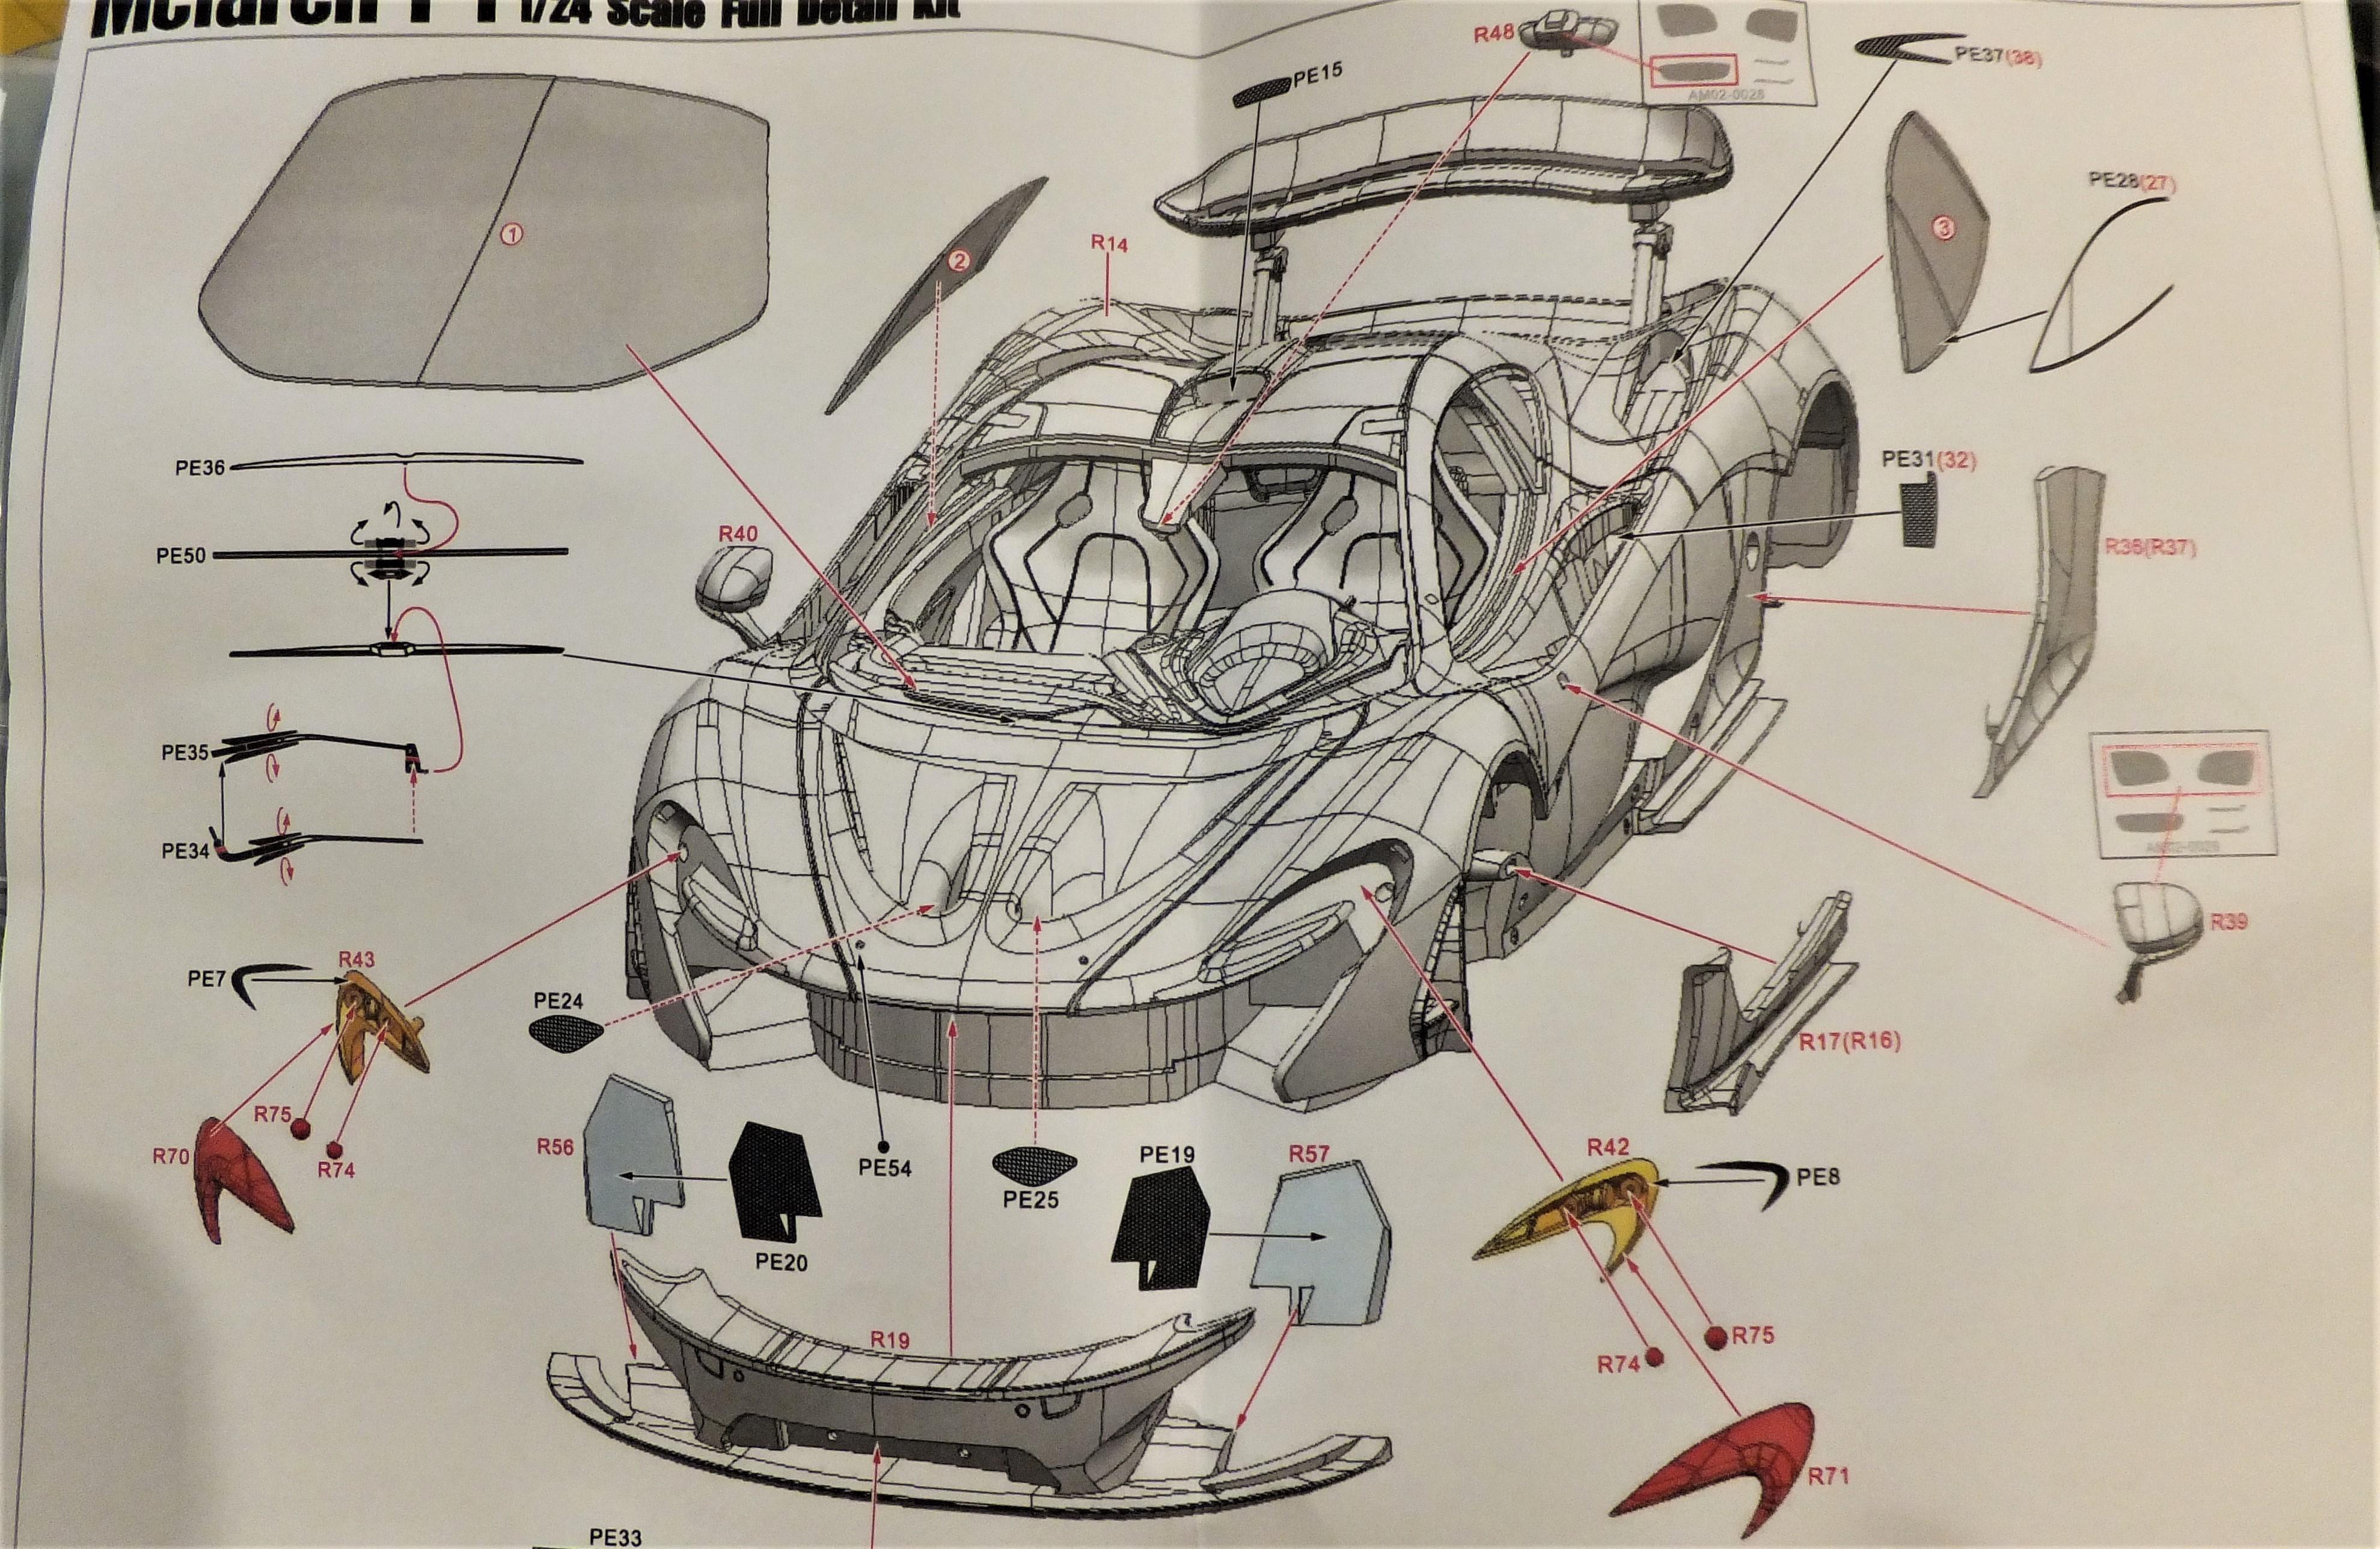
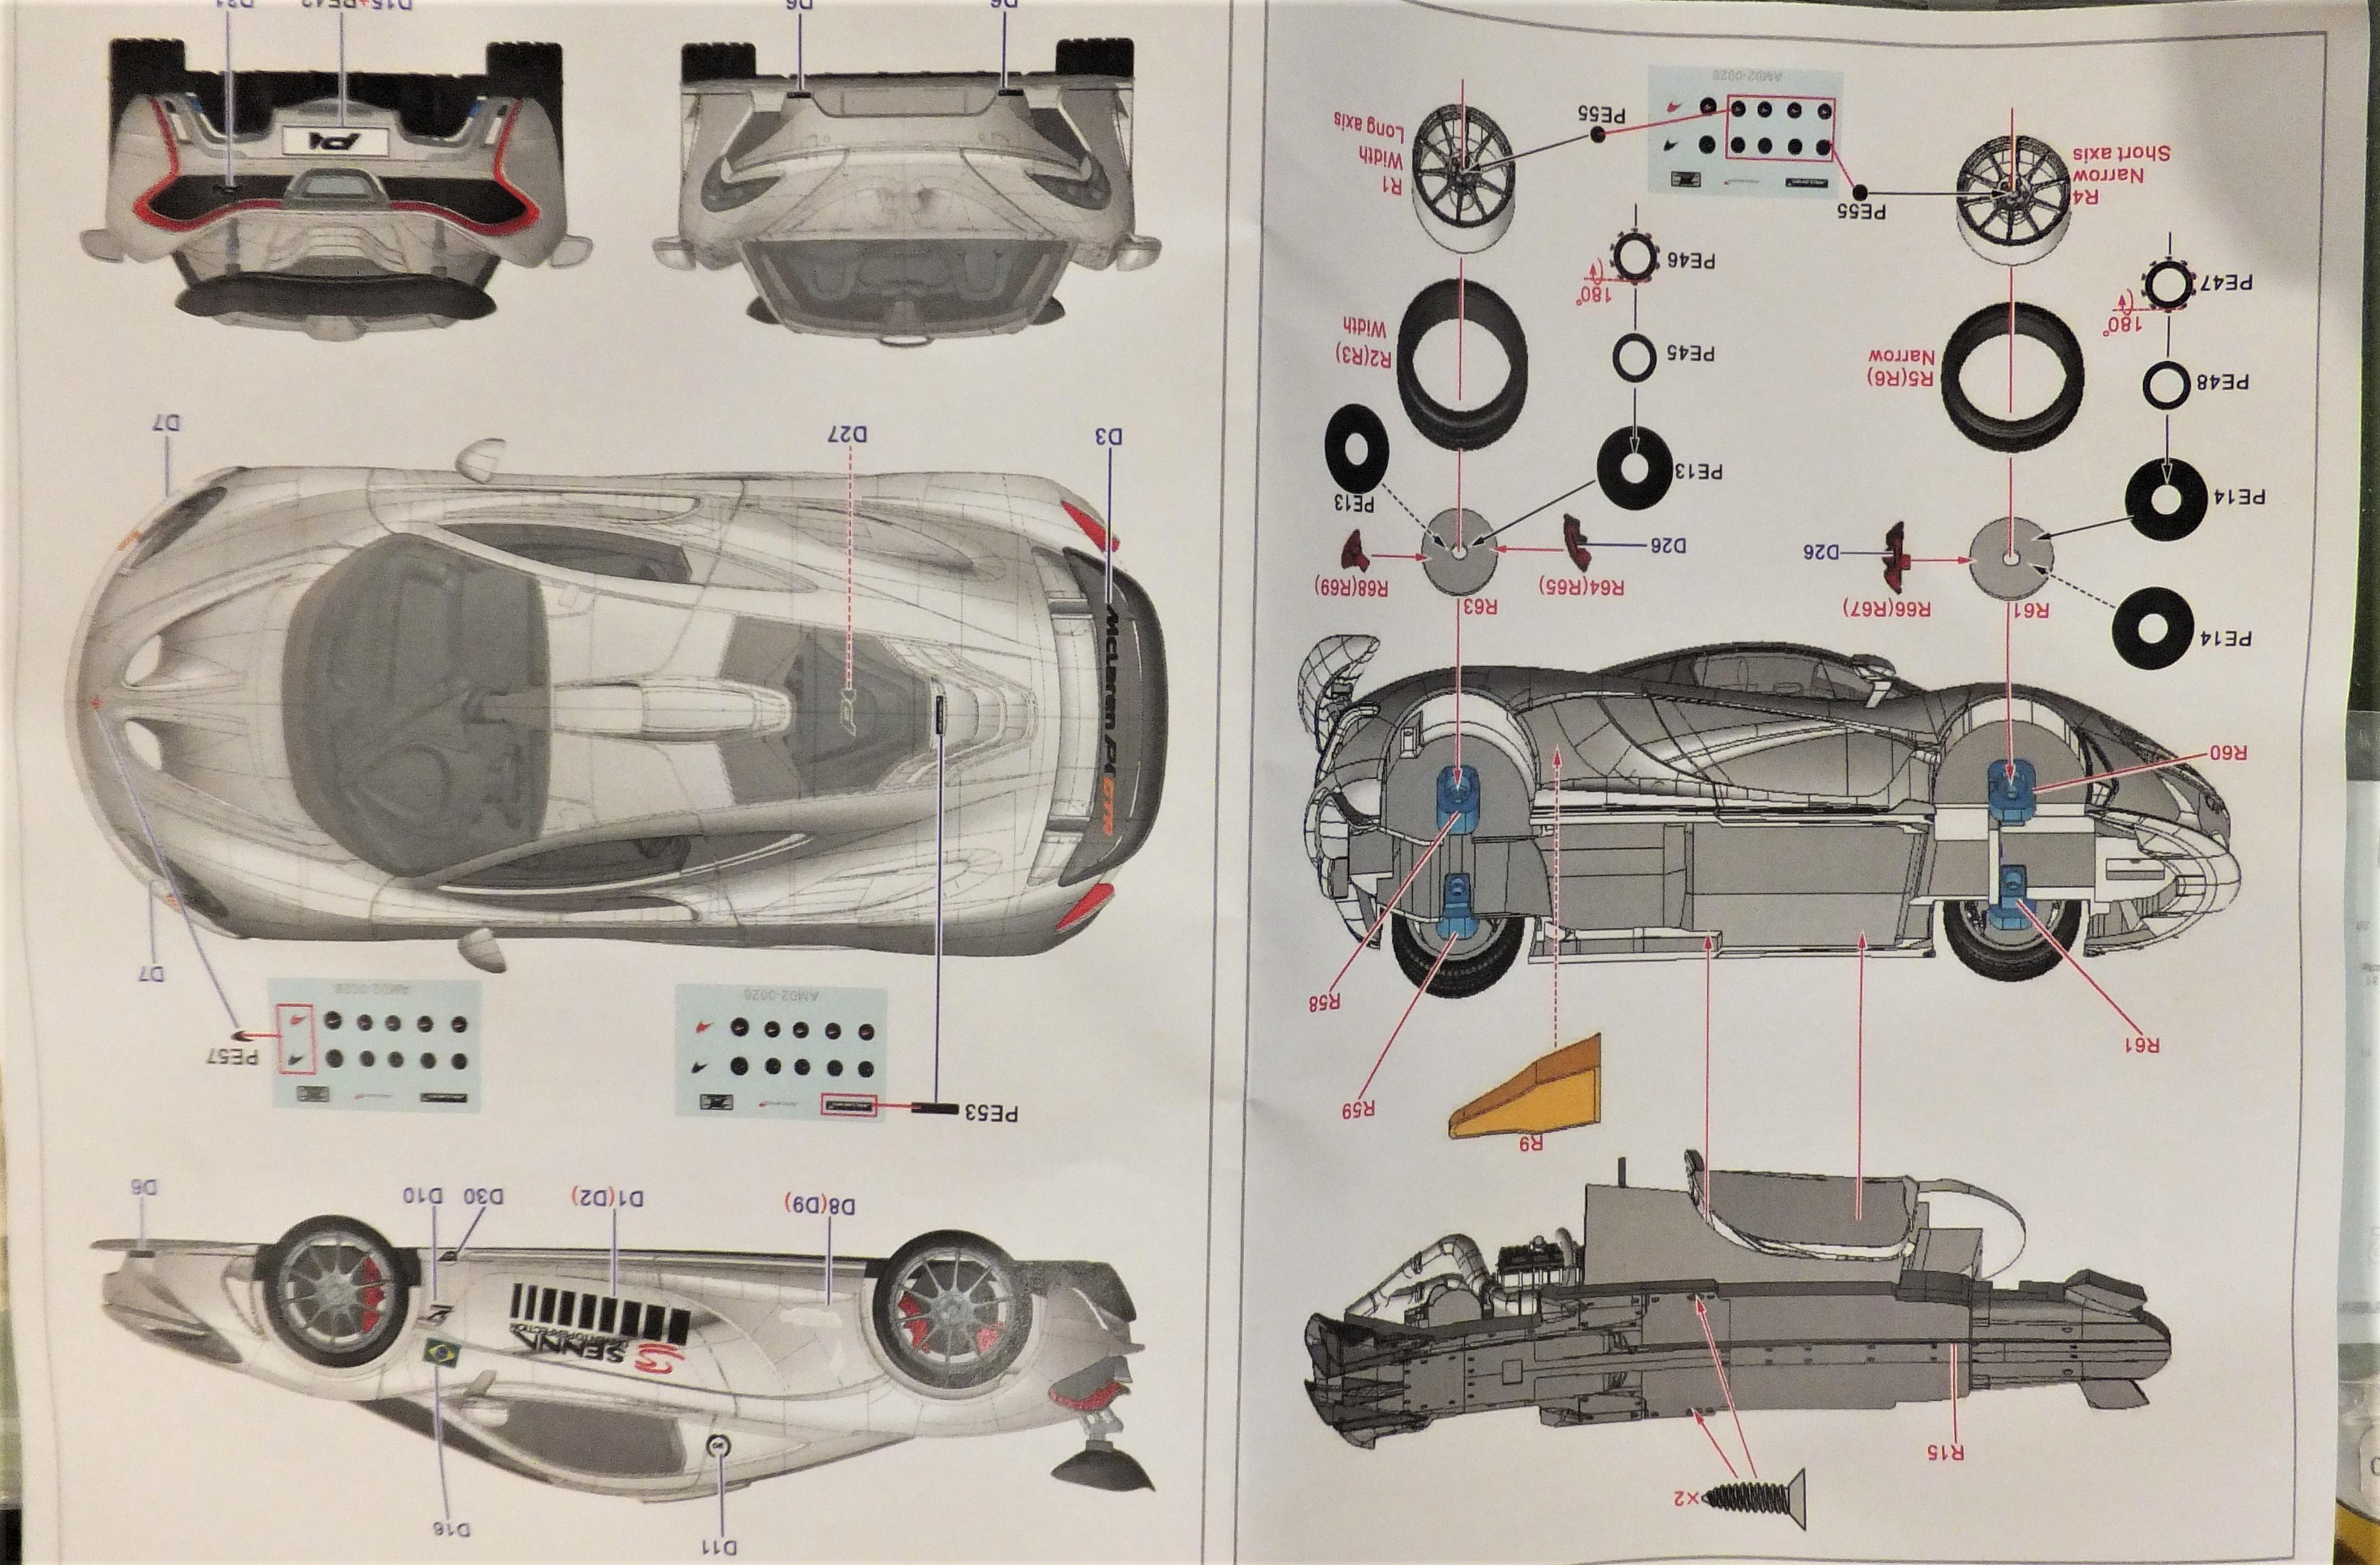
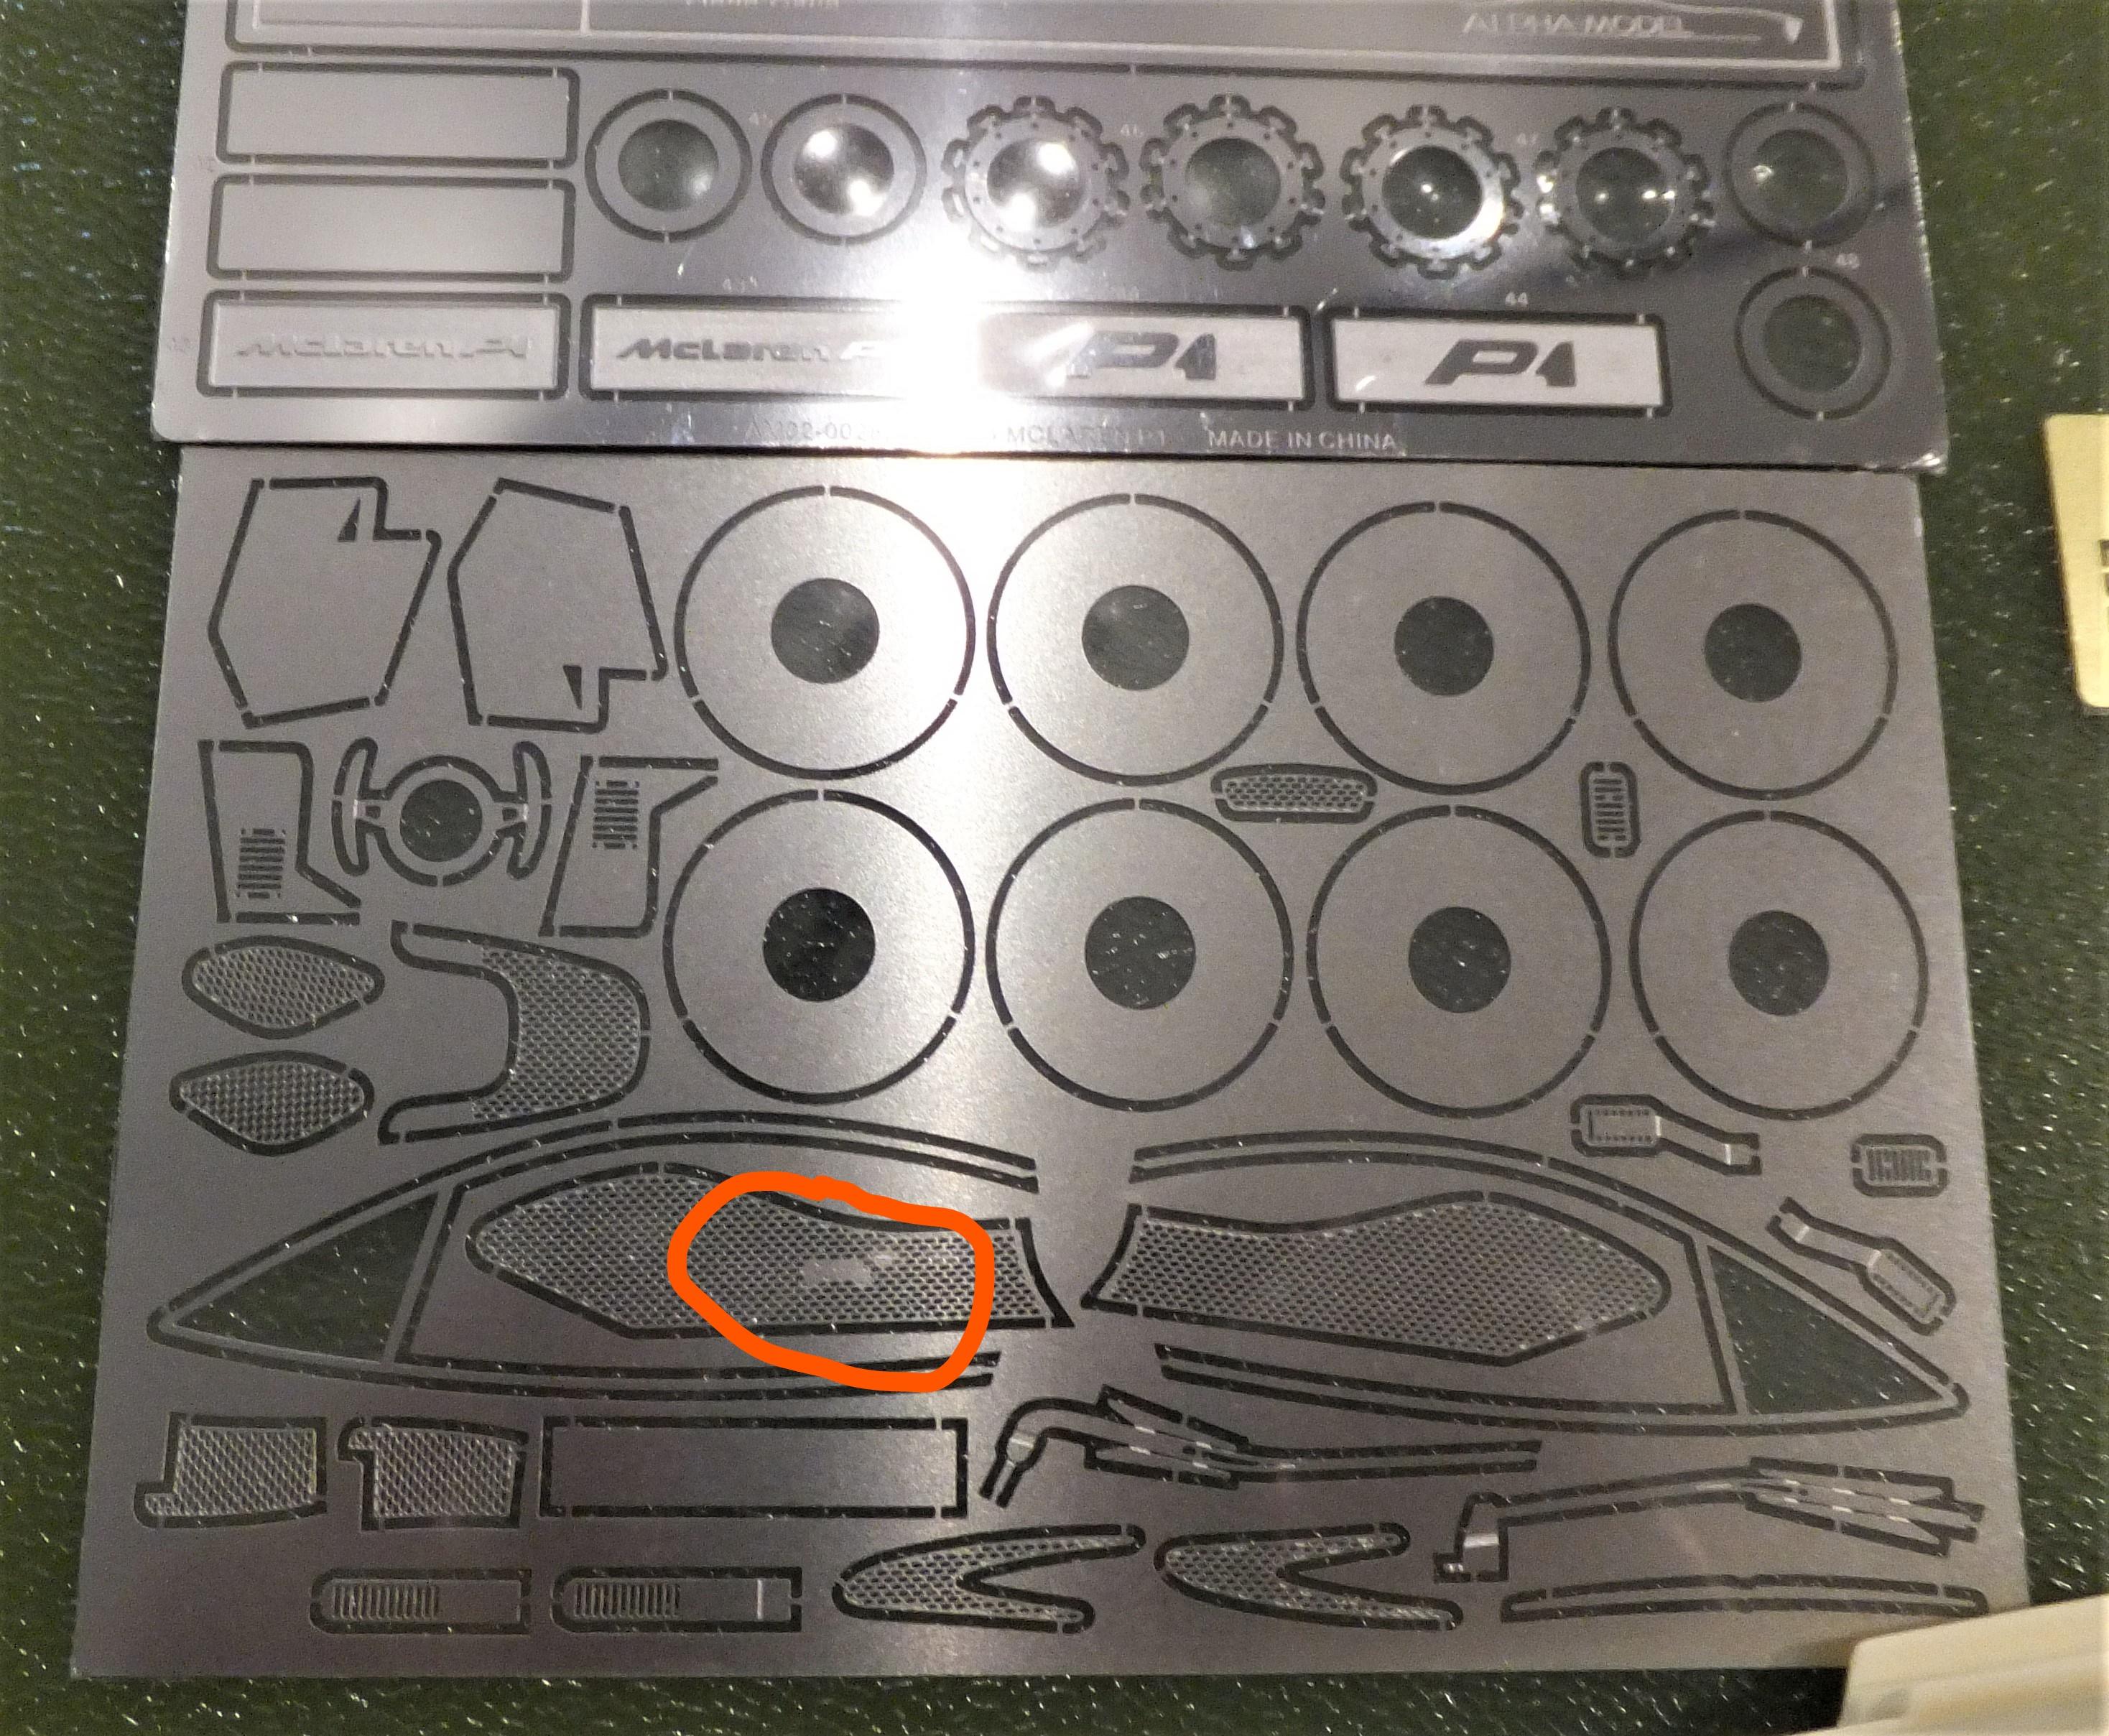
I placed my order on November 10 and got it on Tuesday. If you are not familiar with them, Alpha Models is the full resin kit "arm" of Hobby Design. They have produced a series of very interesting, and to some, desirable, exotic cars such as Ferraris, McLarens, BMW's, Alfa Romeo, Aston Martin and others. The kits include the basic assembly parts for the model, decals, windows with black edging already applied (no masking and painting) and easily understood instruction manuals. Color pictures to help build, including paint options, were not evident in this kit, but were in my other kits. I find that, often, one needs to research these anyways, depending on the desired detail. The contents of the kit are pictured here. First is the overall shot. I didn't take photos of the detail resin pars as Alpha has those on their site. But you can see the decals, PE sets, and chrome transfers. I included the instruction sheets as well. There definitely is enough of an engine for display even though there isn't much to see once assembled. To me, that is a nice touch. I think the body is even crisper than the earlier Alpha Ferrari kits I have gotten. The trunk and door lines appear more defined. I had to do a bit of deepening of these on the Lusso I am currently doing. I see one possible glitch on the PE grill mesh that I circled in orange on a separate shot. I'll need to look more closely at it and may have to contact their customer service for a replacement. In all, I am quite satisfied with this kit. Looking forward to building this. Lusso needs finish first, then maybe this one (sorry Tamiya, Senna will be on hold). I've seen a lot of interesting P1 paint schemes online, and this one "screams" for a more exotic color scheme. But, a little bit of time to think over.

-
Might be this set
-
Yep. Forgot about those. Have these two in the stash (unbuilt)
-
I've gotten a bunch of these over the years, especially early on. Never liked the style of the Countach, so never got any. Sold a few off but still have some to build (more than one of a kit in a few cases).
-
Yes I meant only Revell.
-
The 69 Camaro SS will have the correct ice cube tray hood never offered before in the the 69. I think the non RS grille did not previously have SS logo, but I have to dig out a 69 kit to check. Not sure what has changed on the rims? From the site with the update
-
Well, interesting, but I already have one and the Gurney Eagle (3 in fact). So, hoping for some other goodies.
-
Upscale Hobbies as well. The last time I looked, about 2 weeks ago, inventory was low. Both do bulk orders from Hiroboy and a lot show out of stock or backordered. https://upscalehobbies.com/58_zero-paints?orderby=quantity&orderway=desc
-
LT1. All the AMT Gen 6 Camaro kits that have an engine have this. Some of the AMT Gen 6 Camaros are snap and have no engine. The AMT Gen 5 Camaros had no engine.
-
Interior mainly complete. Need to get the firewall prepped with the pedal assembly and do a little clean up on the dash. I used a Gofer seat belt set. Nice, but I am not completely liking the ribbon look. It will be “buried” in the interior, so may be fine. I created floor mats. Since a well optioned car, I chose a carpeted version I found on the web. I then scaled it down. The image was large enough that I was able to get by with the bitmap. I cloned the GTO emblem for the rear mats (as they were not included on the image). I use a variety of techniques to make floor mats, depending on their look, how visible they will be and materials of the 1:1. In this case, I printed the image at high quality on good paper after a bit of massaging in Corel PhotoPaint. Then I add rough texture painter’s tape to the back to give more substance. I then color the back and sides (after trim to fit) in an appropriate color, black in this case. I glued down using Canopy Glue. For the dash I used a variety of techniques. On the instrument cluster, I painted the wood effect using a Testor Wood and then a dark wood color dry brushed to highlight. The instrument “nacelles” were done by putting a Silver Sharpie down on the each opening to get the trim rim. I followed that by painting Tamiya Acrylic Flat Black from behind. The trim around the wood was done using Tamiya Acrylic Chrome Silver on a round toothpick and then cleaned up with a number 11 Exacto before fully dried. Kit decals were used for the Heater control and radio. I then used Tamiya Acrylic Chrome Silver to get the knobs. For the trim over the glove compartment, I have a Model Car Garage 65/66 Pontiac PE Fret that has the trim piece for the dash. I sanded down the kit trim and painted the PE piece flat black and sanded down to reveal the high spots. I attached the piece and then glued the kit handle to it. The steering wheel was painted with Testor Wood and overcoated with Tamiya Clear Yellow. The console was “washed” with Tamiya Flat Black.
-
68 Hemi Dart decals
Exotics_Builder replied to Tuffy's Garage's topic in Car Aftermarket / Resin / 3D Printed
You may want to specify the cars/livery that you are interested in. People may have out of production sheets available as well -
Same here.
-
Thanks. Which Vancouver? WA state (the first one) or BC (renamed from Granville)?
-
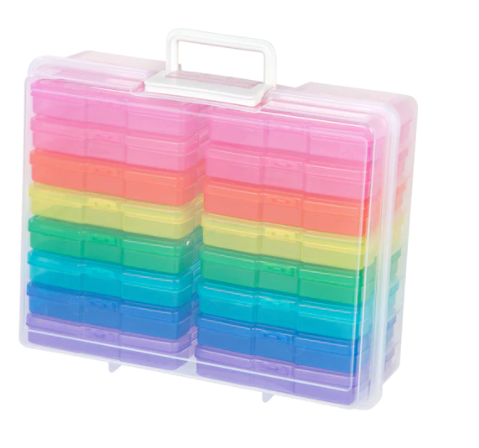
photo etch/decal storage ideas
Exotics_Builder replied to stitchdup's topic in Tips, Tricks, and Tutorials
I separate my PE into categories and store them in these plastic storage boxes Decals are separated out and stored in different plastic storage boxes
-
Heard that a lot. What amazes me is the kit does not include a rear anti-sway bar, nor do almost all reference photos of stock chassis/suspension show any.
-
Wire from a spool I picked up at the hardware store. It is about 0.02 inches in diameter. I picked up a variety of different sizes for detailing.
-
I have gotten Zero Paints from USA sources. First is Upscale Hobbies and second is Hobbyworld USA. Both do periodic bulk orders to deal with the Hazmat shipping costs. I prefer Upscale because he will broadcast setting up an order and give one the chance to specify need. Both are low on supply at the moment.
-
-
And Gravity is the most opaque paint I have tried. Very helpful in answering questions. Again, the "real" one in Spain, not the USA one.
-
I went back and checked. Yes they do. Not sure any other kit has that one. I don't have a lot of Ford/Mercury so hard for me to check
-
Going back to the 72 instructions (and checking a 69) the kit included an AIR pump for smog control. The 72 instructions have the alternator and smog pump locations reversed. I'd have to go back and check the kit to see how "accurate" these parts are.
-
Made some progress on this build. Got the interior painted and dash/door cards detailed. Next is trim out the seats and add seat belts and floor mats. Chassis painted and detail started. As the frame is not actually correct for the GTO (which is not fully boxed), I ran the fuel, fuel return and brake lines as close as I could to give the effect. Next, add the differential and front suspension and finish the detail. I included a reference photo of a real chassis and frame. I’ve got the basecoat on the body and need to clean up a few spots before clear coating and final trim out. And the engine is started (not just the halves glued together). I still have a bottle of Testor’s Pontiac Engine Blue. I poured a bit into a mixing cup along with Mr. Color Lacquer Leveling Thinner and shot with my Iwata Eclipse HP-CS. As an experiment, I recently acquired one of the battery compressors that attach to the brush. I figured it might be useful for small jobs. The engine was painted using that compressor. Next is detail out the engine.


.JPG.aba92a6bd8f11896071e39d6f7bf6ea8.JPG)
.JPG.baa6c525eb92dd05bd540bfb1930bd9d.JPG)
.JPG.82d3db50d44e5cb9ba34346b432969f3.JPG)
.JPG.6f51813a32e35d1a7588ebbf6b2ac189.JPG)


.JPG.87ab7a9645c70293df050d8b4b5f4089.JPG)
.JPG.09b489b63d45578ba0741a3ff4339200.JPG)
.JPG.4793d011caa7887c53b844b316c2f862.JPG)
.JPG.a76fc2618e241d5969da81dbb619b192.JPG)
.JPG.40a0260f2022ecfb6905eb378044d2c7.JPG)
.JPG.9cc98f1d02576cb693c97d88979d7408.JPG)
.JPG.62c6a5c1d8a6a4c1fabc97ee08daa17b.JPG)