

Randy D
-
Posts
1,917 -
Joined
-
Last visited
Content Type
Profiles
Forums
Events
Gallery
Everything posted by Randy D
-
Hello Bill, I just started to carry Profil24 in my store. The limited amount of kits that I have handled so far look very good. I have started with some of their sports car line up. The full detail Jags and the aforementioned Maserati full detail kit, all look great. The body parts are fairly thin. Not as thin as Plastic kits or HRM's stuff but the next best thing. The photo etch, decals and the vacuum formed windows look good. Instructions look adequate. The curbside kits are thicker body castings with a simple one piece chassis plate. I have not had a chance to build one yet so no first hand experience on how they go together. I believe Jason Park did one of the Jags not too long ago on this forum. Randy
-

Model Builders' Warehouse 3D Printed Parts
Randy D replied to Randy D's topic in Car Aftermarket / Resin / 3D Printed
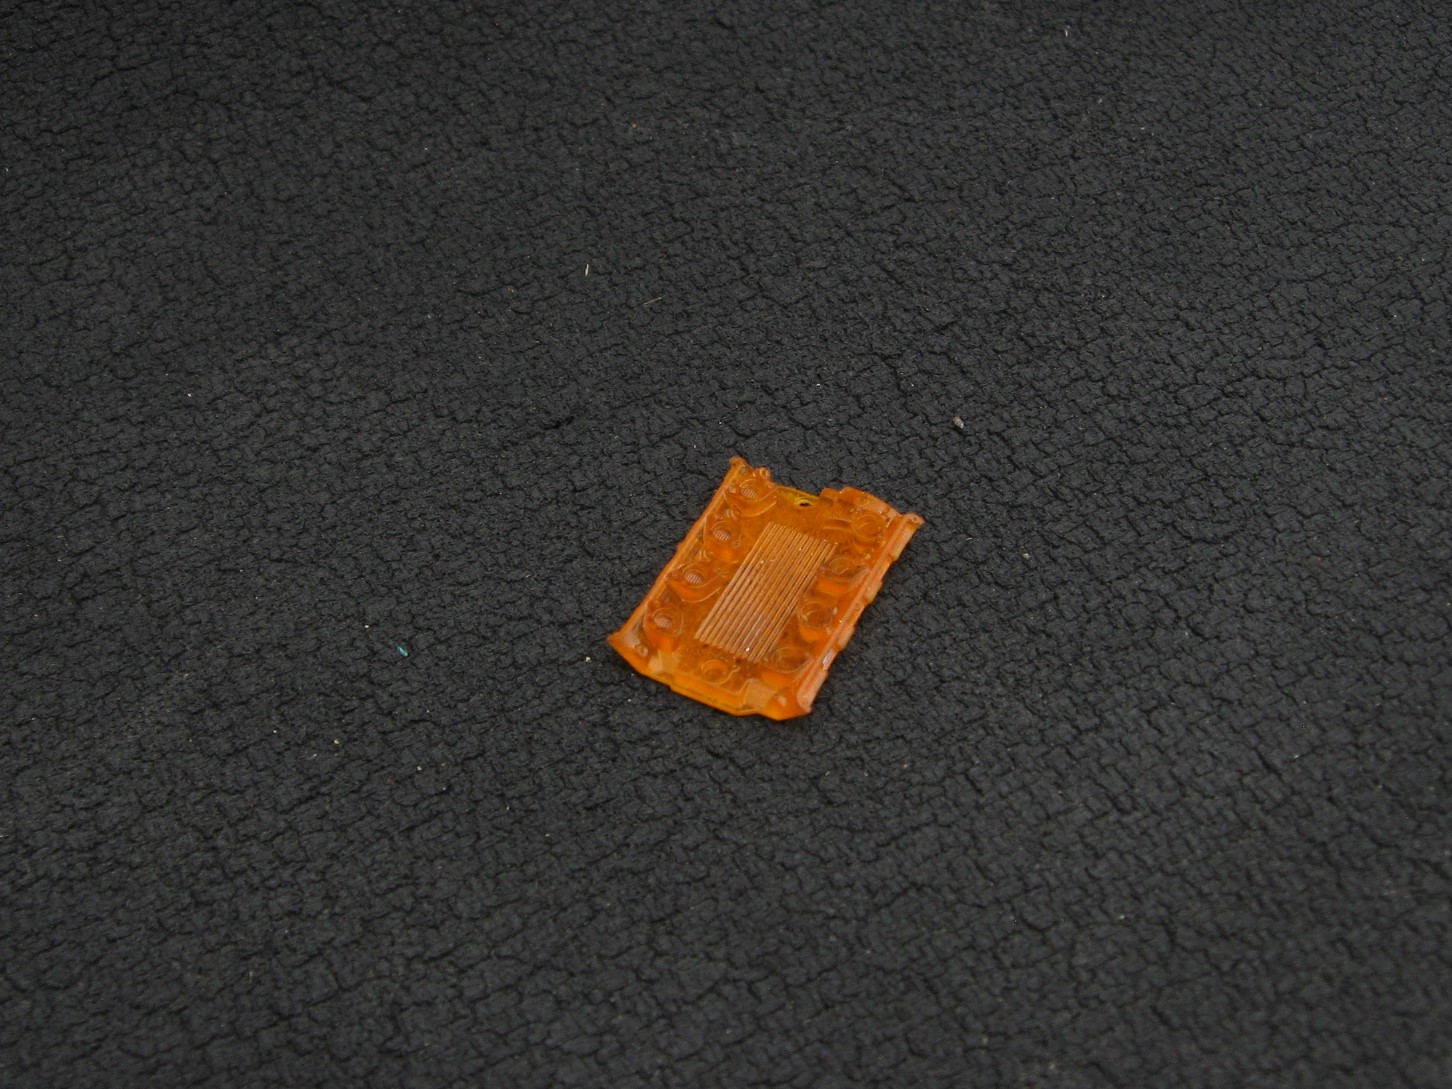
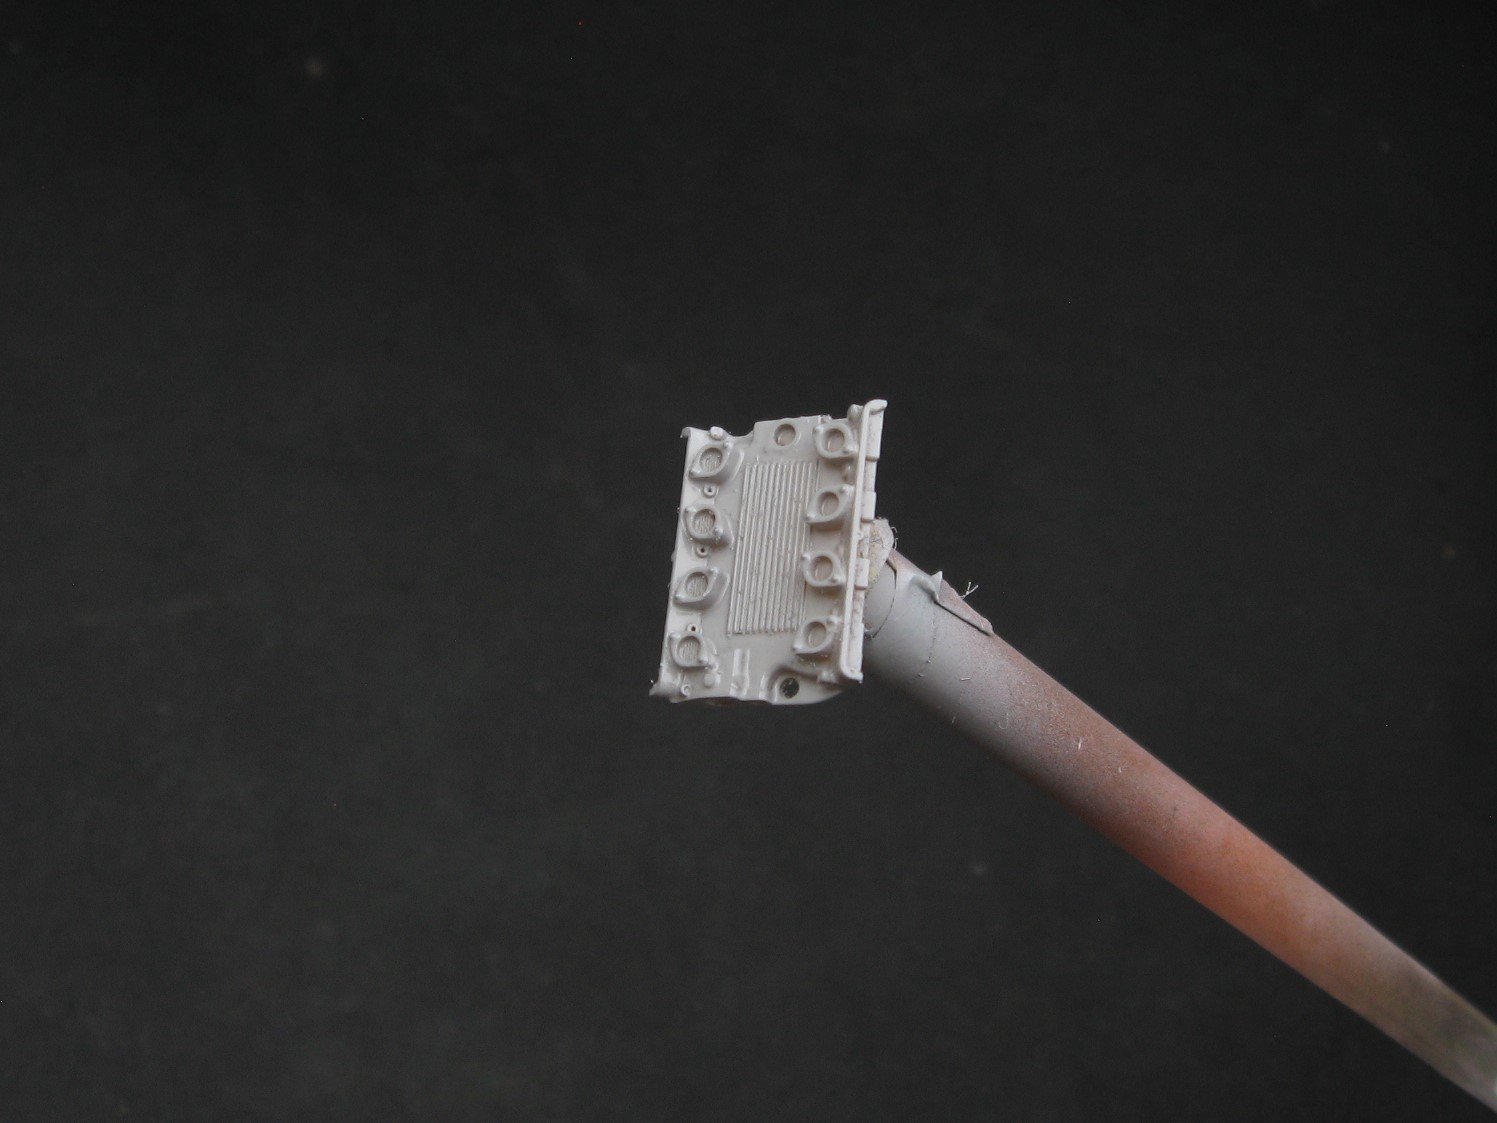
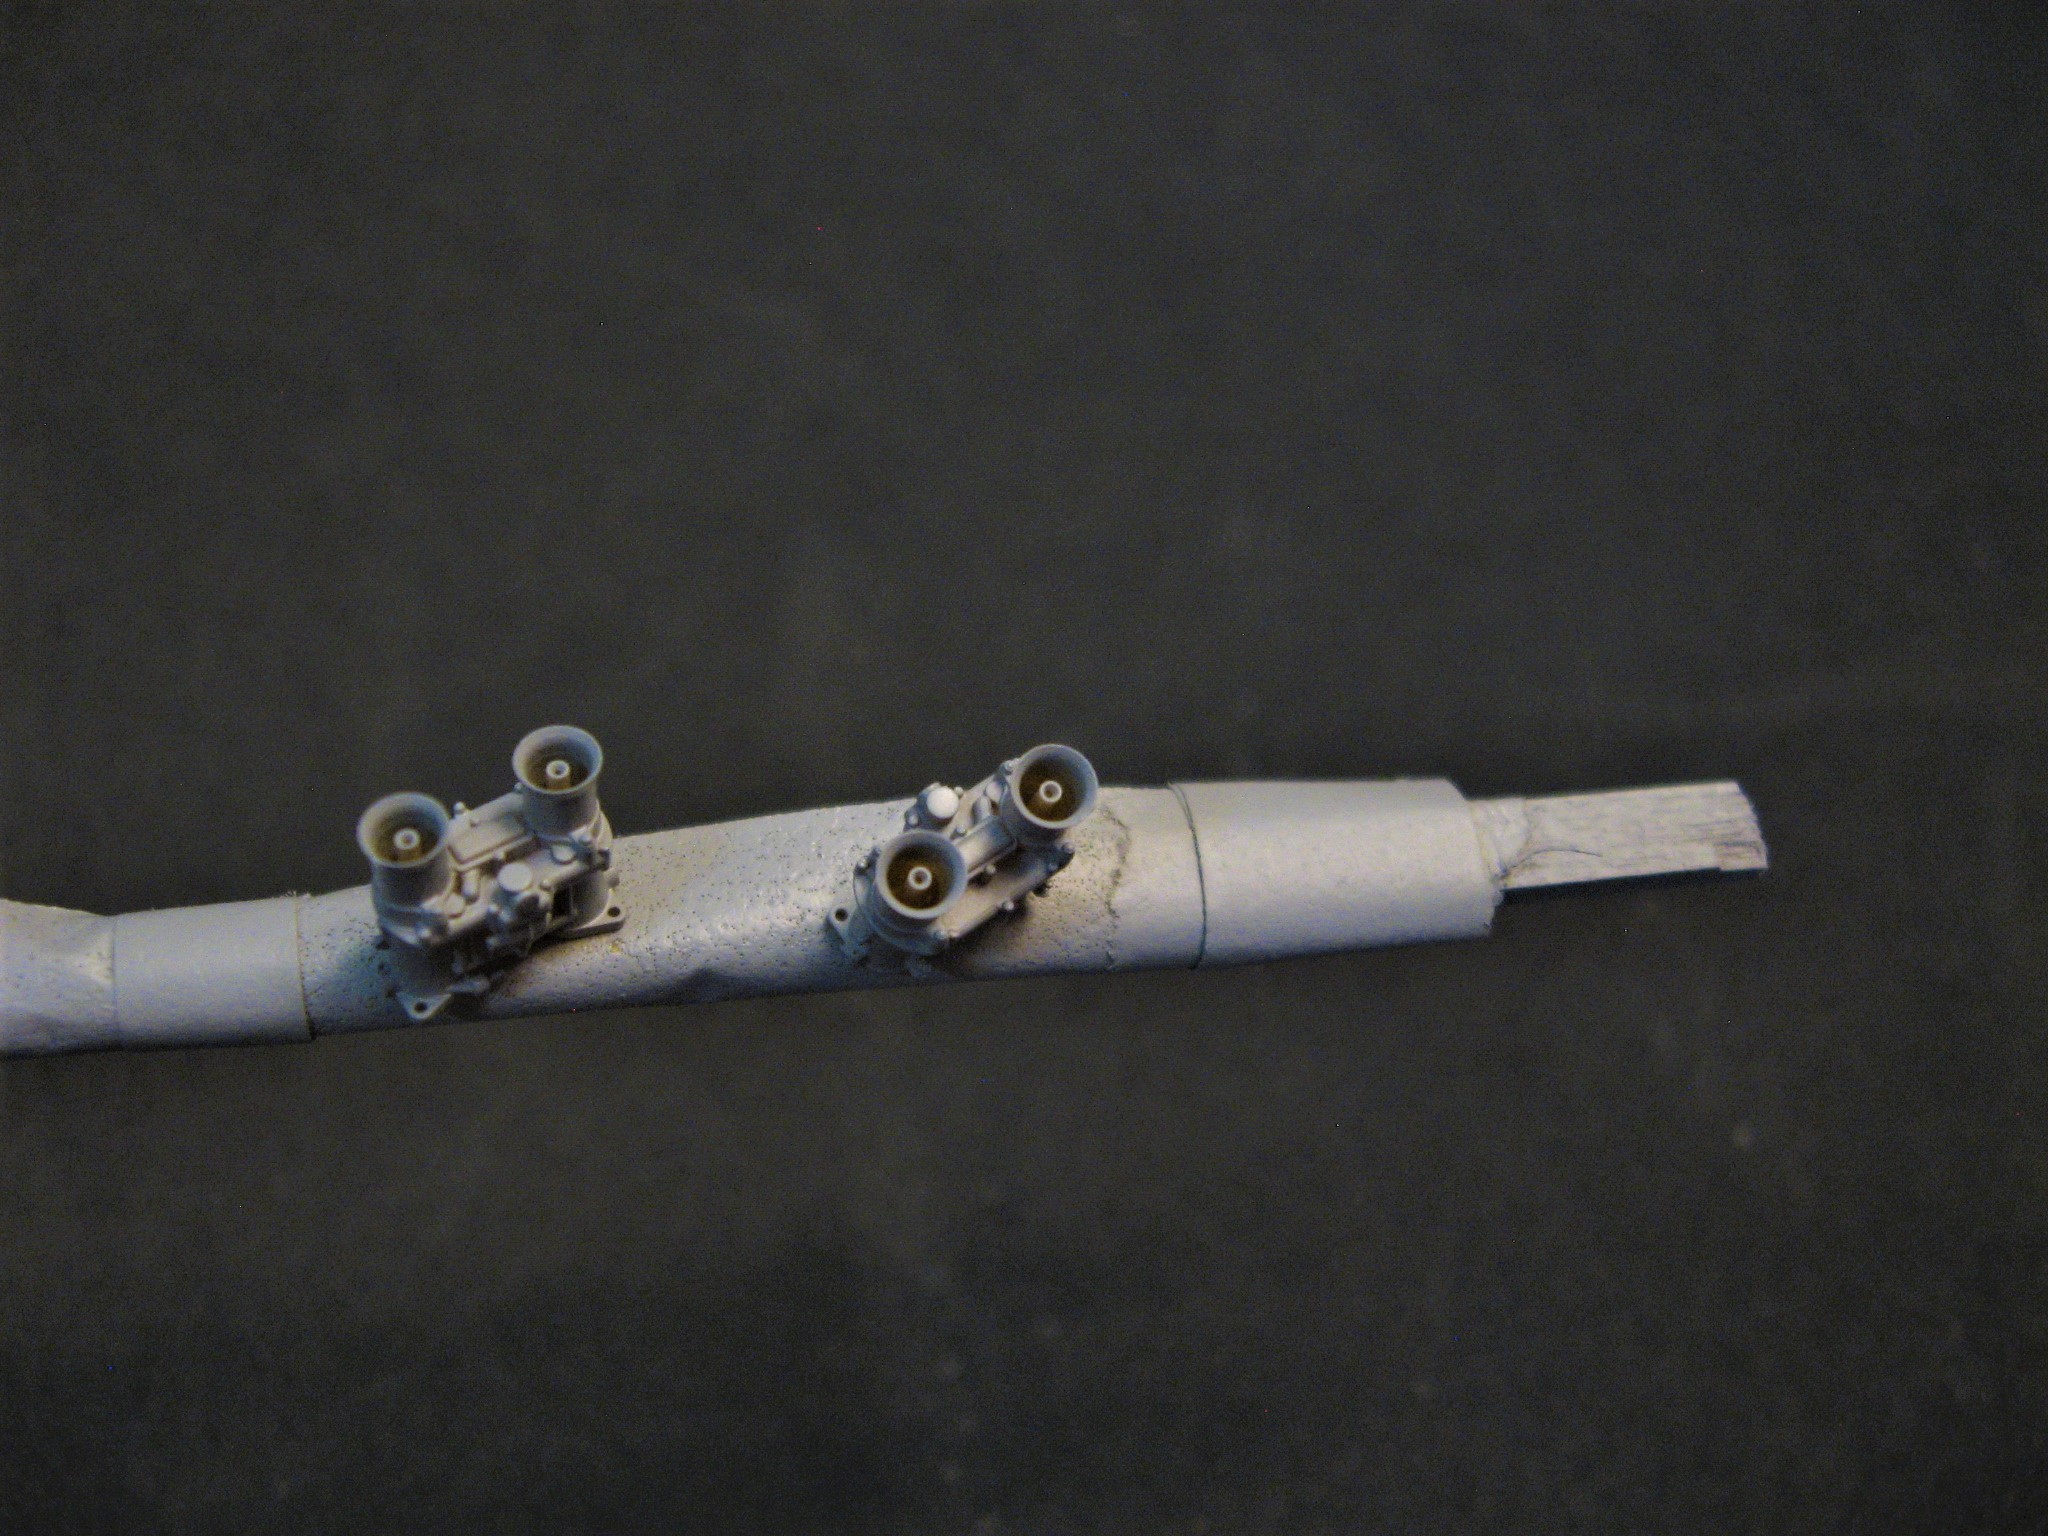
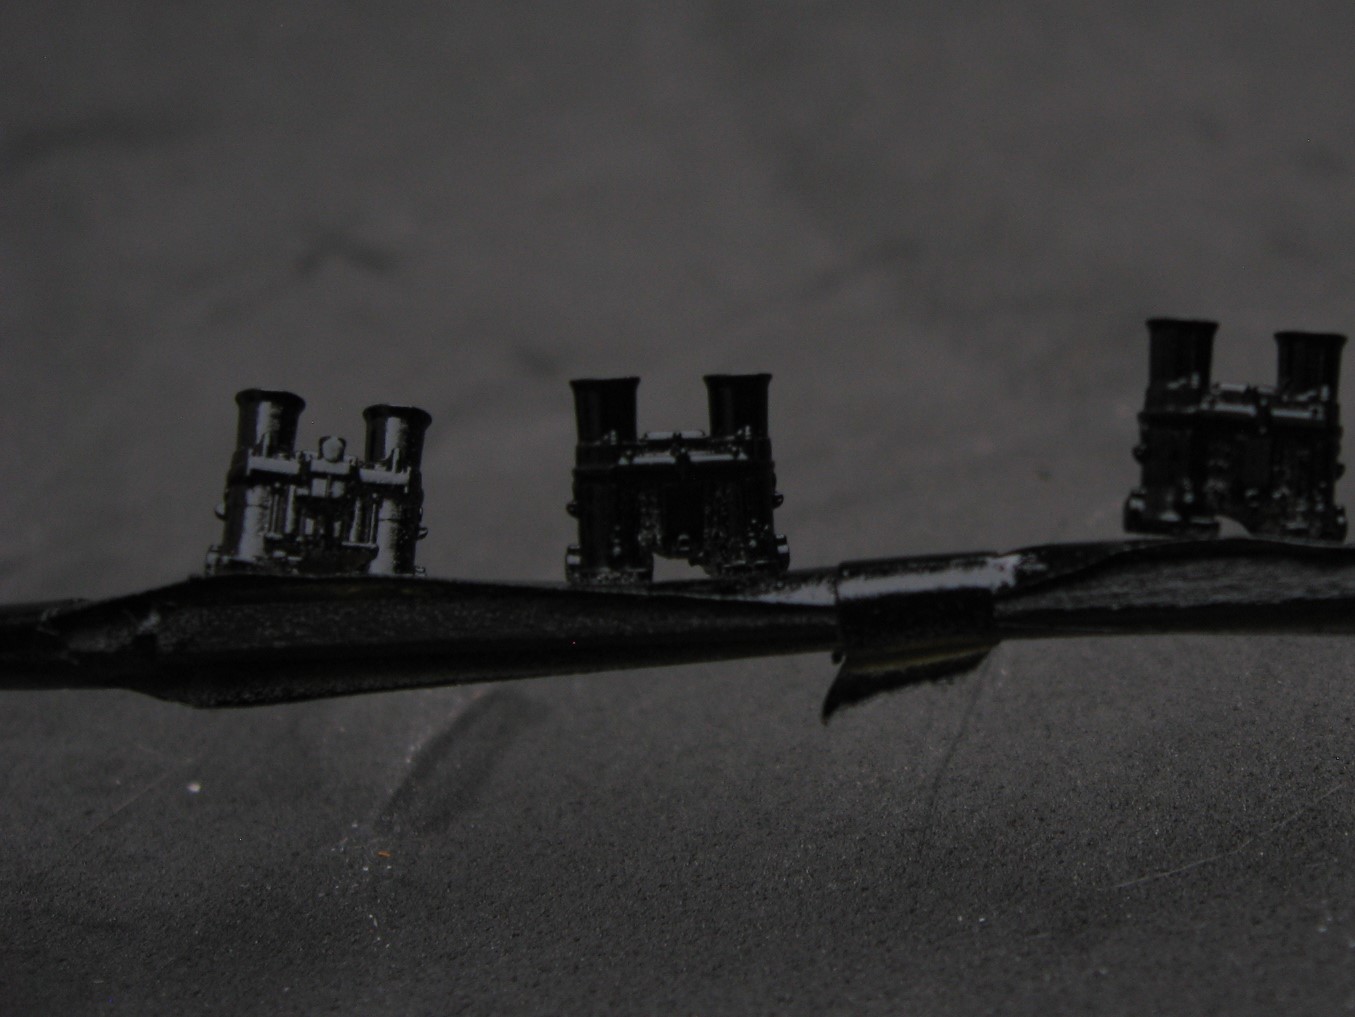
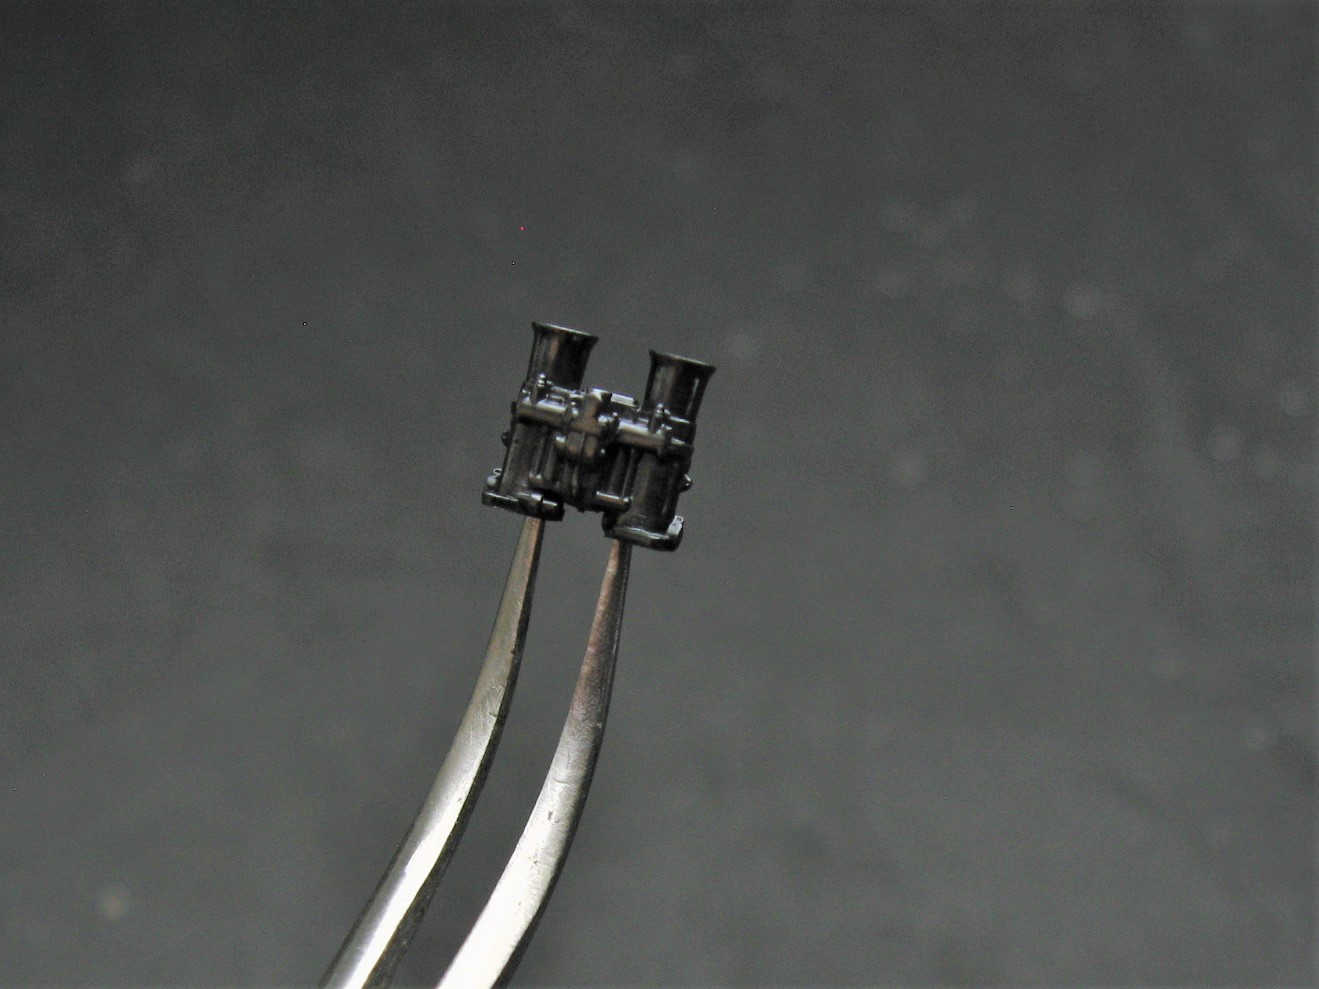
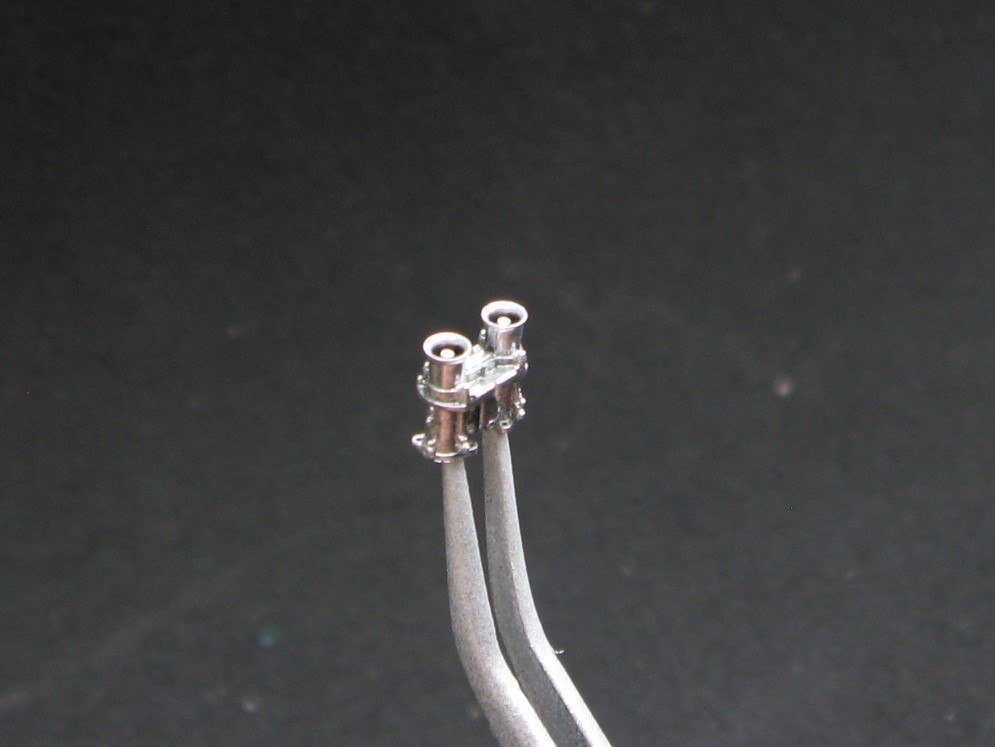
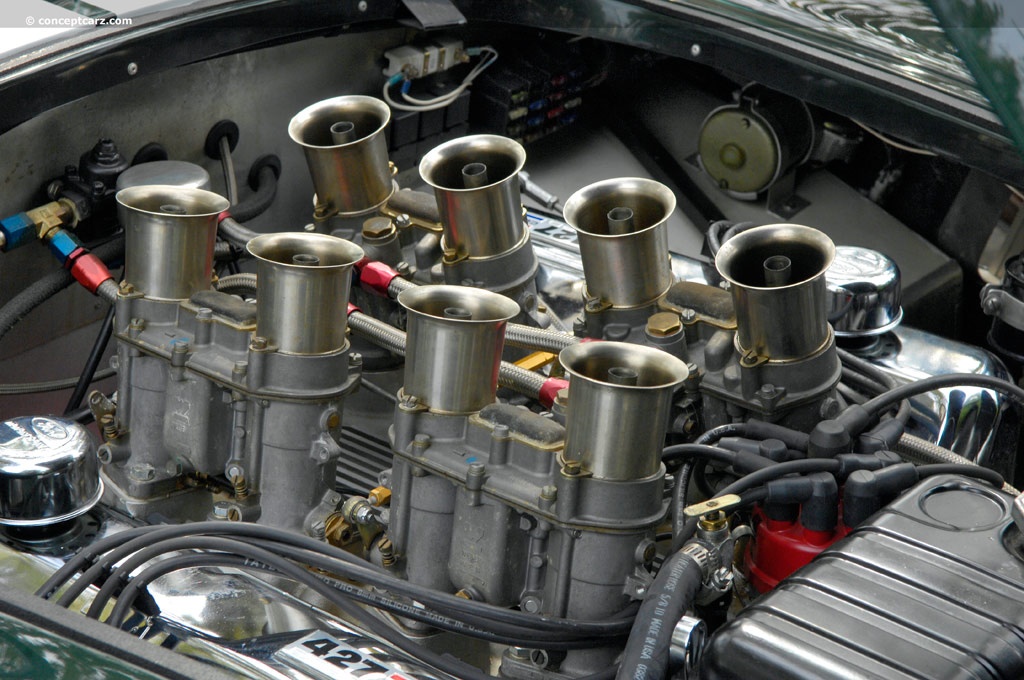
Hi Folks, Thank you George:) Appreciate that Dann !!! Hello Cameron, Yes , both kinds of intakes will be included with the motor kit. You will also be able to orientate the expansion tank either way to match your radiator. The following are some pics of the 'slanted' Weber manifold. *** PLEASE NOTE*** that these pieces are test prints that we run in a black resin (low cost) and print in 50 micron layers for speed. I sprayed two of them with chrome just so you could see them better. These prints were ran with the Webers and manifold as one piece so we can check measurements and parts layout. For fun I included the smaller print in silver that shows fuel lines and throttle linkage and distributor that was printed all together. Randy
-
Well it looks to be getting close to the finish line here my friend ! I have been staring at your last few updates showing this beauty coming together and am just amazed by your skills. This is truly a Masterpiece of scale modelling. Randy
-
Excellent work as always JC !!! Your interior conversion looks right on for the time period. Highlight of my trip back east was spending time with you & Brad Randy
-
Model Builders' Warehouse 3D Printed Parts
Randy D replied to Randy D's topic in Car Aftermarket / Resin / 3D Printed
Thank you Folks for all the positive comments !!!! Stan & Gerry, I know a guy that needs side draft Webers for a Birdcage so you know they are coming Kurt, I believe Ferrari used the Weber 40 DCL carbs which as Bill pointed out, are more compact. Bill, I did let a sample of the manifold go at NNL East but they are not for sale yet. -
Model Builders' Warehouse 3D Printed Parts
Randy D replied to Randy D's topic in Car Aftermarket / Resin / 3D Printed
The Webers are now loaded up on the store site. Thanks for looking in !
-
Model Builders' Warehouse 3D Printed Parts
Randy D replied to Randy D's topic in Car Aftermarket / Resin / 3D Printed
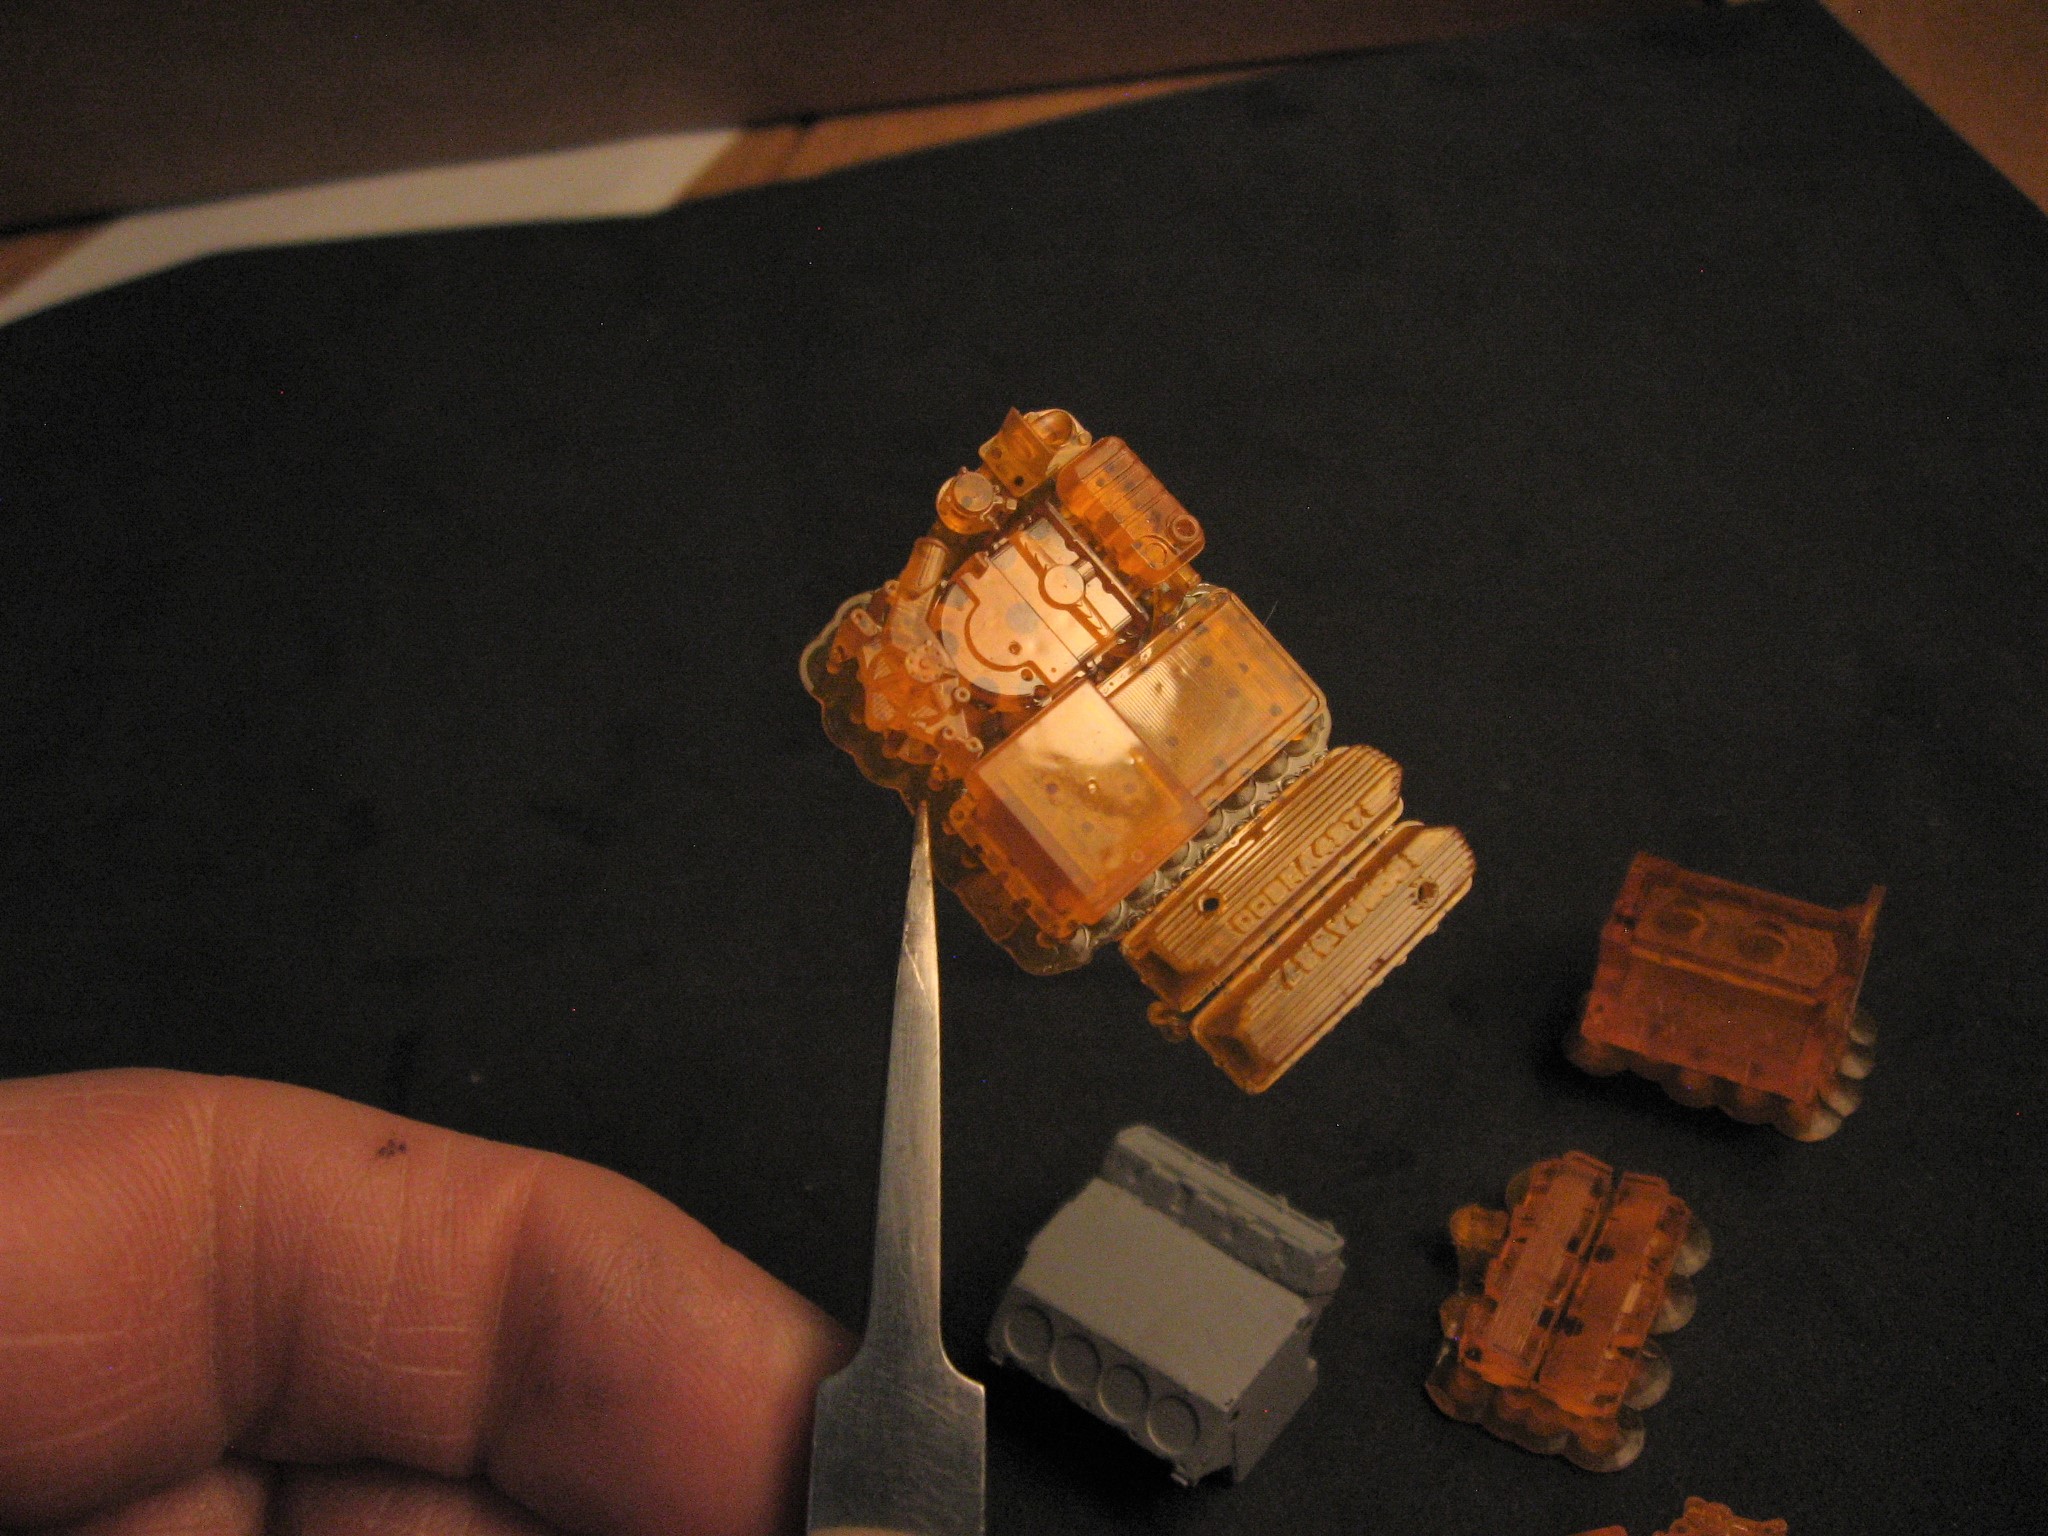
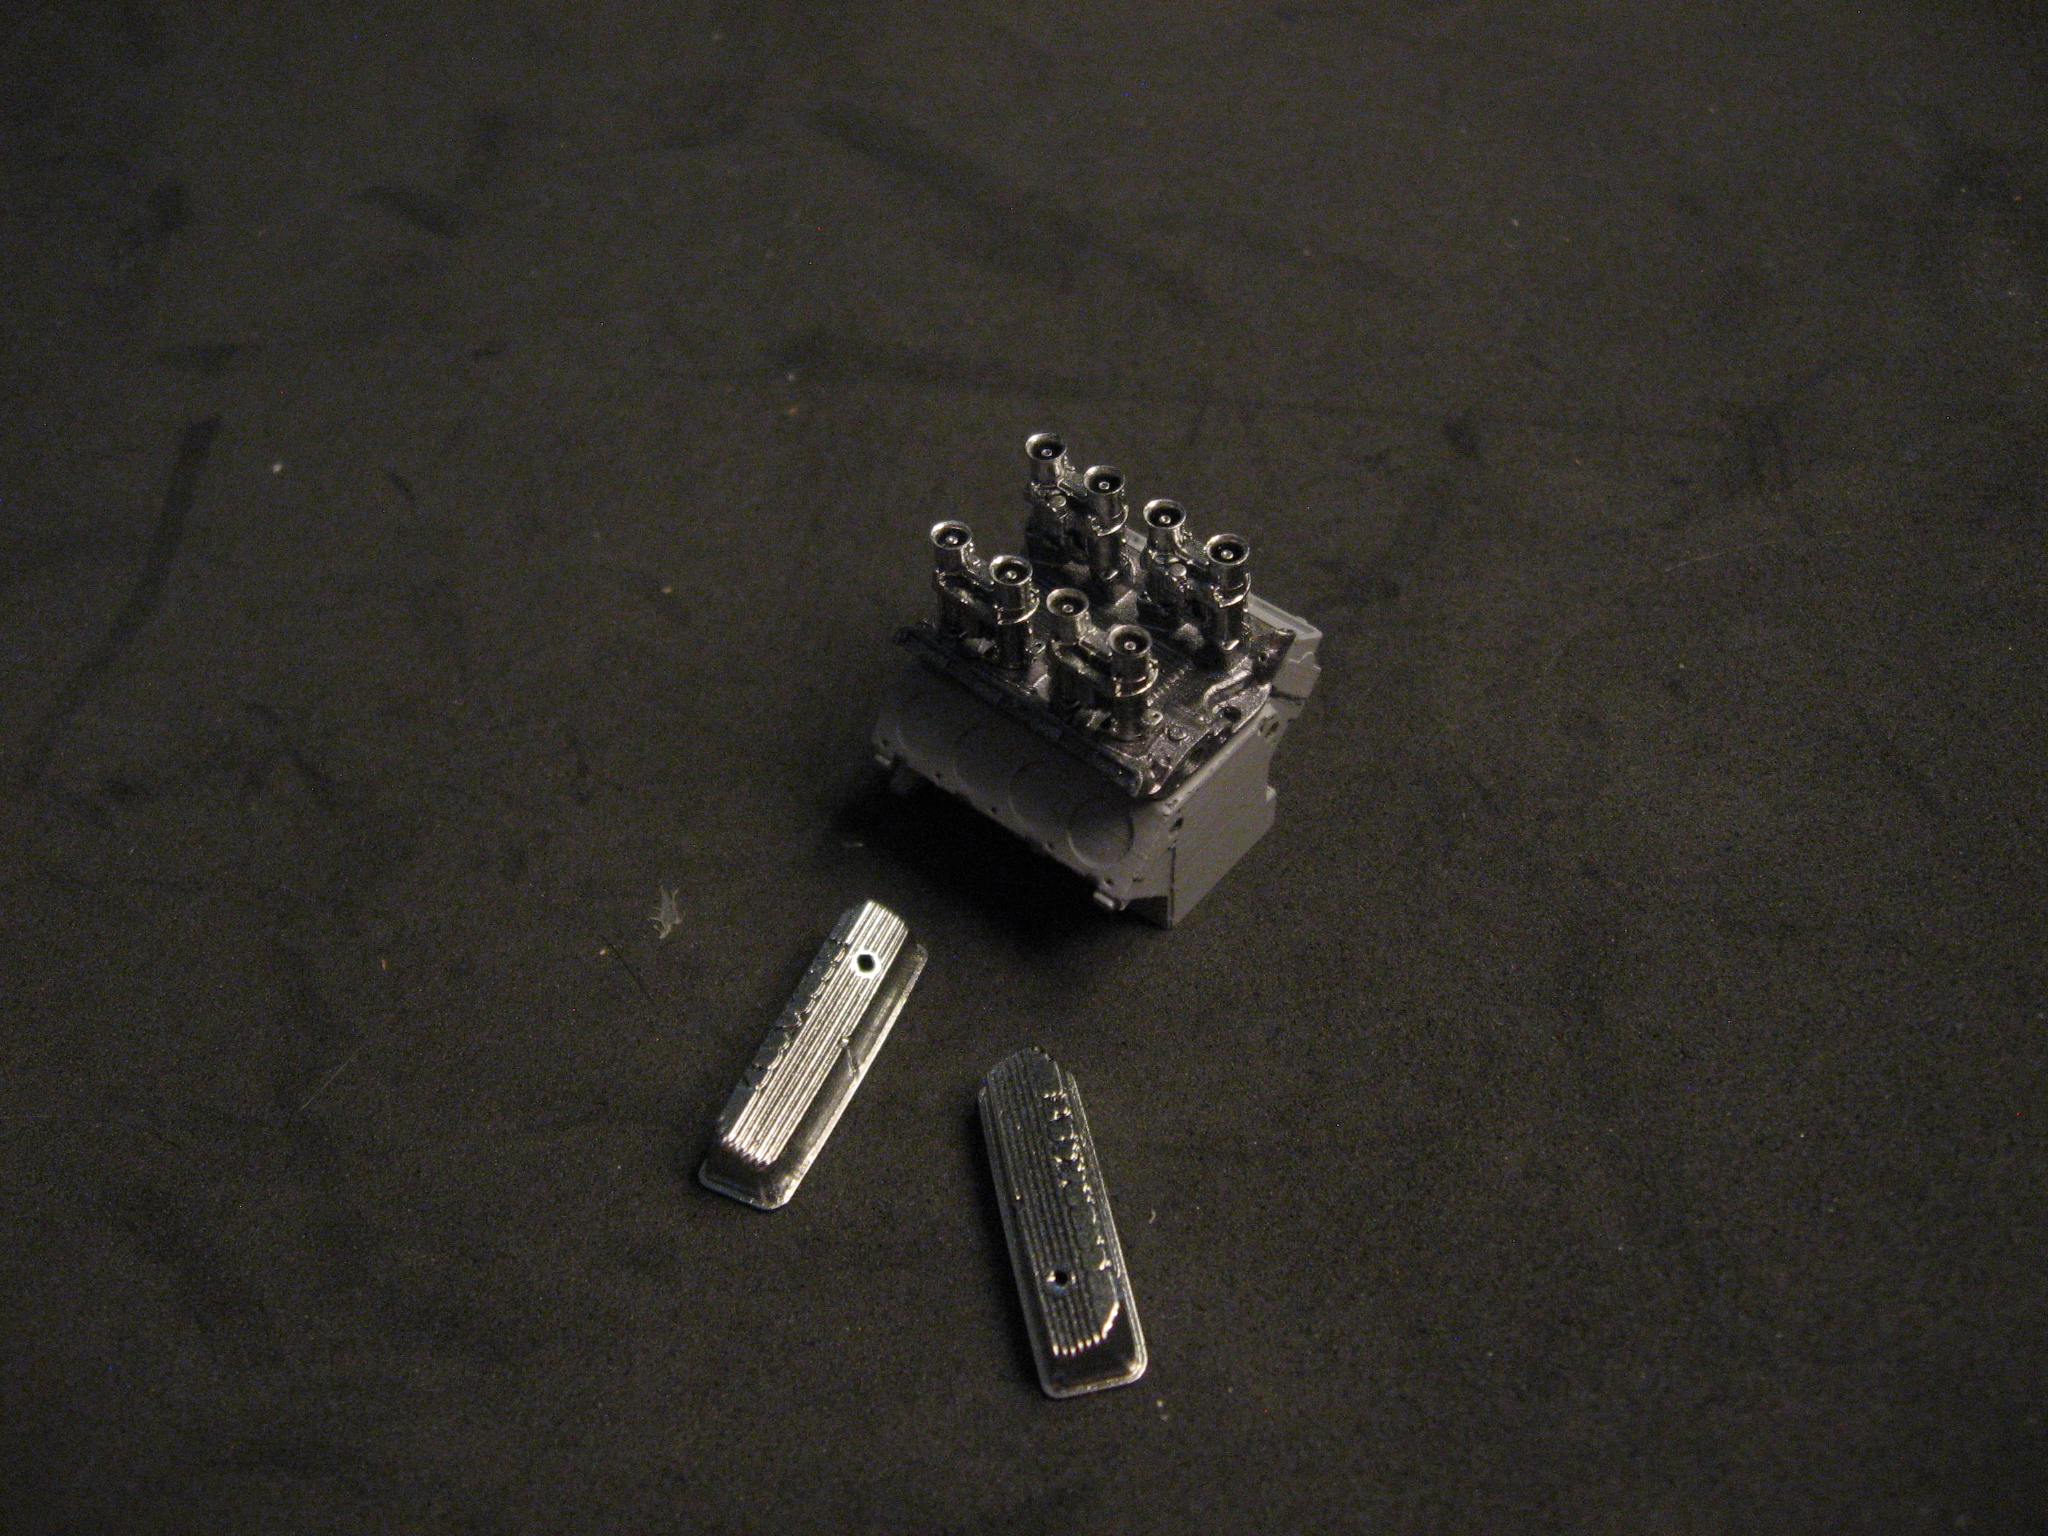
The following are progress pics of the full motor...
-
Model Builders' Warehouse 3D Printed Parts
Randy D replied to Randy D's topic in Car Aftermarket / Resin / 3D Printed
-
Model Builders' Warehouse 3D Printed Parts
Randy D replied to Randy D's topic in Car Aftermarket / Resin / 3D Printed
Here are some pics of the Weber painted......
-
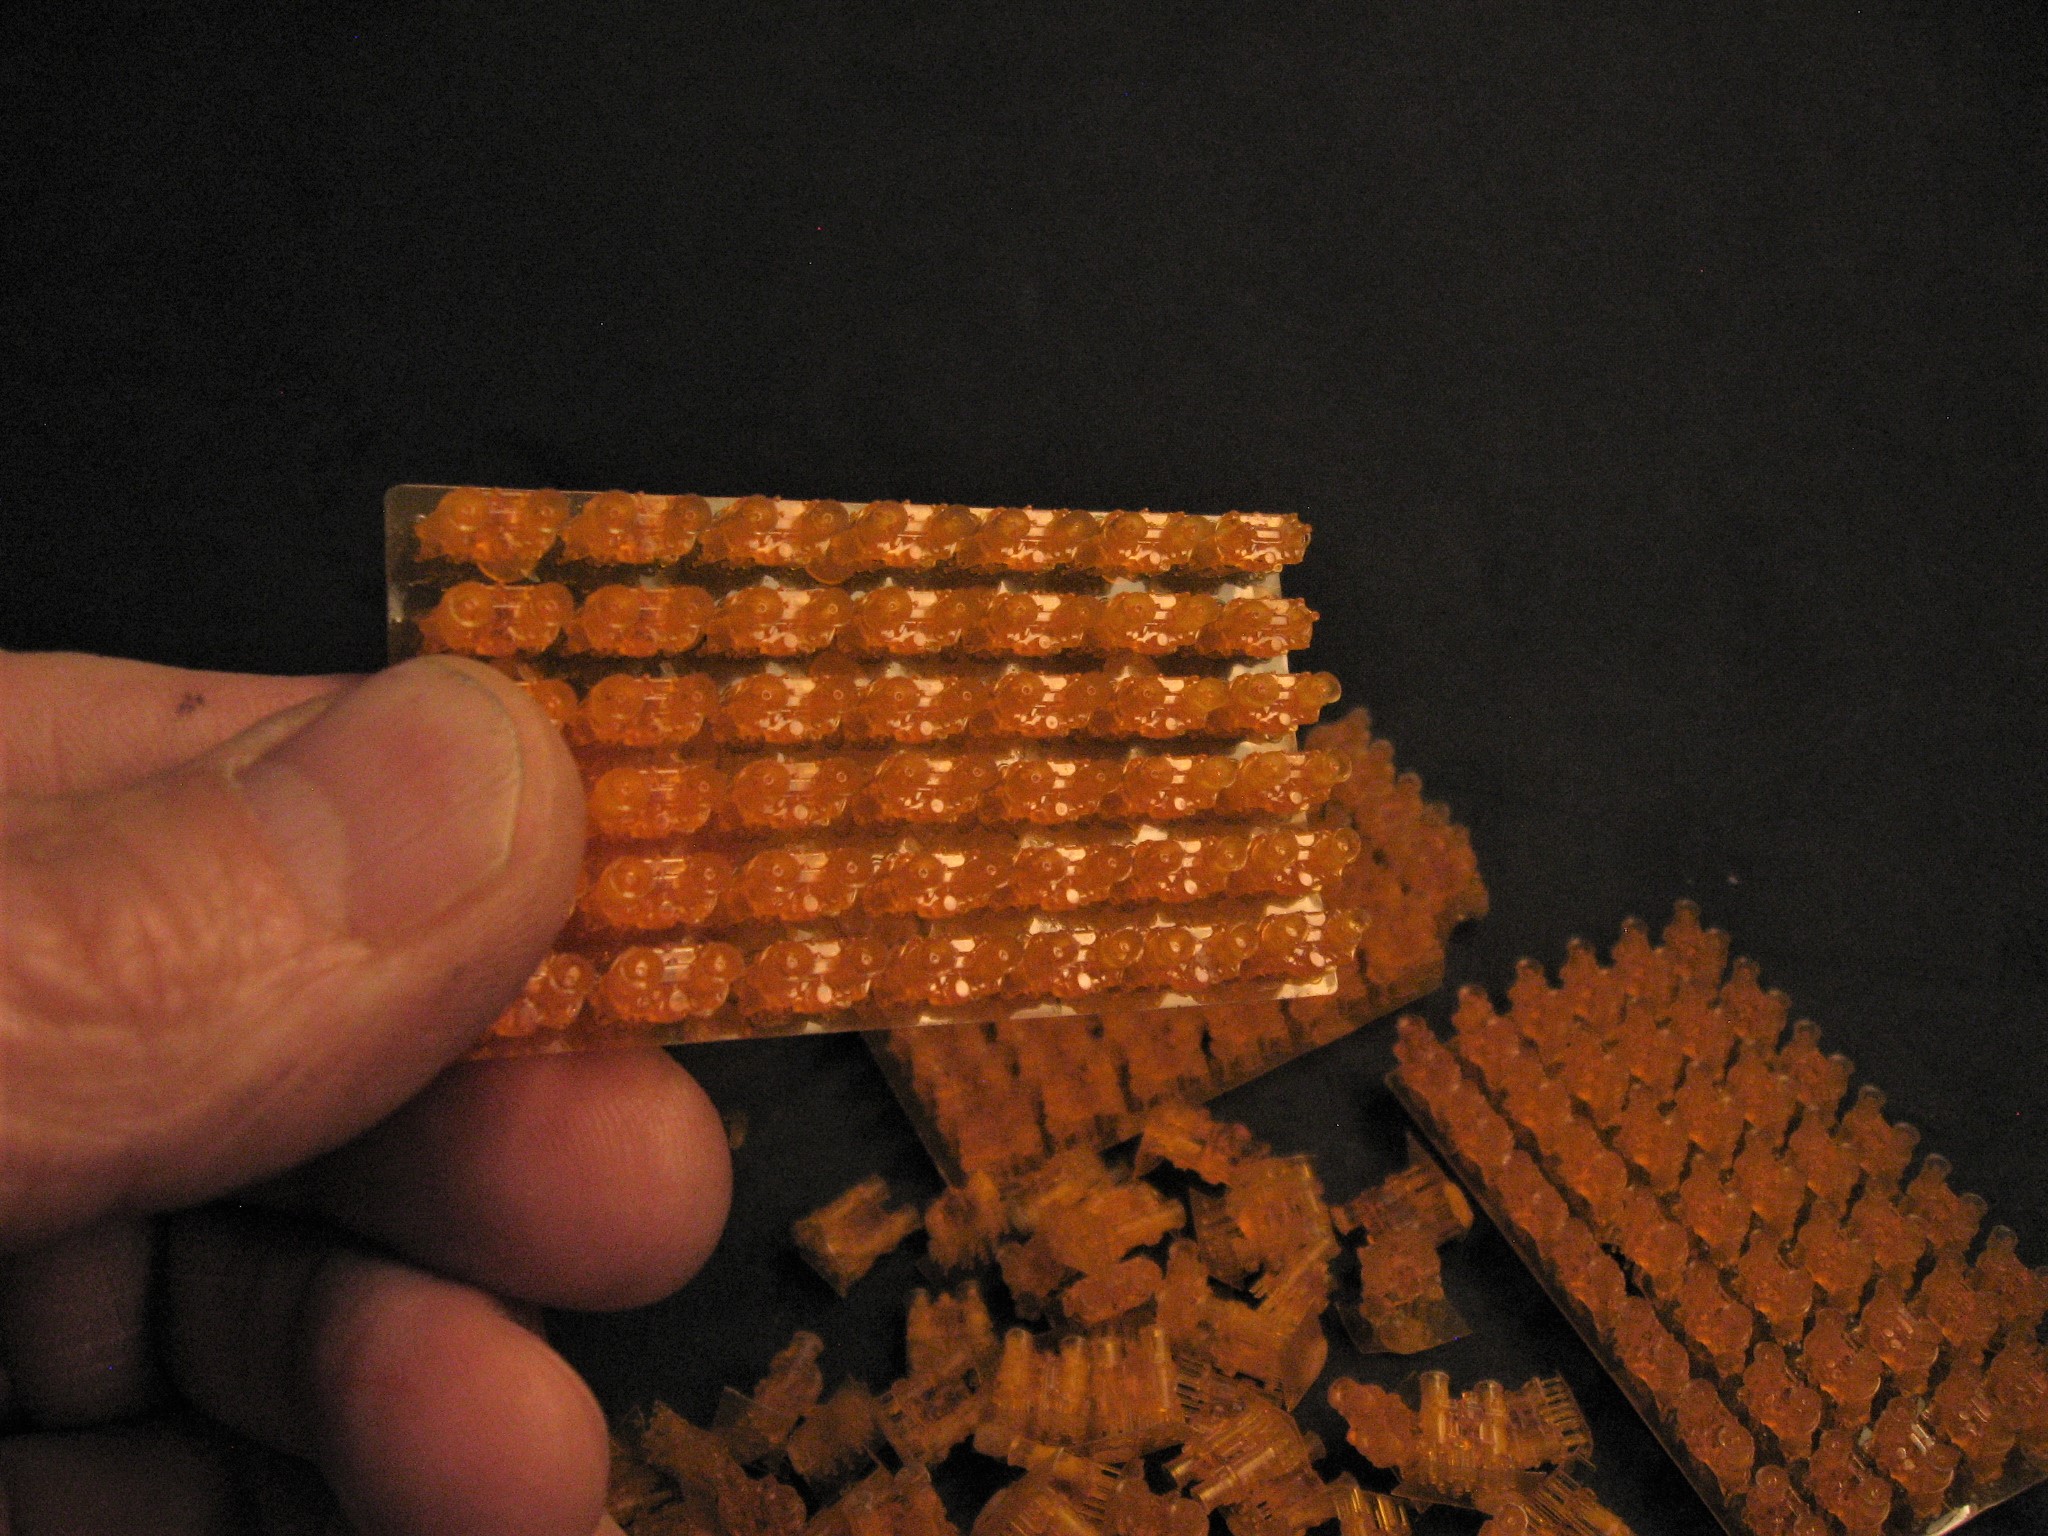
Hi Folks, I thought I would share photos of MBW's 3D parts that we are working on. Our first engine project is the Ford 427 Cobra motor. It will feature Weber carbs. We are releasing the Webers first with the full engine kit coming out first of June. The goal is 3D printed parts that have a surface that is ready for paint, no more 'grainy' texture, and a reasonable price point. The Webers will sell for $9.00 for a set of four (unpainted).
-
Here are the parts after Spatz Chrome.....
-
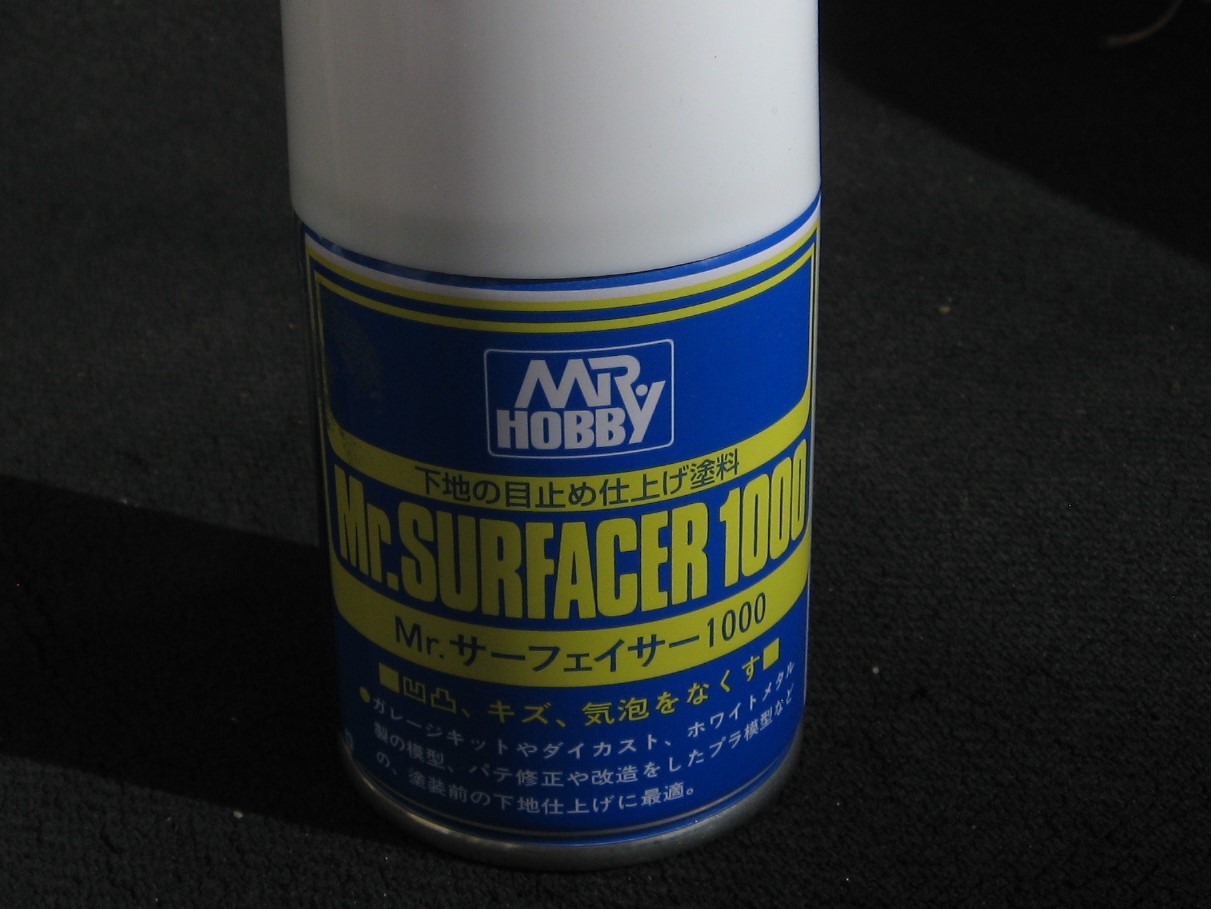
The parts do not get any sanding. These pics show them as they are printed and finished.... I use Mr. Surfacer 1000 as the primer. The last two pics show after gloss black..
-
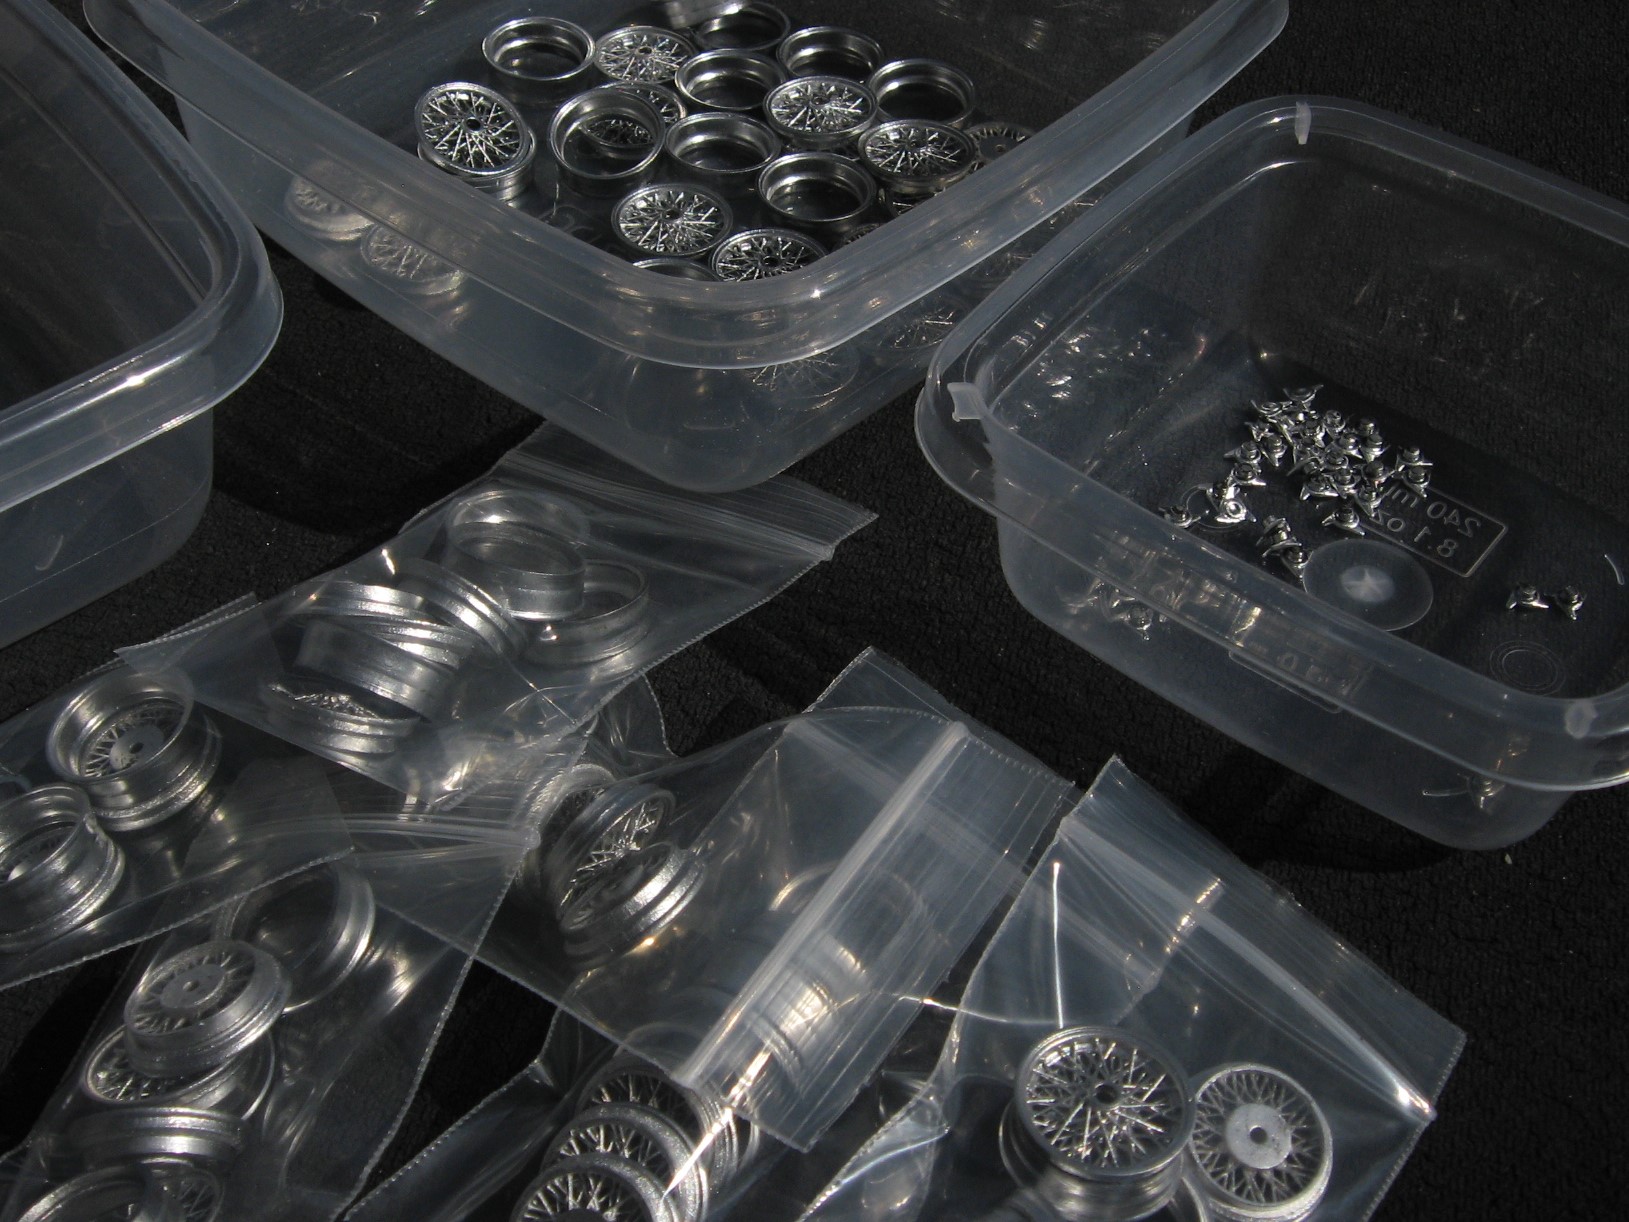
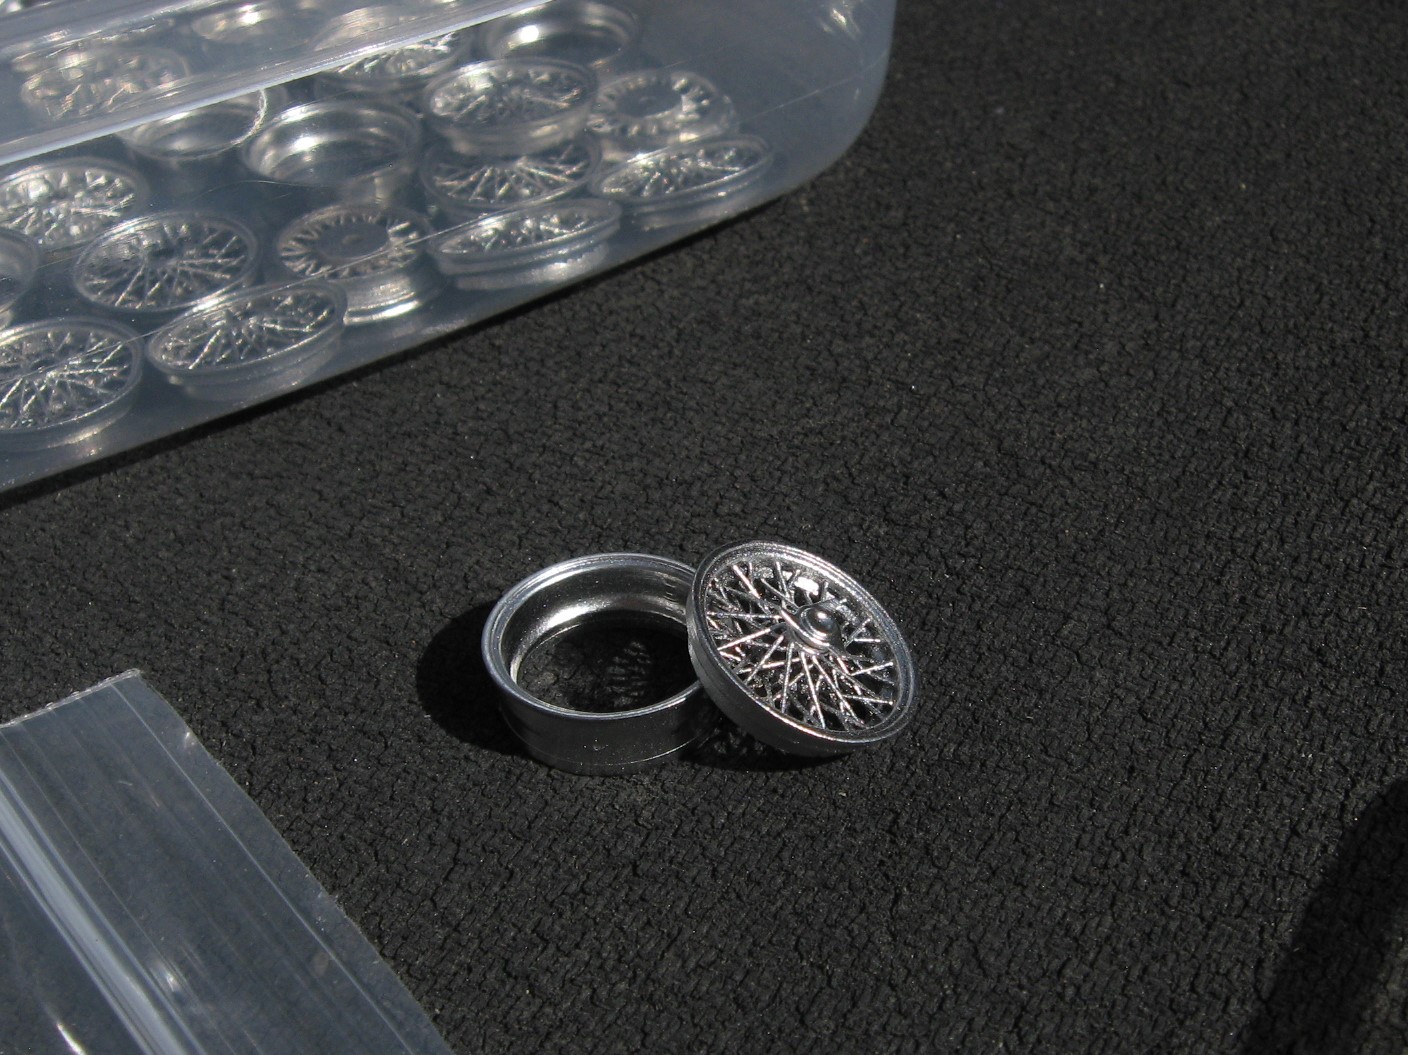
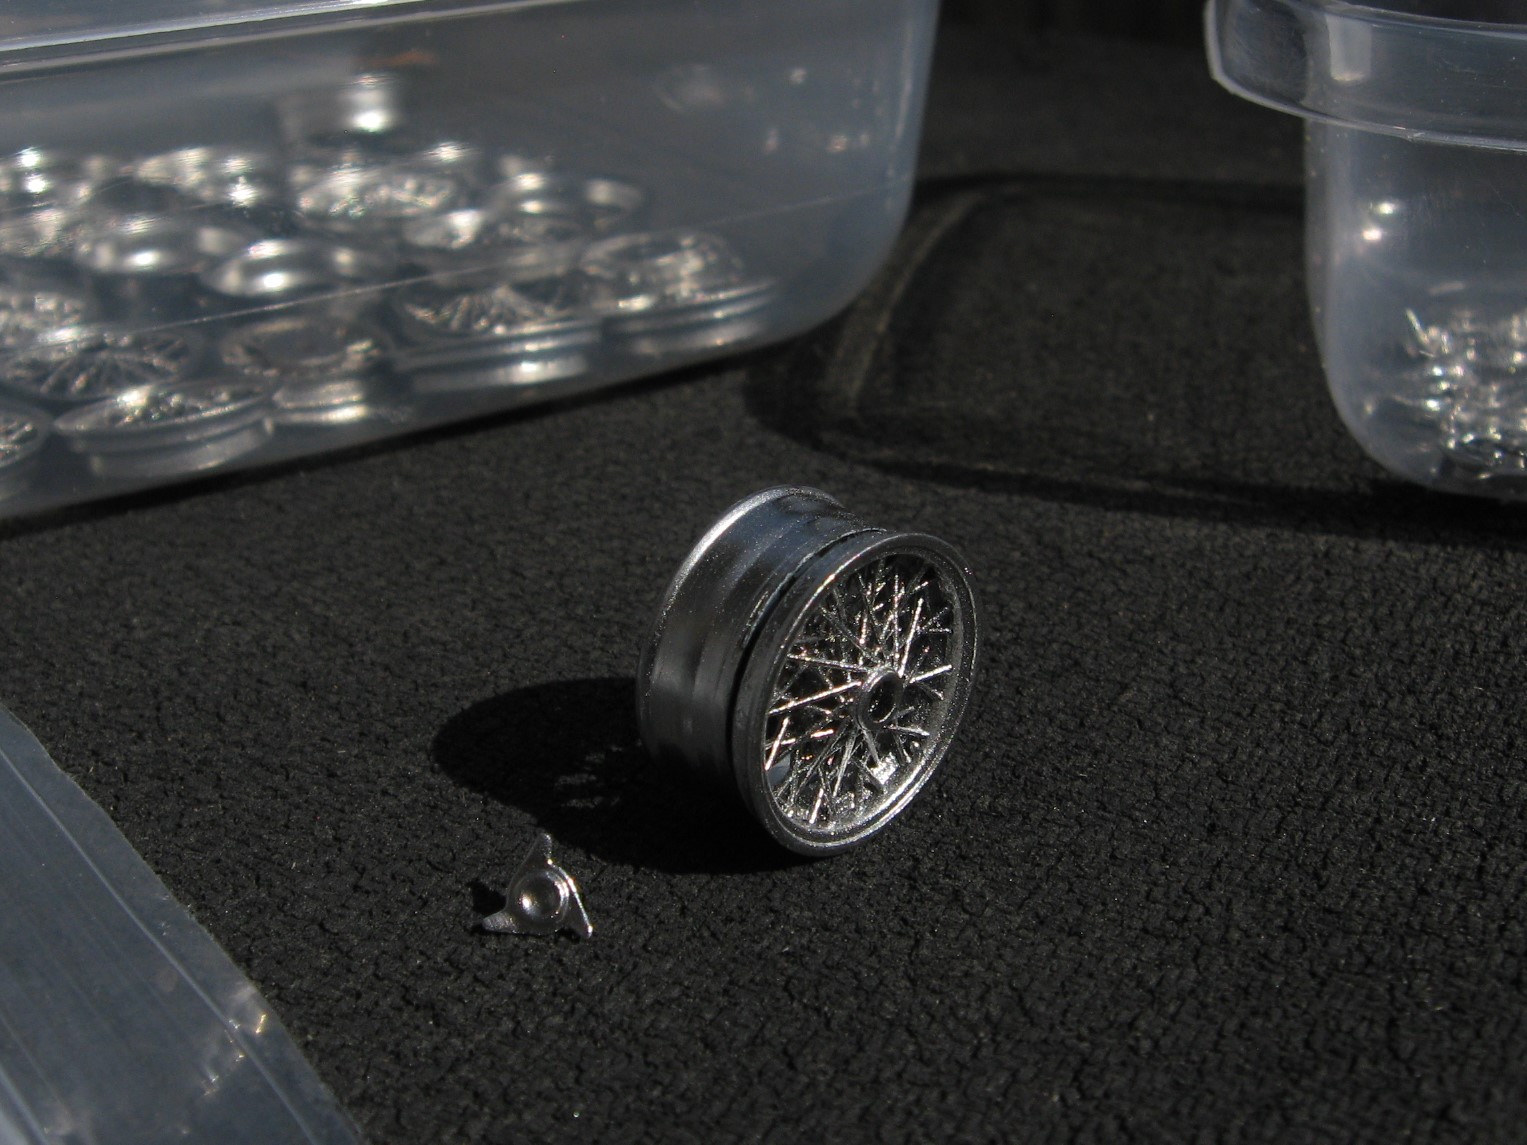
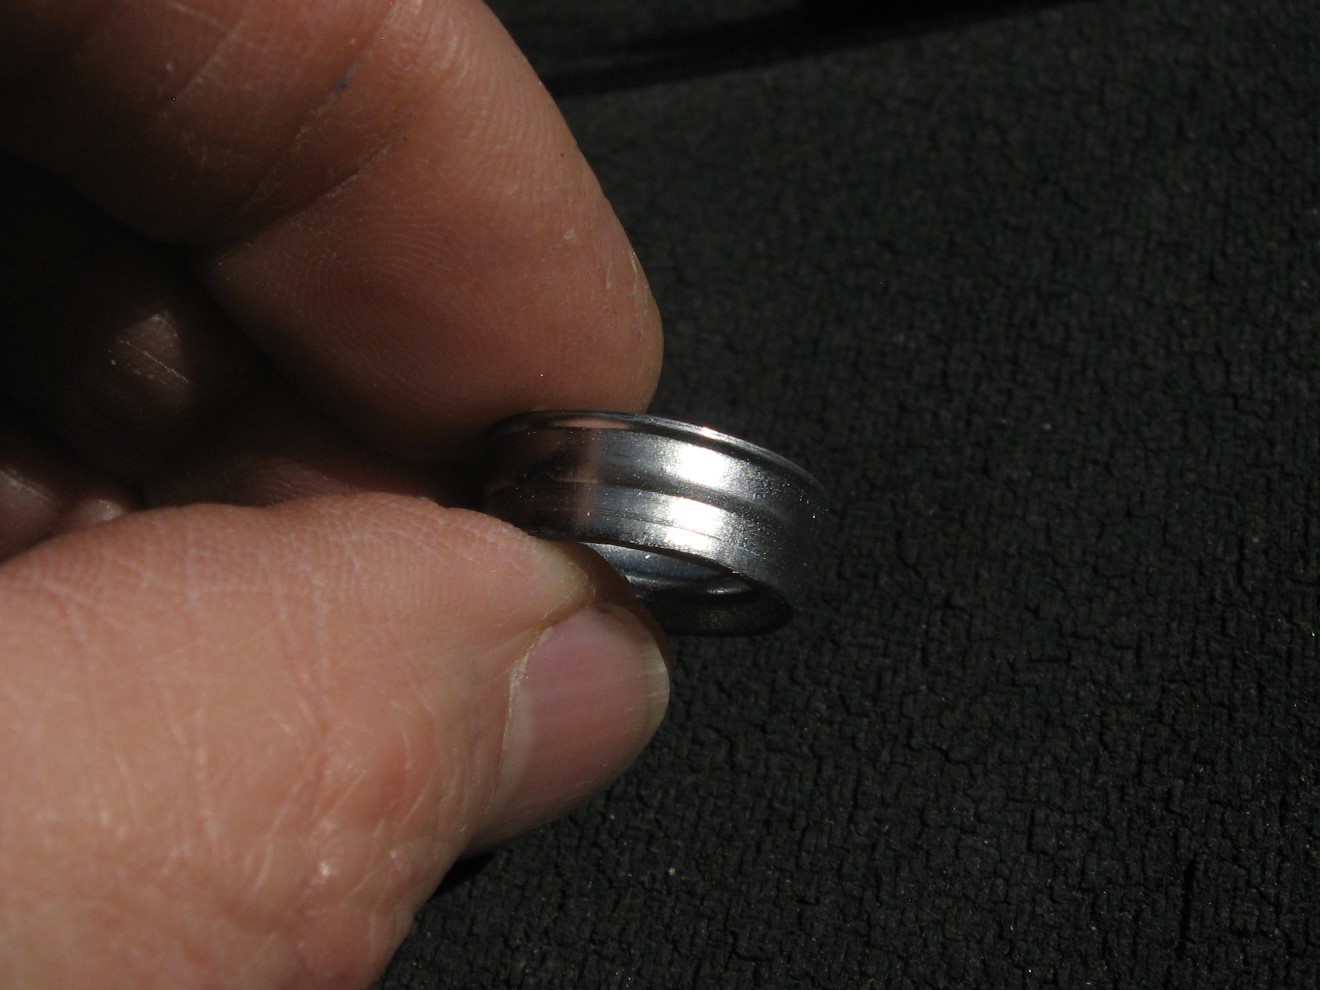
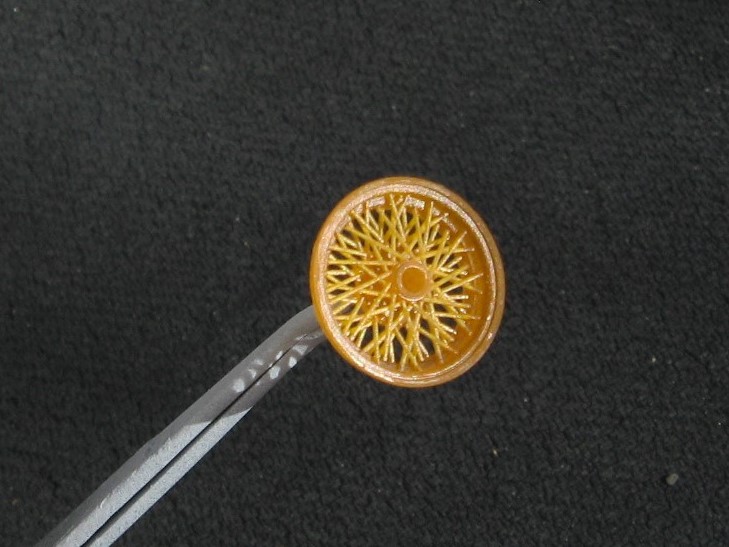
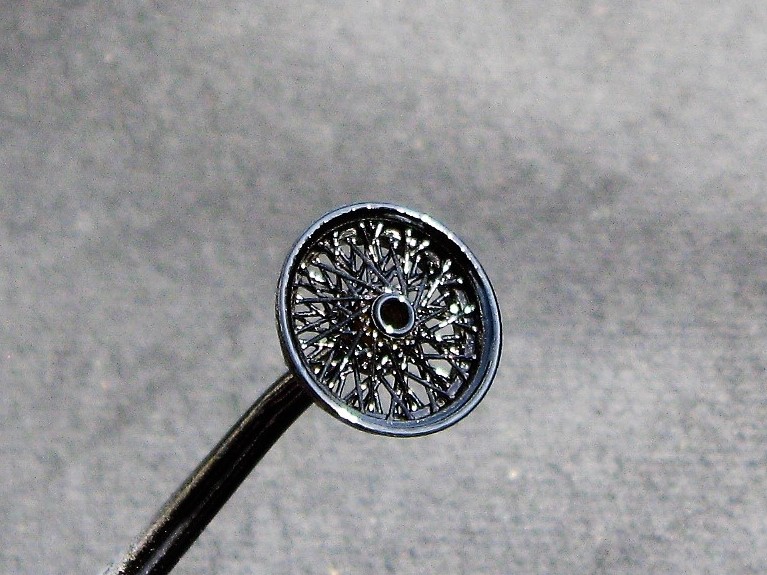
Casey, Apologies for not seeing your questions earlier. Those smooth grey rims were printed with a Wanhao Duplicator 7. 20 micron layers using 3DSR's ' ENG Tough ' resin. The D7 is actually the lowest cost machine of all our printers but works great for some parts. The following is an attempt to show what the 'finish' looks like on the Borrani wire wheels. I will start with the two machines used. The Wanhao D7 printed the larger backs and the knockoffs. For the fine detail needed on the front portion of the rims we used the Titan DLP printer using the orange resin.
-
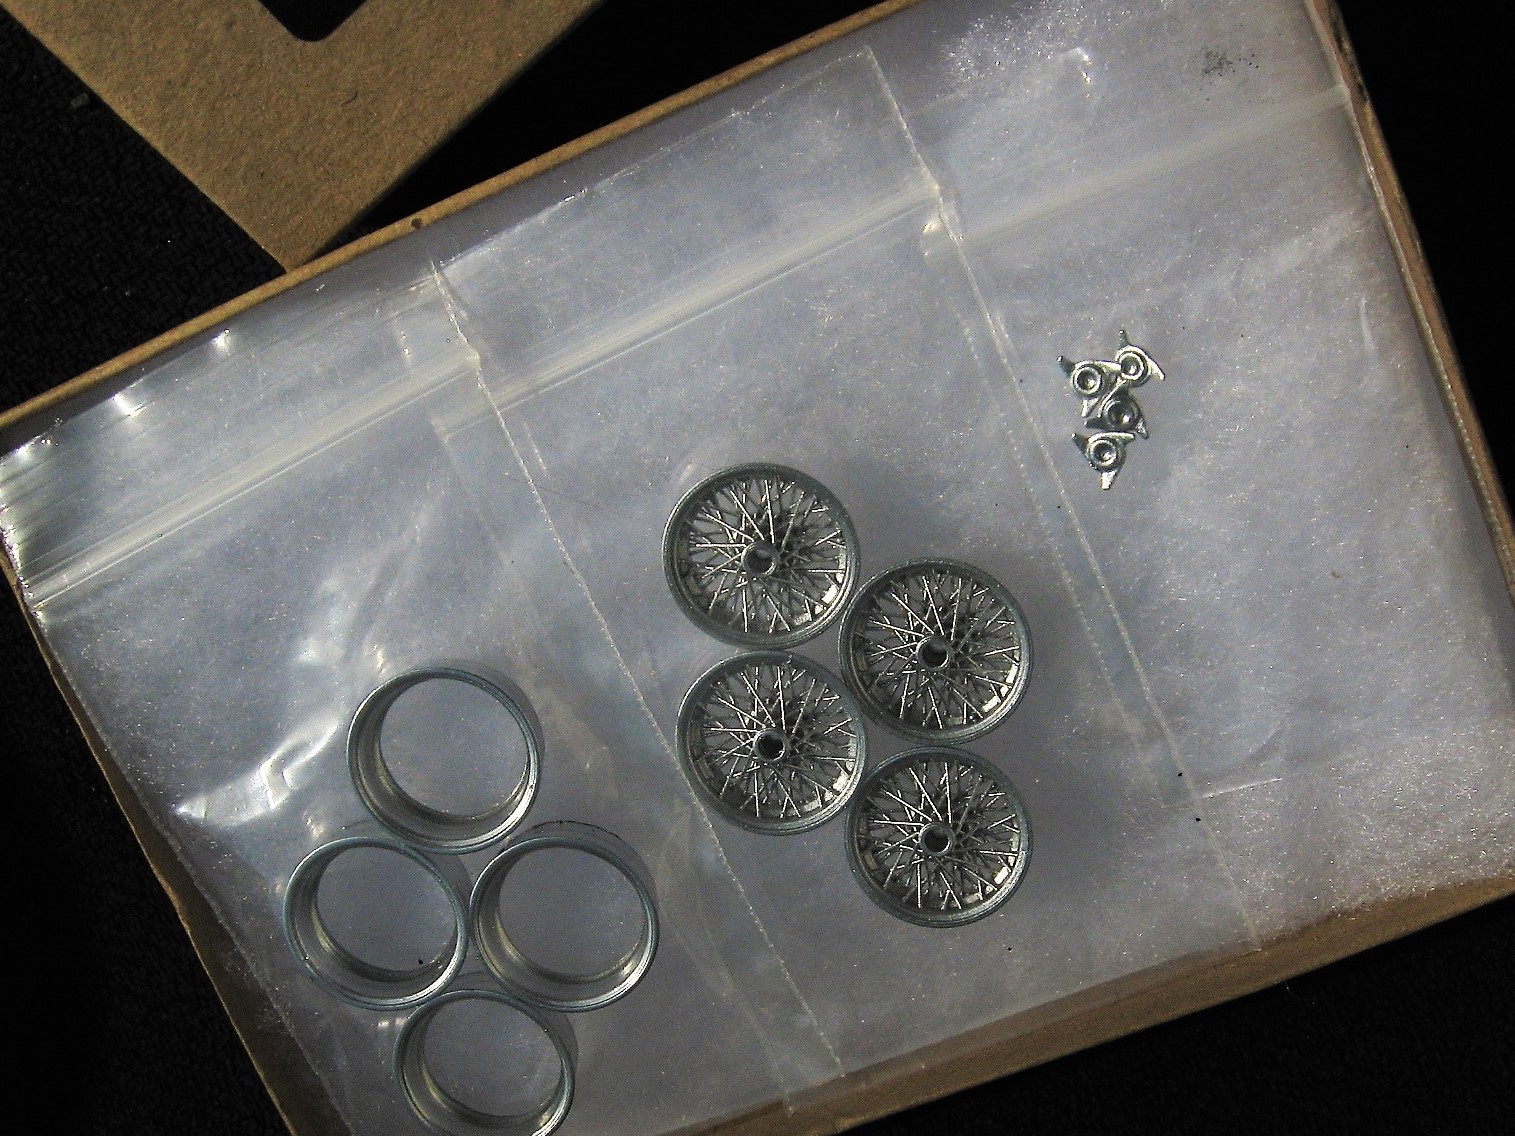
Casey, Those rims are a project that Pico designed for 'Kit Karson'. Model Builders' Warehouse is the firm that these gentlemen choose to do the printing. They would not be for sale on our site as the design is the property of Pico. In this instance we will print x number of parts for 'KK' and charge him accordingly. MBWH is close to offering for sale our own 3D printed parts. As you noted above the quality of printed parts is improving all time ! Randy
-
I have working suspension and pose able steering. Could not resist sticking on one of my 3d printed wheels. Thanks for looking in! Randy
-
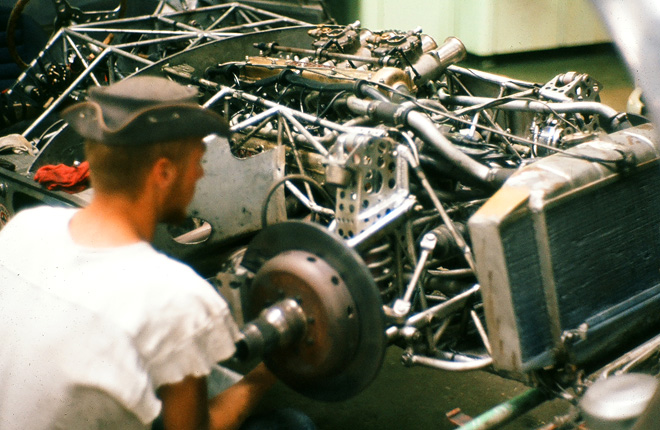
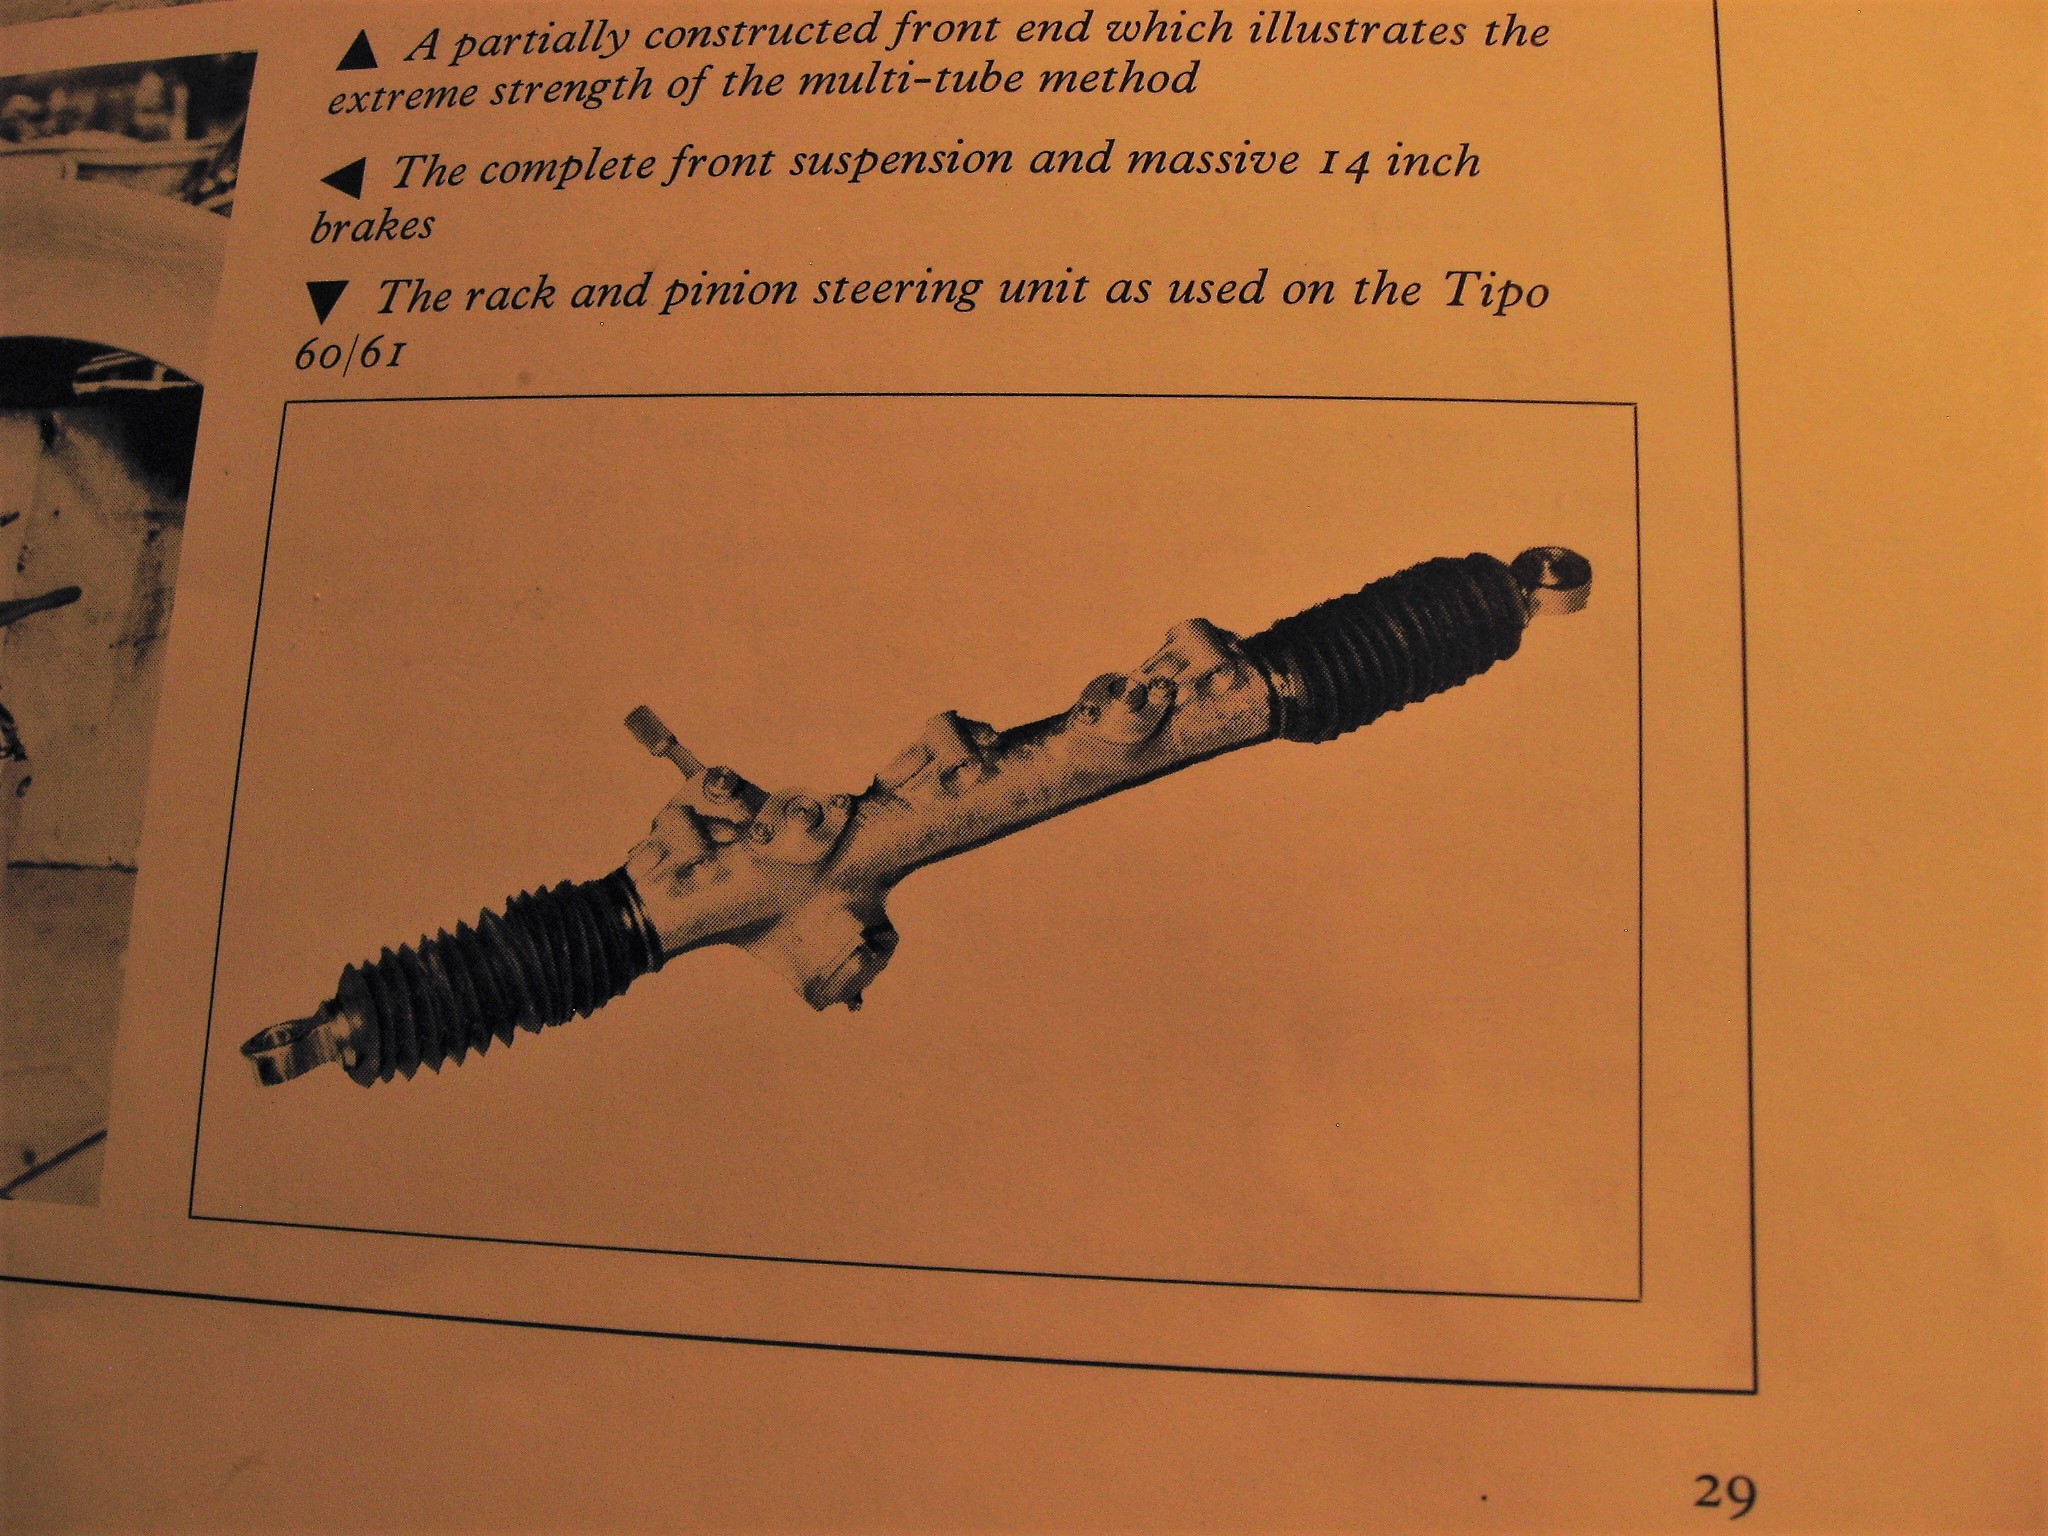
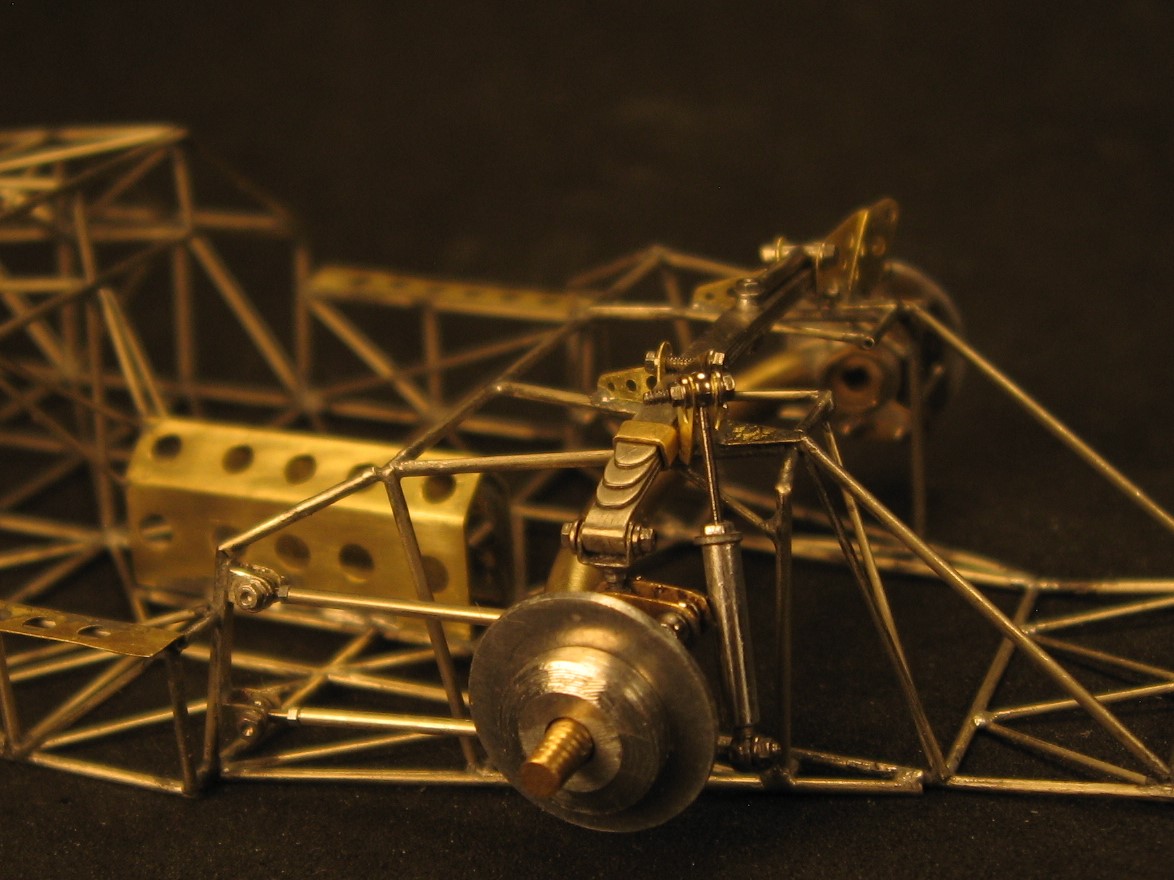
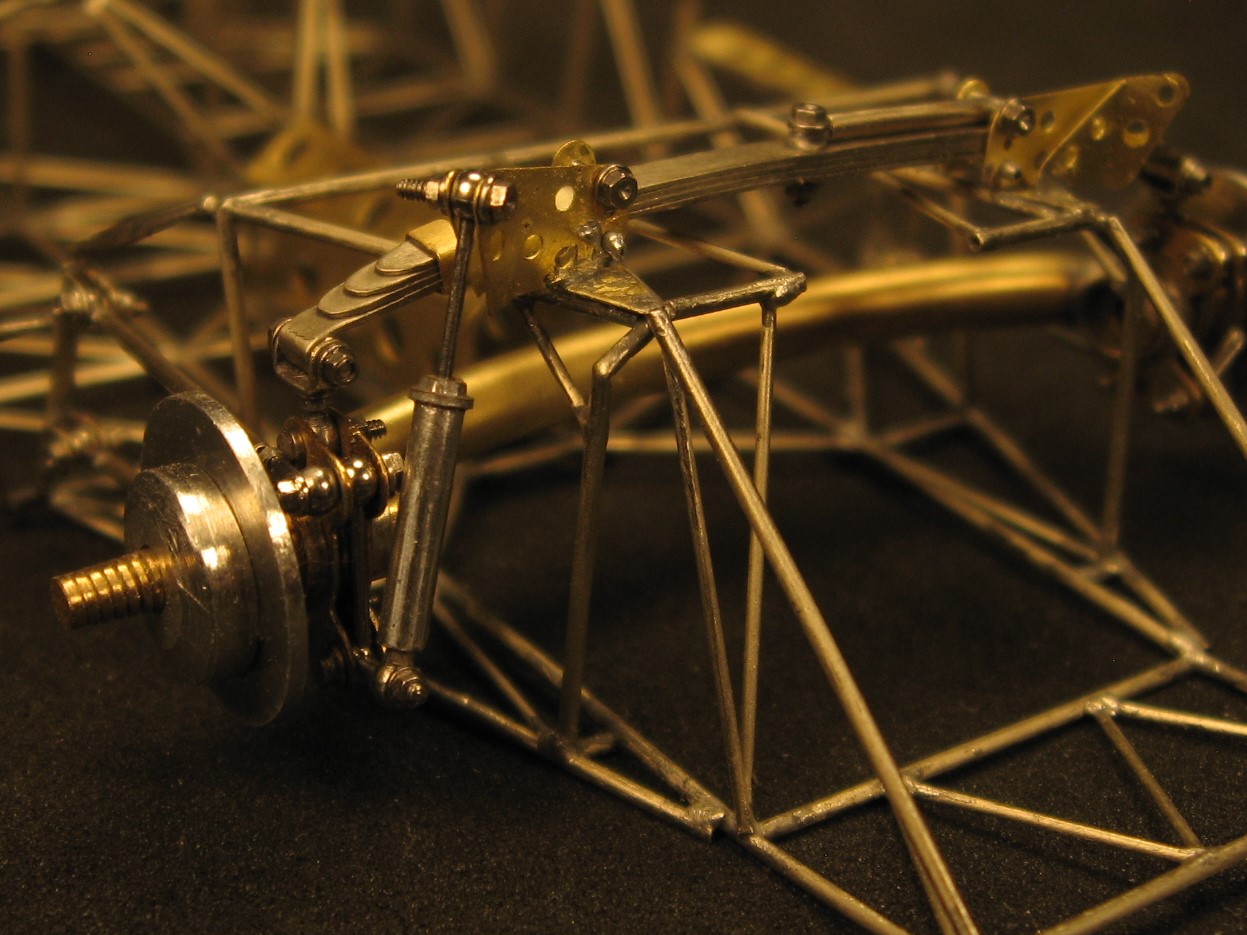
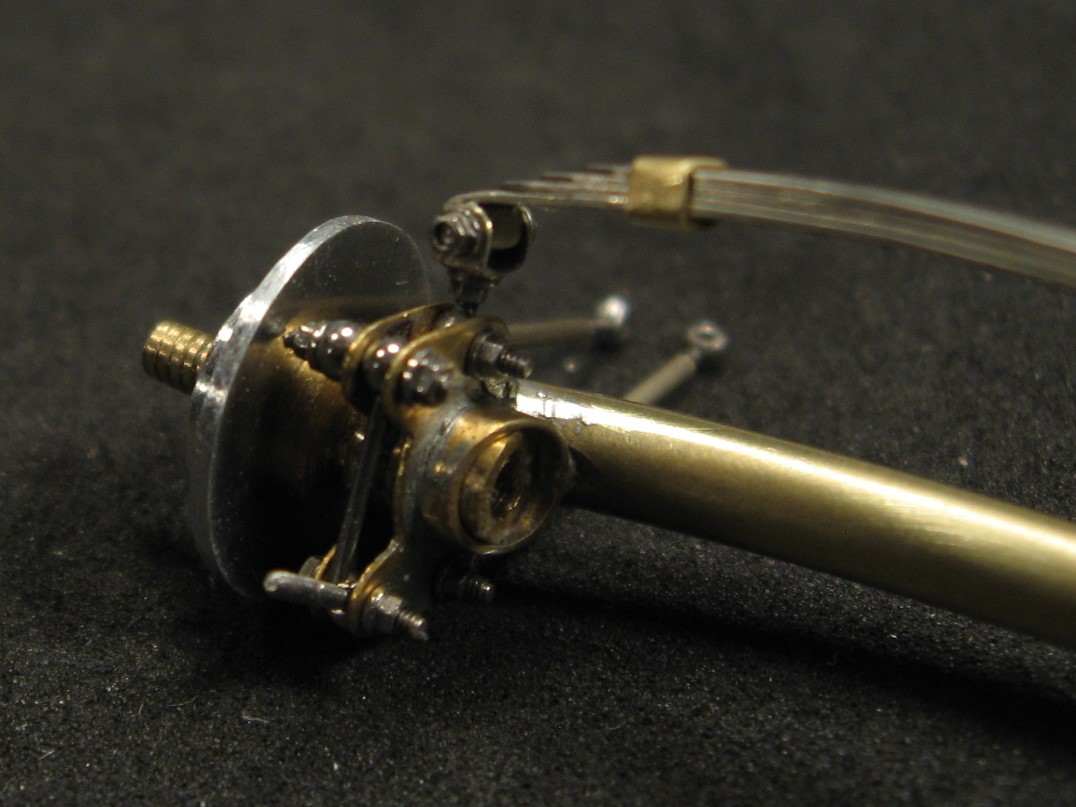
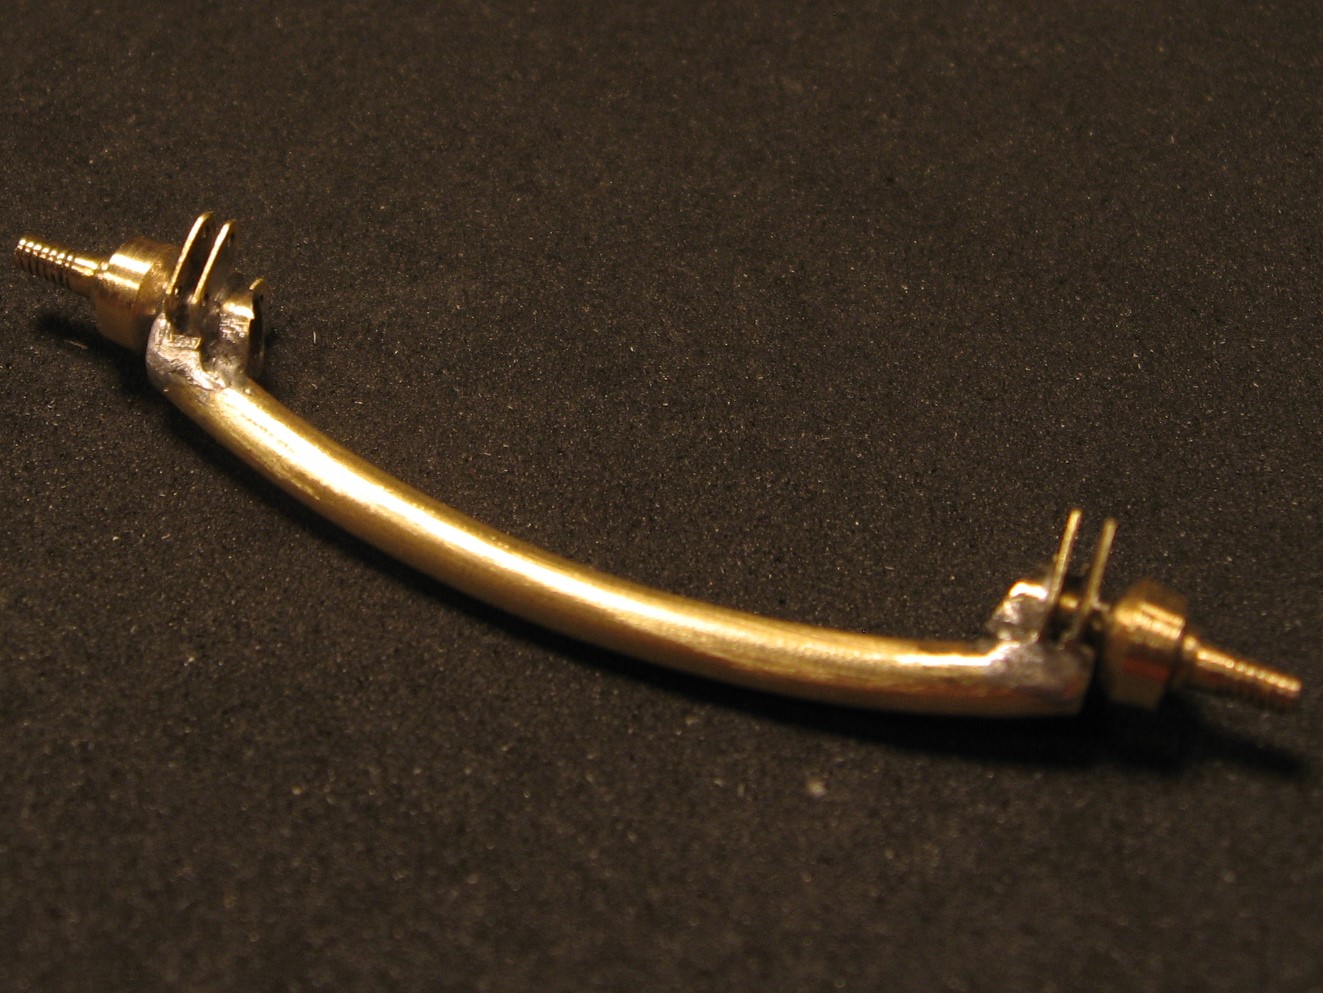
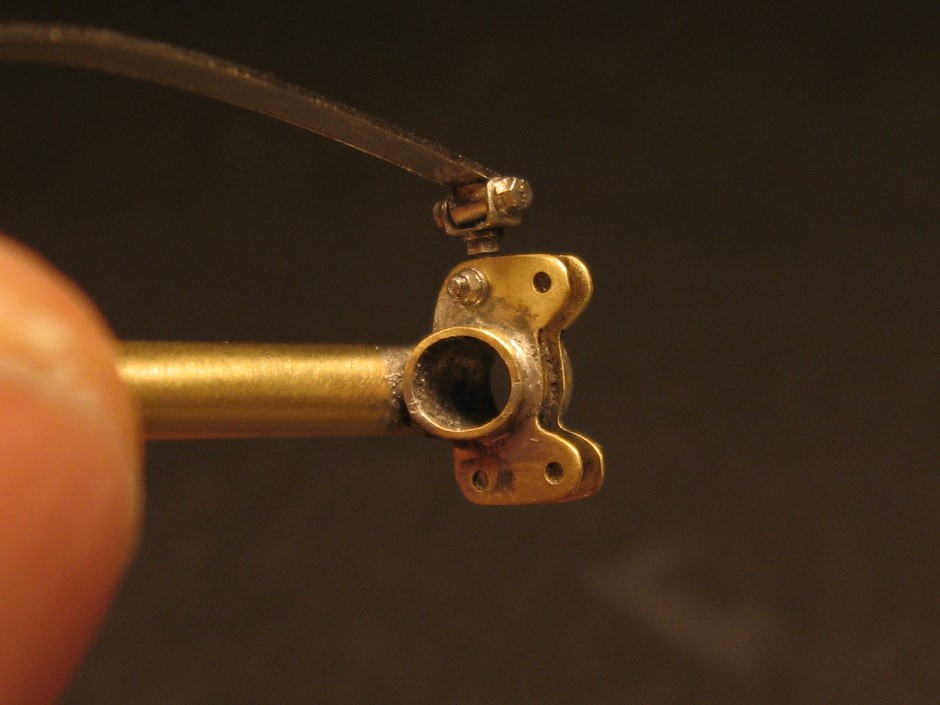
Hi Folks, Hello Dann, Thank you for the compliment but there are several folks on this forum that model in this medium that I look up to. Dave S. and Tim H. (Codi) in the Drag section along with Mark J (Scalemaster) in the Big Boys section and Andy S.(Absmiami) in this section just to name a few:) Hi Bill, Glad you are following along ! Looking forward to talking more with you. A couple of reference pics of the front end. The Tipo 61 used double A arms, Koni shocks with rack & pinion steering.. First is a Ed Matsuishi photo followed by one from a restoration thread, the rack & pinion photo is from Joel Finn's book. Then my attempt.... Was able to reuse the A arms that I had built earlier after shortening them. The shocks are functioning RBMotion items with shorter springs and extended necks. I will split this into 2 posts..
-
Hello Andy, Great fun watching you work your magic on this one! Those wheels are just stunning!!! Really enjoy your use of different materials throughout this build' Learning something every update. Randy
-
The stance looks great JC. The Moebuis kit looks like a nice one, I need to try one of their kits. Randy
-
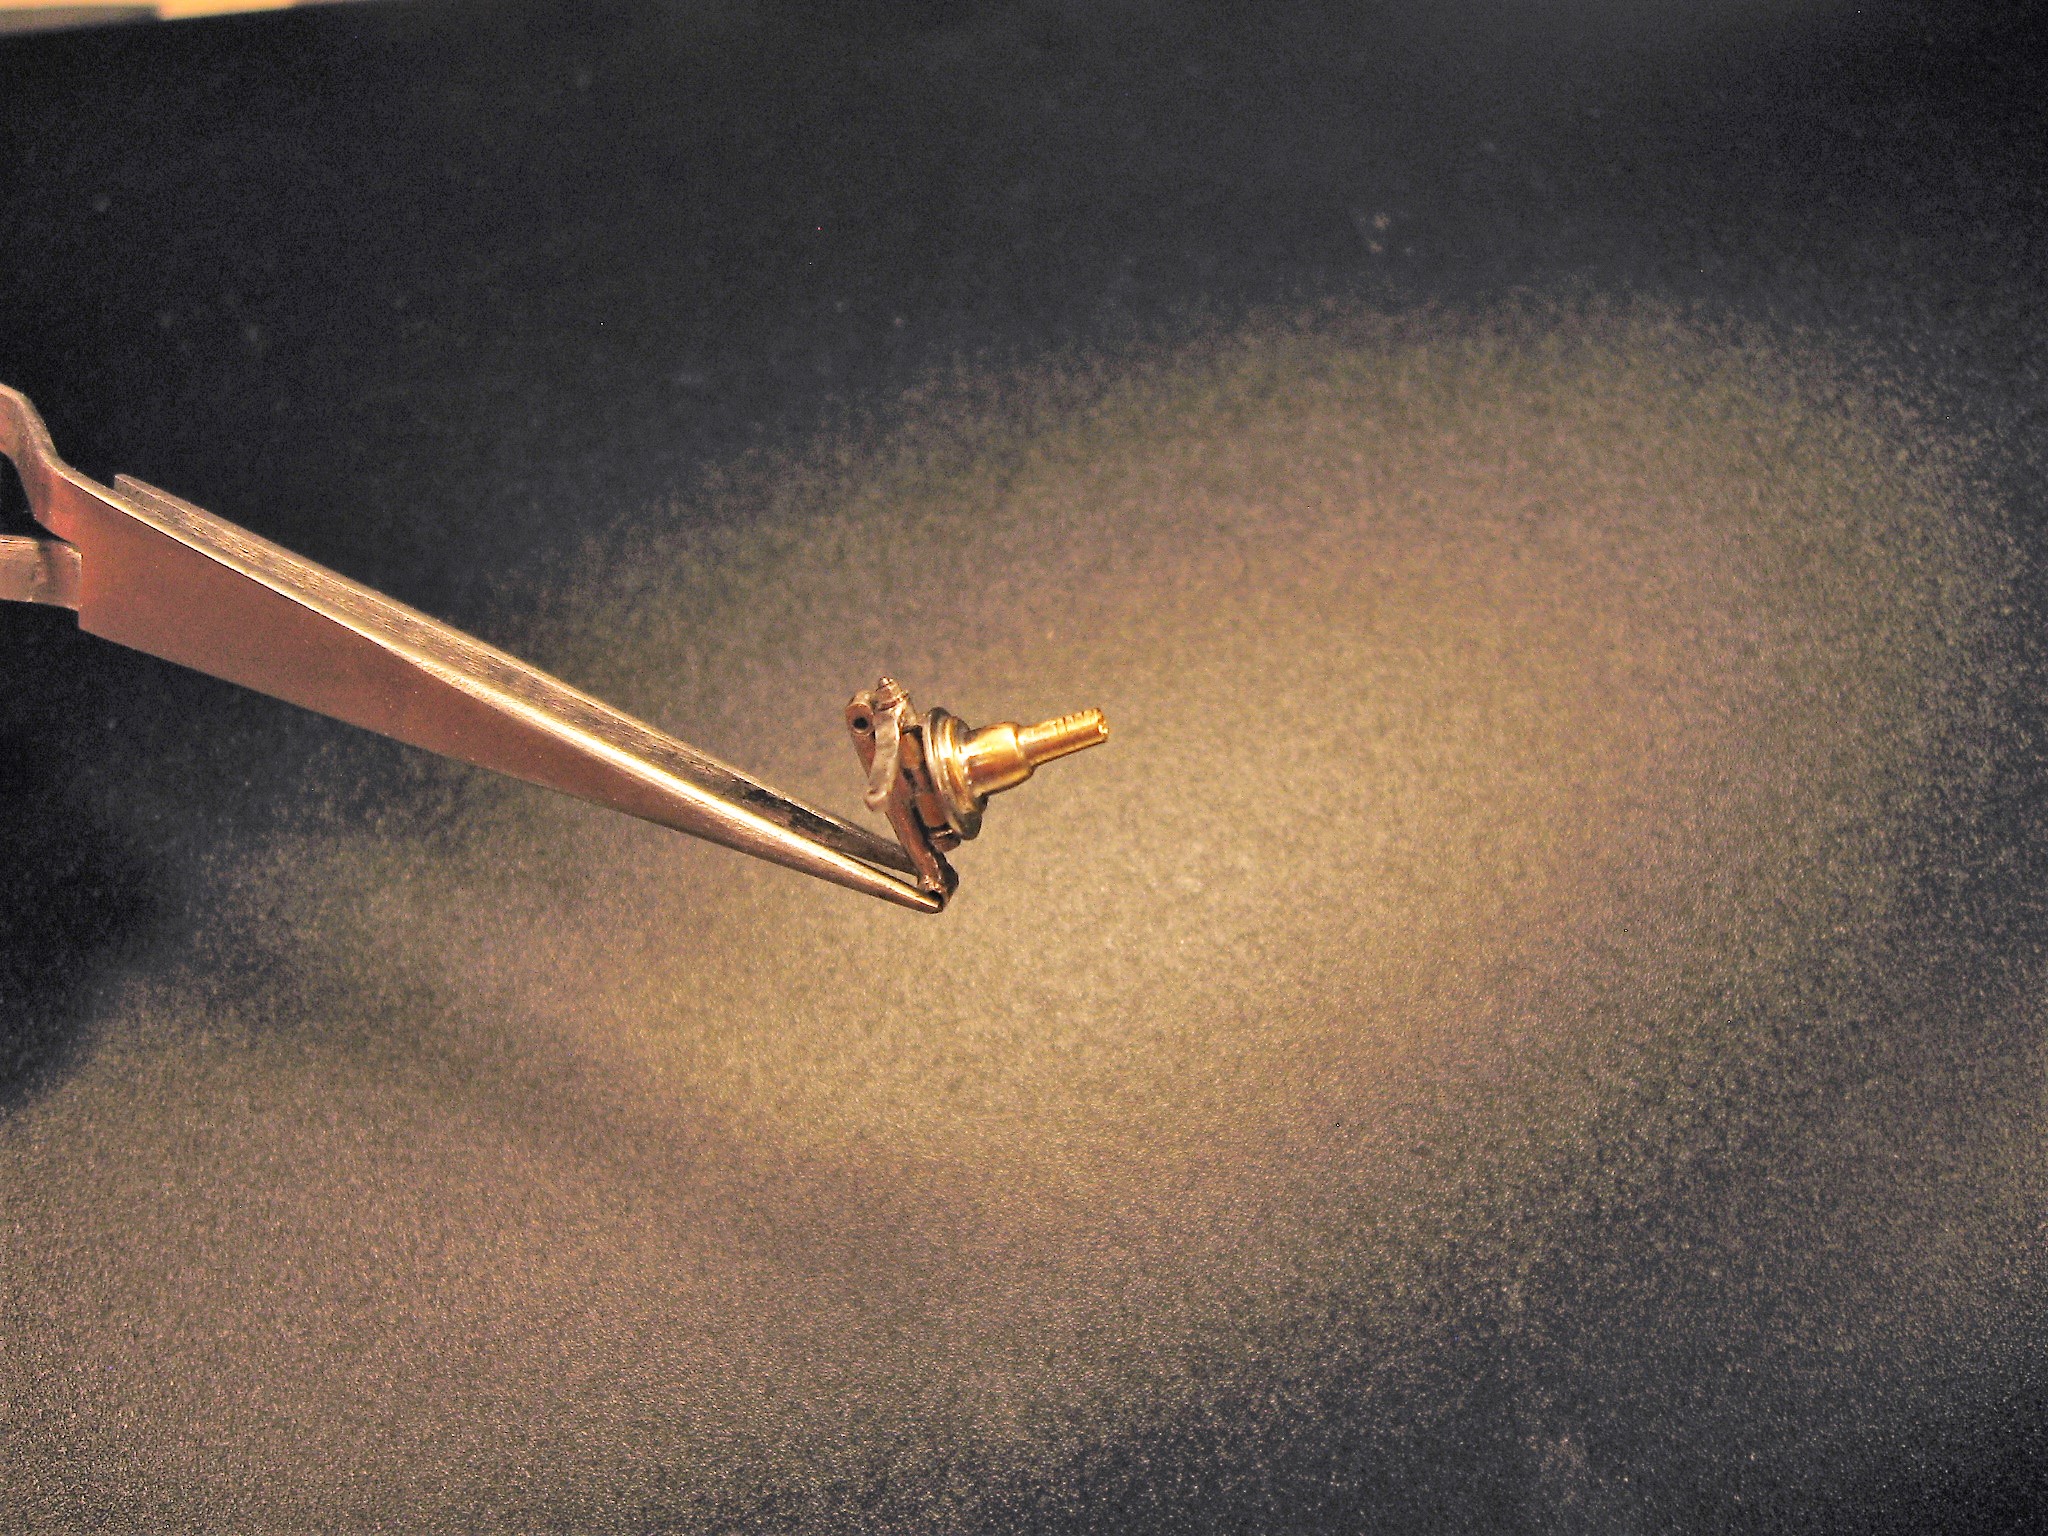
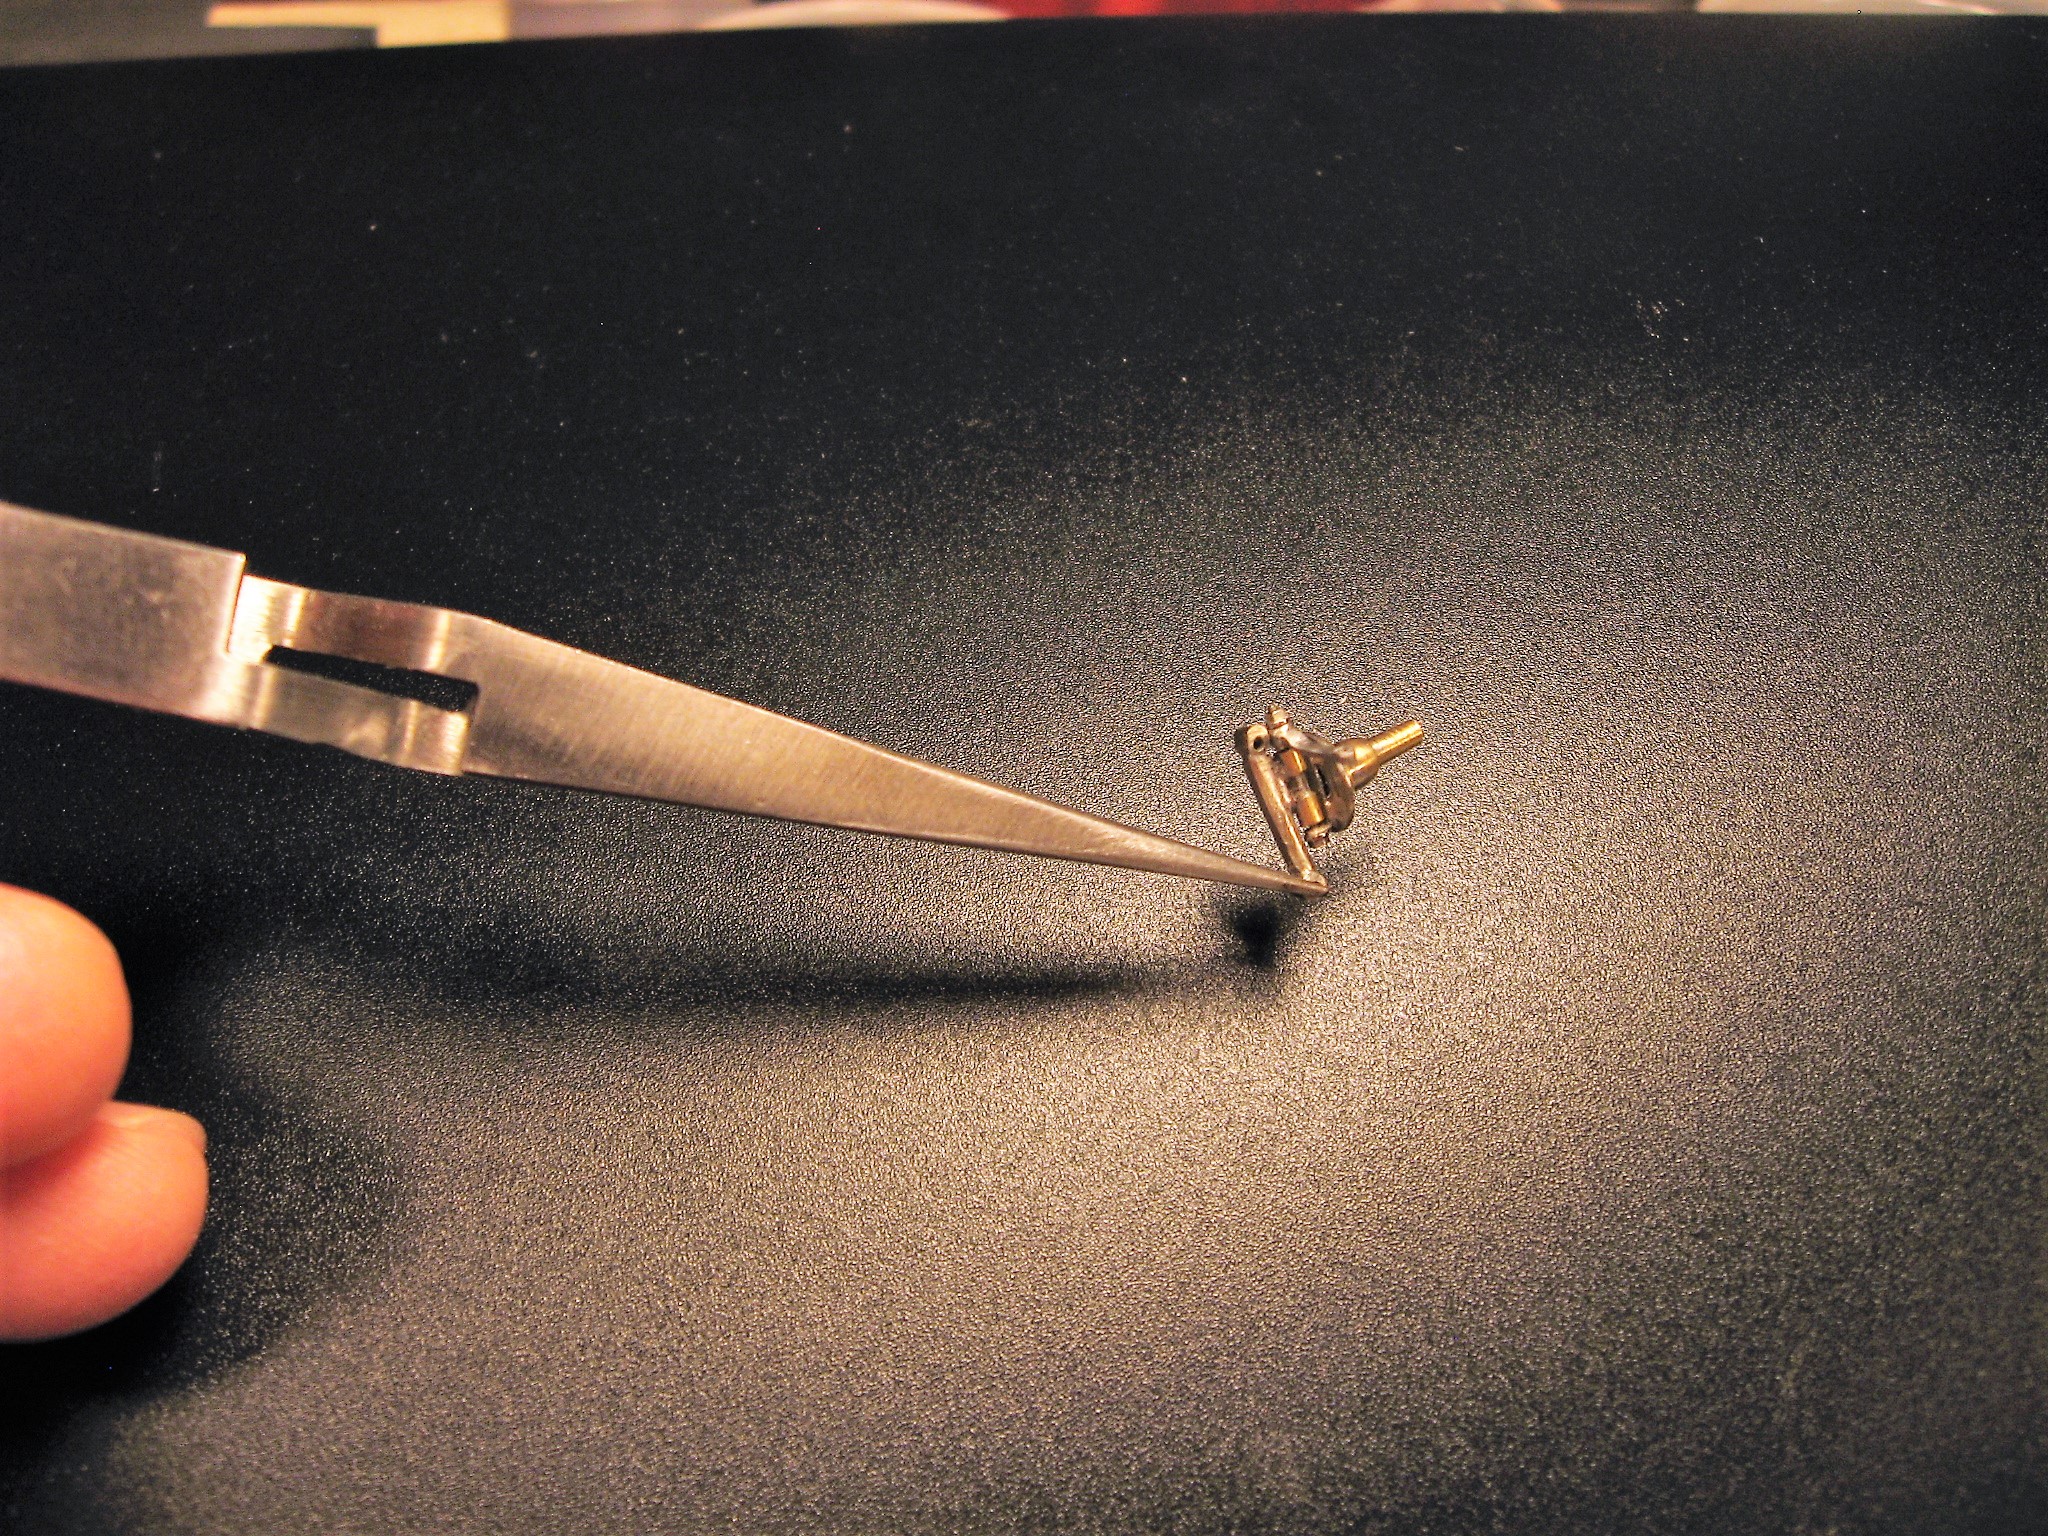
Sonny, Thank you for the kind words. Andy, I did not finish the answer to your question about drilling holes in heavier stock like the four link plates. I use an old glass scriber as a center punch, see attached pic... Randy
-
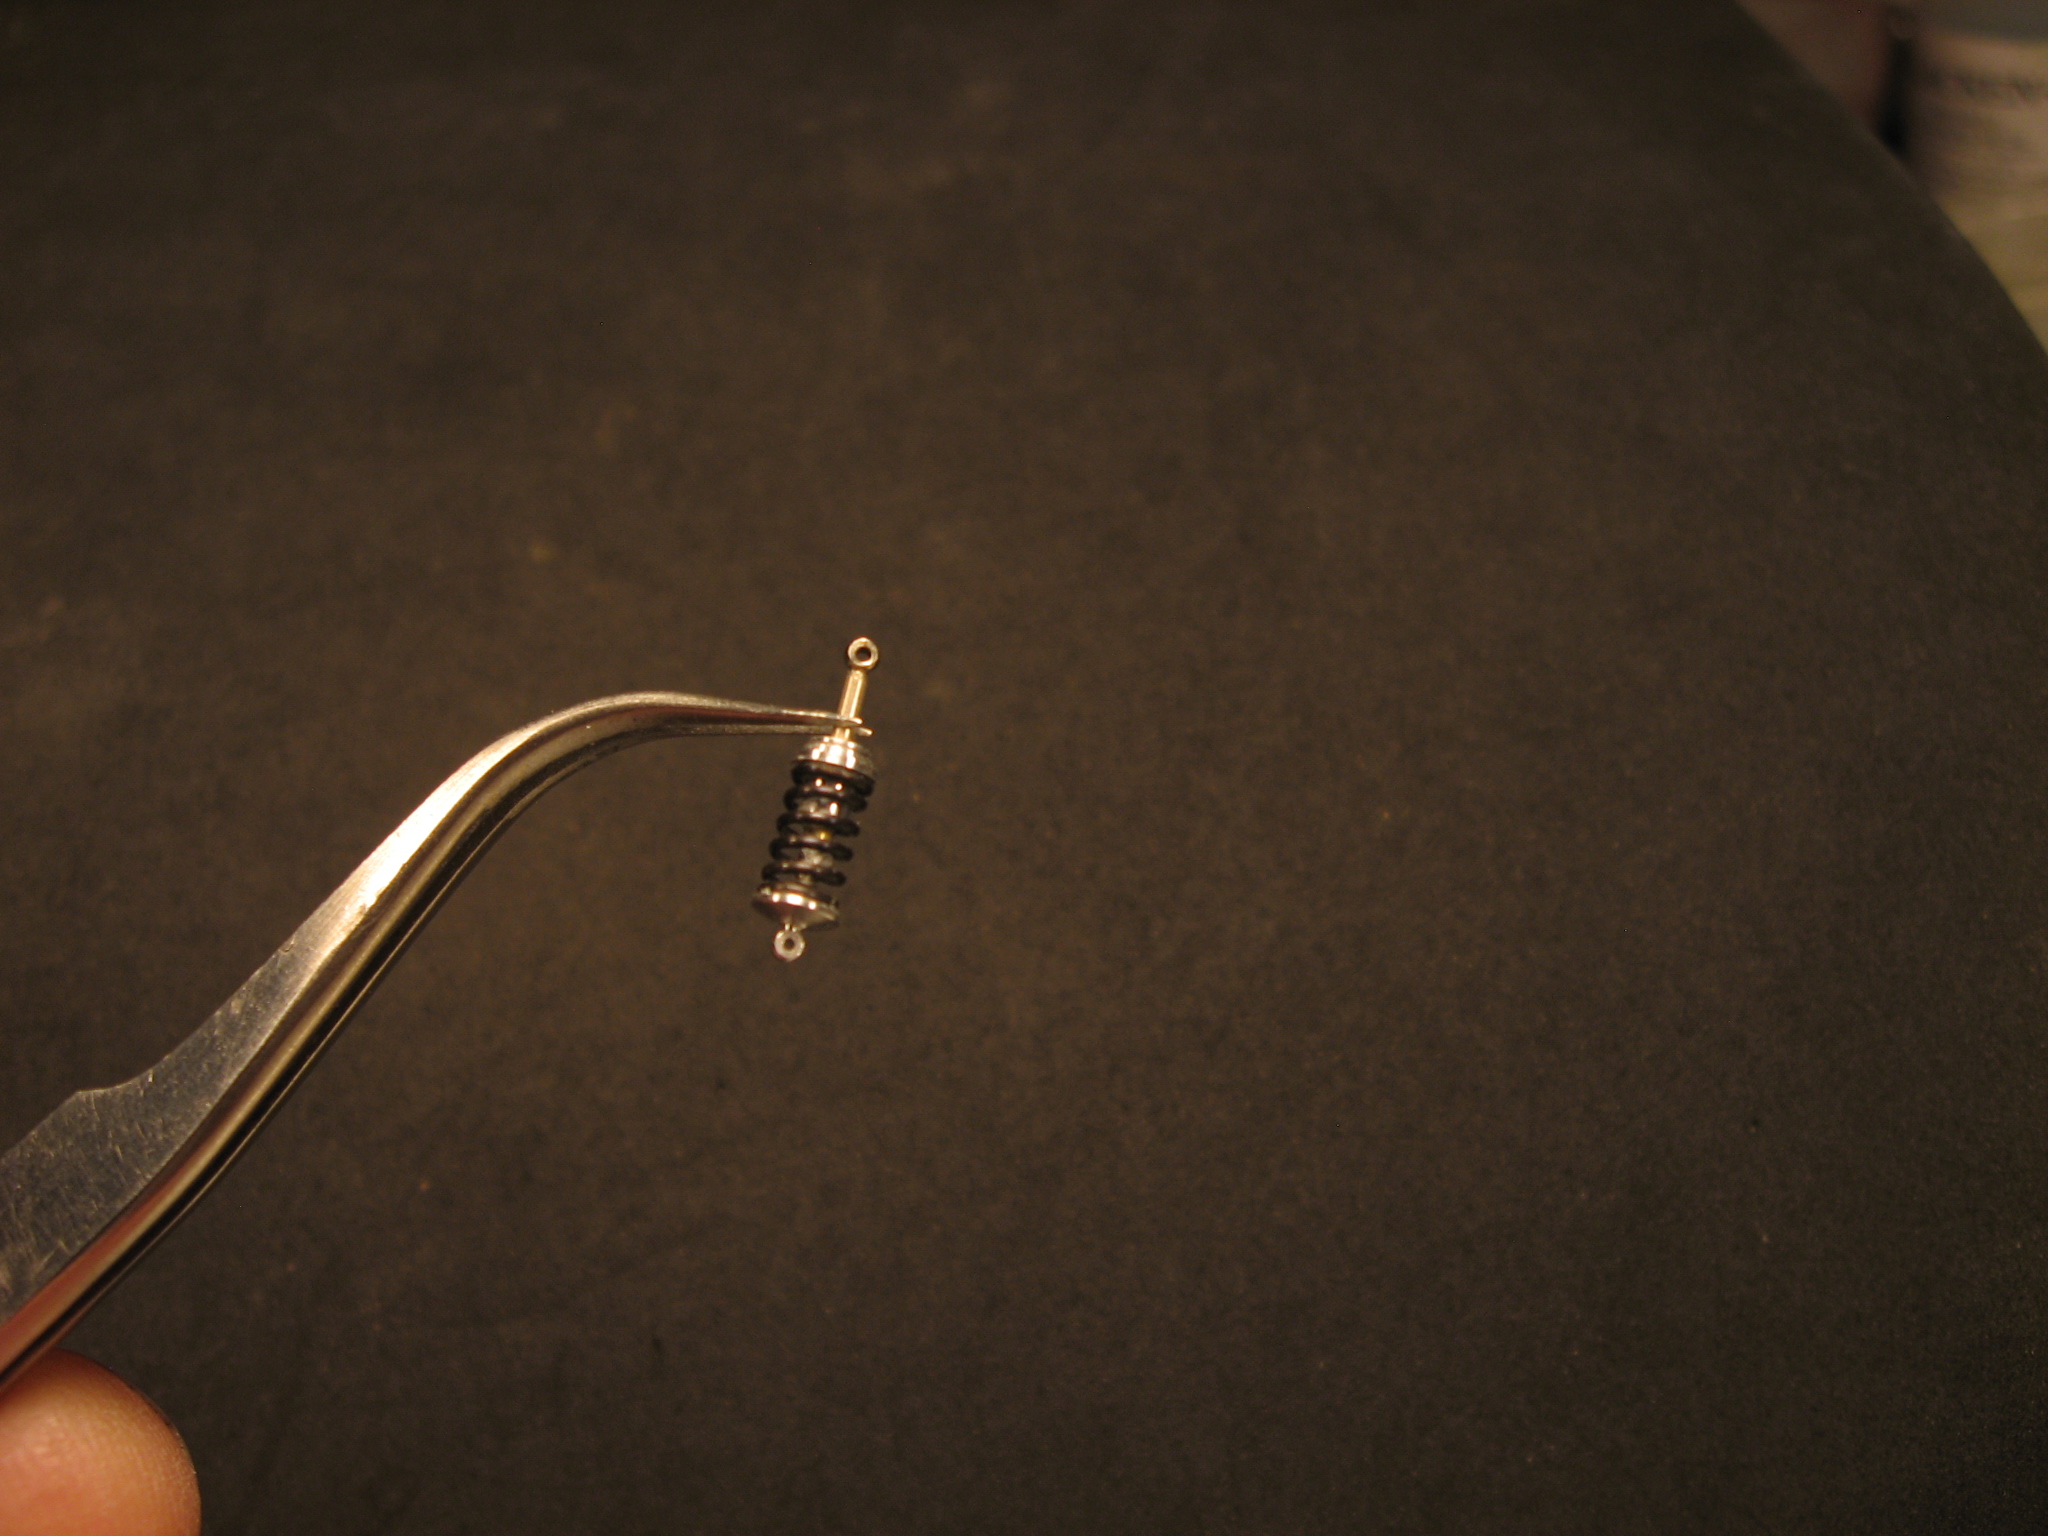
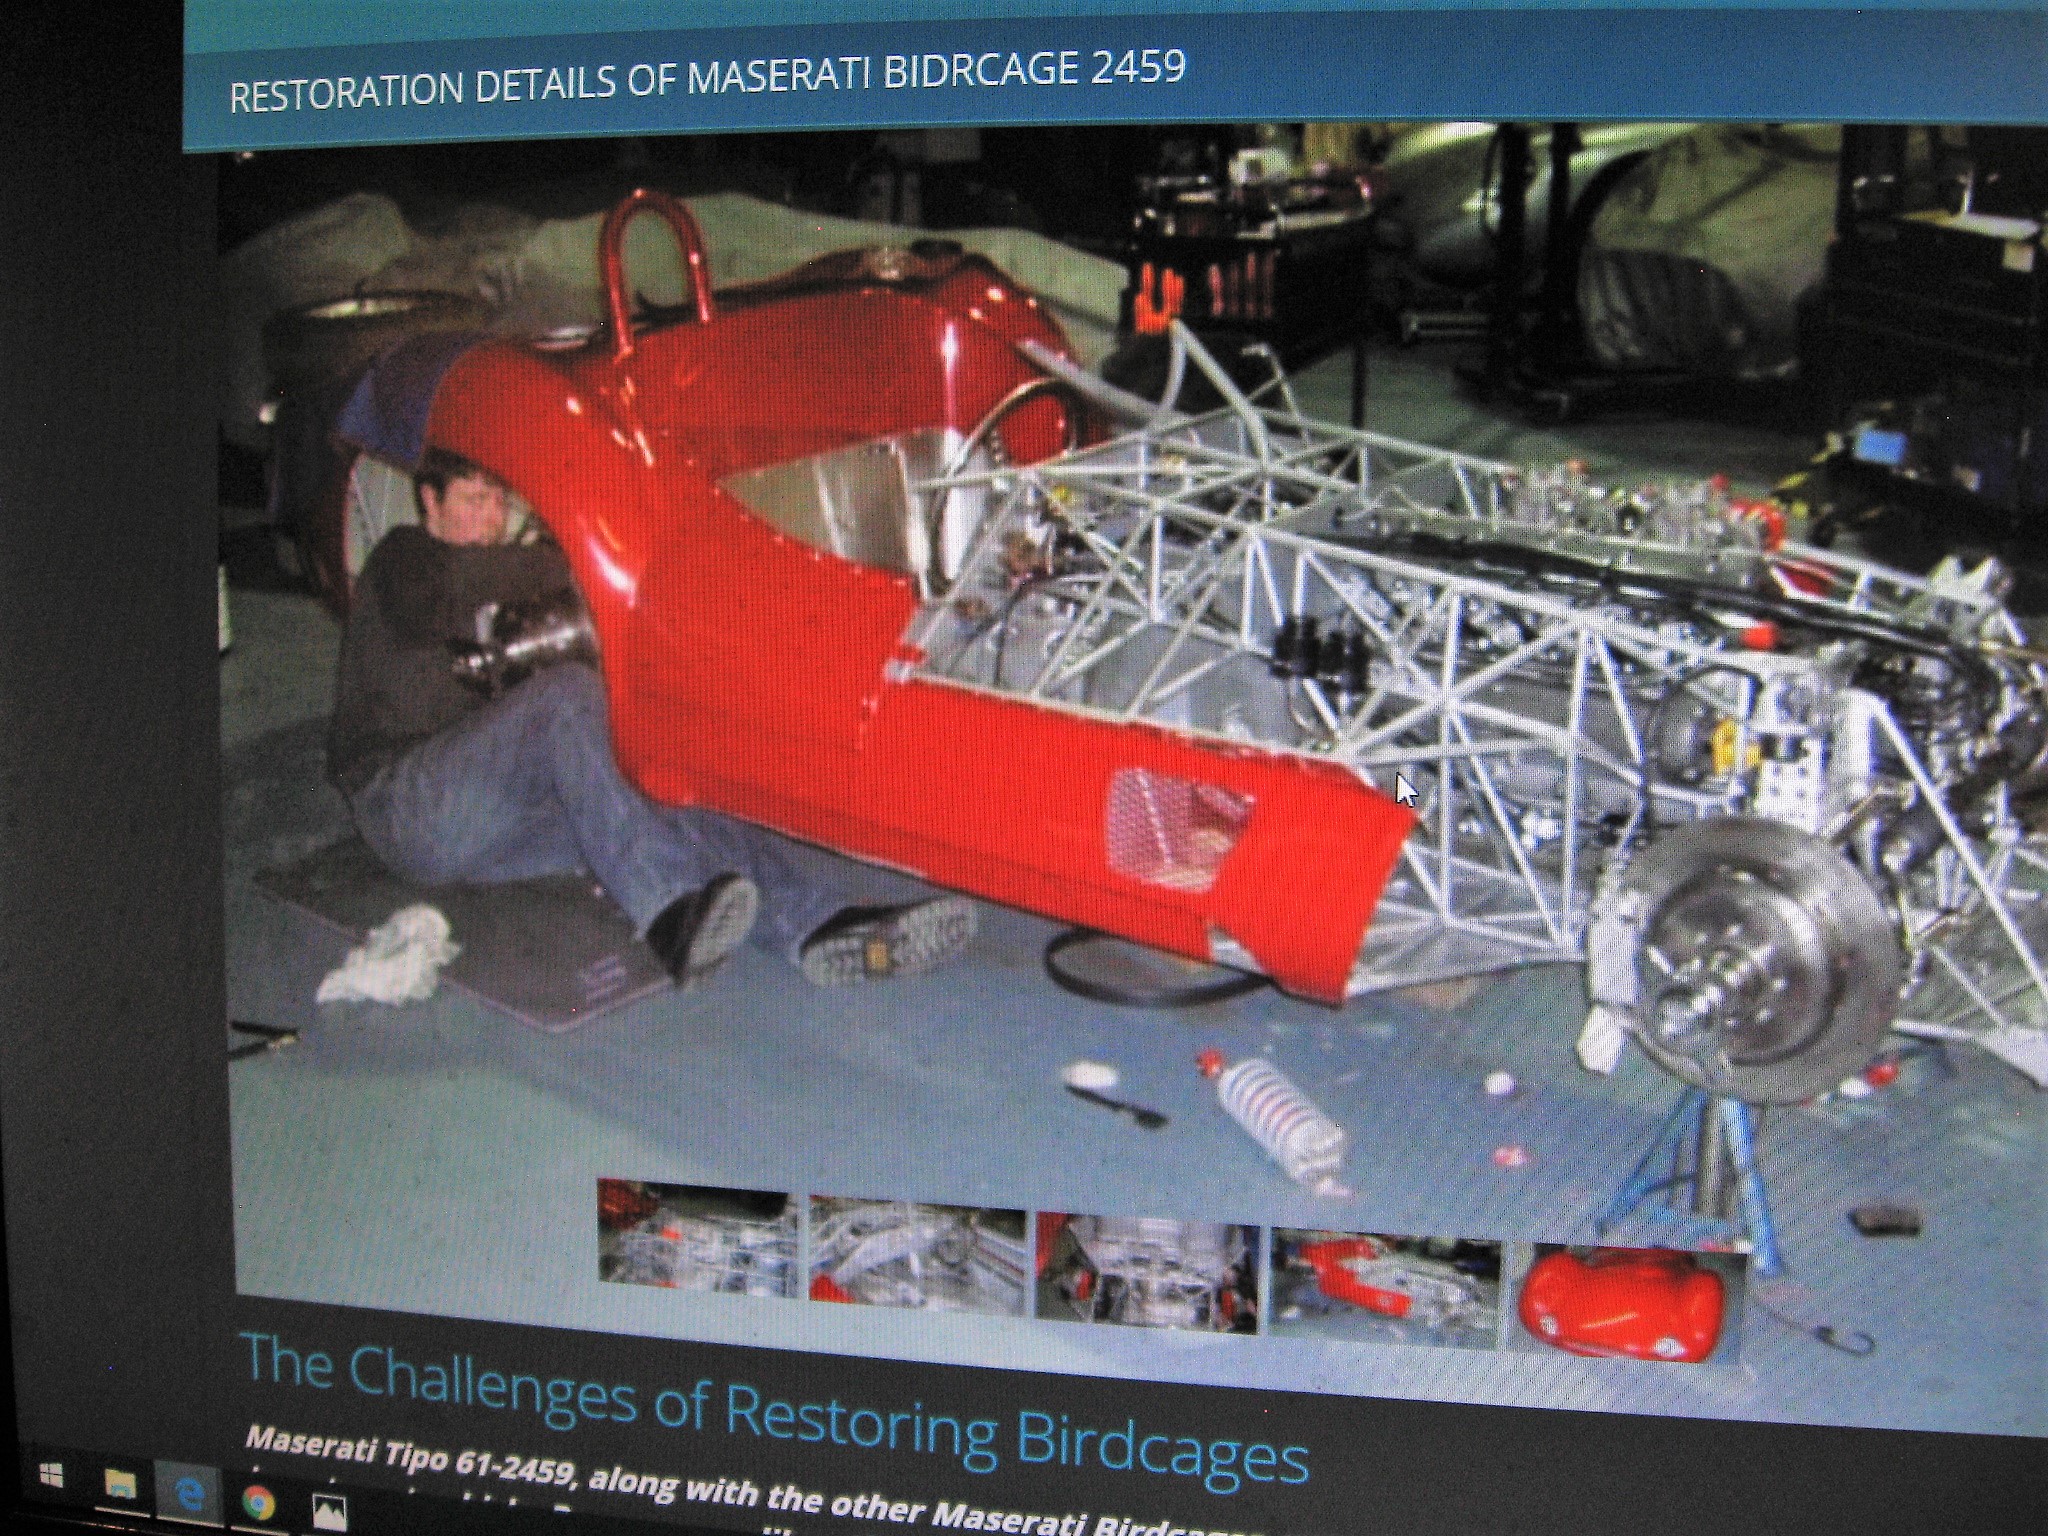
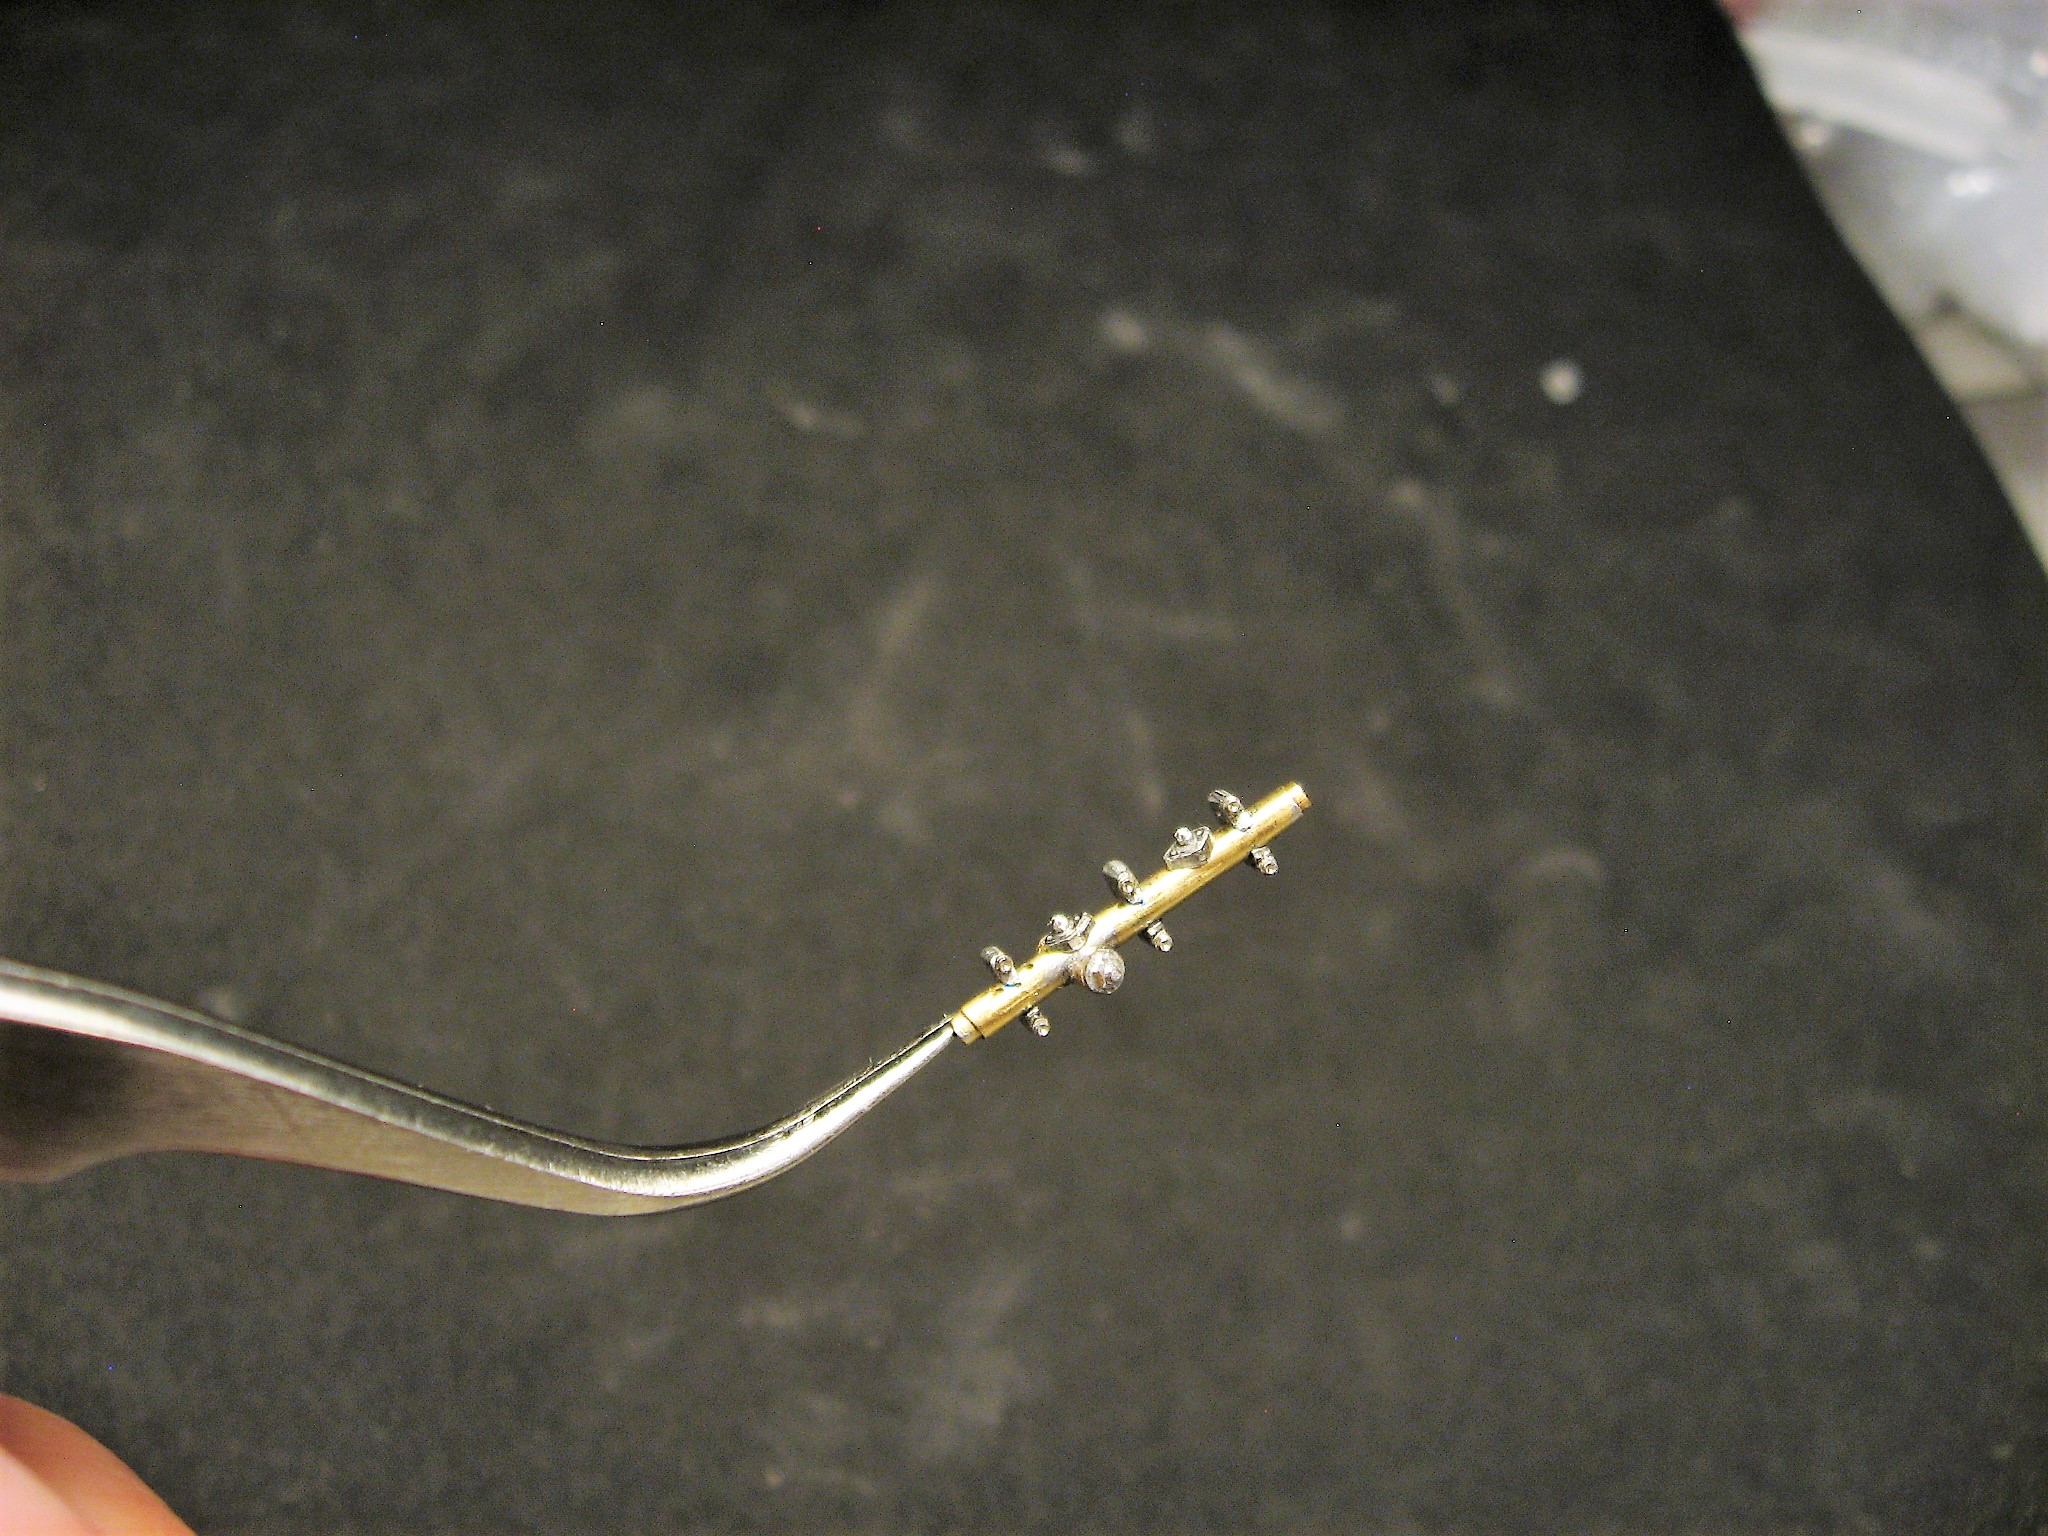
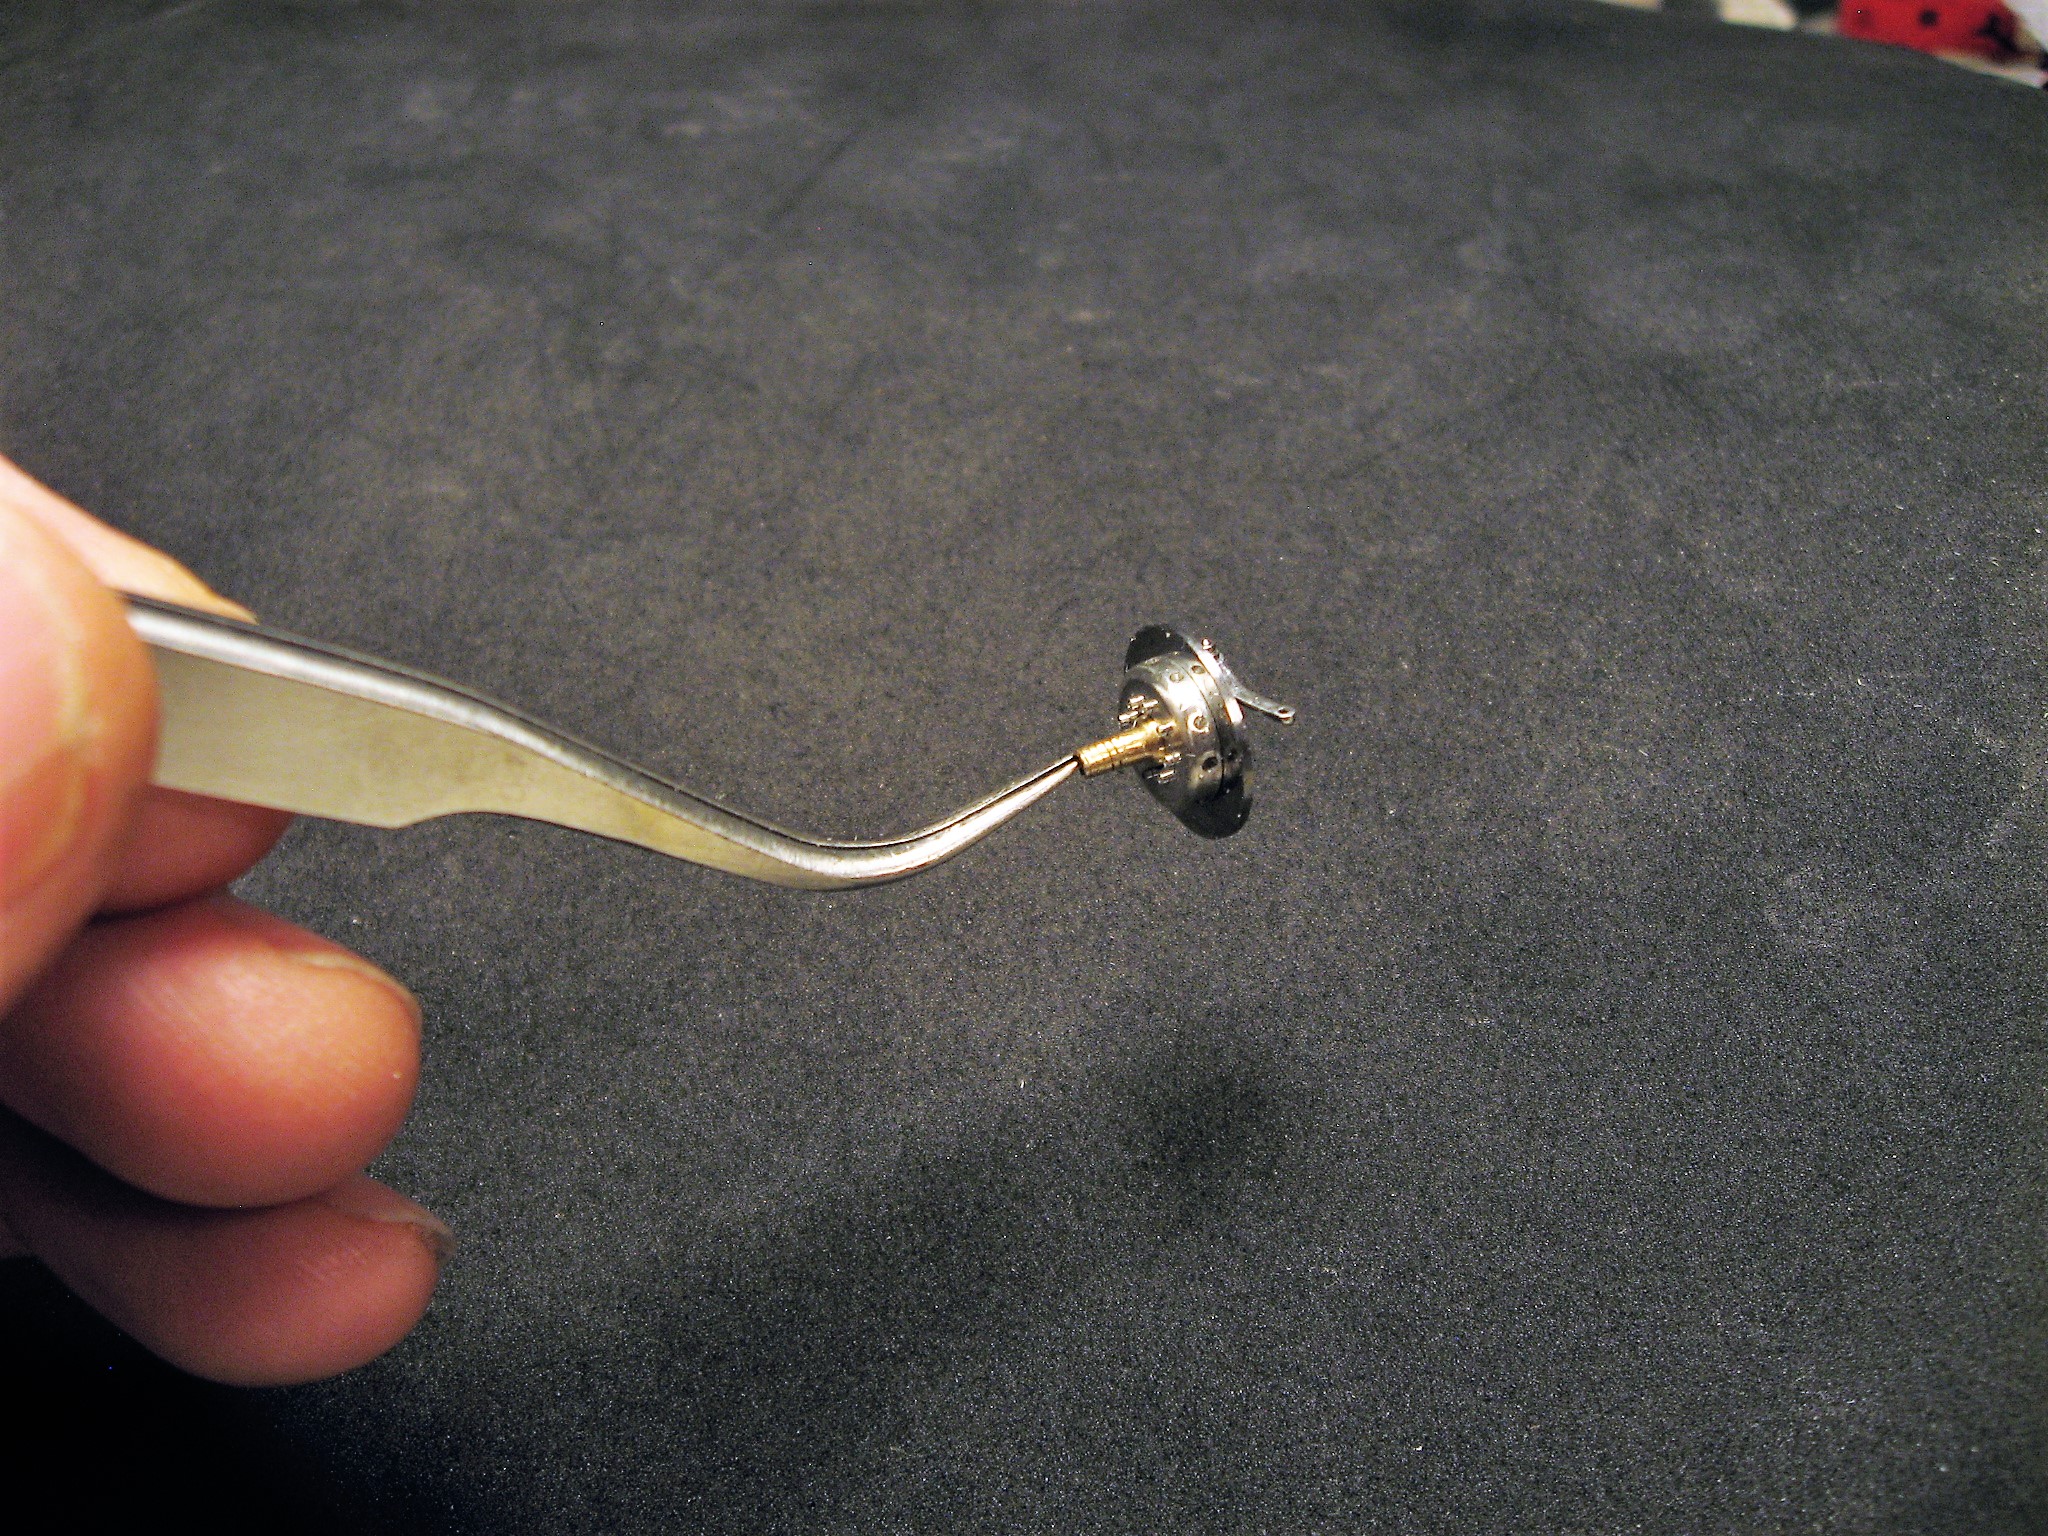
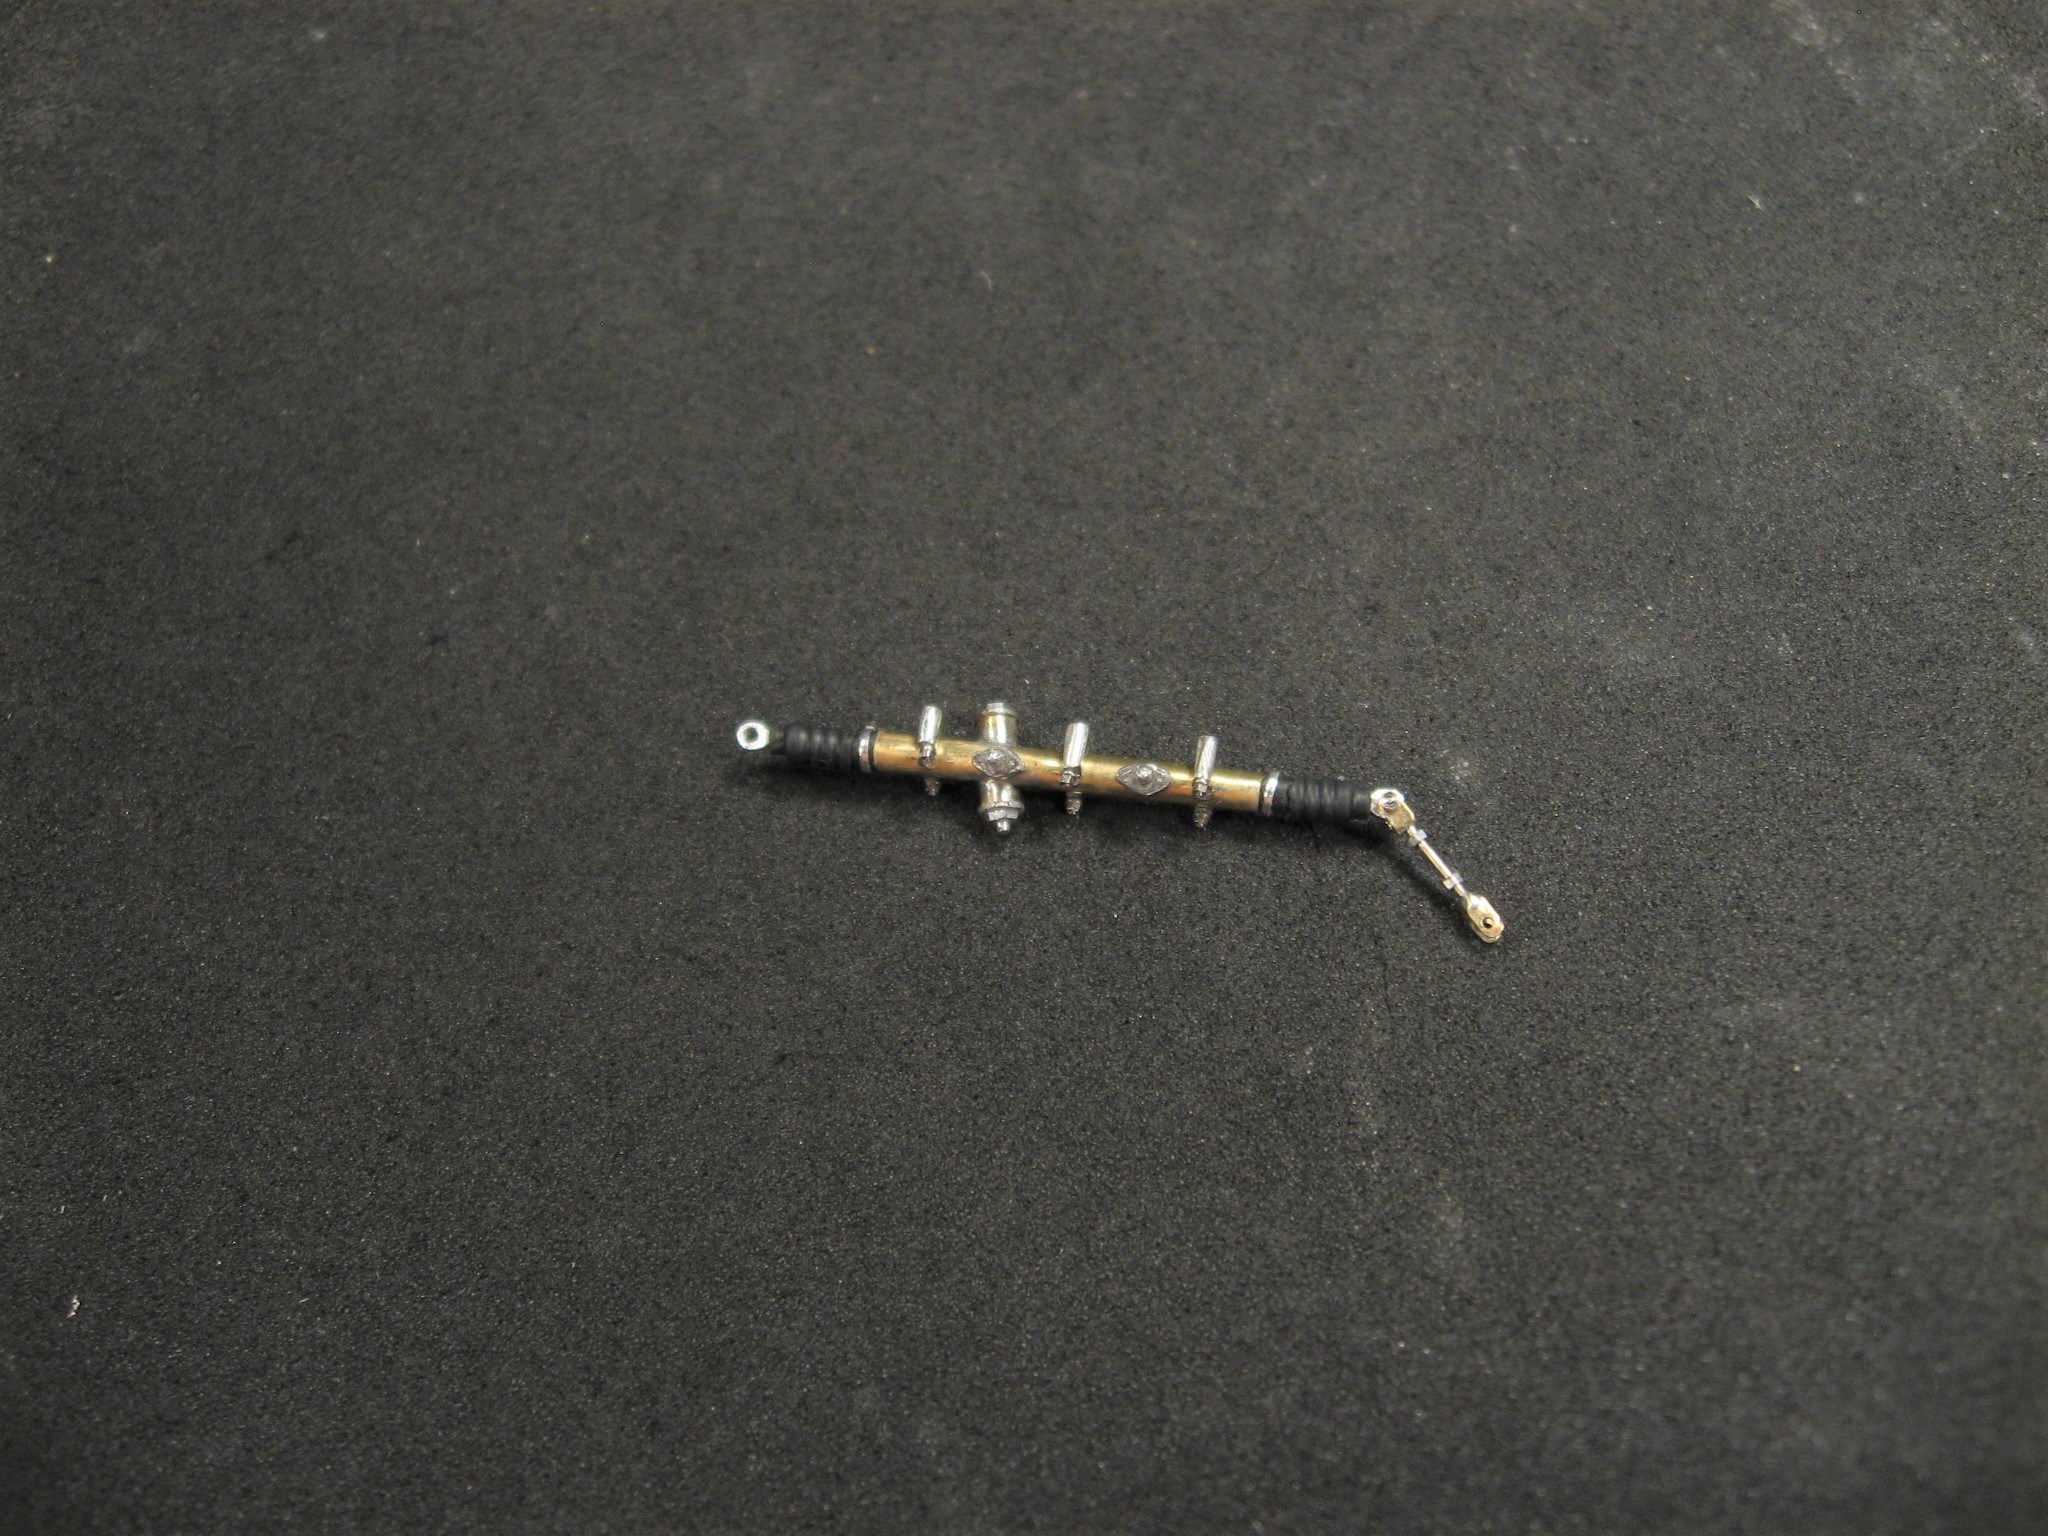
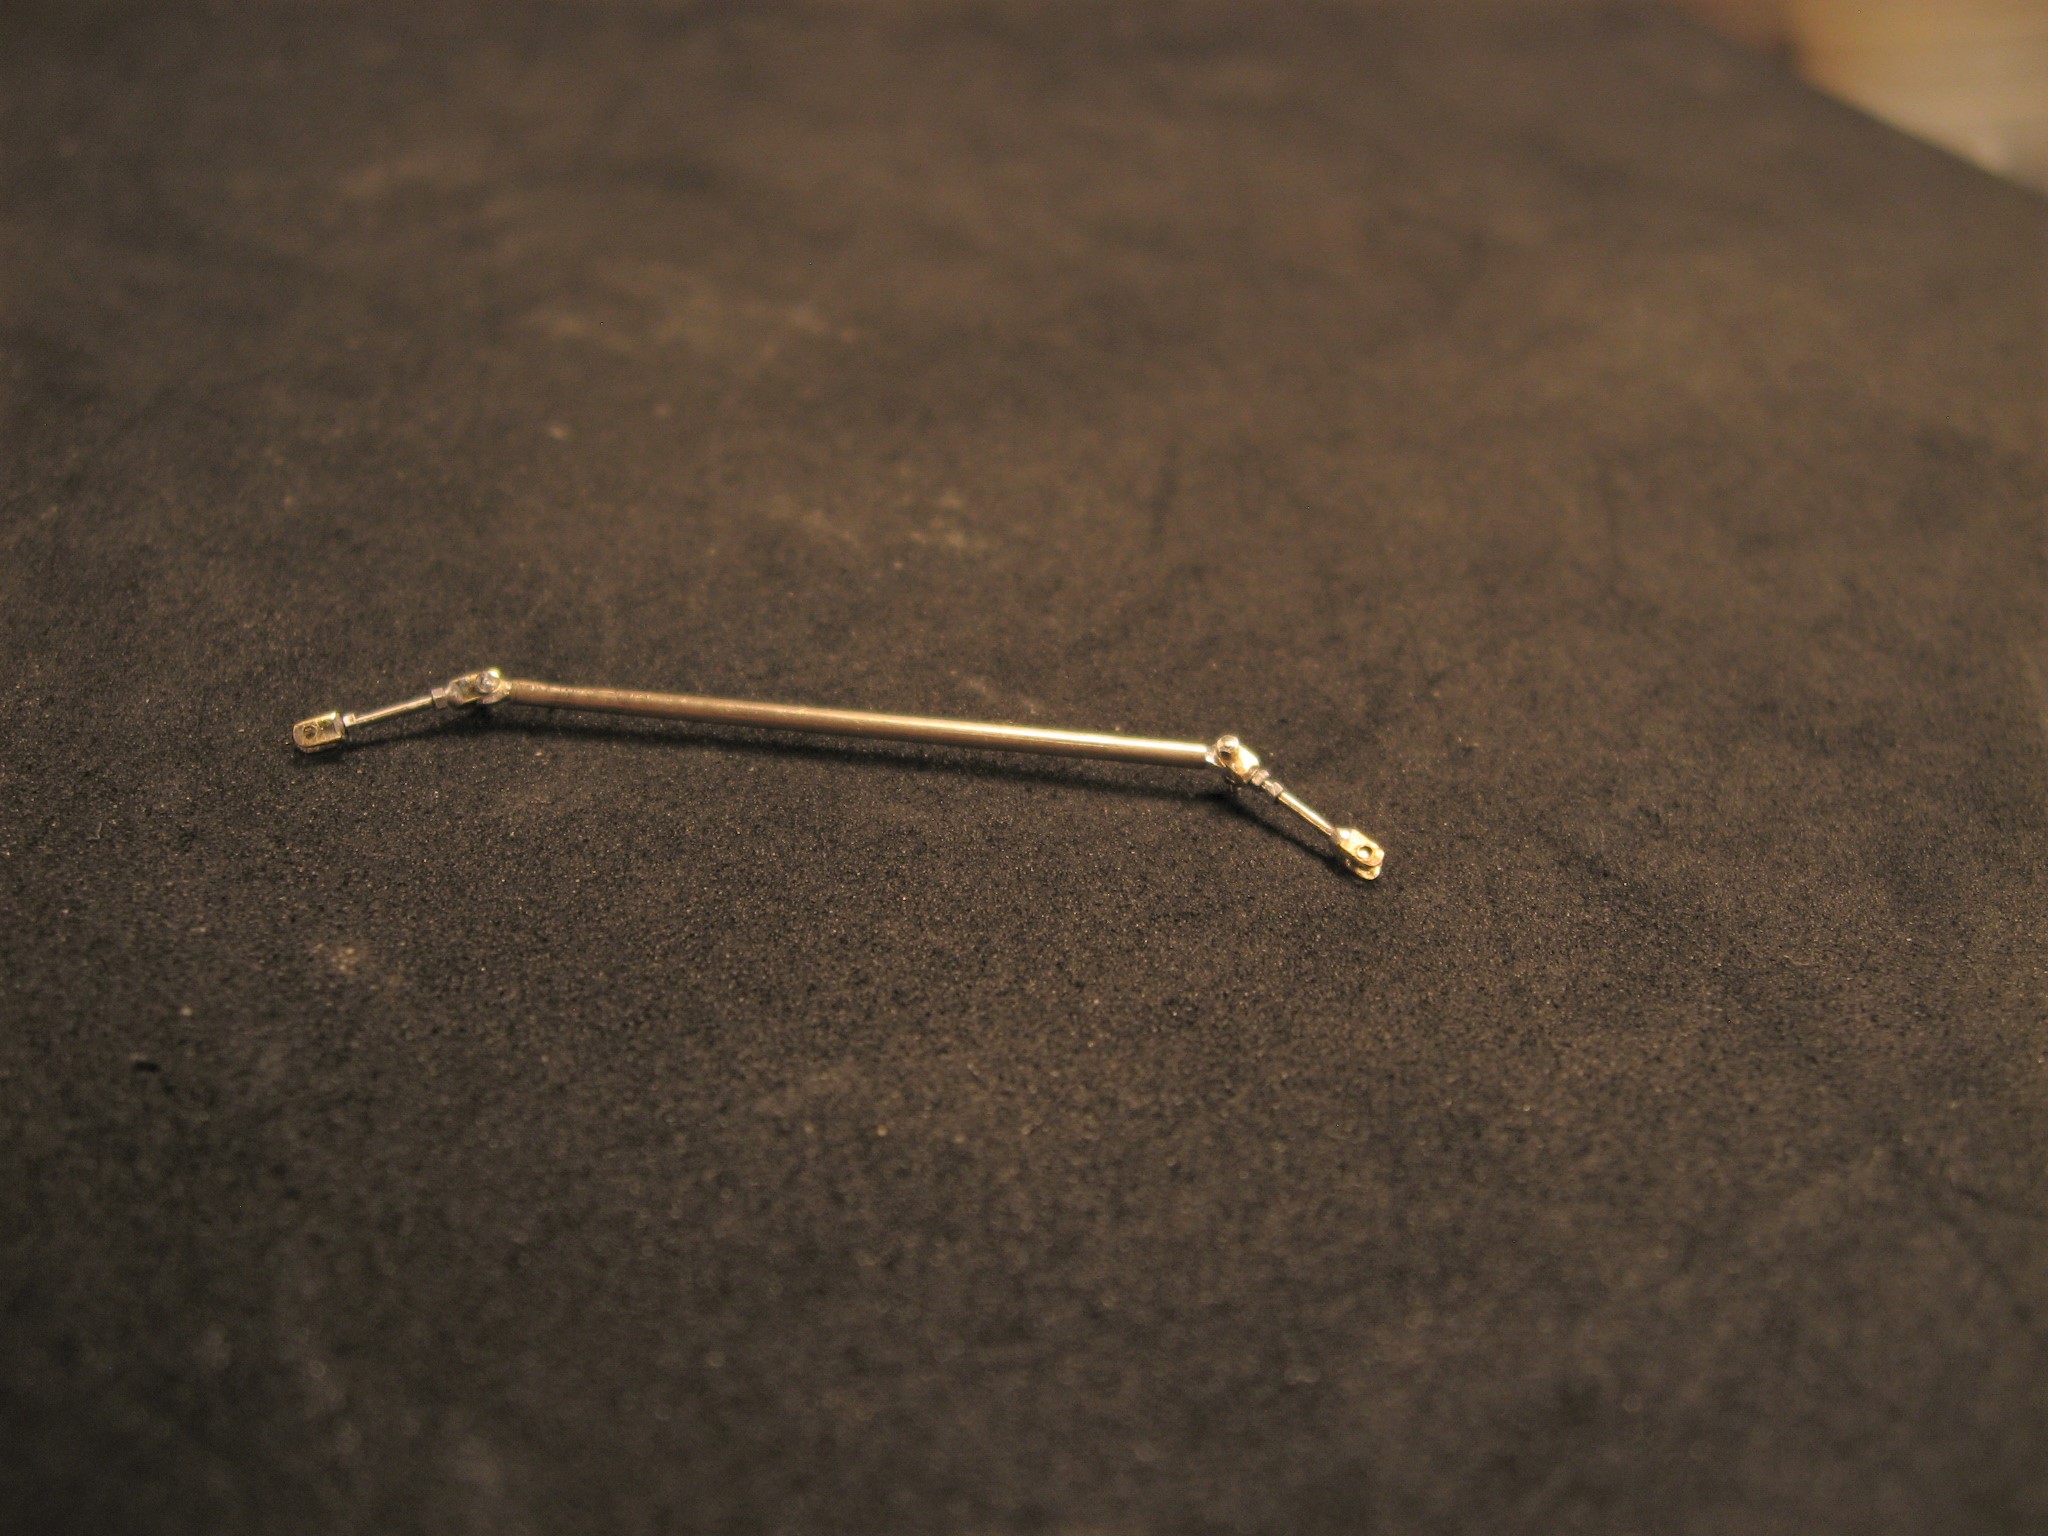
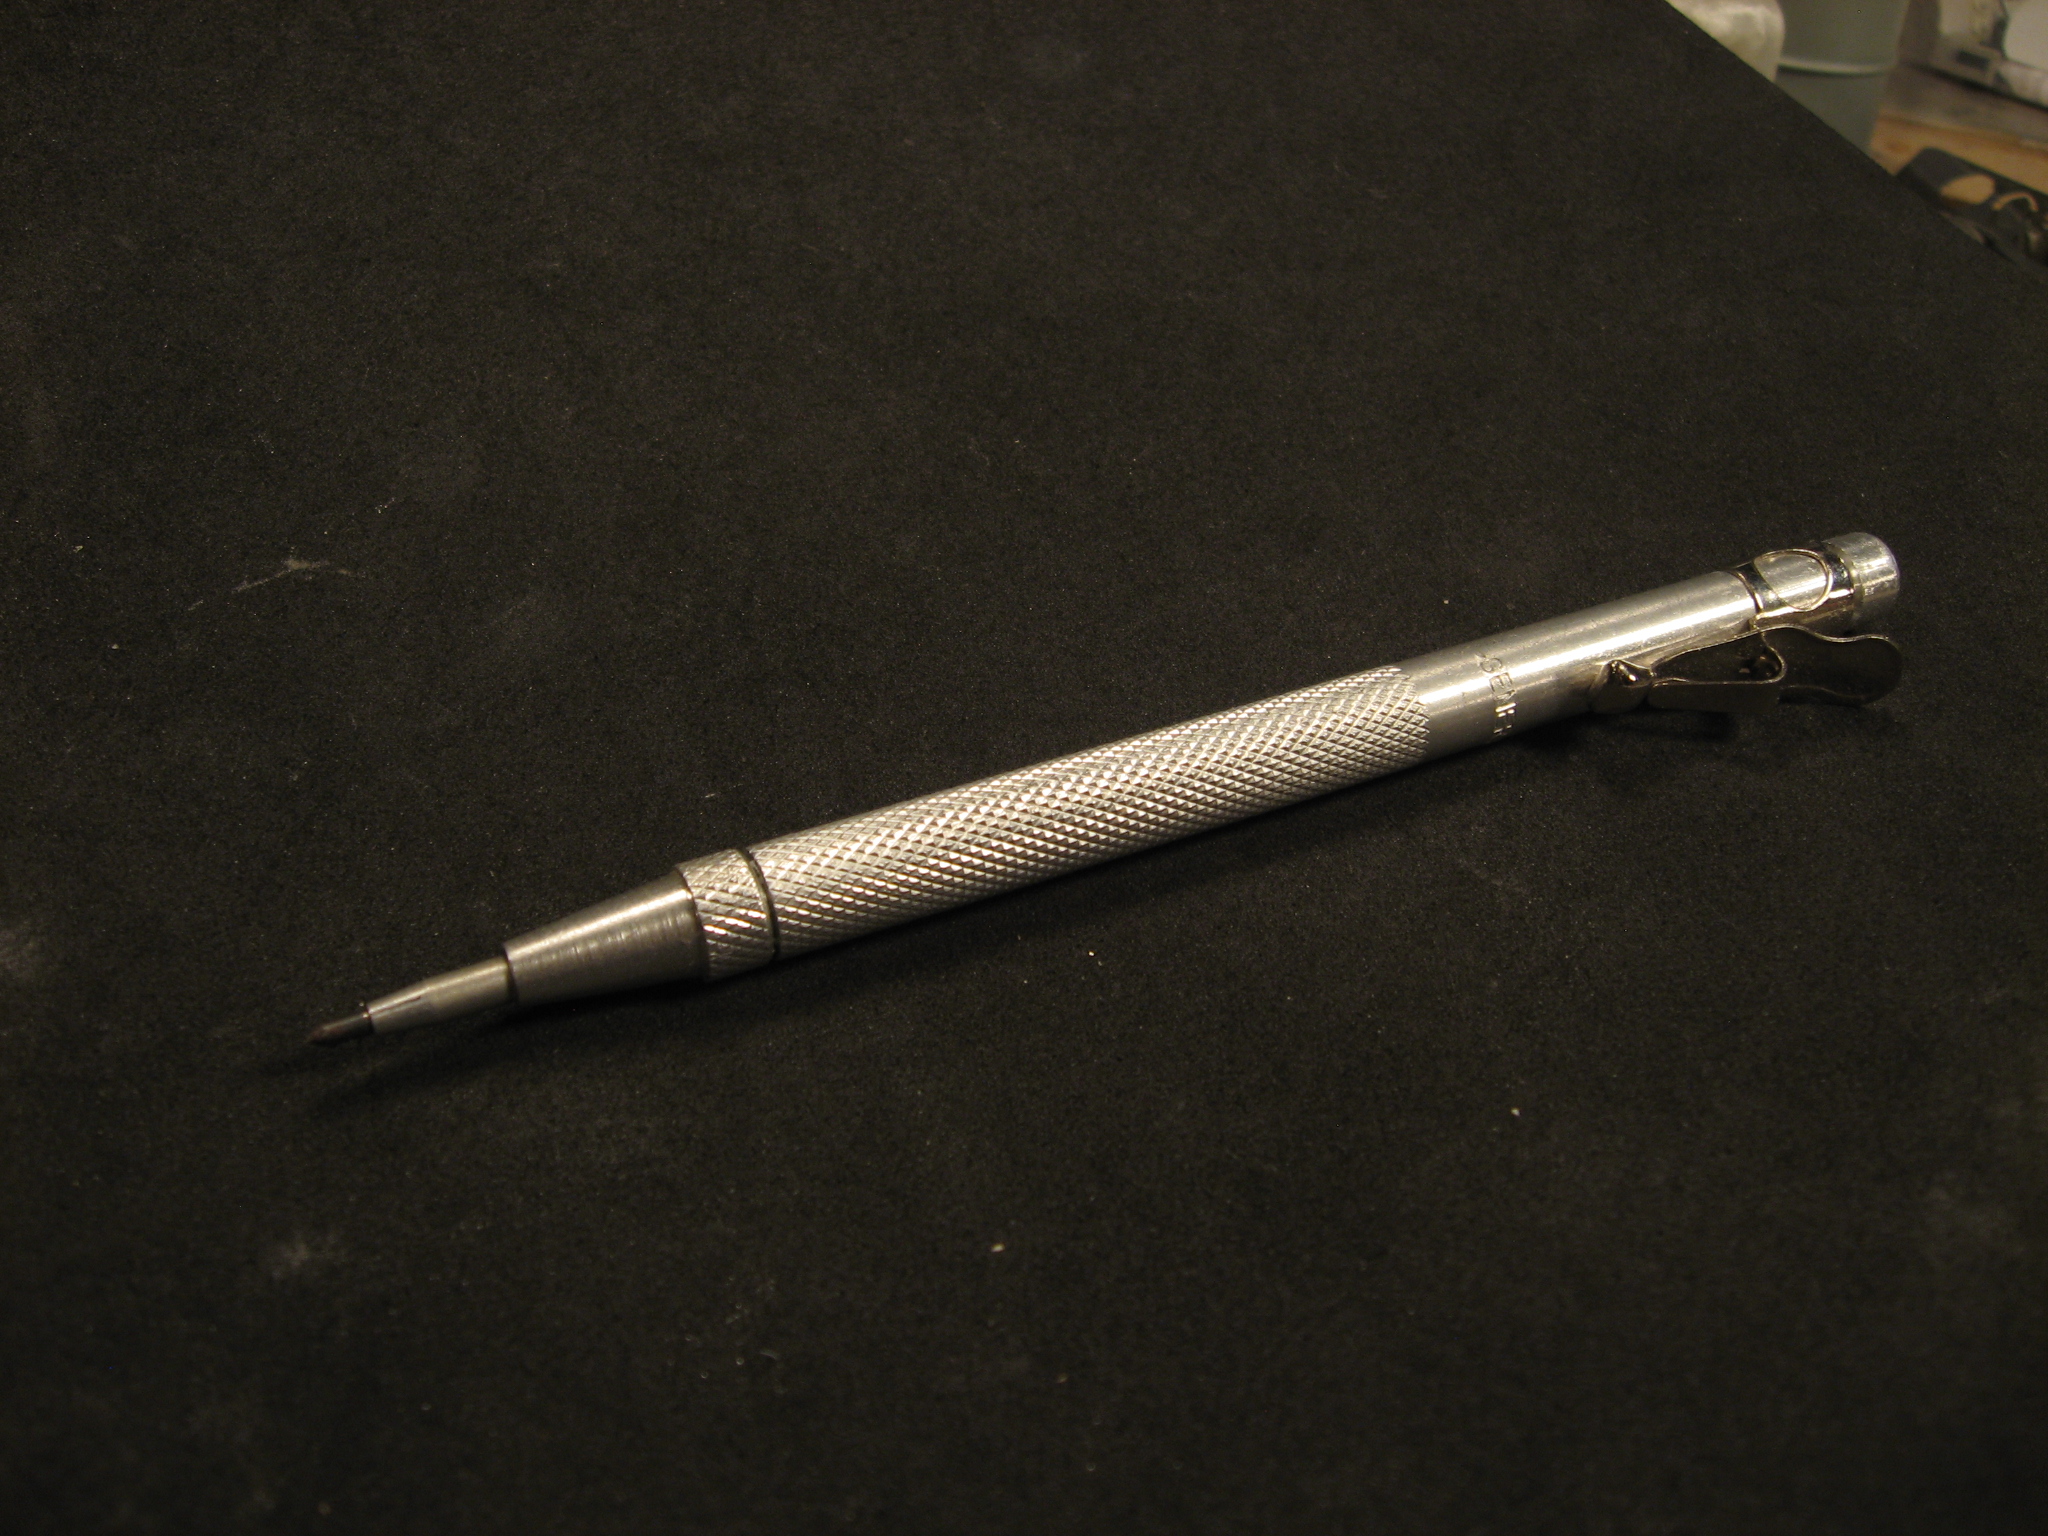
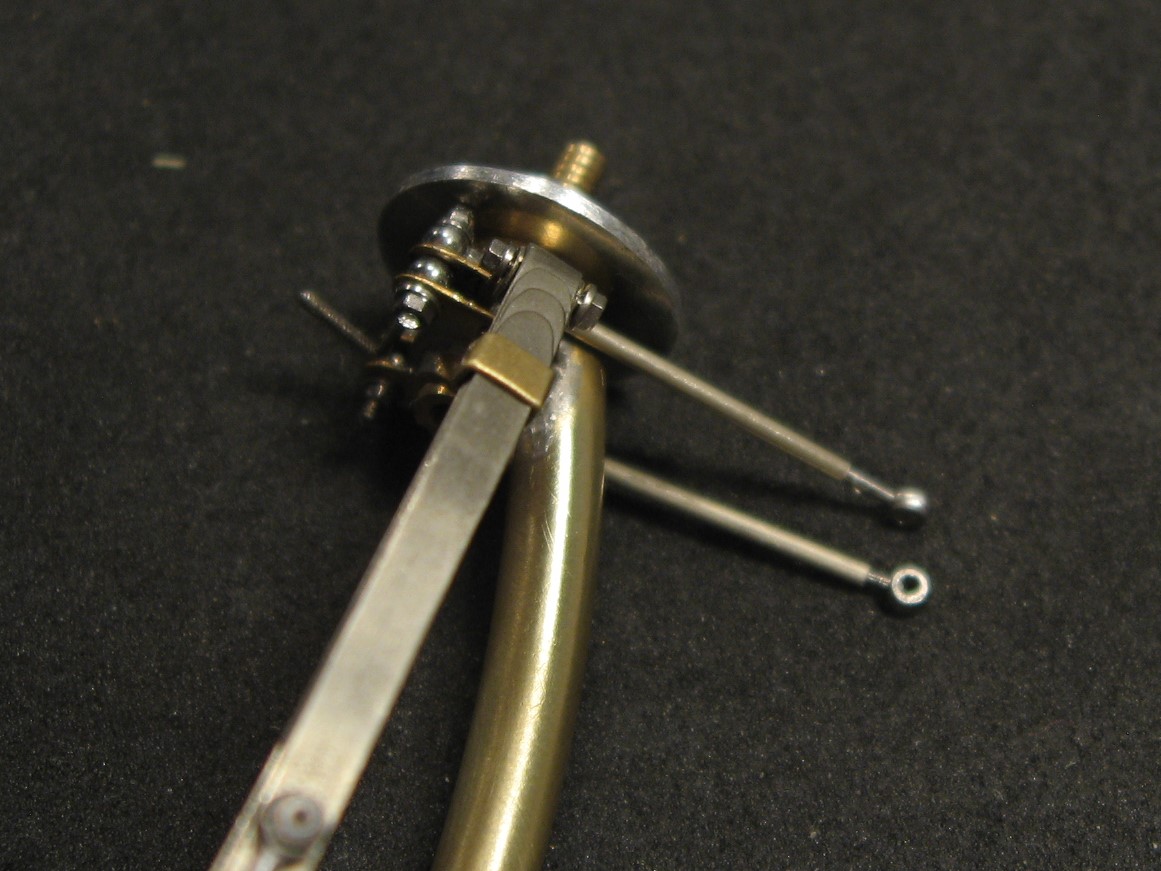
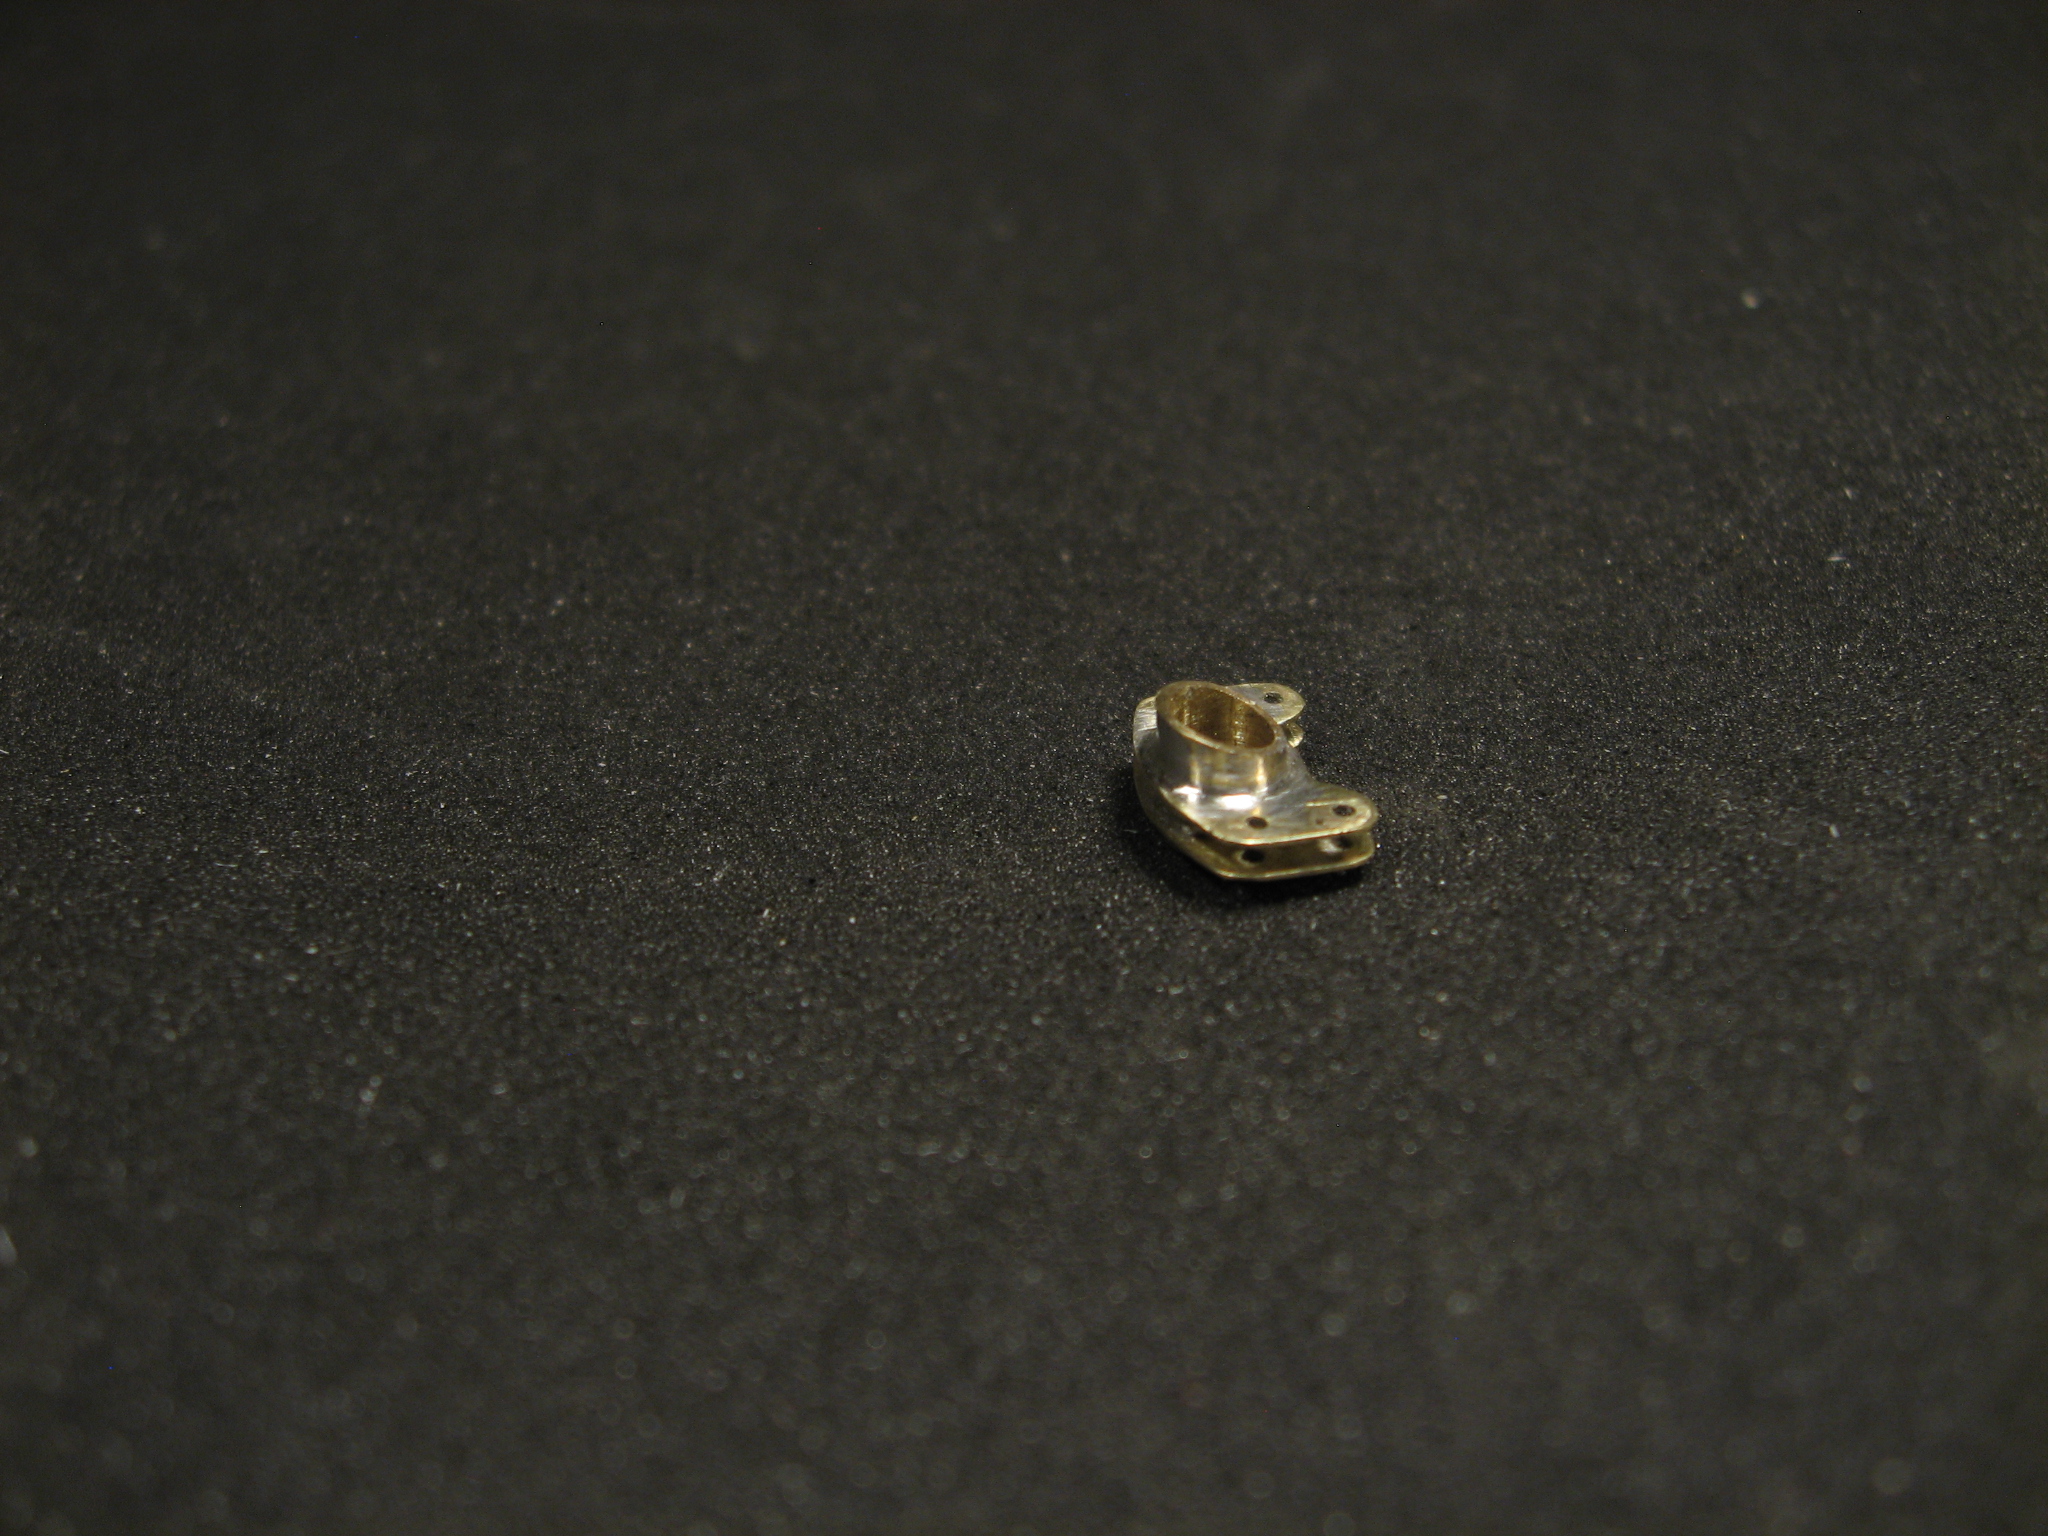
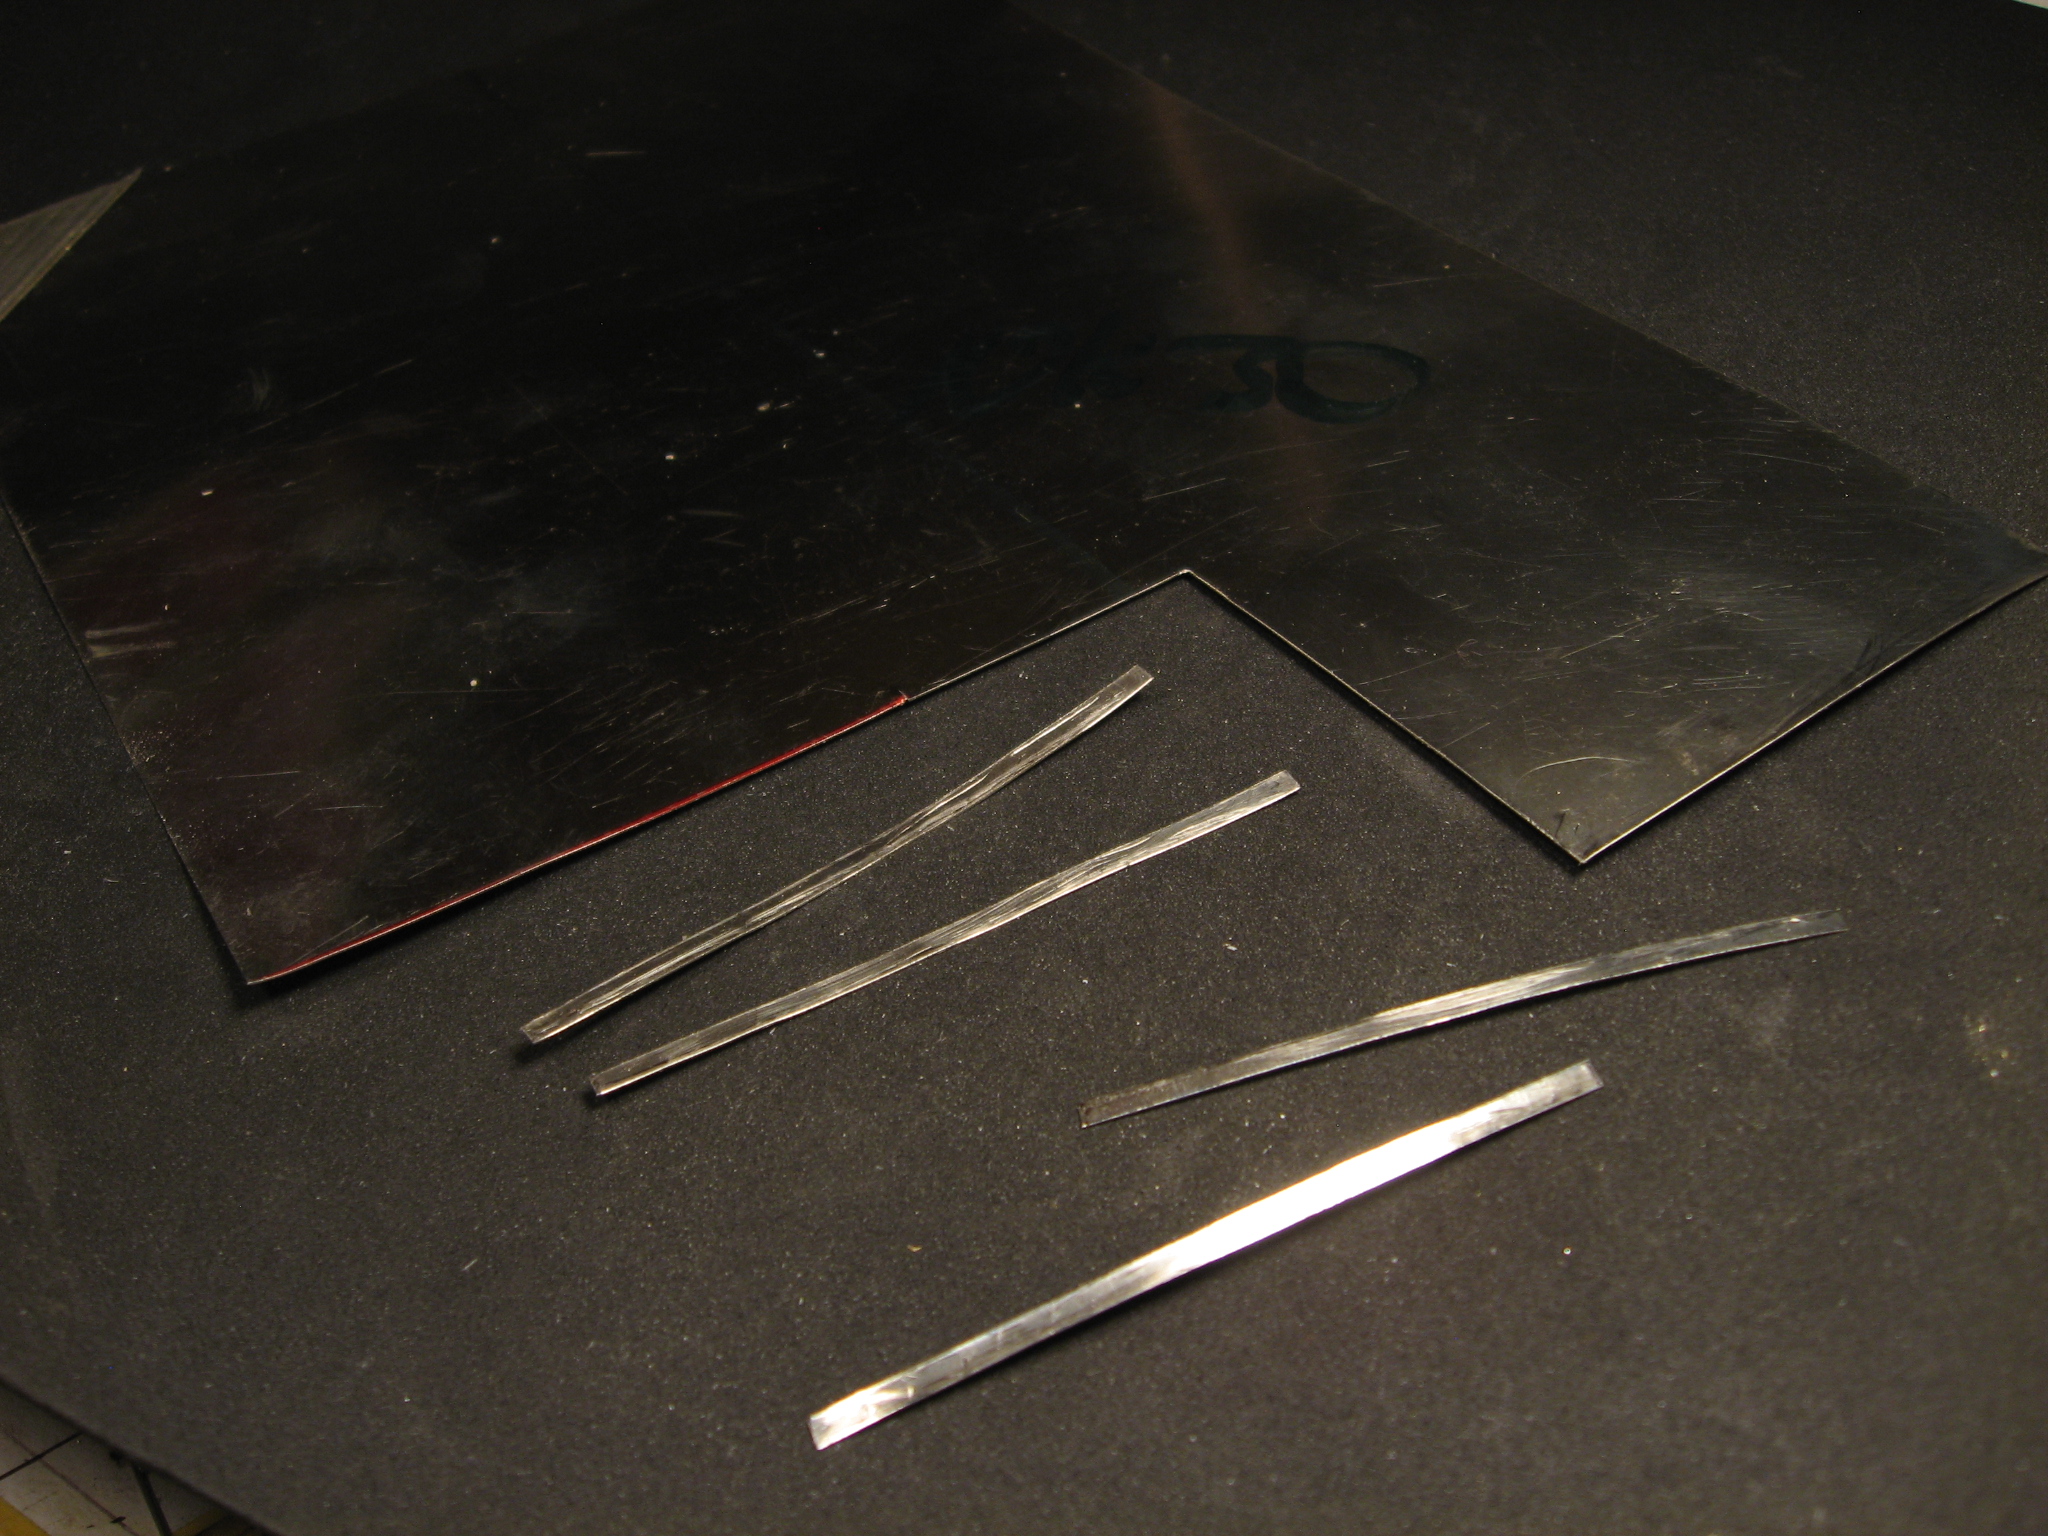
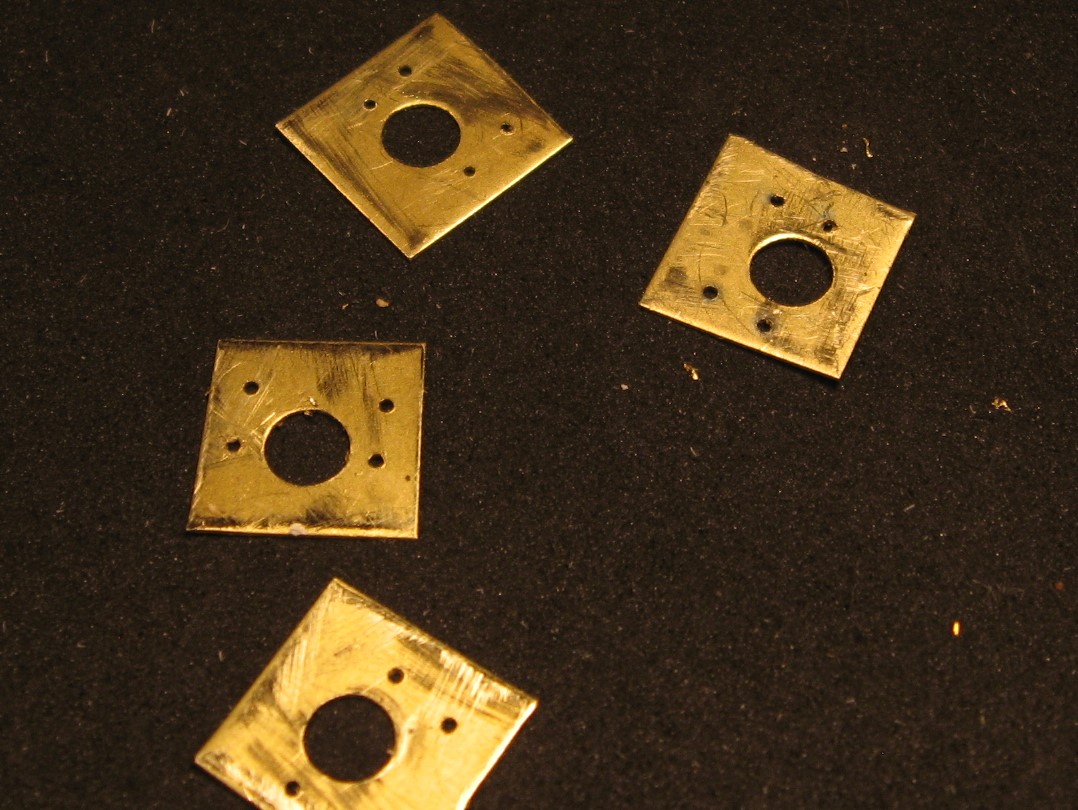
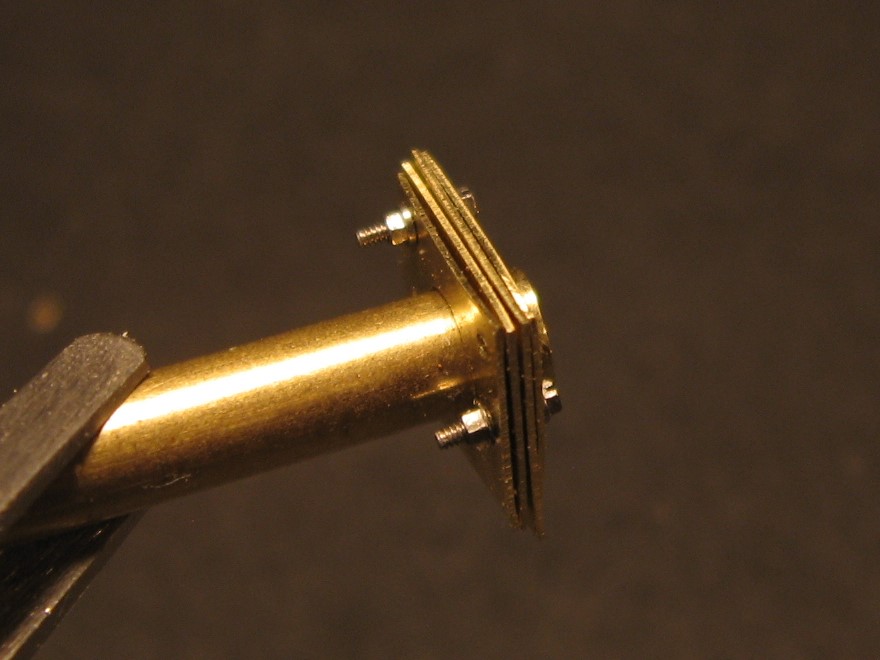
Hi Folks, Jason, I apologize for not thanking you for your earlier comment:) Bernard, Love the way you write my friend, you are right on the money! The best book I have found is Joel Finn's "Maserati Birdcage". I did find a online posting that covers a restoration/ build of a birdcage that has proven helpful. I will post up some links of online info when I get a chance. Hi Trevor, My pleasure and please ask questions if you need more information. Thanks Greg! Hello Michael, Thank you. Hey Bruce, Appreciate you checking in buddy. Foxer, Thank you for sticking with this, time has a way of slipping away on these projects:) Hello Gary, Thank you and yes, all the body work will be removable. Hi JC, Thank you for the compliments, hopefully we can get together at Brad's when I come east this year. Chris, Yes, the late 50's thru the 60's was a great time for auto racing designs. Thank you David ! Tim, Now you want Ansel Adams!!! You are hard to please my friend:) Good point and I will try to bring more light to the subject! About time for an update on your beautiful build is it not? Swede 70, Appreciate the kind words! Pete, Good to hear from you my friend, hoping to see more updates from you:) Andy, I'm glad you found this! Big fan of your 1924 Delage build, those hand laced wheels are magnificent!! Mr Finn's book is on the work bench:) Andy's questions hopefully answered.... I have slowly gotten away from using different melting temp solders. this axle was assembled using "Novak Silver Solder". When adding on pieces to already soldered components I use all sorts of clamps, jigs, ally wire ,ect... to make sure nothing moves when i heat it up. My trusty Weller is always on High. Still using the same pad. I know what you mean about the 'wandering drill bit'. All the holes in the brass work so far have been punched with a punch set from I think Micro-Mark? Brass sheet stock is .015" Yes, the leafs were cut from 30 ga. n.s. stock. The spring works fairly well, I get about a 1/4 inch of movement. Still planning on soldering ally sheet, brass will be the back up plan. Thanks for looking in and I will update the front end tomorrow. Randy
-
Thanks for looking in ! Randy
-
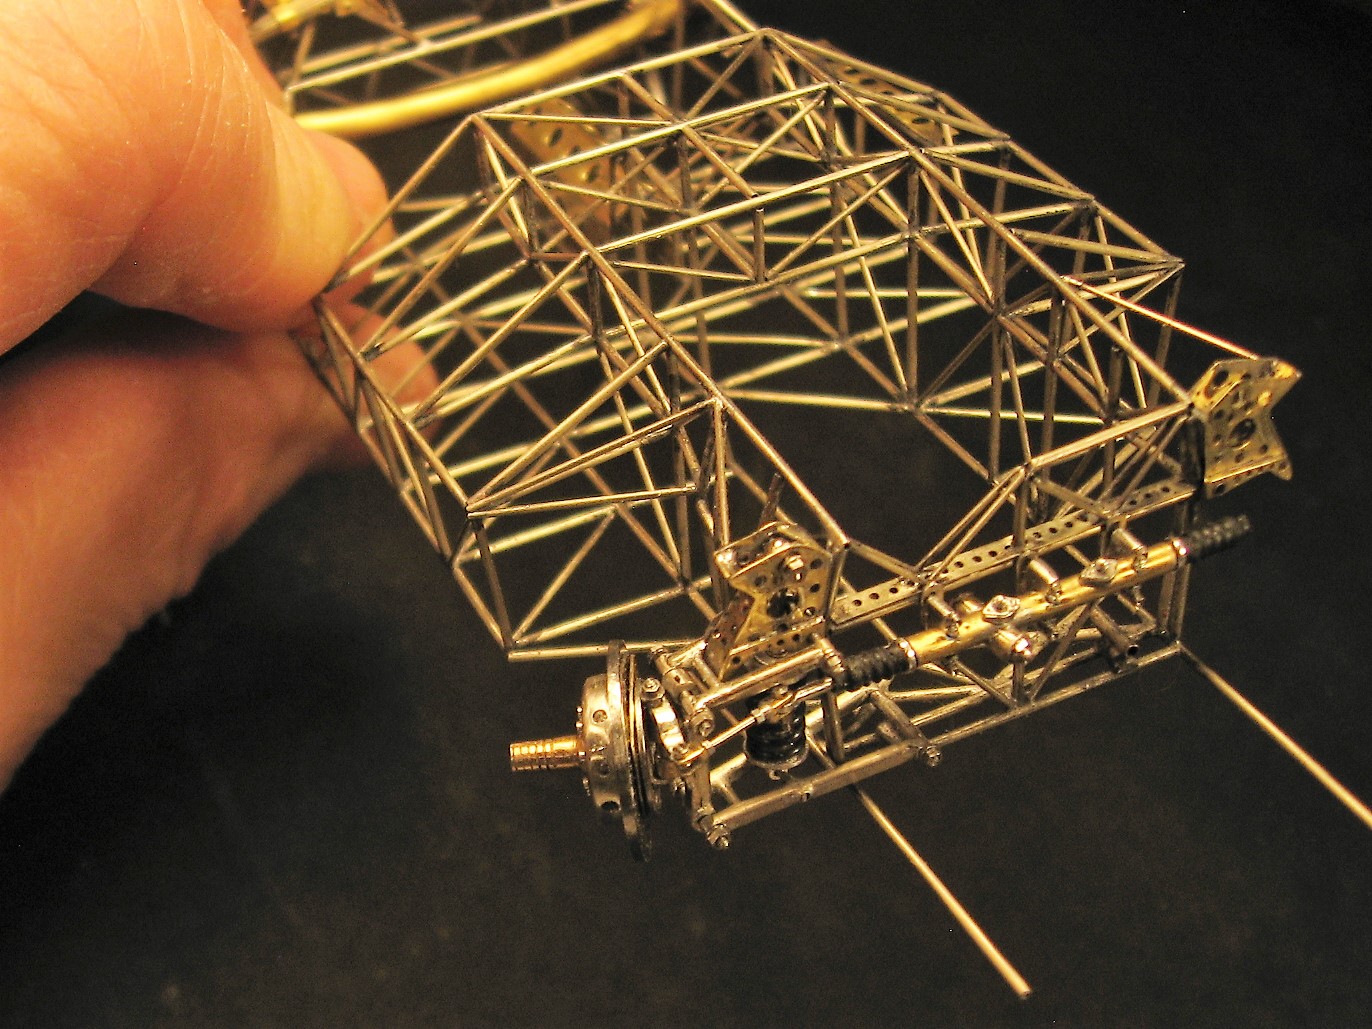
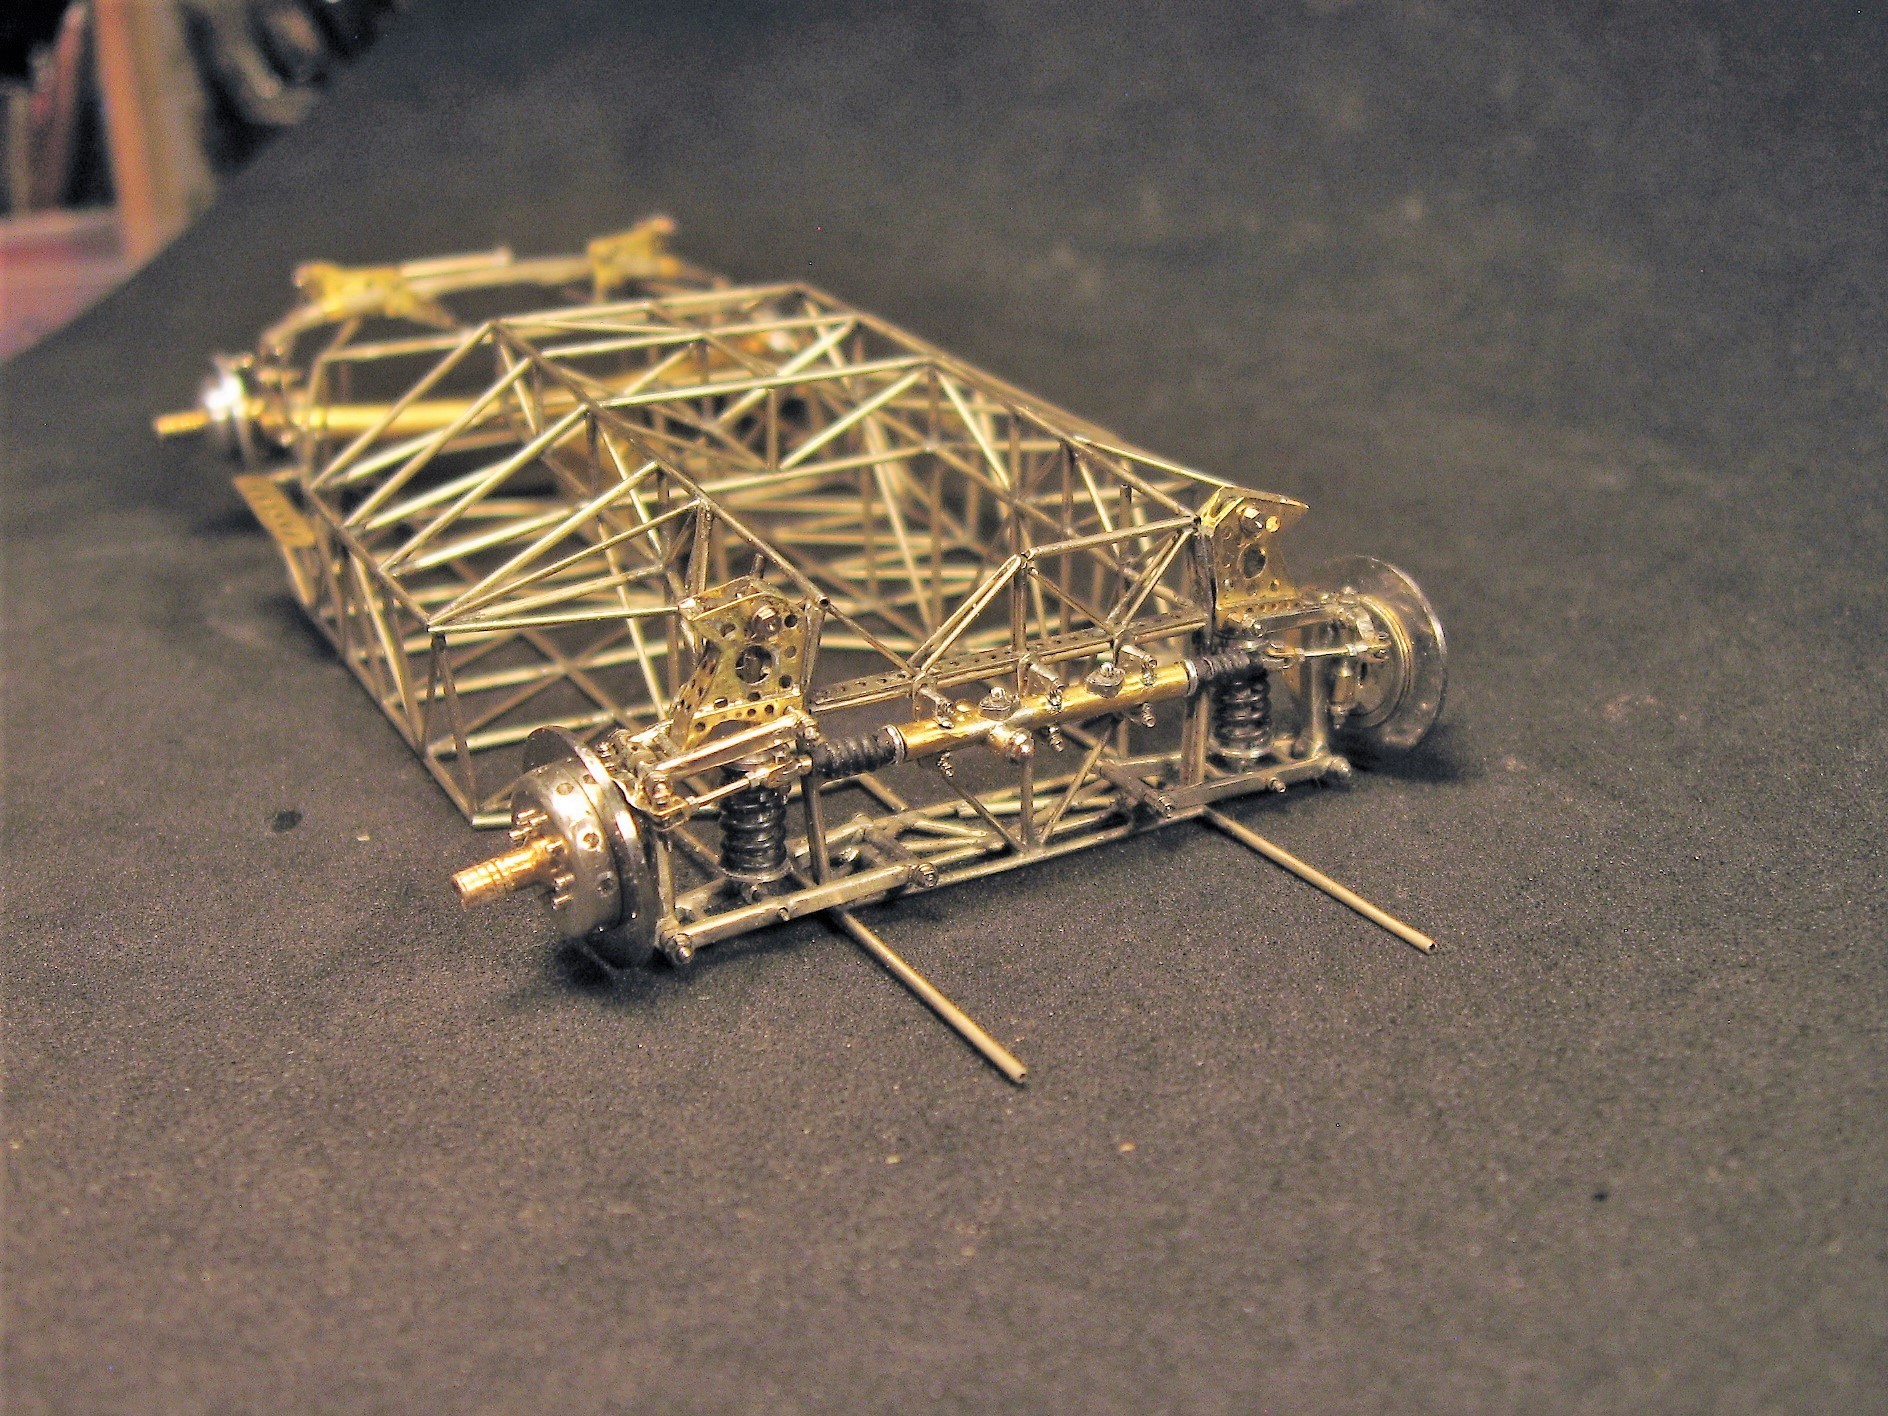
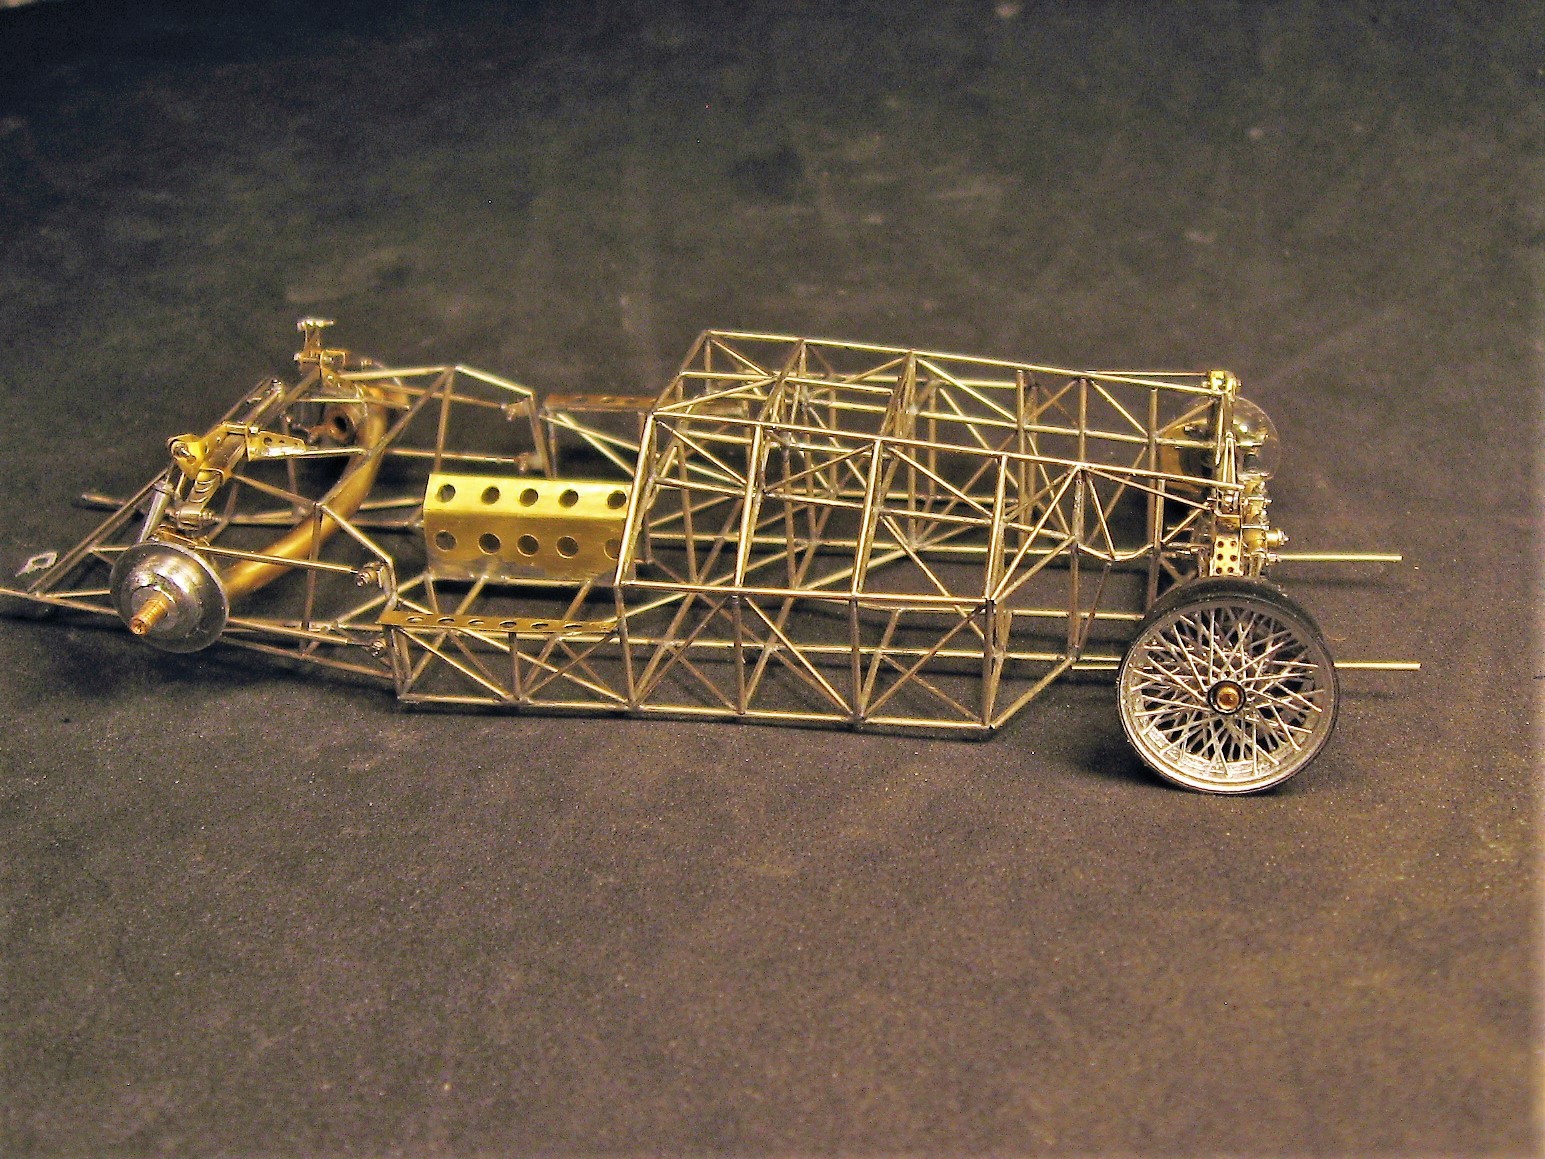
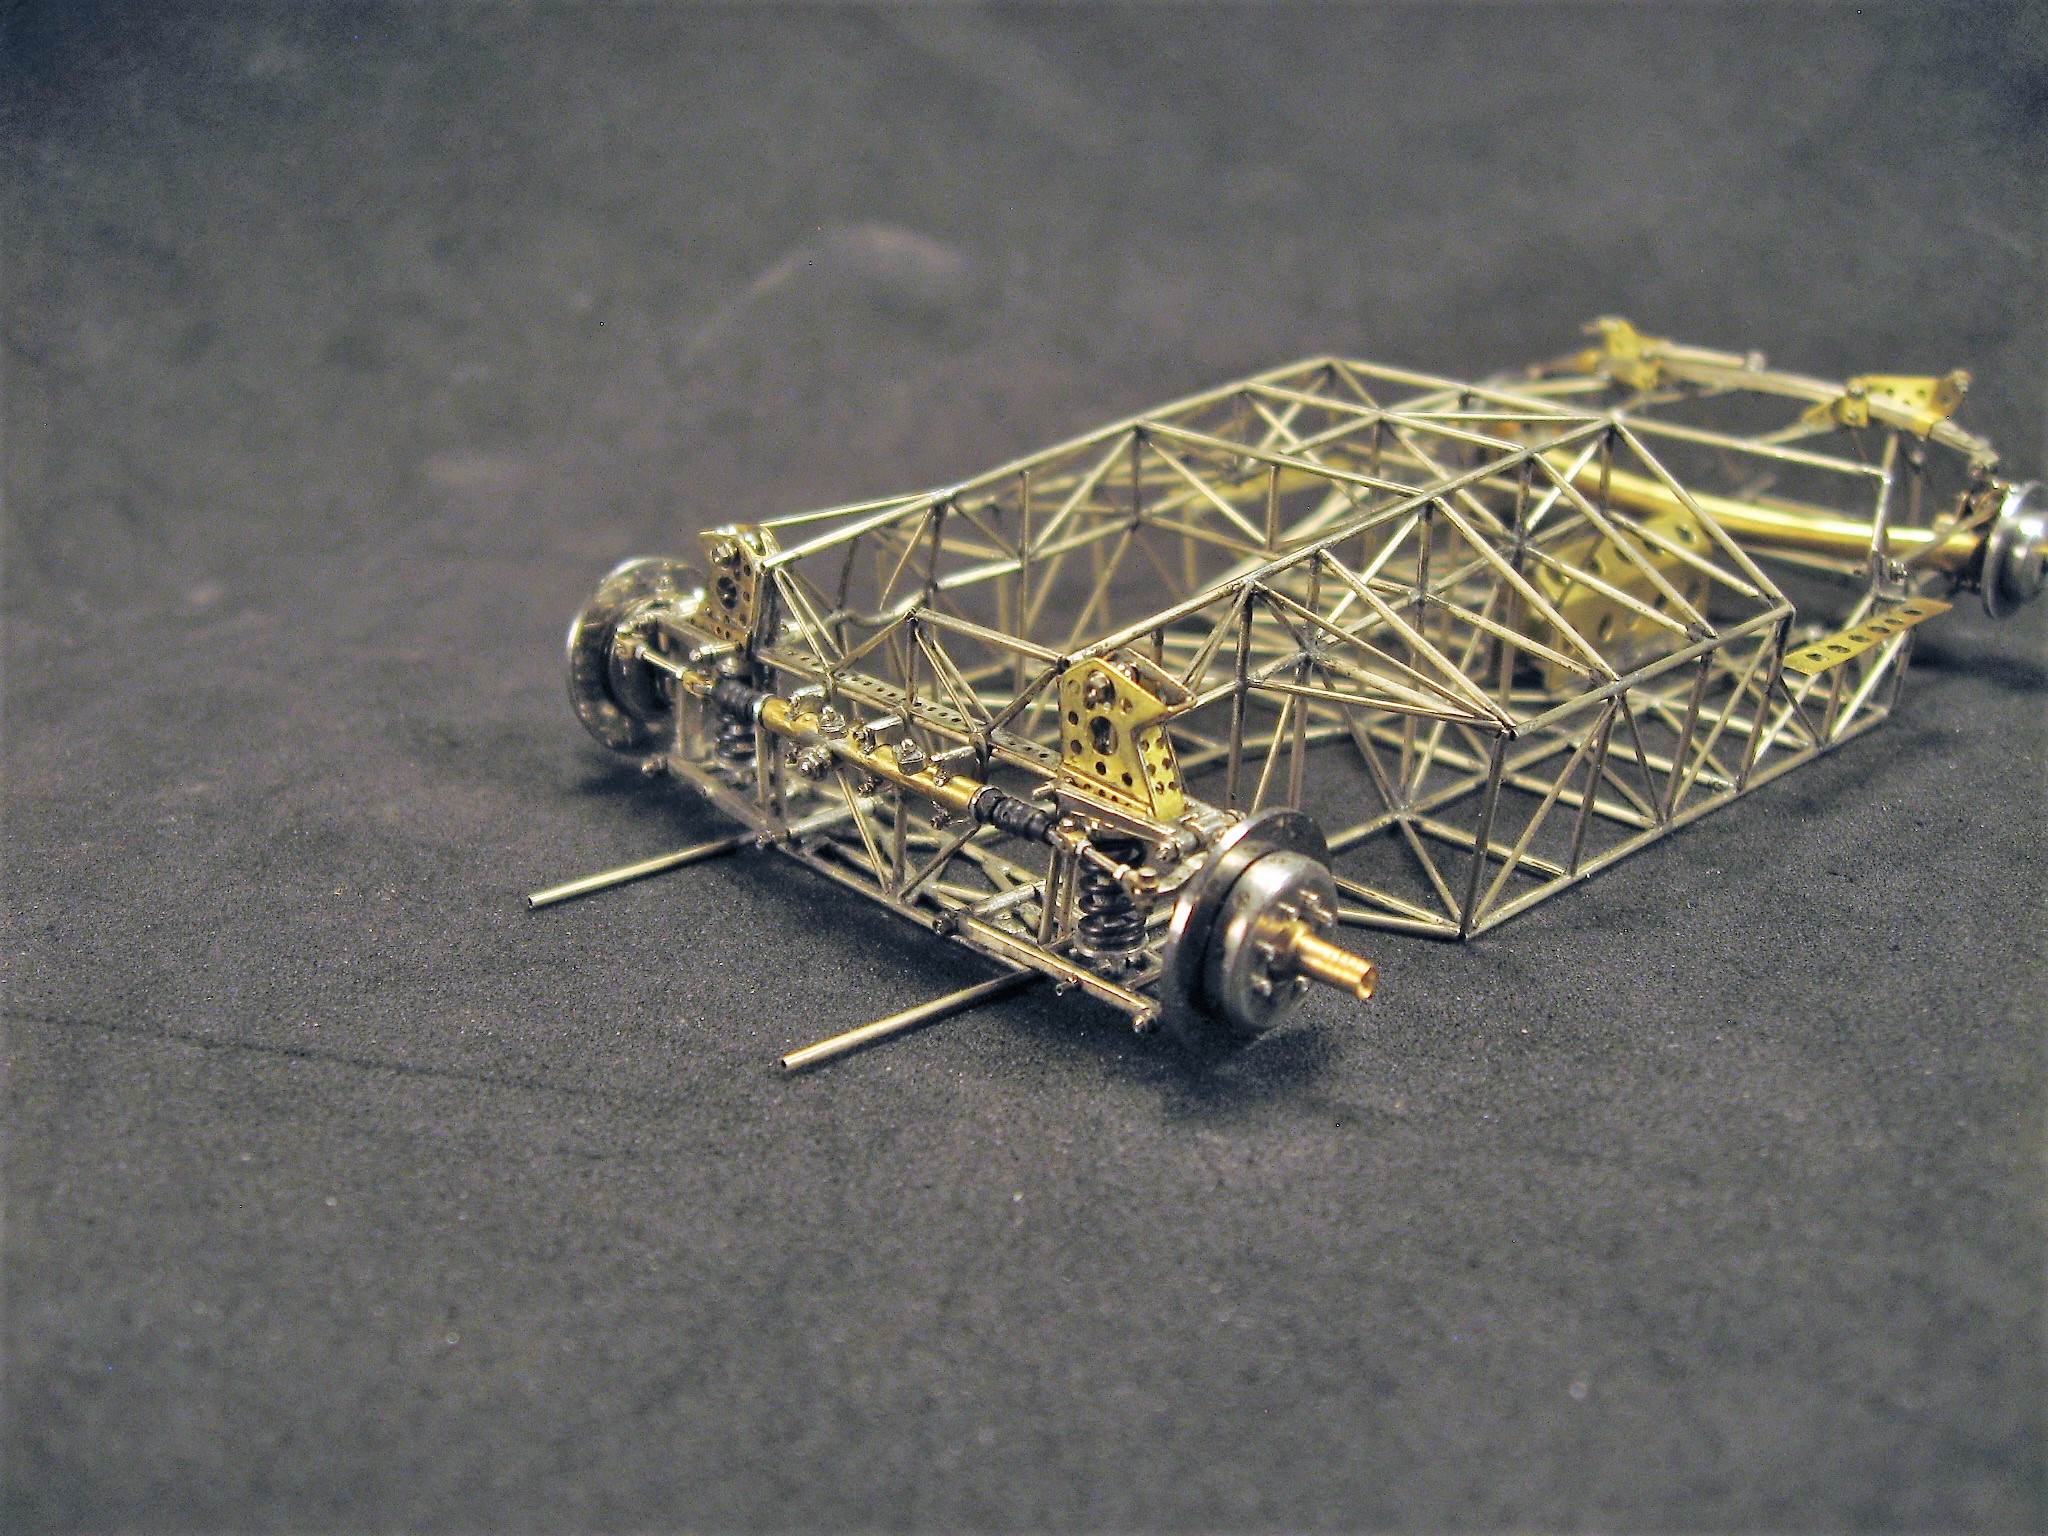
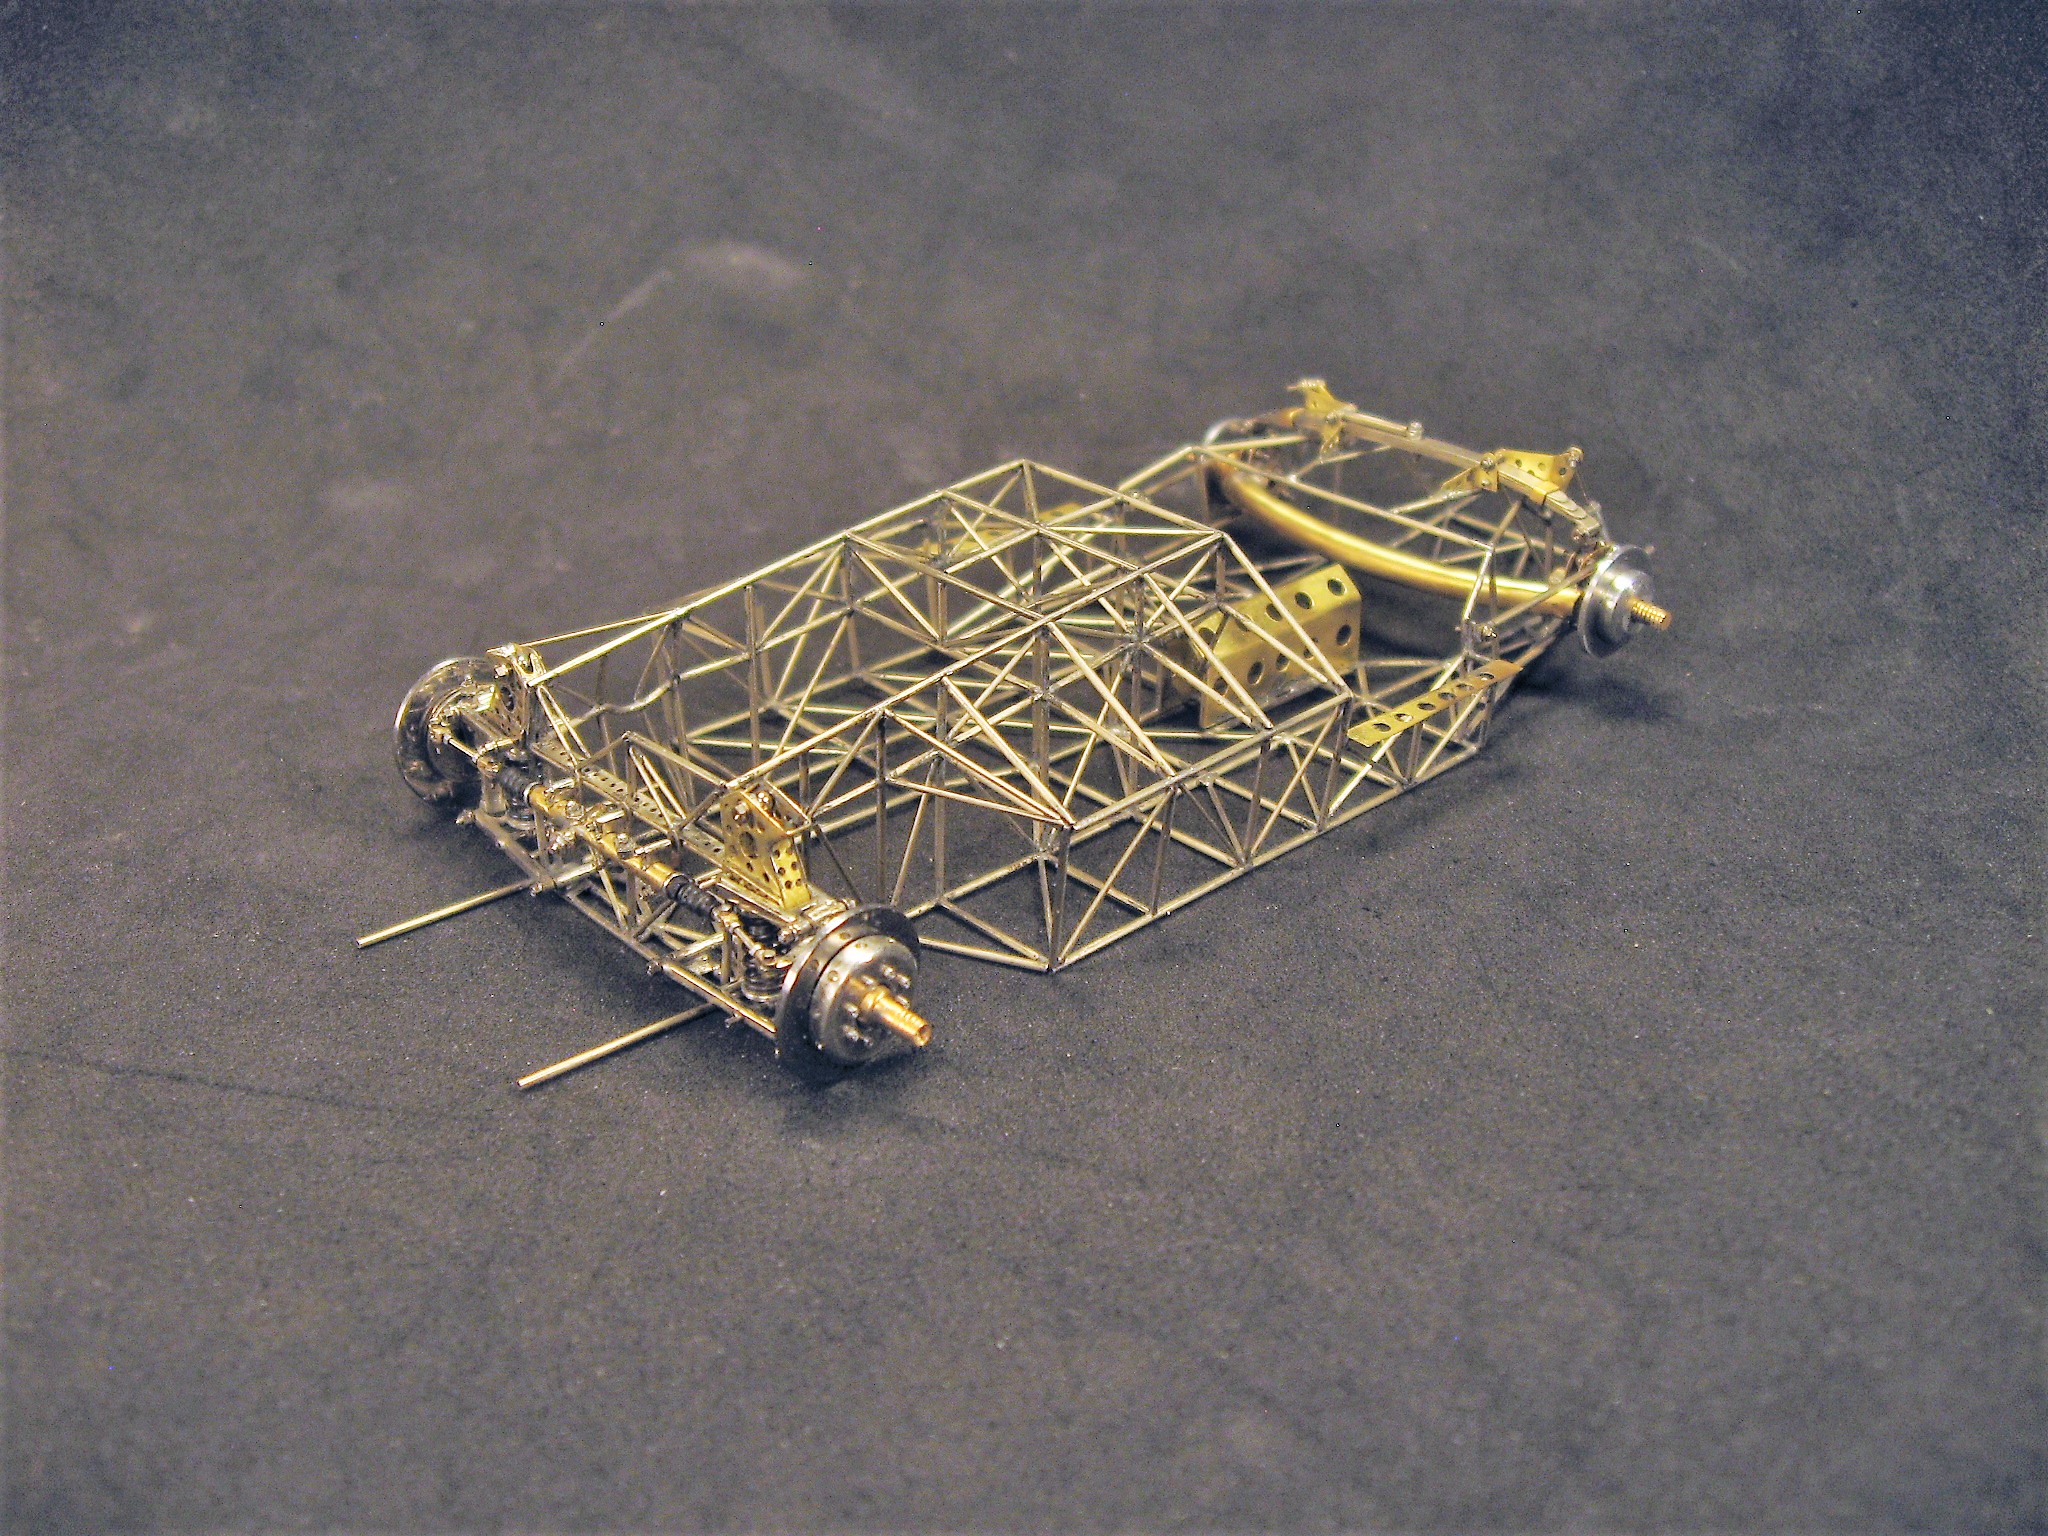
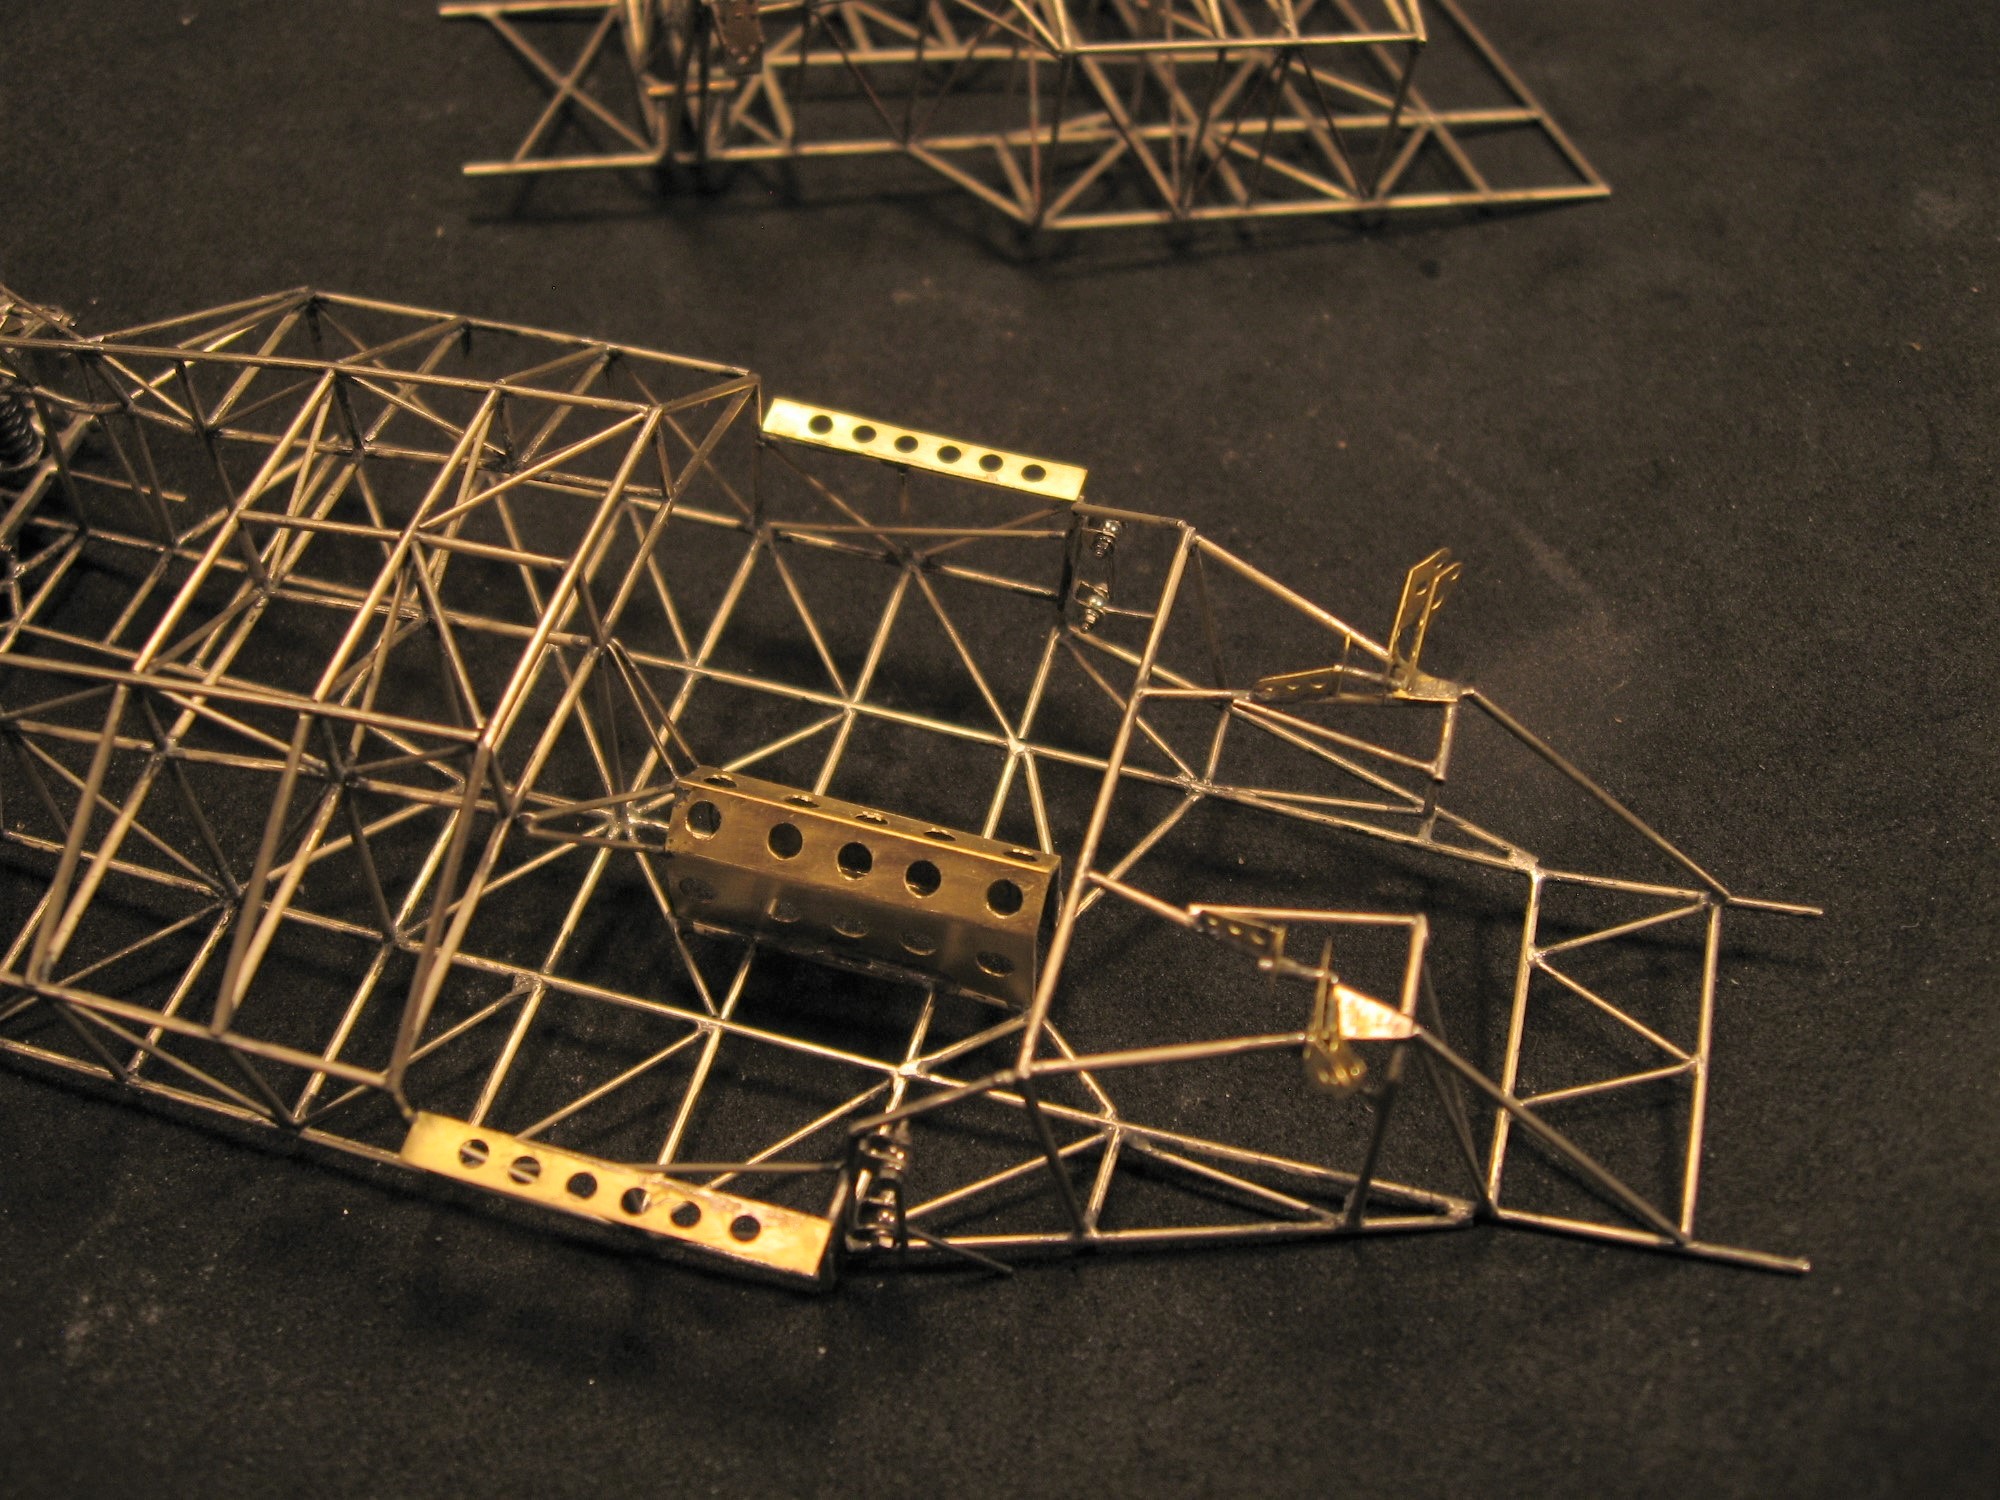
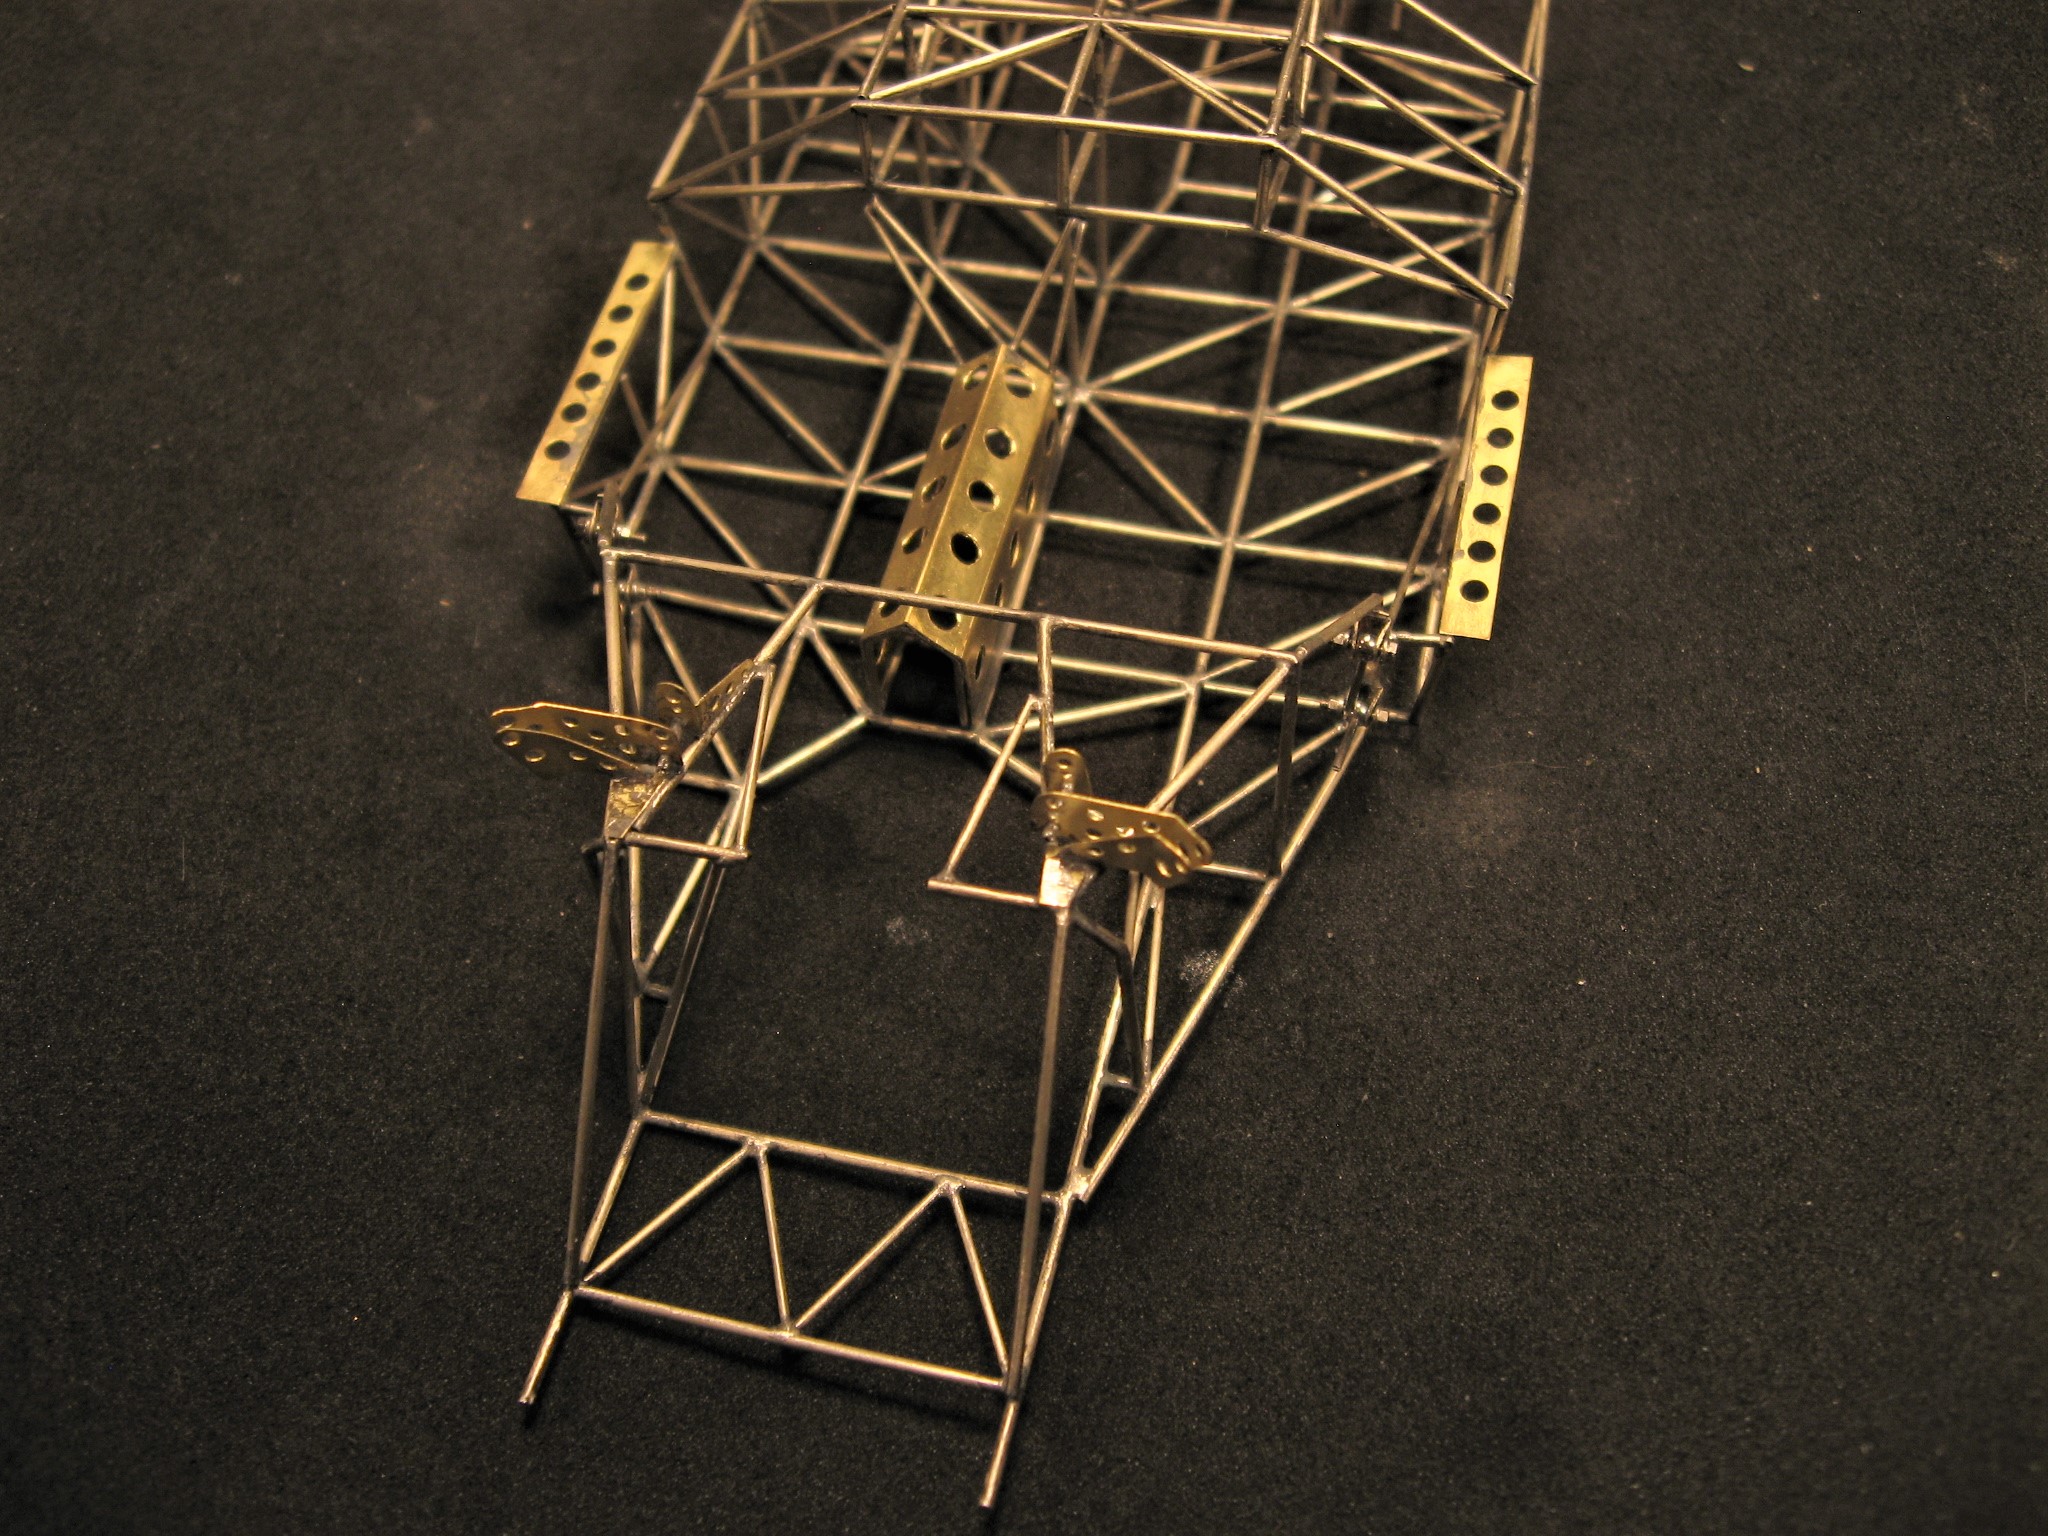
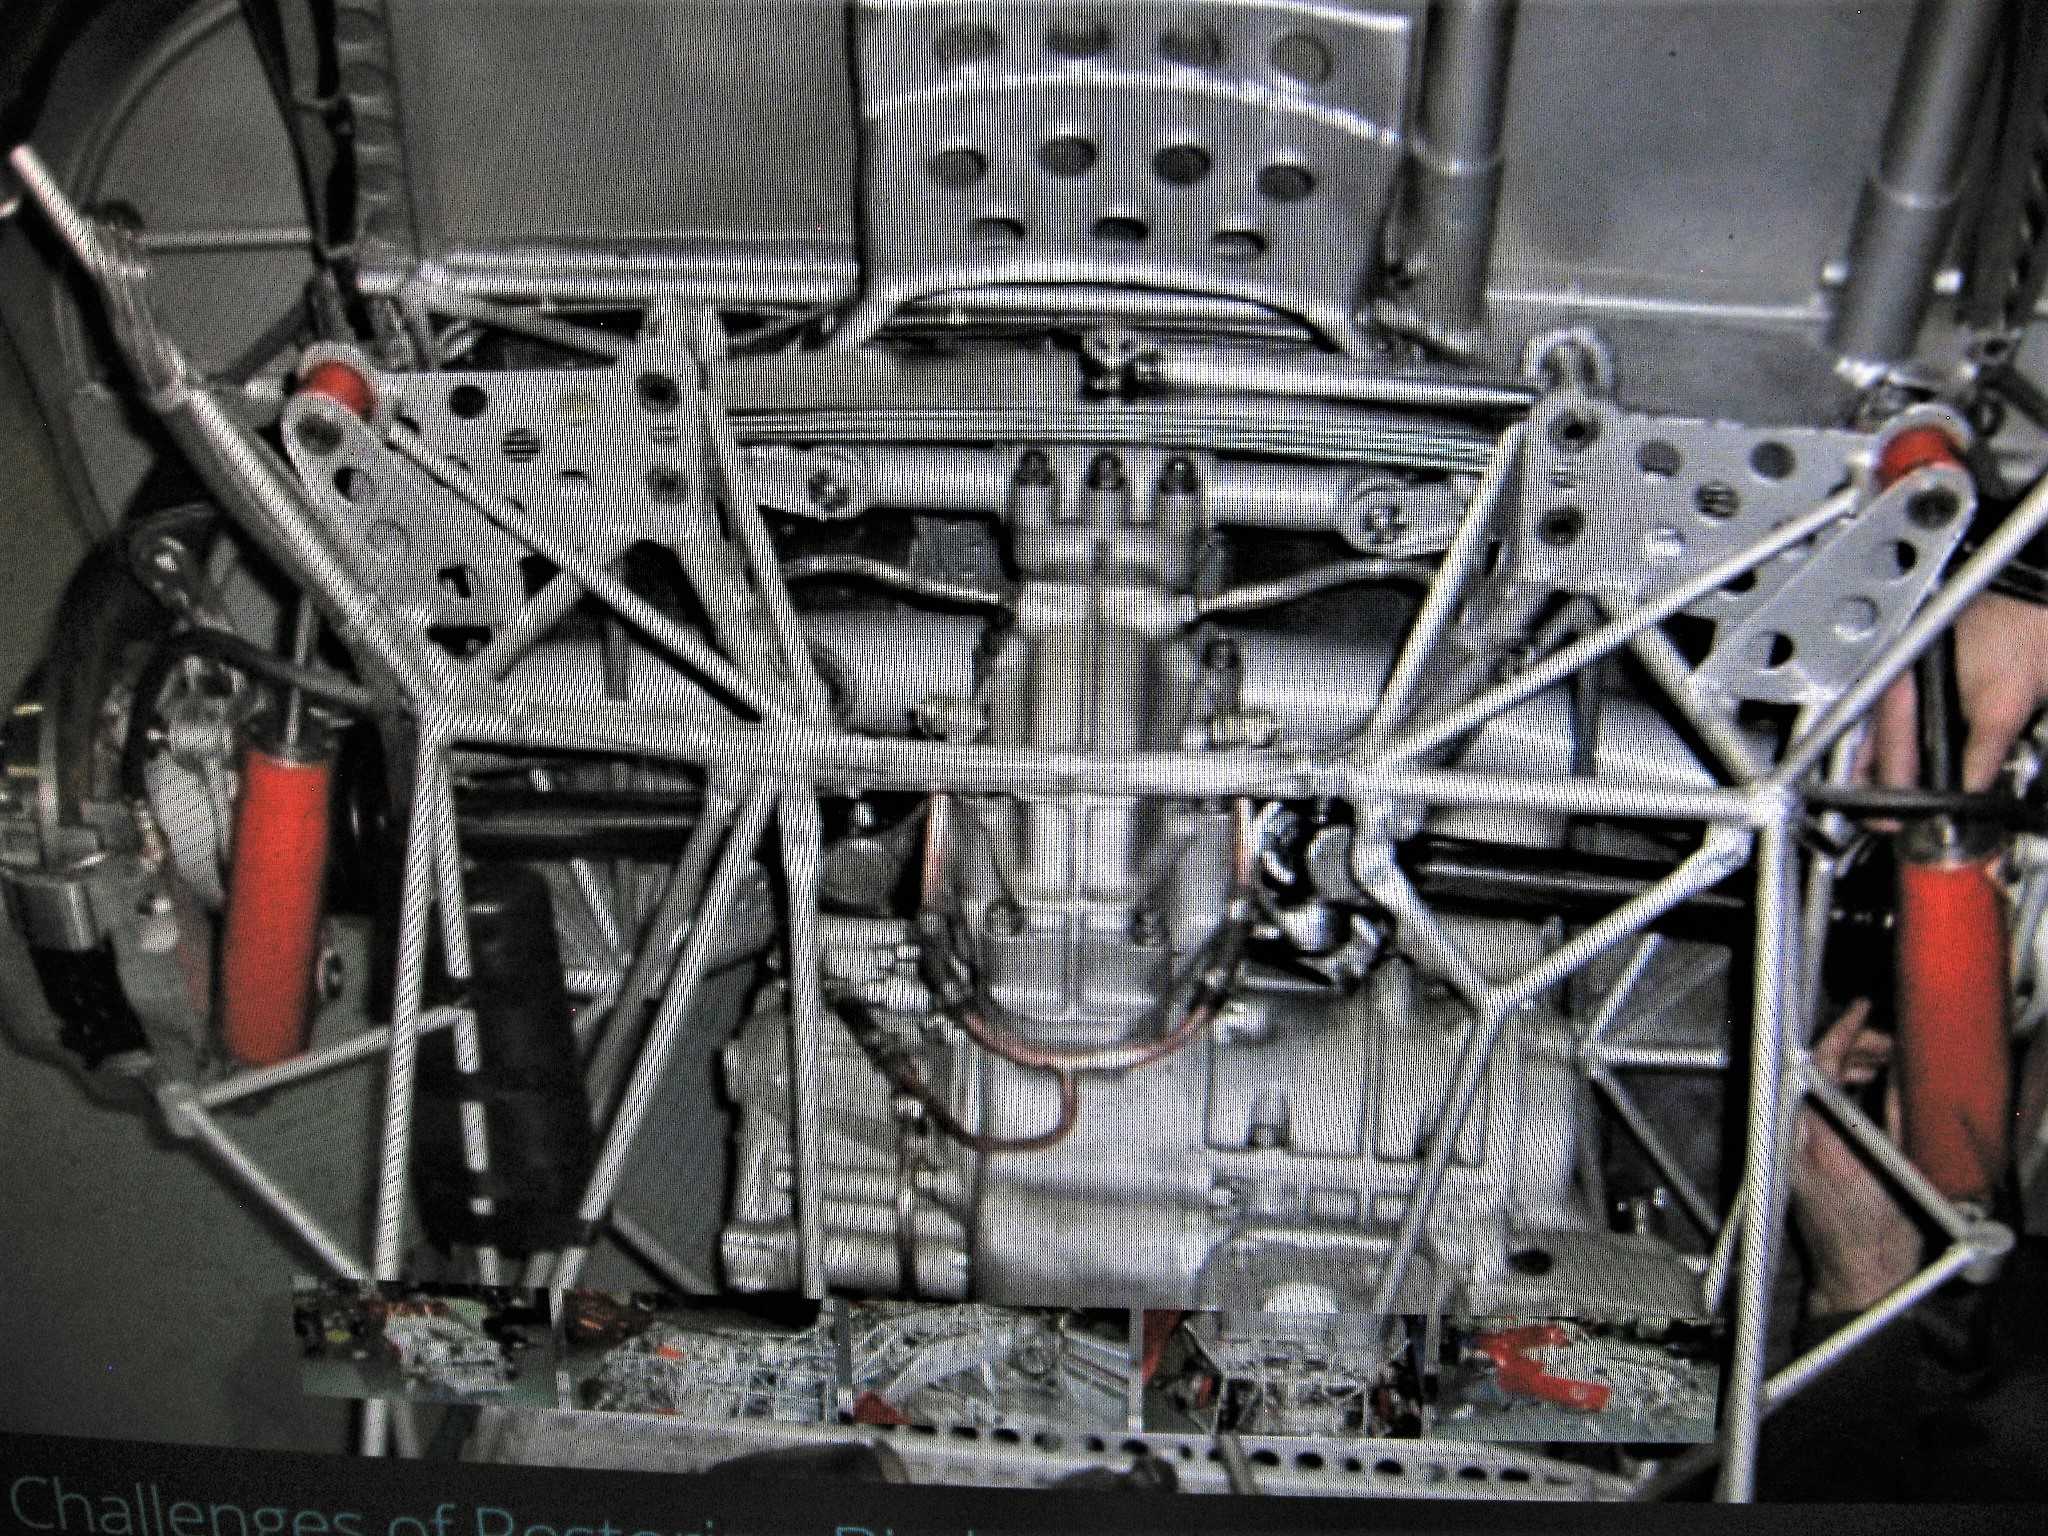
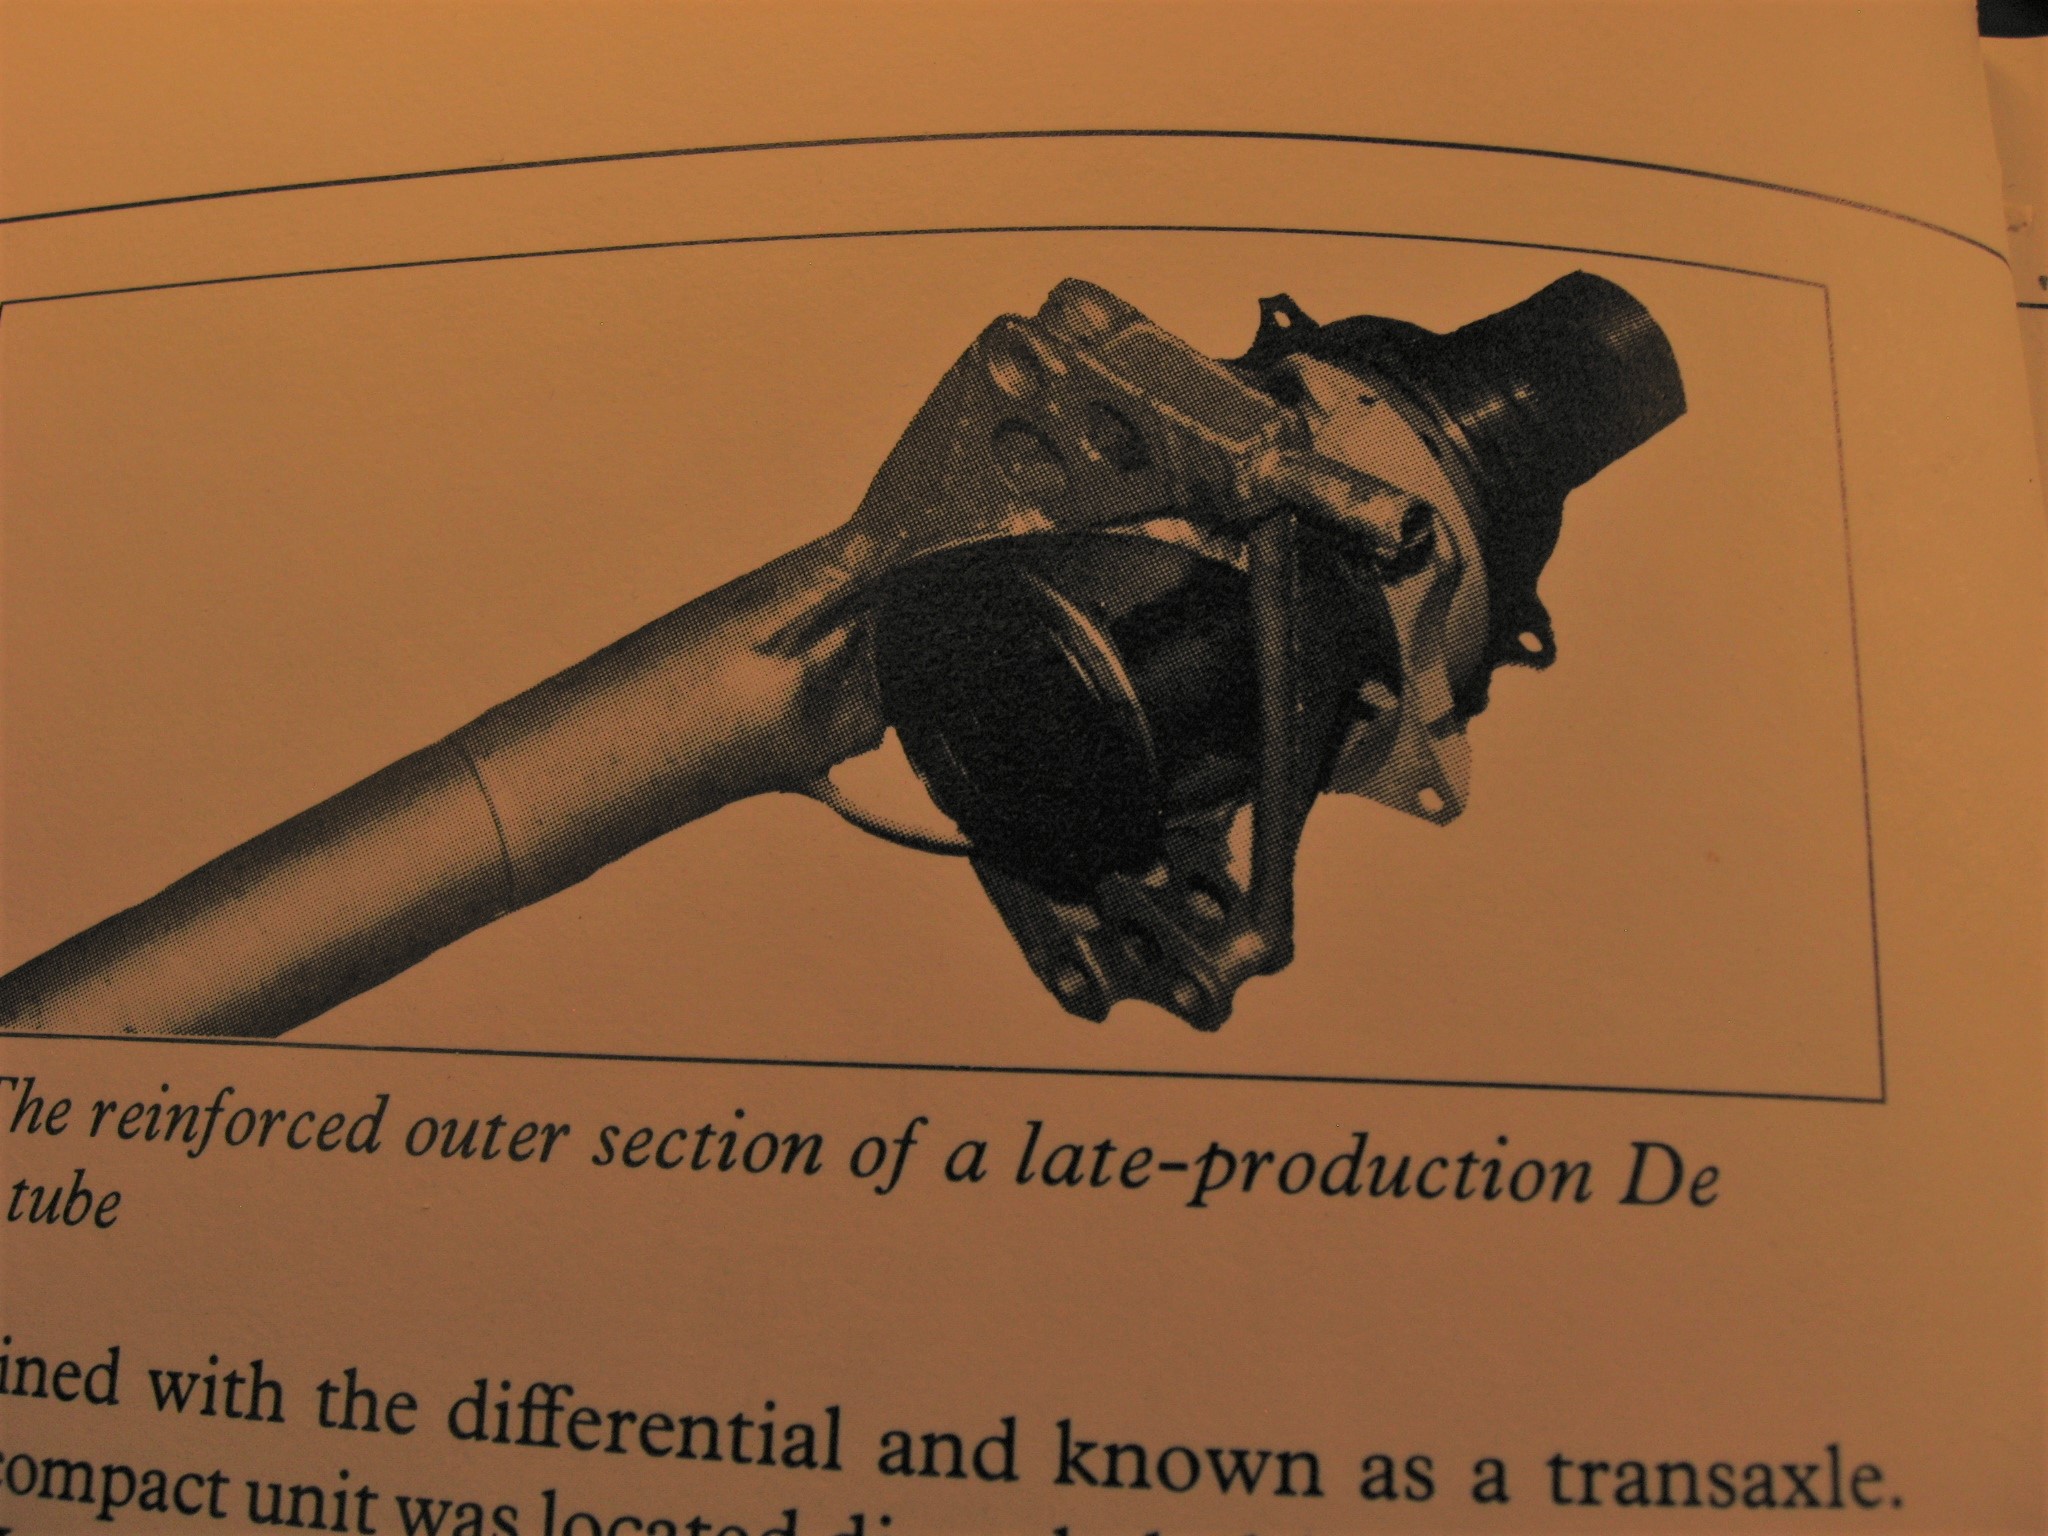
Hi Folks, To Bruce , Tim , Dann and Bill who have posted since I was on last time, a big thank you for taking the time to comment:) O'kay , so I did not get right on this one ! Well actually I did, but I basically started over and it has taken a while to show some progress ! I discovered that I make errors in my working drawings that caused the chassis to be to tall. I also found better info on the sizes of tubing used. After walking away for a time I decided to start over and build it more accurate. I'll just show the chassis to date as the techniques used to construct it are the same as the first chassis. Then I will have a couple of ref. pics of the De Dion rear axle arrangement followed by my attempt to recreate it...
-
Will try to take pictures David Curt & Bernard, glad you guys are coming! Randy


.JPG.2ca55502a3149d966687125b581929f5.JPG)
.JPG.27254fd8558ee243937bd4312c0b58d4.JPG)
.JPG.54722aaf7e142c2efe0aa1904924bc4d.JPG)
.JPG.9494b848631c93a8c0c1f21ff5695f37.JPG)
.JPG.a02c50ff763f5ceae20e7c924a919594.JPG)

.JPG.a3334f429647fec459fe8070d6991e52.JPG)
.JPG.a77b3da2703407d072c4d6724f92647b.JPG)
.JPG.d366c4d29d57c9af16bd7819daf42ea7.JPG)