

Kit Basher
-
Posts
2,266 -
Joined
-
Last visited
Content Type
Profiles
Forums
Events
Gallery
Posts posted by Kit Basher
-
-
31 minutes ago, SfanGoch said:
I know that the rivets are molded onto the glass, Hugh. I suggested using these because you can place them directly on the existing rivets and not have to paint the existing ones.
Sorry, Joe. I must have misunderstood the website. I thought those rivets were for adding rivets where they did not exist, sort of like a 3D decal. Are they more like a colored decal to go on existing rivets?
-
2 hours ago, SfanGoch said:
You can also try Positive Rivets from HGW Models.
Thanks, Joe. The rivets are already there, I just need to paint them.
I tried the toothpick method, and it seems like it is going to work. I will need to refine my technique and practice, but I might get there. Many thanks to all who chimed in to help!
I only have to do the side windows, rear glass, and headlight covers, maybe 50 rivets. (Where is the "pulling out your hair" emoji?)
If I succeed, I will post pics of the results. Thanks again!
-
2 hours ago, Tom Geiger said:
I don’t know the part you are working with, I’m assuming the background would be clear. If the back ground was say black, you could paint it silver first, then black and then polish the black off the rivets.
But if background is indeed clear, I like the idea of flattening the tip of a toothpick to match the rivet, then pretty much stamping the color onto the rivets.
I would tape the windshield to something stable and as a good working height. I’d stabilize my hand against something. A guy who did hand lettering used a bean bag, or the large bag of M&Ms to rest the ball of his hand against. These are good since they take the shape of your hand.
Good Luck! Post what worked for you!
Thanks, Tom. Yes, the parts are clear. As far as flattening a toothpick, did I mention these nibs are tiny? I mean, they are TINY! The point of a round toothpick is bigger than those nibs. I agree with you and the others that a toothpick is probably the way to go, but I think I'm going to need a whole lot of luck!
-
6 hours ago, StevenGuthmiller said:
Another thing to remember is that it's relatively simple to remove any goofs with a little thinner.
3 hours ago, 89AKurt said:NOOooooo! ? That would leave a fuzzy edge, and paint would capillary under and really make a mess. Toothpick, sand the tip to the size of the rivets, dip in the upside-down lid of the paint, and take a deep breath and do the Ohmmmmmmm (yoga if you ever tried it). Clean after a few dabs with paper towel. Good luck!
An alternate idea, if you want. I use a .5mm mechanical pencil, and aluminum tape (for ductwork). Retract the lead, punch the tape, click the lead out and press the little rivet into place. If you don't like it, easy to remove.Thanks, everyone!
So it sounds like there's no foolproof way to do this. (I could use foolproof, I'm a fool!) Just be careful and be prepared to clean up my mistakes. I think I would use enamel, my experience with acrylics is they dry too fast to clean up completely.
The mechanical pencil idea is interesting, I may give that a try.
-
18 minutes ago, StevenGuthmiller said:
For small details, I use what you might call a "semi dry brush" technique.
I dip a small pointed brush in the paint and then "roll" it over a paper towel.
The rolling serves the purpose of not only removing a good portion of the paint from the brush, but it also rolls it into a fine point.
I can do some pretty small details this way with a fairly large brush.
I basically use one brush for the vast majority of my detail painting and let the paint do the work, not the brush.......if that makes any sense to you.
 Steve
Steve
It does make sense to me. There are a lot of cases where it's better to let the paint flow, instead of brushing it on. In this case, I might still be limited by a steady hand. There are a bunch of these rivets, I only have to slip once to cause a problem.
I thought about masking the whole window, sanding thru the tape where the nibs are, painting the nibs, and removing the tape. Does that make sense?
-
4 hours ago, GeeBee said:
Wooden cocktail stick, dip the end into some silver paint and dab it onto the rivet head.
That sounds worth a try. I hope my hands are steady enough.
-
10 minutes ago, Dragonhawk1066 said:
Great job on both of those! I love the color choices as well!
Thanks, Craig! It was almost like I had no choice, they had to be these colors.
-
I'm working on a Fujimi GT 40, and I would like to paint the rivets that hold the glass in. There are tiny nibs molded into the plastic windows, but I can't figure out how to paint them without slathering paint all over the glass. Any suggestions?
-
Thanks, Dann!
Thanks, Andre!
-
Thanks, Gareth!
Thanks, Chris!
-
Thanks, Eric!
-
Thanks, Michelle!
Thanks, Keith!
Thanks, Eric!
-
9 minutes ago, vamach1 said:
Always nice to see the Ford vs. Chevy rivalry.
Thanks, Rex! It would have been fun to do the "Big Four" for 1969, but I like the '70 Cuda much more than the '69, and I can't afford a '69 Javelin or AMX.
-
Thanks, Lee!
Thanks, Snake!
Thanks, Larry!
-
Nice and clean. Gorgeous color, suits it really well.
-
Thanks, Charlie!
Thanks, Ray!
Thanks, David!
-
Revell kits, both OOB. The Camaro paint is MM "British Green Metallic", the Mustang is MM "Grabber Blue".

-
3 hours ago, mr moto said:
Revell had the Jag roof that you're looking for in their old XKE roadster kit - at least In some releases.
There's a very slim chance you might find the Cobra roof from Revell's mid 60's slot car body.
Thanks, Manuel! I have one of those older Revell Jag roadster kits, and I just checked it. That roof is in there. Way cool!
-
28 minutes ago, afx said:
HRM still offers this kit as far as I am aware. It is the Le Mans hard top Transkit. As you can see the trunk area of the AMT kit had to be modified so the hardtop did not cover the trunk lid.
The photo above was the kit I purchased and here is my finished build.

Thanks, JC! Beautiful model. I may look into that HRM transkit.
-
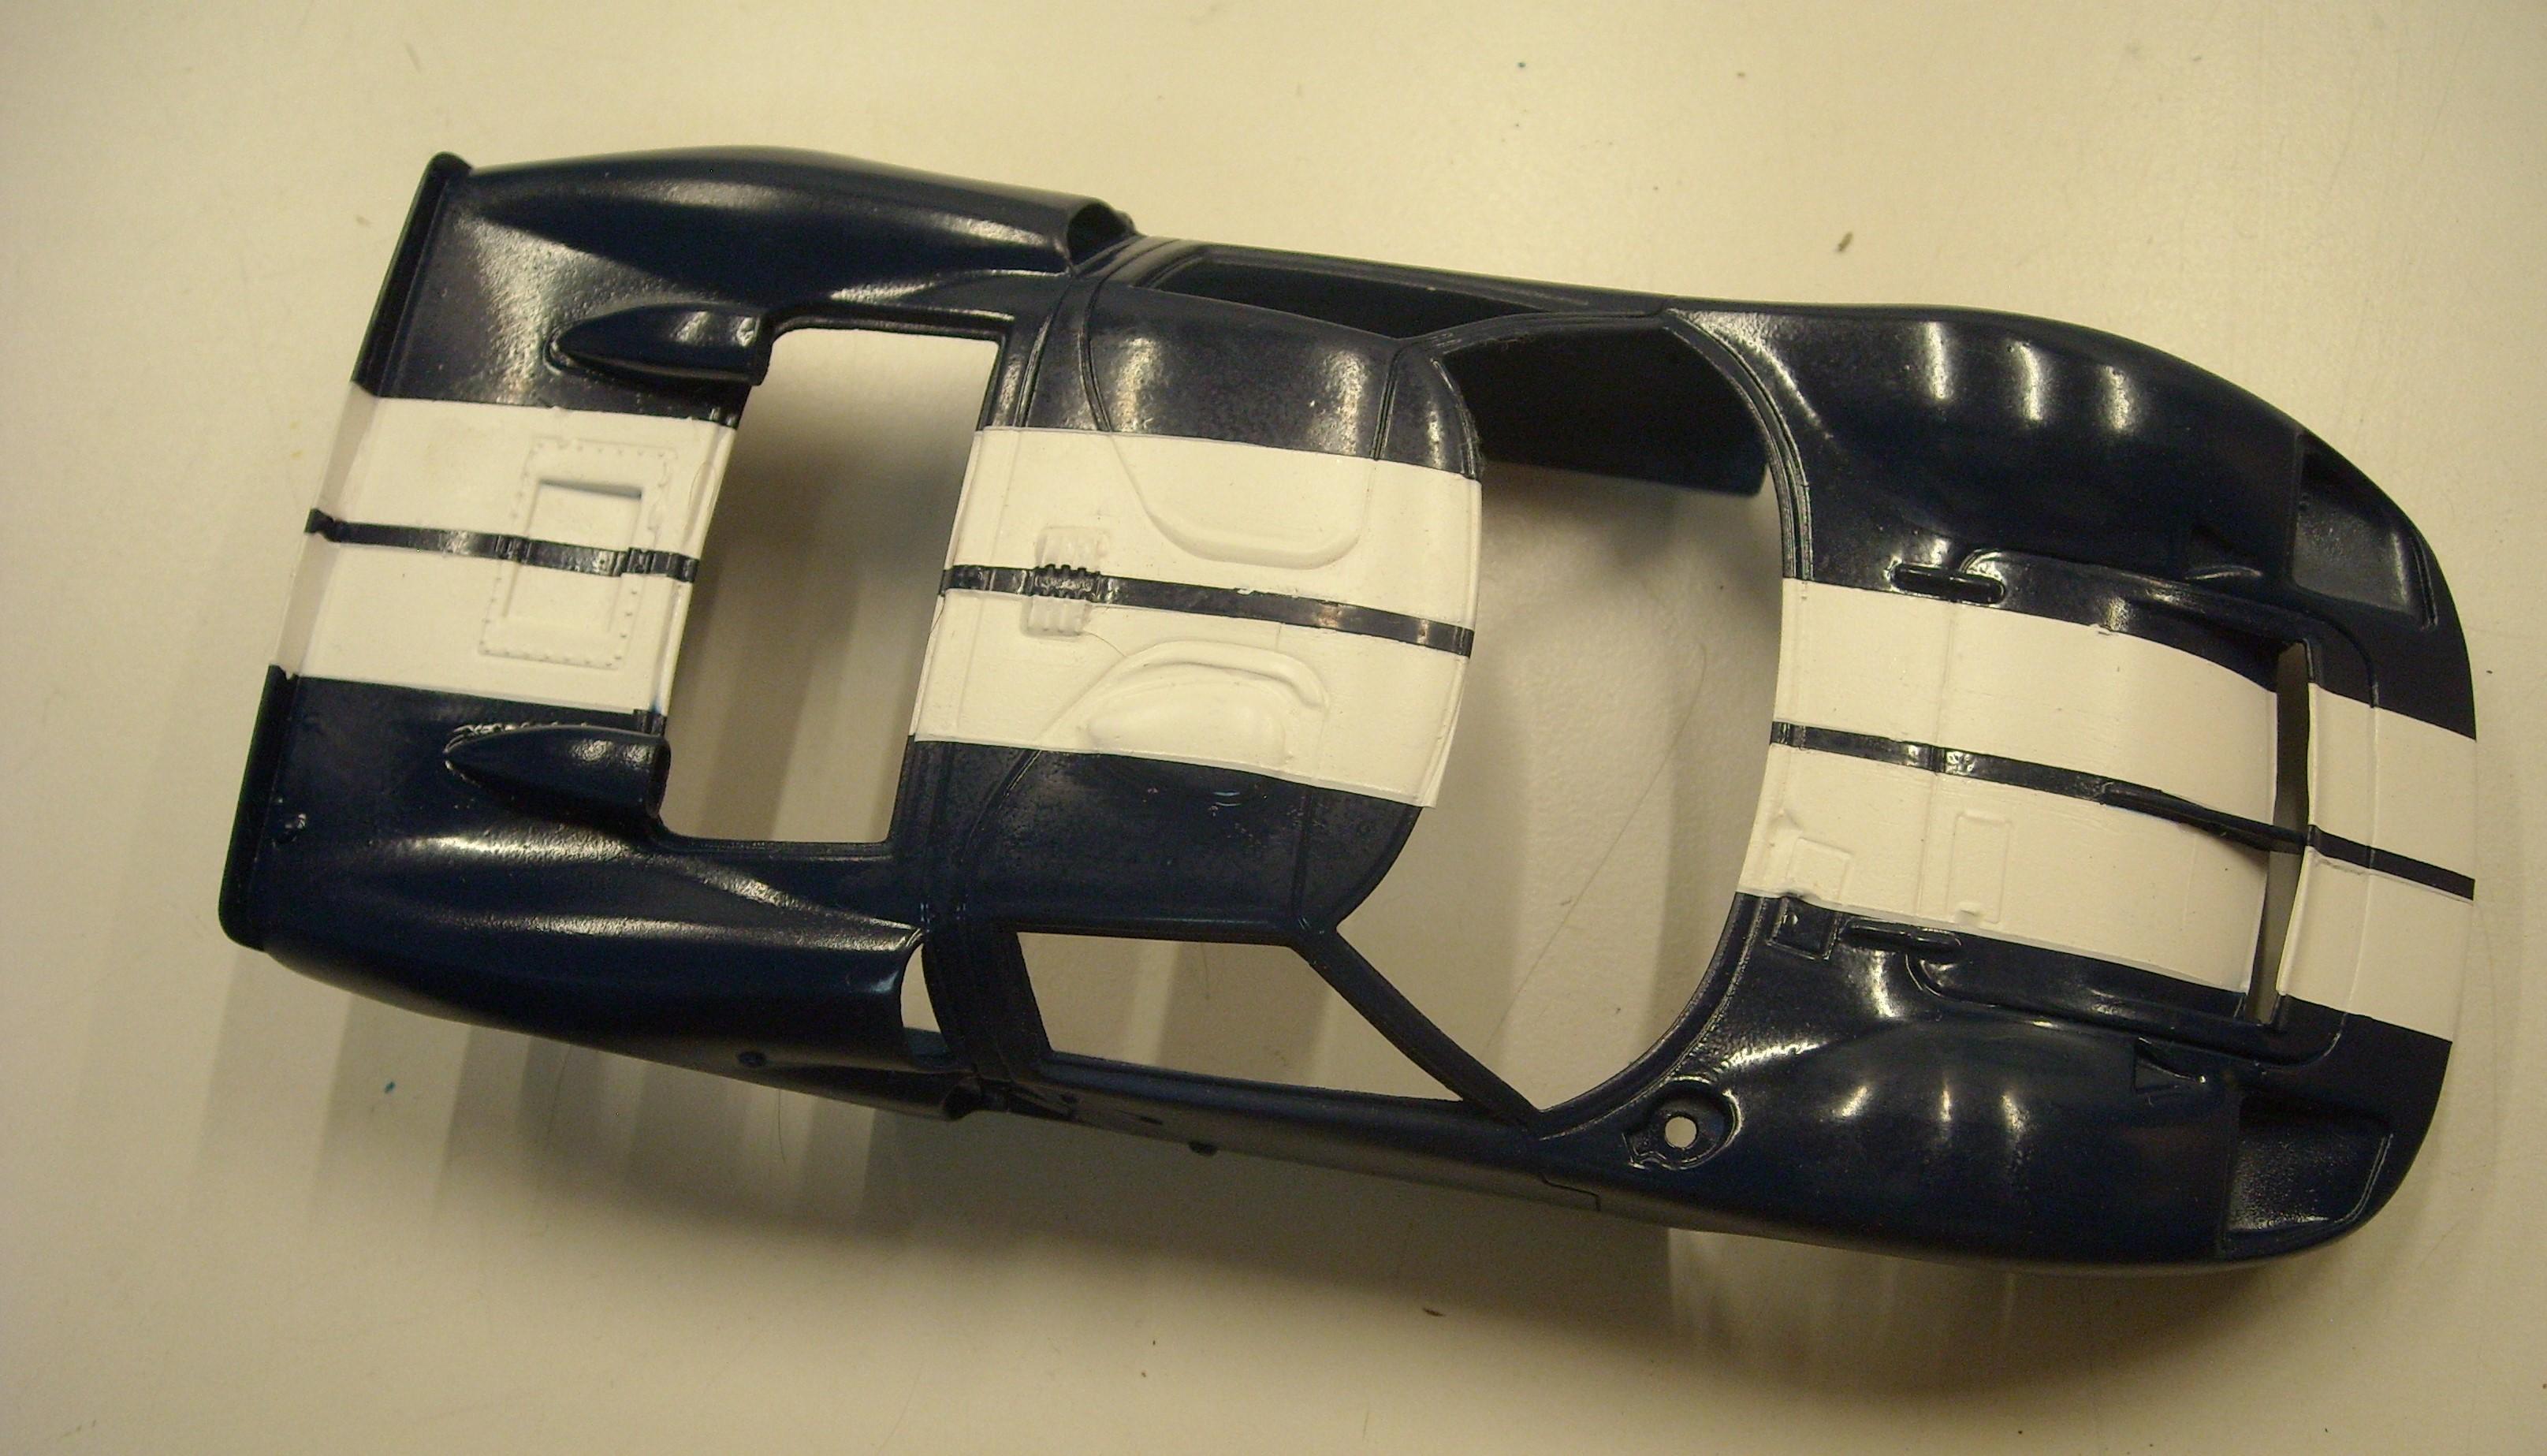
Searched for "AMT 289 Cobra" and found an old thread by Cobraman where he used the kit fastback. Not the same as the one in my original post, but interesting.
Also found this in the same thread:
I don't know if HRM still makes this, but it looks cool.
-
3 minutes ago, TarheelRick said:
IIRC the original AMT Cobra kit came with a hardtop very similar to that one. Although it wasn't quite as bulbous as that one, more streamlined. Then again the more I think about it that particular top I am thinking of may have been in the AMT '57 T-Bird. Disregard, my thoughts are rambling, must have been the extra coffee I had this morning.
LOL. Sounds like a mild case of CRS.
-
On 9/28/2020 at 1:44 PM, SfanGoch said:
Why? Dual blade strip cutters already exist.
I bought one of these and used it to cut the stripes for this GT 40 out of white decal paper. It occurs to me that you could print any color you wanted on the paper, and then cut out the stripes. Thanks, Joe!
-
6 minutes ago, keyser said:
Goodwood is crack for sports car guys.
Indeed it is!
-
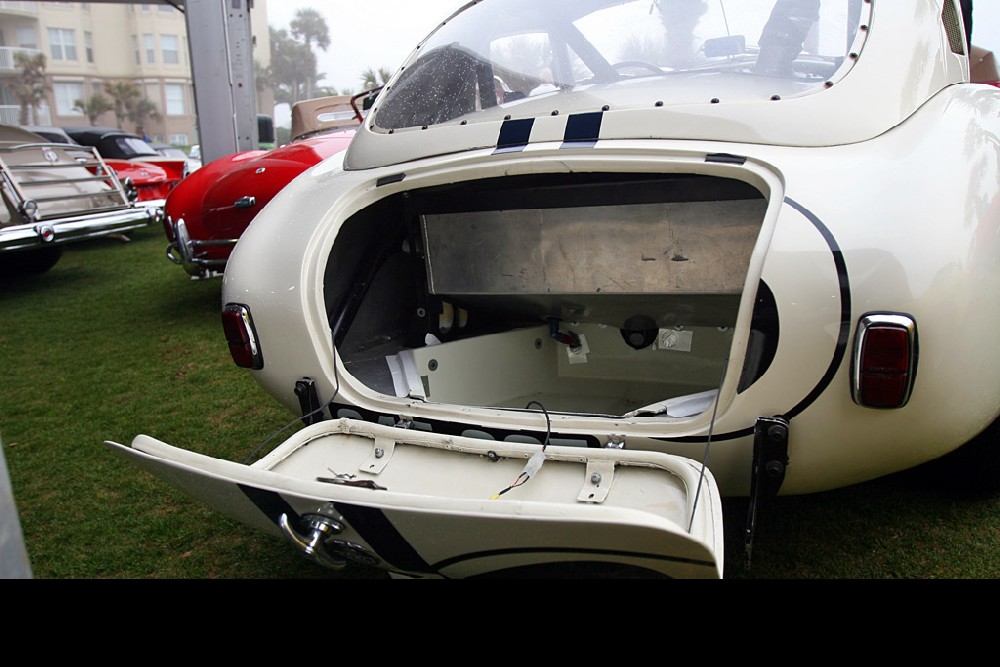
Thanks Brian! The hard top on the Cobra GT is sloped and tapered and reaches almost all the way to the back of the car. I don't know if it was removable or somehow permanently attached to the car. This is the best picture I can find of one
Here's the one for the Jag.


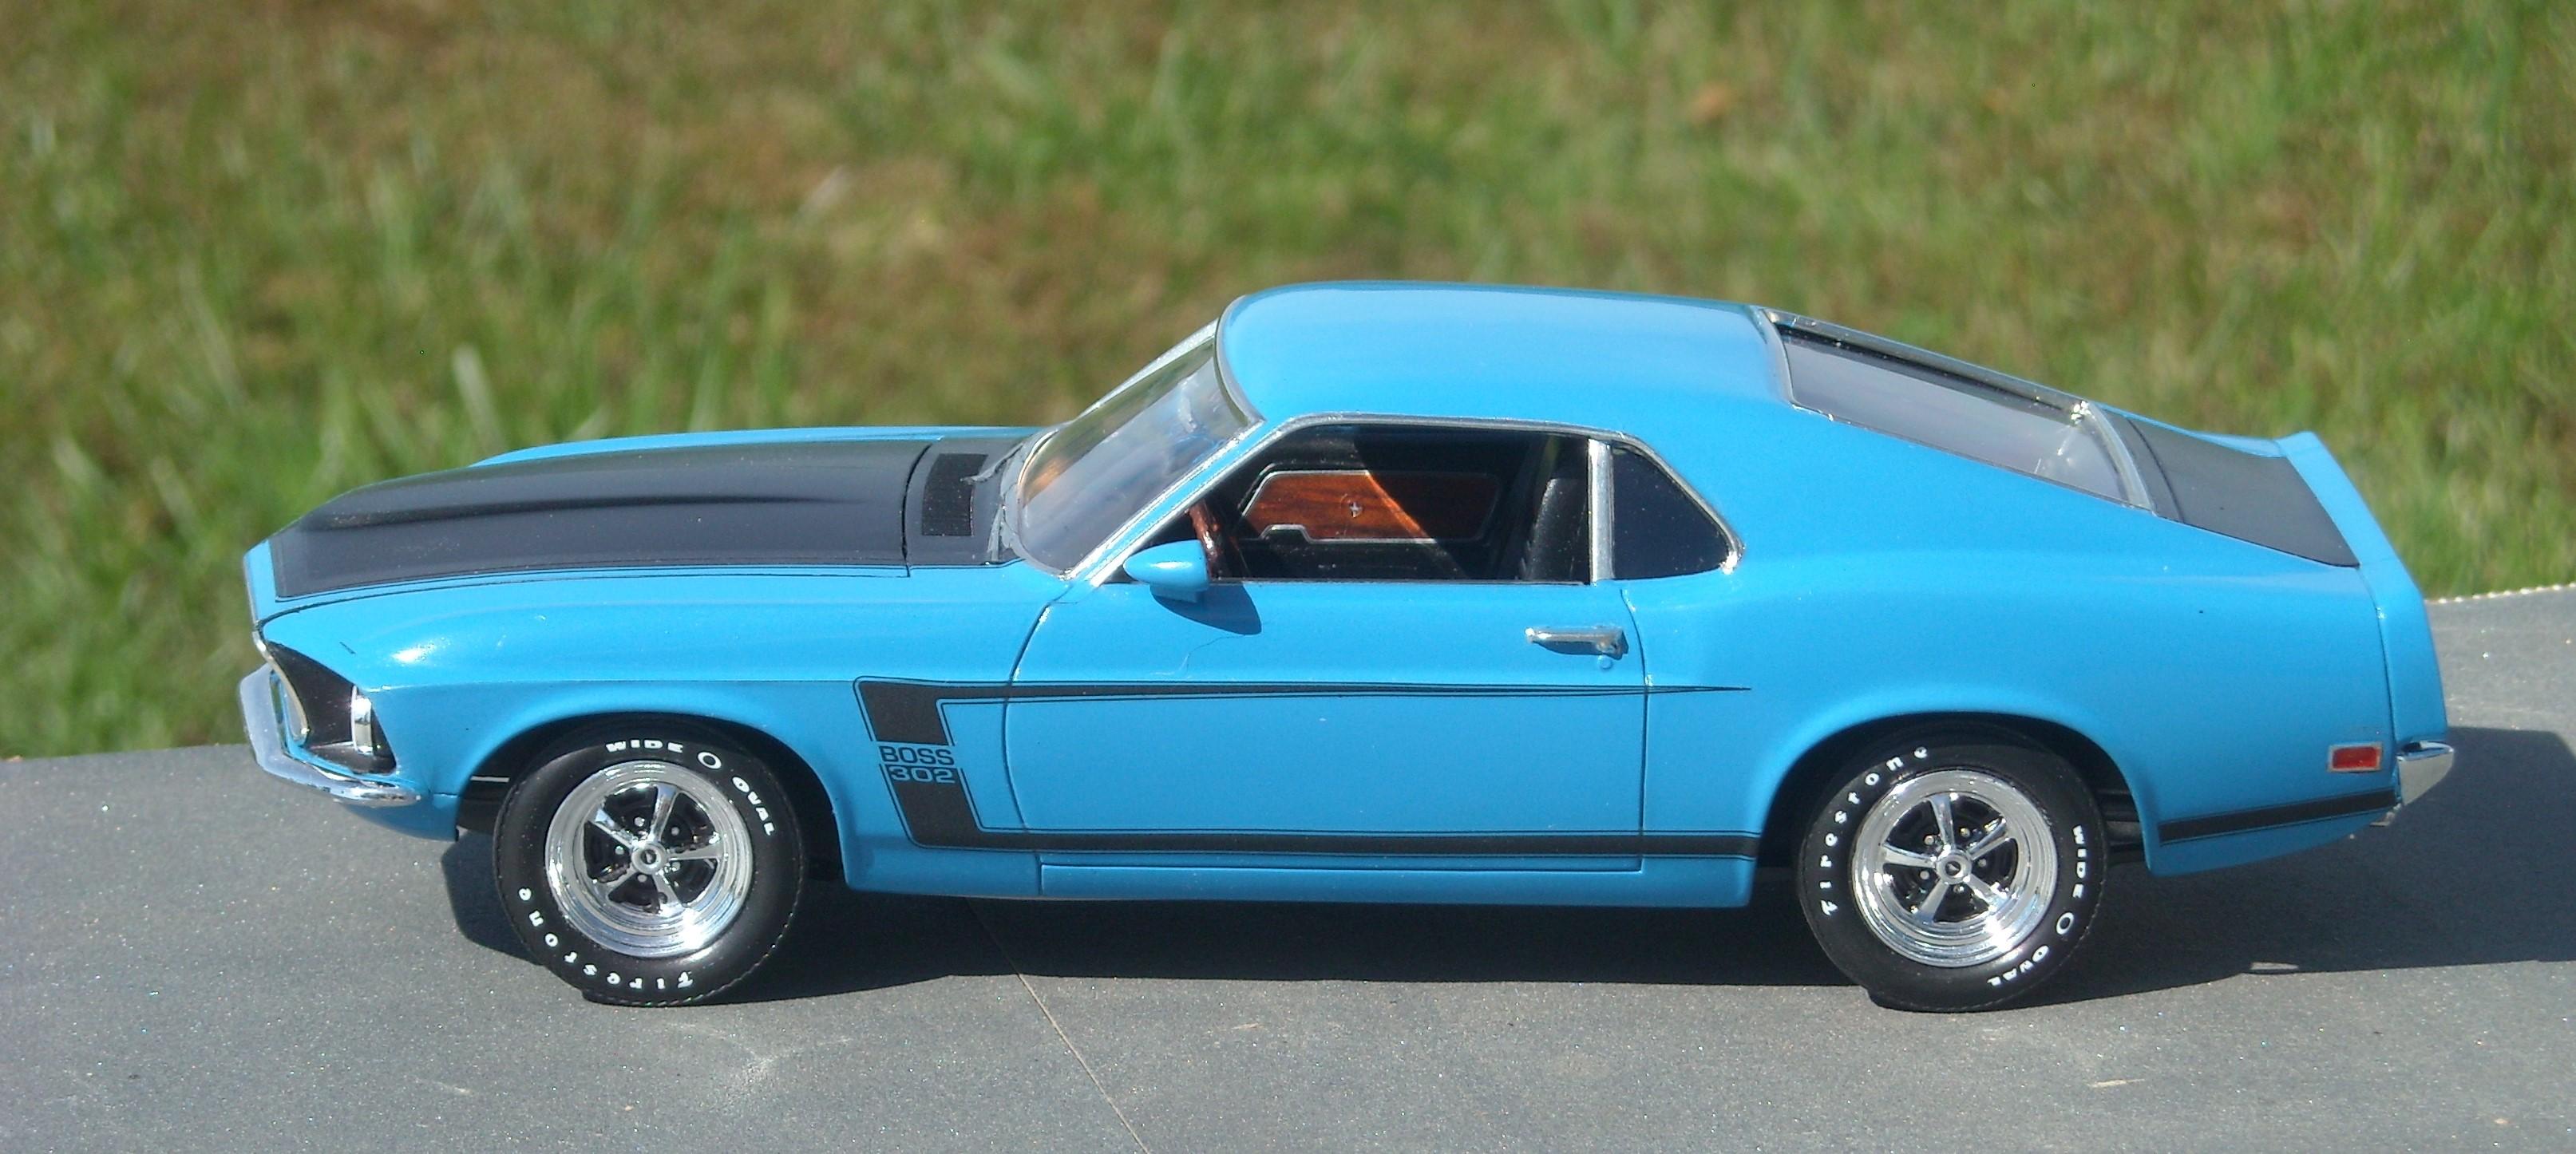


'69 Ponies
in Model Cars
Posted
Thanks, Carl!