mrm
-
Posts
2,845 -
Joined
-
Last visited
Content Type
Profiles
Forums
Events
Gallery
Everything posted by mrm
-
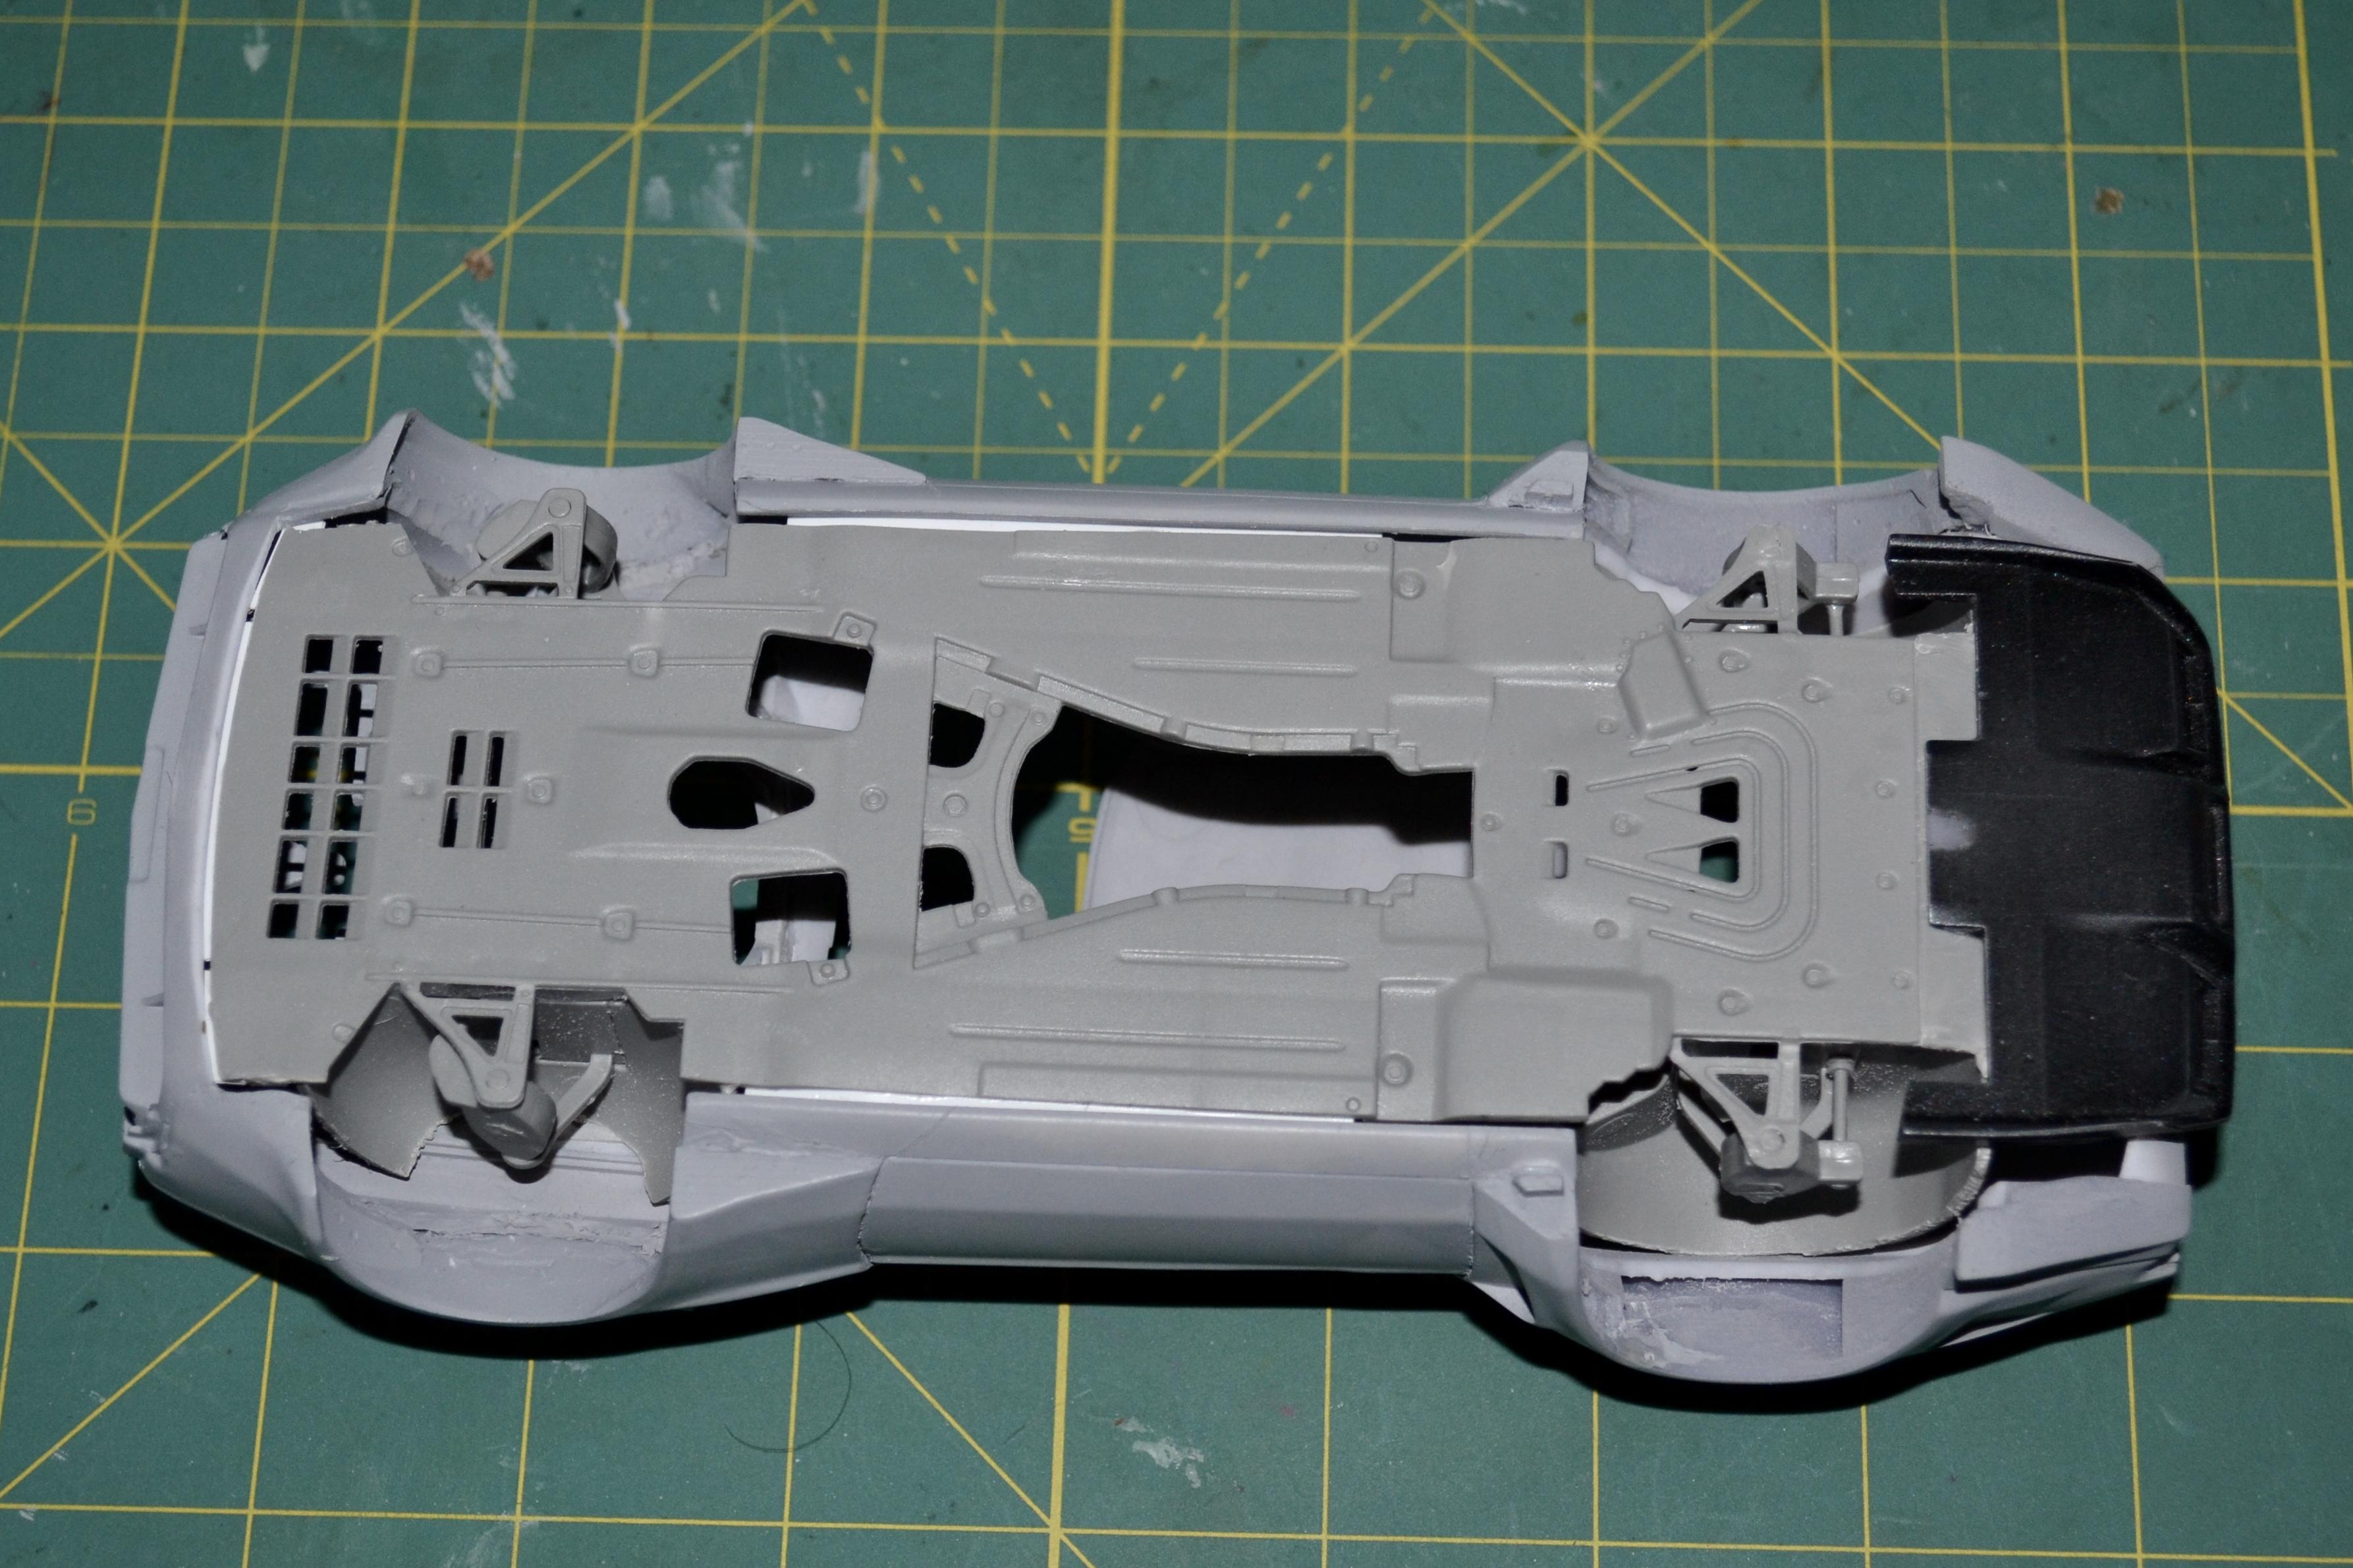
The California's underbody/chassis was greatly modified, including cutting down and reshaping all the wheelwells, narrowing it, cutting both front and rear ends, reshaping them and engineering them to attach to the body, while fitting the somewhat stock (dimension wise) interior or rather what is left of it. A whole new diffuser was molded in at the rear. The result is a very factory looking underside, which was the goal from the beginning.

-
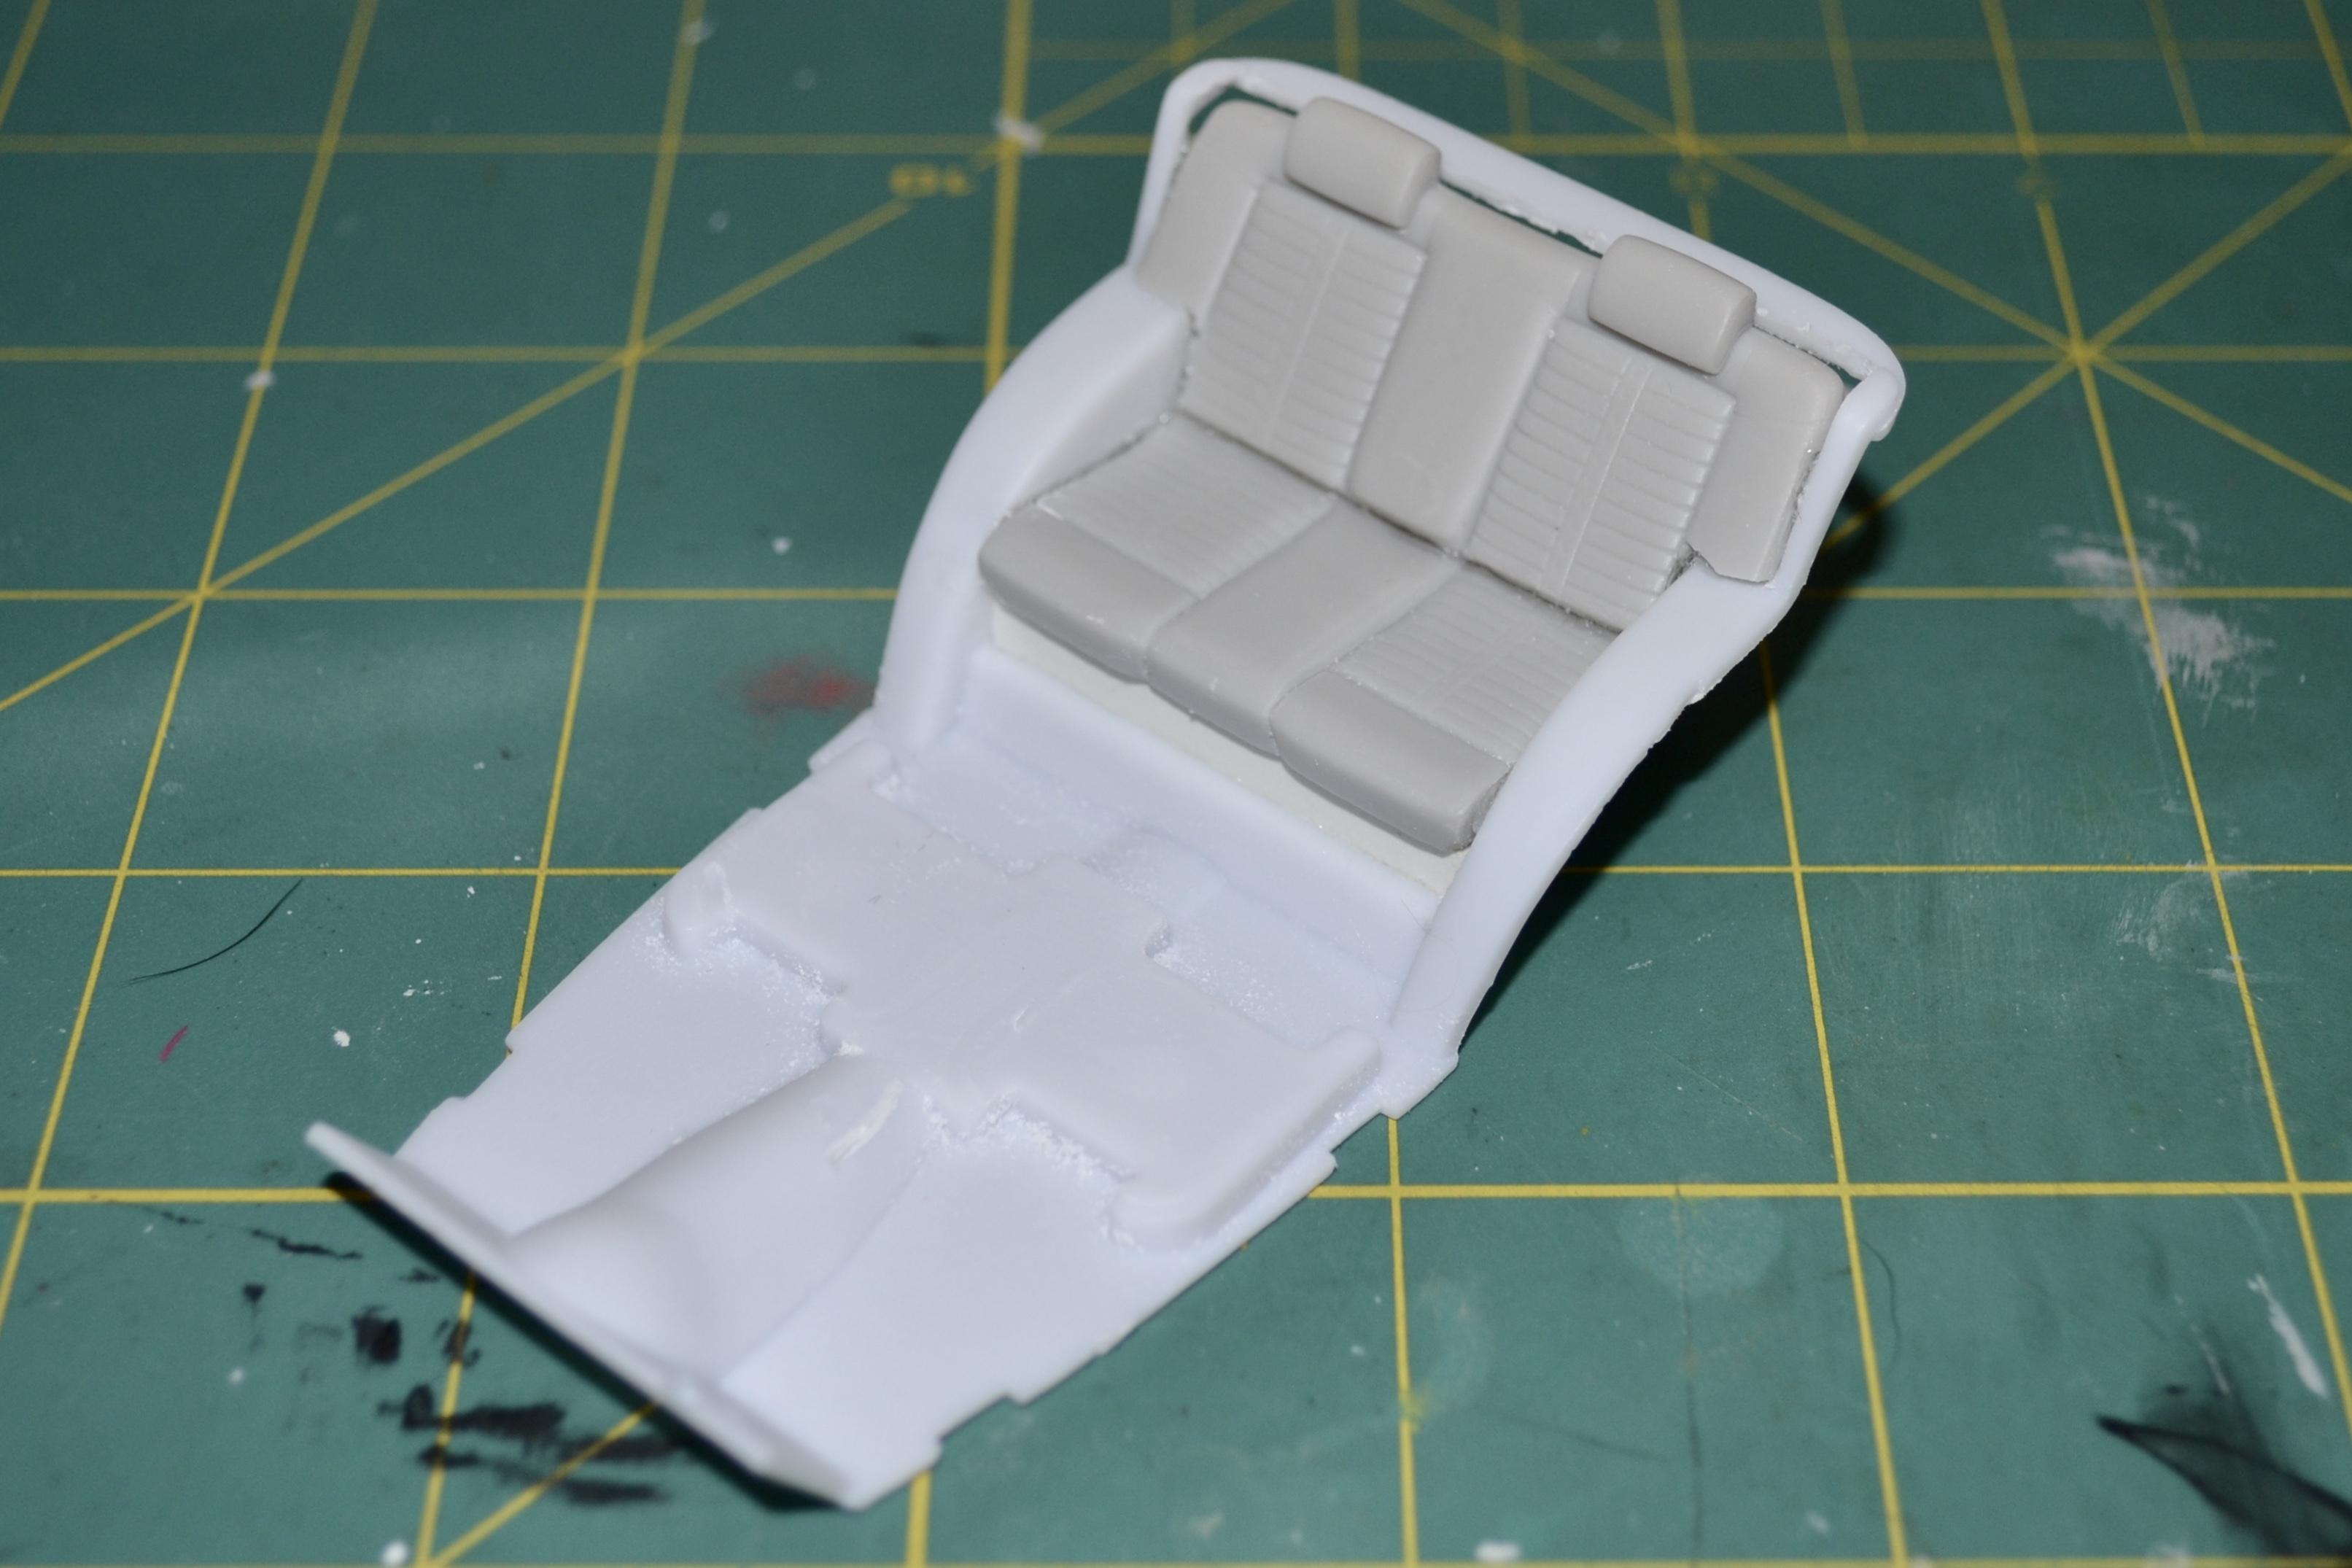
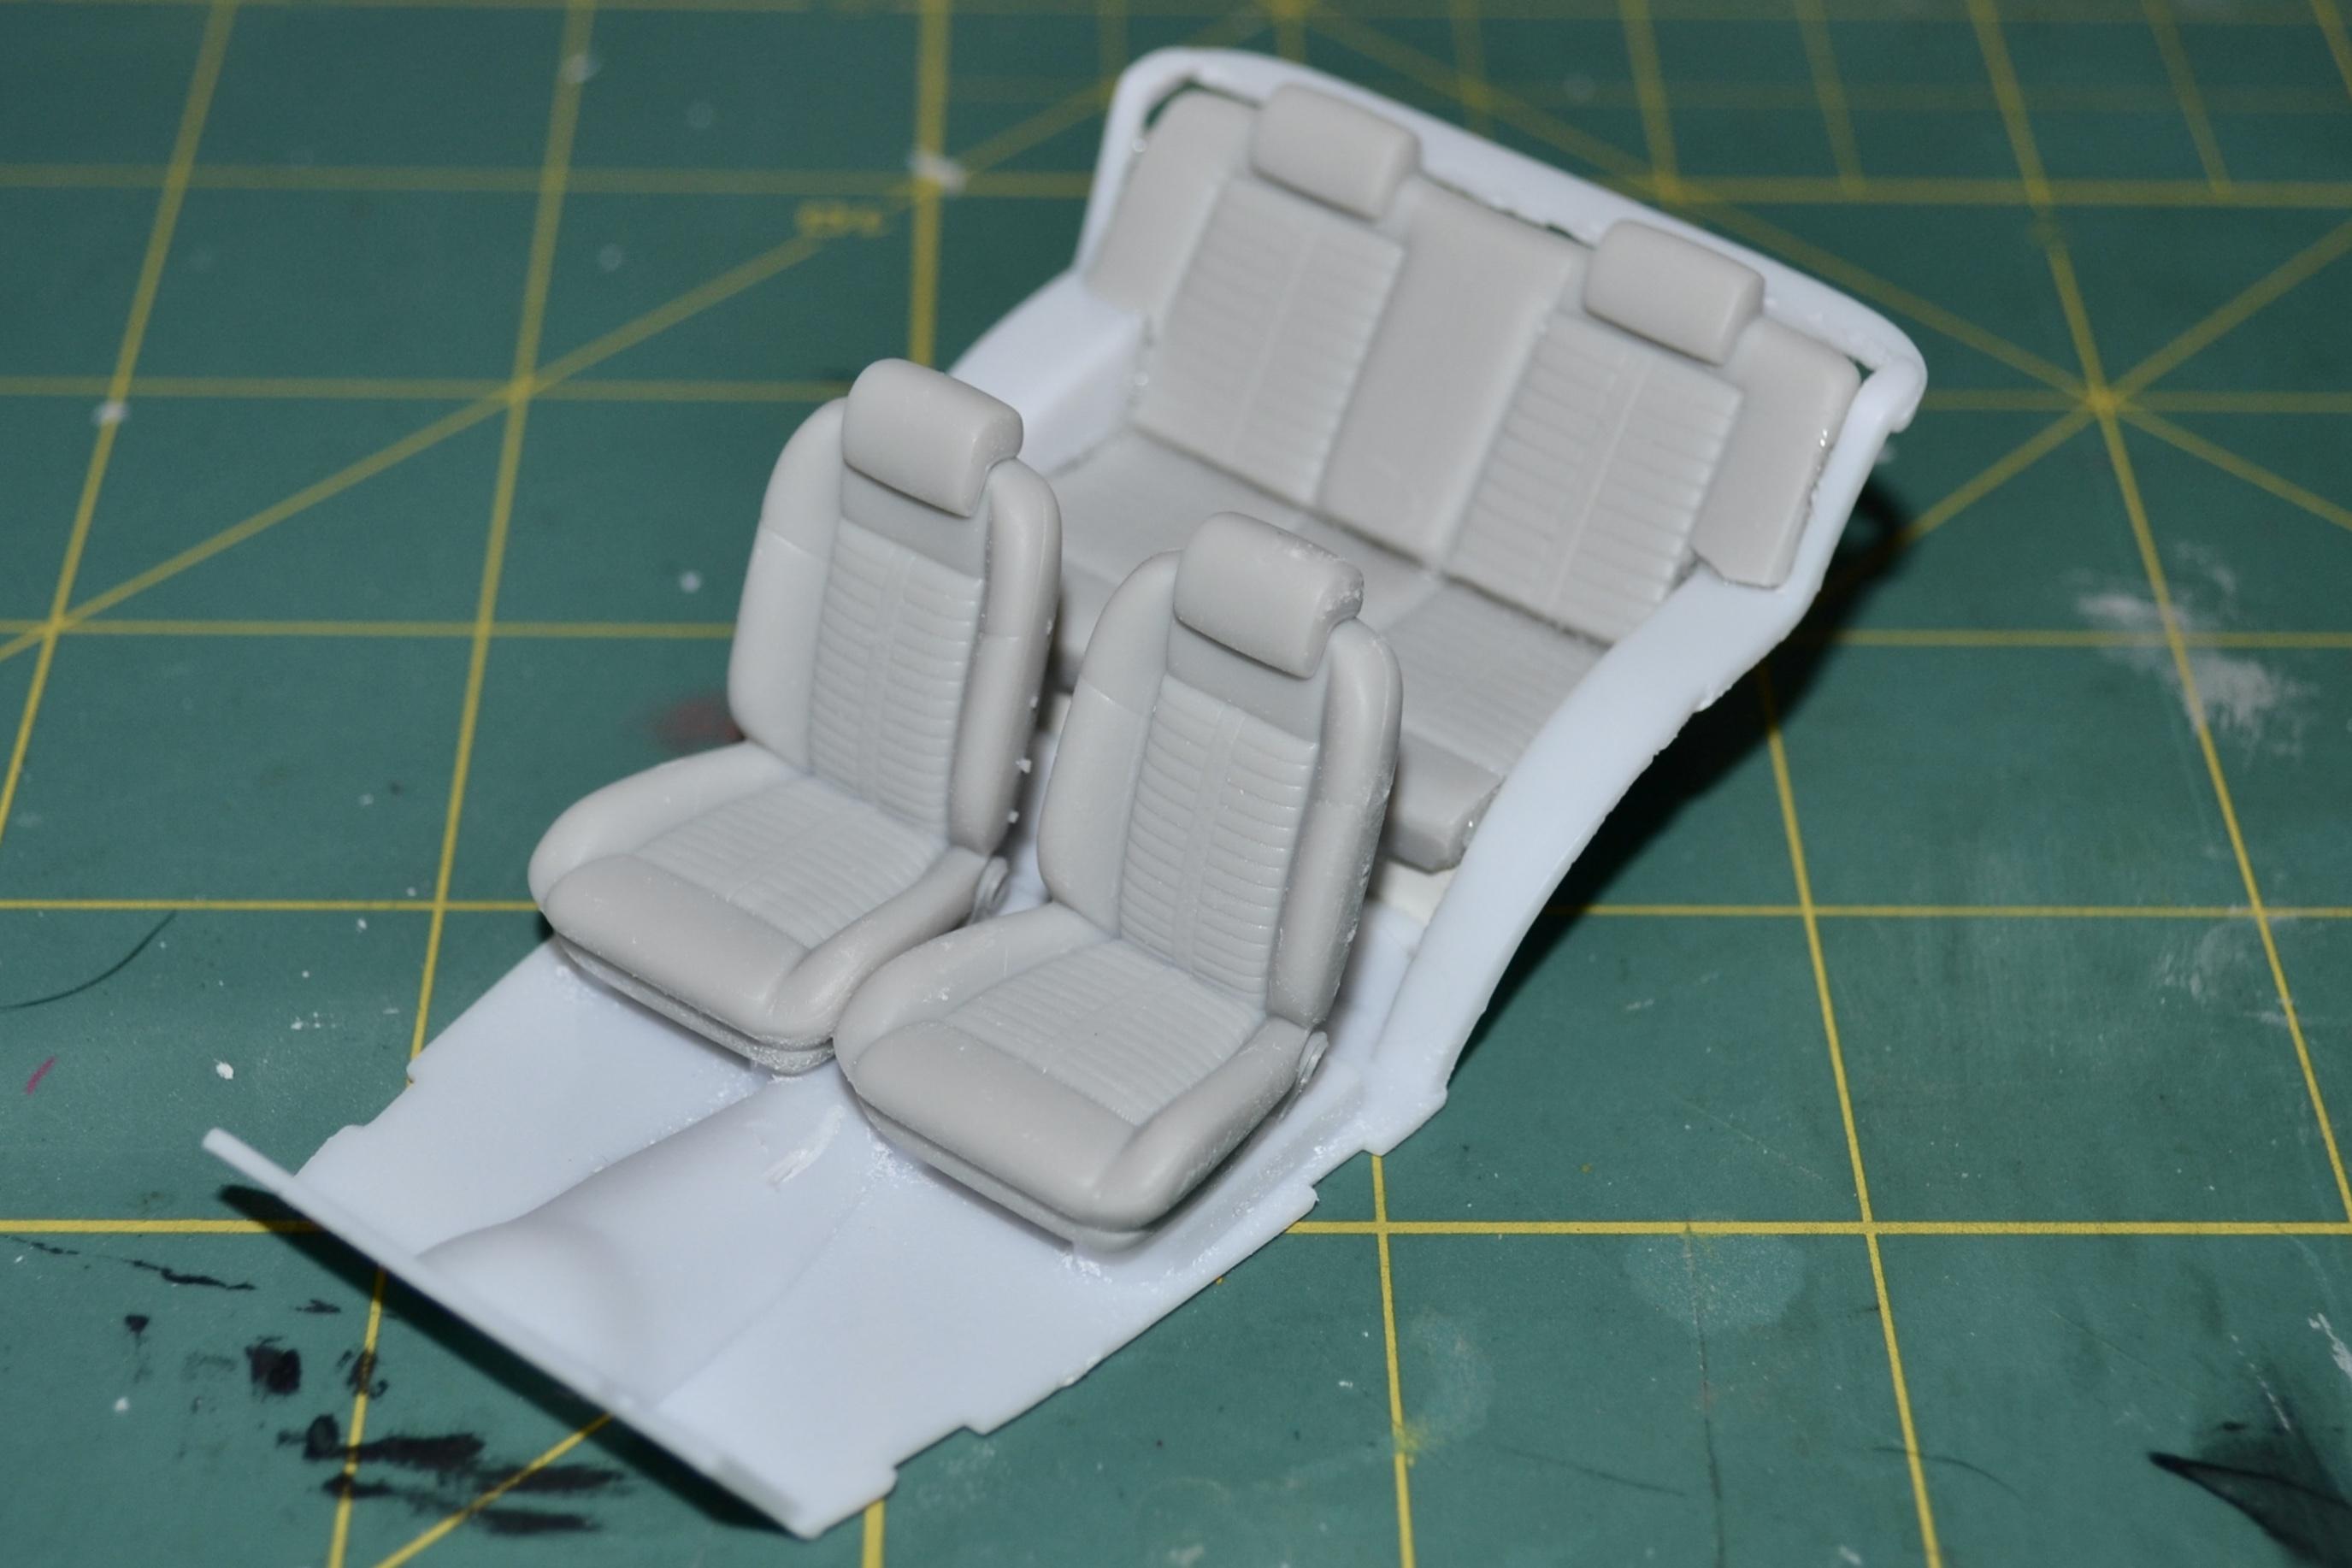
Figuring out the interior of my modern Deuce. Black Box 3D files of interior sets were rescaled and slightly modified/cut to create the seats. The rear seat of the kit was cut out and the new pieces superglued in place. The front seats were just scaled down to match the rears and to fit better in the space. It is funny how on the pictures the sizes and the angles of the rear seat look somewhat weird, but they are the exact same as the kit's pieces.
-

It's a '30-sumthin' truck thingy...
mrm replied to mrm's topic in WIP: Model Trucks: Pickups, Vans, SUVs, Light Commercial
Well, while I resolve the issue (tomorrow) I guess I can upload some pics directly. Sorry for the size. The interior was ,made from some modified pieces from the '31 Coupe kit. Templates were made for custom inserts to be added. Next, the horns of the frame were cut off together with the front cross member, leaving just a thin vertical piece of it. Then the modified cross member from a '32 5 window as grafted, resulting in a slightly longer wheelsbase. Experimenting with my first ever 3D printer, I made some through frame exhaust tips. Shrinkage on waterbased resin is ridiculous. Parts were not affected. I cut an opening in the frame rails ahead of the rear wheels to accept the exhaust flange. I am very happy with the look. The '32 grille from the Rat Roaster is definitely too tall for the '30 firewall, so the back of it was cut down and then the grille shell was filled in with styrene. More to come... Thanks for looking and stay tuned.
-
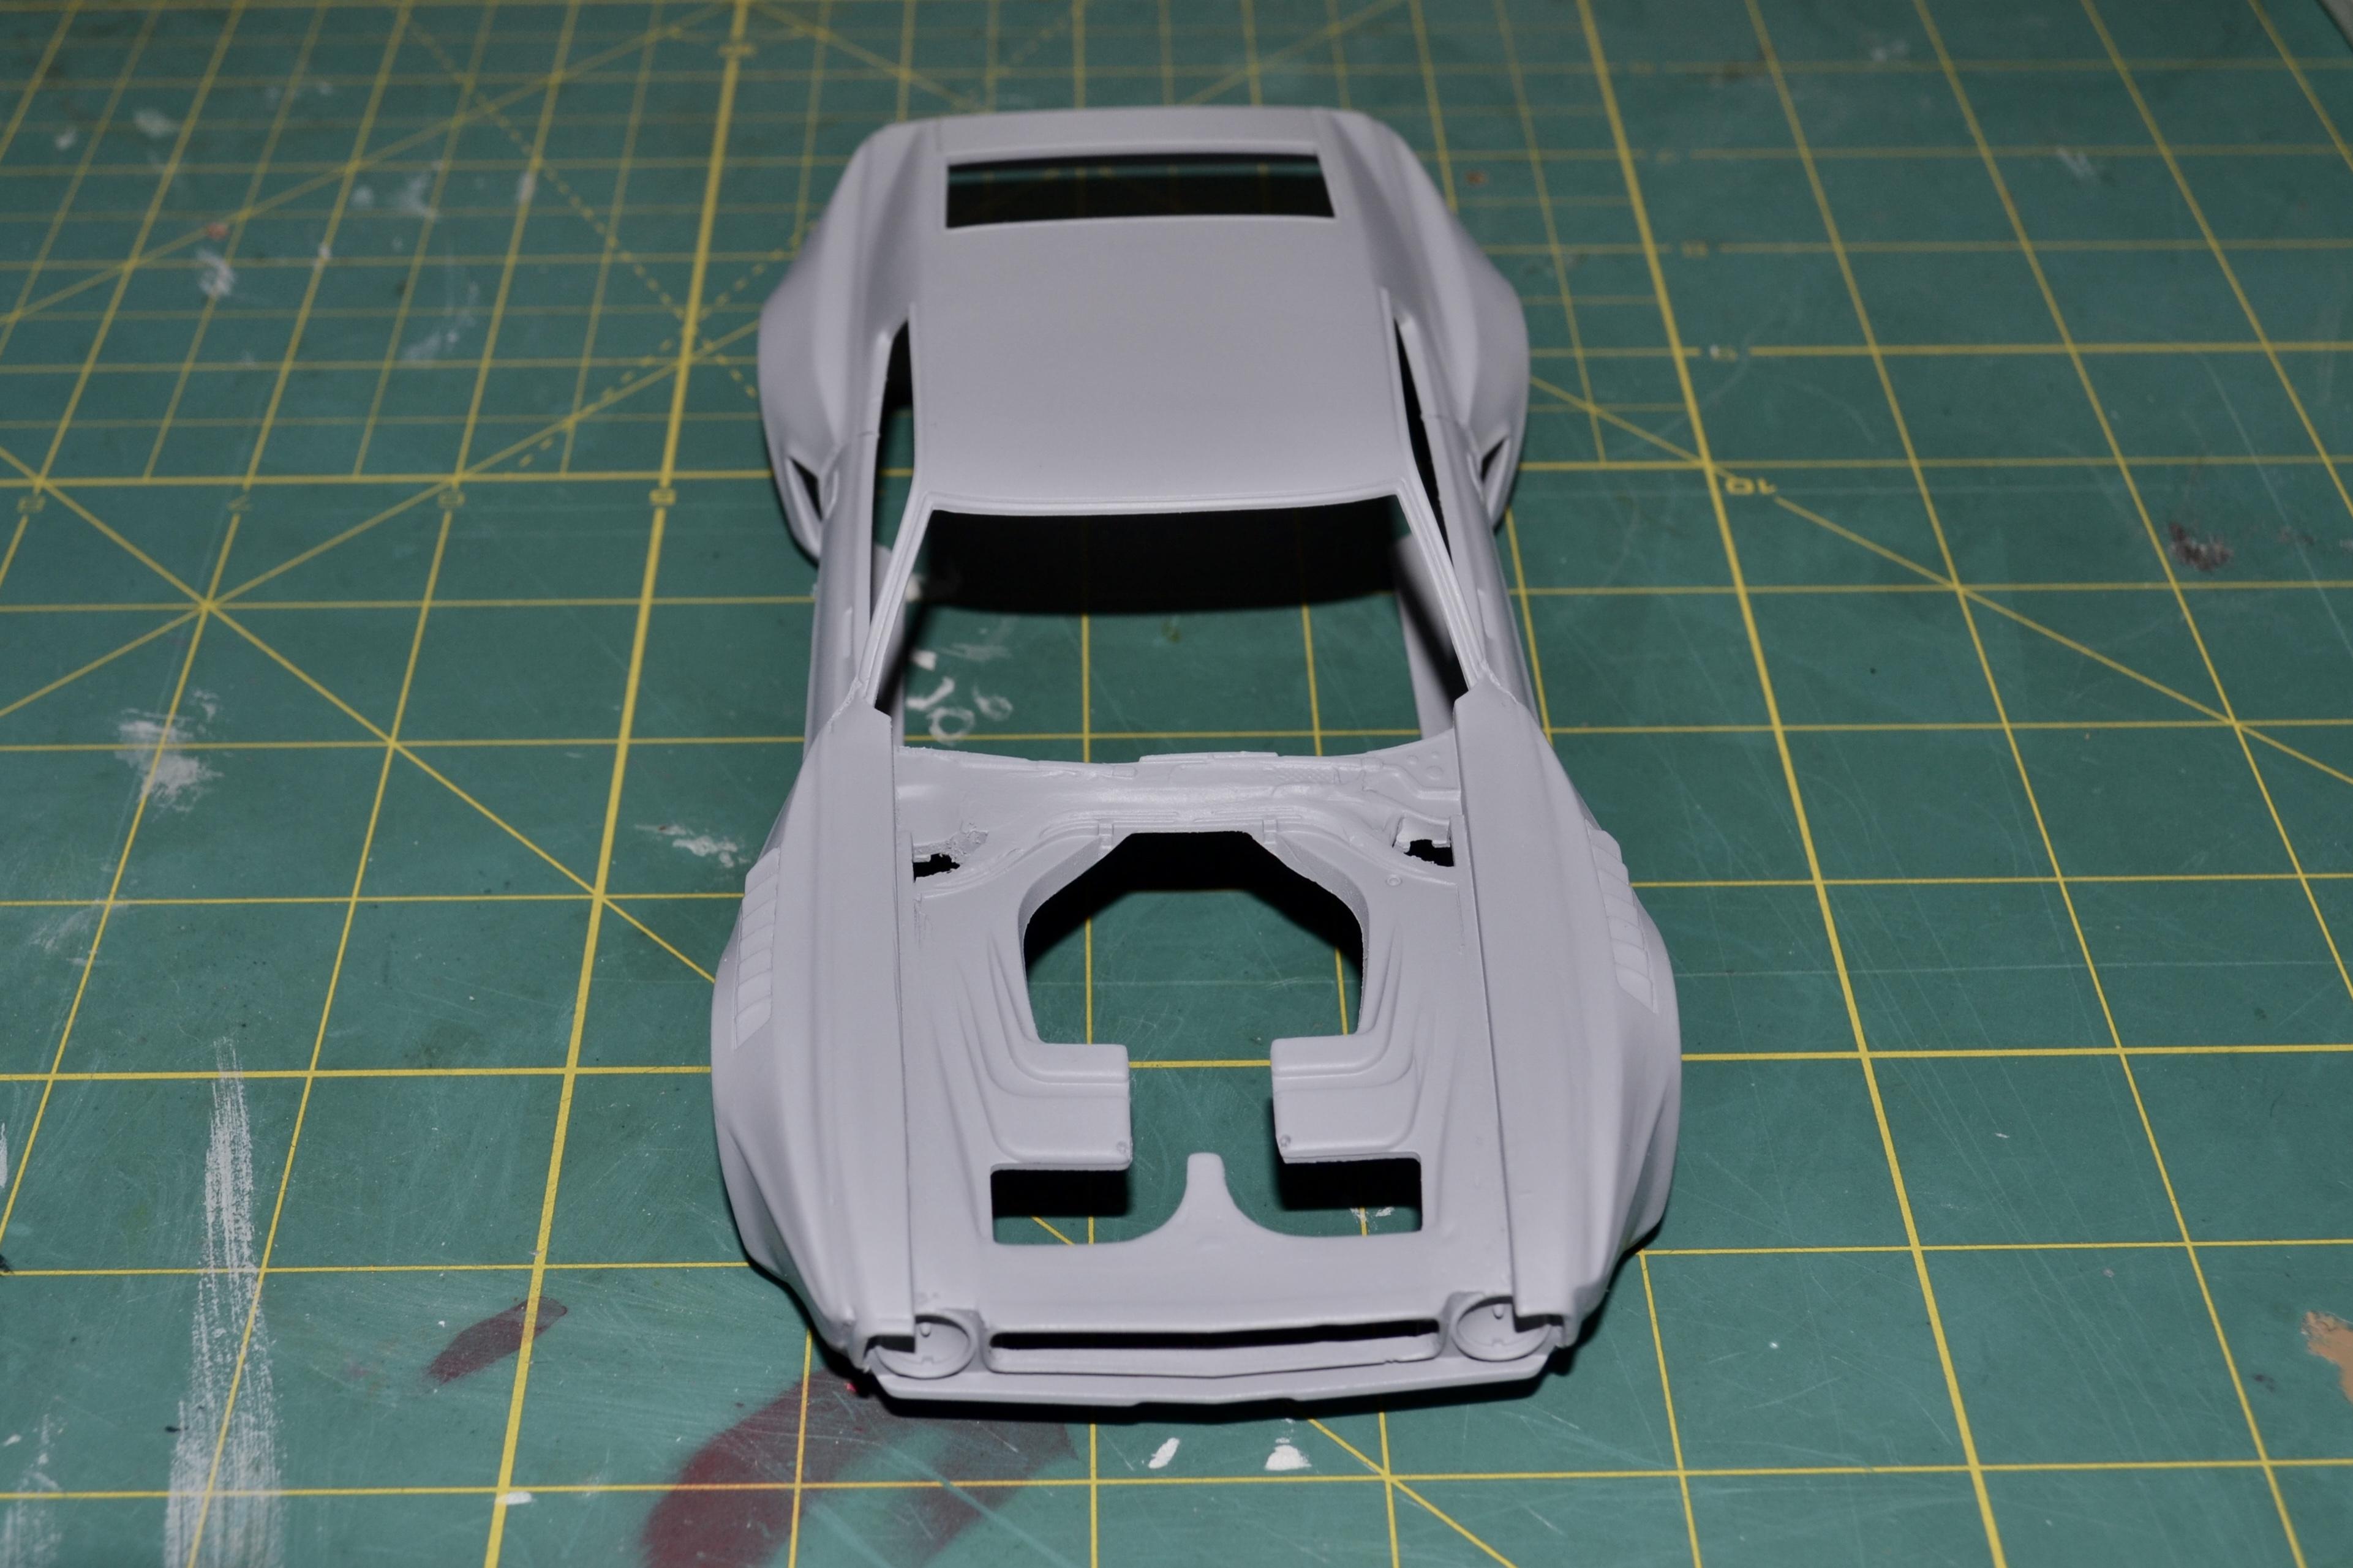
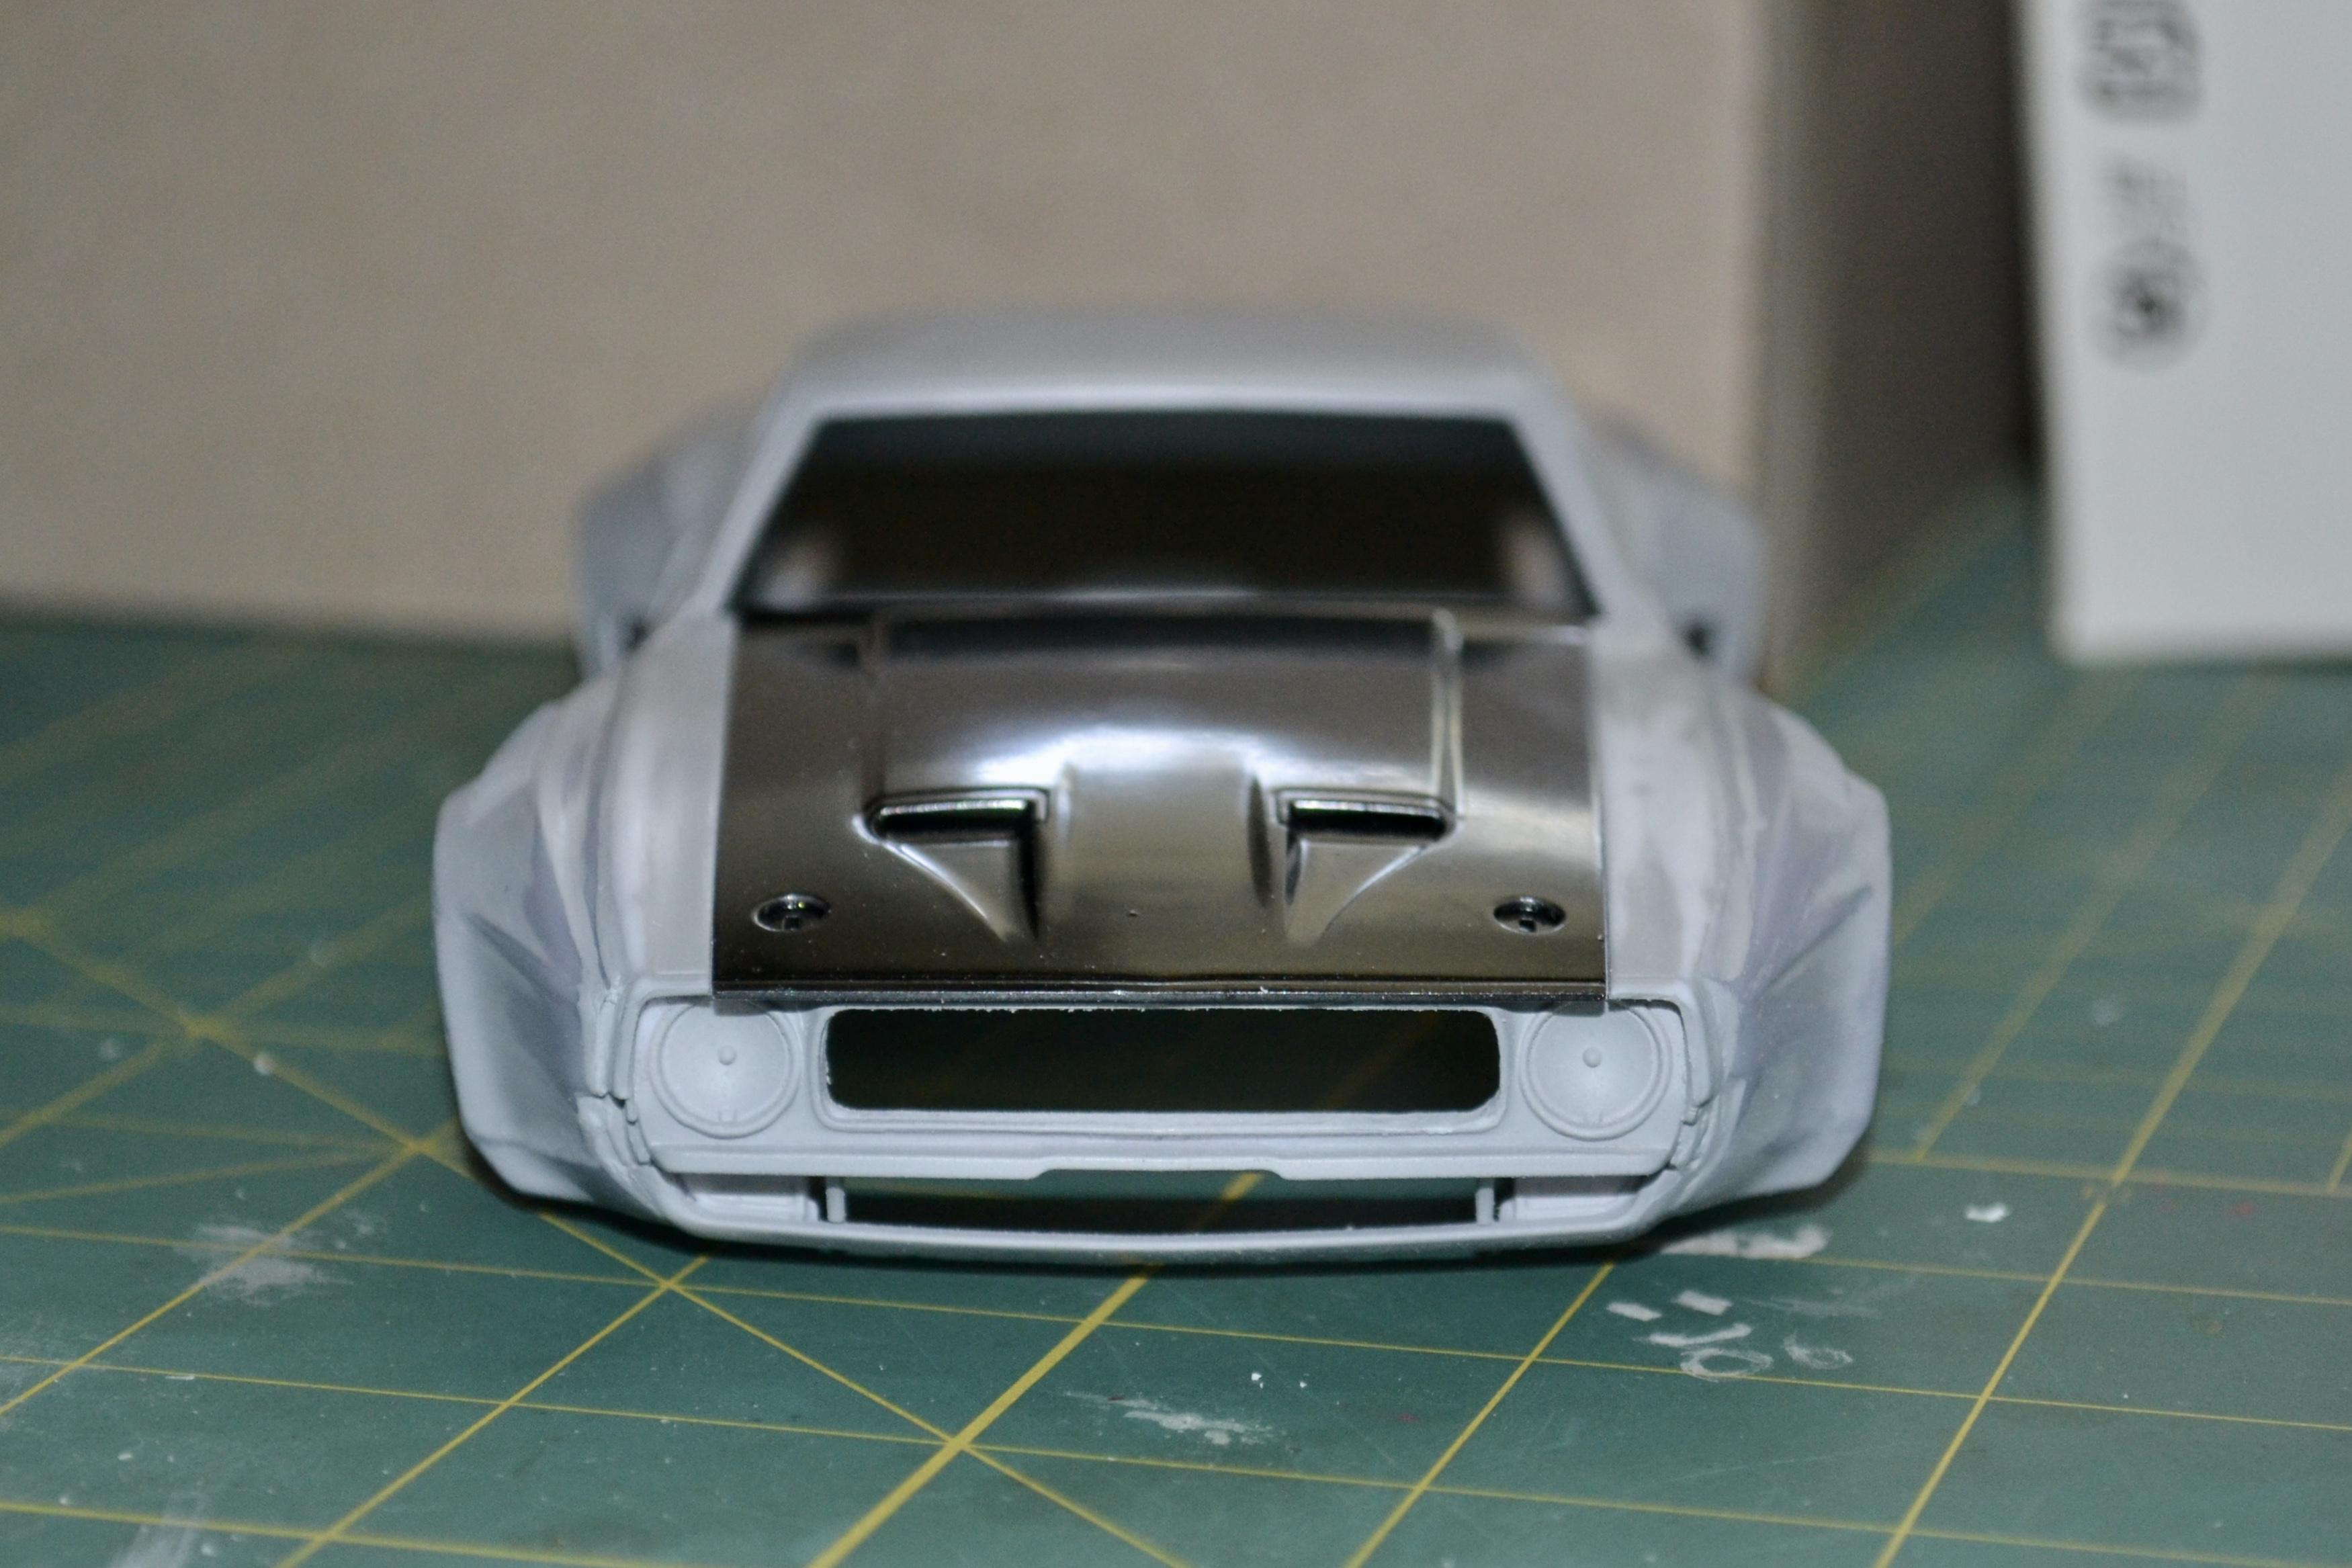
It was a lot of body work, but definitely happy with the outlandinsh widebody look. Molding in that custom engine compartment was no joke.
-
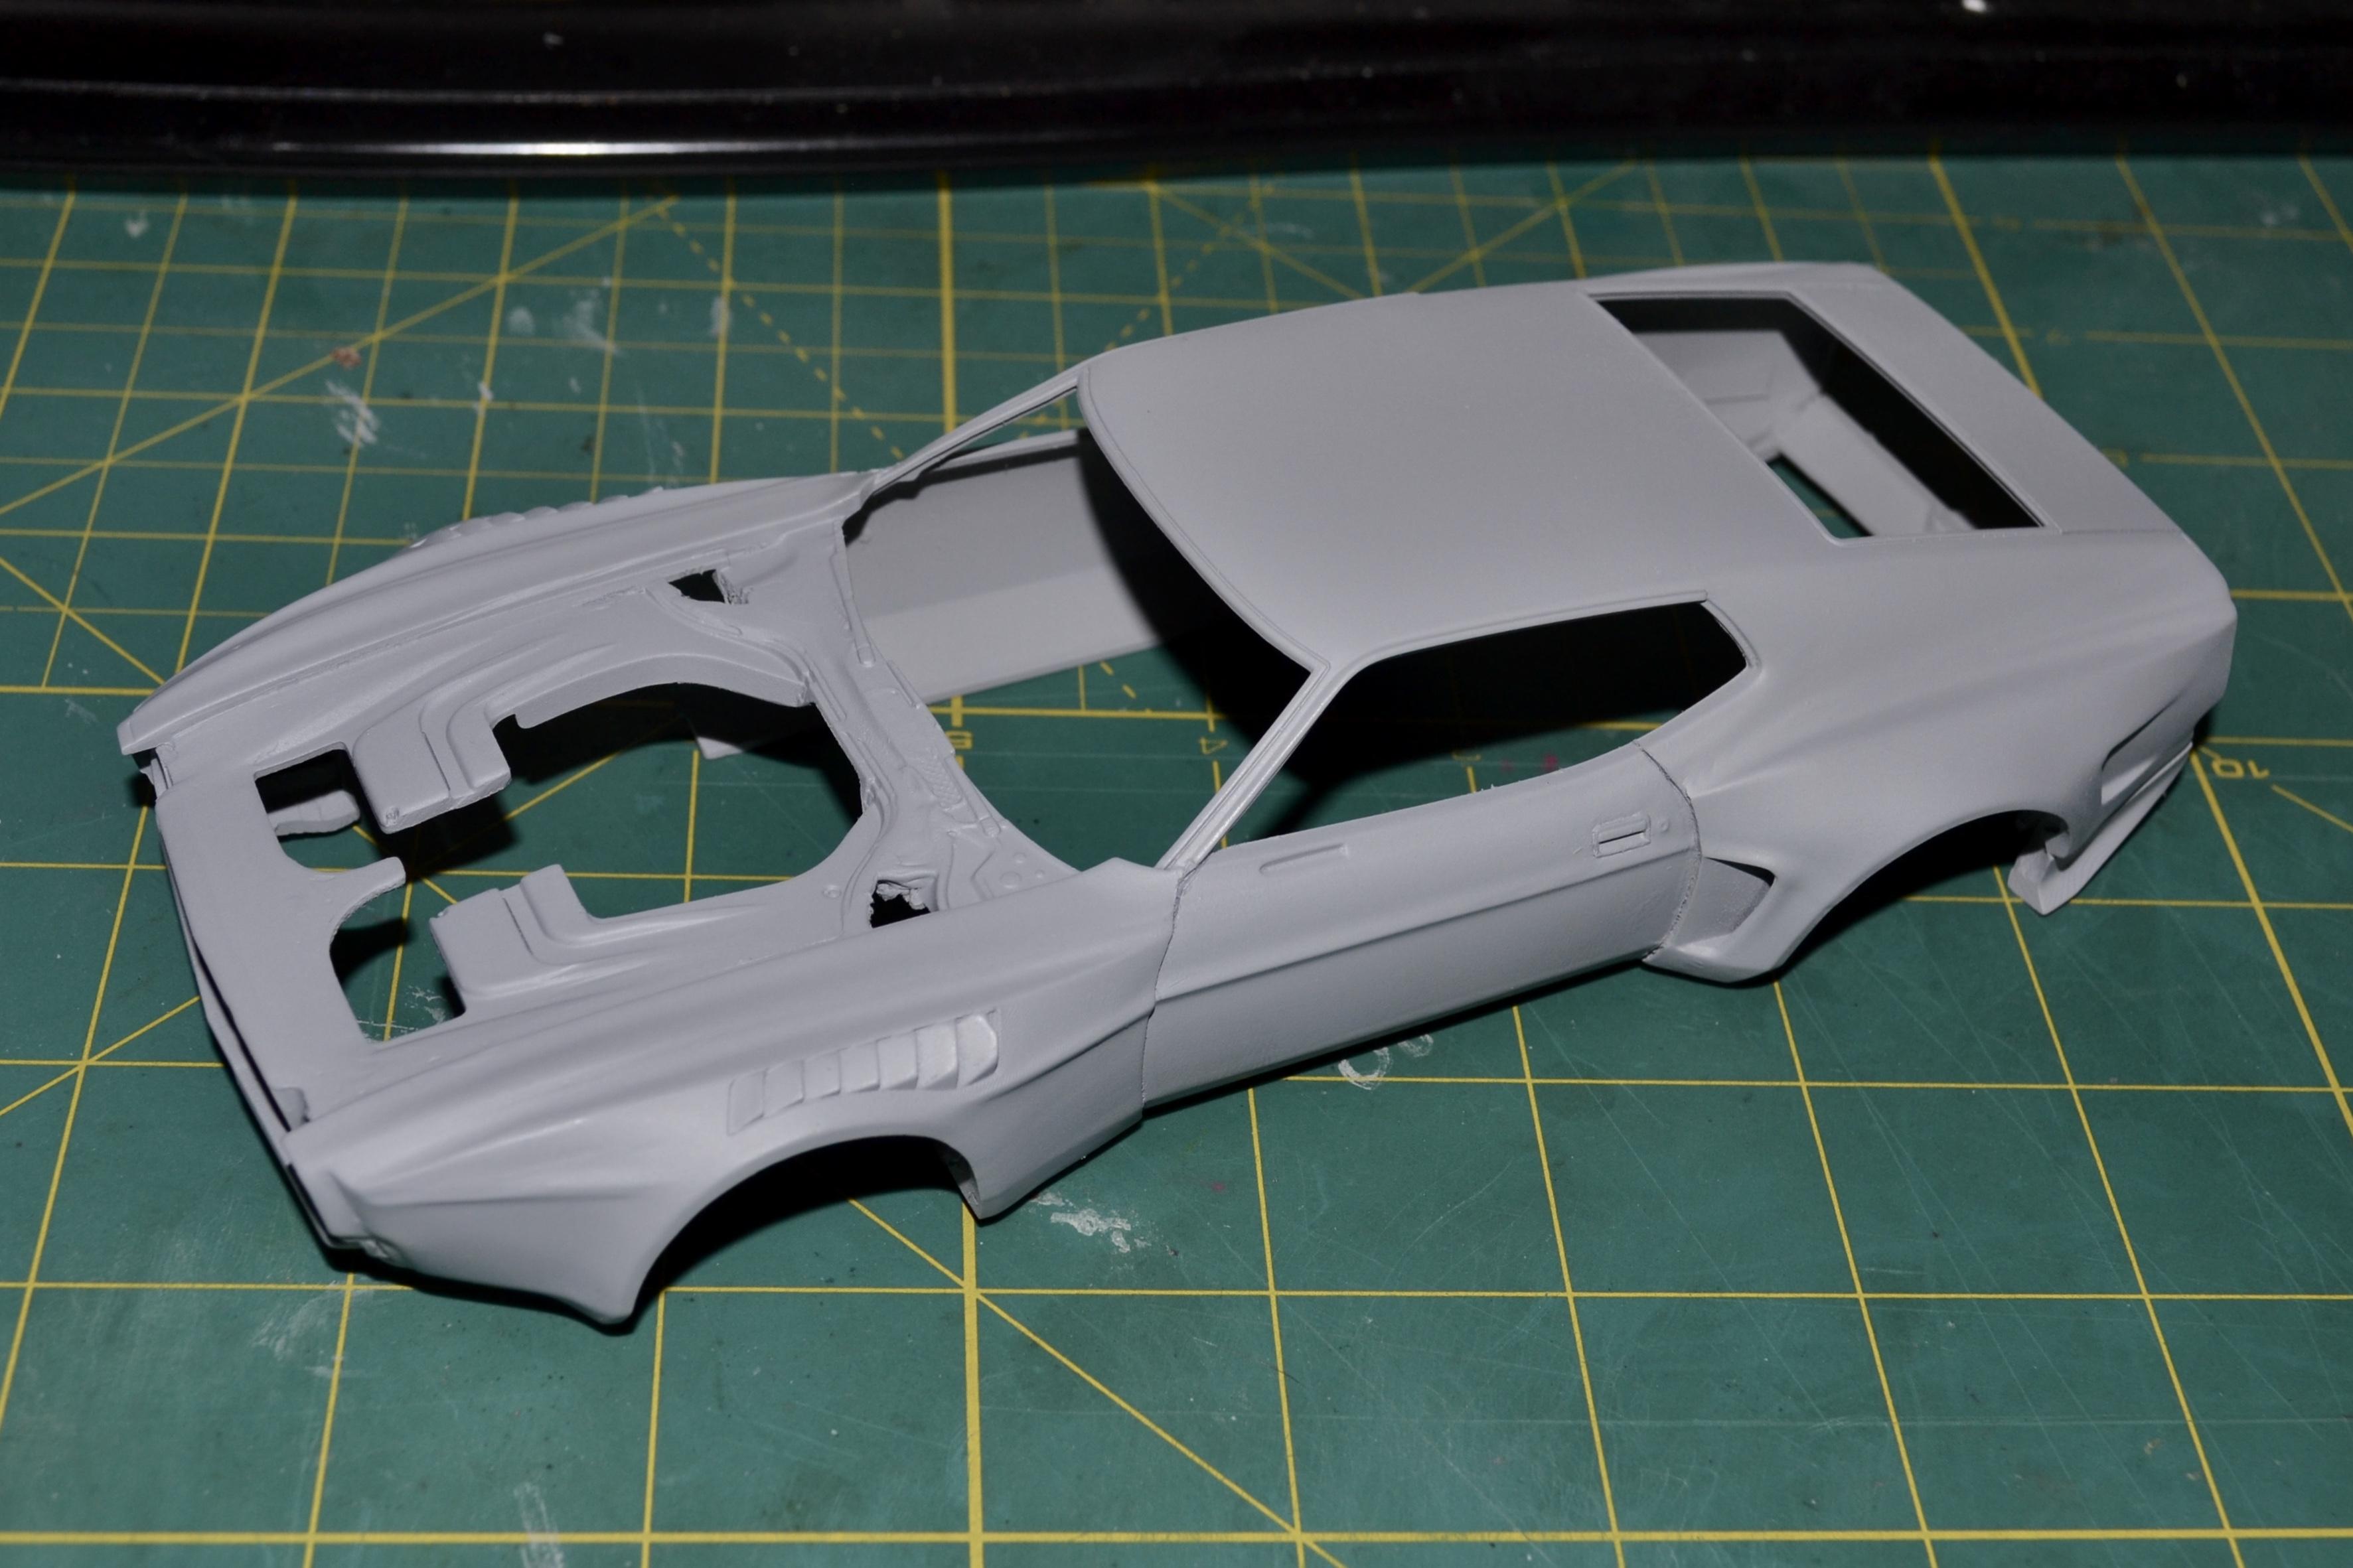
I am having some issues uploading my pictures to my usual Imageshack location, so I'll try putting some up directly. The Body.
-
It would probably go in the piles of other unused stuff in random boxes, until one day I find use for some of it. Or you can have it. Maybe you have some similar stuff that is useless to you you can trade.
-
OK, so this is attempt number two at this thread. First off, I would like to apologize to everyone for the first one. I made a political joke (and it was meant just as that - a joke) in the opening post of the thread, which apparently was against the forum rules. Honestly God, I had no idea, which is no excuse, as I am the first one to advocate that one's ignorance of the rules is no excuse for braking them. Anyway, lesson learned. I got my 30 ban served and now I know better. I'll keep it clean from anything associated with politics from now on. So, I have never ever build a model of a Mustang before in my life. Well... sort of. But I am not counting the two or three diecast models I've done on commission long time ago. For a 1/25 scale plastic kit, this is definitely the very first for me. And to be honest, I have to admit that I know Jack about Mustangs, other than they have a cult following and that their latest small block Coyotee engines make a really cool noise when equipped with the proper exhaust. Here is a little bit of a back story on this build, which happened just because "the planets aligned" as they say: I am an exotics lover and not much out there gets more exotic than a Pagani. Aoshima is the only manufacturer that makes a Pagani in 1/24. They make the Zonda S and Zonda F, which are the second and third generation of the Zonda model. There were 5 cars build of the Zonda Cinque and the only way to get that in 1/24 scale is to either scratch build 50% of the car based on the Aoshima Zonda F or to get all the necessary parts 3D printed. Since I have been thinking about getting a 3D printer for the longest time, I chose the second option. This led to me exploring the available 3D files online. A big presence in the scale is Black Box, who make a bunch of really cool stuff, some of which has been shown by some here on the forum. They also make at least three or four Mustang body kits. Add to that the raving reviews of Revell's new '71 Mustang kits and that one of the themes for this year's ACME show (which I am determined to attend) is Mustangs and You would understand what I mean by the planets aligning. This is what I am starting with. And in a rather unconventional way. I am going to show you what I a NOT going to use from the kit. Which is most of it. So, basically I am going to use just the body and this from the interior: For some reason I love the box art and I decided that my model would be in the same color combo as a nod to it. AKA Storm Trooper spec. Plain white with black. Except this is going to be a very modern, current vibe, resto-mod kind of build, so most of the black will probably end up in carbon fiber. And staying in character the car would need a new chassis, because the dinosaur '70 set up would just not cut it between the cones on a modern auto cross track as the ones seen on Good Guys events. Well, who would have thought that A Revell Of Germany 1/24 scale Ferrari California would have the exact same wheel base as a 1/25 scale '70 Mustang? This gives an instant solution for a modern independent suspension on all four corners. But it is a lot wider, some would say! Yes, it is. But not if you put on the body a freshly 3D printed Black Box wide body kit. Stay tuned and thanks for looking.
-
It's a '30-sumthin' truck thingy...
mrm replied to mrm's topic in WIP: Model Trucks: Pickups, Vans, SUVs, Light Commercial
I have made quite a bit of progress on this one. However I am currently having some issues with uploading pictures. As soon as I fix that problem I will have plenty to show. -
You should try it. It looks scary, or should I say- intimidating. But in reality it is not that big of a deal. Plan things well, take your time and you will be surprised of the result. You can do it.
-
That reissued '32 Roadster is just a cornucopia of goodies. The firewall, the wheels/tires, the Duval windshield. The extra interior, the supercharged Chevy, the side exhaust... And let's not forget the headlight buckets molded already mounted to the chock towers which would would save anyone building a fenderless Deuce hours of inappropriate language. The reissued sedan gives us in a similar fashion the original roadster's wheels/tires with a nice hopped up flathead and that sexy Tudor body. I just hope Revell of Germany adds more interesting options if they reissue their other Deuces. Replacing the Dan Fink's woody body on the Speed Wagon with a chopped Vicky bod and finally adding a quick change rear with some cool new motor (which would basically constitute a whole new kit) would be absolutely amazing.
-
So, that beautiful stock firewall that Drag City casts is just a copy of the firewall that actually comes in the '32 Roadster kit that your frame came from. So if you have that engine and frame and the firewall painted the same color (from what I see in the pictures) chances are it is the kit's firewall. The reason I am saying this is because I had few of those firewalls from drag city and I thought that one already glued on a body and primed was theirs and I didn't want to ruin it just like you. And it turned out I had all the resin firewalls still in their package while the one on the body was the original kit part. Drag city cast those before Revell reissued the Roadster.
-
After a month in the forum's jail, I am happy to say I am impressed with the turnout of the builds so far. I have two (or maybe three long-roof Deuces going on at the same time. Lately I have been entertaining the idea of building models somewhat connected to the box art. Plus I always wanted to build an orange fenderless Deuce. So that is one. A resin casting of a chopped fourdoor from Drag City is also playing a role, while the body I chopped, sanded the roof smooth and added the ribs to is getting fenders and all modern goodies like independent suspension forth and aft and modern drivetrain. I did buy myself a 3D printer and I've been experimenting with things on it, which kinda took a lot of my free time away from actually building stuff. But I realized that and put the resin away, so I can get back to finishing the models I started. Again, some really cool builds going on on here. Keep them coming !
-
Sounds like a solid plan. Can’t wait to see it.
-
Really cool project. I think it turned out just perfect. If you don't mind me asking, what are the chances for you printing one more bystander for me? I am working on a somewhat secret project (I will post the progress after it is done) and I need a storm trooper for it. Actually I would prefer one of the hot sexy female storm troopers, but pretty much any trooper would do.
-
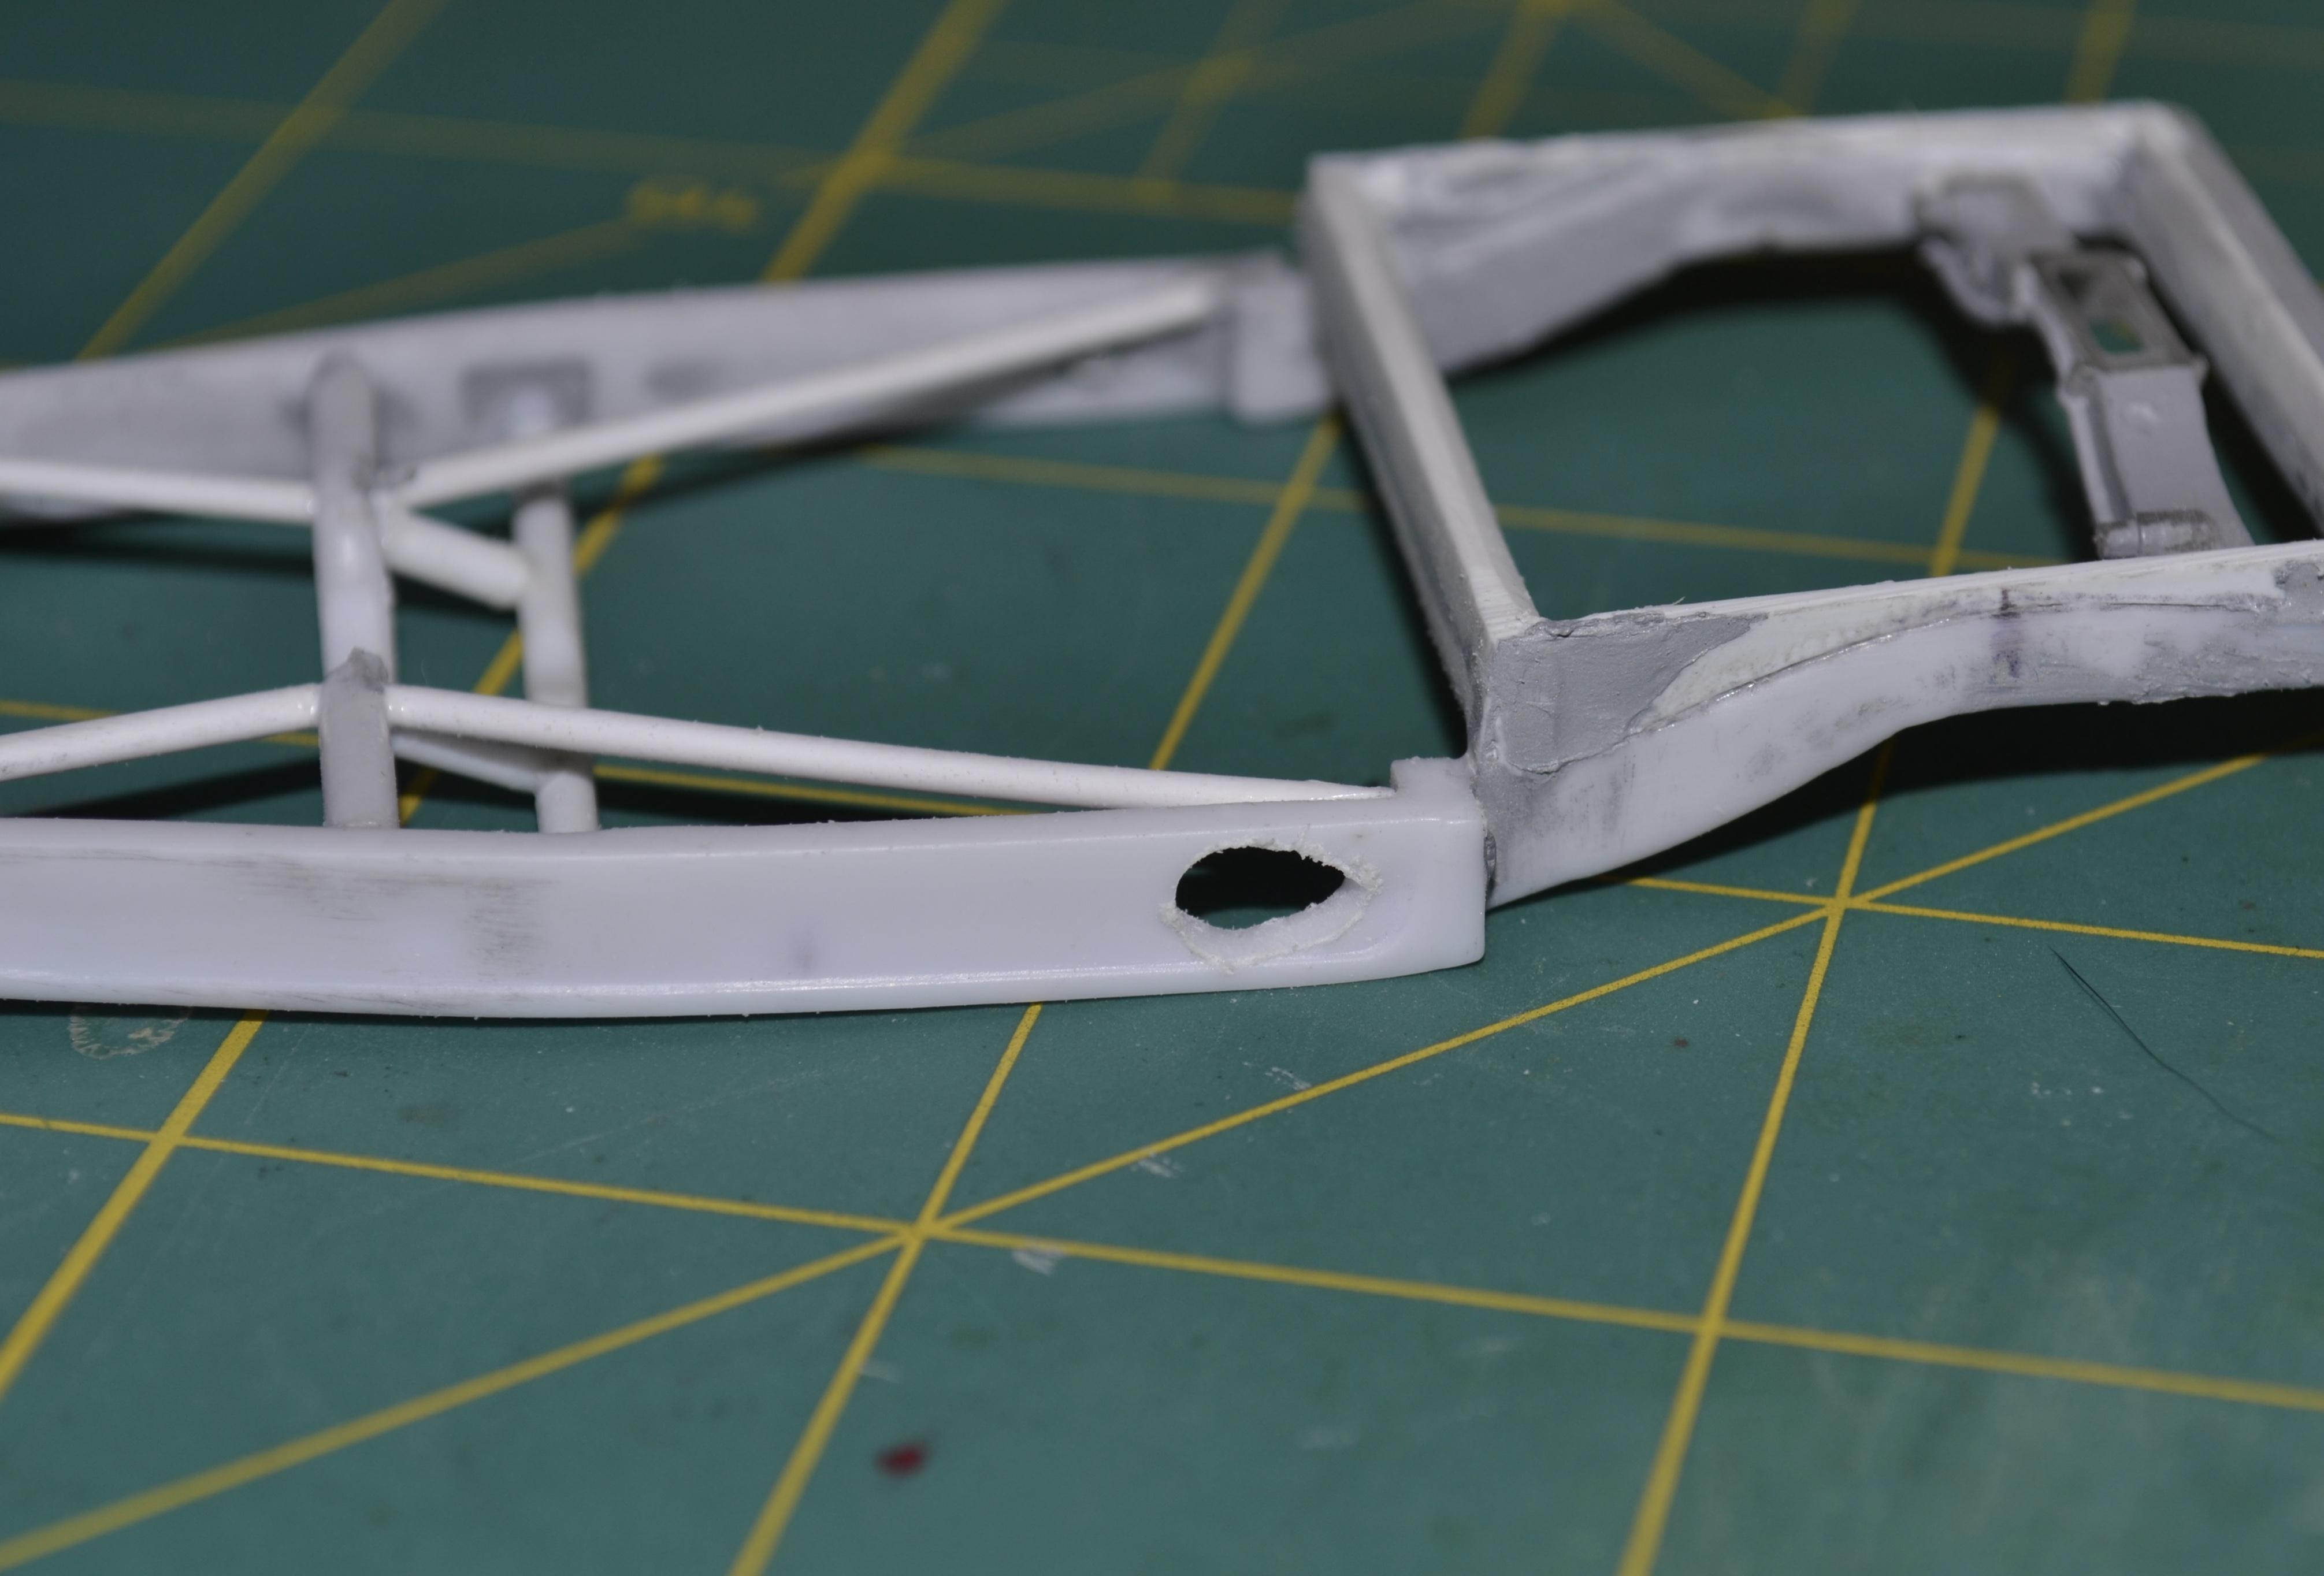
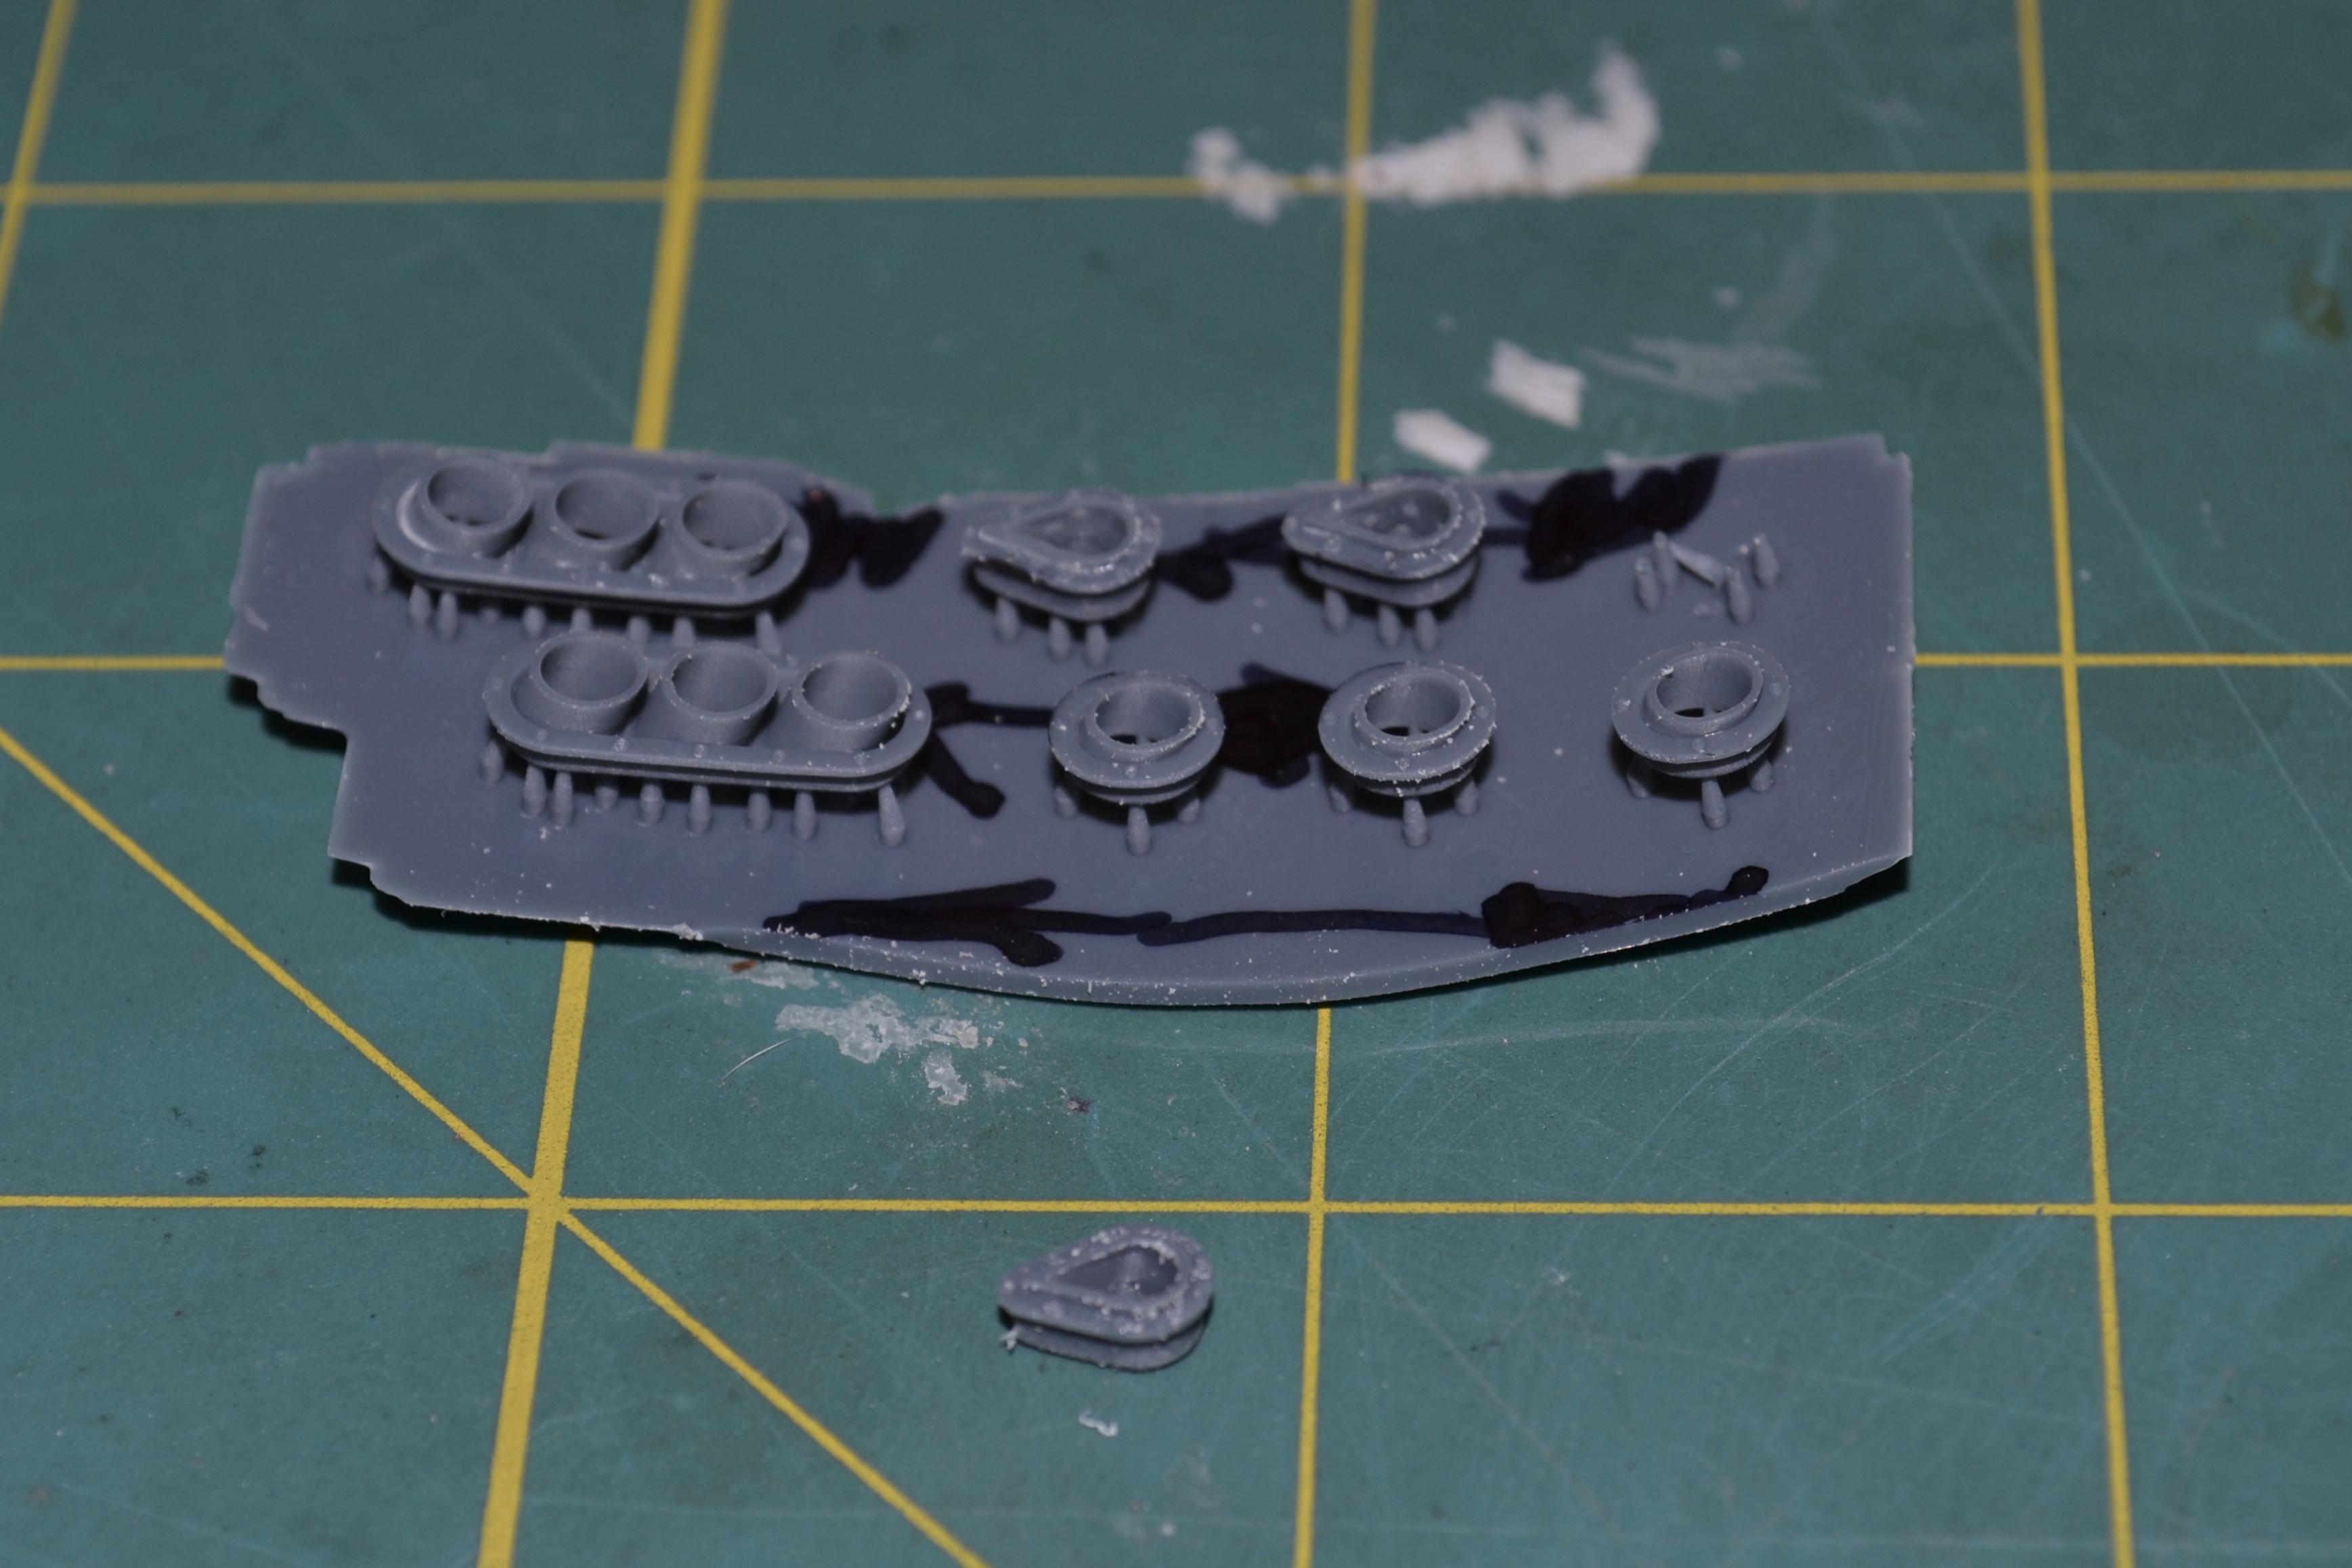
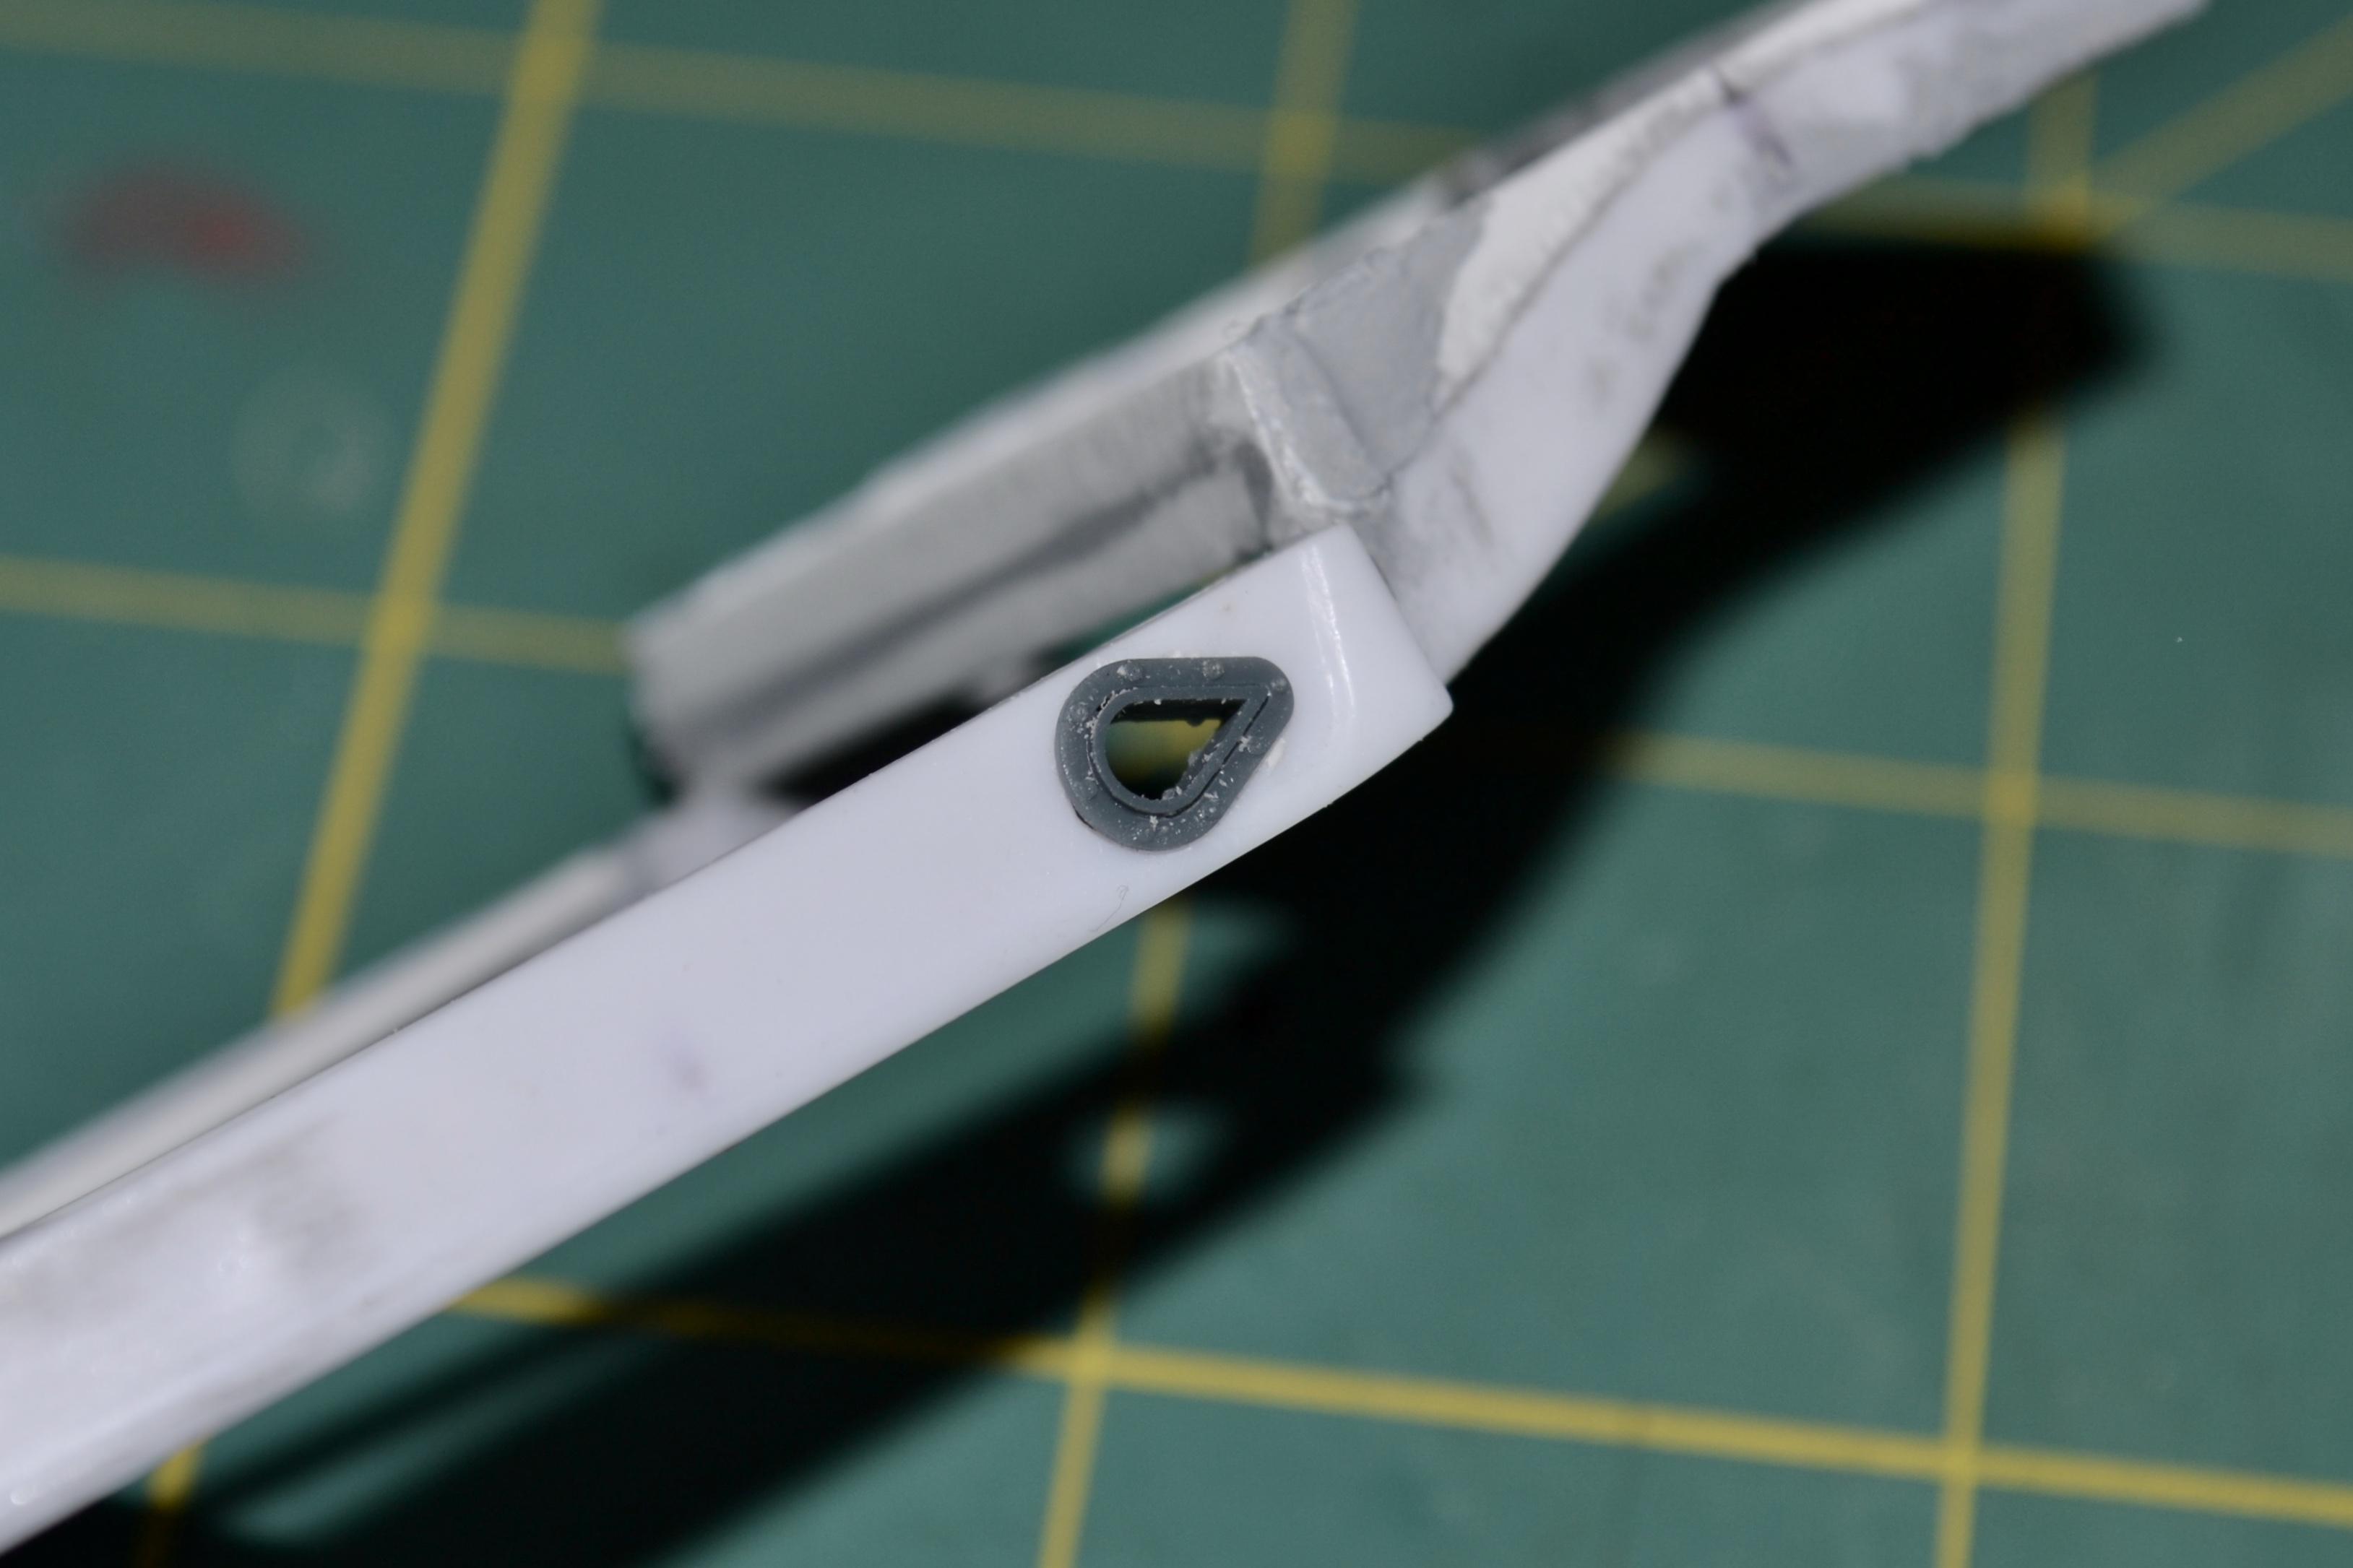
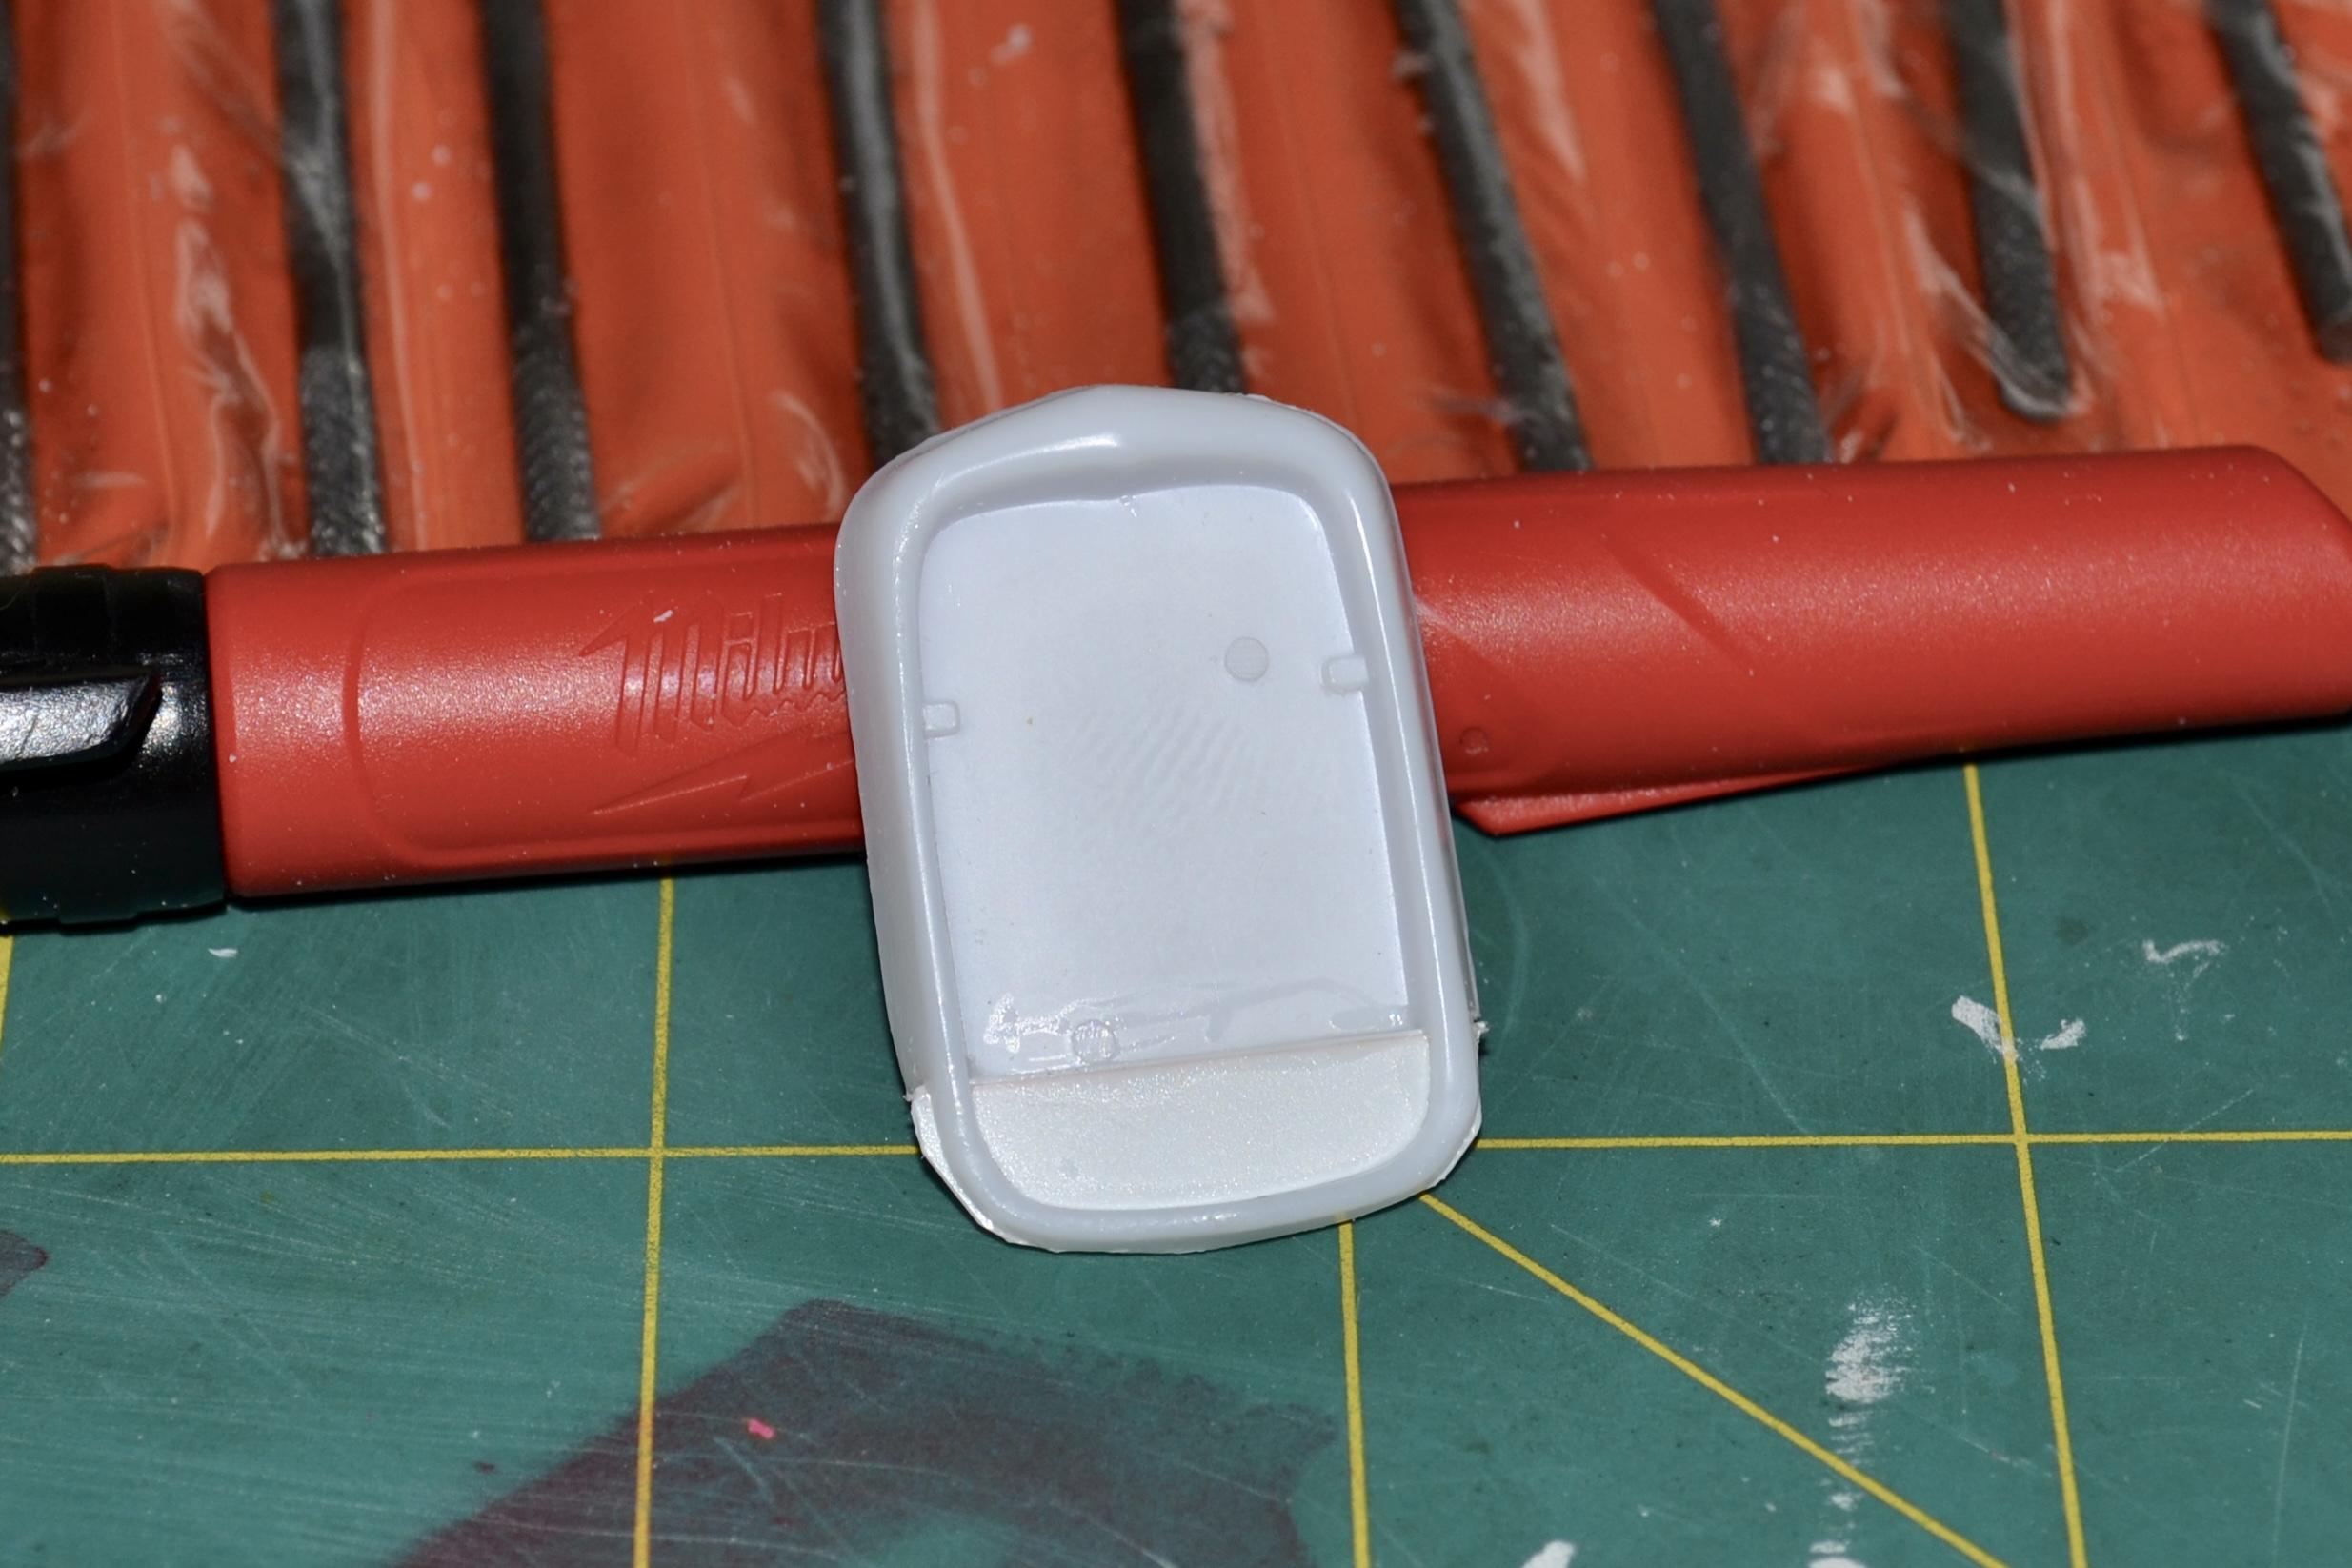
First big news. I managed to figure out the front hinge. It turns out that the hinge on the real car is the simplest thing ever and it is just cleverly hidden. So I grabbed some of the last super thin tubing I had left, with some nickel silver wire in it (springy stuff) and made the simplest of pivots. I made a groove right at the front edge of the center pillar of the hood and glued my tiny hinge in it. Next I ground off the oval space right under where the pillar stays and drilled two corresponding holes for my hinge. As long as the hinge itself is not all the way down, but has about 0.5mm space (it might be even less) the front flips over just fine. I got the photo from someone who actually worked on the cars. He was saying that the front clam shell is super light, because it is all just carbon. He is saying that if that shell was any heavier, like even made out of aluminum, there is no way the two tiny hinges on the real thing would be able to handle it. Something new I learned is that cool center of the front lip is not just a cool design that came from Horacio Pagani's genius. It is actually a separate piece. It is a functional cover that hides the hinges as it creates like a curtain around the necessary gap on the bottom, but it is also removable when the tow hook behind it needs to be used. Remember that front cover that I cut because somehow I thought it would be a good idea? Well, that turned out to be a can of worms that has so far set me back a day and probably few more coming. Because when I cut it out to make it removable, my idea was to show off the cool inboard shocks and their remote reservoirs. The problem is there is absolutely nothing else on the model. Unlike their Huayra, which had a very detailed front suspension and frame, this Zonda doesn't have anything but empty space. So I decided that it can't be that much in there. It's just a frame. "Famous last words"... The worst thing is that there are absolutely no reference pictures of what's behind that cover. let me tell you, it took me days and countless hours and contacts, until I found some info. So, the amount of BLAH_BLAH_BLAH_BLAH behind there is no joke and it would have to be all scratch build. So I rolled my sleeves and started. First the frame is made from some tubes that are oval on top, but flat on the bottom. So those I had to actually make from square styrene rod, which I filed and sanded two of the edges on just to get the stock I needed. And then I started building the front subframe assembly tube by tube like the real thing. I had to make a central shock tower, a support bracket for the insane brake system, and build the support legs under the upper A-arms. Before I went too far down this rabbit hole, I checked to see if anything is visible once the radiator is on. From the front it hides most of the stuff, but when viewed from top mostly everything is visible. So I had carry on. The ABS valve was scratch build from a variety of styrene stock and rods that were filed into shape. The whole piece started on the tip of thinned sown flat rod and was cut off, once all the other shapes on it were made. Then it went on its bracket. It still needs to be drilled for the brake lines plus the in and out lines. On top of it, on its own bracket sits another distribution valve for the power brakes. This piece was made from different size square rod pieces, which were connected with brass wire. The finished piece was drilled three times on each side, as it will have six braided lines coming out of it on each side. This is what it looks like in its place. Next I am doing the brake and clutch pedal cylinders in their bracket. Then I'll have to make the master cylinder, which actually seats on the other side of the car and it is connected by some hoses. Then there is freon tank for the AC, which is attached to the cross member next to the ABS and some fluids bottles on the other side. Then paint everything. Its coming up... Thanks for looking and stay tuned...
-
They are still available on Amazon for $26 and second day free delivery through Prime. That’s a price you can’t beat. My not so local hobby shop has them for $39
-
Bring it on!
-
Looking really good and I actually quite like the blue. It’s a very rich color and this car wears it very well. And please don’t get discouraged from some model shows. Take motivation instead of frustration from it. I still remember my first few shows and chuckle about it. My very first one I will never forget. It was in 1996 in the Chicago area. I built a ‘32 roadster from the old Monogram kit. It was fenderless with some huge funny car rears and painted with Boyd’s Chazoom Teal from a spray can. I totally outdid myself with it and very proud. I entered it in some suburban hobby shop contest where it won first place. Well, little I knew about contests back then, basically at the shop I entered there was not much of a showing. So my win qualified my model to be entered in a big show that was held together with the World of Wheels 1:1 car show in the McCormick Center. I went there with my chest pumped up bringing a “winner”. Boy, was I in for a rude awakening! Hahaha.? I was pretty much ashamed of my model next to the shiny gems on the tables. It looked like it couldn’t place even in the junior category. But I looked at the other models, met some cool people and asked a lot of questions. And got really motivated. I learned about some well stocked hobby shops and aftermarket parts and this miracle, called photo etched parts. LOL. ? So, when the Revell issued the ‘32 3 window kit, I immediately got one and right away purchased a photo etched set for it from MCG and went to work full of enthusiasm. I opened the driver door (glued open, no hinges), wired the engine and put on my very first photo-etched grille. Oh, it was amazing. A true champion! I mean, that’s how you win, right? With cutting things open and ising lots of aftermarket… it looked like million bucks! Until I entered it in a serious contest and heard people laughing, how some noob wasted all these parts to come up with a turd ?. I was humiliated, hurt, mad, sad…you name it. But I went all angry to look at my model next to the other hot rods on the table. And I started seeing my super sloppy superglue residue all over my grille next to the shiny clean one on the model next to it. I saw perfect even flocking next to my bumpy “carpet” with gloss shining through it. I saw where you could see the injection pin marks and even the manufacturer copyright print under the frame on my model and how none of those things were present on the other models. And I thought to myself - well, these guys have a point. I need to bring my basics up to par and hone my skills. So I turned all the negative feelings into motivational anger”. ? And little by little brought my game up. Kept asking questions and kept trying new techniques. Met some great people along the way and learned a lot more that just how to build models. So, don’t give up. Don’t worry about colors being perfect and don’t be afraid to make as many mistakes as it takes to get better. Before you know it, you’ll find yourself at a show answering questions and helping someone who just started. Live long, build’em all!
-
Great! Can’t wait to see it. So, basically, you are building pretty much exactly what I’m building. So a true build-off. I love it!
-
I love the color. It suits the model very well. I think the gold pinstripes were a big W too. About that windshield frame… Be very careful! This particular kit comes often with warped parts, mainly due to the amount of them in the box. I had to deal with few warped frames in them. Whatever plastic they make them from our days does not react well to hot water. I tried to fix a frame this way and the hot water distorted it beyond any fixing. Like one of the rails shrunk, compared to the other. Never seen any thing like that. So, just heads up. If you feel adventurous with that motor in the kit, the six carb intake can be cut down and used to make the six carbs sit on top of the blower, which looks really cool. Your build looks really cool so far.
-
The 5-window coming your way has a Hemi in it that will fit the Sedan frame with no mods. If you want to try some really cool parts, our own Maple Leaf Modelworks has some killer accessories for that motor on Shapeways. I’m not associated with him, but can highly recommend his stuff.
-
It's a '30-sumthin' truck thingy...
mrm replied to mrm's topic in WIP: Model Trucks: Pickups, Vans, SUVs, Light Commercial
"Inspiration for the truck came directly from a painting called "Emerald Tide" by lowbrow fine artist Keith Weesner. Weesner's stylistic automotive-themed creations (often accompanied by a voluptuous female) are about as close to what hard-core hot rodders dream about, and Jimmy's interpretation of Weesner's artwork could only be termed "spot-on." " With my build I am going for a completely different vibe. I want it "modern", in terms as that's what a top shop would build our days in a very traditional style. -
Wow, that's a lot of body work.
-
I hope you do.
-
The progress so far... I am most happy (and releaved) that the rear clam shell was finally sorted out. The solution was quite simple, but still, not as simple as the hinges on the real thing. I have quite few really, really nice and well done high-end diecast Paganis in 1/18. After studying their hinges for the rear hood and researching the real thing, I have achieved probably the best solution. Making prototypically correct hinges for this model is pretty much restricted to impossible due to scale. Grooves were cut into the backing of the tail light panel and brass wire was glued. This gnarly looking crude pivot will be completely hidden later on, when I fabricate the covers for these panels, which are non existent on the kit. Next, some new panels were formed from styrene behind the rear fenders on the hood and little slots were cut out. Now the hood fits perfect and operates flowlessly in the same fashion, if not better than on my $500 diecast models and almost identically as the 1:1. The main reason for choosing this way of hinging it was the ease of removal and reinstalling it without being a major PITA. The exhaust system on this car is really cool in 1:1 ending with a now iconic four pipe cluster in a circle. The kit's parts are total pain and they have very vague mounting tabs making the balancing act of aligning everything properly an extremely testing matter. I don't like the chrome finish on the muffler and I would like to paint the pipes with the cats together with the muffler. The only way to do this was to drill all corresponding parts and to insert brass rod in them so they could be mounted and aligned without glue. Then the pipes were glued to the muffler part. Now I can put on and take off the exhaust as many times as I want and it is always perfectly aligned. At the front there is a part which integrates into one some of the carbon chassis elements and the cover panel that goes over the front suspension. The model has some pretty cool details under there which are completely lost once everything is together. I thought it would be cool to make that panel removable, just like on the real car. So I cut is apart from the structural parts on each side. Now it could be removed to show the front suspension and closed again. This will open a big can of worms, because now I would have to scratch build most of what resides behind that panel. The hardest part would be to actually find good pictures of what everything looks like. For now some of the chassis components received some paint. And so did some of the interior pieces. Next I have to tackle the front clam shell and figure a way to make it open realistically. Latest mockup makes me excited. Thanks for looking and stay tuned...