truckabilly
-
Posts
789 -
Joined
-
Last visited
Content Type
Profiles
Forums
Events
Gallery
Everything posted by truckabilly
-
 I feel very sad because Muleskinner has been one of my model building heros. I borrowed some of his ideas when building my Pete logger. He sure left an empty space in my heart. May you rest in piece, sir.
 -
Scratch/bashing a 702
truckabilly replied to landman's topic in WIP: Model Trucks: Big Rigs and Heavy Equipment
Very nice work on the engine. There is a true model building going on there. My hat off to you and your skills. -
1929 Coleman 4wd
truckabilly replied to Chariots of Fire's topic in WIP: Model Trucks: Big Rigs and Heavy Equipment
That´s som´else! It brings back the old times. Ive probabaly never seen it but it´s nice. Great work so far. -
AMT Peterbilt 359 California Hauler Wrecker
truckabilly replied to Tory's topic in Model Trucks: Big Rigs and Heavy Equipment
Nicely done. Very clean build with subtle weathering. The paint job is awesome. -
My chin dropped down and I cannot get it back. Wow, this is one of the best builds Ive seen. Congrats to such a beatiful thing. Very nice indeed.
-
Best of Show!
truckabilly replied to Petetrucker07's topic in General Automotive Talk (Trucks and Cars)
Congratulations. A very nice truck there at the Picture. -
Pete single axle dump truck
truckabilly replied to Mrjeffrey's topic in WIP: Model Trucks: Big Rigs and Heavy Equipment
Interesting modification. -
Scratchbuilt Timpte Super Hopper
truckabilly replied to KJ790's topic in WIP: Model Trucks: Big Rigs and Heavy Equipment
Nice kick-off. It is sure worth watching. -
Cool snapper, Pavel. The additional fuel tanks look great.
-
Ford LTL9000
truckabilly replied to Bison's topic in WIP: Model Trucks: Big Rigs and Heavy Equipment
Nice color choice. I like it. -
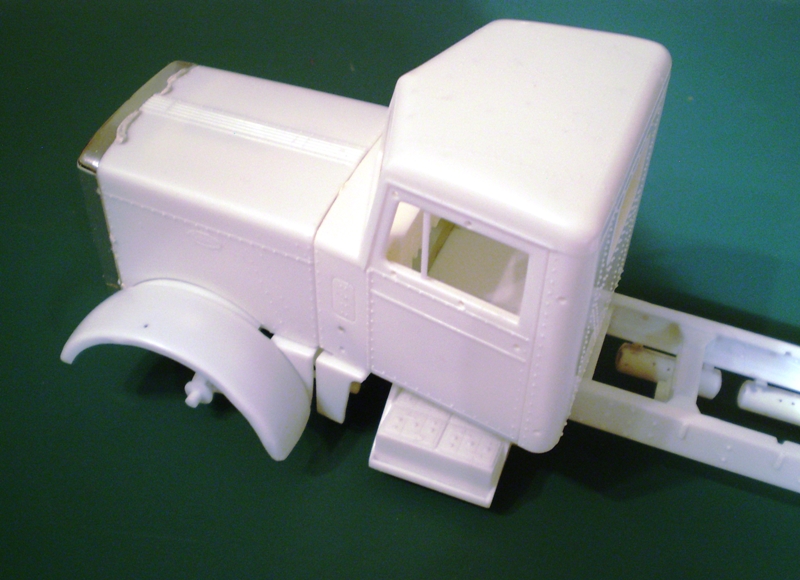
Thank you guys very much. When testing the cab position on the frame I always attach the hood. This way I can see how it works as a whole. I got me Mecury sleeper and looked for for interior pictures. I found one with a black paneling inside and that got me to this idea. Originally a credit card cover this material was the right thing for covering the inside walls with. Maybe it does not look any special but I will not open any door and there will not be anything visible anyway. More impontant for me was to make a decision wether the sleeper should be in line with the cab floor or the cab roof. The sleeper is a bit smaller in height compared to the cab. In lower position the crawl-through tunnel fits perfectly to the cab rear window. In higher position it would take some modification. But I kinda like the higher position better. What do you think?
-
My new little truckin buddy, arrived early!
truckabilly replied to Petetrucker07's topic in The Off-Topic Lounge
Congratulations! Great job, man! Nice and clean -
Instruction sheet? What is that?
truckabilly replied to Petetrucker07's topic in General Automotive Talk (Trucks and Cars)
Someone over here said that the instruction sheets are only for cowards... I always go through them when I open the box and use them when building something I am not familiar with. And even if I am I check them now and then. There are always some parts that are not stuck in my memory. And yes, I spill a drop of color or glue on them sometimes. I never throw them away when the building is done. For the case of rebuilding the kit in a future. -
all Peterbilt Conventionals here
truckabilly replied to Ken Gilkeson's topic in Model Trucks: Big Rigs and Heavy Equipment
Some of mine built a few years ago... -
I thought it was going to be easy to find dimensions of the Peterbilt 351 radiator on the net but I got lost. Does anybody know the height and width of the radiator? Thanks in advance.
-
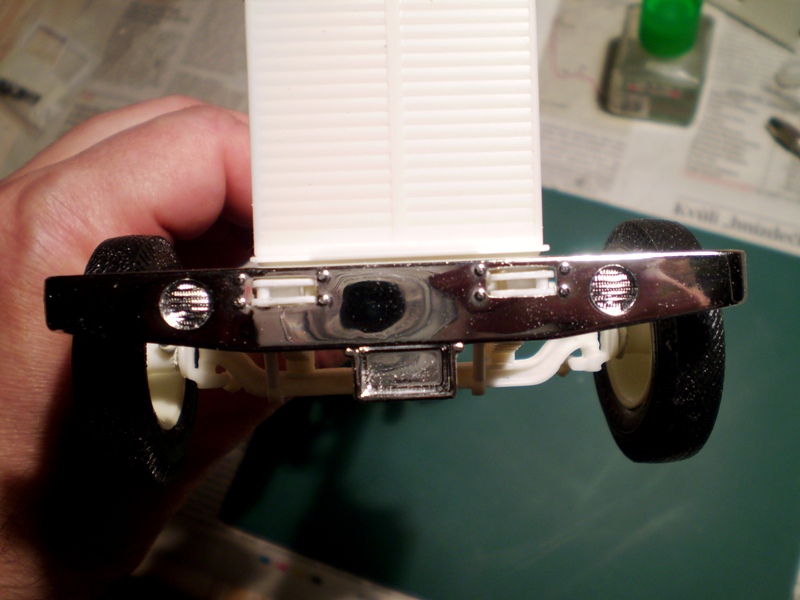
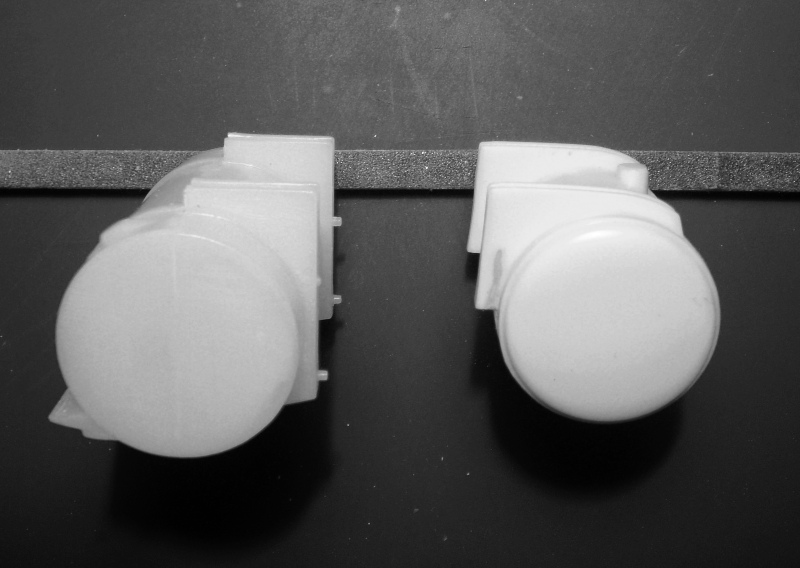
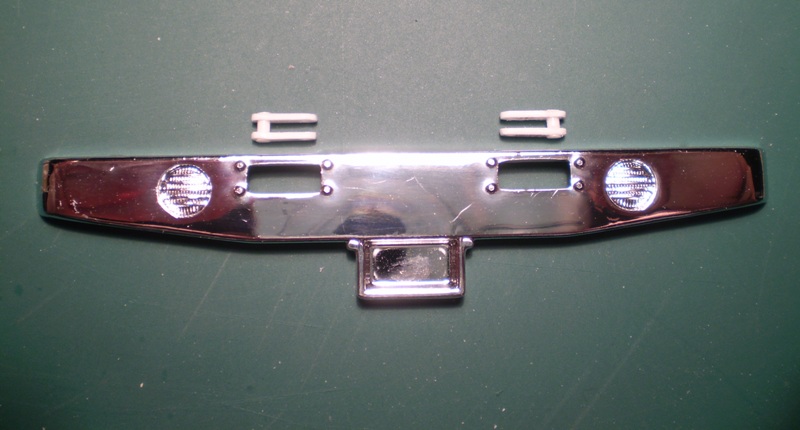
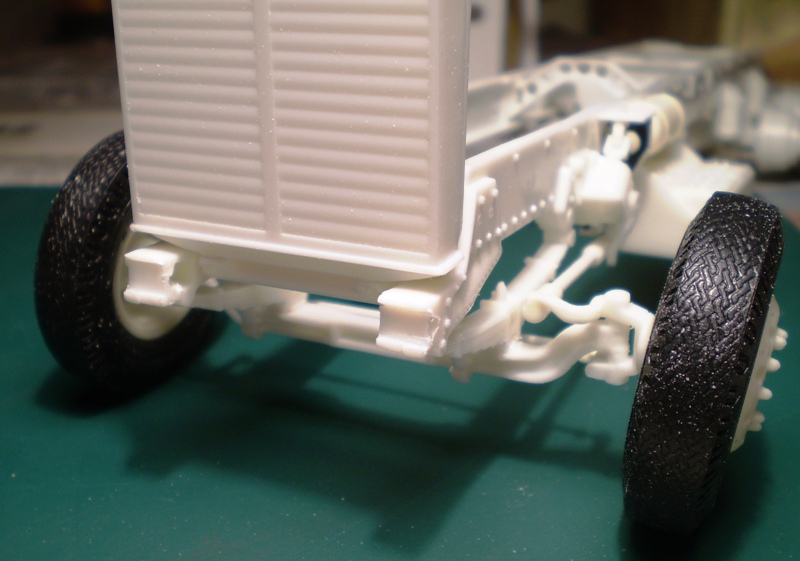
The newly shaped openings need a gasket. I made mine of the Evergreen stock. Since there is an old light bulb in my table lamp that produces a lot of heat besides lighting, I use it for local heating of tiny plastic parts. Did I burn my fingers a few times? Yes, I did. Building a plastic model requires some sacrificing now and then. I heated up the channel at certain places to make the bends and gradually glued it to the cab. With the new floor I needed new mounting points. I did not want to use the rails like the original floor had. I copied the parts from RoG 359 kit and added them to the chassis. The front ends of the frame rails are too plain. The bumper openings would look kinda blind. The towing elements need to be there. I made me a pair but unlike my Bill Signs model these are not functional. I spent some time thinking of the fuel tanks. The original length of the tanks is gone for good since Matchbox changed the tooling for their cabover 352. I was looking for a longer tanks in my parts box and I found some of a Kenworth. Different in size and style it would not match Peterbilt but I said, So what....? One CA original and one of KW, changed a bit, could be paired on the same frame. But I needed the top, Peterbilt style brackets and I did not have them. What I did instead was that I glued one of the halfs upside down and the molded on brackets moved right on top where I needed them. A little bit of putty and sandpaper did the rest of work. There is still some work to do on the tanks but I hope you got the idea.

-
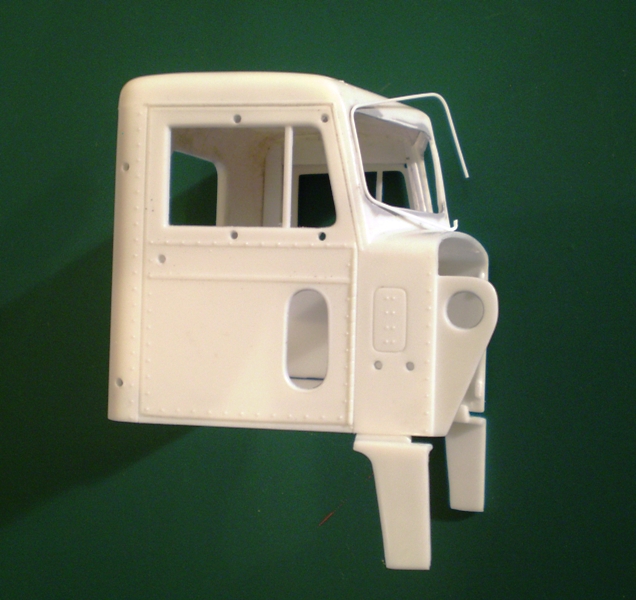
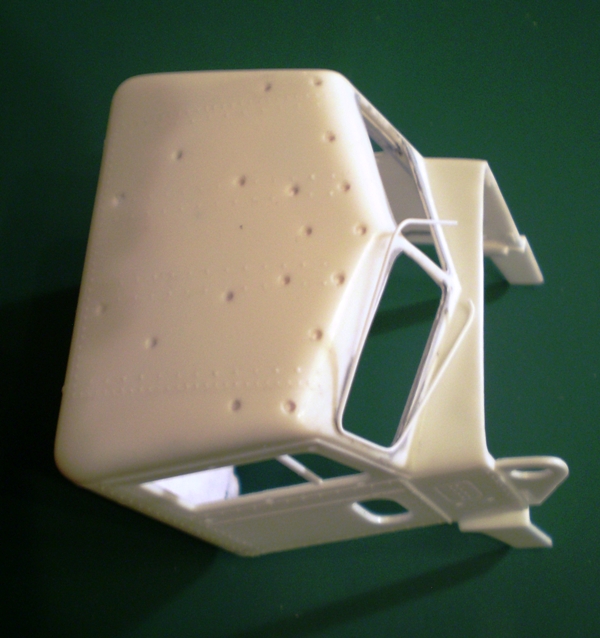
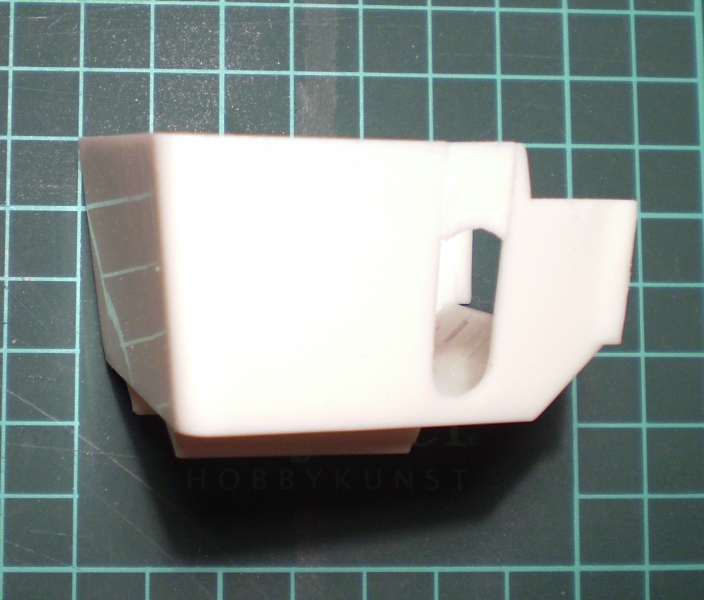
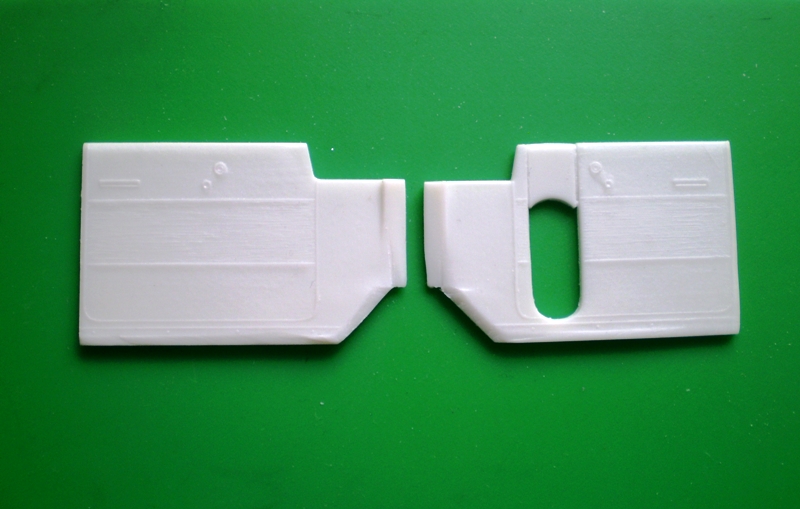
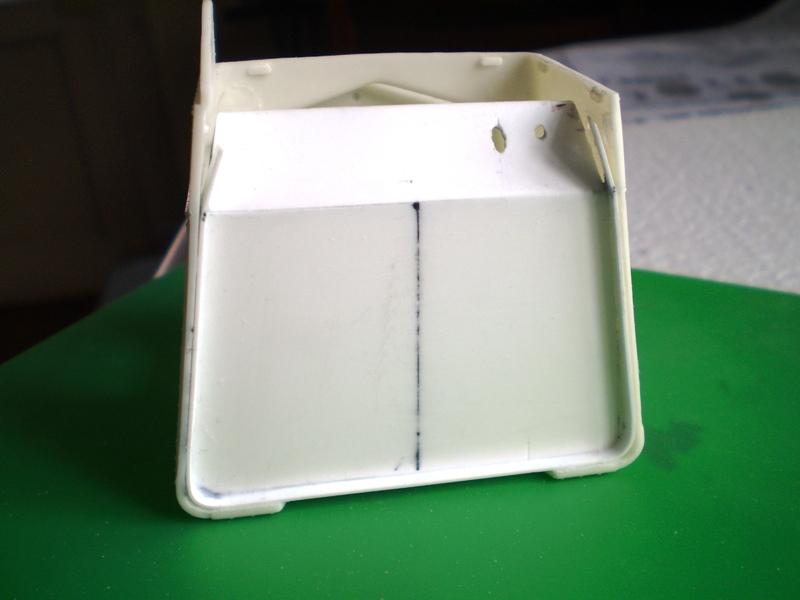
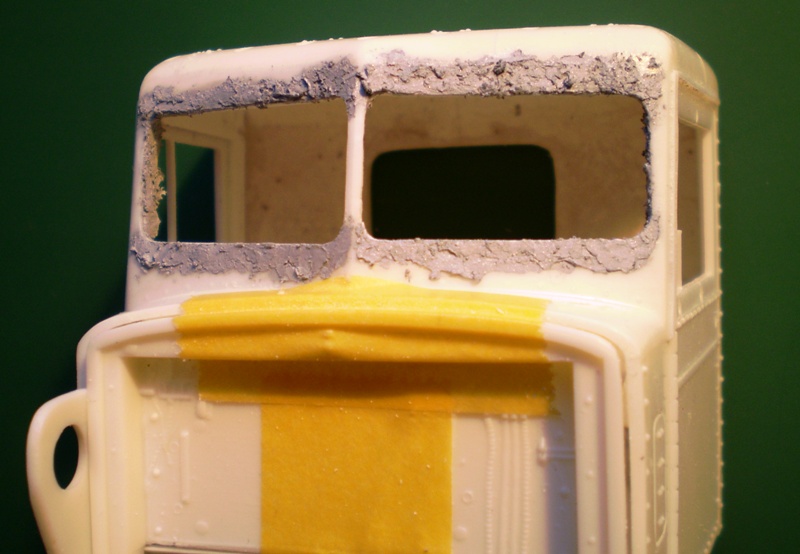
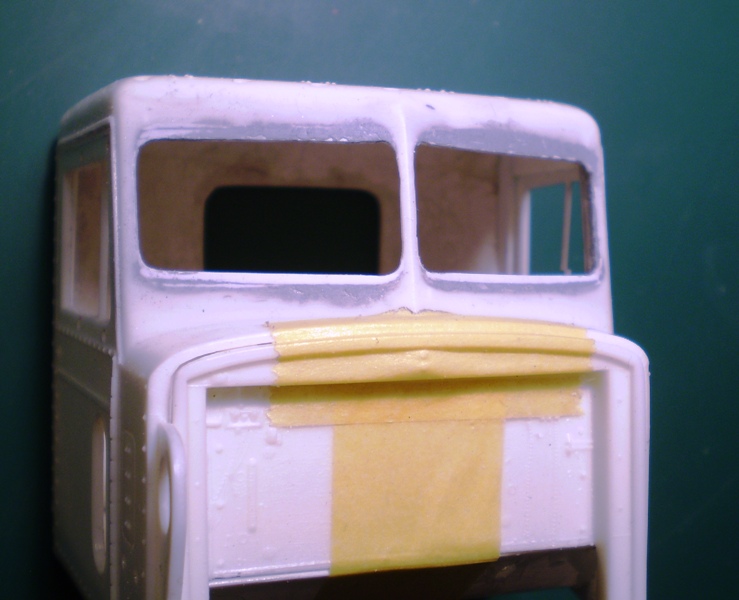
Thank you all very much. Another thing I have changed is the interior tube. I did not like the askew walls. I cut off the sides with the door pattern for later use and threw the rest away. I made a new floor and some simple interior panels. This is what I mean by askew... The gap between the floor and cab skin is unacceptable for me. So, this is all I will use... The new floor... Actually, I did not take care too much of the cab lining. I used a regular paperboard for the back wall and ceiling. They call this cab little window or maybe small window, I am not sure. But the openings for the windshield seemed to be of wrong shape to me. Too tall, so to say. So, I added a stripe of plastic to the top and bottom and shaped the corners. And I did this twice because it did not seem enough after the first shot. Oh, come on! Don´t laugh! You would not look any better immediately after your plastic surgery. This how the curing went on. To be continued in a short while...
-
I bought a set with different sizes and used the one that was closest to original parts. The O-rings are 12 mm (0,472") of outter diameter and bout 2 mm (0,072) thick. If you mean the one between the height valves, I bought a set of those parts years ago from someone at one of the local contests. If it is a straight line, I use hexagonal channel drilled in the middle and sliced in short pieces.
-
Once I made a functional fifth wheel. But apart from testing I never used that function. But it´s about the feeling... I can do it! Nice work on your build.
-
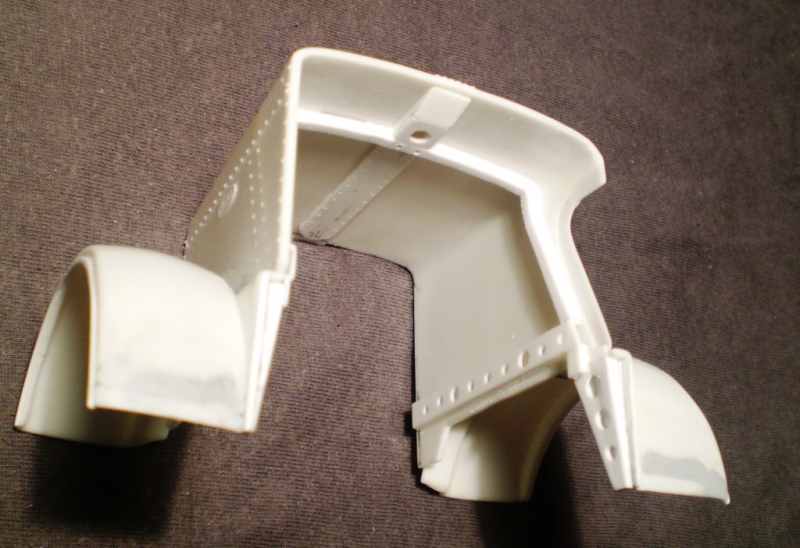
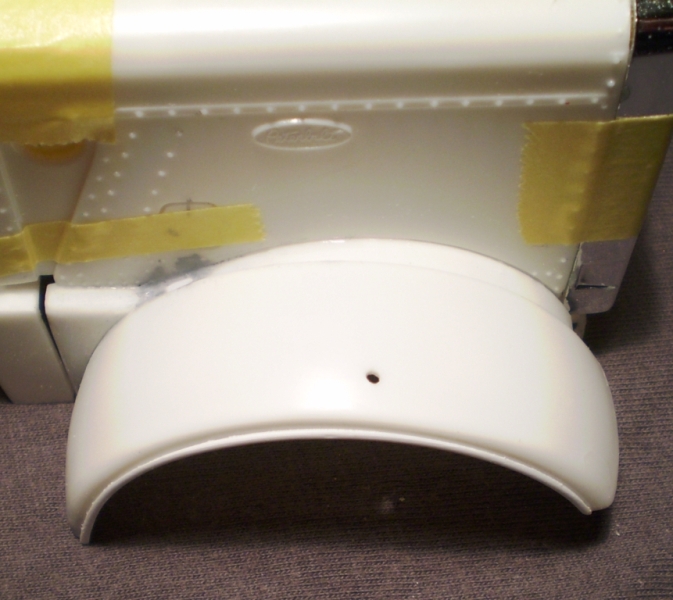
That´s my plan. The hood of the original AMT edition had no hinges and the recent reissue hasn´t them either. I copied a pair of hinges from RoG kit. If they won´t work, I´ll make another, then another untill it sets right. The pins are also ready. Every hood has some inside details but the kits have none. How could I go without something like this? Here is my added structure. Not 100% accurate but still better than nothing. I also corrected the fenders using Tim´s idea (I think he´s the author). To erase the gap between fenders front edge and bumper it is necessary to either add some material to the front of the fender or turn them forwards and add some material to the back. The latter requires more complex reshaping. I chose the more coplicated way to avoid the risk of a failure right in front of the truck. If something goes wrong, let it be hidden in the back. First I cut off the tooth and step in the back of the fenders. I glued the fenders to the sides of the hood turned slightly forwards so that the the bottom edge of the grill and front edges of the fenders were even. Then I glued back the cut off tooth, slightly reshaped so that it would fit okay. The picture shows a hole but that´s filled with a piece of plastic now. I used the mud flap part to extend the material in the back of the fender. It took some putty to hide the joint. The last modification of the fenders is the added lip made of Evergreen rod. I also repositioned the hole for the turn signal light (or is just clearance light?) so that it was on very top of the fender. Till next time...
-
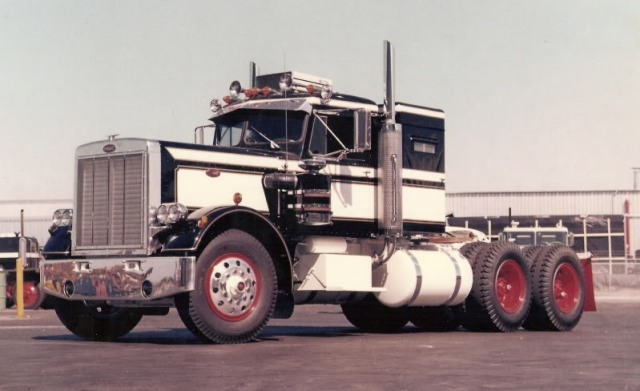
I do think the same too. There is an interesting story behind the kit. Starting out the boom in plastic model trucks, then dissappearing for ages to be found years later as a part of the 352 tooling. That´s just amazing. Probably not. I think I will use the original kit wheels front and rear. The 1:1 truck in the picture has some differences from the California Hauler kit. I will use the Mercury sleeper and sun visor. But the fuel tank arrangement is different and so is the grille. And I hesitate over the red mud flaps. Are they red on both sides? Can´t imagine the red oval on a red mud flap, so... I don´t know.
-
Nice job on "cheating". But you should also get rid of the wide stripe on top of the hood. That´s typical for 359 but 379 has much simpler spine-like mold on top. Just a suggestion.
-
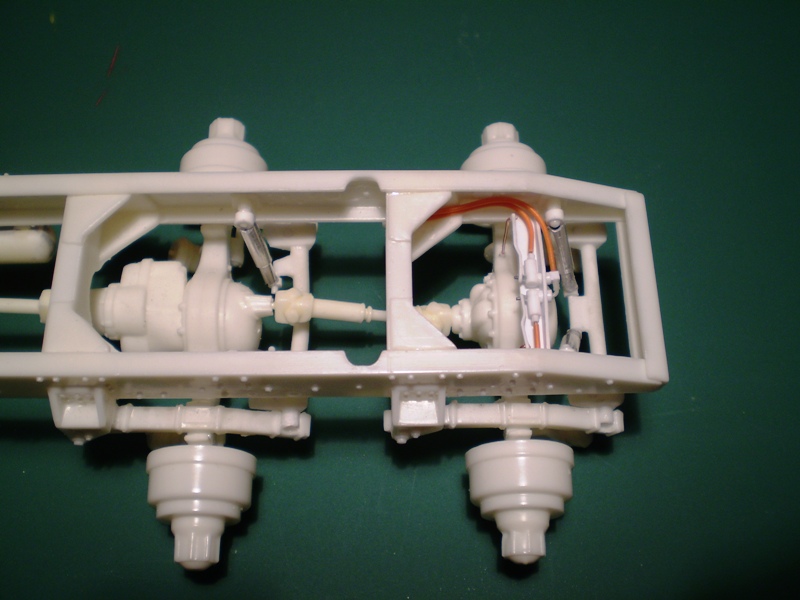
With the reissue of Peterbilt 359 California Hauler came the early version of the truck with unilite cab, two-bar grille, single breather, roof-mounted AC and stabiliaire suspension. The features that vanished in time. It´s great to have it back. First I wanted to build a stock box but then I found that some parts have to be replaced. Like the shock absorbers or the double donut air bags. They are of really bad shape. The interior tube is also out of question. So, I left the idea of stock box and went on my usual way of modifying some parts and replacing the others. I stripped the chrome layer off the parts that I want to paint with a different color. This is the color combo that I would like to replicate. Starting out with a parts pile… I assembled the screaming Jimmy… And went on to frame parts… The engine will be white just as the frame. I will do all I can to make it look not as boring as it sounds. Here is the comparison between the original kit parts my replacement. I had to change the location of the height valve cross member due to space reasons. The valves are linked straight to the axle which is not right but I couldn´t find a better way. That´s it for the start. Up next- the hood.
-
Four 1\32 trailers for my 1\25 trucks!
truckabilly replied to Chu's topic in WIP: Model Trucks: Big Rigs and Heavy Equipment
I overlooked this thread somehow. It is a cool idea to use the trailers of a different scale and modify them to fit the 1/24 scale. They really look very good. Very nice work. -
This is awesome. I always liked the Futurliner buses. Yours looks great! I can´t imagine the amount of work you had to put in this project. Very nice.