Psychographic
-
Posts
1,682 -
Joined
-
Last visited
Content Type
Profiles
Forums
Events
Gallery
Everything posted by Psychographic
-
So Pat, when are we going to see a tutorial on your weathering techniques? You really have that grunge look down to a science.
-
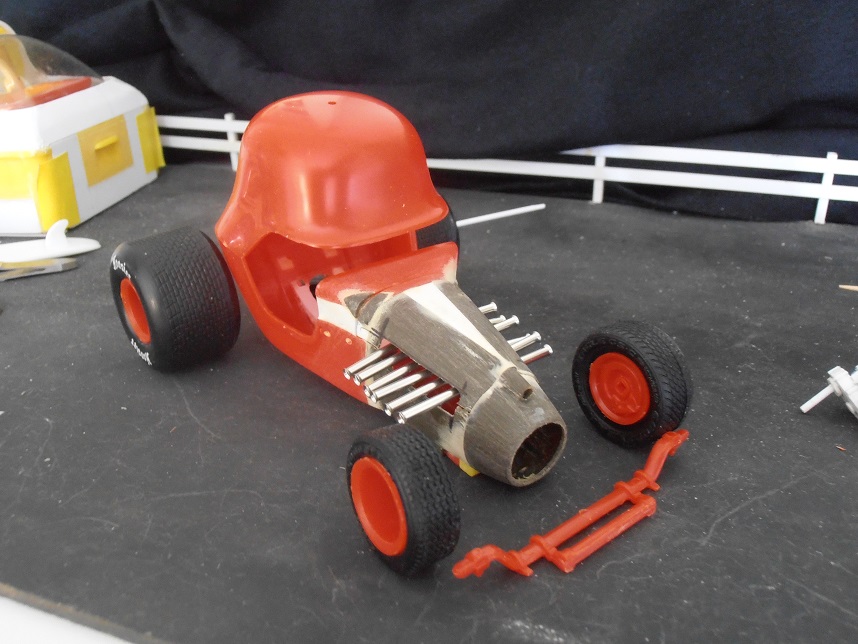
I want to either find or make a pair of bombs to hang under the front wings as headlights. I tried to make one from the fuel tank of the p-40, but even after I cut it down it was too big. I'm hoping maybe a 1/72 scale kit might have something I could use.
-
The wings really look better than I imagined. I think it fits the theme without going overboard.

-
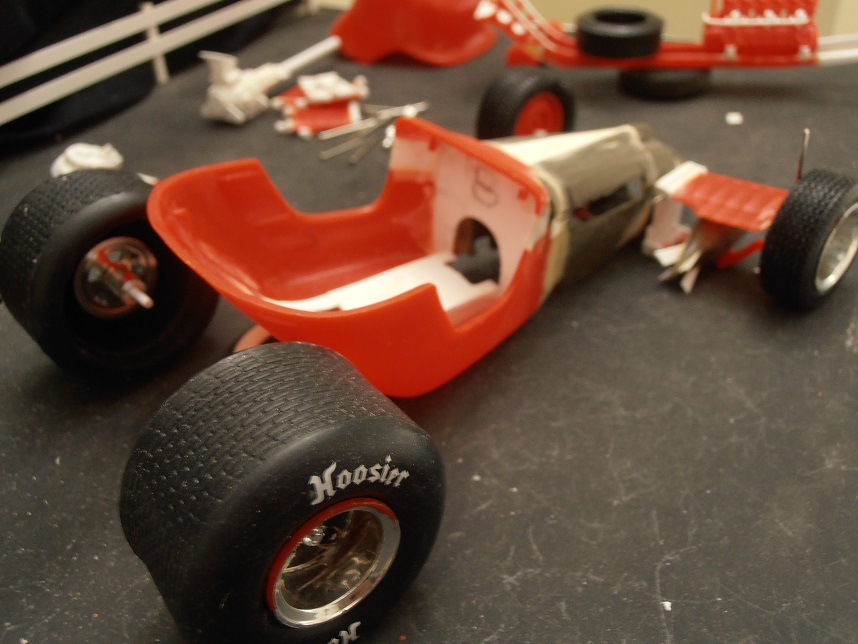
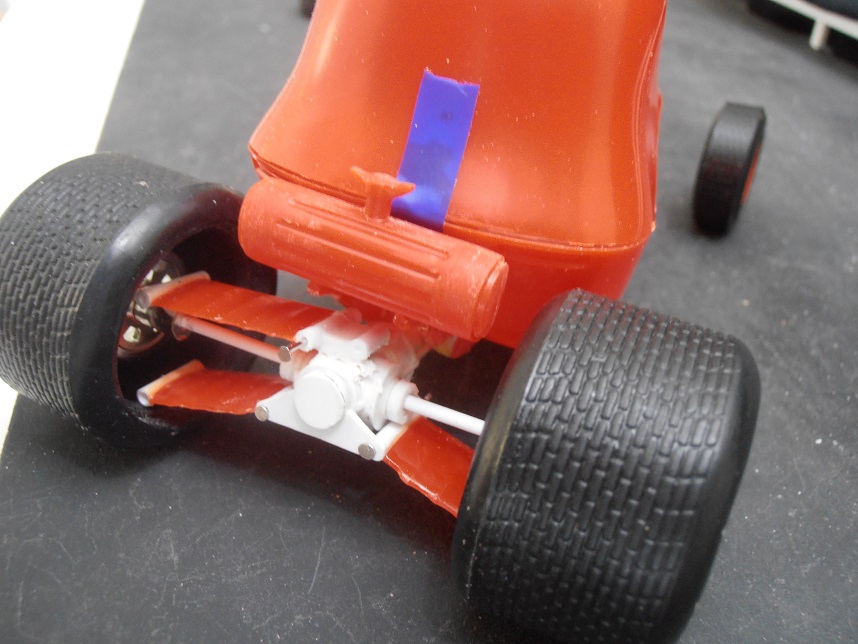
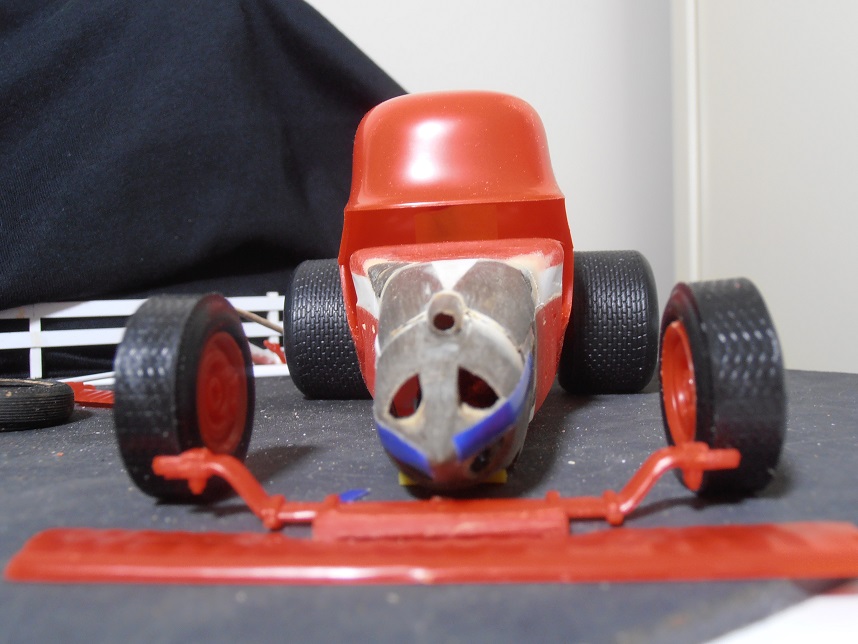
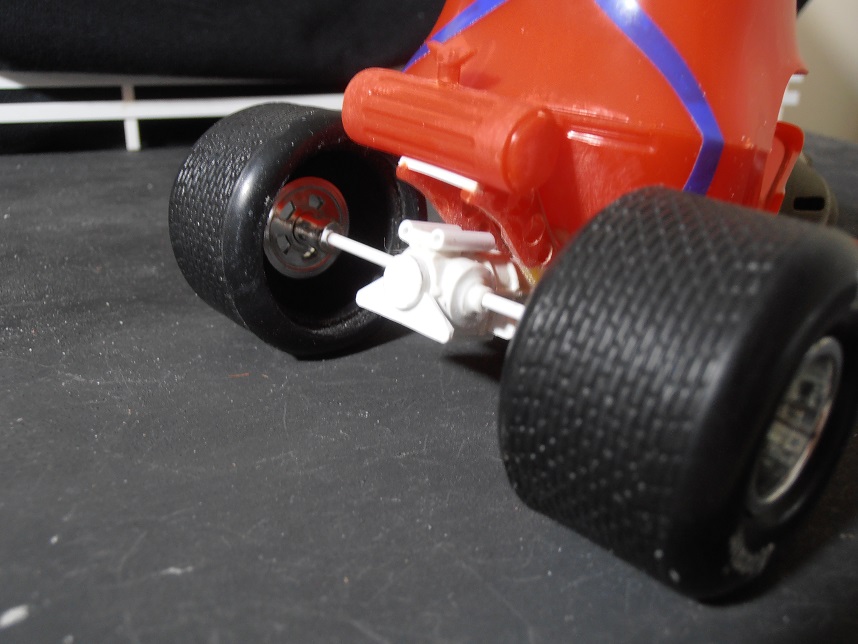
I had to extend the frame to get the wheelbase I wanted. I have an idea I hope will work, it will tie the wings of the rear suspension arms to the front suspension. I only have the top wing left and will use that as the upper arm. I cut the solid axle and that will be the lower arm. Hanging from the upper wing arm will be a small bomb that will be the bucket for the headlight. I cut down the P-40 fuel tank, but it's still too big. I think once it's shrunk down a bit it will look good.
-

Red Baron Engine
Psychographic replied to Psychographic's topic in Model Building Questions and Answers
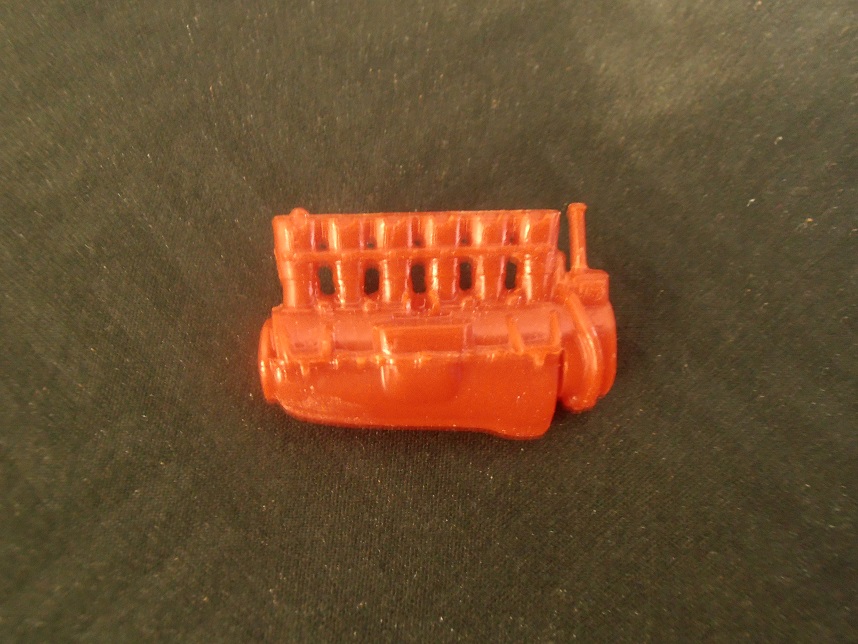
I'm going in a different direction as far as induction is concerned.
-
Red Baron Engine
Psychographic replied to Psychographic's topic in Model Building Questions and Answers
Thank you Bill. -
Red Baron Engine
Psychographic replied to Psychographic's topic in Model Building Questions and Answers
I'm doing away with the kit's intake and exhaust, so I've got that covered. Do you know how much force is needed to move the lever? Would it be feasible to have this operated off of a cable if I decide I'm taking the detailing that far? -
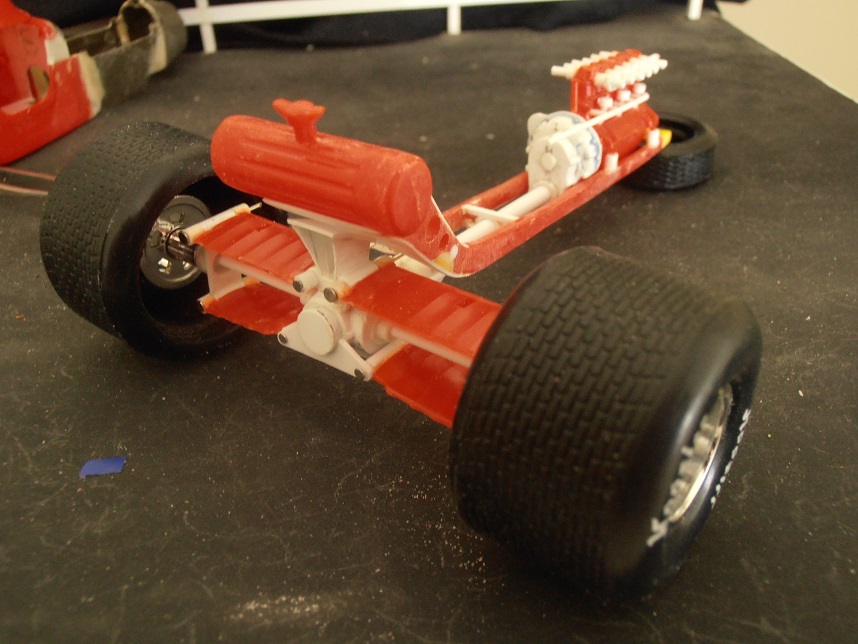
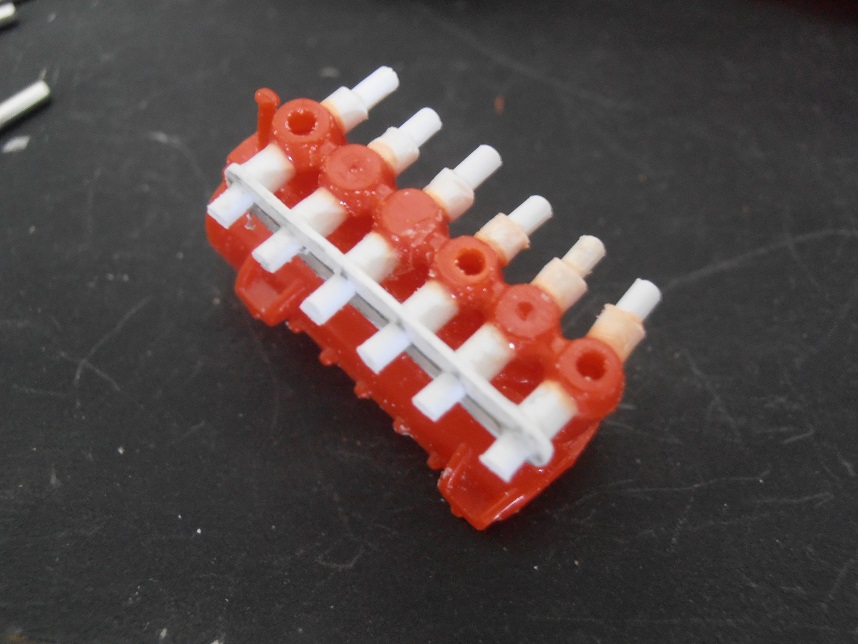
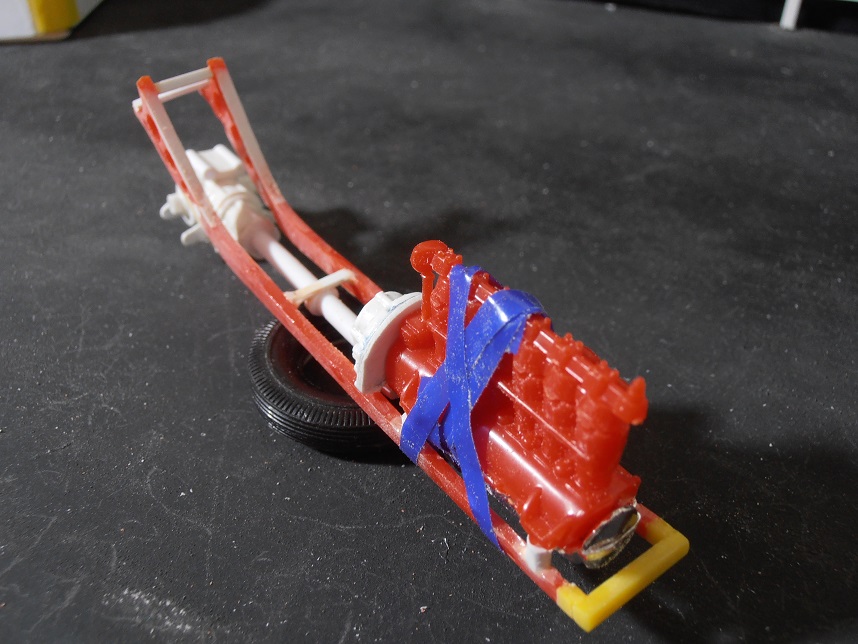
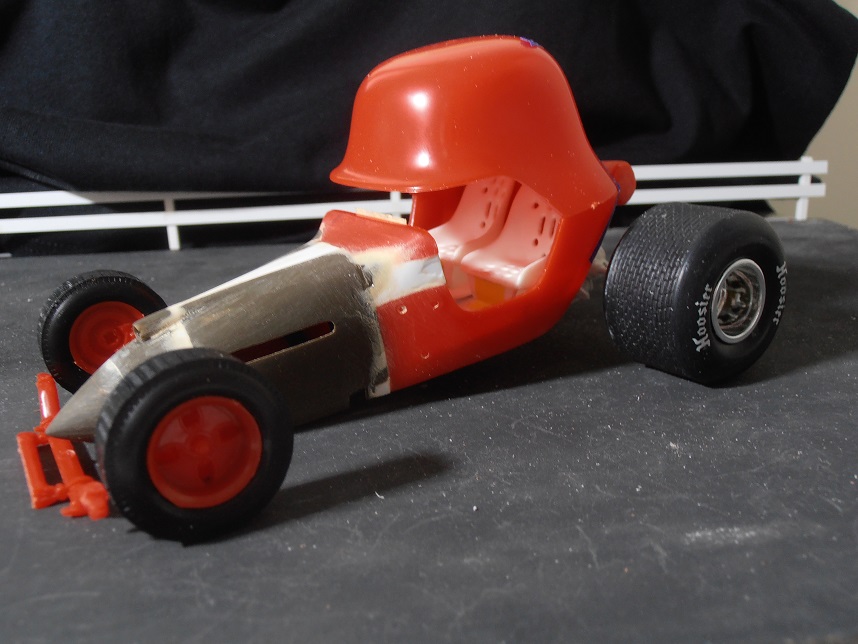
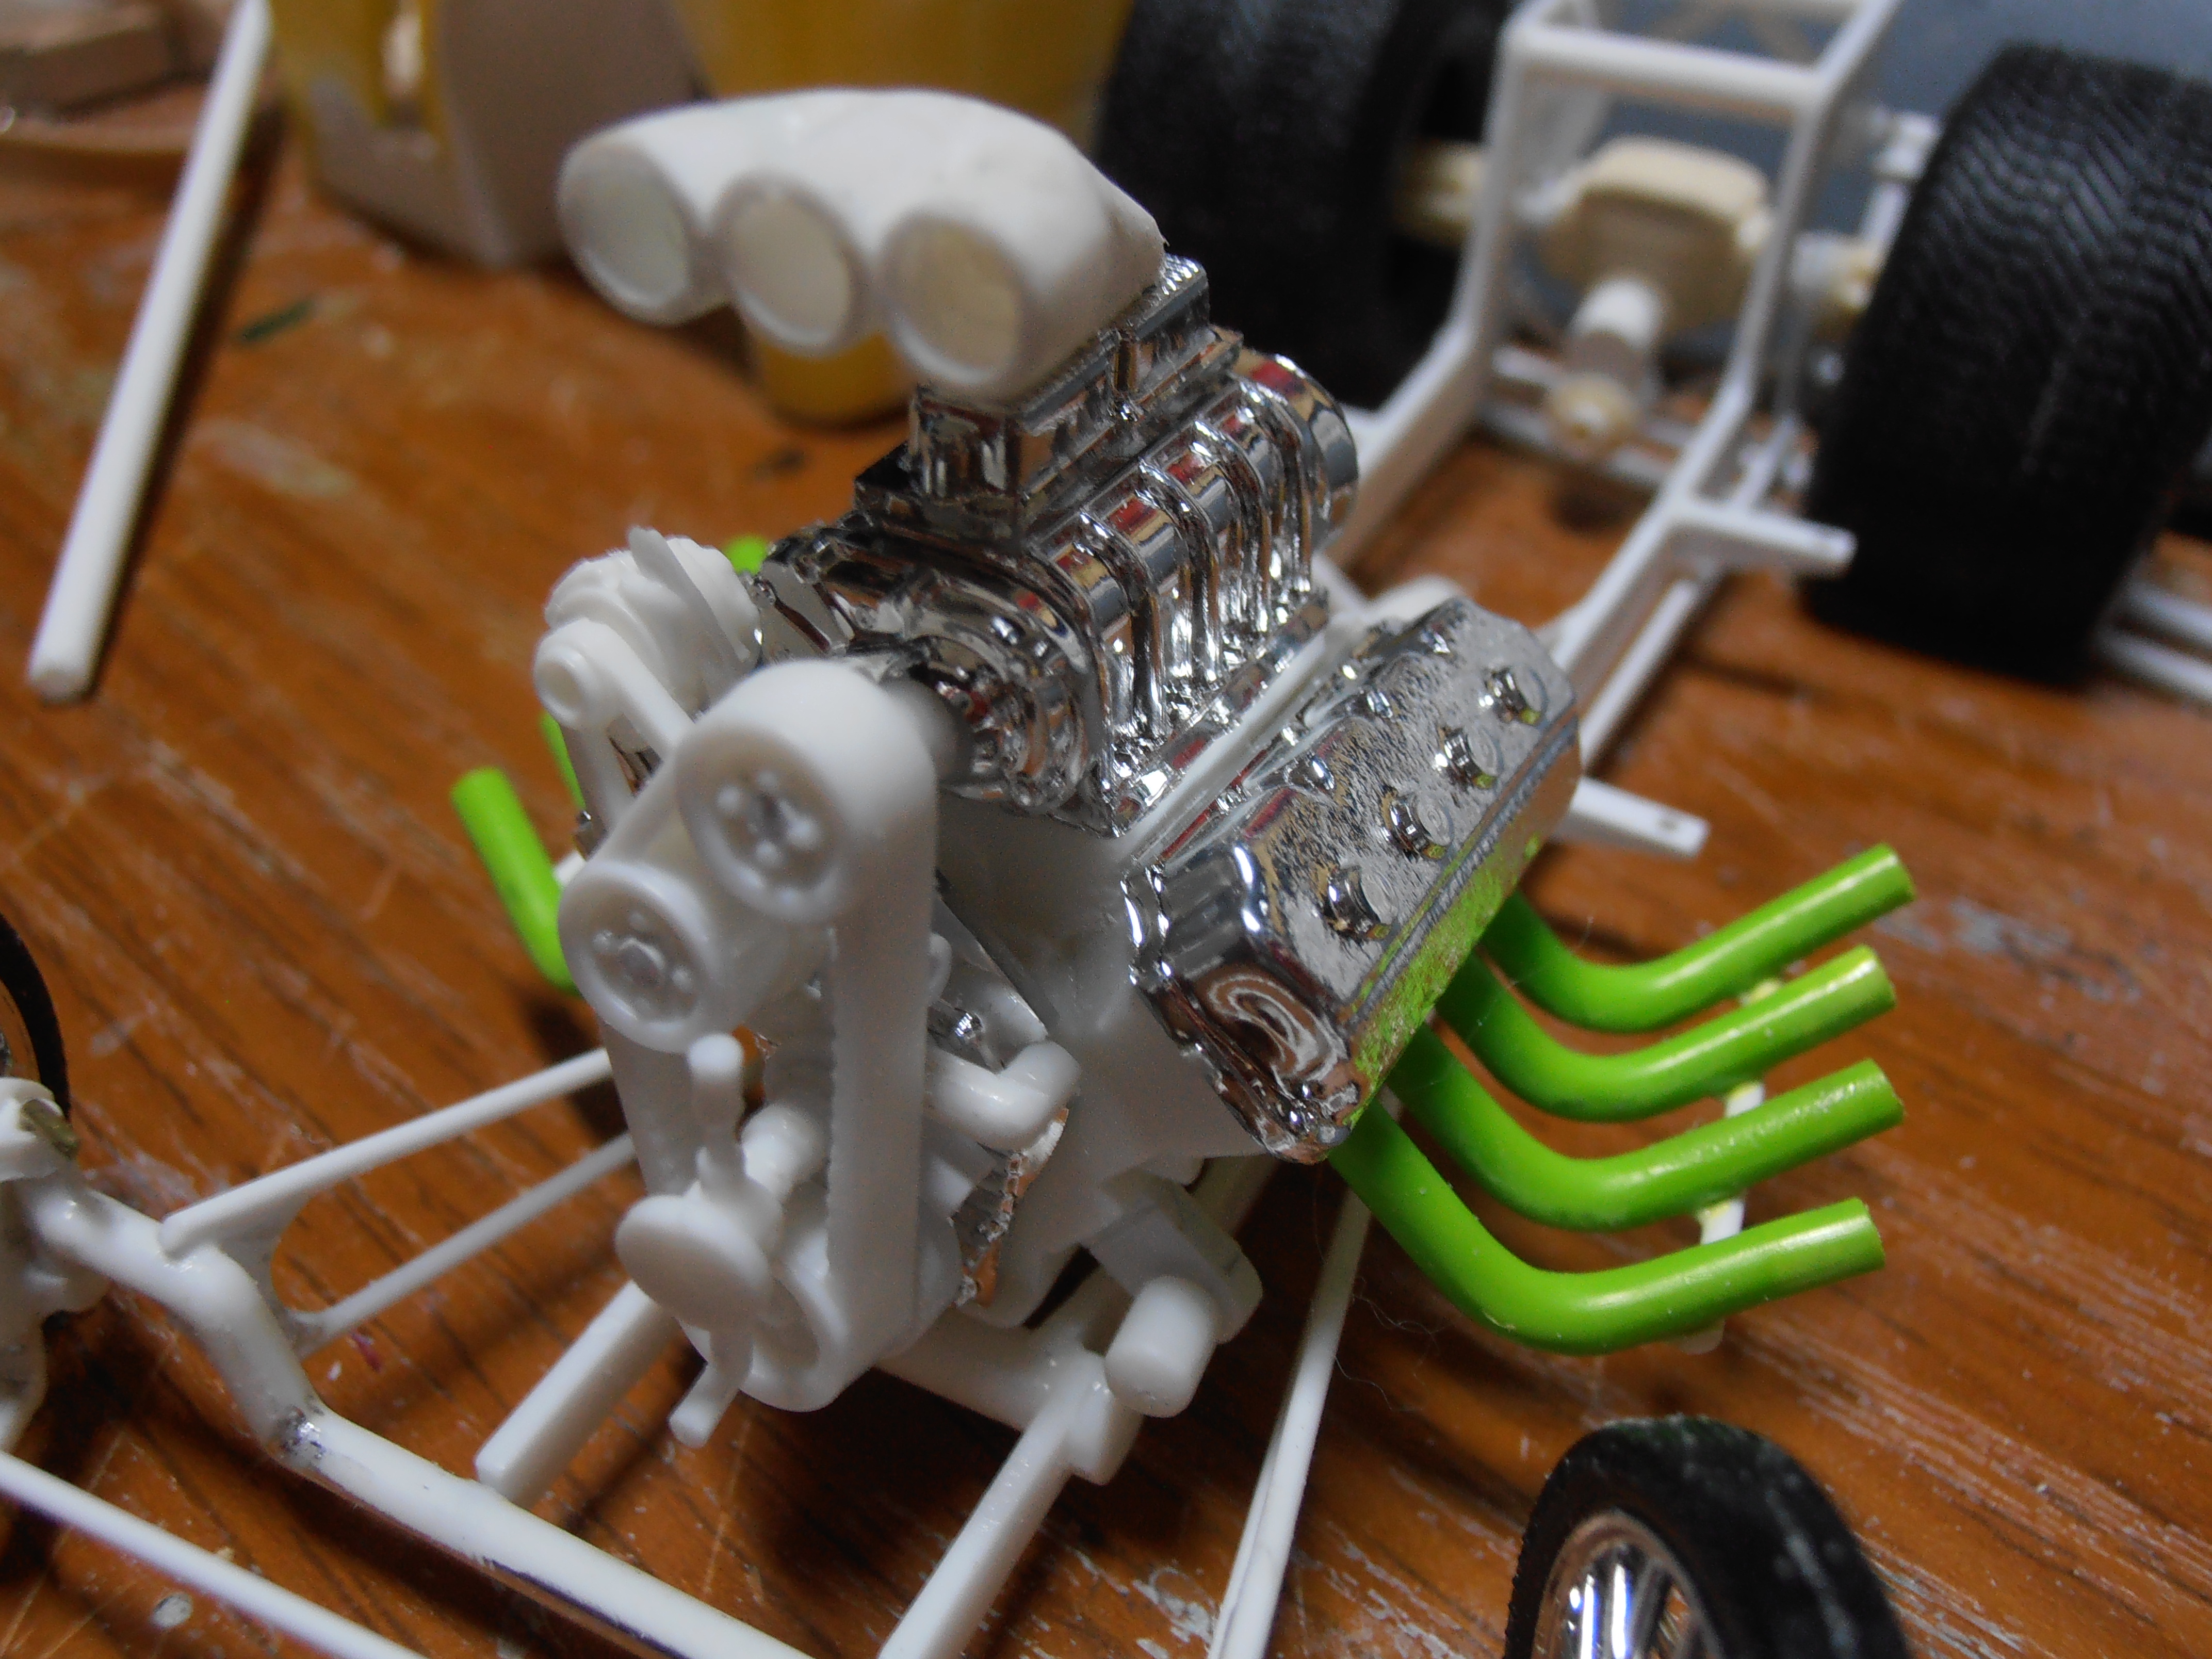
Next up on detailing the engines was removing the area between the cylinders. Then it was time to break out some Evergreen. There are 3 oil fillers/breathers and what I think is the water inlets for the cylinders. I need to sand down the caps of the breathers a bit along with giving them some shape. I made a plate for the back of the frame, this gives me a mounting point for the transaxle and cleans up the back a bit. You can see the start of the upper tranaxle mount. I think with a little more sanding it will have a shape to compliment the winged suspension arms. A couple of pics of the almost rolling chassis. Right now, I think I'm going to convert the solid front axle to an independent suspension, but keeping most of the look of the solid.
-
Red Baron Engine
Psychographic replied to Psychographic's topic in Model Building Questions and Answers
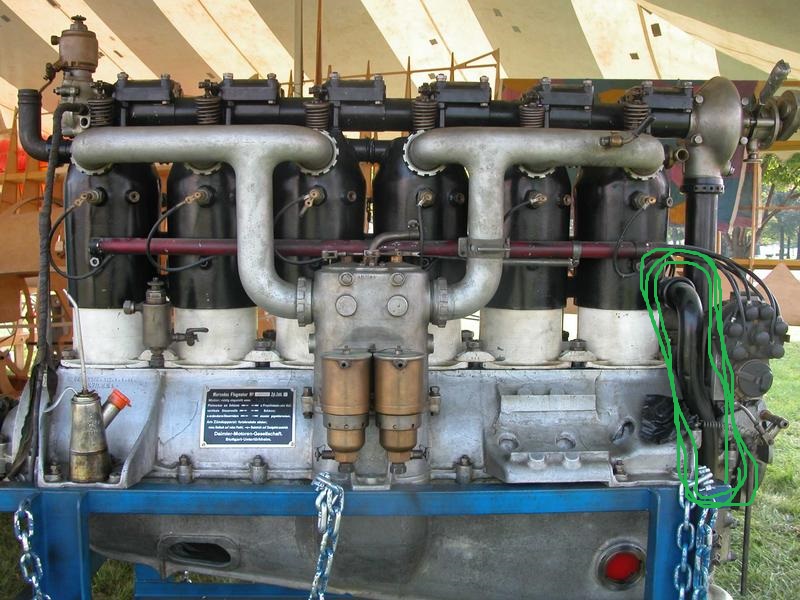
I'm starting to detail this engine a bit and would like to ID some of the plumbing. On the exhaust side of the engine, my guess is the green outilined pipe is the water intake, red is the water output, and I have no idea what the yellow hose would be for? Is the green line the same as the green line on the exhaust side of the engine? I'm hoping someone here can tell me what these lines are.
-
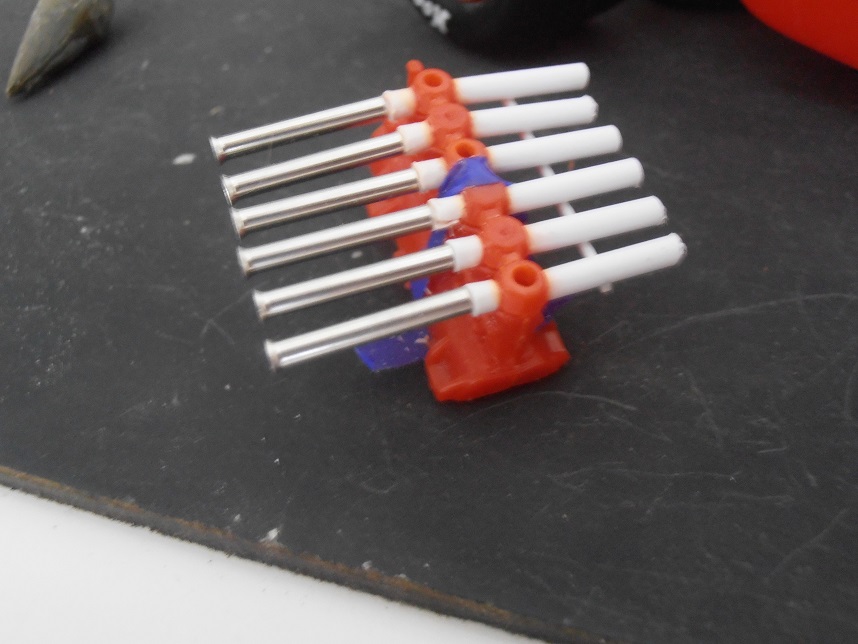
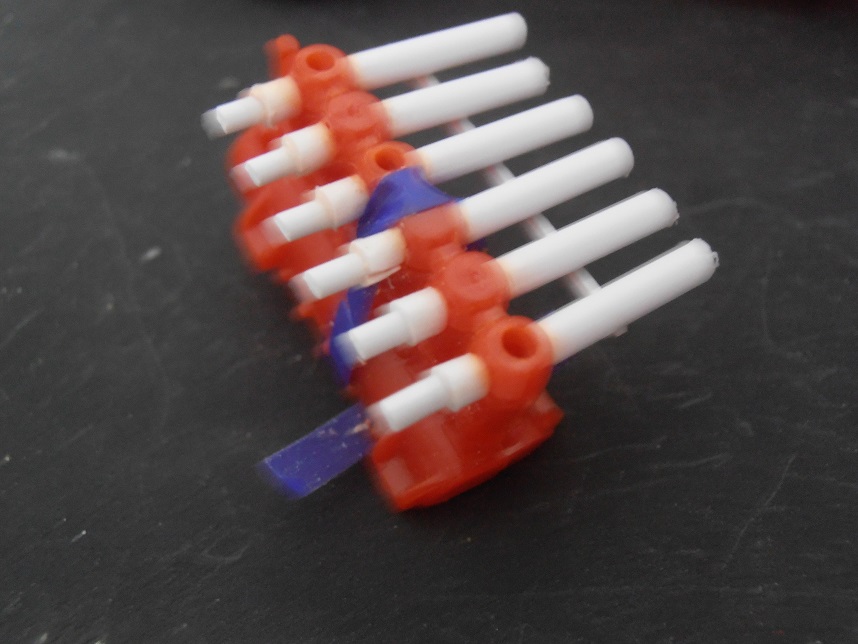
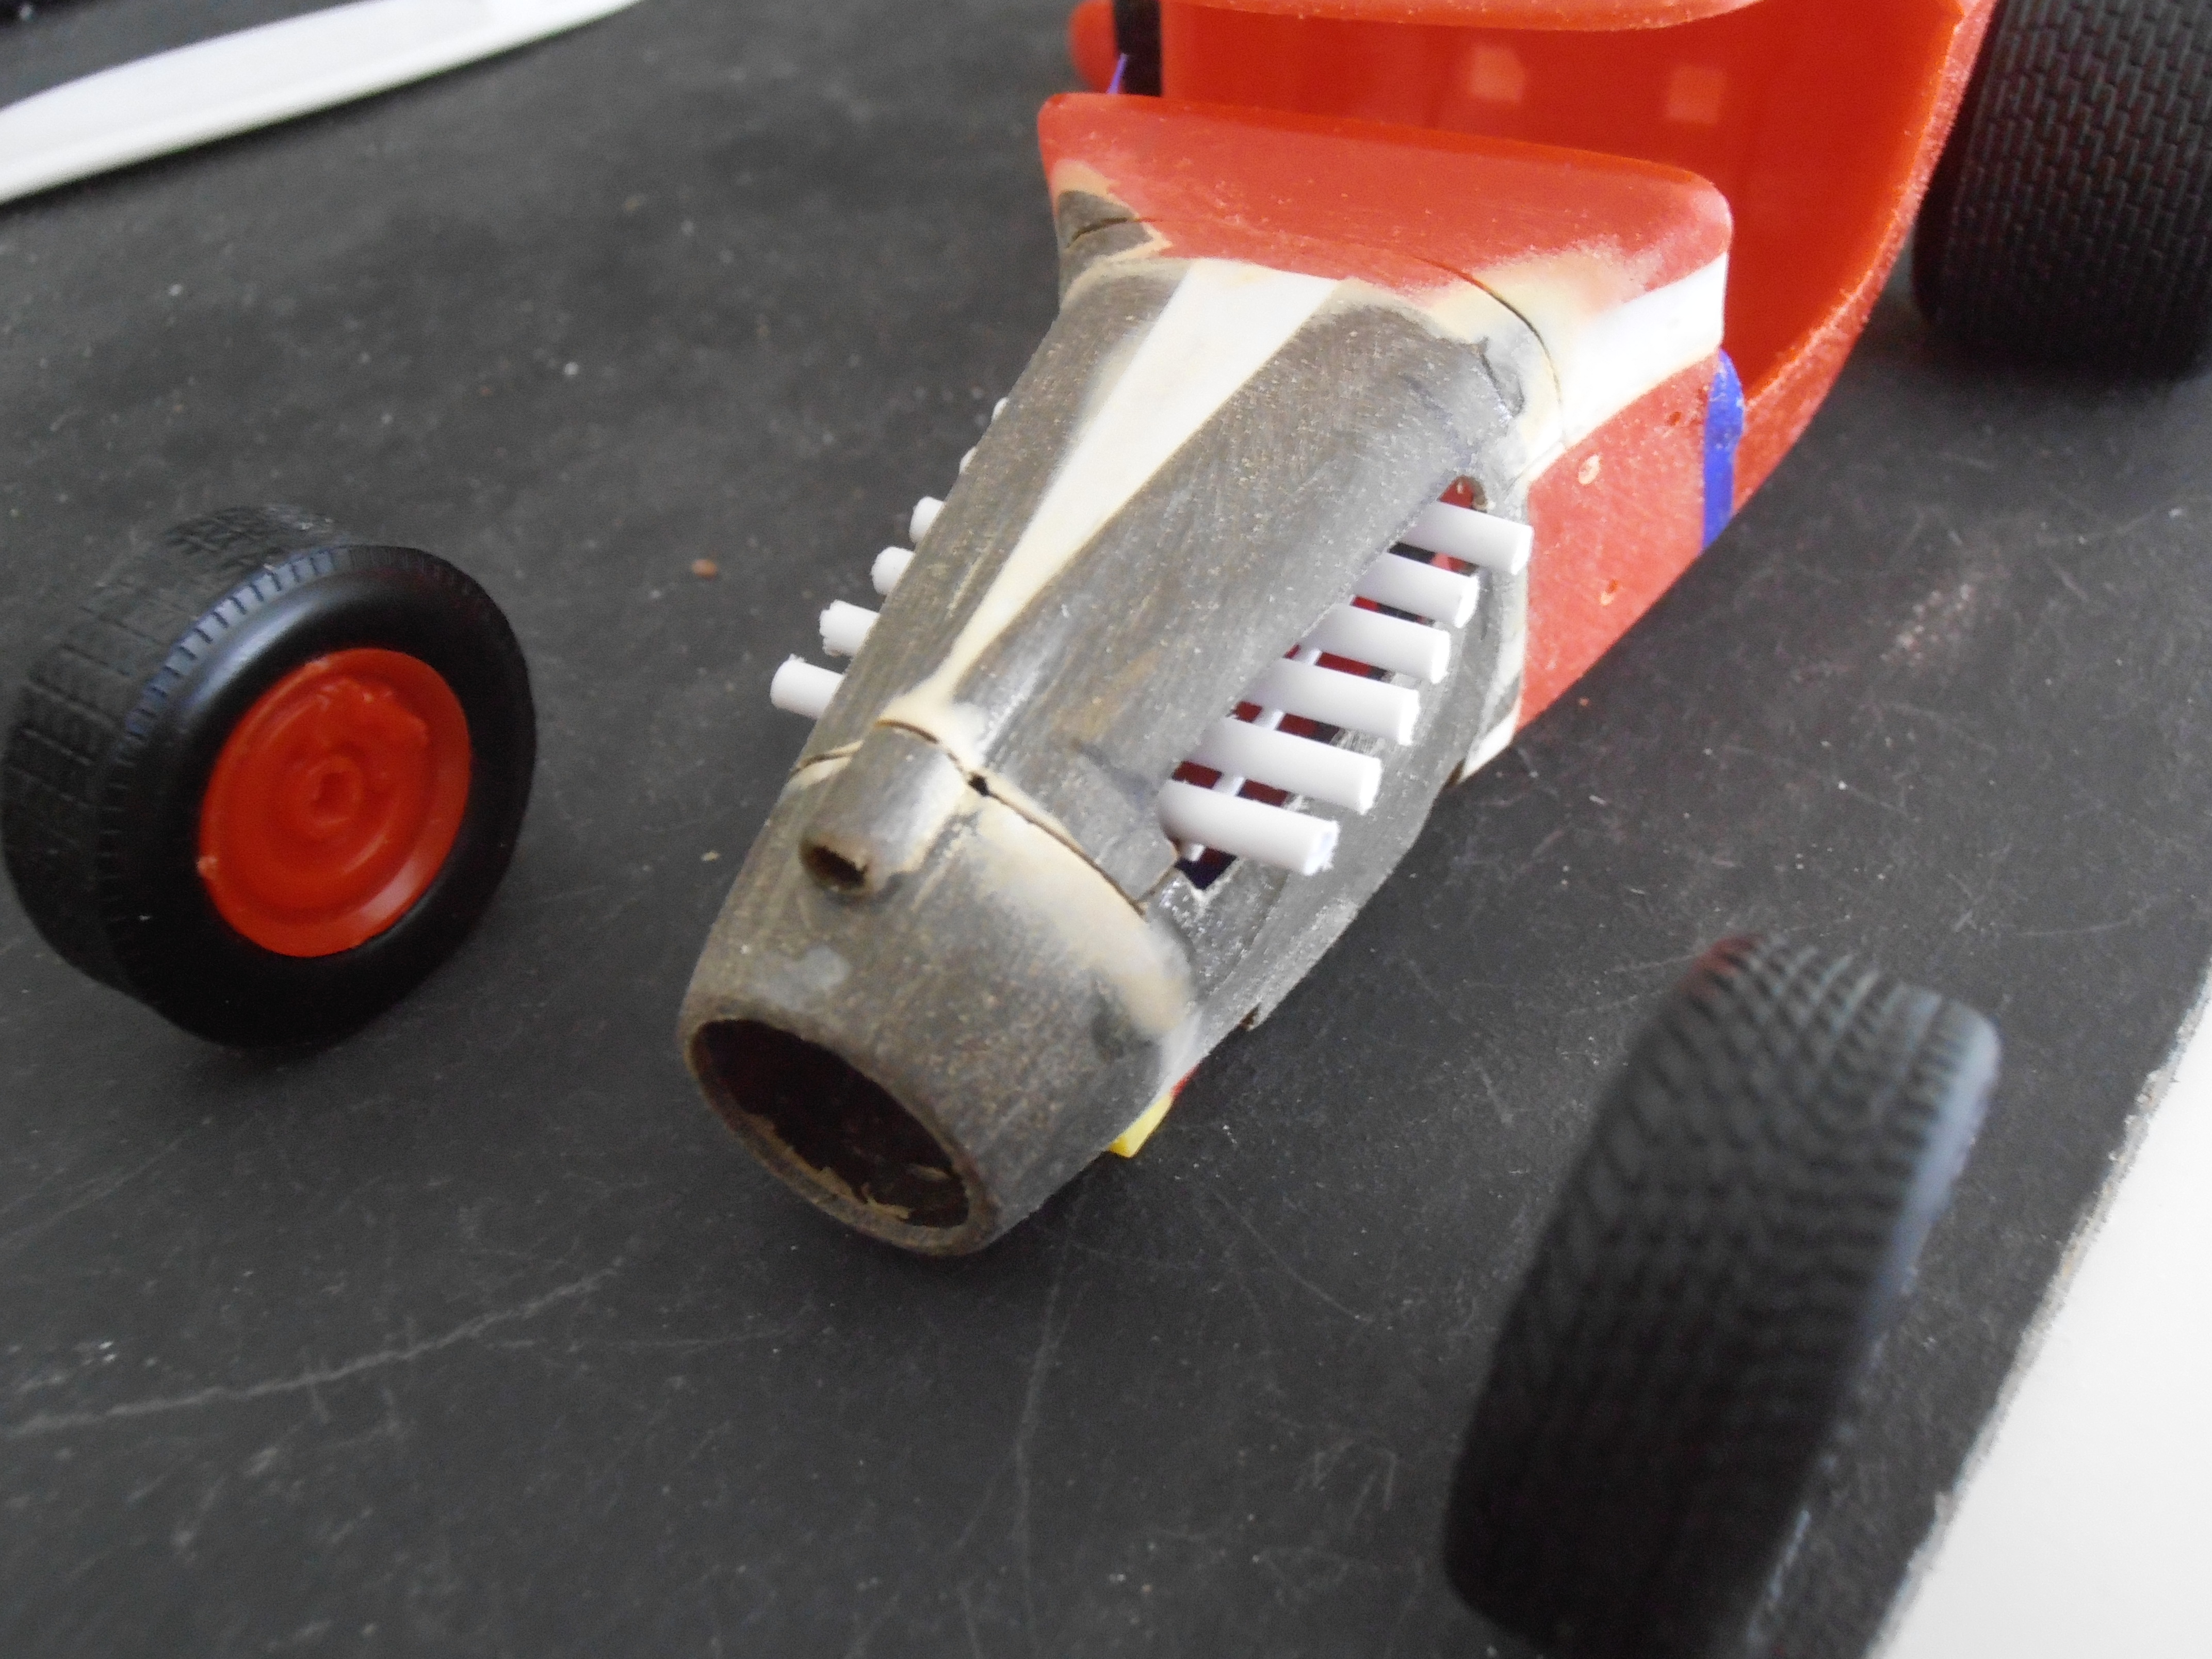
I thought my crimp tubes had a wider I.D., so instead of just sliding them over the tubes, I had to do a bit more work. I carefully cut the tubes down, then drilled them out in 2 steps to 1/16" I.D. and cemented 1/16" rod stubs into the ends. On the exhaust side I made a flange. The tubes fit very loosely over the 1/16 rod, so there will be plenty of room for adjustment. I'm not really looking forward to keeping 12 tubes lined up. In the end the extra work should look much better, so I hope it was worth the effort.
-
The pins are from the jewelry making section of Michaels or Hobby Lobby
-
Apple Barrel and Folk Art Craft Paints
Psychographic replied to Snake45's topic in Model Building Questions and Answers
And ammonia can strip chrome. I use Windex Rain (no Ammonia) for cleaning water bases. I have sprayed with it to see how well it worked. It was OK, nothing special. -
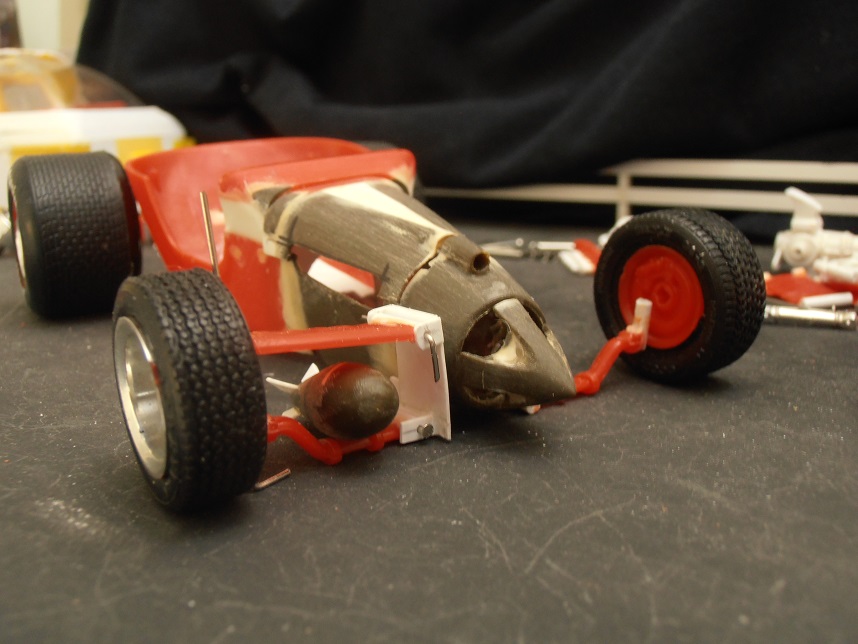
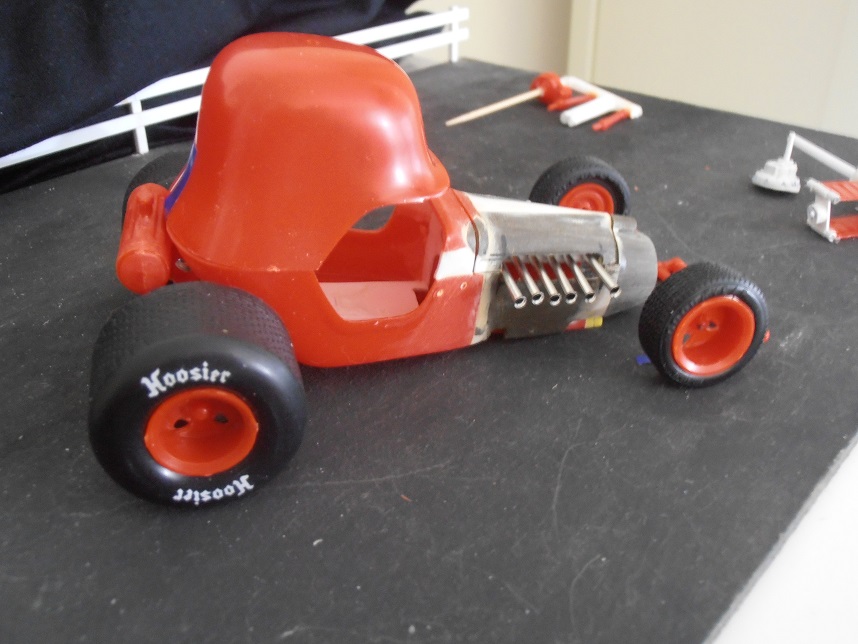
I made the lower arms first, using the bottom wing of the plane. I didn't like nor dislike it, so I figured it was not such a dumb idea but it didn't have any significance. . Then I held the center wing in place to see if it would be a good idea to use it. I immediately saw a bi-plane in the suspension and loved it. I just have to make one more, then make the rear hubs. Next it was time to address the whimpy stock intake. The intake manifolds are about the size of a fuel line, so out they went in favor of something a little more aggressive looking. I used 3/32" tubing for the start of the intake and exhaust. I plan to mirror them using aluminum flared crimps. I thought the engine sat higher, so I filled the old exhaust slots. Of course once I had the new setup in place, it fit the stock opening, only a bit larger, so out came the filler pieces. I lucked out having cut the hood at the top of the stock openings for easy opening..
-
keep stopping at the end of my builds
Psychographic replied to youpey's topic in General Automotive Talk (Trucks and Cars)
I often wonder if I had more tools to replace some of hand work of cutting, filing, and sanding of individual parts, would it get me closer to a better finishing average. Right now I have too make 12 tubes all the same length. With a proper tool, about a minute, To mark cut, sand, repeat, 12 times will be at least 8-10 minutes. A tool for bending wire door hinges, would be another tool I would love to have. I remember someone on here making one, but I never heard anything about if it worked well of not. If you had more tools to make modeling easier, do you think it would increase the amount you finish? -
I'm trying to decide on what I'm doing for suspension on this. The rear is setup as an independent suspension, I just need to decide on the arms. I have an idea of using the wings from the small plane as either the lower or upper arms. On the front I'm not sure if I want the solid axle or go independent. If I decide to use the wings, I'll either use them as the arms to match the rear. If I go solid axle, I could use it as a front wing. I like the idea of carrying a theme of using plane style parts, I'm just worried that using the plane wings for the suspension is a bit too cartoony. While I figure that out, I did a little work on the body. I cut the nose cone off, filled the exhaust openings from the stock location, and cut out a hood. Now I can see where the new openings for the intake and exhaust will need to go. My next problem is getting air to the engine. I could just leave the cone off and have the fuselage look like an older plane. It wasn't bad looking ,but I wanted the pointed look of the nose cone. My next idea was to trim down the cone and have a gap between it and the opening. It looked much better, but now it looked like a jet engine. My final solution was to sand 4 arches into the cone. This keeps the basic point I wanted and if you use your imagination, it creates another cross design that will stand out even more when painted.
-
I've been taking steps forward and back. First I mounted the head (?) and cover to the engine and it doesn't fit. I lowered the mounts and now it just fits. Then it was time to give the power somewhere to go. Getting a drivetrain to fit under this has been a bit of a project. I had to scrap the Hydrostick as the tunnel needed to cover it left no room for the drivers feet to go. I decided to see if I could do a transaxle. I tried one from a prowler kit, then scatchbuilt one. They both wound up being too big. Now I had to fill in notches made to the frame to try to get them to fit. I got one done last night that fits. I think the rear wheels are where I want them. the body sits too high, but I'mgoing to be using 2 of the kits driveshafts as axles which are at a decent angle and should drop it about 3/16".
-
Another masking technique?
Psychographic replied to BigTallDad's topic in Tips, Tricks, and Tutorials
Maybe you need to spray heavier coats? -
Christmas Amnesty Project 2017 - Valiant Stocker 2-9-18 Update
Psychographic replied to Tom Geiger's topic in WIP: Model Cars
Amen to that! It's looking good Tom. -
I decided it looked meaner with some rake, this is about how I think it should sit. I also found some bigger back tires and some bomber seats for it. I had to rethink the drivetrain, Even with the smallest tranny I could find and cheating on the bellhousing, there was no room for pedals. I'm now going with a transaxle. The bellhousing and gear drive to lower the driveshaft. The start of the transaxle using a Hydrostick which will mate to the quickchange, Again a gear drive to get the differential back to a normal height. I also added fins to the pans.
-
Enamel Testor's paint.
Psychographic replied to ewetwo's topic in General Automotive Talk (Trucks and Cars)
Whatever you do, don't reduce them in the bottle. Pour or scoop a little out and reduce what you need. Most likely you can still use it. Like anything you're not sure of, test it first before using it on something important. -
Making oil filters?
Psychographic replied to slusher's topic in Model Building Questions and Answers
Here is one I made.
-
Another masking technique?
Psychographic replied to BigTallDad's topic in Tips, Tricks, and Tutorials
Any liquid mask has to be applied thick or in multiple layers to be able to be peeled off. Chances are if you think you have it thick enough, add about 2-3 coats more. The best thing I could suggest is try it on some scrap similar to the shape you are applying it to. If you are doing a part with a lot of ridges and detail, remember that the top edges are going to be much thinner than the valleys when applying it. The more detailed the part, the thicker it needs to be. Practicing on scrap parts will give you the feel of how thick you have to apply it. If you have areas that don't peel up, try putting tape over it after the paint dries to lift it up. -
Making oil filters?
Psychographic replied to slusher's topic in Model Building Questions and Answers
I have made them from a piece of sprue , sand the flash off so it's round, cut it square, sand the bottom to a convex shape. Then you could either glue a piece is sheet stock and sand it to just a little larger than the filter, or cement a thin rod around the top edge to make the lip. -
Hobbico - BANKRUPT!
Psychographic replied to niteowl7710's topic in General Automotive Talk (Trucks and Cars)
Now that I think of it, it must have been an ebay purchase. -
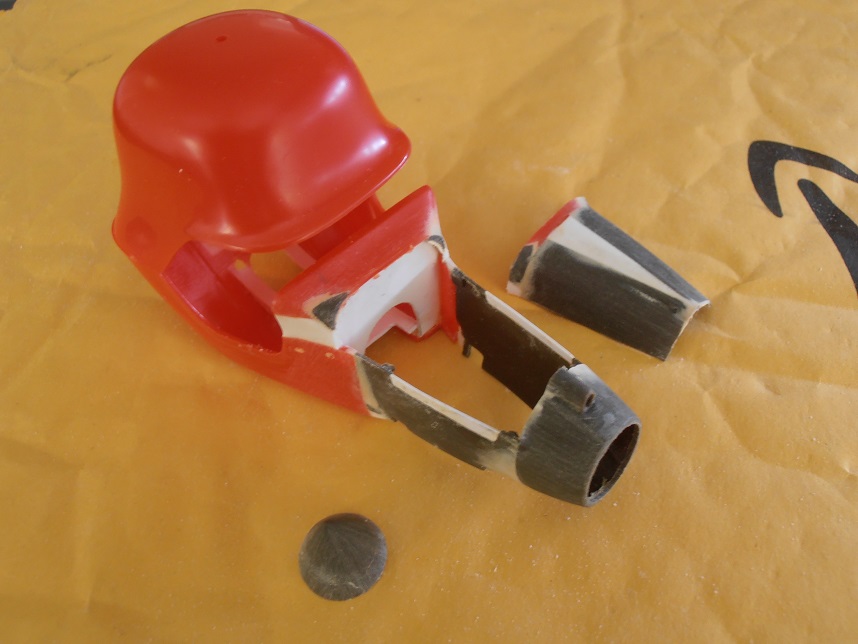
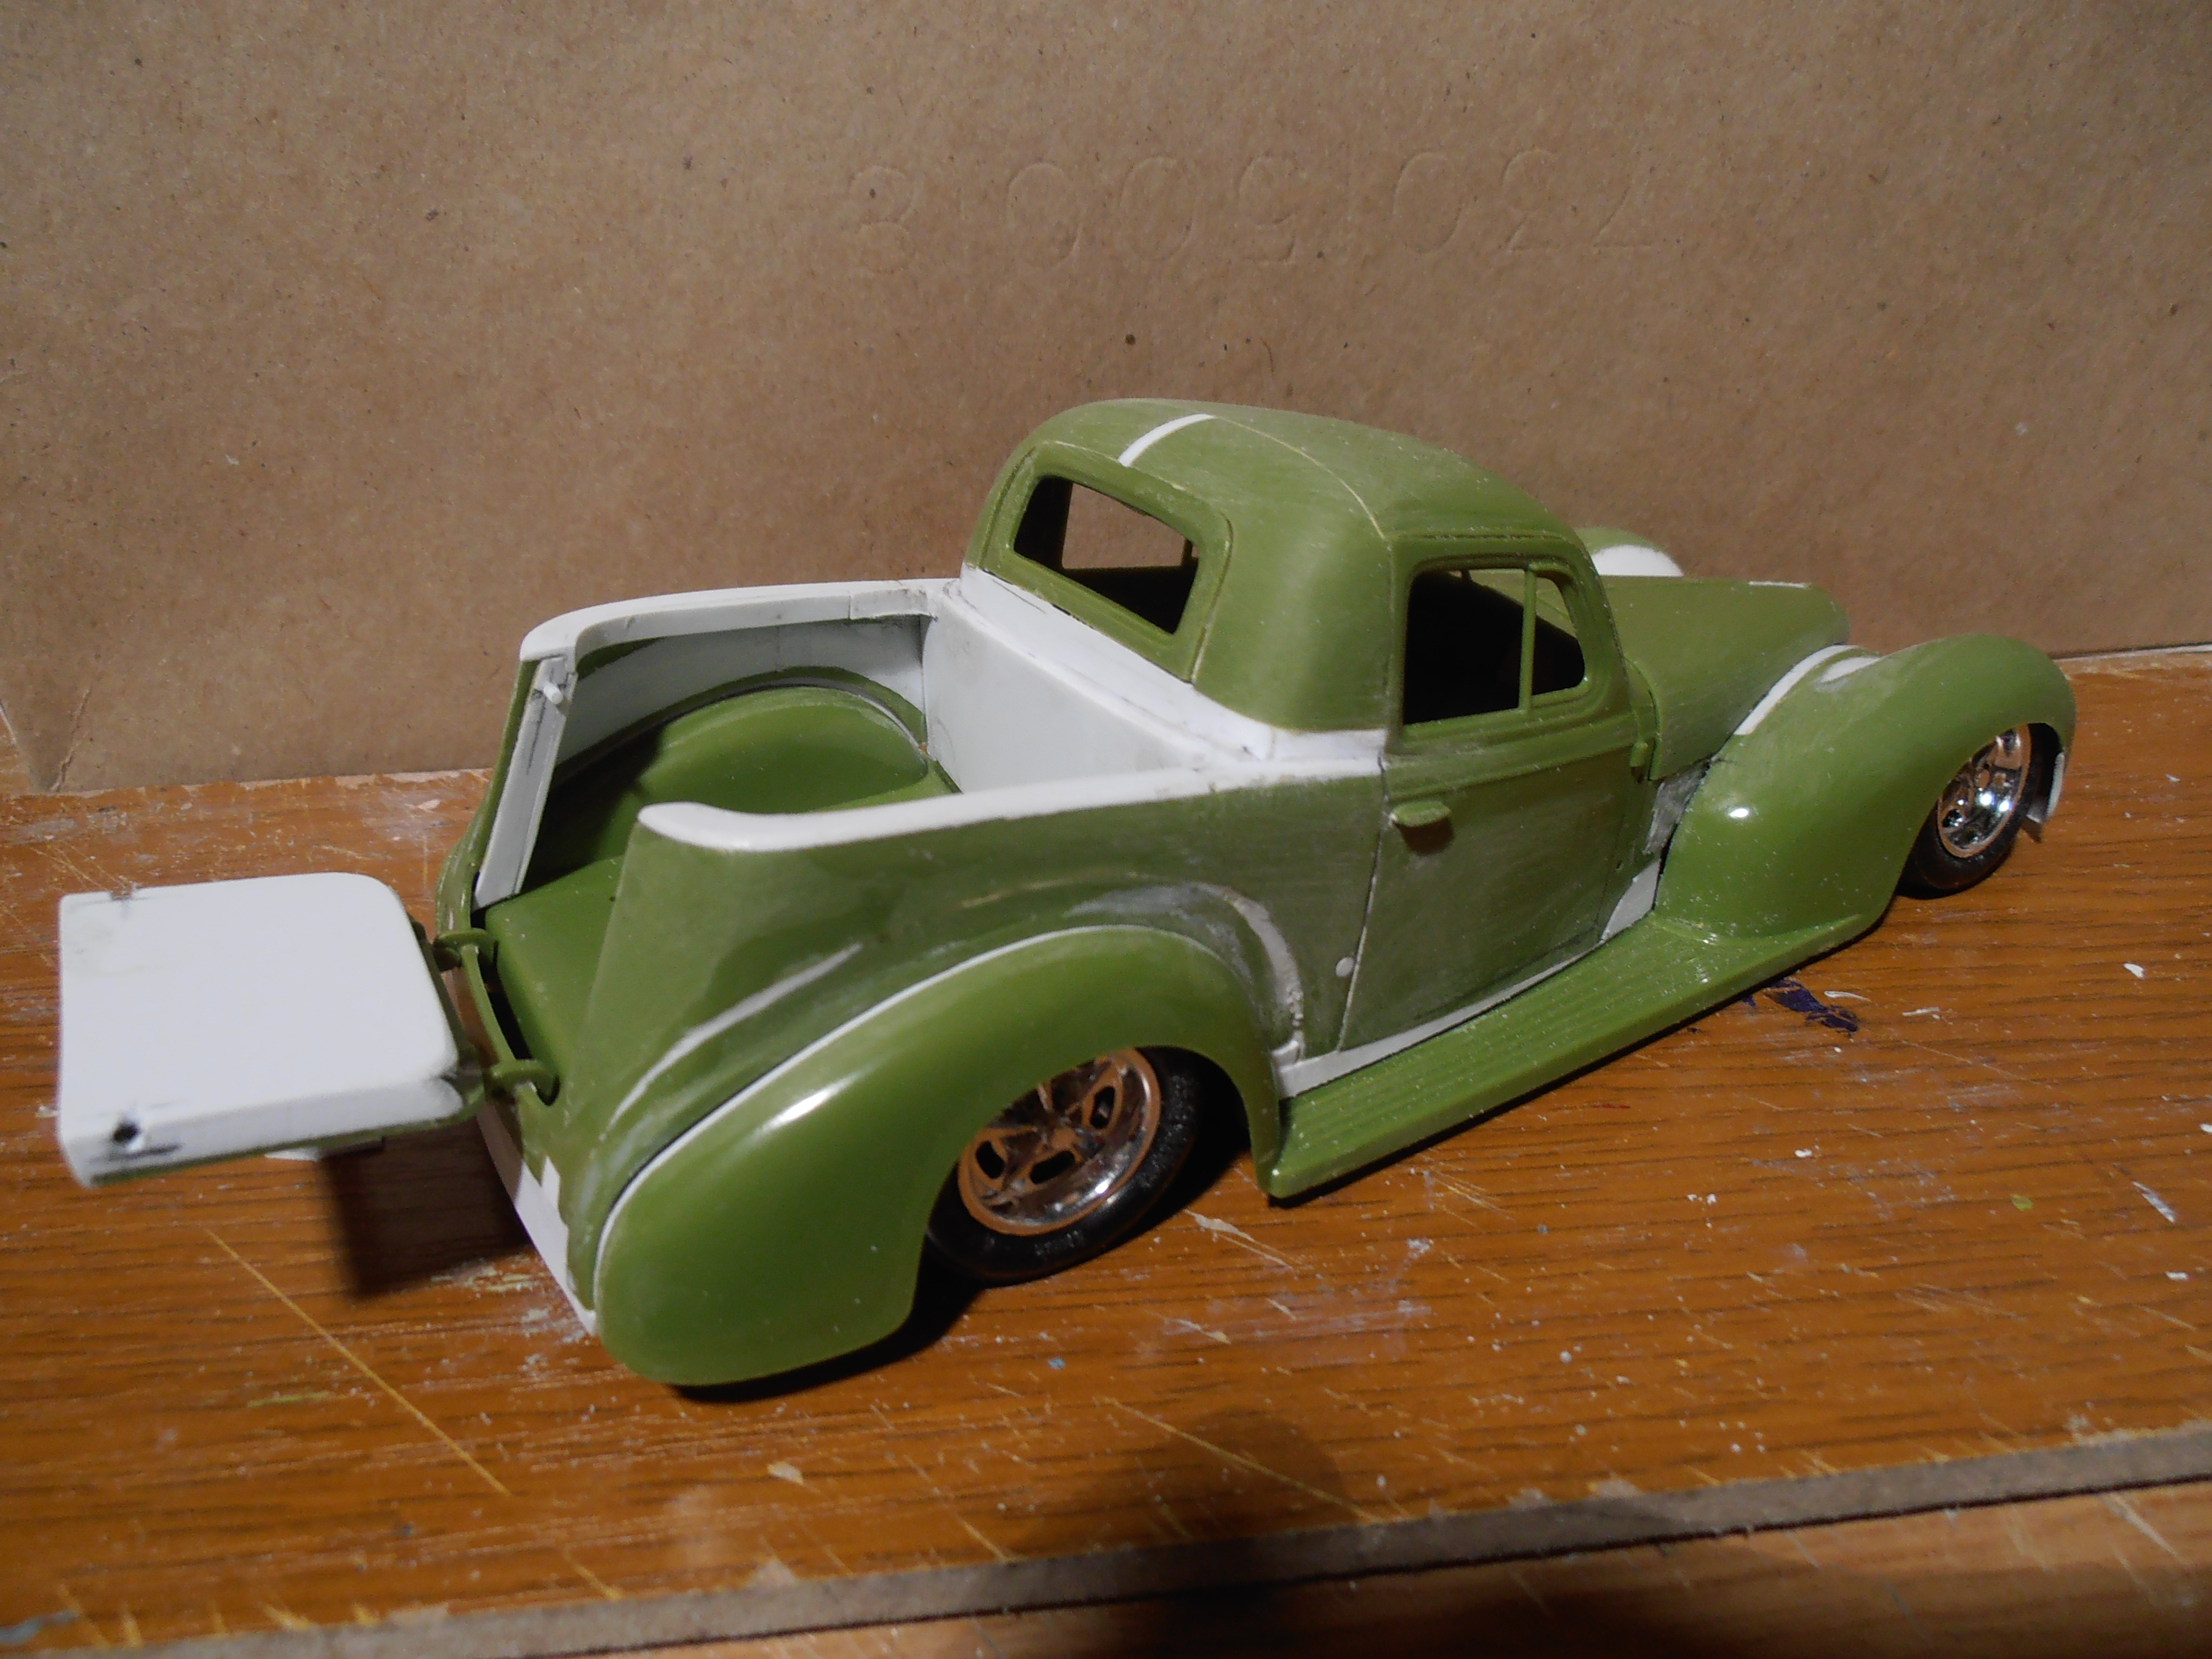
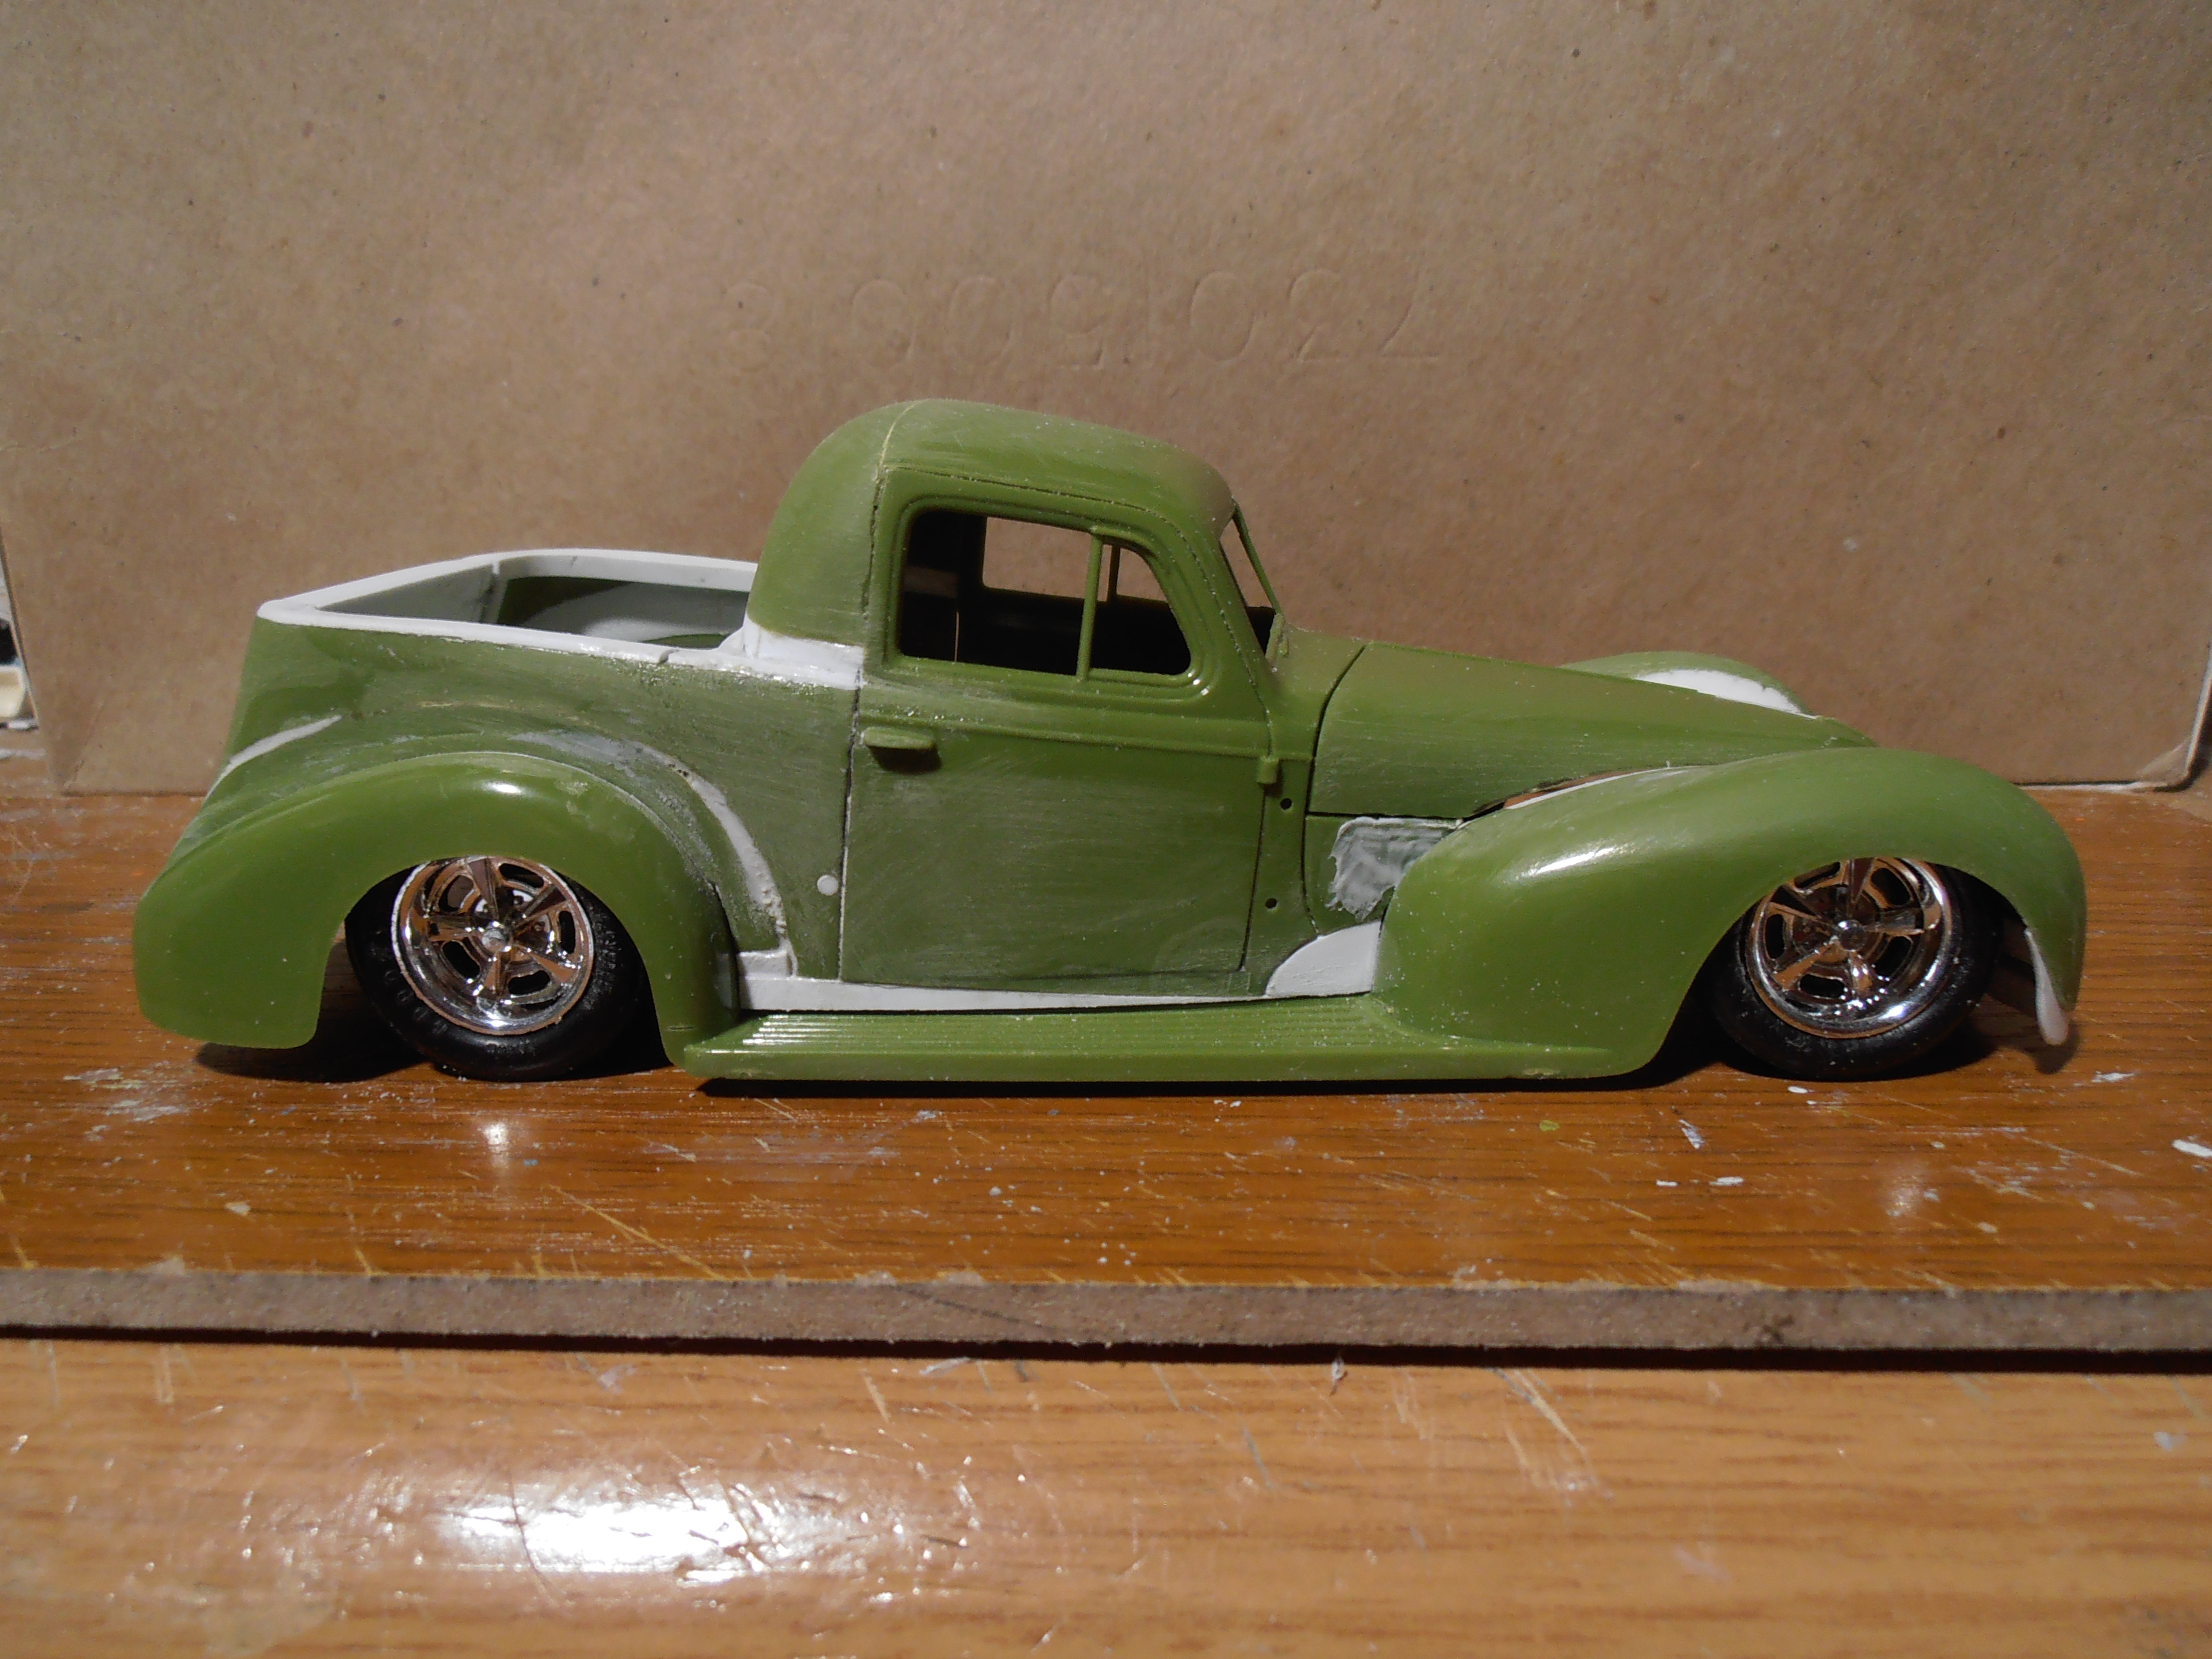
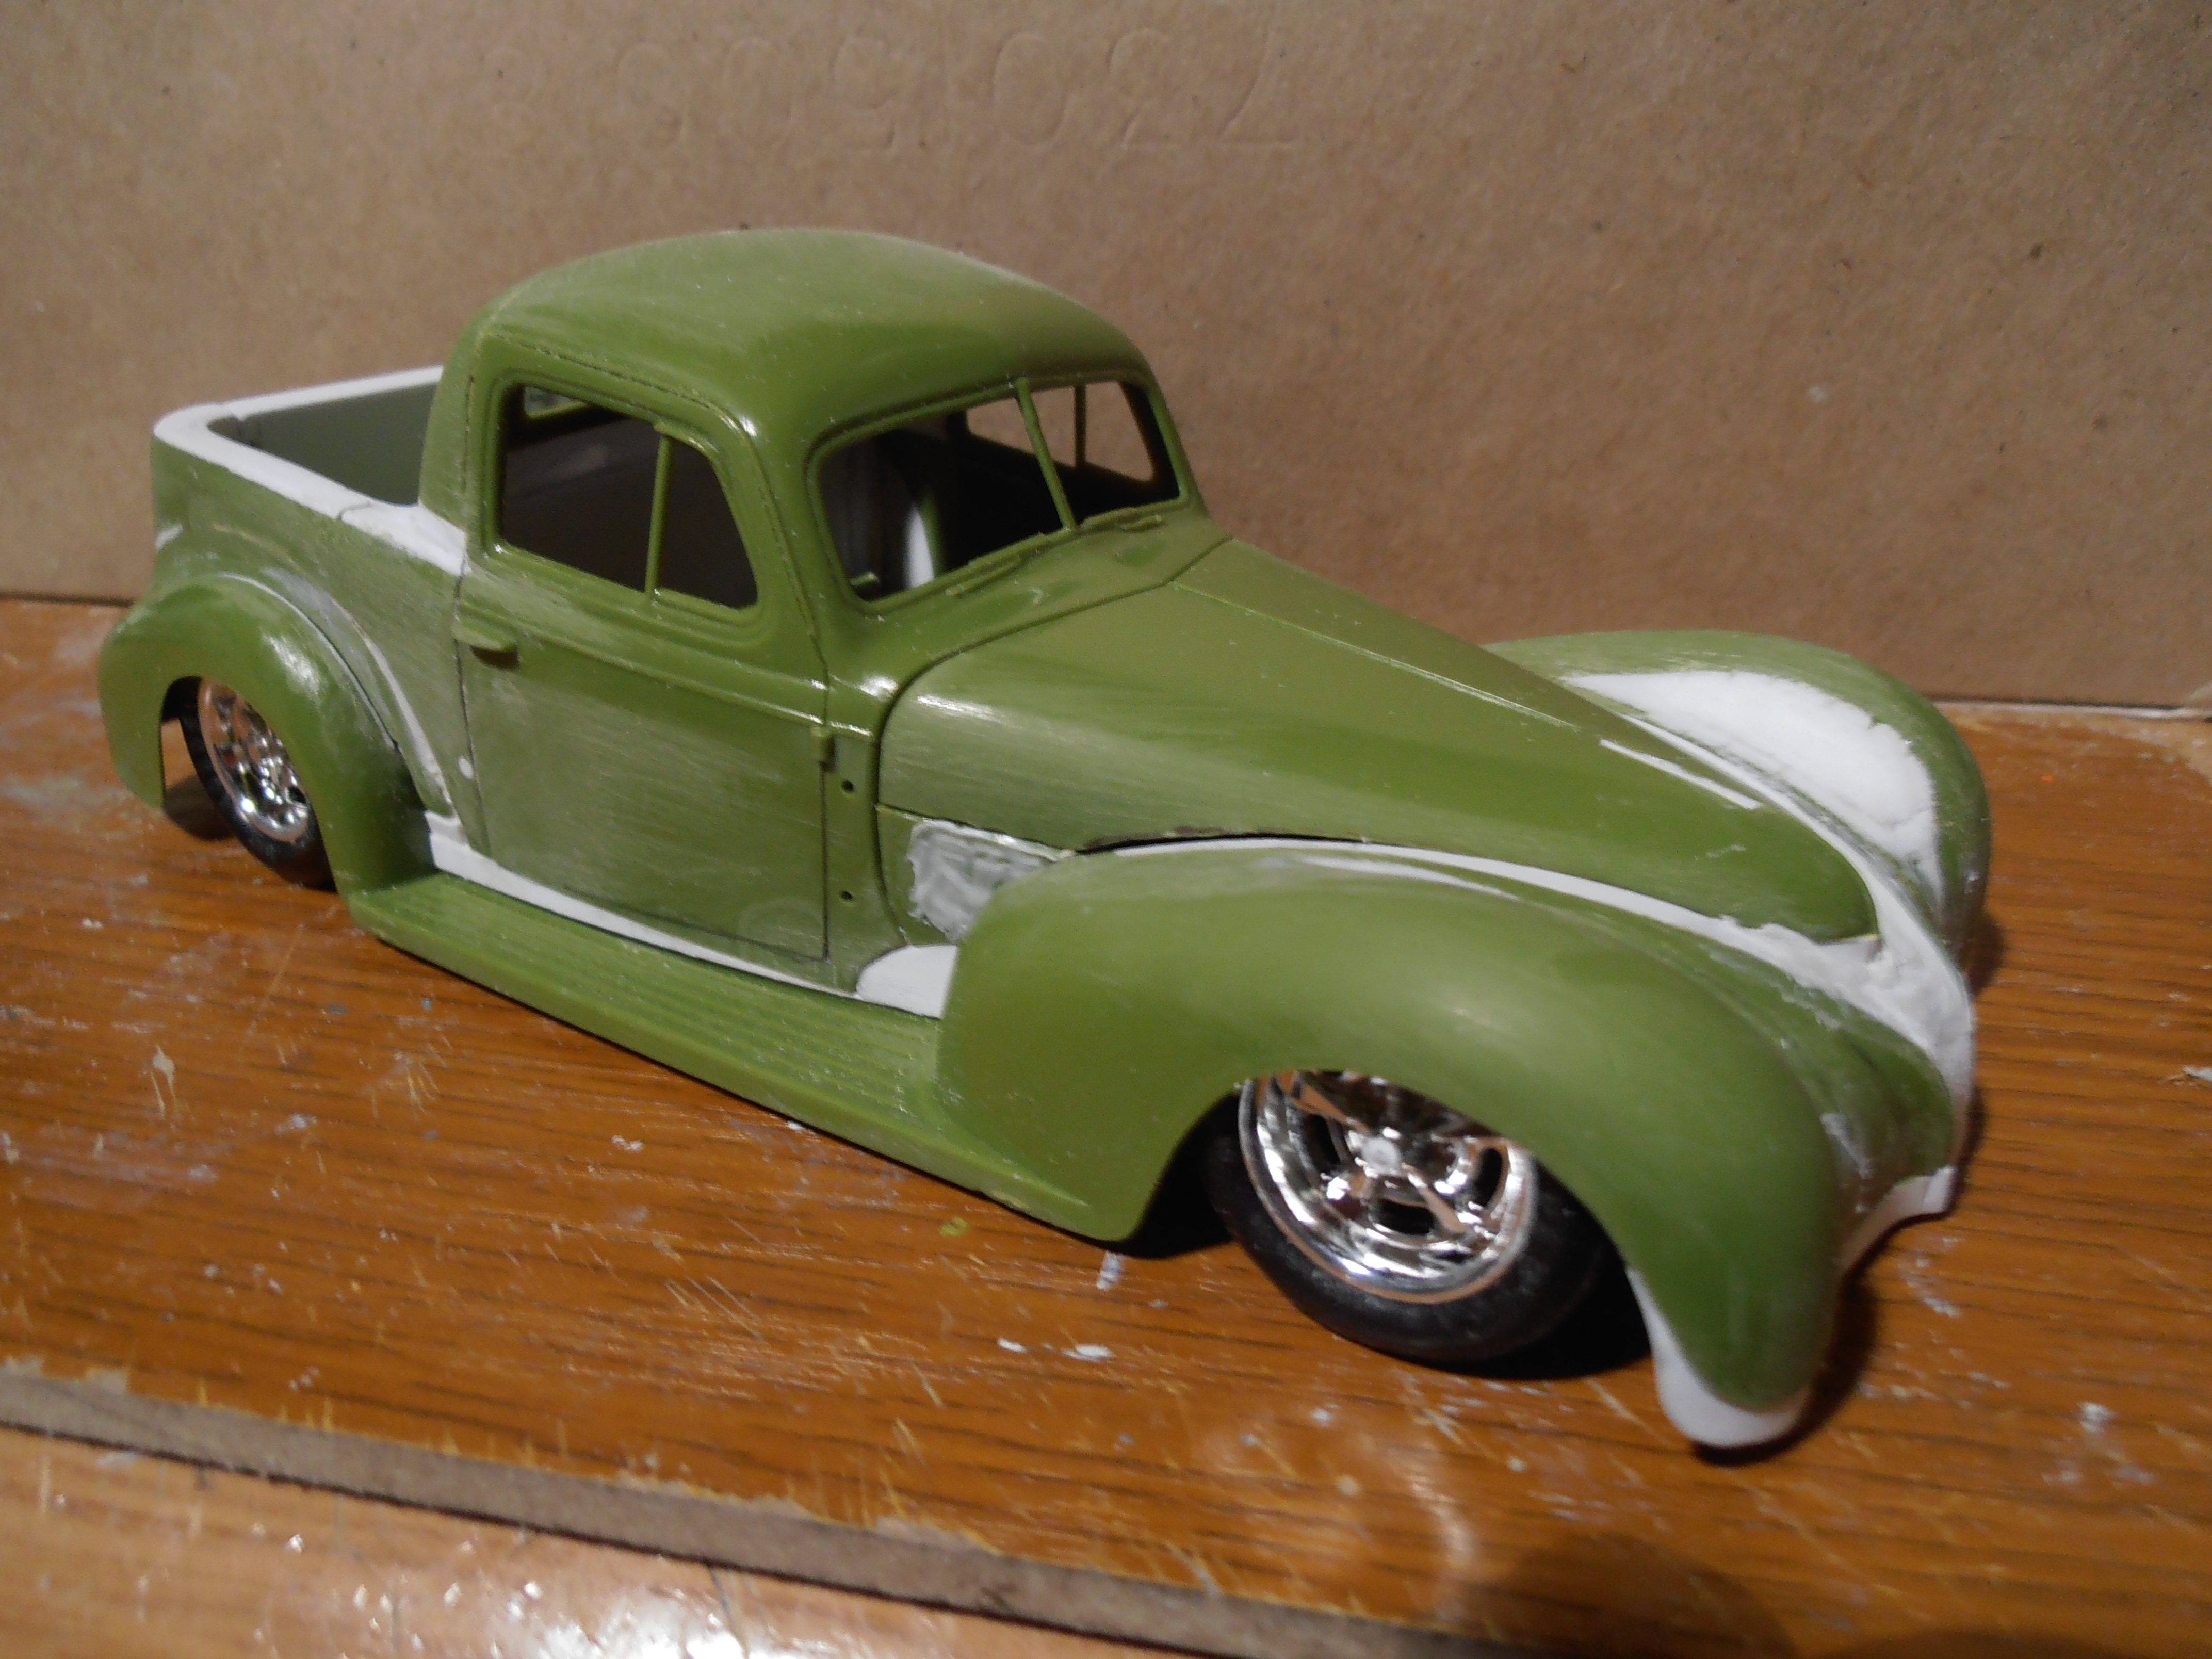
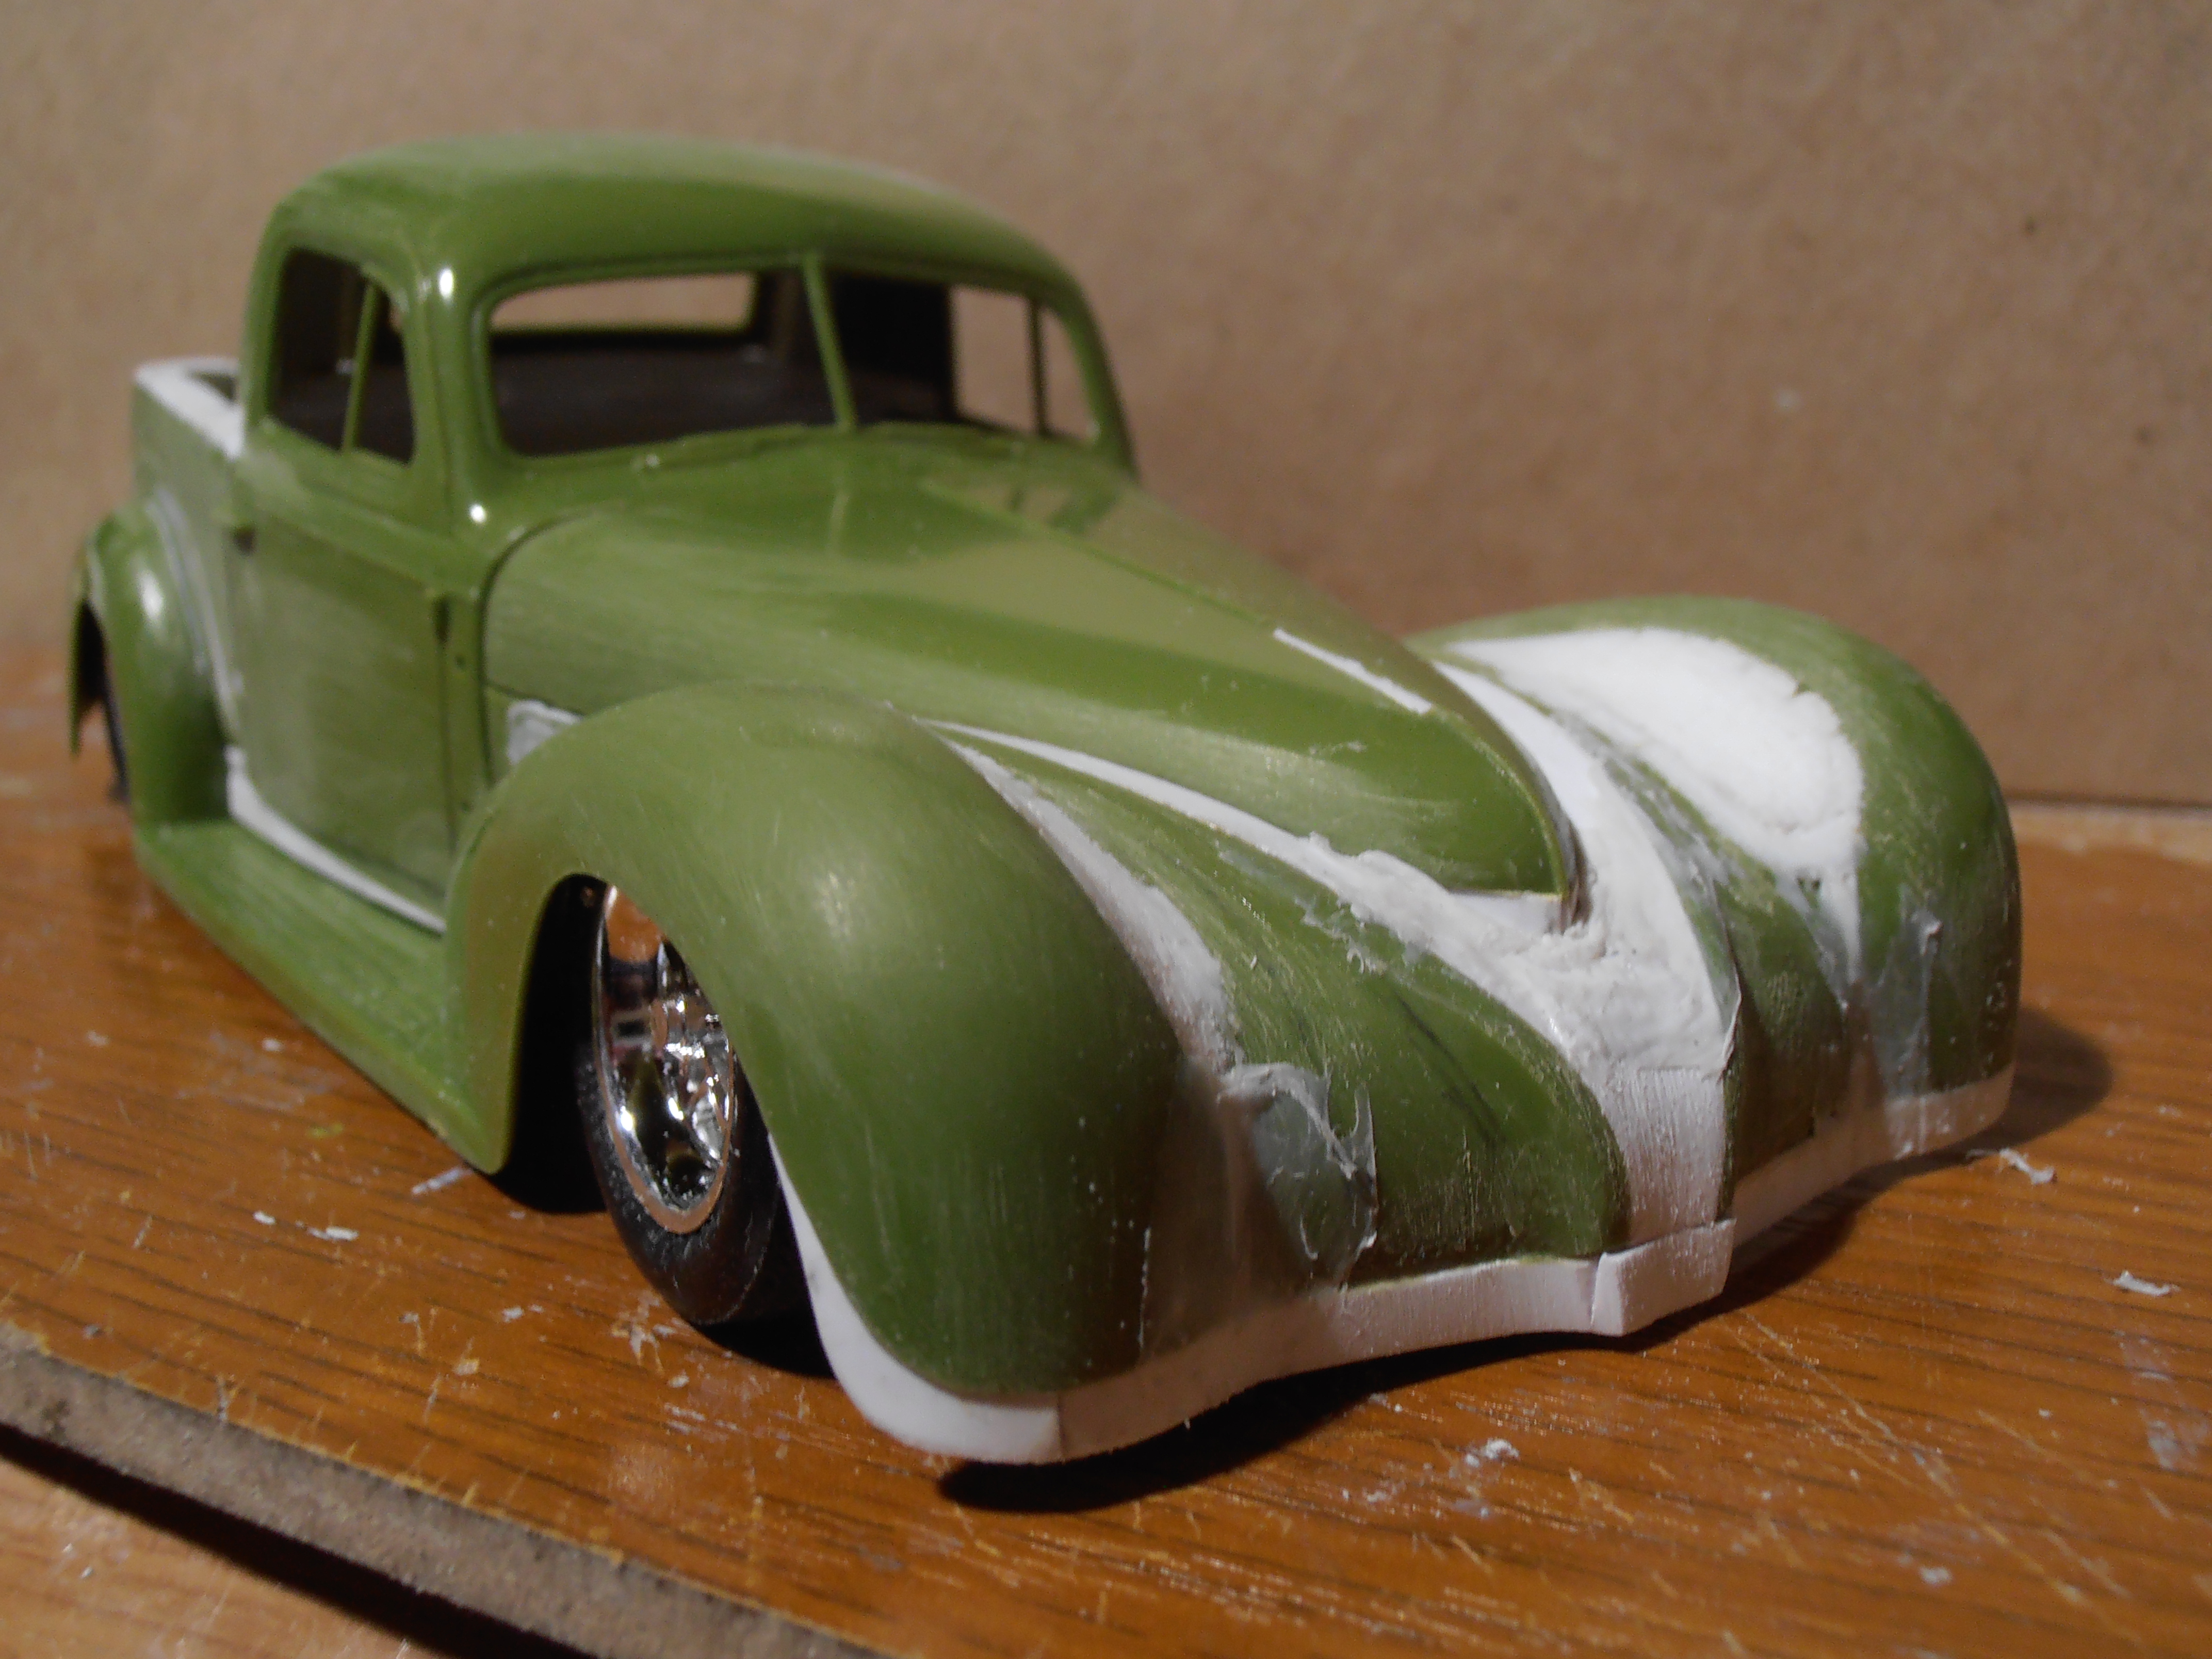
This one broke my heart. I had it a safe distance from a heat lamp to speed up the drying process on something, the clamp slipped allowing it to get to close and it ruined the cab. 39 El Camino