-
Posts
851 -
Joined
-
Last visited
Content Type
Profiles
Forums
Events
Gallery
Everything posted by fractalign
-
The next task will be to make up the corners and the inner skins on the c plllars. Once I get these tasks complete I can finally think about attaching the roof.
-
The finished cross beam.
-
Hey Guys. I made up the rear cross beam today after getting the measurements. Here are the components that made it up.
-
Hey Guys. Just a quick update, sorry for the lack of photo's but there is not much to show. I have been continuing reinforcing around the front fenders. I have also started to rebuild the chassis as well. I am in the process of adding new cross members because thew old ones were very untidy. The new cross members will allow the fenders to sit very squarely. All will be revealed tomorrow.
-
The final image is a comparison. Its starting to look more like a roof now and once the undercoat is on I can begin to finish this off. Next task after the undercoat is to move onto the rear window area.
-
I also started shaping the mirror mount. Still a bit to do on this one but once the undercoat goes on, it will look a bit more like the 1:1 version. One thing I will need to do when I undercoat the underside is make sure I have masked off the sand paper because I don't want to lose that detail.
-
Another important detail was to construct the centre cross frame. The two lengths of square tubing tubing are 0.5 x 0.5 mm. The spines in the 1:1 cross frame are rounder than this version, but one the undercoat goes on that will soften this up a bit.
-
After some trimming a second piece was added.
-
The sand paper is being used to simulate the spray on body deadener found in the roof and inside the outer door skins.
-
The sand paper is being shaped, for a very good reason.
-
Hey guys ! After photographing the underside of the roof yesterday, I got the measurement for the various sections and began construction.
-
The steel inner pressing in the C pillar will also be included. Next task will be to recreate all the elements in the roof and then begin the task of attaching it.
-
The upper part of the windscreen sits inside this recessed area. This will also need to be recreated. While most models feature a built in windscreen frame and glass that attaches from the inside, this one will have a separate windscreen frame and the windscreen will attach from the front just like the 1:1. There is a very good reason for this extra detail and that will be revealed later in the build.
-
The underside of the upper part of the front windscreen area will need to be recreated.
-
Hey guys. Having finished the top of the roof, I am now turning my attention to the underside. Before I even think about attaching it I will need to get all the details correct including the bracing and inside shape of the pillars. This is what the 1:1 roof looks like, you will notice the cross beam that extends from b pillar to b pillar. Also notice how the inside wall of the pillars are rounded.
-
Thats no problem, it would be cool to seek more of the 1:16 scale 34's being built. Once I have completed the modifications with this one I am thinking of the casting the body too with a full traditional style interior and dash. Not too many stock height 34 kits out there. Maybe a Roadster or Cabriolet version will be cast further down the track. Cheers.
-
Being such a large kit will mean that it will be easier to reproduce the inner detail such as the door skins and door jams. I will also be creating a working cowl vent. Next task though will be to finish of the door frames.
-
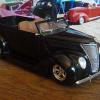
Hey guys. Thanks for the feedback. Here is an idea of what I am chasing with this build. I won't be using most of the parts that came with this kit because i am trying too recreate an early seventies look. One thing I will be keeping with this kit are these wheels. For a late eighties kit I was surprised and pleased they did not produce it with a set of billets wheels. I am pretty sure the tourer version of this kit had them so am more than pleased with these ones.
-
Hey Miles. I will definitely be casting this one, you must have read my thoughts.

