
wraith
-
Posts
465 -
Joined
-
Last visited
Content Type
Profiles
Forums
Events
Gallery
Everything posted by wraith
-
DEAD ON! RAKE!
-
I have always know these wheel to be called "Sharktooth" wheels. As a Big MOPAR fan, especially anything fwd and fast!, I have never heard of these wheels being called "Eggshell" I personally like the 85 Daytonas best! And if you couldn't tell from my user name, I really like these cars! I will be watching this closely! And those are some REALLY NICE Daytonas you put together!
-
model kits in unexpected places
wraith replied to milkman's topic in General Automotive Talk (Trucks and Cars)
ACE Is a national chain store but each store is independantly owned. I worked at our local Ace Hardwares (we have 4) and the onlt time we got models in wash for Christmas. From Thanks giving to when the toys are gone, like Early Jan is the only time we carried them and it was for only 1 out of my 3 Christmas' working there. I have been to many Ace's in the Twin Cities and have hardly ever seen any toys. Each kinda has it's own lil idenity. I have seen models occasionally at our HyVee grocery stores. Usually just snap kits and it has been a couple years since I last saw one. I do miss Wal-Mart and K-Mart carrying models! Flea markets and Goodwills have scored me some gluebombs in the past. -
Jeep J10
wraith replied to 01blueedge's topic in WIP: Model Trucks: Pickups, Vans, SUVs, Light Commercial
Need some chassis pics as well as some underhood! I keep looking at this and thinking to myself I need to pick up this kit and build itlike you did! My Power Wagons need company on the shelf! -
Very good ideas here. everyone should post some finished pics of their headlight tricks!
-
Lots of amazing work here! I see lots of ideas for when I someday finally finish one I started years ago and to do to a second one.
-
Kustom s-10
wraith replied to kruzzinlow's topic in WIP: Model Trucks: Pickups, Vans, SUVs, Light Commercial
Very nice! beautiful color combo! excellent craftsmanship! I like that it is simple and clean. Less is more with it! -
POWER WAGONS
wraith replied to wraith's topic in Model Trucks: Pickups, Vans, SUVs, Light Commercial
a pic can be found here! http://www.modelcars...showtopic=53470 a big thanks to plowboy / ROGER HAYES for directing me to it! Many thanks again Roger!!!!!!!!!!!!!!! The ones I have found at Dollar General come in a playset in a blue box and costs $8.00. I have found and bought 4 of these sets so far and will probably buy more when I find them. Not sure what I am going to do with al these sets of wheels but i know one thing, once you find a good source for parts you should use it as much as you can before it runs out! I got the back half of the frame redone last night! And exactly like I thought, it was a blessing in disguise! box sits were it should now and the frame looks so much better!!!! pics later today! -
Scooby Van
wraith replied to kruleworld's topic in WIP: Model Trucks: Pickups, Vans, SUVs, Light Commercial
from the movie! yes! what a hottie! and ZOINKS! LIKE WOW! -
Jeep J10
wraith replied to 01blueedge's topic in WIP: Model Trucks: Pickups, Vans, SUVs, Light Commercial
AWESOME!!!!!!! -
POWER WAGONS
wraith replied to wraith's topic in Model Trucks: Pickups, Vans, SUVs, Light Commercial
Axles are the box stock axles that came in the old Dodge pickup 4x4 kits. And the hood, thanks! I wasn't sure what to do. ask if anyone had LRE hood for it or just see what I could do with what I had! I chose the later! lol! -
POWER WAGONS
wraith replied to wraith's topic in Model Trucks: Pickups, Vans, SUVs, Light Commercial
The good thing about me having to tweak the rear part of the fram to get the box at the right height is that for a week or so I was wondering why it seemed like the box fenders were closer to the wheel than the front fenders. AS much as I don't/didn't want to massage the box fenders to add clearance I was about to do so! Glad I looked at more reference pics today! Now that is solved by the lifting of the box! -
POWER WAGONS
wraith replied to wraith's topic in Model Trucks: Pickups, Vans, SUVs, Light Commercial
Here you can see the material i added to the front valance to help with strength and mounting area for the grille. and the work done so far on the old monster truck hood.. I still have some work to do to it. you can see the nick in it in the front center. I also want to add a small rib down the center on my sharpie line. I am debating on cutting out the buckets in the interior tub and putting these seats from a dead diecast in. Color will/should be a Metallic Root Beer Brown with a tan interior. aat least that is my plan for now. Although the colors blue, like the real truck photo, and a dark copper and maybe even white have been going through my mind.I would paint it Hemi Orange like the new Challengers but I have that color already picked for another LRE Pro Touring truck. -
POWER WAGONS
wraith replied to wraith's topic in Model Trucks: Pickups, Vans, SUVs, Light Commercial
Here you can see just how bad this frame was I started with I had to reglue the front fenderwell back on and needed to add material to them and the frame to start with. Then it was on to remaking the rear half of the frame. All of this is done in these pics. Wish I had a pic of the frame in its multipe piece stage. It was almost complete junk! But I guess not since I was somehow able to save it! here you can see the relief cuts I made to push the floor board up for clearance for the t-case. I also had to move the trans crossmember down. In the pics you will see that I removed the "box" that was cast into the passenger inner fender for clearance for the heater box which is mold ed to the firewall. I di this to all these inner fenders on all of my builds. personally It helps make the model look a lil better and if you are lowering on, like 2 I have in the works, it really helps for tire clearance as well. -
POWER WAGONS
wraith replied to wraith's topic in Model Trucks: Pickups, Vans, SUVs, Light Commercial
update pics! old front suspension set up. lasted about 3 days new revised suspension! -
Filler for scratches and seems ?
wraith replied to rickd13's topic in Model Building Questions and Answers
Super glue is one of my favorite tools for modeling. I use it to glue most parts together and also use it to fill in scratches and such. Sometimes when i need to fill a hole I will use Superglue gel. Lately my "filler" for low spots or sinks from glue on gluebombs is super glue and the fine plastic powder from my sanding. i acutally sand over a container now and keep as much of my powder as I can. So far this method has worked really well for me! -
Let's hear/see your Craft Store findings for our models!
wraith replied to Mike Kucaba's topic in Tips, Tricks, and Tutorials
lots of good ideas here! Not the craft store but I was looking around at ACE hardware on Sunday and found some really thin nylon washers I plan on using as beadlocks on my 77 Power Wagon. Also using paperclips as my u-bolts. And while i was at ACE i found some bolt head covers that will work as baby moon hubcaps. -
POWER WAGONS
wraith replied to wraith's topic in Model Trucks: Pickups, Vans, SUVs, Light Commercial
FOR SURE! i am also a MOPAR MAN! -
POWER WAGONS
wraith replied to wraith's topic in Model Trucks: Pickups, Vans, SUVs, Light Commercial
Well it looks like I found a BIG area that needs correction! Looking at pics of real trucks and then looking at my model, the truck bed needs to be raised ! grrrr! if you look at the real blue truck you can see the bed side step is level with the bottom of the cab. then look at my latest pic of the model and you can clearly see the bed side step sits lower than the cab. Time to raise the bed! I finally saw this last night as i was starting to fab up my rockrails. hope I don't have to redo the back half of the frame totally. This might be a blessing in disguise though! at first I was going to do a real wood bed floor then decided a real trail rig would need more stability. So now I am thinking that i can cut away my "filled" in frame and have a "open" fully exposed frame and just add the bed mount cross rails and get a lil more detail in the frame! I am also not completely happy with the fuel tank I made tp replicate the one on the kits frame. I want a bigger one and one a lil more realistic as well, on real trucks a very popular mod is to swap in a Ramcharger fuel tank. Bigger and relocates it to the back of the frame bewteen the rails. So it looks like I will be fabbing up a new fuel cell as well. And a skid plate for it. which reminds me I need to pick up some diamond plate sheet styrene. -
Iam restoring a dodge D-50
wraith replied to gray07's topic in WIP: Model Trucks: Pickups, Vans, SUVs, Light Commercial
the motor that come inthe LRE is terrible! and is closer to a 400 block. a terible representation of a engine in the LE kit! terrible. If you want to put a MOPAR small block in it, which I would! I would get the 340 block from the 71 duster. By far the best scale replica of the MOPAR 318/340/360 blocks, which are all very similar and that engine can be made to be a very realistic representation of all 3. looking forward to seeing this resurrected! -
POWER WAGONS
wraith replied to wraith's topic in Model Trucks: Pickups, Vans, SUVs, Light Commercial
No way I am cutting out the doors! I love the real blue truck, but if it were mine the doors would go back on! Thanks for the compliments Chris! I didn't make the t-case. It is from the SoReal Chevy diecast. But I did shave it down it some places and added material in others to make it look better. I needed to shave it on the top side so it would sit as close as possible to the underside. I will have to get some pics of the t-case as well! -
POWER WAGONS
wraith replied to wraith's topic in Model Trucks: Pickups, Vans, SUVs, Light Commercial
teaser pic with the redone front suspension more new and old pics soon! -
POWER WAGONS
wraith replied to wraith's topic in Model Trucks: Pickups, Vans, SUVs, Light Commercial
My original plan for the step side was to rebild the frame and use the leftover 4x4 parts from the "Firefighter" MPC kit I bought for the correct 79-80 cab, hood, and grille to build a replica of my dads 79 D-140 2wd long box. then I saw this looking online for inspiration! it took off from there! -
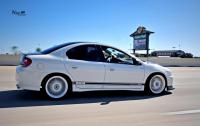
Looks good so far! i always liked those STi's. Especially in blue!
-
I feel them same way at times. I also feel guilty for spending too much time working on them and not enough doing other things. I have no kids, and the wife works nights so I have ample time to work on them but I often neglect myself! I should be working out and losing a few pounds and finish building my race motor for my real car! If the weather is not "ideal" to be out in the garage I am inside working on "my toy cars" as my wife puts it! lol! But real soon I will be outside i the gaeage and the models will be on the back burner. Then after a while I will have the not getting any work done on my models guilt again. modeling is addictive. I get to working on one, especially scratching a part or heavily modding one and it becomes an obsession until I get it done. What is weird will that is then sometimes i am content with the model and it stis unfinished till it catches my attention again.